


SkiBee
-
Posts
182 -
Joined
-
Last visited
Content Type
Profiles
Forums
Gallery
Events
Posts posted by SkiBee
-
-
-
I wet sanded between coats of paint, also I used a stain preconditioner before staining. I agree with druxey, try your stain on excess wood before committing to staining your boat
- tlee01 and mark.bukovich
-
 2
2
-
Lynn, I used a combination of sanding sticks, sanding blocks, a dowel with sand paper wrapped around it. And I still used a combination of knife blades to thin the bulkhead down, very carefully
- Keith Black and Ryland Craze
-
2
-
-
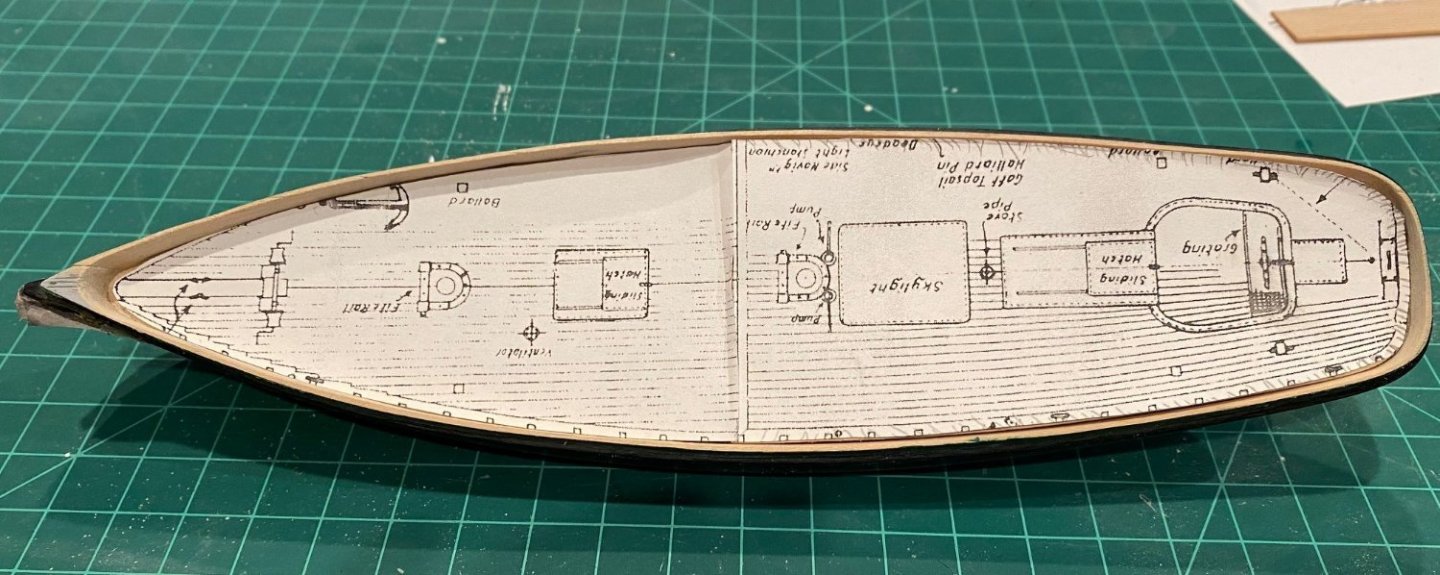
Lynn, I tried to match the schematic in the instructions too; but if you look at my results, they don't look much different than yours, plus both sides of my hull are different. When done, I think it all looks good.
It's the journey not the destination.
- lraymo and Keith Black
-
2
-
-
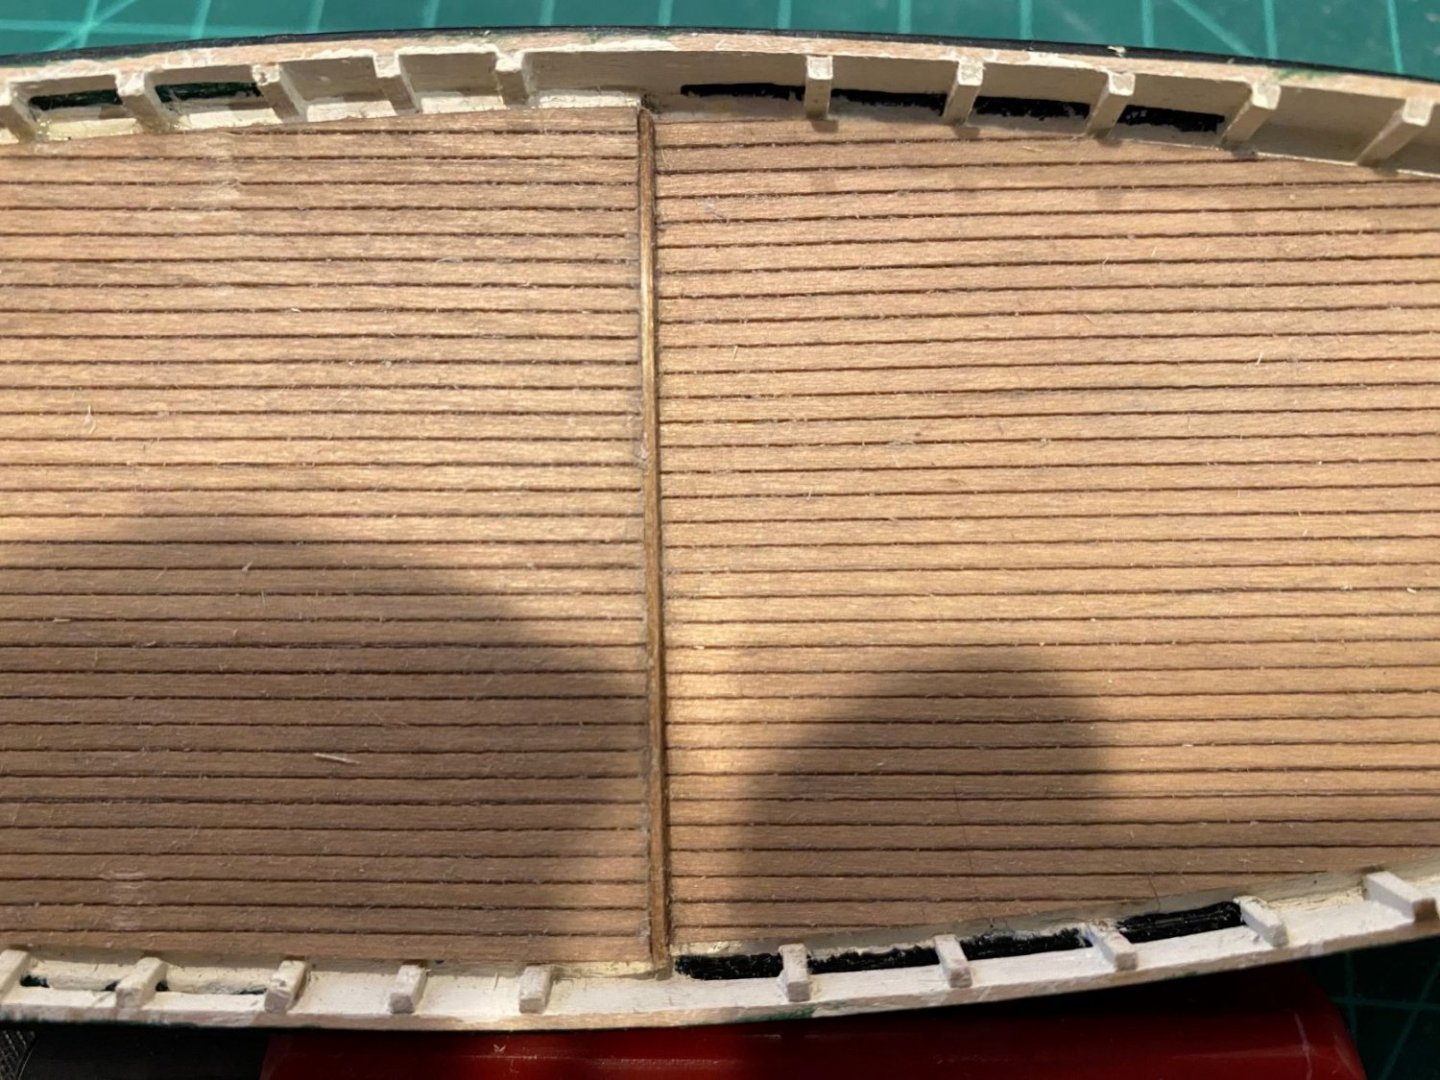
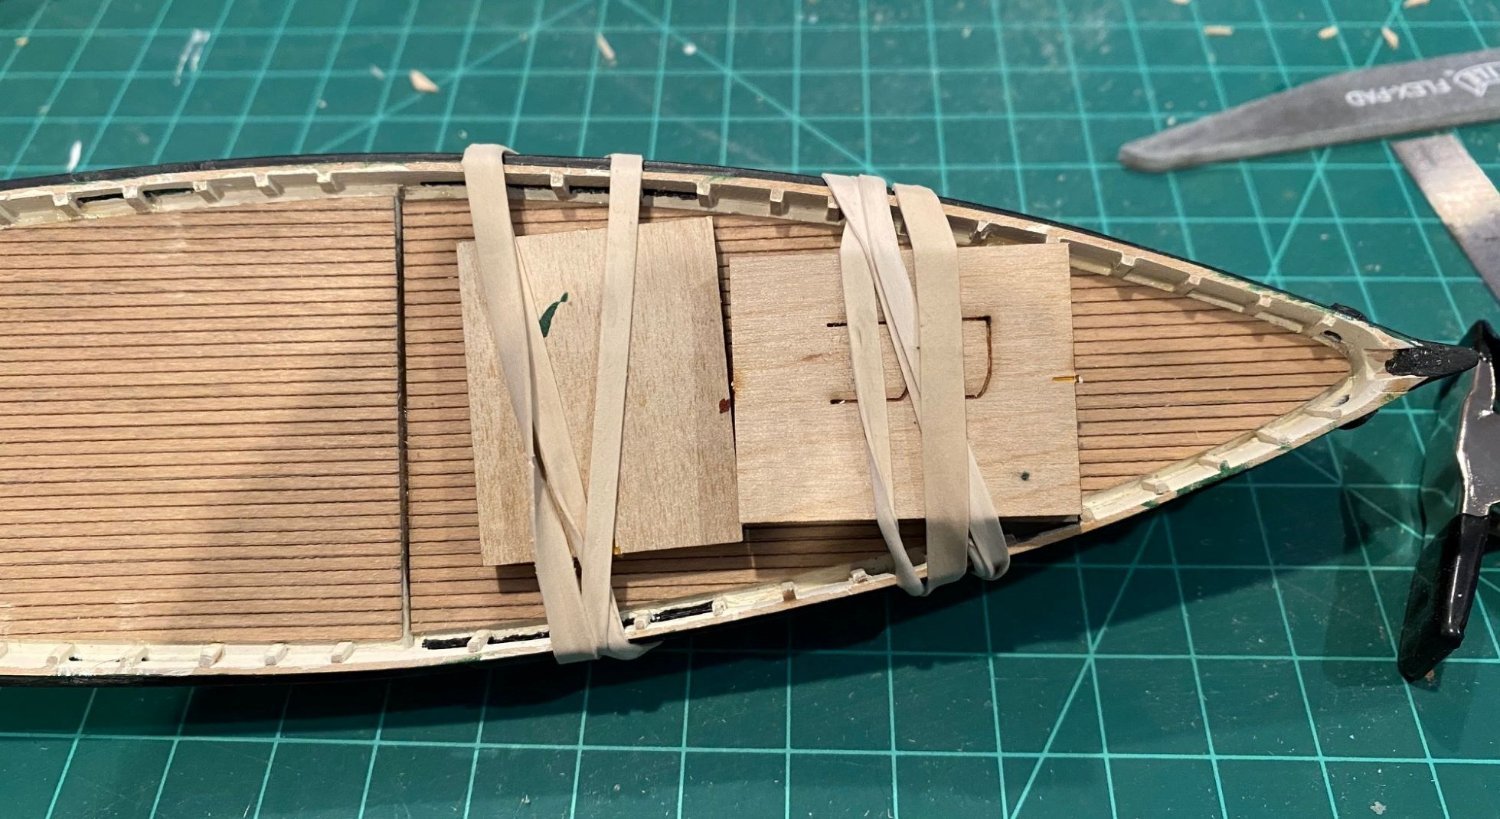
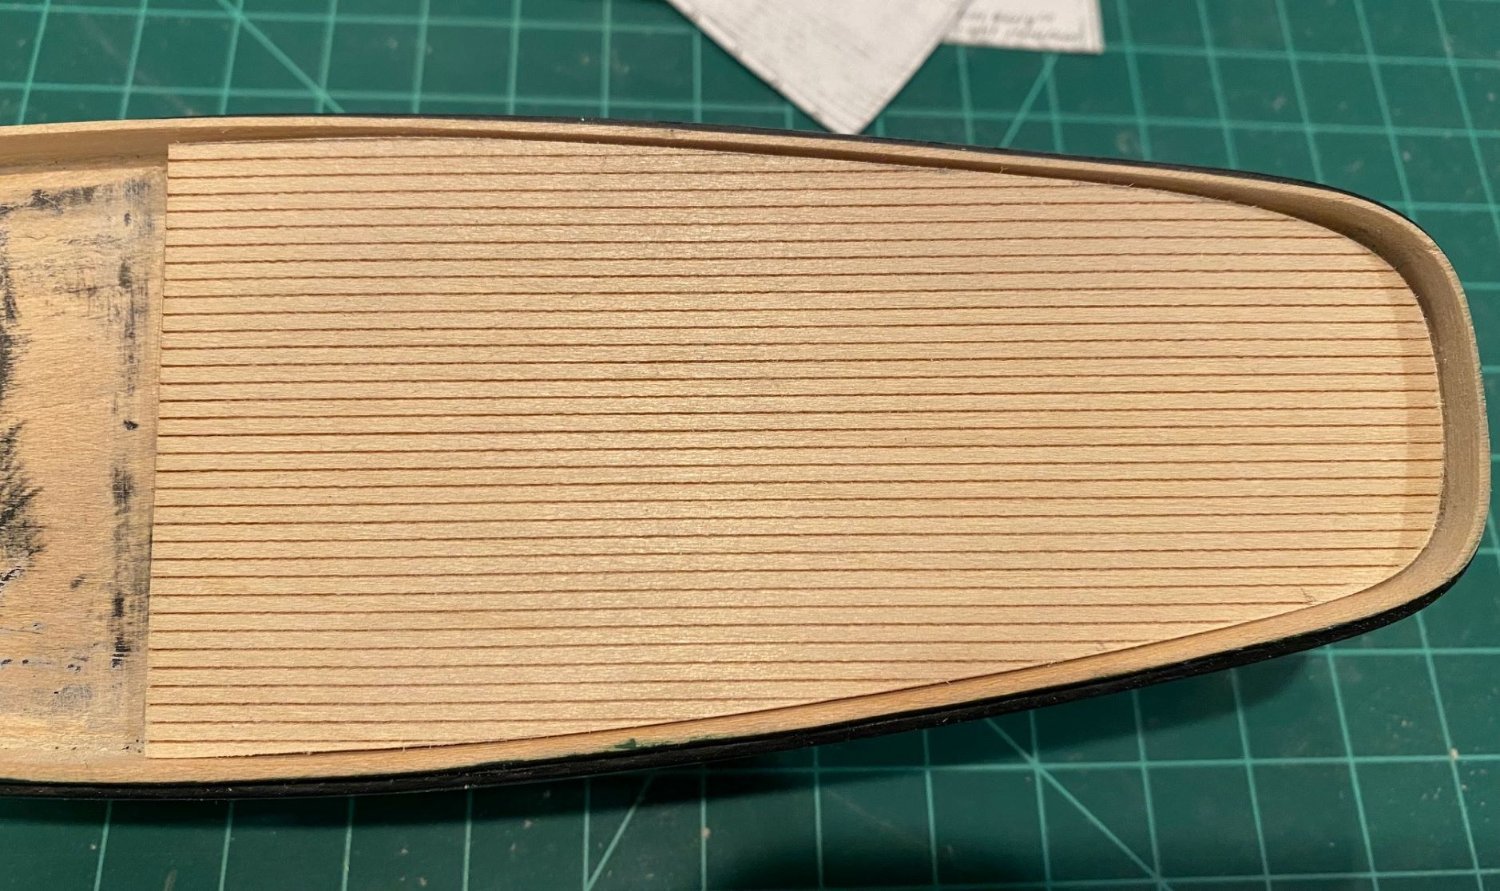
Glued the deck down with rubber cement, I’ll see how that works. I had read about some glues causing ripples in the wood. Probably should have used more of a wood contact cement, but I wanted some ability to do last second adjustments to the deck alignment. I did not have a square piece of wood to use as the step, so I used a strip and sanded it to match the deck height, not to good on the Port side, but from the side and top it looks good.


Started to bend the wood strips for the cap rail. The curve on the aft end is too much of a 90 deg for me to bend. I have a piece of wood that was from one of my previous builds that I’m going to try and cut out the aft end of the cap rail and then butt the ends of the strips to it. Also, I’m going to stain the cap rail a Light Oak (Minwax).
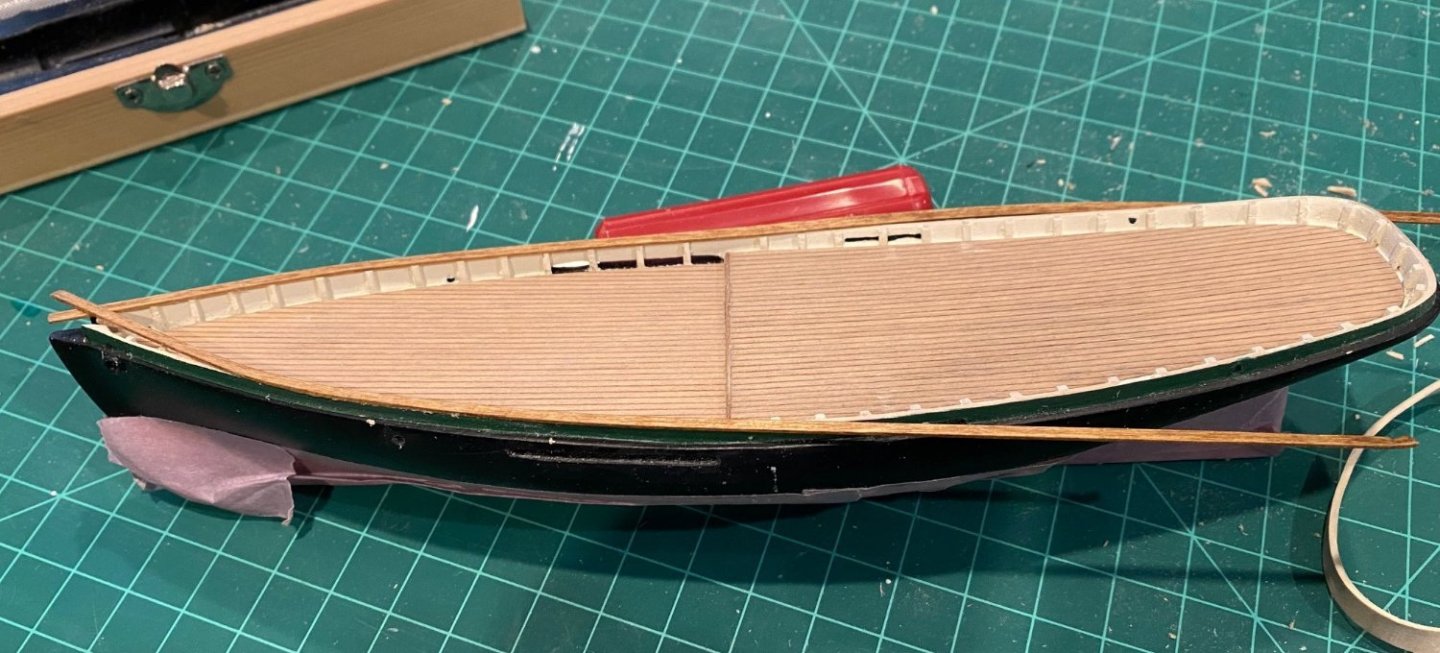

I think it looks good, except that the grain does not flow in the same direction that the strips do, but I have a lot of clean up and touch up on the green step and the black hull.

- robert952, Jorge Hedges, BrianK and 4 others
-
7
-
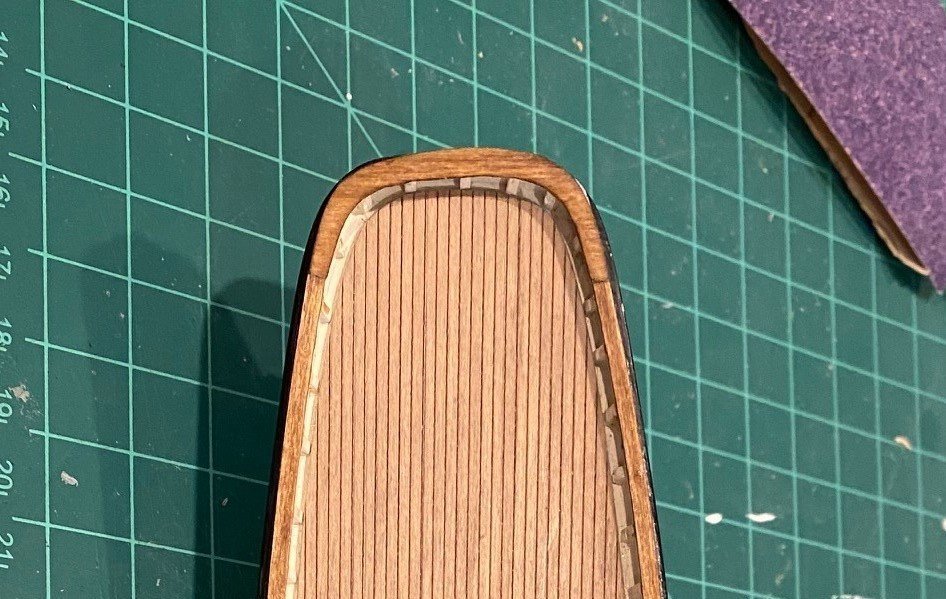
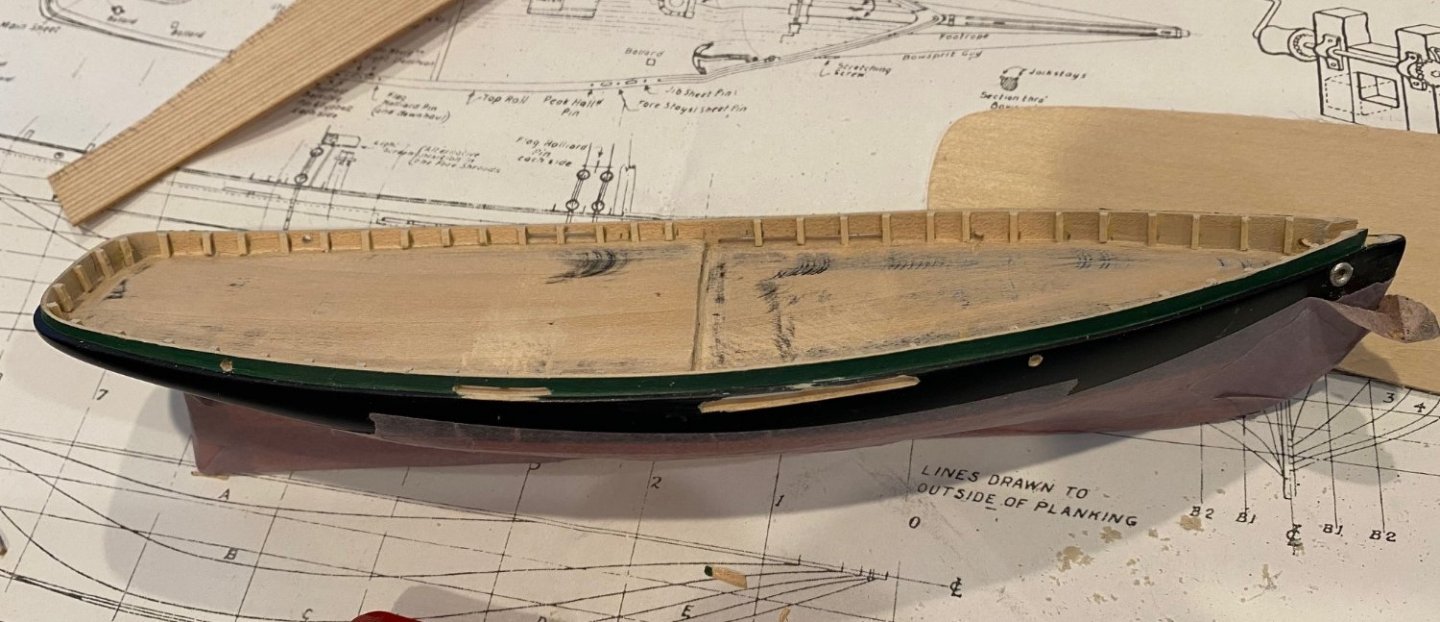
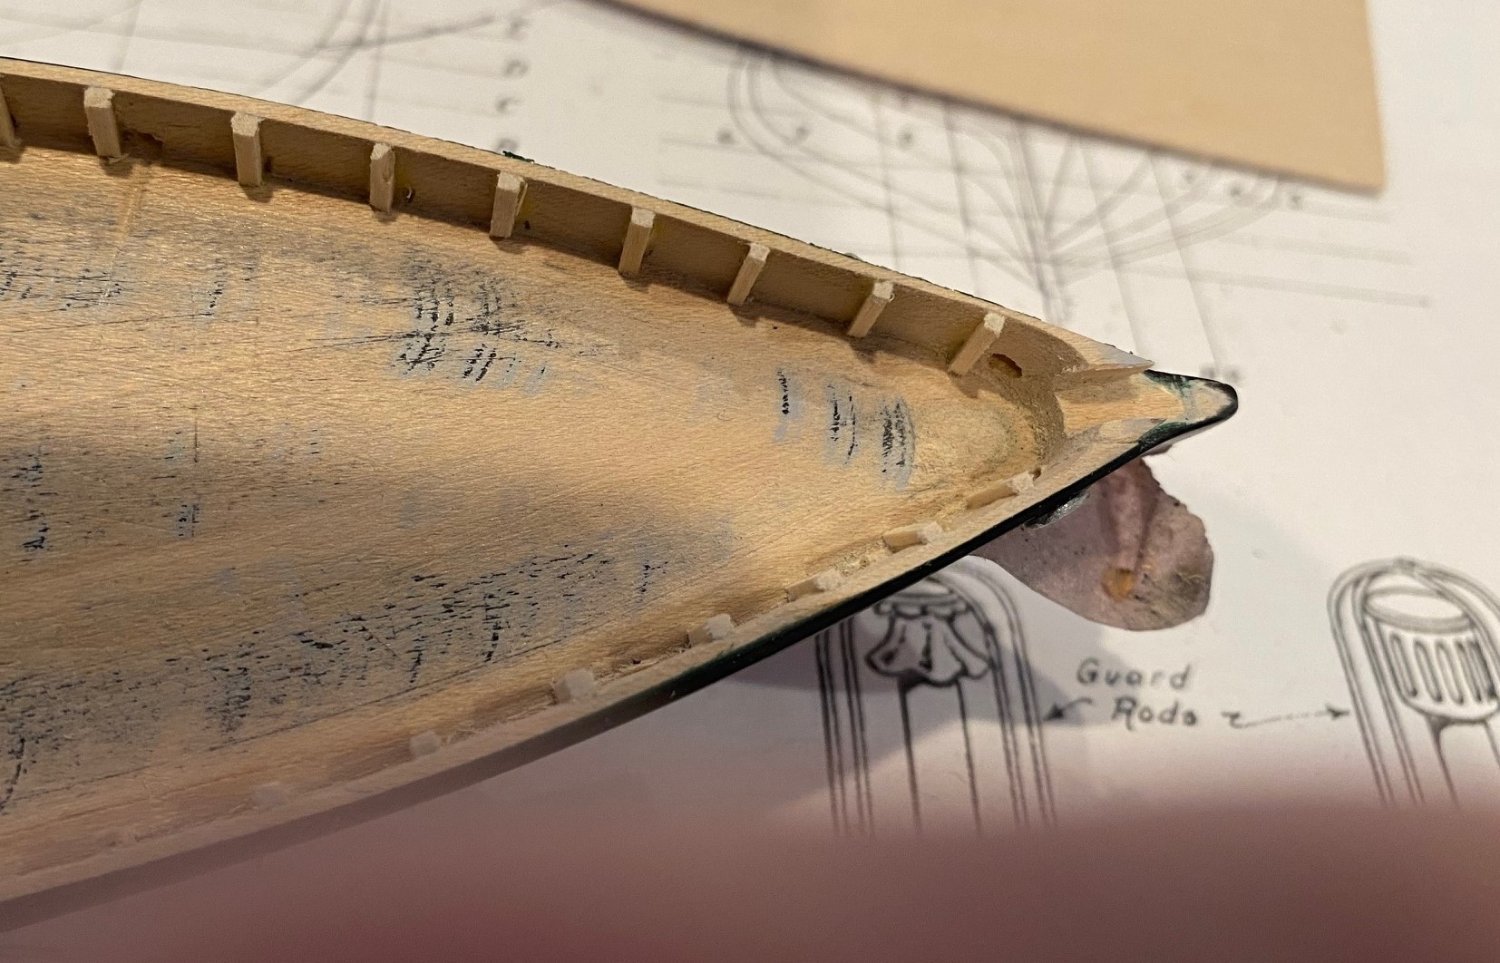
Drilled the holes on the side of the boat and for the hawse pipe and glue on the lid. I then installed the bulwark stanchions. You can see that I installed the stanchions prior to gluing in the deck and water way, the reason is that I am building it with a depressed waterway to collect and channel the deck water, by sanding the sides of the deck to fit inside the stanchions. This might not be accurate, but I wanted to see how it looked. I also cut out the bowsprit notch.
I’m going to try and make the cap rail out of the supplied wood strips; we’ll see how that looks.

- GrandpaPhil, victory78, lraymo and 2 others
-
5
-
-
Thanks for the positive comments, they do help.
Cut the fwd deck out of the stock and sanded the edges until it fit fairly well. I’m going to stain them with a weathered gray stain before gluing them in.
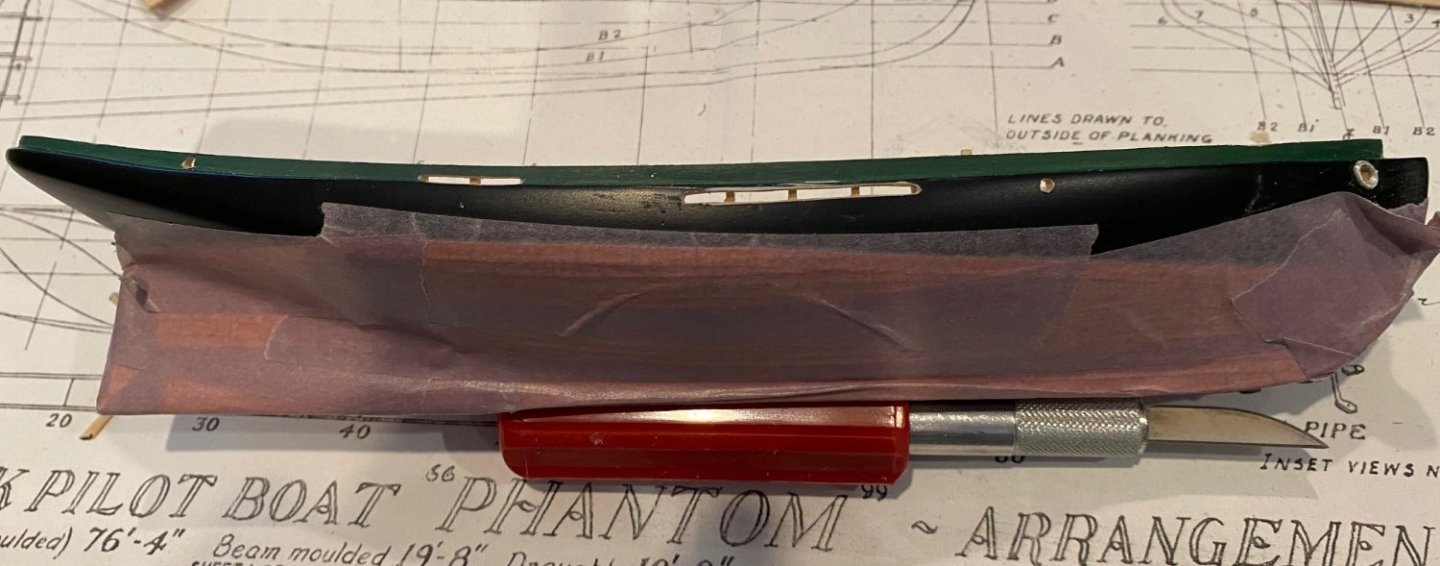
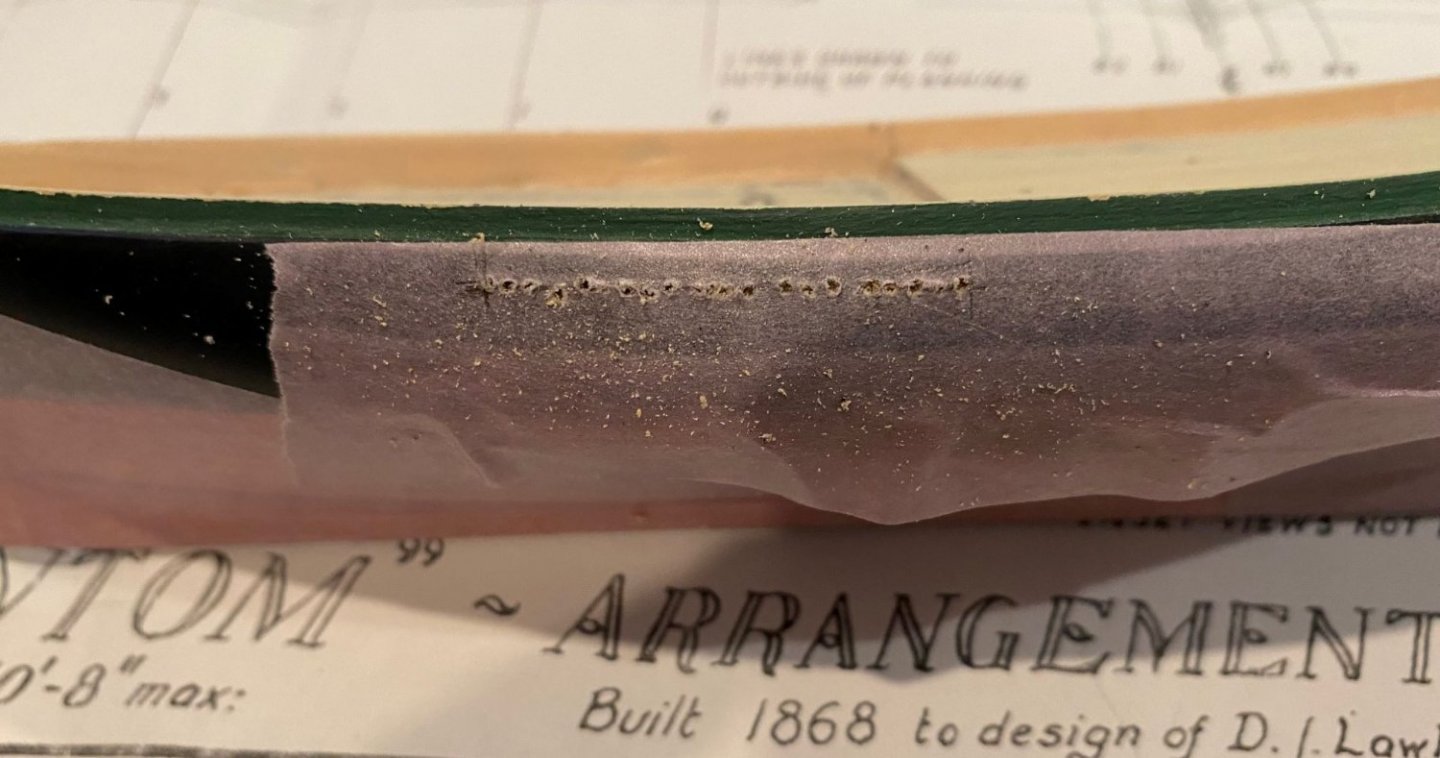
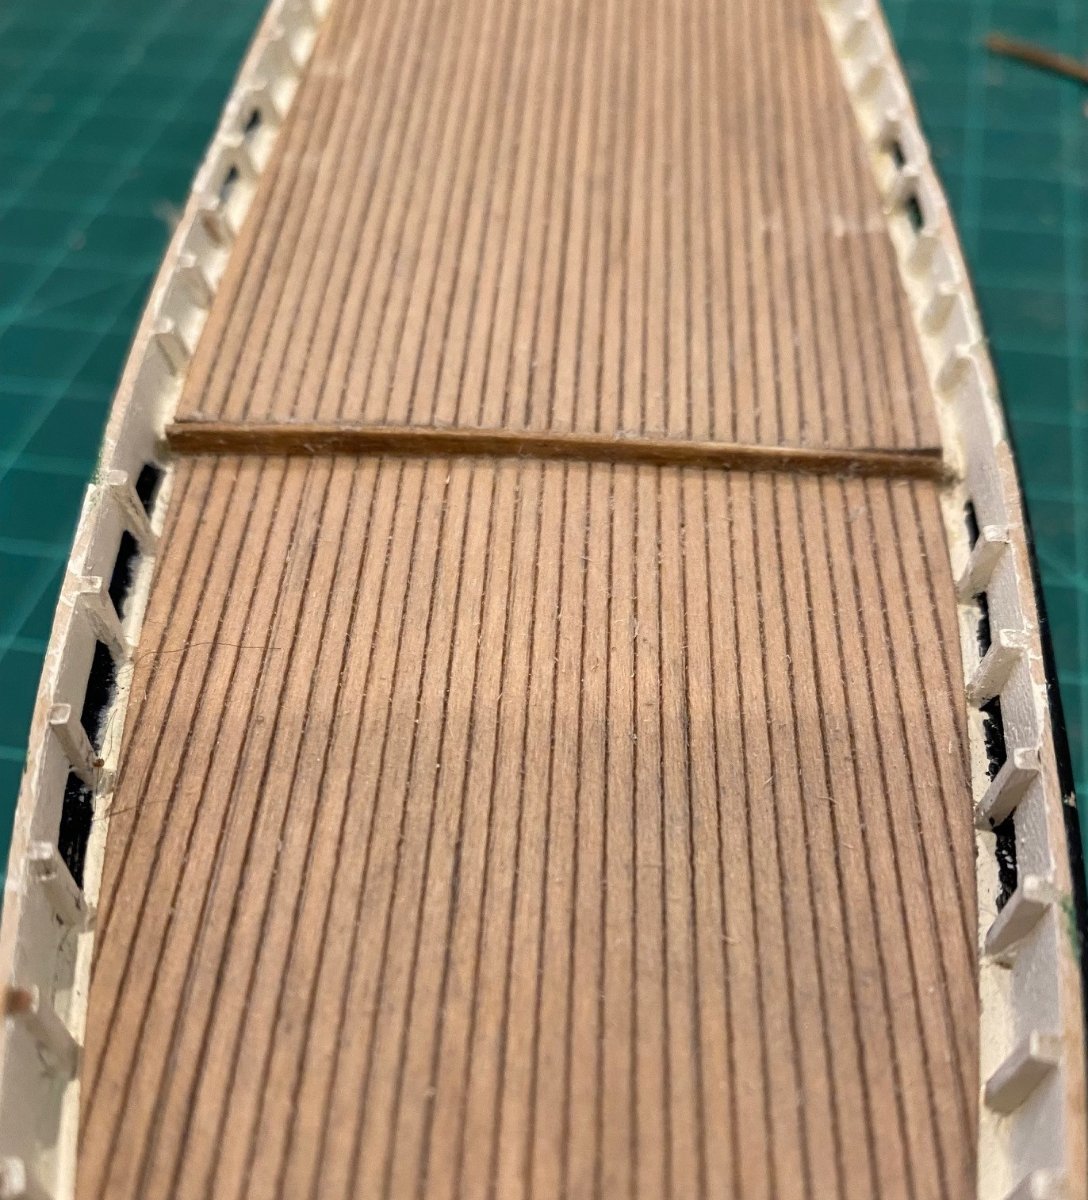
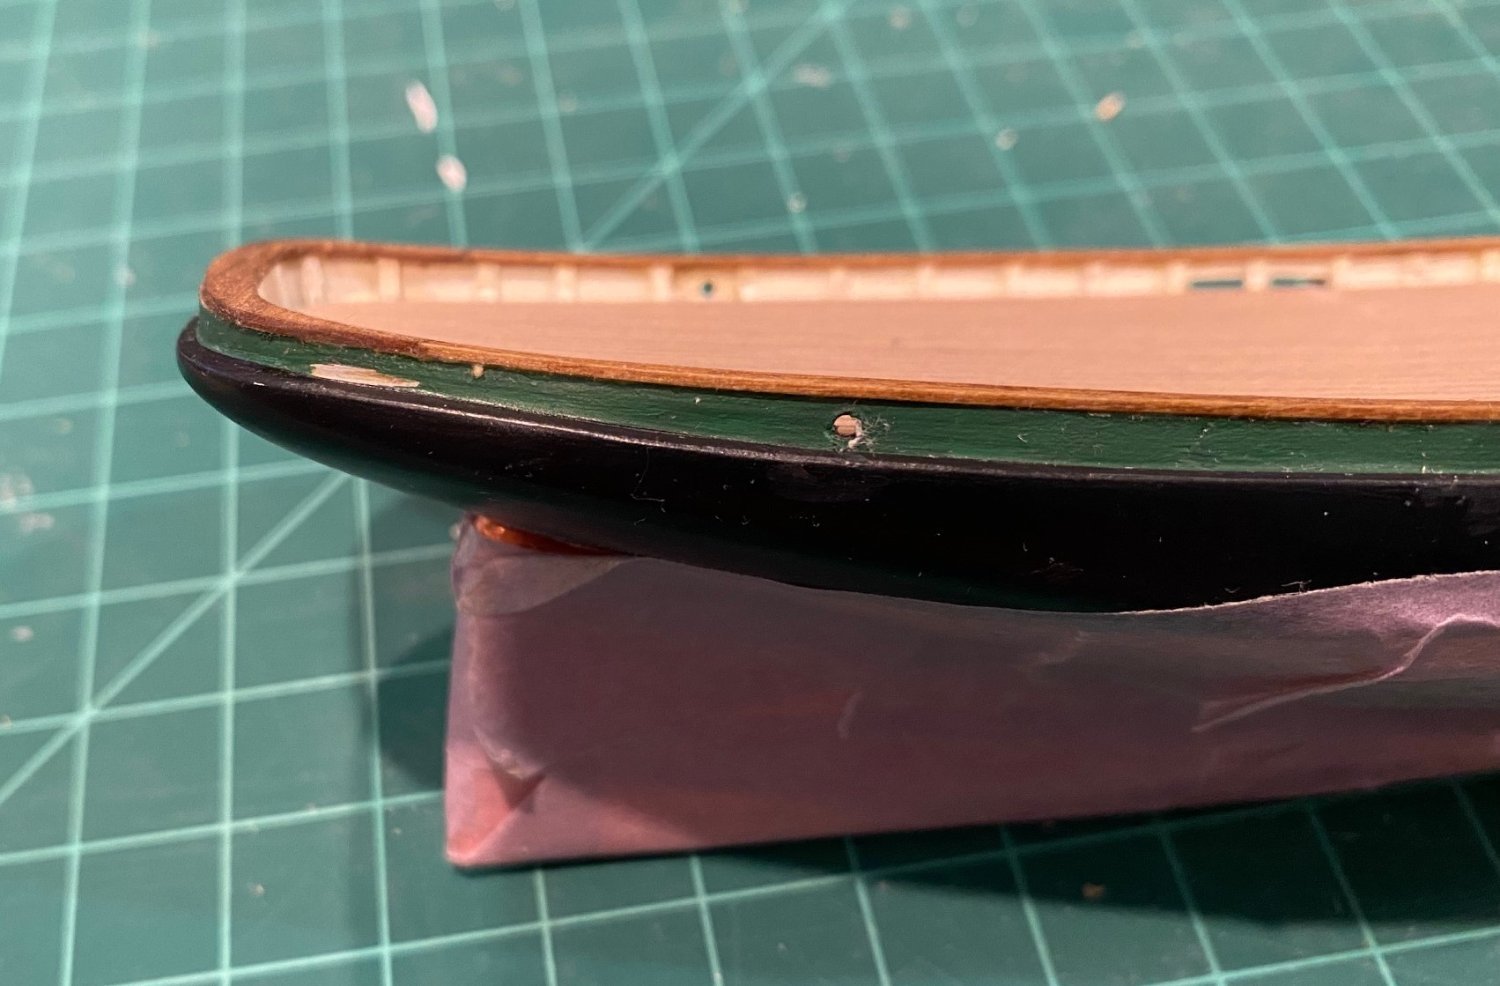
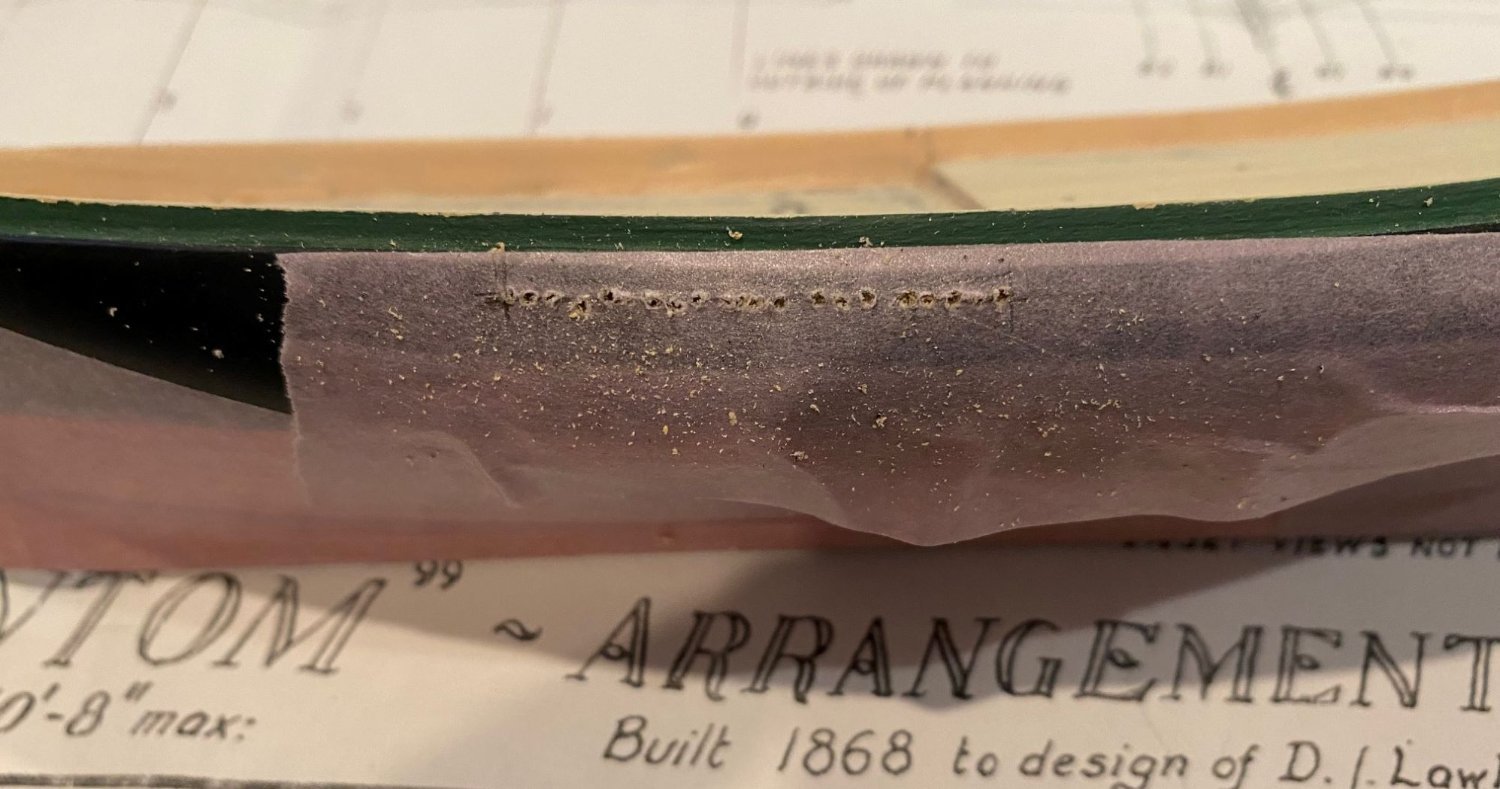
Started on the scuppers, first I covered the outside of the hull with a piece of sensitive painters’ tape to help prevent lifting the edges where I drilled, to prevent accidental scratching with the tools and to help mark the location of the scuppers on the outside. I followed the instructions on measuring down from the top of the hull down to the deck and then marking the outside and drilling holes as close to each other as possible. But then I used the drill bit like a file to connect the holes and then cleaned the slot out with a small file and sanding strip. They might be a little two big, top to bottom, but I didn't have a smaller file. I did get a little to close to the step edge on fwd port side, this led to a small split in the wood from the scupper to the step edge. I used a little white glue to fix the split. I plan on sanding my deck pieces edges a little more to simulate a water way, that is why my scuppers are as close to the wood block deck. I plan to touch up the outside of the hull once I drill the other holes, also I will then paint the bulwarks prior to gluing the deck in to prevent getting paint on the deck.

- GrandpaPhil, BrianK, lraymo and 1 other
-
4
-
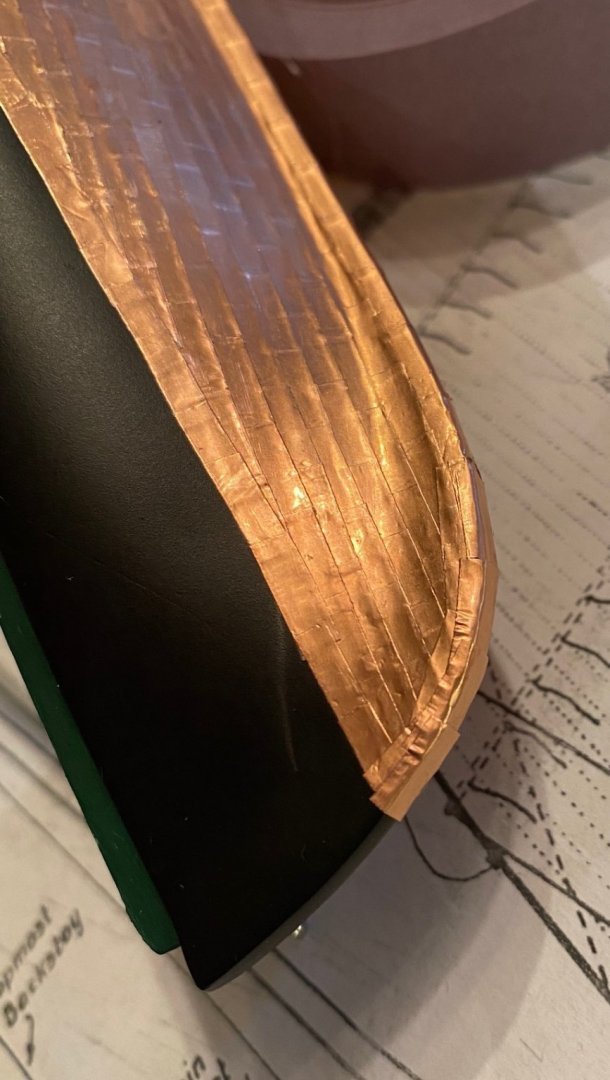
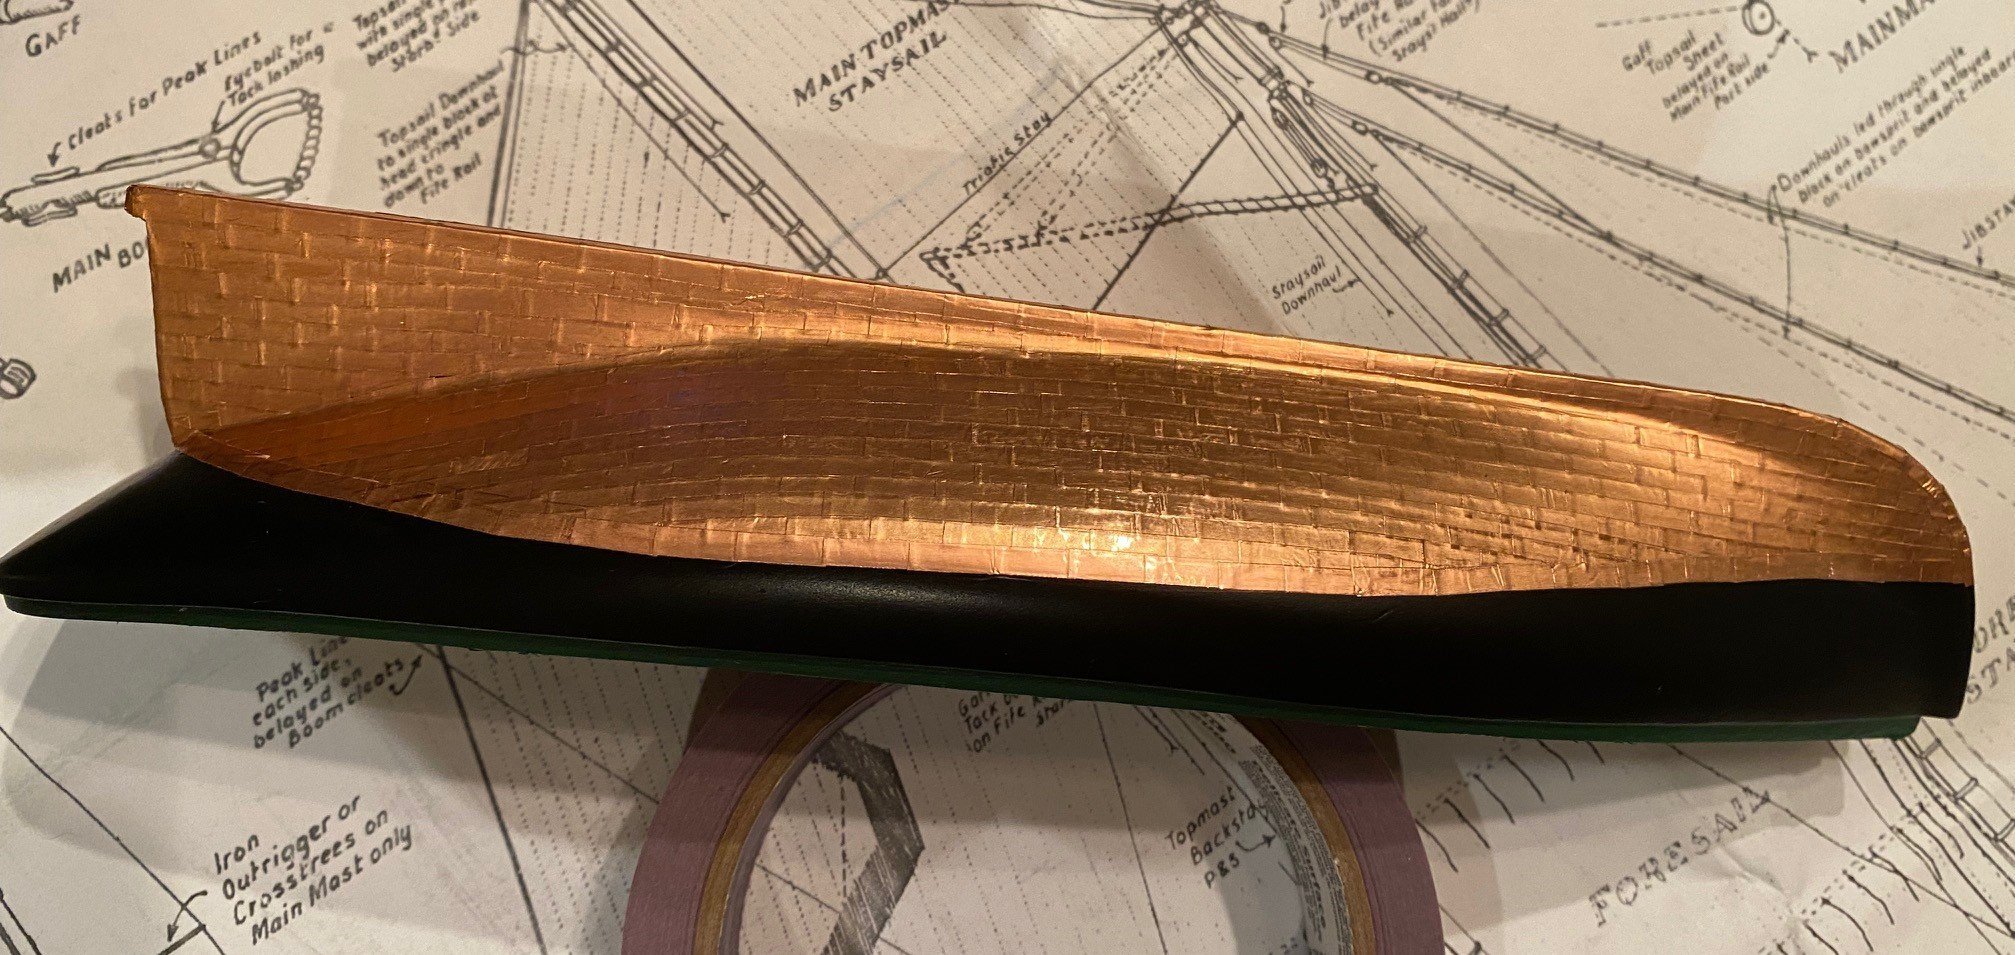
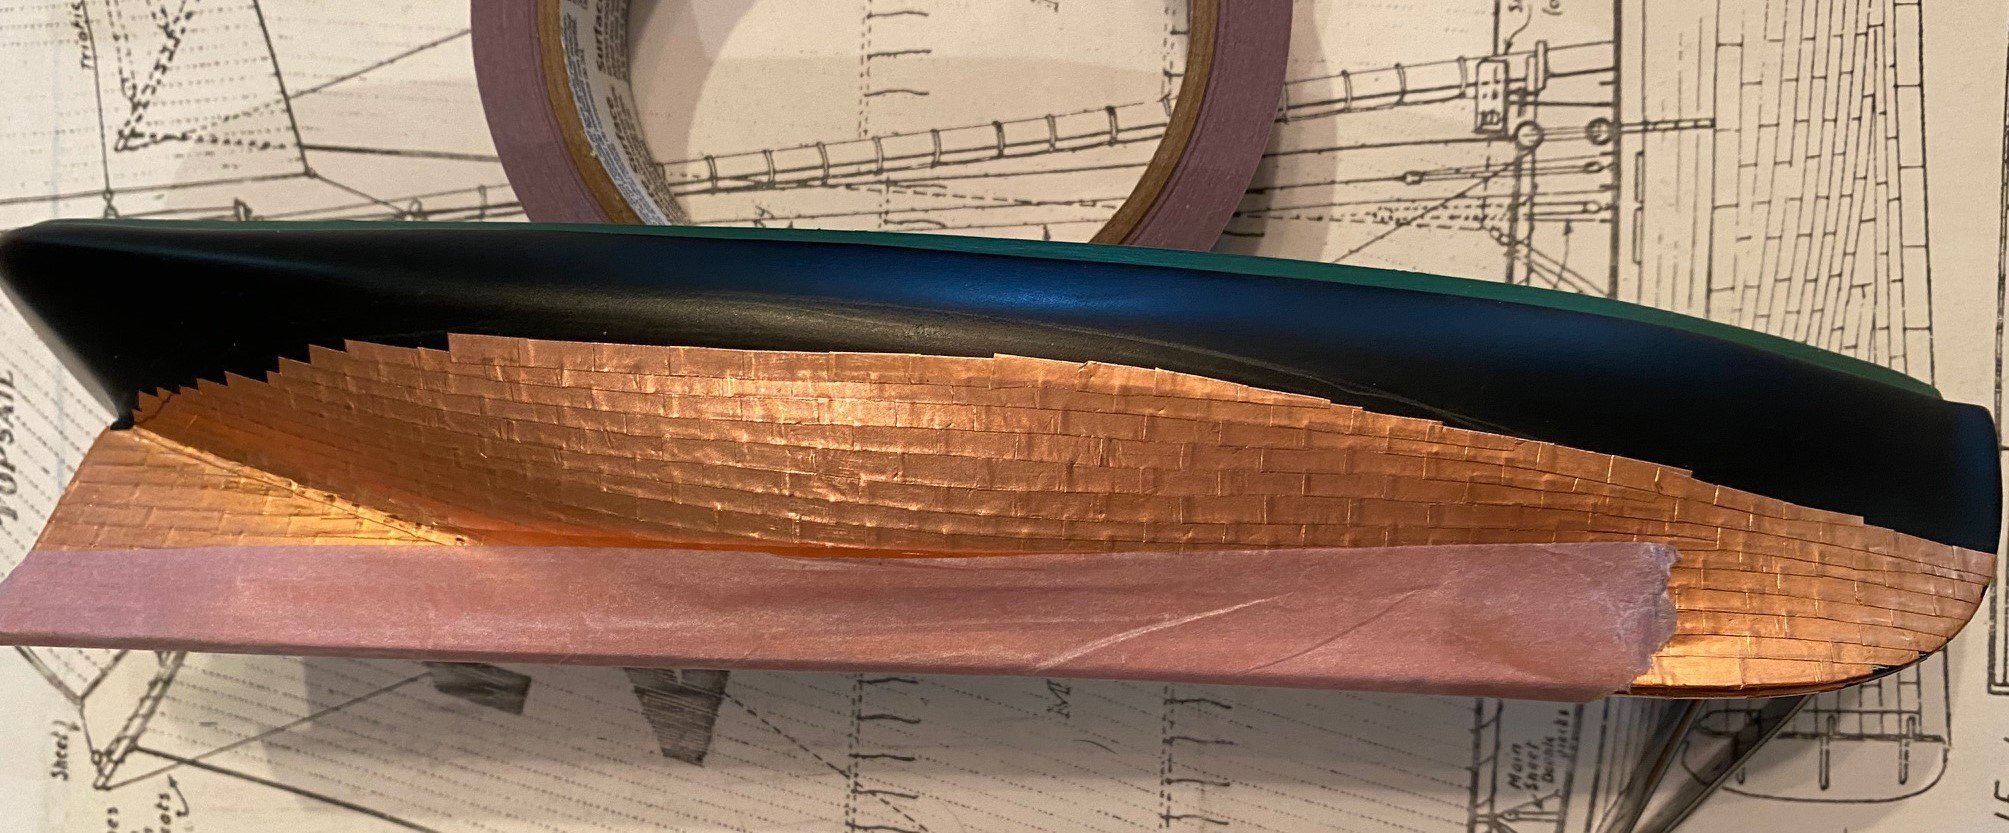
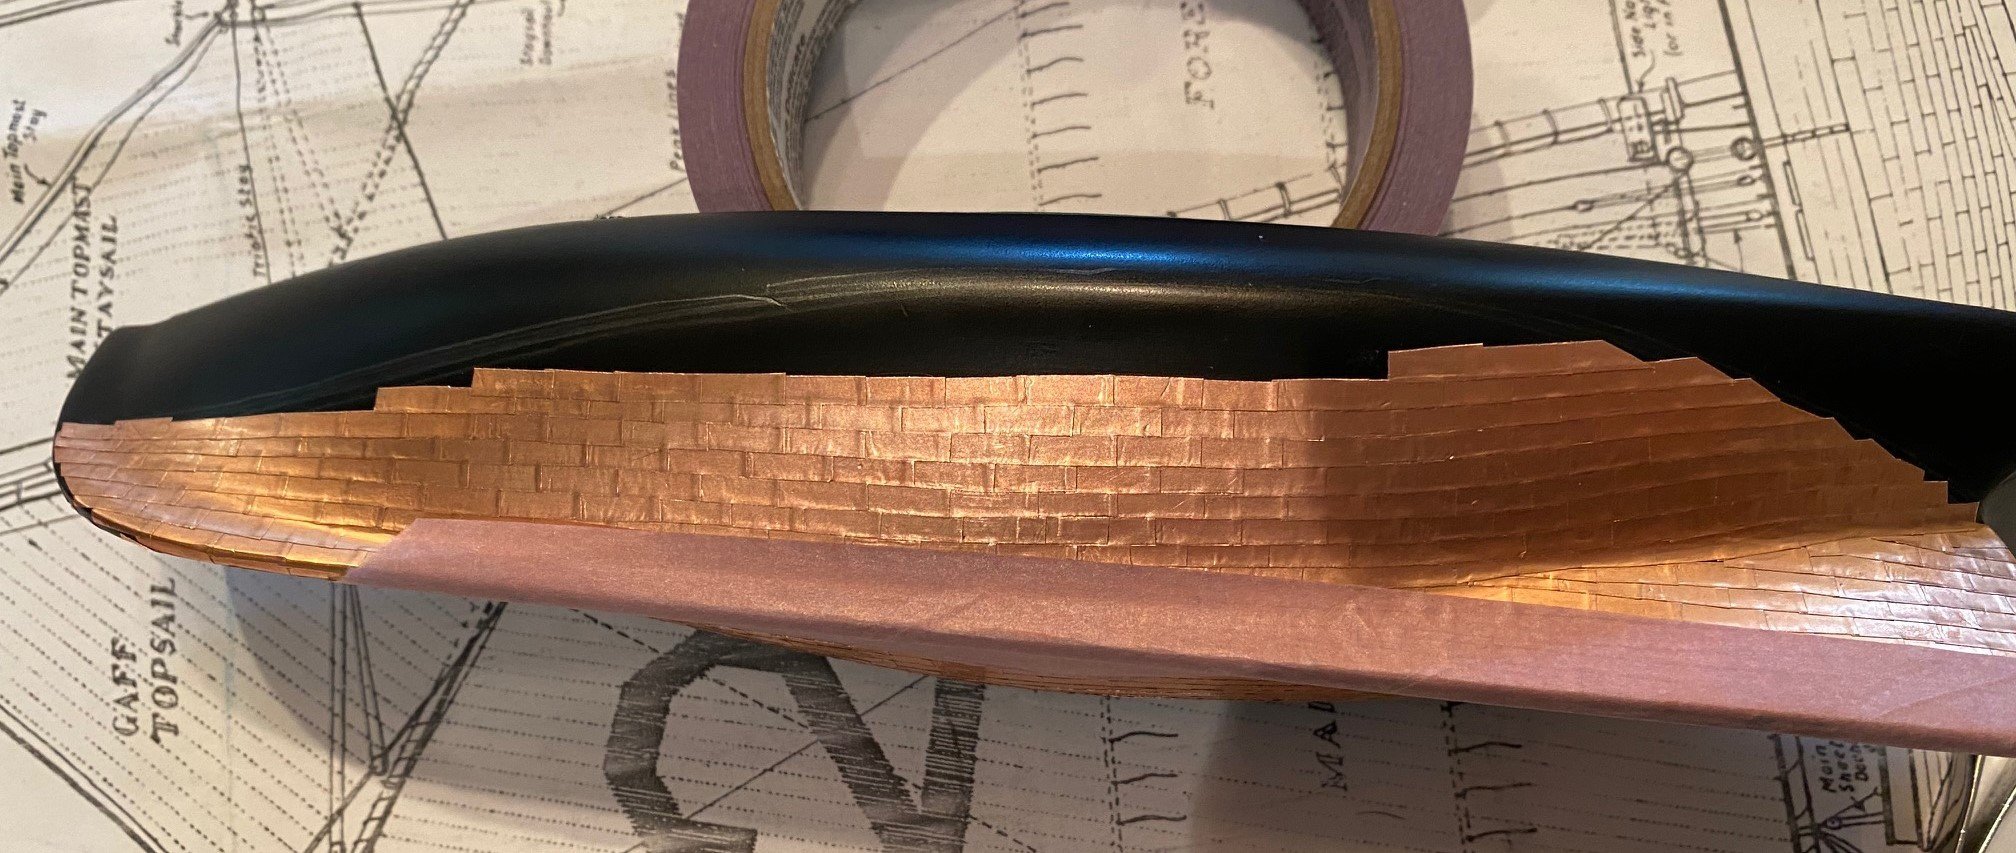
@lraymo First, I was very, very intimidated by the copper tape, but just took my time and worked aft to fwd and bottom to top. I painted the hull prior to tapping and it worked ok. I was a little concerned to the tape not adhering well, but a little test sample on un-painted wood vs painted wood indicated it would not be any more of problem. That said, it is easy to lift the edge of an applied piece of copper tape and create a problem. I found that just taking my time was the best solution, also covering major completed sections with sensitive painter's tape to prevent edge damage while I coppered the rest. Also, I still have the tape covering my copper hull while I work on the rest of the ship.
In regard to painting and sanding, like Keith said, I usally spray primer a couple of coats on and then lightly sand it prior to spraying a couple of coats of color. I do use fine and very fine wet sand paper when I'm sanding the color. I usally pray a lot and don't sand the final coat.
- Keith Black, lraymo, Cathead and 1 other
-
4
-
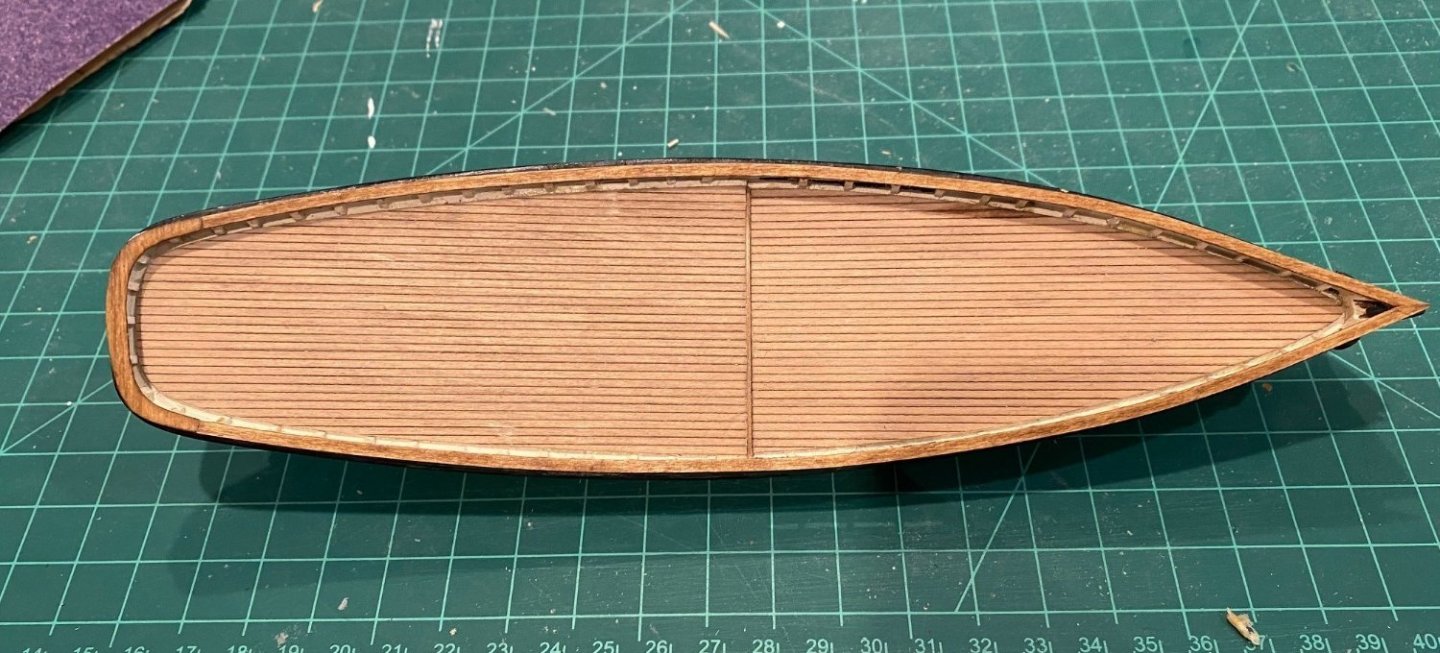
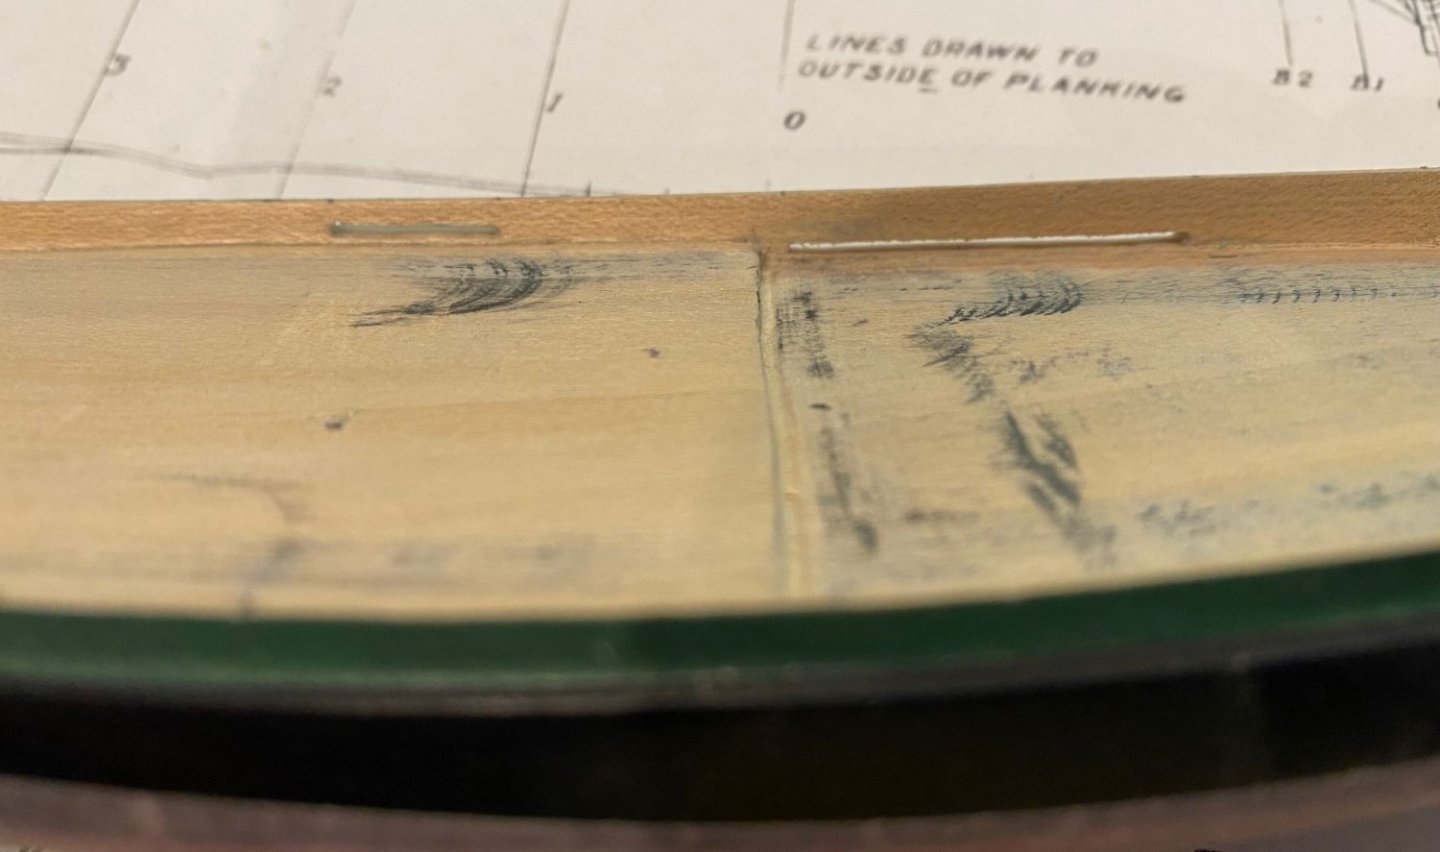
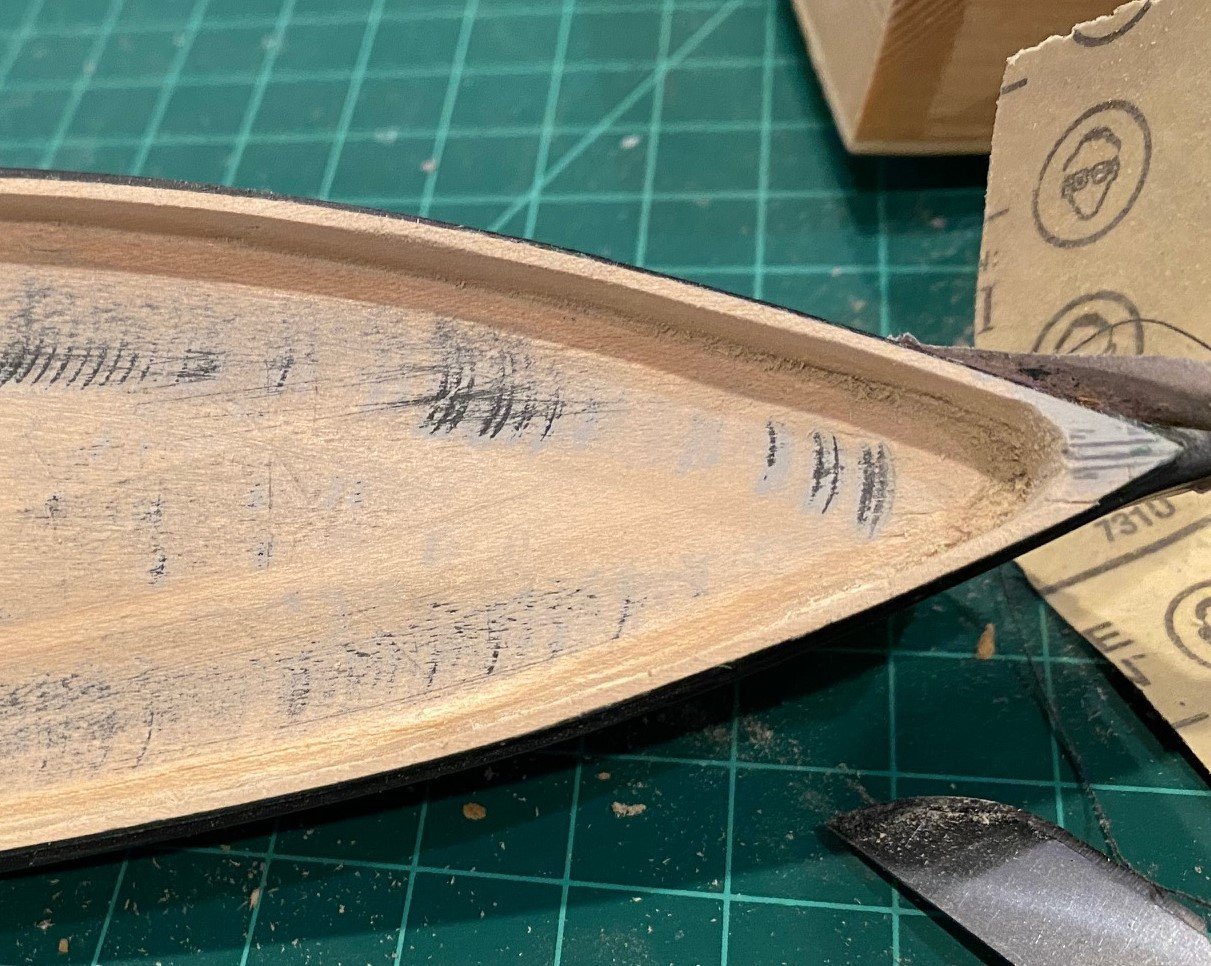
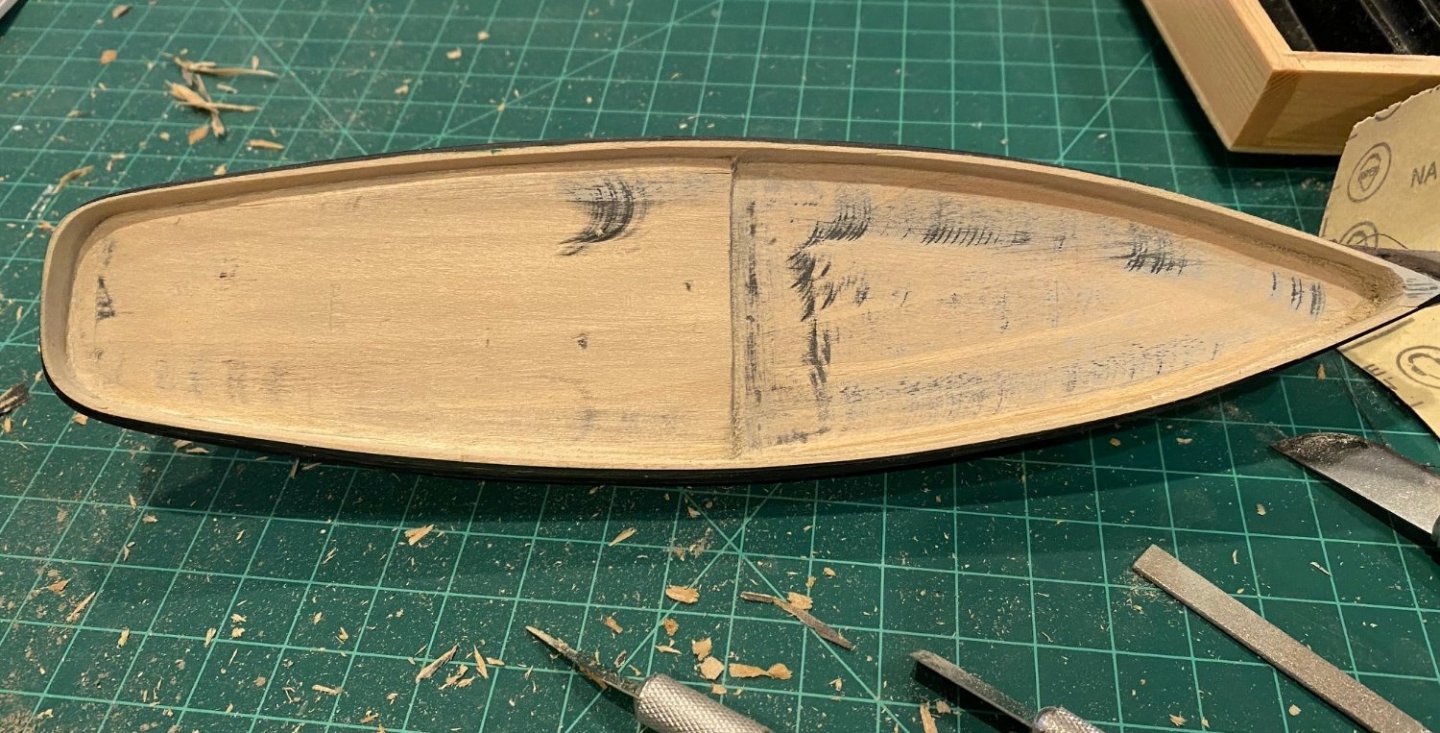
I sanded the bulkheads more, got them pretty even, somewhere between 1/32 and 3/64 inch. I would have liked to get them thinner but didn’t want to break them and I got tired of sanding. I did sand down the stanchions wood a little thinner.Now to the deck, I still might have more of a hump in the middle than I should but it seems like the wood is really hard compared to the outer sides of the deck. I made a copy of the drawing and cut out the deck little larger, so I could fit it to the actual model by trimming it down. Then transferred it to the scribed deck material. Started cutting out the aft deck a little larger than required and sanded the edges down until it fit with a minor gap.

-
All I can say is WOW!!!!!
- Canute, mtaylor, Keith Black and 1 other
-
4
-
@Karleop Fantastic, I will be refering back to your log when I start to build mine.
-
The holidays are finally over so I can get back to the yard. I started to thin the bulwark; first with a curved #22 blade to score the bottom of the bulwark even with the deck. Then I used a #18 chisel blade to cut straight down in small cuts, making sure that if I needed to flip out the shaved wood that I leaned the blade handle towards the center line and not to the outside of the hull. I cleaned up and rounded the bow and aft corners with a small triangle blade. I ended up with about 1/16th of a bulwark, then I used sanding course sticks to smooth and thin out the bulwark. This resulted in a thickness 3/64ths.
When I temporarily installed a bulwark stanchion and determined the width of the required cap rail, I think it looks to wide. So I think I will thin out the bulwark and stanchions a little more.
I am glad that I covered the copper plating with sensitive painter's tape the way I had to handle the hull to cut and sand.
- victory78, lraymo, Bill Morrison and 1 other
-
4
-
Just a thought. Due to the problem with worms, insects, and termites found in ship dunnage; wouldn't the timbers for the launch way be coated in some sort of anti-insect proofer, such as tar/creosote. It seems that would make the launch way darker to blackish.
- Keith Black and lraymo
-
2
-
-
Yes it is and my fat fingers didn't help
-
@lraymo A great question. Both the 'Instructions' by G. F. Campbell, the schematic and the 'Practicum' by C. Passaro are not very clear and confusing. All three agree that the width (height) of the plate is 1/8 inch, split the tape down the middle. But the Practicum says the plates are 1/4 inch long, the sheet 2 of the schematic measures out to 1/2 inch long. I don't remember why I cut my plates 3/8 inch long.
I might now go with the 1/2 inch long for reduced number of plates but I do like the look of the 3/8 inch, they look proportional to the width. The 1/2 inch long plates might not curve smoothly.
-
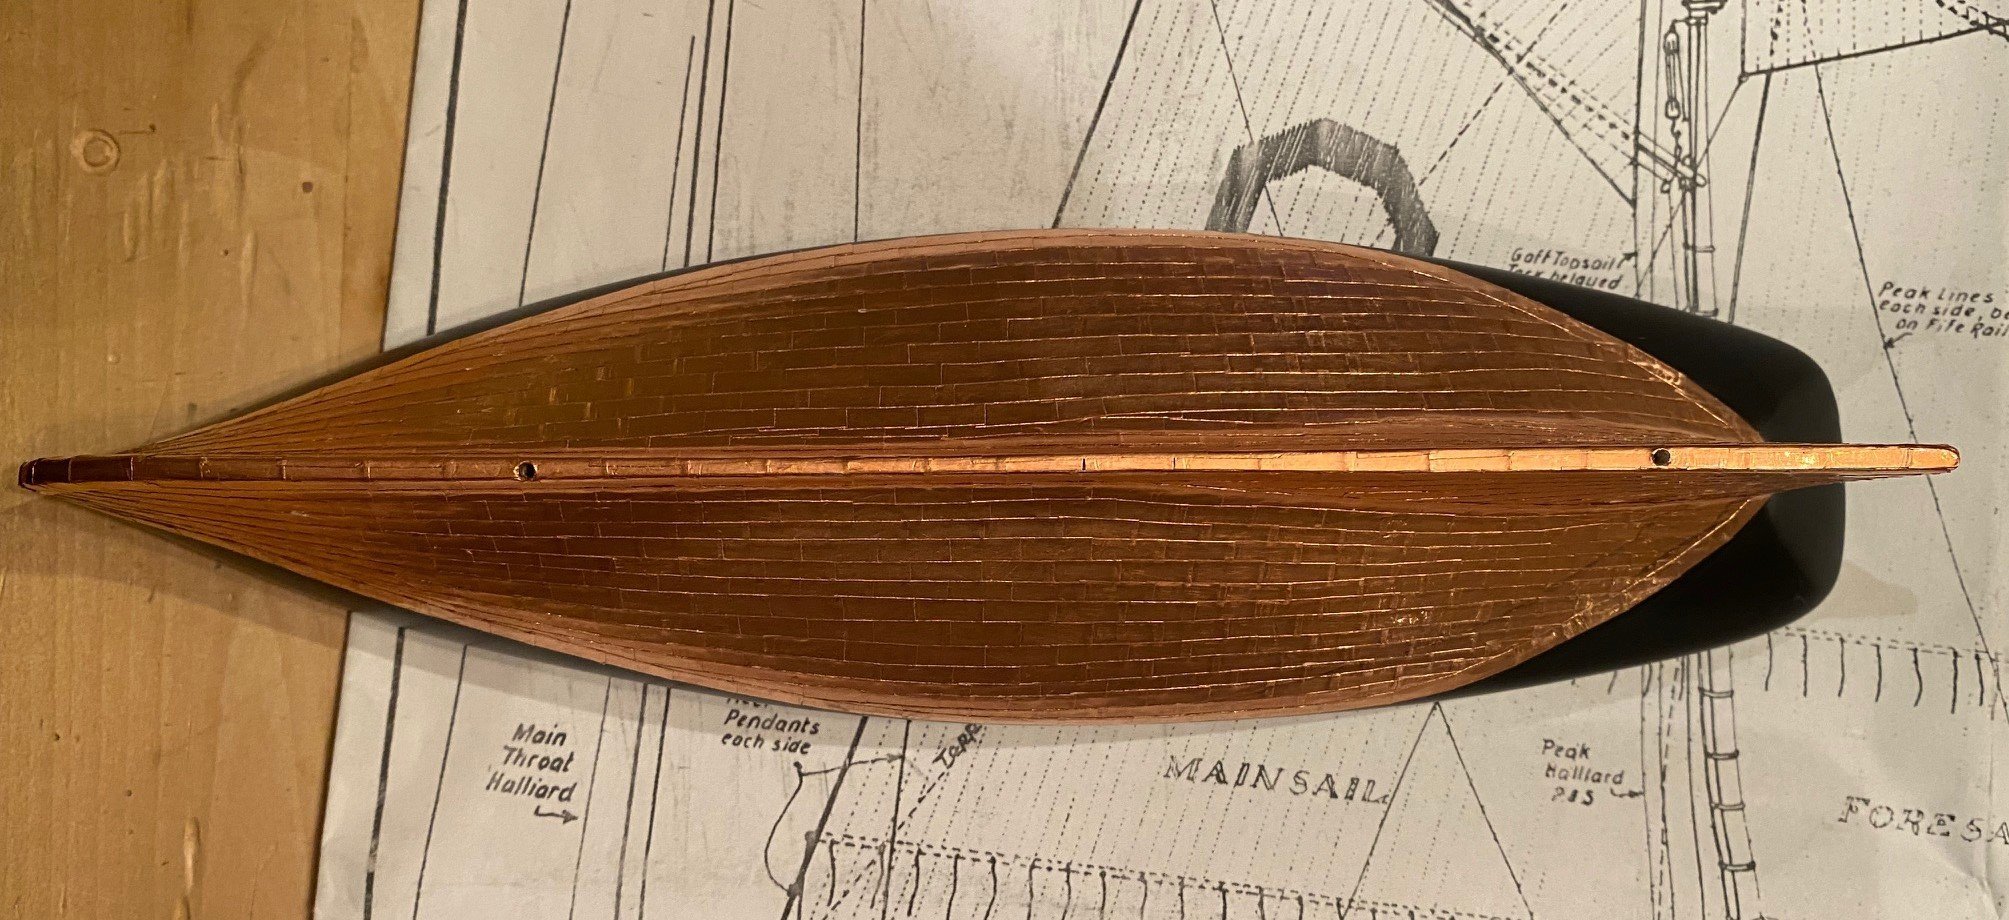
I'm finally done with coppering the hull, this was as tedious as setting the rigging.


I don't like how the bow stem turned out, it's not very smooth and somewhat misaligned. I haven't decided if I will redo it or not, but I need to move on and work on something else for awhile.
- victory78, Duanelaker, lraymo and 1 other
-
4
-
-
Coppering the hull is much more difficult and time consuming then I thought it would be. This experience will be very helpful in the future. I would recommend getting the deck flat before working on coppering the hull to help prevent snagging the copper edges.
One of the problems I ran into was inconsistency in the runs of the tiles; inconsistency of my overlap, both horizontal and vertical, the runs had a small wave appearance. I strongly recommend that you decide how you want the tiles to flow on hull, fore to aft and top to keel, this would be similar to a planking plan. Then scribe lines for the starting and final rows and tick marks for the runs. This would be similar to tick marks on bulkheads/frames to keep your planks aligned to your planking plan.


As another builder mentioned, the copper edges are easy to snag and lift or compress as you work on the model, they sure are easy to snag. Not sure if there is a way to prevent, I think I might try sticky plastic wrap or painter’s tape. As you can see below, I used sensitive painter’s tape which peels of the hull without lifting the copper.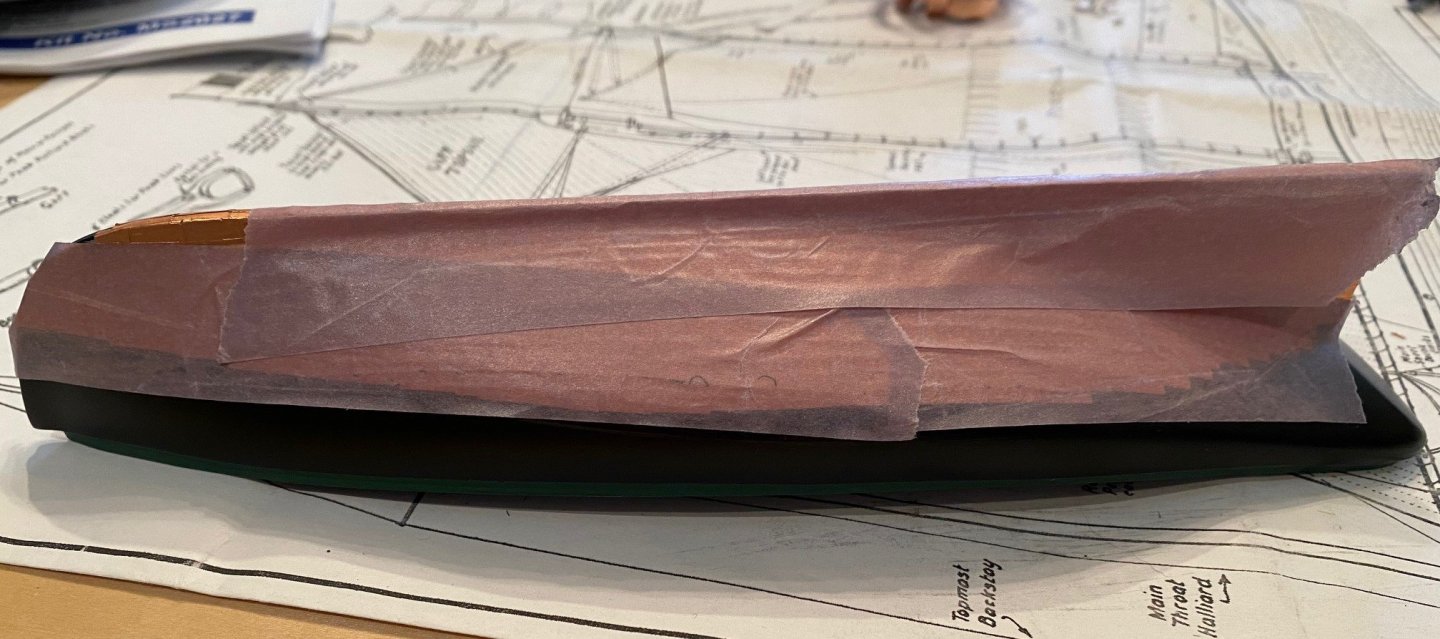
-
@Raymond Morris thanks, let me know if you have any questions
-
@steveg In my opinion the boat you choose has a lot to do with what your experience is. Have you built many models before, plastic or wood?
- Ryland Craze, mtaylor and Keith Black
-
3


Glad Tidings by Paul Le Wol - FINISHED - Model Shipways - 1/24 - pinky schooner
in - Kit build logs for subjects built from 1901 - Present Day
Posted
Fantastic work, love your detailed work!!!!