Bill97
-
Posts
2,730 -
Joined
-
Last visited
Content Type
Profiles
Forums
Gallery
Events
Everything posted by Bill97
-
Oh no Marc I am by no means still playing. I was more meaning playing HORSE or something like that. My years of running up and down the court a long gone at 69 😀. But yeah it is a giant tradition here in the bluegrass. Big rivalry between Univ of Louisville and Univ of Kentucky. I of course am a Louisville fan. Unfortunately my team has fallen on a couple rough seasons. Hope that gets back to normal soon. Glad to hear your dad is doing well. When we went through it with my mom we went to a few support group gatherings (not with her). We learned that your memory is like an onion. The outer layers (short term memories) leave first but the inner (long term memories) last much longer. I remember so well us taking my mother to church near the end when she barely rendered who we were but as soon as the service started she could say every response and sing every song she learned as a kid. There was a very moving show in TV the other night about Tony Bennet you may have seen. He did a concert with Lady Gaga. As soon as the lights went up on stage and the band hit the first note Tony’s eyes lit up and he was his old self. Sang every song with out sheet music from memory. Very soon after the concert was over he had no recollection of doing it. Such a sad and mysterious disease. My thoughts are with you my friend. Ok enough of that. Back to happy modeling thoughts😊.
- 2,699 replies
-
- 5
-

-
- heller
- soleil royal
- (and 9 more)
-
No need to to be sorry Marc. It is comforting to know someone as talented as you is equally novice at rigging as I am. Kind of like when I miss a free throw in a pick up basketball game and then I see a NBA player miss one on TV. I say Hey even the greatest struggle from time to time! 😊 I kind of wish I was brave enough, and had space enough, to work on both the he Victory and the Soleli Royal at the same time. I am getting close on my Victory where rigging, which I think is beautiful, will be the predominant activity. I know once I start my SR painting will be the predominant activity for a long time. Would maybe be a great change of pace to rotate between the two builds when I needed a respite from one or the other. I have to admit I am anxious to start the SR painting. By the way Marc if you don’t mind my asking, how is it going with your dad? Hope all is well for him and for you and the family dealing with this difficult and emotional issue I too know so well. Bill
- 2,699 replies
-
- 5
-
-
- heller
- soleil royal
- (and 9 more)
-
Marc I have to admit I continue to sneak a peek at your SR build even though I still have a very long time remaining on my Victory. Your SR build here will definitely be an inspiration for me when I start my build of that Heller ship. Beautiful job so far. By the way I accidentally referred to you as Kevin a couple posts back. Sorry to both you and Kevin 😊.
- 2,699 replies
-
- 5
-
-

-
- heller
- soleil royal
- (and 9 more)
-
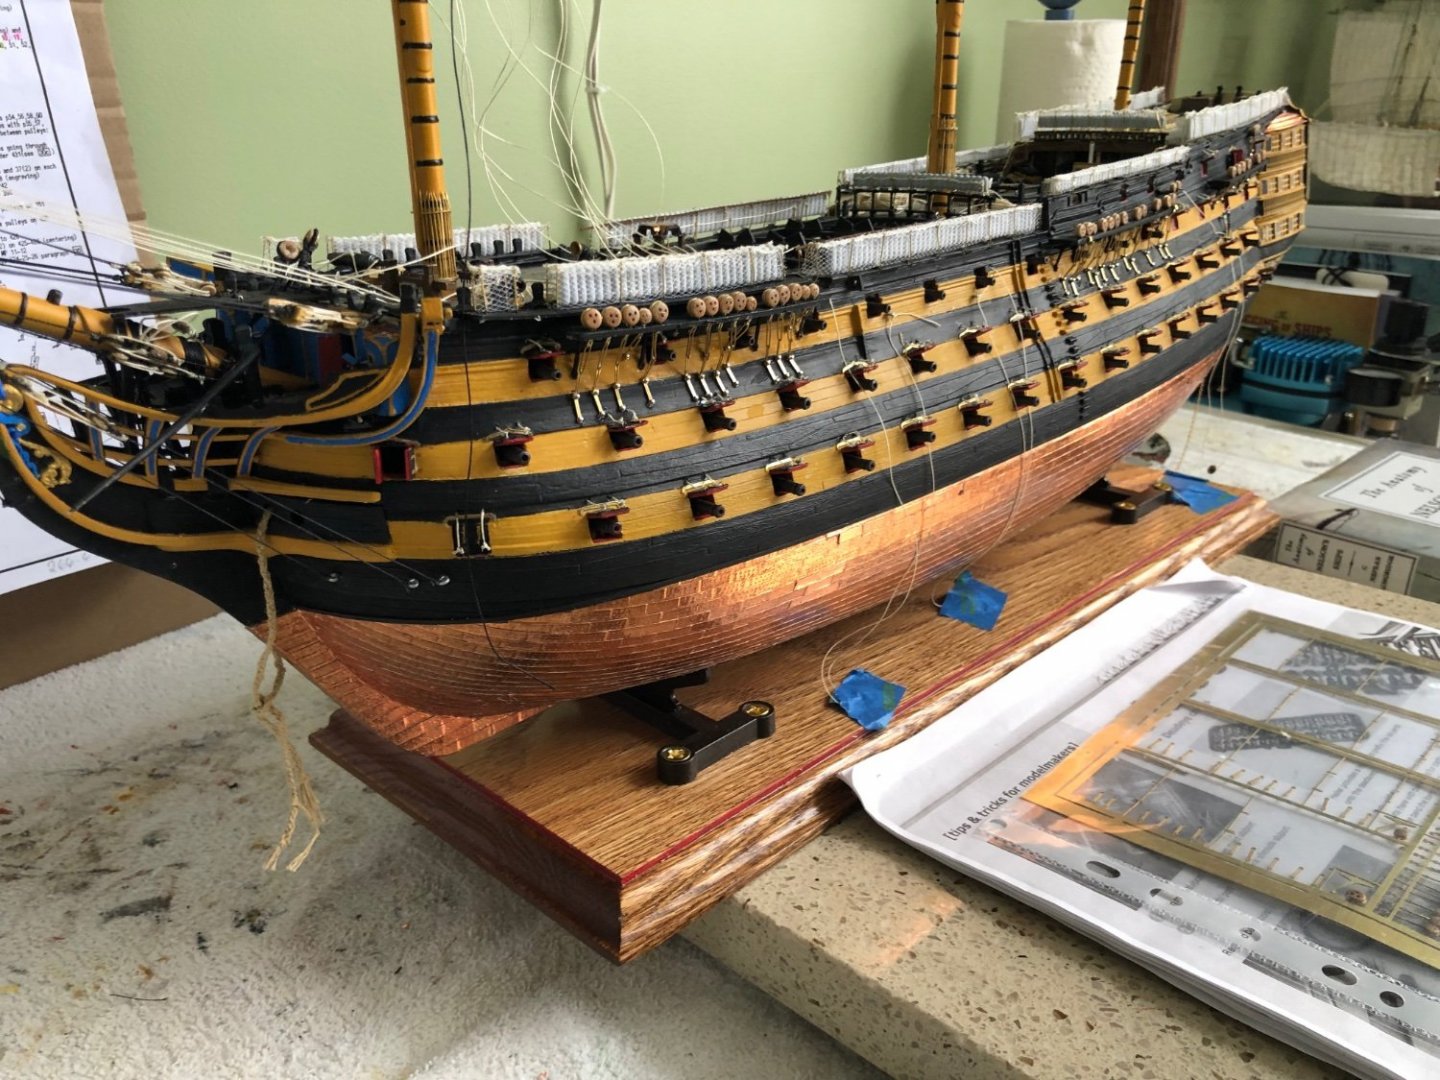
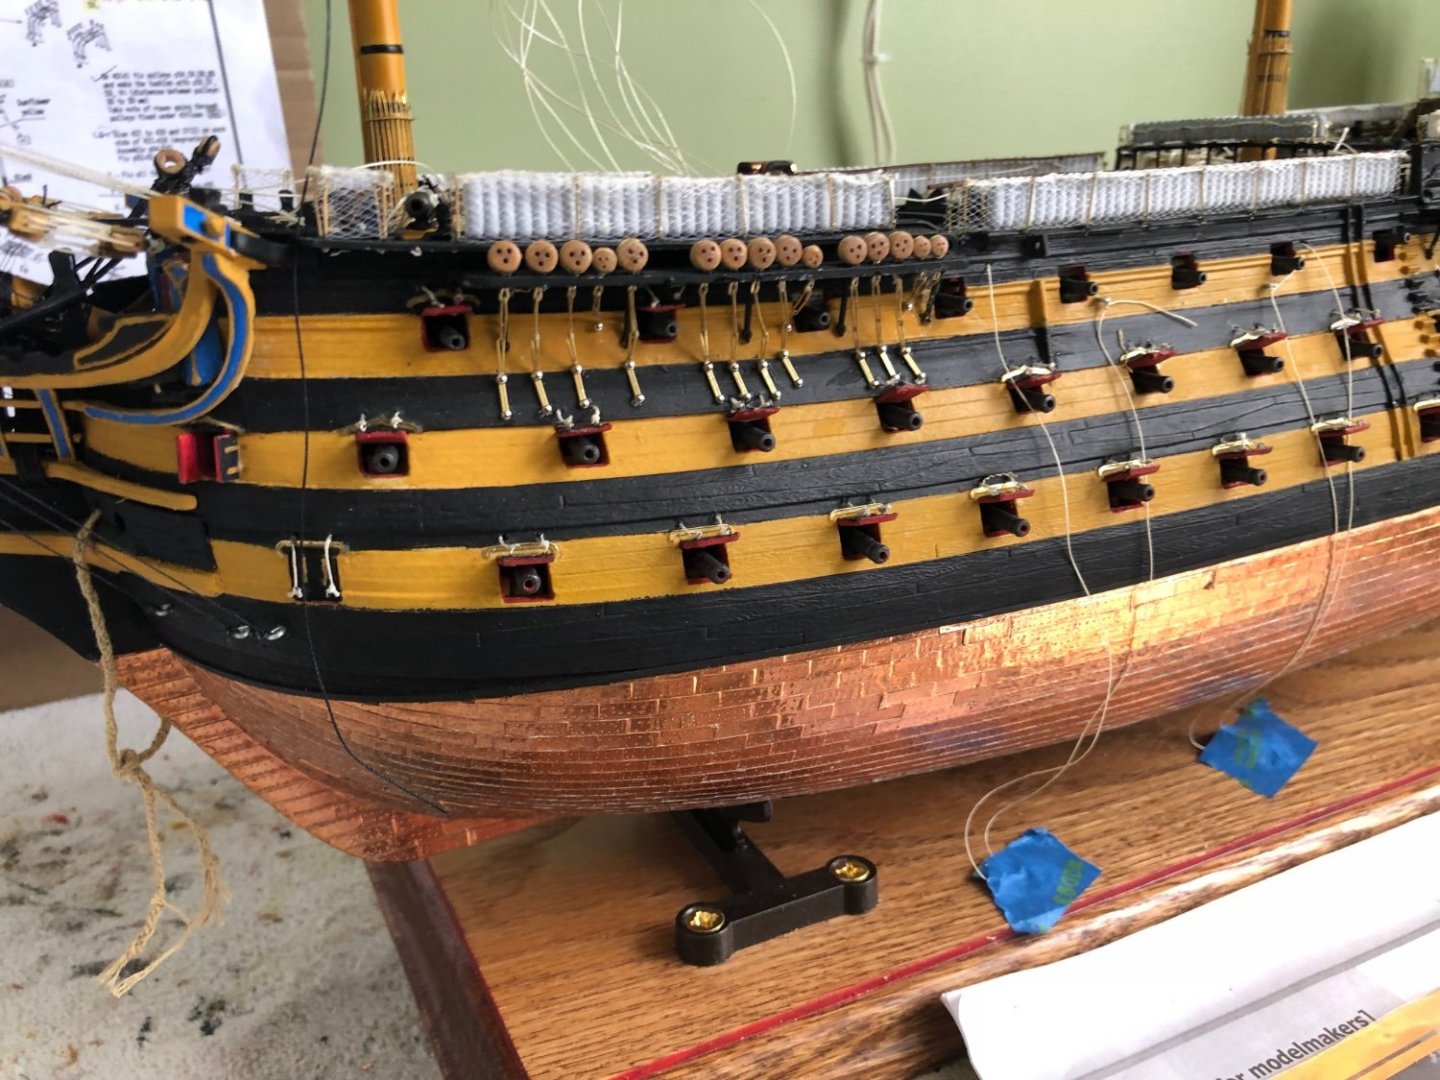
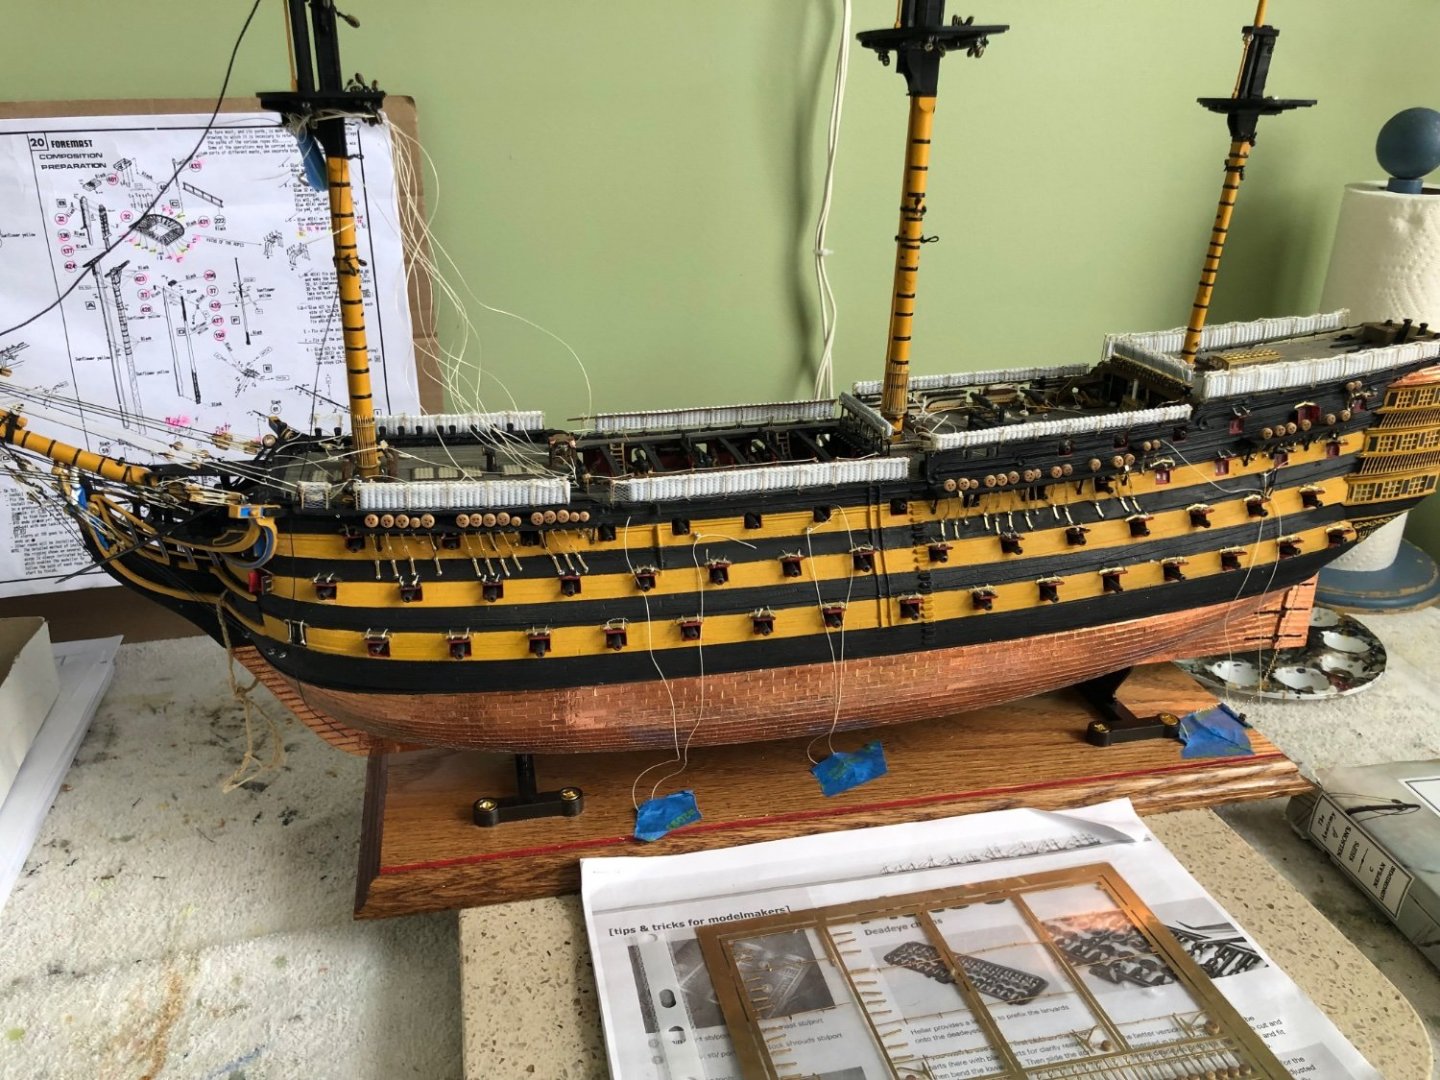
Deadeyes, irons, chains, and preventer plates completed all the way around. Did not add pictures since it is redundant to pictures already included. Now to add the eyebolts and blocks on the channels that will be used later in the standing and running rigging. Then I guess it will be time to start using some of this rigging thread!
-
OK here is my next curiosity. I am sure it is a matter of preference for each builder and not a standard practice. I have looked through the build blog of a number of builds and read through Longridge’s book but don’t have a clear course of how to proceed. The curiosity is when do you hang your yards in conjunction with the standing rigging? I know I am going to rig each yard with all the needed blocks and ropes off the ship. I also know I am going to use the tiny brass rod technique to attach it to the mast and cover it with a parral. That is all good. Once I finish the deadeye chains on the starboard side I am moving into the standing rigging following the recommended sequence. As I stated above when do you attach them. I have my mast assembled up to the top masts and am planning to hang the shrouds and stays up to that point then complete the remainder of the masts along with the remaining standing rigging. Do you hang up he yards before the standing rigging, after all the standing rigging, or as you make your way up? I know it has to be done before the running rigging.
-
Kevin that is a great idea the way you designed the deck sections to interlock like fingers to hide the seam. Reminds me a lot of a great deal ceramic tile I have laid over the years.
- 444 replies
-
- 1
-
-
- Cutty Sark
- Revell
- (and 2 more)
-
Deadeyes, irons, chains, and preventer plates completed on port side. Woo! There is some work to that! Daniel I know it was not your intention when you made these etched sheets but I really like them left brass, as well as all your other pieces😊.
-
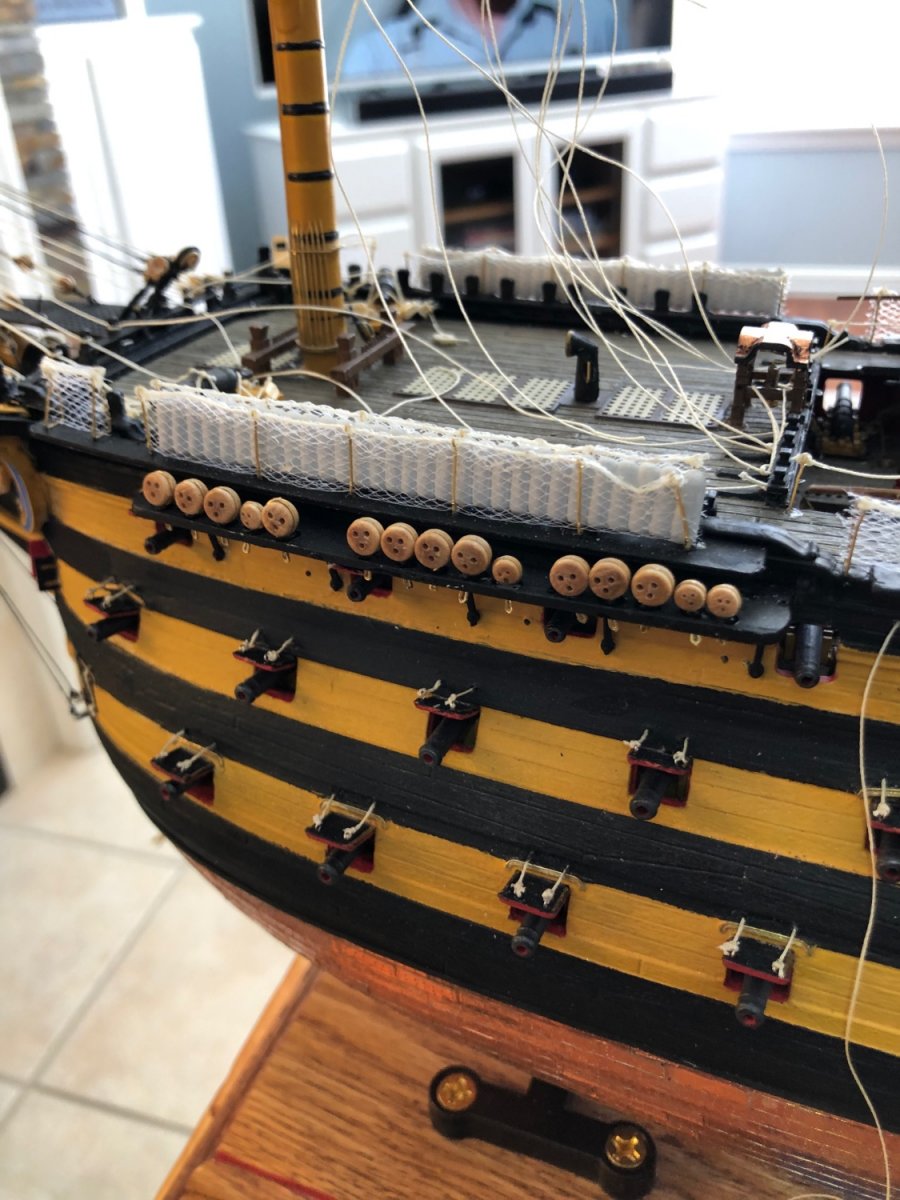
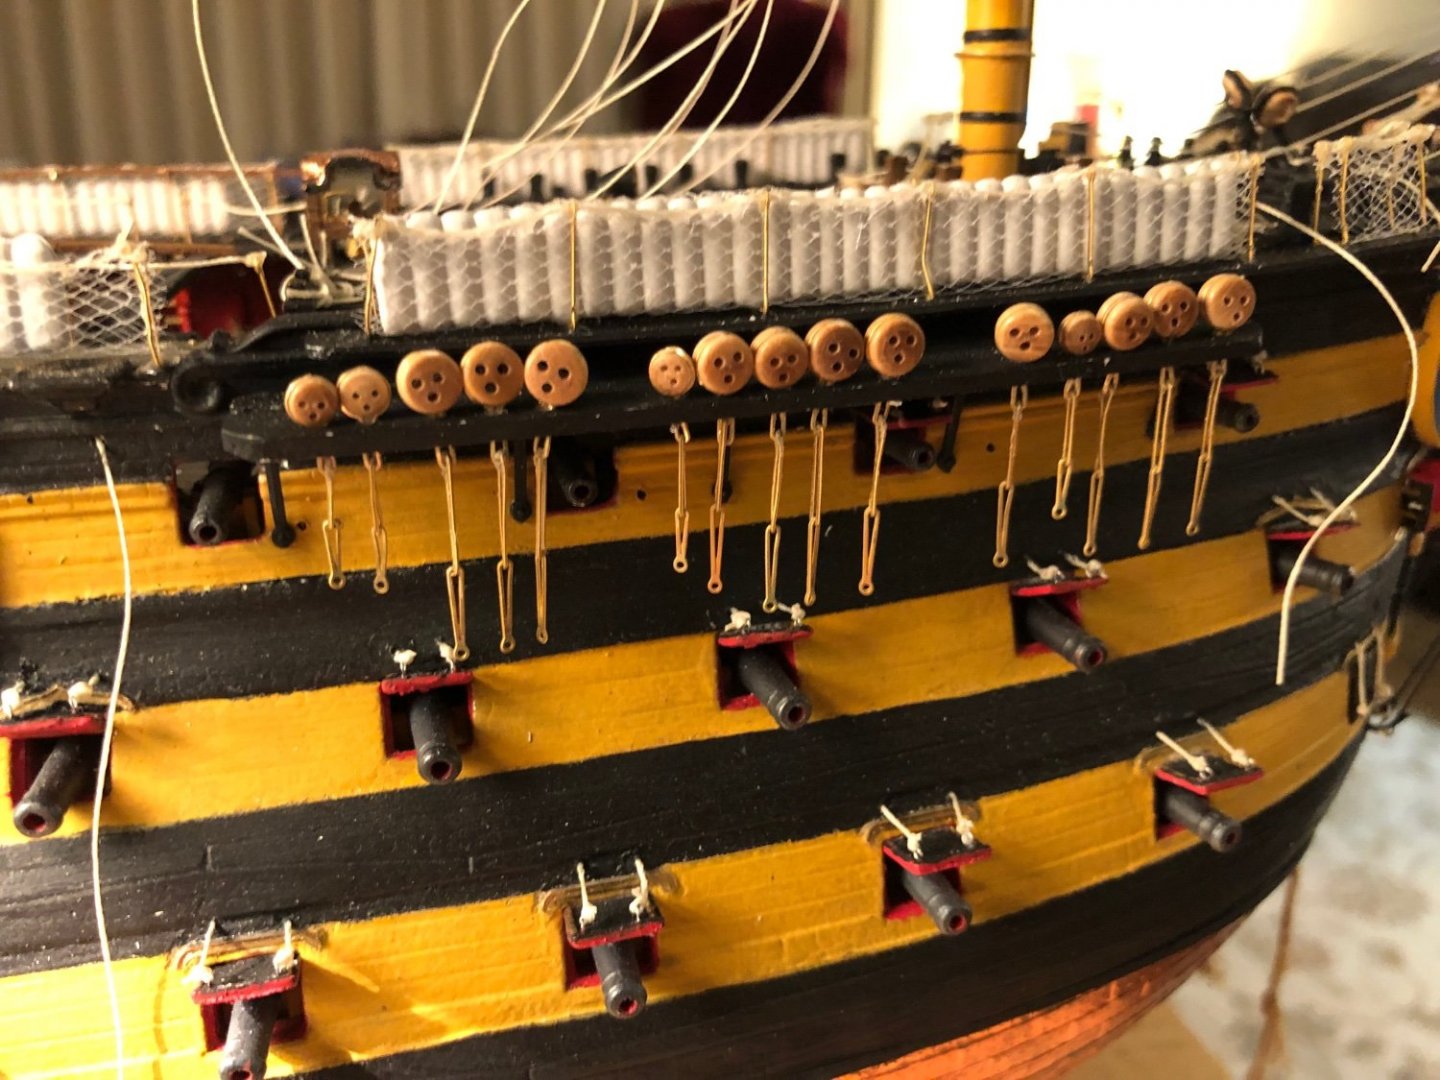
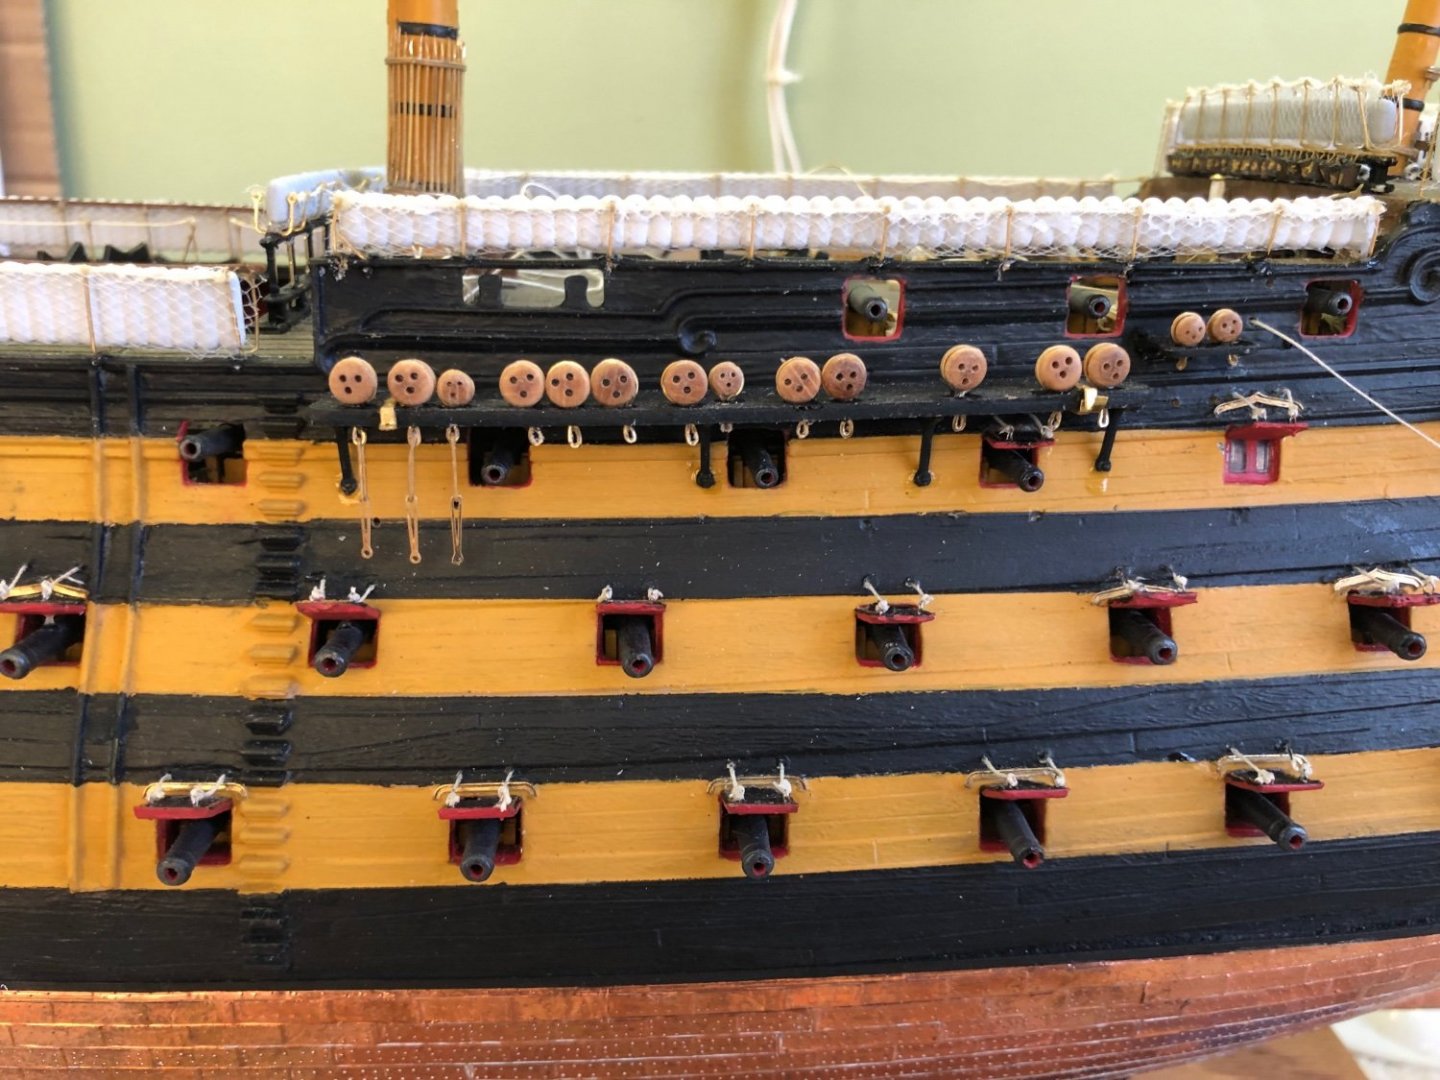
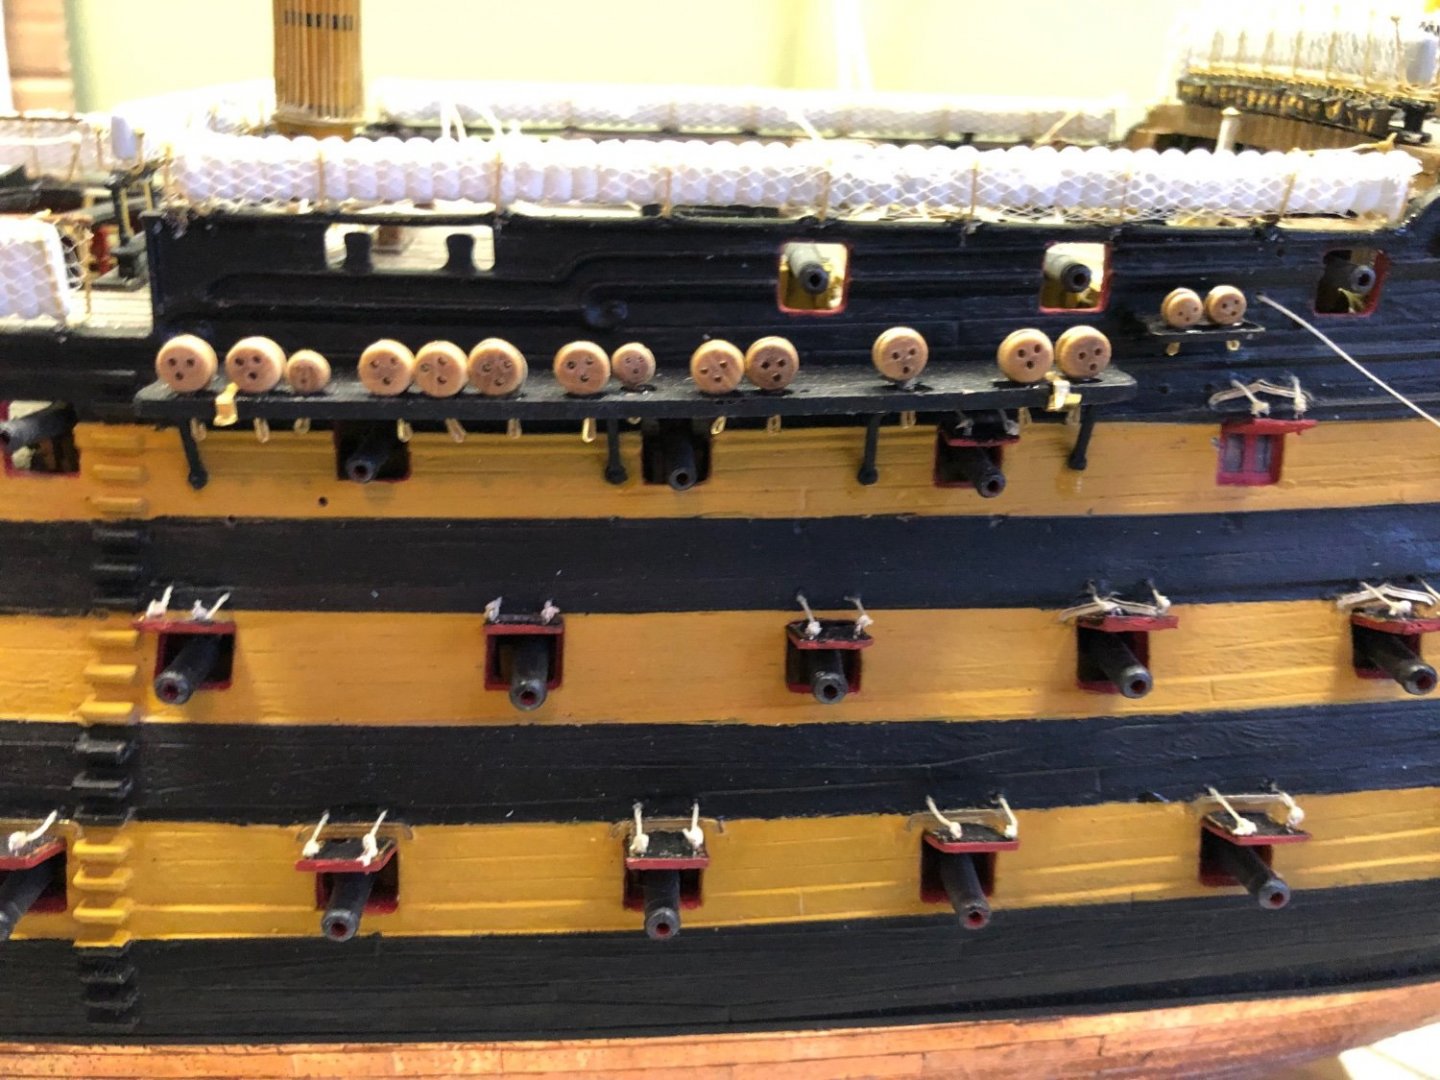
Hmmmm? I wonder? Looking at the deadeyes I have installed on the foremast channel I am wondering if they are a little to tight together? Based on Daniel’s recommendation I increased the size of he foremast channel and drilled new holes for the deadeye irons. Now that I have placed the irons in the new holes I can see a few of the deadeyes actually touch each other. New holes drilled slightly to close together or wooden deadeyes slightly bigger than Heller plastic deadeyes for which the channel was designed. Since the shrouds basically form a triangle shape with the apex at the top the sides will obviously get narrower as I move up from the channel. The result will be that the upper deadeyes will be slightly closer together than the bottom deadeyes, some of which are already touching each other. The future distance between the lower and upper deadeyes for the shrouds is not that much, maybe 10mm or so. Even though it is only a few here and there across the fore channel I am curious/concerned that it will cause the shrouds to not lay flat. To bow outward or inward along the upper deadeye line. I have already glued them in on the port side but not yet the starboard side. I know I will not try to move the ones on the port side for fear of to much damage to the fragile brass irons. However I may try to determine if I should adjust the holes for the irons on the starboard side before gluing them in. Oh the tangled web we weave when we bash! 😊

-
Thanks Ian. I was looking at some online and wondered what size to get. Still a good while before I start hanging the yards but always thinking ahead.
-
Ian do you remember, or want to make a guess, at the size of the seed beads you used to make your parrals?

-
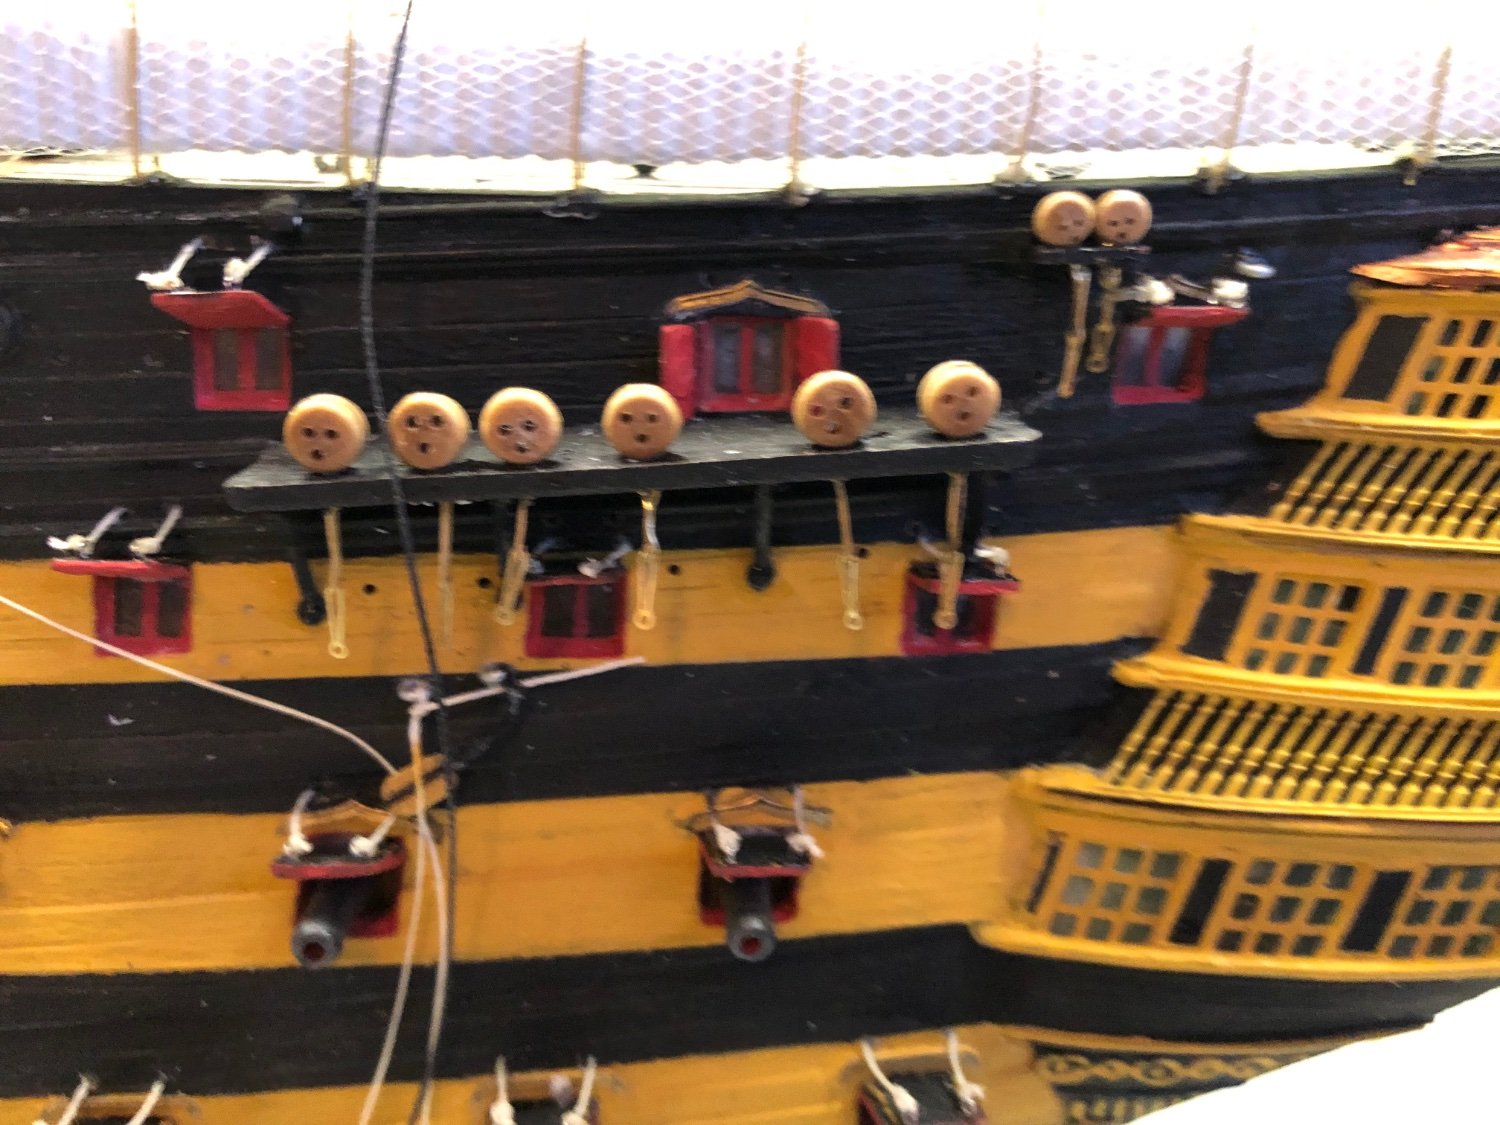
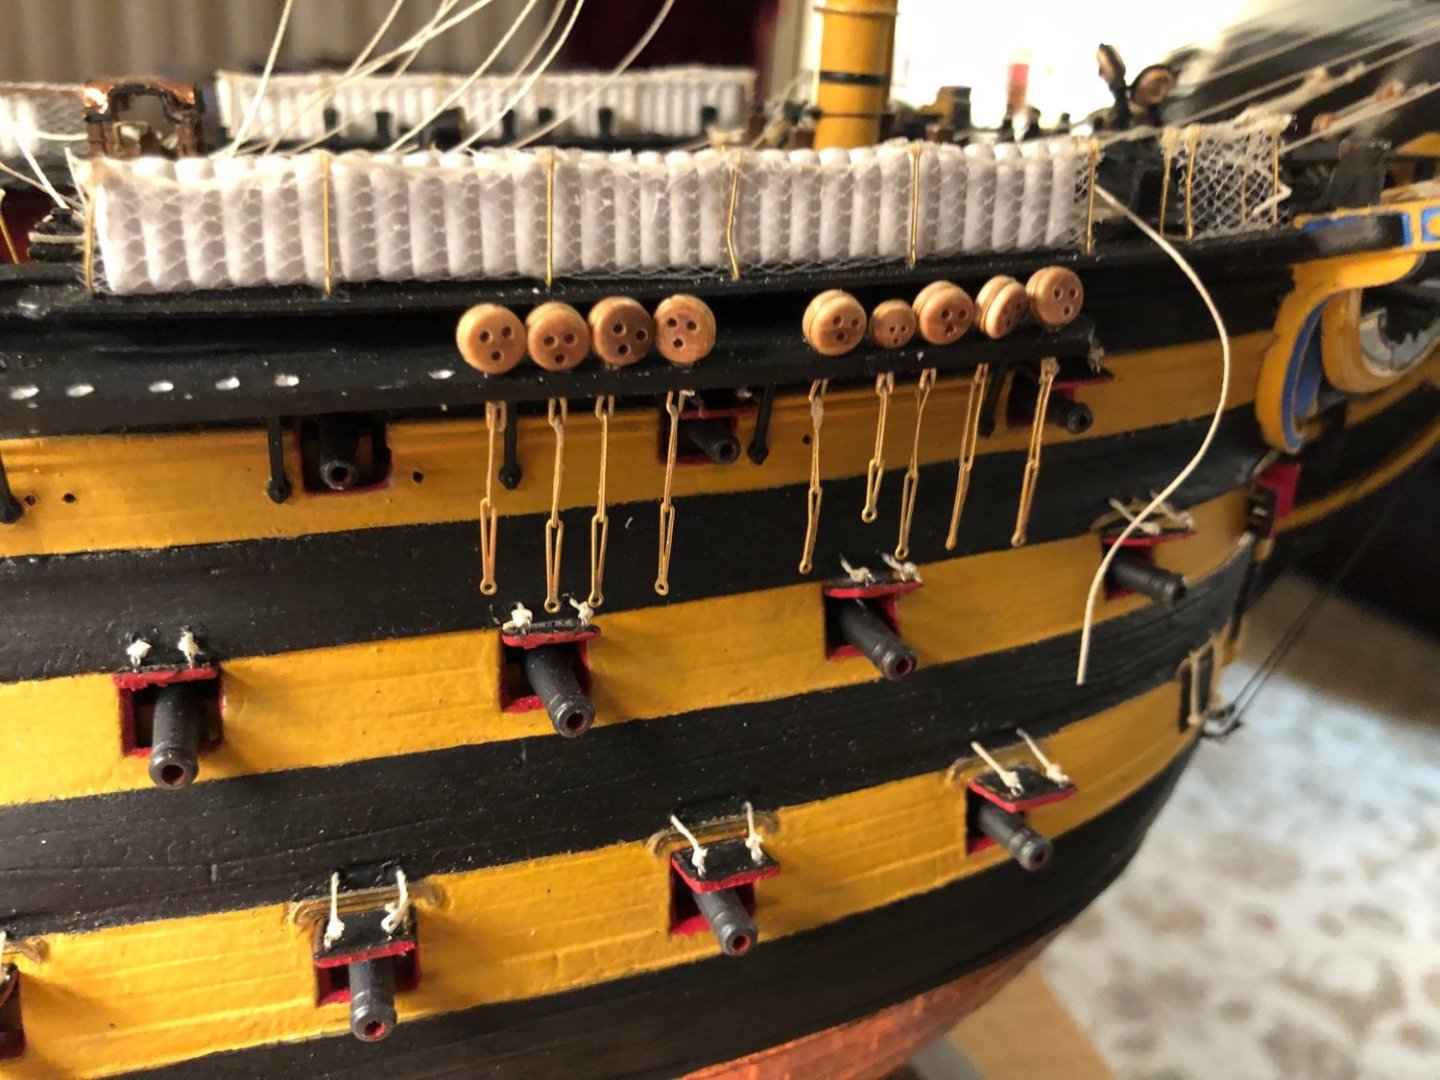
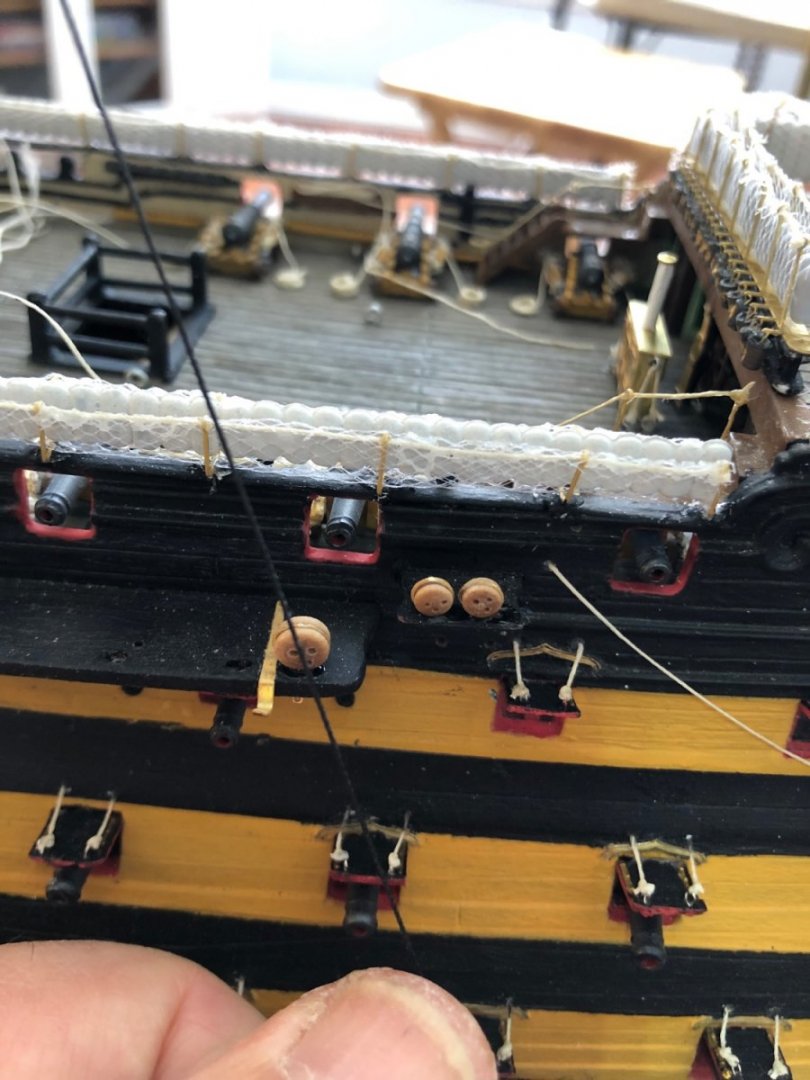
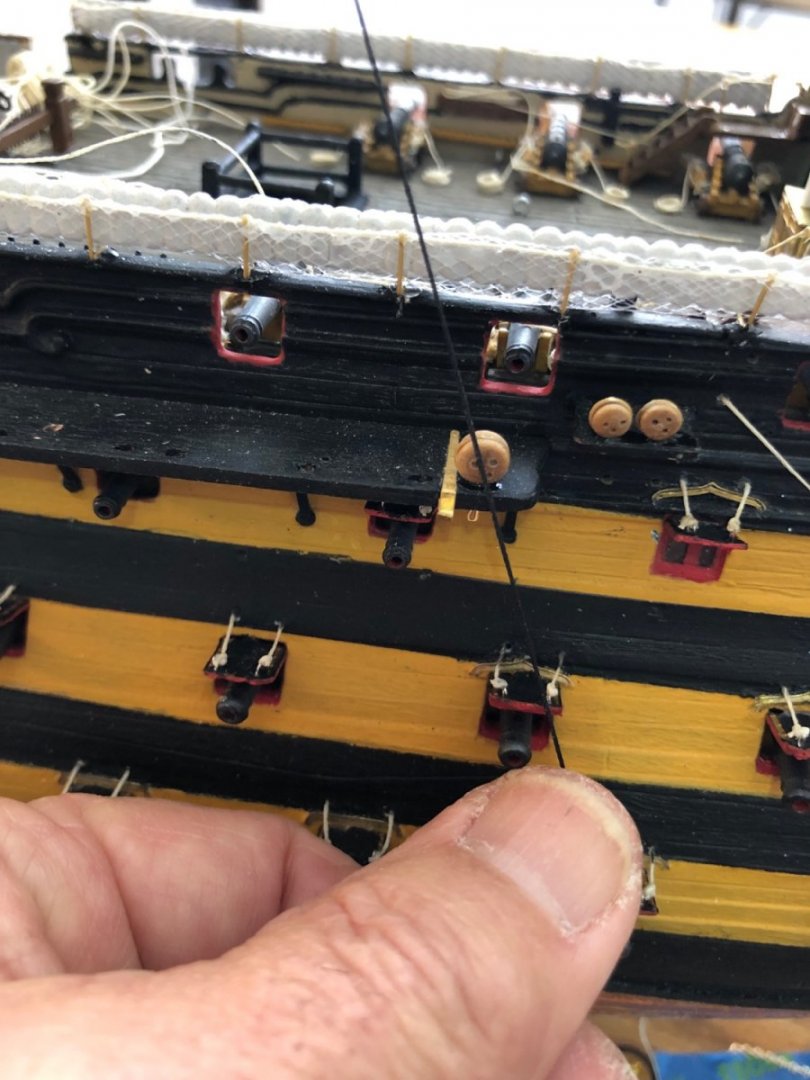
A little possible help maybe. Looking at a number of pictures I can see there eyebolts placed here and there on the channels behind the deadeyes. I have not been able to get a clear diagram as to where they are needed. As usual I have no doubt there is a clear picture right under my nose in Longridge’s book 😊, unless someone tore that page out.
-
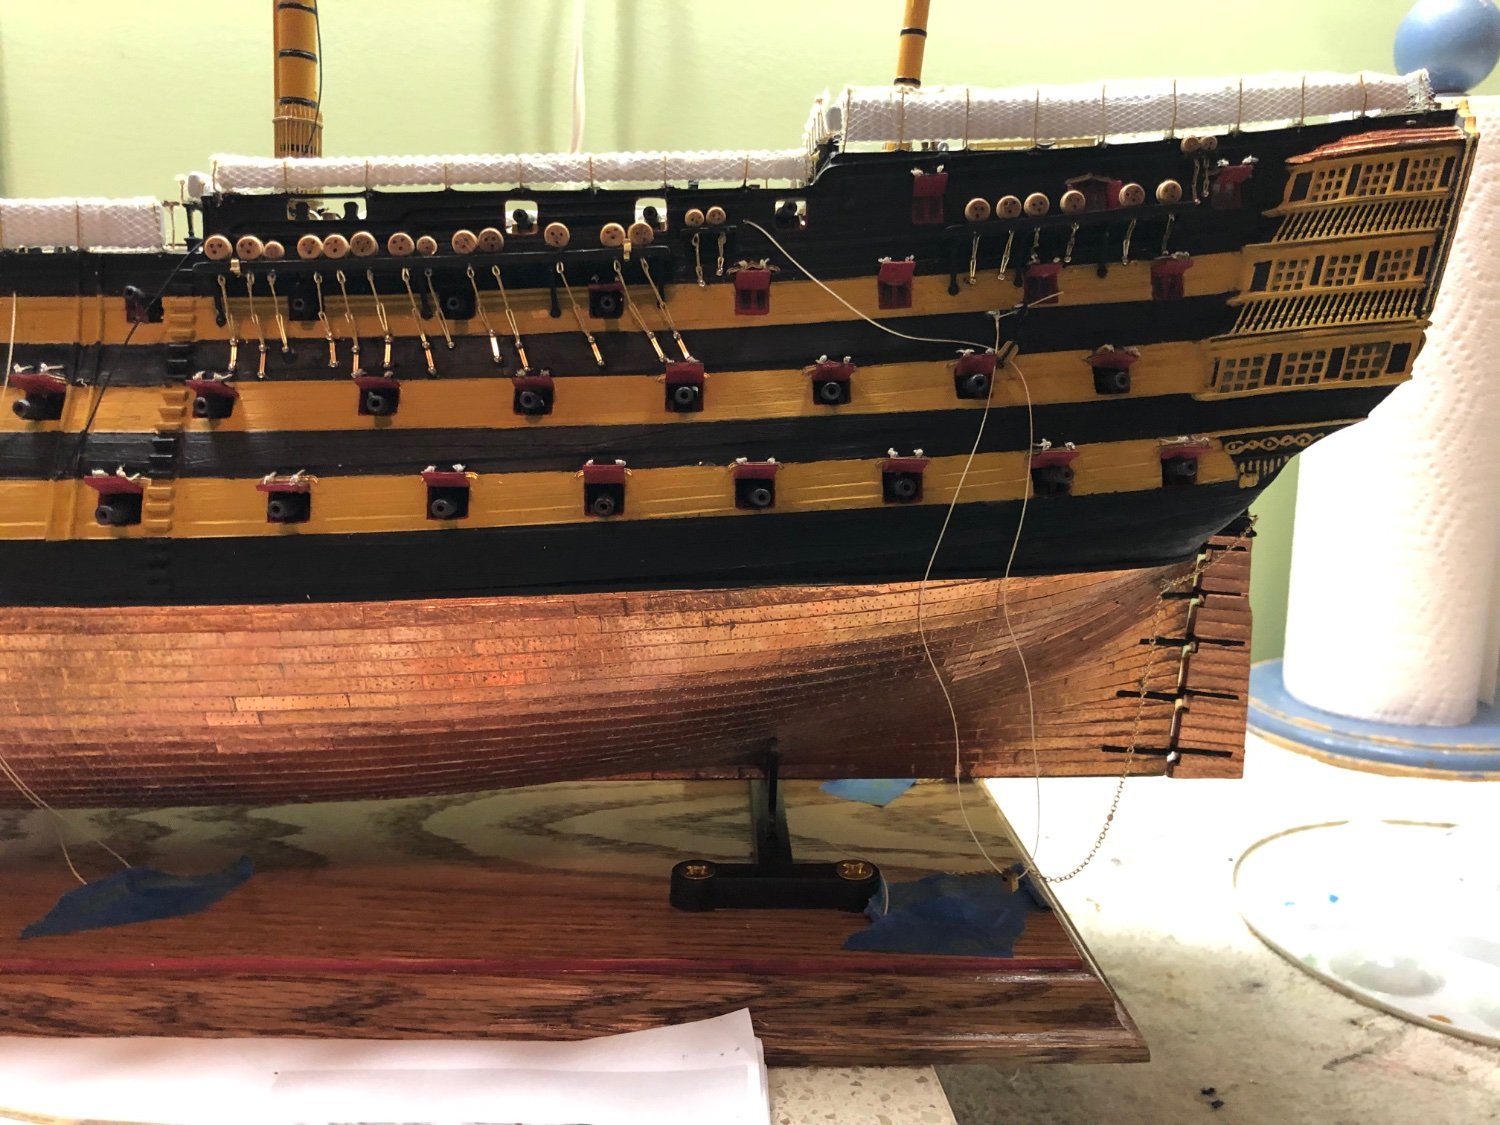
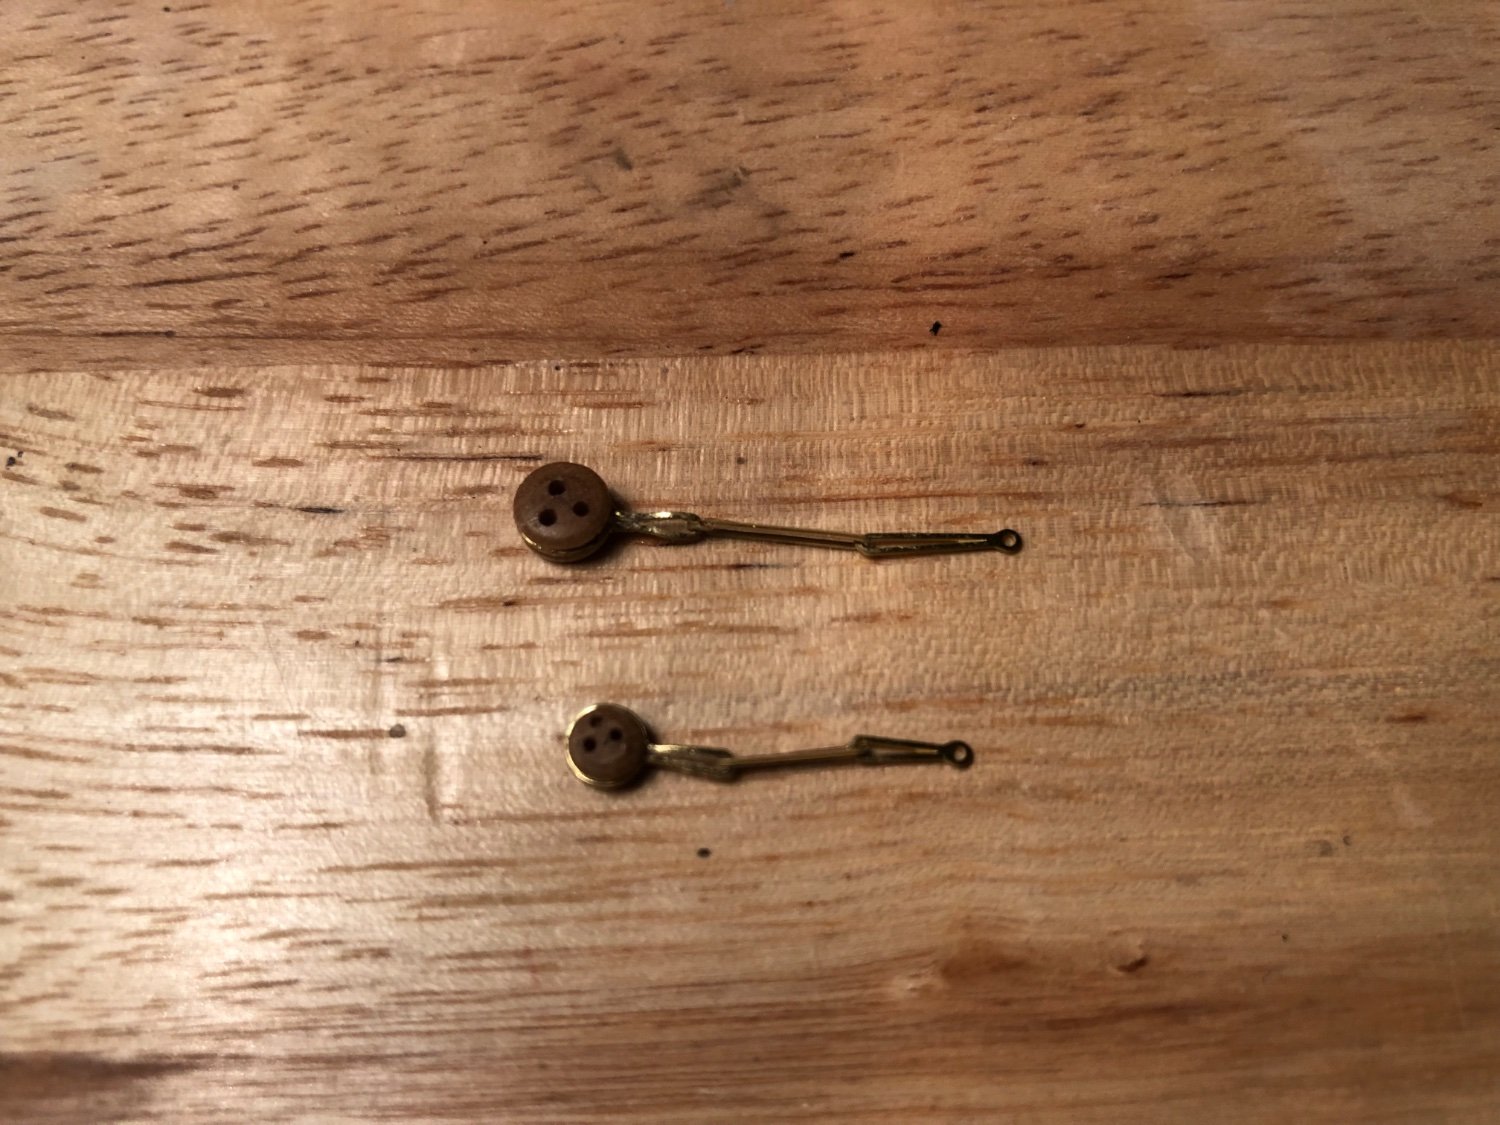
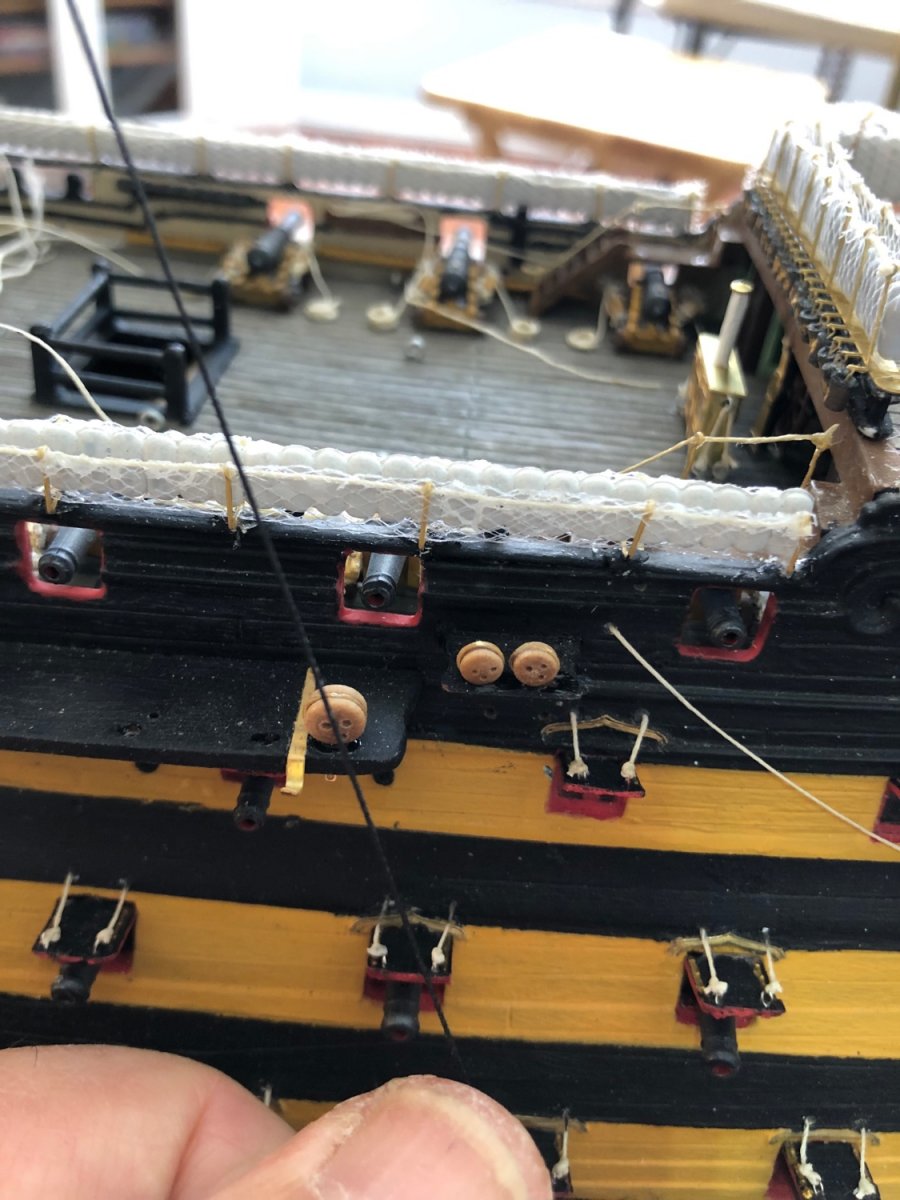
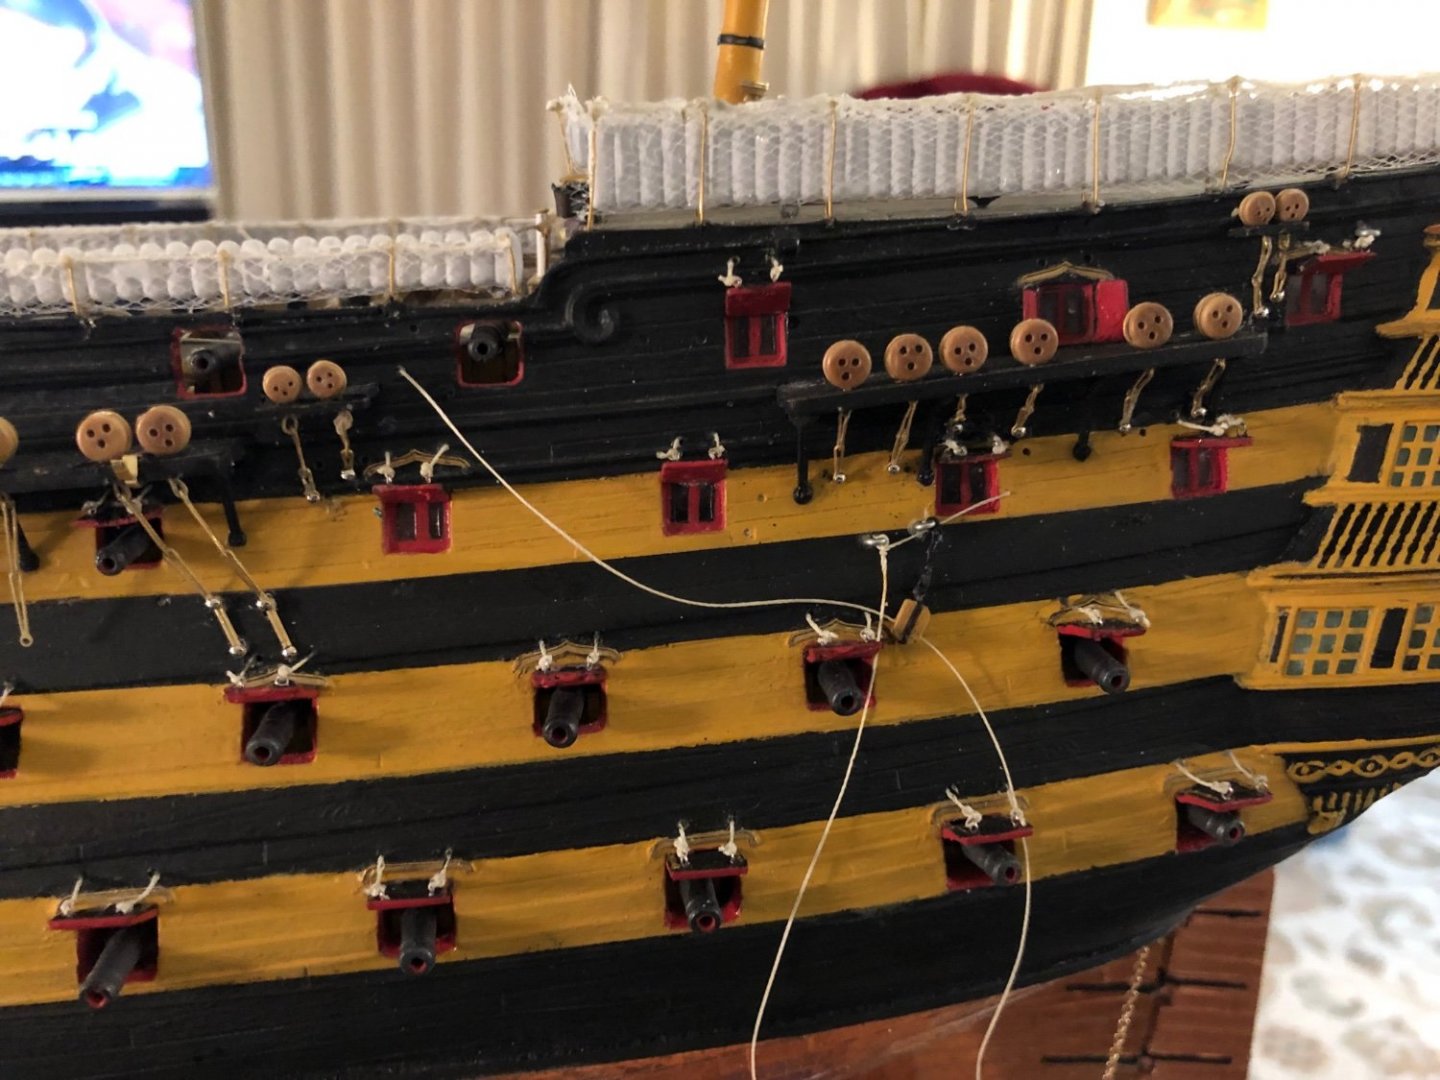
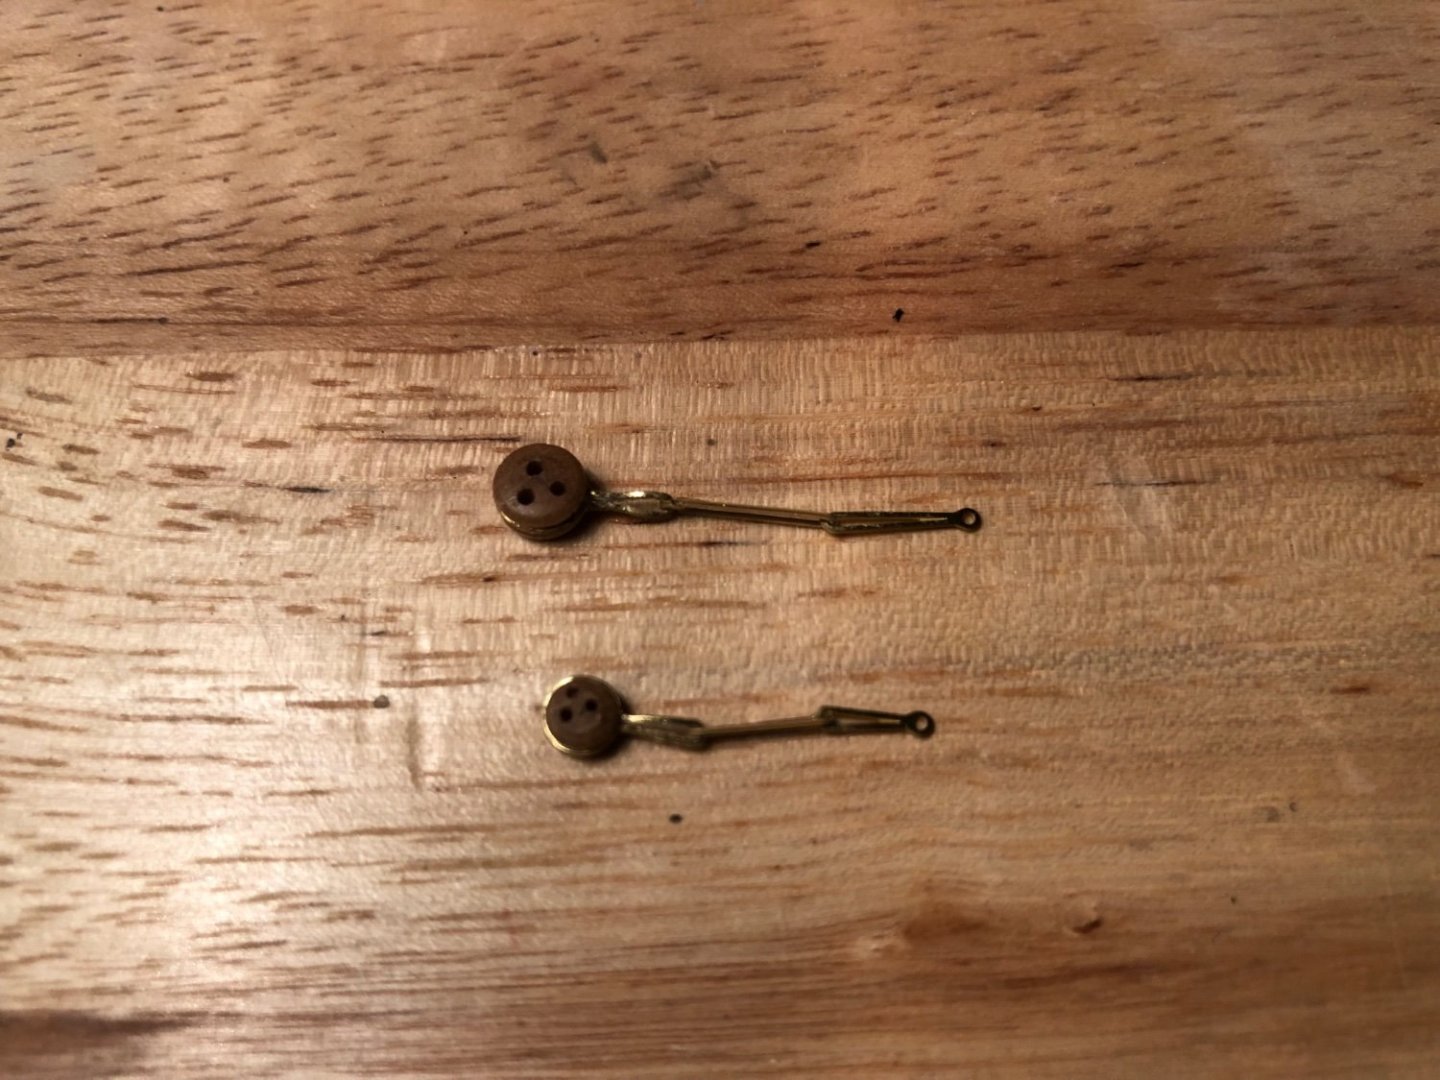
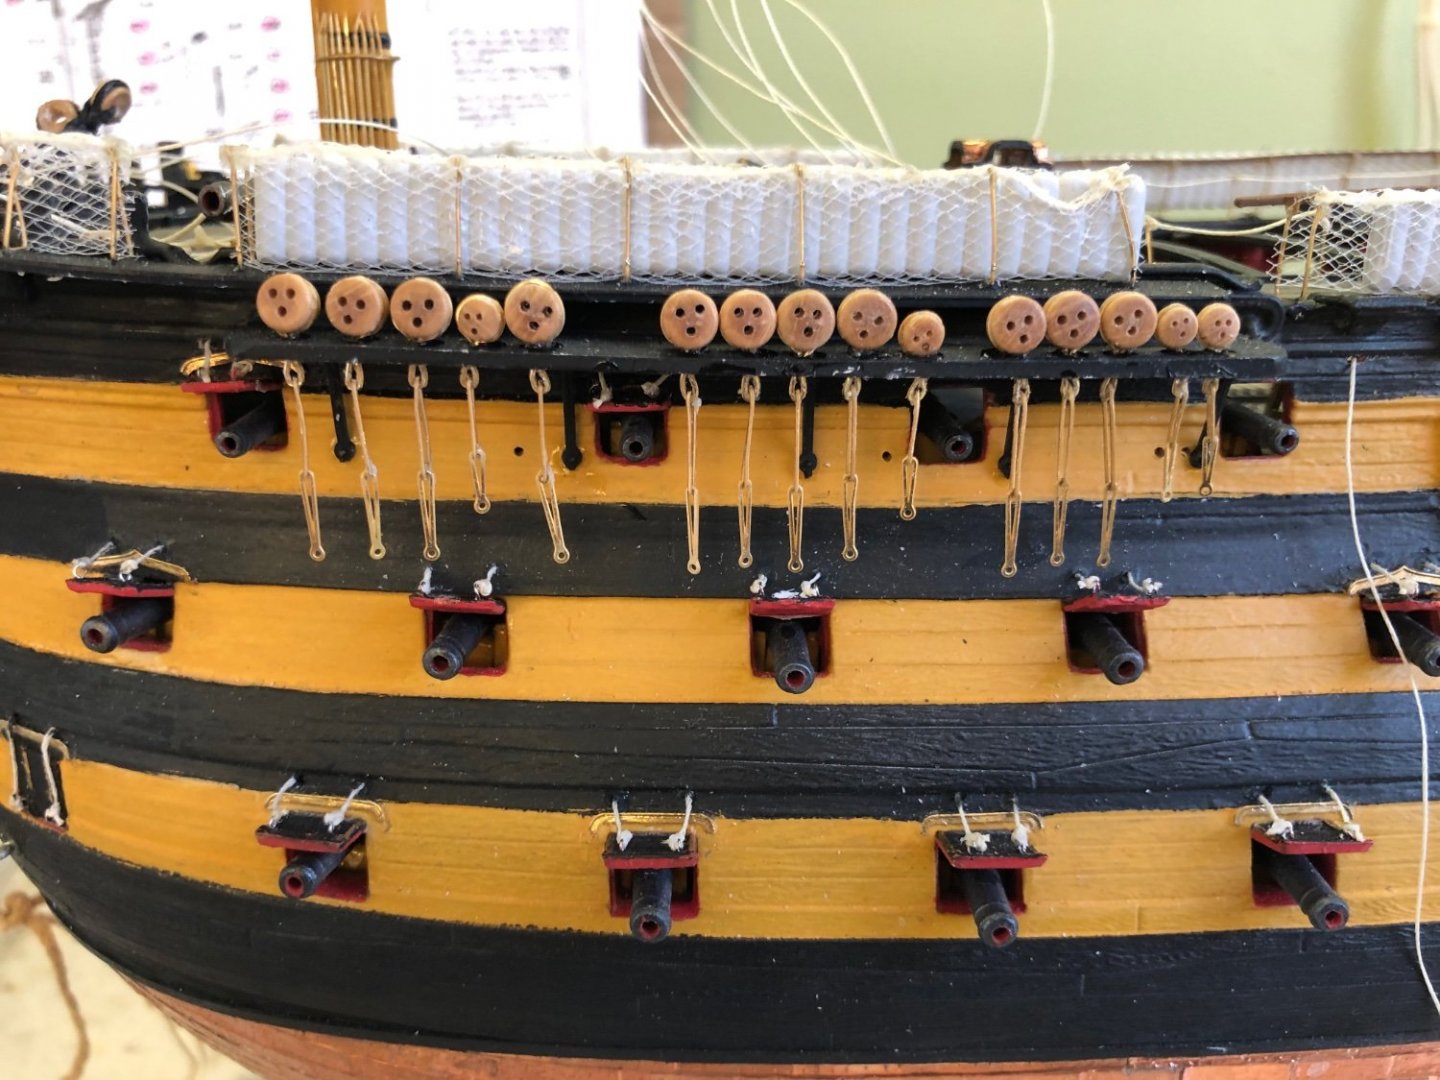
Continued working on the lower deadeye chains, irons, and the preventer chain plates I got from Daniel. Completed the bolts on the mizzen chains and started the preventer plates and bolts on the main chains. I used a thread attached to the mast top and held across the deadeyes to get the proper position of the chains and preventer plates. Still a ways to go with them. Got tired of drilling holes for the needles (bolts) so I moved to the work on chains on the starboard side. Will go back to working on the port side bolts tomorrow. I changed my method of preparing the chains for the starboard side. On the port side I placed the deadeye and iron in the hole in the channel and with a drop of CA glue. Once the glue set up I prepared the bottom two sections of the chain and struggled a bit to attach it to the bottom loop in the iron on the underside of the channel and then apply a touch of CA to the small overlap in the middle iron. Felt my result was a little less sharp looking than I wished. On the starboard side I decided to assemble the complete iron off the ship except for the preventer plate. This made closing up the overlap much easier and cleaner. Once the CA set up I dropped the completed iron into the hole in the channel. I drilled the holes slightly larger to accommodate the iron. Next I will go back and lift the deadeyes up slightly and apply a drop of CA in the hole then reposition the deadeyes. Later I will add all the preventer plates and bolts

-
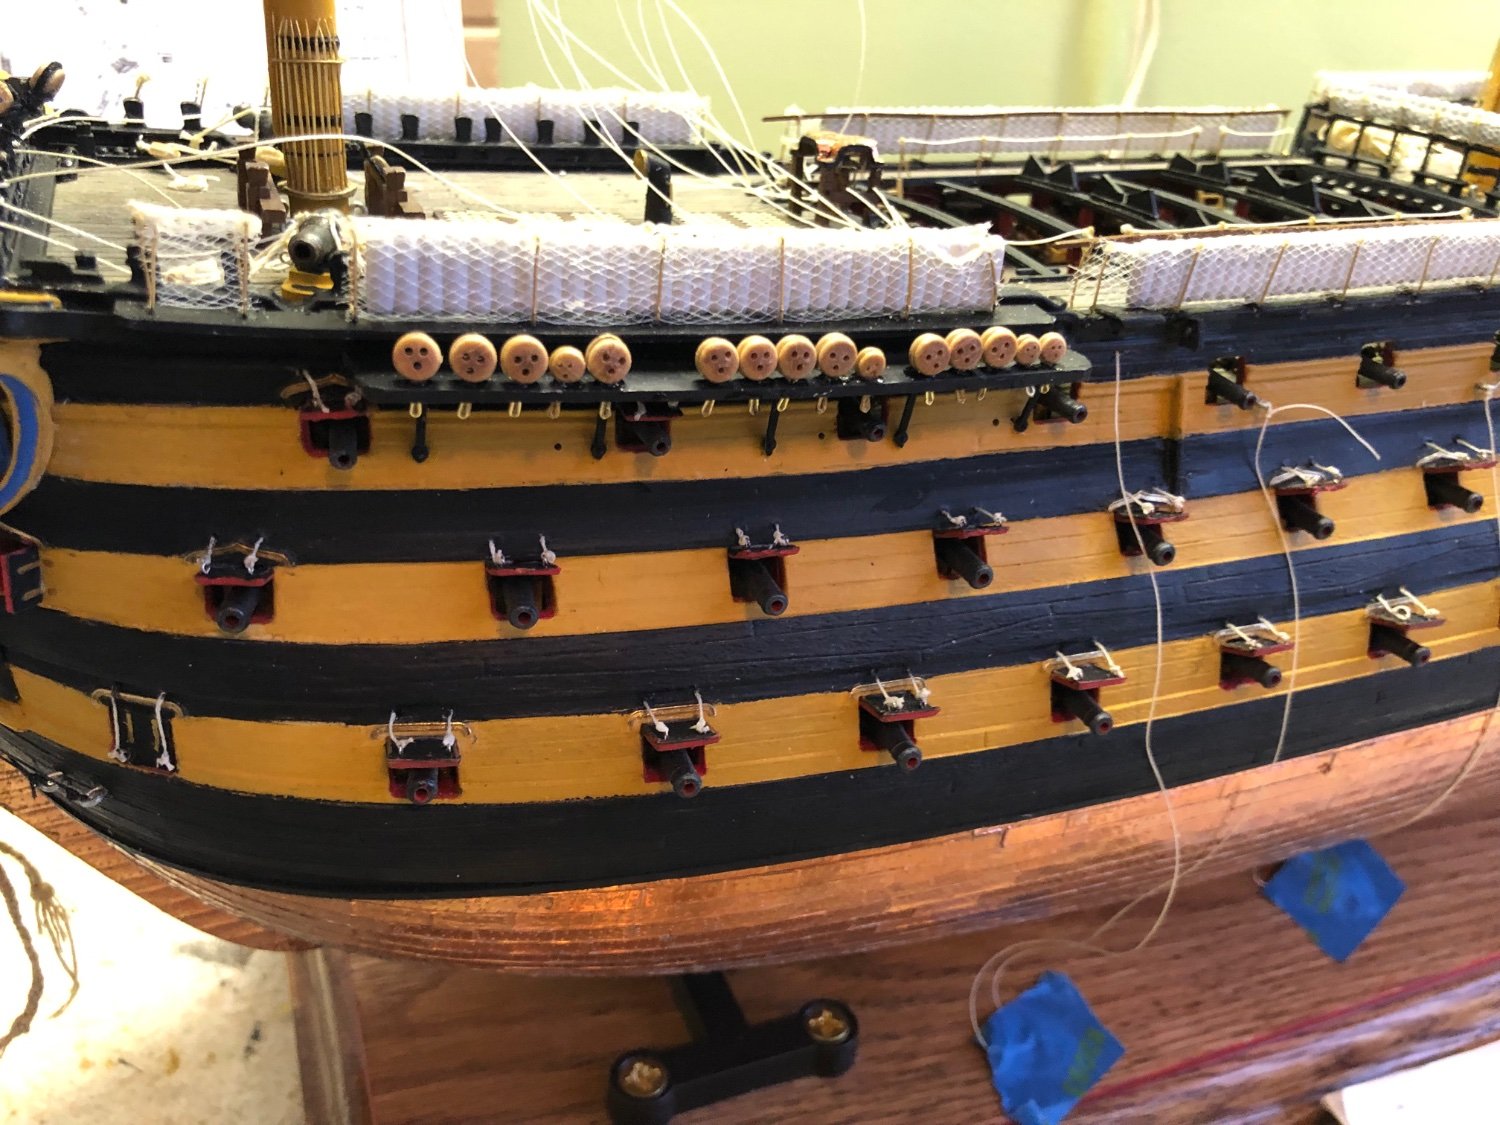
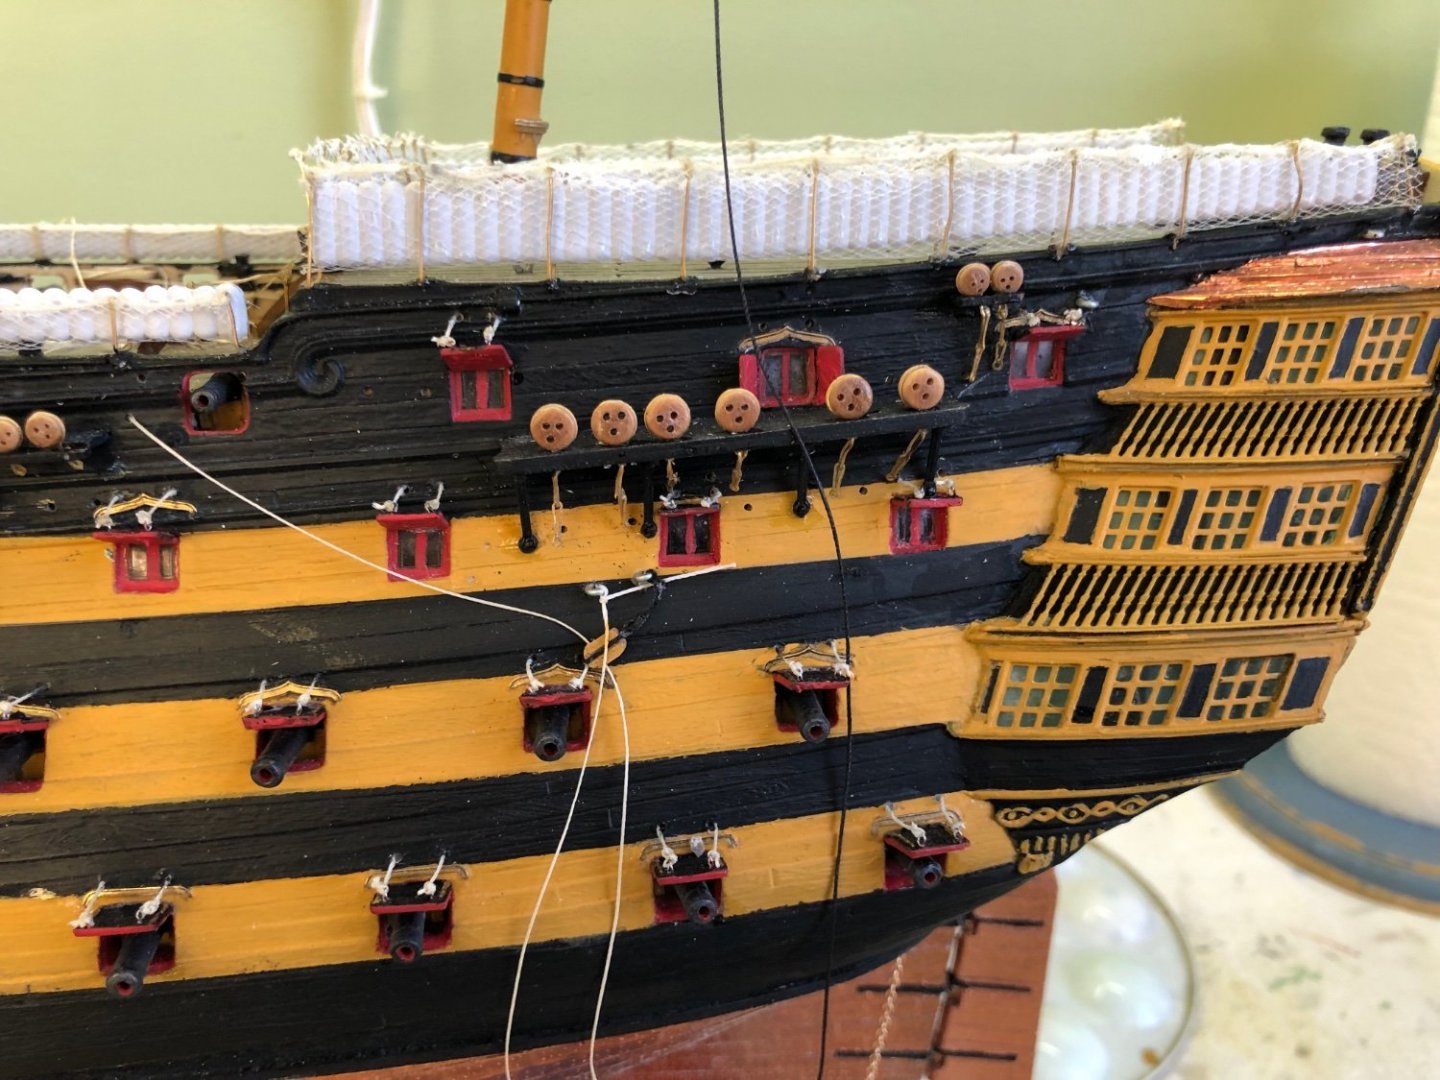
Installed Daniel’s Fore chains, Mizzen chains, and a few of the Main chains on the port side. Once all the chains on the port side are installed I will go back an install the preventer chain plate for the main and fire channels. This will involve drilling a bazillion little holes for the needles (bolts). Then on to the starboard side. As I have mentioned before I am leaving all Daniel’s etched parts brass instead of blackened. Should give a unique appearance to the model.

-
Yeah Ian. That makes since. It was more of a curiosity than a concern since I plan to have the sails furled. Of course I may have my top spritsail yard out a little further than needed as well. It just looked like when unfurled that sail would come in contact with the inner and outer martingales. Since that sail would be on more of an angle it would probably come close to following the line of the martingales.

-
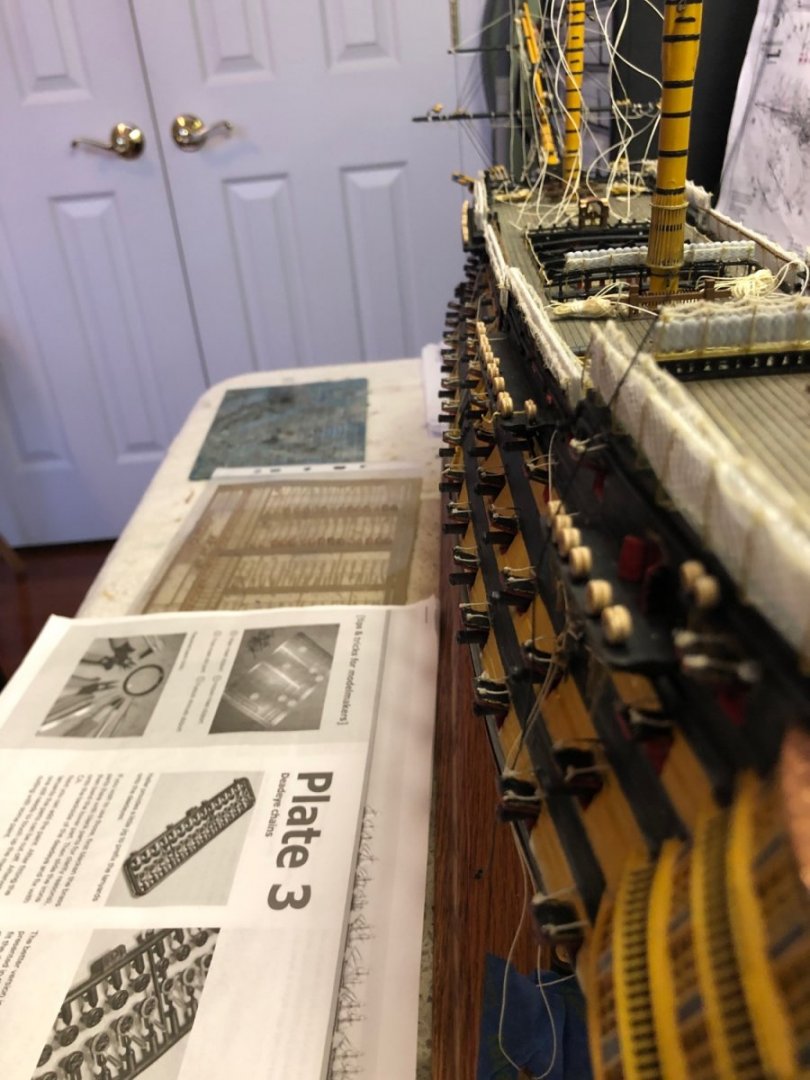
Took a break from running rigging lines around the bowsprit and decided to install the lower deadeyes for the shrouds. Got Daniel’s etched plate #3 that has the brass chains and wood deadeyes. Used a thread around each mast head to try to get the deadeye holes to line up so when I rig the upper and lower deadeyes together the threads will run at an angle toward the mast. Got them installed on the port side. Still need to add all the chains under the channels.


-
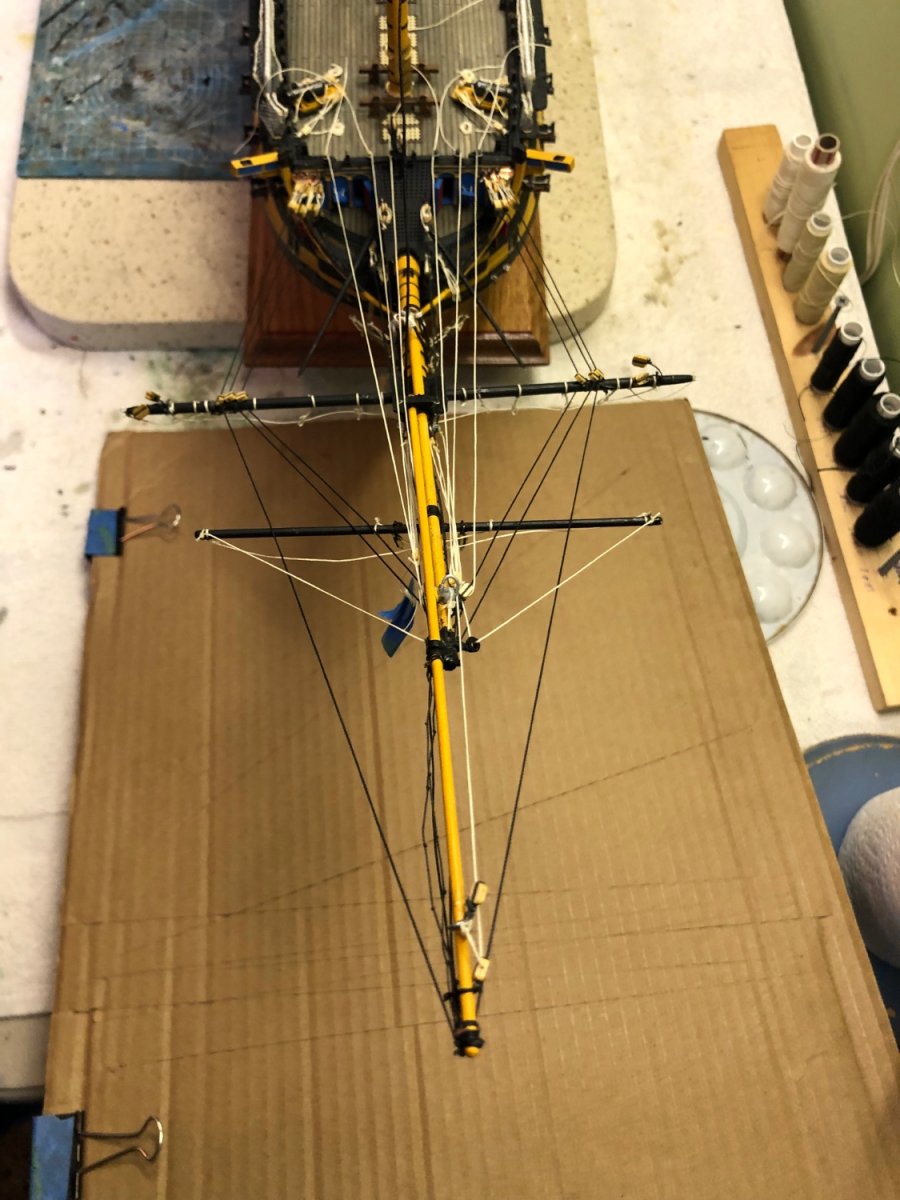
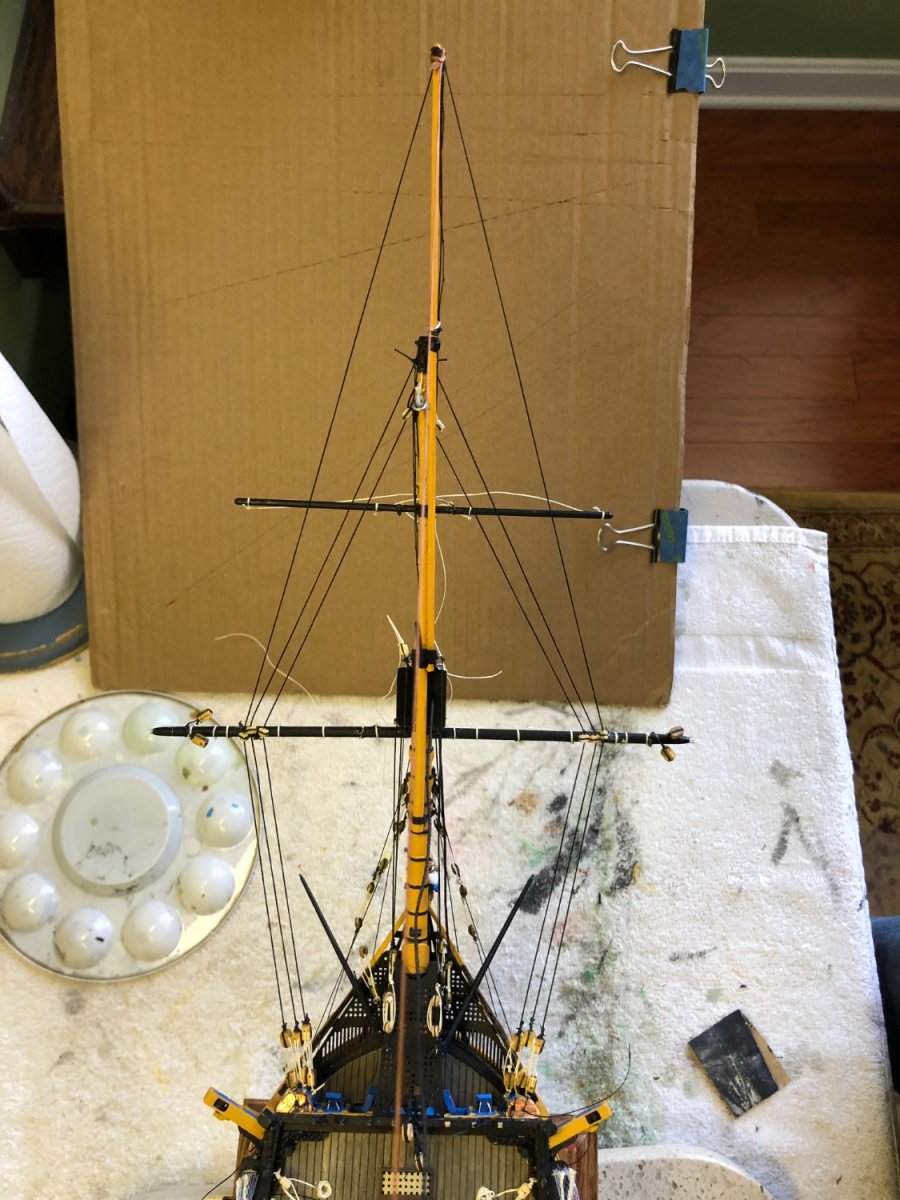
A curiosity I have is the spritsail that goes on the top spritsail yard. The way the martingales run down to the dolphin striker it seems as if the sail would touch them unless it is a real short sail.
-
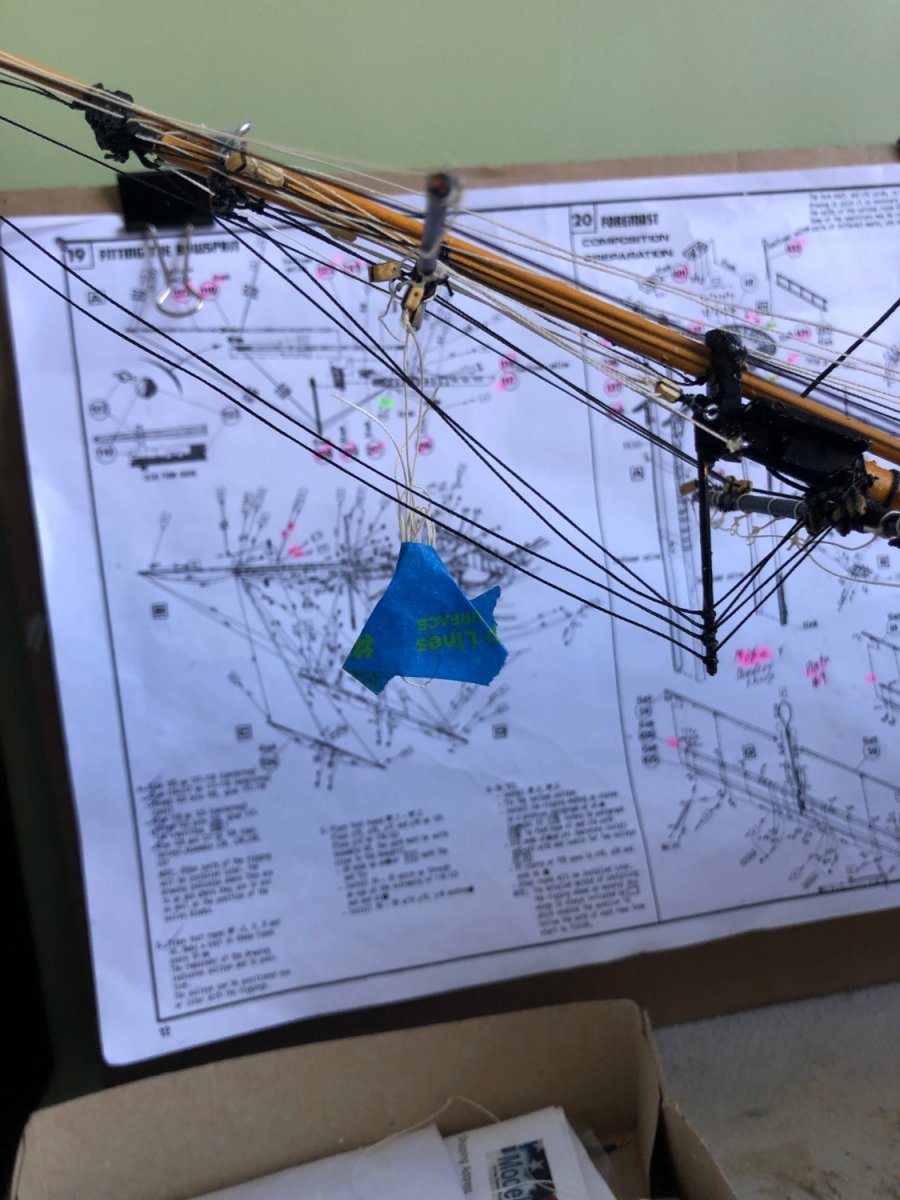
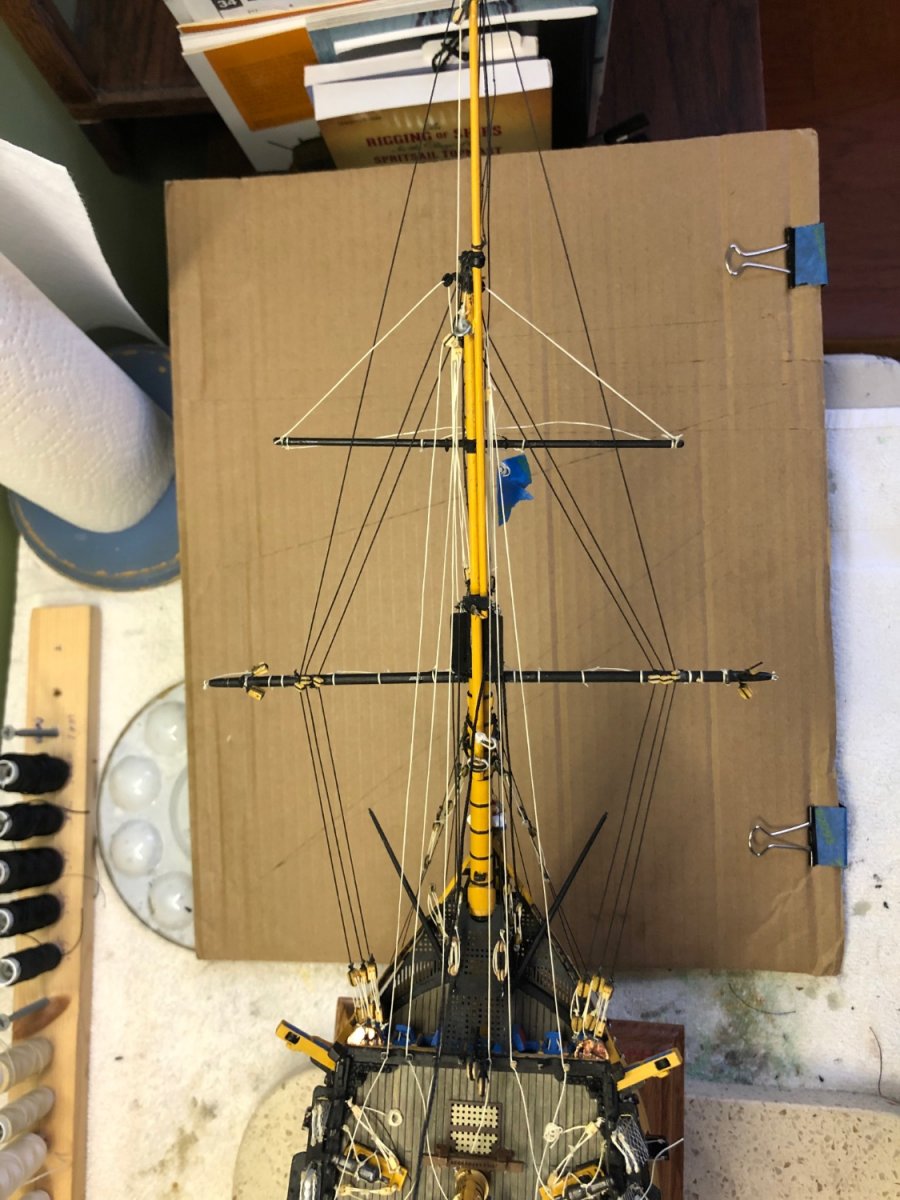
Continuing to rig the bowsprit. Based on your direction Ian I have completed a good part of it. Still some to go. Still have to figure out the routes of the downhaulers. Don’t tell Adm Nelson but I changed the timber heads that I am belaying the lines to in order to get more direct straight lines that don’t cross each other. Since I replaced the flying jib with a brass rod I did not have a shrive at the tip to run a thread through so I simply tied on a block to serve the purpose.


-
I can check to see if I have the date I ordered mine and when i received it. Daniel (Dafi) mailed mine on June 21st and I got in the mail July 19th. If you ask him here or message him he can tell you the current processing time from when you order and he drops it in the mail (Deutschland Post).
-
Thank you guys for the 👍. Moving on to some of the bowsprit running rigging and then into the masts.
-
You know I actually don’t remember where I found it but I am going to go with your expertise because that is how I have it so far and don’t want to change it 😀

-
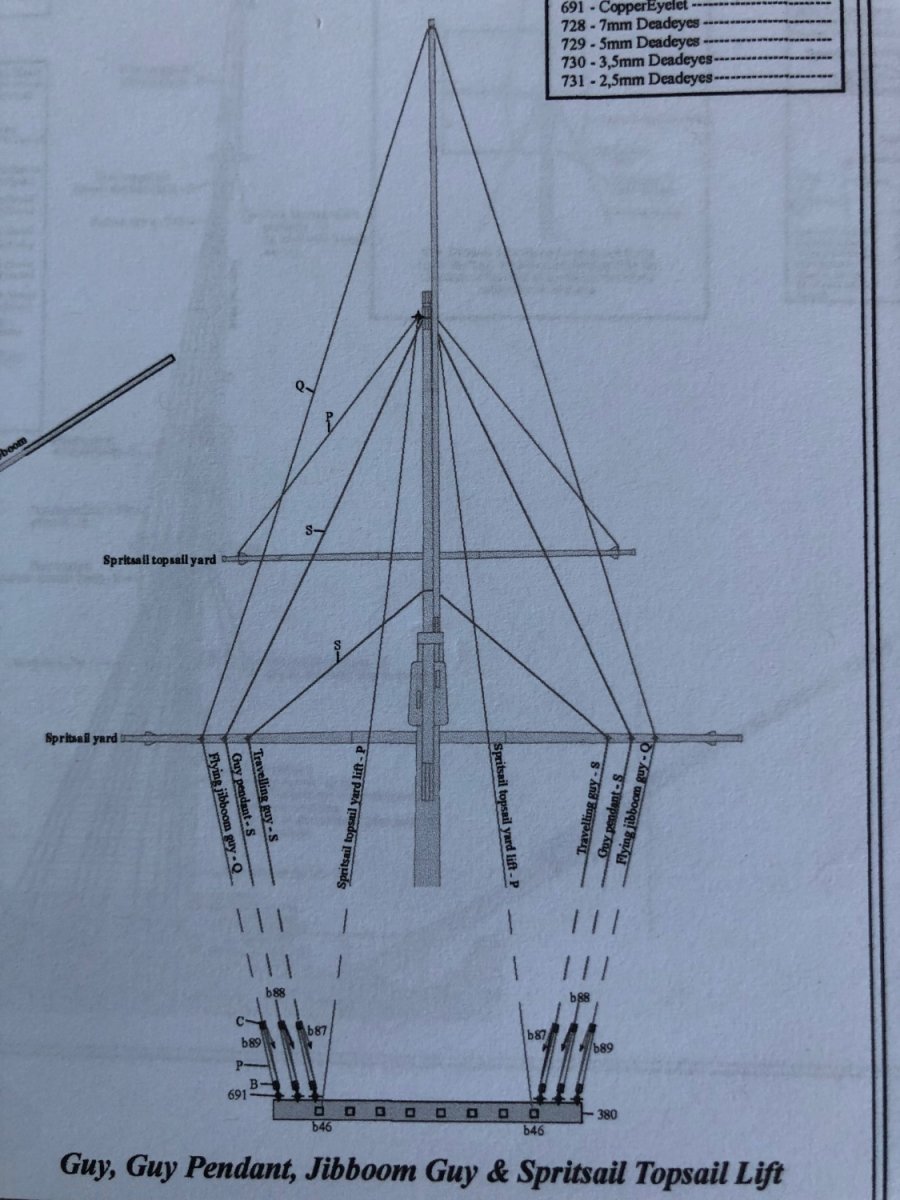
So Ian this picture would be incorrect?
-
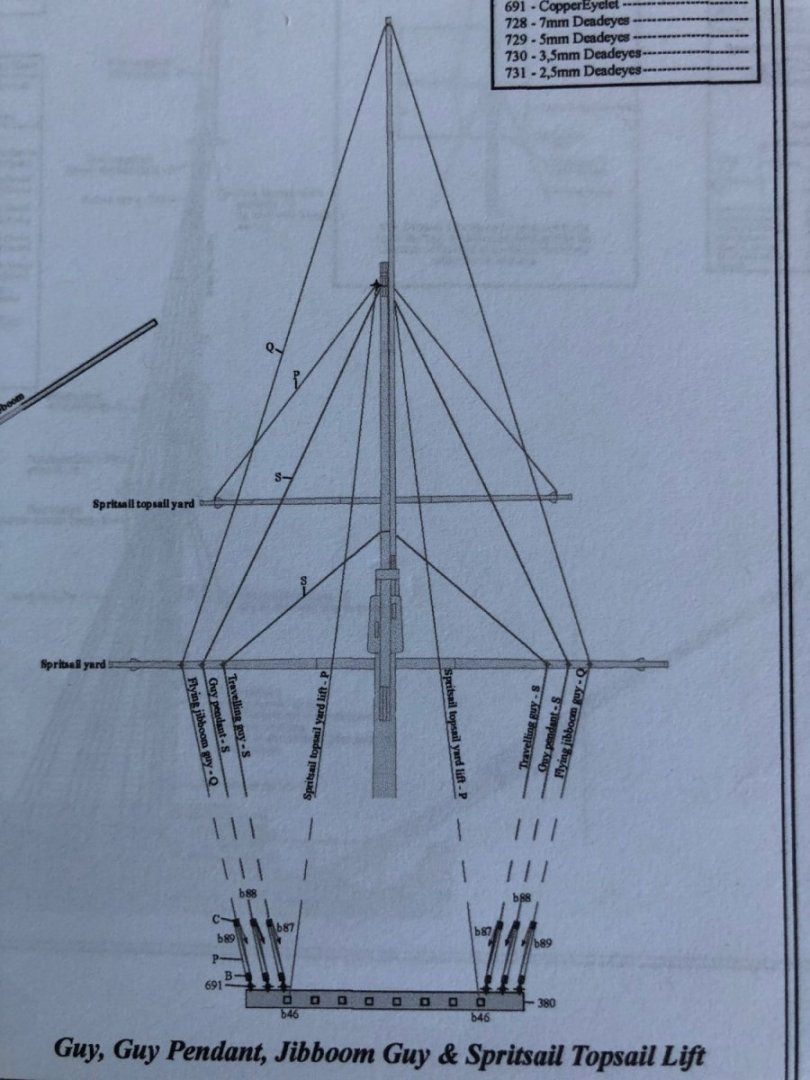
Ok gentlemen another technical question. The spritsail topsail yard attaches to the Jibboom with a parrel, not the flying Jibboom correct? The jib traveller goes on the Jibboom. Therefore I would expect that the jib traveller should be set further out the Jibboom than where the spritsail topsail yard is positioned, or does that matter? I have seen pictures where the traveller is behind the topsail yard and others where it is in front. Which is correct, or is either?
-
This is a European company I found on line that sells it for 30 Euro. Not sure if there are limits as to where it can be shipped. https://www.besserepreise.com/index.php?page=productDetails&productNo=1080897176-glo&search=doofinder
-
I have the new Heller instructions for the Soleli Royal and looking at it I wish I had the new instructions for the Victory primarily for the rigging instructions. Fortunately there are plenty of builders here on MSW who graciously share their expertise. With their help I can not justify spending even more to purchase the new instructions. Last I saw it is rather expensive. But if you can afford it, it is well worth it.