Bill97
-
Posts
2,730 -
Joined
-
Last visited
Content Type
Profiles
Forums
Gallery
Events
Everything posted by Bill97
-
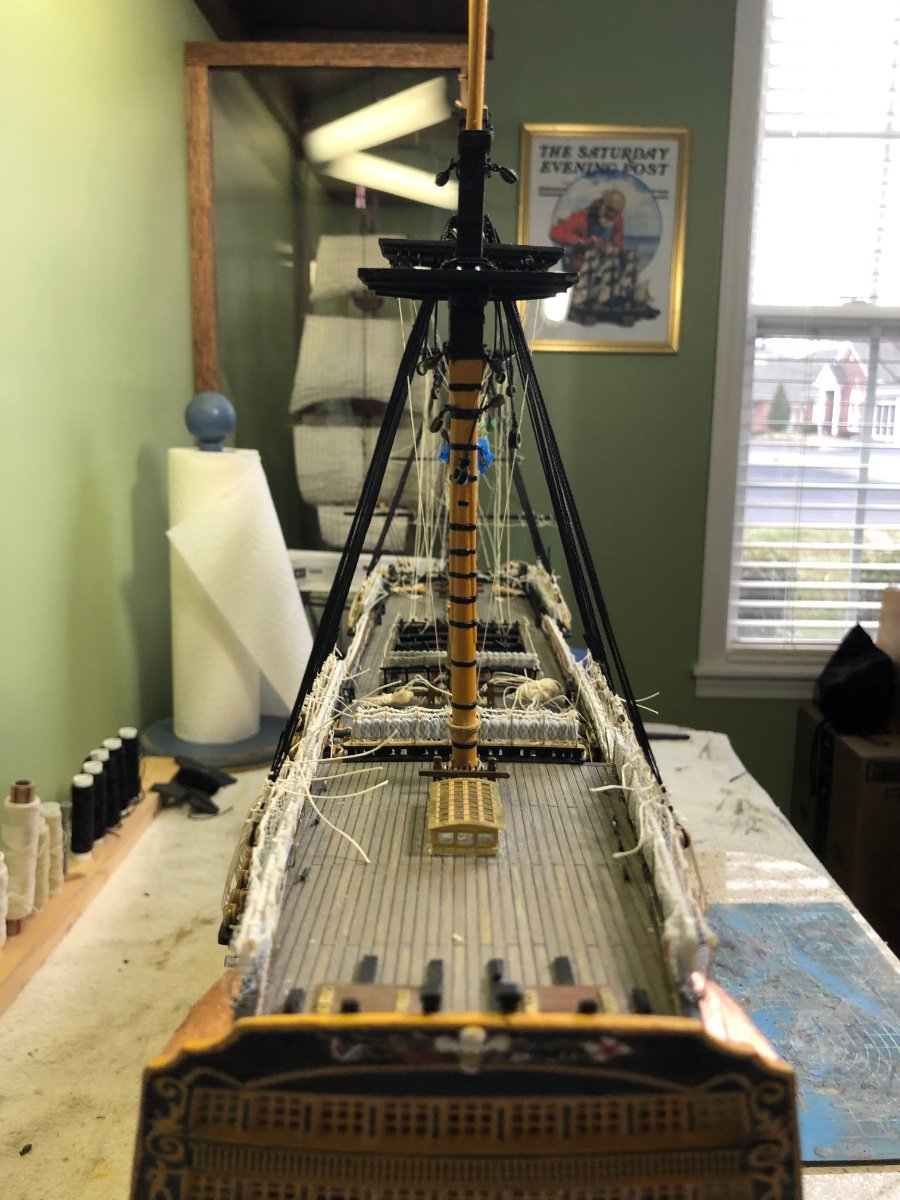
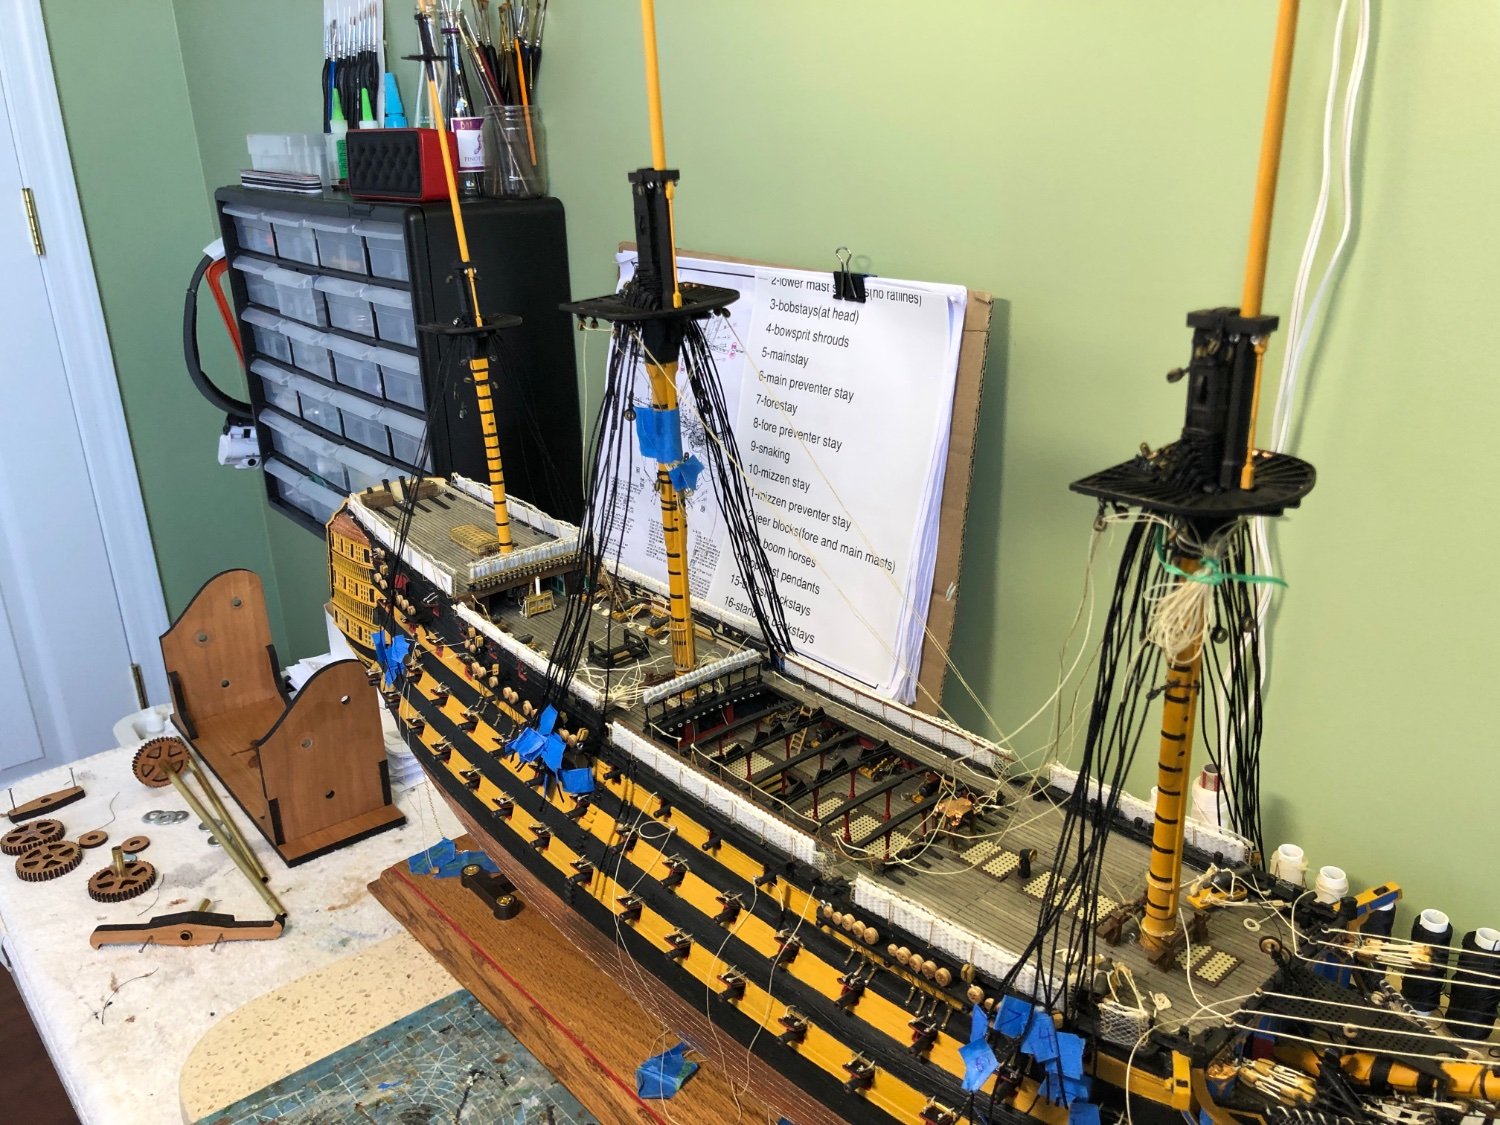
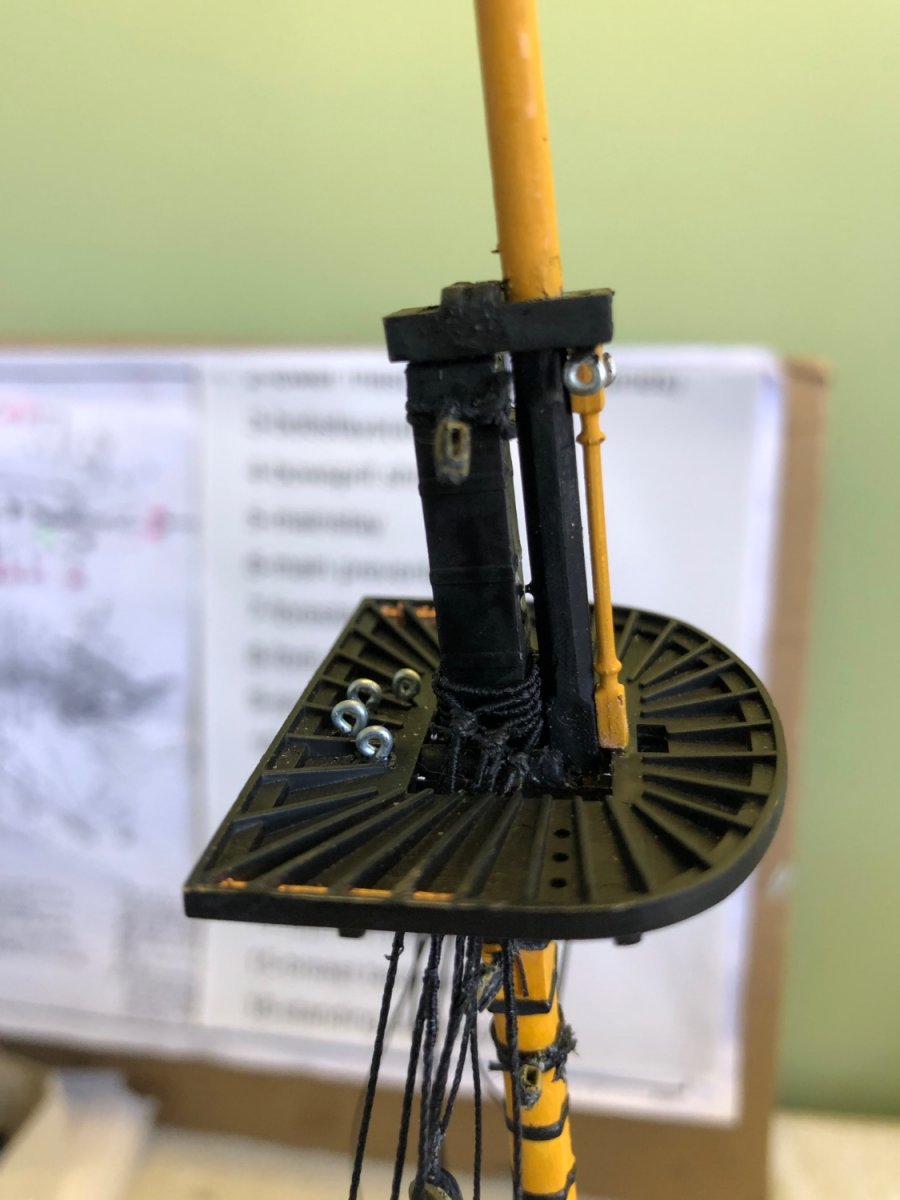
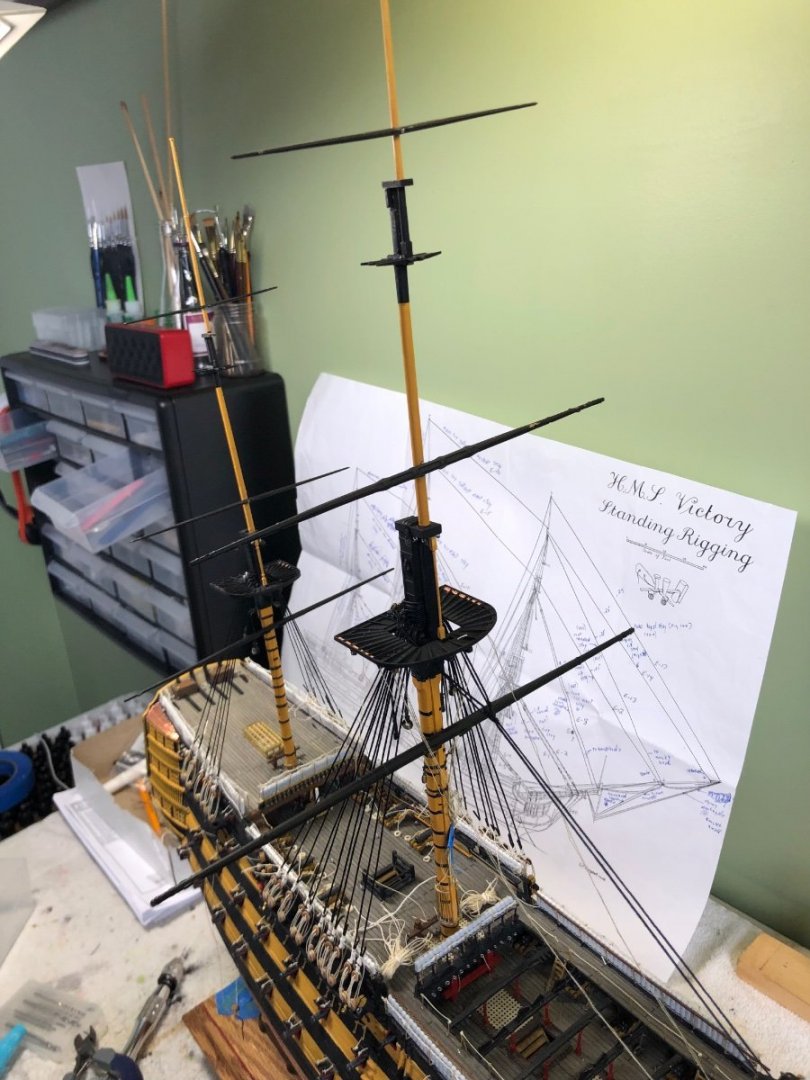
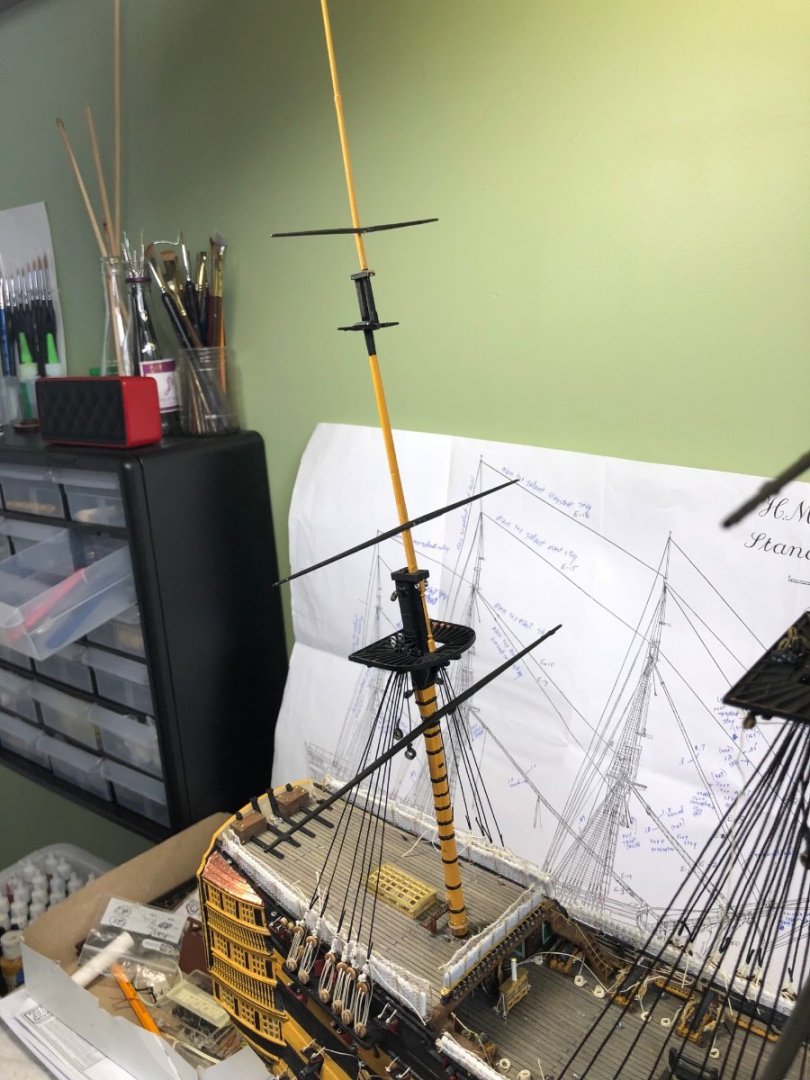
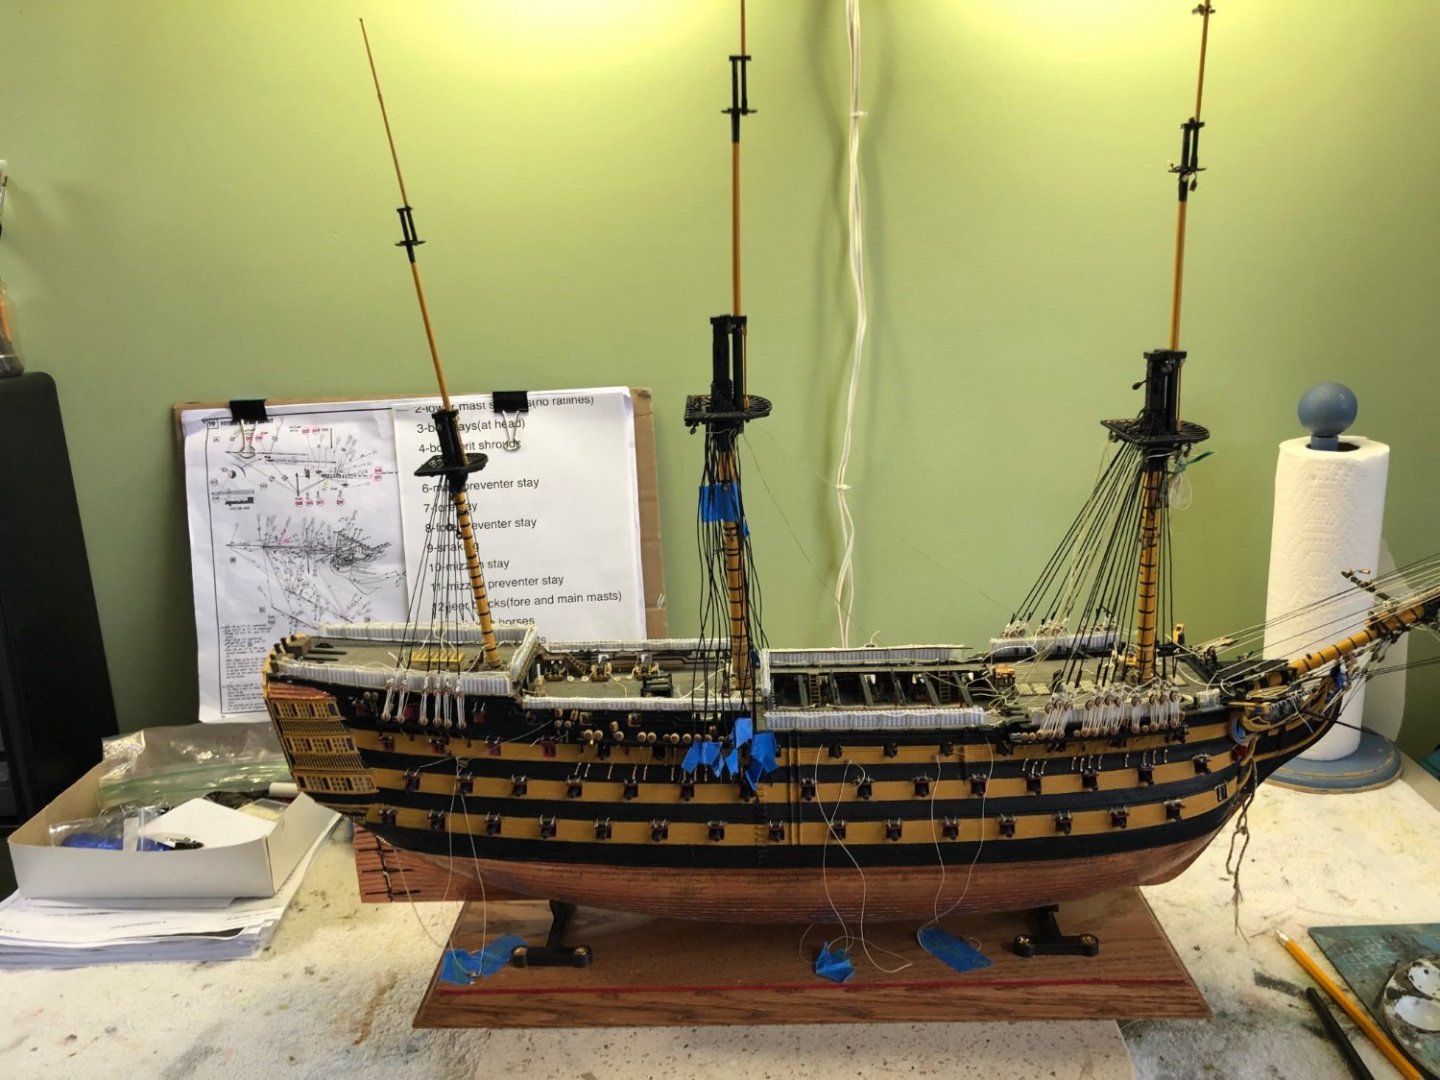
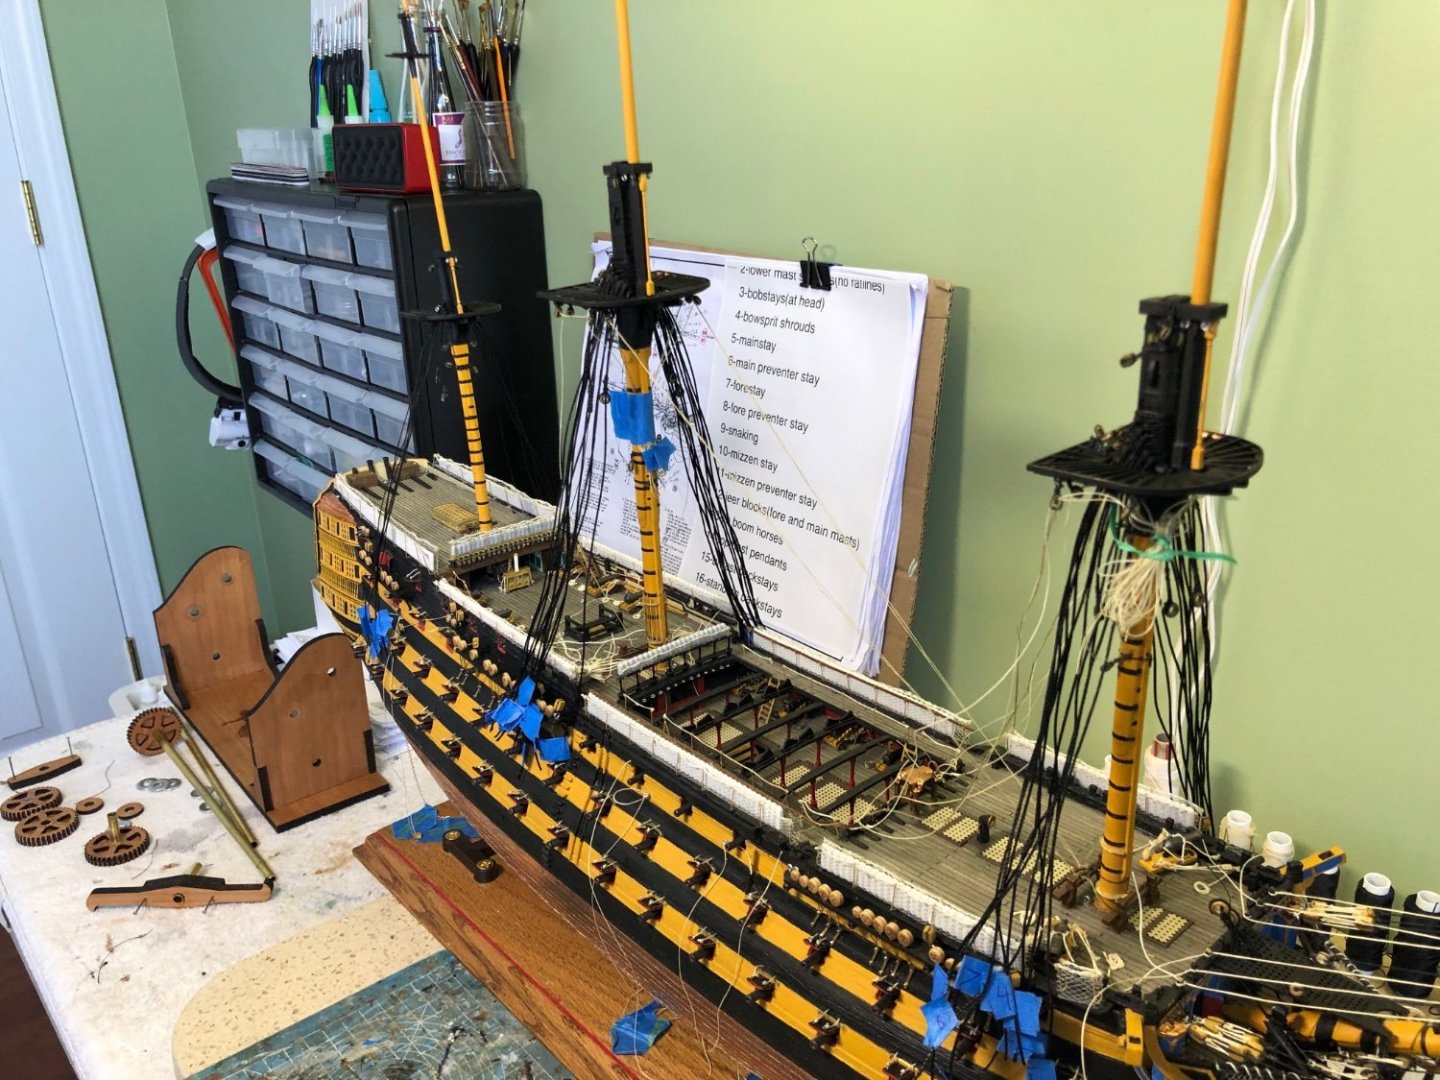
OK now back to the stays. I have the invisible pins for attaching the 9 yards to the 3 masts installed and the corresponding holes in the masts drilled. This was easier to do with out all the stays in the way. Now to take the yards back off and store them away until I am ready to start working with them.

-
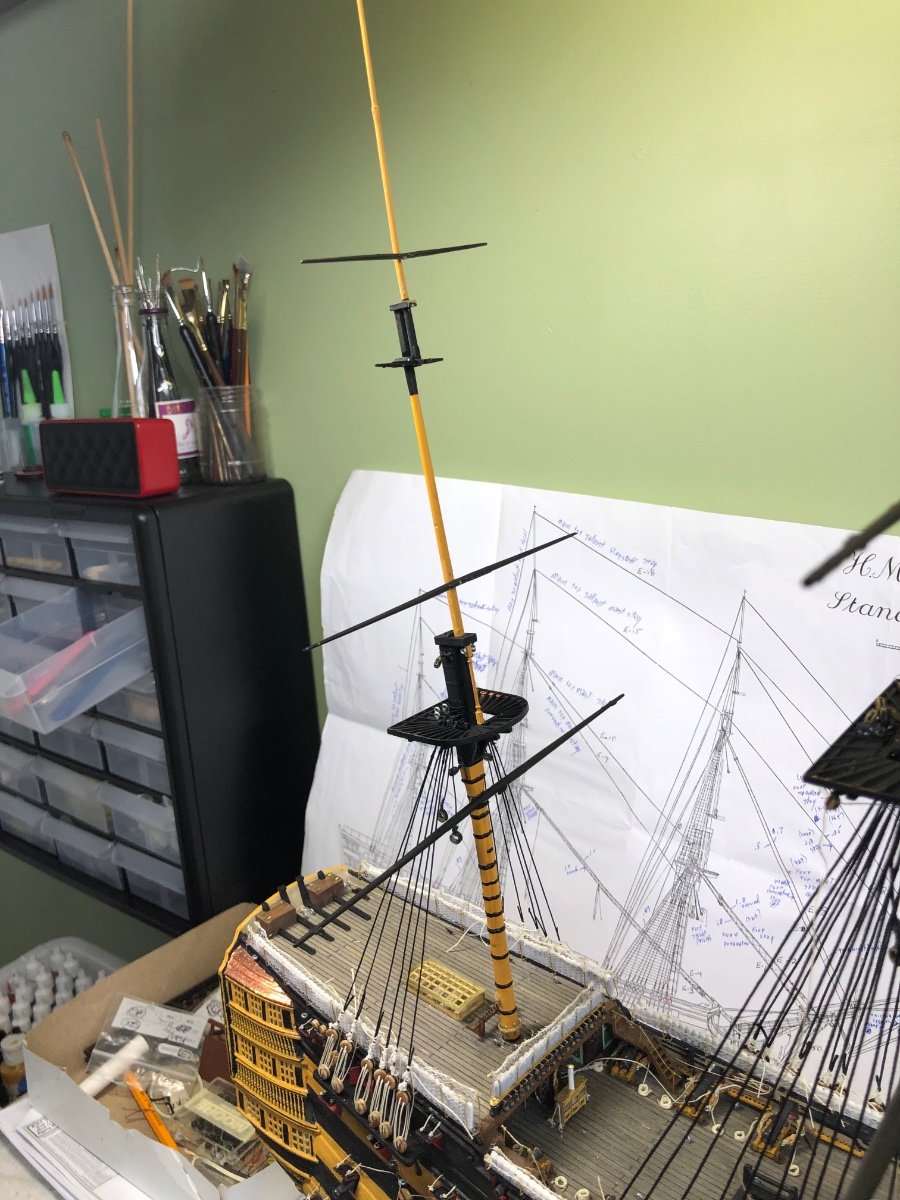
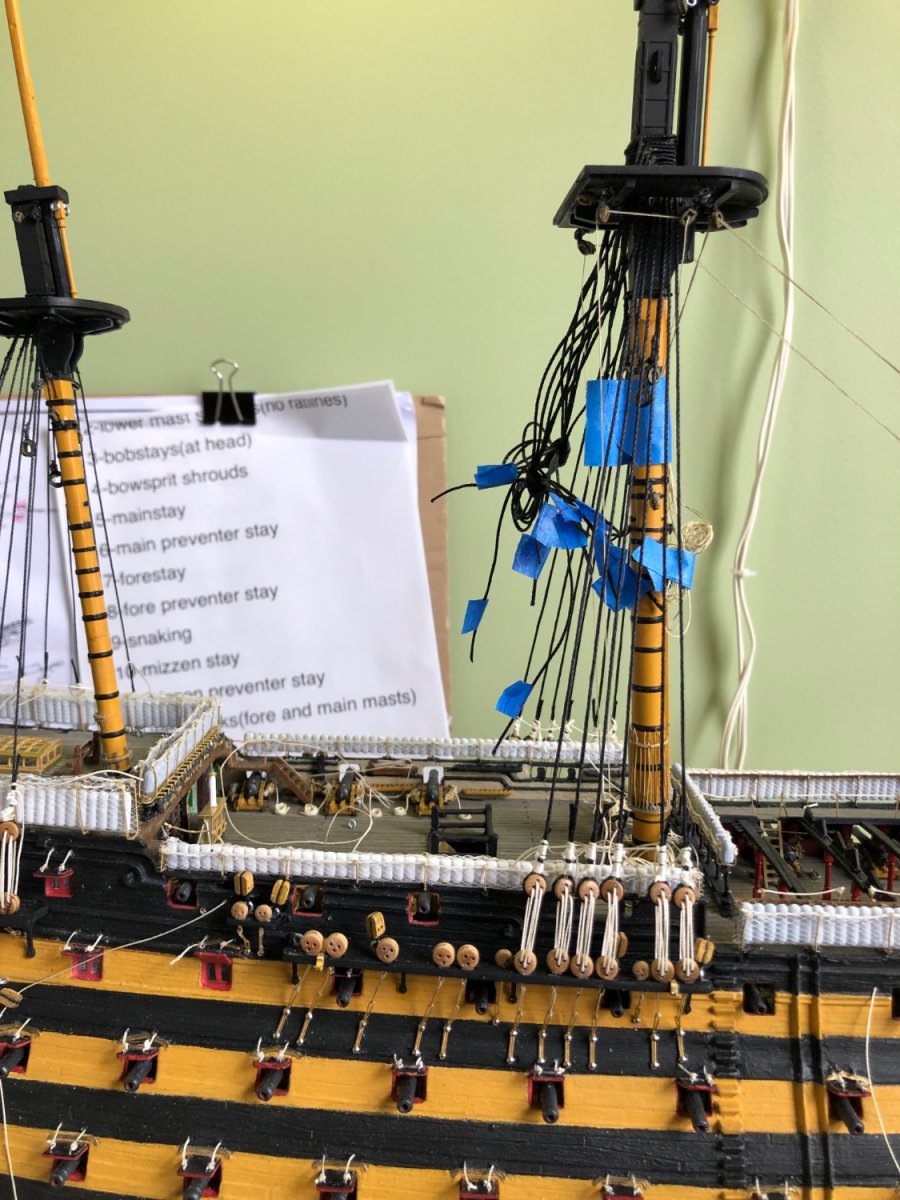
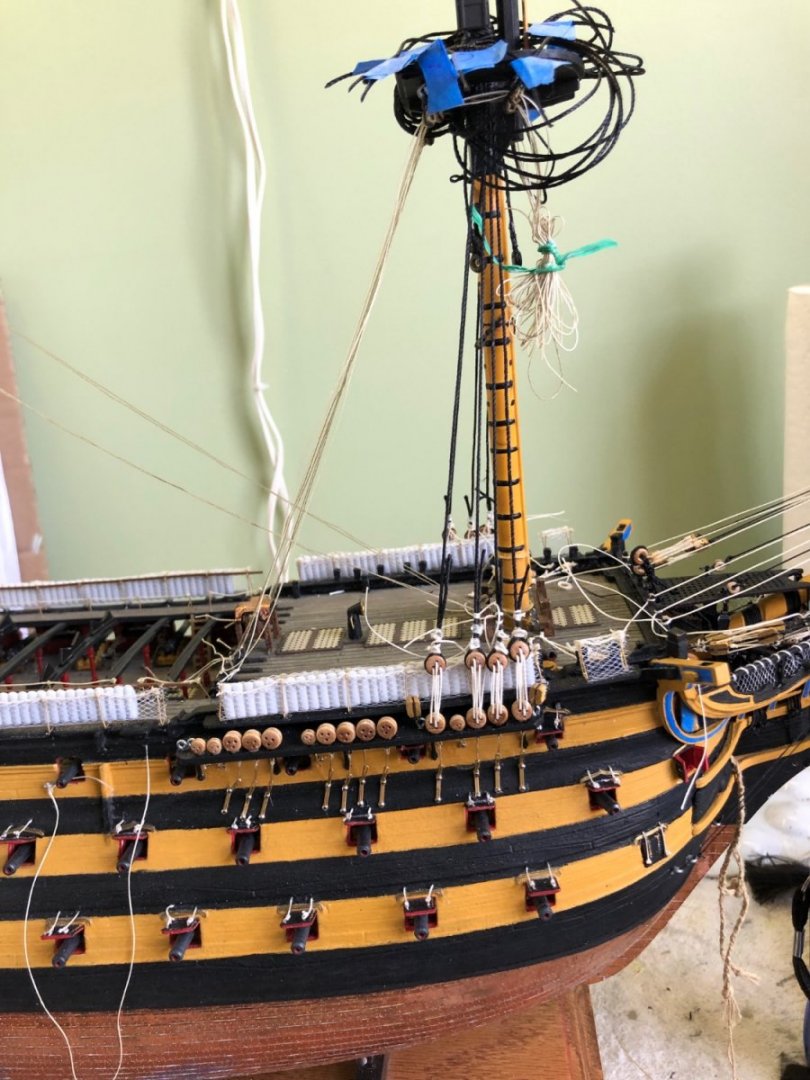
I plan to use the idea you guys shared about using a pin in the back of the yards to invisibly attach them to the masts and then add the parrals and other rigging attachments. I realized before I get to far into adding the stays and preventer stays I need to drill the corresponding holes in the masts to go with the pins in the yards. If I waited to long I would not be able to get the drill lined up correctly. So I am pausing on the stays until I get all the yard mounting pins and holes set up complete. I will then put the yards aside and get back to the stays.
-
Ian I noticed above I said seizing four stays. I meant serving. My little Serv-o-matic is getting a work out!
-
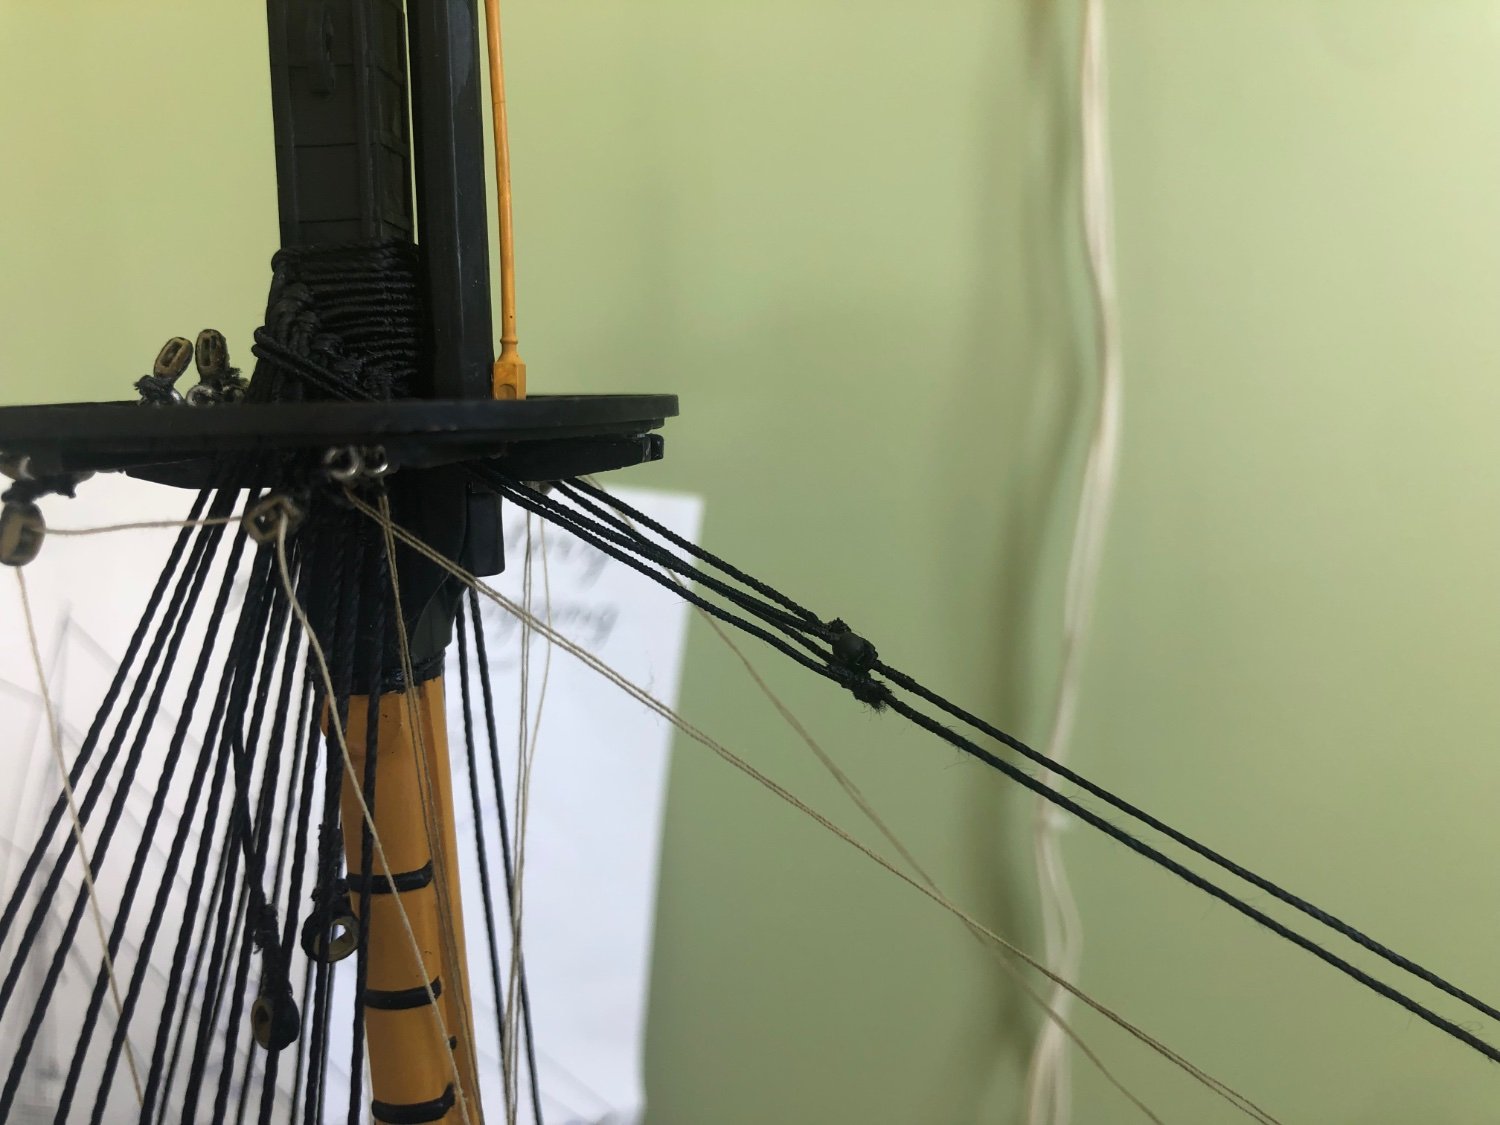
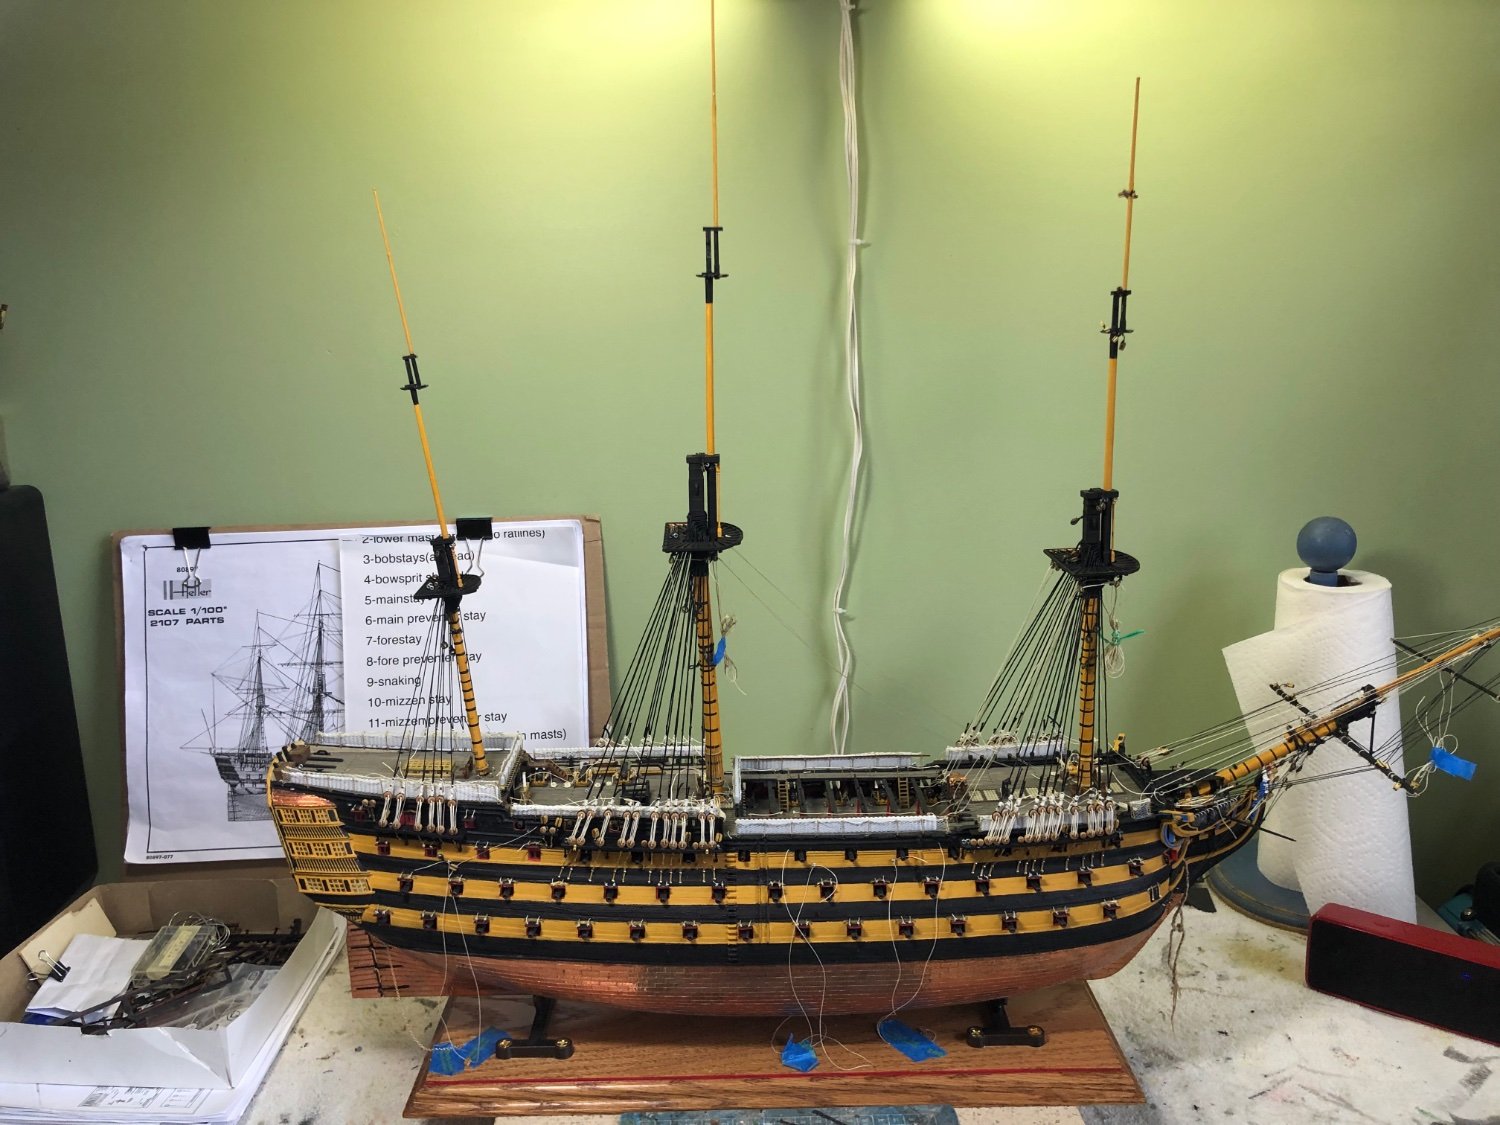
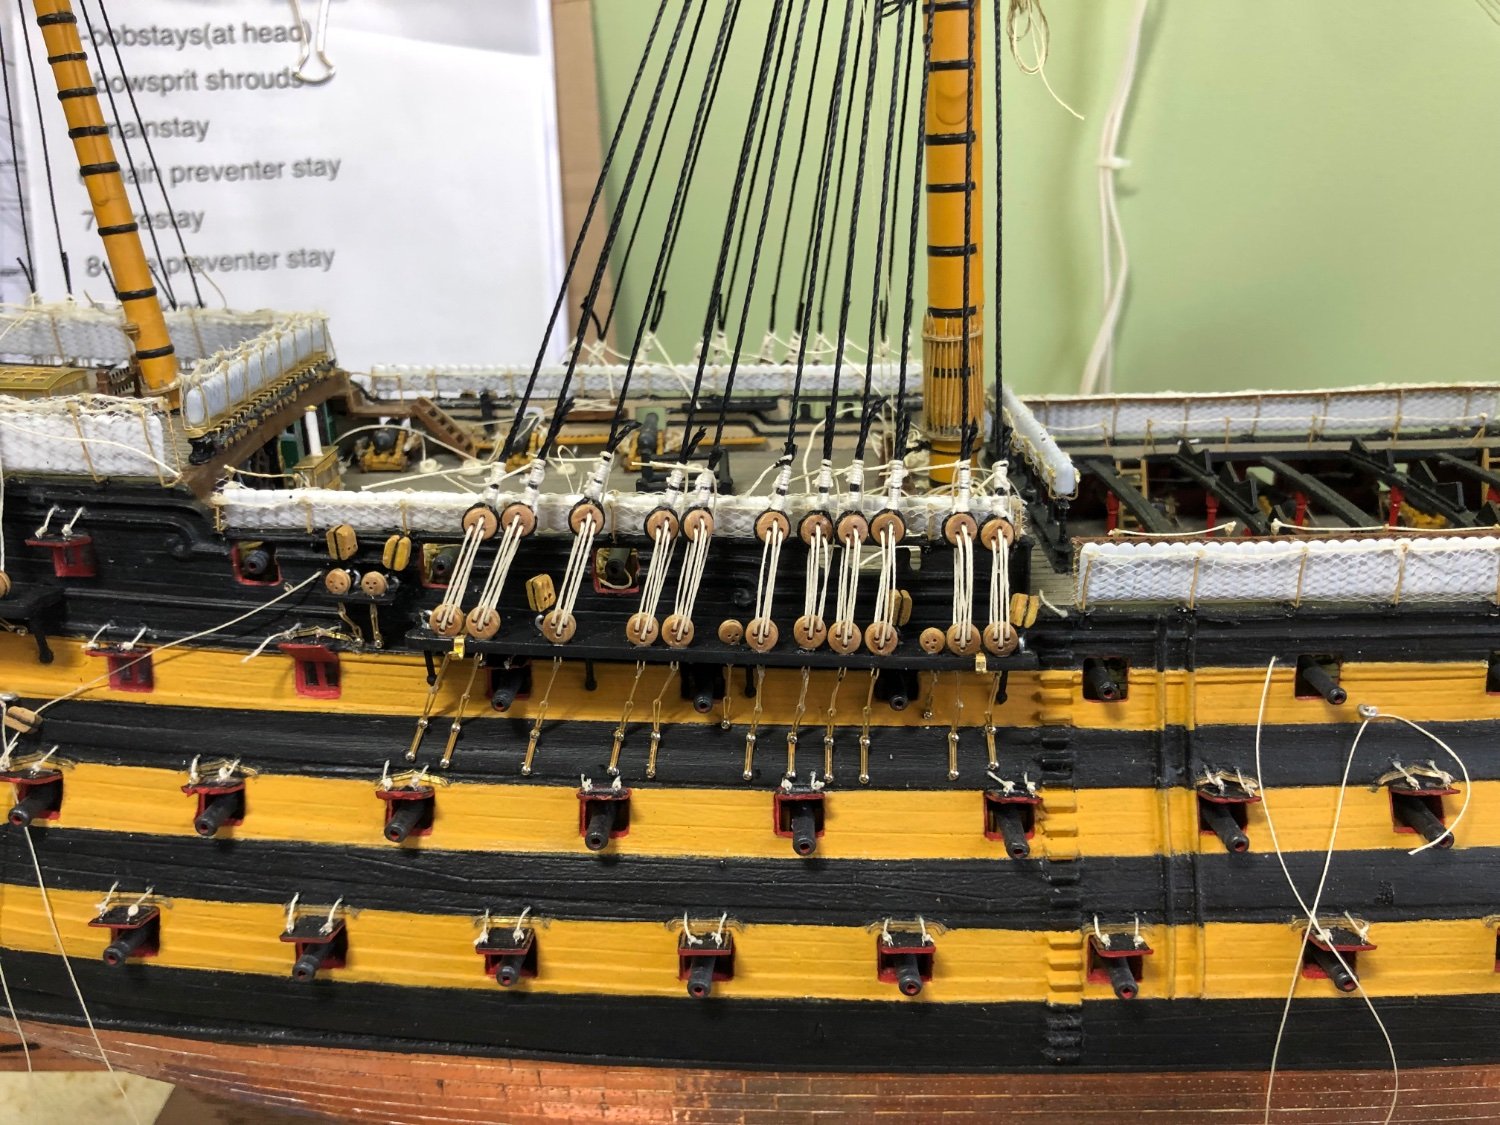
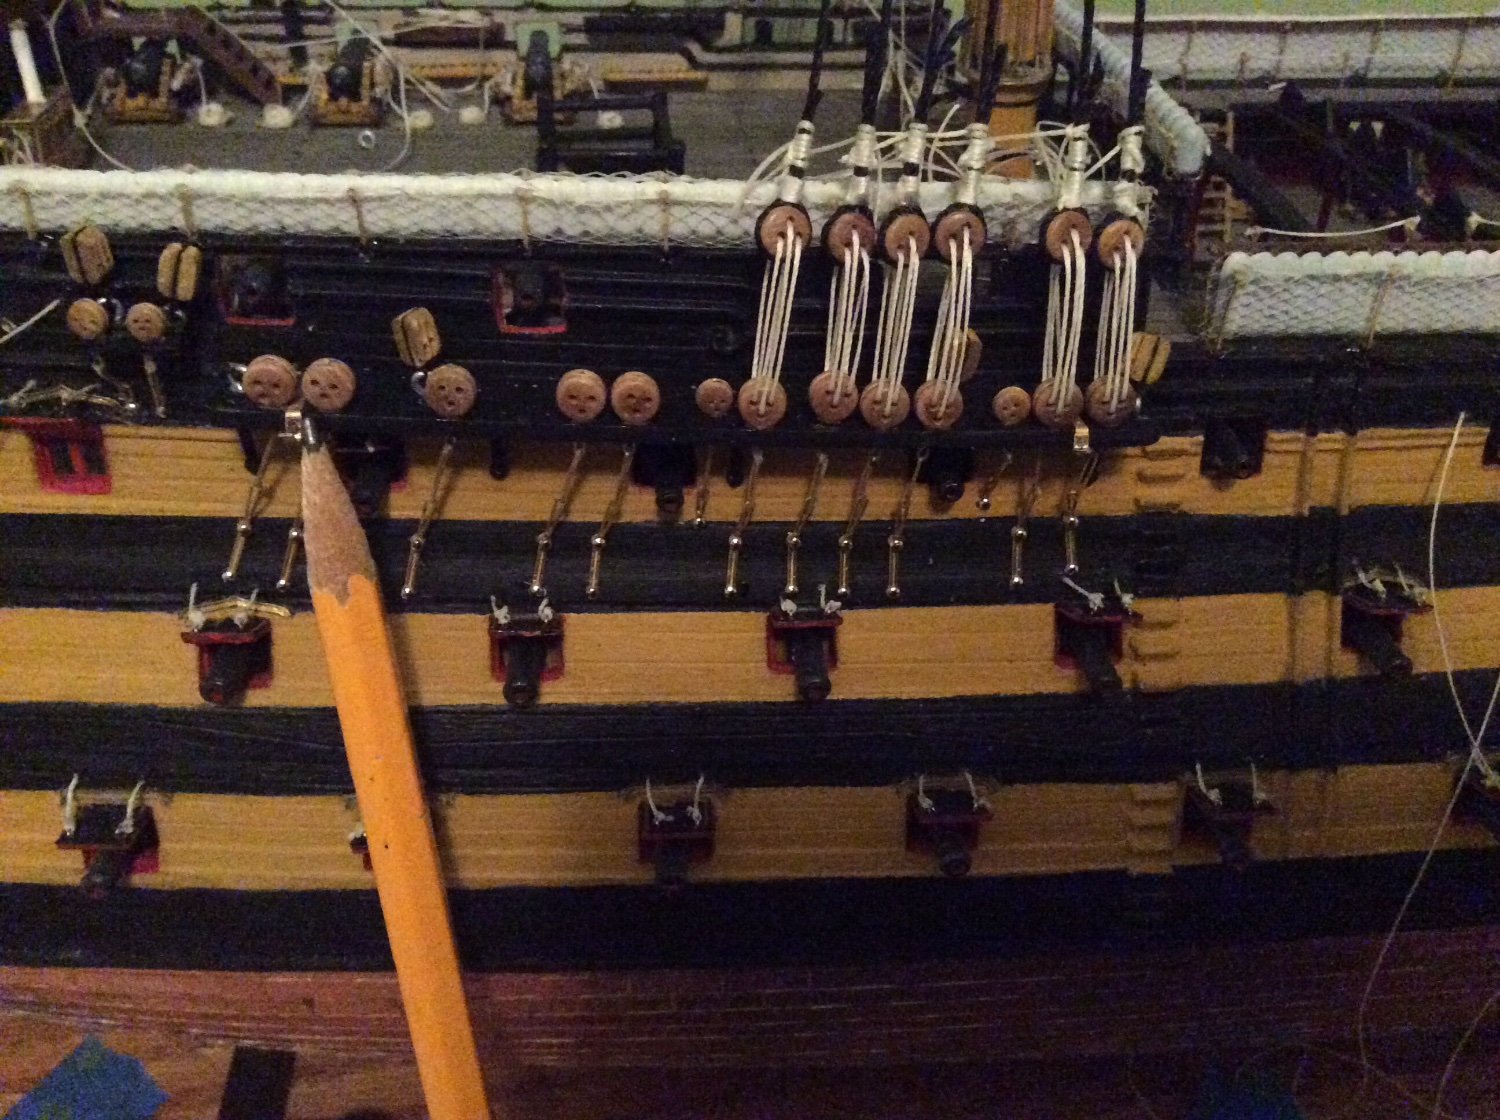
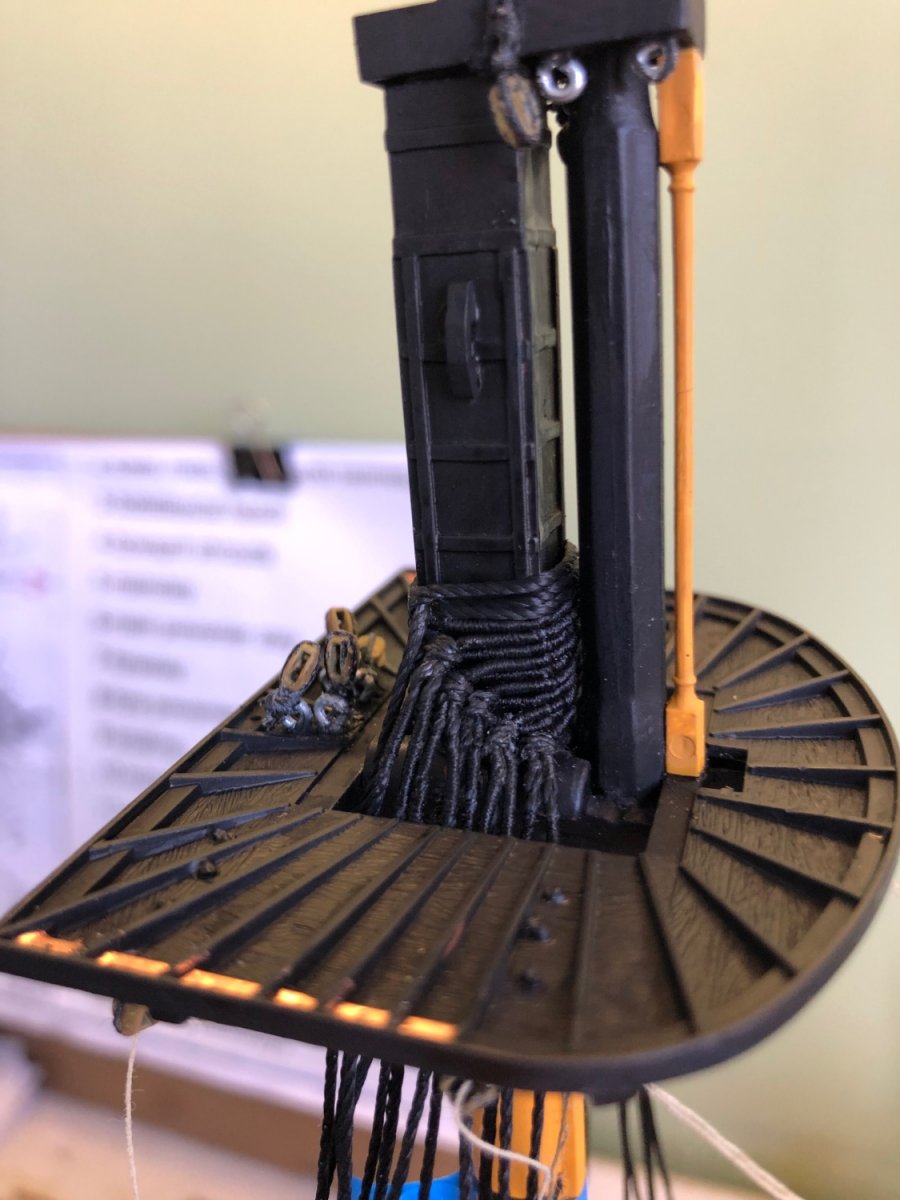
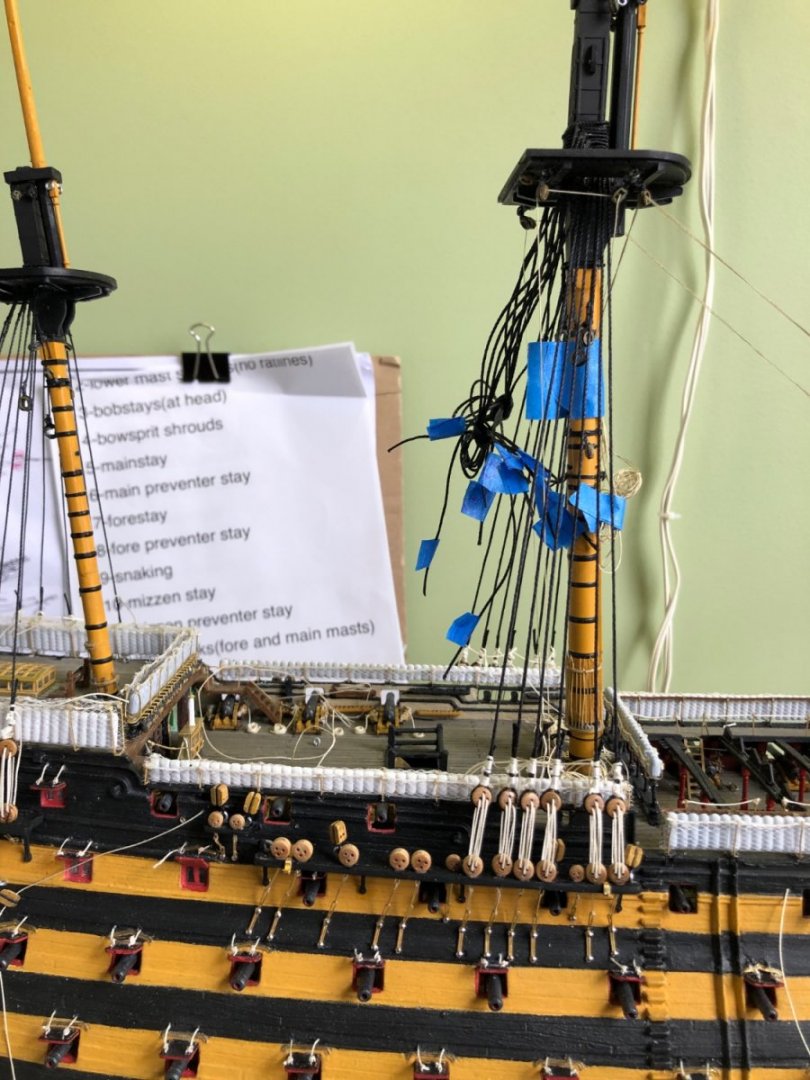
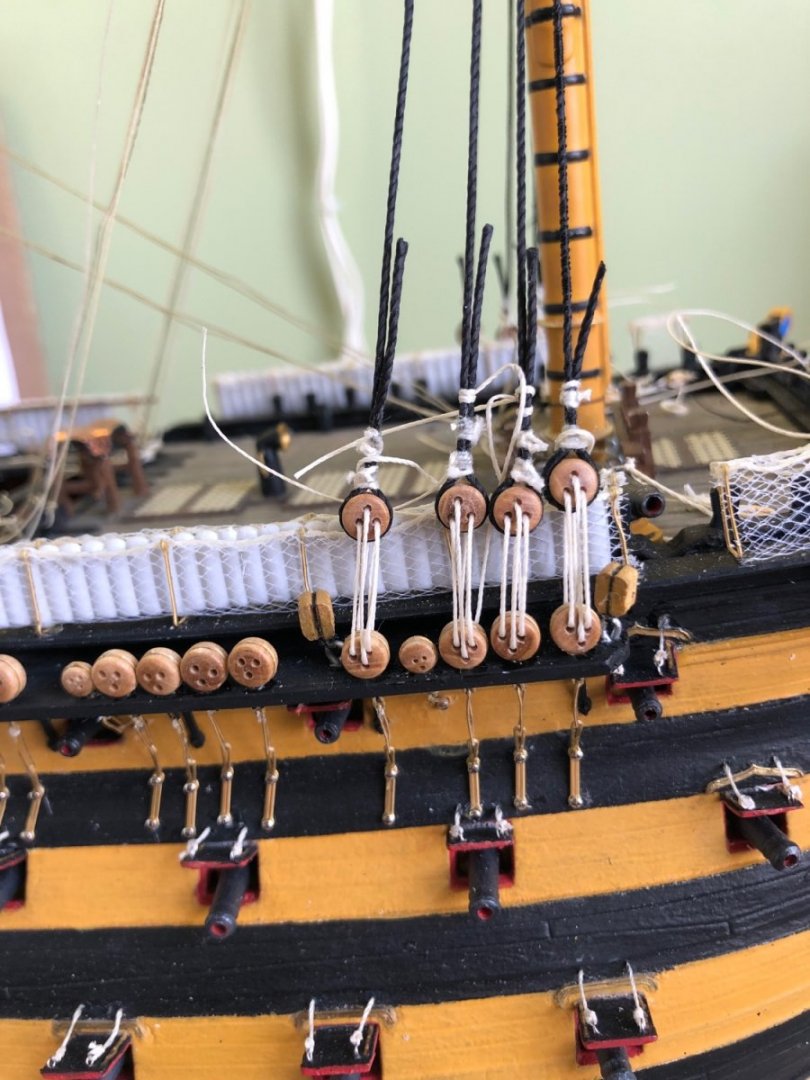
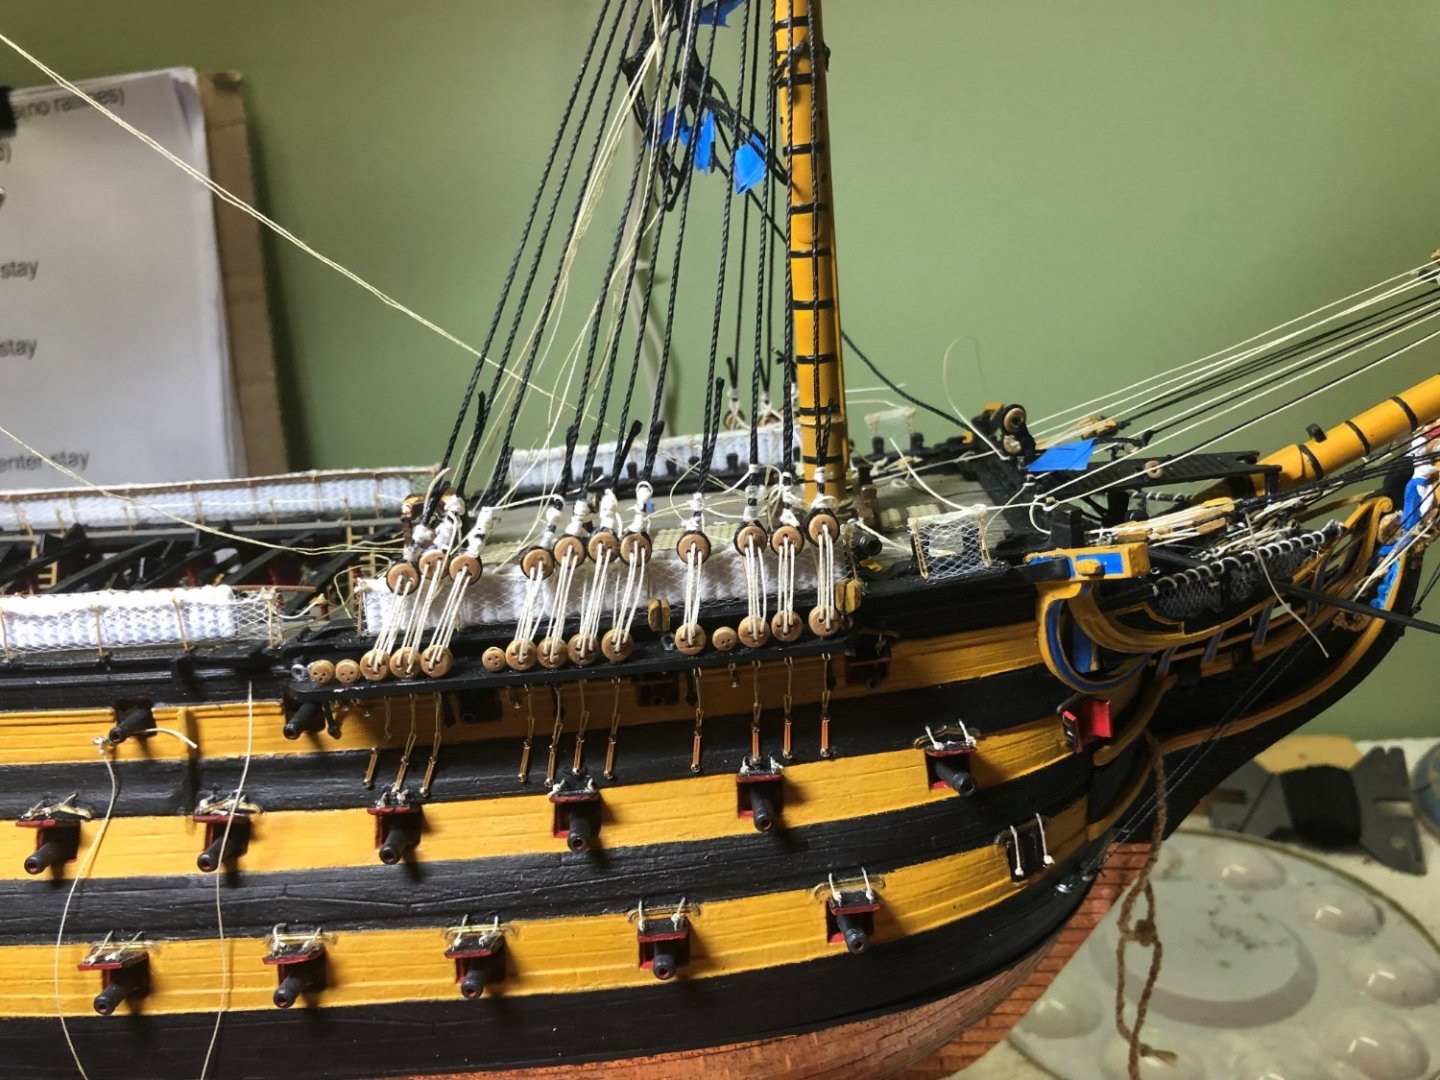
Ian I made a few day trip down to Florida to see family, a little warm weather, and the ocean (actually Gulf of Mexico). Thought about wrapping the beads in thread. May still do that. Progress seems slow now. All my work today was used up seizing four stays, attaching seed beads, making closed hearts, and rigging it up to the Main and Fore mast.
-
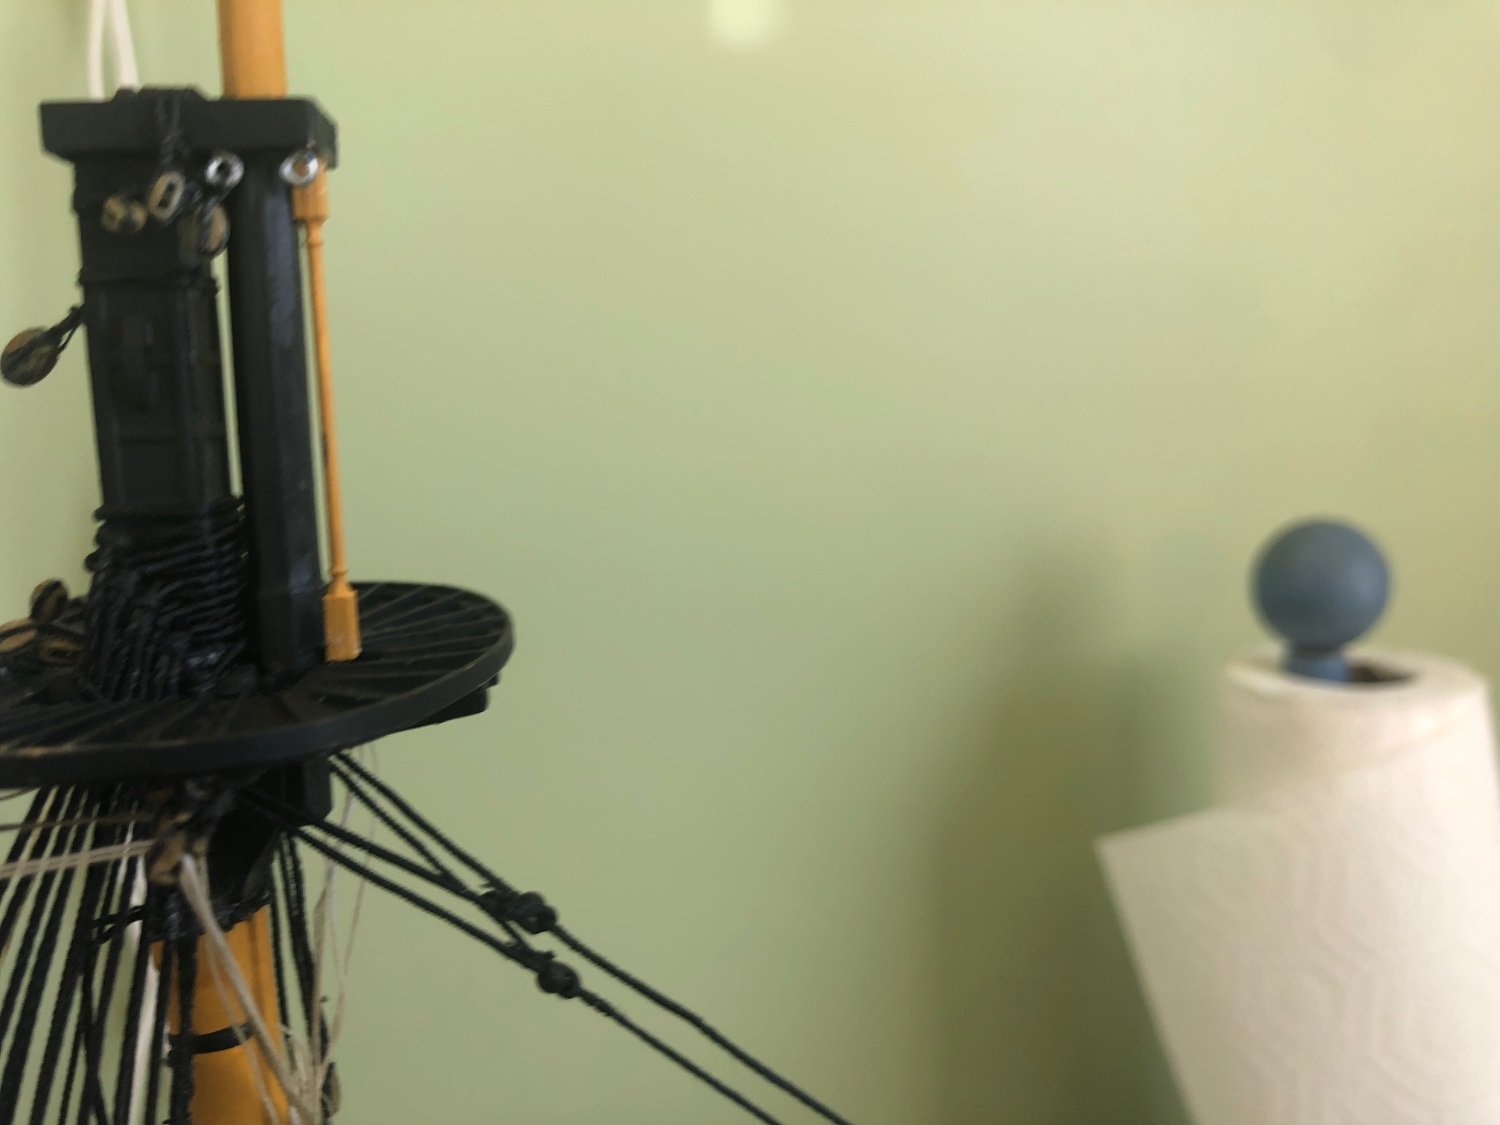
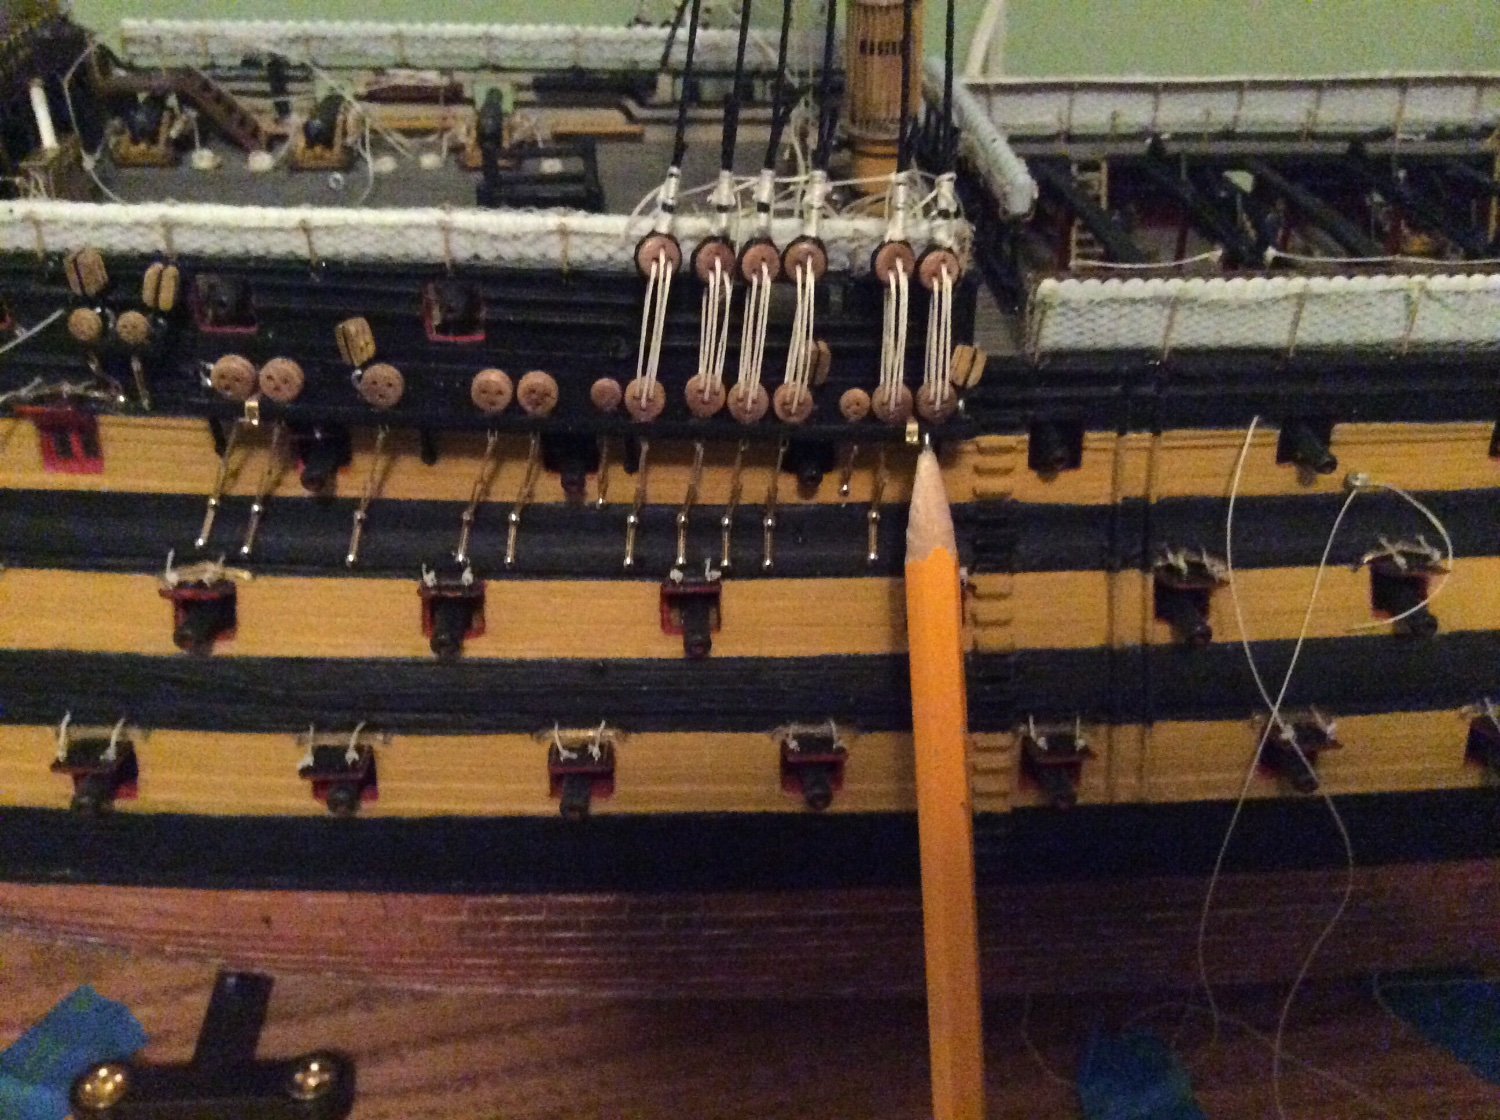
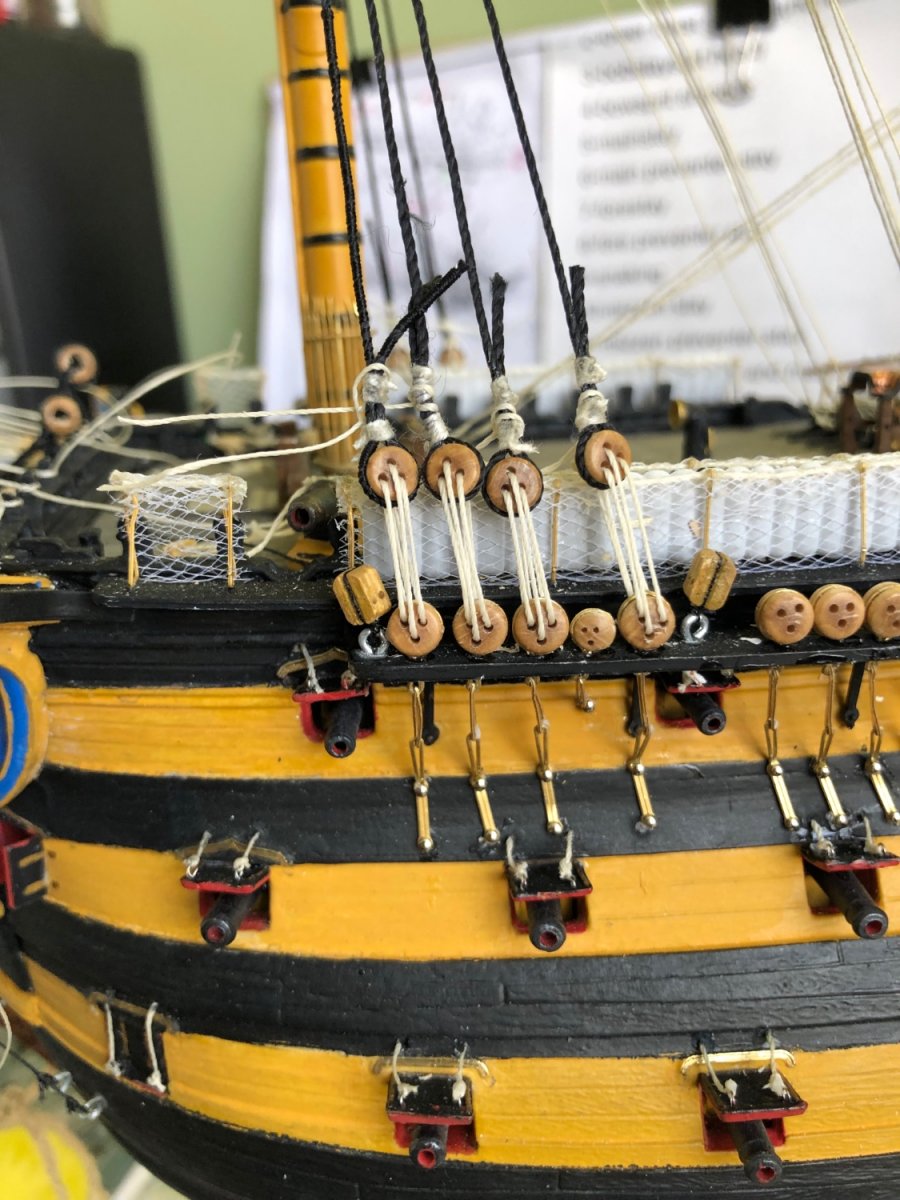
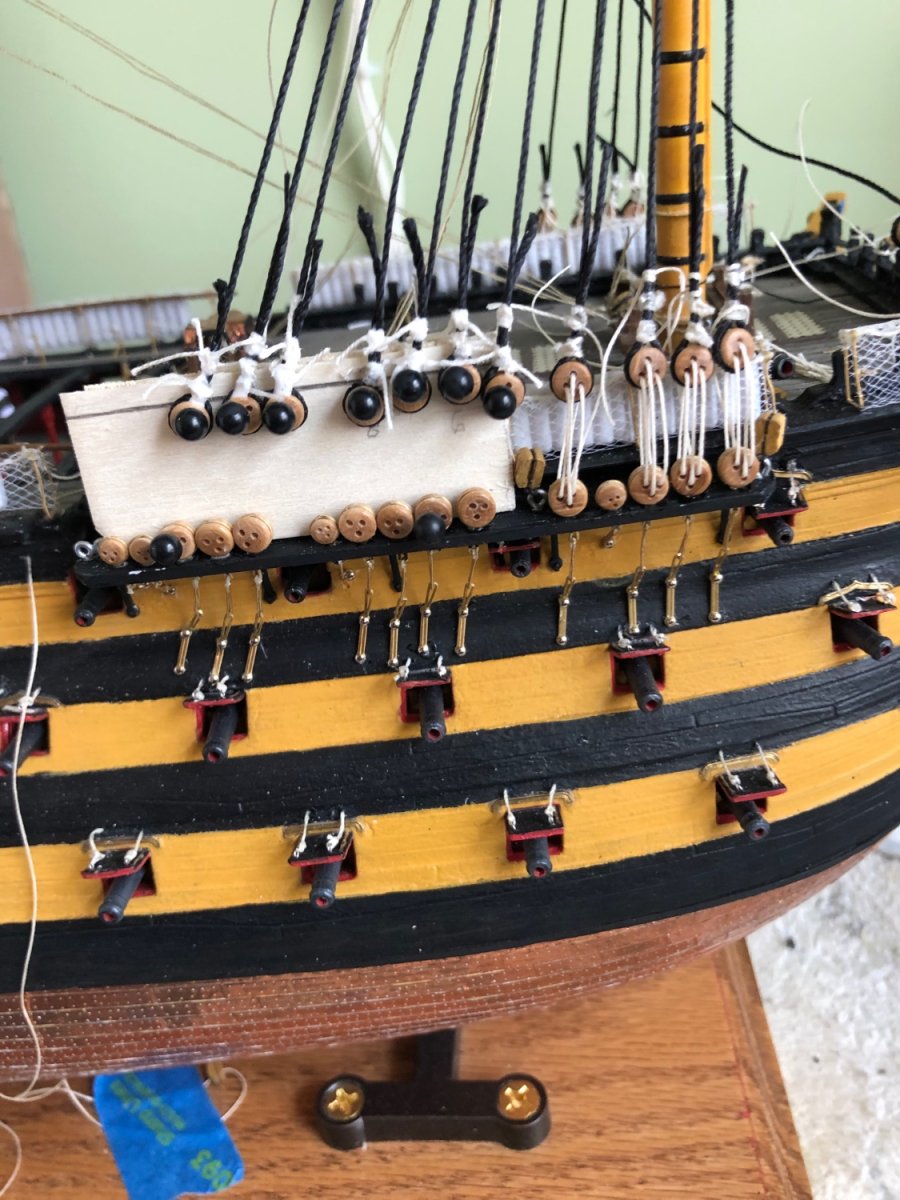
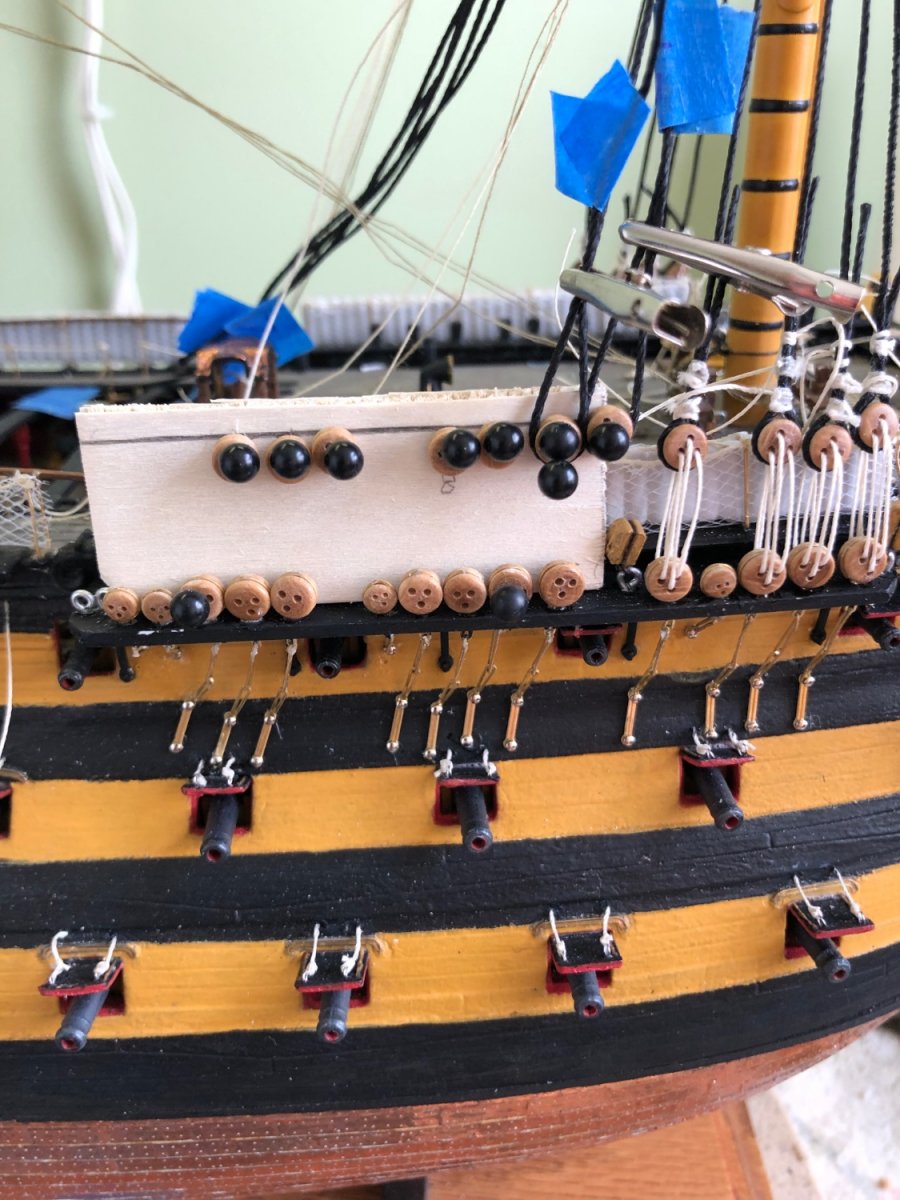
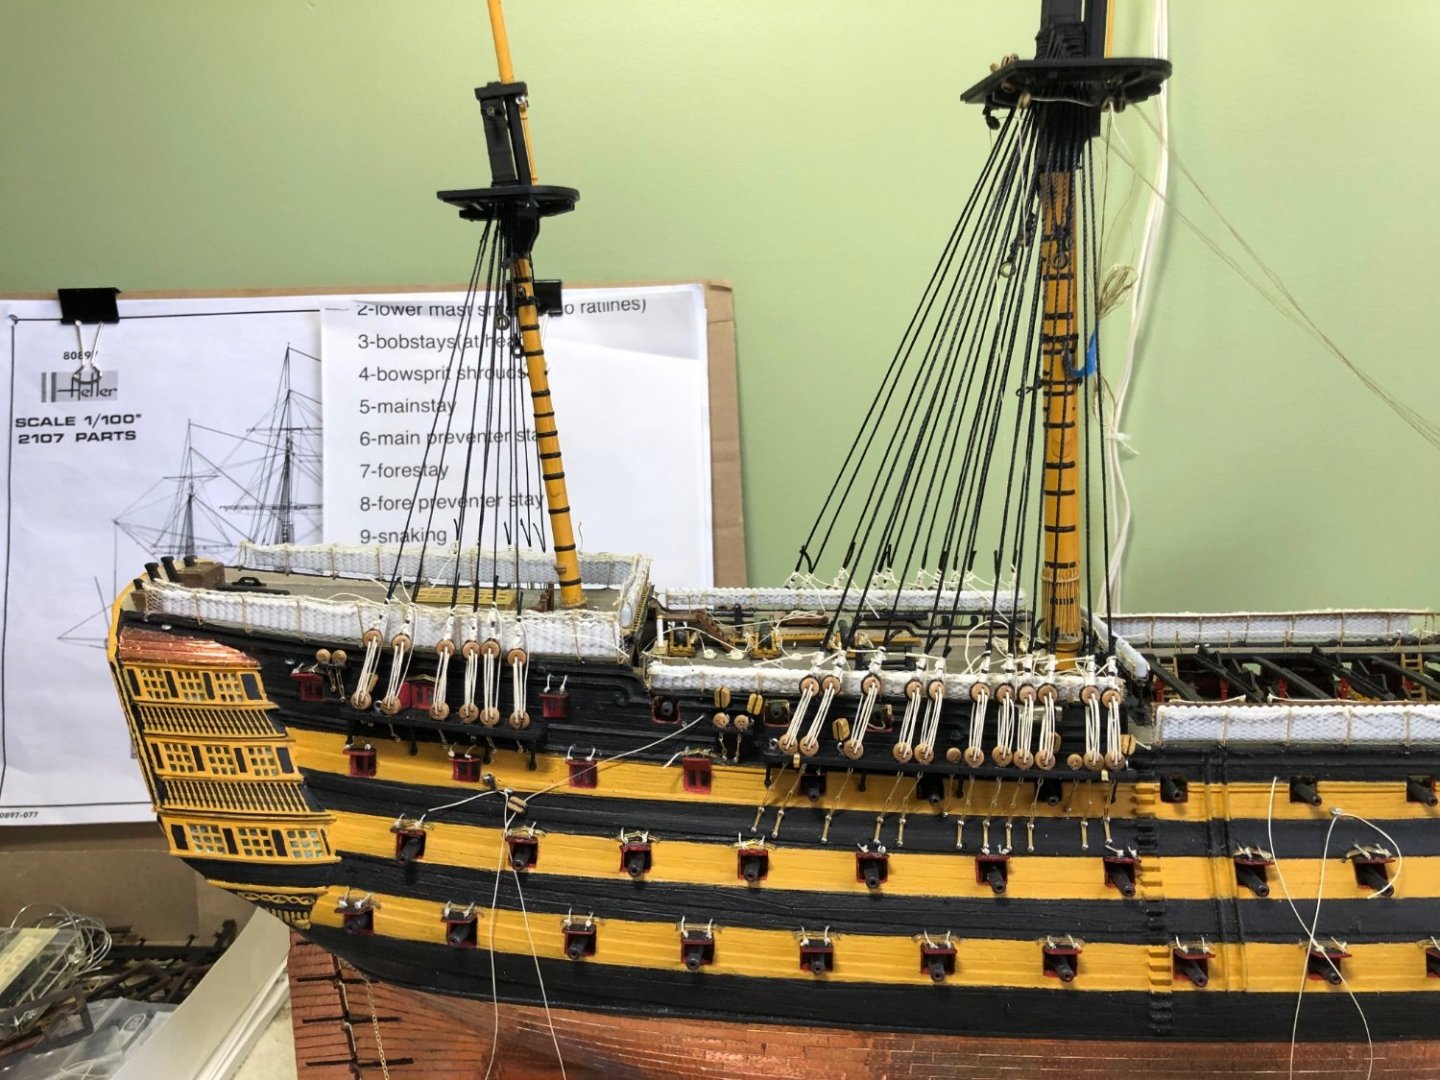
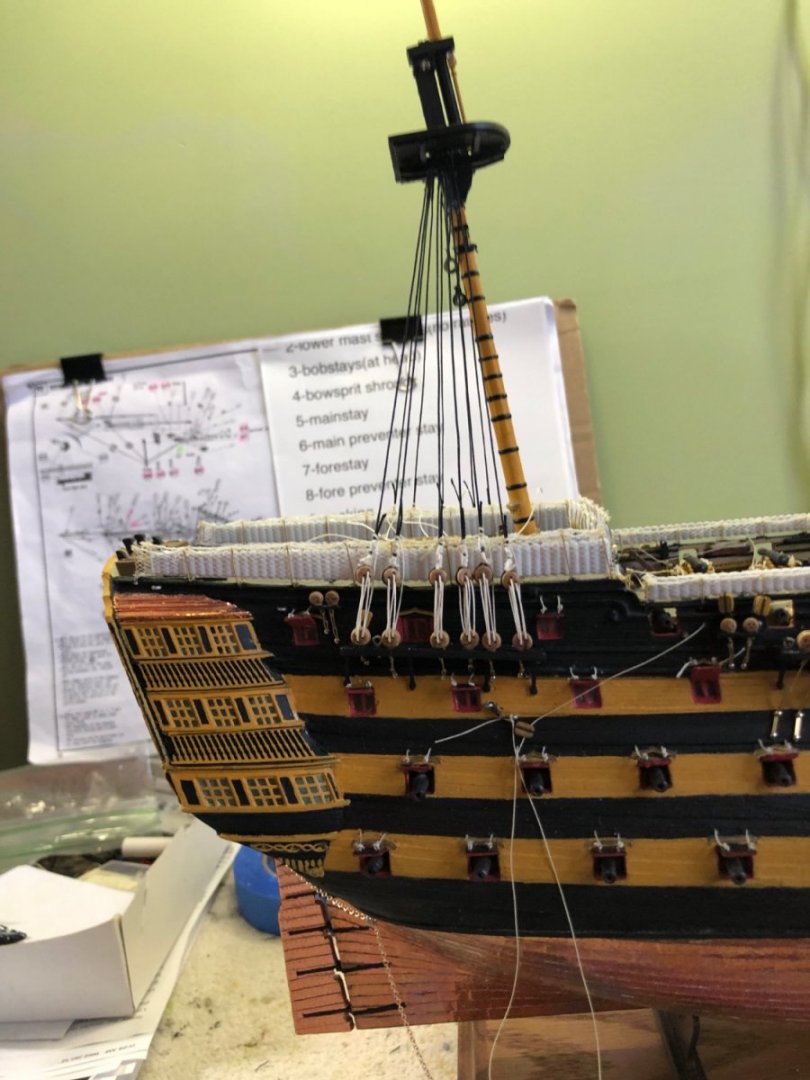
Been away from the shipyard for a few days but finally back at it. Worked on the main stay and the main preventer stay and also the fore stay and fore preventer stay. Don’t tell anyone but I gave up on trying to make a mouse for each stay and settled for simply using a black seed bead. I am satisfied with it. As with the shrouds I am leaving the lanyards loose for now per chance I need to tighten later. Still need to add the snaking.


-
Kevin that is a pretty funny story 😀. Wish you still had that horse turned moose picture. Maybe that is the inspiration you have when you take a model ship and customize it to be a different ship.
- 444 replies
-
- 2
-

-
- Cutty Sark
- Revell
- (and 2 more)
-
Kevin that was pretty profound your comments about putting the soul back in the model. I college my college degree many many years ago in art and photography. Never was able to make a living with it so found other means to make a living. However, I still really love color and painting just as you said above. Have to give this ink process a try.
- 444 replies
-
- 3
-
-
- Cutty Sark
- Revell
- (and 2 more)
-
Guys this opens up a whole new world for me to explore! Never knew about this. Will have to experiment with it before my next build.
- 444 replies
-
- 1
-
-
- Cutty Sark
- Revell
- (and 2 more)
-
Thanks Kevin. I am fascinated by your discussion over on your CS build pertaining to ink. Hope to learn something new. Really like the effect.
-
You guys are going to have to explain this ink process you are discussing. I really like the results but have absolutely no idea what you are doing with ink to create it.
- 444 replies
-
- 1
-
-
- Cutty Sark
- Revell
- (and 2 more)
-
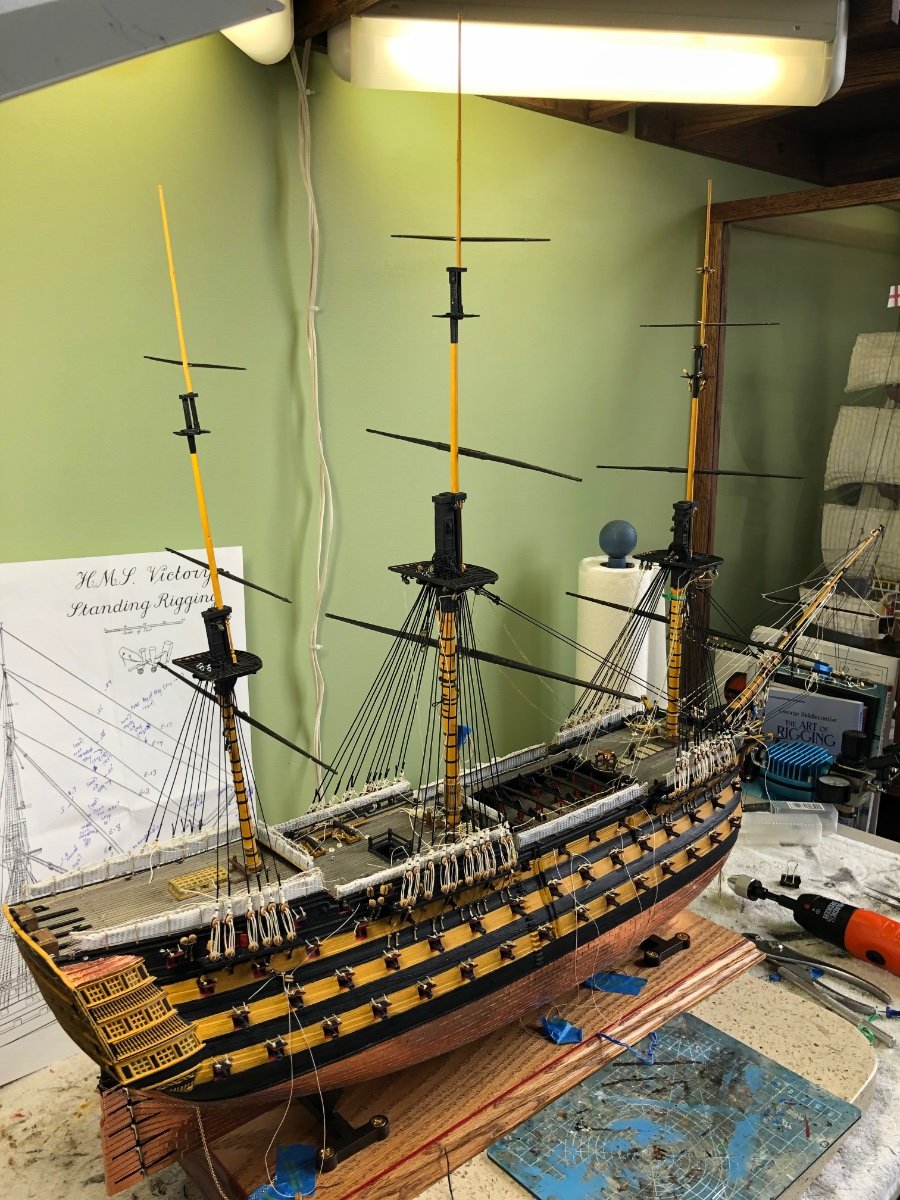
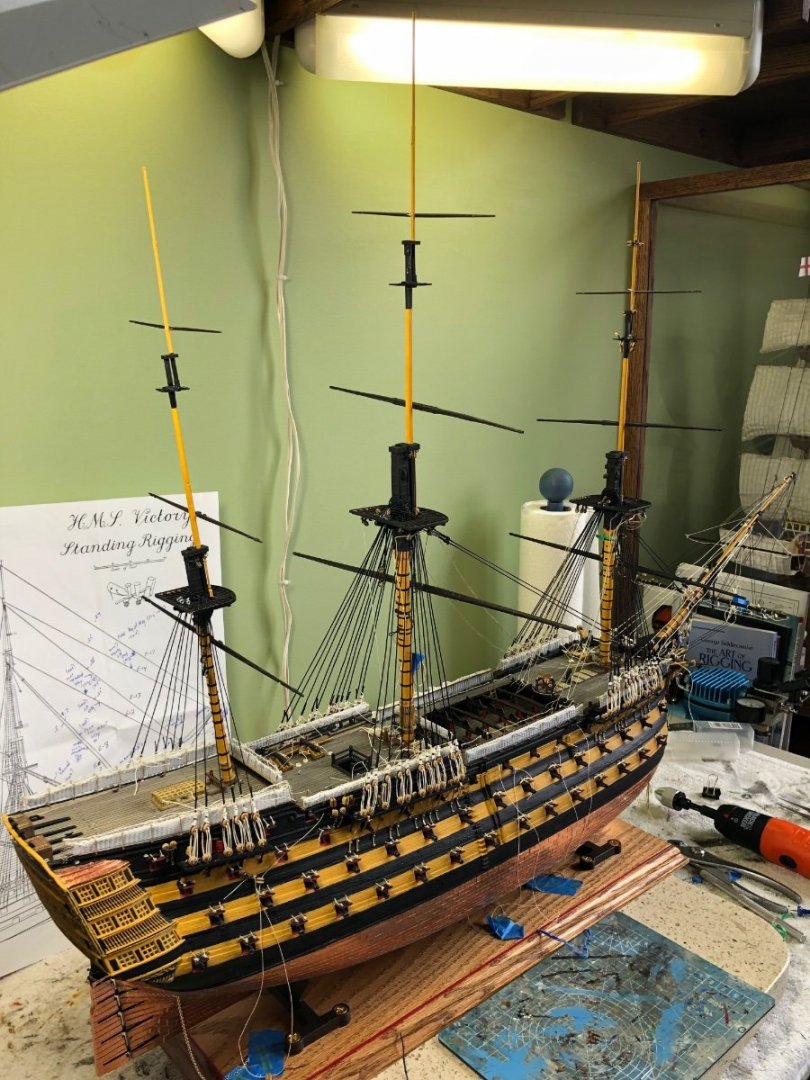
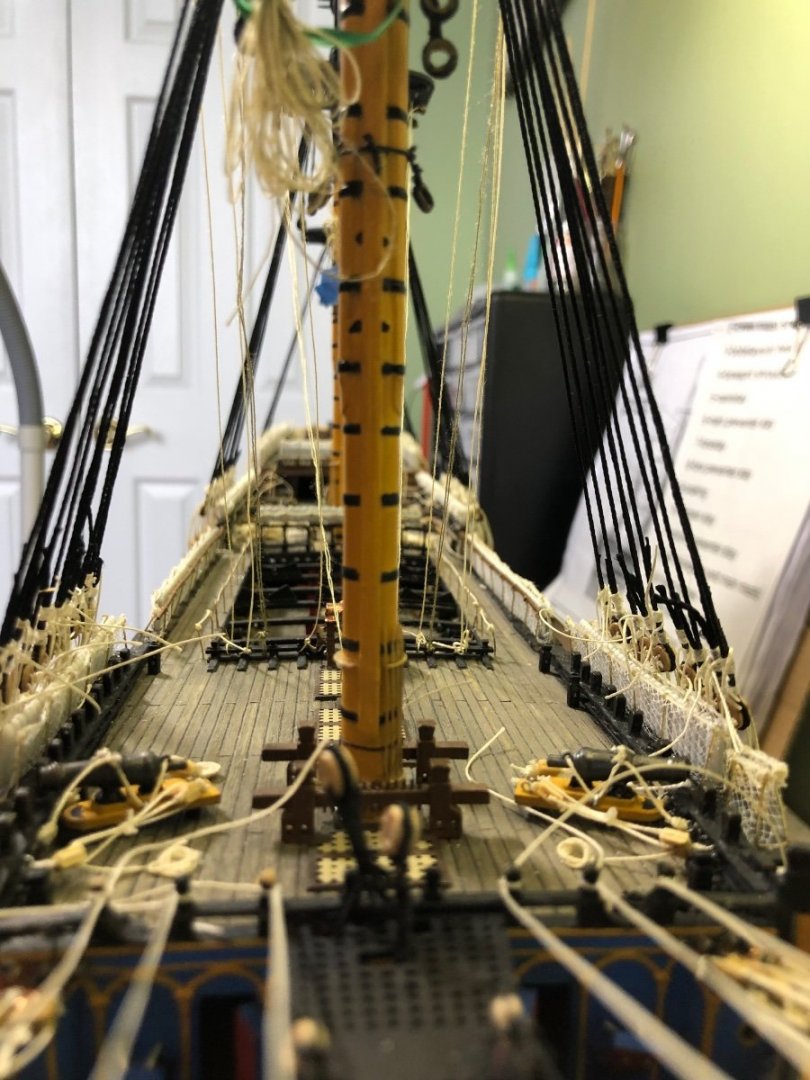
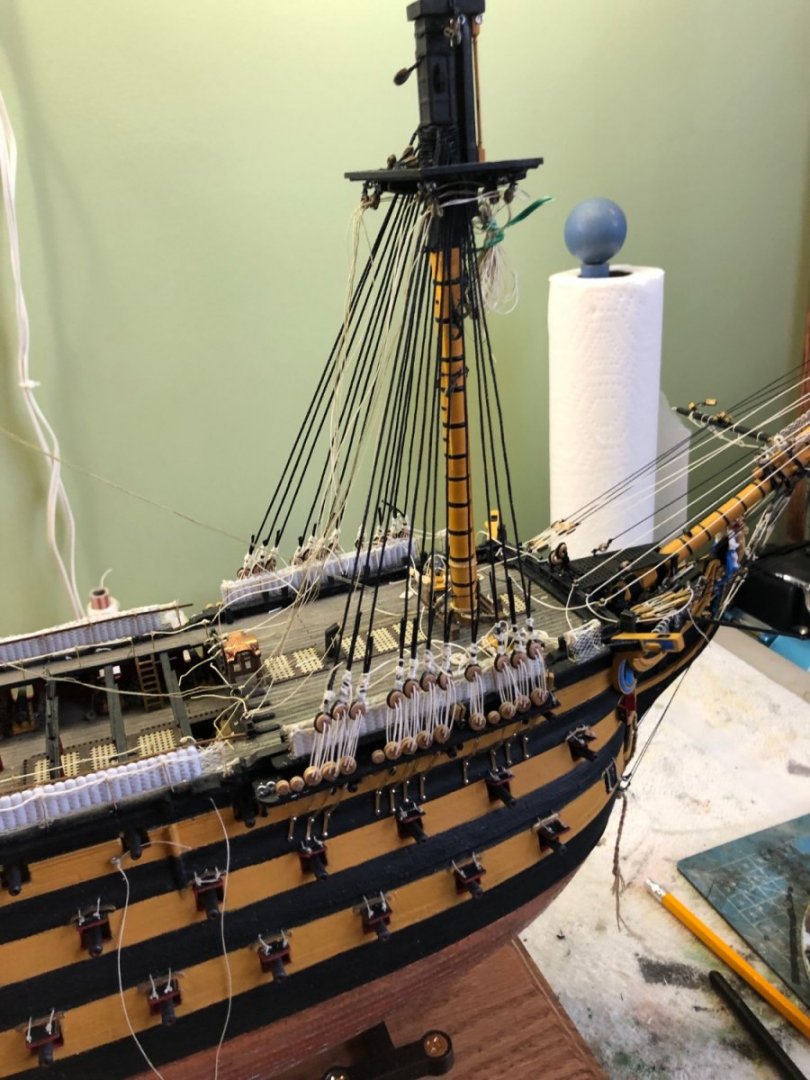
Finished all the lower shrouds on the 3 masts. As I mentioned earlier I am going to wait until much later to do the ratlines so as to improve access for other rigging. I can’t decide if I am confident enough to go ahead and permanently tie off the lanyards. Not sure if the standing rigging stays will cause the shrouds to get a little slack and have to be tightened with the lanyards.


-
OK Ian thanks. I bet I looked through the instructions 5 or 6 times looking for part #56. Never saw it in step 28 until you said so. So that is what part 6 (stun sail boom) on Daniel’s brass etched Plate 3 is for. 👍


-
👍. Thanks Kevin.
-
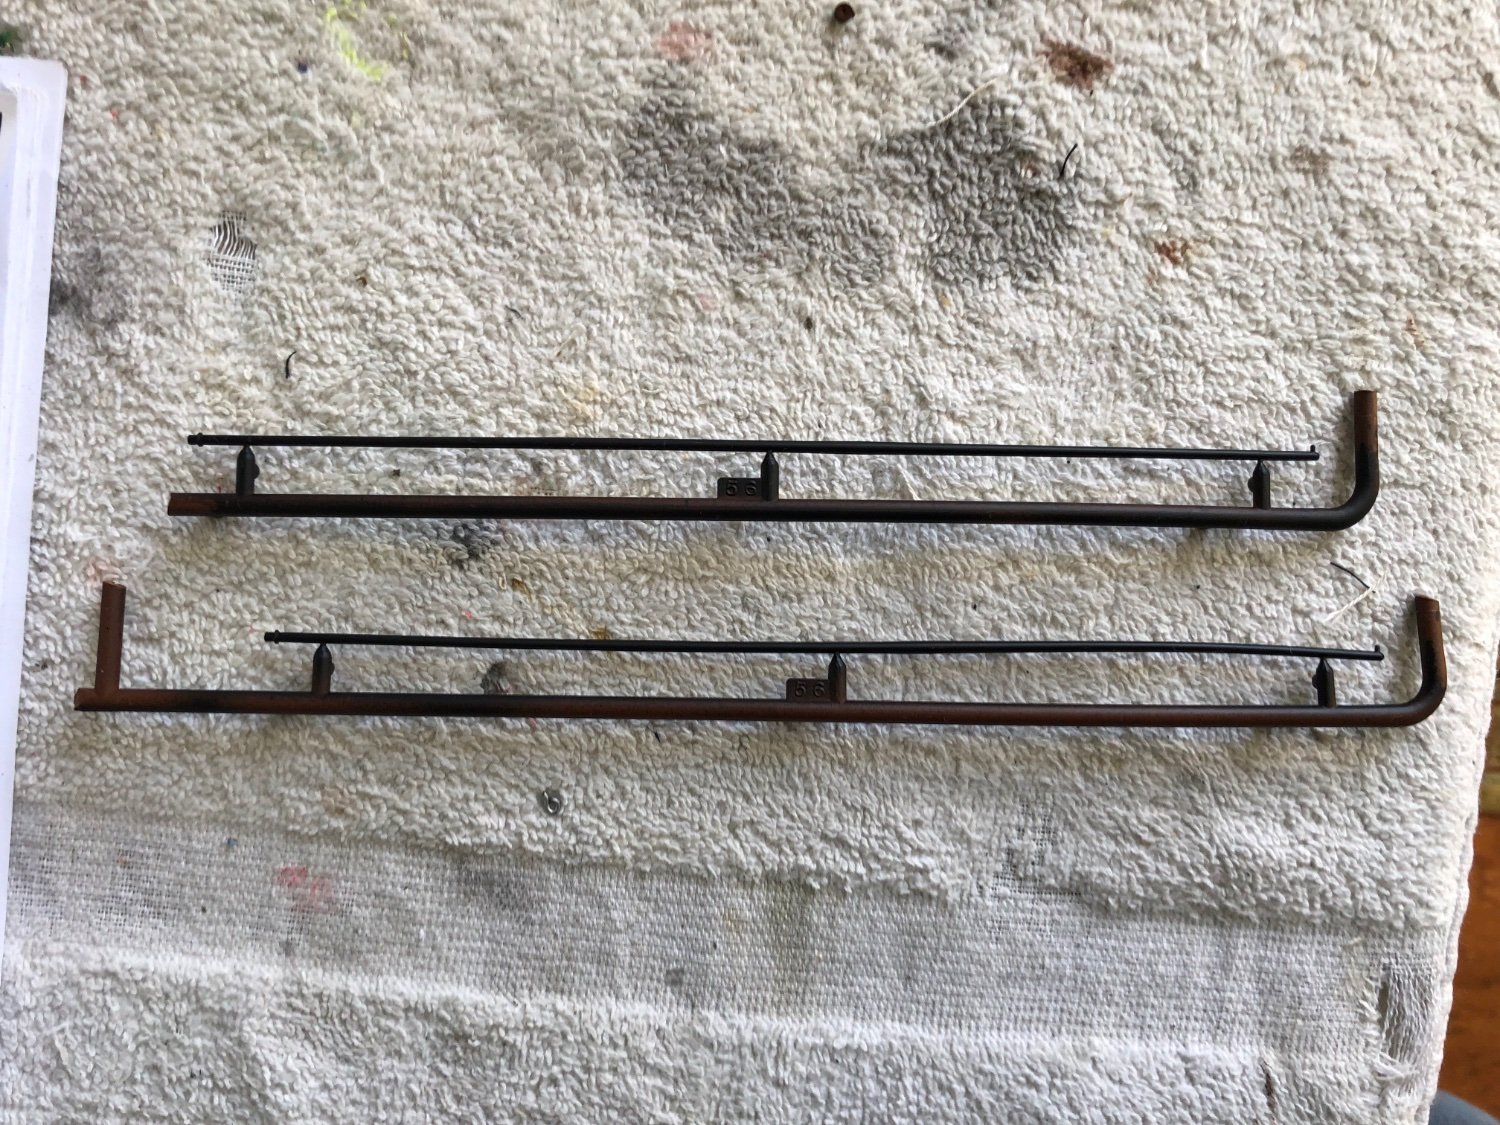
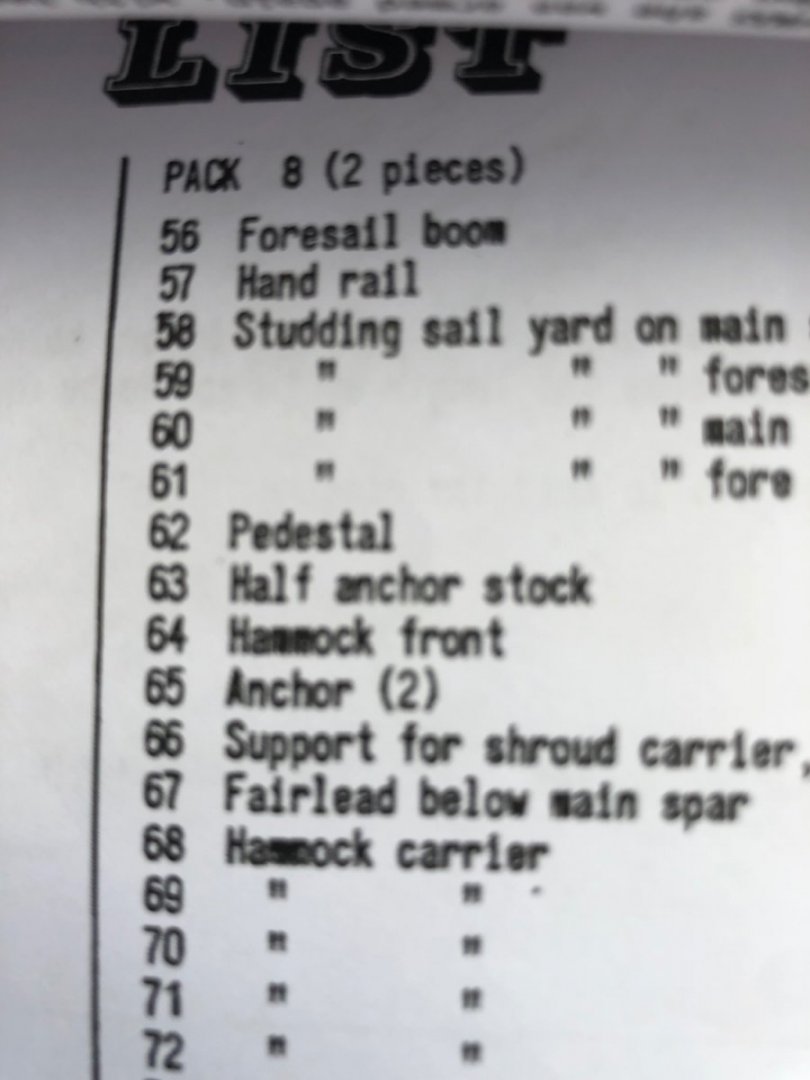
Maybe a little inventory help if any one knows. I did an inventory of all the remaining parts in the kit and pinpointed where almost everything remaining goes. Not a lot left in the box. I have two matching pieces that I cannot locate in the instructions or in Longridge’s book. If any of you guys could give me a hint I would greatly appreciate it. I have two pieces numbered #56. In the instructions part list they are named Foresail boom. However I find no where on the instructions where I am to use them.

-
Continuing attaching lower shrouds to the channels. About half way done with the main mast’s lower shrouds.

-
Thanks Ian. I am actually closer than I thought.
-
Ok. Lower shrouds, minus the ratlines, are installed on the fore and mizzen masts. After completing the work and examining it with my critical eye, I am thinking the upper and lower deadeyes are maybe a bit to far apart. Since the work is done, I am going to live with it. Still have the main mast to complete.
-
Started rigging my shrouds to the channels. I use the thin piece of balsa wood and push pin method to space the deadeyes. I got the starboard side of the fore mast done and two pair on the port side of the fore mast. I am leaving the lanyards loose for now and will adjust and tighten as I complete the standing rigging. Also going to postpone adding the ratlines till after the standing and running complete. Should allow easier access to the interior of the deck.


-
Kevin I am very much afraid of heights but would surly have to suck it up for that opportunity. Will be anxious to hear your thoughts and see your photos when you do it.
- 444 replies
-
- 1
-
-
- Cutty Sark
- Revell
- (and 2 more)
-
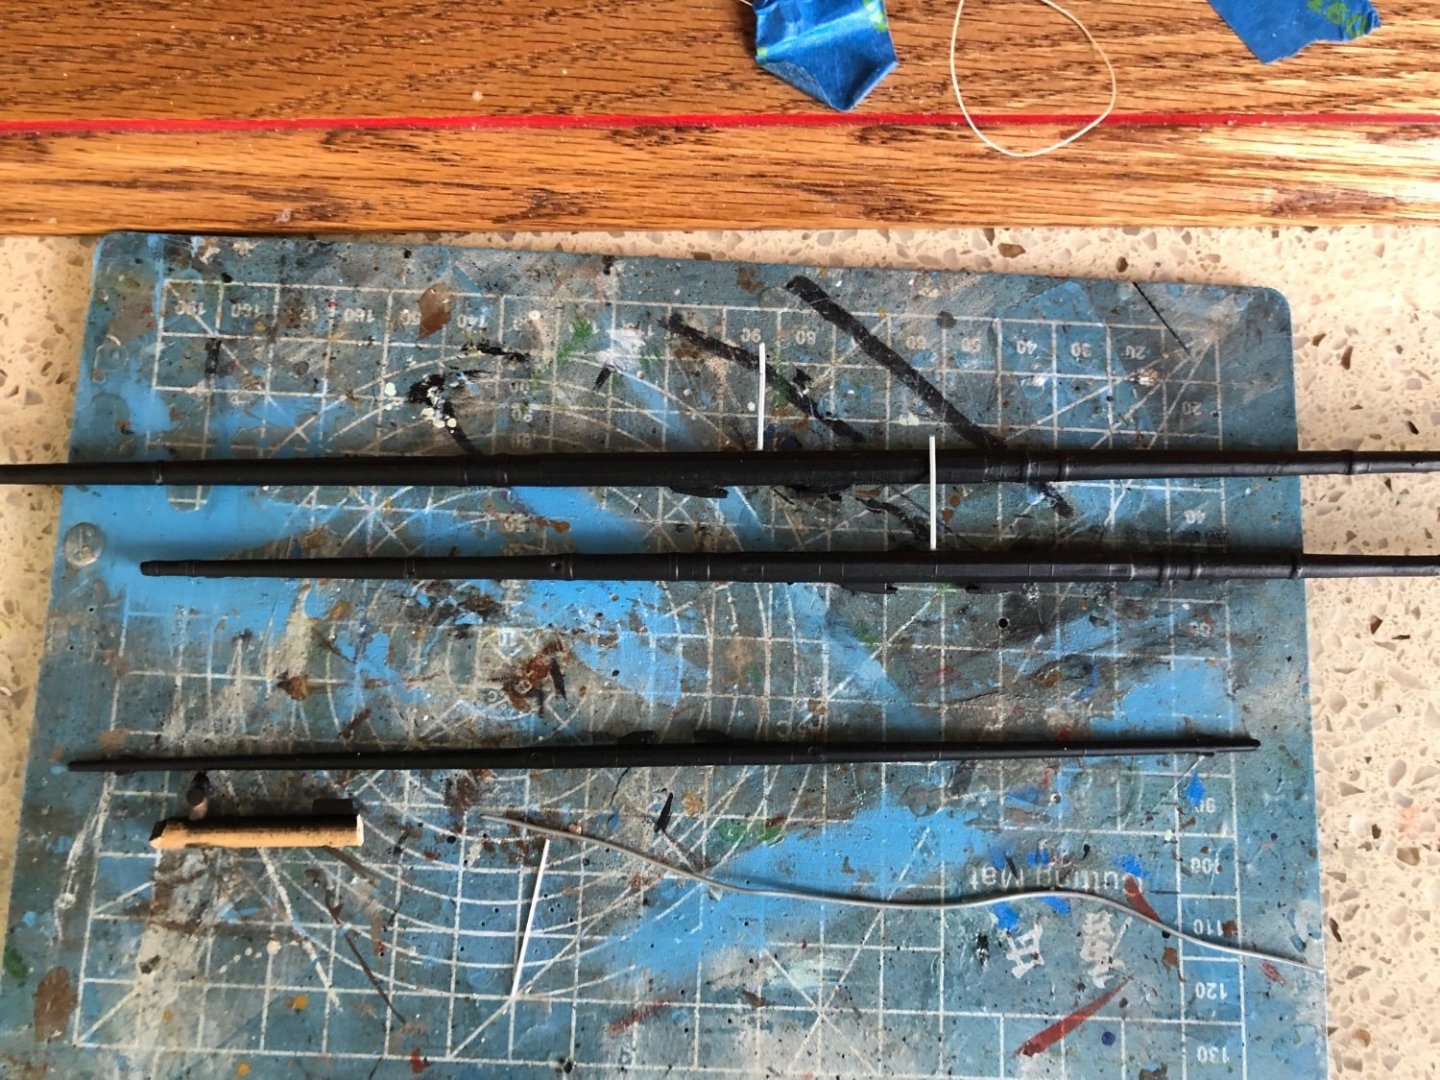
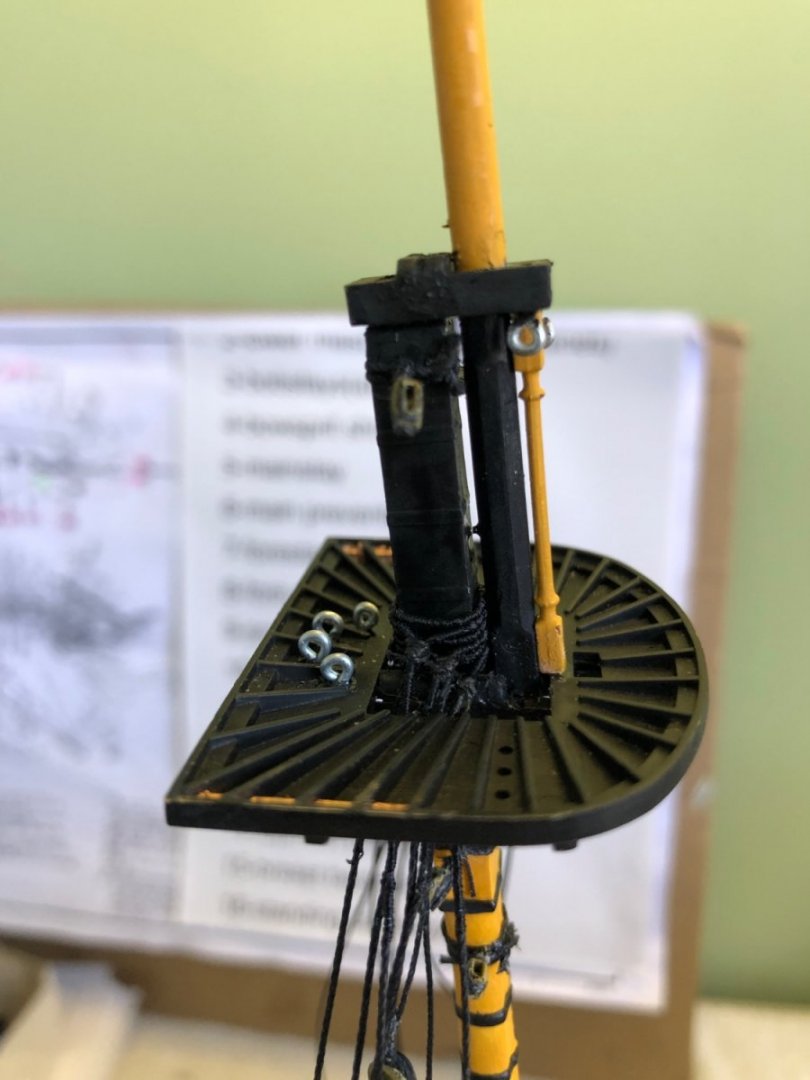
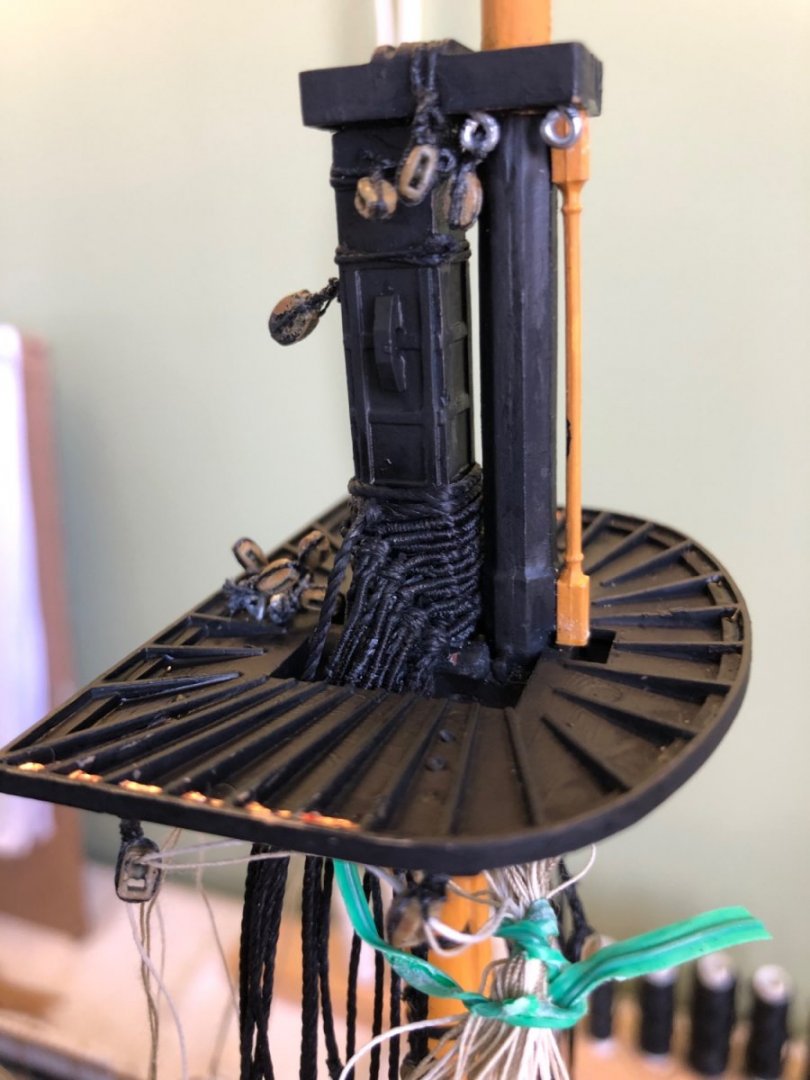
Lower shrouds served and installed on all 3 masts! Now where to go next? Ian you make a very good point of working from inside out so not attaching the shrouds to the channels yet. Others make the argument of attaching the lower shrouds before doing the stays, just not the ratlines yet. And regardless which way I go with the shrouds I am still doing analysis paralysis on when to install the yards. So far now until I decide how I want to proceed with the shrouds I am working on the yards off the ship. Where possible I am strengthening them with wood or copper rods and painting them. As I prepare them I am searching for instructions/guidance/advice on the blocks and rigging to attach to each yard.

-
Tom your mouse and loop combination look very good. Again great job. I will be there real soon and have been practicing make no them.
-
Tom you work is incredible! Absolutely beautiful. This is the first time I read through your build. Each time I read through someone else’s I see things I wish I had done after it is to late. Just curious about your thread colors. In the pictures above you show a coke brown thread along wi h the black and sand colors. What do you plan to use the brown for. I also have that color in my stash and think it is a nice compliment color to the others.
-
Thanks Tom. Your DeAgostini build looks incredible. I really love the cannon balls! Going to take some time to read through your blog.
-
I think I asked this question before so forgive me if I am repeating. I probably should just scroll back through by build here to see if you guys have advised me what to do already. Now that I am into my standing rigging when would you guys recommend I attach the yards? I know I will want to attach the foot ropes, blocks, and other rigging essentials to the yards before attaching them to the mast with pendants or parrals, and that I need to attach them before I begin the running rigging. But how far into the standing rigging should I progress before stopping to add the yards? How do you guys do it?