Bill97
-
Posts
2,730 -
Joined
-
Last visited
Content Type
Profiles
Forums
Gallery
Events
Everything posted by Bill97
-
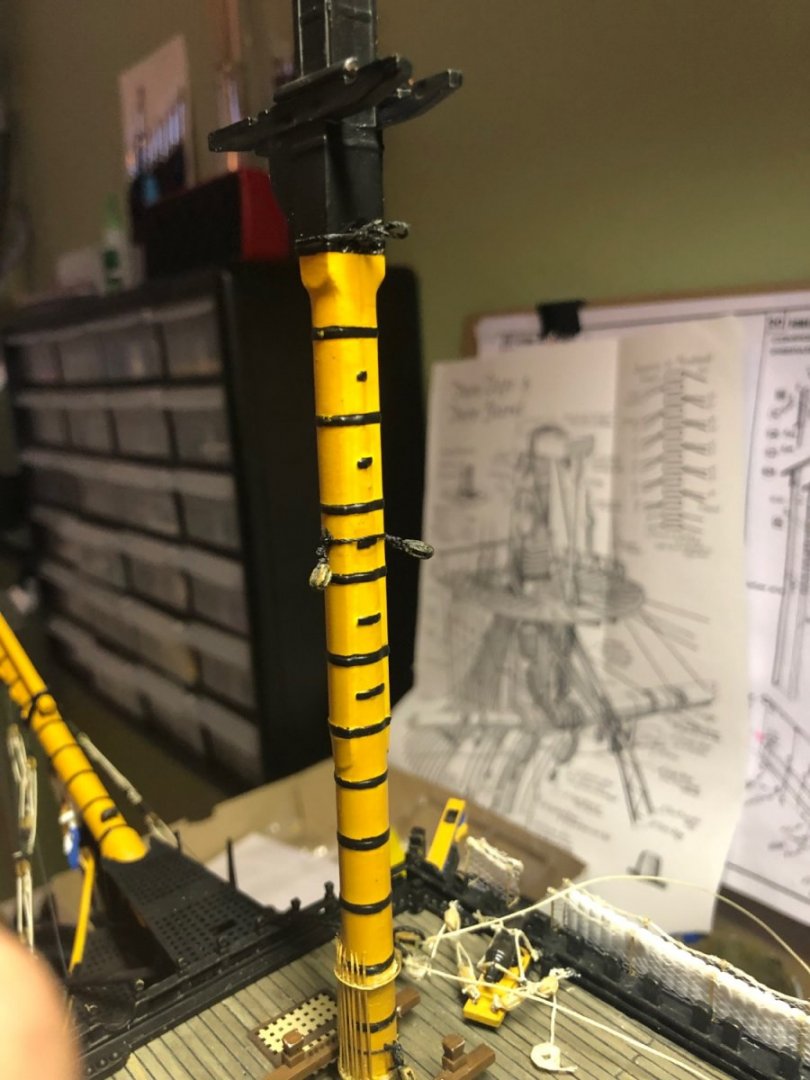
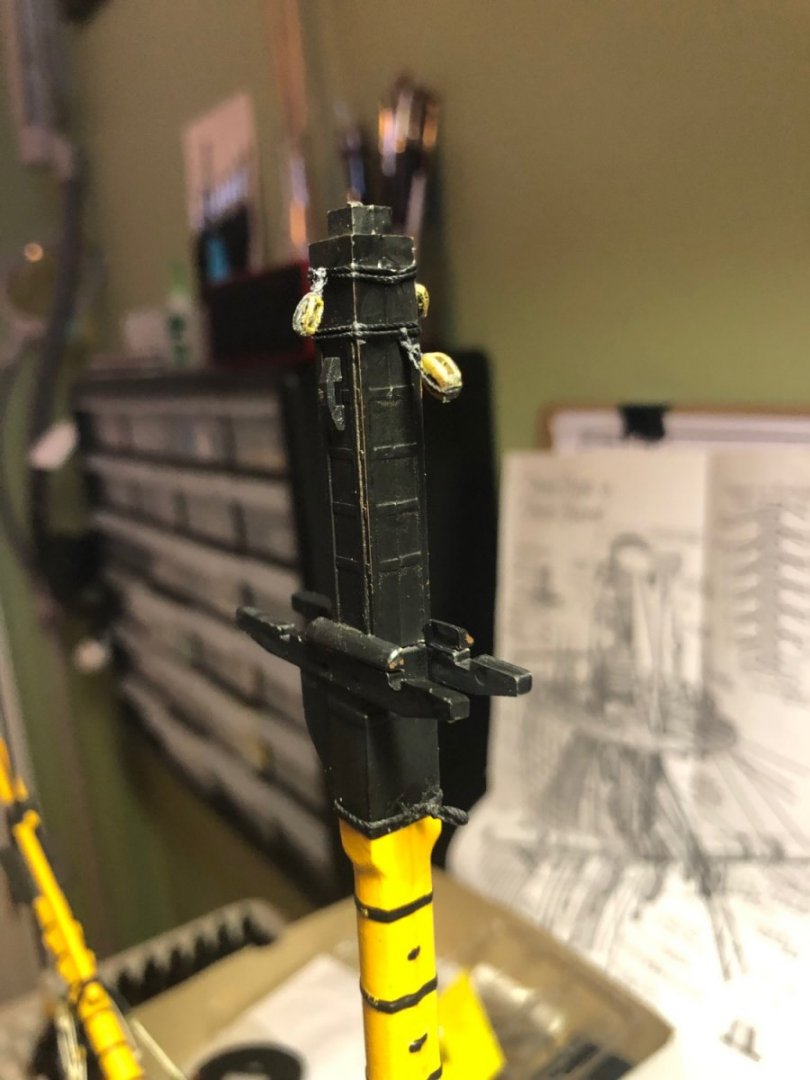
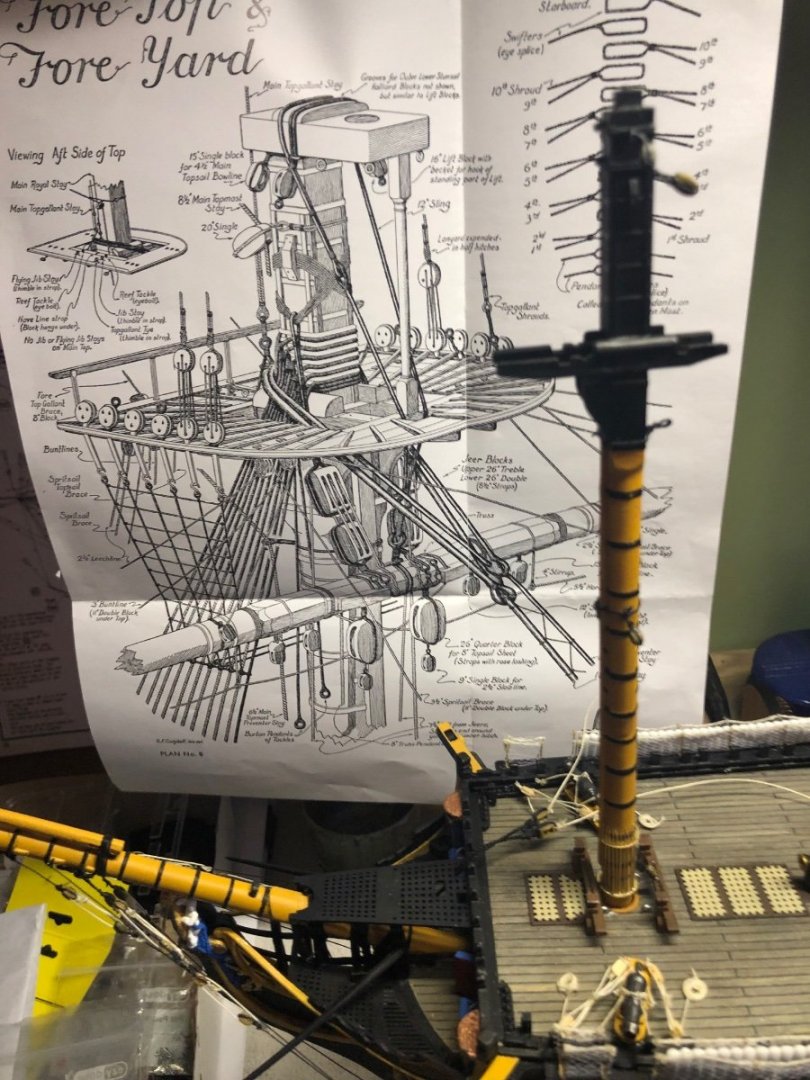
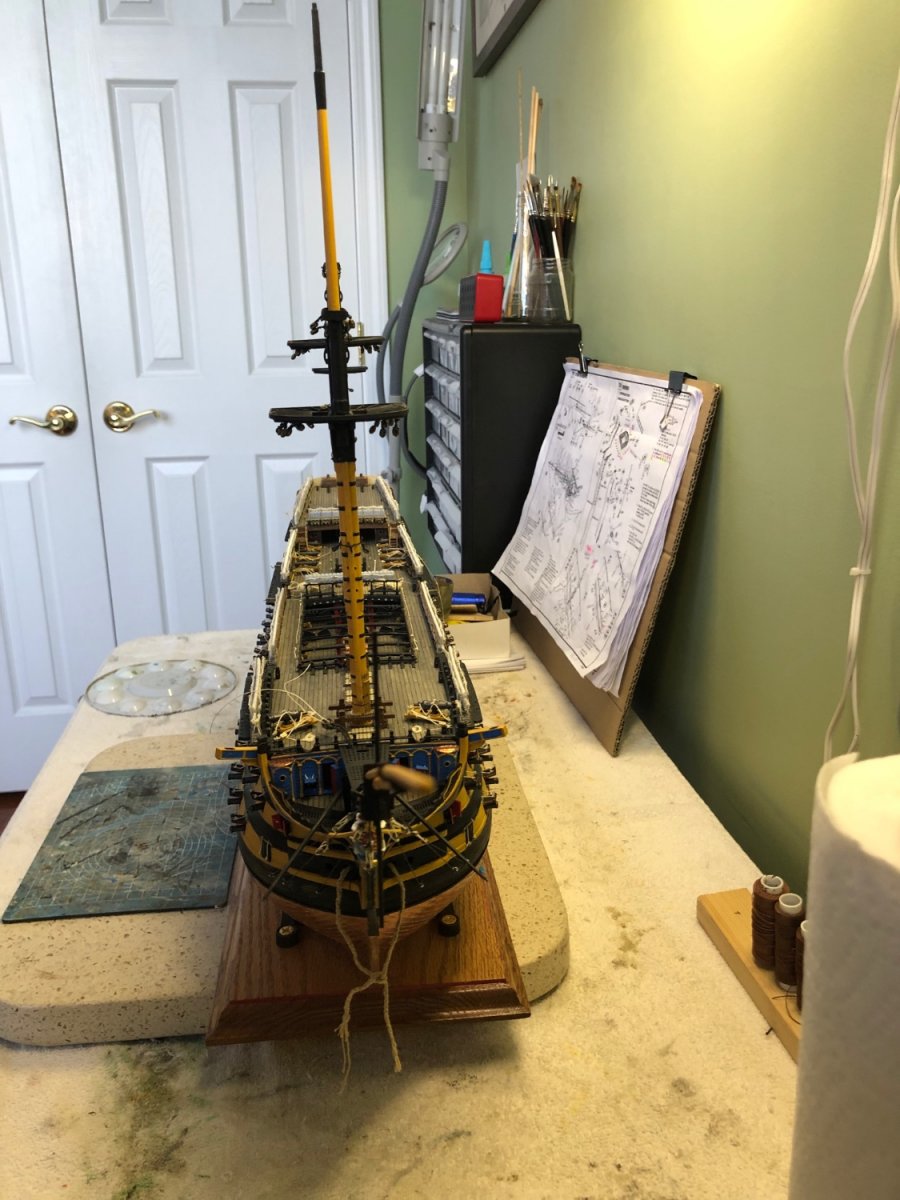
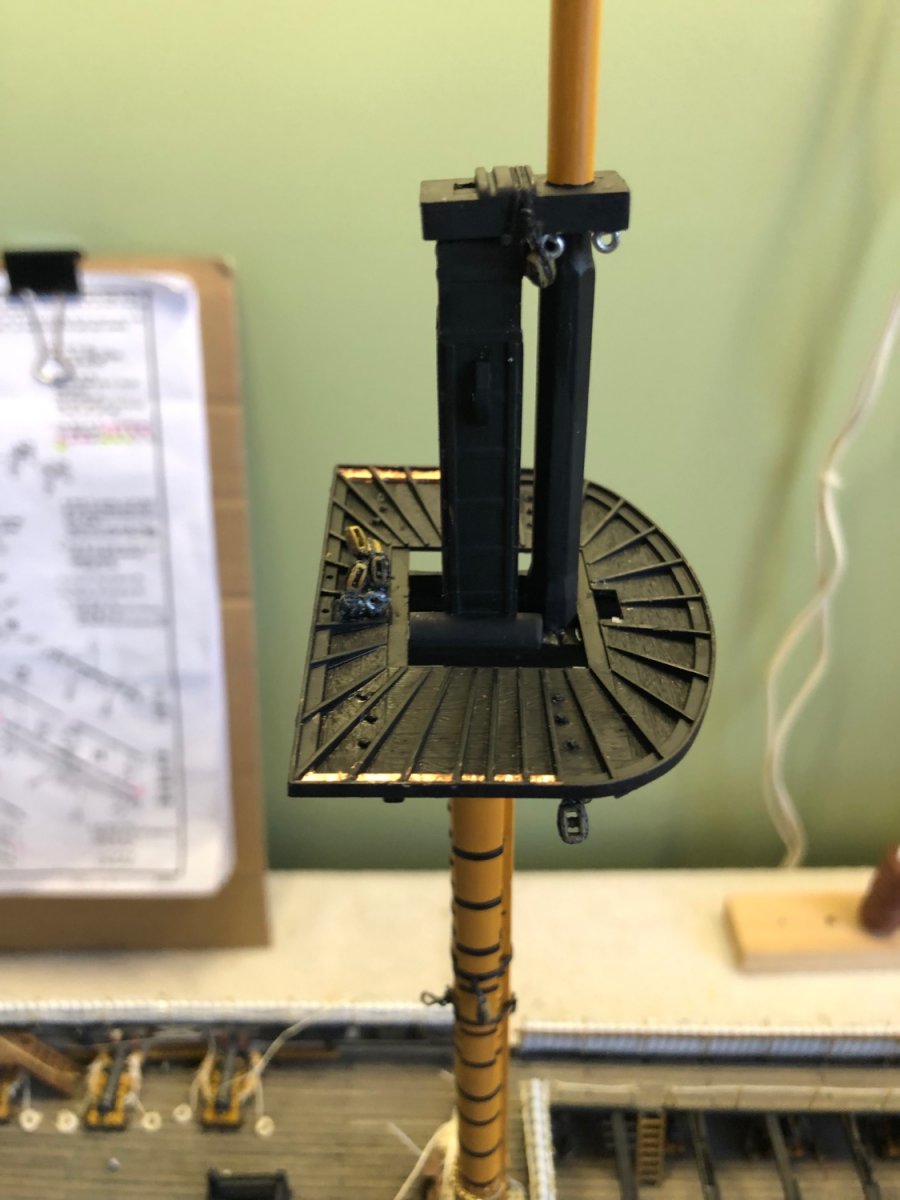
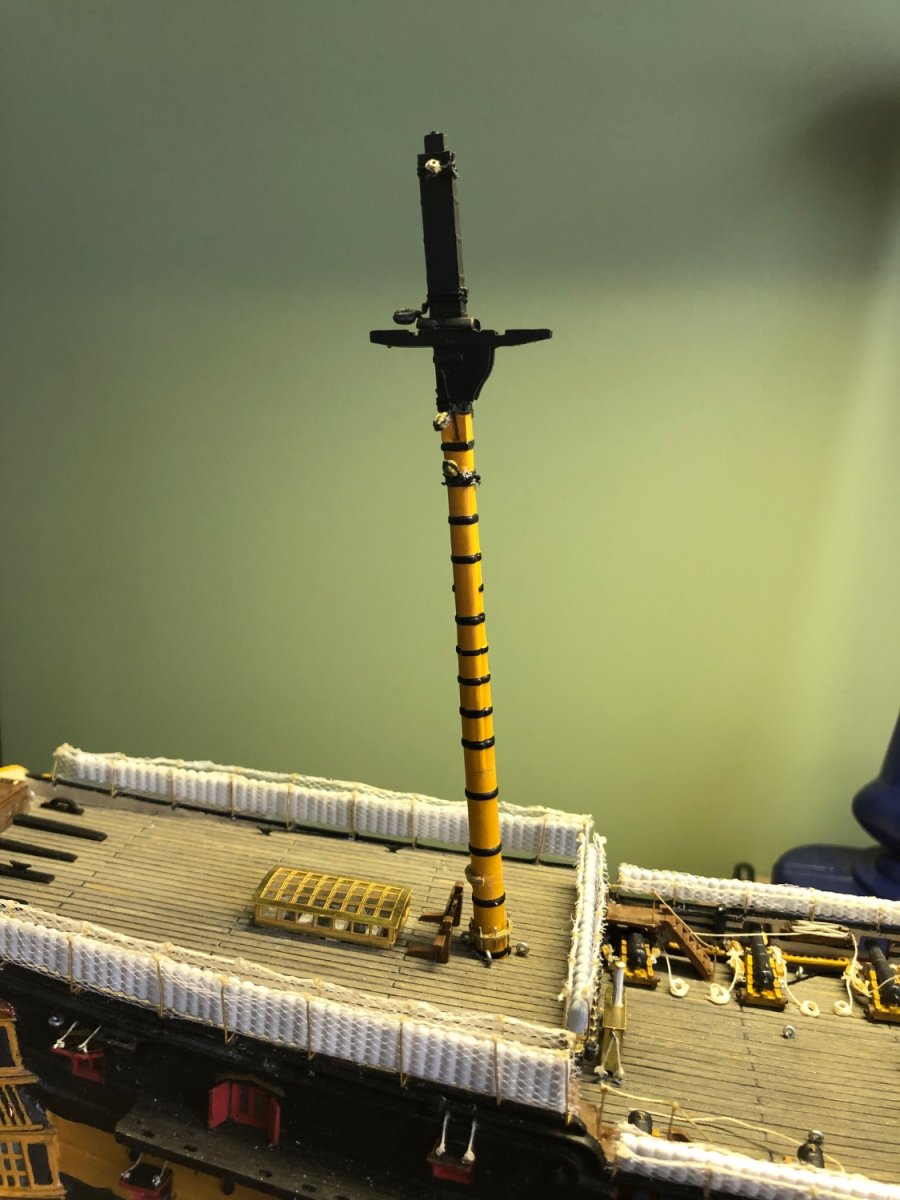
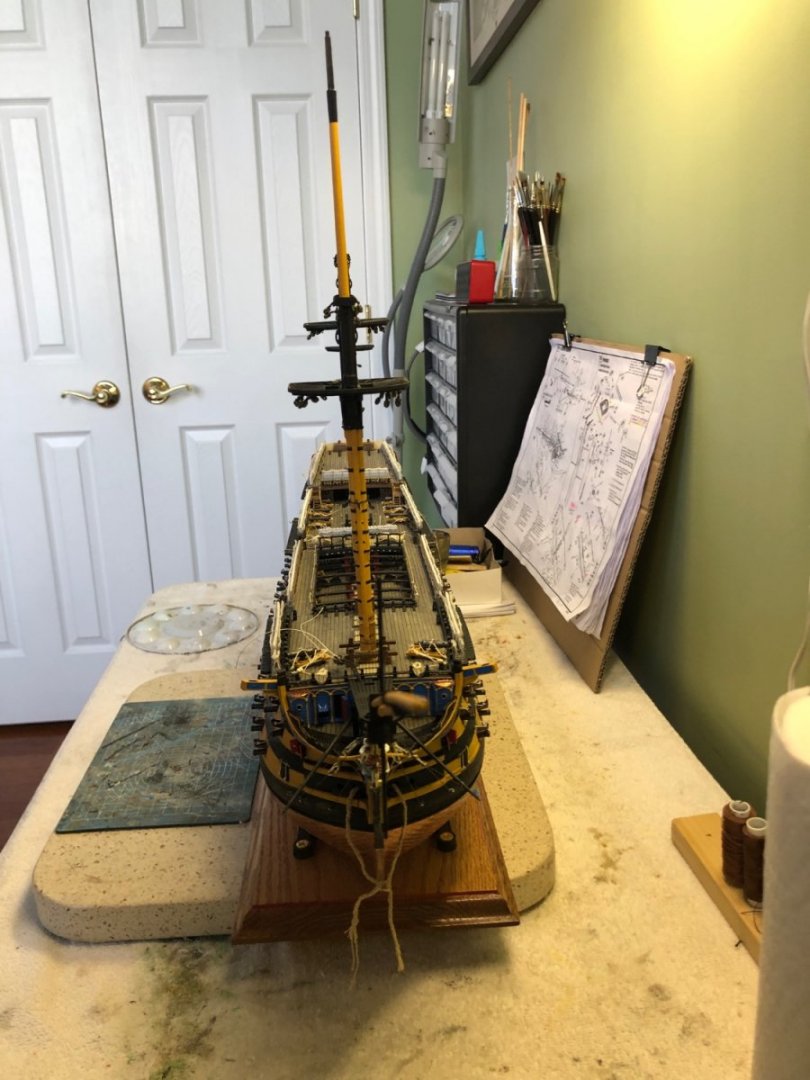
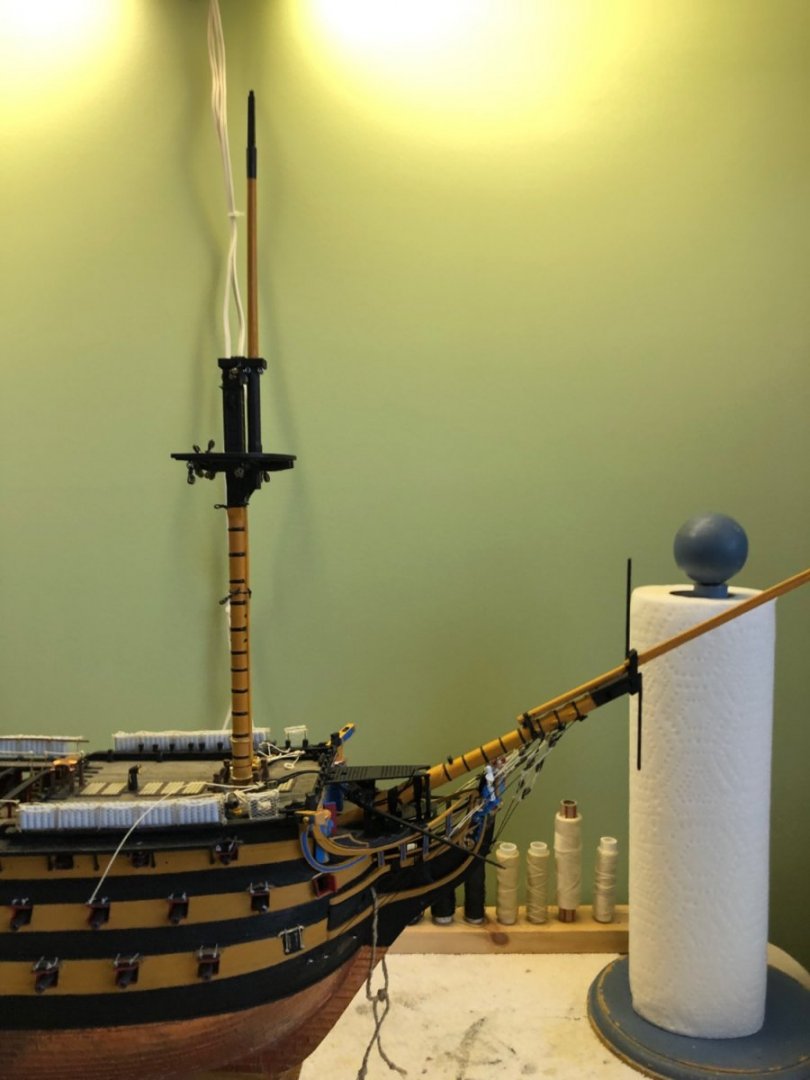
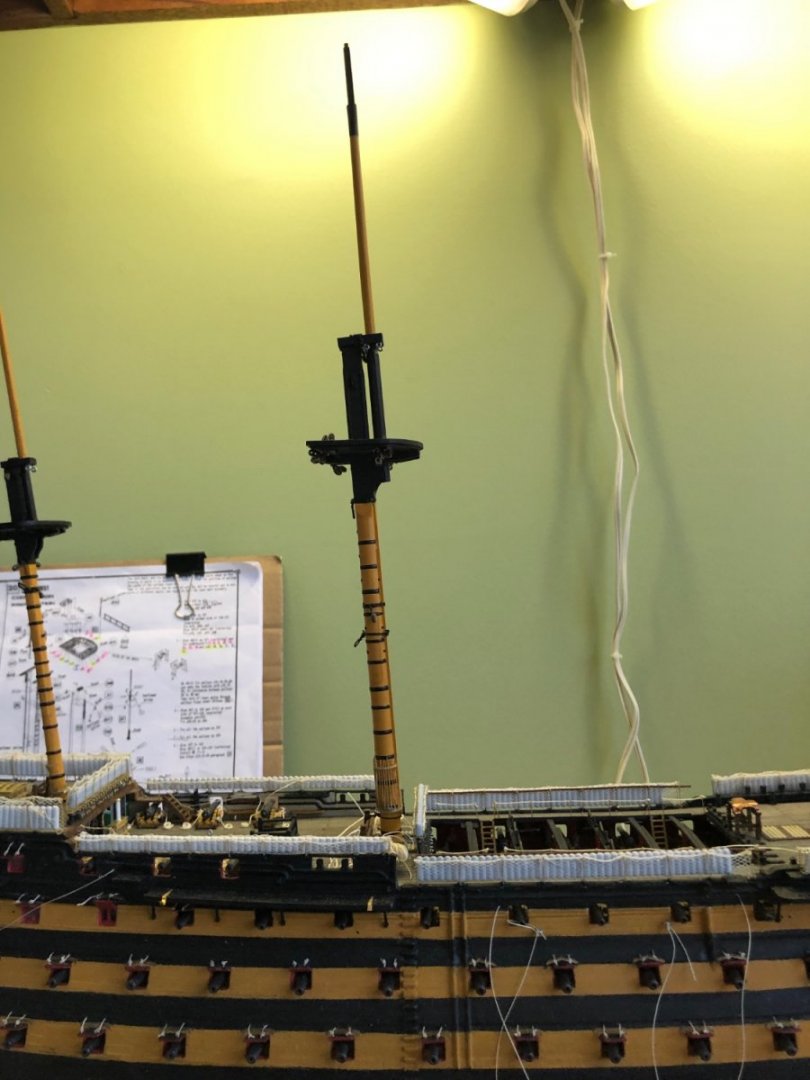
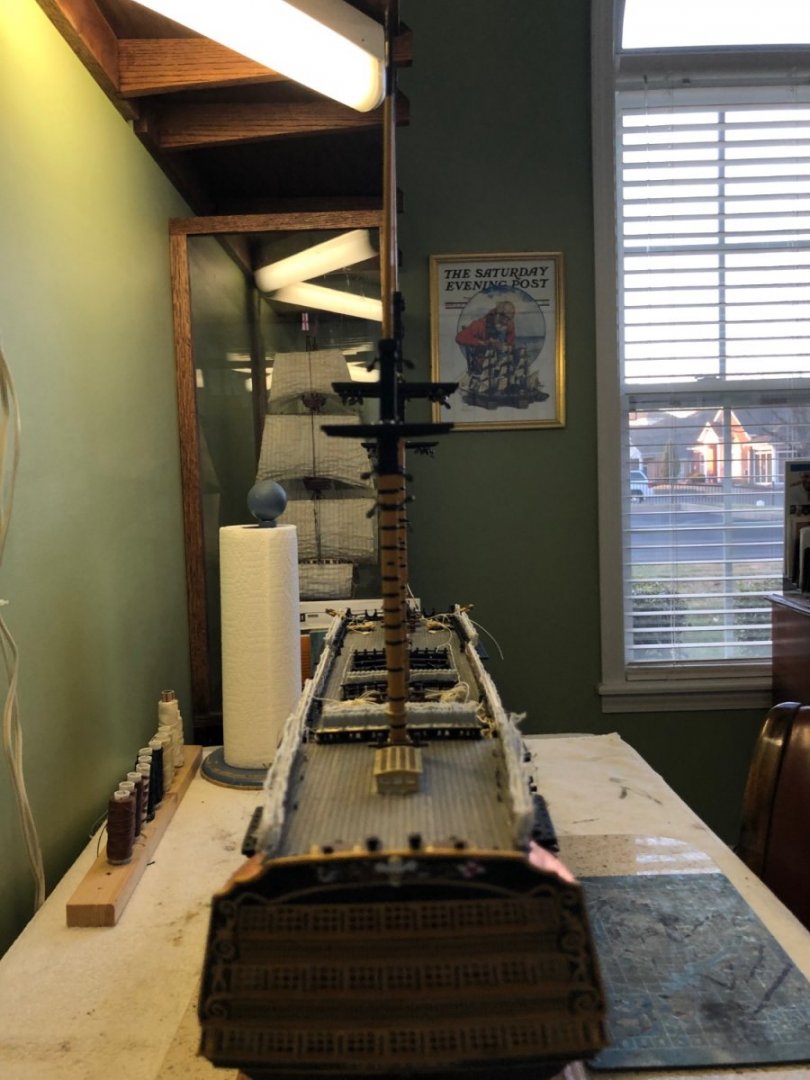
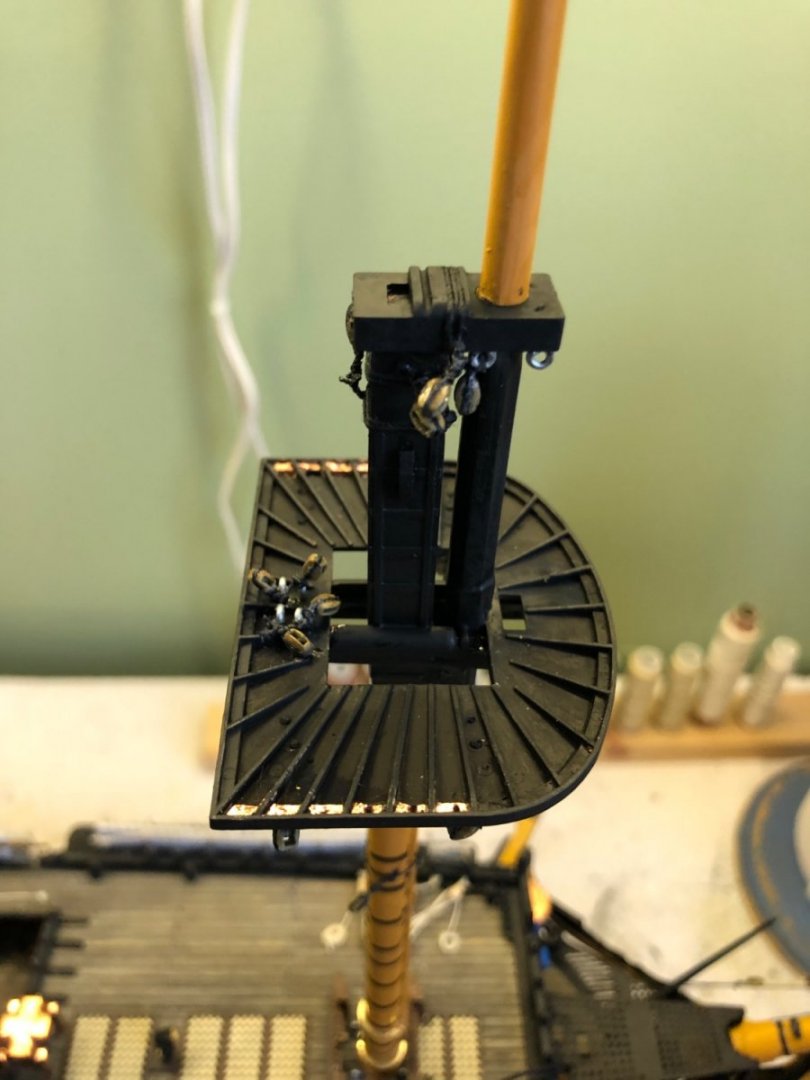
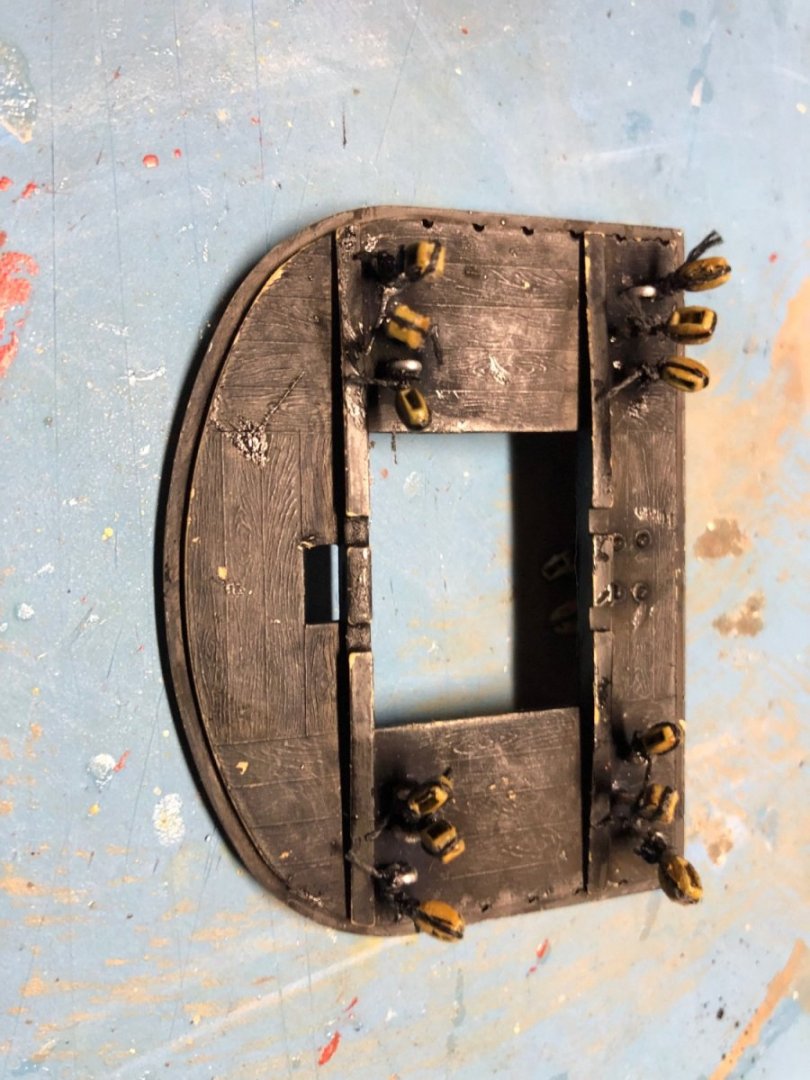
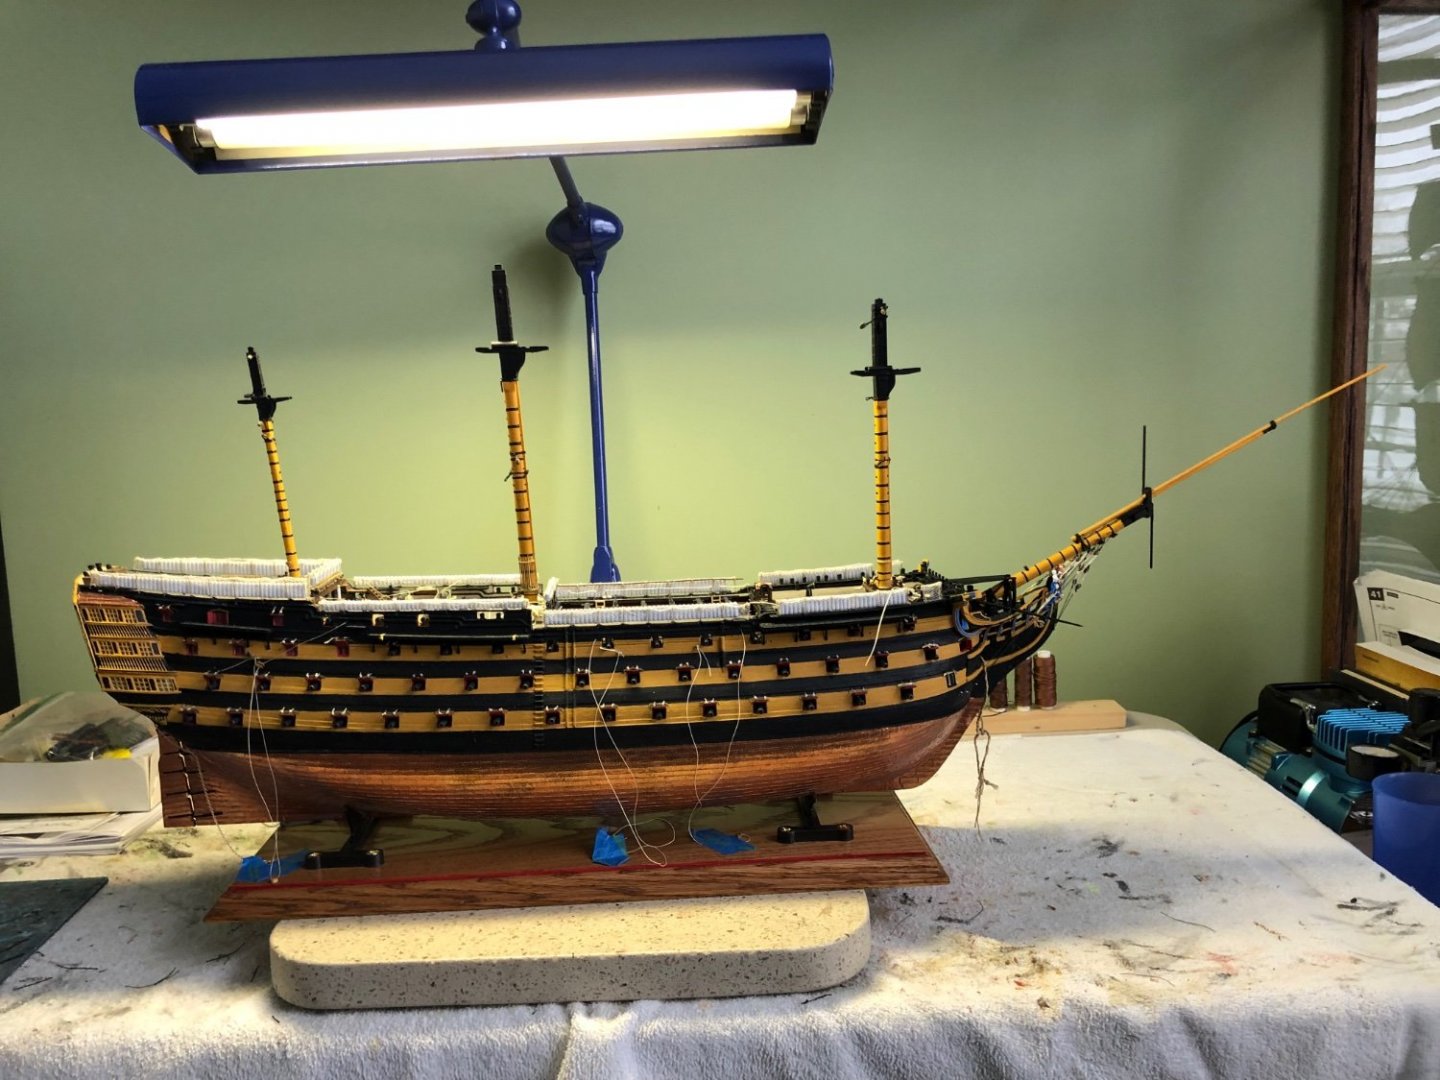
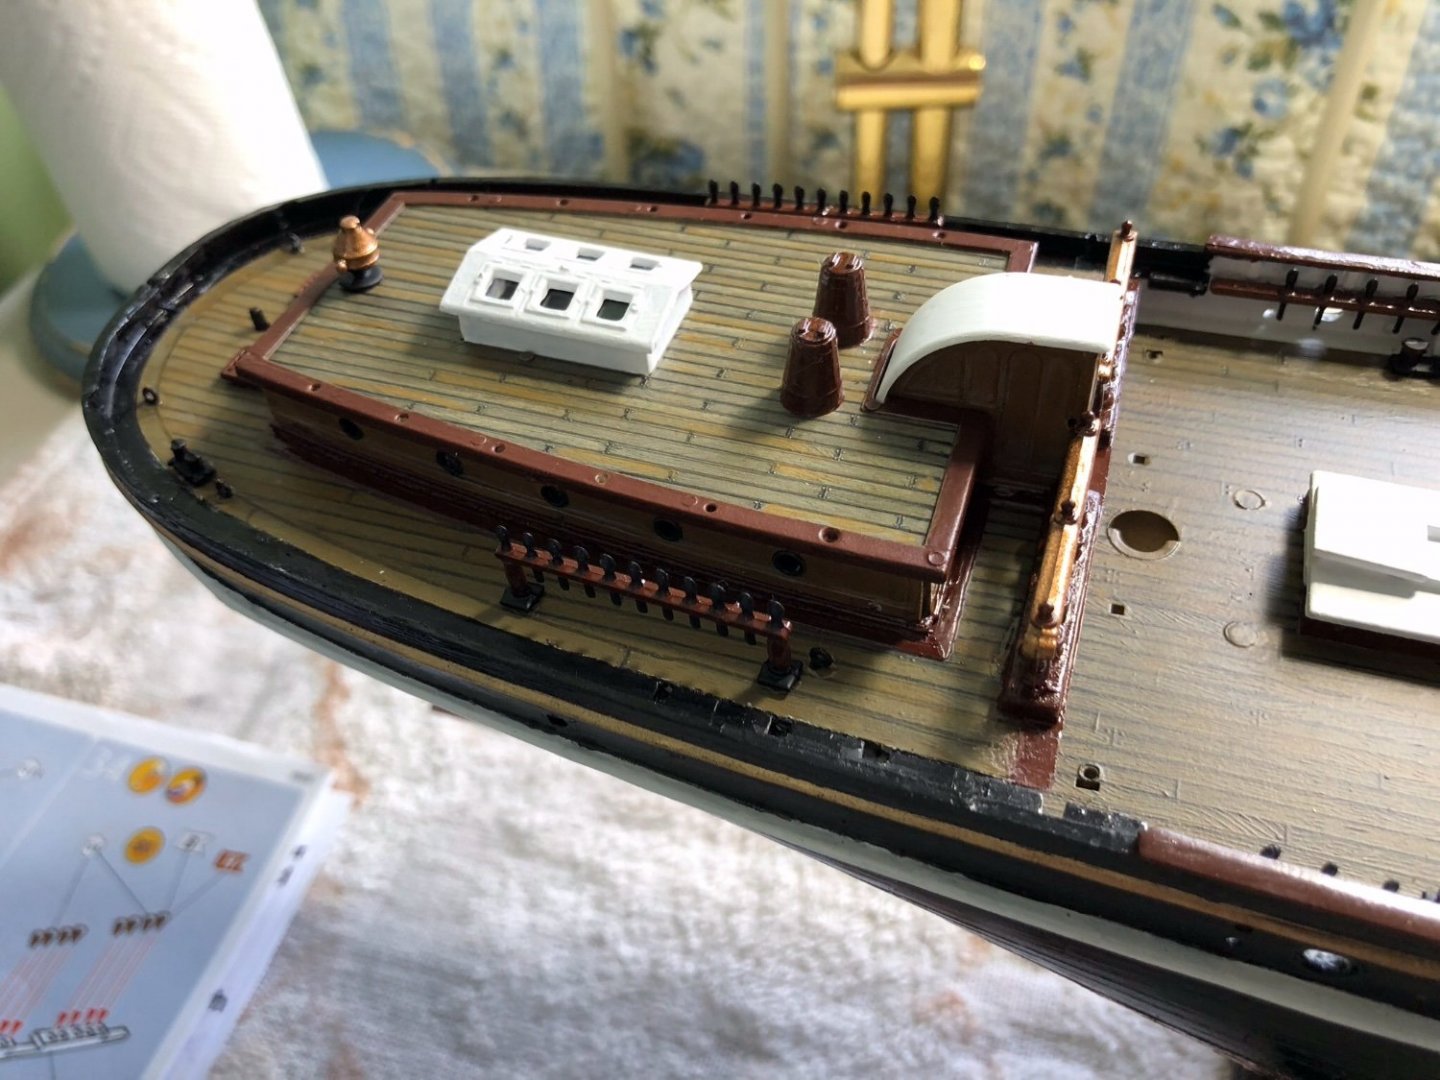
Big leap forward in the overall height of my Victory! Got all the rigging blocks attached to the mast tops and caps. Got the 3 top masts reinforced with a rod. Got the top masts painted and now installed. Kevin put the ol tradesman eye on these top masts and the mast tops from the front. I think they line up pretty good and the mast tops are pretty level with other.


-
This is no big deal and maybe more of a question for the site moderator, but I am just curious. Do even if you get multiple duplicate notifications? As an example I just went to my build blog and it showed a little red alert and said “26 Notifications”. I thought wow that is a lot. When I clicked on it is was 26 duplicates of Marc’s comment. Earlier today I had a very large number of notifications and they were all duplicates of OC’s and Grandpa Phil.

-
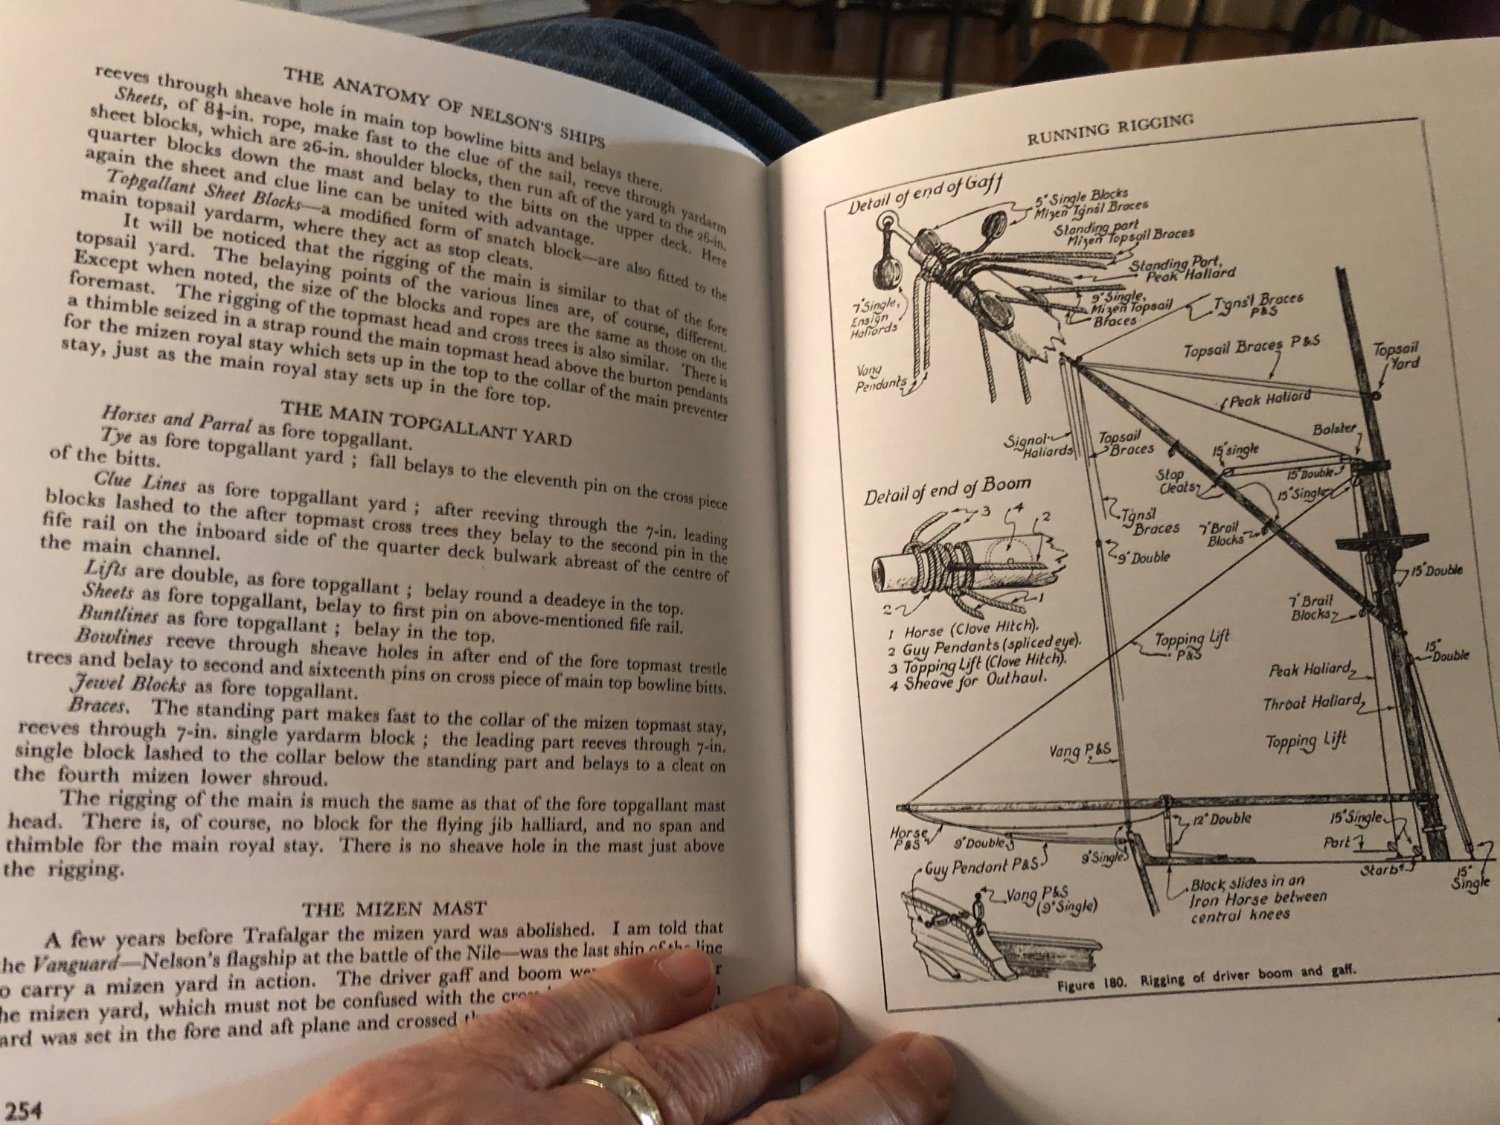
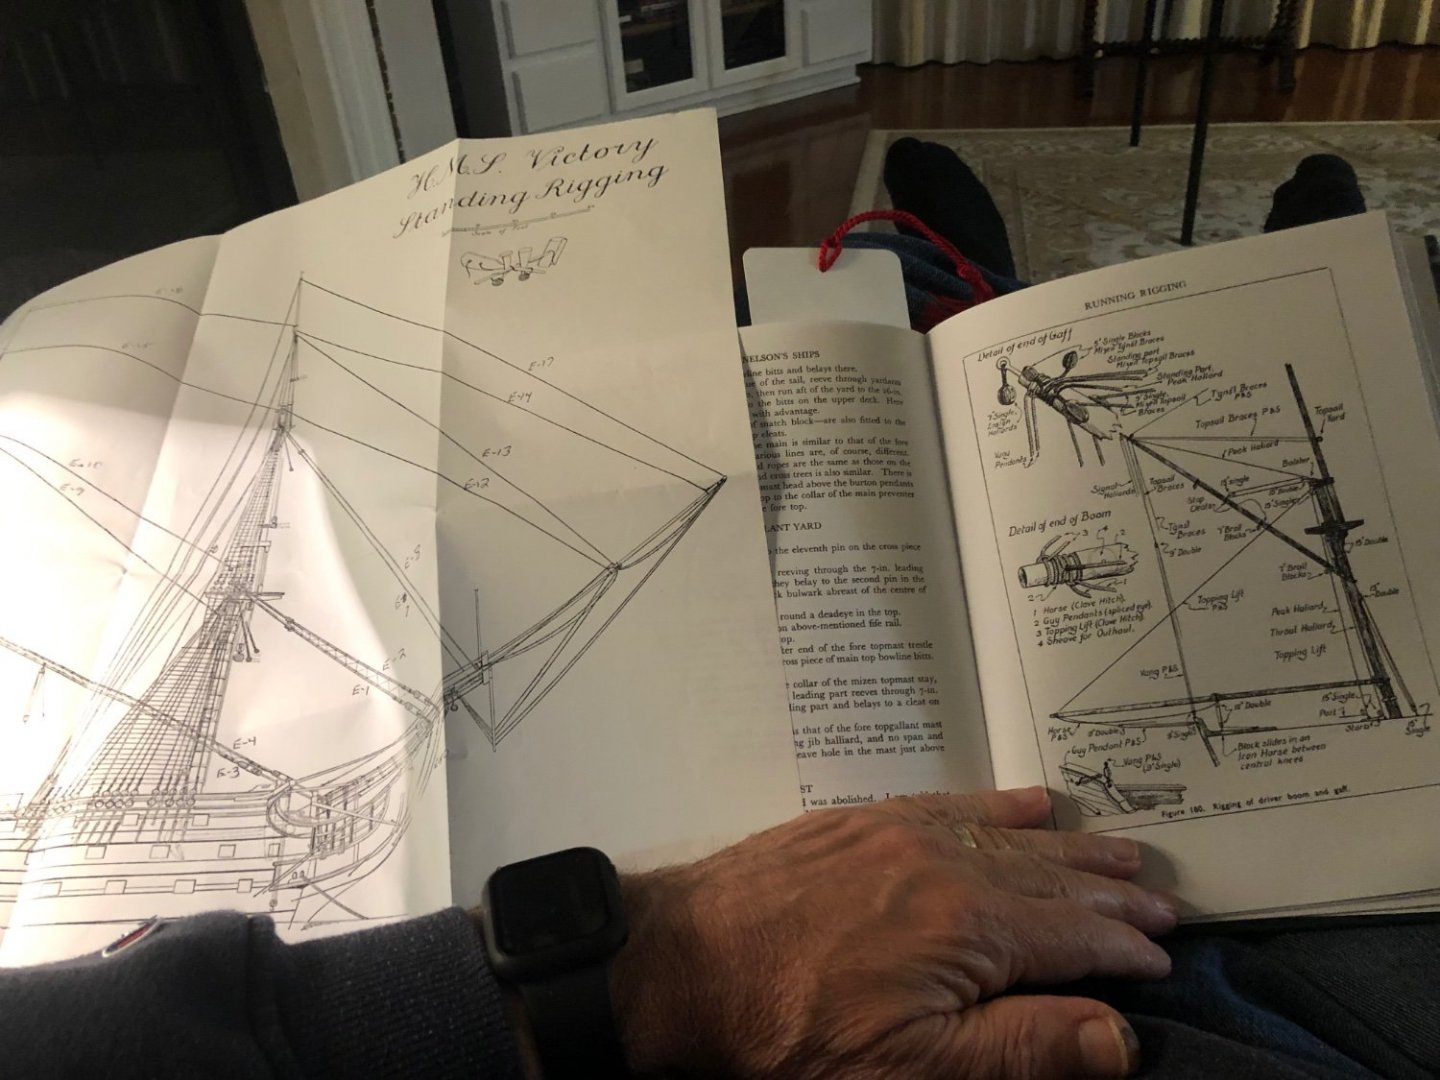
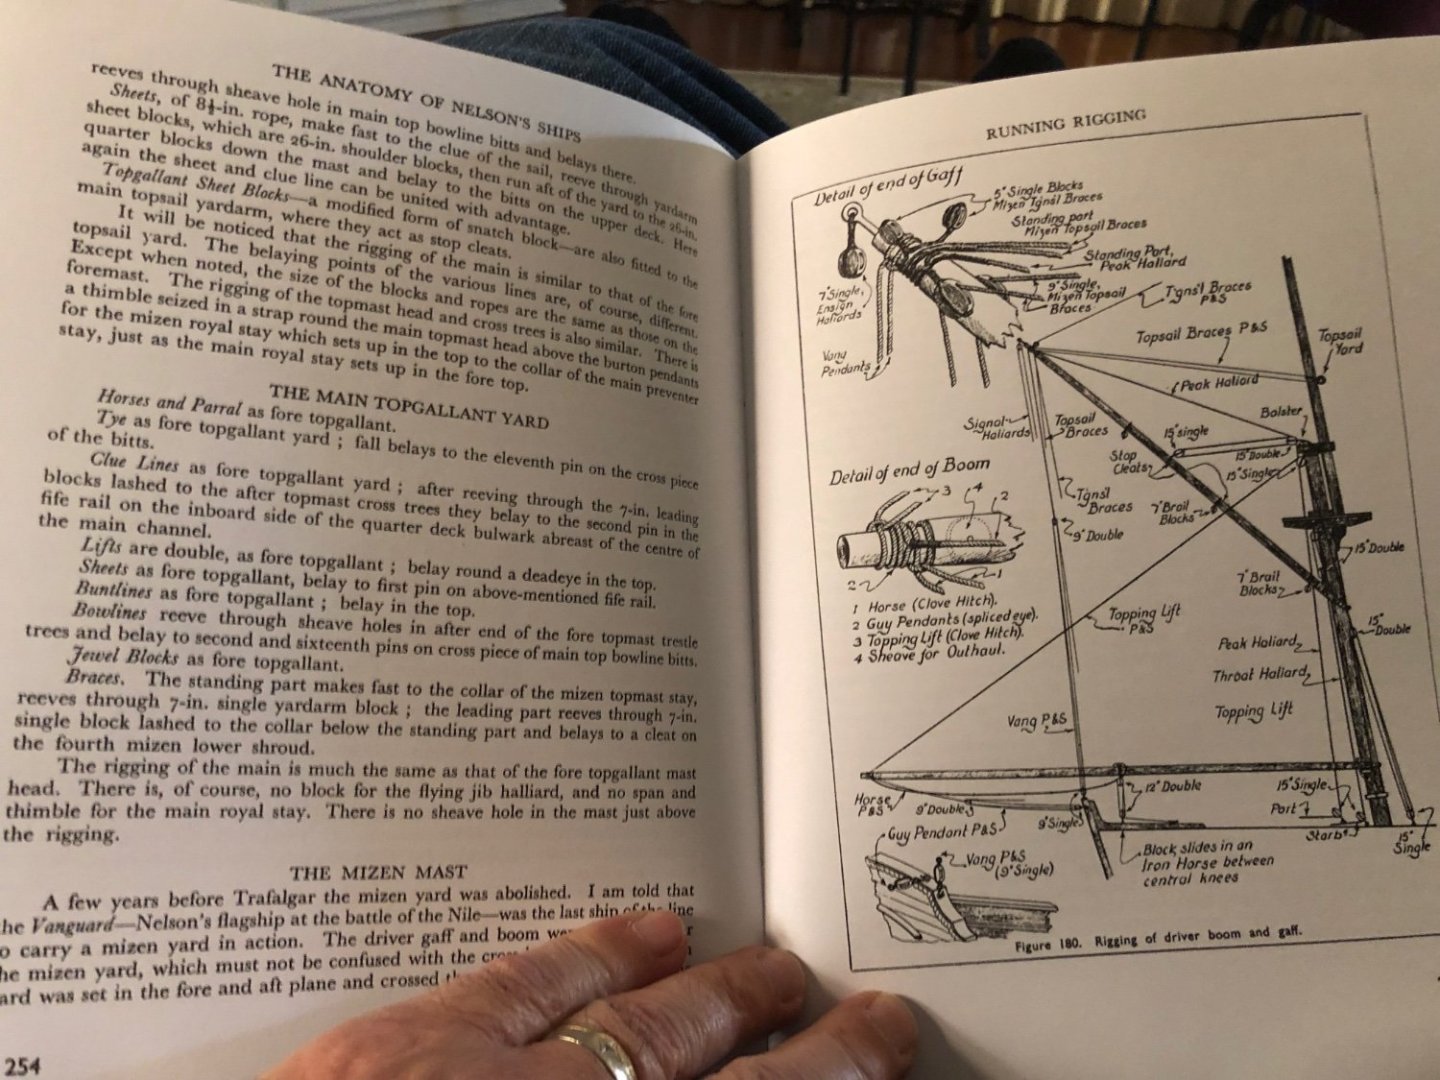
Tomganc I do not have accurate rigging plans. The Heller instructions are tough to follow. Based on advice from my friends here I got Longridge’s book which helps. Still wish I had a detailed sequential set of instructions.
-
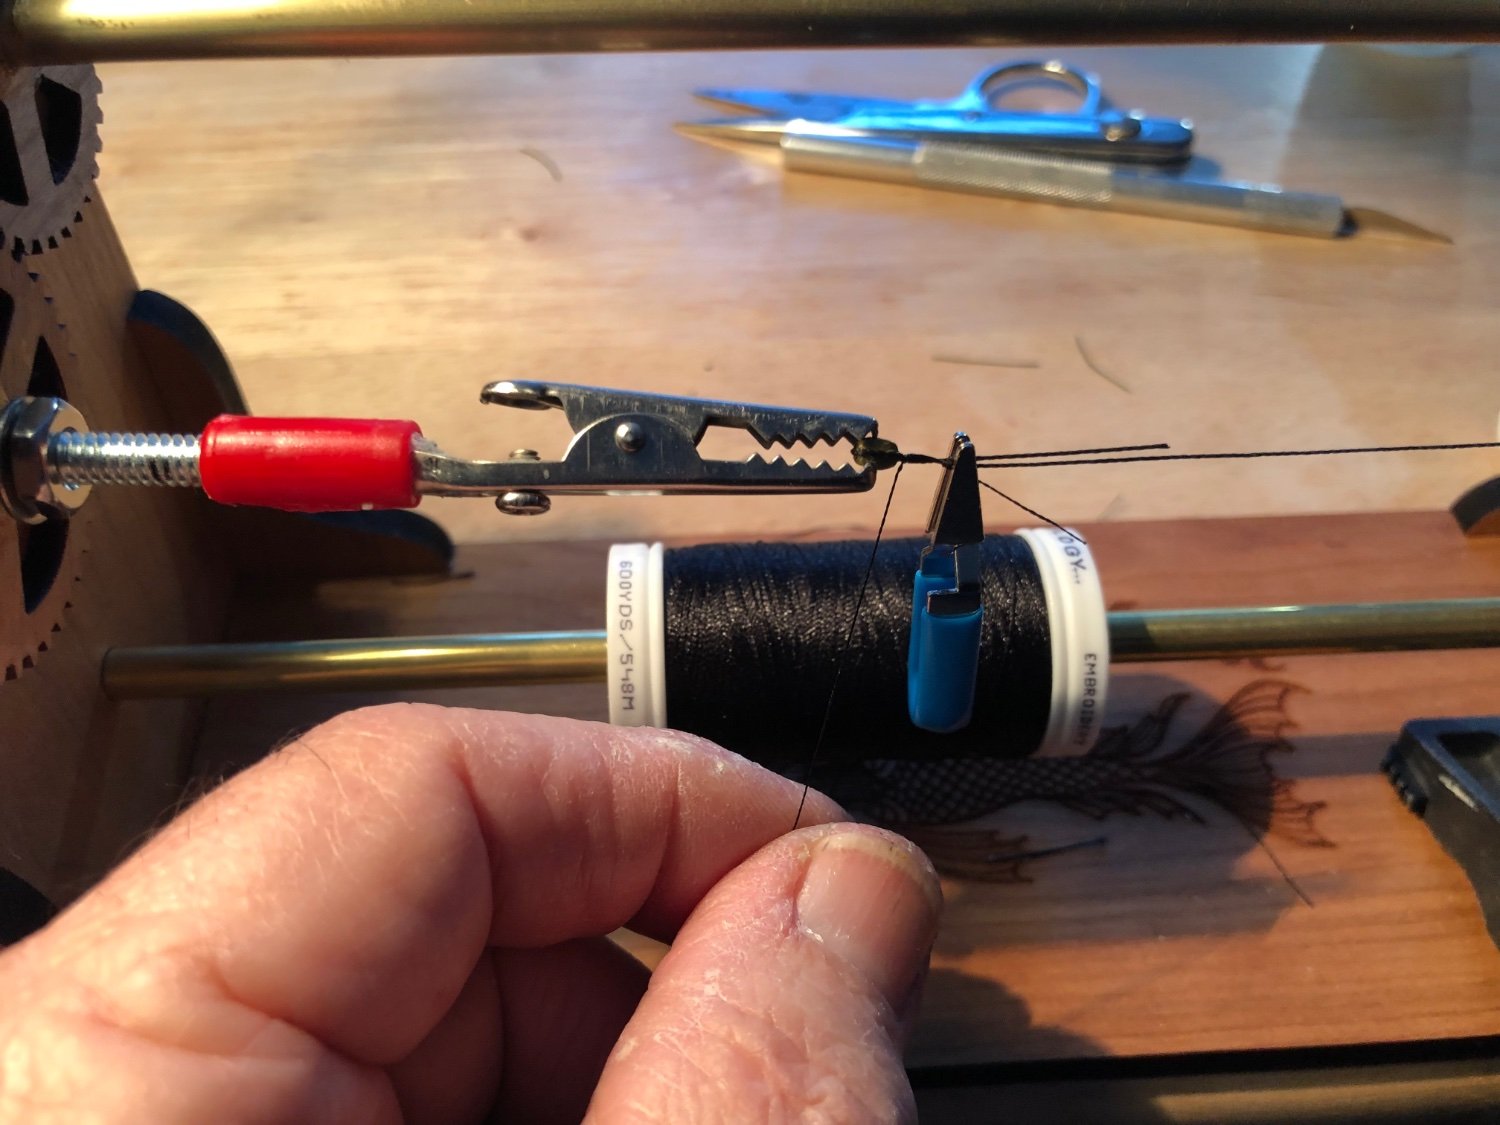
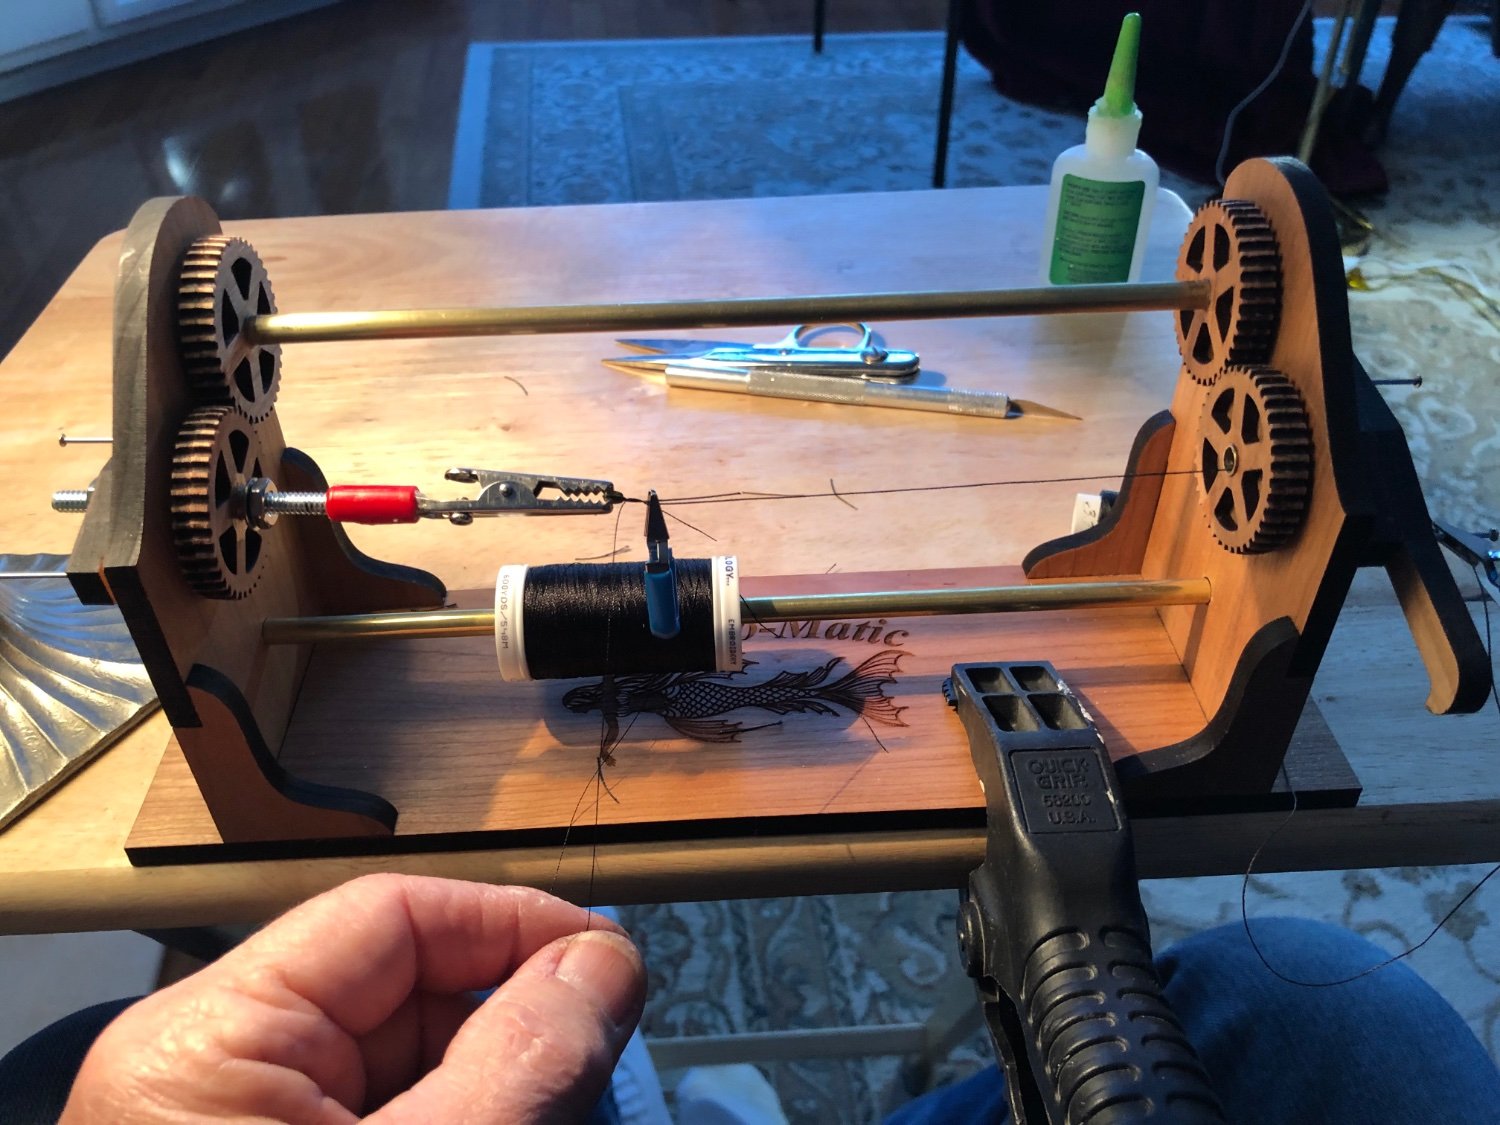
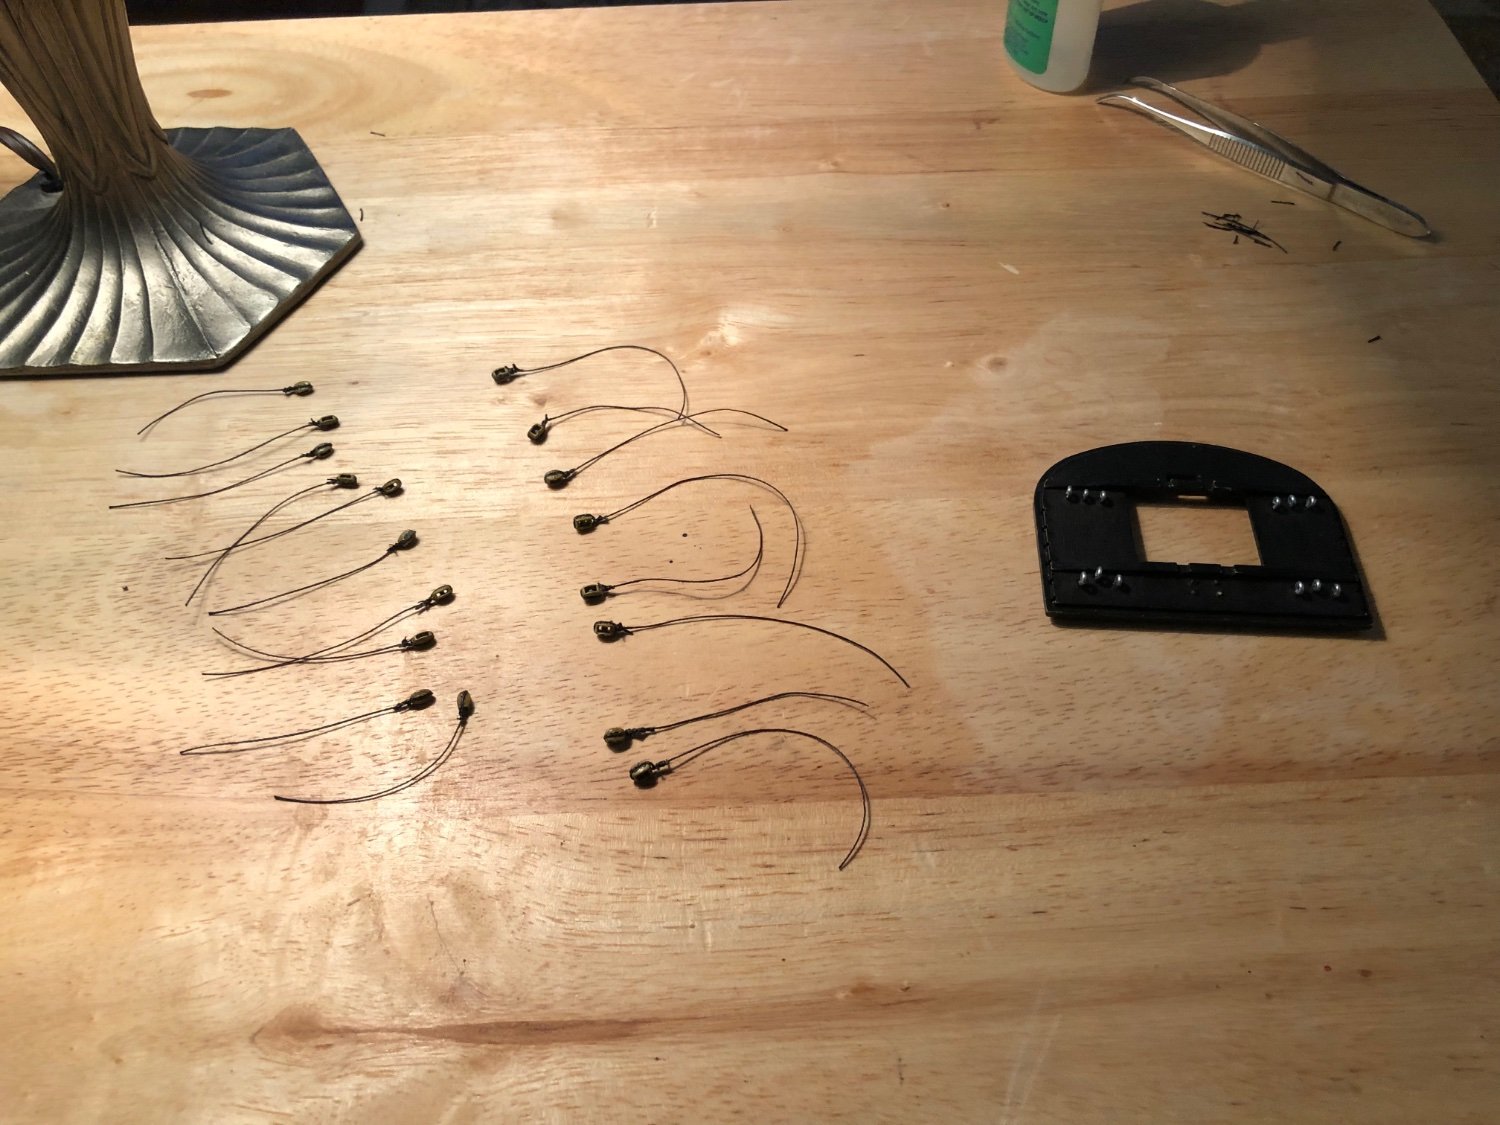
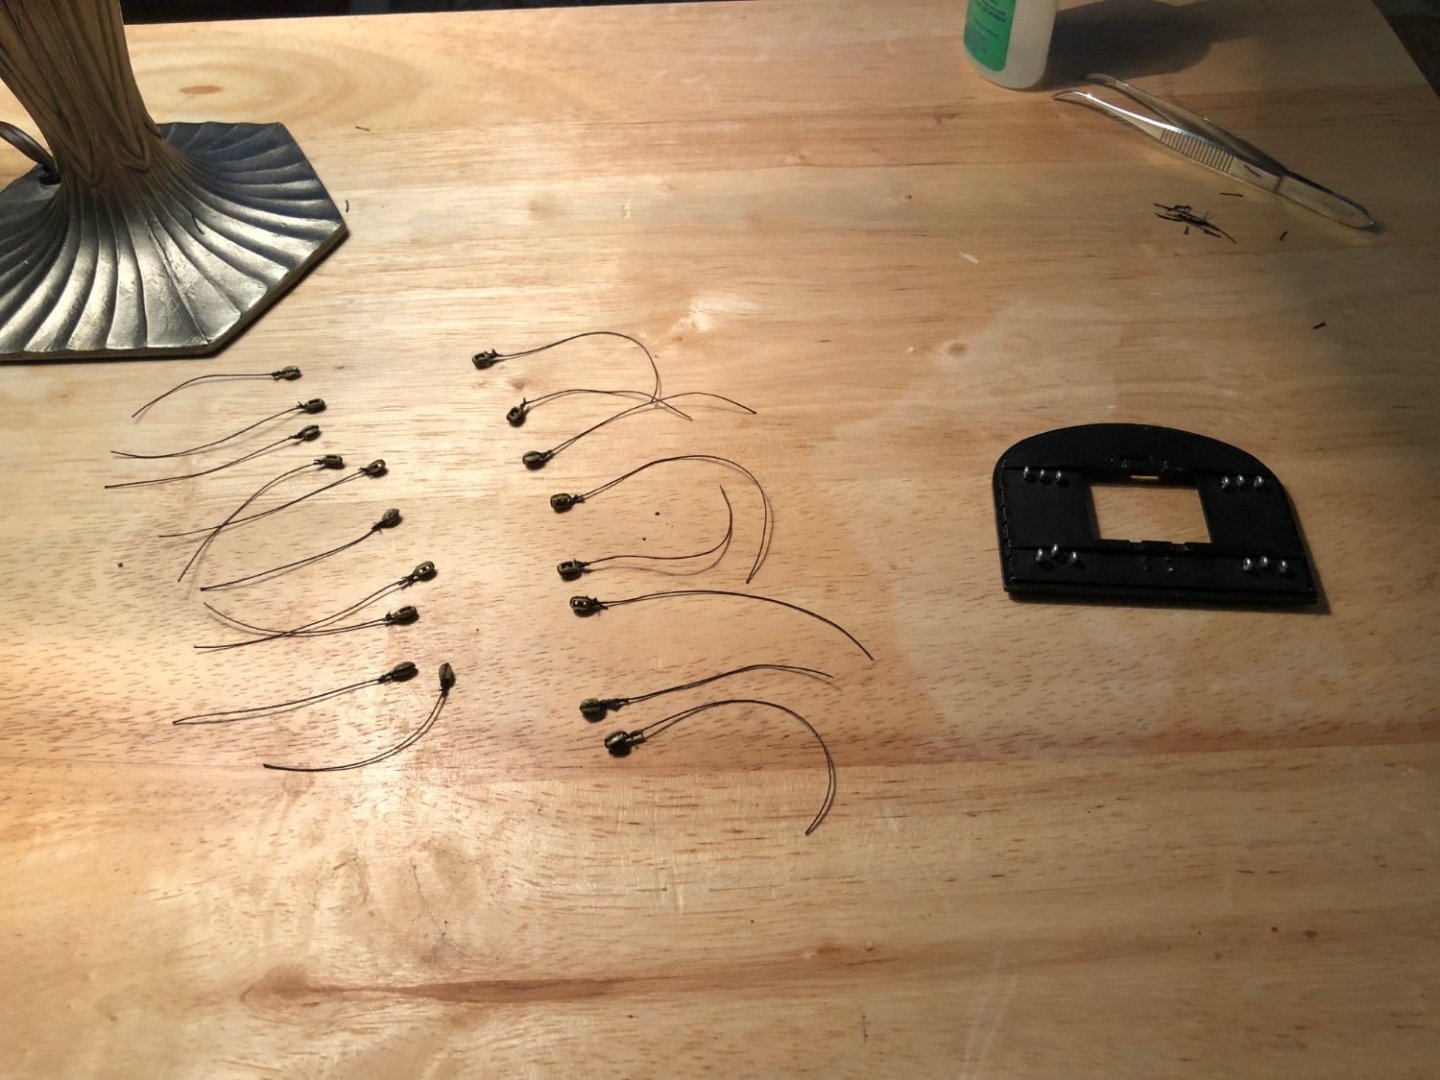
Ian our wives must be related! That is her exact reaction when I show her what I have been doing for hours and it can all be contained in a small cup! 😀. I have a small table I clamp my serv-o-matic to and bring it along with blocks, thread, scissors, etc. into the living room and set in my easy chair rigging blocks. Any time I am not working on the actual ship and need to be in my ship room I will work this way and watch a movie or something with the wife! I think that is what I will be doing today. Need to make a hole bunch of wire eye bolts as well. Hey Marc, I was wondering what come of you? Thanks for the compliment. As OC says it is definitely a labor of love. What is is still scary to me is knowing every one of these blocks and deadeyes will some day have a thread running through or too them. It is time consuming making them but it it is like brick laying in that I can count through the instructions and see I need to make 310 blocks and where they go. Simple math and “labor of love”😊. But then having to follow my different reference guides to determine the lines (running or standing) that go to each! Wow! I hope you guys will be patient with all my questions. 😀
-
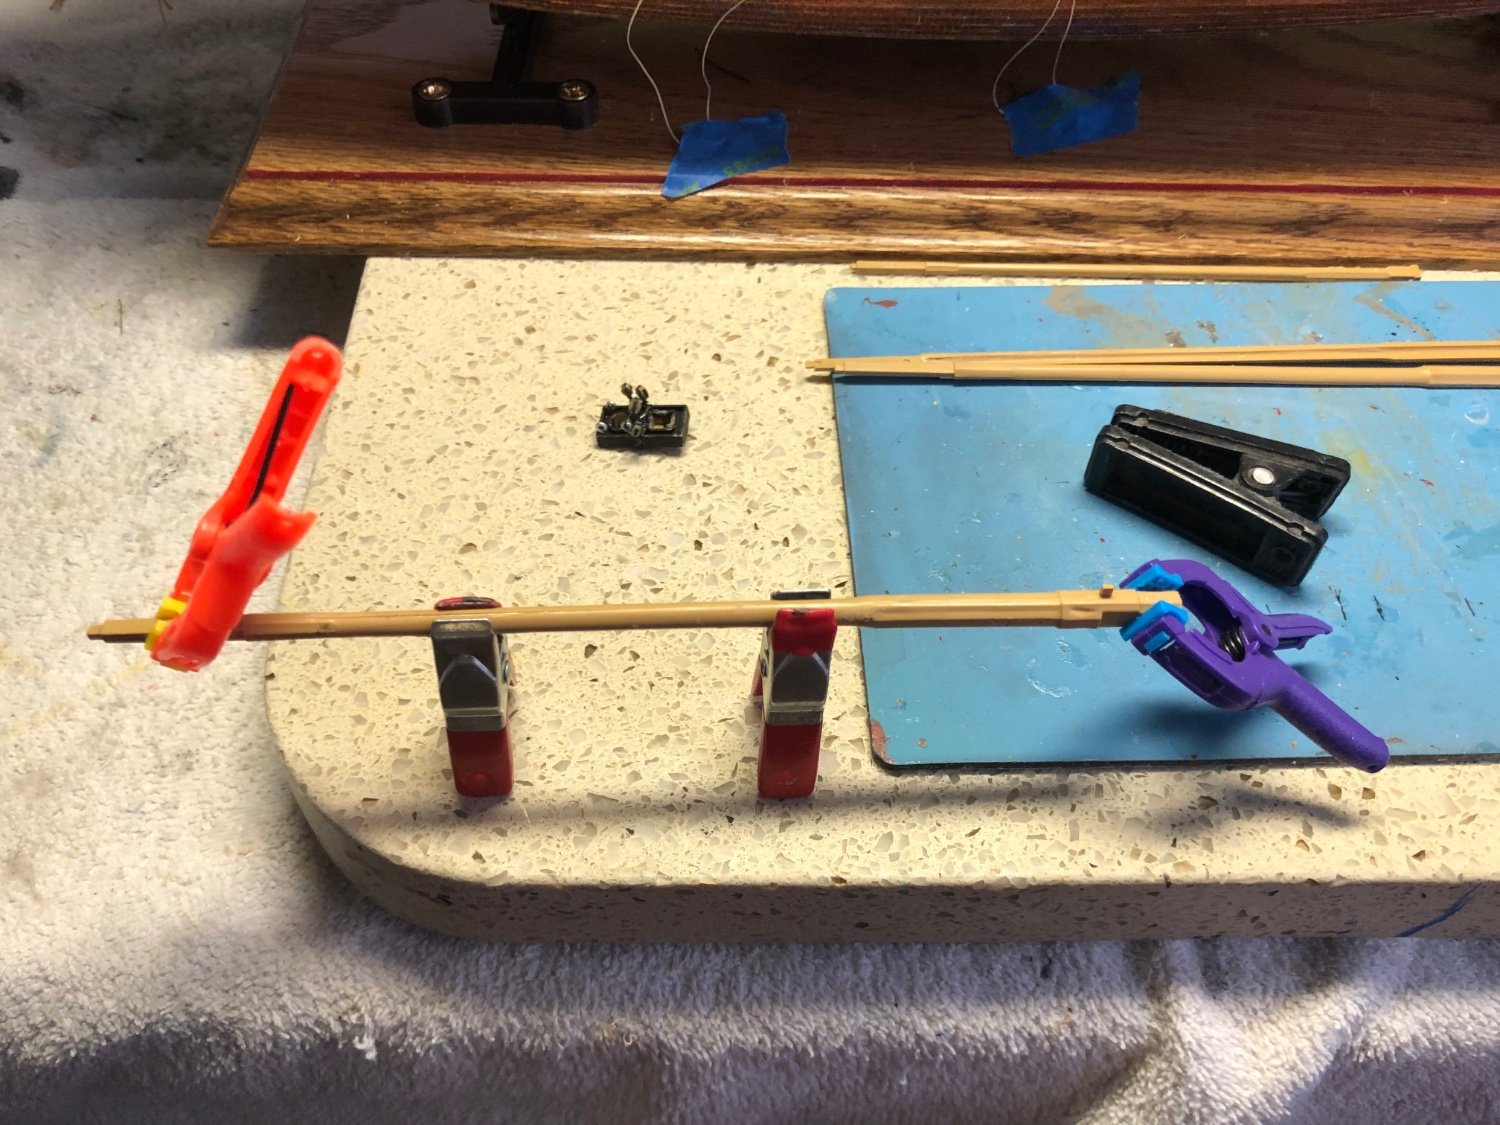
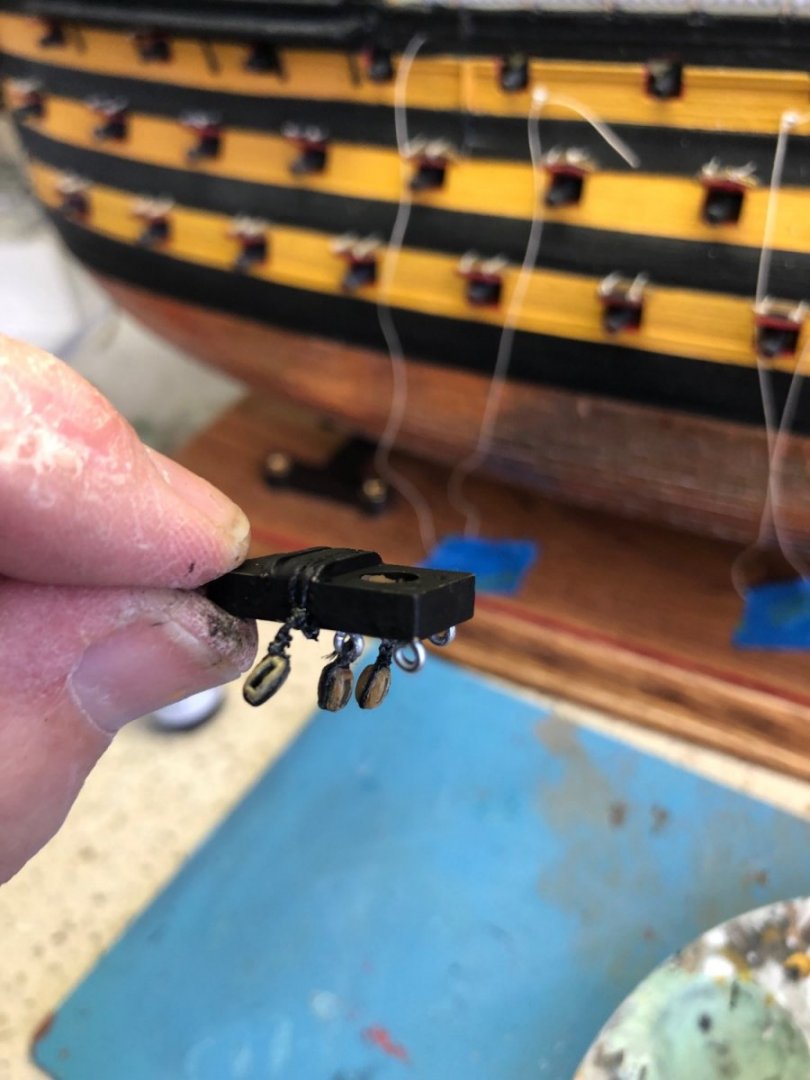
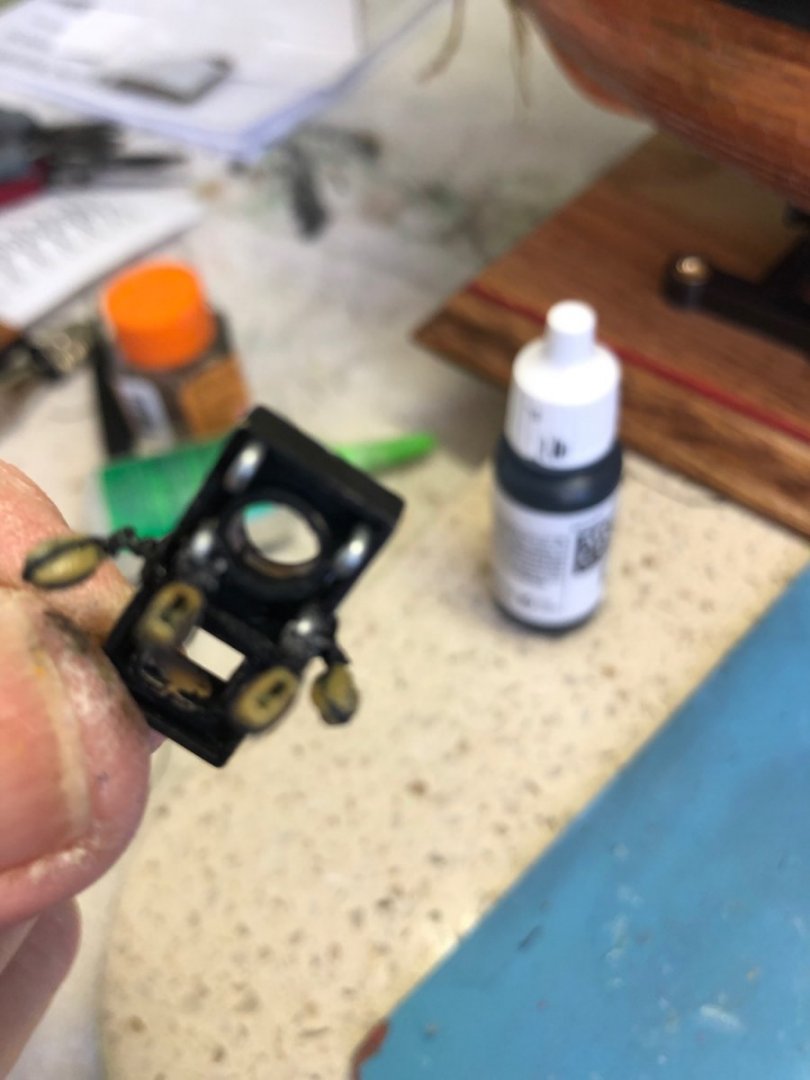
Wow! How many blocks do I have to rig? 😳 Converted my serv-o-matic to help serve my blocks for the mast tops. Eighteen combined single and double on the foremast top. A little thread trimming after the dots of CA dry and some paint touch up then on to the mainmast top. You guys are telling me I am going to figure out all the different lines that go through these blocks! I hope you are right.


-
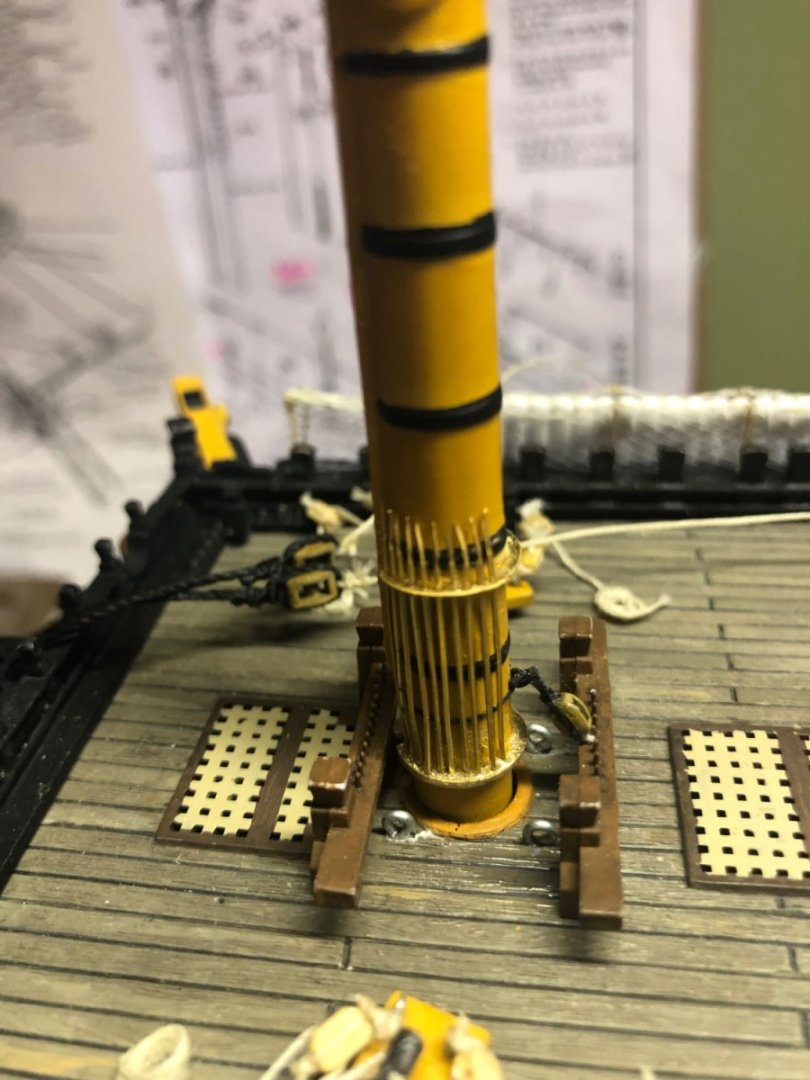
You are correct Ian. I just discovered that. I have changed my assembly path. I am going to construct up to and include the top mast before beginning rigging. So the cap, mast top, and top mast to be painted and have all rigging blocks attached for all 3 mast before rigging is the route I am taking.
-
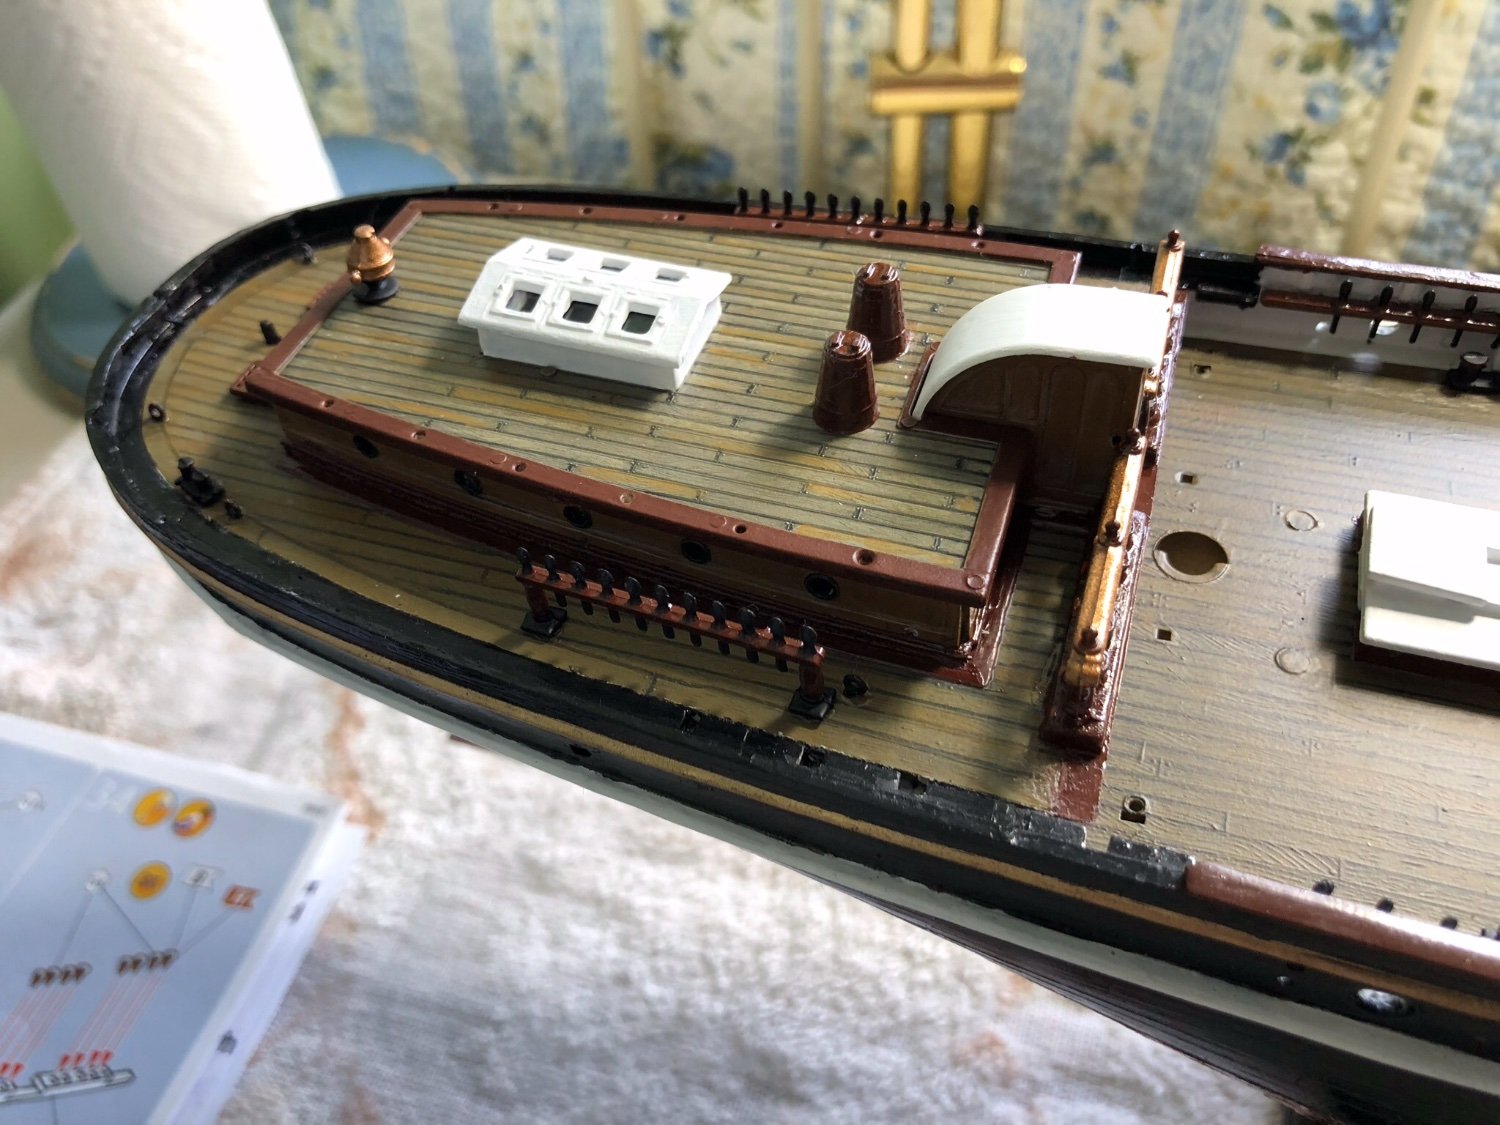
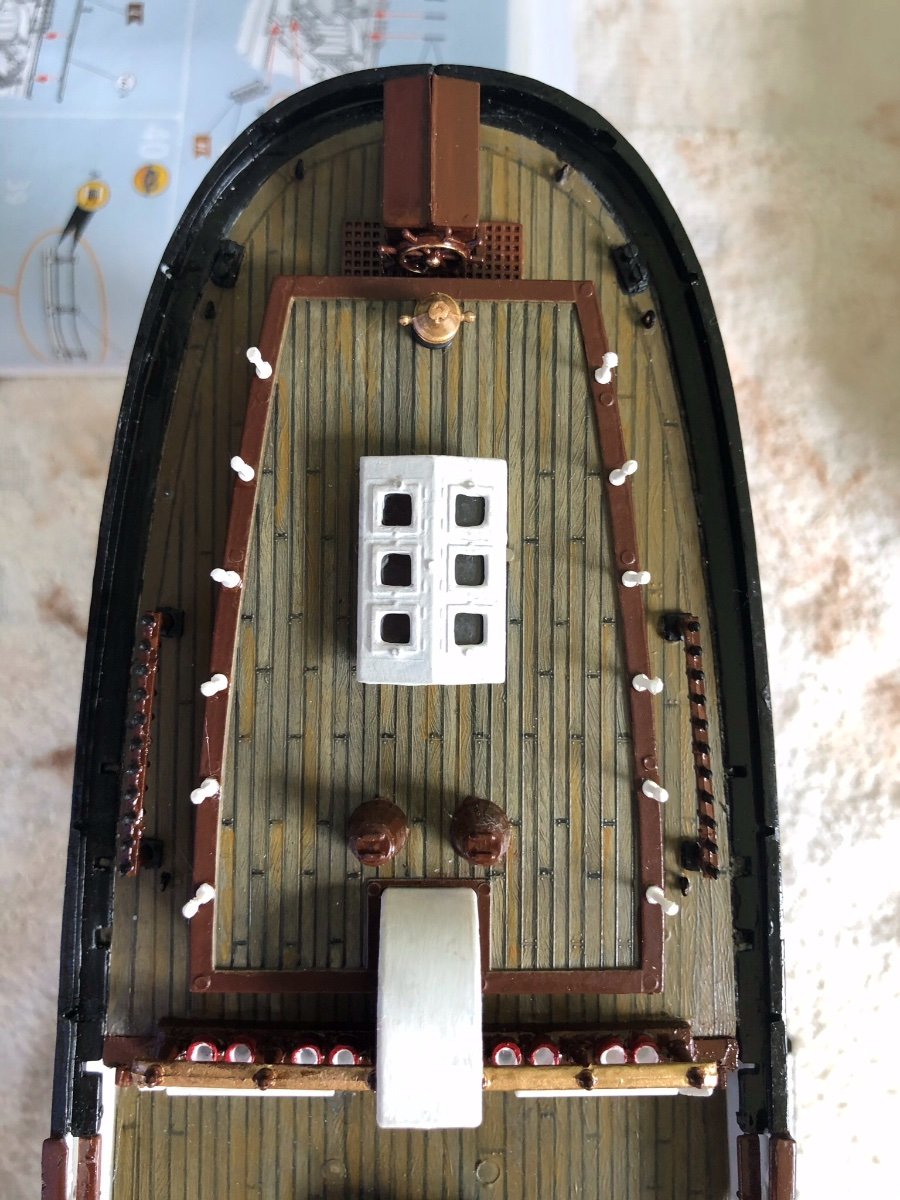
Kevin there is a thread here on MSW back in 2018 titled: Weathering the tan deck any easy way of doing this In it, comment #9 by Welfack, which I cut and pasted below, he explains how he did it. I adapted that to the Vallejo Old and New Wood kit. “ I would paint the whole deck in a suitable wood colour, e.g. Vallejo Wood. I then would line out the seams with a very thin (0.1 mm) pigmented ink pen and seal this with light coat of flat clear varnish. In the next step you mix the primary wood colour with a minute drop of white and paint individual planks at random with this mixture; then you make another mixture with two drops of white etc., in the next round you mix the primary colour with a tiny drop of burnt umber and paint a random selection of other planks; then the same with two drops of burnt umber, etc. Once everything is dry and you are happy with the effect, you can seal everything with a light coat of flat varnish. In the next step you can blend in everything with a very dilute wash of white. This also has the effect of making the deck look a bit 'weathered'. Further weathering, accumulation of grime etc., can be applied with light washes of black in areas where water would accumulate. On a normal working ship, the decks would be scrubbed regularly, so do not overdo the weathering. This procedures sounds a bit complex, but really is fast and simple - you will literally see the deck coming to 'life' as you are working on it.” You should be able to search for the topic to find the discussion for additional ideas.
- 444 replies
-
- 4
-

-
- Cutty Sark
- Revell
- (and 2 more)
-
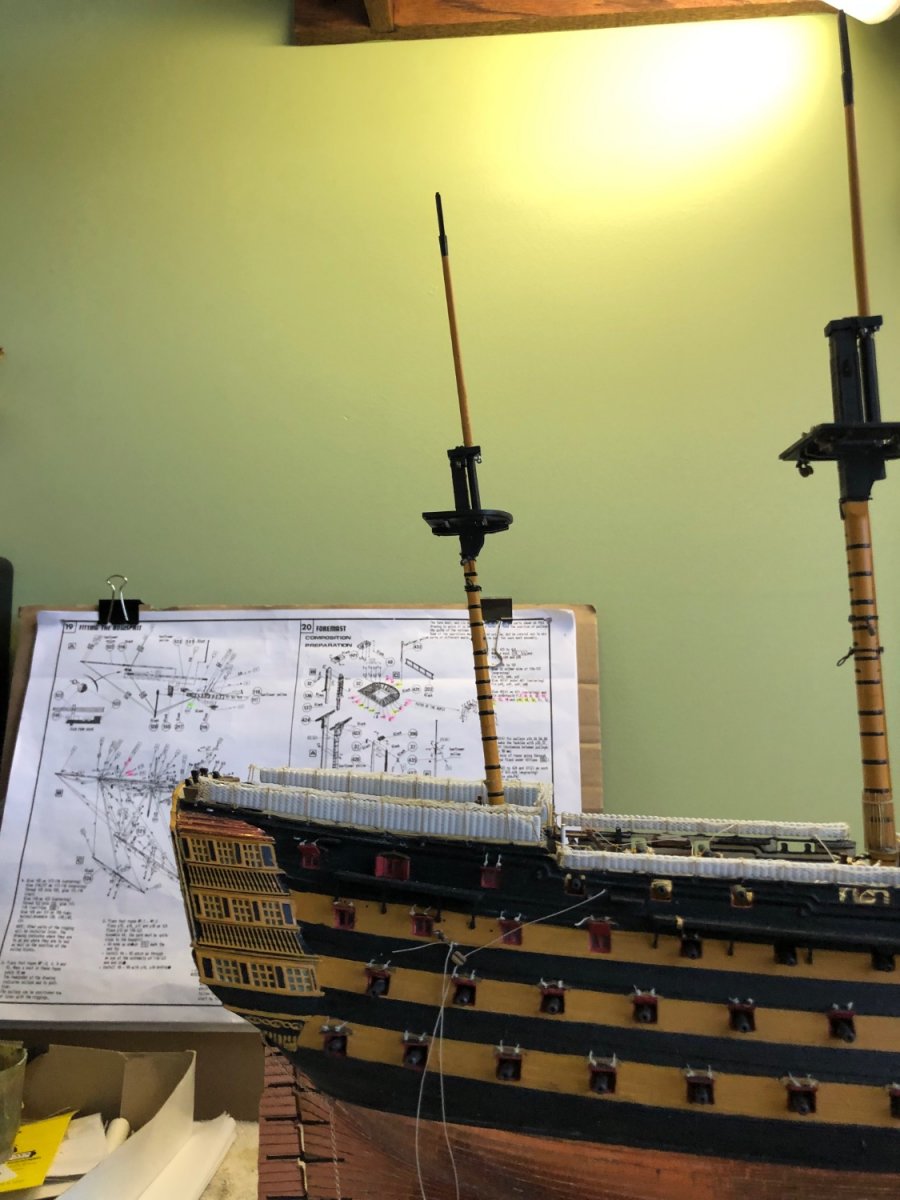
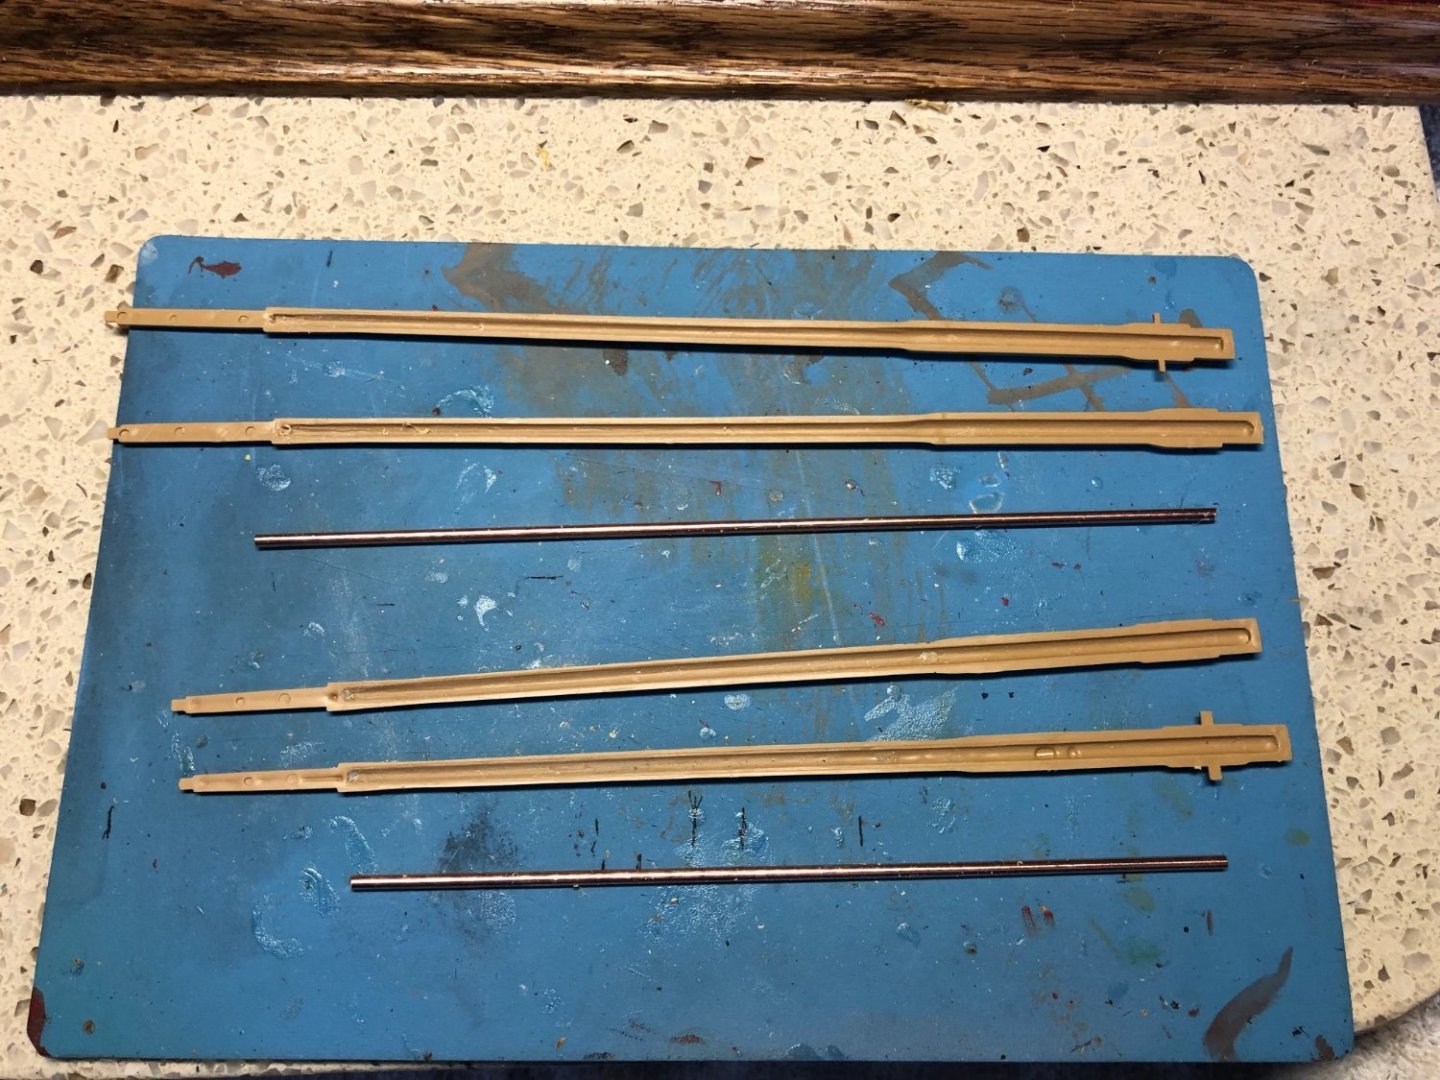
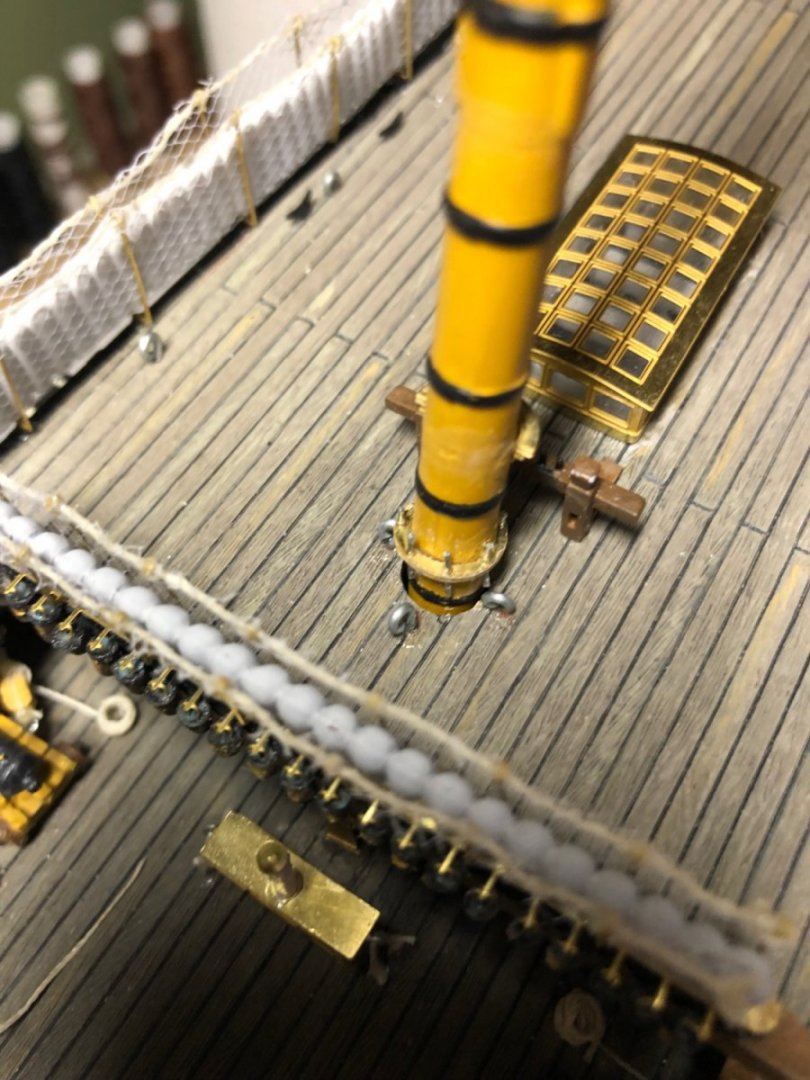
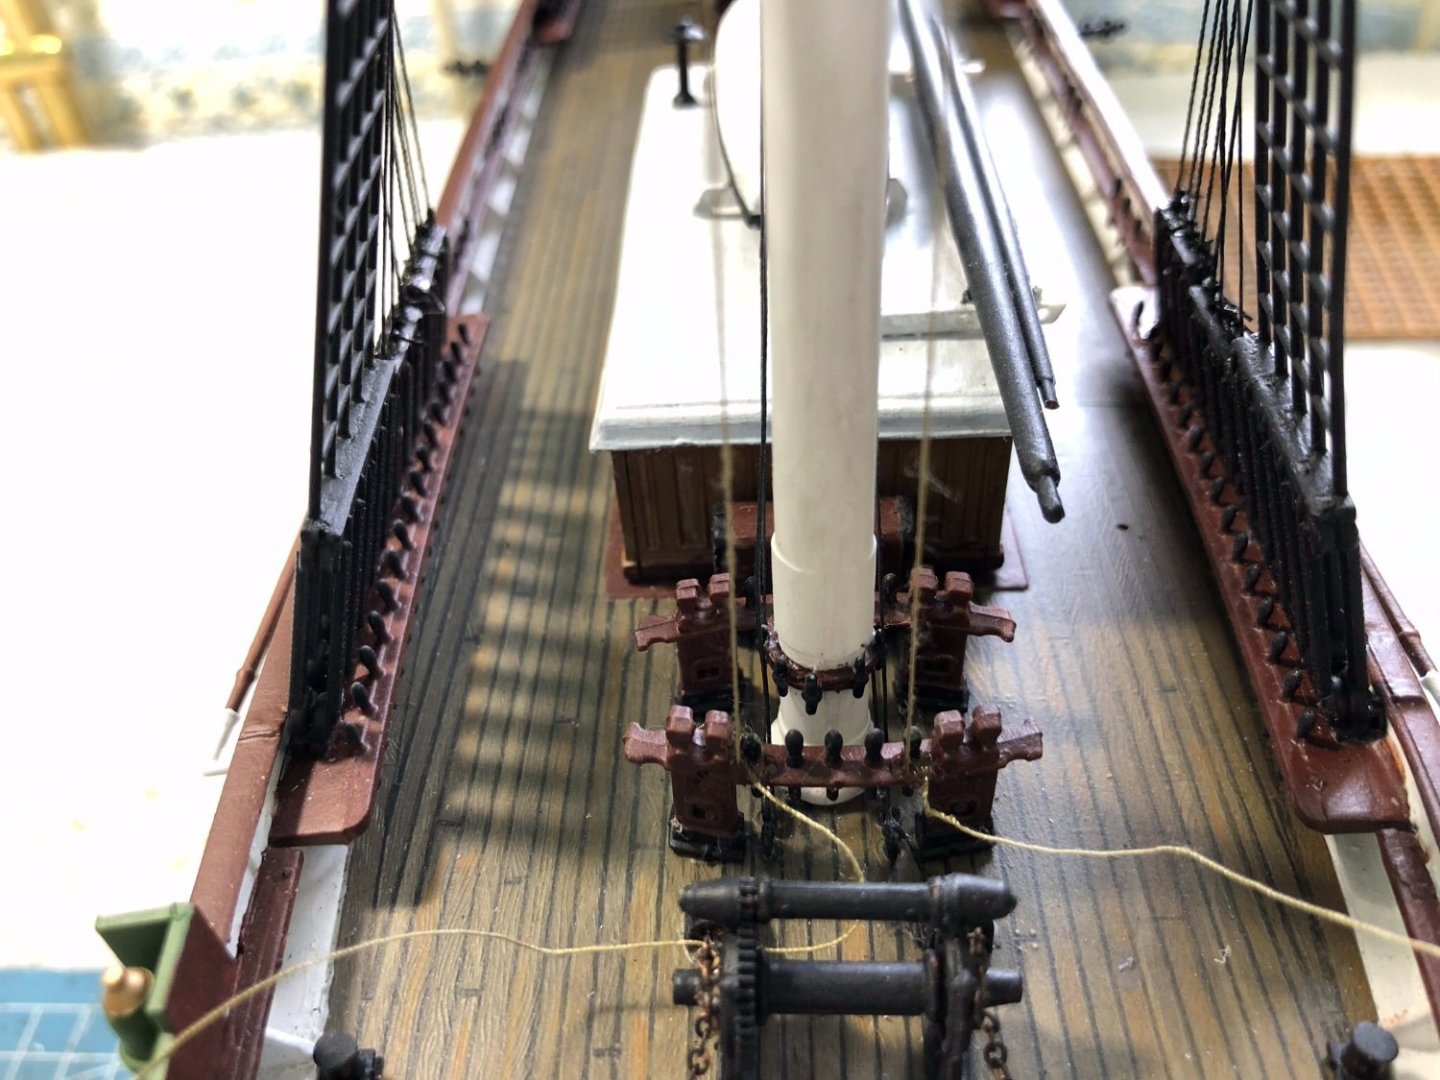
Well who was I kidding when I suggested what I might get accomplished today! 😀 Fixed the incorrectly placed eyebolts at the bottom of the mizzenmast, added eyebolts and blocks to the cap of the foremast, and the blocks for the lifts? I started to glue the cap to the top of the foremast but determined I would need the fore top mast to make sure I had the cap aligned correctly. Since the top mast for both the fore and main mast are in two parts and would need to be assembled before I could use them to test my cap alignment, I put the cap aside and decided to assemble the two top masts. I had previously decided I was going to reinforce these two mast sections the same way I did the lower mast. I filed the inside space of the sections to except the brass rod I had and using CA glued the sections together with the brass rod inside.

-
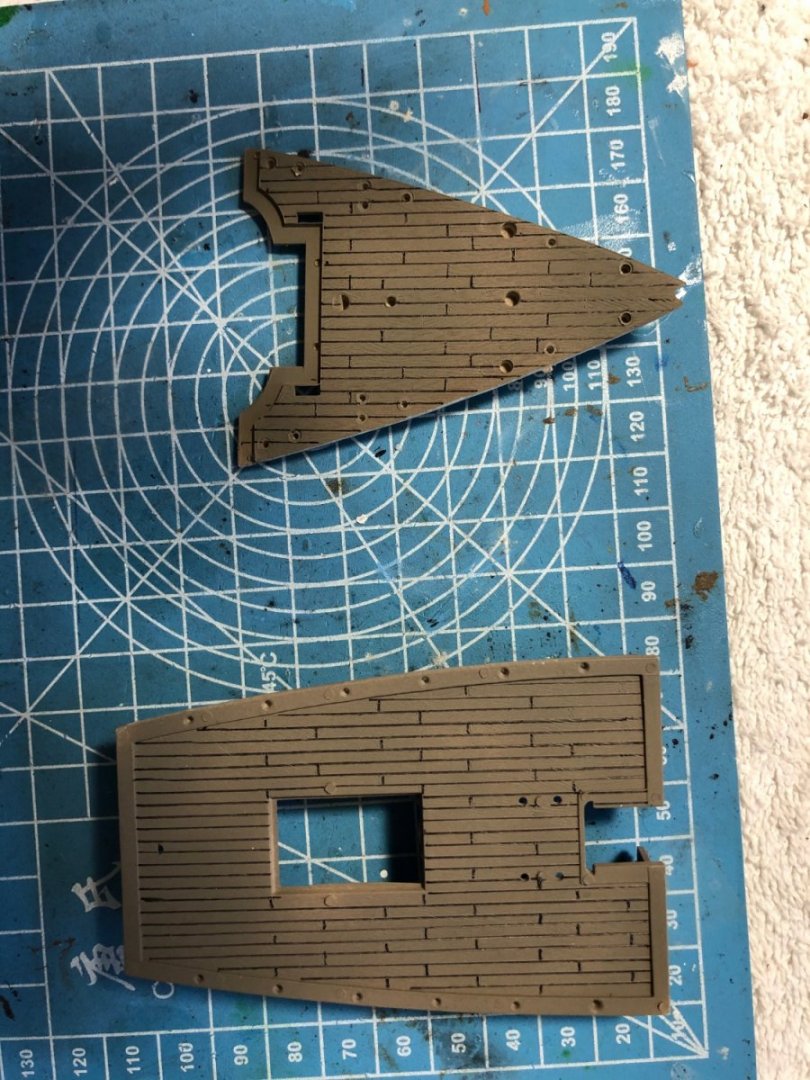
Kevin after I airbrush the undercoat and IDF sand base coat the next day I let it dry thoroughly. Then using a fine point (.01-.02 I think) and a straight edge, I draw in all the deck lines. Then using a fine tip brush I hand stroke the highlight colors included with the kit on random boards all over the deck. Basically painting a thin brush coat of color on almost all of the boards individually. After the hat is finished I I use a light and a dark wash to highlight areas around the deck where there may have been heavier foot traffic. An additional step I take in the process you may like to do if not to late is to apply a coat of clear flat spray can varnish or lacquer over the vase coat before you draw in the ink lines. This seems to improve the lines appearance with the pen point not getting gummed up. Once complete I coat the finished deck with an additional couple coats of the spray varnish. Kevin I honestly pretty much follow the instructions that come with Vallejo pack to select the colors to hand paint the individual boards.
- 444 replies
-
- 6
-
-
- Cutty Sark
- Revell
- (and 2 more)
-
Big smile Kevin 😃. Going to watch your build with great interest and memories of my CS build. As Ian said I may find myself wanting to get mine out of the case and redo some things. Of course some things like redoing the shrouds may be impossible. I am confident you don’t need to see more but if you do I have many many pictures not in my build blog.
- 444 replies
-
- 4
-
-
- Cutty Sark
- Revell
- (and 2 more)
-
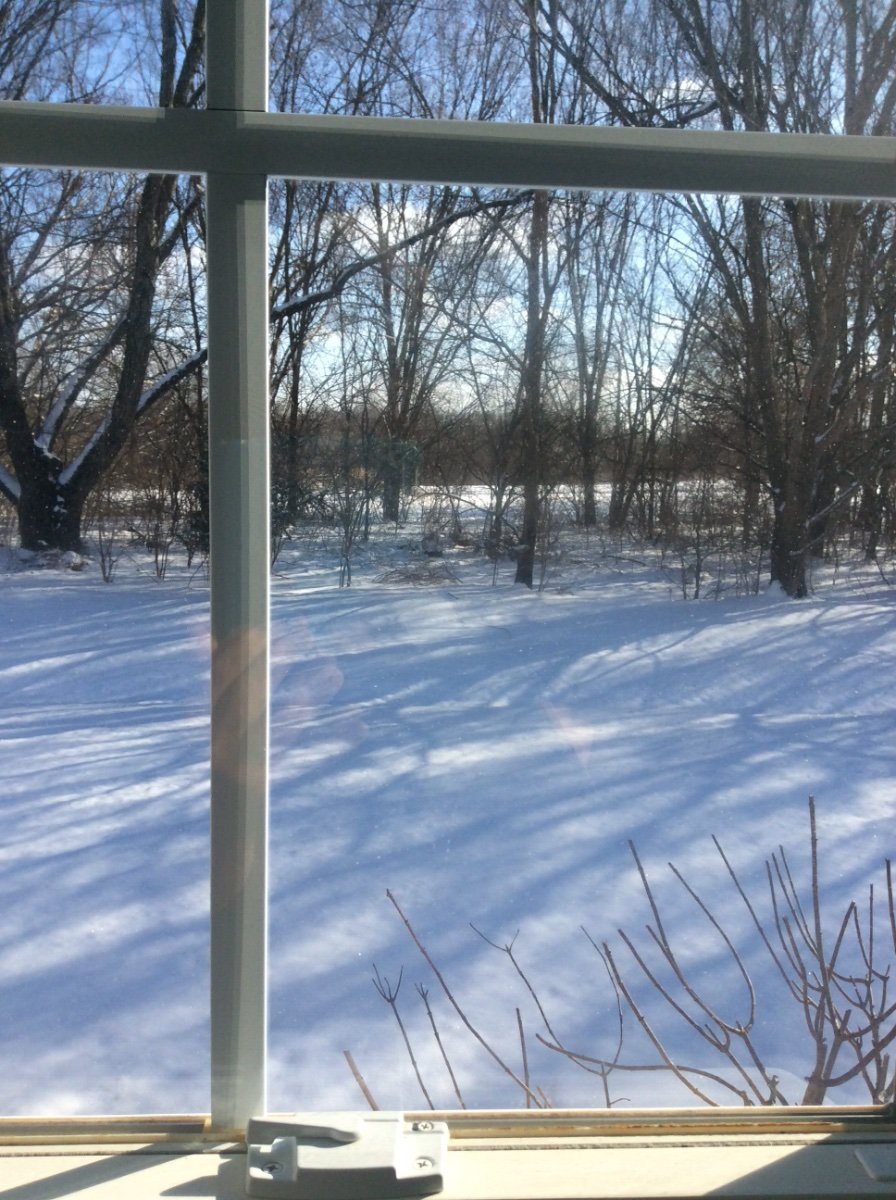
Same with me Kevin and Ian. The sharing and friendship are so valuable on this site. As I mentioned a couple post back, and smile now reading your last post Ian, I will need to grab my Longridge book and look up “ The jeers, sling, and truss pendants/nave line “ . Nautical terms I have not yet memorized!😊 Today I guess I will move the eye bolts incorrectly placed at the base of the mizzenmast and figure out in layman’s terms what the 12 (4 at each mast) rigging lines are Ian that you recommend going ahead and tying to those bolts. I am assuming they are all running rigging and not standing rigging. May get he caps with their bolts and blocks attached to each he masts as well. Anxious to start installing some of Daniel’s chains with deadeyes on the channels so I may tinker there as well. Kevin the last time I was in London we stayed over at the Hilton Metropole over by Edgeware station (Brown line). Enjoyed very much seeing the city and going out to Windsor, Bath, Stonehenge, etc. Did not make it to Leafy Sussex but maybe next time. View out my “shipyard” window this morning.

-
Good morning Ian! 😊. I see you on here early just like me. Cold snow day today. Ten degrees! My butt will not be leaving this house today. Time in my ship yard. How is your Ottawa weather?
-
Yeah Old Collingwood that is the debate I have been having. Ian makes a very good point about being able to work on rigging around the mast if shrouds not in the way yet. Others, like you, recommend shrouds without ratlines initially.
-
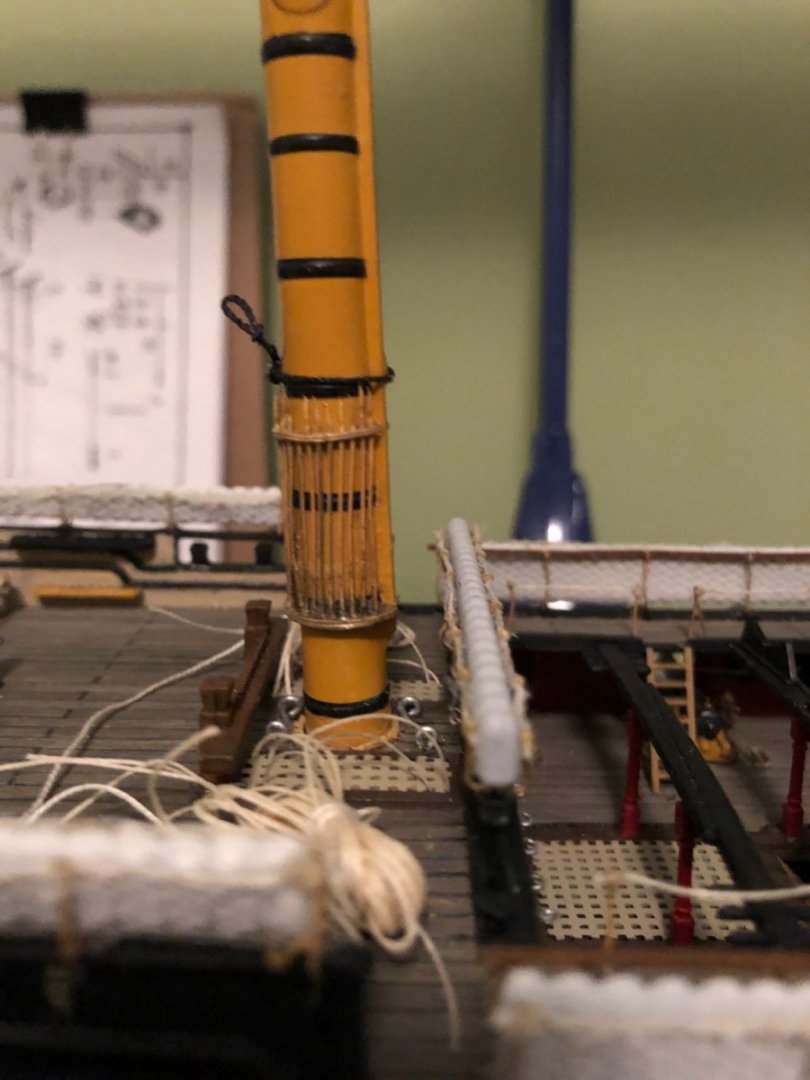
Old Collingwood I don’t mind at all you adding your observations. I agree that I will need to layer the shrouds and then wrap the stays around them. So the debate would be if I should leave the ends of the shrouds loose initially to facilitate other ridding or go ahead and attach to the deadeyes. The masts are the stock plastic ones but I reinforced them with wood dowel rods inside that give them much more rigidity.
-
Thanks again Ian for the thousandth time 😊. That is exactly what I have been doing in my evenings. I have my Longridge book, several other reference books, and my iPad for reading my MSW comments from you and my other friends stacked on my end table next to my recliner. There is so much to learn and decipher. As I mentioned before this is my first build where the instructions did not just simply say tie this line from point A to point B. In the past, there was no need to know the name of the line or how it was actually rigged with blocks, hearts, etc. I love learning how these wonderful ships were built and rigged now. Gradually I am learning the nautical names of lines, but only have a handful memorized. I still very often read through one of your comments, as well as from other friends, and grab Longridge’s book to see what is the line or rigging component being talked about. As a compliment to you I am impressed with your vast knowledge and your generosity in sharing it. I am very curious if that knowledge comes from life experience or did you gain it simply modeling?
-
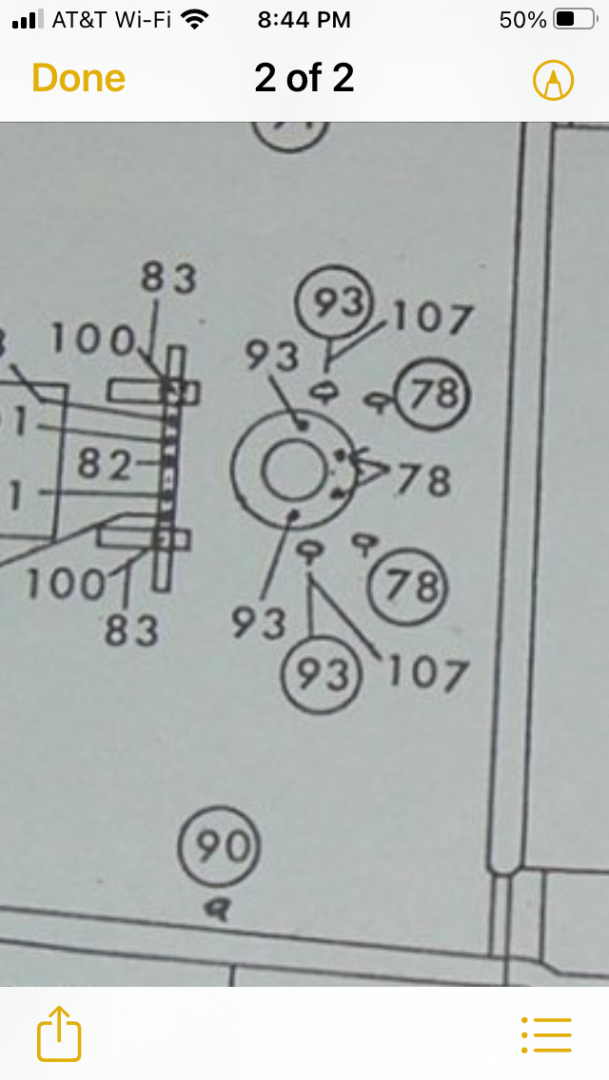
Ian, just curious here, in the diagram you sent me showing the eyebolts around the mizzenmast you show numbers 78, 93, and 107 that also apply to the belaying pins on Daniel’s etched ring that is there. Do I use either the eyebolts you recommend or the belaying pins in the ring for those lines?
-
Thanks Kevin for your compliments. I was a tradesman as well in my younger years and often used the old eyeball to line things up. In retrospect I wish I could go back and replace the plastic shrouds on both my Cutty Sark and USS Constitution.
-
Ian I was just looking at Longridge’s book and see that the stays go over the shrouds. So I will add them before the stays just not connect them to the deadeyes. I see what you mean about not being able to make them off the ship and slide on the mast top. Would have to be lose like the top of the stays. So I will add the eyes and blocks to the tops and put them on. Great idea to rig to the eyebolts at the base of the masts before proceeding. And yes I fully intend to put my serv-o-matic to work on my shroud lines. As far as the eyebolts around the base of the mizzenmast, I was hoping you did not see that. For some dumb reason I drilled and placed 4 but put them at front, back, side and side. Trying to decide if I should clip them off, repair the damage to the deck, and redrill them.
-
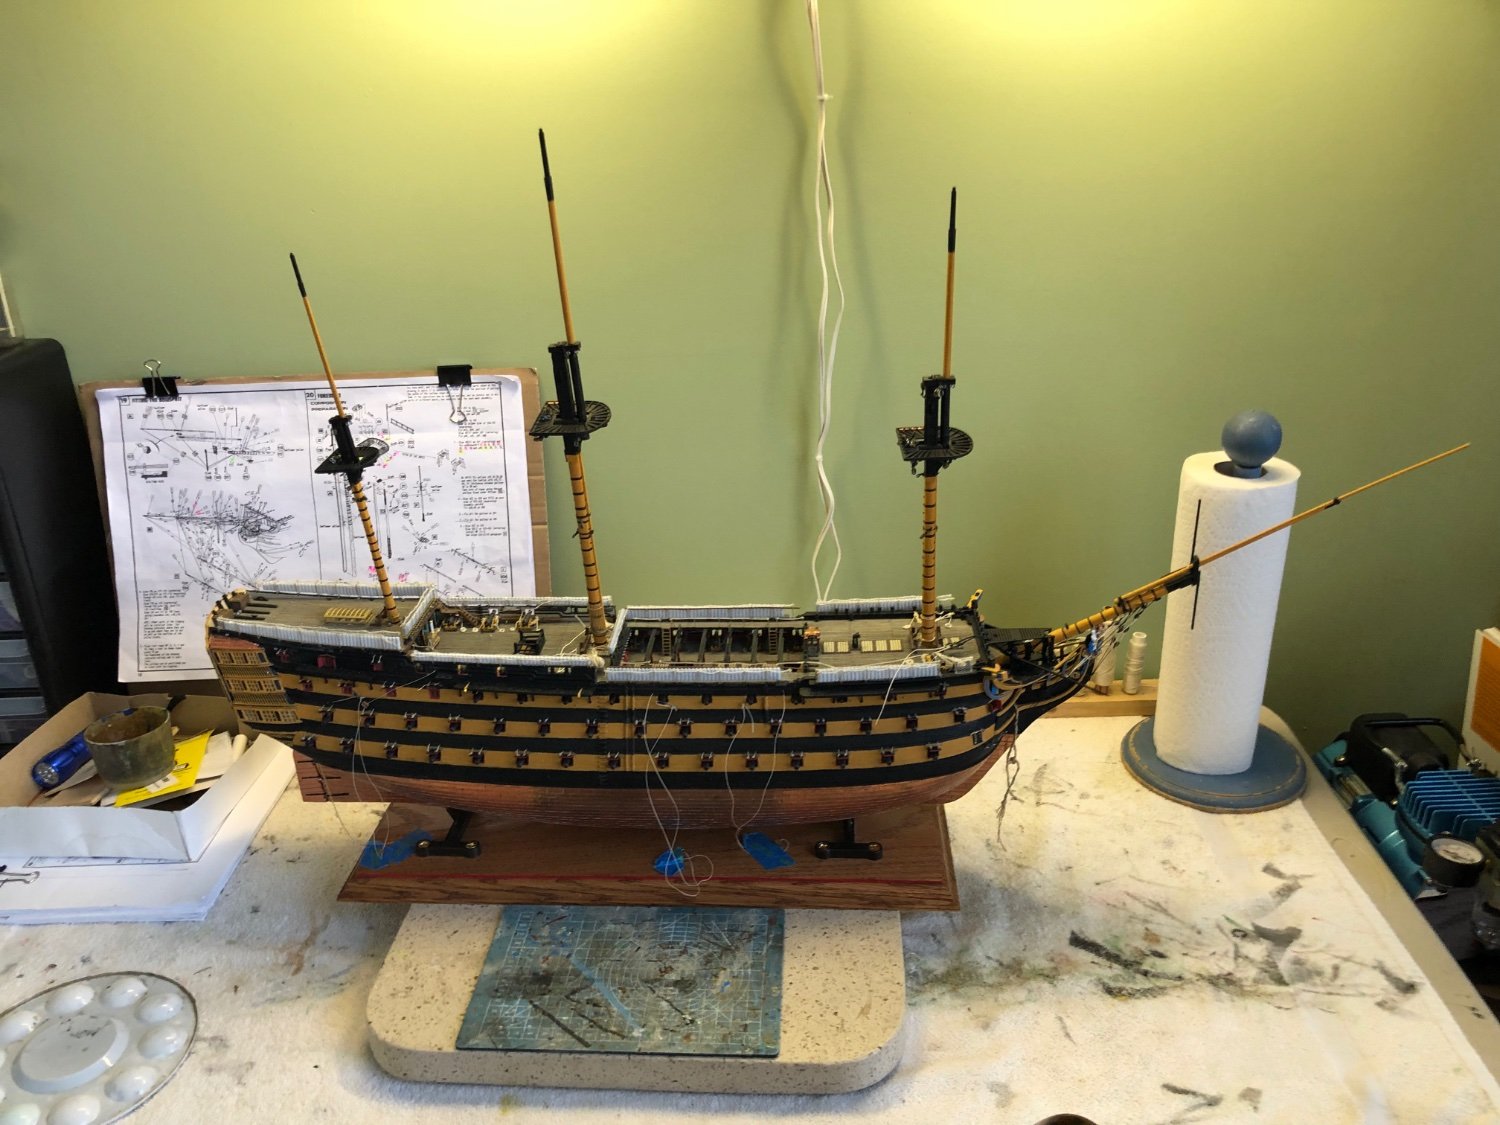
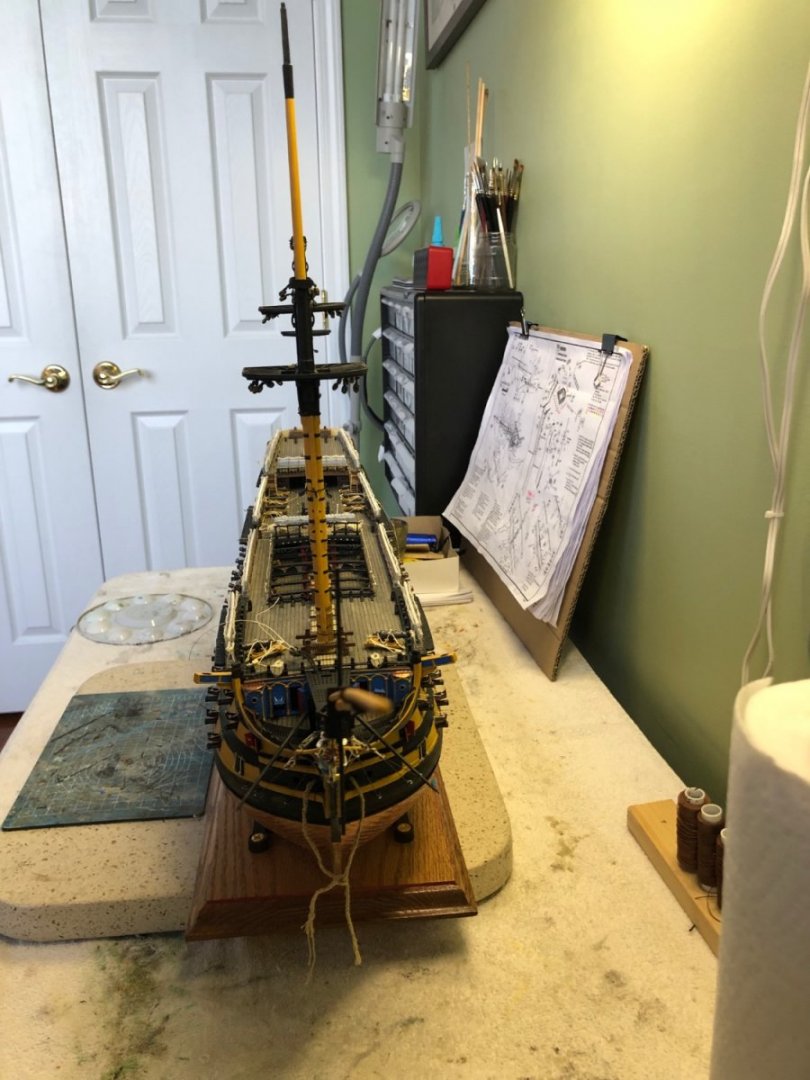
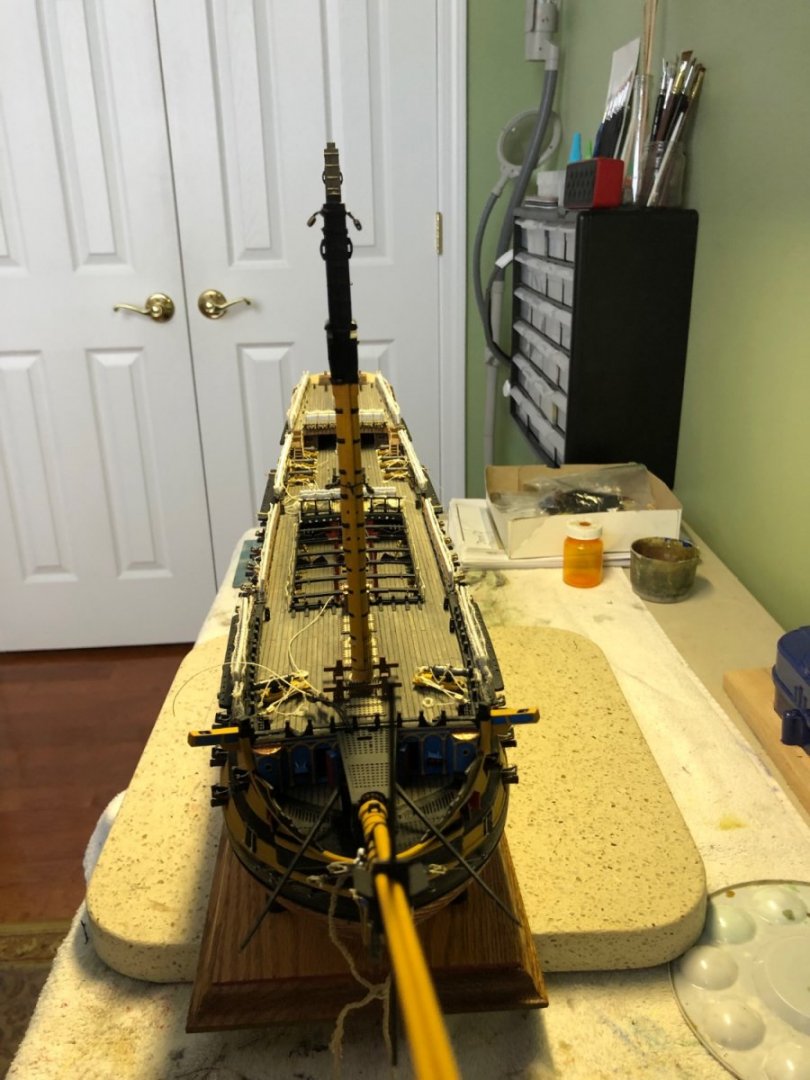
Ok gentlemen the mizzenmast is installed. It to required a little filing down the lower decks to improve the alignment. All three lower masts are now installed with rigging blocks attached as directed. Viewing the deck looking toward the stern all 3 masts appear in perfect alignment. Mainmast and mizzenmast are hidden behind the foremast! So where do I go from here? Is it better to do the lower stays now, then the lower shrouds, and then the back stays once complete mast is in?

-
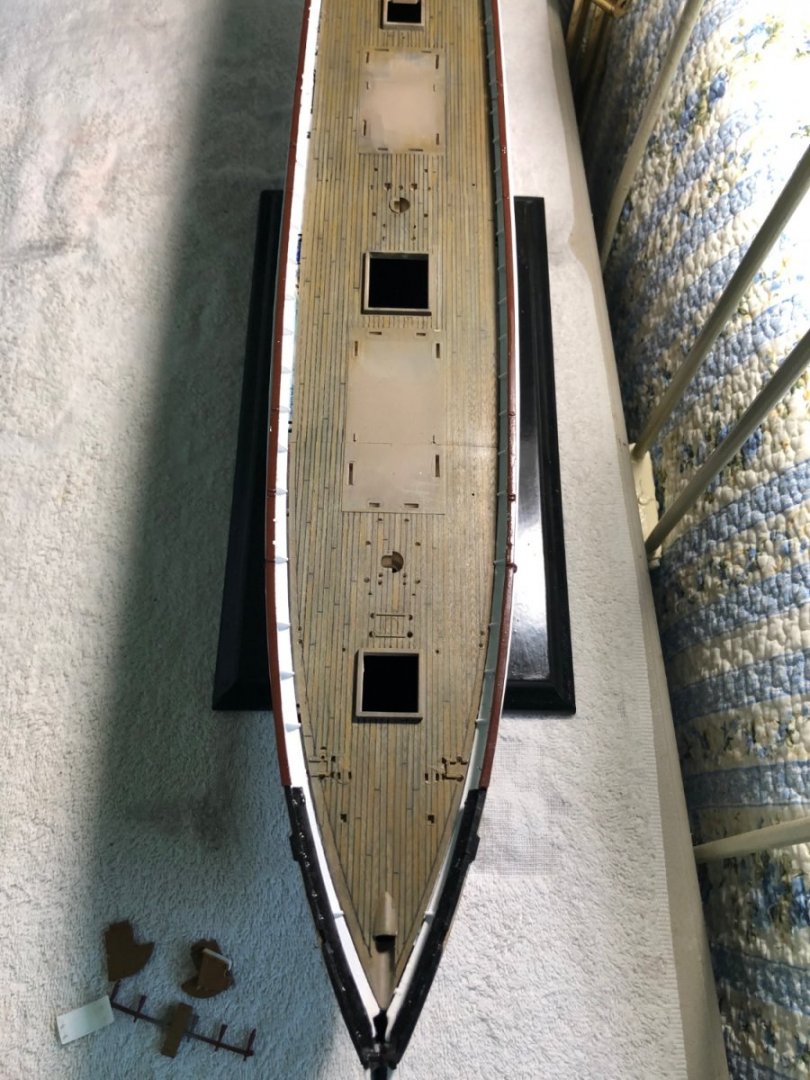
Kevin I did not look back at my CS blog to see what pictures I attached but here are a few of my deck using the he Vallejo Old and New Wood kit.

-
Not a problem Kevin and Ian. I don’t consider you hijacking my blog. I learn from all the conversations.
-
Kevin I will look forward to watching your 3D printing experiment. Glad I could provide you a useful tip 😊. I am aware about alcohol removing acrylic paint since I to have unfortunately had to use it time and again over the years! I really like using the Vallejo Old and New Wood set. I have used it at different times for both effects. I am more pleased with the result I get for making old wood but sometimes the new wood effect is more appropriate for the project. Now that you have brought it to my attention I need to check my kit colors to see if any are getting close to needing replacement before I get near starting my Soleli Royal deck, which is going to be a long time from now!
-
Yes Ian. That is what is was. The alignment was just not right. I used a long narrow file and widened the one that appeared out of alignment as I looked down through the whole with my flashlight. The bottom one seemed to be the issue. I just now got it glued and set correctly. It is late evening (I think we are in same time zone) around 10:15 PM. A little late to be modeling but this was going to keep me awake until I got it set. Looking at the photo I attached I can tell I need to adjust the pikes a bit but that is easy on comparison. Hopefully I can do the mizzenmast without issue. So far I am 0-2 for installing the fore and main mast without issue. 😀
-
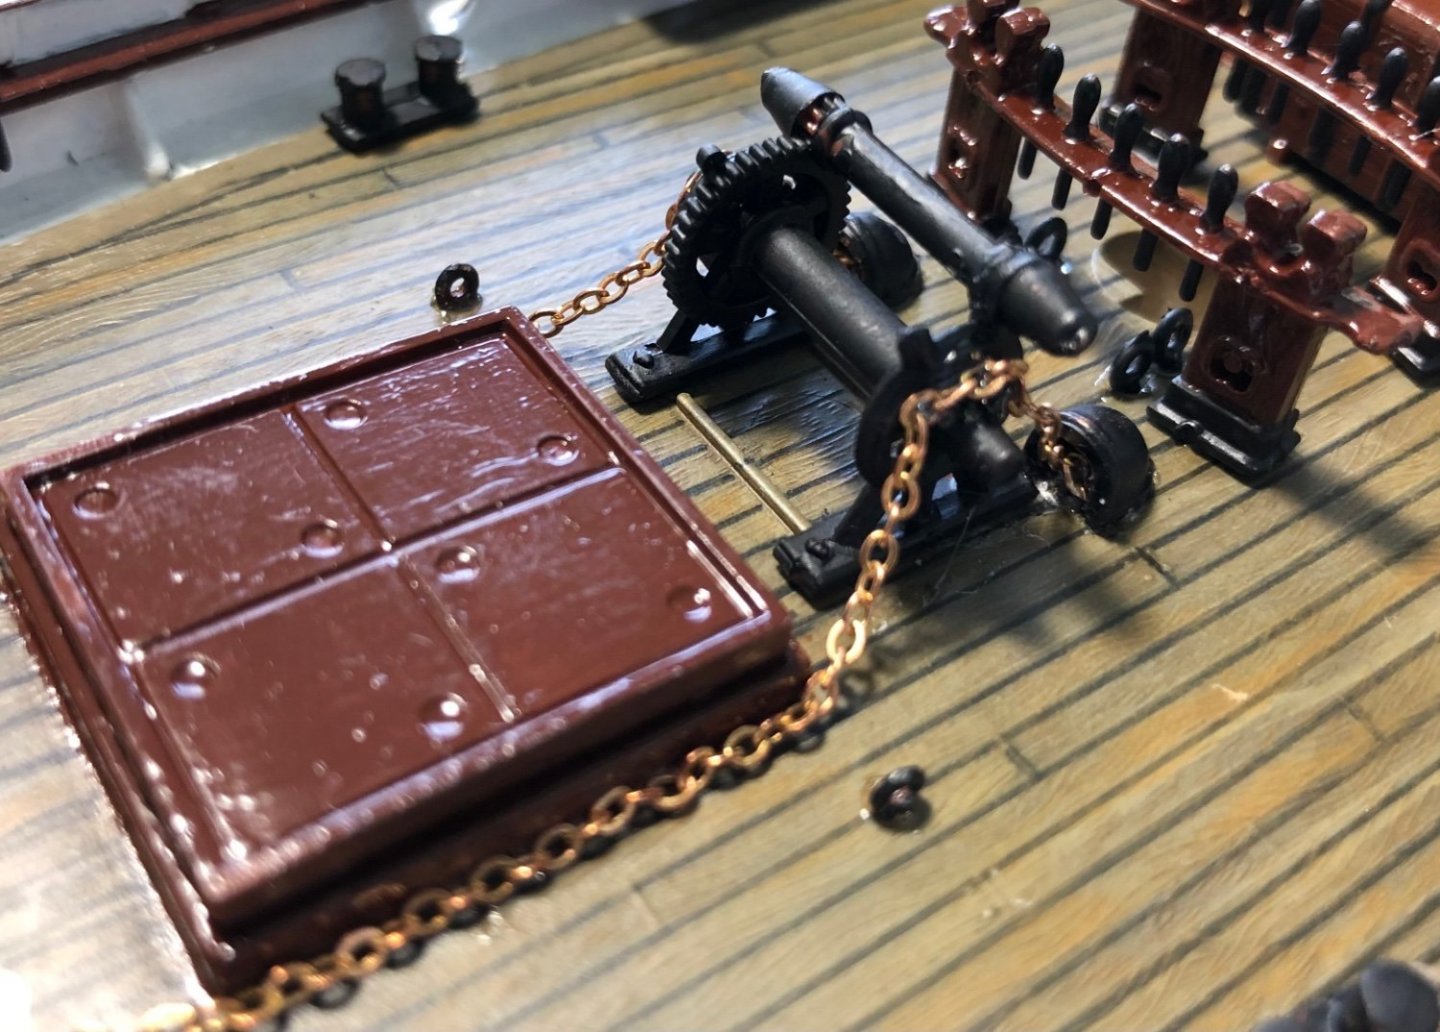
Well. Pretty good screw up noticed today. If you scroll up to post #700 to see I show the completed installation of Daniel’s etched boarding pikes on the main mast. Little frustrating to do but I thought I did it OK. Anyone who has installed them know Daniel’s instructions say to dry fit the mast in the hole and make a mark about 5mm above the surface of the deck. This mark is where the bottom ring is to be fixed and then the upper ring and pikes placed in accordance with this bottom ring. No problem. Did it just as instructed. Today I finished attaching all the appropriate blocks on the lower main mast and was finally ready to glue it in. There is a square peg on the bottom of the mast and a matching square hole in the bottom of a he hull that the mast is supposed to set in. If it is set correctly the mast is locked in position and can not turn. Applied glue to the square peg on the bottom of the mast and slid it into the holes on the decks heading toward the square hole in the bottom of the hull. As expected the mast came to a solid stop and I believed the squares were lined up as required and that the mast should not be able to turn. Ready to let it set and the glue dry. Thought I needed to adjust the mast just a little to get the top perfectly parallel with the deck. Expected that I should only have a slight bit of play since the square peg was firmly in the square hole. Well no that was not the case. The mast was able to rotate completely all the way around meaning it was not fully in and set. After scratching my head, peering into the hole with a flash light, and examining what was going on I reinserted the mast into the decks and with a little twisting, turning, and a little pressure had the mast drop down into position. Apparently my decks are slightly off alignment to where the mast does not smoothly slide into the hole. However with a bit of effort I am able to set it correctly so that is not a problem. Where the screw up came in is when I was able to set the mast correctly the bottom ring of Daniel’s etched boarding pikes dropped to the surface of the deck! For whatever reason whatever was stopping the mast from fully dropping into position happened as well when I was doing my original mark for the ring. As a result I knew I was going to have to carefully remove the boarding pike rings and slide them up about a half inch. I again resulted to using acetone to loosen the CA and ever so gently prying the rings lose enough to slide them up the mast. I reinserted the mast and located the correct seat. I marked the mast correctly this time and used CA to glue it into position. Acetone also dissolves Vallejo acrylic paint so I had to sand off all the old paint and dried CA at damaged area and refinish it. Several of the fragile pikes were bent in the process so I straighten them and all was good again! I plan to use a long narrow file to adjust the alignment of the holes in the decks so the mast will easily slide into place this time.
-
Lower foremast installed with appropriate blocks at this point added and the deck eyebolts you recommended Ian.