Bill97
-
Posts
2,730 -
Joined
-
Last visited
Content Type
Profiles
Forums
Gallery
Events
Everything posted by Bill97
-
Woo Hoo. Got it. Thanks my friend!
-
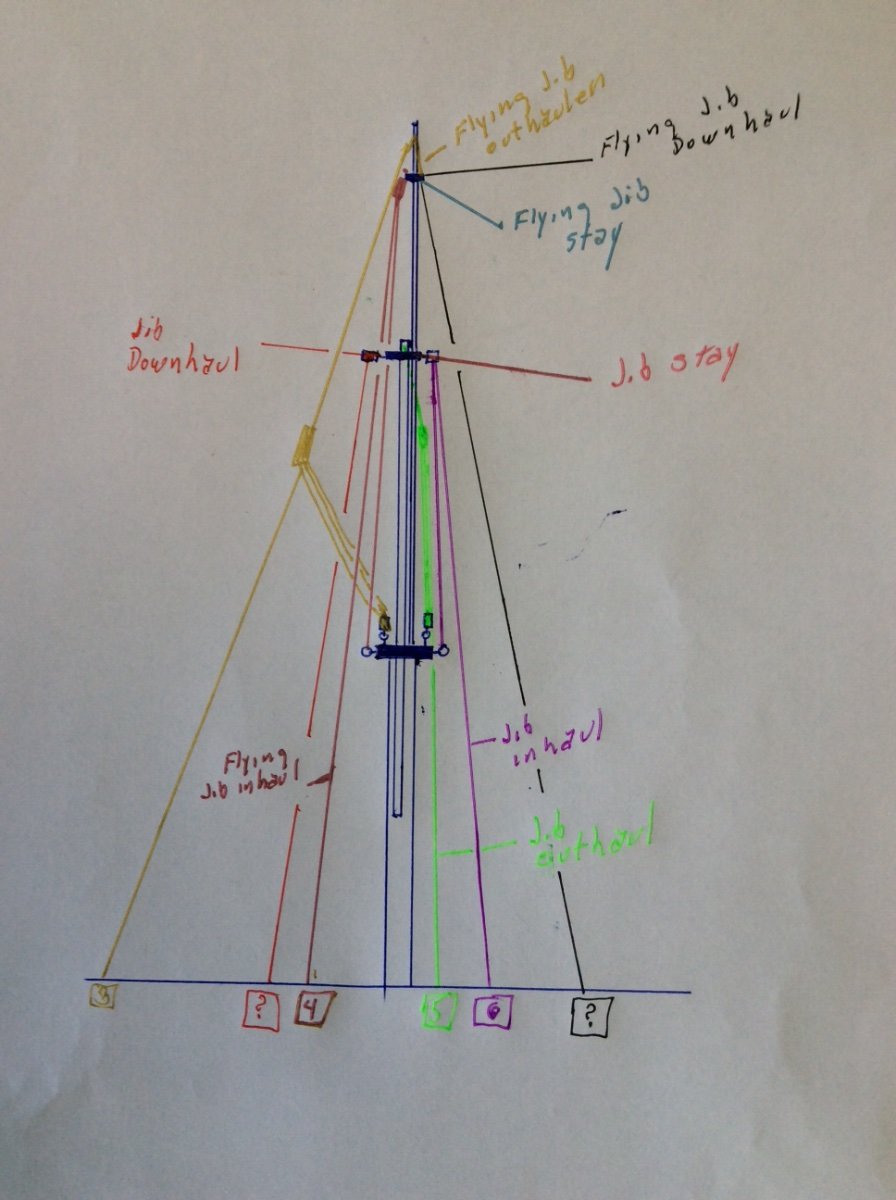
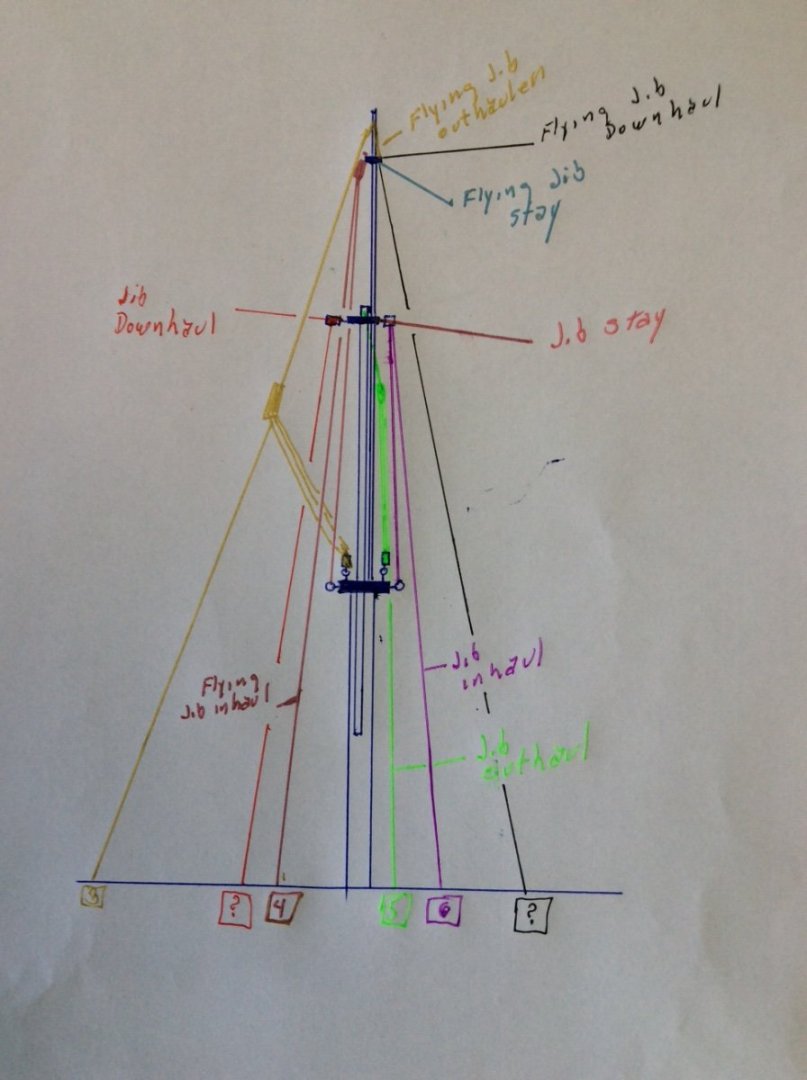
Ok Ian this should be my updated sketch if I understand correctly. What do you think. Thumbs up or down?
-
Kevin the CS was my second build several years ago after I got back into the craft. The Constitution being the first. What a long way I feel I have come since then. I am so anxious to see what an artist like you can do with it. If your blocks and deadeyes, which I have had the fortune of using, are any indication of what you can do your CS is going to be fantastic. Will enjoy watching your build.
-
Hey Ian don’t apologize I am so thankful. I may find myself doing the same when I start the mast. Rather get it straight on paper before actually rigging. And I guess the rigging process on the flying jib traveller as far as the inhaul and outhaul lines are the same?
-
Ian check this out. If you can make out my scribble. Tell me if all is correct. Curious about the flying outhaul on the flying traveller being on the opposite side as the flying jib outhauler.
-
Hey Kevin. How have you been. Your blocks are great. I have not used to many of them yet because in prep for the Victory I had purchased a bunch of wood blocks and deadeyes. I plan to use the ones you sent me for my Soleli Royal. However, I have found that if I am careful I can drill out the center of the small deadeyes you made me and use them as thimbles. I have used some for that purpose.
-
Thanks my friend. This does make since now. You are a great teacher. Ought to teach a class on this subject. I told my wife yesterday that when I started the Victory I had no intention of learning all the ins and outs or reasons for ship rigging. As with my other builds, it was just to assemble an attractive model to display. It had always been glue this line from here to there and from time to time pass through a pulley maybe. No real idea what all those lines do or why. Just follow the instructions. No one who has ever viewed my ships is very knowledgeable of rigging and therefore have never said “you know that rigging line right there is wrong”. They just usually say “wow Bill these ships are beautiful!” and that is about it. Now that I am working on the Victory with your help and guidance, along with Kevin, OC, Daniel, Marc, and others, my eyes have been opened to a whole new exciting world of engineering although often very frustrating. As someone who during my younger working years was a craftsman I find this fascinating and love it. I find myself saying to myself “this is going to take forever!” Then I realize and say “so what, what if it does you have no where to be.” Someday it will be complete and everything I learn will help tremendously when I start the Soleli Royal.
-
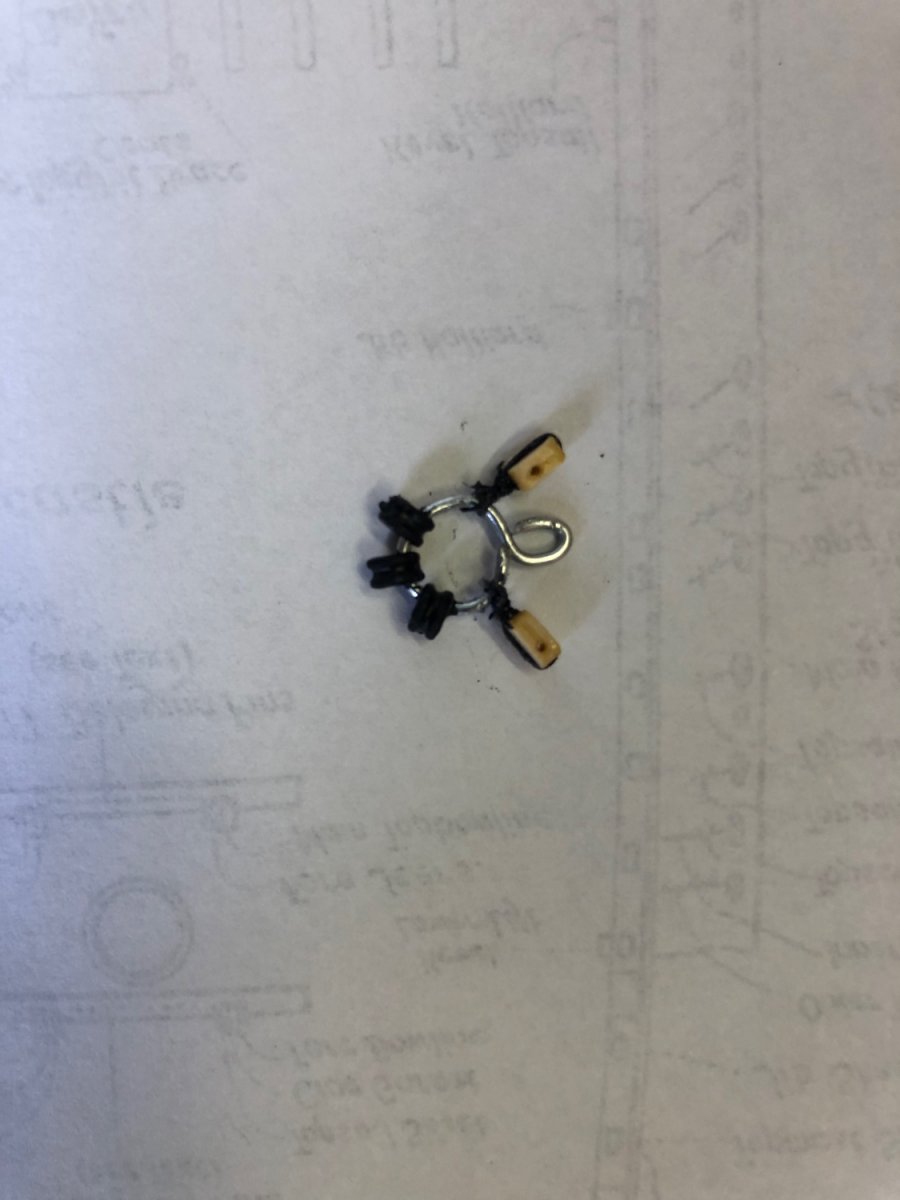
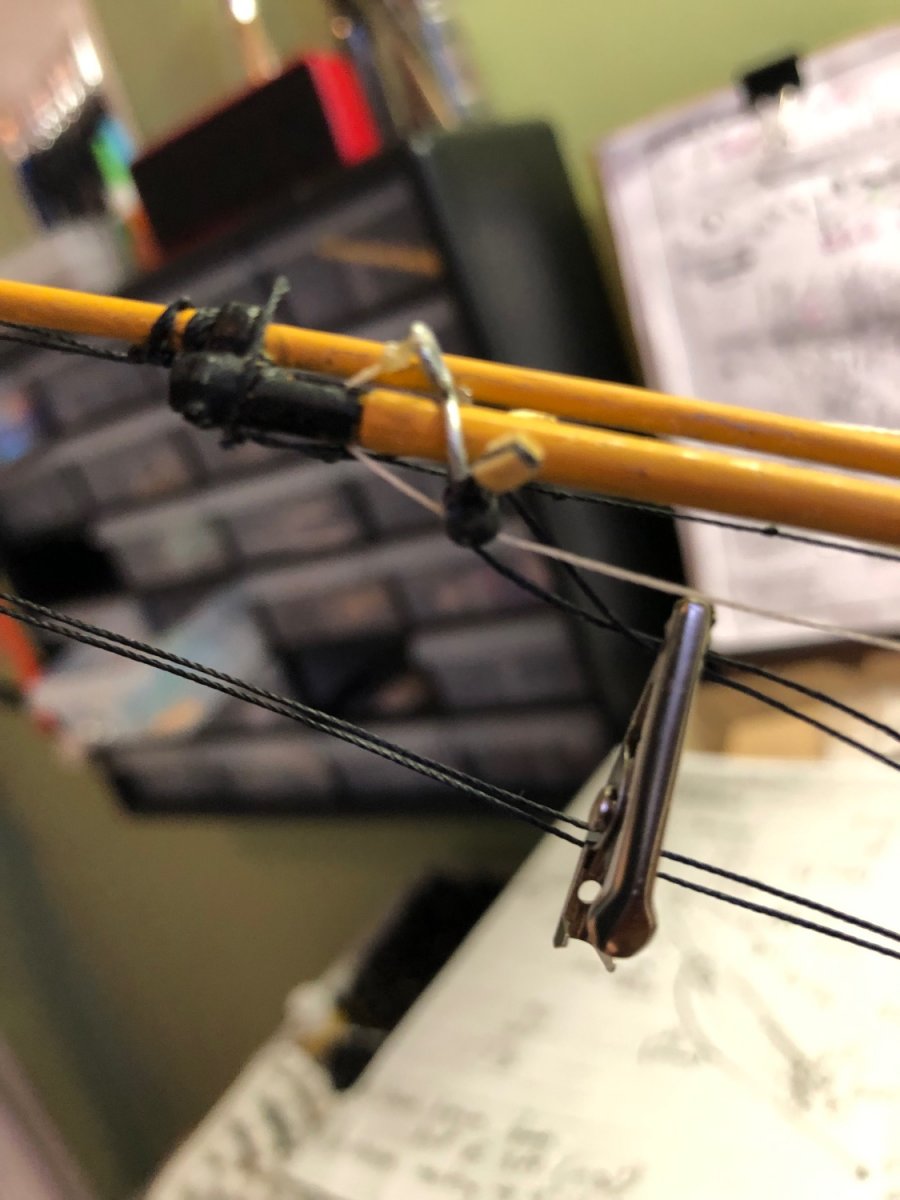
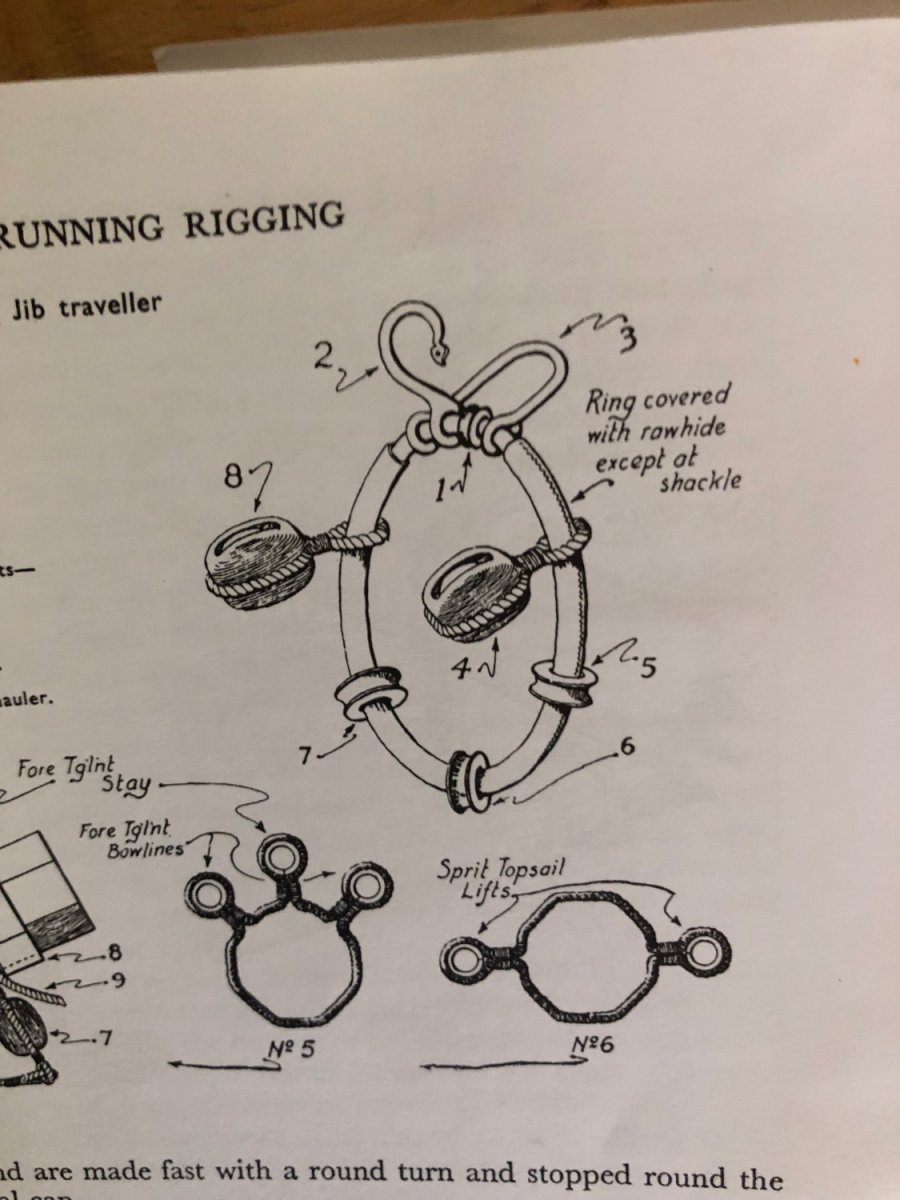
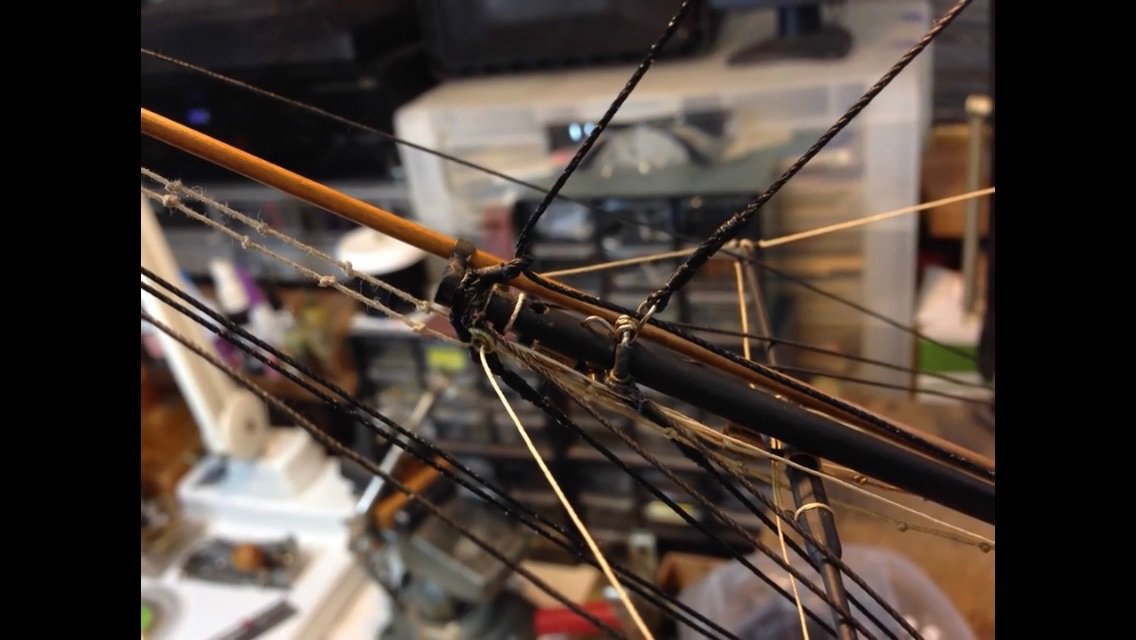
Ian this is a good close up photo. I don’t remember who it is from. May be your’s. It shows a number of the lines and the jib boom traveller. My thimbles on the traveller may be a little to big maybe. I also notice that in this photo that the jibsail line is tied to the loop (#3 in the diagram) on top the traveller. I understood Longridge’s instruction to tie the outhauler to that. Is that wrong? If so where does the hauler attach to the traveller.
-
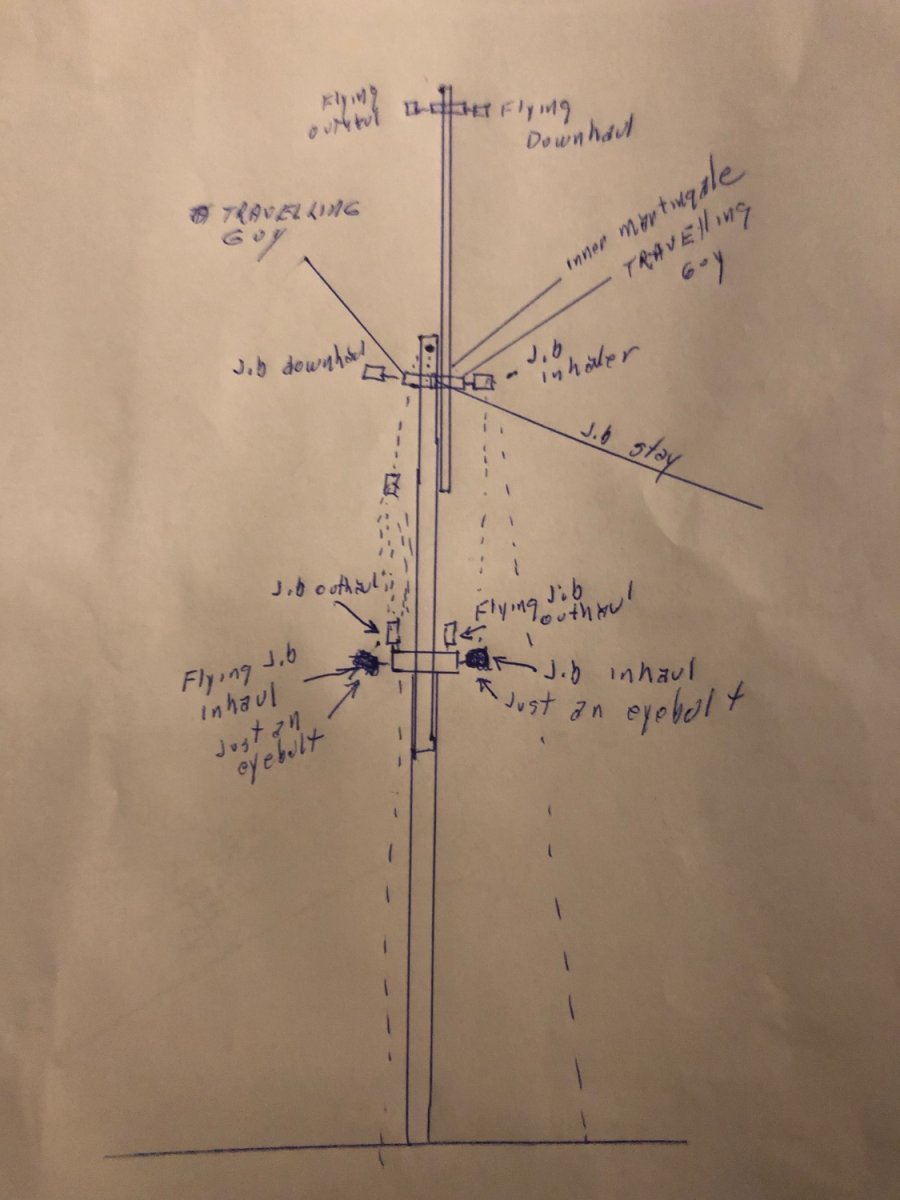
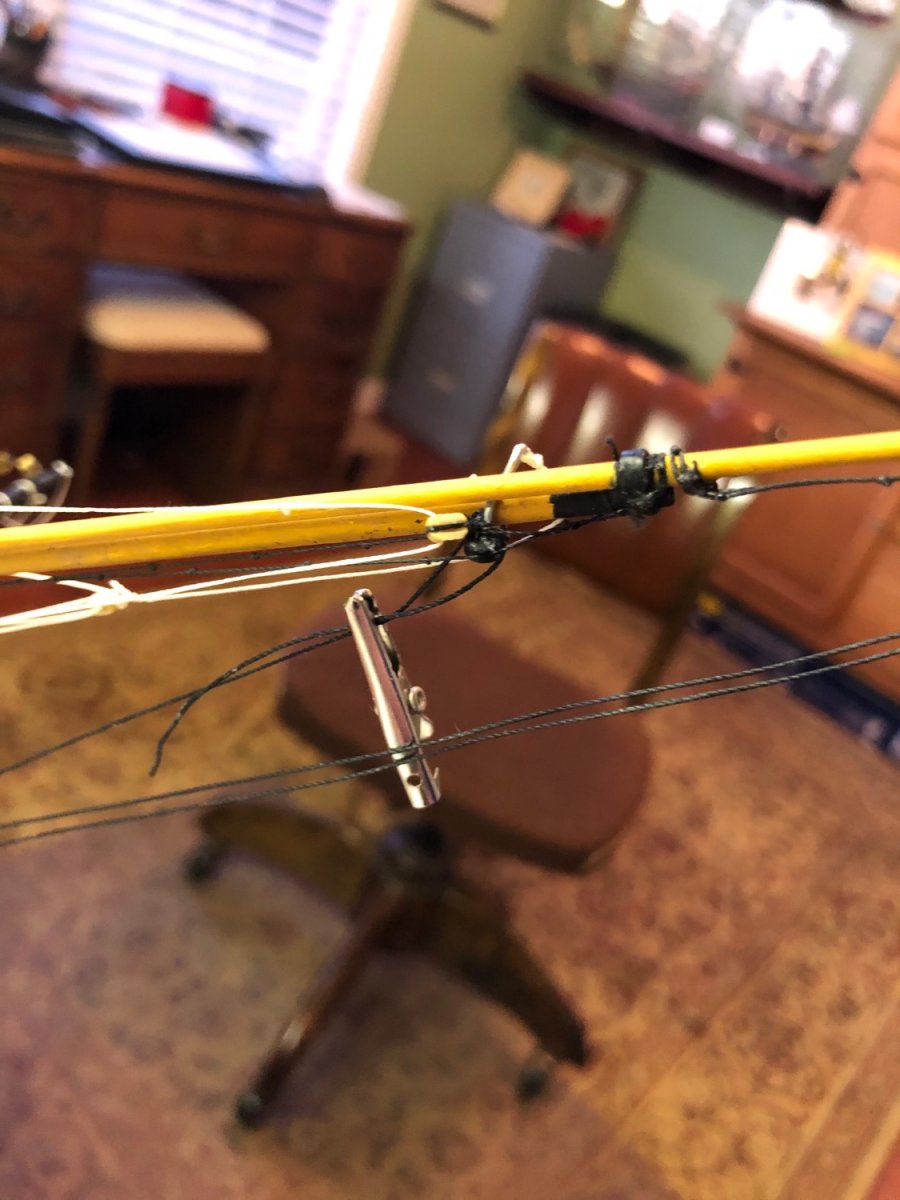
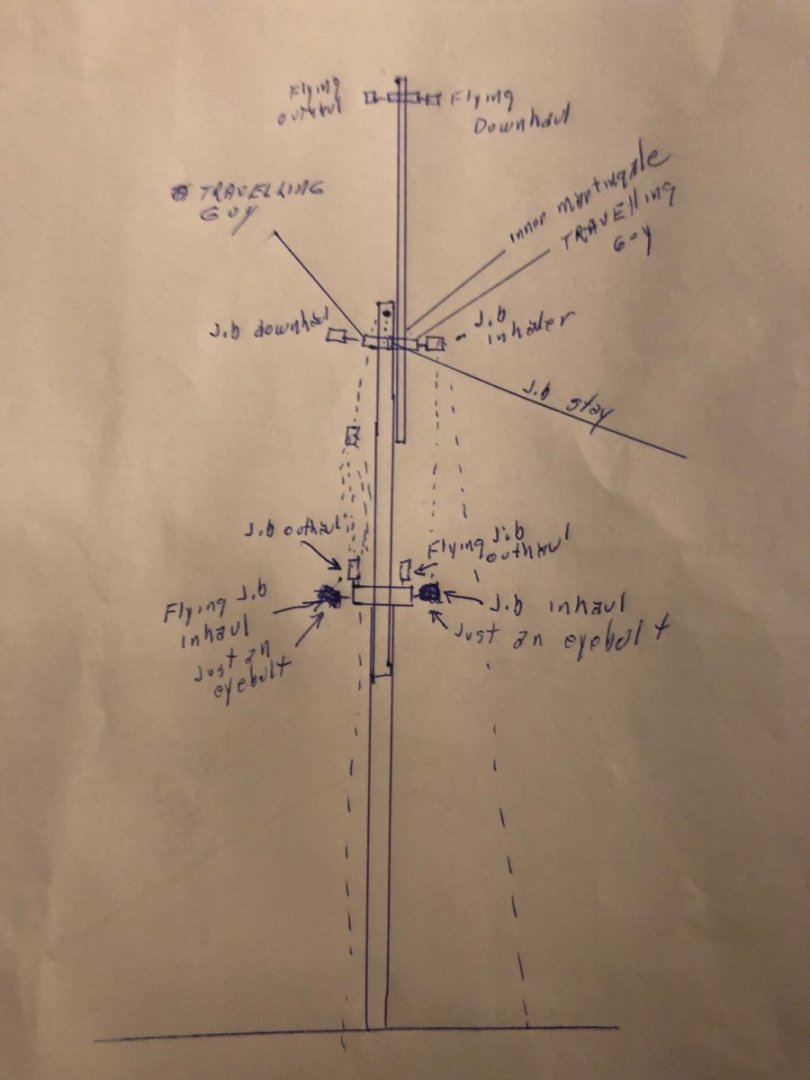
Ok thanks Ian. I am going to have to study this some more and read over your comment several more times. I do now understand there is a down haul as well as the in and out. I understand these are used to control the jib sail. The inhaul and outhaul move the traveller horizontally along the jib boom and the down haul is used to pull the jib sail up the jib stay. I think I got that. And I now understand what block 8 is for. So I still have the issue of the outhauler line running directly under the traveller when the traveller is all the way out and as a result the line rubs against thimble #6.
-
OK Ian just a bit more clarification on the jib inhaul and outhaul. Longridge refers to a downhauler as well on page 234. In the next to last sentence on the page he stated that all 3 haulers (in, out, and down belay to the timber heads. Plan #10 (Belaying Plan) only shows the in and out hauler for the jib and flying jib. Is the downhauler the same as one of the others, he maybe just used two different names? Also your drawing showing how you figured out the instructions, and Longridge’s instructions, show the outhauler going through the hole in the outer end of the Jibboom and then seized to the long block. The middle part of the instructions on page 234 say for both the inhauler and downhauler to go through the single blocks attached to the traveler. When I ran the outhauler the way you described and Longridge maybe confusingly did it runs under the traveler and the line rubs up against the bottom thimble. Should it go through the single block on the traveler before heading back to the long block to keep it off the thimble? Or do I have something completely wrong, which I would not be surprised. 🤔


-
Thanks Ian. Did you go ahead and do it at the time you did the standing rigging or wait until you did the running rigging? I am thinking to keep those standing rigging lines in place I probably need to go ahead and put the haulers on and tie them down? What is your thoughts. By the way, based on your recommendation I have purchased rigging thread 1, .8, .65, .55, .45, .35, and .15mm. I am just going to round up or down with those diameters. For the stays that are bigger than 1mm I may seize them the entire length to give them the appearance of being thicker.
-
Ian I was looking at your drawing of the inhaul and outhaul for the jib traveller. Looks real good and makes perfect since. Reading through Longridge book page 235, bottom paragraph, I can’t determine if the inhaul and outhaul for the flying jib traveller are set up the same way. Did you do it the same way? Also, did you use the haulers to actually keep the traveller in the desired position on the jib boom, or did you apply a touch of CA to keep it in place with the haulers providing the illusion?
-
Oh yeah Ian that’s right. I forgot That spread sheet you sent me several months ago. At the time I was way before rigging and filed it away on my computer. I dug it out. This will be very helpful. To be cost effective I still will most likely round up or down the number of sizes I use/purchase.
-
Thanks Tomganc. That is handy. I believe I will round up and down to maybe use 4 or 5 sizes. Some of them or pretty small at .12, .17, .22mm is that correct?
-
I believe I will Ian. I see what you mean. I will probably keep the collars I already have installed. Won’t be that noticeable with the seizing already done to them. What do you think about the hearts I made? Think they are doable?
-
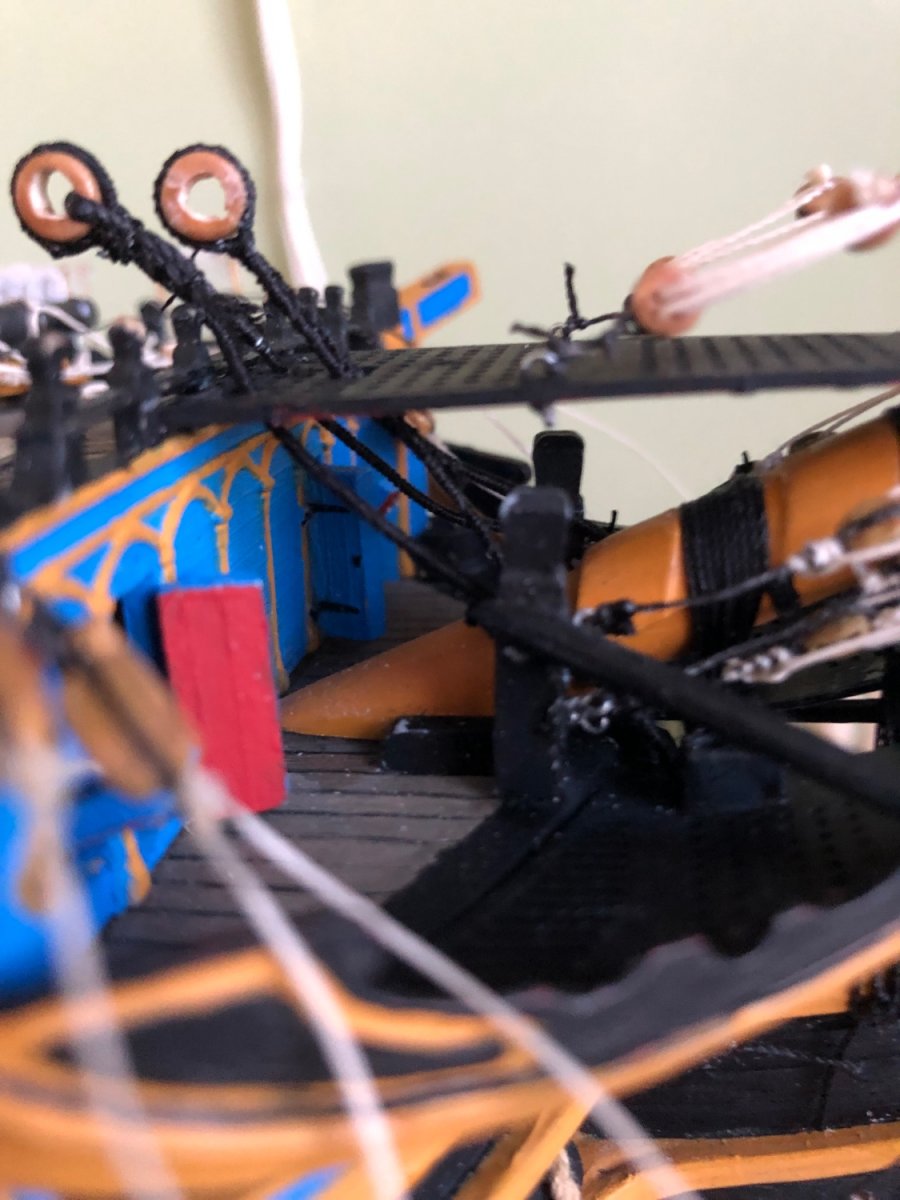
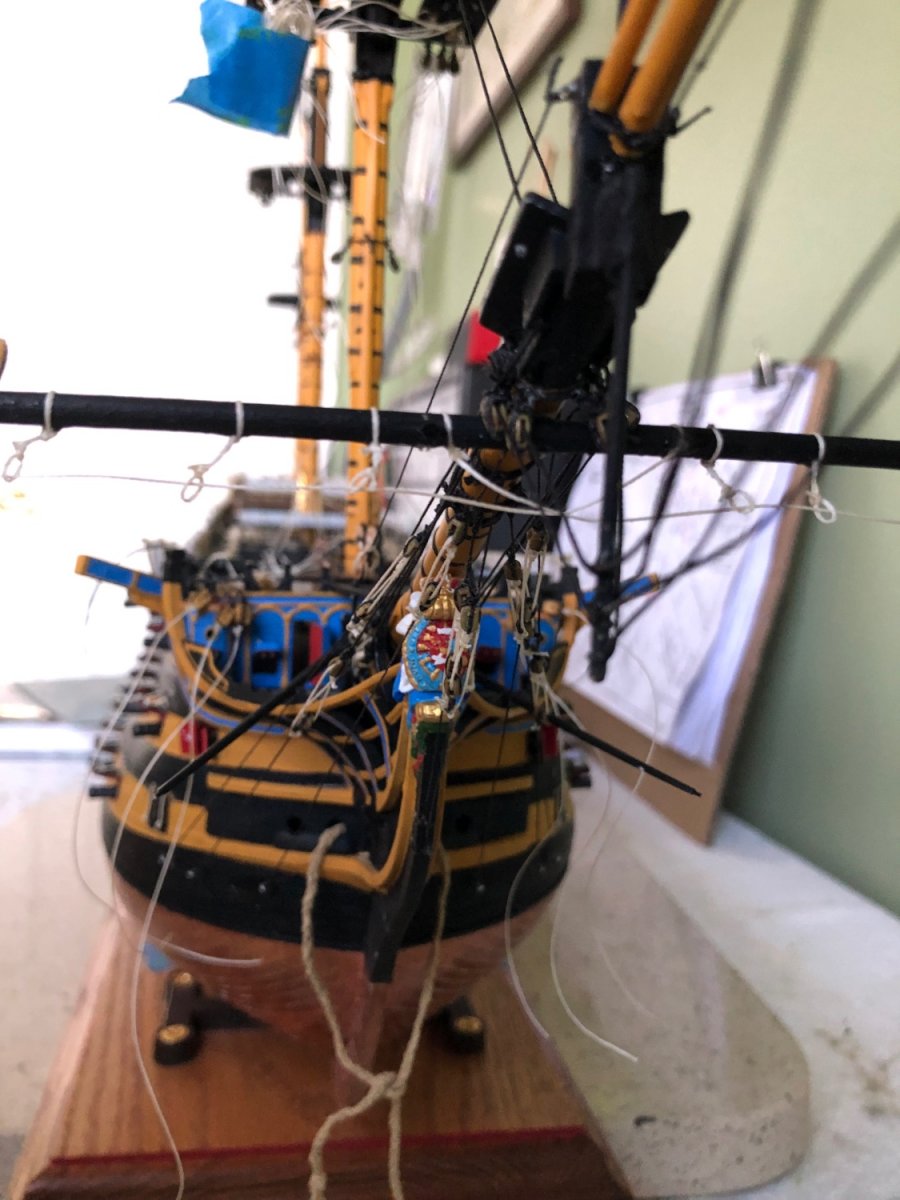
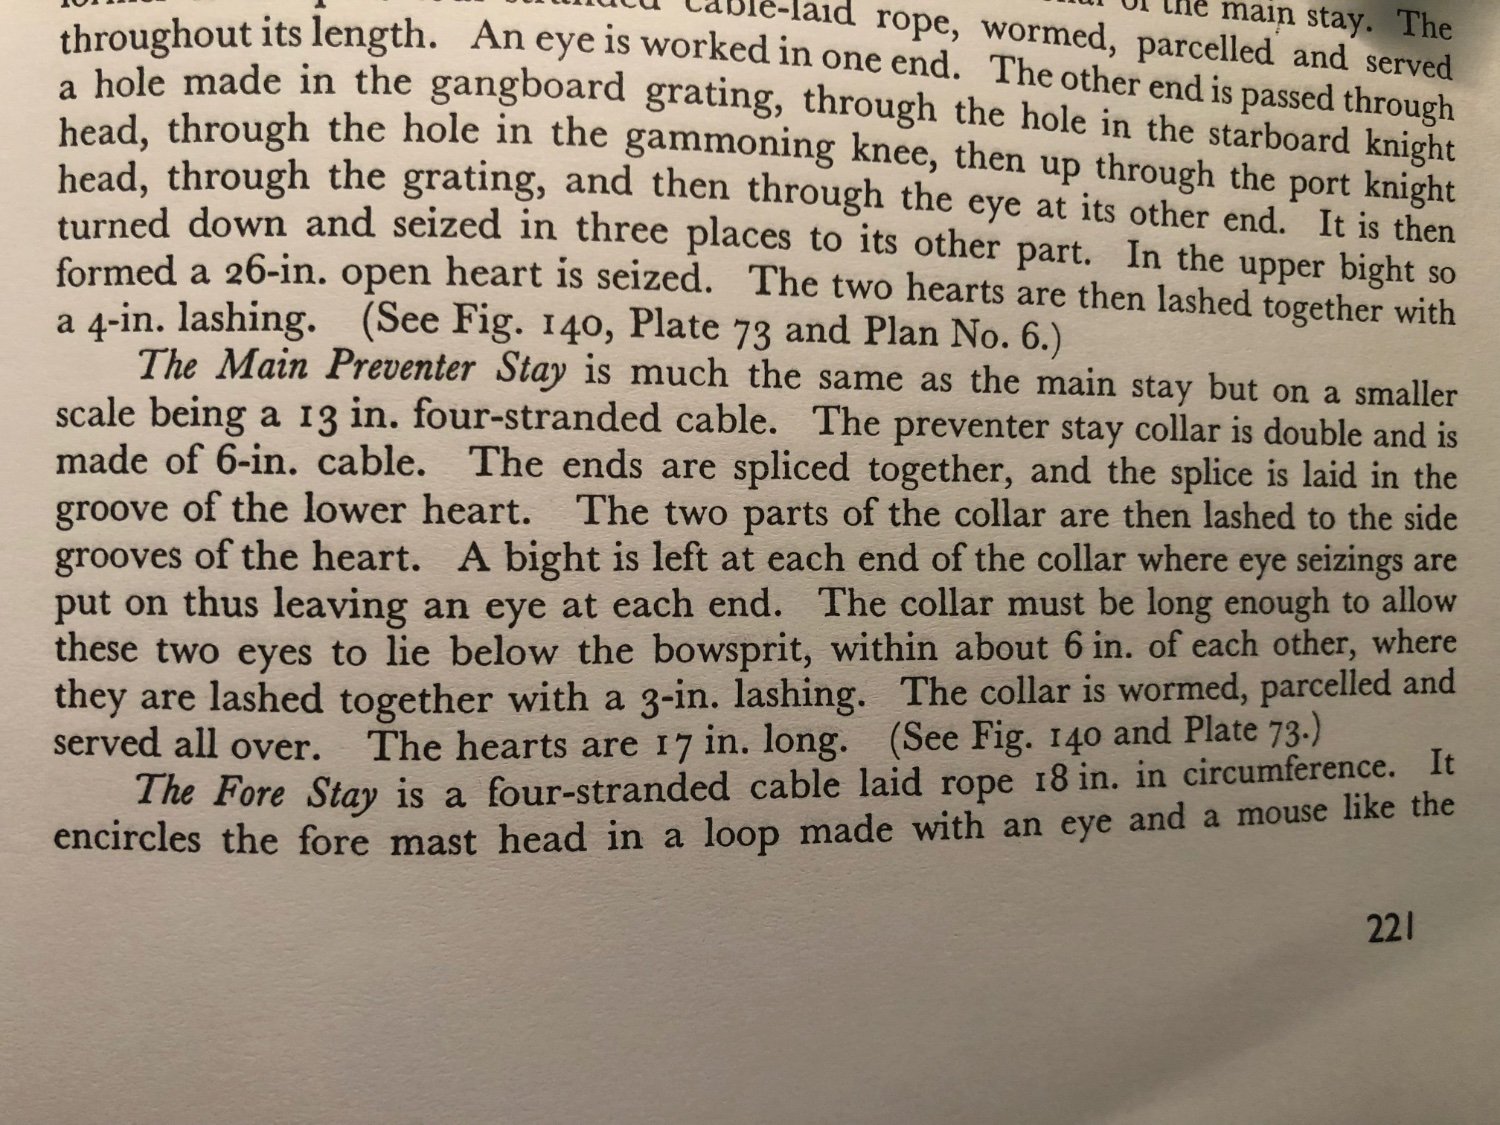
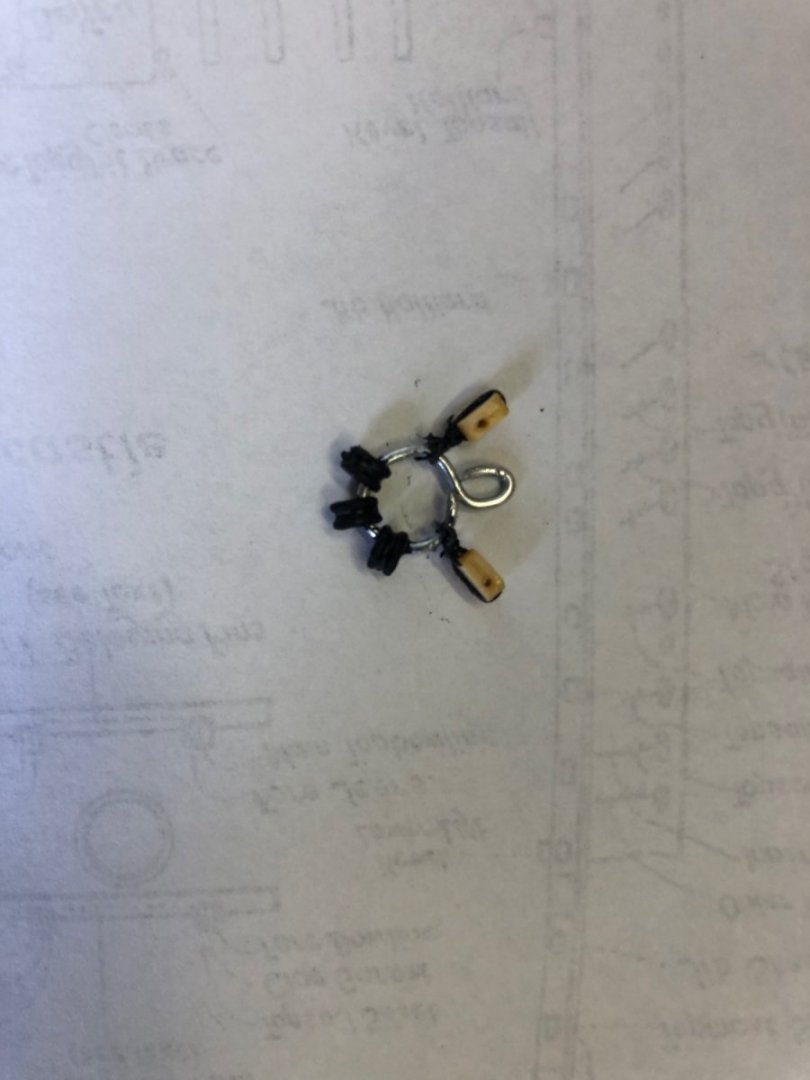
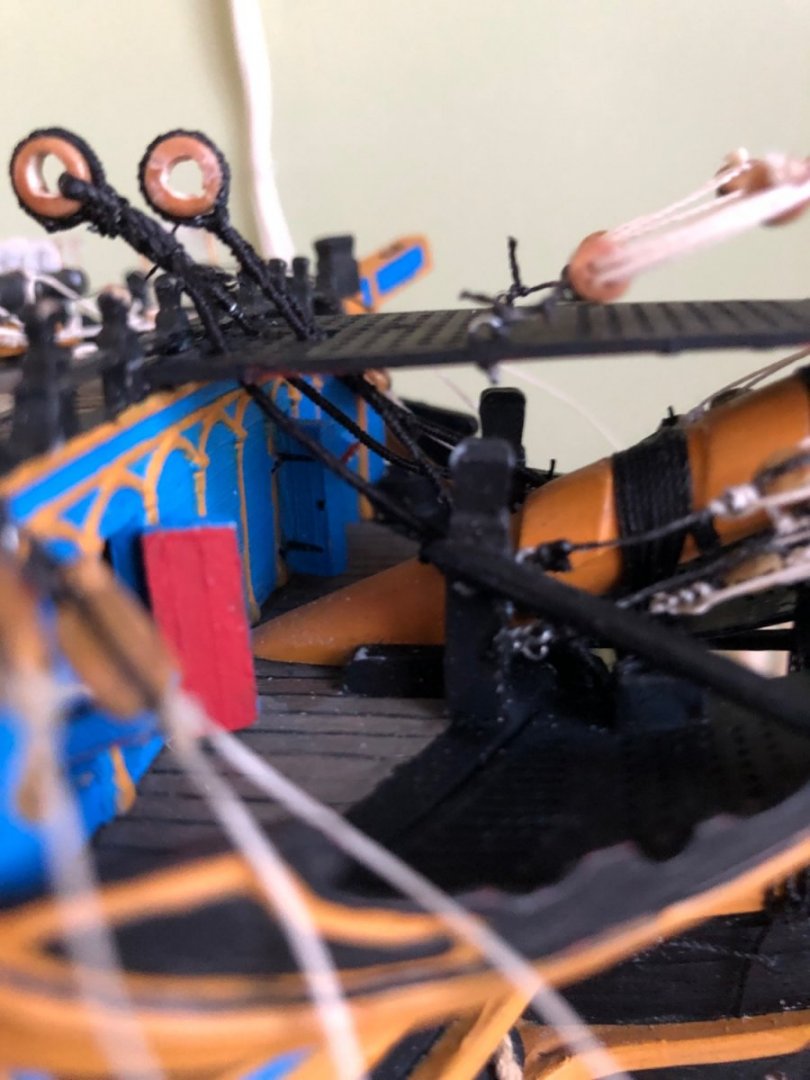
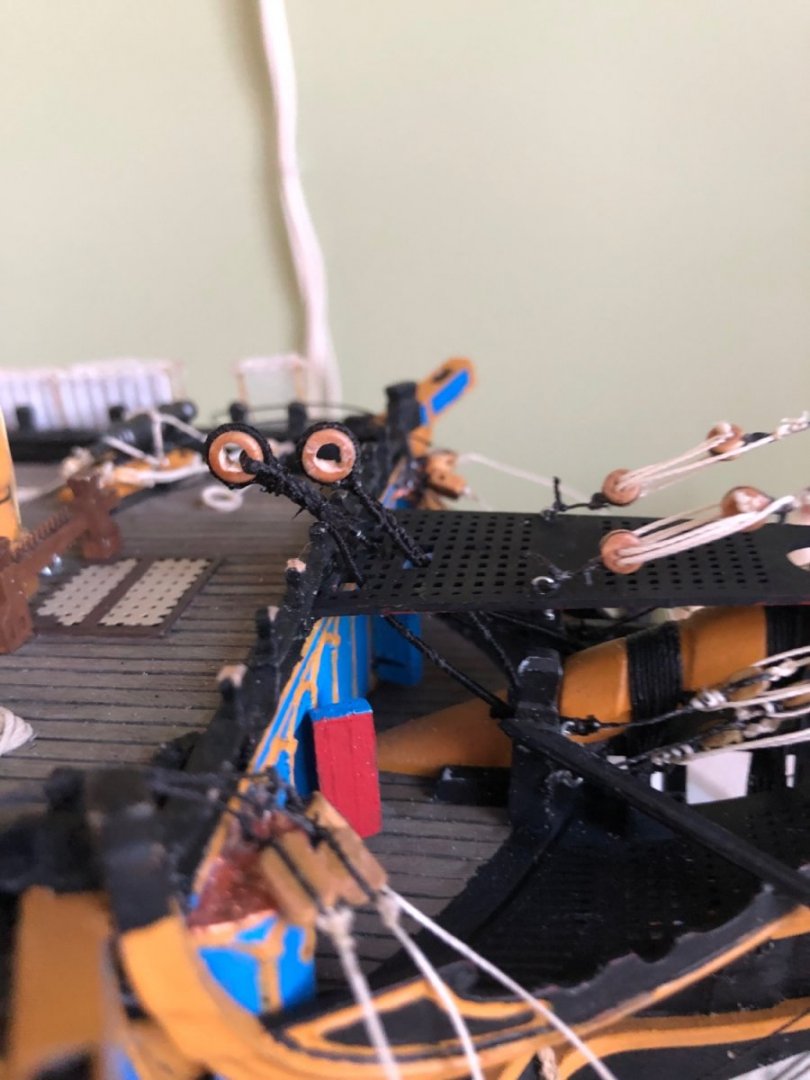
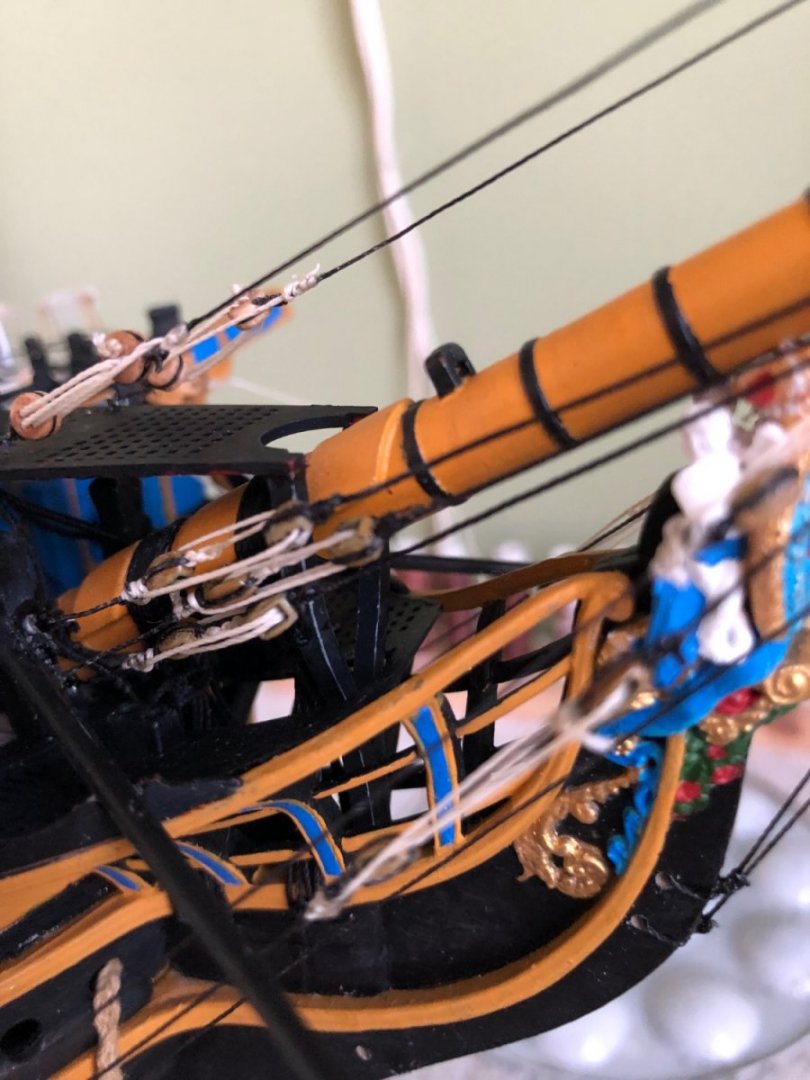
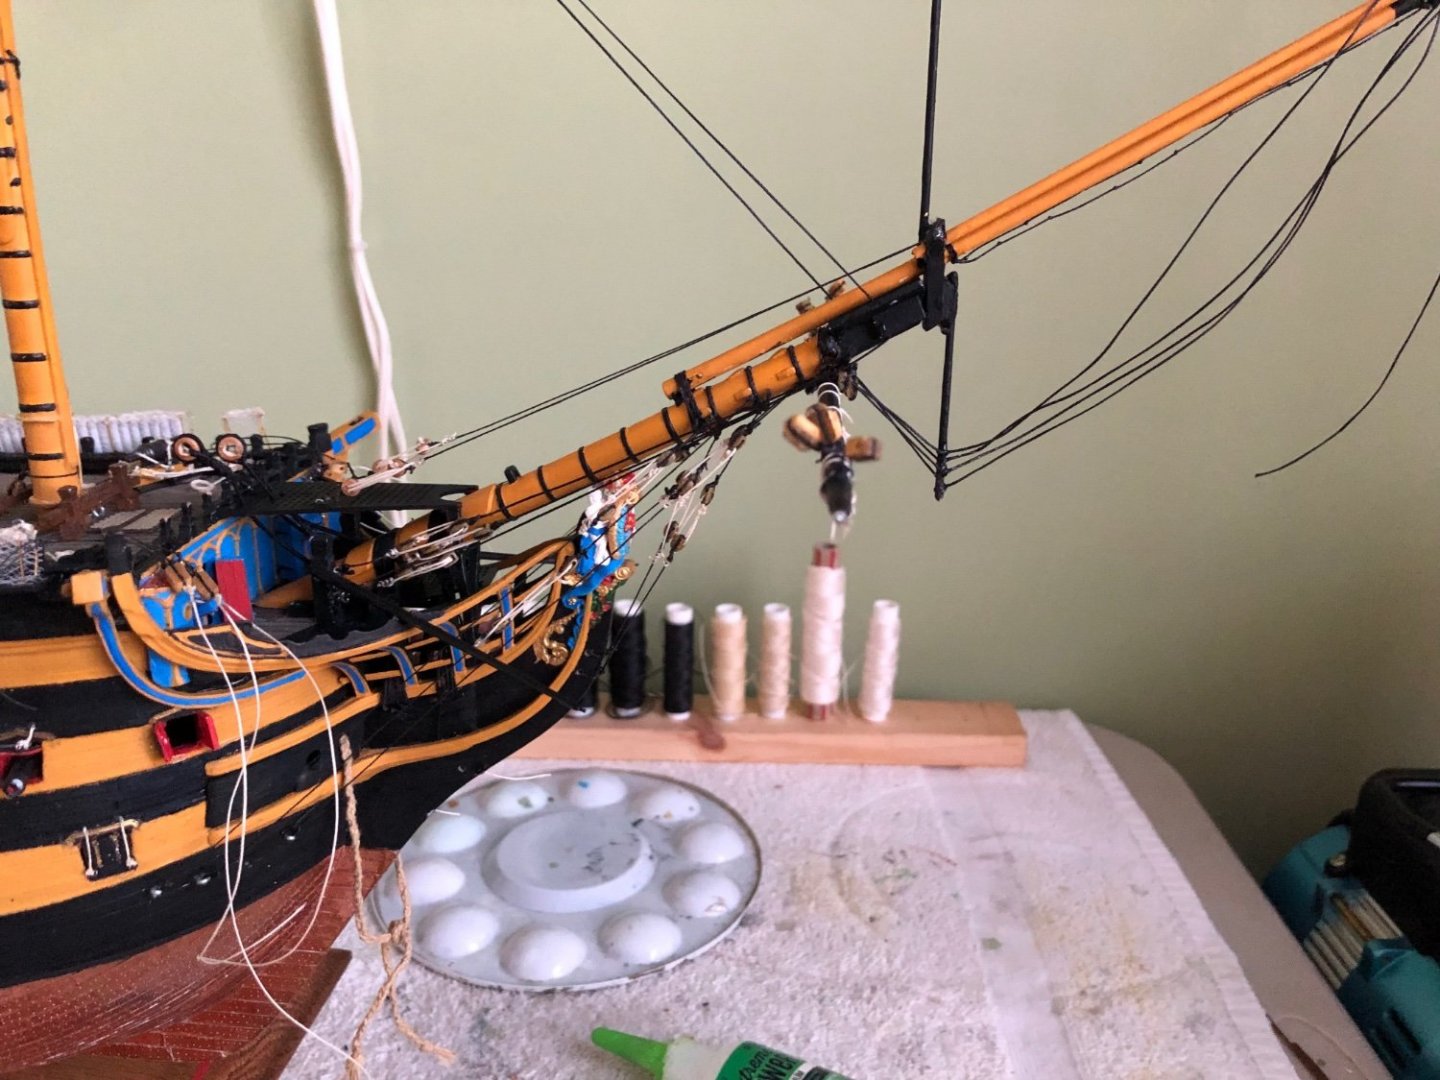
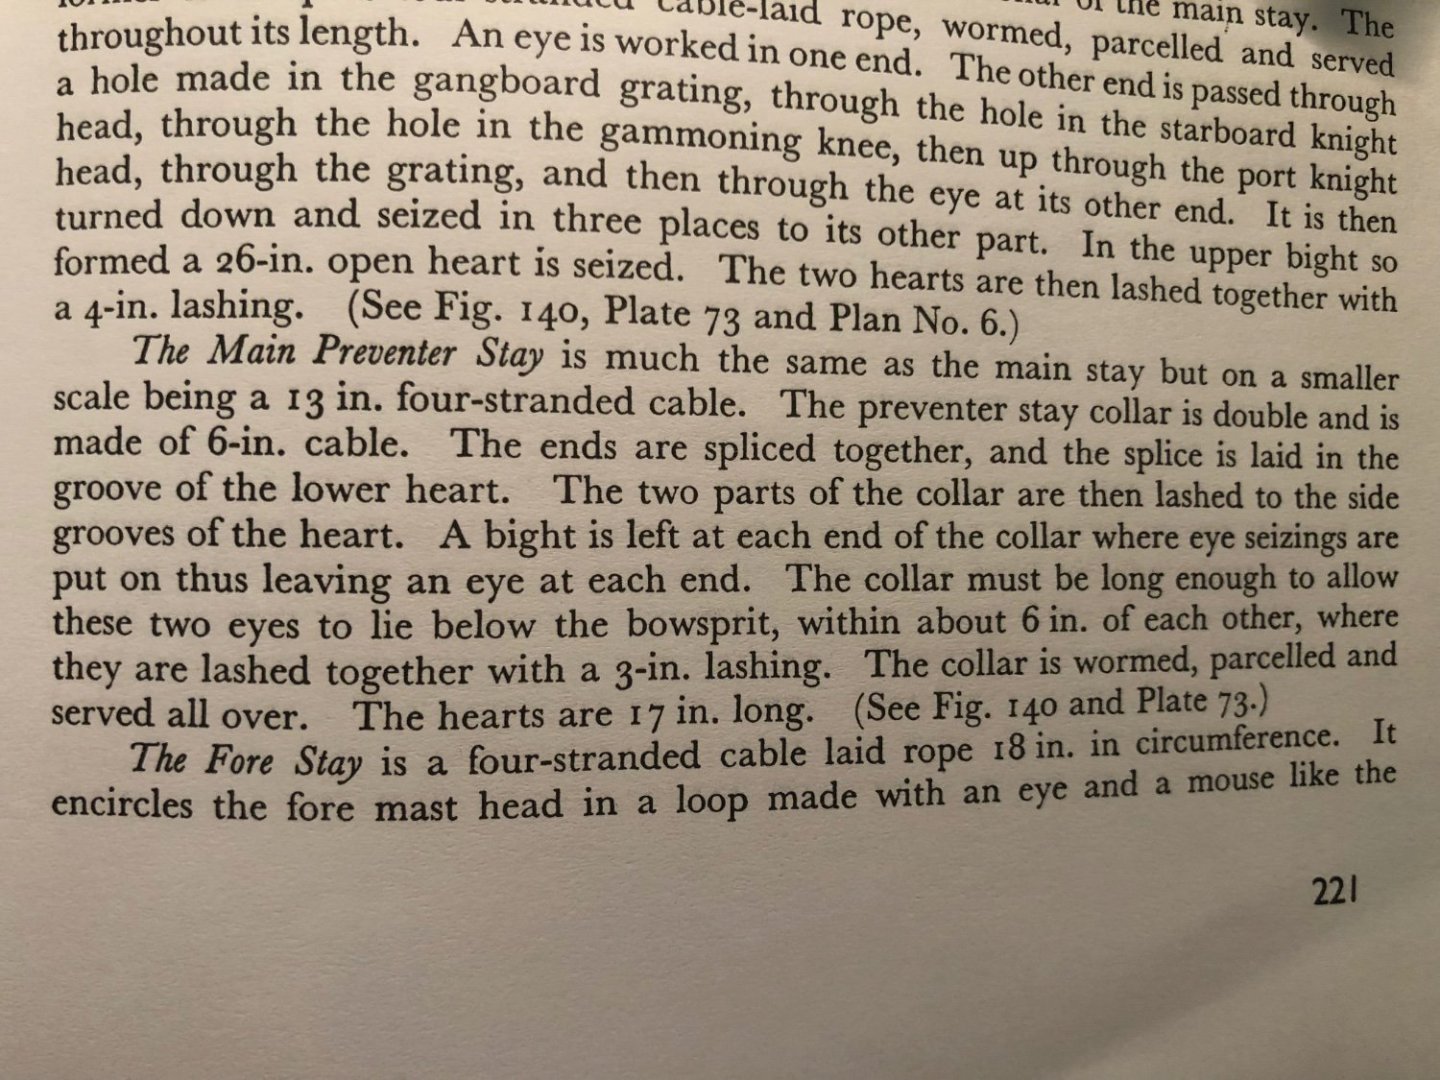
Some progress rigging the bow area and bowsprit. Followed Longridge’s directions to install the main stay and main preventer stay collars. Since the instructions call for a heart in the collars I decided to make a couple out of wooden deadeyes by drilling out the centers. I don’t have hearts or thimbles but do have plenty of deadeyes so I may use this same idea in other places where hearts are needed. I see I need to add a drop of wood stain to the insides. Also since my largest cord on hand is .6mm I just went with that as directed by Heller. I attached the 3 rigging lines to each of the knightheads and ran them in reverse to their future end points. Since I replaced the plastic dolphin striker supplied by Heller with a brass rod for strength, I did not have the four holes in the end of striker to run the martingales through. As a result I just wrapped the cord around the rod and applied a dot of CA. Still need to attach the ends to the bowsprit as directed by Longridge. Also have the two lines that go from the knightheads up through the bees to later be stays for the foremast.

-
Hey gang are hearts, thimbles, and bull’s eyes virtually the same thing? Just different shape and size maybe?
-
Thanks Ian (my very wise teacher). I will read over all you said here and see if I have any follow up questions. Initially reading through real quick, yes I am Ok with the main stay (or was until you mentioned thread size). Yes my Main Stay does bend at the knight head and goes down through a hole in the knee and then up the other side. I did not get Daniel’s knighthead piece. I am contemplating making my own hearts. It seems that hearts and bull’s eyes or thimbles are pretty much the same thing, just different shape? No I don’t have thread that large. My largest is .6mm! That is the largest Heller called for in there instructions. I may have to get some larger for the stays or just live with the smaller .6mm. Will a 1.6mm even go through the hole in the Knightheads, especially if served?
-
OK Ian thanks. I will just take out the deadeyes and run new threads to the eyebolts. Ian are the thimbles standard size throughout the ship or would I need different sizes? Last question for the night Ian. Would you mind deciphering the route of the Main Preventer Stay? I figured out and understand the route and rigging of the Main Preventer Stay (although I do not have any hearts either. 😊). May have to order them as well as thimbles. The Preventer Stay is a little confusing.
-
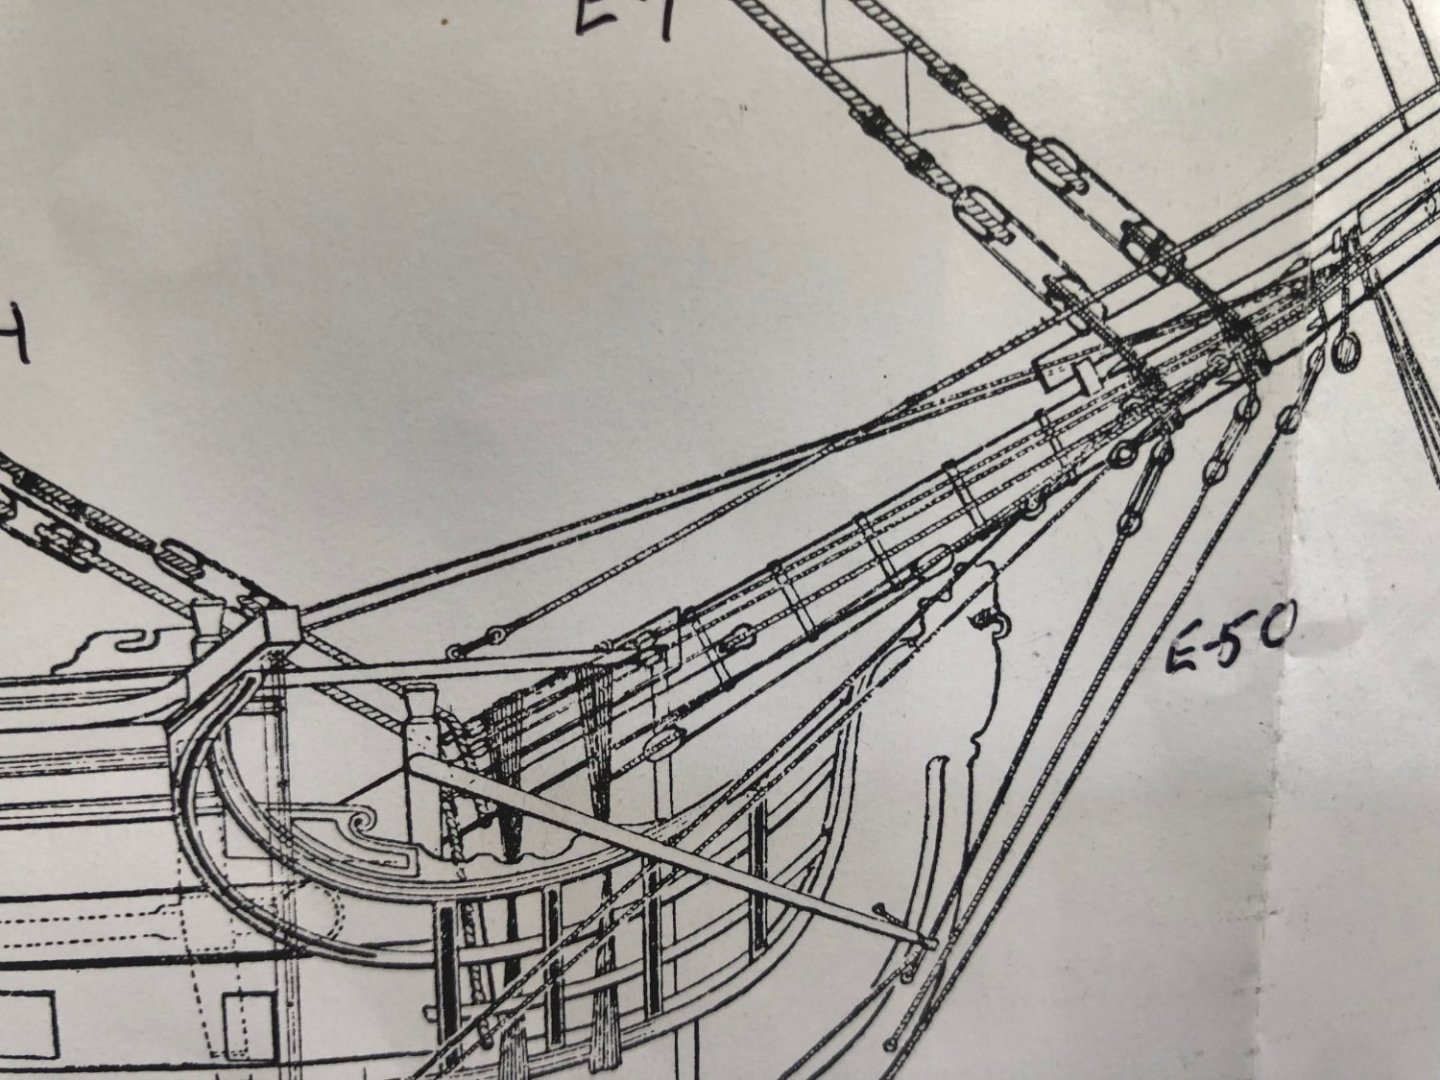
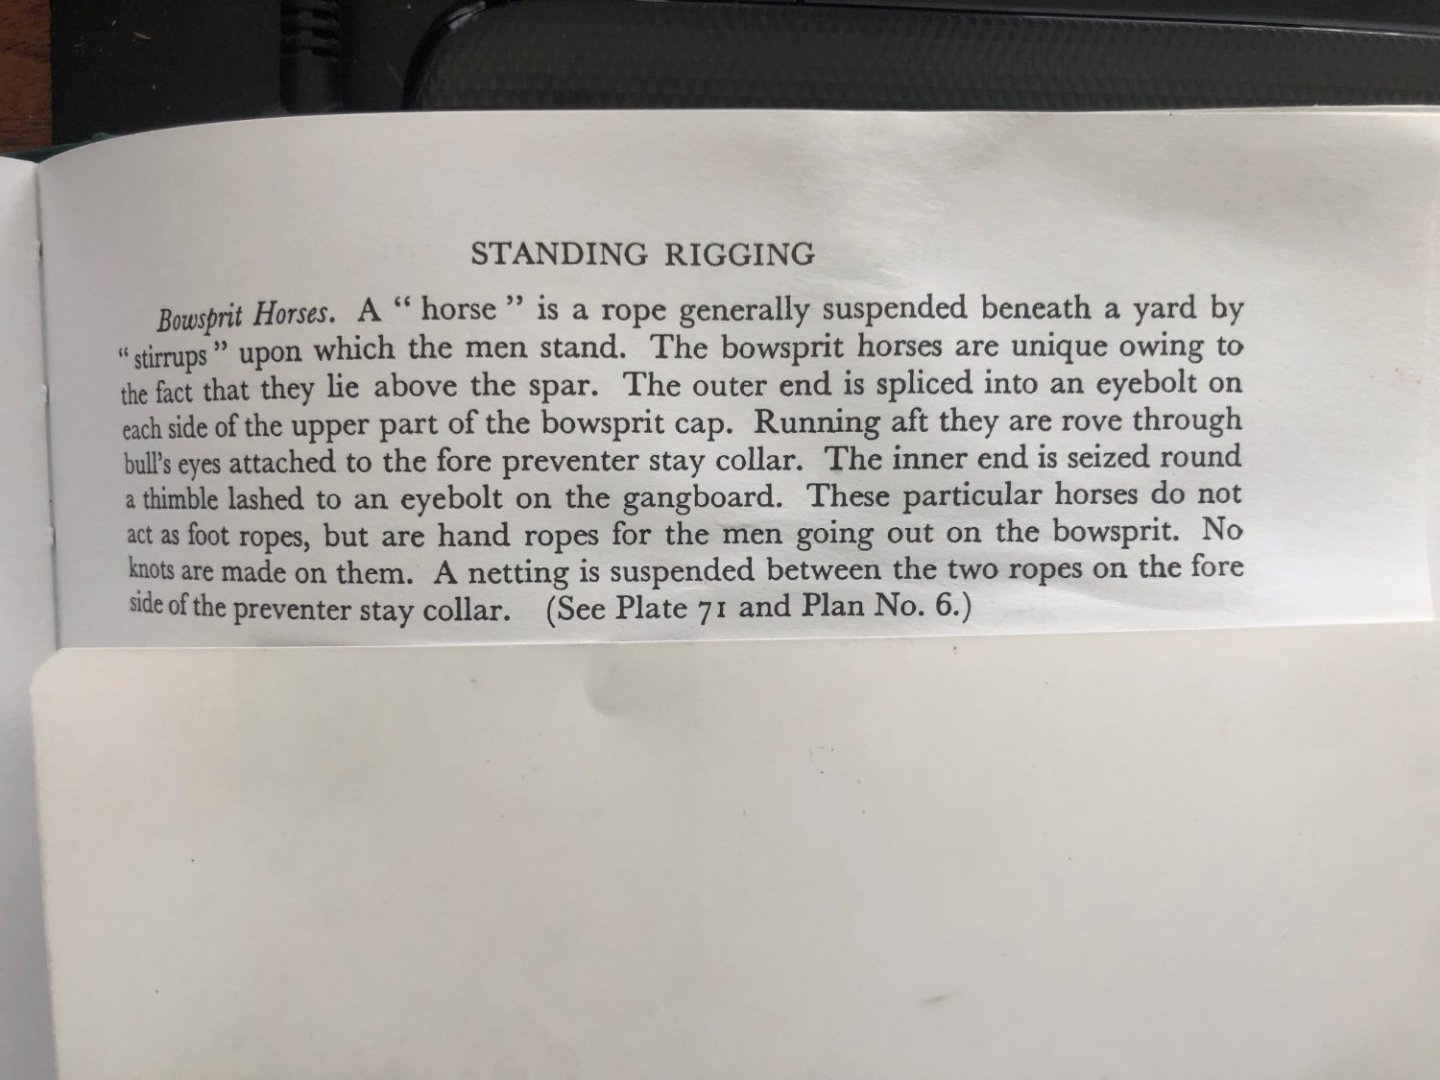
Thanks Ian. So I could probably just live with the deadeyes I used since I don’t have any bullseyes or thimbles? Would look somewhat similar. Do you read the Longridge instructions and the plate as conflicting reference the bowsprit horses? The plate shows them going directly to the bullseye on the gangboard. His text says to go through an eye on the fore preventer stay.
-
As I make my way along in this build I find myself often changing direction or planned building sequence. My most recent plan was to complete the standing rigging on the bow sprit then move to the shrouds and standing rigging on the 3 lower mast. I am realizing now that is not a good route because I can’t complete the bowsprit rigging without the completed foremast because of the upper stays on the foremast that run through the bowsprit. This would continue to be the domino effect working toward the mizzenmast mast. So I think I will now fully construct all 3 masts before getting back to standing rigging.
-
Michael thanks for bringing that to my attention. I believe the honest answer to that is that I think I miss read Longridge’s instructions. In the picture from Longridge’s Plan #6 it looks like the way I did it, not the way he explains it. In the paragraph Longridge says to rove the line through a bull’s eye attached to the fore preventer stay. The inner end is then seized round a thimble lashed to the eyebolt. I misread that as a deadeye lashed to the eyebolt. Will have to redo that once I figure out what a bull’s eye is, and after I install the fore preventer stay collar.
-
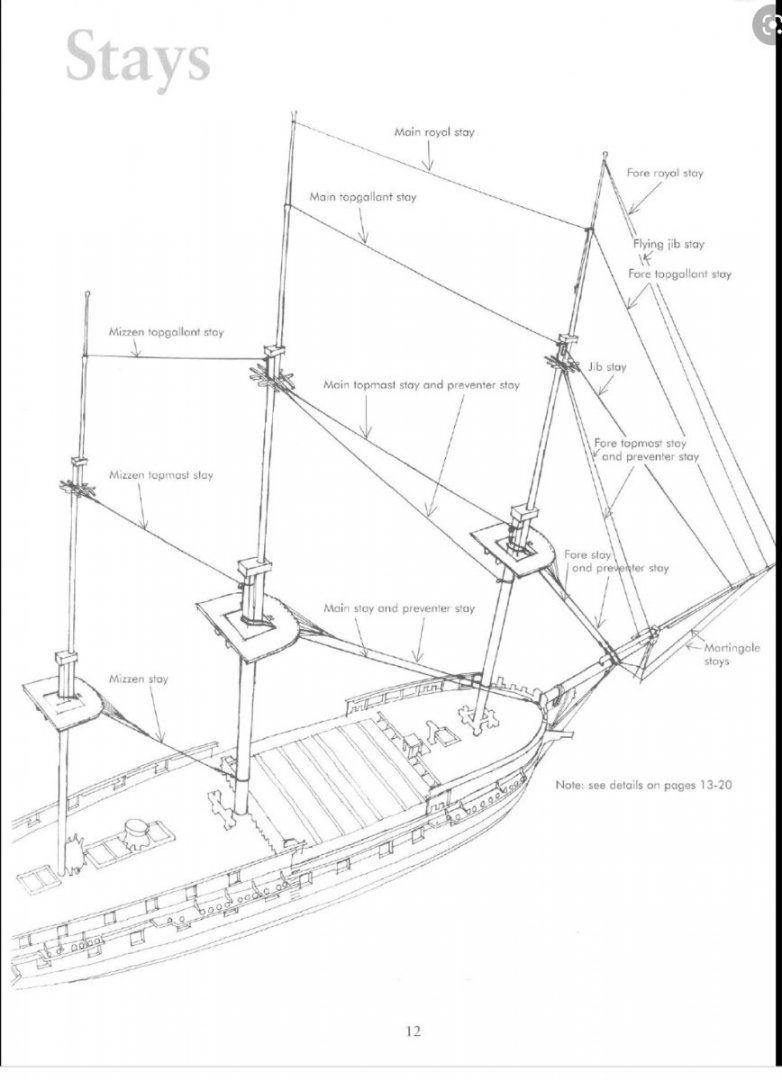
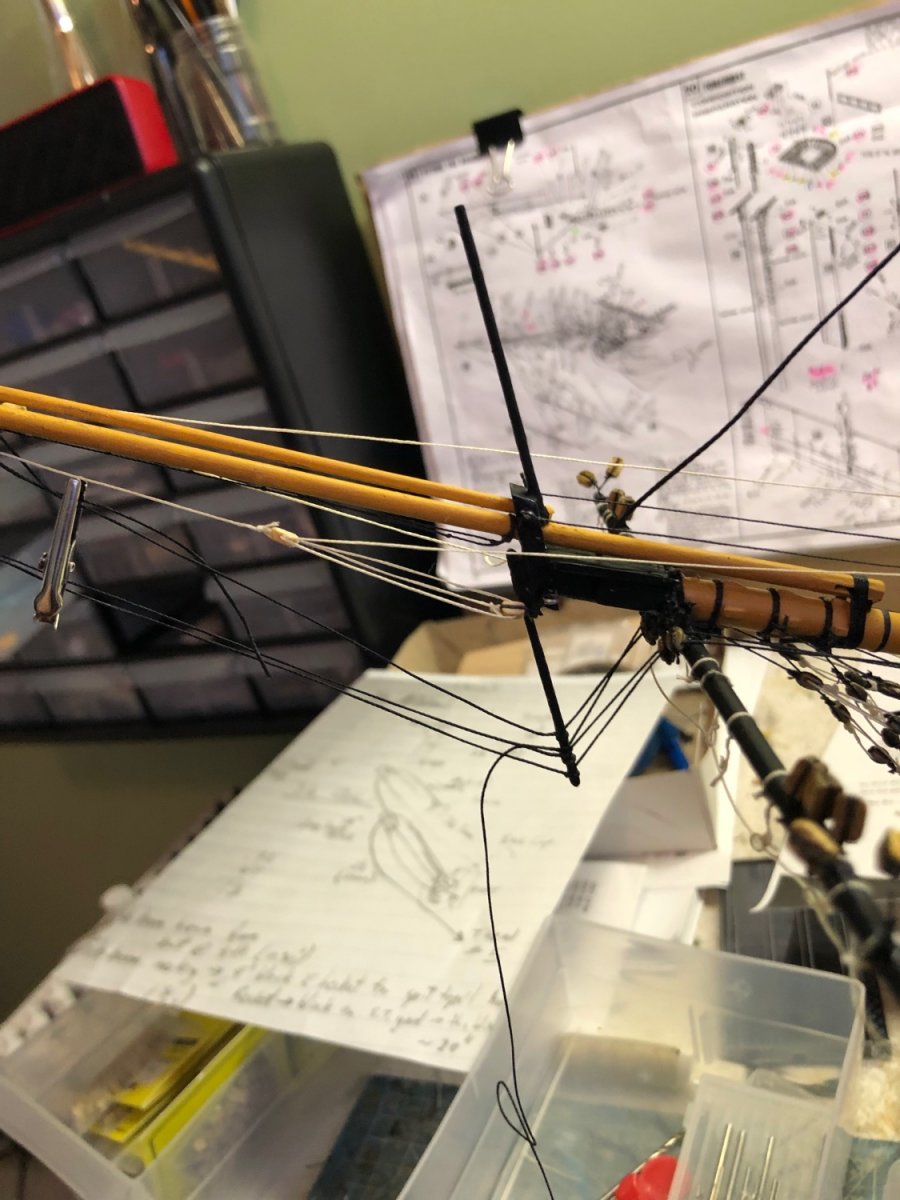
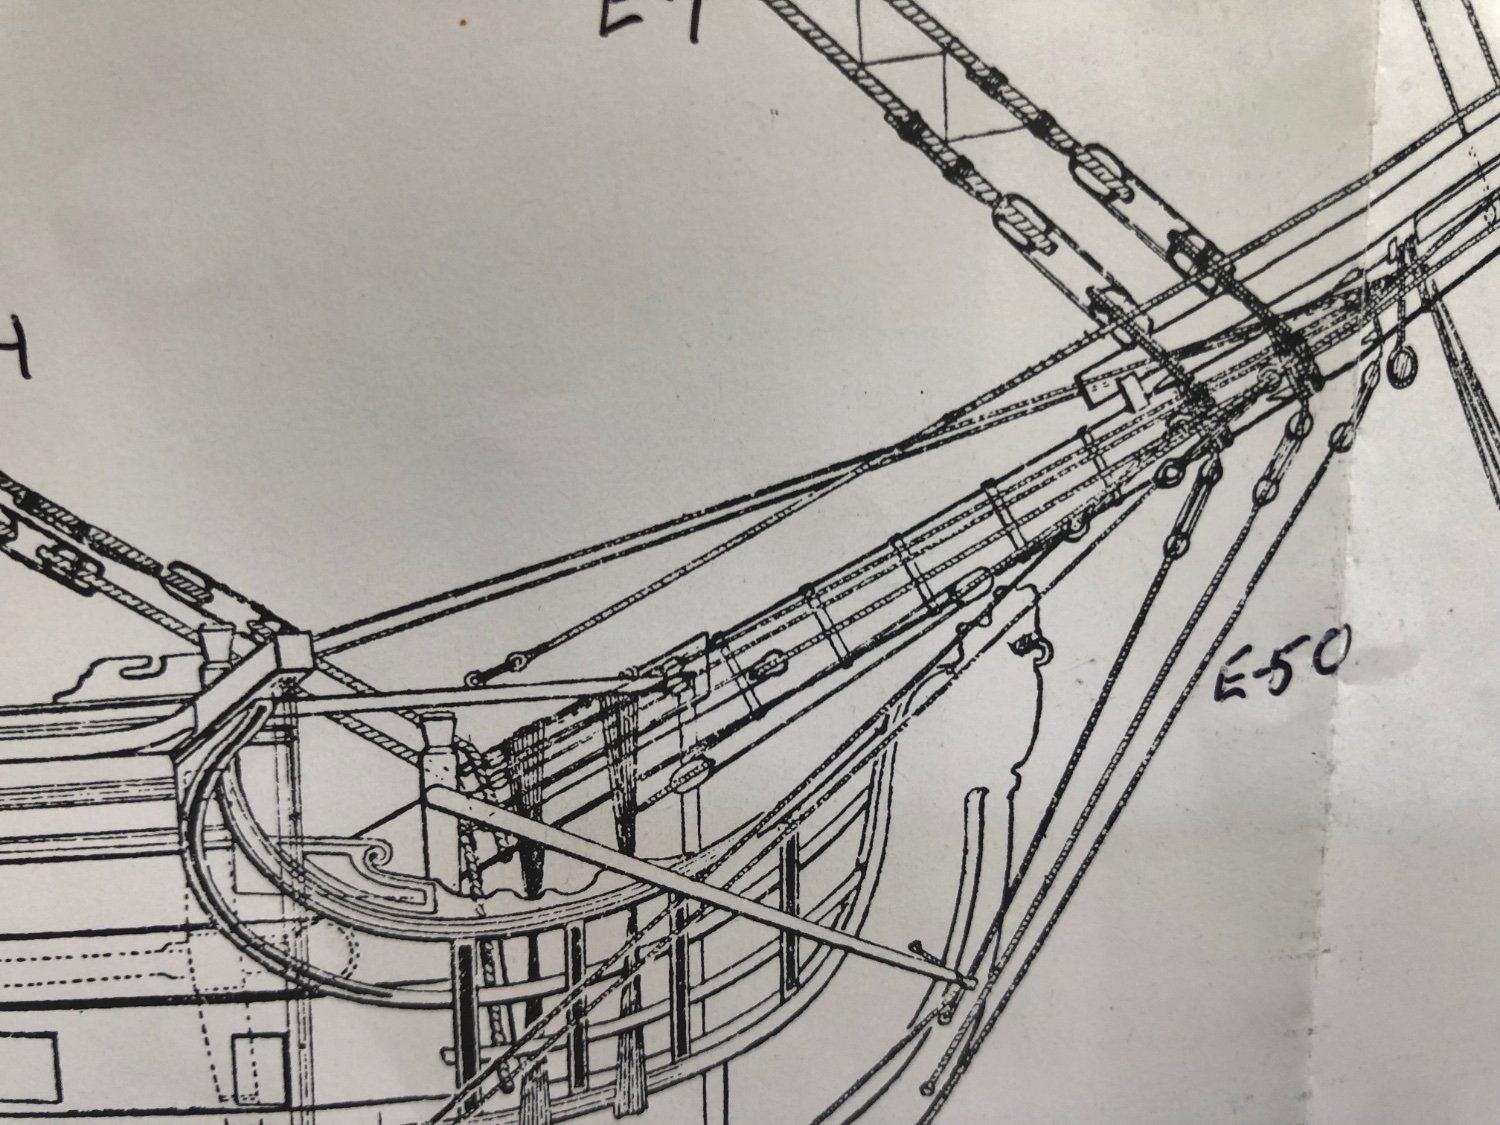
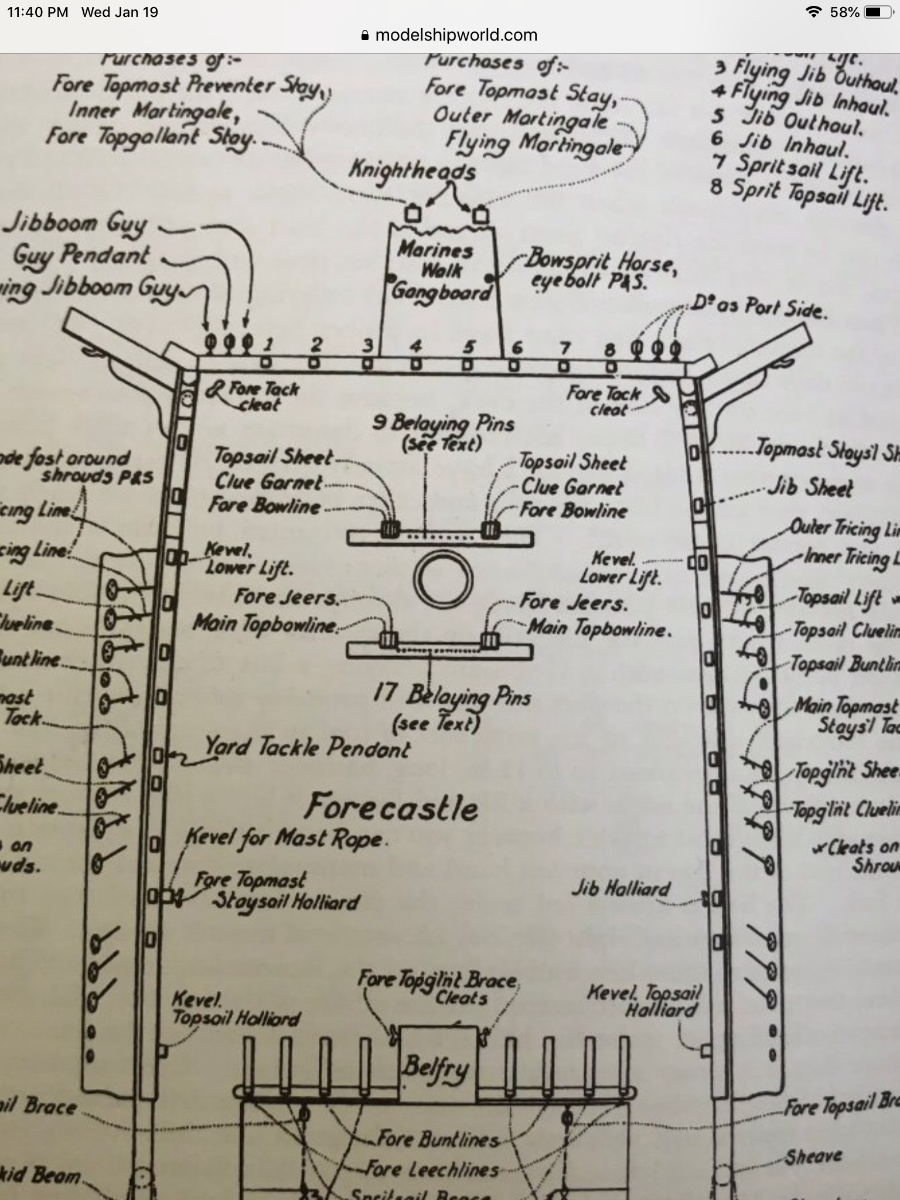
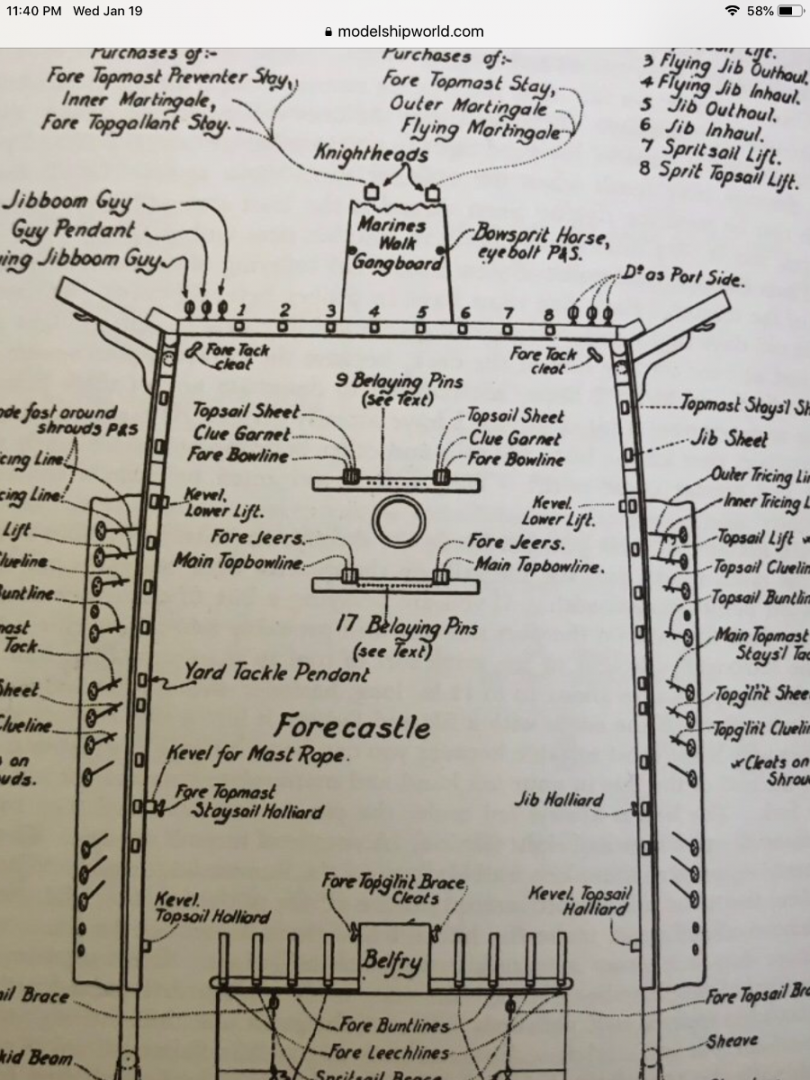
Thanks Ian. I was reviewing the belaying diagram and wanting to make sure I had the six lines that go to the two Knightheads. I saw in Longridge’s diagram the names of the lines. I was then going to the index to find the line, and then to the text. Then I wrote the name by the line I thought I understood. I got the bottom 4 right and almost the fore top gallant stay right 😀. The text says the top spritsail yard uses a parral. It is so tiny that far out on the bowsprit! Did you try to make one that little?
-
After the last comment I found this photo online. Will see how this compares to Longridge.