Supplies of the Ship Modeler's Handbook are running out. Get your copy NOW before they are gone! Click on photo to order.
×


Bill97
-
Posts
2,656 -
Joined
-
Last visited
Content Type
Profiles
Forums
Gallery
Events
Everything posted by Bill97
-
Daniel, you could probably expect, I have looked at your control board in the pictures where it is visible. Is there anything specific you would recommend for the on/off switches? I like the look of yours. Are your’s a two pin type? I have looked at your a number on Amazon and not exactly sure of the requirements for my future application. Thanks
-
Daniel and Mike look what Santa delivered early!
-
Marc I am hoping all is going well with your dad. Best wishes my brother.
- 2,634 replies
-
- 4
-

-

-
- heller
- soleil royal
- (and 9 more)
-
Thank you gentlemen. I hope to learn so much from both of you before I start my AV. As you may see on my Endeavour build log, I still have a good way to go before this beautiful model is complete. I will fully appreciate any and all advice that you would file in any of these file drawers: A. If I had it to do over I would have..,,, B. I wish I had known this before I started….. C. In retrospect I would not have wasted so much time on…….. D. With out a doubt the most difficult task was … Etc.
-
Thanks Daniel. I am getting all my stuff together. Enjoying your and Mike’s discussion back then and detective work finding certain lights on the real AV. I have not let myself look forward yet to see how you did the lights for the port holes before the planking.
-
Daniel I am again reading through your build and I read early on that you said you use 3mm LED’s. That is different than the size I originally showed you I have. Those are bigger. So I ordered a selection of 3 mm diode LEDs in a few colors. I should still be good with the resistors and voltage regulators you recommended if I use the 3mm LED’s, right? The smaller bulbs will obviously look better in places where the bulbs will be seen.
-
Marc I am so sorry to hear about your uncle and dad. These times can be so sad for you, especially around Christmas. As I mentioned before I went through this with my mom. It is great when you can get away from it for a few minutes and let your brain sink into your ship. She is looking great. Be at peace my brother! Bill
- 2,634 replies
-
- 2
-
-
-
- heller
- soleil royal
- (and 9 more)
-
Thanks Mike. That is an option as well.
-
BRILLIANT!!!! That makes perfect logical sense. The voltage regulator you recommended from Amazon has 4 included. So since I will have everything I need to do 4 circuits that is what I plan. Will review your plan to see which I want to copy. Hope you do not mind my using your knowledge for my gain. It is so appreciated. I ordered 22 gauge wire so I am ready in the future. How many LED’s did you ultimately found gave the best bellow deck lighting? I don’t know to expect to wire 10, 15, 20, etc to get the right port hole illumination.
-
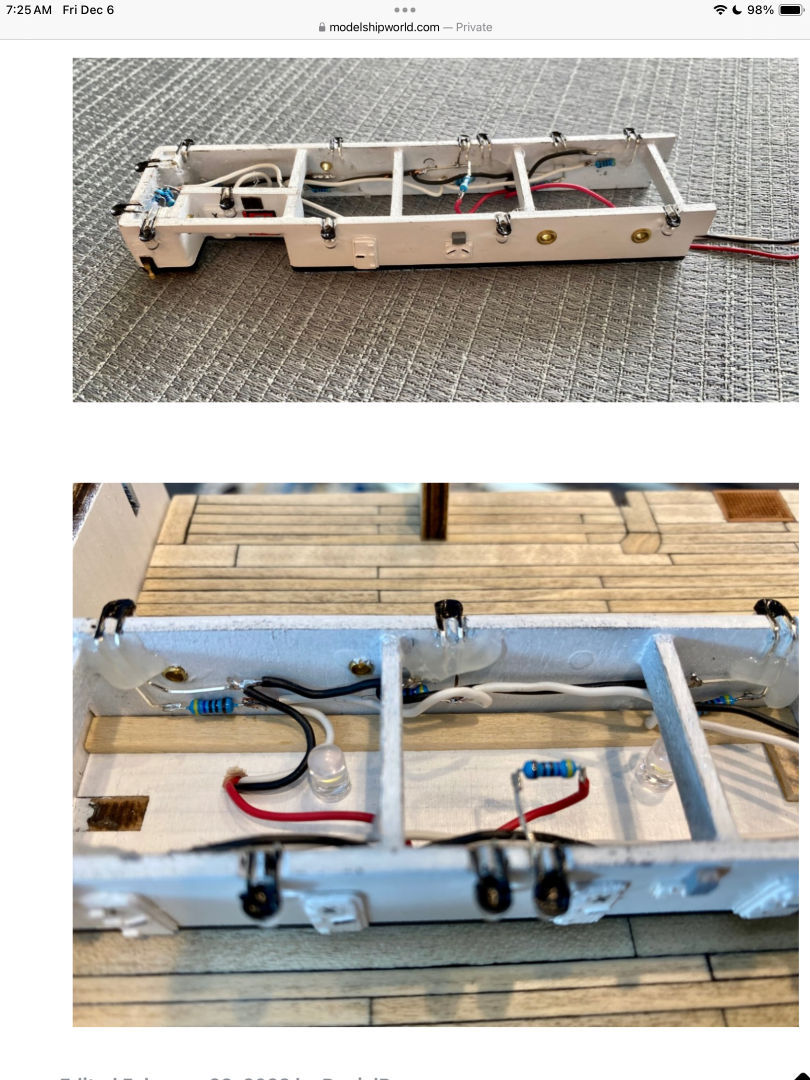
Ok Daniel now that we had our long discussion and you gave me an excellent electric education upon witch I ordered all my needed stuff, I have gone back to the beginning of your build and started reading again. Sure enough, as I expected, I have another question. In the photo below (from your 1st page) you show 3 wires. Red, black, and white. I am only expecting a red and black wire running through the circuit. What is the white wire? I also see a green wire peeking in there in the photo of your control board with the voltage regulators but I won’t ask about that yet 😊. While I am bugging you with a question would you want to venture a guess at what gauge wire you are using?
-
Oh well. I ordered the one you recommended. And it comes with the adapter! Would be my luck as soon as I use it I would remember what it goes too! 😂
-
I did find this rather new one but I don’t think the information on the back identifies all you said it needs to. So I think with the adapter included, knowing it is correct, and very affordable I will go with the one you recommended. How many white LED’s did you put below deck on that circuit? Just guessing how many I should have.

-
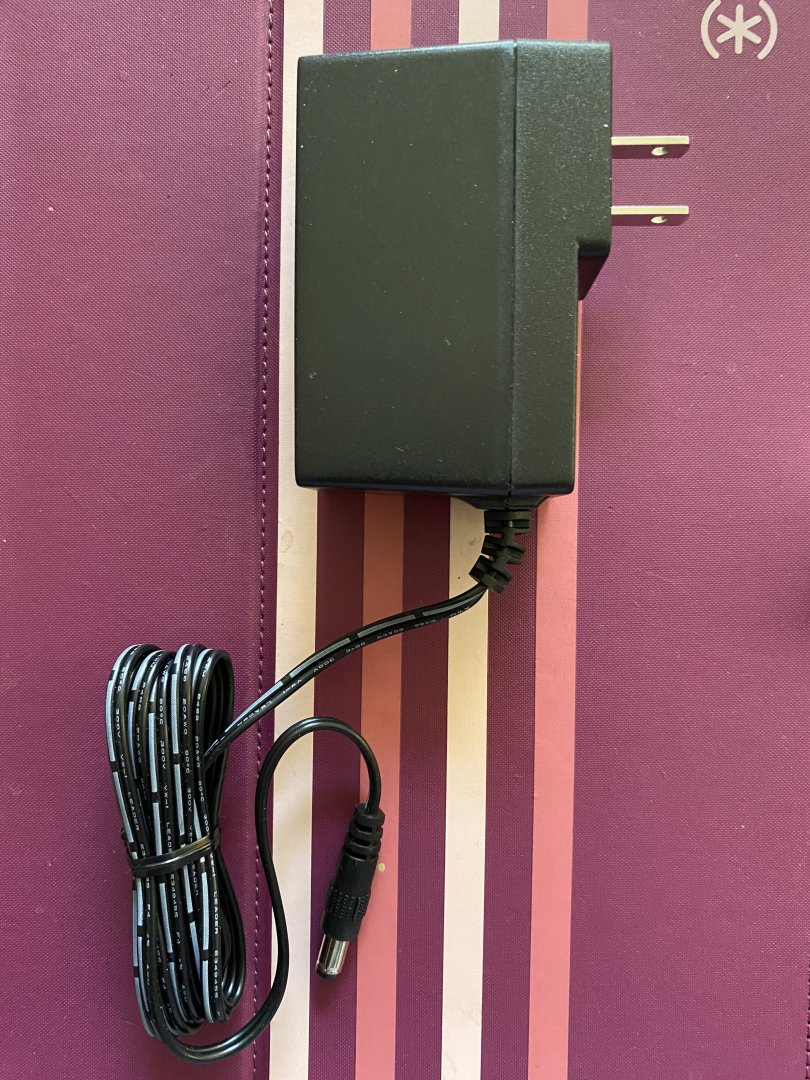
Oh my gosh Daniel I had no idea what a power brick is. I am sure I have one or two of those around here somewhere. But for that price on Amazon, and your recommendation, I will save time looking for one and making sure the one I found was correct. Correct me if I am wrong Daniel. It appears there is an adapter included with this brick. Is the piece with the green part on the end the adapter? It looks like there are two screws that the red and black wire would connect to. So I have in my Amazon cart the power brick, the resistors, and the voltage regulators. May include some more white LED’s. I only have 10-15. And what the heck a spool if red and black wire as well. Hopefully it is all in my stocking Christmas. That is fantastic that you are a chiropractor. If I lived in Washington my wife and I would surely be a patient! Old body aches and pains. I have surly received chiropractic adjustments from time to time. I retired from the US Army years ago and enjoying retirement life. For many years I supplemented our income by doing home improvements for other people, and our home as well. I also did custom furniture building. Once I got the 3 kids out of college I cut back.
-
Daniel this is fantastic and will be so helpful when I start this project. So I will put a voltage regulator on each circuit (I can’t imagine need more than 3). Then a resistor on each of the LED bulbs. Following your diagram is very clear and understandable. Would you care to recommend a power brick? I doubt seriously if I have anything around here that has one. Or maybe just tell me the official name of it so I can check Amazon or other source. Do they come with a positive and negative screw to attach my red and black wire, or other means of starting the circuit? Again Daniel this is incredible and so very much appreciated. By the way are you an electrician or engineer by trade? Your diagram looks very professional and comes from experience in this area.
-
Yards for the main mast rigged with blocks, foot ropes, etc. Ready to make the furled sails, attach the yards to the mast, and install the mast on the ship.


-
By the way Daniel I am reading through your Terror build. Great work.
-
Great information Daniel! You are hitting on exactly what I want to do. I can’t make up a Christmas list for all the stuff I want. Plenty of time to get this together before I start my AV. I would be forever grateful to you if you were to sketch out a basic diagram. I have never lit any of my ships. I want to run my lights on a power brick that will plug into the wall. I will have my finished AV in a display case and this will solve the battery change issue. So would this be my shopping list: 12 volt power brick (your recommendation appreciated) Voltage Regulator (as you recommended) Resistor (as recommended. 1 for every LED) I will have additional questions about the voltage regulator(s). Will I need more than one? Where do I put it, or them, in the circuit? Daniel I so much appreciate your help with this. As I said initially, I have studied this at length in the past and avoided because I just could not grasp it
-
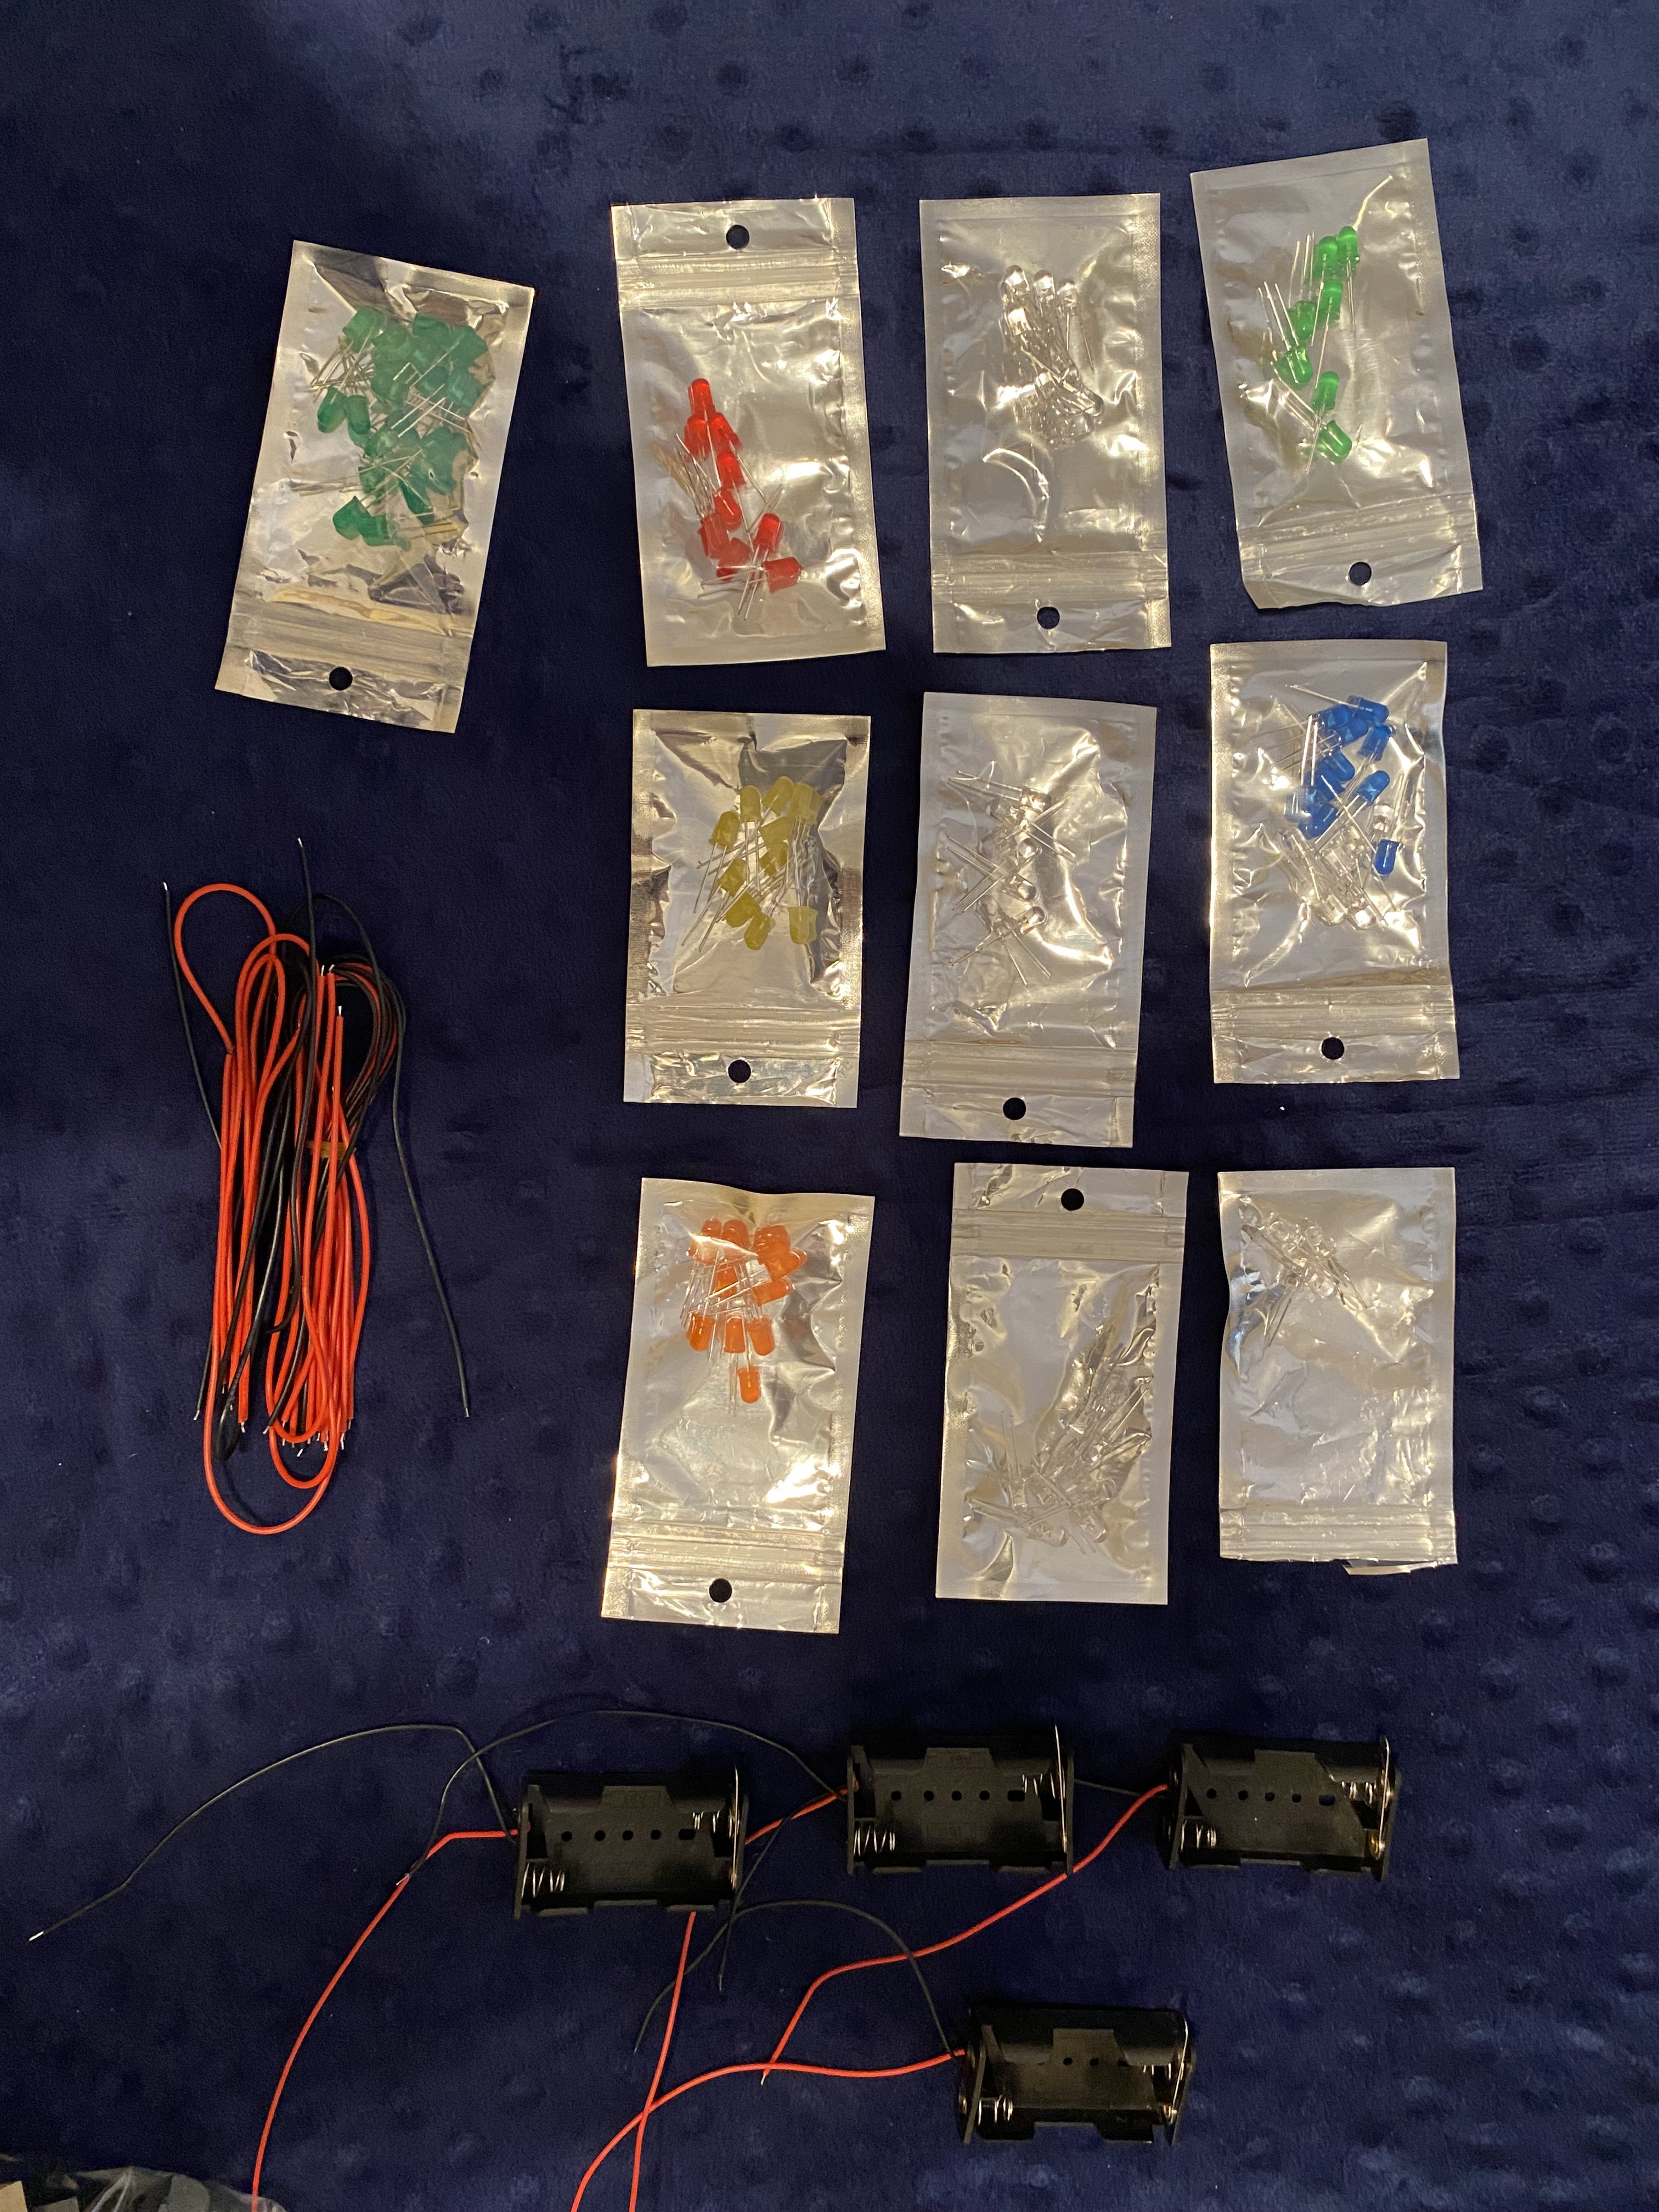
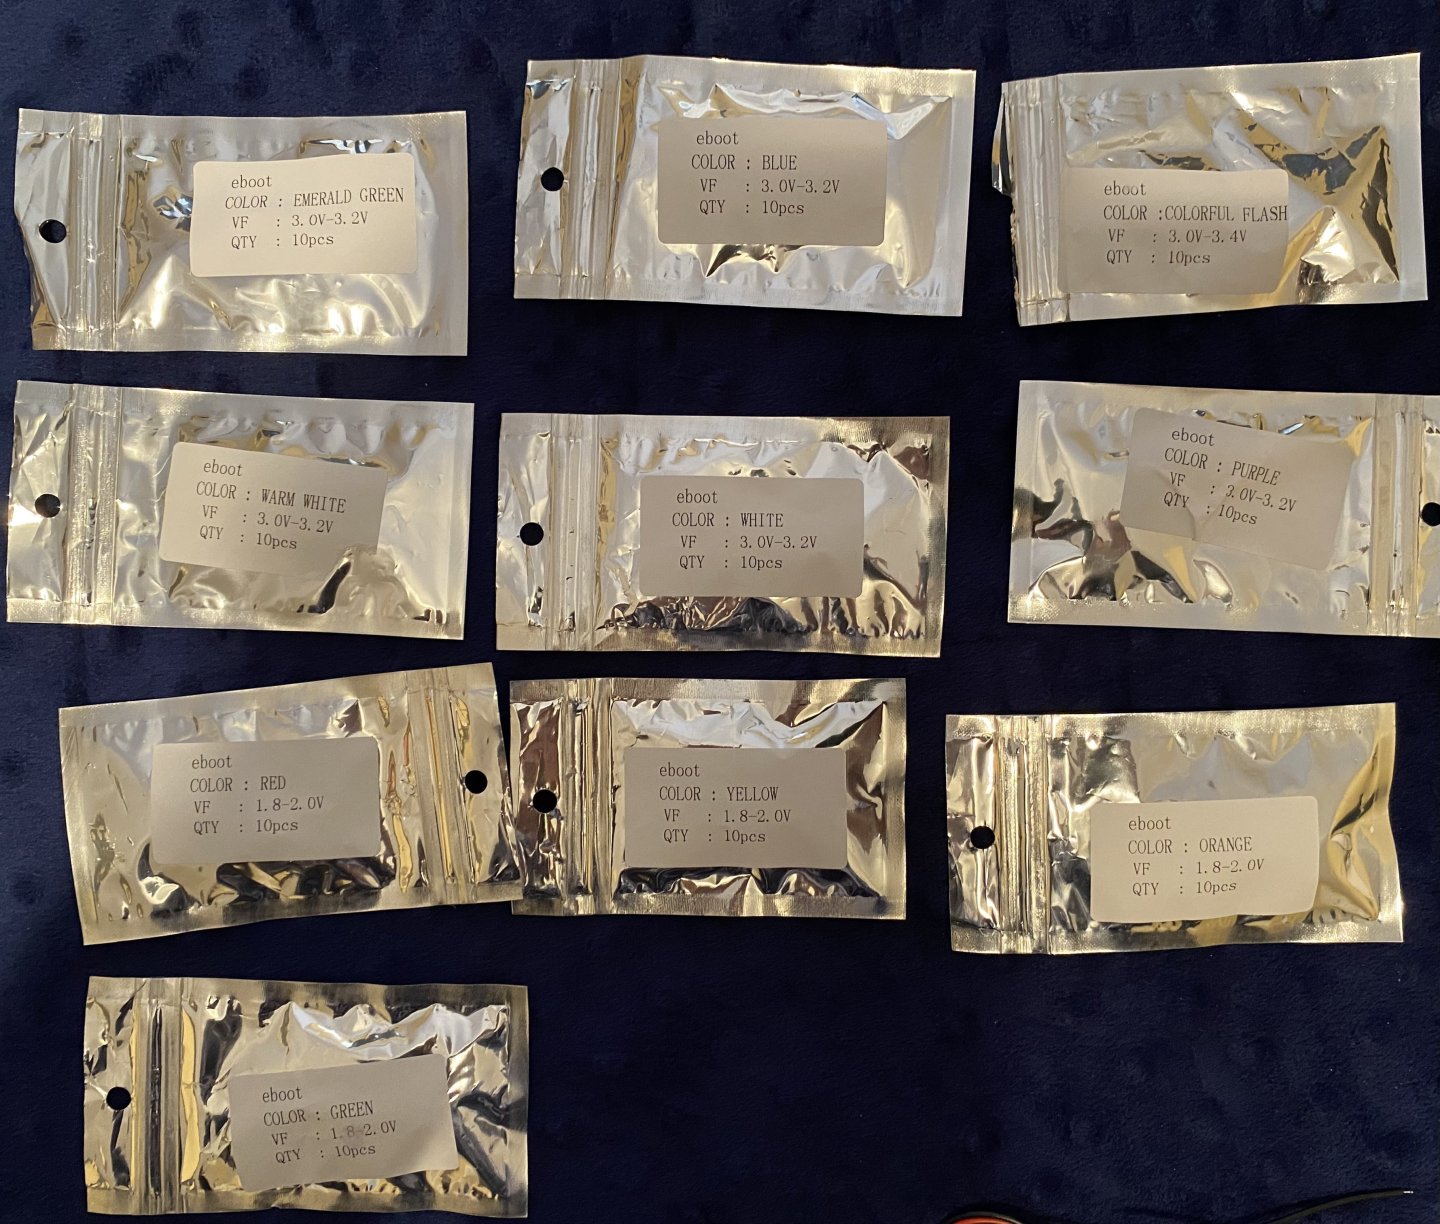
Daniel later in the day I reread through our discussion today and I think it is starting to to click now. Looking at the data on the back of the top 6 light packets (emerald green, blue, warm white, white, and purple) in my photo they all read 3.OV- 3.2V. If I understand better now that means it takes a minimum of 3 volts and a maximum of 3..2 volts? My 2 doubleA battery pack produces 3 volts so if I use that battery pack I would not need a resistor on those LED’s as Mike said and they could be on the same circuit? If I want to use any of the four colors at the bottom (green, red, yellow, or orange) that are rated 1.8-2 OV, I would need a resistor to protect them from the high 3 volts and they could bro the same circuit. I do like the idea of the adjustable voltage regulator and the benefits you mentioned. I could get a 9v battery pack and adjust to what I need. Do you just put one on each circuit?
-
Great Daniel. Hope my continued questions are not interrupting your busy day. I so appreciate your help and am excited to get started. This is beginning to make sense. If I decide to use more than one color I will set up a separate circuit using a separate battery pack with for each circuit. Got that part. 👍 I was curious about the long and short LED bulb wires and you answered that before I asked. 👍 So for simplicity, and appearance, it would be best on one circuit just to have one color white light, not white and warm white? Or does that not matter since their specifications are the same? So, to make a long story short and me stop asking you so many dumb questions, if I use the white and warm white LED’s I have and the double A battery packs I have, what resistors do I need to solder on to each bulb? Once I get that down pat I will attack the possible circuit for any color light I may decide to set up.
-
Thanks Daniel. That is what I am exactly hoping for. I don’t mind purchasing different resistors and soldering them into the circuit. I would not expect I would use more than a couple different colors other than the white. Maybe the red or green on deck as you did. So if you would not mind to just tell me get this resistor for this color light I have and this resistor for that color light I will forever be in your debt! This will certainly save me on purchasing the OcCre light kit. As you saw I have a number of 2Double A battery packs with a built in switch. I guess it might require a different resistor, I honestly don’t know, but I would I have longer life with a 9volt battery packs? I doubt I turn on the lights for extended periods. Would be great if there was an AC adapter I could just plug in and use a remote. That might be wishful thinking.
-
Thanks Mike and Daniel. Mike I don’t mind you commenting at all. So how do I know the voltage of my LED’s? Is that the number on the back label? Like the warm white for the example reads 3.OV-3.2V and then the colors, like the red for example, reads 1.8-2.OV. So would my 2 doubleA battery pack (3volts) exceed the voltage requirement for all of my LED’s? I think I may be still a little confused.
-
Daniel I wonder if you can help me get smart. I have tried reading and researching but my brain can figure it out. I am planning to light my AV, just not to the same incredible level you are. I looked at the lighting kit OcCre offers and have considered buying it. However I already have a good supply of everything that is in the OcCre kit except for the resistors. As you can see in the photos I have a good selection of LED color lights, numerous battery packs with switches that hold a pair of 2A batteries, and a good supply of red and black wire. Everything in the OcCre kit except resistors. I looked at on the back each LED color pack and there is information provided that is Greek to me. I assume there is a relationship between my battery power source and the info on the back of the packs. You can see in the photos I showing the back that the information changes a bit from light to light. Could you please enlighten me as to what I need to make this work.

-
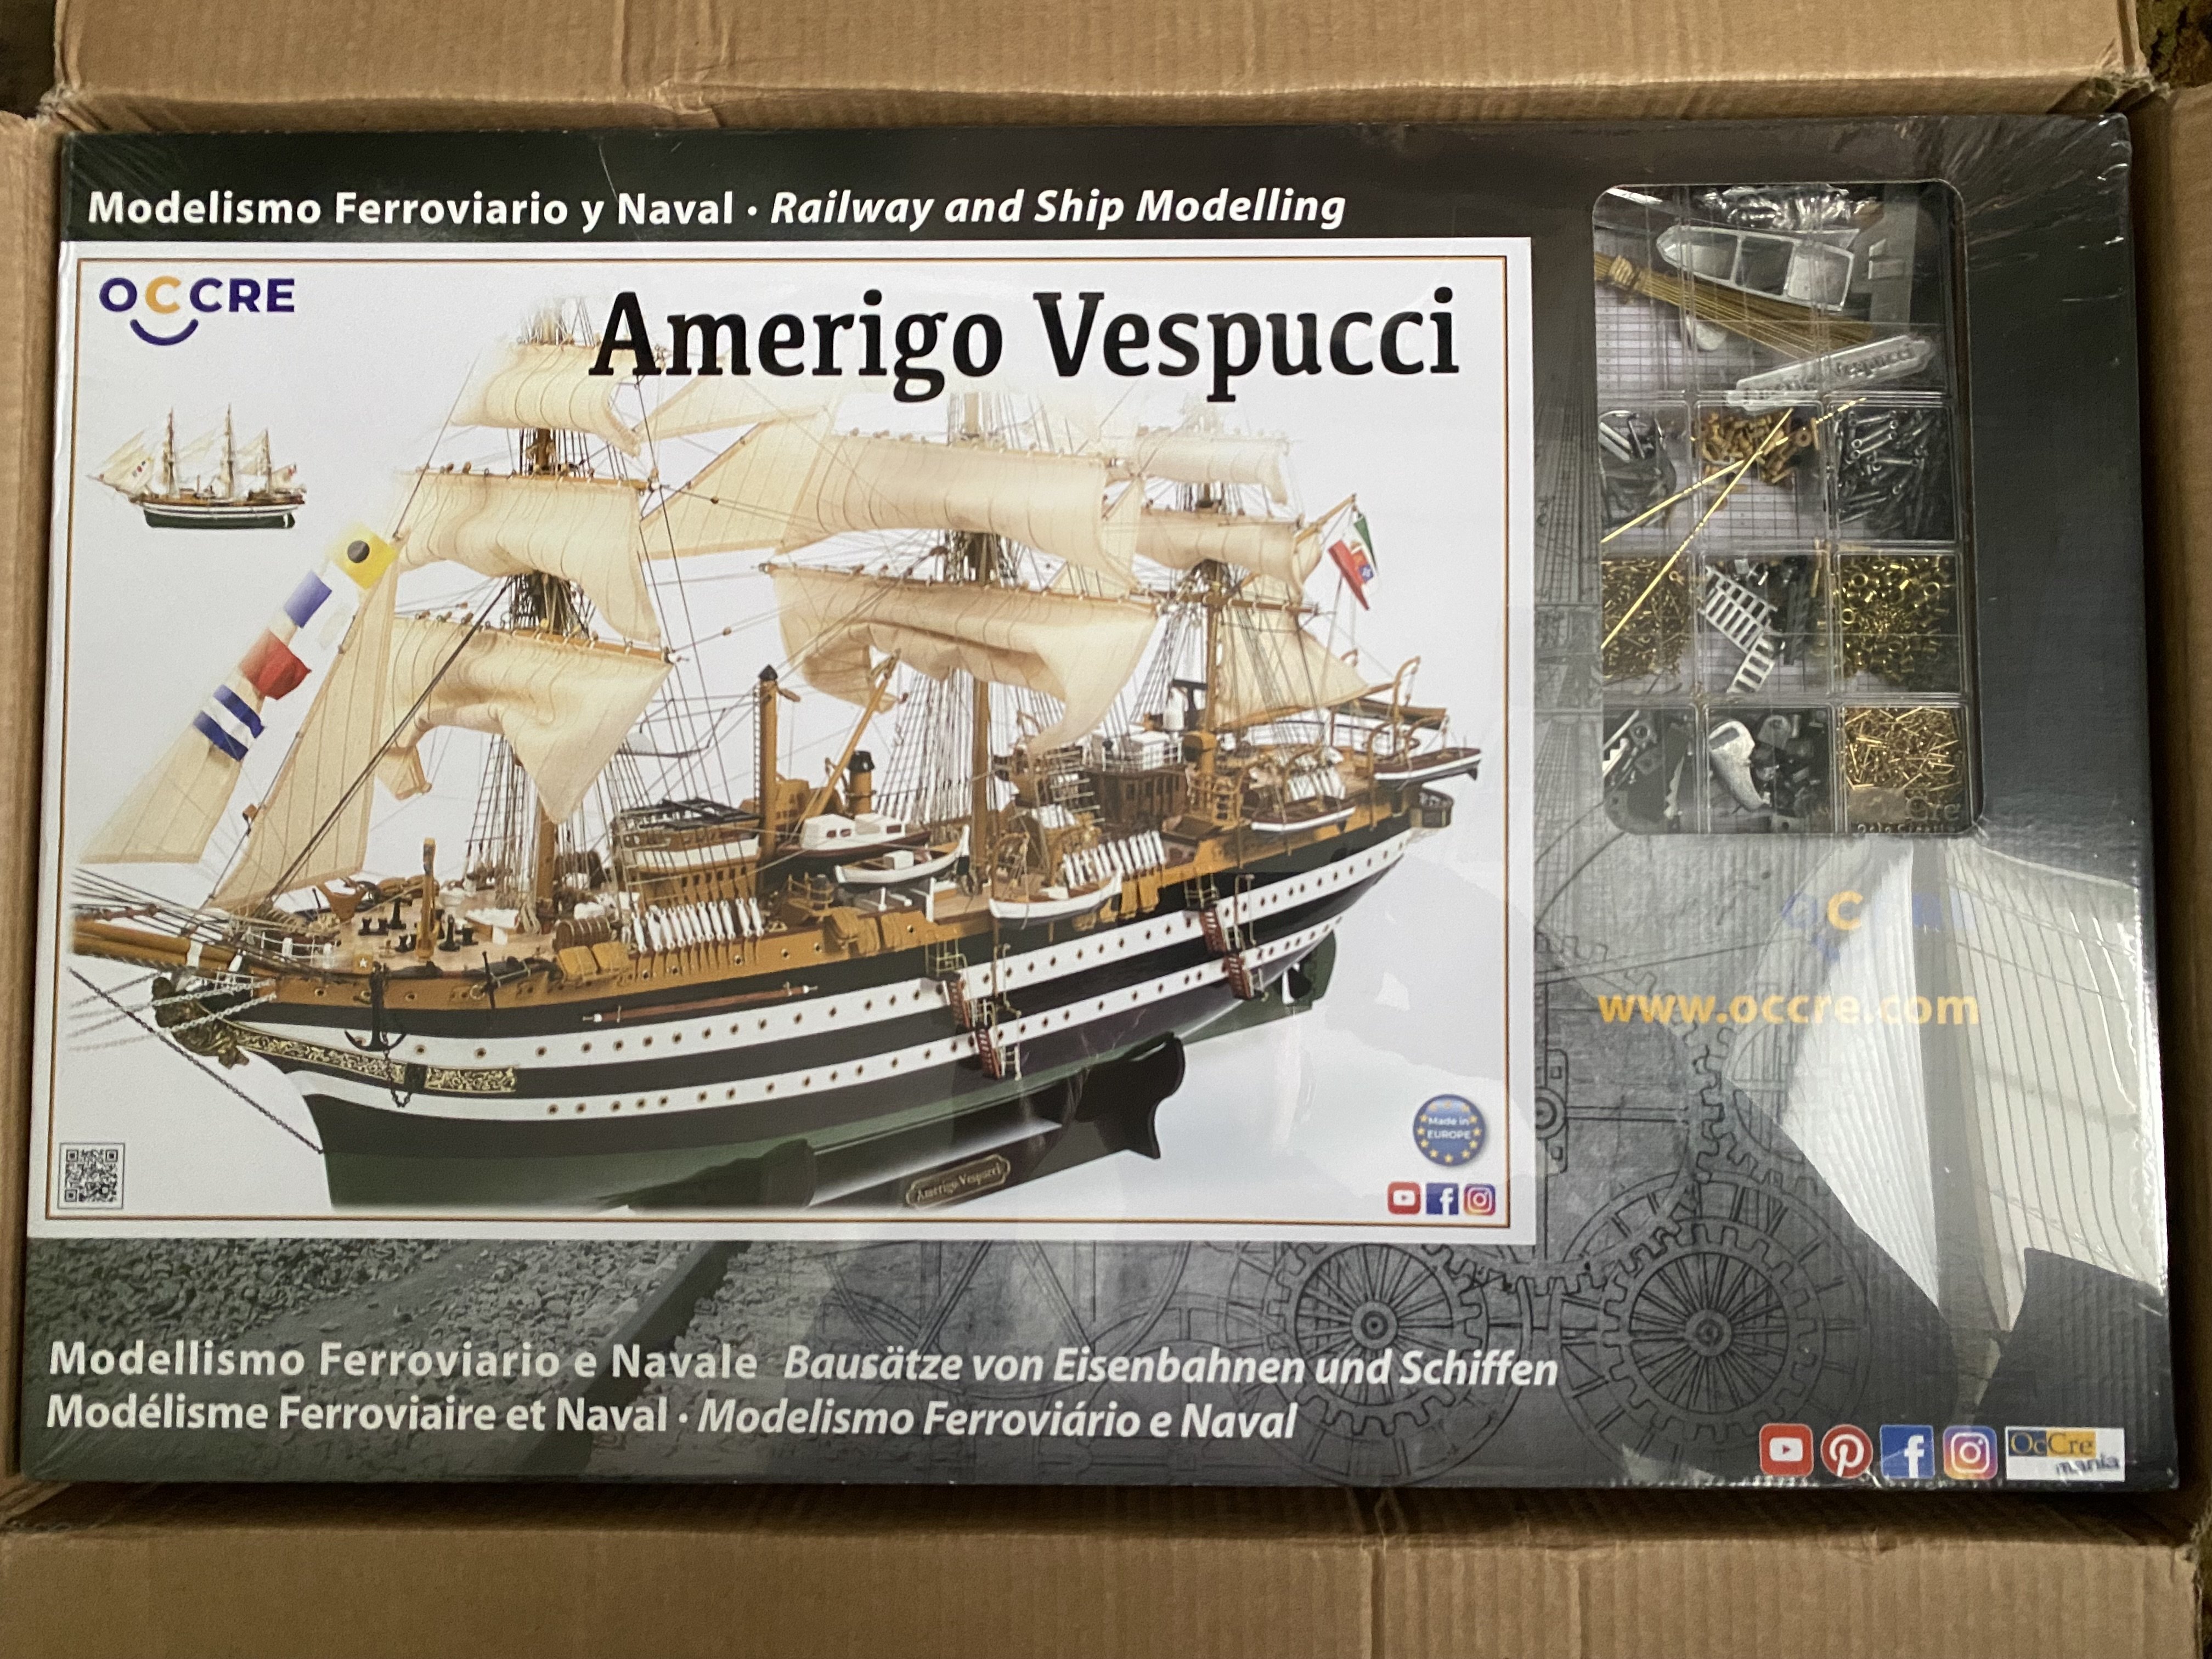
No Daniel I don’t have it yet. I checked FEDEX tracking this morning and it is still somewhere in Spain 😊. I will finish my Endeavour before starting it. Still a while. Here is the link to my build if you want to take a peek. https://modelshipworld.com/topic/36221-endeavour-by-bill97-occre-154/ Would really like you to follow my AV build once I begin and provide advice and comment. I will be making the “upgrades” that you have shown. I also plan to light my AV but no where near the expertise you obviously have! Your lighting
-
Thanks again Daniel. I ordered the OcCre paint set for the AV. Well let me say my daughter is giving it to me for Christmas 😉. I have an extensive set of Vallejo acrylics, both airbrush and paint brush. However I thought I would give the OcCre paints a try. Did you airbrush any of the painting or hand paint it all? I have a thought I know is in no way accurate for the AV but I can’t help wonder how it would look. One of the reasons I like wood models is look of the wood planking on the hull. I am a woodworker and love the look of wood. I know the AV has a steel hull painted a high gloss series of green, black, and white. The AV videos show I am to coat the second planking with wood putty and then sand it down to a smooth seamless finish before undercoat and color top coat. I am curious what it would look like to painstakingly apply the second planking with no gaps or spaces. Then apply the color over the planking without using the wood filler. The ultimate look would be a glossy wood hull instead of steel.
-
Daniel while wait for my AV to arrive I read through your build and watch all the OcCre YouTube videos. I am curious, is the thread you are using for your stays white or is that just how it appears in the photos? In the OcCre videos the lighter thread is their standard raw thread color.