


closehaul
-
Posts
150 -
Joined
-
Last visited
Content Type
Profiles
Forums
Gallery
Events
Posts posted by closehaul
-
-
I appreciate that Bob. It always seems like two steps forward and one back and I'm not as far as I hoped, thinking the hull would be painted by now. But even at this point I'm very satisfied with the work.
-
-
That sounds better than what I've done. I went ahead and penciled in and topcoated with 2 coats of a clear matte polycrylicfinish before I saw your reply Roger. Being that this is my first model ship kit at this level of quality detail, (my only other 2 kits were from the Scientific Model Co. and a breeze compared to a Bluejacket kit of which I revel in the challenge it affords me) I'm going full speed ahead to the next step and look forward to when I display a finished post of Atlantic.
And Jim, sorry I missed yours too. I am satisfied with the results presently of the caulk lines but my next ship will improve on this one.
Angelo
- thibaultron, mtaylor and Canute
-
 3
3
-
Hi Jim, I noticed that technique on the planking forum, but when I researched a photo of the Atlantic's deck the planking appeared to my guesstimation about 4" wide; at
1:96 scale of the kit that would involve planking 1/64" wide, way over my novice skill level although the number 2 pencil to highlight the scribed caulk lines sounds like a good answer. Yes?
Thank you,
Angelo
- thibaultron and mtaylor
-
2
-
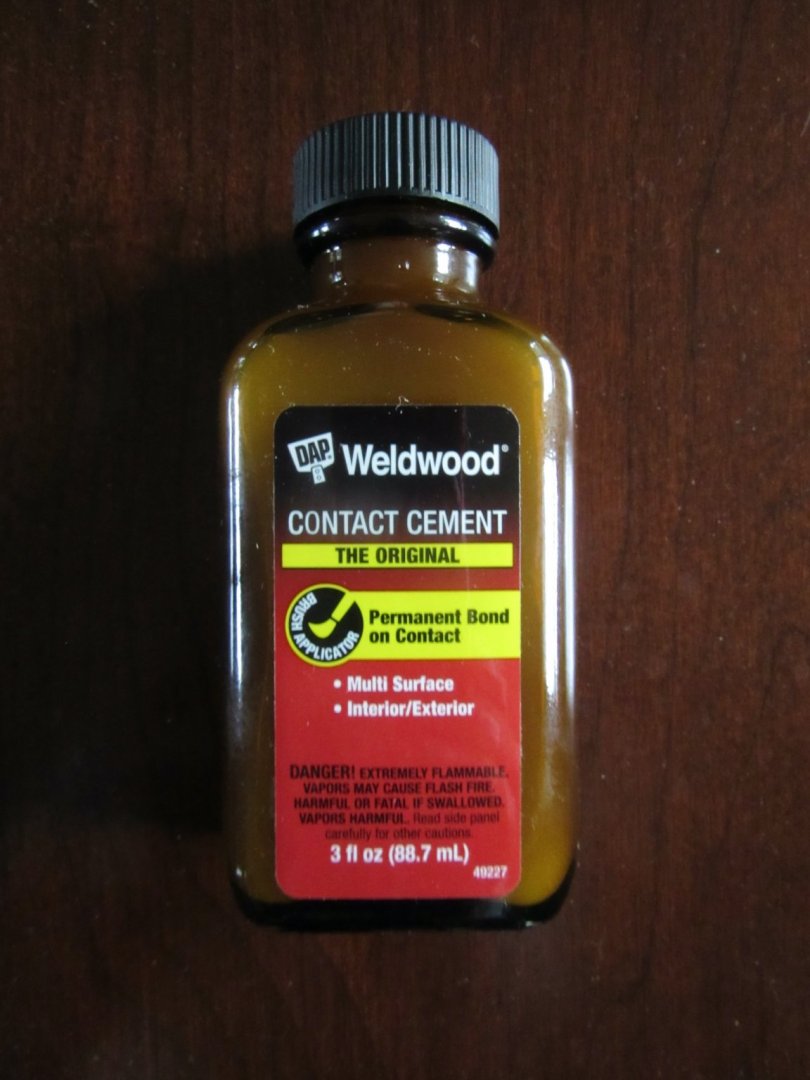
Thanks Tim, Overkill is fine if it leads to the solution. My bad for overlooking the instruction that state not to use water based wood glues so I picked up a bottle of contact cement.
Angelo
-
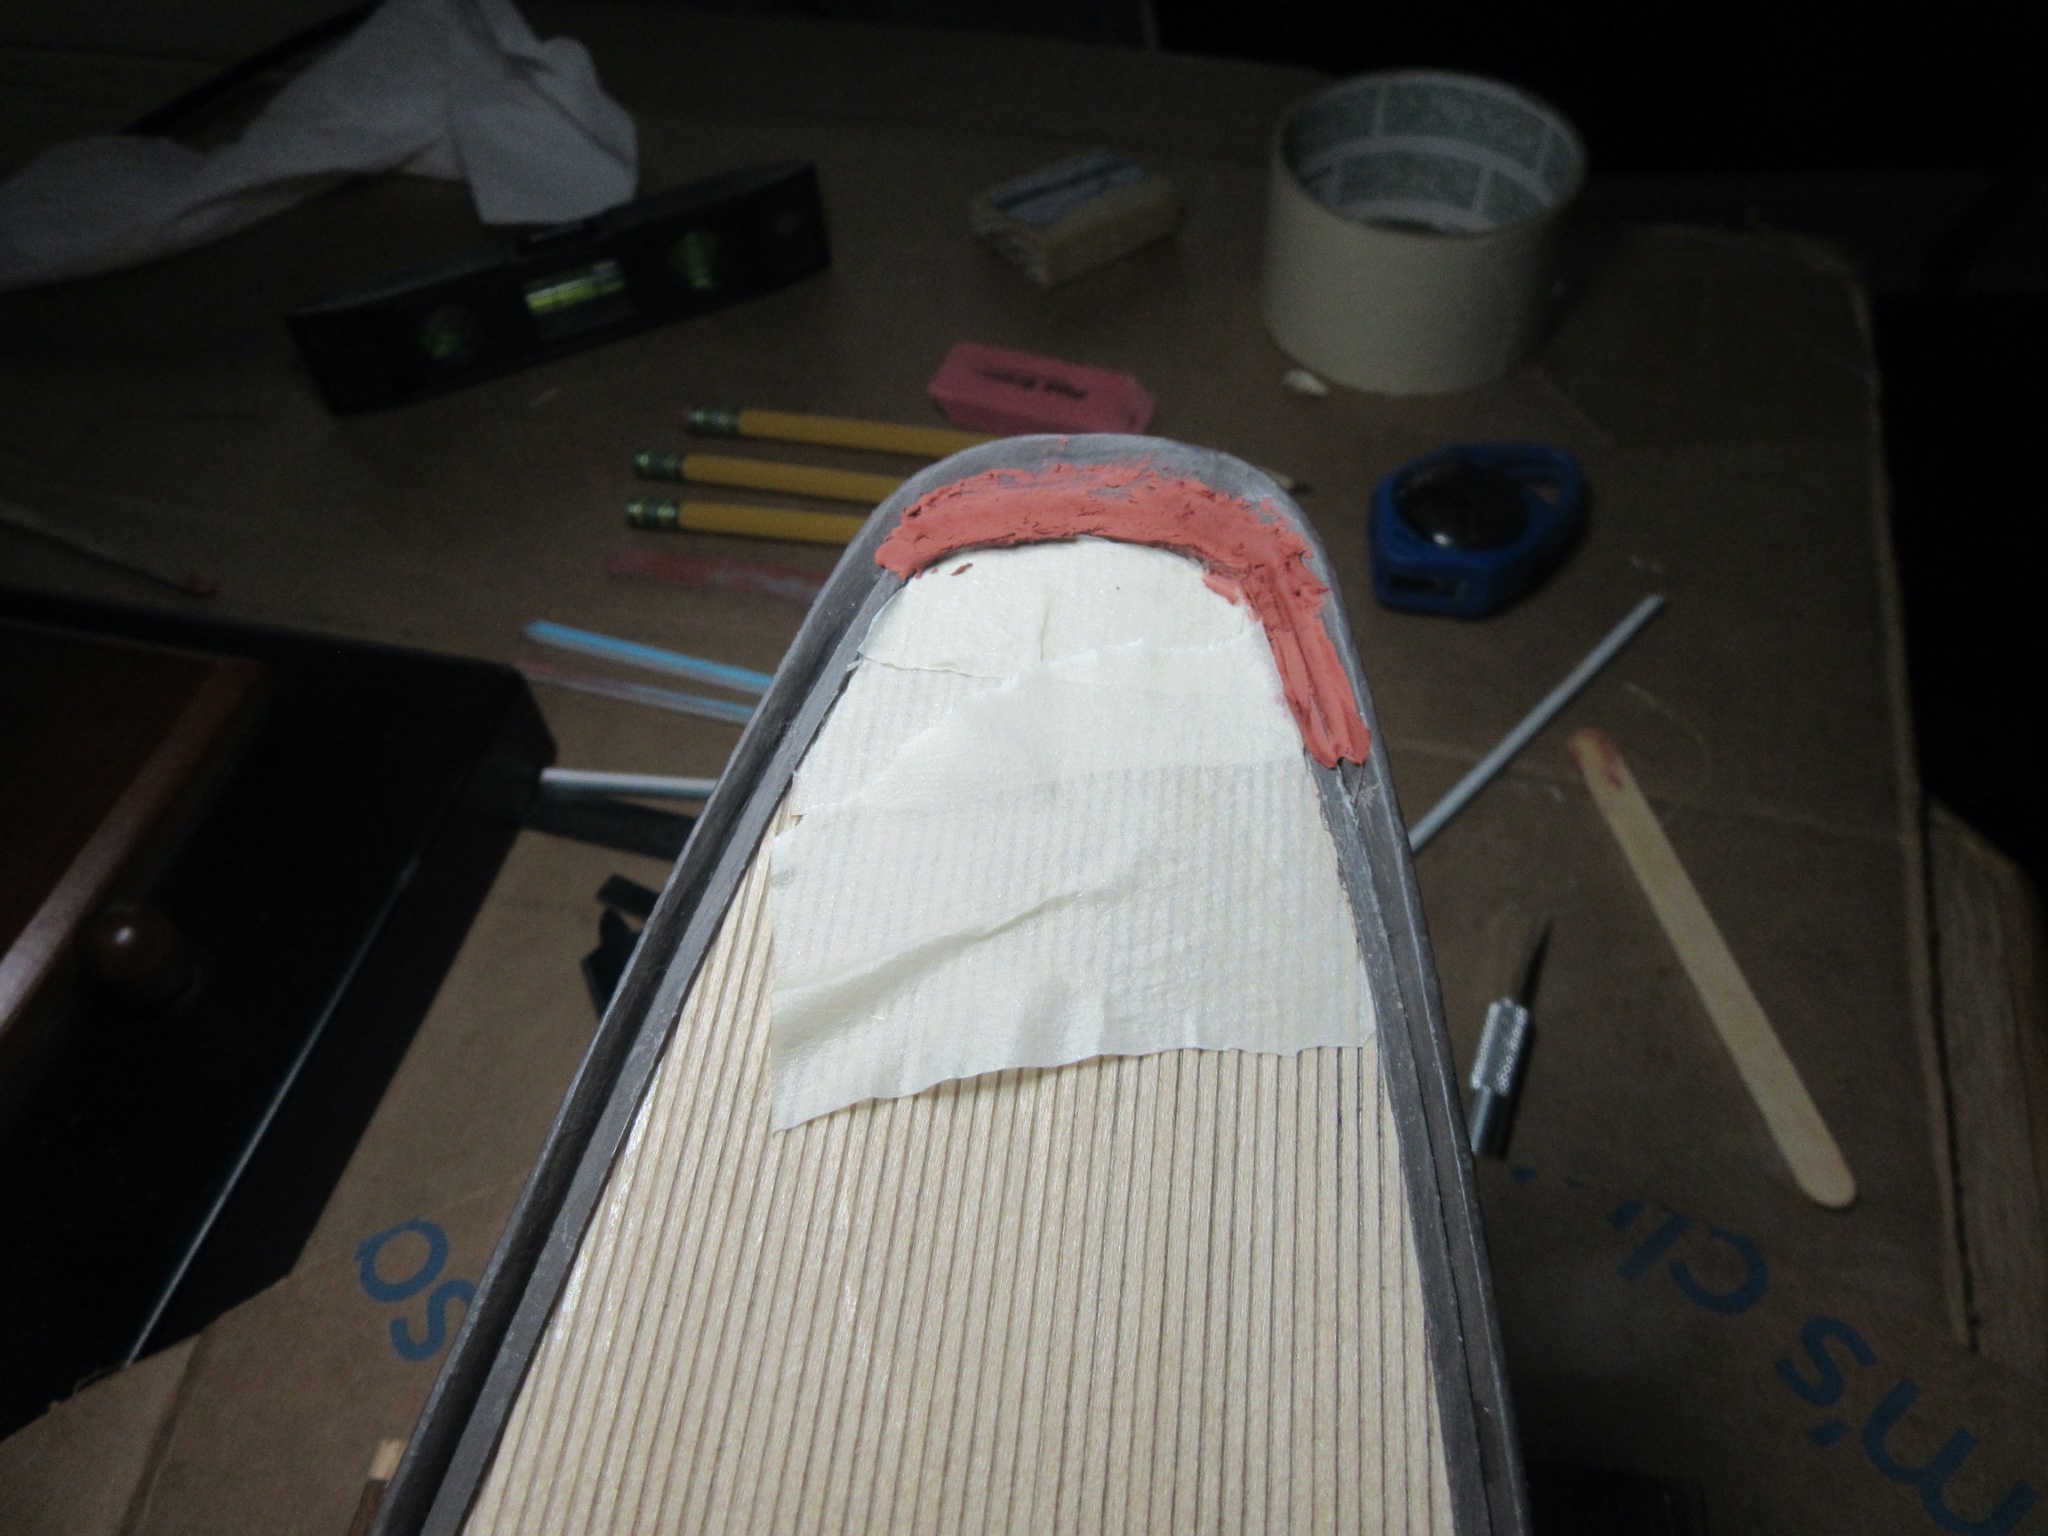
I'm currently working on the Atlantic kit from Bluejacket Ship Crafters. Forward progress on the hull is presently in irons on account of lack of knowledge in figuring out how to darken the the caulk lines scribed on the 1/32" thick deck panel. The deck finish desired is a light wood deck with darker but not necessarily black caulk lines. Tried the instructions which say to use an oil stain to achieve a light colored deck on test pieces but it darkens it to mush even when i try to wipe it off immediately with mineral spirits. I know I'm doing something wrong, just don't have the solution per se.
- Gregory, thibaultron and Archi
-
3
-
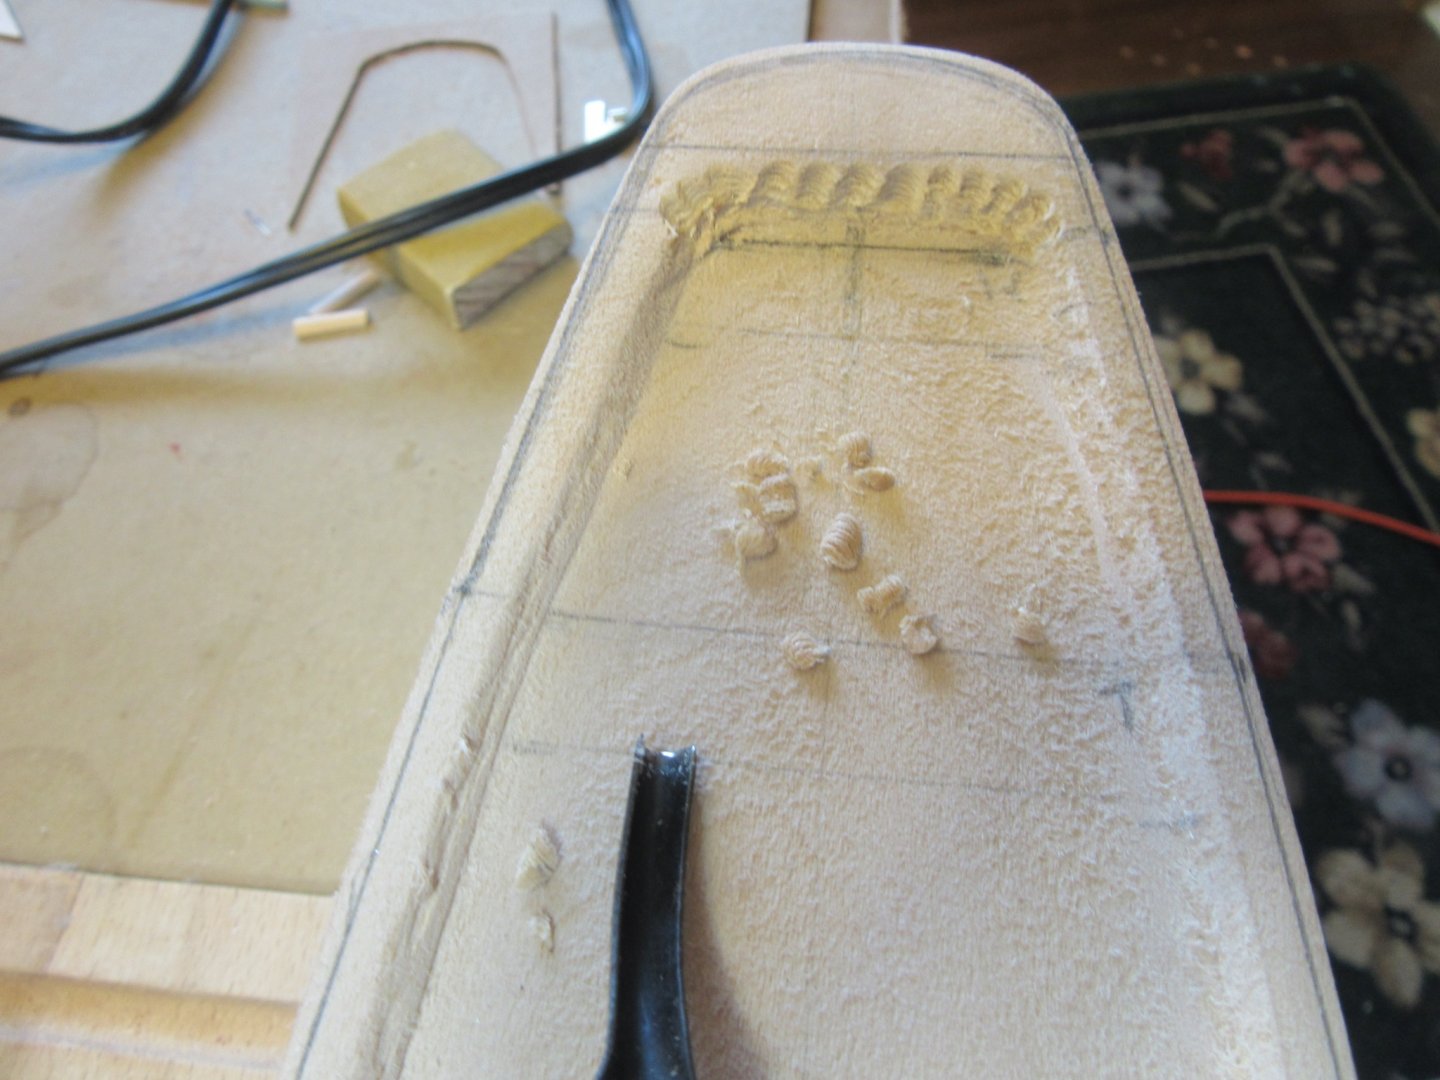
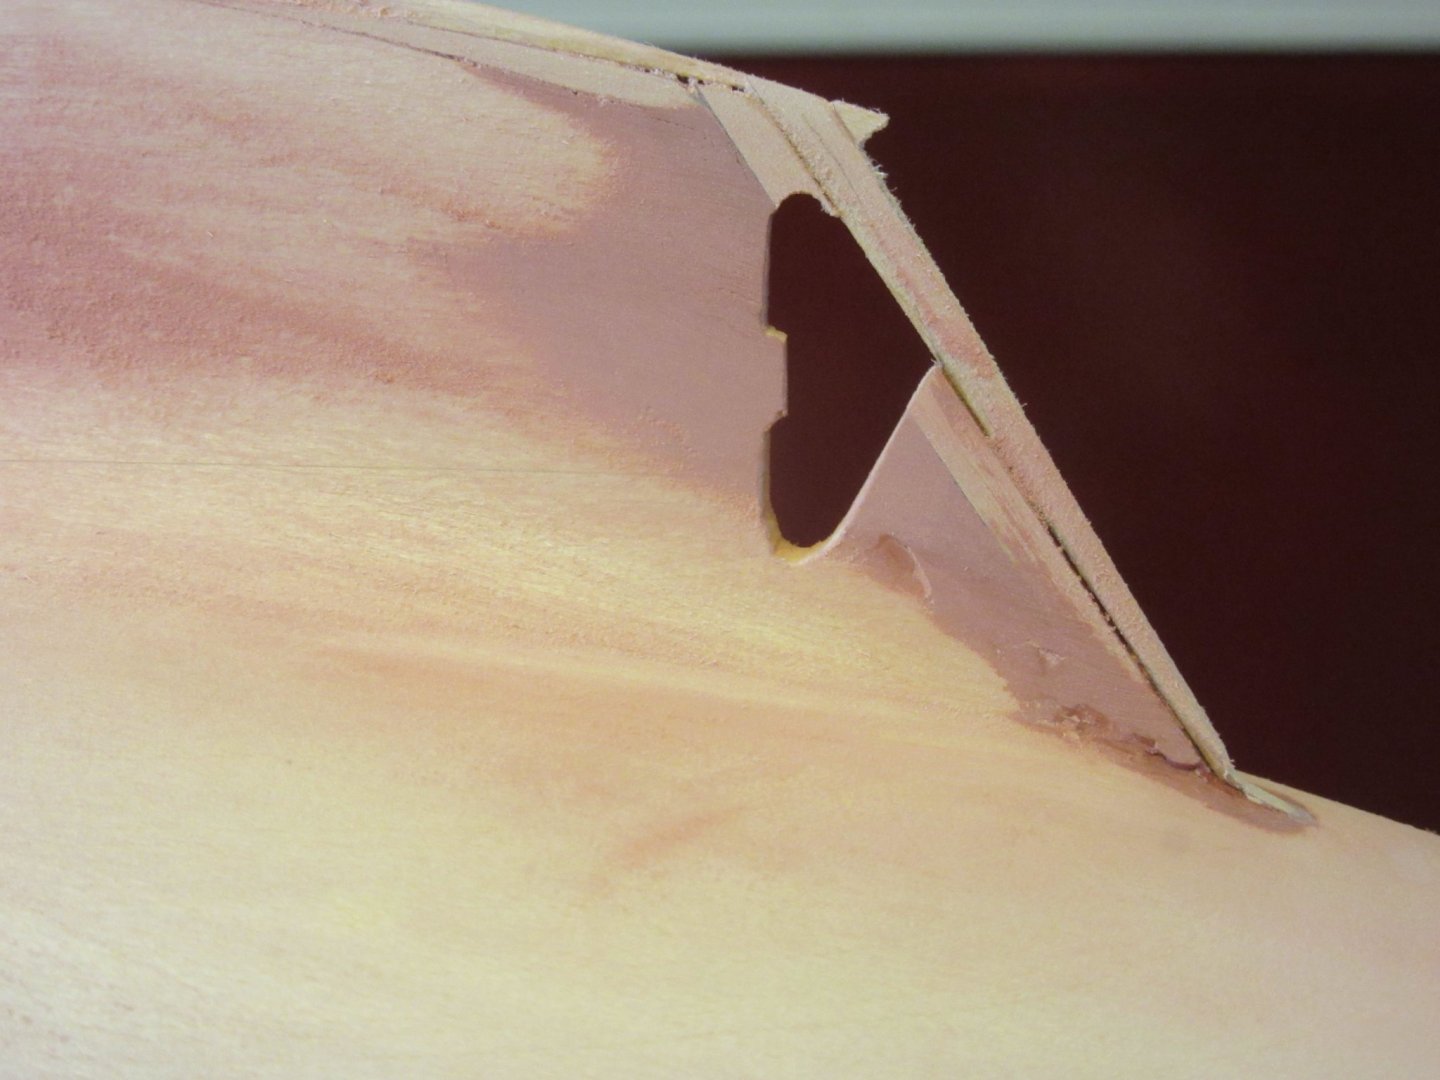
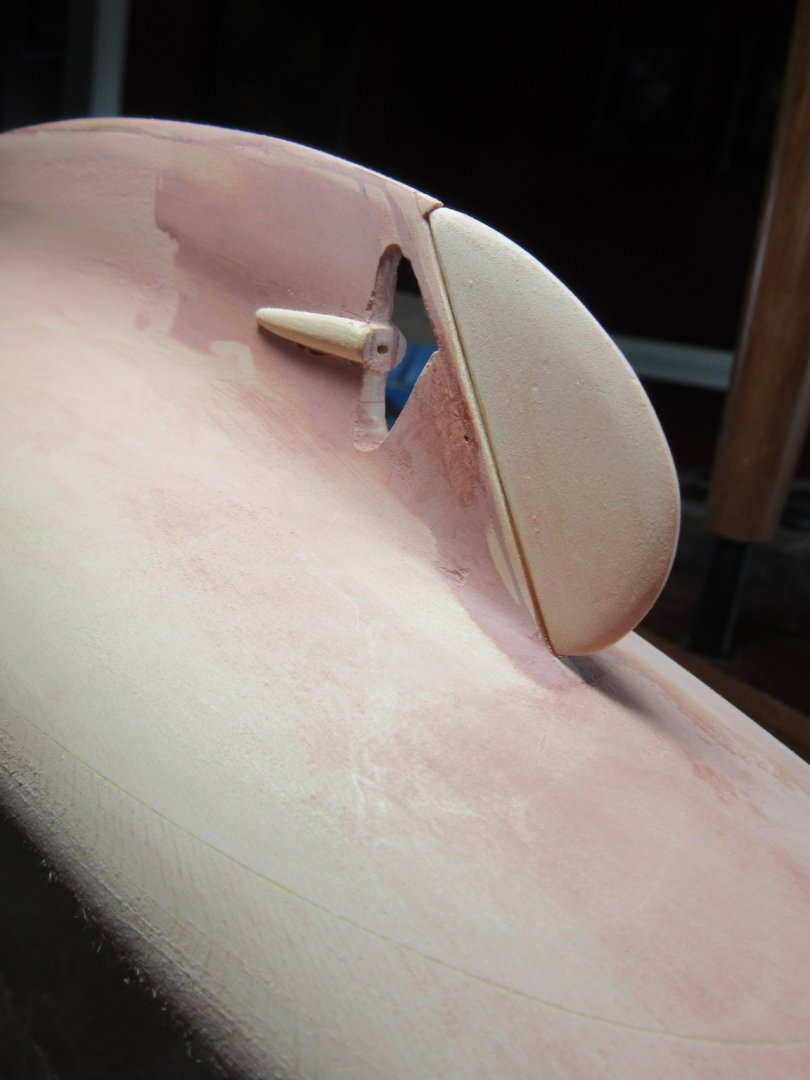
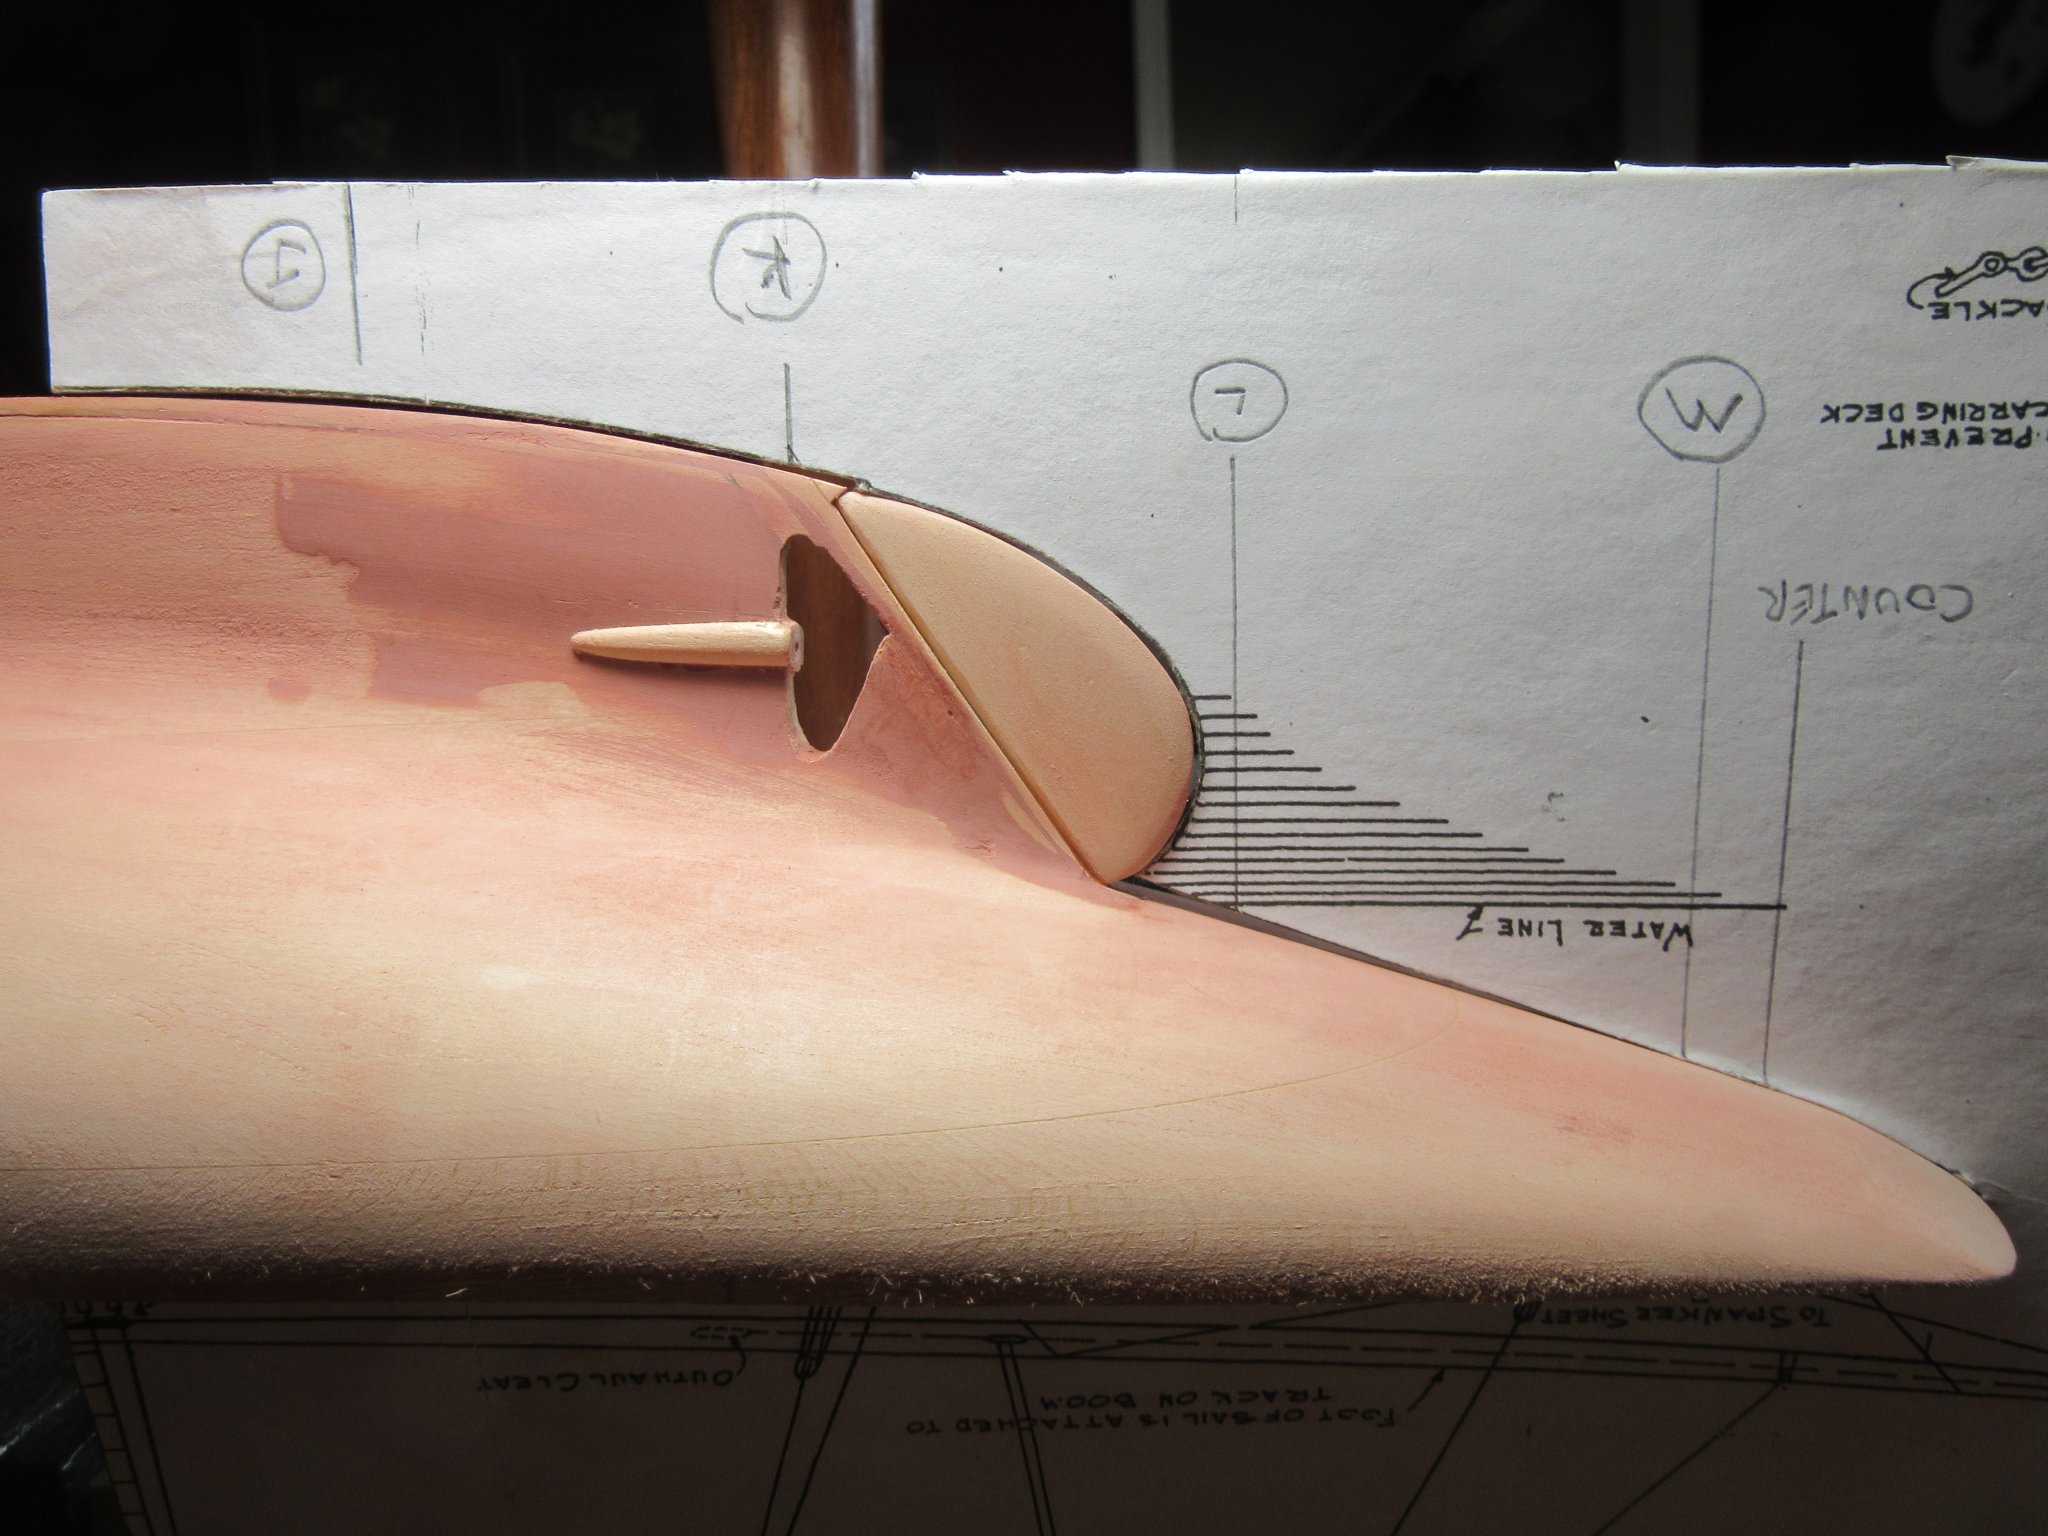
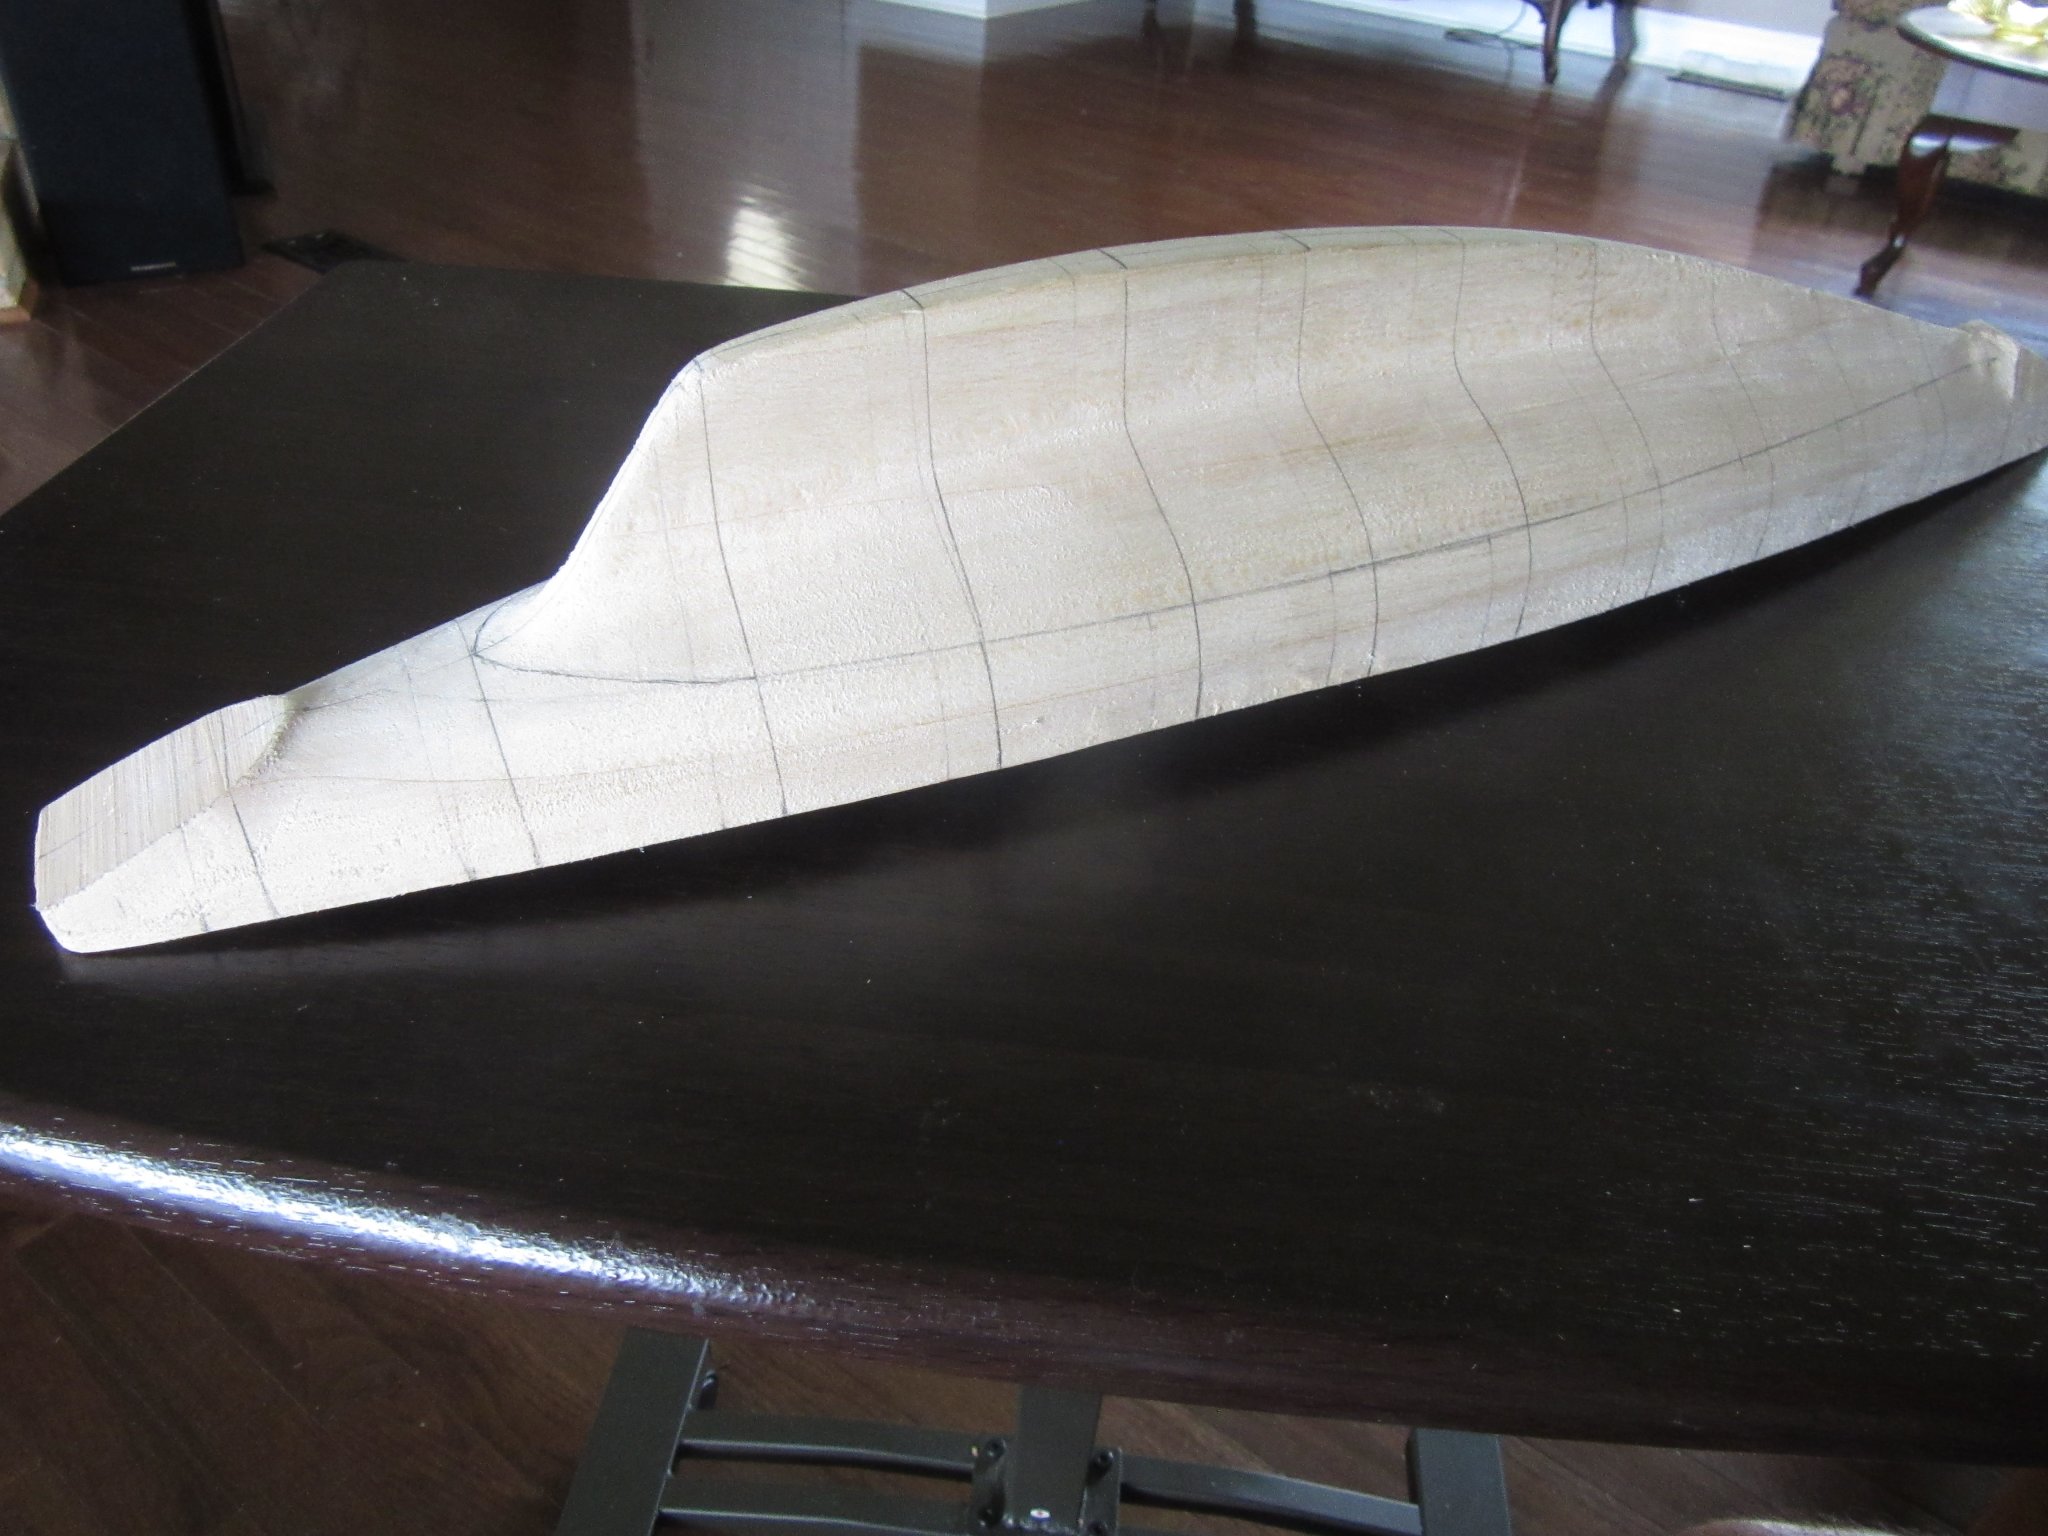
Thanks Bob. I gouged and chiseled the bulwark down to a hair below 1/16" first and ai worked as slow as Geppetto and still made errors. breaking thru the fantail with chisel. also forgetting to camber the deck at the transom. while the top of the bulwark measures to 1/32" the decline thickness was kept at 1/16" for strength. otherwise a lot of fine sanding with 120 grit then 400 on tiny sanding blocks. I repaired chisel break and deck camber with glazing putty. My question is will the scribed decking hold on the bondo when I glue it with Tite-Bond wood glue? sorry for my delay in responding but I've been searching forums, You-Tube videos and general google searches on scribed deck weathering, painting, staining, and ponce wheel techniques this past week.
-
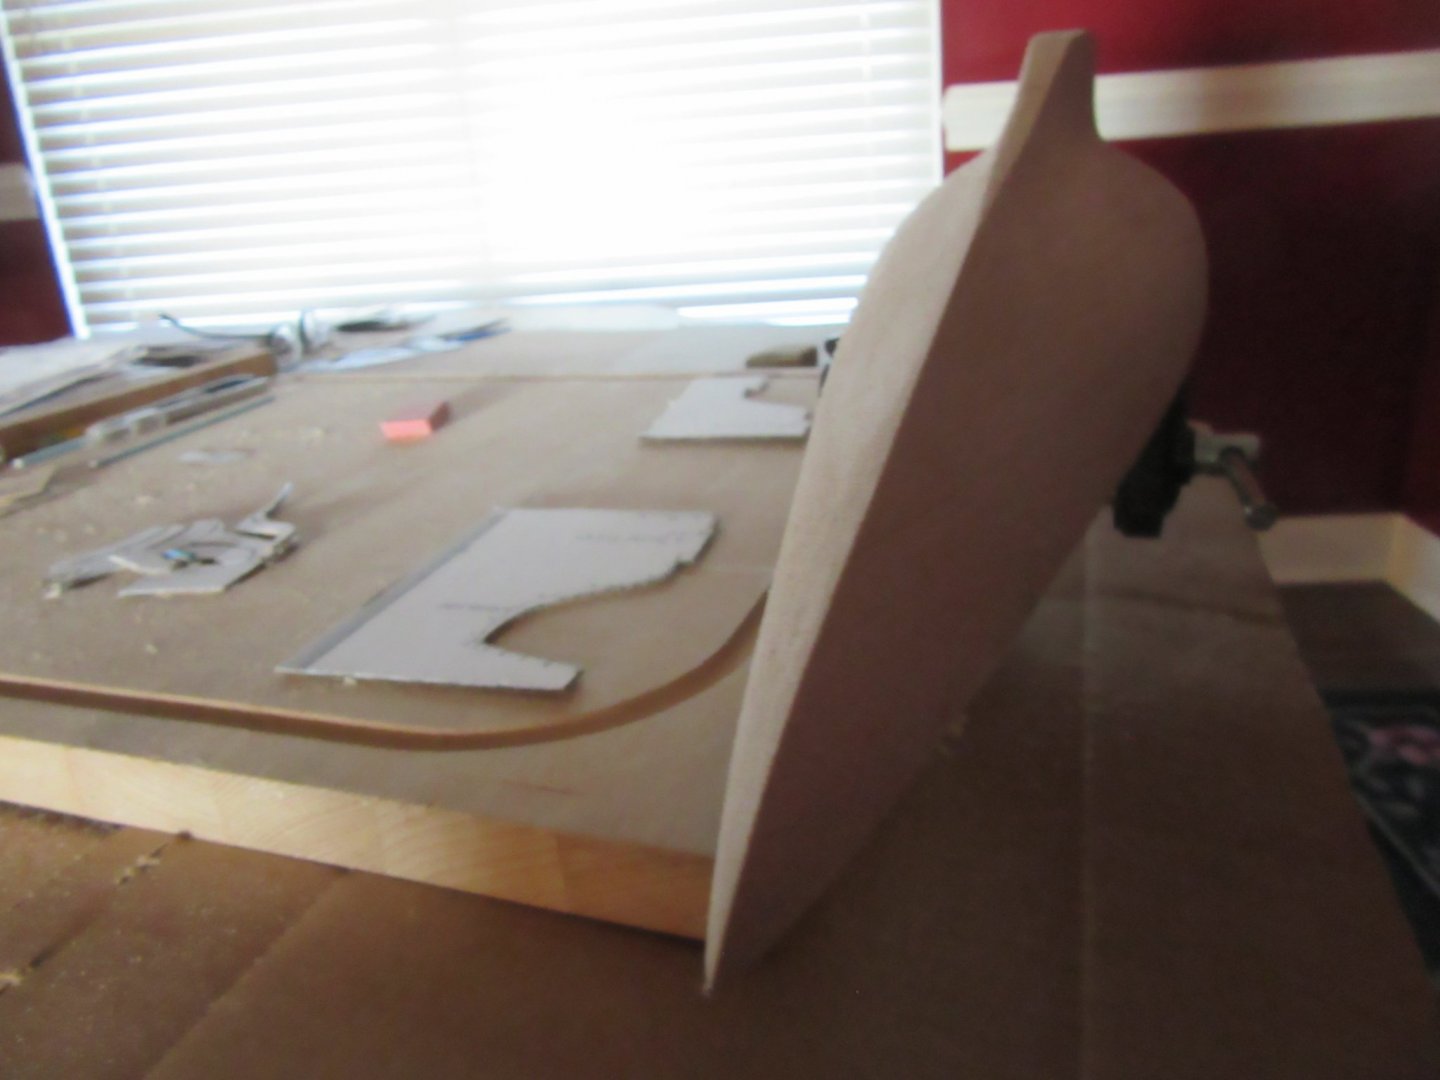
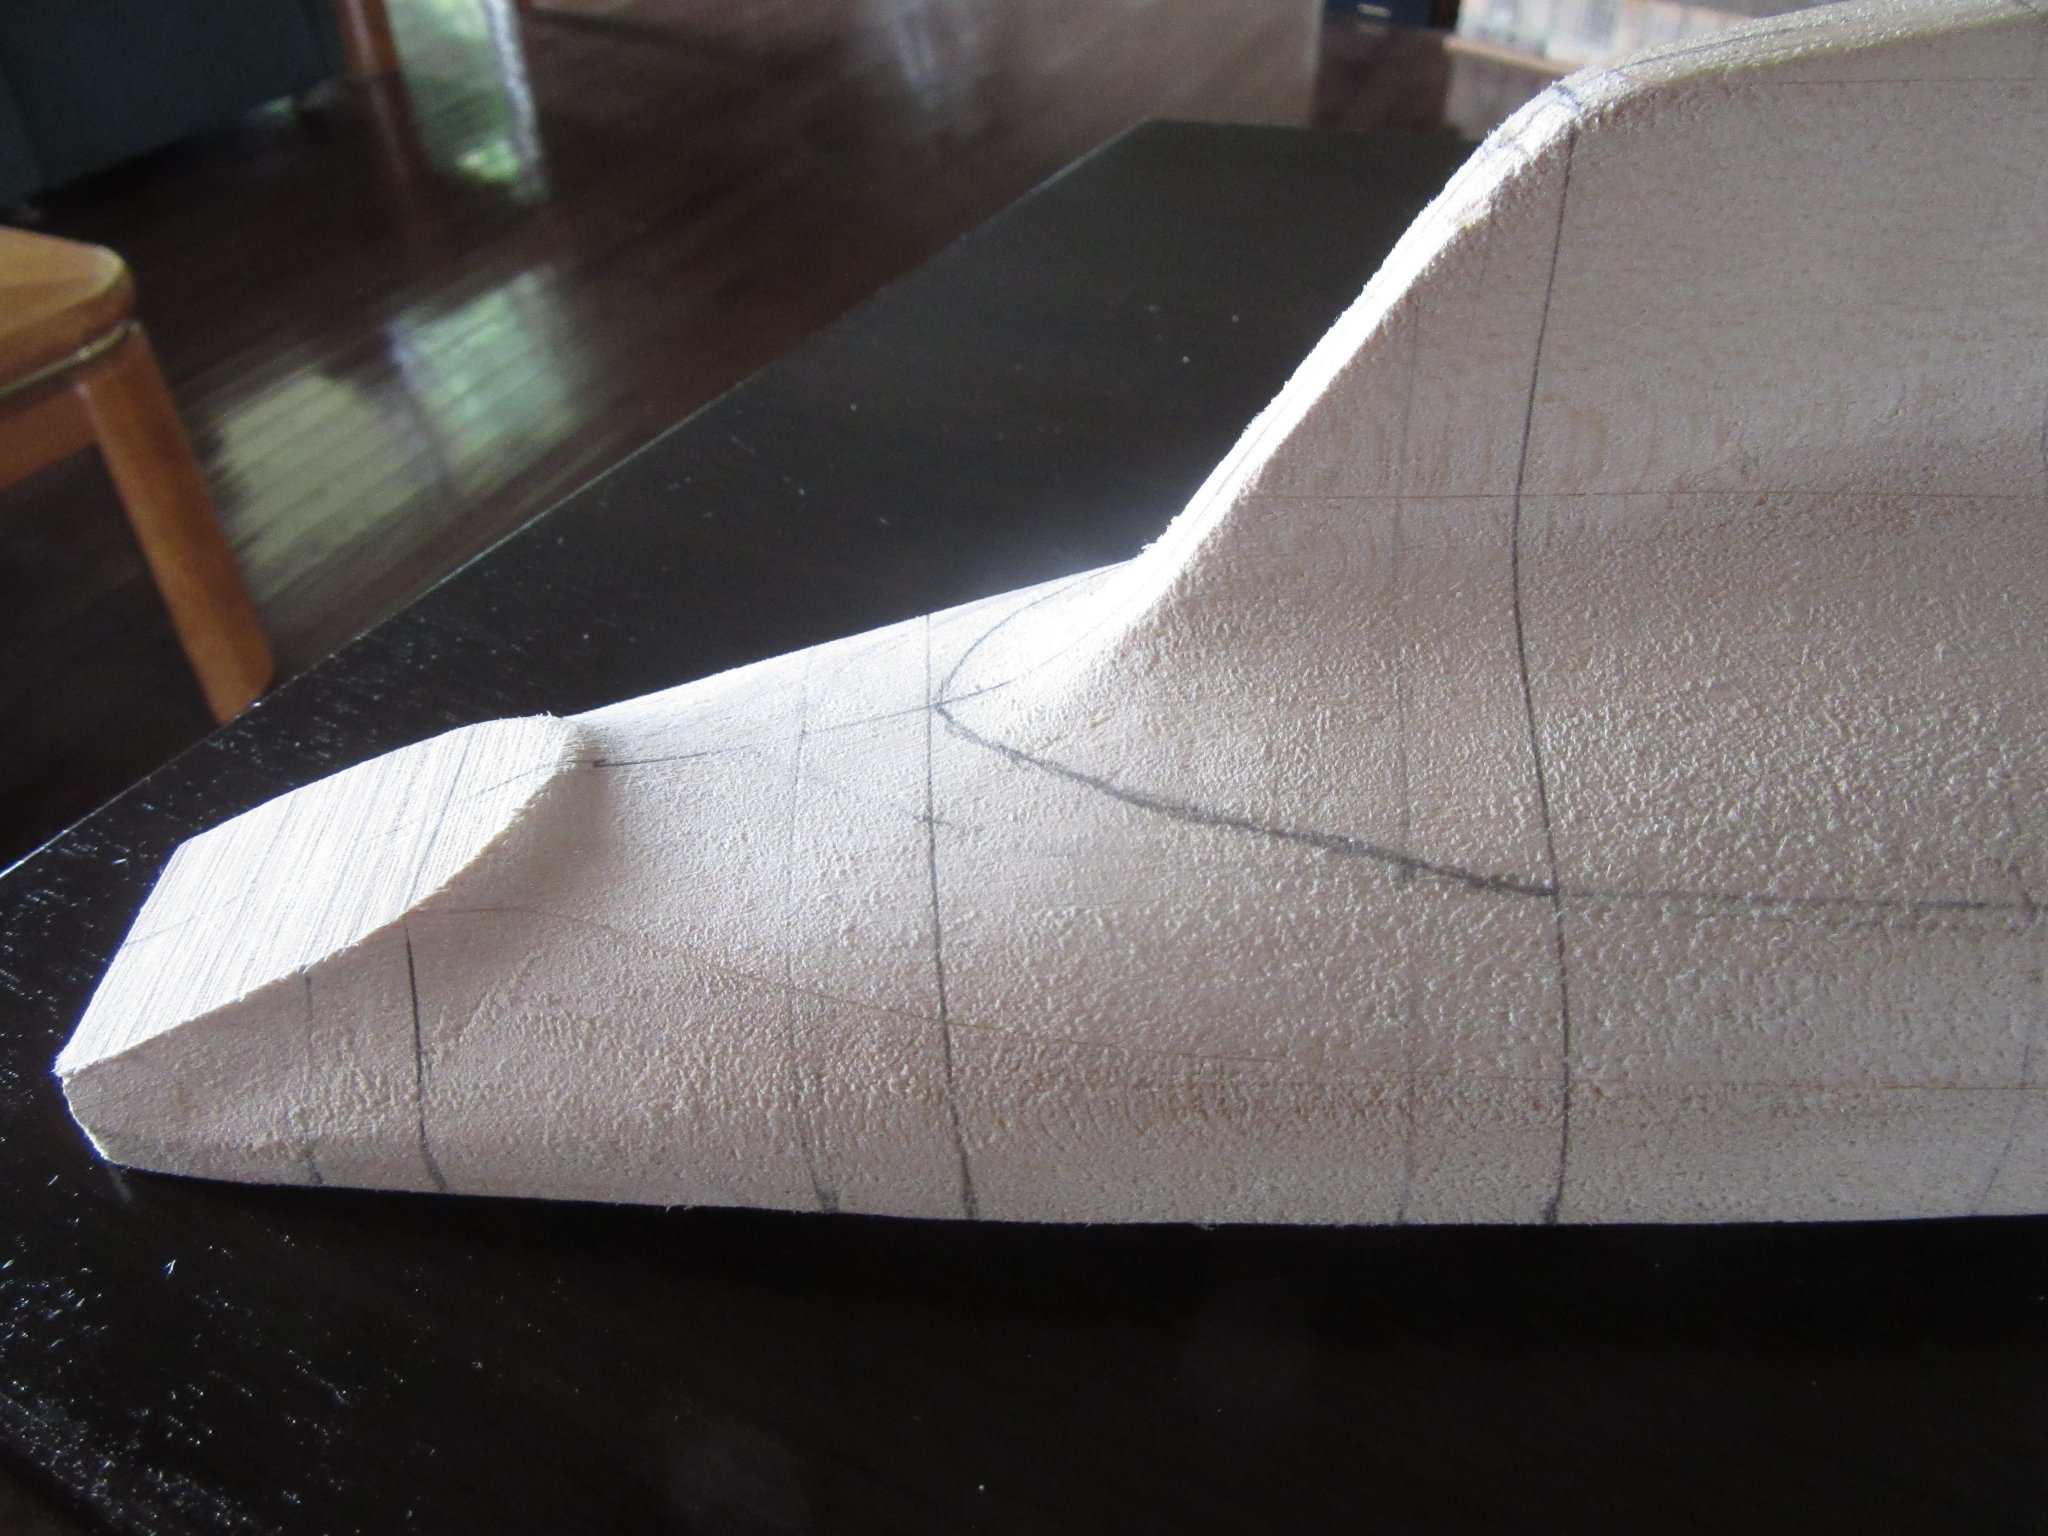
Next the hull was removed from its' pedestals and cradled for gouging, chiseling, and sanding the bulwarks down to 1/32". A little nerve wracking.

- Duanelaker, jwvolz, Rudolf and 5 others
-
8
-
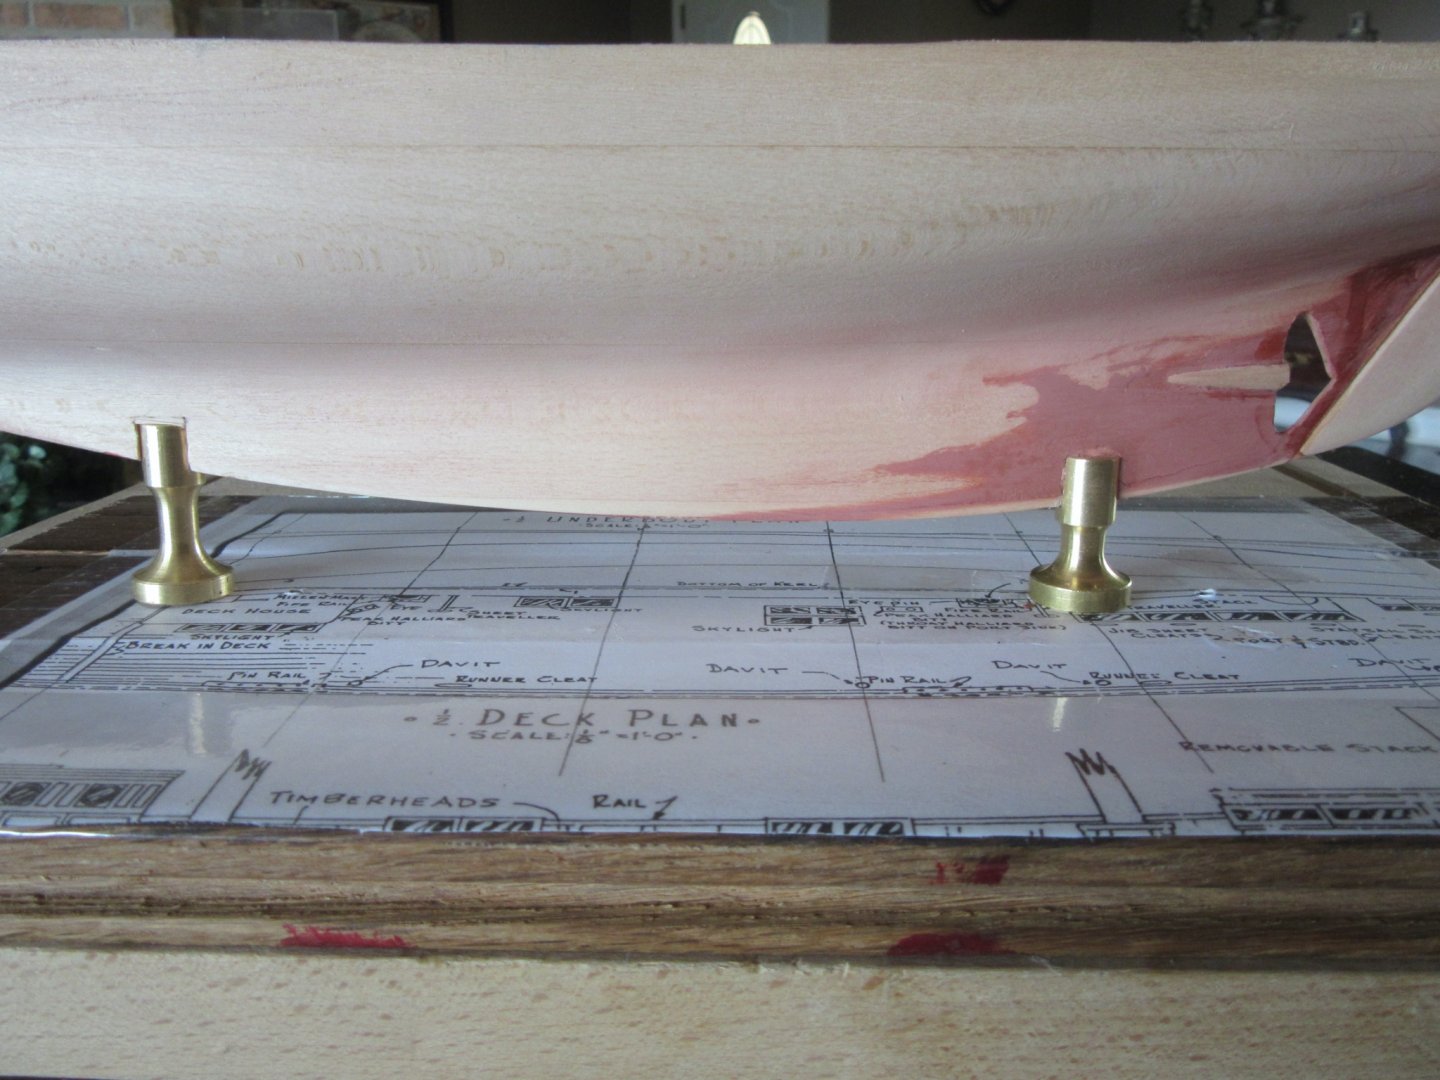
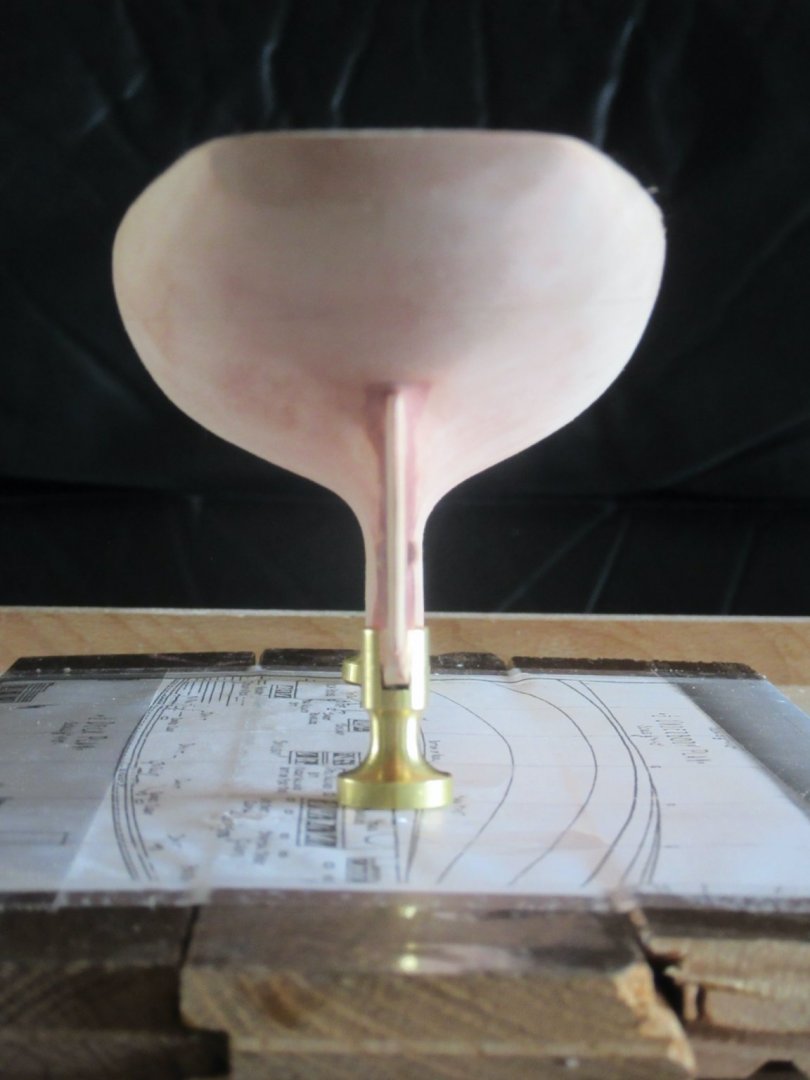
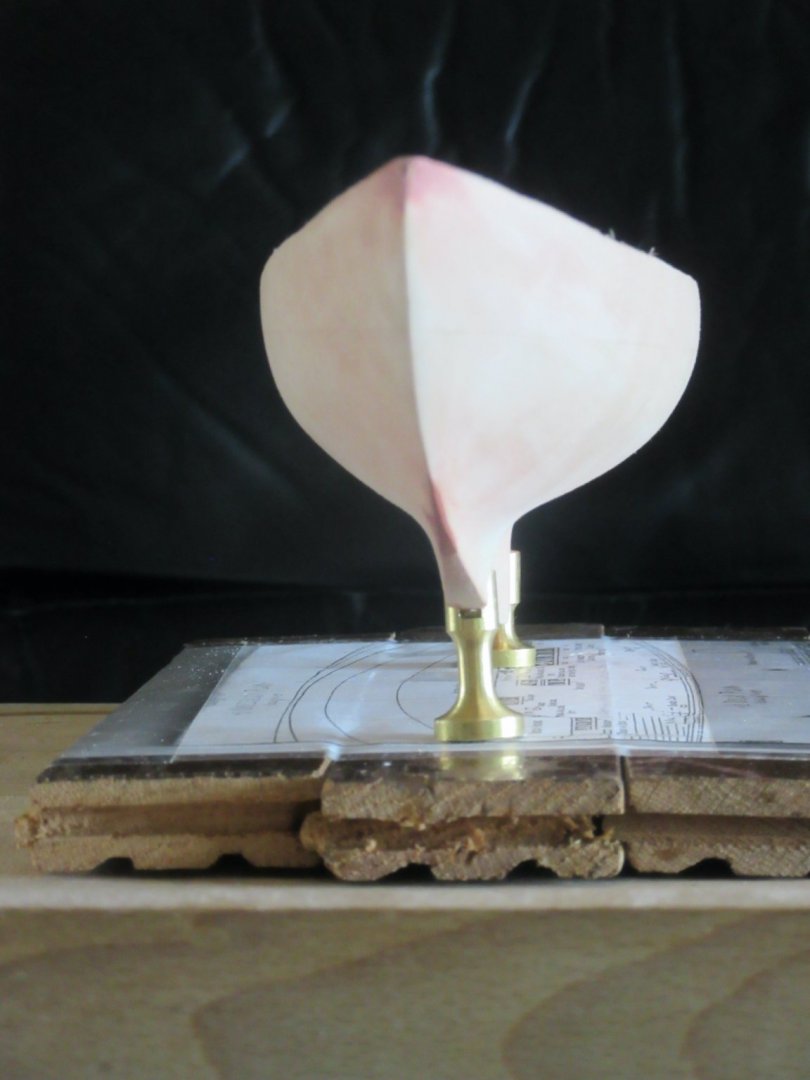
I affixed the hull to the pedestals to get their slots chiseled out ahead of priming the hull soon.
- Duanelaker, Rudolf, etubino and 2 others
-
5
-
-
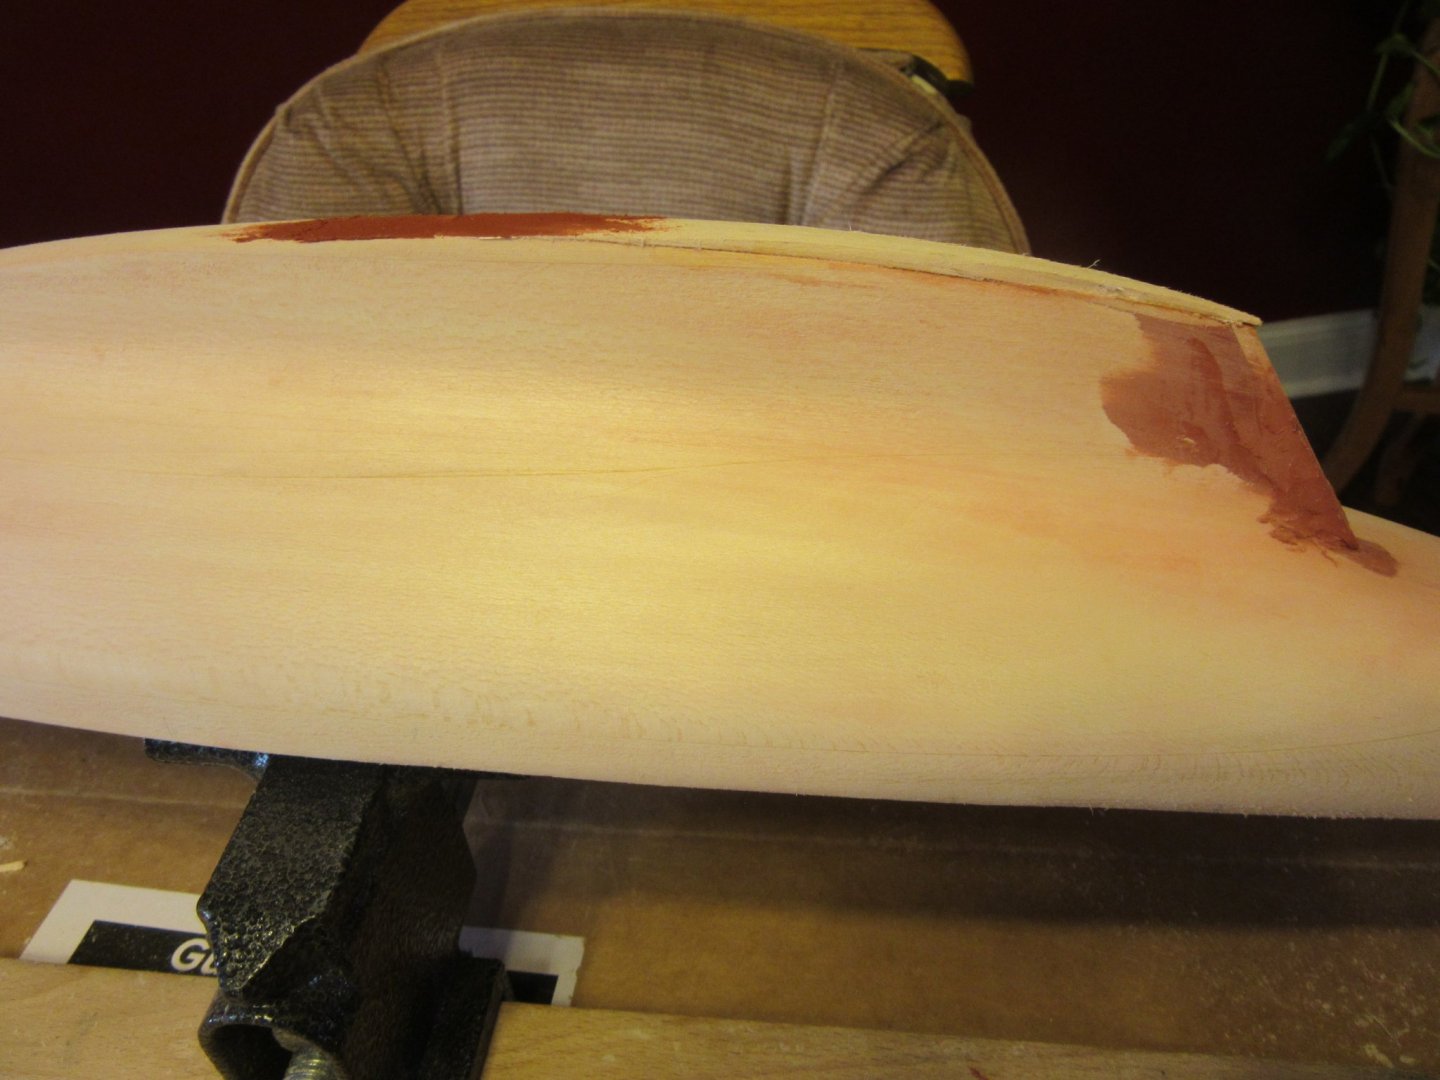
So I added putty and wood to an oversanded keel. I'm satisfied with the over all results at this stage.
- Rudolf, Duanelaker, yvesvidal and 5 others
-
8
-
-
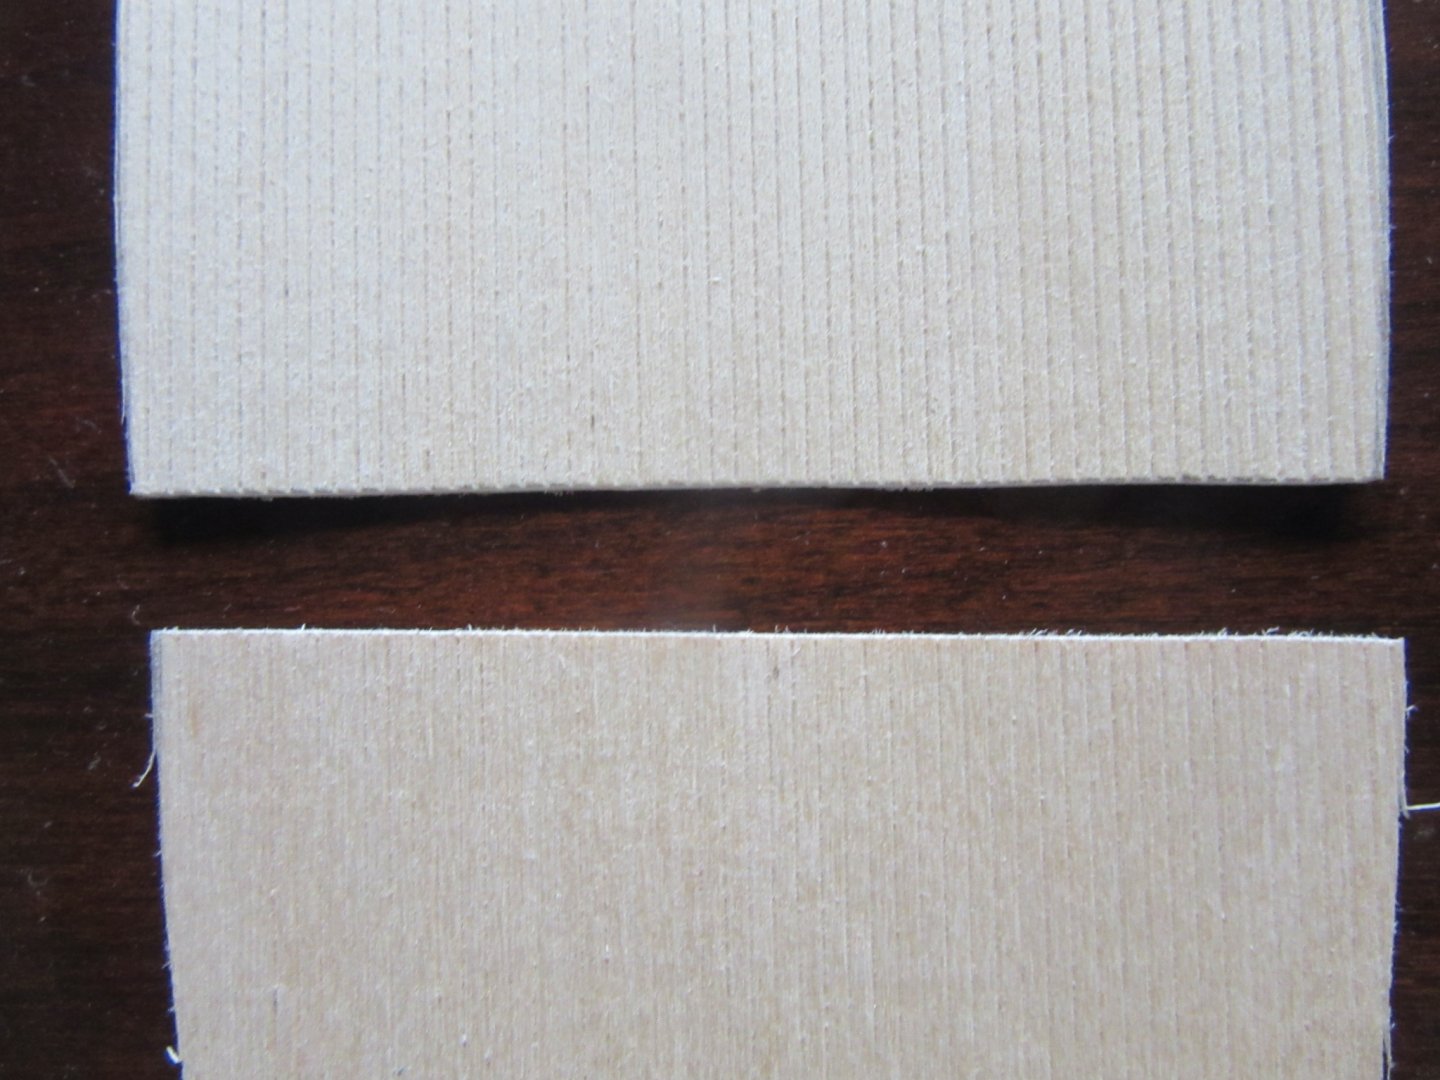
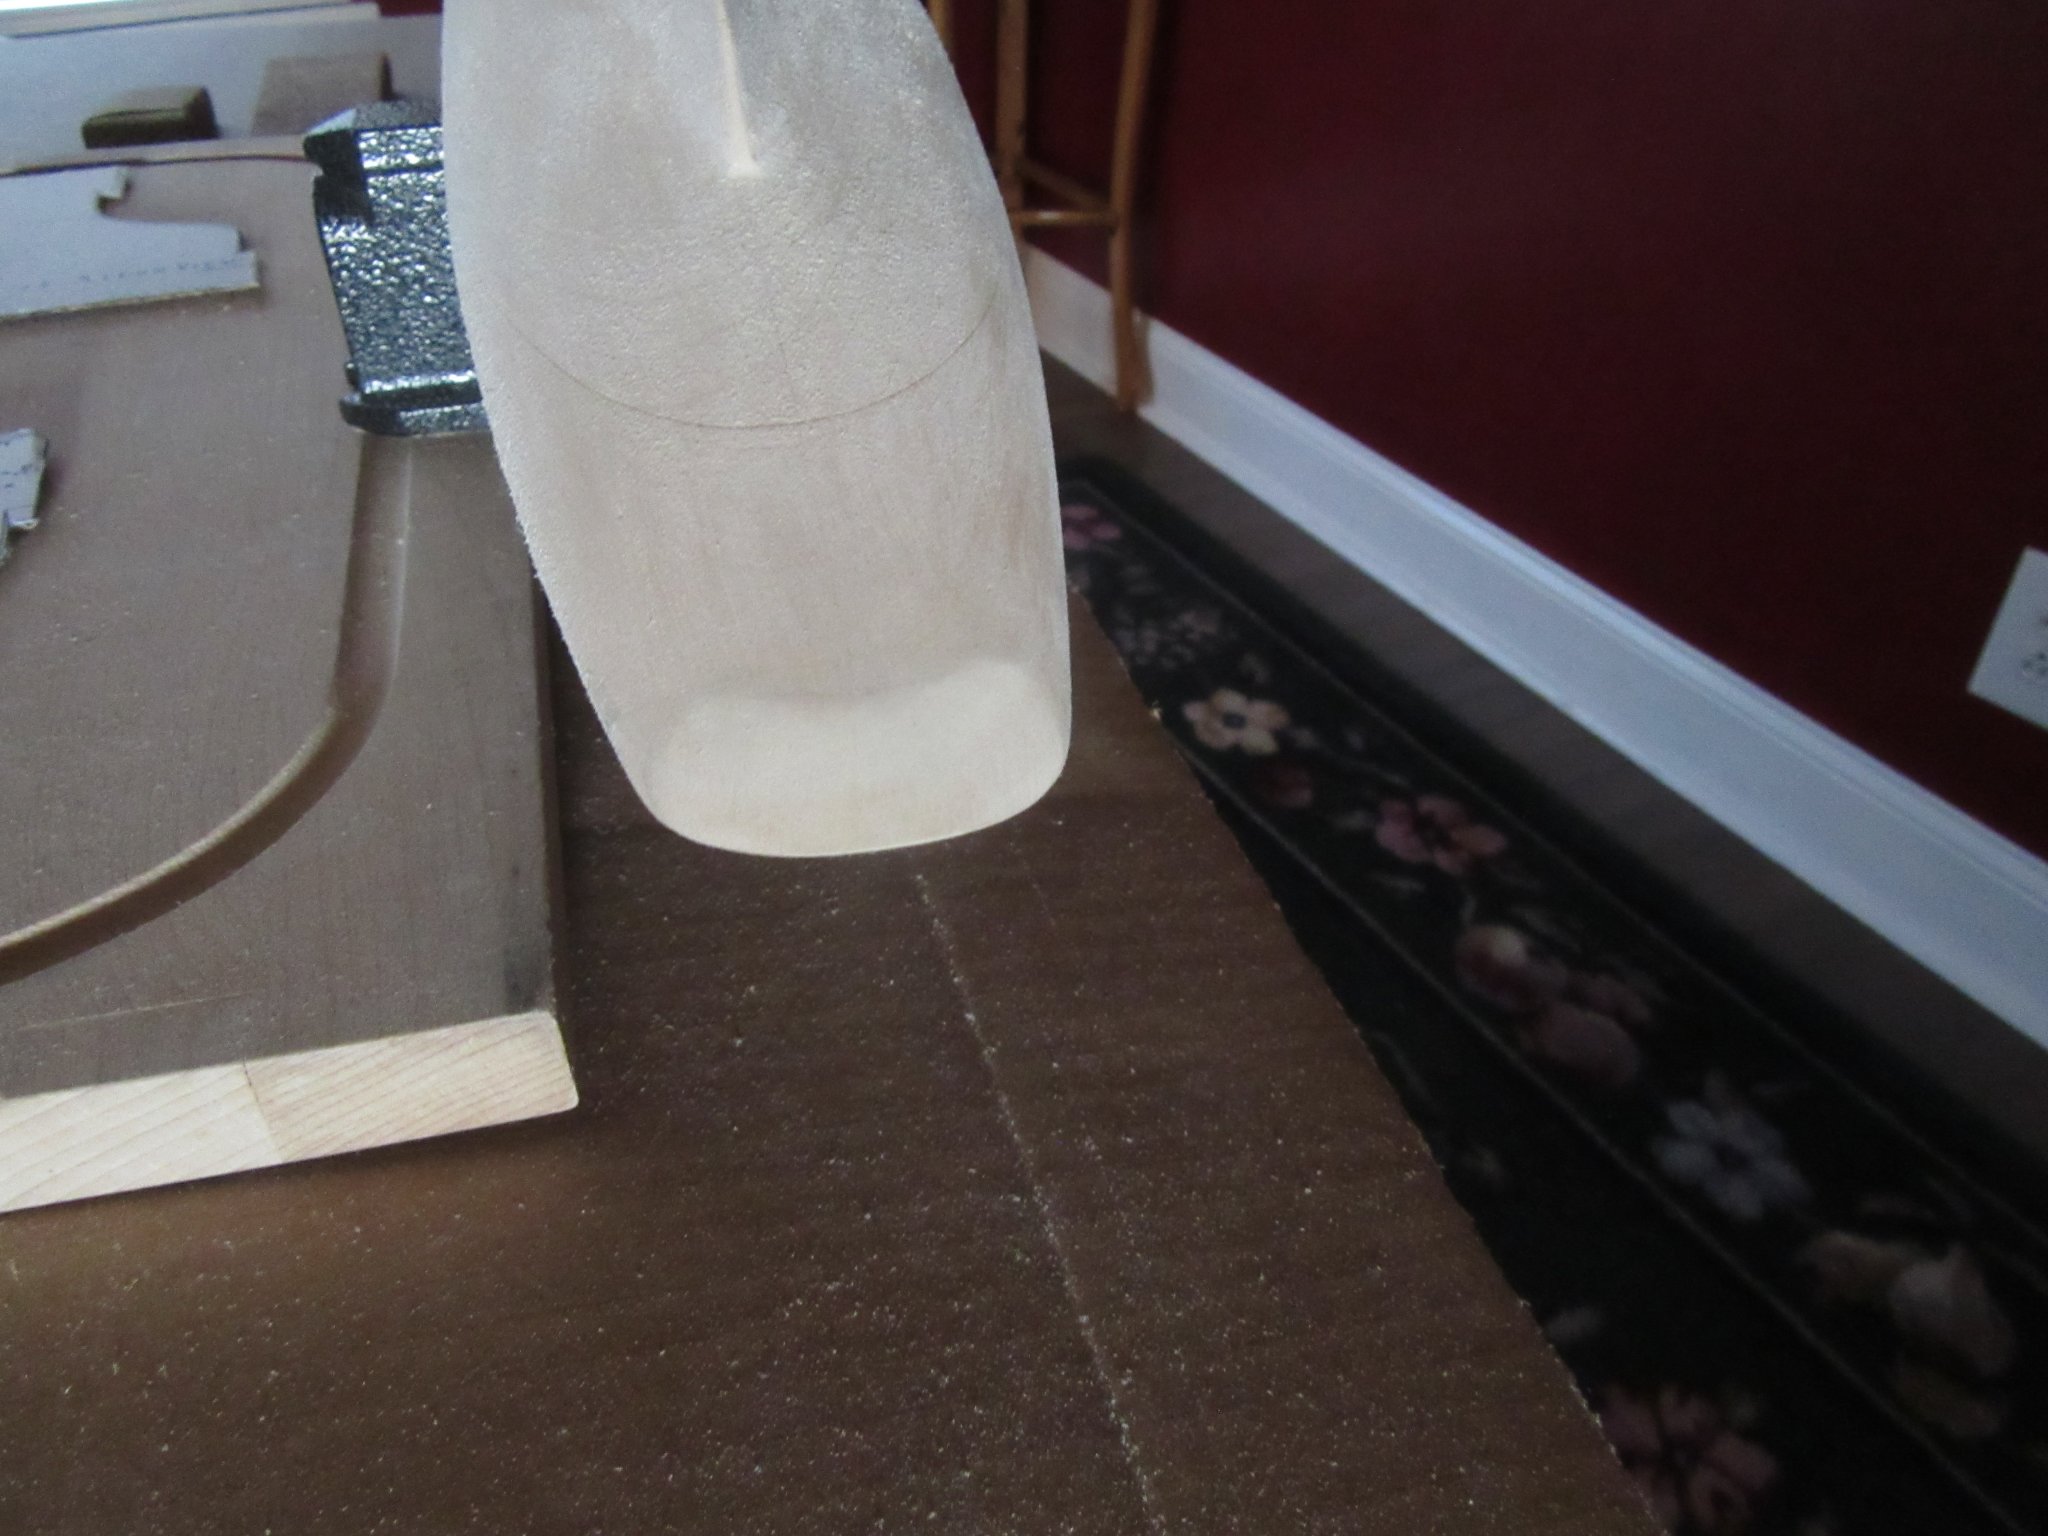
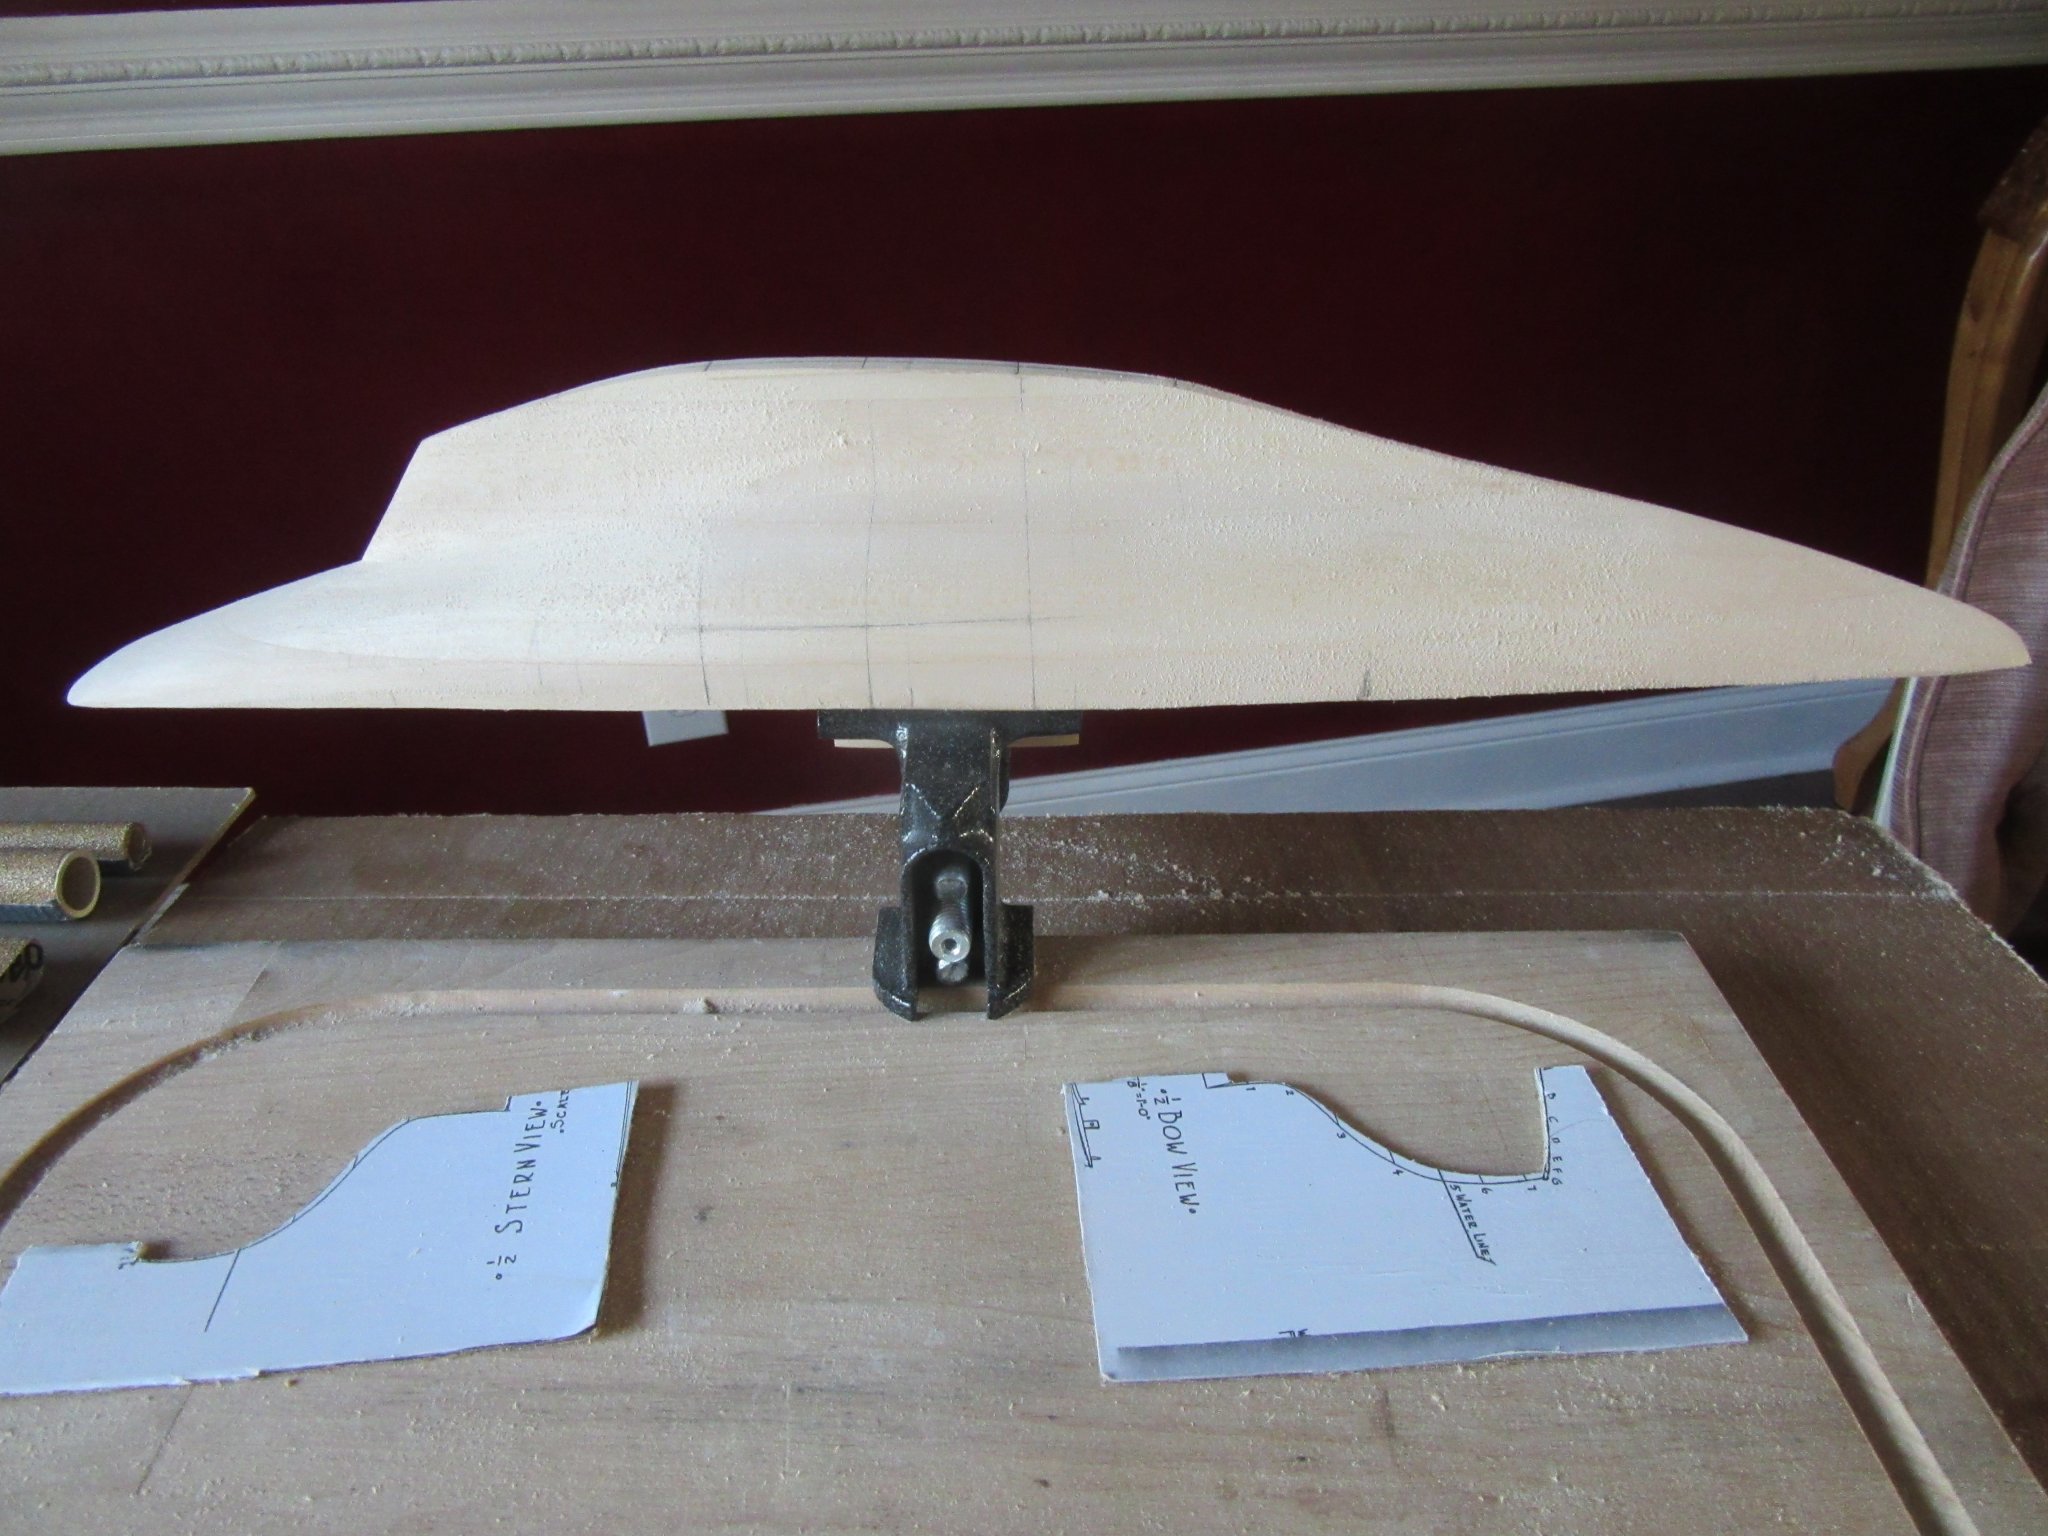
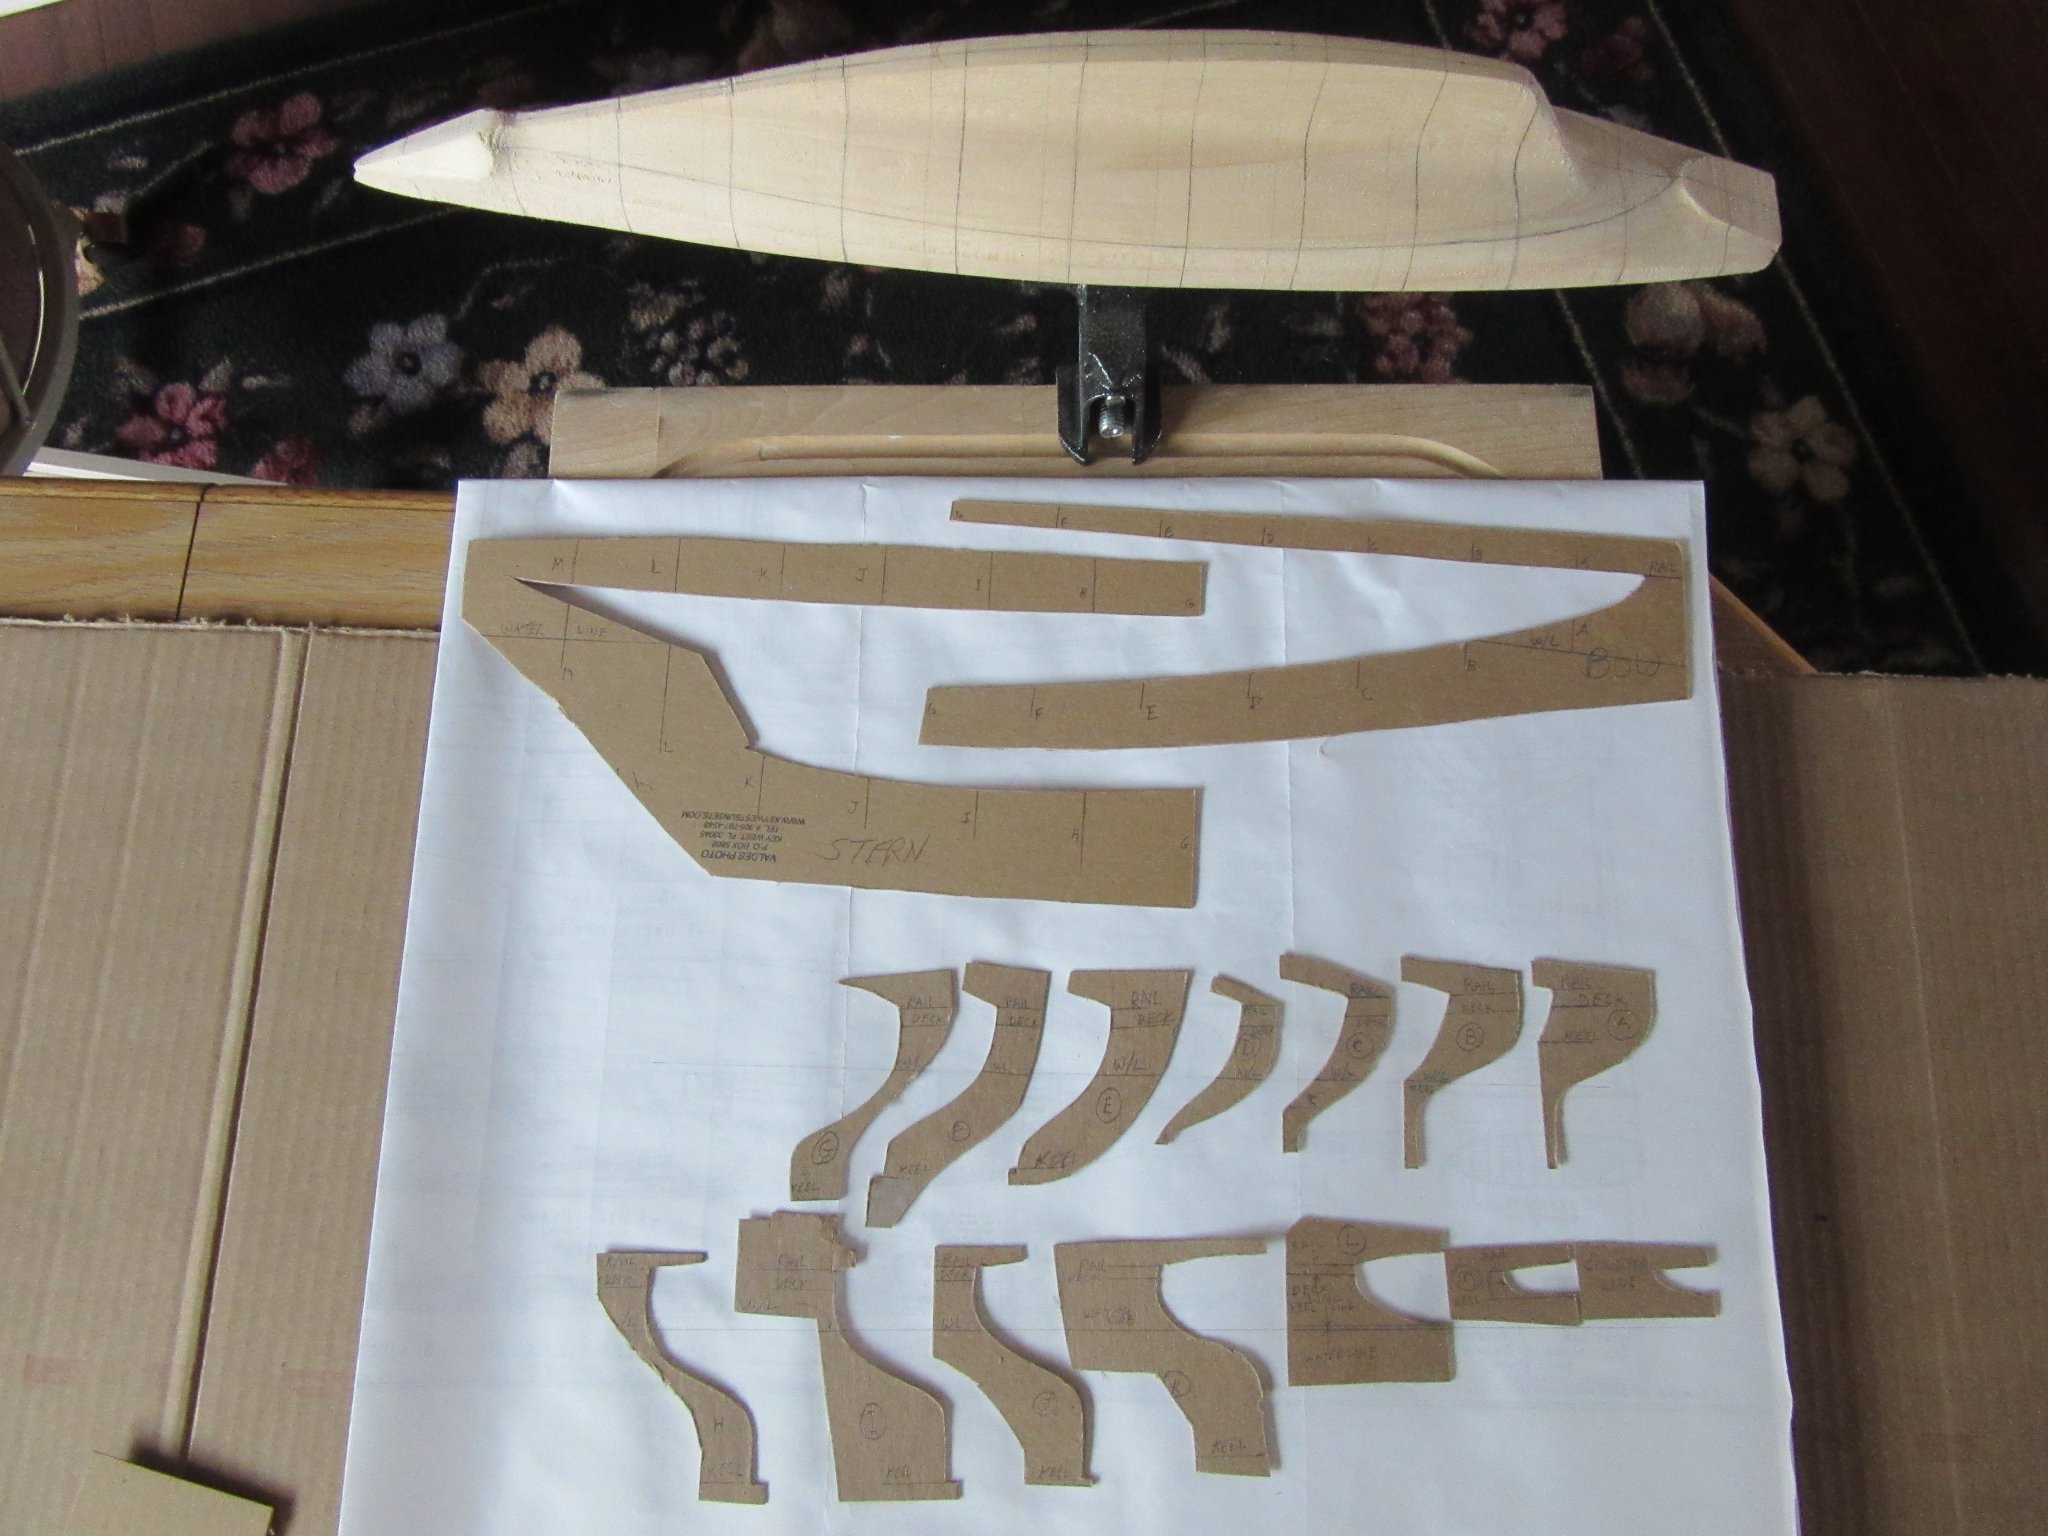
Yes Bob, I sand it about an hour or two a day and I constantly stop and check the contours with the templates. I may have over sanded on section C towards the bow. The cardboard templates I cut out are starting to wear out down around the bulwark tops at the rail line and probably affected section C. I'm not certain if putty will fix this or I should lay in a new layer of the extra basswood that comes with the kit along the keel line. Any tips on how to correct this would be welcomed by all. Otherwise it's shaping up according to the sail plan. One note, I've been cutting up old picture frame backing
for the templates.
-
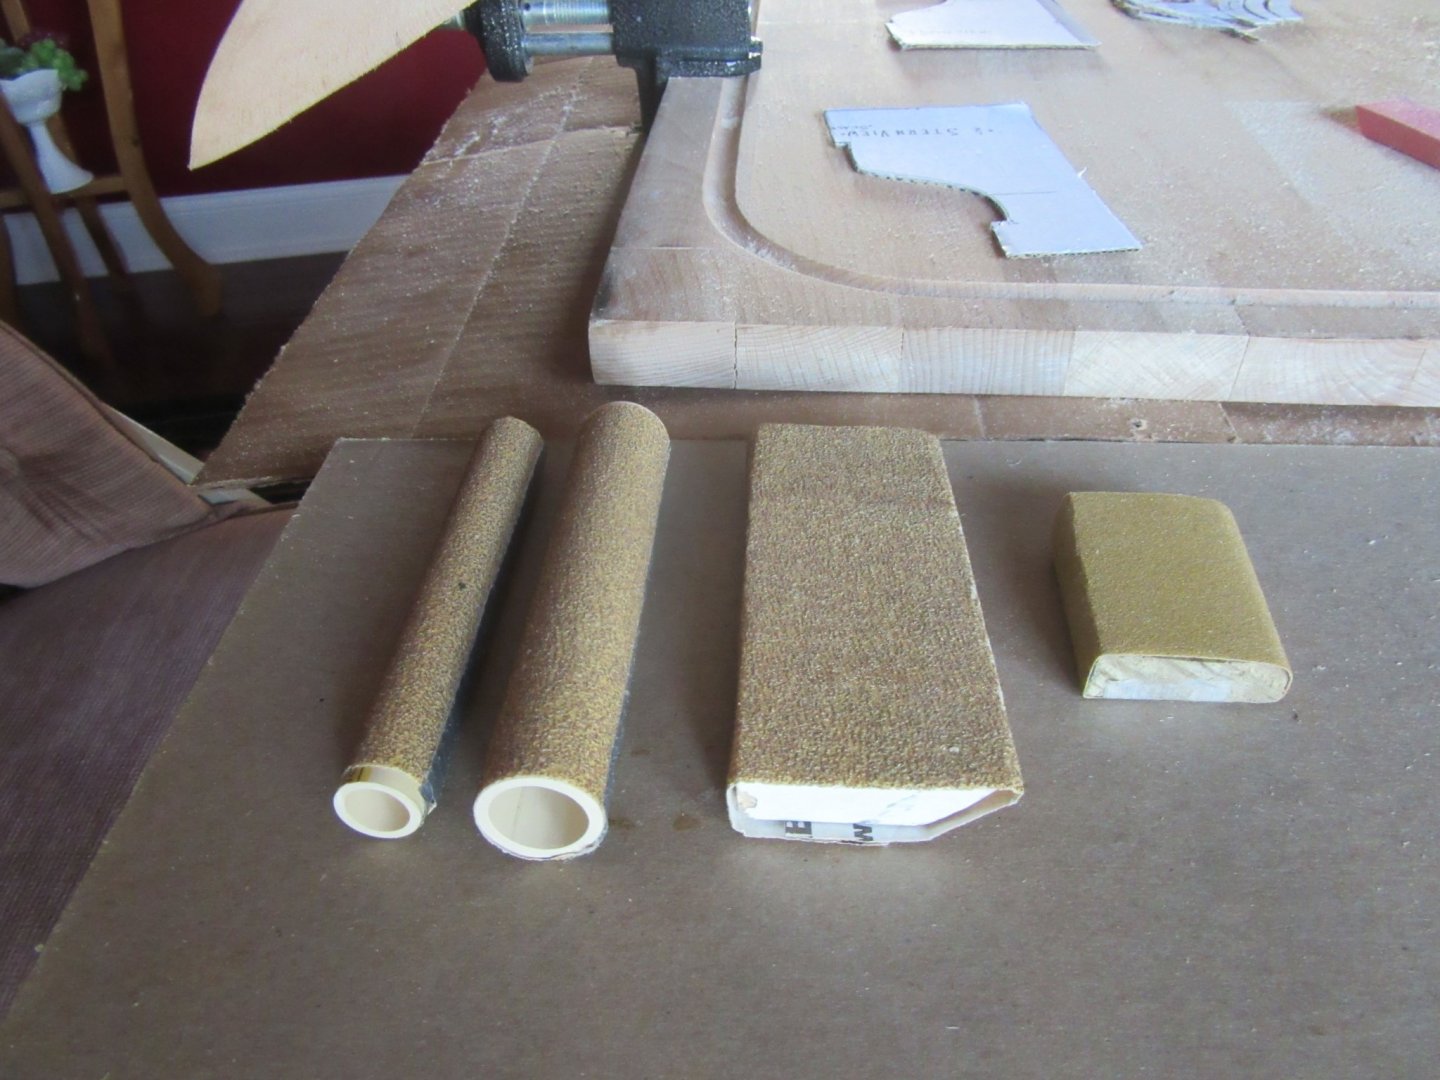
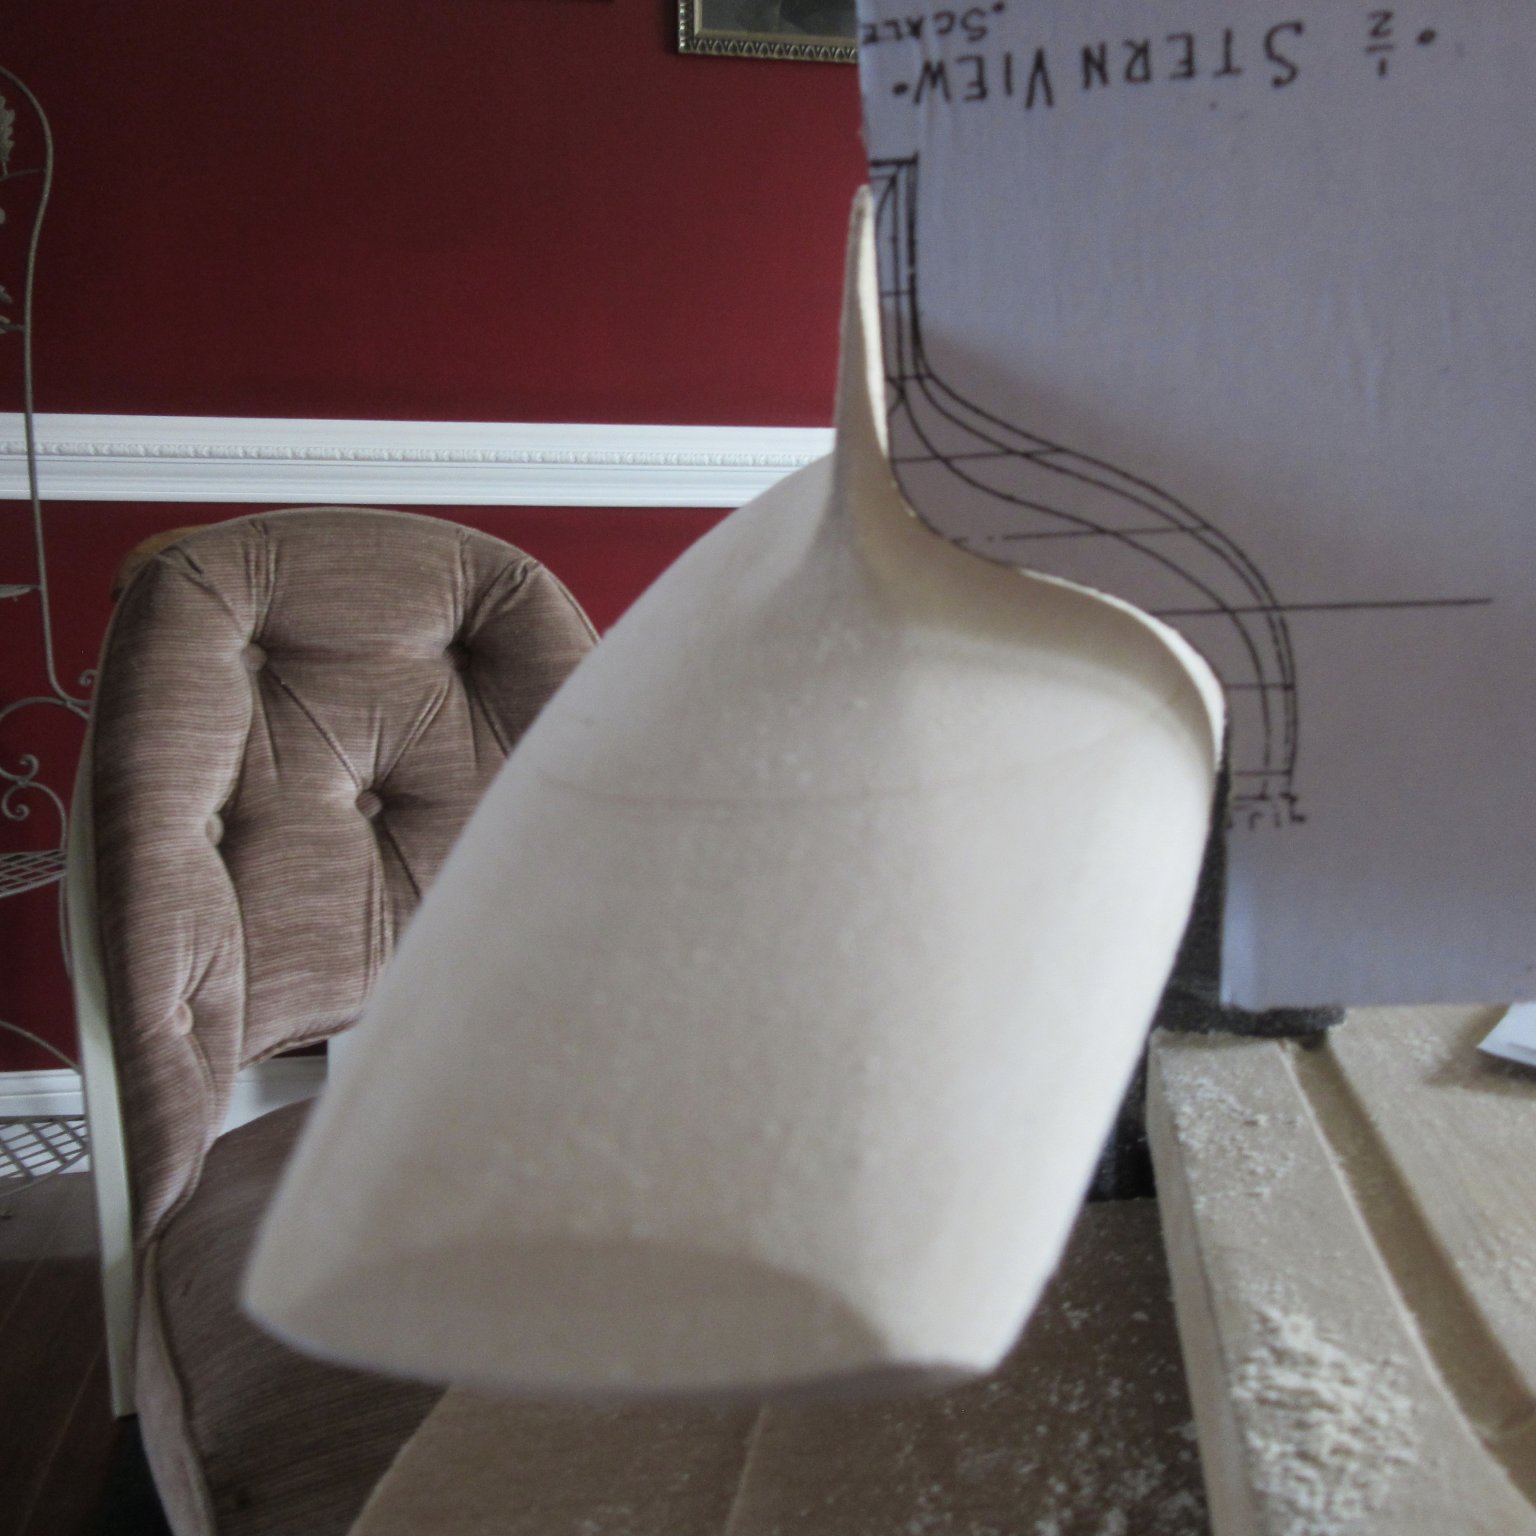
I've been rough sanding the hull using 60 grit starting with the bow and stern then the keel as stated in the instruction booklet. The bow is shaping up well but the transom is a challenge. I sanded the transom with 120 grit to get better definition where the transom meets the topsides of the hull and the counter. The homemade sanding blocks are working out adequately enough, but will definitely upgrade for the the final hull sanding.


- schooner, Duanelaker, yvesvidal and 3 others
-
6
-
-
-
Just having started work on Atlantic's hull, I appreciate your detailed build log. As being relatively inexperienced at the level the Atlantic kit requires, your CNS Alfred build log answers a lot of questions that have been coming to mind as I read the instruction book. The Admiral isn't going to like it but I'm going to need more tools. keep up the informative log Schooner. It's a big help to us newbies.
-
Without a doubt one of the prettiest ladies to grace the seas.
-
Thank you Chris, MSW is a fantastic asset in expanding on the kit instructions with all the posts on construction methods, materials and abundant tips to assist me in completing my schooner with the best results possible. I'm delighted having been referred to MSW by the kit manufacturer.
- ccoyle and Ryland Craze
-
2
-
-
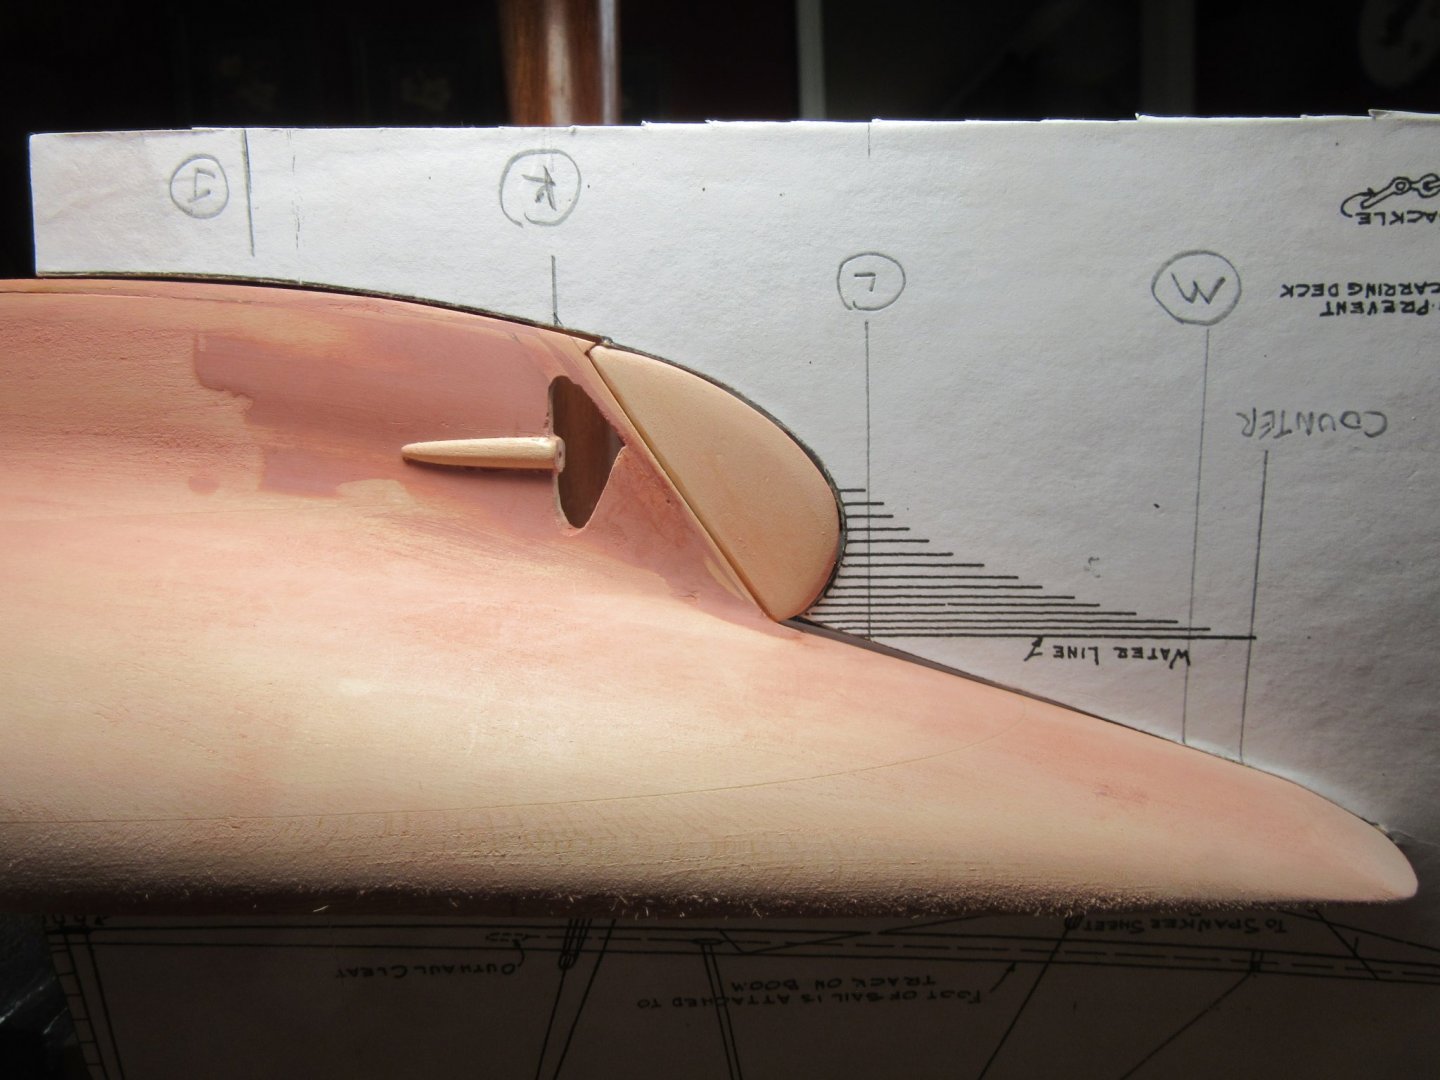
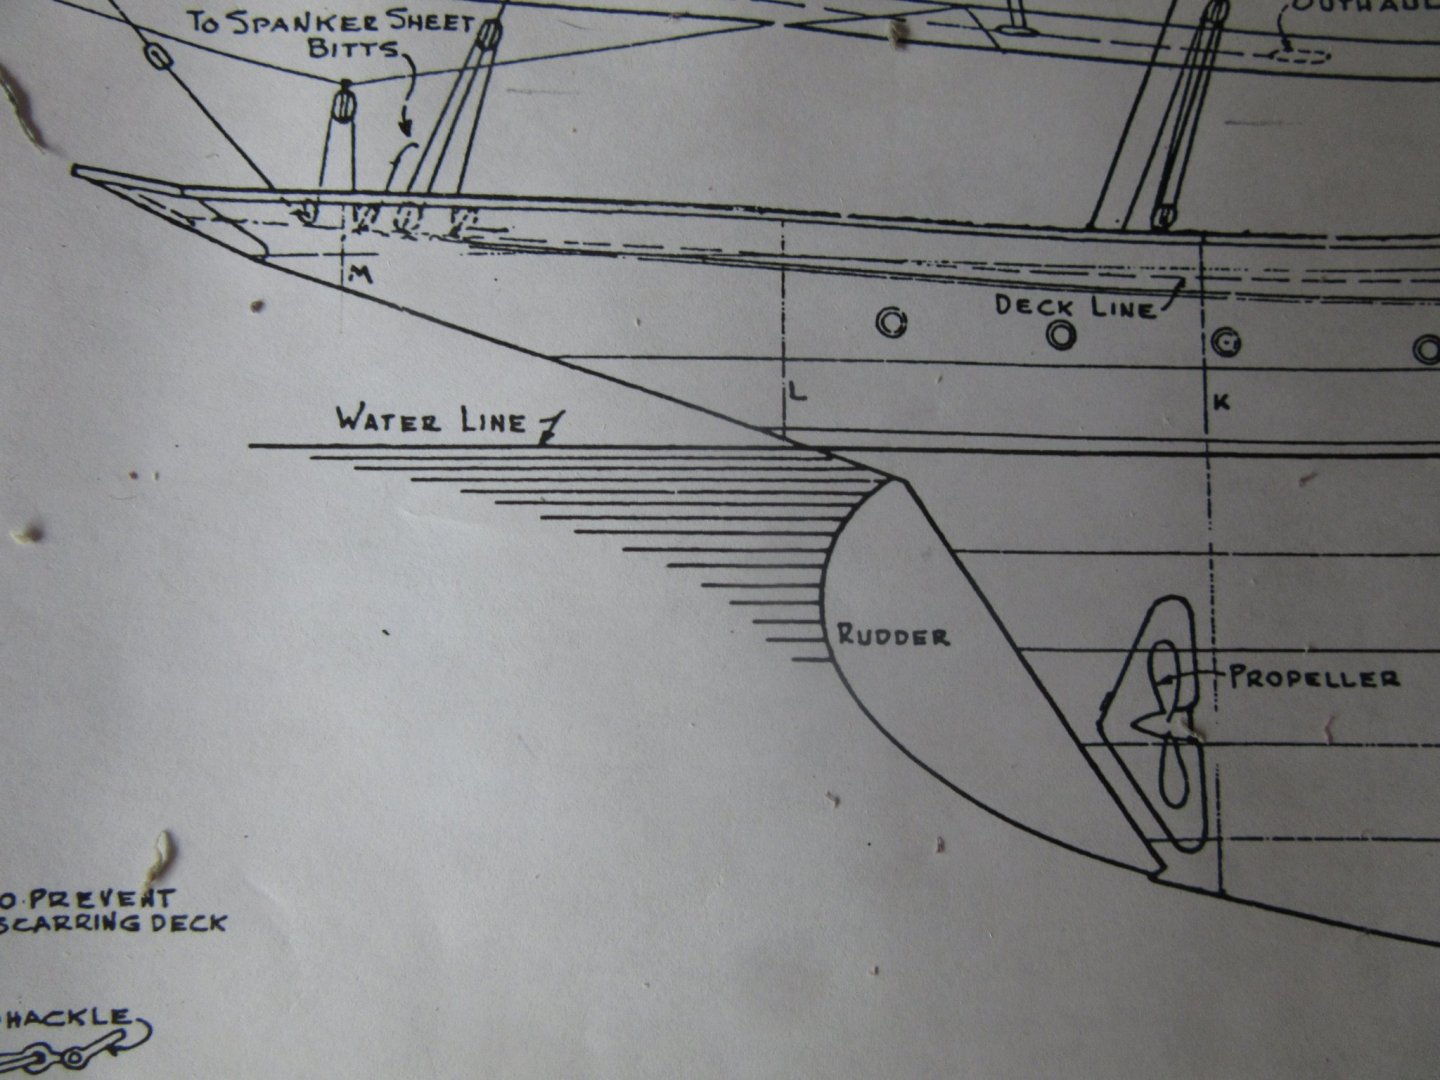
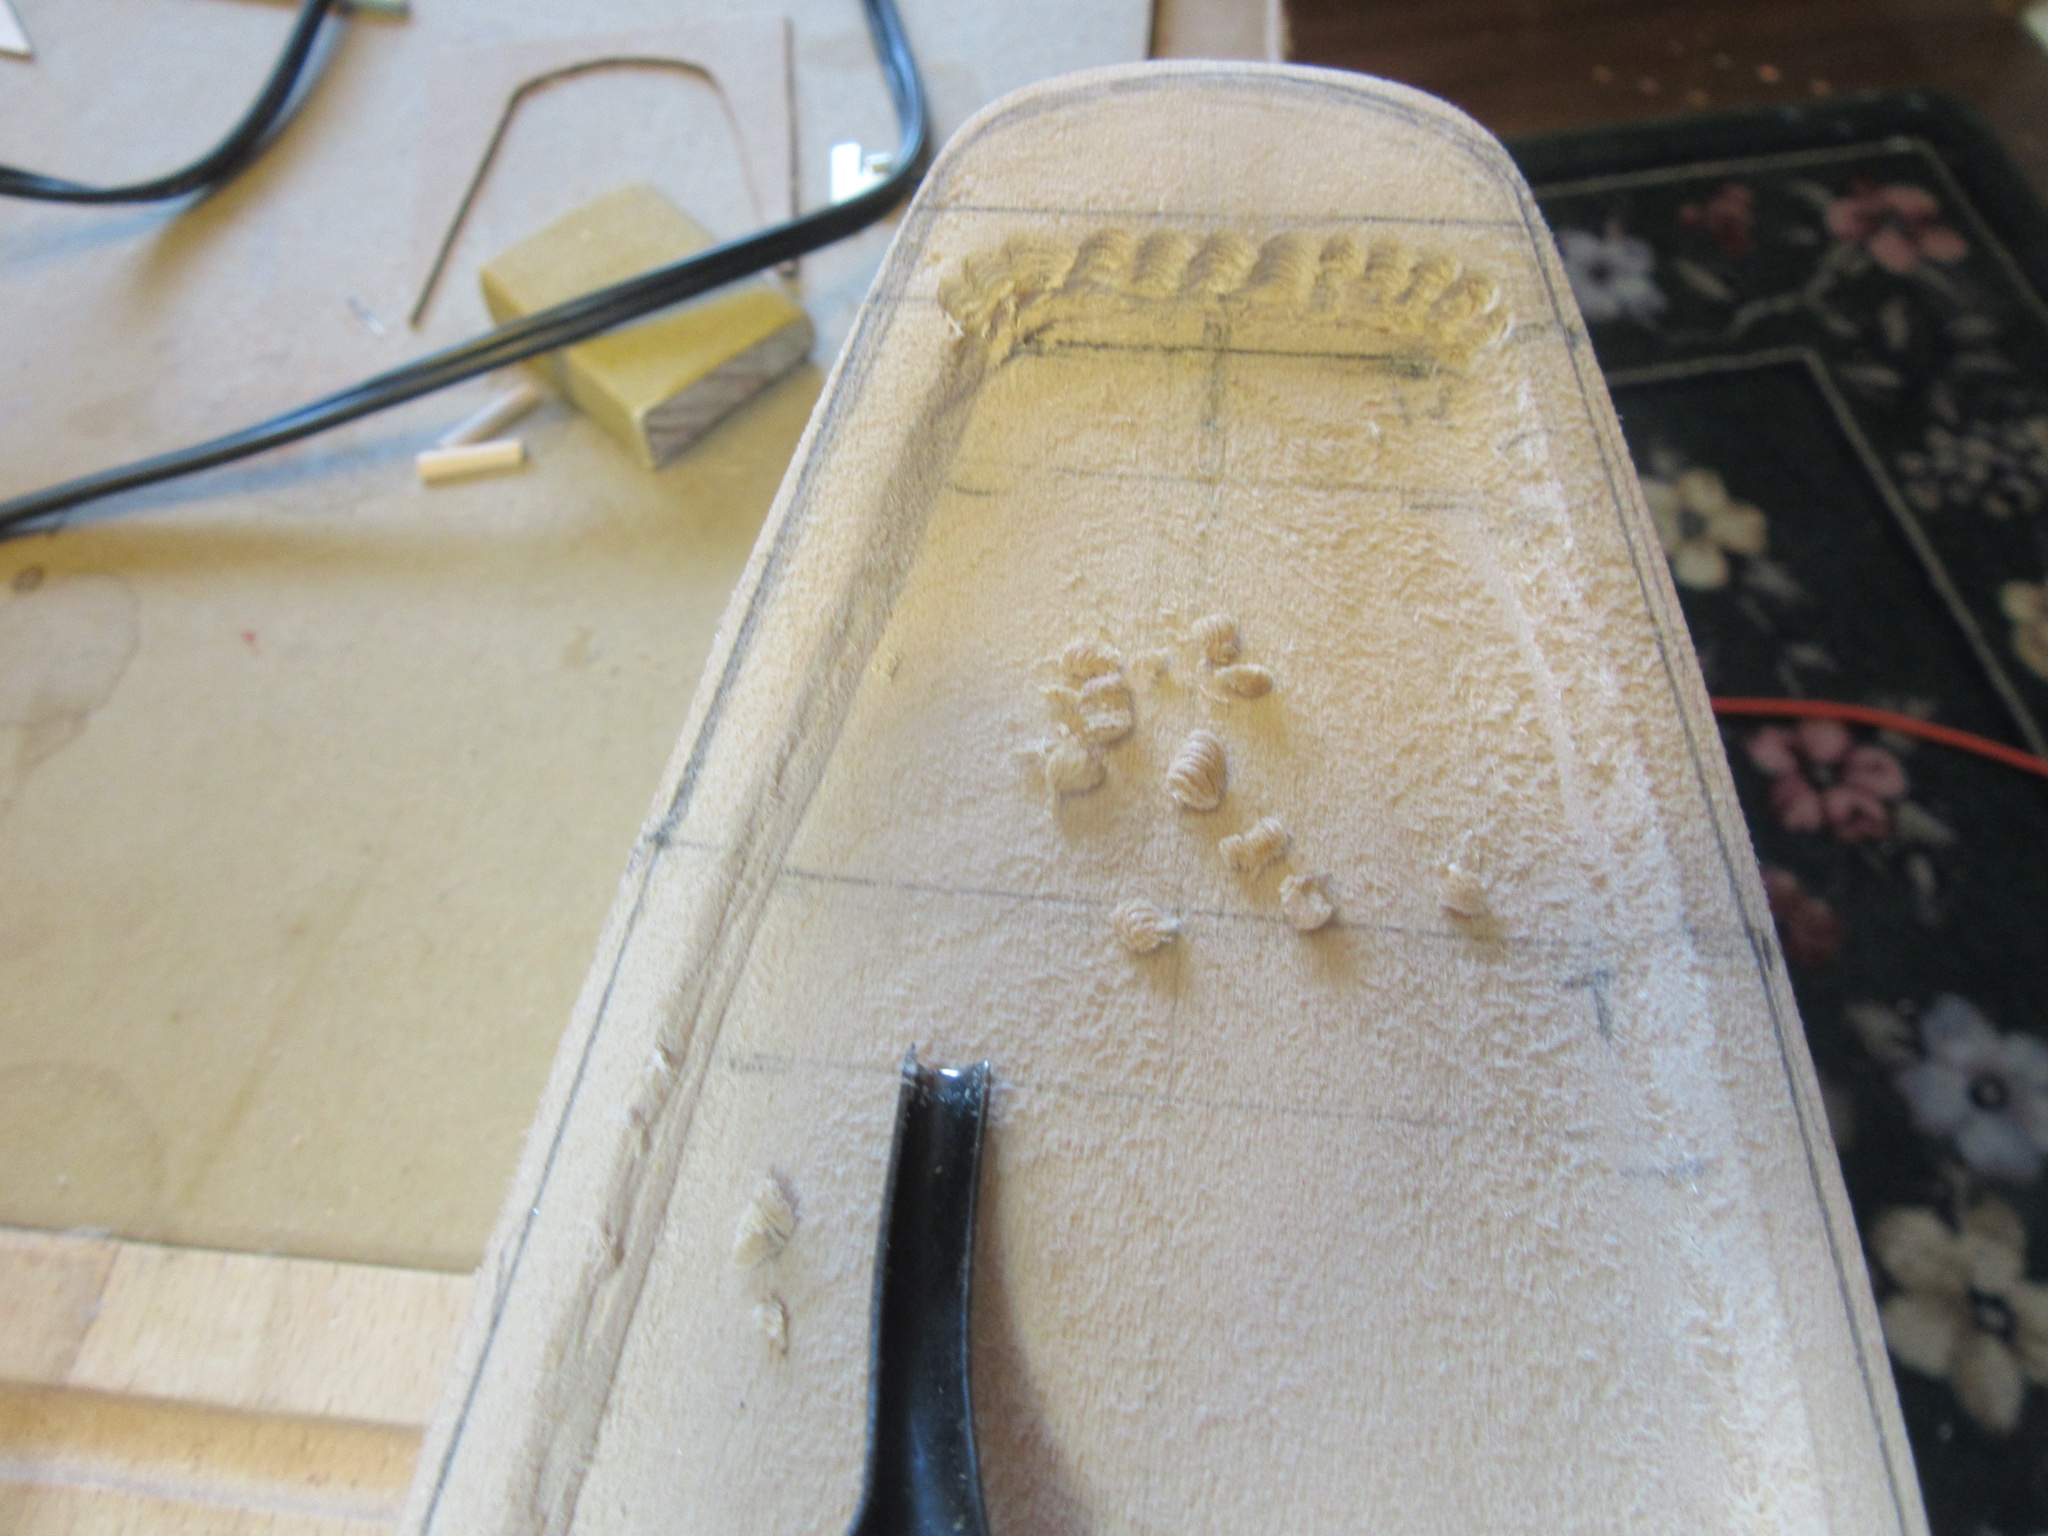
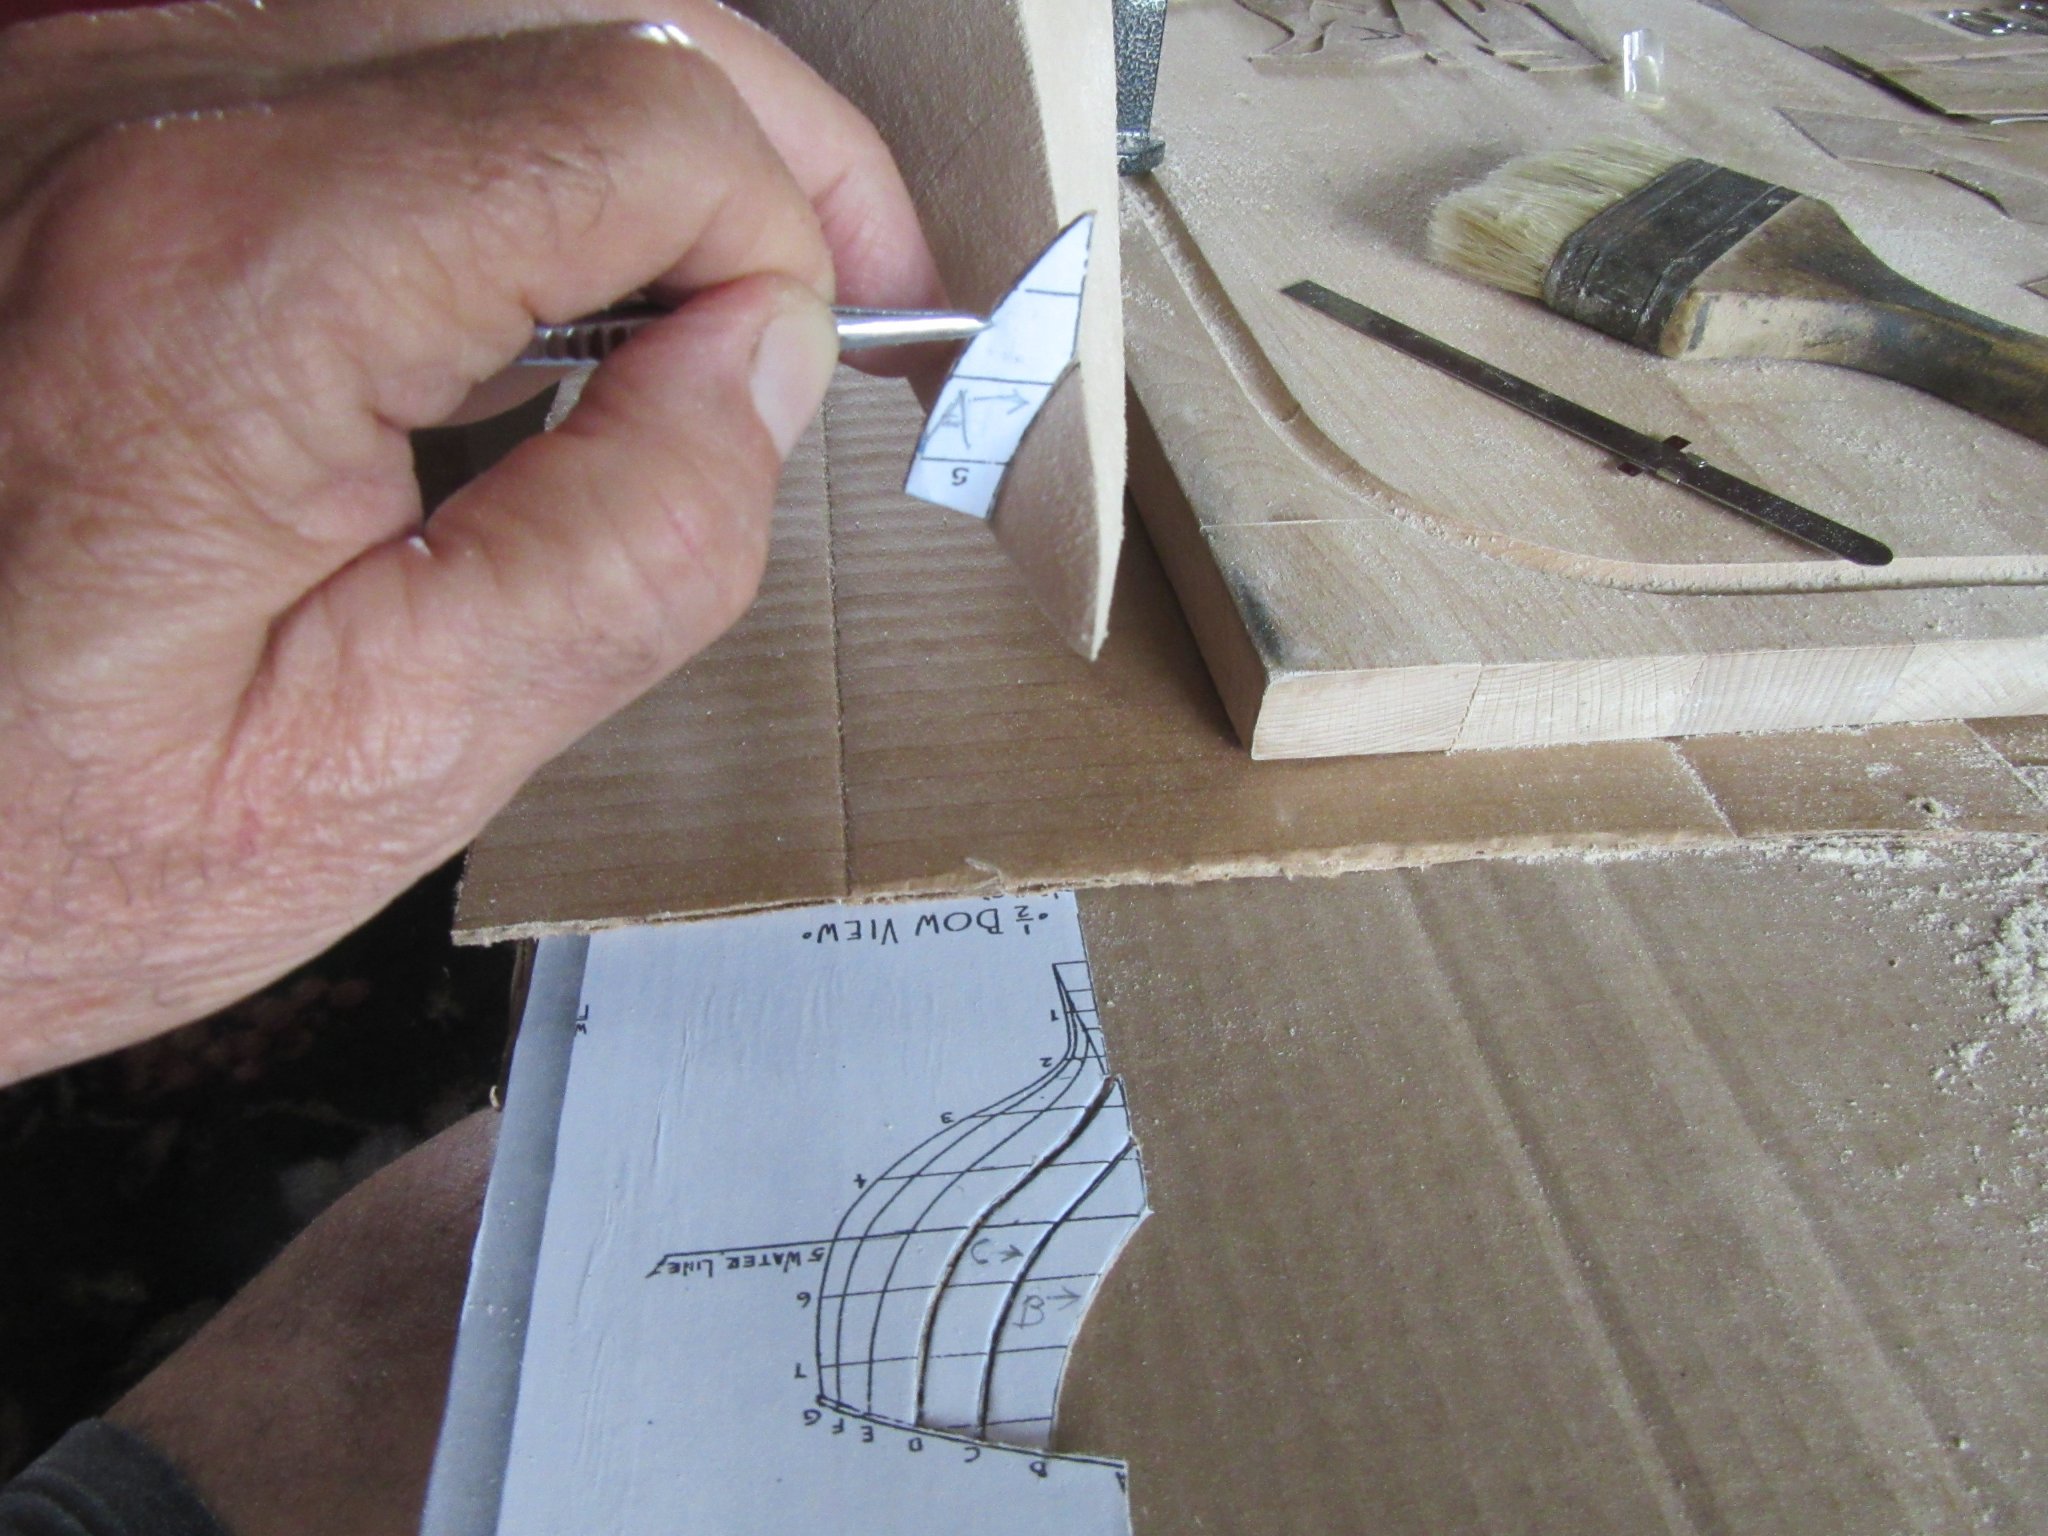
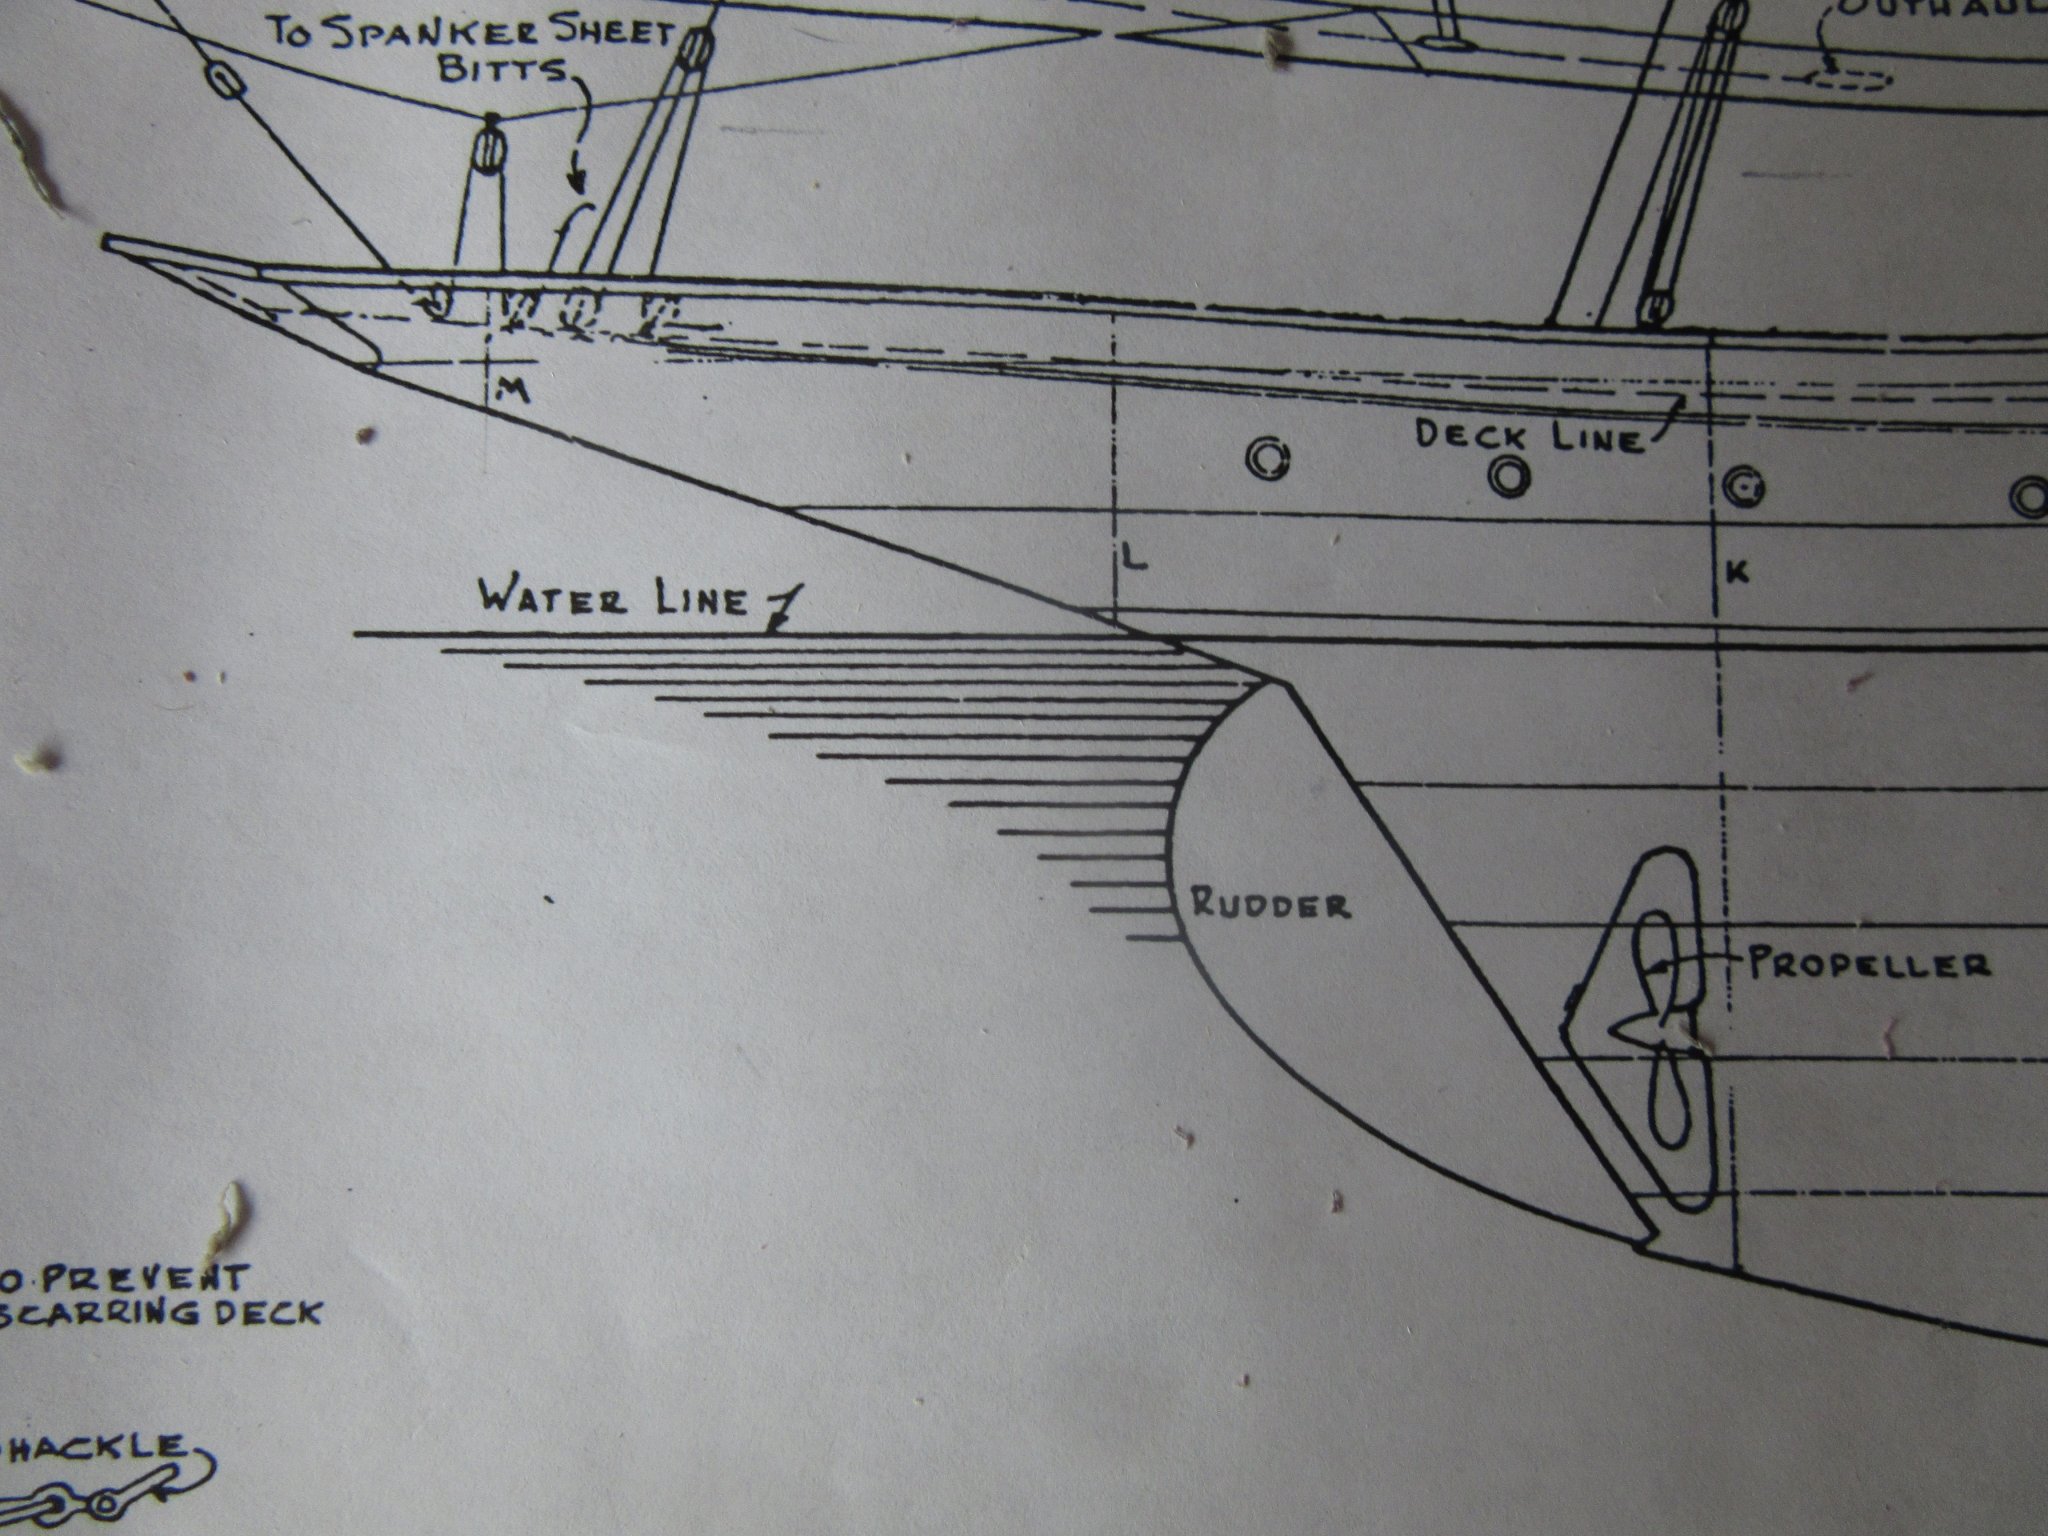
Hello everyone. This is my first build thread and only the third wooden ship model I've built over the last 40 years (retired now). Currently I'm still reading the instructions and sail plan and yet to purchase tools except for a medium duty knife and pinvise. If you look closely at the body lines you may notice previously erased lines. This had to be done to correctly position the propeller boss area onto more of the keel area. Any advise and opinions are welcomed as although it may be I've bitten off a little more than I can chew, I won't give up the ship. Hope to hear from you and looking forward to my next progress post.


Atlantic by closehaul - FINISHED - BlueJacket Shipcrafters - 1:96 Scale
in - Kit build logs for subjects built from 1901 - Present Day
Posted
Thank you Tim, Its not entirely uniform around the hull. Although the top is ok the bottom I discovered varies at the deckline as I run my thumb and finger along it. With waterways hiding random inconsistencies though, I'm very satisfied with its looks.
Angelo