


Gabek
-
Posts
278 -
Joined
-
Last visited
Content Type
Profiles
Forums
Gallery
Events
Posts posted by Gabek
-
-
2 hours ago, Knocklouder said:
…👀 we be whatchin

And that’s what keeps me up at night! 🤣
-
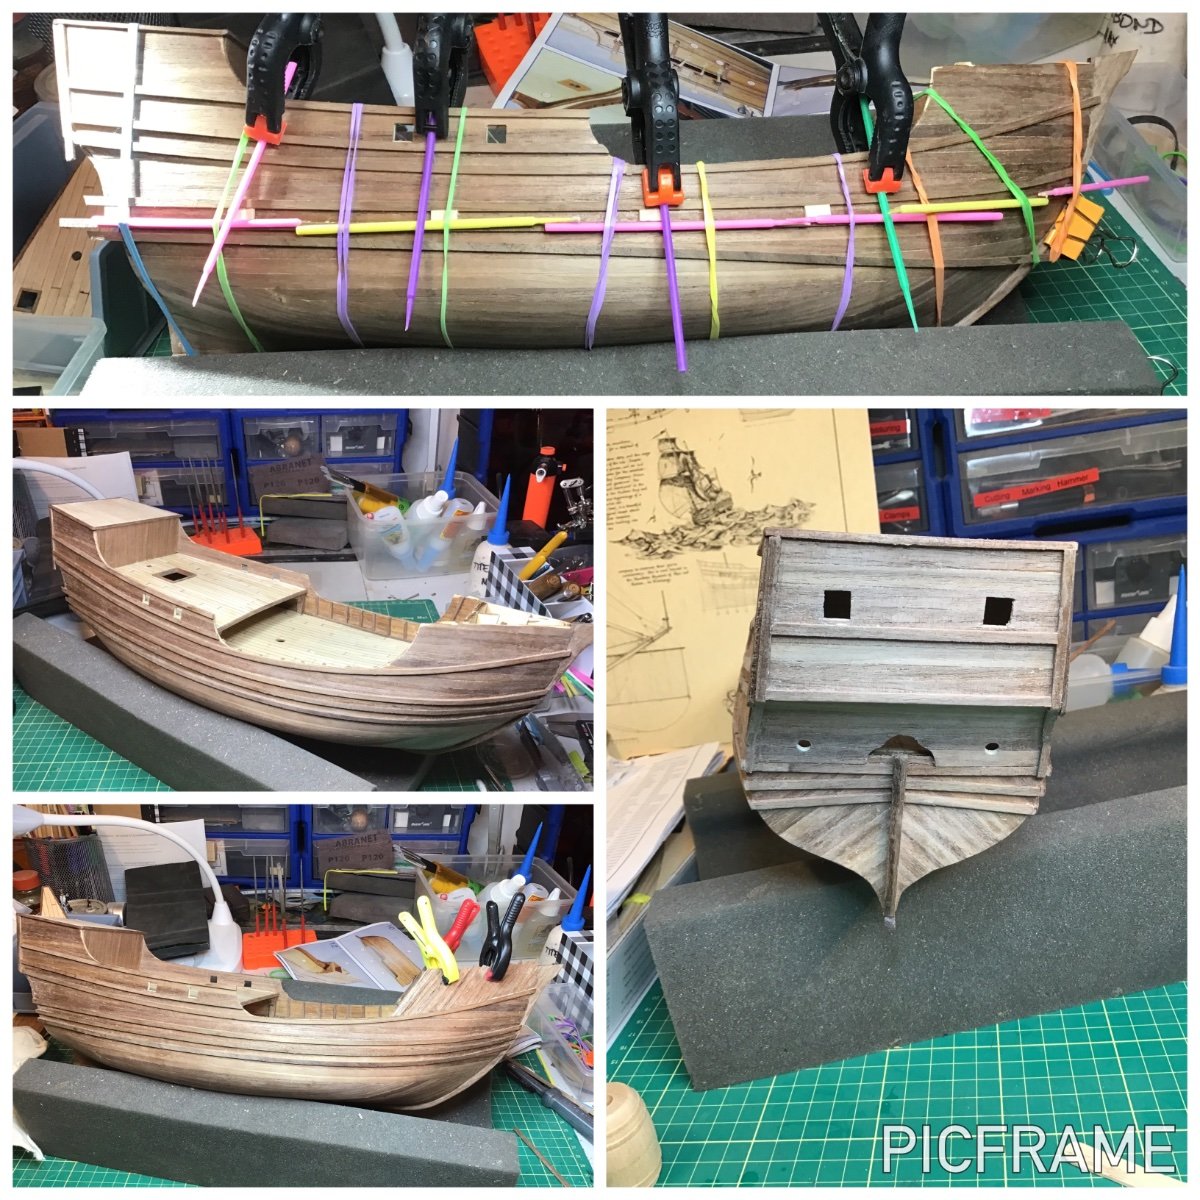
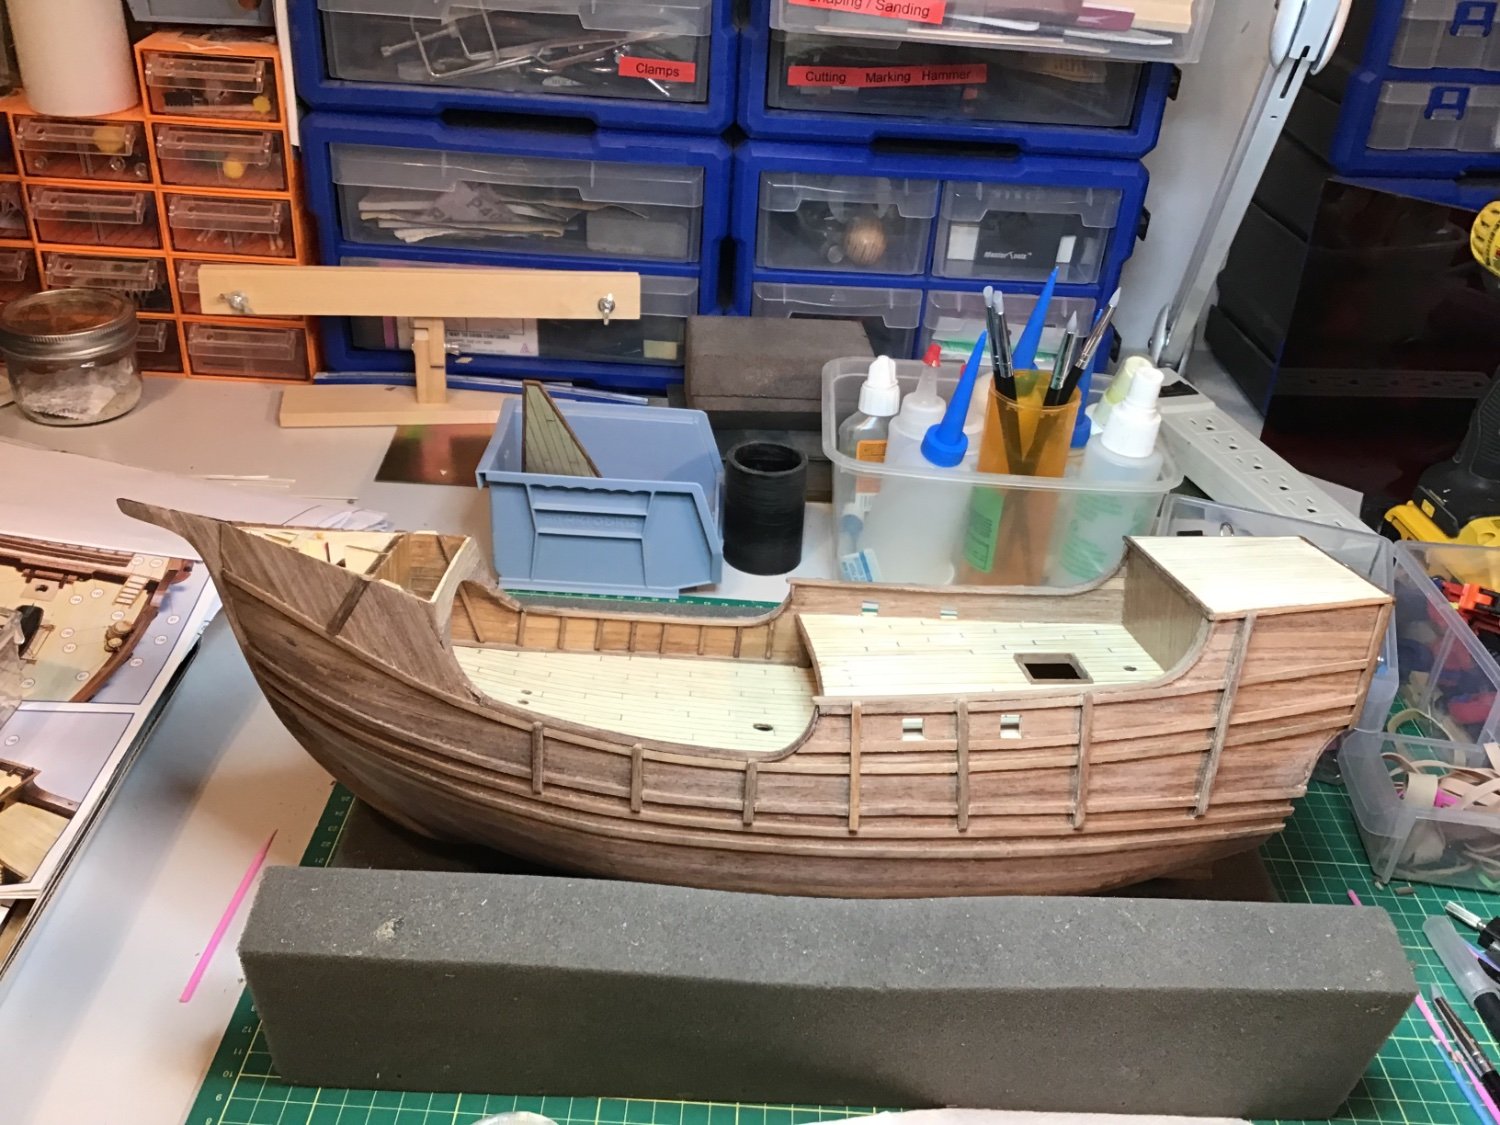
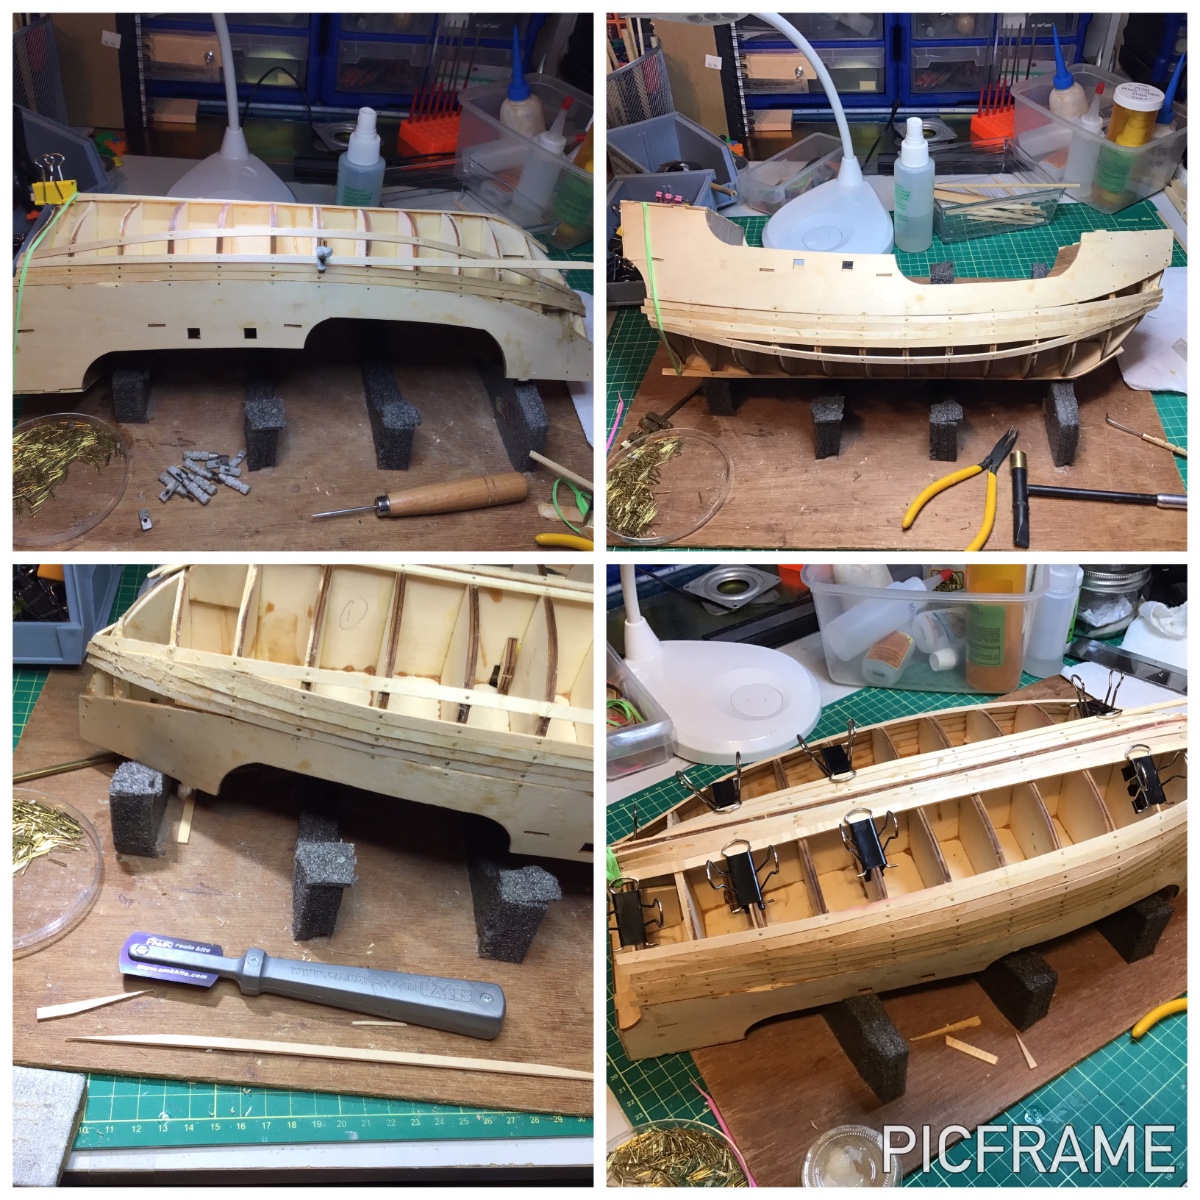
Hull is done
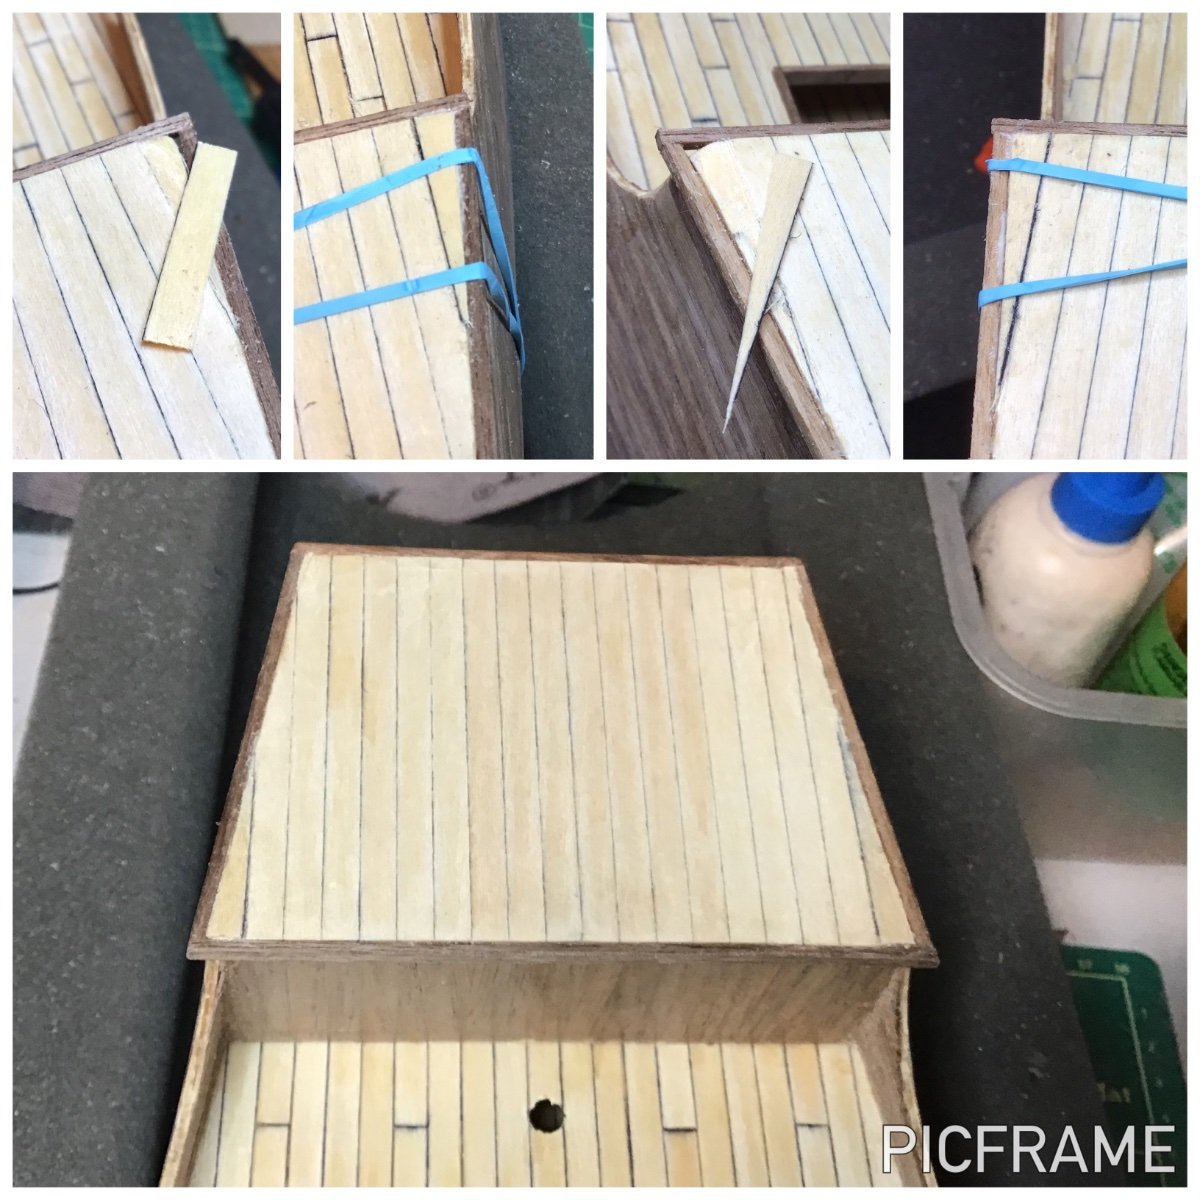
Besides a few days off due to back issues, I still managed to add trim, fenders, and rails.

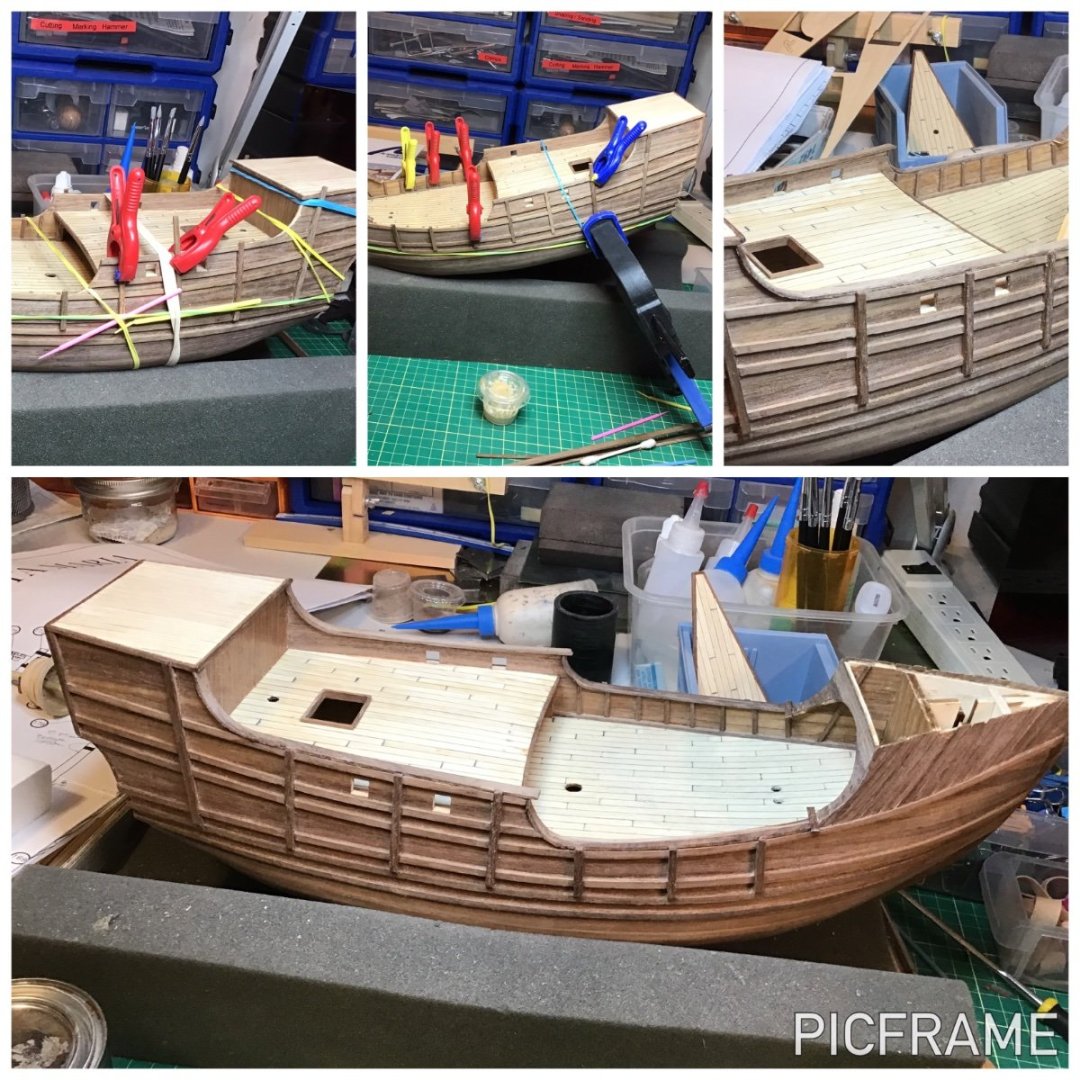
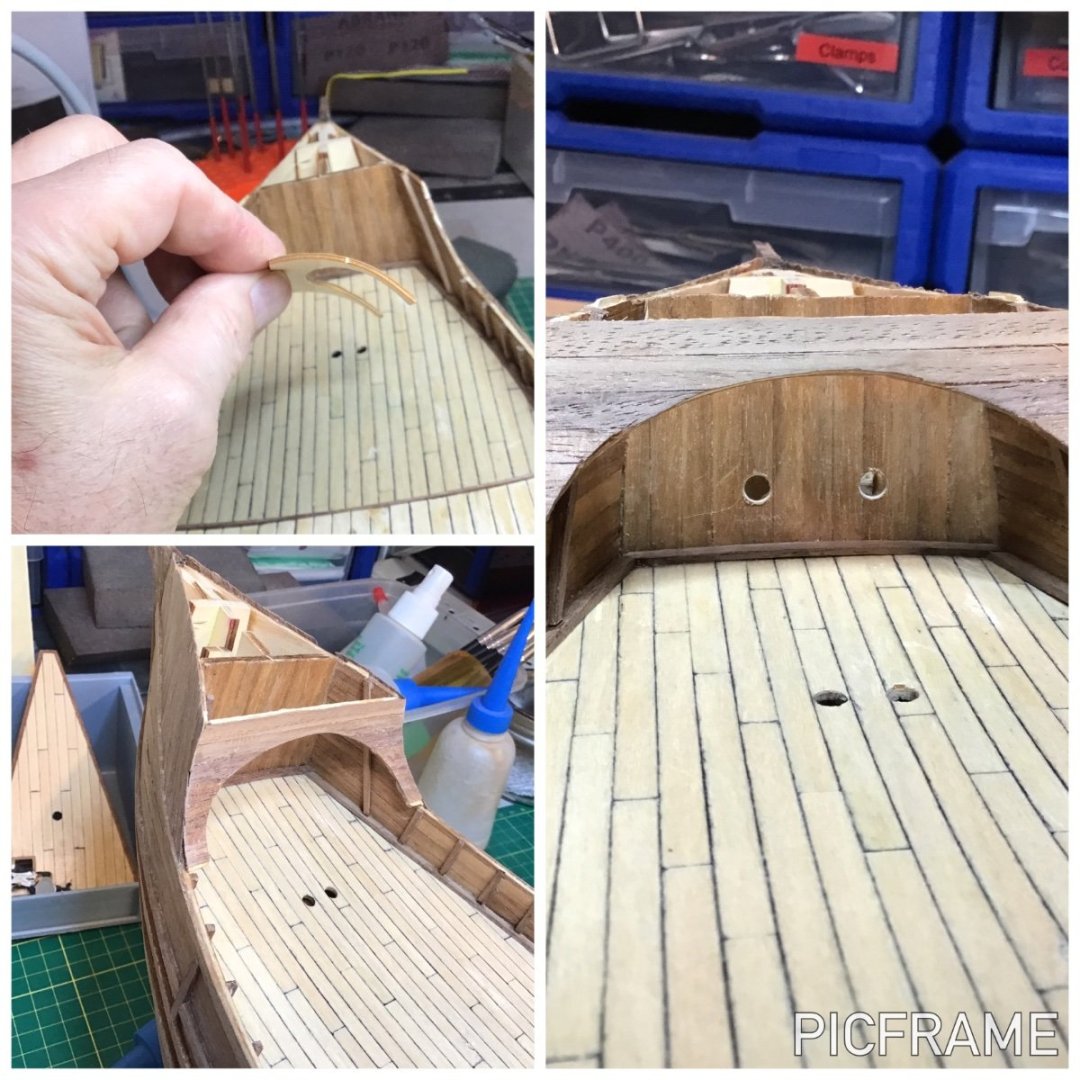
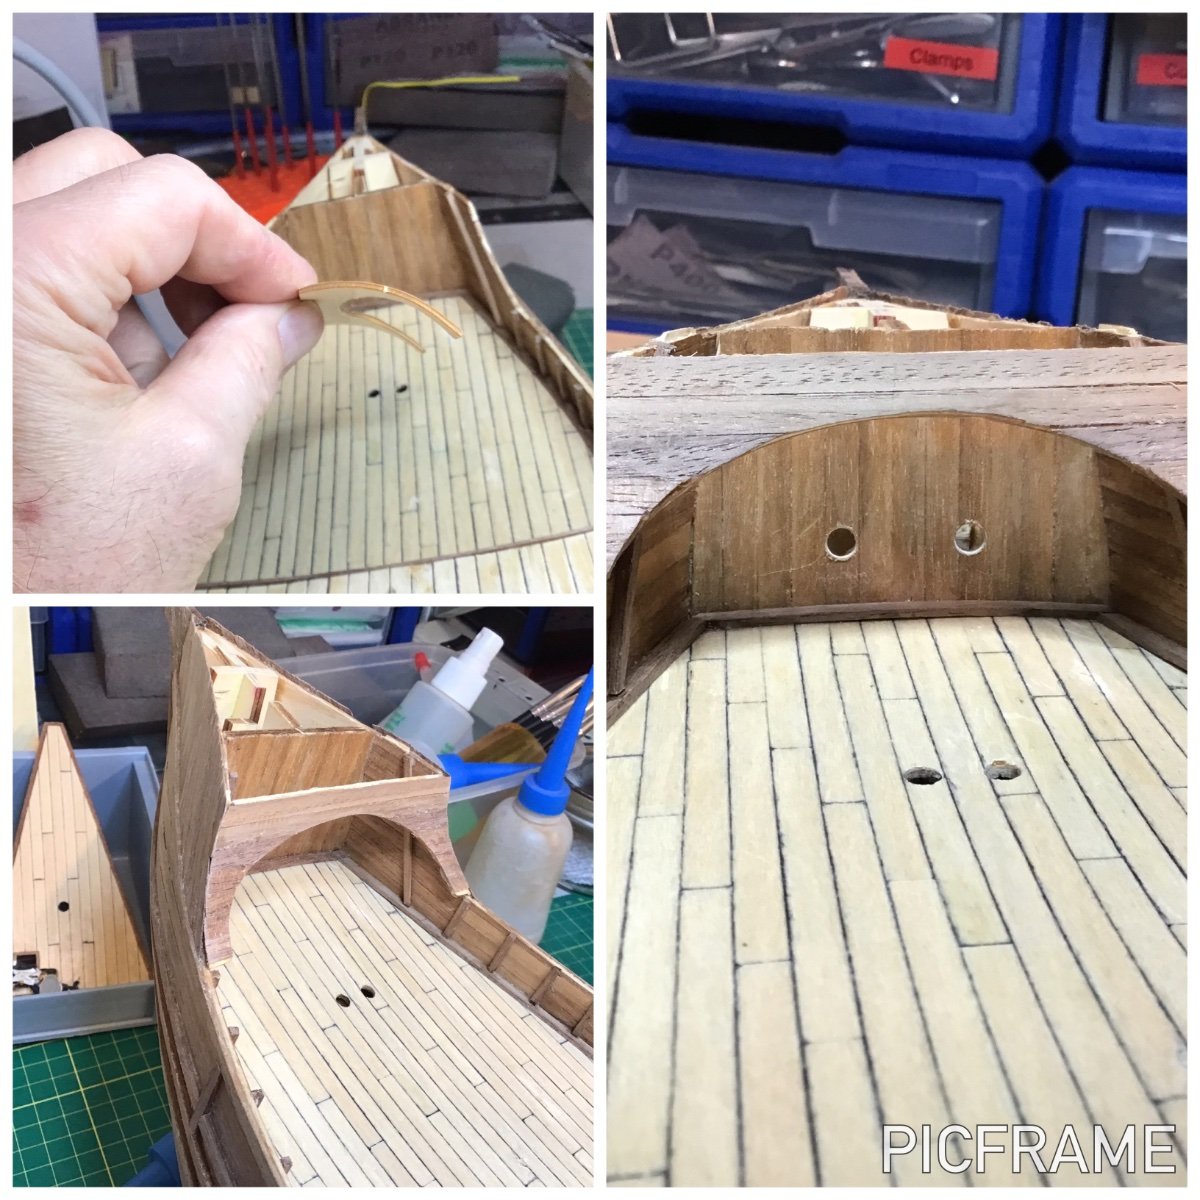
I soaked the plywood for the forecastle bulkhead and formed it around a piece of ABS drain pipe that was the perfect diameter (forgot to photograph it). After drying, I installed it and planked over as per instructions. I’m glad that I looked ahead in the “instructions” because I discovered two hawse holes that needed to be drilled in the interior forecastle bulkhead, which would have been much more difficult had I not done so now. Ideally, these should have been drilled before installing the curved forecastle bulkhead.
I sanded, scraped, patched and cleaned the model. Reattached the broken stem. Varnishing will happen next. Then on to deck furniture and fittings.

Clear skies and sharp tools,
Gabe
-
18 hours ago, Massimodels said:
Thanks for the suggestion. I have also considered joining IPMS Toronto as it’s closer, but don’t think I have the time. How does it compare?I don't know much about the Toronto group but, since I'm in Winnipeg, attending the 60-90 minute, monthly Zoom meetings with MSON works well for me. The next regular meeting is on April 16. They actually have a special online presentation on April 15 on paper/card models originating from the UK. This has really piqued my interest.
Clear skies and sharp tools!
Gabe
- mtaylor and Keith Black
-
 2
2
-
Welcome aboard MSW and hello from Winnipeg!
You'll find many resources and help in these forums. Great place to come to. Although I would consider myself to primarily be a wood model builder, I just bought a couple of 1:700 WW2 models on my shelf that I hope to squeeze in and a 1:144 HMCS Snowberry. It's been about 45 years since I built a plastic model!
You might also be interested in a model club near you that has online meetings - and the majority of them are in these forums:
Model Shipwright of Niagara. I just joined a few months ago and have enjoyed the meetings so far. If you're interested, membership is free - you just have to complete a form online: https://modelshipwrightsofniagara.weebly.com/
Clear skies and sharp tools!
- Gabe
- mtaylor and Keith Black
-
2
-
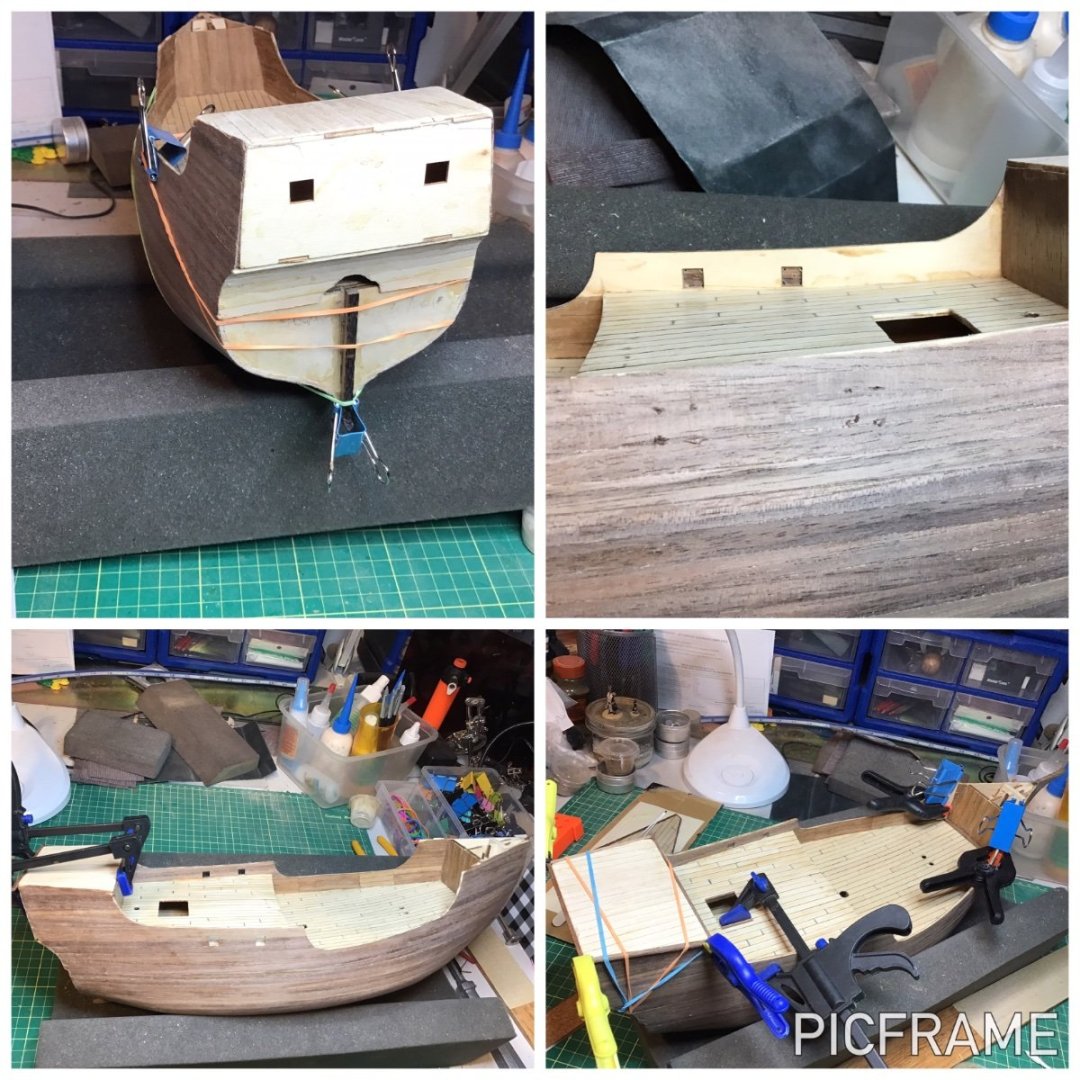
I just had to post this update before @Knocklouder sends me a "gentle" reminder! 🤣
Got quite a bit done, including dropping the model and breaking off the stem! 😡😭 Fortunately, it’s a clean break and I'll reattach it as I get close to finishing the hull. In my zeal in sanding down the completed second layer planks I managed to round off a few corners, especially on the poop. I decided to patch these up. Looks much better.
I'll just post the pictures now and stop socializing before @Knocklouder sends me a "gentle" reminder! 🤣


Clear skies and sharp tools!
- Gabe
- modeller_masa and Knocklouder
-
1
-
 1
1
-
Welcome aboard, Andrew!
You've come to a great place to learn about this hobby. I've seen someone has already mentioned Model Shipwrights of Niagara. I just joined it a few months ago and have enjoyed attending the monthly Zoom meetings. It is well worth the time to check it out: https://modelshipwrightsofniagara.weebly.com Membership is free. There is a membership form on the main page or you can just email them directly: modelshipwrightsofniagara@gmail.comClear skies and sharp tools!
- Gabe
- mtaylor and Keith Black
-
2
-
Second time around…
A bit of a delay on the model due to a bout of Covid…it went ok for me but a week disappeared. 🤒
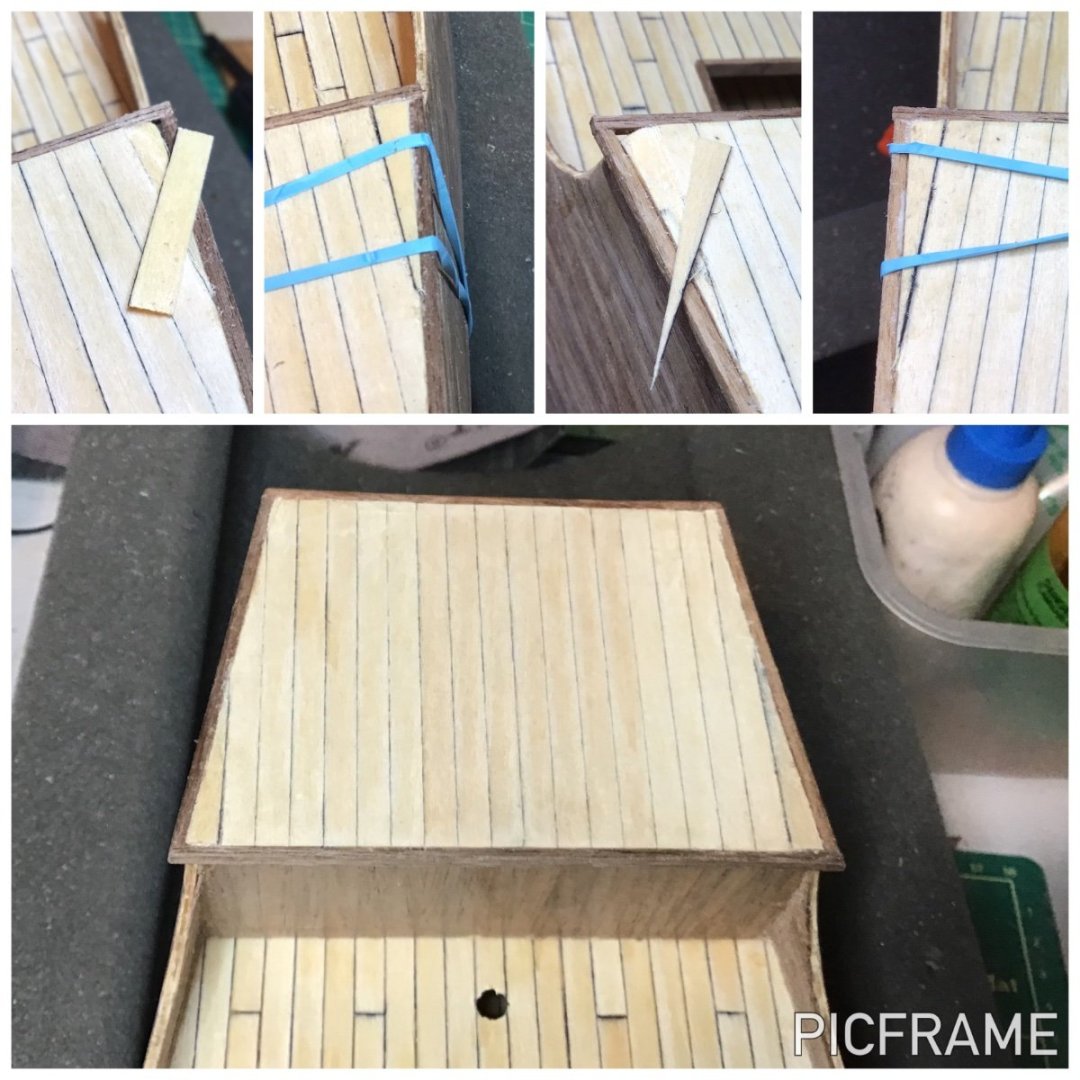
Once I got back to the workbench I finished the second planking and, while waiting for glue to dry, continued with the forecastle deck. Finished sanding the hull today. It turns out that I'm getting pretty good at installing planks incorrectly! 😝


I have a few repairs on a couple of corners and I'll fill a couple of small gaps with sanding dust I collected.
Clear skies and sharp tools, everyone!- Gabe
-
So sorry to hear that you and your wife have been under the weather! Hoping that you've both recovered nicely.
Very nice work, Gary! A piece of art.
Clear skies and sharp tools!
- Gabe
-
Welcome aboard!, Scott!
This is definitely a great site for this hobby. You'll be learning lots. It's funny how the "on the shelf" projects grow with your family!
Clear skies and sharp tools!Gabe
Emptynesterlotsofsleep👴🤣
-
[Holding my nose]
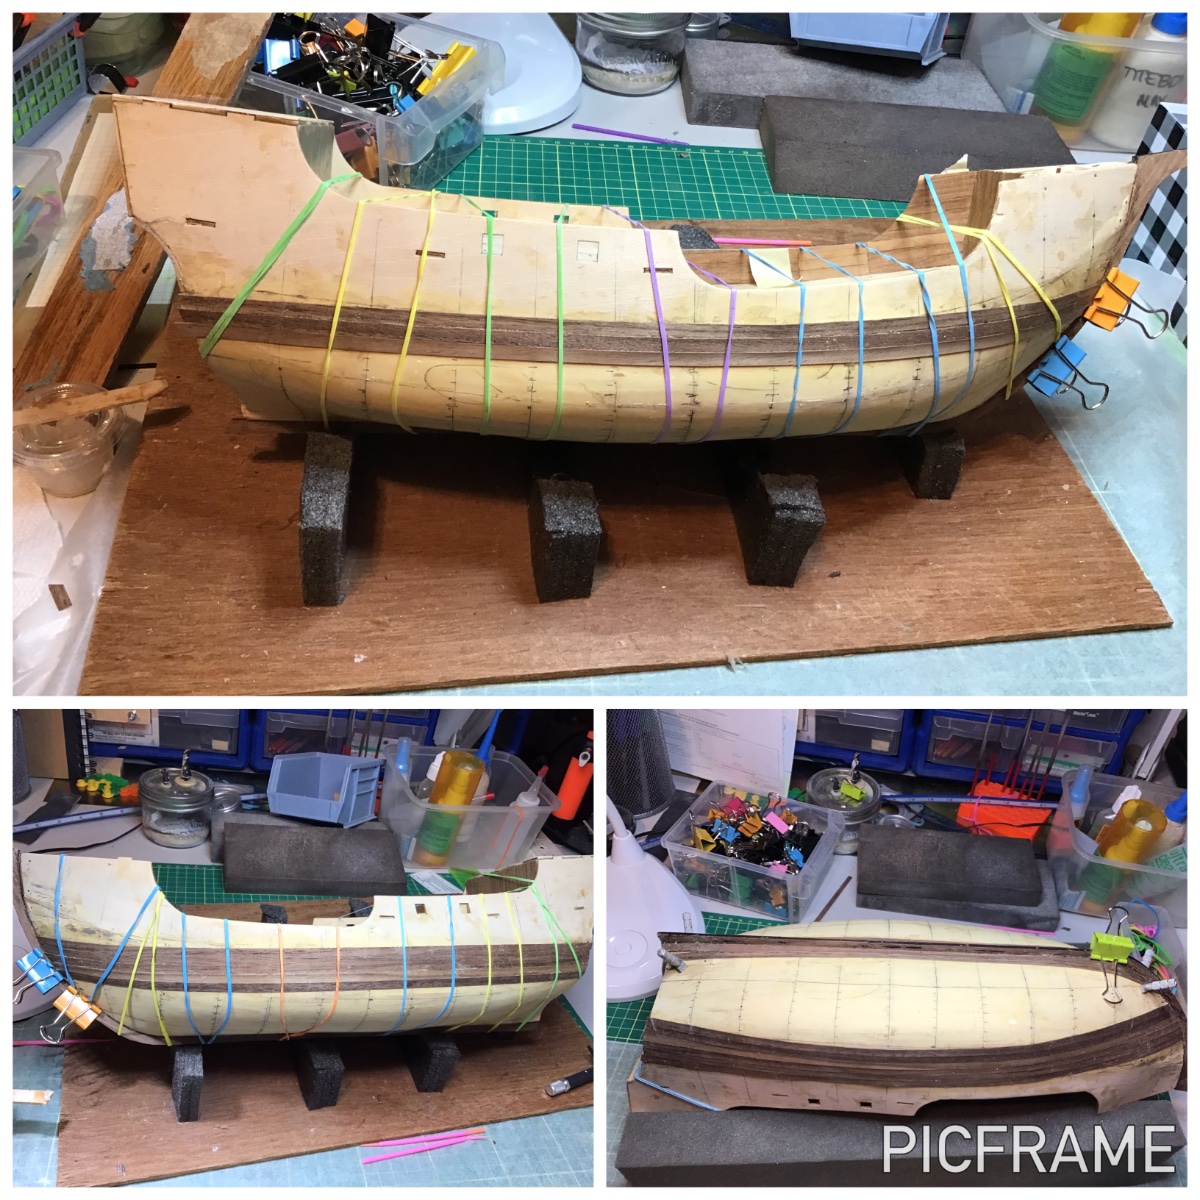
In between moving my younger son and hosting THREE sets of out-of-town visitors I still managed to plug along with the model over the last few weeks.My original plan was to actually spile the second layer of planks so after attaching the keel and stem post I carefully marked off the hull as per Chuck Passaro's tutorial. I have several sheets of walnut veneer that would do the job…I thought.

Marking and transferring the shapes to the veneer went easily enough and the first planks on either side went well, but I ended up having a lot of trouble cutting veneer consistently and smoothly for the subsequent planks. I tried cutting with both a rotary veneer cutter and an xacto knife but I just could not produce planks that fit tightly. I found sanding and shaping veneer was an exercise in frustration, so I peeled off those first planks and [holding my nose] began throwing on the walnut strips from the kit.

My younger son came to see how I was doing on the model and I told him, “I feel like I'm building a house but I'm putting the doors in wrong…and know it!”While waiting for glue to dry I planked the forecastle deck…and managed to skew the planks slightly off centre. 😡 ( I won’t say anything if you don’t! 🤣)
Well, that's all I gave 'er this time.
Clear skies and sharp tools,
Gabe
- Knocklouder, Ghost029, Prowler901 and 1 other
-
4
-
10 hours ago, Katsumoto said:
I've build this AL kit as well and had lot's of fun with her. Excellent for bashing, and I did plenty of that....so I'll go for the beer and crackers. ☺️
If you like to have al look, my buildlog is on this forum, just look it up.
Good luck and have fun.Thanks, Peter, I have read your log! I was very close to copying almost everything you did - just wonderful modifications through and through. However, I'm going to hold my nose and just plow through this model quickly. It won’t be pretty…[sigh]
Clear skies and sharp tools!
- Gabe -
-
15 hours ago, modeller_masa said:
When you receive the book, your question about the forecastle will be solved. Oh, I can't wait to show you a cheat sheet. The AL Santa Maria is a type of Nao based 1990 replica, which is one of the three kinds of Santa Maria in the AotS book. The plan you bought before may be a galleon Santa Maria. They are very different ships. Good luck on your build!
Thank you very much for this reference and information, Modeller_Masa!
I'm so sorry to say this, but if I get this book I'll end up buying 4 more on the Santa Maria and taking at least another 7 years to finish this model! 🤣. I just have to get this model finished. THEN I will totally indulge my obsession with researching ships!
Kind regards,Gabe
- Canute, mtaylor and Knocklouder
-
3
-
16 hours ago, mtaylor said:
Welcome back home, Gabe. At this rate you'll be done in time for the grandbaby.
Thanks, Mark!
Good thing the wood is REALLY patient with me!Kind regards,
Gabe
- mtaylor, Knocklouder and Canute
-
3
-
On 2/17/2023 at 1:48 AM, Knocklouder said:
You see that was not so hard all you had to do is start. Looking pretty good , now I suppose you be to busy to come over LOL
As I recall there is a lot of rat lines to do on the Santa Maria , but just give'er , you be done in no time 🤣
Glad to see you back in the shipyard.
Bob M.
Thanks, Bob!
I'm thinking this will be finished, everything willing, just as the snow melts…perfect time for a visit!
Clear skies and sharp tools!- Gabe
- mtaylor, Canute and Knocklouder
-
3
-
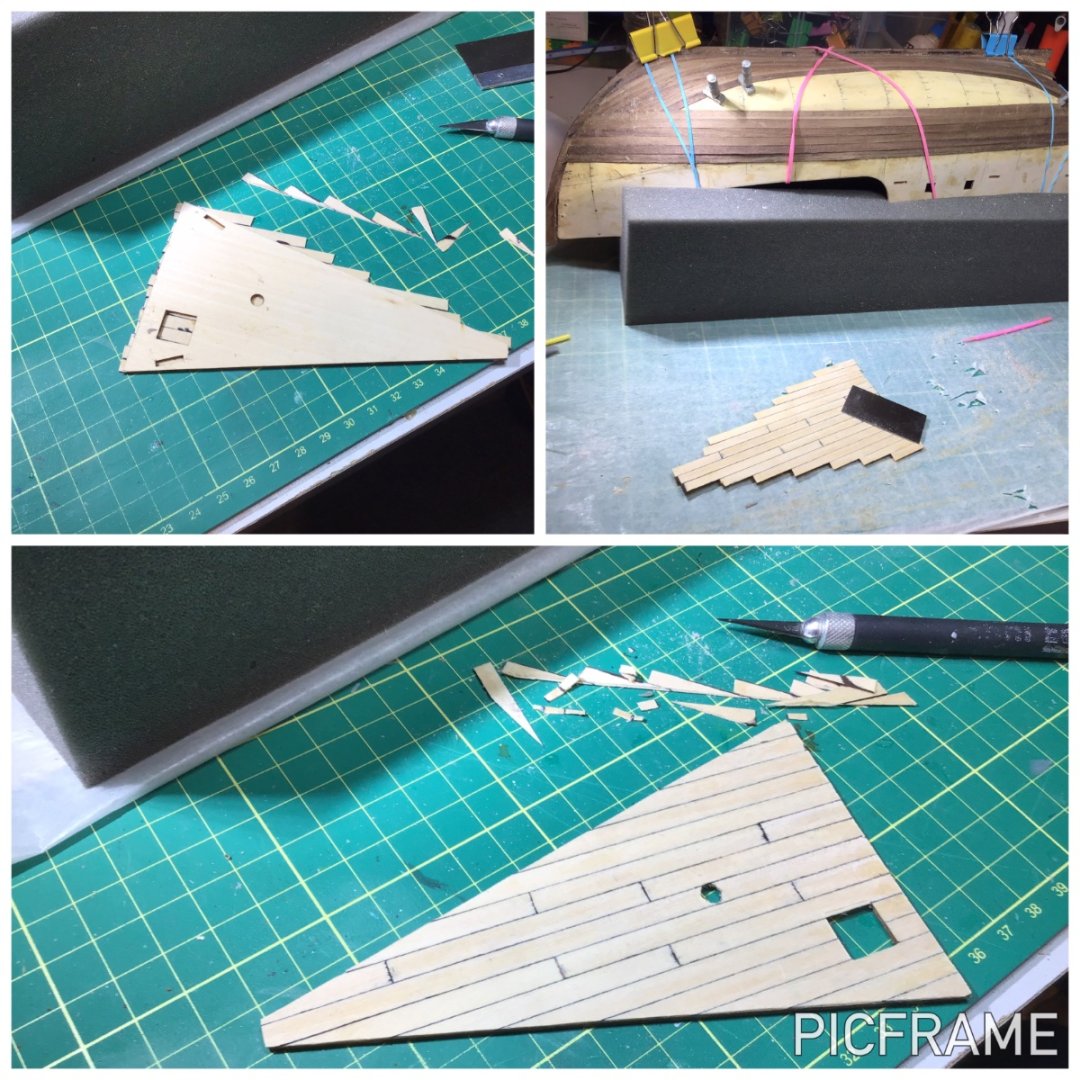
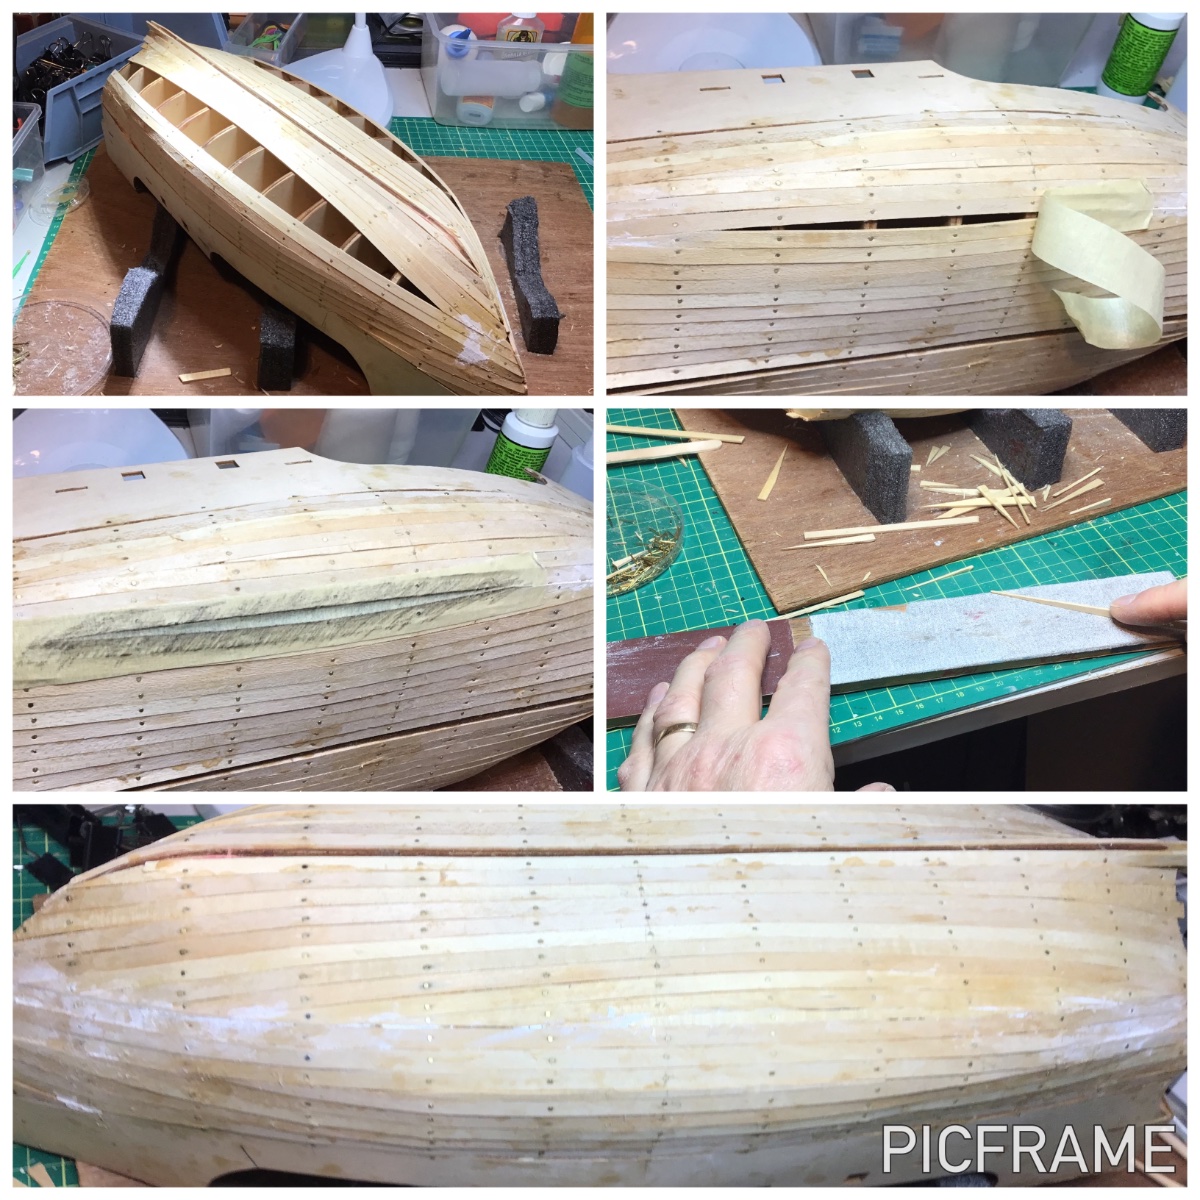
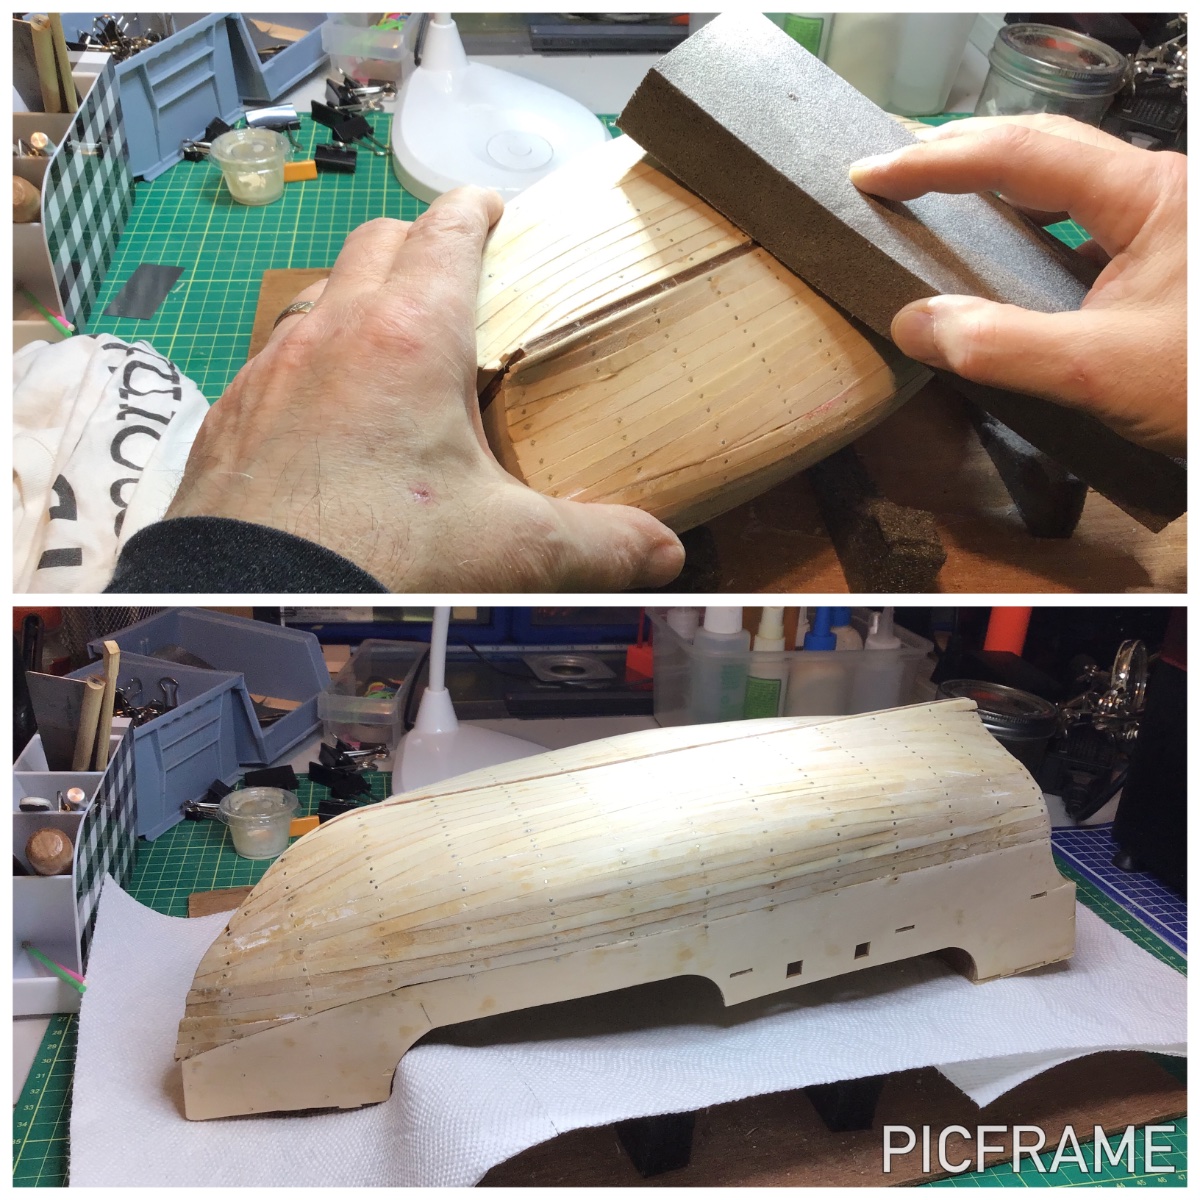
Give 'er!
This great and useful Canadian phrase is always used as an excited exclamation to "go for it", "floor it", "do it" and that’s exactly what I'm going to do…at last! Inspired by fellow Manitoban @knocklouder and fully embarrassed at not only missing my son's graduation but also his wedding I figured I've GOT to finish this gift before our first grandchild is born…which should be this July!
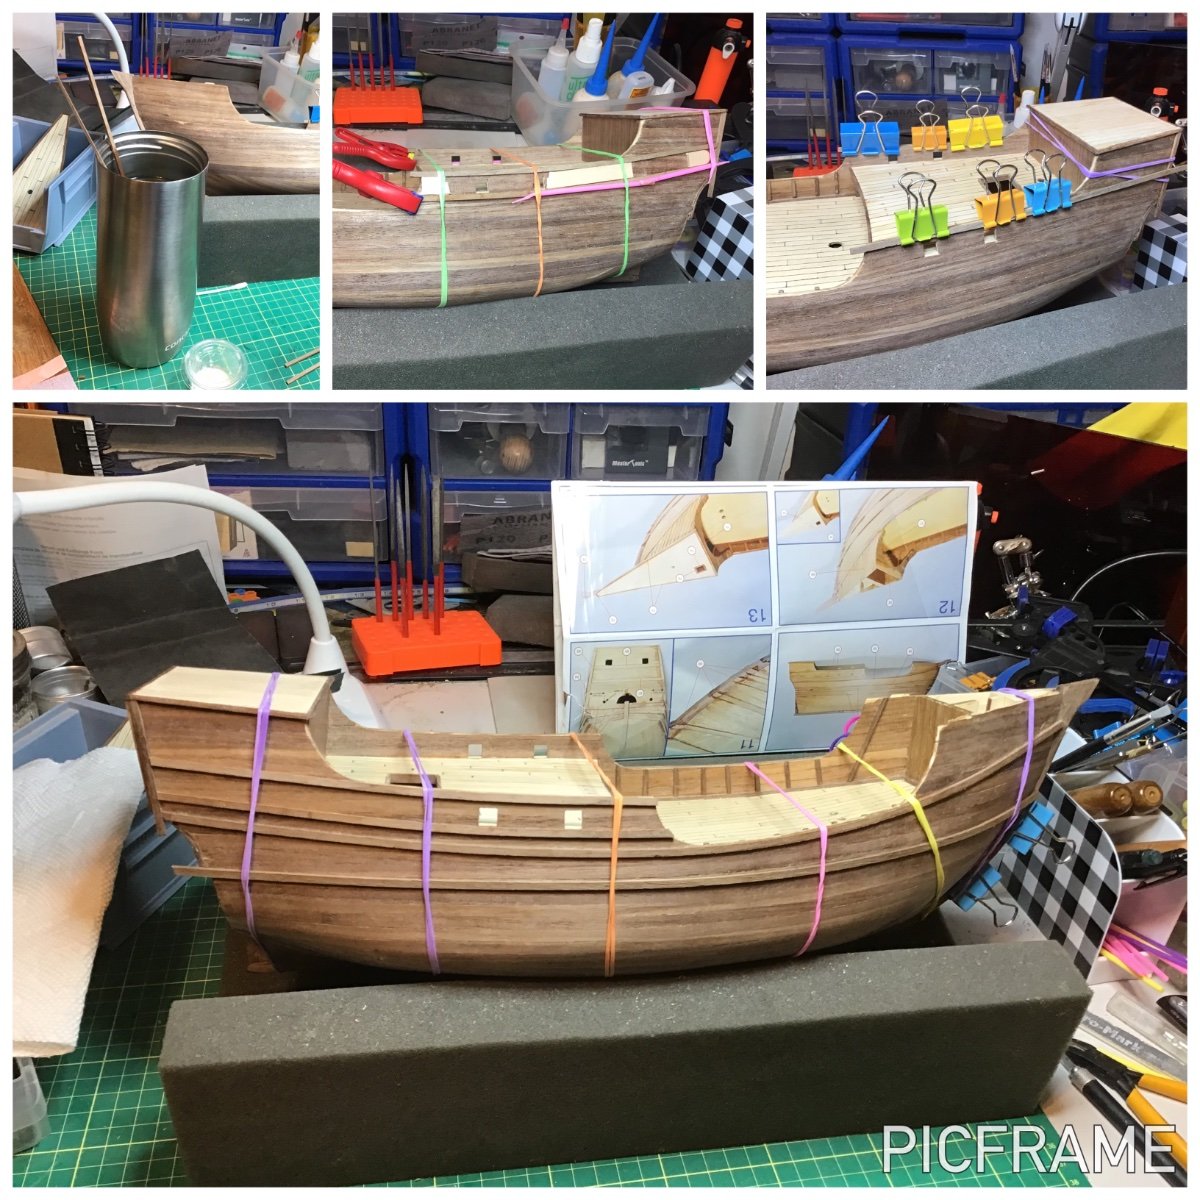
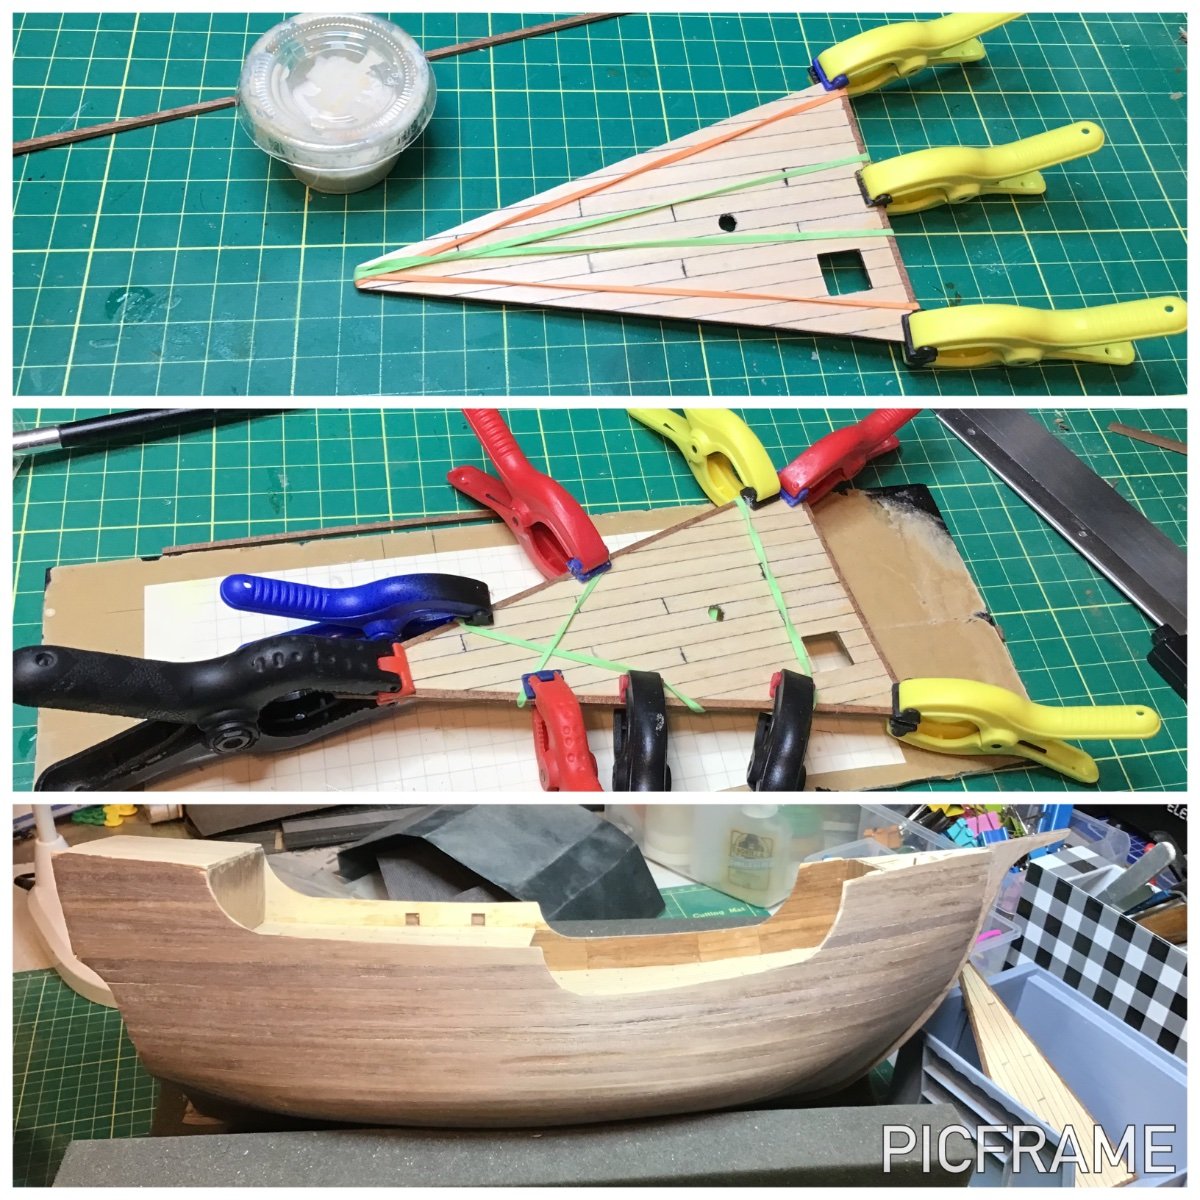
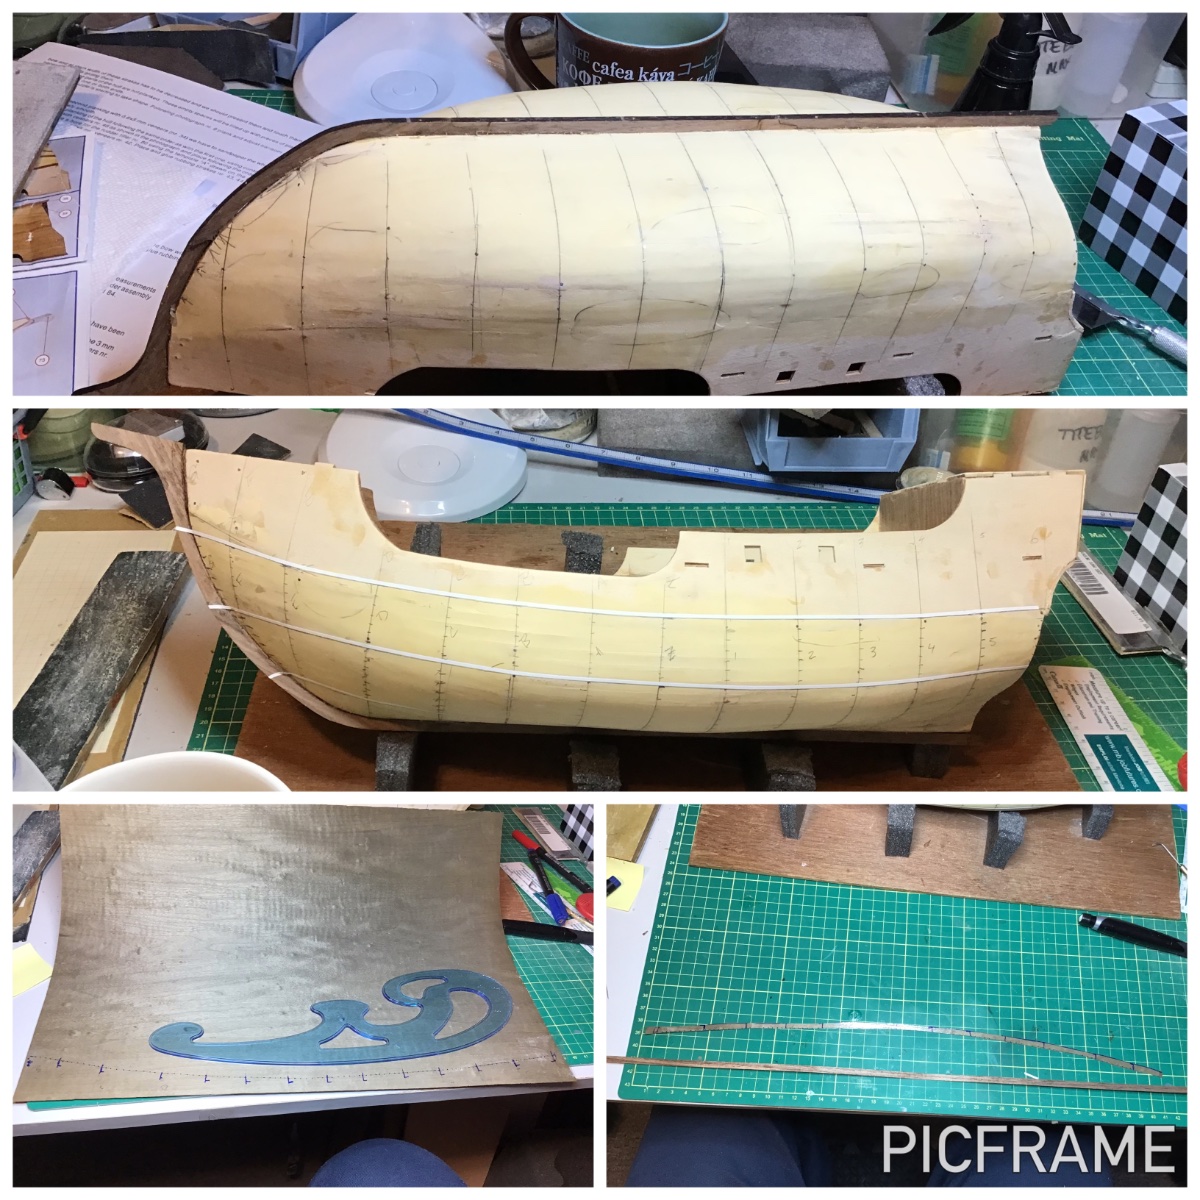
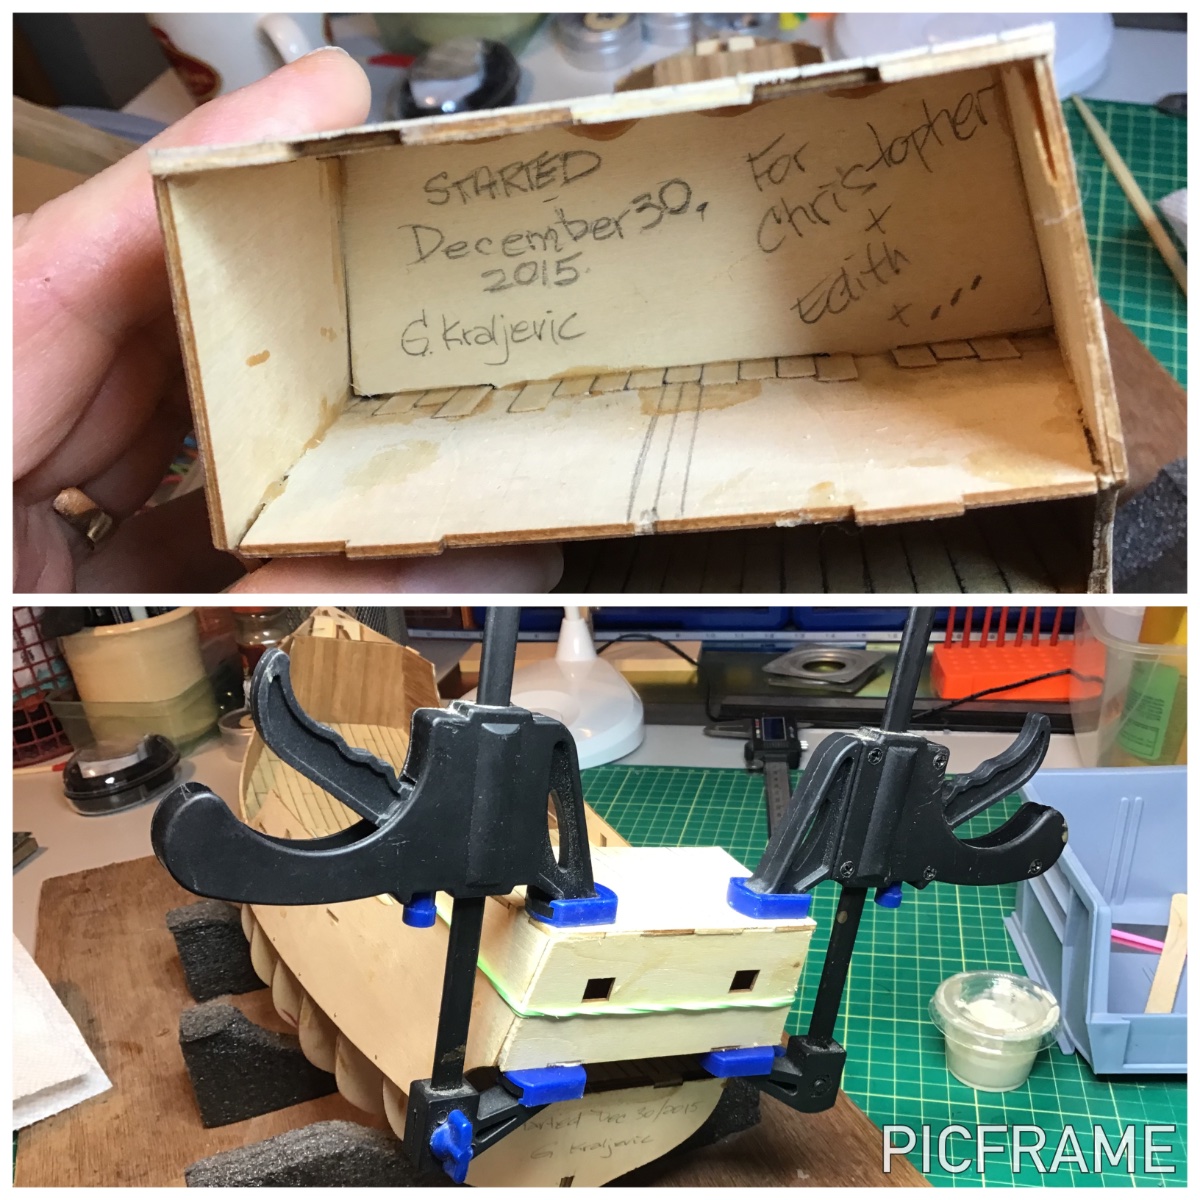
So, here it is…I'm going to just give 'er!Feb 7, 2023. 7 years late! Dusted off the model and got organized. Planked the separate poop deck and then glued it in place. Prepared a message for inside the cabin.
.

Feb. 8: closed up the cabin.
Feb 9-11: Began the first layer of planking. I am not a fan of this method because it is so historically inaccurate, but I'm not arguing or changing. I realize that this is just to establish the shape of the hull.

Feb 12: completed first plank layer:

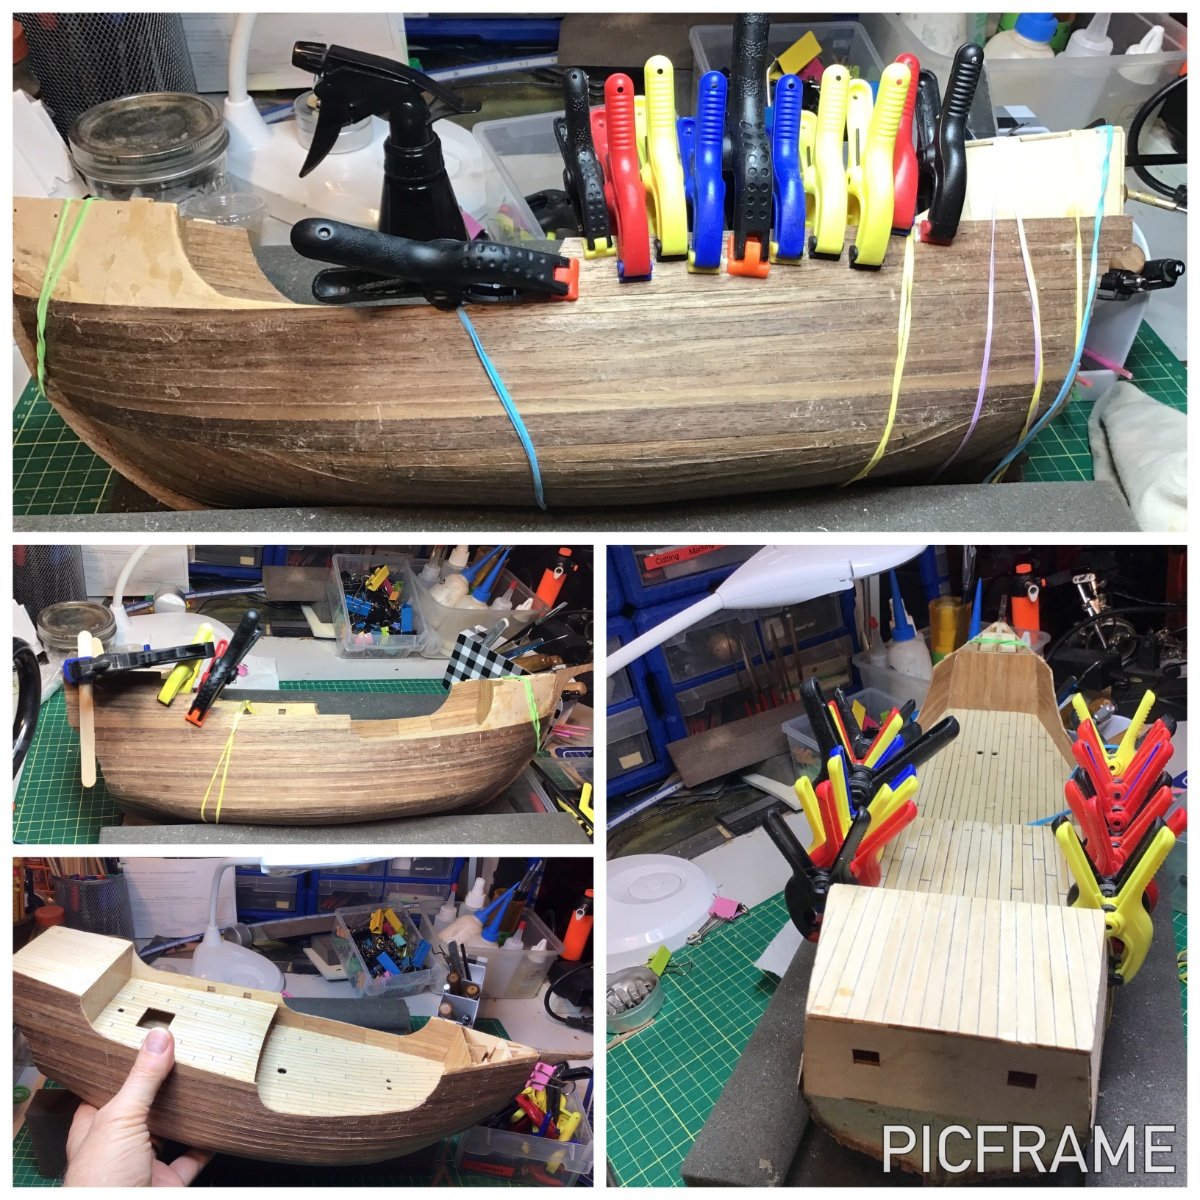
Feb 13: sanding the hull.
Feb 14-15: applied wood filler, sanded and filled in low spots.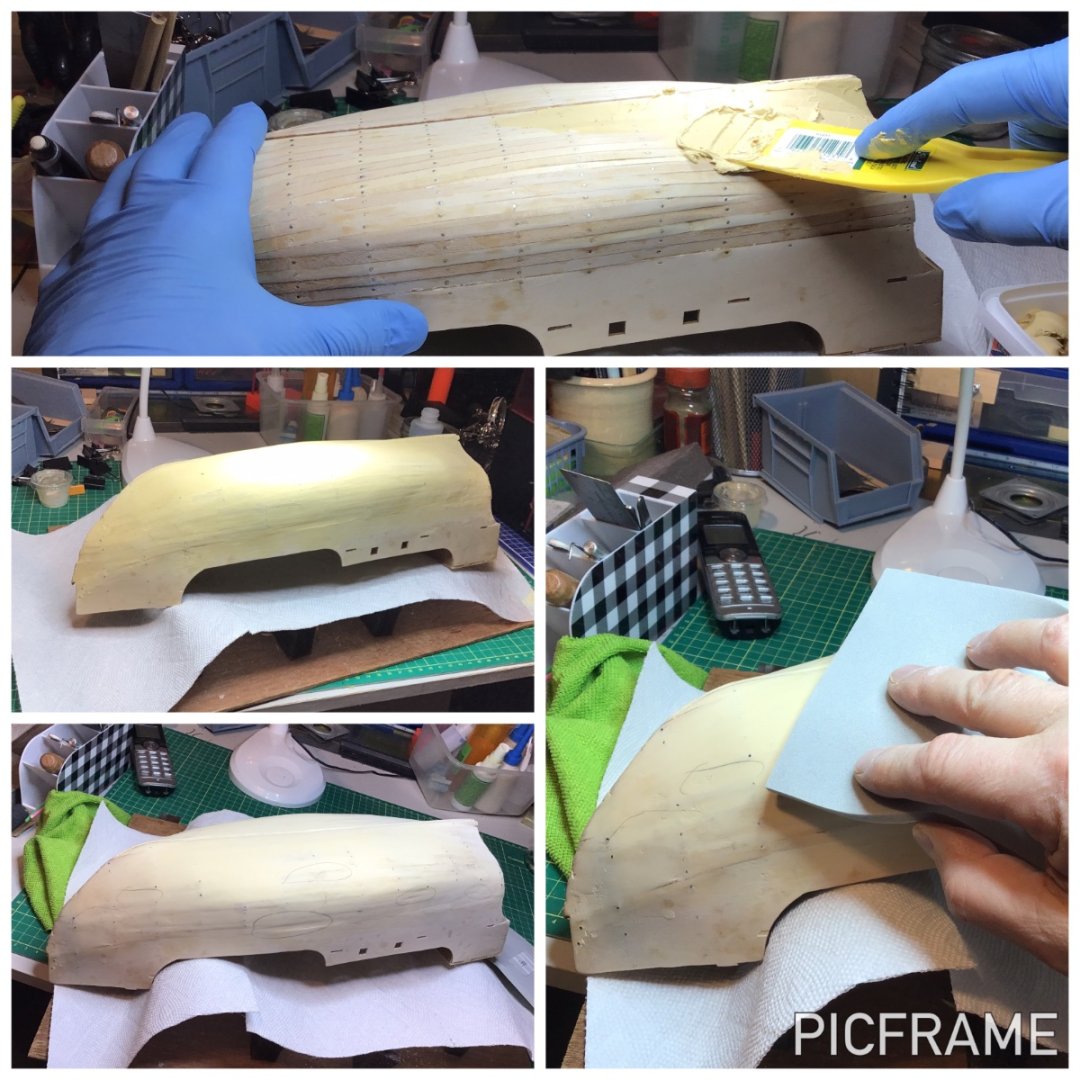
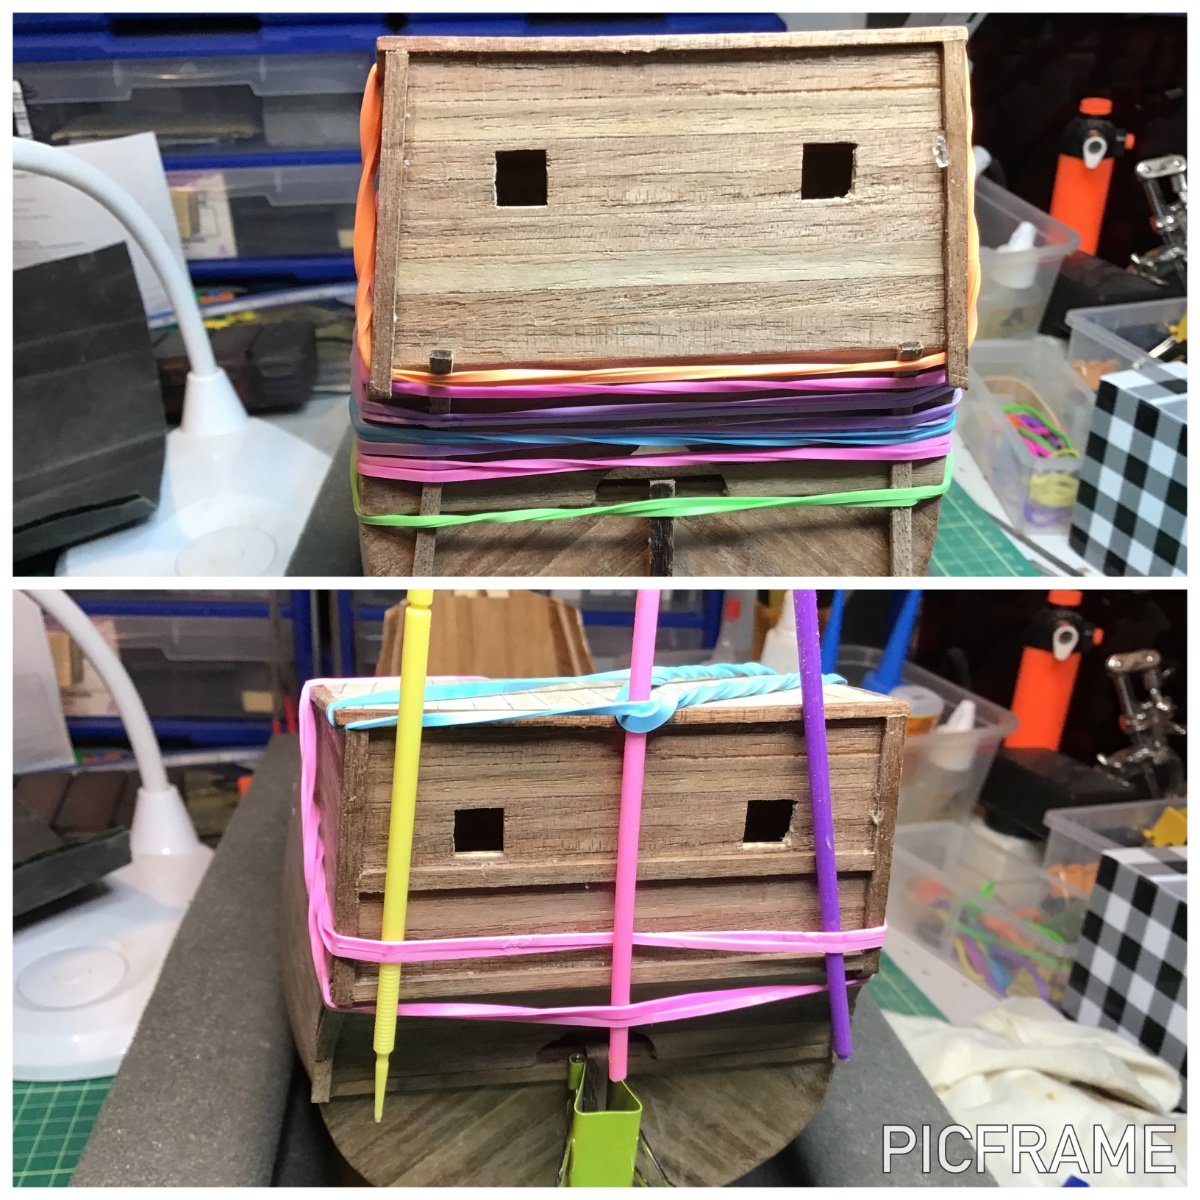
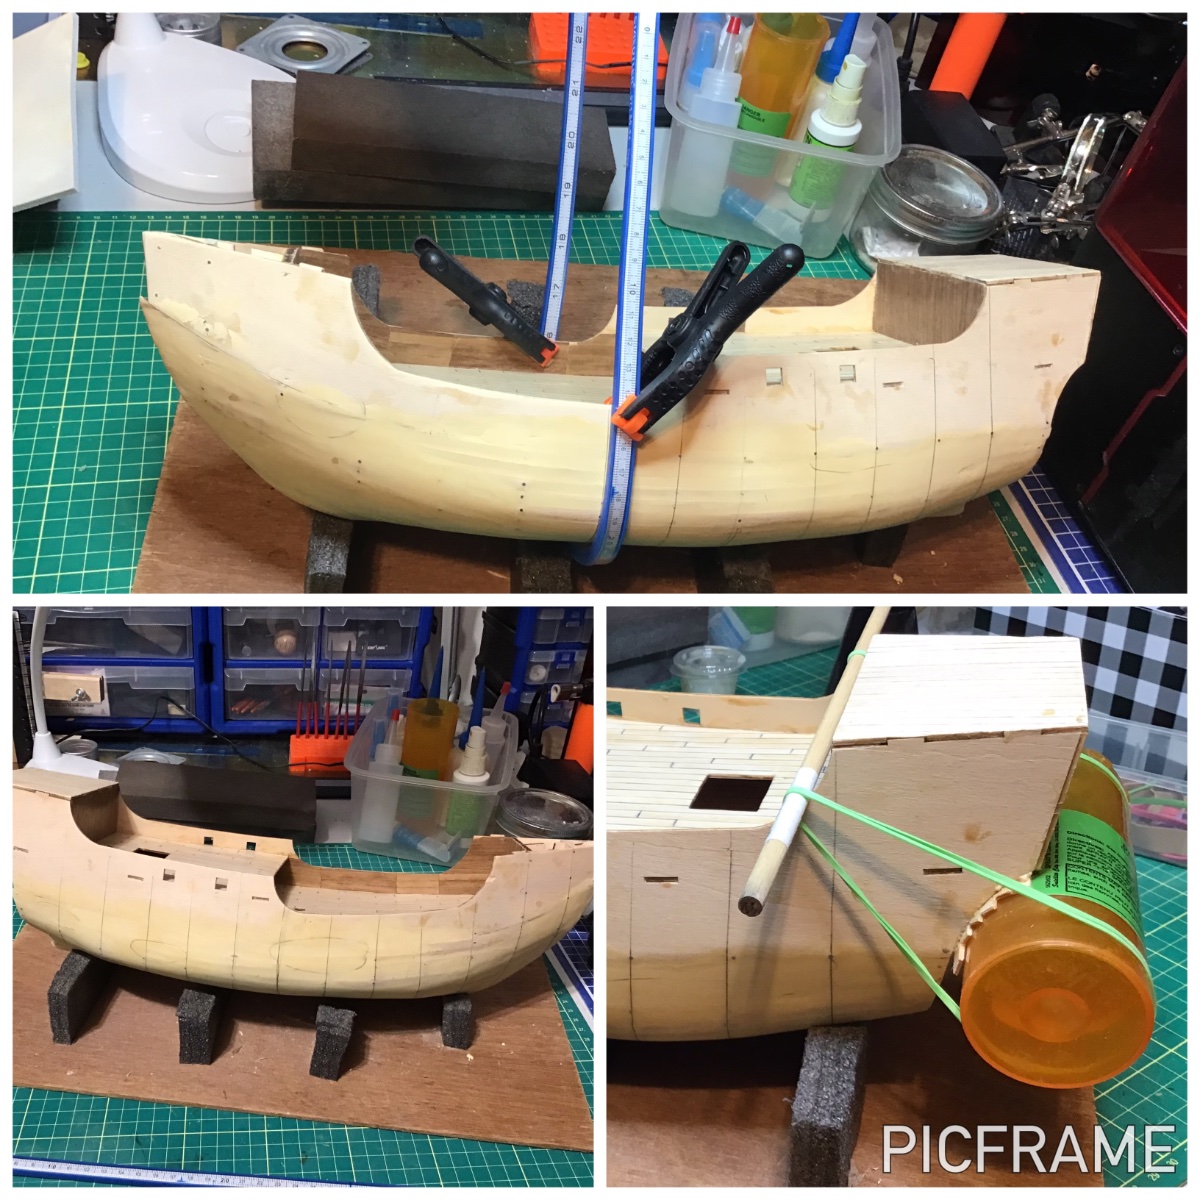
Feb 16: drew in station lines and closed in the transom. Used a storage bottle to help clamp the planks of this curved feature.

Here’s to just givin' 'er! A very productive week.
- Gabe
- Canute, modeller_masa, Bryan Woods and 3 others
-
6
-
Hello modellers,
I was frustrated in my search for 3D files of casks suitable for my Triton build so I finally just sat down and created some in Fusion 360.
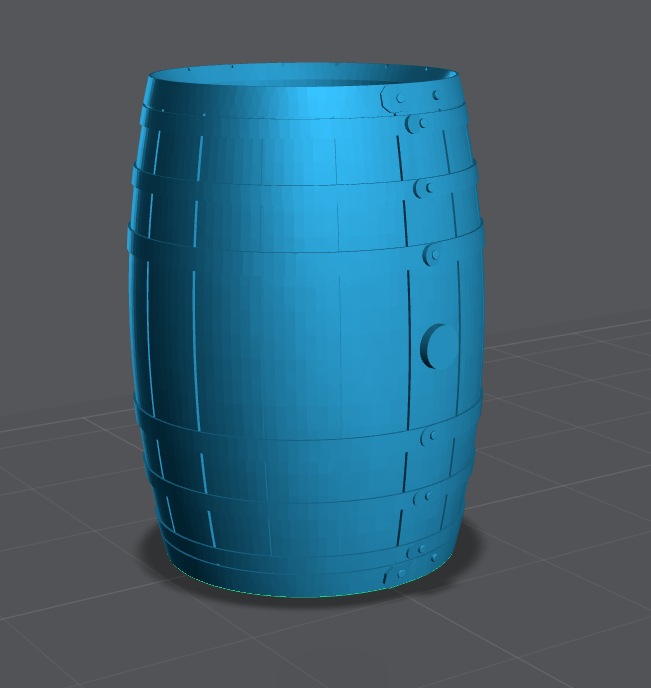
Attached you will find:
- two cask designs - one with 6 metal hoops and one with 8 metal hoops.
- Each are hollow and there is a separate file for the head (lid), which you can glue on to close up the cask.
- The current files are 1:48 versions of "leagers" - the largest casks used for water. These are easy to scale and resize in your slicing or CAD software.
I found this reference on the Society for Nautical Research website on the size of these casks which was used in designing the models: https://bit.ly/3XKCIzO :
- THE OED has a quotation “1800 Naval Chron. 3 66 The largest casks are called leagers, and are of the following dimensions: Length..4 ft. 6 in., Diameter of Bouge..3 ft., Diameter of Chine..2 ft. 5 in” ...
The 8-hoop design is based on photos of the casks in the HMS Victory and HMS Trincomalee.


CREDIT: Davies, W., & Mudie, M. (2015). HMS Trincomalee: Frigate 1817. Seaforth Historic Ships.
These printed up beautifully on my Elegoo Mars with Anycubic ABS+ resin at both 0.03mm and 0.05mm slices.
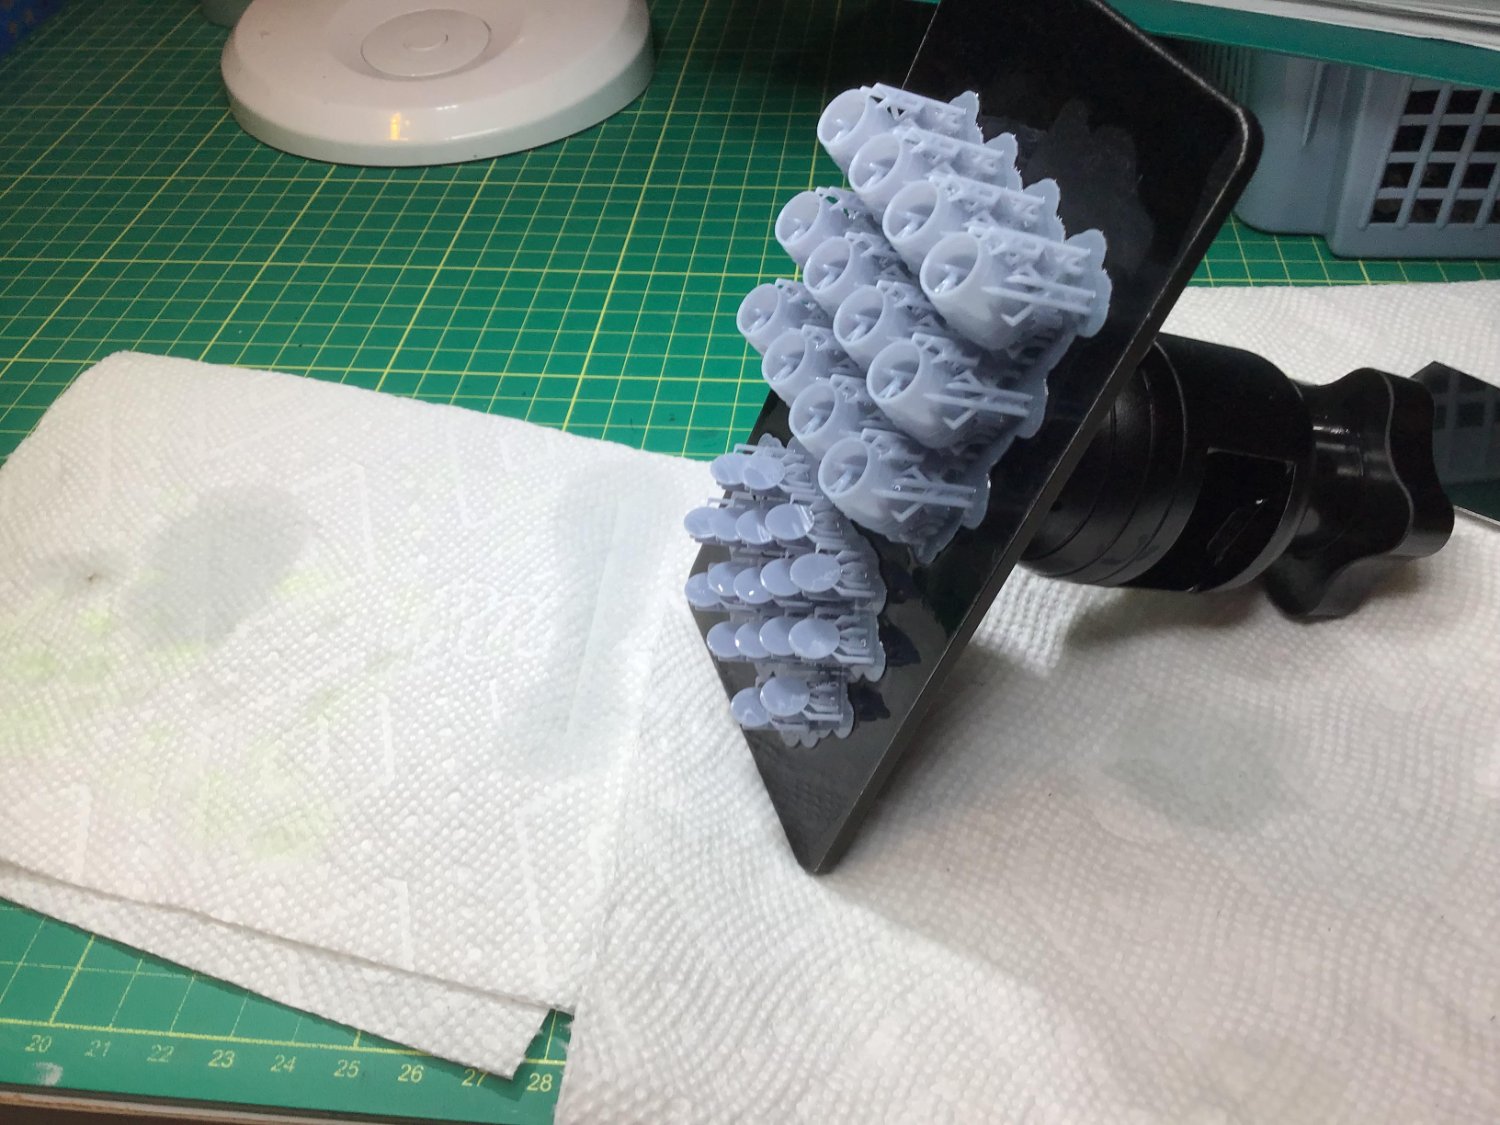
Here they are printed at 1:48 and 1:96 with Number One showing off the scale. My first try at painting one is shown. I will likely change the colours slightly.

I have already printed up smaller versions of these files for the variety of other casks that were used on board a Royal Navy ship. Here is a print of 1:96 hogsheads at 88% the size of the leager:

I hope some of you will find this helpful. I would be happy to send along the pre-supported files and print settings if anyone would like.
Clear skies and sharp tools!
- Gabe
Cask with 8 hoops - no lid .stl Cask with 6 hoops - no lid.stl Cask Lid.stl
- mtaylor, iMustBeCrazy, thibaultron and 3 others
-
4
-
 2
2
-
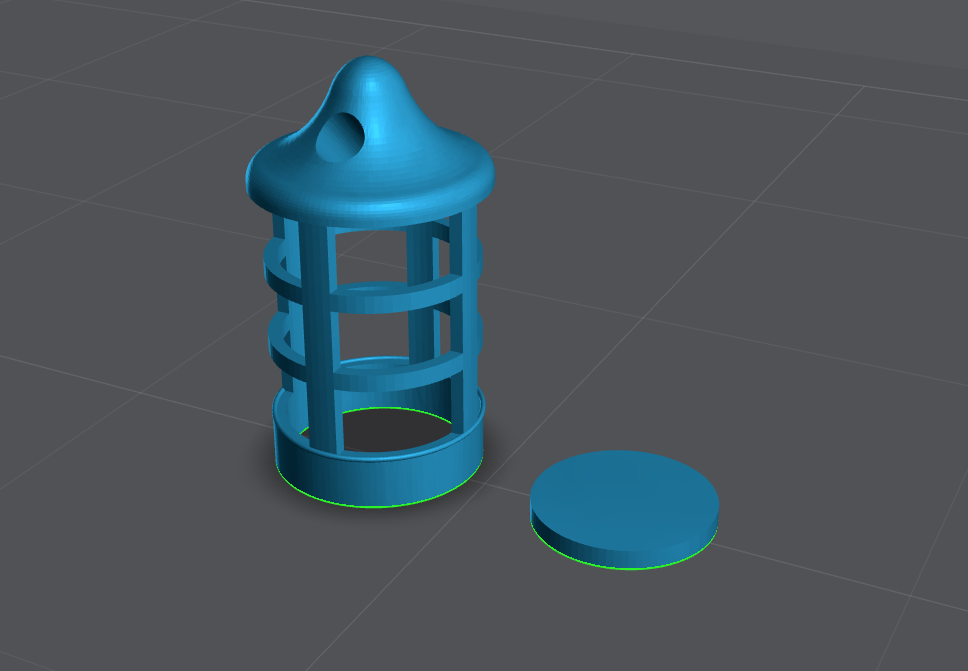
In the "I can't believe I forgot to do this" department...
Here is the modified lantern that JJ's original design evolved into. It comes with the bottom plate removed to allow threading an LED in from the bottom. A separate "plug" can be glued in place afterwards. This file is at 1:48 but can be scaled up or down as needed in your slicing or CAD programs.
Clear skies and sharp tools!
- Gabe
- scrubbyj427 and mtaylor
-
2
-
Way to go, Bob! Nice work. I'm going to have to stop by and see it in person!
Clear skies and sharp tools, mate!
- Gabe
- Keith Black, Knocklouder and mtaylor
-
3
-
Great work, mate! Impressive problem solving. The clam shell idea is great! Nice, nautical touch (and from the middle of North America, no less!)
Stay warm, neighbour, and best wishes.
- Gabe
- mtaylor, Dave_E and Keith Black
-
3
-
On 8/12/2022 at 6:23 PM, Knocklouder said:
Oh yes did I mention that I got this to help out in my builds lol
 Really have to thank everyone I see the difference in my work thanks to the right tools and jigs.
I bought this same model of band saw. While I love Canadian Tire products and half my tools are from them, their lathe and this band saw croaked on me in about a year of not terribly heavy use. I replaced both with CraftEx brand from BusyBee. Just as economical, free shipping and much more robust.
Clear skies and sharp tools!
- Gabe
-
Coming along nicely, Bob! Have fun with the ship in a bottle! I know I did and went on a rampage buying bottles at flea markets, etc. Now I just got to start another one!
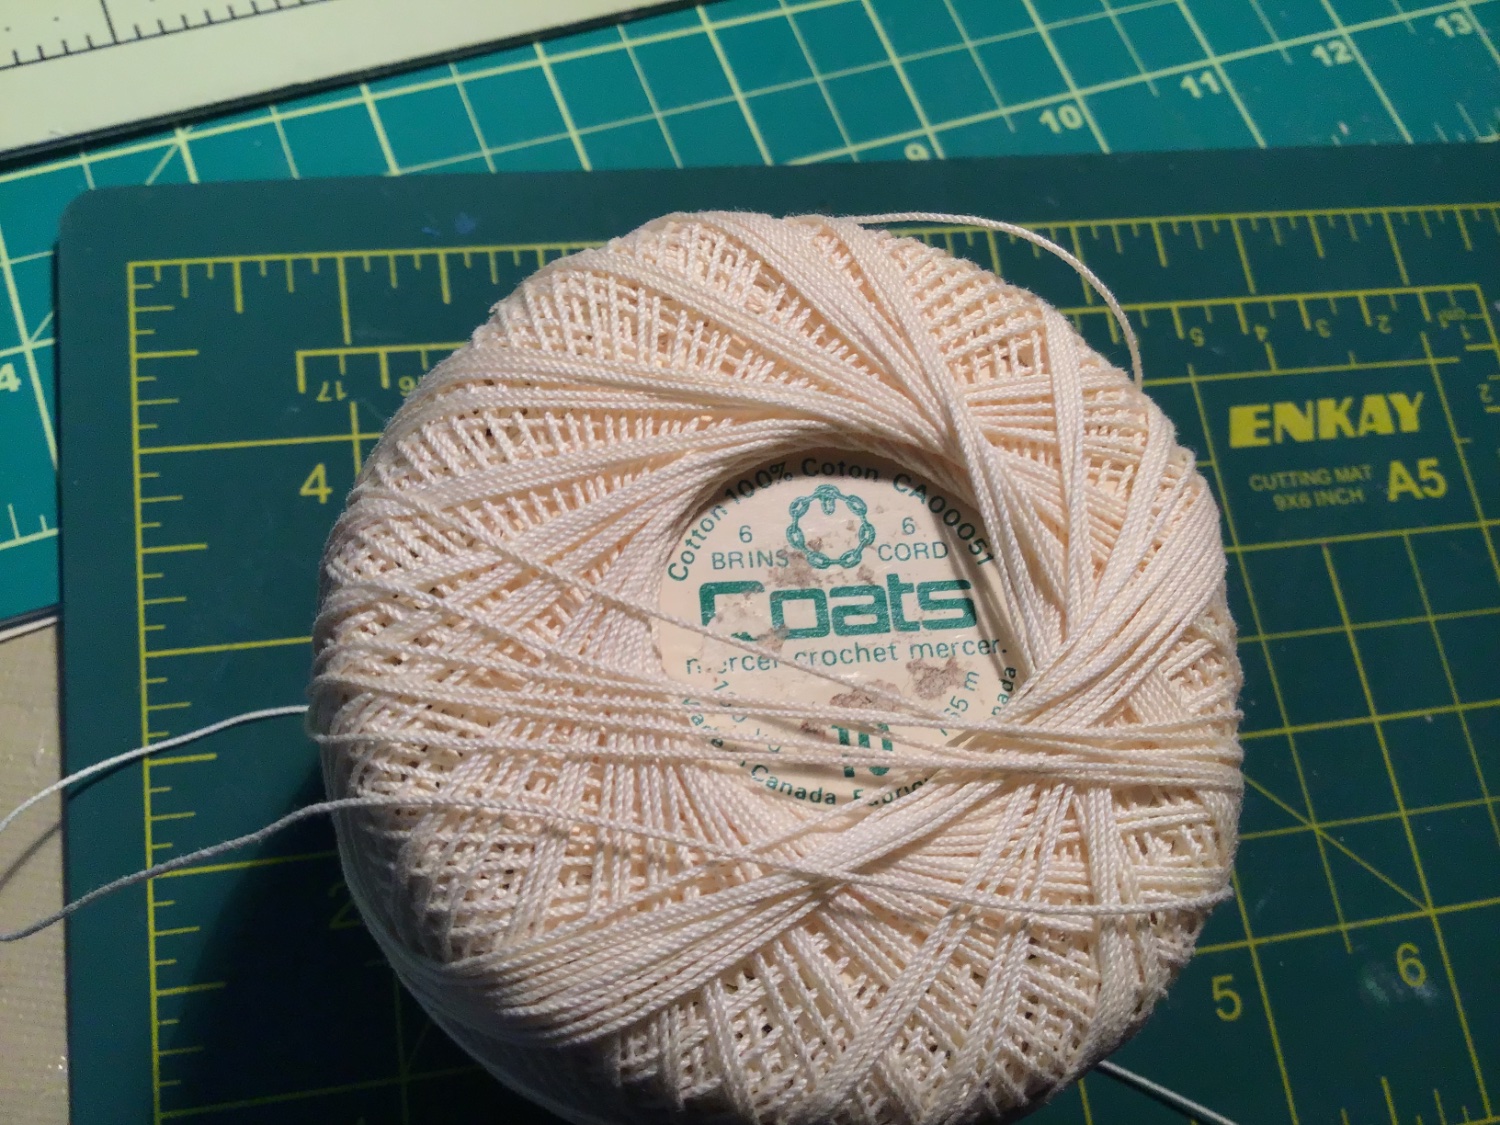
I have found that crochet cord is quite good and comes in different widths, large quantities and fairly cheap. You can dye or colour them black, etc. if necessary. You can get them anywhere they sell sewing supplies. (I like Fabricland on St. James).

Clear skies and sharp tools!- Gabe
-
On 8/7/2022 at 6:07 PM, scrubbyj427 said:
I’ve got my first set of lamps in, now I can begin working Big thank you to Gabe @Gabek for his assistance with the lamp printing, the resin printer captured the 3D model wonderfully. These are very small pieces and require some assembly work as well as an opaque glazing. I’m happy with the results.
Excellent! I was wondering if those lamps had been delivered! I'm glad they’re working out for you. Fabulous work, JJ
- hollowneck, FrankWouts and scrubbyj427
-
3
-
Man, you're going so fast your model might catch fire! 🤣Nice work!👏🏼
Clear skies and sharp tools,
Gabe
- mtaylor, Keith Black, Ryland Craze and 1 other
-
3
-
1


HMS Montague 1779 bygaryshipwright - 74-gun Alfred-class
in - Build logs for subjects built 1751 - 1800
Posted
Just wonderful work, Gary! Superb details.
Clear skies and sharp tools,
Gabe