

GGibson
-
Posts
892 -
Joined
-
Last visited
Content Type
Profiles
Forums
Gallery
Events
Posts posted by GGibson
-
-
Initial planking looks very nice!
-
Thanks for your input, Bill. Yeah, I made a quick decision after my post above to put the hoops on the masts, and will probably tie them/secure them to the appropriate rigging just for the appearance that they are connected, albeit at the bottom of the masts, but sails are off. And, yes, they will go on before the trestle trees!
53 minutes ago, wmherbert said:Don't ask how I know this?
Wouldn't think of asking....
-
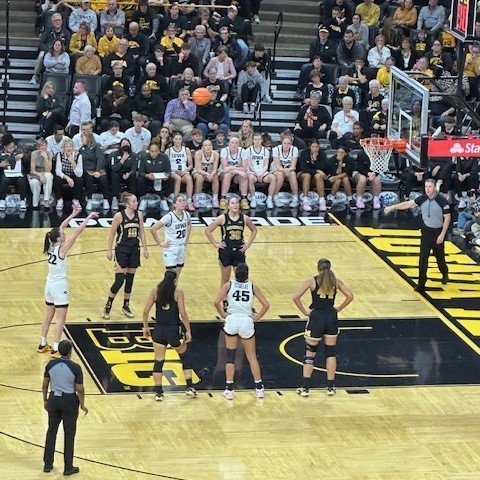
Time for another update! It's been a bit of slow-going. One of the reasons for delays was for a quick trip to Iowa. For those of you who are in the USA and are sports fans, you have no doubt heard a lot recently about Caitlin Clark with the Iowa Women's basketball team breaking the all-time NCAA scoring record recently. My 91 year-old mother-in-law is a big basketball fan and a fan of Caitlin and her recent success. A few months ago, I bought tickets to a game in February in order to take her and some other family. Well, that just turned out to be the game in Iowa City when Caitlin Clark broke the record! So exciting to be there and to have my MIL witness the achievement in person!
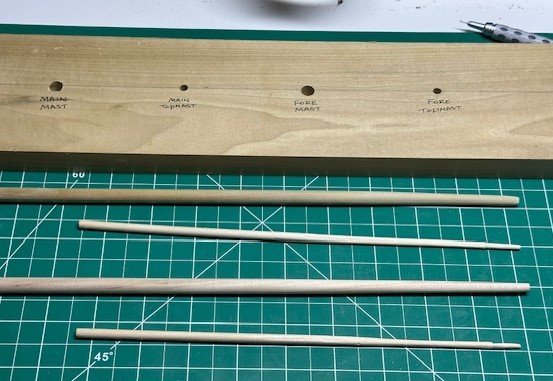
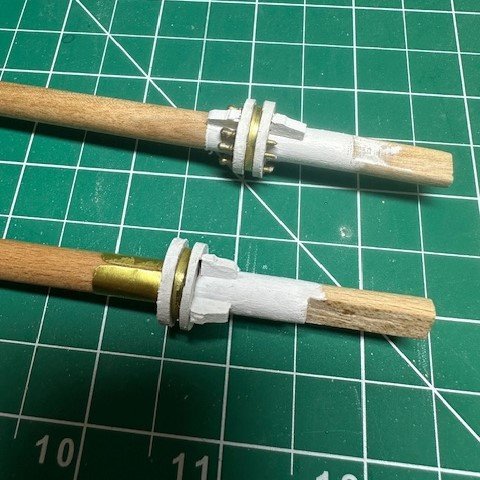
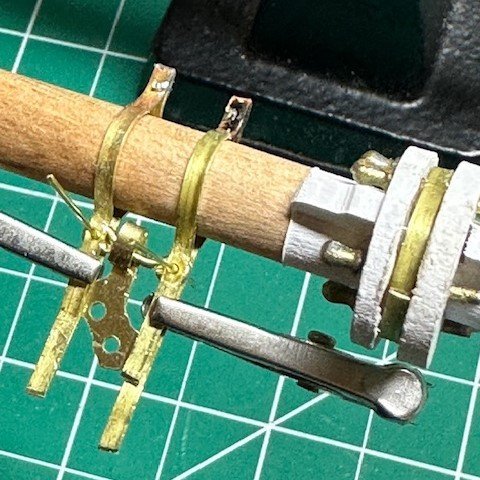
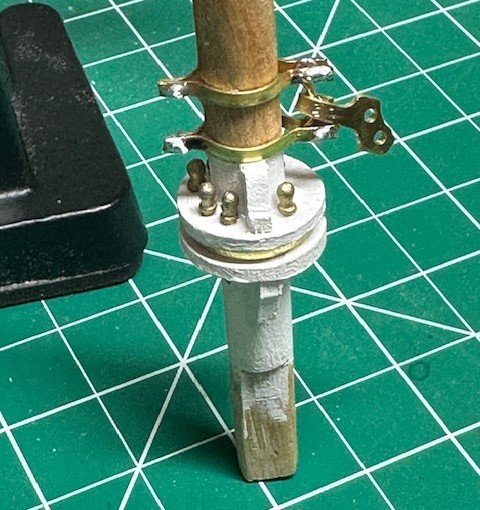
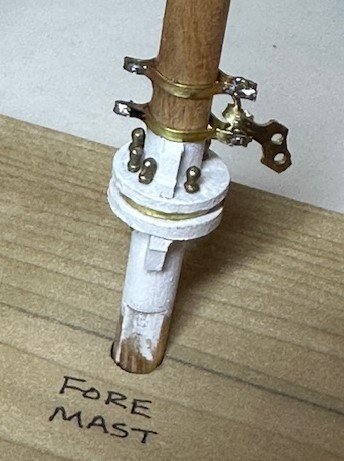
OK, now on to my Bluenose update... Began work on the masts. First task was to cut and shape the masts from the dowels provided in the kit. As others have probably done with their masts, even though I'm beginning with details on the lower masts, I shaped and tapered both the lower and top masts to start. That was pretty straight-forward. Also made a pretty crude stand for the masts to sit in while I work on them and the rigging that will take place prior to putting everything on the actual Bluenose deck.
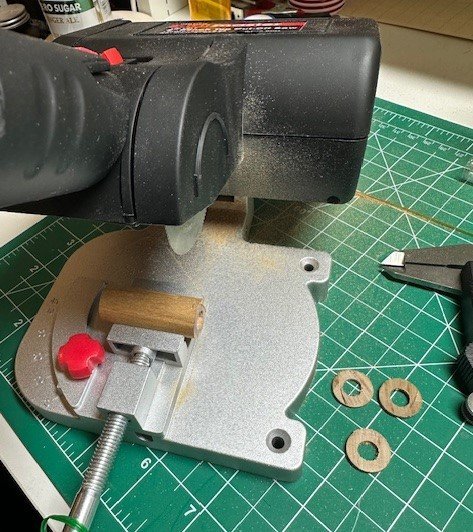
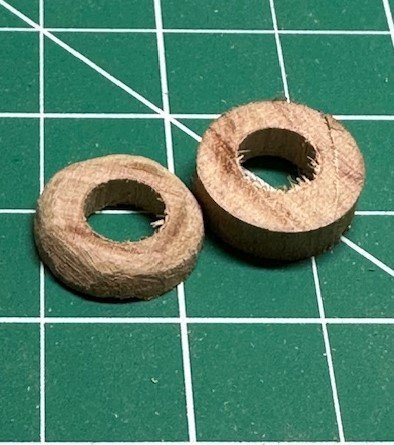
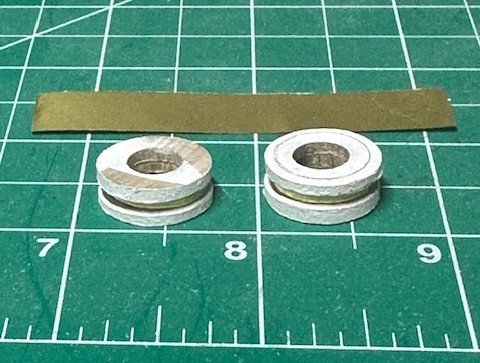
Next task was to work on the boom rest for the main mast and the pin saddle for the fore mast. Taking a 5/8" and 1/2" diameter dowel, I drilled 5/16" holes down the center of each several inches. Then, using my little DrillMaster 2" cut-off saw, I cut narrow "discs". The 1/2" discs were used as the center pieces for both the pin saddle and boom rest, so that 1/16 x 1/64" brass strips could be wrapped and secured around the center disc. It actually worked pretty well! I also cut two additional discs to eventually place at the base of each mast.
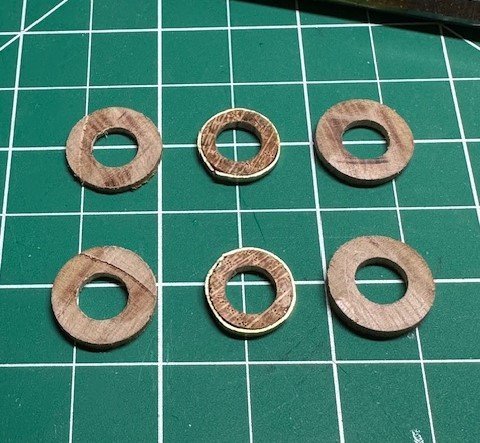
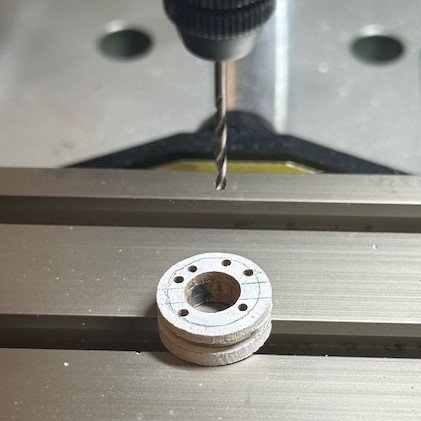
After assembling both pieces, I painted them and then drilled holes in the appropriate spots for the belay pins on the piece that will be on the fore mast. Using some stock 3/32" x 1/8 " strips, I made the chocks that go on both pieces. A chafing piece was placed above the boom crutch on the main mast using a very narrow 0.05mm brass sheet that easily wrapped around the mast.
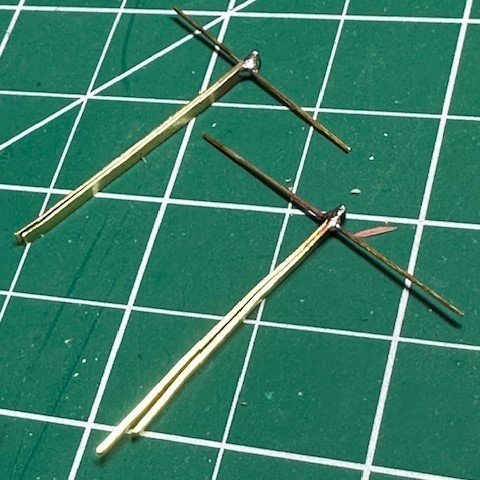
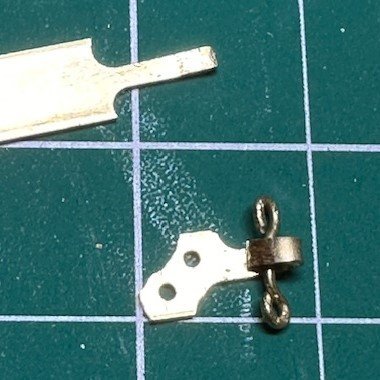
The next thing to complete was the gooseneck on the fore mast. I carefully folded two 1/64" brass rods in half and, using my new Proxxon drill press, drilled a hole in each to place a .51mm brass rod thru the holes. Another opportunity to work on my horrible soldering skills! 🤣 Actually, did pretty well!
Then, I opened and wrapped them around each mast, and marked & drilled holes on the other side for pins. So far, so good!
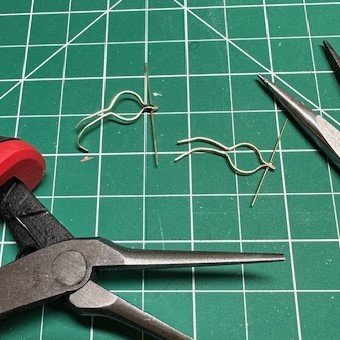
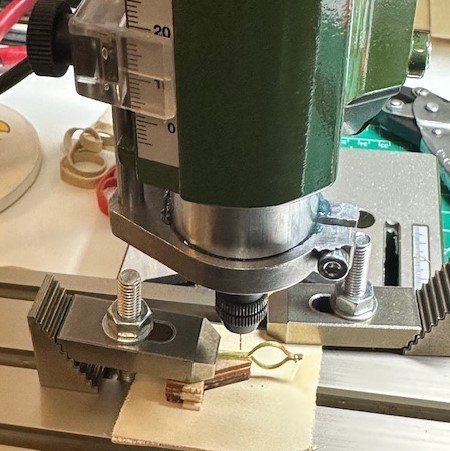
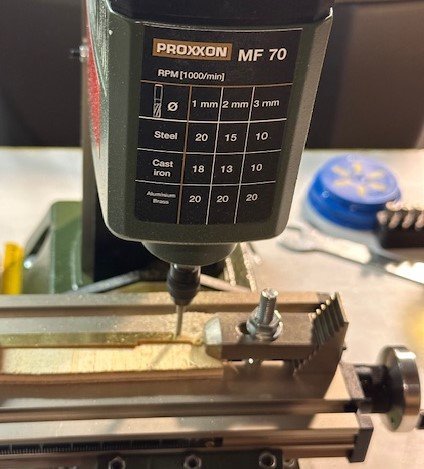
Needed to now create the shackle piece that attaches to the gooseneck and is used to connect to the fore boom. This requires a NEW tool, right?!? I've been interested in getting a mill machine and have seen good reports on the little Proxxon MF70 mill machine, so... why not?!? It actually worked out really well (in my humble opinion) for a first-time use. Following genericDave's Bluenose build and his suggestion, I loaded the MF70 with a 1/32" thick brass strip (0.81mm x 6.35mm) and cut the brass strip to shape. Cool!
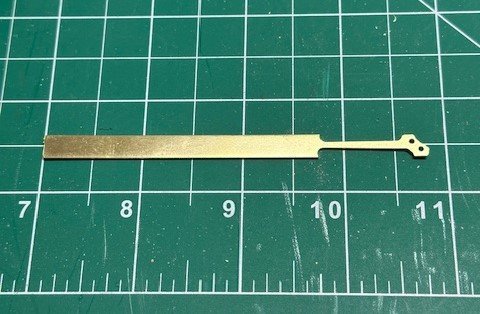
I then cut and wrapped the shackle piece around a 0.82mm brass rod that I had shaped to fit into the gooseneck bands. I secured the entire gooseneck piece on the fore mast. The shackle piece may be a little oversized and out of scale, but once everything else is installed around it on the completed ship, any differences should appear negligible.
Time now to work on things higher up on the masts! Moving along, slowly but surely. My retirement travels should be done until May, so I should be able to put some decent time in the shipyard. We shall see how I do.
Quick question and recommendation request for those of you who have read this entire post to this point (thanks for hanging in there!). I still have not decided entirely on whether to put the sails on this Bluenose, to place furled sails, or to not put any sails on and just do all the rigging. I am guessing, though, that if I do not do any sails, I should still put the mast hoops on the masts, and they would simply be stacked at the base of each mast, accordingly? Would I do anything differently? I've glanced briefly for now at the rigging plans, but have not specifically determined how my plan would affect mast hoop placement. Any expert advice is greatly appreciated. For now, though, I'll work on the hoops and then on to the trestle trees!
Thanks for peeking in!
- mtbediz, Retired guy, Fubarelf and 3 others
-
 6
6
-
4 hours ago, Olaf said:
Hi GGibson.Can you give some examples of this blades and what knife I can use for this blades please? I just getting nystagmus on websites🙃
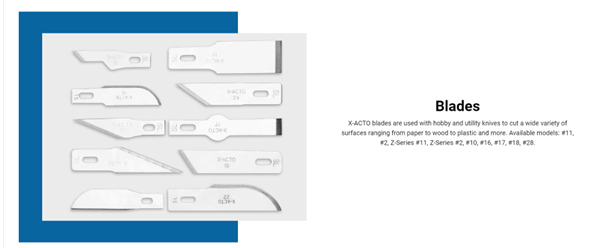
Hi Olaf! If I am understanding your question, the #10 Xacto blade I was referring to that I like is the 2nd one down from the top left in the picture on my post, that fits into a "standard" Xacto knife handle. The lower right one is similar, but fits in a larger handle, as you can see the notch part (the little rectangle opening on the left side of the blades) is a bit bigger in that one.
EDIT: Here's a "knife/blade matrix" I found that will help determine what blade goes with what handle...
- Ryland Craze, SiriusVoyager, bridgman and 4 others
-
4
-
 3
3
-
Not sure what you mean either by over or under, Paul. As a relative newbie, I always have to remind myself how to tie off to belay pins or cleats. Here's a nice short video reminder. Hope this is what you were asking about. Tying to fife rails wouldn't be any different, I don't think, than to rails or mast cleats.
-
On 2/20/2024 at 4:32 AM, Olaf said:
One more question guys. I saw somewhere that curved blades are better than straight ones for photo etched parts? Someone is using them and can compare them please?
I am actually preferring the curved #10 Xacto blade for my work, including the removal of PE pieces. I can "rock" the blade easier, rather than slicing with the #11 blade.
-
No website updates... and it's past their 7:00 CEST announcement time... <shrug>
EDIT: But just got an email from Model Expo... pre-order for OcCre's San Felipe 1/86. OcCre still hasn't updated their own website.
2nd Edit: OcCre's website now updated. Looks like a nice kit! 👍
-
Square bolts give it a bit of character! 👍🤷♀️
-
Hi Bob! Welcome! This MSW forum is a great resource for you in this hobby. John had great suggestions in beginning your journey.
If you are interested in honing your skills before tackling the Enterprise, look at any one of the Model Shipways' Shipwright Series, which was an excellent way for many of us to "get our feet wet" in model shipbuilding (no pun intended).
Enjoy the ride! If you start a build log here, keep us updated on your progress!
-
Slick! Very nice! 🏆🏆
- thibaultron, Canute and mtaylor
-
3
-
9 hours ago, mtbediz said:
Good luck with your Proxxon MF70 (If I understand correctly, you bought the machine). It's a really great tool... I hope you also purchased the vise compatible with this machine. Because you'll need it too.
Yes, got them both, as well as the dividing attachment! 👍
-
6 minutes ago, JSGerson said:
...finding the USS Constitution plans is an effort on the Museum's site, because it's not obvious; why, I don't know. So here is the link...
Agreed, Jon! Although I am not (yet) building the Constitution, I have looked at that page before and it was difficult to discern everything one would need. Nice of you to point out specifics! 👍
-
5 hours ago, JSGerson said:
At the time I fabricated my gun deck capstan, I made the square holes with my Byrnes Saw because it never occurred to me to use my Dremel drill on my Dremel drill press to make the cuts. I don't have a dedicated drill press. You just proved there is always more ways to do the same job with equal results. You do what ever is more comfortable for you. As always, nice job.
Jon
Both of you gentlemen have demonstrated exceptional use of the tools you have to do remarkable work on your ships. I have just added the Proxxon MF70 mill machine to my arsenal and am hoping that Donna Byrnes restarts production of the Byrnes Saw soon, and I will be first in line for it. I have always repeated the adage "right tool for the right job". Great looking capstan, Mustafa! 🏆
-
Nice work, John! Long process but looking good! I'm beginning my own Bluenose mast work, so may be asking questions.
- Glen McGuire, John Ruy and Knocklouder
-
3
-
-
-
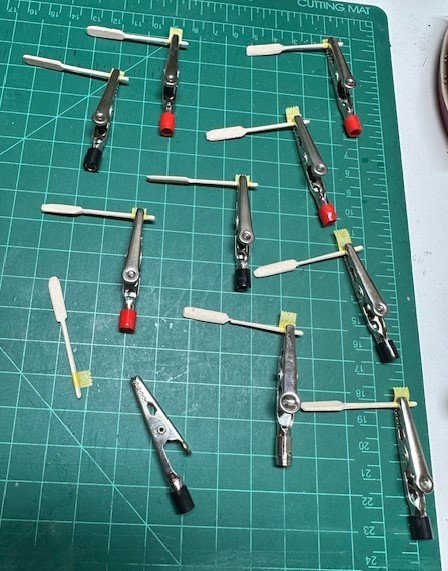
Love the "loop form" process using the helping hands, Tim! May have to steal that idea on my Bluenose rigging.
It all looks great. Congrats on some nice-looking rigging.
-
Yep! If you sand hard enough and long enough! Oops! <shrug> 🤣
- cdrusn89, robert952 and SiriusVoyager
-
3
-
Looking nice, Gary! Much improvement from your pictures yesterday! 🤣 Sanding does wonders.
On the four hulls I have now worked on, I have done the fill/sand/fill/sand/fill/sand routine religiously, working my way up from 200 grit to 320 grit to 400 grit to finally 800 grit. It all pays off. Carry on! 👍🏆
-
-
That is a sharp-looking gun deck, Mustafa! What are the dimensions of the stove you had to build? What type of wood are you using for the construction?
- mtbediz and Bill Morrison
-
2
-
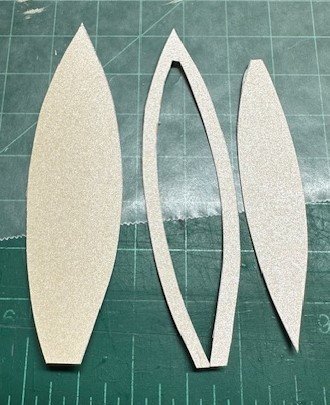
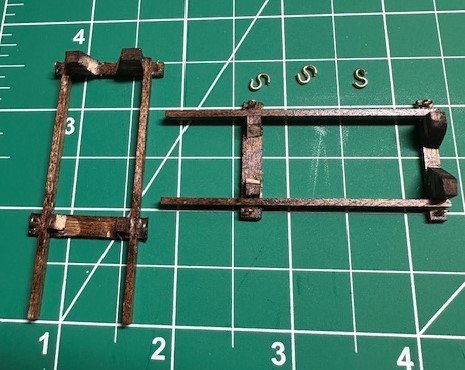
An update on my dories... After not having great success using the kit-supplied pieces to construct the dories, I needed to come up with an alternative plan. One of the other participants in our local Kansas City-area shipbuilders' club also does a lot of 3D printing for tabletop RPG activities. I provided him the dimensions for the dories needed for this Bluenose, and he (quite easily, he states) printed out a handful of 3D resin models. Sweet!
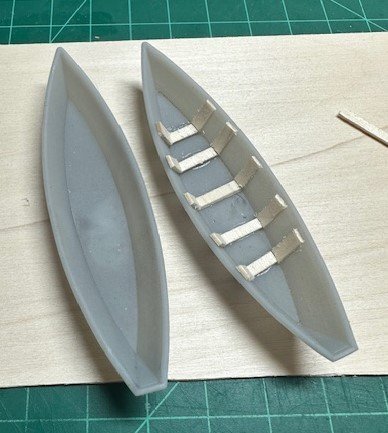
In the picture above, the dory on the left is what he was able to print and he printed a bunch for me to work with. The dory on the right is where I began to cut and paste the cleats and battens using 3mm wide strips. This is where a lot of trial and error came into play. It was very difficult for me to get these hand-painted well (still not good with the airbrushing technique...) with the wood pieces glued in. So, I needed to paint these first without any inside work. I also tried to prime these first and then apply paint, but I wasn't liking how that was looking on a few I tested. I finally landed on simply painting these directly with no primer, and the paint spread pretty nicely, albeit I probably put 4-5 coats of the acrylic paint on each dory.
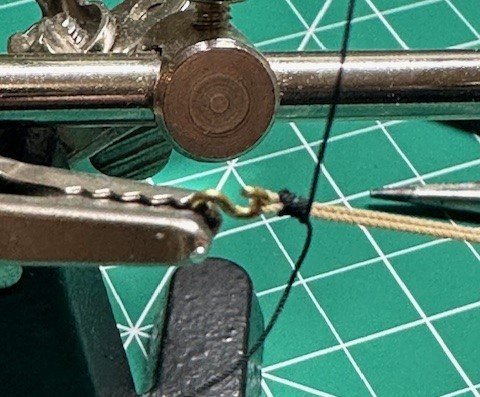
Once they were all painted, I was then having difficulty cutting the rails using 1/64" and even 1/32" thin wood, so I decided to use some thick 80 lb/118 gsm cardstock for the rails. I was still able to use the 1/32" wood for the cleats and battens, as well as for the thwarts (seats). I also drilled holes in the cardstock for the thole pins. I was also able to easily drill holes in the resin-printed dories for the beckets using a #74 bit (0.57mm). The beckets were made using 0.50mm tan rope.
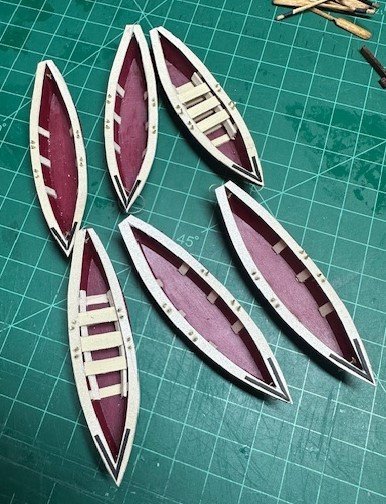
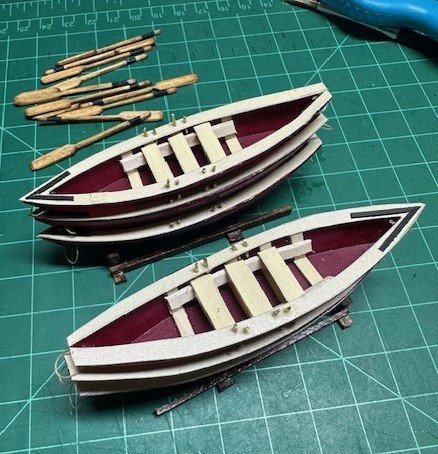
I made the oars using 1/16' x 3/16" stock. They were cut to 50mm length with a 30mm handle. They were stained with Red Oak and the handle grips were painted with Mars Black acrylic paint.
I had previously built the dory kids and placed them aside. I now finished those dories, placing eyebolts at the base for the tie-downs.
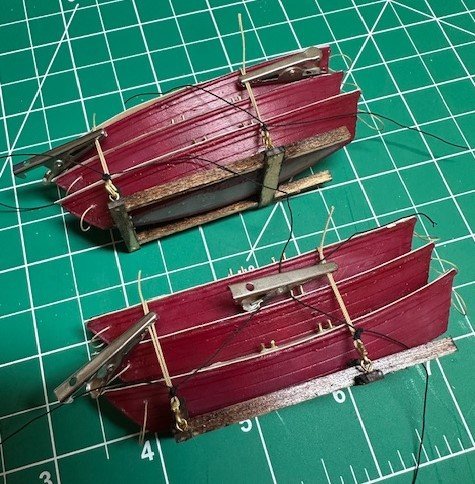

Although I am going to wait until I complete more work on the masts and some of the rigging on and close to the deck before I secure these dories and kids to the deck, of course I had to see how they are going to look on the deck... They look ok!

So, now it's time to work on the masts! The work just keeps on getting more challenging! Appreciate the reads, comments, criticisms and advice!
-
Nice start on your Constitution, SUBaron! I have been seriously considering adding the Constitution to my own shipyard, so have been following all of the above-mentioned build logs. I'm pleased to add yours to that list. Enjoy the work, accept the challenges as they arise, and remember that it is not a race, but a journey. Have fun and keep up the good work! 👍
- mtbediz, SUBaron and Scottish Guy
-
3
-
Great to see you back with your build log, Jim! Bulwarks look great! Excellent wood. 👍
Muscongus Bay Lobster Smack by cdrusn89 - FINISHED - Model Shipways - 1/24
in - Kit build logs for subjects built from 1851 - 1900
Posted
Awesome job with the eyelets, Gary! The sails look very sharp with them! 👍 🏆