Glen McGuire
-
Posts
1,984 -
Joined
-
Last visited
10 Followers


About Glen McGuire

Recent Profile Visitors
4,952 profile views


-
 thibaultron reacted to a post in a topic:
Billy 1938 by Keith Black - FINISHED - 1:120 Scale - Homemade Sternwheeler
thibaultron reacted to a post in a topic:
Billy 1938 by Keith Black - FINISHED - 1:120 Scale - Homemade Sternwheeler
-
John Fox III reacted to a post in a topic:
Columbia 1835 by Glen McGuire - 1/400 - BOTTLE - Steam Packet
-
JacquesCousteau reacted to a post in a topic:
Billy 1938 by Keith Black - FINISHED - 1:120 Scale - Homemade Sternwheeler
-
Ryland Craze reacted to a post in a topic:
Billy 1938 by Keith Black - FINISHED - 1:120 Scale - Homemade Sternwheeler
-
 Keith Black reacted to a post in a topic:
Billy 1938 by Keith Black - FINISHED - 1:120 Scale - Homemade Sternwheeler
Keith Black reacted to a post in a topic:
Billy 1938 by Keith Black - FINISHED - 1:120 Scale - Homemade Sternwheeler
-
 This adds to what might be the most unique collection of models on MSW. Congrats on her completion. Well done, Keith!
- 386 replies
-
- 4
-
-
-
- Billy
- sternwheeler
- (and 1 more)
-
 Glen McGuire reacted to a post in a topic:
Billy 1938 by Keith Black - FINISHED - 1:120 Scale - Homemade Sternwheeler
Glen McGuire reacted to a post in a topic:
Billy 1938 by Keith Black - FINISHED - 1:120 Scale - Homemade Sternwheeler
-
Landlubber Mike reacted to a post in a topic:
Columbia 1835 by Glen McGuire - 1/400 - BOTTLE - Steam Packet
-
Glen McGuire reacted to a post in a topic:
Columbia 1835 by Glen McGuire - 1/400 - BOTTLE - Steam Packet
-
SaltyScot reacted to a post in a topic:
Columbia 1835 by Glen McGuire - 1/400 - BOTTLE - Steam Packet
-
BANYAN reacted to a post in a topic:
Columbia 1835 by Glen McGuire - 1/400 - BOTTLE - Steam Packet
-
BANYAN reacted to a post in a topic:
Columbia 1835 by Glen McGuire - 1/400 - BOTTLE - Steam Packet
-
Coyote_6 reacted to a post in a topic:
Columbia 1835 by Glen McGuire - 1/400 - BOTTLE - Steam Packet
-
I agree that your method is more difficult, but you pulled it off nicely on Scheldt River as I recall. I used a yet another method for the funnel on the SY Aurora. It was my 2nd scratch-built SIB, so I was still trying to figure a lot of things out. I put a wire hinge thru the funnel near the base and used pull threads for the forward guy wires to raise the funnel once inside the bottle. It worked ok, but I decided later that I liked using metal wire for the guy wires a lot better. Plus, I've gotten a lot more comfortable doing assembly inside the bottle.
-
Glen McGuire reacted to a post in a topic:
Columbia 1835 by Glen McGuire - 1/400 - BOTTLE - Steam Packet
-
Glen McGuire reacted to a post in a topic:
Bateau de Lanvéoc by JacquesCousteau - Scale 1:32 - From Ancre Plans
-
The funnel will fit quite easily into the bottle. Now getting it in place on that main cabin deck? I'm borrowing an empty swear jar from @Knocklouder for that exercise!
-
 Glen McGuire reacted to a post in a topic:
Columbia 1835 by Glen McGuire - 1/400 - BOTTLE - Steam Packet
Glen McGuire reacted to a post in a topic:
Columbia 1835 by Glen McGuire - 1/400 - BOTTLE - Steam Packet
-
Glen McGuire reacted to a post in a topic:
Chaconia by Javelin - 1/100 - RADIO - LPG Tanker
-
Glen McGuire reacted to a post in a topic:
Columbia 1835 by Glen McGuire - 1/400 - BOTTLE - Steam Packet
-
Glen McGuire reacted to a post in a topic:
Columbia 1835 by Glen McGuire - 1/400 - BOTTLE - Steam Packet
-
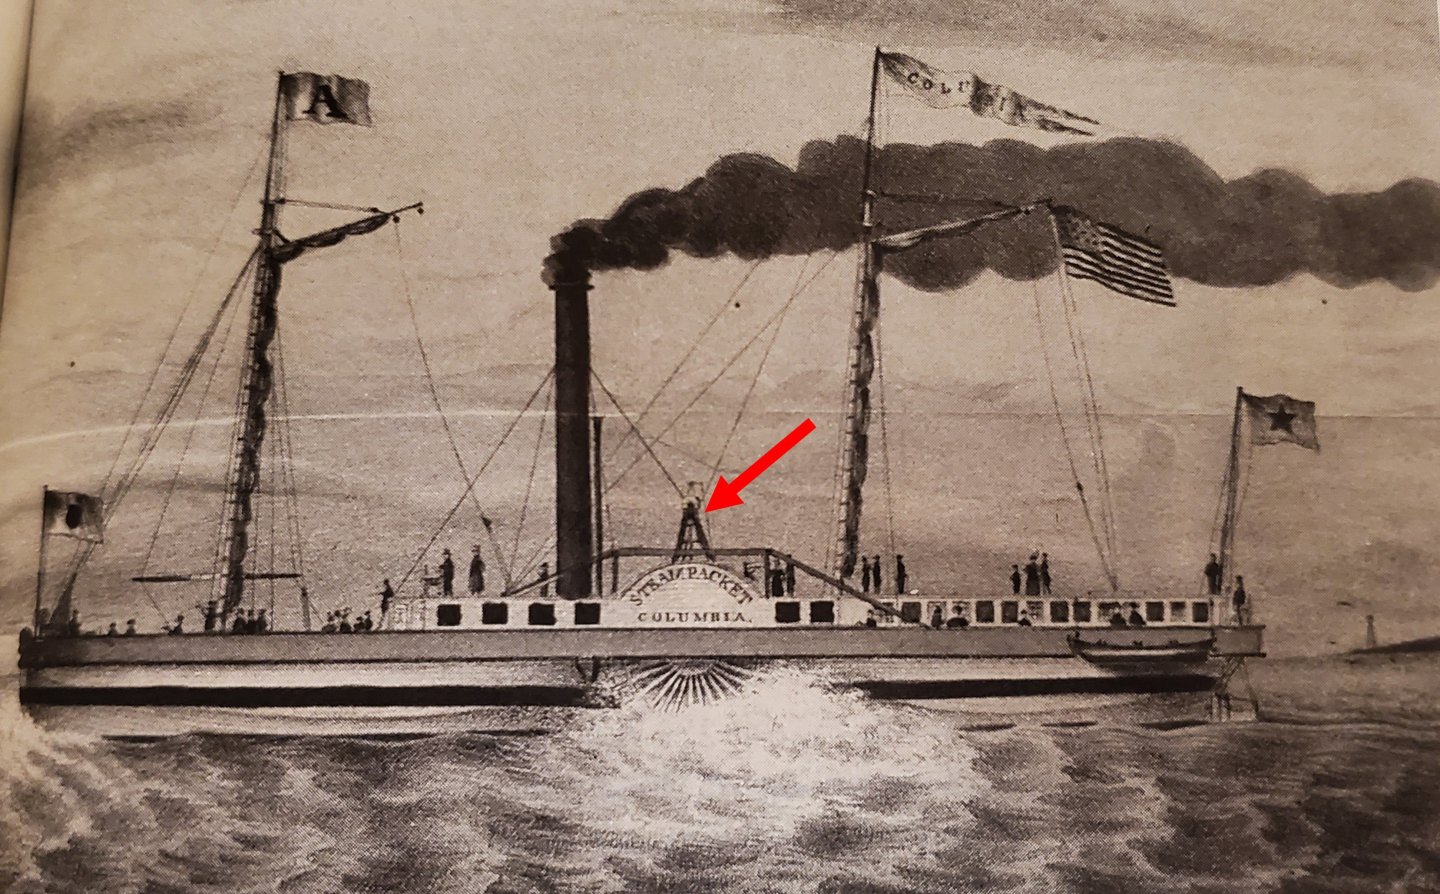
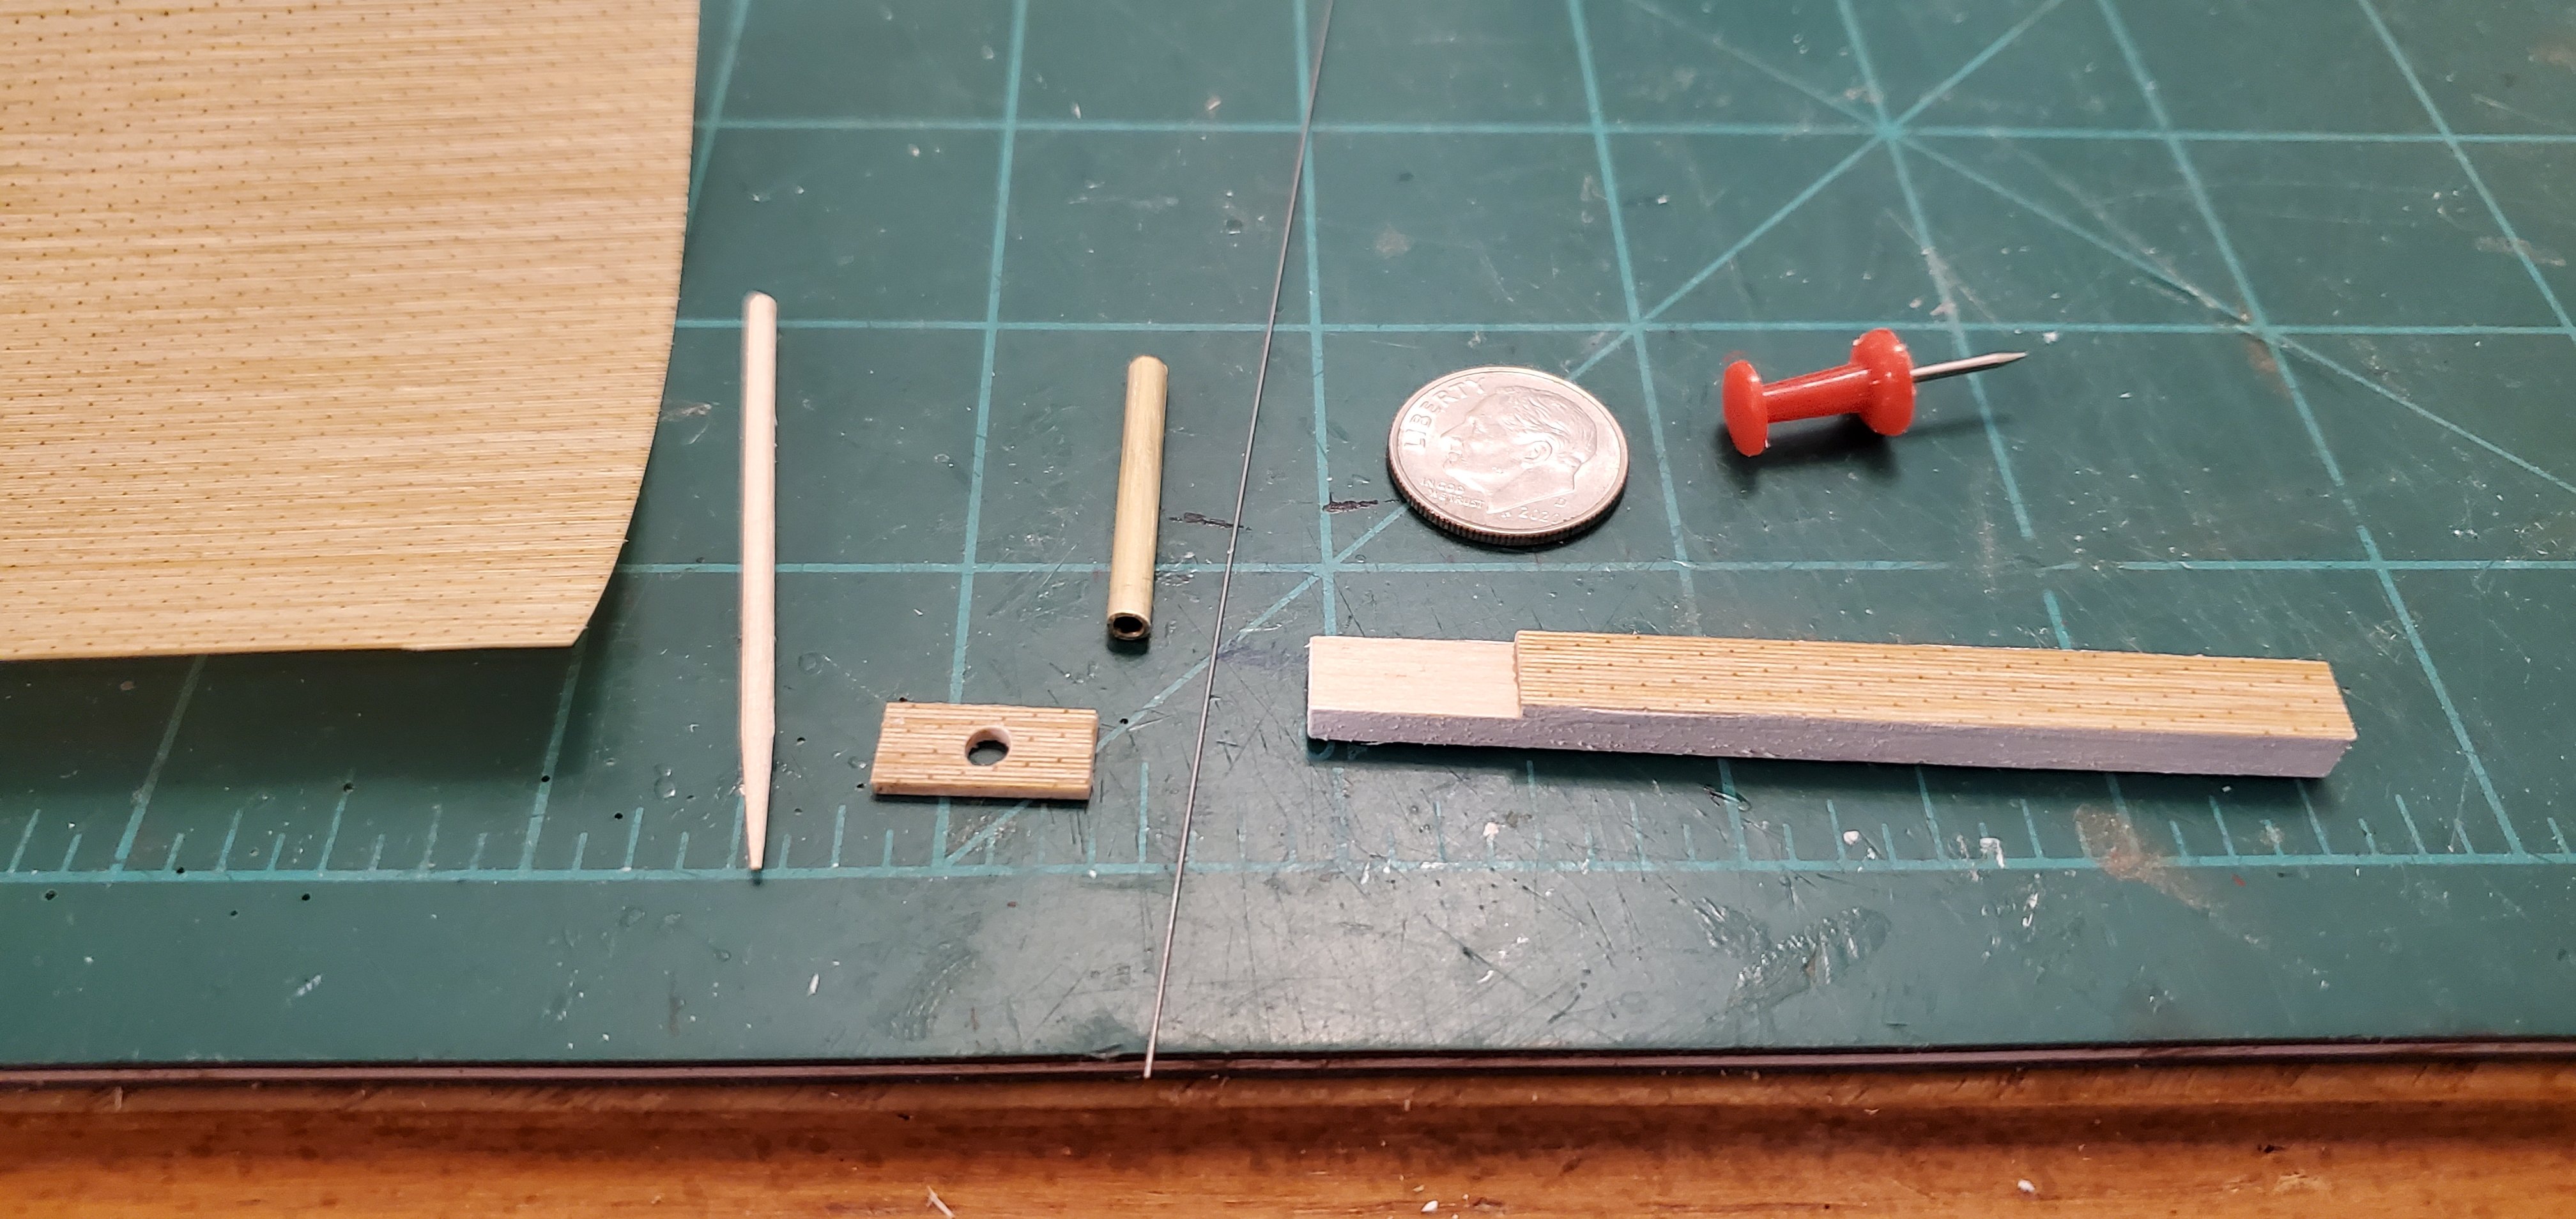
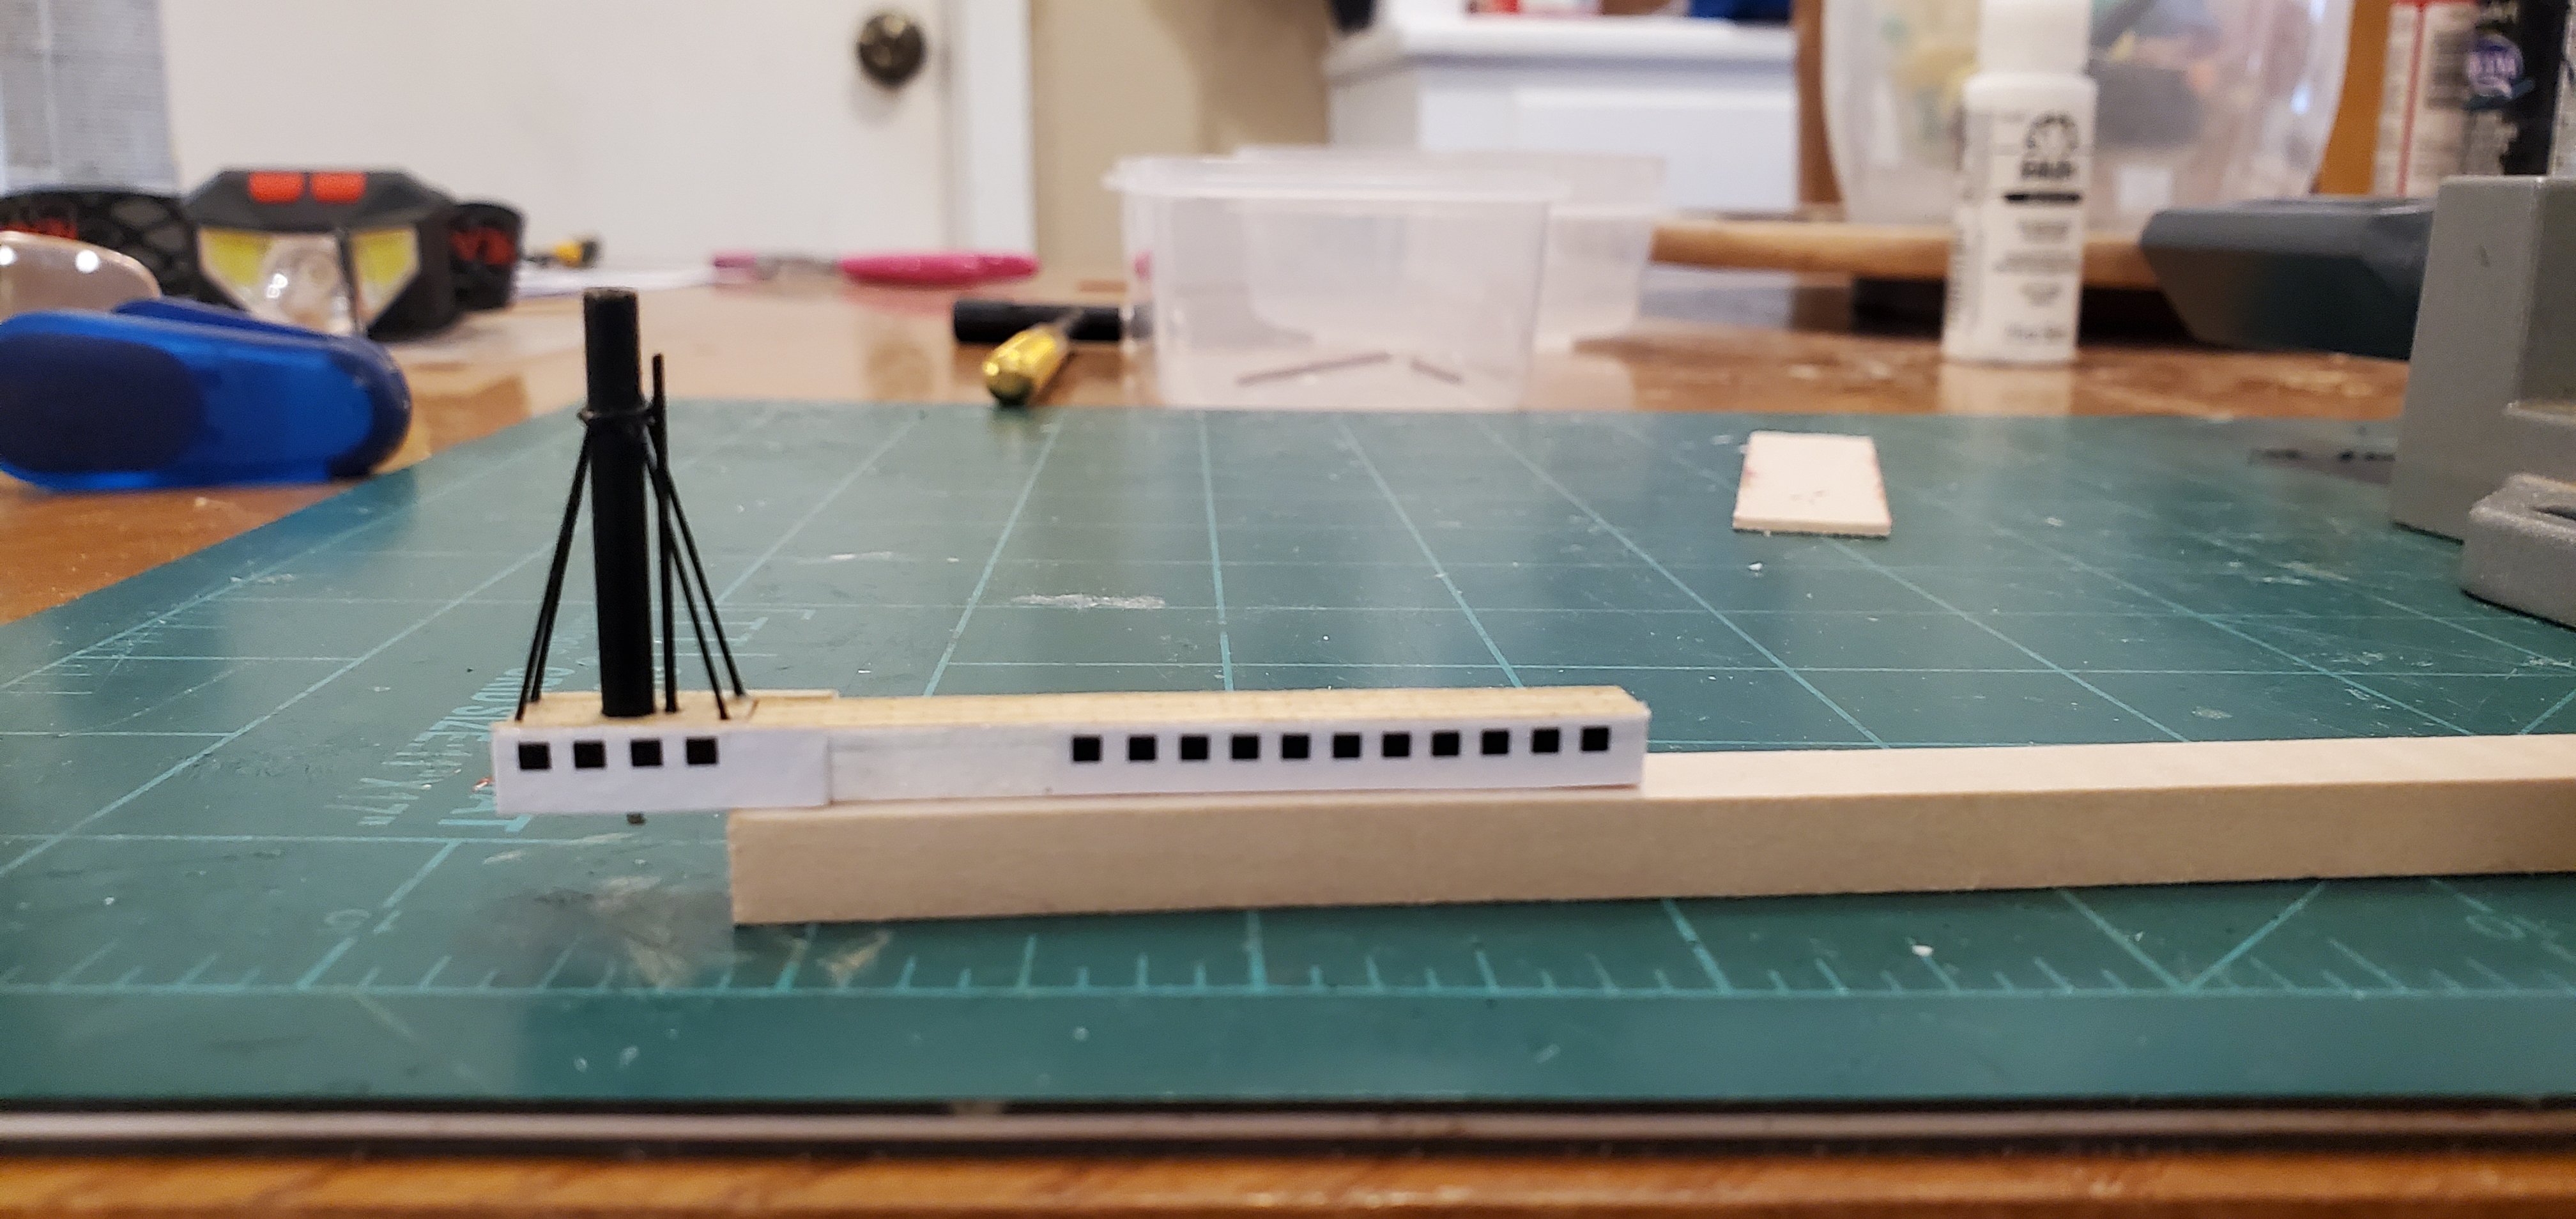
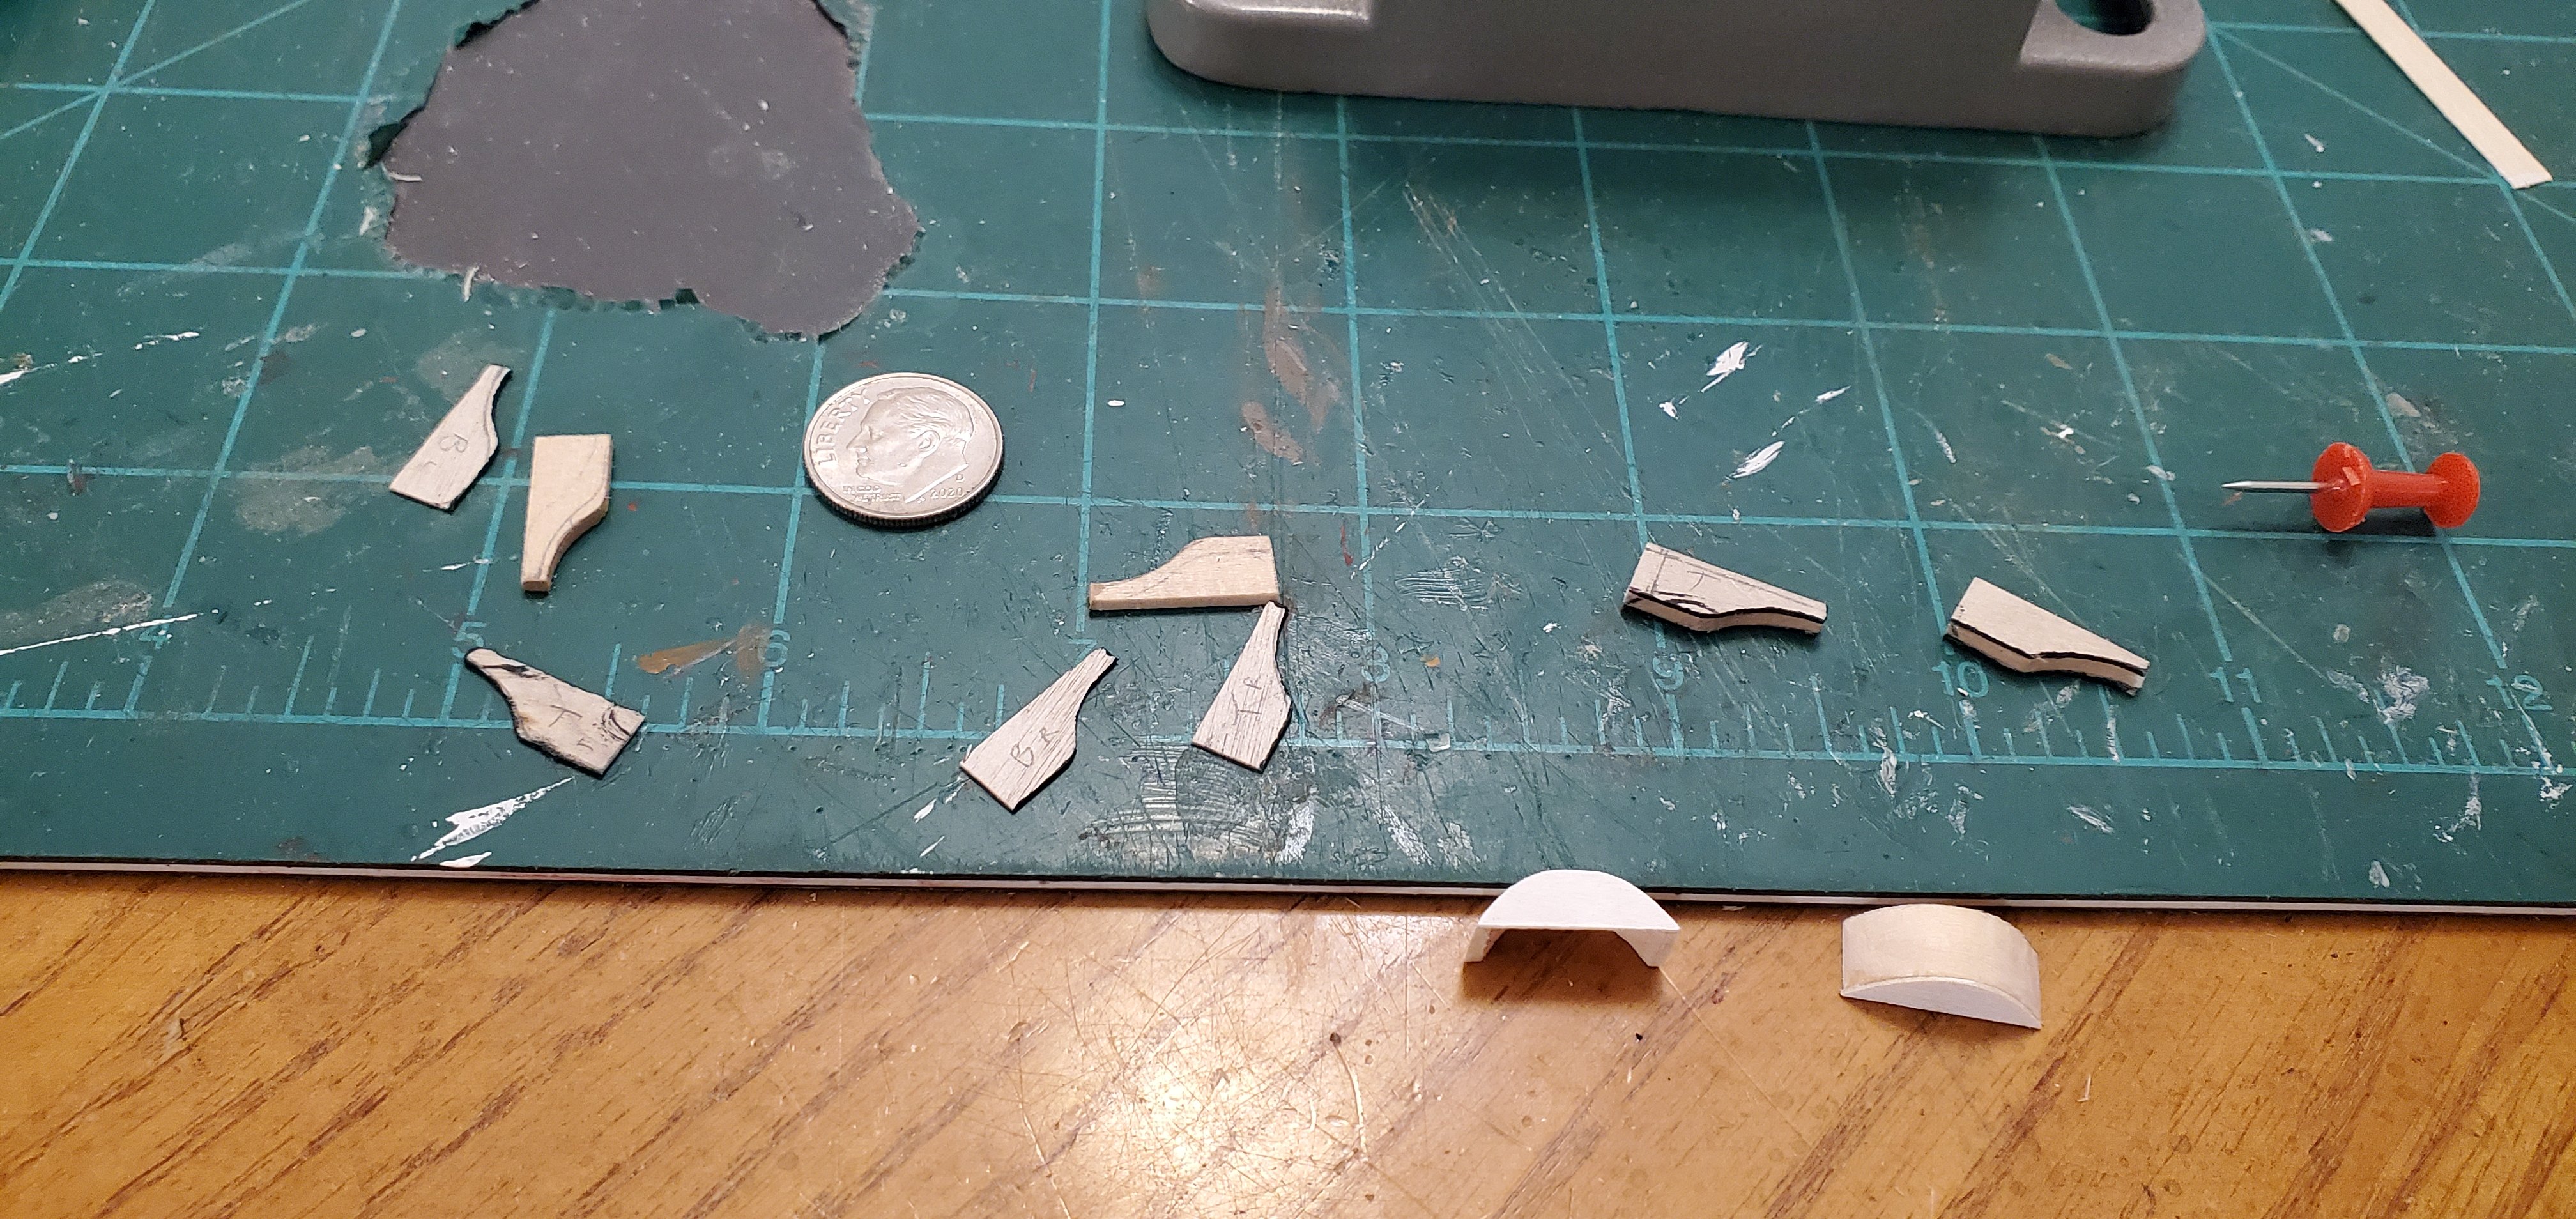
Thanks, Mark. I've been thinking about asking @Keith Black if I could subcontract some of that intricate work to him since he is doing some amazing small-scale stuff on his riverboat collection. I think he's a closet SIB builder! For this build there's one thing that's certain - it will require some (or maybe a lot of) assembly that must be done inside the bottle, starting with the funnel and main cabin structure. The main cabin structure will straddle the split in the hull but not be as wide as the deck. I see people in the painting standing between the windows of the main cabin and the bulwark, so I know there's a walkway. Their looks to be a deck on top of the main cabin (again, more people walking around in the painting) and the funnel appears to go straight thru that deck. So to pull that off, once the hull is in the bottle I will install the main cabin structure first and then install the funnel into it. The funnel has guy wires which are a distinctive look that I don't want to omit. I don't think I could add them inside the bottle. The only thing I could think of is to cut out a small portion of the main cabin deck and add it to the funnel now, along with the guy wires, and add that subassembly to the rest of the main cabin deck inside the bottle. That probably makes no sense. Hopefully the pictures below help! Here are the pieces. From left to right - Artwox decking sheet, toothpick for funnel guide pin, deck cutout for the funnel, brass funnel (it's brass despite its appearance in the pic), guy wire (.015" music wire), and the main cabin structure. Here's the funnel subassembly with guy wires, vent pipe, and guide pin dowel. The main cabin structure has the windows added. The windows added a complication that I did not think about beforehand. Below the funnel, the deck cutout would split the windows horizontally. So I added the side pieces which make a nice slot for the funnel/deck cutout to fit into. Here's how the main cabin structure looks with the funnel in place. Here's how everything looks dry fit:


-
Glen McGuire reacted to a post in a topic:
Columbia 1835 by Glen McGuire - 1/400 - BOTTLE - Steam Packet
-
Glen McGuire reacted to a post in a topic:
HMCSS Victoria 1855 by BANYAN - 1:72
-
NOOOOO!! DO NOT wake up the penguins from their winter nap!!
-
HMCSS Victoria 1855 by BANYAN - 1:72
Glen McGuire replied to BANYAN's topic in - Build logs for subjects built 1851 - 1900
Your trial set of davits look pretty darn good, Pat. I think they will be a nice improvement over the original set.- 1,021 replies
-
- 2
-
-
- gun dispatch vessel
- victoria
- (and 2 more)
-
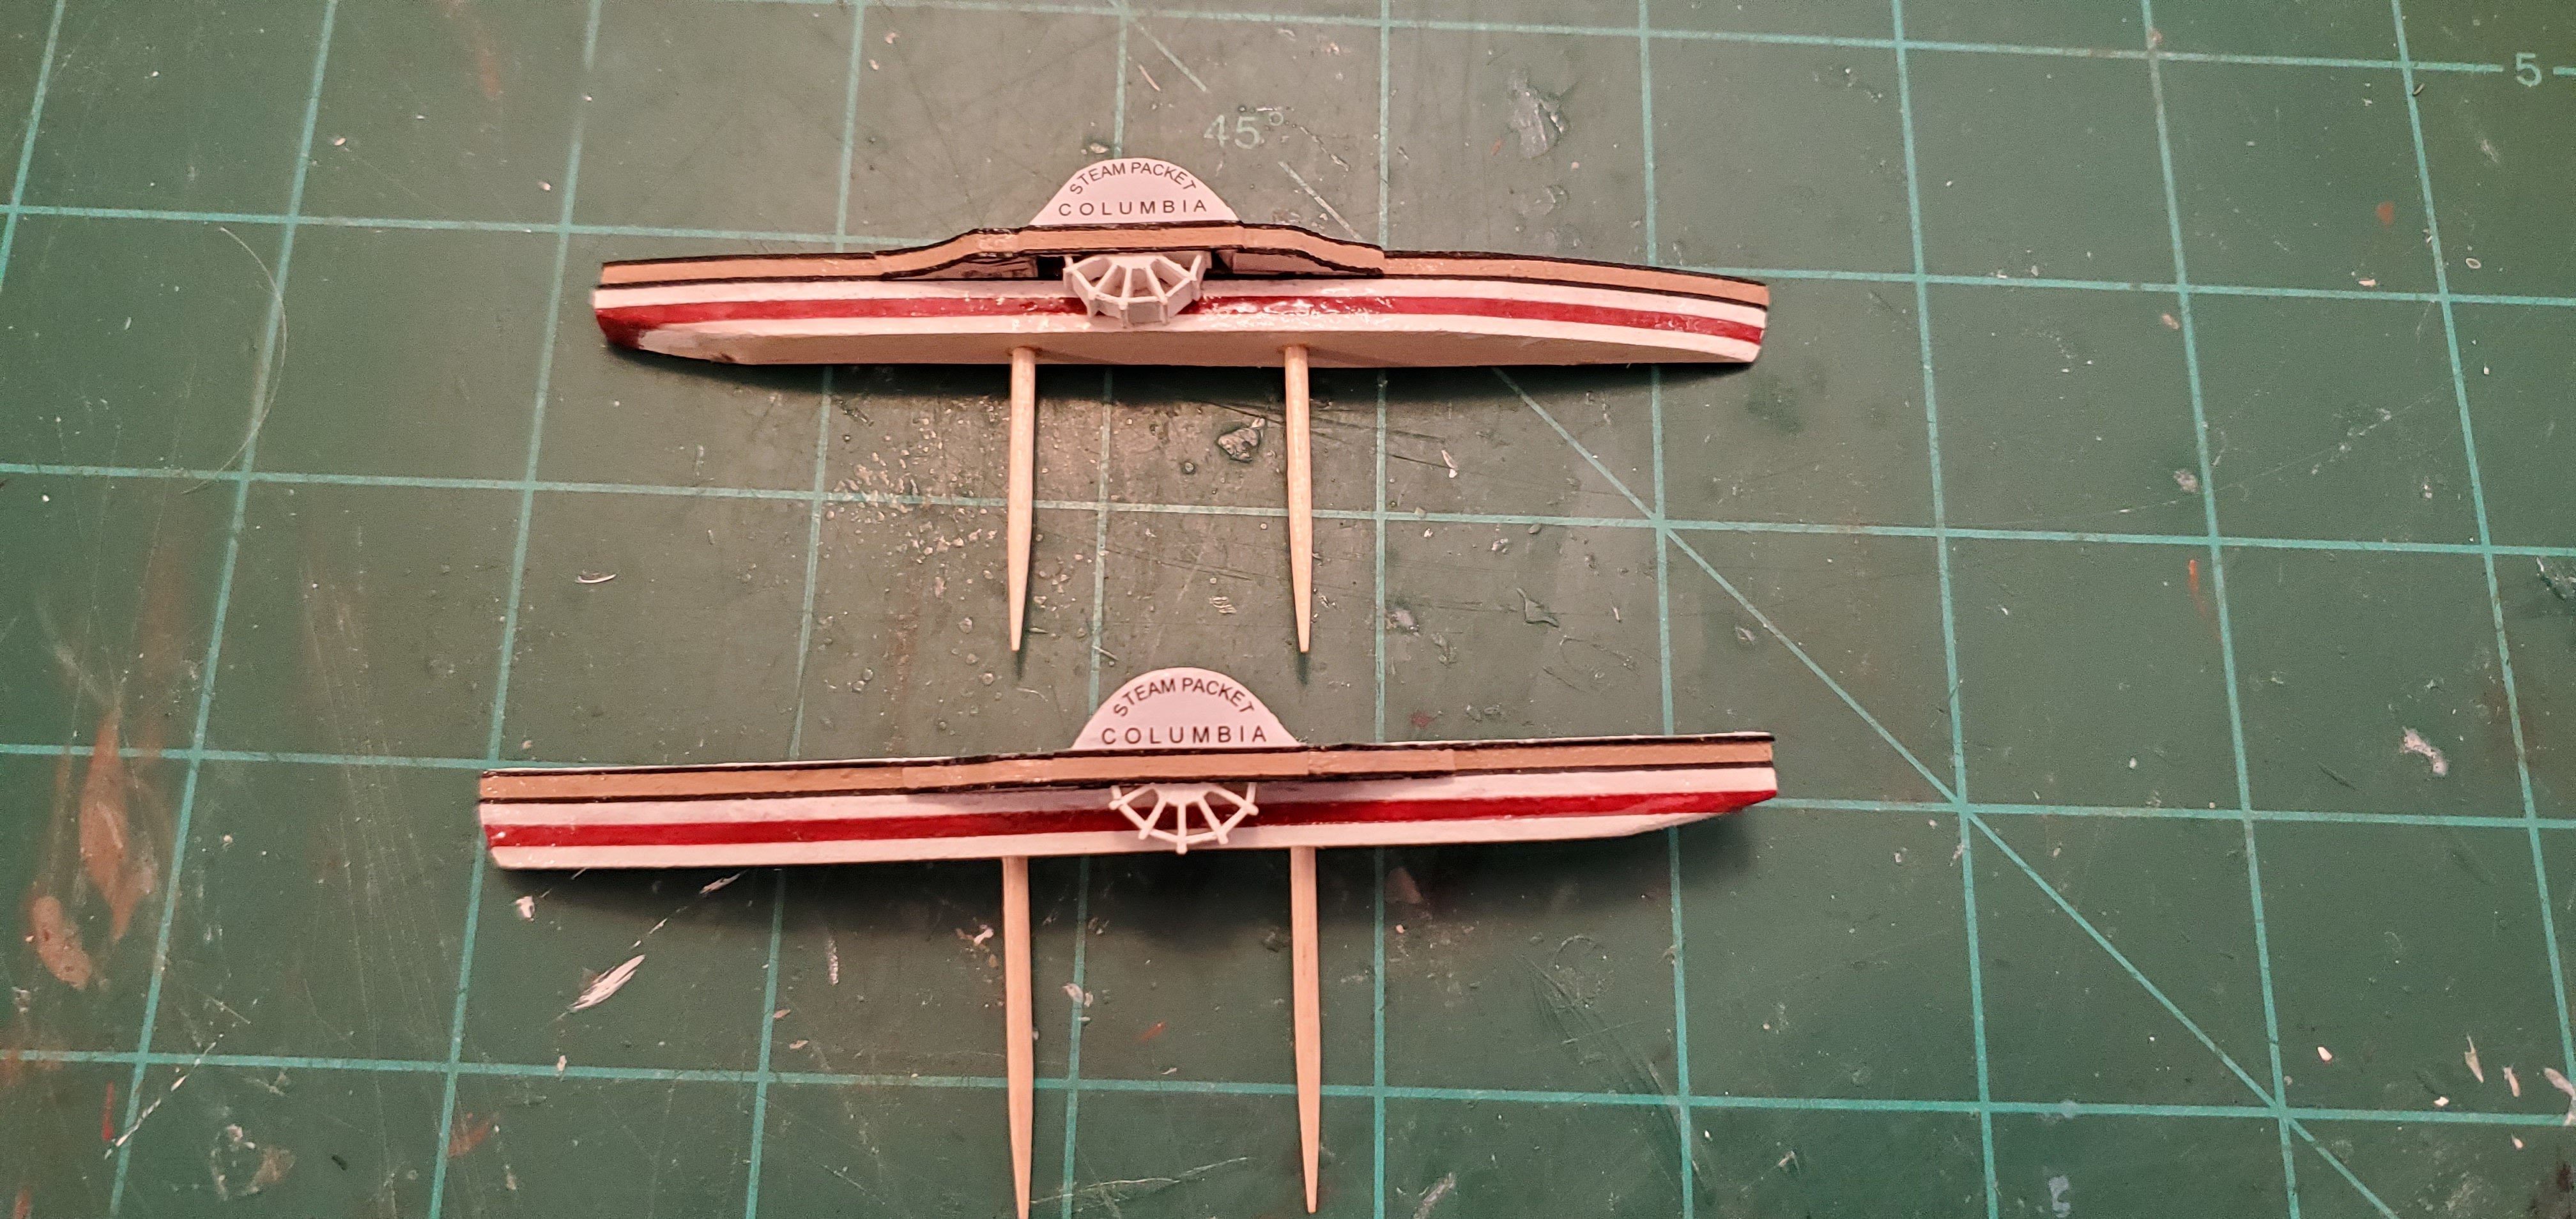
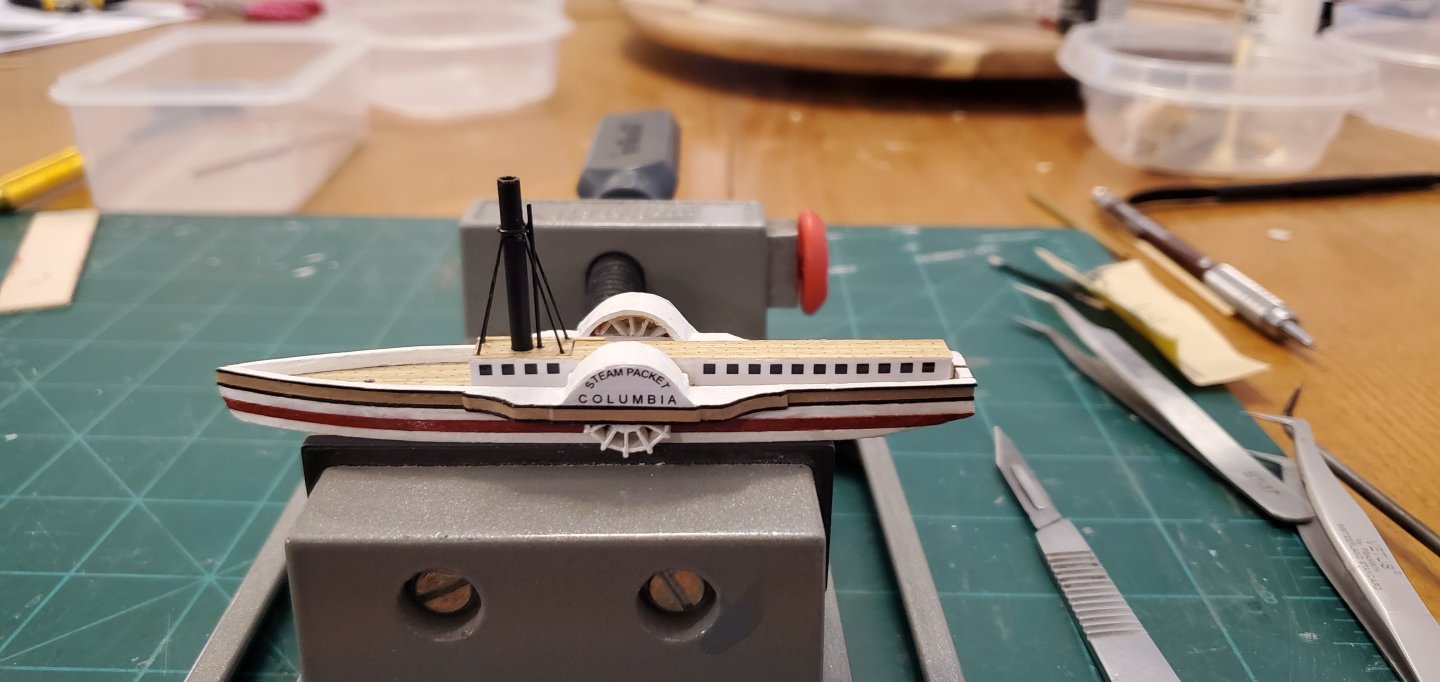
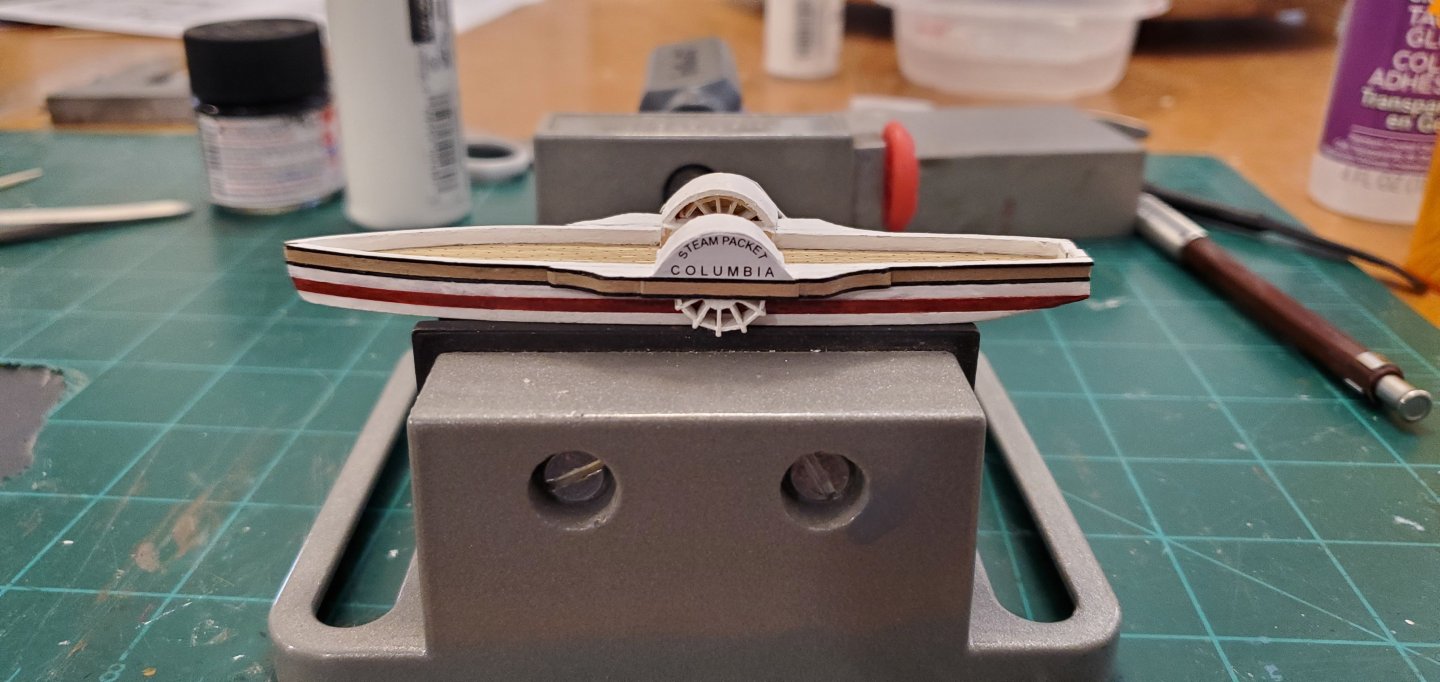
What, you don't think I free-handed that lettering? LOL. I laser printed them on paper and mod-podged the paper to the wheel cover. The letters for "STEAM PACKET" are font 4 which is .06" tall. The "COLUMBIA" letters are font 5.
-
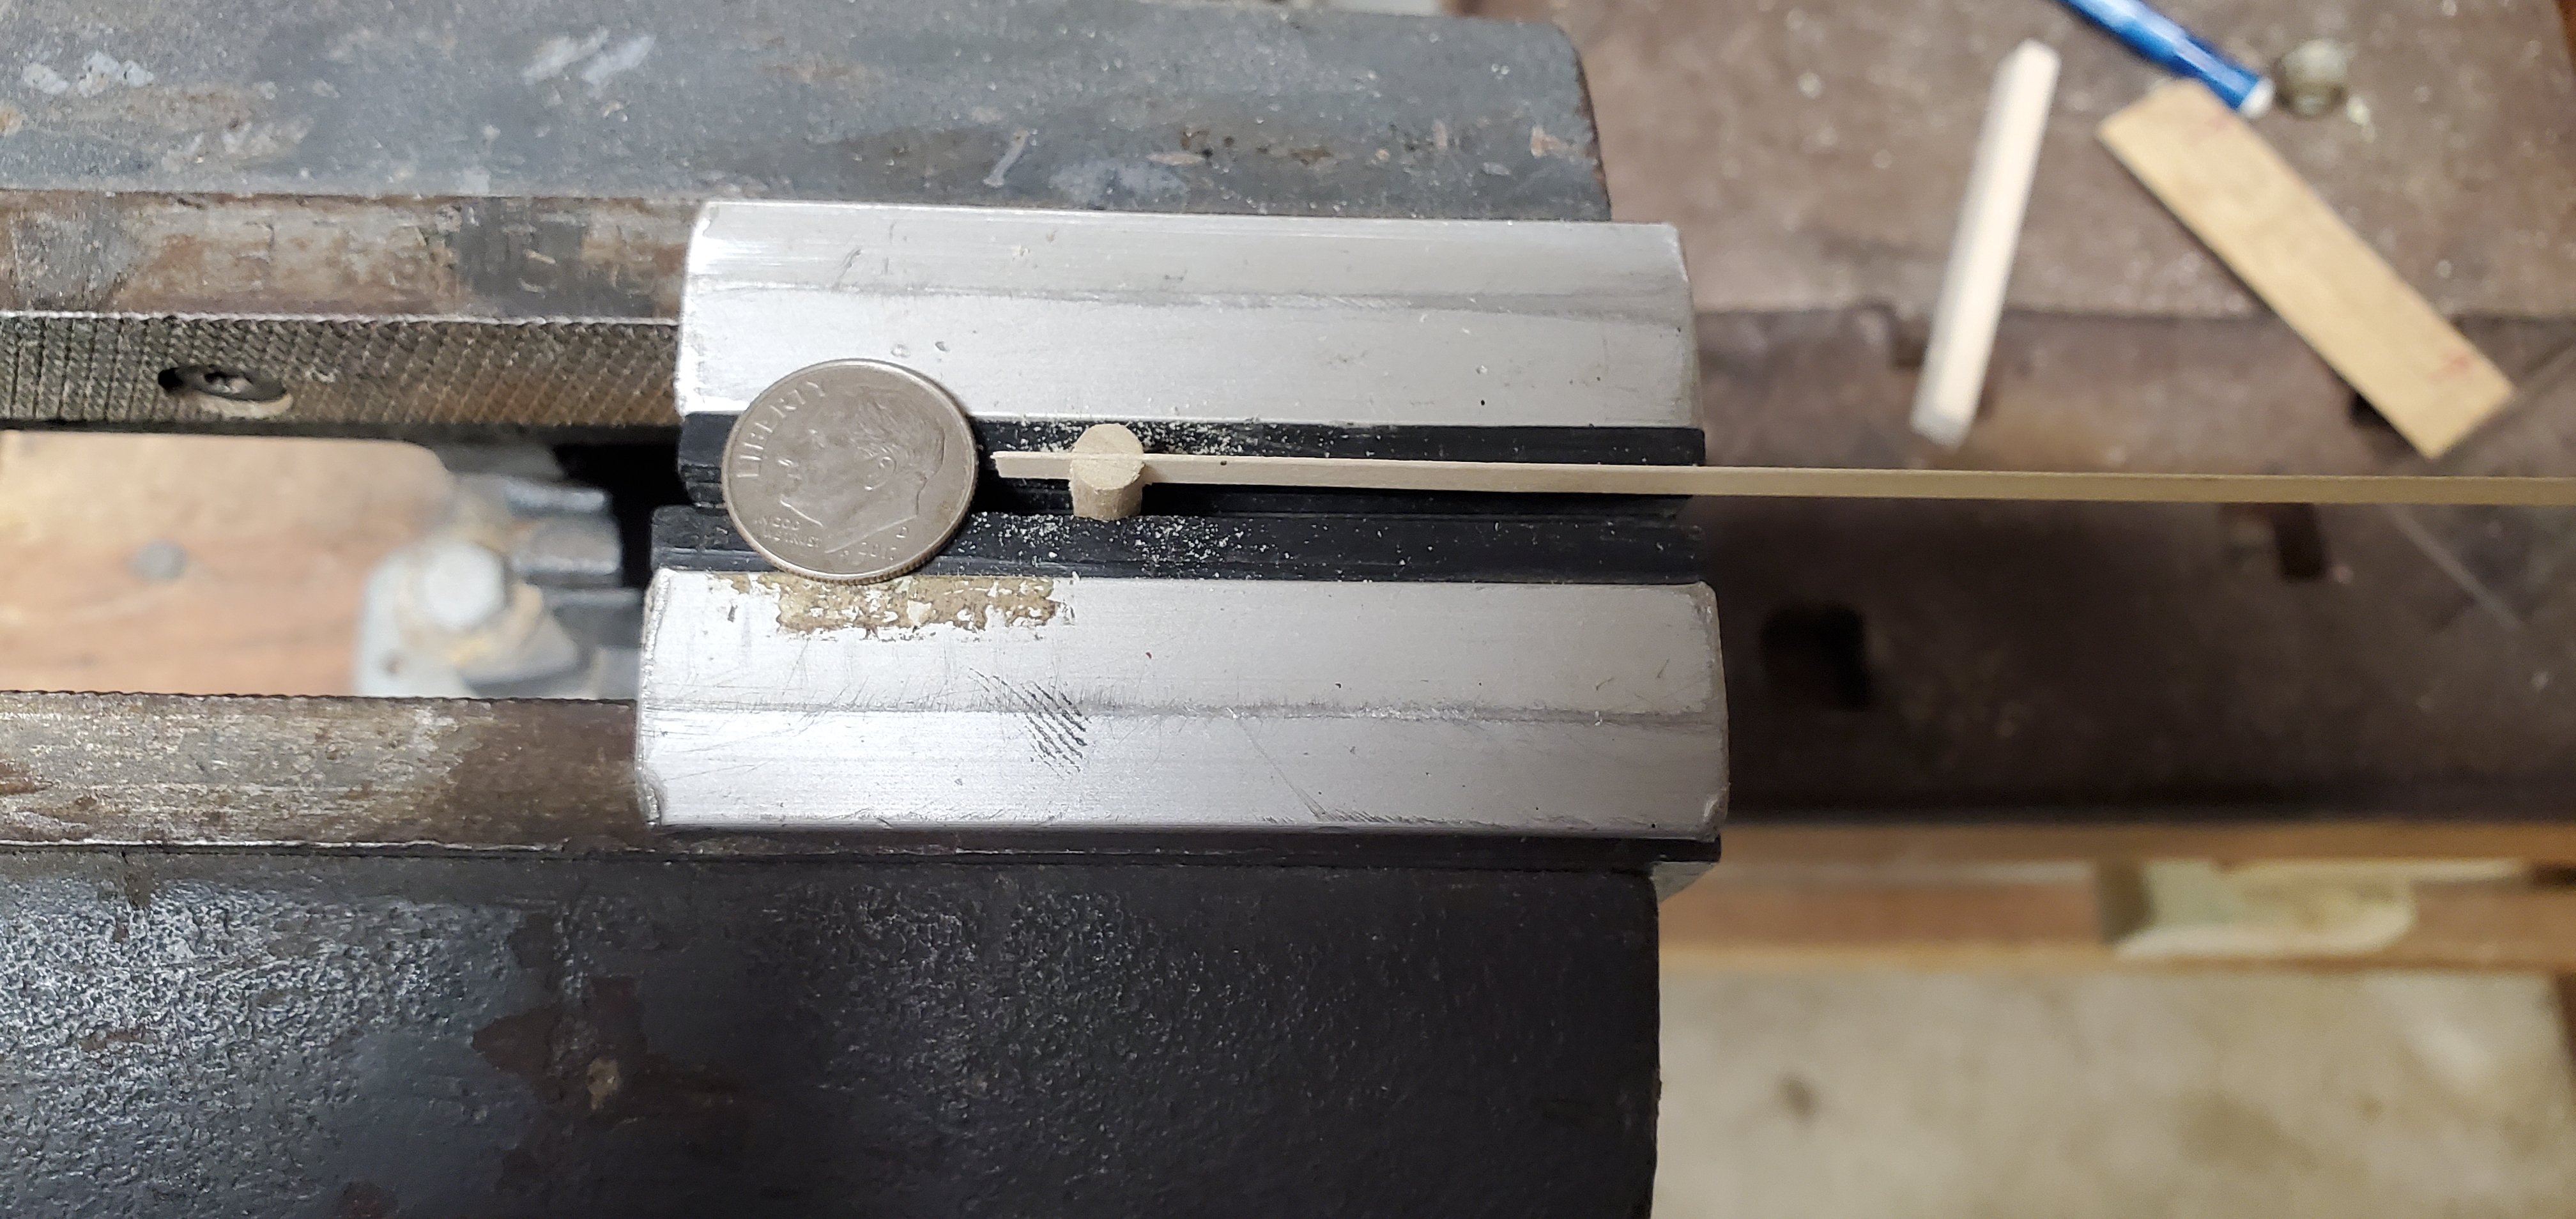
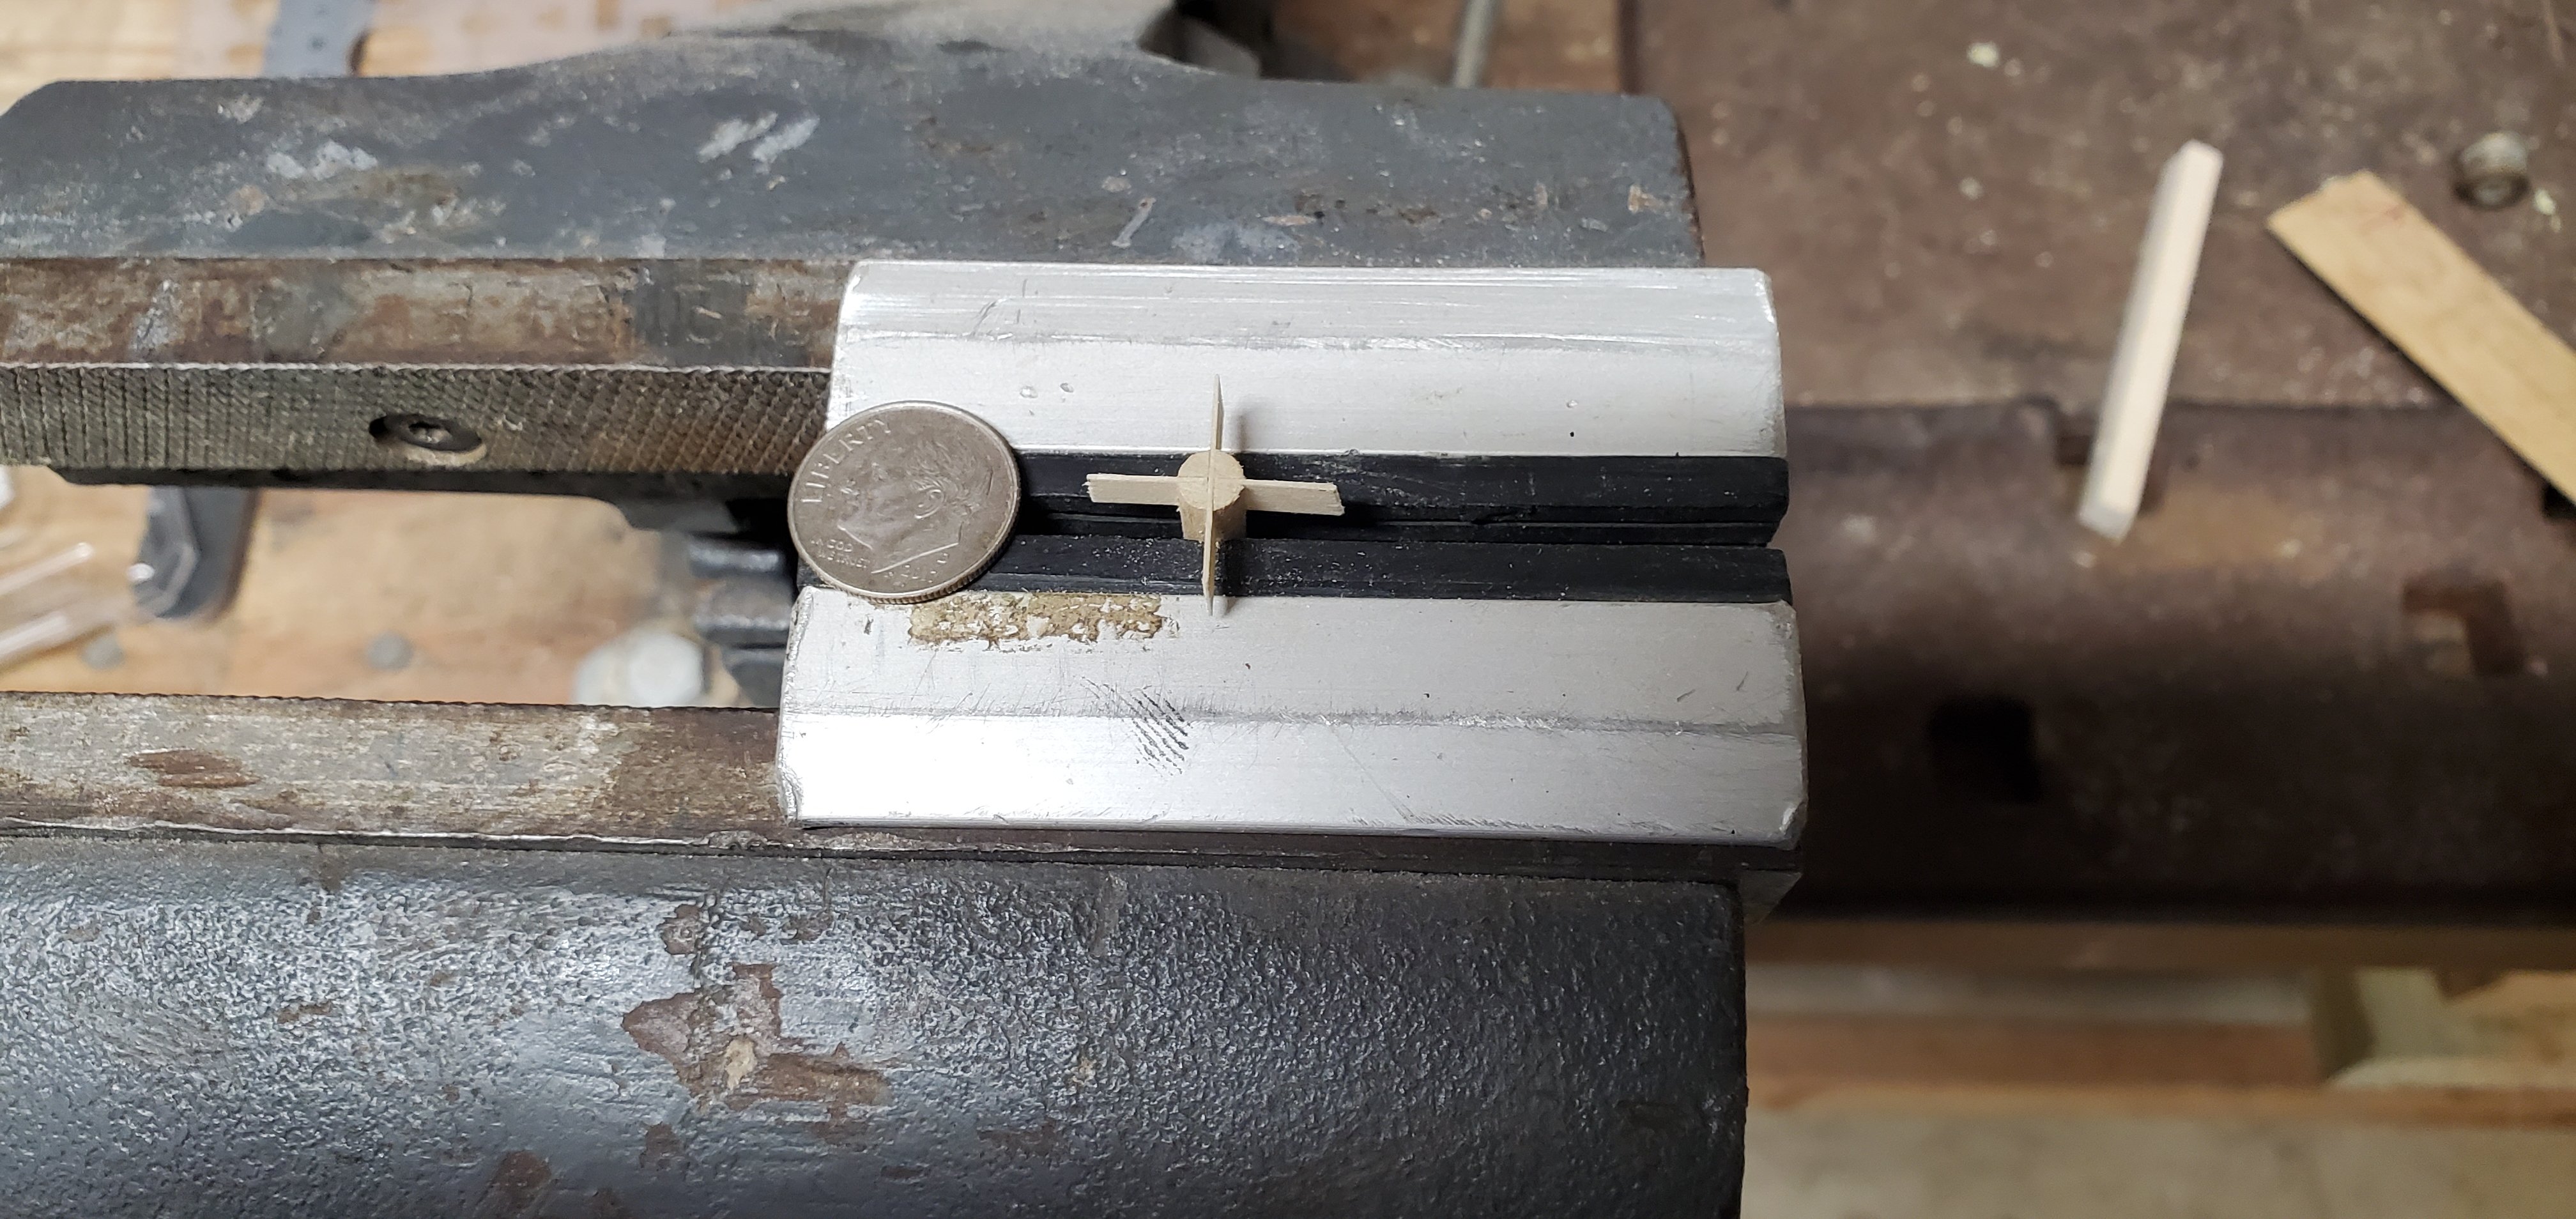
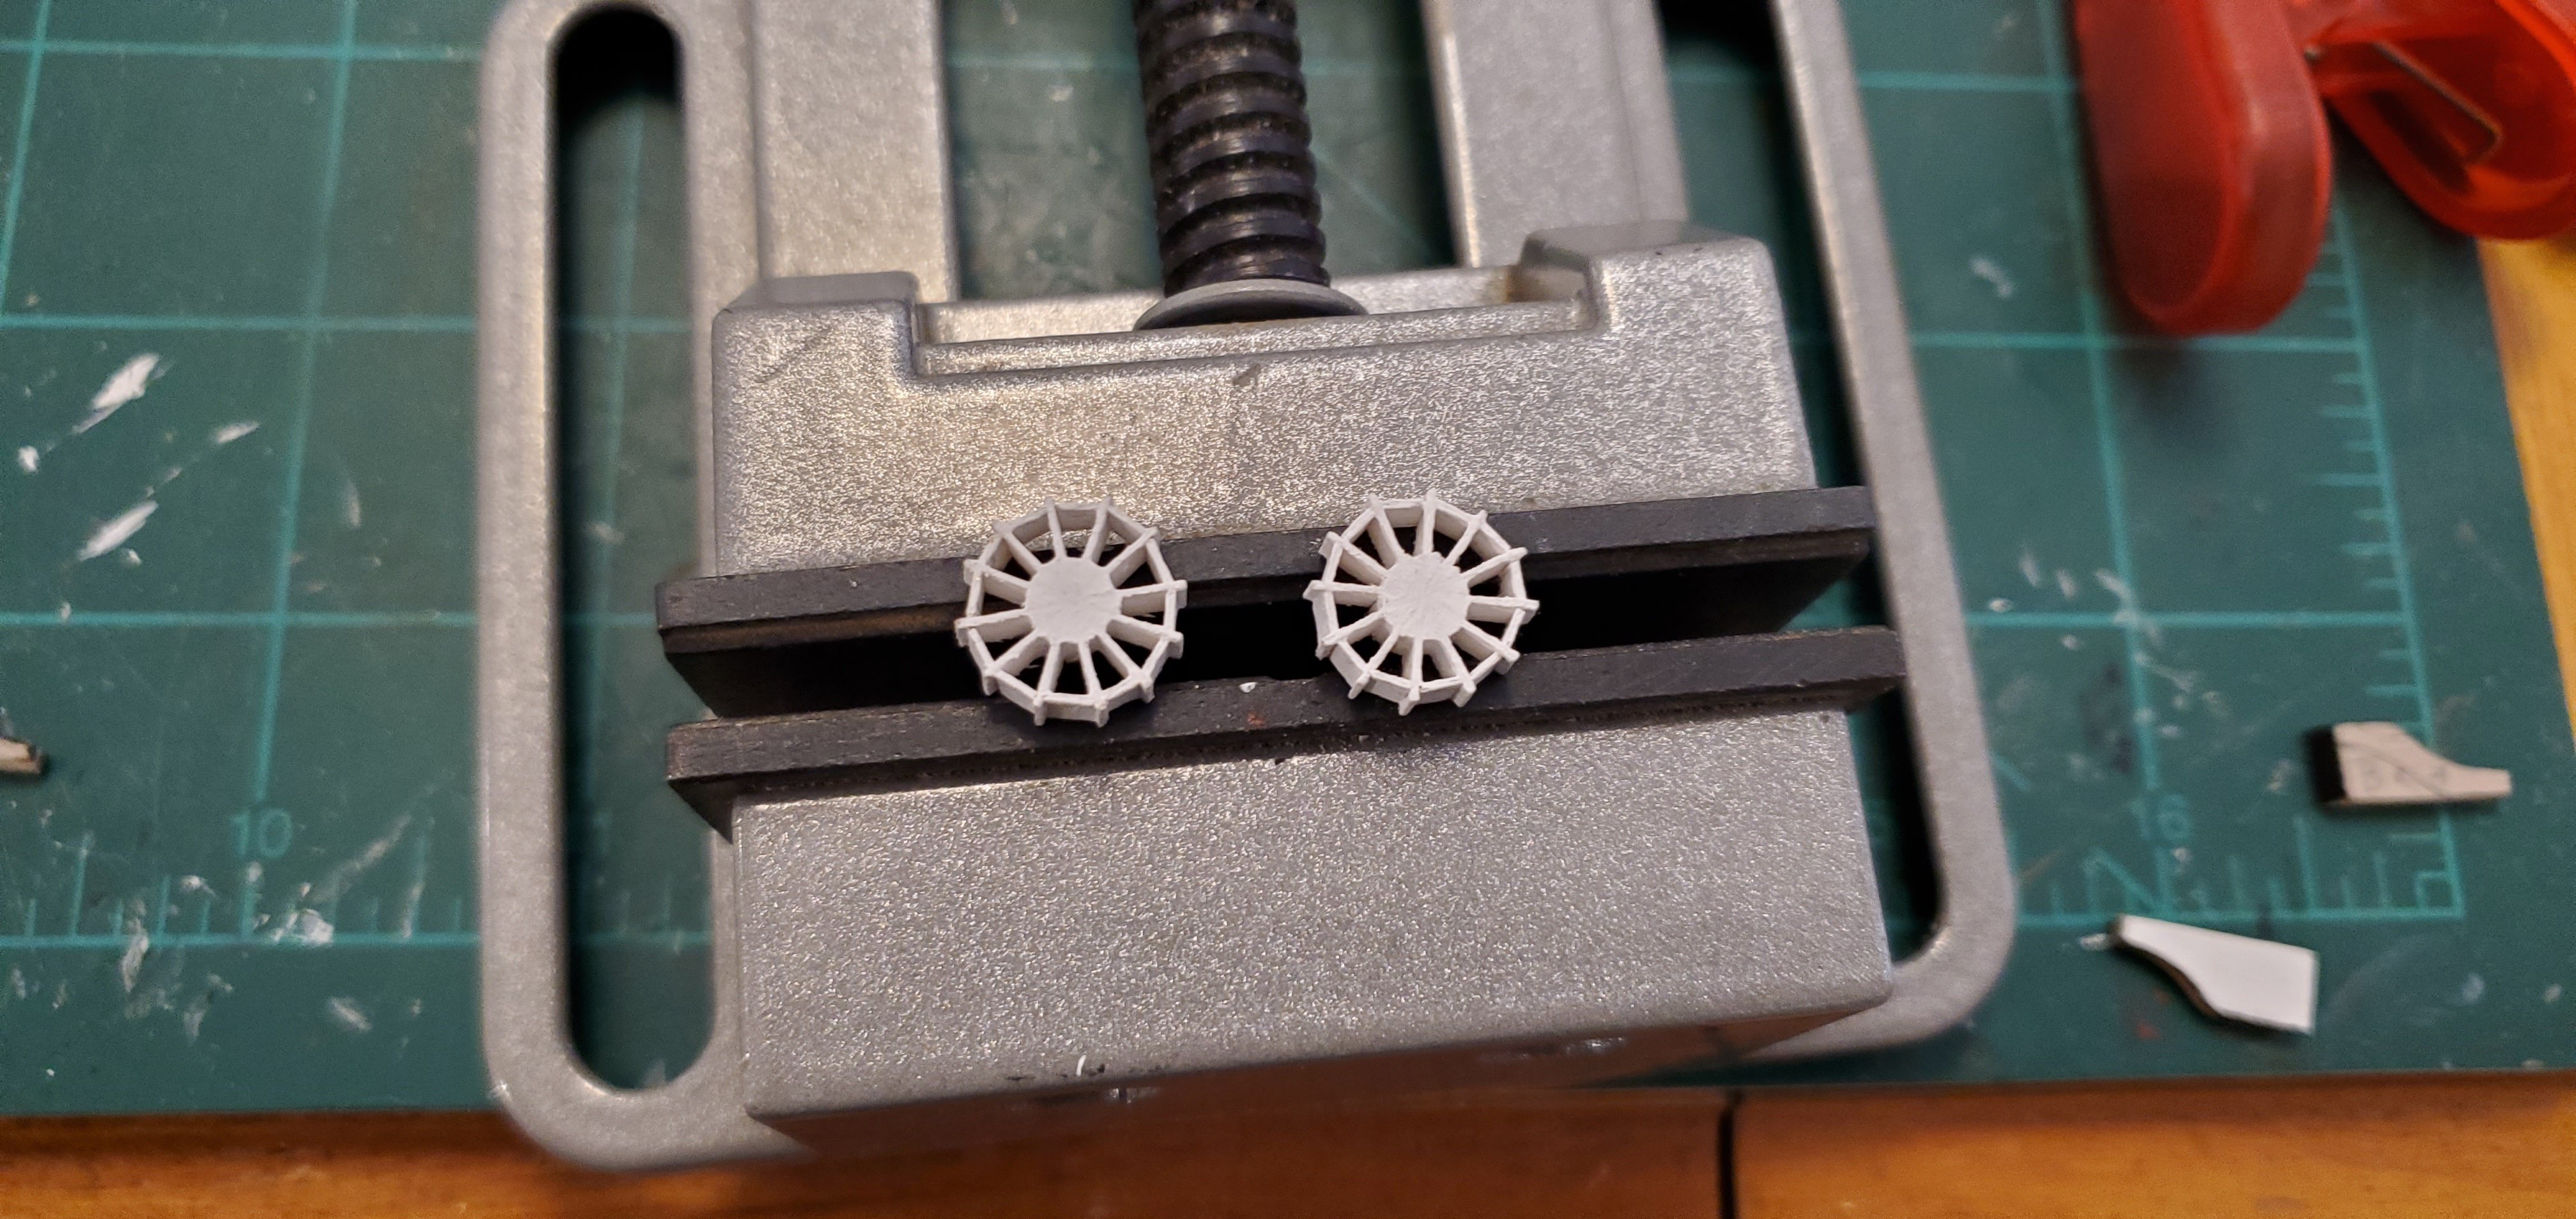
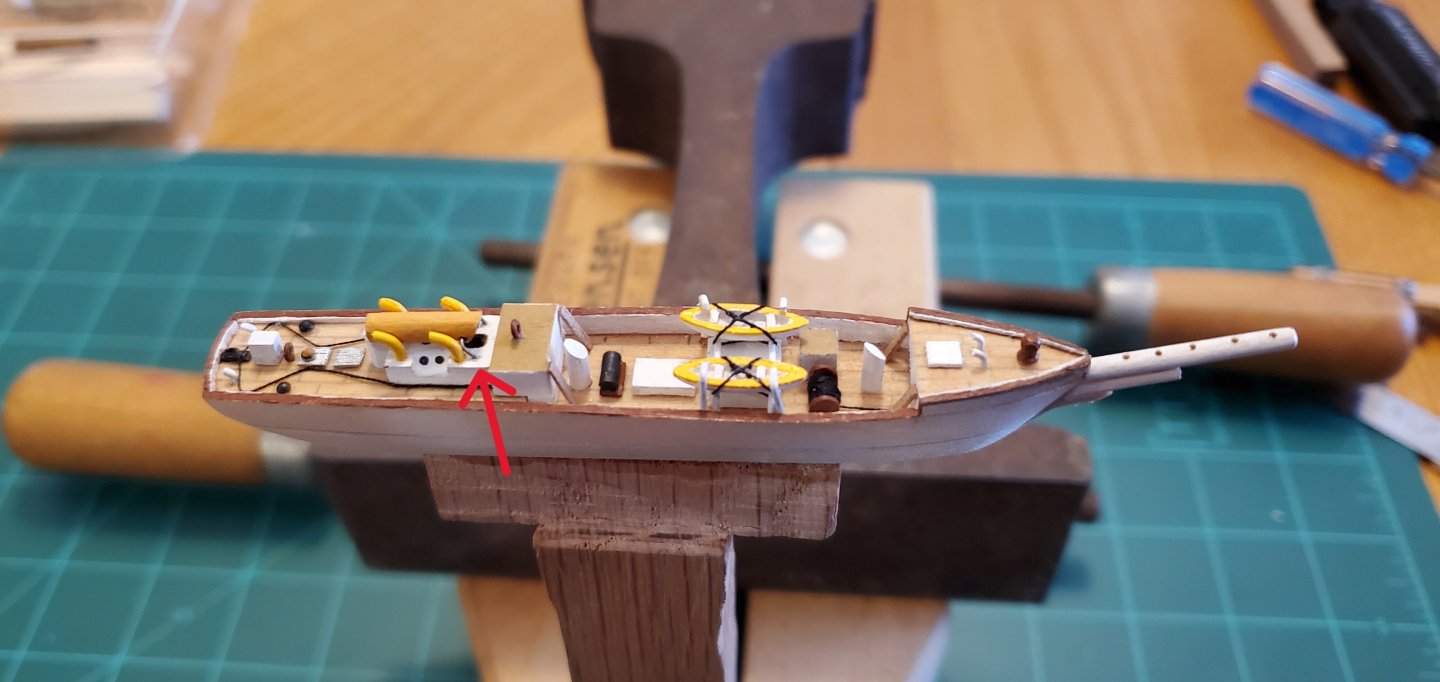
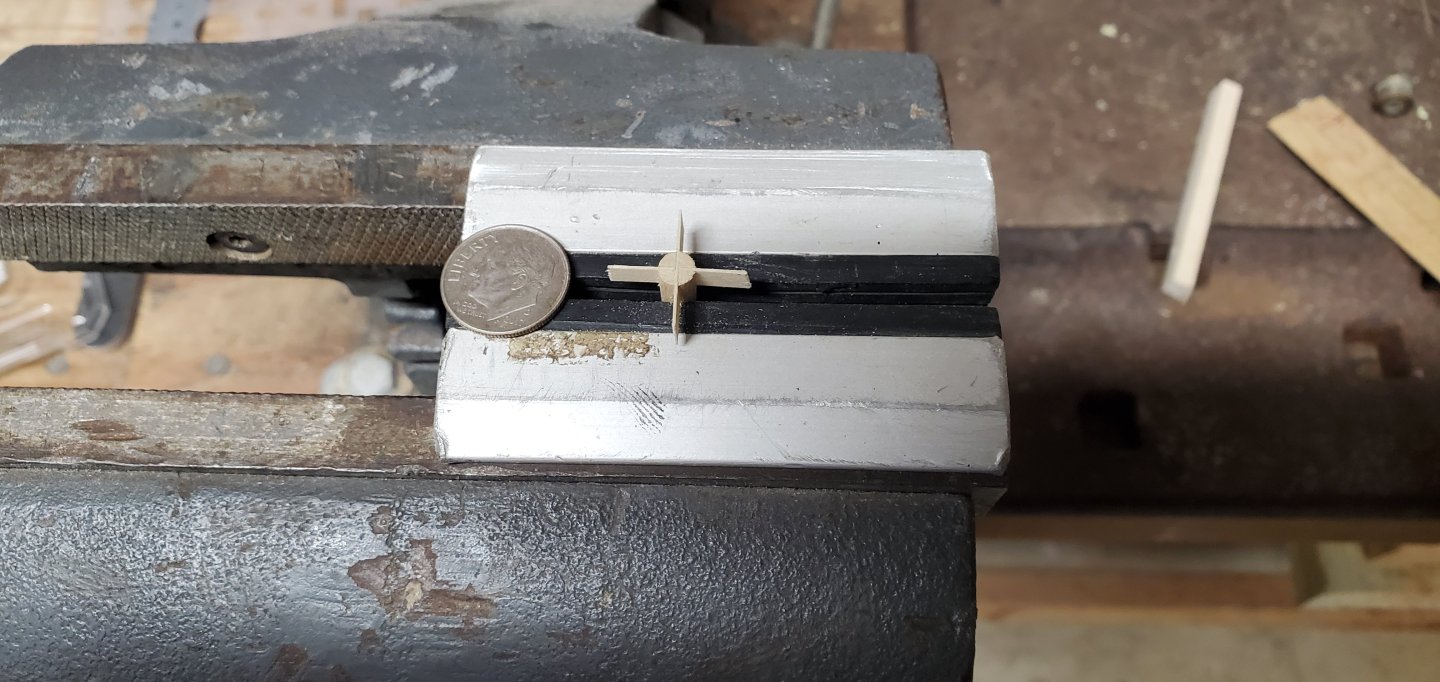
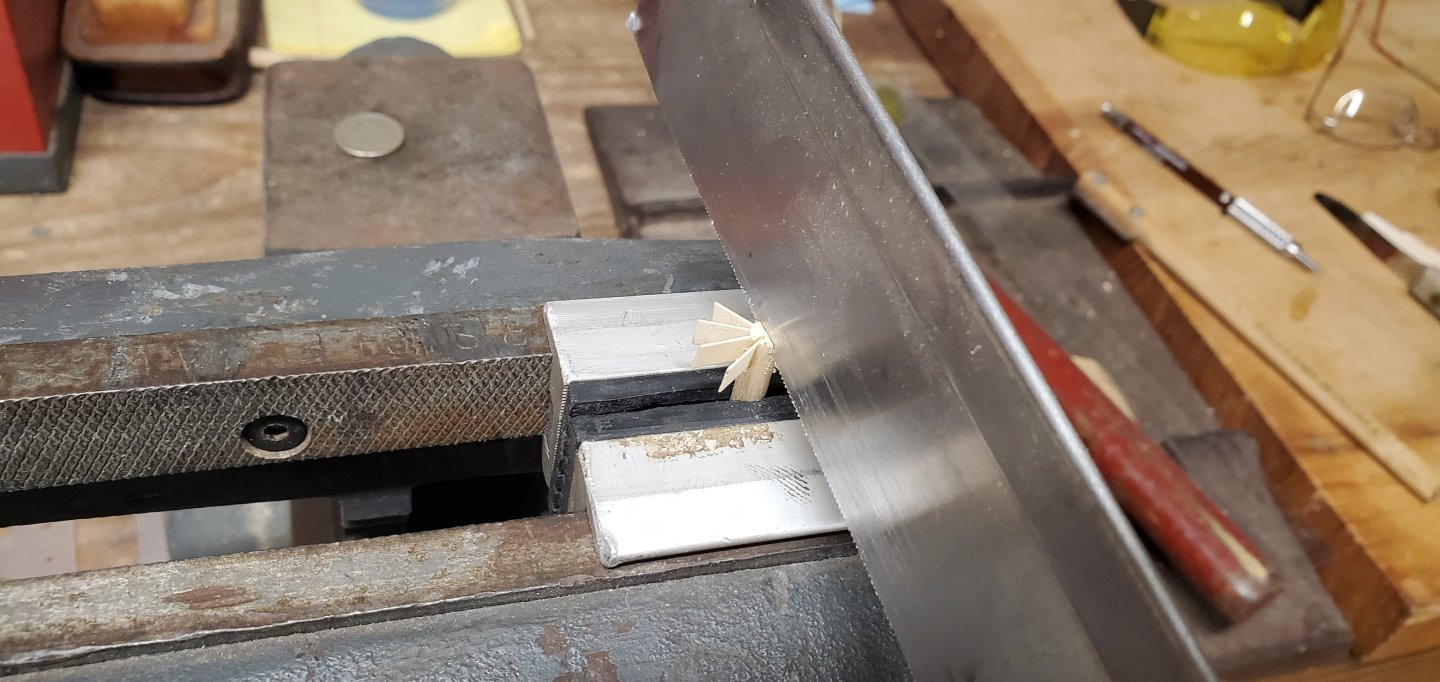
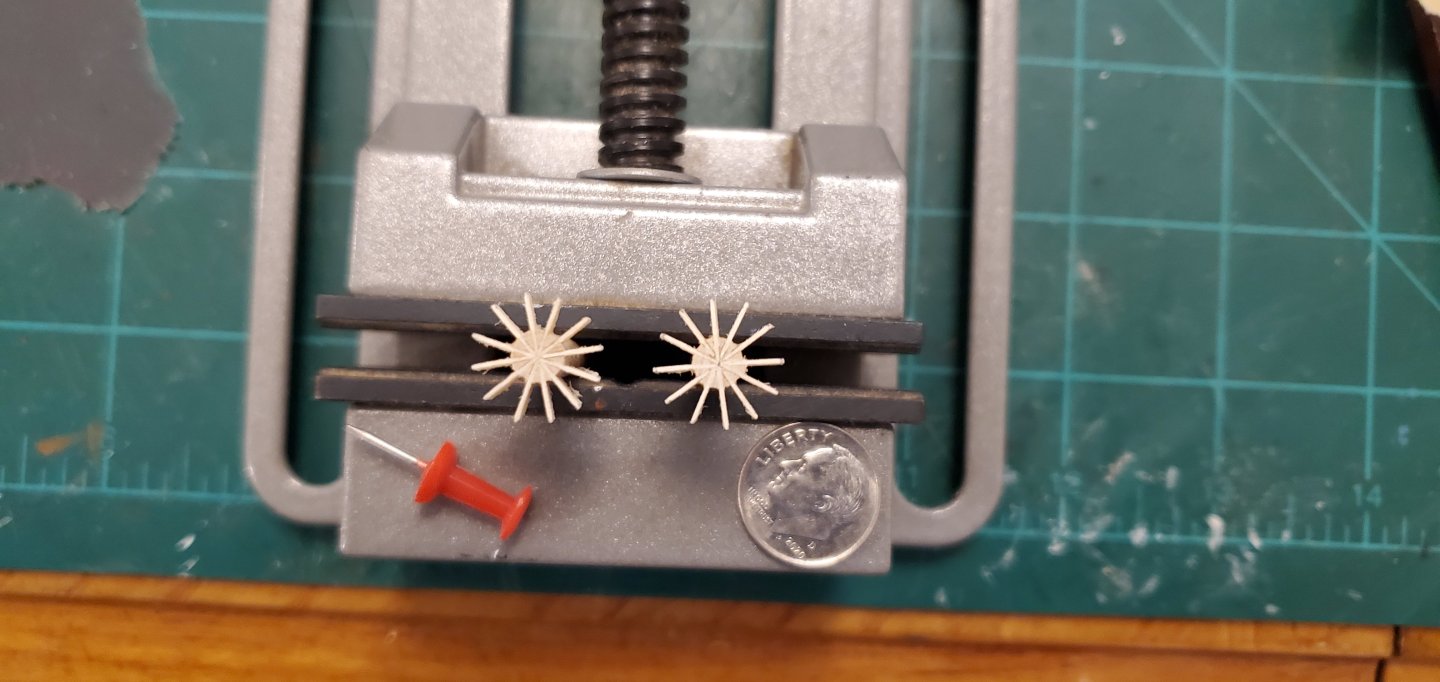
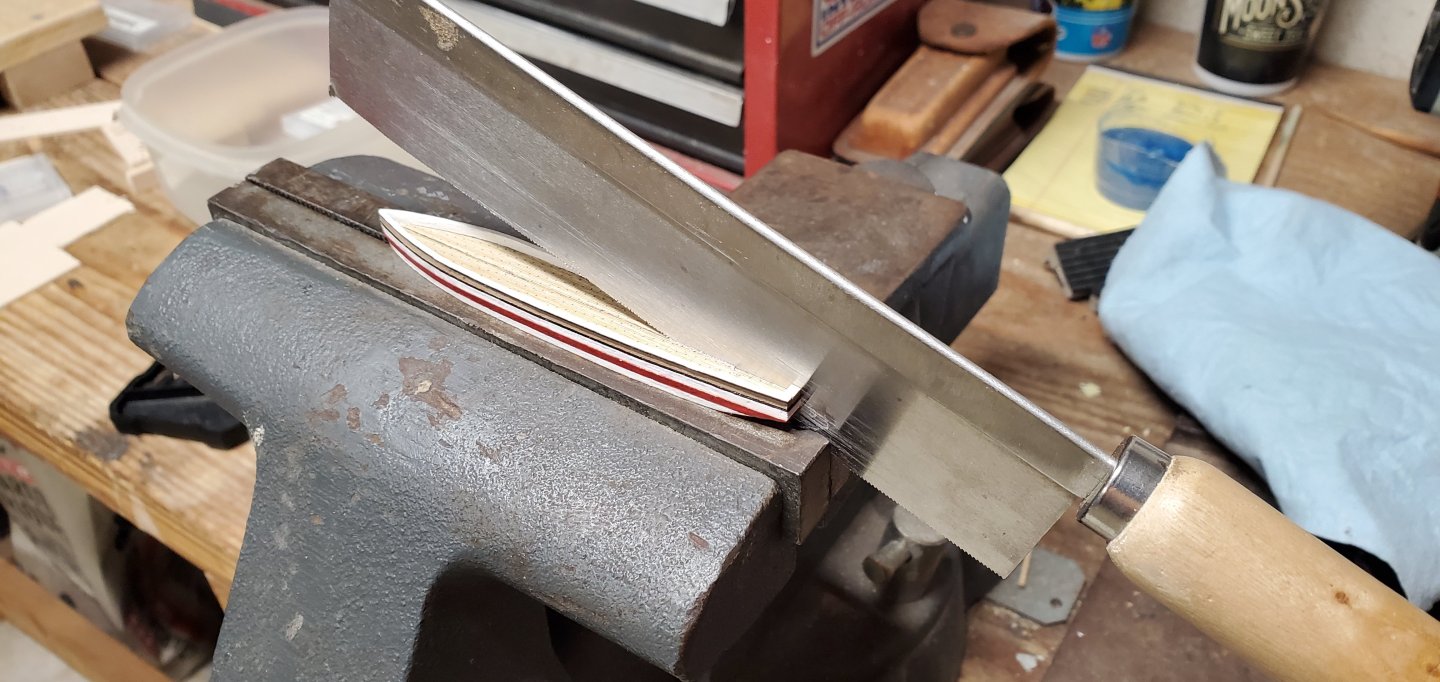
In case y'all are wondering what we're doing here in central Texas with all this winter weather... Despite all the noise outside from the terrified Texans, I managed to get a lot of work done on the paddle wheels. Actually it was a lot of work and rework and work and more rework. But I finally got a couple of paddle wheels and covers that I was satisfied with. I measured the wheel in the picture at 1/2" diameter. For that size, I chose a 3/16" dowel rod for a hub. For the paddles, I used super thin planking strips that are 1/64" thick. To make the wheels, I put the dowel in a vise and made a slit thru the middle with a fine kerf saw. fortunately, the saw makes a cut that the planking strips wedge into perfectly. Pics of the process below: I don't pay a whole lot of attention to the paddle length during the above, as I will trim them to the proper length after they are all in place. The next step is the most painstaking part of the process - making the spacers that go between the paddles. As hard as I try to get the paddles evenly spaced, there are very slight differences, which means I have to cut the spacers and trim to fit one at a time. My dark side kept telling me that I only needed to make half a wheel for each side since only half the wheel is visible below the cover. But I resisted the temptation to take the easy way out. For the covers, it was just a matter of making a number of small pieces and assembling them in place (with a few rounds of rework of course). Here's how she looks with wheels and covers in place. Still needs a bit of touch-up paint but overall I'm ok with how they turned out. Although I've still got the main cabin, funnel, and sails/rigging to deal with, I think those wheels will be the toughest part building the ship.
.png.55251309292f8a4cf0624e2be7b42cd4.png)


-
I agree with everyone above!
-
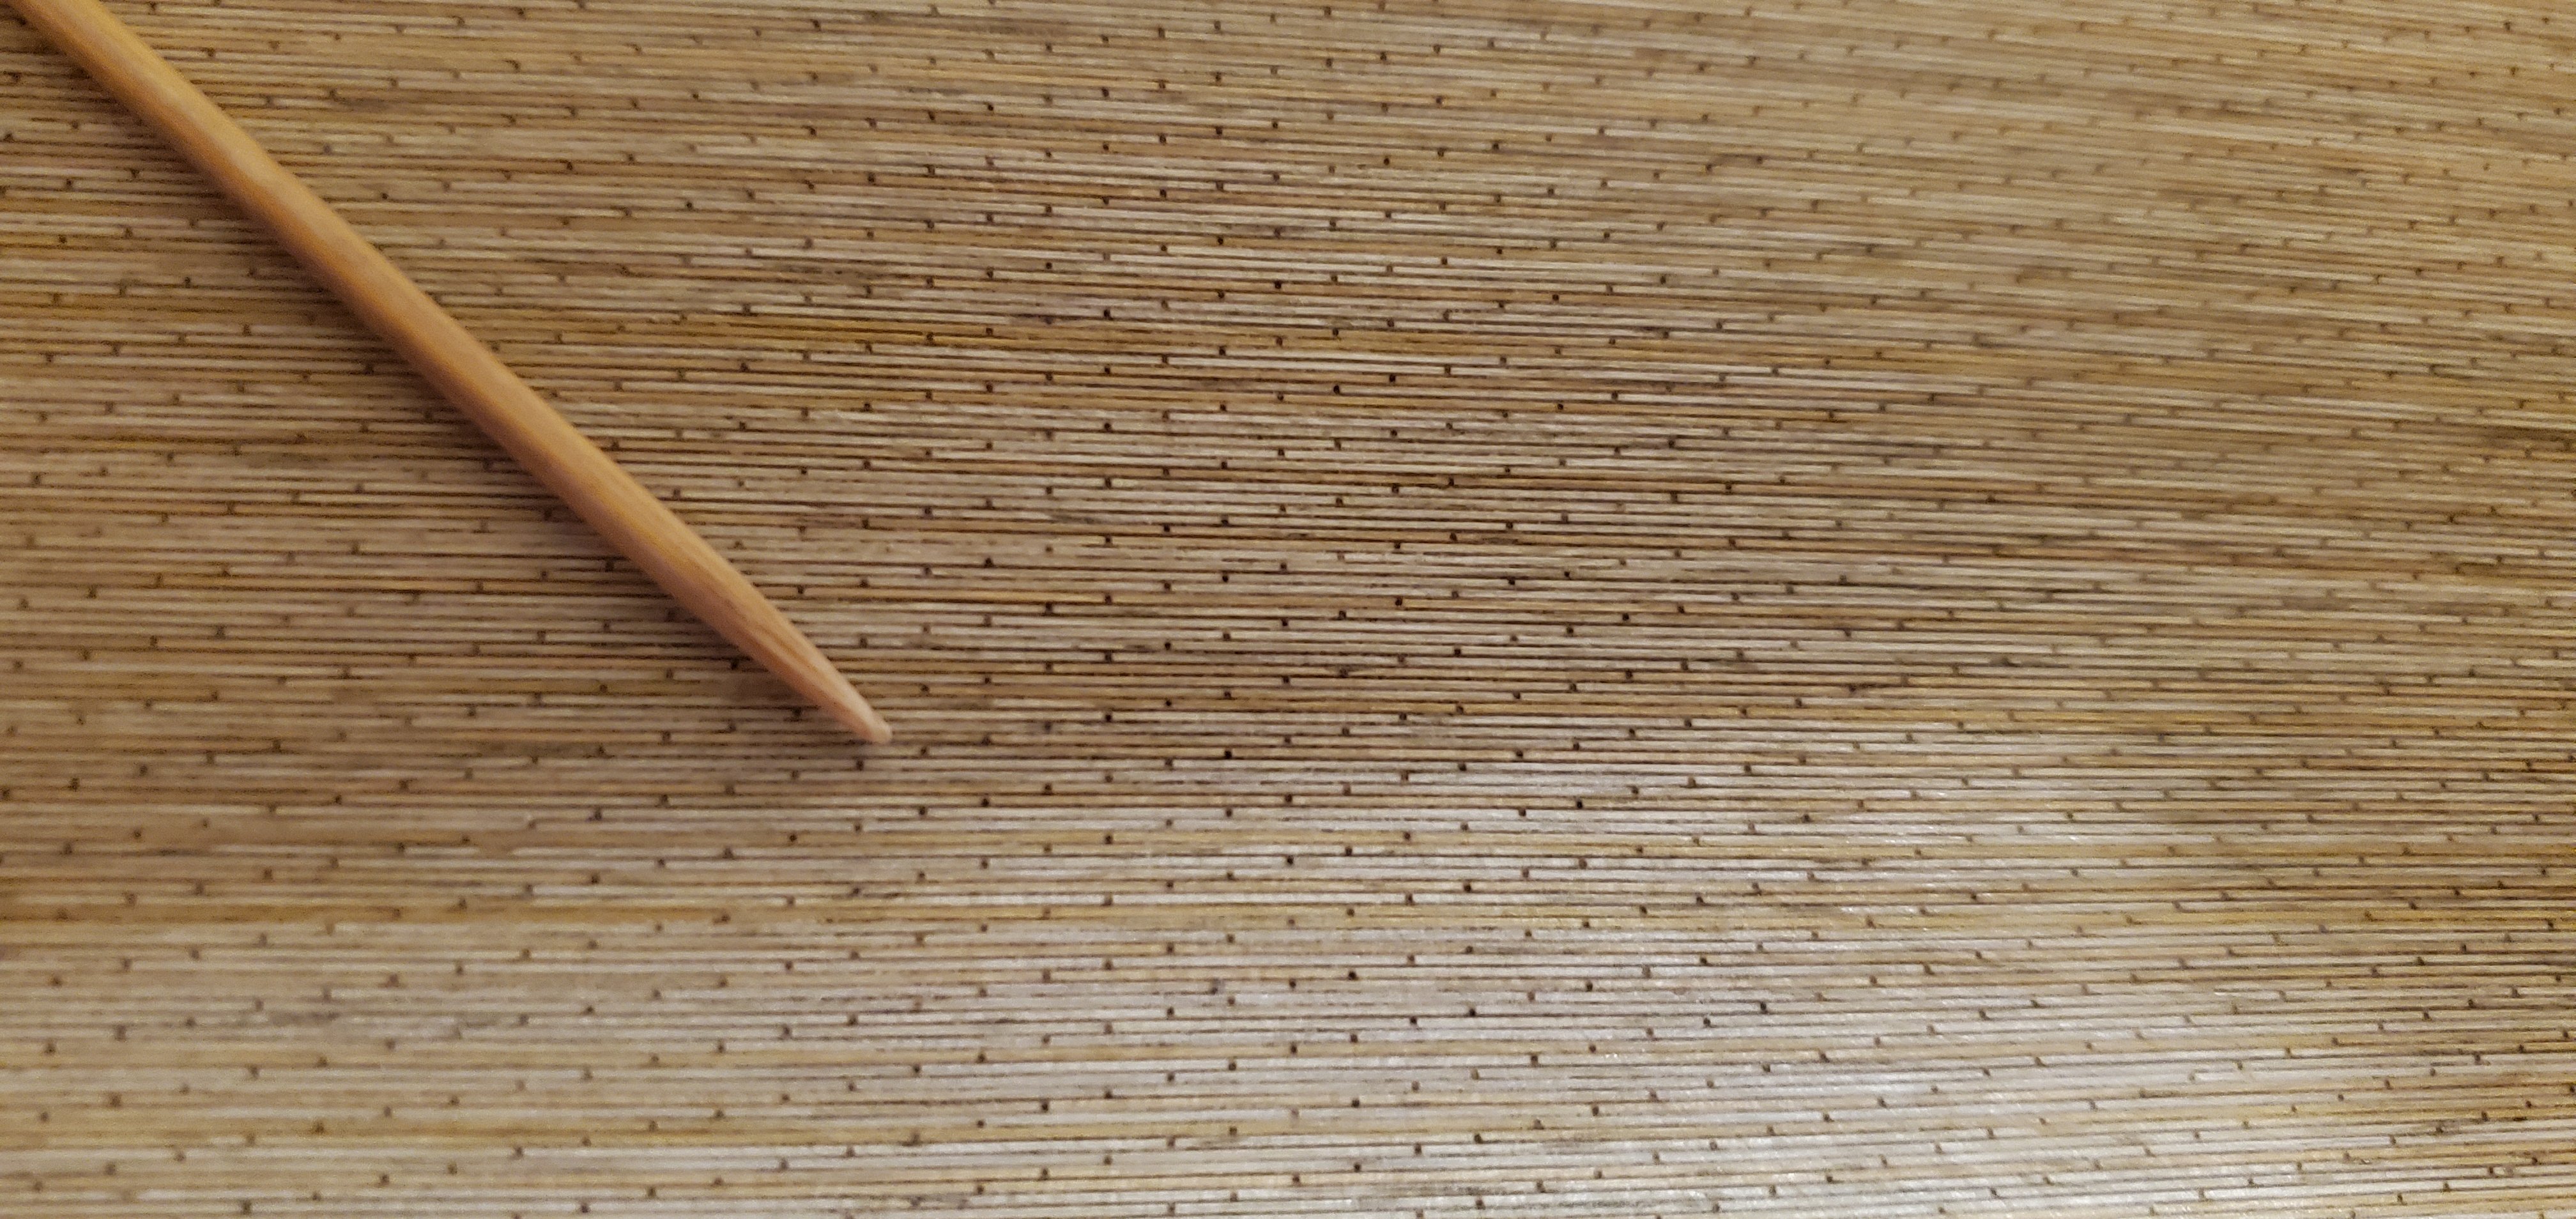
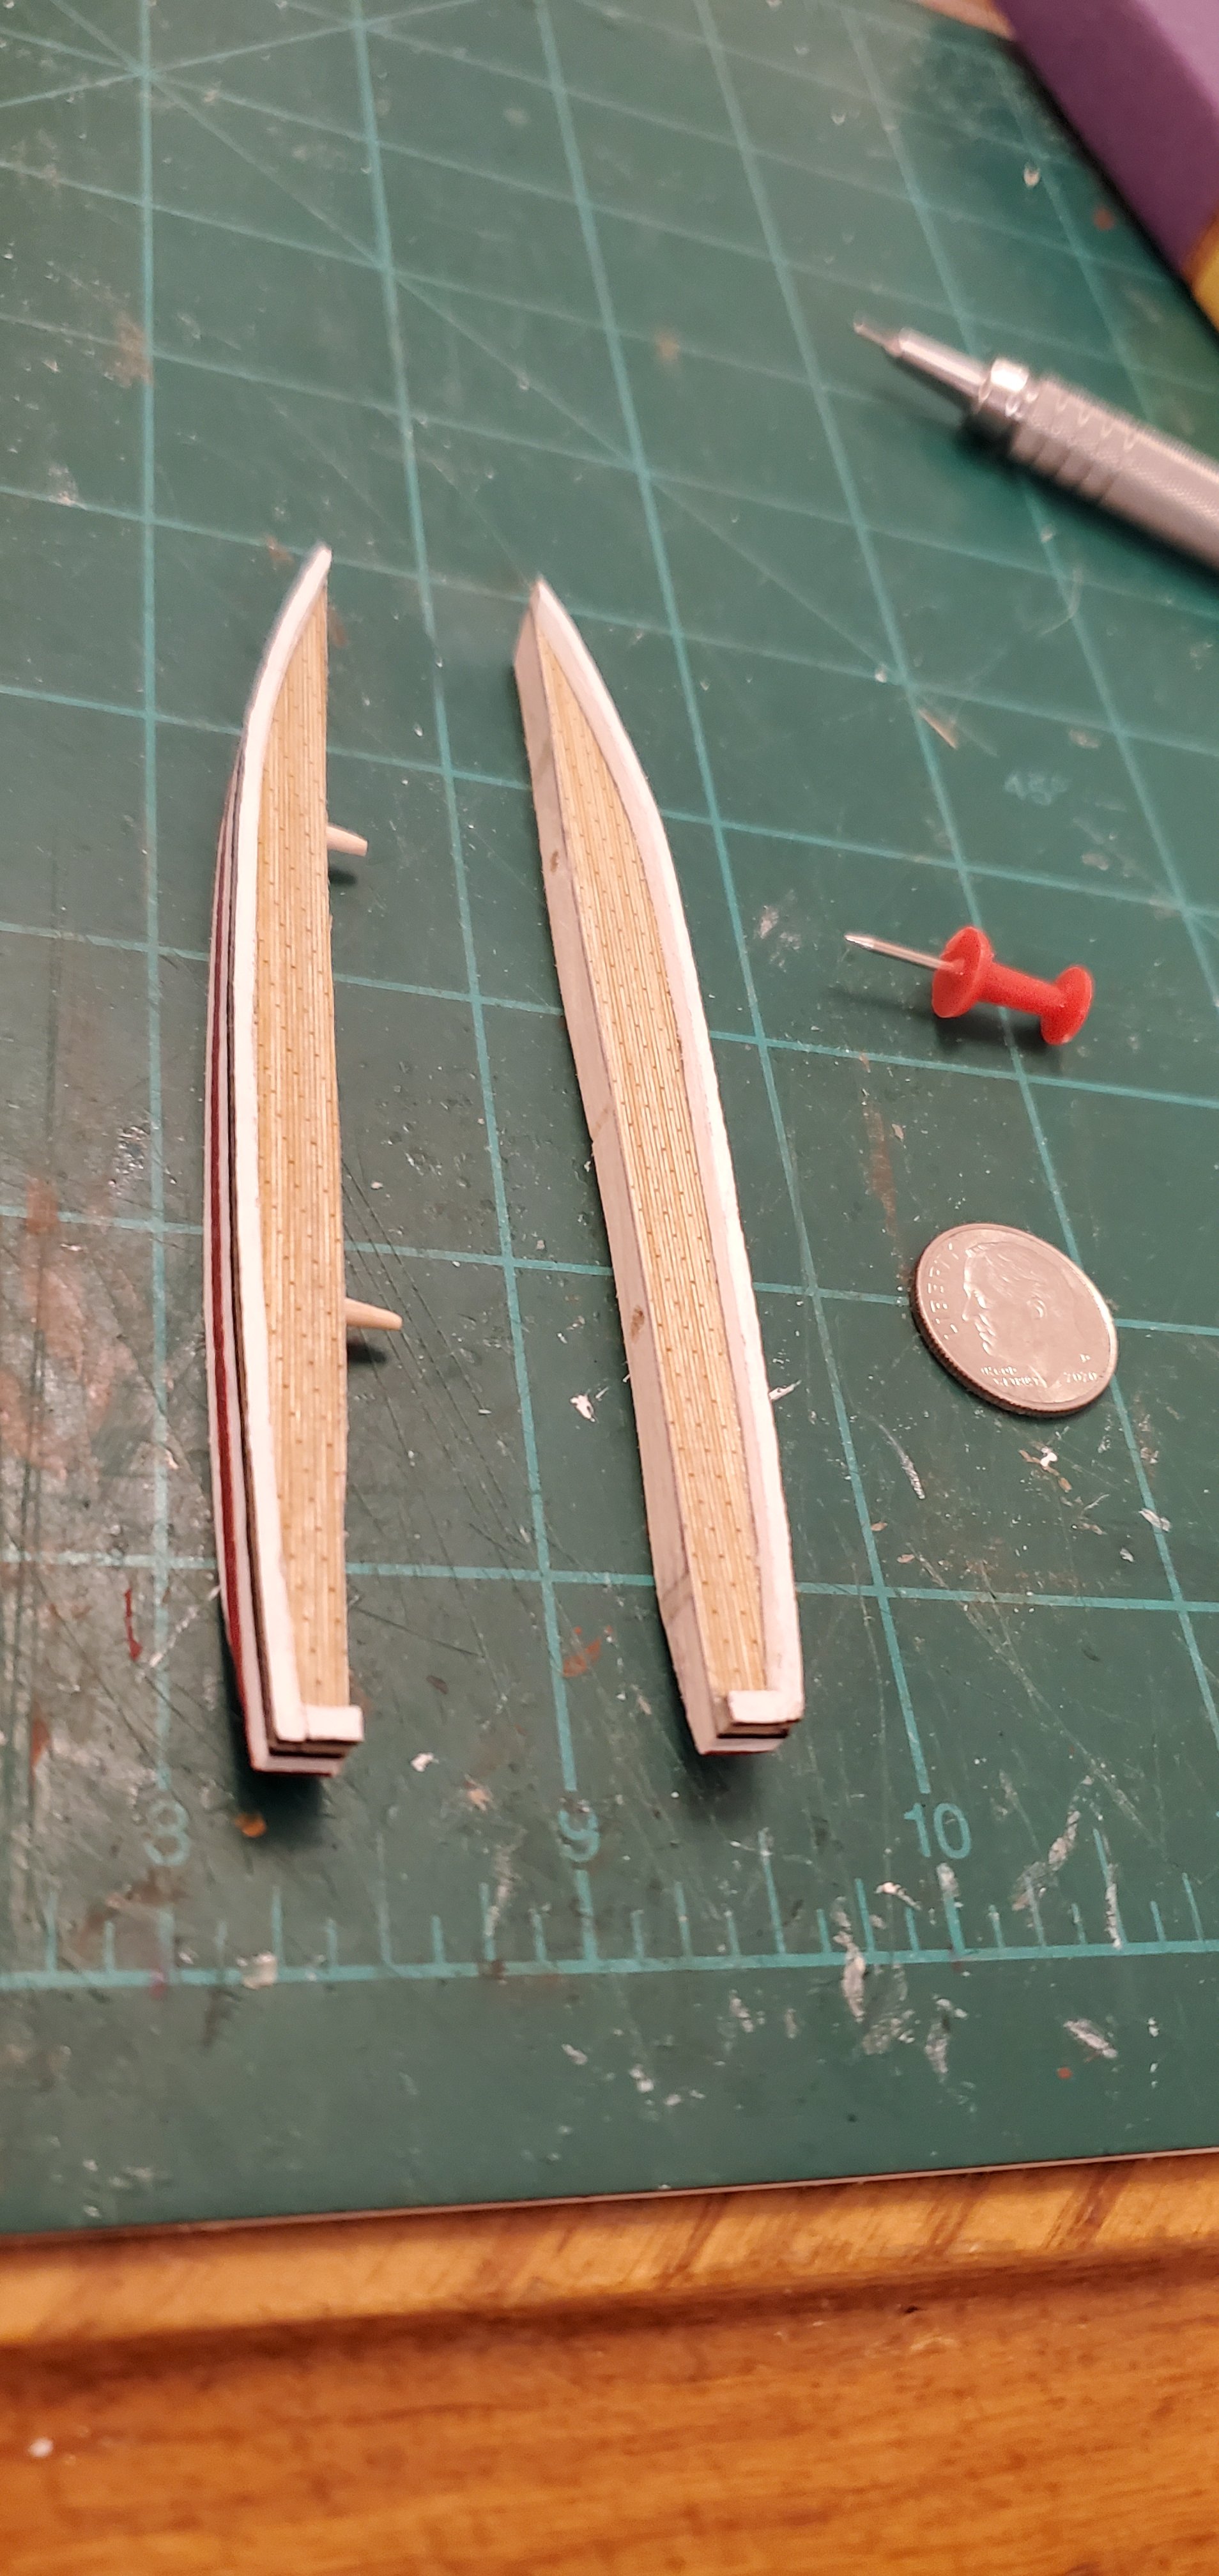
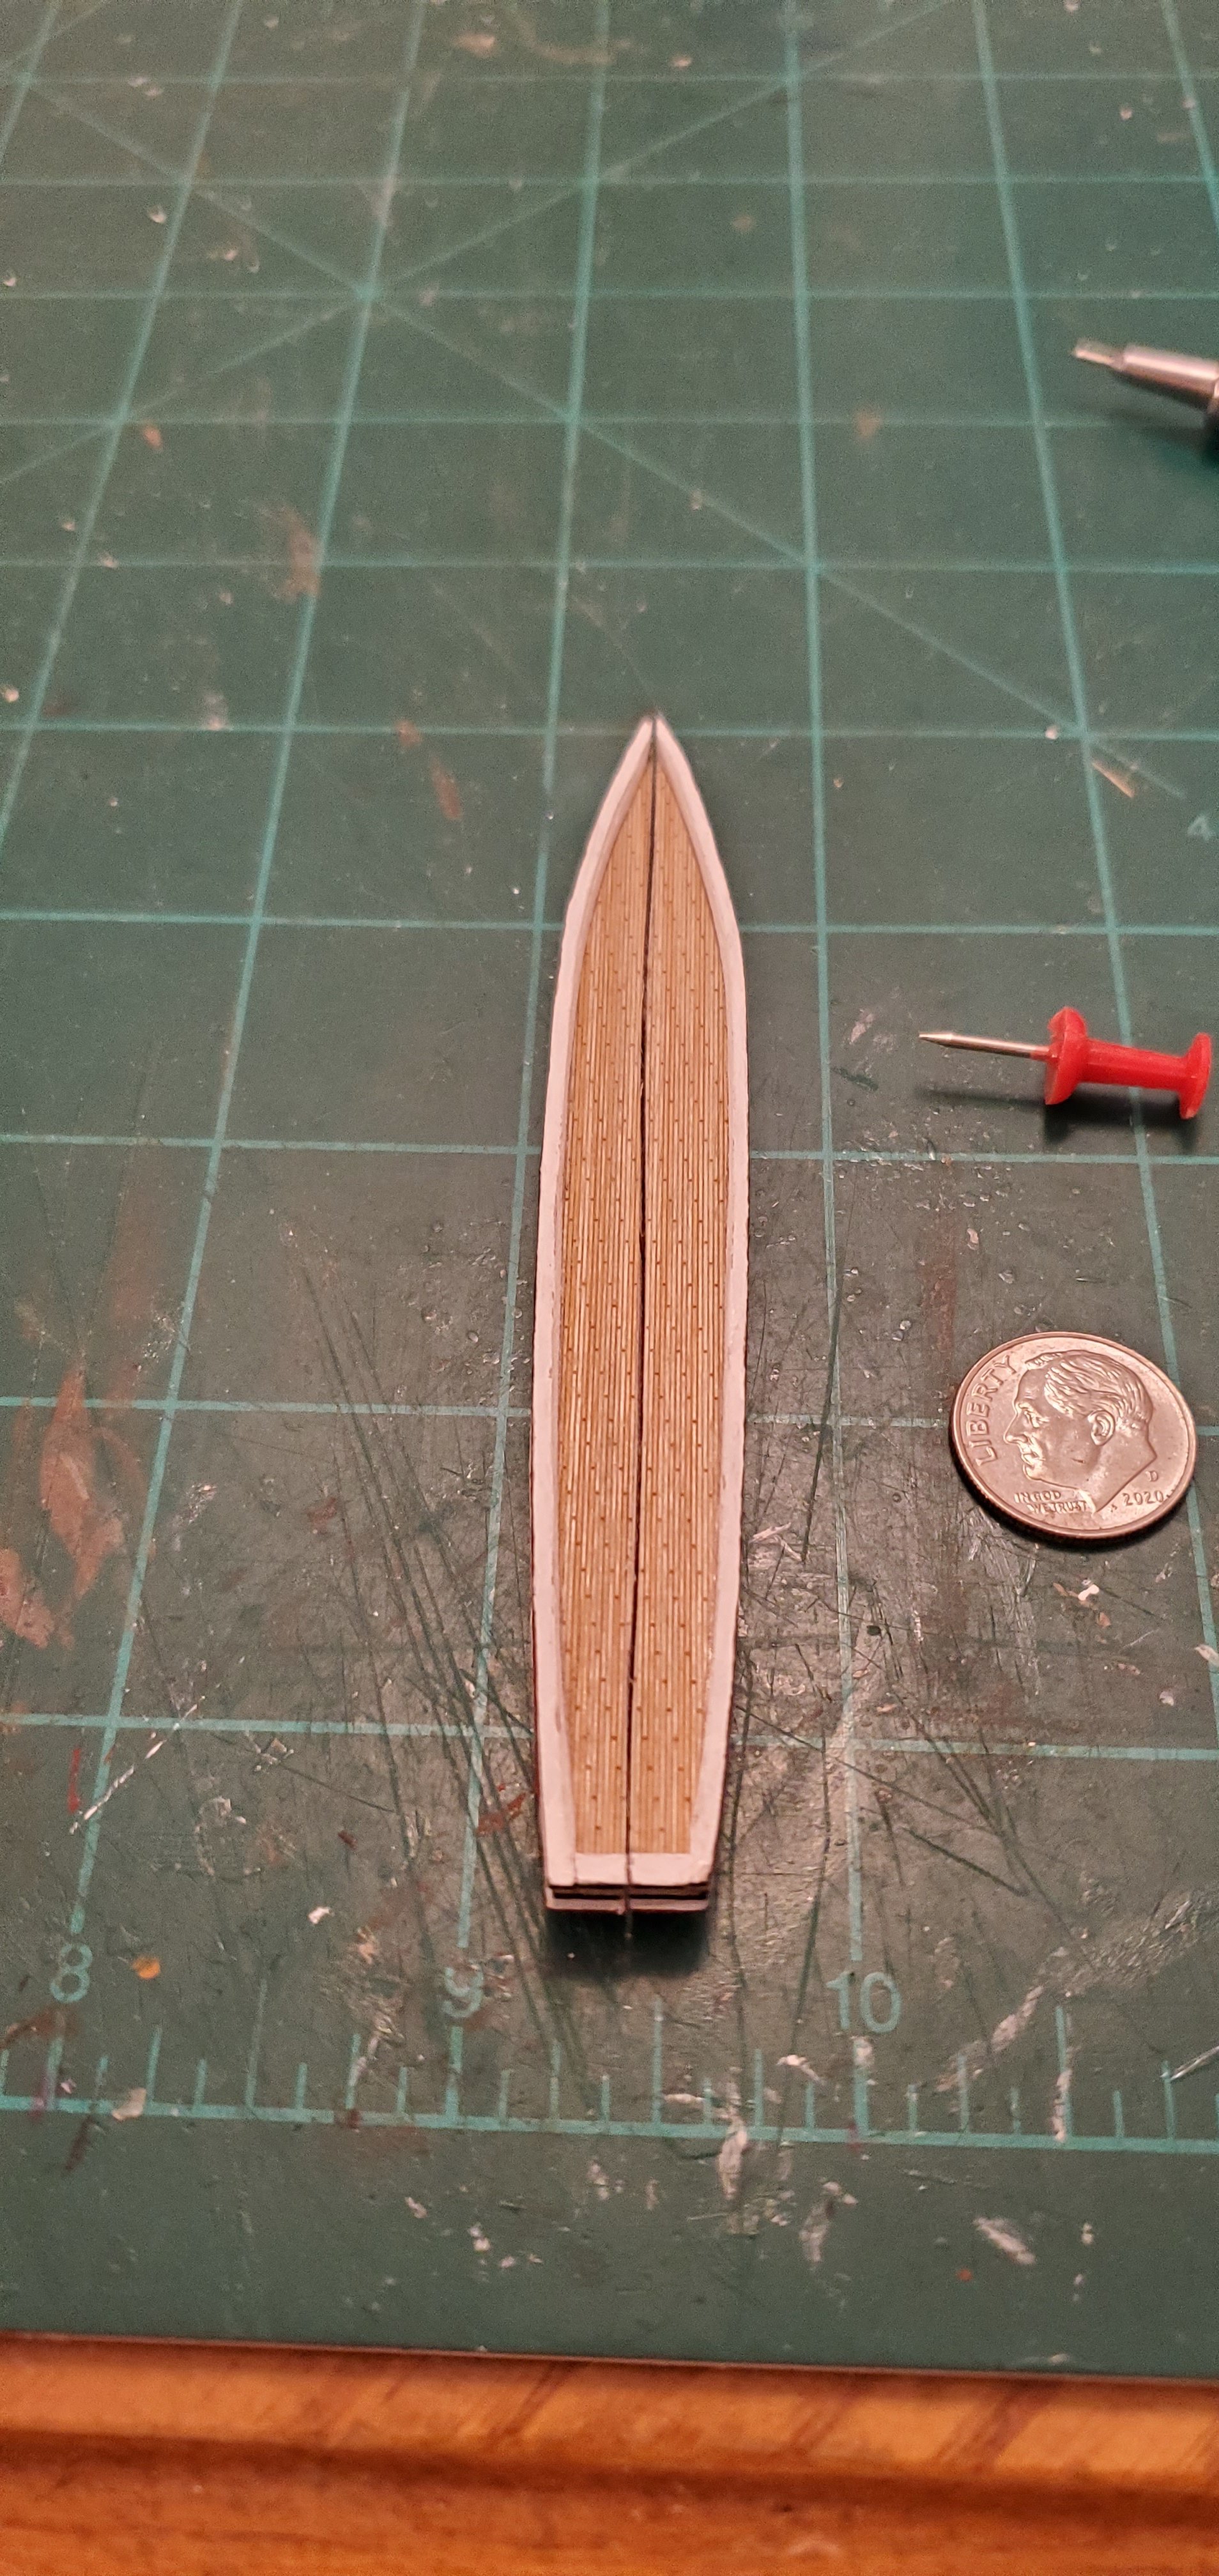
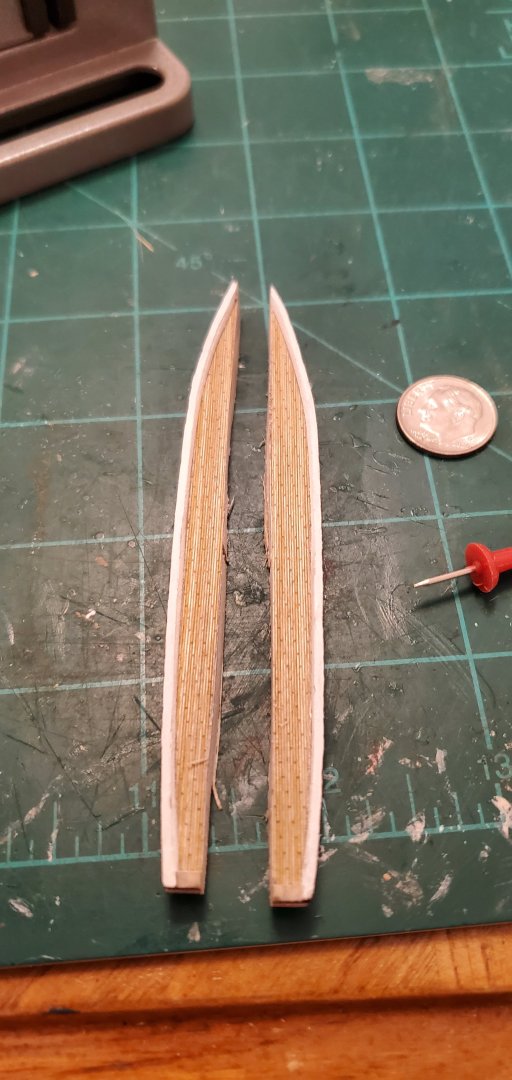
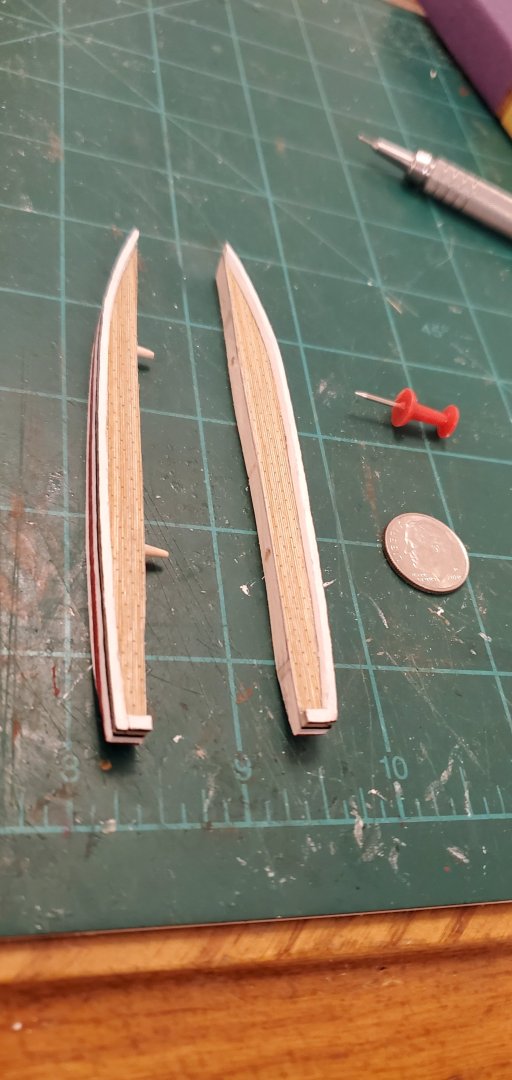
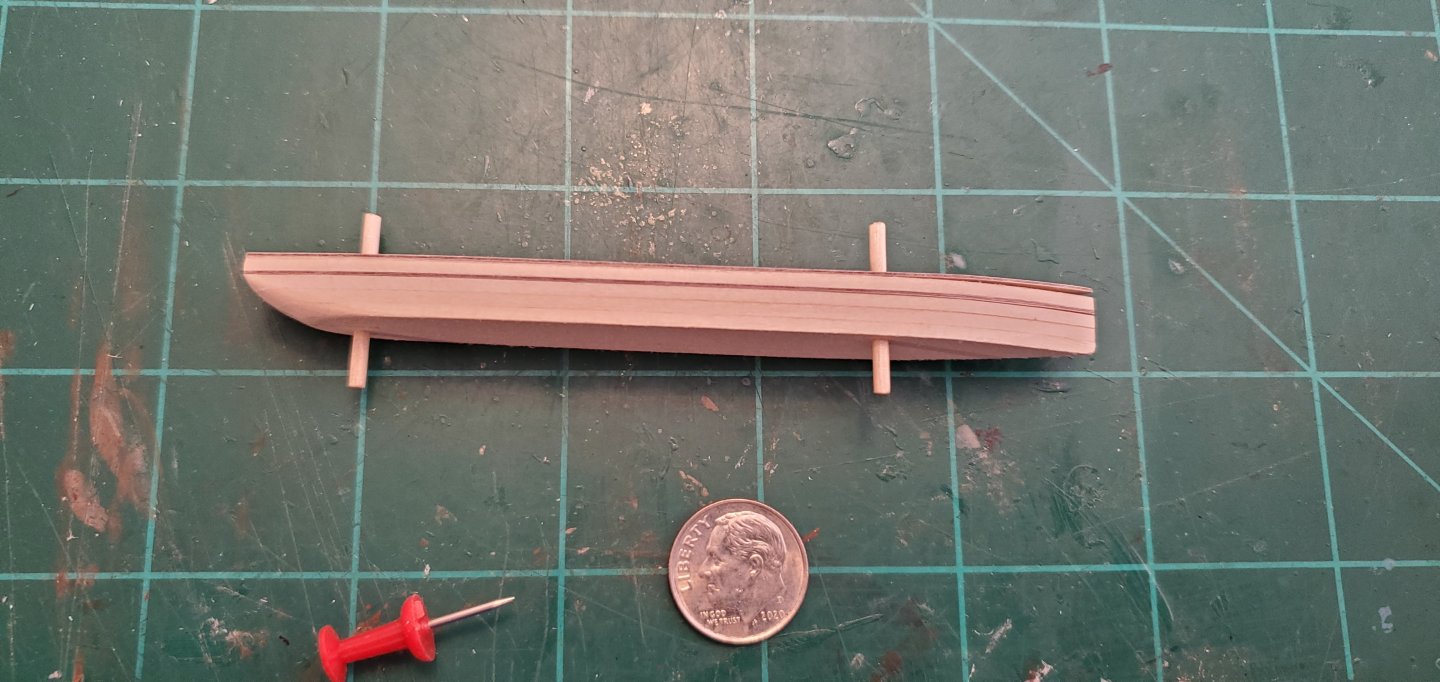
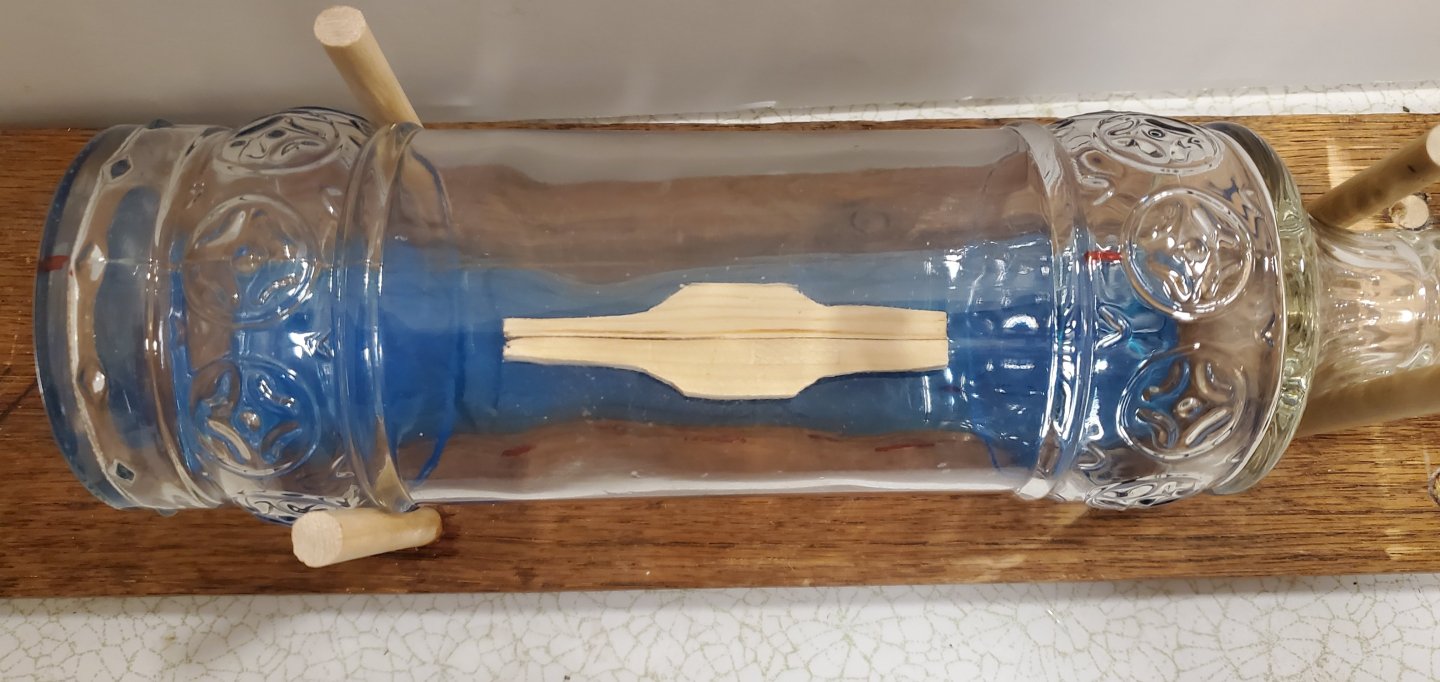
Thanks, Roel. Both the hull and the Artwox decking sheet are wood. Looking closely, I think the decking sheet is made from bamboo fibers but I'm not sure. @Landlubber Mike warned me that he'd heard reports that the adhesive backing on the deck sheet would sometimes fail after a while and the deck would peel up. He recommending using CA glue in addition to the decking's adhesive, which is what I did. Here's an up close shot of the decking material. That's the end of a toothpick for visual reference. I tried to find some Artwox decking that did not have those little holes that look like perforations but all their decking products seem to have them. But they are so small that to the naked eye they kind of blend in with everything else and are barely noticeable. Glad you made it clear that it was the "index" finger, Keith! Actually, you can continue to wag that index finger because I realized I had a very important and gut wrenching thing I needed to do before starting the wheels. And it's all because of the wheels. With those side paddles, the ship is far too wide to fit in that narrow bottle opening. Which means I have to do one of my least favorite things ever - split the hull. I've managed to do it a couple of times before, but the idea of taking my finished hull that I've spent days making and try to saw it right down the middle gives me the creeps. There's a real fear of screwing things up and having to start completely over. To make the cut, I drilled 3 holes in the bottom of the hull and glued toothpicks in place. That allowed me to anchor the hull in my workbench vise. I penciled a centerline and then took my fine kerf saw and carefully made the cut. This is a pretty long hull for me (4.25") so it took a while, but things went ok. Afterwards, I drilled holes sideways into the hull and added small, tapered dowels for guiding pins. Here's a few pics of the process: As garish as that split looks, once the ship is in the bottle, a large part of the split will be covered by the main cabin structure that runs from the stern to about 3/4 of the way to the bow. Plus, there's a forward mast that will distract from the view as well. And now with the hull safely split, I'll get started on those wheels. We're supposed to get some nasty weather/freezing rain here this weekend, so I should get to spend plenty of time in the shipyard.


-
The stairs and railings look fantastic. Well done, Nils.
- 315 replies
-
- 3
-
-
- lightship
- Feuerschiff Elbe 1
- (and 1 more)
-
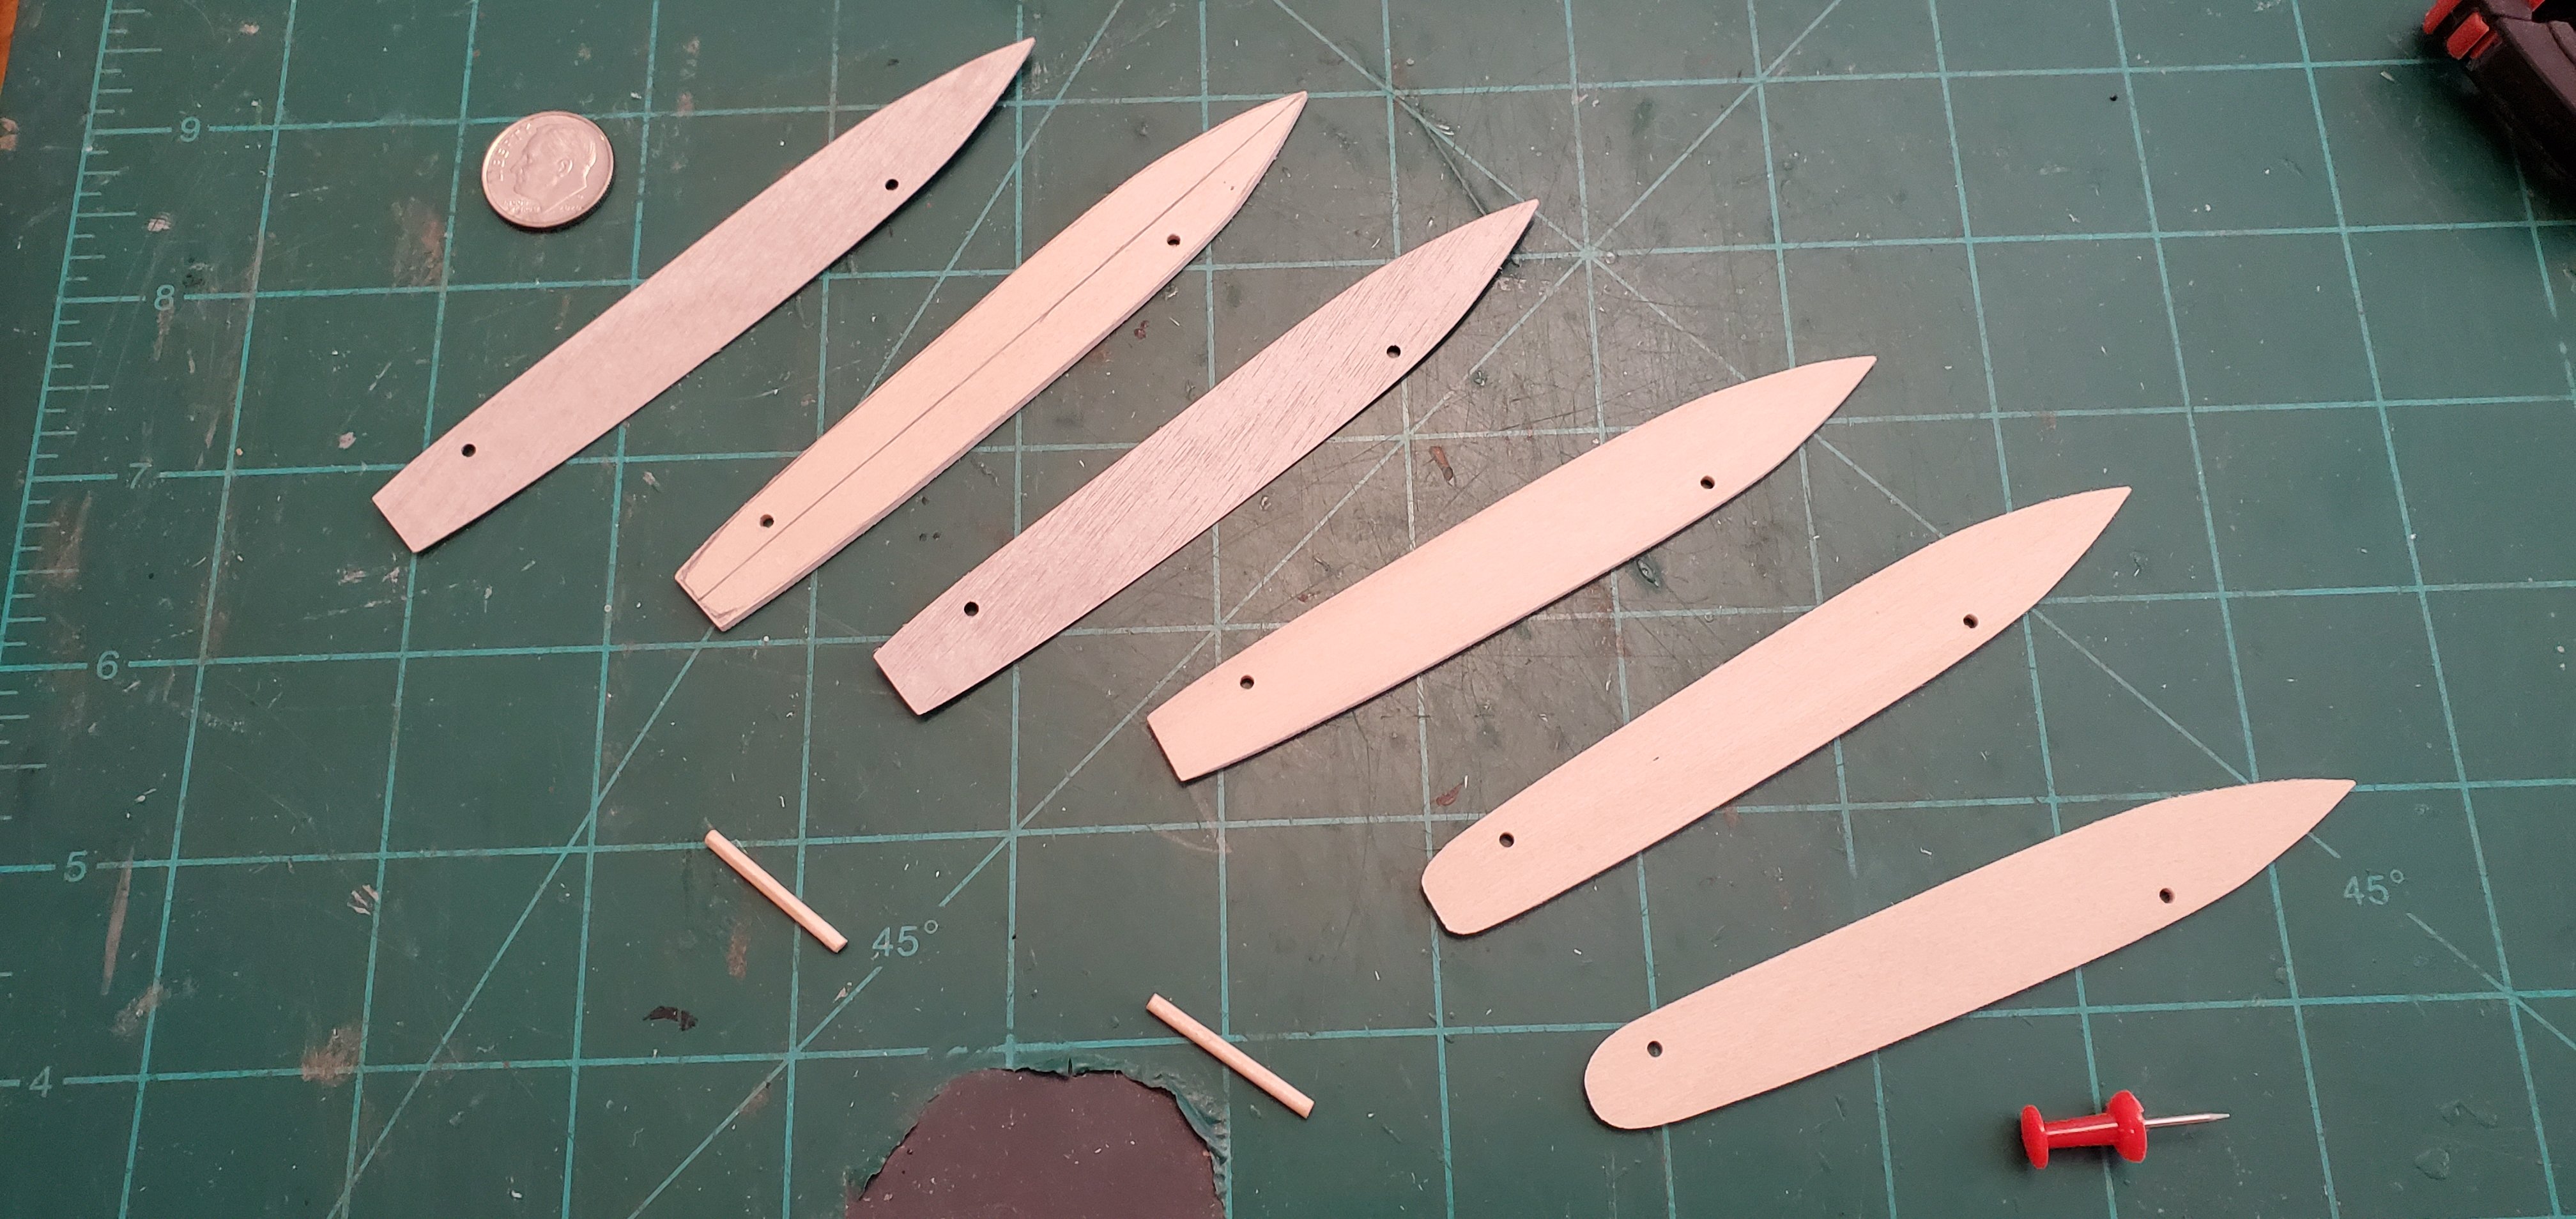
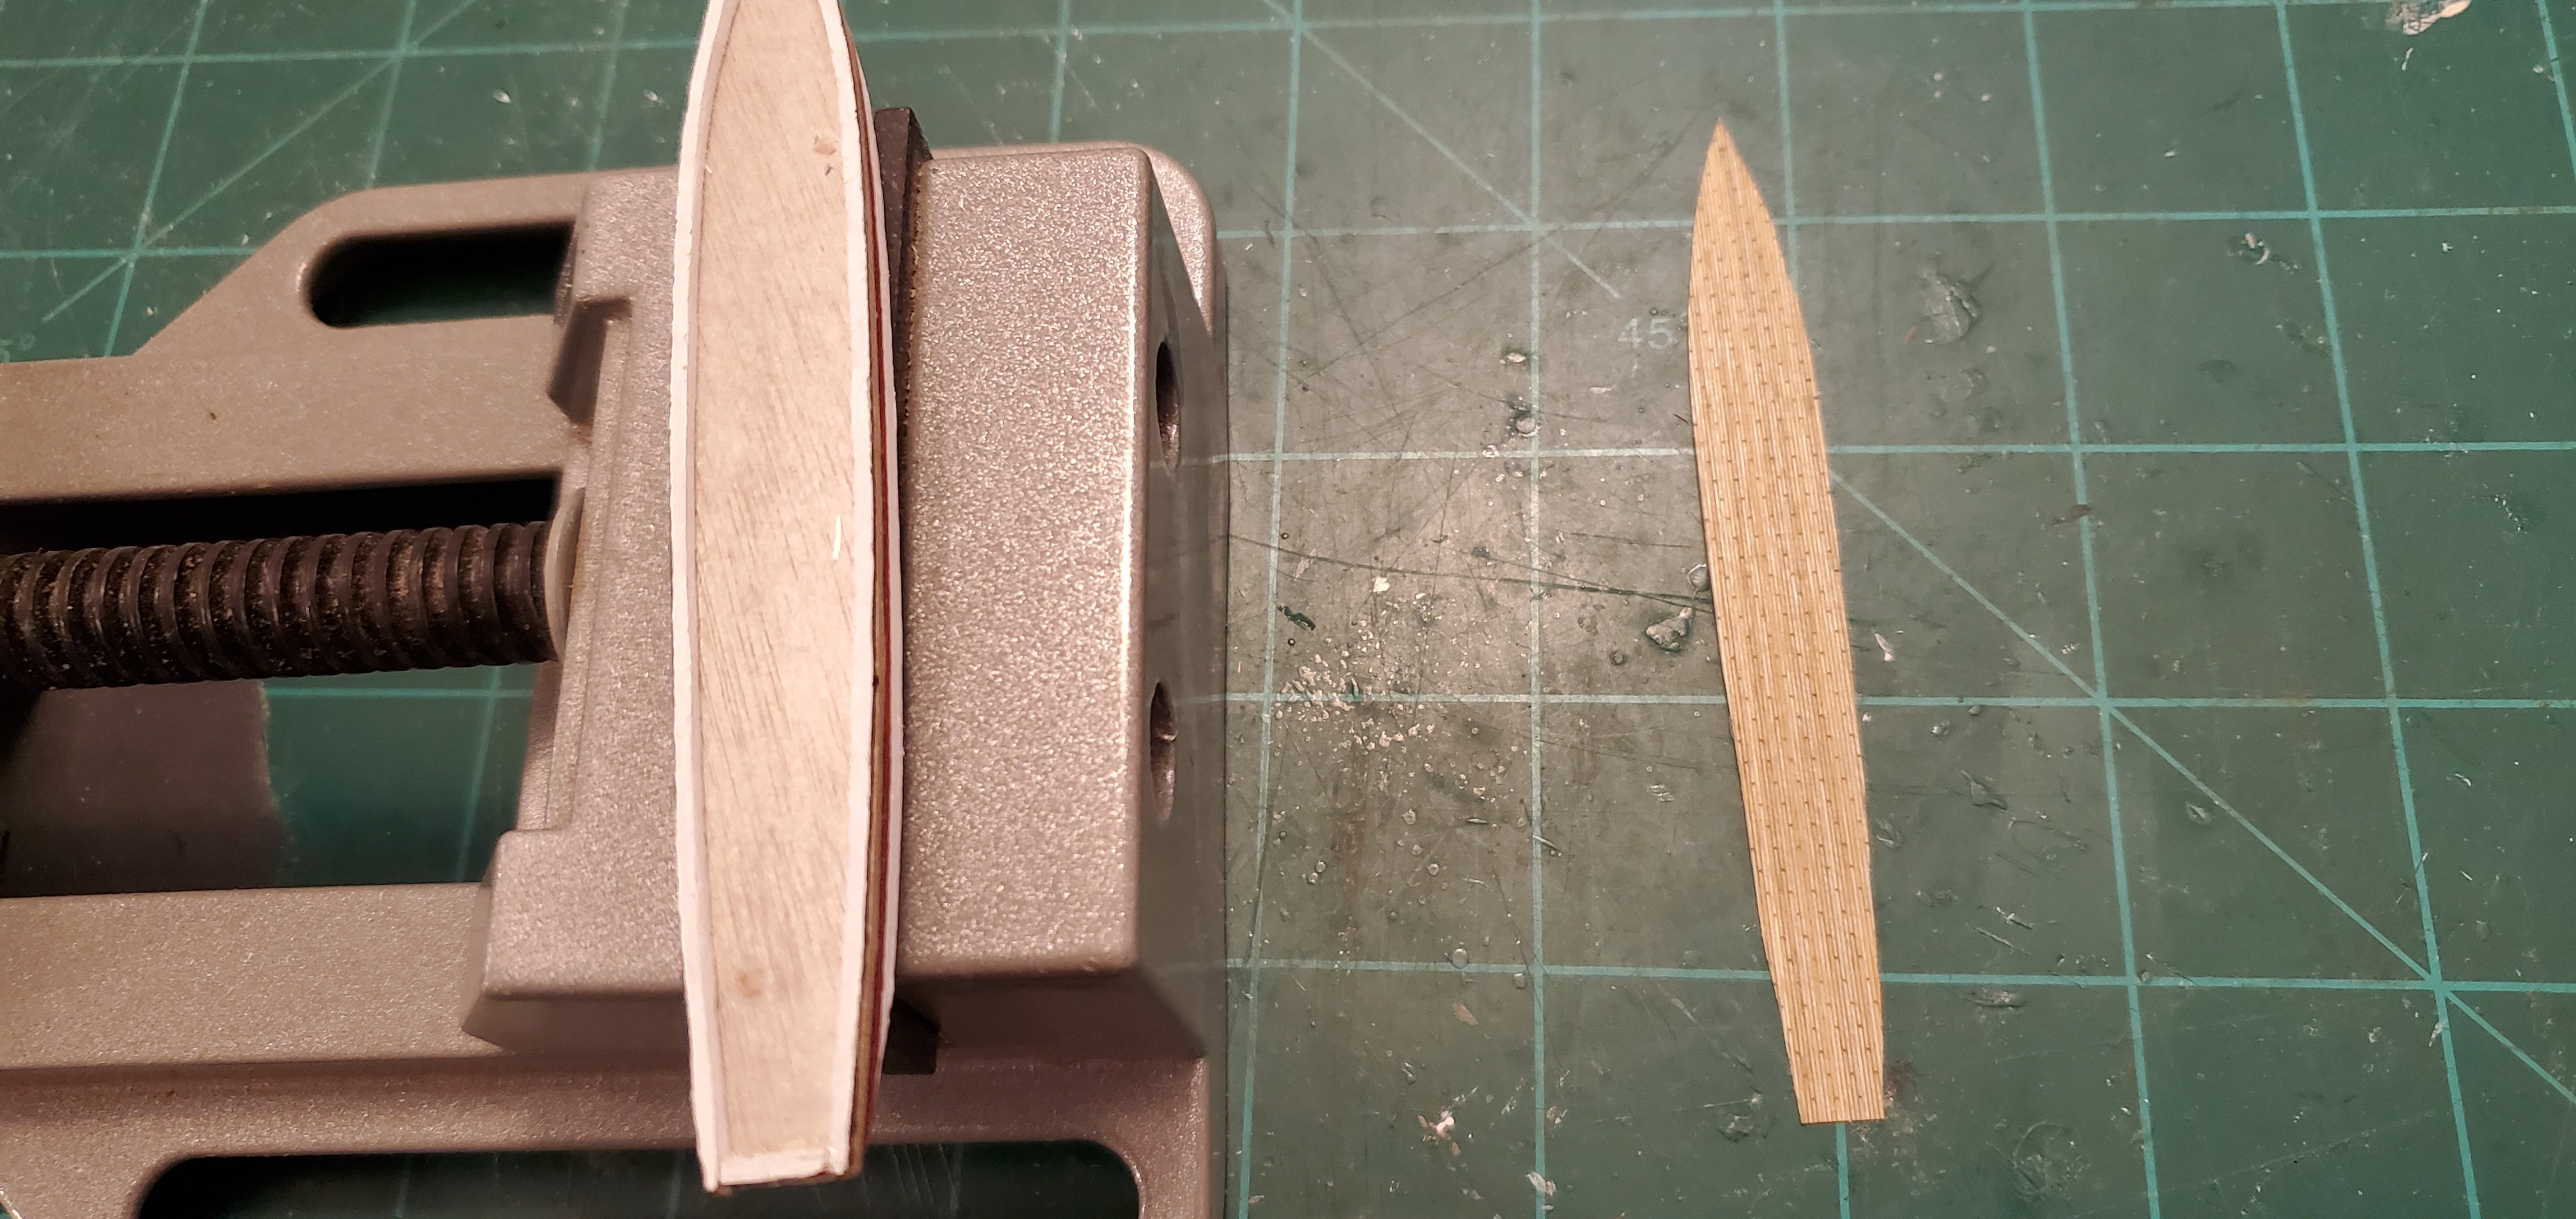
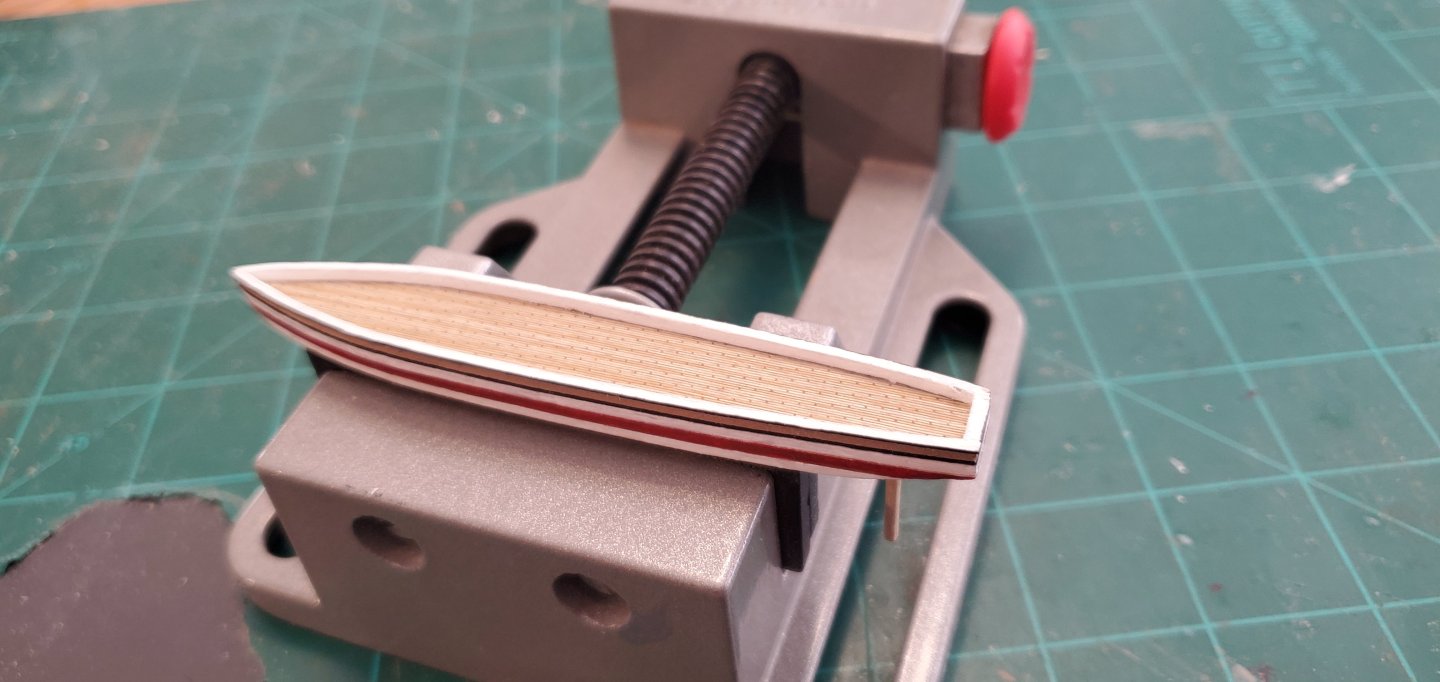
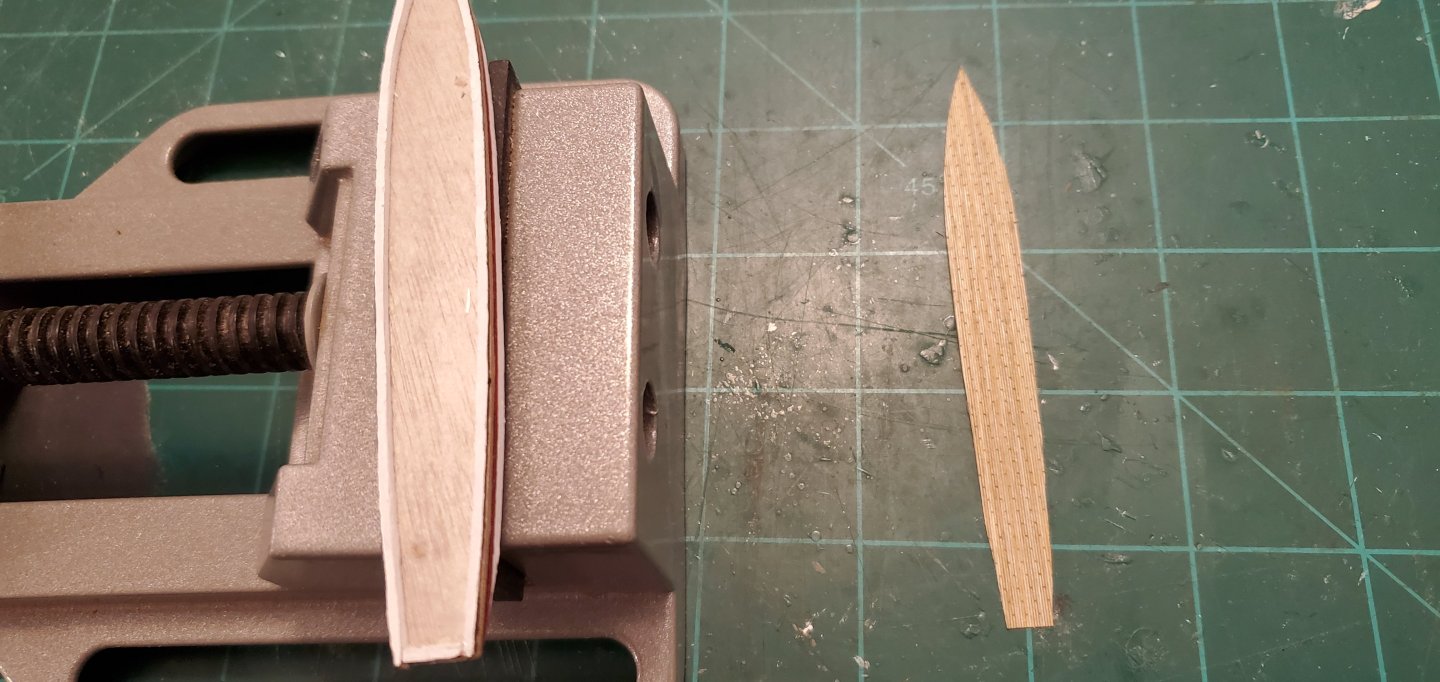
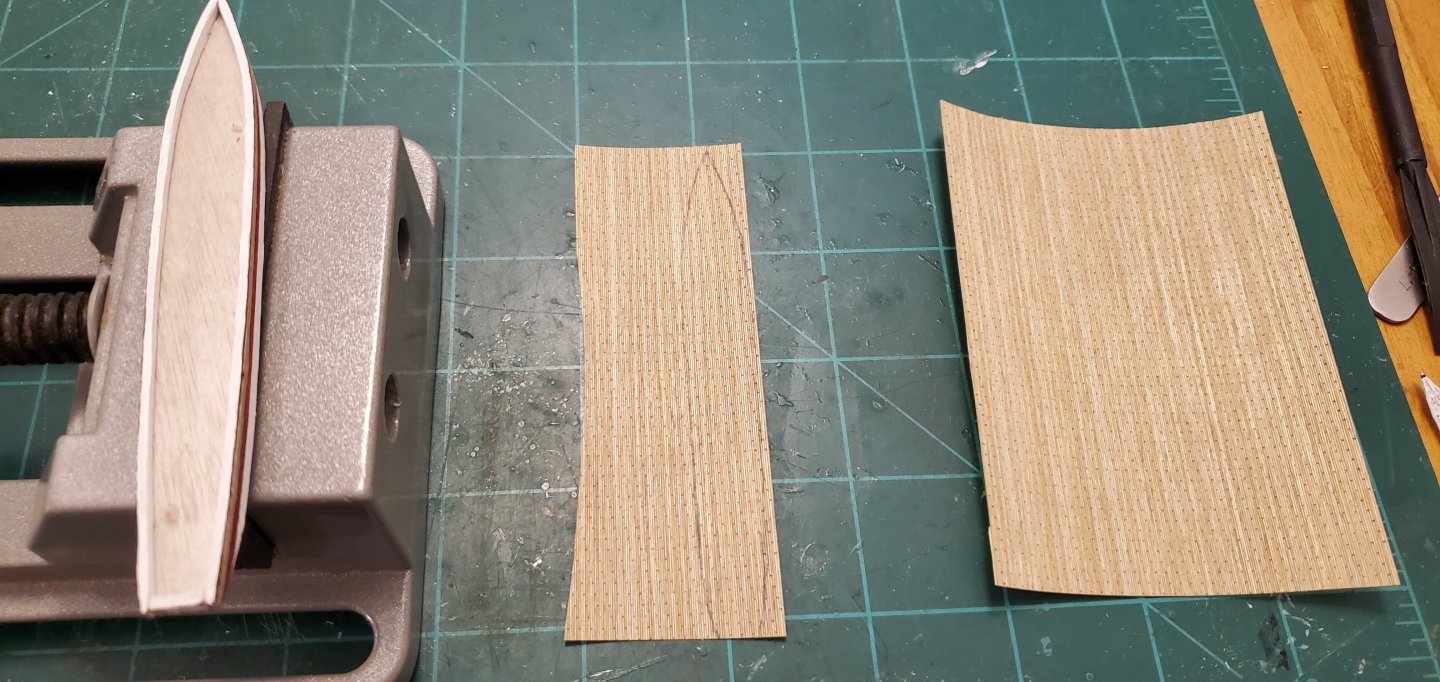
@Knocklouder - Glad to have you hop on board. Tell the first mate thanks for letting you take a break from shoveling snow to follow along! @Keith Black - Amen brother. Another battle with another bottle has indeed begun! With the dimensions of the bottle's viewing window figured out, time to actually start building the ship. From the painting, there appear to be 4 bands of different colors - white, dark, something in between, and the thin black pin stripes. Since it's kind of a sepia print, it's hard to tell exactly what the colors are. I experimented with some different options and found a color scheme I liked - From bottom to top - white, dark red, white, black pinstripe, khaki tan, black pinstripe. If you've followed my other builds, you know I like to do laminated hulls. On a hull like this where there are different color bands, it is particularly advantageous for painting. I use wood that matches the thickness I need for each color band and shape the hull. Then I simply paint the sides and glue the layers together. It is so much easier for me than trying to pinstripe clean lines on a rounded surface. In this case, the white, dark red, and khaki layers are 1/16" thick basswood. The black pinstripe layers are 1/64" thick plywood that @Keith Black turned me on to a while back. Thank you, Keith! Here are shots of the hull in progress: The last shot also shows the decking in place. The decking is another great tip I got from @Landlubber Mike. Mike has given me more fantastic tips on unique modeling supplies than I can begin to count. This one is from his amazing Seishi Maru 1/700 build. If you have not seen it, I would highly recommend checking it out here: https://modelshipworld.com/topic/39201-seishu-maru-by-landlubber-mike-five-star-1700-resin-and-pe-ija-crane-ship/#comment-1129840 The decking is from Artwox. It has a great color, super fine lines, and and is ultra thin. I measure it at 1/128" with the plastic adhesive backing in place. I love the look and it is very easy to work with as long as you remove the plastic adhesive backing before trying to stick it in place. Don't ask me how I know that. 🙄 Always a relief to get the hull shaped, bulwarks in place, and decking done. I think I will go ahead and tackle the sidewheels next.

-
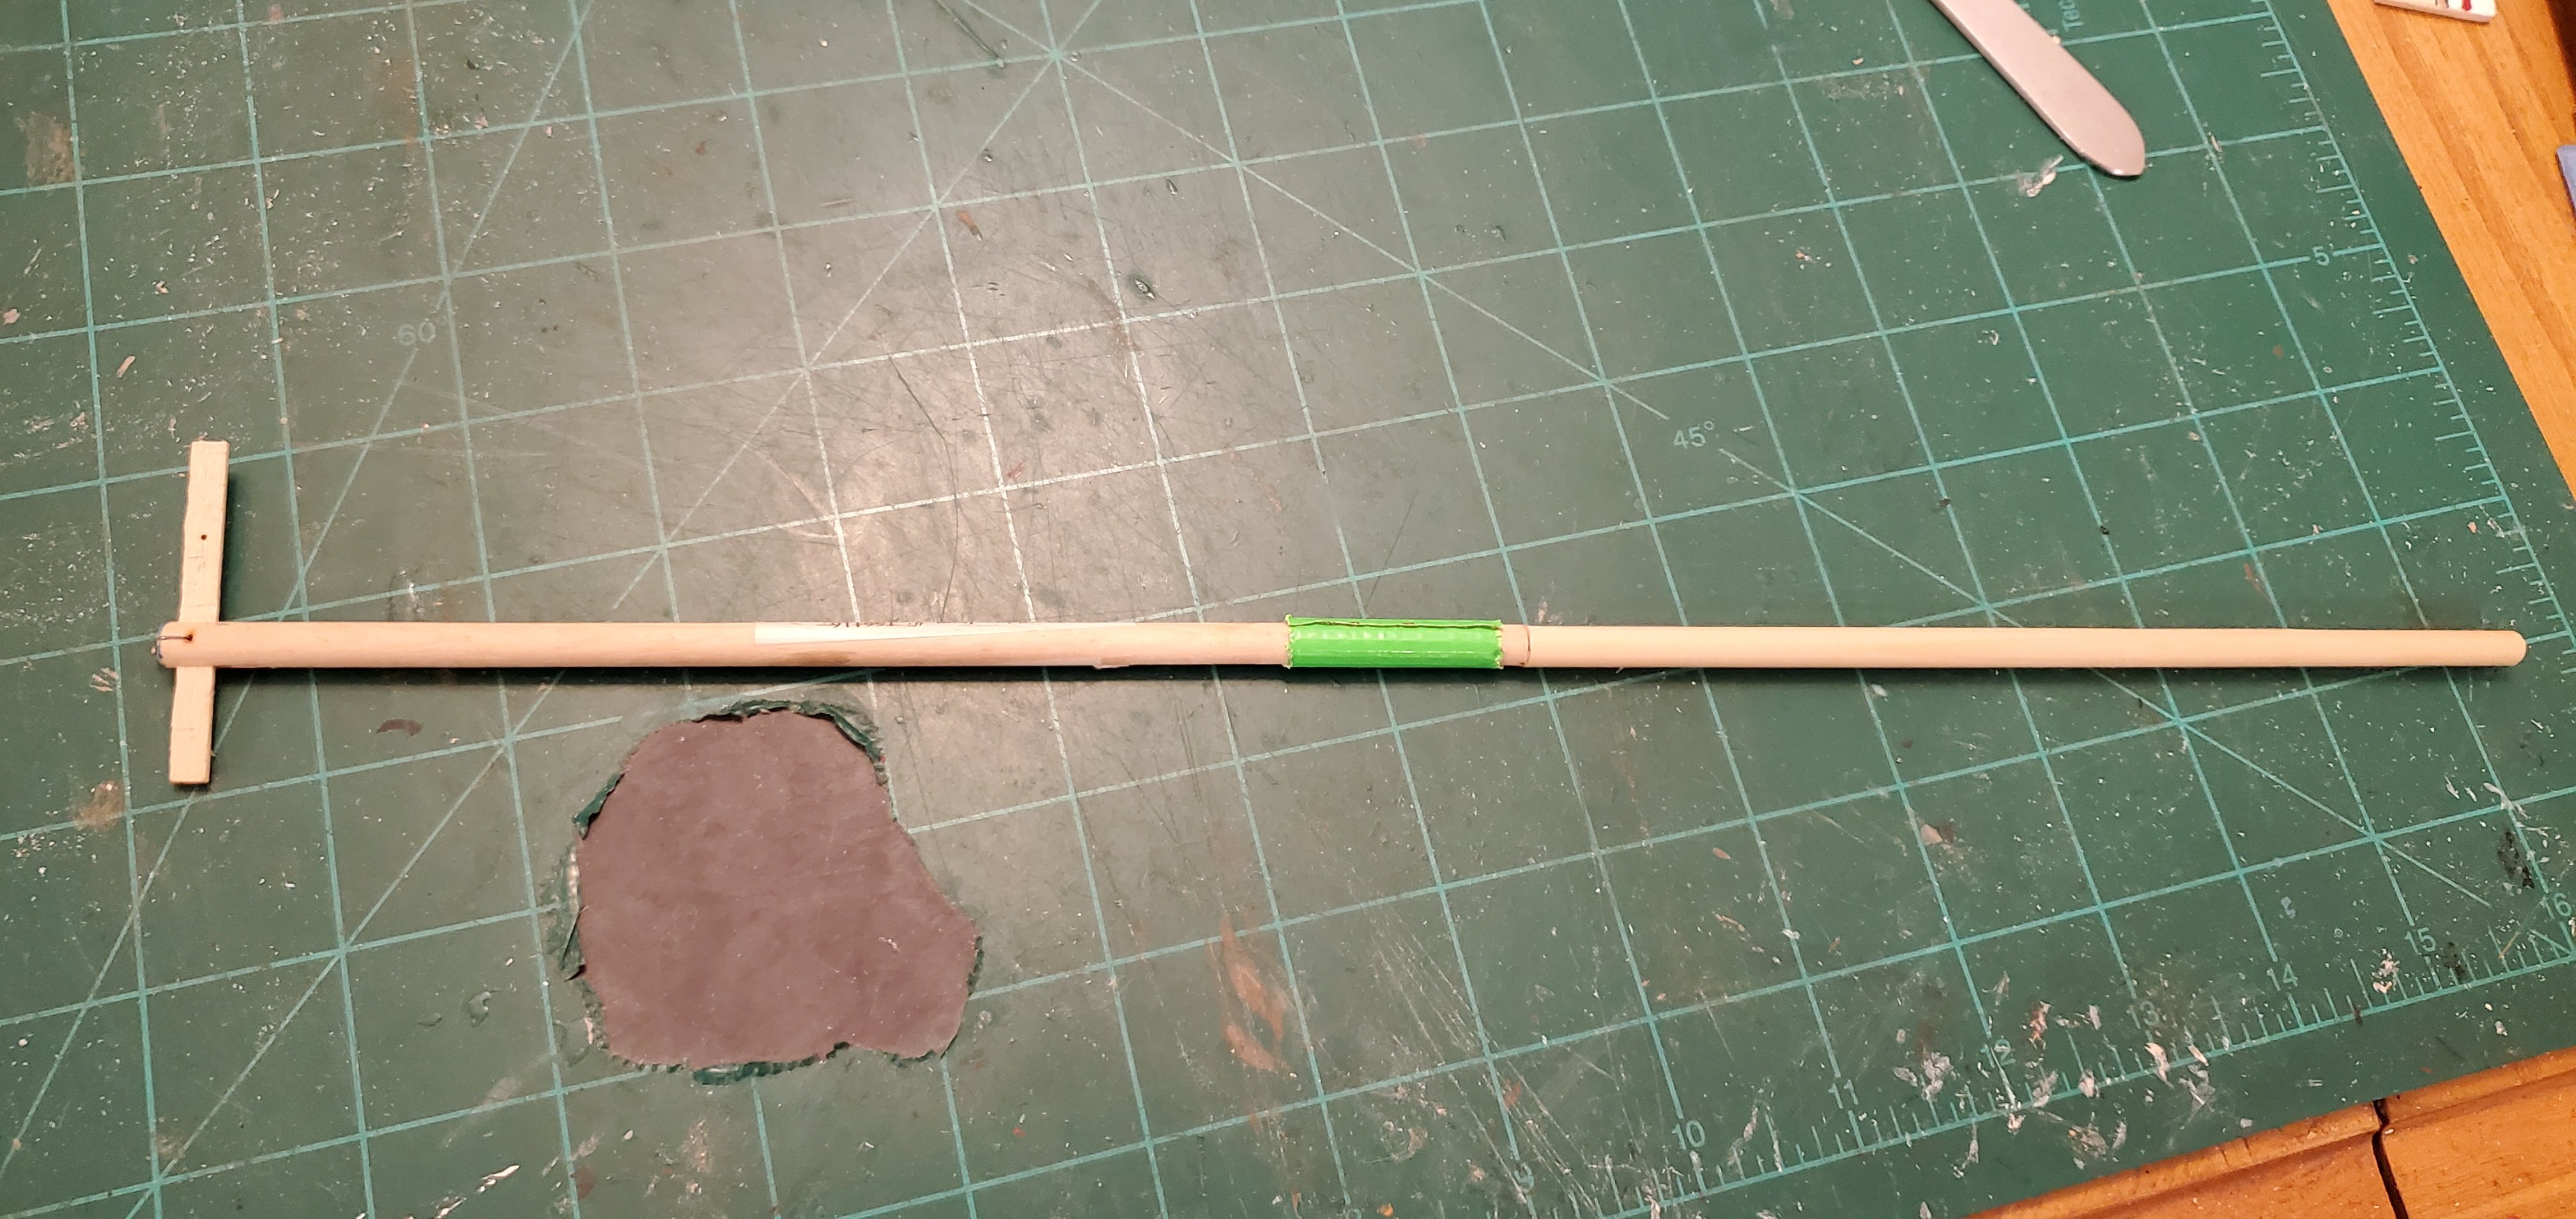
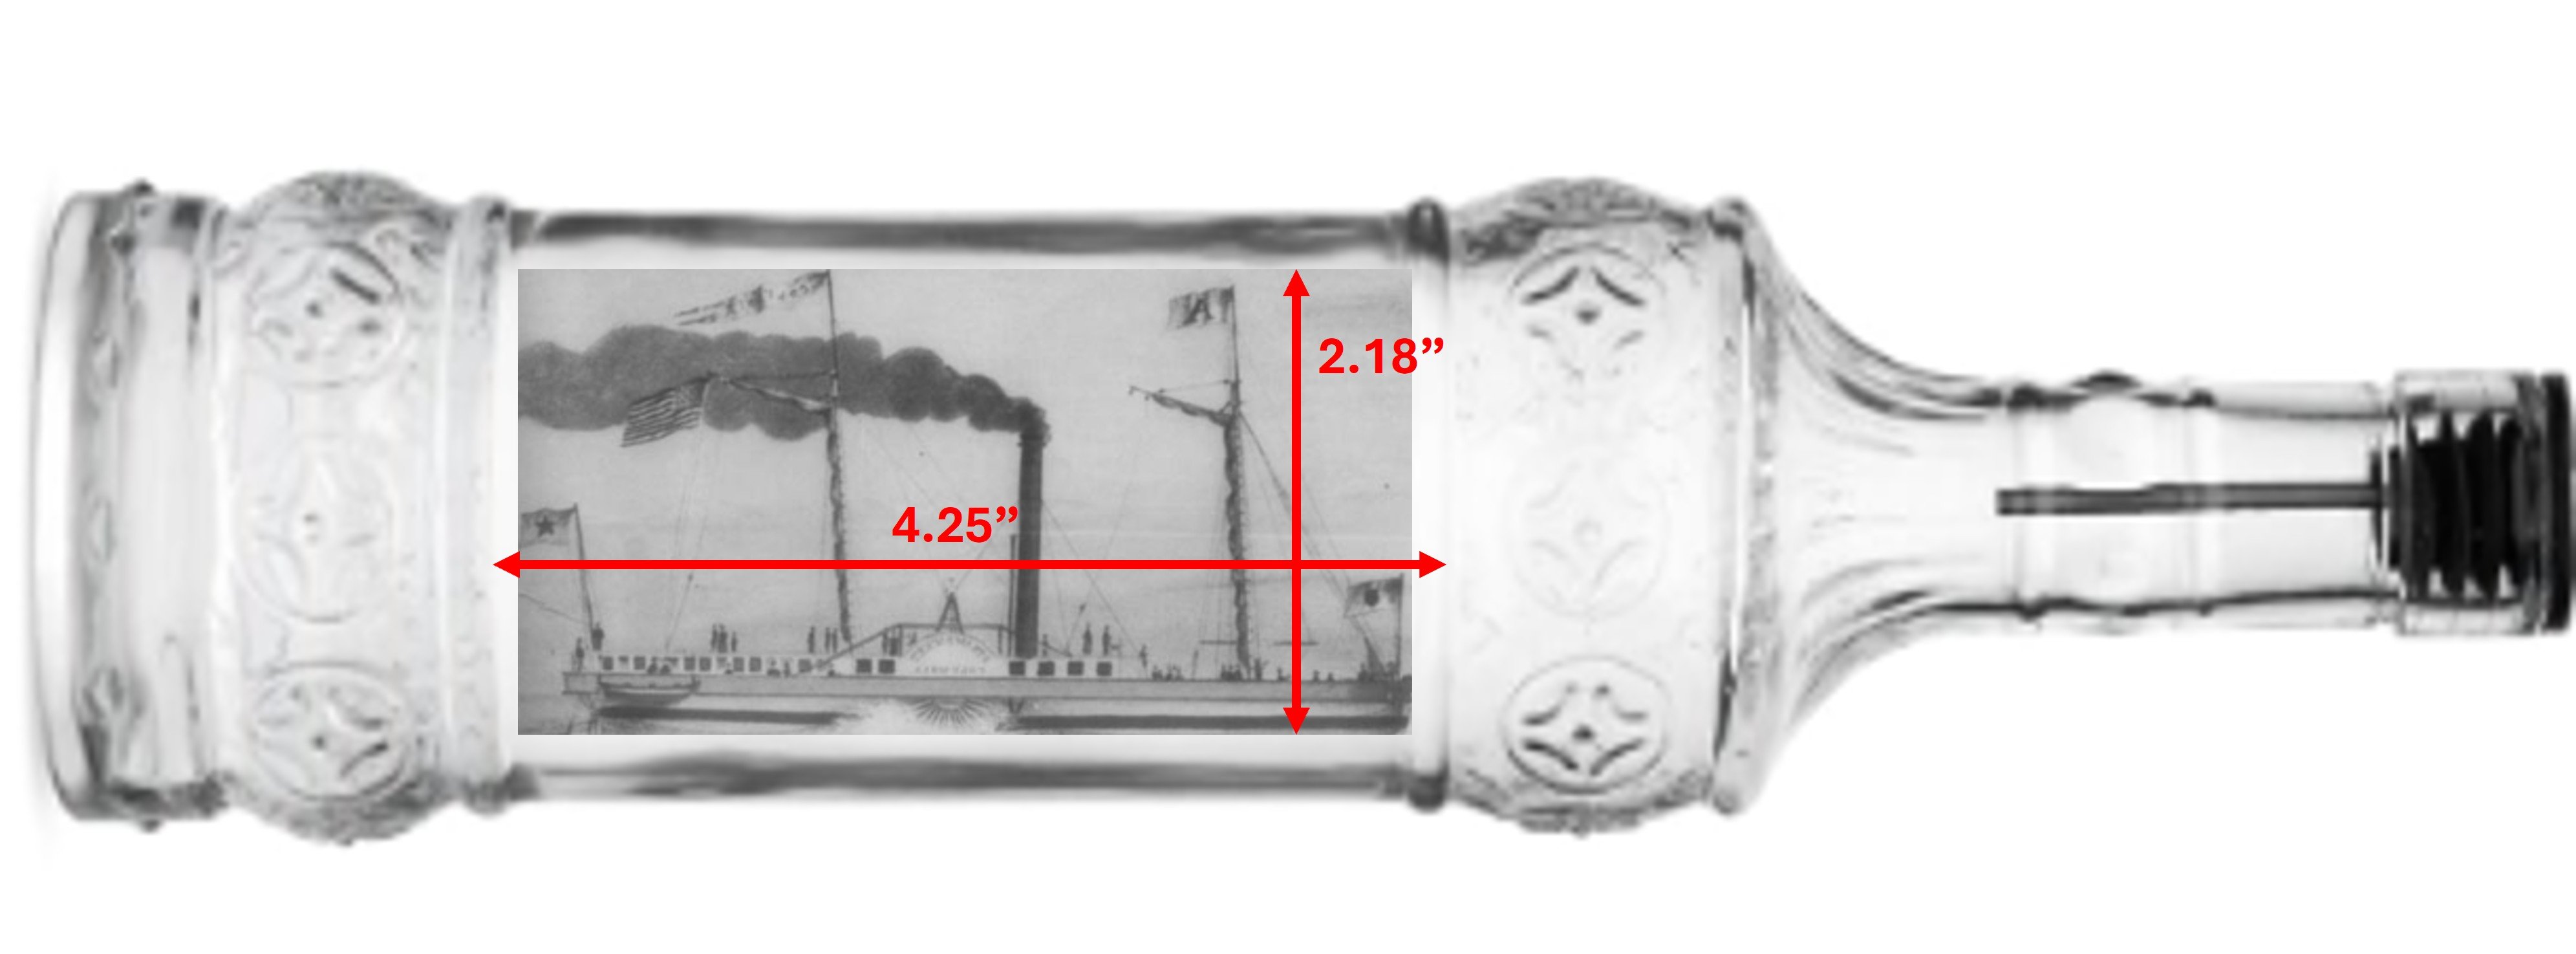
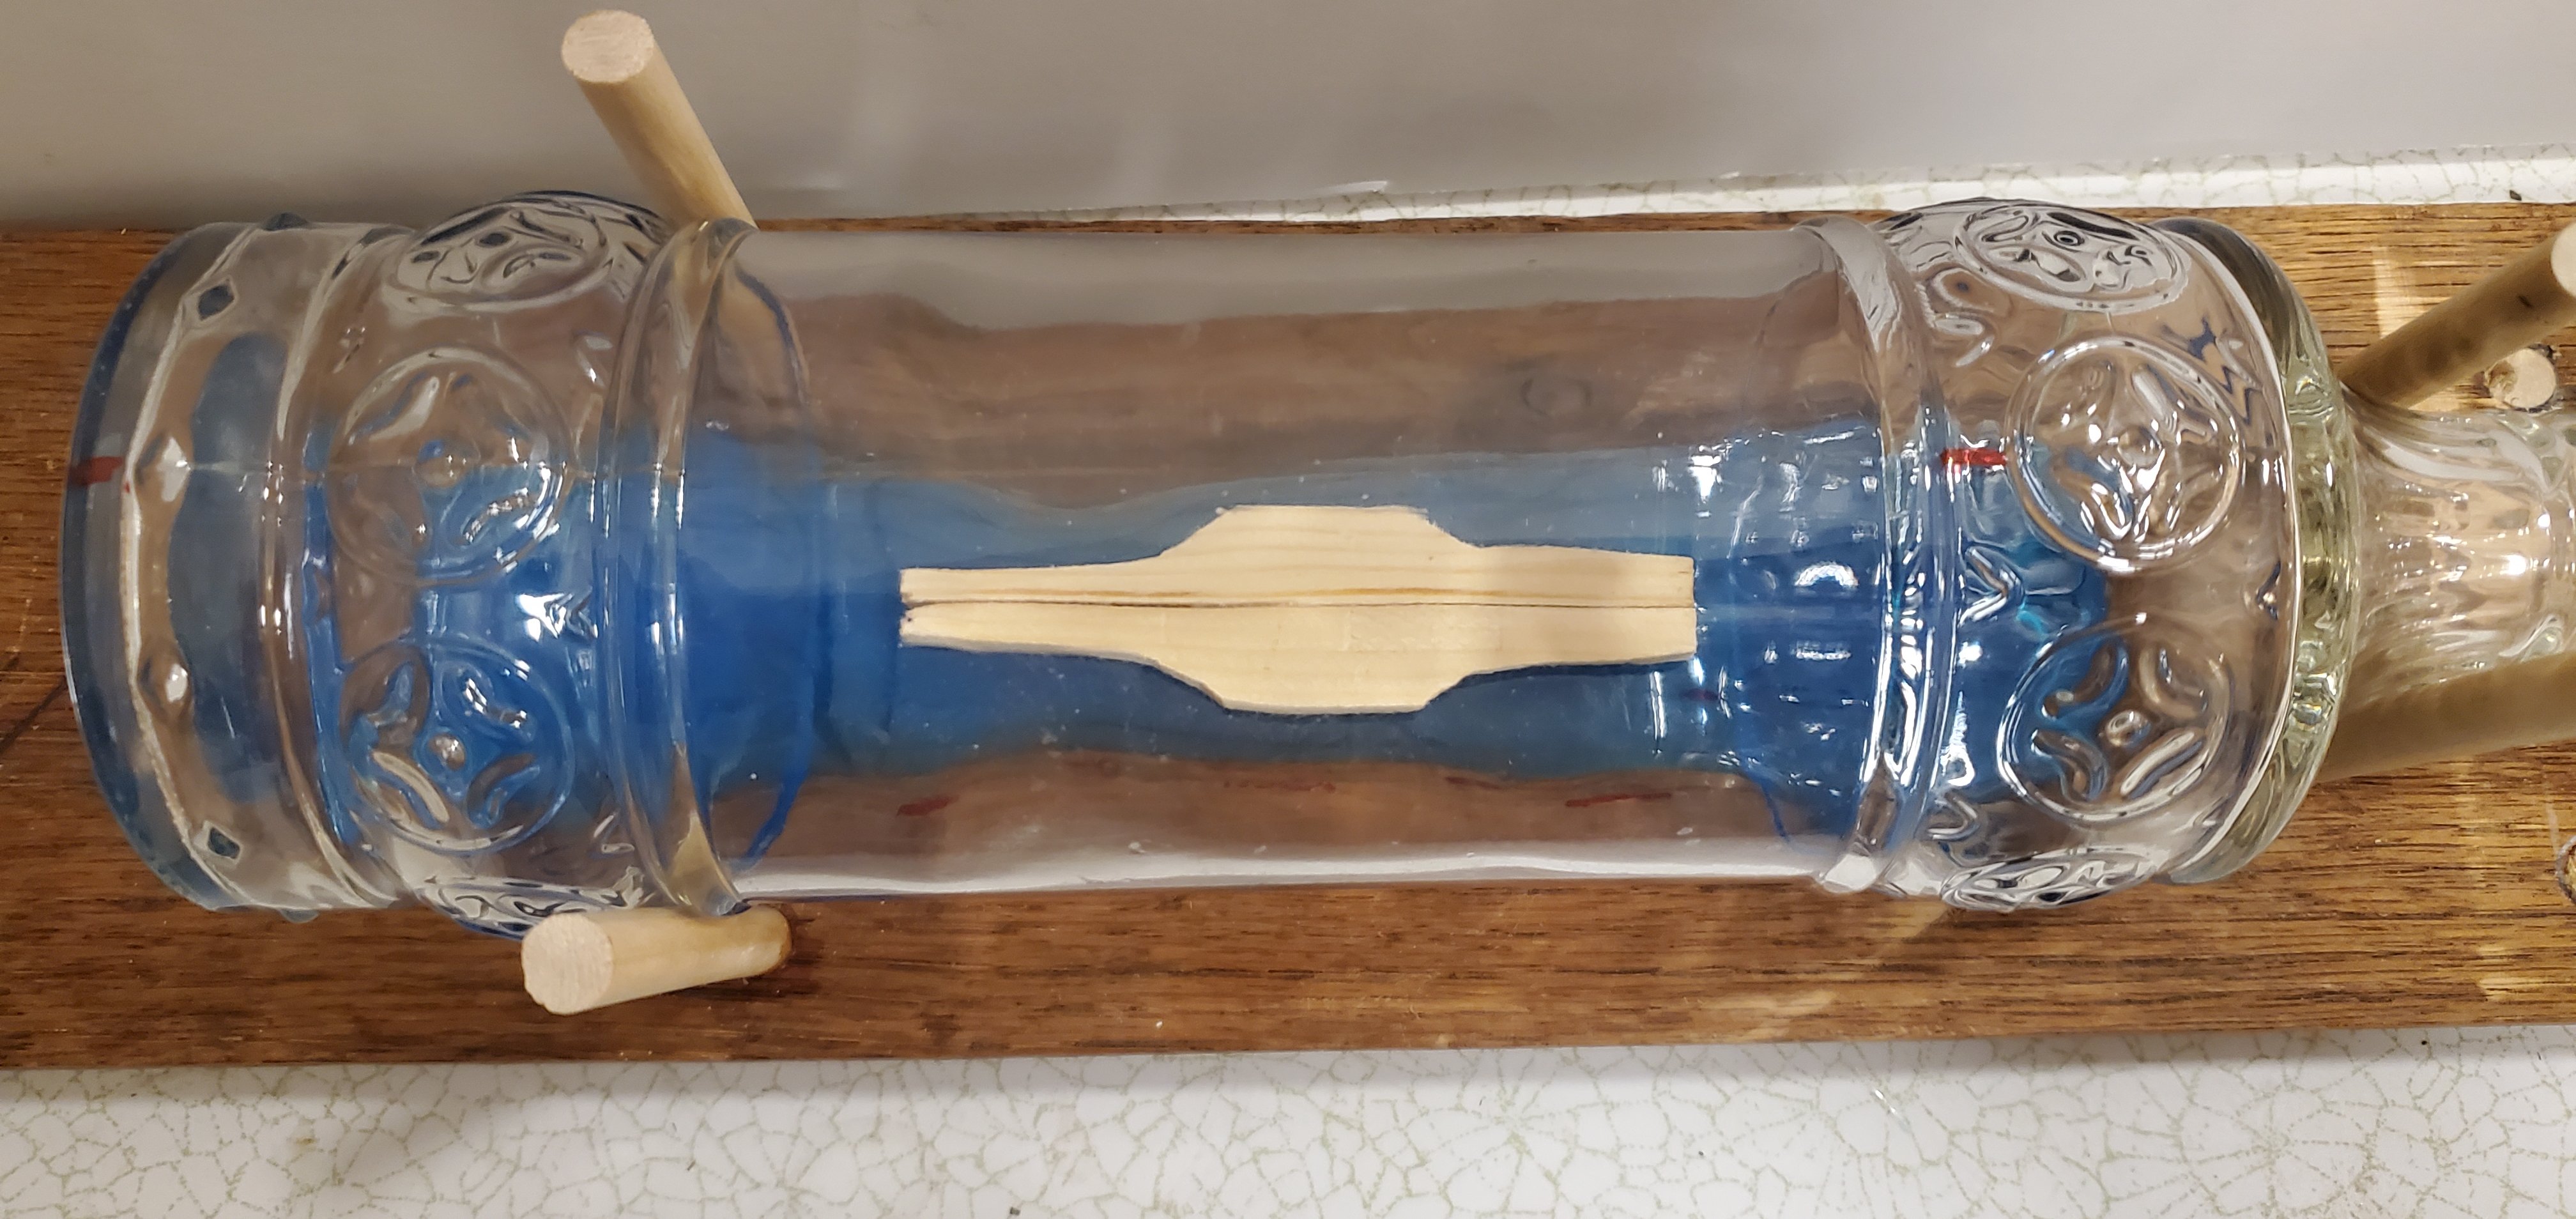
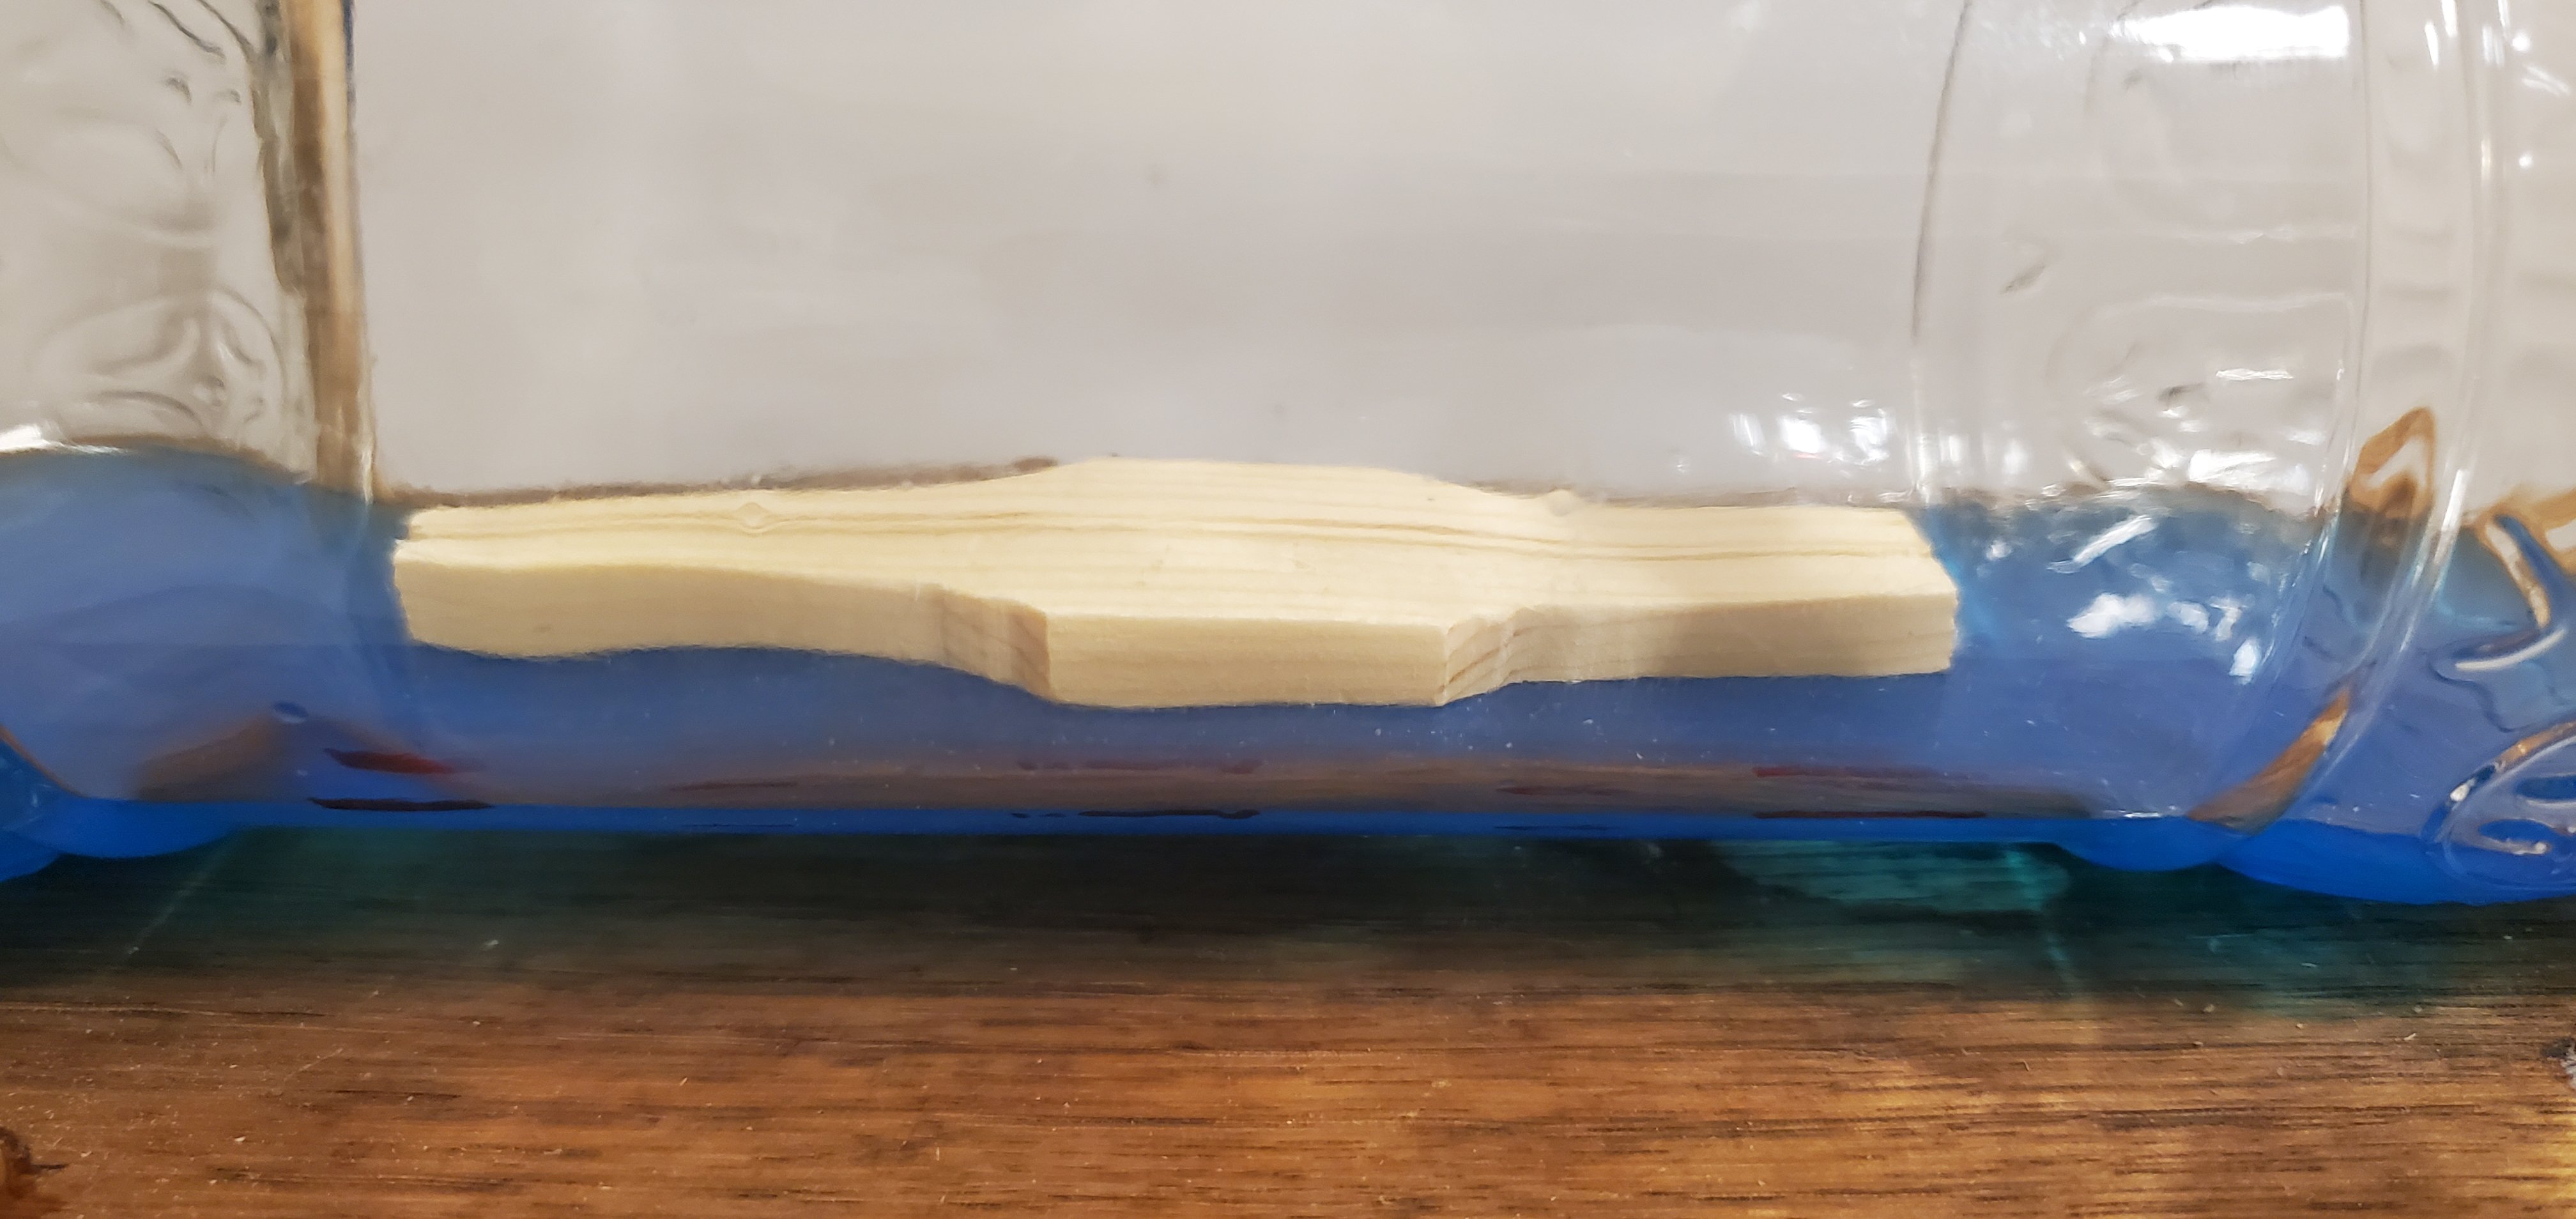
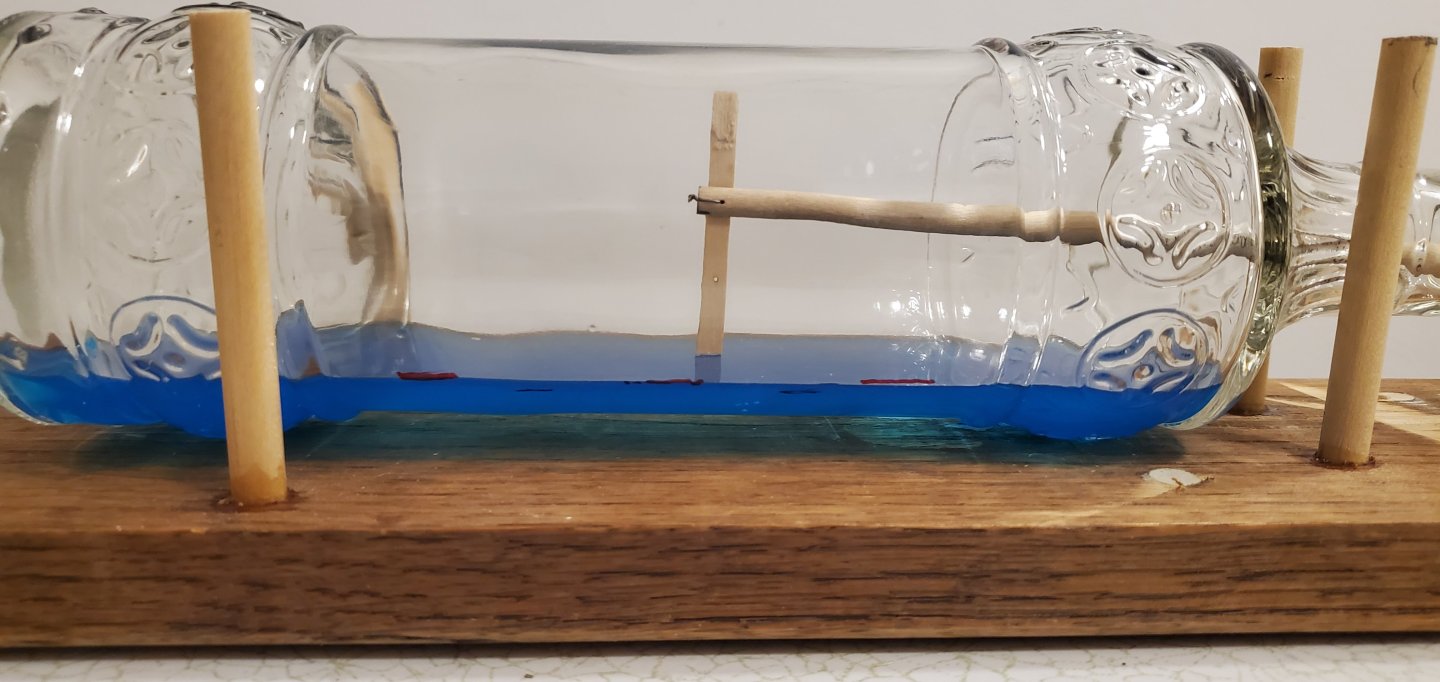
@GrandpaPhil - Thanks for joining in, Phil. Always appreciate you following along. Time to get started building the ship. With the very narrow profile of the bottle's midsection where the ship goes, I'm concerned about making the ship too big and not leaving room for any water or vice versa. But I also want the ship to fill up as much of the viewing window as possible (to Roel's point about the ship perhaps looking too small for the bottle). So I need to figure out exactly how much room I have to work with. Measuring the horizontal window of the bottle is obviously easy. To measure the bottle's inside diameter, I use crude tool with a dowel rod and pivoting arm on the end. Here's how the measurements came out. Usually I will wait till I'm finished building the ship before I put the epoxy resin water in the bottle. I'll measure the completed ship from waterline to top of the main mast, which tells me how much epoxy resin I can put in the bottle to have the mast's tip fit just below the inner ceiling of the bottle. In this case, I decided to put the epoxy resin water in the bottle first, and then take my measurements for how tall to make the ship. In addition to the height, I was also concerned about the water being wide enough to show some water on each side of the ship. I put 2 ounces of tinted epoxy resin water in the bottle. After it cured, I inserted a dummy hull an inch wide to see if the water would be visible on each side on the hull. There is less water on the sides of the hull than usual, but I thought it looked ok. Next, I used my crude measuring tool to indicate there was 2 1/16" of space from the waterline to the apex of the bottle. Now if I want to maintain the exact proportions of the ship in the painting, it would be 2 1/8" tall. I'll take some additional artistic license and squeeze the height down just a hair to fit. Fortunately, those early steam packet ships did not have the towering masts of the frigates, galleons, and clippers that were only powered by wind, so a long ship with not so tall masts is a pretty natural fit for the space I have to work with. Overall, I'm happy with how the foundation of the build has been set.


-
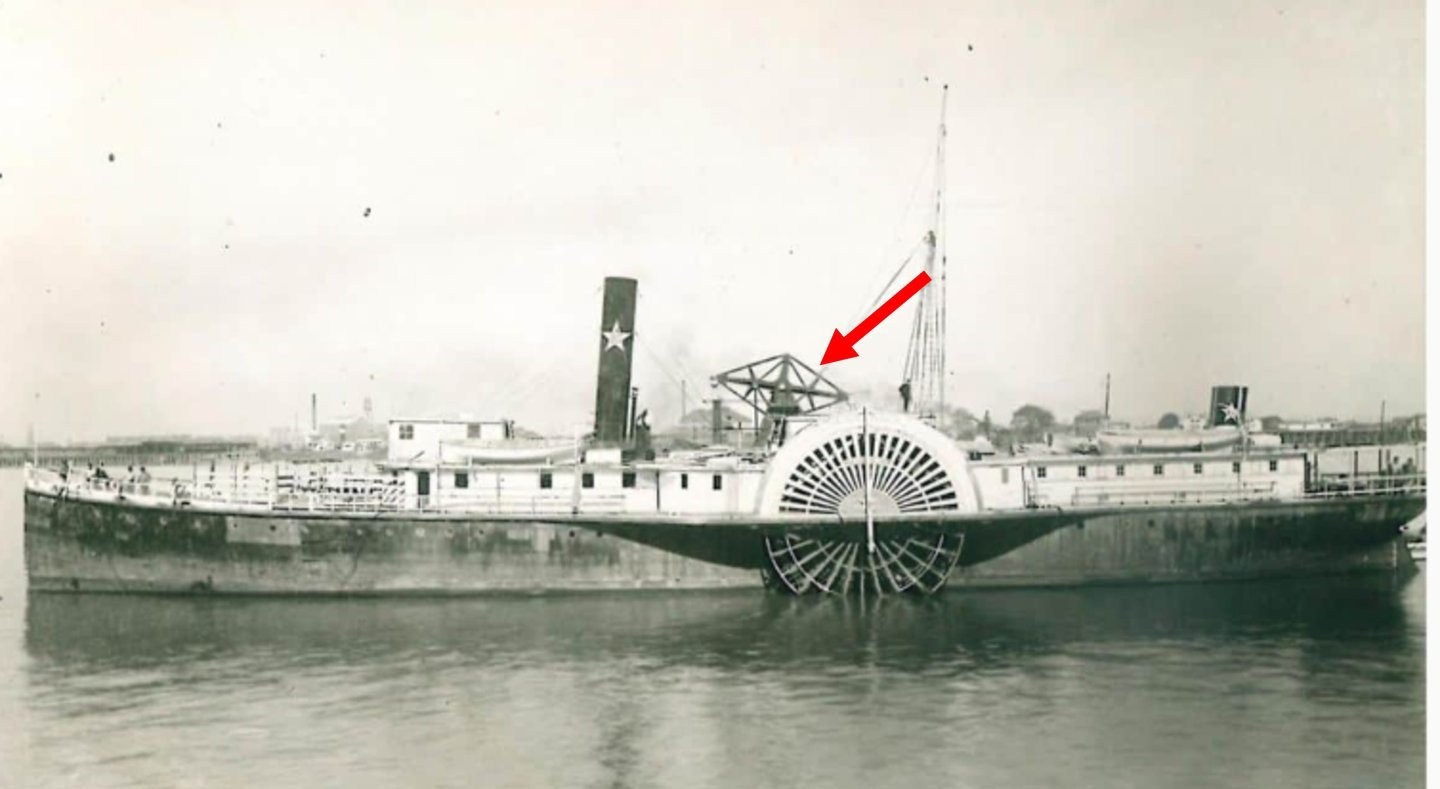
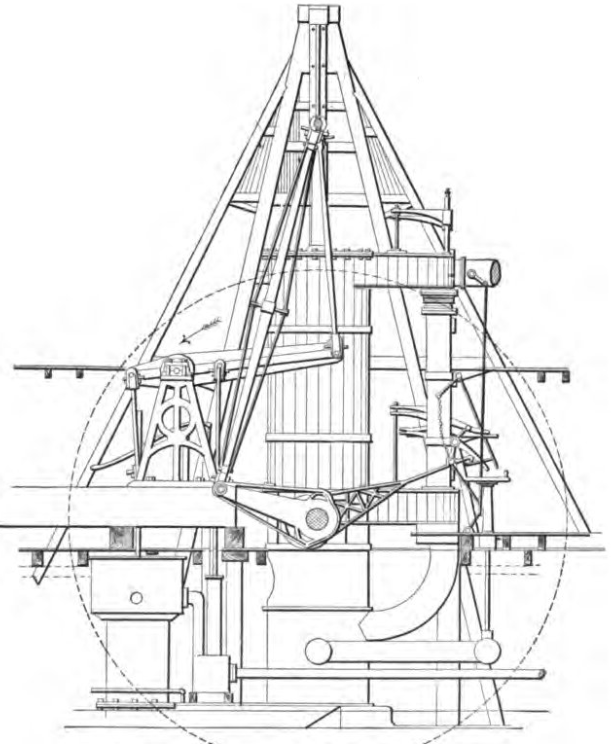
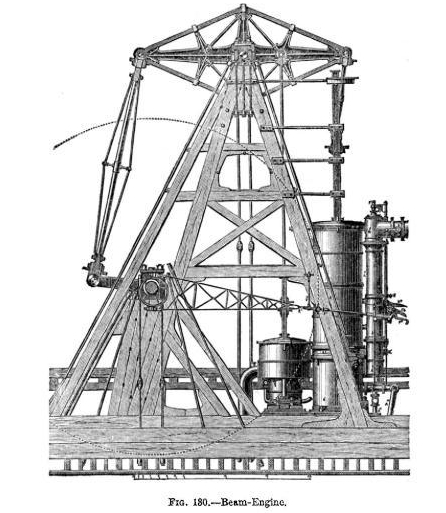
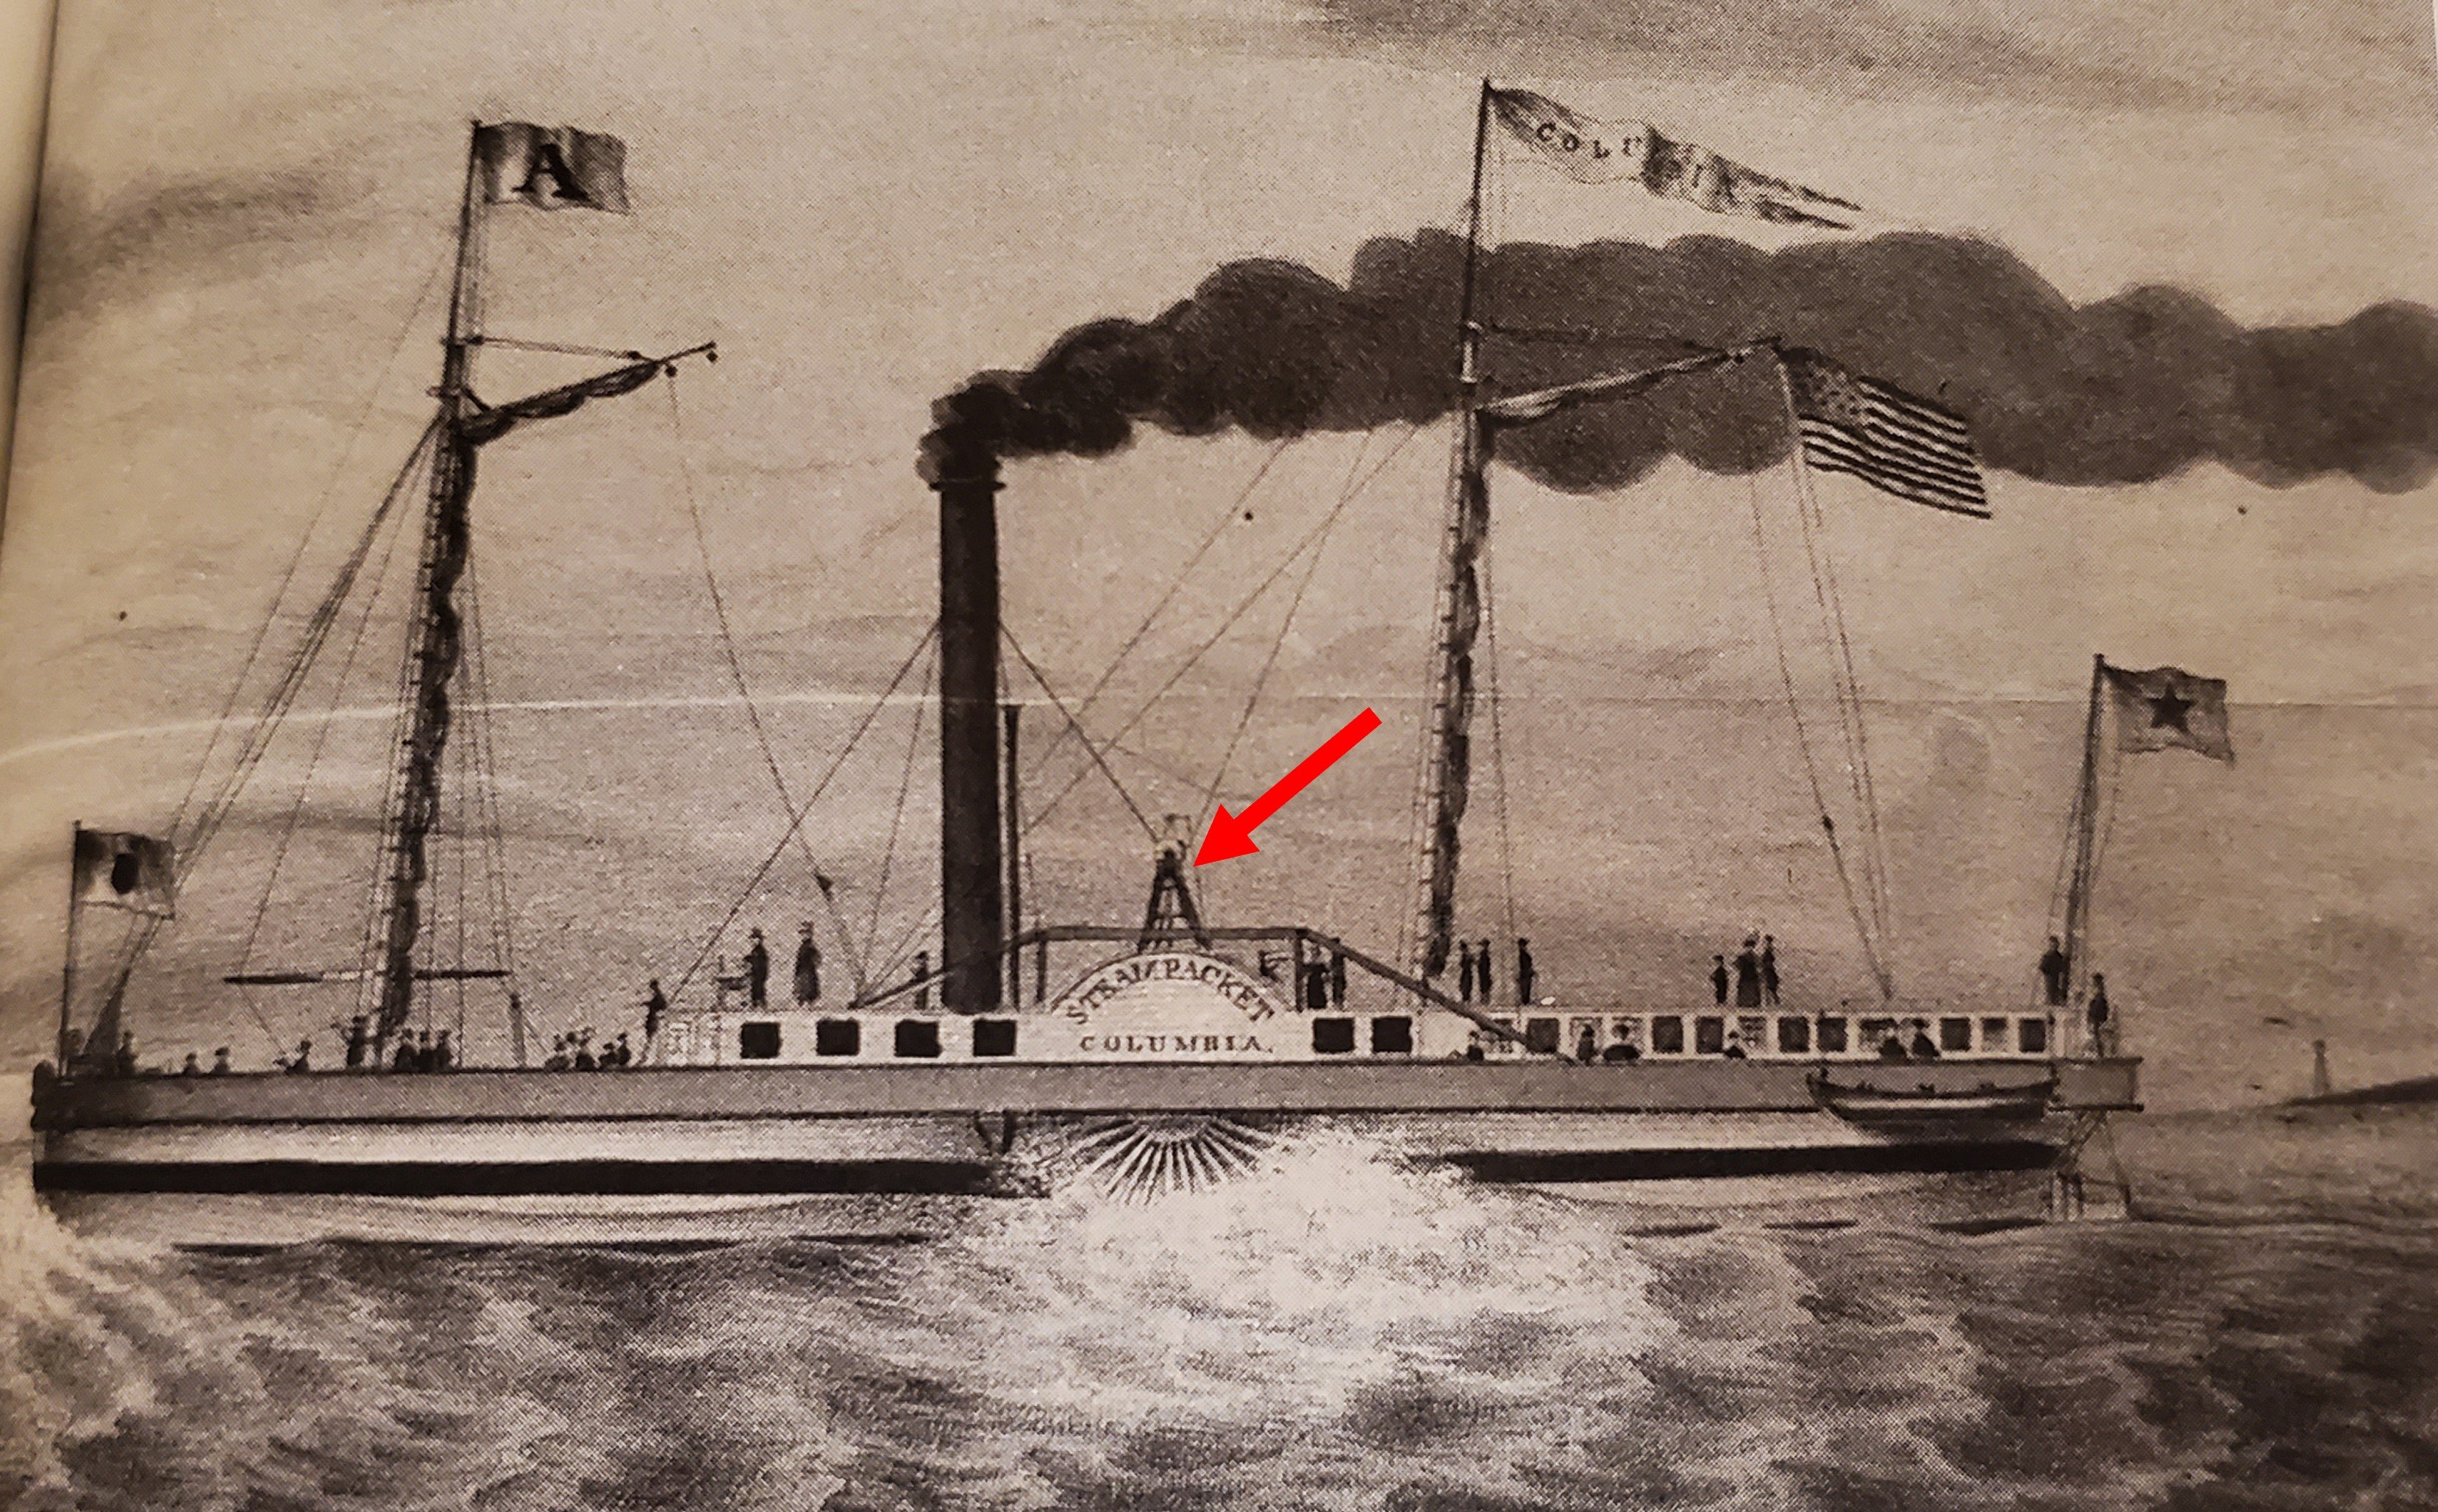
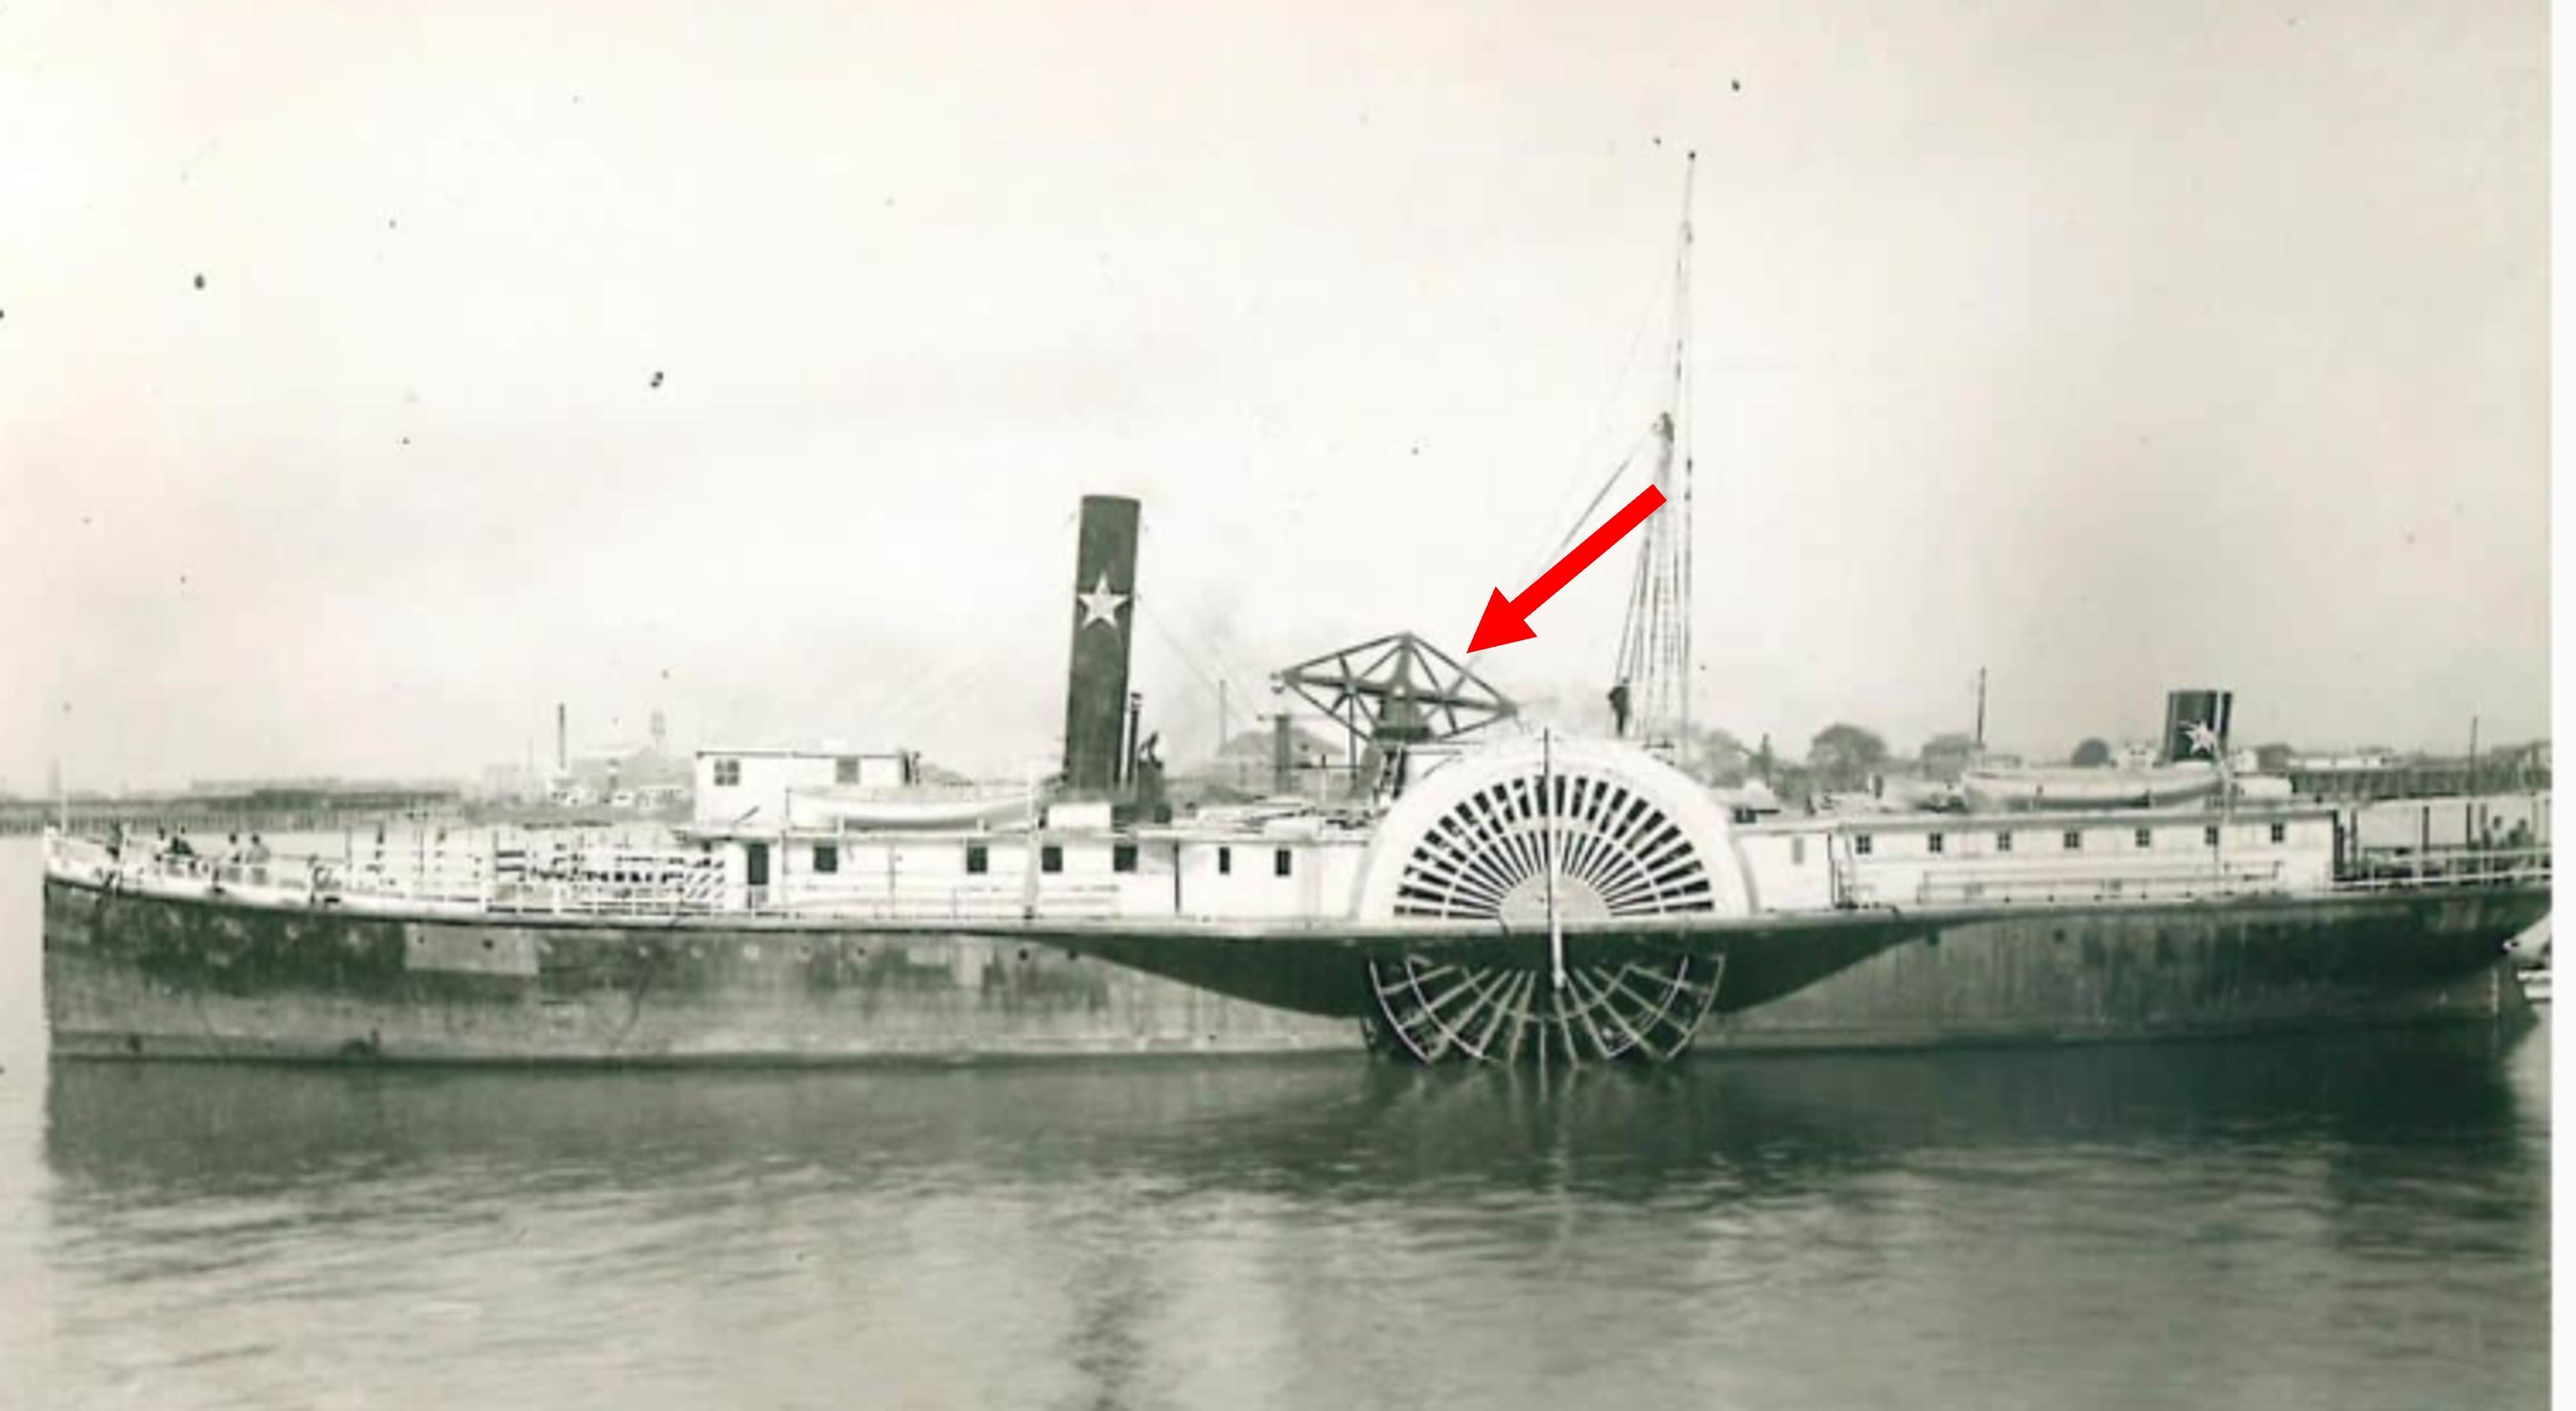
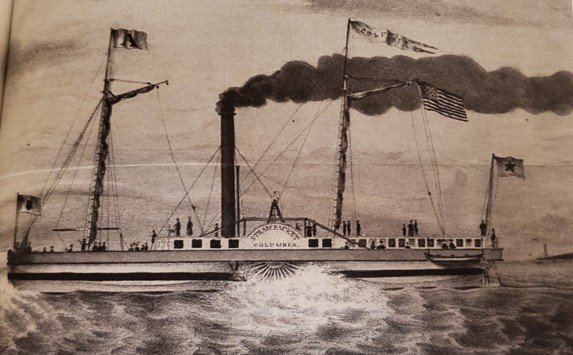
Thank you @gsdpic, @tmj, @Keith Black, @Paul Le Wol, @JacquesCousteau, @Javelin, @SaltyScot, @BANYAN, @gjdale, @Canute, @Bryan Woods for hopping in the wagon on this one. Might be a bumpy ride from time to time but should be fun! Like you, Gary, I also live in Wilco with an Austin address and have been called to jury duty up there. I would highly recommend visiting the restaurant on one of your trips to Georgetown. It's well worth it. Roel, The picture came from the website of the Texas State Historical Association. It's been around since 1897 so I'd tend to think they would be a reliable source. However, I spent some hours yesterday doing further research and found that you are probably right. Besides the paddlewheel cover, one of the obvious differences between the picture and painting is the small, odd-looking structure in the middle of each ship. In the painting, it's an A-frame shape and in the photo, it looks like an elaborate teeter-totter. What I learned is that both structures are actually the powerplant for the steam engine. In the painting's ship, it's called a crosshead (or A-frame) engine. It was a very common type of engine employed during the early period of steam ship construction. There were 2 A-frames connected by a horizontal beam. The piston rod connected to the beam and the beam moved within vertical guides. Here's an example of one. In the picture's ship, the structure is called a walking beam engine. The beam connected to the piston rod that ran parallel to the A-frames and was reinforced with 30 degree angle iron struts giving it a distinctive diamond shape. Here's a closeup example. The crosshead engine had a high center of gravity making it inherently unstable in rougher waters. By 1840, shipbuilders had mostly abandoned it in favor of the walking beam engine. So Roel, circling back your comment, I believe you are correct. The painting and picture are different ships. And it is highly likely that the painting is the Columbia and the picture is another ship. So I will use the painting as my guide on this project. However, I really like that lone star on the funnel of the ship in the picture. It just might find its way onto my version of the Columbia via artistic license or other means!