HOLIDAY DONATION DRIVE - SUPPORT MSW - DO YOUR PART TO KEEP THIS GREAT FORUM GOING!
×


Glen McGuire
-
Posts
1,954 -
Joined
-
Last visited
Content Type
Profiles
Forums
Gallery
Events
Everything posted by Glen McGuire
-
 The speed at which you make progress is remarkable, Phil!
- 288 replies
-
- 5
-

-

-
- Card
- Pre-Dreadnought
- (and 3 more)
-
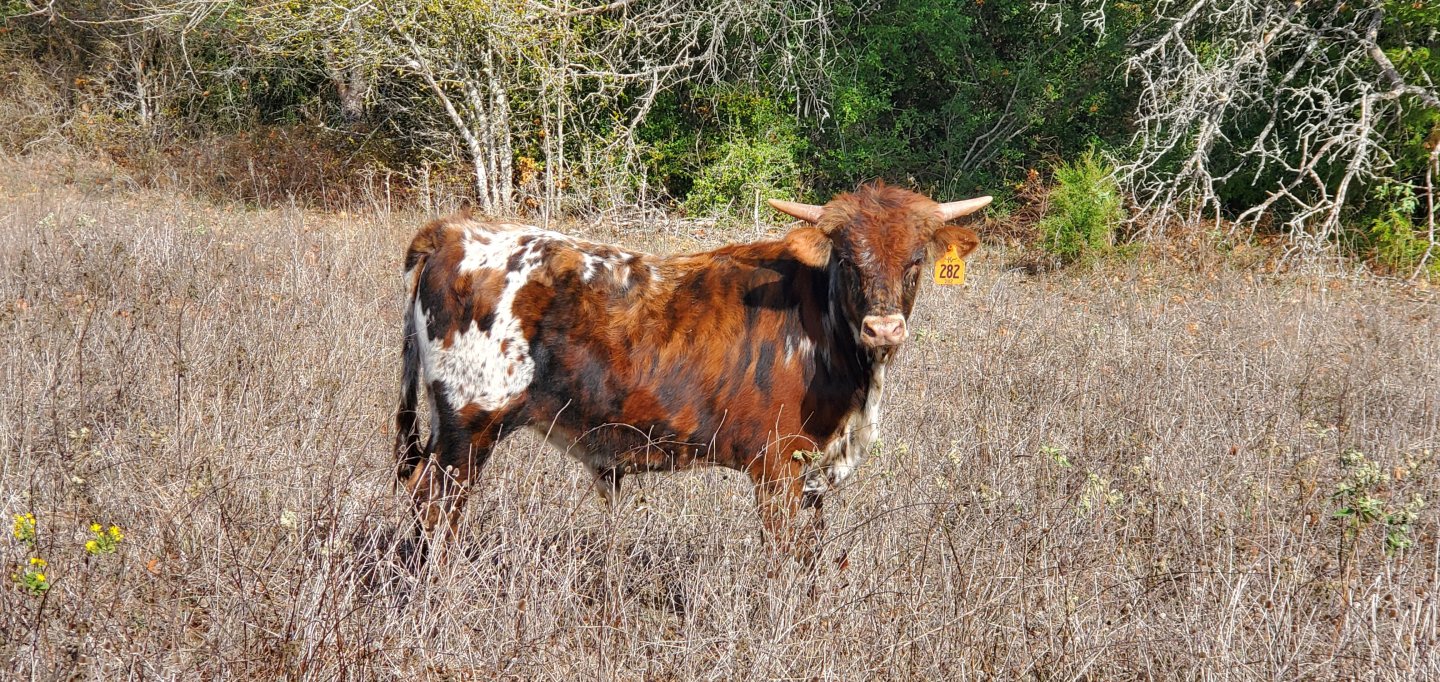
Indeed! The colors are very similar. Quite unique for a longhorn which is what drew me to him. Only if you're like @BANYAN and say "STEAK" around him!! 😃
- 185 replies
-
- 4
-
-
- Flying Dutchman
- Black pearl
- (and 2 more)
-
HAHAHA! The penguins here in central Texas are on a strict diet of Tex-Mex! They love nachos in particular. But Pat, you gotta be careful and keep your voice down when mentioning steak. No all caps allowed or my longhorns might overhear. Speaking of which, I gave myself an early Christmas present earlier this week and added a yearling bull to the herd. His name is Big Country.
- 185 replies
-
- 11
-
-

-

-
- Flying Dutchman
- Black pearl
- (and 2 more)
-
Superb metal work. The shackles are particularly well done!
- 201 replies
-
- 5
-
-
-
- Oyster Sharpie
- first scratch build
- (and 1 more)
-
That looks fantastic! With that skill level at such a small scale, I hear an SIB project calling your name!
- 732 replies
-
- 4
-
-
-
- Lula
- sternwheeler
- (and 1 more)
-
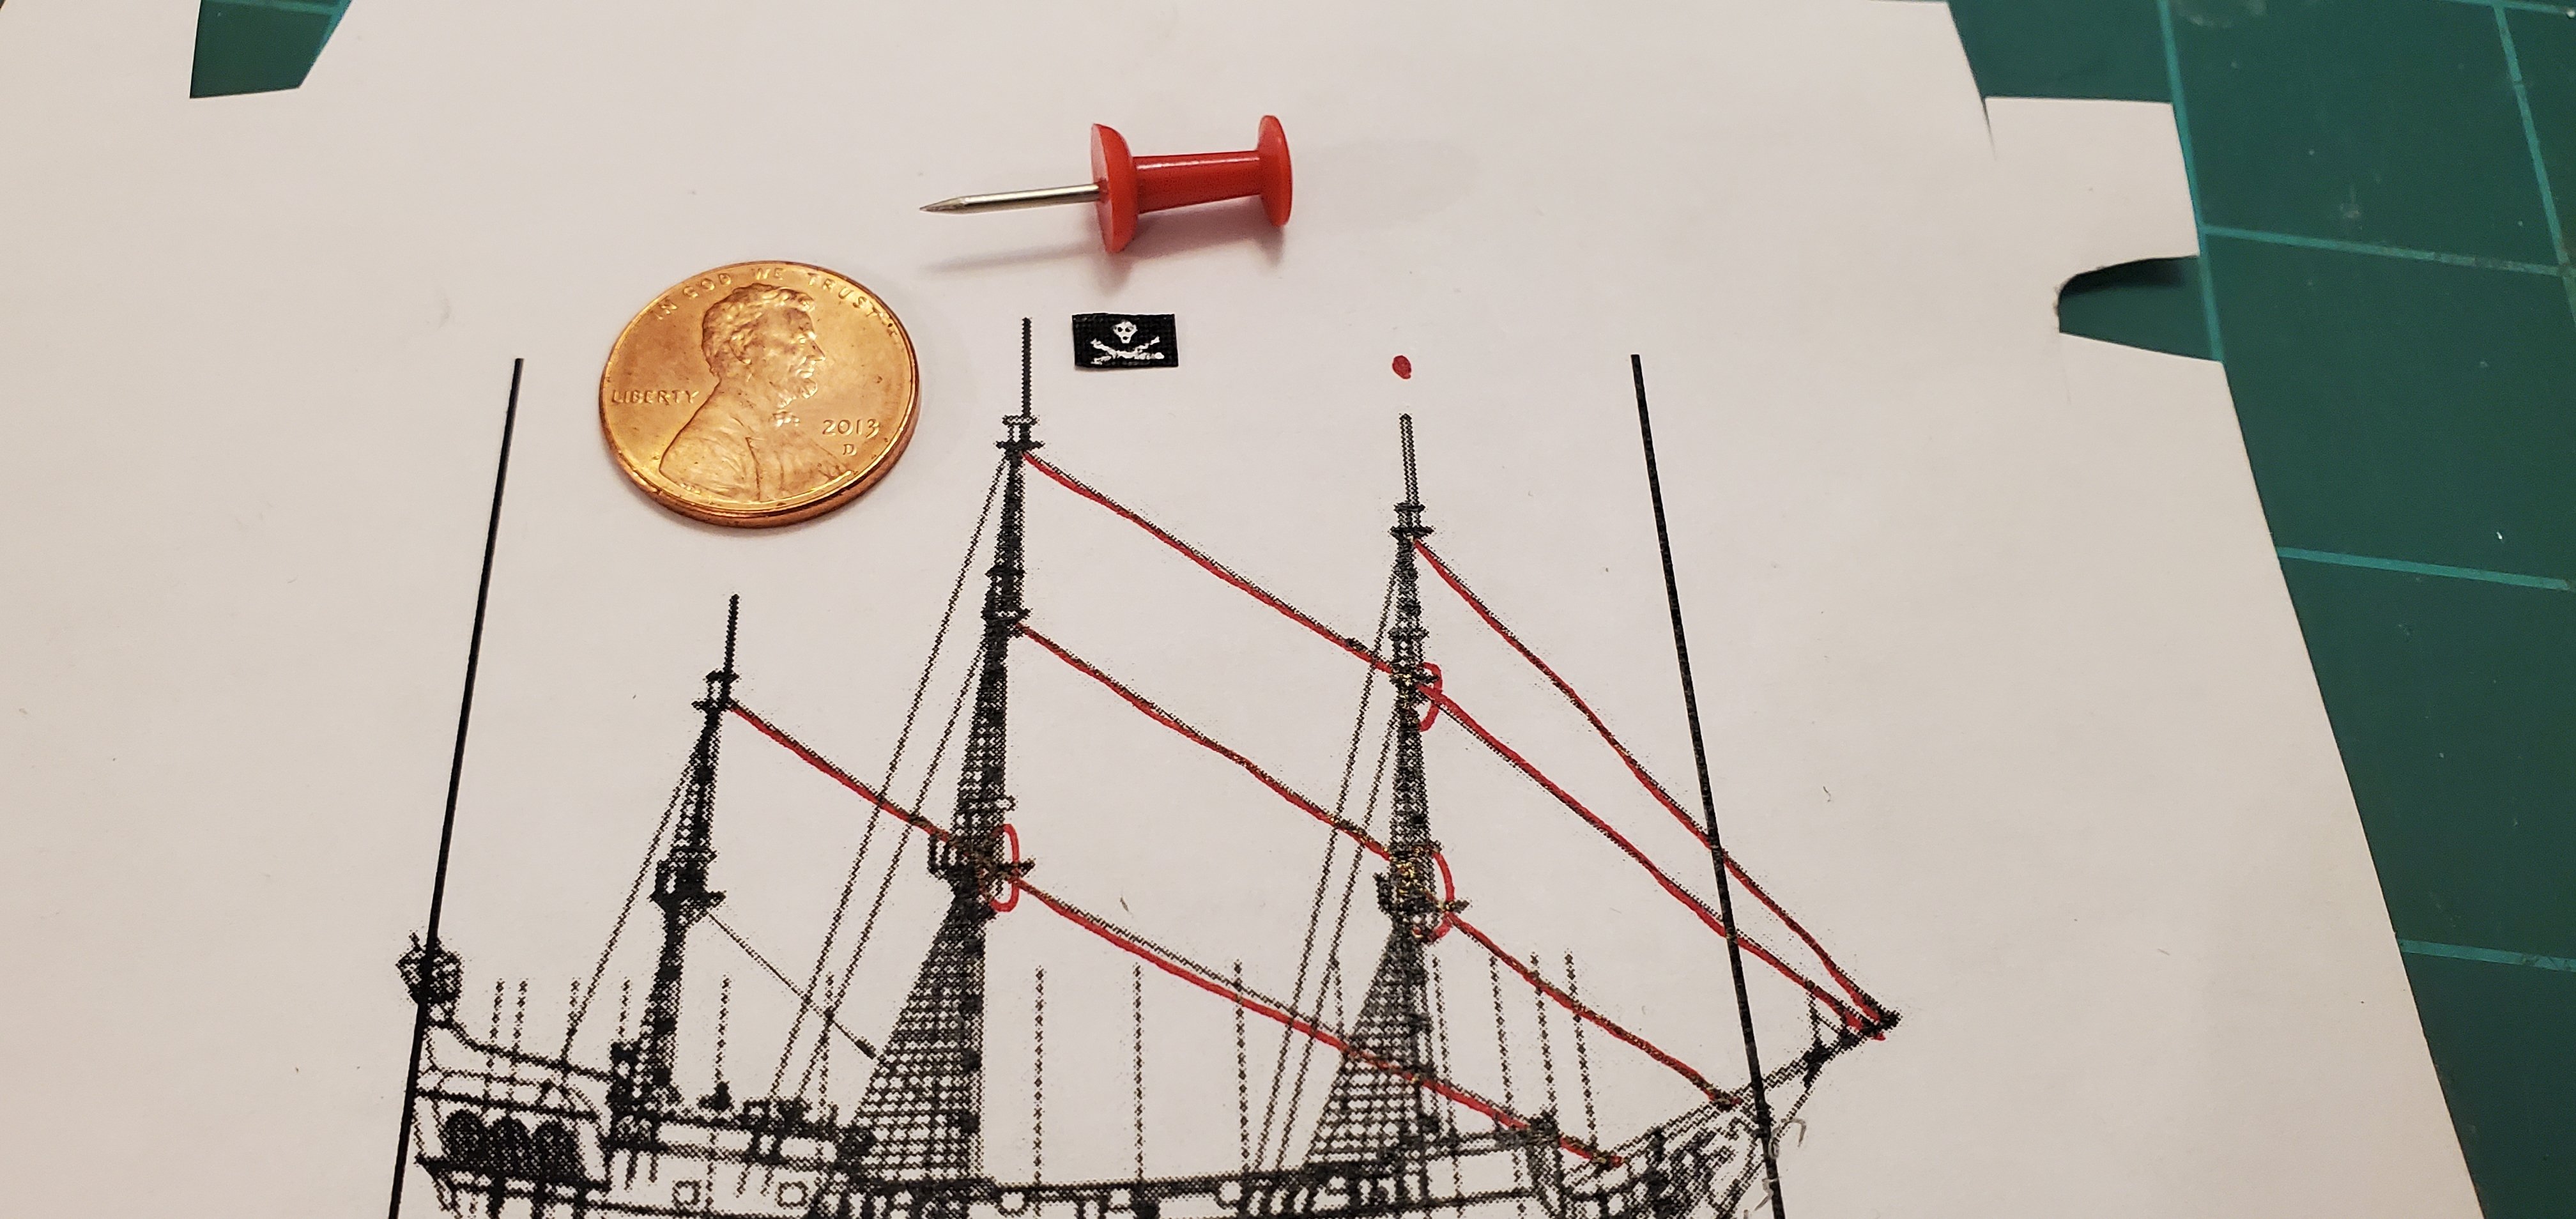
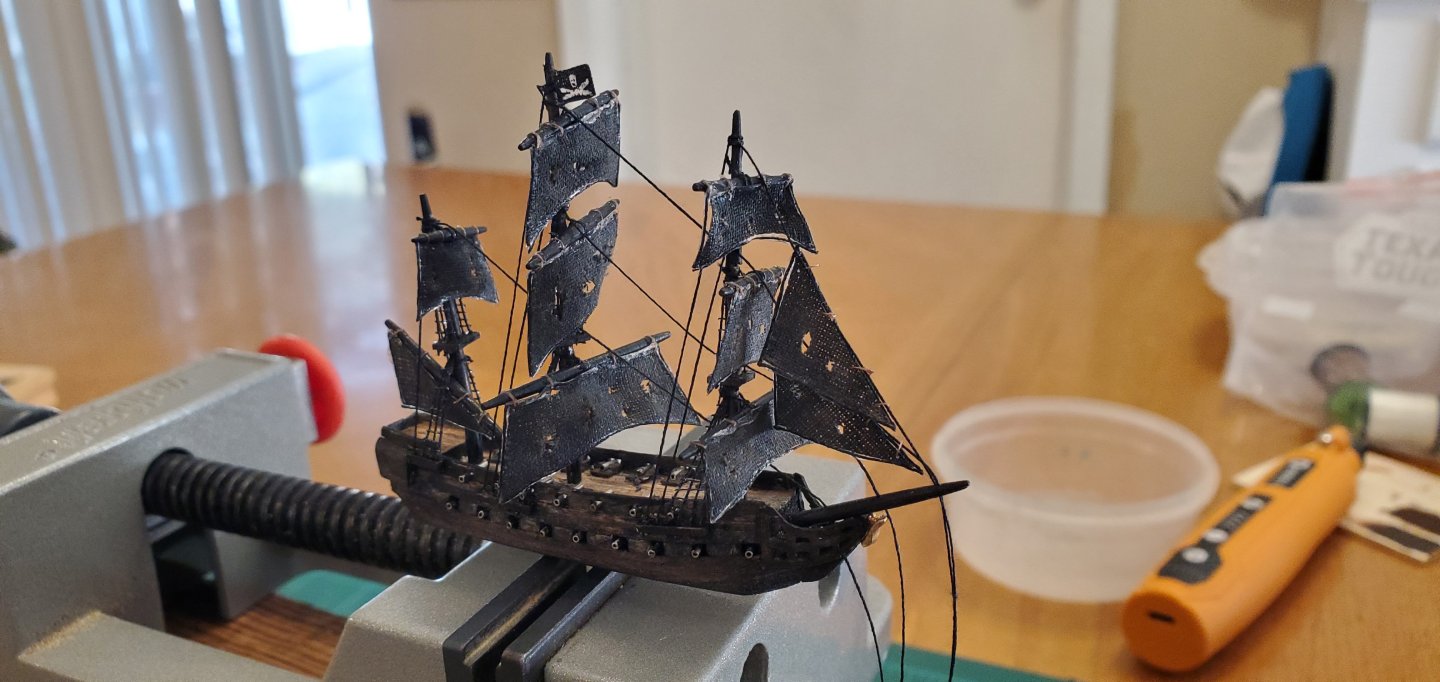
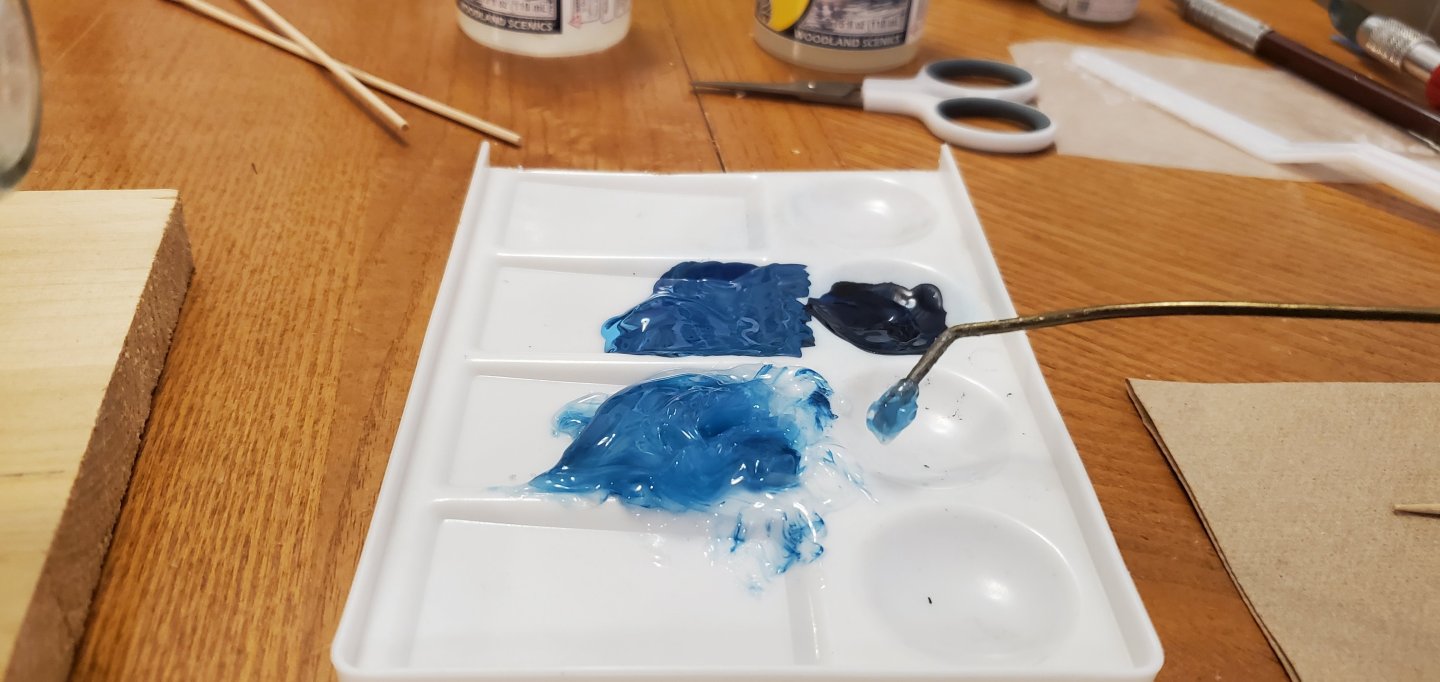
But now the ships... With the whirlpool done and waiting its combatants, I needed to put the finishing touches on the Pearl. I started by making a tiny Jolly Roger flag. Next was making all the sails. I used tan shirt cloth and colored it with mostly black and a smudge of acrylic white paint. It was pretty stiff after drying so I decided to try something new. At my ranch, I run across the occasional rattlesnake. I've killed a few and skinned them. To preserve the skins, I soak them in a glycerin bath which leaves them soft and pliable after drying out. I decided to see if glycerin would do the same thing with my stiff sails. And it actually worked! So that should help them return to their original shape after getting scrunched during insertion into the bottle. The pic below shows the bolt ropes being glued to the edges with fabric glue. Here's the Pearl with all sails in place except the stay sails. And finally, the completed Black Pearl with its full complement of sails and some rips added to the sails. In the movie, the Pearl had some holes in its sails, so I wanted to match that small feature. And now stepping into the batter's box is what should be the last big challenge of this adventure - getting the ships inside the bottle and raising the masts. If you recall, the Dutchman did not fit into the bottle, so I had to reconfigure it to where the mizzen and main masts fold to the stern and the fore mast folds to the bow. That meant adding a bunch of extra pull threads to raise the shrouds and back stays of the fore mast. I haven't tried that process before, so I'm anxious to see how it goes. Also, we had a previous discussion about whether to secure the ships to the water and then raise the masts or try to raise the masts without the ship being secured. The latter being another thing I haven't tried. But I also think the latter will be the easiest method so that's what I plan on doing. Hopefully the next post will announce the thrill of victory rather than the agony of defeat!

- 185 replies
-
- 15
-
-
-
- Flying Dutchman
- Black pearl
- (and 2 more)
-
Fabulous work, JC! She looks amazing. This was really a fun and interesting build to follow. It took a lot of creativity on your part to find the right materials and methods to complete such a unique model. Well done, sir!!!
-
But now the ships. Yes, Roel, thank you for bringing me back to reality from my euphoric stupor! But now the ships...
- 185 replies
-
- 8
-
-
- Flying Dutchman
- Black pearl
- (and 2 more)
-
Now that is an idea!!! At least you didn't see a penguin in there! There's another whirlpool in a different room of the house I thought you were going to mention but glad you did not! 😃
- 185 replies
-
- 7
-
-
-
- Flying Dutchman
- Black pearl
- (and 2 more)
-
Thanks for adding that step of the building process. Fascinating work, Keith!
- 732 replies
-
- 5
-
-
-
- Lula
- sternwheeler
- (and 1 more)
-
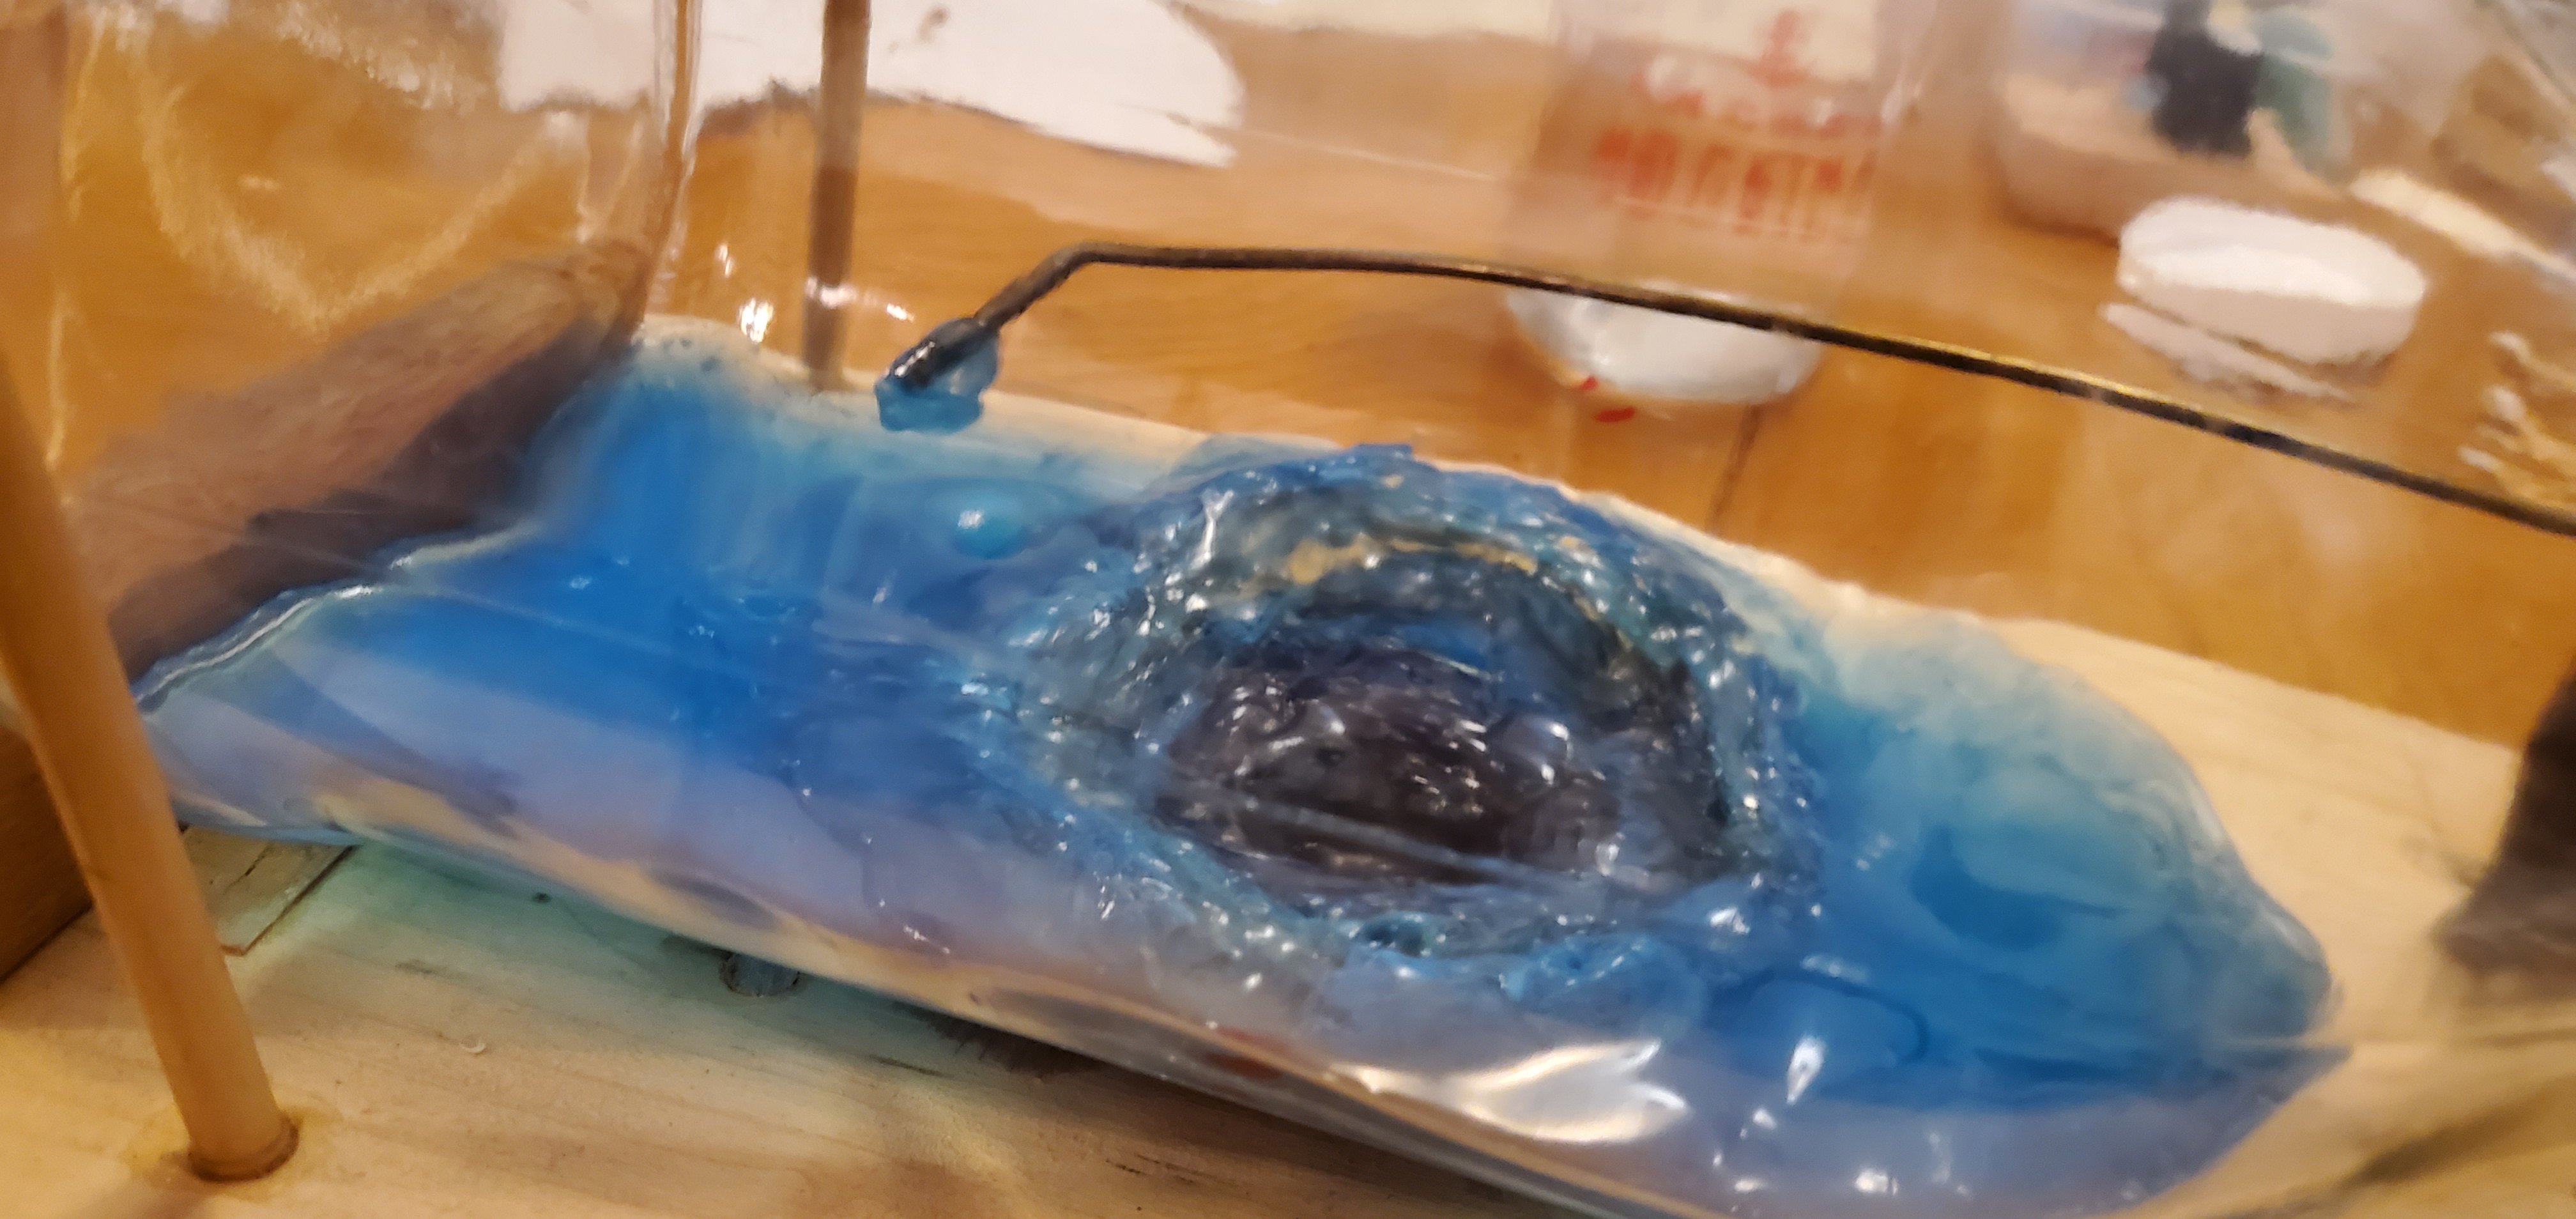
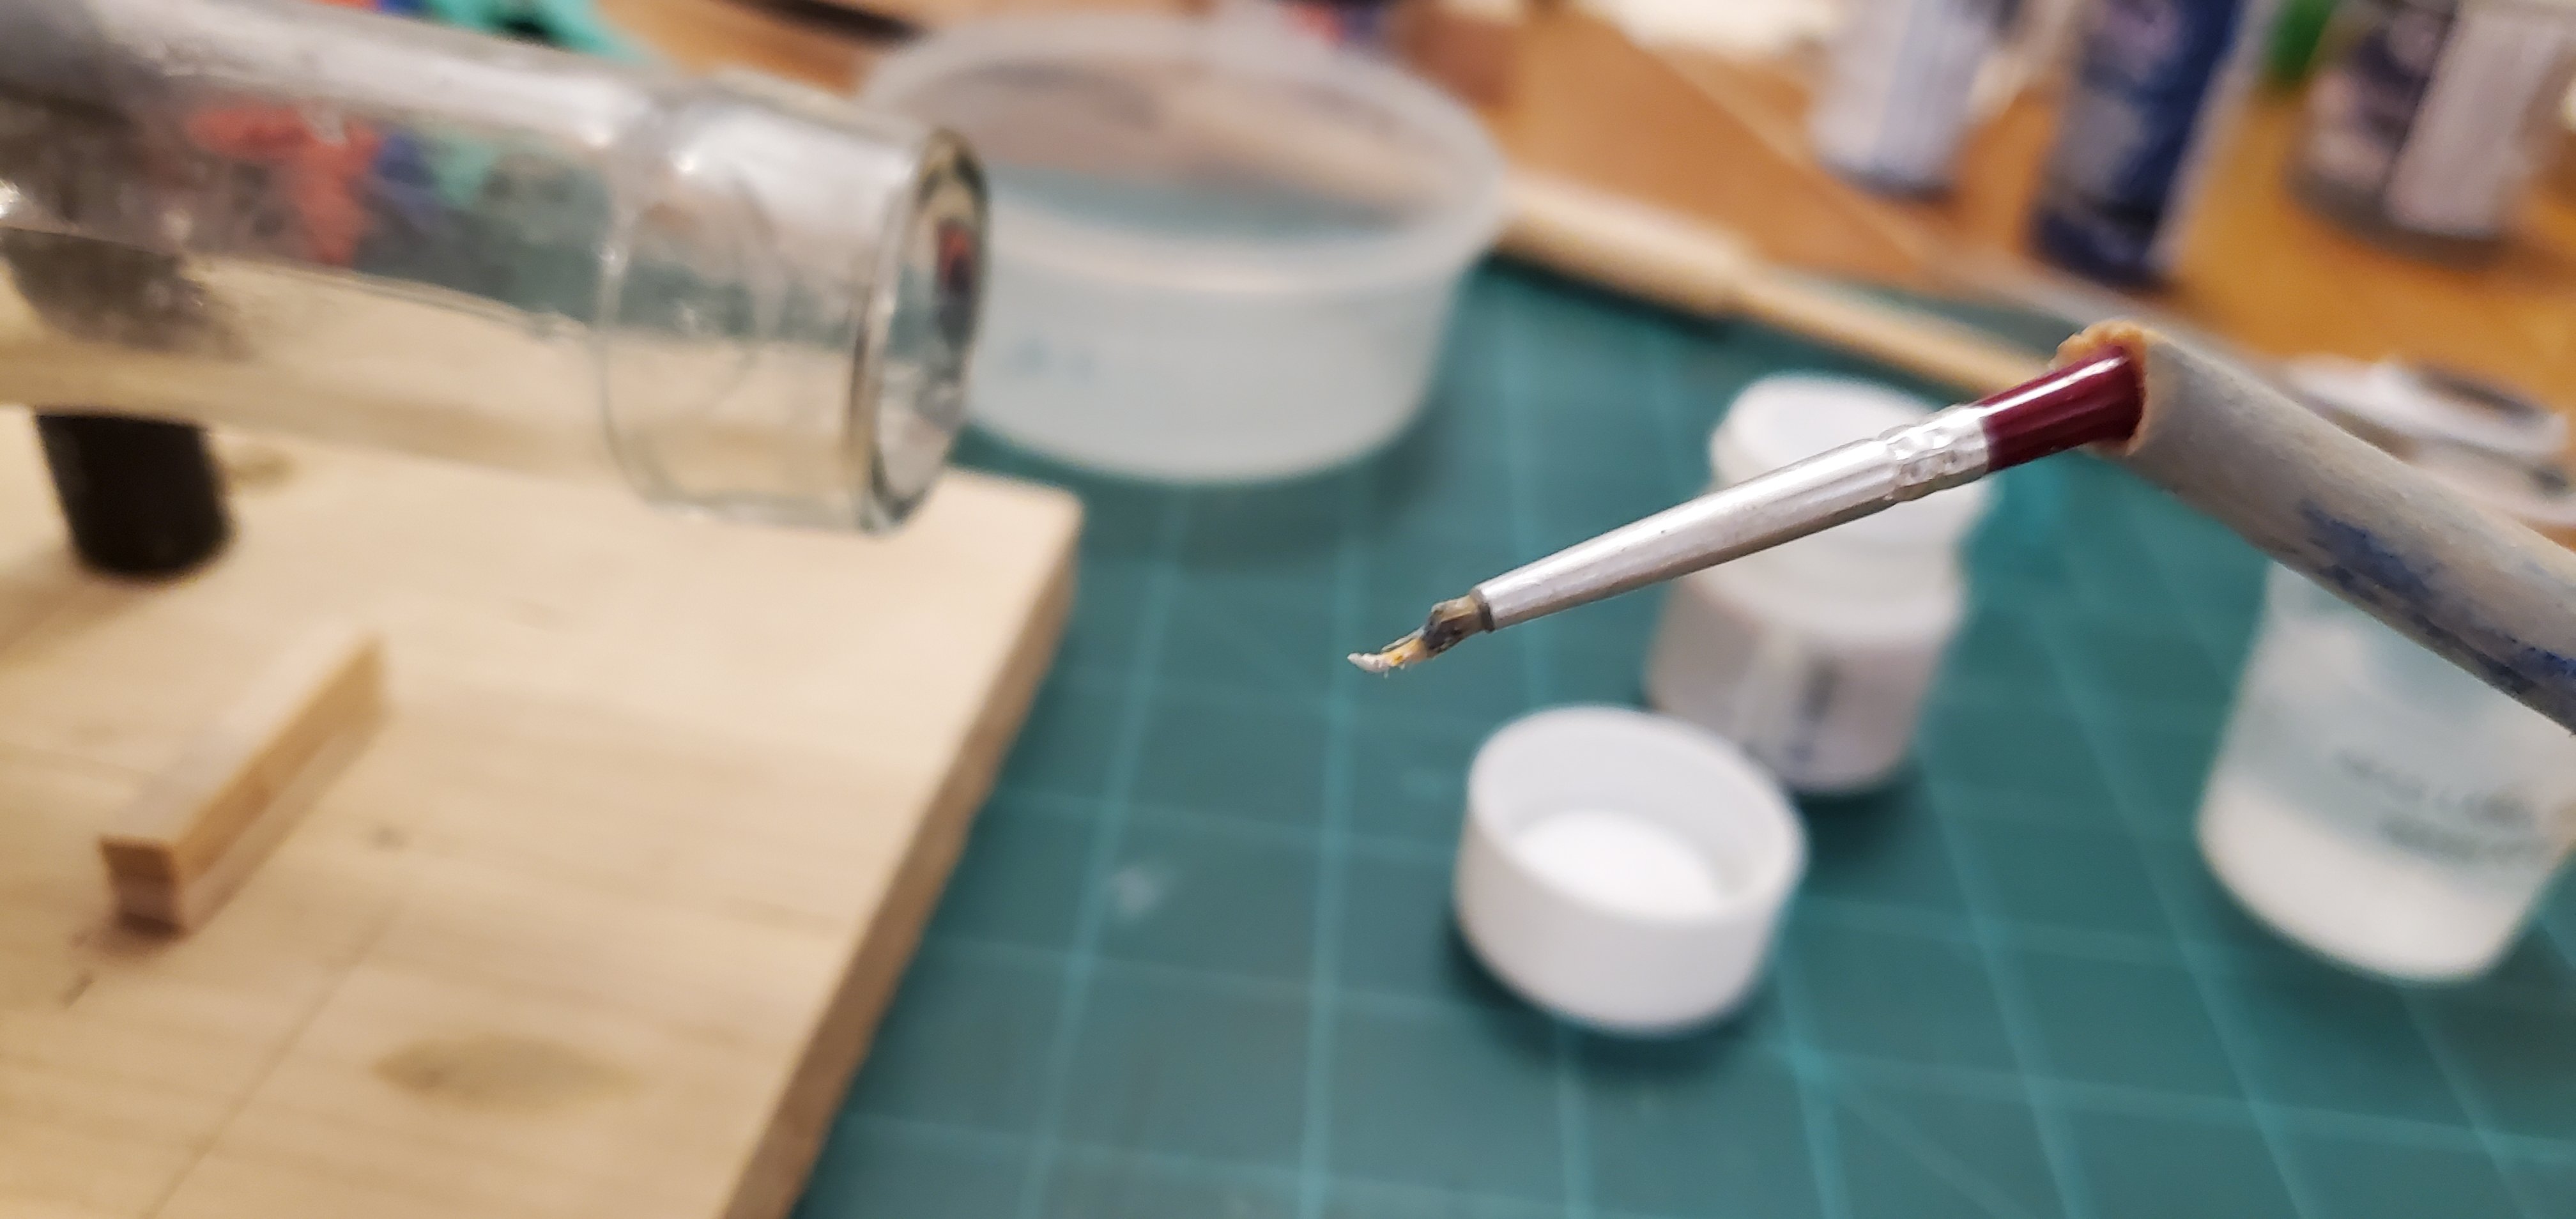
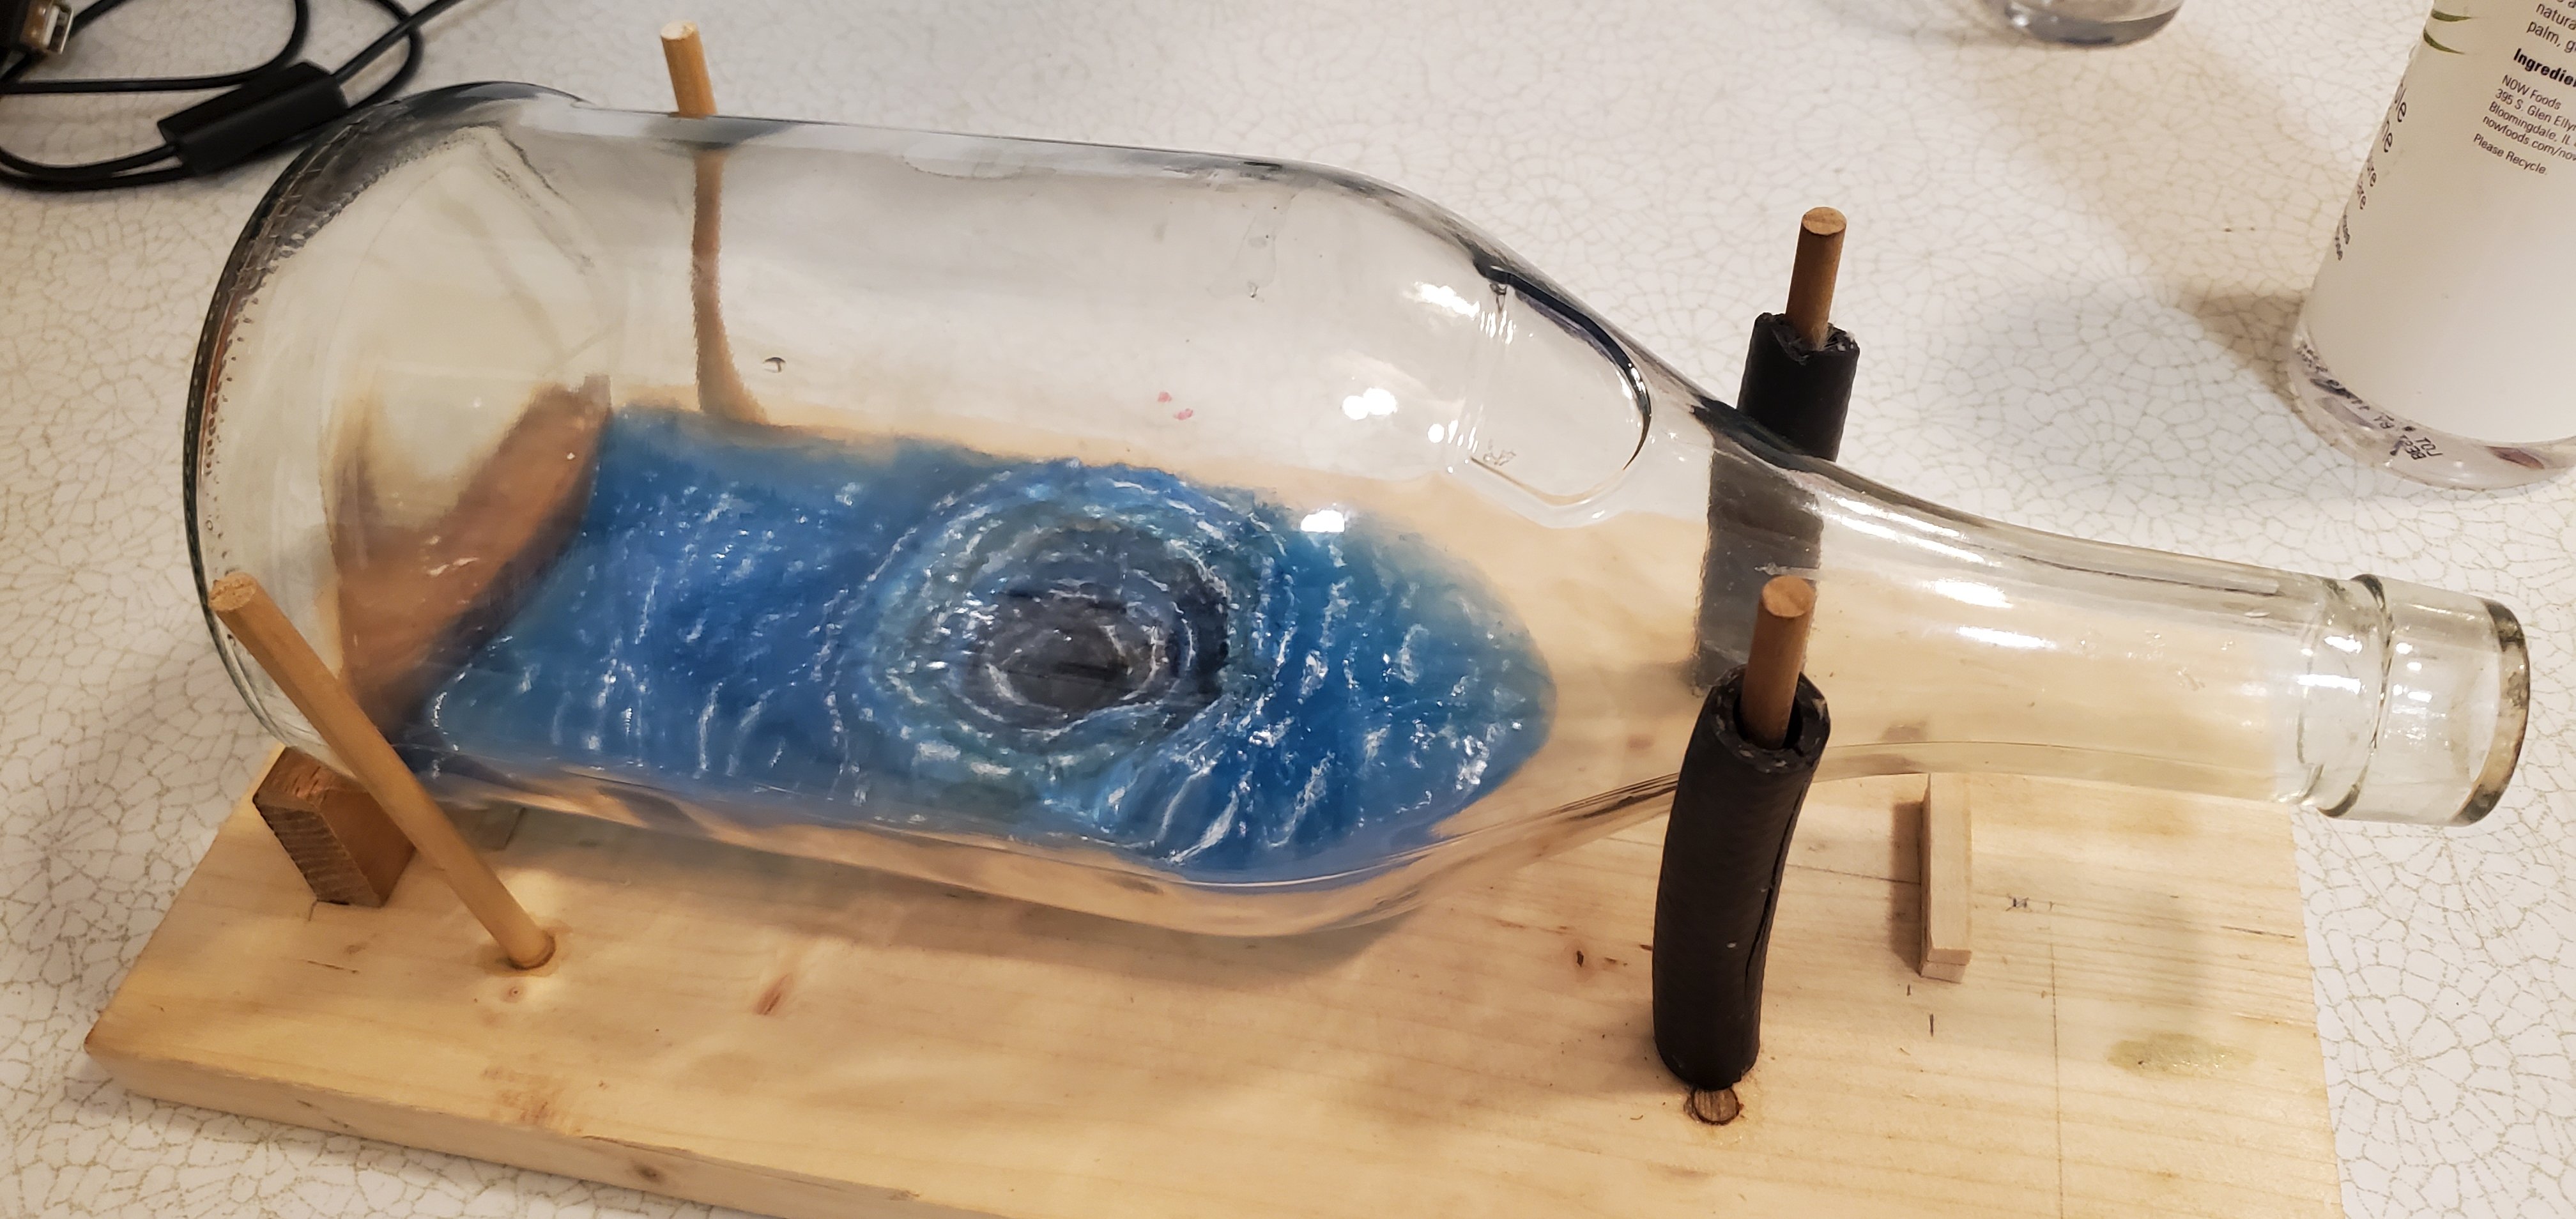
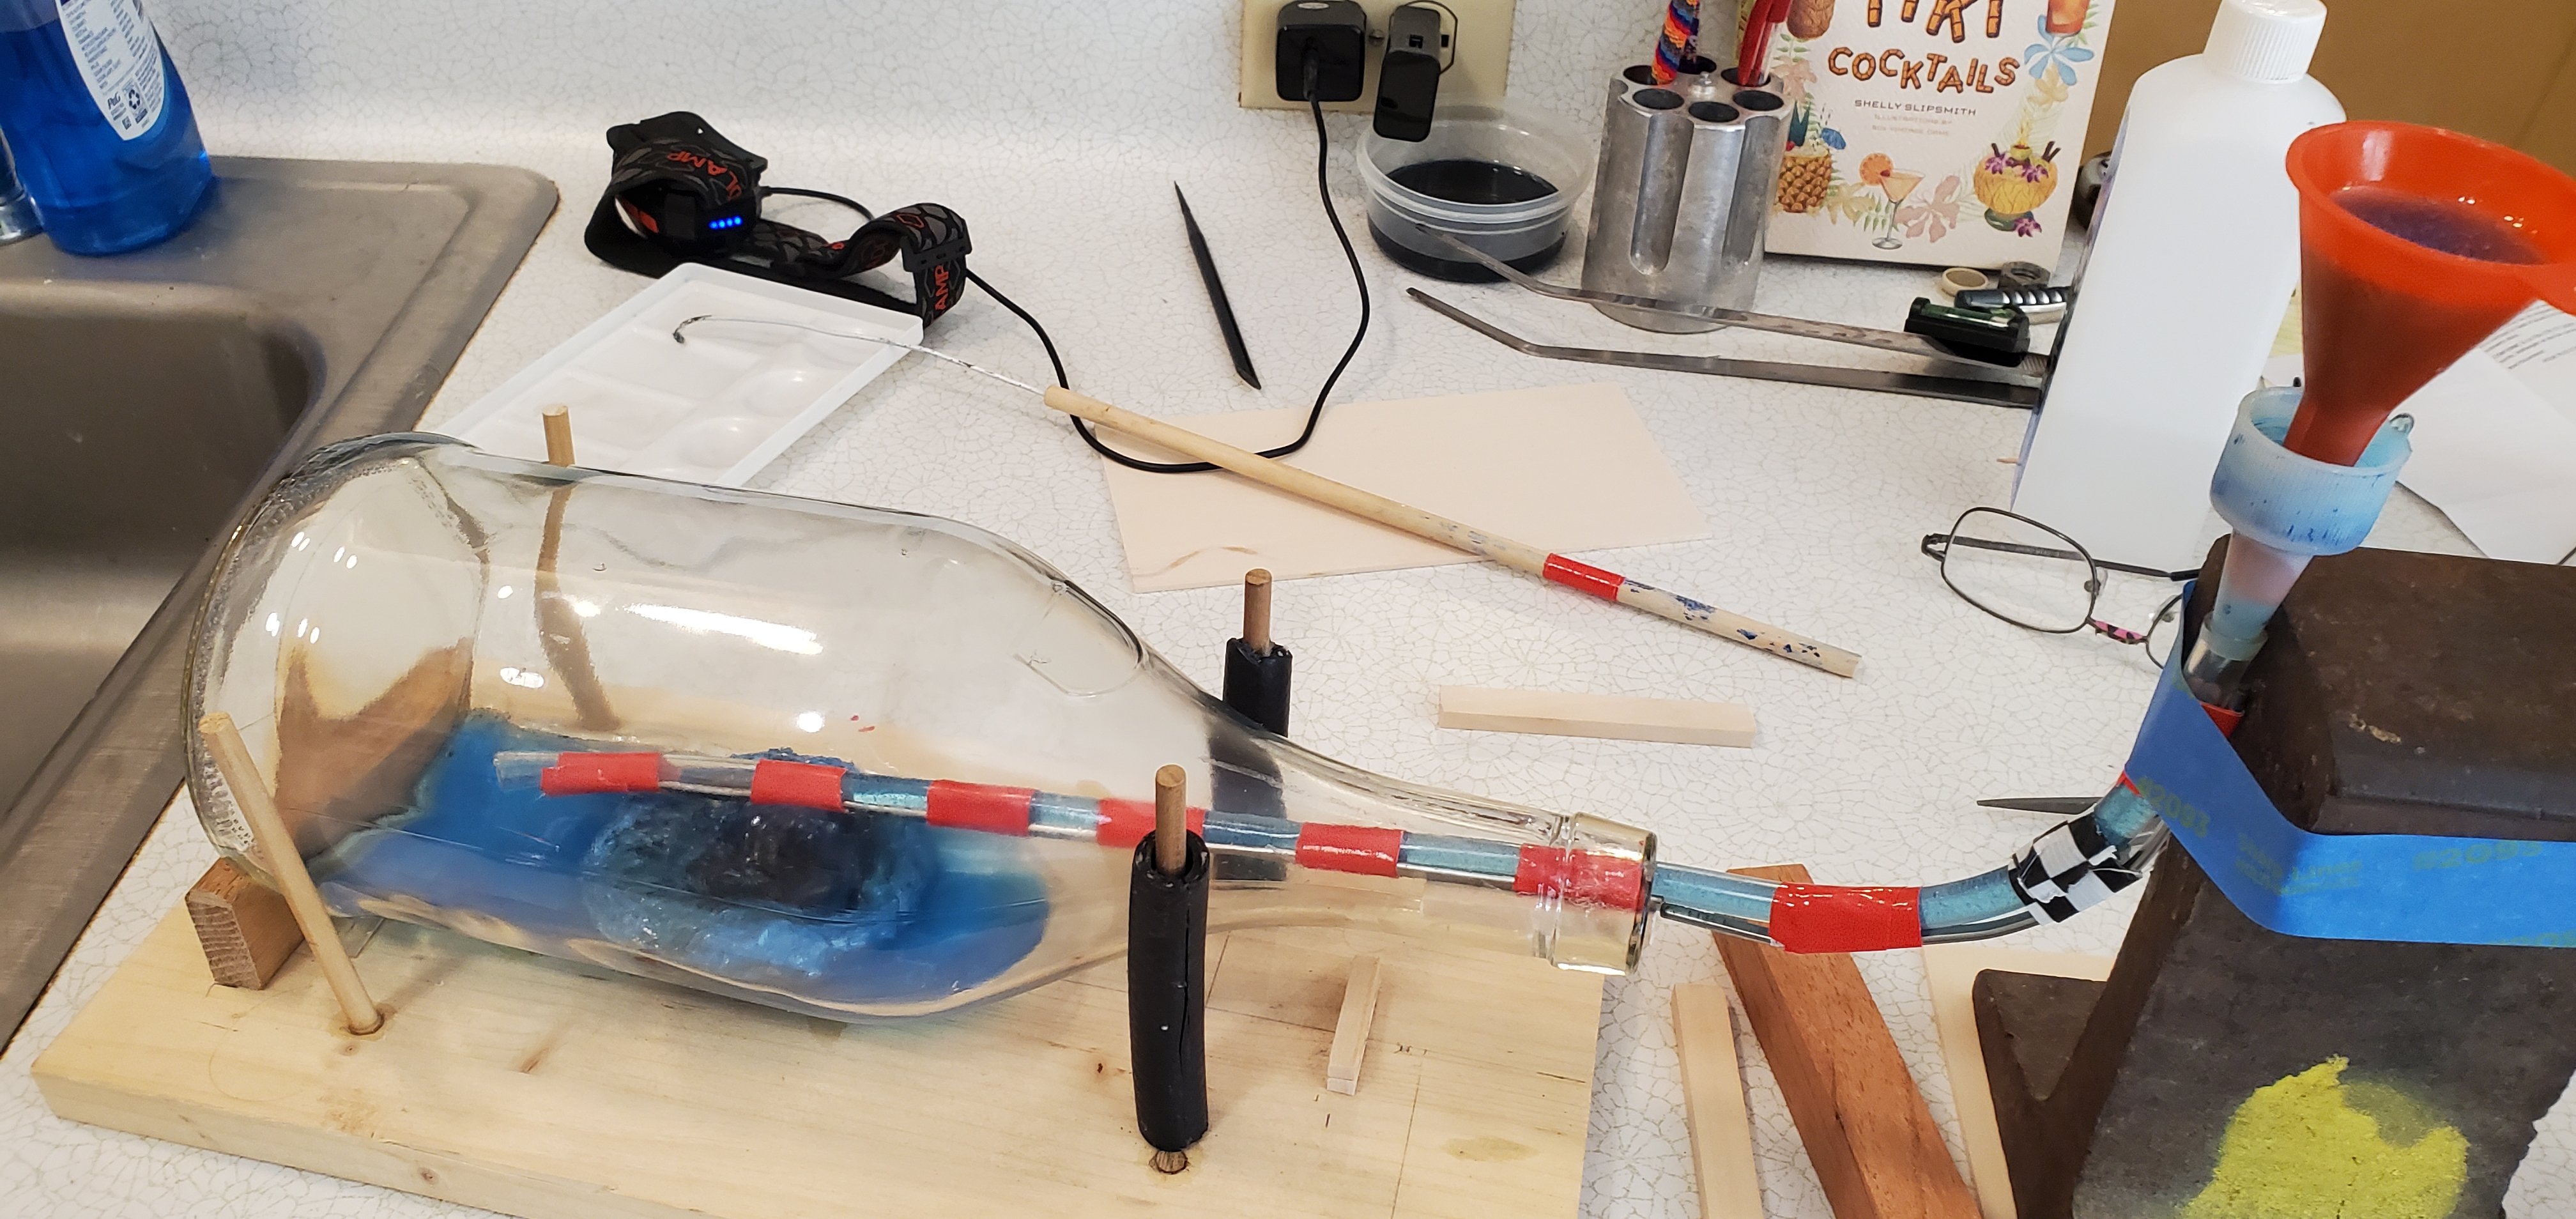
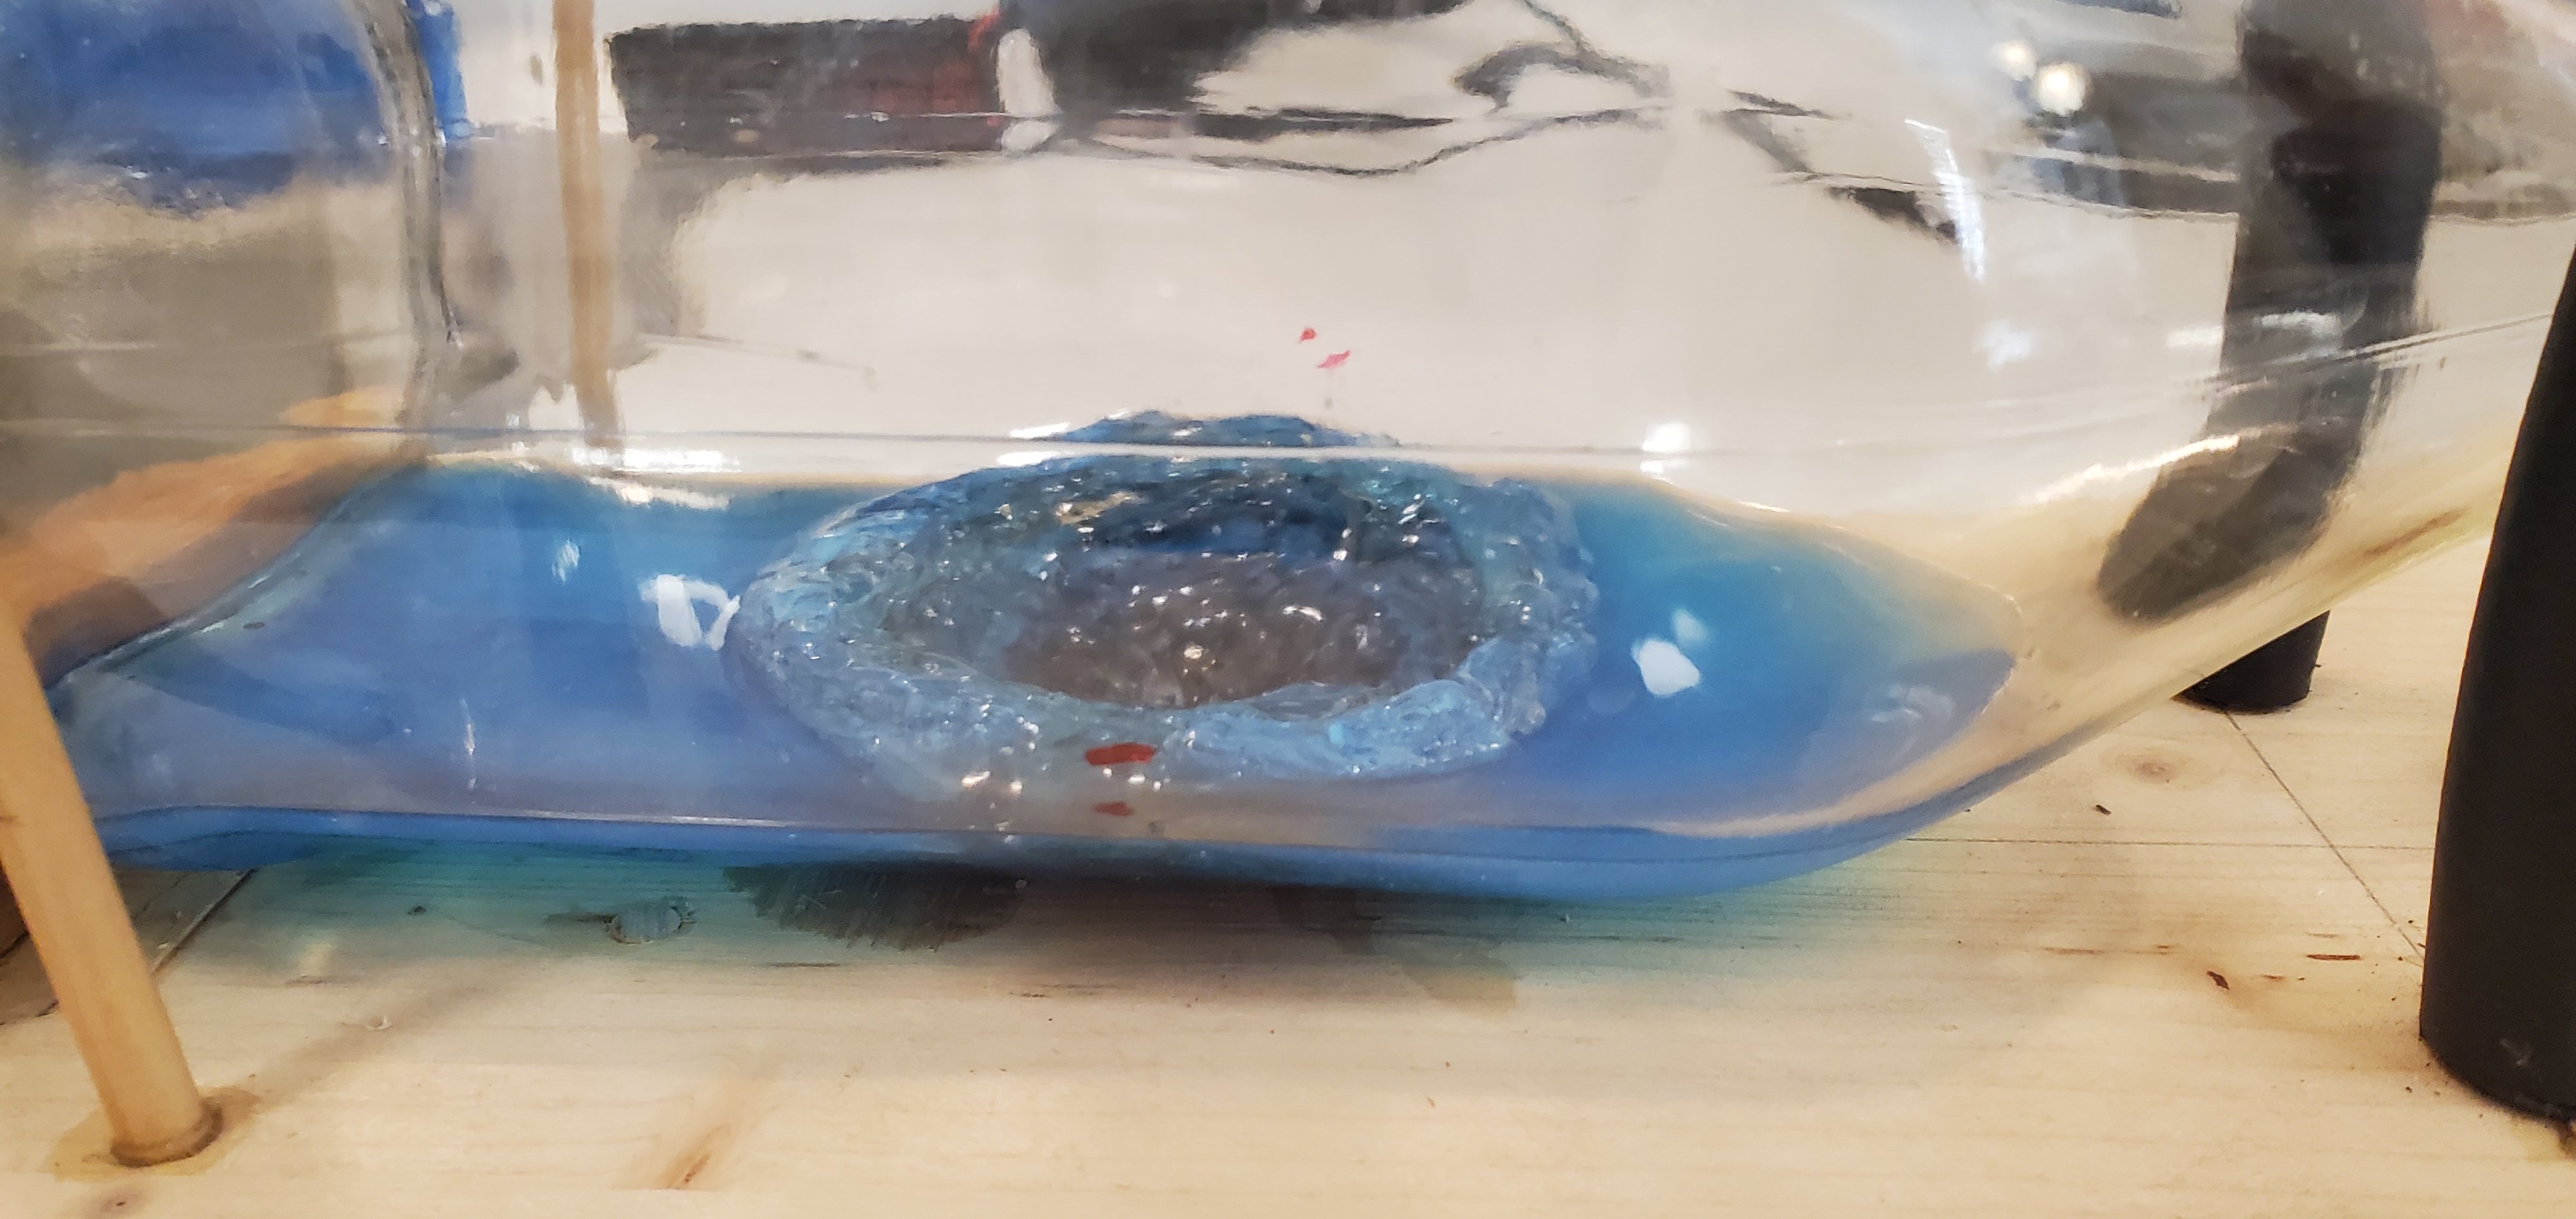
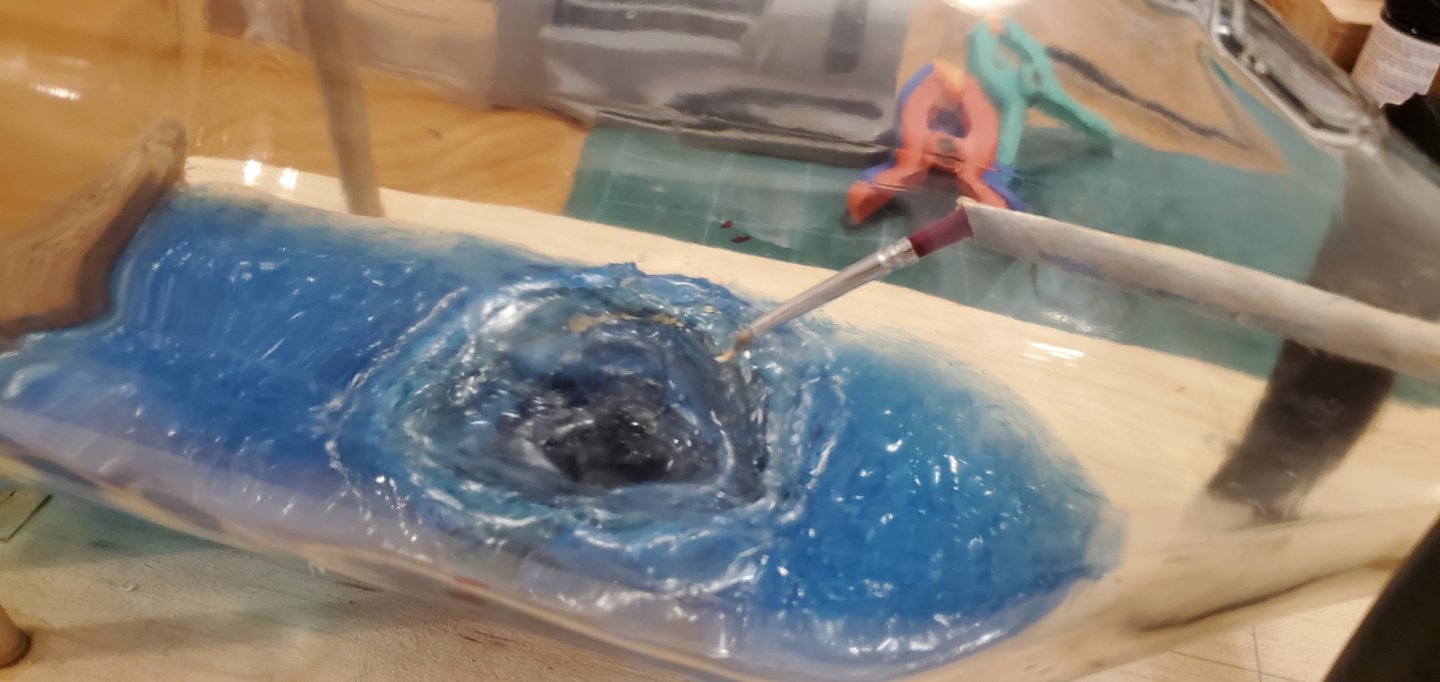
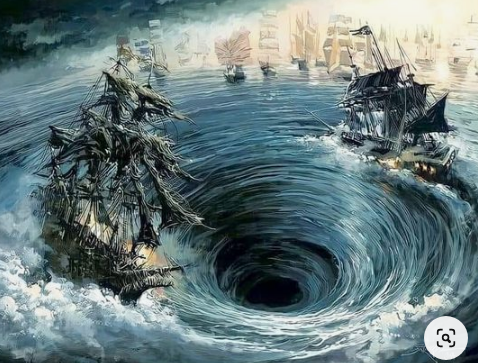
Seems like it doesn't it! I've got 850+ knots left on the lower ratlines of the Constitution waiting for me when I finish this thing here. And then the uppers after that! WOOHOO!!! Time to hit the bottle again and try to finish up the water effects. To build up the ocean water to the edge of the whirlpool in the front and back of the bottle, I needed to add about 1/8" - 3/16" of "water". That's a little too thick for acrylic gel medium (or at least the stuff I have) because it gets opaque if applied too thick. So I used Woodland Scenics Water Waves product. Getting the product in place inside the bottle was a tedious process and took several hours. I had to put it in one small dab at a time on the end of my long clothes hanger prong. You can see in the pic below that I swirled just a touch of matching blue color into the product. After I got the Woodland Scenics Water Waves into the bottle at the desired level, I used the tip of a small, hard brush to agitate the surface into ripples and waves. And here's where things got annoying. The water waves product is a thick gel that is supposed to hold its shape after you sculpt it (hence the name). However, When I checked on it an hour later, all my waves were gone. The product had self-settled into a nice smooth, glossy surface. That is NOT what it is supposed to do. So I recreated all my little waves and positioned a fan pointing into the bottle hoping to dry the product before it wilted again. An hour later, waves gone. GRRRRRRR. So I pretty much spent the entire day and evening recreating the waves every couple of hours until the product FINALLY stiffened enough to somewhat hold the wave shapes. I contacted Woodland Scenics and complained. They said I must have gotten a bad batch and are going to send me a new bottle to try. Too late for this project, but happy to try it again on the next one. I let it sit overnight to dry out completely, then added the white caps to bring the whirlpool and surrounding ocean to life. This was done with Tamiyo whit paint and a brush that has maybe 3 bristles left on it. Here's the completed whirlpool along with the picture I was attempting to recreate for comparison. I think I'm in shock. I keep looking at it in disbelief. It's not a perfect match to the picture, but I think I actually pulled it off and made a halfway decent looking whirlpool inside the bottle! I was not going to give up on it, but I have to be honest and admit that there were more than a few times over the past couple of weeks that I thought it was an effort in futility. That southern breeze you feel in Canada, @Knocklouder, is my huge sigh of relief!


- 185 replies
-
- 17
-
-
-
- Flying Dutchman
- Black pearl
- (and 2 more)
-
No worries, Keith. I just enjoy seeing how the sausage is made, especially on something as unusual as your engine.
- 732 replies
-
- 6
-
-
-
- Lula
- sternwheeler
- (and 1 more)
-
Great job on the engine, Keith! A very nice replica of the picture. What are all the individual parts made from?
- 732 replies
-
- 6
-
-
-
- Lula
- sternwheeler
- (and 1 more)
-
I actually like the look of your initial fold of the fore end. To me, it hangs in an unruly but natural way. But if you are trying for a look that is more tidy and ship-shape, then refolding is a good idea. Beauty is in the eye of the modeler!
-
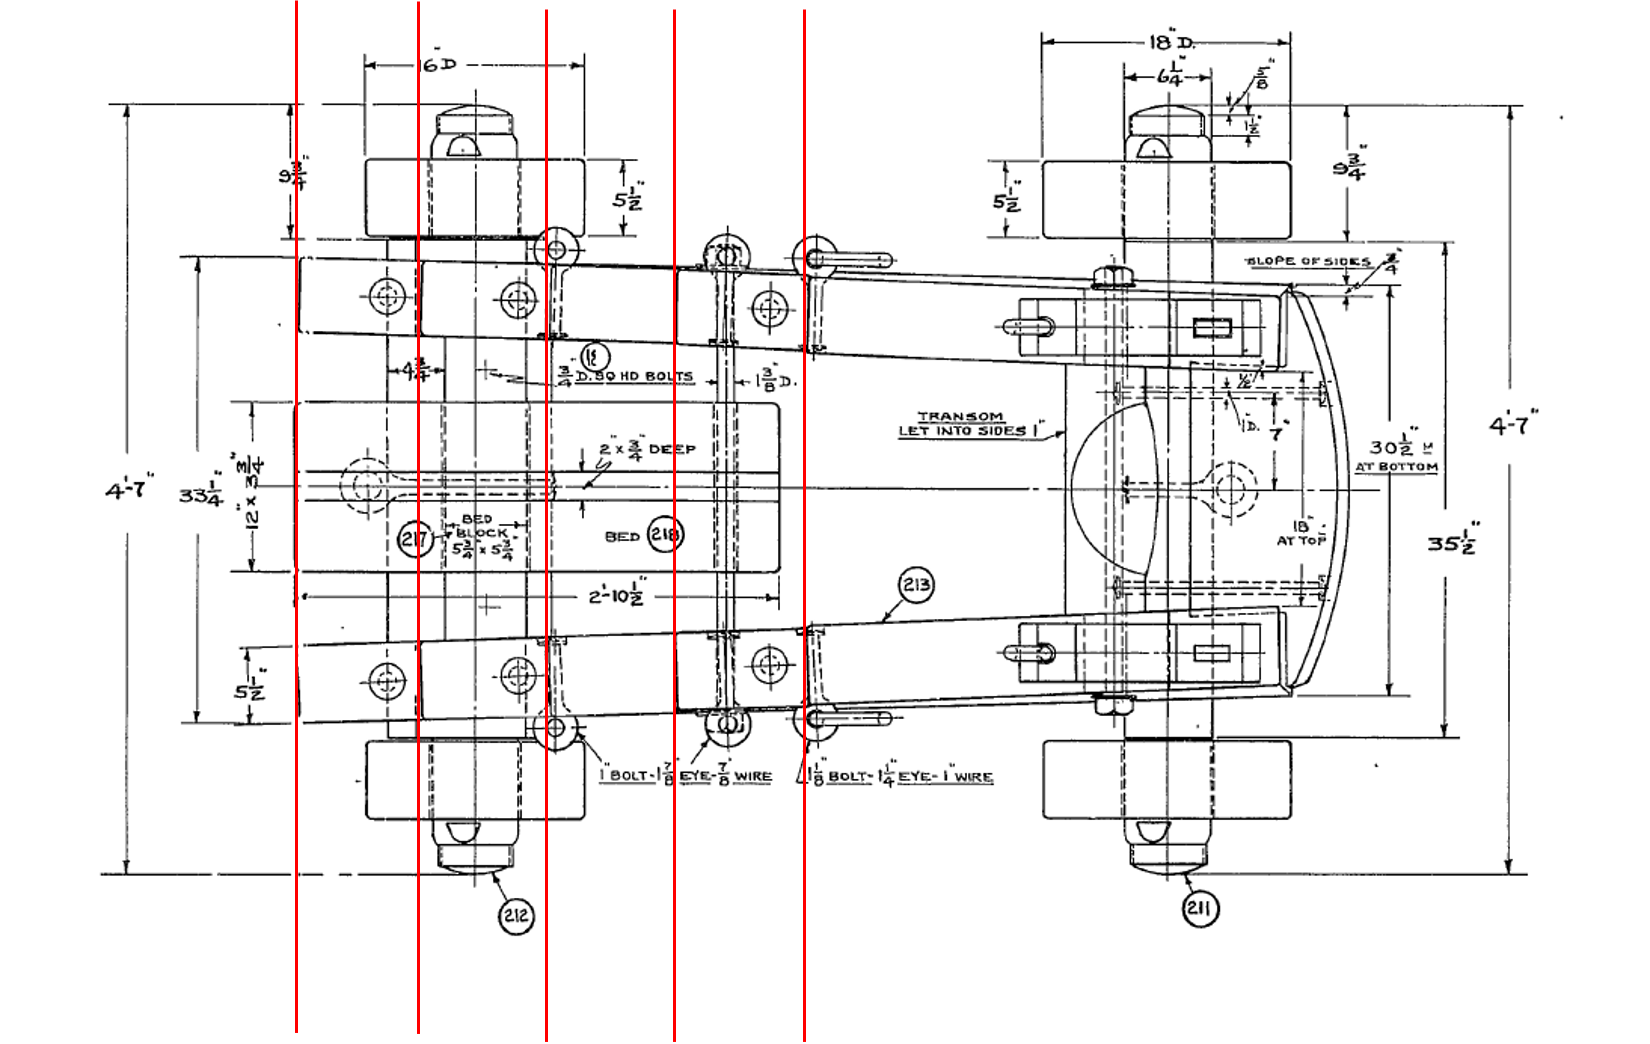
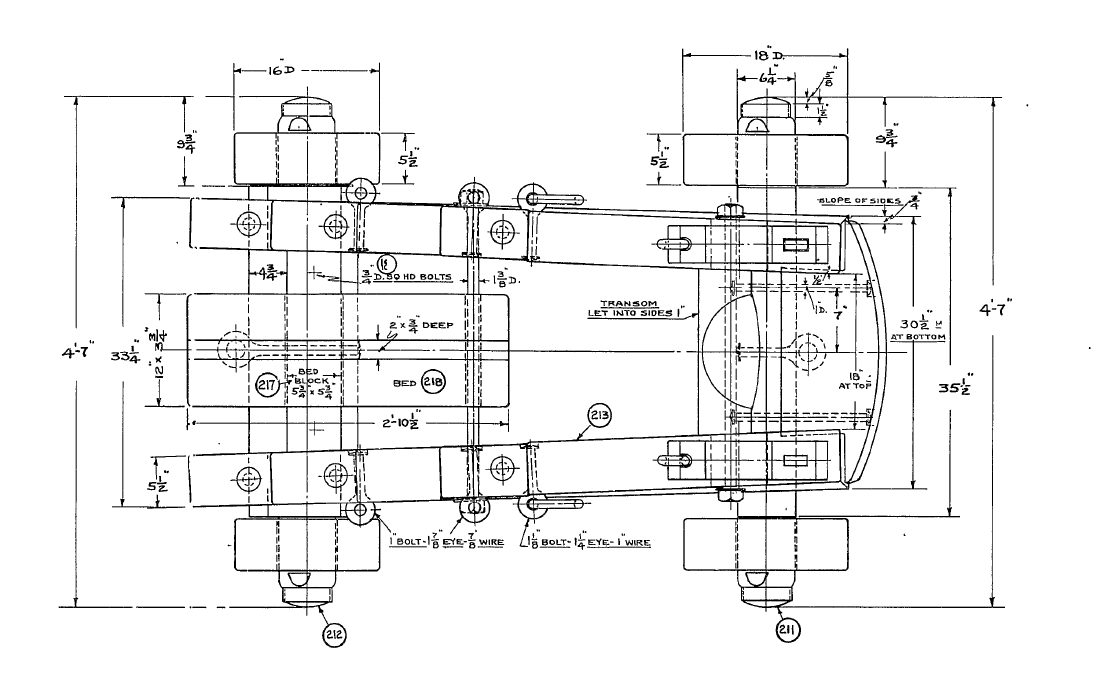
Well Alan, you made me go back and take a closer look! I drew some vertical lines on the plan and the steps for both brackets do appear to be off the centerline, but just barely. However, they do not appear to be exactly perpendicular to the brackets either. So I think Thukydides is right and further investigation is required to get a definitive answer.

-
Given the detail of the plan from the Constitution Museum's website, I would be surprised if the draftsman took a shortcut with the steps. Just my opinion though. 22130-GunCarriages.pdf
-
This is from the USS Constitution Museum's website - Modeler's Resources page (https://ussconstitutionmuseum.org/discover-learn/modeler-resources/). It's from a plan for a 32 pound gun/carriage. It looks to me like the steps are perpendicular with the brackets and not the centerline.
-
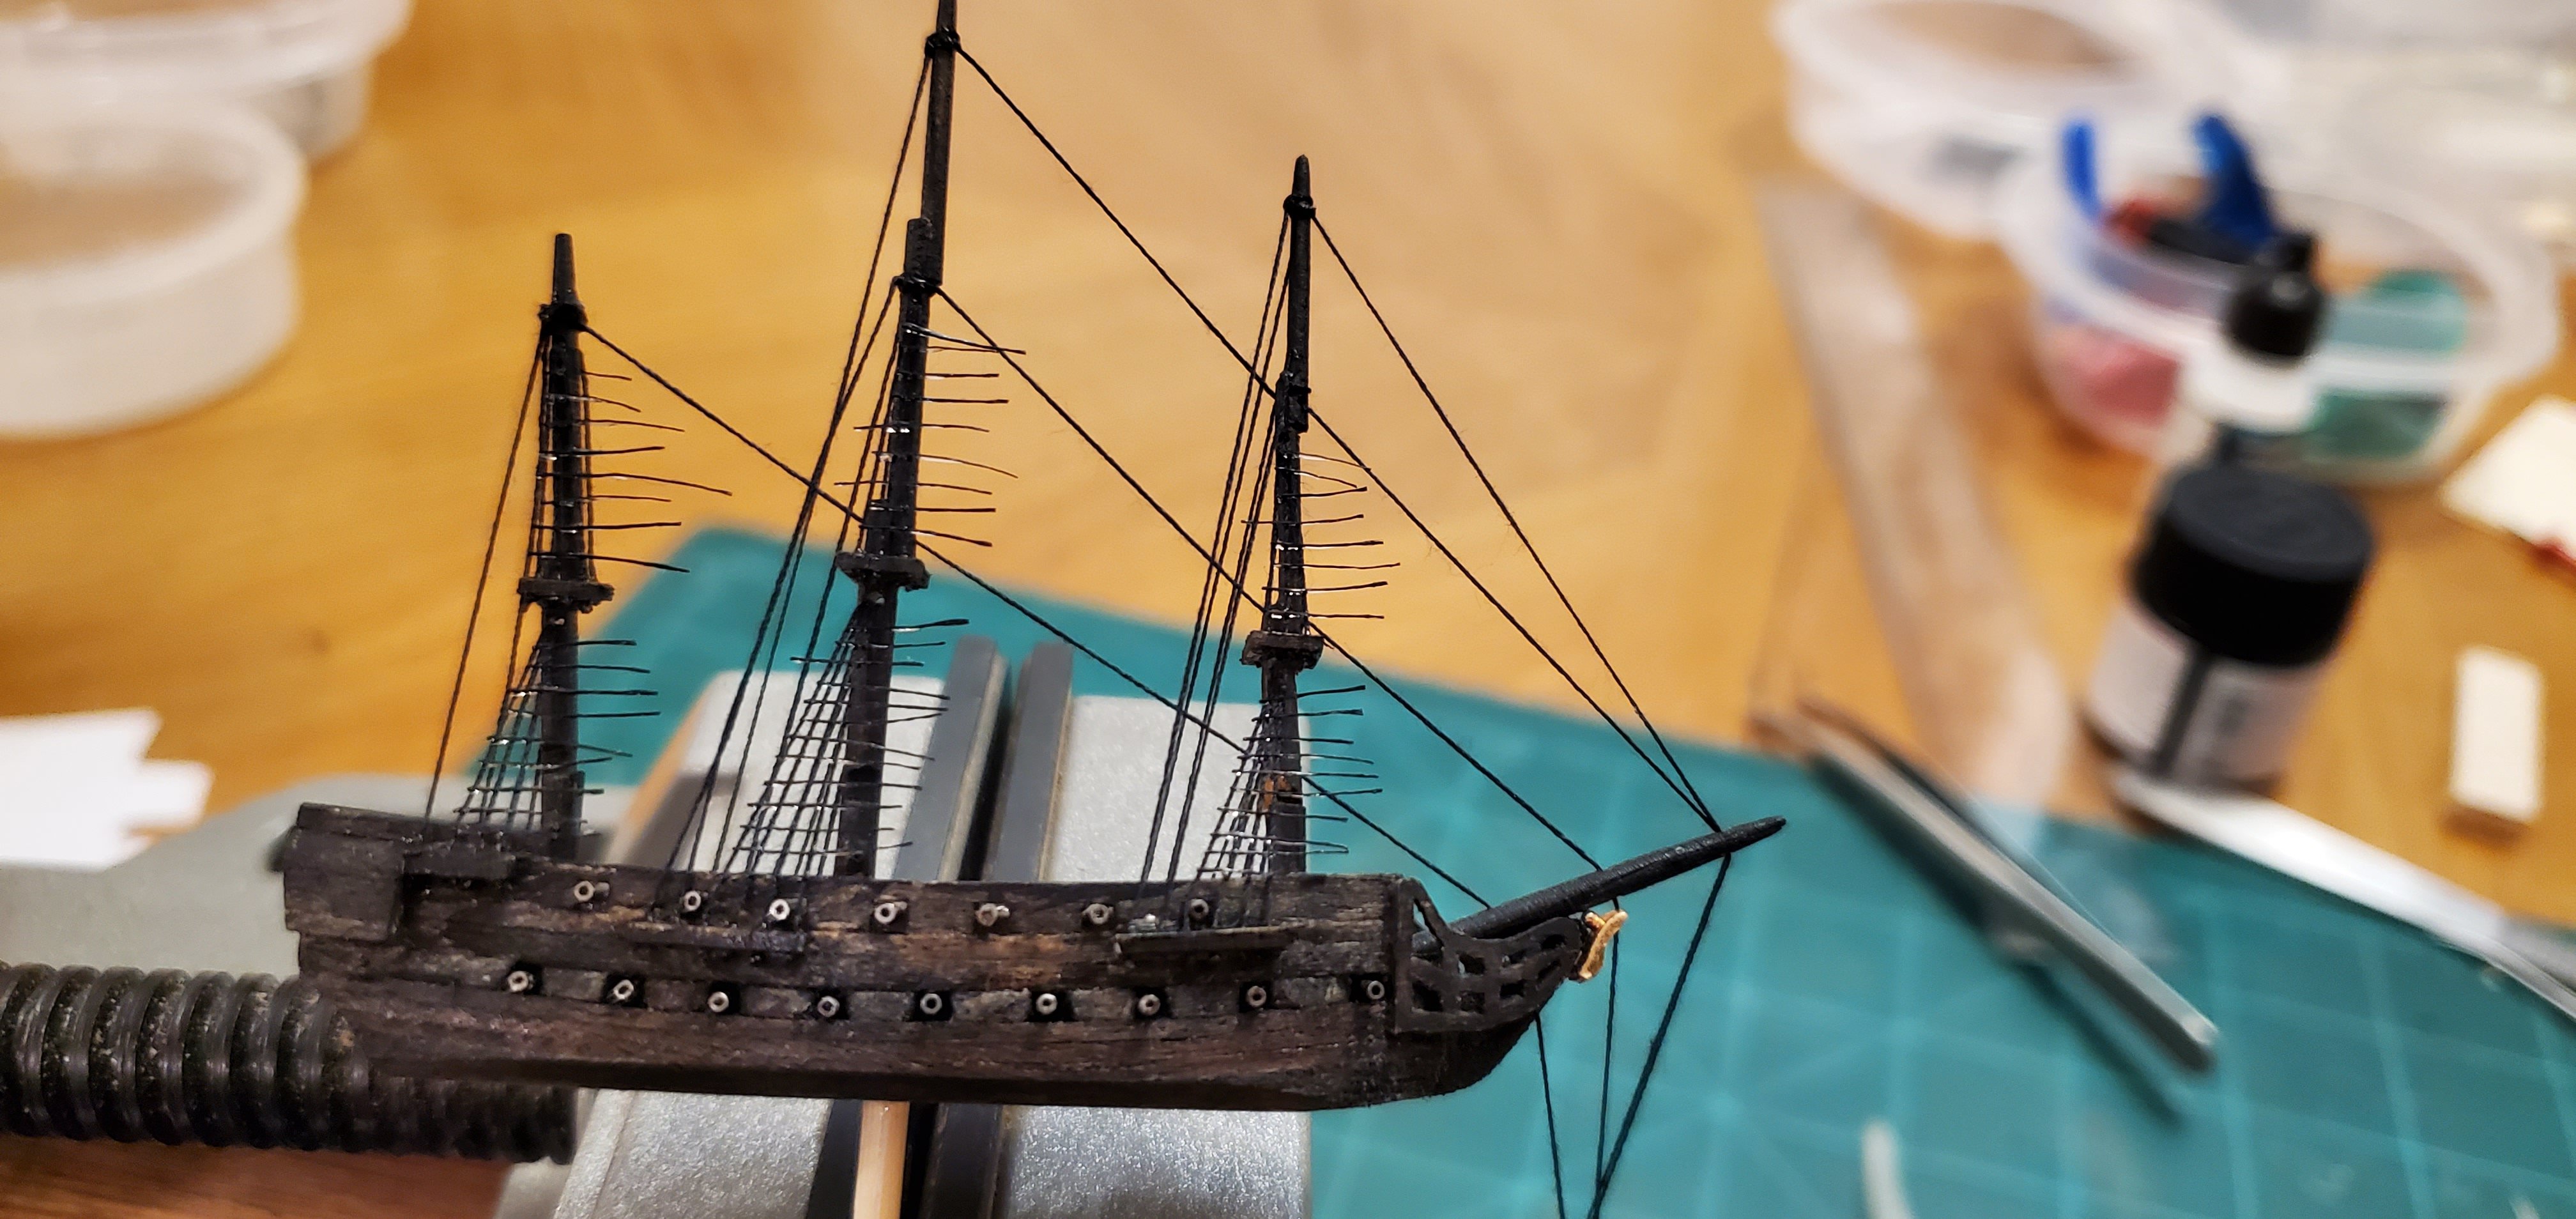
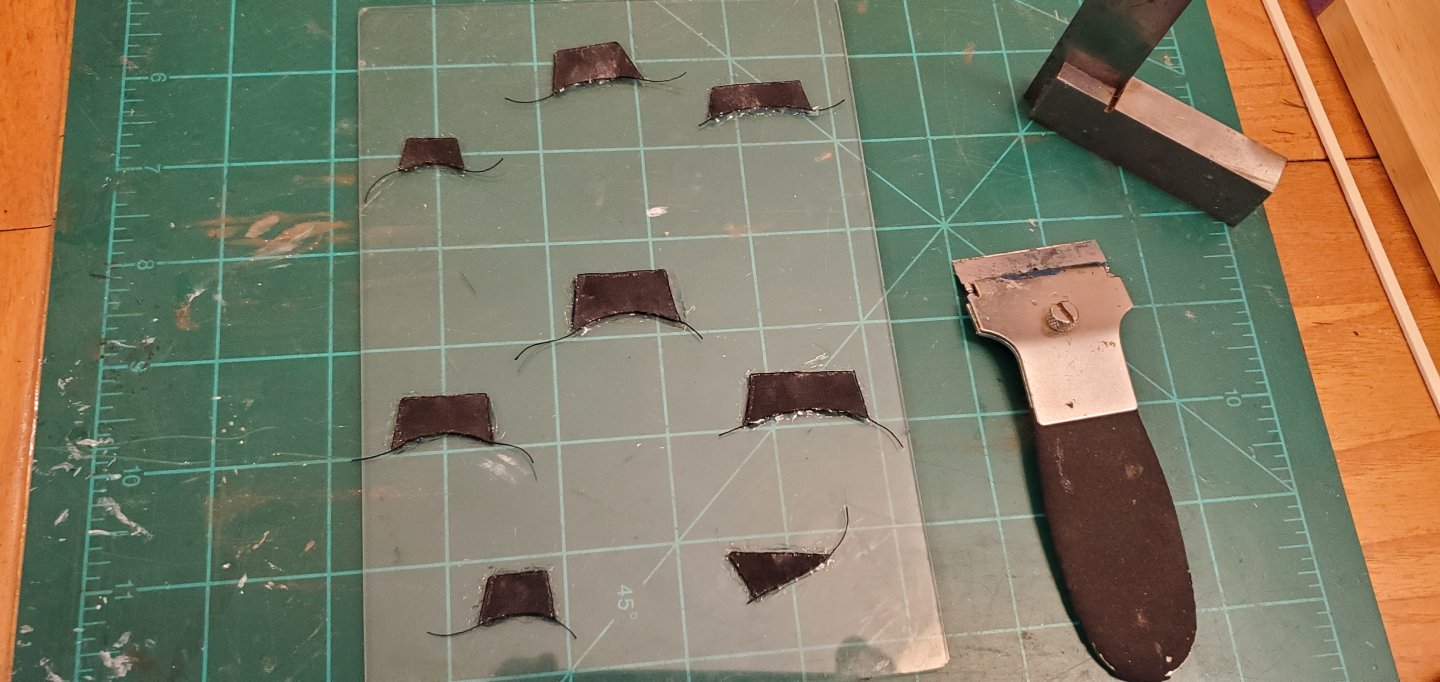
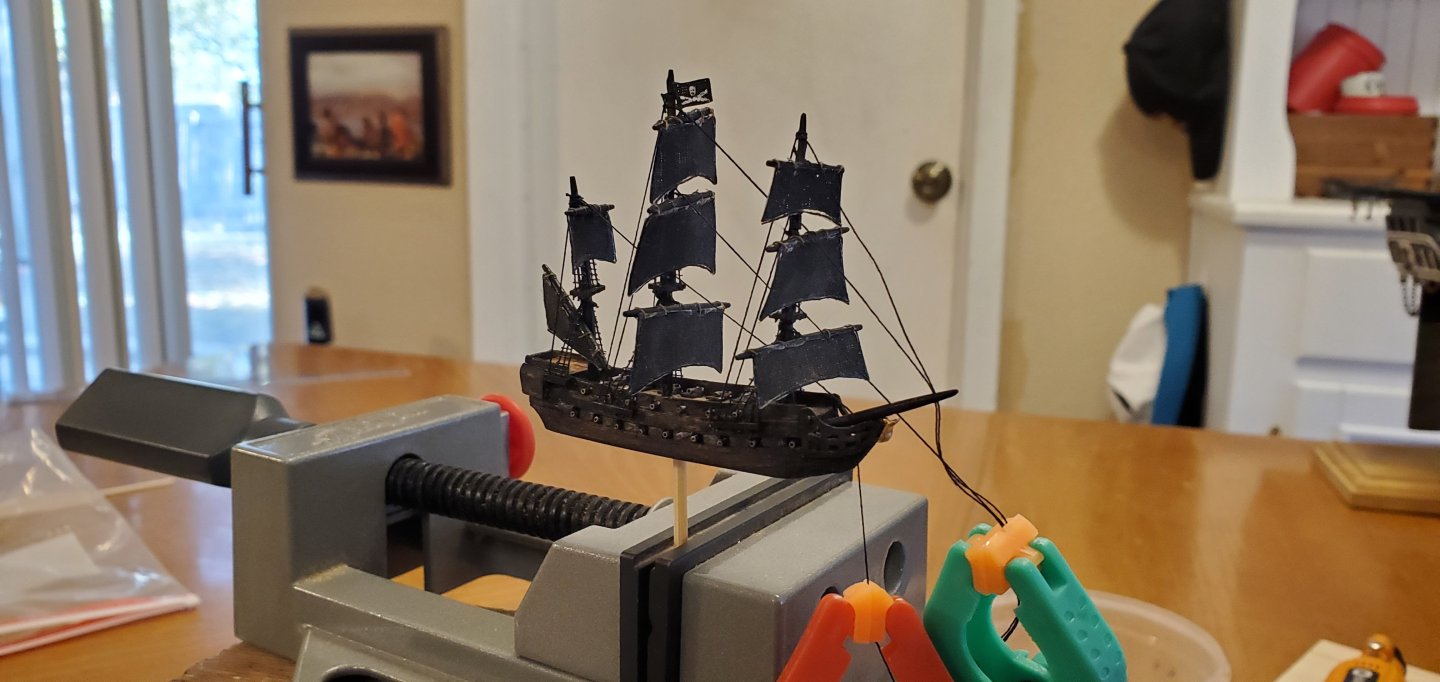
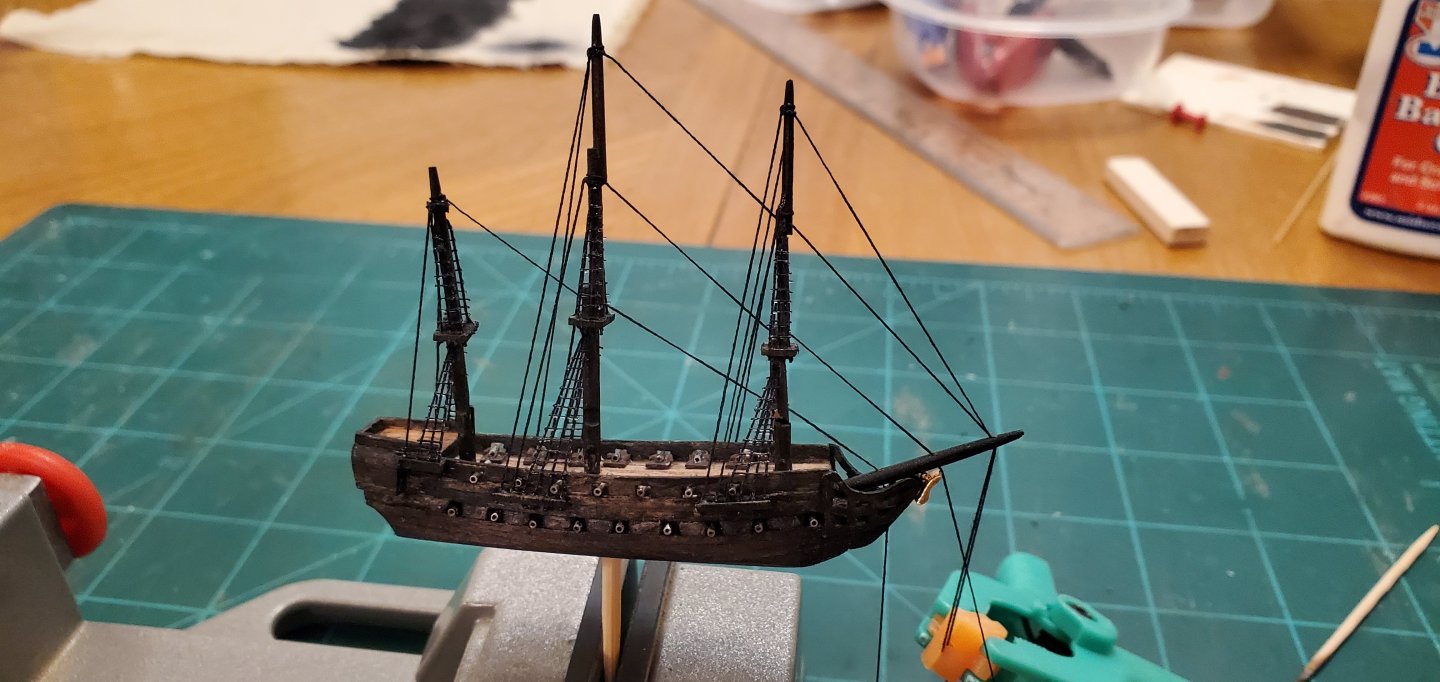
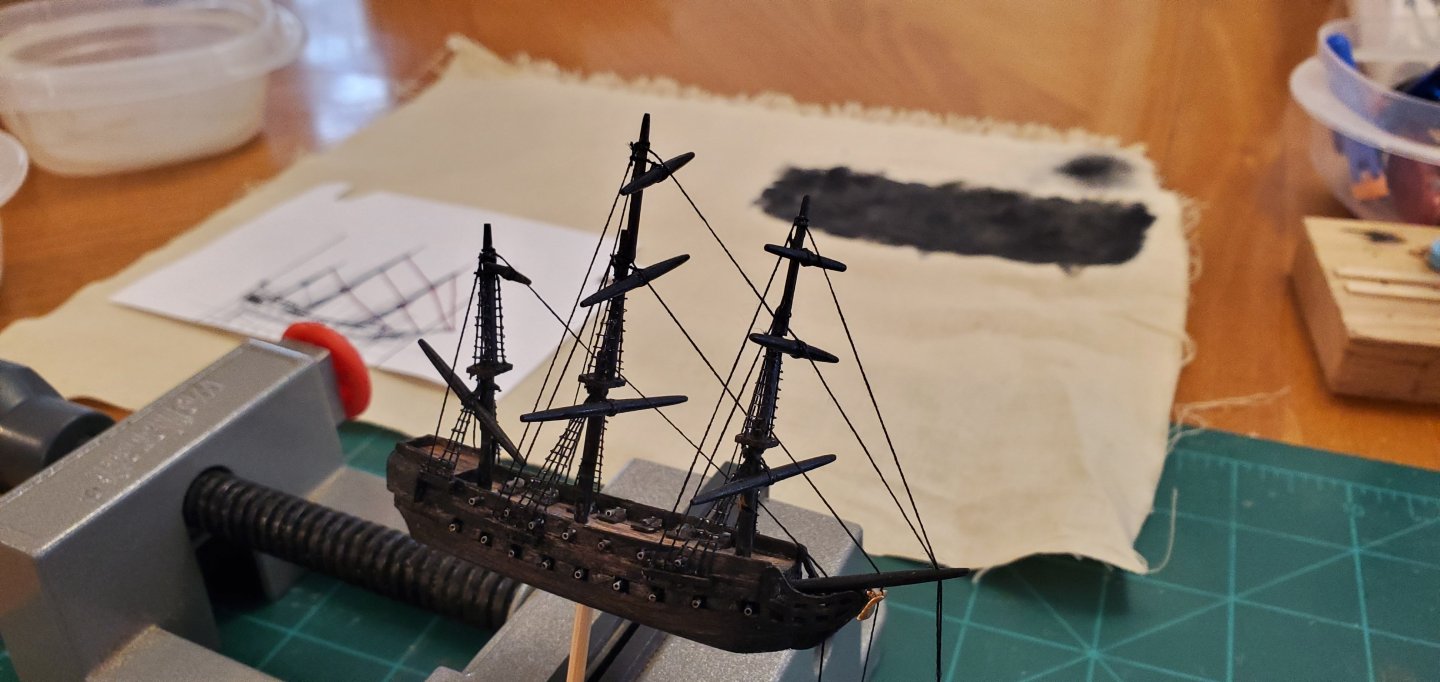
Amen to that, Gary. And such a thrill to find something in that junk box that is just what you need. Entering the home stretch on the Pearl. First the bamboo masts built and in place. Next, added the mast tops and black paint. Then added the stays (which serve as the pull threads), shrouds and backstays. Next, the ratlines. So much easier on this ship than the much larger Constitution! I cut fly tying thread into 1/4" to 3/8" pieces, drag them thru fabric glue, and lay them across the shrouds. After the fabric glue dries, I snip off the ends with cuticle trimmers. There's a few ends in the pic below that I went back and trimmed a bit closer to the shrouds. I managed to snip all the edges without cutting any of the shrouds. I've done that before and it's a real pain to try and remedy. I did get careless and cut 2 of the stays/pull threads but they were an easy replacement. Finally, I added the yards. Other than some minor details, the only thing left to add to the Pearl is the sails. The epoxy resin inside the bottle is dry now, so before I do the sails, I am going to finish up the water effects inside the bottle. I'm anxious to get going on that.


- 185 replies
-
- 14
-
-
-
- Flying Dutchman
- Black pearl
- (and 2 more)
-
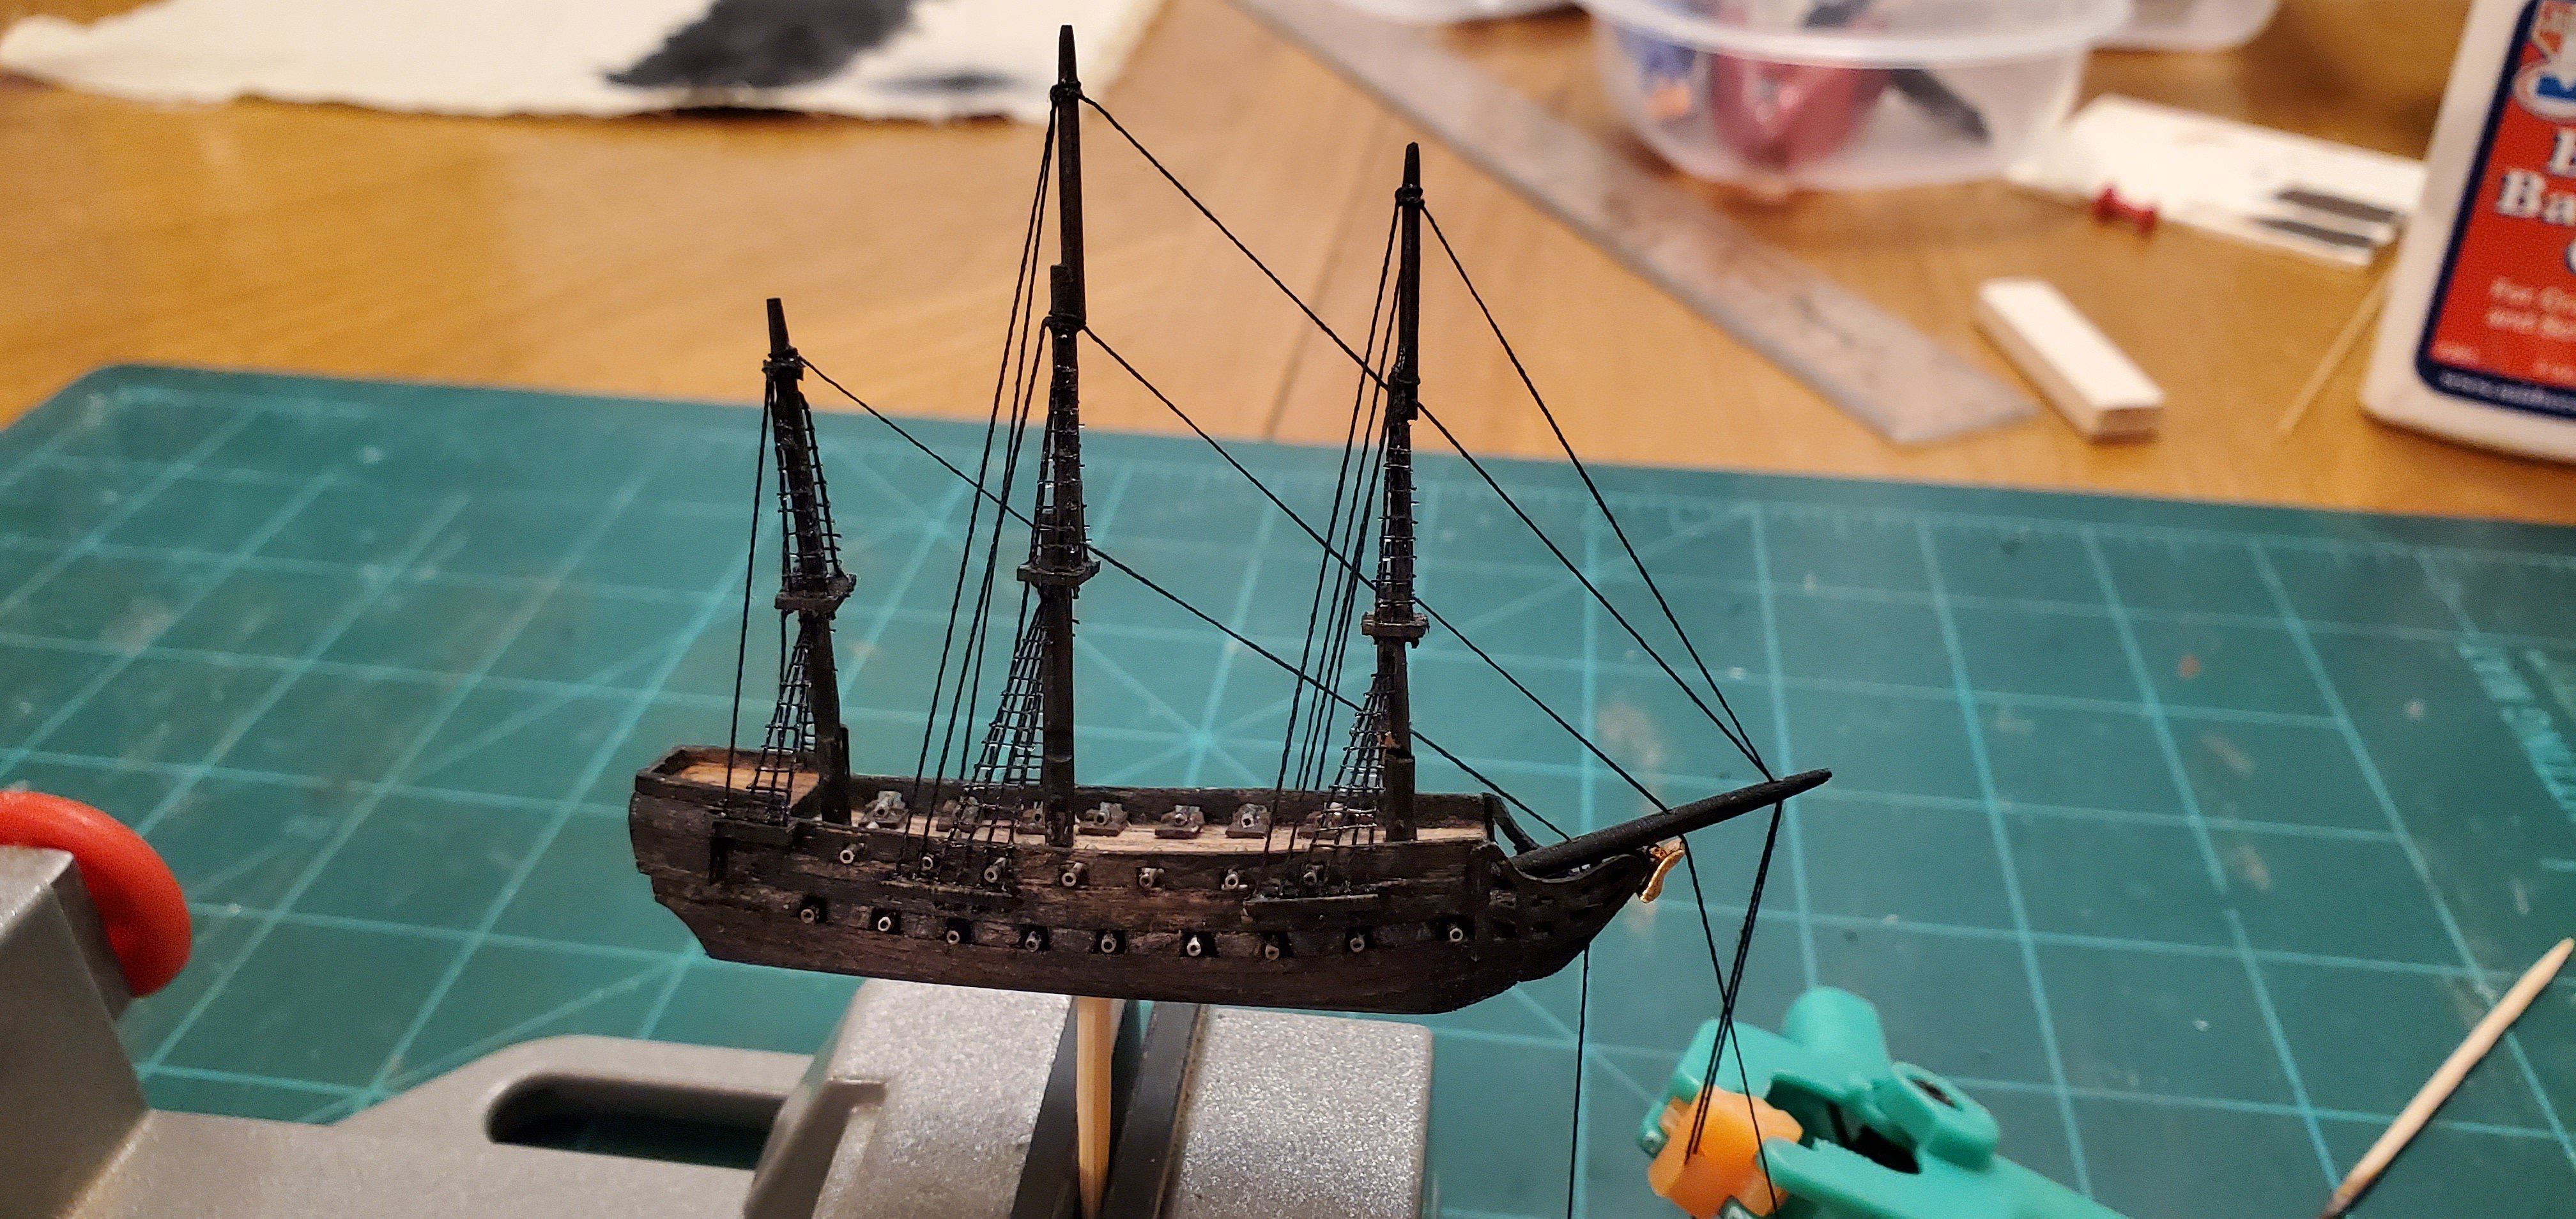
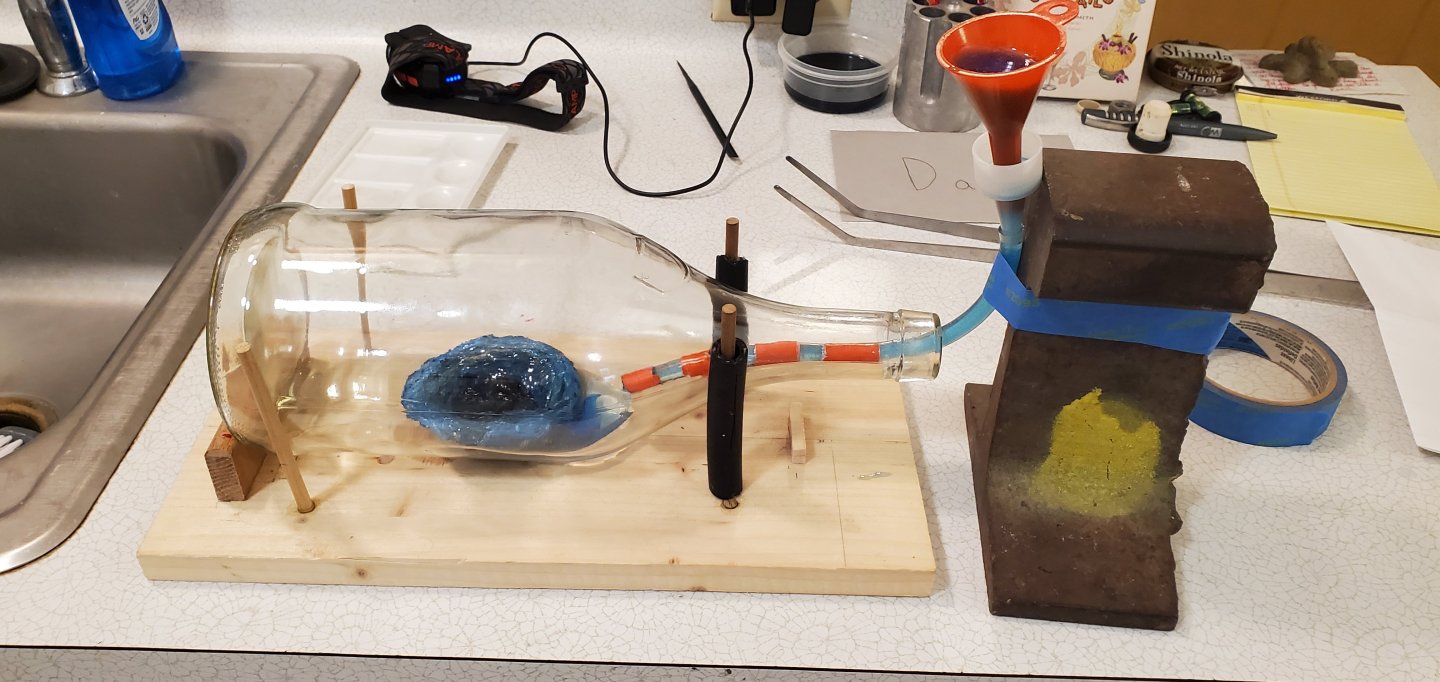
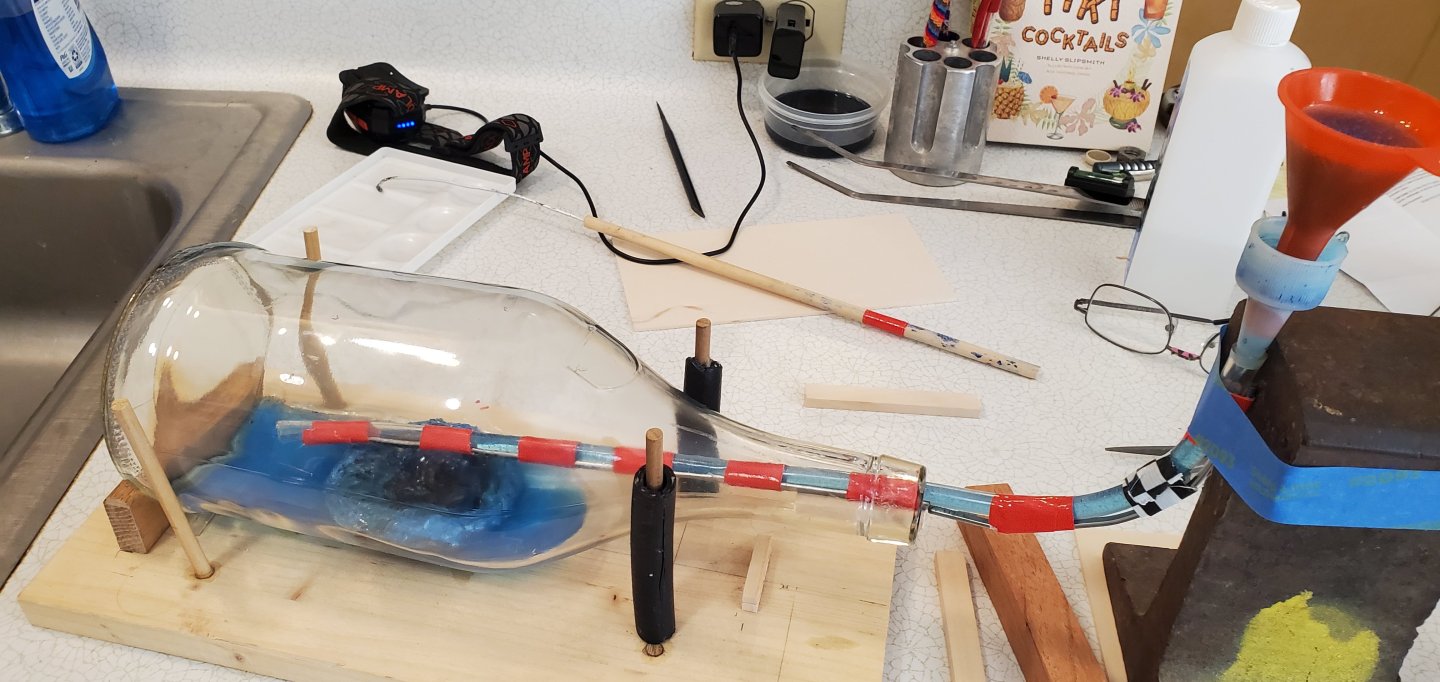
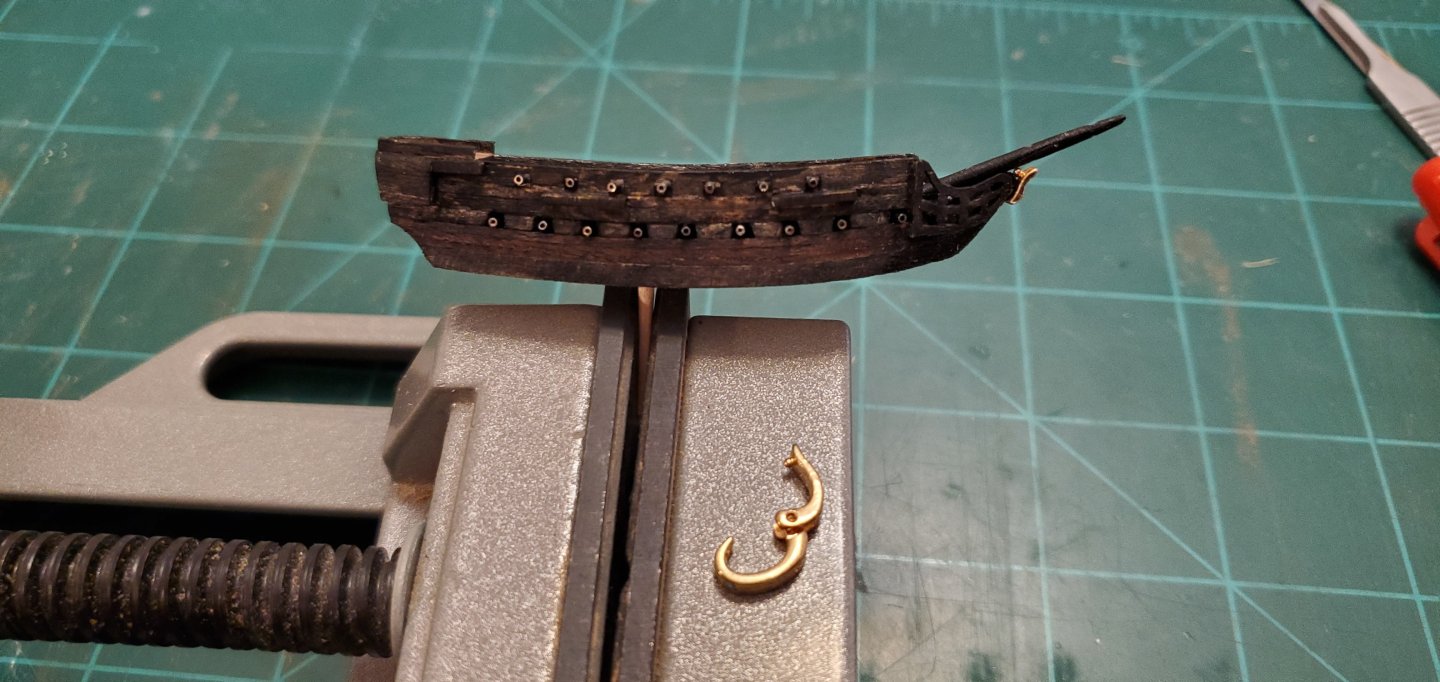
The whirlpool failed a couple more leak tests. Ugh. I started getting real impatient because it was taking a couple of days each after each test for the water inside to dry out, and that was with a fan blowing air inside the bottle constantly. So decided to try what I think @Javelin and @Knocklouder were suggesting, which was to basically coat the inside of the whirlpool with caulk rather than plugging leaks on the outside. After I did this, I decided no more leak tests. I was just gonna let er rip and see what happened. So I mixed some epoxy resin and used resin dye trying to color match it with the outer ring of the whirlpool. I think I got pretty close. Then I set up my funnel/surgical tube fixture and started easing the epoxy resin into the bottle in front of the whirlpool. Hobby Lobby did not have my normal brand of epoxy resin in stock so I tried a different one. This one (Clear Cast Epoxy Resin) mixed easily and took the dye well, but it had a much higher viscosity than my usual brand so it was super slow flowing thru tube. I had to put on my higher magnification glasses and look at the tiny air bubbles to make sure it was actually flowing. Things stared out pretty well. But then I hit a problem. I thought I could just pour the resin into the area in front of the whirlpool and have it work its way thru the side and into the back area as it self-leveled. I soon found out that was not going to work because the sides of my whirlpool were hitting the sides of the bottle with only tiny gaps for the resin to flow thru. The resin was thick to begin with, and it was taking so long for it to flow into the bottle that by the time it reached the gaps on the sides of the whirlpool hardly any would flow thru to the back. And the resin was rising in the front to the point where I figured I'd better stop before it overflowed into the whirlpool itself. So I stopped the flow and pulled the tube out. But not before I knocked the funnel over while it still had resin in it and spilled a bunch all over the counter top and floor. Bob mentioned in his Duchess post that we say DANG here in Texas. I can promise him that I said a whole lot more than DANG when that happened. Nevertheless, I got things cleaned up and set up another fixture with a longer tube to reach the back. This worked out pretty well. The only problem came as the resin neared the top of the whirlpool's edge. I ended up having to stop pouring resin with the level about 1/8" below the top edge of the whirlpool because I was limited with the angle I could set the tube at to keep the resin flowing. It took about 5 hours total to get as much resin as I could on both sides of the whirlpool. I will build the resin up from there to level with the whirlpool's edge with acrylic gel or Woodland Scenics water effects and give it some texture. All in all, I'm pretty pleased with the result and very relieved that I got past that major hurdle. In between leak tests, I did get some additional work done on the Pearl. I painted and installed the beakhead railings. Then I spent some time trying to come up with something for the figurehead. I'd never put one on any of my SIB ships before but the Pearl has such a prominent one that I wanted to try something. No way I could carve anything that small, but going thru my box of junk I found a gold clasp that had a shape close to the curve of my Pearl's knee. So I cut it off, did a bit of filing and attached it. Up close, it just looks like junk, but at a distance, it does have the rough shape of the Pearl's figurehead. And with SIB's, often times it's about giving the impression rather than the reality.

- 185 replies
-
- 16
-
-
-
- Flying Dutchman
- Black pearl
- (and 2 more)
-
Do you have fabric glue available? I use Aleene's Fabric Fusion to glue on the bolt ropes for some of my small SIB sails. It has a good bond but dries flexible so it can survive me wadding up the sails tightly when I insert the ship into the bottle.
-
I reckon nobody will ever notice that upside down deadeye but you. Your Duchess is coming along quite nicely. Tip of the hat to PFCGP and Goober for keeping you in the shipyard while the snow piles up outside!
- 207 replies
-
- 4
-
-
-
- vanguard models
- Duchess of Kingston
- (and 1 more)
-
That is a possibility. I think it would present another challenge with cutting the lines as Pat mentioned, but at least I would not be reaching around the length of the ship to do it.
- 185 replies
-
- 9
-
-
- Flying Dutchman
- Black pearl
- (and 2 more)
-
It does make sense, Pat and is an interesting idea. I agree with you that the hardest part would be cutting the pull thread off the bowsprit. The bottle I'm using has a very long neck and with the ship pointed towards the back would be a really long reach. Plus, it would be at a difficult angle. Cutting the threads inside the bottle is always one of the most nerve wracking things for me as I'm always afraid my razor will slip and cut other lines which would be disastrous. You may have just convinced me that I will have to raise the masts and cut the lines with the bowsprits close to the bottle's neck and then push the ships into position afterwards.
- 185 replies
-
- 7
-
-
- Flying Dutchman
- Black pearl
- (and 2 more)
-
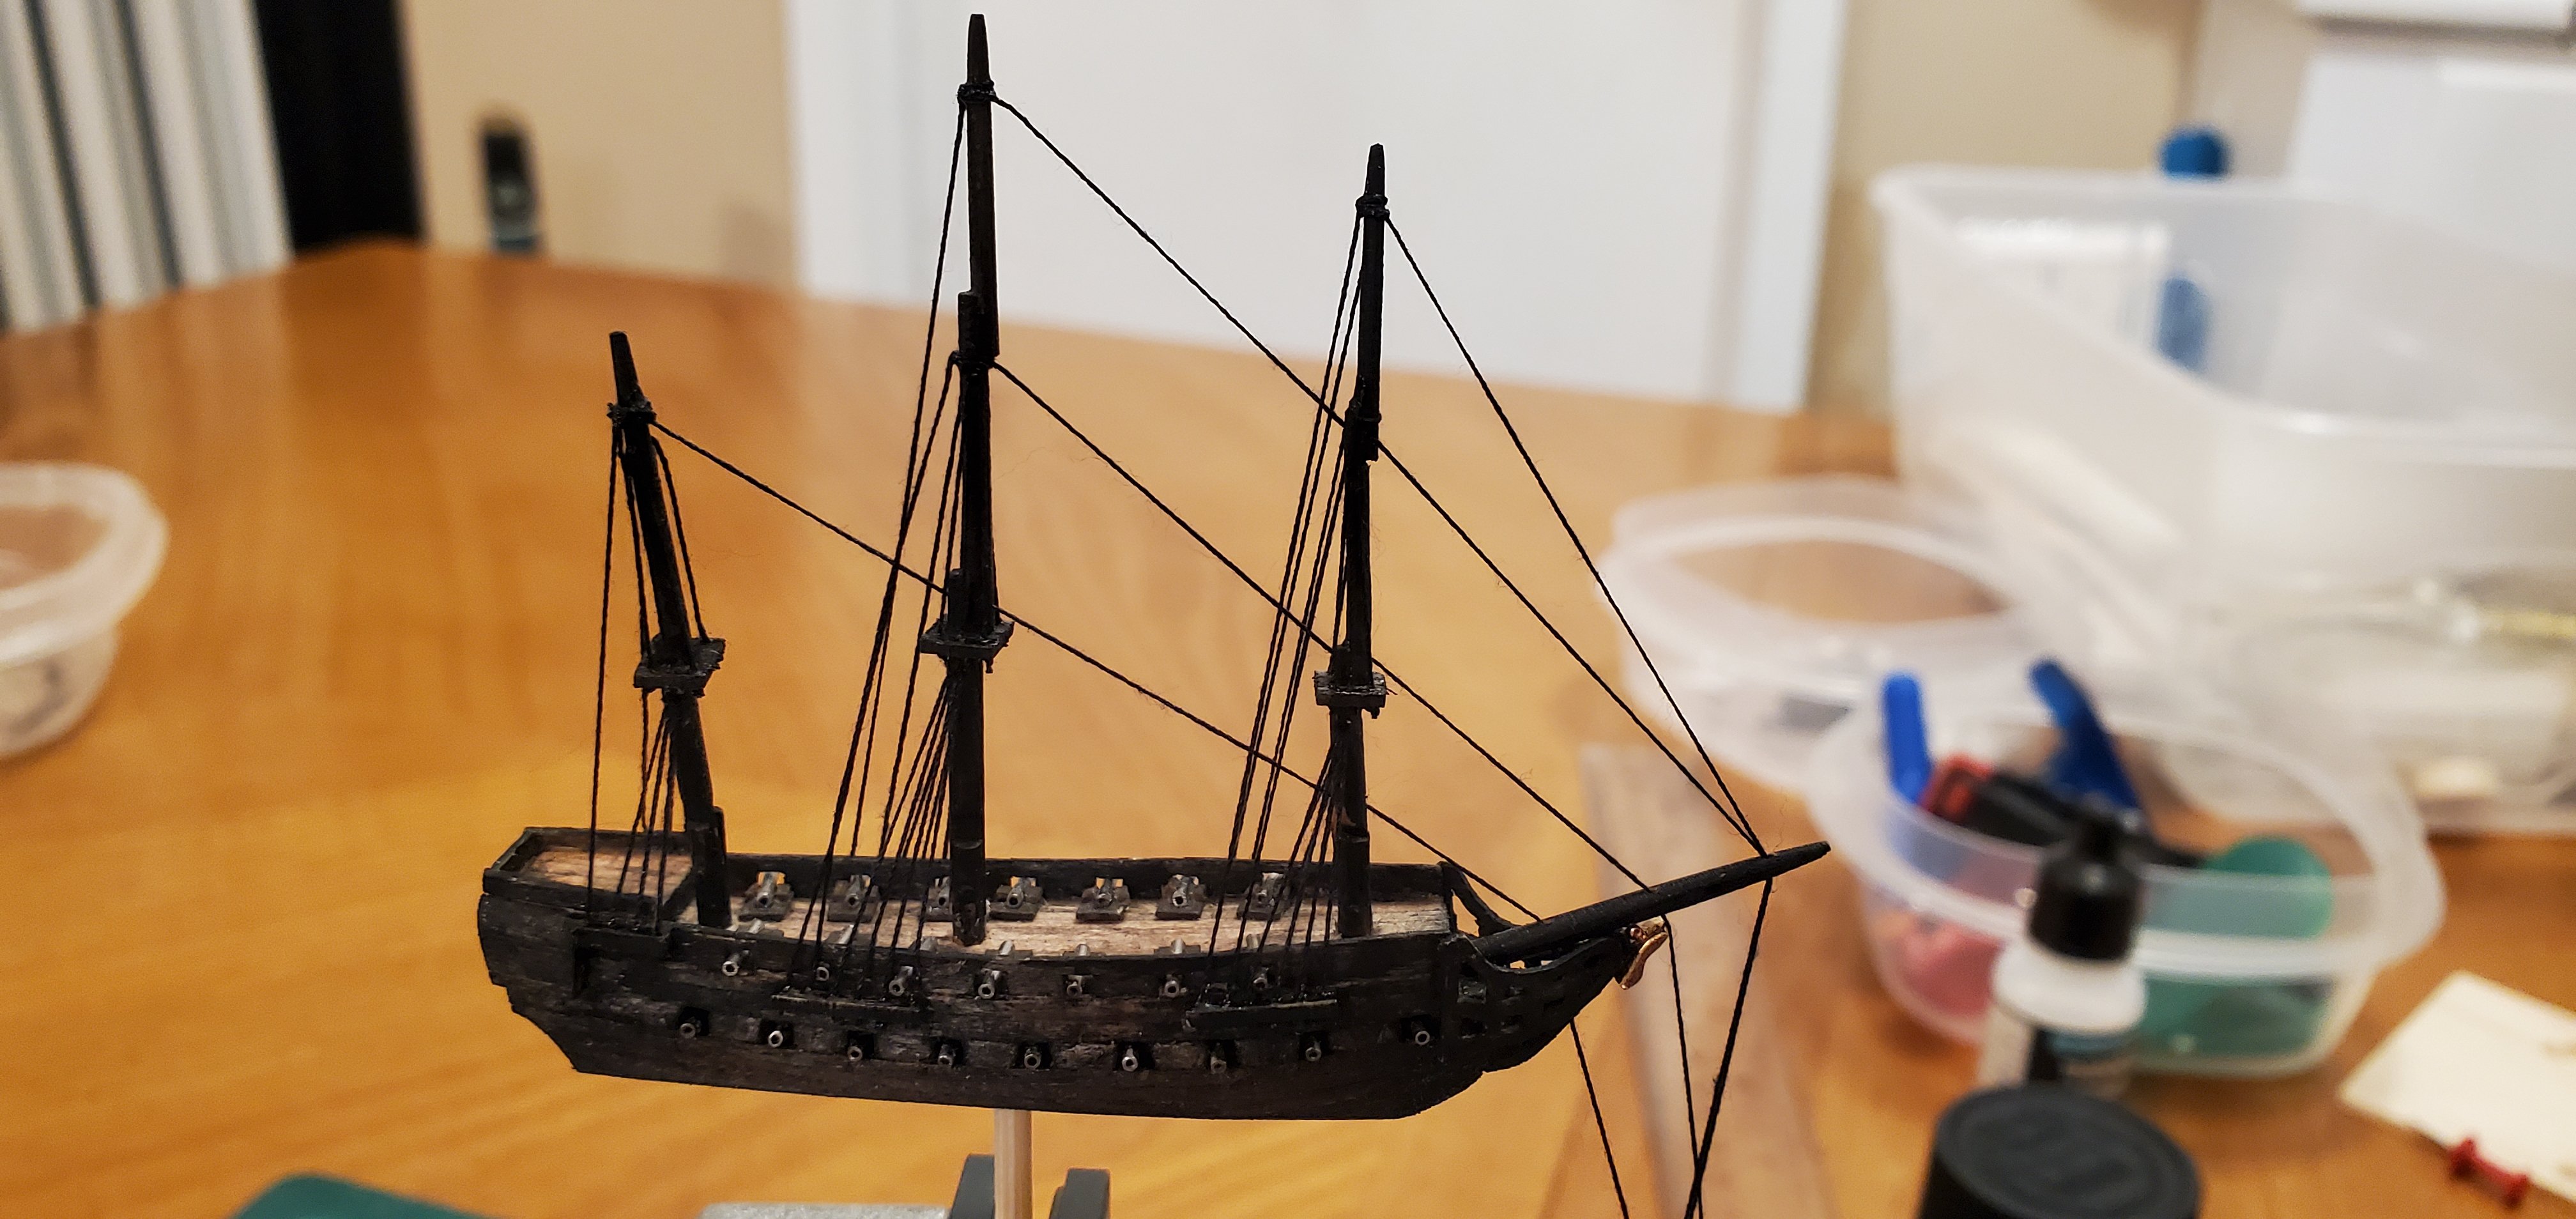
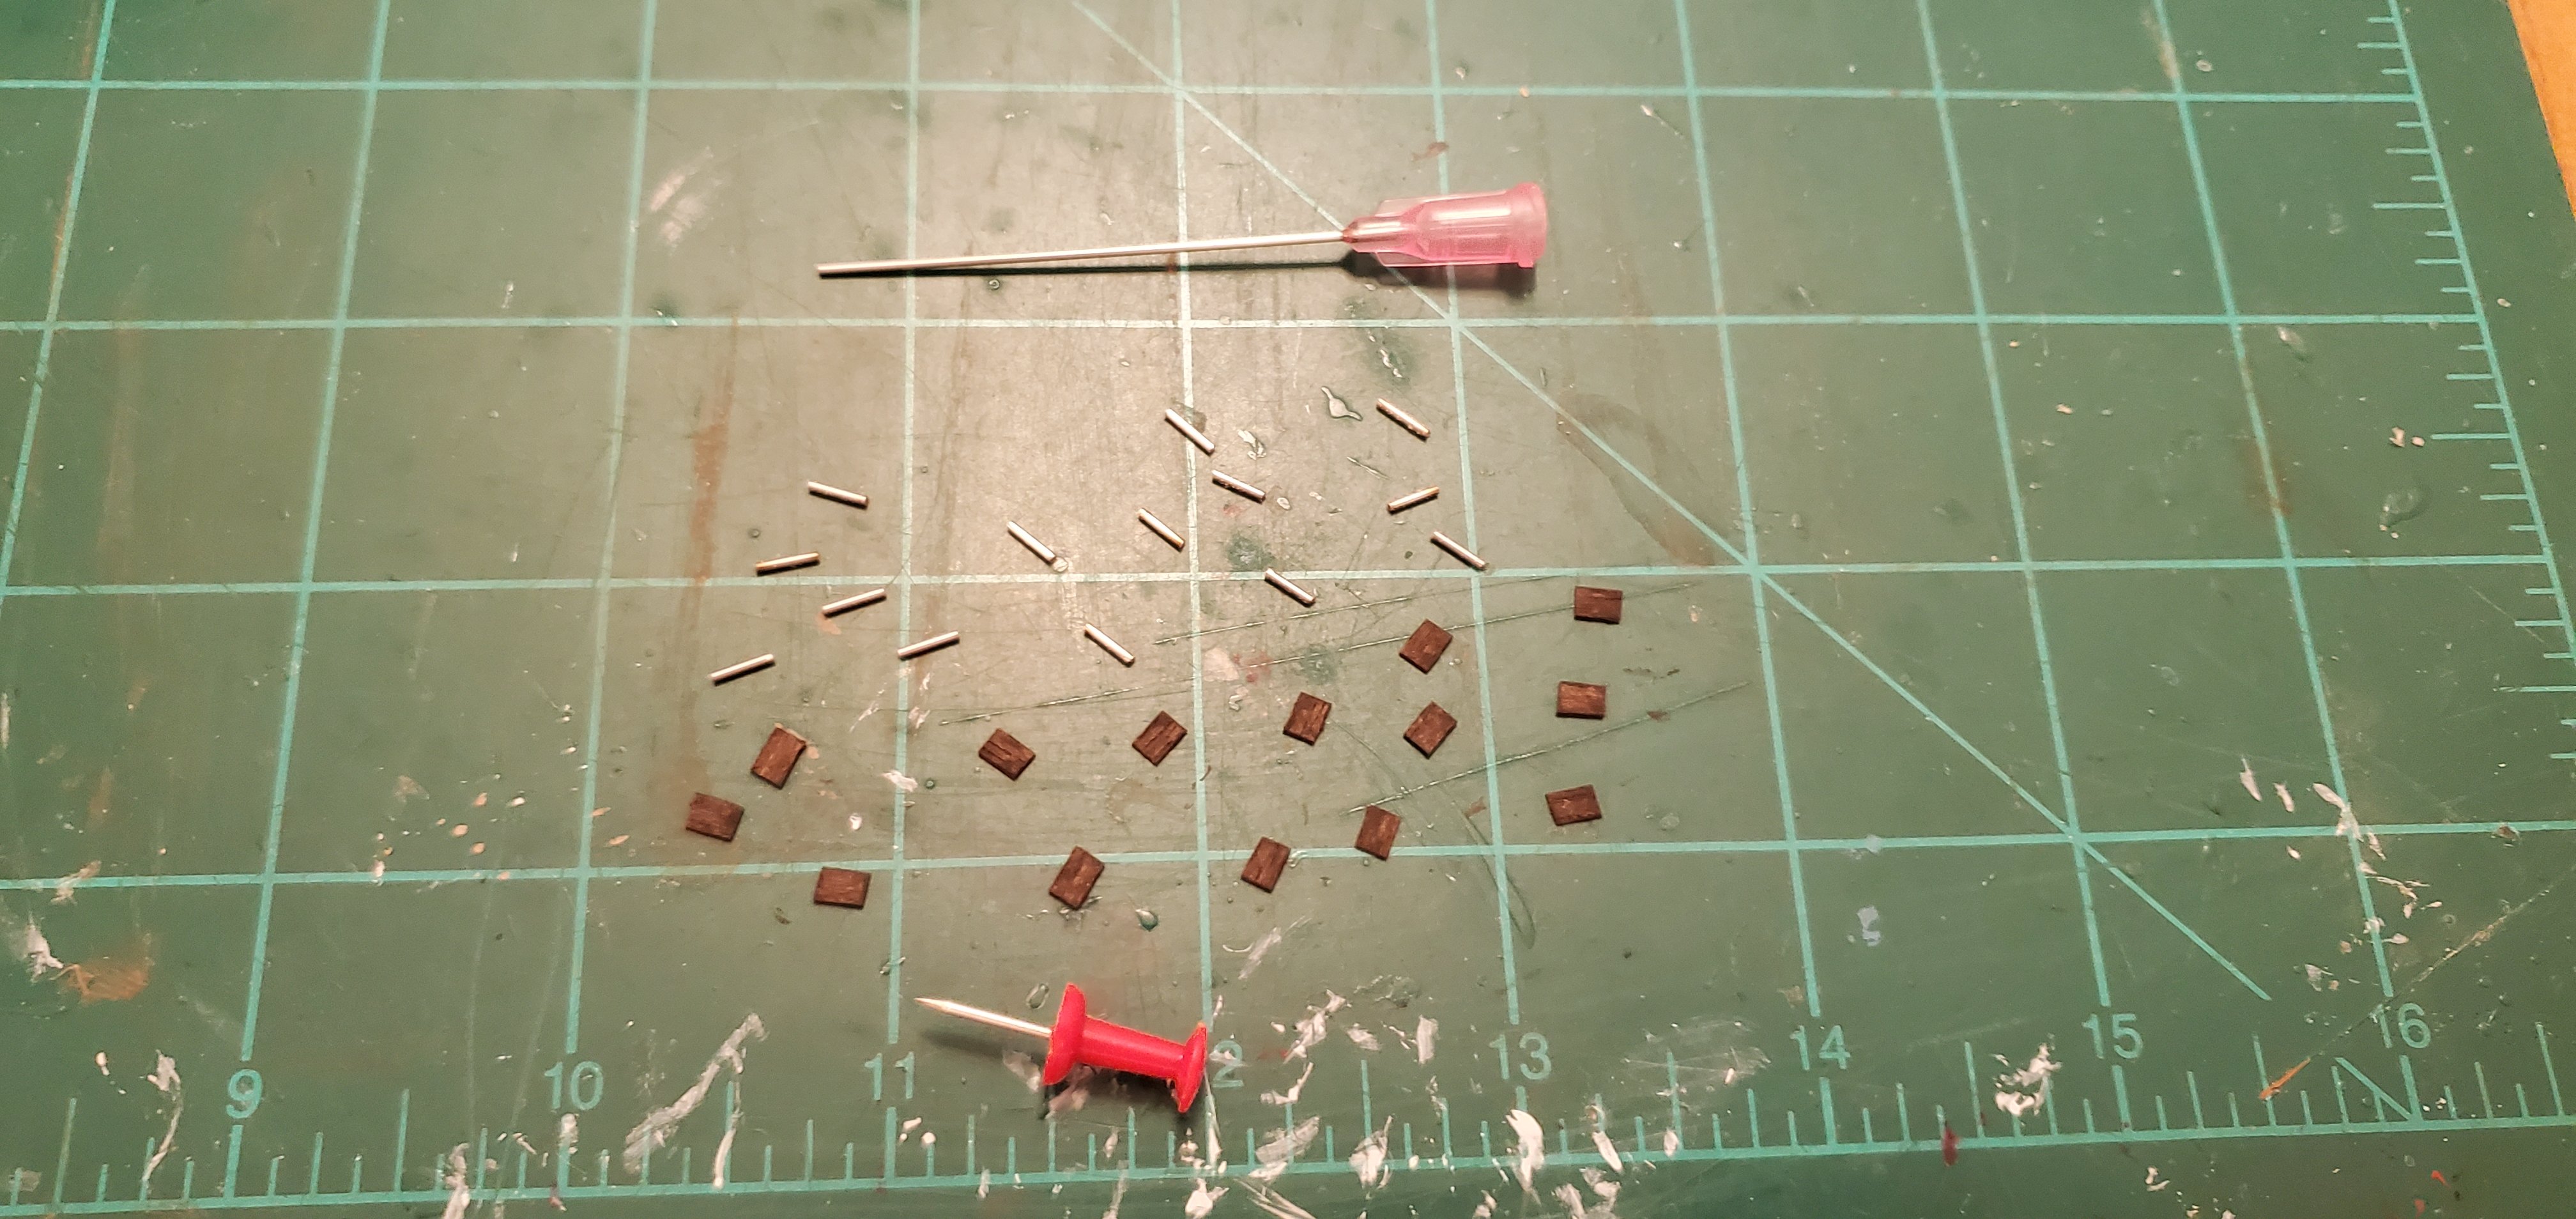
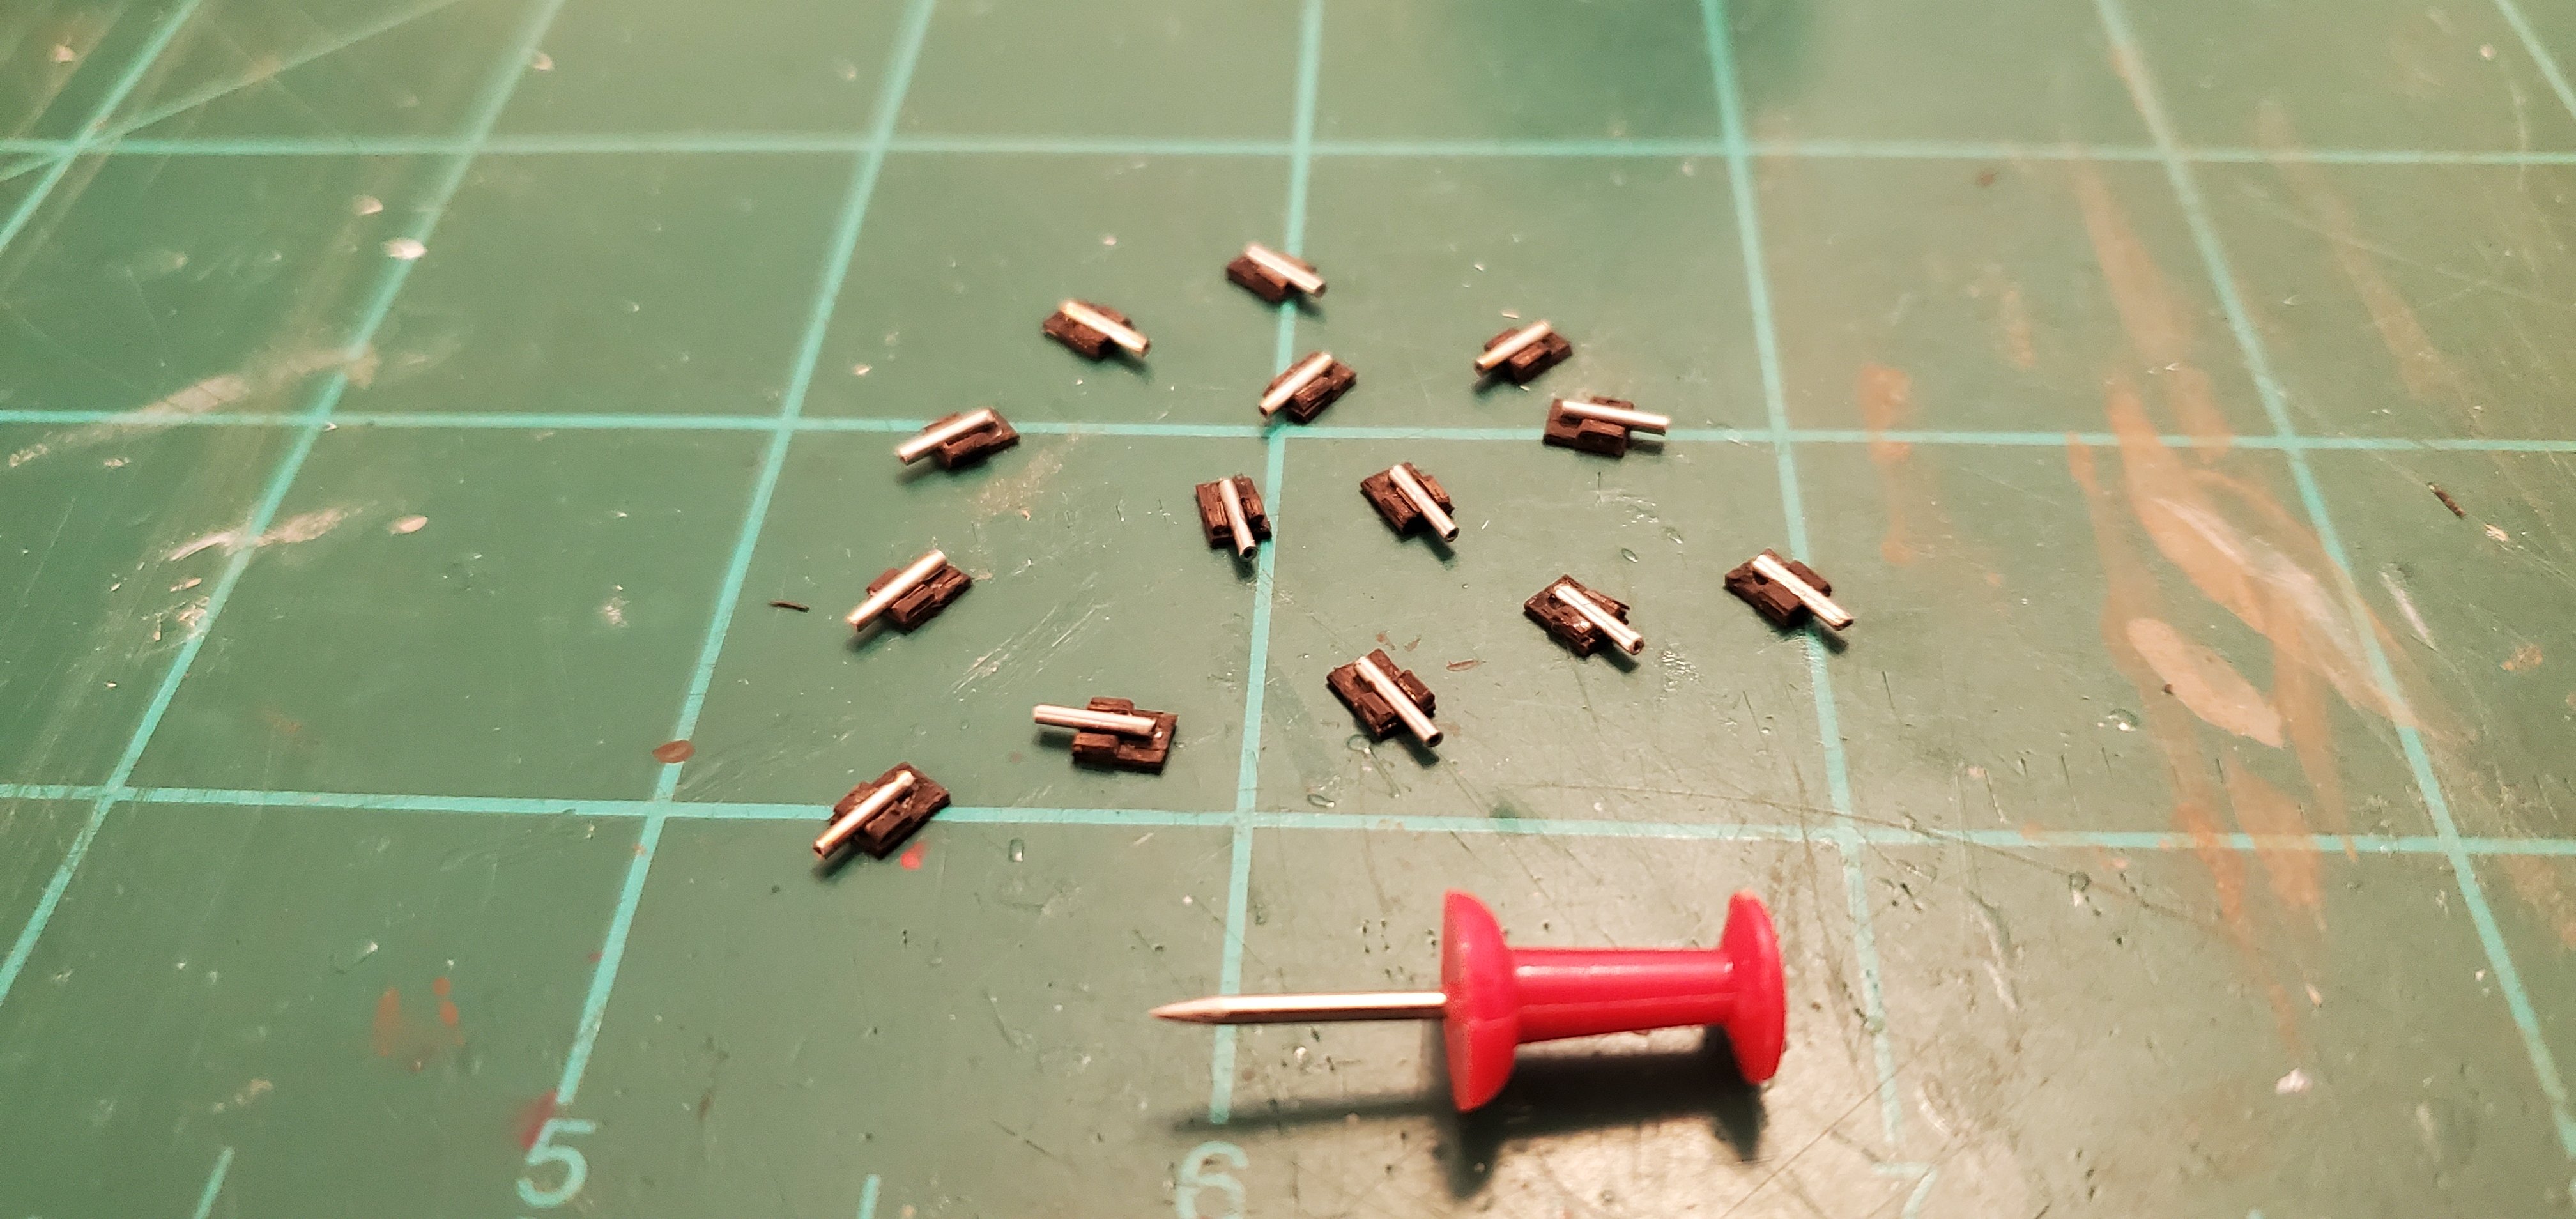
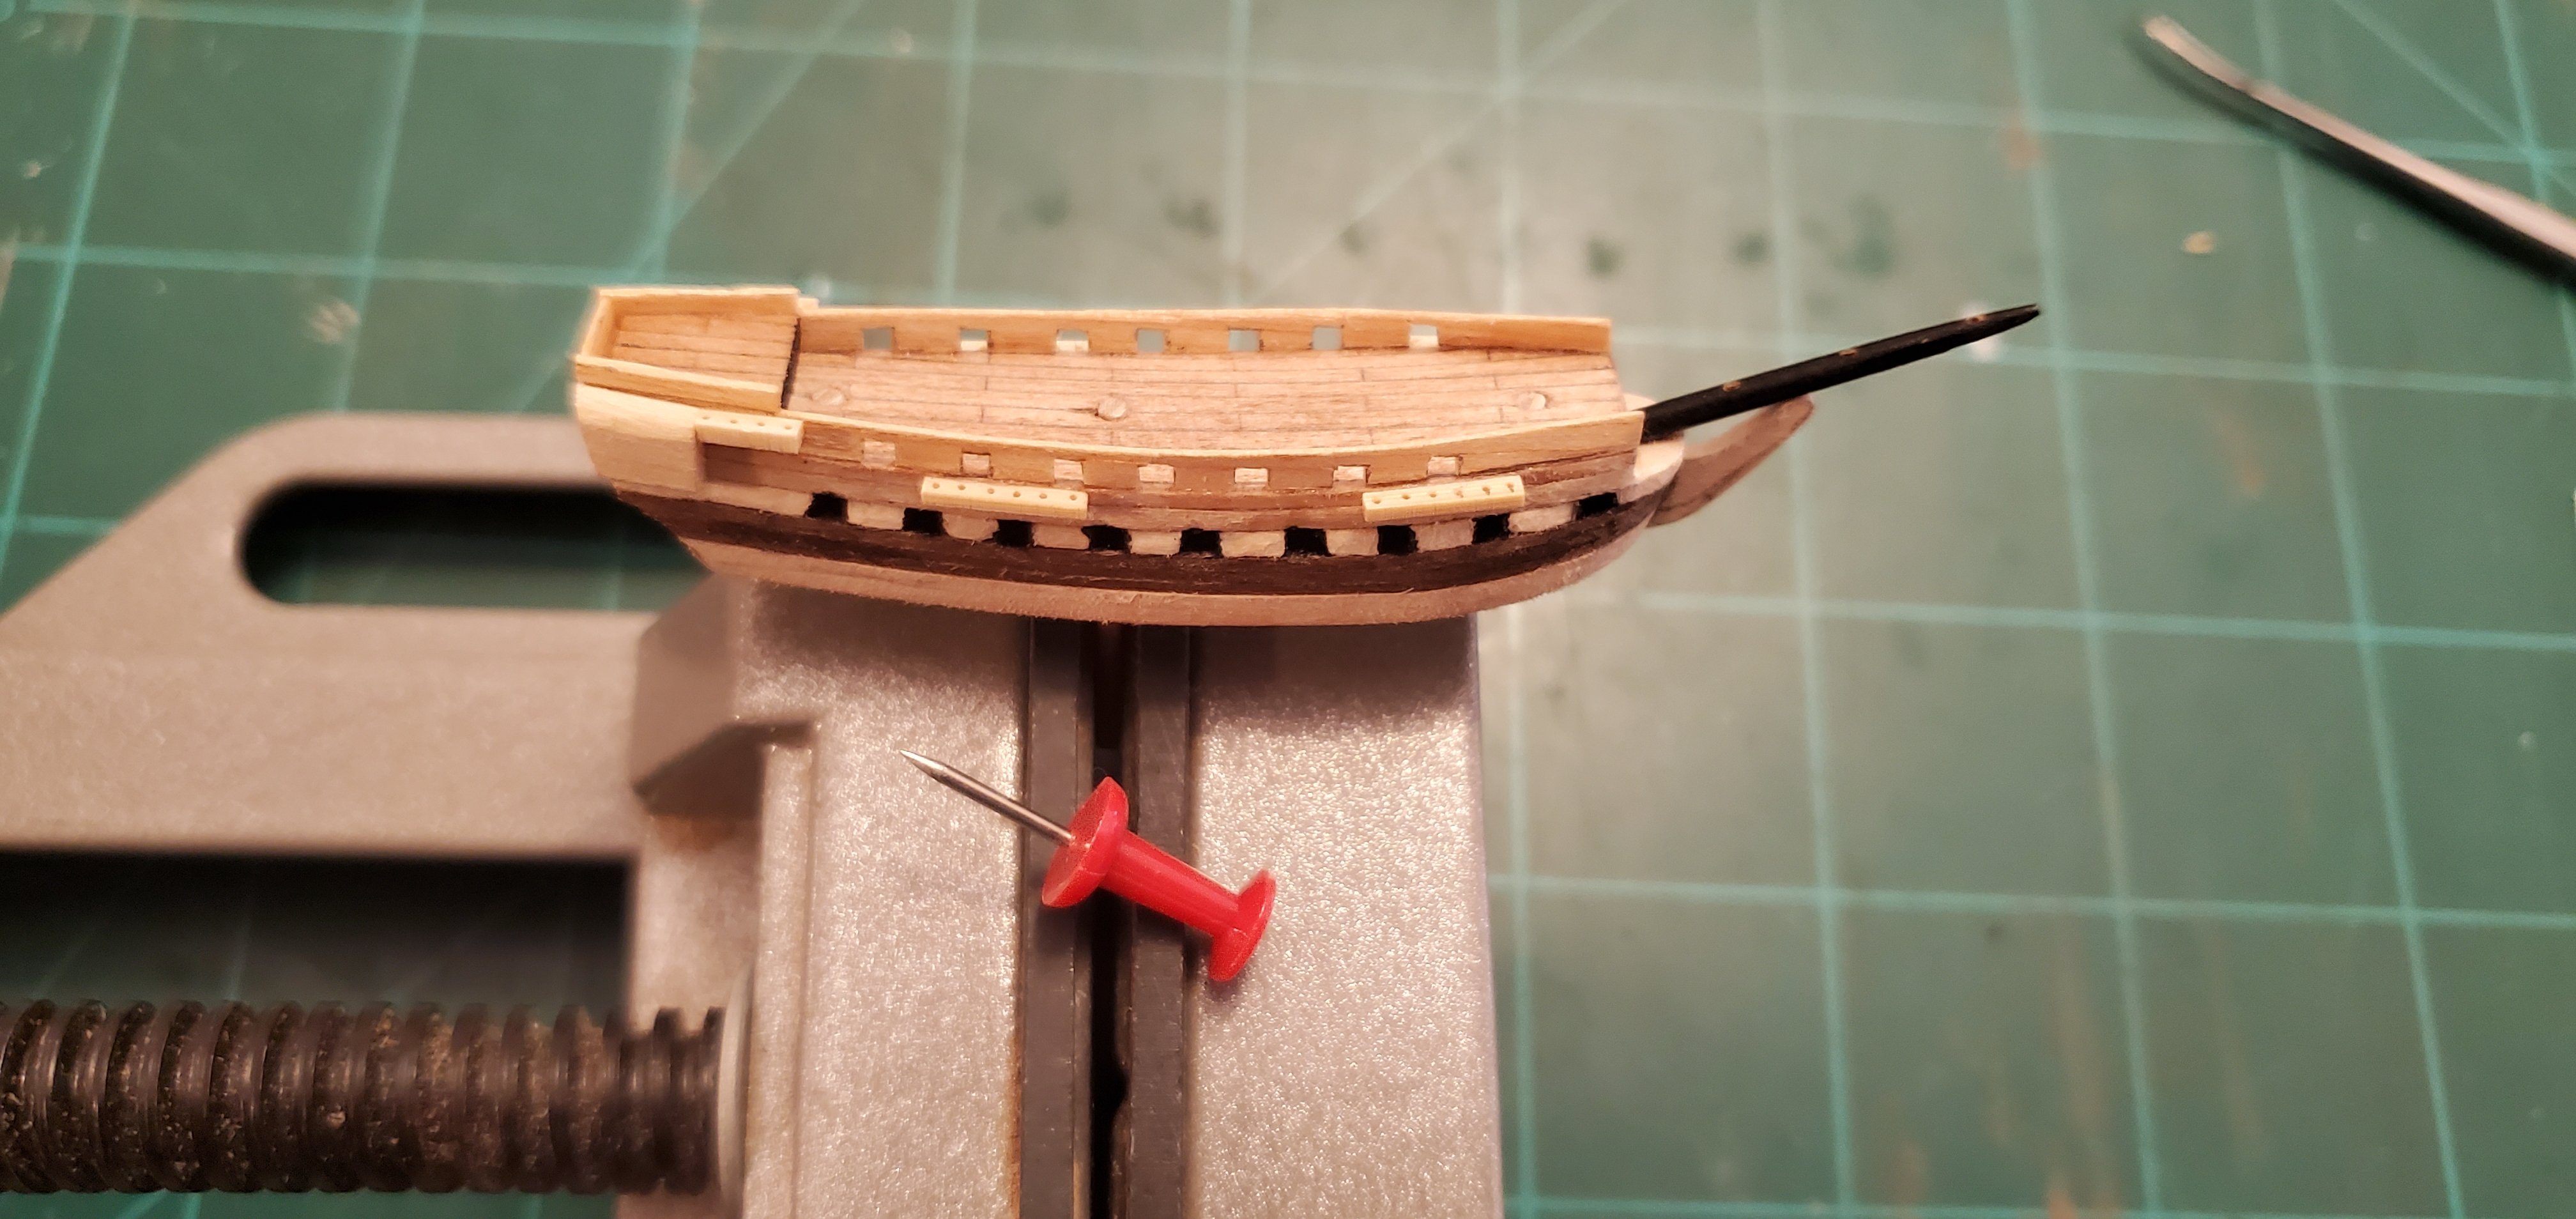
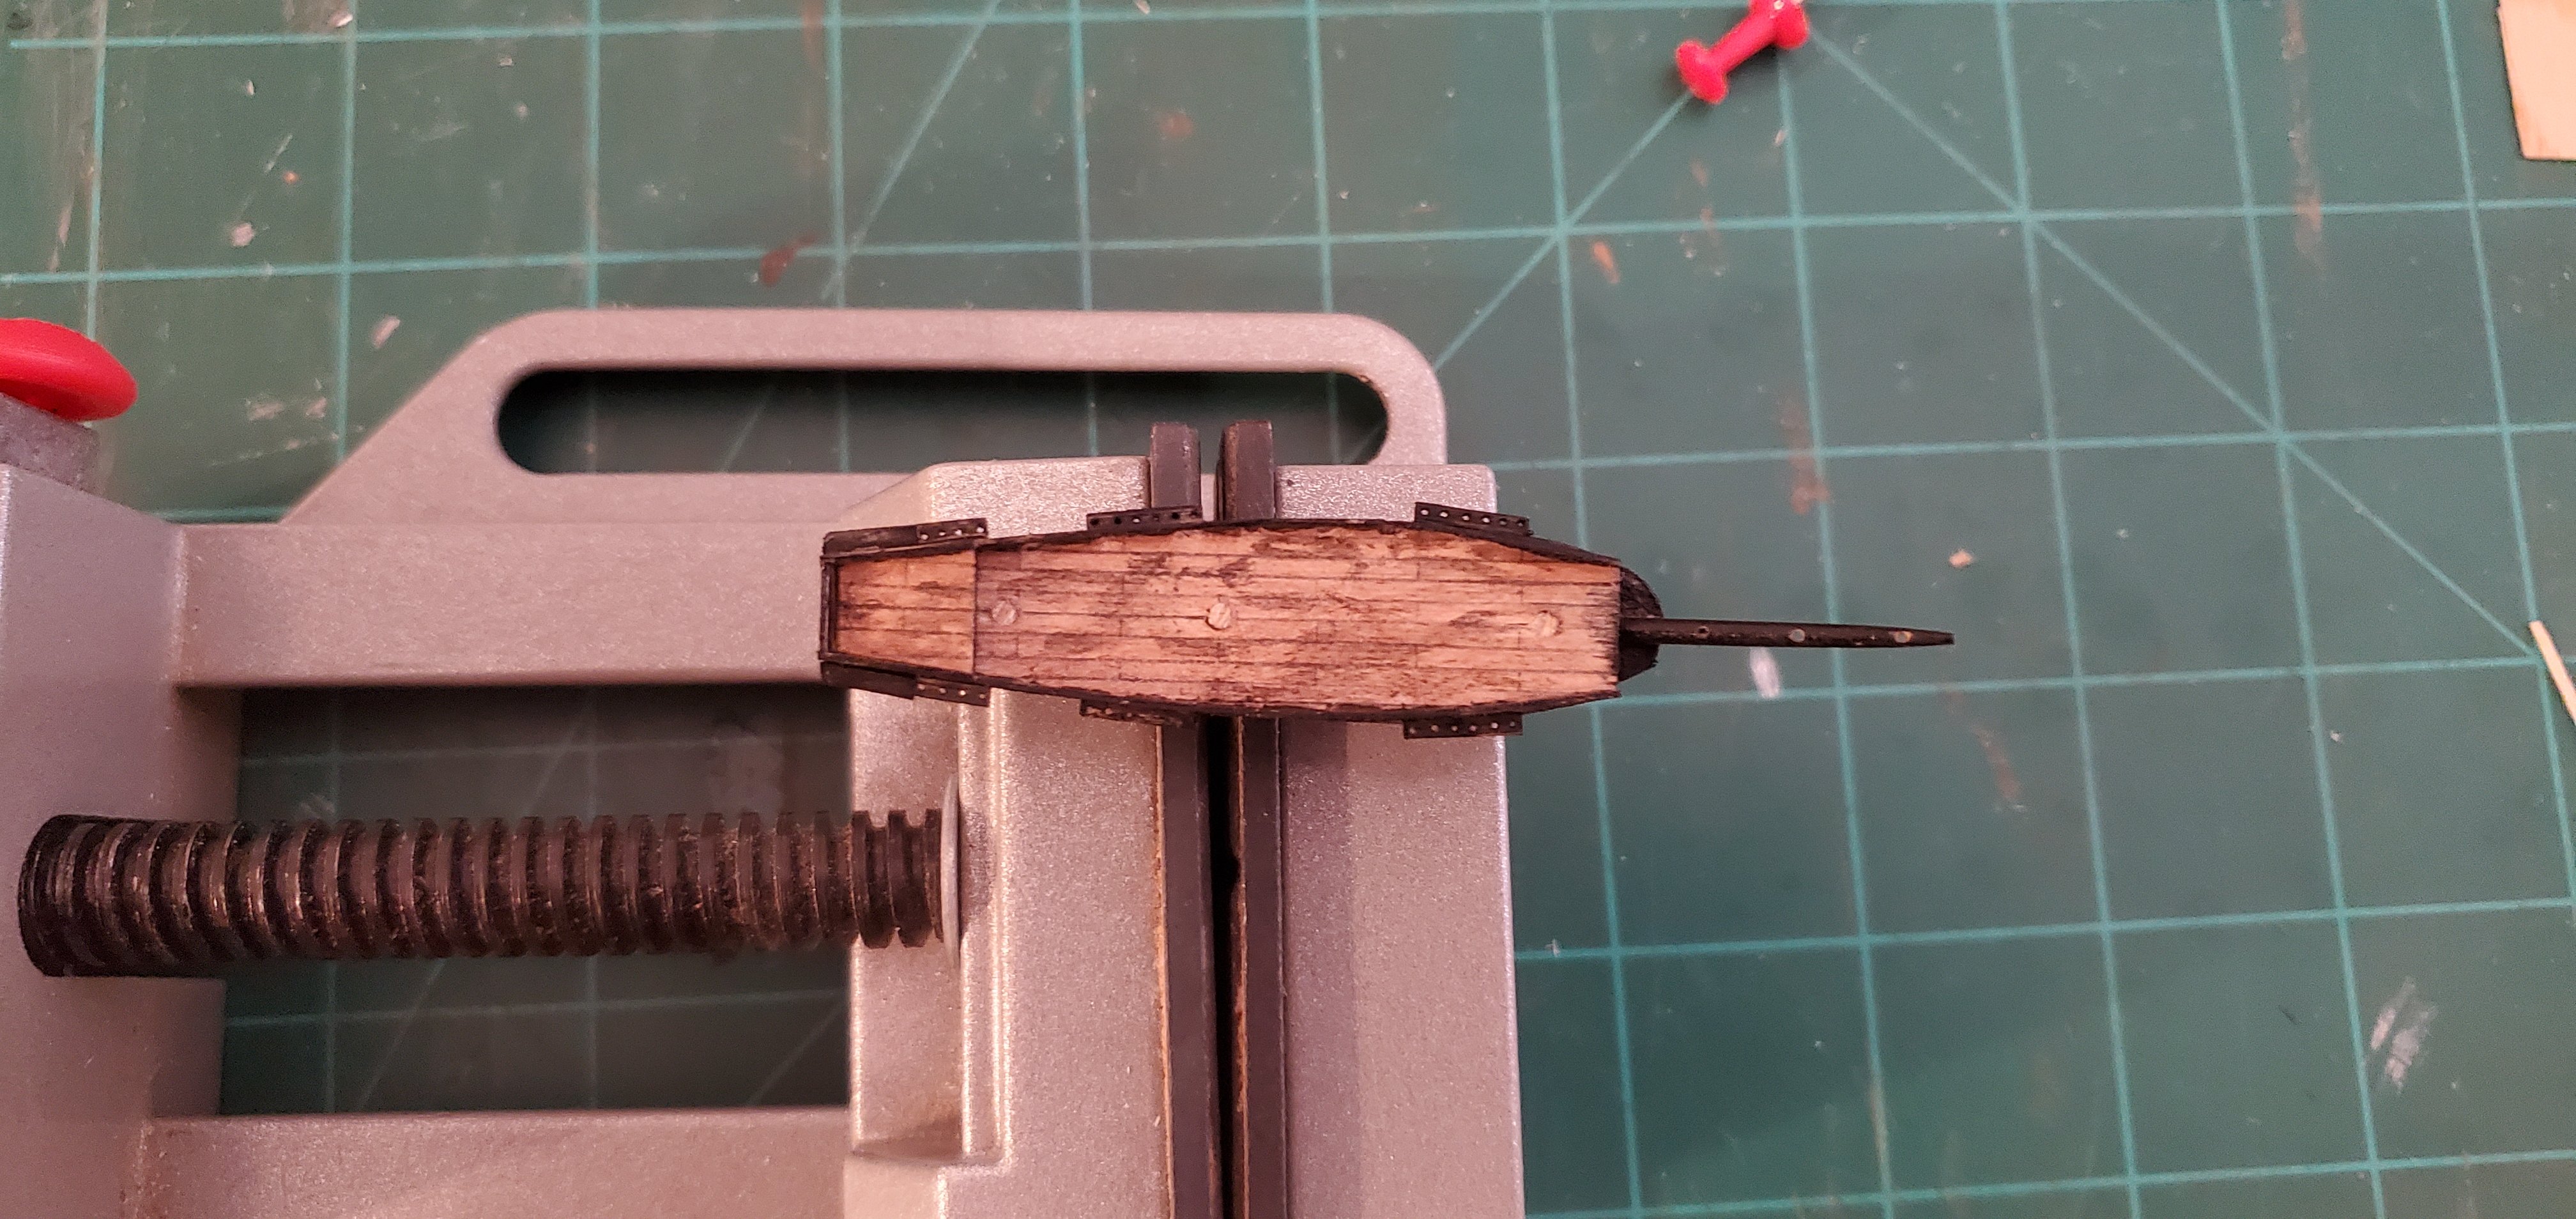
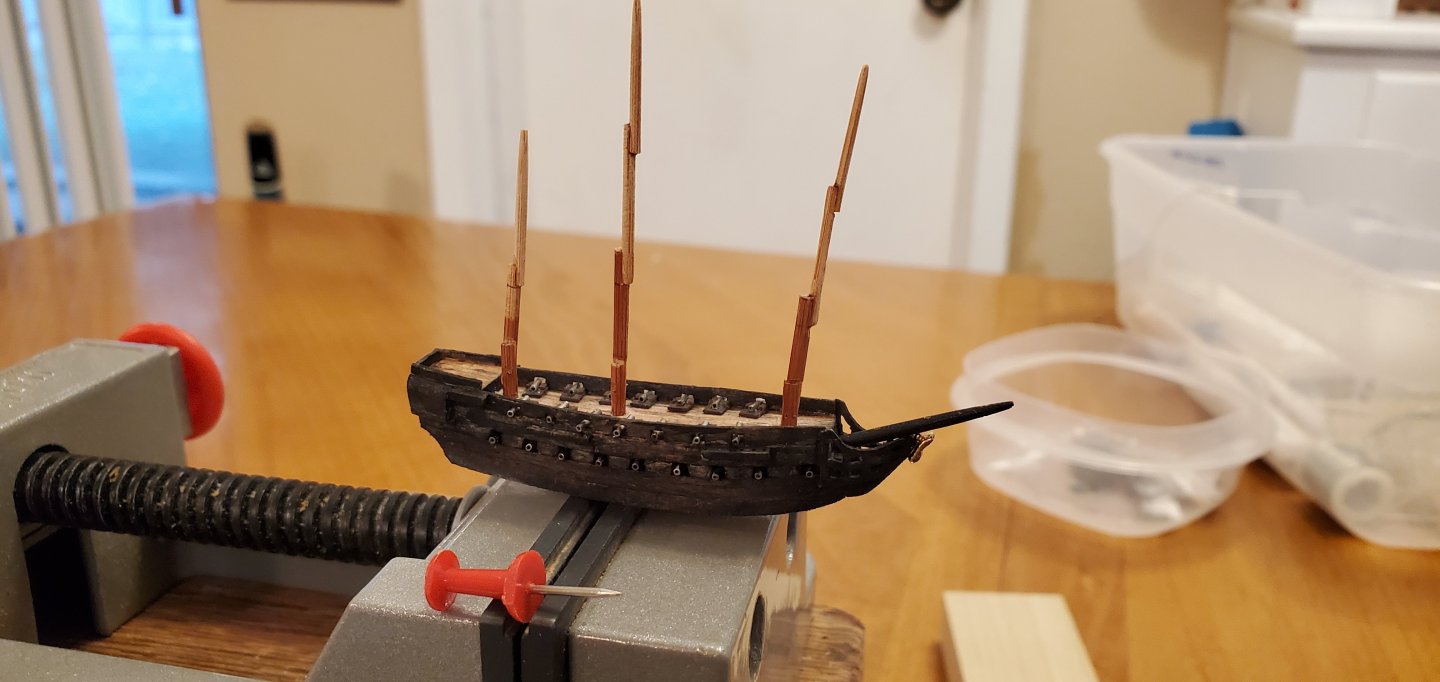
Still patching whirlpool leaks, but in between, work continues on the Black Pearl. First up were the 14 cannons for the spar deck. The barrels are 20 gauge vet needles. The carriages are made from .5mm planking strips. Next was carving the beakhead rails that extend from each side of the bow to the top of the keel. I have a hard time carving sharp angles that are so small. I use a scalpel with a fine pointed blade but it's still to big for some of the tight spaces. Next, I carved and added the knee, channels, poop deck, and quarter galleries. Finally, I gave it a paint job. Following @Old Collingwood tip, I wanted the to have something that resembled the storyline from the movie where the Pearl was set on fire and sent down to the bottom of the sea with Captain Jack Sparrow aboard. Sparrow sold his soul to Davy Jones and was allowed to raise the ship and continue his command. So the ship needed a dark look of charred wood. At the same time, I wanted to make sure there was enough color contrast between the Pearl and the dark gray Dutchman. So I made a black wash with liberal amounts of thinner (Tamiya black and acrylic thinner medium) and brushed it lightly over the hull making sure that a hint of the underlying wood color showed through. I left the deck a lighter color with some random streaks of ash color.

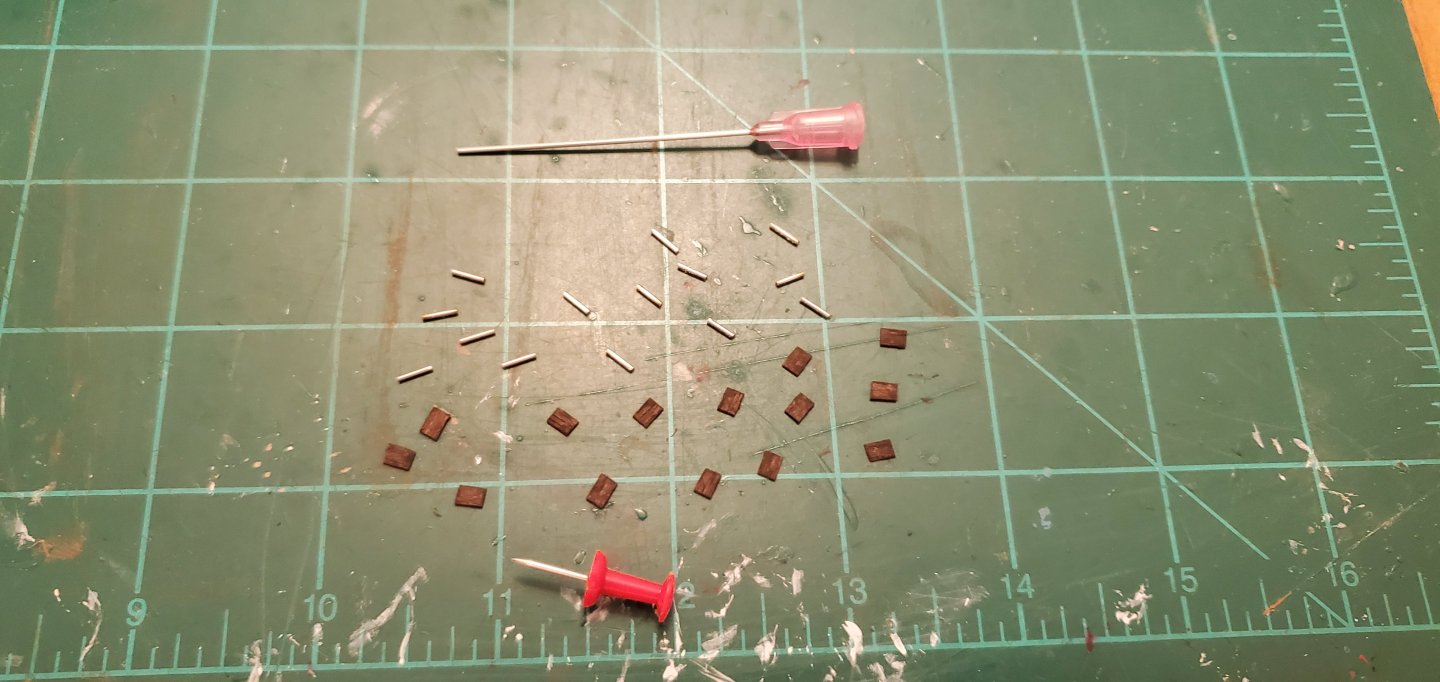


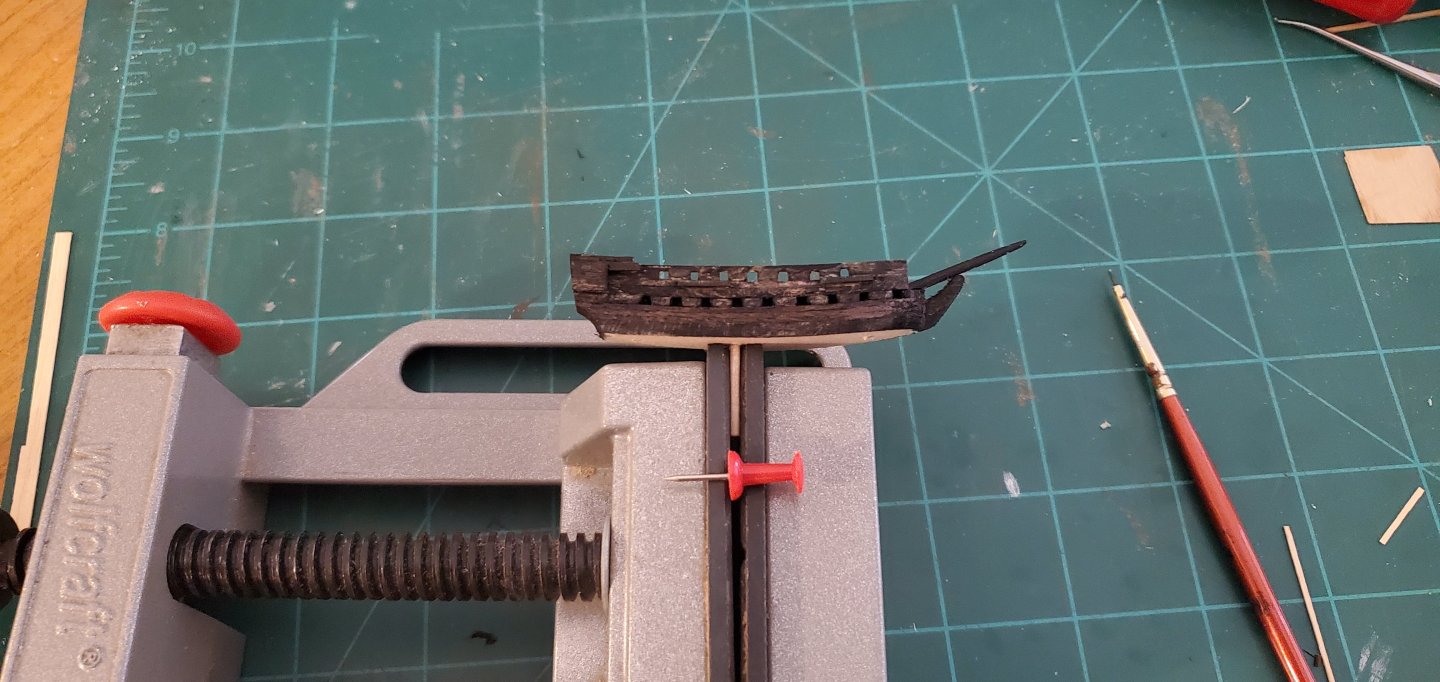
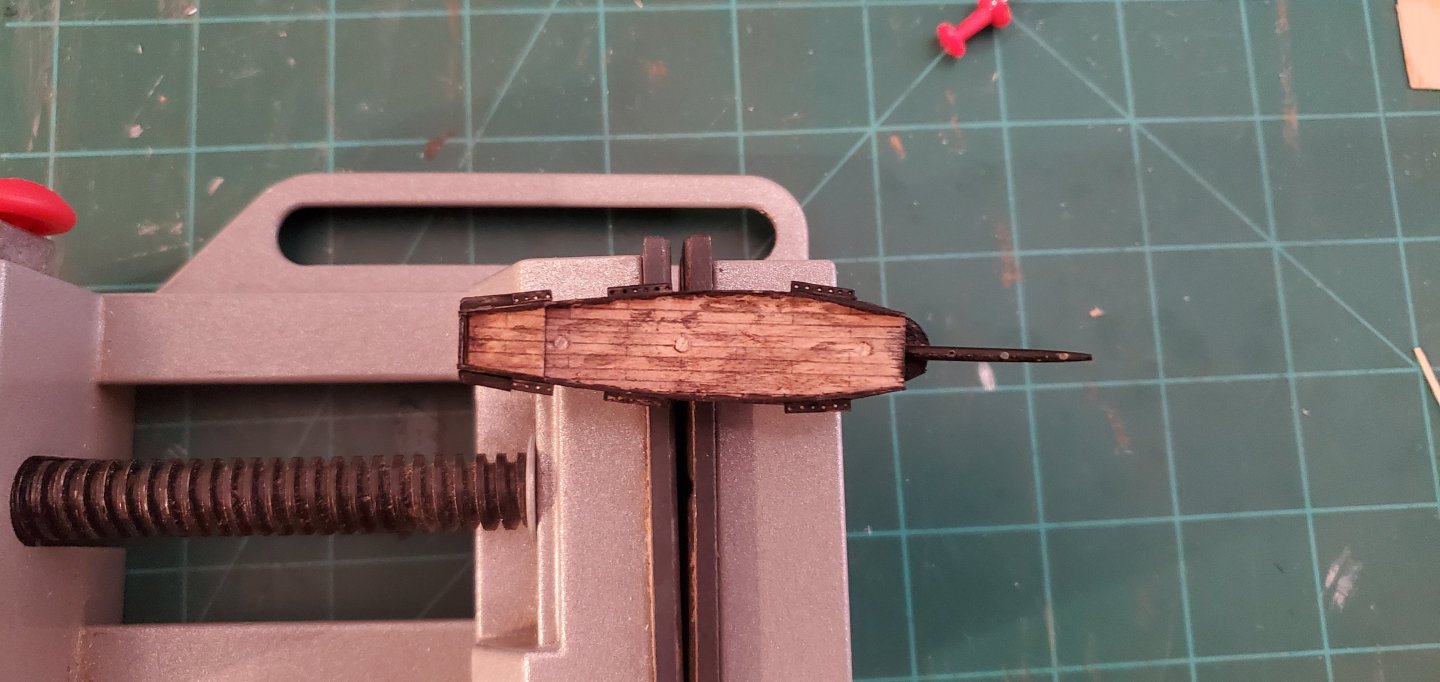
- 185 replies
-
- 14
-
-
-
- Flying Dutchman
- Black pearl
- (and 2 more)