HOLIDAY DONATION DRIVE - SUPPORT MSW - DO YOUR PART TO KEEP THIS GREAT FORUM GOING!
×


Glen McGuire
-
Posts
1,954 -
Joined
-
Last visited
Content Type
Profiles
Forums
Gallery
Events
Everything posted by Glen McGuire
-
 Enchanting words, Keith. Where did that passage come from?
- 301 replies
-
- 3
-

-

-
- Constitution
- Bluejacket Shipcrafters
- (and 1 more)
-
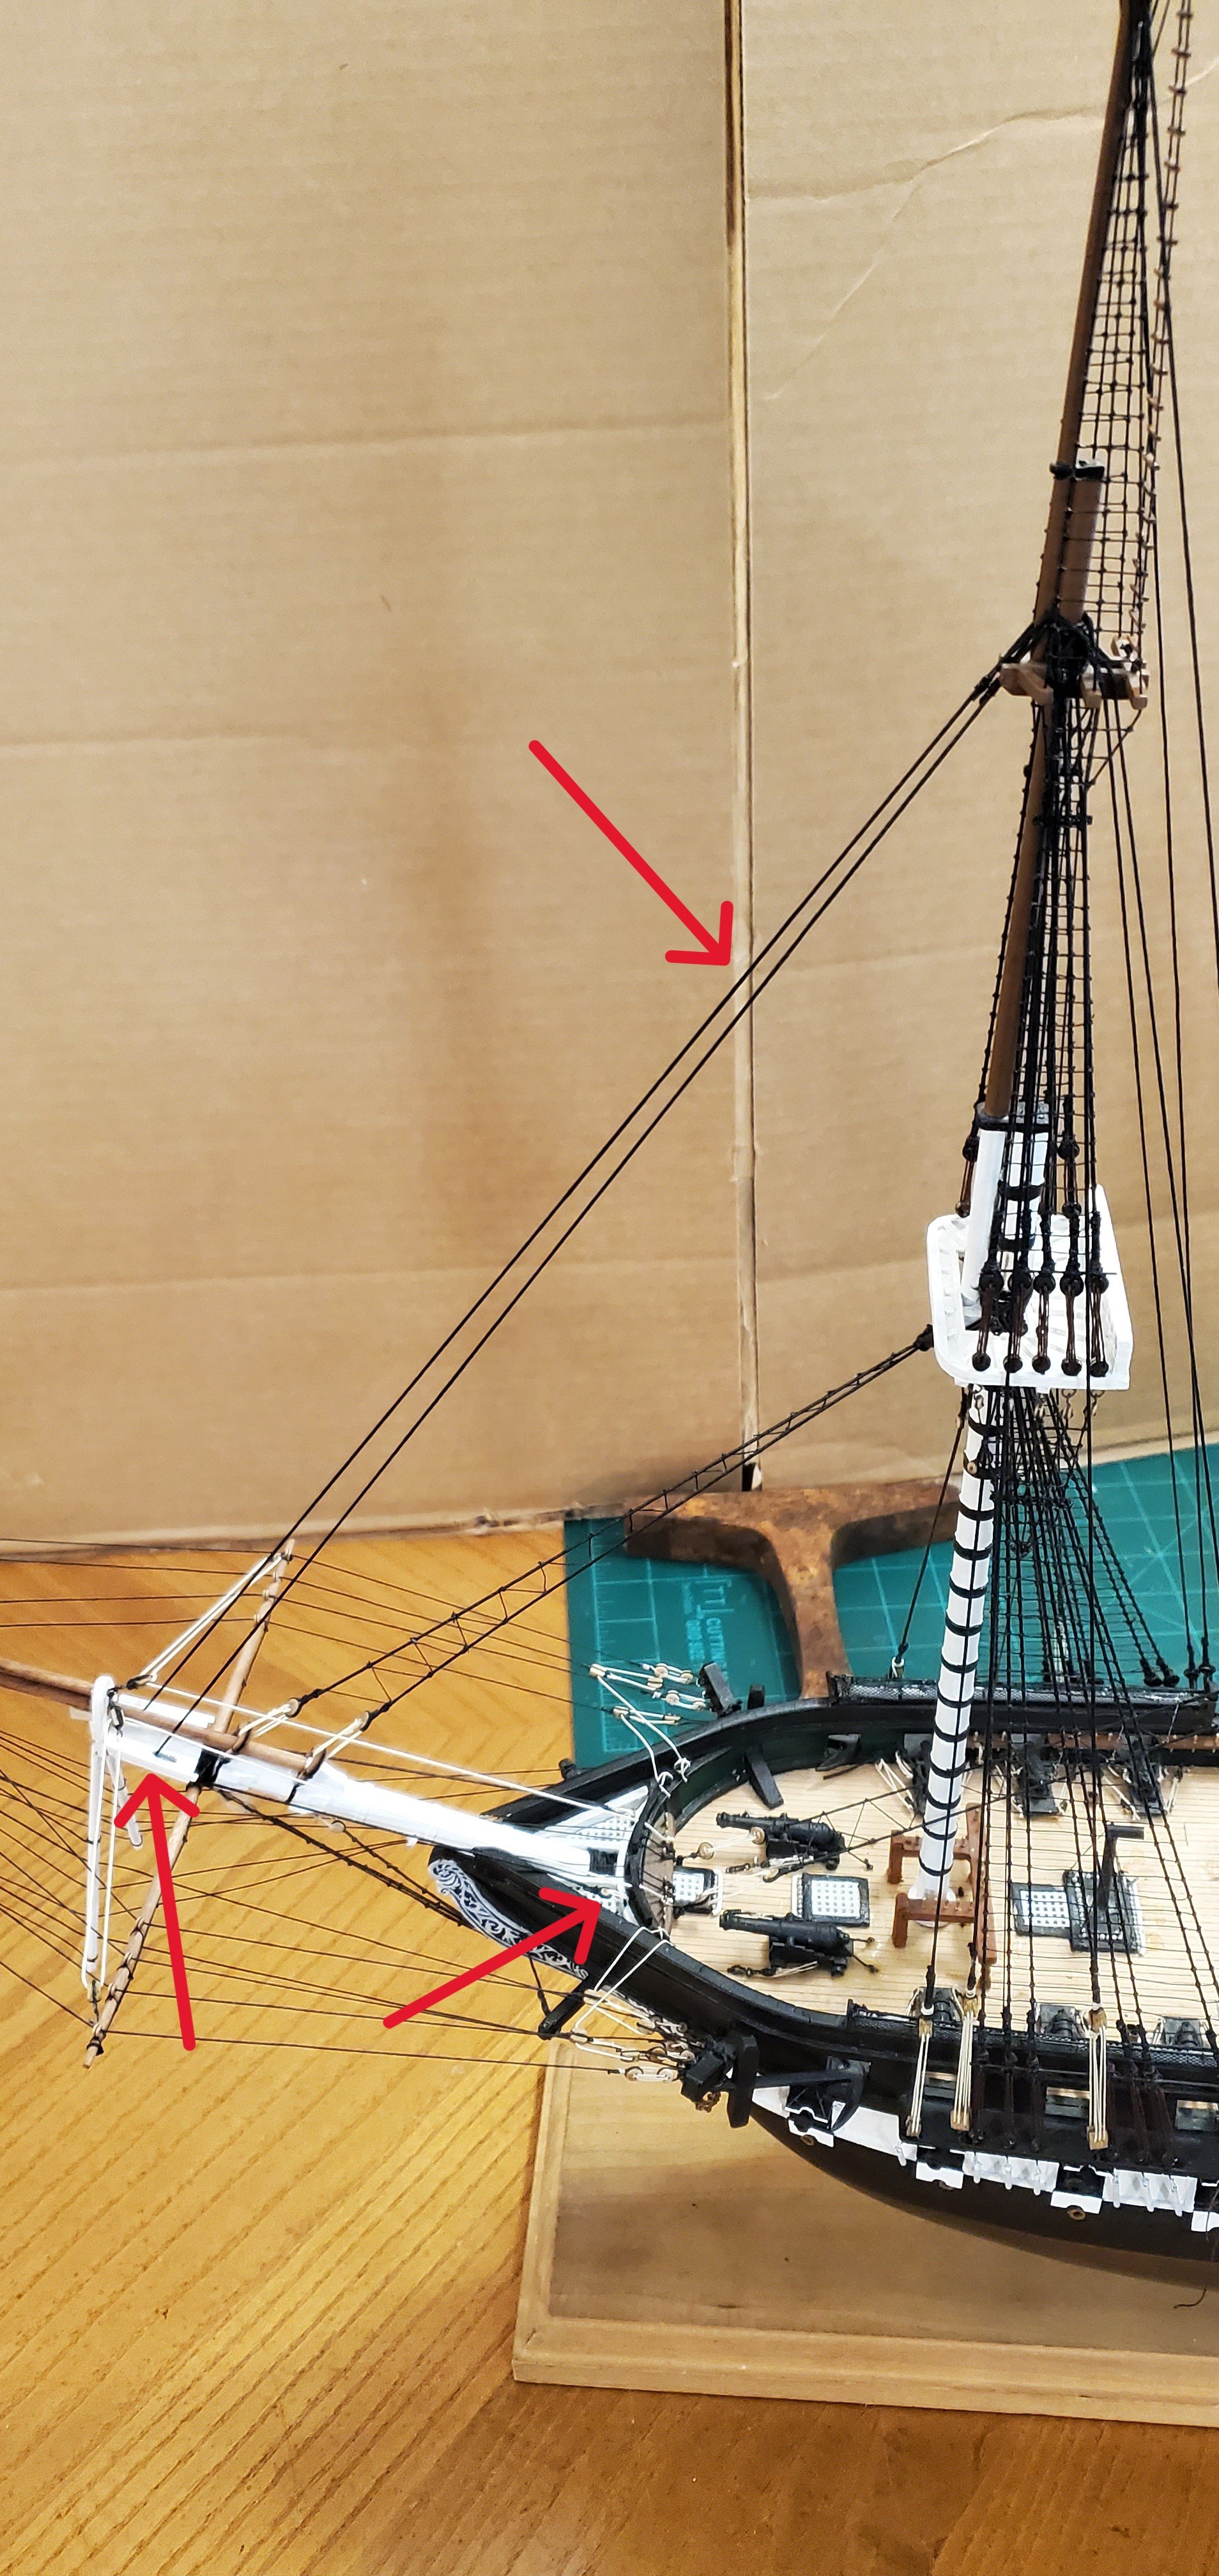
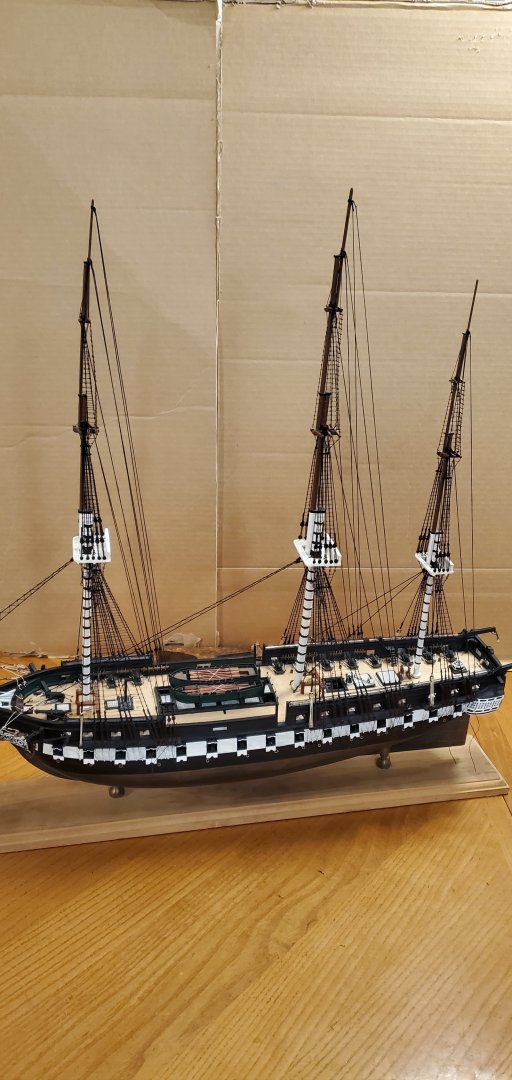
This part of the build reminds me of an old Gospel song by Cristy Lane called, "One Day at a Time, Sweet Jesus", with the lyrics adapted to fit ship modeling: "One stay at a time, sweet Jesus, that's all I'm asking of you. Just give me the strength to do everyday what I have to do Yesterday's gone, sweet Jesus, and tomorrow may never be mine. Lord help me today. Show me the way. One stay at a time" Today's focus was the fore topmast stay and for topmast preventer stay. They are both tied off with a loop at the fore top mast above the layers of loops from the breast backstays, topmast shrouds, etc. The fore topmast stay runs from the topmast to the bowsprit, is reeved through the starboard bowsprit bee, and travels the beside the bowsprit to where it's tied off to a bullseye inside the bow head. The fore topmast preventer stay does the same thing on the port side. Here's how they look after installation. Lots more stays to go!


- 301 replies
-
- 14
-
-
- Constitution
- Bluejacket Shipcrafters
- (and 1 more)
-
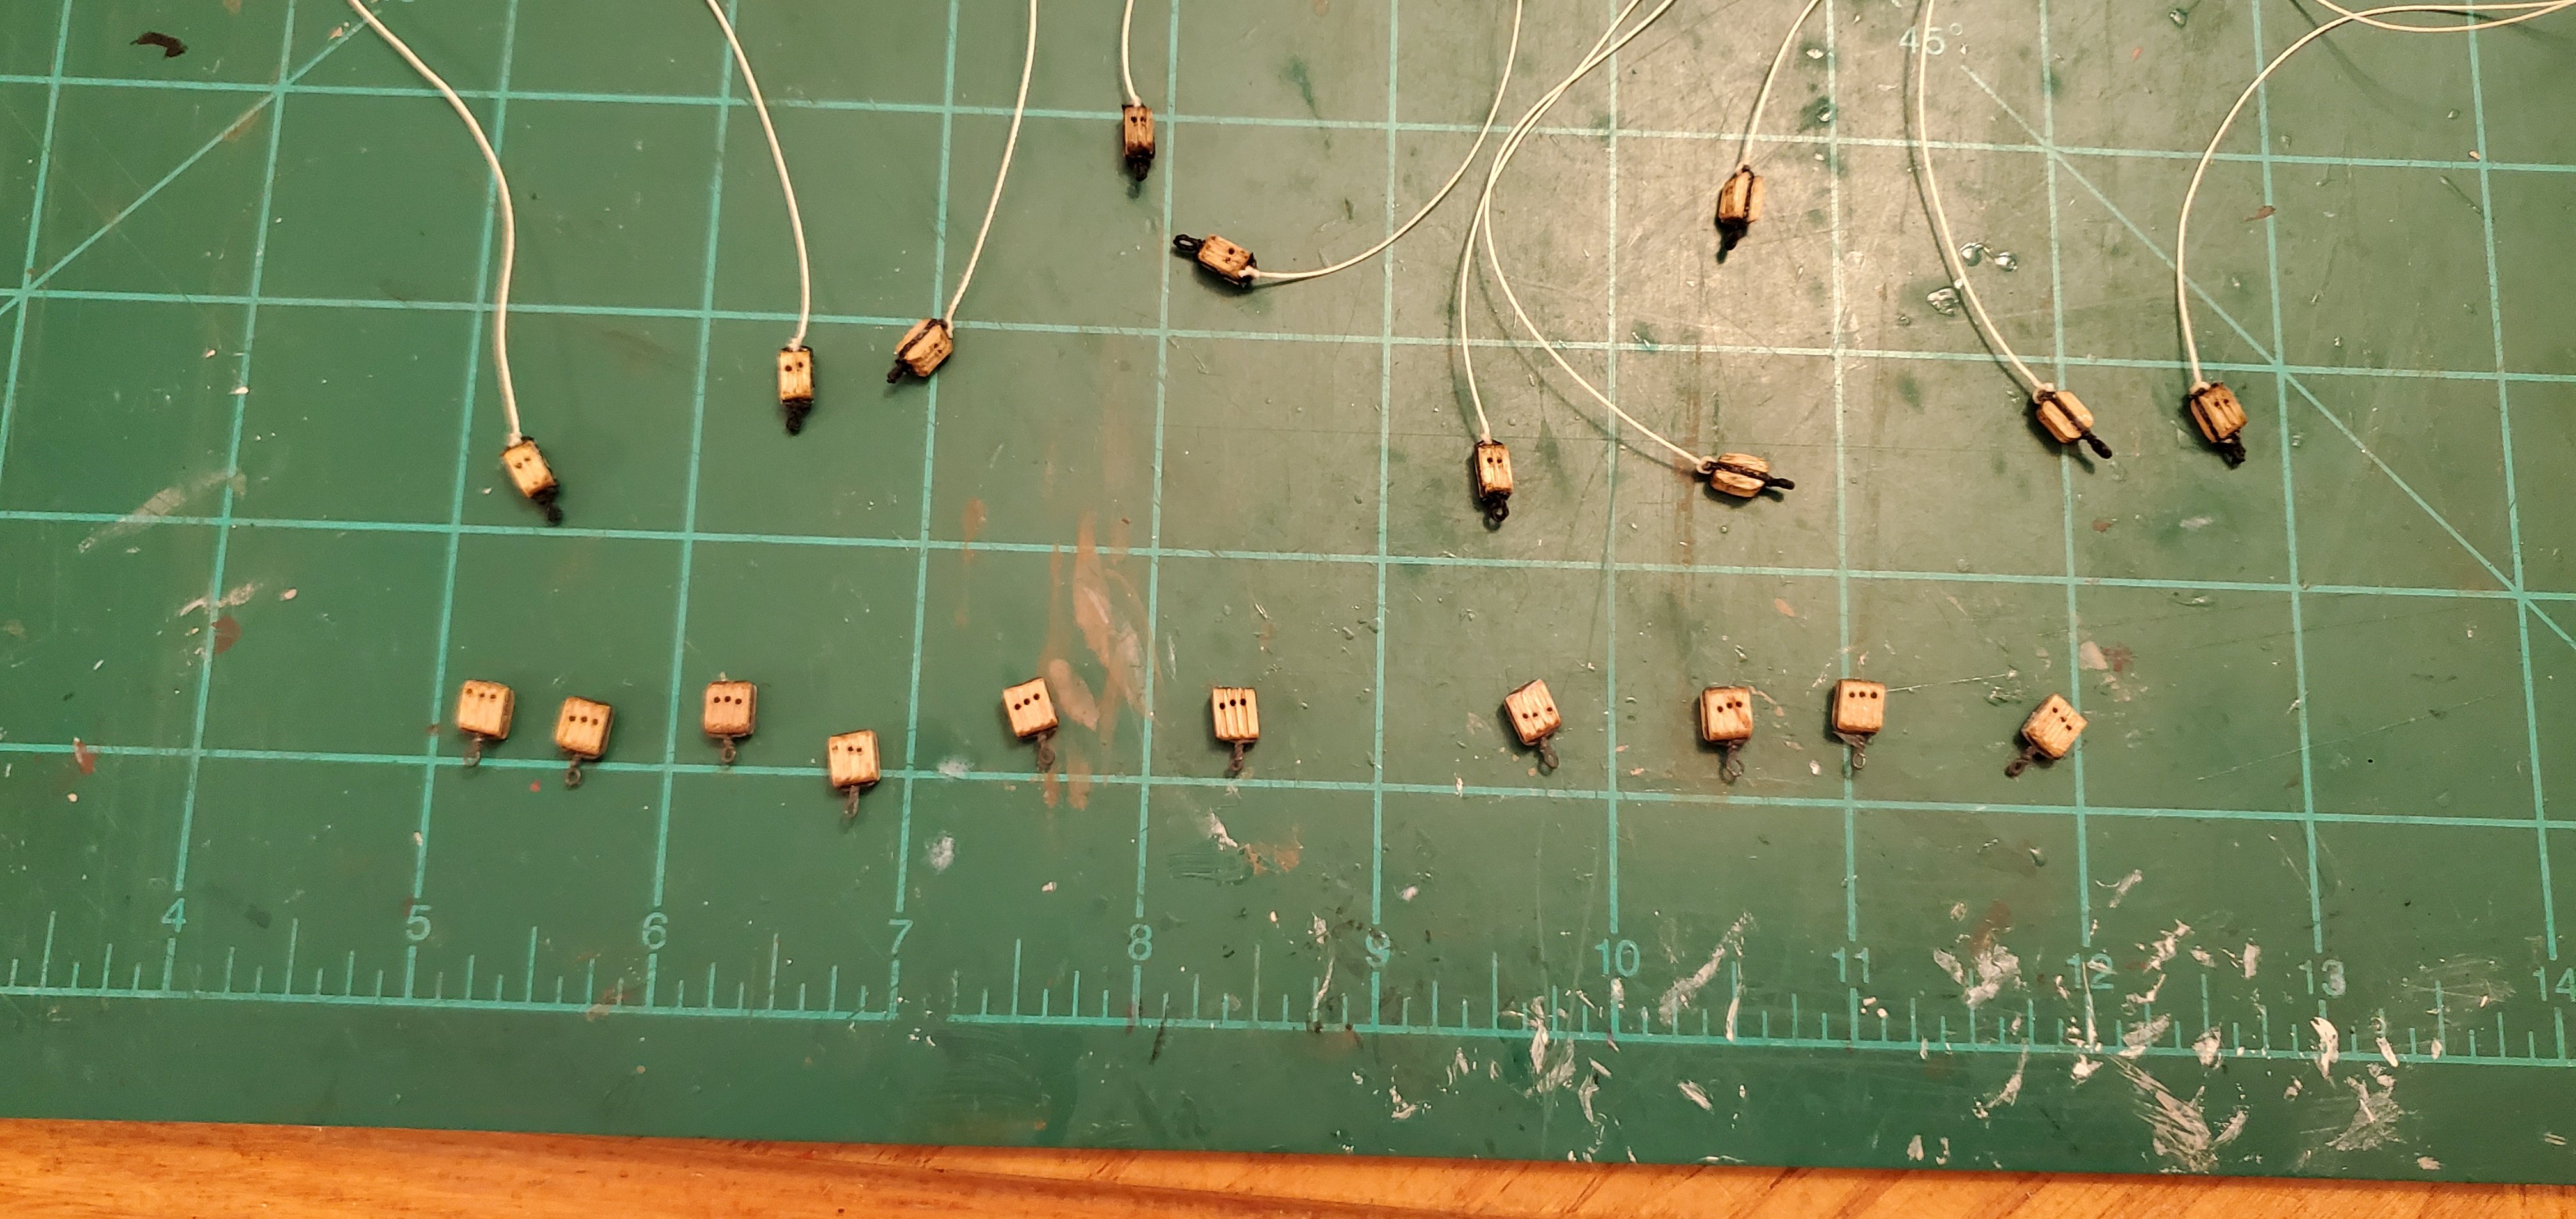
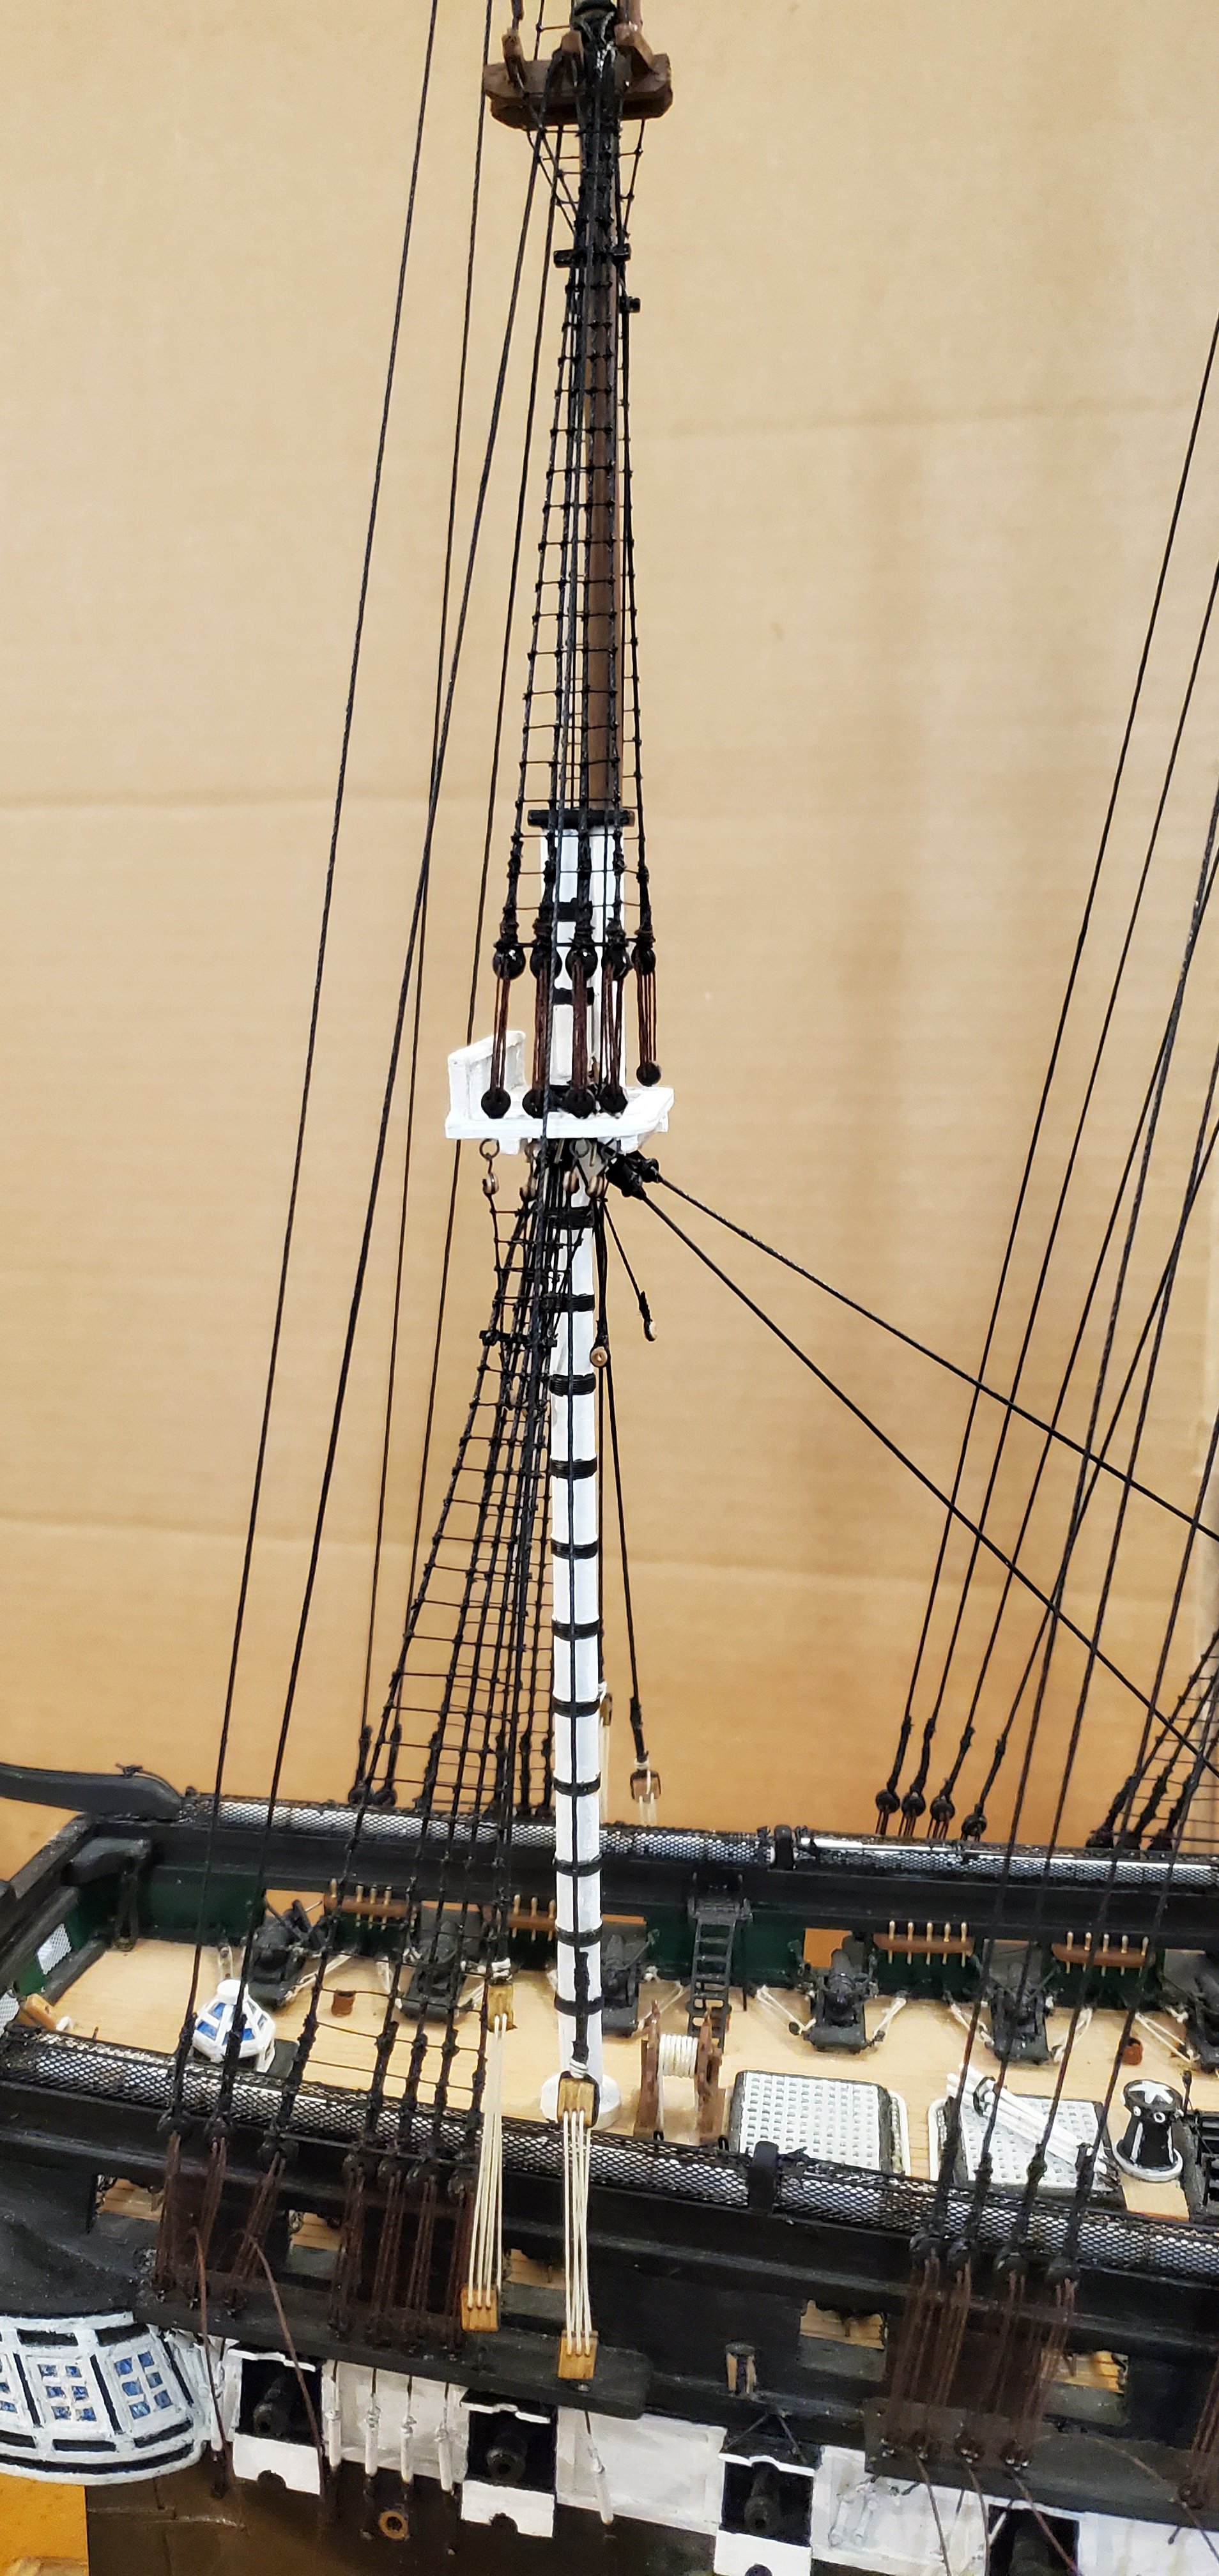
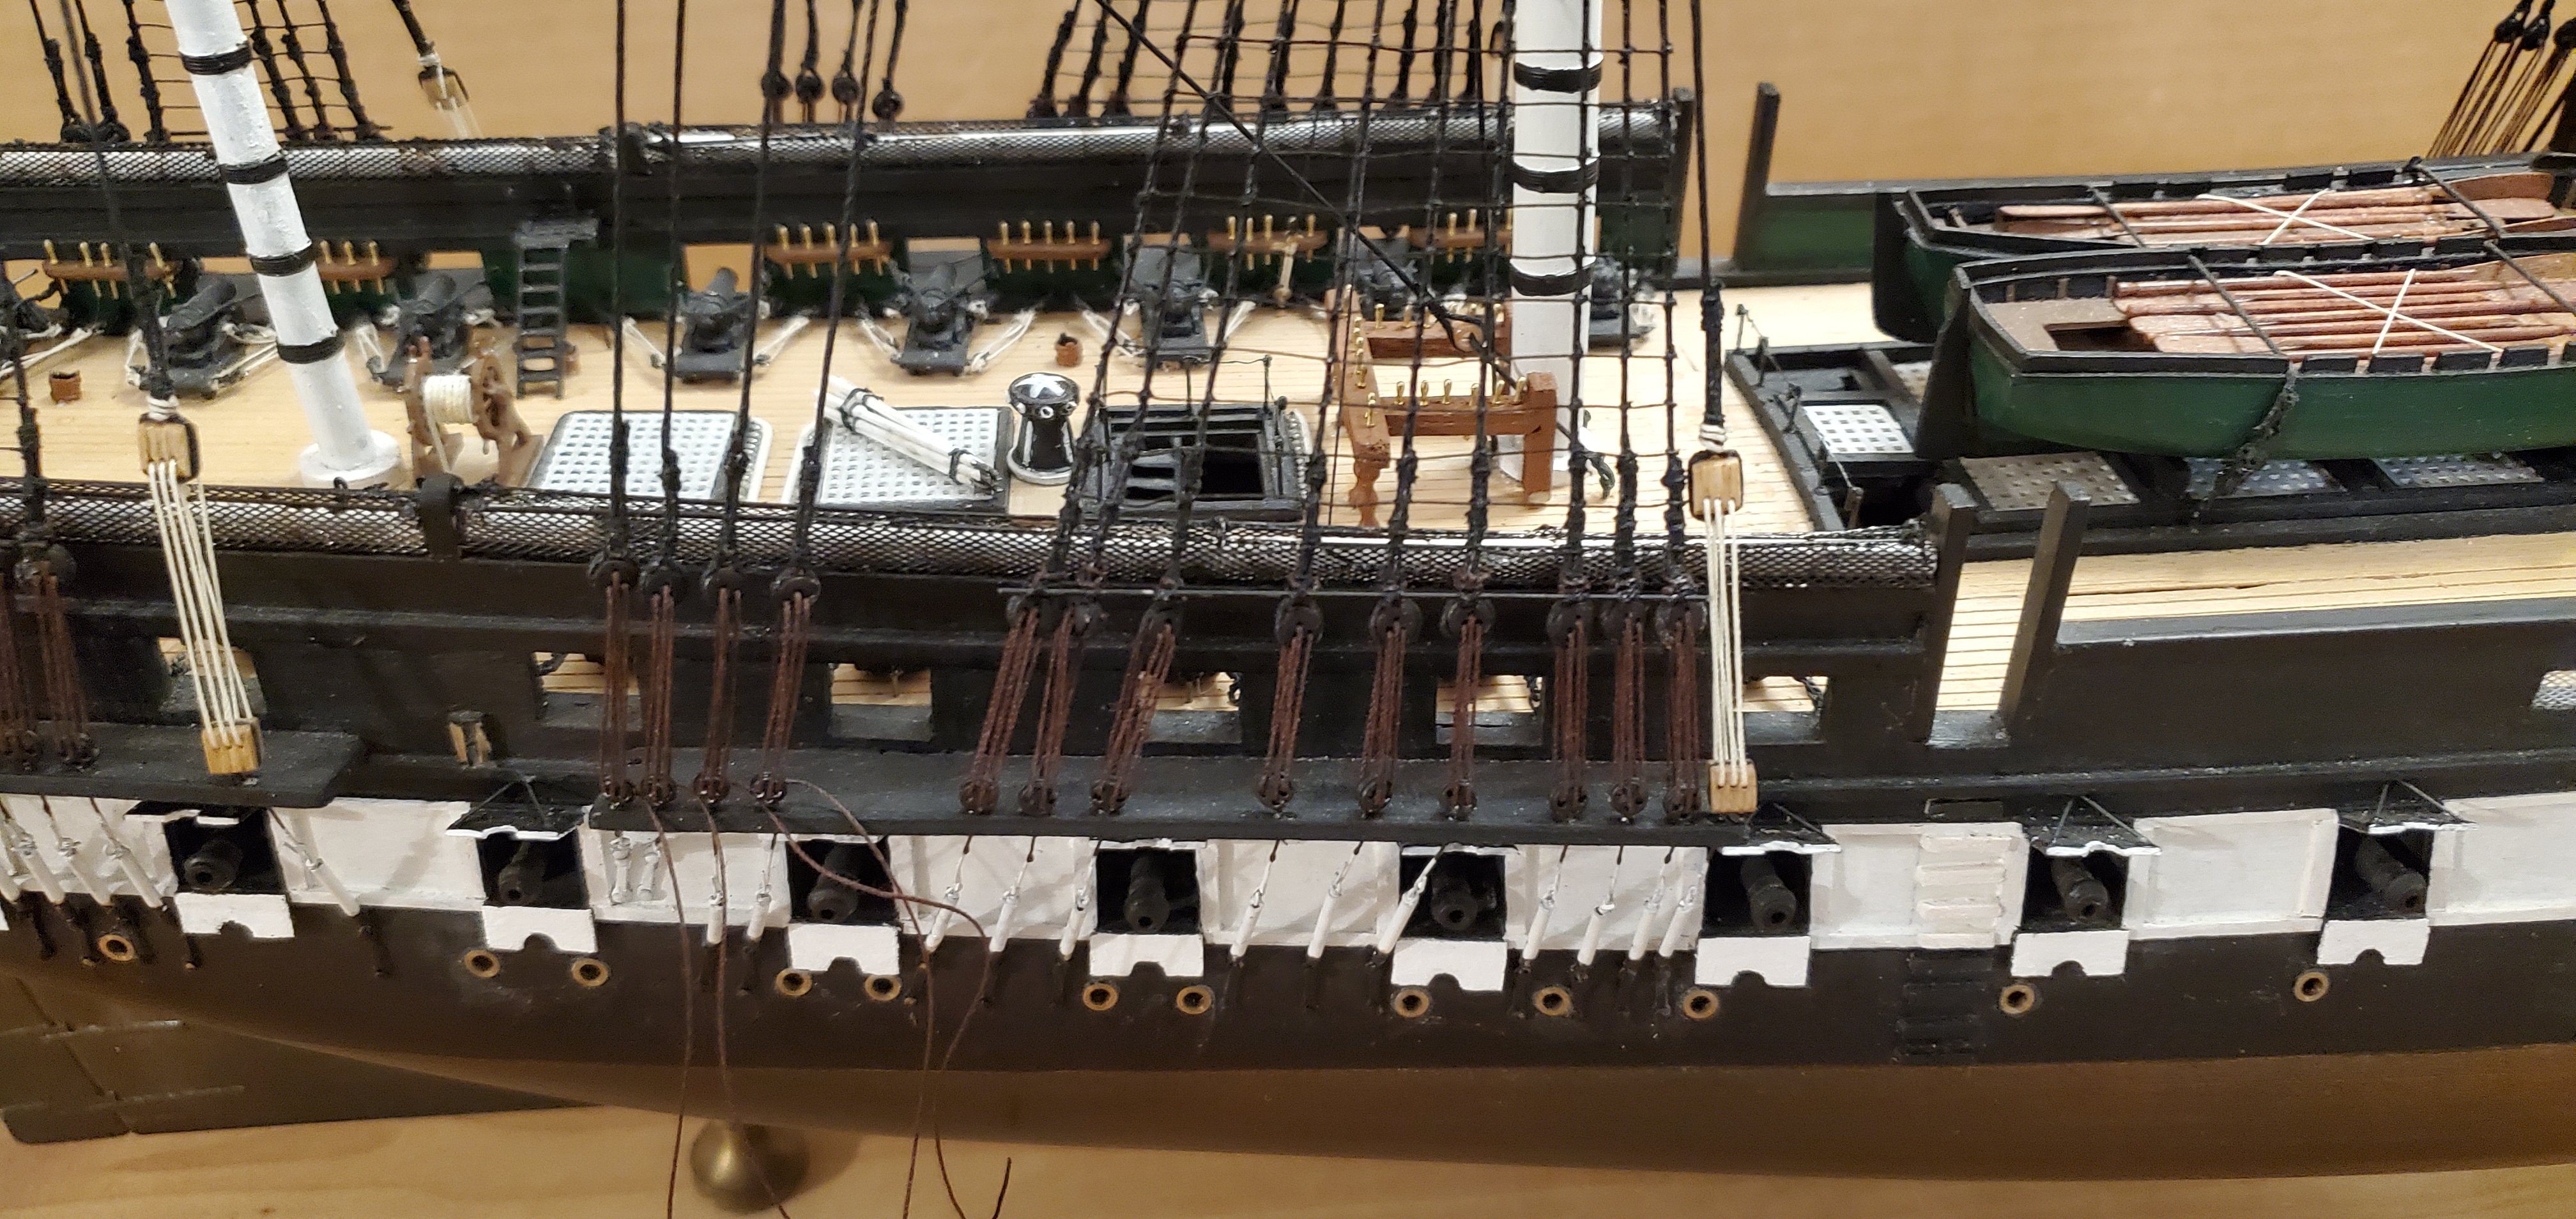
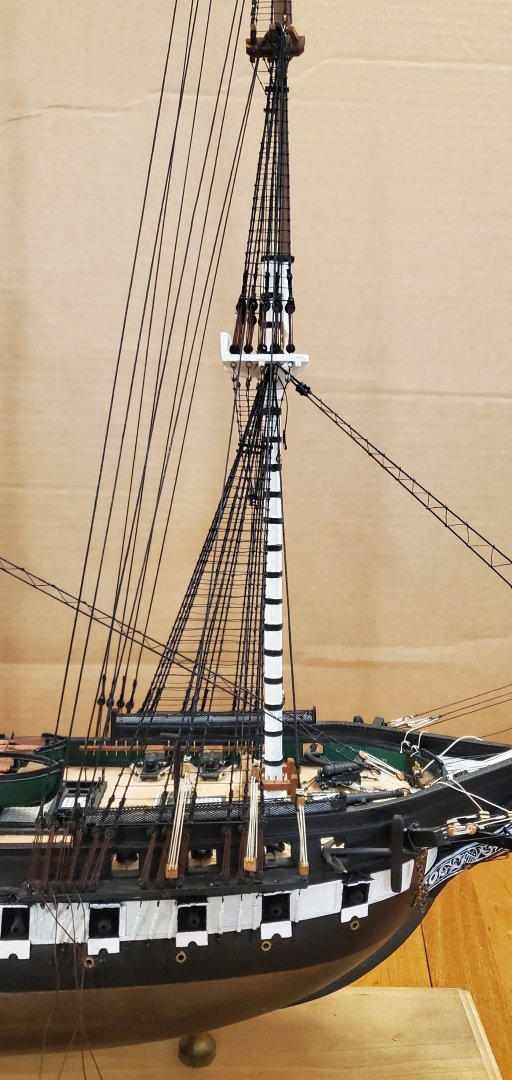
I assume that is the voice of experience I'm hearing? Thanks, Bob. Based on the answer I got from the question I posted on the Masts, Rigging and Sails forum, I tied off the block rigging for the breast backstays above the double block similar to how deadeye rigging is tied off. Here's how they look starting with the blocks being stropped. Here are the breast backstays in place. The breast backstays kind of blend in with the shrouds, but they are the block rigging with a double on top and triple below. The stays run from the double blocks to the junctions of the top gallant masts and the royal masts.


- 301 replies
-
- 9
-
-
- Constitution
- Bluejacket Shipcrafters
- (and 1 more)
-
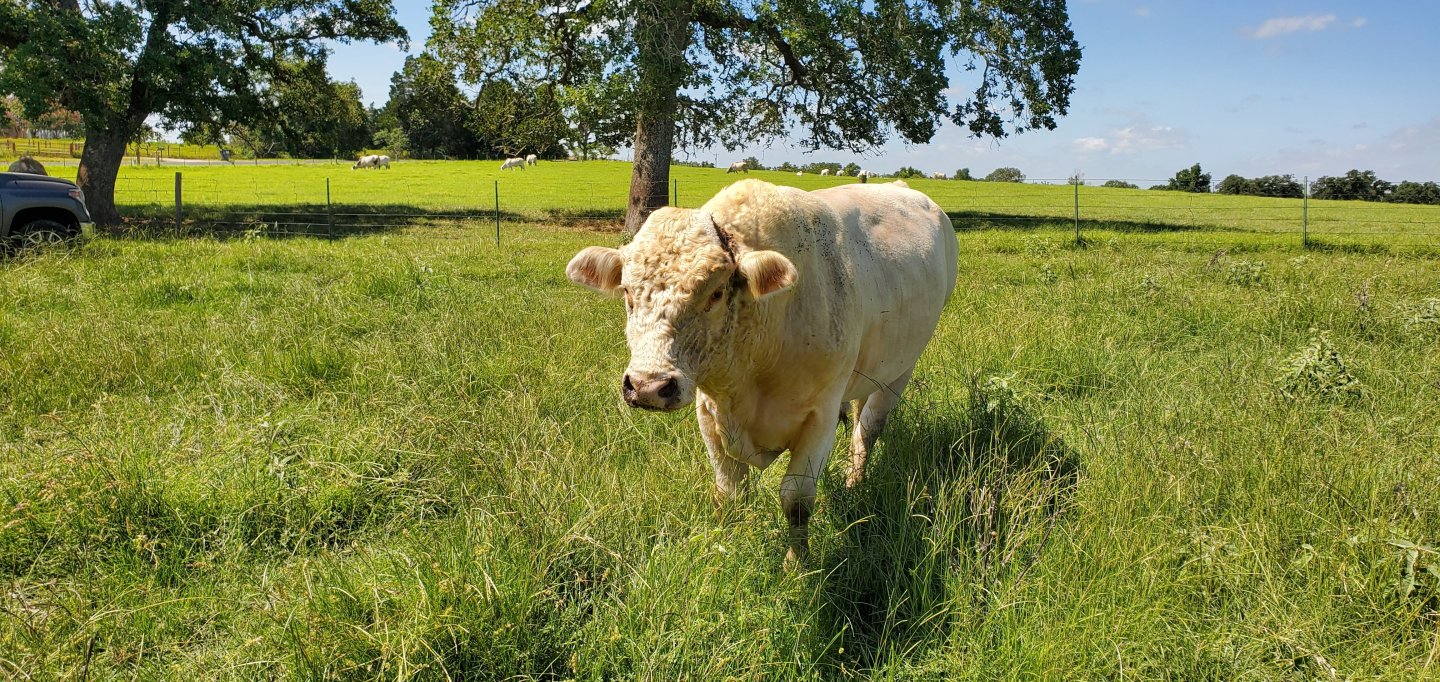
Tell your niece not to feel bad. Broken horns happen from time to time. My young (but large) steer Shiloh, got thru the fence and had a little confrontation with his daddy. Not sure what they were arguing about, but daddy bull ended up with both his horns broke off clean at the skull. Here's daddy bull, afterwards, and he is not in a very good mood. At least the horns on yours can be fixed. This poor guy got polled the hard way and the horns ain't coming back!
- 87 replies
-
- 1
-

-
- King of the Mississippi
- Artesania Latina
- (and 2 more)
-
Just found your log, Gary, and I'm on board. Looks like you are off to a nice start!
- 90 replies
-
- 2
-
-
-
- Friendship Sloop
- bluejacket shipcrafters
- (and 1 more)
-
You've made great progress with your Texas dialect, but you gotta fix that and change it to "y'all". Bummer that you have to backtrack with some of the build, but it will be worth it to make it look the way you want it to look. Tell PFCGP that his loafing is over and it's time to get back to the shipyard!
-
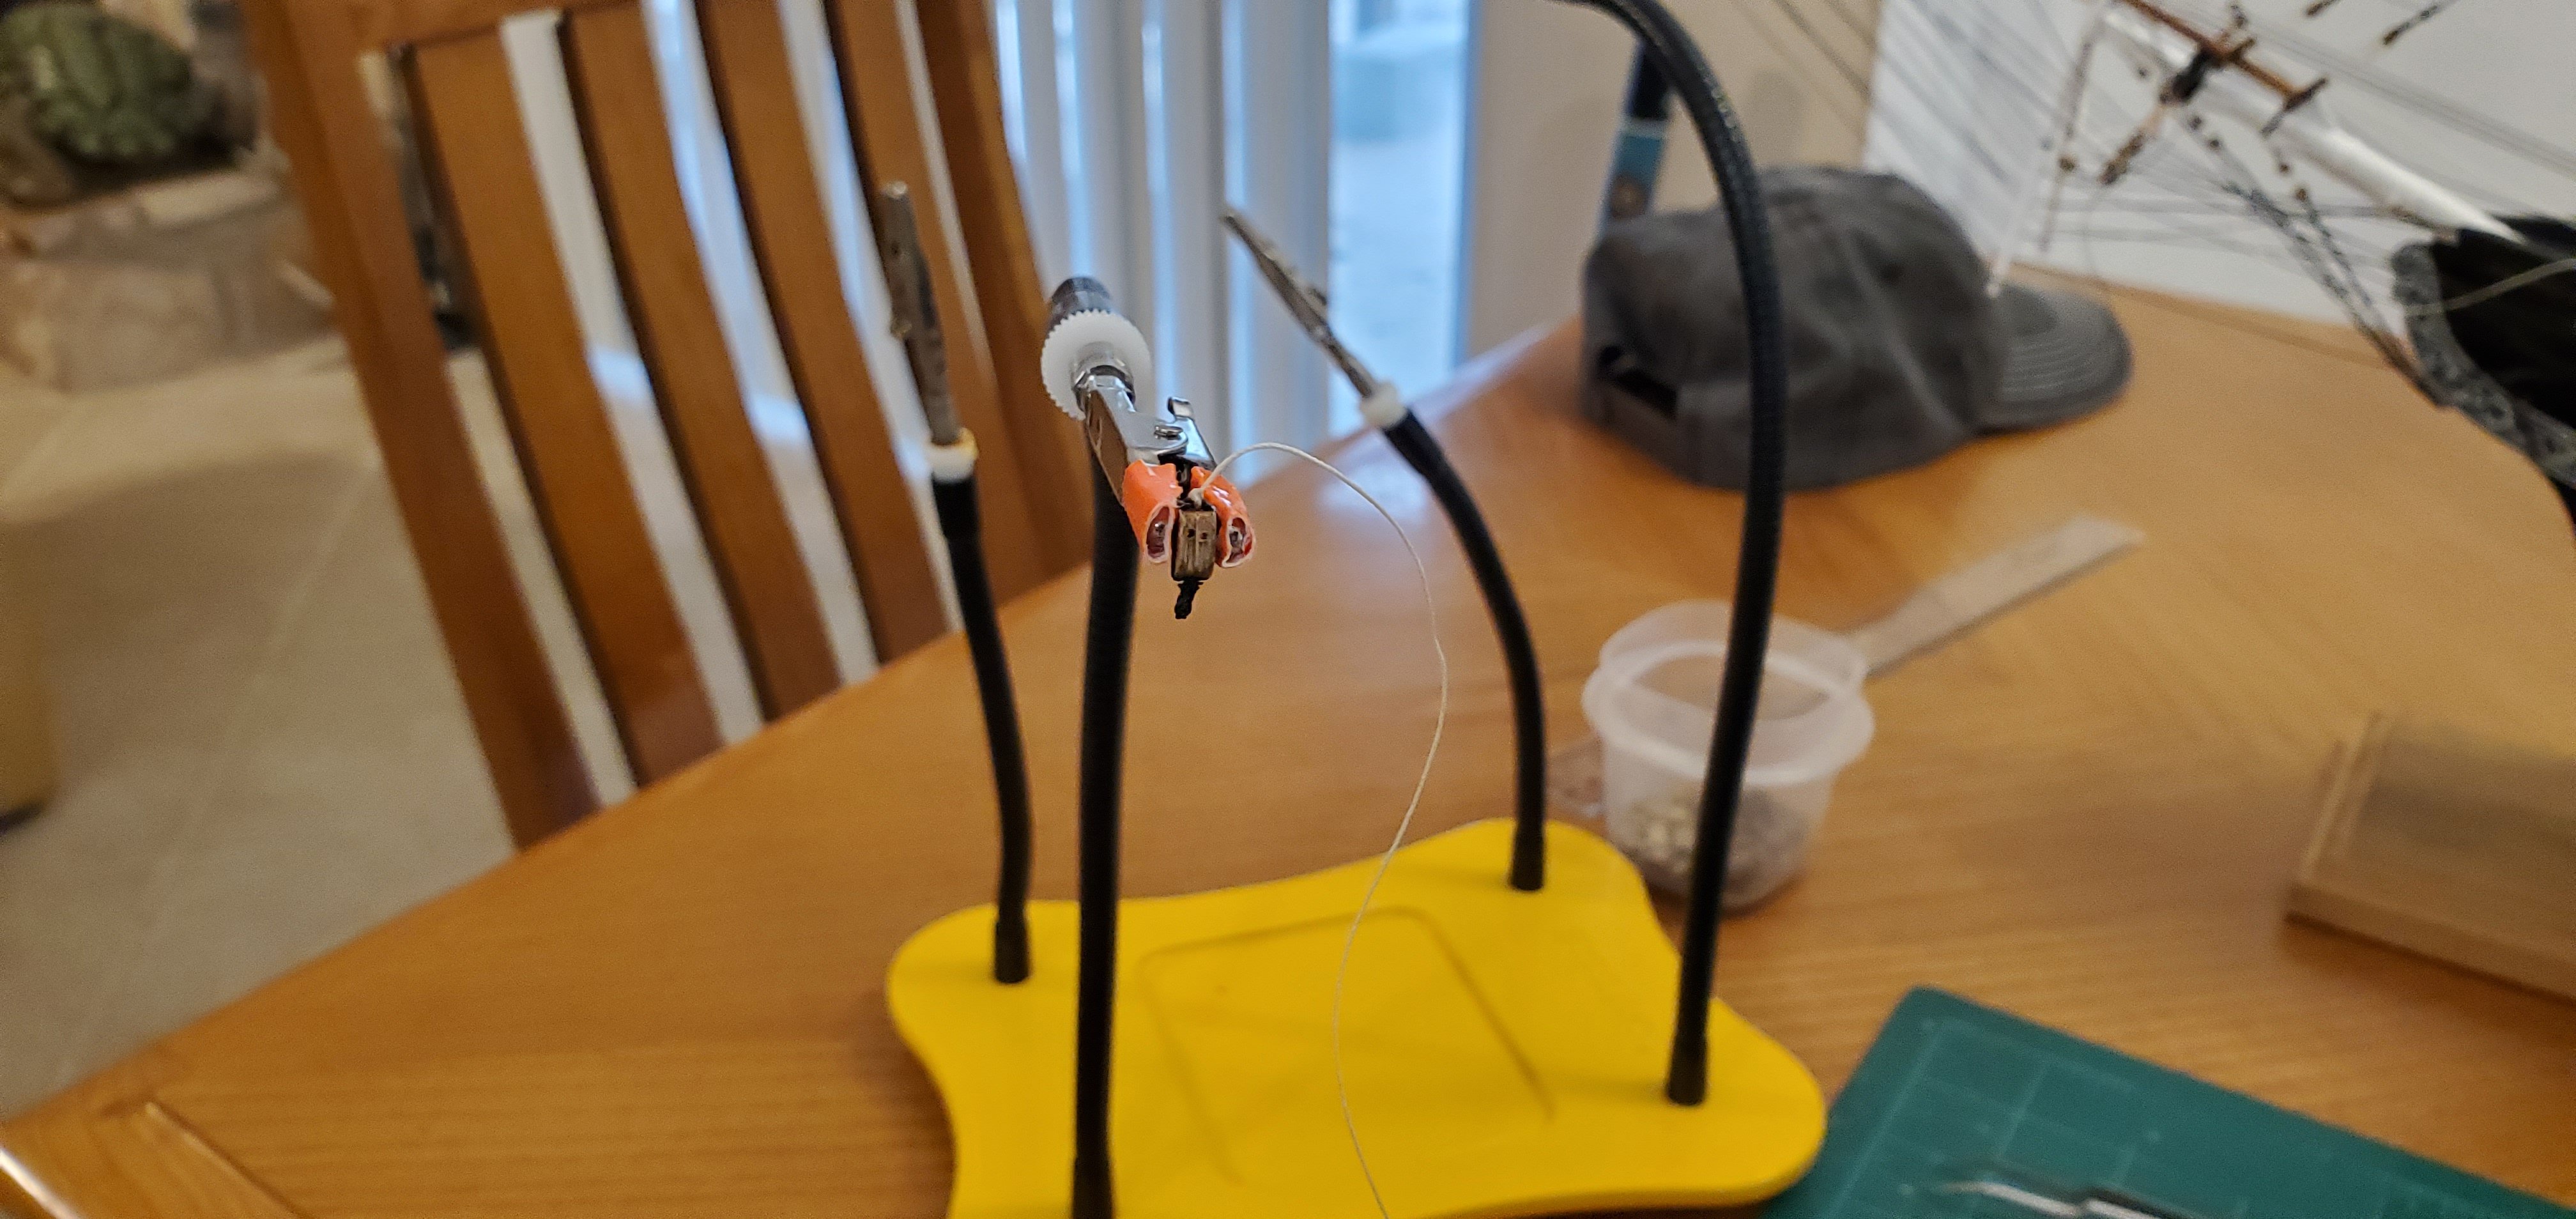
I agree with Ian. I use one of those helping hand contraptions. Mine does not have smooth jaw alligator clips (I need to find some), so I use a bit of duct tape to keep from damaging the block.

- 55 replies
-
- 3
-
-
-
- Le Martegaou
- billing boats
- (and 1 more)
-
@popeye2sea - Those are perfect instructions. Thank you, Henry!
-
I am in the process of adding breast (shifting) backstays to my USS Constitution project. The backstays are secured to the channels with a double block on top and triple block below. My question is what's the proper way to reeve that type of block configuration with a double on top and triple below? Here's a picture I took of a Constitution model at the USS Constitution museum with the breast backstays highlighted, but I cannot tell for sure exactly how to reeve them and what to do with the loose end of the rope. Any help would be appreciated.

-
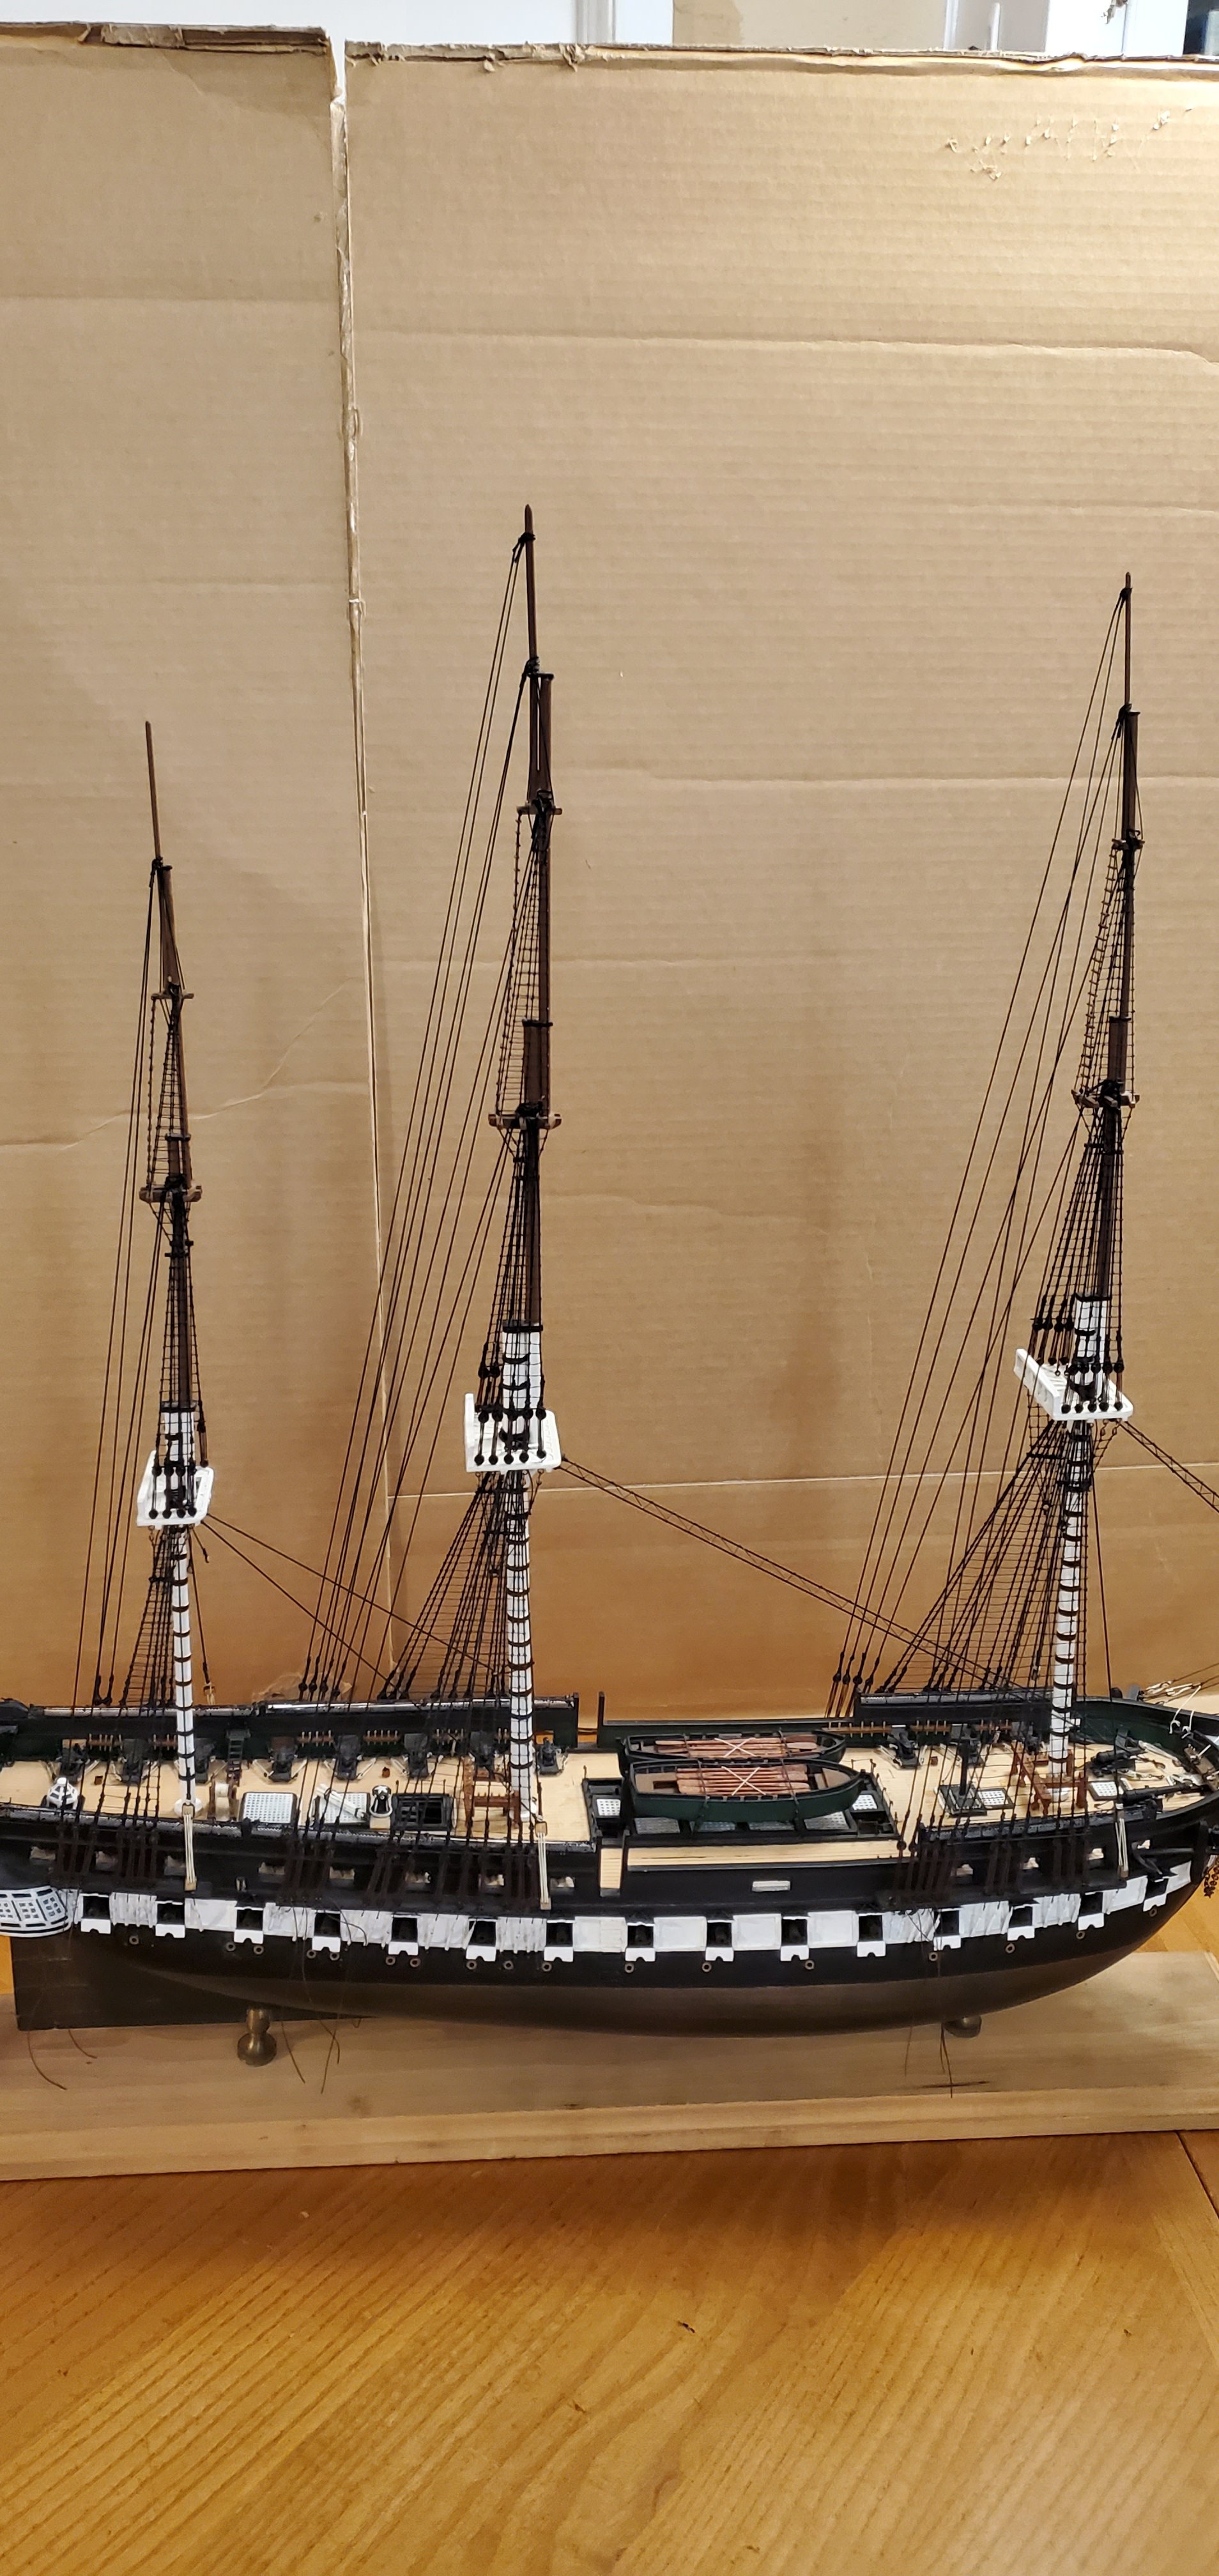
Oh good grief (head slap). How did I not figure out that reference. I blame it on the insane cold that I experienced on my trip to the northeast. My brain has not thawed out yet. Thanks again to everyone for your kind words on my SIBs and the model show. Time to steer this discussion back to the Constitution. I finished up all the backstays. They are in place with deadeyes threaded but not tied off. I'll wait till after I get all the stays in place so I can tension all the lines properly. I had a much harder time aligning the upper row of deadeyes on the backstays than I did on the shrouds. Maybe it's because the lines are longer and all of them are different lengths. Regardless, here's how she looks with all her back stays in place: Here's a closeup of the main deadeyes. You can see one of the backstay deadeyes on the opposite side that is drooping well below the others. I'll fix that when I get the stays on and do the final tightening of the deadeye rigging. Next up are the breast (shifting) backstays. I had not heard of these before. The instructions tell you how to rig them (sort of) but also state that they are not included in the rigging plan, so they don't give any hint as to how they should look. Here's what the instructions say, "Fore, Main, Mizzen Breast (Shifting) Backstays - 5" collar seated on top of the backstay. Set up between 4th and 5th deadeyes on channel with 1/8" double and triple blocks (not shown on rigging plan)." I took this picture of a large and very nice model of the Constitution at the Constitution Museum. It's a closeup of the main channel and deadeyes. I've highlighted what I believe are the breast backstays. My instructions seem to indicate that there is one breast backstay per side per mast, but it looks like there are 2 per side in this picture. So if there are 2 per side, would both be tied off with a collar around the top mast or would 1 be tied off at the top mast and the other tied off around the top gallant mast? Any insight on breast backstays would be appreciated.


- 301 replies
-
- 12
-

-
-
- Constitution
- Bluejacket Shipcrafters
- (and 1 more)
-
You're fixing to be busier than a stump-tailed bull during fly season!
-
What about using the wider plank in the center? That would give it a symmetrical look.
- 312 replies
-
- 4
-
-
- Chile
- Latin America
- (and 6 more)
-
That was a fun ride you just took all of us on. Great build log and even better build. Well done, Bob!!
- 207 replies
-
- 3
-
-
-
- vanguard models
- Duchess of Kingston
- (and 1 more)
-
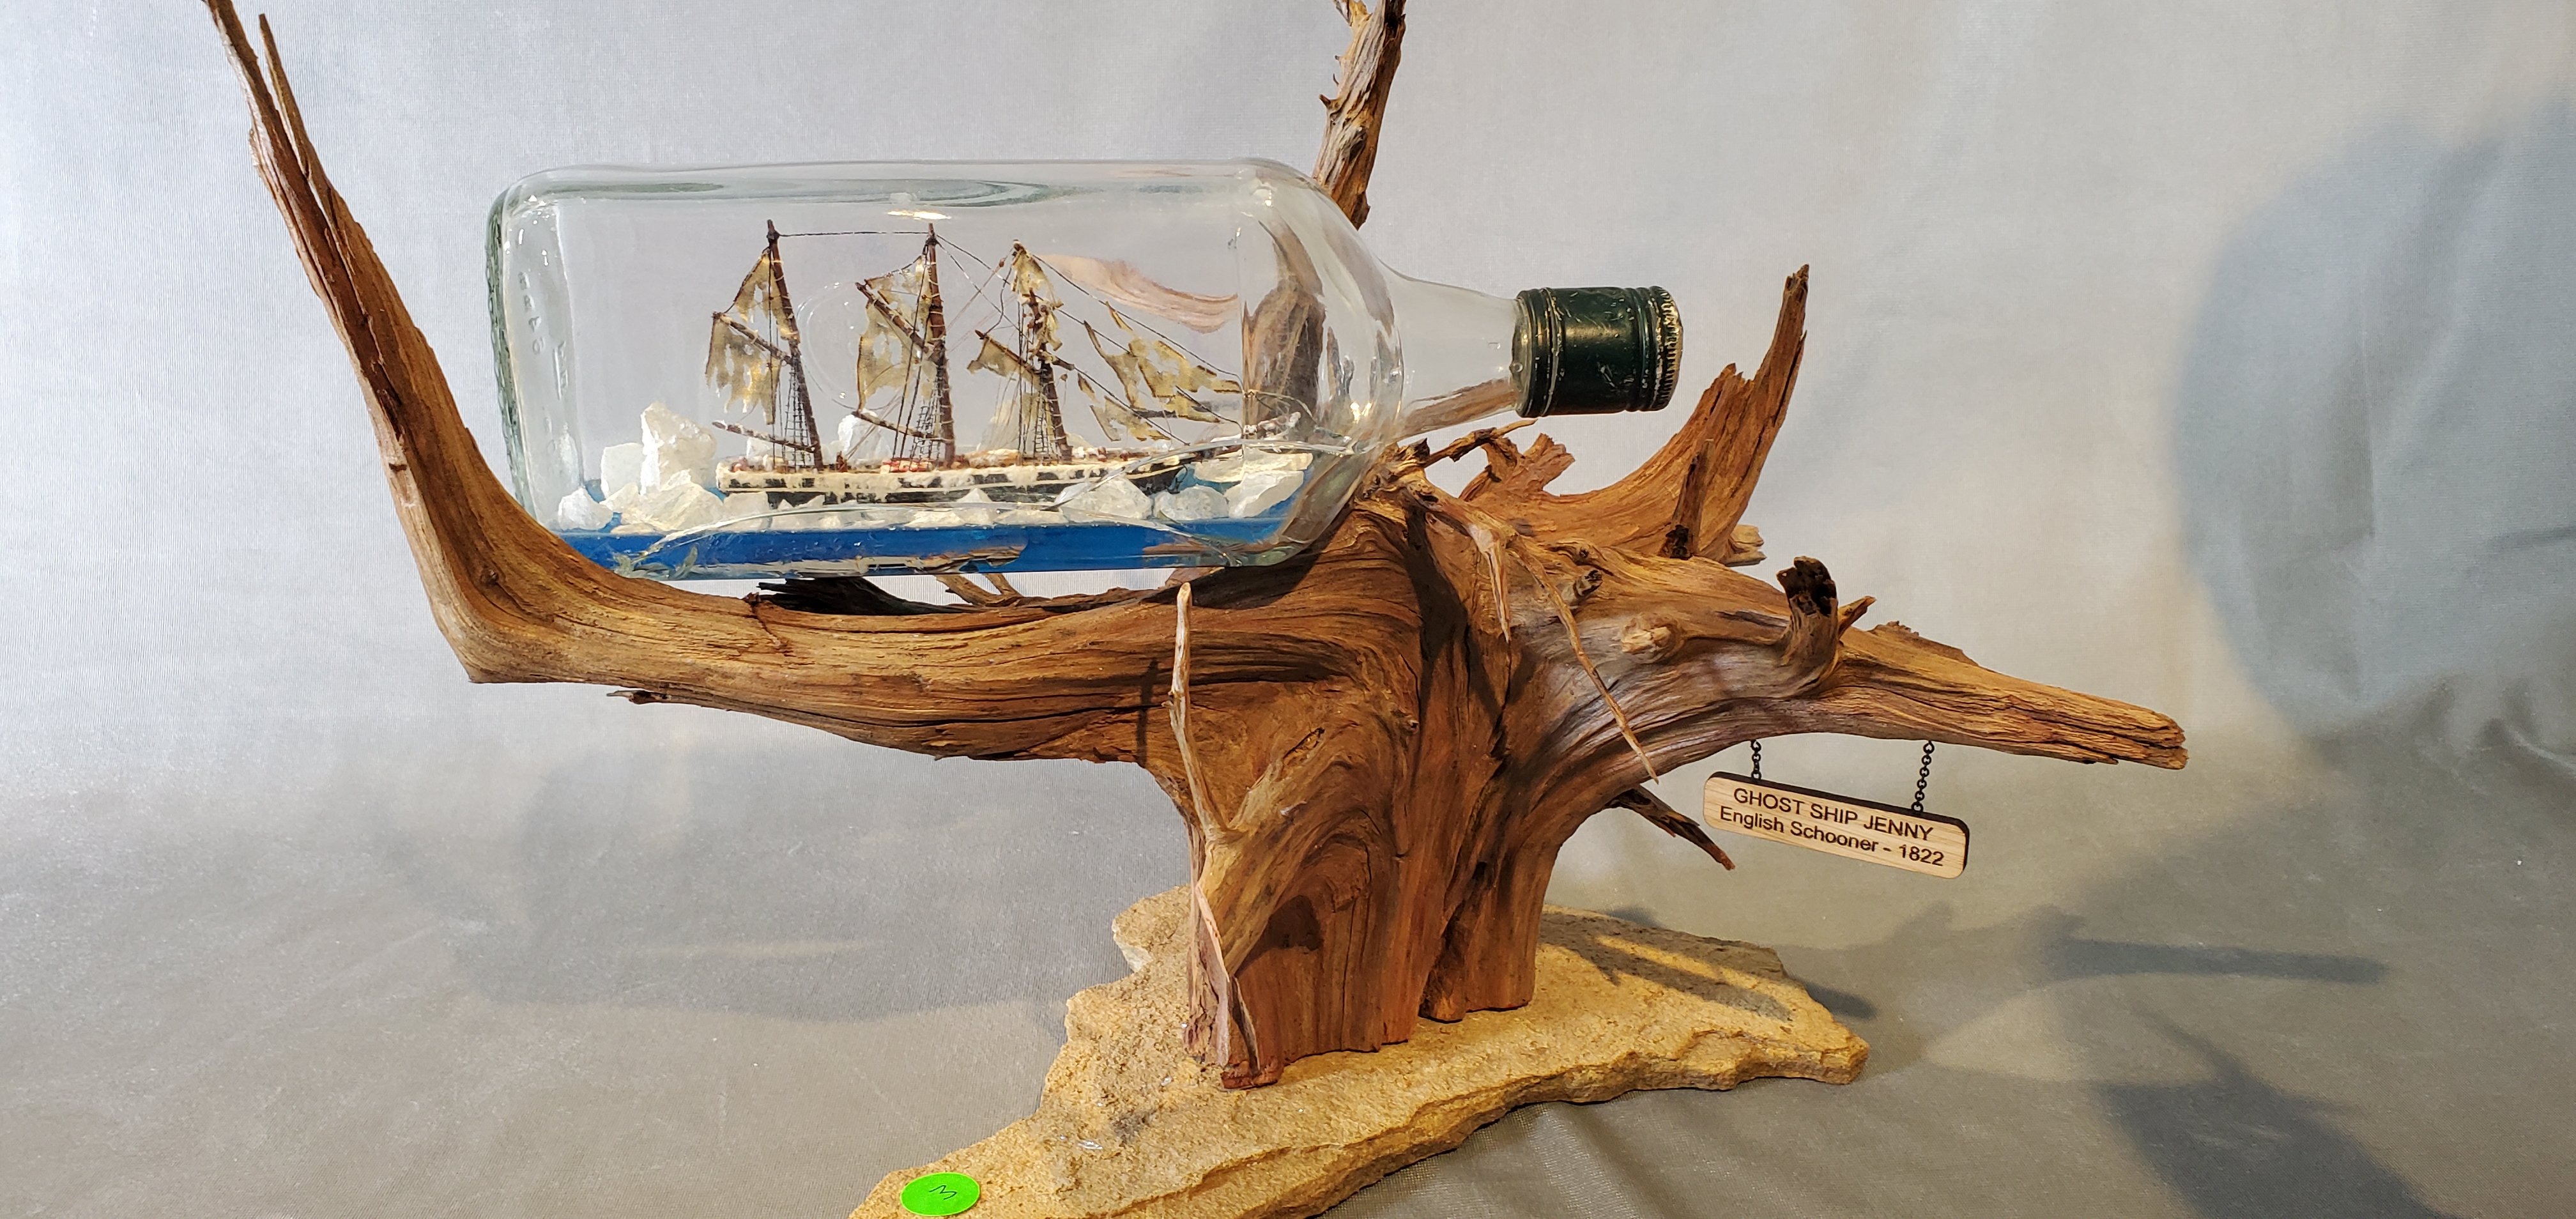
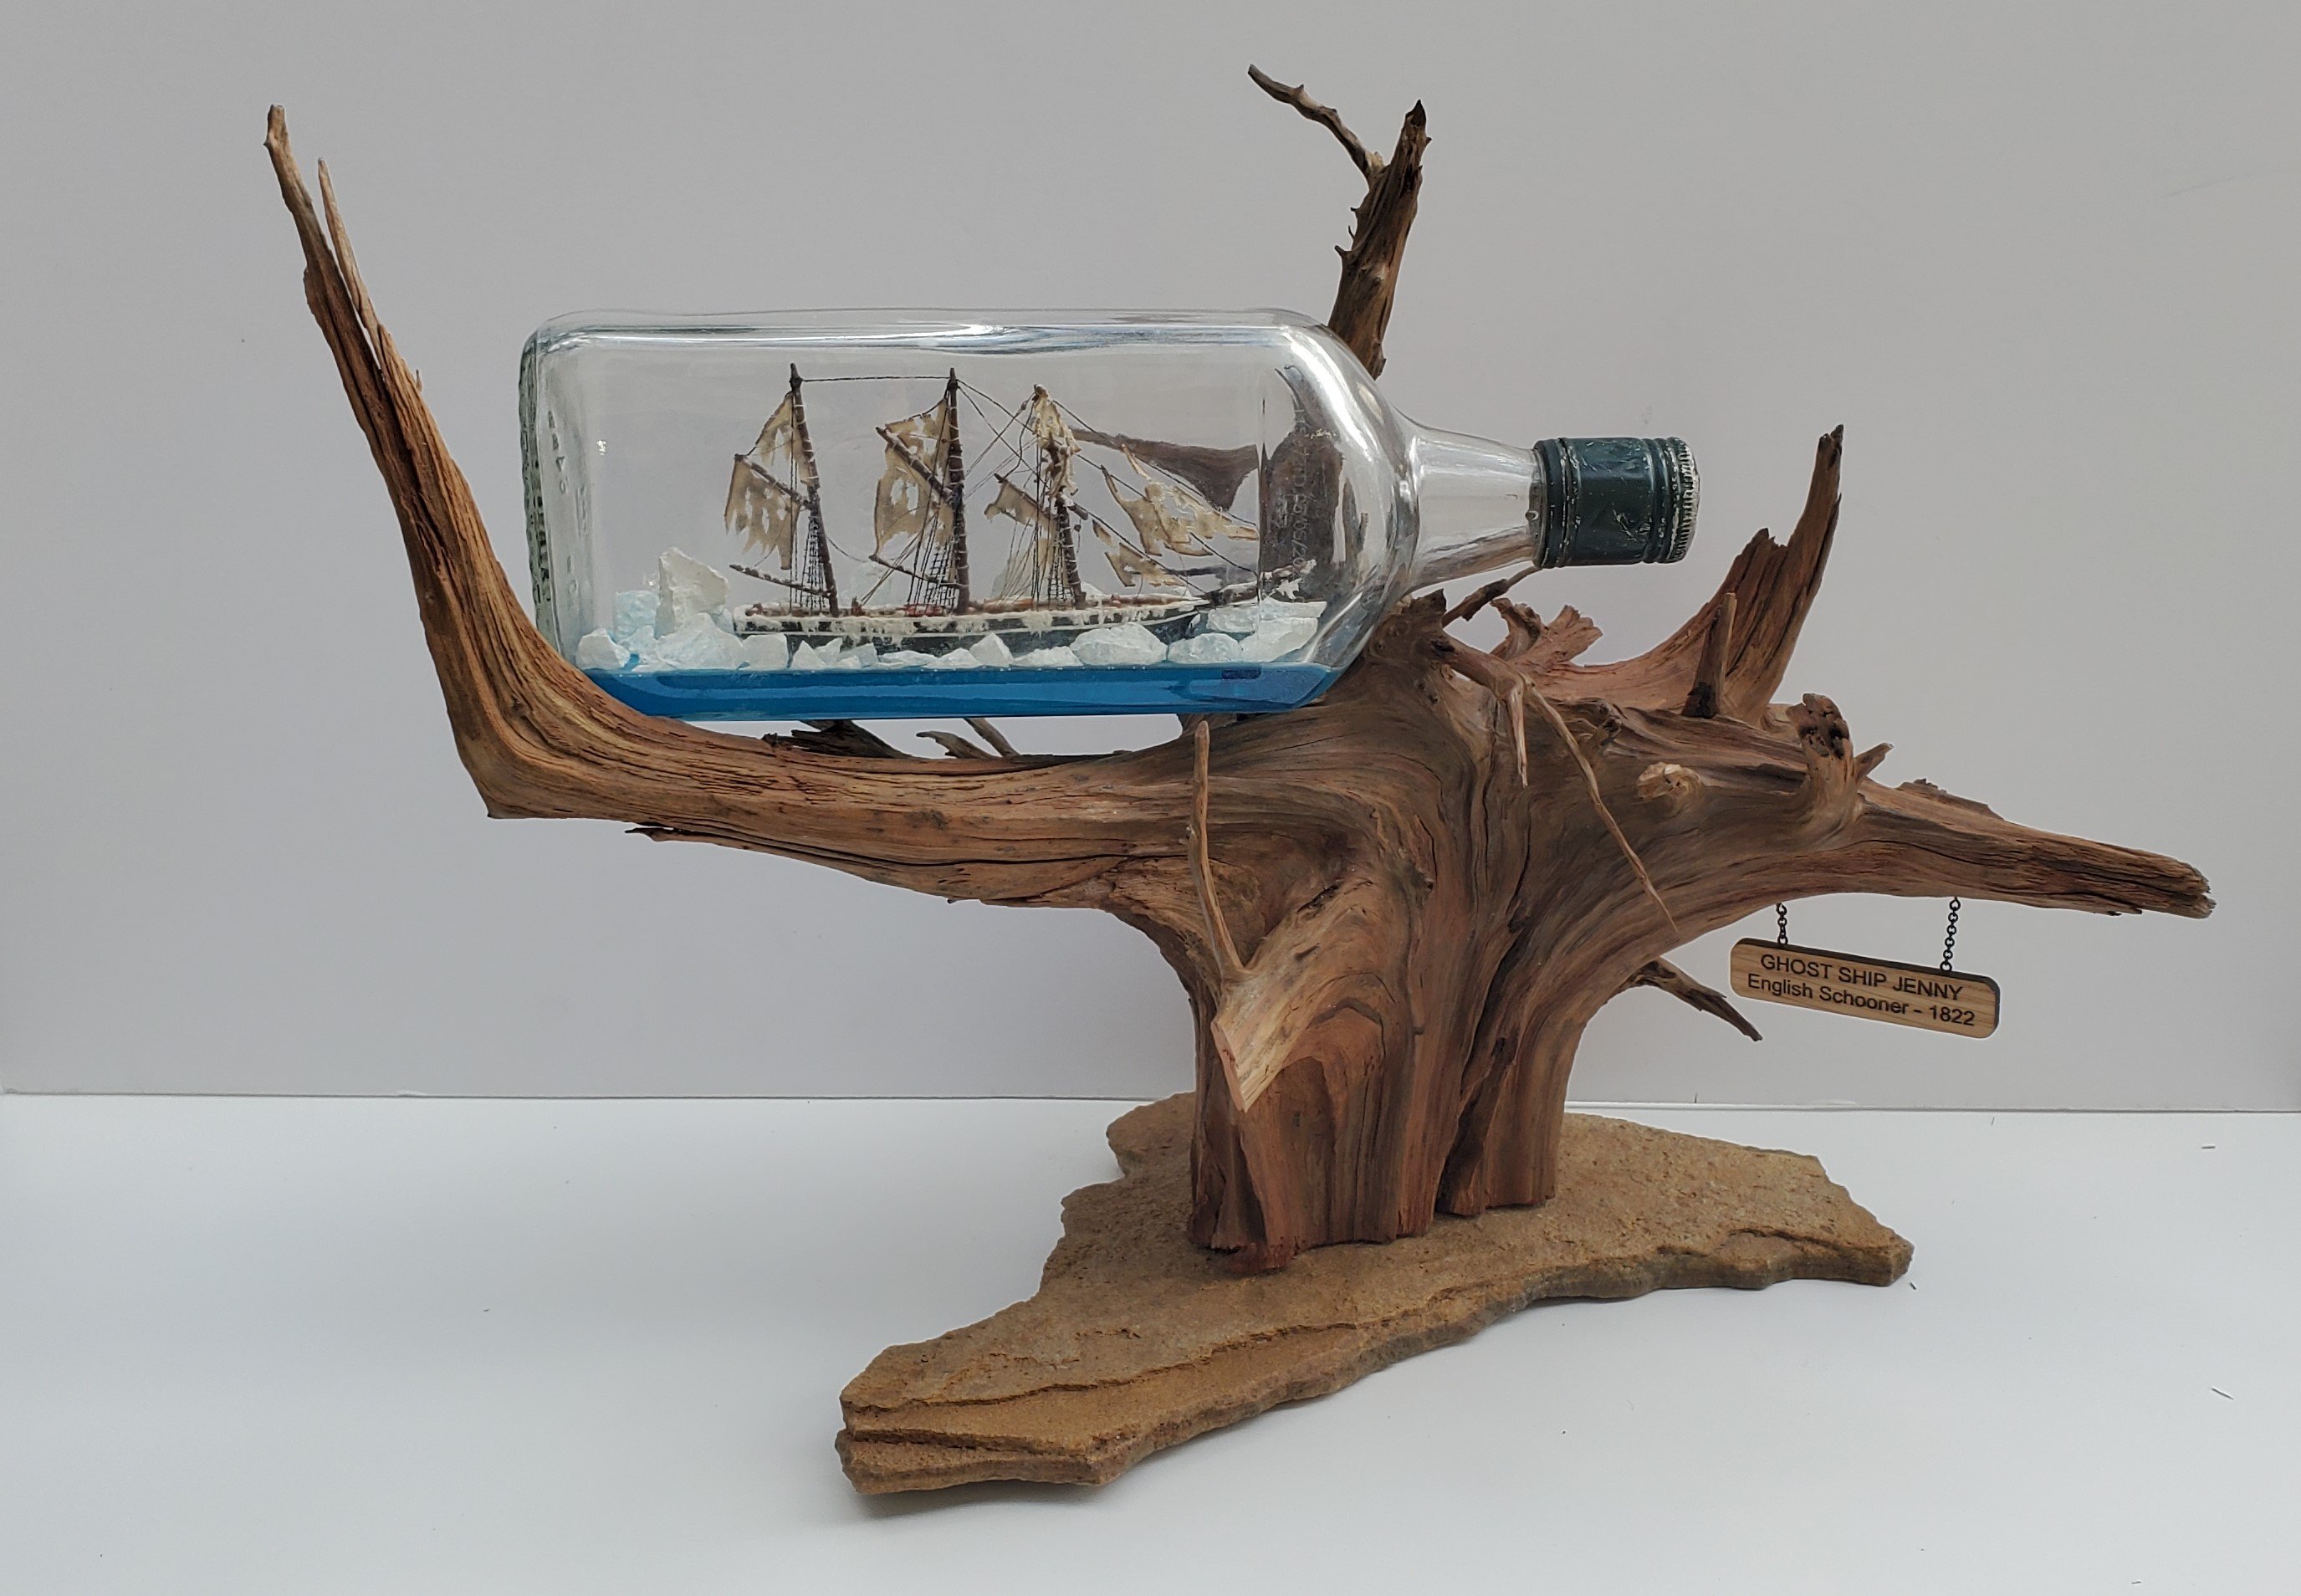
Thank you, Roel, Grant, Keith, and Ian for the kind sentiments. The Masters level builds are amazing, Roel. Based on my understanding of the rules for competition, you have to earn your way into the Masters category by accumulating awards at lower levels. And from what I've seen in person, I've got room for improvement in my ship building to reach that level. So I happily accept the Apprentice label with the goal of getting better with each build and eventually reaching that level of craftsmanship. I appreciate your thoughts, Keith. I believe my SIBs were well received based on getting an award (I just didn't get a feel for it when I dropped them off). If I had guessed beforehand which one would get an award, I would've picked the Dutchman/Pearl like you mention. I was very surprised that the Jenny was recognized like that. Keep in mind that there is not a separate category for SIBs, so my entries are being judged against regular ship models. I honestly have no idea how the judges do a comparison of an SIB to a regular ship model. So I was thrilled beyond words when I found out they recognized one of mine for an award. Now about that salty iced tea. Hmmmm. You got me on that one! Interesting that you should mention temperature. I was wondering about that myself. On the drive to Boston, I spent 2 nights in Gettysburg, PA and the temps got down to -5 F at night. I knew the negative temps would be hard on this old Texan's body but didn't really think that the low temps might affect my SIBs, so I just left them in the car. Now I'm wondering if the cold actually did cause the crack. Or maybe there was already a hairline crack in the bottle that I could not see beforehand and the vibrations of a 30 hour drive in the car caused it to expand. After all, the bottle was fished out of a creek before I put it to use!
- 301 replies
-
- 7
-
-
- Constitution
- Bluejacket Shipcrafters
- (and 1 more)
-
That is very precise work with those thin veneers, Chris. Well done.
-
Those railings are incredible (along with the rest of the ship). Well done, Phil.
- 288 replies
-
- 7
-
-
-
- Card
- Pre-Dreadnought
- (and 3 more)
-
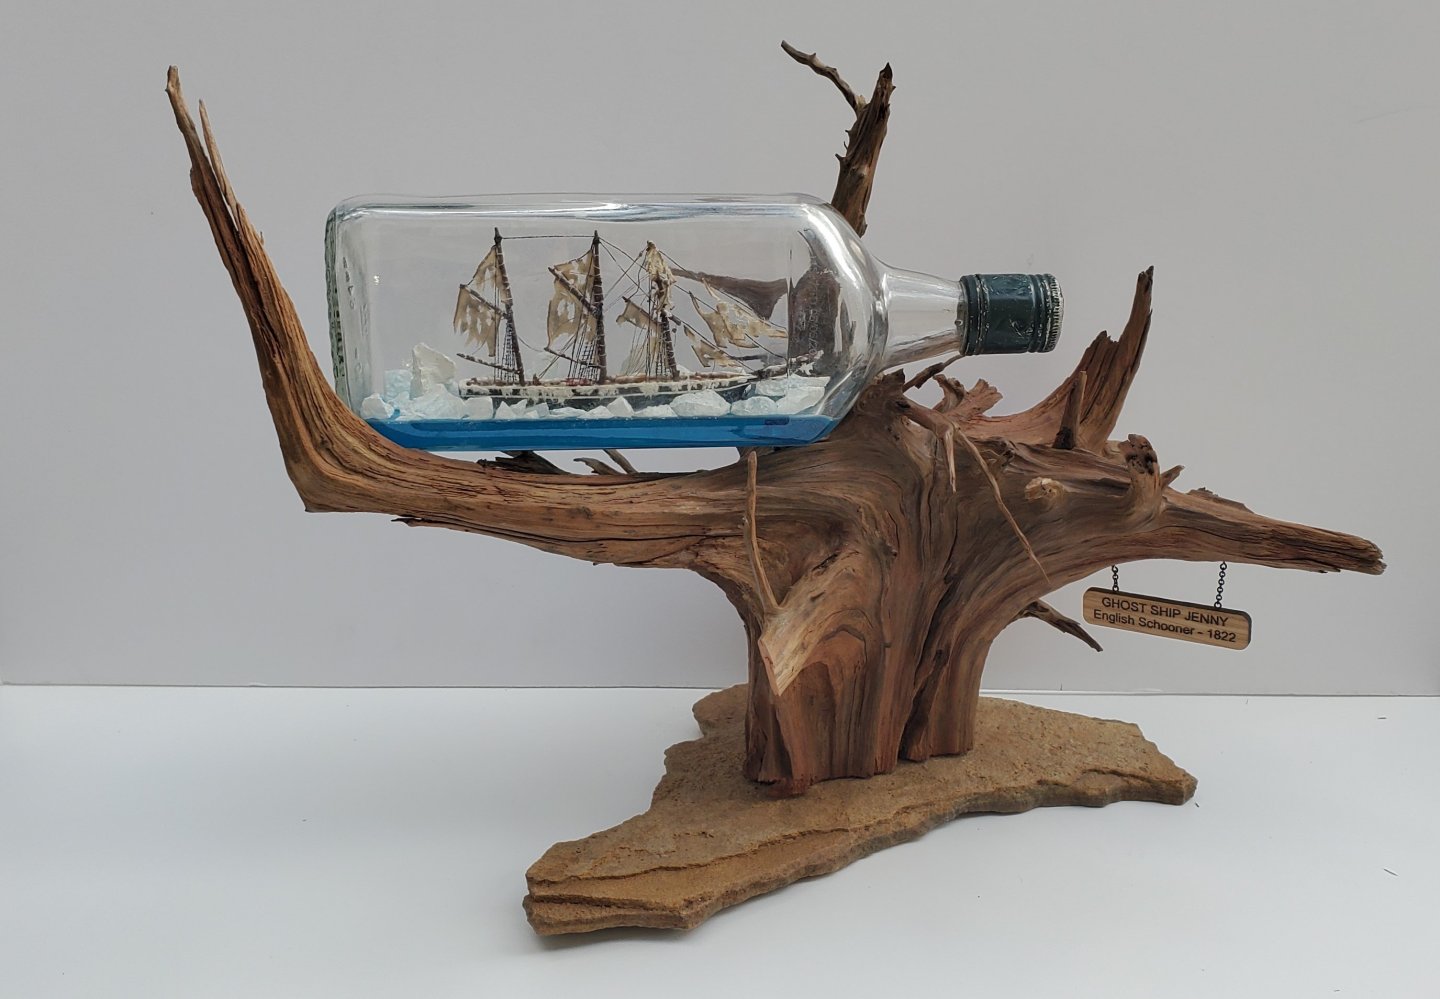
Thanks, Keith! The model show is incredible. There are some truly remarkable craftsmen that participate. It is quite the honor to have some of my work sit alongside theirs for the competition and show. The show runs from 1/28 to 3/8. So the models will be on display at the museum for public viewing for over a month. A large number of the Boston area schools schedule field trips during this time so there will be hundreds and hundreds of kids that get to look at all the models. As far as how my SIBs were received, I couldn’t really say at the time. There was a 3-hour window to drop models off on Sunday 1/26. You sign in, put your model(s) on a table, and then the official photographer takes pictures of them. When I arrived, there were only a handful of people in the exhibit room and nobody said much about my SIBs. Then Monday the next day, the judges review the models and determine awards so that when the show starts on Tuesday, the viewing public will know which models are award winners. I was not able to stick around for all of that as I needed to hit the road and head back home. So here’s the Paul Harvey rest of the story. I took 4 of my SIBs to the show – The Independence, Flying Dutchman/Black Pearl, Ghost Ship Jenny, and Hannah (my first SIB from that Amati kit. I took the Hannah because the museum was celebrating the 250th anniversary of the US Navy and they asked for as many historic US Navy ships as possible). I was watching the photographer take pictures of the Ghost Ship Jenny when, to my absolute horror, I noticed that the bottle was cracked! And I mean a LARGE crack running horizontally along the base and circling around the bottle. When the photographer finished with his pictures, I examined the bottle and pressed on it to see if it was fixing to come apart. But it still seemed solid despite the hideous crack. So I figured, what the heck, maybe a cracked bottle adds to the mystique of a ghost ship? So I left it there. An FYI - this Ghost Ship Jenny was not the same one that I did the build log for here on MSW and is linked to below. That one I gave to my niece since Jenny is her name. But I liked it so much that I decided I wanted one for my own collection. Her father (my brother) had fished out an interesting bottle of Tullamore Dew Irish Whiskey in the creek behind his house and given it to me. It was a great fit for Jenny version 2 so that’s what I used. I worked on it in parallel with the Banshee last year but didn’t do a build log on it since it was a repeat. Here are before and after pics. The first one I took before I started the drive to Boston. The second I took on the exhibit hall table at the museum. For Jenny 2, I did make a few changes from the original Jenny. For the icebergs inside the bottle I used pieces of quartz rather than modeling clay. The piece of wood that the bottle rests on is a root ball from a cedar tree I found on my ranch. The flat rock base also came from my ranch. I think its sandstone, but I’m no geologist. In the second pic, you can see the large crack running somewhat horizontally the length of the bottle’s base near the water line. To wrap up this way too long story, I got an email form the modeler’s guild on Tuesday informing me that one of my SIBs was awarded 3rd place in the Apprentice category (the only SIB to receive an award). And guess which one of my four SIBs got the award – the Jenny, cracked bottle and all!! I would have never guessed that. But maybe the gruesome crack did add to the mystique of the ghost ship after all! So that’s my story and I’m sticking to it!

- 301 replies
-
- 15
-
-
-
- Constitution
- Bluejacket Shipcrafters
- (and 1 more)
-
Epic! That's the word that comes to mind for your Duchess build. Congratulations, Bob. A masterful job all the way around!
- 207 replies
-
- 3
-
-
-
- vanguard models
- Duchess of Kingston
- (and 1 more)
-
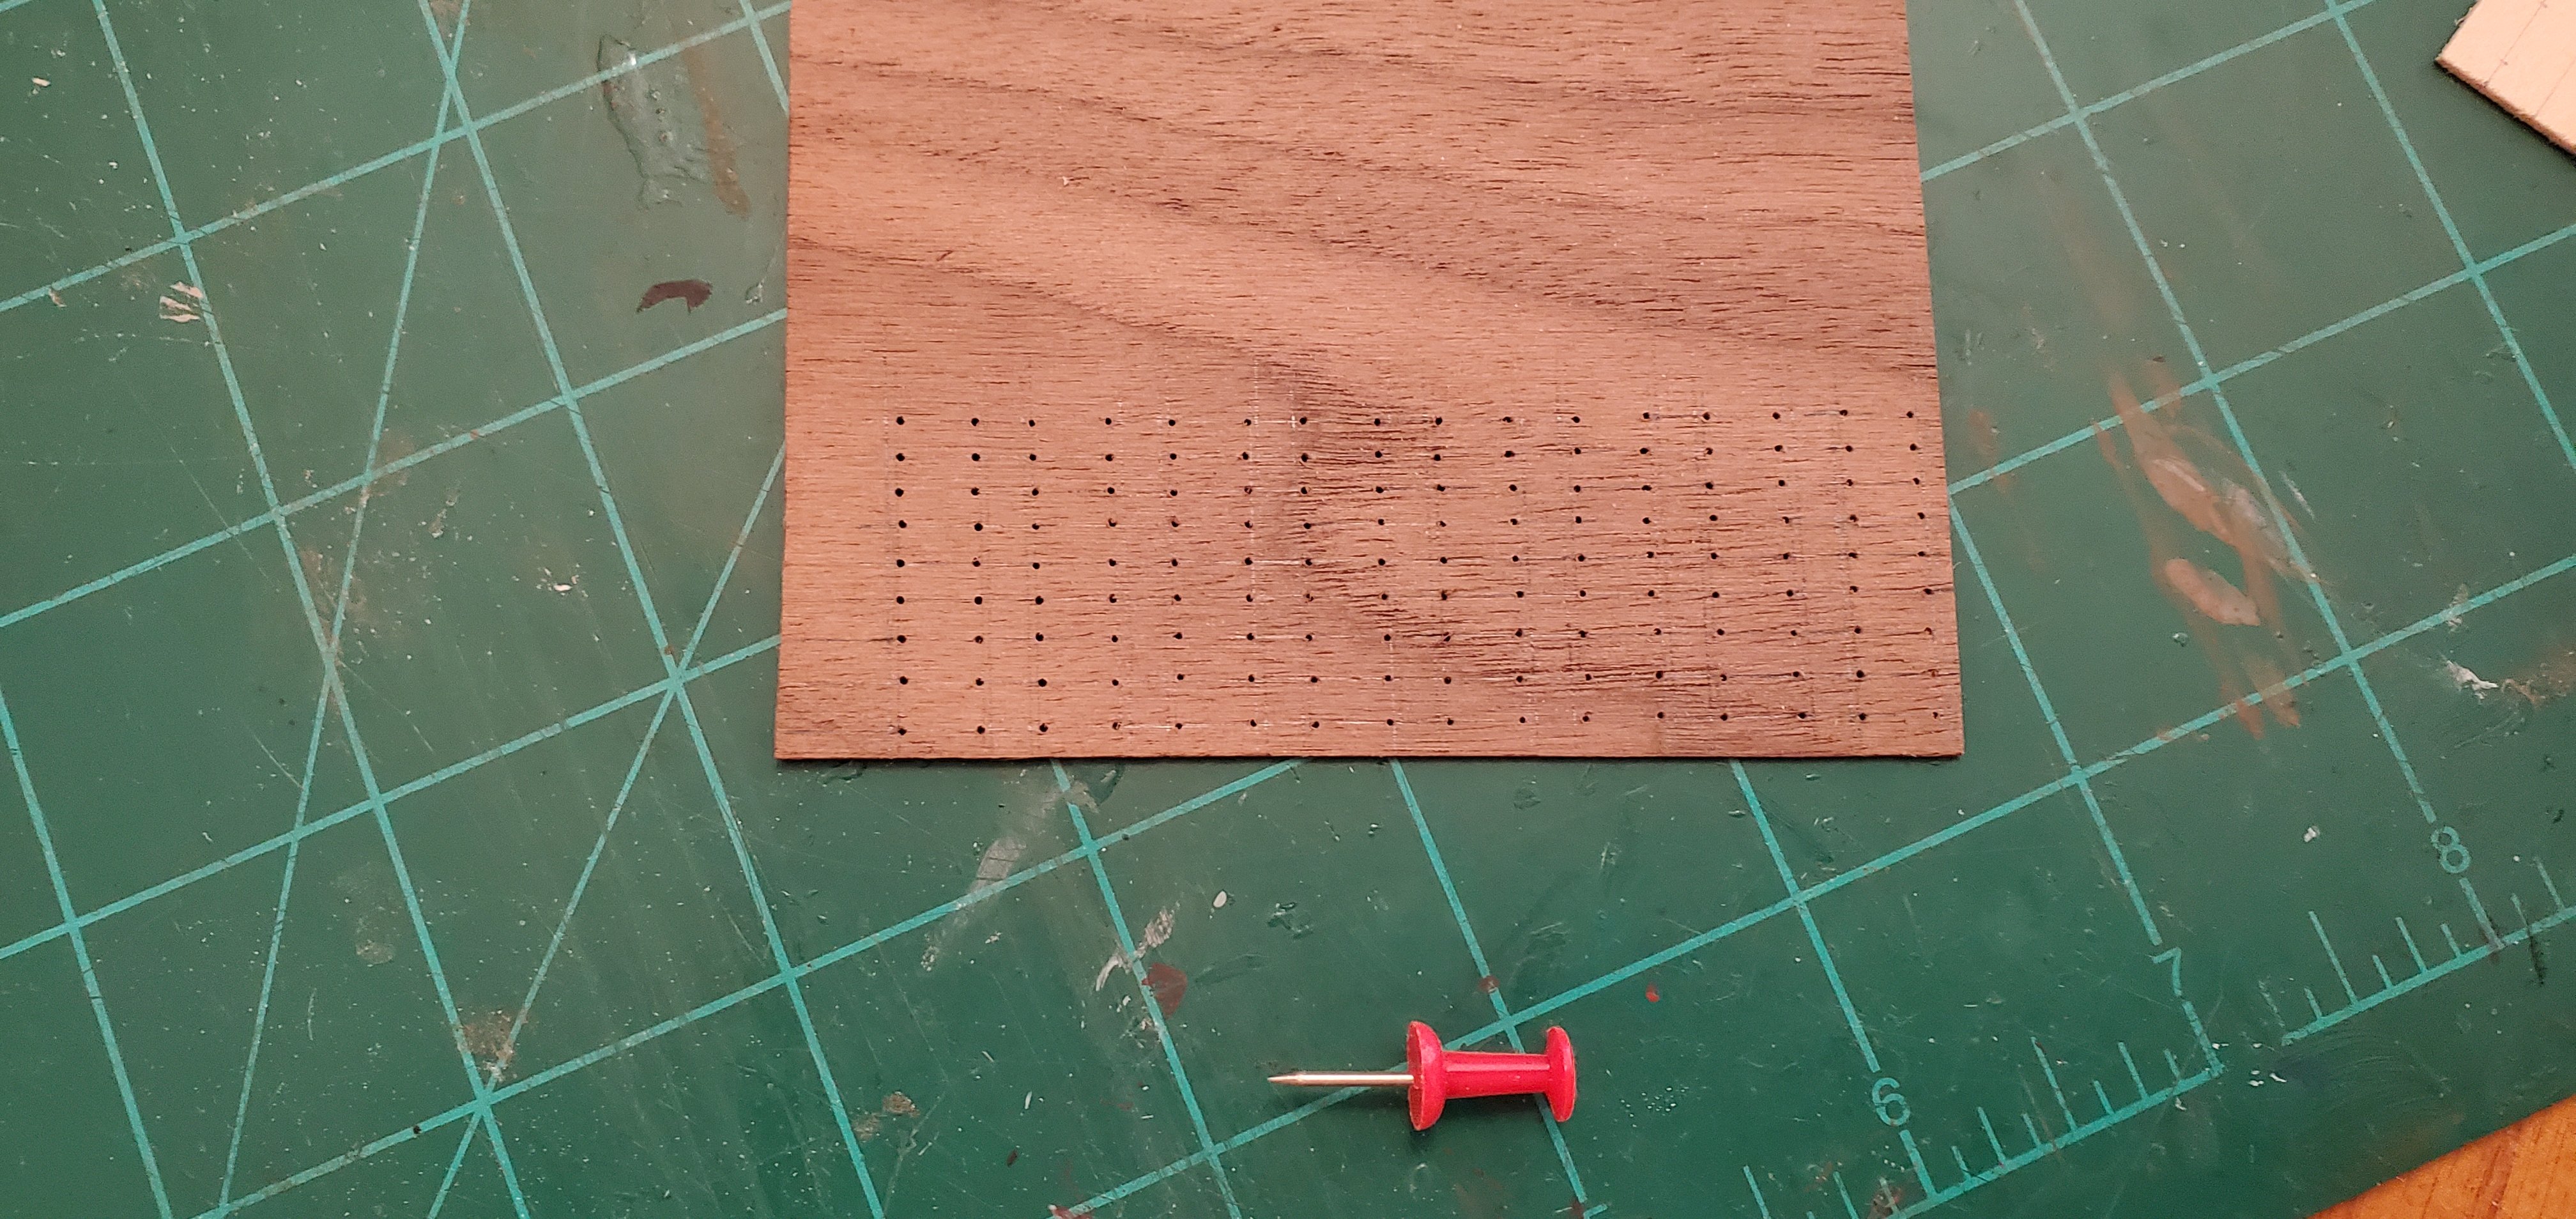
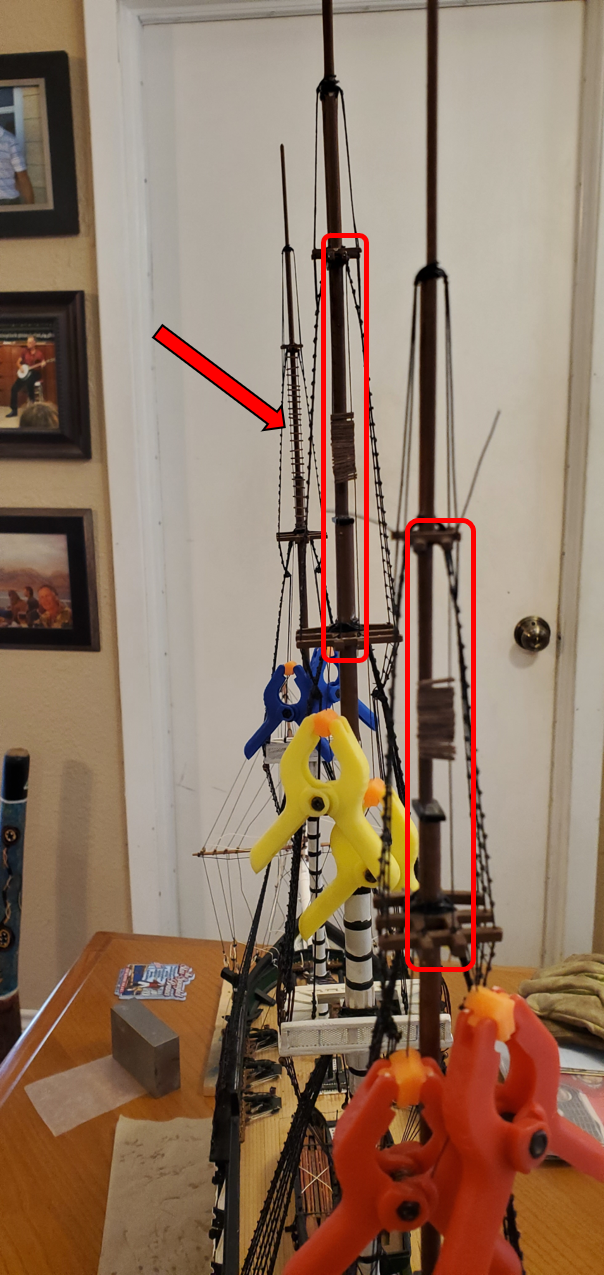
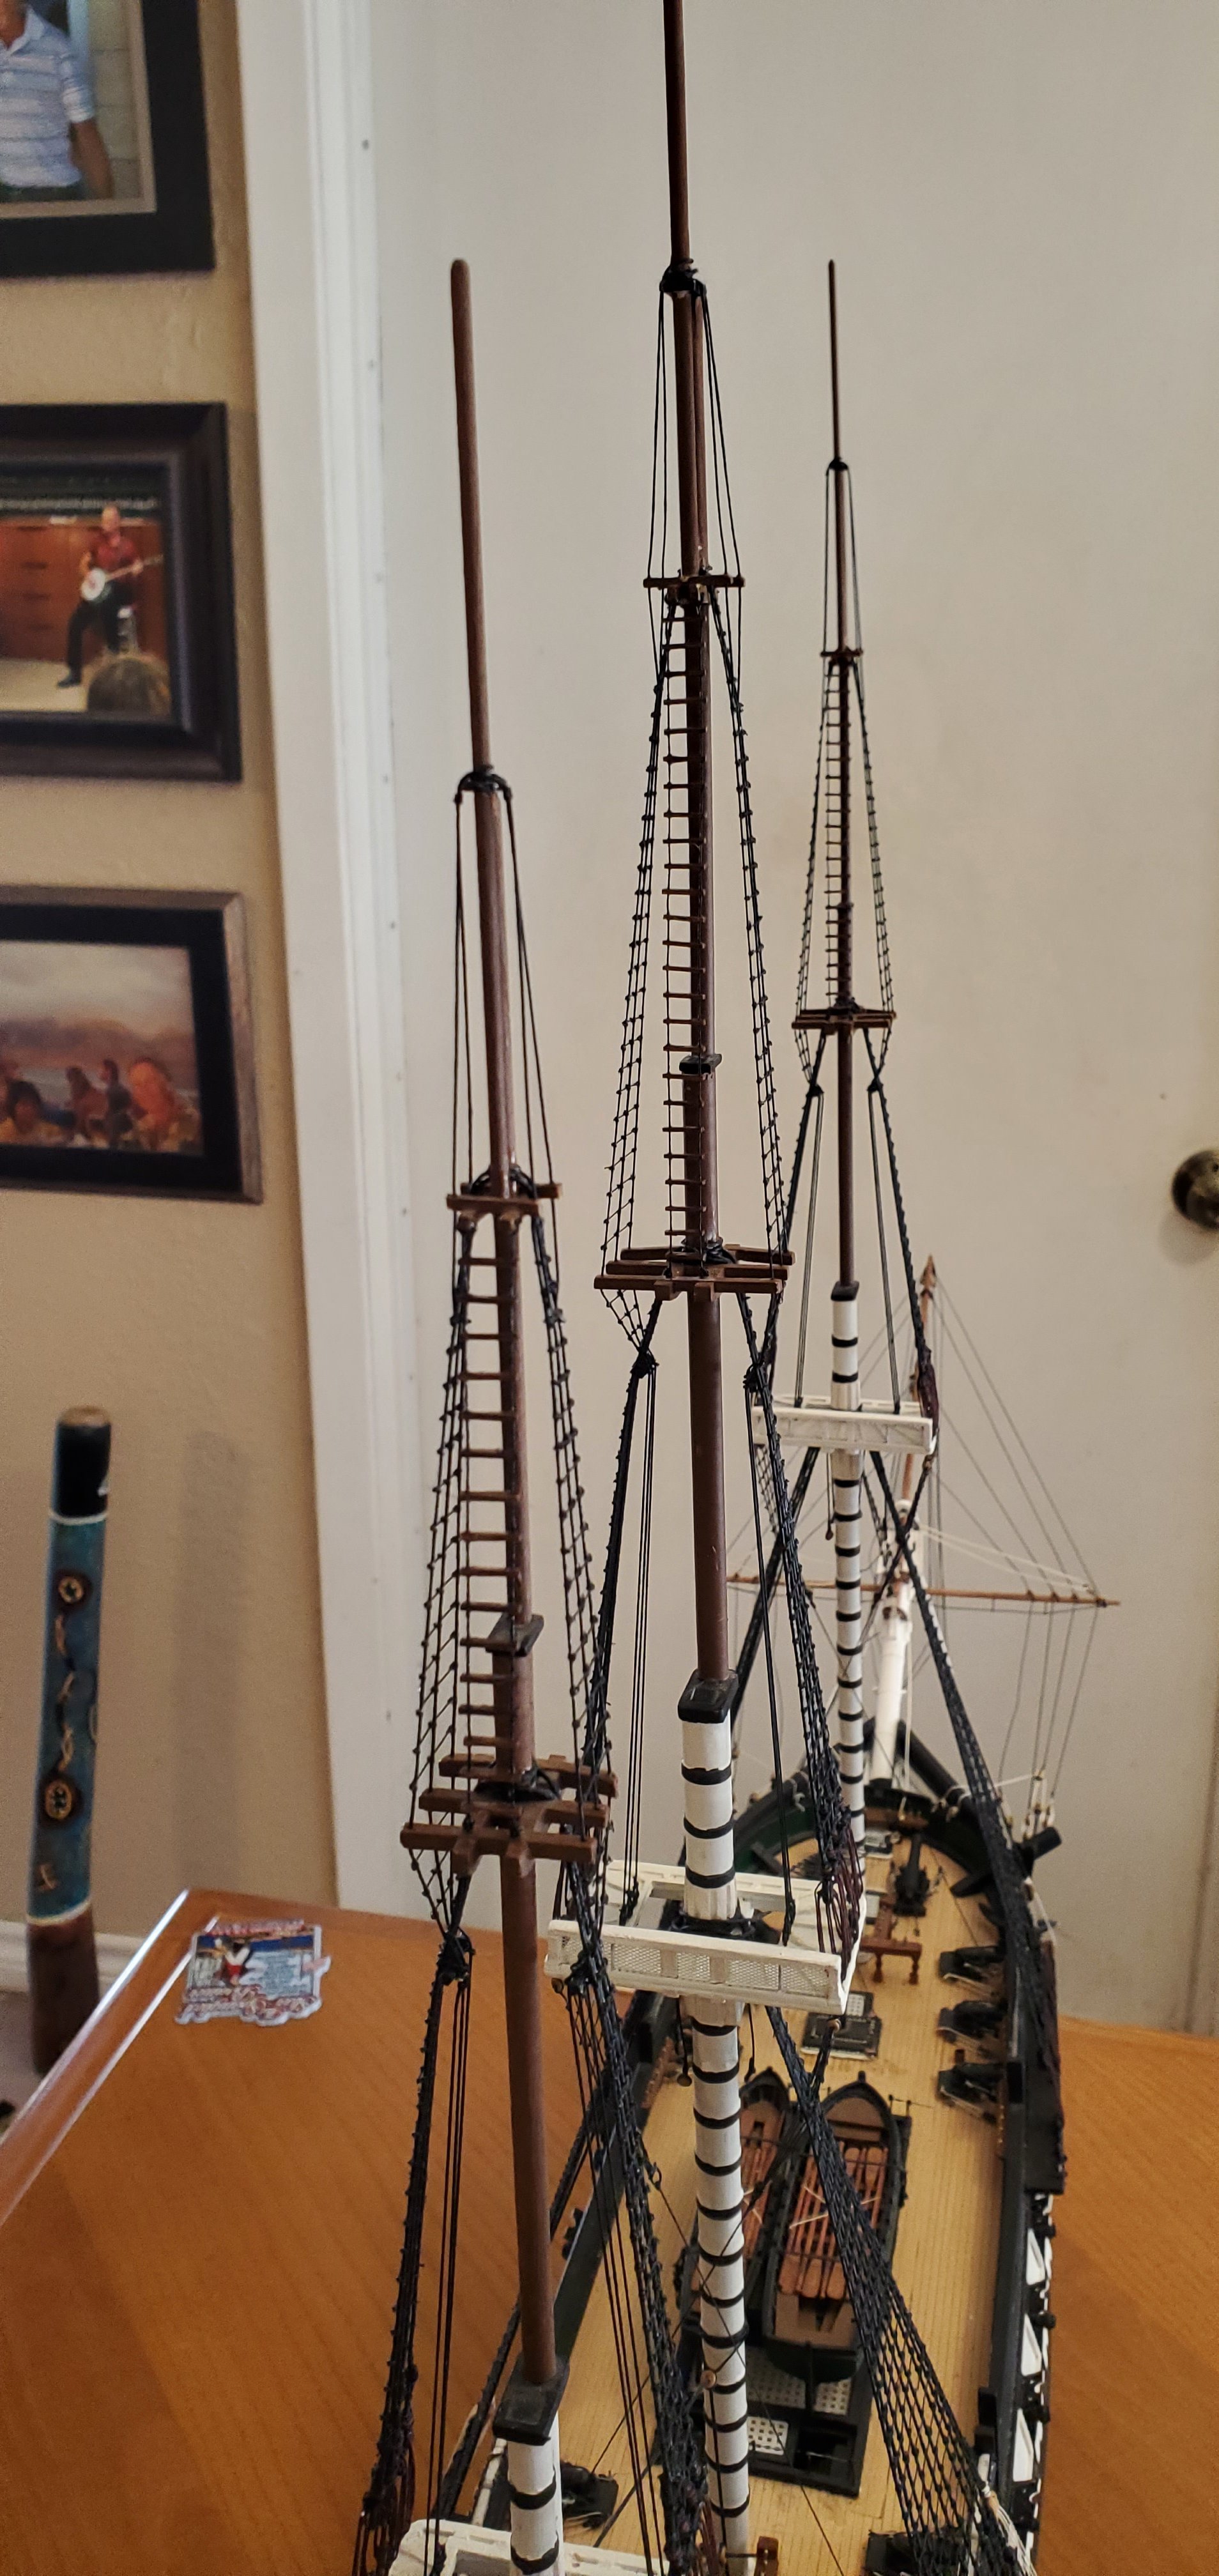
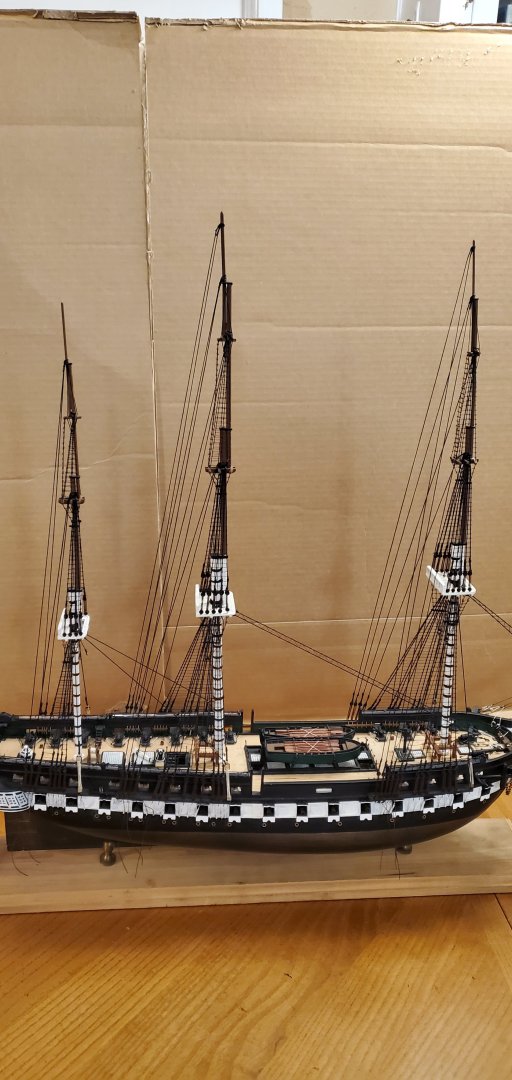
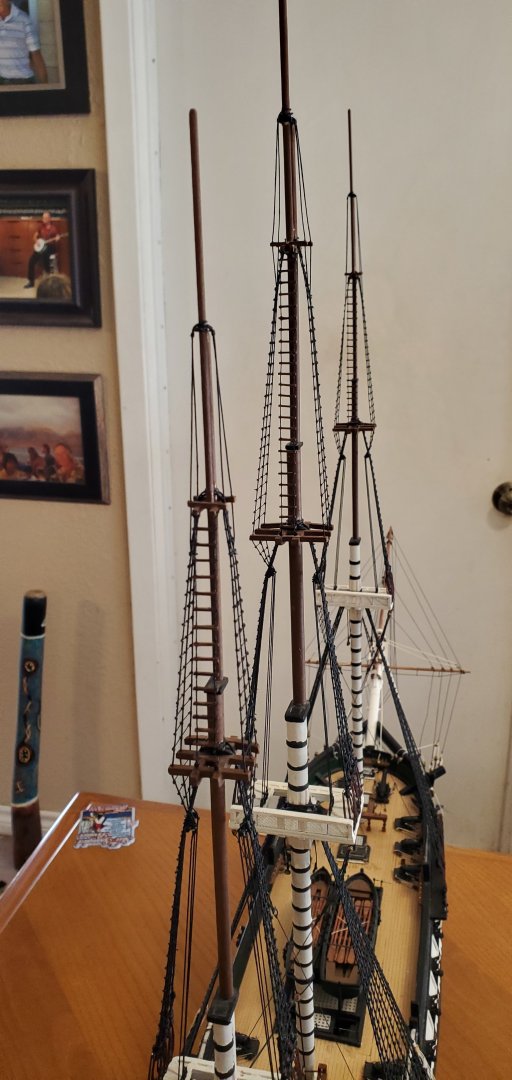
Thanks, Ken. I took my time getting up there with stops at several historic places along the way - Wash DC, Ft. McHenry, Gettysburg, Battleship Cove and the Maritime Museum in Fall River, CT, and the Whaling Museum in New Bedford. In Boston, I got a tour of the Boston Museum of Art from a fellow ship modeler and artist that taught art at the museum for 30 years. And then, of course, the USS Constitution Museum which is amazing. But I'm out of the cold and happy to be back in a much warmer Austin! For the next step, I decided to work on the Jacob's ladders that stretch the length of each top gallant mast. The ladders go behind each mast and are perpendicular to the shrouds. So anyone climbing them would be facing the ship's bow. The BlueJacket plans do not call for Jacob's ladders, but I've seen them on a number of Constitution models, including an incredible one that is a centerpiece of the Constitution Museum, so I wanted to take the additional time to add them. Also, I think they look cool! The first task was cutting out the 70+ steps for the ladders. Each step is 1mm thick, 1.5mm deep, and 7mm wide. I lined them out a scrap piece of 1mm walnut and drilled holes near each end for the ropes to pass through. Next, I threaded the ropes thru the holes of each step and attached the rope ends to the cross trees. The mizzen mast's ladder is highlighted in the foreground and the main mast's ladder in the middle. Their steps are bunched up at this point. The foremasts's ladder has the arrow pointing to it with the steps spread out but not glued in place yet. Here are all the Jacob's ladders completed and in place.


- 301 replies
-
- 13
-
-
- Constitution
- Bluejacket Shipcrafters
- (and 1 more)
-
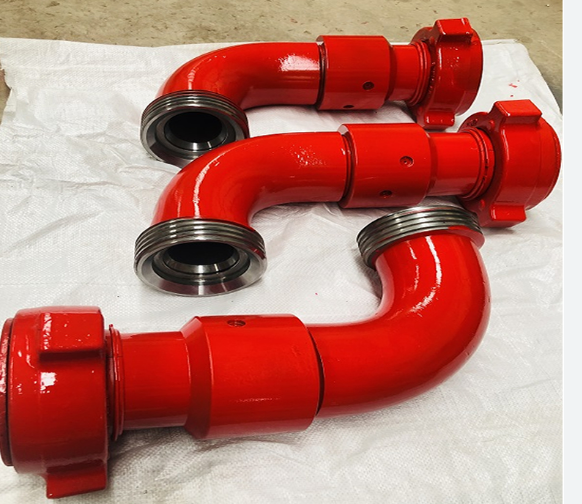
That looks FANTASTIC!! What a cool project and a nice complement to the Sea Installer. Regarding the bottle cap. I agree that the white looks better than the shiny silver. Now if you wanted to get a little crazy, you could make the bottle cap look like some kind of piping cap. I don't know how much piping there is aboard one of these vessels, but it's just a thought (sorry, that's just the way my mind works! 😃). Something along the lines of the caps on the ends here: Regardless, I say again what a fantastic job you did here. I congratulate you on the uniqueness of your subjects and the quality of your builds.
- 70 replies
-
- 5
-
-
-
- Scheldt River
- Dredger
- (and 2 more)
-
You are correct, Roel. I have cut and glued wooden brush handles to reach behind the ship and other annoying places. I also have found some brushes with longer metal ferrules where I can bend and rebend the ferrule to change the angle as needed. Of course you can only do that a few times before you end up breaking the metal completely. I but cheap brushes and go through quite a few! As far as getting gel on the inside of the bottle neck, I will sometimes adhere some strips of blue painters tape to the inside of the neck to help keep things clean. Usually, however, I'm lazy and just decide to clean up any mess afterwards. Your waves are very well done. Just the right amount of texture.
- 70 replies
-
- 3
-
-
- Scheldt River
- Dredger
- (and 2 more)
-
Ditto what everyone above said about your planking job!!
- 312 replies
-
- 3
-
-
-
- Chile
- Latin America
- (and 6 more)
-
Nice work getting both halves inside the bottle, mated, and hung in position. Looking forward to you adding the water.
- 70 replies
-
- 4
-
-
- Scheldt River
- Dredger
- (and 2 more)