Glen McGuire
-
Posts
1,978 -
Joined
-
Last visited
Content Type
Profiles
Forums
Gallery
Events
Everything posted by Glen McGuire
-
 Everything has come together very nicely, Keith. Your weathering, smudging, and dirtying look very authentic.
 -
"Ambitious" is a nice word, Gary. Thanks! But ludicrous may be a better description of this one! We shall see. I appreciate your confidence in me.
- 185 replies
-
- 10
-

-
- Flying Dutchman
- Black pearl
- (and 2 more)
-
Gravity and brute force! The only way to go!! And glad to have you on board, Gary! Thanks for joining!
- 301 replies
-
- 4
-
-
- Constitution
- Bluejacket Shipcrafters
- (and 1 more)
-
Looking forward to this one, Keith! Don't count on me for any help with the knowledge part, but I will cheer you on the whole way!
- 732 replies
-
- 6
-

-
-
- Lula
- sternwheeler
- (and 1 more)
-
Indeed, Ian. That's been my problem all along! I'm the guy in the 3rd Indiana Jones movie that picked the wrong Holy Grail to drink from.

- 185 replies
-
- 12
-

-
-
- Flying Dutchman
- Black pearl
- (and 2 more)
-
Catching up on all the research posts above. Fascinating. This is going to be another very entertaining build.
-
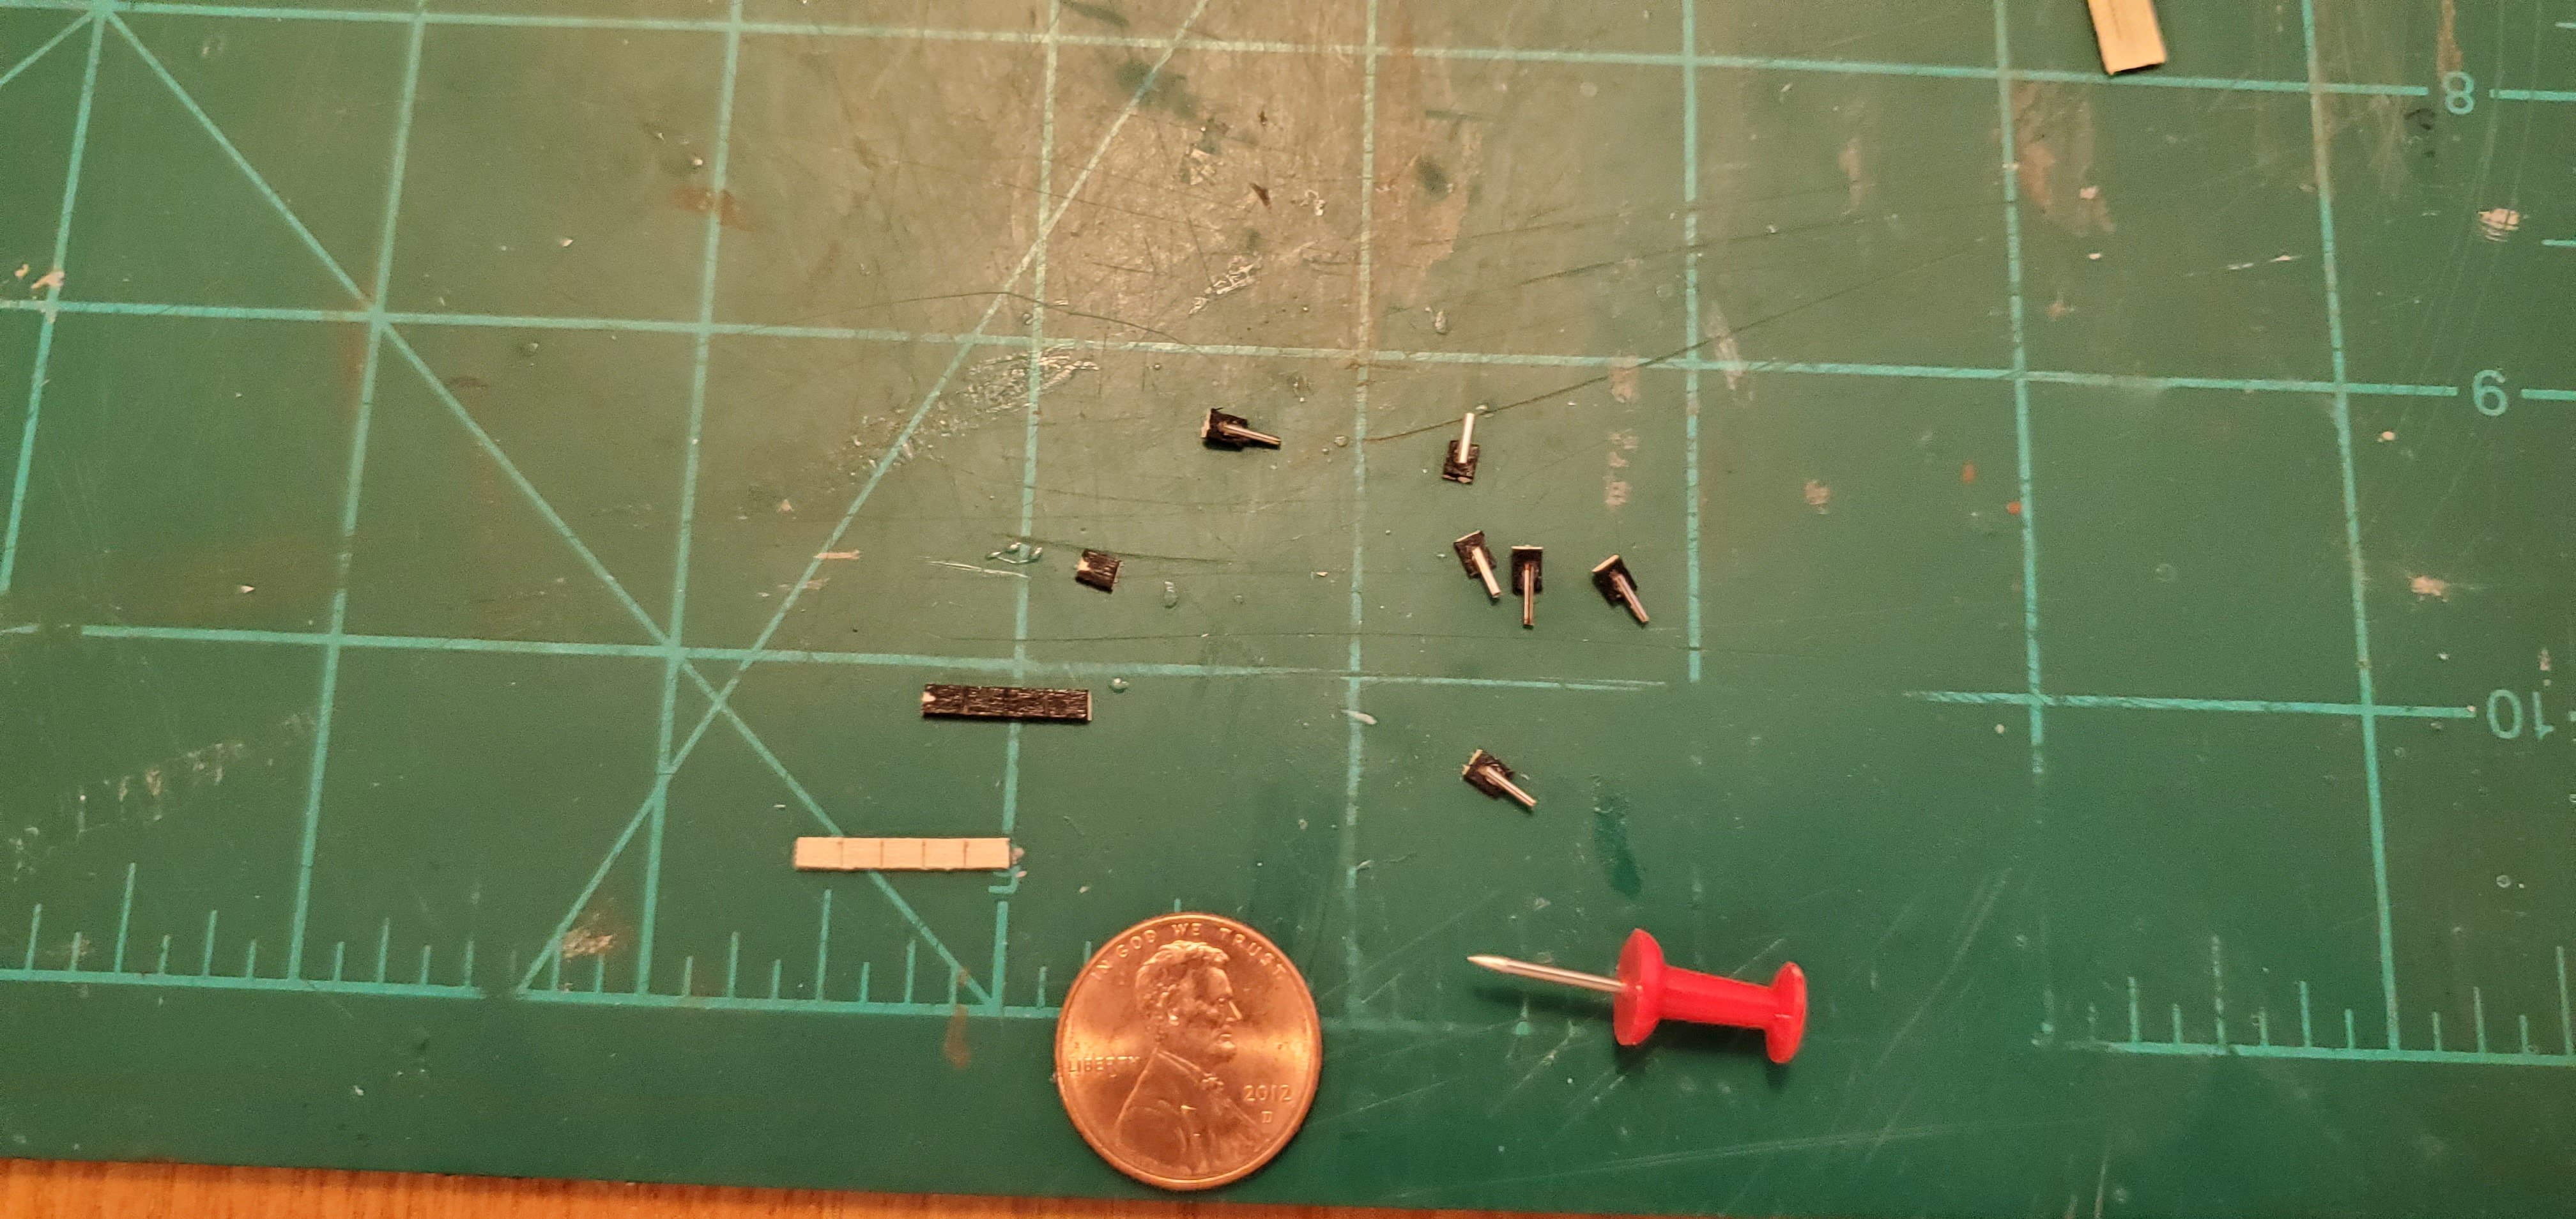
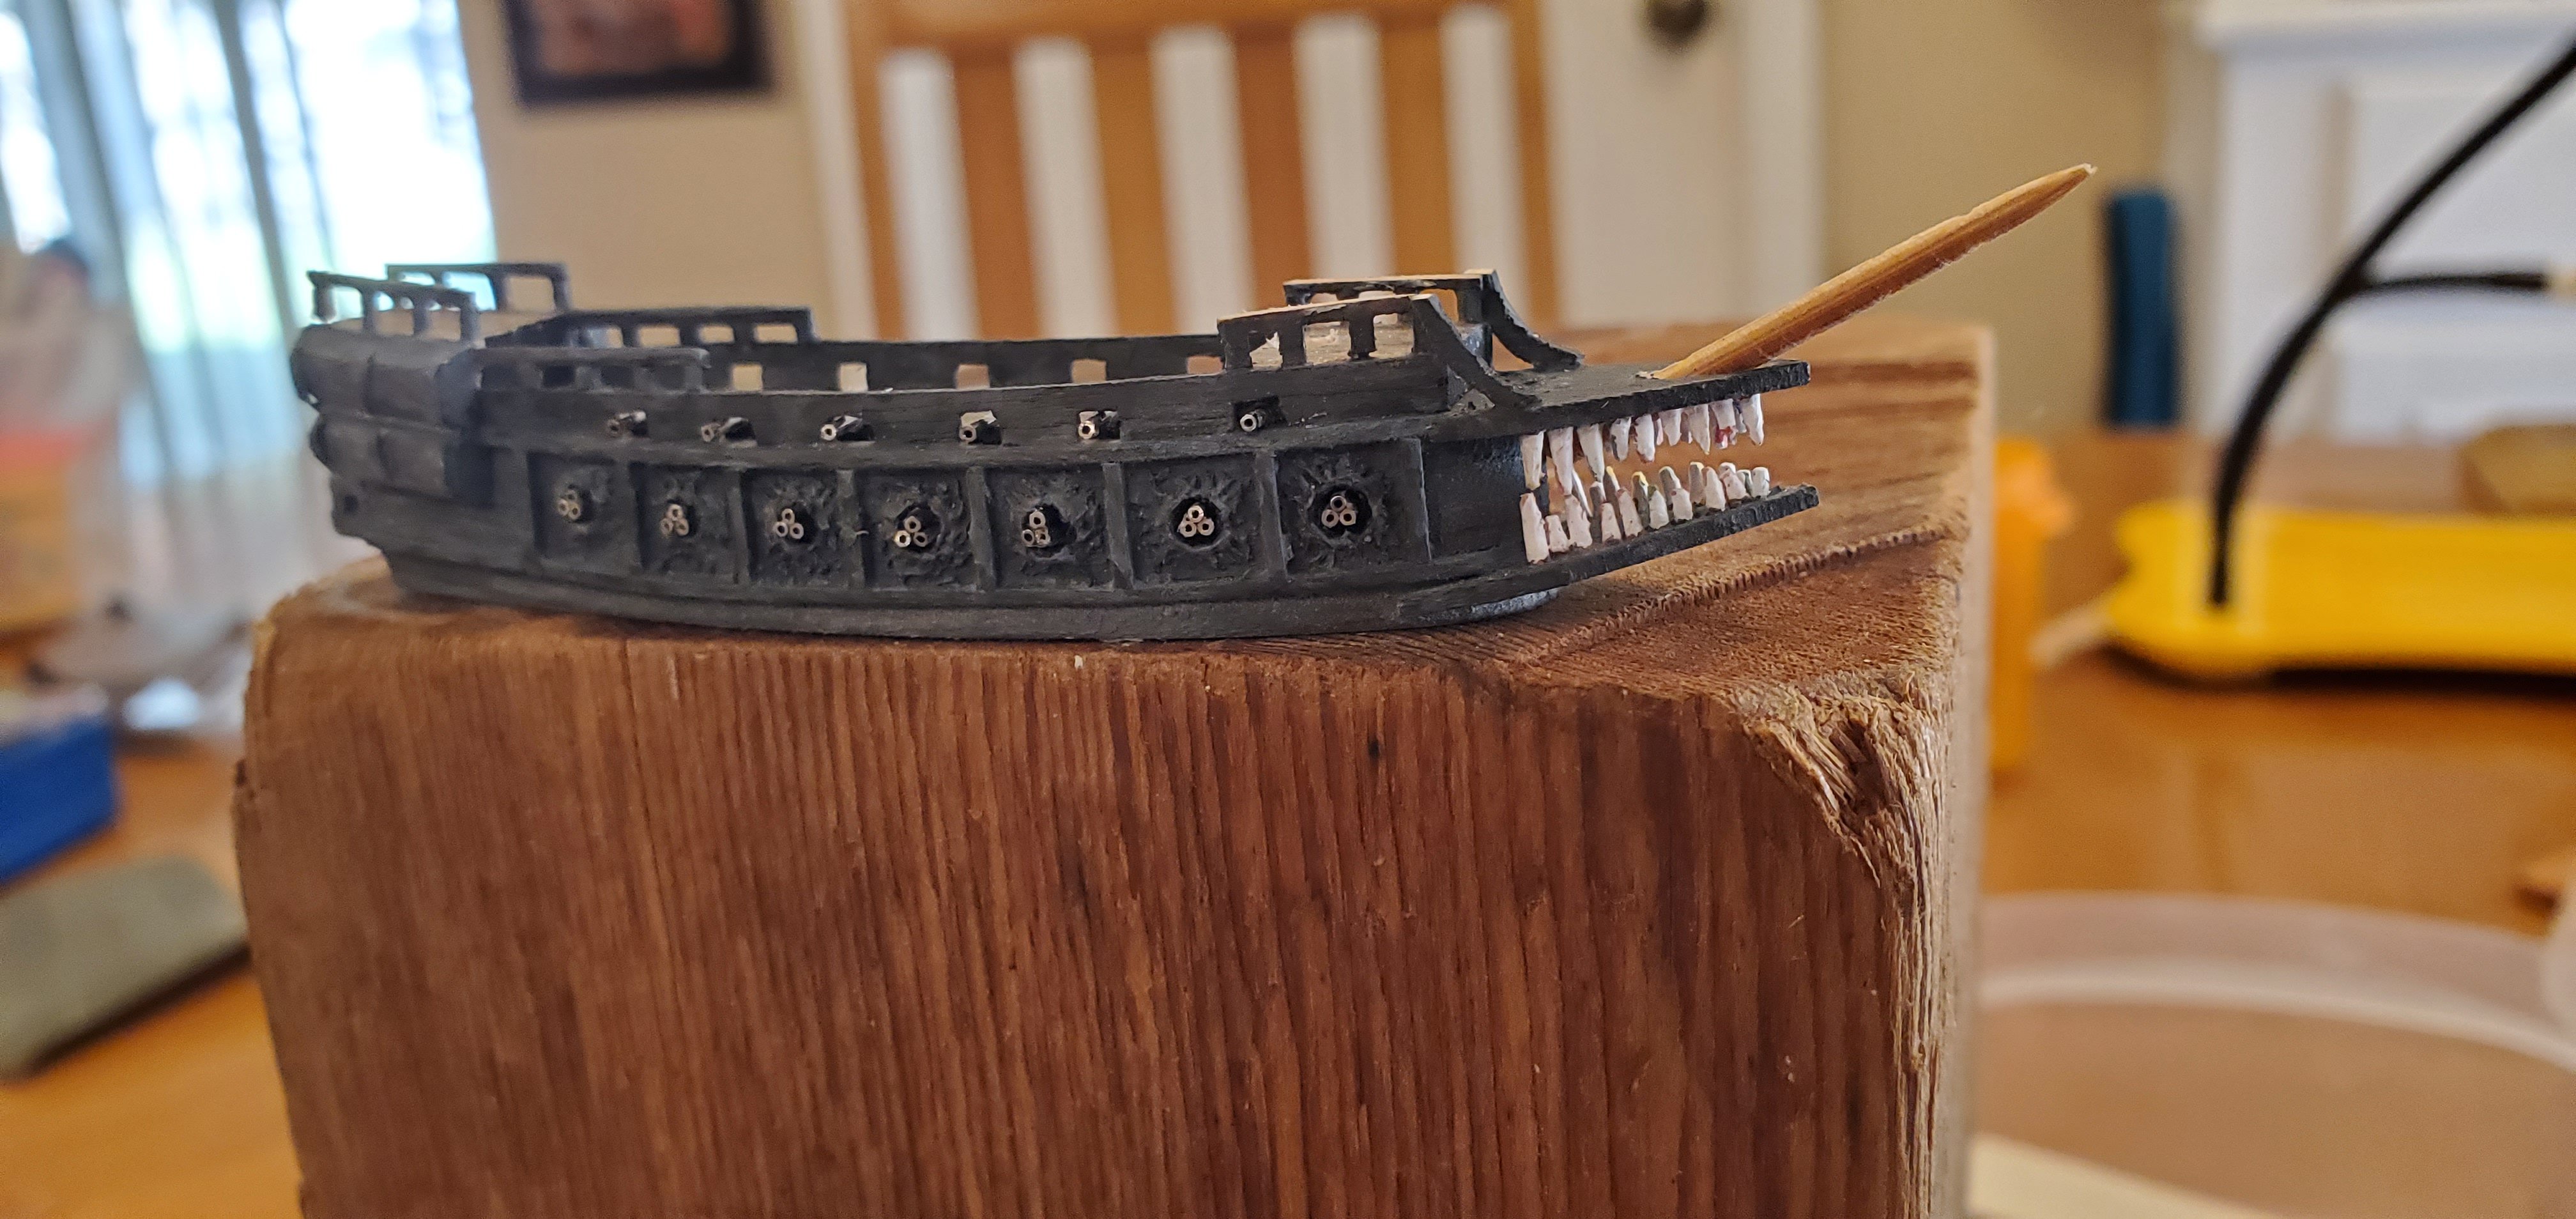
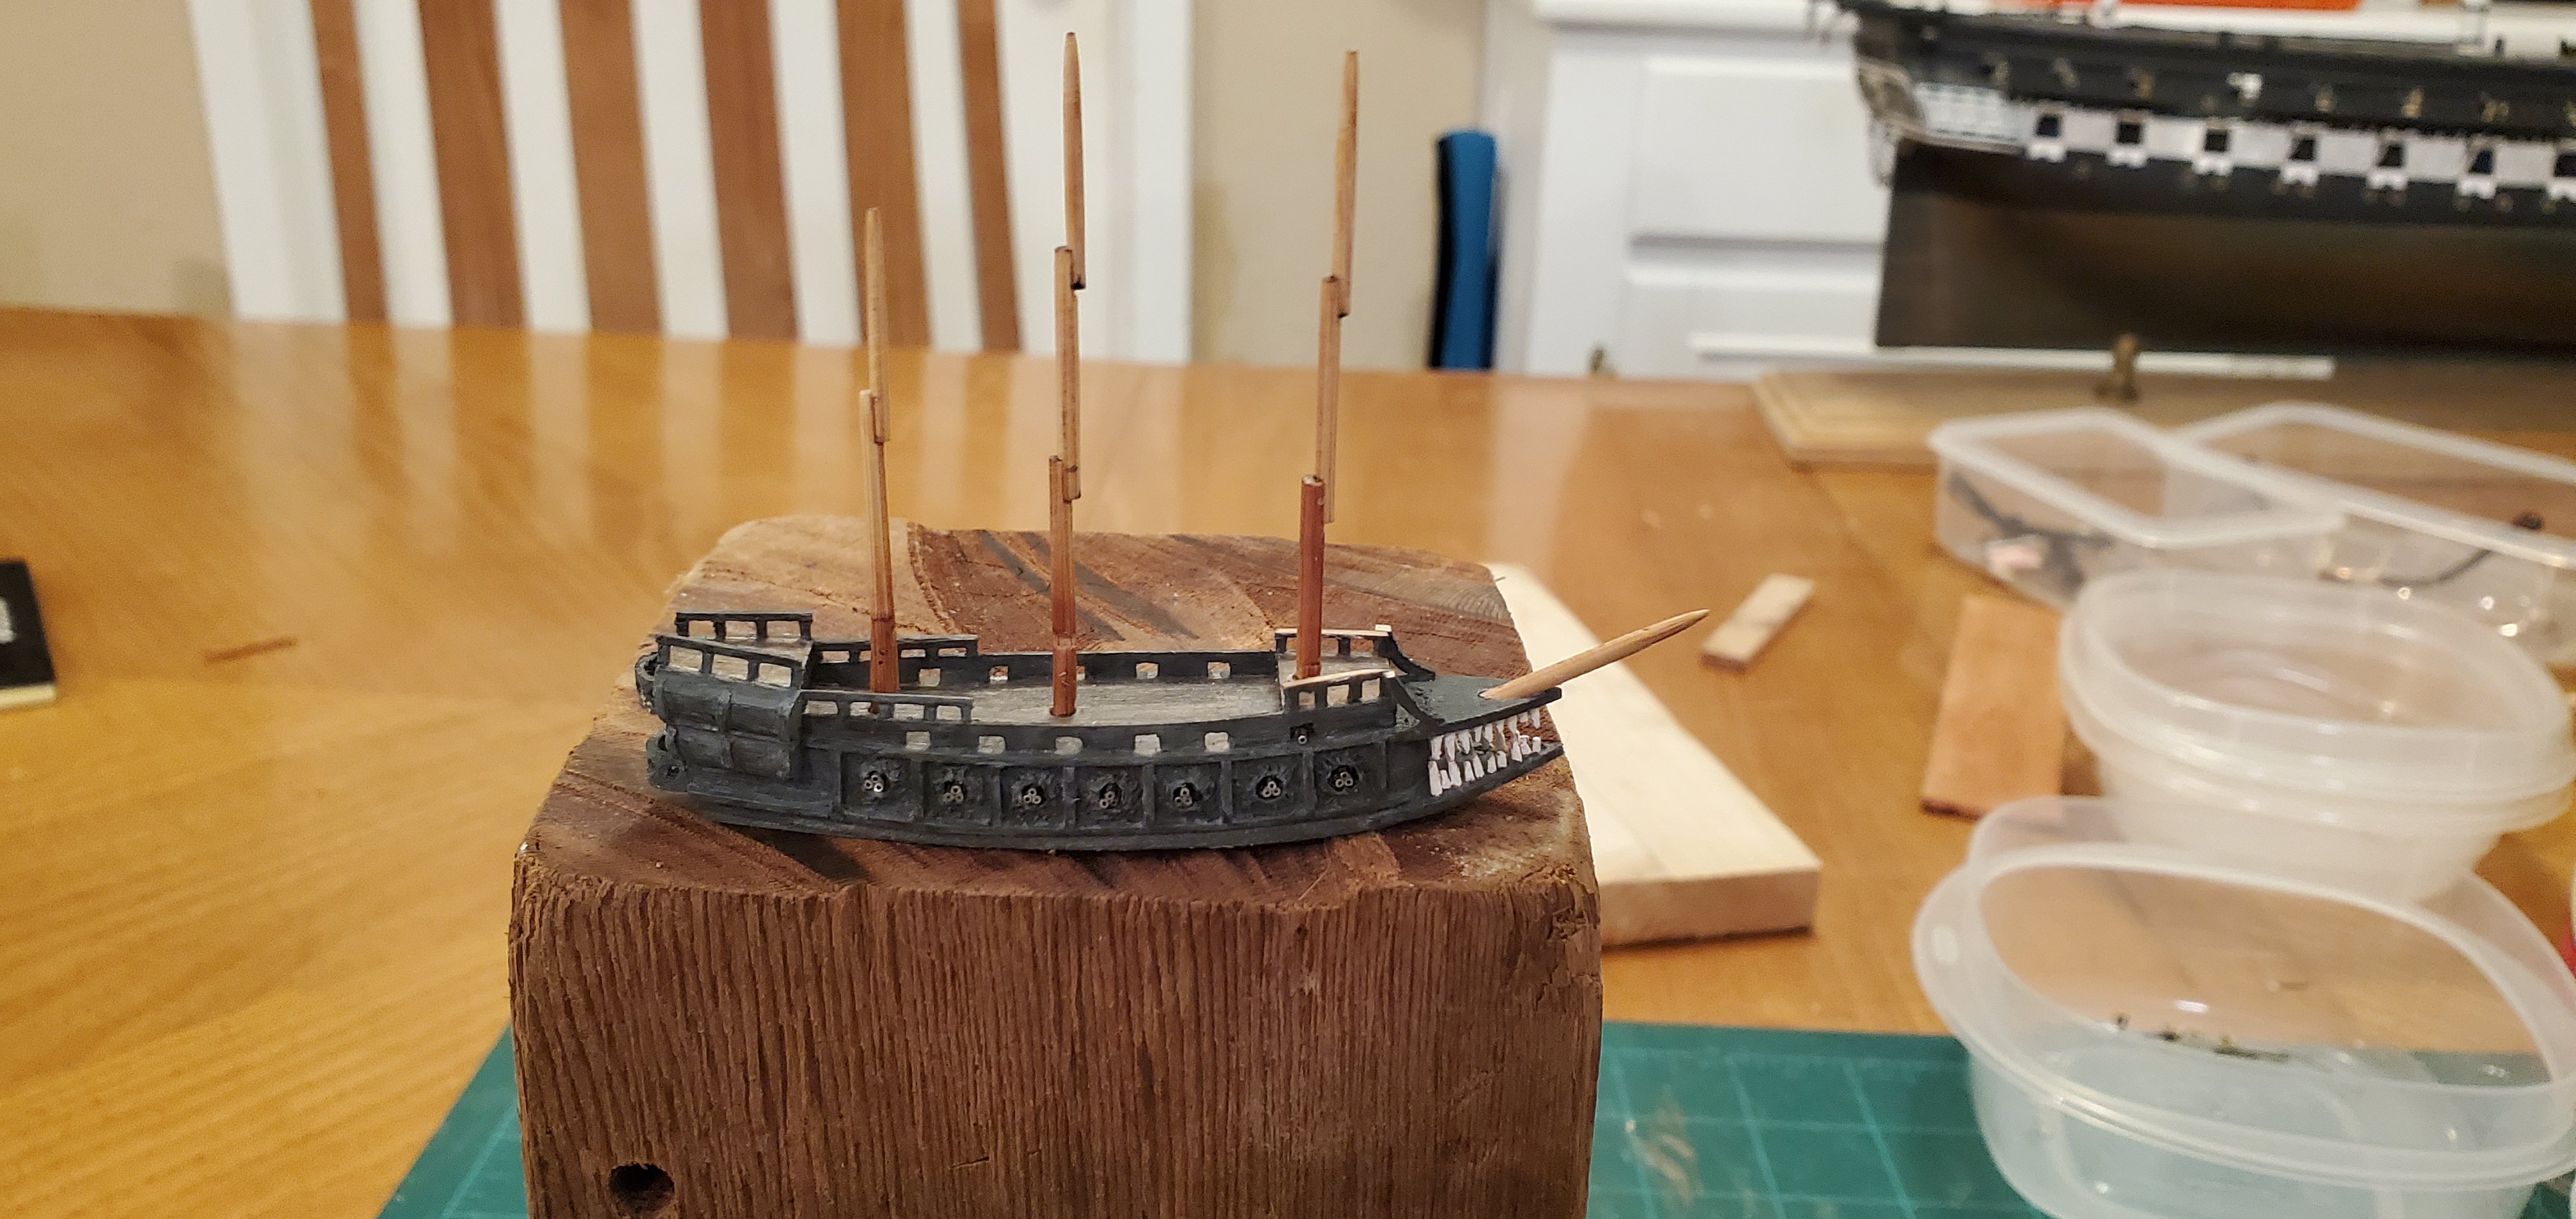
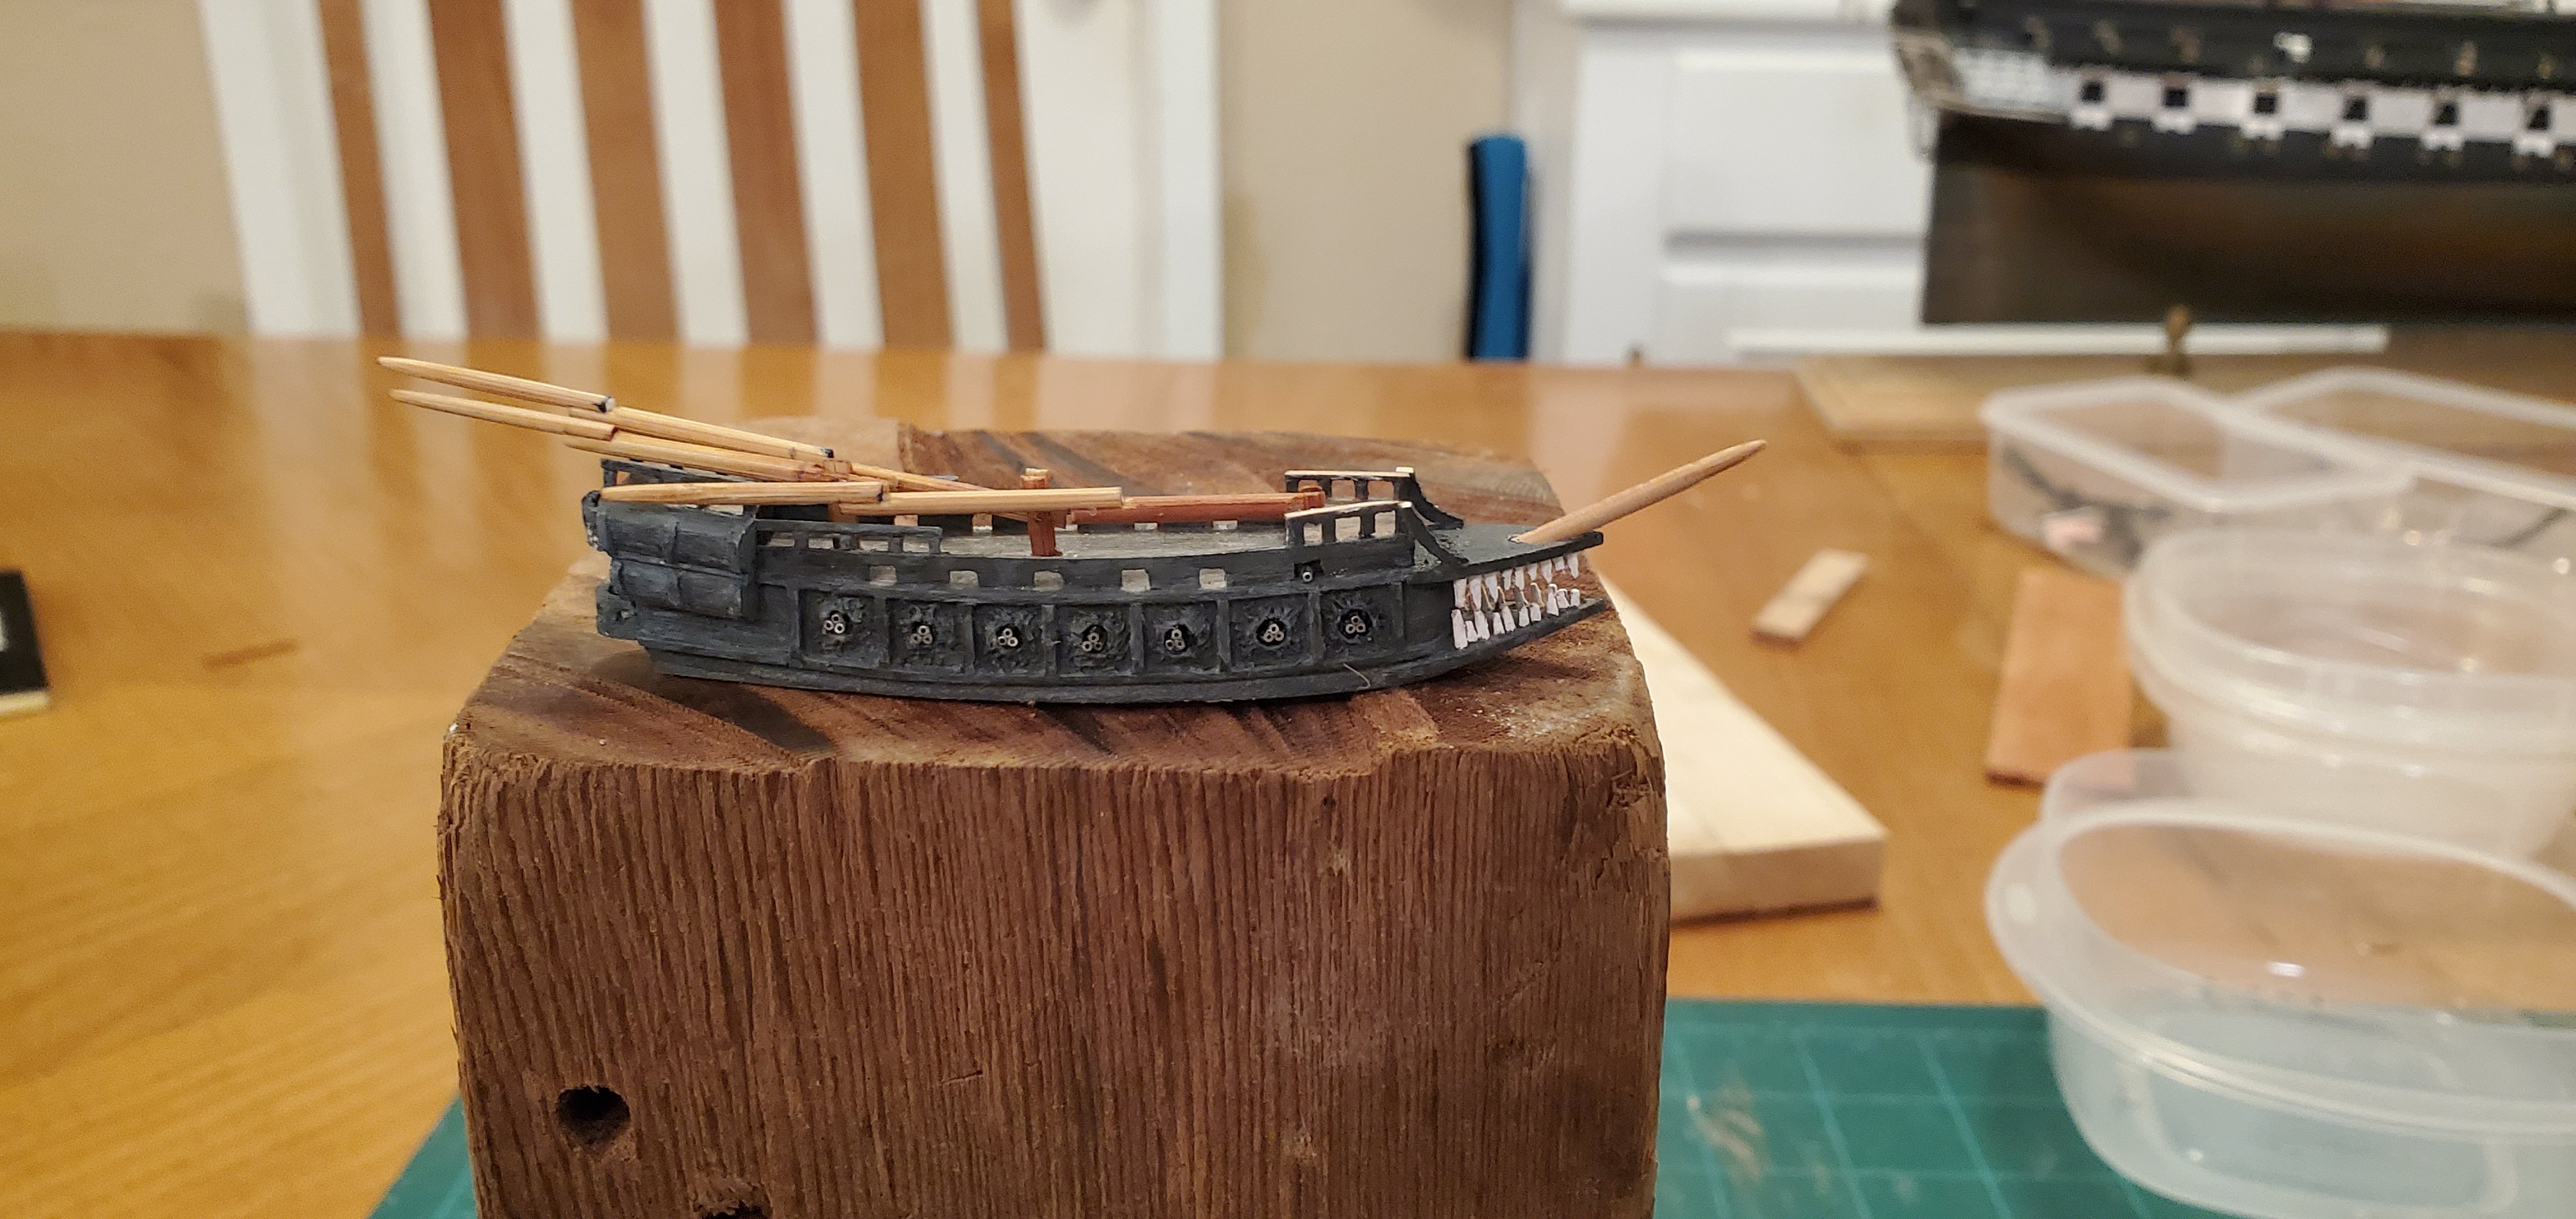
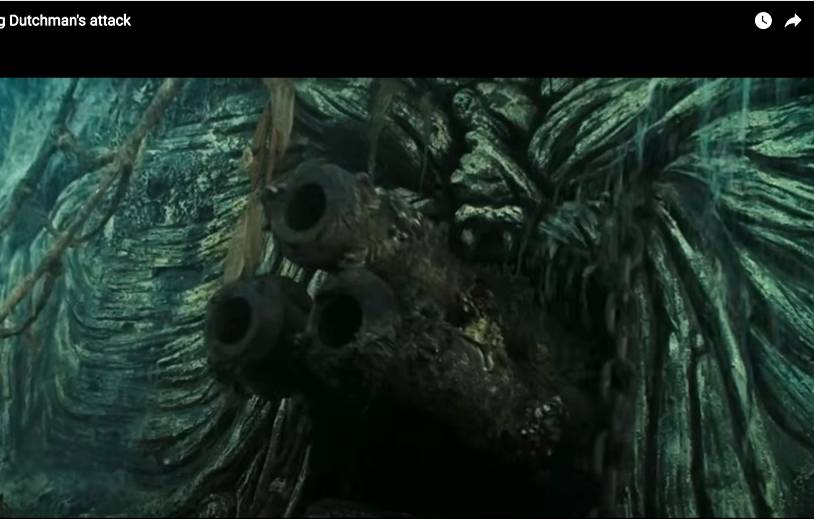
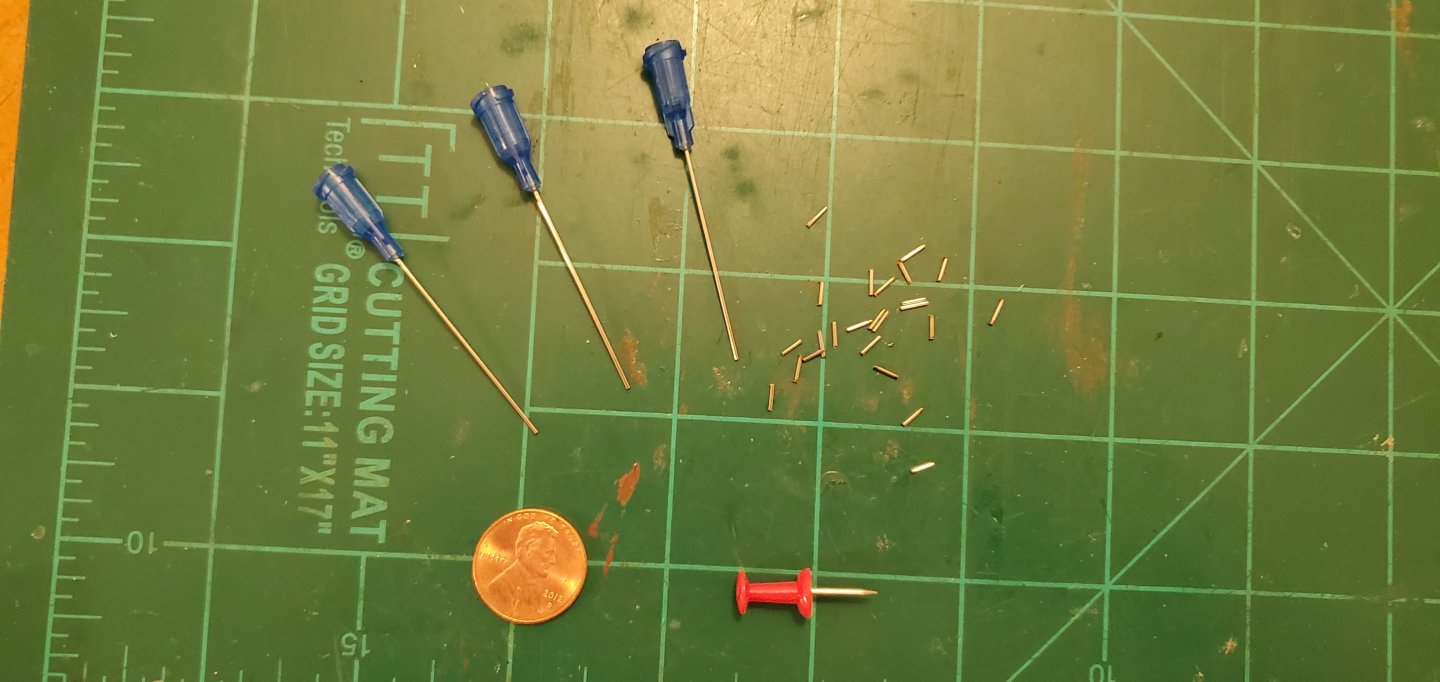
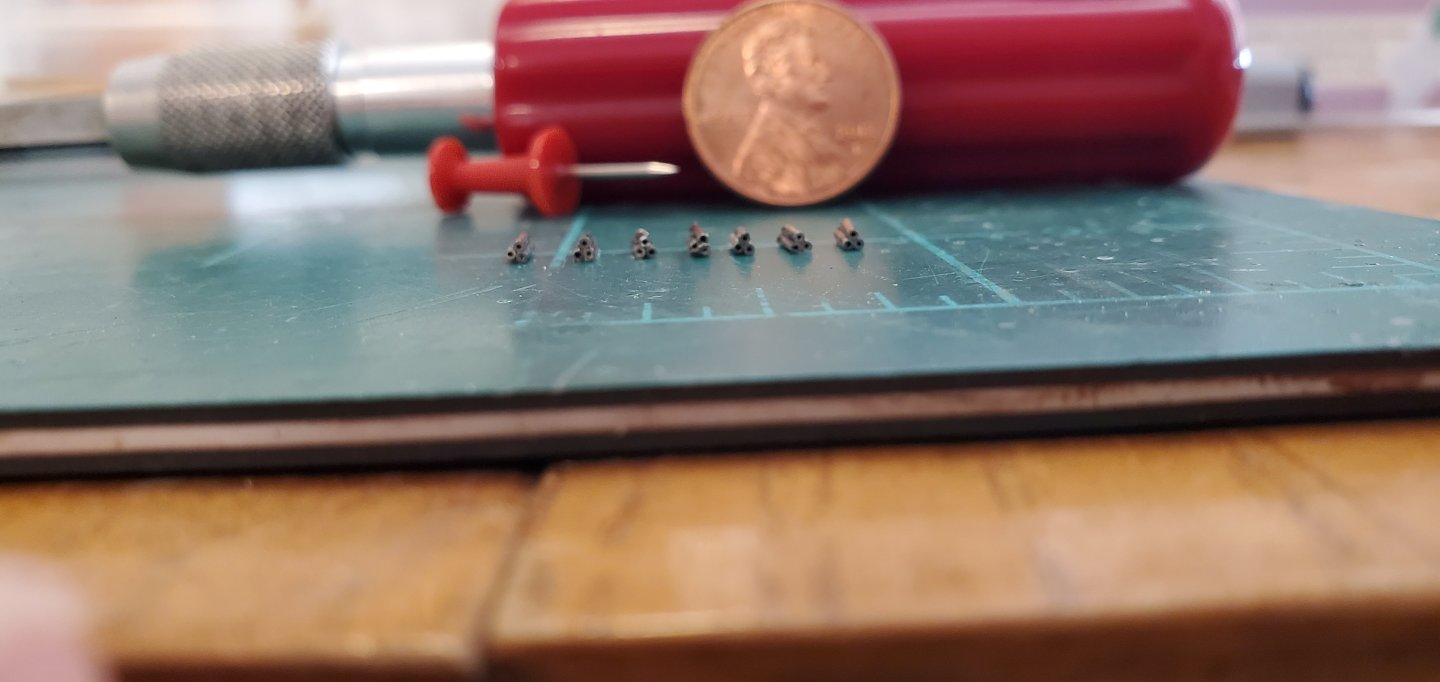
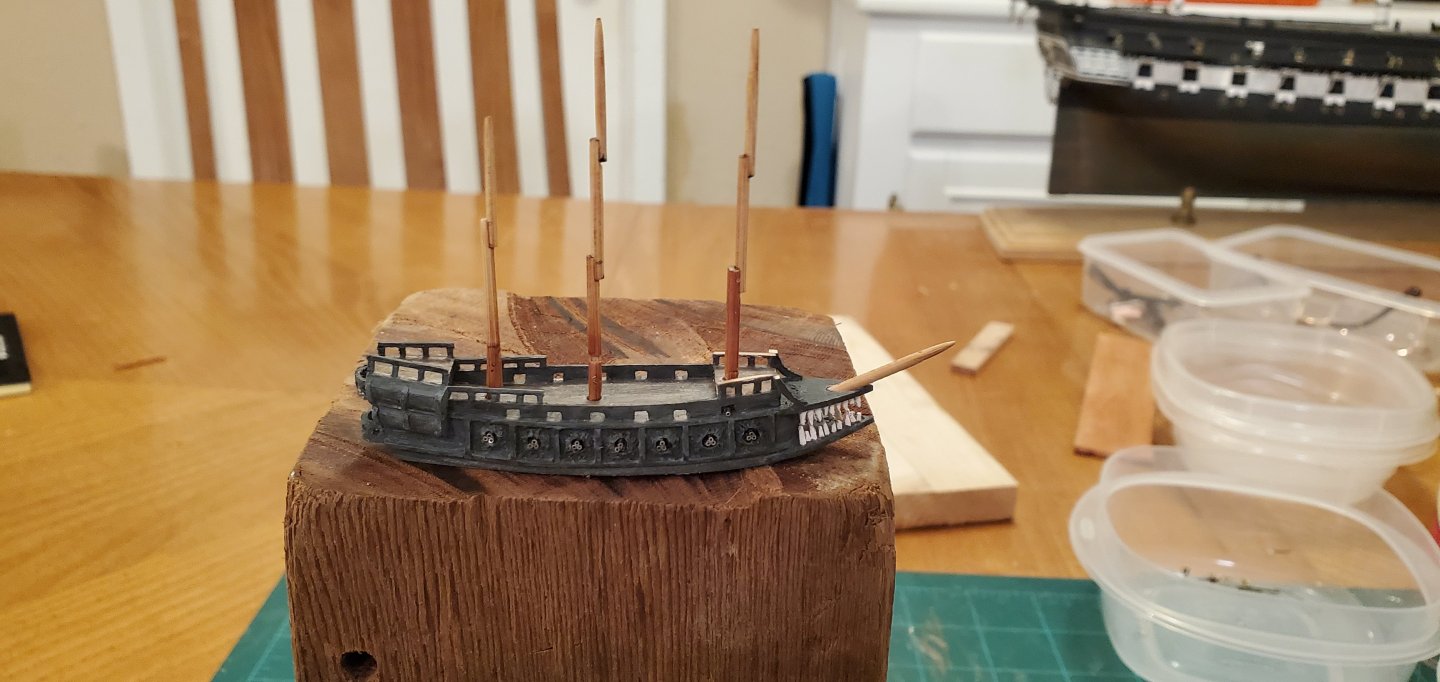
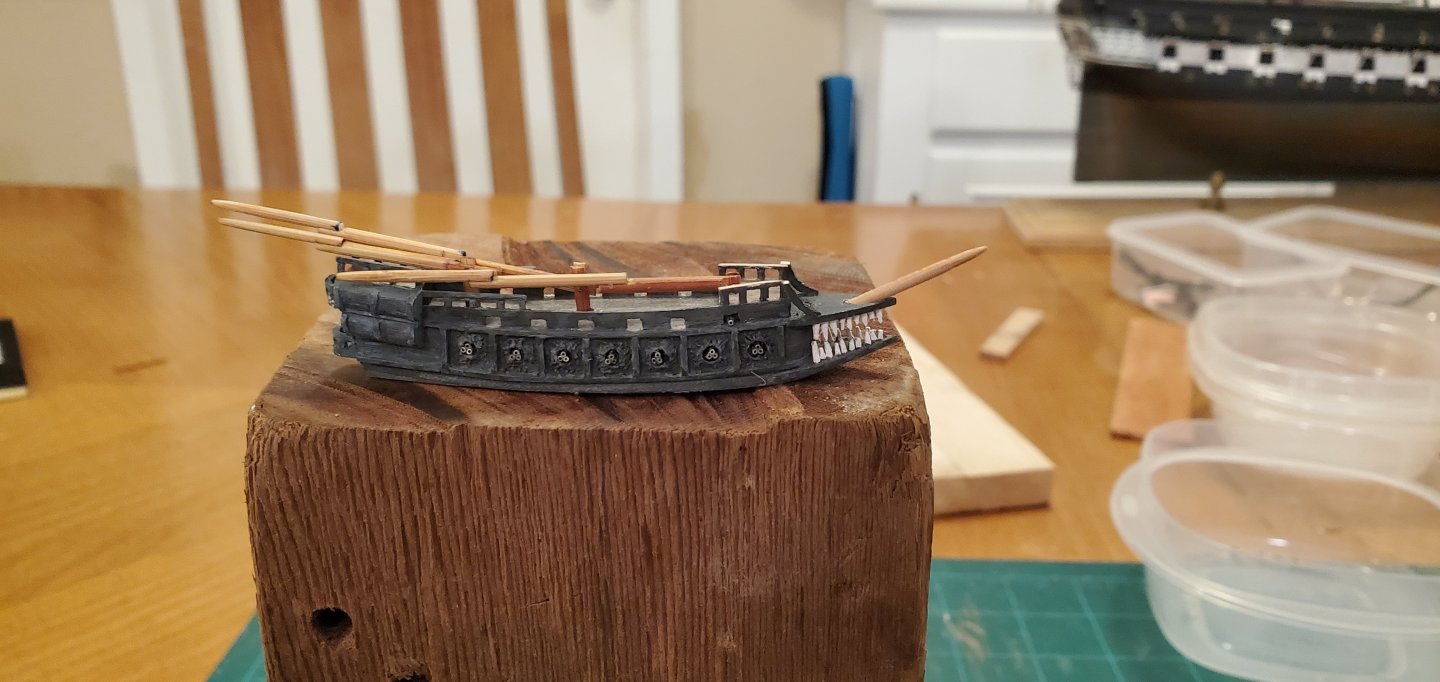
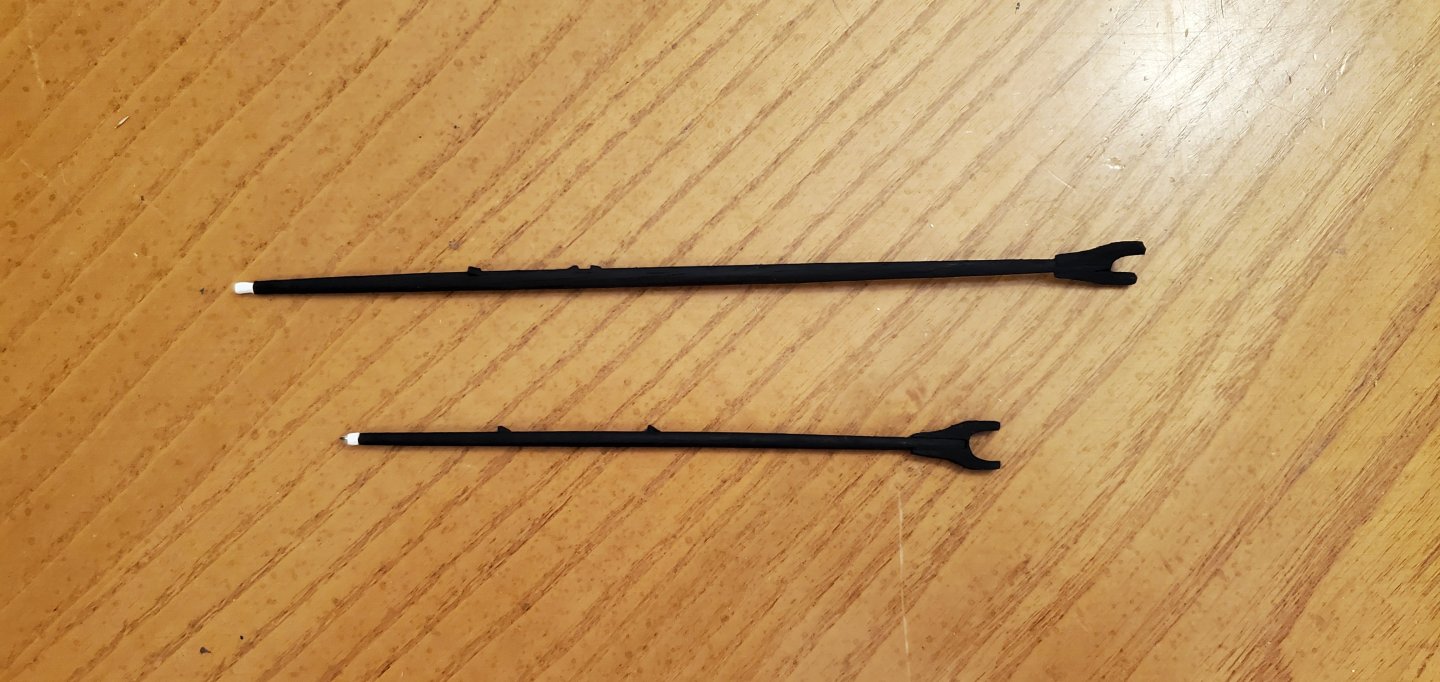
Thank you to everyone for the lively discussion and the creative solutions for solving the whirlpool problem. You have given me a number of good ideas to try out. In the mean time it's back to work on the Flying Dutchman. Next up is the ship's armament. I built the ship with ports for 7 cannons on the gun deck and 6 cannonades on the spar deck. In the movie, there's a few close-up shots of the cannons emerging from the gun deck ports. In some shots, there are triple-barreled cannons. I thought those looked very cool so decided to make all my gun deck cannons with triple barrels. For my cannon barrels, I use 22 gauge (.67mm diameter) veterinary needles. They are hollow, so if anyone looks close enough they they look more like a cannon barrel than a solid rod which is what I used to use. I cut the needles into pieces 4mm long, then CA glued them into a mini pyramid 3 at a time. For the spar deck cannonades, I made carriages out of .75mm thick basswood, grooved a small cradle into the top surface, and CA glued the barrels in place. Crude, but it works at this scale. Here she is with the triple-barreled cannons glued in place and the cannonades dry-fit. Next up - the masts. I'm doing 3-piece masts for the fore and main with a 2-piece for the mizzen. For these, I take a bamboo rod, cut it up, thin it, and taper the tip. As usual, I use a version of John Fox III's hidden hinge method at the base. Here's the ship in its current state with the masts and bowsprit dry-fit. The junction on the mizzen between the main mast and top mast is too high, but necessary for the crow's nest to clear the stern when it is laid down.


- 185 replies
-
- 23
-
-

-
- Flying Dutchman
- Black pearl
- (and 2 more)
-
When I first started research on this project, I googled "how to make a whirlpool with epoxy resin" and that video showed up at the top of the list. I perused the entire Minibricks website and was left in awe. They take epoxy resin art to a level that I've never seen before nor thought was possible. That particular video is what I'd like mine to look like (in my dreams, anyway), but doing it inside a bottle makes it a whole 'nother thing!
- 185 replies
-
- 7
-
-
- Flying Dutchman
- Black pearl
- (and 2 more)
-
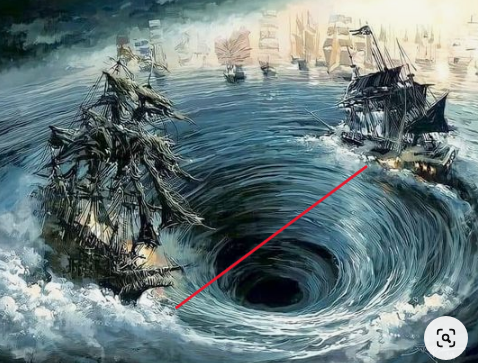
Yes, much bigger. The diameter will be about 2 1/4" at the top edge of the whirlpool where the ships face each other (red line below). Depth will be around 3/4", maybe a bit more. Hence the problem with getting a funnel that large, or even pieces of a funnel that large, out of a bottle neck that is 3/4" wide. That's why I think I will have to construct the whirlpool inside the bottle, but I'm going to experiment with the funnel idea.
- 185 replies
-
- 8
-
-
-
- Flying Dutchman
- Black pearl
- (and 2 more)
-
Thanks, Mike. I think the Vallejo product you used is similar to the Woodland Scenics Water Waves that I've used. The idea has some promise, but scooping so much into the bottle cleanly will be a challenge.
- 185 replies
-
- 6
-
-
- Flying Dutchman
- Black pearl
- (and 2 more)
-
Are you trying to get blocked from this build log too, Ian?? 😃 Now remember, I am not an engineer. So I don't have a box full of DC motors and rheostats lying around in my garage like I'm sure you do! I also think we have different definitions of the word "simple", but I do appreciate your creativity!
- 185 replies
-
- 8
-
-
- Flying Dutchman
- Black pearl
- (and 2 more)
-
The funnel is an interesting idea. Getting the funnel out, as Roel said, would be the hard part. I'll do some experimenting on that.
- 185 replies
-
- 7
-
-
- Flying Dutchman
- Black pearl
- (and 2 more)
-
That would make me a cheater, cheater, pumpkin eater!! 😲😲😲 I'm sure it would also violate something in the SIB builder's Pirate Codex and I know what happens in the Pirates of the Caribbean movies if anyone does that!

- 185 replies
-
- 9
-
-
-
- Flying Dutchman
- Black pearl
- (and 2 more)
-
Dang, Roel! I was hoping you had an answer for me! A fairly easy solution would be to use clay. I've seen a lot of SIBs that use clay for water in the bottle. But I like using epoxy resin or something similar that has transparency because it looks so much more like real water. One idea I've got is using Woodland Scenics Water Waves product. I've used it in the past to add texture to a layer of epoxy resin and it works very well. Another idea is clear silicone. I need something that I can swirl around but will hold it's shape while it dries. I'm going to experiment with some things. Glad you are following along!
- 185 replies
-
- 10
-
-
- Flying Dutchman
- Black pearl
- (and 2 more)
-
Welcome aboard, OC! I need to check out your Black Pearl before I dive into mine.
- 185 replies
-
- 6
-
-
- Flying Dutchman
- Black pearl
- (and 2 more)
-
As much as I like the Tennessee, I vote for the Lula to complete this unique project.
-
Where's a site moderator when you need one? 😃
- 301 replies
-
- 7
-
-
-
- Constitution
- Bluejacket Shipcrafters
- (and 1 more)
-
Glad you are here, Grant! It wouldn't be the same without you!
- 185 replies
-
- 7
-
-
- Flying Dutchman
- Black pearl
- (and 2 more)
-
The biggest challenge for me was making those dang 8 battens that go around the middle of most of the yards. Trying to make each set of 8 exactly the right width to fit evenly around spars of varying diameters cost me some brain cells. But to my surprise, they all ended up fitting pretty well in the end.
- 301 replies
-
- 6
-
-
- Constitution
- Bluejacket Shipcrafters
- (and 1 more)
-
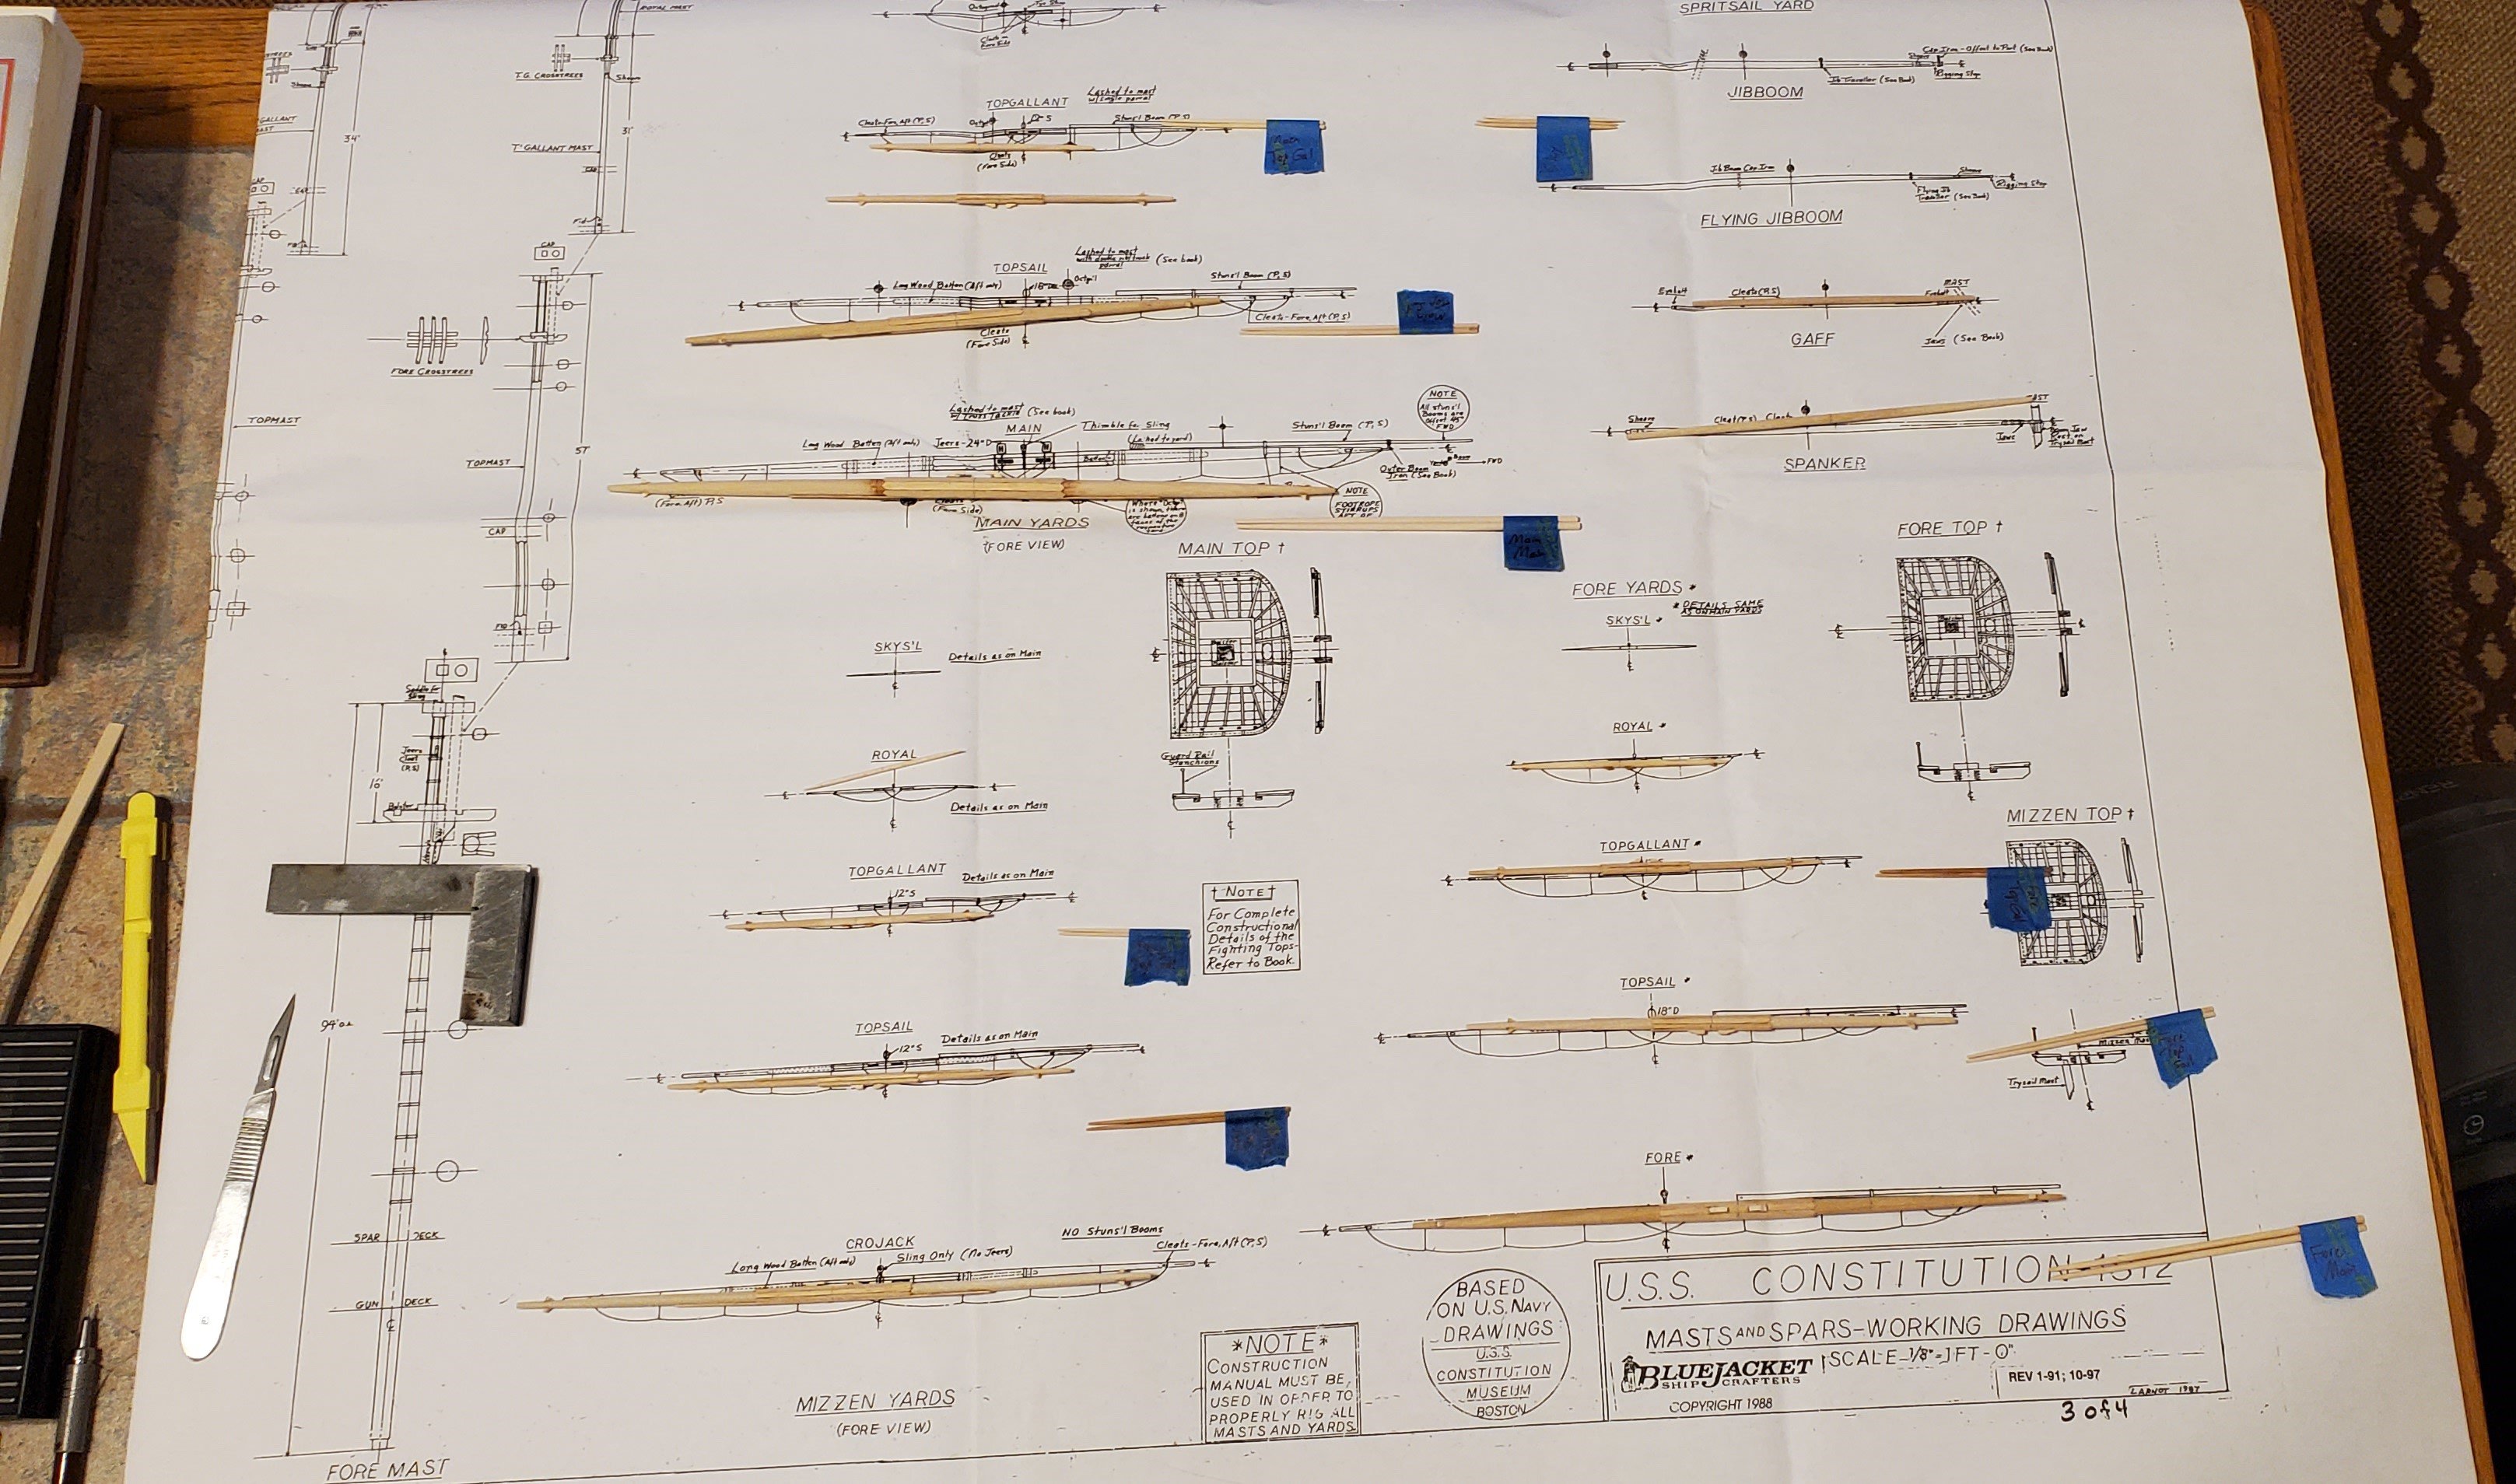
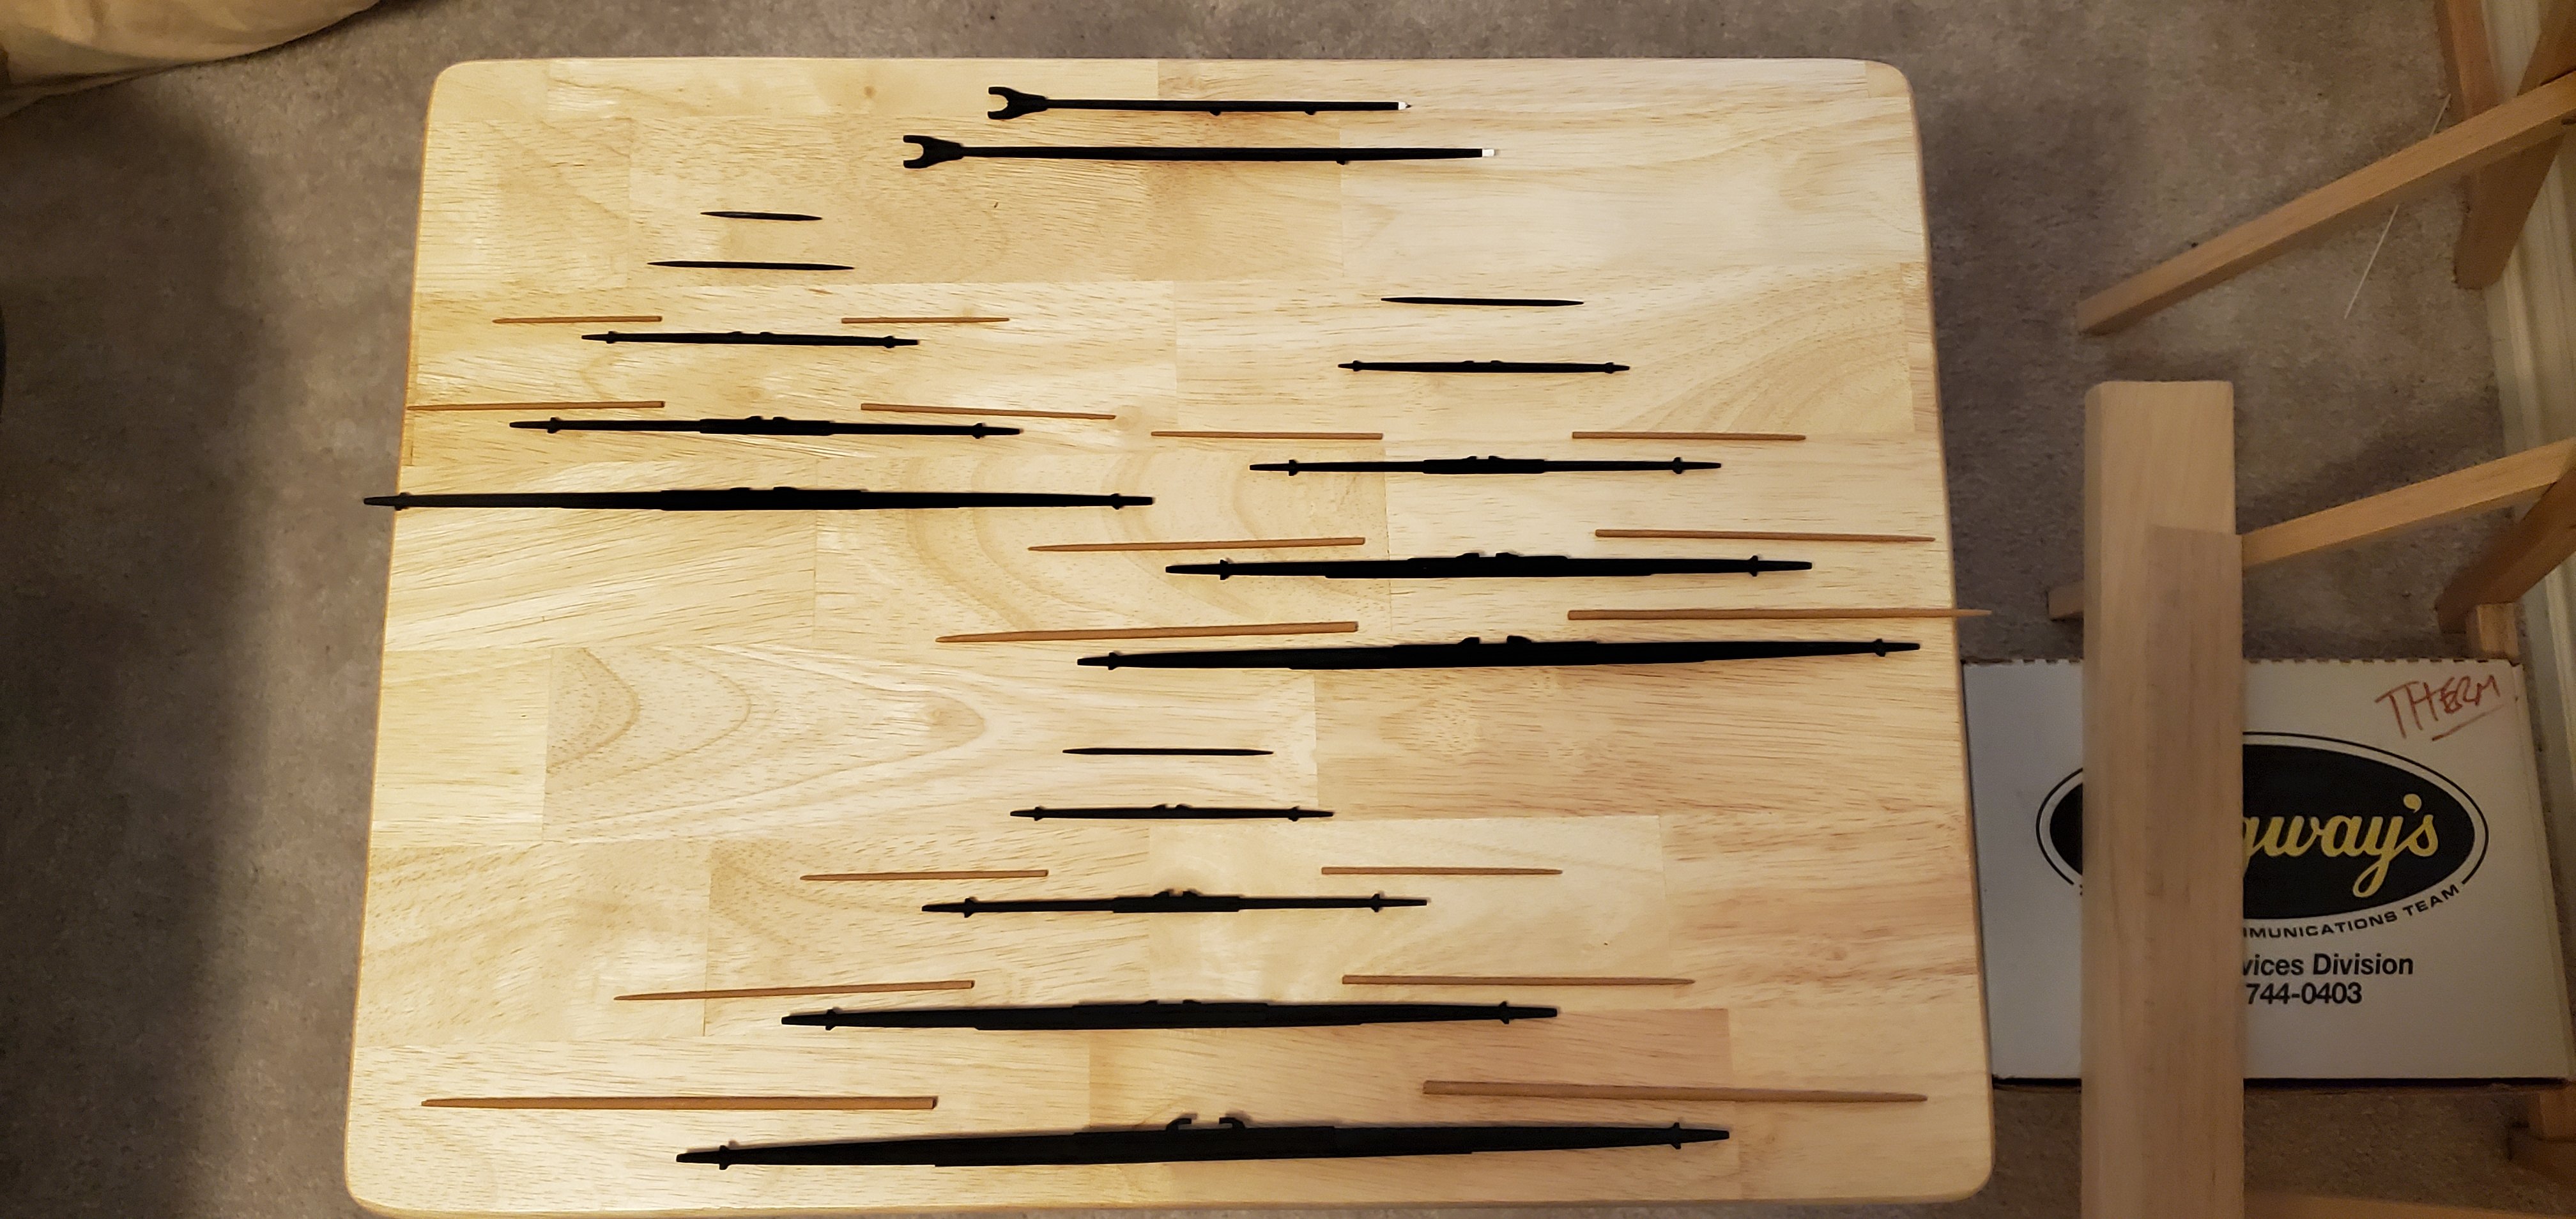
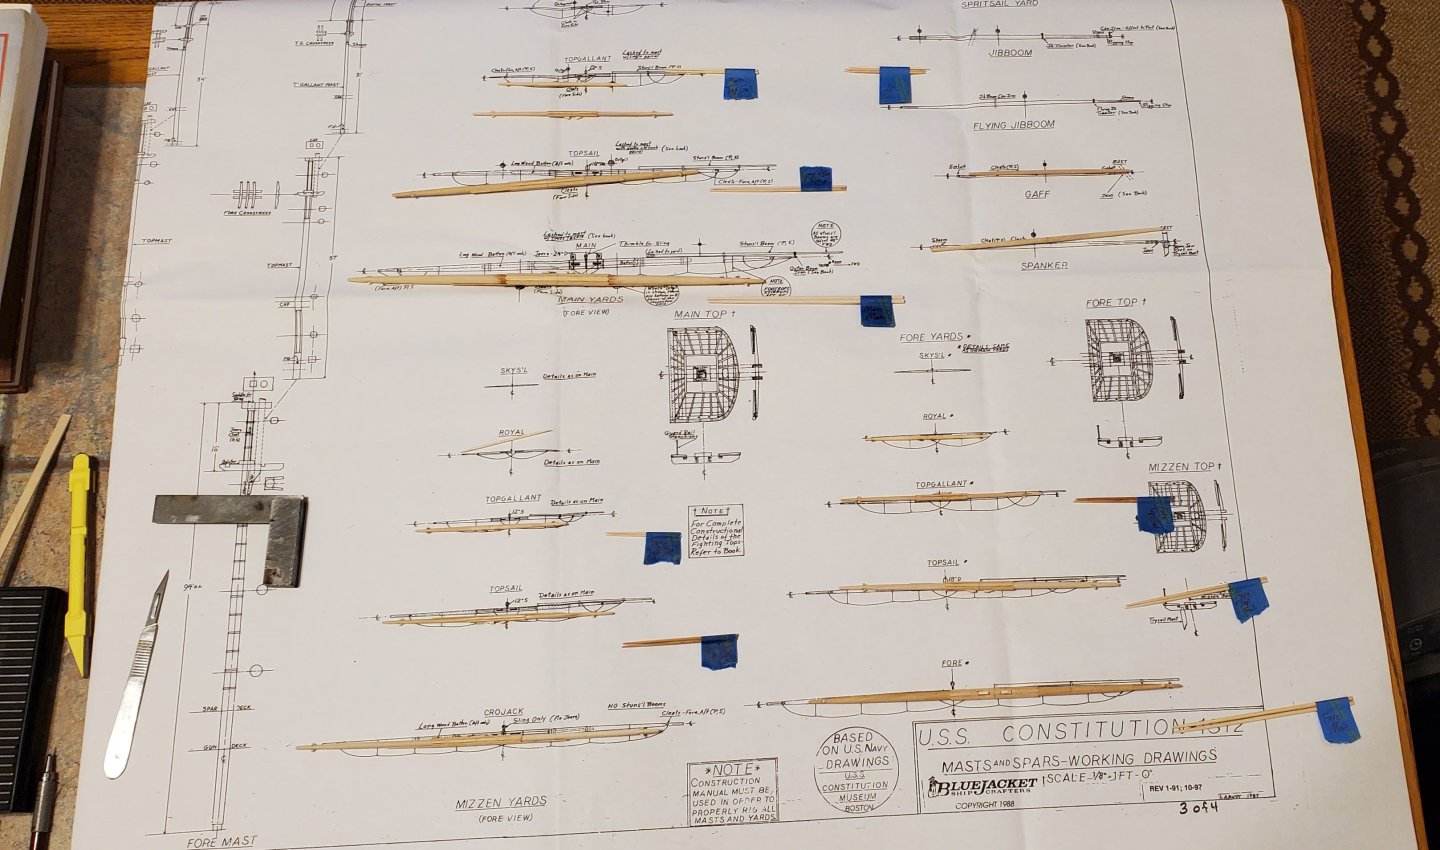
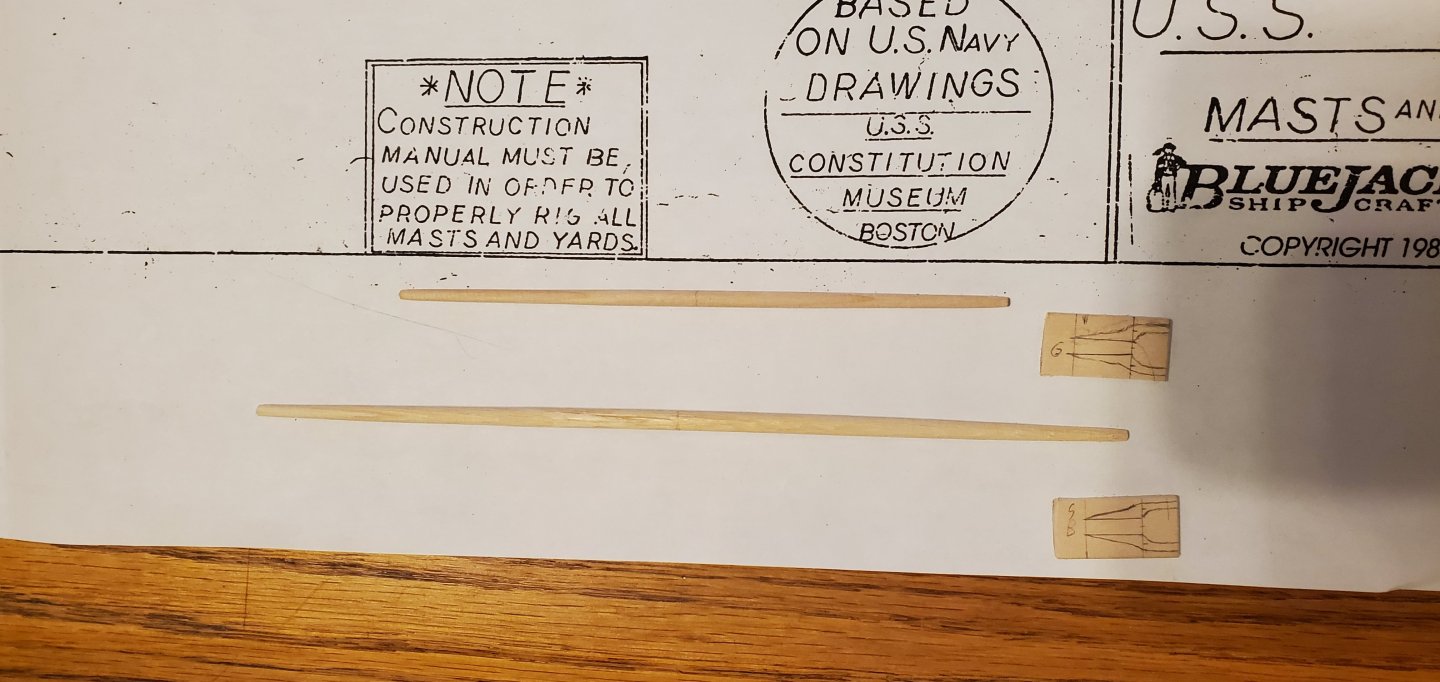
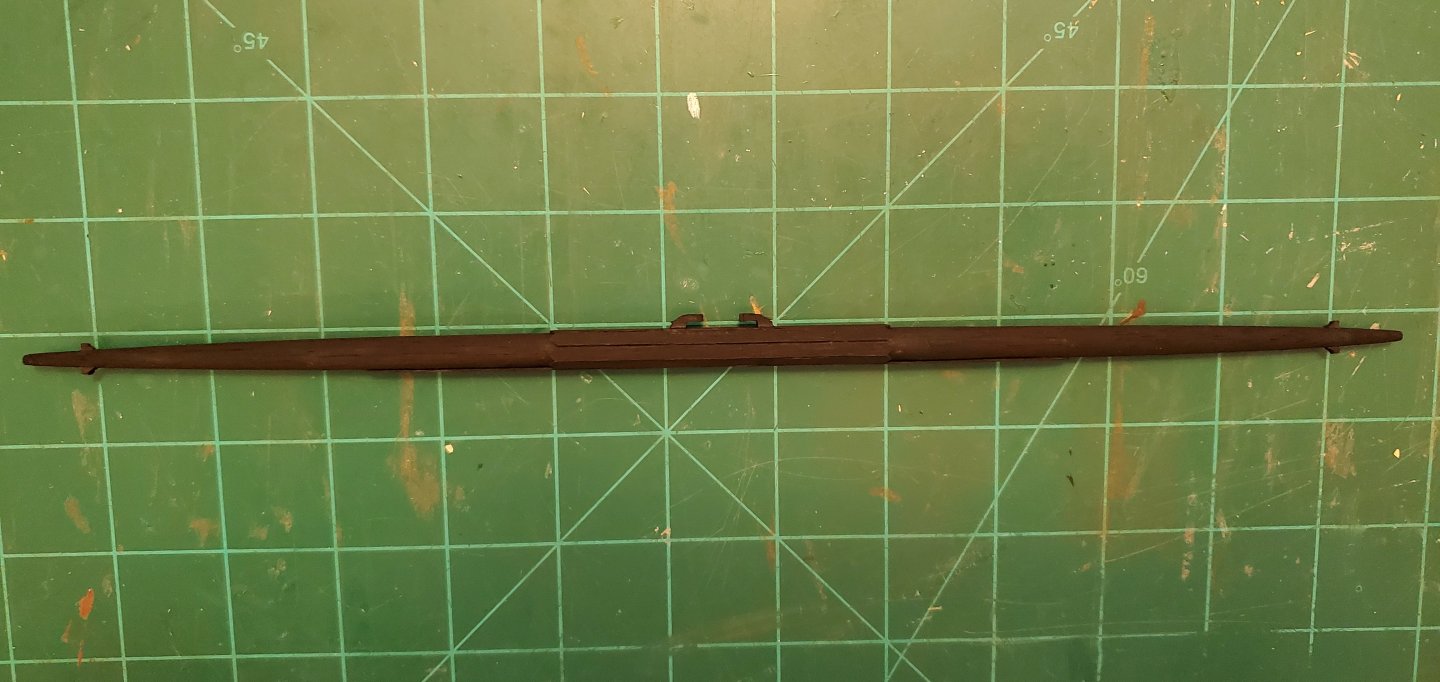
I spent the weekend doing yard work. But I wasn't pushing the lawn mower in our 100 degree heat like I should have been. Instead, I was hunched over the drill lathe making all the yards and yardarms for Connie. That consists of 15 yards, 16 yard arms, a gaff and a spanker boom. Here's everything laid out on the mast/yard plan after the tapering process which was followed by adding the center battens, the parrel cleats, and the yardarm cleats. Next, I carved out the jaws for the spanker boom and gaff. Here's the completed spanker boom and gaff. Here's a closeup of the main yard. And here's the whole 9 yards (haha 🙄). I think that's a fair amount of progress for a little over a week, so I'm going to give Connie a short rest and head back over to the Flying Dutchman/Black Pearl SIB.

- 301 replies
-
- 15
-
-
-
-
- Constitution
- Bluejacket Shipcrafters
- (and 1 more)
-
I can't top that compliment, so I will repeat it! This project is bloody ripper! Such a cool build to follow and every aspect of the work was exceptional. Congratulations, Keith!!
-
Talk about a cheap date! 😃 Cheap entertainment or not, you did a really nice job on this, Bryan. The final result turned out great in all respects. Well done!
- 16 replies
-
- 1
-
-
- Oseberg
- Billing Boats
- (and 1 more)
-
Thanks for posting about the model shop, Carson. I'm sure that visiting it with your dad is a very fond memory for you. The link on the history of the shop has a couple of great quotes: "Freitag credits women employees with keeping the store neat." Ain't that the truth!! One look at the workspaces that most of us here on MSW keep will confirm that 100%! "We try to make more friends than we make money" That's got to be the best quote I've ever seen on how to run a successful local business.
- 301 replies
-
- 8
-
-
- Constitution
- Bluejacket Shipcrafters
- (and 1 more)
-
Congratulations, Grant! That is awesome and very well deserved!!
-
Welcome aboard, Nick! I hope that you will create a build log for this epic adventure so we can follow along.