HOLIDAY DONATION DRIVE - SUPPORT MSW - DO YOUR PART TO KEEP THIS GREAT FORUM GOING!
×


Glen McGuire
-
Posts
1,954 -
Joined
-
Last visited
Content Type
Profiles
Forums
Gallery
Events
Everything posted by Glen McGuire
-
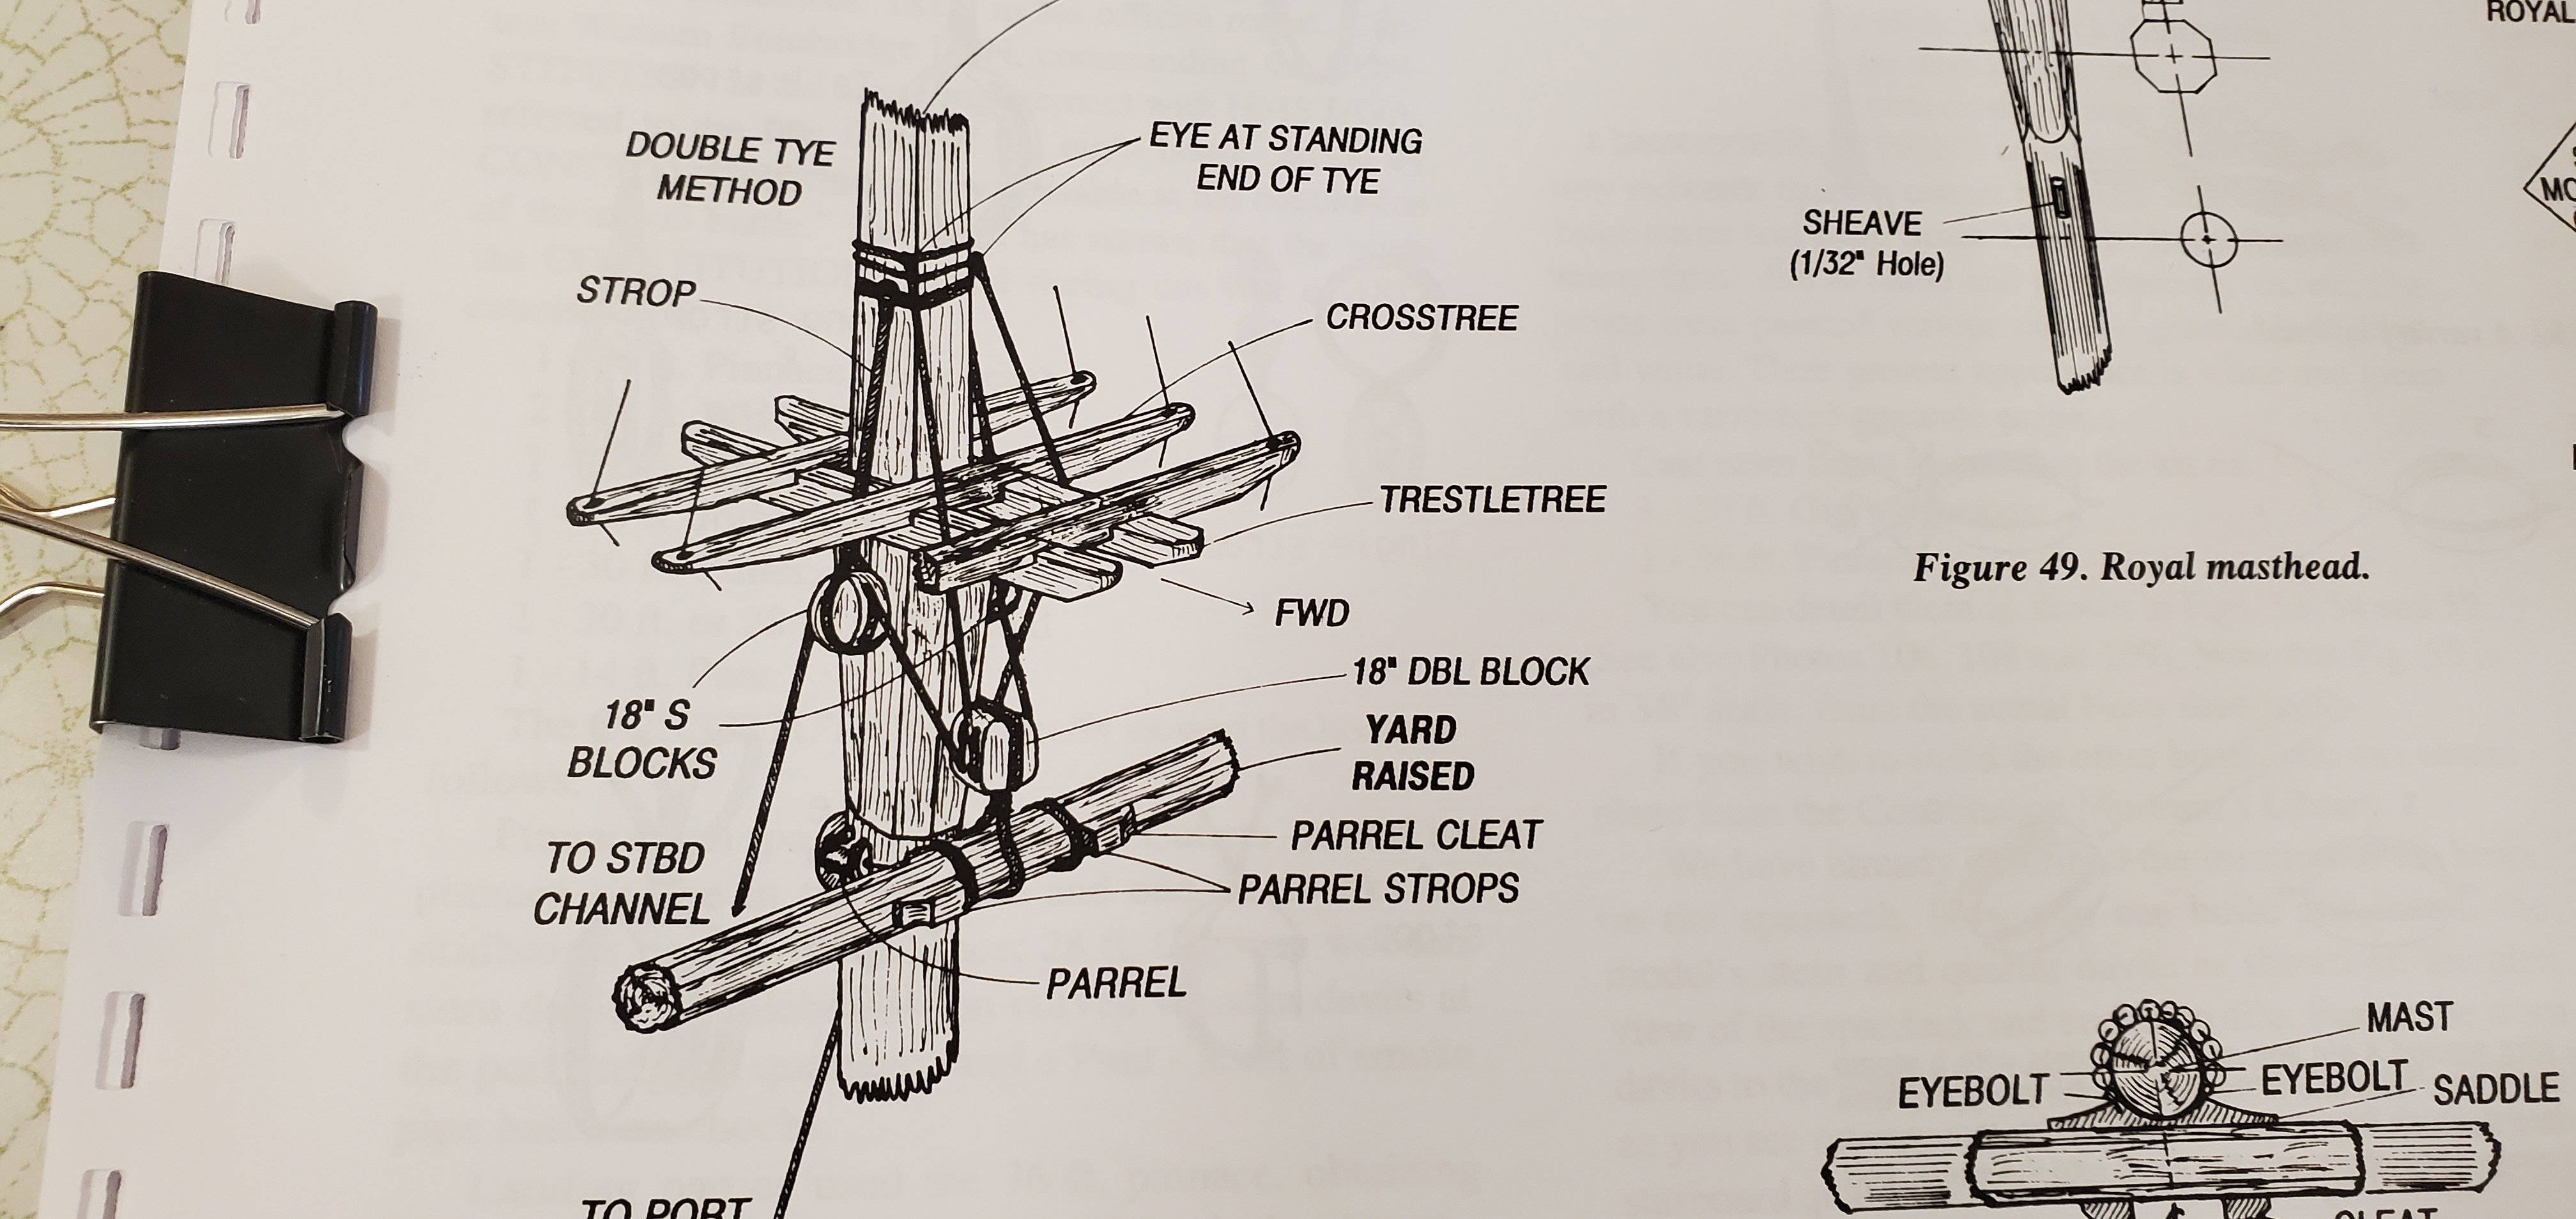
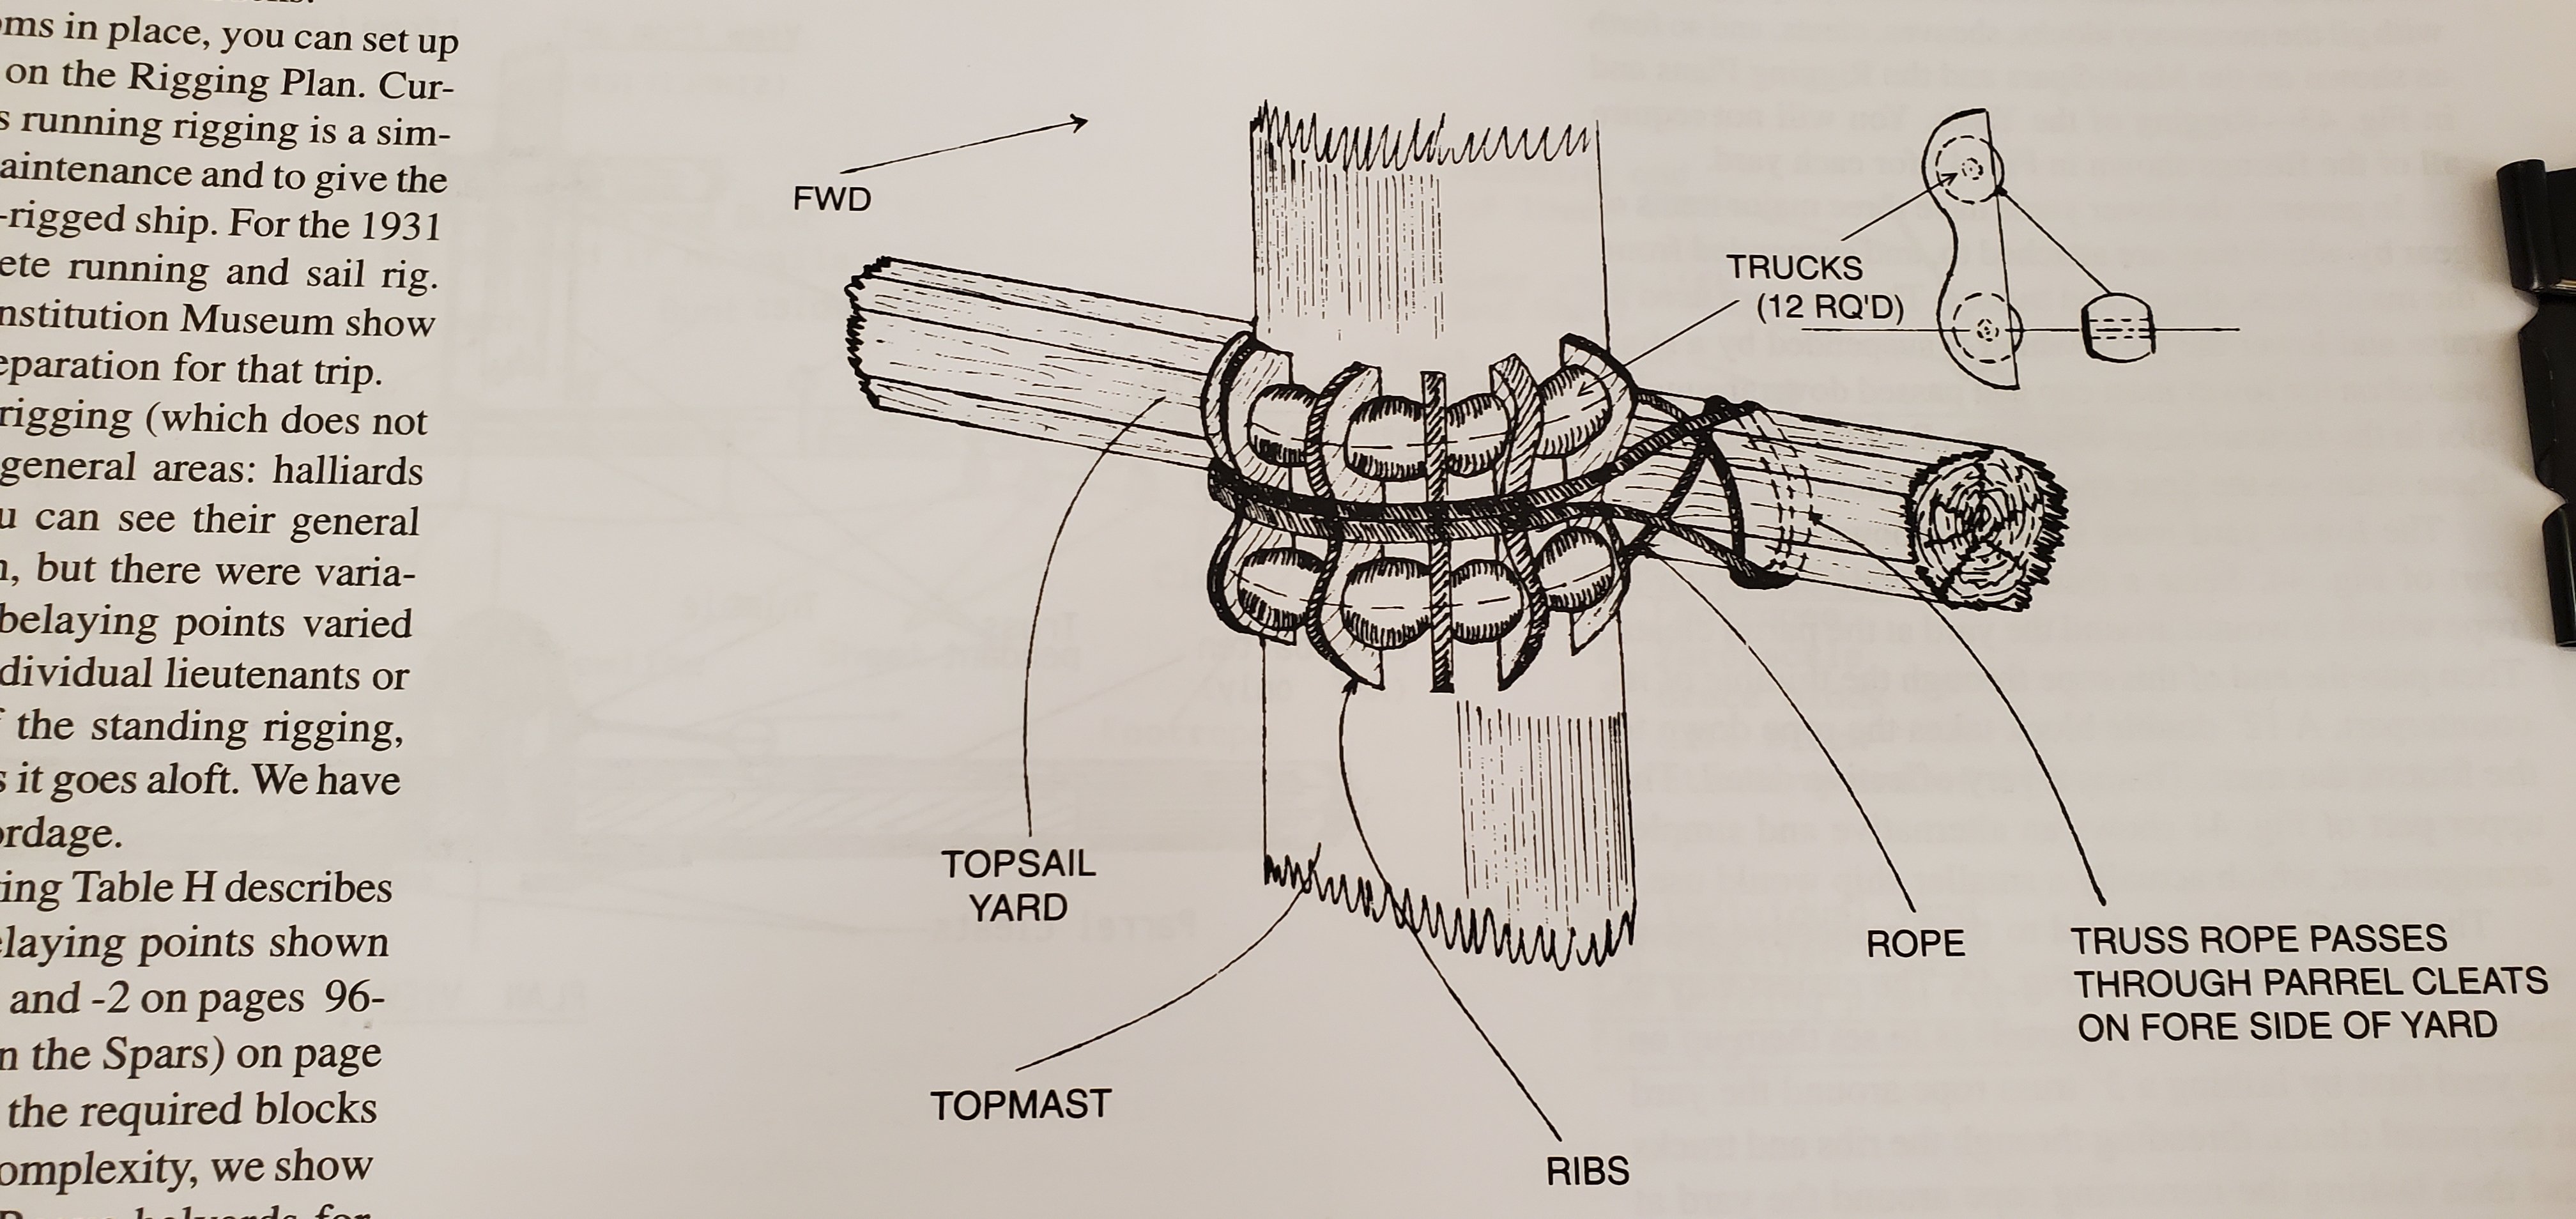
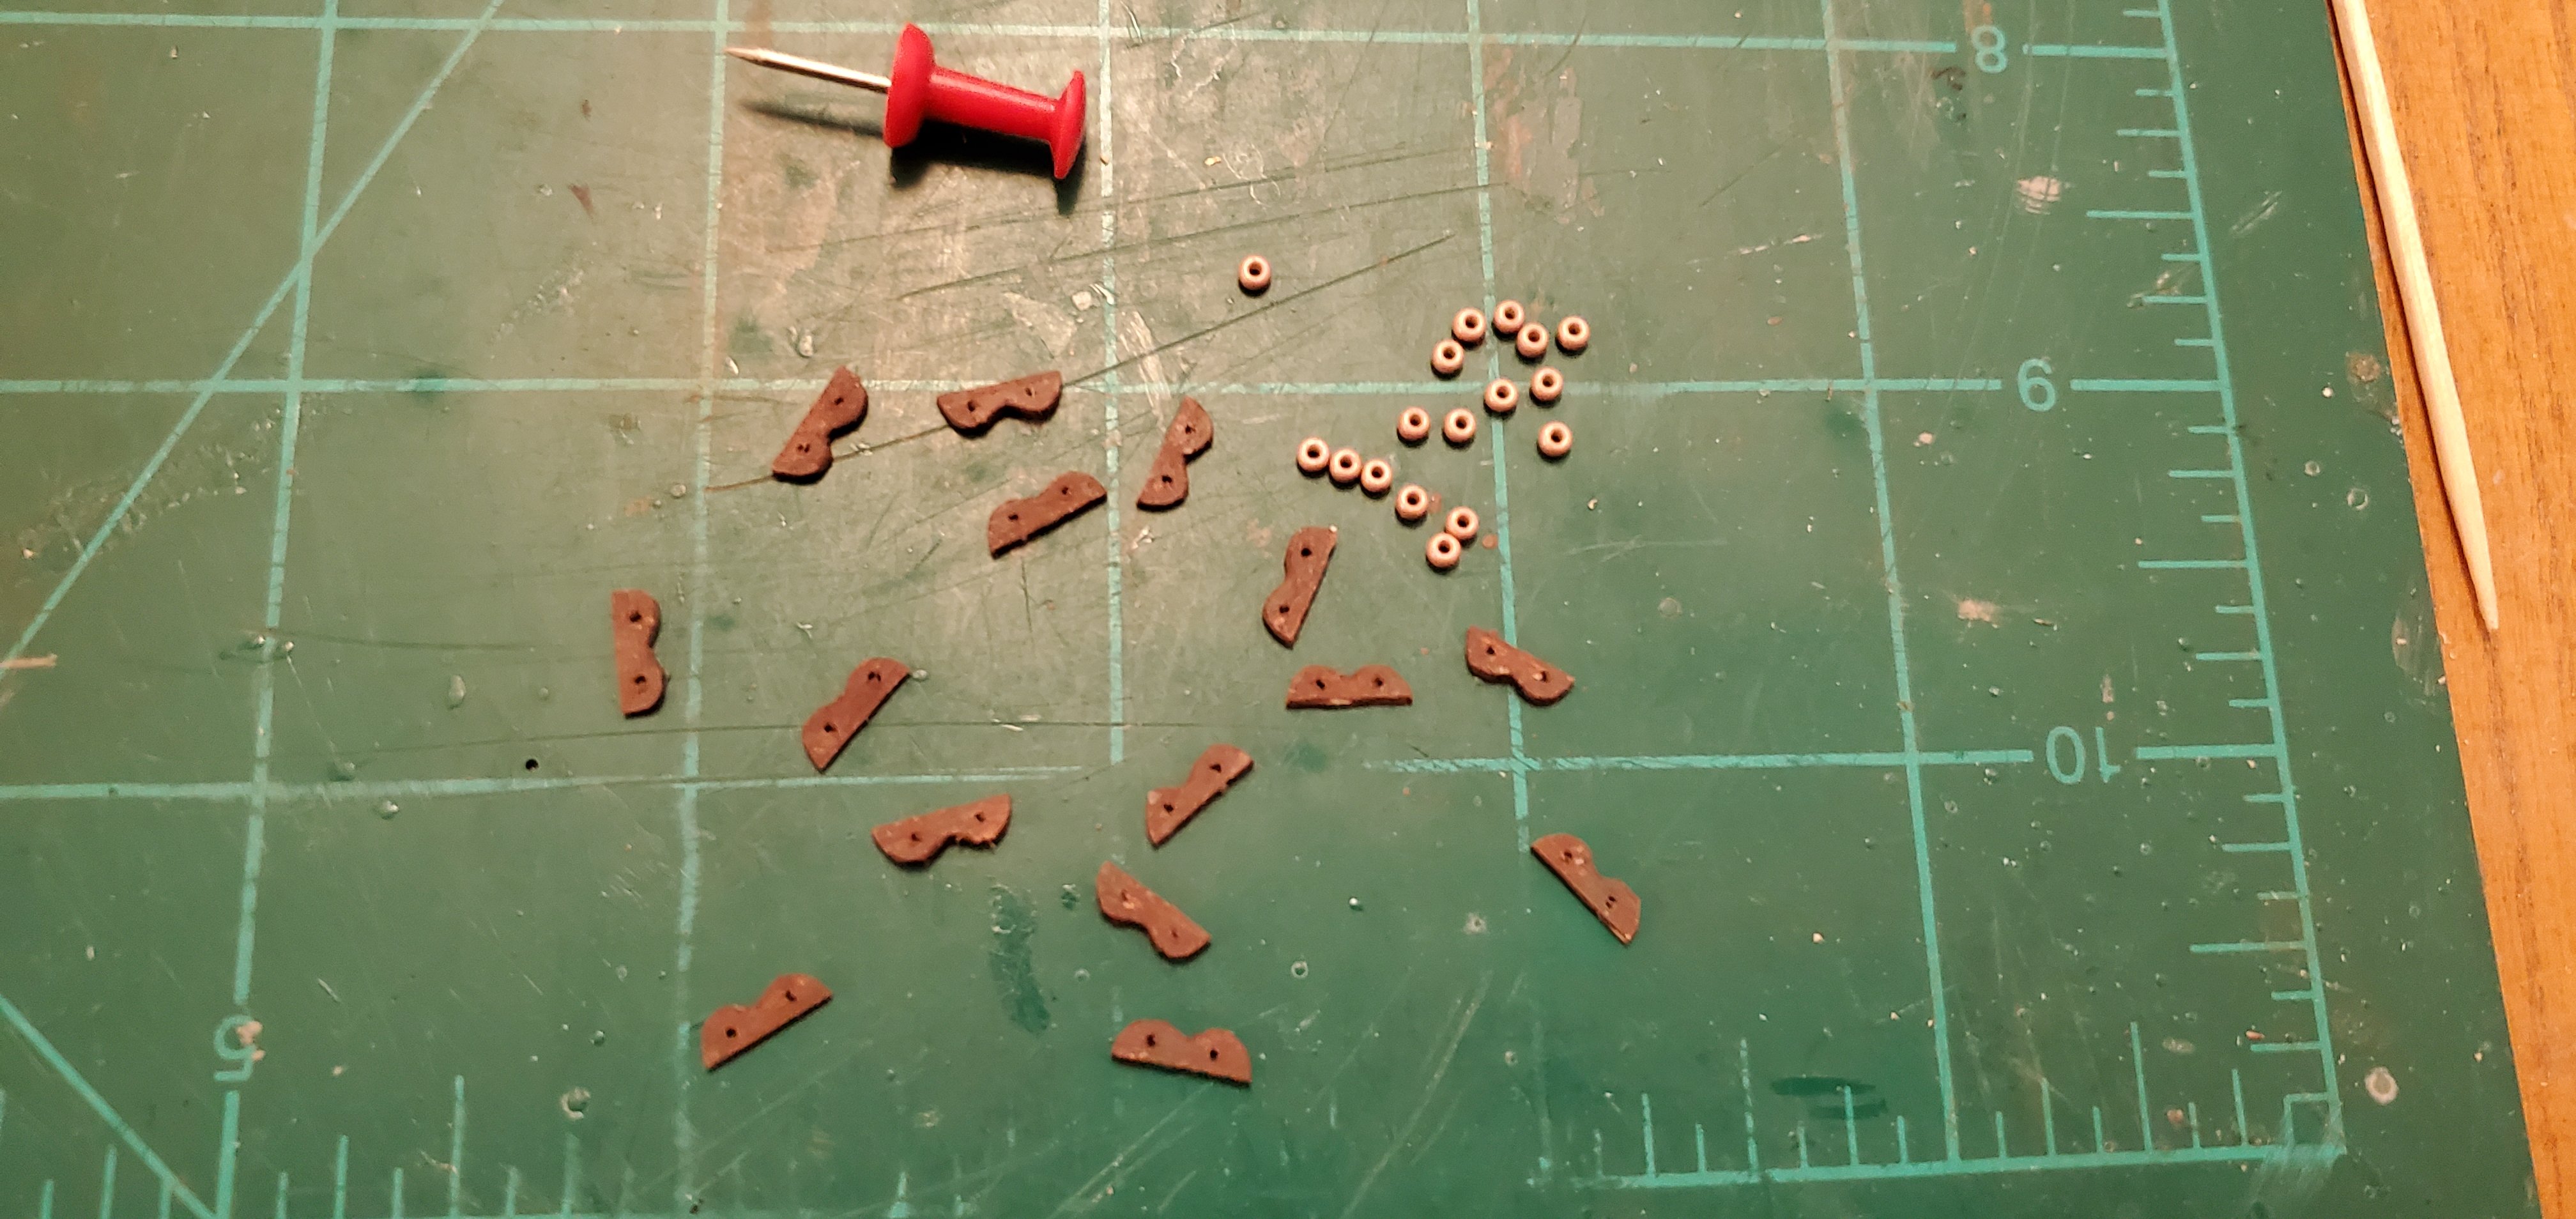
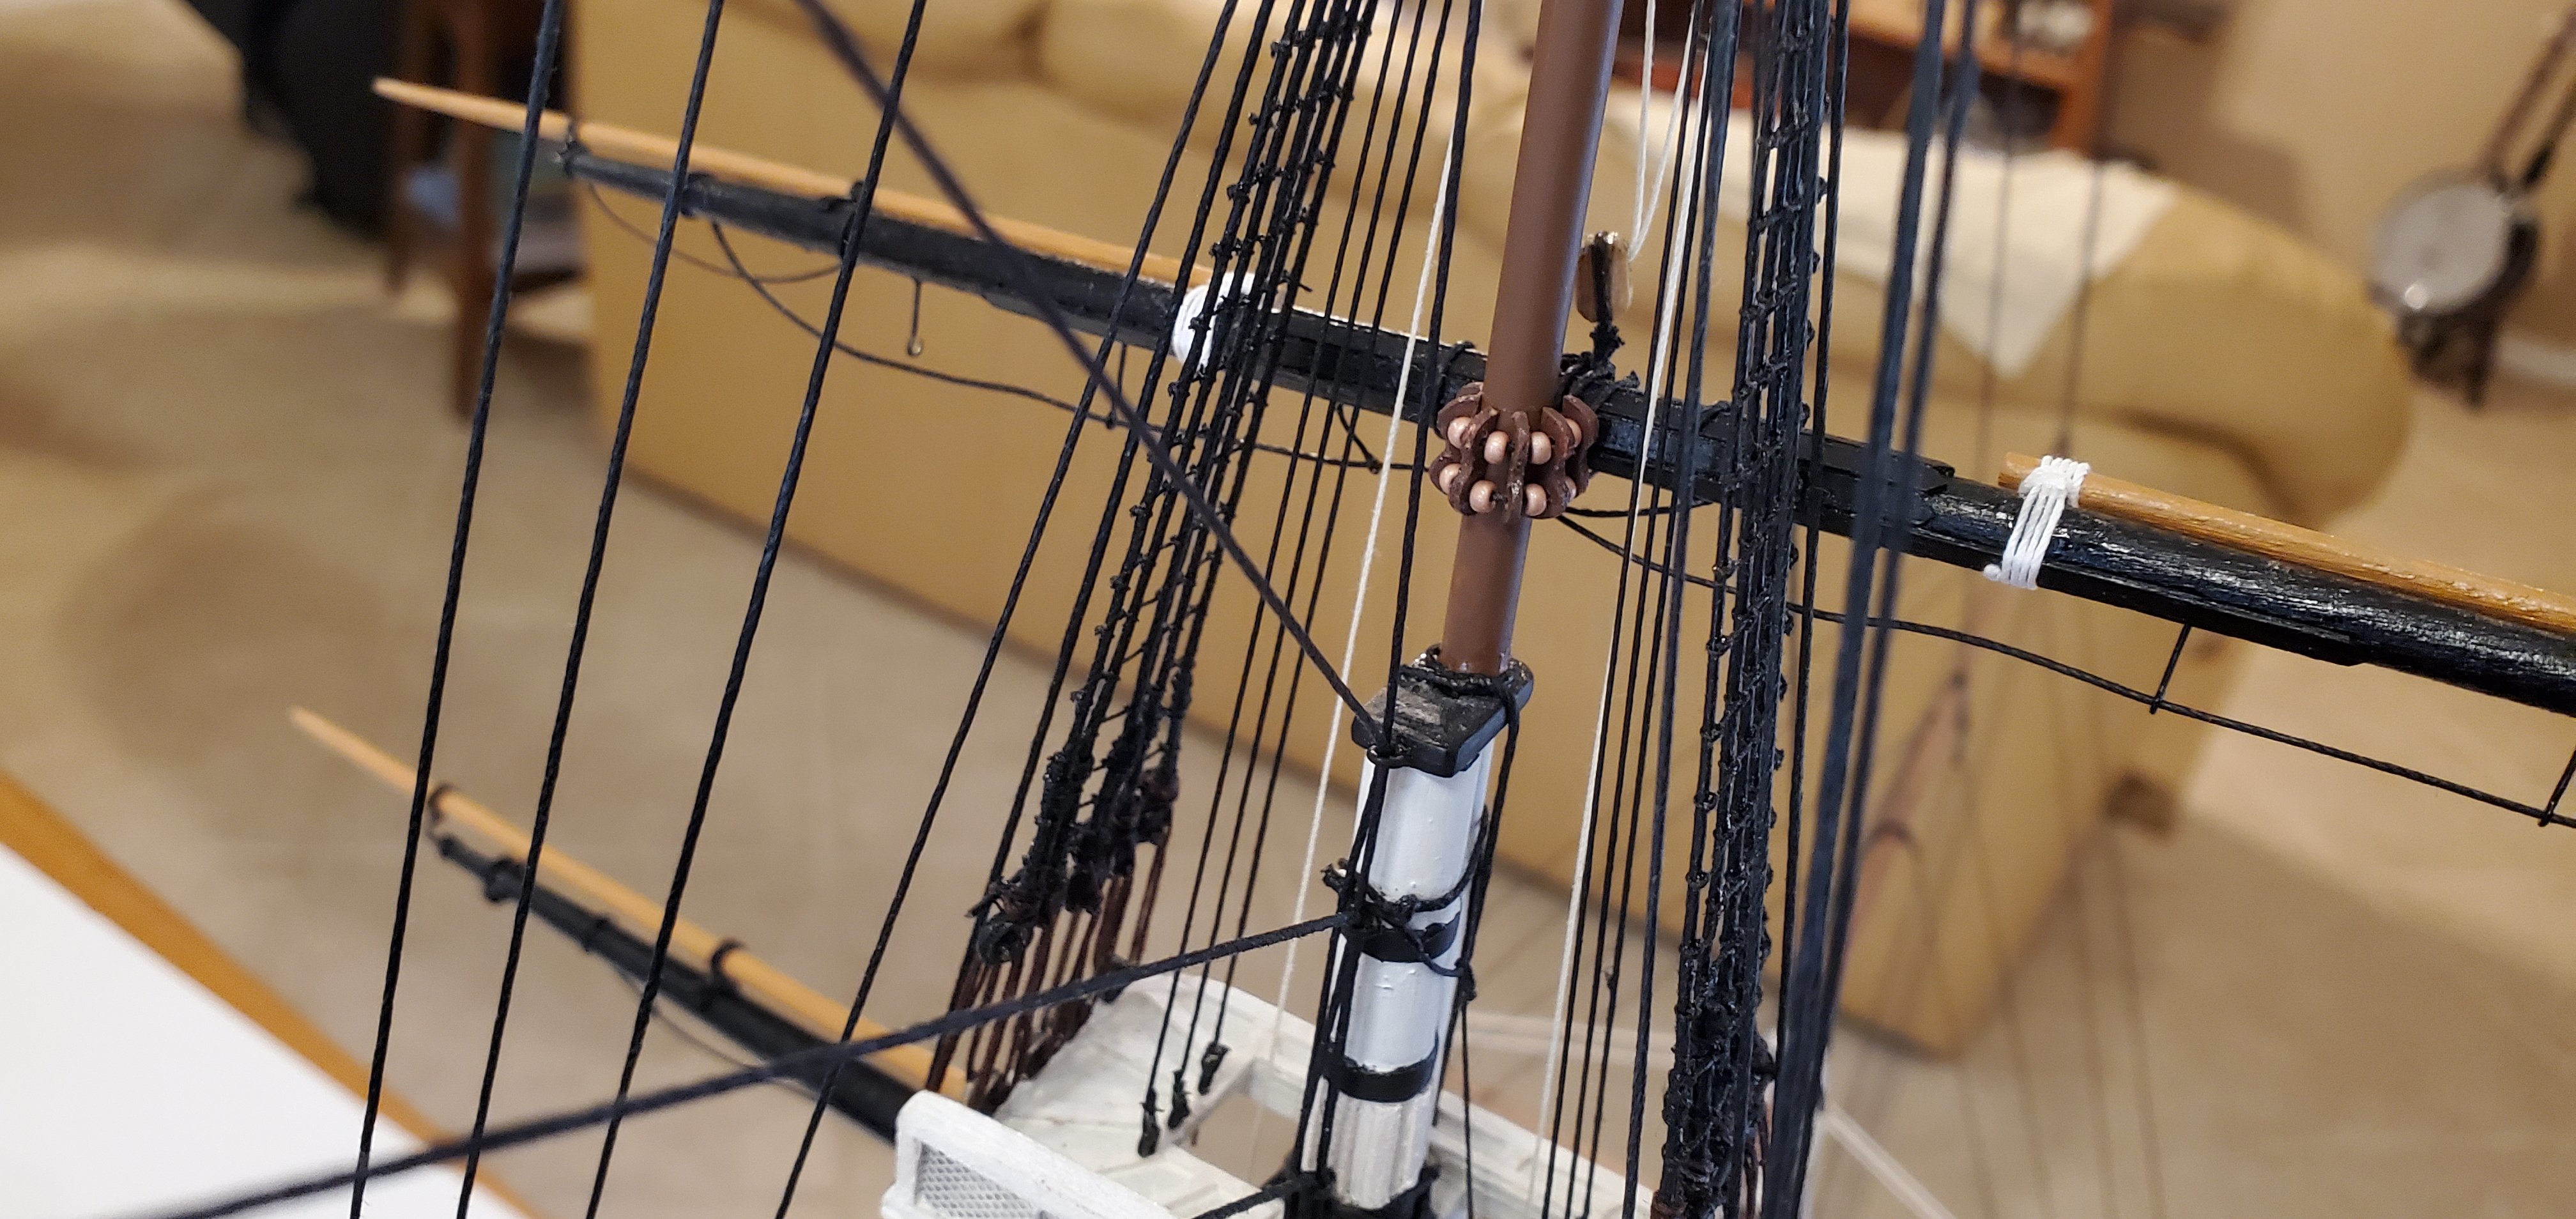
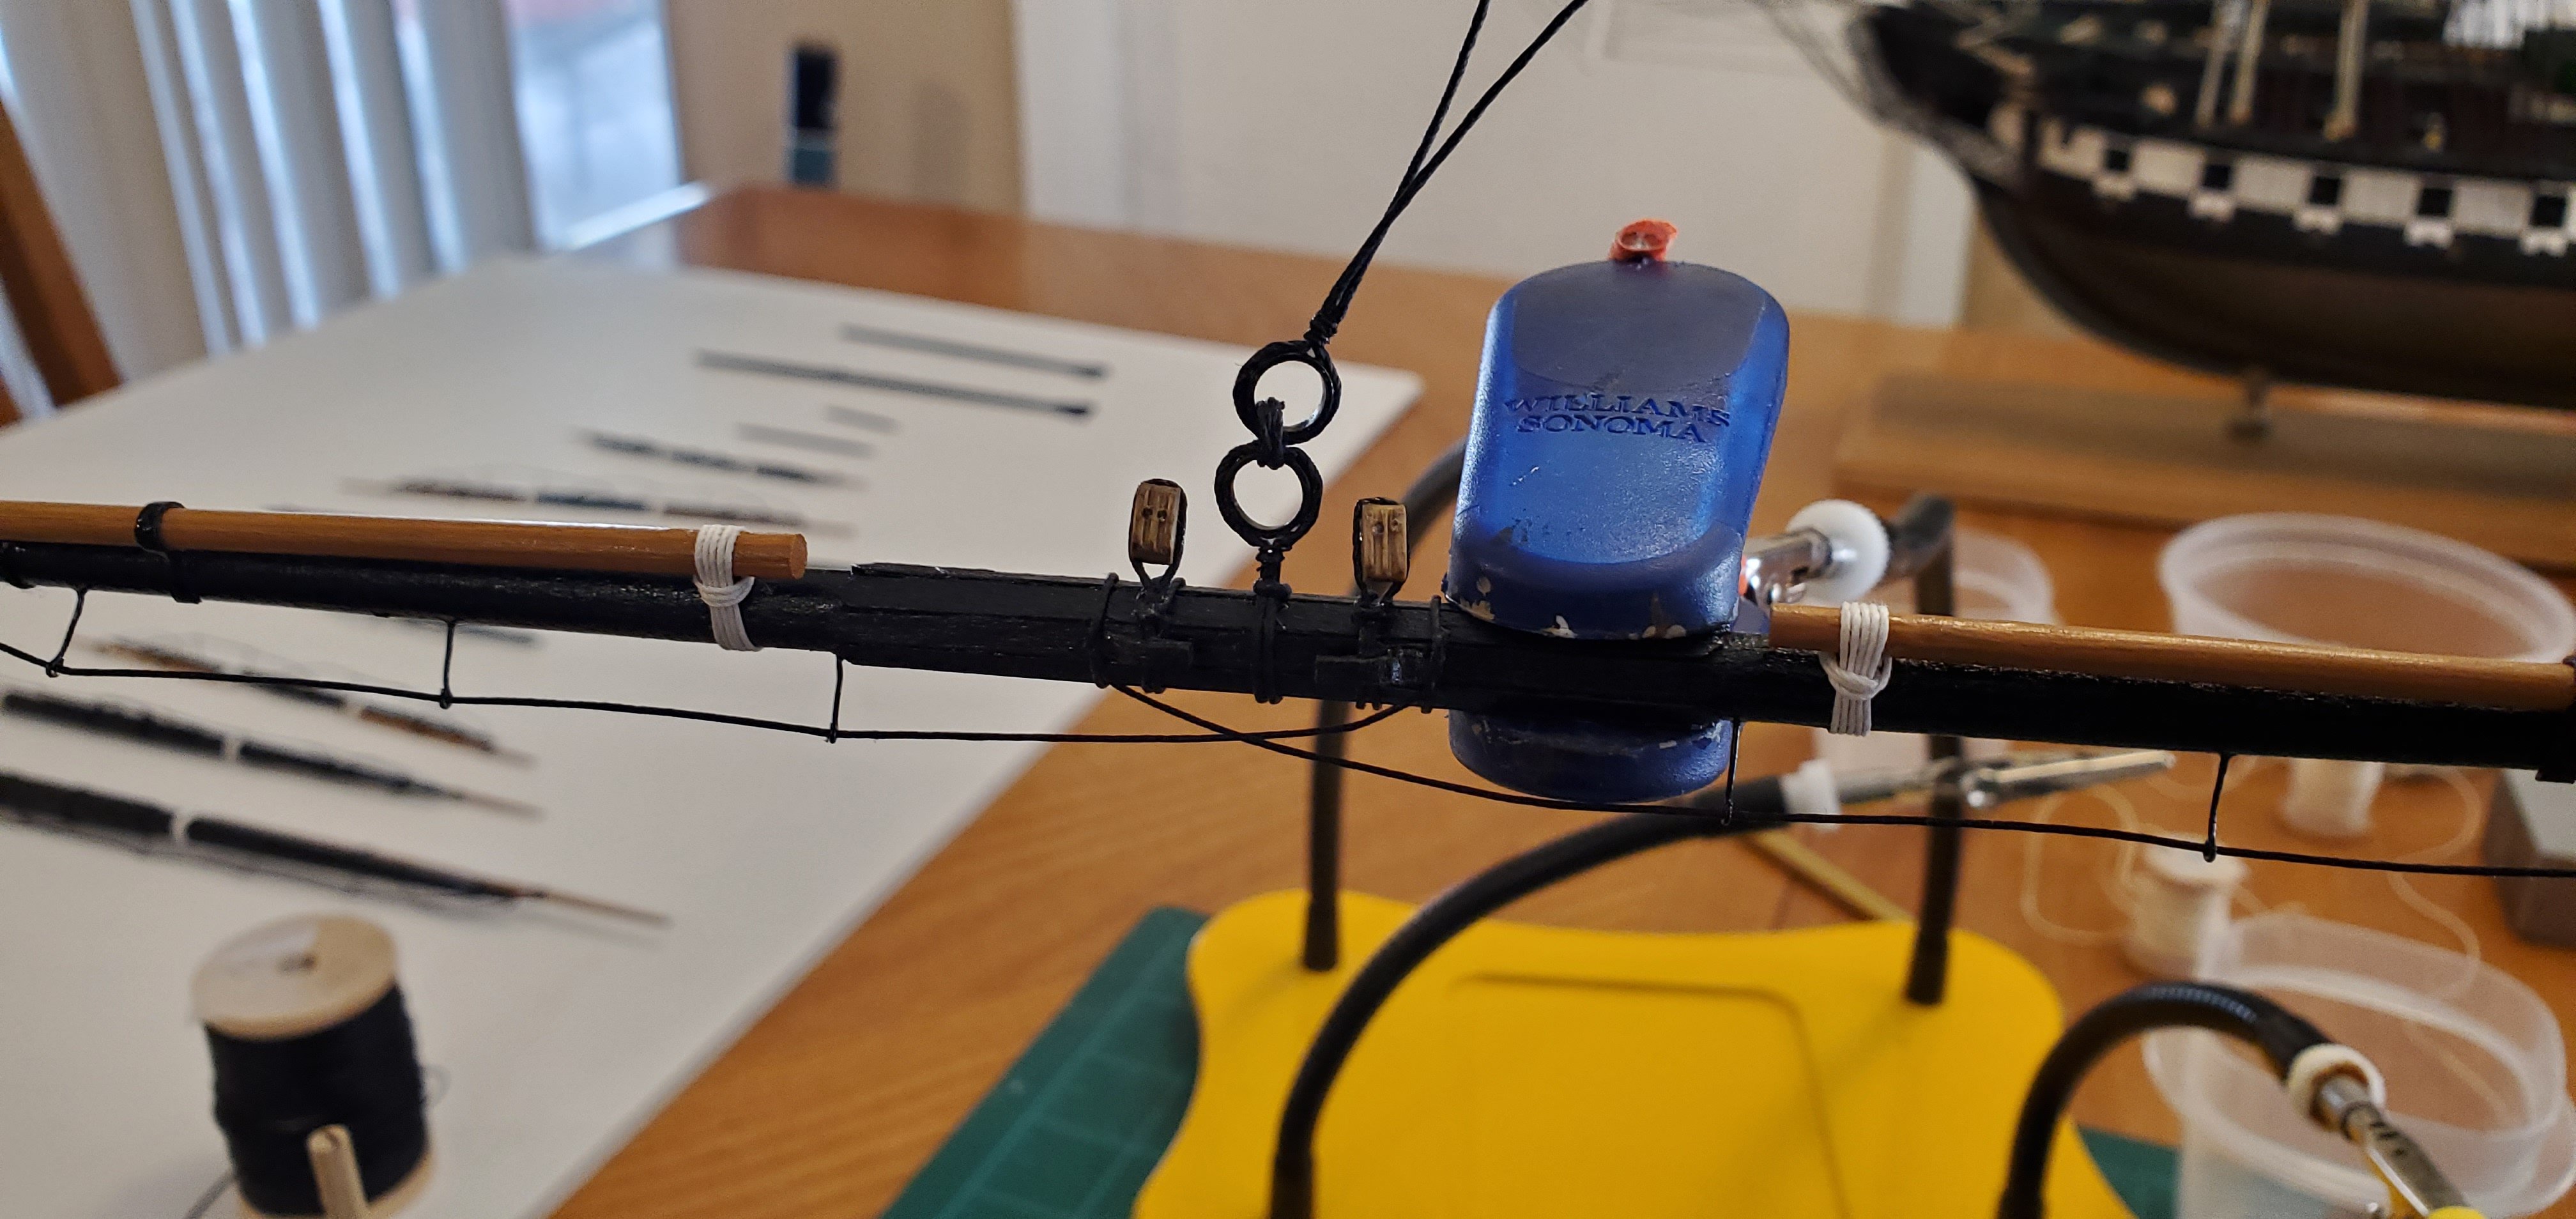
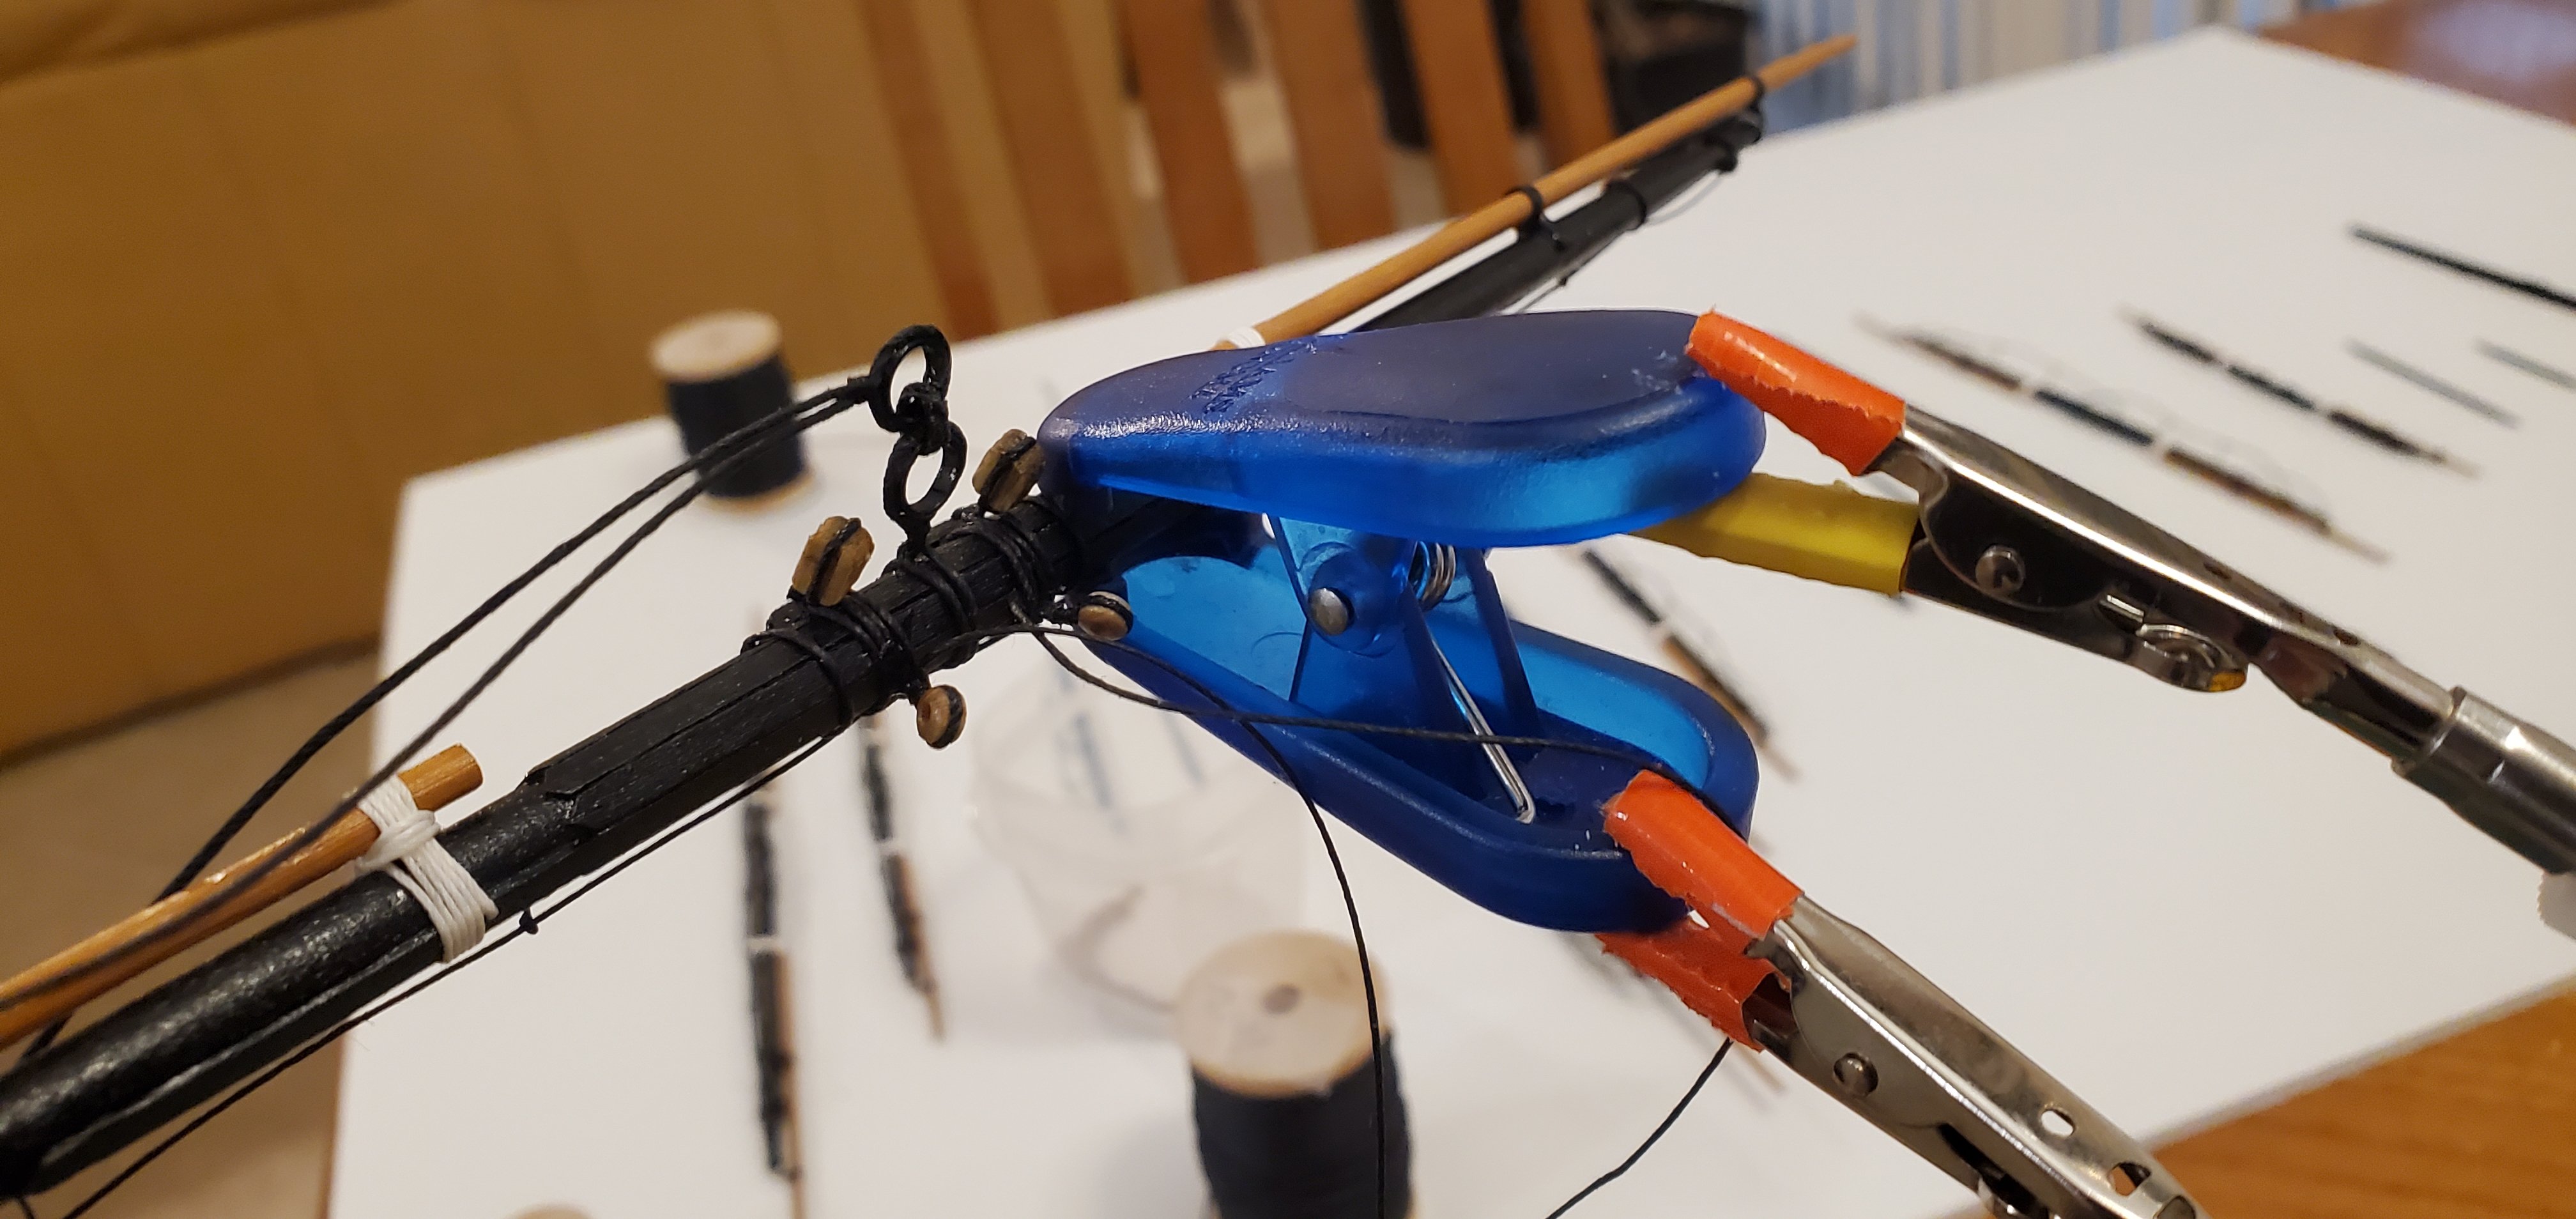
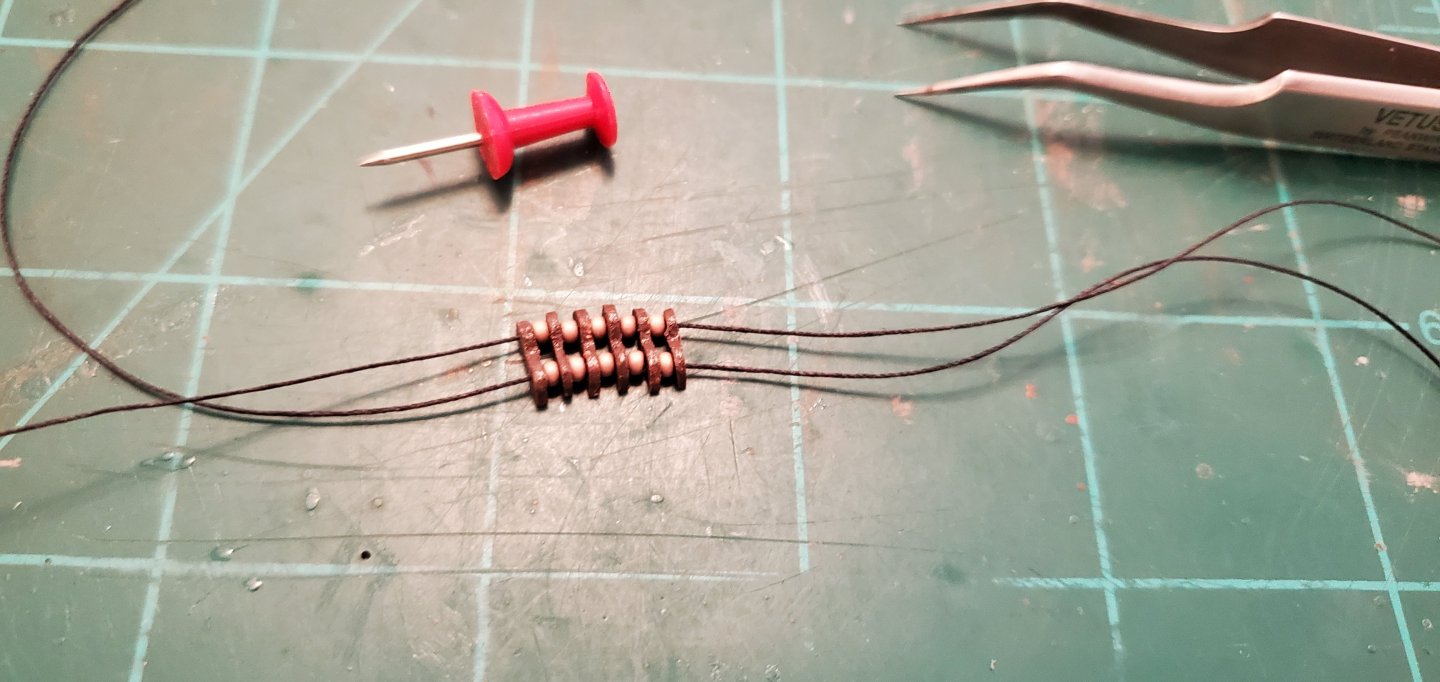
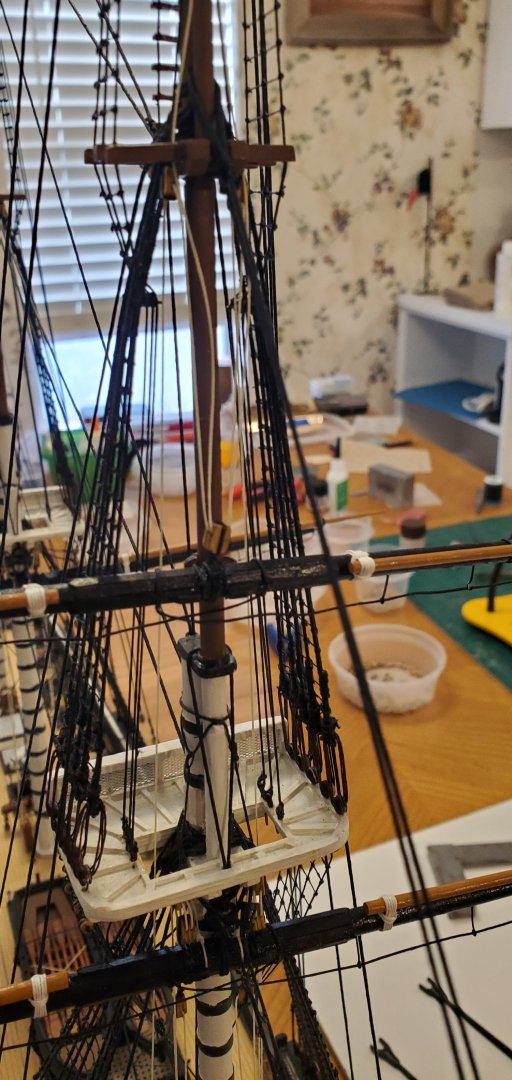
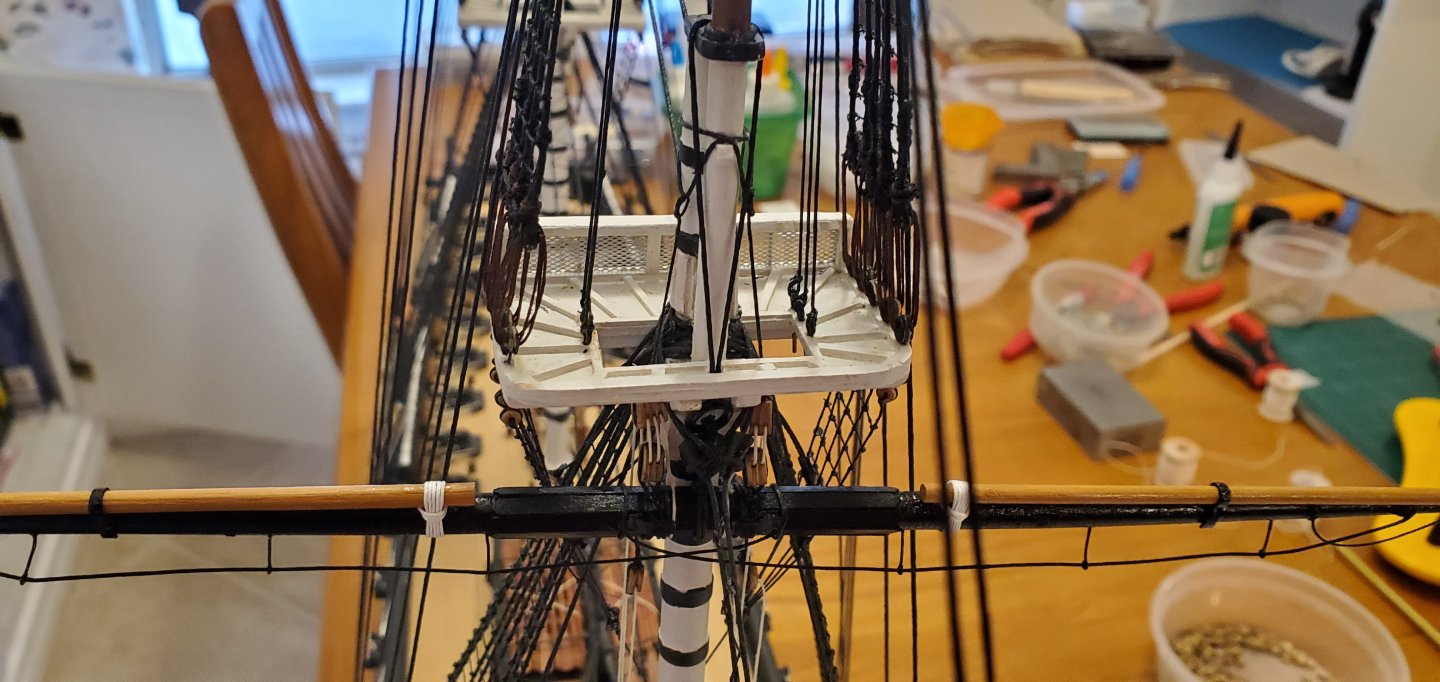
 I went back and reviewed other build logs and I can see where some rig the truss pendants just as you describe. When I read the description and look at the picture from the BlueJacket instructions, I still don't see the the rigging going upwards to the mast top and then back down. But what you describe makes sense, so I will go back and see if I can reconfigure what I've already done. In the meantime, I got the main lower yard hung (which means I will need to reconfigure 2 sets of tackle) and started work on the fore topsail yard. The topsail yards are hung with different rigging than the lower yards. Rather than a sling, the lower yards have a double block in the center of the yard with 1 line tied off above the crosstrees and the other running through 2 single blocks on each side of the mast just below the trees and then down to the deck. Here's the picture from the instructions. The yards is secured to the mast with a parrel which includes a double row of trucks. I assume these trucks act as rollers to facilitate the yard being raised or lowered. I'm using 2mm beads for the rollers with the dividers made from 1mm thick basswood. Here's the fore topsail yard hung with the parrel in place. And the front view.
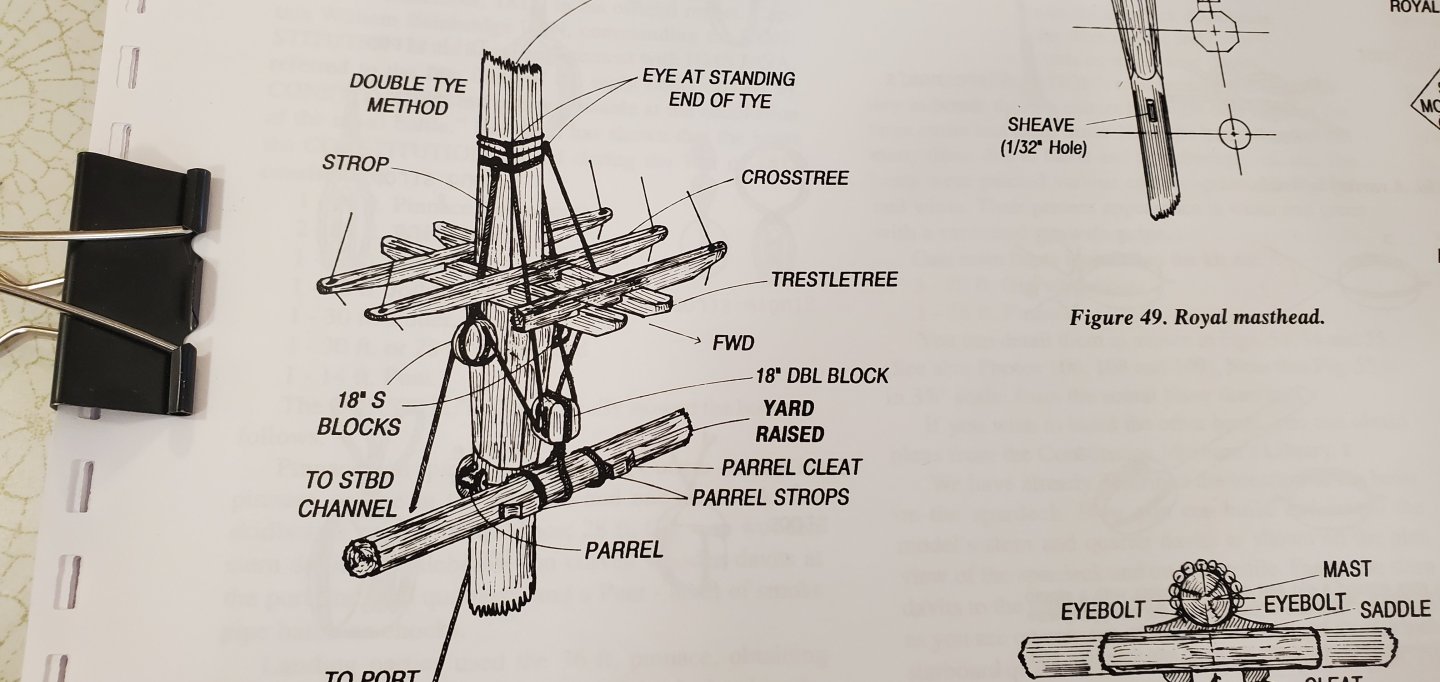


- 301 replies
-
- 16
-

-

-
- Constitution
- Bluejacket Shipcrafters
- (and 1 more)
-
I'll take "Things you won't hear in Texas" for $200, Alex.
-
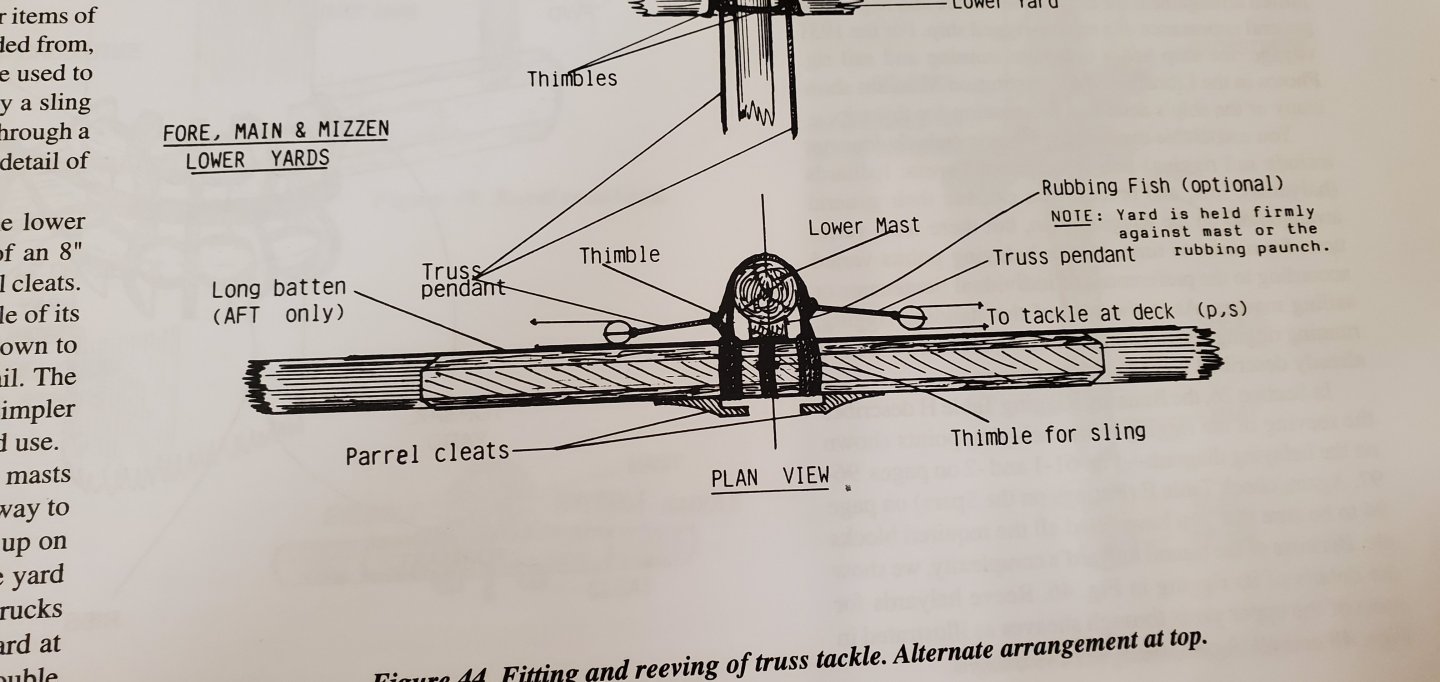
Hey Henry! Thanks for the explanations on the sling and the truss pendants. That makes a lot of sense. I've been trying to follow the BlueJacket instructions as close as I can and they seem to read a bit differently, unless I am interpreting them wrong (which is a distinct possibility!). For the sling, the instructions say, "Set up over masthead, brought down through hole in foretop, and set up to sling thimble on yard with a lanyard." Throughout the instructions, thimbles seems to be interchangeable with bullseyes. I did not have any bullseyes large enough for this application so I decided to fashion brass rings as a substitute. Unfortunately, there were no pictures of the sling in the instructions to help. Regarding the truss tackle pendants. I really had a hard time interpreting what the instructions were saying, and that's even with a picture! As I mentioned above, I must have read it a hundred times trying to figure it out. Here are the instructions and the accompanying picture. "Seize a thimble into one end of a 8" rope which is wound around the yard at the parrel cleats. Then pass the end of this rope through the thimble of its counterpart. A block takes the rope down to the foot of the mast." I'm not 100% sure, but I believe I matched what the instructions were telling me to do. Perhaps there are multiple ways to rig the trusses depending on the timing of the construction or restoration?
- 301 replies
-
- 6
-
-
- Constitution
- Bluejacket Shipcrafters
- (and 1 more)
-
Amen to that, JC! The SIB work has definitely prepared me for drilling tiny holes in things and threading line in hard to reach places! You are probably right, Keith. I don't see any other logical way to accomplish that. Yes! What I would give for some detailed photos with labels, etc! I read the BlueJacket instructions about 100 times, then I study bunches of build logs with lots of great pics ( @xken and @KurtH have build logs that have been incredibly helpful), but I always seem to need a shot from a different angle to help me figure out exactly what to do. 😃 The truss pendants in particular!
- 301 replies
-
- 4
-
-
- Constitution
- Bluejacket Shipcrafters
- (and 1 more)
-
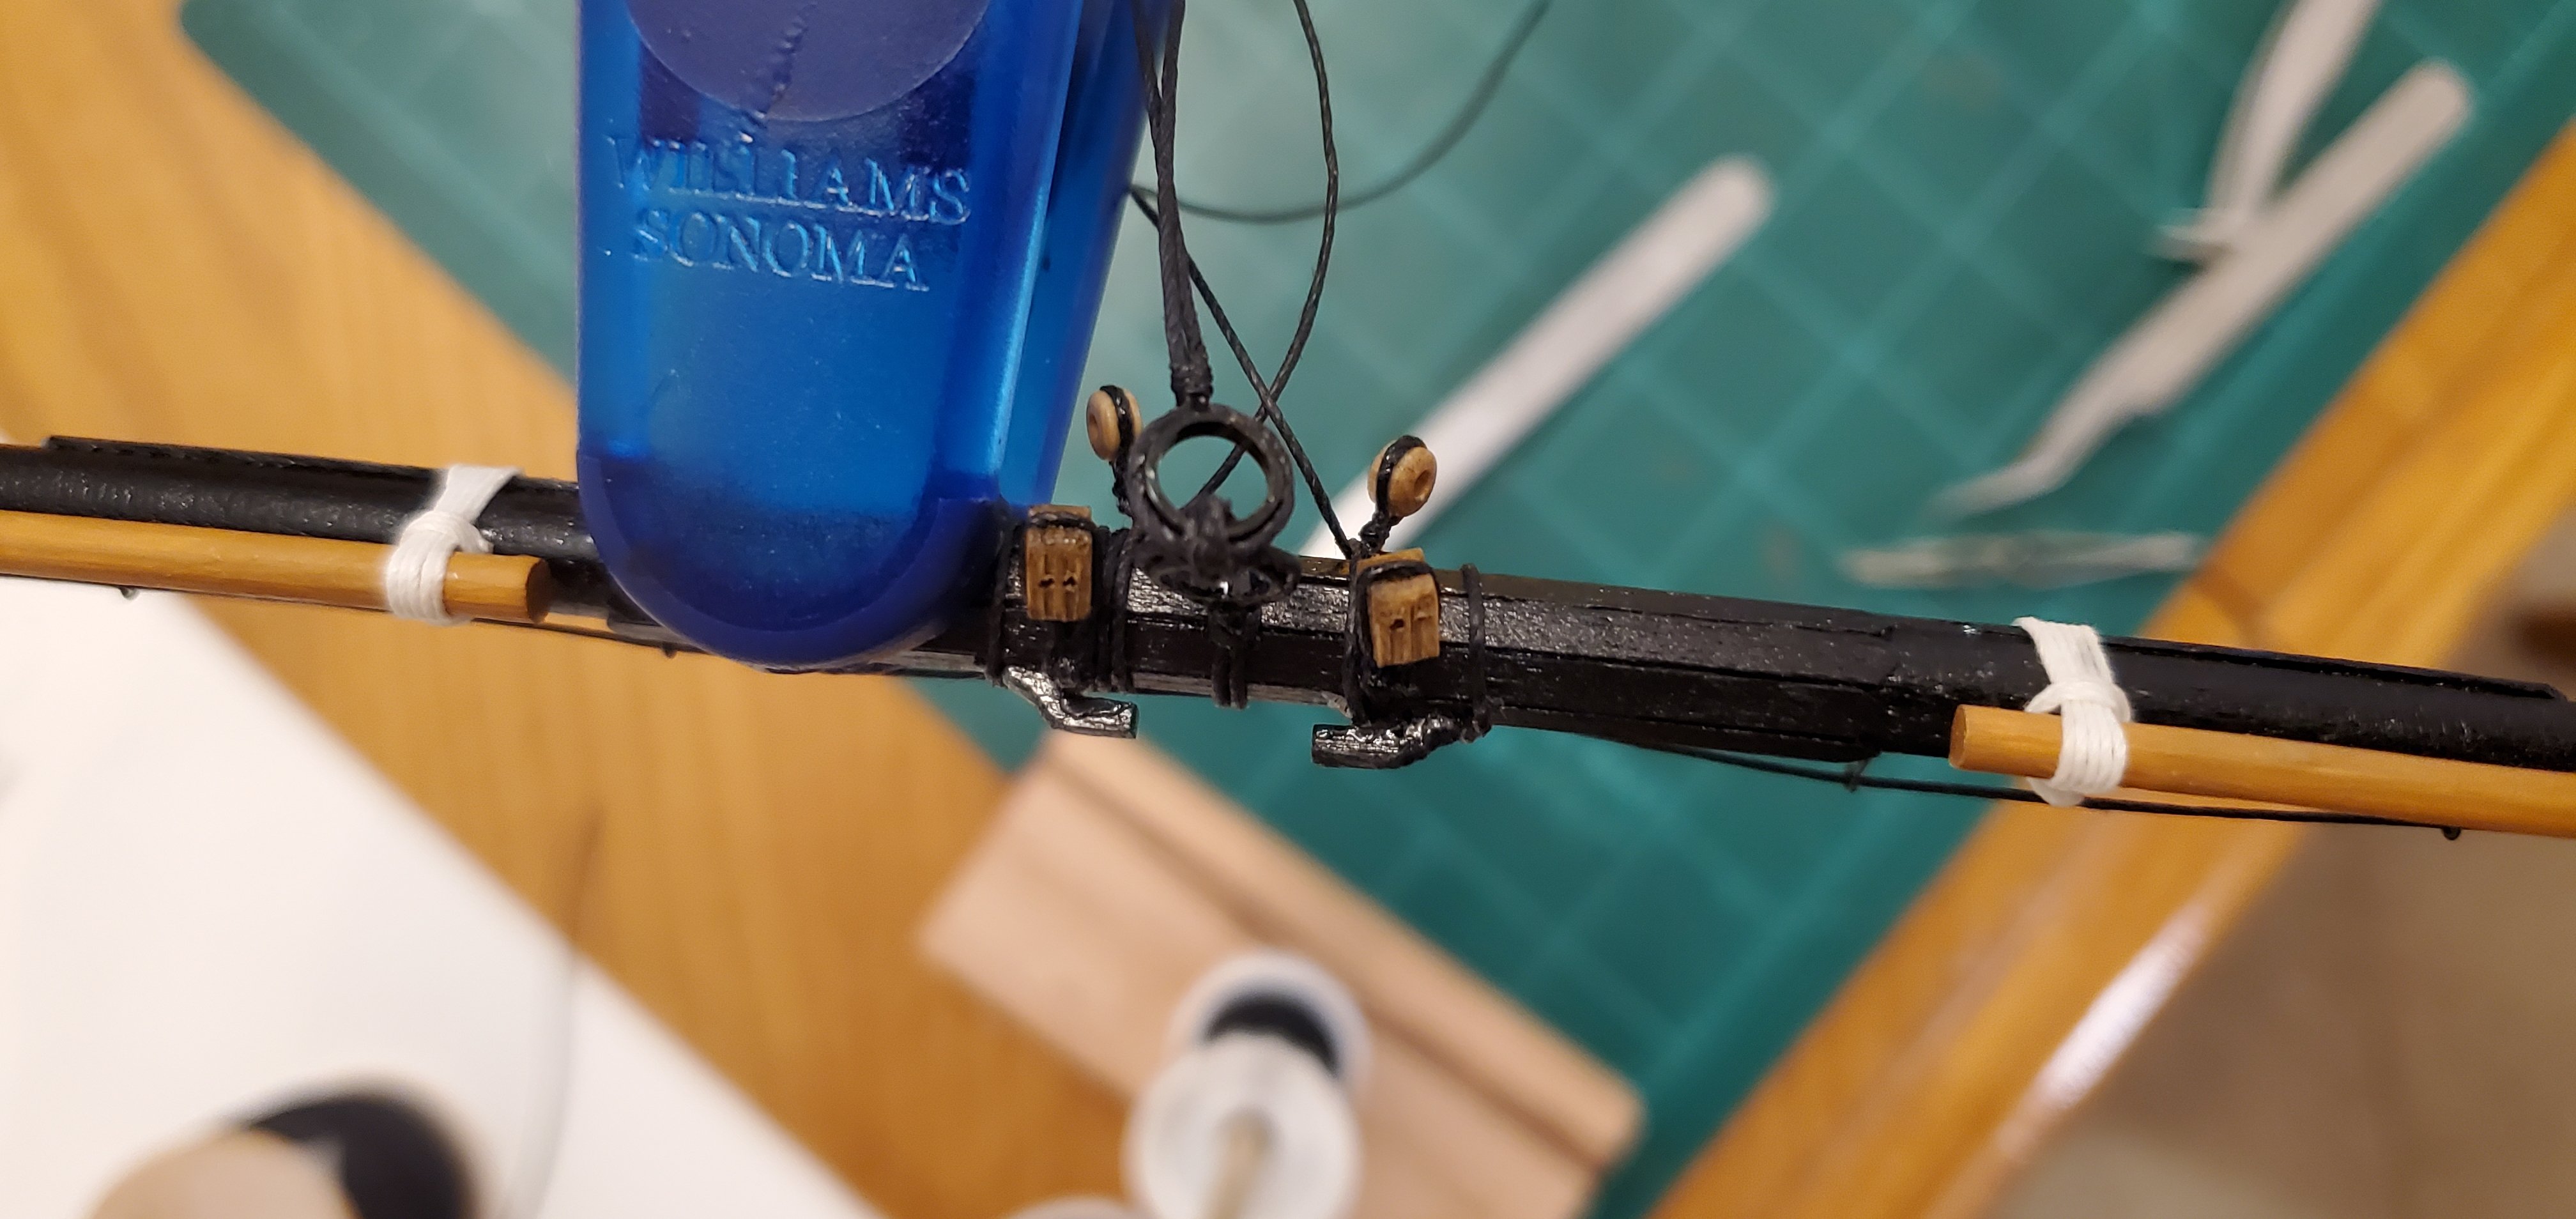
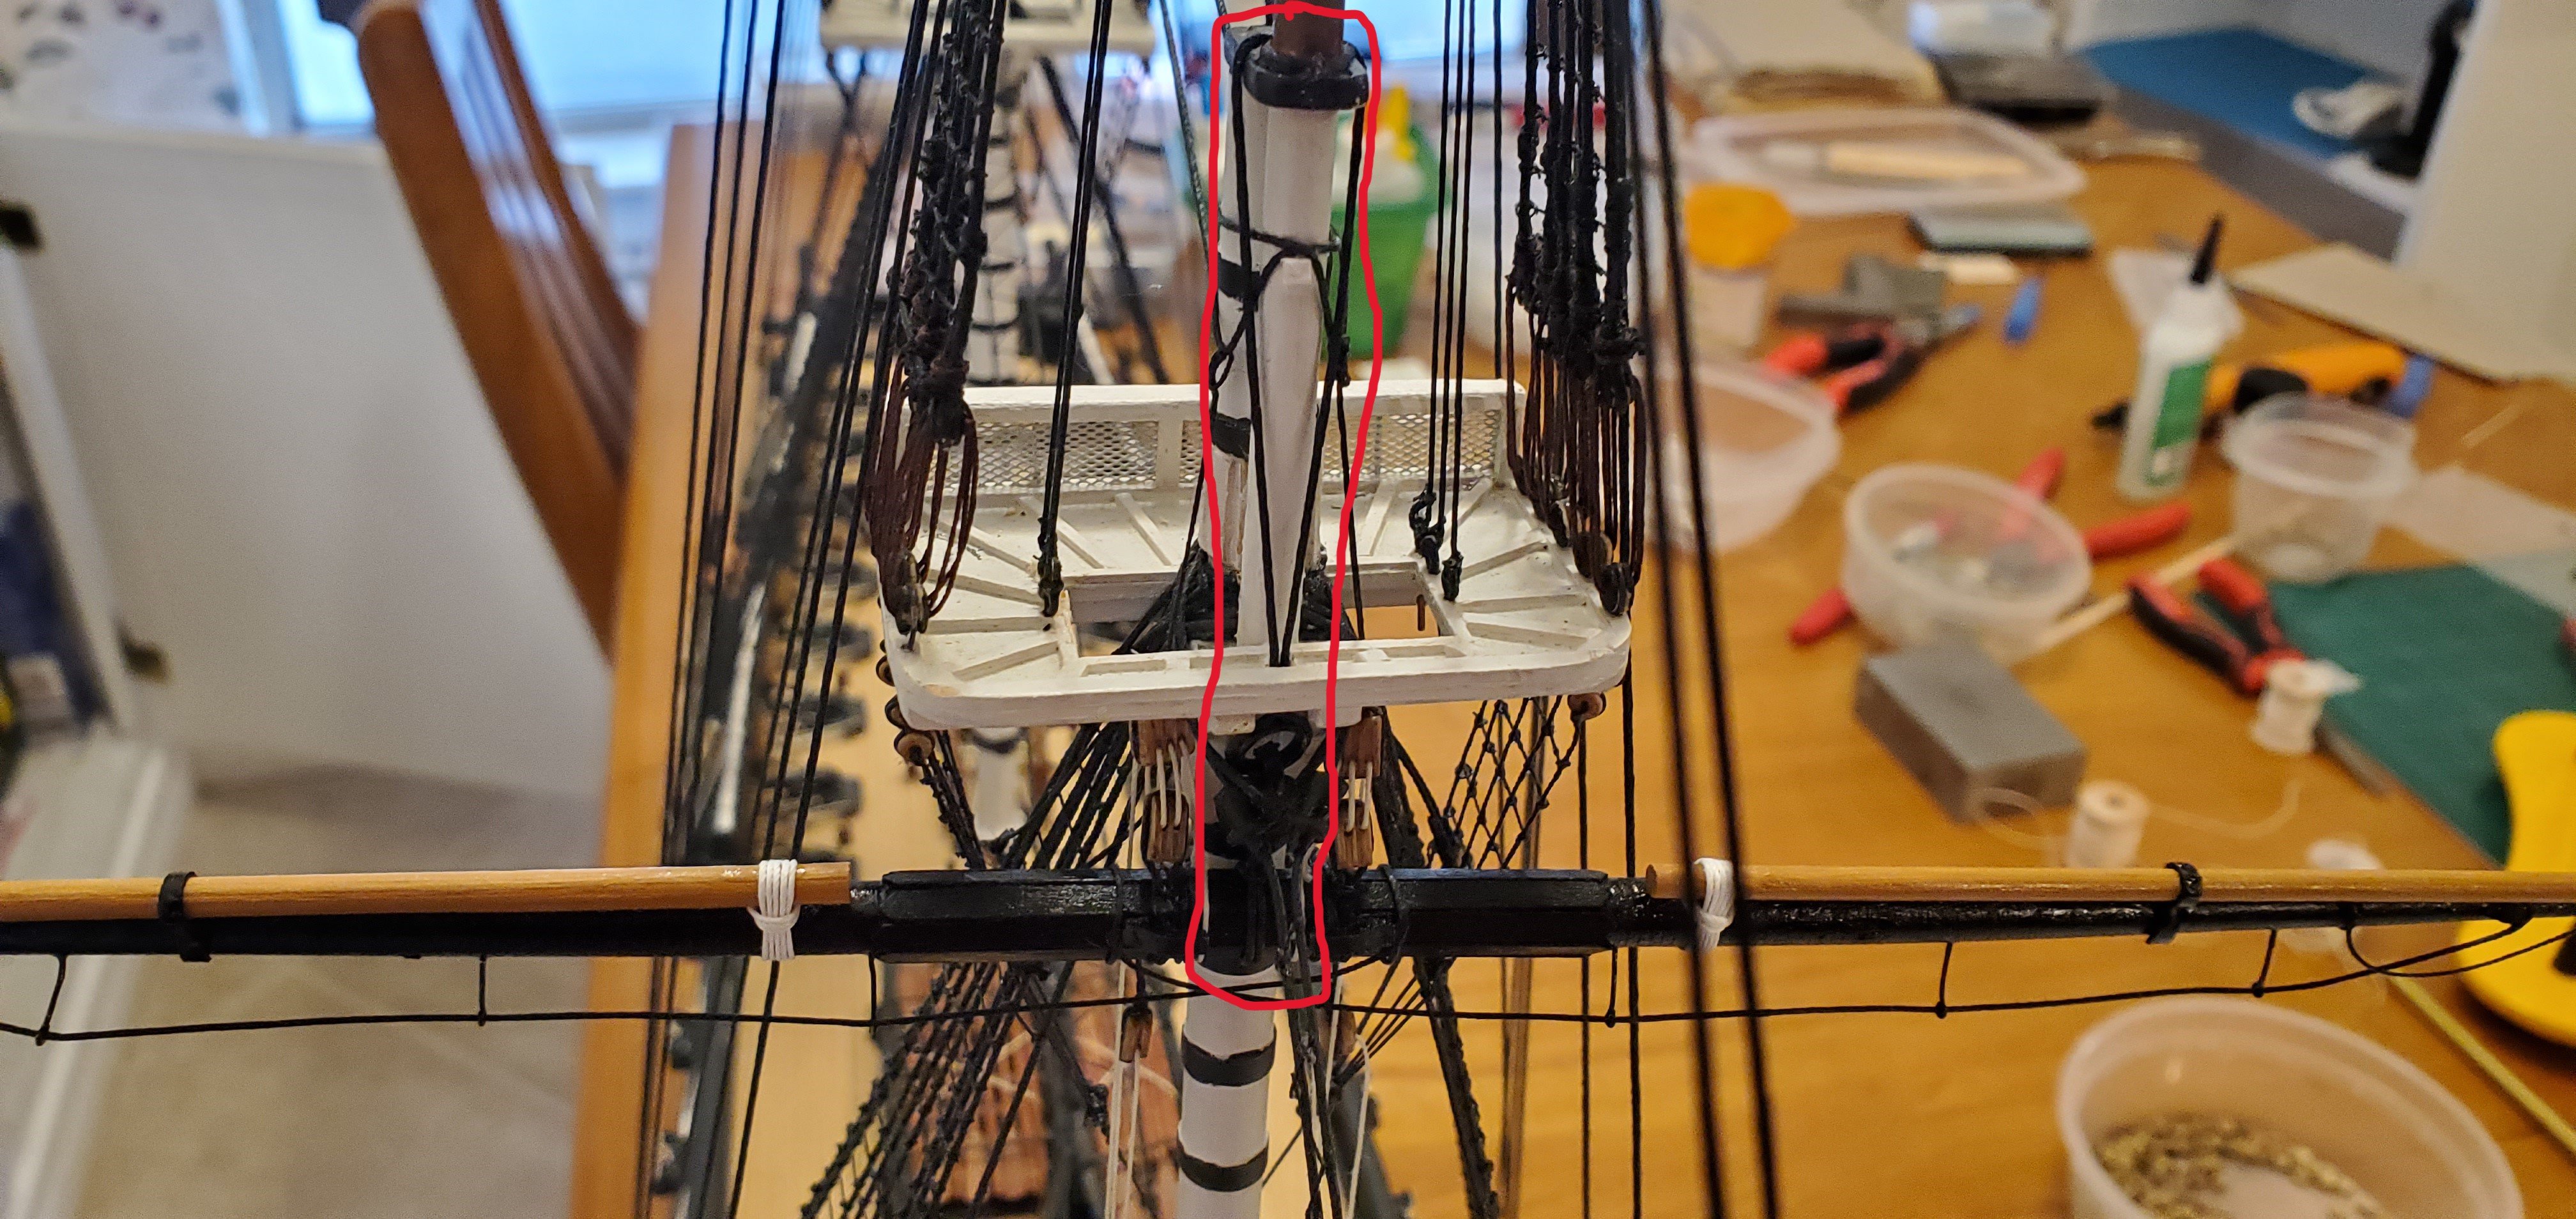
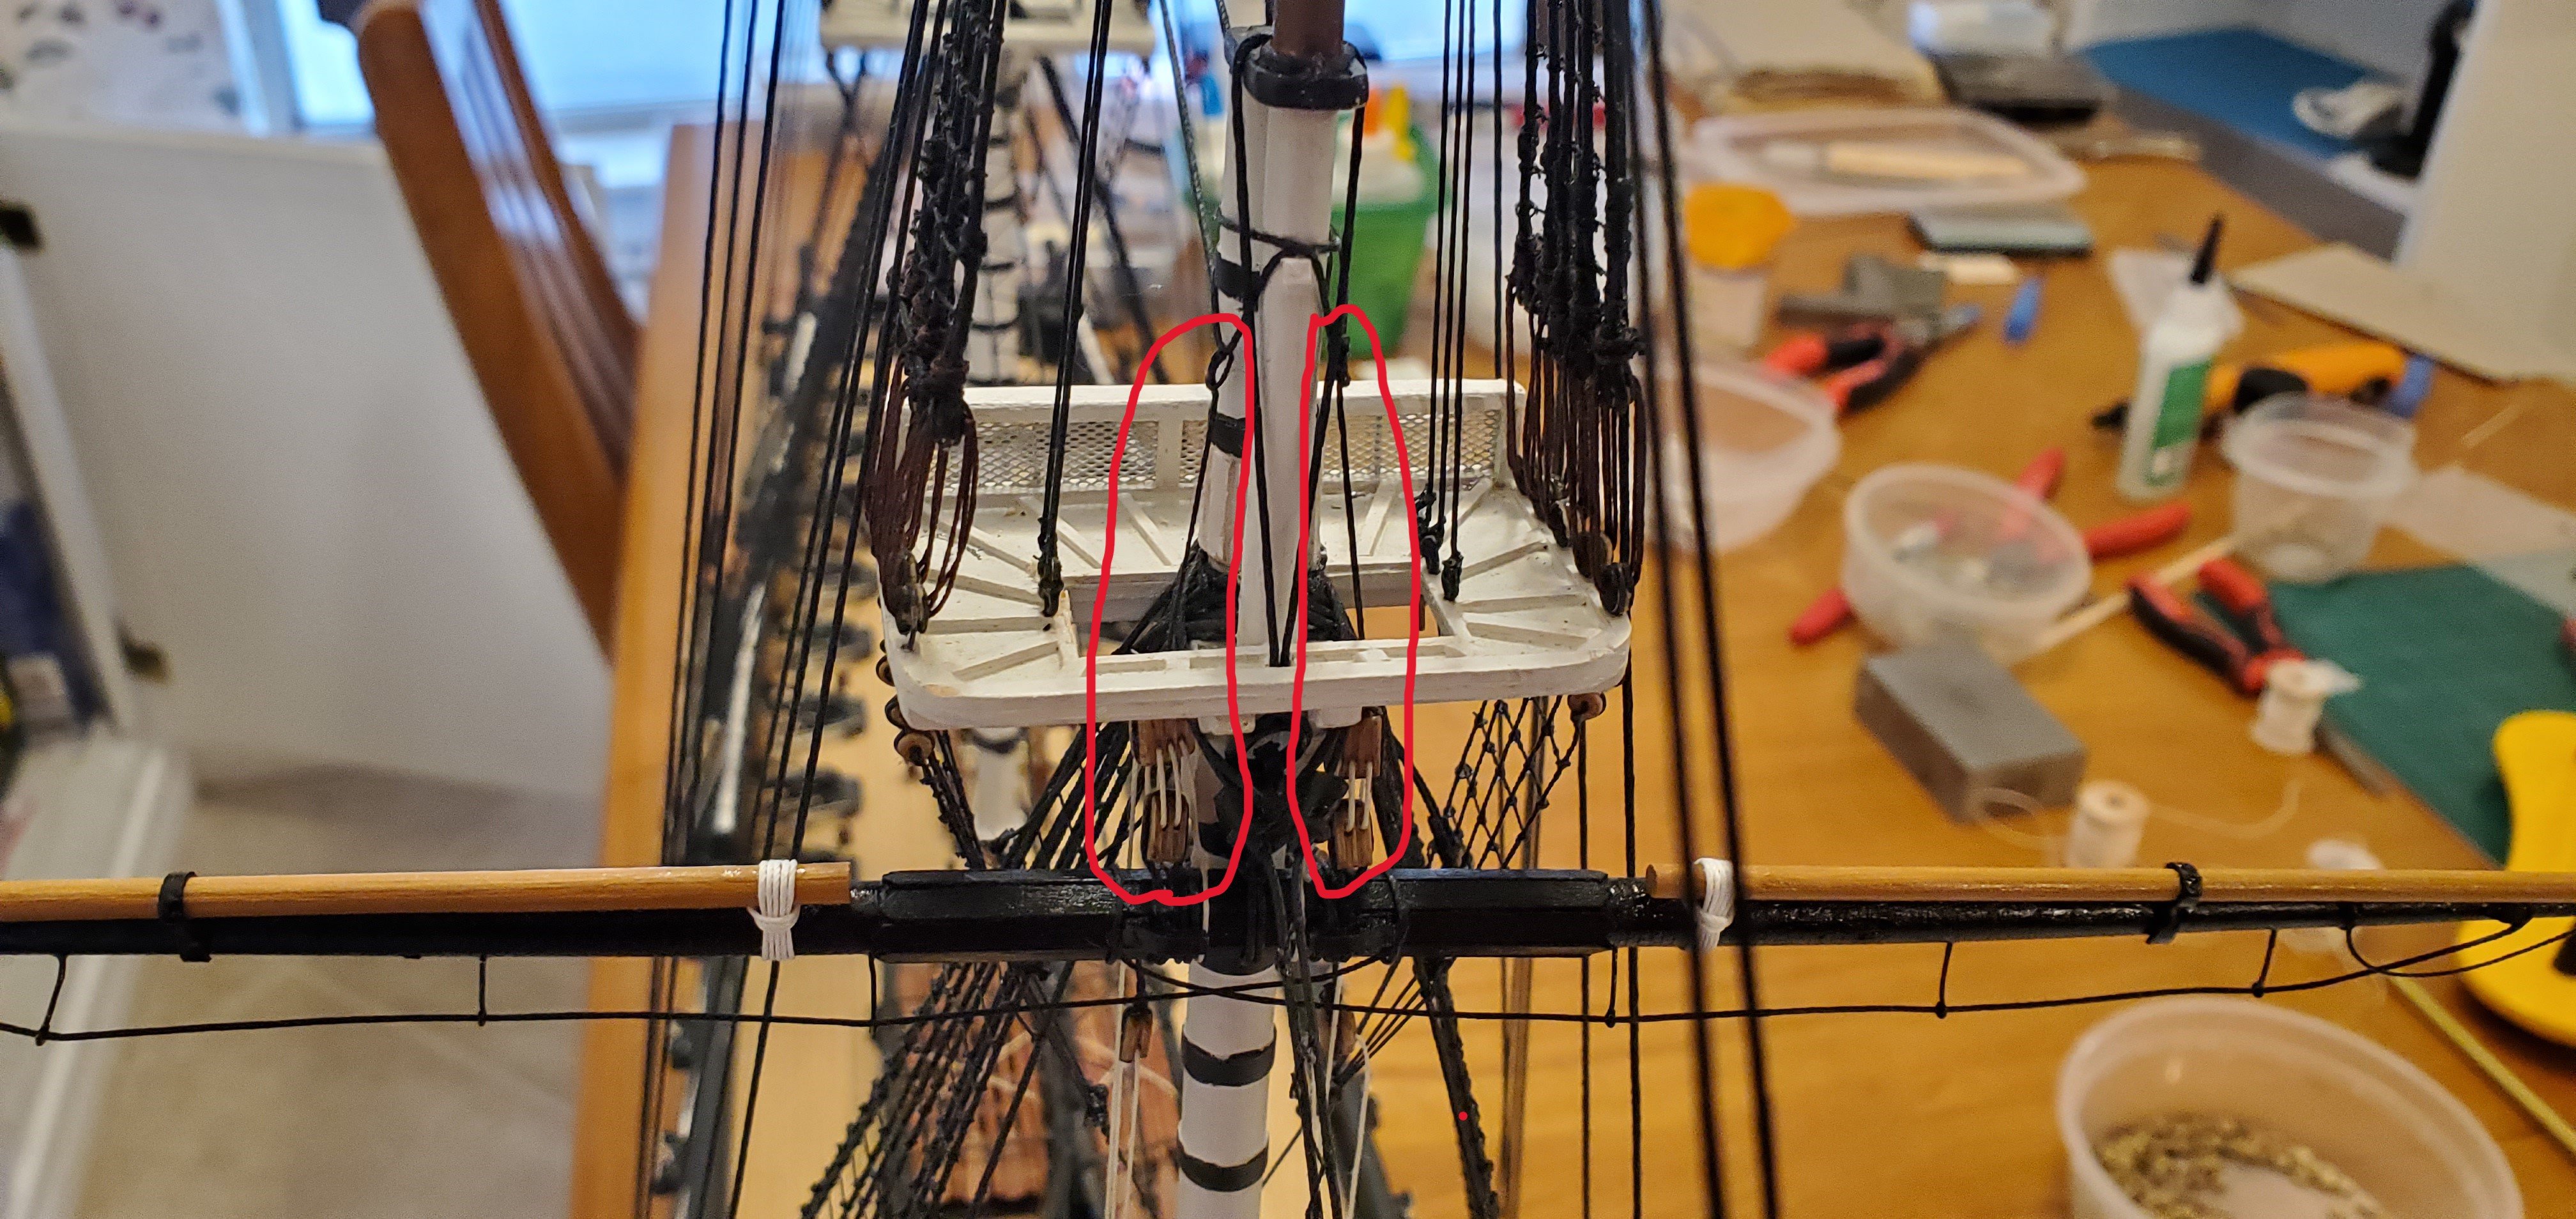
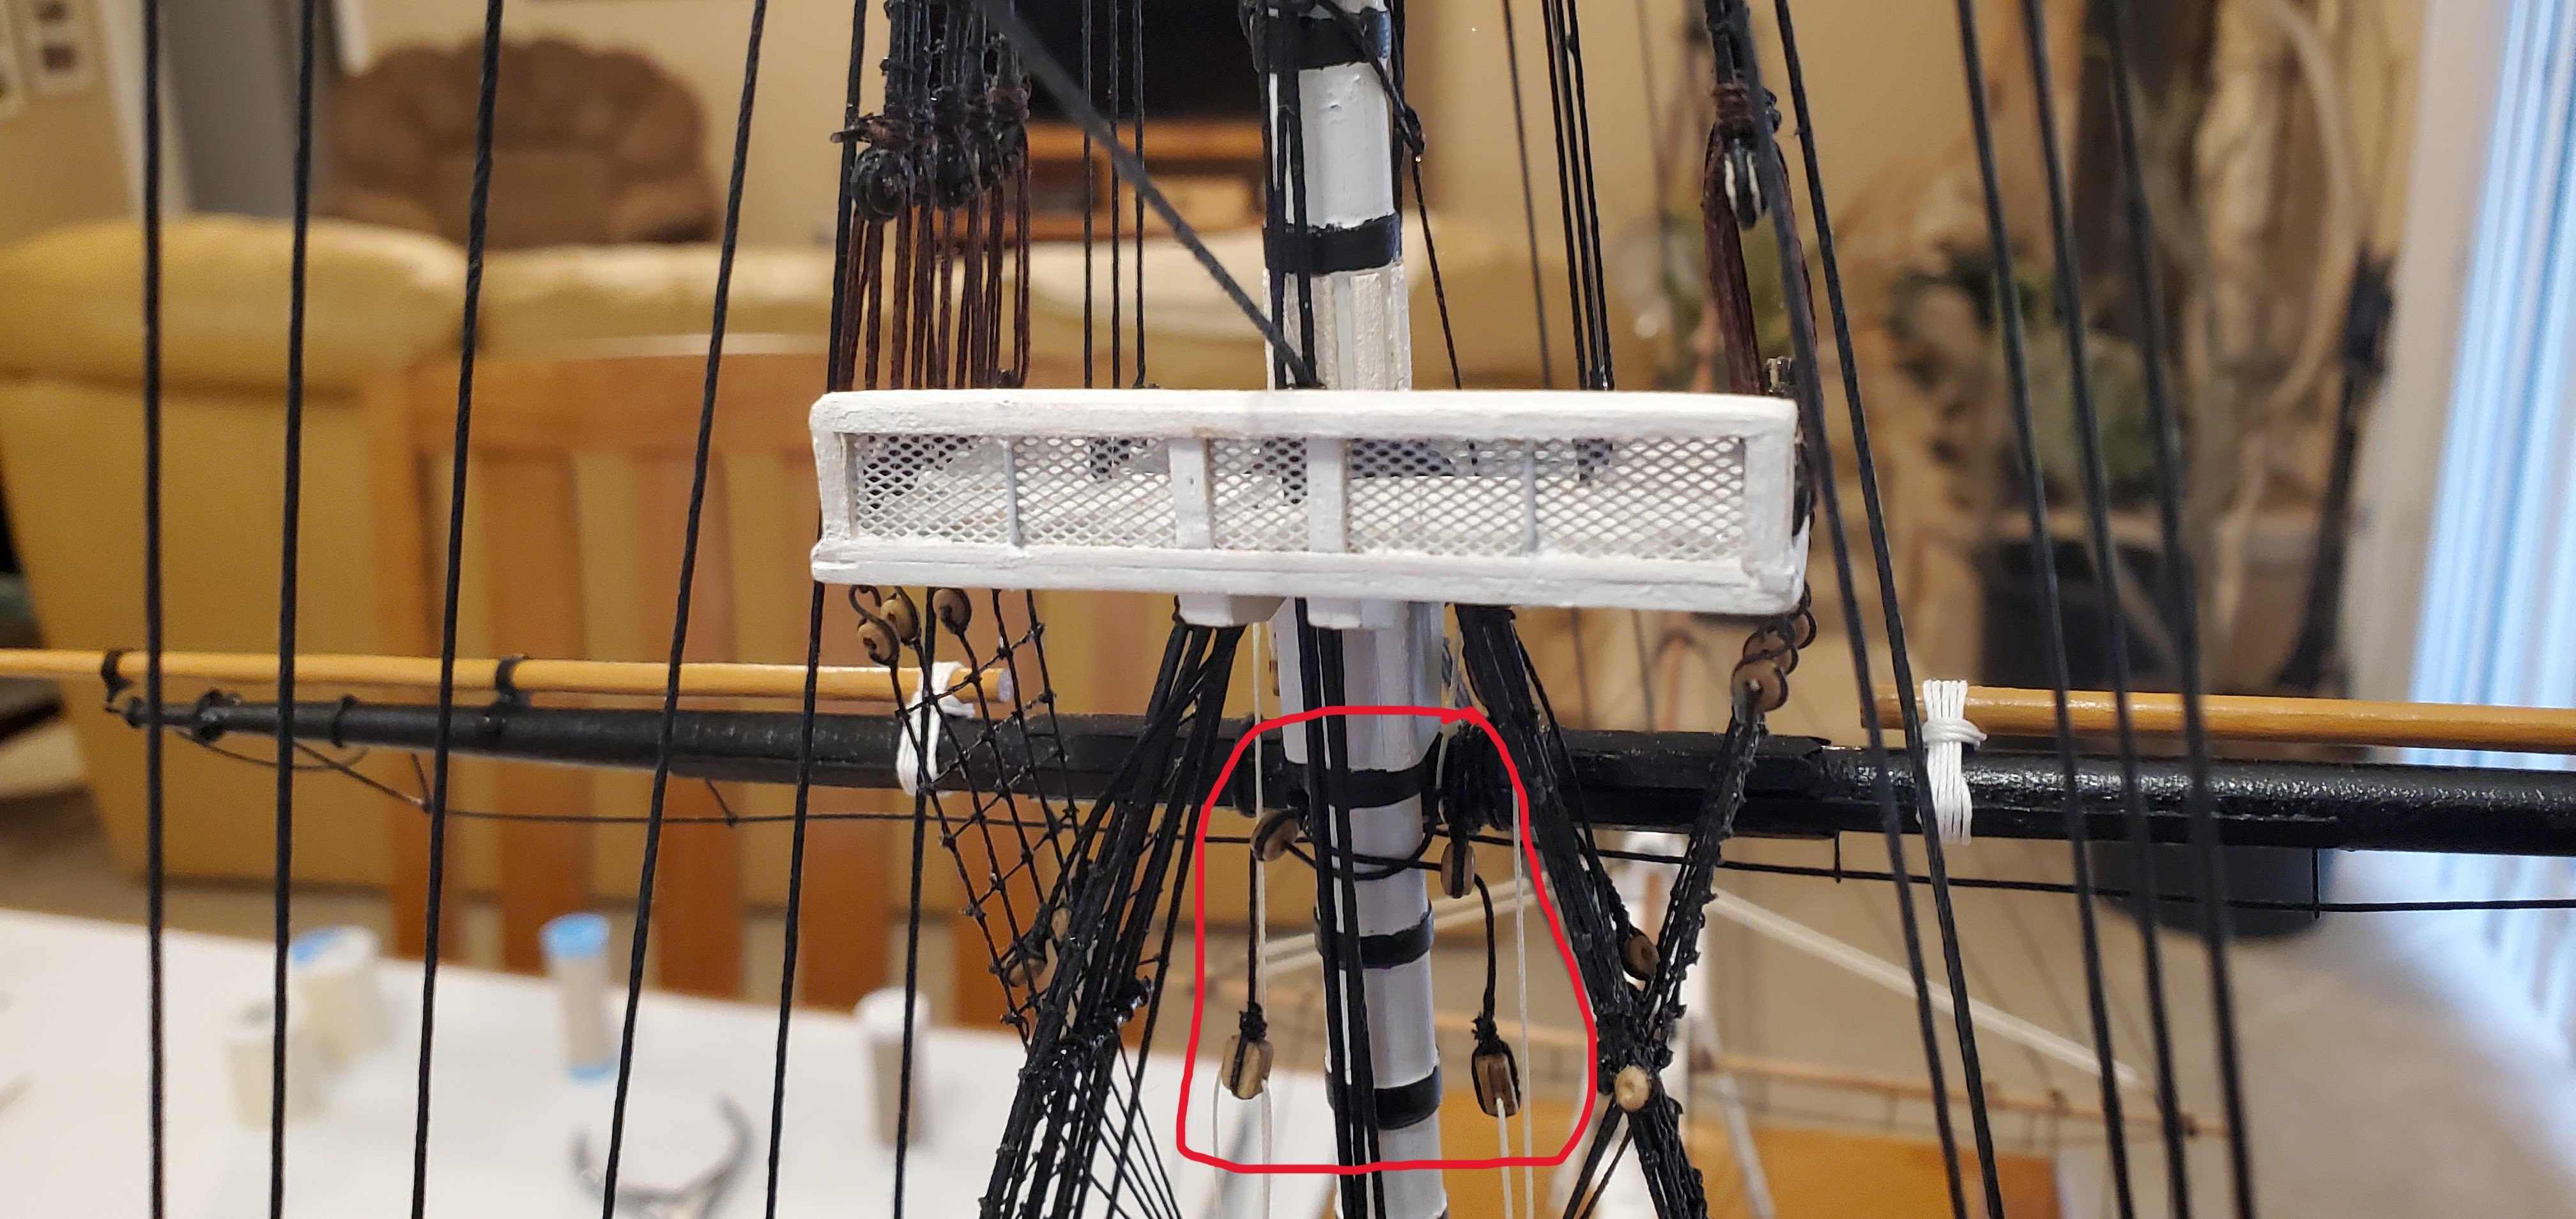
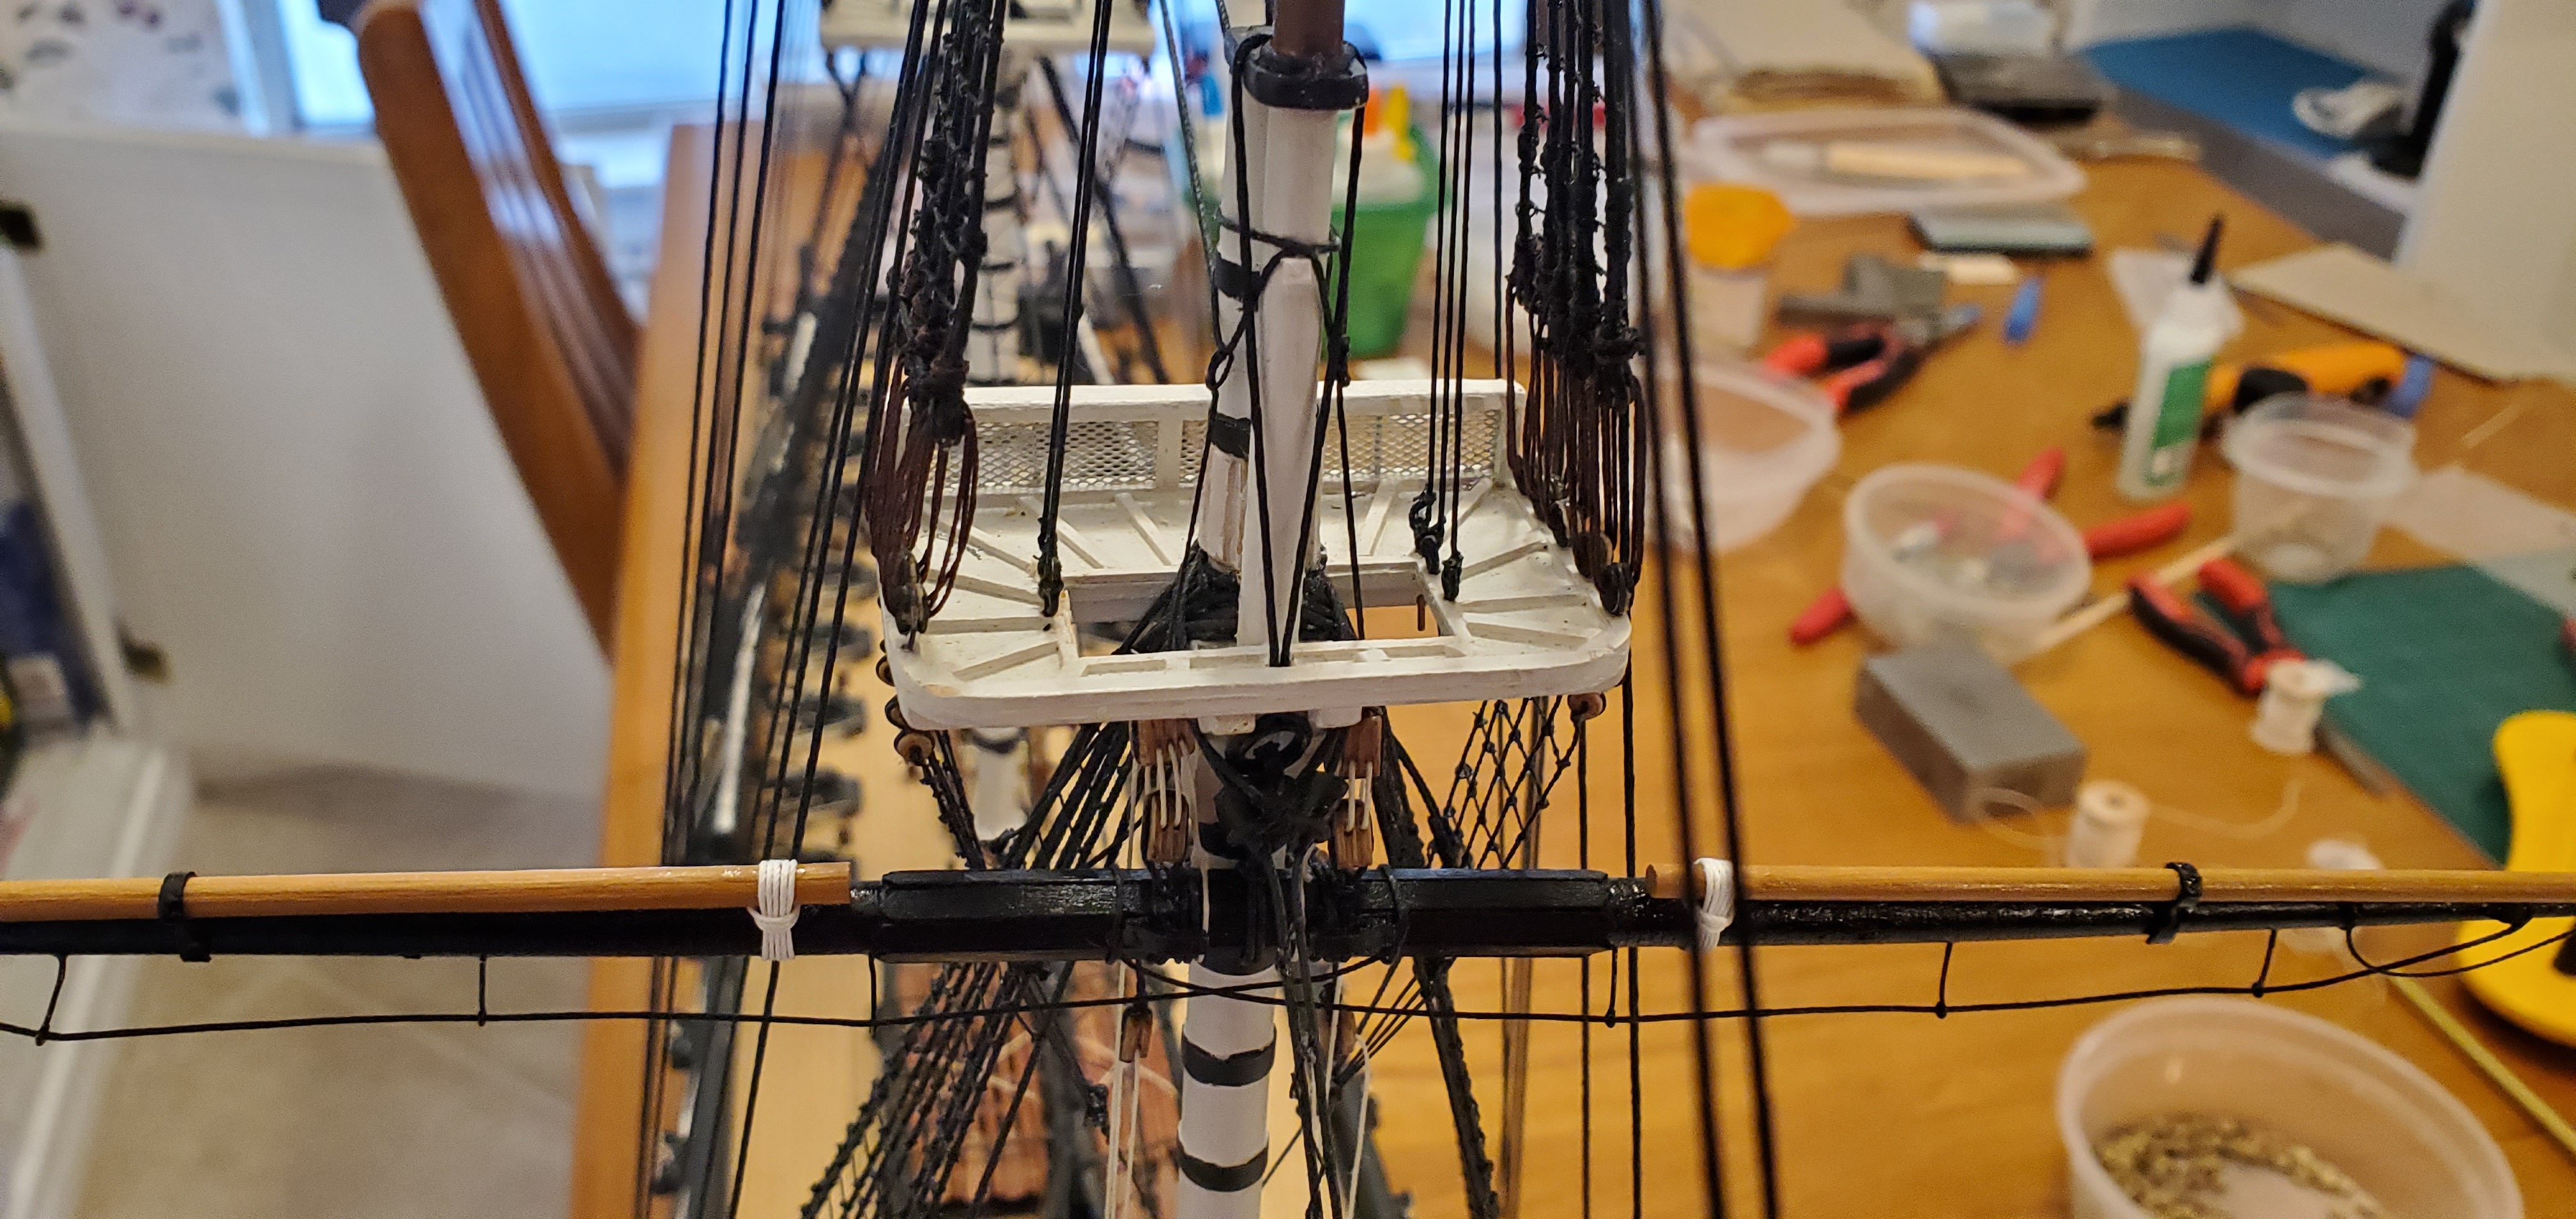
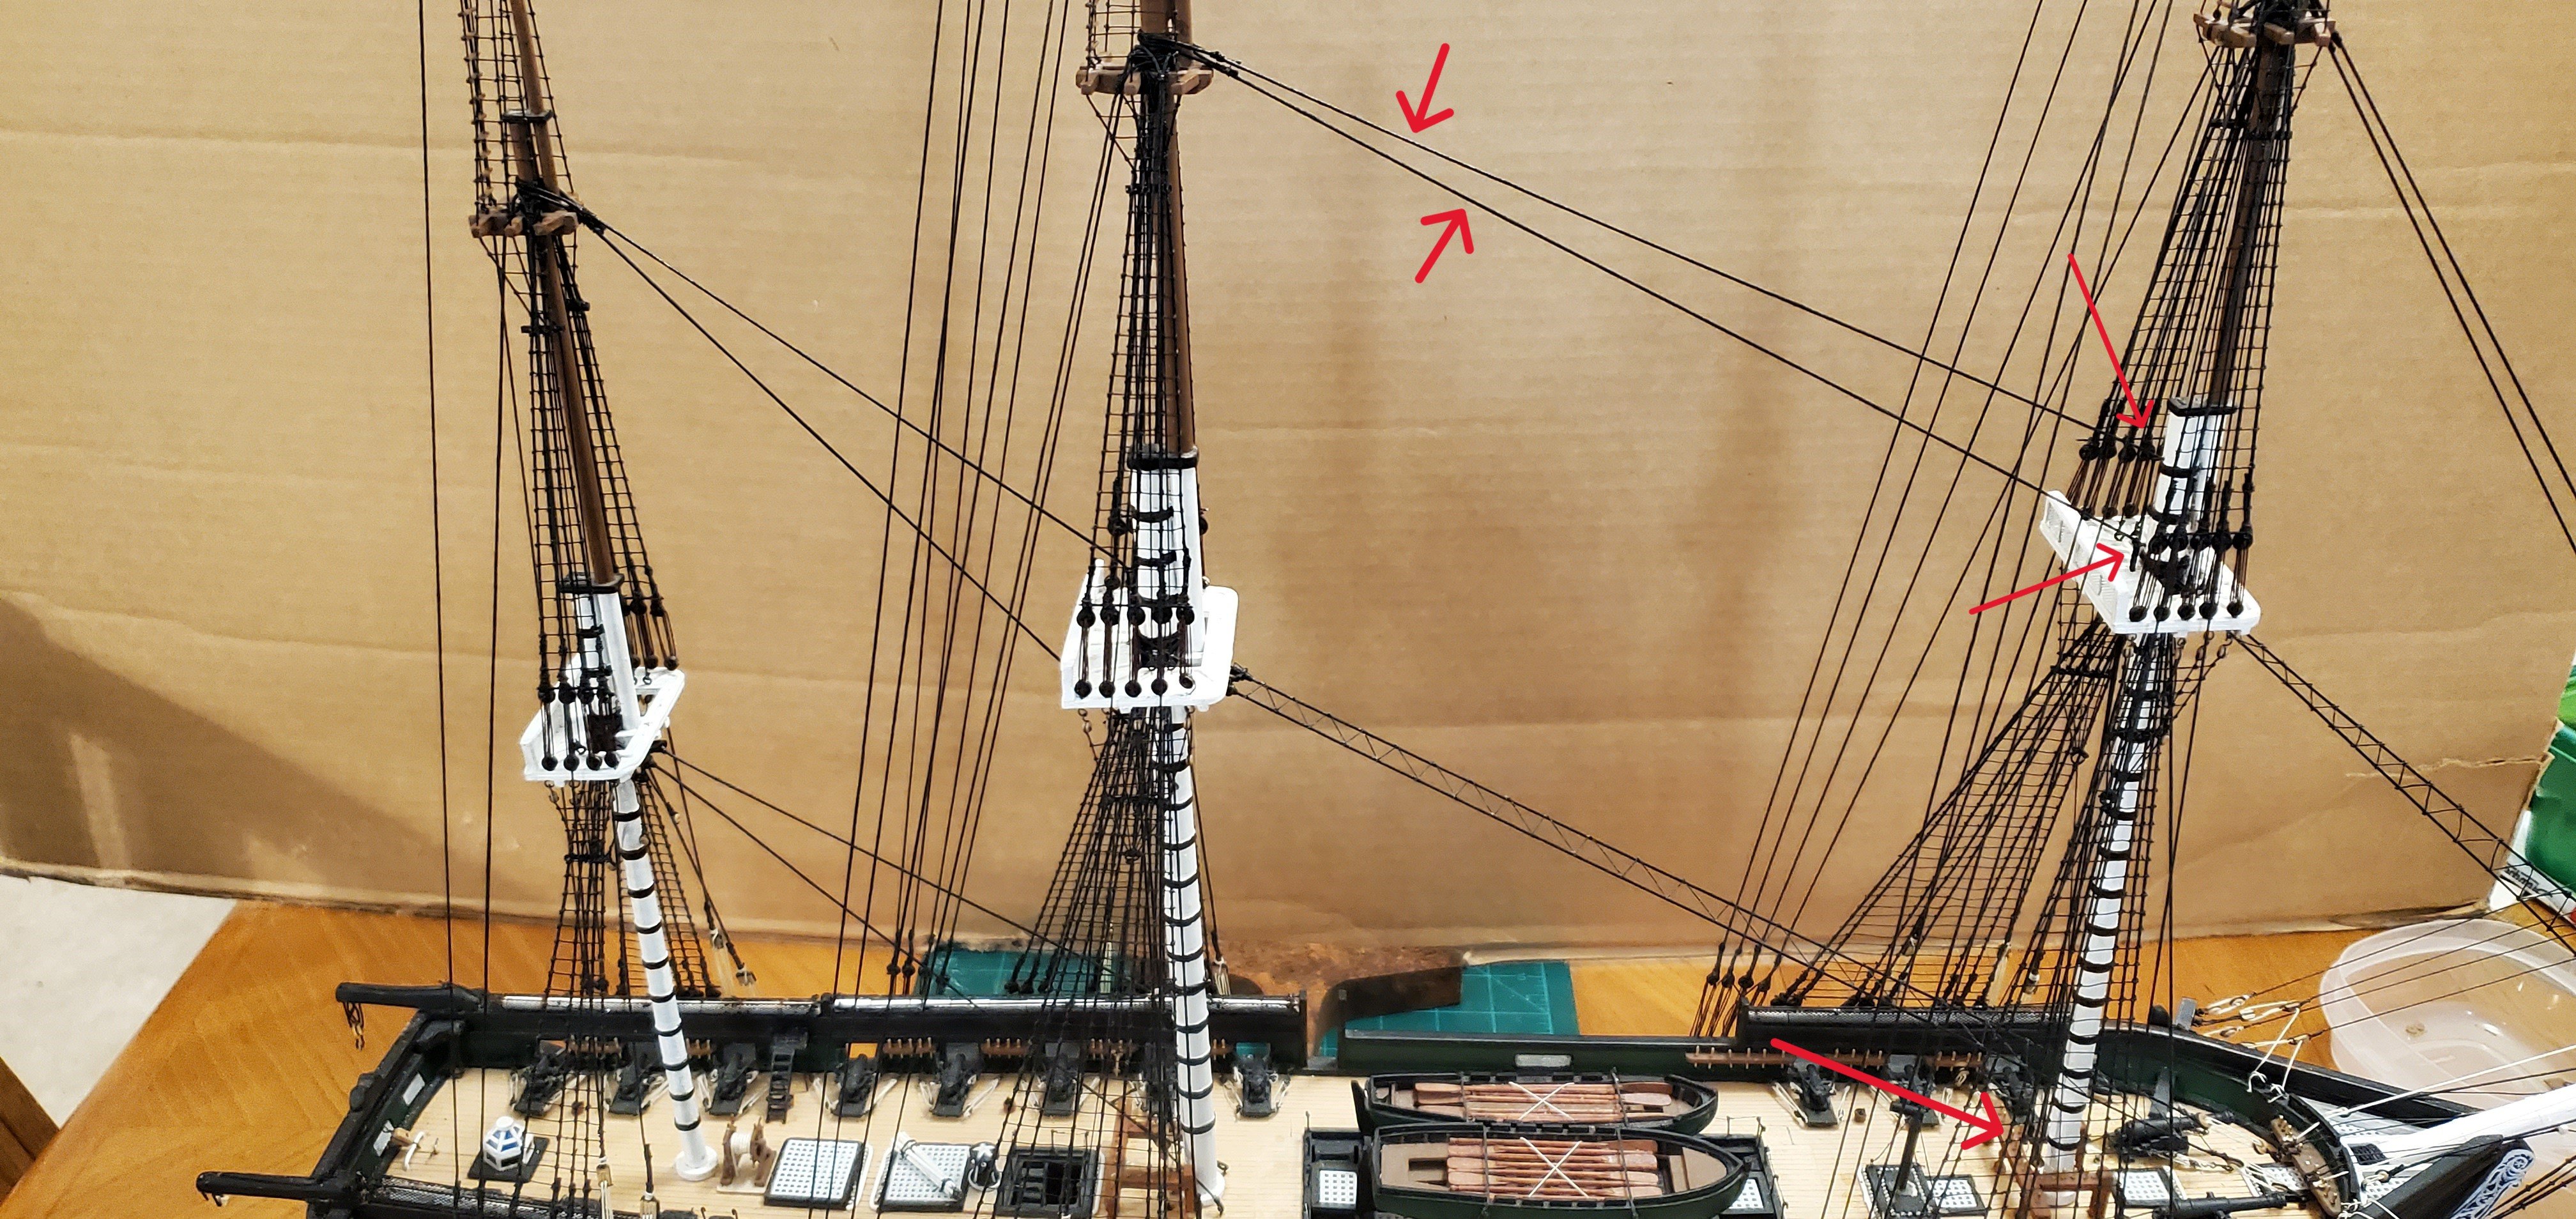
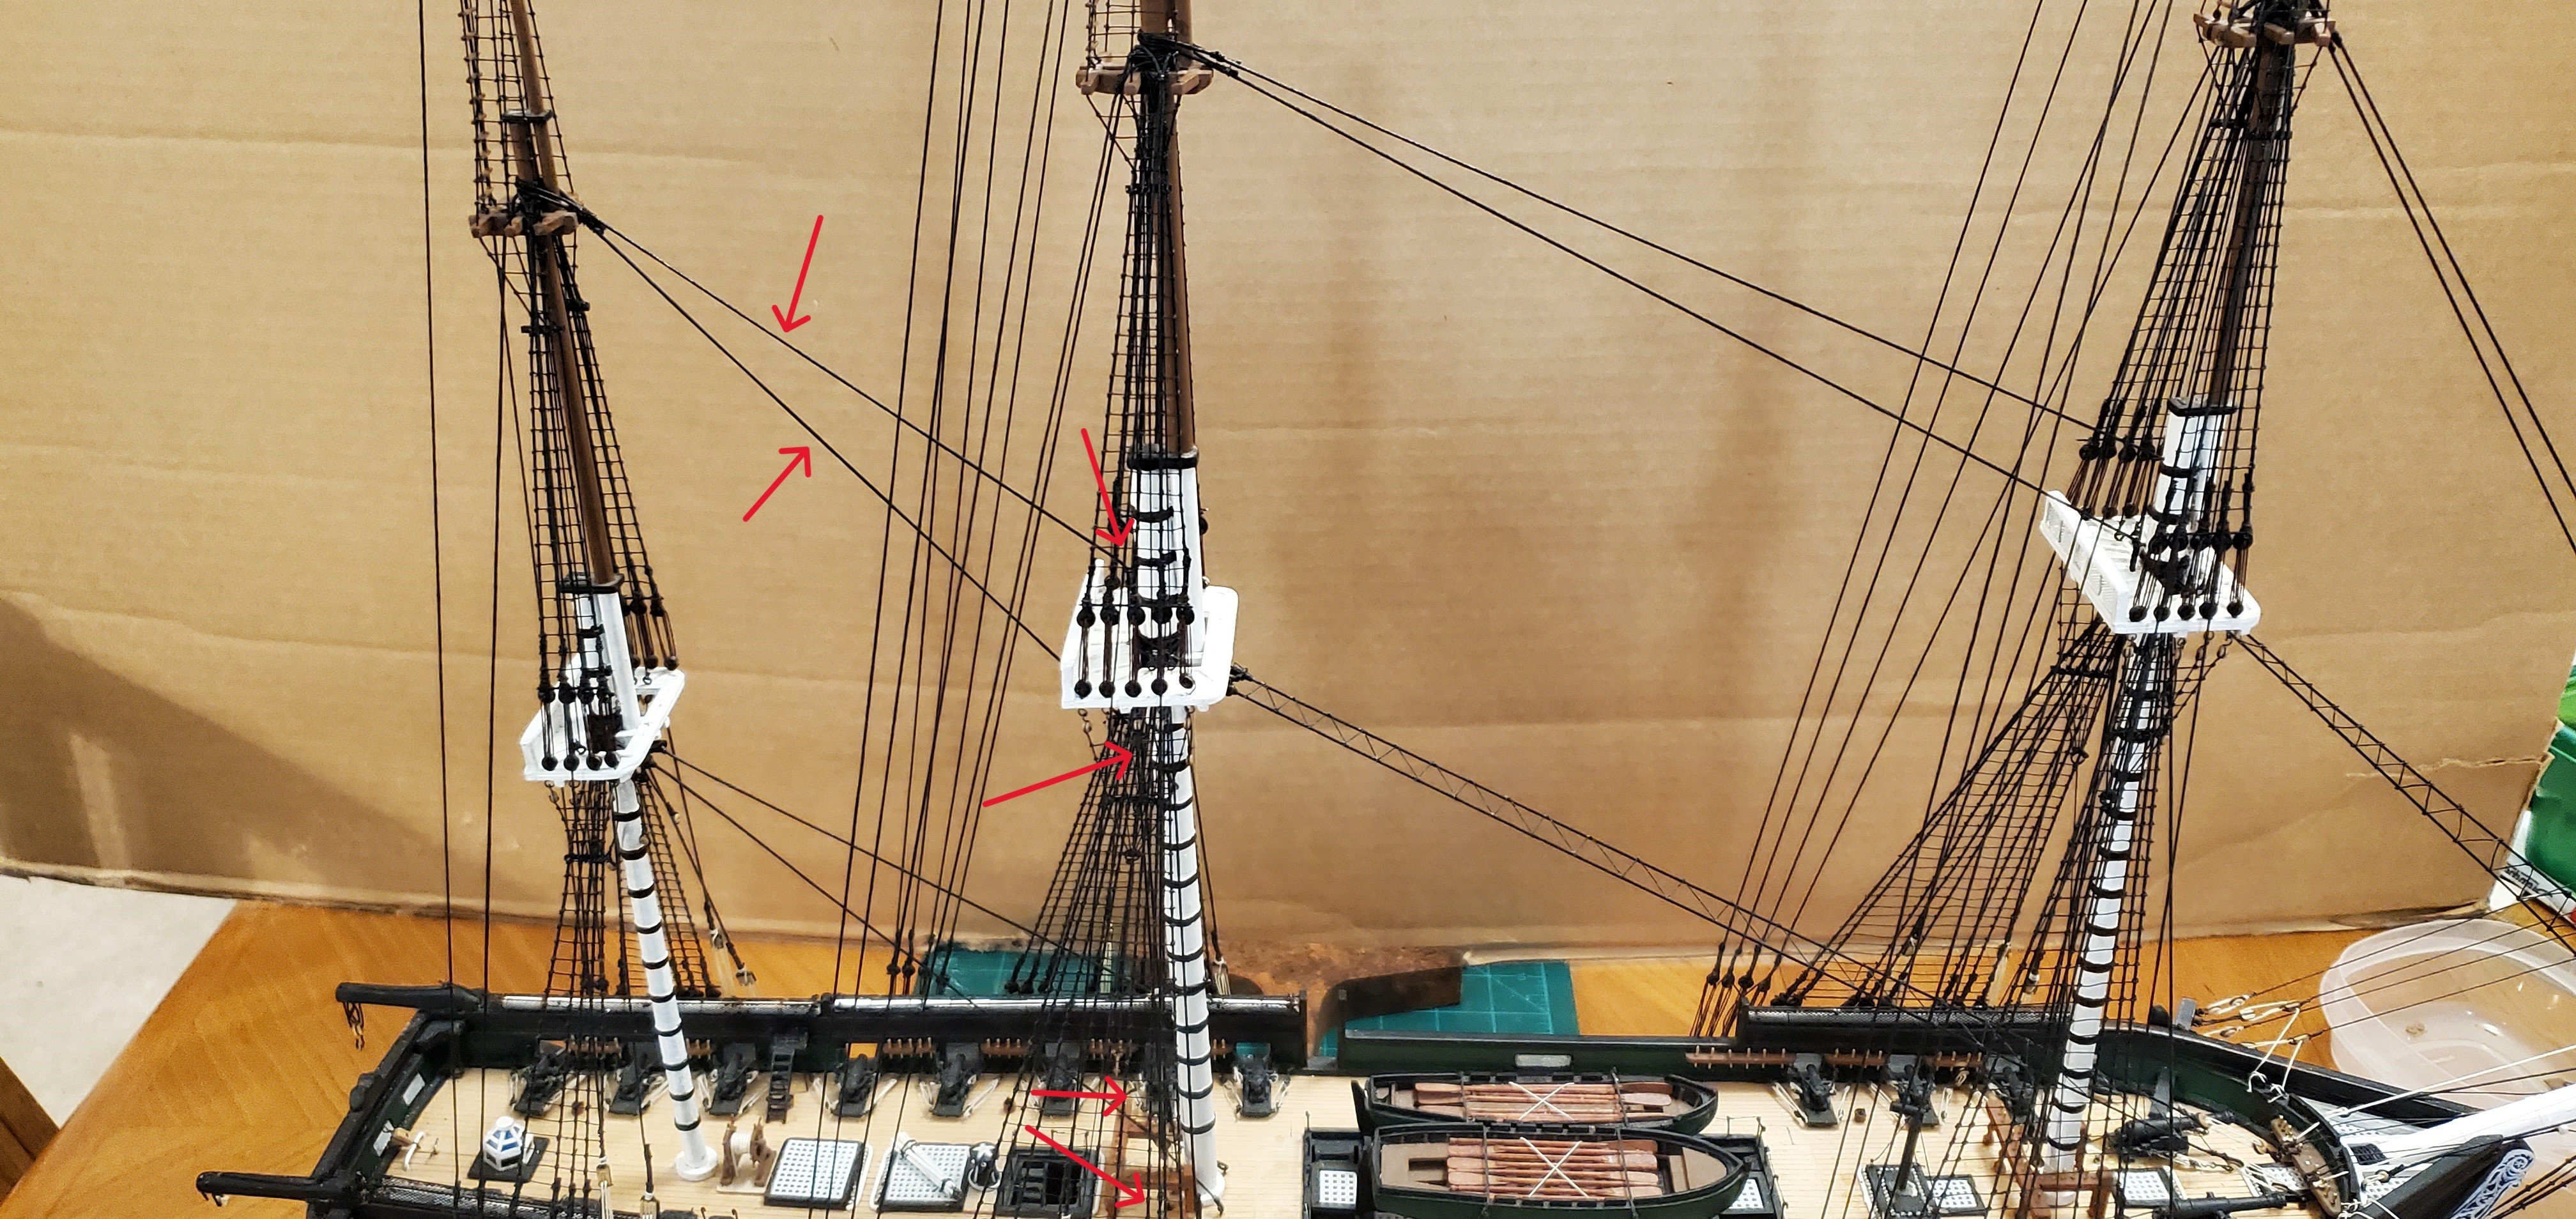
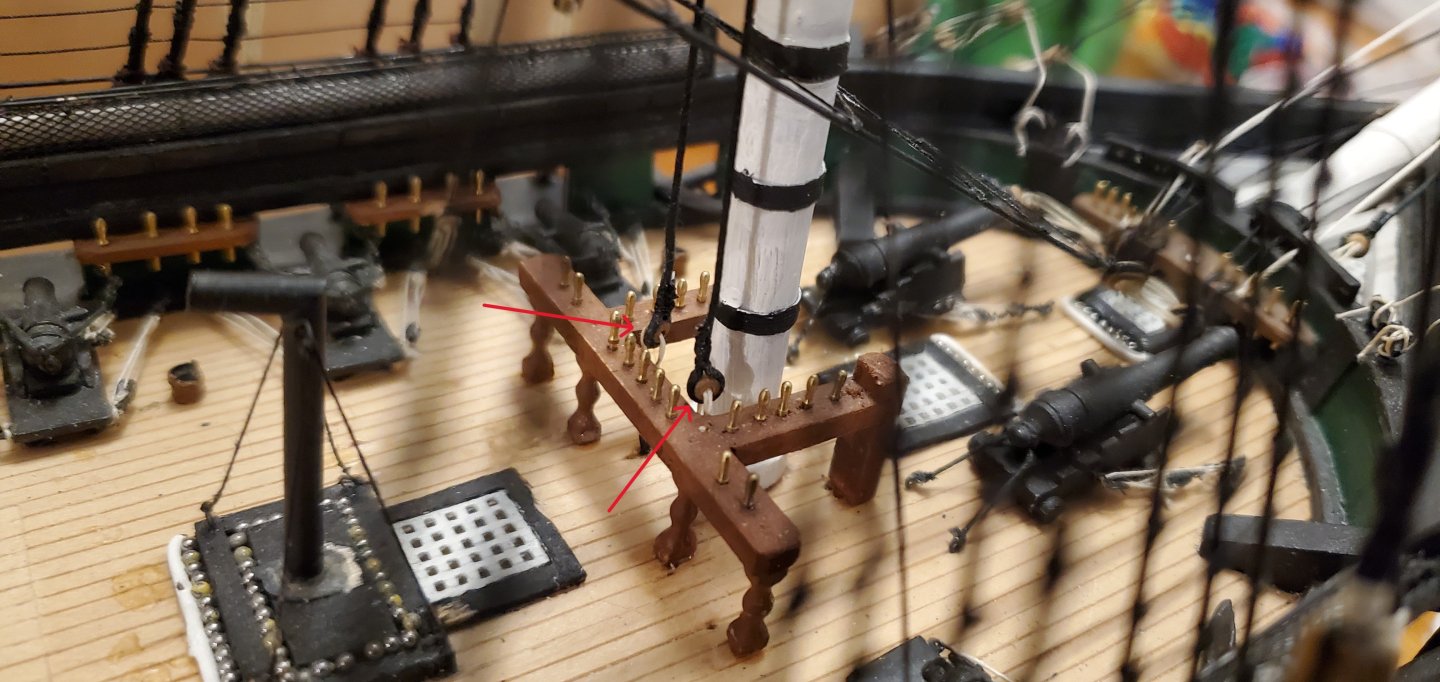
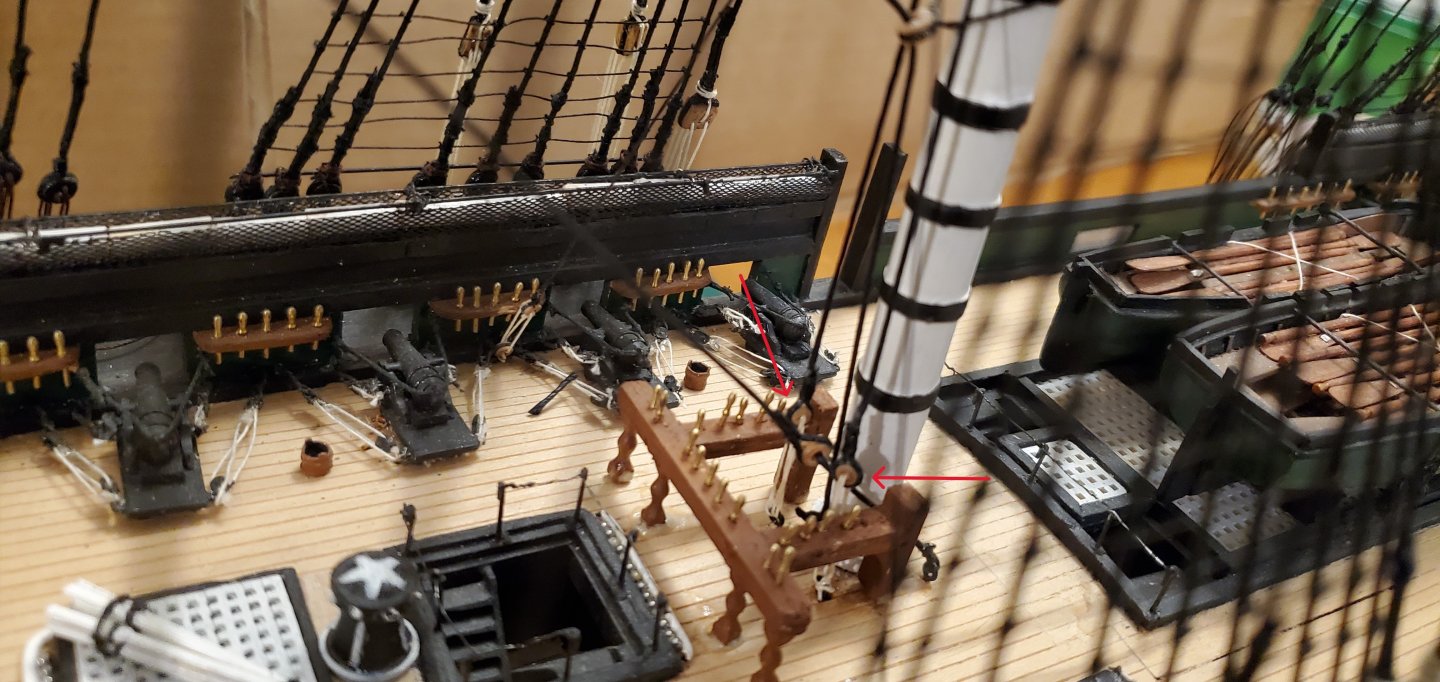
Time to hang the first lower yard, which will be on the fore mast. It's a somewhat complex trio of items that hold the yard in place (at least complex for me trying to figure it all out). There's a sling that is composed of connected rings. The bottom of the sling is wrapped around the middle of the yard. The top of the sling wraps around the top of the mast top. The way I understand it, the purpose of the sling is to be the primary weight bearer of the yard. Although I'm not sure how it gets disconnected when the yard is lowered. The second item of the trio is the jeer blocks which are used to raise and lower the yard. There are 4 jeer blocks in total. The lower ones (seen below on either side of the sling) are double blocks that are attached to the yard inside the parrel cleats. The upper blocks will be added later and are attached to a sling wrapped around the mast top. The third item in the trio are the truss pendants which hold the yard against the mast. One end of the pendant is seized to a bullseye. The line is wrapped around the yard, runs behind the mast, thru the bullseye on the other side and then is seized to a block where another line takes it to the deck. And here is the yard in place. Below I've highlighted the sling which holds up the yard. Here's the full set of jeer blocks in place. The upper jeer blocks are triples. Here are the truss pendants in place. And here's what the whole thing looks like without all the red circles. This process will be repeated for the main and mizzen lower yards.


- 301 replies
-
- 11
-
-
-
- Constitution
- Bluejacket Shipcrafters
- (and 1 more)
-
Stunning work, Gary. As usual!
-
Welcome aboard from a fellow Texan!
-
Very nice lines. Well done.
-
I think the trim is black, but a weathered or faded black. Really nice job on the LULA lettering, Keith. I've got a feeling that was a whole lot more difficult to do than it looks.
- 732 replies
-
- 7
-
-

-
- Lula
- sternwheeler
- (and 1 more)
-
I call BS on that, Bryan! I've seen your work and it is high quality with great attention to detail. Don't underestimate yourself! Thanks, Mark. I could not solder a lick before I started ship modeling a few years ago. I continue to be amazed at how many different skills you have to learn to be able to do this hobby!!
- 301 replies
-
- 6
-
-
- Constitution
- Bluejacket Shipcrafters
- (and 1 more)
-
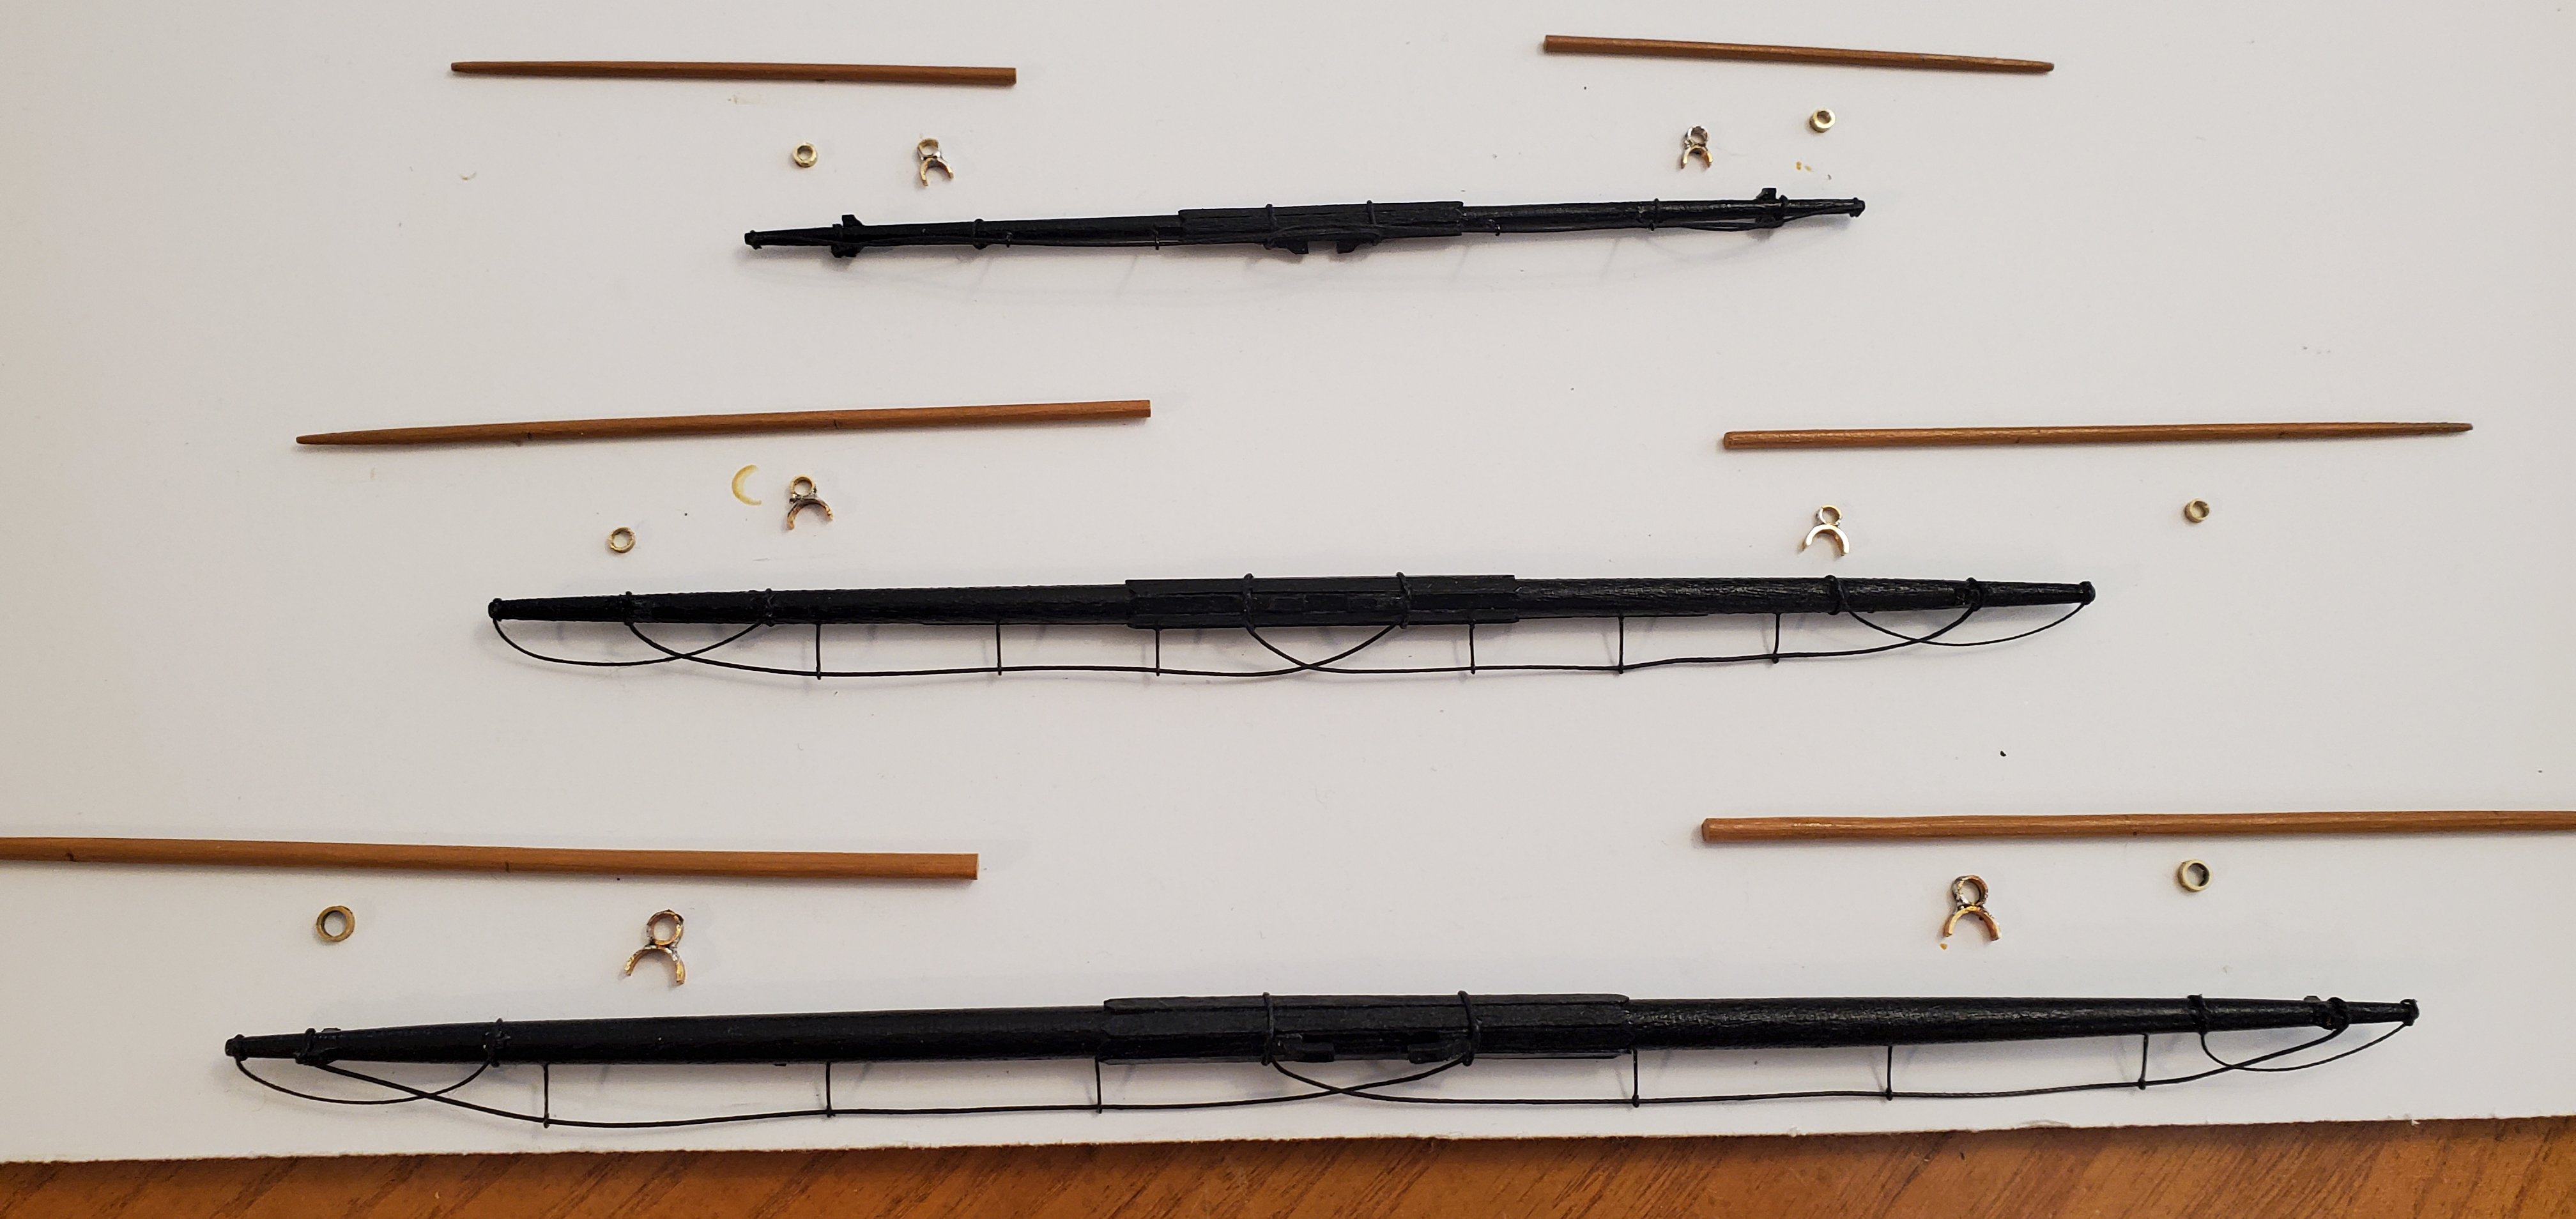
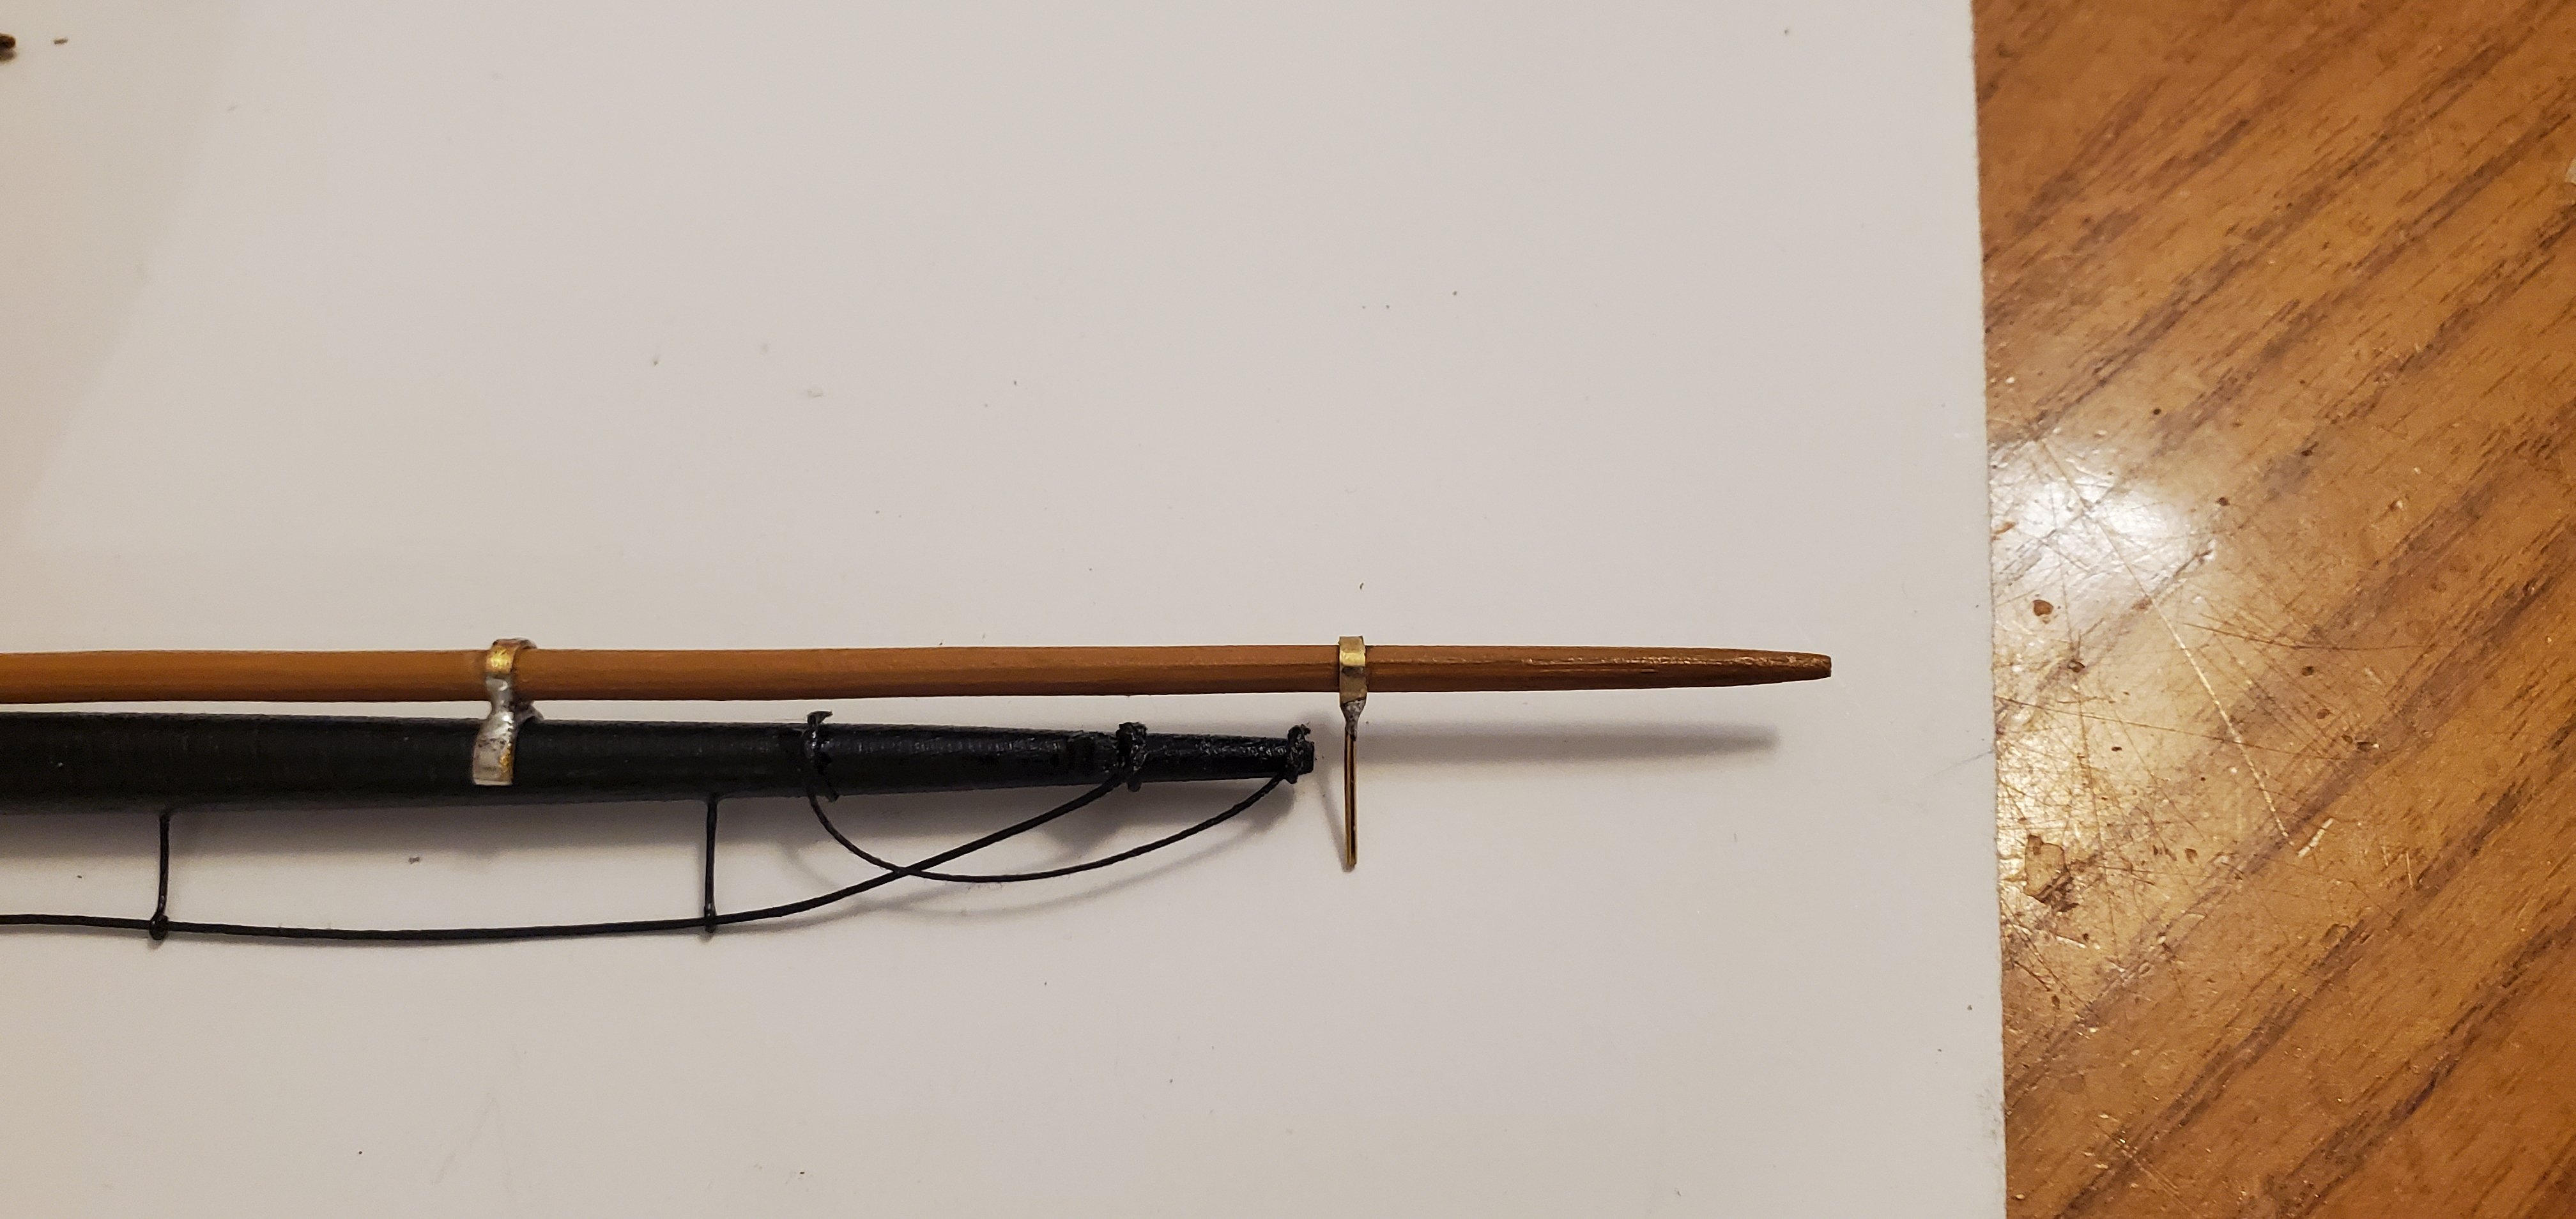
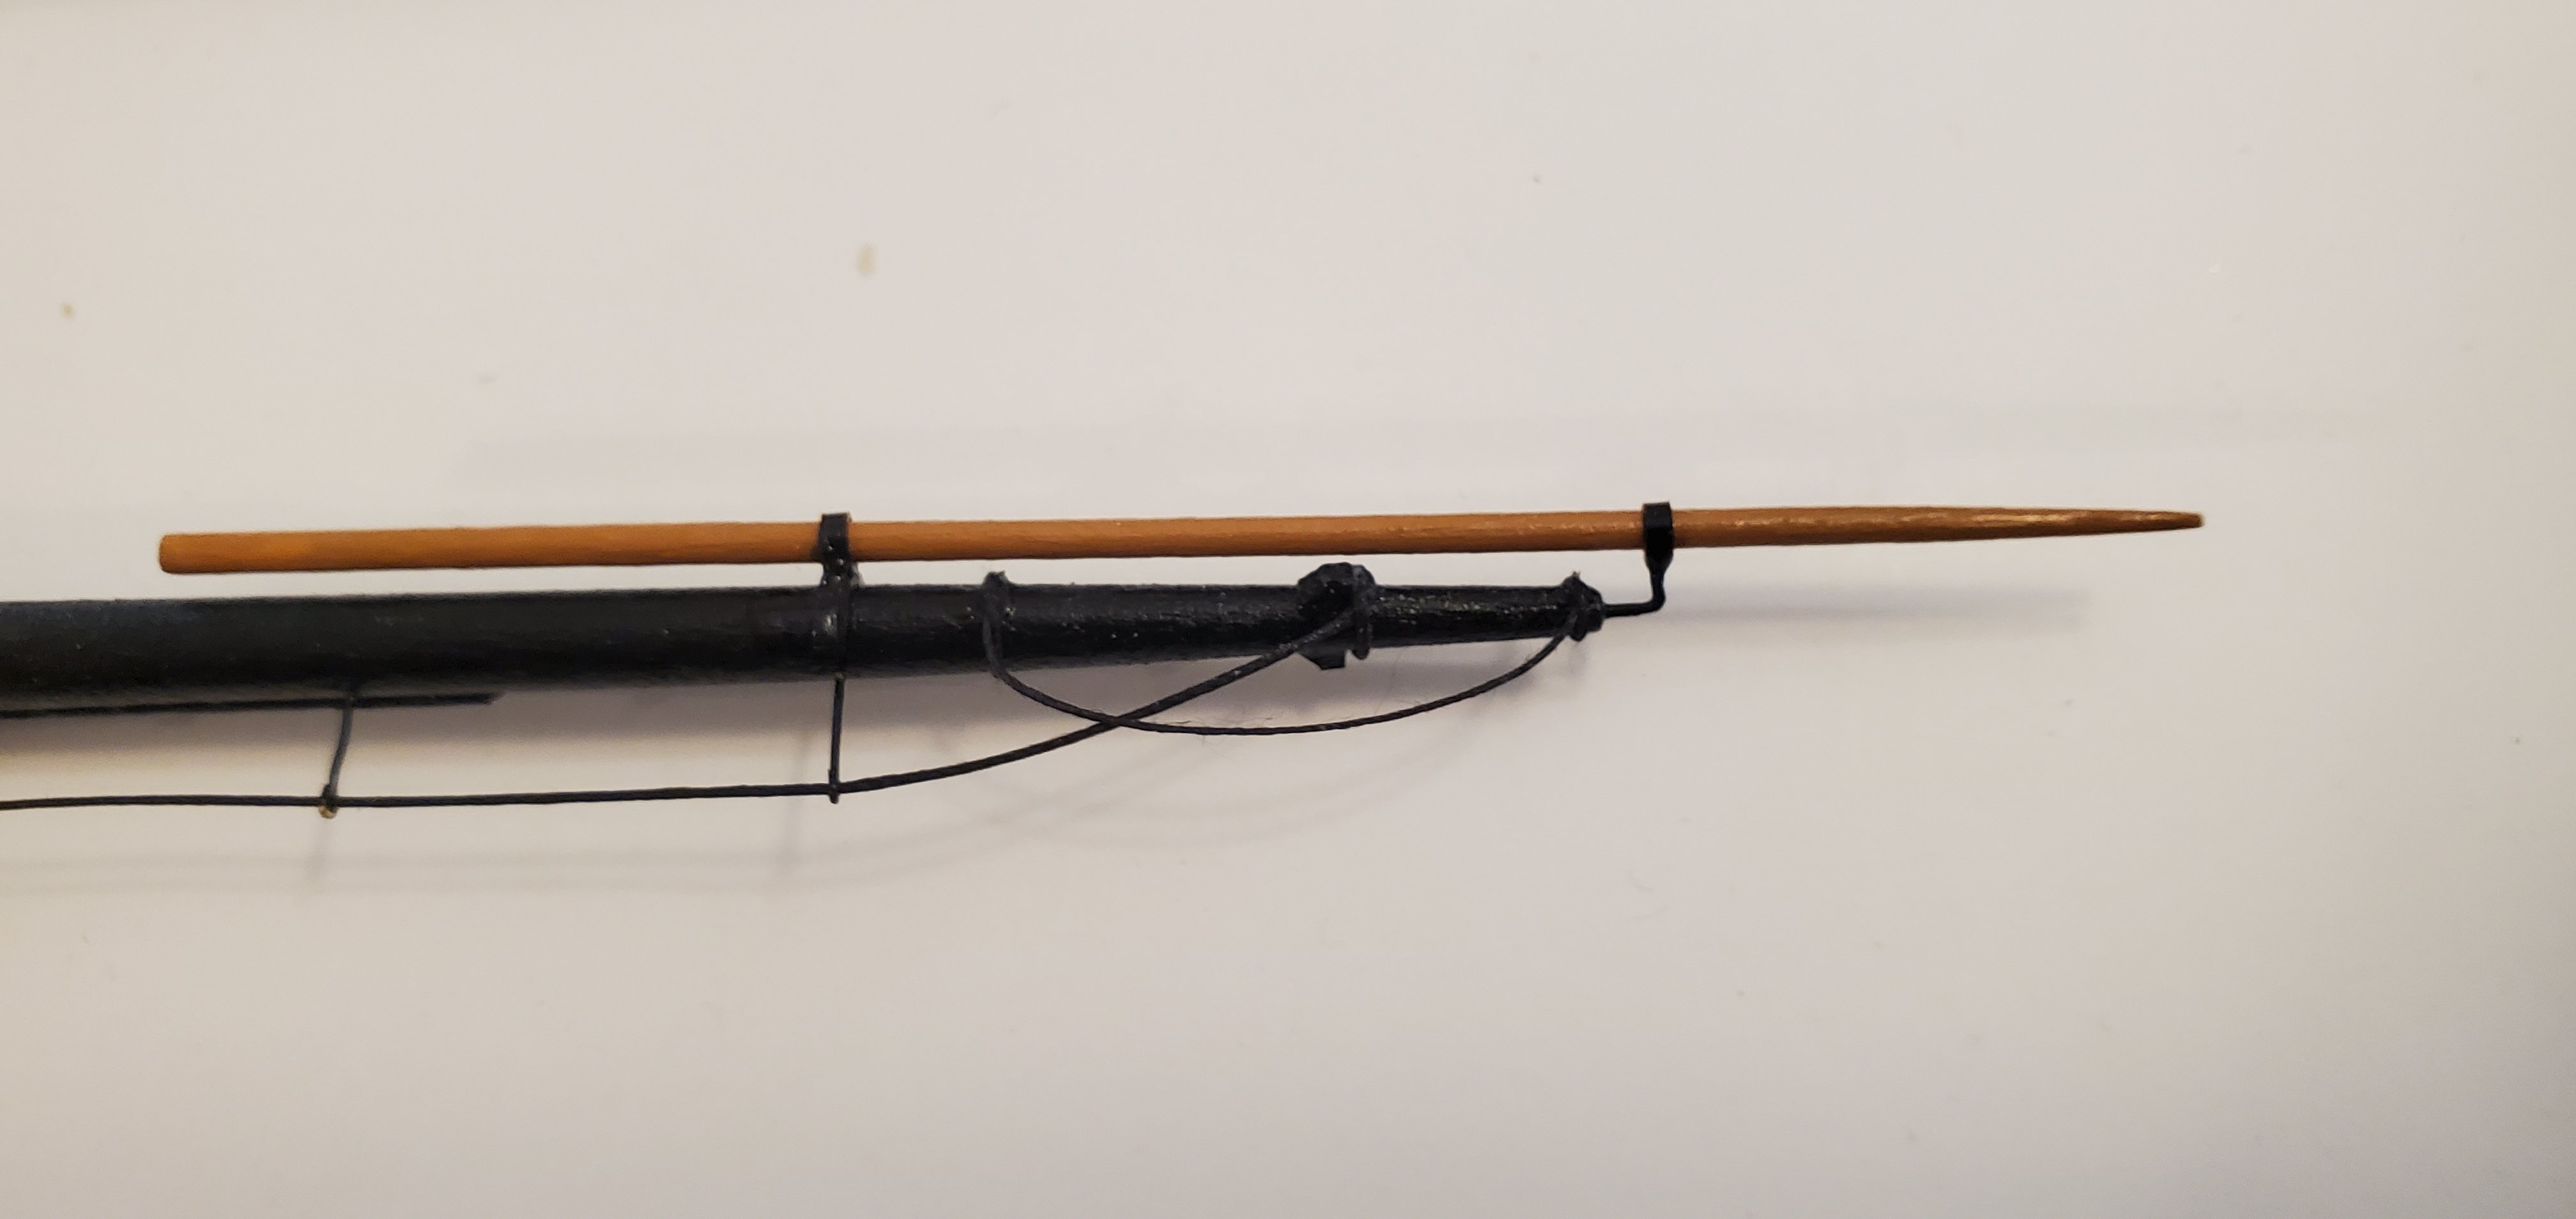
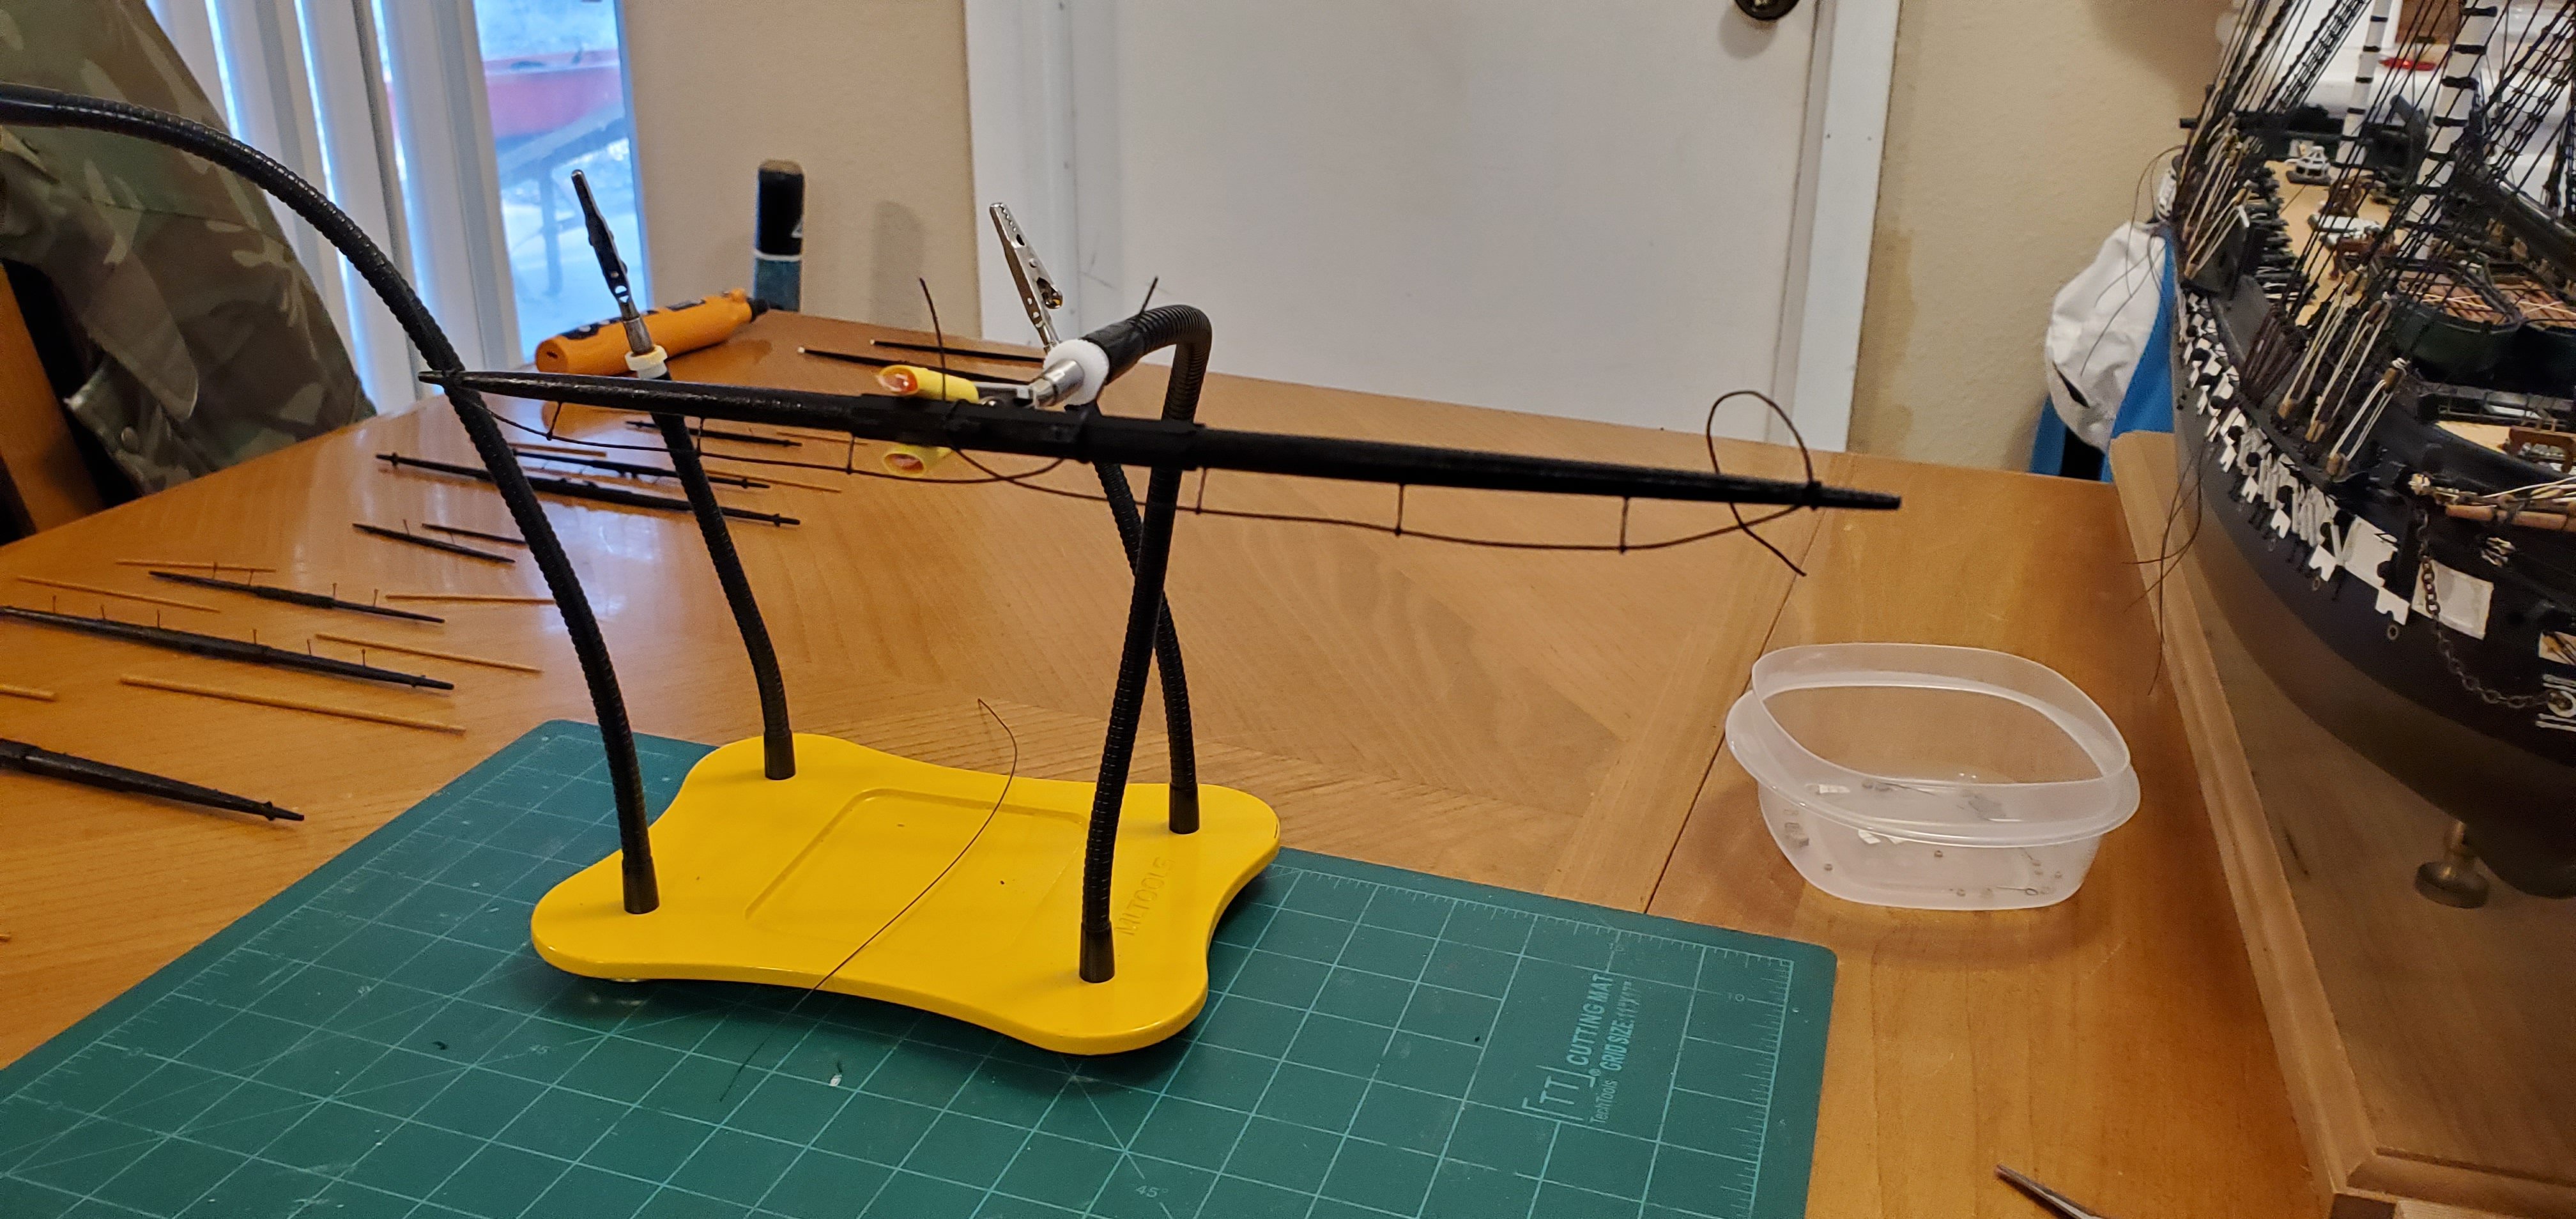
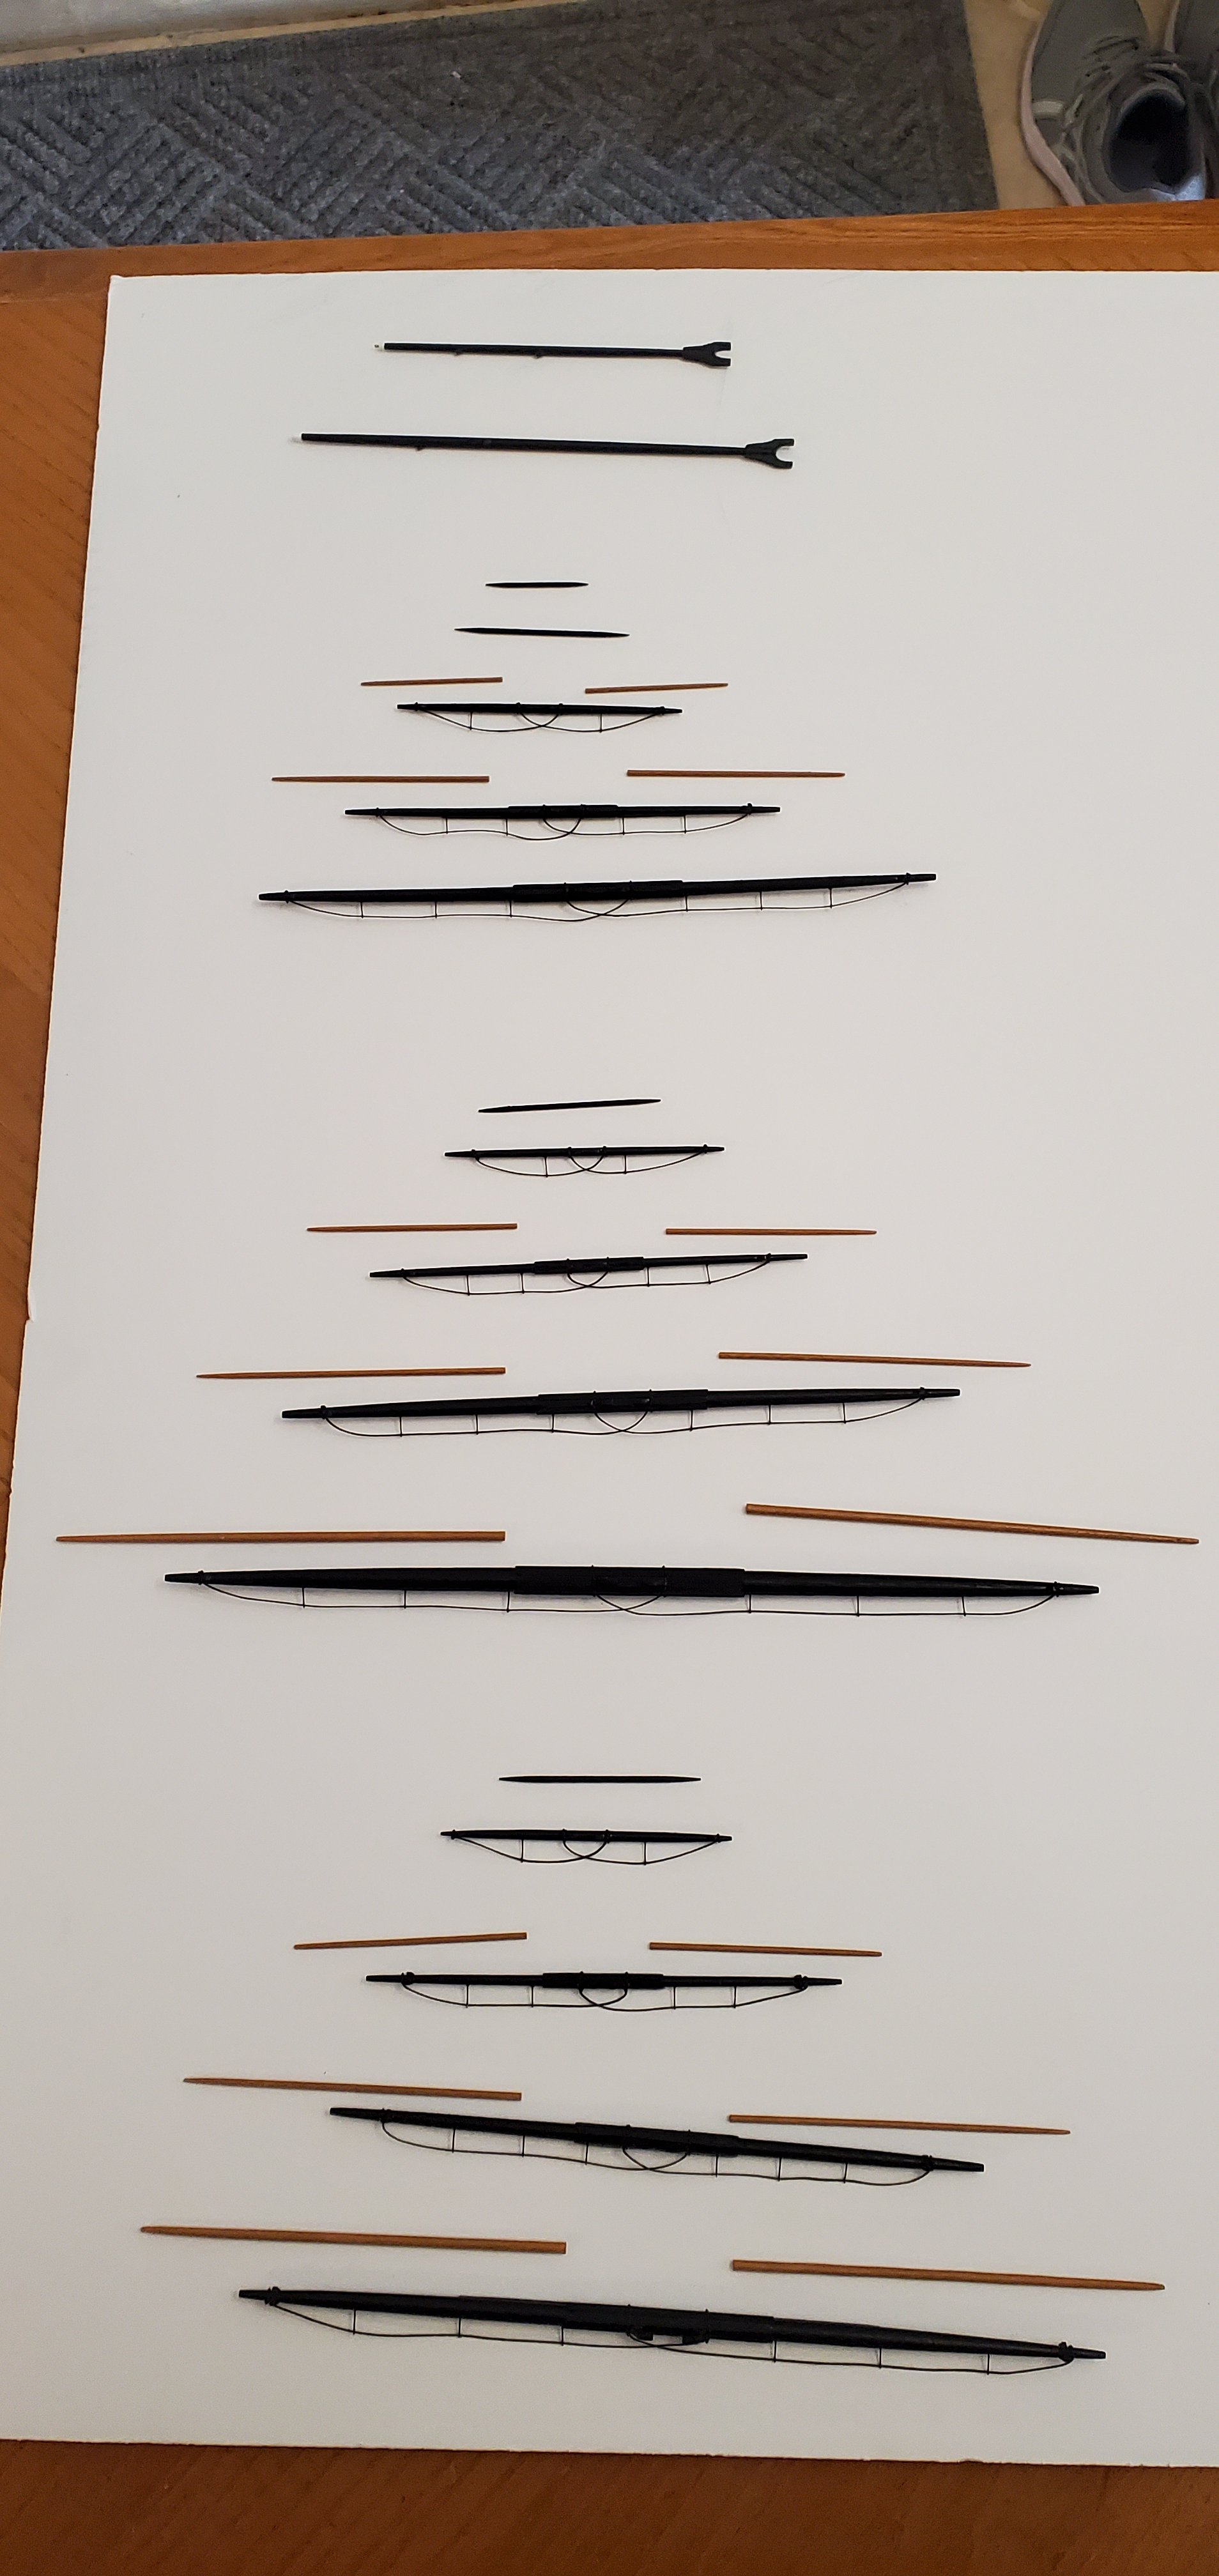
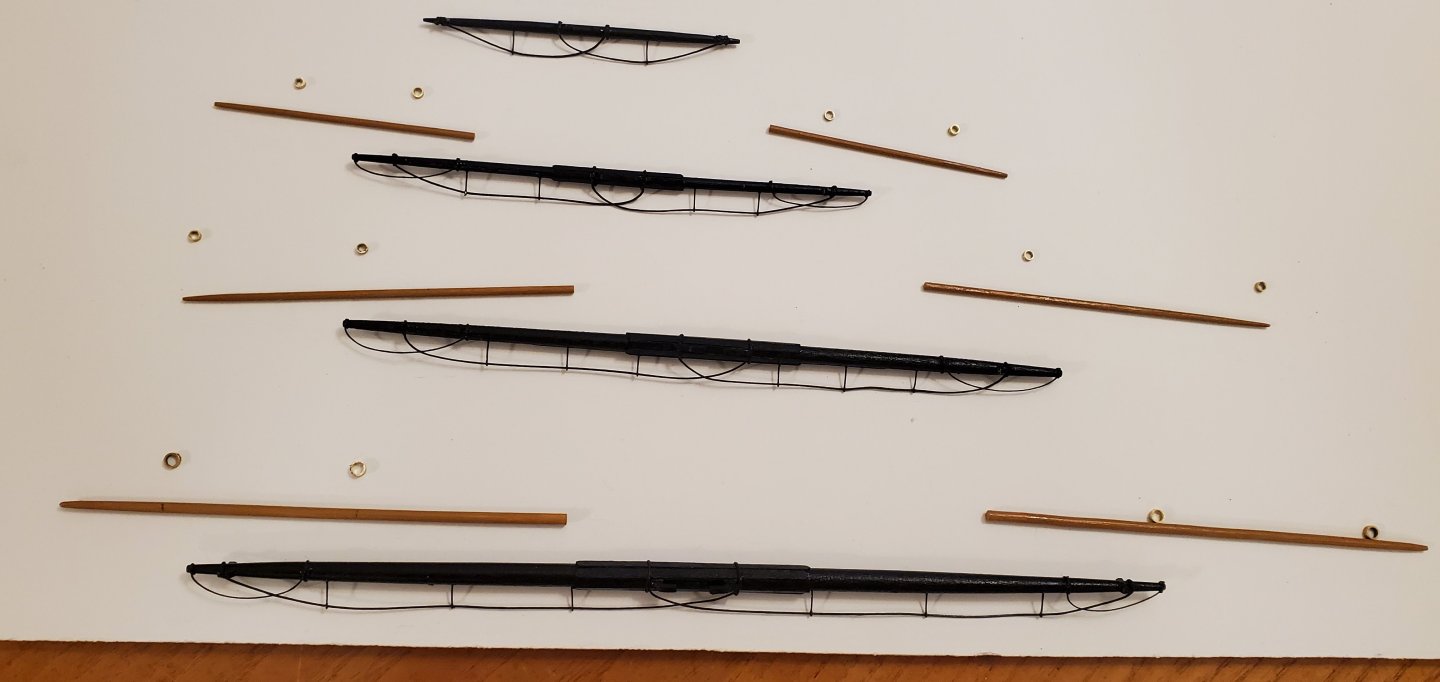
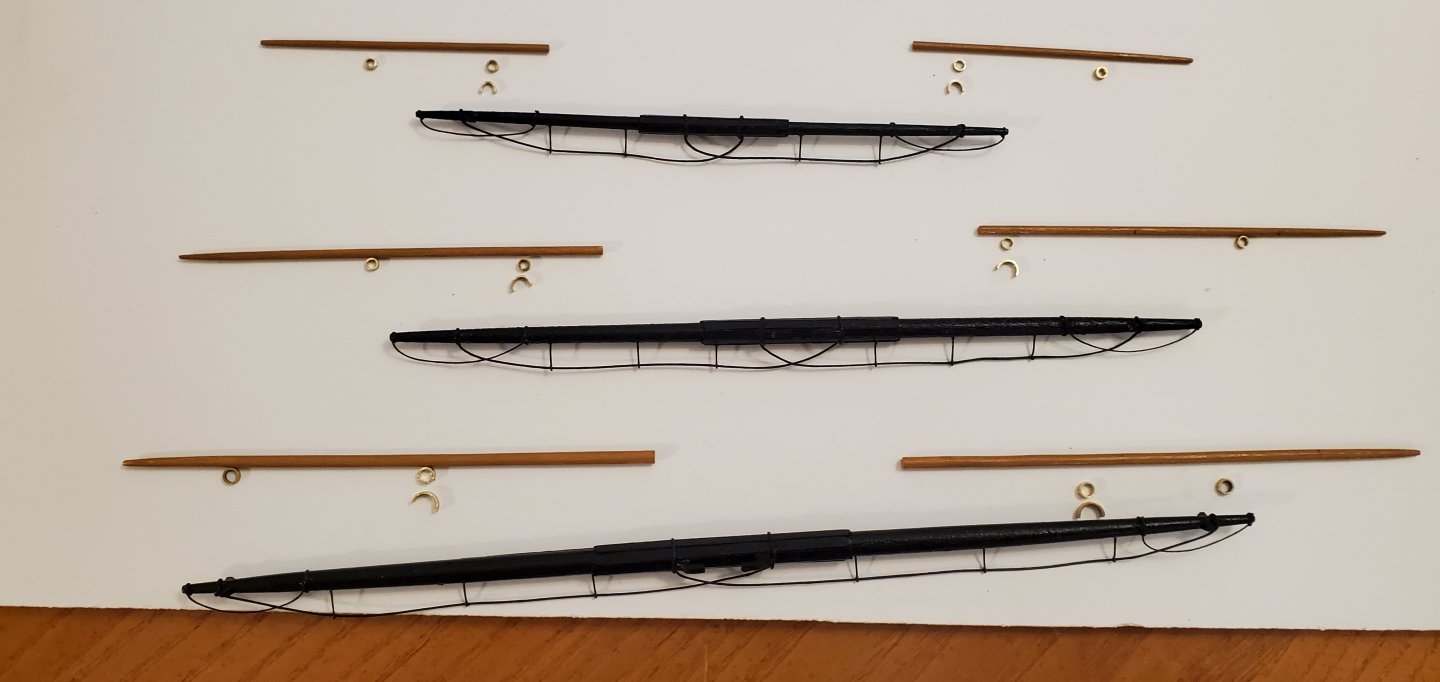
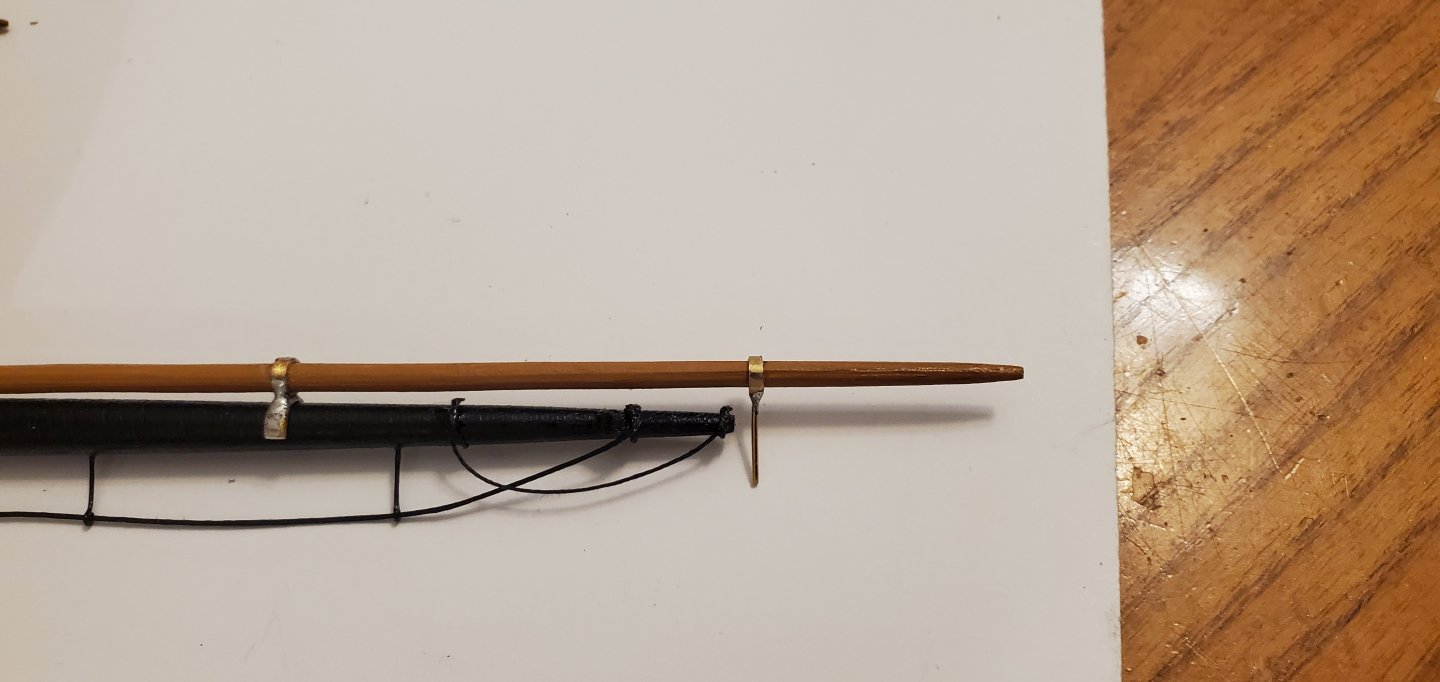
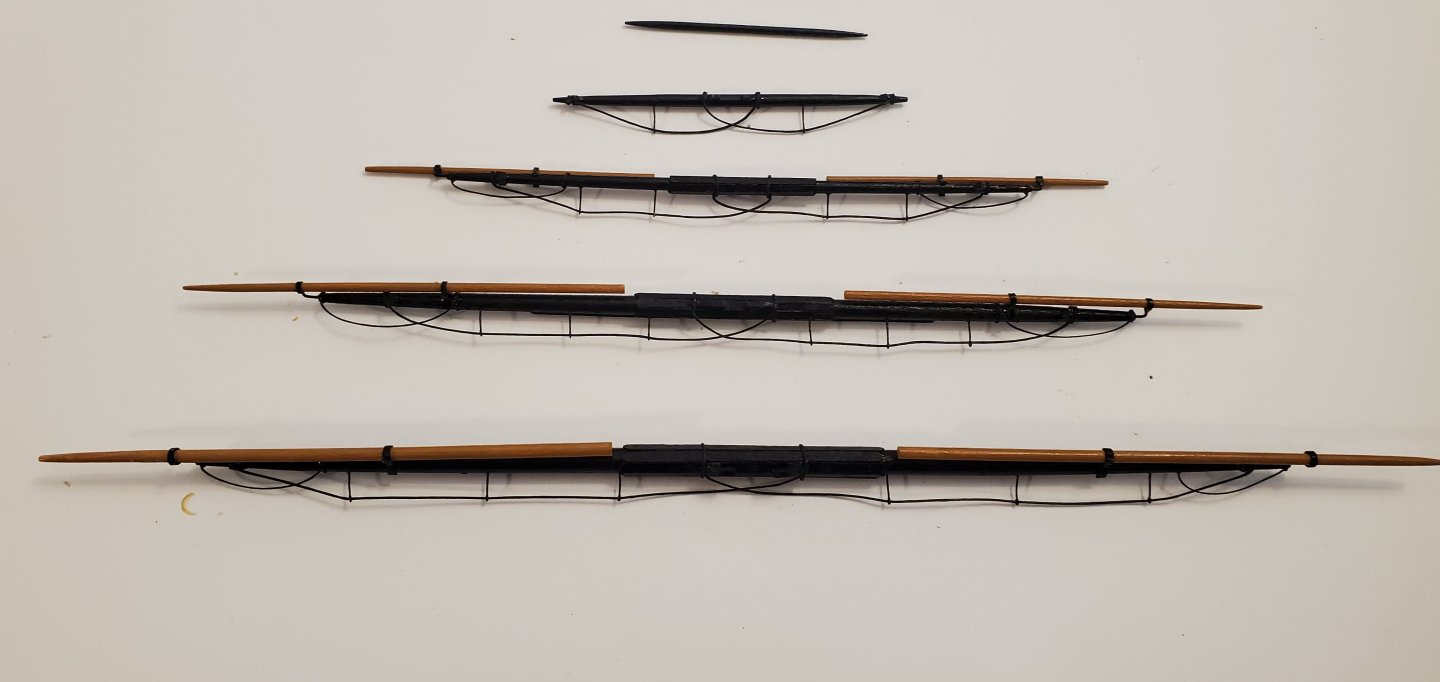
Well Pat, in the absence of Bundy here in central Texas, I settled for a few tots of Ol' Sailor Jerry's fine spirits! Glad you are checking in, Carson! Slowly but surely the team here is gettin' it done!! And now on to the studding sail booms (I always thought they were called yardarms but I seem to have been mistaken about that). There are 8 yards that have studding sail booms - The lower 3 on the fore and main masts, and then the 2nd and 3rd lowest yards on the mizzen. The crojack yard is not so equipped. The booms are offset forward at a 45 degree angle to the vertical plane of the yard as it hangs from the mast. Each boom is held in place by passing through 2 rings called studding sail irons. The inner iron looks like a figure 8 with a portion of the bottom cut off forming a saddle that rests on the yard. The outer iron is a simple ring attached to a rod bent at a 90 degree angle that feeds into a hole in the end of the yard. I used brass tubes and wire for my irons. I started with brass tubes of various inside diameters. Of course none of them quite matched the diameter of my booms, so I had to drill out each of them to fit. The rings below are for the fore mast yards. Next, I cut pieces of brass tube in half to make the lower half of the inner iron that will rest saddle-like on the yard. Next step - soldering the top and bottom half of the inner irons together. Next, I soldered a small piece of brass wire to each ring for the outer irons. Here's a closeup of 1 pair of irons dry-fit (before I bent the wire on the outer iron). Here are the foremast yards with the booms and irons in place and the irons painted black. And a final closeup. The fat end of the boom will be lashed to the yard, which is next on my to-do list.


- 301 replies
-
- 16
-
-
-
- Constitution
- Bluejacket Shipcrafters
- (and 1 more)
-
Fantastic build, Bryan! Everything is very clean and looks top notch. The crew was a nice added touch, too. Well done, sir!
- 55 replies
-
- 2
-
-
-
- Le Martegaou
- billing boats
- (and 1 more)
-
I am very sorry to hear about the passing of your friend, Rodney. My sincere condolences to you and family.
-
Y'all better send a gorilla along with that gorilla glue. I ain't getting near that bull in his current mood! Can't wait to see those newly painted longhorns and the ferris wheel that your niece is working on!
- 87 replies
-
- 2
-
-
-
- King of the Mississippi
- Artesania Latina
- (and 2 more)
-
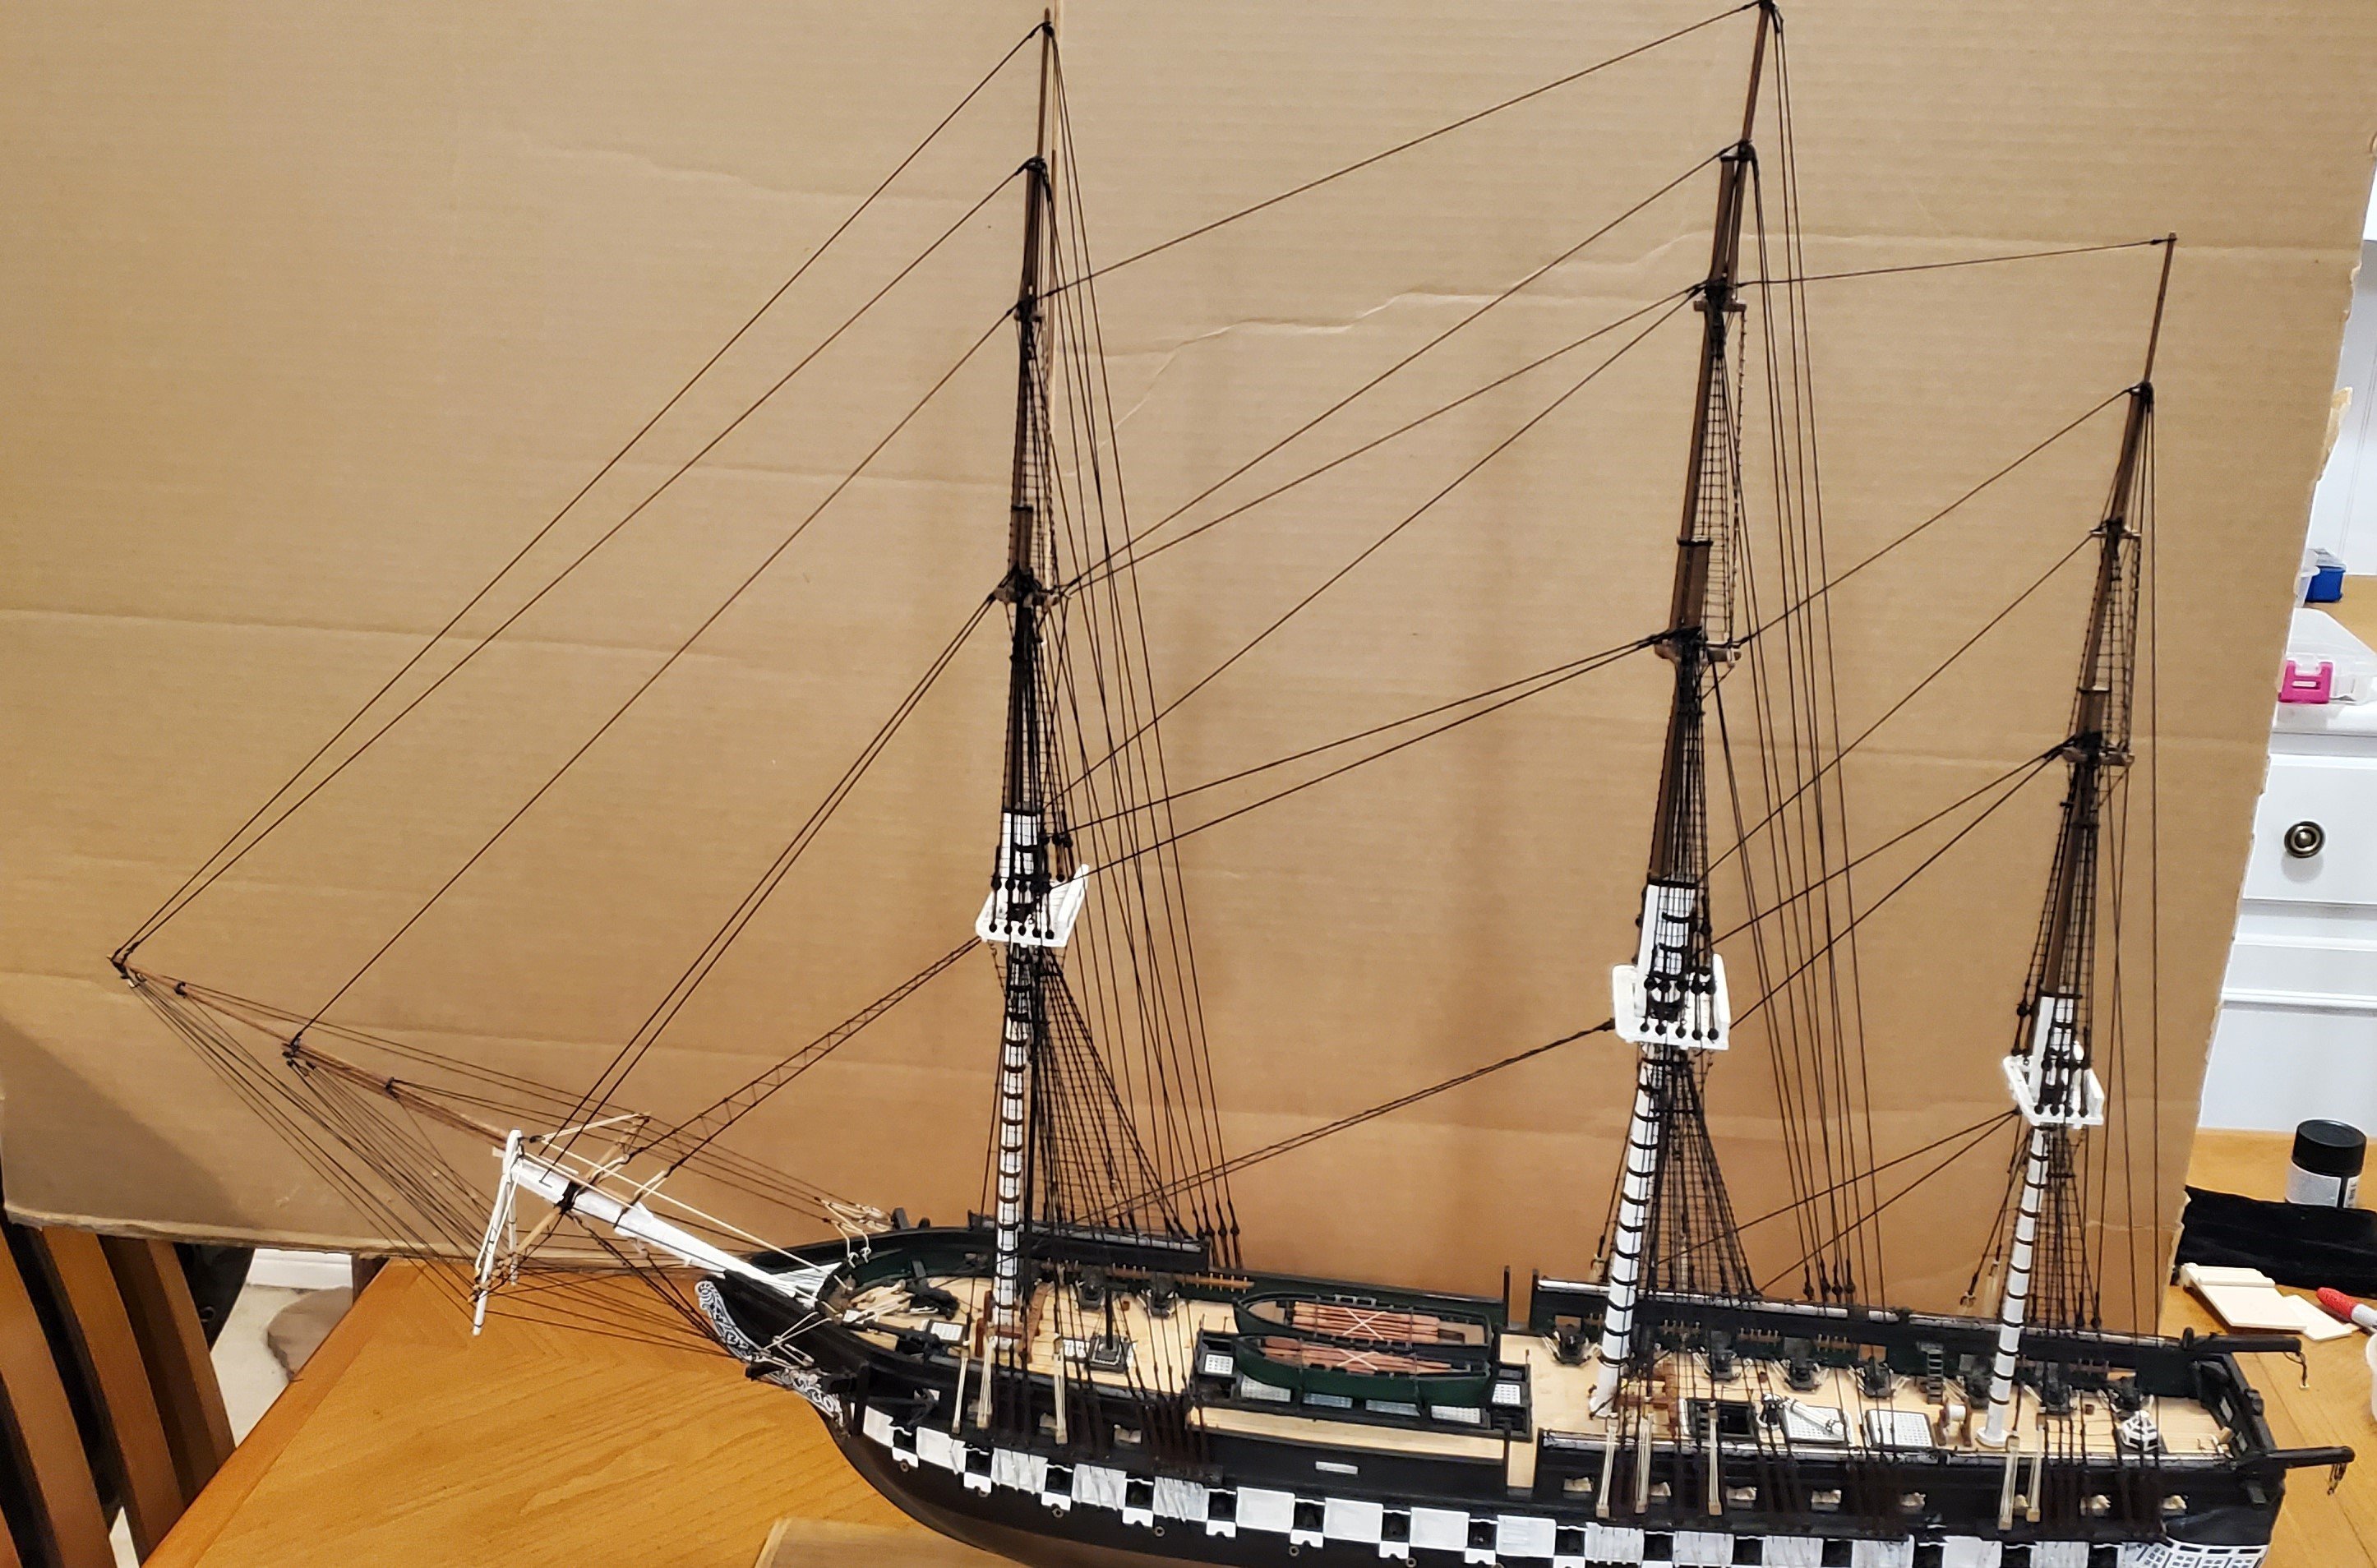
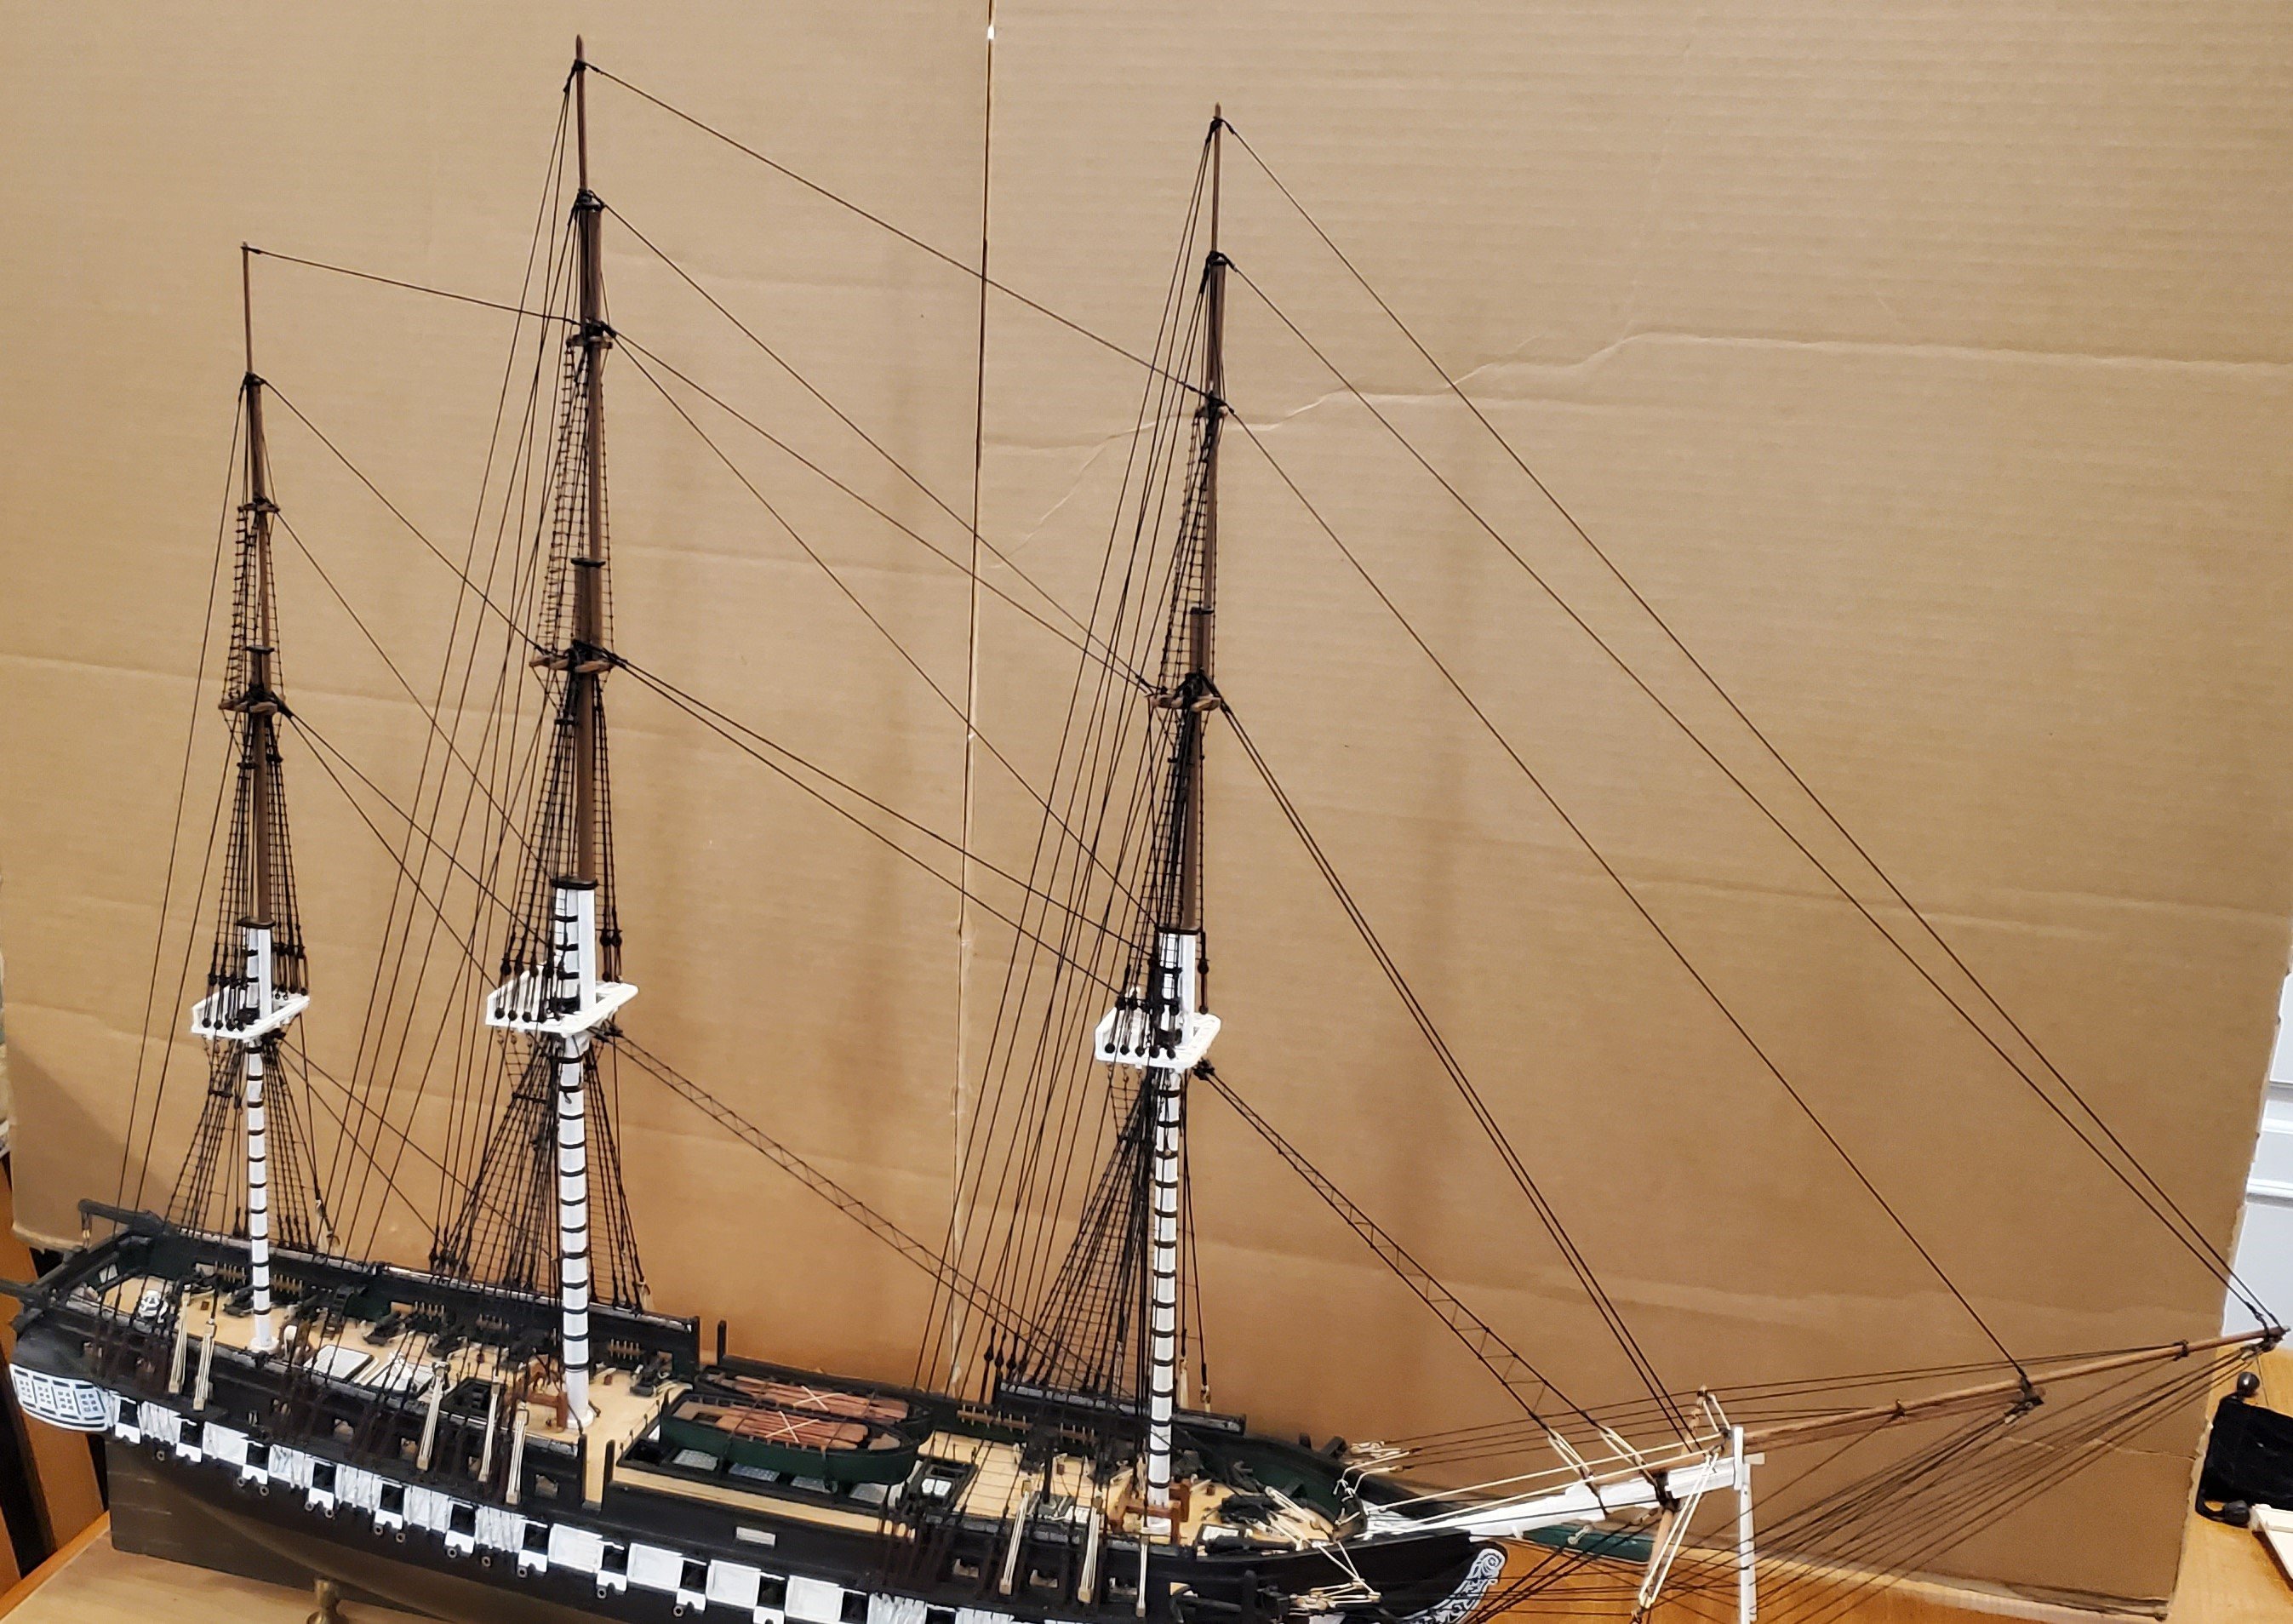
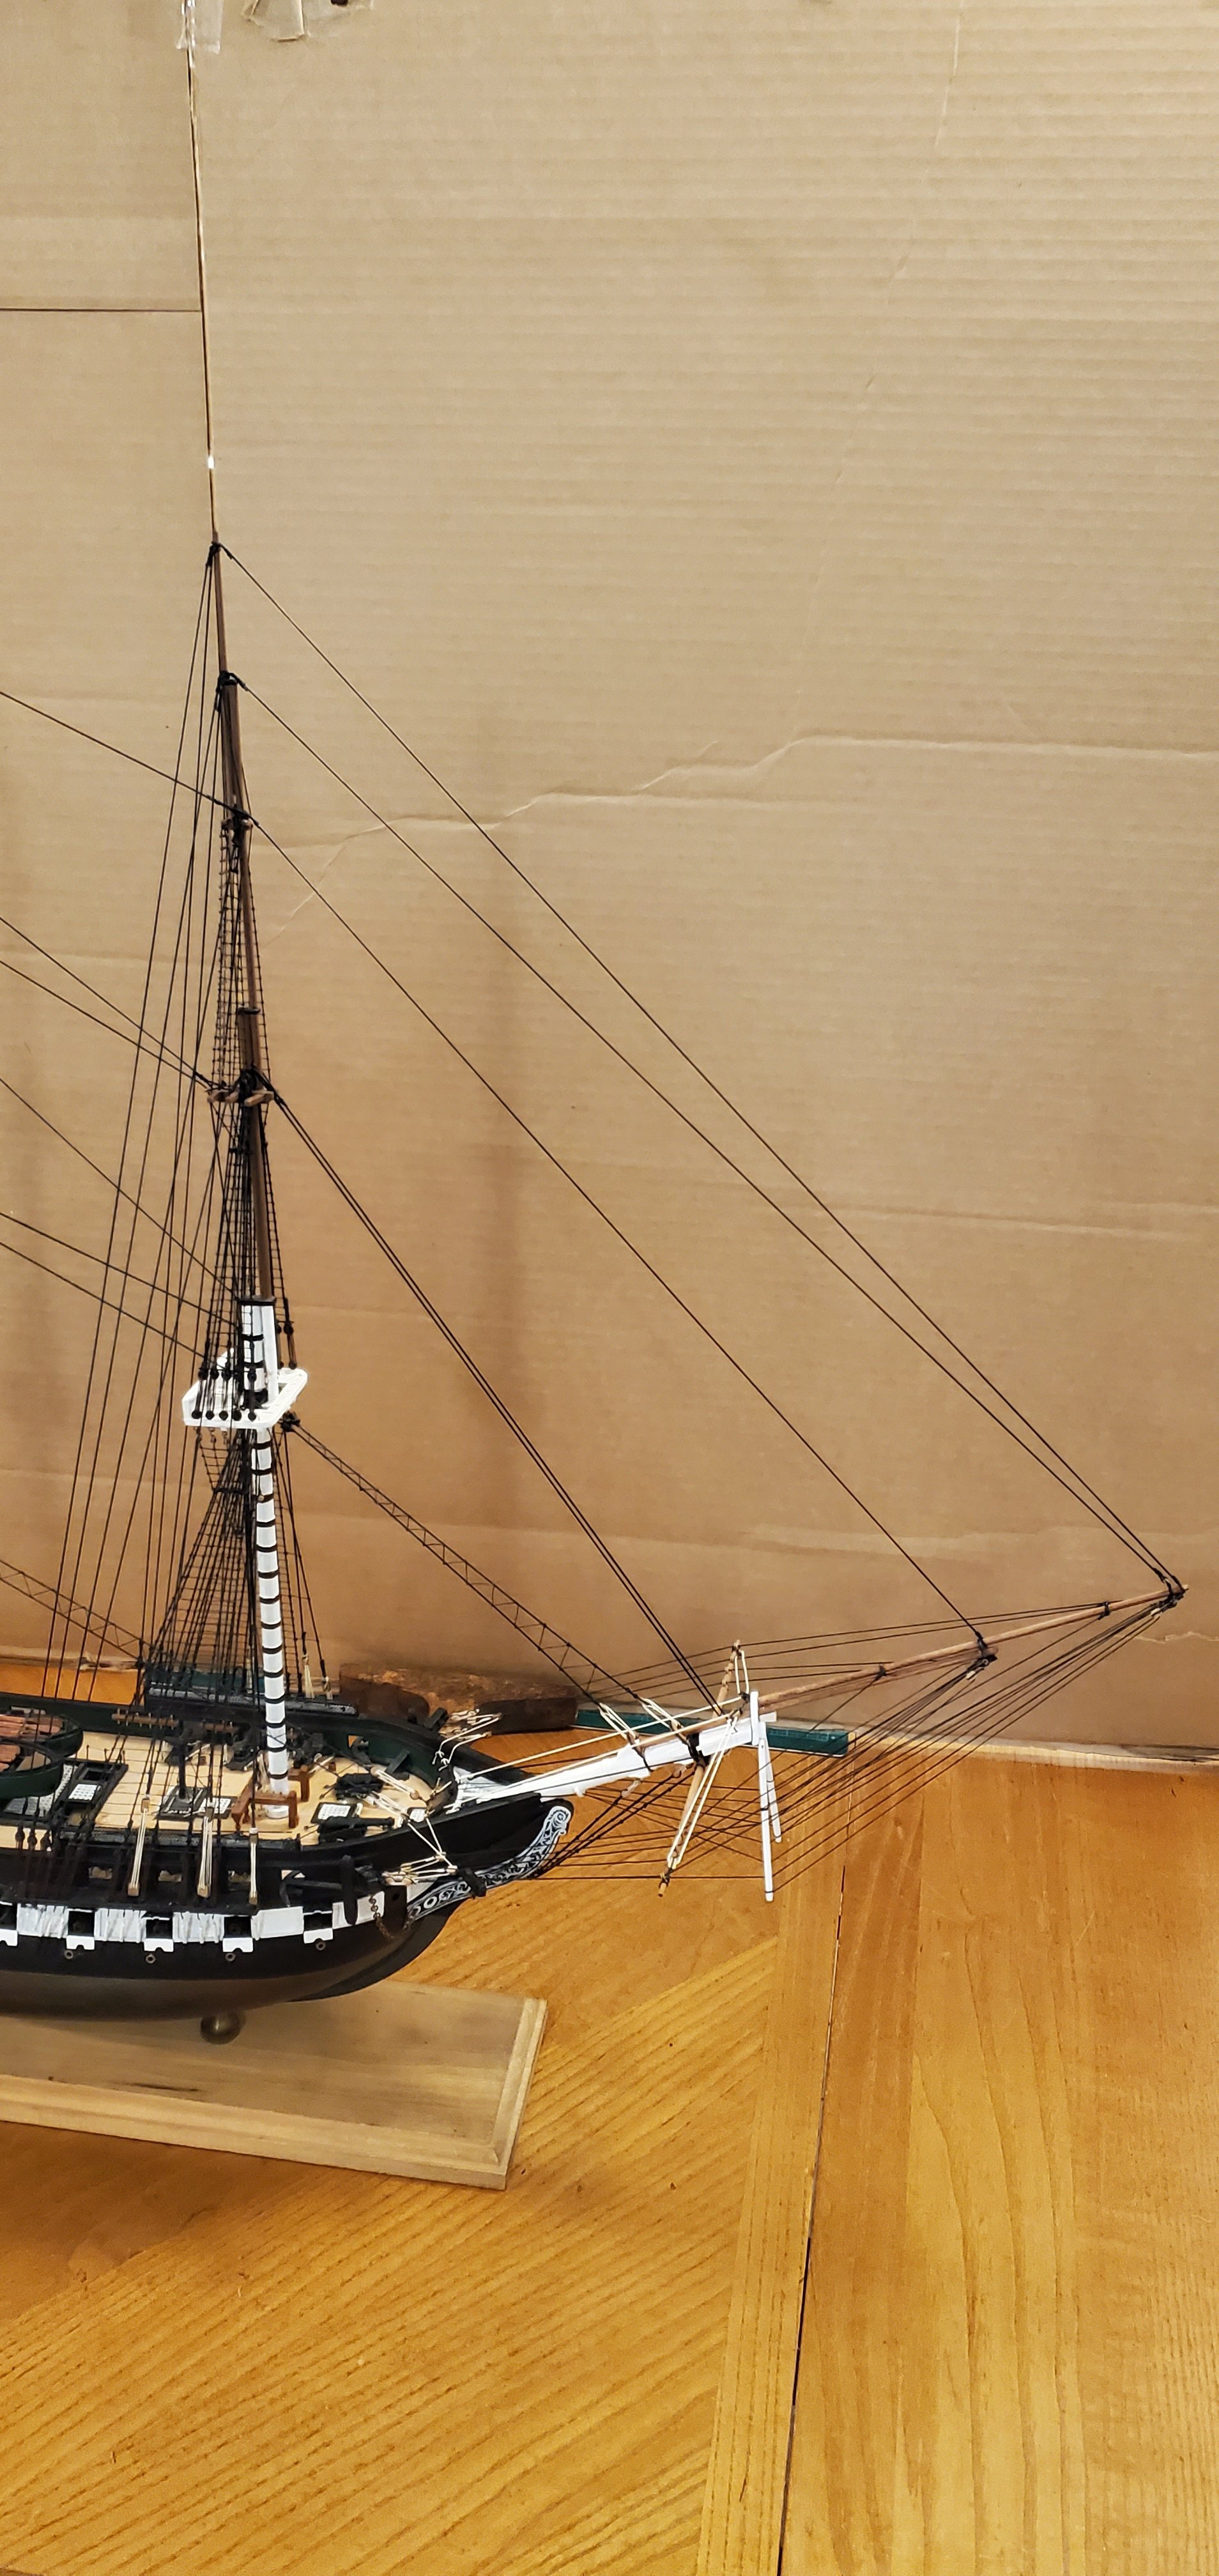
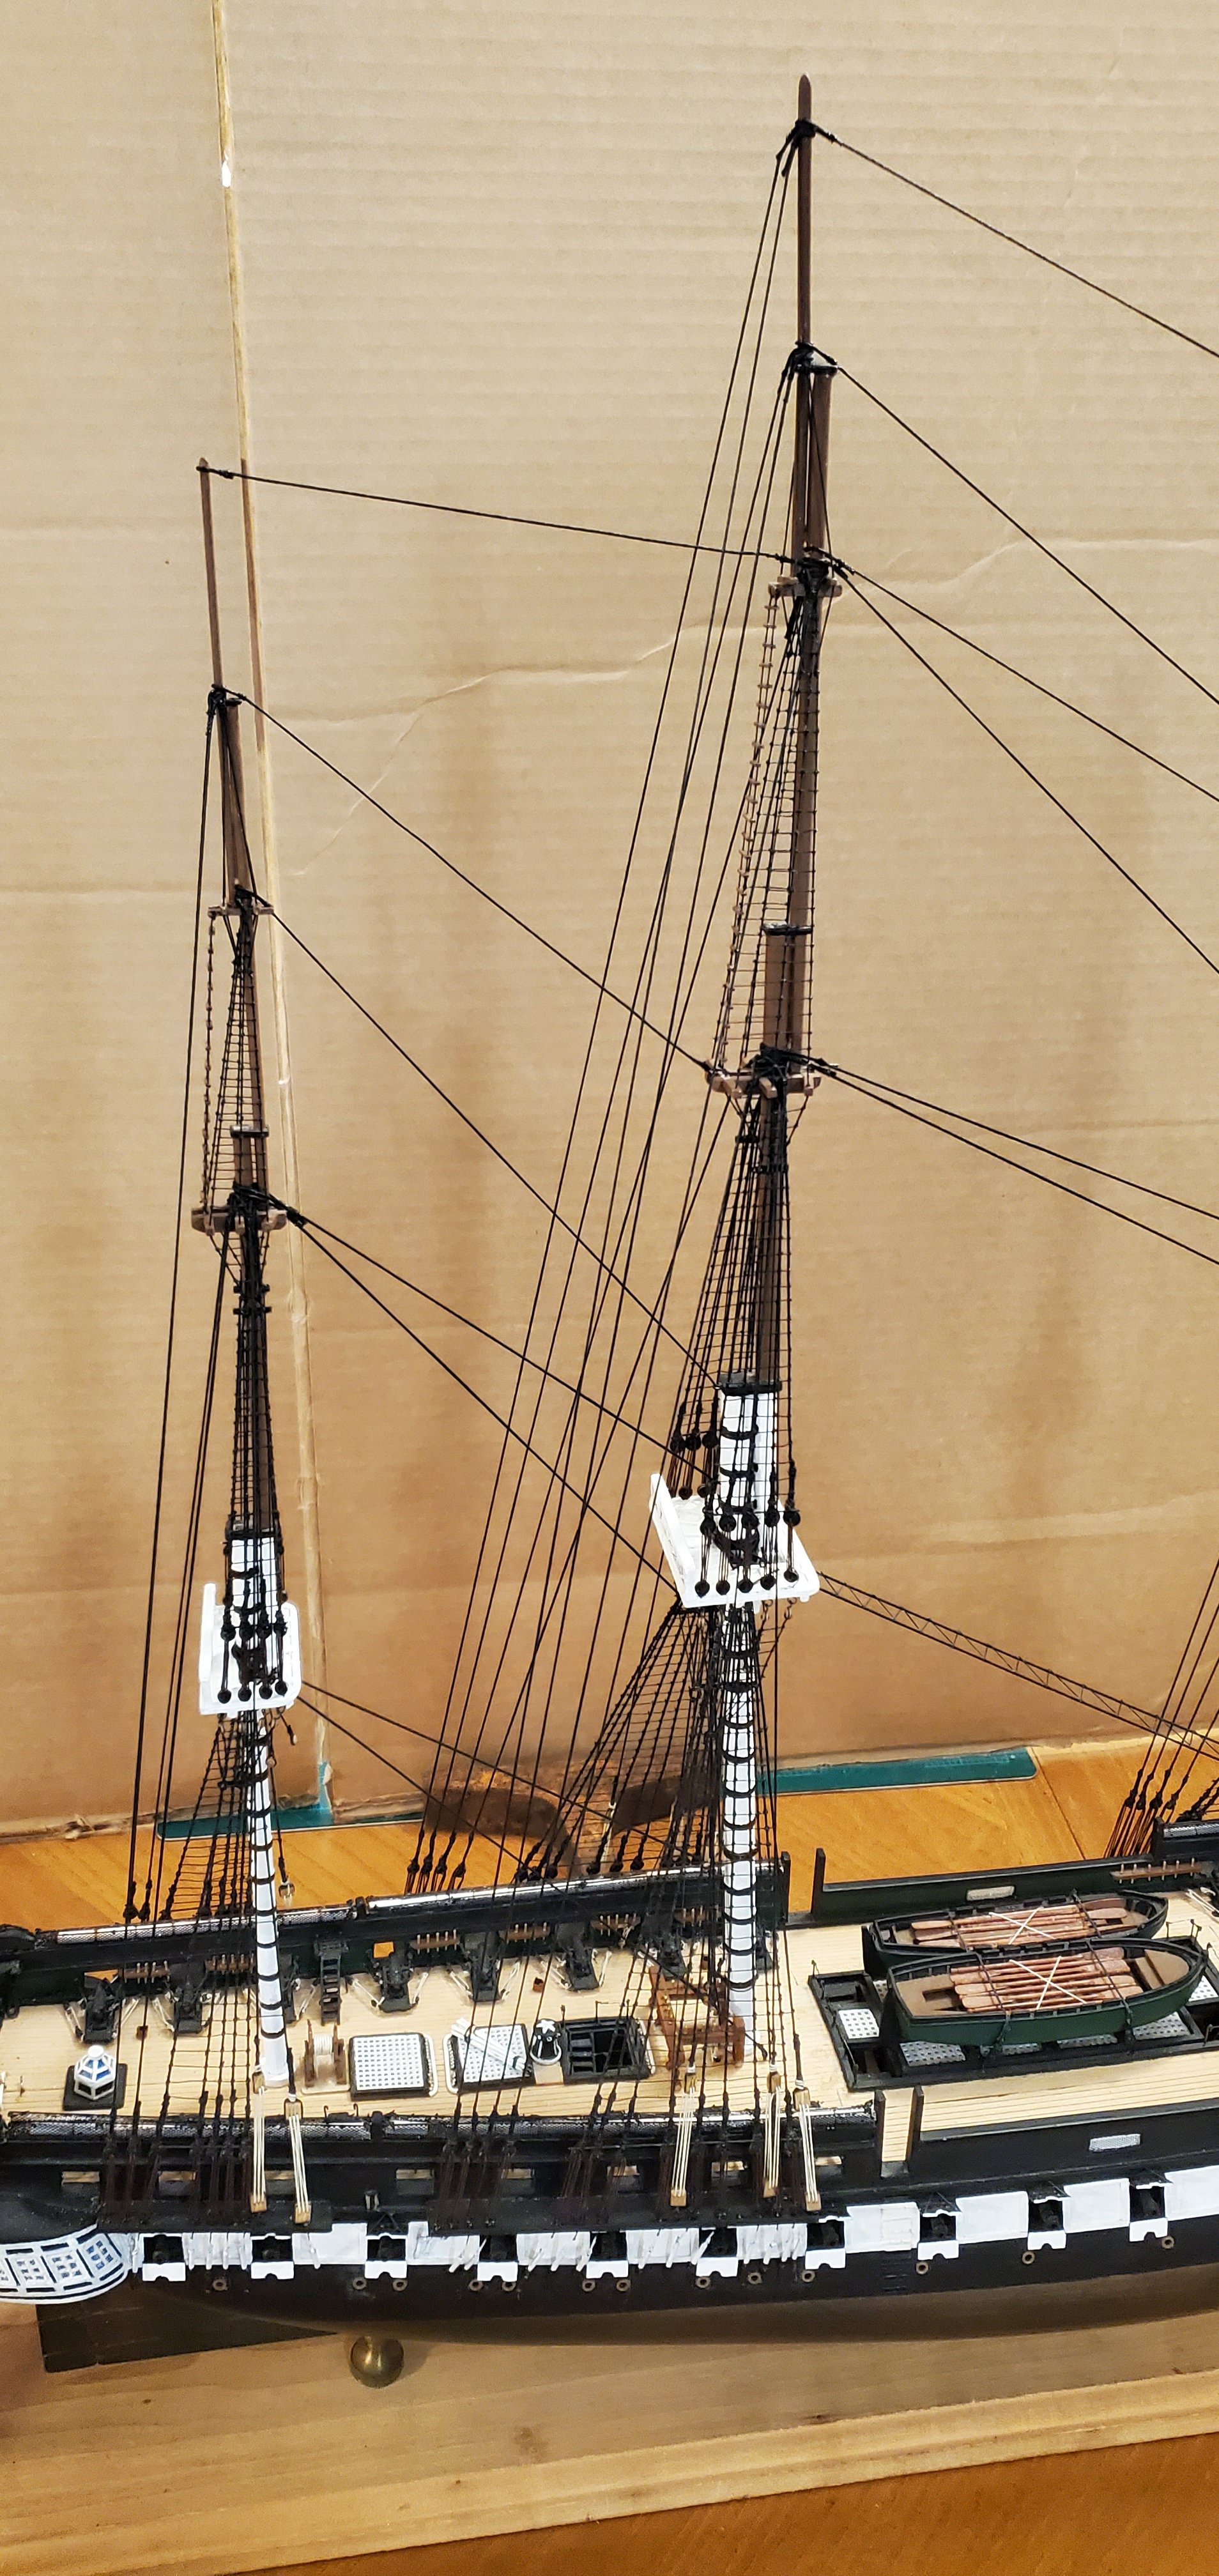
I have reached a major milestone on this project - all of the standing rigging is complete! WOOHOO!!! The stays are taut (all 52 of them) and the masts are straight and aligned. That calls for another round! Next up is attaching the stuns'l booms to the yards, which means it's time to cozy up to the soldering iron.


- 301 replies
-
- 20
-
-
-
- Constitution
- Bluejacket Shipcrafters
- (and 1 more)
-
I believe that the medium blue-gray would fade to a more pale gray as the ships aged. So if you want a brand new look, I'd go more with the medium blue-gray. But if you want a more aged or weathered look, I'd go pale gray. My 2 cents.
-
I think they should be called Flemish Longhorns rather than horses. But what do I know! As far as the crow's feet, the BlueJacket plans don't call for those so I didn't install them. Thanks, Keith. My goal was to make them look as good as yours on your Tennessee.
- 301 replies
-
- 7
-
-

-
- Constitution
- Bluejacket Shipcrafters
- (and 1 more)
-
Well, I took another look at the mast and spar diagram and realized the lower 3 yards on each mast have these little mini-foot ropes on the ends. I did a quick search and found that they are called Flemish Horses. Hmmm. Had not heard of them before. So I did a quick add.

- 301 replies
-
- 14
-
-
- Constitution
- Bluejacket Shipcrafters
- (and 1 more)
-
Well, I got to the end of my rope on this project. Literally. I ran out of cord for the stays, so I had to order more from BlueJacket. While waiting for the new line to arrive, I circled back to the yards and installed all the foot ropes. I've seen some people use thread for the stirrups and others use small eye pins. I particularly like the way the foot ropes look on @Keith Black's Tennessee so I decided on eye pins.


- 301 replies
-
- 12
-
-
- Constitution
- Bluejacket Shipcrafters
- (and 1 more)
-
I think that's good advice, Ian. The even trickier thing, which I did not mention above, was drilling tiny holes in the deck for the eye pins inside the fife rails at the base of the masts. Even my small pin vise was really difficult to position and work inside those tight confines. I guess what I should have done is read the instructions backwards at the start. Then I would've known where all those tie off points for the rigging are and could have put the eye pins and lanyards in place first. Too late now!
- 301 replies
-
- 5
-
-
- Constitution
- Bluejacket Shipcrafters
- (and 1 more)
-
Having none of Keith's eloquence, I can only recite song lyrics to show how I'm feeling doing all these stays "Whether you're a brother or whether you're a mother, You're stayin' alive, stayin' alive. Feel the city breakin' and everybody shakin', And we're stayin' alive, stayin' alive Ah, ha, ha, ha, stayin' alive, stayin' alive, Ah, ha, ha, ha, stayin' alive" OK. Enough of that! I finished off the topmast stays by rigging the main topmast stay and main topmast preventer stay, followed by the mizzen topmast stay and mizzen topmast preventer stay. The main topmast stay and preventer stays run from the main topmast to eyebolts on the foremast above the fore mast top, down the foremast to bullseye lanyards inside the fife rail. Here's the mizzen topmast stay and preventer stay rigged basically the same. The only difference is the stay runs through an eyebolt above the main mast top and the preventer stay runs through an eyebolt below the main mast top. Again, both are tied off to bullseye lanyards inside the fife rail. It was a bit tricky tying the lanyards inside the tight confines of the fife rails, backstays, shrouds, etc. Had I know more what about I was doing, I might have done some things in a different order.


- 301 replies
-
- 10
-
-
-
-
- Constitution
- Bluejacket Shipcrafters
- (and 1 more)
-
OK. Now I am really impressed! You have some remarkable talents, Keith.
- 301 replies
-
- 6
-
-
-
- Constitution
- Bluejacket Shipcrafters
- (and 1 more)