Glen McGuire
-
Posts
1,978 -
Joined
-
Last visited
Content Type
Profiles
Forums
Gallery
Events
Everything posted by Glen McGuire
-
 That catwalk is particularly well done, Roel!
 -
Thank you, Bob, Keith, Pat, and Henry. Just to make sure I'm clear on the recommended steps, they are: 1. Snug up all the shrouds equally taut but don't tie them off. 2. When snugging up the shrouds, start with rear-most then forward-most, back to rear, etc finishing in the middle. 3. Also, when snugging up the shrouds, alternate starboard to port for each shroud. 4. Add stays and other rigging. 5. Do final tweak on shrouds for final alignment, then tie each shroud off permanently.
- 301 replies
-
- 7
-

-
- Constitution
- Bluejacket Shipcrafters
- (and 1 more)
-
Hey Jackson! What an interesting thesis you have chosen. I hope you will share it with us after its completion. I got into ship modeling just a few years ago at probably an advance age for a beginner (60). For me, the initial attraction of ship modeling was the challenge of building something that look so complex and intimidating with curving woodwork and an infinite spiderweb of lines running everywhere. I’ve always liked to build things, and a wooden ship model seemed like the ultimate challenge. After buying a kit and completing my first ship, I stumbled upon a ship in a bottle (SIB) kit that looked like another level of challenge. Although I’m not a mechanical engineer like Snug Harbor Johnny above, and many other builders on this site, my dad was a mechanical engineer and I think I’ve got a bit of his ME blood in me. I successfully completed the SIB kit and began doing SIBs from scratch. I really like the engineering aspect of SIBs as you have to devise a mechanical solution for doing what looks impossible - folding masts, twisting yards, scrunching sails, and fitting the assembly through something it looks like it won’t fit through. I also love the fact that there are so many unique ships with incredible stories behind them. From majestic ships that were the centerpiece of some of the most consequential battles in wartime history to ghost ships with an eerie, unexplainable past, there is an endless list of great subjects for us to model and add a small piece to their legacy. On a more personal note, as I started doing these SIBs, something happened and I found it quite interesting. Creating my SIBs brought out an artistic side that I never even knew I had – nor did anyone that’s known me knew I had. The most common reaction from friends and family that see my work is a head scratch and “you did that??” So the word you chose to describe this hobby of ours – enrapturing – is perfect. I am wrapped up in this because I like to build things, it’s incredibly challenging, there are so many fascinating ships with incredible stories, and it brings out things in me I didn’t even realize were there. There’s one other aspect too, and that’s the joy and amazement we get to see in others (particularly children) that look at our work. I cannot think of a more satisfying hobby than ship modeling. Thank you for your interest in our endeavors. Again, I hope you can share your thesis with us after you are done. Best of luck to you!
- 36 replies
-
- 11
-
-
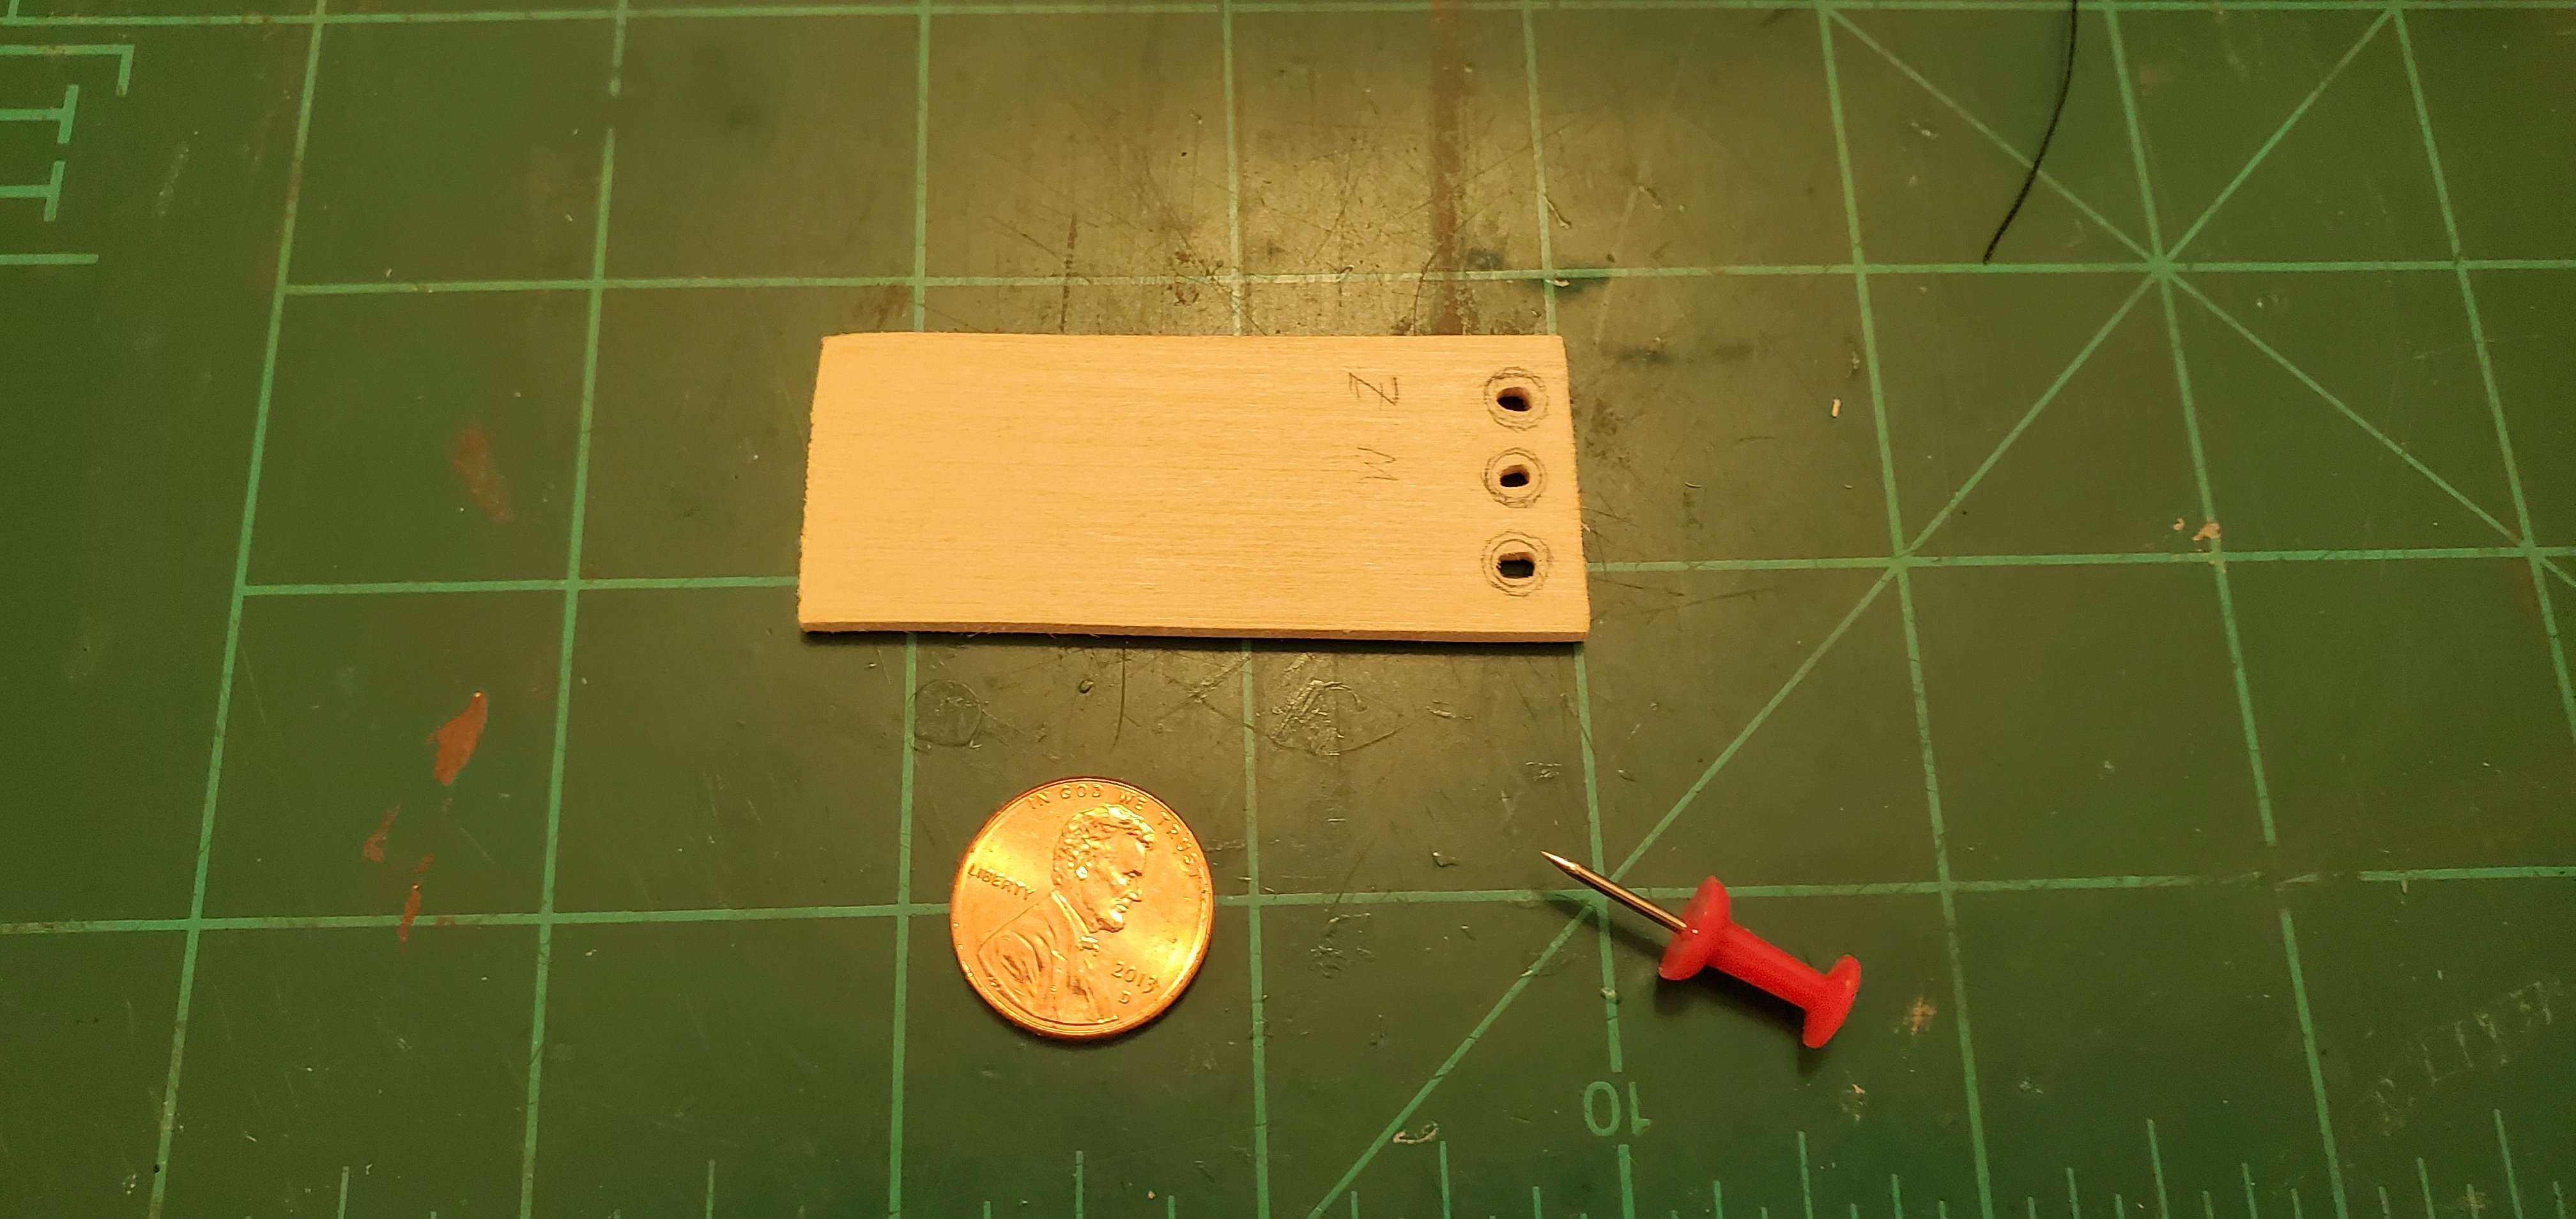
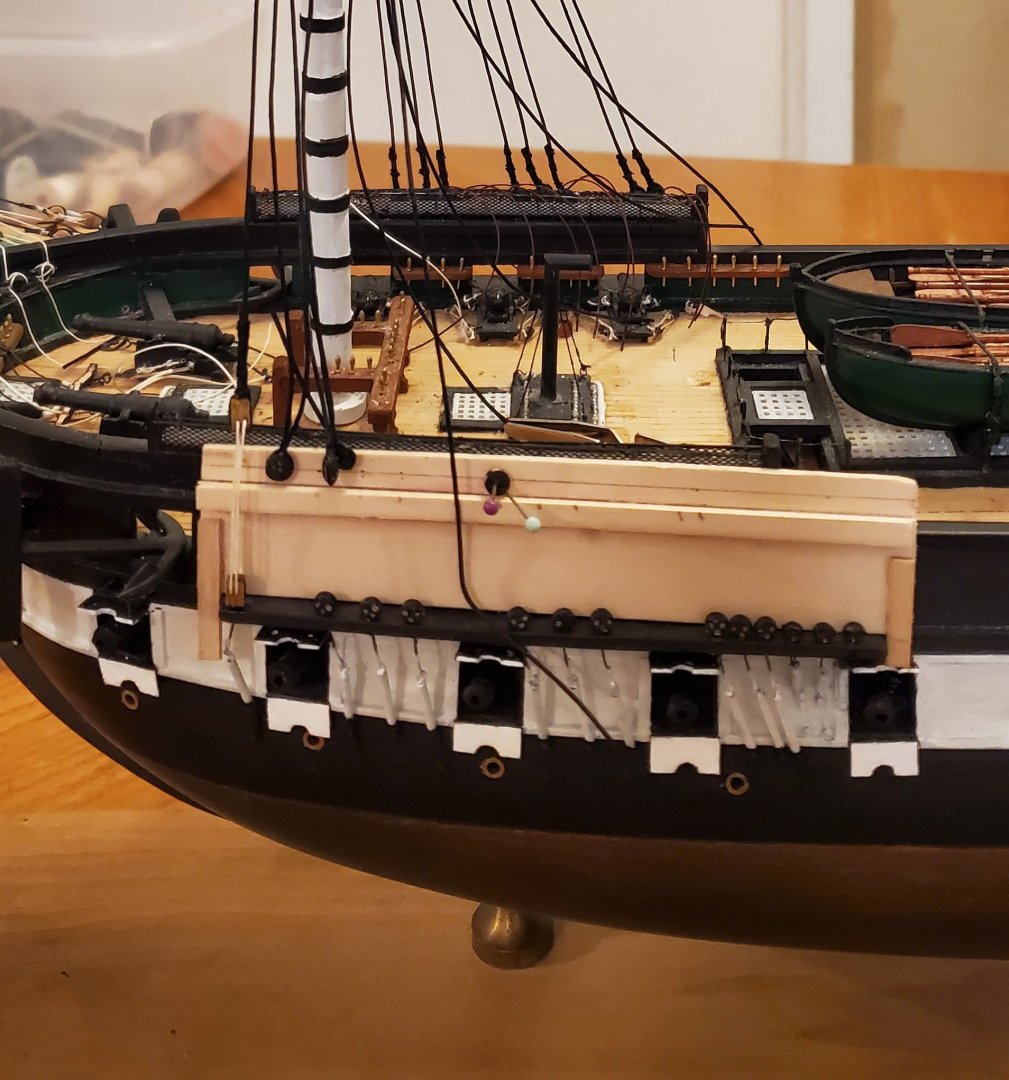
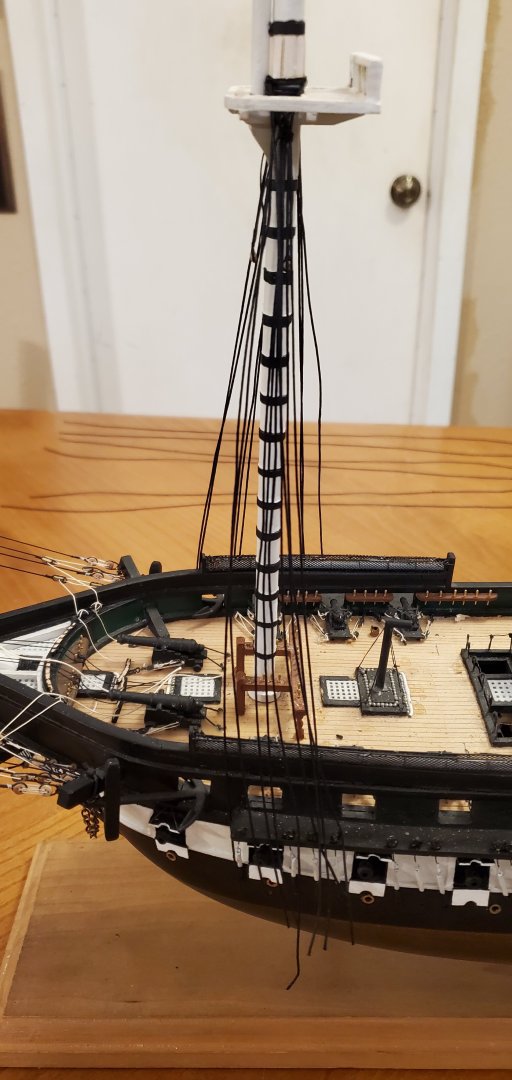
I got the deadeyes on the foremast tied off. The bottom row of deadeyes were already attached to the channel by the previous builder. That meant for me it was just a matter of lashing the top row of deadeyes to the shrouds and then stringing the lanyards. It seems like every builder on MSW has a different jig for aligning the top row of deadeyes. I wanted to keep up the tradition. so here's what I came up with. A rectangular piece of basswood with an alignment strip glued horizontally. Legs on each end fit over the ends of the channels to hold it in place. I use a couple of straight pins to hold the deadeye in position while I attach the shroud. After attaching all the shrouds to the deadeyes, I threaded the lanyards and "hand-tightened" them equally to check my deadeye alignment. Not too bad. Here's a question for the group - should I tighten all 9 lanyards on one side and then move to the other side or should I alternate back and forth, doing 1 on the starboard side followed immediately by the opposite one on the port side, then back to the starboard side, etc... ?
- 301 replies
-
- 10
-

-
-
- Constitution
- Bluejacket Shipcrafters
- (and 1 more)
-
Oh no, no, no. Phil. Not you too! You've been hanging around @Keith Black for too long! 🐧🐧🐧
- 301 replies
-
- 7
-

-
- Constitution
- Bluejacket Shipcrafters
- (and 1 more)
-
Thanks for the explanation, Henry! Now it makes sense to me.
- 301 replies
-
- 2
-
-
- Constitution
- Bluejacket Shipcrafters
- (and 1 more)
-
Agree with Mark. You've done a magnificent job on this project. I hear Lula clamoring for your attention!!
-
Words of wisdom. Come to think of it, they do call the SIB genre "Impossible Bottles", don't they? Thank you for your perspective, Roel!
- 185 replies
-
- 7
-
-
- Flying Dutchman
- Black pearl
- (and 2 more)
-
OMG! That sounds like it requires patience, which makes it totally out of the question for me! 😃
- 301 replies
-
- 9
-
-
-
- Constitution
- Bluejacket Shipcrafters
- (and 1 more)
-
Really nice job on the color match. That can be difficult, especially with two different types of wood.
-
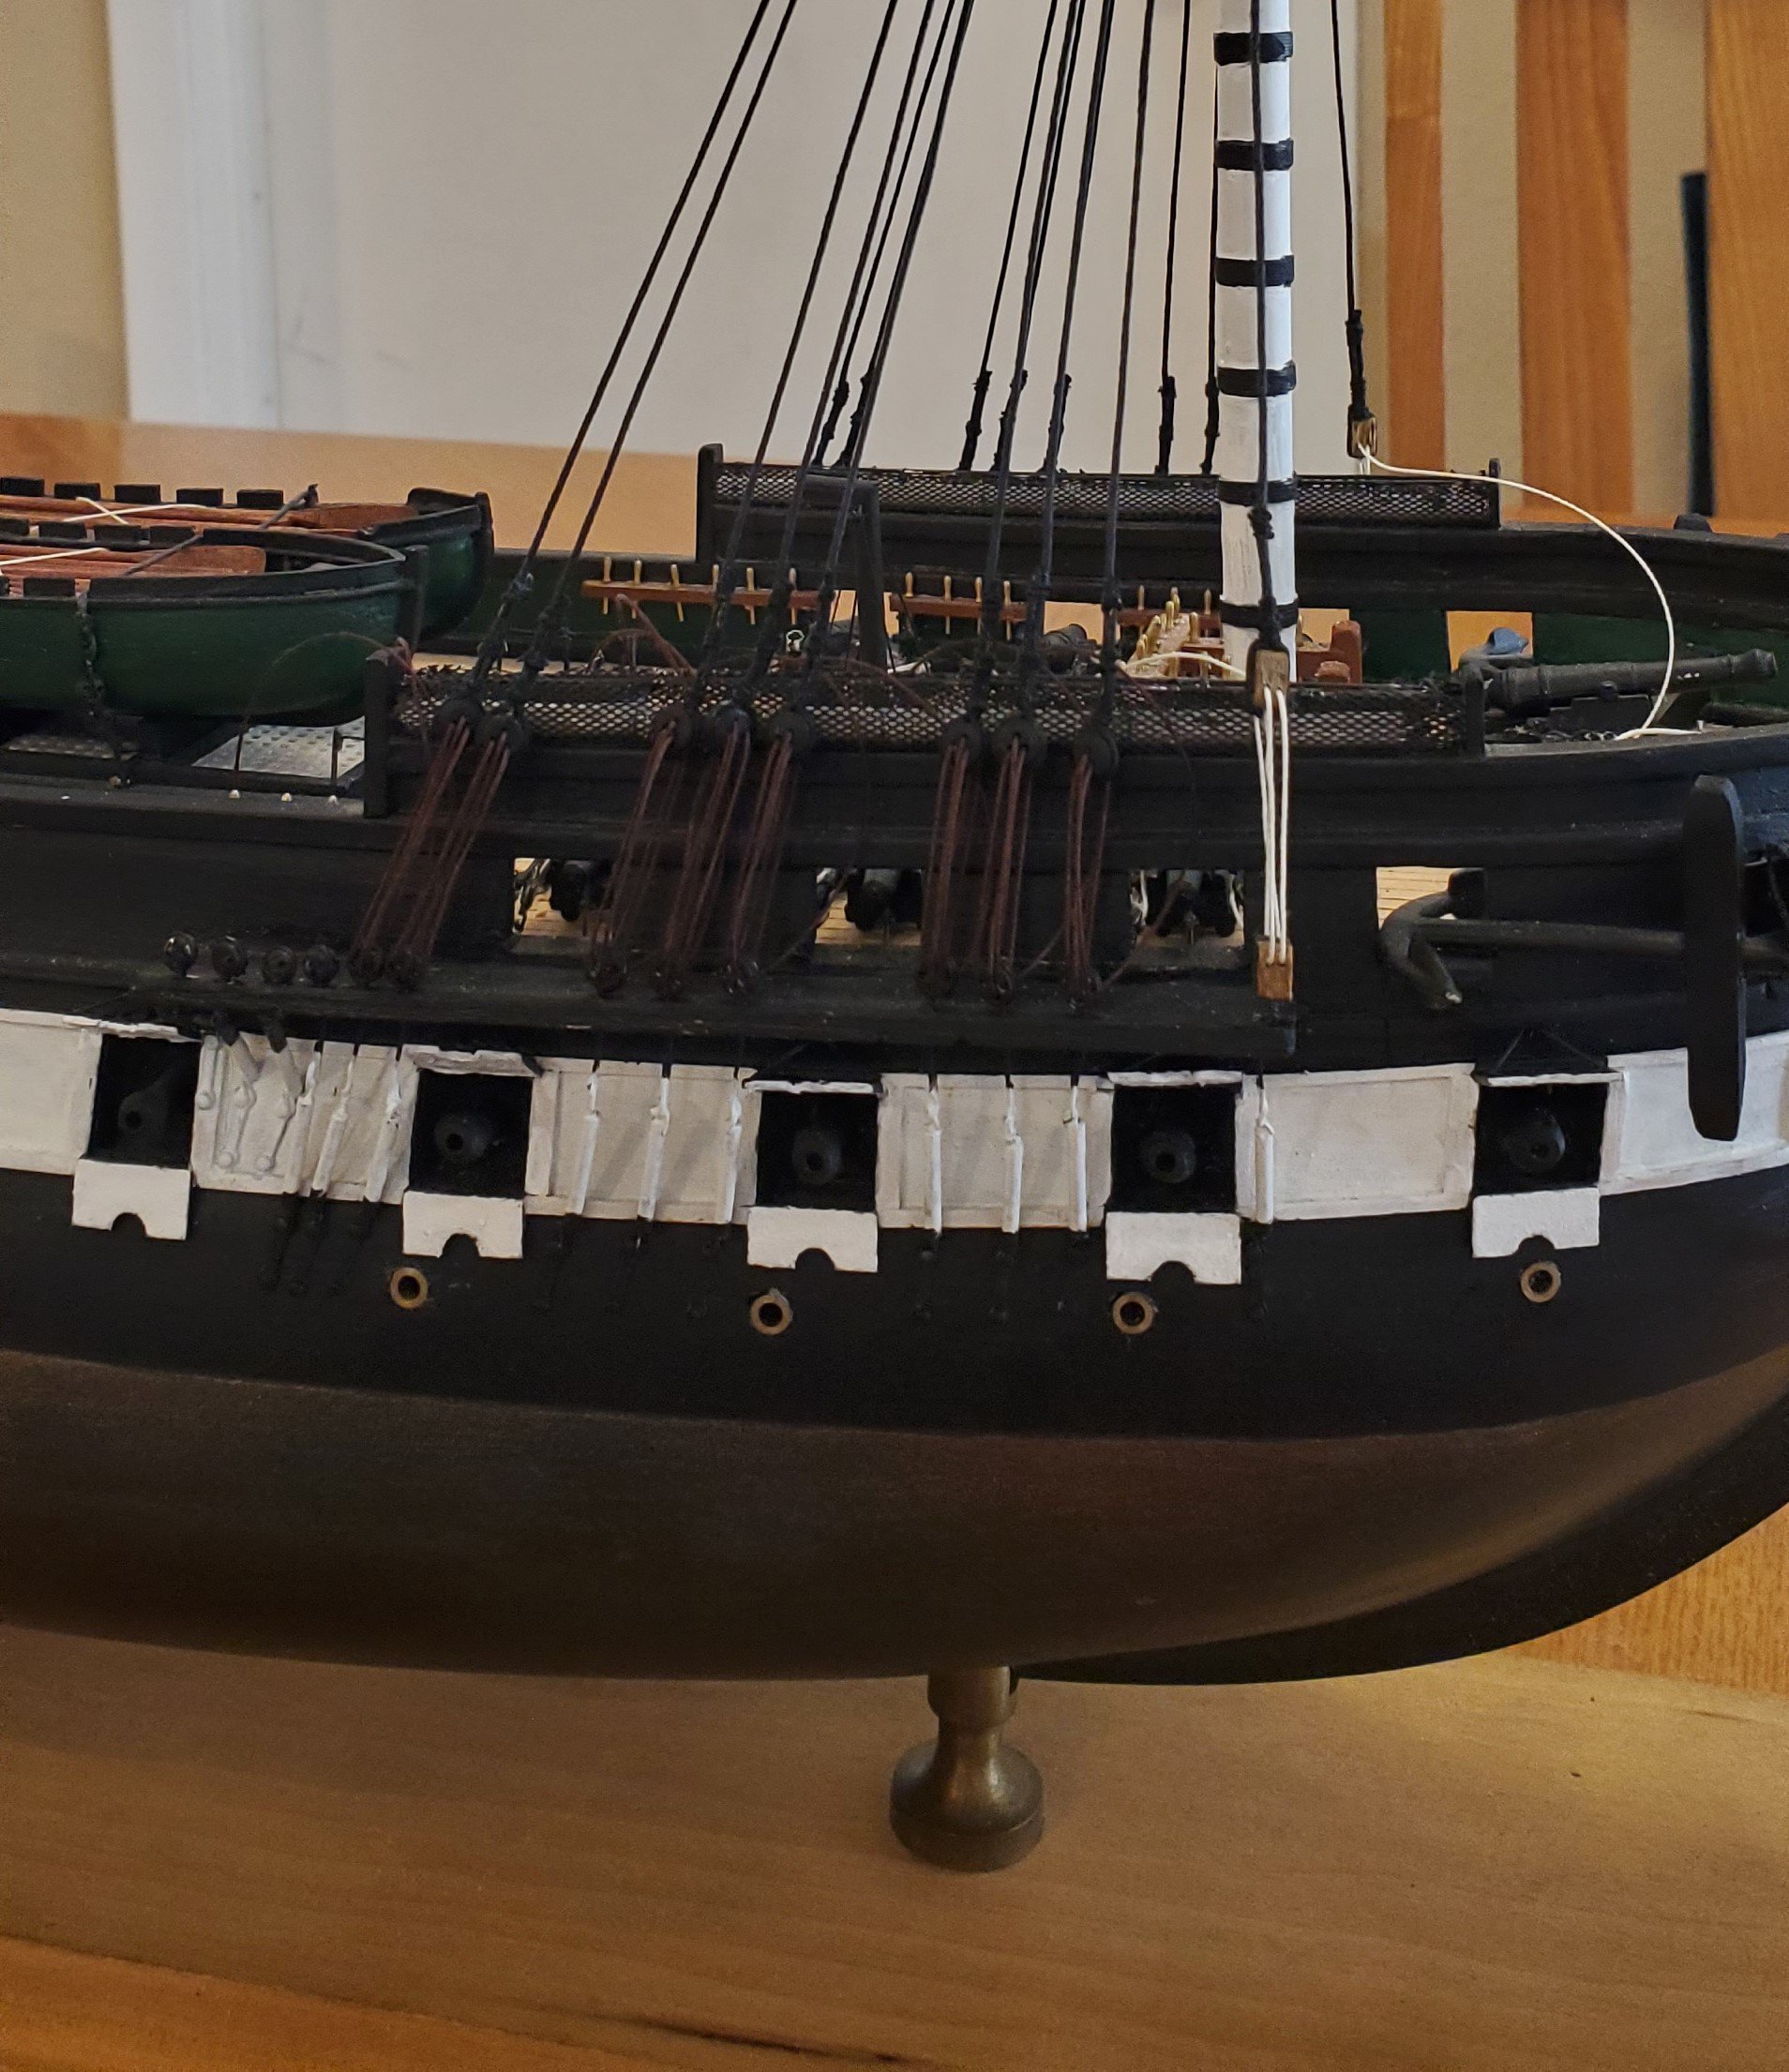
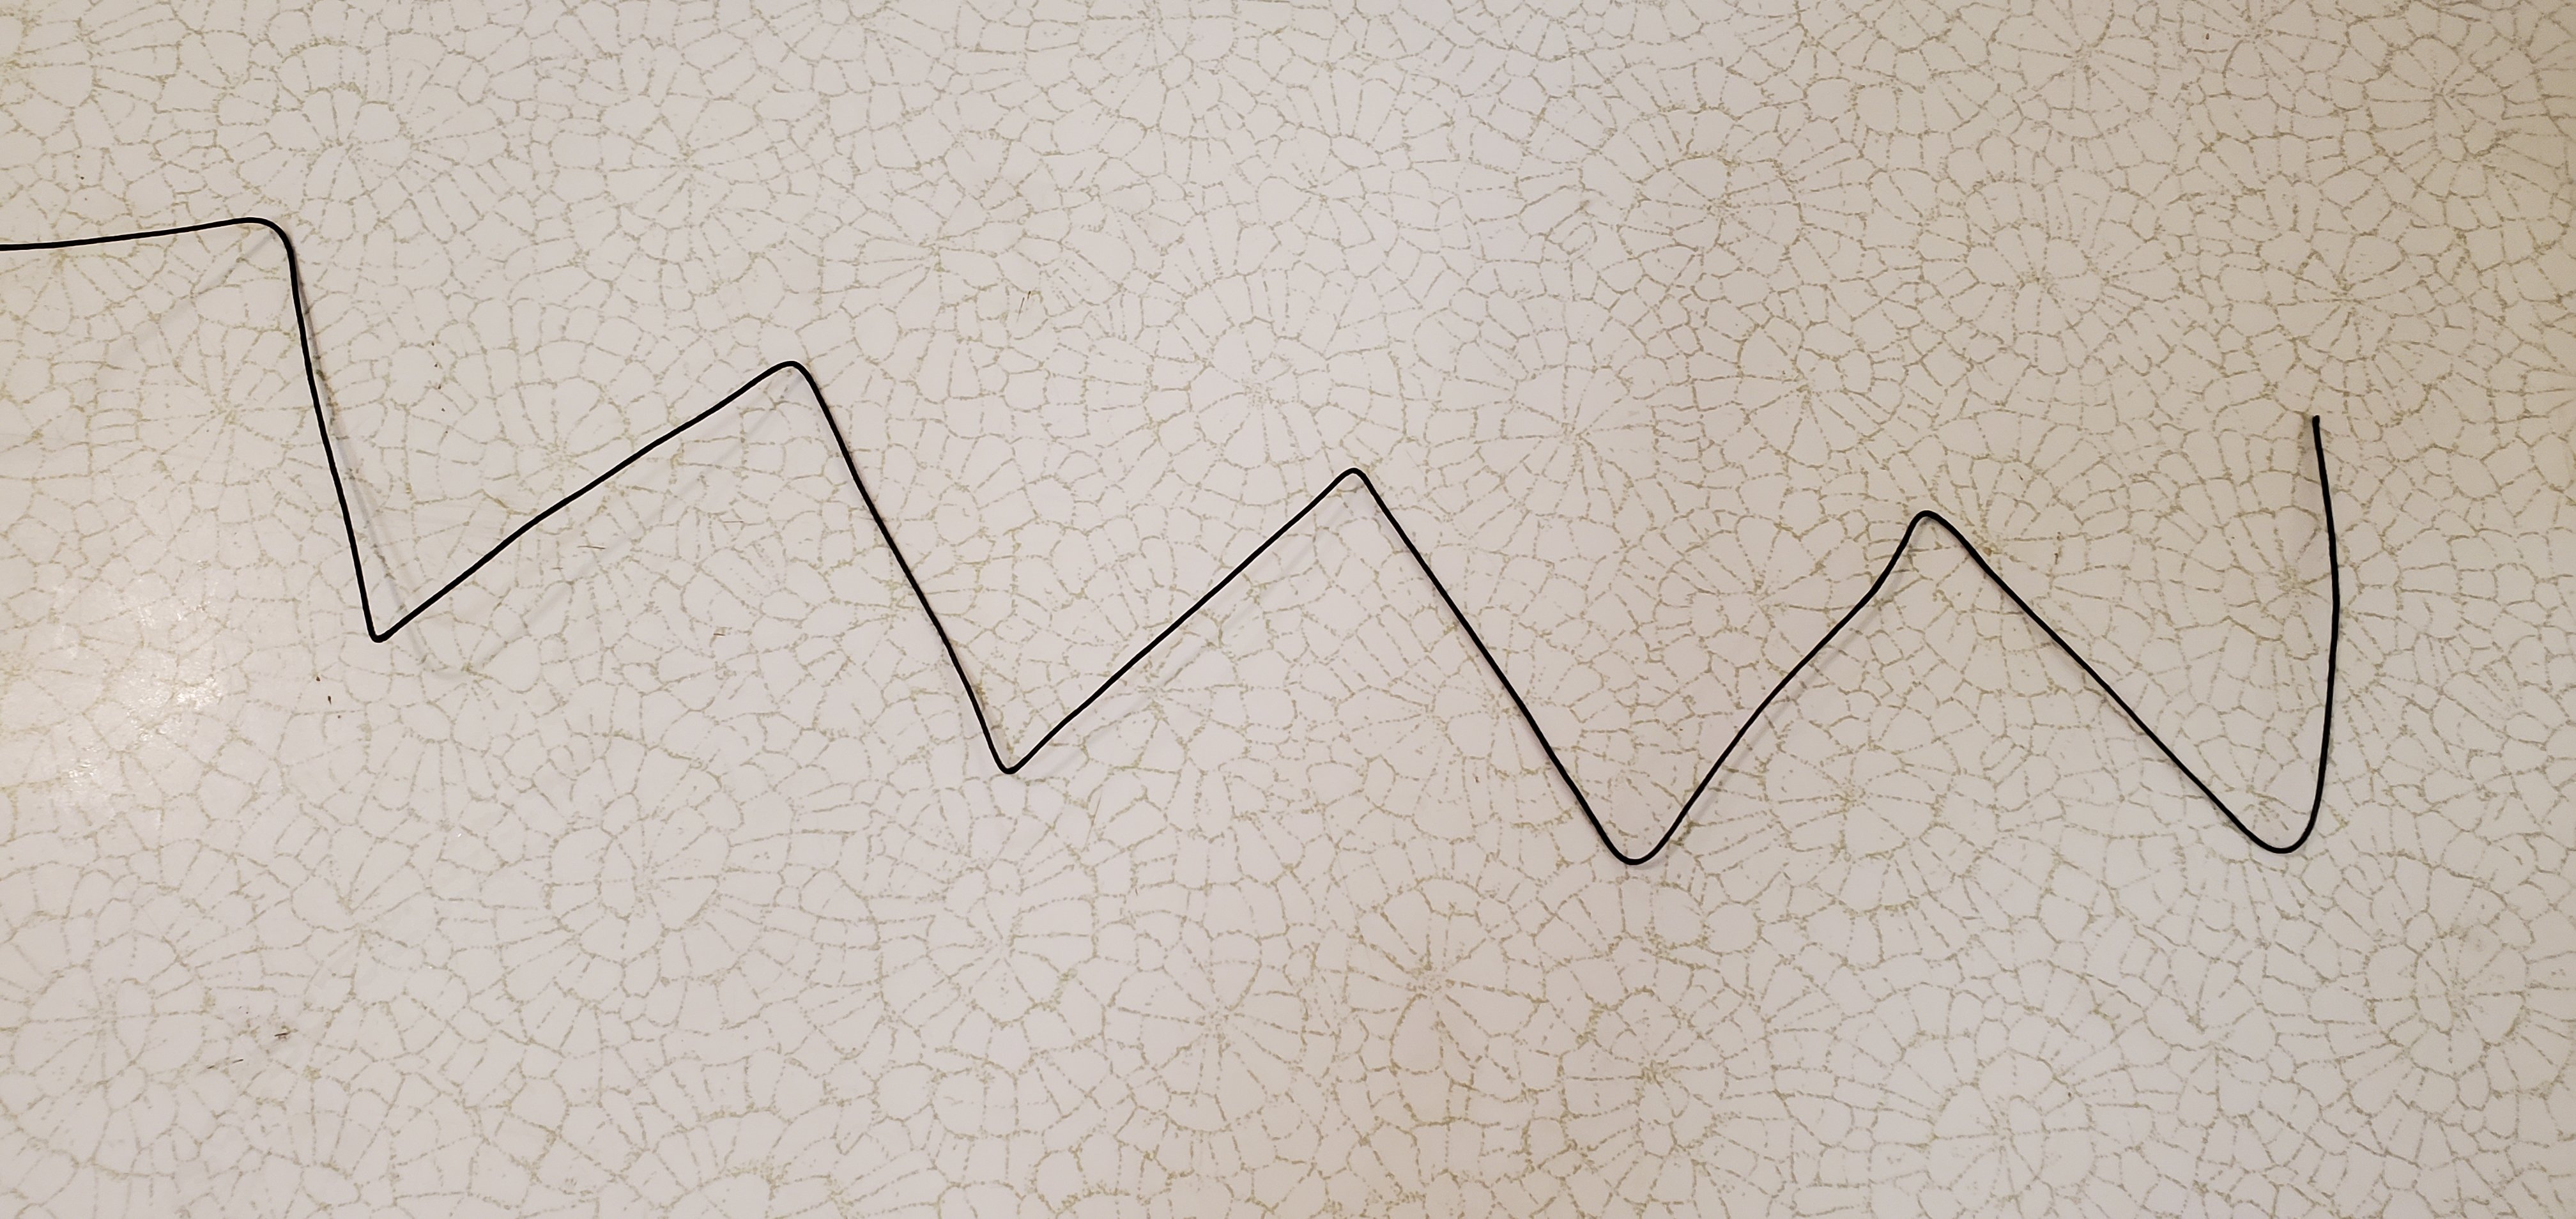
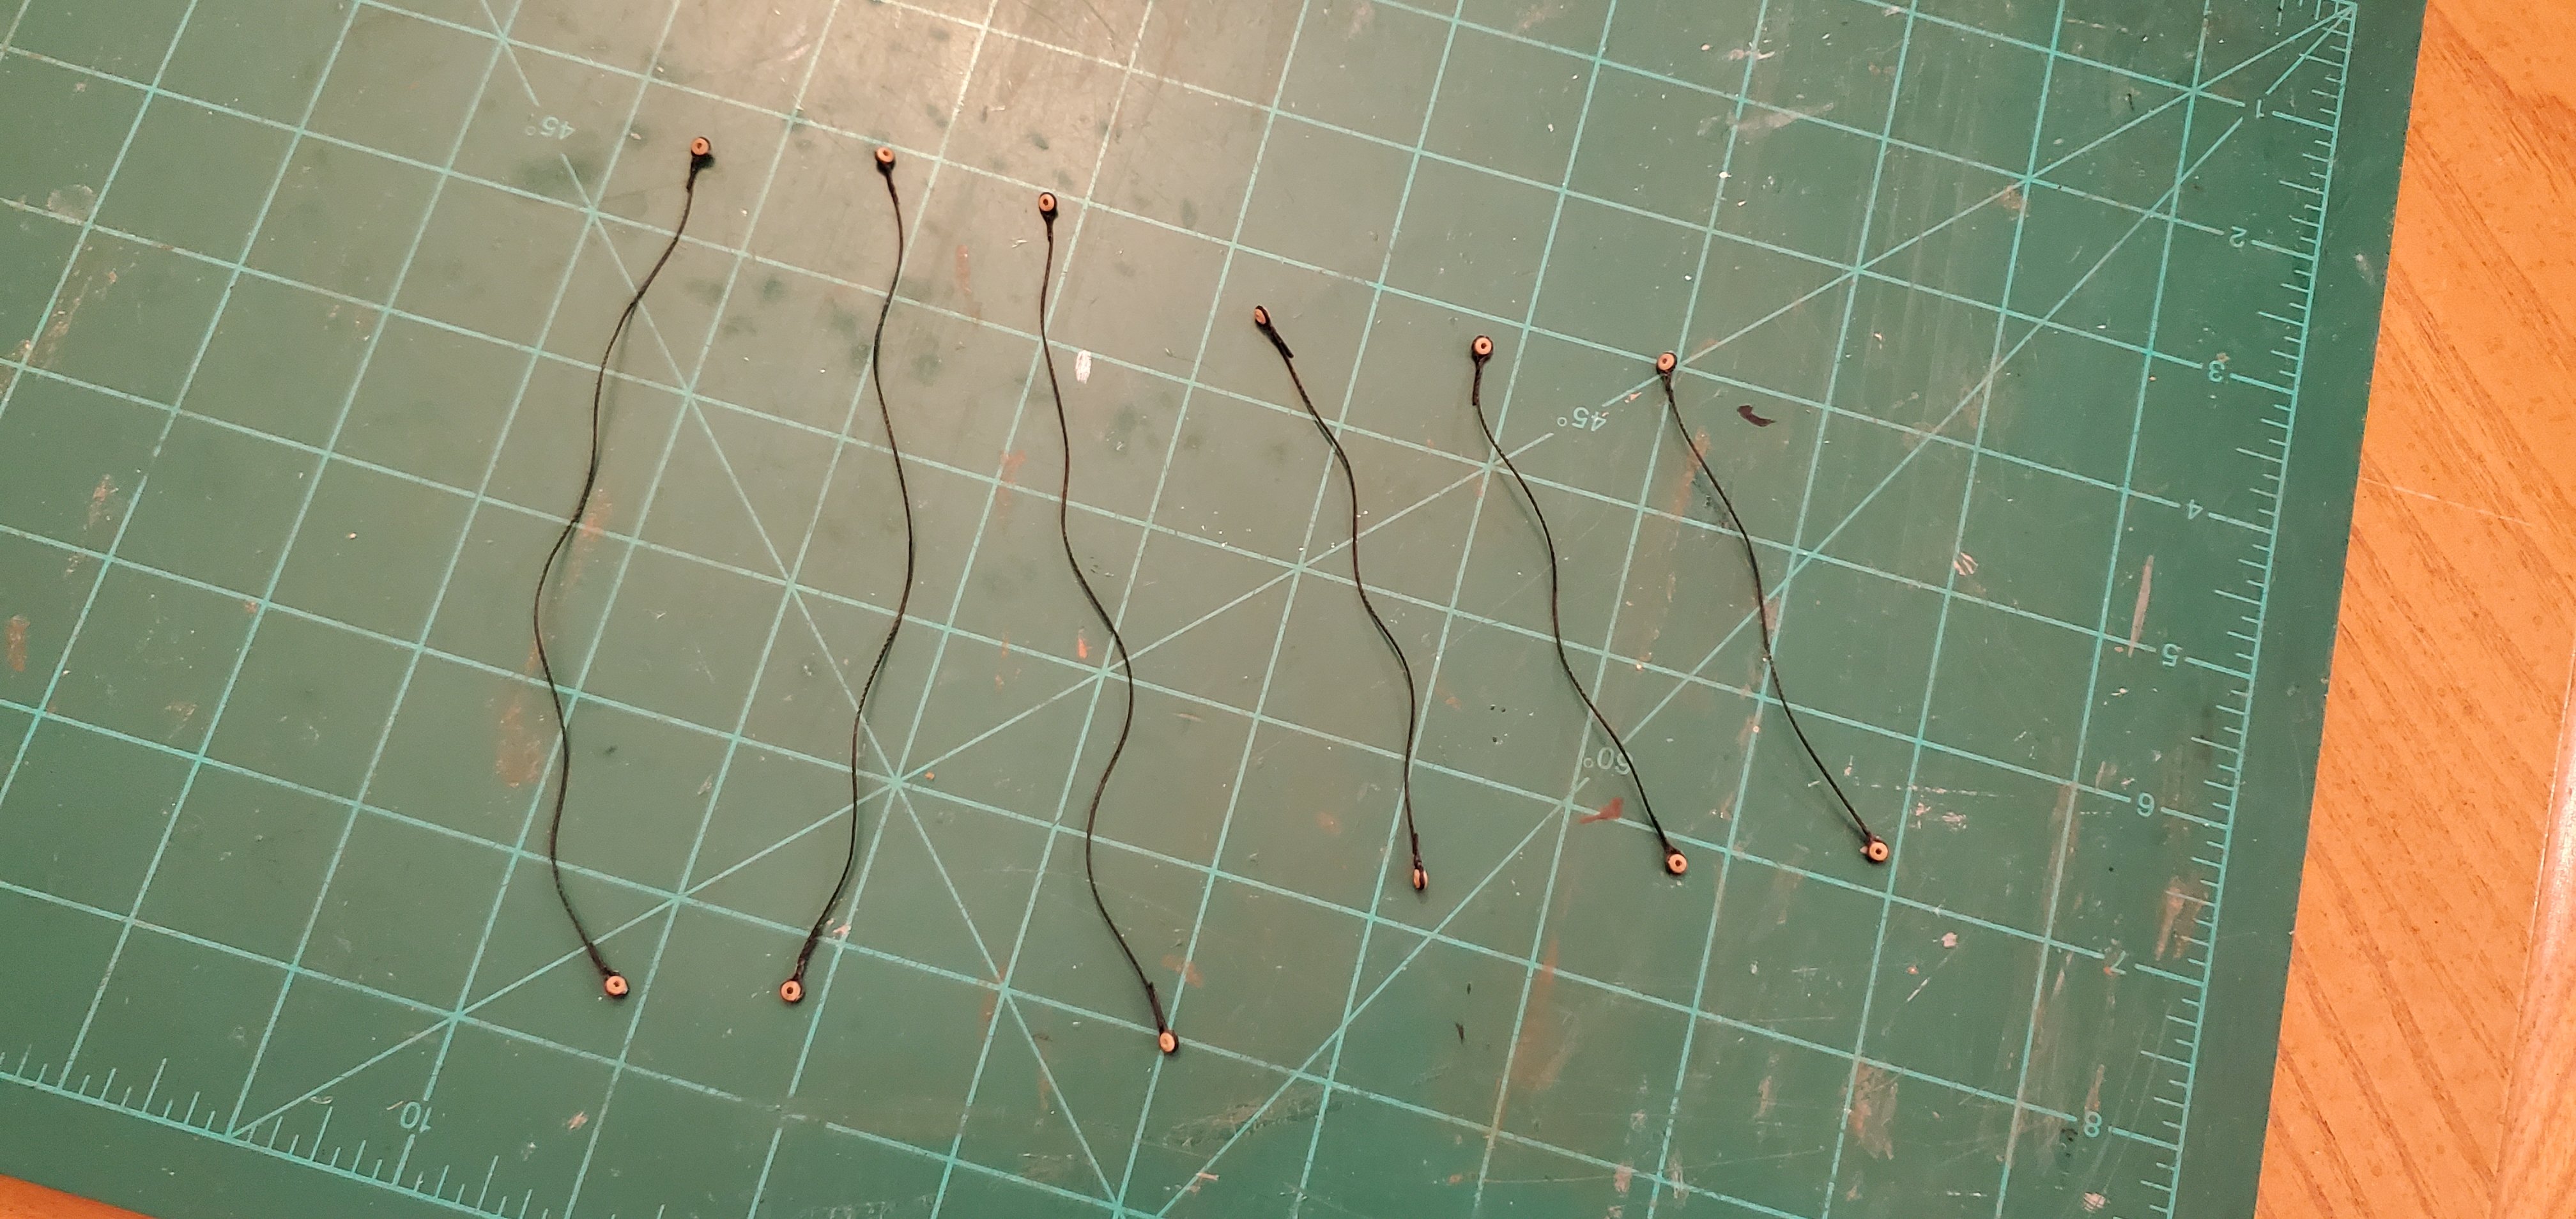
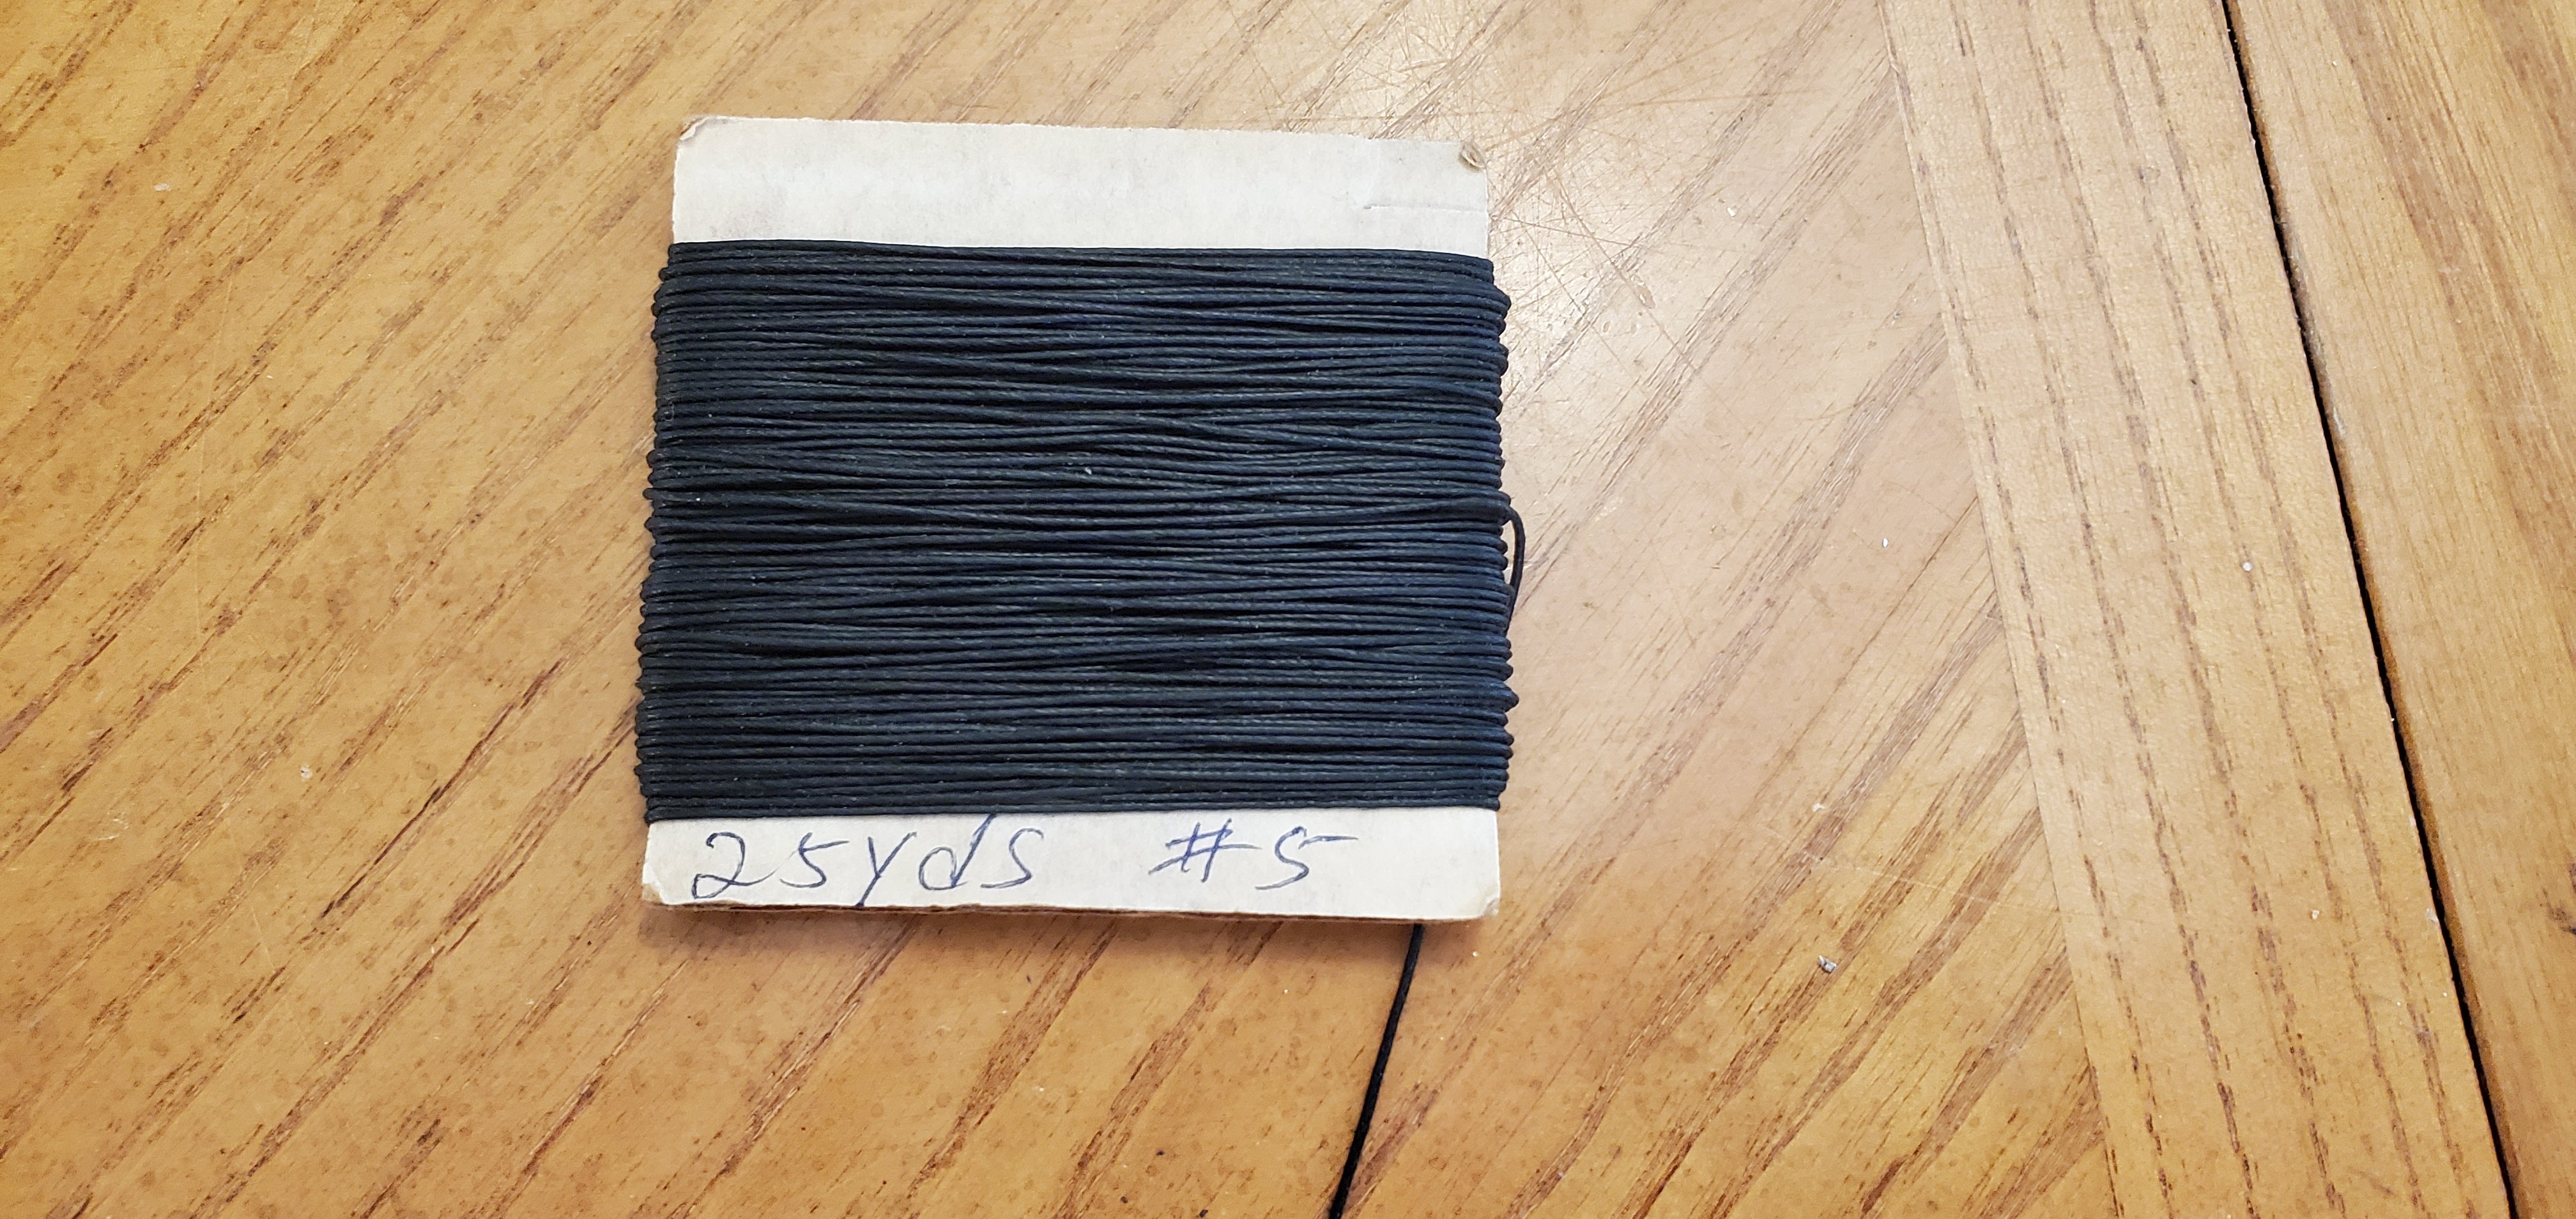
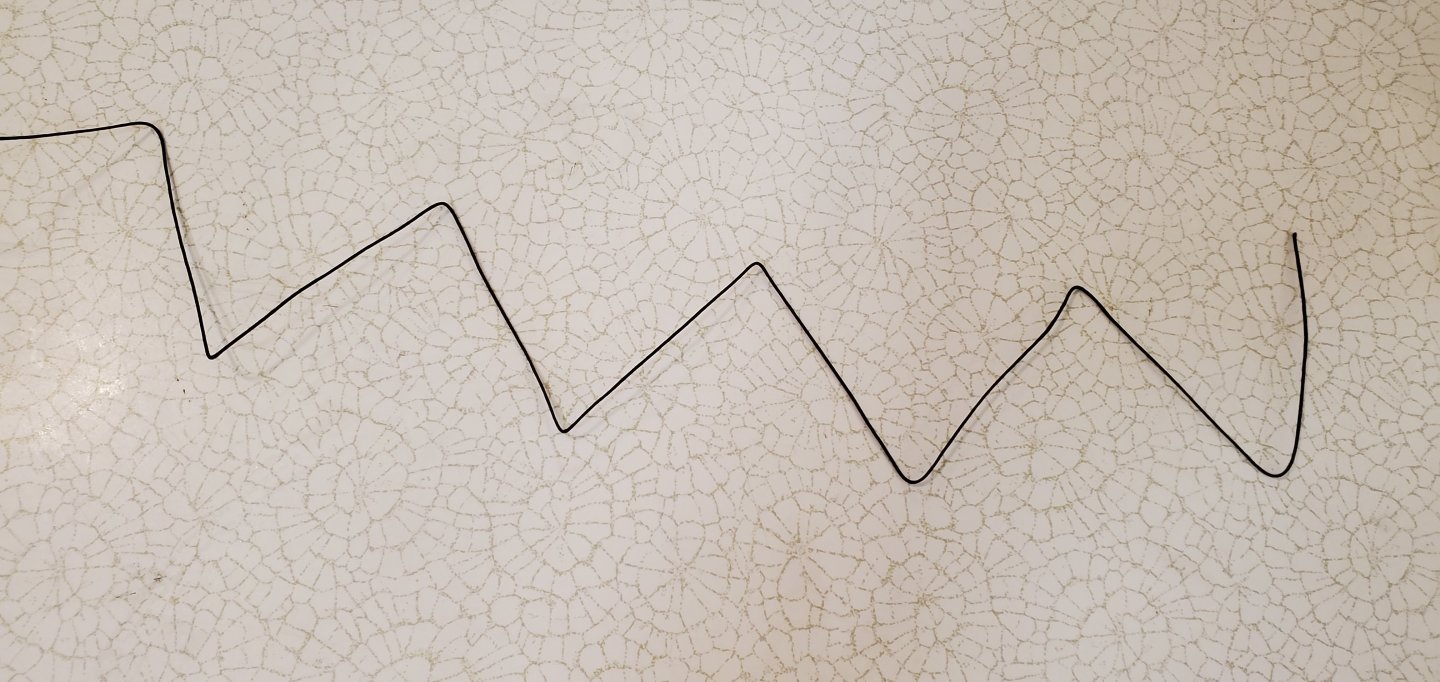
Switching shipyards back to the Constitution and time to start rigging the masts. First up, I made the running pendants. I'm not exactly sure what the purpose of these are as they appear to just hang from the mast unused. Nevertheless, they are going on. After fixing the runner pendants in place, I started adding the shroud pairs. The kit instructions recommend working bow to stern, alternating starboard to port. Nothing too difficult, but when I finished with the foremast, I noticed the lines did not hang very straight. They had prominent creases. I'm using shroud line from the original kit, which is 20 plus years old. The line is wrapped tightly around a cardboard square and has been sitting like that for a long time. Plus, the line feels heavily waxed which is probably why the creases hold their shape so well when unwound. Unfortunately, I didn't notice this and realize the possible consequences until I'd already seized the shroud pairs to the foremast. Since I didn't want to cut them all off and start over, I decided to see if I could literally iron out the creases. I did a test on a foot-long piece of line pressing the thread with 6-7 passes and a few puffs of steam. It worked very well. so time to try it on the installed shrouds. The challenge would be not having an ironing board. I have no pictures of the process since it took both hands, but what I did was grab a shroud pair, stretch it out horizontally and press the iron against the line as best I could with nothing to press it against. To my surprise (and thrill) it worked nicely. You can see in the pic below how much straighter they hang. Hopefully that will make aligning the deadeyes easier when I tie them off. Here's where I'm at now with all lower shroud pairs in place.


- 301 replies
-
- 10
-
-
- Constitution
- Bluejacket Shipcrafters
- (and 1 more)
-
Here's how I read the drawings. In the first drawing, F71 and F72 probably indicate different thicknesses for the lines. F700 (and other F+3 digits) indicate different size blocks. Each circled number points to a specific rigging line. You will have to figure out where each numbered line is tied off, then trace its path though the blocks till it disappears below the bulwark. The 2nd drawing is the belay plan and shows where to tie off each of the numbered lines. I can't tell from the drawing which ones are tied to belay pins and which to cleats. Maybe the little circles, like for 1, 4, 8, 11 are pins and the little ovals are cleats? That's my guess anyway!
- 55 replies
-
- 1
-

-
- Le Martegaou
- billing boats
- (and 1 more)
-
That's a beautiful model, Chris! I particularly love the contrasting light and dark planks of wood at the stern. Congratulations on a fine build!
-
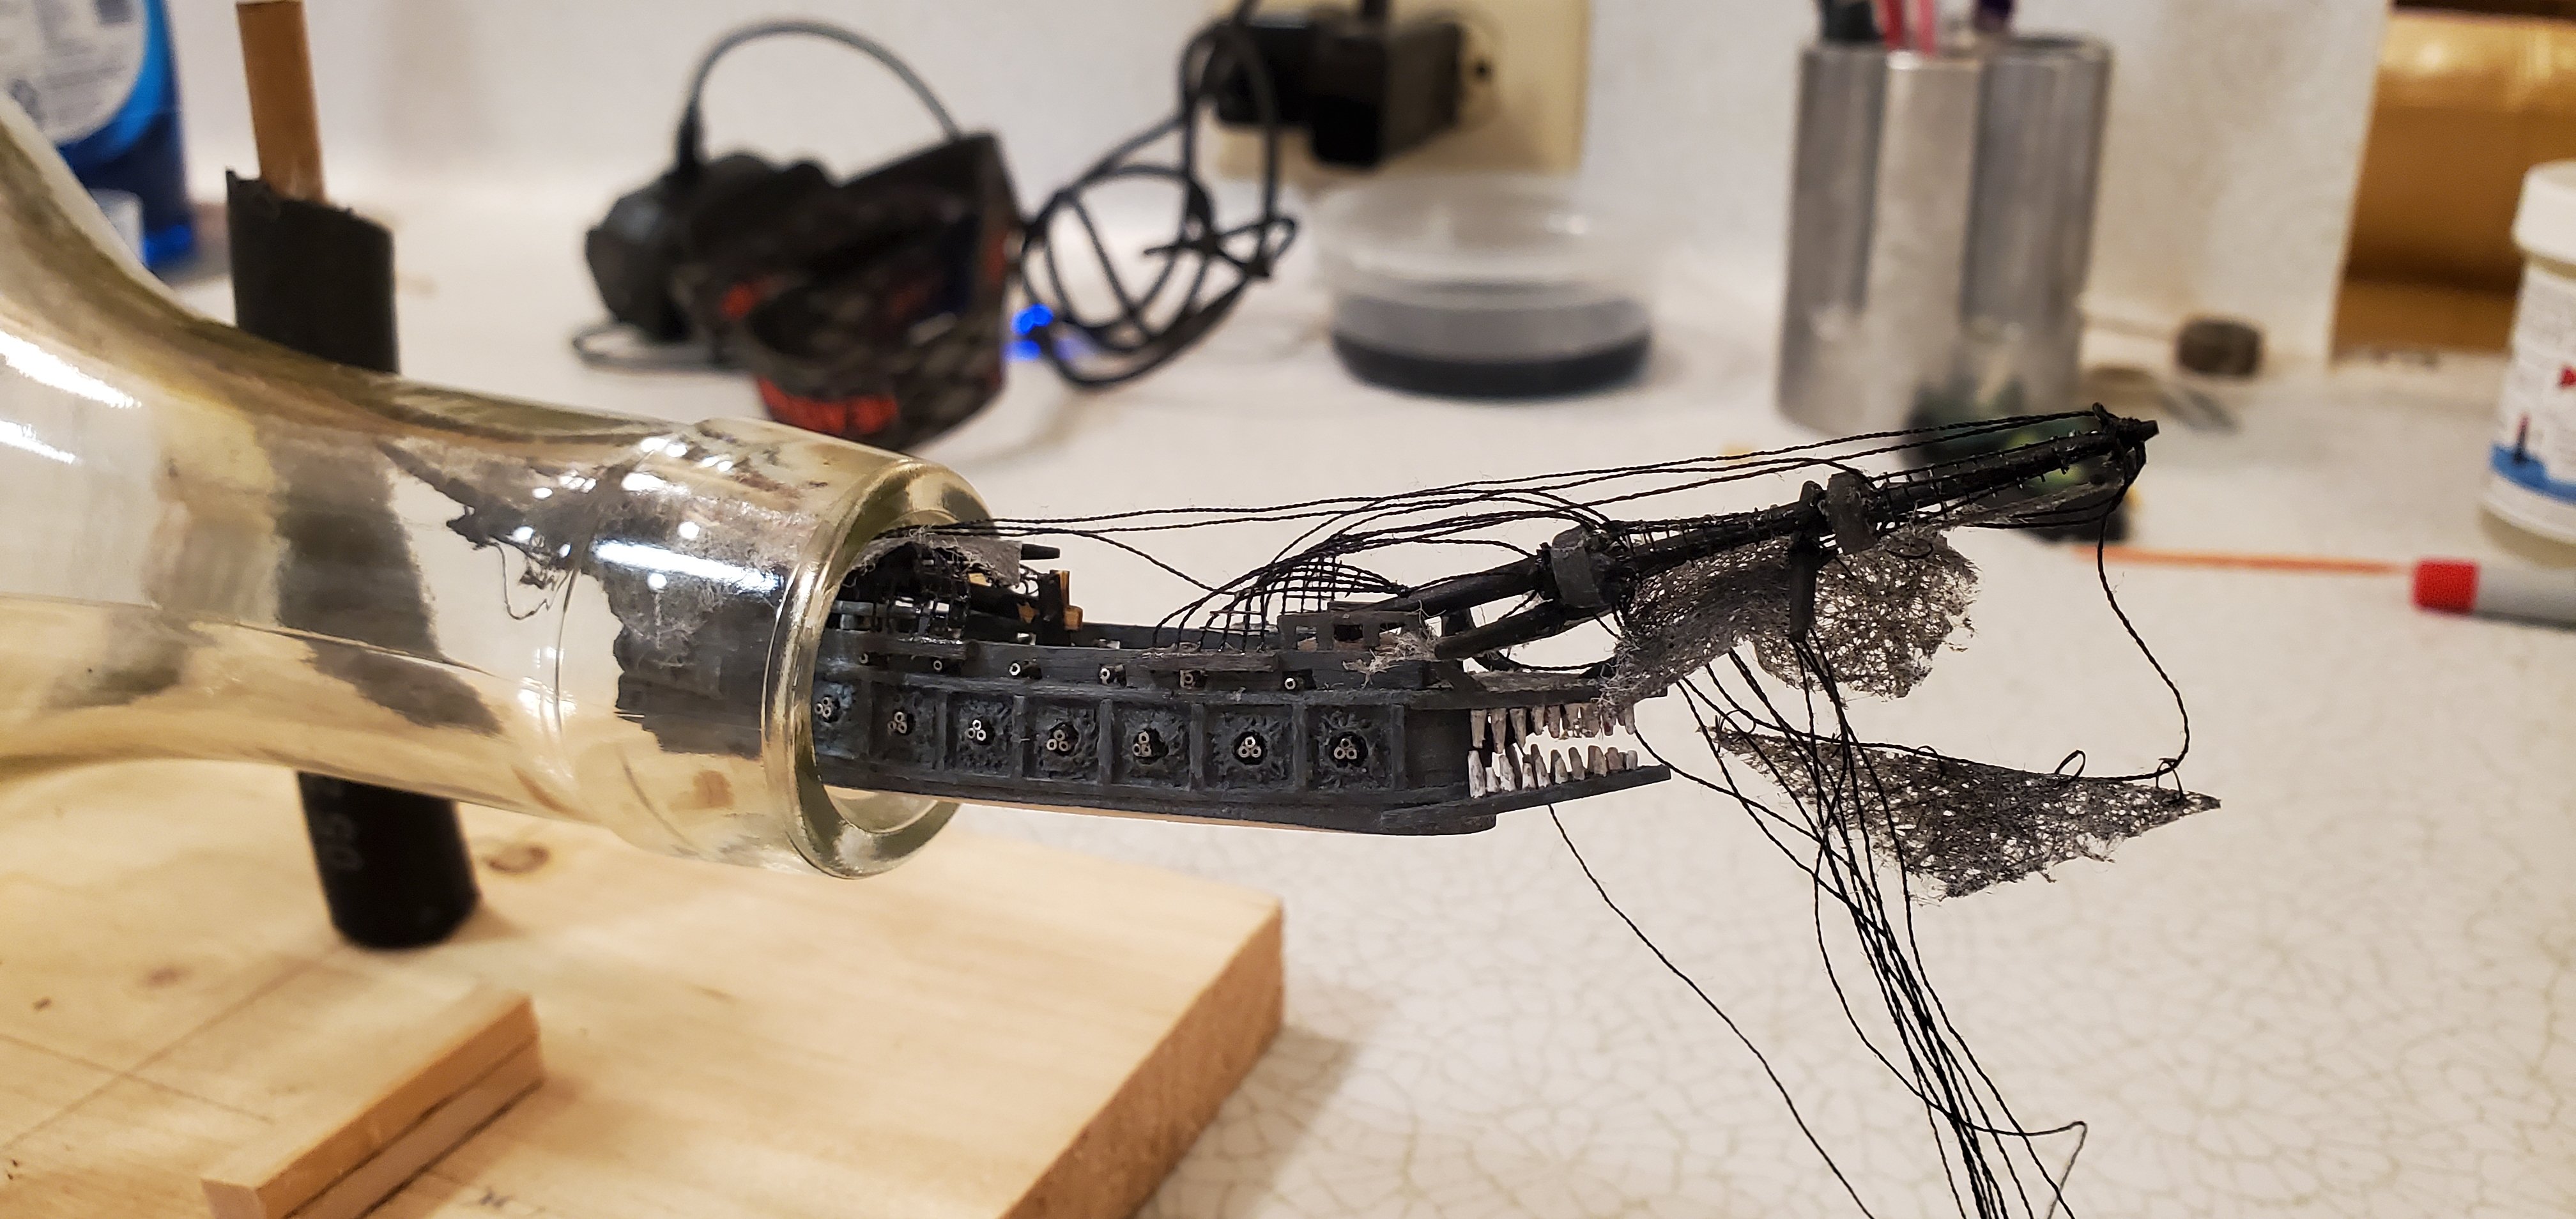
You got that right, Pat. Had the bottle opening been 1mm wider, the ship would have slipped in the normal way with all masts folding to stern. 1mm narrower and I'd be starting the whole thing over! All of that speaks to my poor planning up front. From now on, I just need to make my ships 10% smaller than my original design. Thanks, Ian! It will be a while though. I've still got a whole nuther ship to build, not to mention the whirlpool!
- 185 replies
-
- 10
-
-
- Flying Dutchman
- Black pearl
- (and 2 more)
-
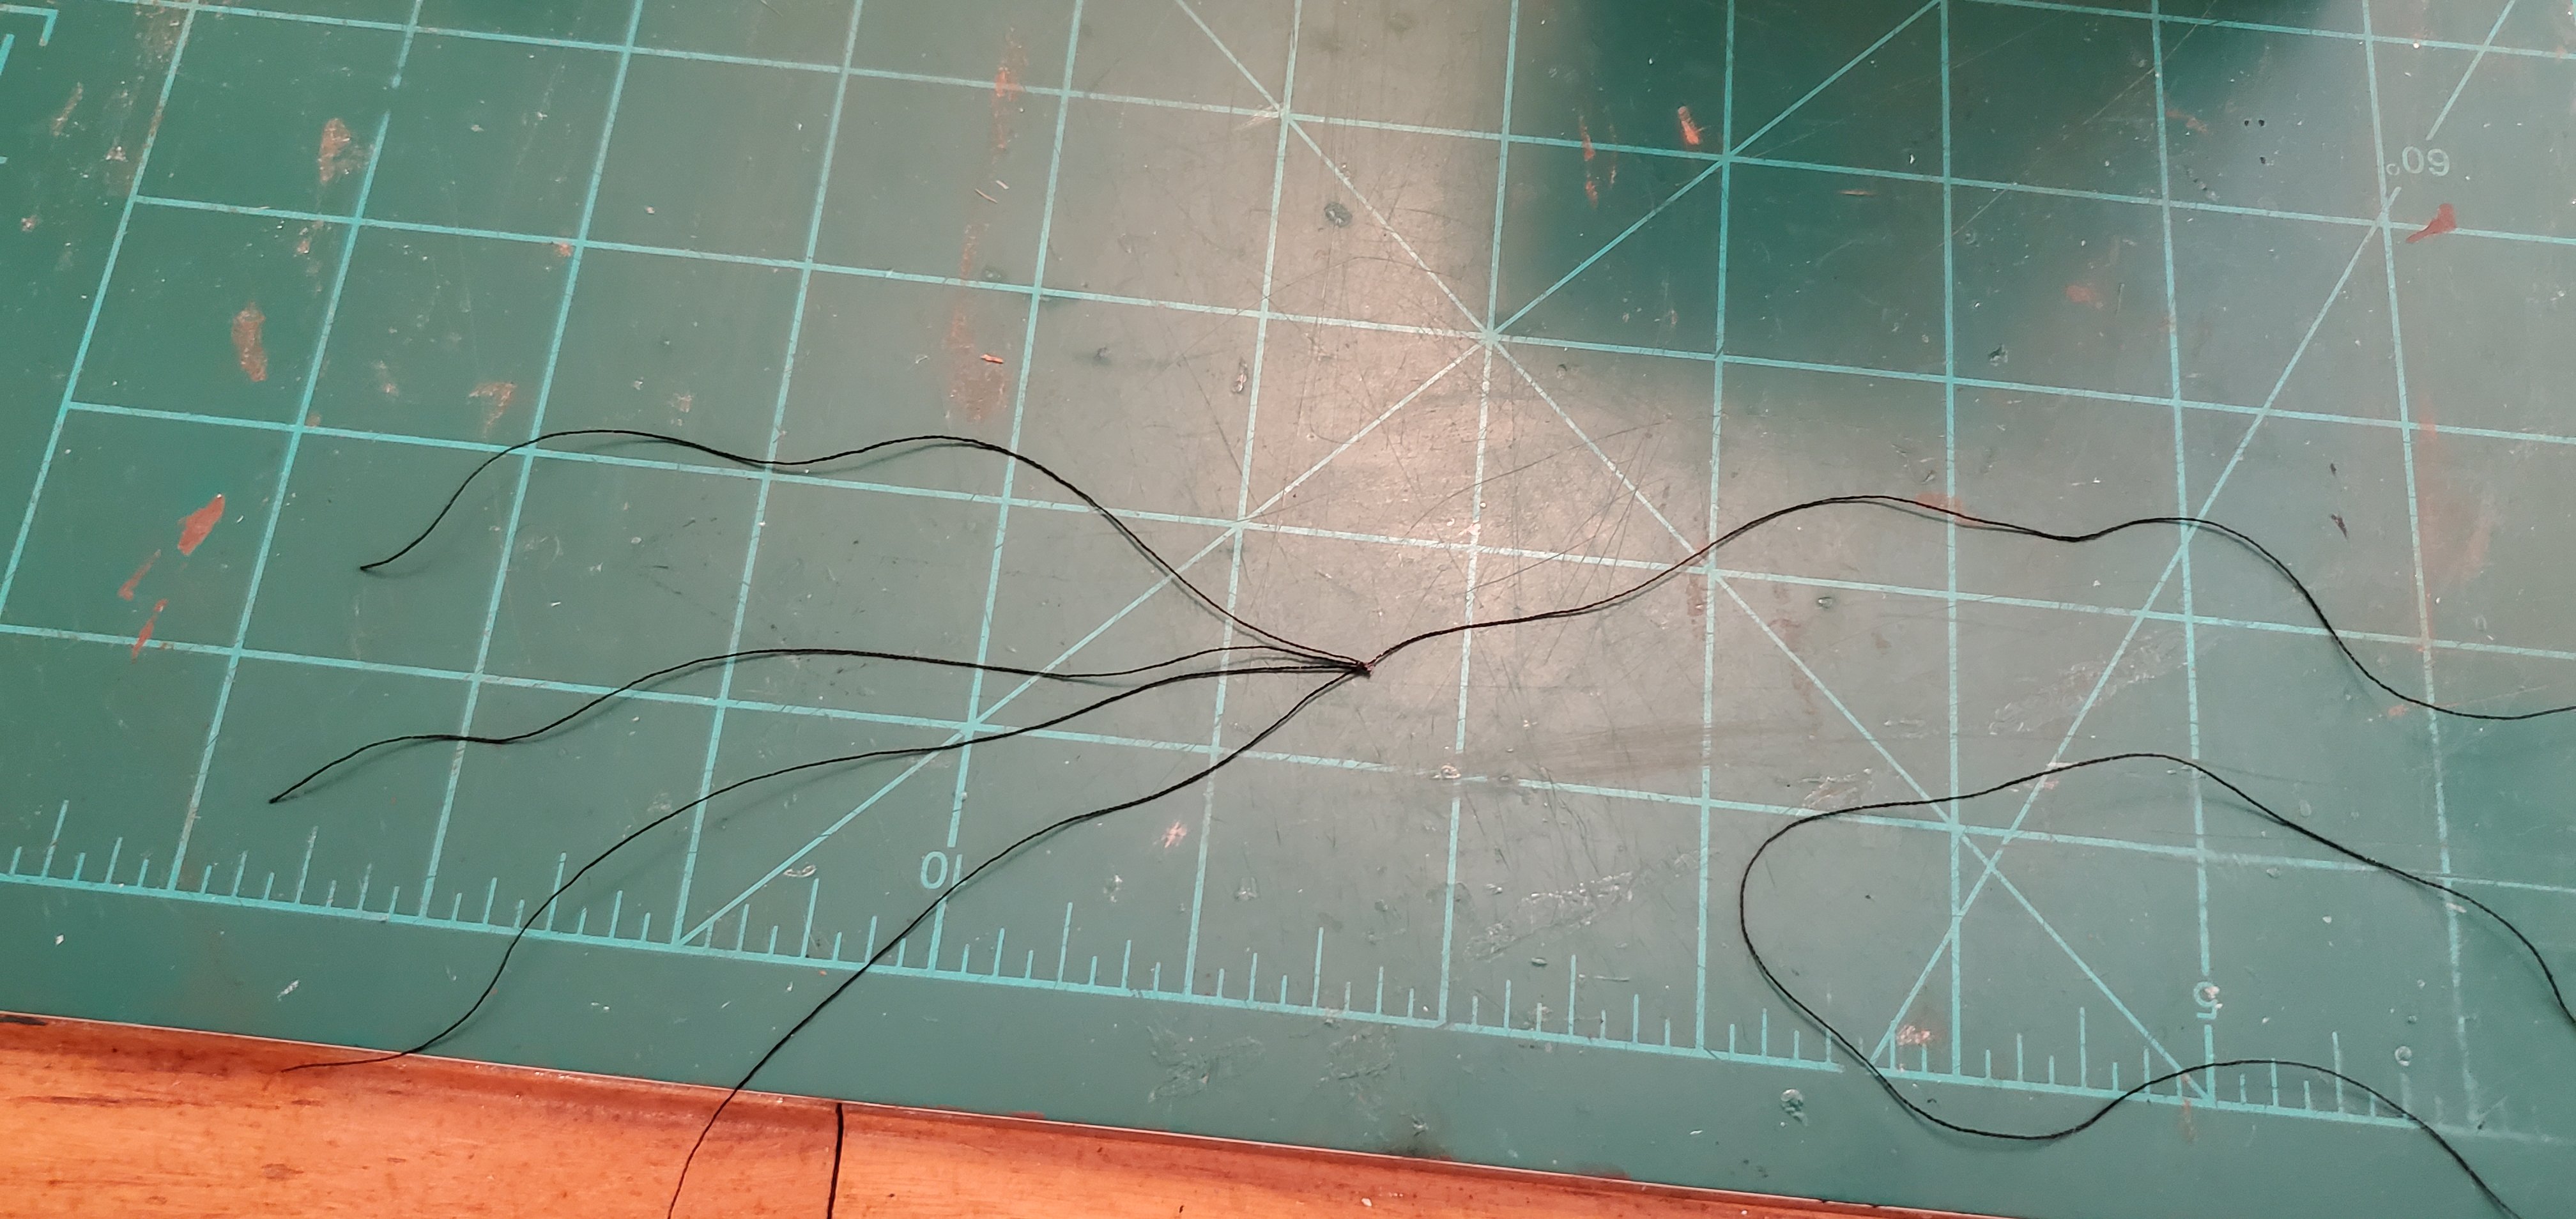
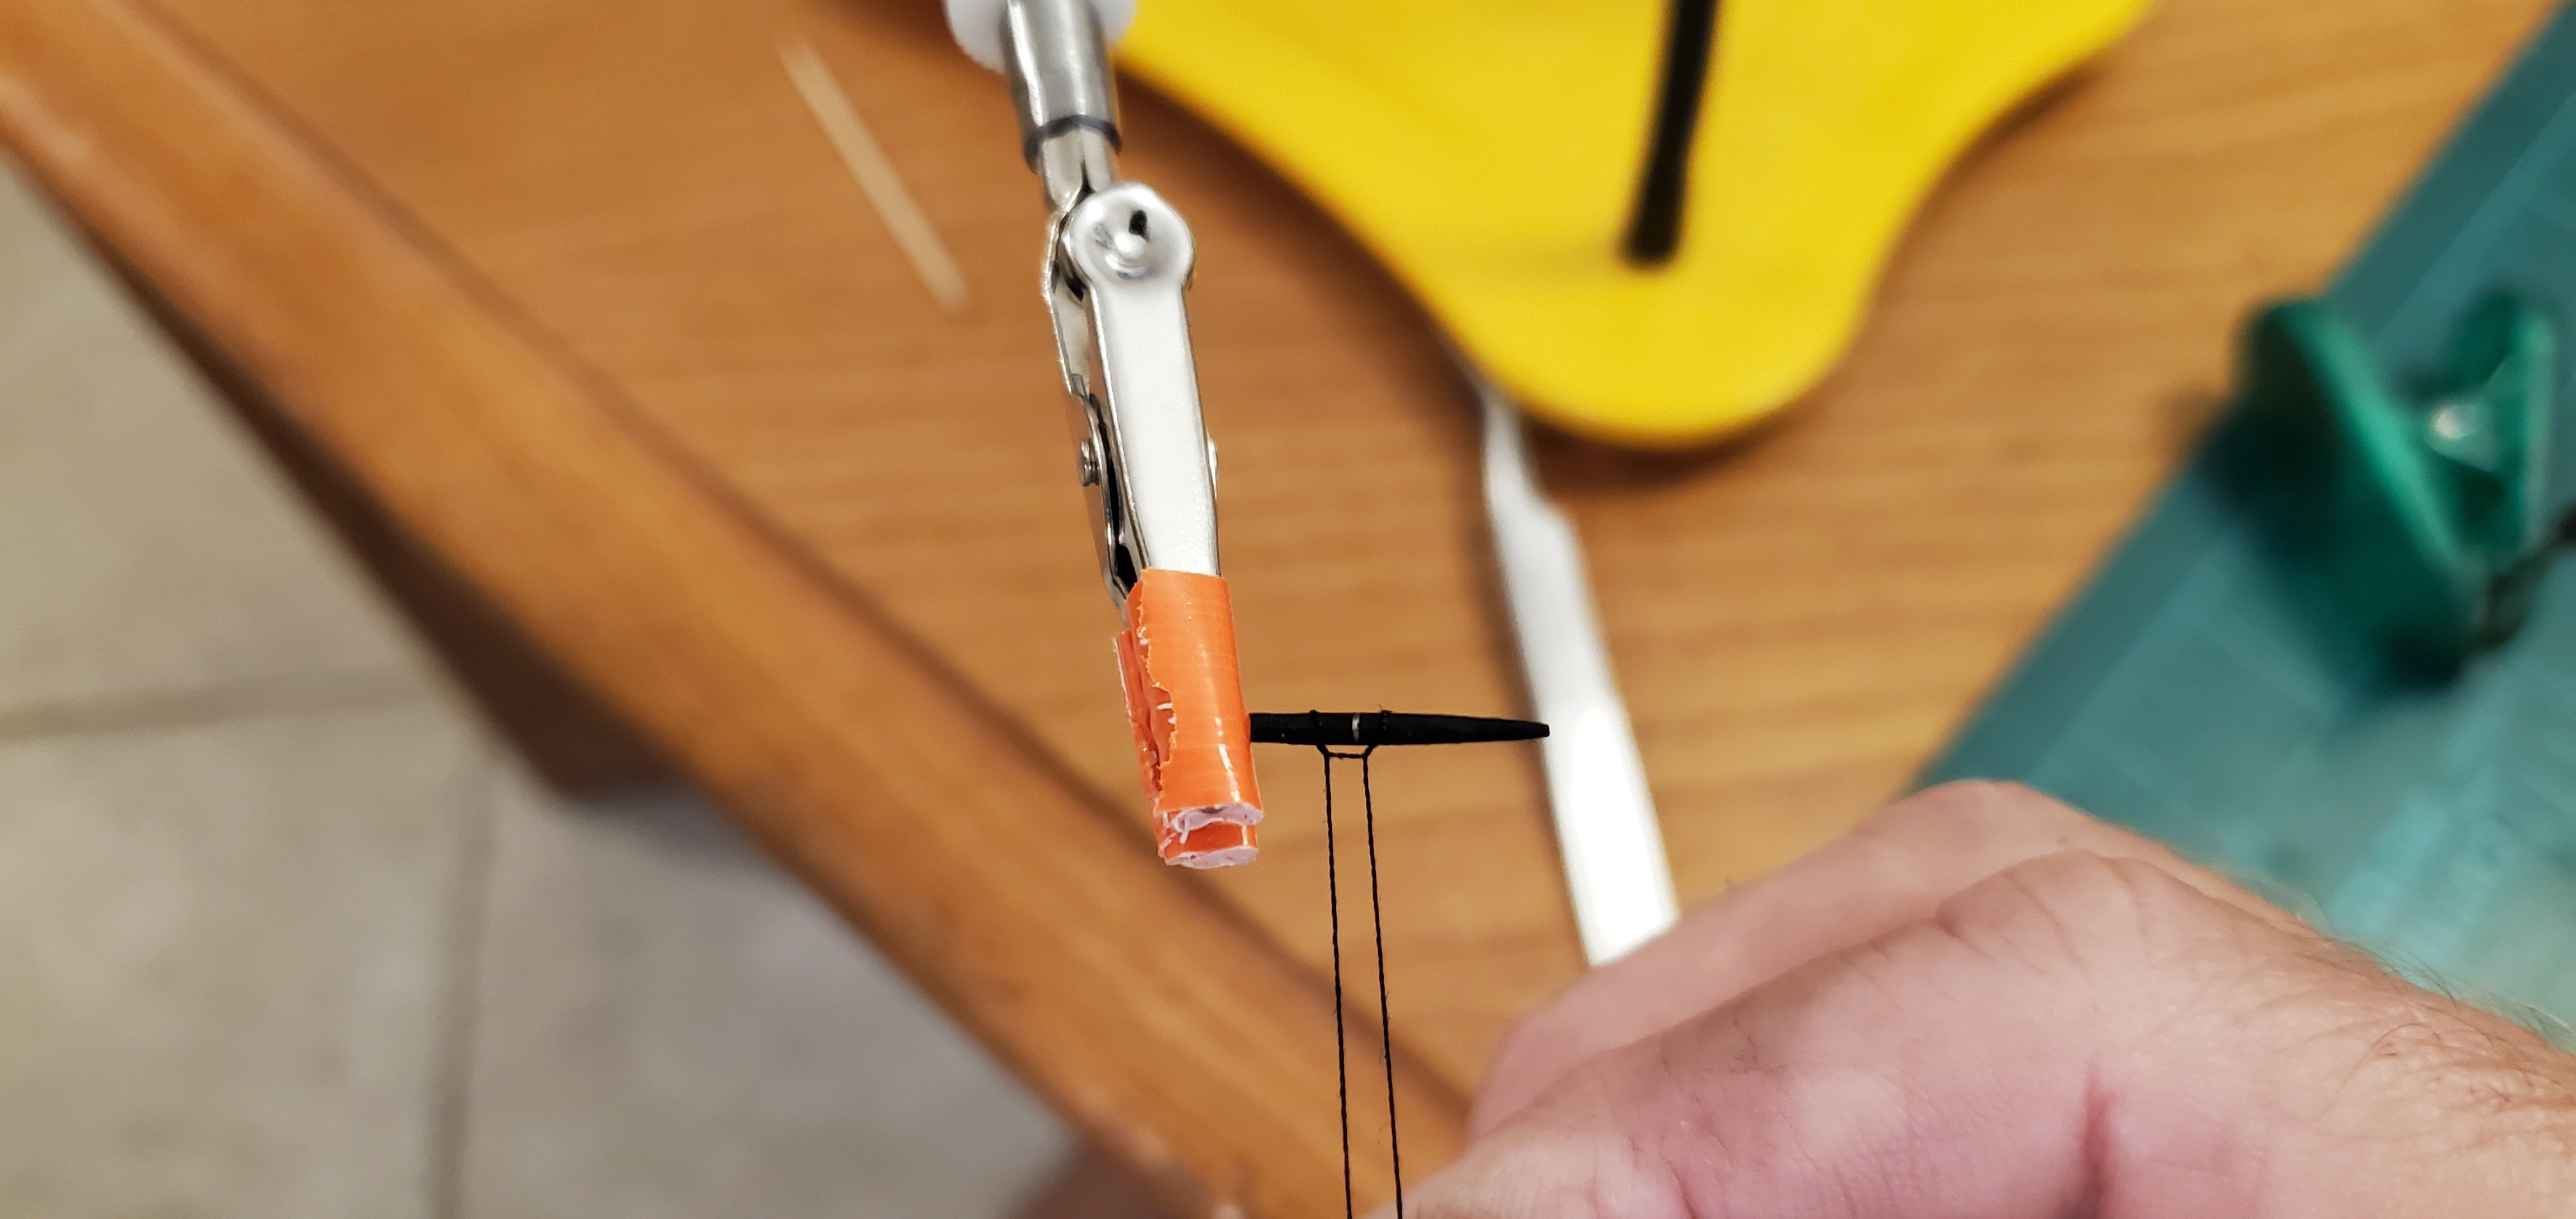
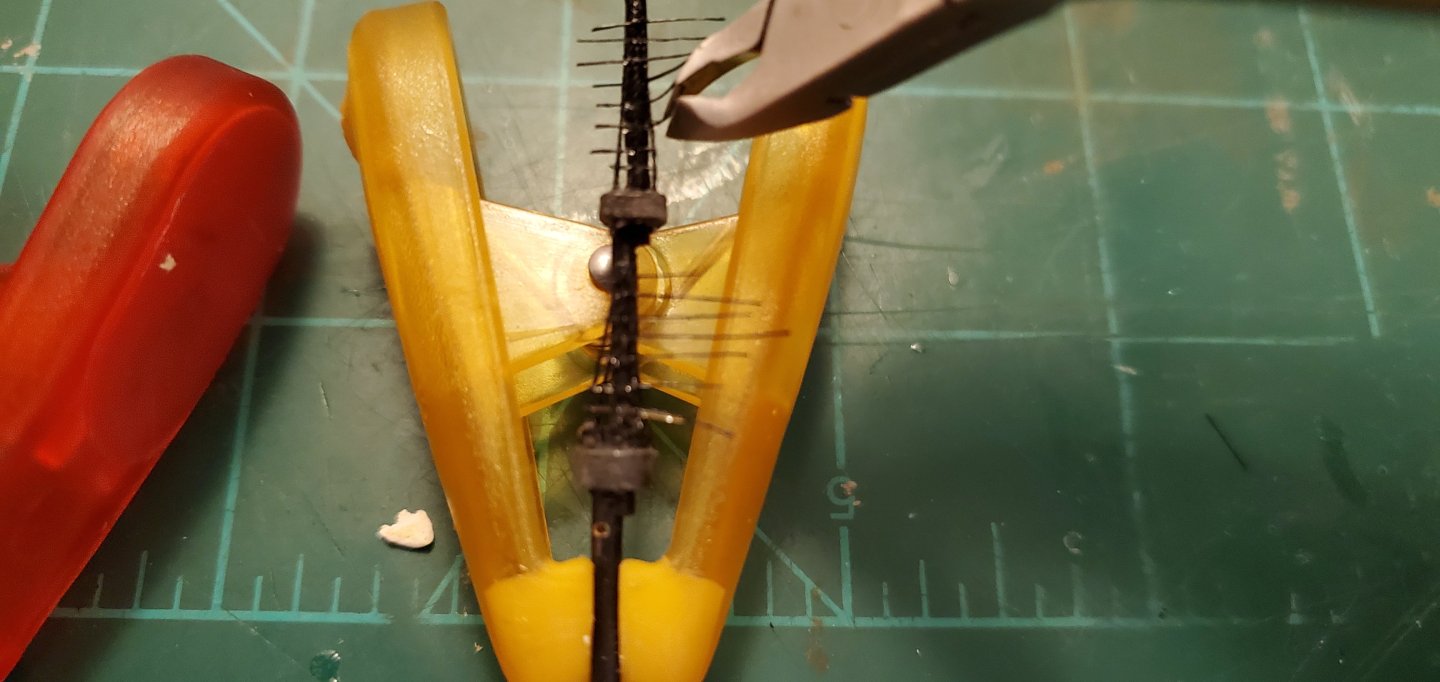
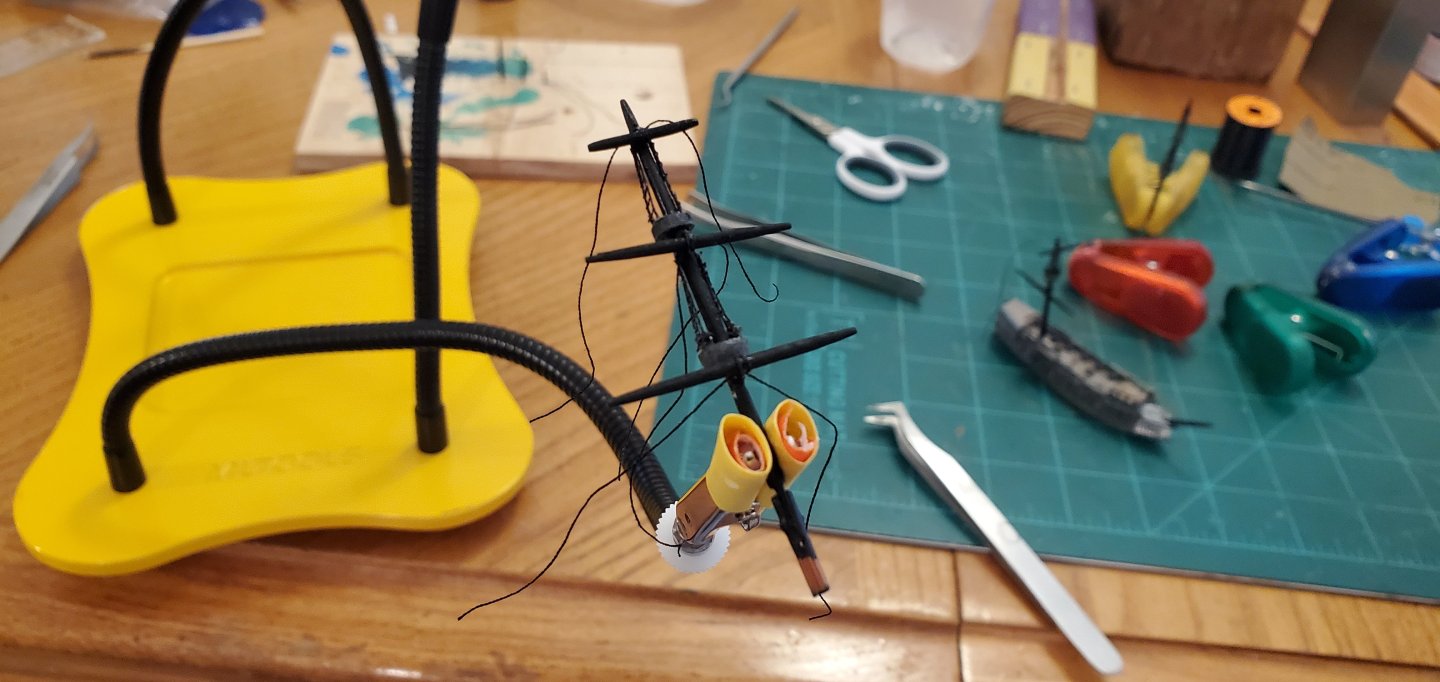
I think Keith's unique mind is its own private penguin breeding colony!! The final challenge for my Dutchman is the fore mast shrouds and back stays. Normally, I will tie off a shroud to the starboard channel, run it through a tiny hole in the mast (just below the mast top), and tie it off on the port channel. That works great when the masts hinge sternward. However, as mentioned earlier due to my poor ship design, I am forced to hinge the fore mast forward to get it to fit in the bottle. So here's the idea I came up with for the fore mast shrouds and backstays that would allow the mast to hinge forward. I cut a single 18" long thread and tied 3 other (shorter) threads to it. Then I installed a small eye pin (1.4mm outside diameter) on each side of the mast just below the crow's nest where I normally would have run the shrouds through the mast to the other side. I tied off each of the shrouds to the channels then ran the single long thread through the eye pin. The long thread will run out of the bottle and allow the mast to hinge forward. Once the ship is in the bottle, I'll raise the mast and the eye pin will meet the knot where the top of the shrouds are all tied together. For the back stays, I did basically the same thing except I did not have to tie any together. The forward back stays run through a small hole I drilled in the mast just above the crow's nest. The rear back stays run through an eye pin installed near the top of the fore mast. The last thing I did was install 2 stay sails above the bowsprit. The lines are a bit loose because nothing is under any tension until it gets inside the bottle. And here's how she looks folded up, impatiently waiting for me to make a whirlpool in the bottle. With the Dutchman complete, it's time to put the bottle down and get some more work done on the Constitution.


- 185 replies
-
- 19
-
-
-
- Flying Dutchman
- Black pearl
- (and 2 more)
-
Fantastic job! I love the poor lobster in the trap!!
- 65 replies
-
- 2
-
-
-
- Maine Peapod
- Midwest Products
- (and 1 more)
-
Agree 100%.
-
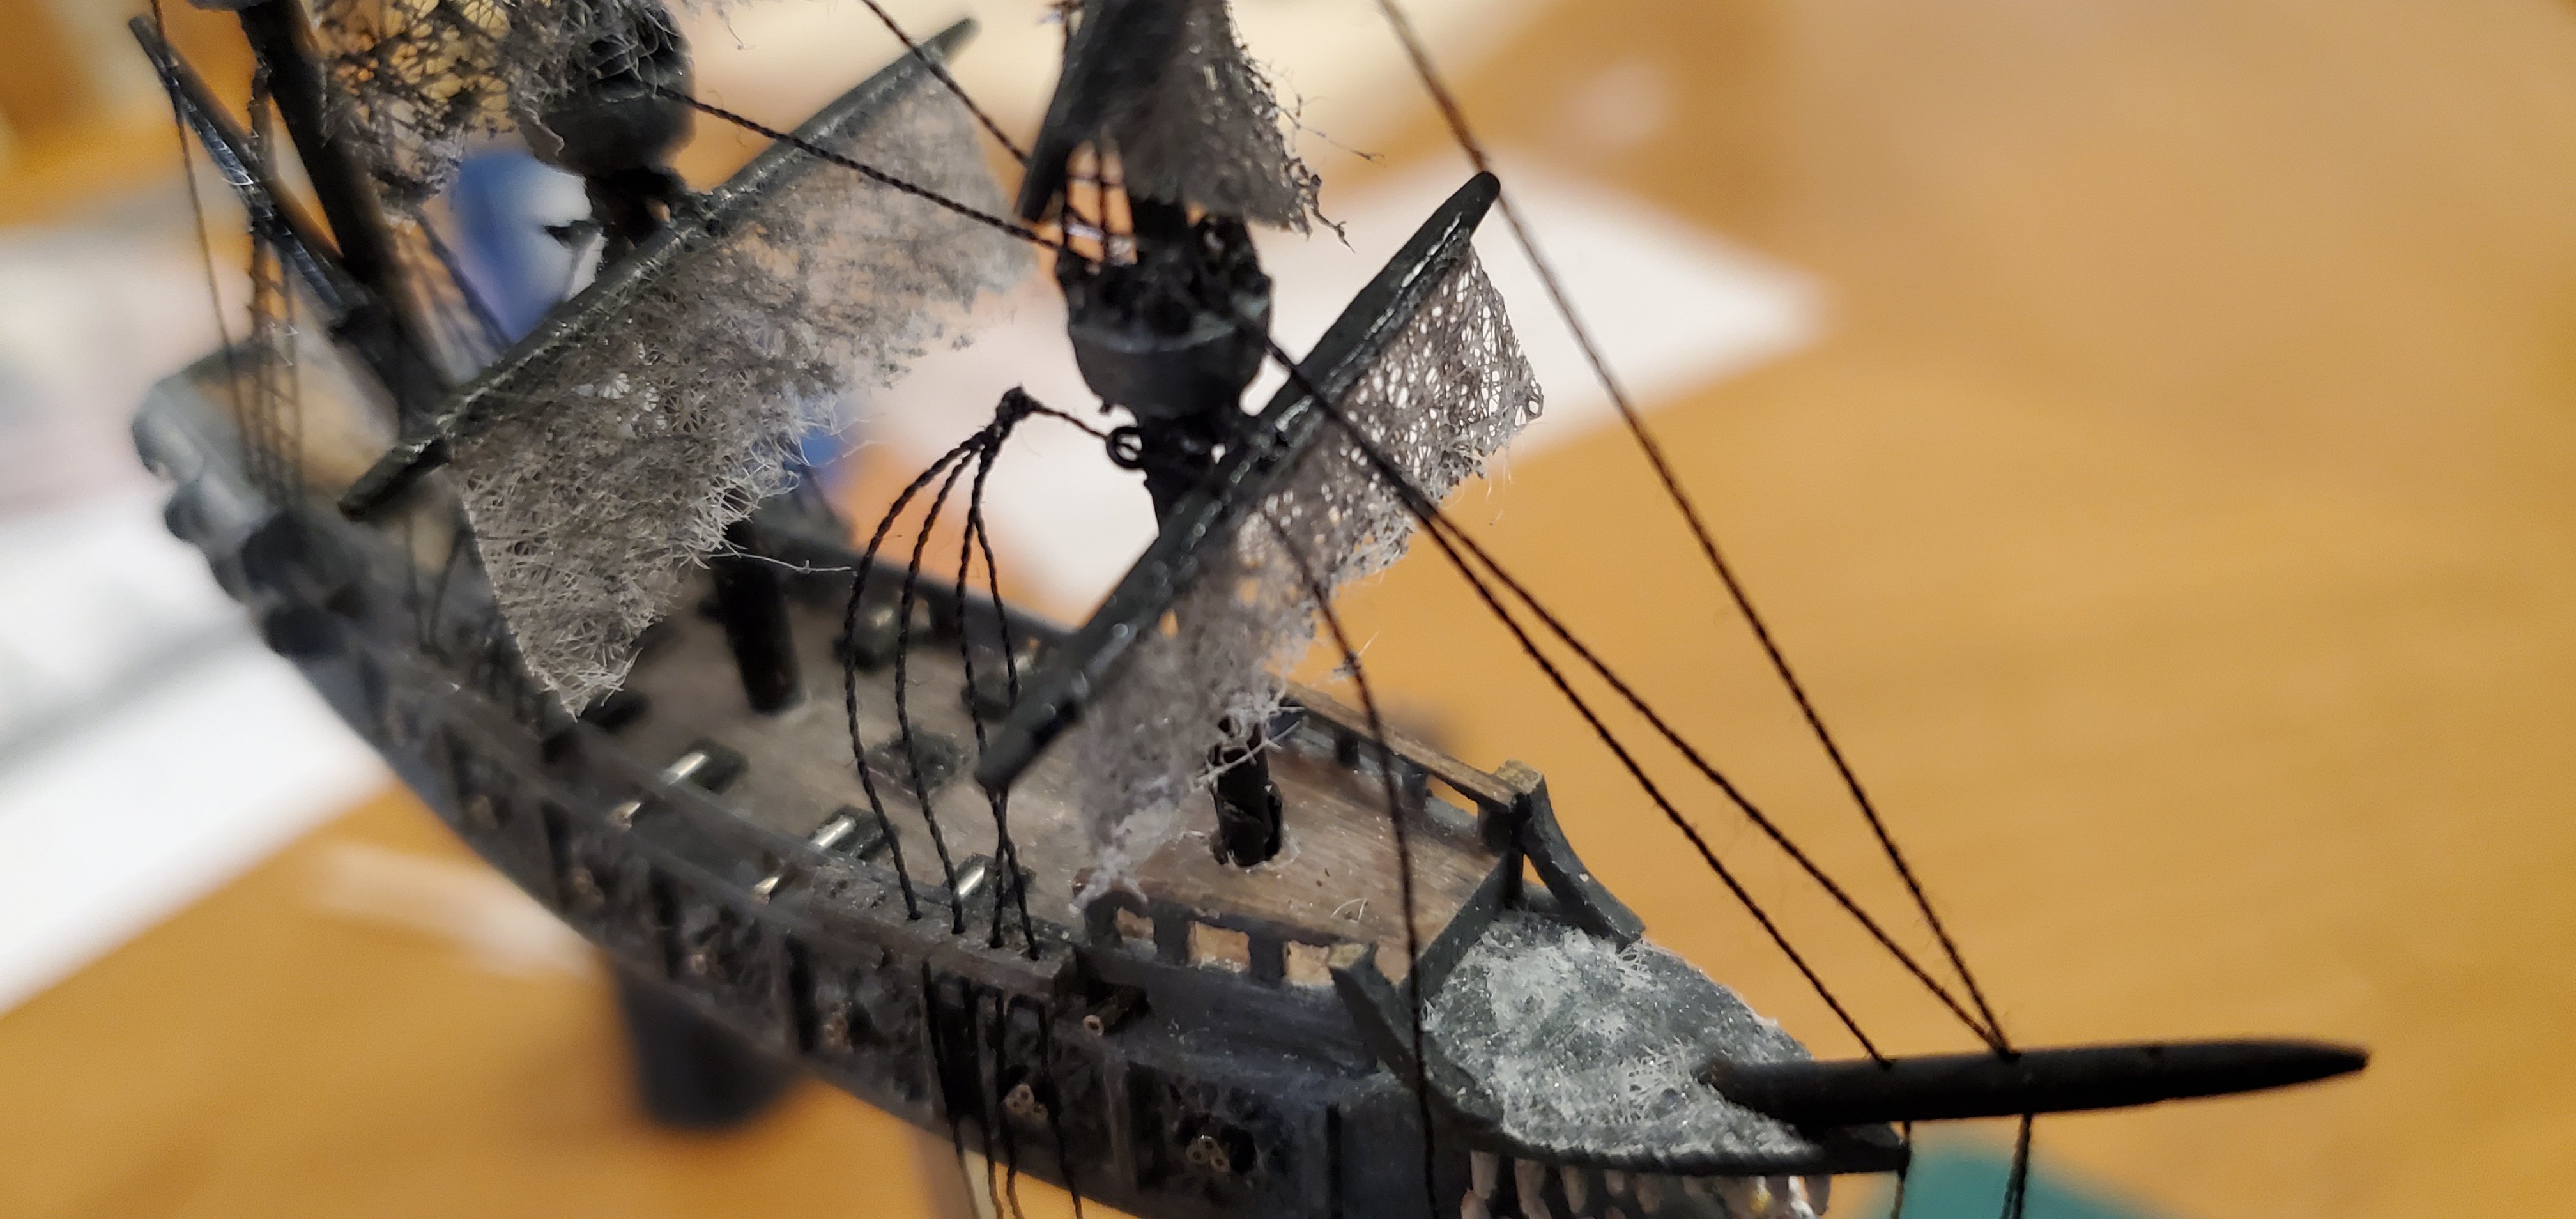
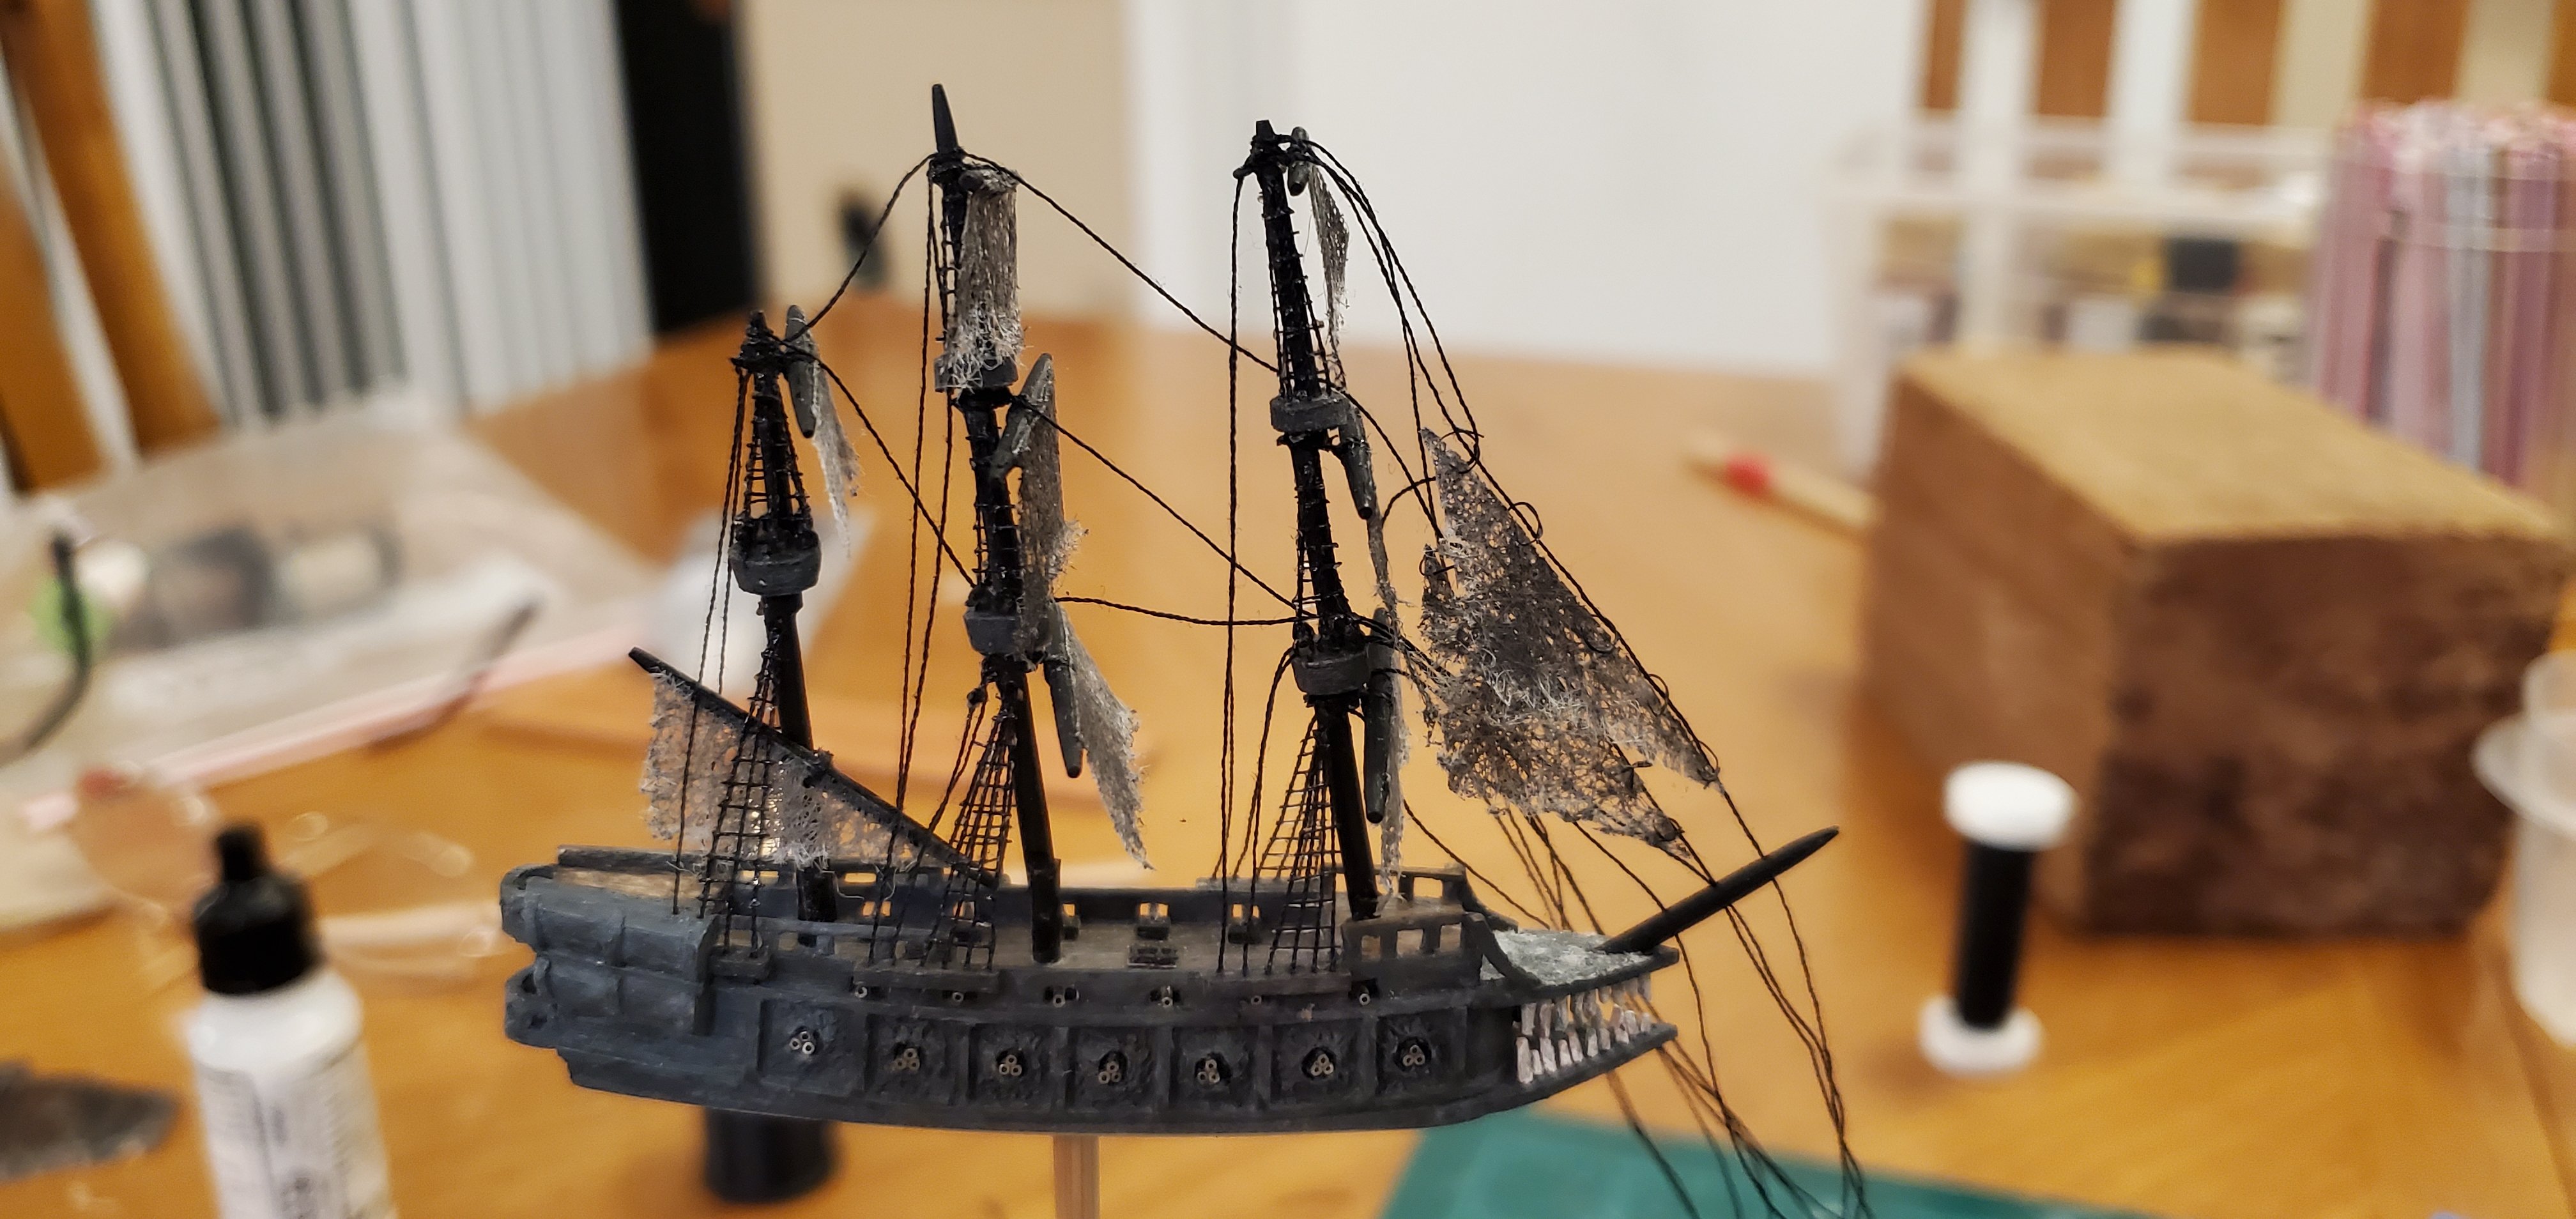
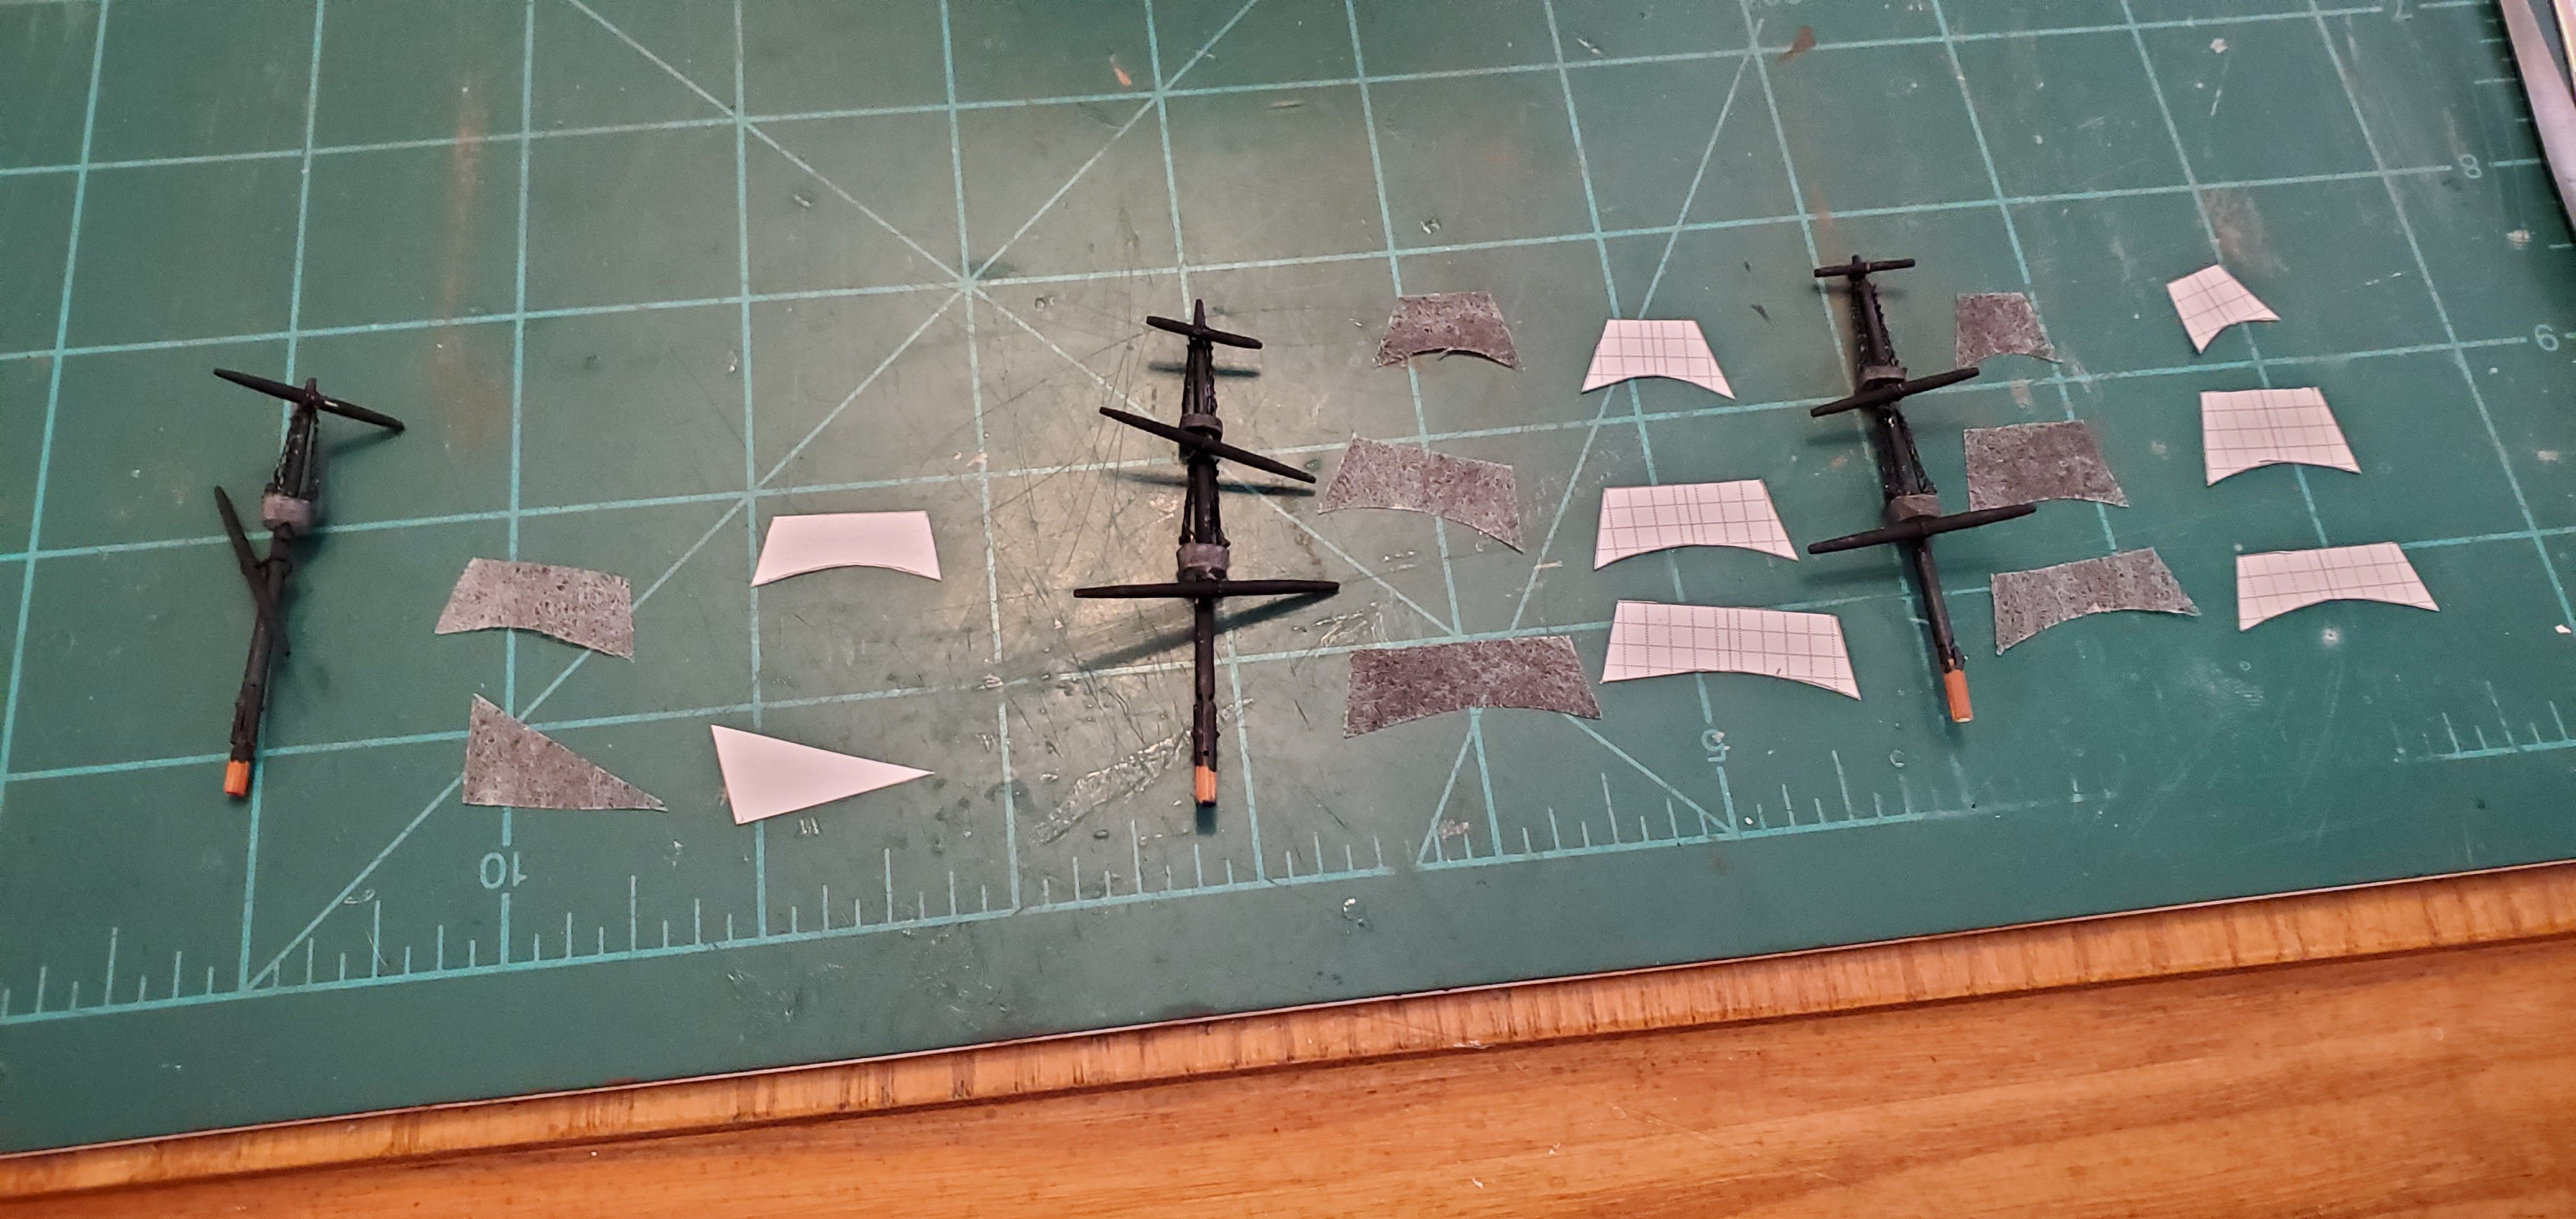
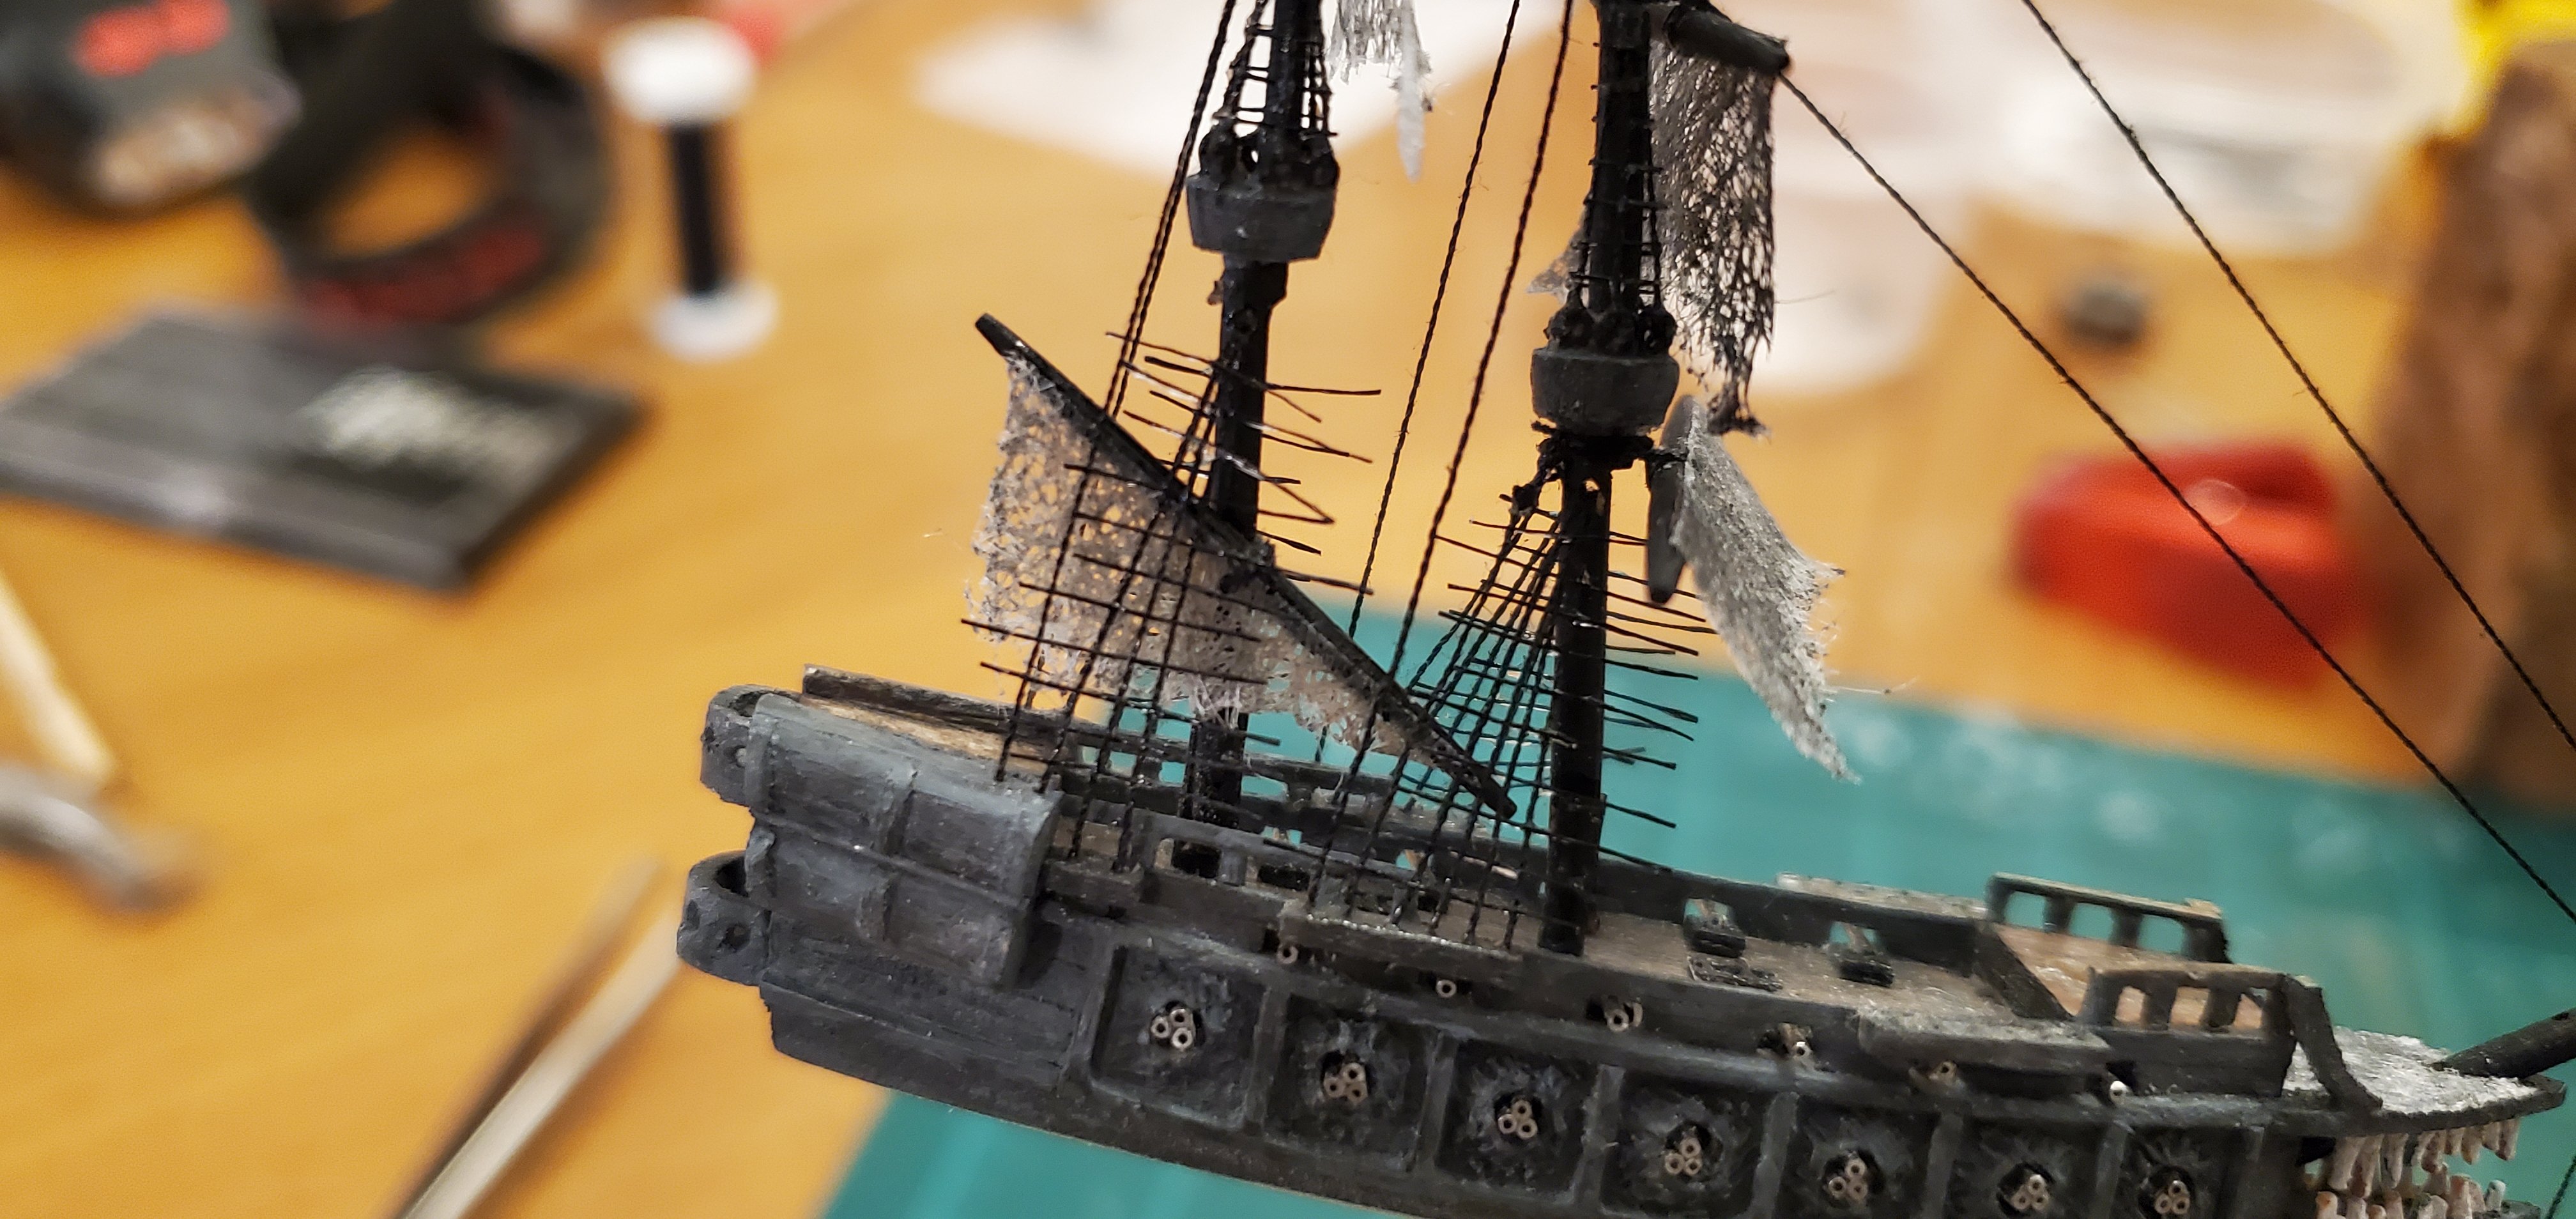
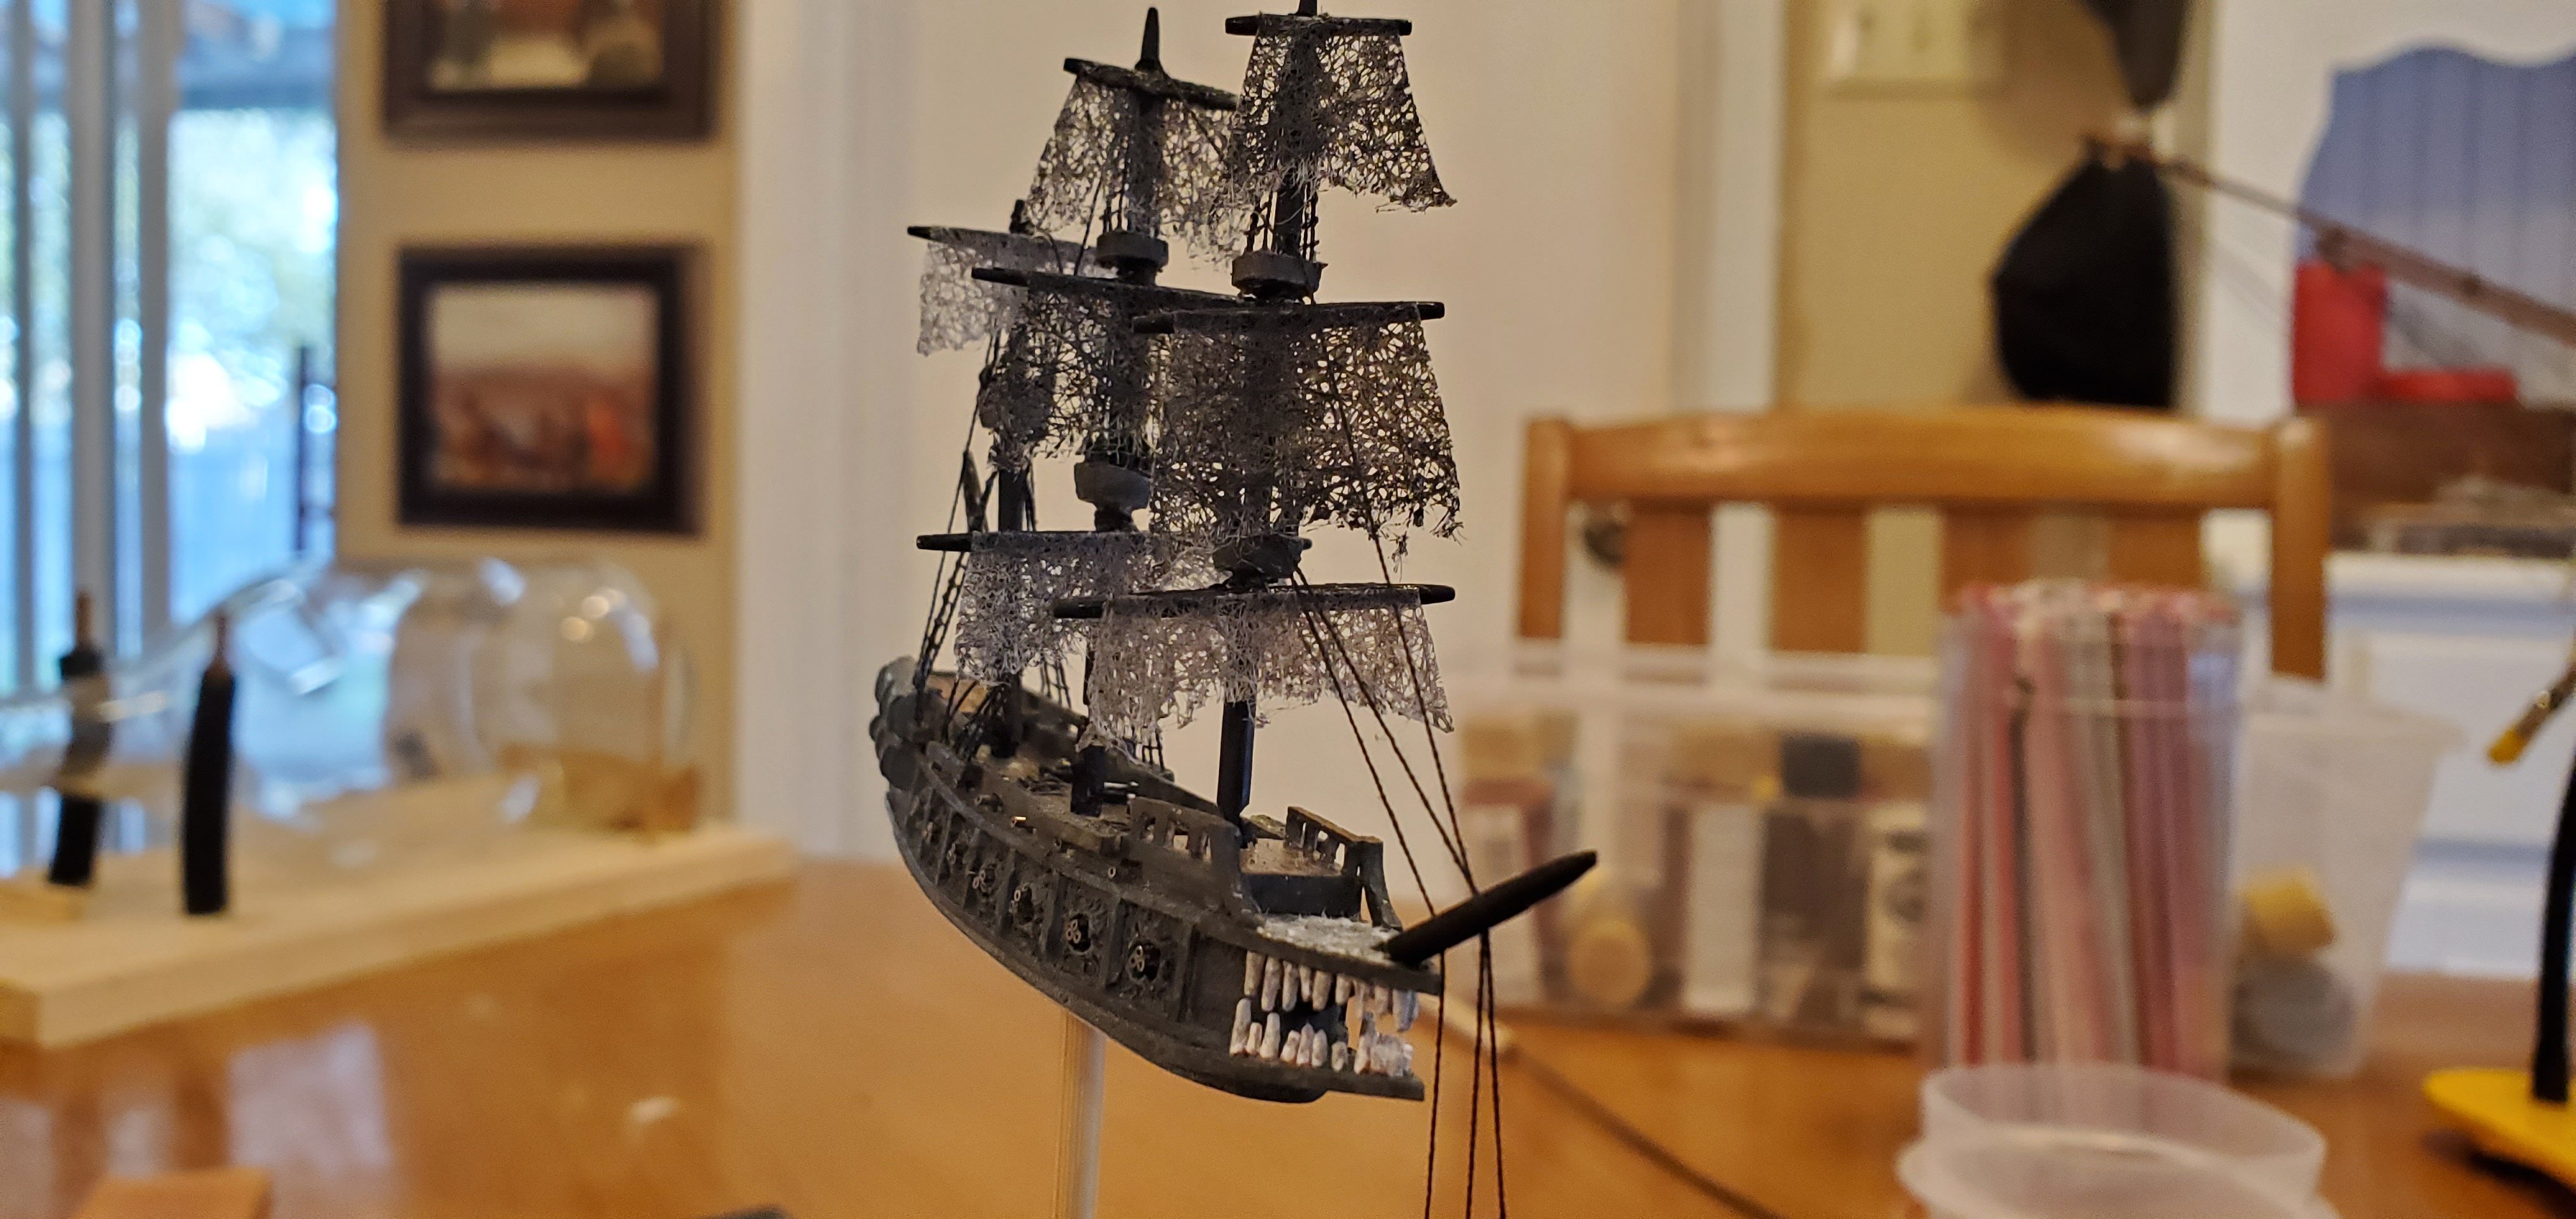
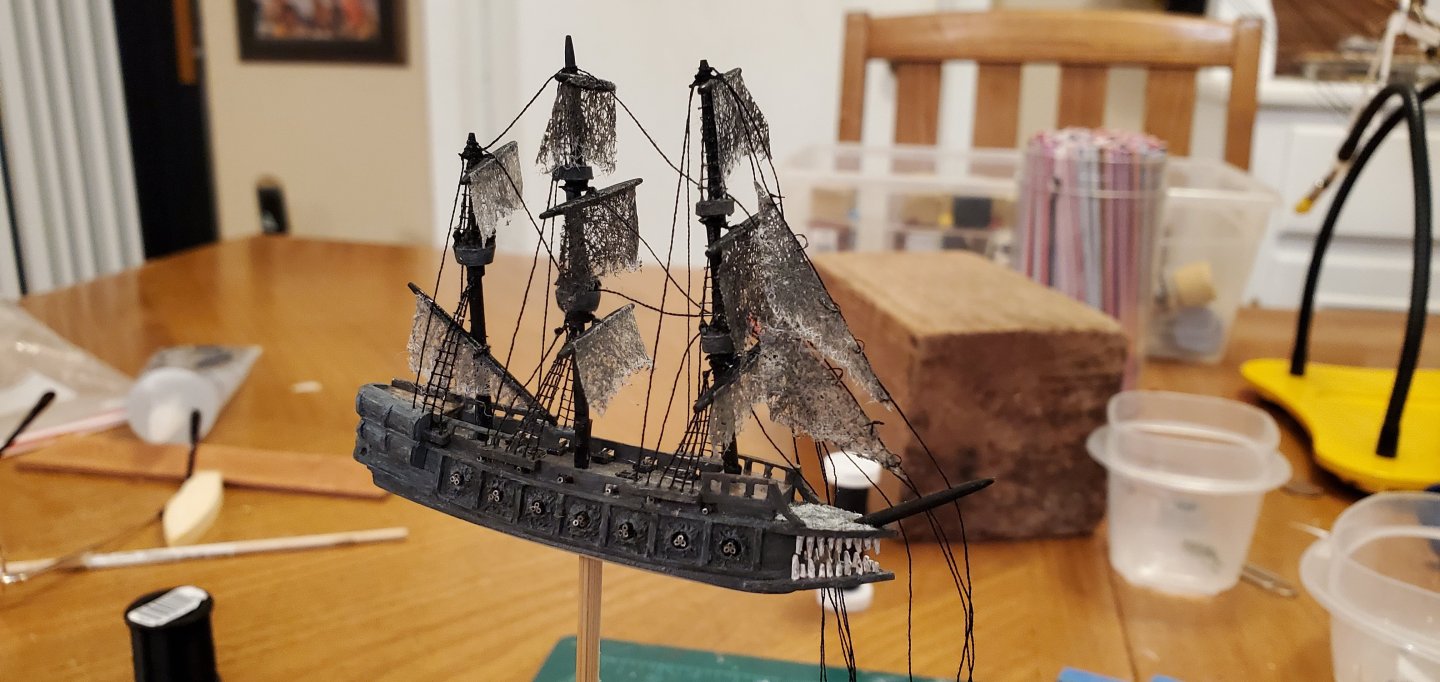
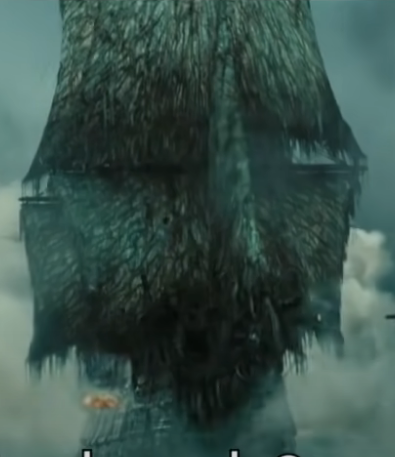
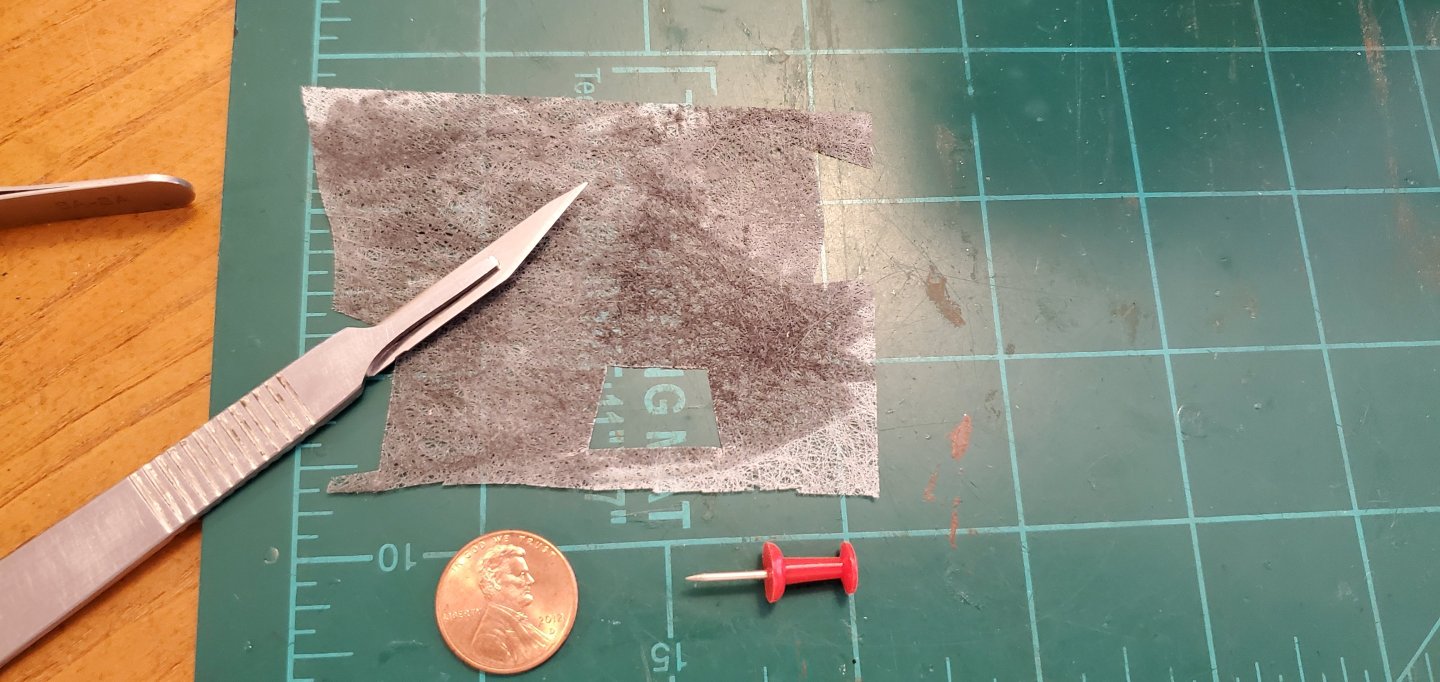
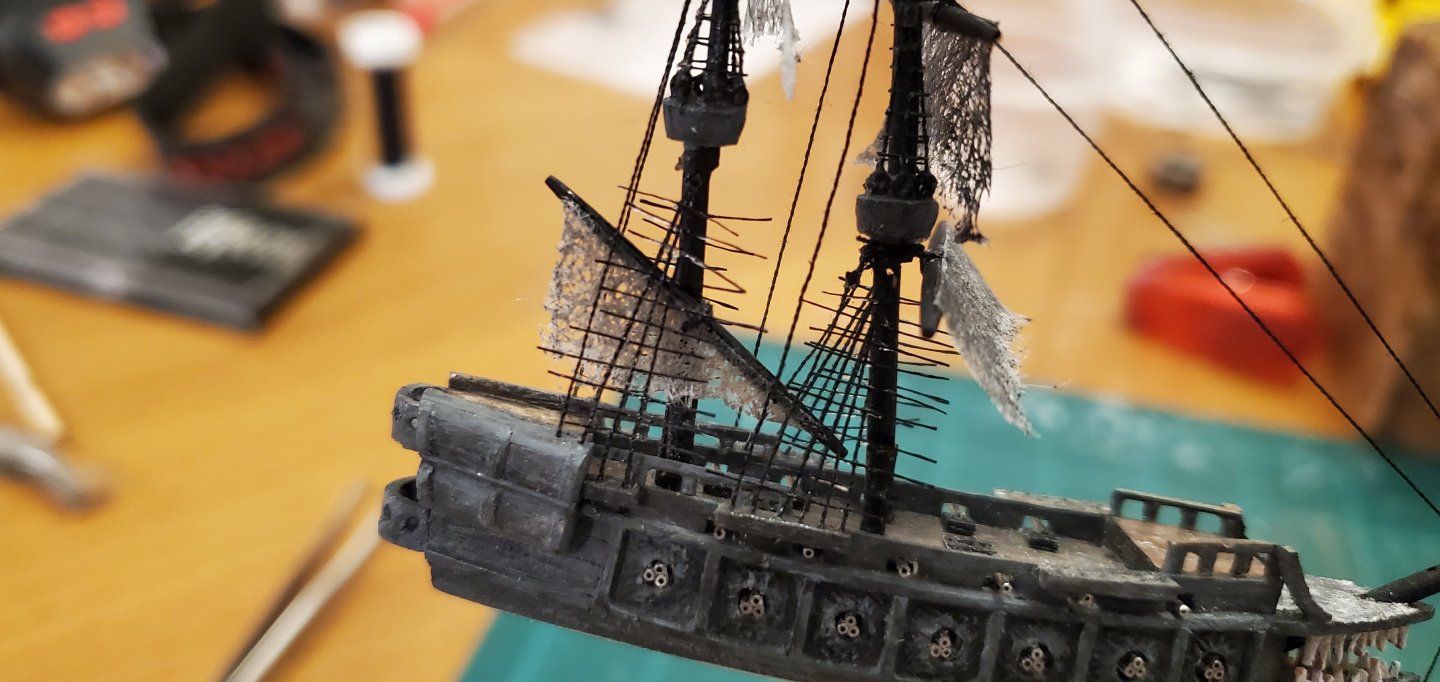
That has to be the most creative idea yet, Keith! I hope you are not losing sleep over this problem either! 😃 Back to the Flying Dutchman though, and the sails in particular. While watching the movie, I loved the eerie look of the Dutchman's sails - kind of a cross between thick cobwebs and varicose veins. A couple of days ago while I was throwing a load of clothes in the dryer, I looked down at my hand and realized I was holding something that just might work for the Dutchman's sails - one of those Bounce anti-cling sheets. I took one and brushed it with a grayish-black wash. It looked promising at first glance so I cut out all the necessary sails and gave it a go. I attached the sails to the yards. I liked the coloring and the veiny effect, but the bottom edge was too clean. So I shredded it a bit and then was satisfied with the look. I also started adding the lower shrouds and ratlines. Here's where she sits now with all sails in place except for the fore stay sails. The main and mizzen masts are glued into the deck. The fore mast is dry fit. Now it's time to do the special rigging on the fore mast that will allow it to lie down over the bow instead of sternward like the other masts.


- 185 replies
-
- 22
-
-
-
-
- Flying Dutchman
- Black pearl
- (and 2 more)
-
Thanks, Roel. I hope that dang whirlpool is not keeping you up at nights like it is me! I agree that it would be much easier with the bottle upright. But I'm determined to figure out a way to pull this off with the bottle lying sideways. I had a friend over yesterday who is very artistic and we were playing around with some ideas. DAP makes some UltraClear caulk that I used on the waterfall of my Wa'a Kualua project. It's workable but holds its shape very well. We tried coloring it with acrylic paint and it mixed nicely. My friend's idea was to build the whirlpool in layers outside the bottle - each layer being thin enough (after drying) to roll up, insert into the bottle and place on top of the previous layer. For a test run, we spread some of the caulk on wax paper, made a few layers, and set aside to dry overnight. Unfortunately, when I got up this morning and tried to peel the layers off the wax paper, they were completely stuck. So I will try again using a pane of glass as a working surface. If it the layering process actually works, I could stack up the whirlpool layers inside the bottle and pour epoxy resin around it. If I make the epoxy resin with the right amount of translucence, you might actually see the vortex when looking through the side of the bottle. I think that would be pretty cool. If IFs and BUTS were candy and nuts...🎄
- 185 replies
-
- 12
-
-
- Flying Dutchman
- Black pearl
- (and 2 more)
-
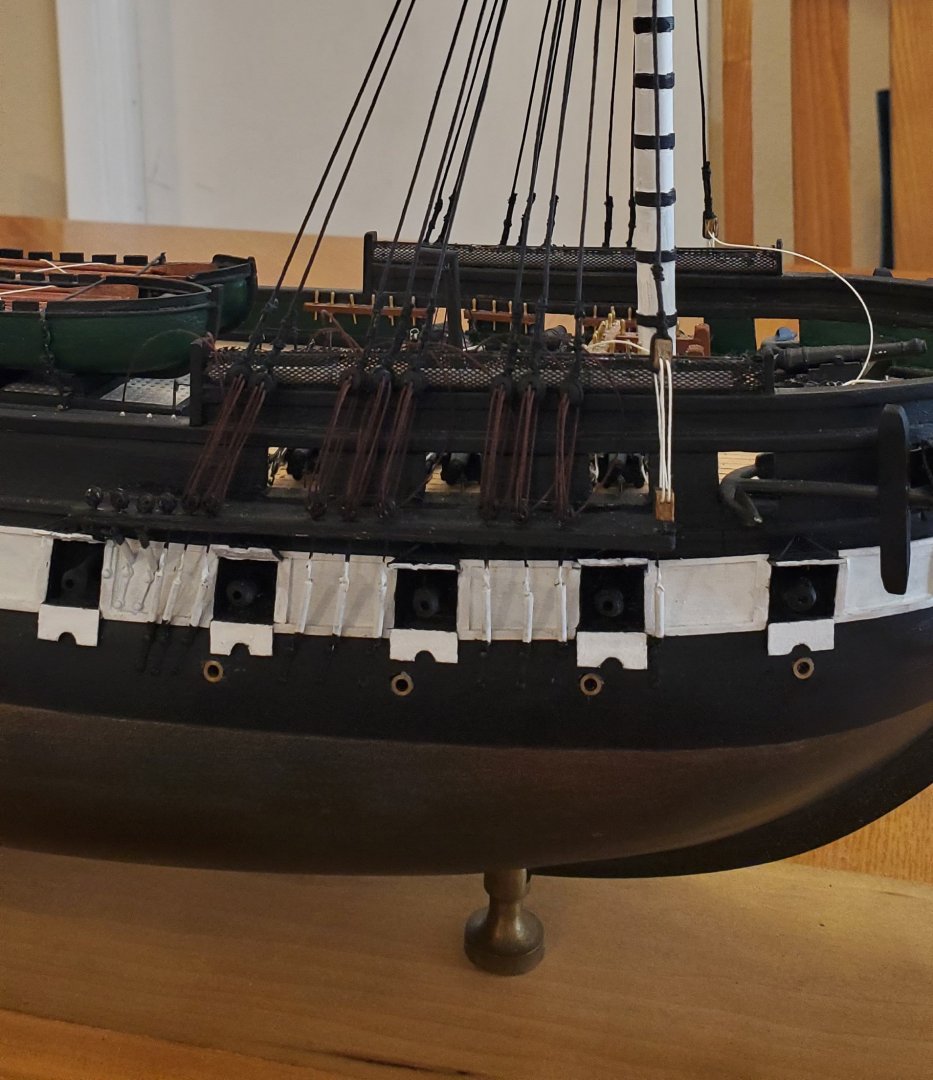
@Bill Morrison Thank you for the comments, Bill. If you read my first post on this build log, you will understand that this is not my ship. I am merely completing the model for a family that recently lost their father who was the original builder. Since the family would like the model as a tribute to their father, I do not want to change any of his original work if I don’t have to. I want there to be as much of him in the completed ship as possible. Are there some things I might have done differently were it my ship? Sure. As an example, I would have painted the masts solid white instead of having black bands. But my assumption is that the original builder had a reason for the black bands. Maybe it was his signature style or maybe he just liked the way it looked. Not sure, but I don’t want to change something like that because if I did, in my mind I would be making it my ship instead of his. The same goes for the height of the white band. Regarding the gunport lids, I measured the upper and lower pieces and they actually fit the opening perfectly. So it may just be some bad photography on my part that makes them look too tall. As for the spar deck cannonades not being cannonades, you got me on that one! I had to read the armament part of the kit instructions 3 times to realize it was saying “carronade” instead of “cannonade”! My mind kept seeing cannonade. So thank you for the correction on that terminology. Thanks again for the comments, Bill. I appreciate you looking in.
- 301 replies
-
- 7
-
-
- Constitution
- Bluejacket Shipcrafters
- (and 1 more)
-
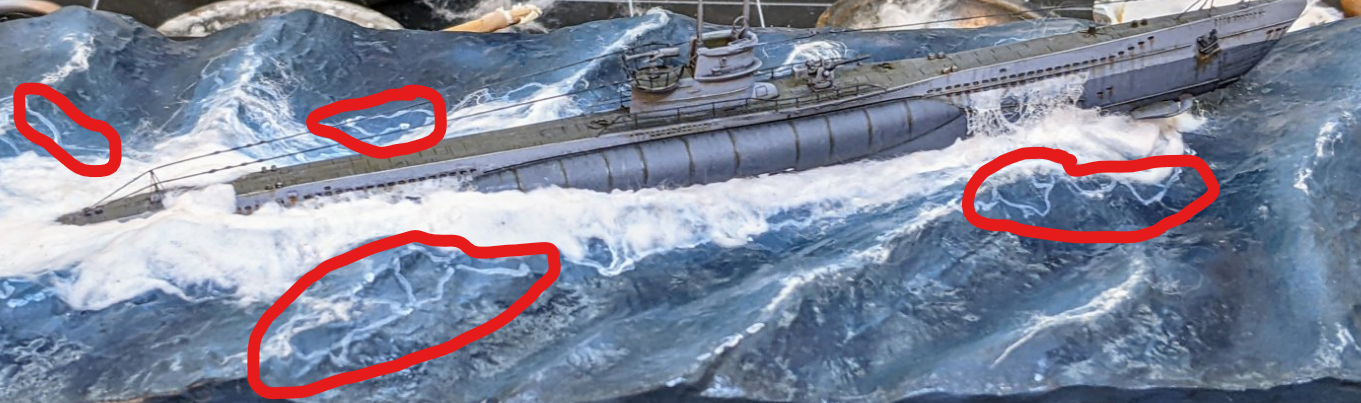
Really nice work! For me, cotton is the key for spray and foam and you did very well with it. If you are going to do some touch up work, I would suggest taking out the prominent white lines I've circled below. The lines don't look as natural as the rest of your water effects and I don't believe you need them there. I think you could cover them with the blue of the surrounding water and it would look more natural. Just a suggestion. Regardless, this is a great diorama!
-
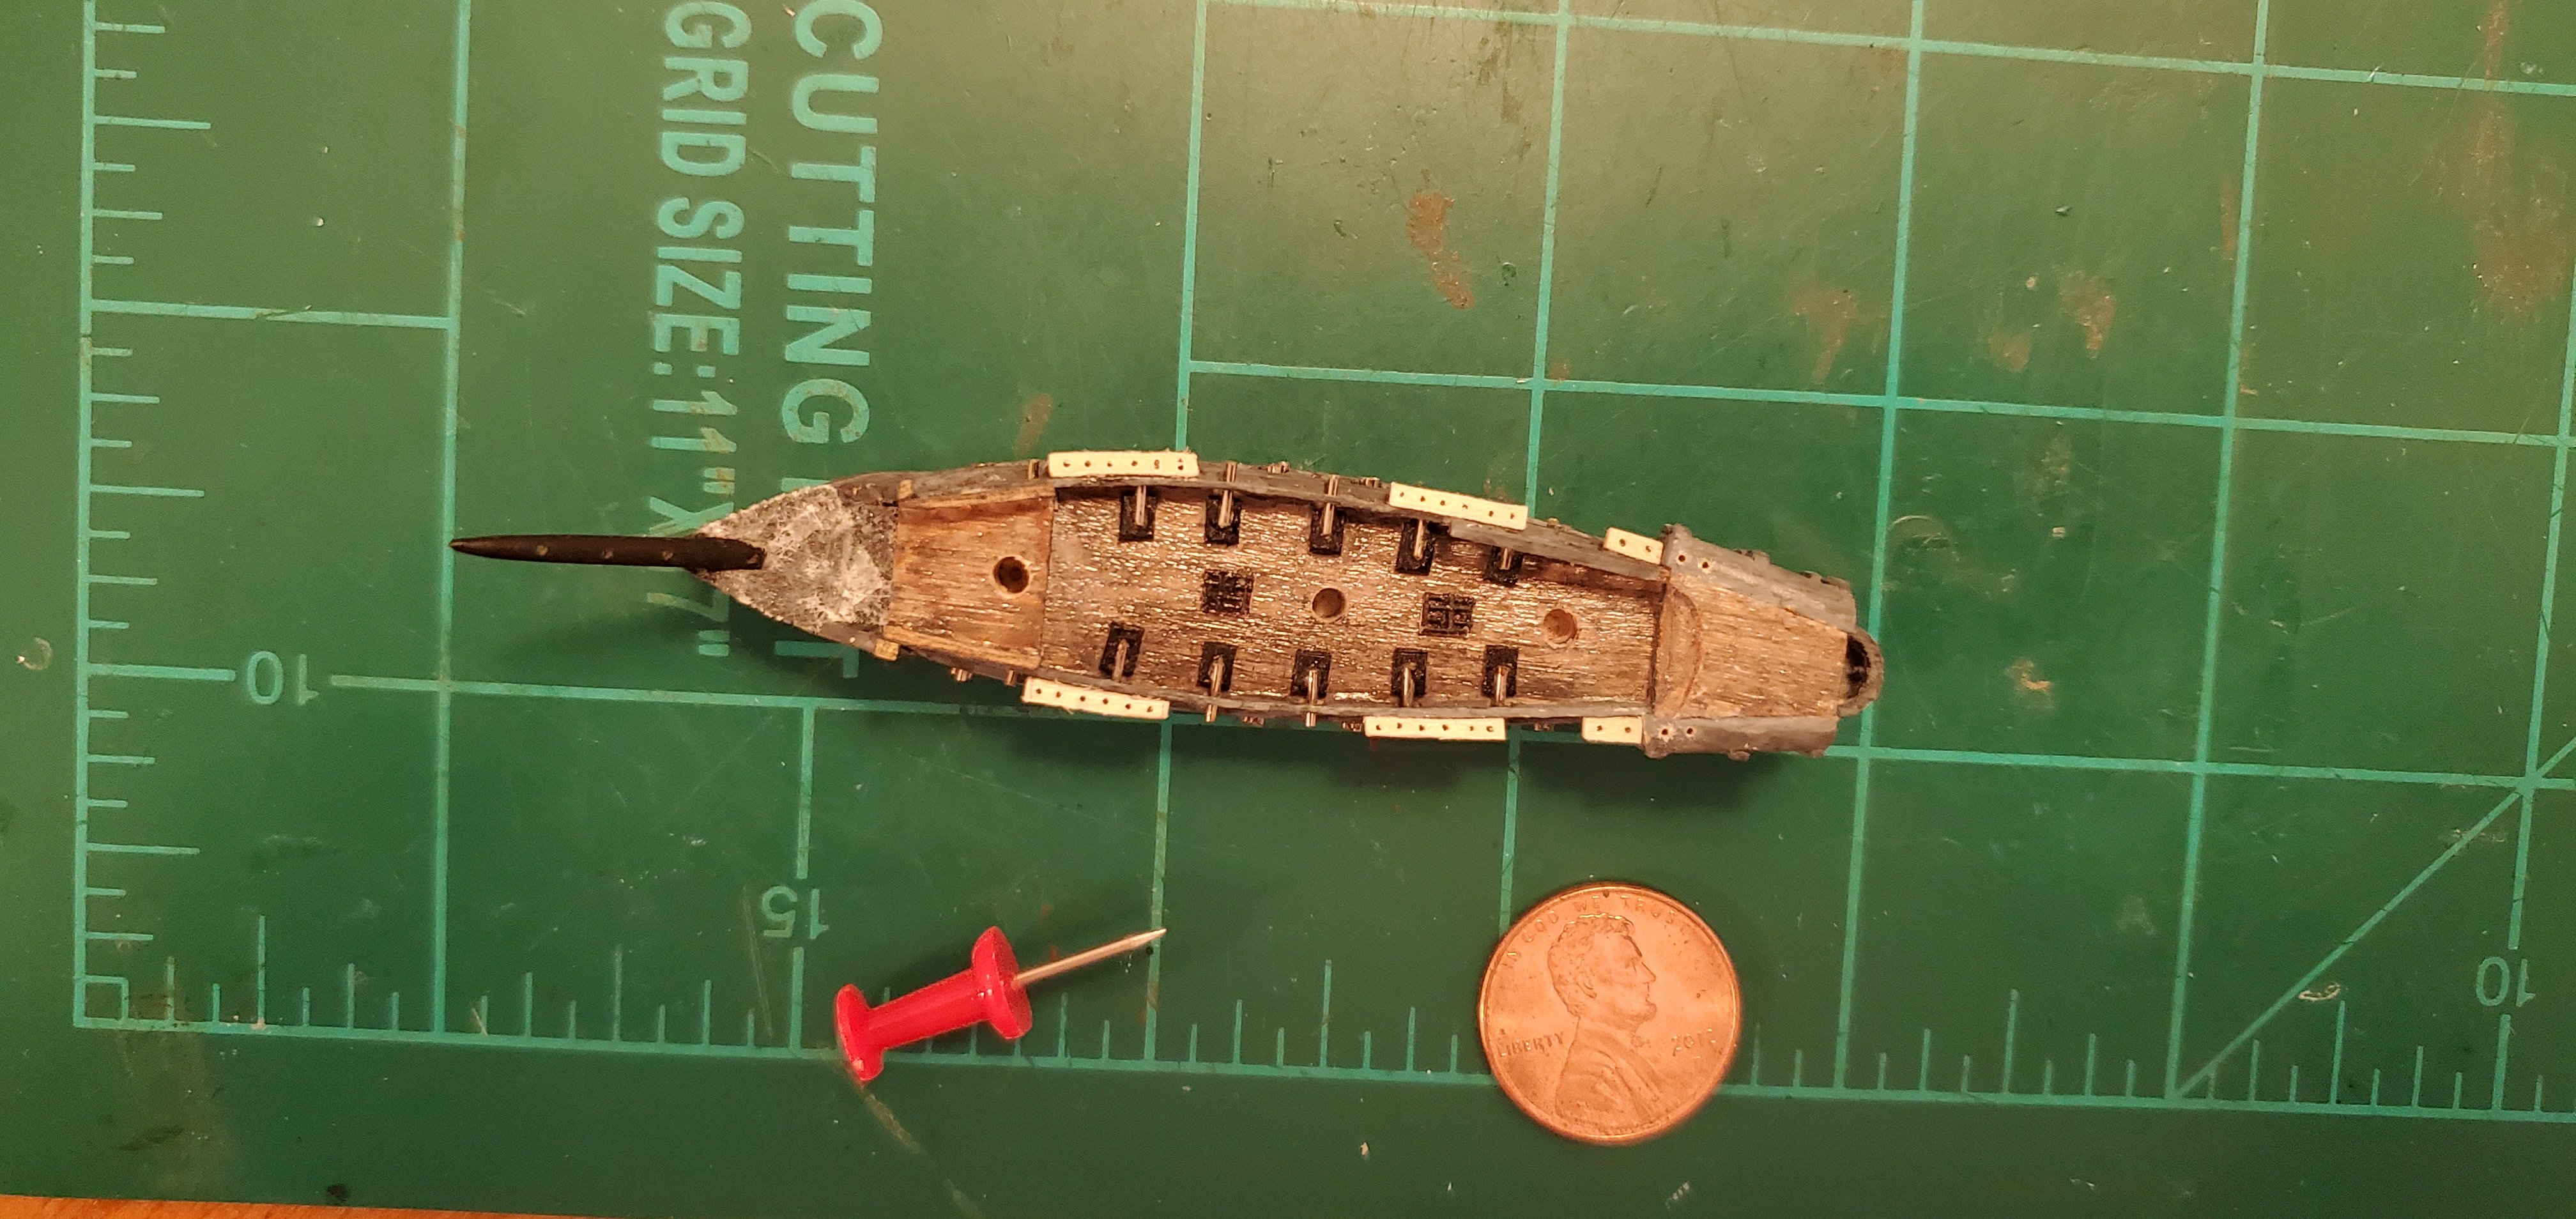
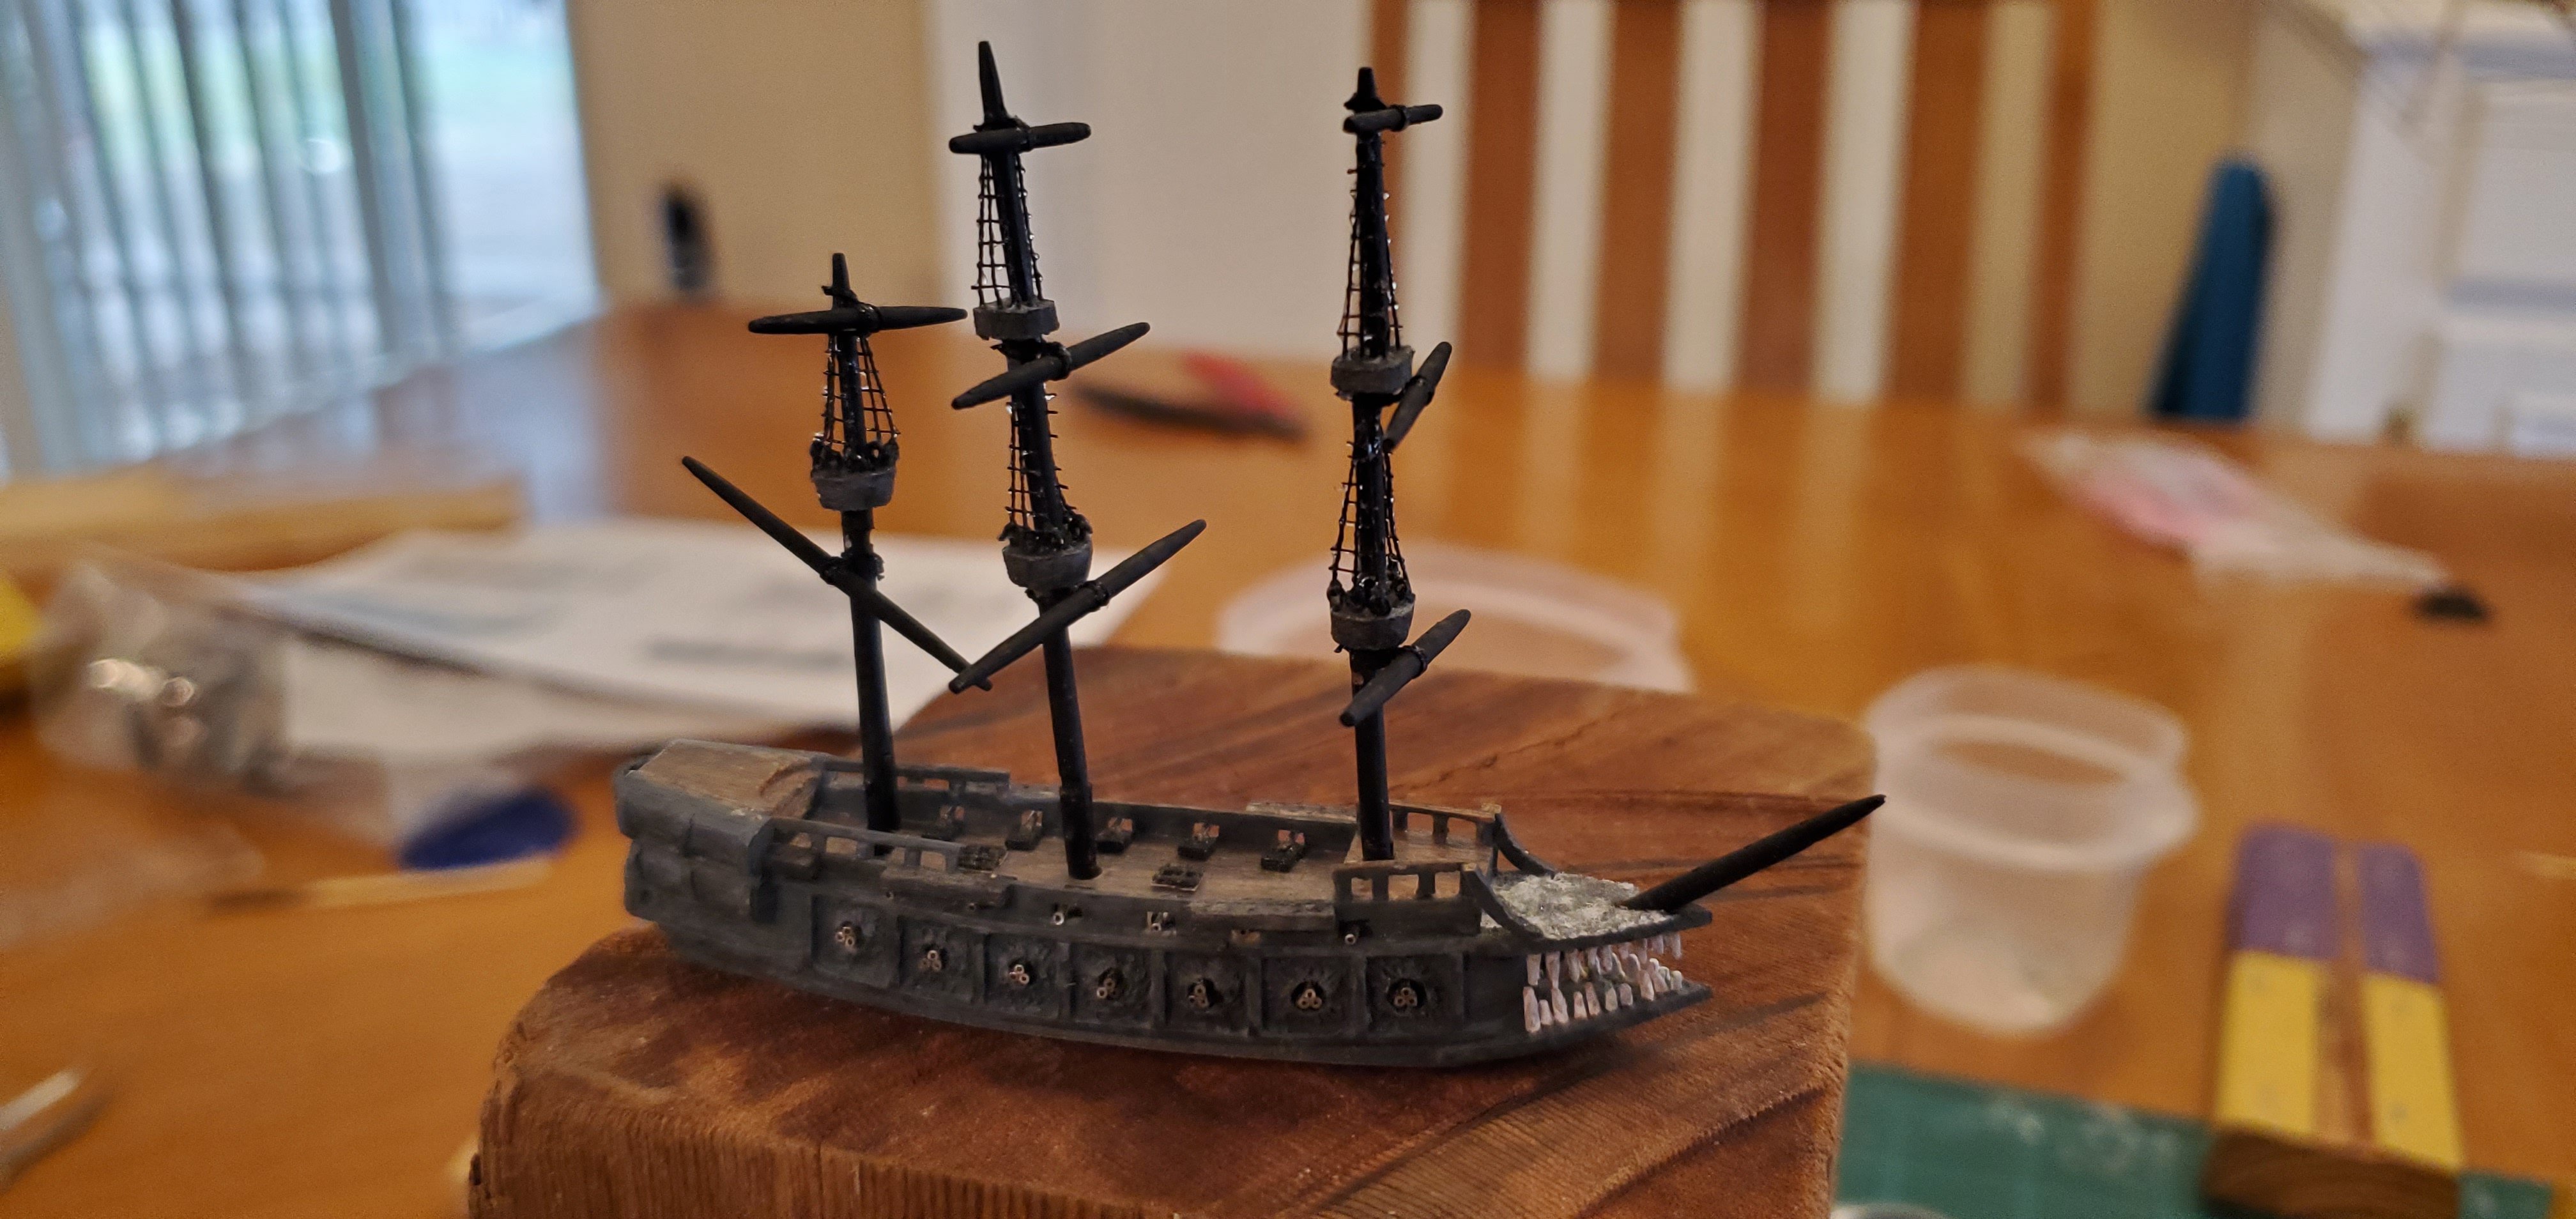
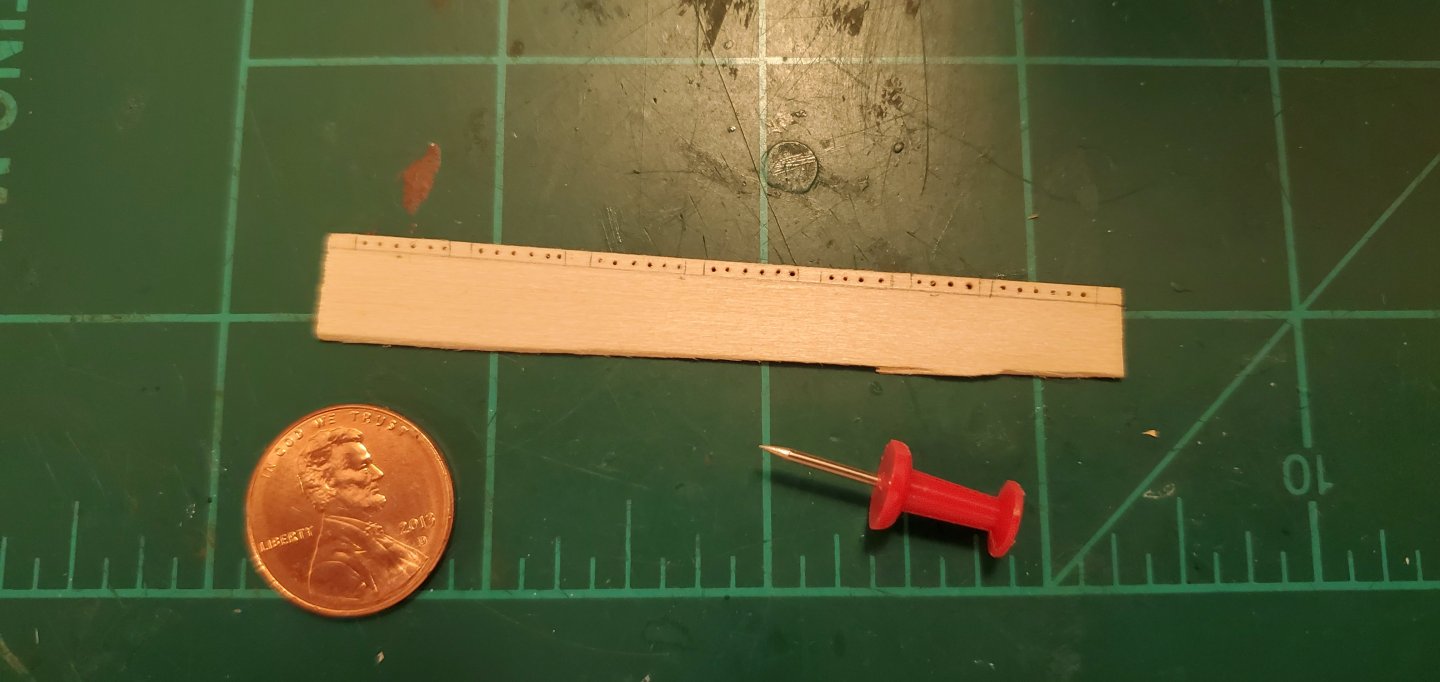
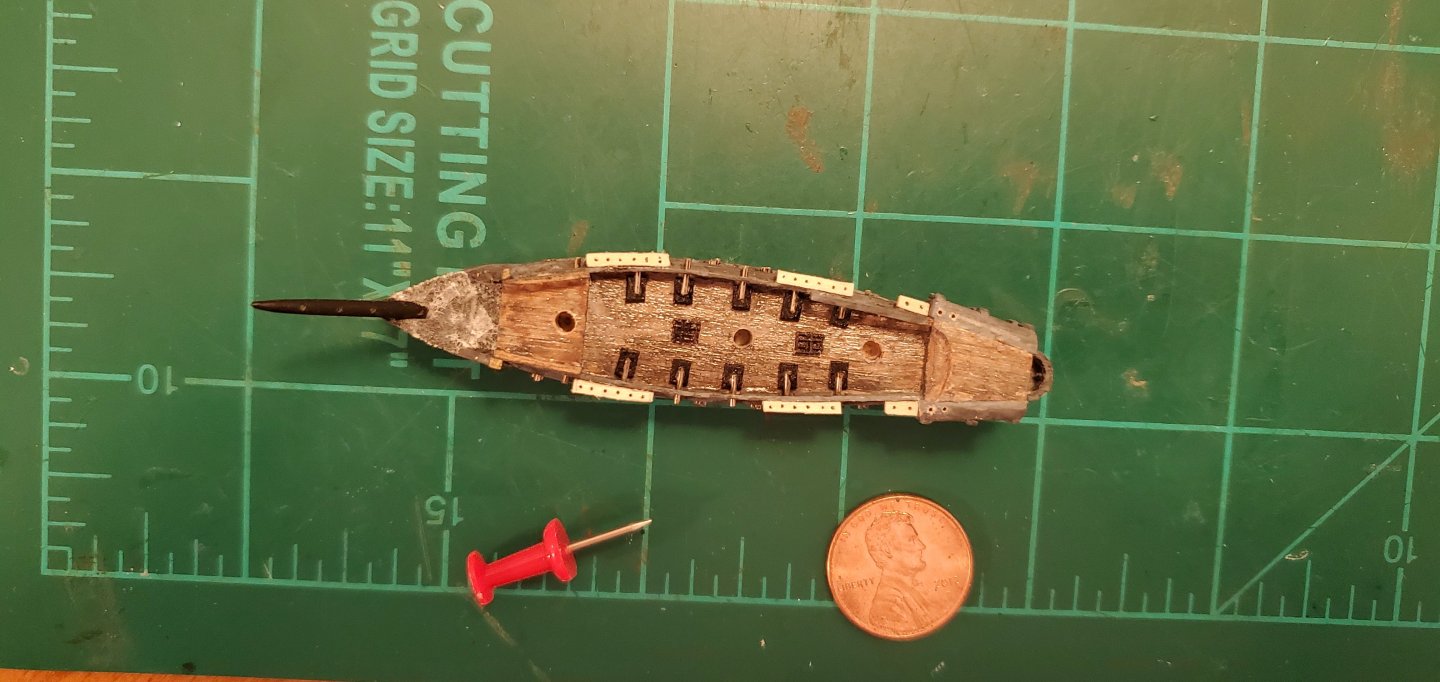
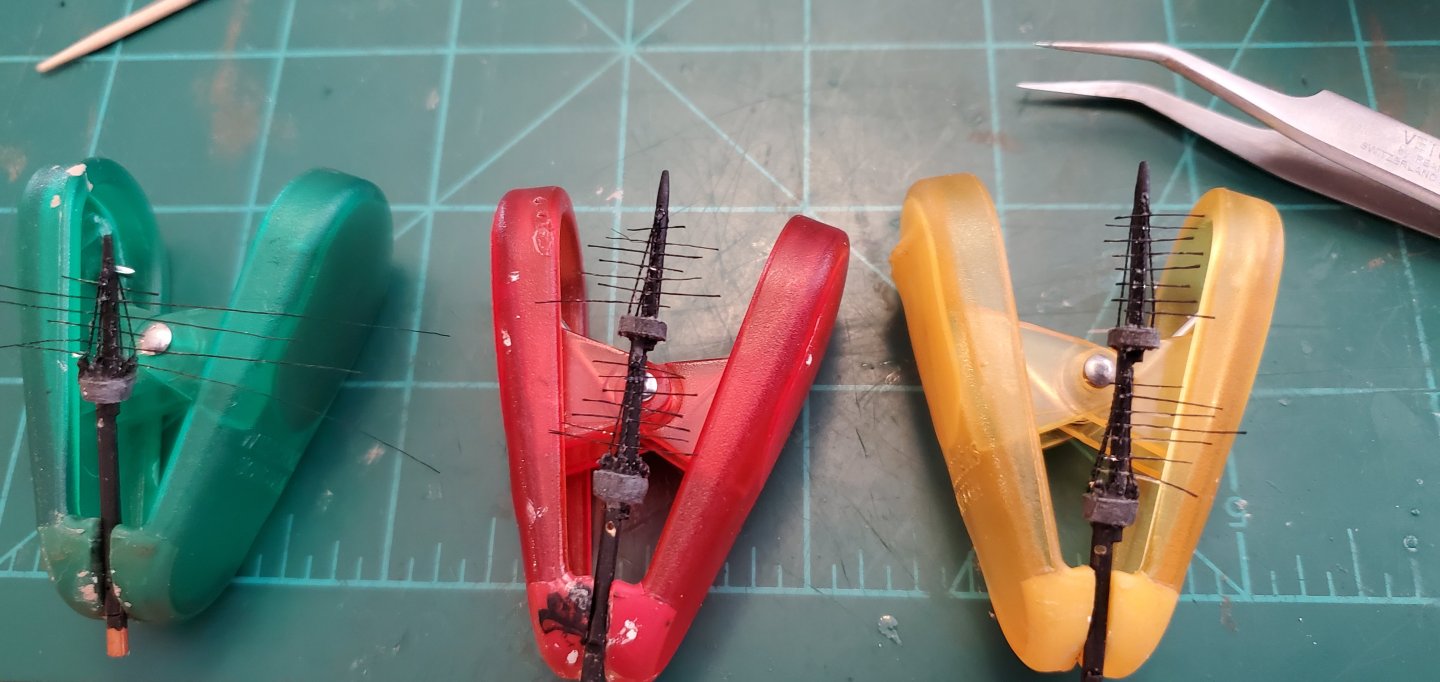
Next up - making and affixing the channels. The channels were made from 1mm thick basswood. I drilled .35mm holes spaced 1.5mm apart. The next step was making the crow's nests - much more time-consuming that regular mast tops. They are carved out of 2mm think basswood, then rounded and tapered. I got the crow's nests made and installed, followed by the upper shrouds. Then it was time for @Knocklouder's favorite pastime (aside from killing varmints in his workshop), adding ratlines. As with my other builds, I used fly tying thread (136D 6/0W). I cut a bunch of short pieces, dabbed them with fabric glue, then inserted them with a small weave where they sit on top of the outside shrouds and underneath the middle one. After the glue dried, I clipped the ends with cuticle trimmers. Next, I made all the yards and added a thread in the center to attach them to the masts with a clove hitch. And here's where she is at now with the masts dry-fit into the deck. You will notice that I removed the poop deck rails at the stern. This was necessary to get the mizzen and main masts through the bottle's opening. I may try to reinstall them after the ship is in the bottle. Also, you may notice that I carved a half-moon shape out of the leading edge of the poop deck. I put the main mast crow's nest bit too high on the mast. It was supposed to lie short of the poop deck when the mast was folded over but was hitting it and preventing the mast from lying down as far as I needed it to. I may carve it out further and just make a quarter deck out of it. Not too much left here - sails, lower shrouds, and a bit more rigging. Oh, and one other small thing, the ship will NOT fit inside the bottle with the foremast lying down to the rear. Not even close. I simply made this ship too tall for the bottle opening. So I've got to engineer a solution for that. Of course I'm not talking about a real engineering solution like @Ian_Grant would come up with. I'm talking about something simple-minded. It will fit if I fold the fore mast forward. That will create some difficulties with the rigging, but I think I can make that work. I think I can...I think I can...I think I can...


- 185 replies
-
- 17
-
-
-
- Flying Dutchman
- Black pearl
- (and 2 more)
-
I'm on board too, if Bob will share his popcorn with me.
- 55 replies
-
- 2
-
-
- Le Martegaou
- billing boats
- (and 1 more)
-
Whether they are visible or not, you know what they look like and the high quality of work you put in. To me that's what really matters. It seems like half the details I put on my SIB ships are almost impossible to see once it gets in the bottle. But I know they are there. You are doing beautiful work here. Keep it up, JC!