MORE HANDBOOKS ARE ON THEIR WAY! We will let you know when they get here.
×


Glen McGuire
-
Posts
1,912 -
Joined
-
Last visited
Content Type
Profiles
Forums
Gallery
Events
Everything posted by Glen McGuire
-
 Fantastic build, Bryan! Everything is very clean and looks top notch. The crew was a nice added touch, too. Well done, sir!
- 55 replies
-
- 2
-

-

-
- Le Martegaou
- billing boats
- (and 1 more)
-
I am very sorry to hear about the passing of your friend, Rodney. My sincere condolences to you and family.
-
Y'all better send a gorilla along with that gorilla glue. I ain't getting near that bull in his current mood! Can't wait to see those newly painted longhorns and the ferris wheel that your niece is working on!
- 85 replies
-
- 2
-
-
-
- King of the Mississippi
- Artesania Latina
- (and 2 more)
-
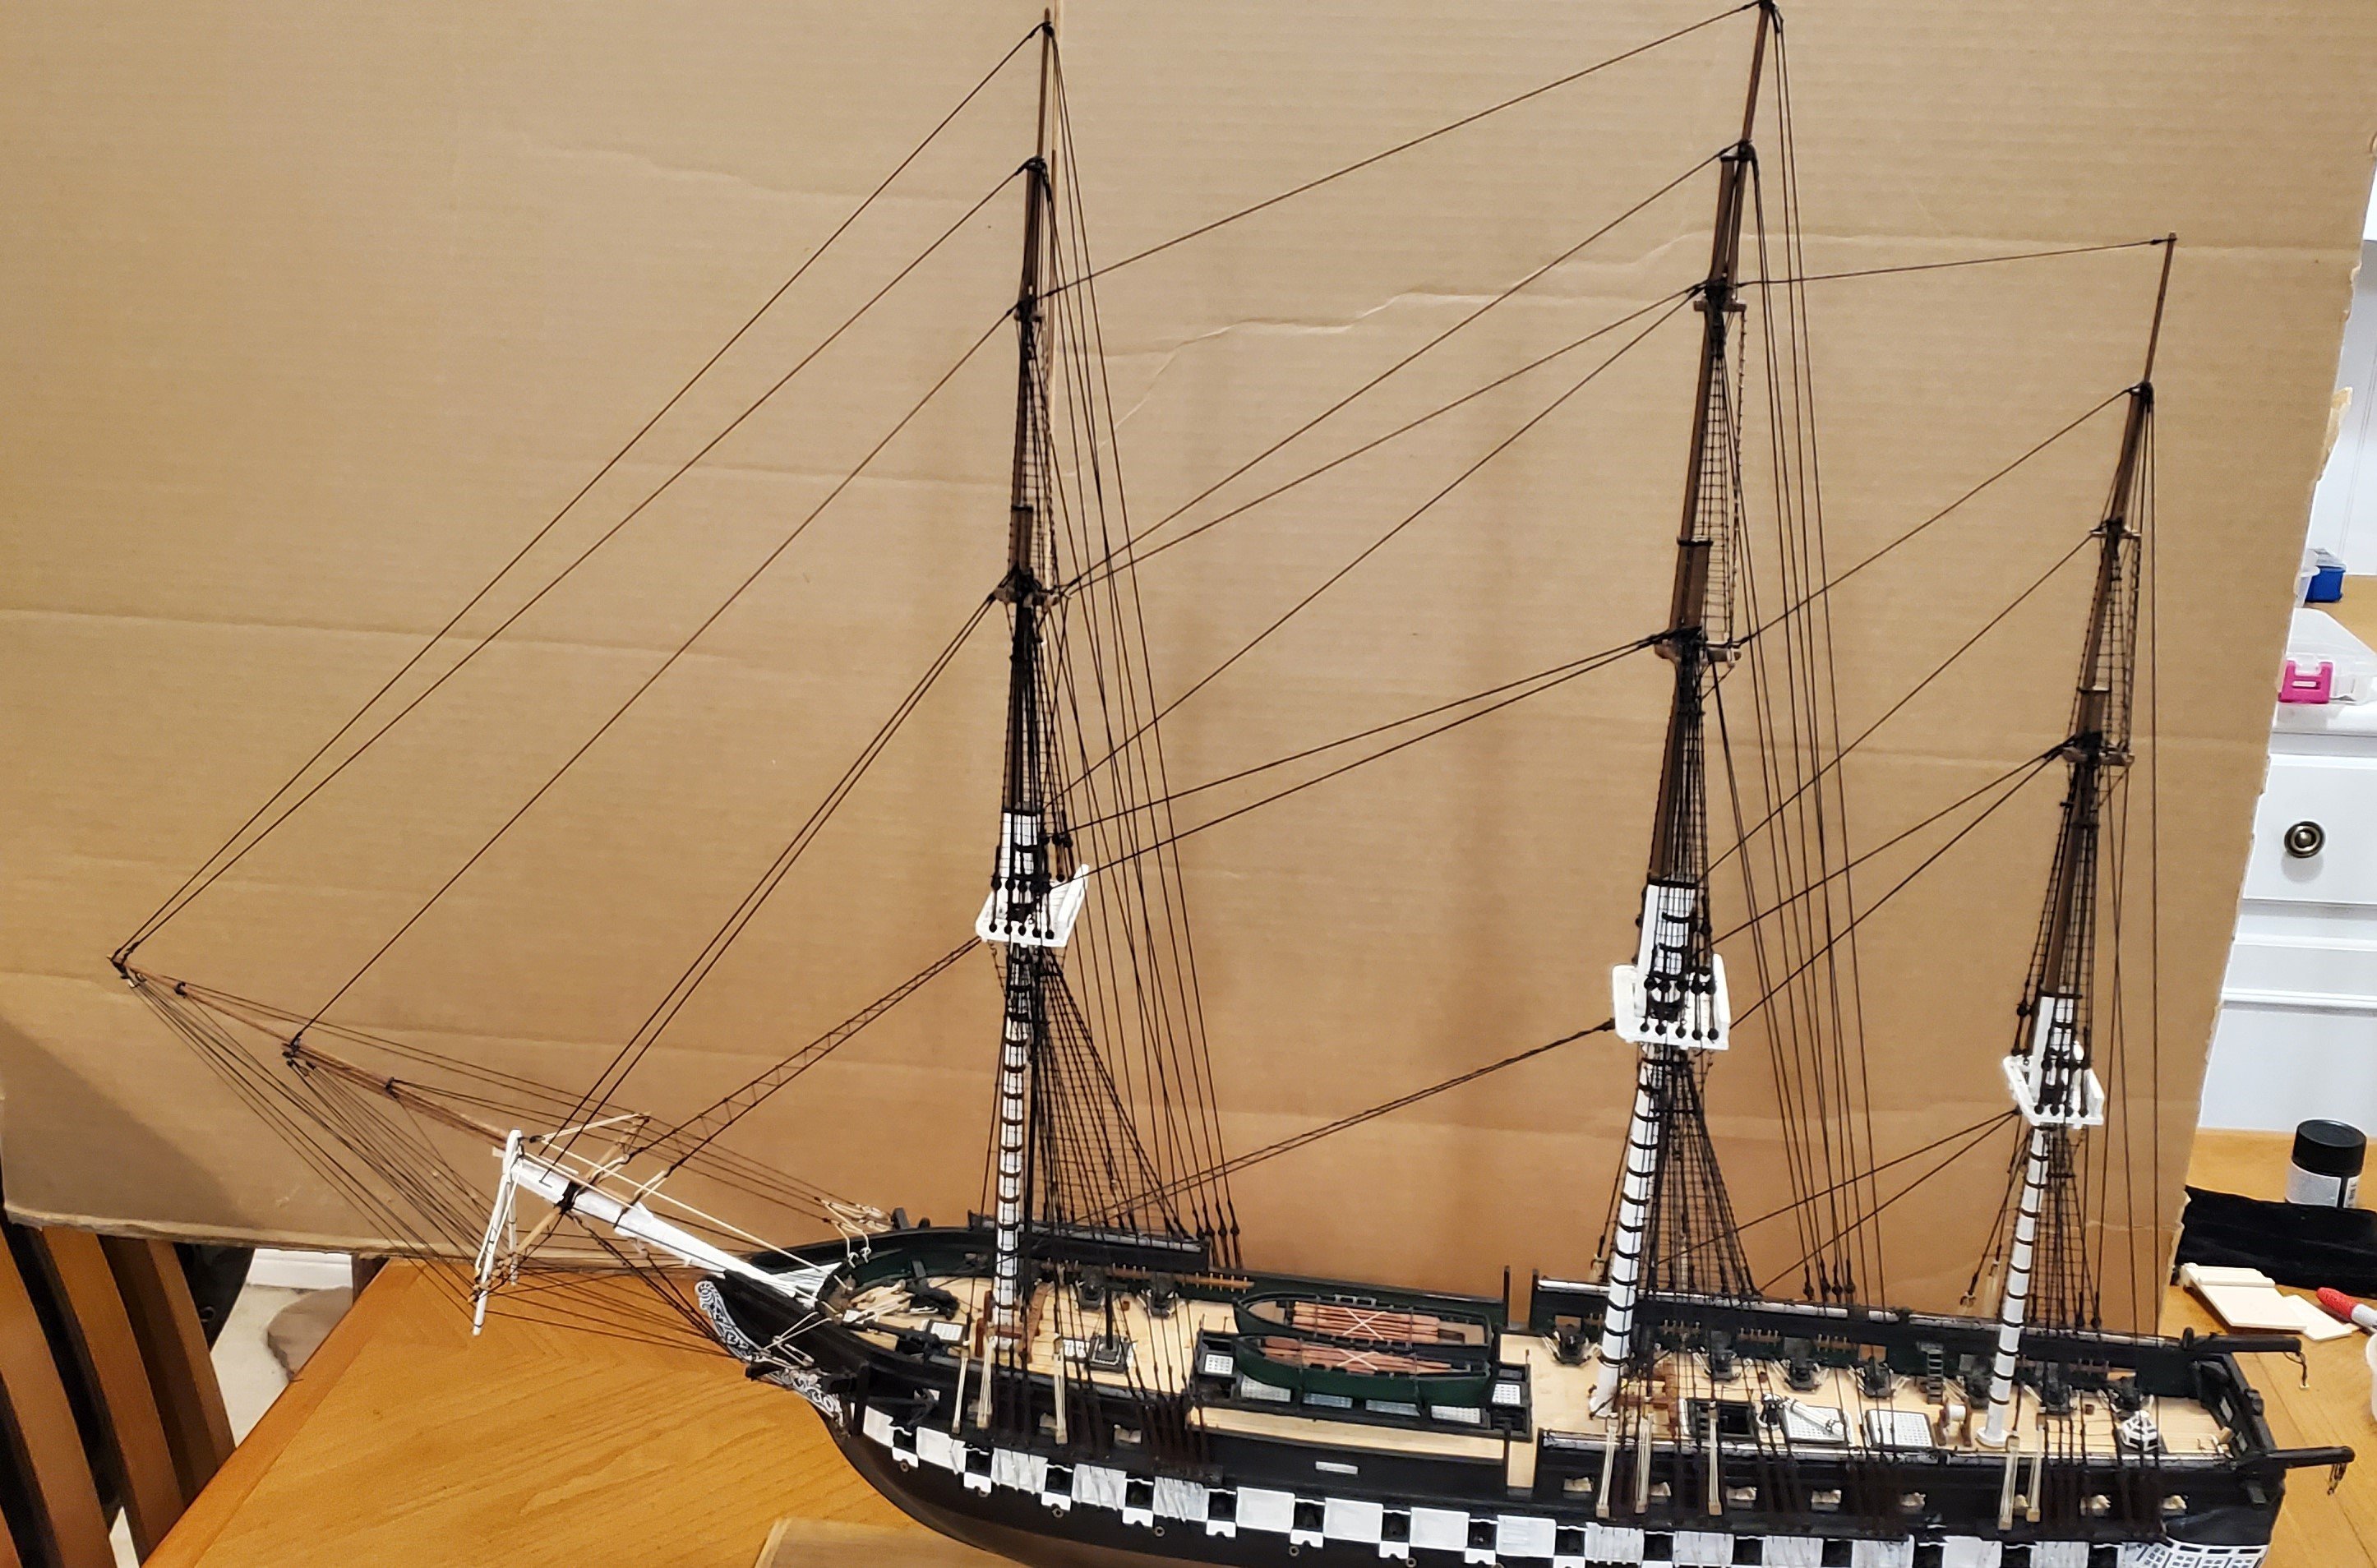
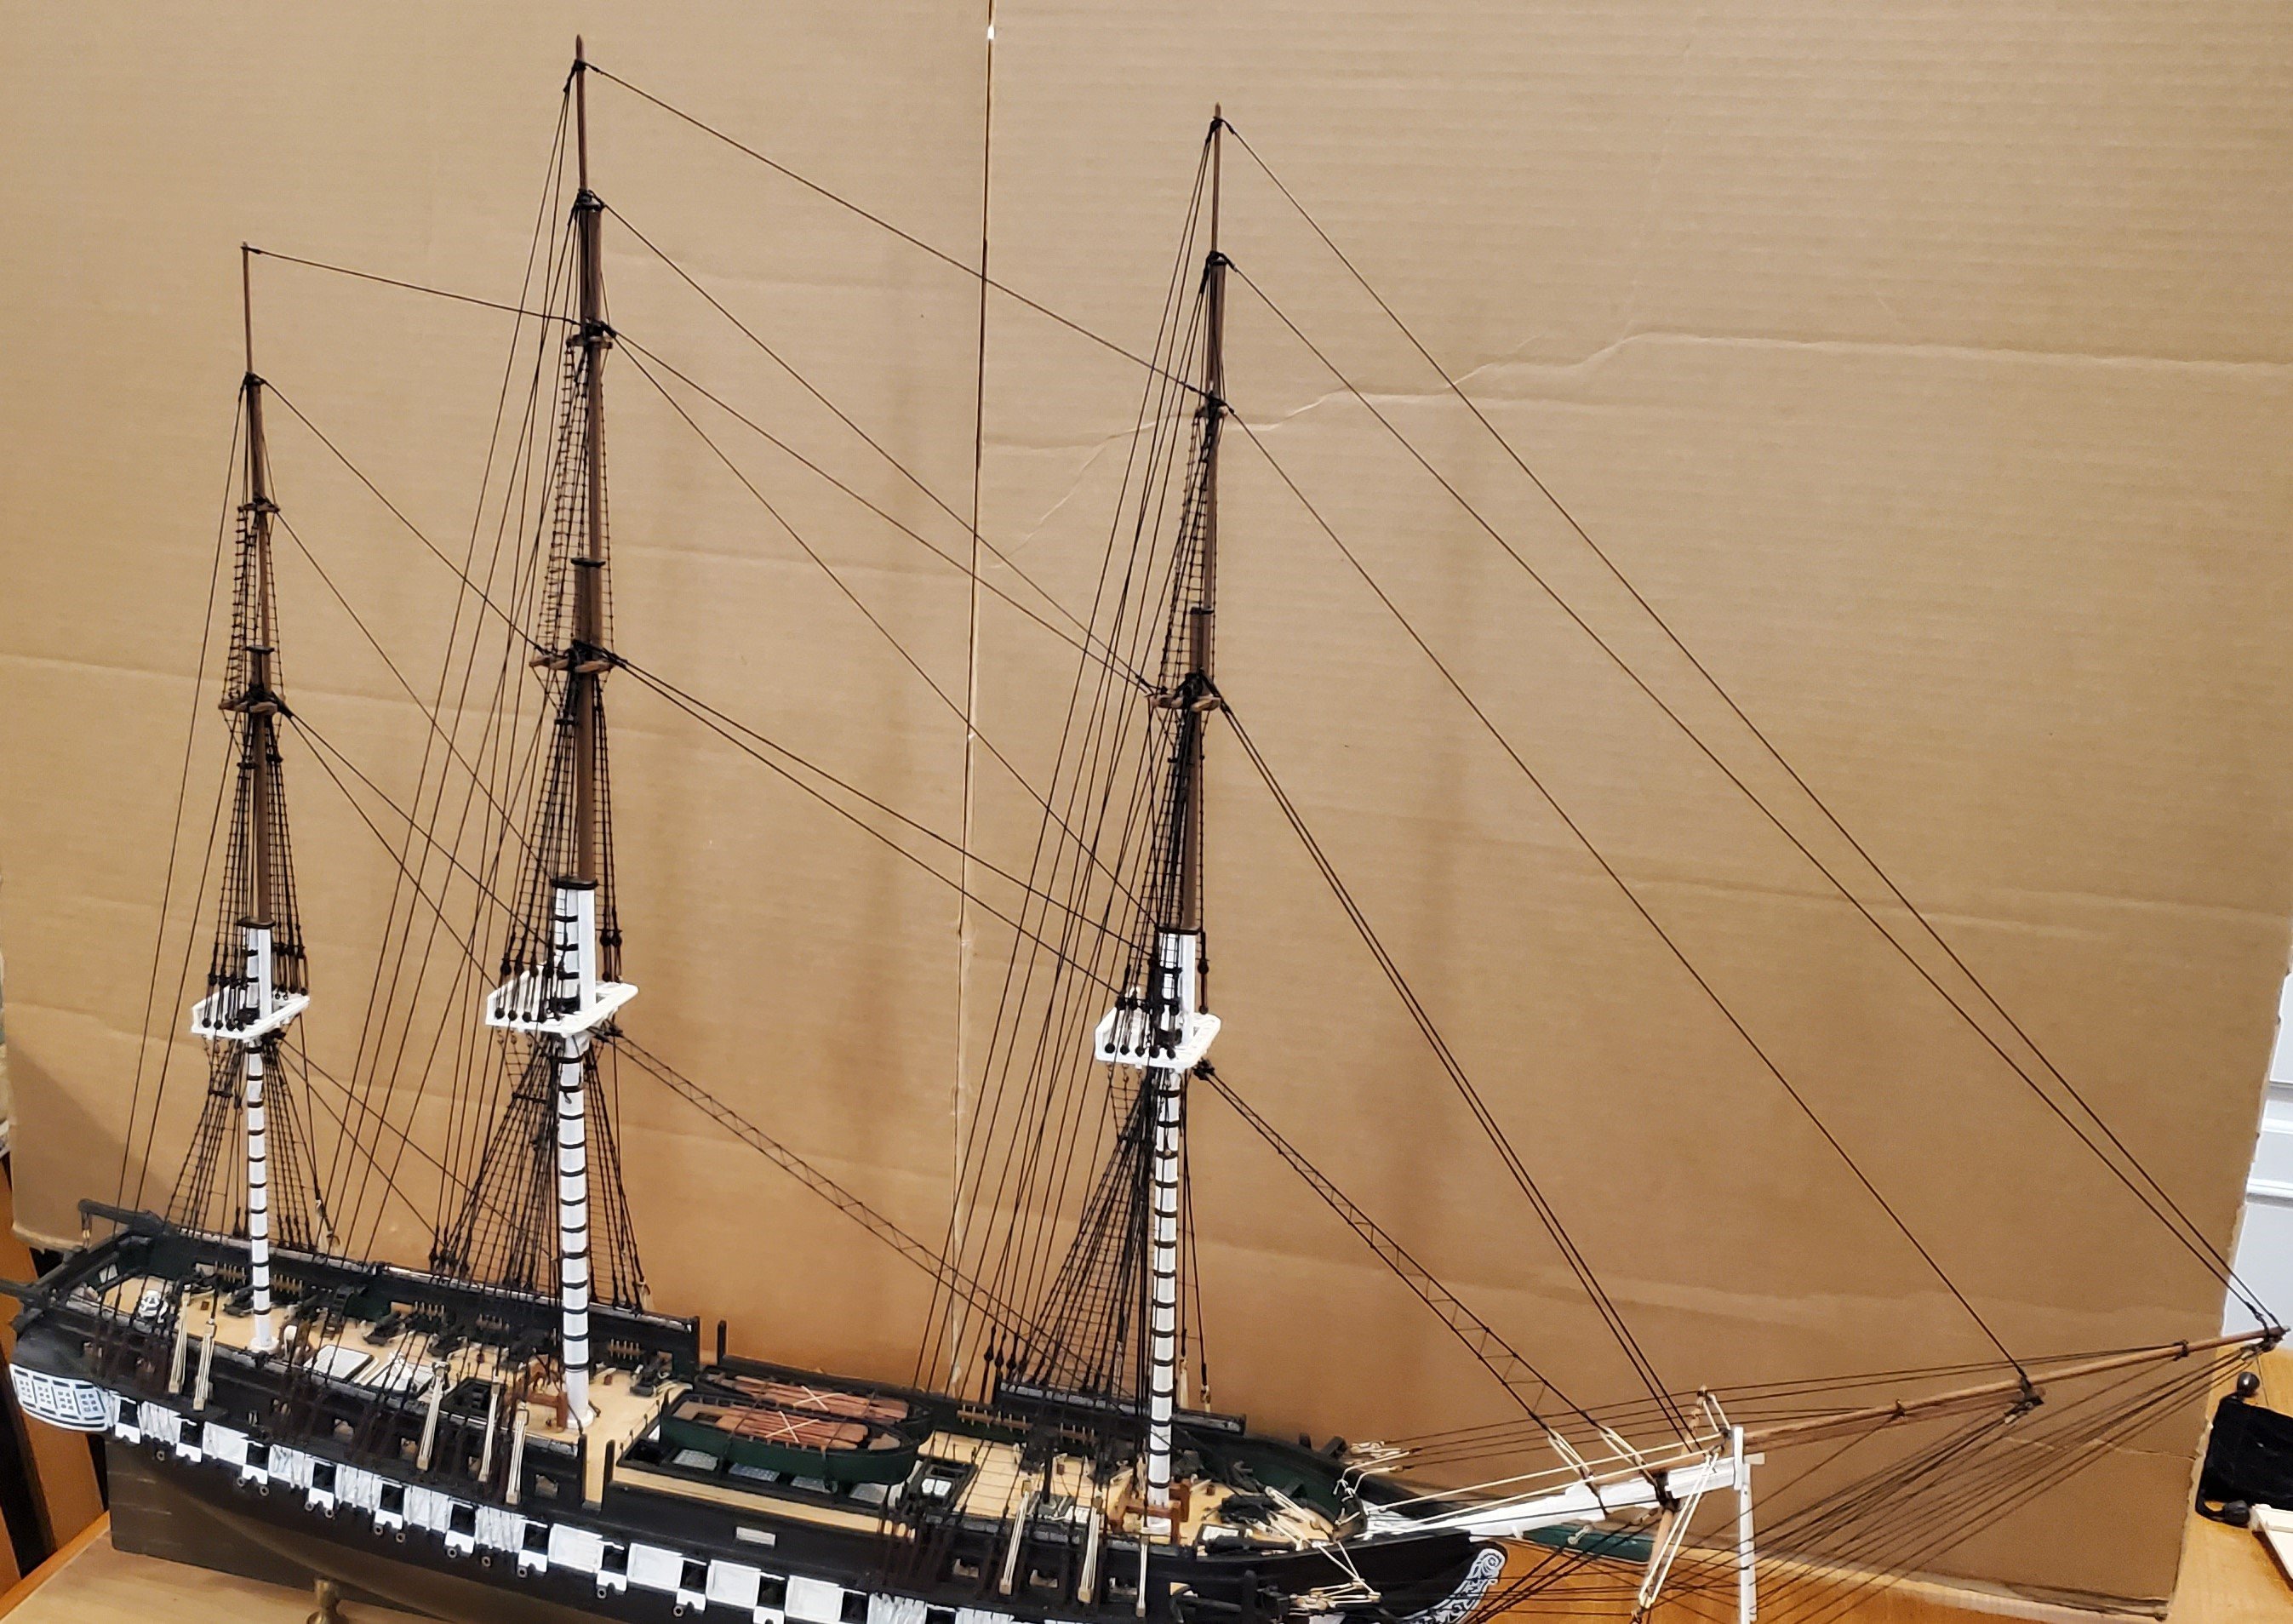
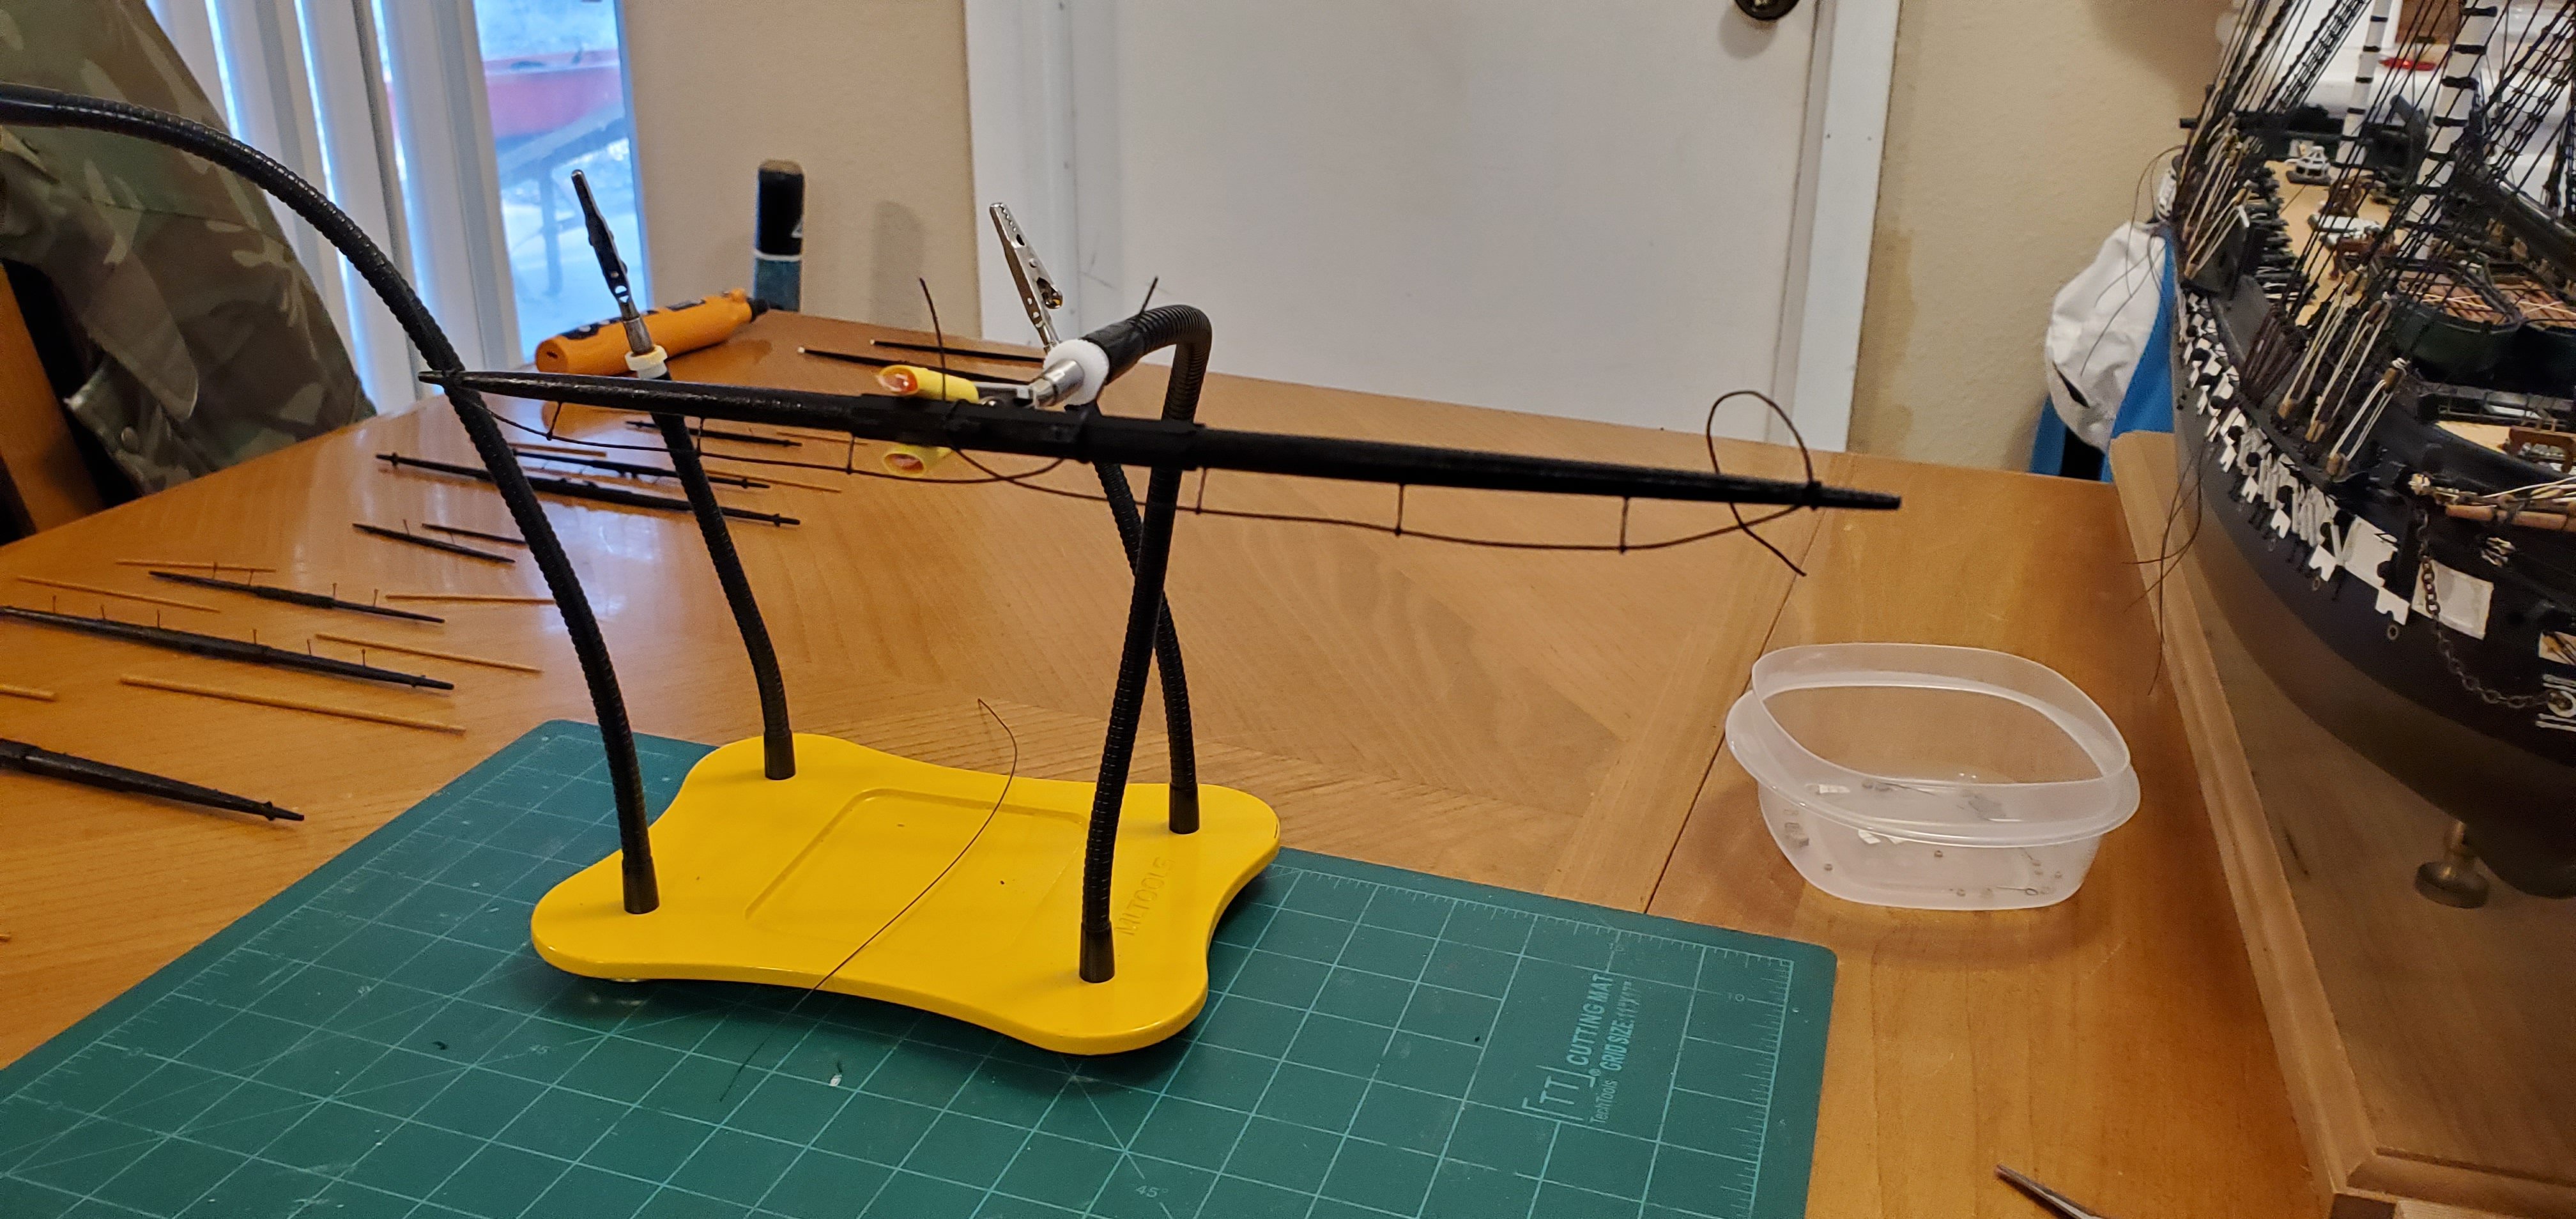
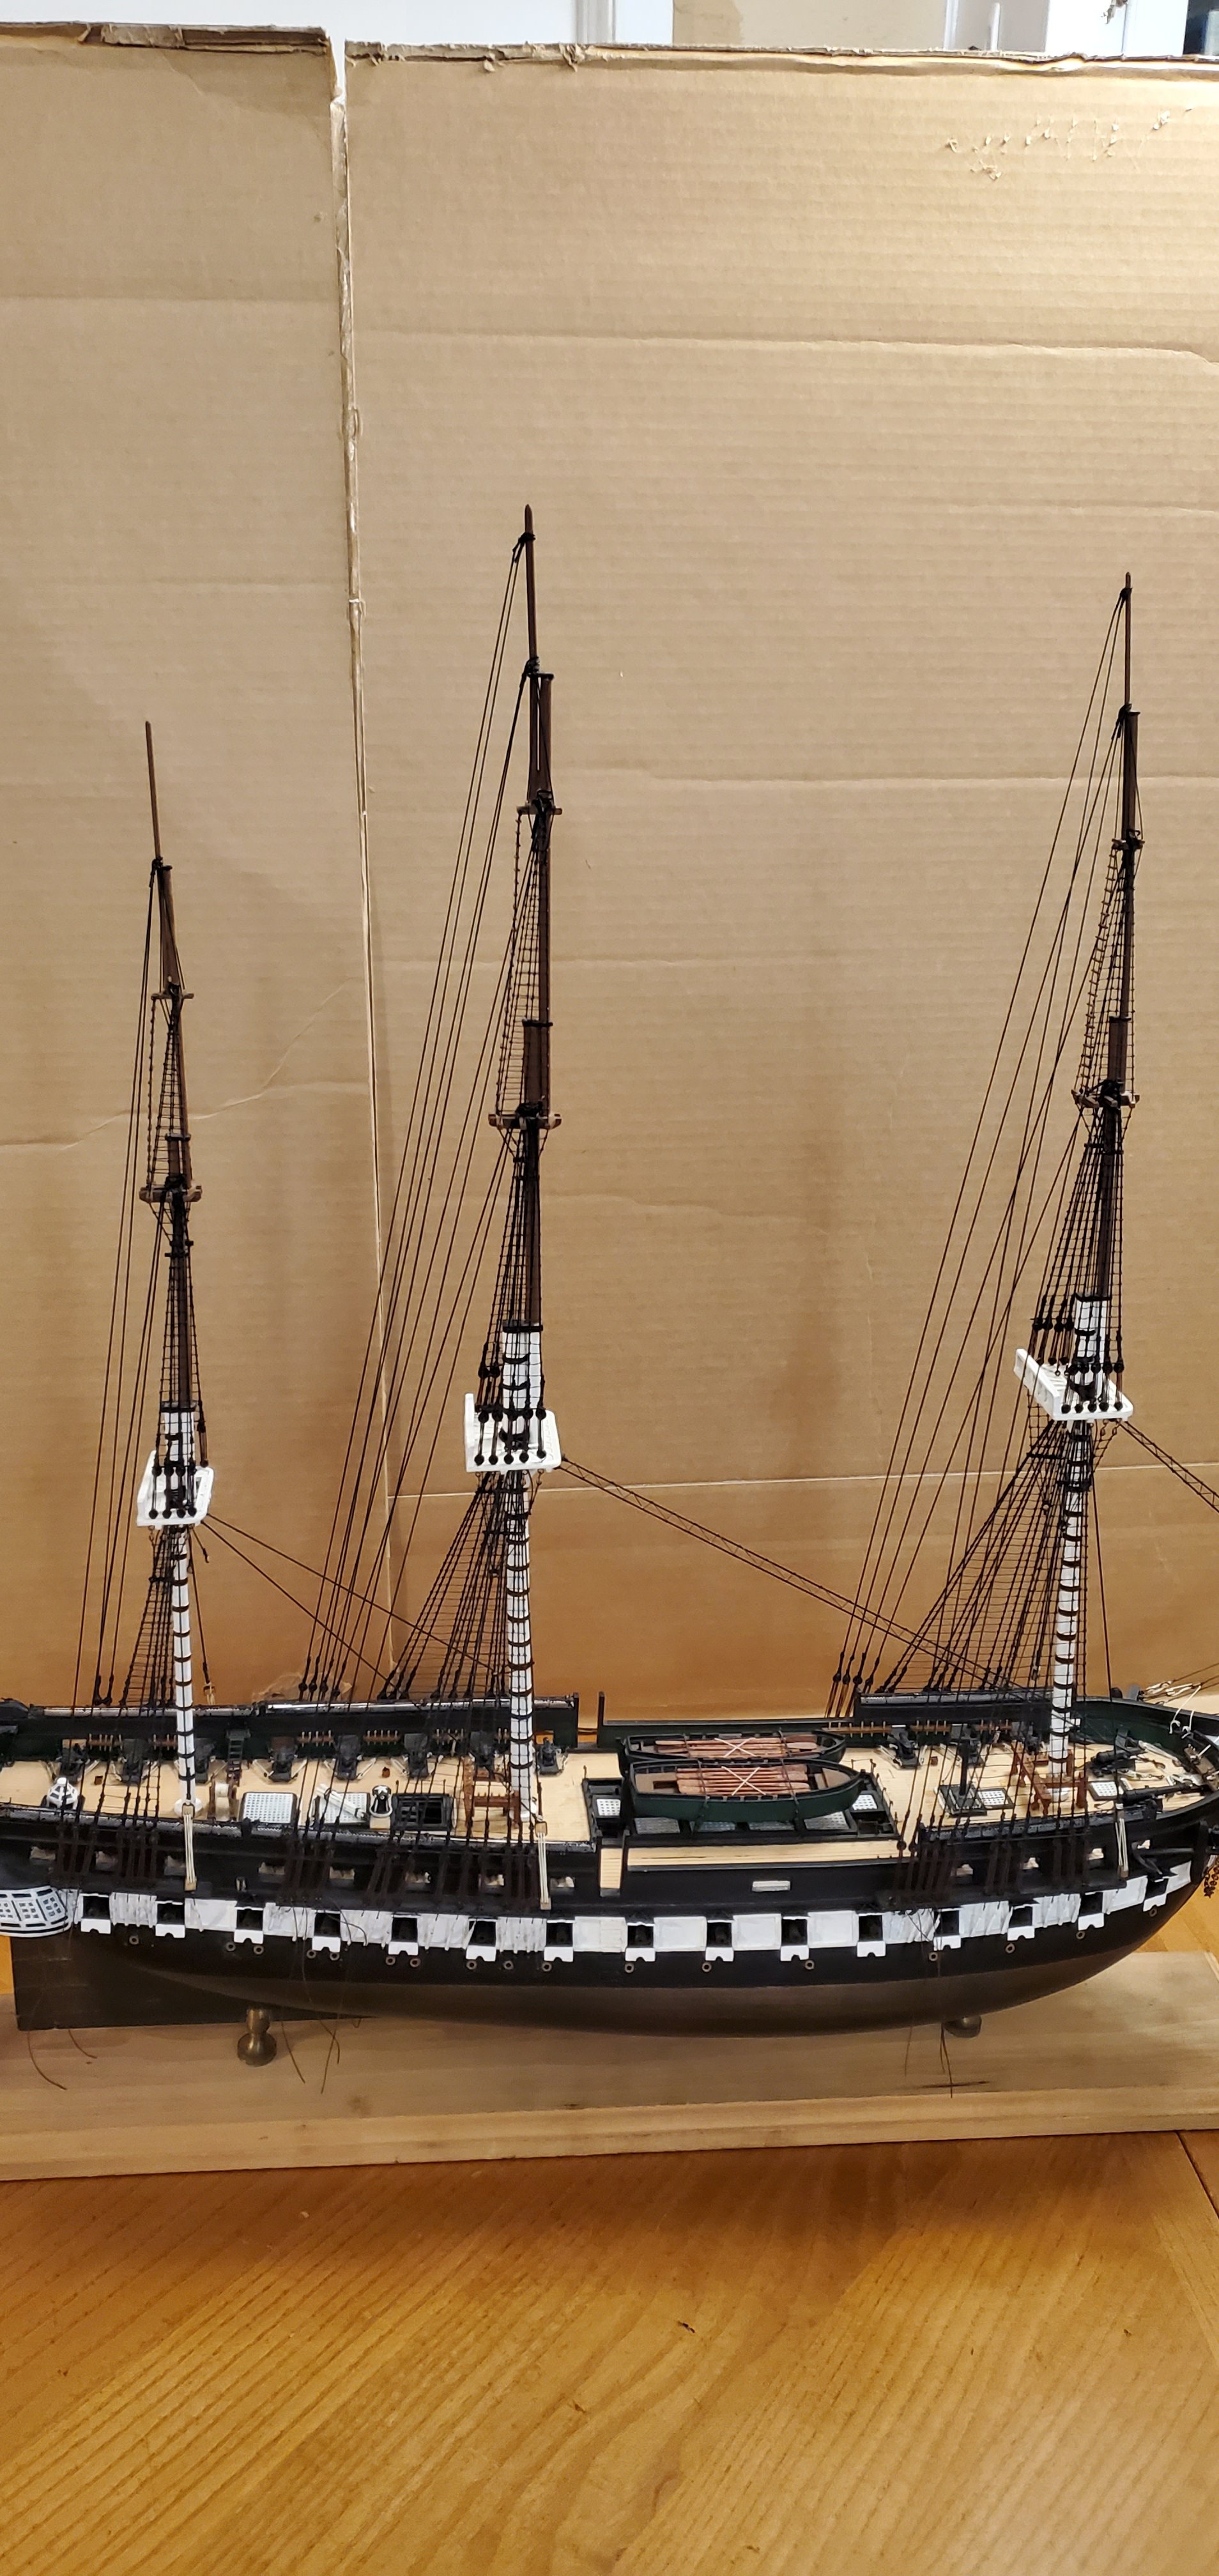
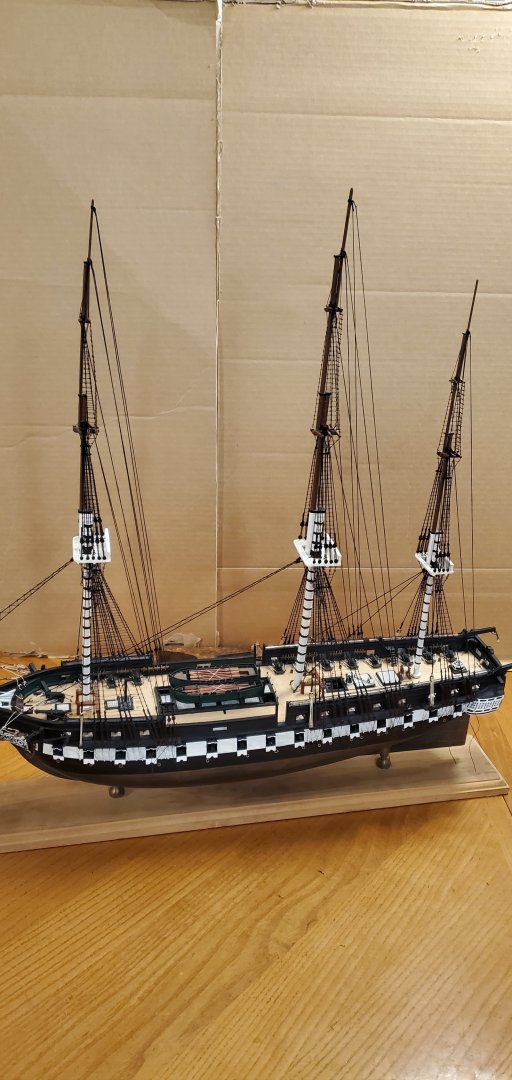
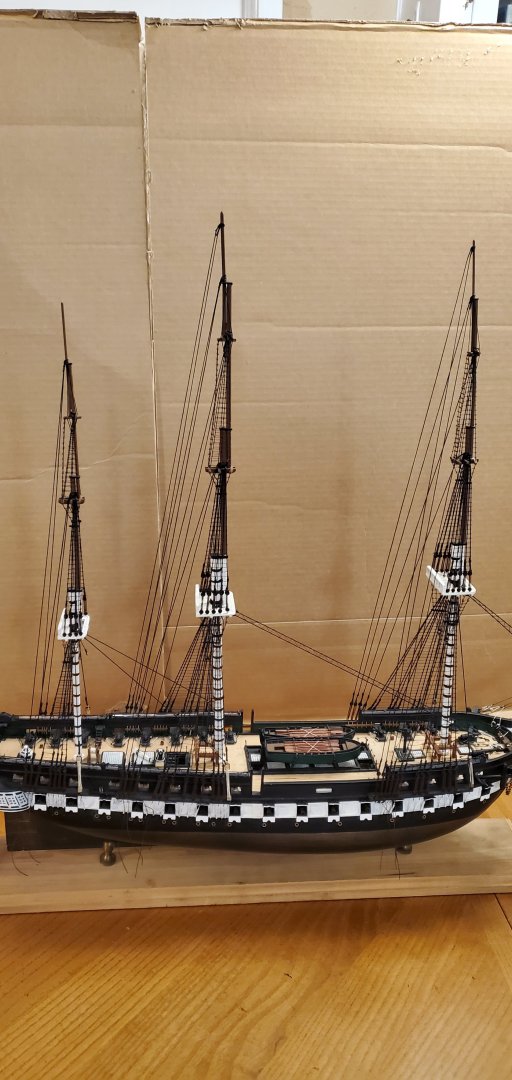
I have reached a major milestone on this project - all of the standing rigging is complete! WOOHOO!!! The stays are taut (all 52 of them) and the masts are straight and aligned. That calls for another round! Next up is attaching the stuns'l booms to the yards, which means it's time to cozy up to the soldering iron.


- 301 replies
-
- 20
-
-

-
- Constitution
- Bluejacket Shipcrafters
- (and 1 more)
-
I believe that the medium blue-gray would fade to a more pale gray as the ships aged. So if you want a brand new look, I'd go more with the medium blue-gray. But if you want a more aged or weathered look, I'd go pale gray. My 2 cents.
-
I think they should be called Flemish Longhorns rather than horses. But what do I know! As far as the crow's feet, the BlueJacket plans don't call for those so I didn't install them. Thanks, Keith. My goal was to make them look as good as yours on your Tennessee.
- 301 replies
-
- 7
-
-

-
- Constitution
- Bluejacket Shipcrafters
- (and 1 more)
-
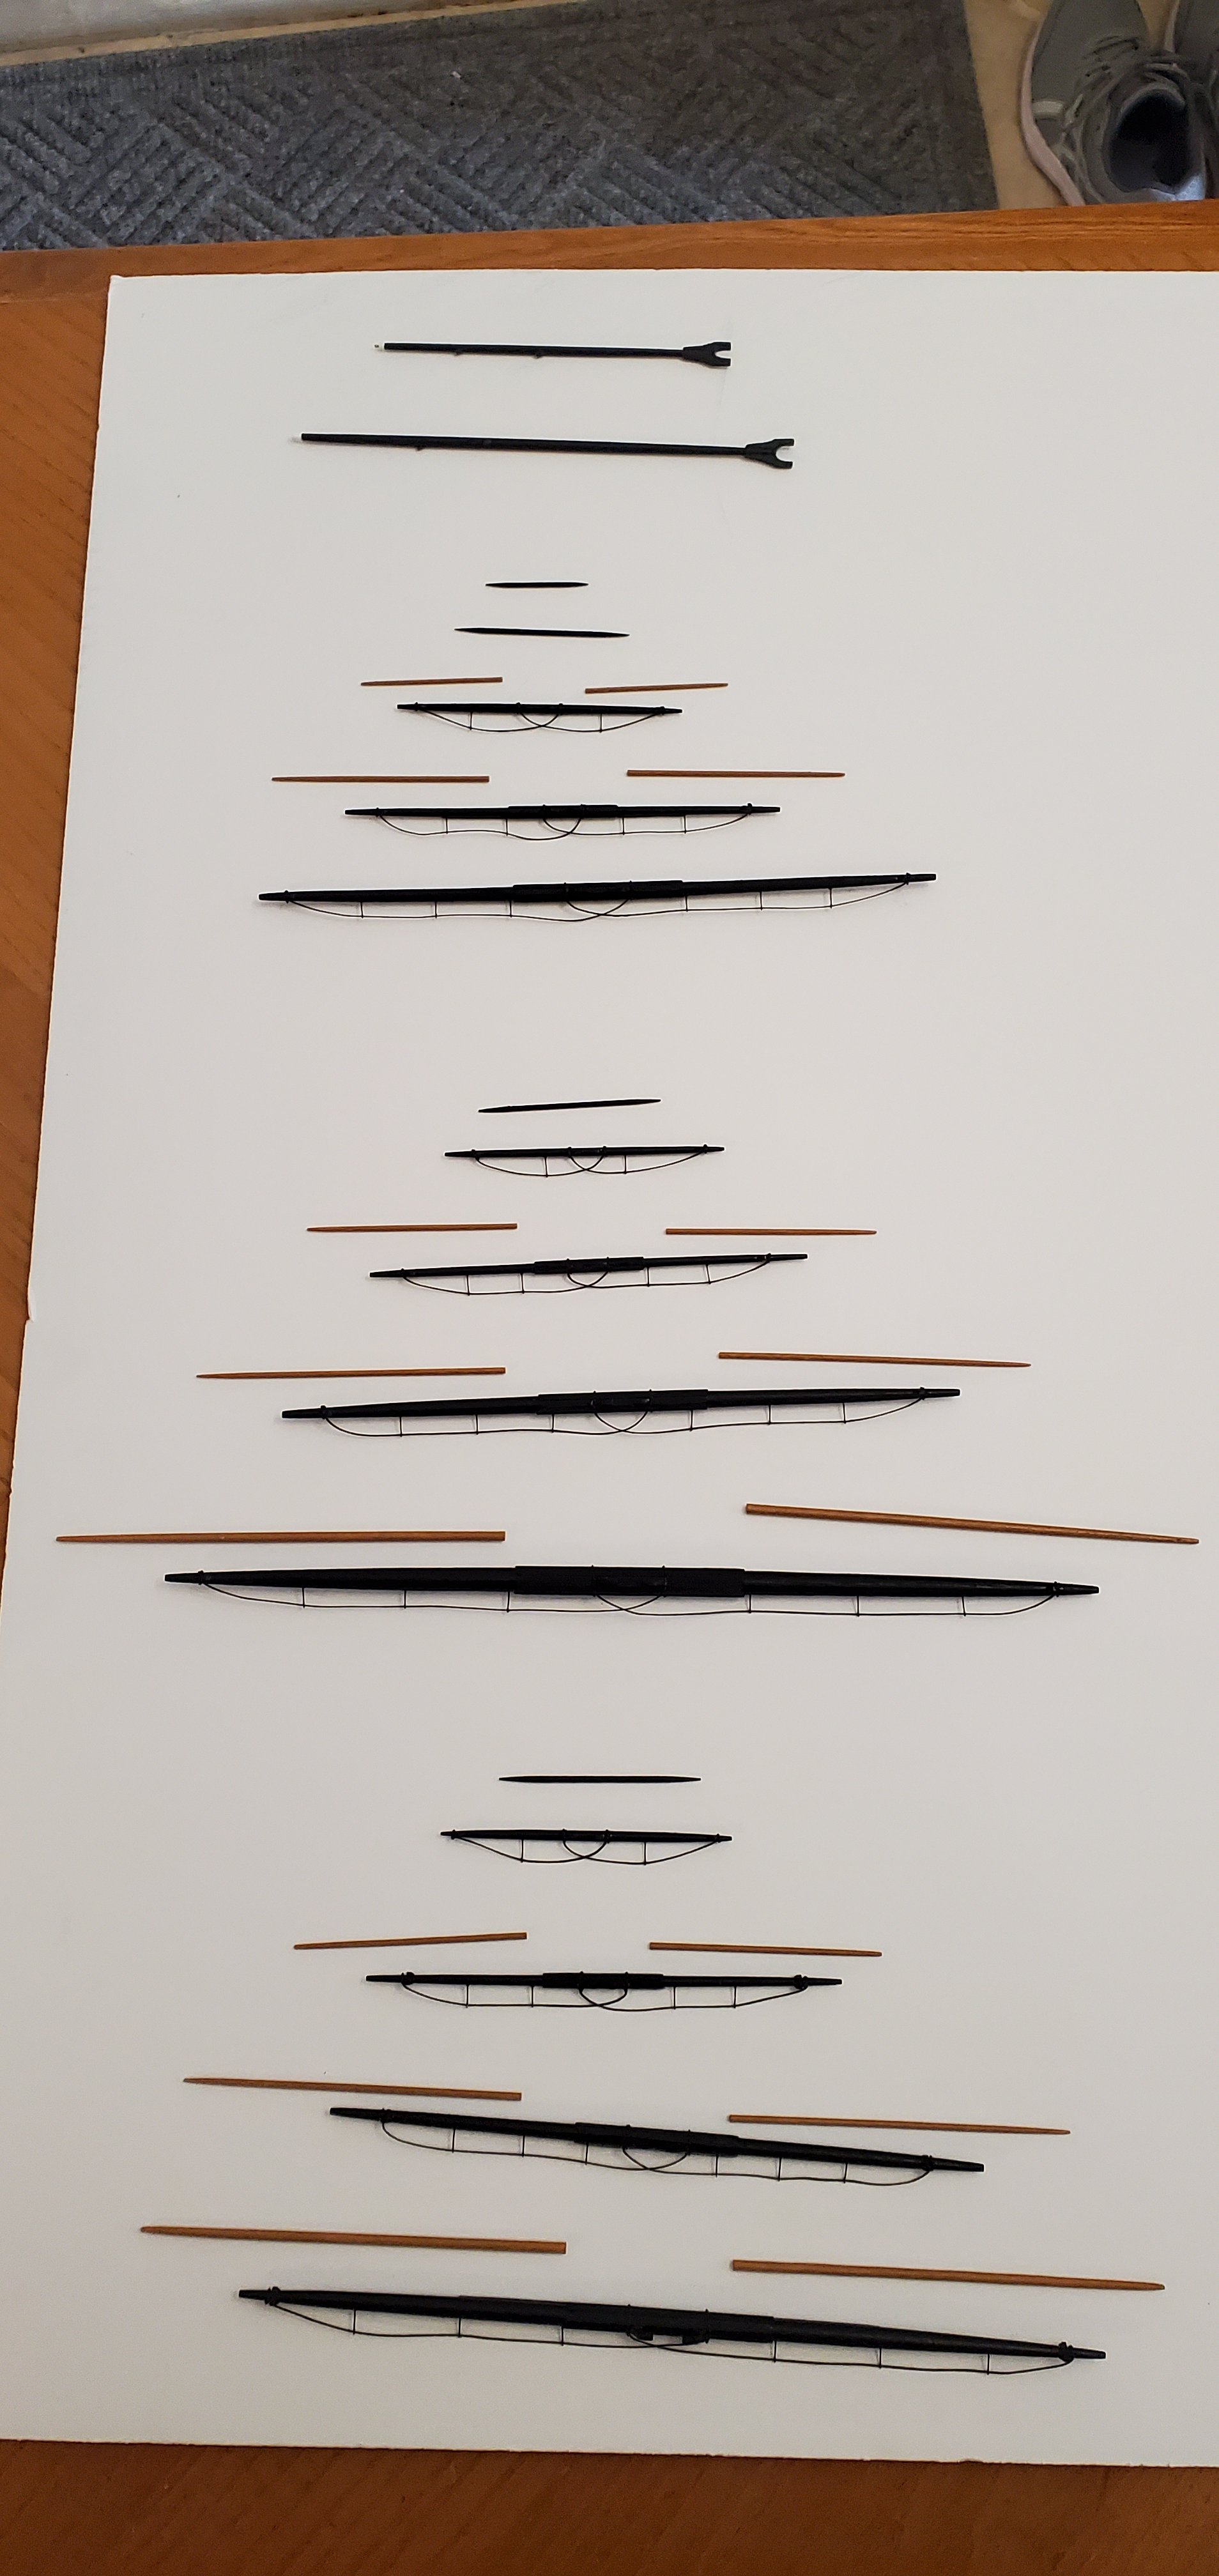
Well, I took another look at the mast and spar diagram and realized the lower 3 yards on each mast have these little mini-foot ropes on the ends. I did a quick search and found that they are called Flemish Horses. Hmmm. Had not heard of them before. So I did a quick add.

- 301 replies
-
- 14
-
-
- Constitution
- Bluejacket Shipcrafters
- (and 1 more)
-
Well, I got to the end of my rope on this project. Literally. I ran out of cord for the stays, so I had to order more from BlueJacket. While waiting for the new line to arrive, I circled back to the yards and installed all the foot ropes. I've seen some people use thread for the stirrups and others use small eye pins. I particularly like the way the foot ropes look on @Keith Black's Tennessee so I decided on eye pins.


- 301 replies
-
- 12
-
-
- Constitution
- Bluejacket Shipcrafters
- (and 1 more)
-
I think that's good advice, Ian. The even trickier thing, which I did not mention above, was drilling tiny holes in the deck for the eye pins inside the fife rails at the base of the masts. Even my small pin vise was really difficult to position and work inside those tight confines. I guess what I should have done is read the instructions backwards at the start. Then I would've known where all those tie off points for the rigging are and could have put the eye pins and lanyards in place first. Too late now!
- 301 replies
-
- 5
-
-
- Constitution
- Bluejacket Shipcrafters
- (and 1 more)
-
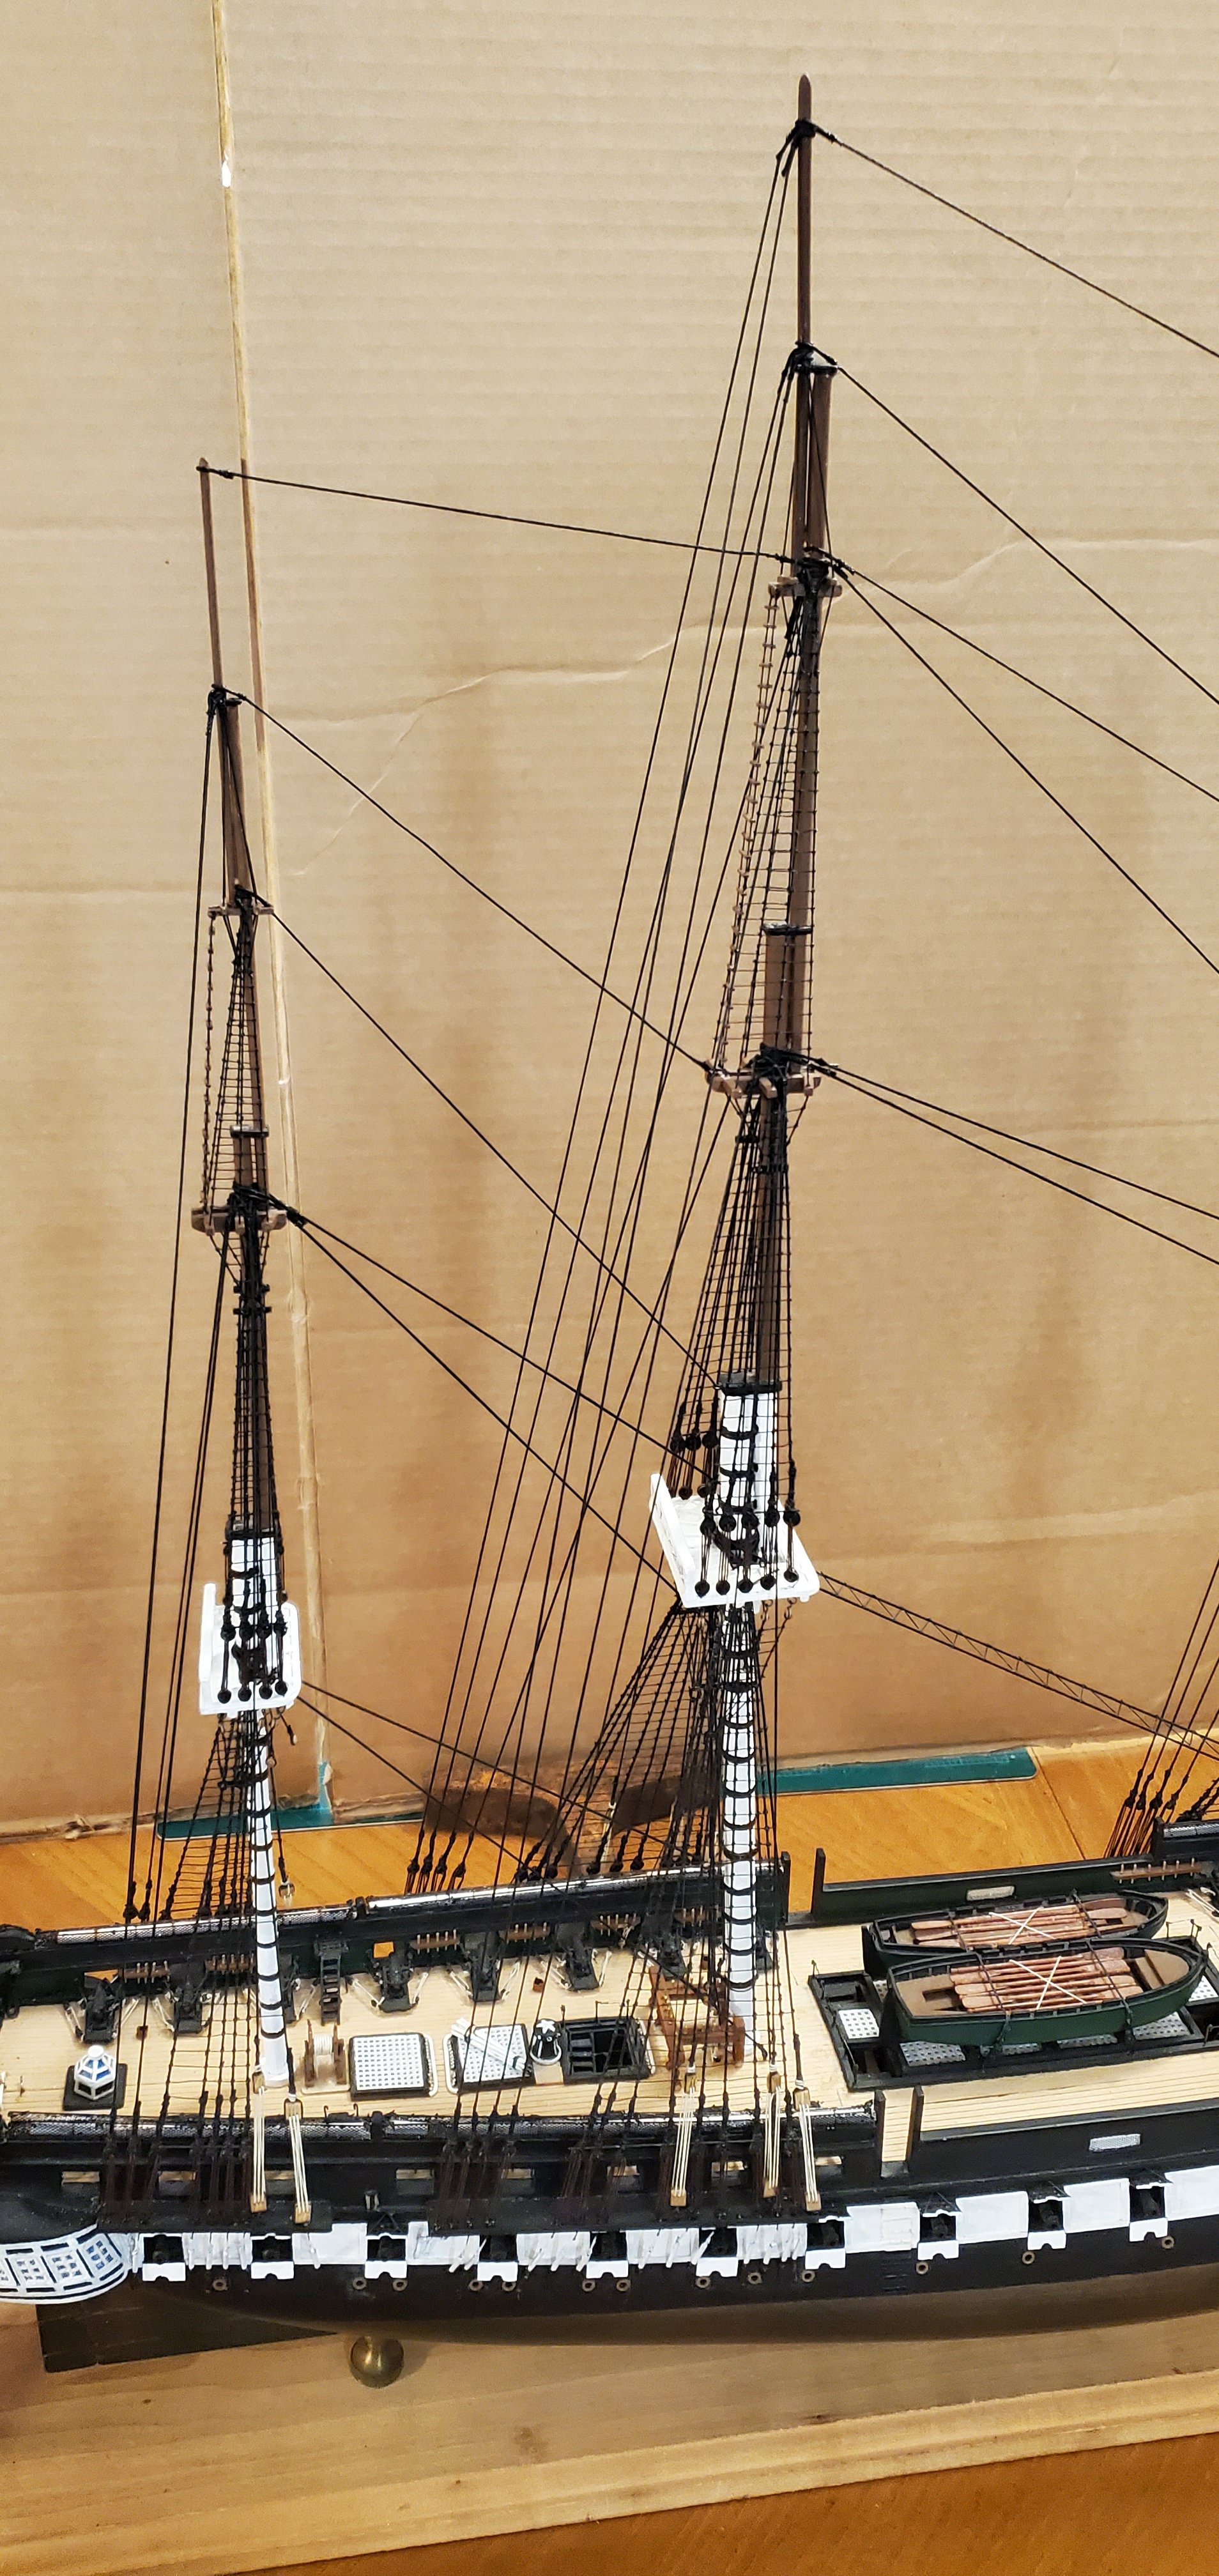
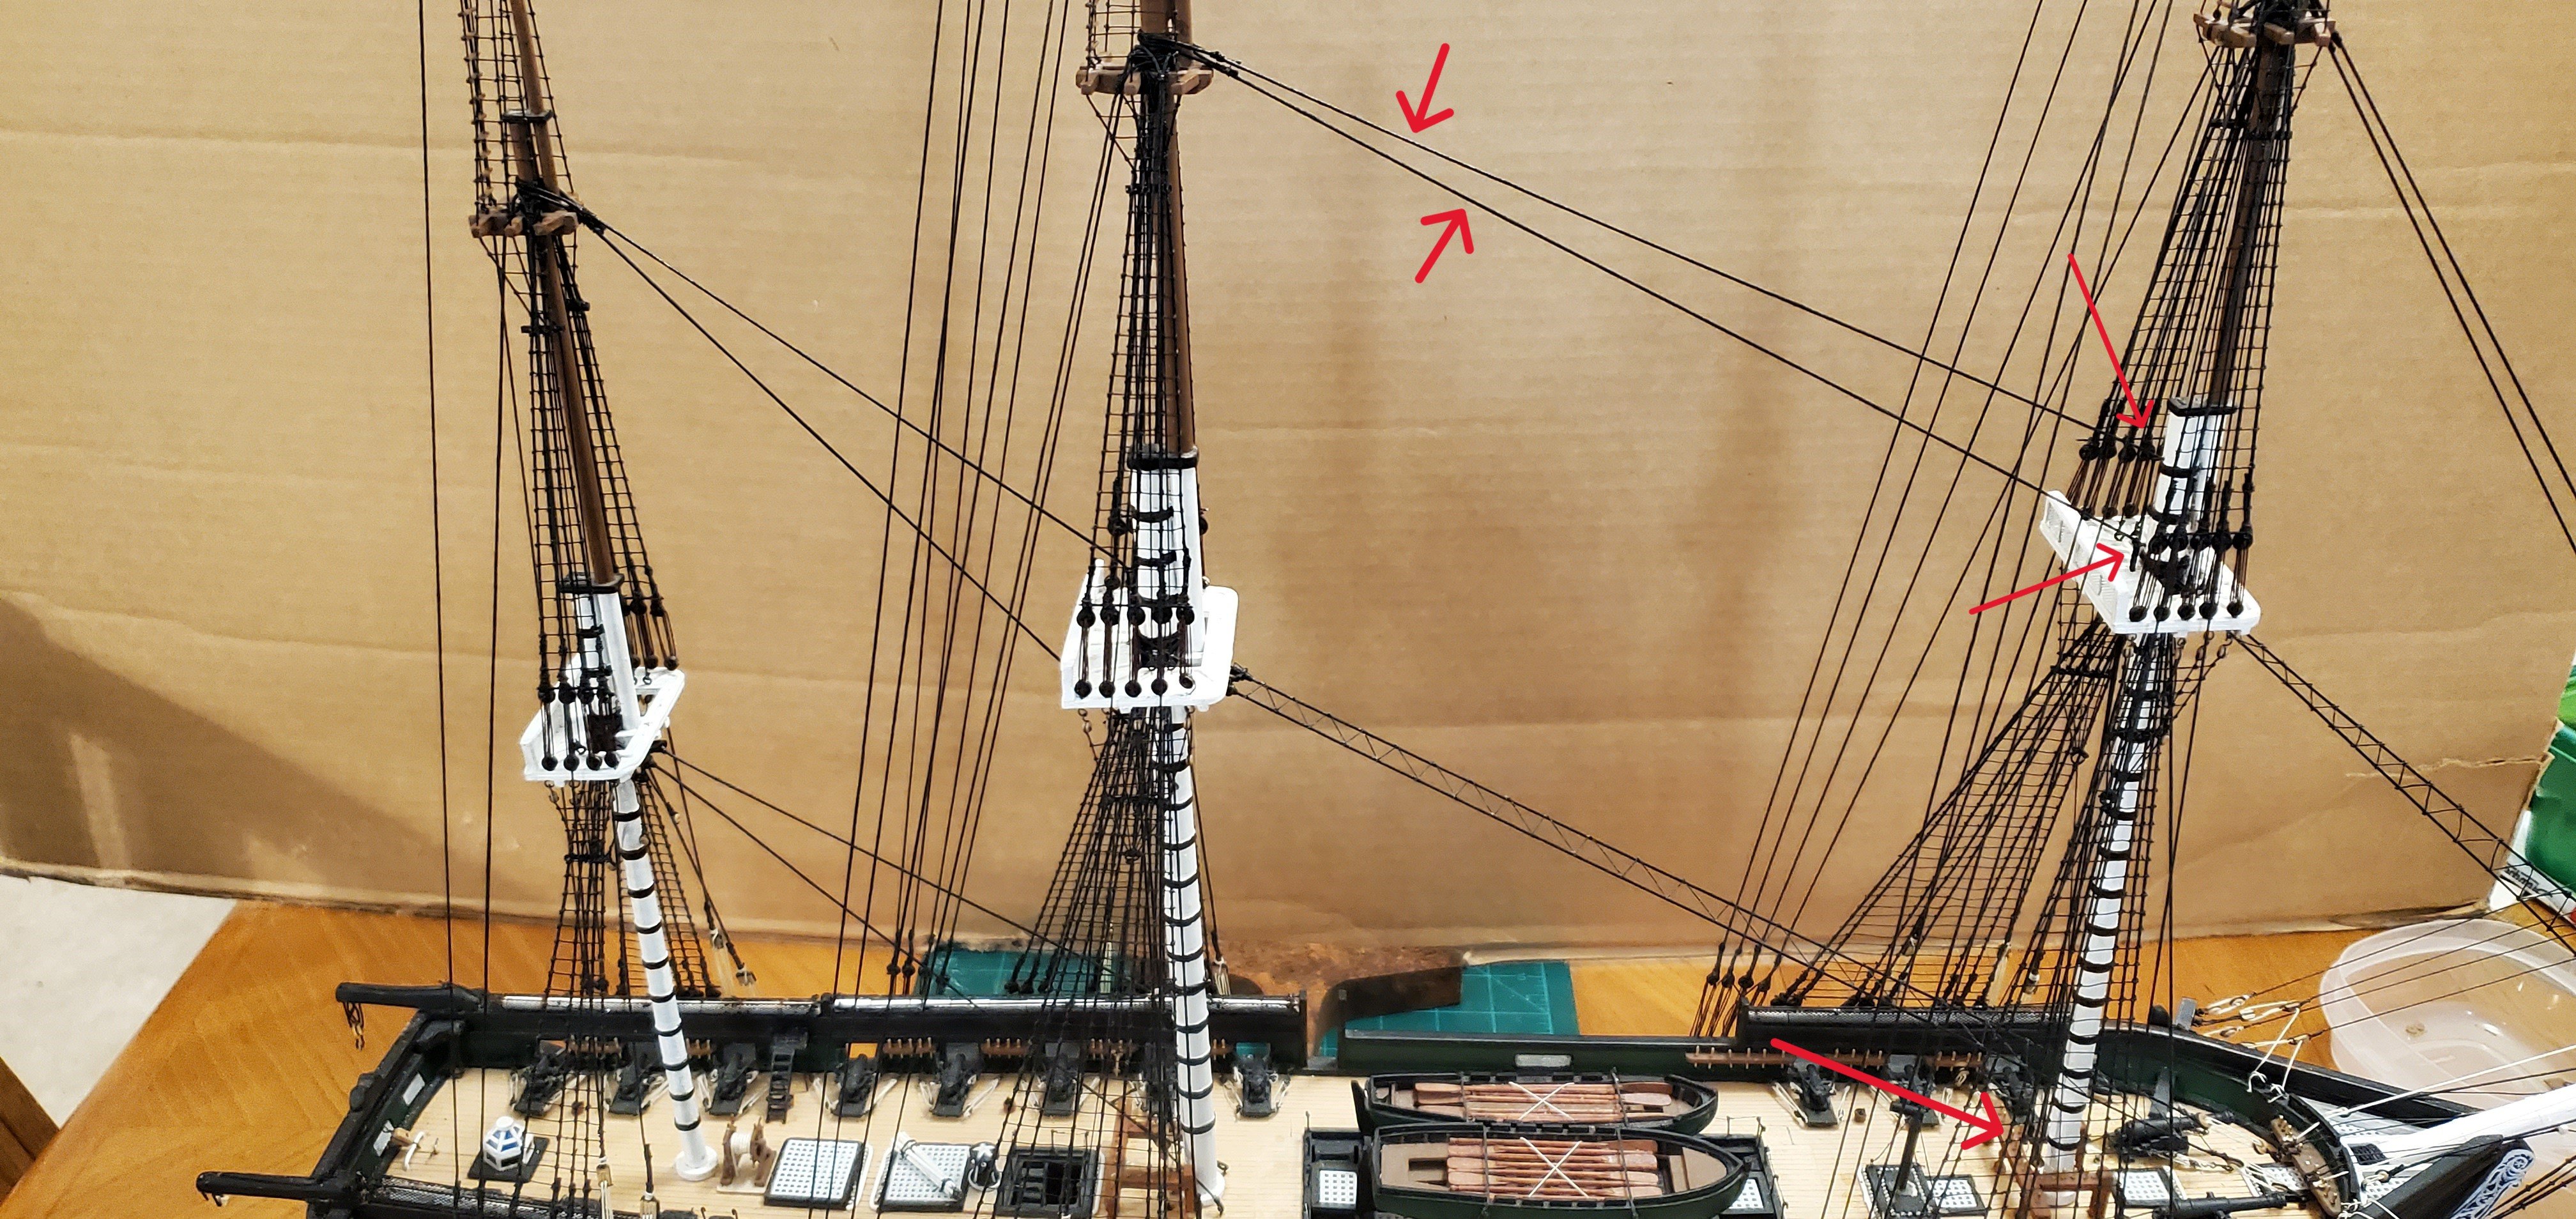
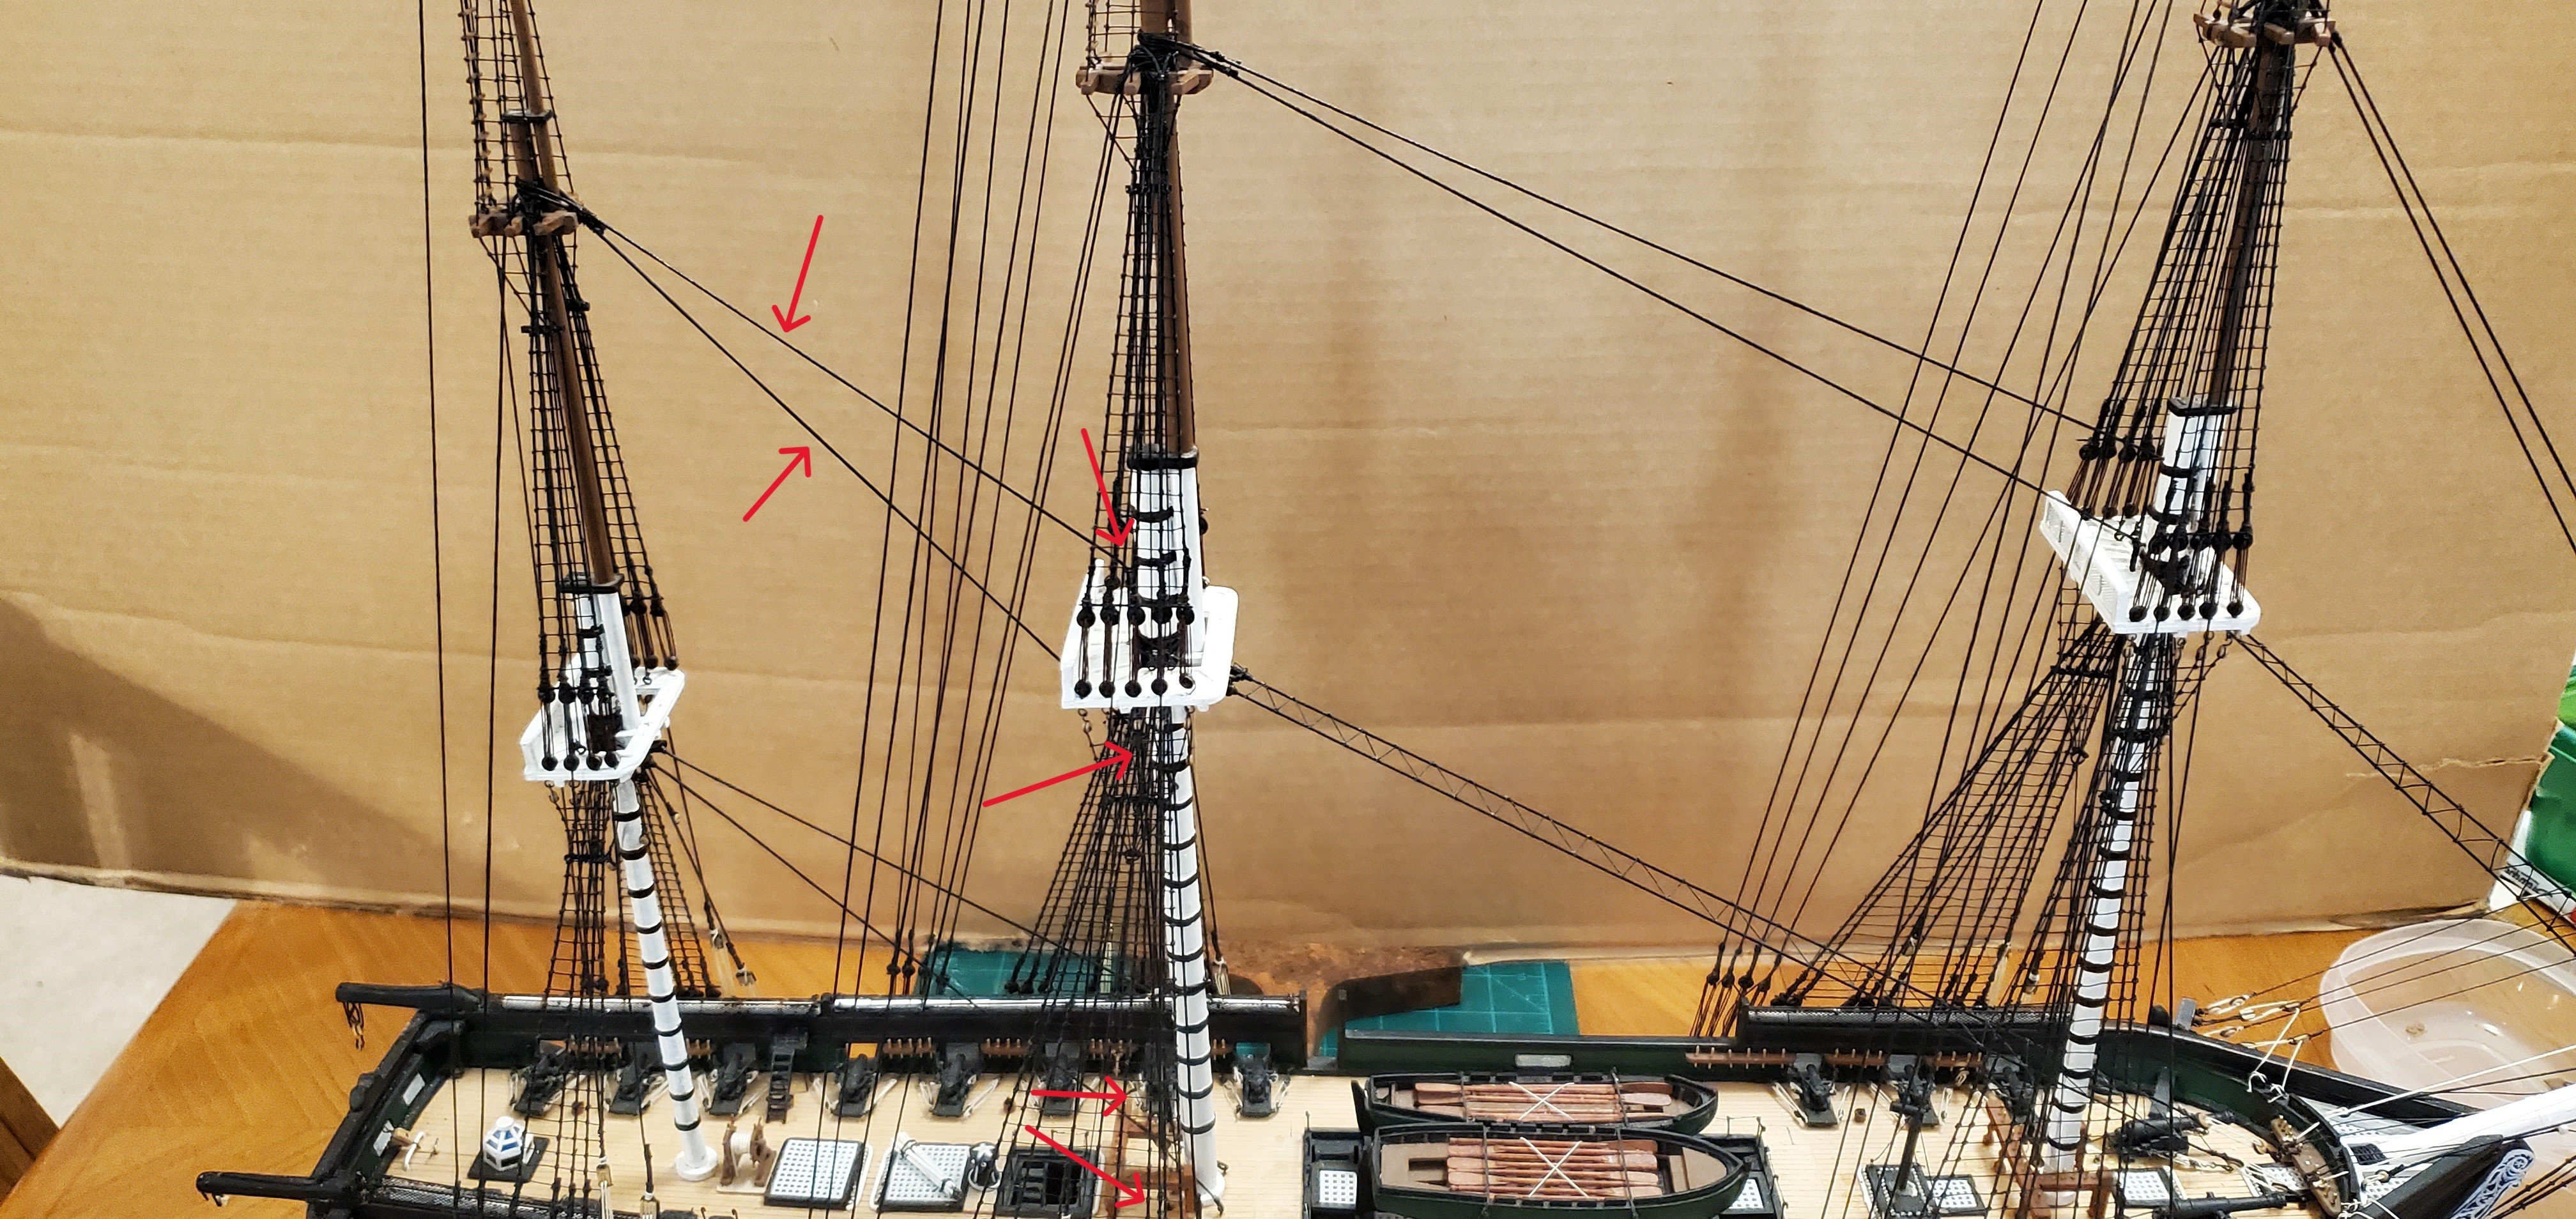
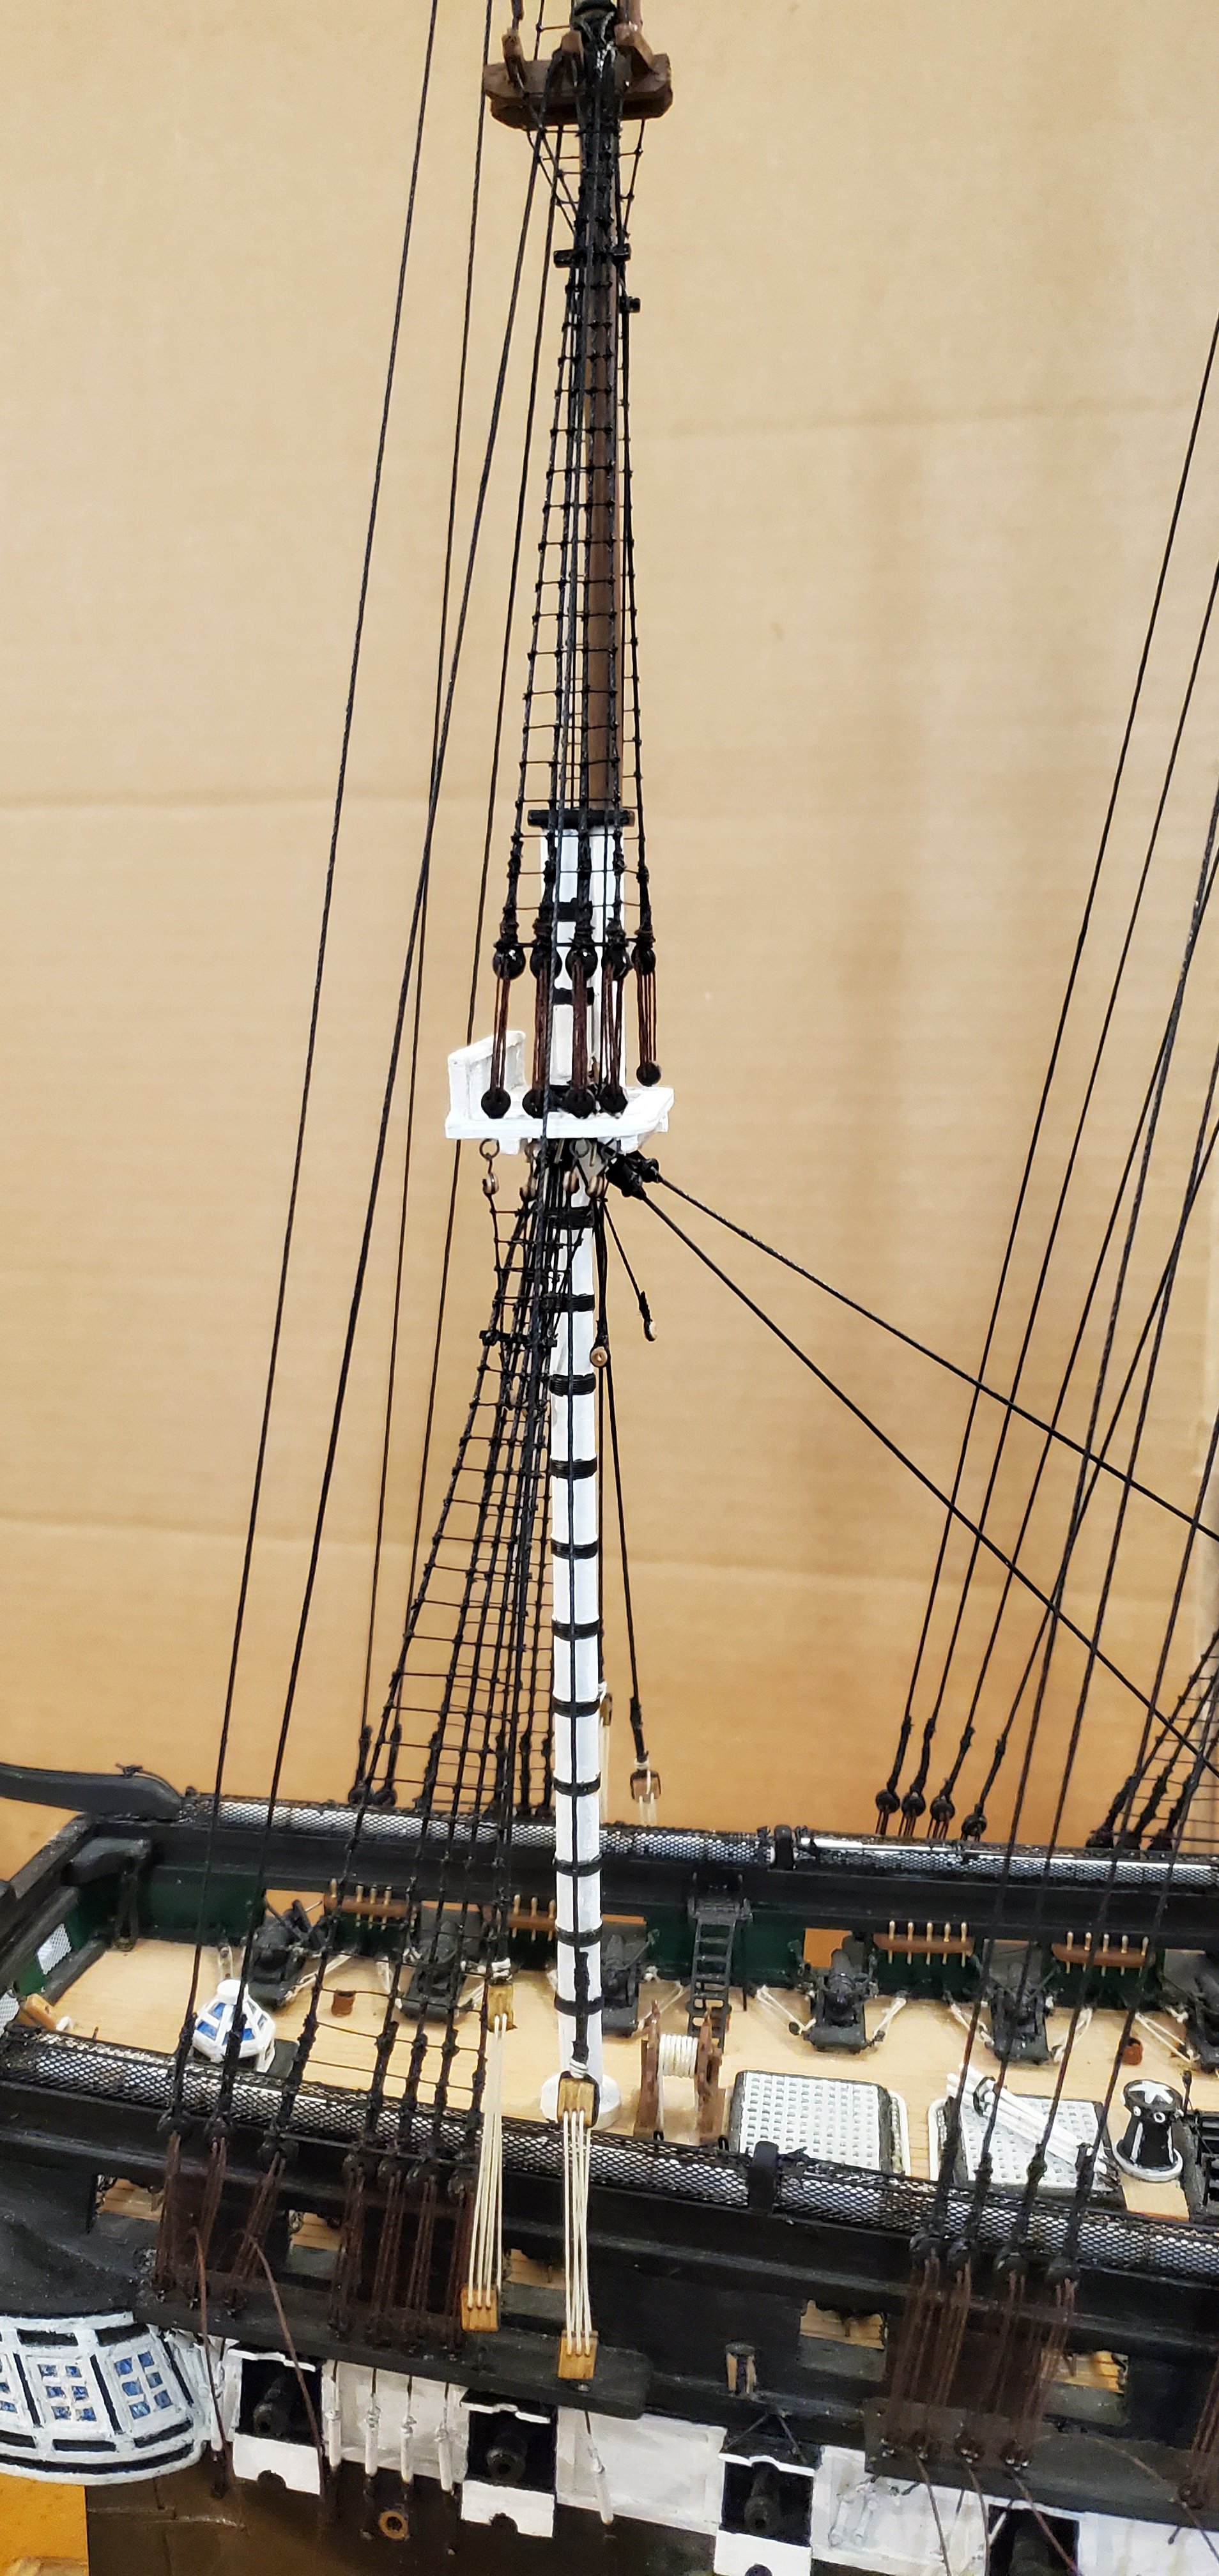
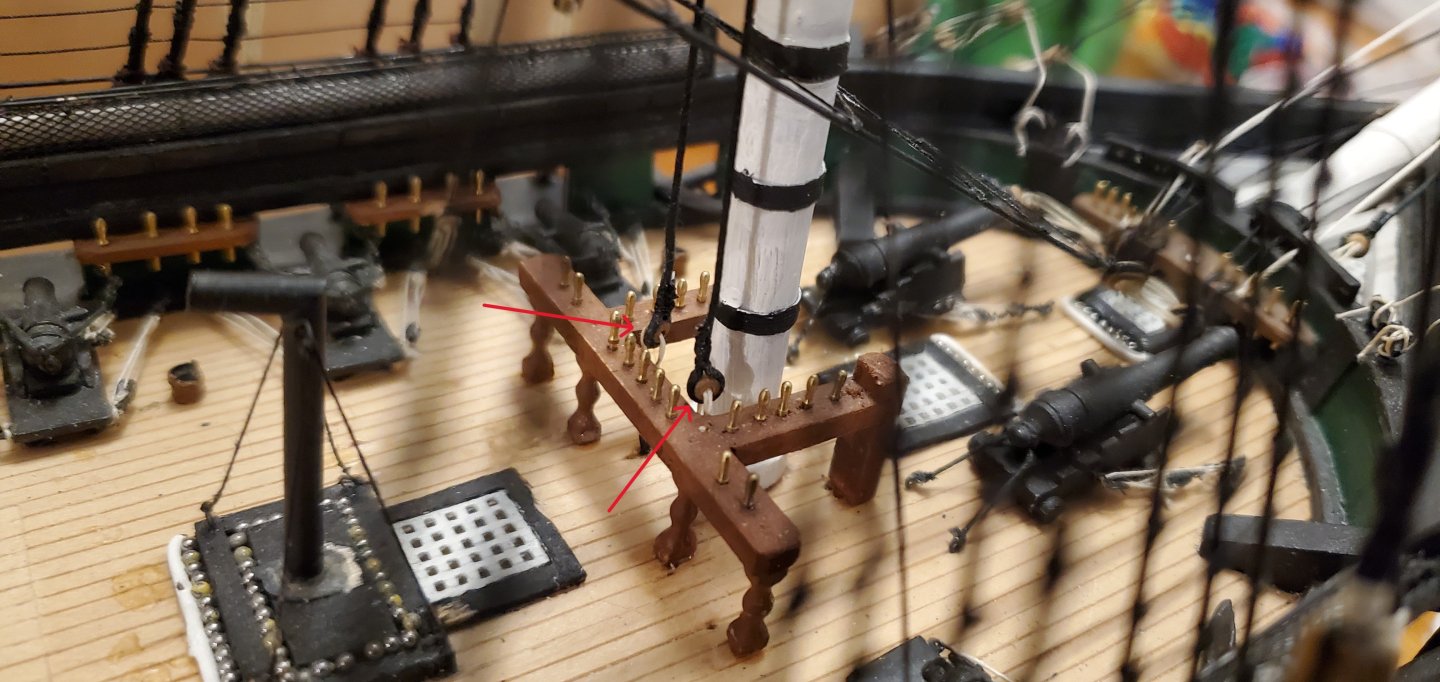
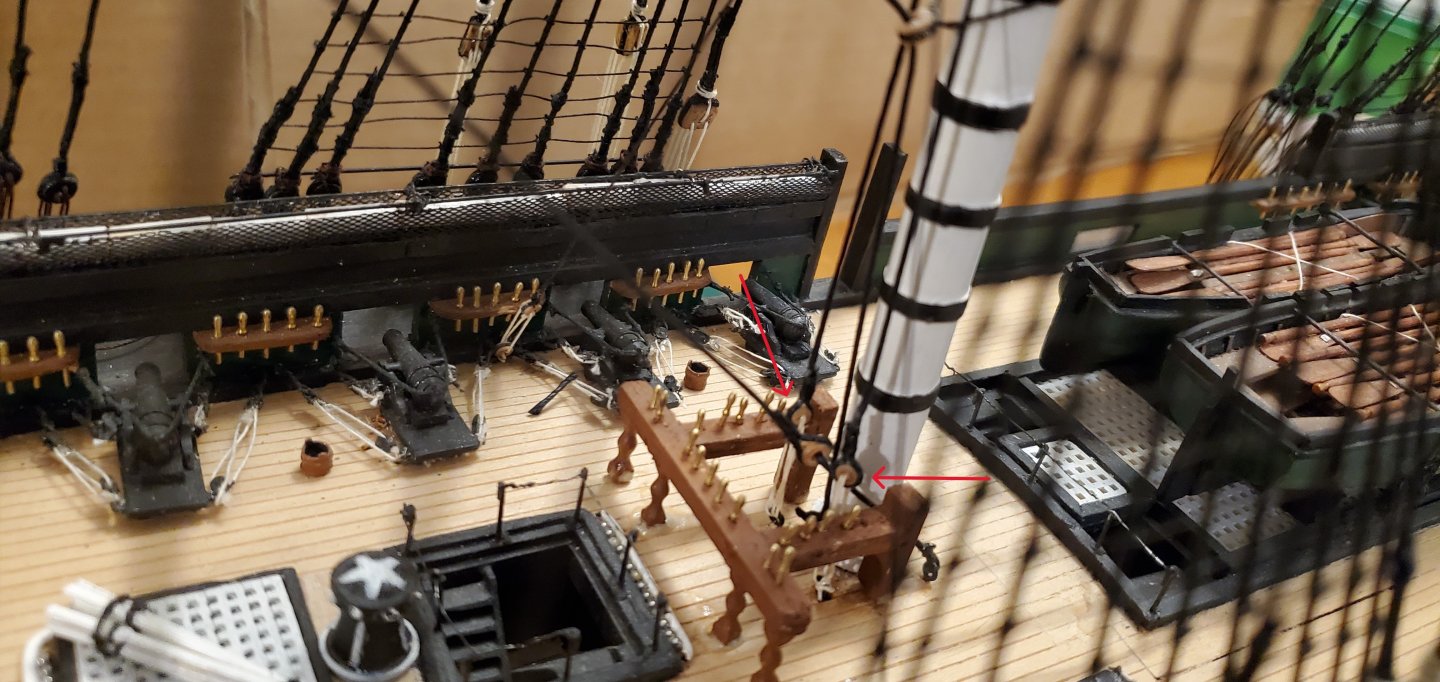
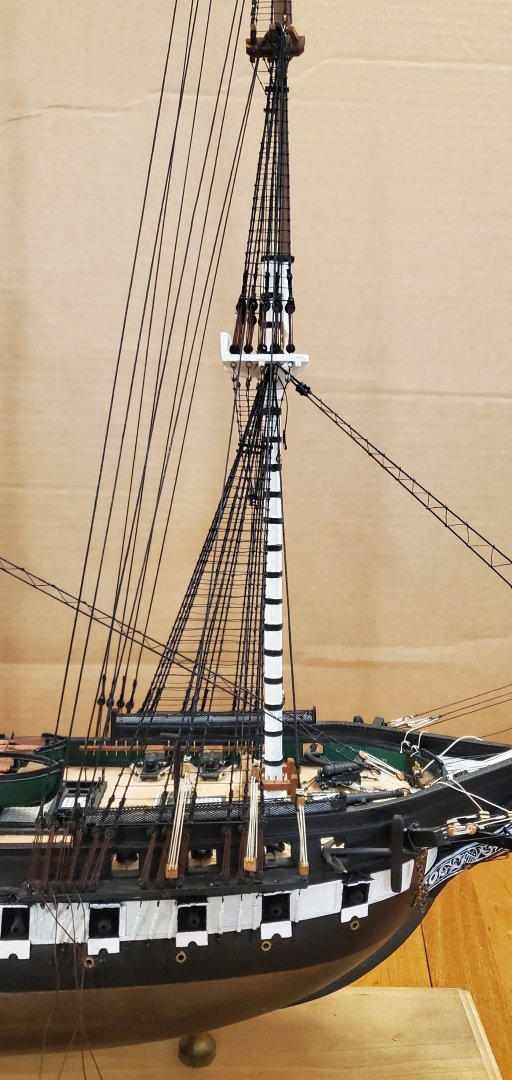
Having none of Keith's eloquence, I can only recite song lyrics to show how I'm feeling doing all these stays "Whether you're a brother or whether you're a mother, You're stayin' alive, stayin' alive. Feel the city breakin' and everybody shakin', And we're stayin' alive, stayin' alive Ah, ha, ha, ha, stayin' alive, stayin' alive, Ah, ha, ha, ha, stayin' alive" OK. Enough of that! I finished off the topmast stays by rigging the main topmast stay and main topmast preventer stay, followed by the mizzen topmast stay and mizzen topmast preventer stay. The main topmast stay and preventer stays run from the main topmast to eyebolts on the foremast above the fore mast top, down the foremast to bullseye lanyards inside the fife rail. Here's the mizzen topmast stay and preventer stay rigged basically the same. The only difference is the stay runs through an eyebolt above the main mast top and the preventer stay runs through an eyebolt below the main mast top. Again, both are tied off to bullseye lanyards inside the fife rail. It was a bit tricky tying the lanyards inside the tight confines of the fife rails, backstays, shrouds, etc. Had I know more what about I was doing, I might have done some things in a different order.


- 301 replies
-
- 10
-
-
-
-
- Constitution
- Bluejacket Shipcrafters
- (and 1 more)
-
OK. Now I am really impressed! You have some remarkable talents, Keith.
- 301 replies
-
- 6
-
-
-
- Constitution
- Bluejacket Shipcrafters
- (and 1 more)
-
Enchanting words, Keith. Where did that passage come from?
- 301 replies
-
- 3
-
-
-
- Constitution
- Bluejacket Shipcrafters
- (and 1 more)
-
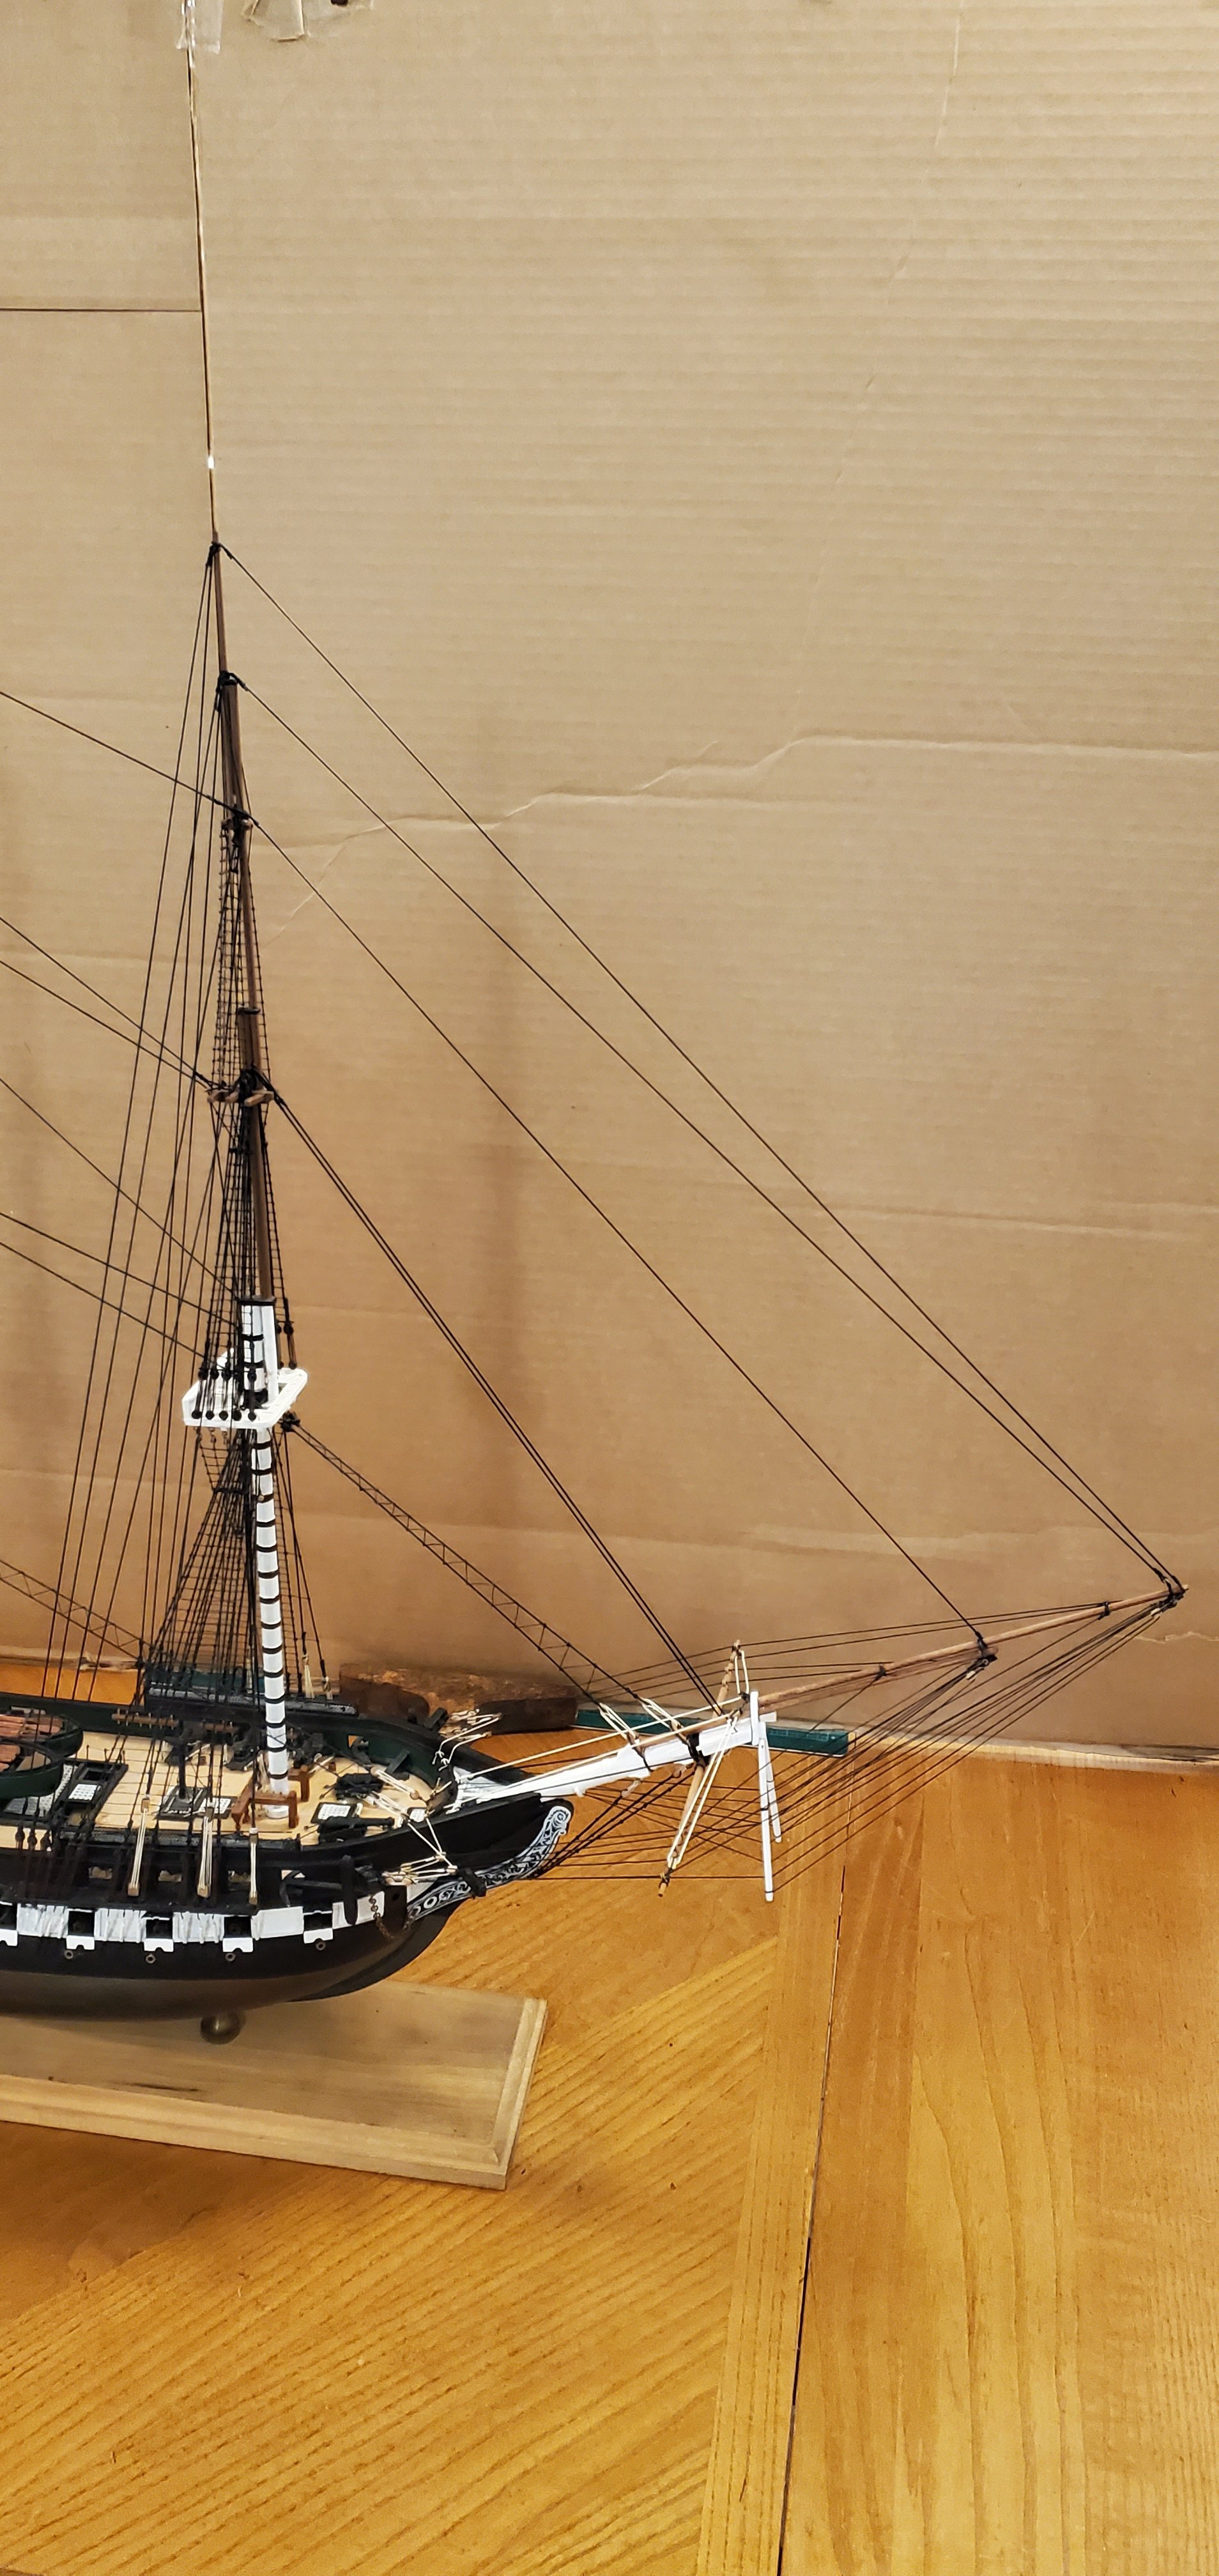
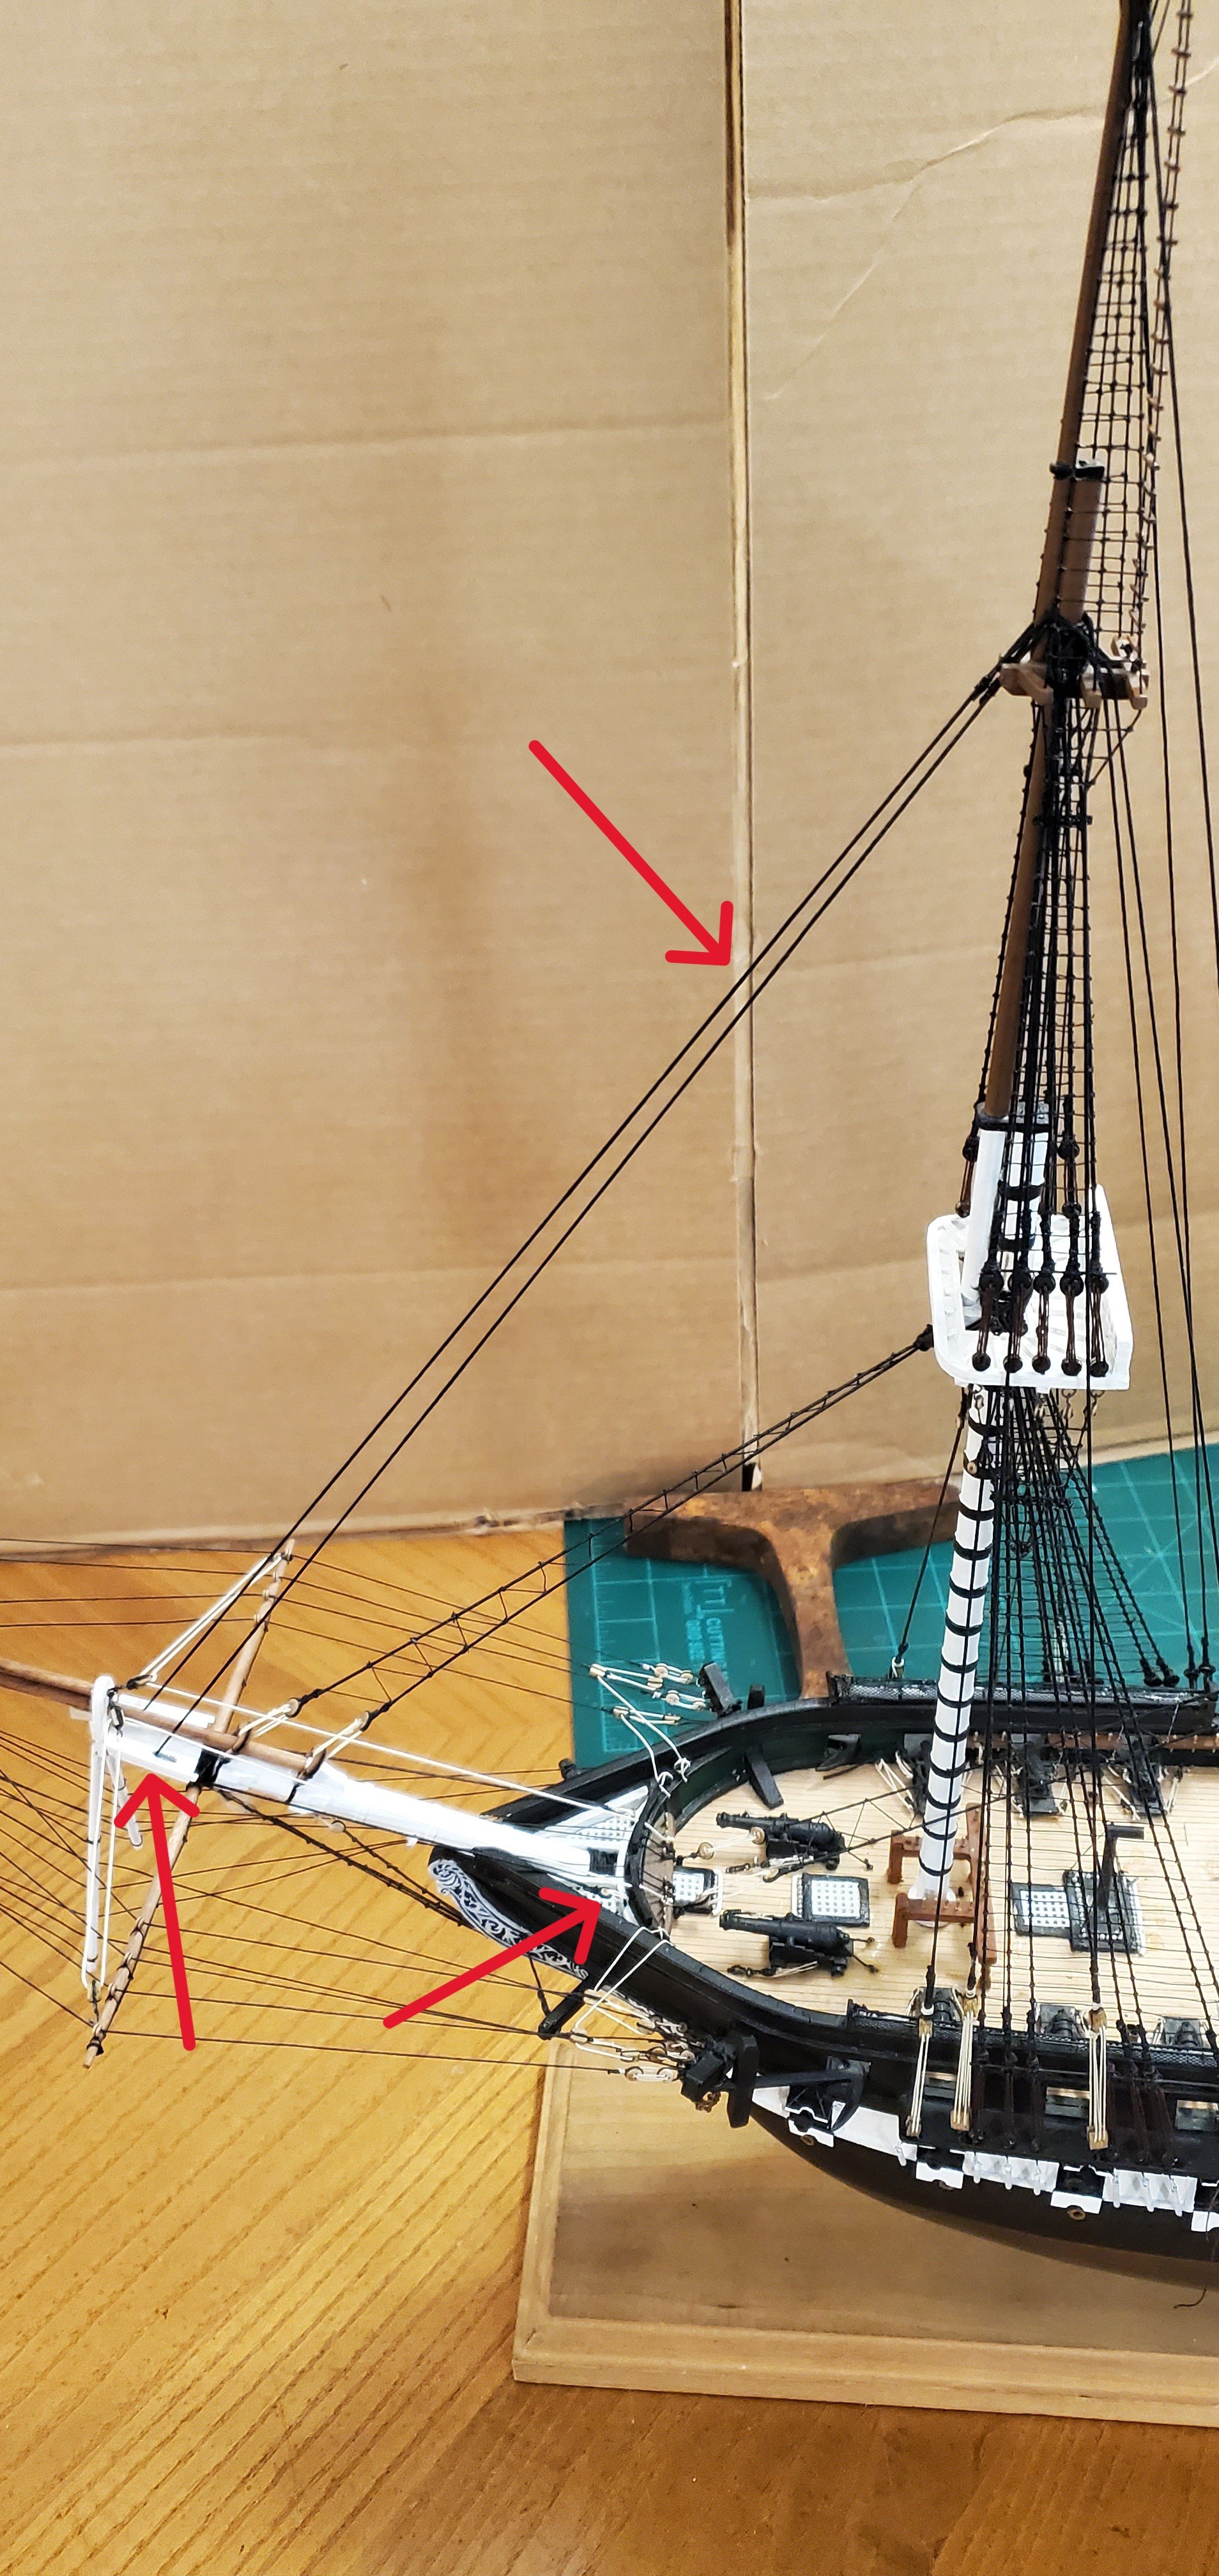
This part of the build reminds me of an old Gospel song by Cristy Lane called, "One Day at a Time, Sweet Jesus", with the lyrics adapted to fit ship modeling: "One stay at a time, sweet Jesus, that's all I'm asking of you. Just give me the strength to do everyday what I have to do Yesterday's gone, sweet Jesus, and tomorrow may never be mine. Lord help me today. Show me the way. One stay at a time" Today's focus was the fore topmast stay and for topmast preventer stay. They are both tied off with a loop at the fore top mast above the layers of loops from the breast backstays, topmast shrouds, etc. The fore topmast stay runs from the topmast to the bowsprit, is reeved through the starboard bowsprit bee, and travels the beside the bowsprit to where it's tied off to a bullseye inside the bow head. The fore topmast preventer stay does the same thing on the port side. Here's how they look after installation. Lots more stays to go!


- 301 replies
-
- 14
-
-
- Constitution
- Bluejacket Shipcrafters
- (and 1 more)
-
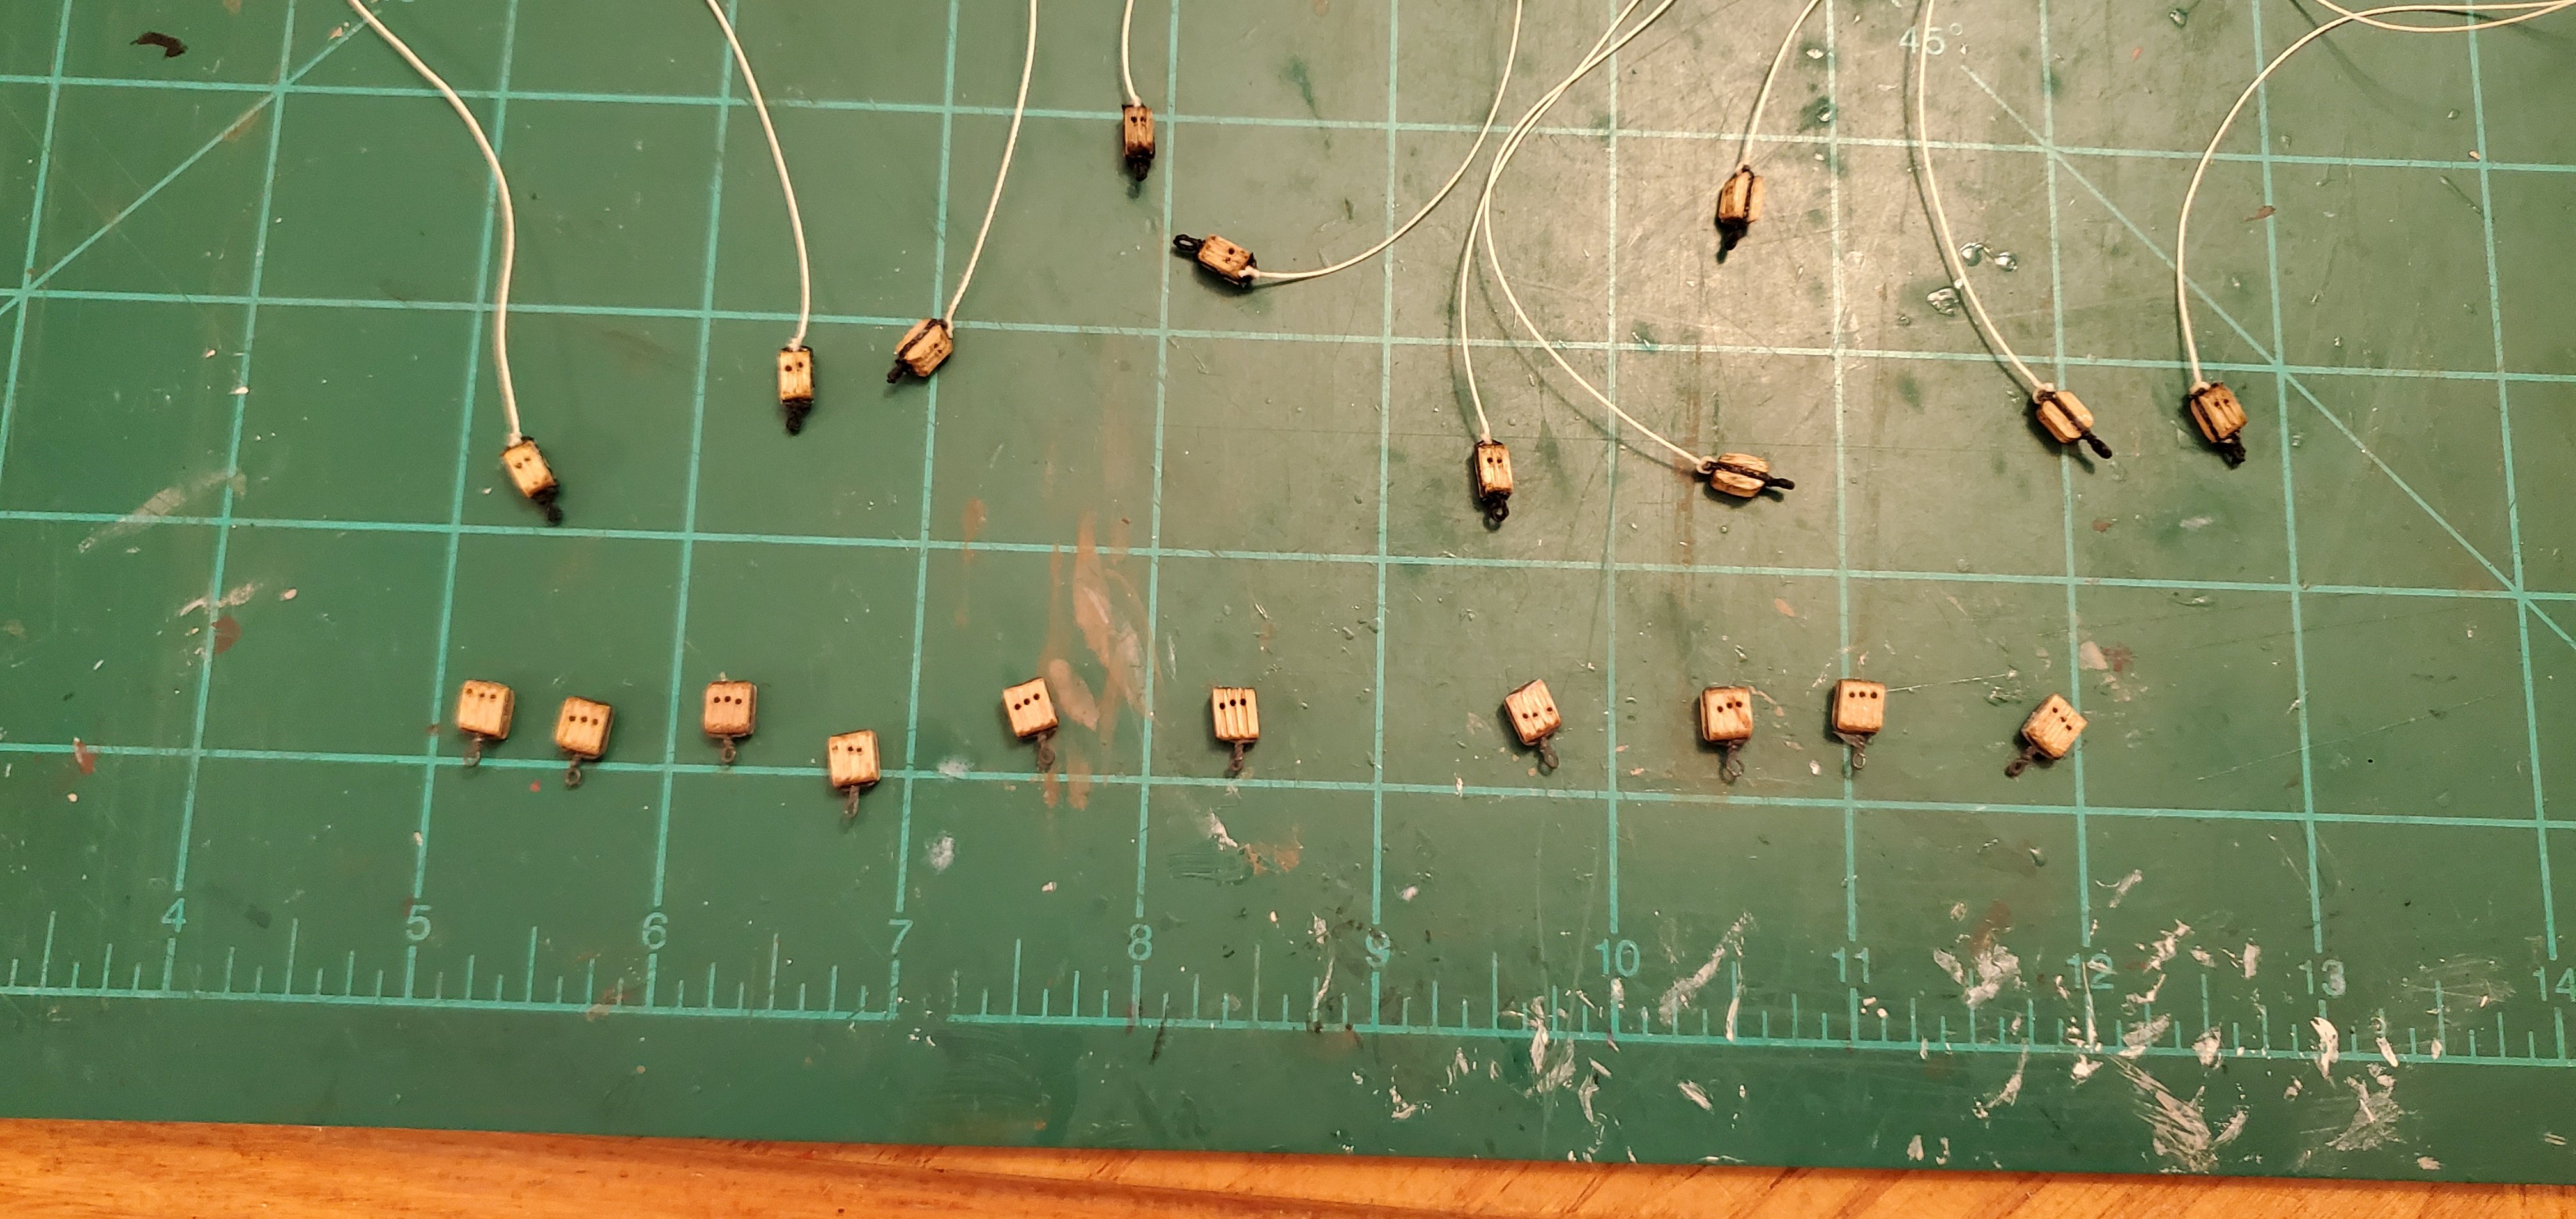
I assume that is the voice of experience I'm hearing? Thanks, Bob. Based on the answer I got from the question I posted on the Masts, Rigging and Sails forum, I tied off the block rigging for the breast backstays above the double block similar to how deadeye rigging is tied off. Here's how they look starting with the blocks being stropped. Here are the breast backstays in place. The breast backstays kind of blend in with the shrouds, but they are the block rigging with a double on top and triple below. The stays run from the double blocks to the junctions of the top gallant masts and the royal masts.


- 301 replies
-
- 9
-
-
- Constitution
- Bluejacket Shipcrafters
- (and 1 more)
-
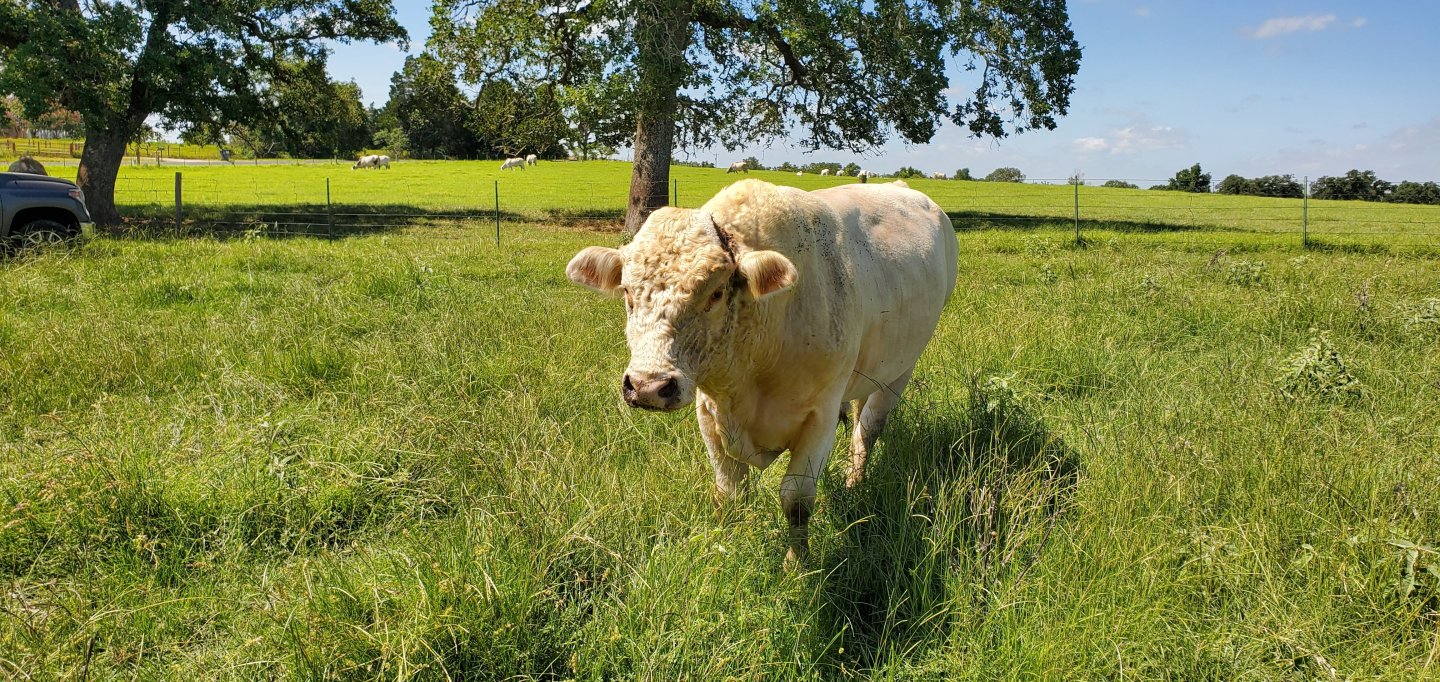
Tell your niece not to feel bad. Broken horns happen from time to time. My young (but large) steer Shiloh, got thru the fence and had a little confrontation with his daddy. Not sure what they were arguing about, but daddy bull ended up with both his horns broke off clean at the skull. Here's daddy bull, afterwards, and he is not in a very good mood. At least the horns on yours can be fixed. This poor guy got polled the hard way and the horns ain't coming back!
- 85 replies
-
- 1
-

-
- King of the Mississippi
- Artesania Latina
- (and 2 more)
-
Just found your log, Gary, and I'm on board. Looks like you are off to a nice start!
-
You've made great progress with your Texas dialect, but you gotta fix that and change it to "y'all". Bummer that you have to backtrack with some of the build, but it will be worth it to make it look the way you want it to look. Tell PFCGP that his loafing is over and it's time to get back to the shipyard!
-
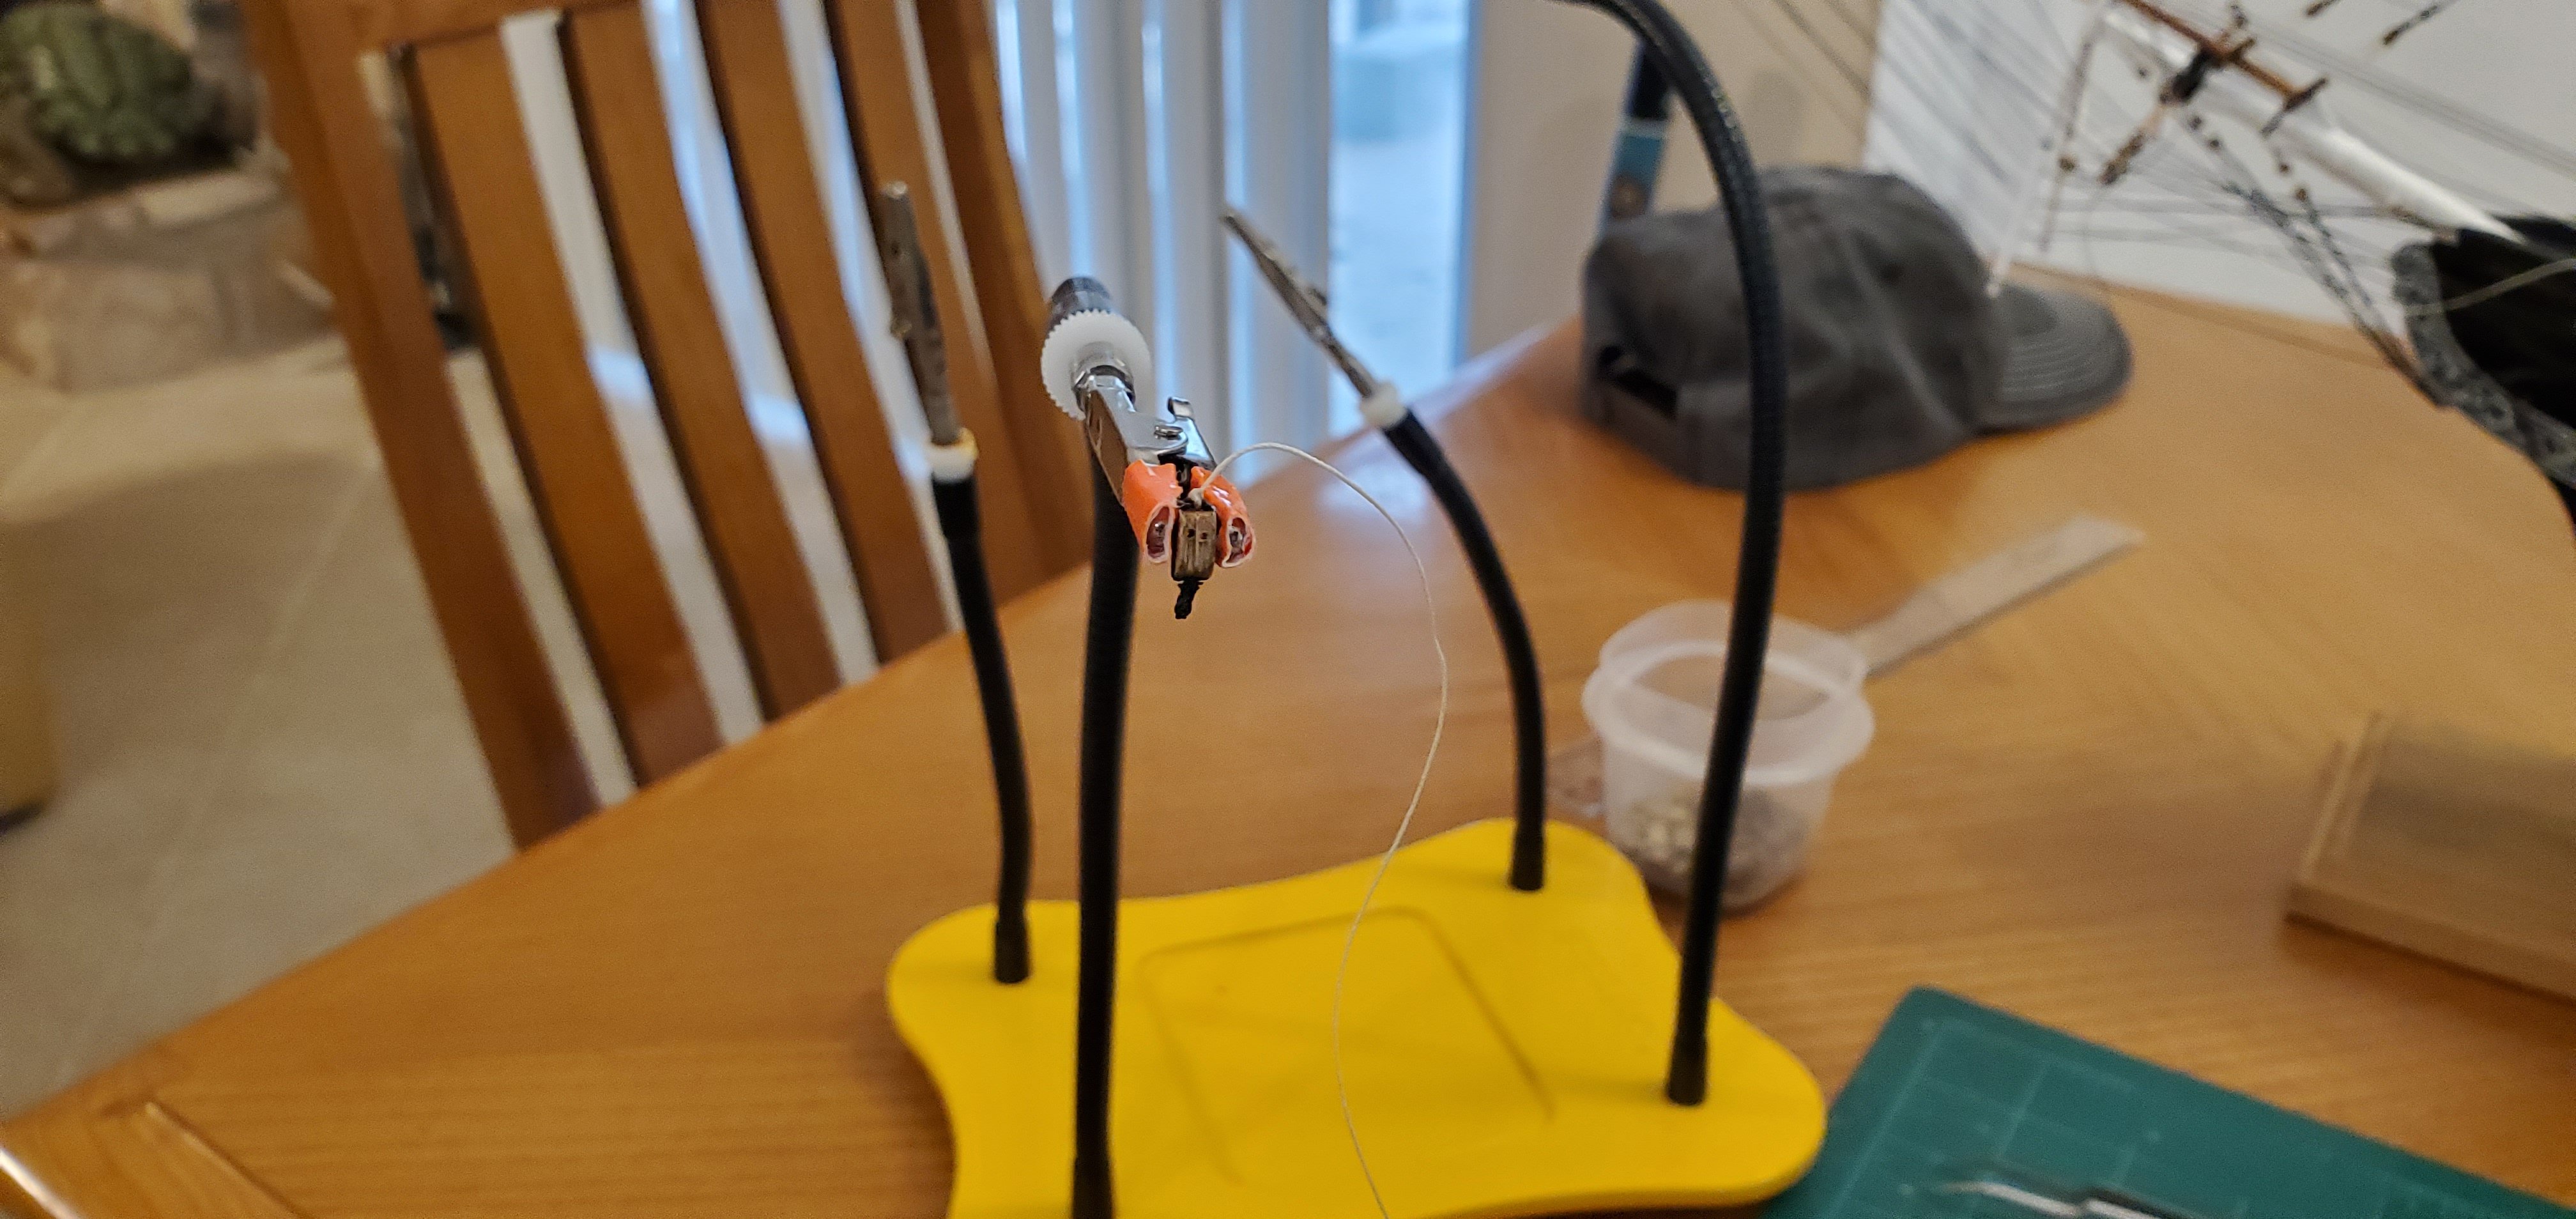
I agree with Ian. I use one of those helping hand contraptions. Mine does not have smooth jaw alligator clips (I need to find some), so I use a bit of duct tape to keep from damaging the block.

- 55 replies
-
- 3
-
-
-
- Le Martegaou
- billing boats
- (and 1 more)
-
@popeye2sea - Those are perfect instructions. Thank you, Henry!
-
I am in the process of adding breast (shifting) backstays to my USS Constitution project. The backstays are secured to the channels with a double block on top and triple block below. My question is what's the proper way to reeve that type of block configuration with a double on top and triple below? Here's a picture I took of a Constitution model at the USS Constitution museum with the breast backstays highlighted, but I cannot tell for sure exactly how to reeve them and what to do with the loose end of the rope. Any help would be appreciated.

-
Oh good grief (head slap). How did I not figure out that reference. I blame it on the insane cold that I experienced on my trip to the northeast. My brain has not thawed out yet. Thanks again to everyone for your kind words on my SIBs and the model show. Time to steer this discussion back to the Constitution. I finished up all the backstays. They are in place with deadeyes threaded but not tied off. I'll wait till after I get all the stays in place so I can tension all the lines properly. I had a much harder time aligning the upper row of deadeyes on the backstays than I did on the shrouds. Maybe it's because the lines are longer and all of them are different lengths. Regardless, here's how she looks with all her back stays in place: Here's a closeup of the main deadeyes. You can see one of the backstay deadeyes on the opposite side that is drooping well below the others. I'll fix that when I get the stays on and do the final tightening of the deadeye rigging. Next up are the breast (shifting) backstays. I had not heard of these before. The instructions tell you how to rig them (sort of) but also state that they are not included in the rigging plan, so they don't give any hint as to how they should look. Here's what the instructions say, "Fore, Main, Mizzen Breast (Shifting) Backstays - 5" collar seated on top of the backstay. Set up between 4th and 5th deadeyes on channel with 1/8" double and triple blocks (not shown on rigging plan)." I took this picture of a large and very nice model of the Constitution at the Constitution Museum. It's a closeup of the main channel and deadeyes. I've highlighted what I believe are the breast backstays. My instructions seem to indicate that there is one breast backstay per side per mast, but it looks like there are 2 per side in this picture. So if there are 2 per side, would both be tied off with a collar around the top mast or would 1 be tied off at the top mast and the other tied off around the top gallant mast? Any insight on breast backstays would be appreciated.


- 301 replies
-
- 12
-
-
-
- Constitution
- Bluejacket Shipcrafters
- (and 1 more)