Glen McGuire
-
Posts
1,976 -
Joined
-
Last visited
Content Type
Profiles
Forums
Gallery
Events
Everything posted by Glen McGuire
-
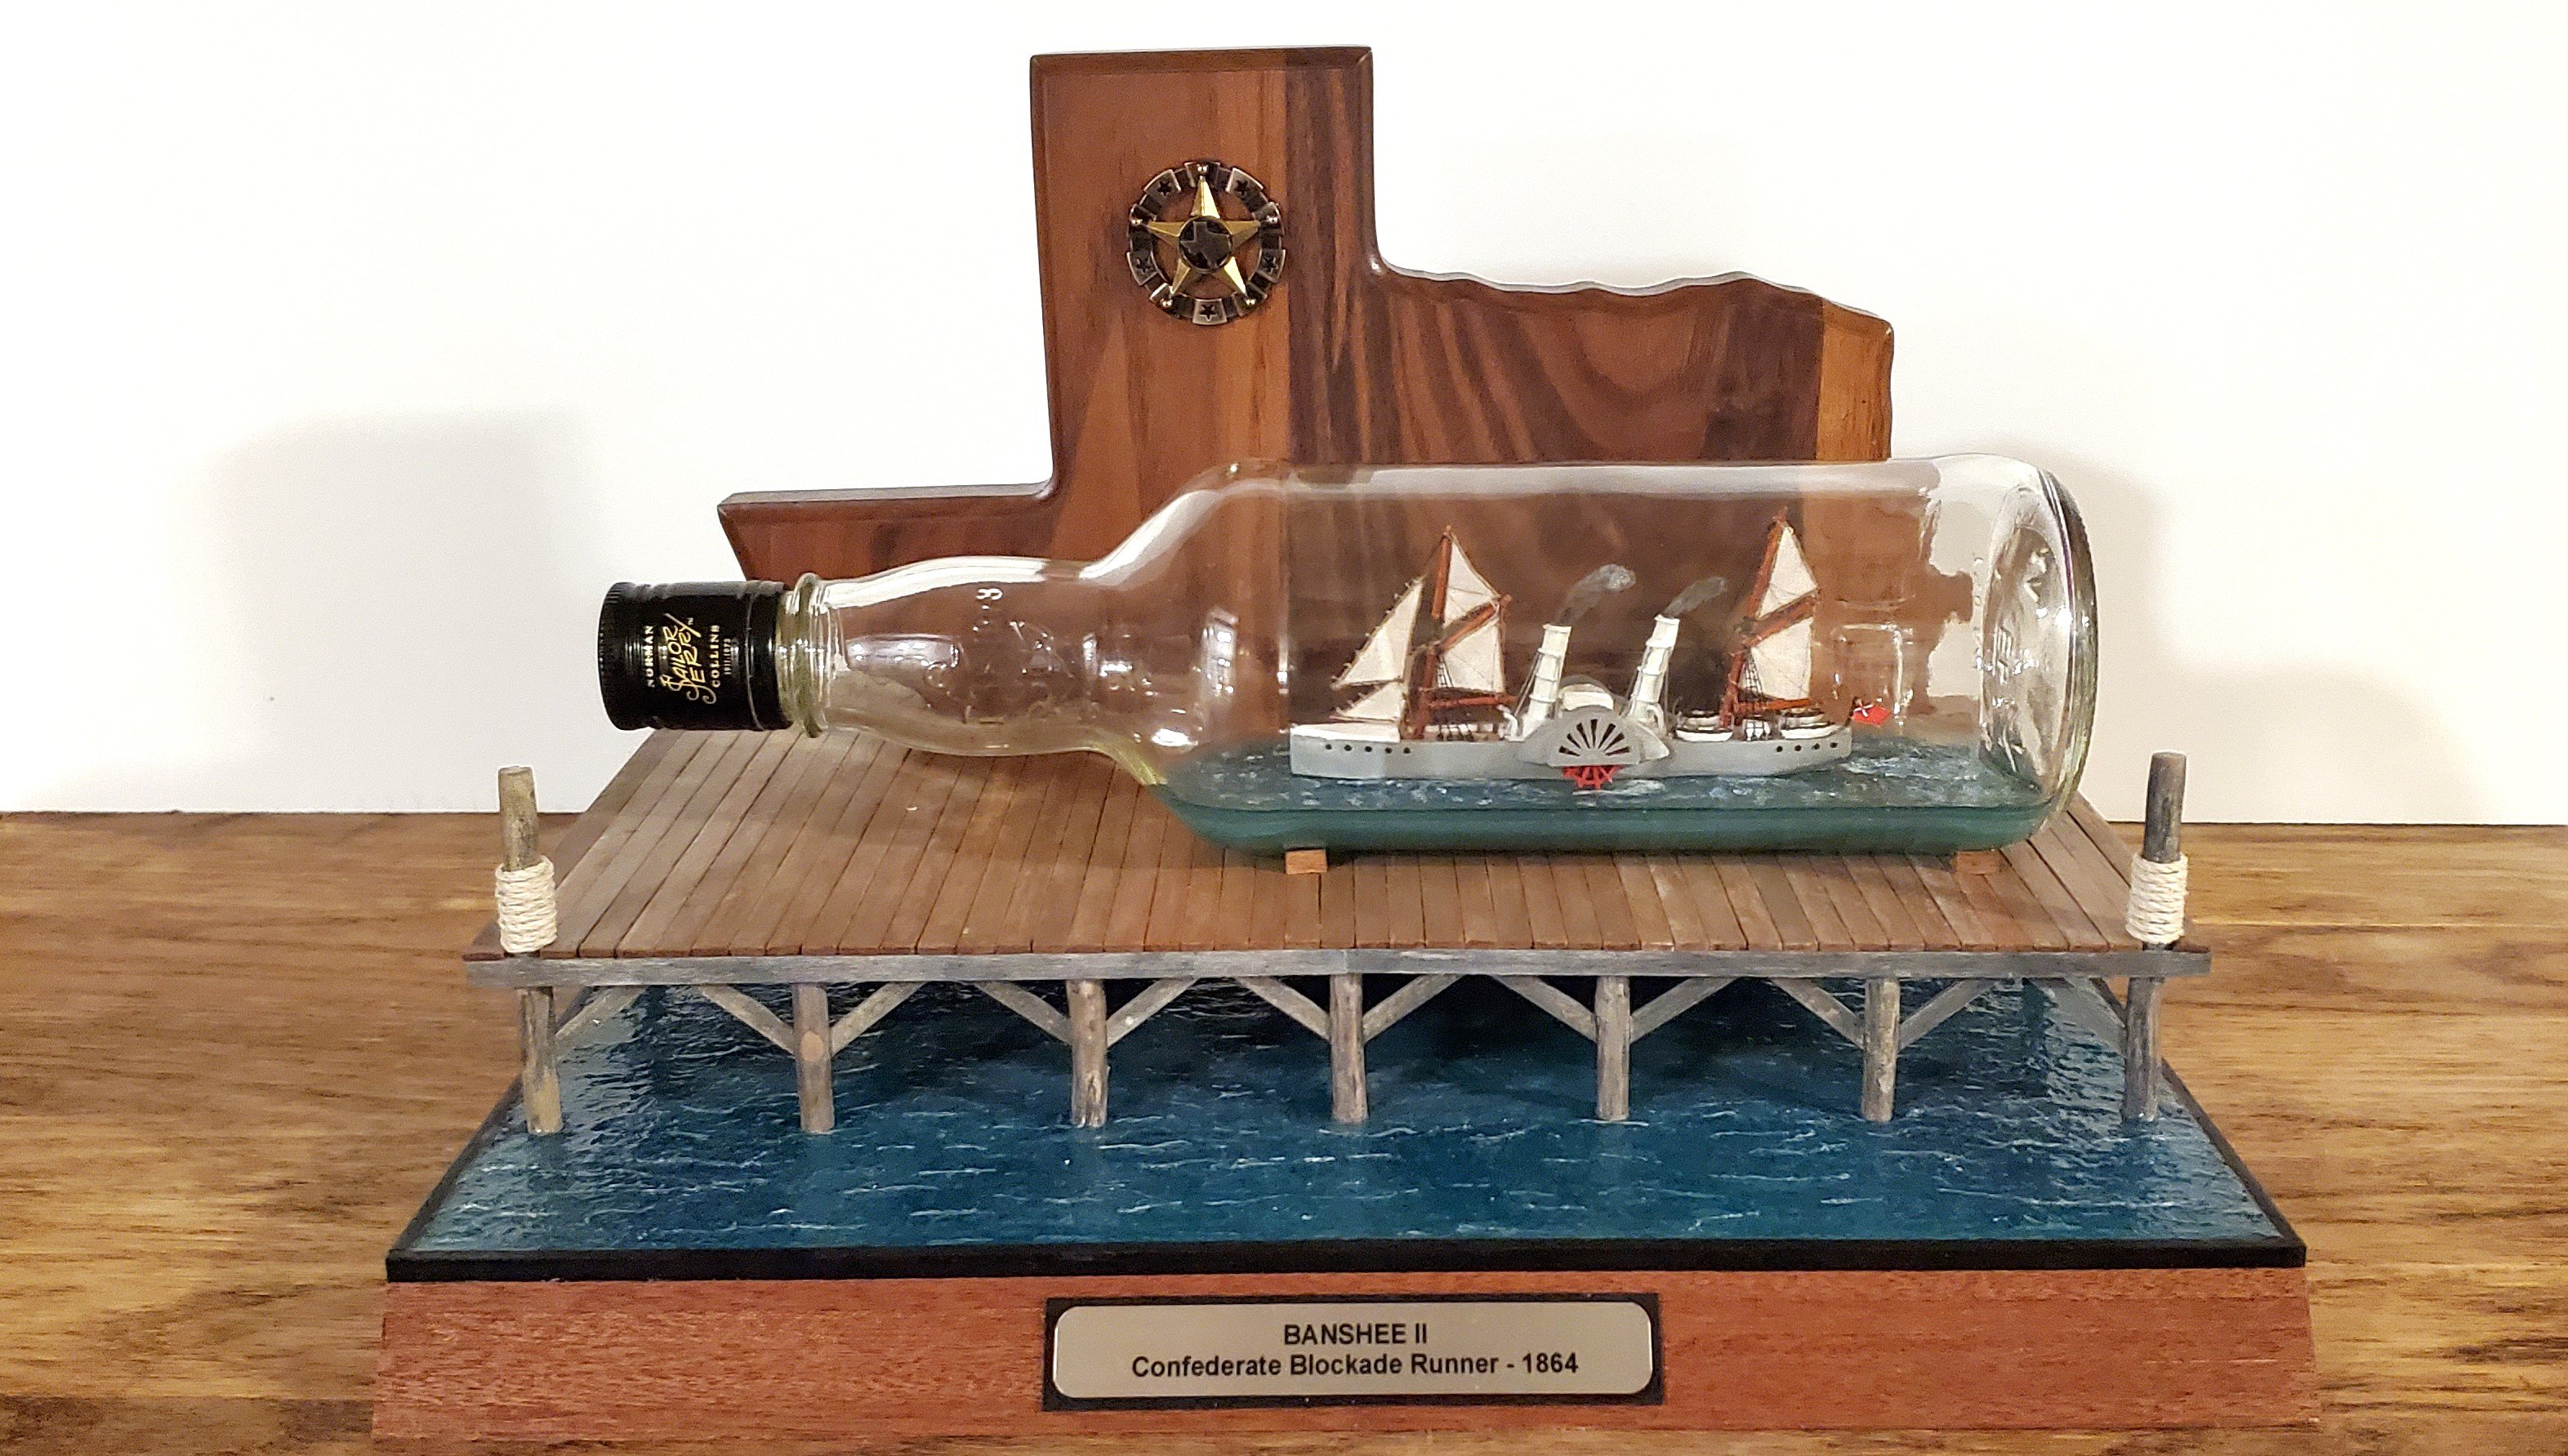
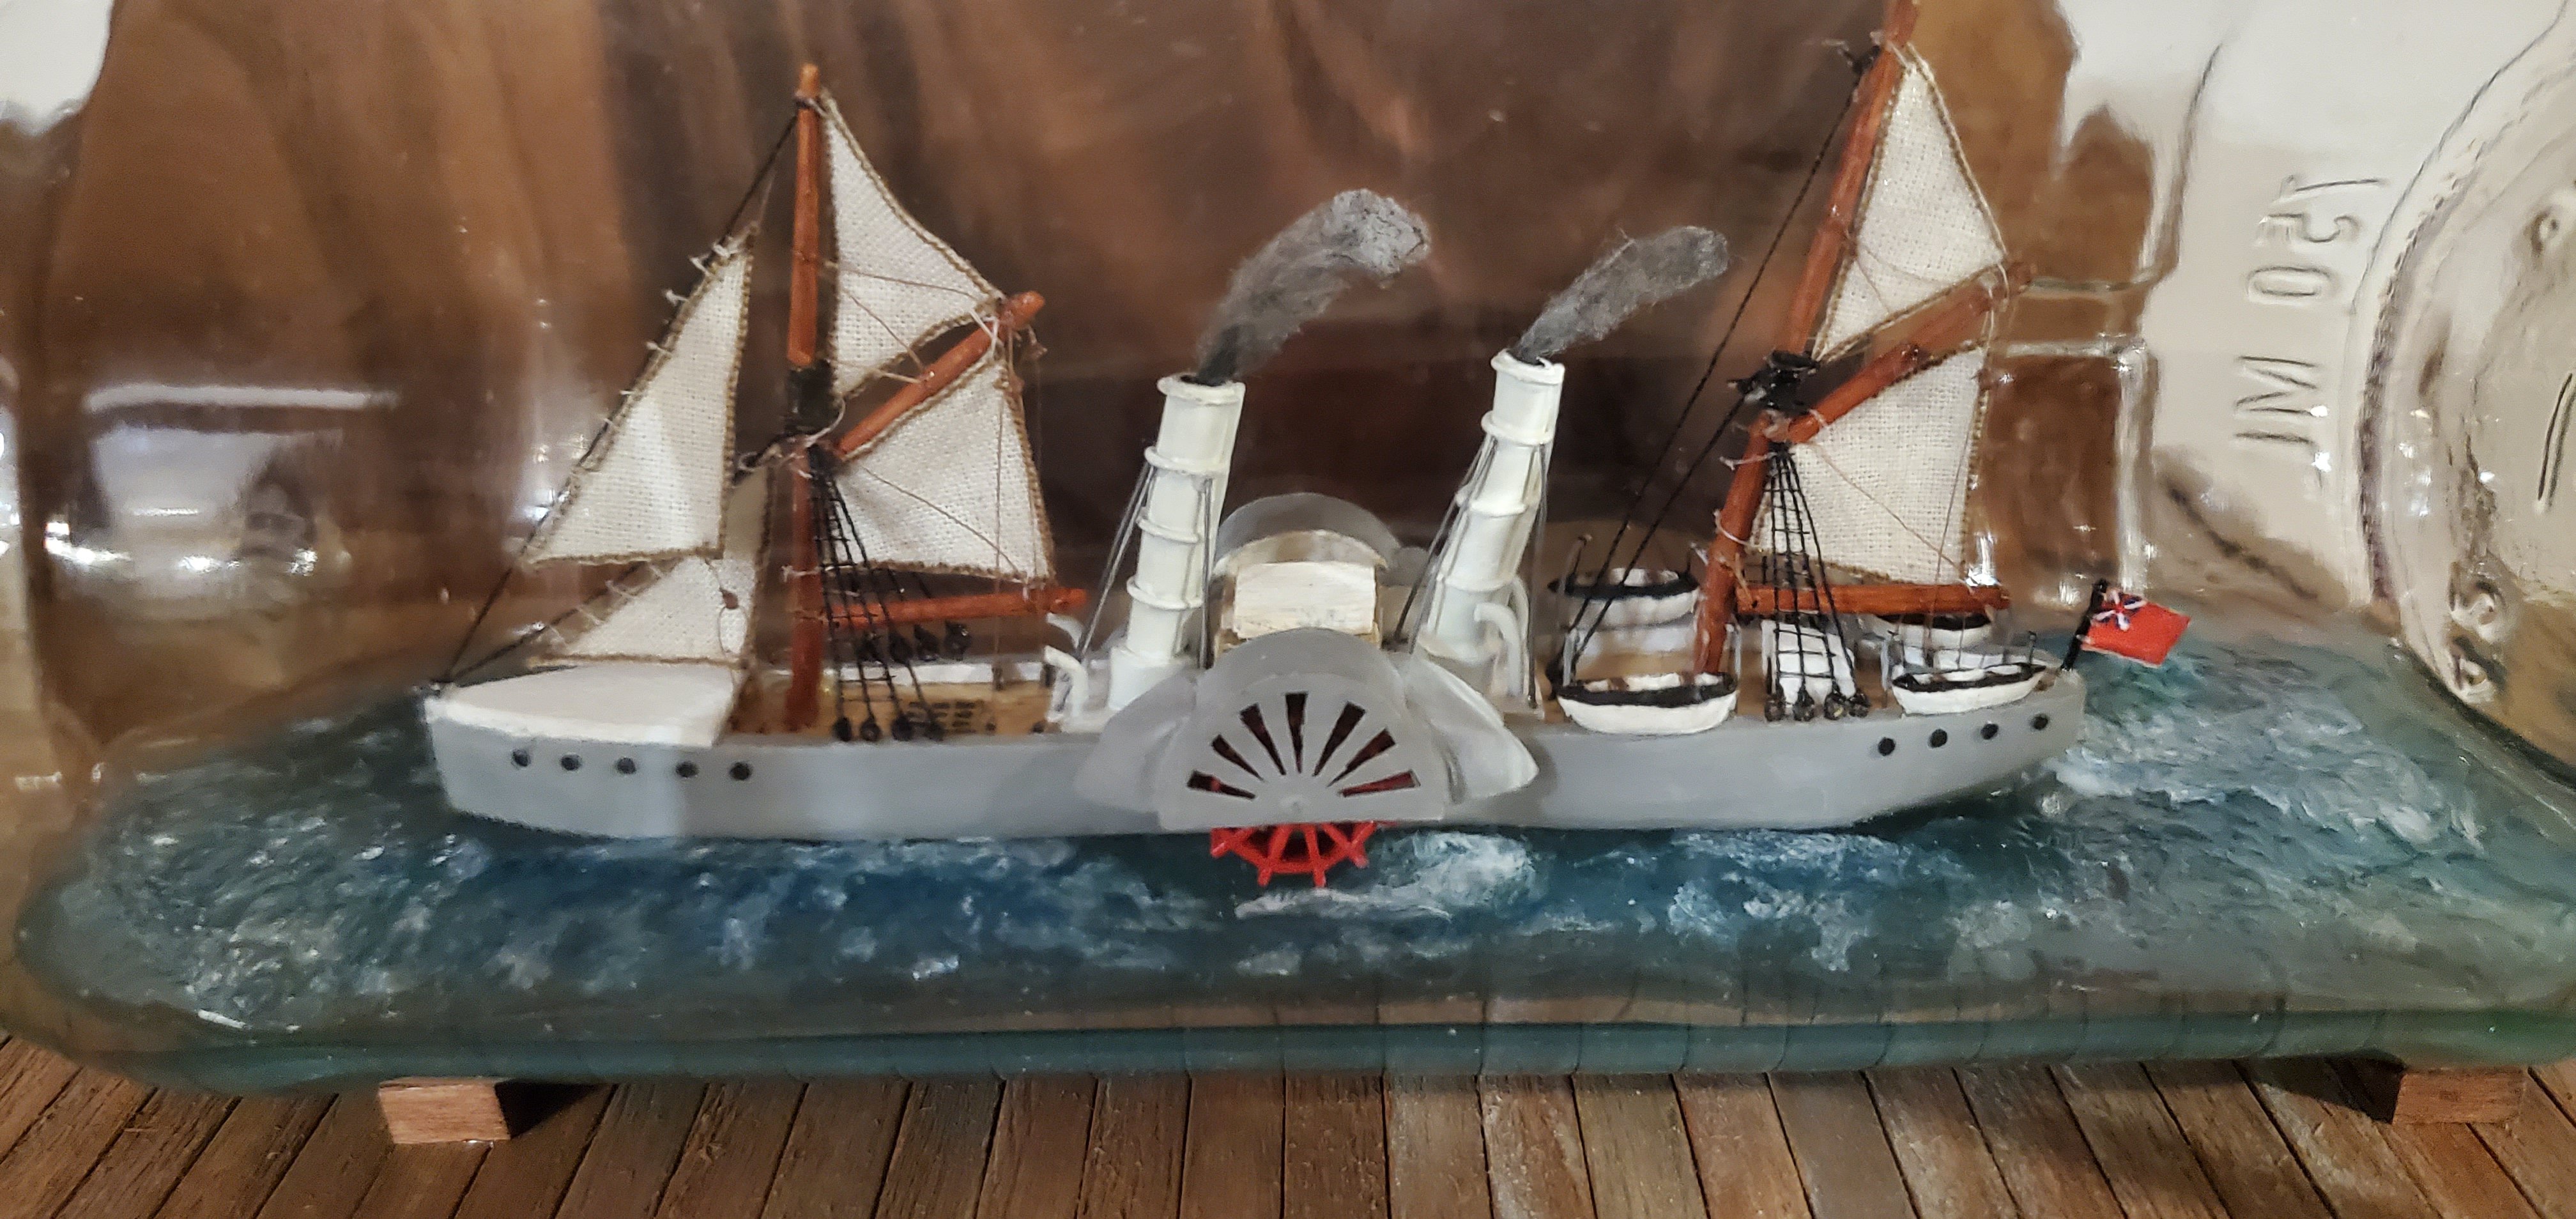
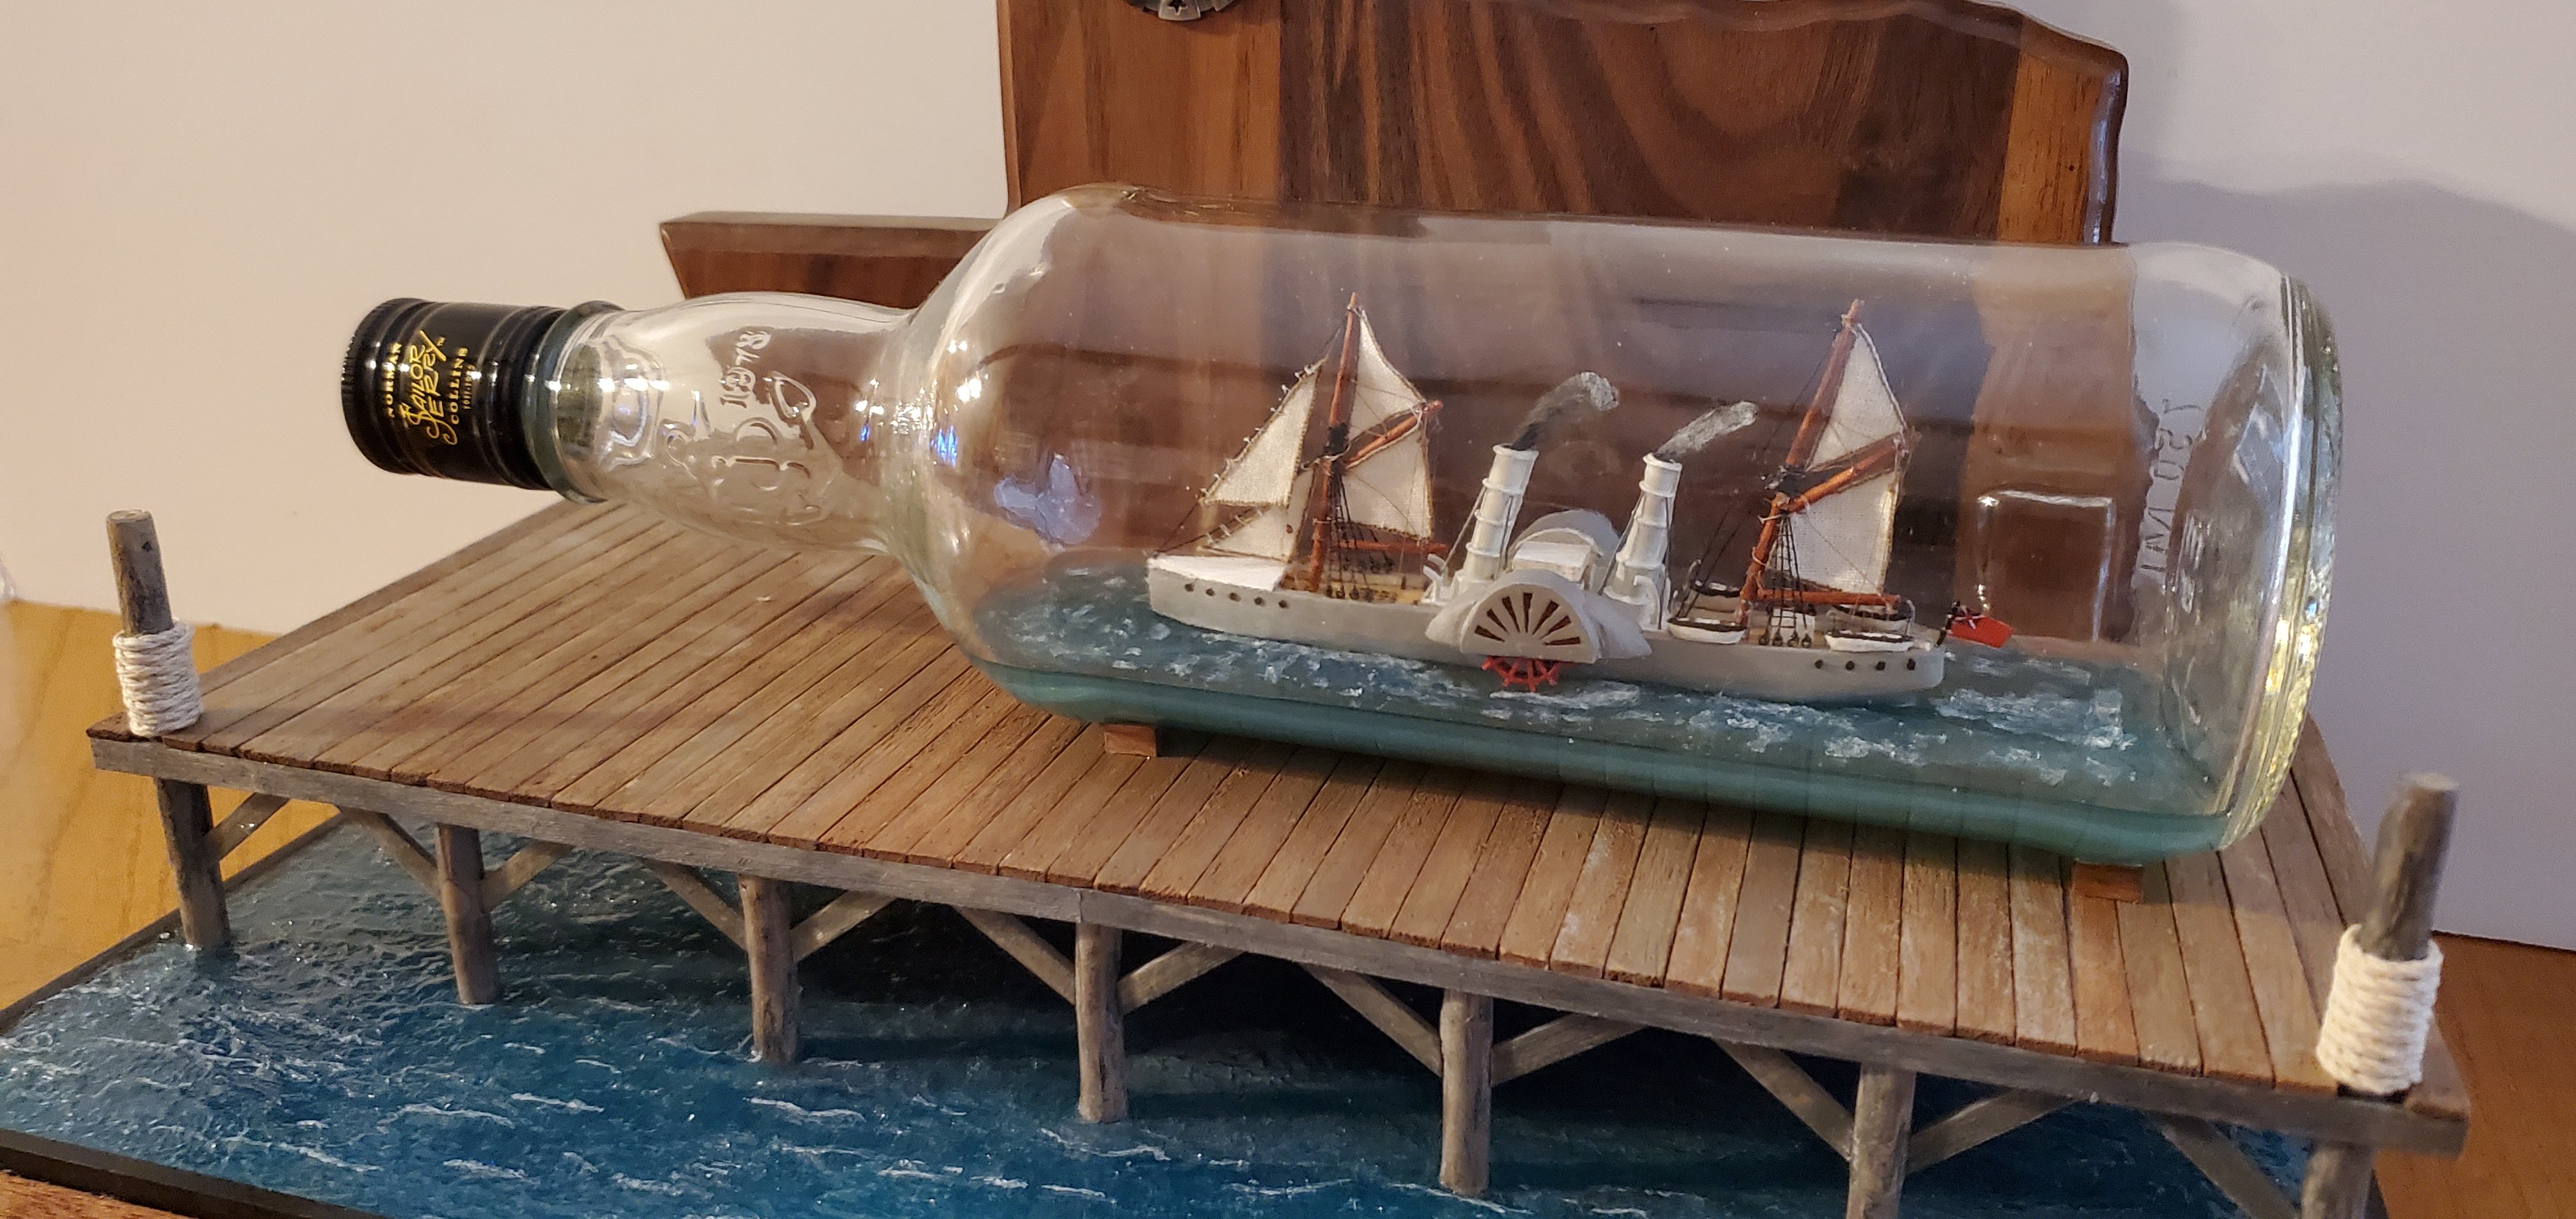
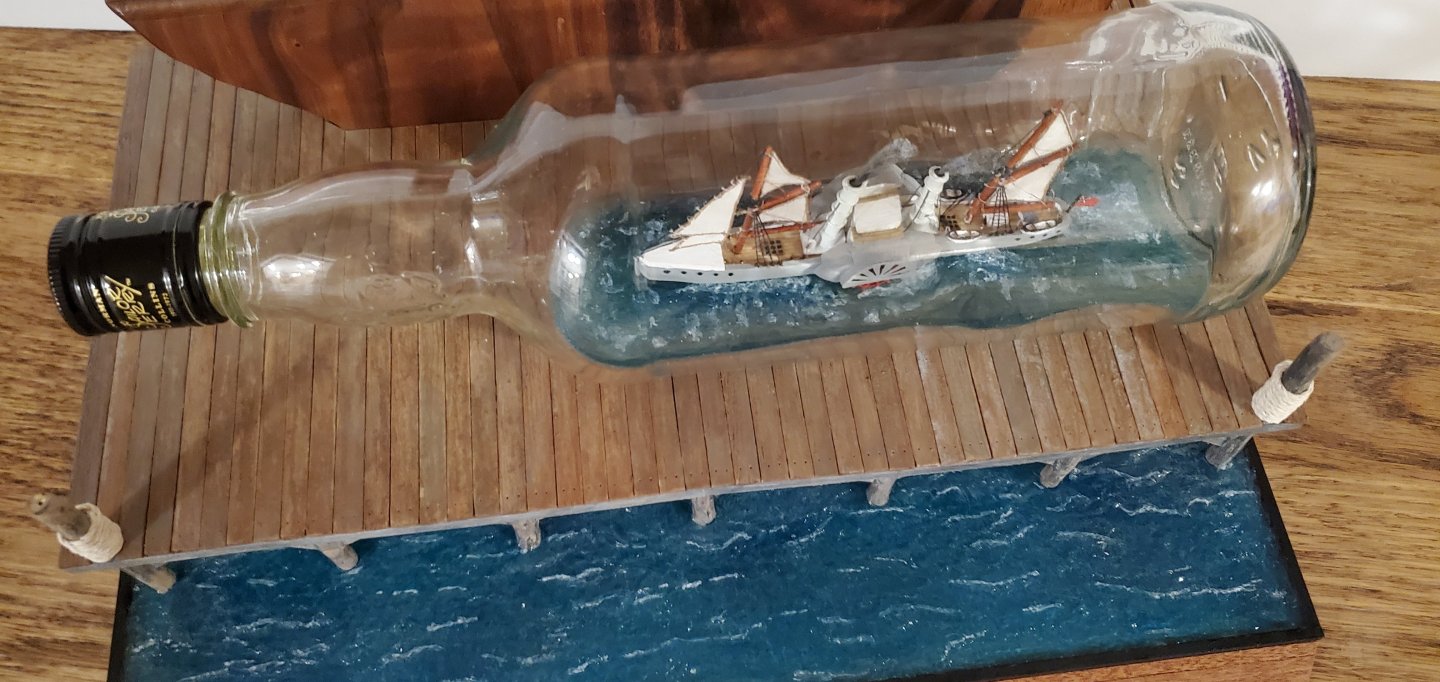
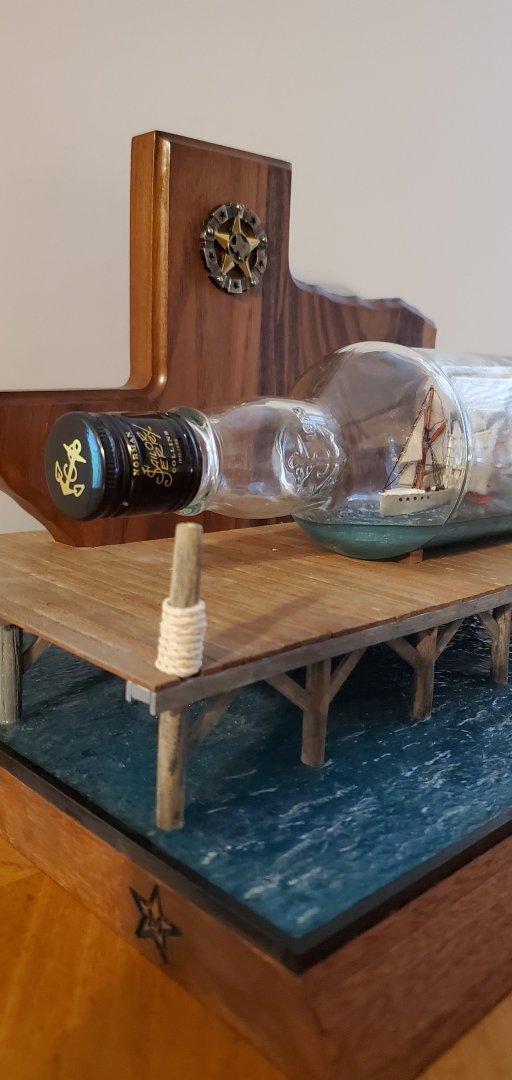
 Another SIB adventure comes to a close here on MSW. I put the finishing touches on the Banshee II project last night and it’s ready for the shelf. I want to give a personal thanks to everyone that took part in this journey. @Keith Black, @Knocklouder, @BANYAN, @Javelin, @Ian_Grant, @Canute, @gjdale, @FriedClams, @Landlubber Mike, @KeithAug, @GrandpaPhil, @Thukydides, @PvG Aussie, @gsdpic, @JacquesCousteau, @Paul Le Wol, @ccoyle, @Harvey Golden, @mtaylor, @CDR_Ret, @John Fox III, @Roger Pellett, @berhard, @Rick310, @Desertanimal, @Ryland Craze, @rookie, @rwiederrich, @Dave boatswain, @cotrecerf, @Charter33, @Snug Harbor Johnny, @Dan Poirier, @Charles Roseberry, @JEFFRAV, @downeaster. Whether you popped in every now and then or managed to endure each step along the way, I am very appreciative of your support, comments, and suggestions. You make everything I try to do so much better and I can never say thank you enough. Also, because of y’all, this was the most interesting and entertaining build log I can remember. Along the way, you gave me a number of great recommendations which helped tremendously – ship plans/drawings from Grandpa Phil, Bare Metal foil and painting tips from Landlubber Mike, Funnel schematics from Pat (Banyan), and corrections to my cowlings from Rob (rwiederrich). Y’all also provided fascinating discussions on a variety of subjects like fire ants, Venetian and Czech beads, Philly cheesesteaks, stropping 2mm deadeyes, and Norfolk Island just to name a few. Furthermore, I was so very fortunate to receive free language lessons where I learned what an egg nishner is and how to talk some strine, as well as Keith Black adding a couple more B words to my cow's forbidden vocabulary. And finally, there’s Knocklouder who kept me laughing the whole time with his comments like the one about “whack a mole”. Bob, you are one of a kind! On to the final reveal. Here's the original concept drawing and how the completed project turned out.
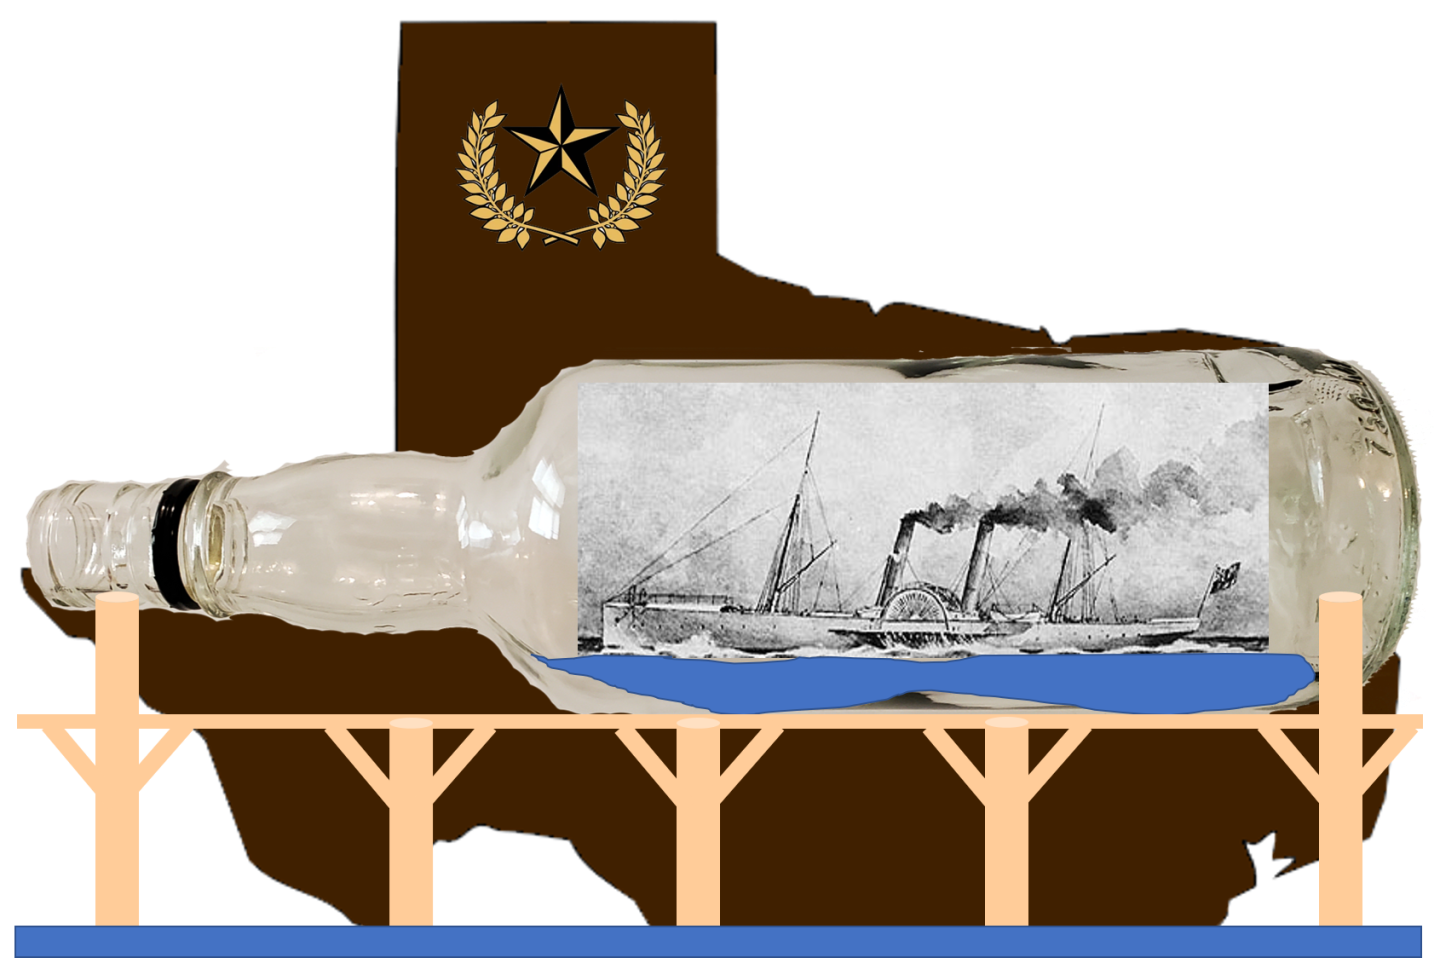


- 235 replies
-
- 25
-

-

-

-
- Banshee II
- Bottle
- (and 1 more)
-
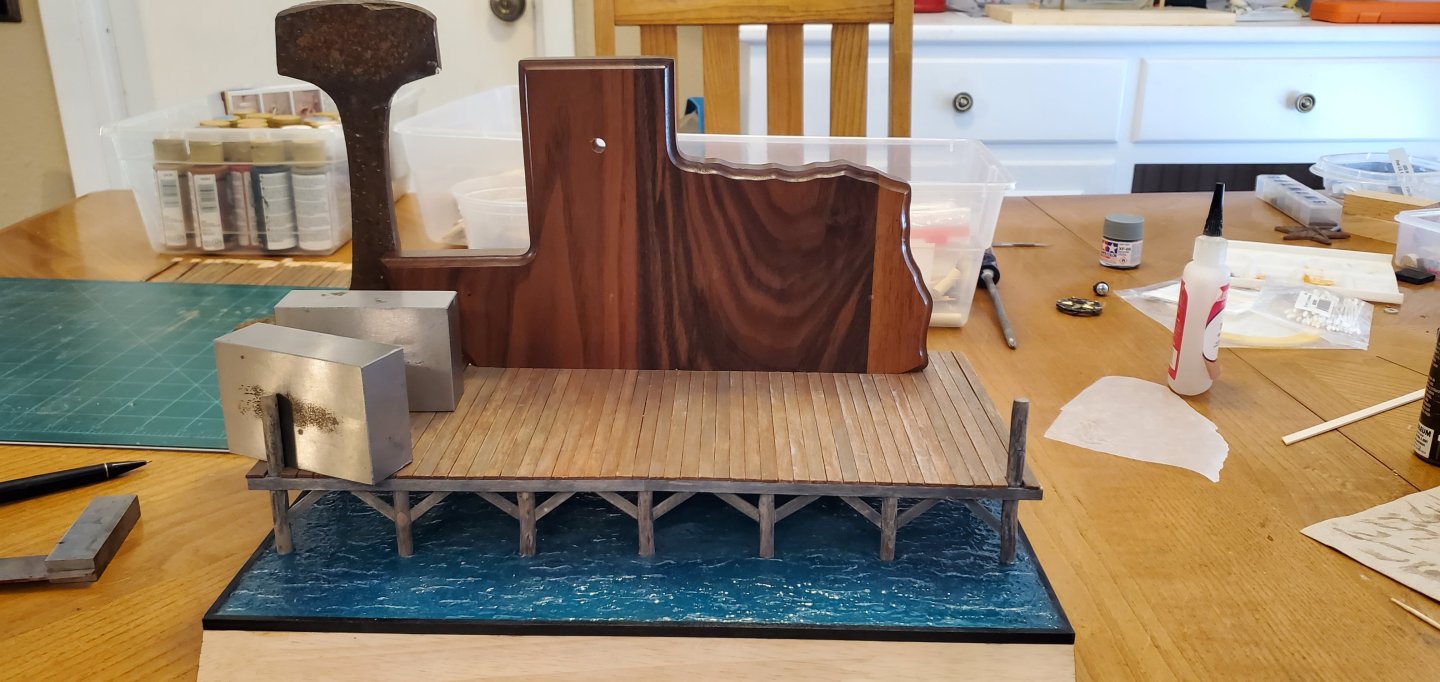
Amen to that, Gary! With those blocks, old pieces of railroad track, and duct tape, I can pretty much do anything!!
- 235 replies
-
- 6
-

-
- Banshee II
- Bottle
- (and 1 more)
-
"Twigged the shape"?? WTH does that mean? I thought y'all talked normal up there, but I guess I gotta go get me a book on how to speak Canadian as well as 'strine! 😃
- 235 replies
-
- 6
-
-
-
- Banshee II
- Bottle
- (and 1 more)
-
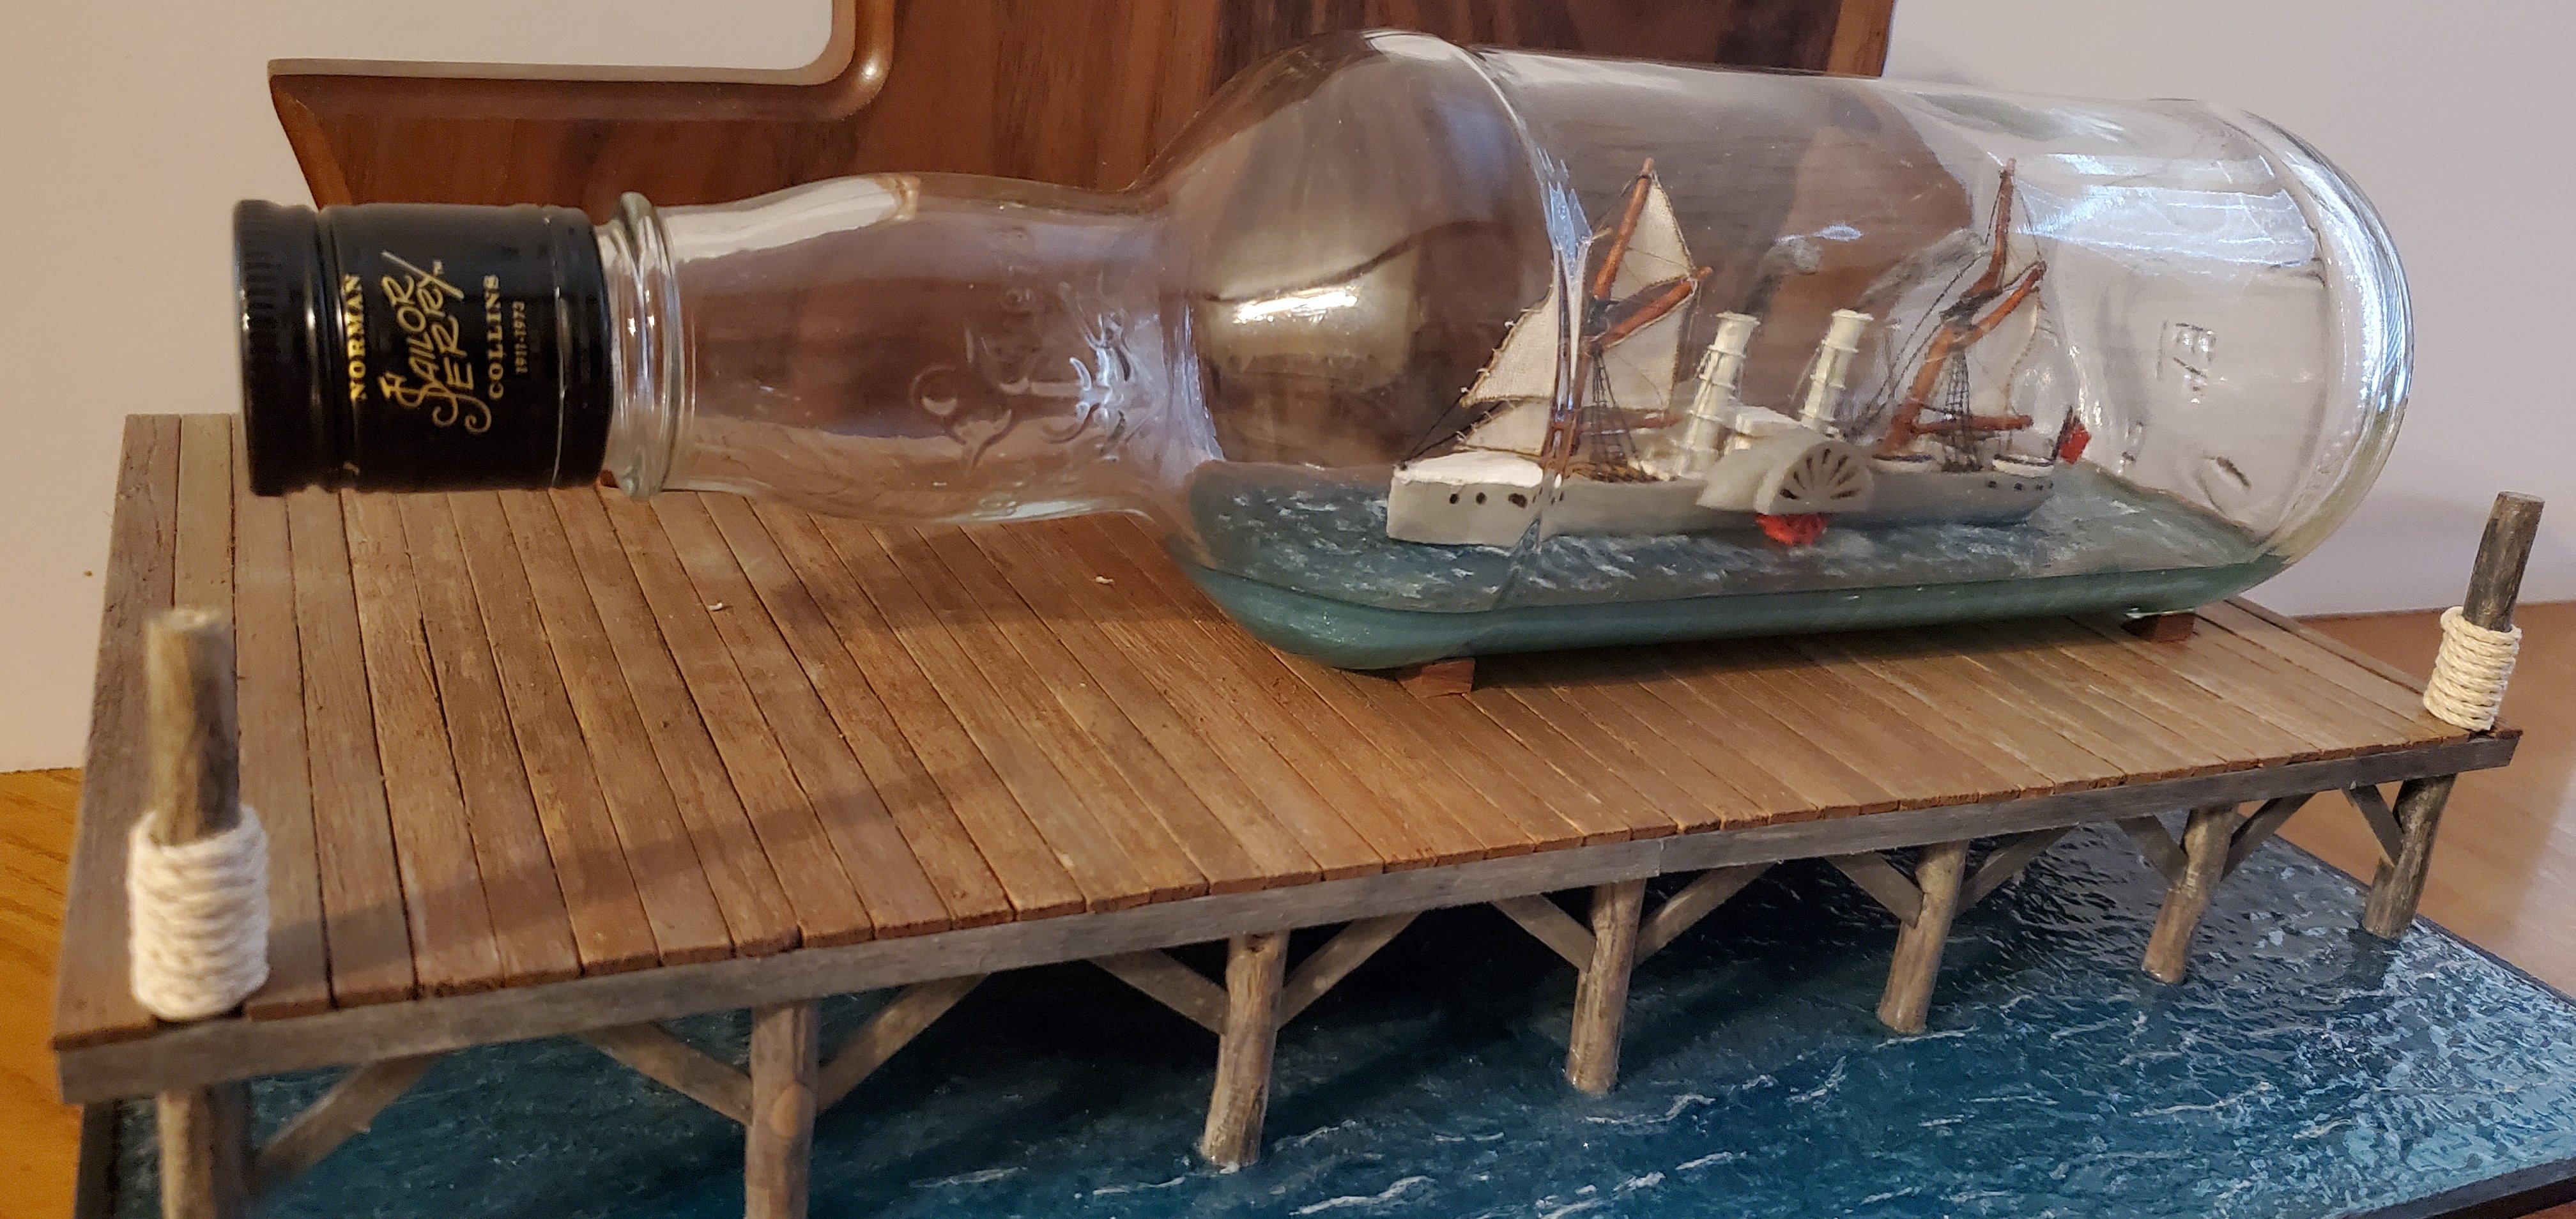
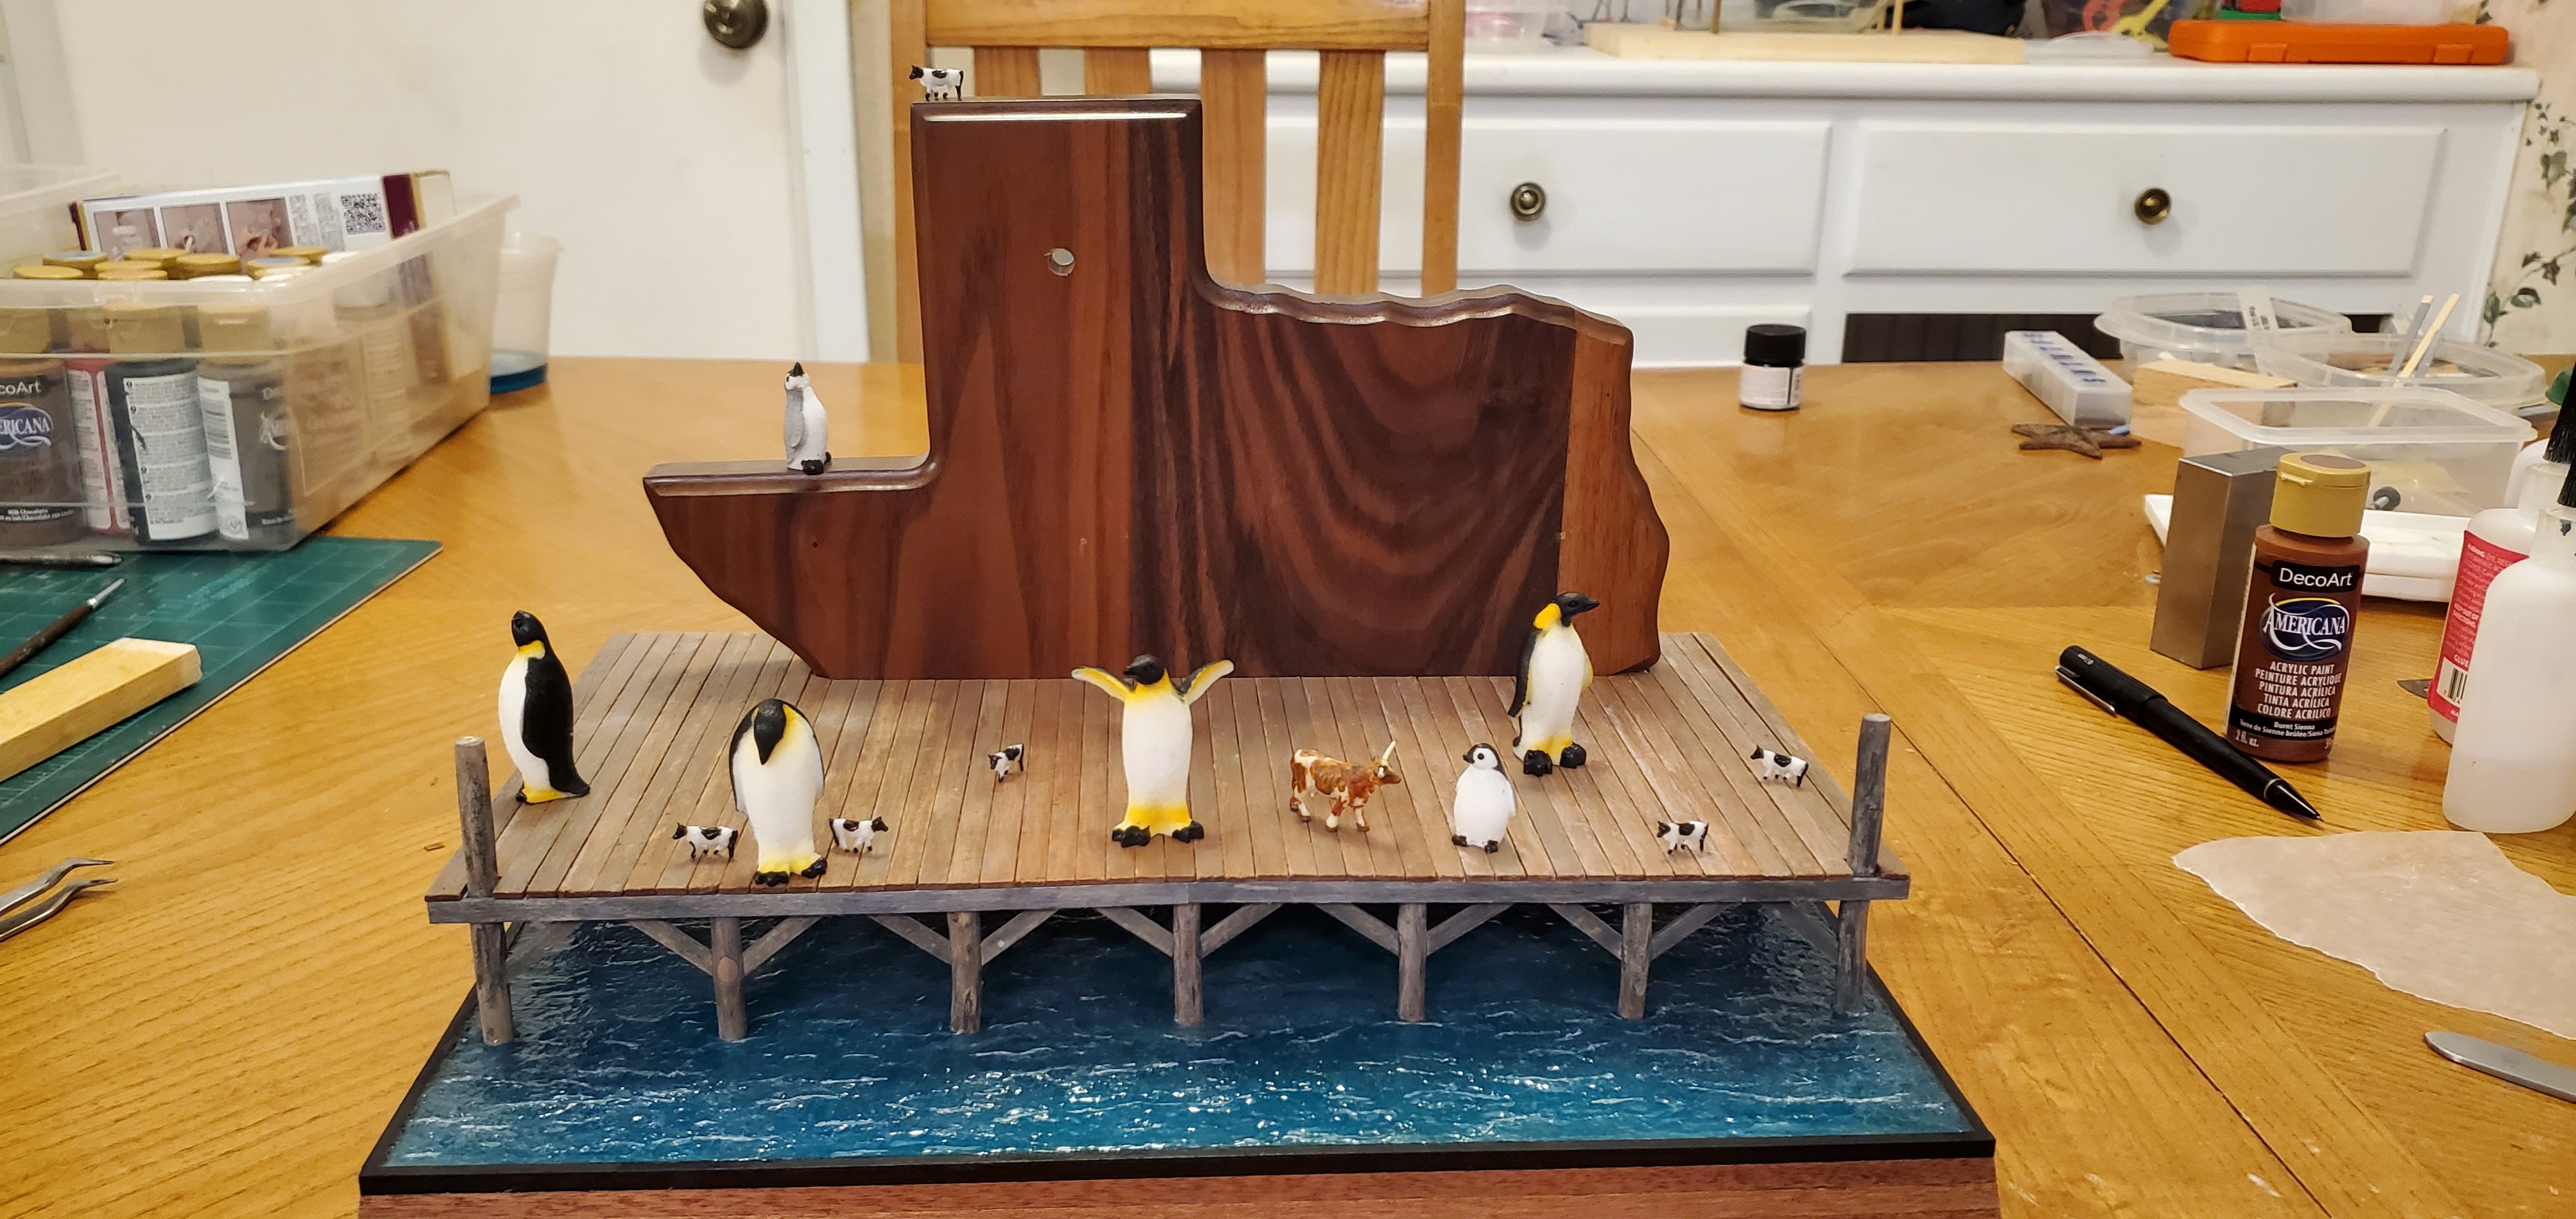
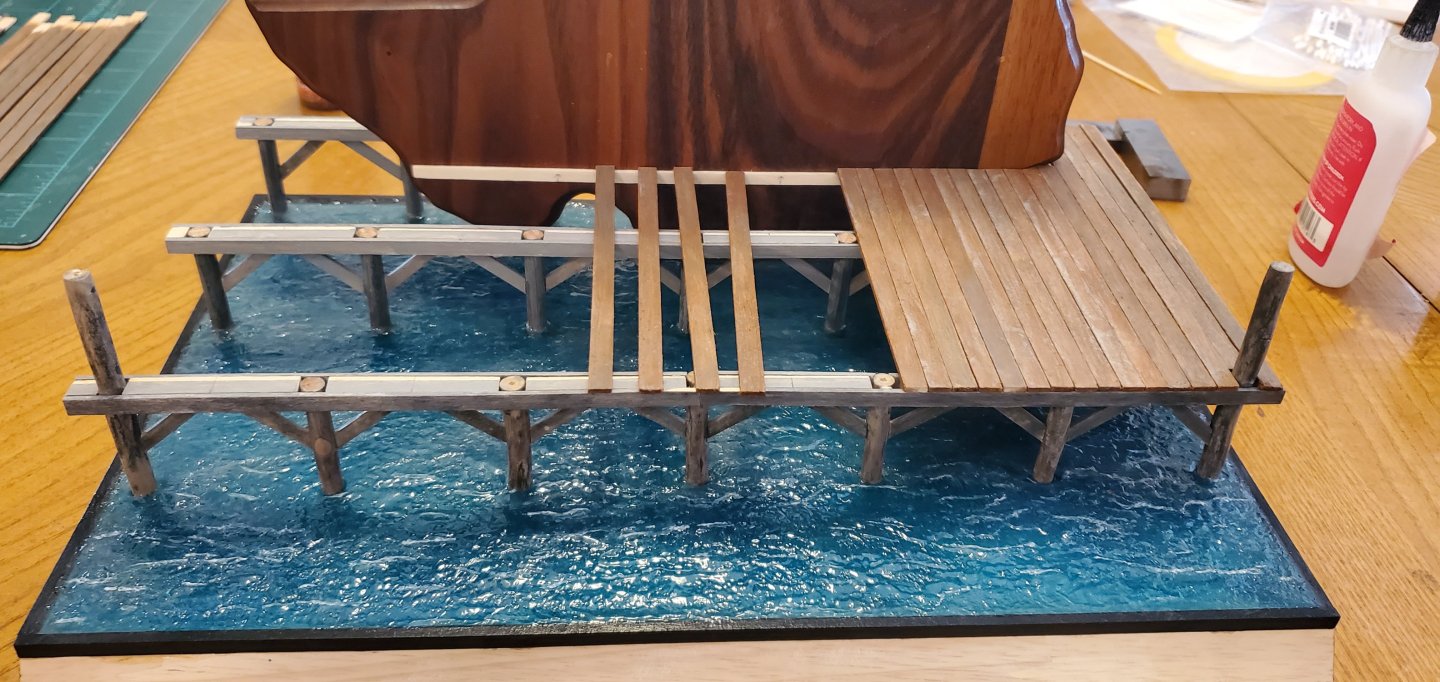
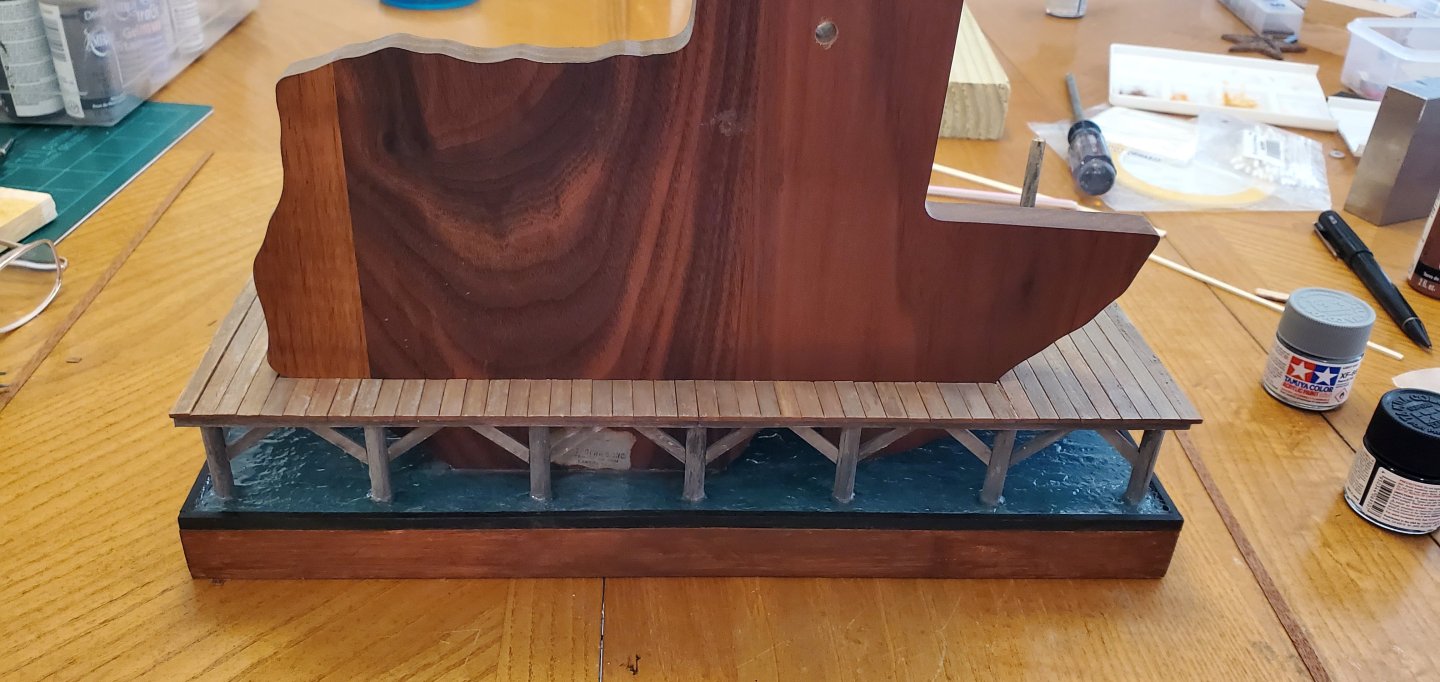
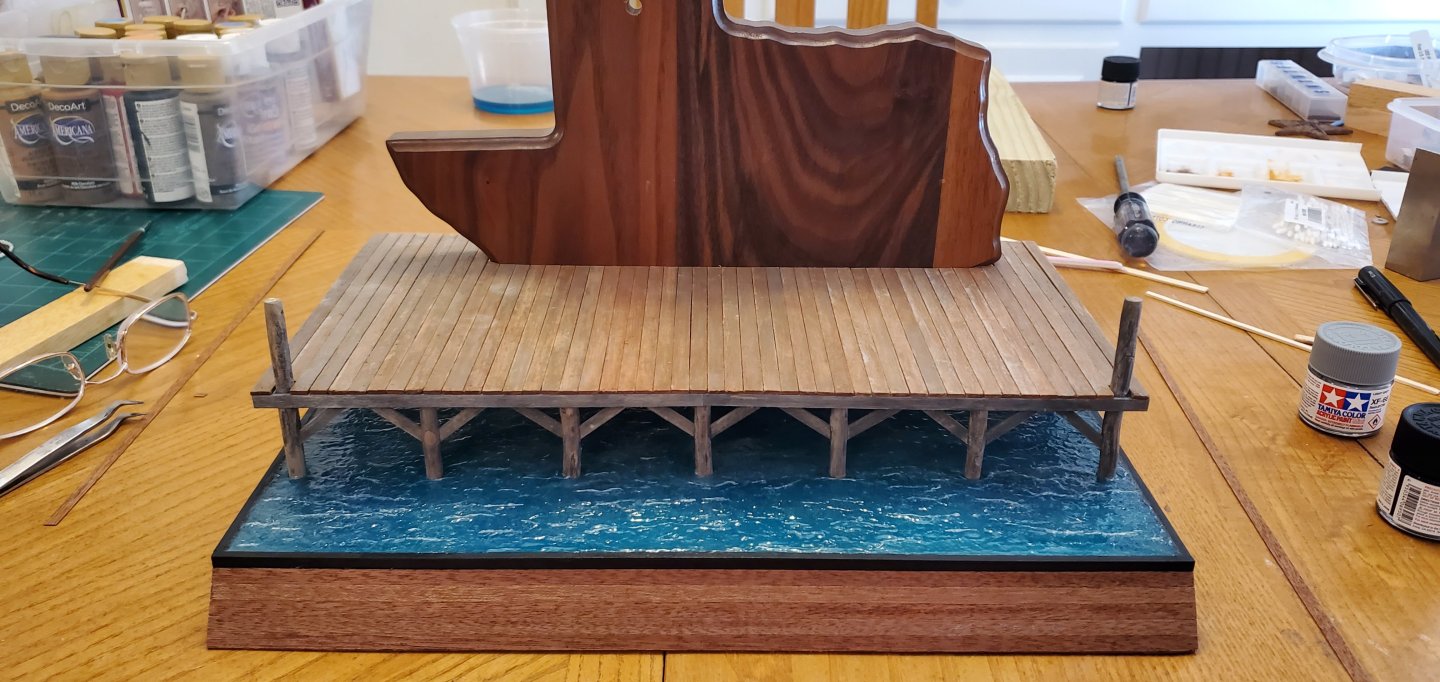
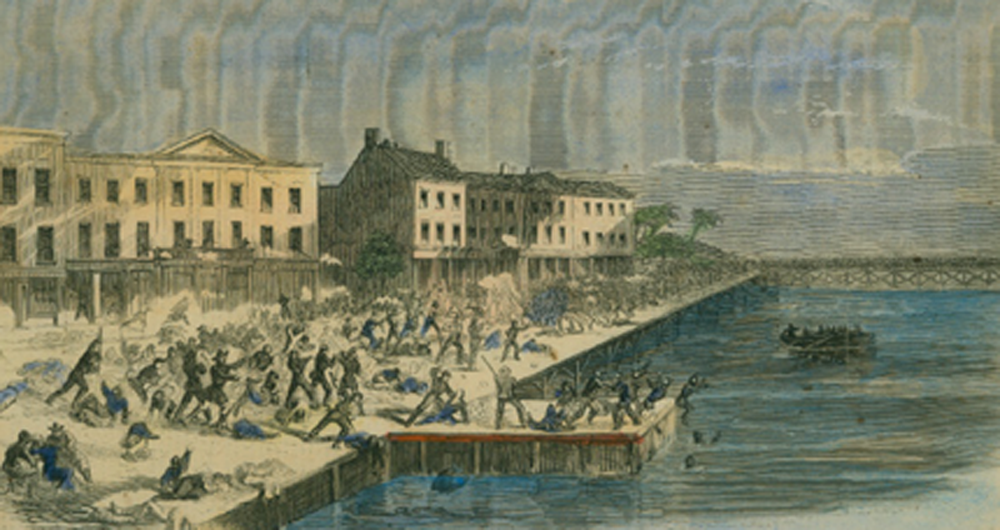
Thank you @Knocklouder, @Ian_Grant, @Keith Black, @FriedClams, @Thukydides, @Bryan Woods, @Javelin for the comments on the water effects. It's definitely a challenge for me and one that I'm trying to improve on with each effort. Now for some planking! Except it's waaaaay easier than the planking that all you real ship model builders face. This is just completing the wharf with deck planks. I had already colored and weathered them earlier, so now it was just a matter affixing them to the pilings and support beams. As a reminder, here's the wharf idea I'm trying to suggest with the base. The painting depicts the Galveston, Texas waterfront of the mid 1800's. Here's some pics showing the stages of my planking efforts. Next, I added a layer of veneer on the front panel of the base using poached plank strips from my USS Constellation kit.

- 235 replies
-
- 15
-
-
-
- Banshee II
- Bottle
- (and 1 more)
-
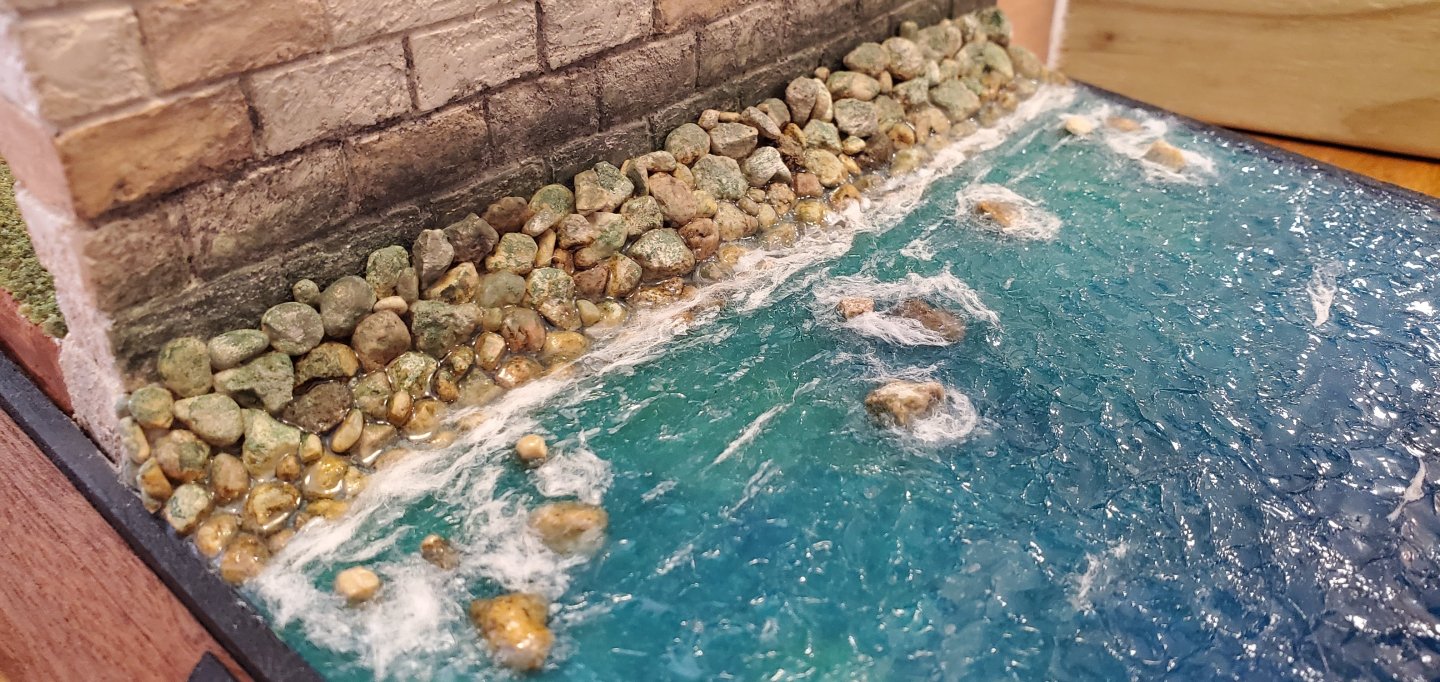
I agree with Cathead, that it would look better with a little color variation besides shades of brown, especially for algae. If you remember on my Roman Quinquereme build, @BANYAN suggested I add a scum line to my wall. I made a gradient of dark green, gray, and black extending upwards from the edge of the water, which looked like this. It might not be as subtle as you need, but maybe something in the middle would work.
-
Around here, anything built before 1950 is considered old world and pretty much qualifies as a historic landmark.
-
Nice teaser! Are you doing a build log for it?
-
I've got popcorn for me and cubes for mini-Dimples! We are ready for the show!! Git er Done!!!
- 207 replies
-
- 2
-
-
-
- vanguard models
- Duchess of Kingston
- (and 1 more)
-
Thanks, Gary and Thukydides. I appreciate y'all saying that. Knowing when to stop is the thing I struggle with the most. I add a little bit, back off and look, add a bit more, back off and look, etc... And then I force myself to stop before I really want to.
- 235 replies
-
- 5
-
-
- Banshee II
- Bottle
- (and 1 more)
-
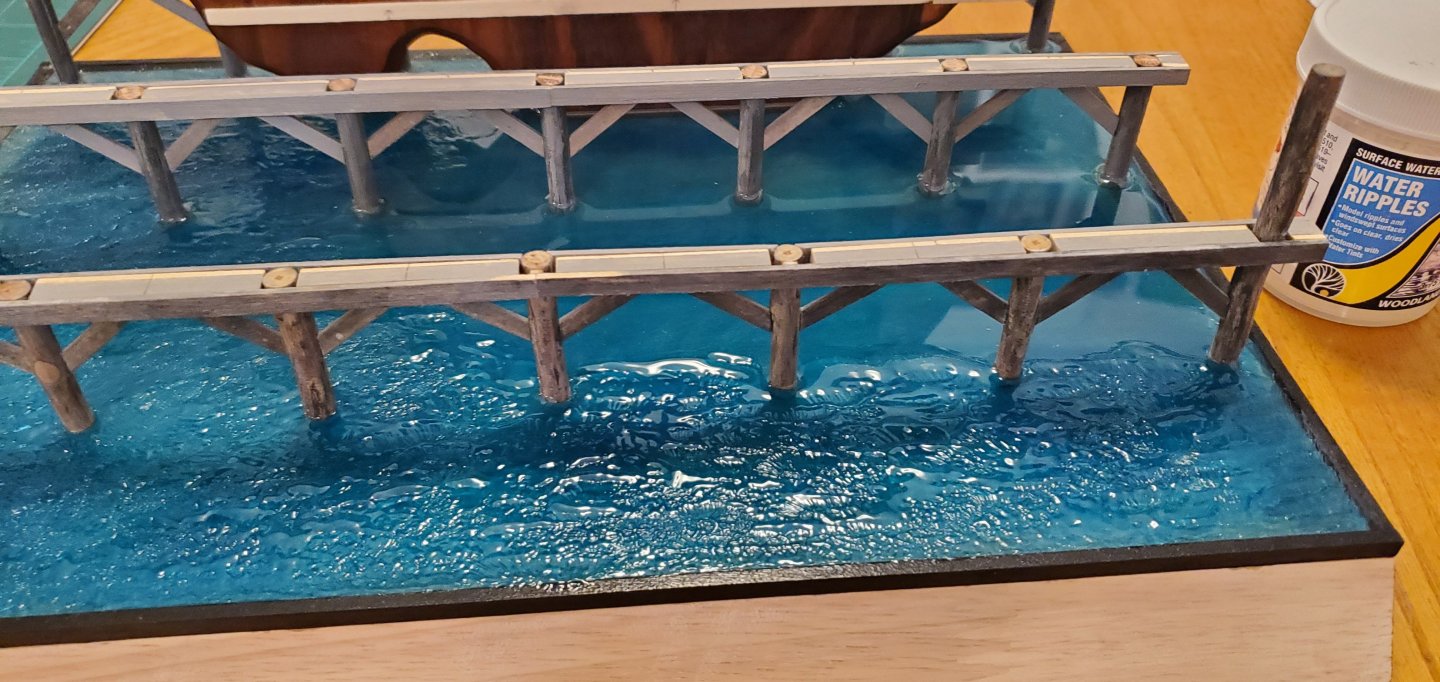
Thanks, Ian. I dab it on with a stiff-bristled paint brush that's about 1cm in width (the stiffer the bristles, the better it seems to work). I'll dab it sideways (parallel with the rows of pilings) to create ripples and some small rolling waves. With the thicker Water Waves product, it does not take much shaping beyond the dabbing to get some nice light ripple/wave action. If I do want to create some larger waves, I'll use a small plastic spatula. A popsicle stick would work just as well. If I get some areas that look too smooth or glassy, I'll take a small brush and rough it up a bit with some light dibbing. The Woodland Scenics products work really well.
- 235 replies
-
- 6
-
-
-
- Banshee II
- Bottle
- (and 1 more)
-
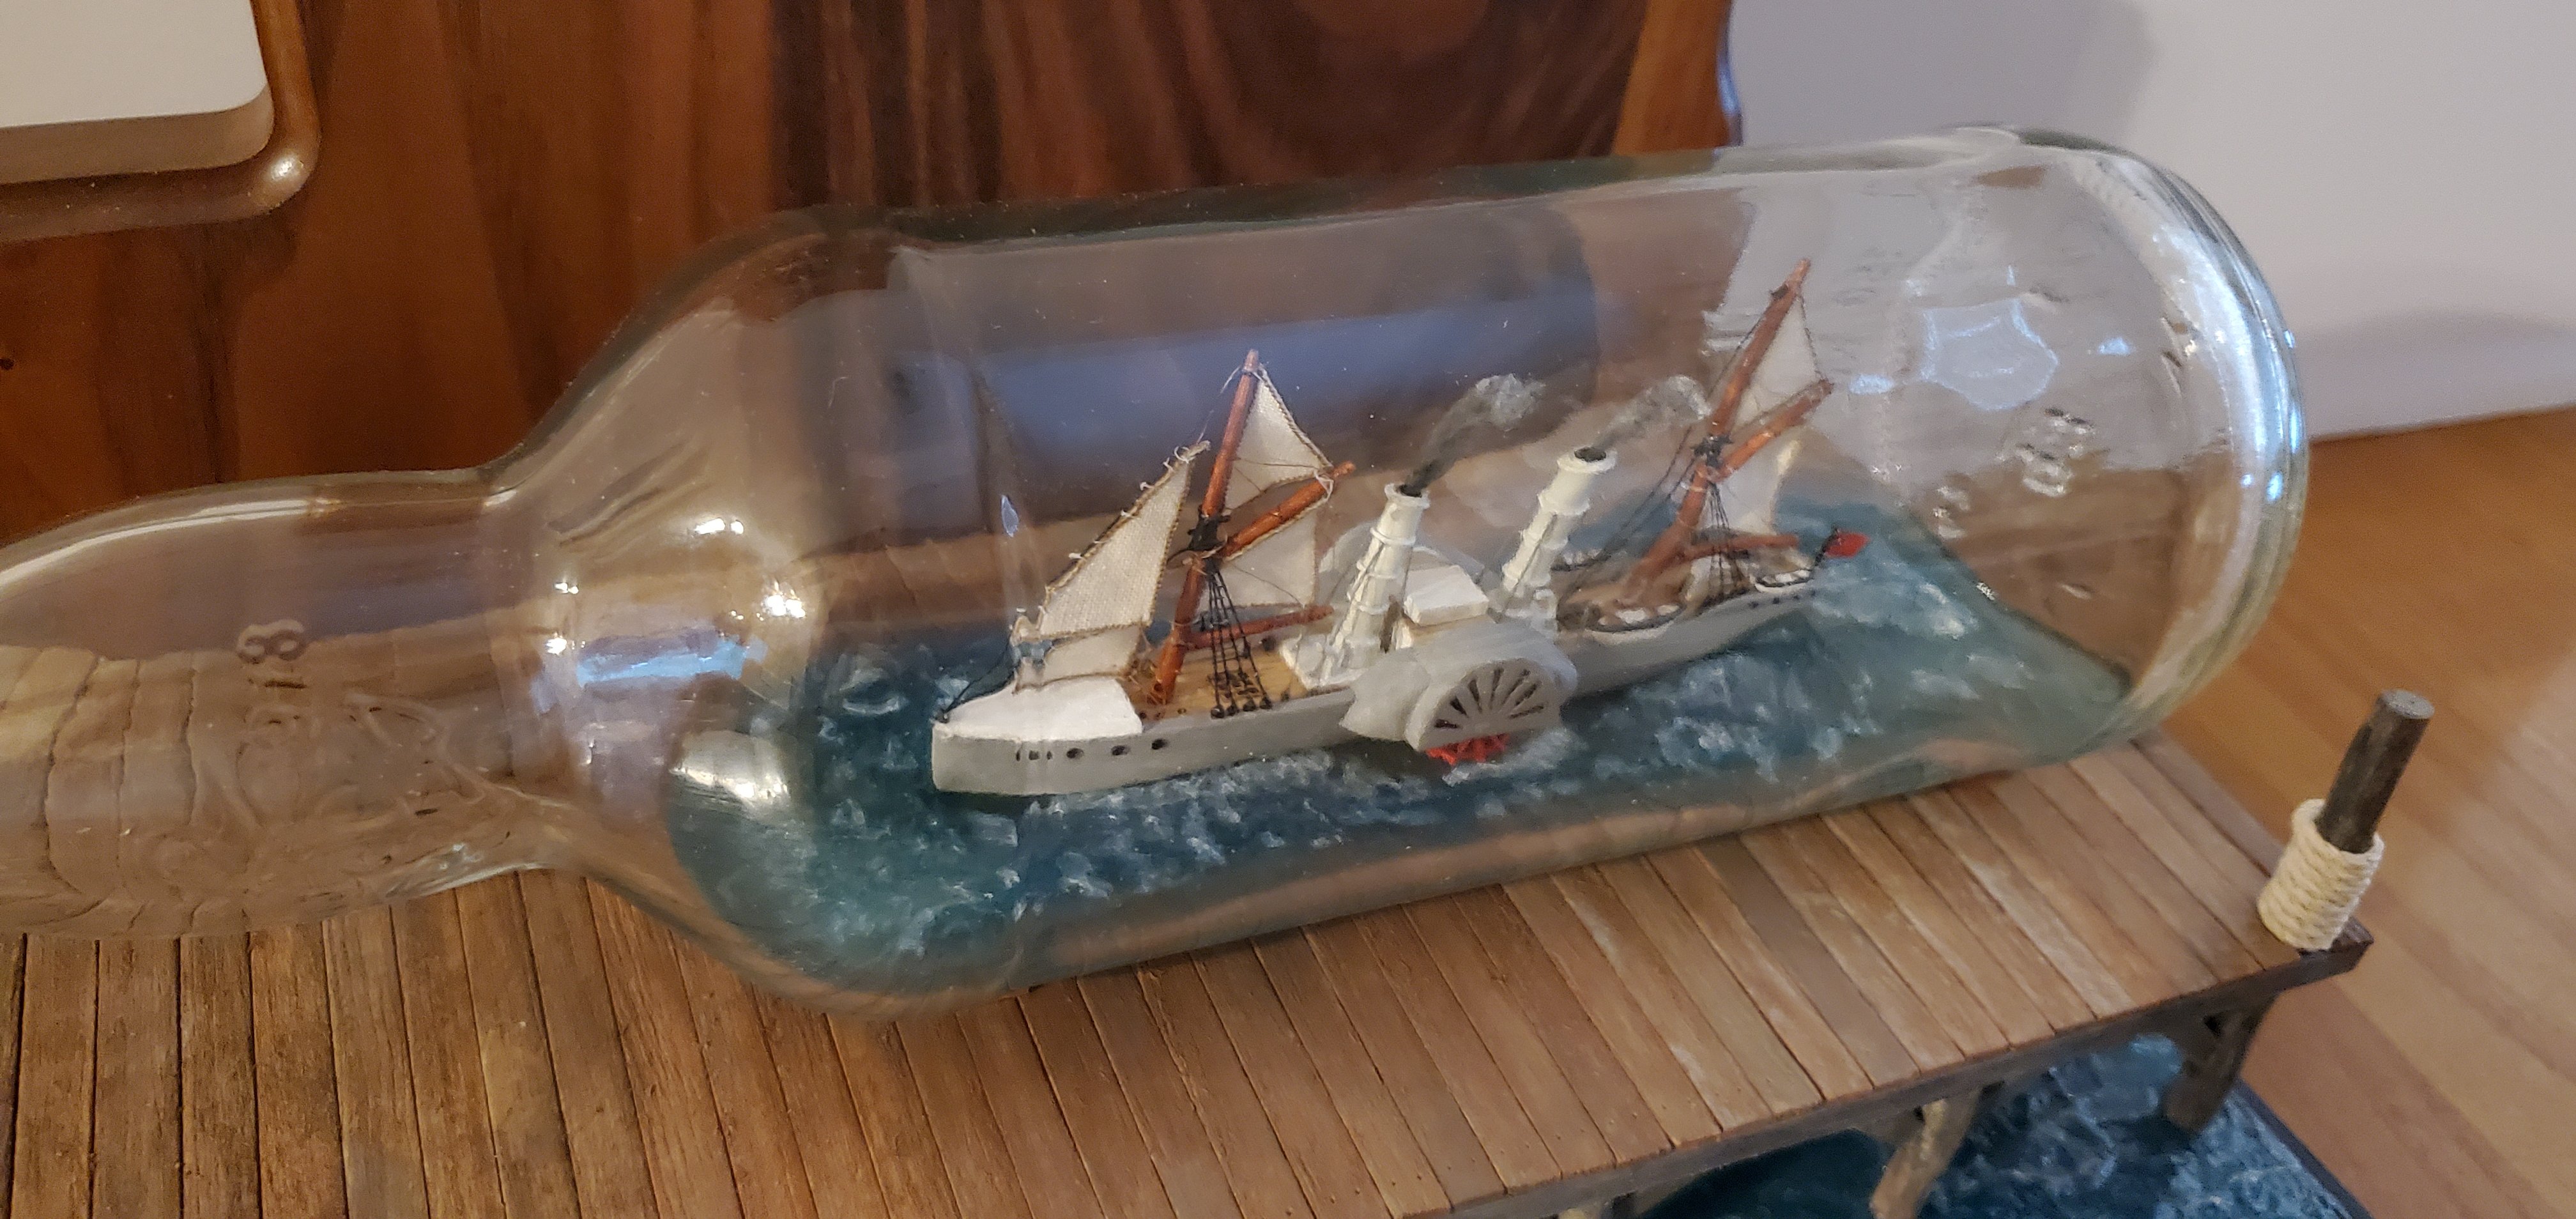
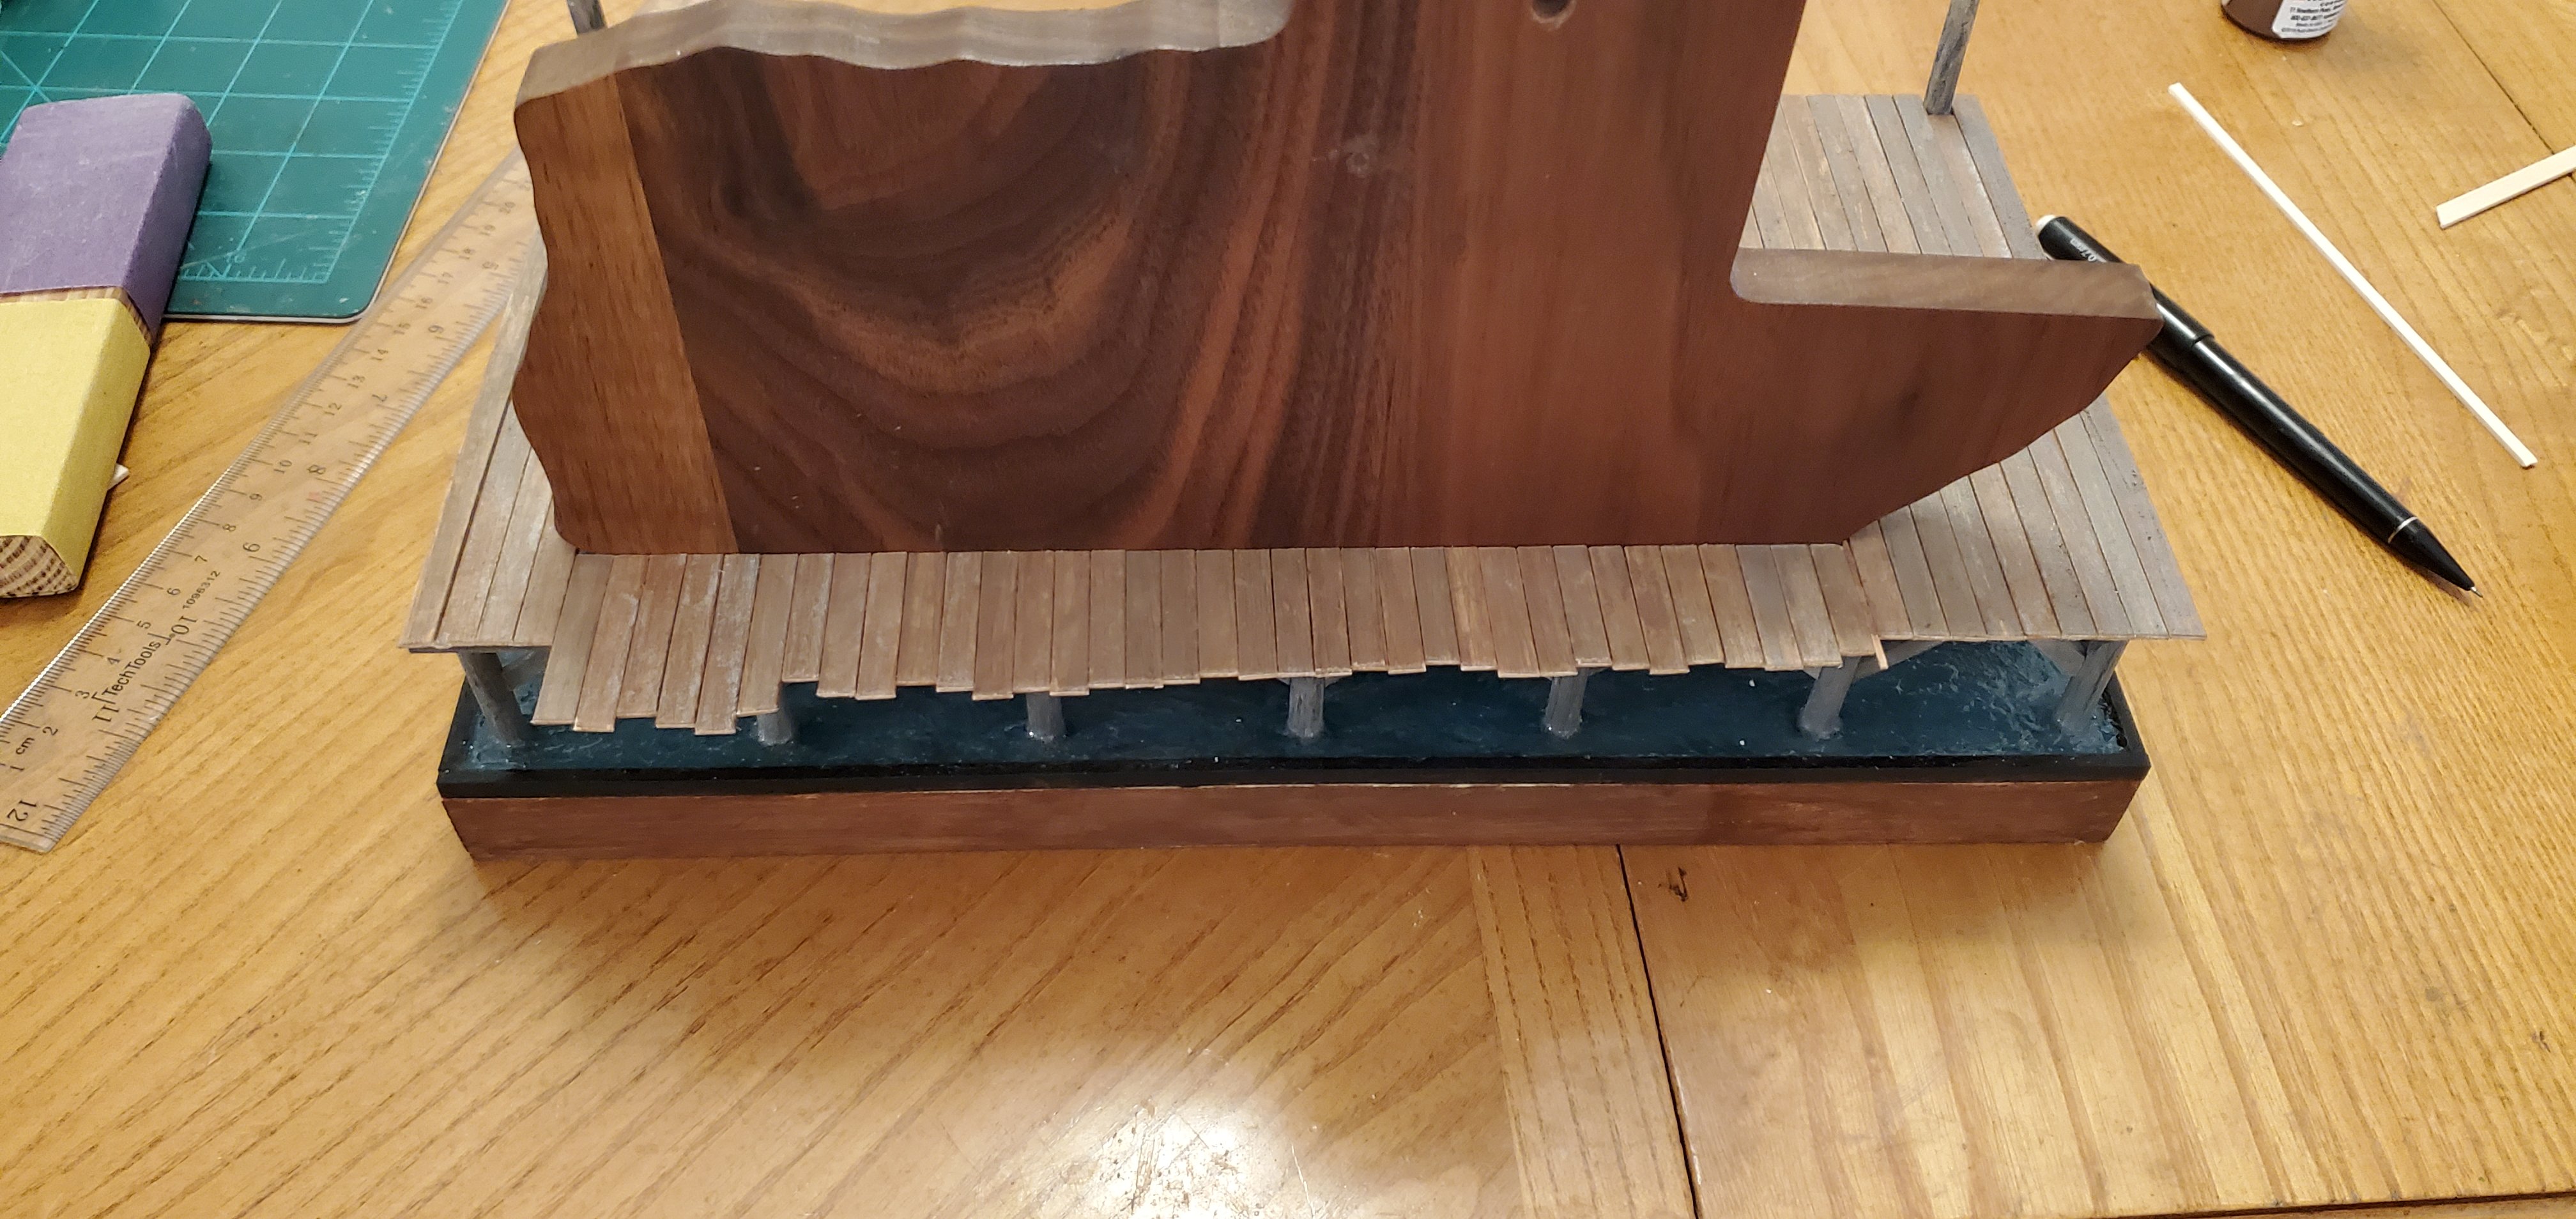
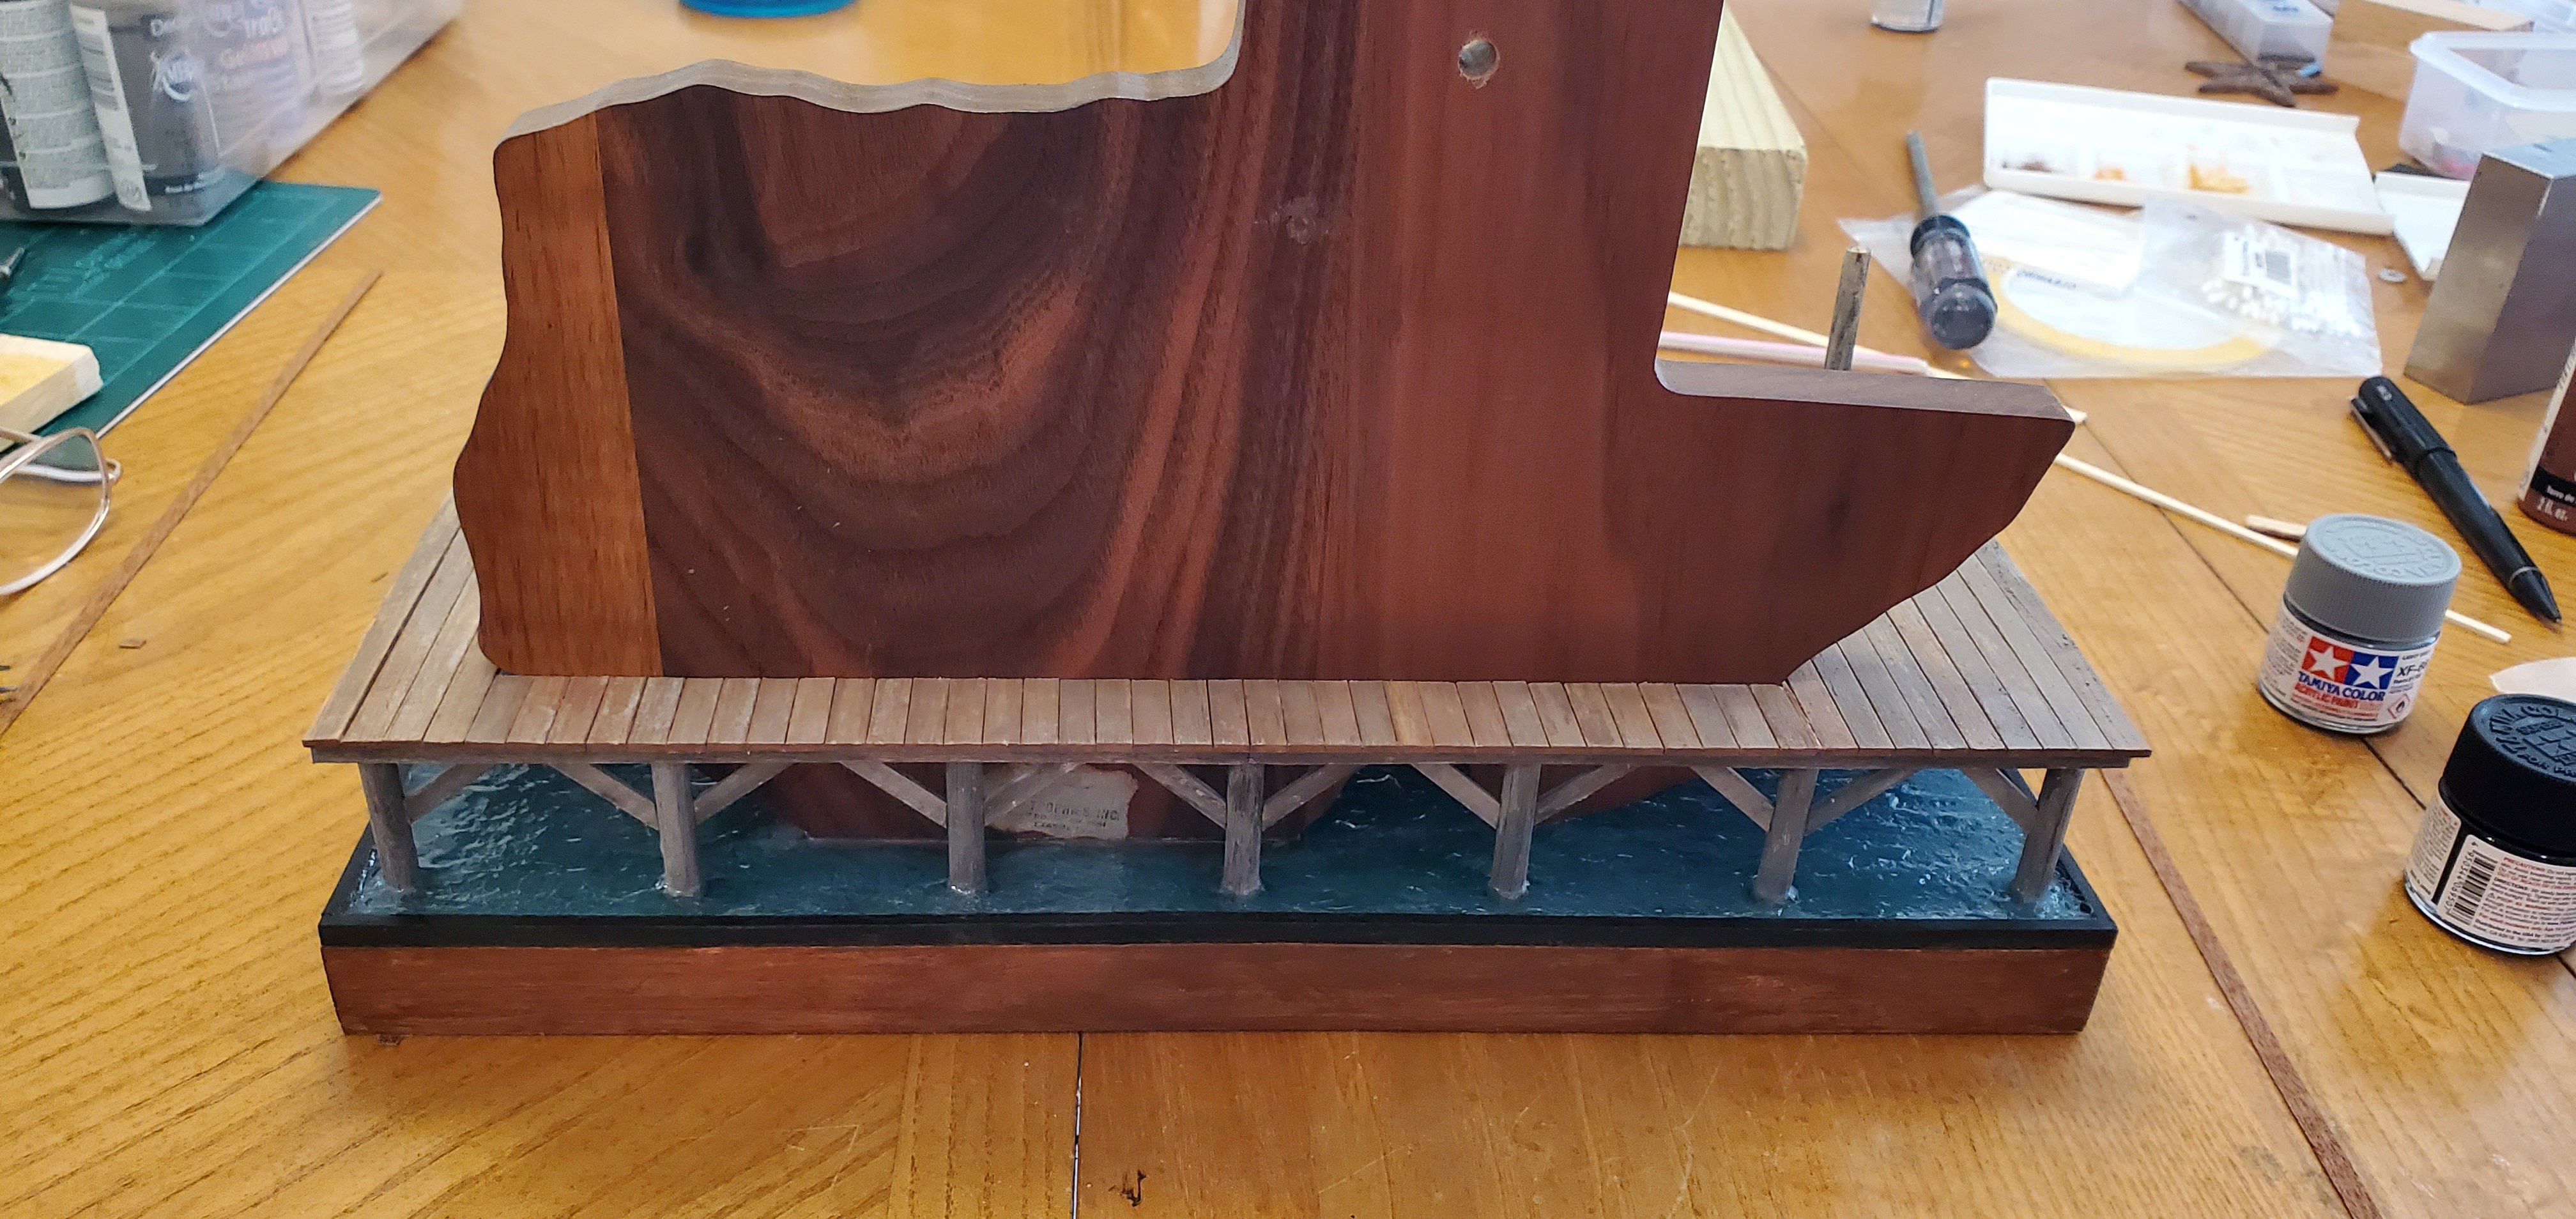
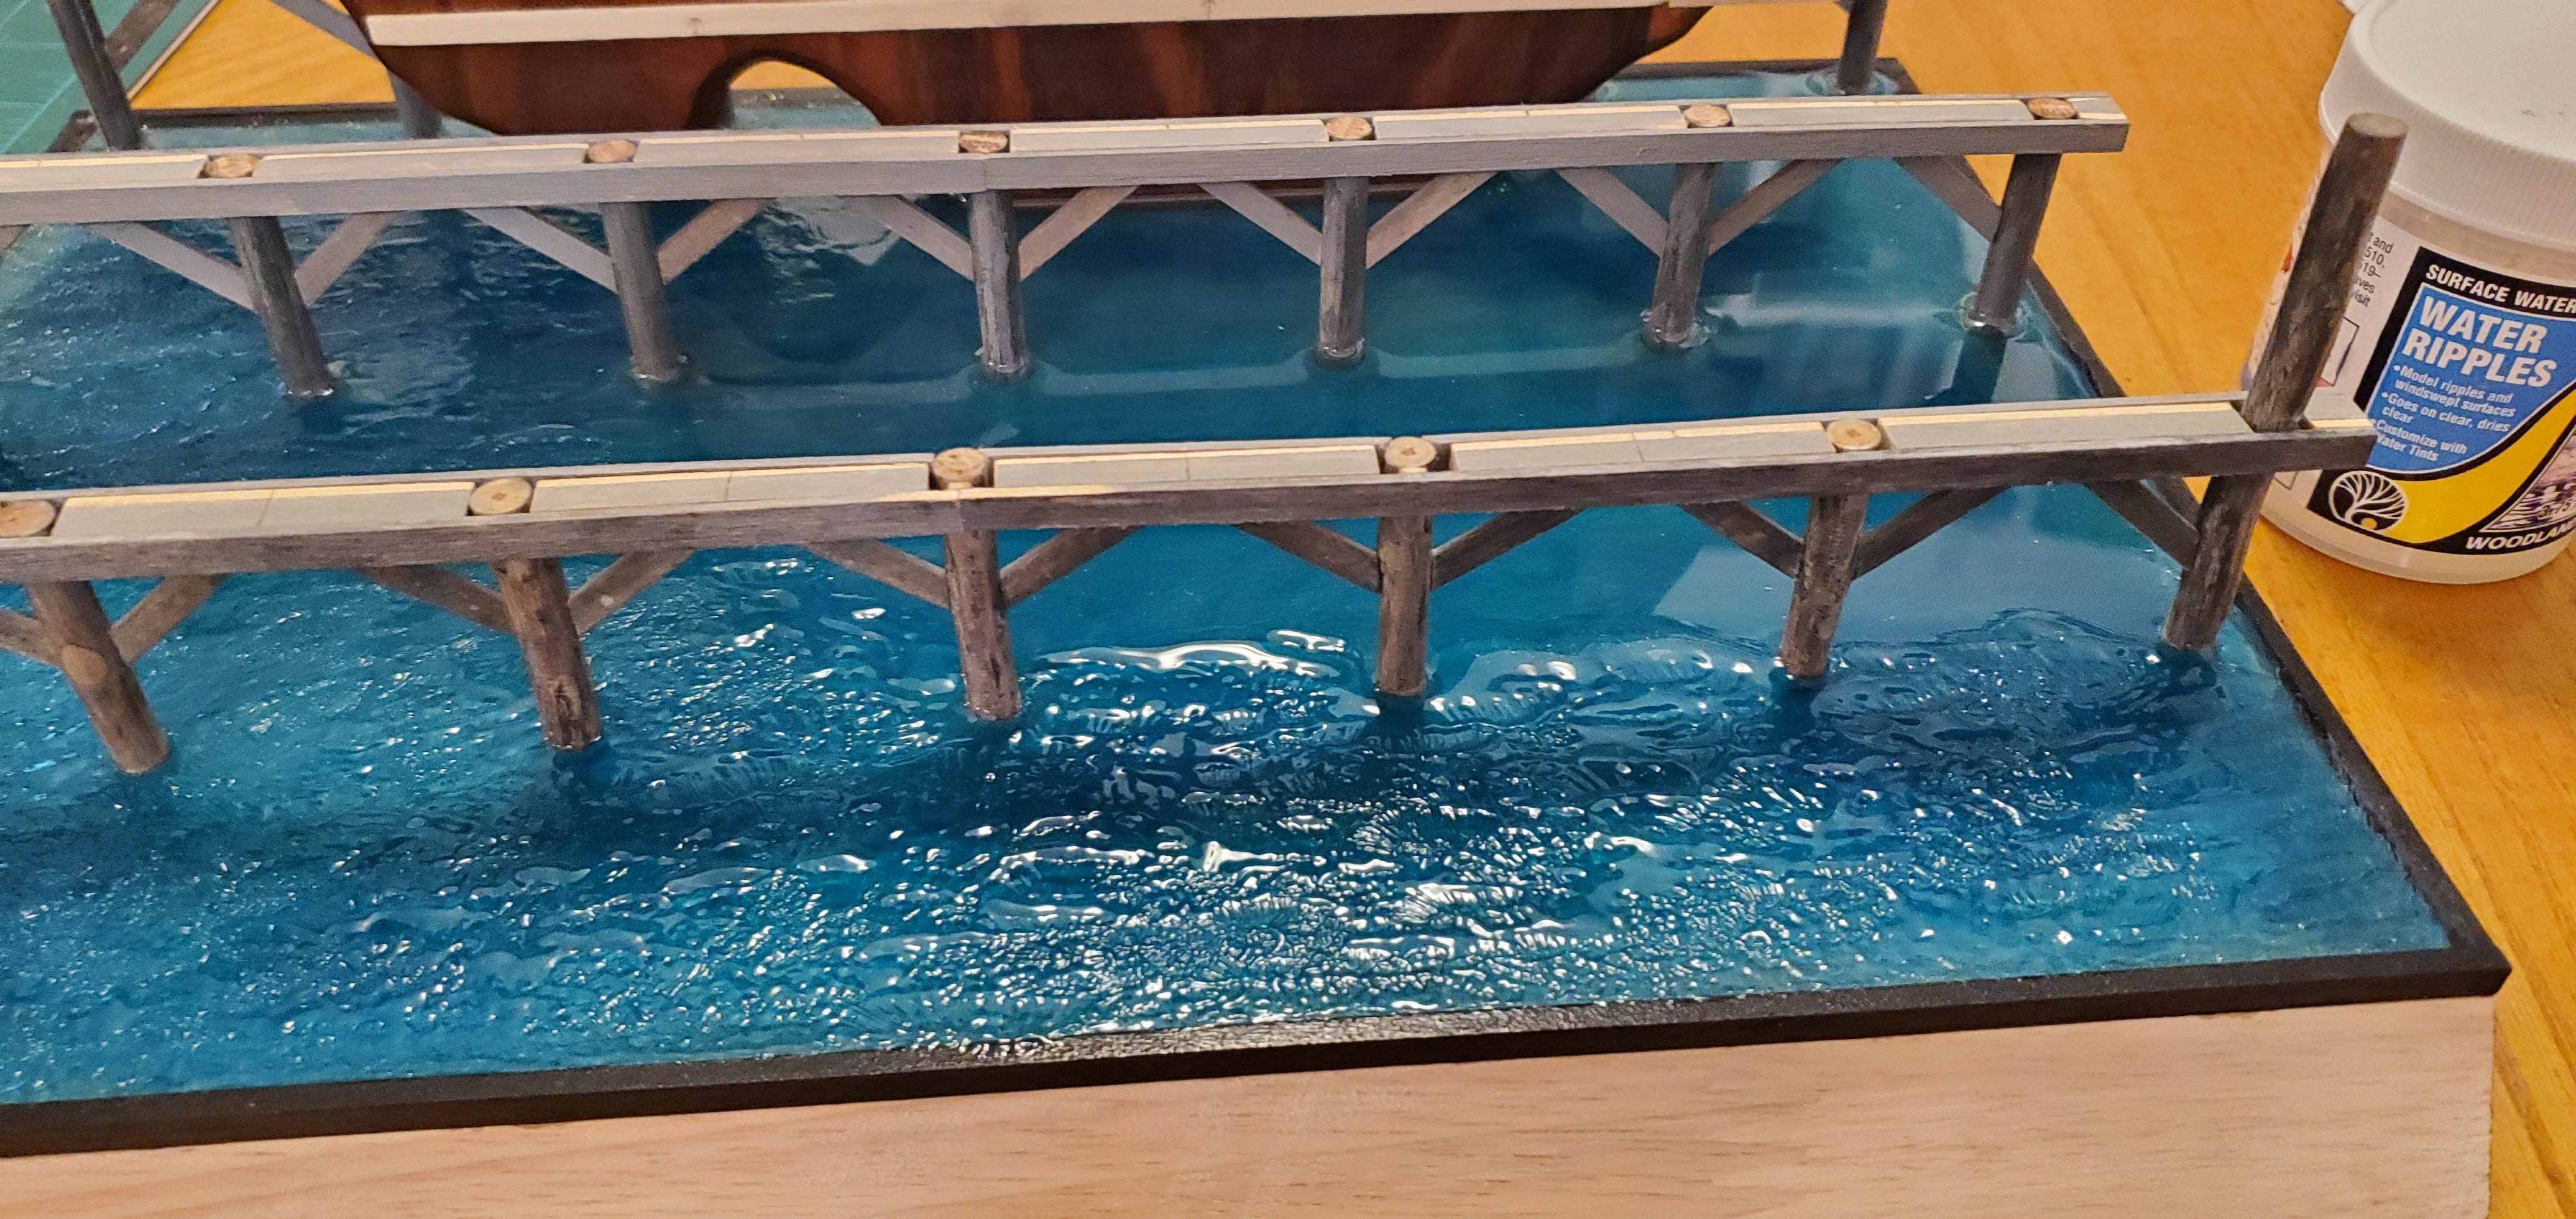
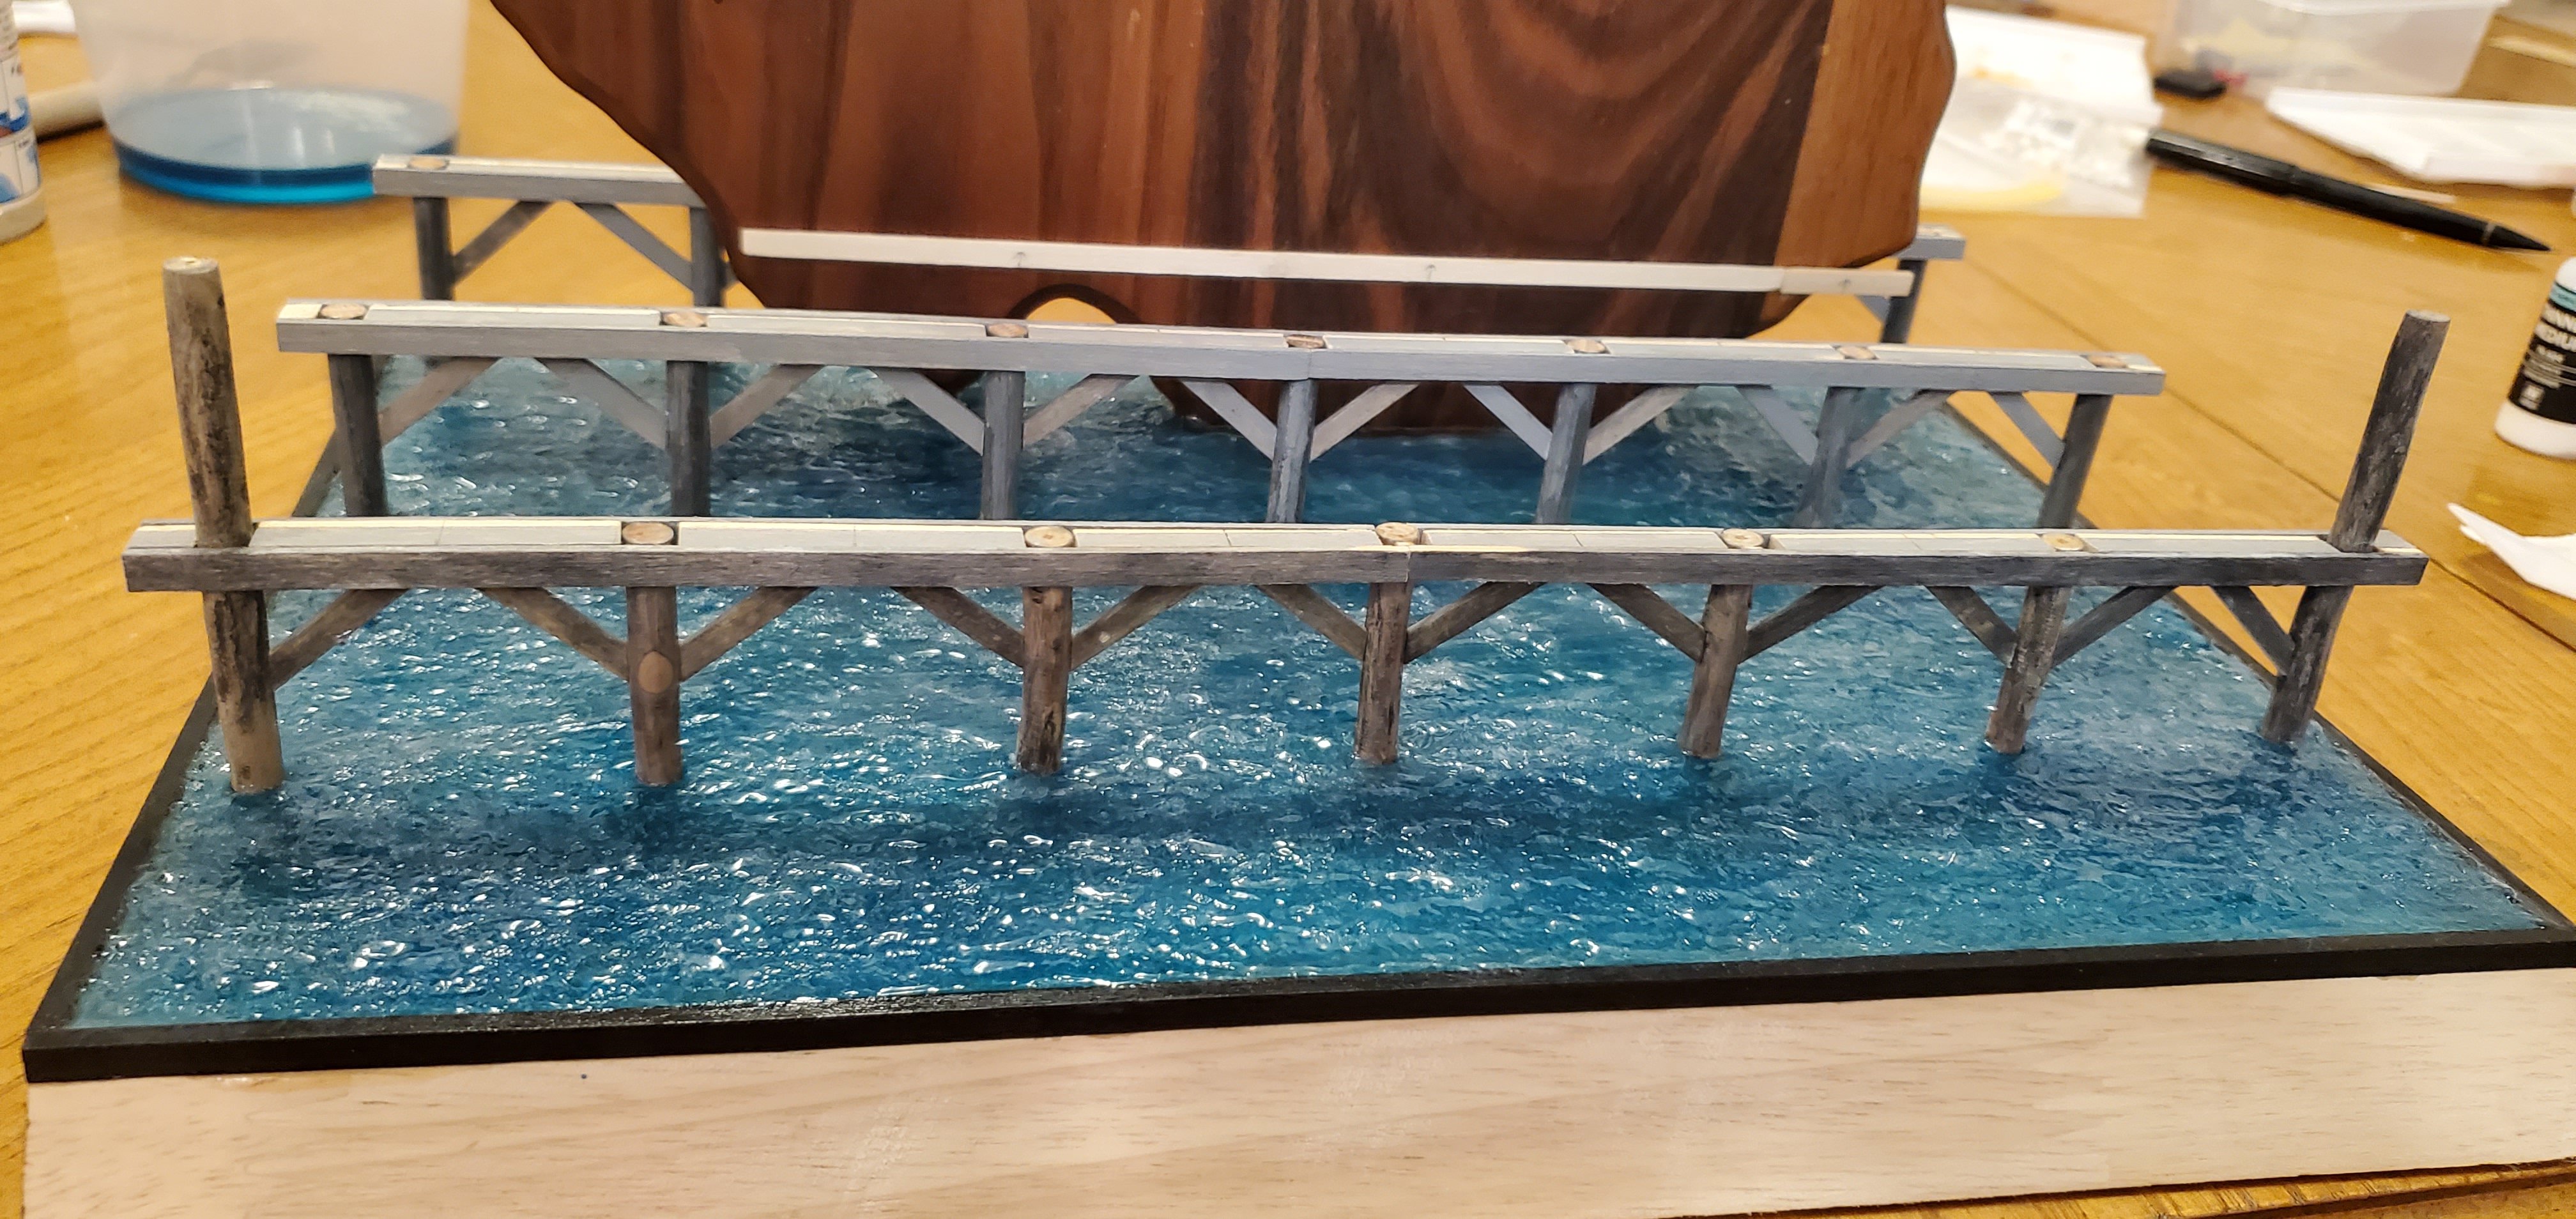
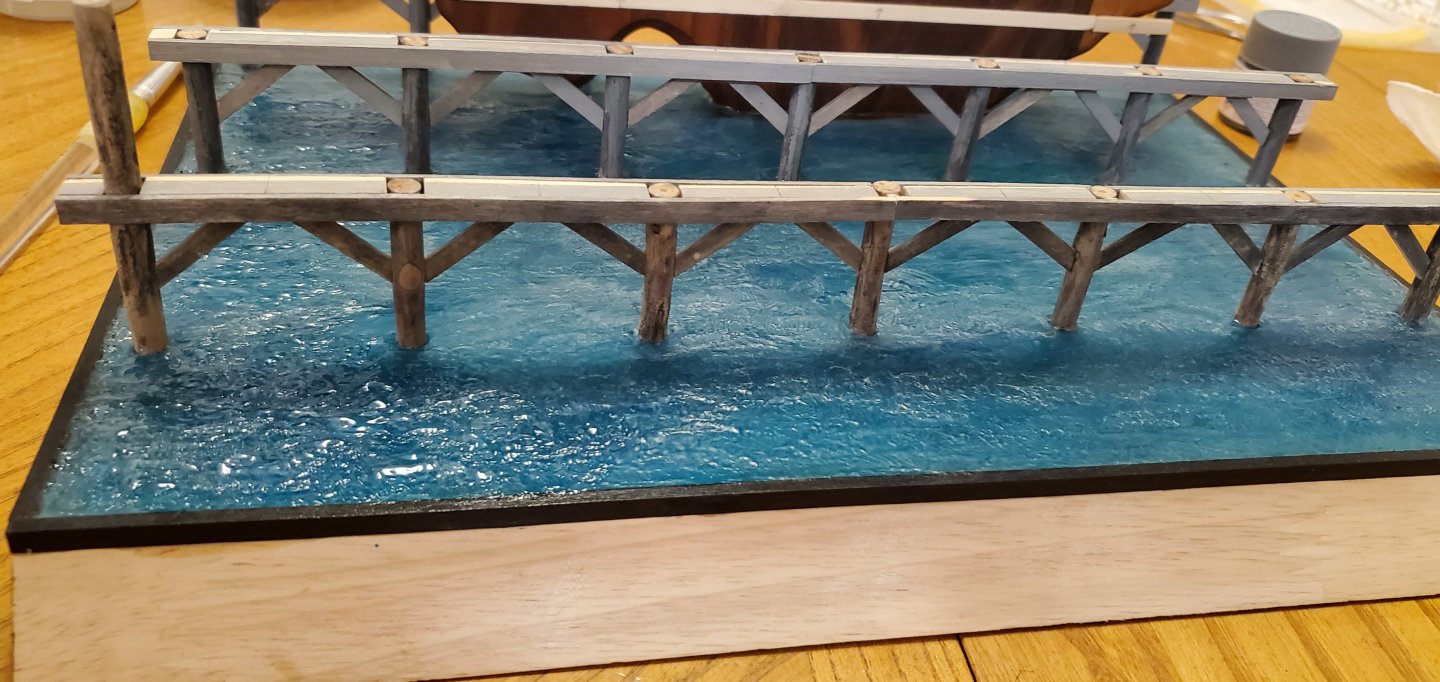
Dang Olympics have been distracting me from finishing this build. I can't seem to pull myself away from the TV even if it's the most obscure sport. A couple of hours watching mixed doubles ping pong? Are you kidding me? Summoning great will power, I finally managed to stop my binge-watching and get some work done on the water. With the pilings in place, the next step was adding some texture to the water. I started by applying a layer of Woodland Scenics Water Ripples to the smooth base of epoxy resin. The product is clear and goes on with some nice ripples/small waves. While drying, however, it settles itself down and smooths out much of the original texture. In this case, a little too much for what I wanted. So for the next step, I did two things. The water was just a little bit too clear and too blue (we are talking about the Galveston Bay, right?). So I thinned out a very light gray wash and spread it over the surface. Then I added a different Woodland Scenics product called Water Waves, which is thicker and holds its shape much better than the Ripples product. In the pic below, you can see on the right side how much the Ripples product settled and smoothed itself out. You can also see the slight clouding effects of the light gray wash. On the left side, you can see where I began applying the Water Waves product. Here's the whole thing after application of the Water Waves product. As a final touch, I added light brushes of white to some of the wave crests to give the water just a bit of action. Next step is adding the deck planks for the wharf. The finish line is in sight!

- 235 replies
-
- 17
-
-
-
- Banshee II
- Bottle
- (and 1 more)
-
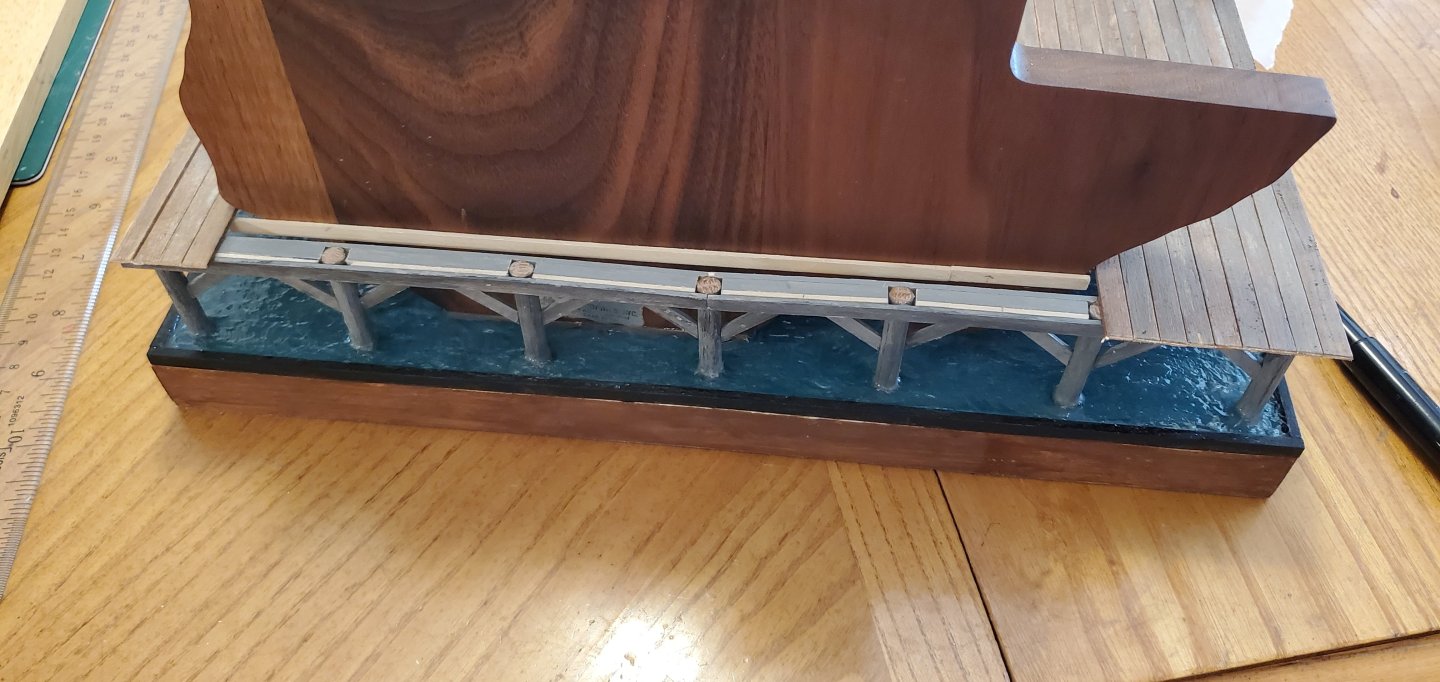
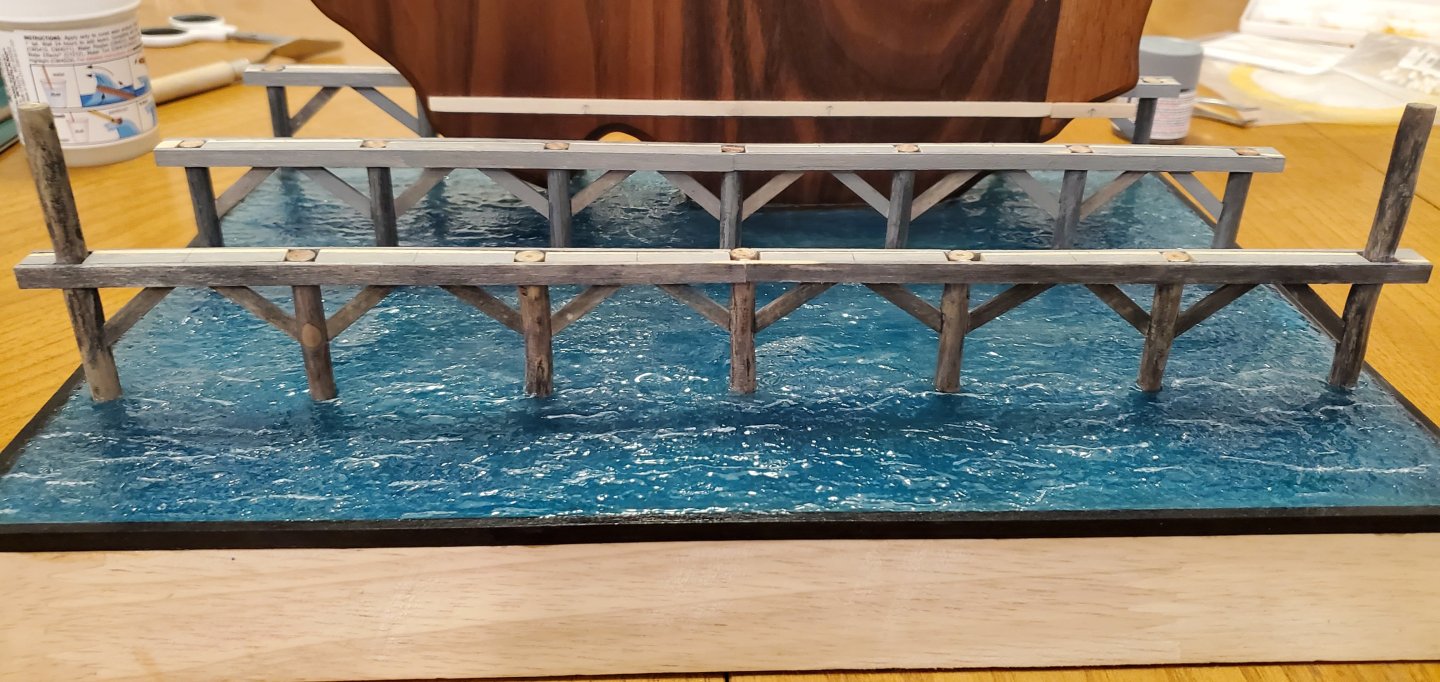
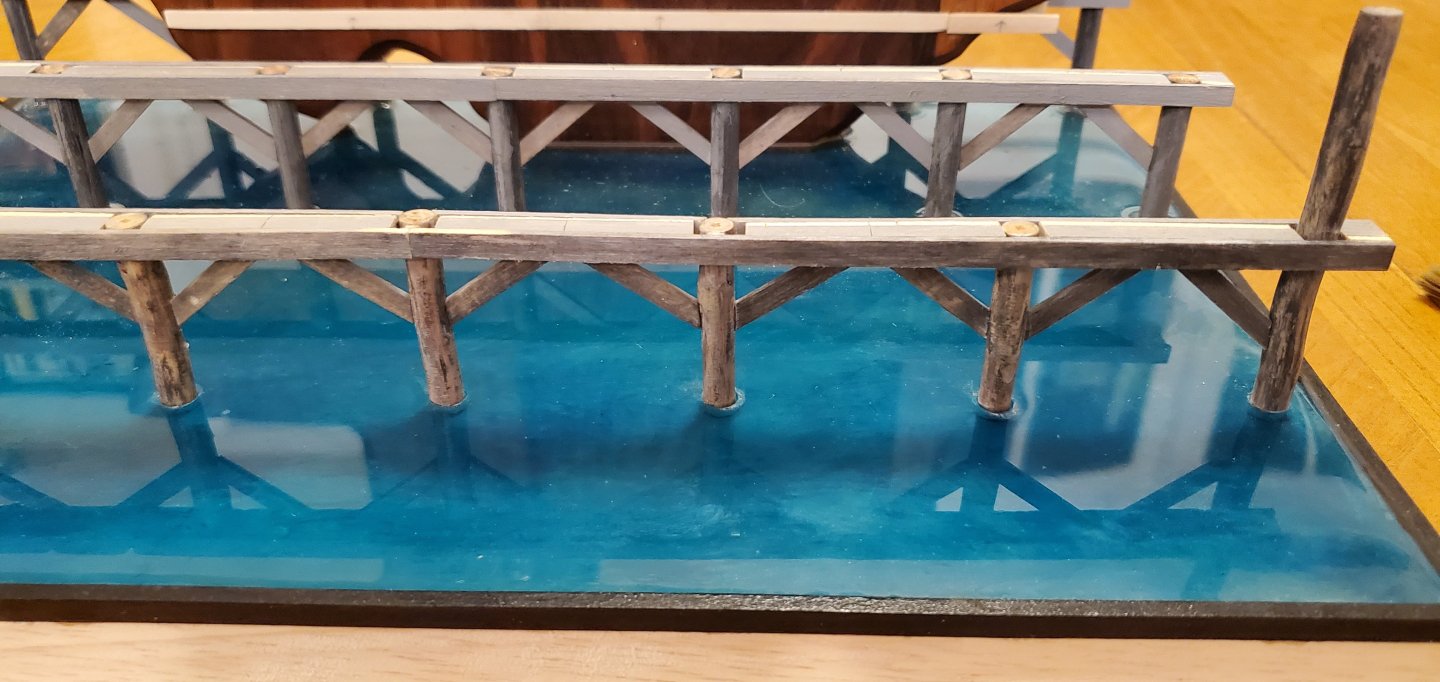
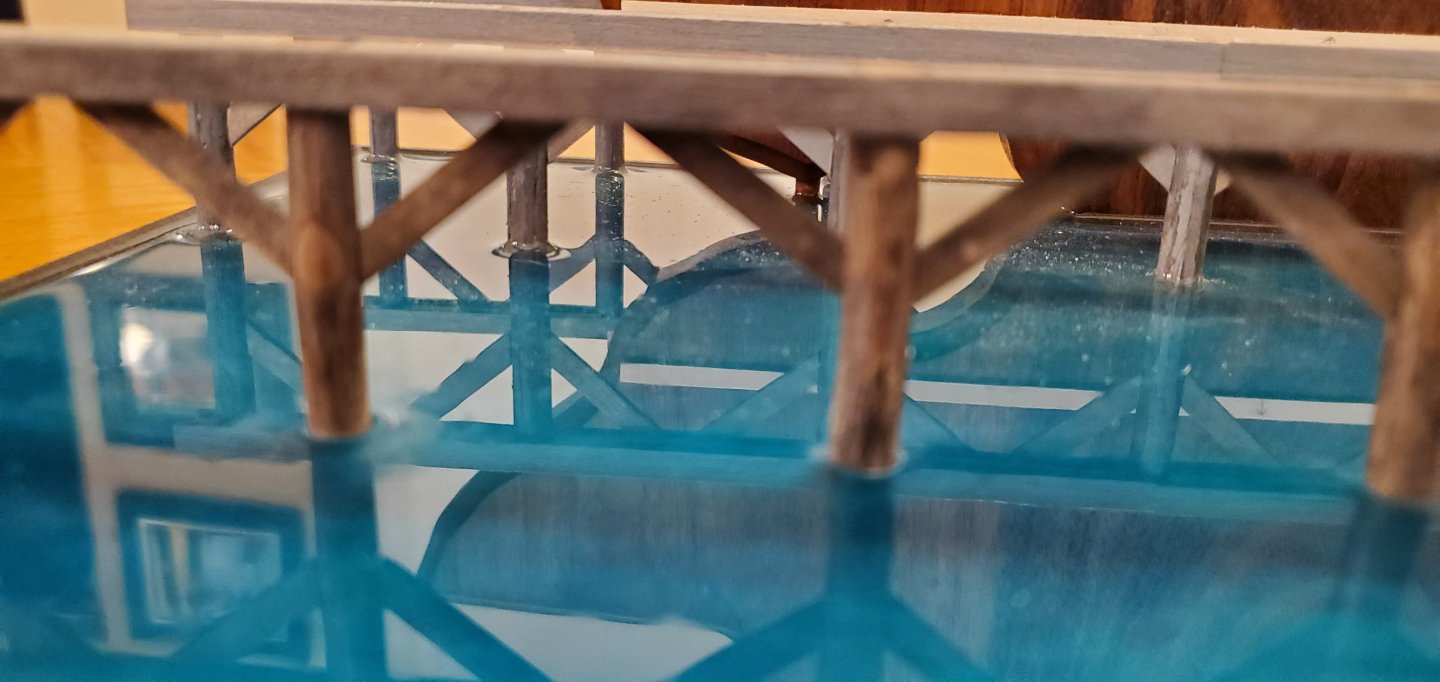
Thanks, Roel. For the front row of pilings, I drilled holes into the epoxy resin and into the base at the same depth as the holes on the back 2 rows. That was really a nerve wracking experience as I was petrified of making a mistake with the drill and royally screwing up the whole base with all the hours of work it had eaten up. But I managed to get clean holes drilled with uniform depths and good alignment. Yes, I drilled the holes for a tight fit. To affix the pilings, I used a very thin layer of CA glue (instead of epoxy) on the sides and a more liberal amount at the bottom. I think I only had 1 where I used a bit too much glue and it oozed out the top of the hole. But it was an easy cleanup. Here's a couple of closeups that show the difference in how the sets of pilings look. The first pic focuses on the front row where I poured the epoxy resin first, drilled holes after it cured, then inserted the pilings. The second pic focuses on the back rows where I put the pilings into the base and then poured the epoxy resin epoxy around the pilings. The back rows show the significant resin creep-up that I wanted to avoid on the front row. The next step is to add ripples and mild waves to the entire base of water. That might hide the creep-up, but I was not sure so didn't want to take the chance on the front row.
- 235 replies
-
- 15
-
-
-
-
- Banshee II
- Bottle
- (and 1 more)
-
That's a great solution! Gonna have to add that one to my bag of tricks.
-
She's a real beauty, Bob. Well done!!!
- 87 replies
-
- 4
-
-
-
- King of the Mississippi
- Artesania Latina
- (and 2 more)
-
Looks great! I think PGP deserves a promotion to PFCGP after all his great work on this project!!
- 87 replies
-
- 4
-
-
-
- King of the Mississippi
- Artesania Latina
- (and 2 more)
-
Glad it will be helpful, Bob. The artist chalk dust process is a lot more trouble than just painting, but I believe it's worth it. As @gjdale said in his Foss Landing diorama, good weathering involves color and texture, which the chalk dust helps provide.
- 235 replies
-
- 6
-
-
- Banshee II
- Bottle
- (and 1 more)
-
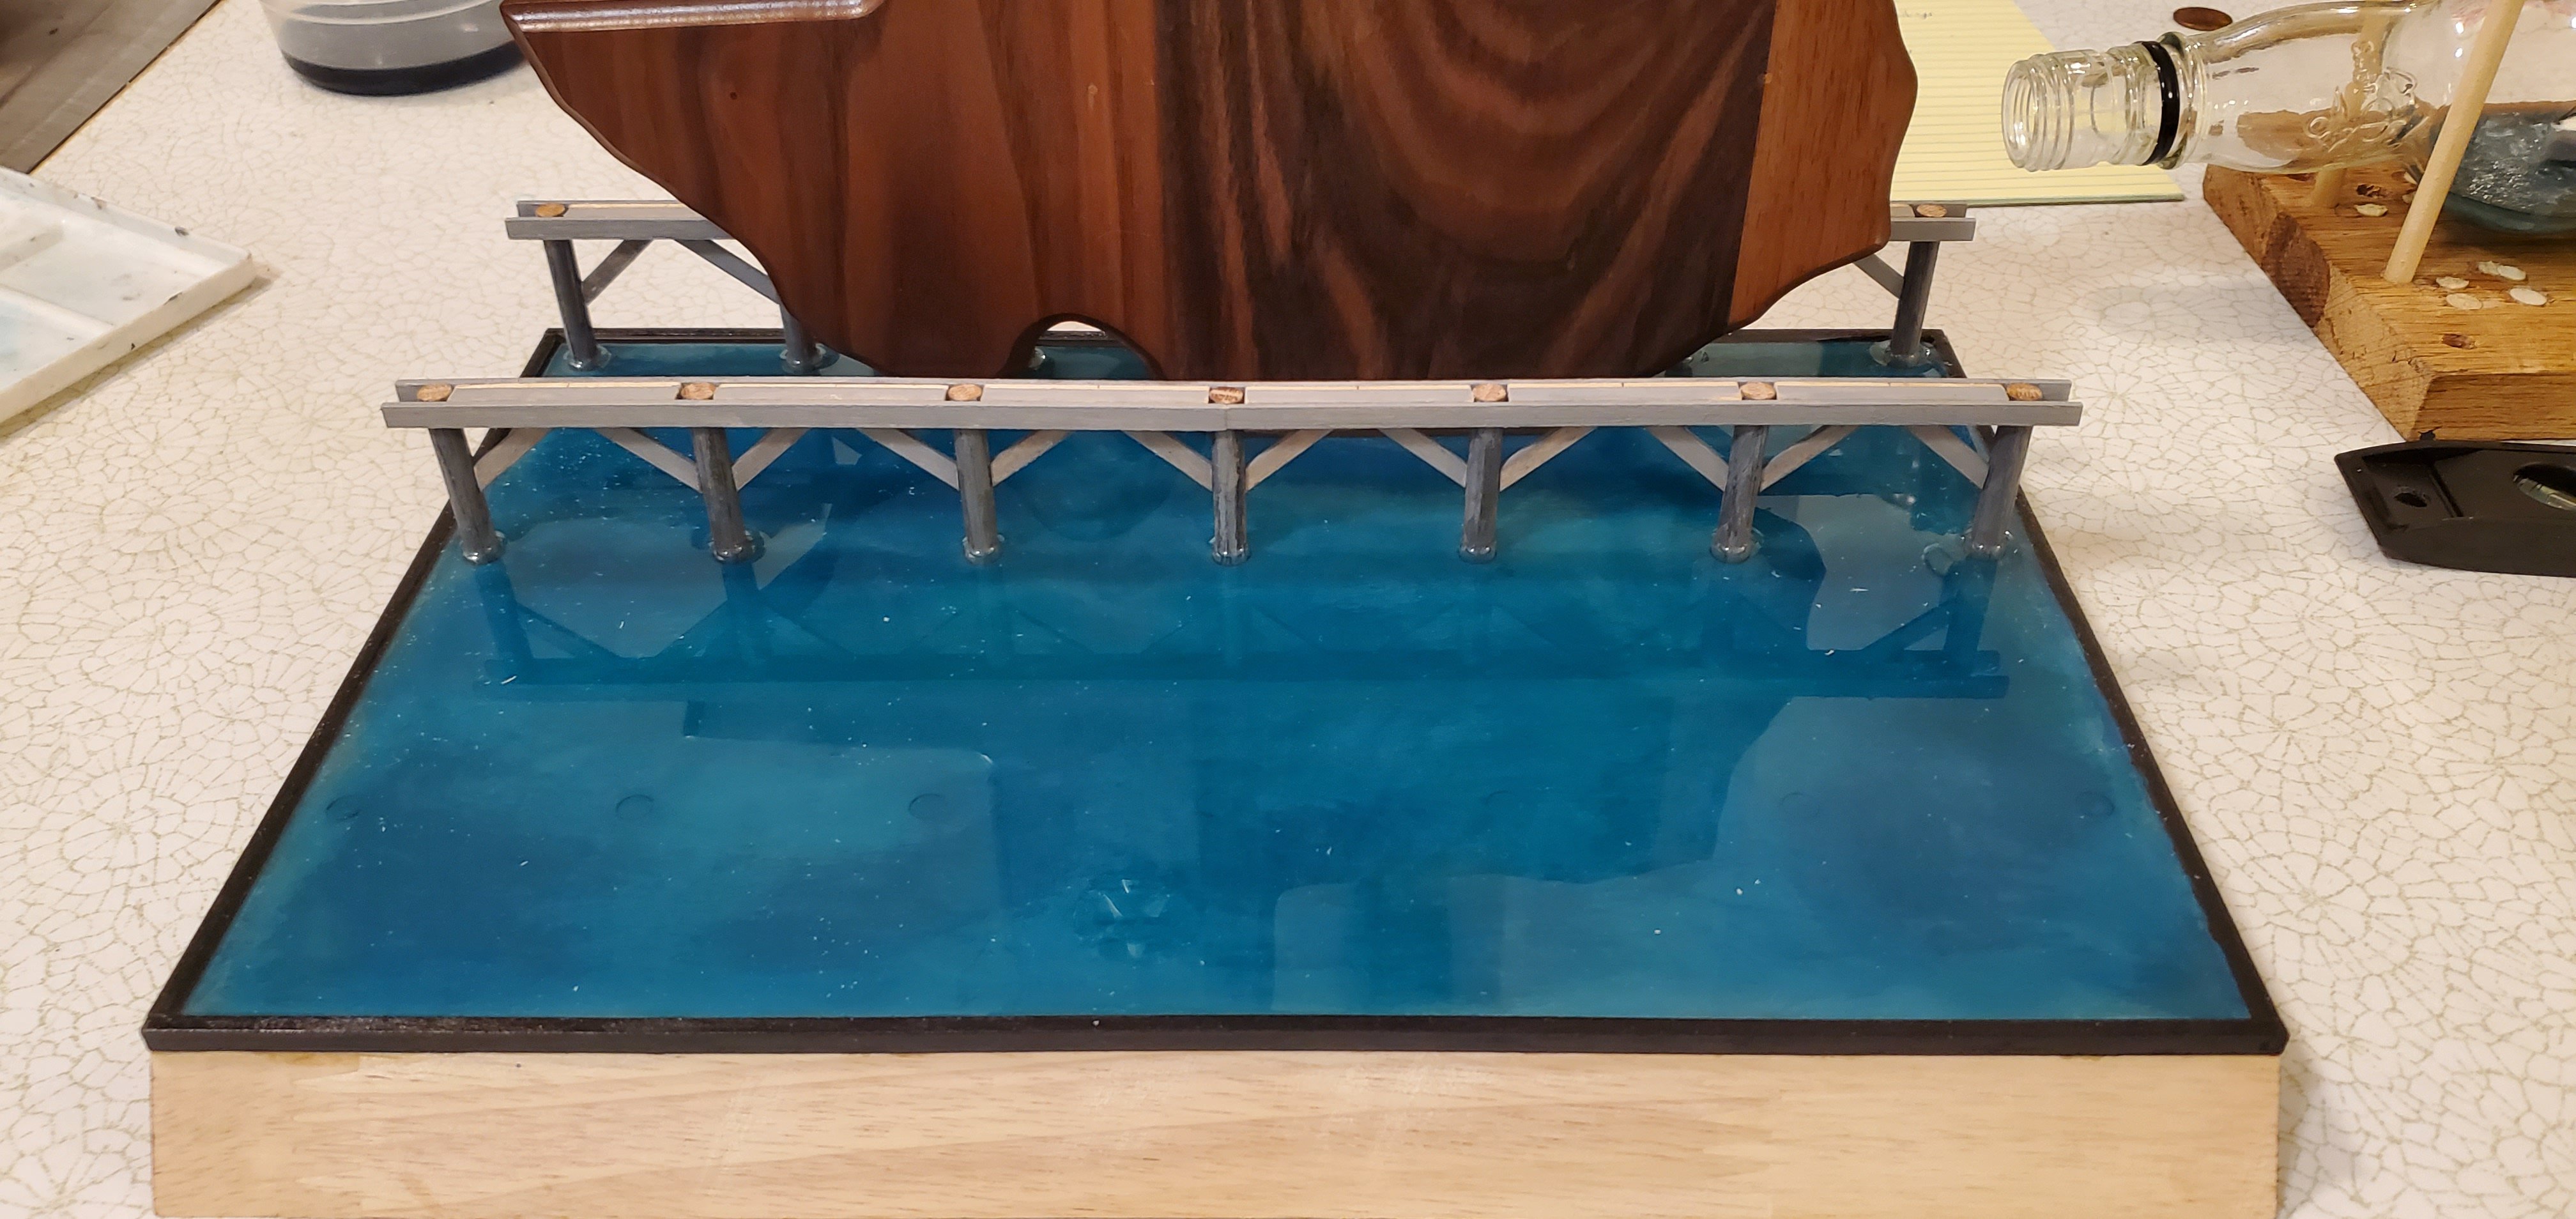
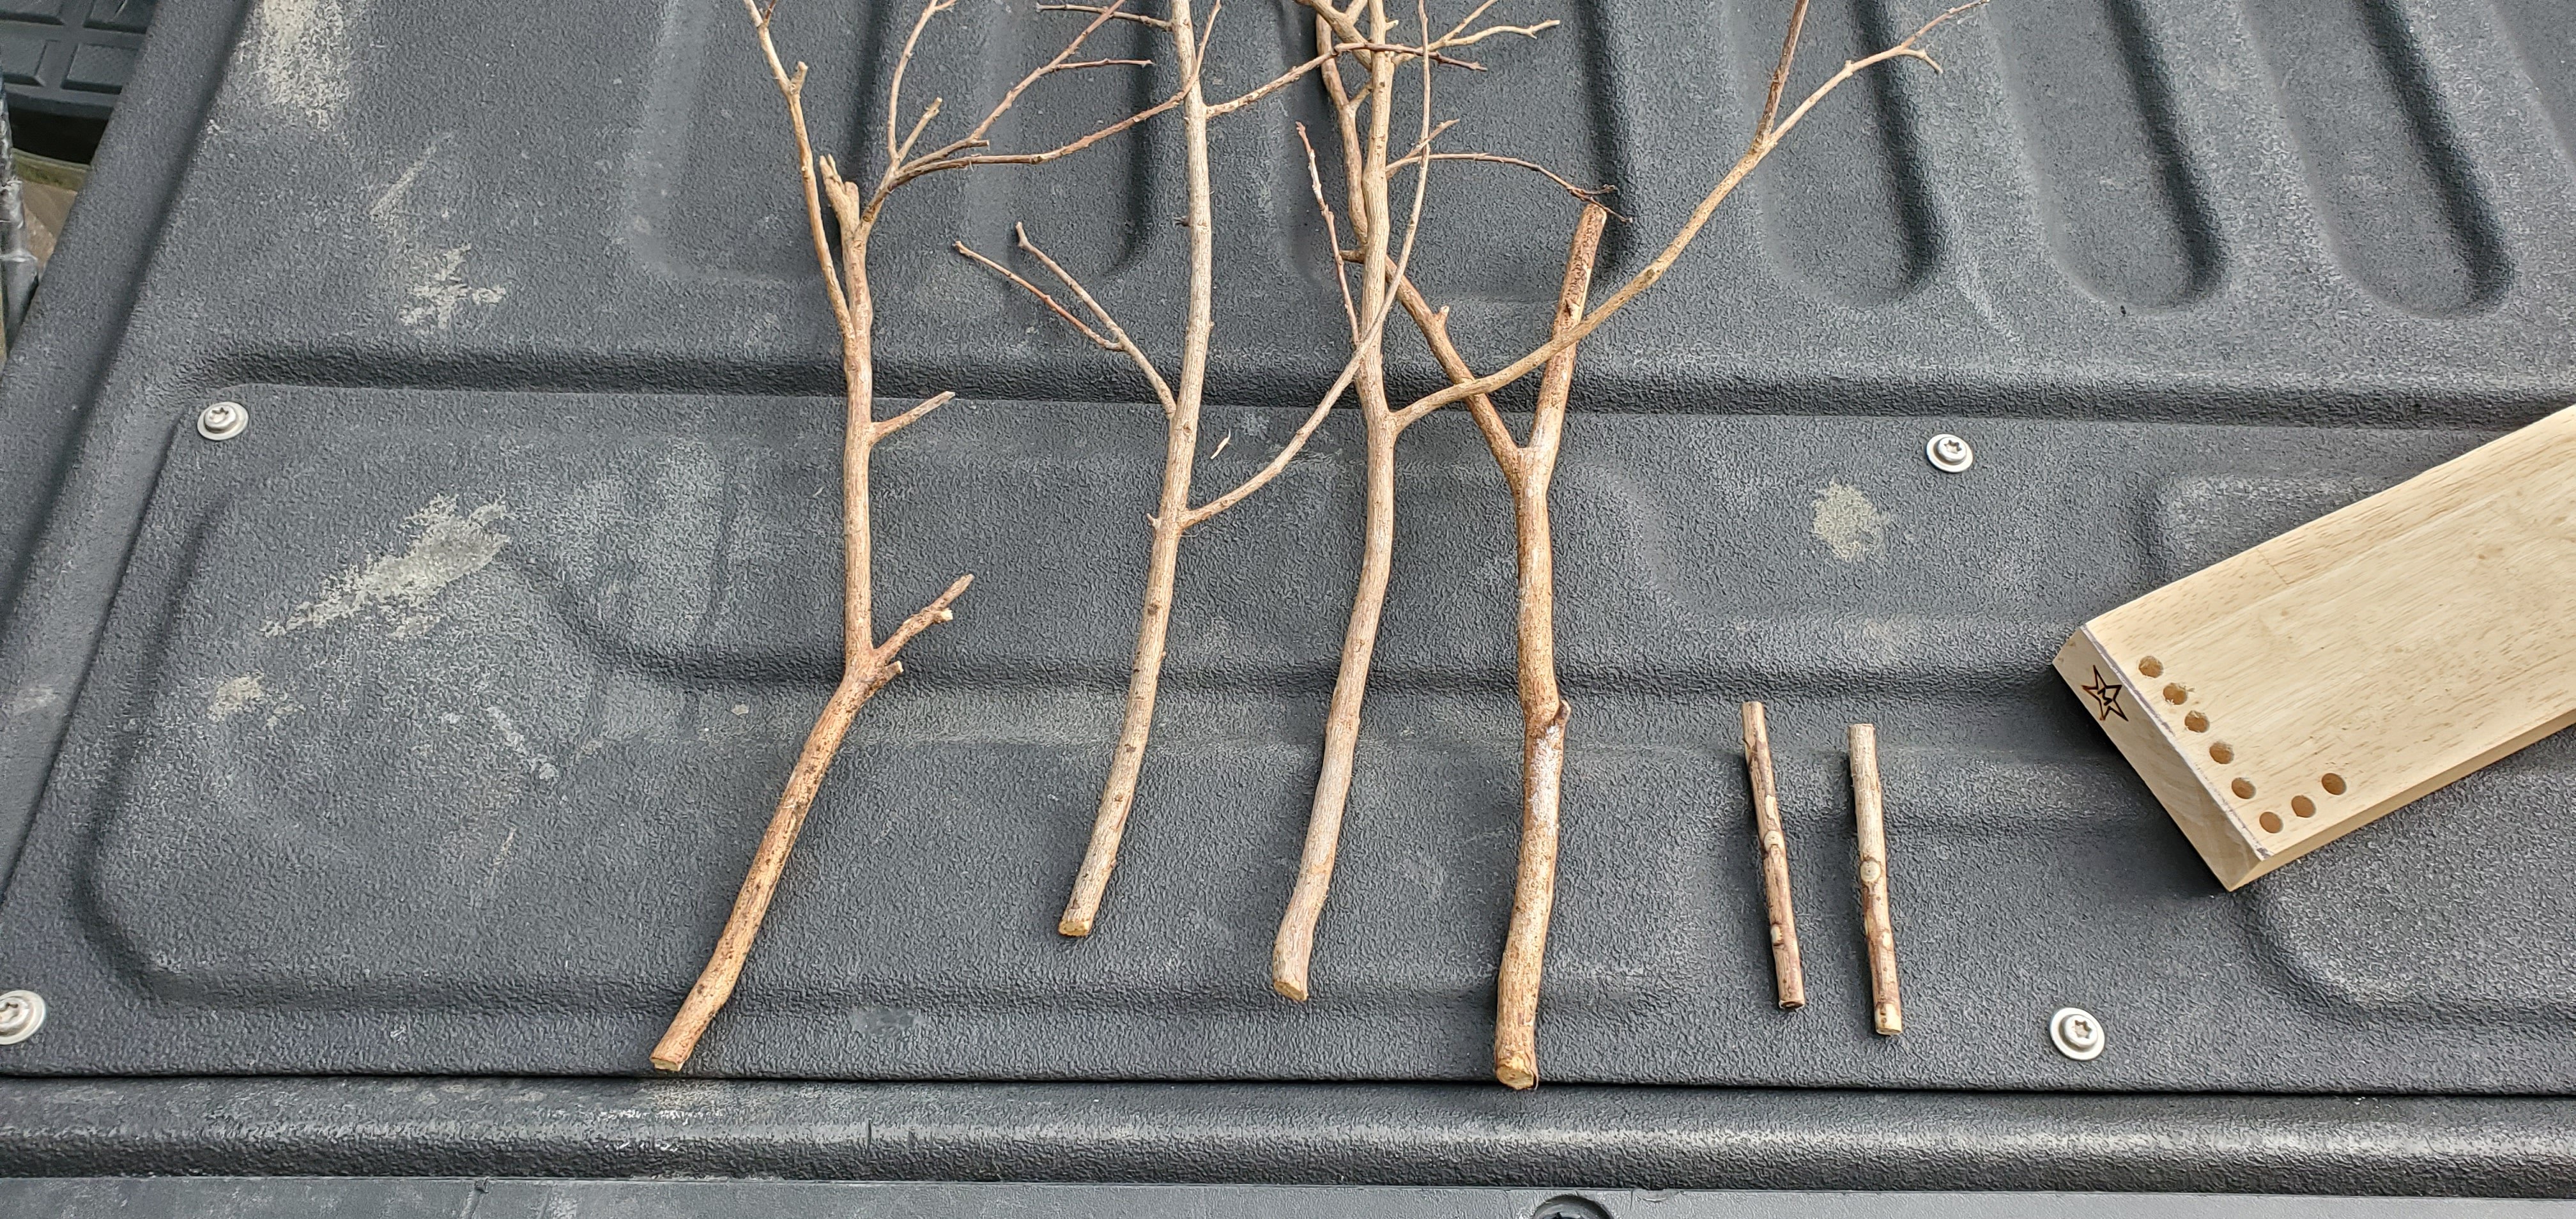
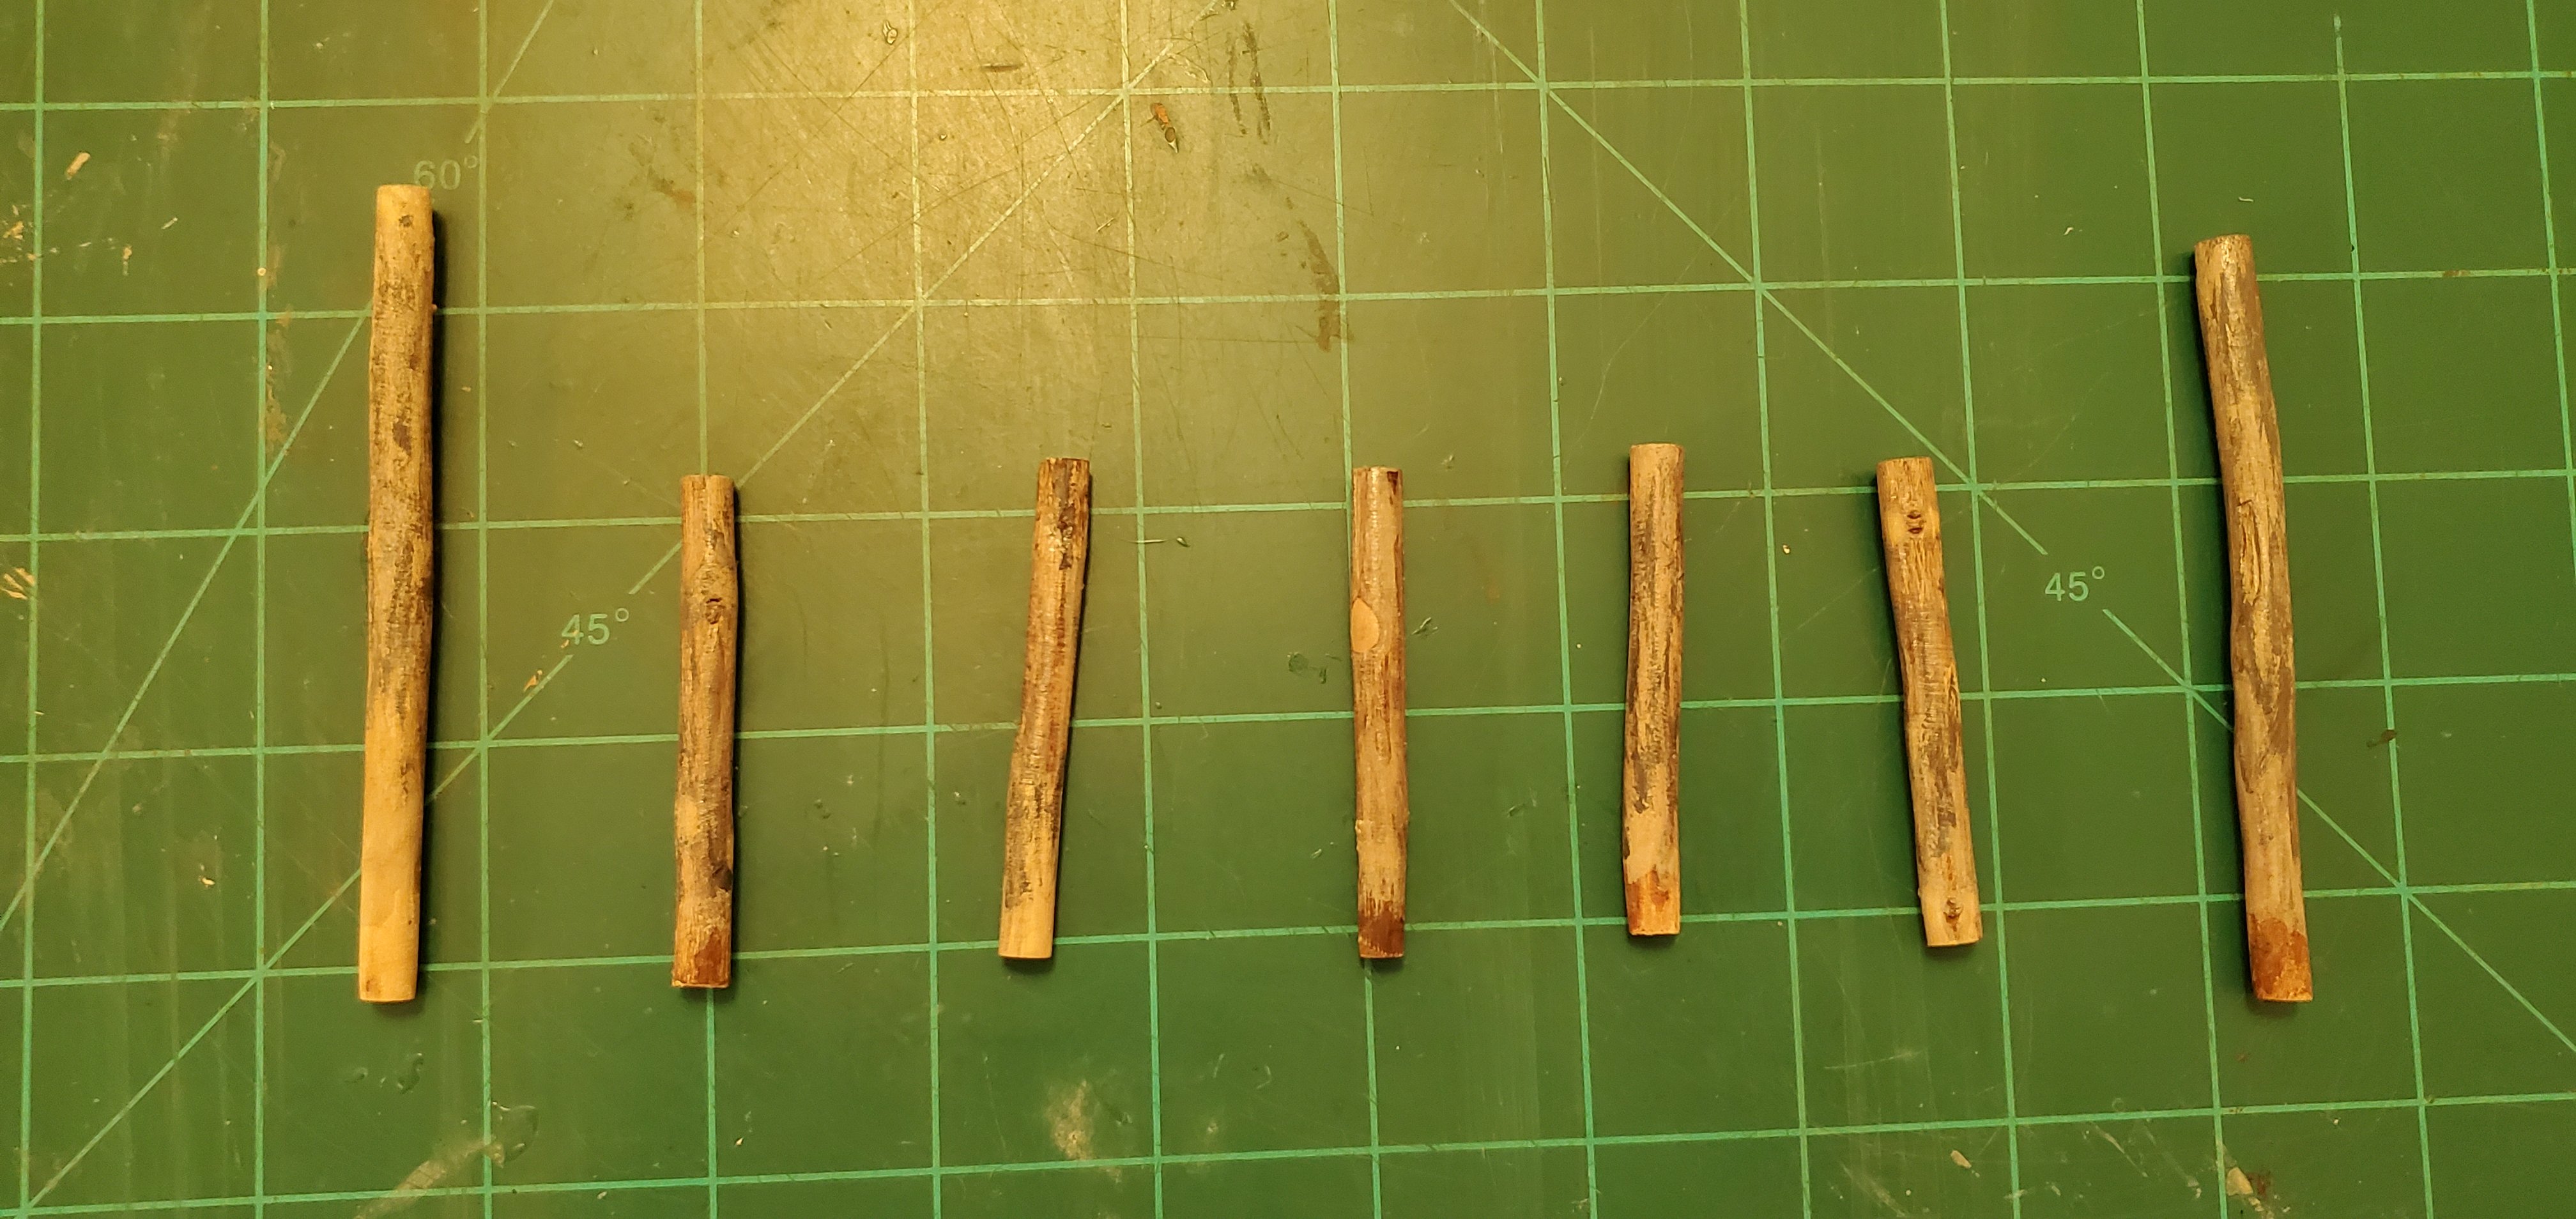
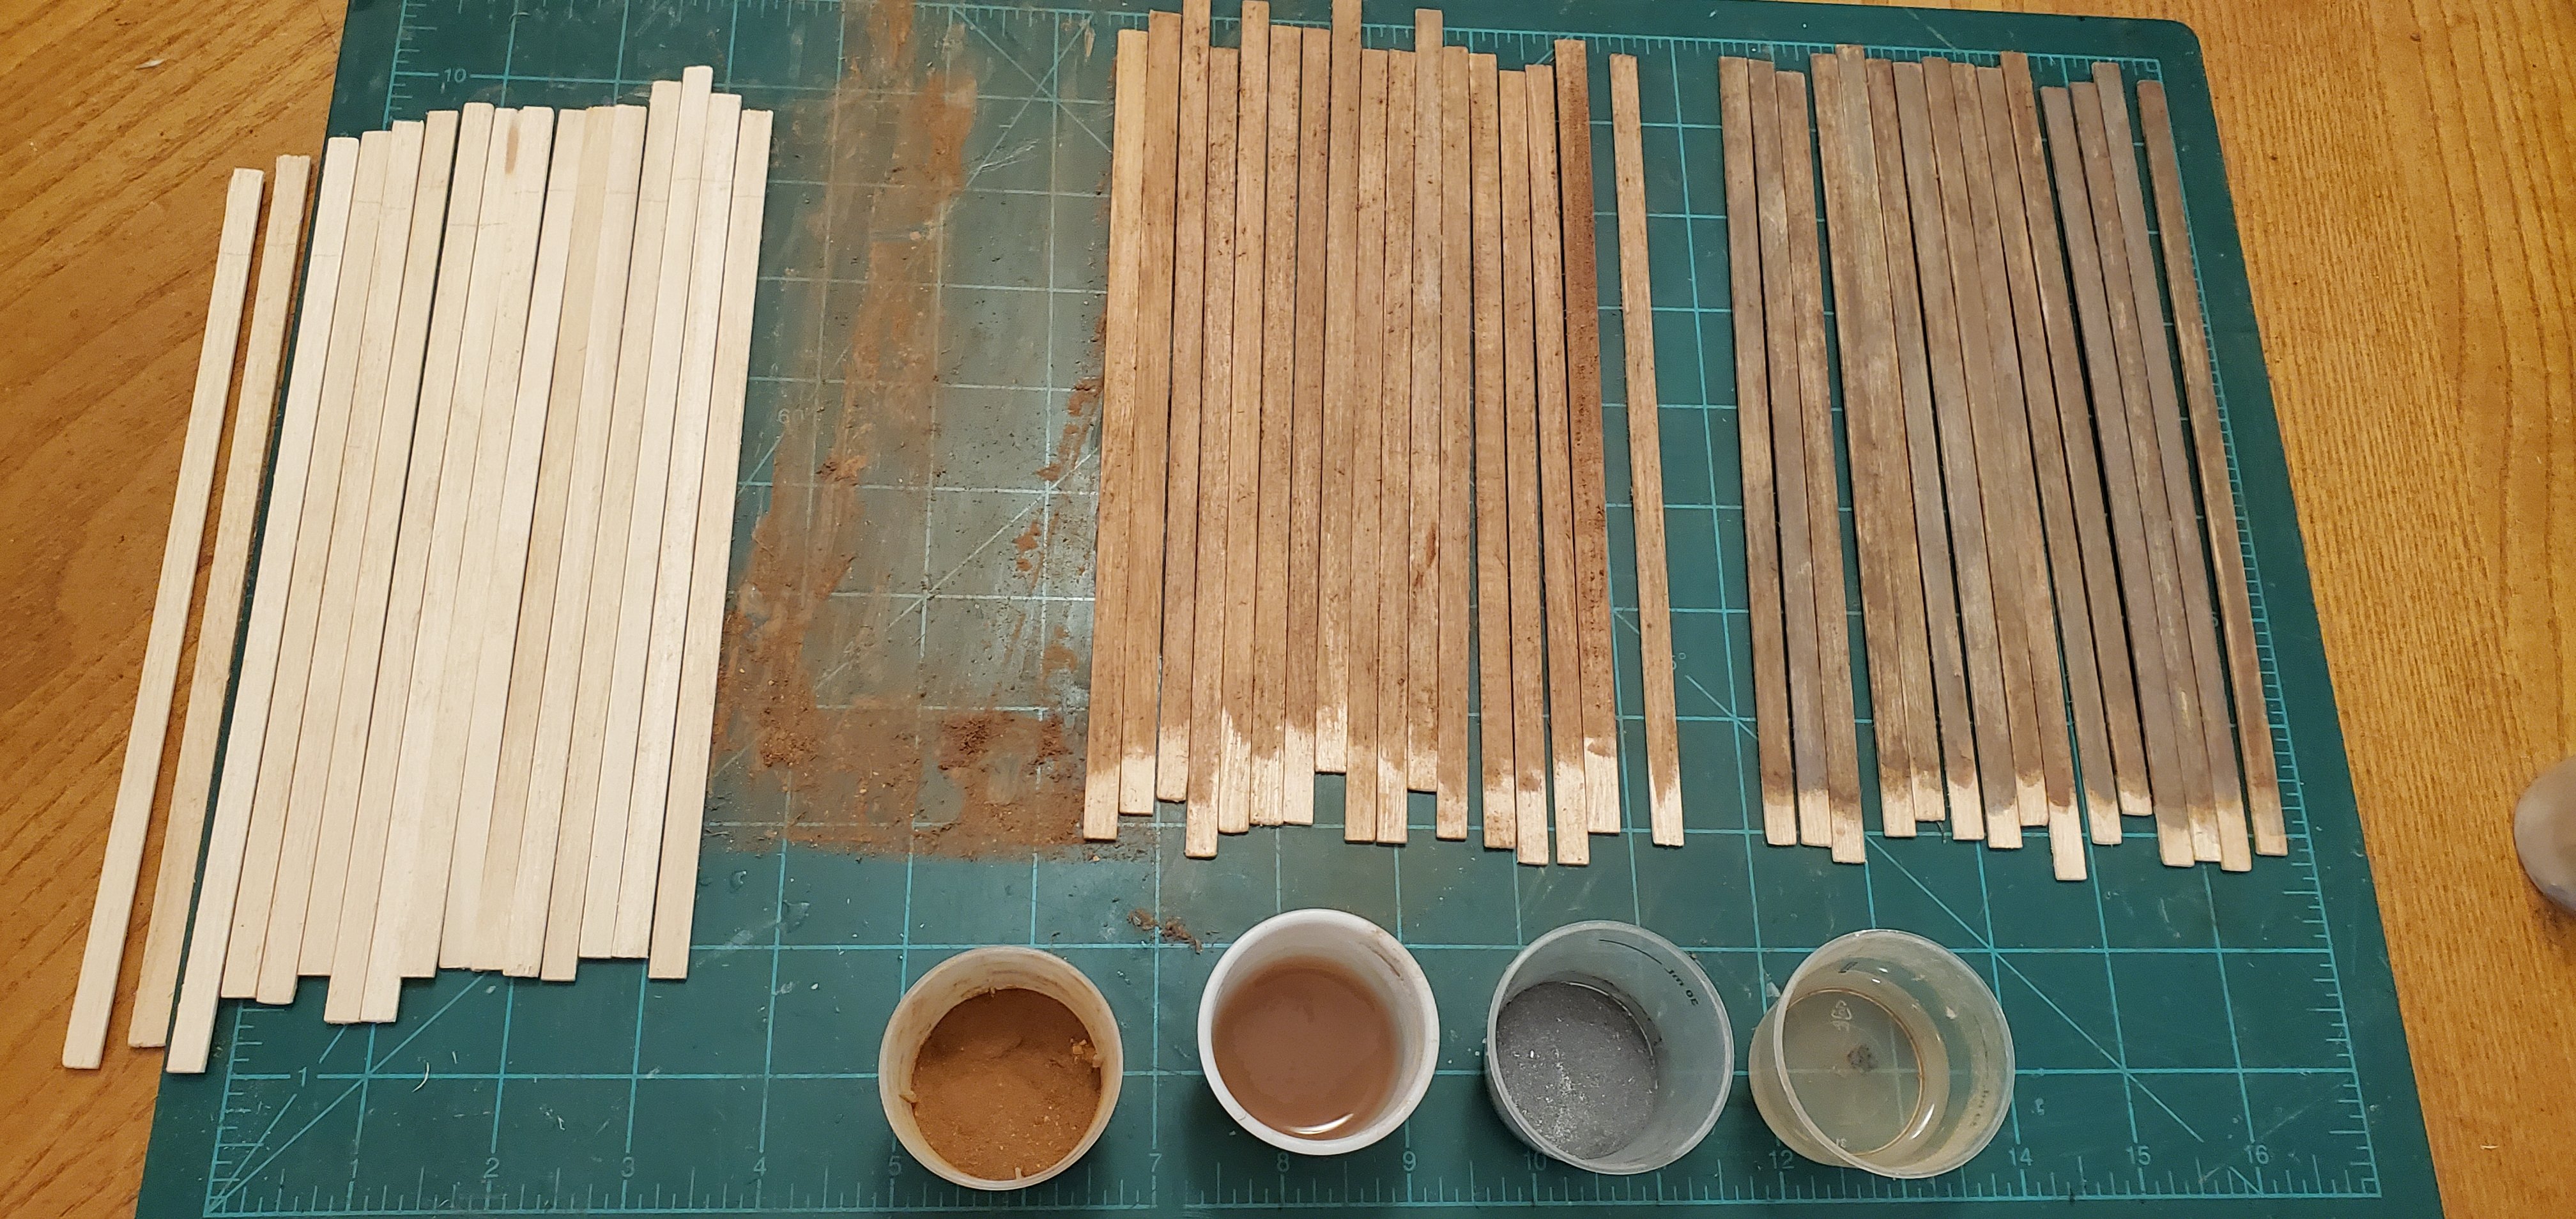
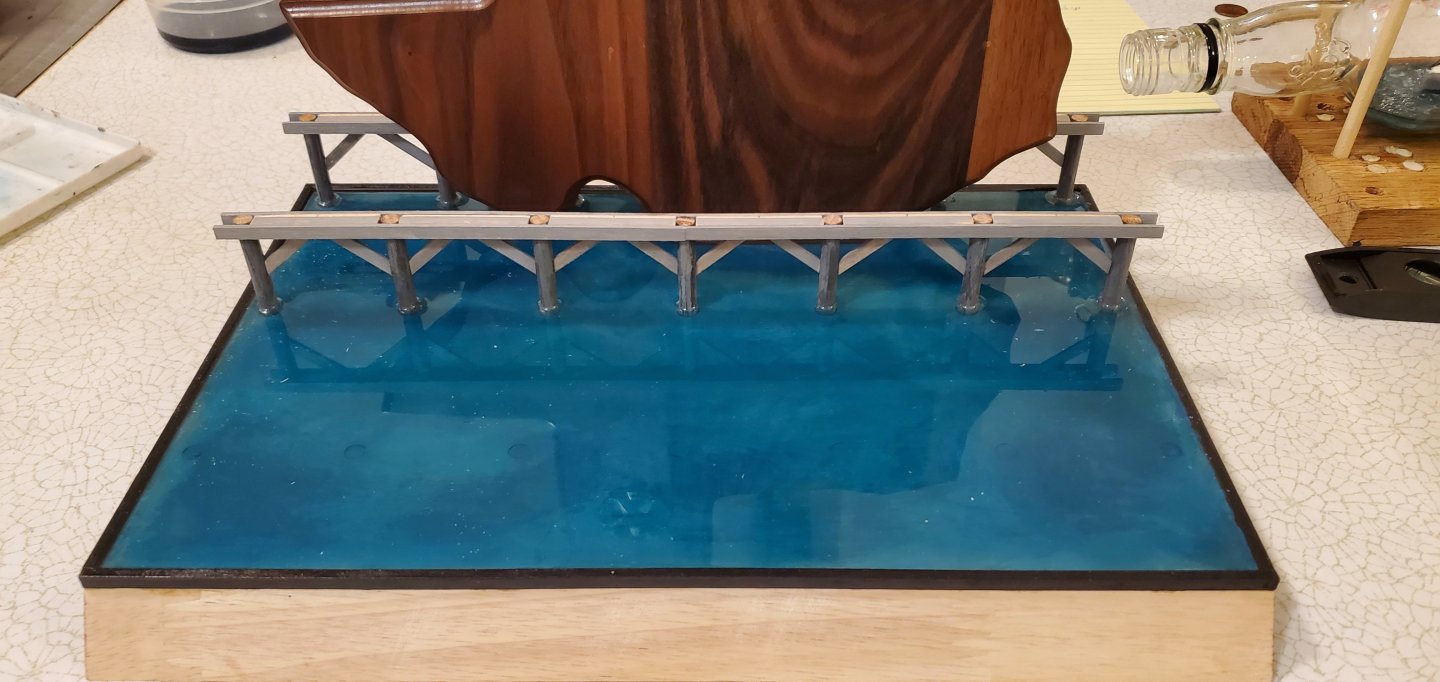
Whoa!! Those pictures are breathtaking, @BANYAN!! OK, penguins or no penguins I may have to put that place on my bucket list. Now that I’m totally distracted, I’m having a hard time remembering where I was with the Banshee…Oh wait, I was working on my own waterscape, although Galveston is so far from the beauty of Norfolk Island I shouldn’t even mention them in the same post! Nevertheless, I got the epoxy resin water poured onto the base (after I installed the Texas backdrop. Then I added the wharf’s support structure to the back 2 rows of pilings. I did not do weathering to these pieces as they will not really be visible. Also, I poured the epoxy resin before installing the front pilings because they will be quite visible and I did not want the resin creeping up the pilings where they contact the resin as @Javelin and I have discussed previously. I will give the resin 3 days for a hard cure before drilling holes for the front pilings. Speaking of the front pilings, I decided to go for a more realistic look than dowel rods. So I scrounged around my pile of small kindling and found several sticks that were the right diameter and straight enough. I put them on the drill lathe to get them to a uniform diameter while trying to leave as much of their natural variation as possible. Afterwards, I gave them a light gray wash to get them to the aged wood color (second pic below, although for some reason the pic makes them look more greenish than grayish). While the epoxy resin continues it drying process, I started work on the deck planks for the wharf. It’s going to take about 50 planks that are 8” x ¼”. Since they are on top and likely would have been cared for a bit more than the support structure, I wanted to show a mix of ageing and weathering – a color in between the gray of the supports and a natural brown. To try and achieve this, it took a 3-step process. First was texturing (grooving) the planks as I did with the supports using a rasp. Second, I mixed a couple of shades of brown chalk dust and worked it in with IPA using the same process described in an earlier post. This gave the planks a reasonable base color of brown. Finally, I went back over it with a light dusting of gray chalk and IPA. The pic below shows the 3 stages. The first set of planks have been textured. The second set has the brown base color applied. The third set has the gray applied for the finished color.


- 235 replies
-
- 15
-
-
- Banshee II
- Bottle
- (and 1 more)
-
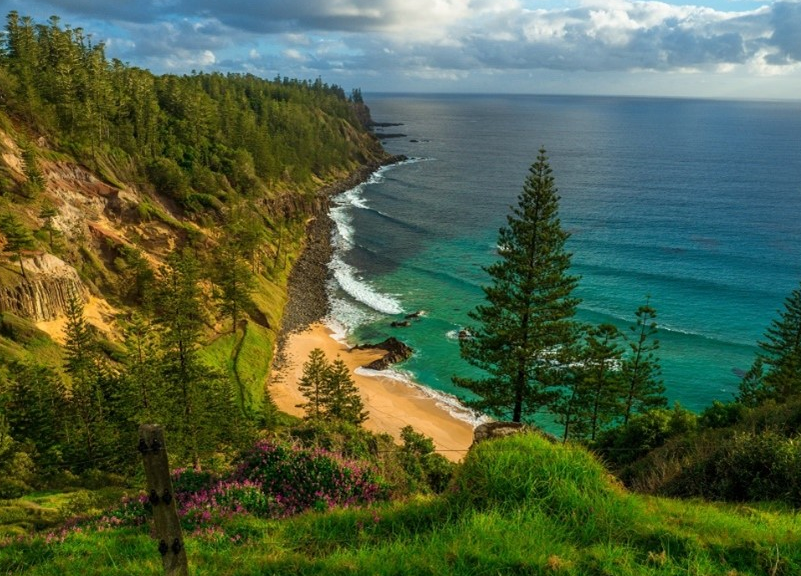
Thanks and welcome back, Pat. I've never heard of Norfolk Island so I had to look it up. And wow! Just wow! Ever picture I saw was a stunning landscape like the one below. Hope you had a wonderful time there.
- 235 replies
-
- 8
-
-
- Banshee II
- Bottle
- (and 1 more)
-
Looking good, Keith! How did you make the cleats and the boiler?
-
Absolutely incredible work!!!
-
Aloha from North Carolina
Glen McGuire replied to Charles Roseberry's topic in New member Introductions
Glad to have you join the MSW family, Charles!