Glen McGuire
-
Posts
1,976 -
Joined
-
Last visited
Content Type
Profiles
Forums
Gallery
Events
Everything posted by Glen McGuire
-
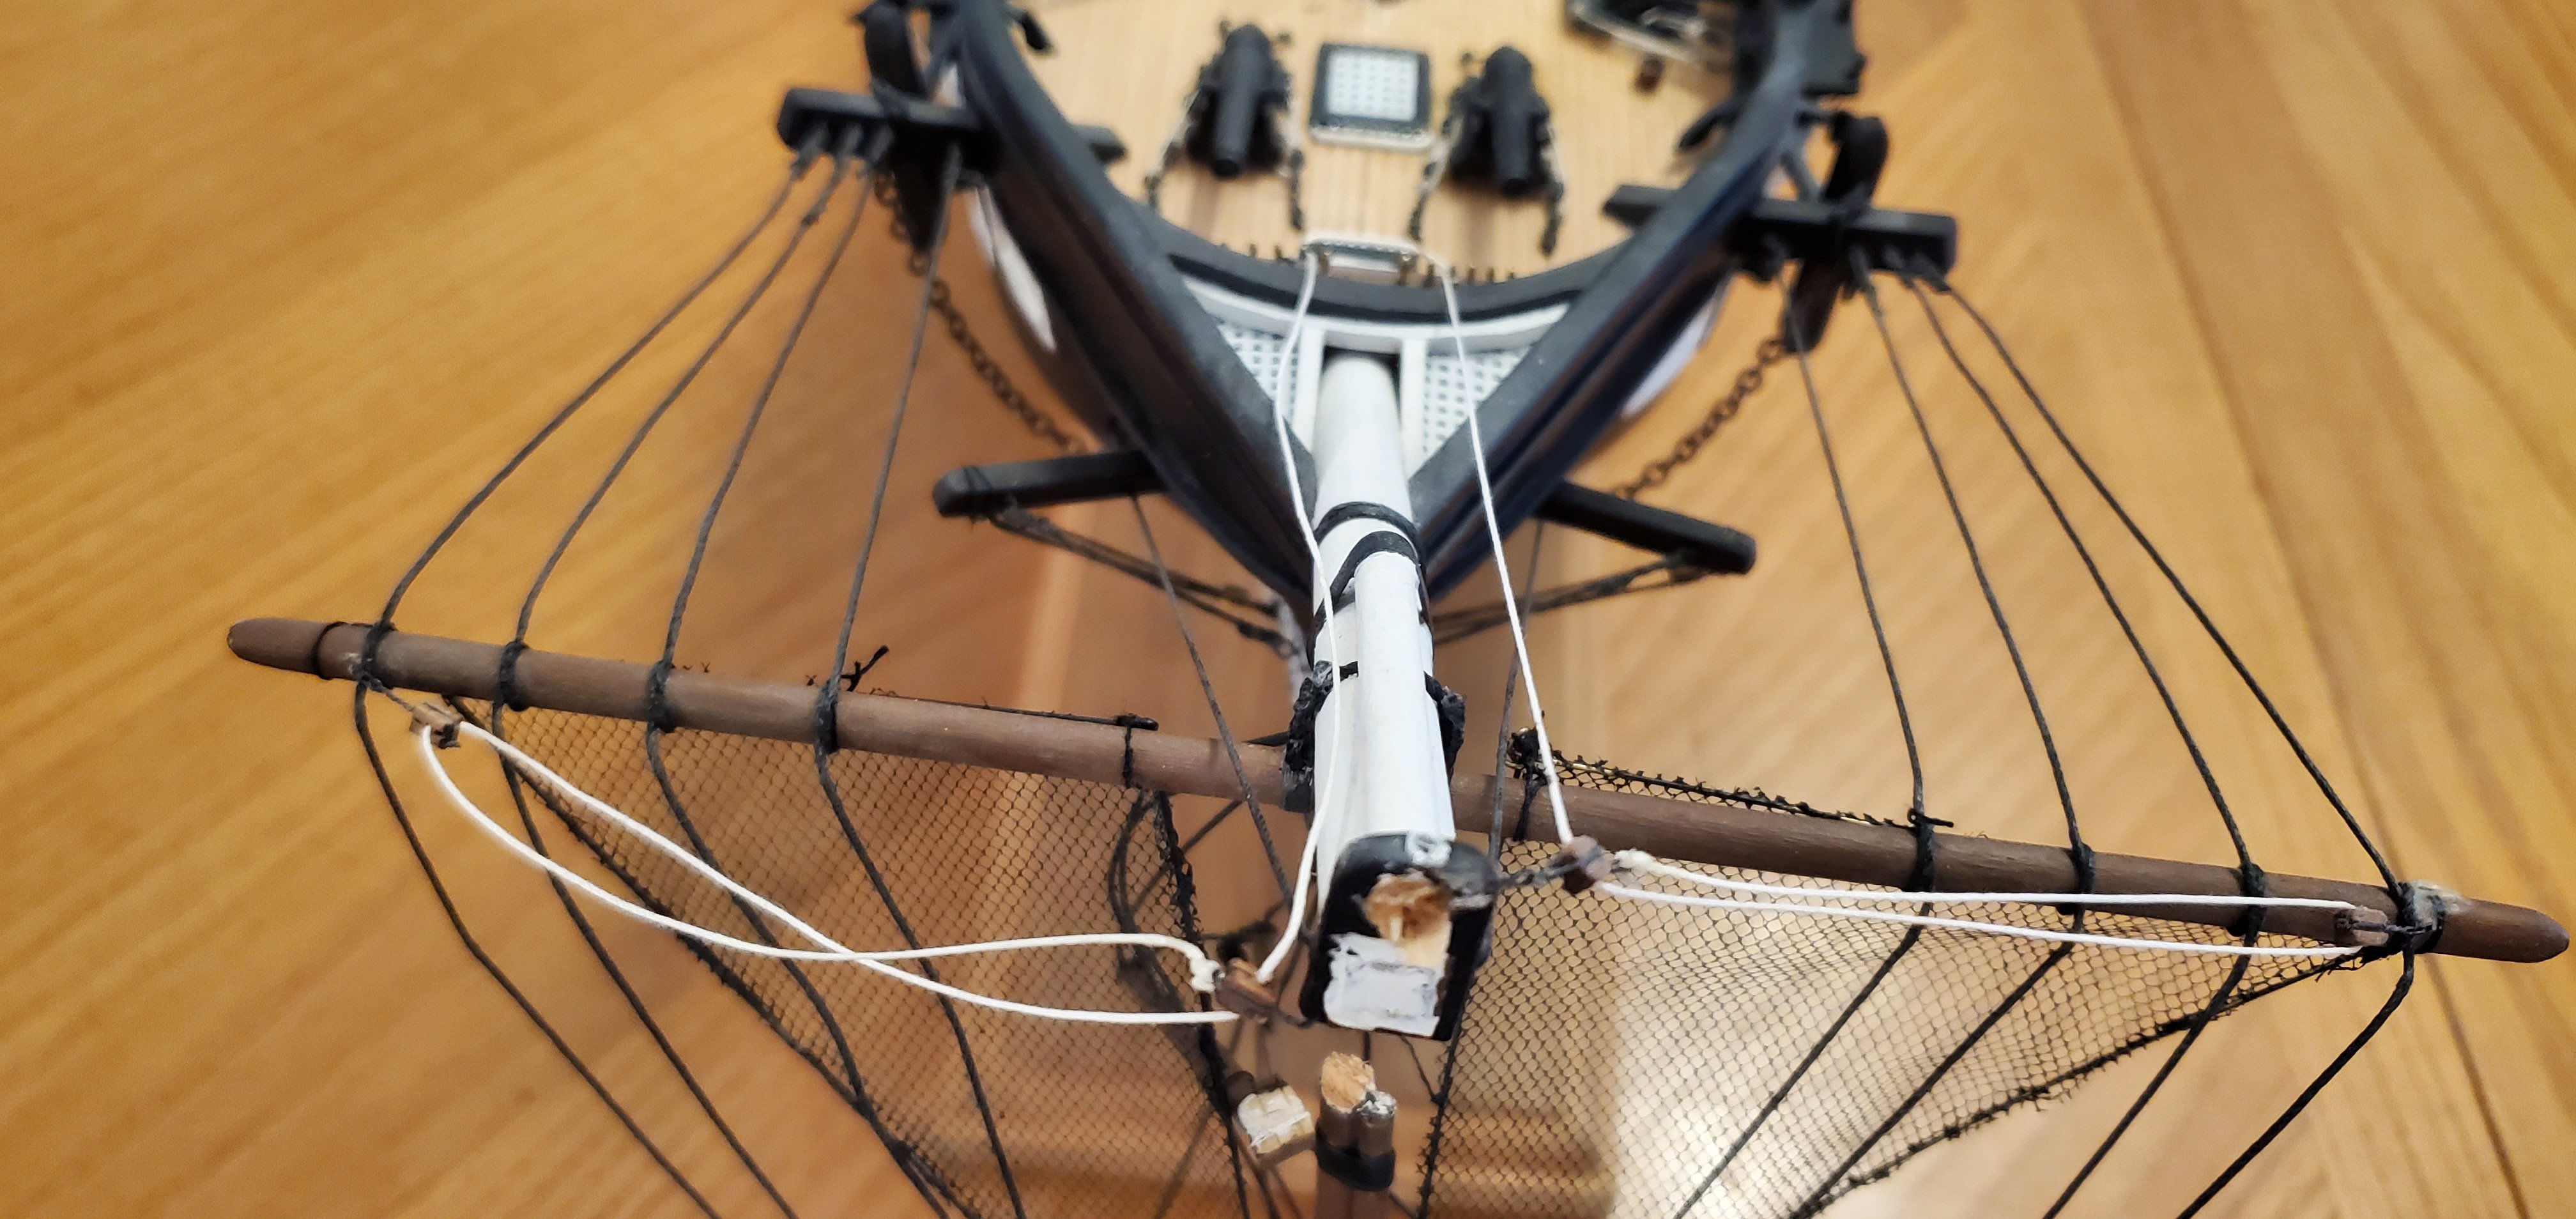
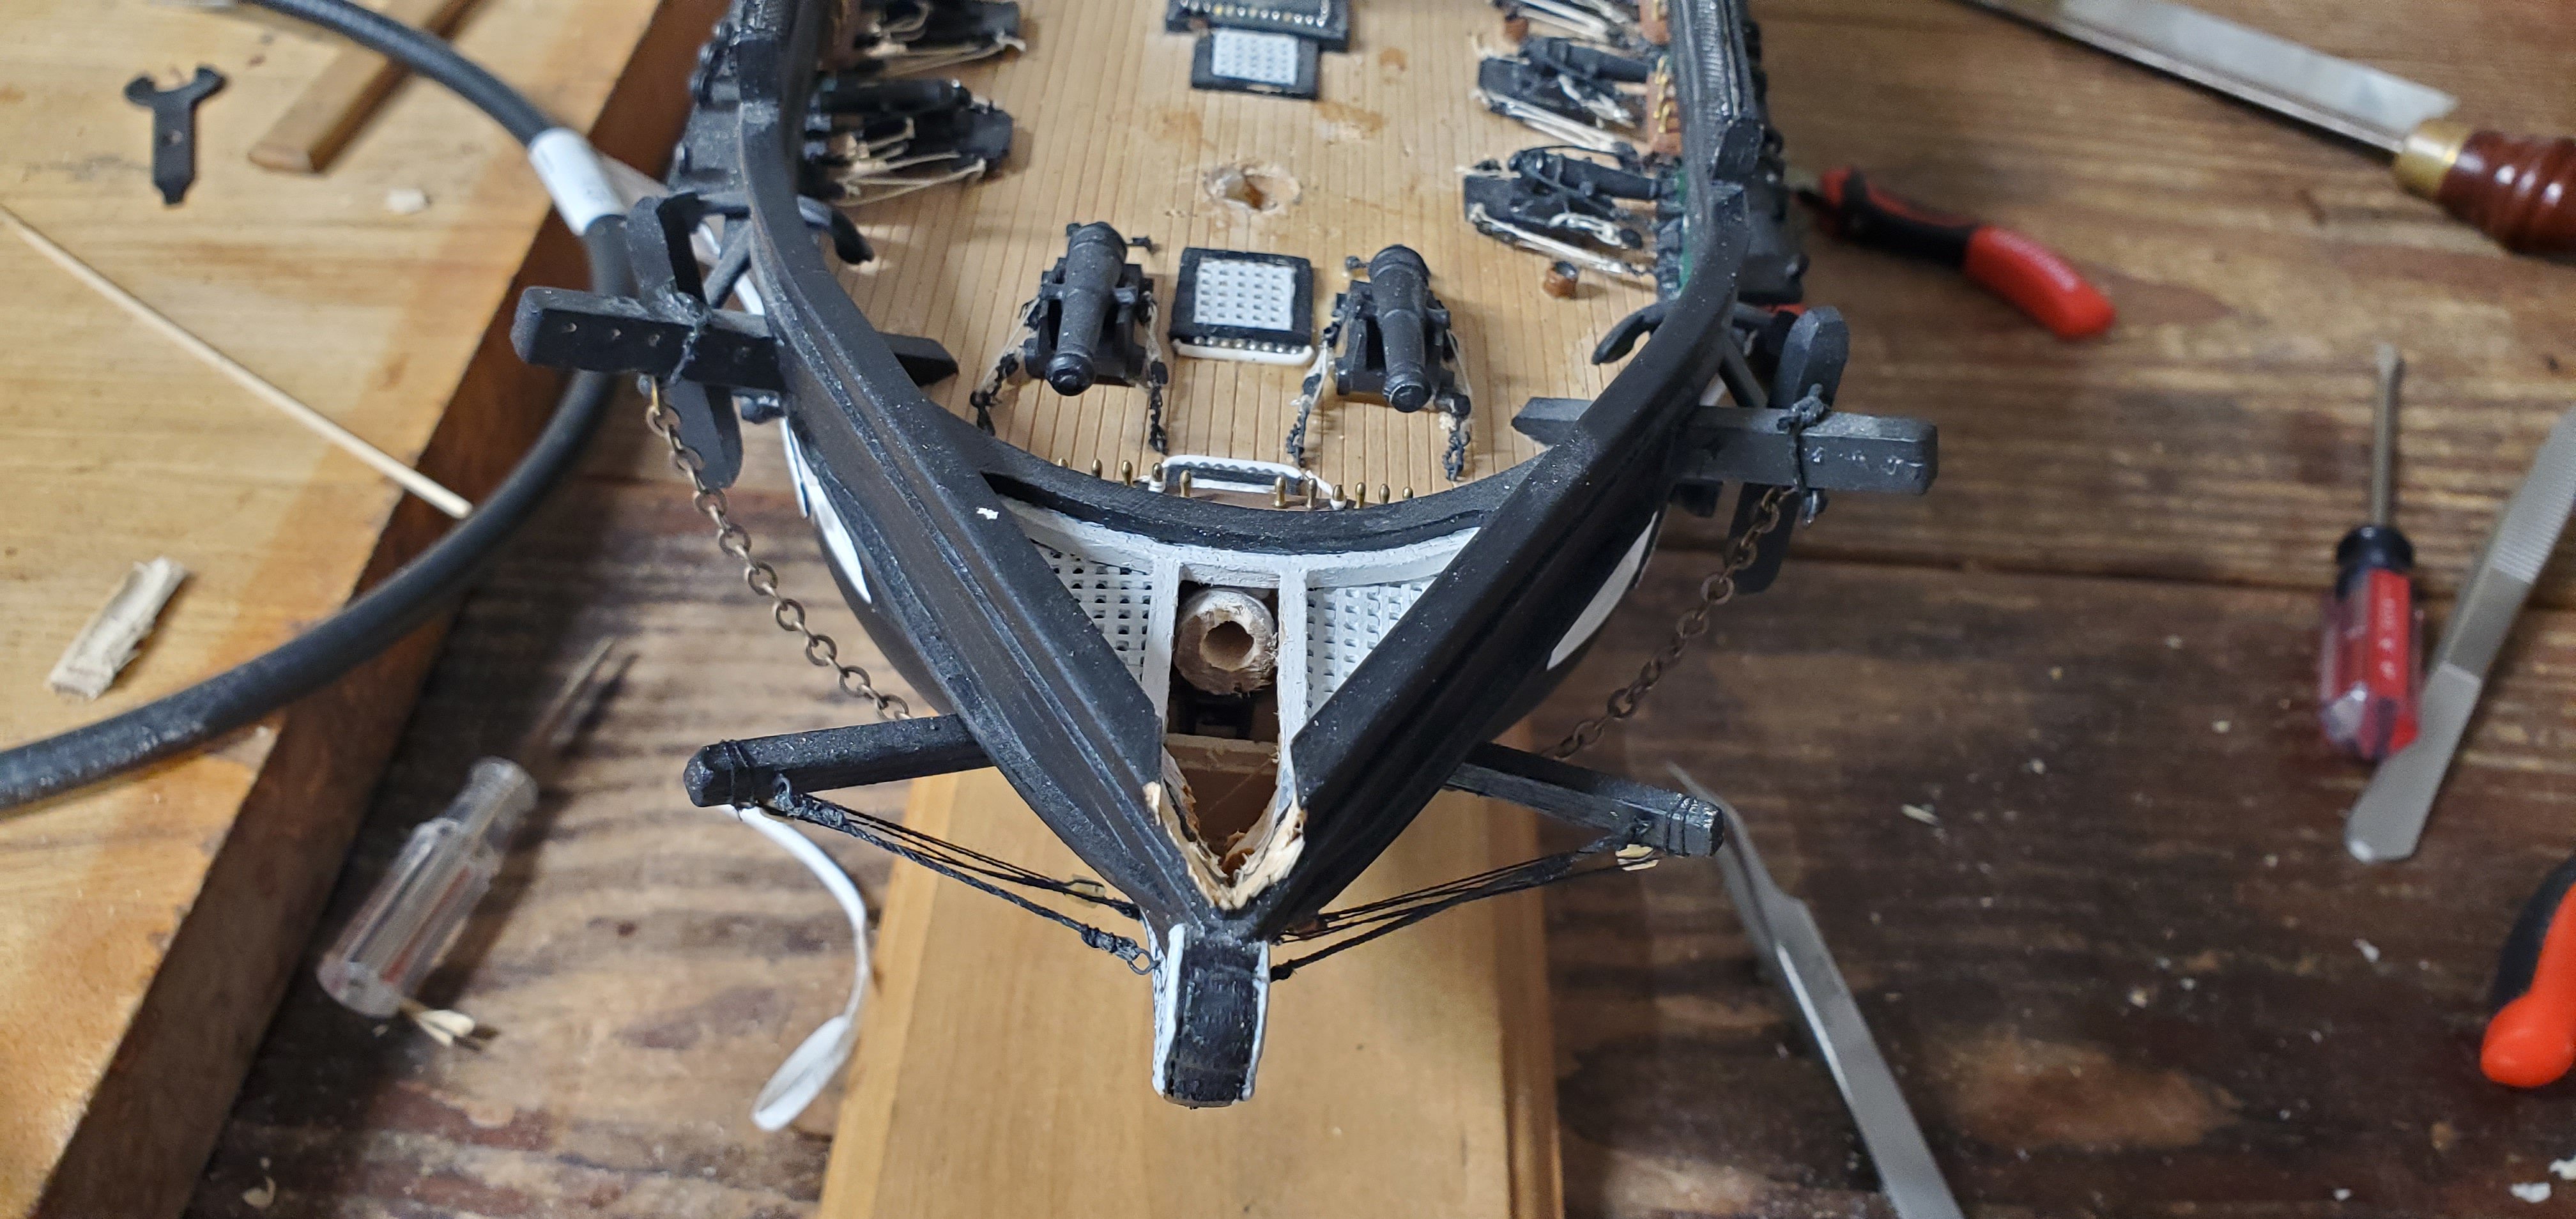
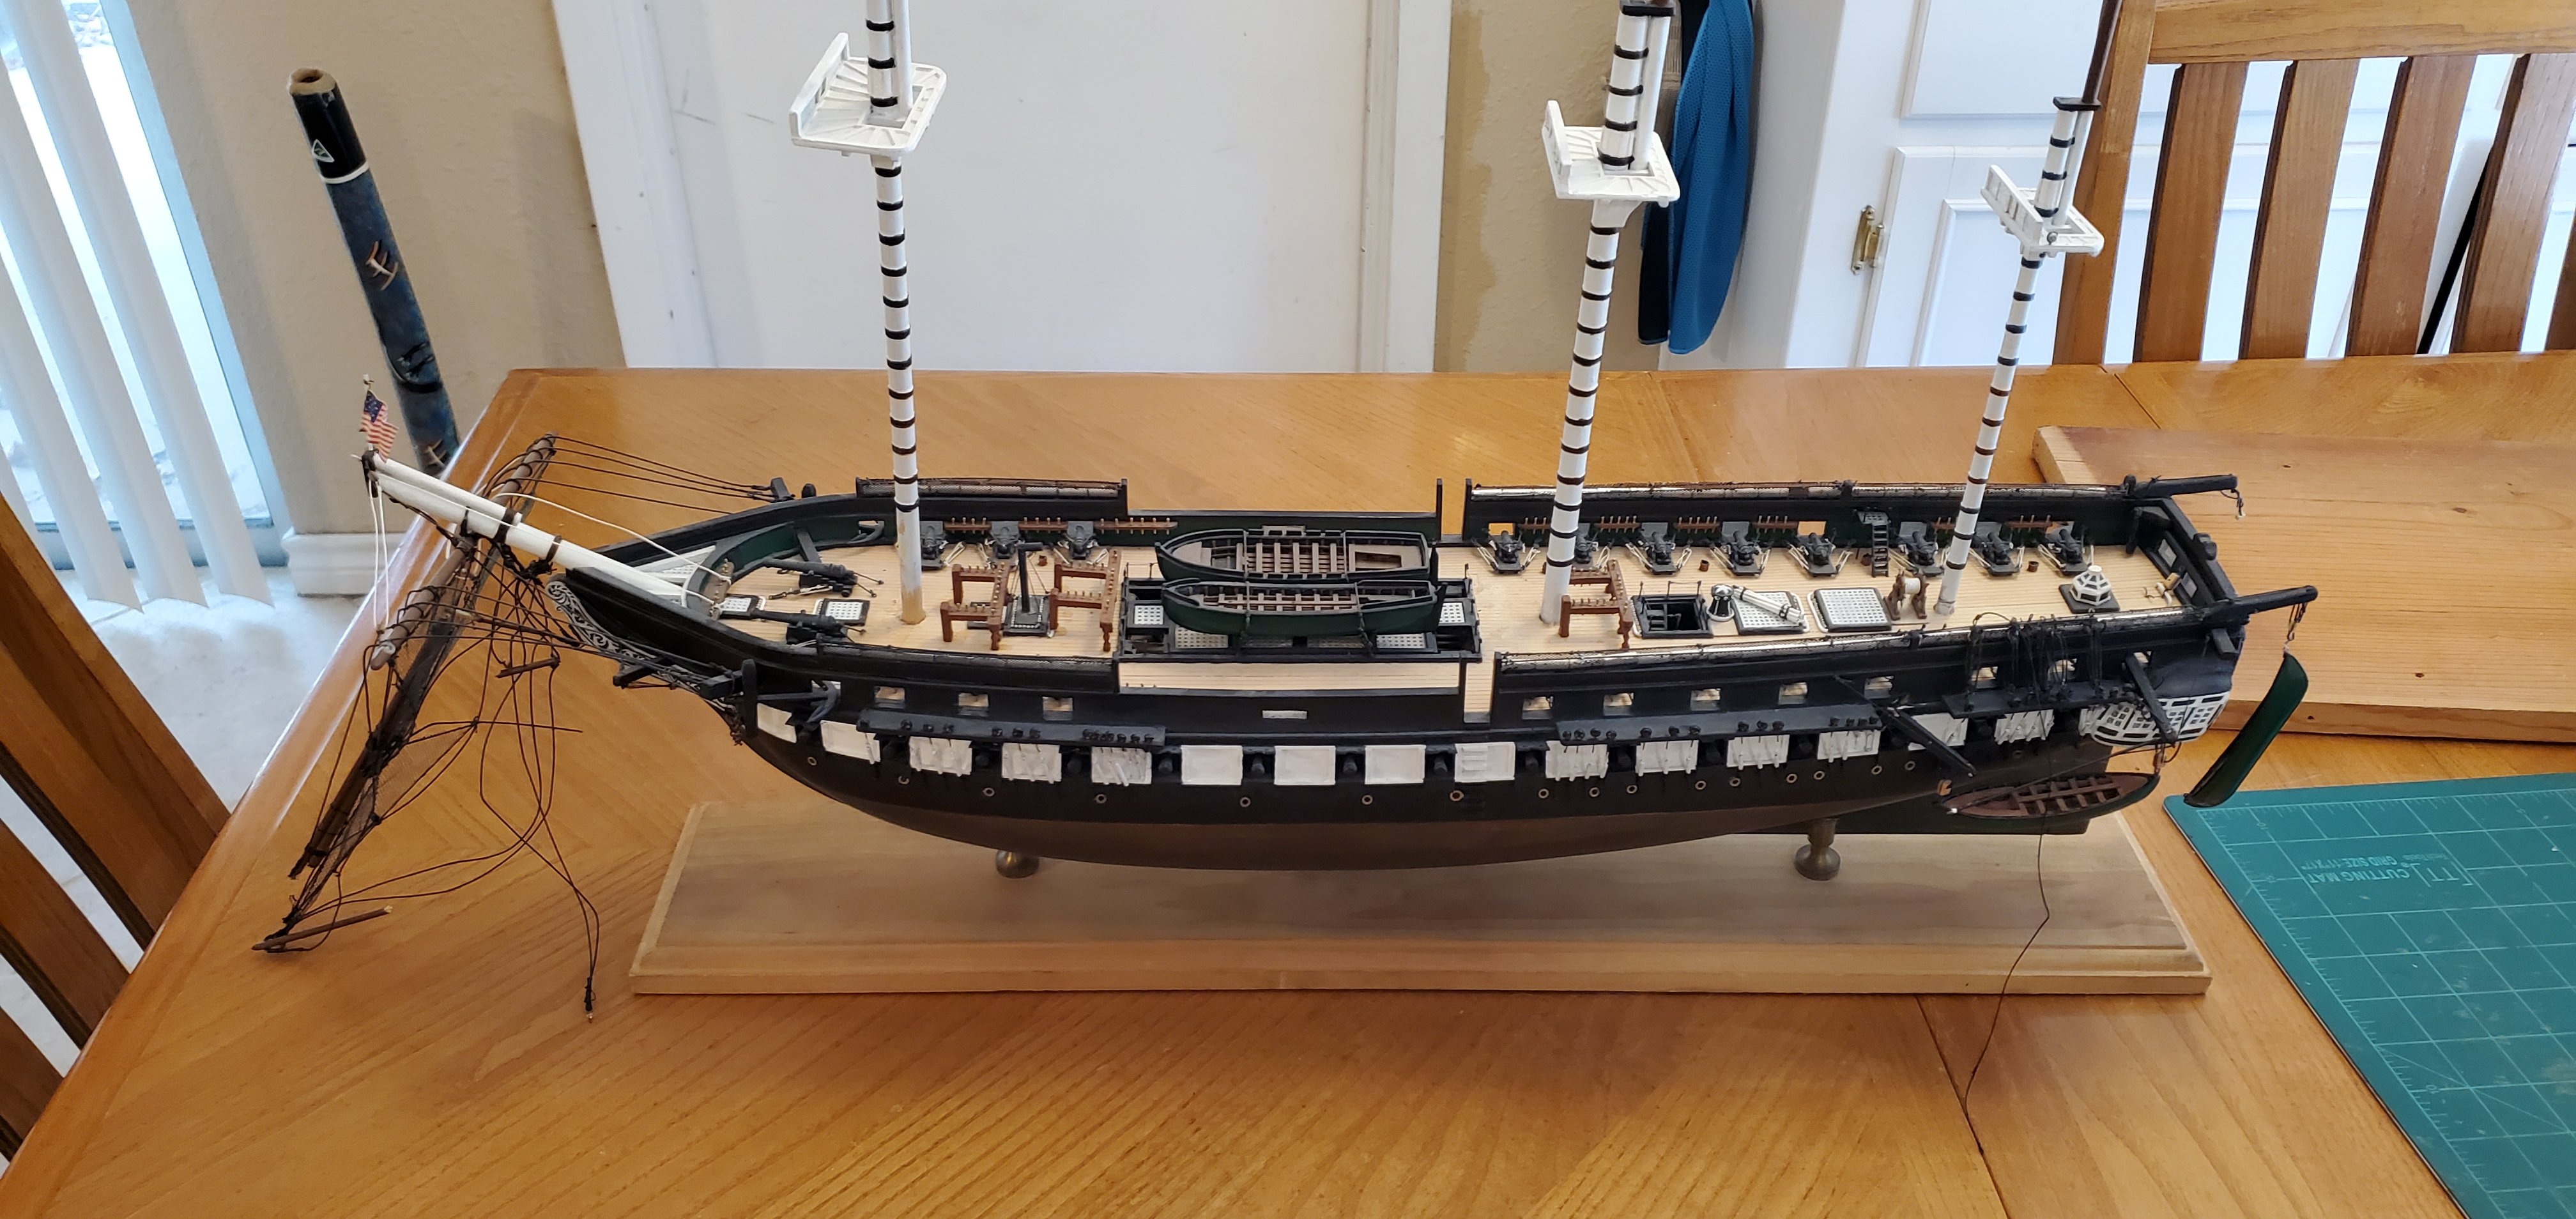
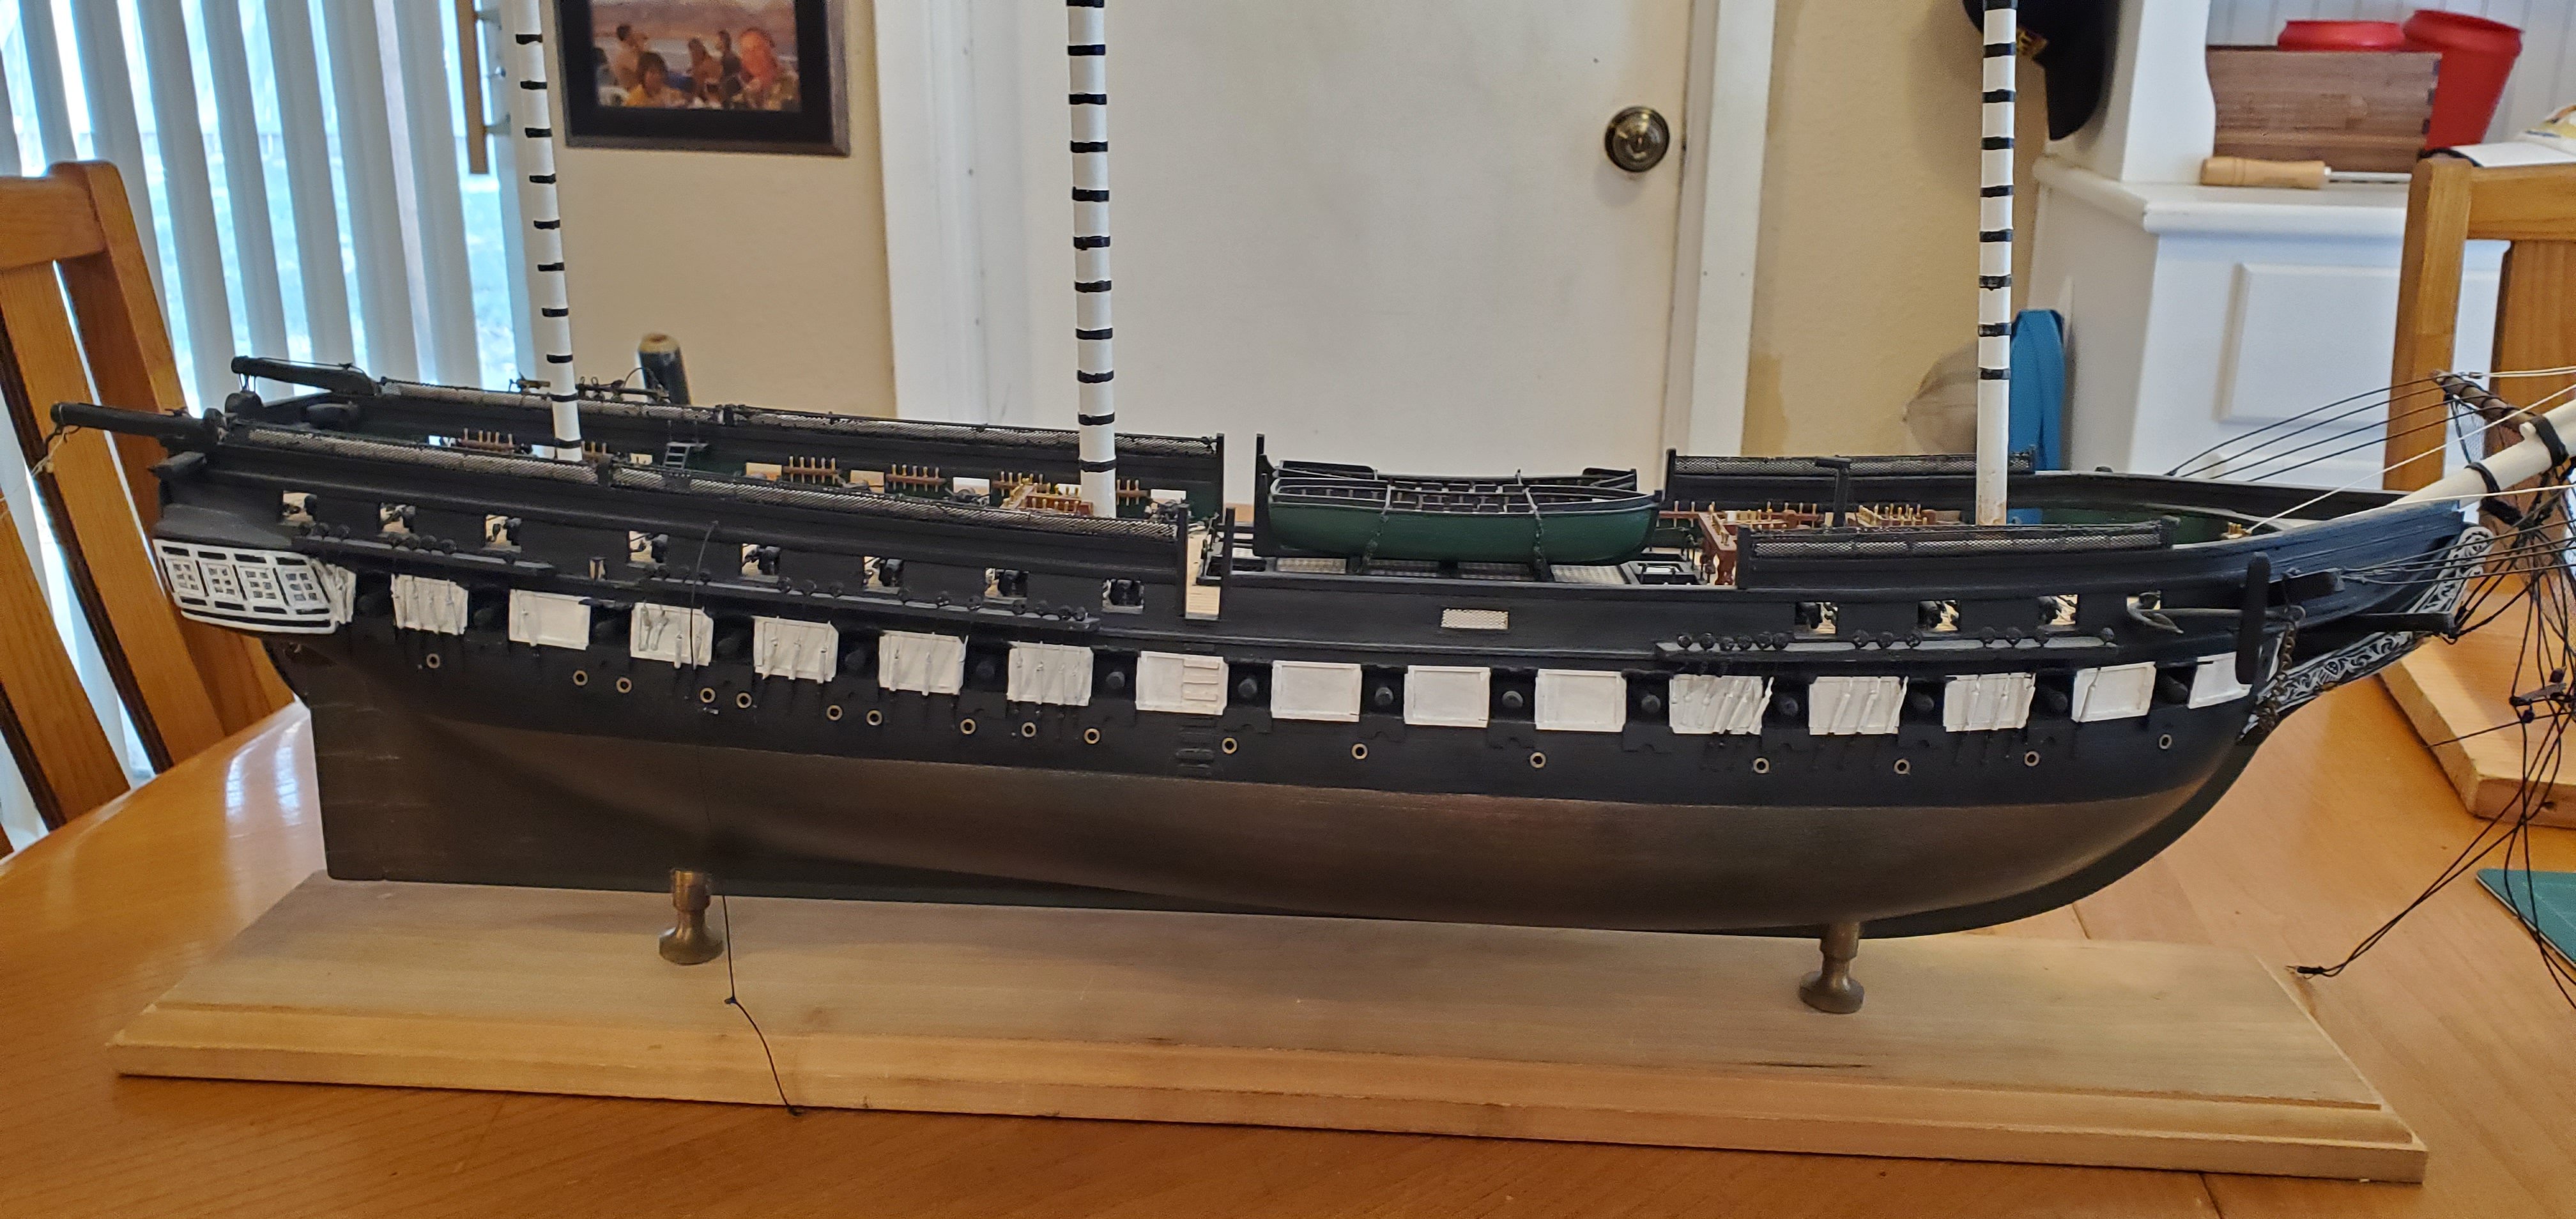
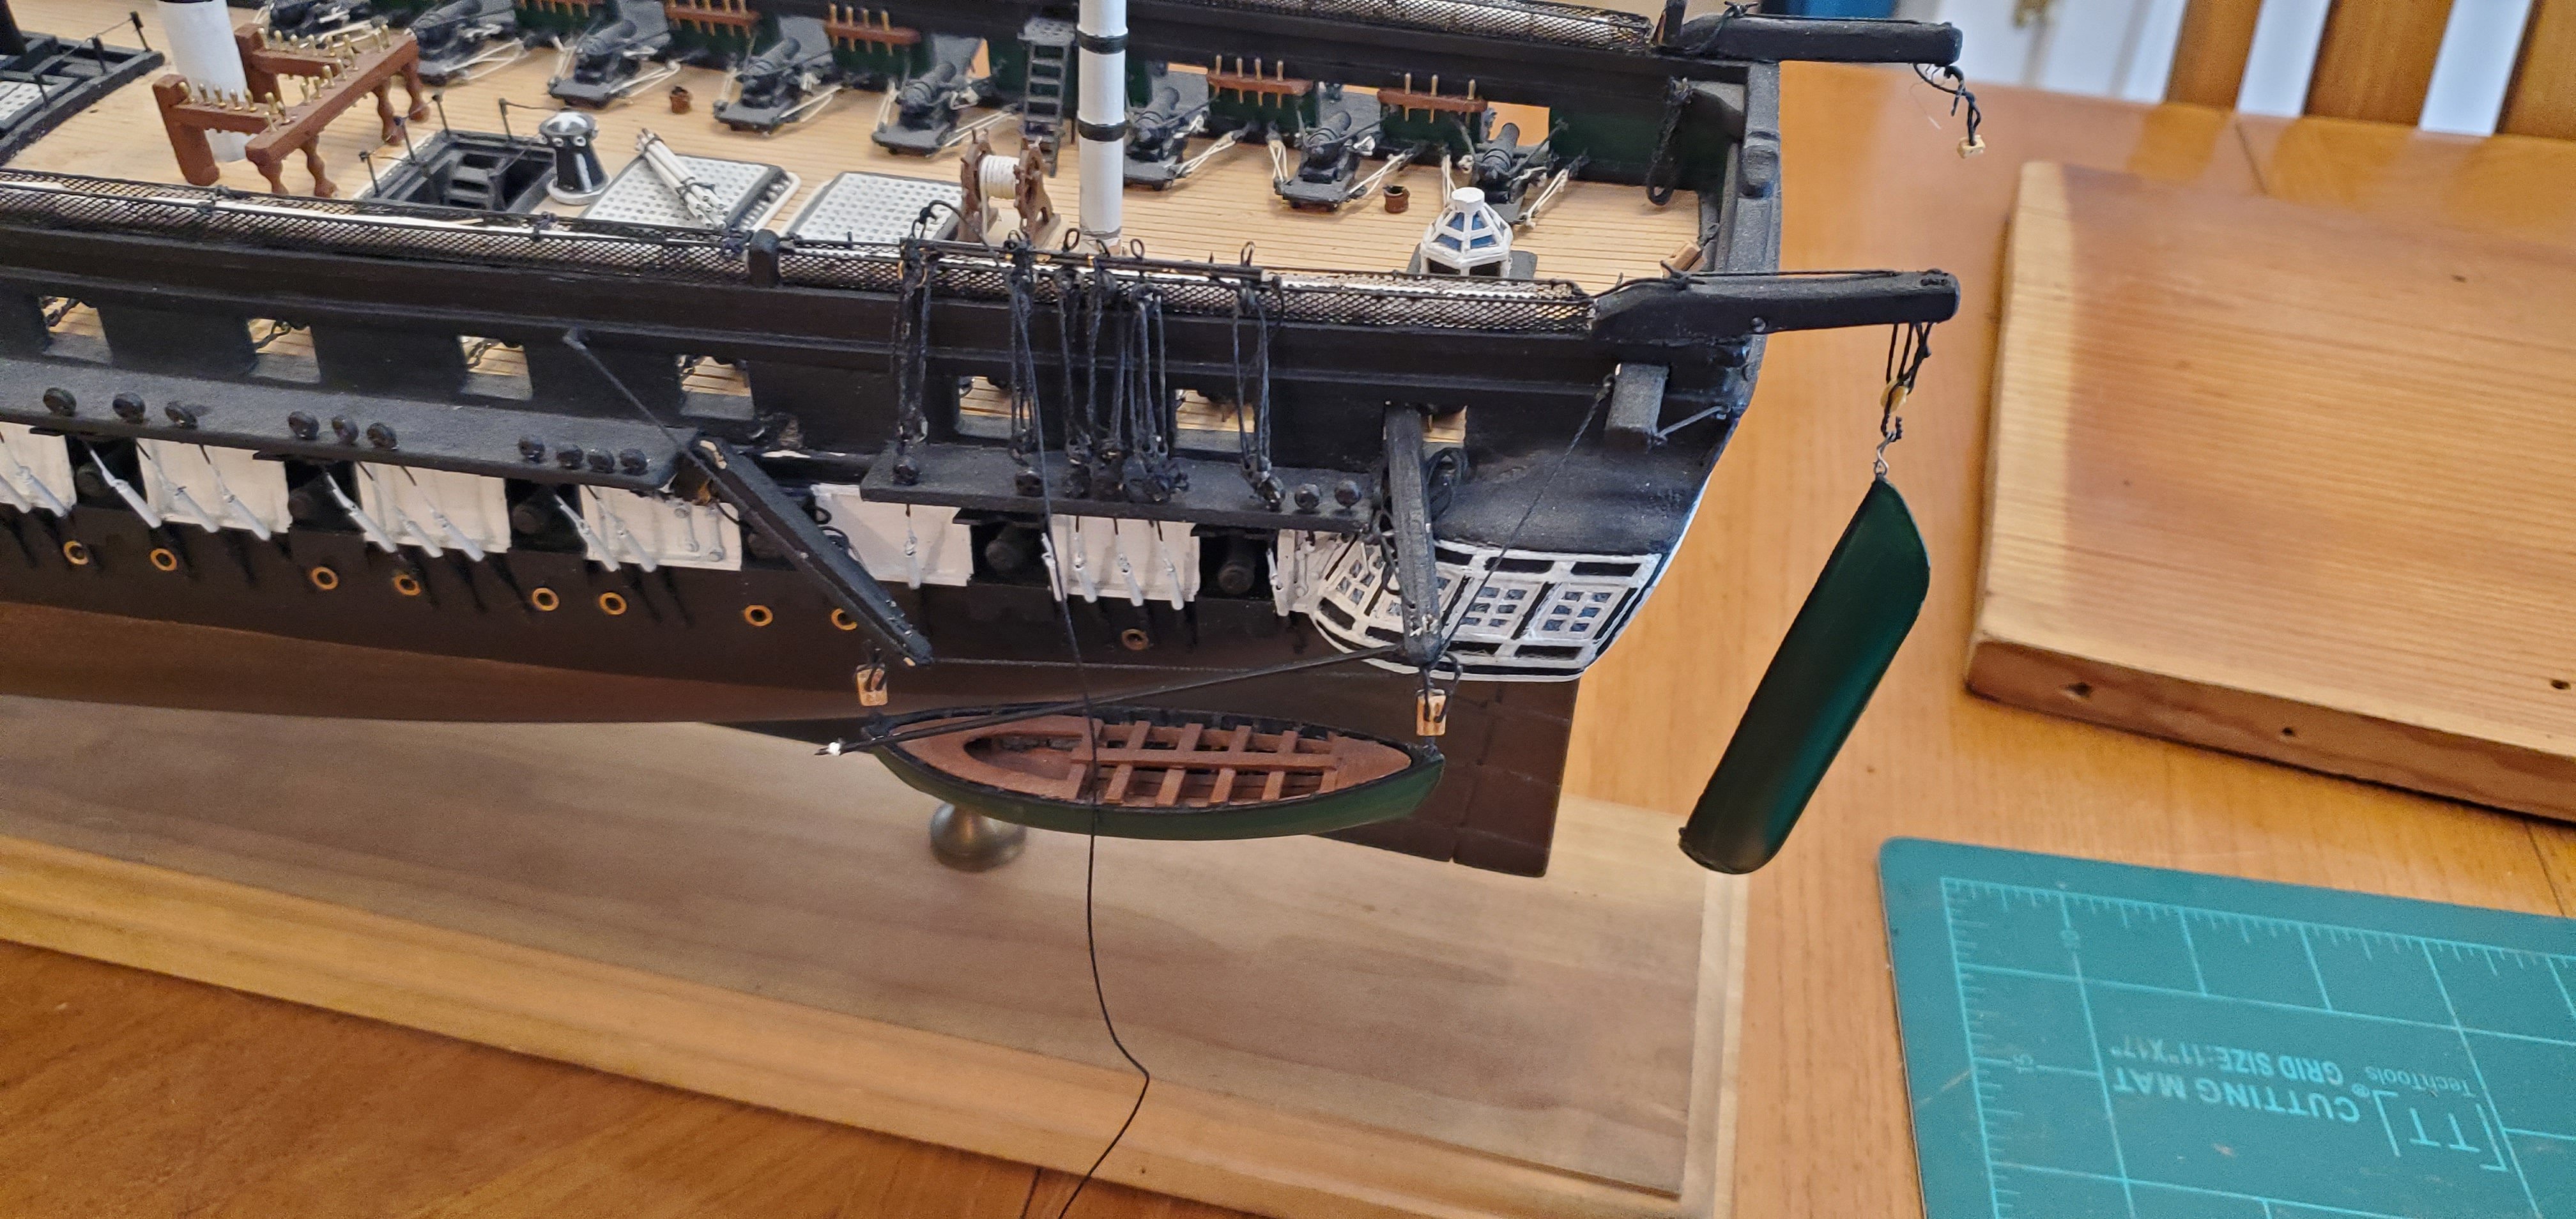
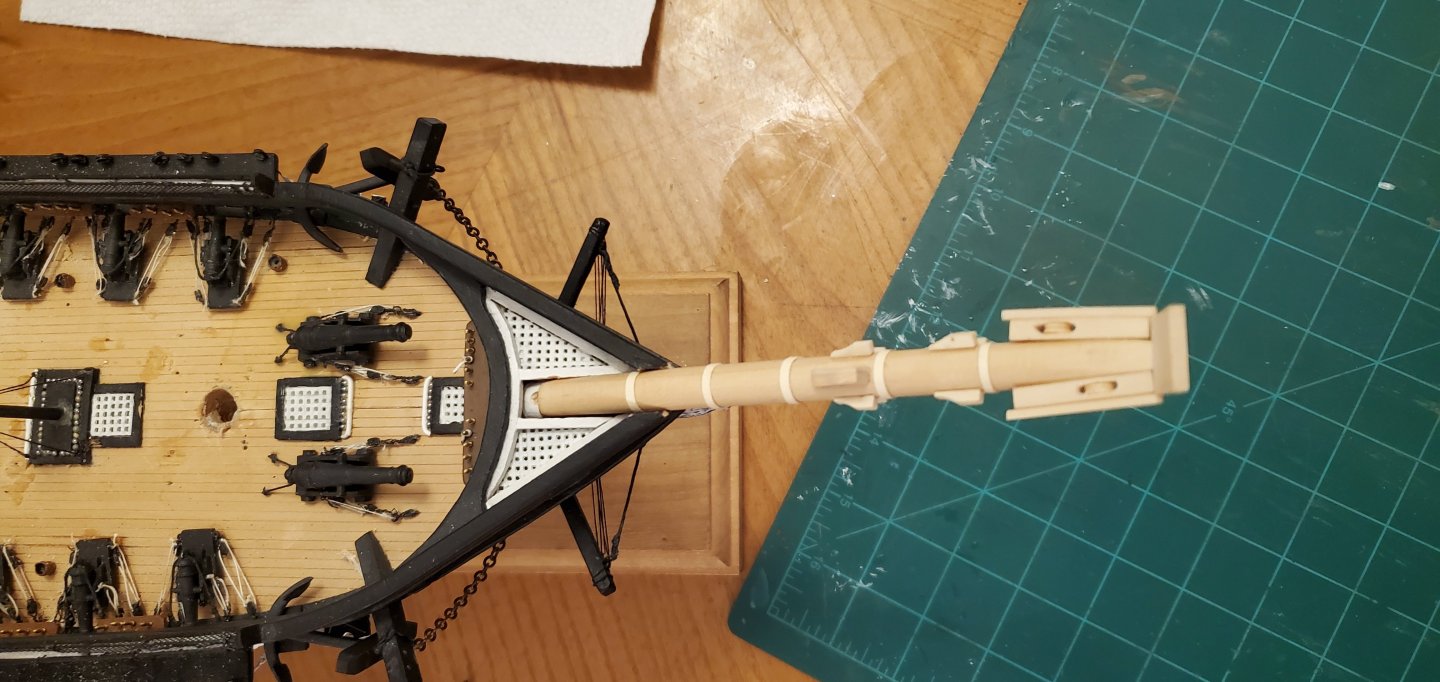
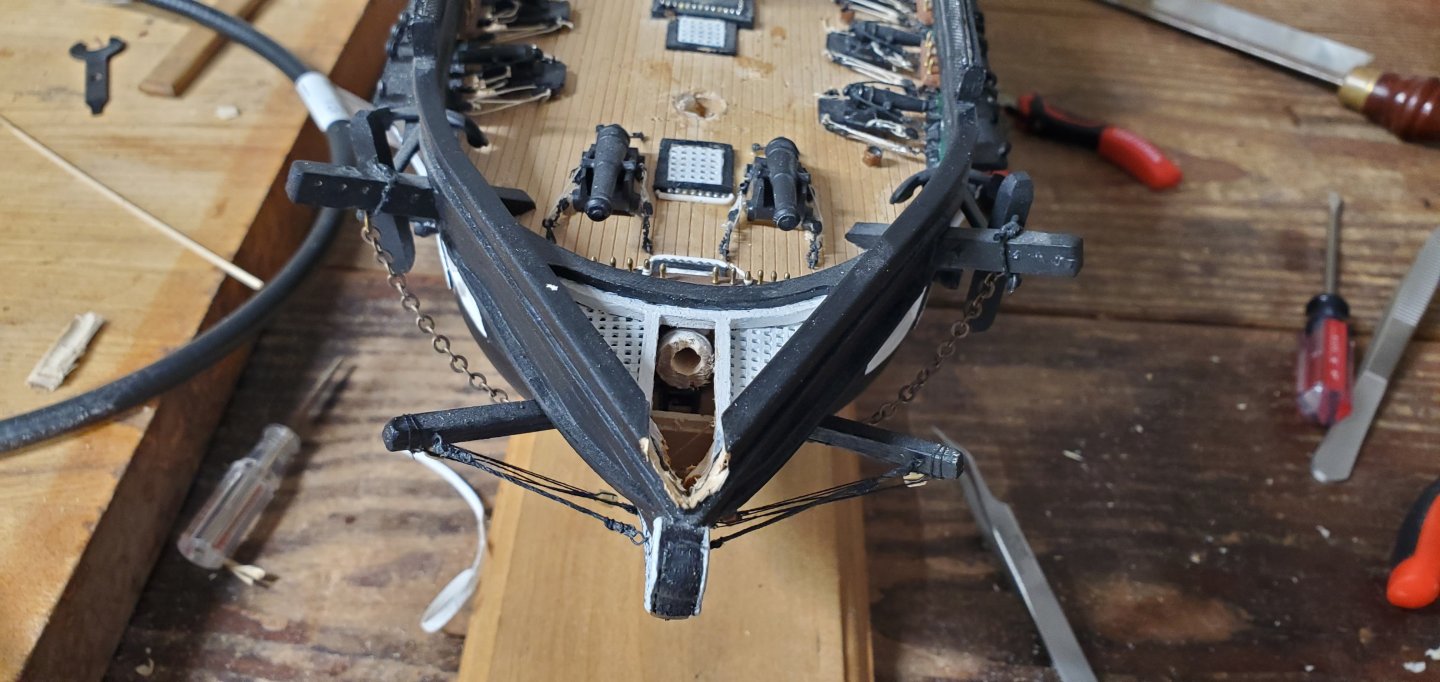
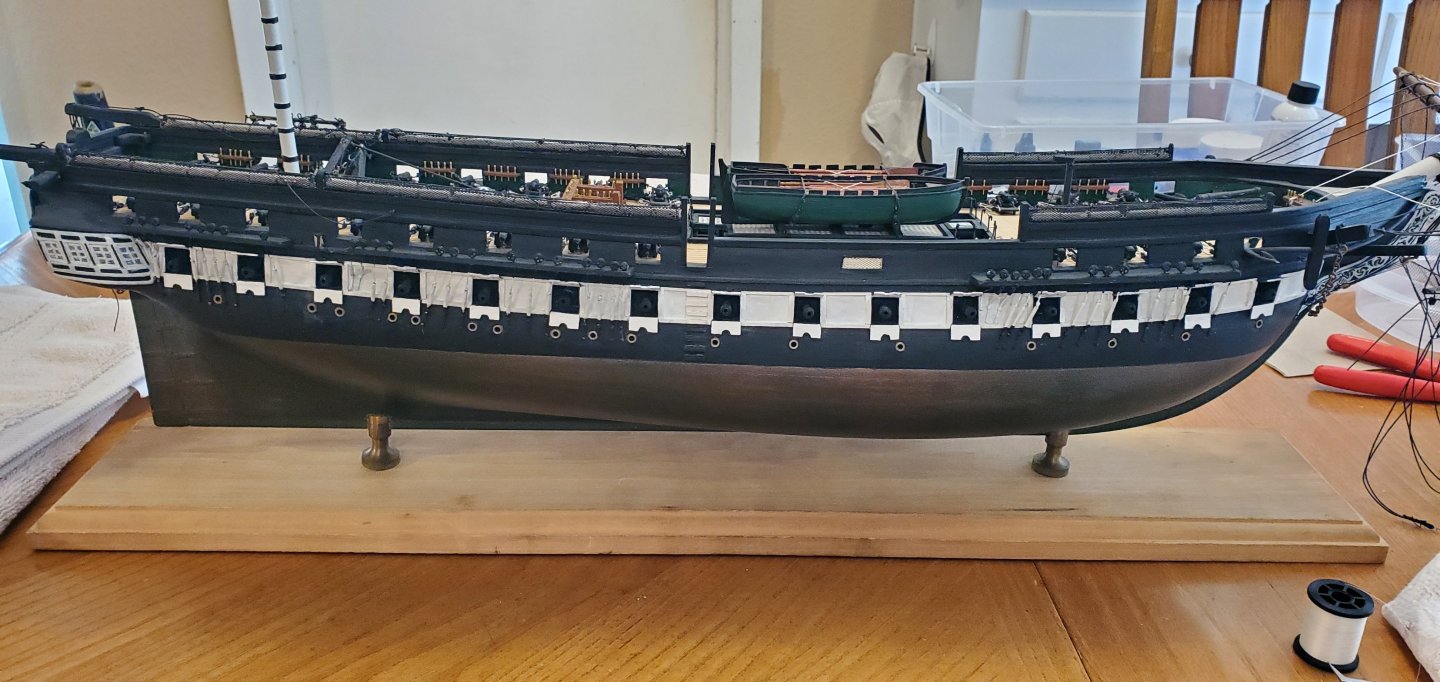
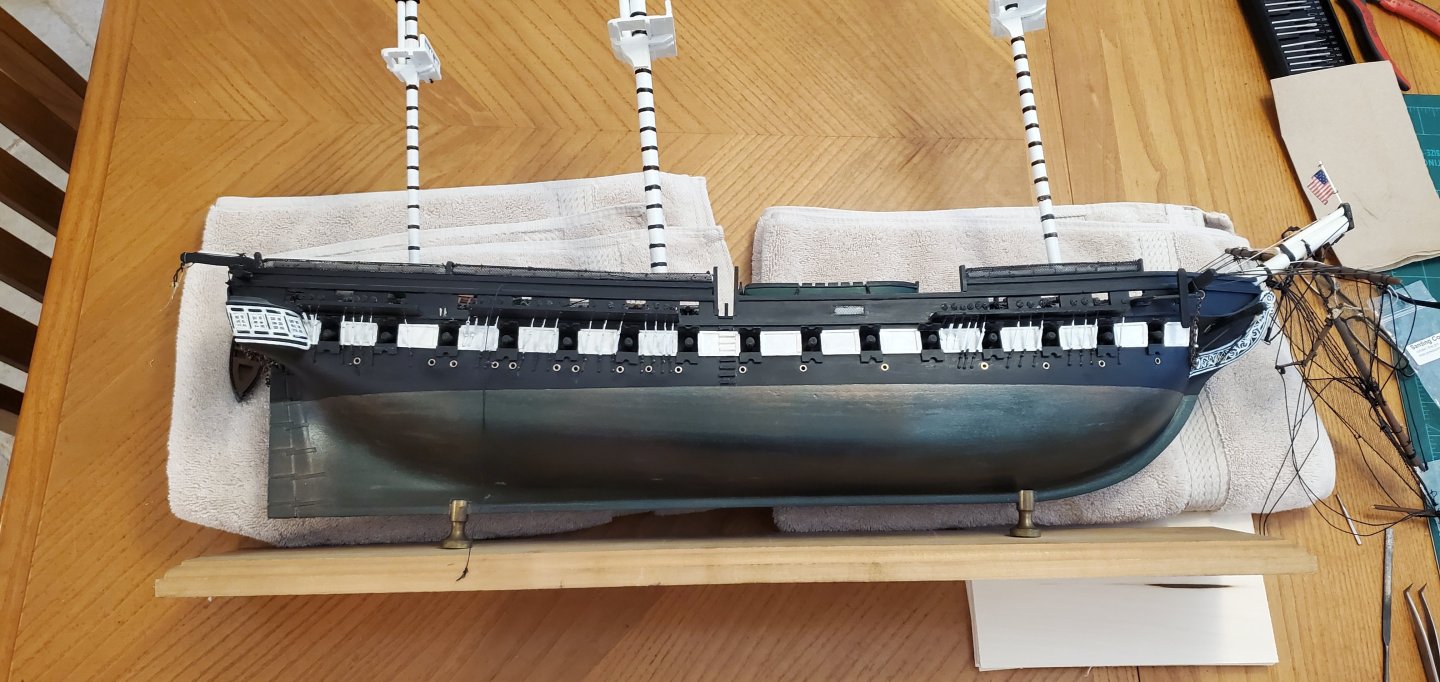
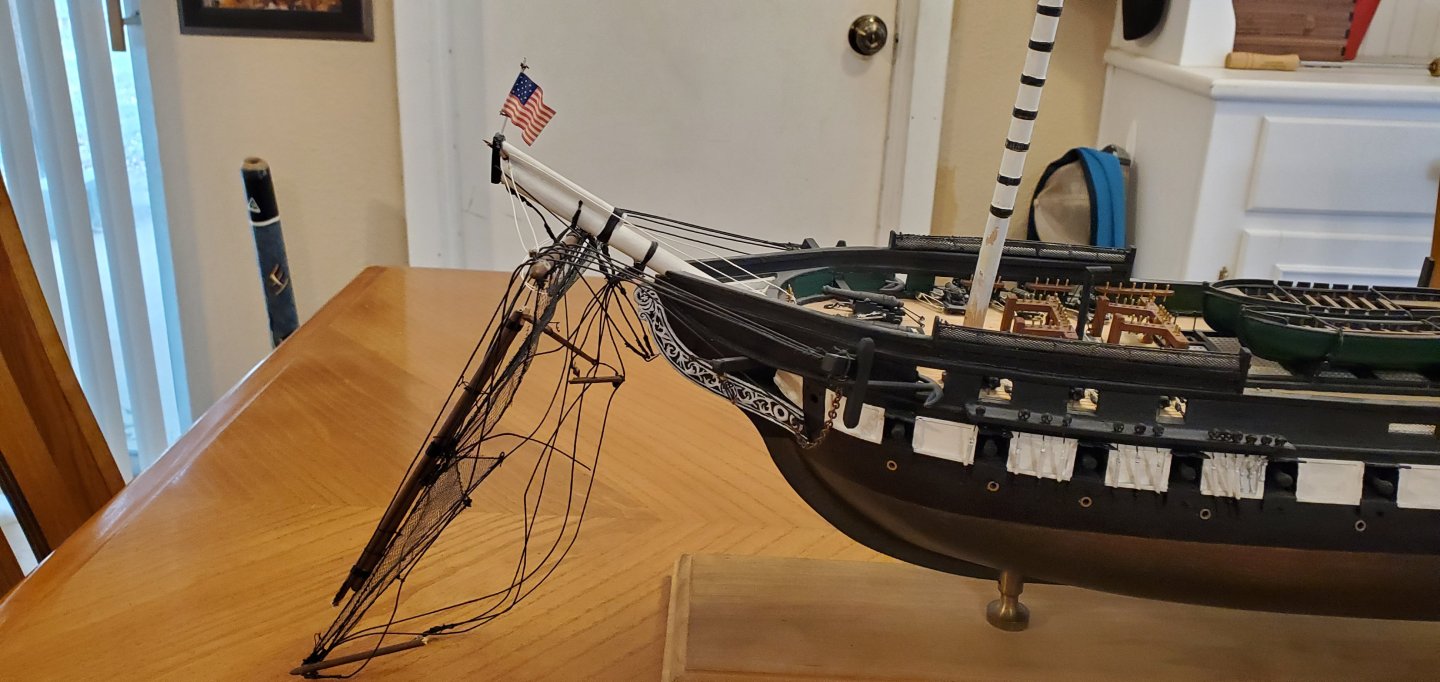
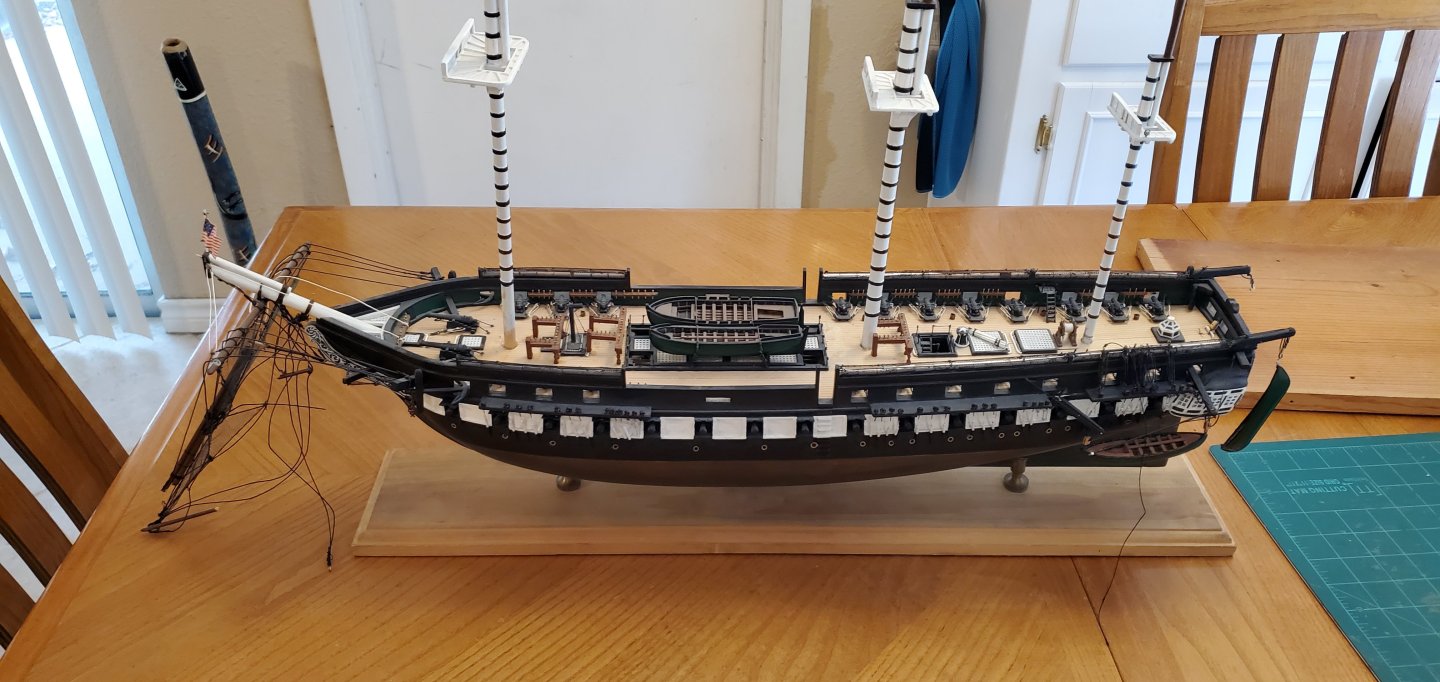
 Did you say 8 seconds or 8 months, Ken? I think this will be the longest bull ride in history! And just when I thought I was getting the bull under control, he turned and started raging in a new direction! I was looking at the ship sitting on my table and something didn't look quite right. I dismissed the idea at first thinking it was because, like @Bryan Woods said earlier, I'm not used to seeing a boat that large on my work table. Then it hit me like the business end of that bull's horn. The masts were on backwards. Going back to the first pic I took when I started, you can see that top masts and topgallant masts are attached to the rear instead of forward and the the fences on the mast tops are in front instead of in the back. The good news was that, as I mentioned earlier, the glue bond on the main and fore mast was broken, so they were easy to remove from the hull. The bad news was the the mizzen mast was still firmly in place. The worse news was that more close-quarters cutting would be required to get the mizzen mast flipped. So I put a circular saw blade on my Dremel and oh-so-carefully made a cut through the bottom of the mast, trying not slip and shred the ship's wheel which sits 1/4" from the front of the mast. Why didn't I just make a cut higher up on the mast? I wanted to cut as close to the deck as possible to fix another minor issue. The mizzen mast tilted to the starboard side, so I thought this was a good opportunity to straighten it up. I figured a slight angle in the mast near the deck would not be near as noticeable as one higher up on the mast. The cut was successful, dowel was installed, mast was flipped, and glued in place. Whew! Still riding that bull! Next, I decided to re-repair the sky sail pole which required another (much easier) cut and dowel job. Then it was a matter of color matching the shade of brown used on the mast. Before and after pics below. With all mast repairs completed, time to re-step the masts into the deck. The bull decided to take a nap during this part and things went pretty smoothly. The first pic shows decent alignment of the bowsprit and masts from bow to stern. The second shows ok vertical alignment as well. The plans show virtually no rake, so I made them as perpendicular as possible. Next, I revisited the bowsprit where I had to make that cut inside the bow head. I had an ugly gash from a slip of the reamer plus an unsightly junction showing between the original bowsprit and the new one. So after getting everything epoxied in place, I hid the ugliness with a gammoning rope. The plans called for 9 turns of the rope which was just enough to hide my mess. With the bow head grating already in place, there was no way to actually wrap the gammoning rope around the bowsprit, so the ends are just tucked down the small gap on each side. That will be our little secret, ok? Before and after pics:


- 301 replies
-
- 14
-

-

-
- Constitution
- Bluejacket Shipcrafters
- (and 1 more)
-
Sorry to hear the whole crew is sick. Hope y'all get done with that covid mess quickly.
- 207 replies
-
- 3
-

-
-
- vanguard models
- Duchess of Kingston
- (and 1 more)
-
Thanks, Keith. I emailed Carson the link to this build log after I made the first post. He replied back after reading the post so I know he's keeping an eye on things. I don't expect him to be an MSW junkie like the rest of us hopeless people, but I do think he will look in from time to time.
- 301 replies
-
- 5
-
-
- Constitution
- Bluejacket Shipcrafters
- (and 1 more)
-
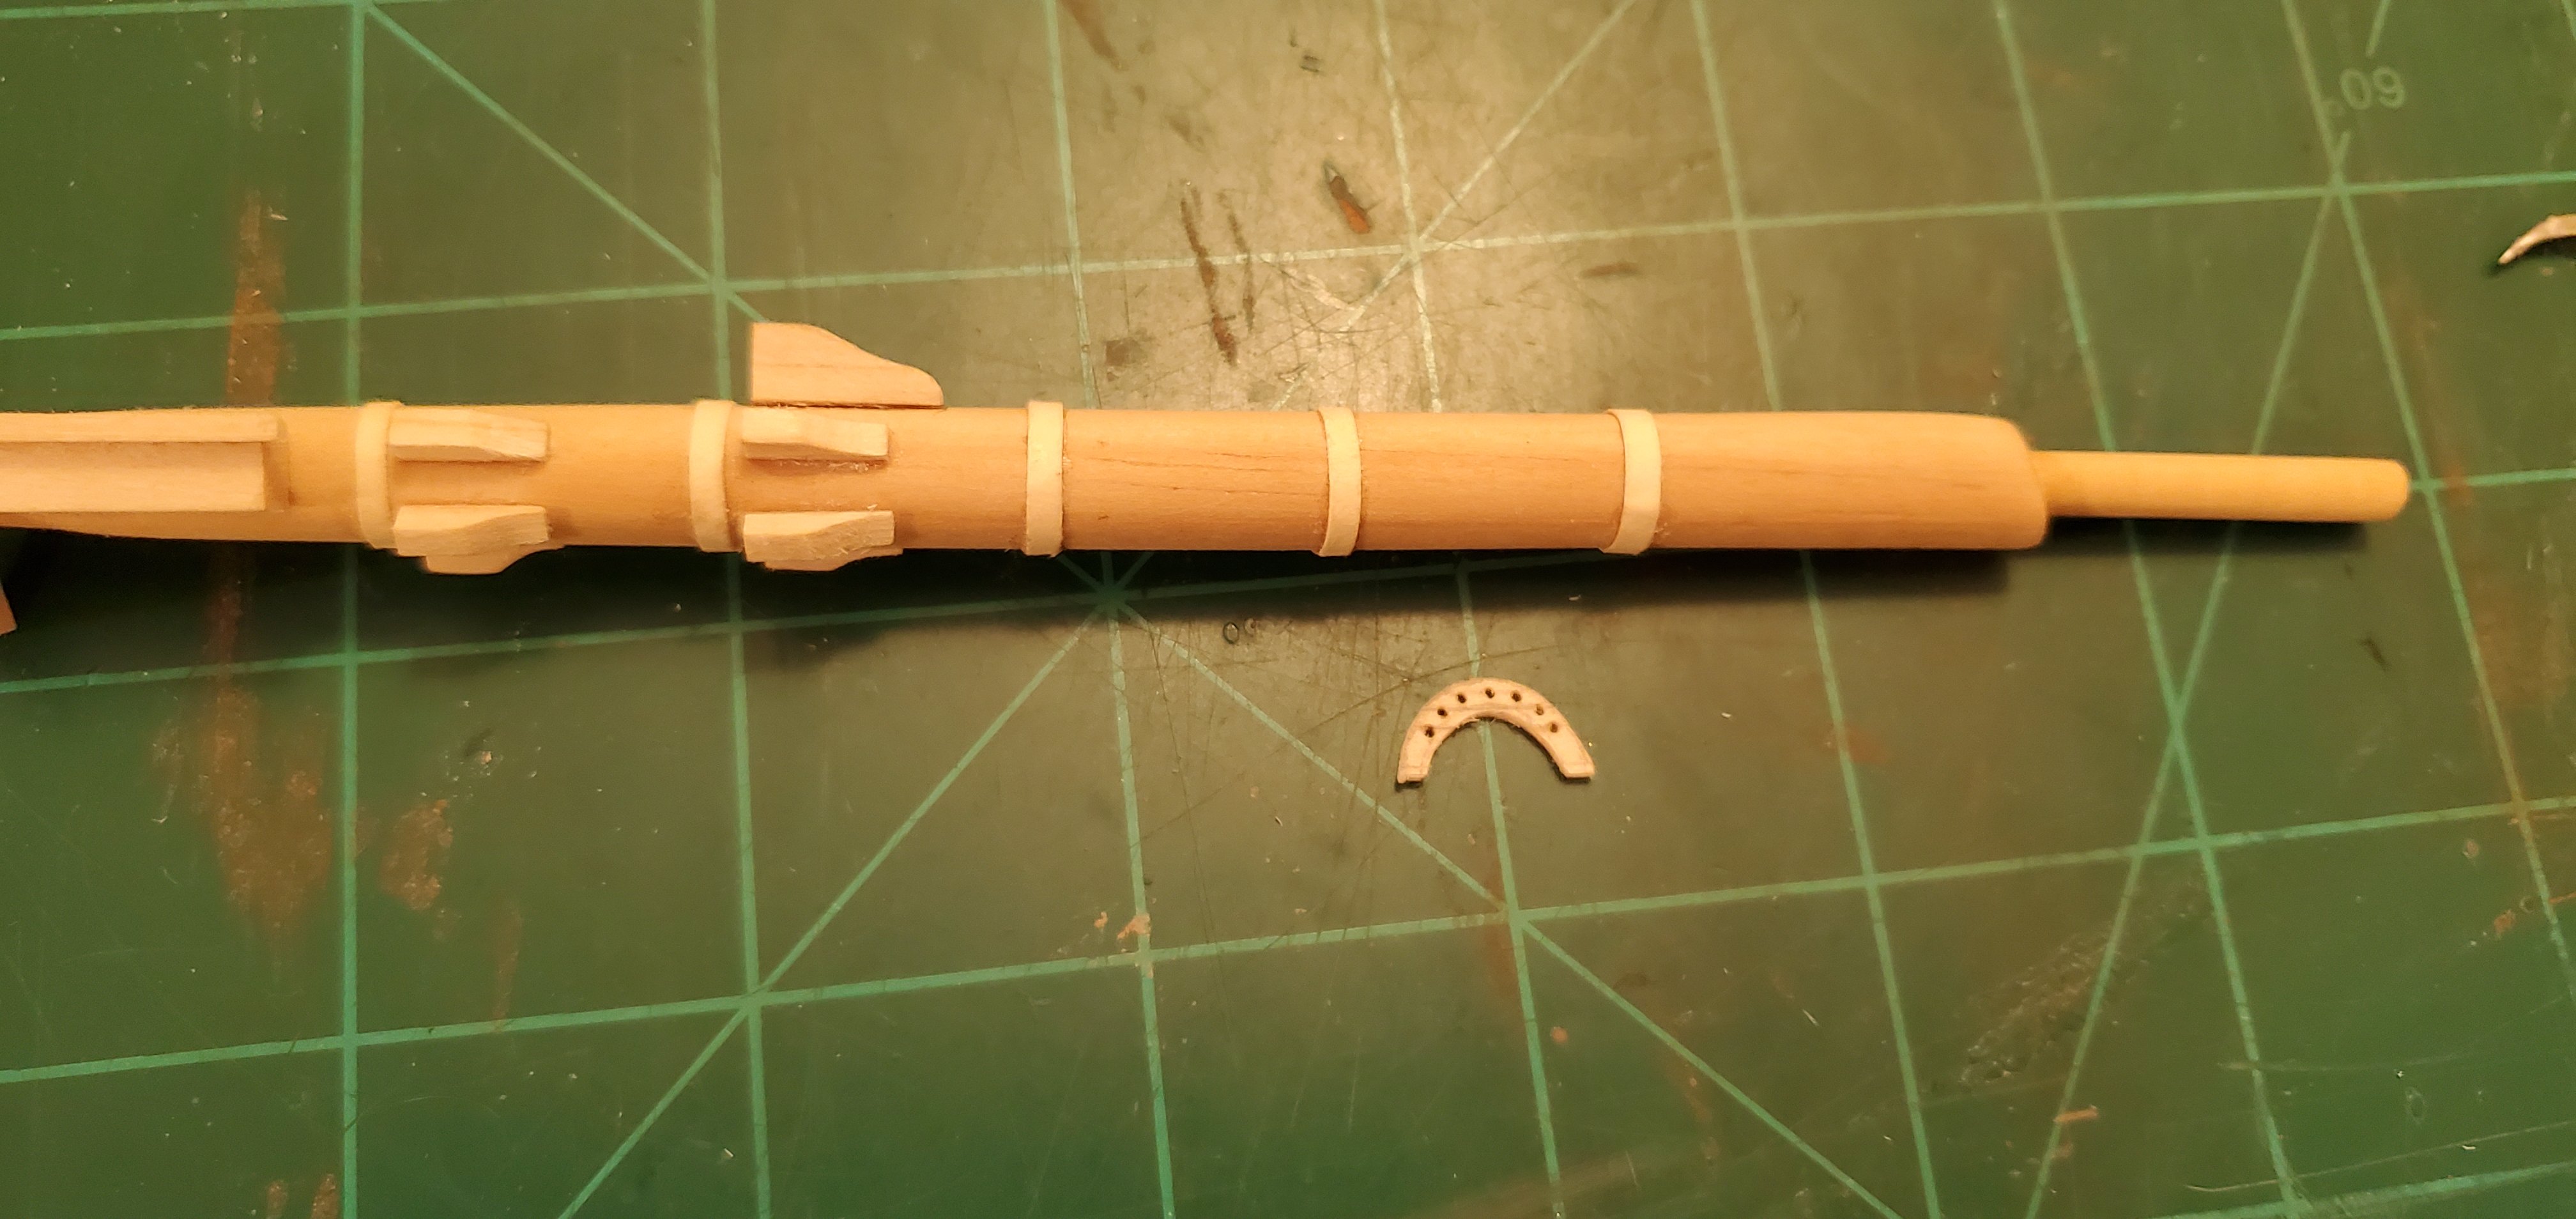
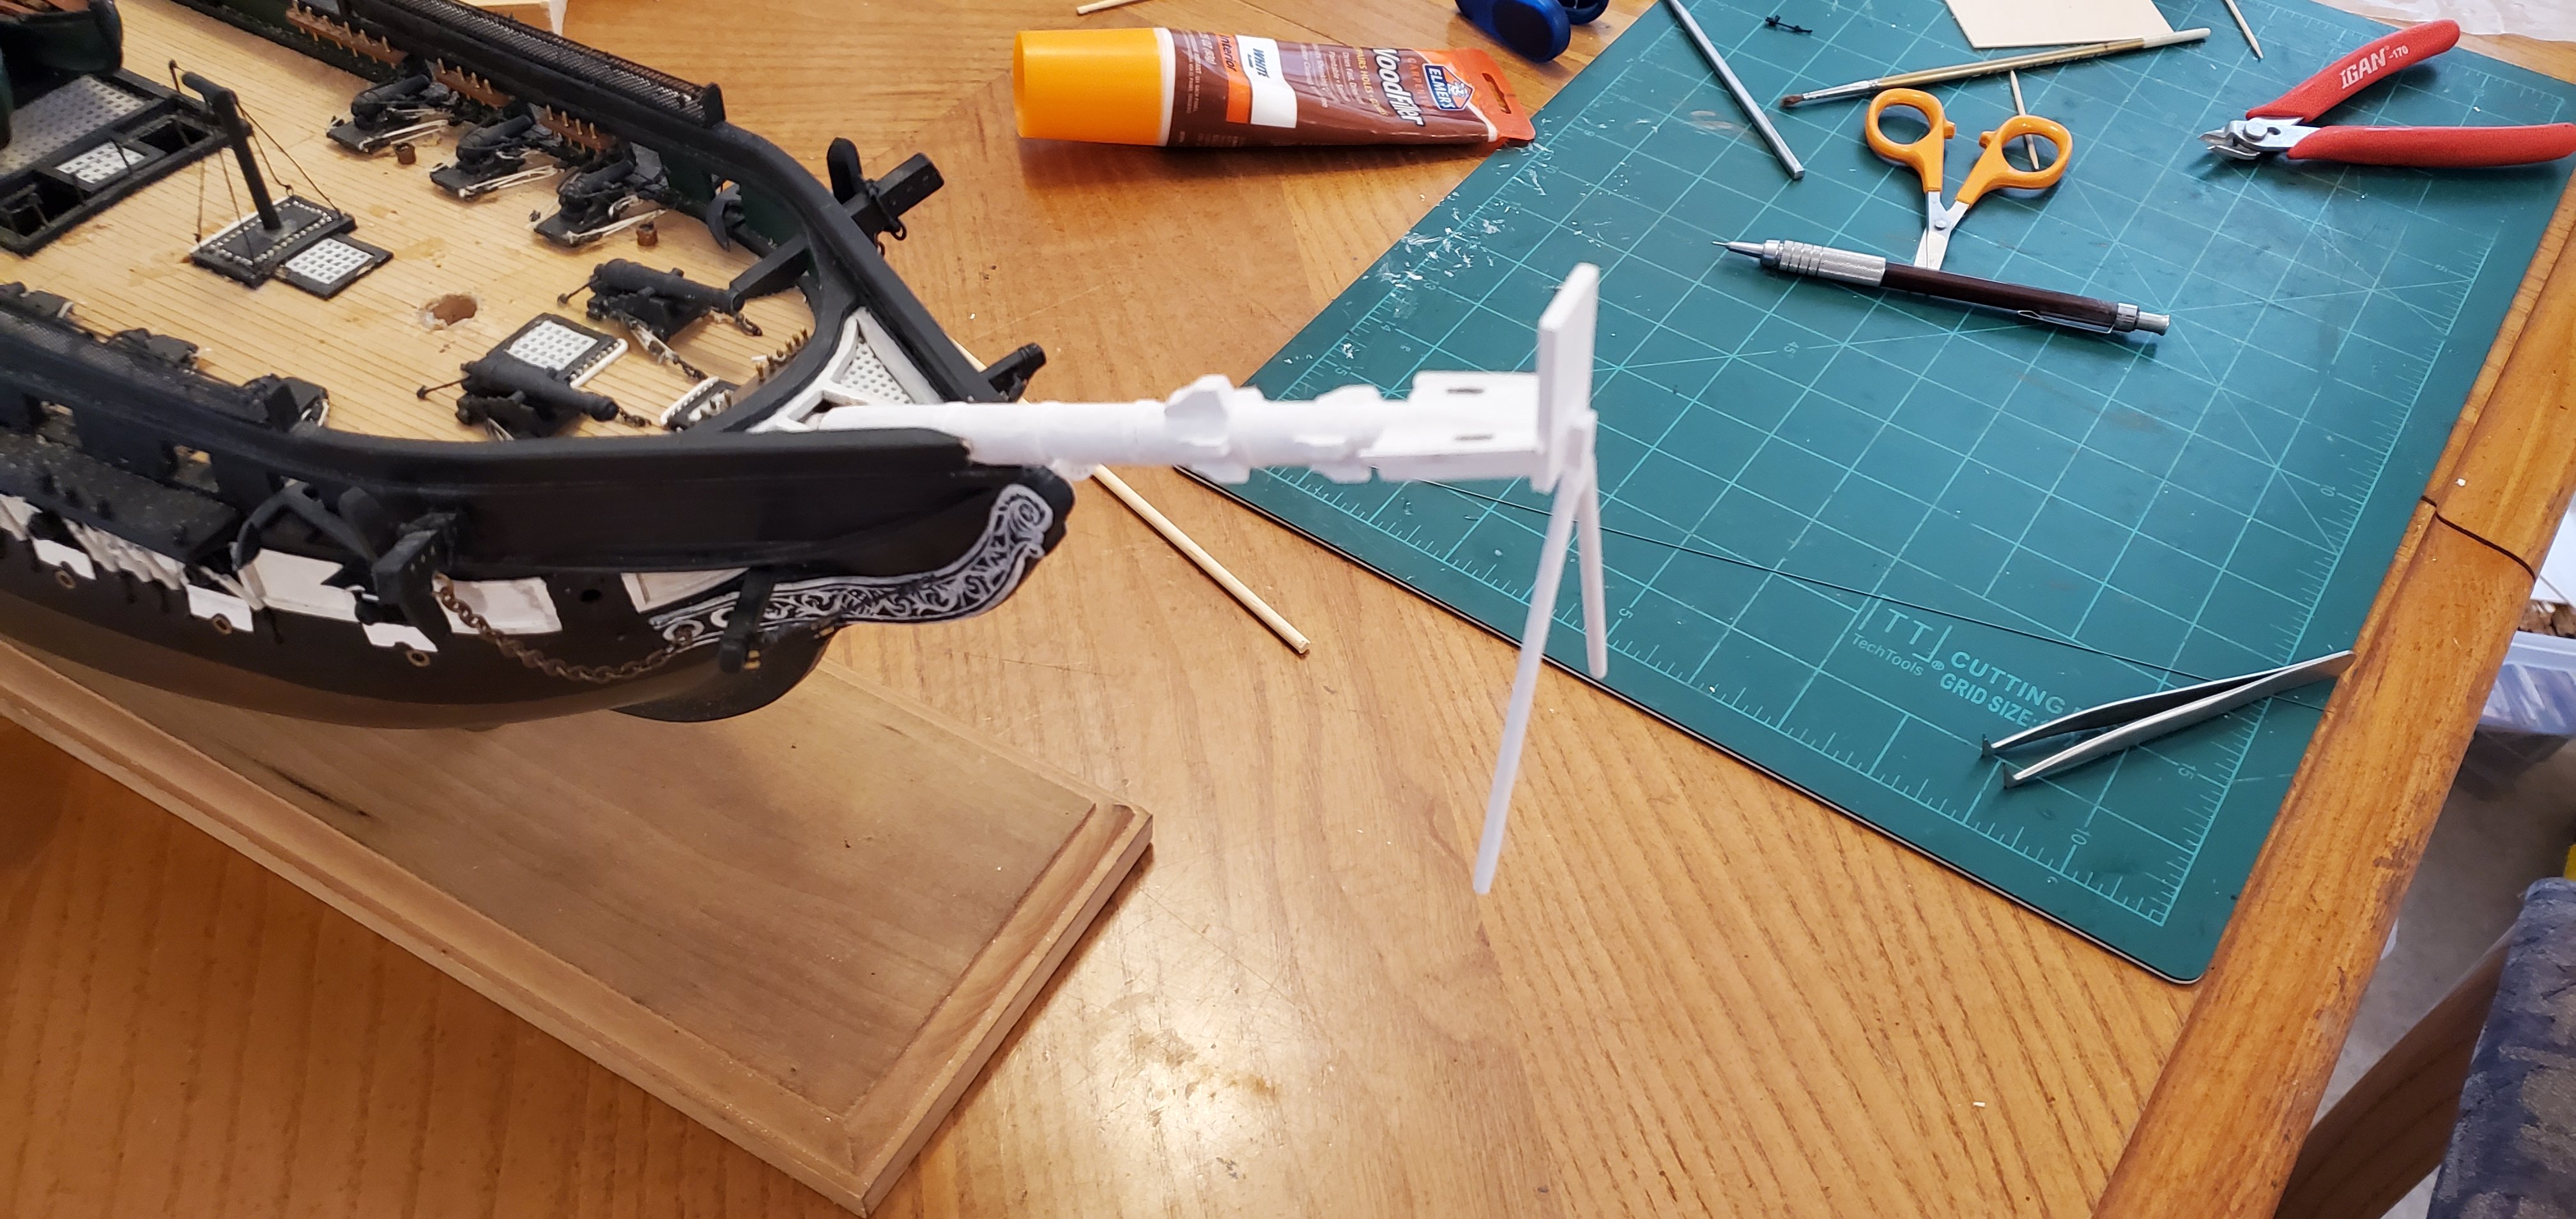
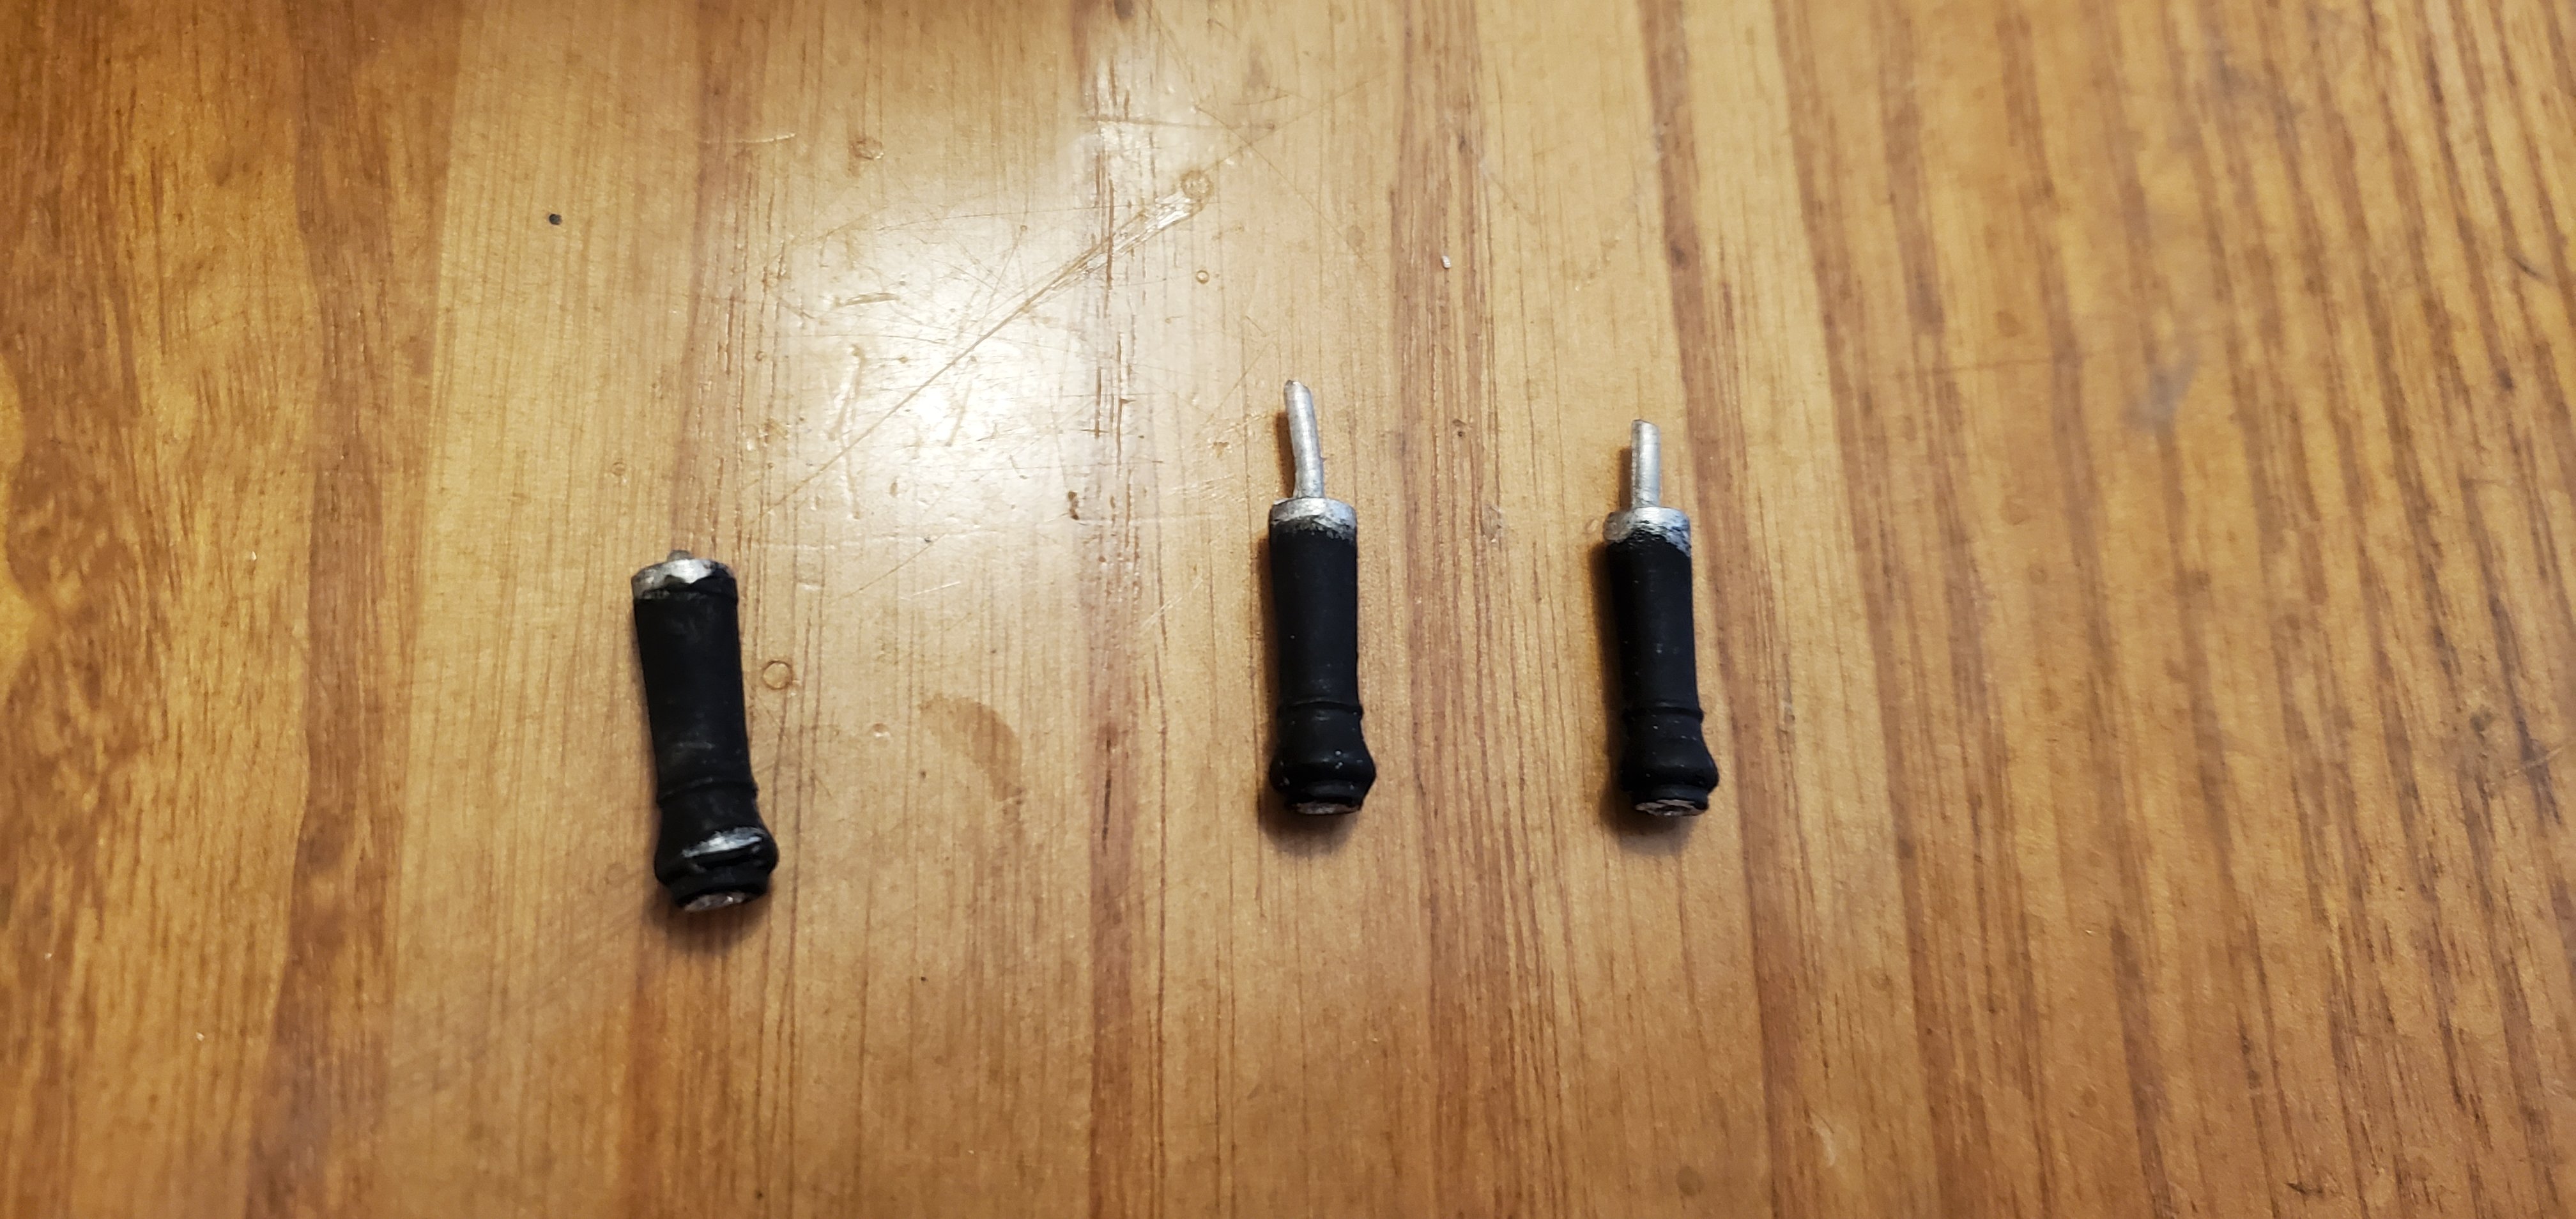
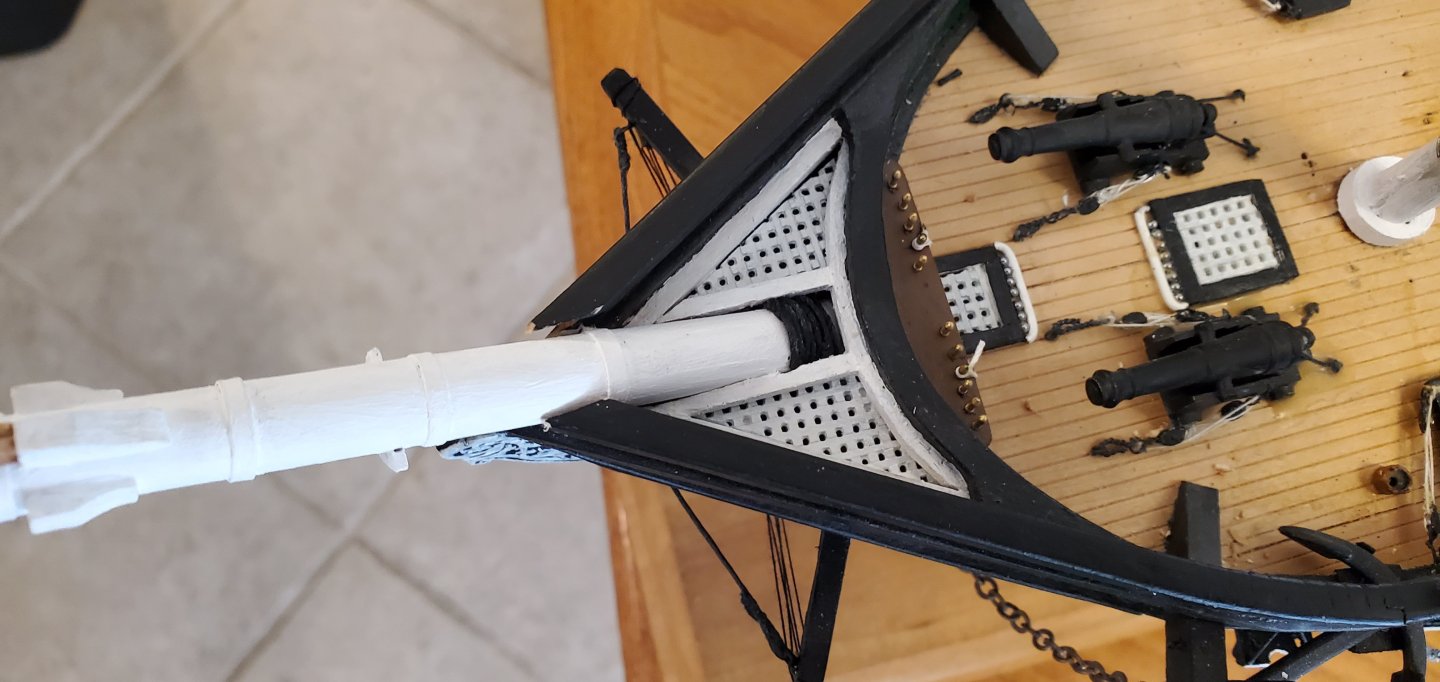
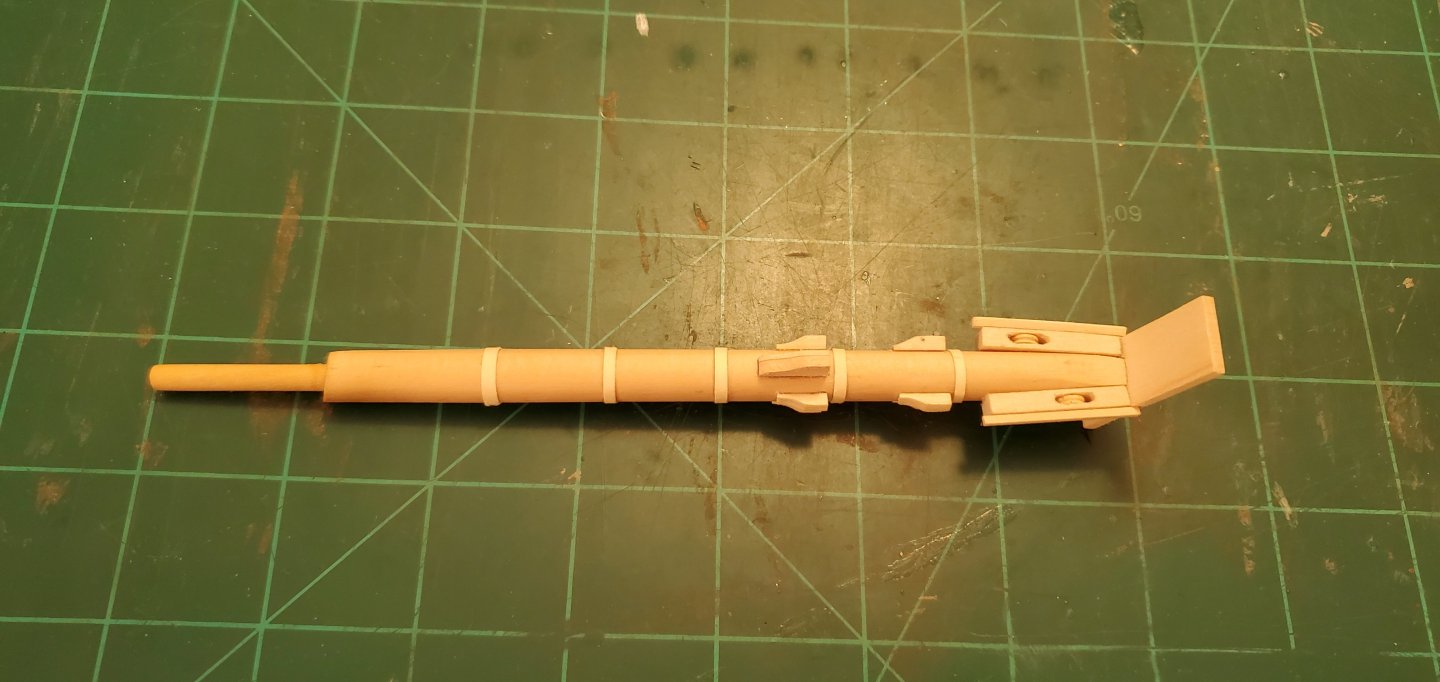
The warm up is over. It's time to jump on top of the bull and see if we can ride this thing out. The first real step in this project is also the one that makes me the most nervous - fixing the broken bowsprit assembly. A lot can go wrong when you try to deconstruct something with drills and reamers and chisels and such. Here's what it looked like starting out. My first thought was to cut the bowsprit, drill it completely out, and then replace it entirely. But I was nervous about a slip of the hand and damaging the bowhead or deck or grating, etc. So I decided on this plan: cut the bowsprit down as close as possible to where it submerges beneath the deck, then use a dowel rod to connect the new bowsprit to what remains of the original one. Here's what it looked like after making the cut and drilling the dowel hole. I managed to do my drilling and reaming with only a slight bit of damage to the end of the gunwale, which will be an easy cleanup later. Here's the new bowsprit blank connected by dowel rod to the original (dry-fit). You can see a small, unwanted notch on the top of the original bowsprit where the reamer bit got away from me for an instant. However, I plan to hide the notch as well as the entire junction between the bowsprit pieces with gammoning rope. Now for construction of the new bowsprit. I'm using the Blue Jacket instructions for reference, but they are not very detailed. Fortunately for me, @KurtH has a very nice build log for this kit with a lot of helpful photos. Plus, his finished model in a thing of beauty. So I am using it for additional reference. The bowsprit has a lot going on, but nothing too difficult. Here's the new bowsprit with components added - cap, bee blocks, hoops, forestay cleats, and jib boom step. The most interesting things to build were the bee blocks. For the sheaves, I used 5mm deadeyes and sanded them down to fit in their slots. I liked the deadeyes because they already had a groove cut down the middle and look perfect for a rope to slide through. As Kurt mentions in his build log, the kit does not supply a fairlead. For his fairlead, Kurt said he ordered a spare spider ring from Blue Jacket. I'm too impatient to wait for an order and delivery so I roughed one out with basswood. I think Kurt's looks better, but mine should work ok. The last step for the new bowsprit was making the dolphin striker. The cap is still a bit oversized, but will be sanded down when I figure out exact positioning for the jib boom and flying jib boom. The bowsprit is still dry-fit in the pics below.


- 301 replies
-
- 17
-
-
-
-
- Constitution
- Bluejacket Shipcrafters
- (and 1 more)
-
I love the rusting effects on the anchors. That's a nice touch and very well done, Steven.
-
You are cracking me up, Bryan!! 🤣 The answer to your question is YES! Those whale boats are gargantuan!! And get this - I can drop things on the floor and actually look down and find them without having to spend 30 minutes searching with a magnifying glass and spot light.
- 301 replies
-
- 8
-

-
-
- Constitution
- Bluejacket Shipcrafters
- (and 1 more)
-
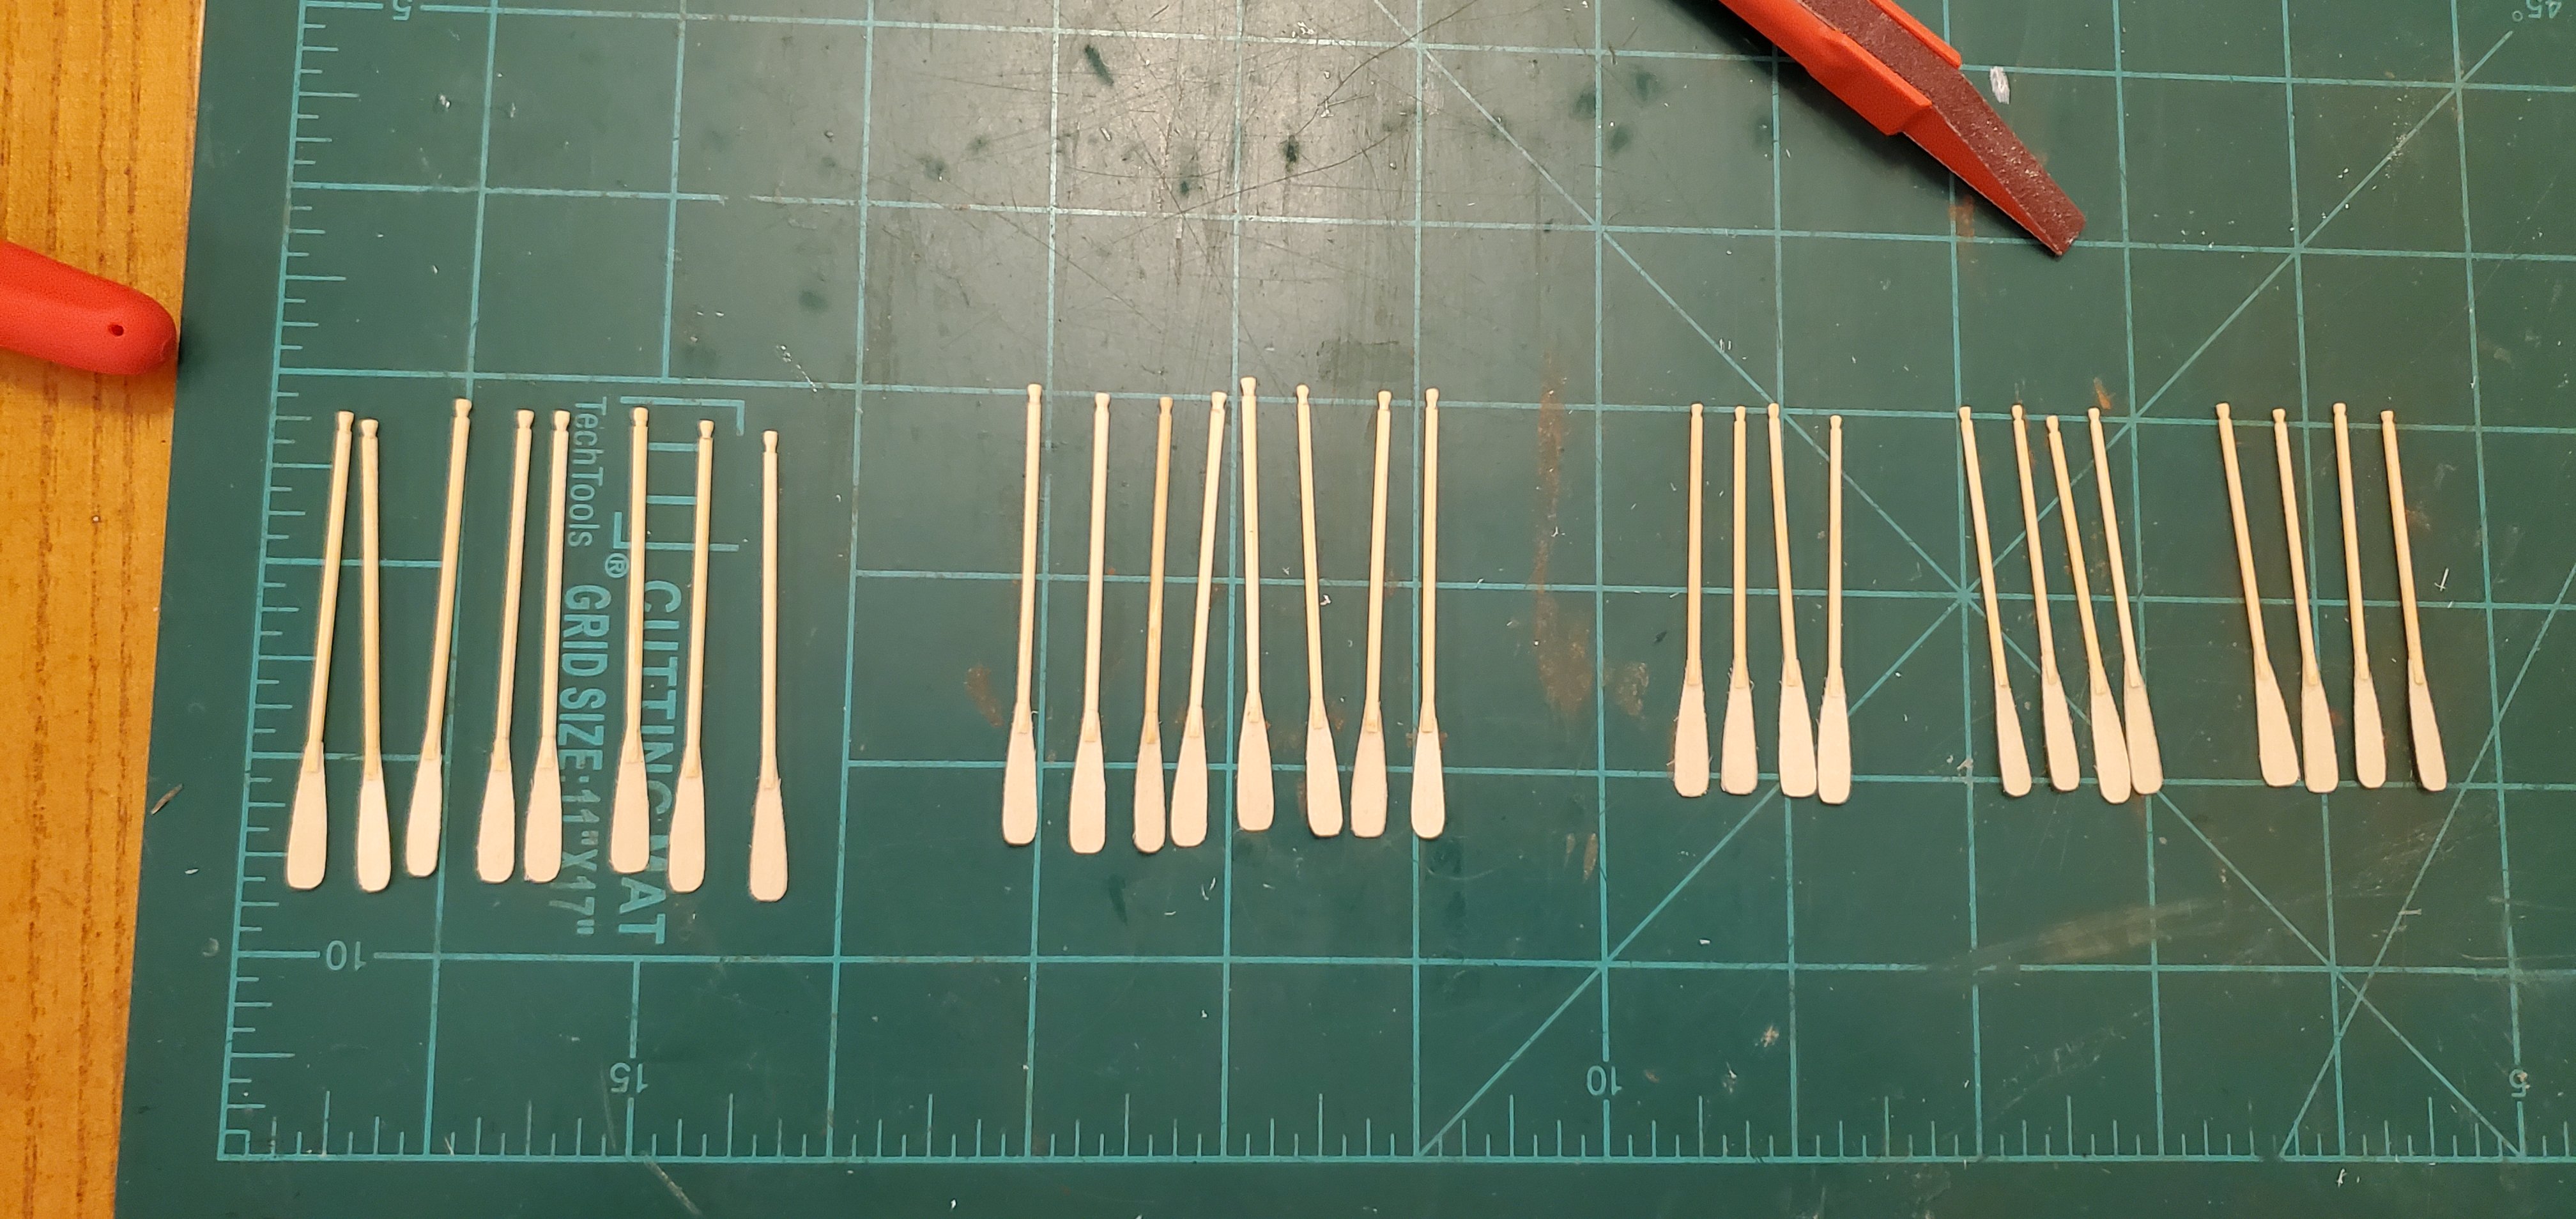
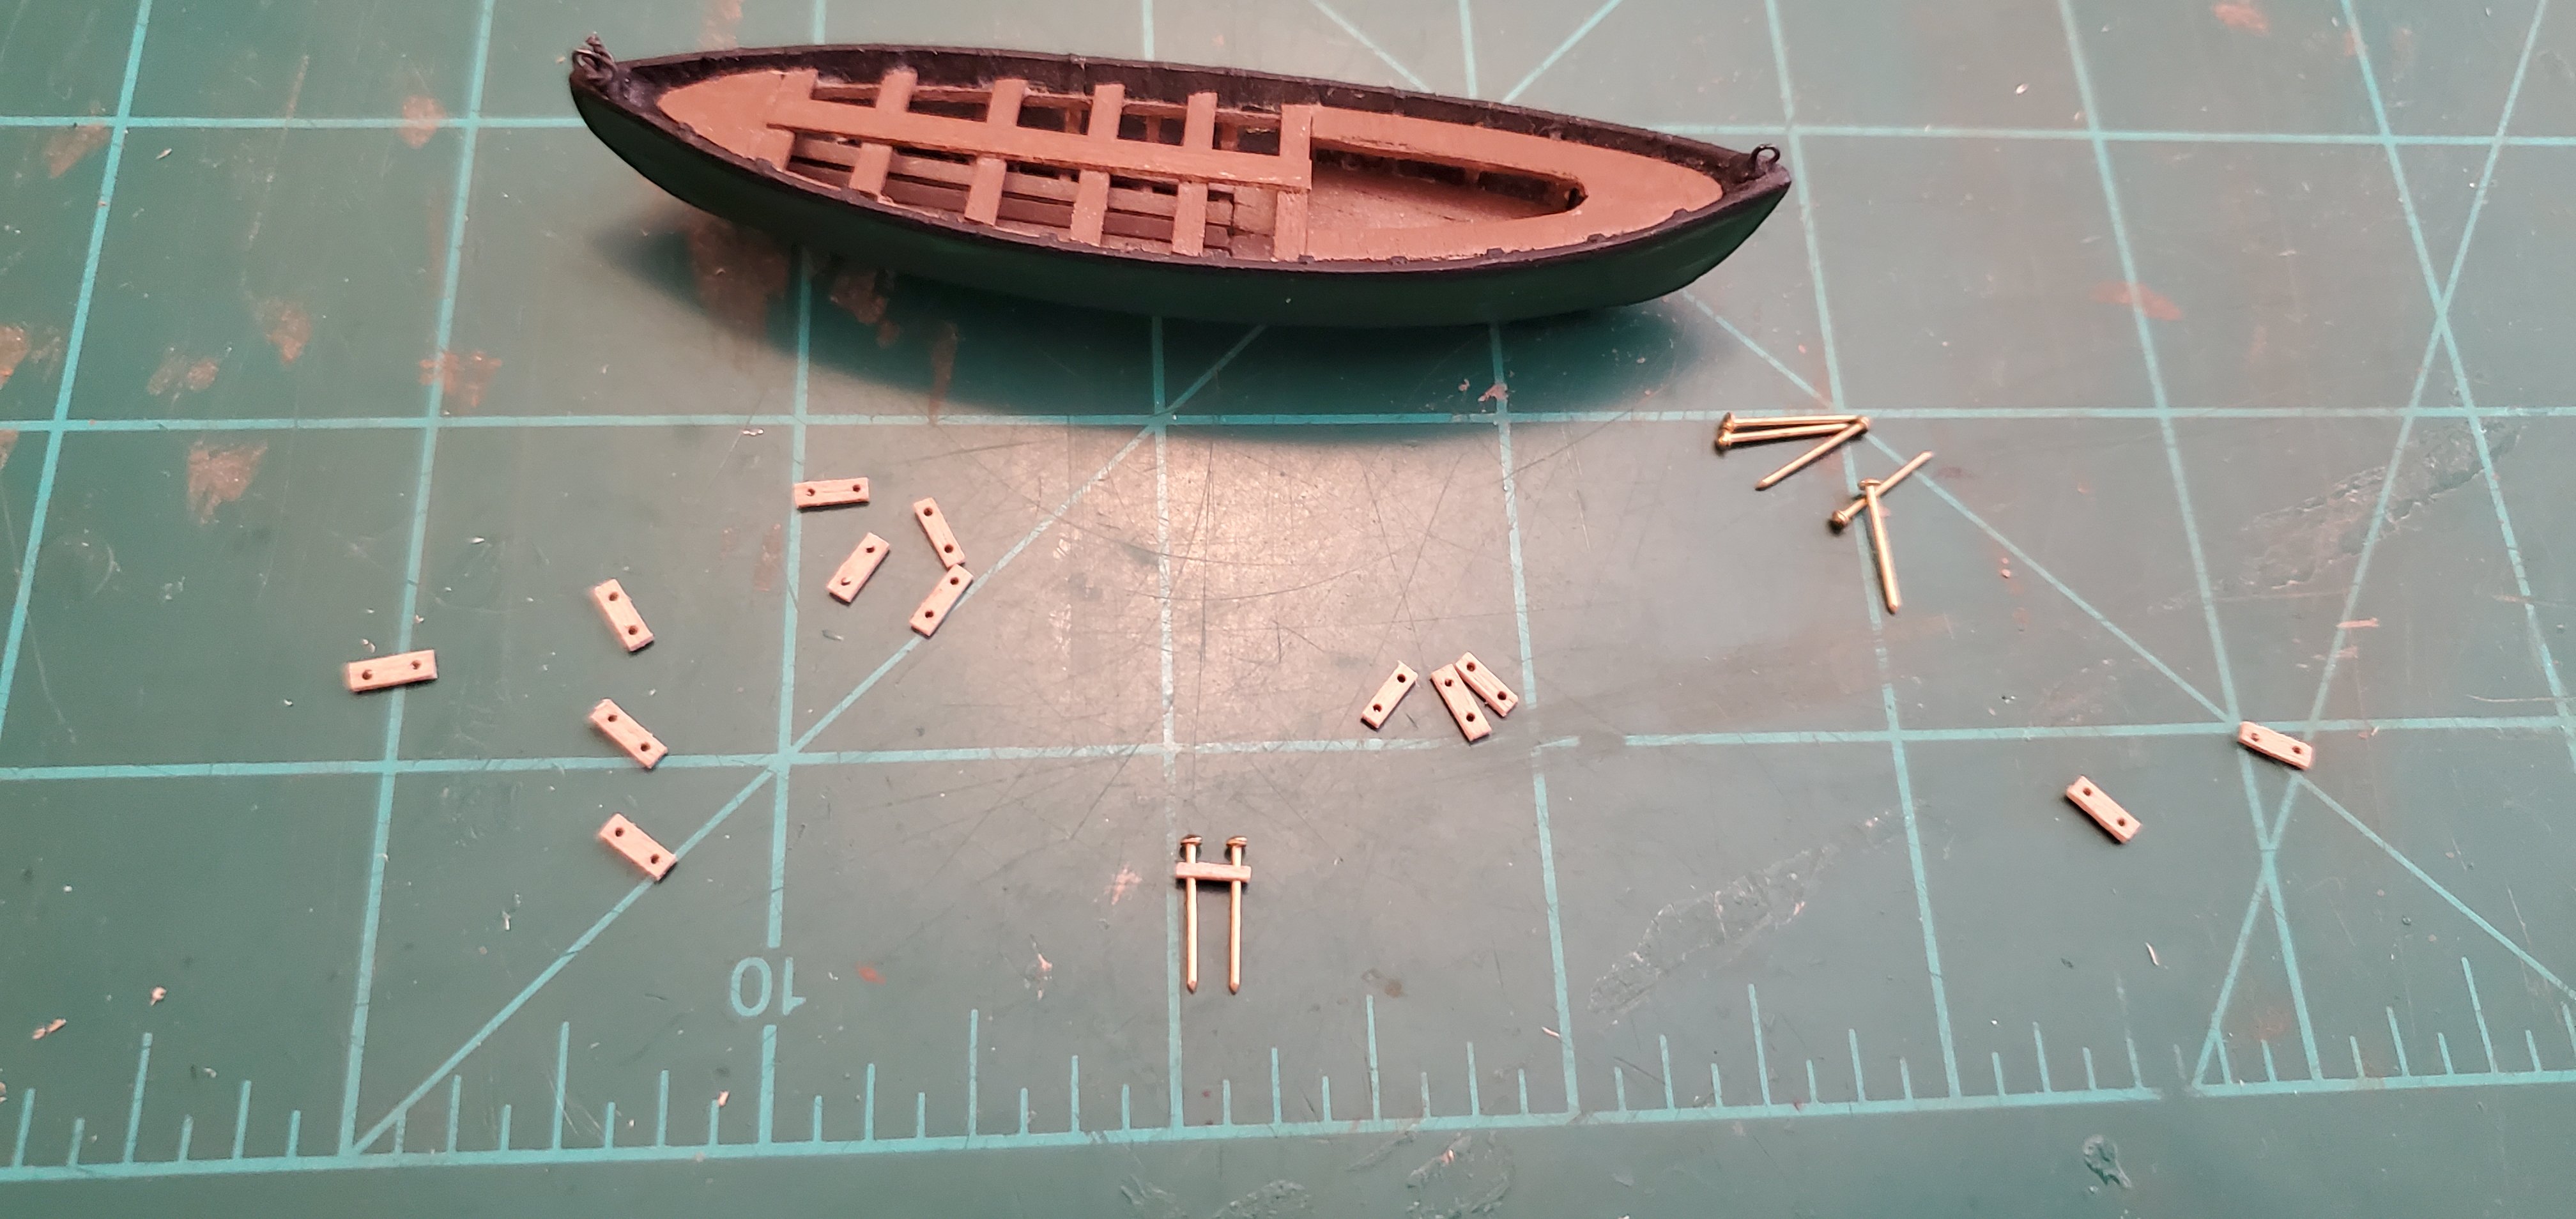
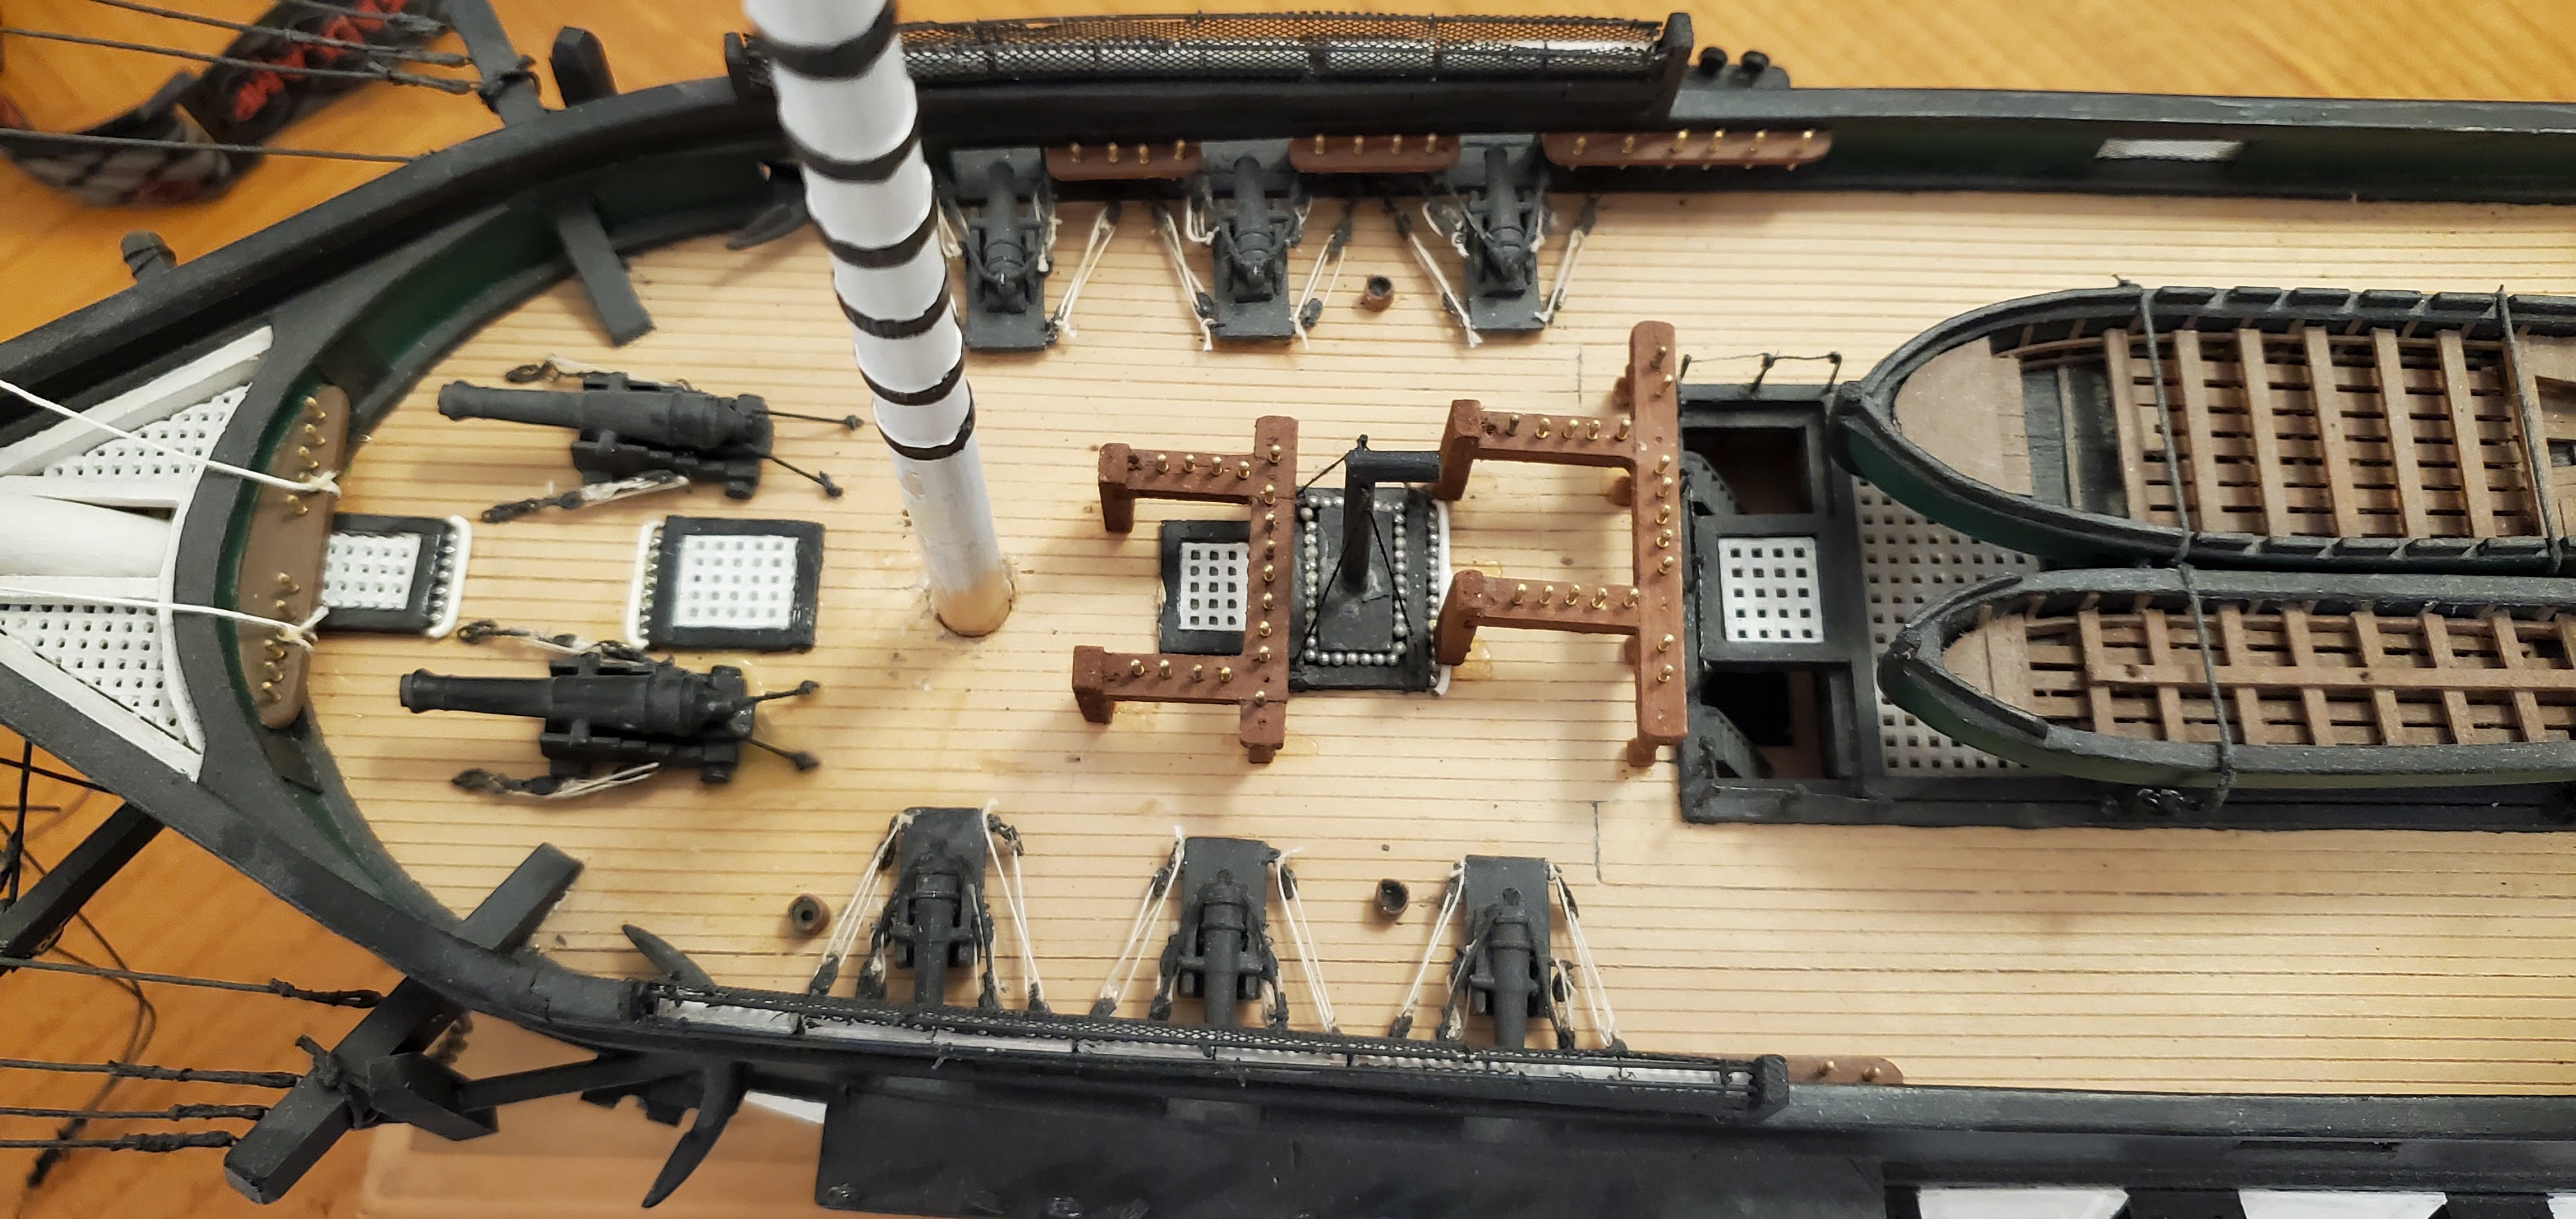
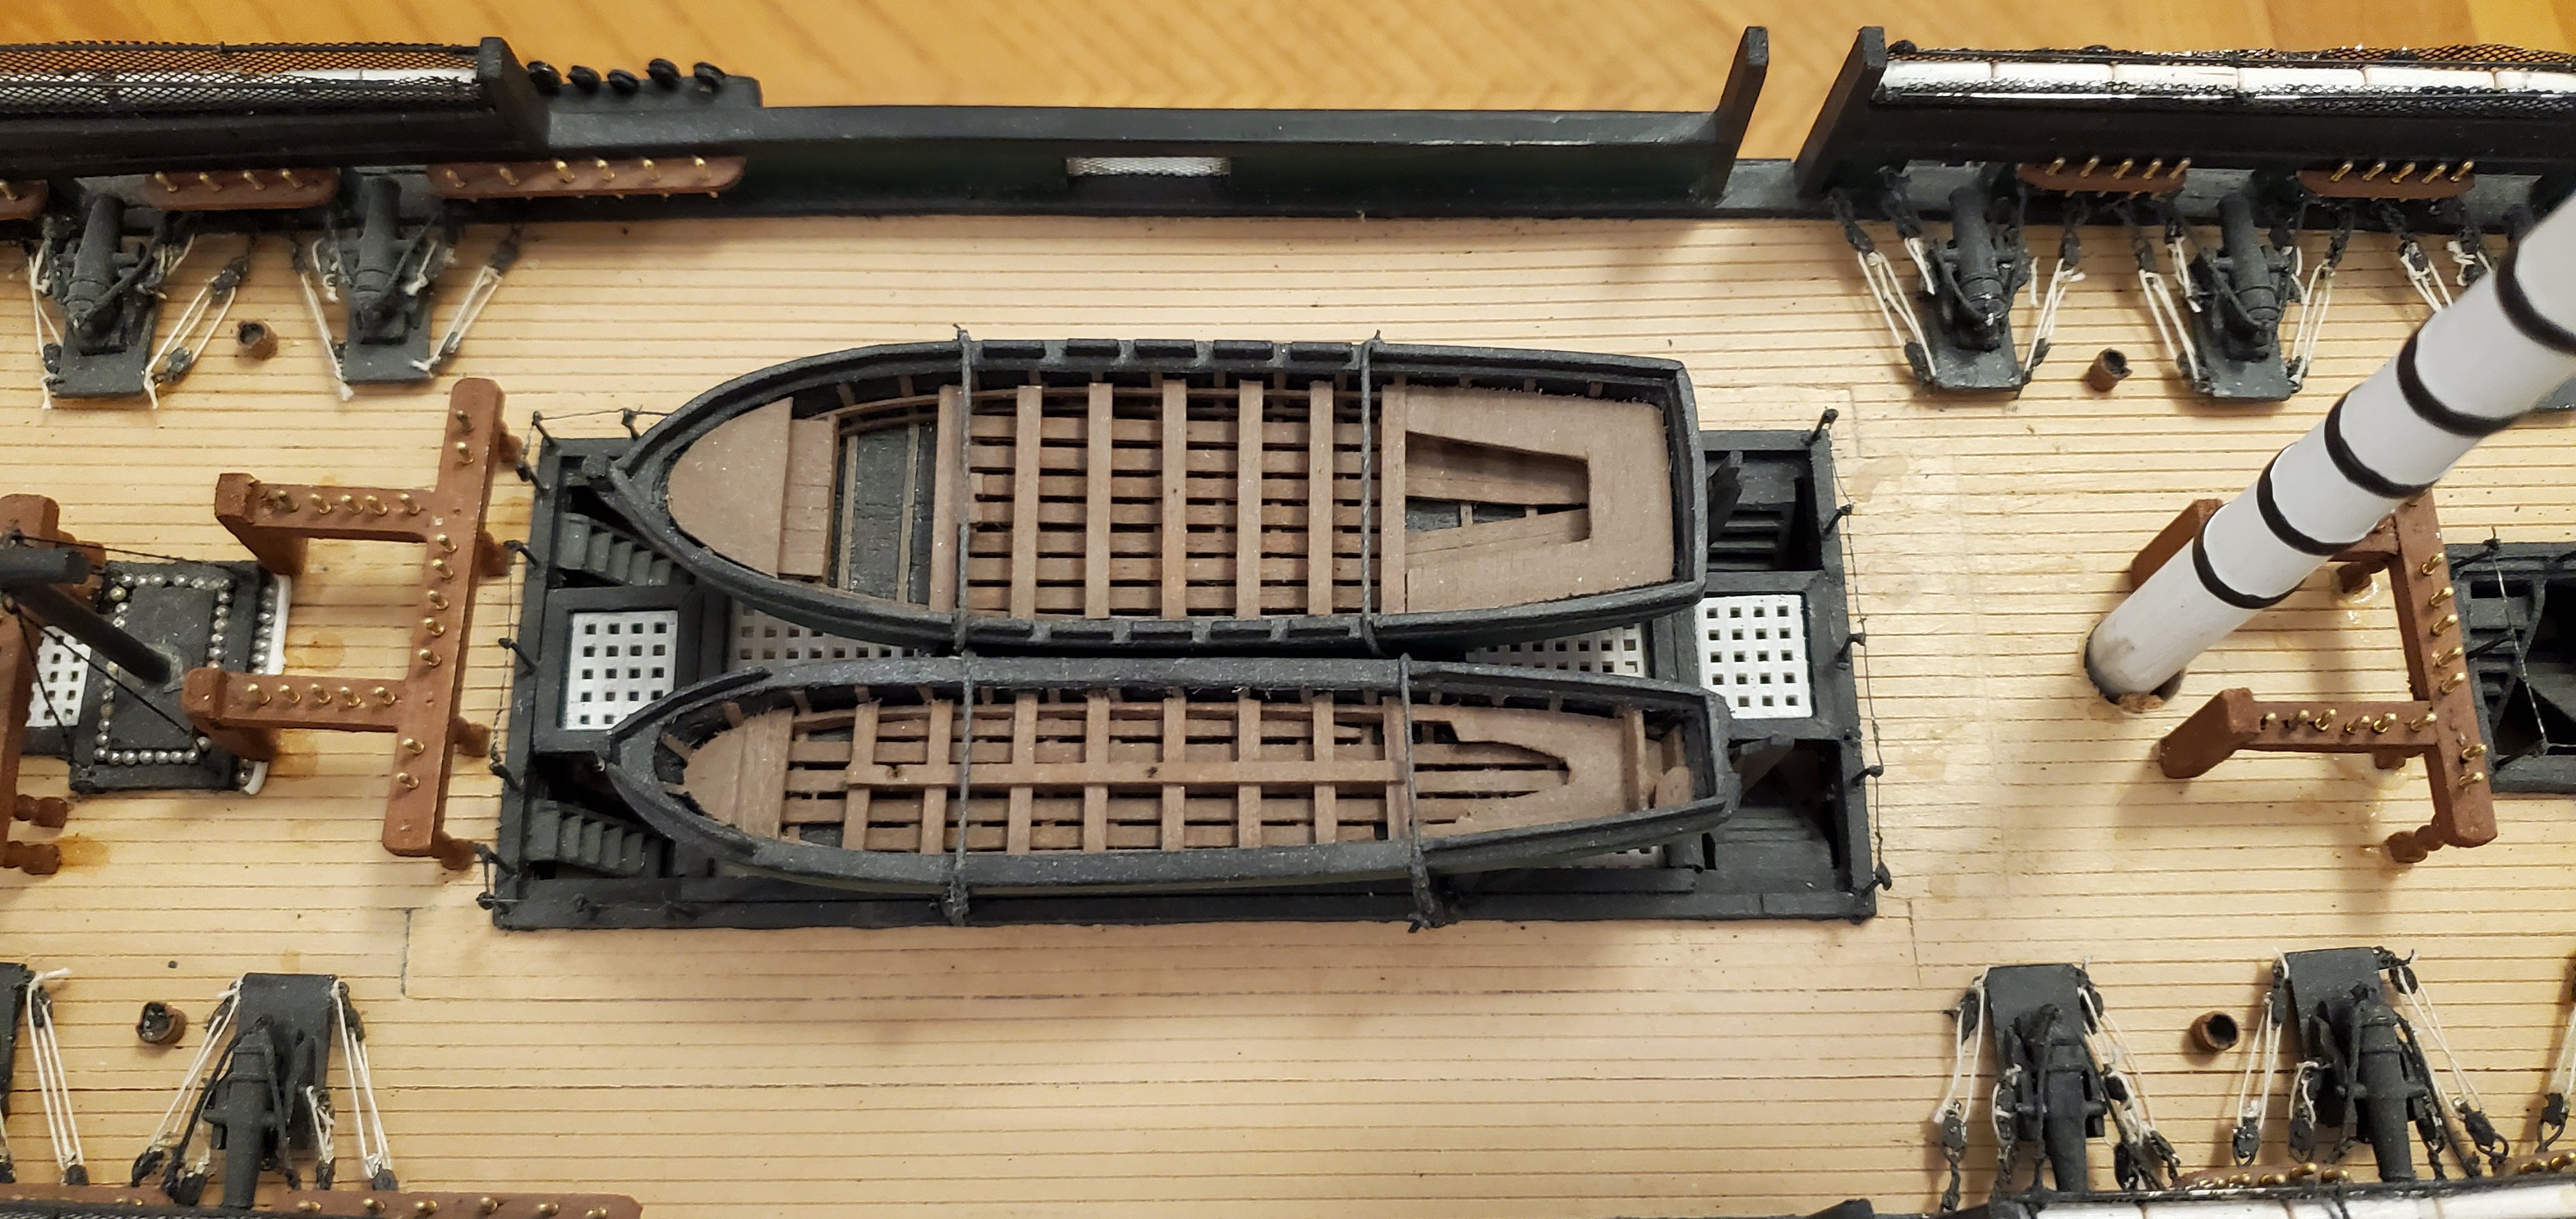
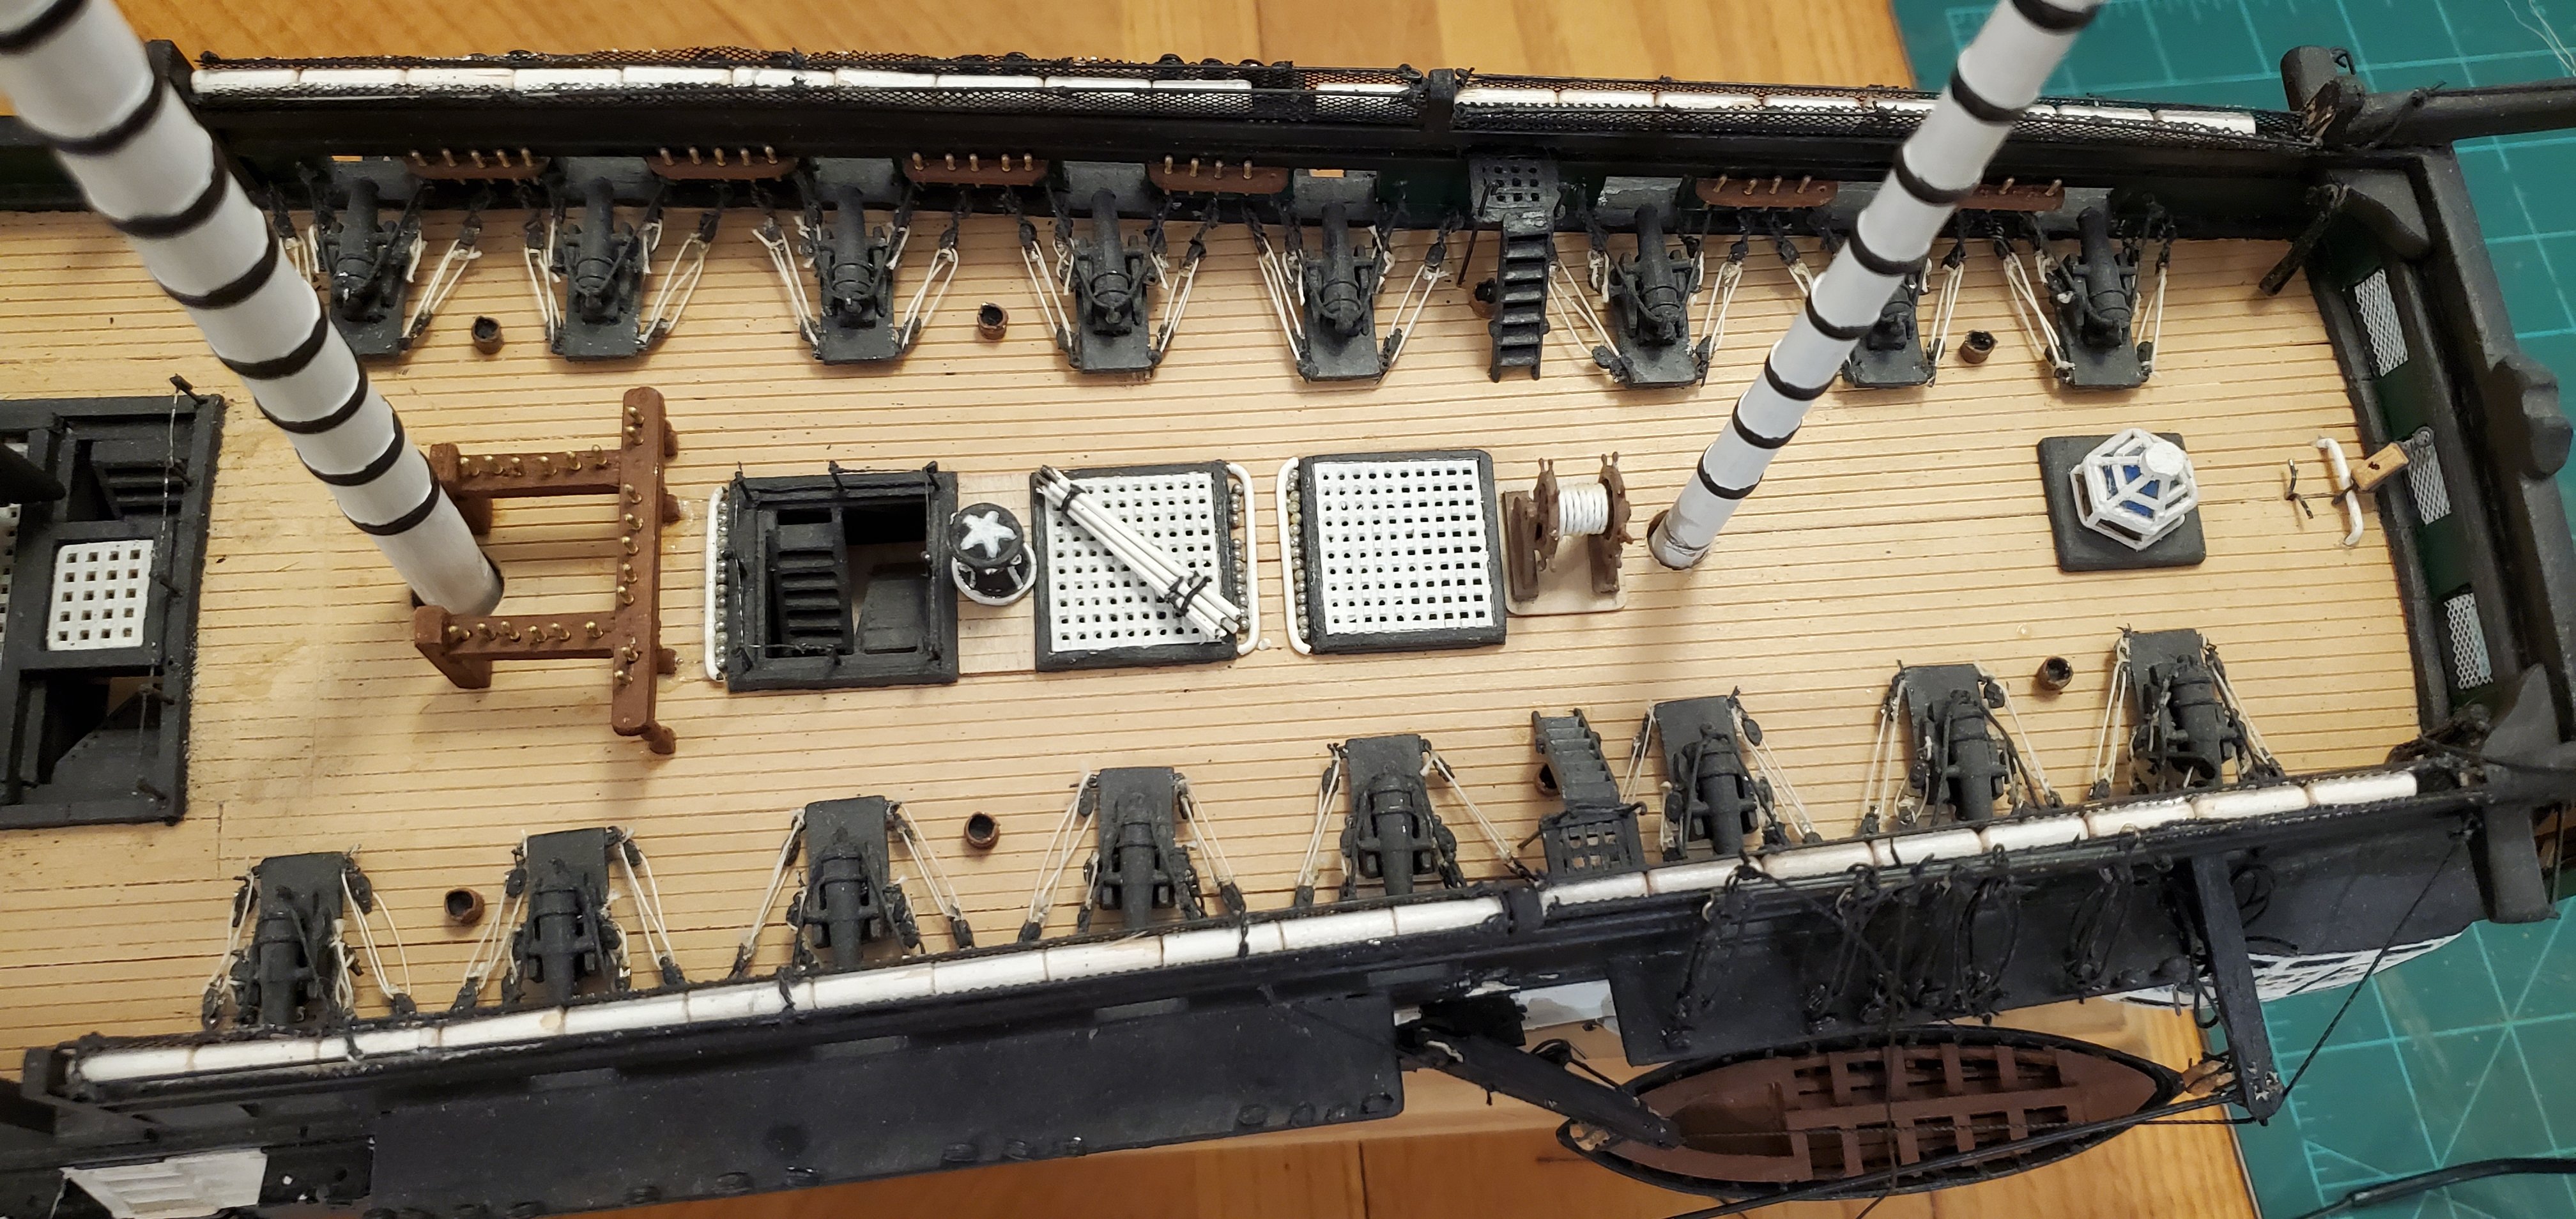
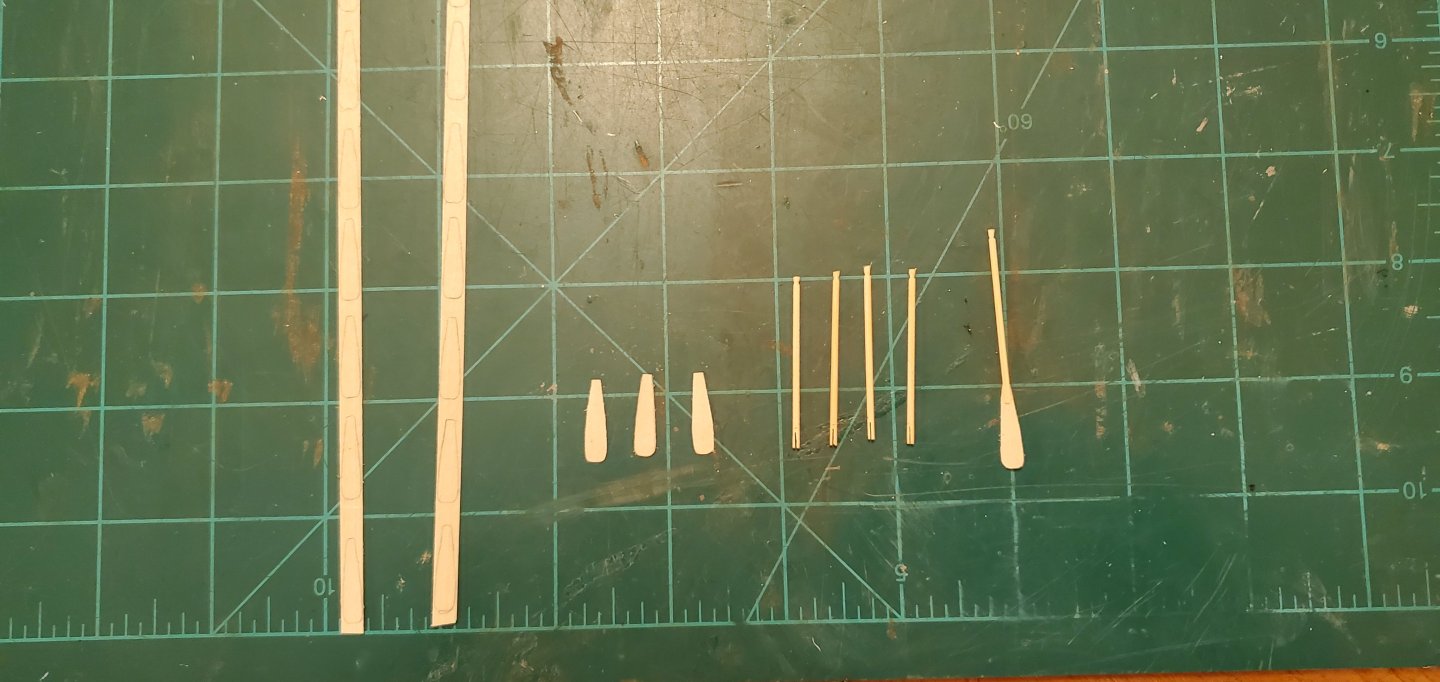
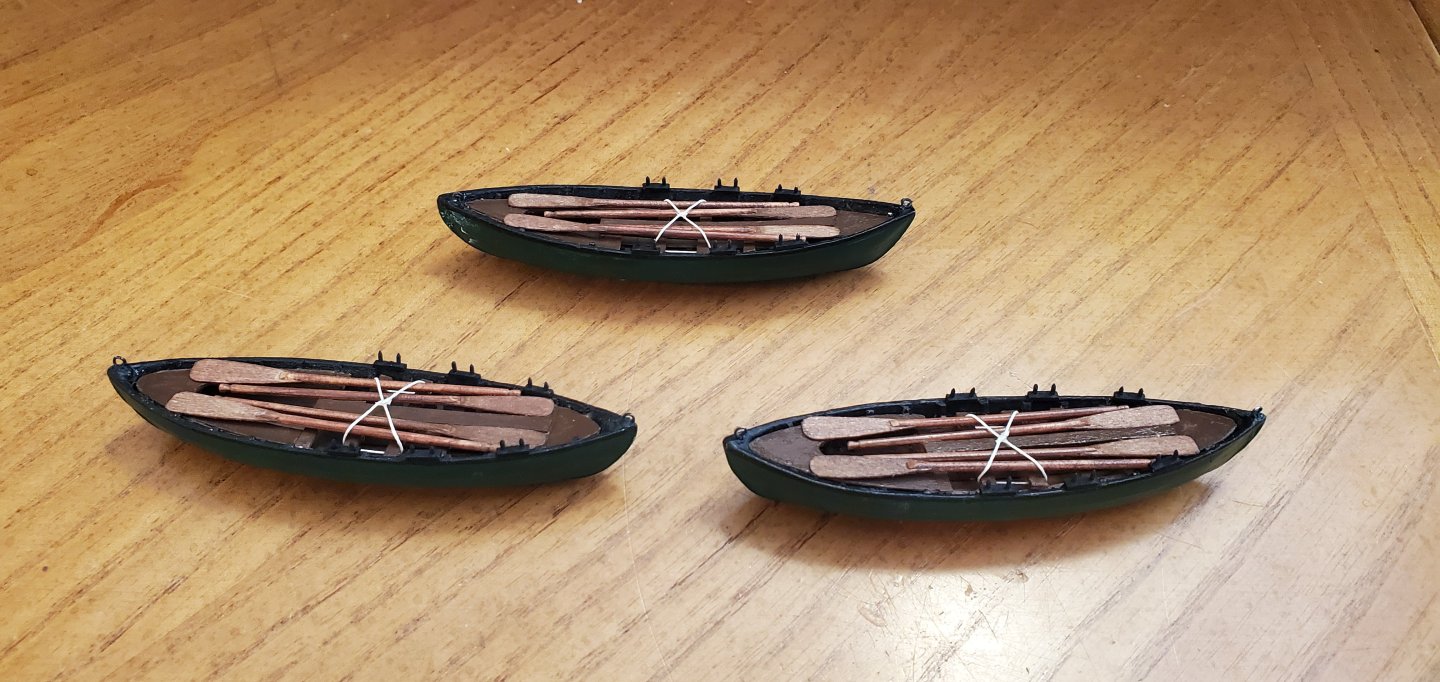
Thank you so much to @Keith Black, @Knocklouder, @Paul Le Wol, @FriedClams, @Bryan Woods, @Canute, @tmj, @hollowneck, @GrandpaPhil for the kind words. Whether its our own model or someone else's it's a labor of love for all of us that do this work, isn't it! I found another Constitution build log that I will be referring to repeatedly throughout this project. The build log was posted by @usedtosail (Tom). It's a Model Shipways kit, which no doubt has variations compared to the Blue Jacket kit I'm working with, but his model is so well done, I want to mirror some aspects of it. Plus, on the very first post of the log, Tom inserted an index with links to all the various parts of the build. That is incredibly helpful for someone like me. Thank you, Tom! https://modelshipworld.com/topic/5003-uss-constitution-by-usedtosail-finished-model-shipways-scale-176/ For the next step, I turned my attention to the ship's boats. With this Blue Jacket kit, there are 3 whale boats - 2 that hang from davits on each side near the quarter galleries and 1 that hangs from the stern. On the spar deck, there is a launch boat and a pinnace. As mentioned earlier, the davits are in need of repair. Before I do that and rehang the boats, I wanted to add a complement of oars to each boat to give them a bit more detail. Borrowing from Tom's build log, I made the oar handles and paddles separately and then joined them together. The handles started out as 2.5mm diameter bamboo toothpicks. I narrowed them to 1.5mm, cut a paddle slot in one end and notched the tip of the handle on the other end. For the paddles, I took a 0.4mm planking strip, drew a bunch of paddles on it, and cut them out. The pic below shows the various stages of construction and one assembled oar. Here's all the oars assembled and ready for staining. The longer ones will go inside the launch boat and pinnace. Next was adding some oar locks to the whale boats. These were made from bits of basswood for a base and tiny brass nails for the oarlock itself. Here are the whale boats with the finished oars in place and lashed down, followed by the launch boat and pinnace. And the last thing I did this week was paint the inside of the gun port lids. This version of the Constitution has split lids that open vertically. According to the Blue Jacket instructions, they needed to be white, which I think makes a nice look. I also had to make a couple of new upper lids that I found were missing.


- 301 replies
-
- 16
-
-
-
- Constitution
- Bluejacket Shipcrafters
- (and 1 more)
-
Dang, Grant. So sorry to hear about the difficulties you have been going through. My prayers for you finding peace and a positive way forward.
- 57 replies
-
- 8
-
-
- live steam
- radio
- (and 2 more)
-
I look forward to reading that article when it comes out!
- 301 replies
-
- 4
-
-
- Constitution
- Bluejacket Shipcrafters
- (and 1 more)
-
Looking at the water tank ladder you reference on post 224, I think the touch of black grunge is very well done. I often run into the same issue on really small details of my SIB ships. Some details I do for my own satisfaction and don't care if they can't be seen without 6x glasses. But If I want the detail to be somewhat noticeable, I'll go a little brighter/darker/thicker whatever with the paint to make it stand out just a bit. I think you found a nice middle ground with that ladder grunge where it's noticeable and a nice detail if you look close, but it does not jump out and scream "HEY LOOK AT ME!" (which is probably what you don't want).
-
Gunboat Philadelphia 1776 by tmj
Glen McGuire replied to tmj's topic in - Build logs for subjects built 1751 - 1800
Nice demo, Tom. Thanks for posting. -
That's a great story, Ron. Thanks for sharing. I'm hoping my work here is worthy of a similar reaction!
- 301 replies
-
- 6
-
-
- Constitution
- Bluejacket Shipcrafters
- (and 1 more)
-
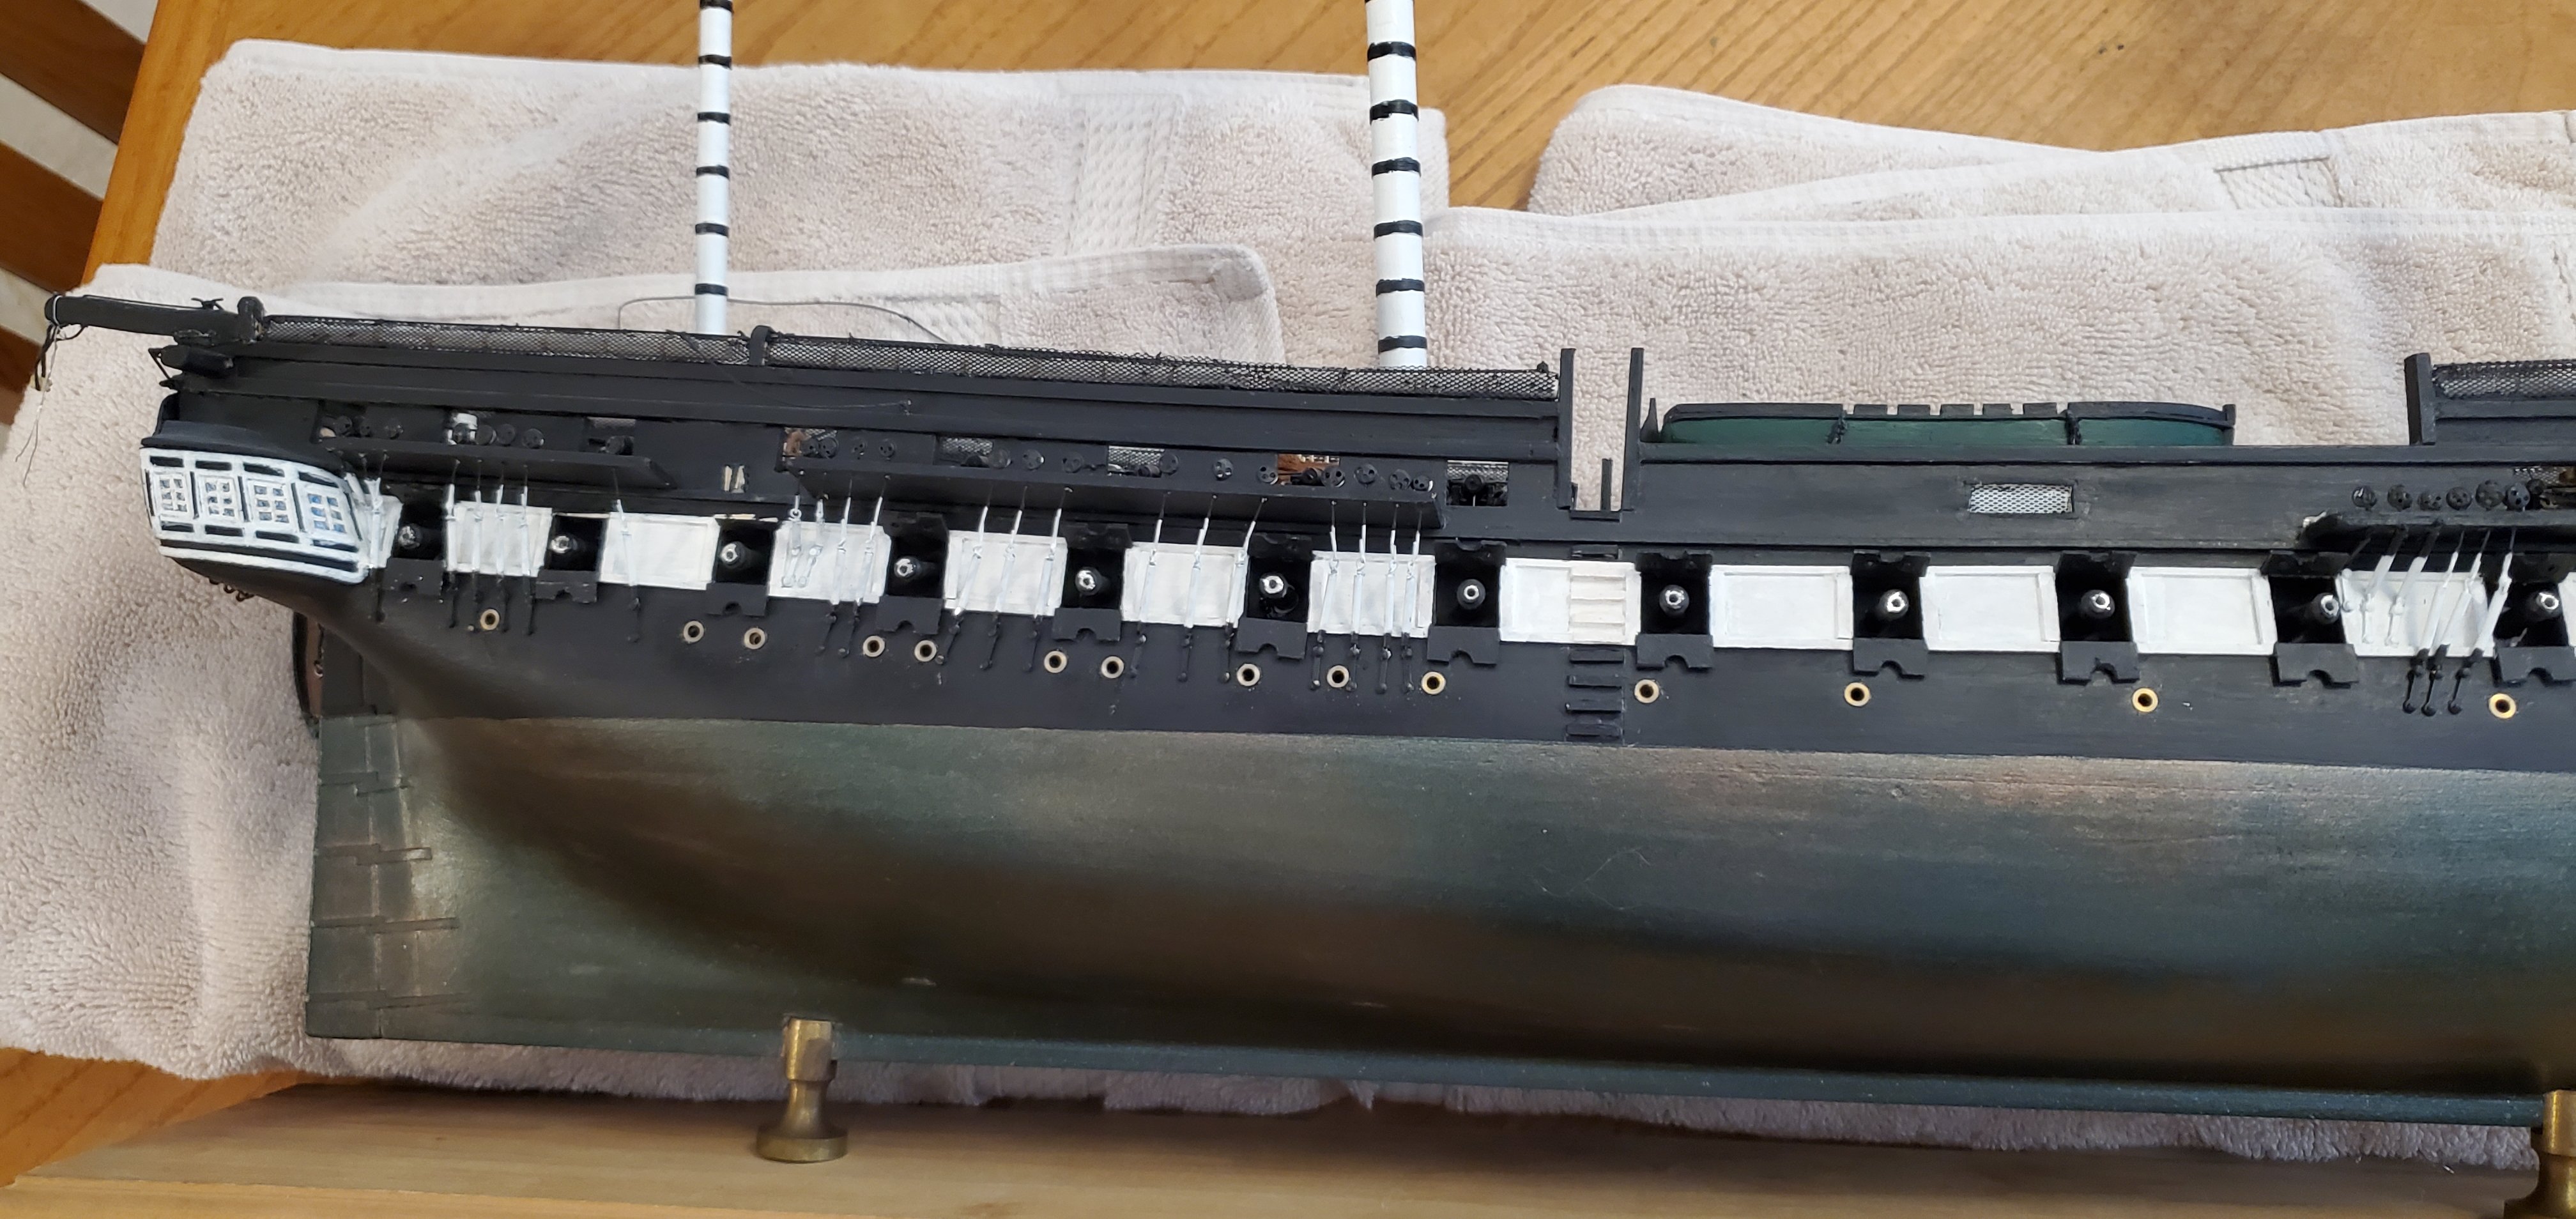
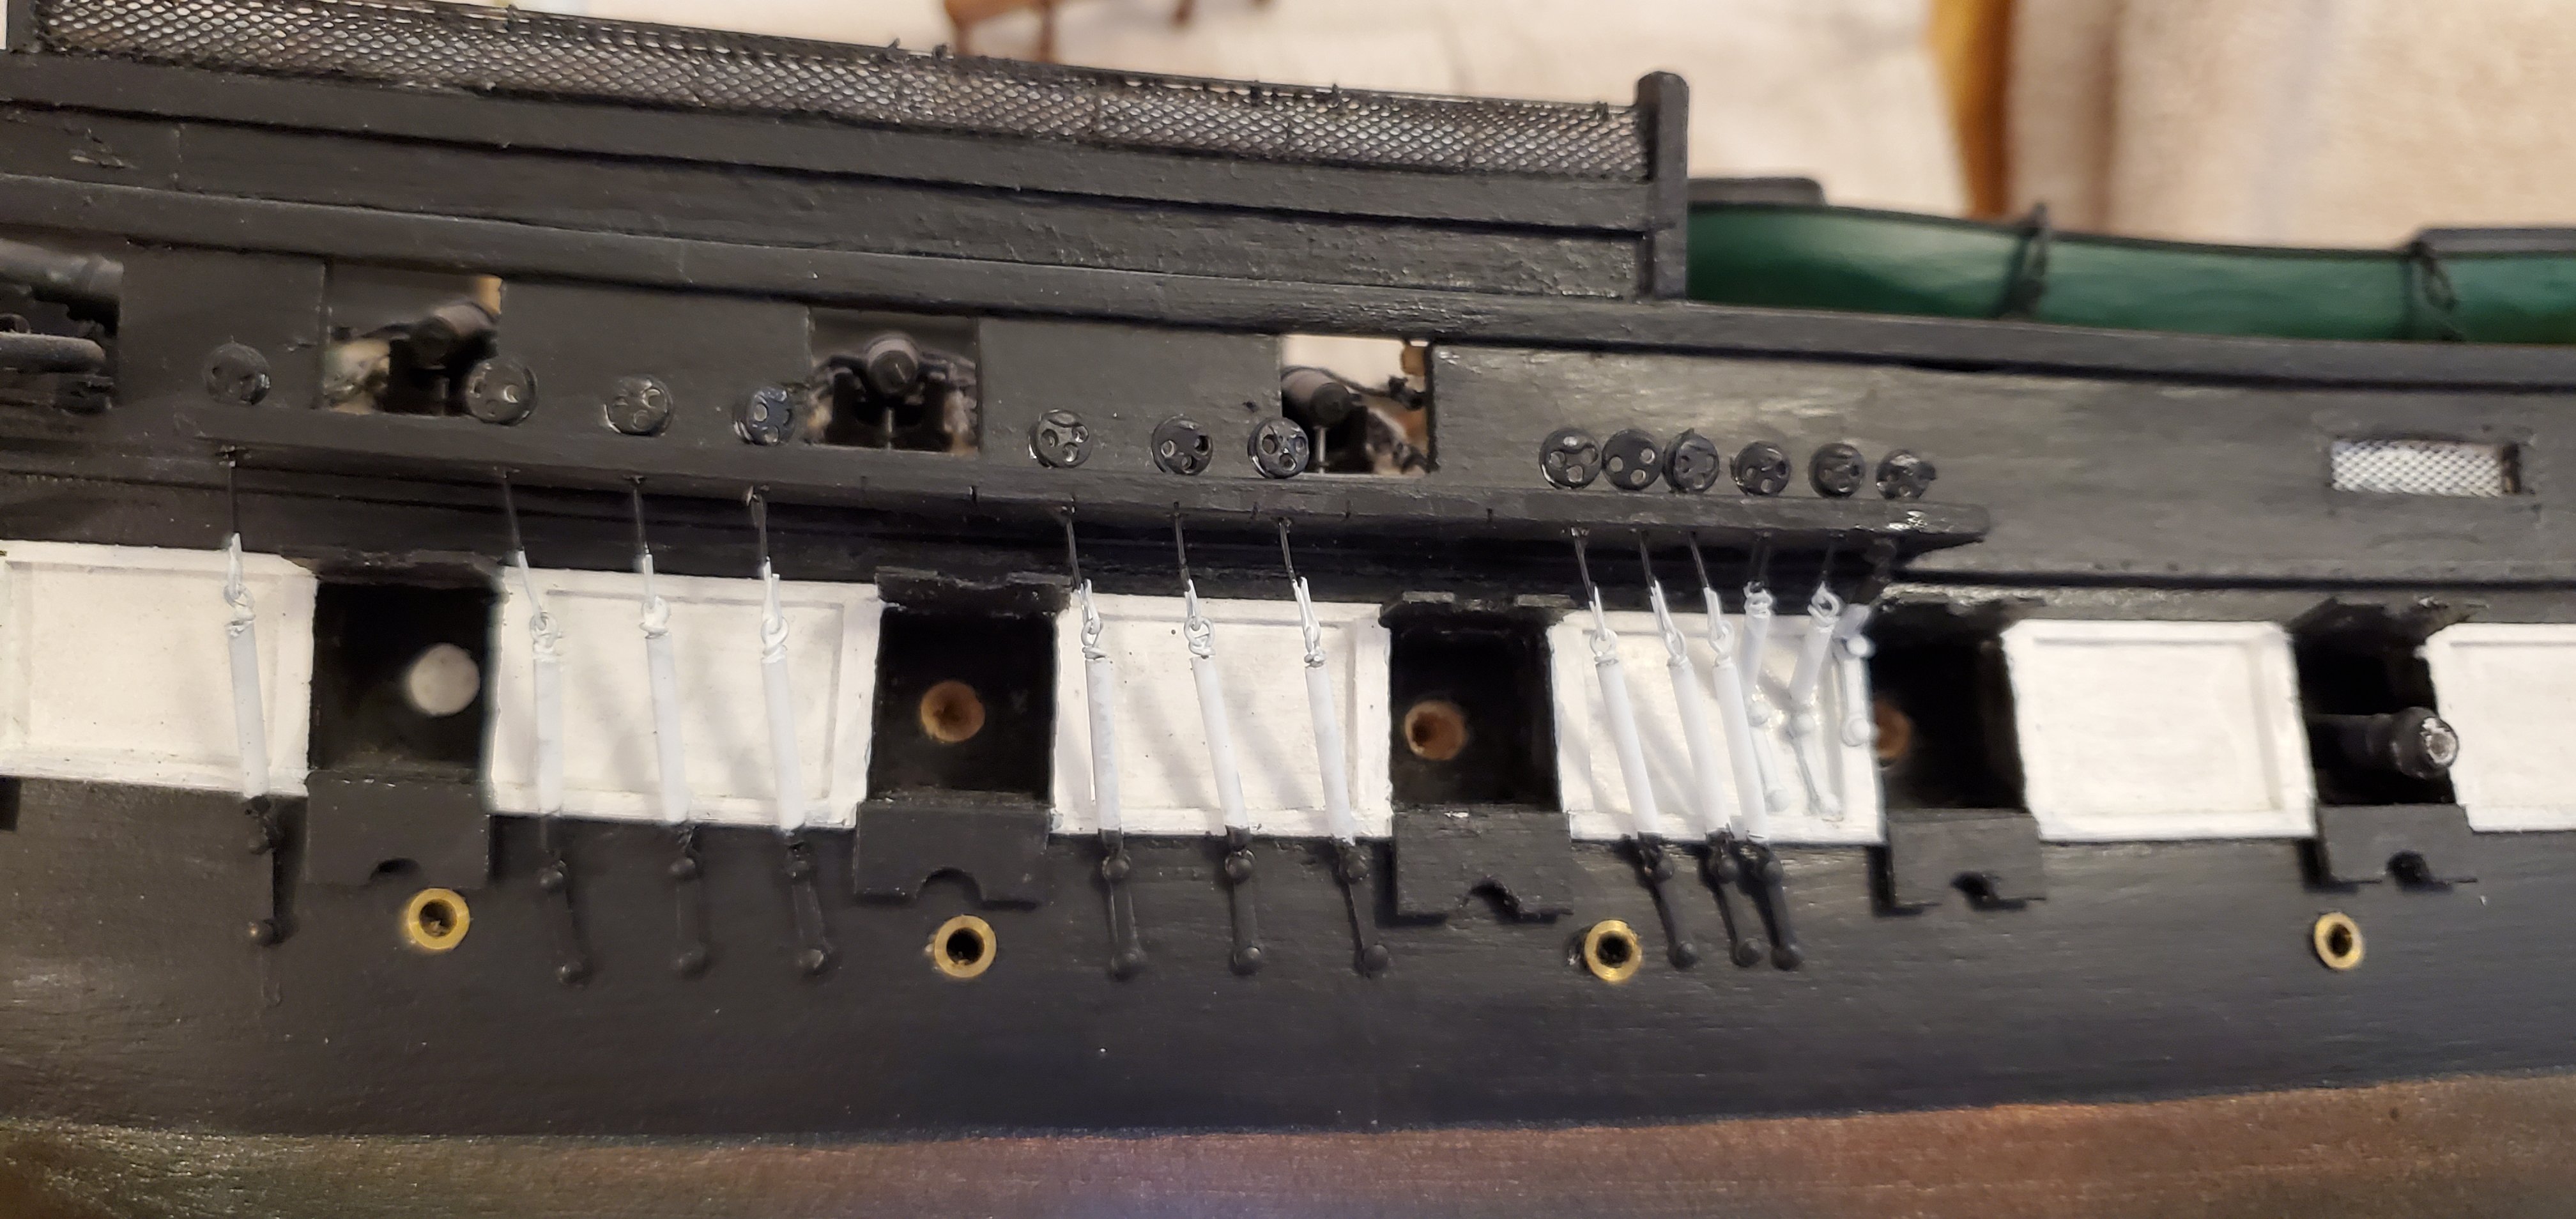
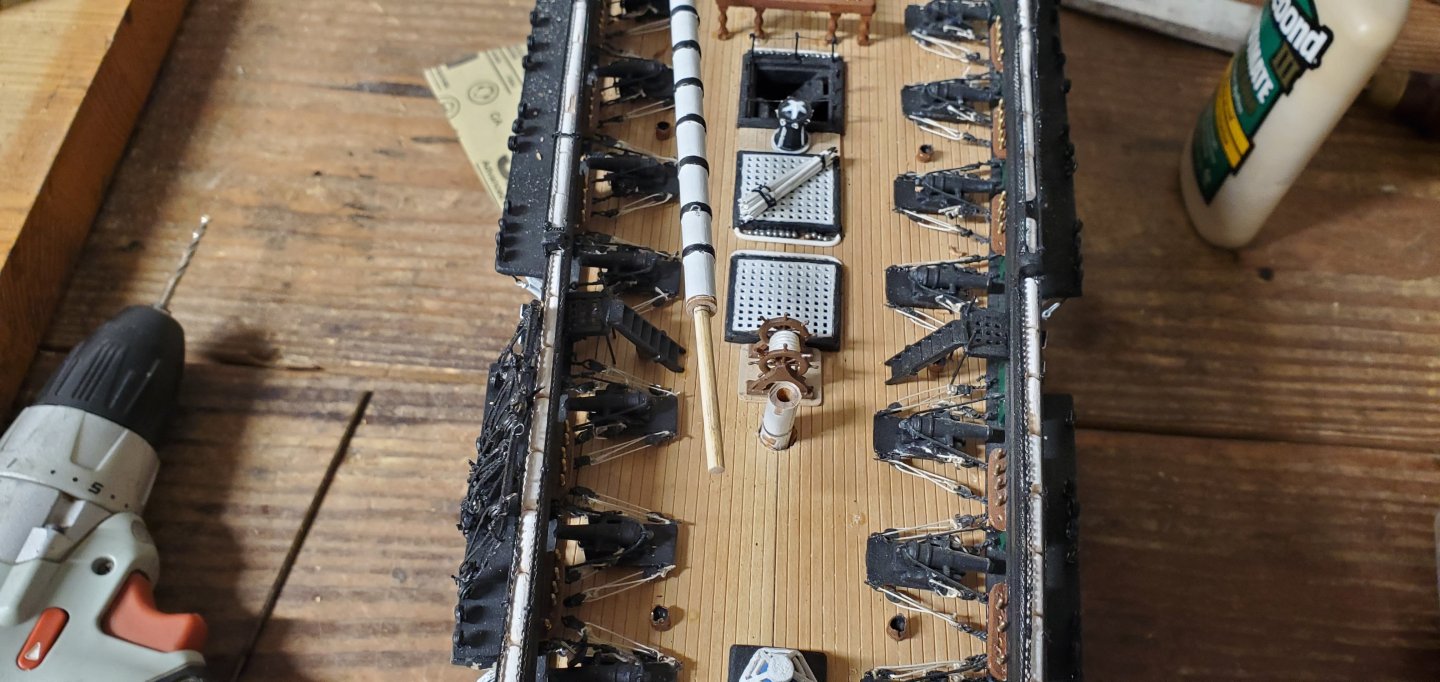
My guiding principle for this project is, “First, do no harm”. As I work through the repairs and additional construction, I don’t want to mess up any of the fine work that Carson’s father accomplished. I decided to kick things off with something that seemed fairly benign. The gun deck is equipped with thirty 24-pound cannons. As you can see from the pic below, the barrels are still solid and had not been drilled out yet. The barrels are made from Britannia metal so I figured they would be fairly easy to drill out. The 24-pound cannons have a bore of 5.8 inches, which at 1/96 makes a 1/16” drill bit pretty close. It was a little awkward drilling the barrels with them installed and sticking out the gun ports, but it went ok for the most part. I say for the most part because a few of them came loose and popped out. That’s when I realized that there were not individual cannons on the gun deck. The barrels have a post on the breach end that fits into a hole drilled into some solid wood inside the gun deck. Ironically, that is pretty much the method I use for my ship-in-bottle ships like the Independence that have gun decks with cannon barrels protruding through the gun ports. The cannon barrels here that popped out were very easy to drill out and reinstall with a bit of wood filler. Here's what it looks like with all the cannon barrels back in place and repainted. The spar deck has much smaller cannonades, 18 pounders I believe. Their barrels have not been drilled out either. However, as you can see in the picture above, they are set back from the gun ports on the gunwale. And for all but a couple, the channel is in the way so it would take a very long and very thin drill bit (probably 1/32" or maybe 3/64") to try and bore those barrels out. The cannonades are all glued to the deck quite securely with complete rigging, so removing them and reinstalling is not an option. So I will probably leave them as is and not risk damage to the surrounding areas by trying to do some heroic drilling.


- 301 replies
-
- 11
-
-
- Constitution
- Bluejacket Shipcrafters
- (and 1 more)
-
That's a great looking ship, Chris. Hard to believe it's made out of card!
- 146 replies
-
- 7
-
-
- Speeljacht
- Seahorse
- (and 2 more)
-
Fine work, Rob. As usual! That bell is particularly well done.
-
The boxcar red on the shed is spot on, IMO. And I would love to have a business card I could hand to people that said I was a "Donkeyman"!
-
PFC Pile and cousin Goober are a talented pair. Not many seamen could take the ship out for a spin when there are no sails yet!
- 207 replies
-
- 4
-
-
- vanguard models
- Duchess of Kingston
- (and 1 more)
-
That shed looks great, Keith! Well done so far.
-
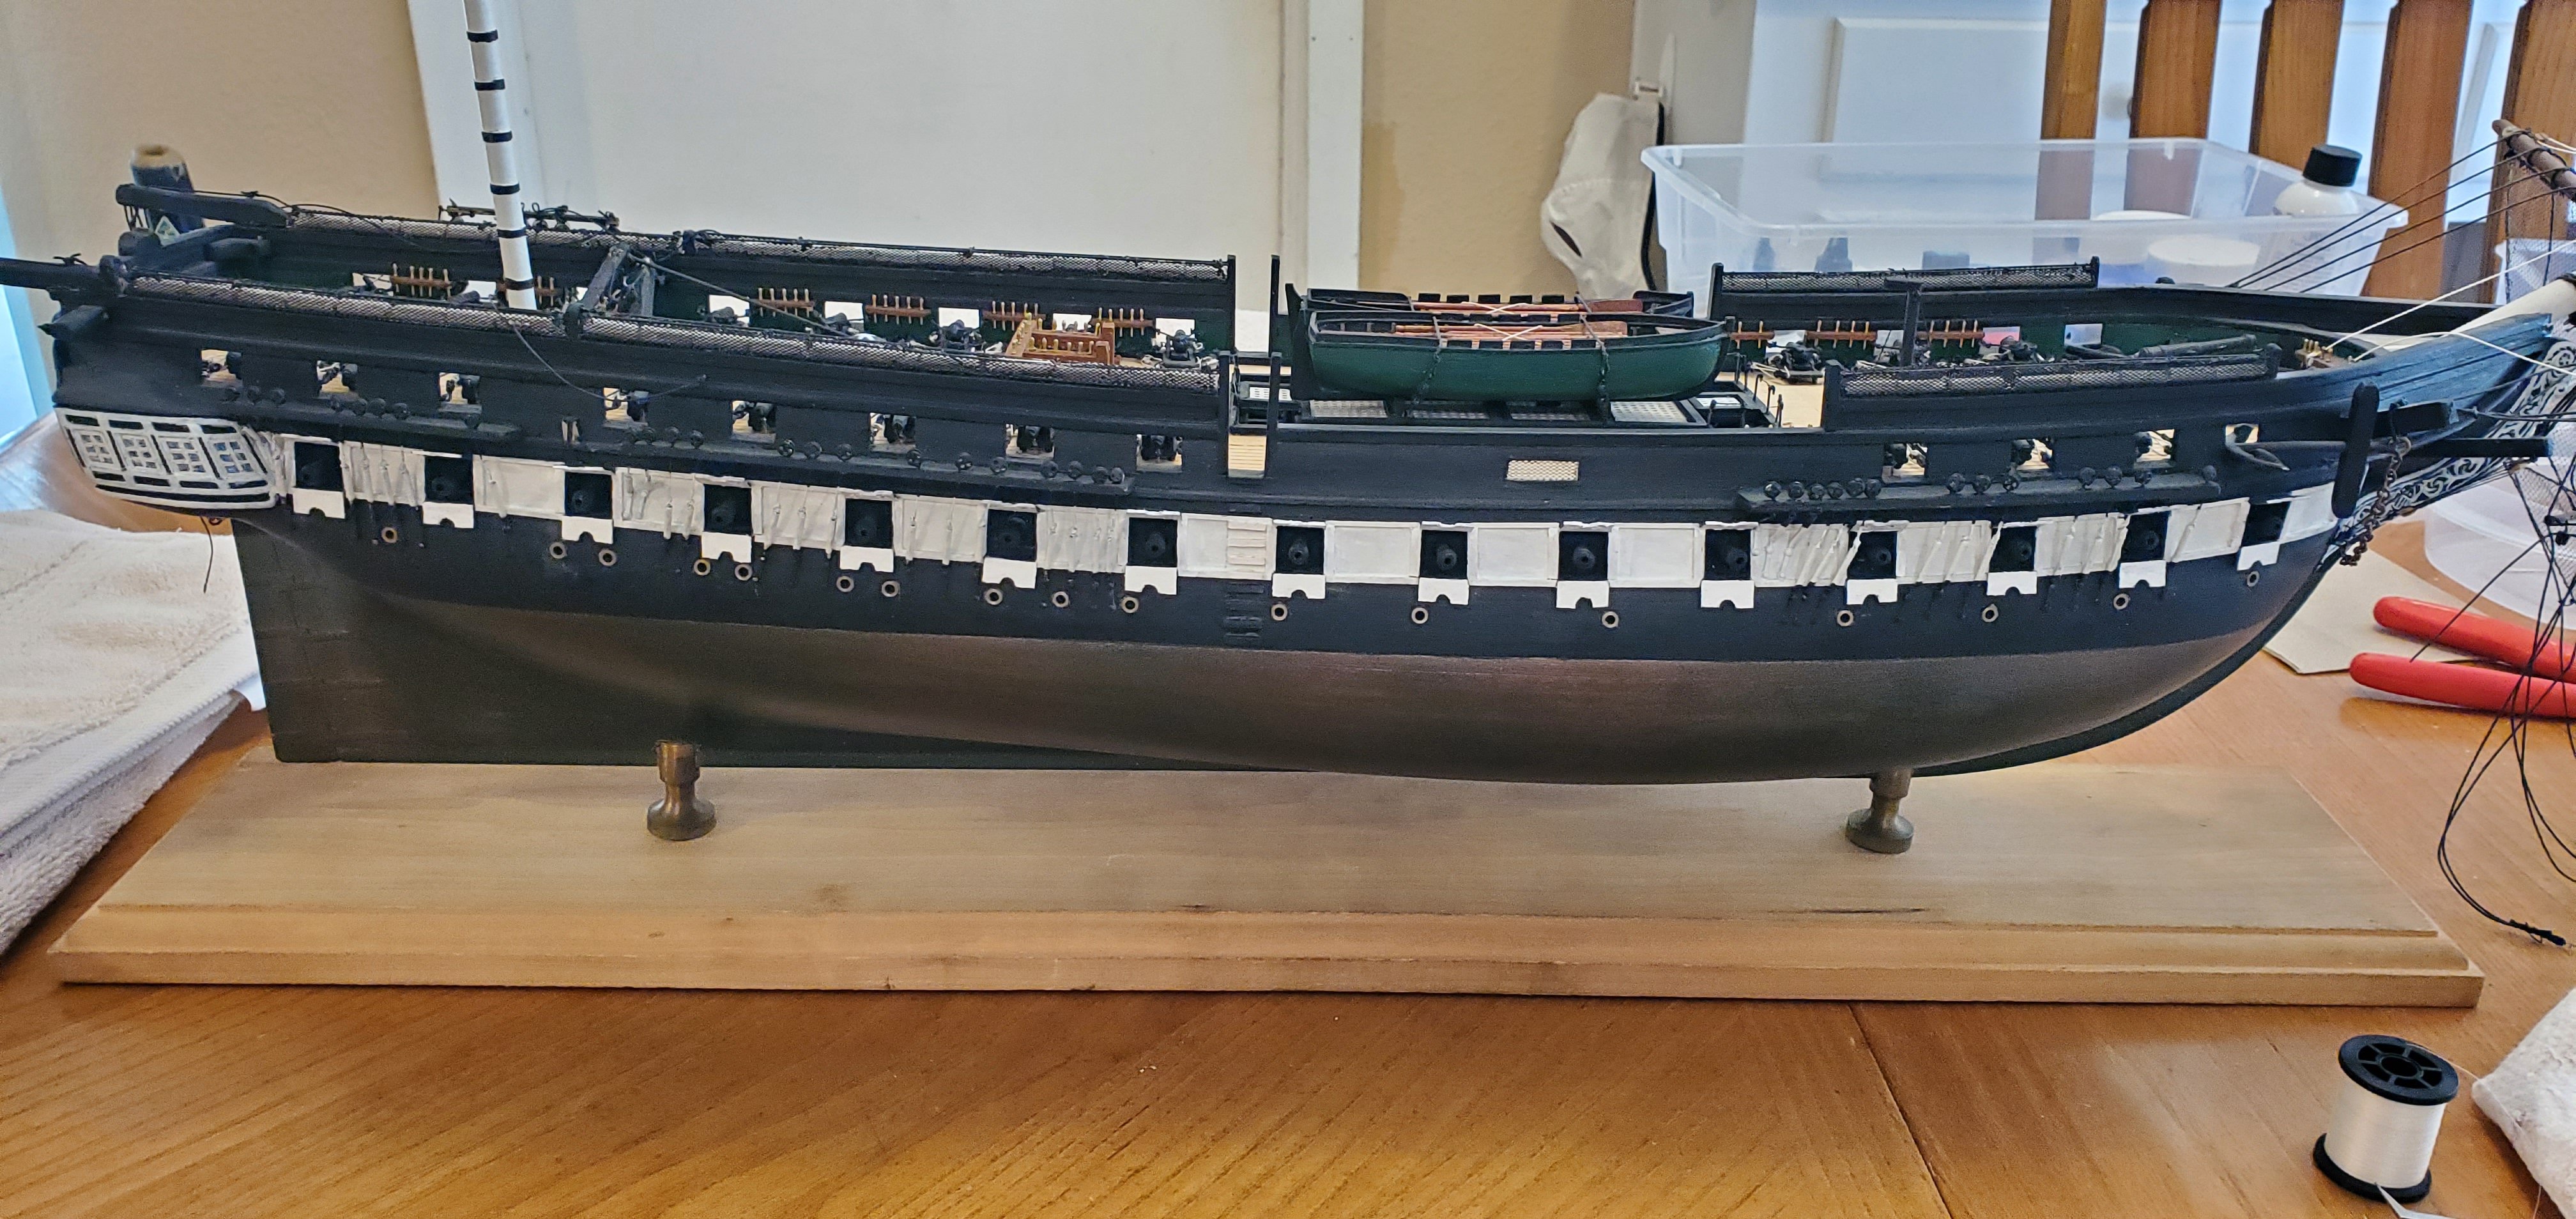
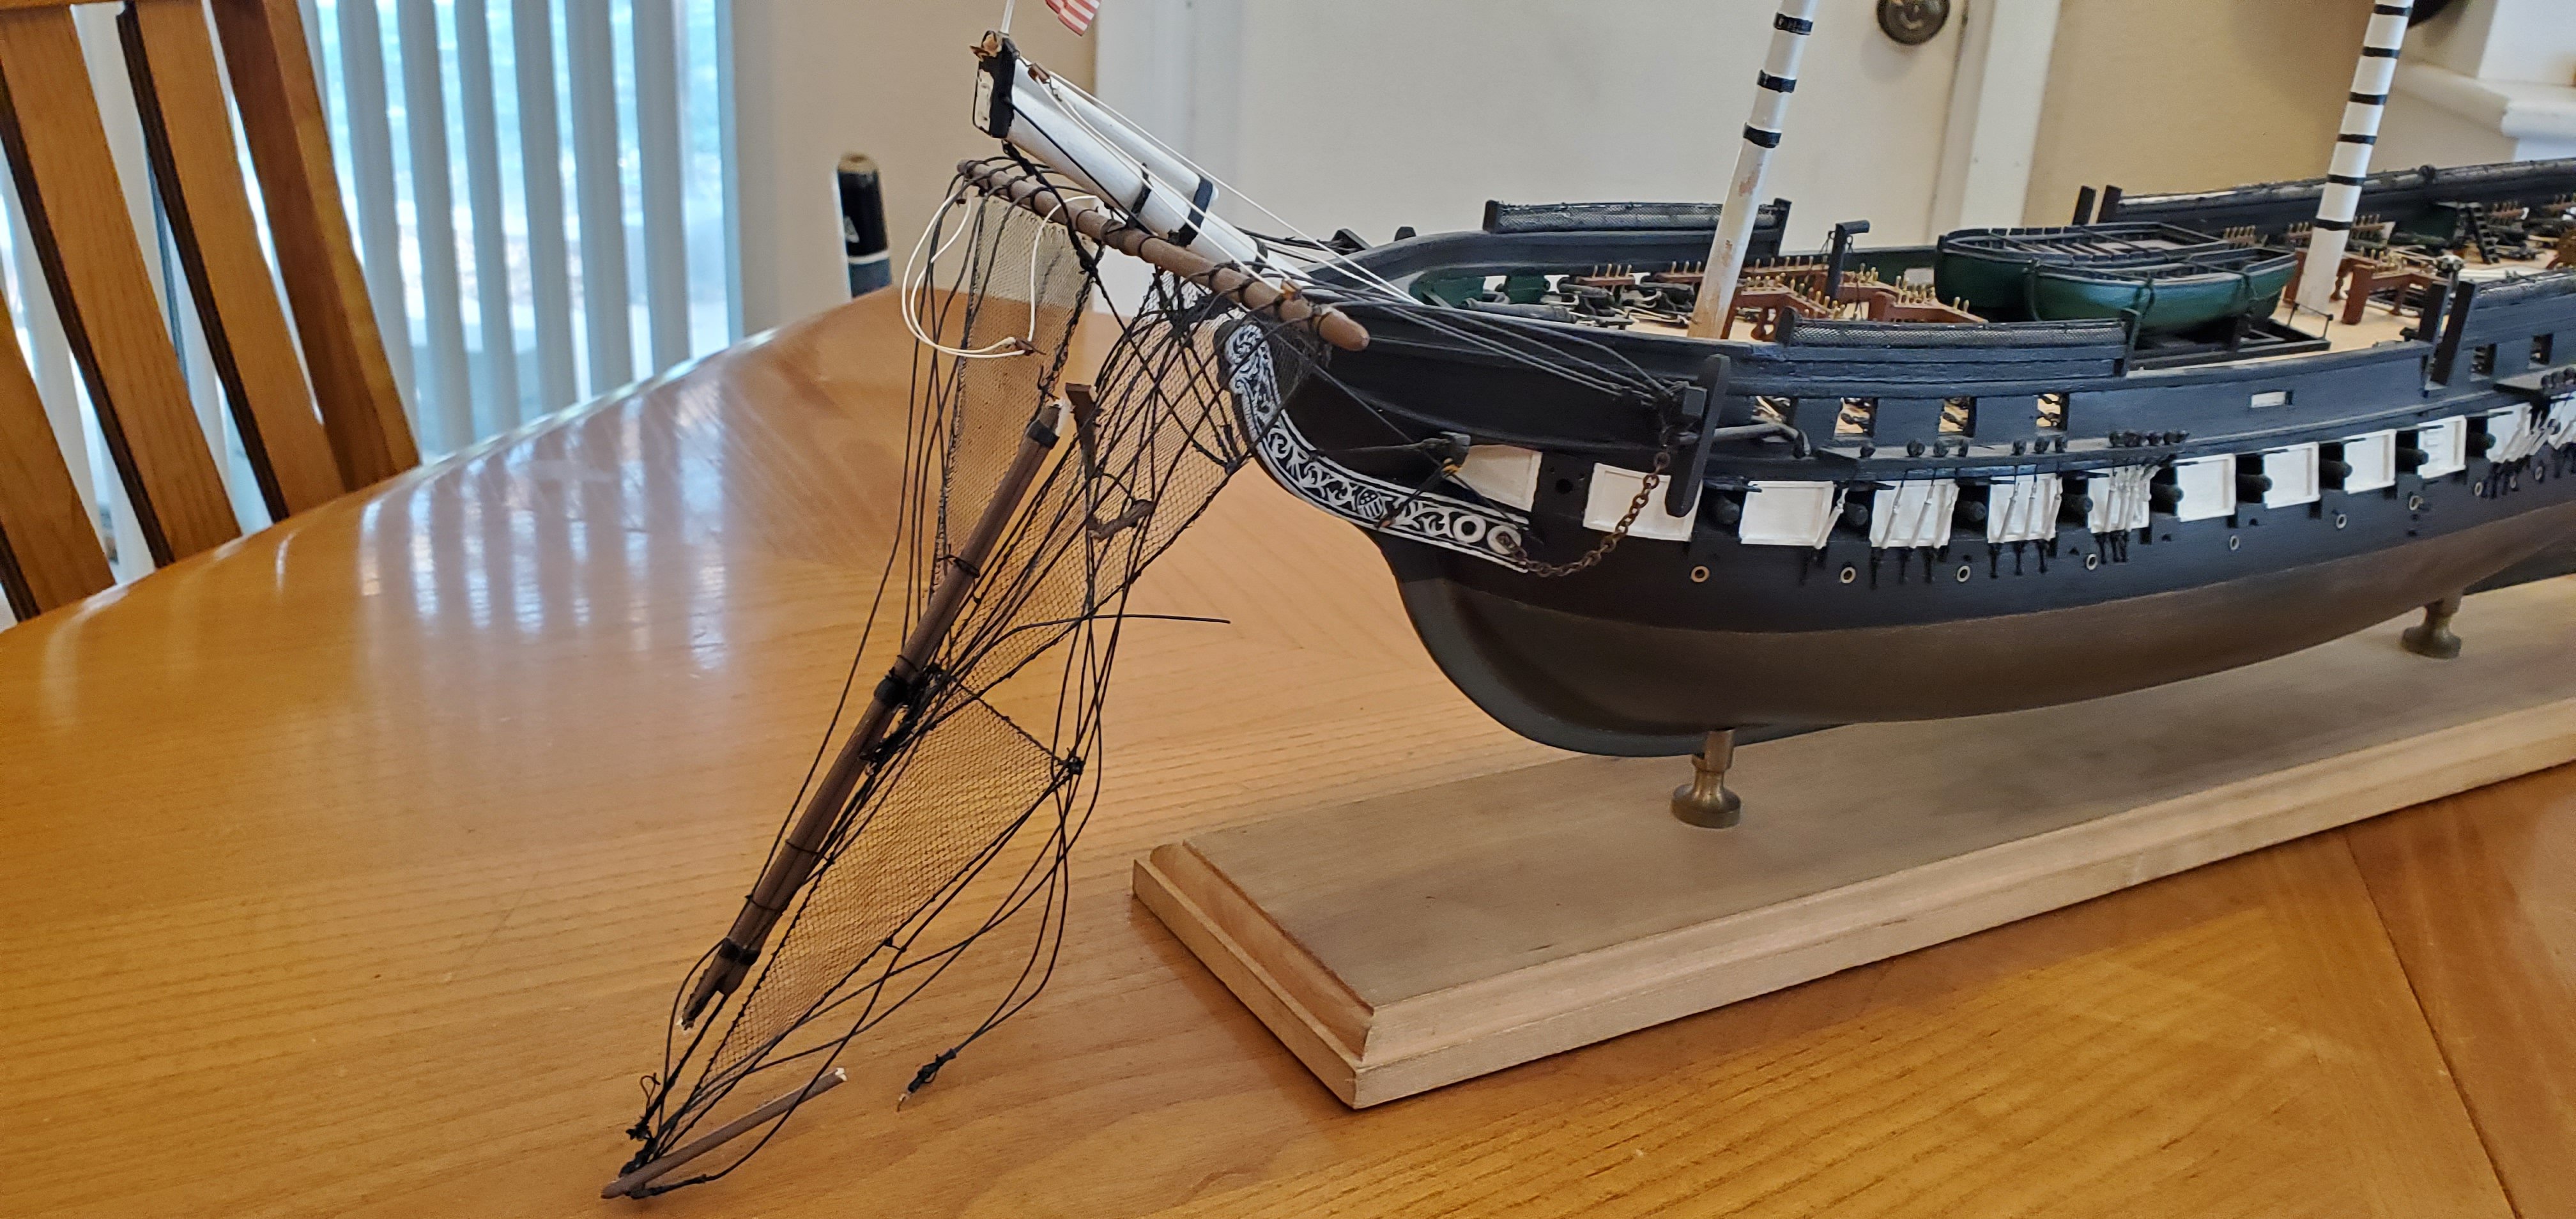
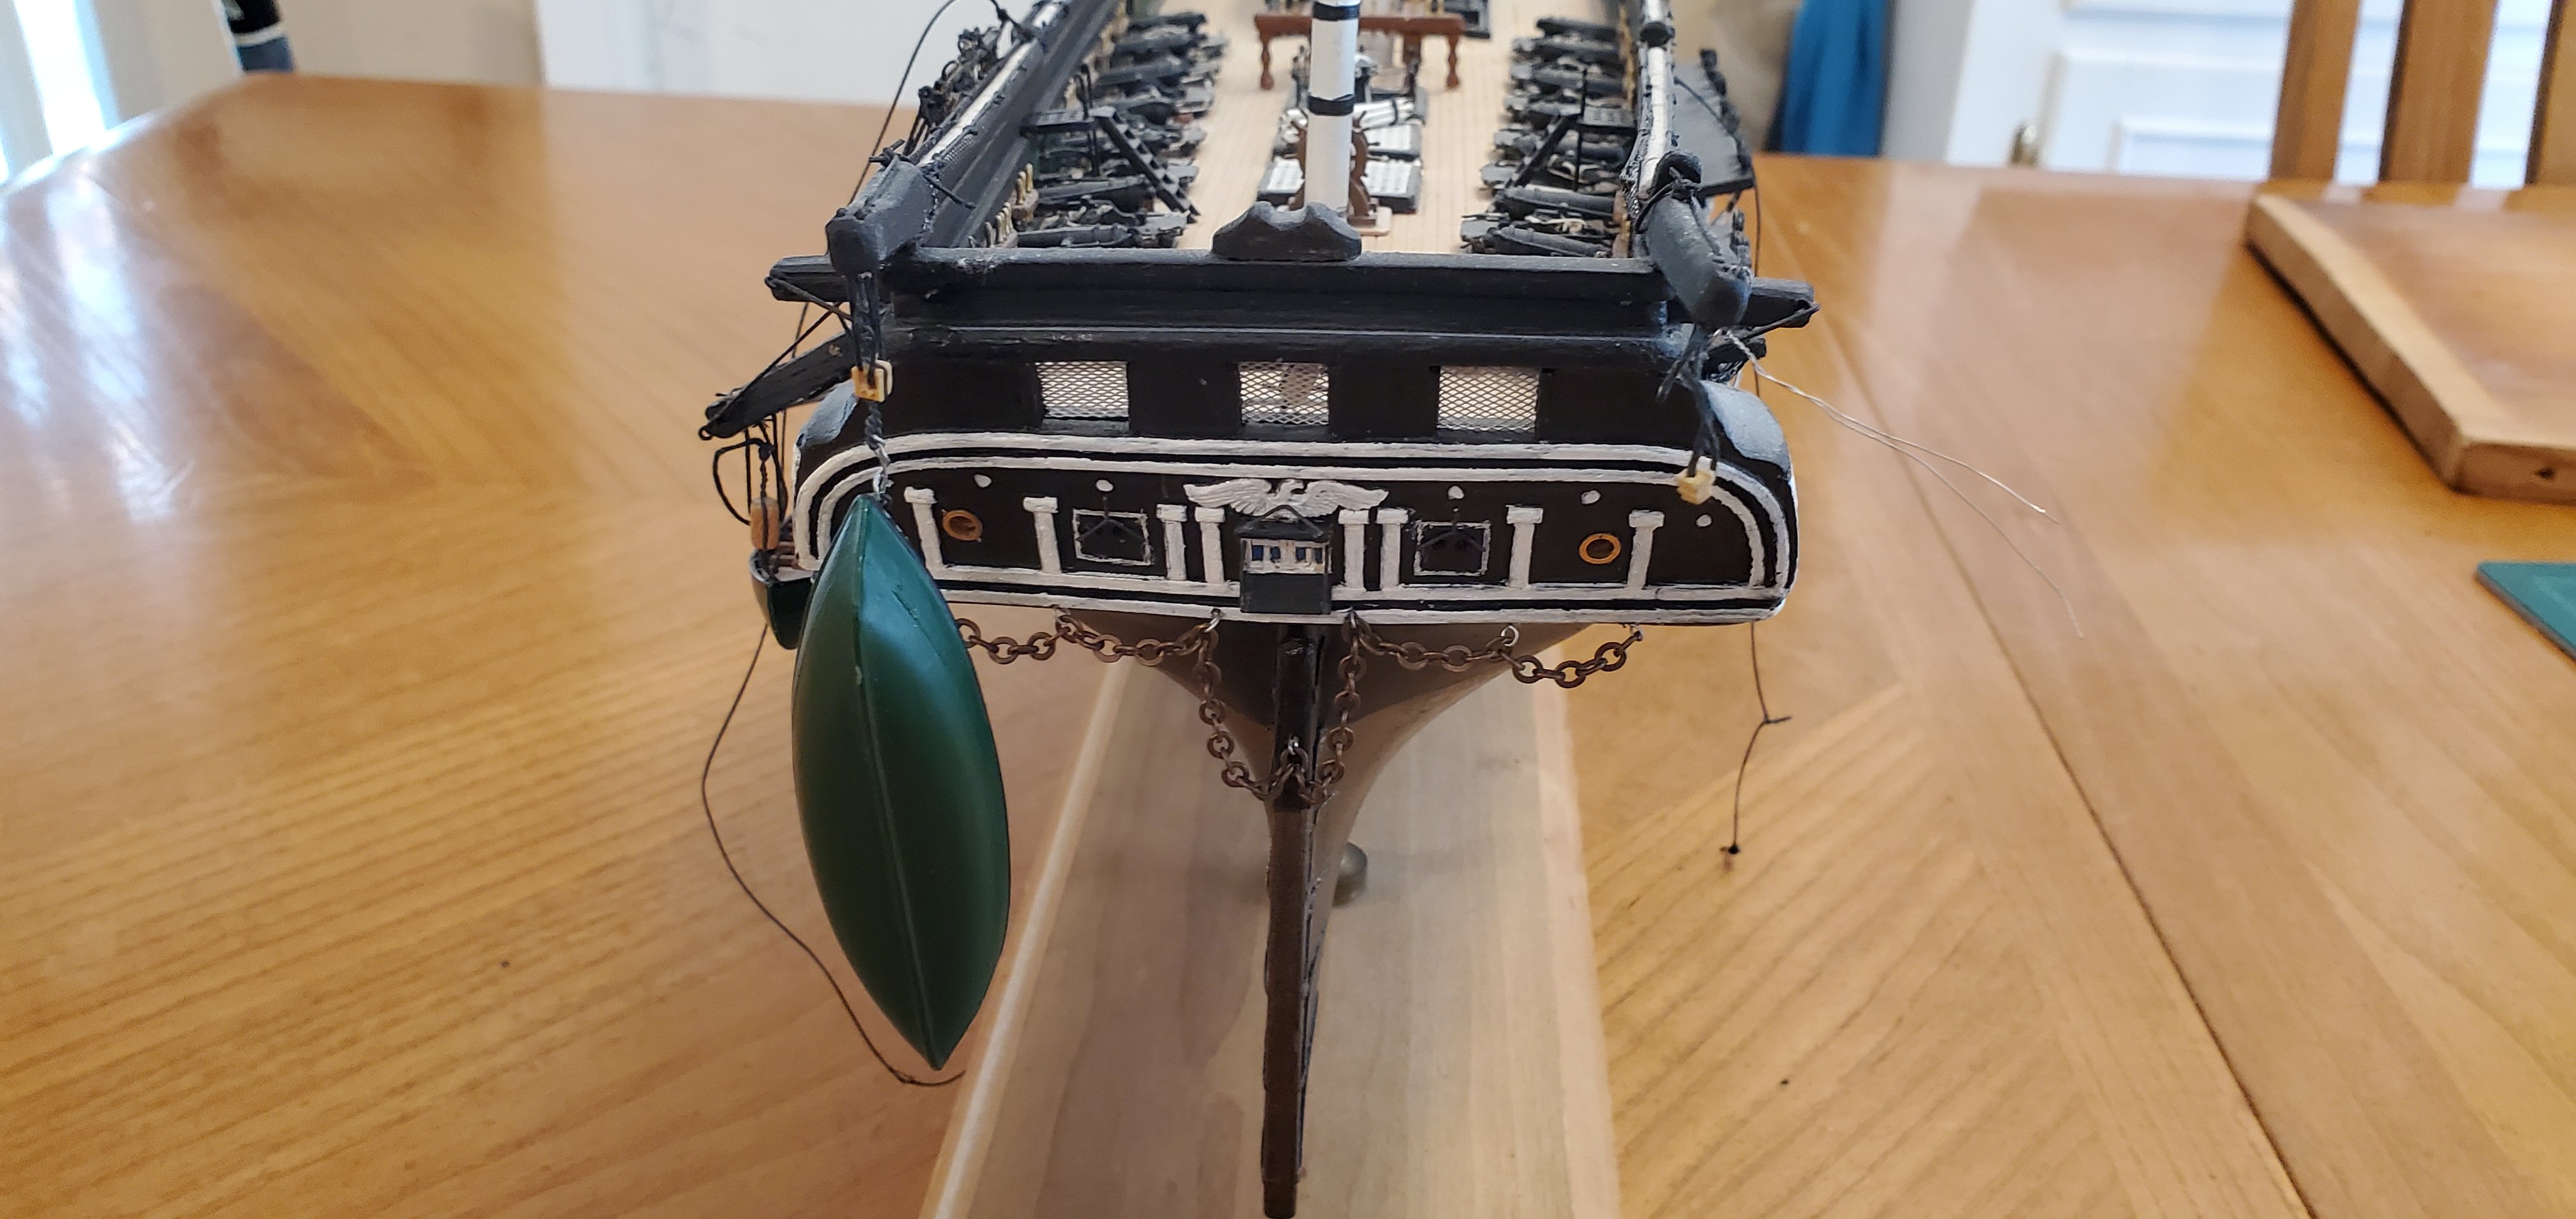
A couple of months ago, @Keith Black sent me this MSW post from a gentleman in Austin, Texas who was looking for help completing a model. https://modelshipworld.com/topic/36787-looking-for-assistance-completing-model/ Since I also live in Austin, Keith thought this might be of some interest to me. He was right. The gentleman, Carson, was looking for someone to complete a model his father had been working on before unexpectedly passing away late last year. He and his family were hoping to have the model completed as a way to honor and remember their father. I contacted Carson, found out more about the model, and agreed to finish it up for them. I picked up the model earlier this week and have just started to examine it and the kit's documentation. I will also be studying some of the Constitution build logs out here on MSW. Once I get my arms around the whole thing, I’ll put together a plan for how to attack this project. The model is the Blue Jacket Bicentennial Edition of the U.S.S. Constitution. Carson’s father had done a significant amount of very nice work on the model - completing the hull, outfitting both the gun and spar decks, stepping the masts, and completing the complex bowsprit rigging. It appears he was on the verge of diving into the real fun that goes with all the standing and running rigging. Somewhere along the way, the model took some hits and suffered a bit of damage. But just like the real Old Ironsides, the model survived with the hull intact and just a few repairs needed. So this project will be a repair job at first followed by completion of the construction. For repairs, here’s what I’m seeing on initial review: 1. The most significant damage is to the bowsprit which is broken in a couple of places. 2. The sky sail pole on the main mast was broken at some point but has been repaired to a degree. 3. The davits for ship’s boats on both sides are broken off. 4. The masts have been stepped, but the glue bond on the fore and main has come undone, so they will need to be re-stepped at the proper rake. 5. The netting for the hammock storage has some minor dings. Other than that, I believe, the model is in good shape and I hope to complete the model in a way that properly honors Carson's father. I know there are many folks here on MSW that have extensive experience with the Constitution and perhaps the Blue Jacket kit itself. So please do not hesitate to offer comments, critiques, and suggestions. I welcome it all. Following are pictures that show the current state of the model. I’ll start with my favorite which shows all the damage to the bowsprit assembly. Yet Old Glory survives and still waves proudly above it all!


- 301 replies
-
- 14
-
-
- Constitution
- Bluejacket Shipcrafters
- (and 1 more)
-
"DonKeith Oaty". I'm dying!!! 🤣🤣🤣
- 87 replies
-
- 3
-
-
- King of the Mississippi
- Artesania Latina
- (and 2 more)
-
Yes, Keith! Definitely a better shade of boxcar red. At least for my eye.
-
That's what we do!