Glen McGuire
-
Posts
1,976 -
Joined
-
Last visited
Content Type
Profiles
Forums
Gallery
Events
Everything posted by Glen McGuire
-
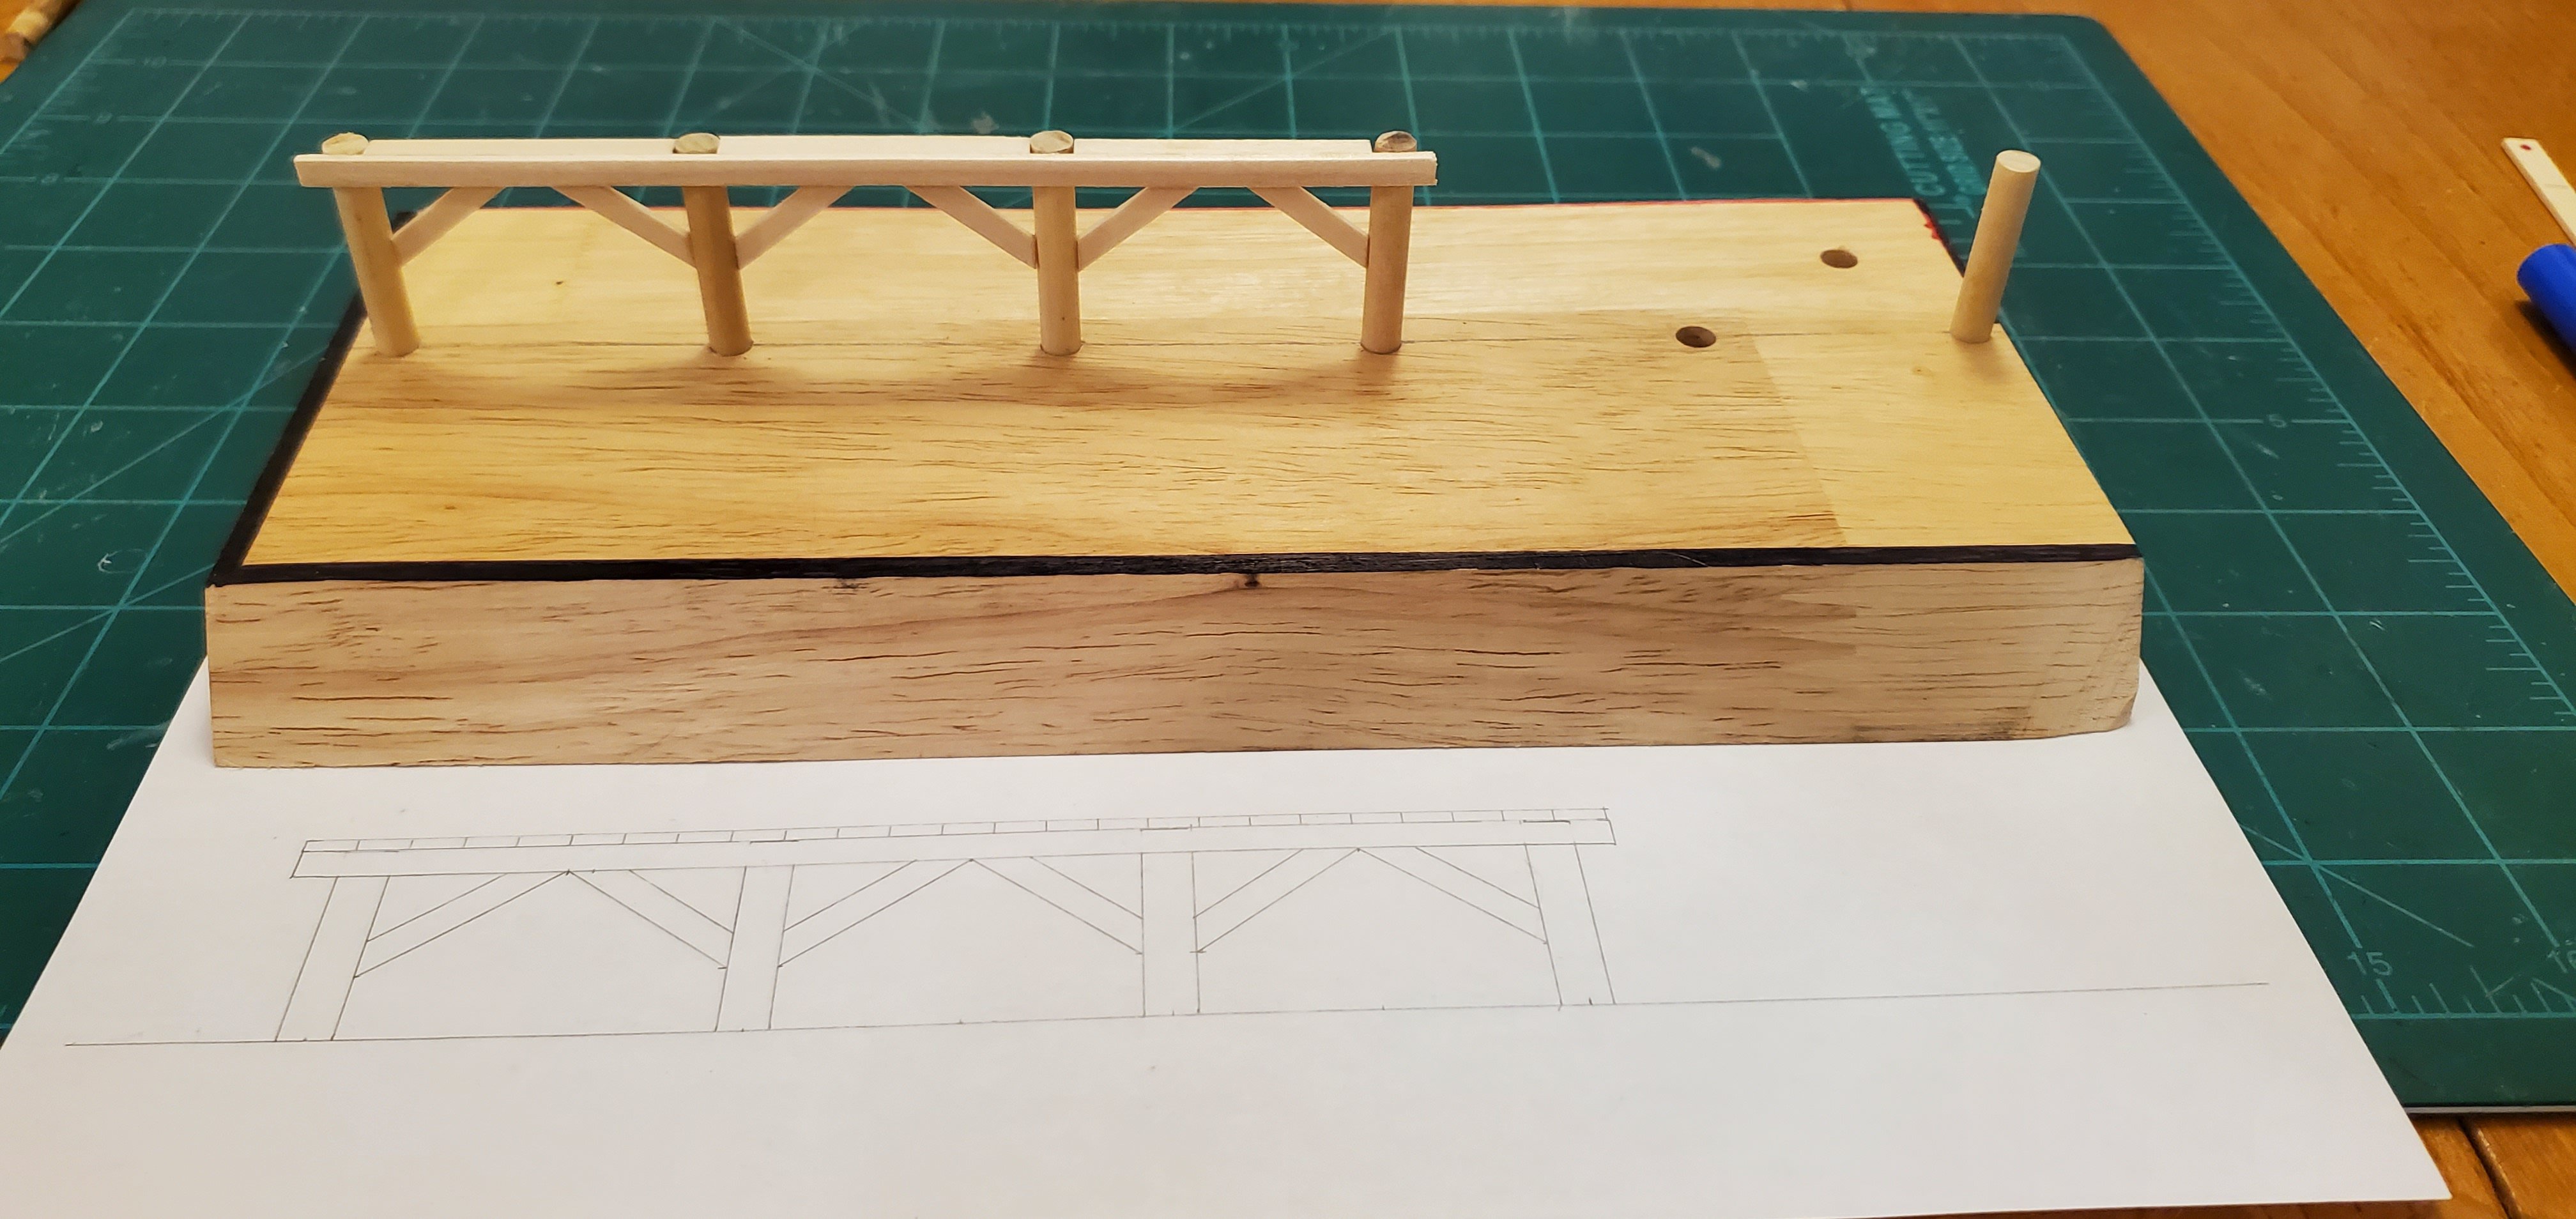
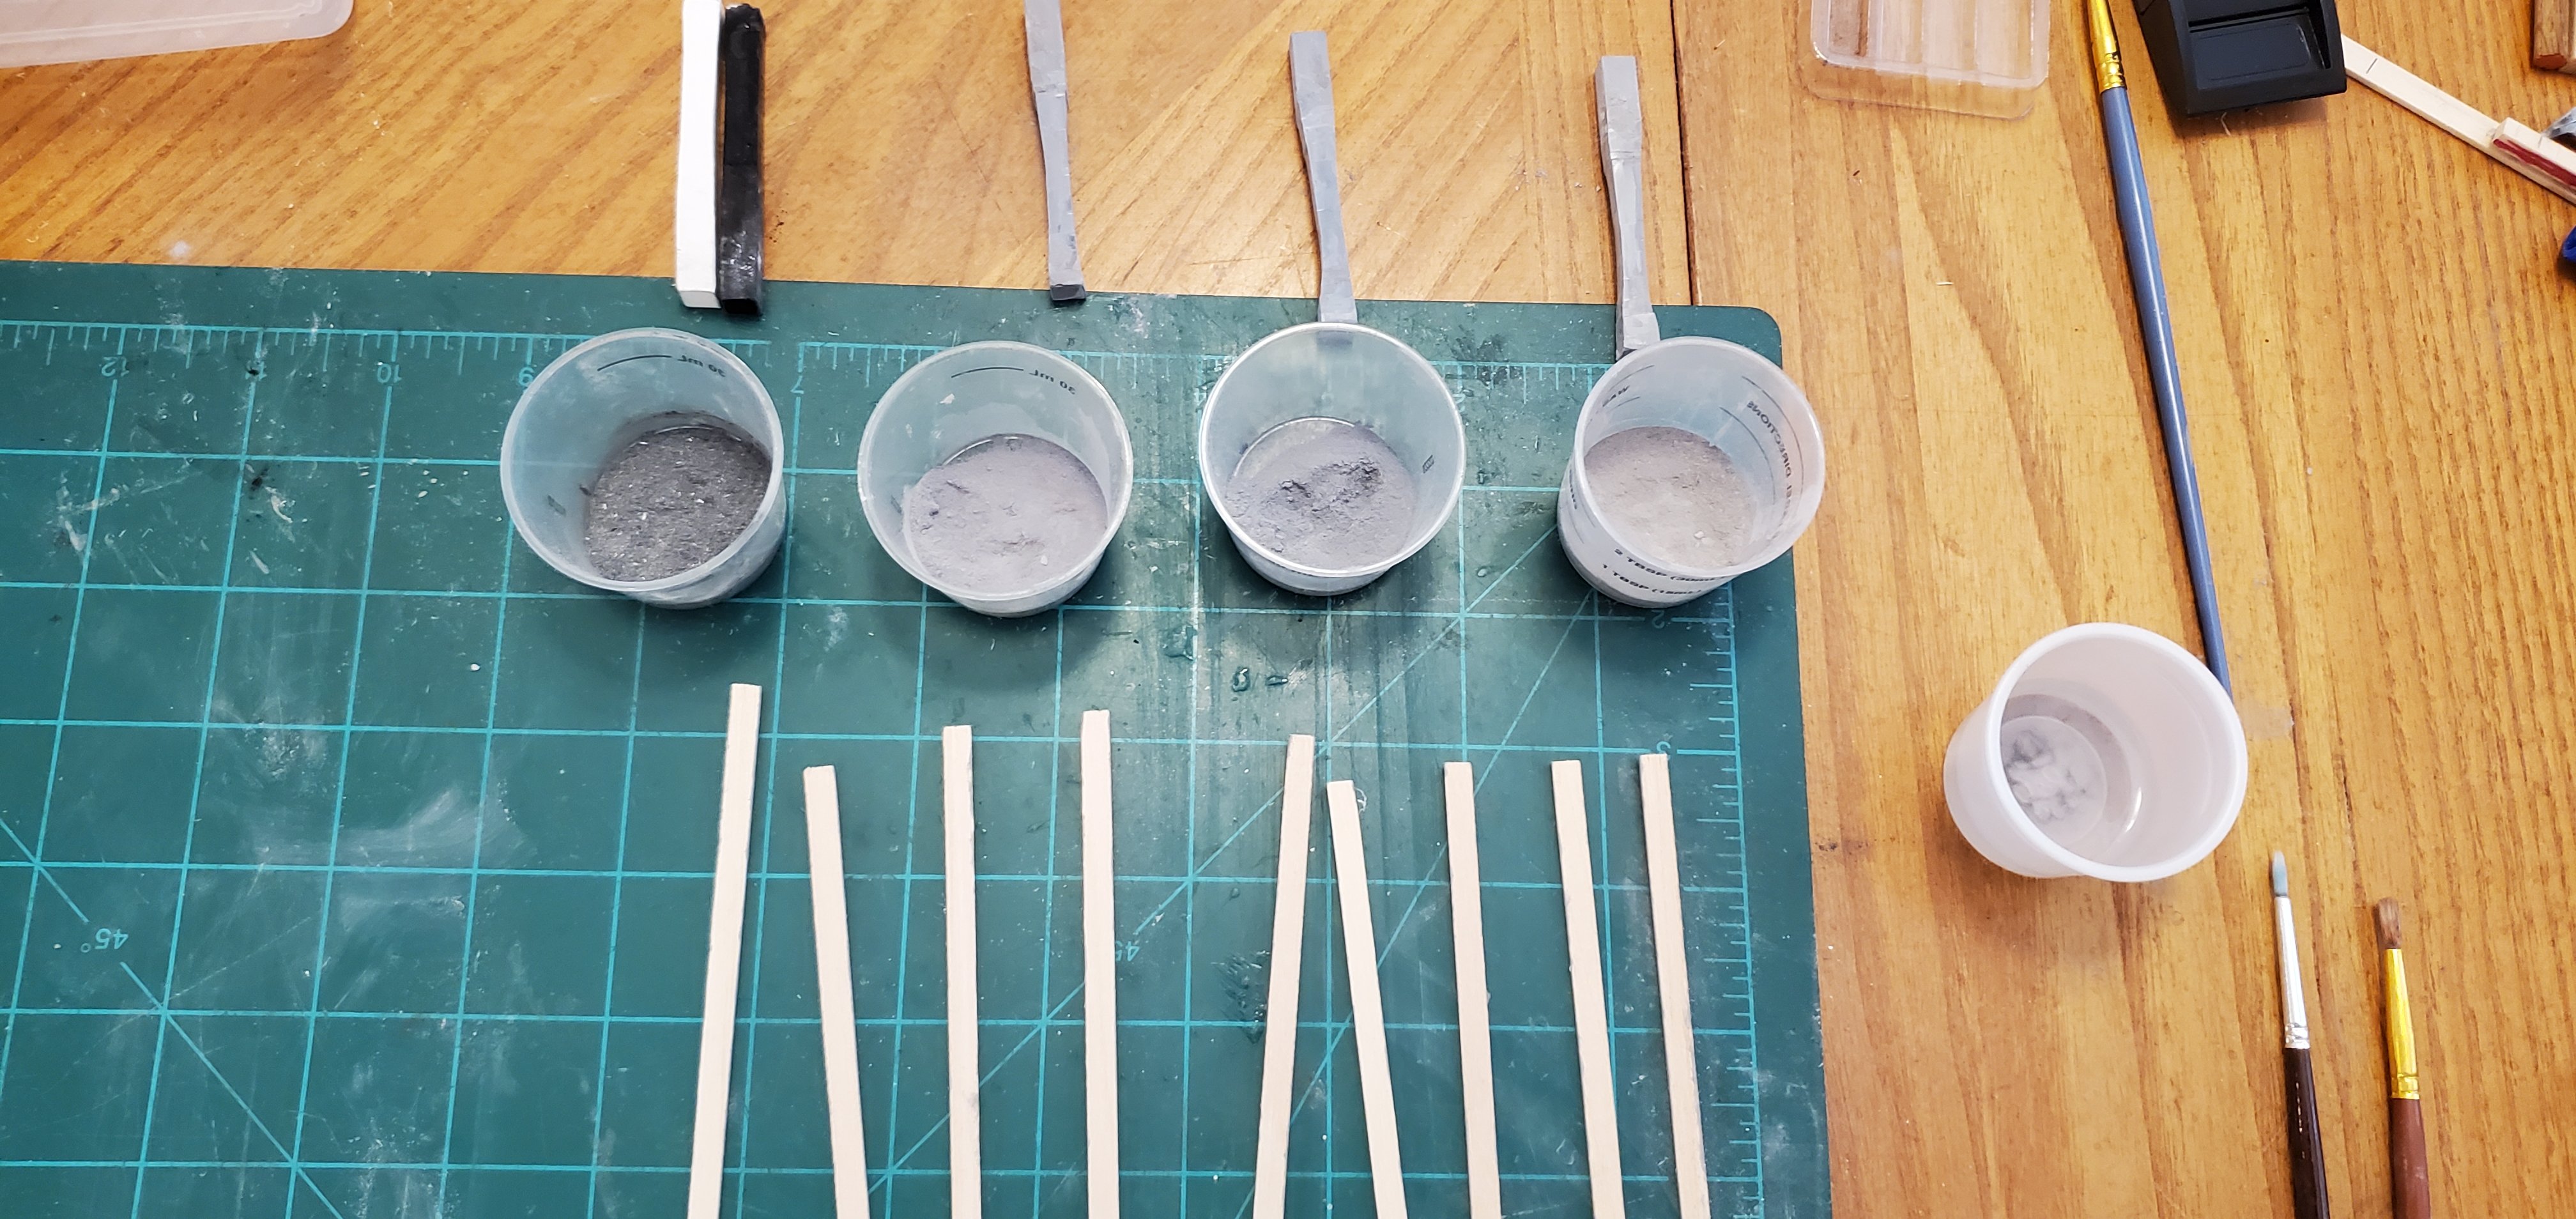
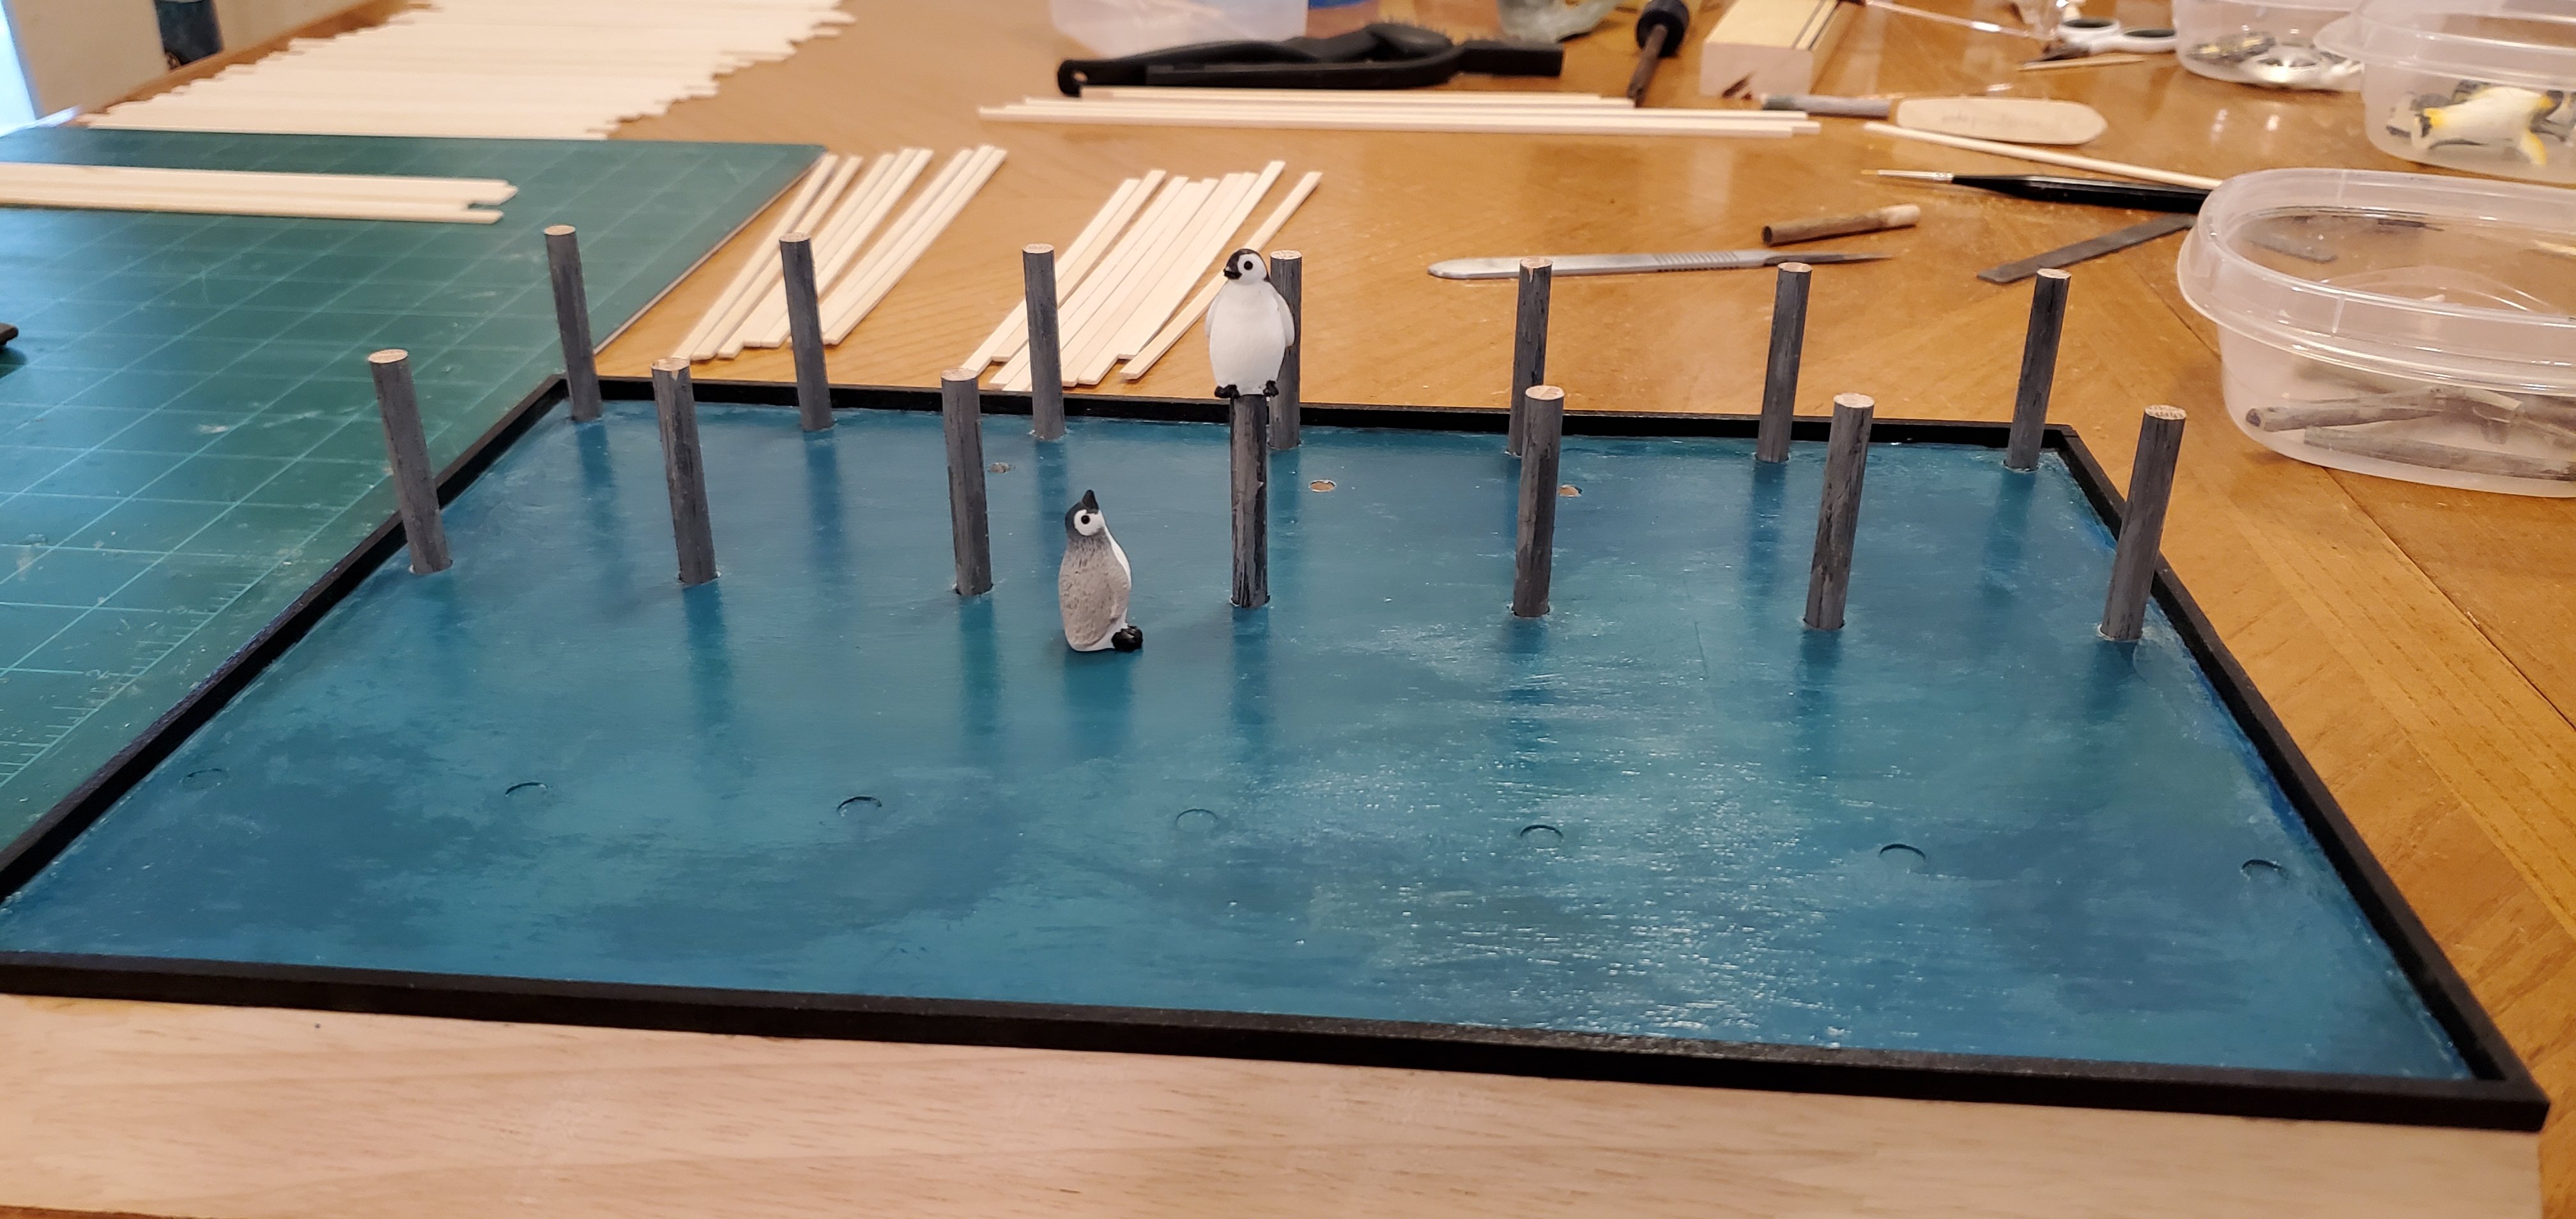
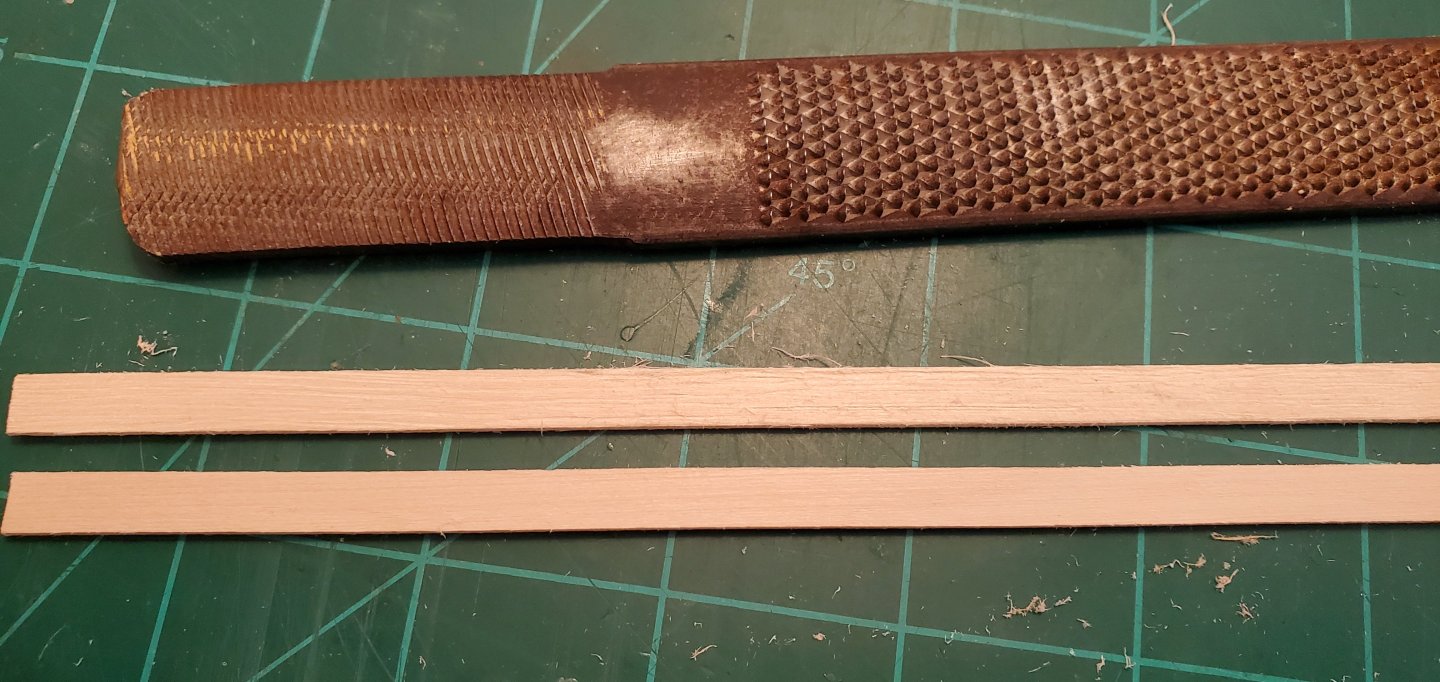
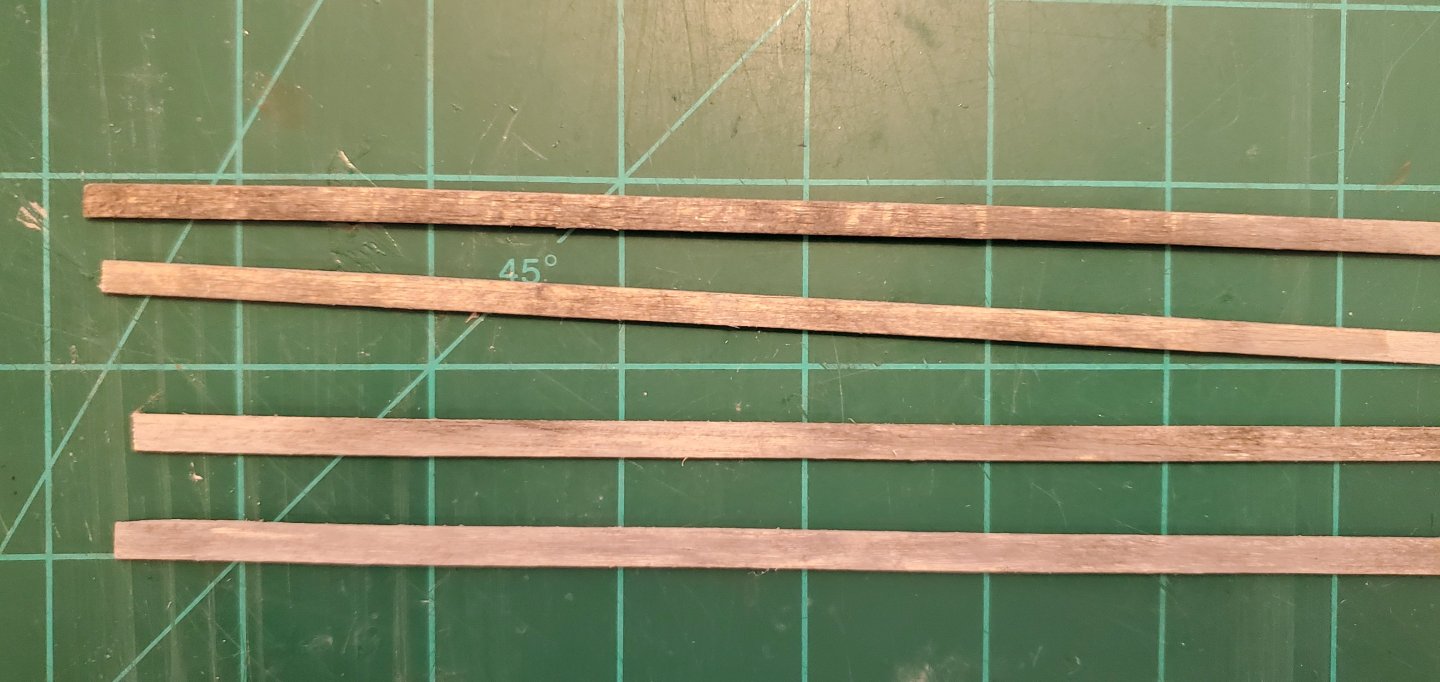
 Egg nishner, nose tone unturned, let stalk strine. Y’all have me as confused as my cows were when I put them on astroturf. I’m pretty sure when they were mooing, they were saying “bloody oath, eh?” 😃 Now that I’ve flunked my Aussie language lesson for the week it’s time to get back to the project. First up is the wooden wharf to represent the Galveston, Texas waterfront of the mid 1800s. I built a small mock-up of the support structure to see if what I had in mind would look ok. The next step was weathering/texturing/coloring the planks and pilings for the support structure (I'll do the deck boards later). I used @gjdale's method of chalk and isopropyl alcohol (IPA) that he described so well in his Foss Landing diorama build log. I used a rasp to roughen the flat wood surfaces. The pic below shows one plank before I hit it with the rasp and one afterwards. For the chalk dust, rather than scrape it directly onto the planks as I believe Grant did, I scraped the different shades into little cups and dabbed them on the planks from there. Then, as Grant described, I brushed over the chalk dust with a liberal amount of IPA. I had to go back over different spots a few times with additional dust and IPA to get the color variation I was looking for. They are actually a little more gray than they appear in the pic below. I wanted gray with a bit of the natural wood color showing thru as if the boards were in the middle of the ageing process. For the wharf’s pilings, the back 2 rows will be mostly hidden, so I just used regular dowel rods and smeared them with some different shades of gray paint. I’ll have something better for the front (more visible) row. Since I don’t have a steam donkey pile driver like @Keith Black is working on, I had to enlist some alternative help to get mine in place.


- 235 replies
-
- 14
-

-
- Banshee II
- Bottle
- (and 1 more)
-
Such clean and crisp craftsmanship. The ensign and the pennant really accentuate the look. Well done, Thukydides!
- 562 replies
-
- 2
-
-

-
- vanguard models
- alert
- (and 2 more)
-
I'd start here with the superb weathering job @gjdale did on the wood strips for his diorama. It's on the first page of the log. https://modelshipworld.com/topic/32778-the-shipyard-at-foss-landing-diorama-by-gjdale-grant-finished-sierrawest-scale-187-ho/
-
I thought you were pulling my leg, Grant, but I checked on Amazon and there really is a book by that name! I may have to get that one. Here's a question for you - Here in the US, someone from Texas like me talks a lot different than someone from the the northeast (like Boston) or the west coast (like California). Do folks in different parts of Australia have significantly different accents and/or ways of talking?
- 235 replies
-
- 5
-
-
- Banshee II
- Bottle
- (and 1 more)
-
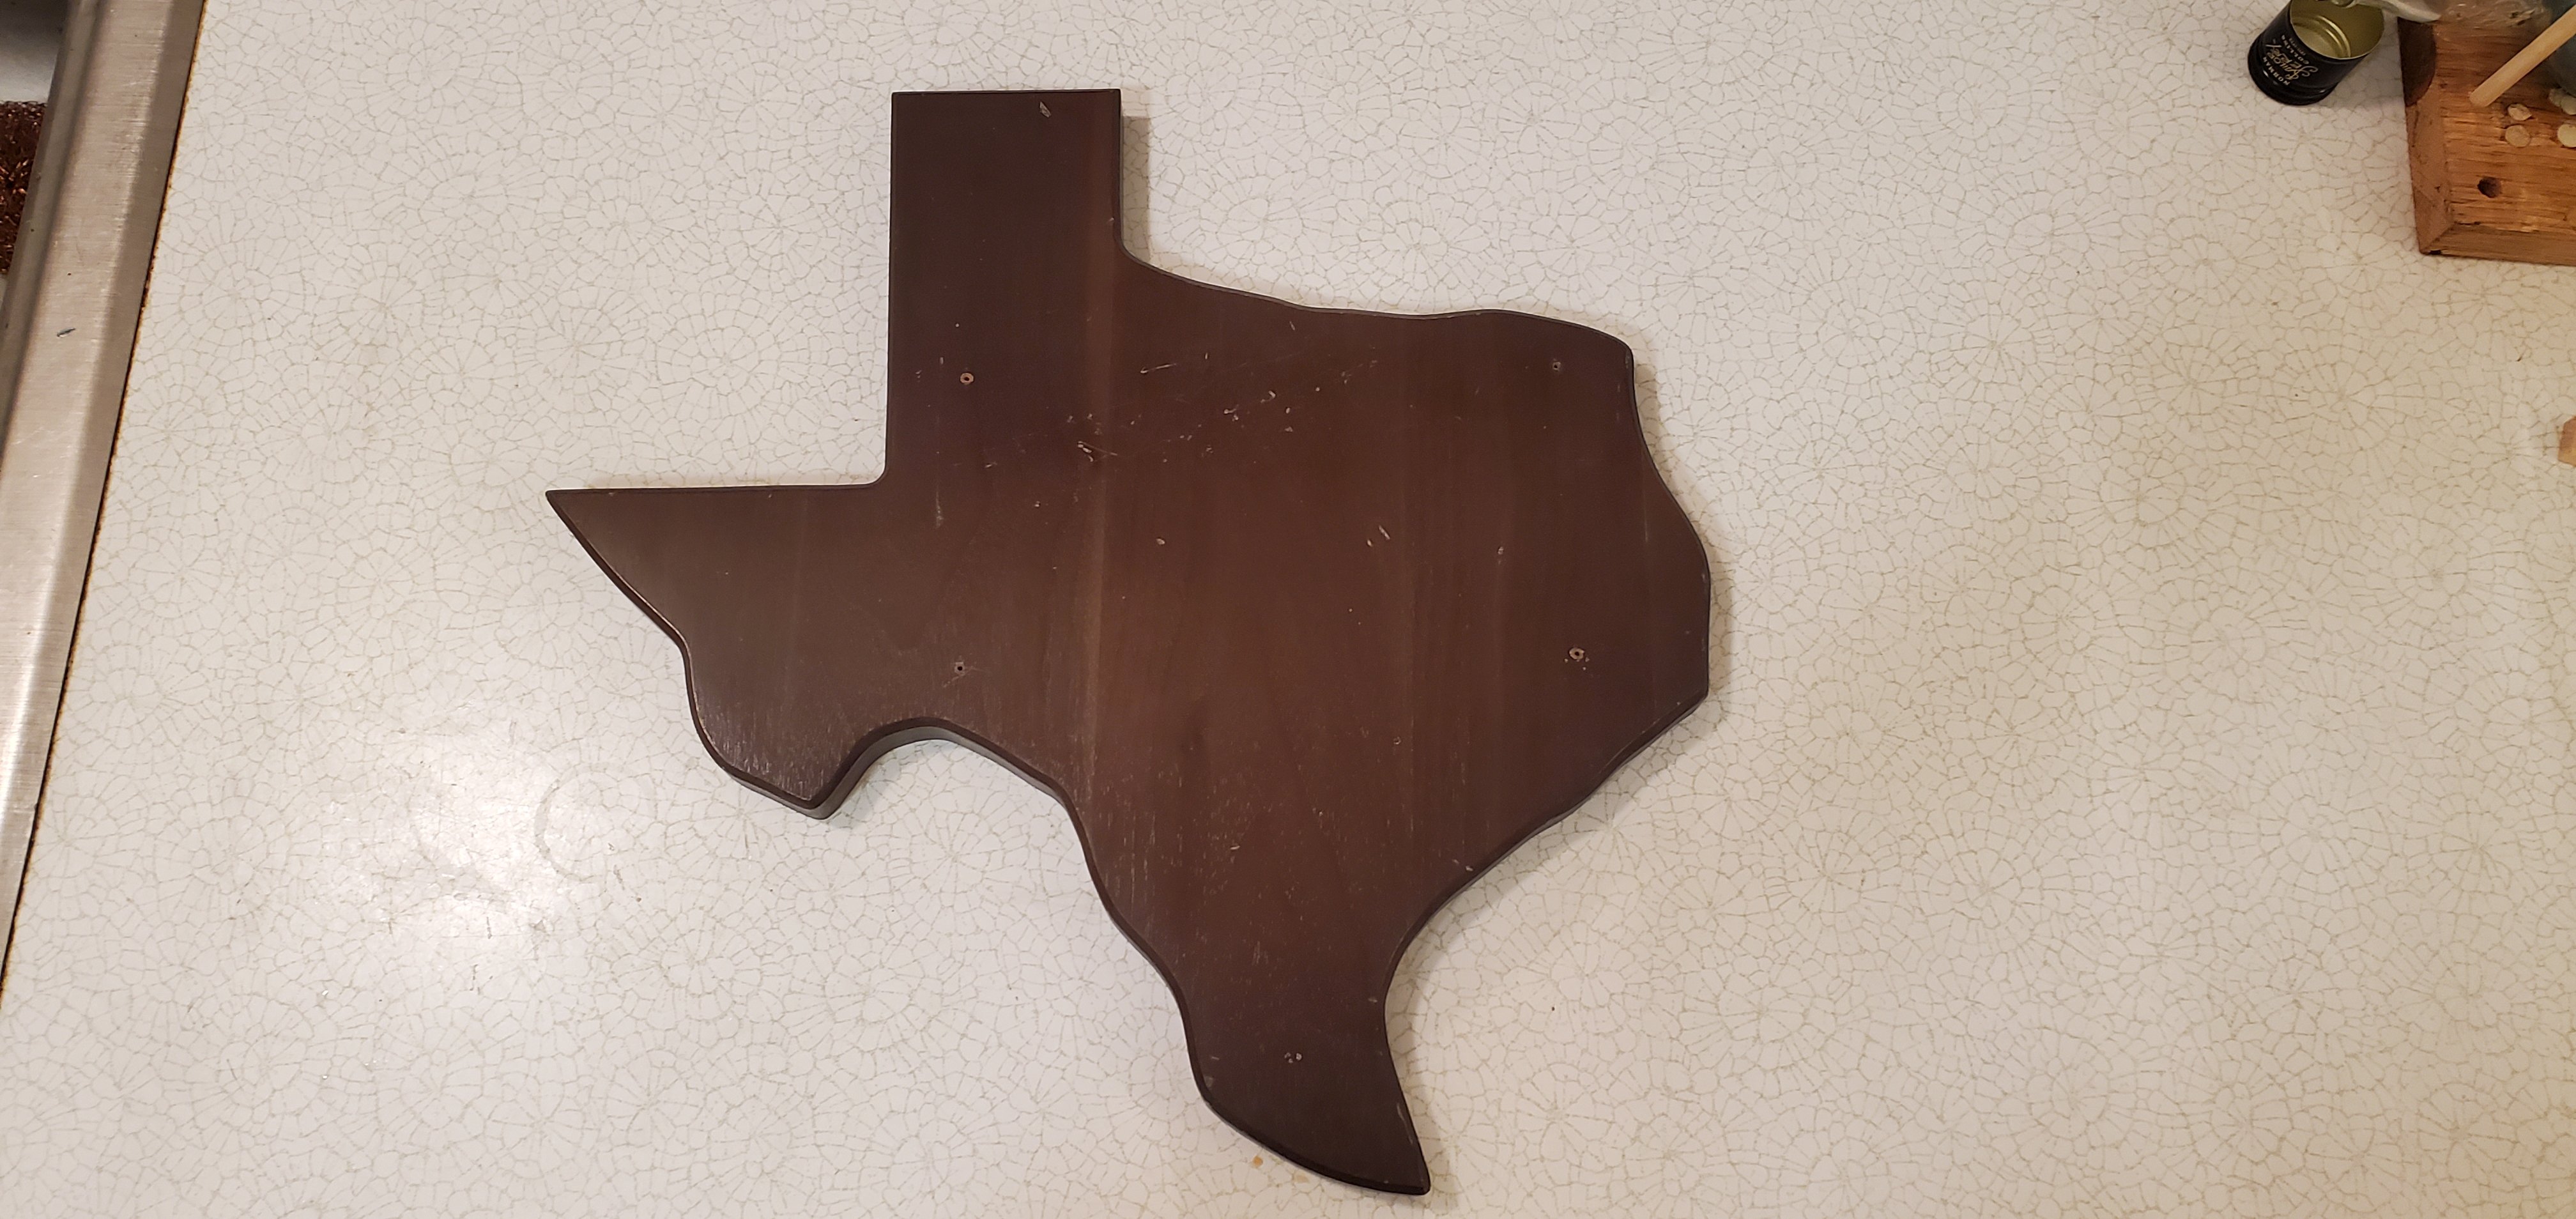
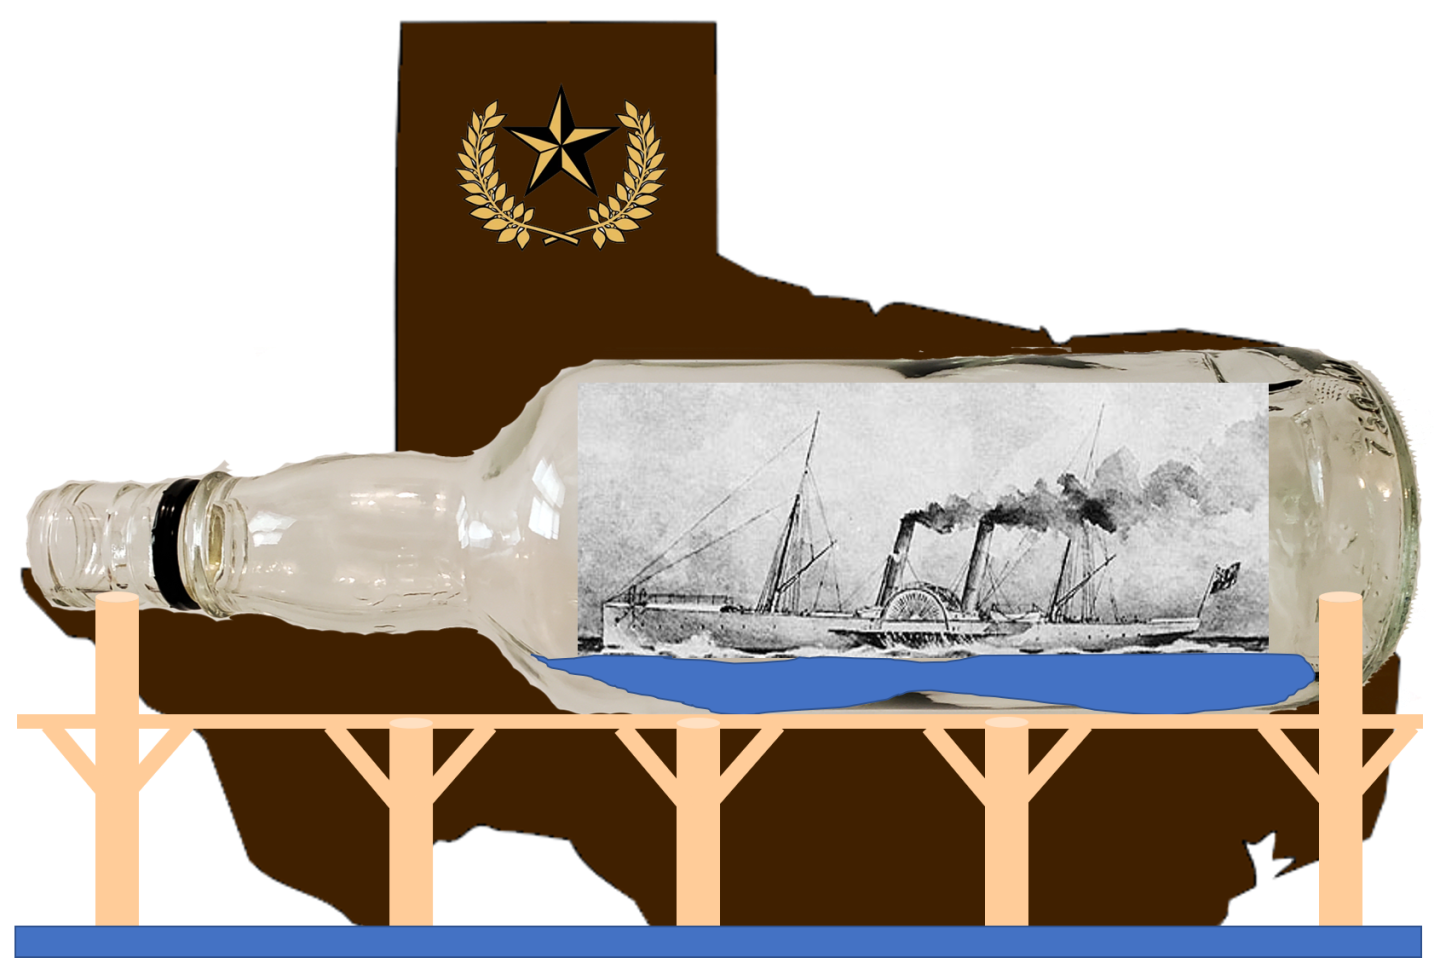
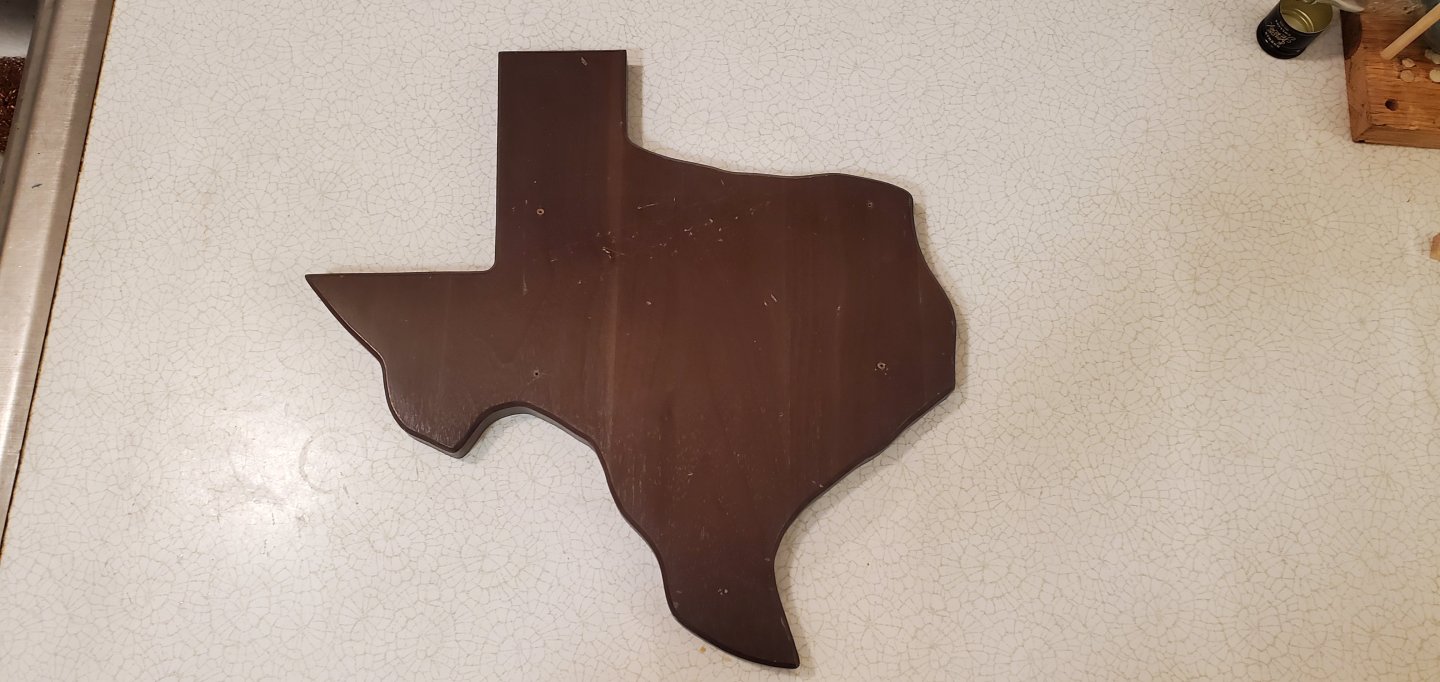
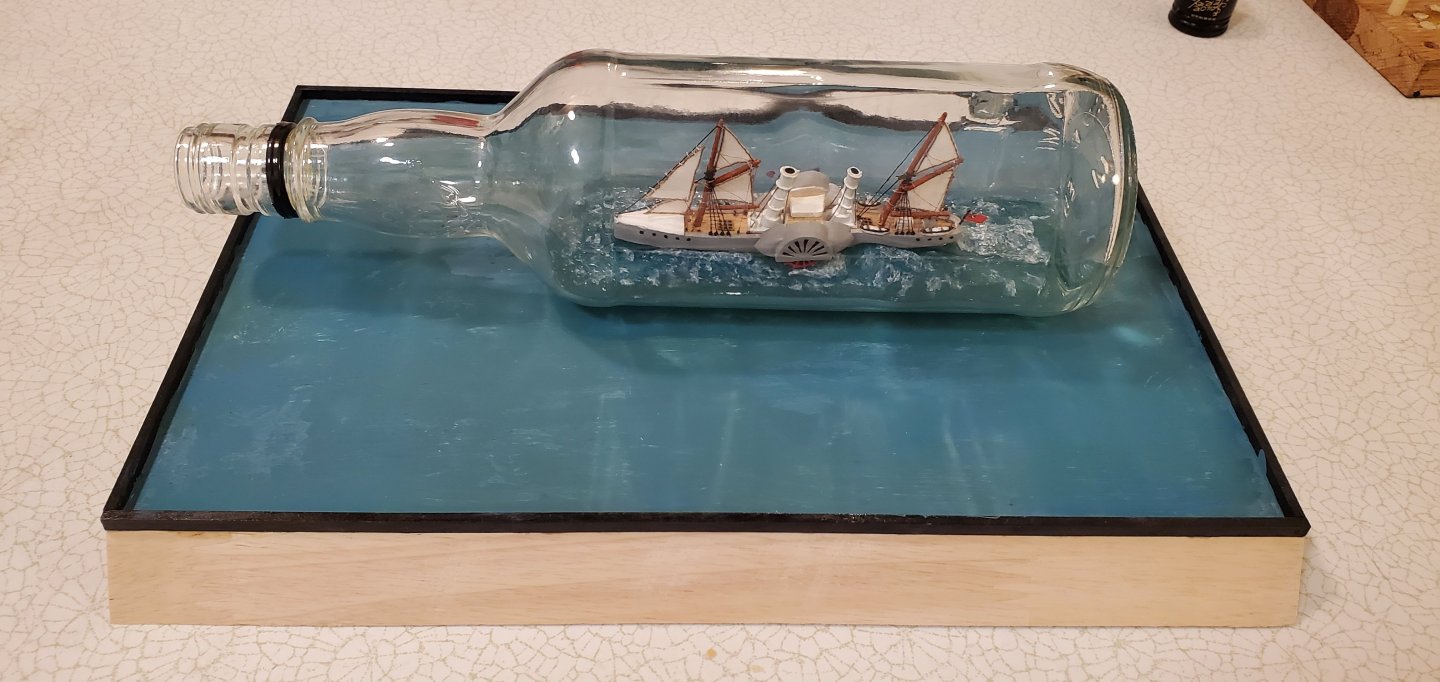
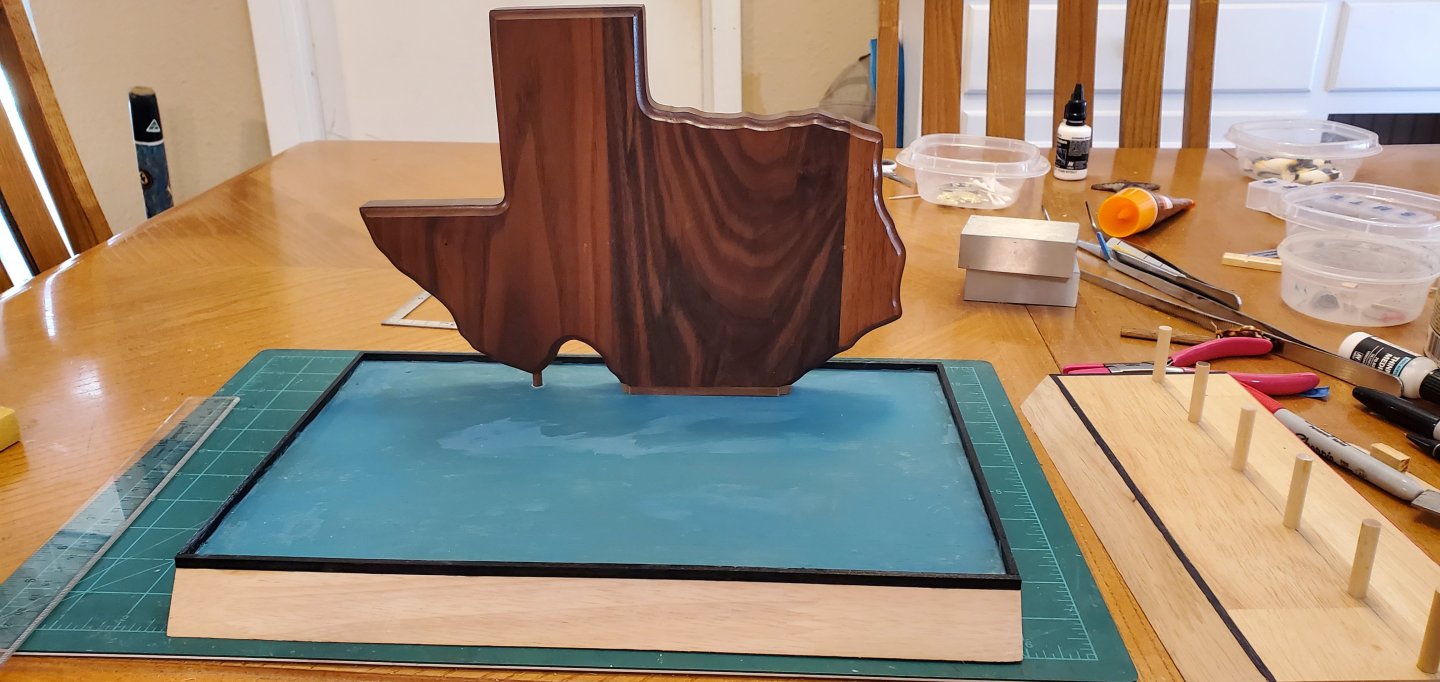
When I see comments from folks like @BANYAN, @gjdale, @PvG Aussie, I try to imagine the Australian accent as I read them. I saw this meme the other day and it's helping me with the accent. Now, on to stage 2 of the project which is the display base. As a reminder, here's the original idea suggesting the civil war era Galveston, Texas water front where the Banshee II made it's one and only blockade run. For the backdrop, I've got several walnut cutouts of Texas. The finish was a little dark and had some wear, so I sanded it off and refinished it. Then I made a horizontal cut about halfway between San Antonio and Corpus Christi to make it the proper height that I needed. Finally, I added some dowels that will secure it to the base. For the actual base, I put down a layer of acrylic paint for the basic water color that I wanted. Here's the backdrop added. The next step is adding about a 1/8" layer of epoxy resin for the actual water. Then I have to decide whether I should add ripples/small waves to the water then build the wharf or vice-versa..


- 235 replies
-
- 18
-
-

-

-
- Banshee II
- Bottle
- (and 1 more)
-
Just discovered this build log, Rob. I will follow along with interest. What a majestic subject you've chosen!
-
@gjdale, @Javelin, @Paul Le Wol, @Rick310, @Knocklouder, @Ian_Grant, @Keith Black, @Desertanimal - Thank you for the comments and for suffering thru those videos! Forget the tot, I needed a barrel of Bundy rum after that experience!
- 235 replies
-
- 8
-
-
-
- Banshee II
- Bottle
- (and 1 more)
-
Dang, Roel! Your comments make it sound like you were right there with me! You describe EXACTLY the things I struggled with. Yes, on the first funnel, I was trying to change the angle of the funnel by slightly releasing pressure on the tweezers handle without dropping the funnel. The third time was the charm on that mess. Yes, you make a great observation about working out of centerline with tweezers (especially the foot-long ones I was using). The further they reached inside the bottle, the more off centerline they were. This made it hard, even with the locating pin, to drop the wheel assembly in the hole in the deck because the wheel cowlings needed to line up and rest on top of the gunwale. Yes, the second funnel install was smooth because of what I learned dropping the little pilot house in between the two wheel houses. While doing the pilot house, I realized that the fore mast and sails would actually fit between the prongs of the tweezers while they were holding something. So I figured if I could get the funnel over and just beyond the fore mast, I could drop it straight down into place. The challenge was that there was not enough room between the top of the mast and the inside ceiling of the bottle. So I had to push the mast far enough down towards the stern to get the funnel past. But not too far or it would be in the way.
- 235 replies
-
- 4
-
-
- Banshee II
- Bottle
- (and 1 more)
-
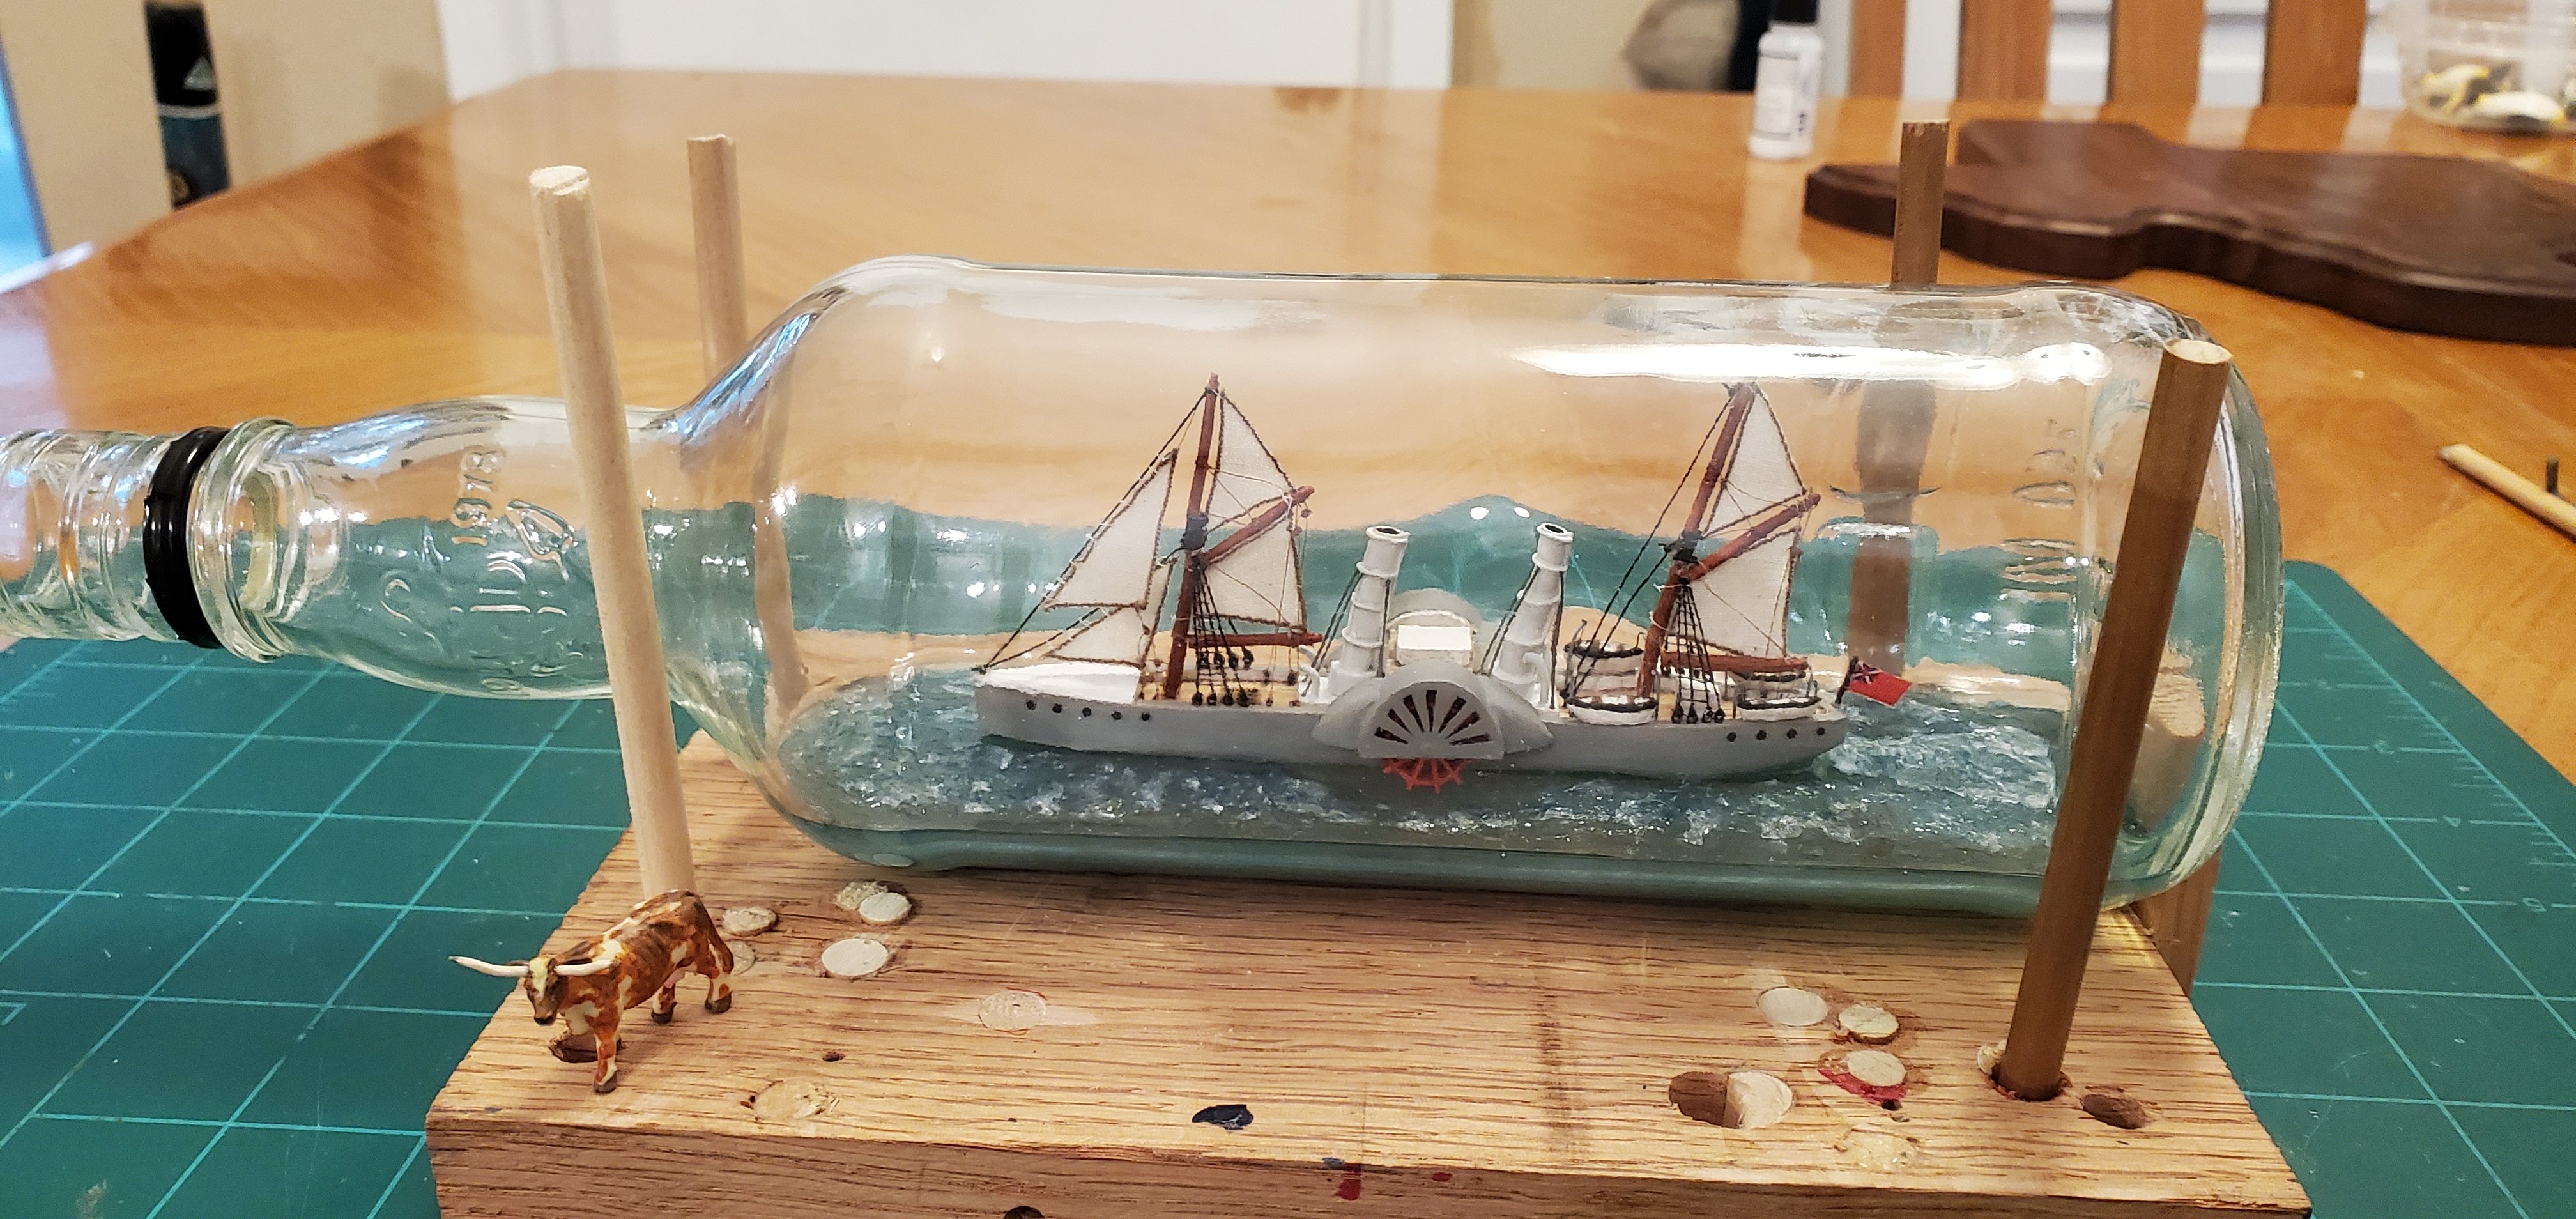
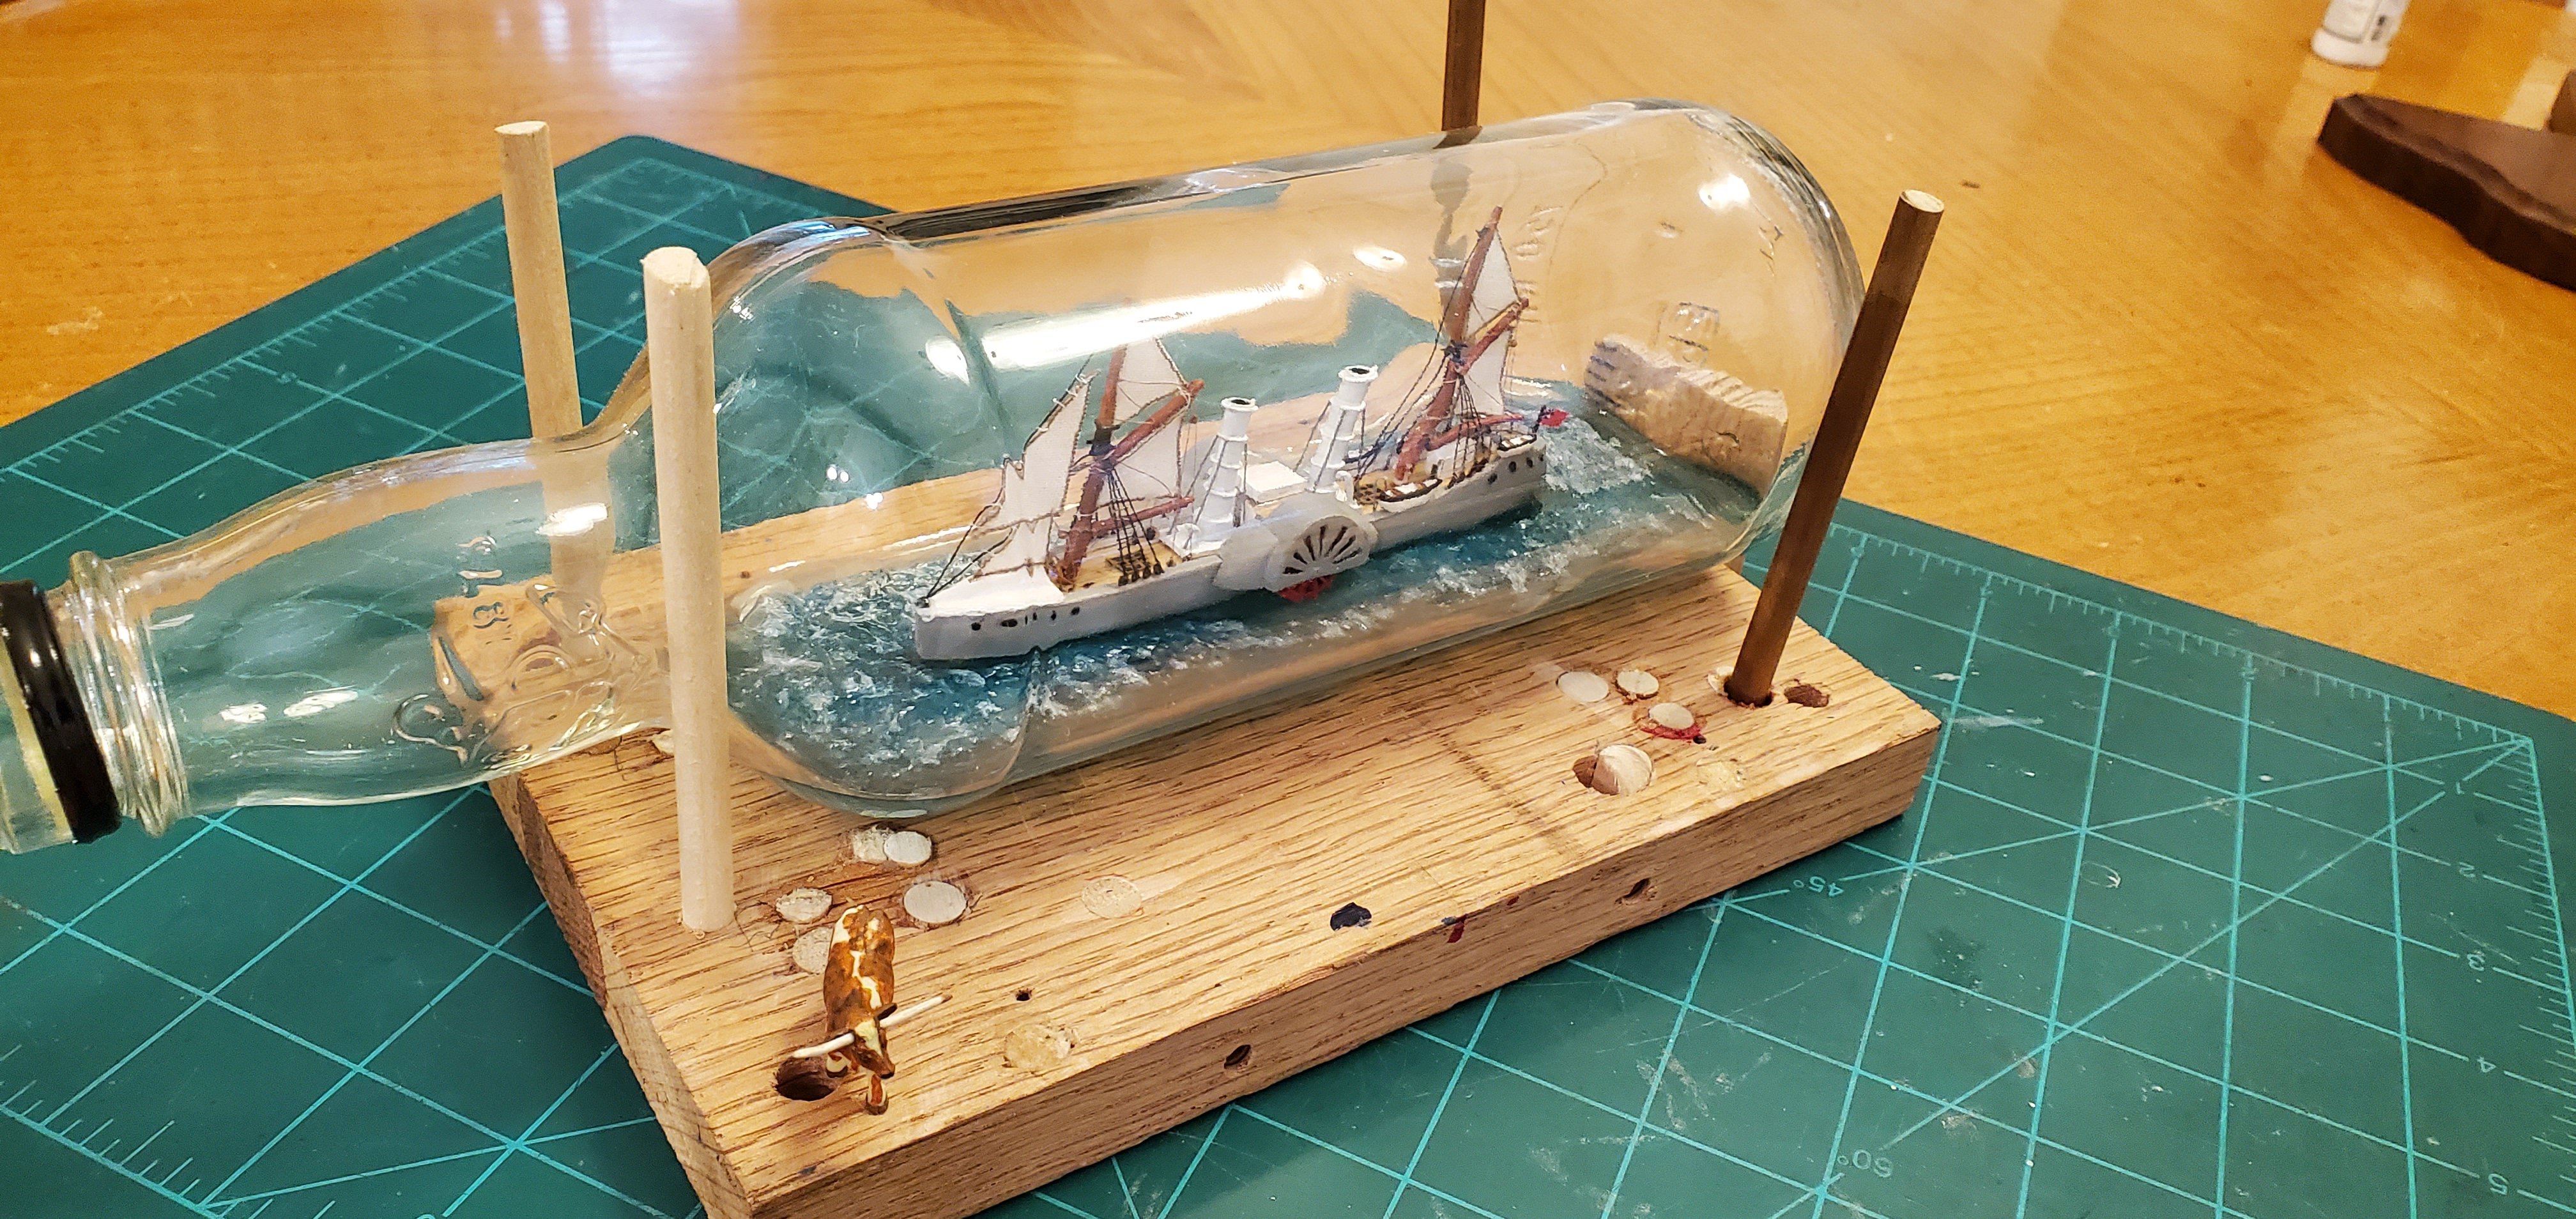
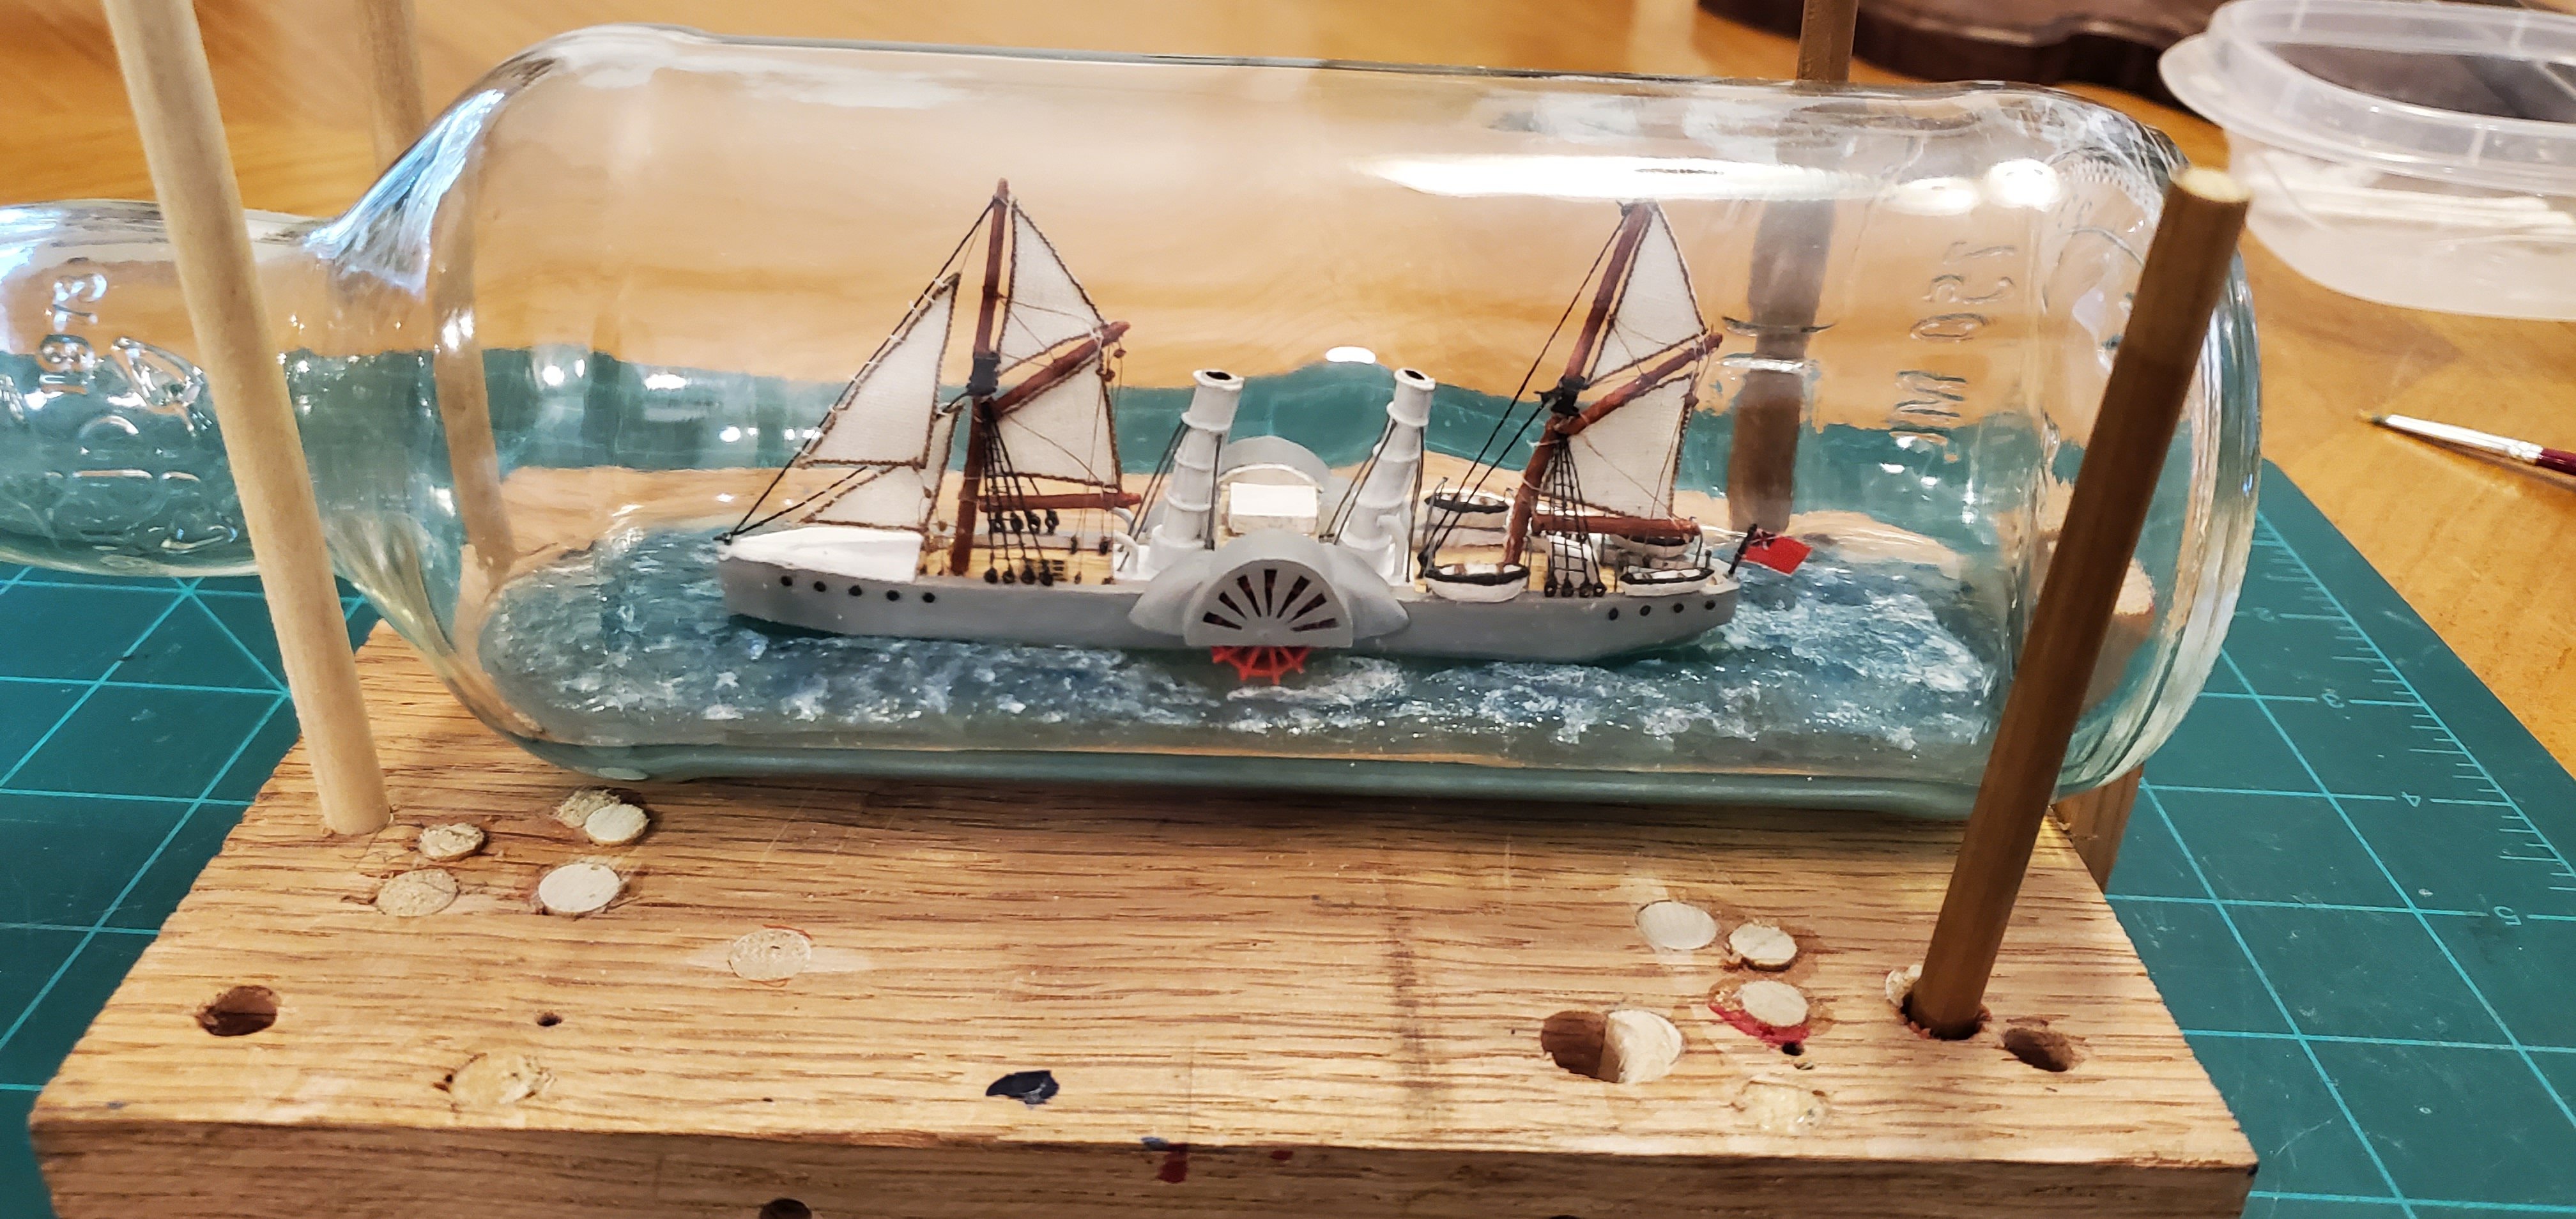
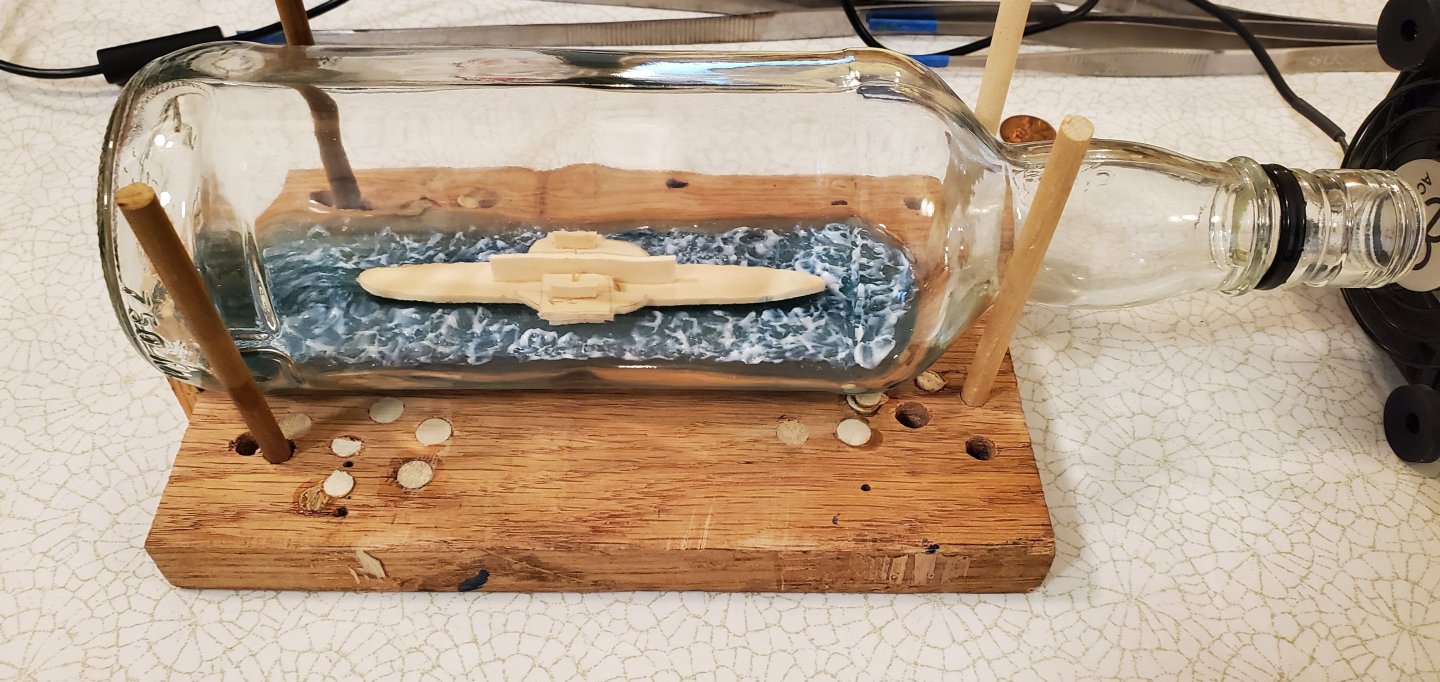
It was Man vs Model again last night. But this bout wasn't even close. Man emerged victorious while suffering a minimum of mental wounds. The insertion and assembly process went surprisingly well. Maybe it's because I actually put a lot of thought and planning into the process this time, instead of just charging in guns a blazing. Regardless, I am relieved and very happy with the results. For those that want to see all the steps in how the sausage was made, here's 3 videos. Part 1 (9 minutes) - https://www.youtube.com/watch?v=I10HQDJBoXI Part 2 (9 minutes) - https://www.youtube.com/watch?v=76UNcu8hvCo Part 3 (4 minutes) - https://www.youtube.com/watch?v=3KX4MUFjlps Here's 2 pics of the Banshee II after getting her secured inside ol' Sailor Jerry's long neck bottle. As a final touch, I added some froth from the paddle wheel and also along the hull's edge where it hits the water. Wait, "final touch"? Did I hear someone say "what about the smoke coming from the funnels???"


- 235 replies
-
- 18
-
-
-
-
- Banshee II
- Bottle
- (and 1 more)
-
Greetings from the Nation's Capital
Glen McGuire replied to AreyPotter's topic in New member Introductions
Great to have you here, Scott! -
That is interesting, Johnny. I had not heard of demi-round Czech beads before. I agree with you that having a bead that was a bit flattened would look better for our application than round. Just getting the thread thru the hole in my 1mm beads is maddening enough. I cannot imagine trying to strop it! Nor would I want to try to rig 2mm deadeyes like Keith mentioned.
- 235 replies
-
- 5
-
-
- Banshee II
- Bottle
- (and 1 more)
-
You gave us a whole new meaning to the term "build log"! 🤣
- 235 replies
-
- 8
-
-
- Banshee II
- Bottle
- (and 1 more)
-
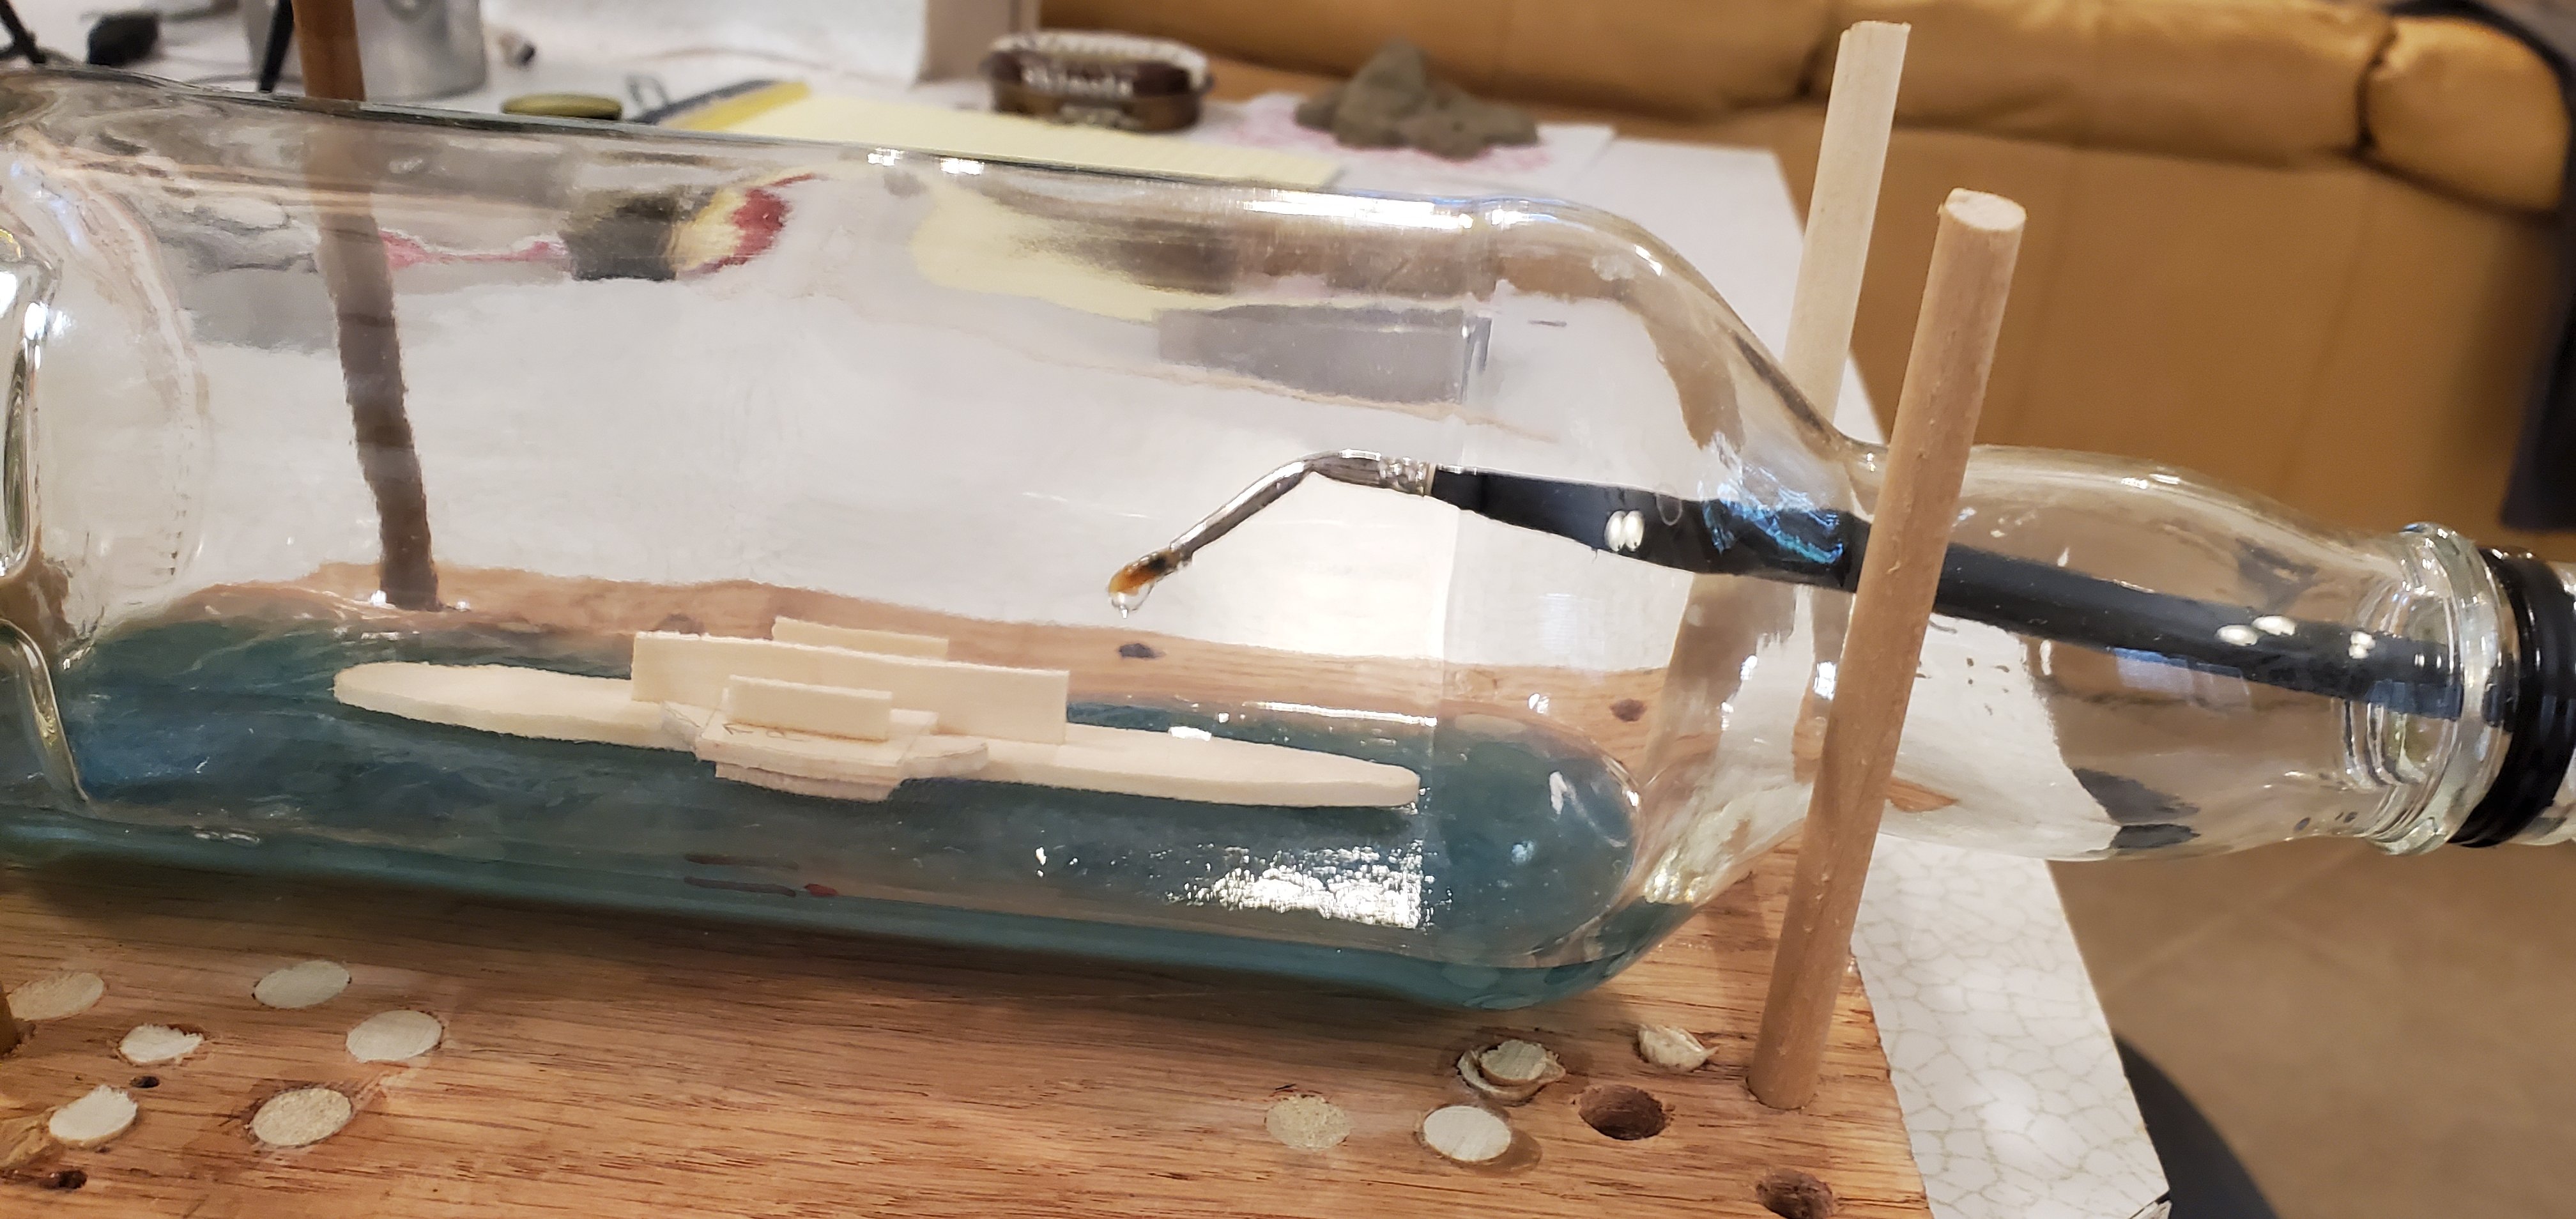
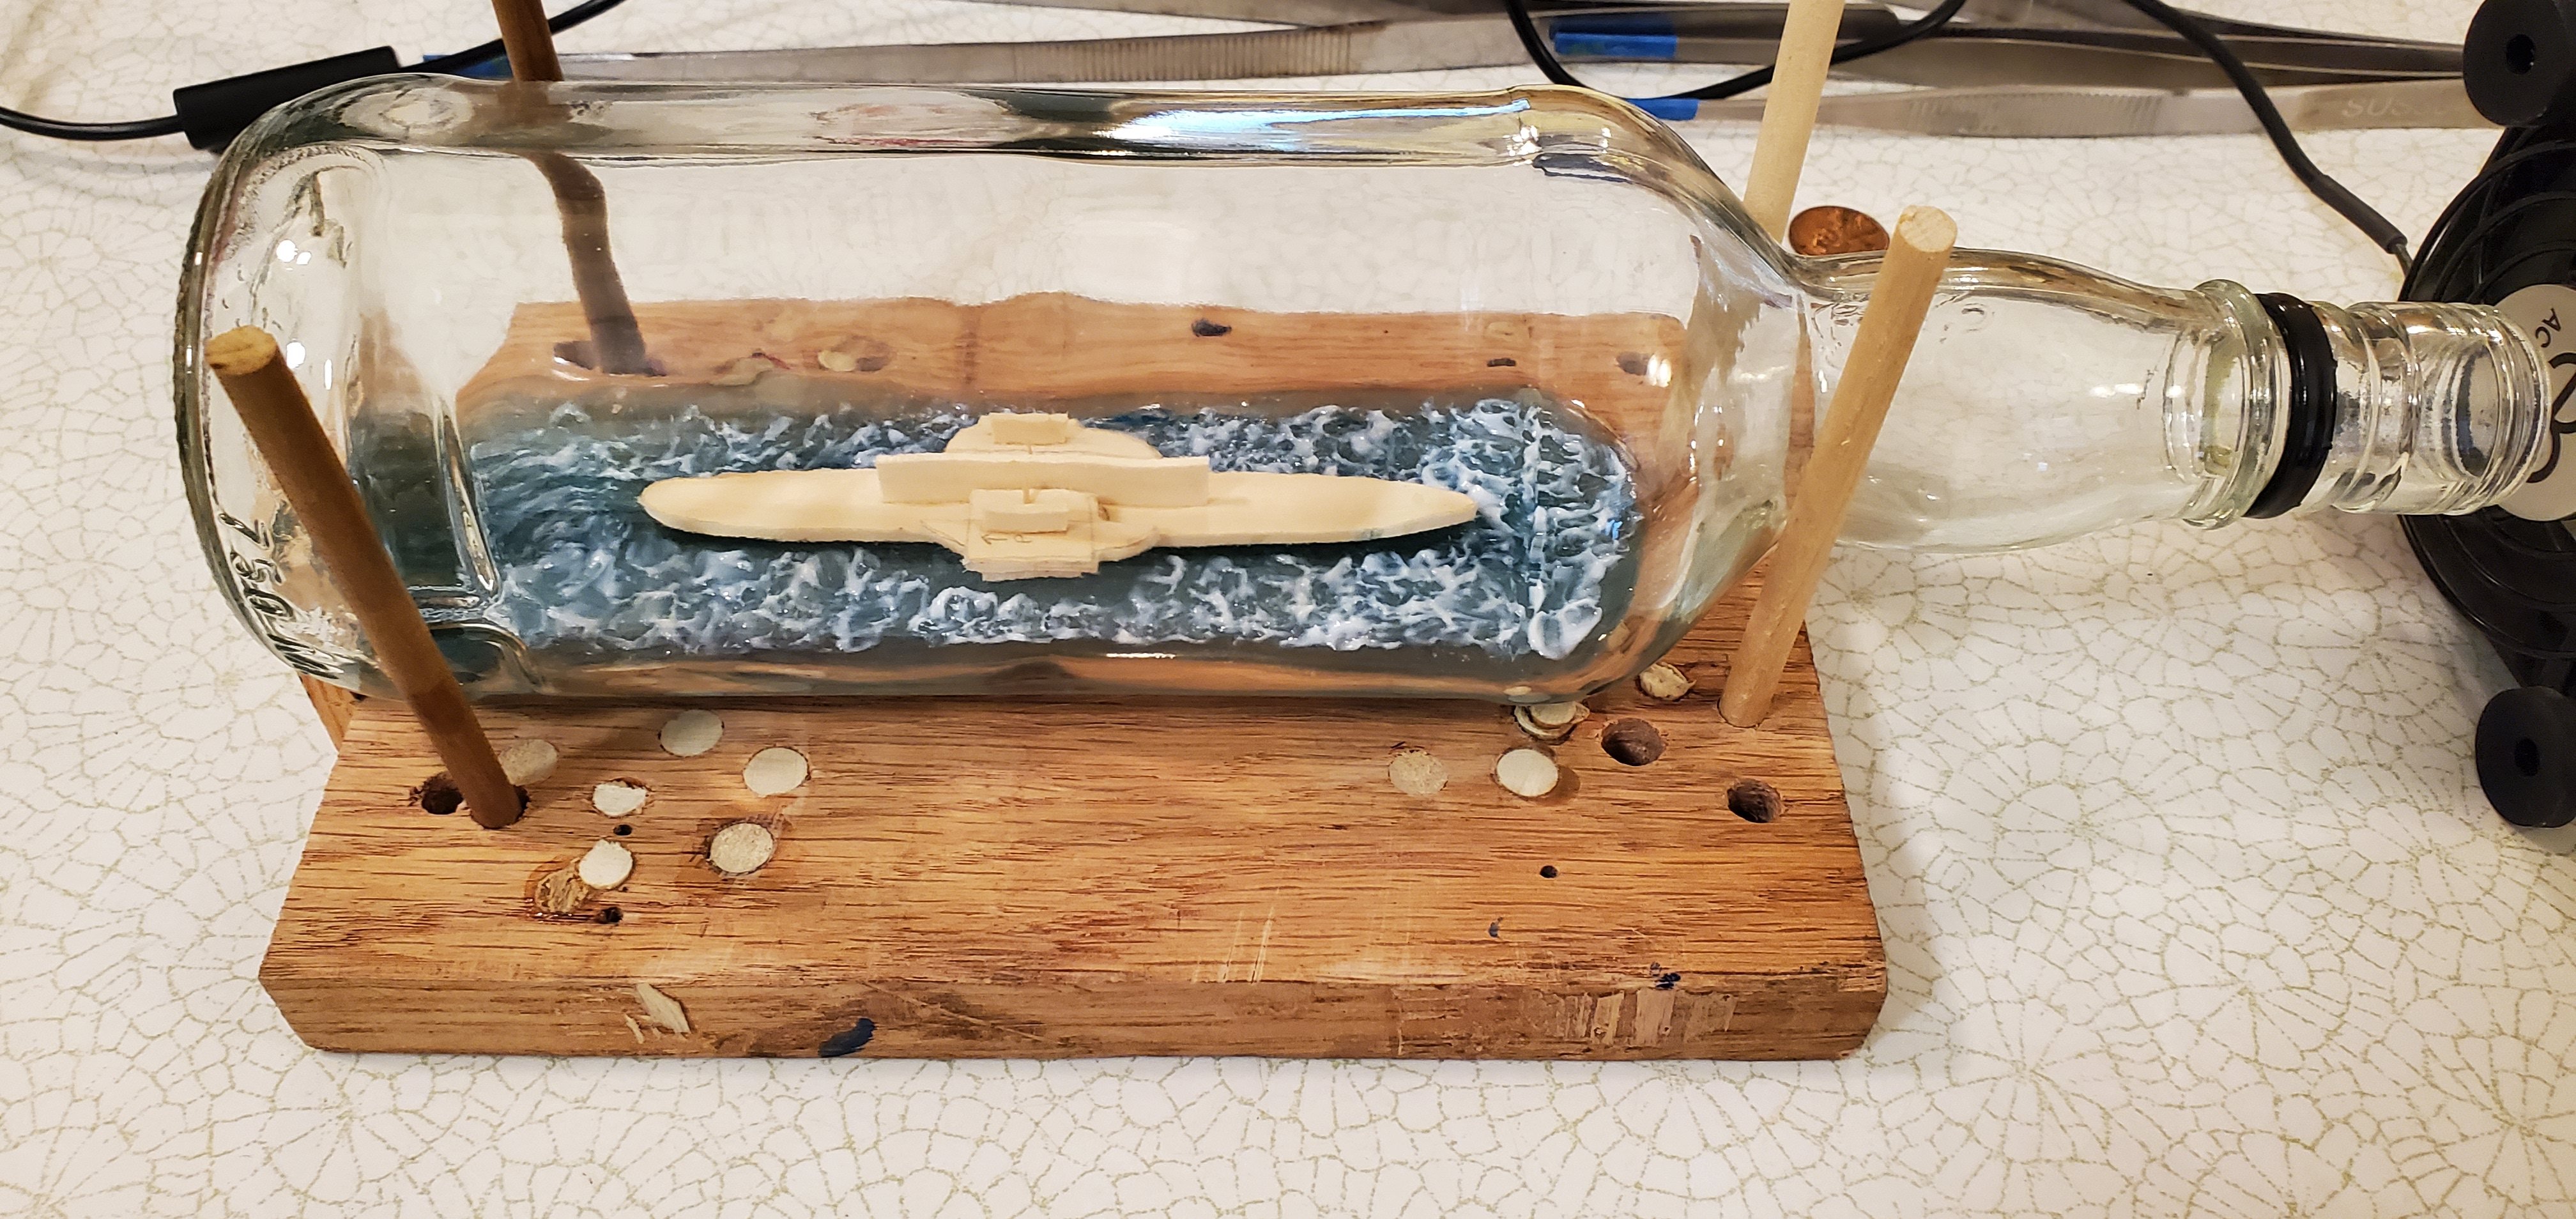
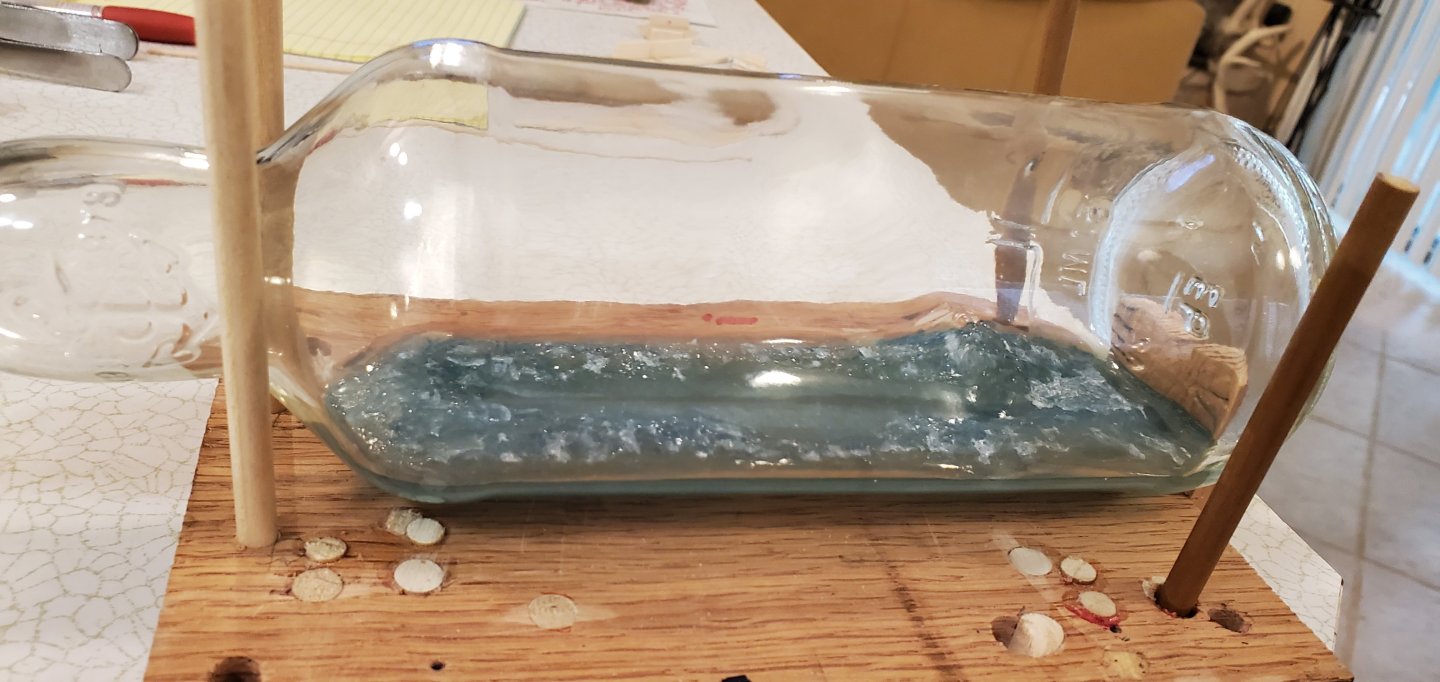
The last step before trying to assemble the ship in the bottle is texturing the water with some mild waves and a few whitecaps. First, I built a fake ship that matched the real ship's footprint and inserted it into the bottle. That would make it easy to texture the water around where the ship will rest. I first tried dabbing around some Woodland Scenics Water Waves to give me some wave and ripple action. The Woodland Scenics product is supposed to hold it's shape while drying. Unfortunately, it did not do that for me. After I applied it, it self-settled into droopy puddles. Not what I was looking for. So I went back to the acrylic medium gel gloss that I'd used with success on several previous SIBs. I know it will hold its shape. The gel gloss goes on rather whitish as you can see below, but it dries clear (unless you put it on too thick). After the gel gloss dried, I hit the wave edges with some diluted white paint to highlight the waves. Now it's time to get that ship inside the bottle! Let's


- 235 replies
-
- 15
-
-
- Banshee II
- Bottle
- (and 1 more)
-
I gotta be honest, Keith. When I first glanced at the title of this project I thought it read "Steaming Donkey Pile". It really got me anxious to see what you were stepping in here. I figured you might need to borrow @Knocklouder's character with the shovel.
-
You are absolutely right, Roel. And the extra long neck of Ol Sailor Jerry's bottle is not gonna help! Thank you for the kind words, Gary. As I suspect many of us do, every time I look at my work I see so many things I wish I'd done better. But that makes me look forward to the next project even more!
- 235 replies
-
- 5
-
-
- Banshee II
- Bottle
- (and 1 more)
-
Exceptional work, John! And what a magnificent gallery!
- 282 replies
-
- 1
-
-
- Bluenose
- Model Shipways
- (and 1 more)
-
Dang, Ian. Sorry to hear the test on the lake did not go as planned. However, I am confident you will figure out what adjustments to make. The eyes are a nice touch!
- 536 replies
-
- 3
-
-
-
- Quadrireme
- radio
- (and 1 more)
-
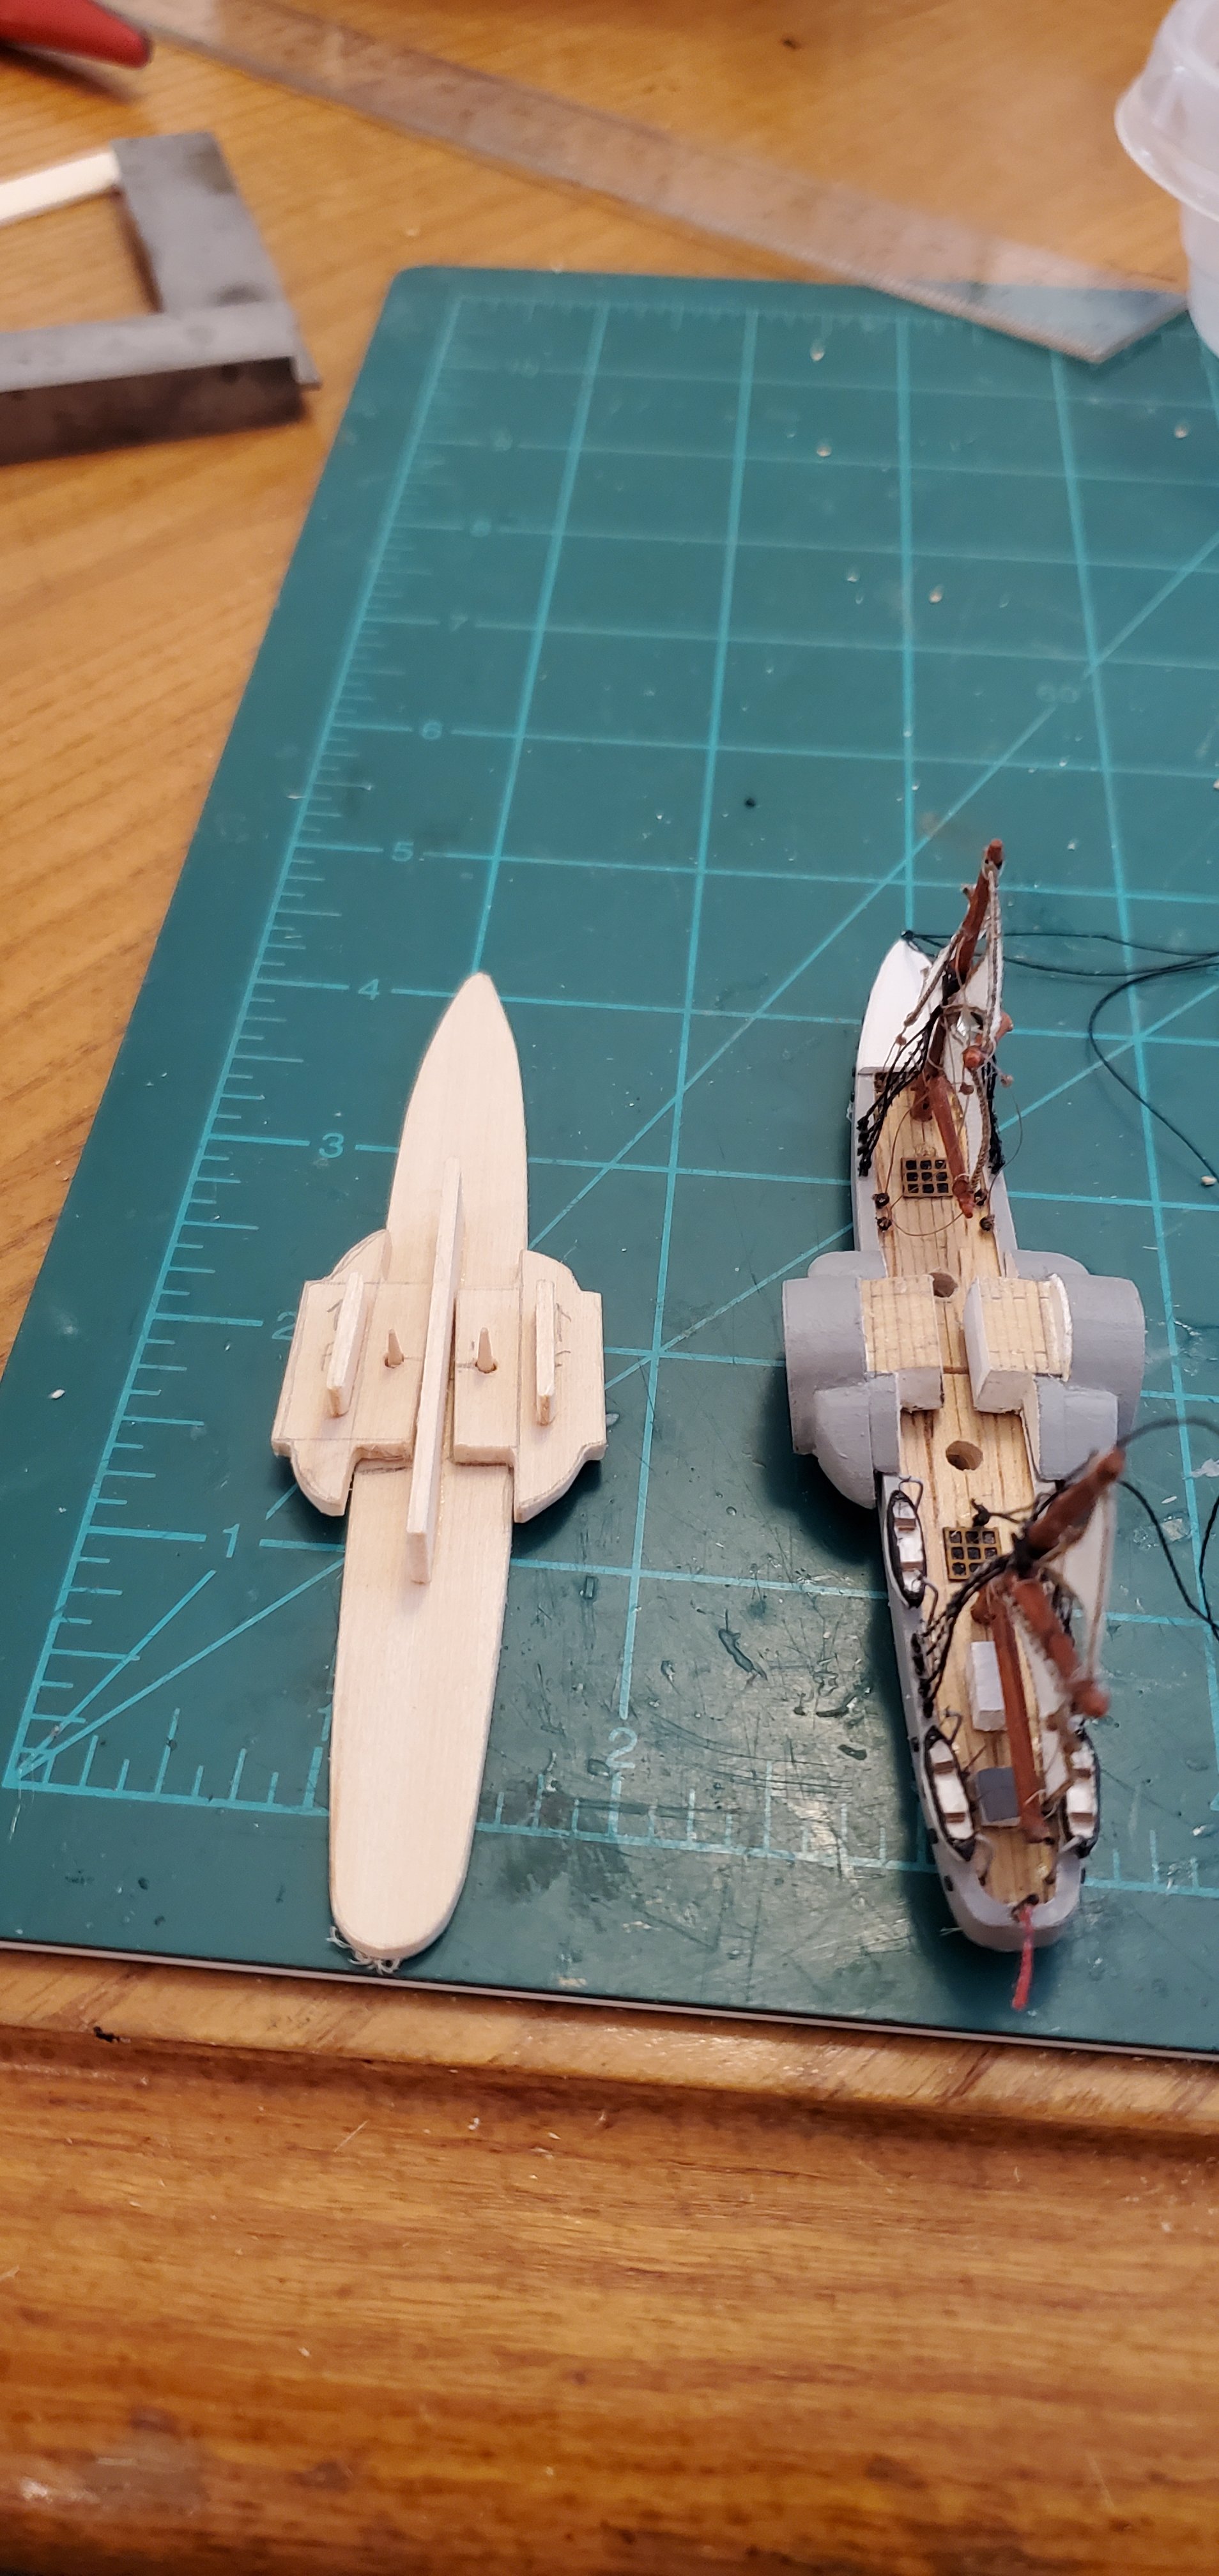
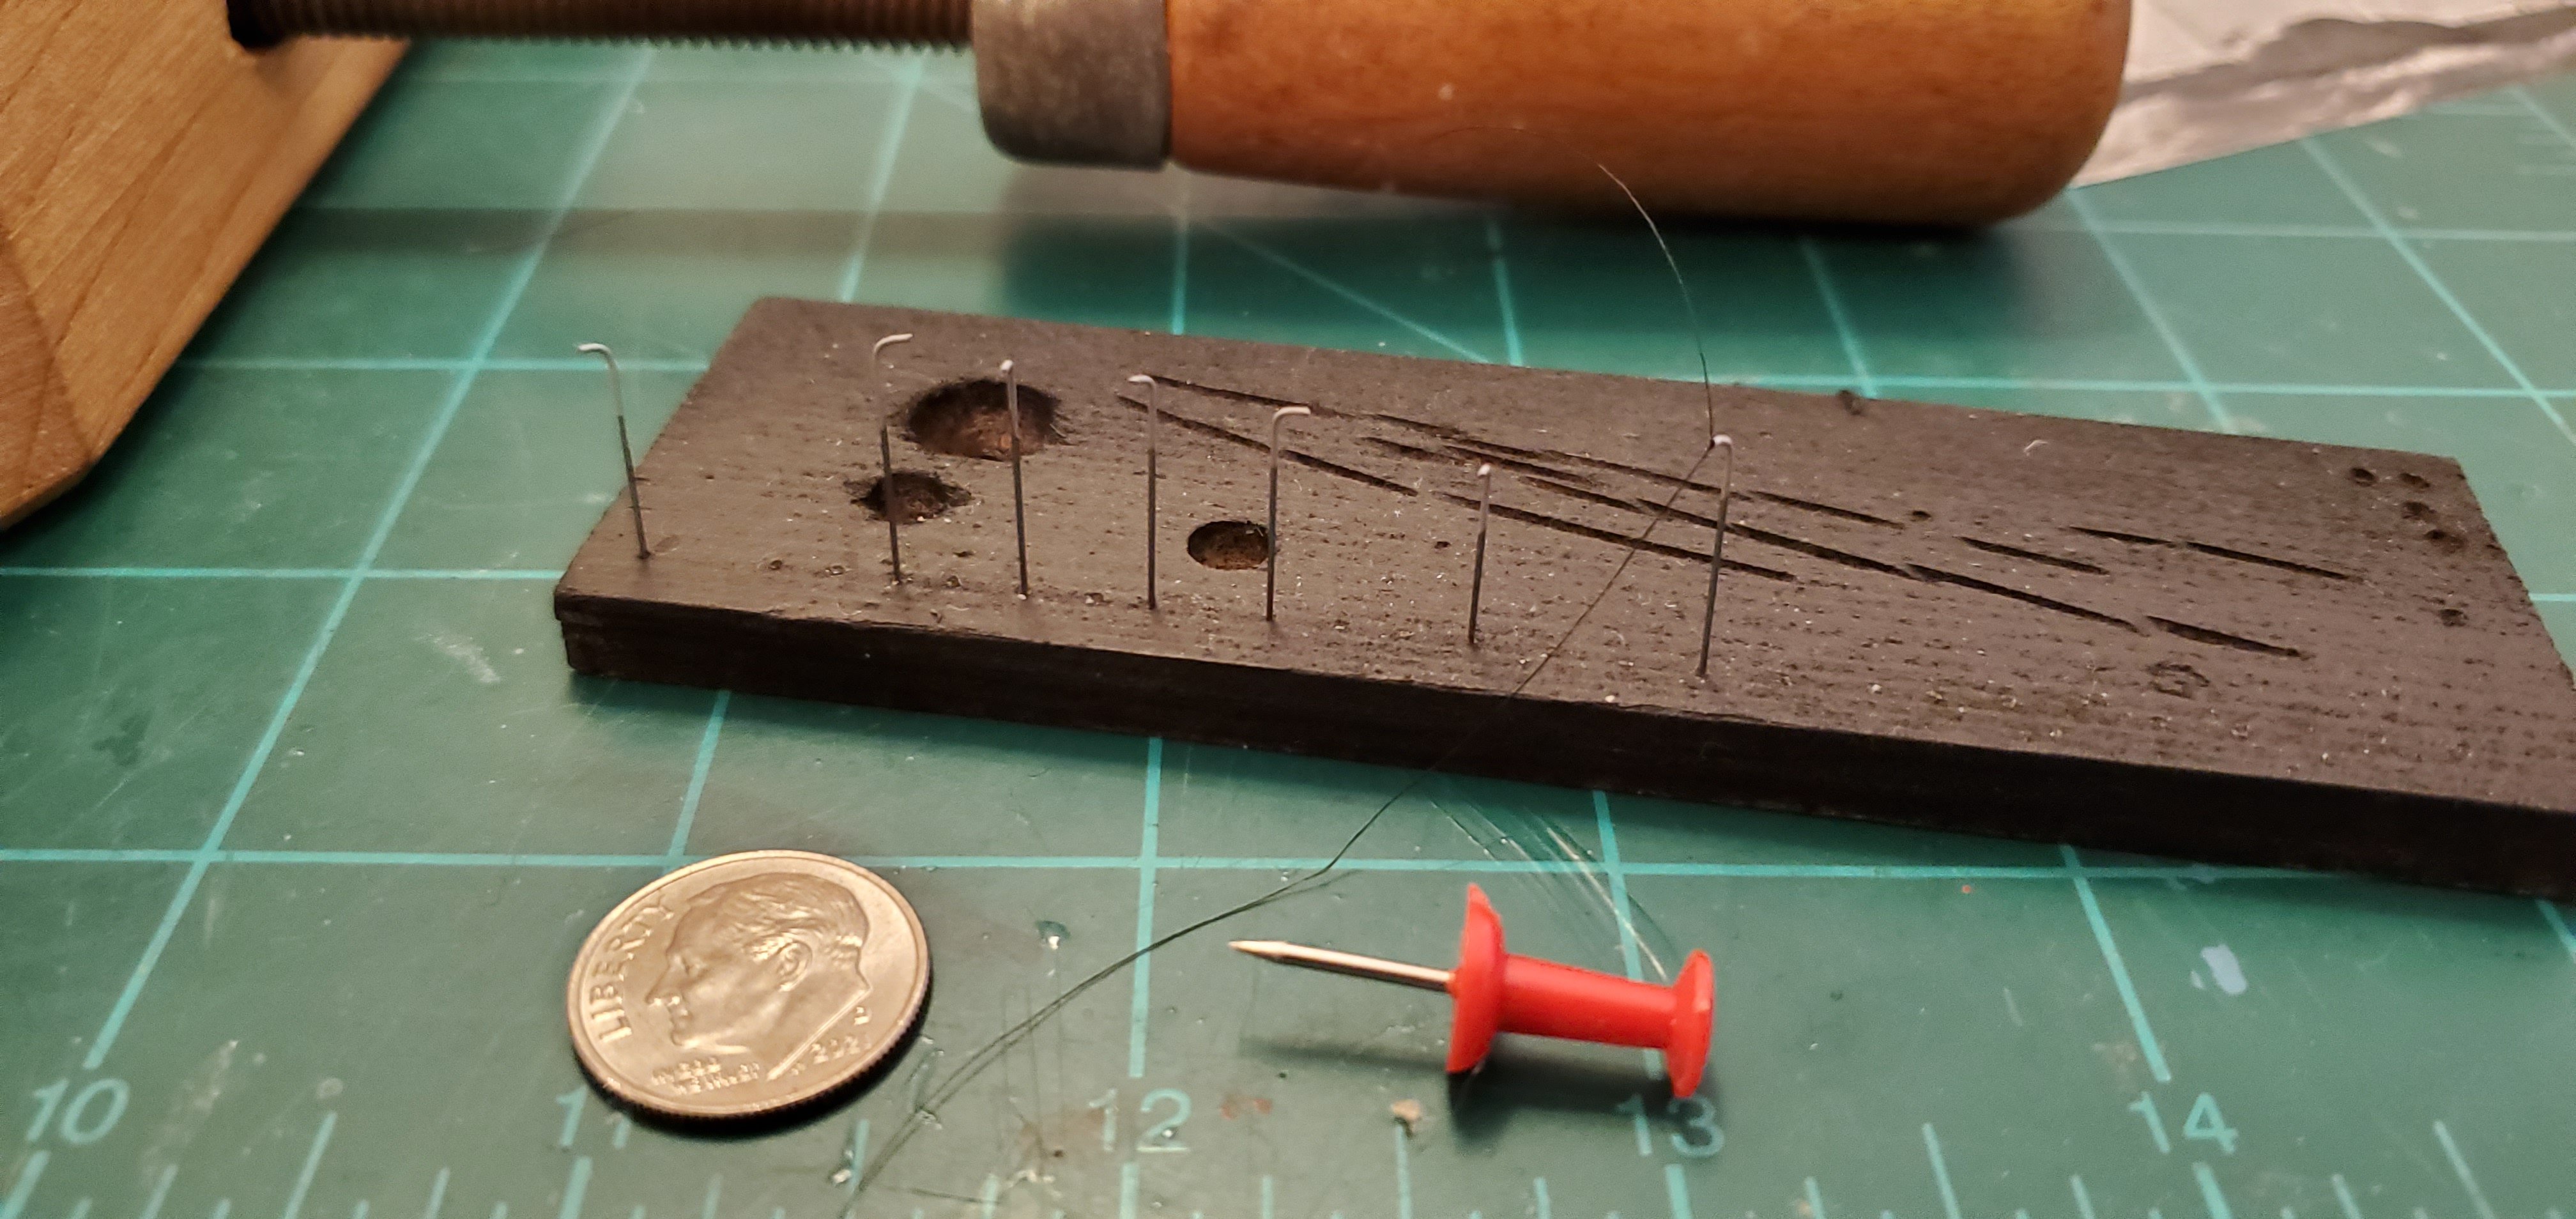
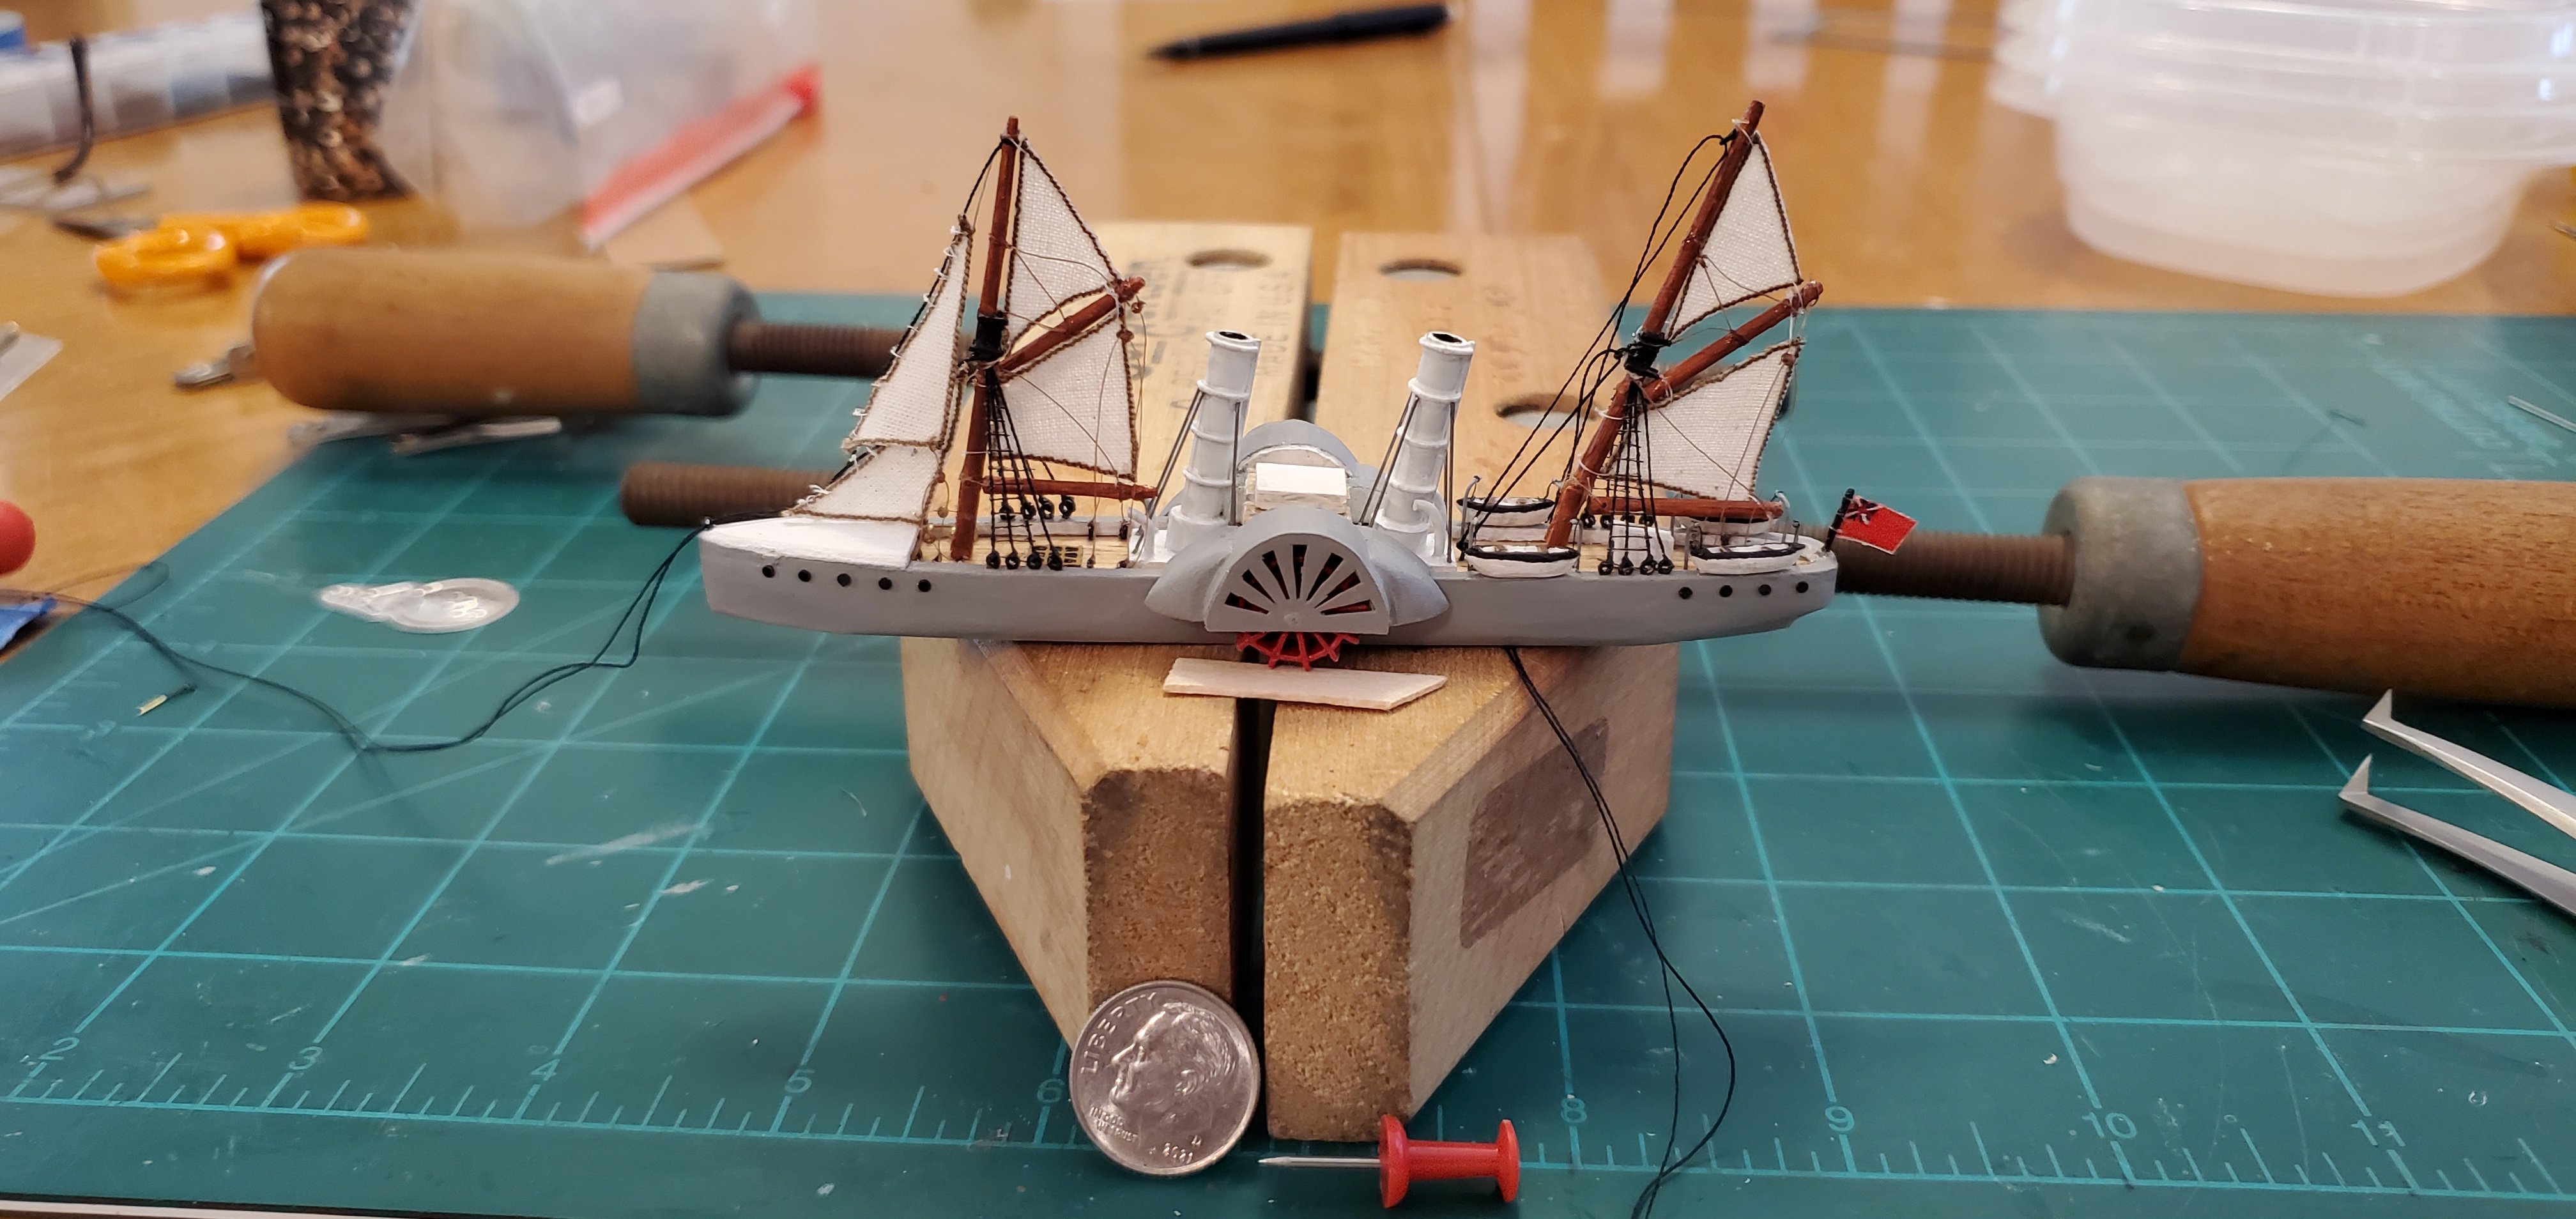
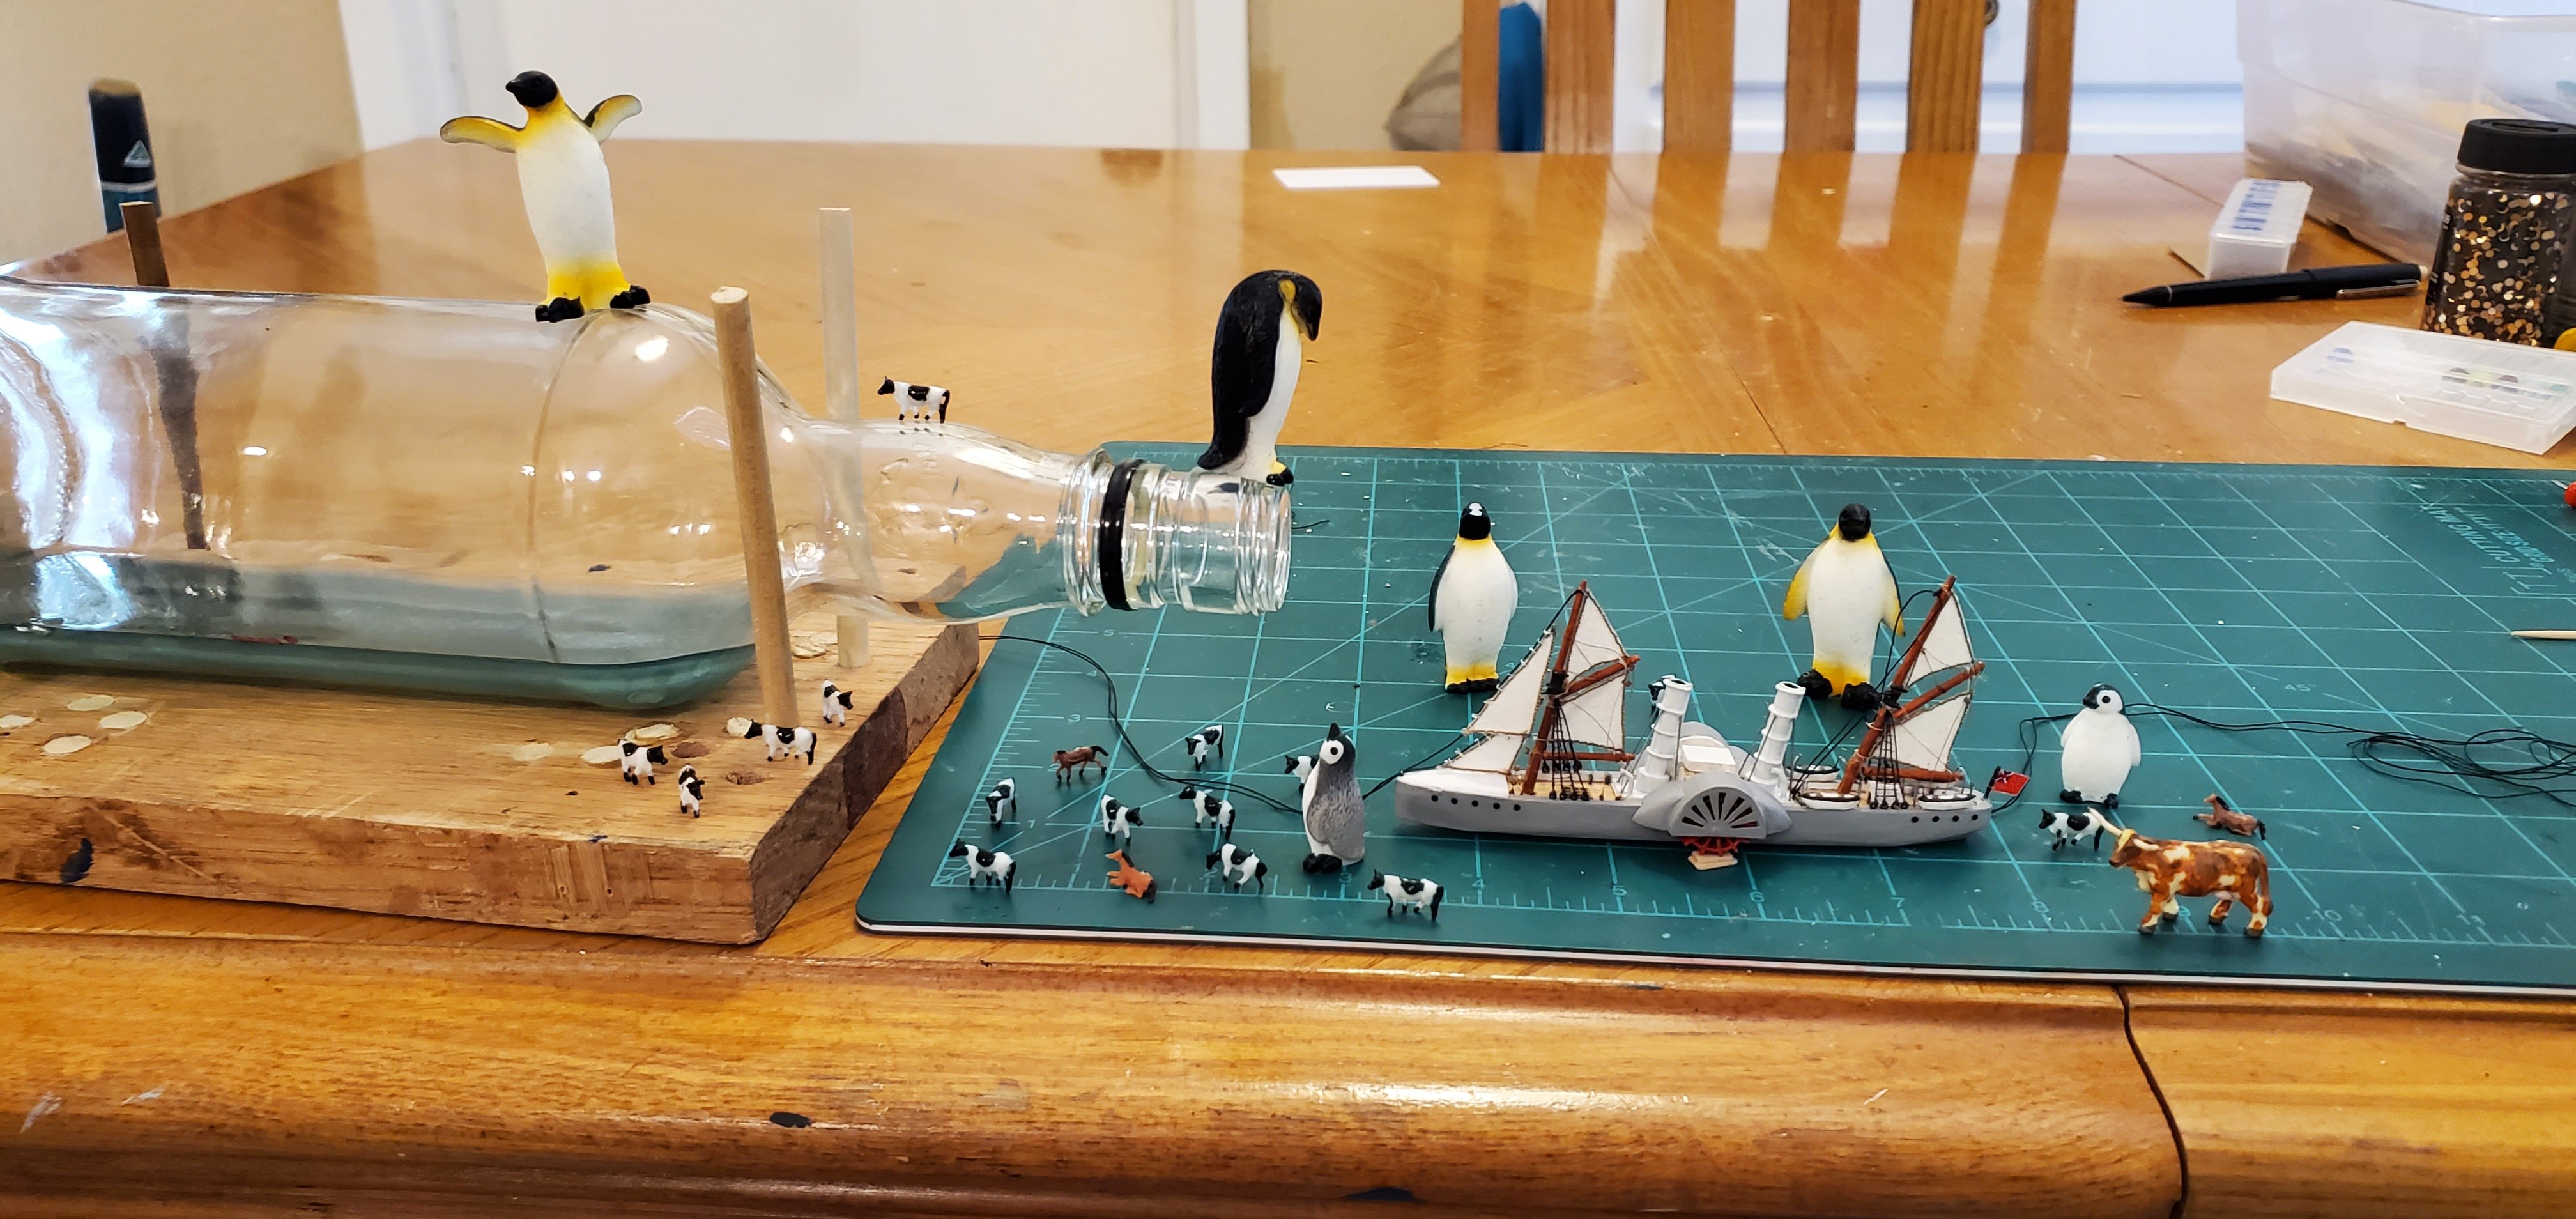
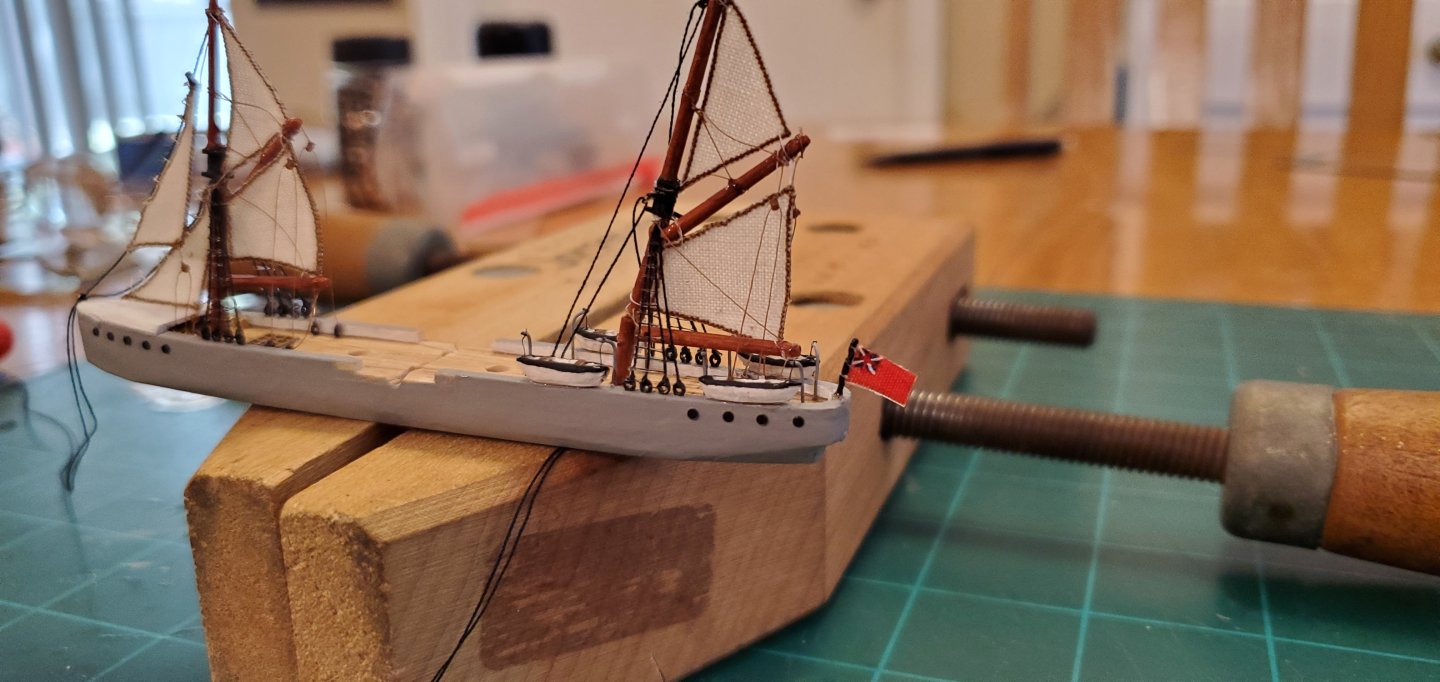
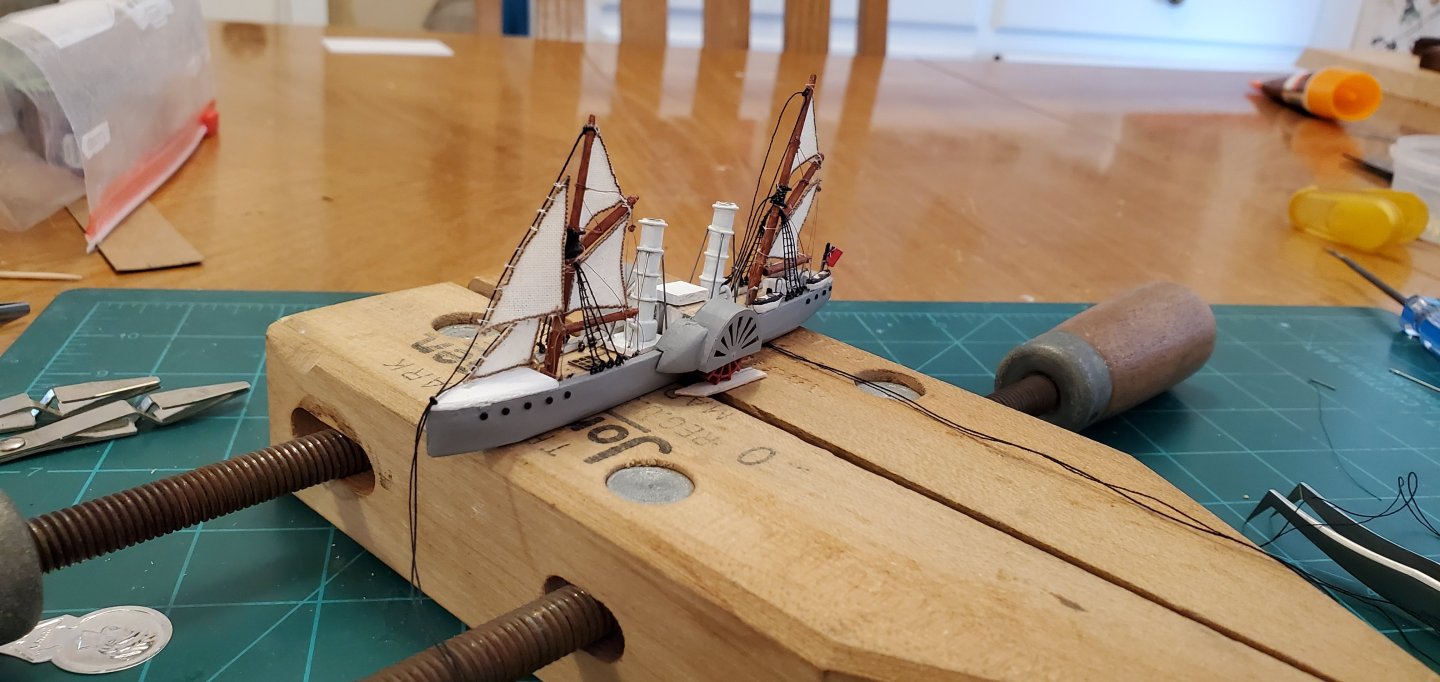
Interesting discussion about beads. Now if I could only find all the ones I sent flying in various directions while trying to hold them with tweezers. Ugh!! On to the ship's boats and davits. Here's my "davit board" where I staged them for painting and tying on the threads that will attach to the ship's boats. I pre-drilled tiny holes in the bow and stern of each of the ship's boats so I could insert the thread connecting them to the davits. Here's what it looks like with all the little boats and davits in place. Again, the boats rest on the bulwark instead of hanging from the side because that's the only way the assembly fits inside the neck of the bottle. Here's the whole ship with all the pieces in place. By far the most challenging ship I've tried to build. But I fear a bigger challenge awaits when I try and put it all together inside the bottle. In fact, word got out about the potential disaster that awaits and an expectant crowd has already begun to gather.


- 235 replies
-
- 17
-
-
-
-
- Banshee II
- Bottle
- (and 1 more)
-
Glad to see you kicking off another project, Keith! This one looks very interesting. Count me in.
-
Wow. Just wow.
-
Texas longhorns on a Mississippi riverboat! They look awesome!! Just get them a few hay bales and they'll be happy.
- 87 replies
-
- 6
-
-
-
- King of the Mississippi
- Artesania Latina
- (and 2 more)