HOLIDAY DONATION DRIVE - SUPPORT MSW - DO YOUR PART TO KEEP THIS GREAT FORUM GOING! (Only 13 donations so far - C'mon guys!)
×


Glen McGuire
-
Posts
1,955 -
Joined
-
Last visited
Content Type
Profiles
Forums
Gallery
Events
Everything posted by Glen McGuire
-
 Incredible work, Gary (as usual!).
 -
Just found this build log (thanks to a head-up from @Ian_Grant) and got caught up our your progress, Peter. Looks great so far and very good explanations of your work! This is going to be fun to watch it come together!
-
Ditto what Keith said. Fantastic job! A well deserved keg of Kraken rum for you, the first mate, and the twins!!
-
Yes, Please! That would be fascinating (and helpful).
-
You and me both, Ian! Strainer body, booster pumps, vapor return, bursting discs...my head is spinning! I do have a question, Roel. I may have missed it in an earlier post, but what is your guide for such a complex piping layout? Do you have plans from the ship, are you going off pictures, are you designing it on your own?
-
I don't know about that, Bob. I think ol' Nessie may have somehow made it half way around the world and found a new home in your water. And BTW, really nice job on that water as well as the painting of the sail. Well done on both!!
-
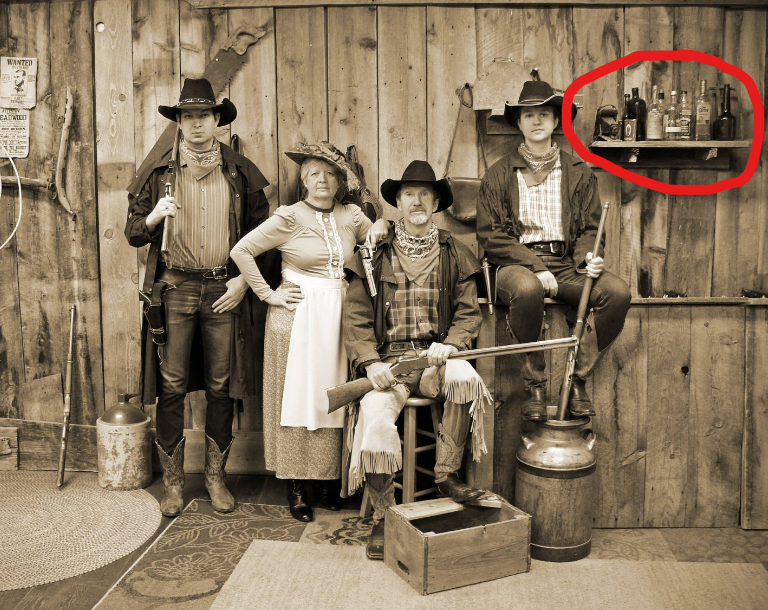
Great vacation pics, Ian! I need to go there and see if I can snag some of those bottles!!
- 536 replies
-
- 4
-

-

-
- Quadrireme
- radio
- (and 1 more)
-
Just ran across this log, Steven. A very cool project and amazingly well done in such a short time. Like Pat, I doff my hat. I hope that "chuffed" means the people that run the museum liked your model!
- 110 replies
-
- 2
-
-
- Paddlewheeler
- Ballarat
- (and 3 more)
-
How can you have fires up there? I thought there was snow and ice everywhere?? Choco Taco was fixing to head your way but he changed his mind now.
-
A blacksmith supervising a card model build? What could possibly go wrong? 🔥🔥🔥 You are a brave man, Phil!!
-
Mahalo, Ron!! Yes, some folks call it a Texas Tattoo! I appreciate you following along. 🤙!!! Thanks for following along, Micha! Your comments were greatly appreciated and I sincerely hope that you take part in all my future builds! Thanks, Mike! And yes, I finally caved to the pressure and found a way to get a penguin in the bottle. No doubt they will now want a polar bear or Canadian rat or something in the next one! 😁 Thanks, Gary. As a fellow Austin guy, I'm sure you are way too familiar with those cedars trees! Hope you don't suffer from the allergies like so many around here do. Thanks, Keith. I was worried about how much the poly darkened the wood, but you make a really good point about the contrast with the white ice and snow. Thanks you, Phil! Always appreciate you following along. Thank you, Paul! And many thanks for following along. Thanks, Ken! I appreciate you being part of this project. Thanks, Bob! Not sure about the next one yet but hopefully something will come to mind soon. In the meantime, I'll enjoy checking out you and Captain Marvin on your dual builds! Thank you so much, Steve! I'm really anxious to see my niece's reaction to it (she knows nothing about it yet). Thanks, Grant! Same comment as above to Steve!! Thank you so much, Mark and Johnny! I'm always grateful to hove y'all following along on these projects. Hey Pat! So glad you found this but I certainly did miss your excellent commentary and suggestions along the way. I've grown accustomed to them on my build logs! However, as I mentioned to Landlubber Mike above, I don't think the "stalkers" (LOL!) are going to be satisfied with that one tiny penguin! Thank you so much, Gary! And thank for following along!
- 109 replies
-
- 7
-
-
- Ghost Ship
- Jenny
- (and 2 more)
-
Dang! That's 2 pieces of great news for us. Maggie is making a wonderful recovery and you are fixing to get back to work on the Tennessee. That's an even better update than I was hoping for!
-
I just went thru this build log from start to finish. What an incredible journey, Gary, with the destination being a true work of art. Congratulations on overcoming a myriad of challenges and producing such a beautiful model!
-
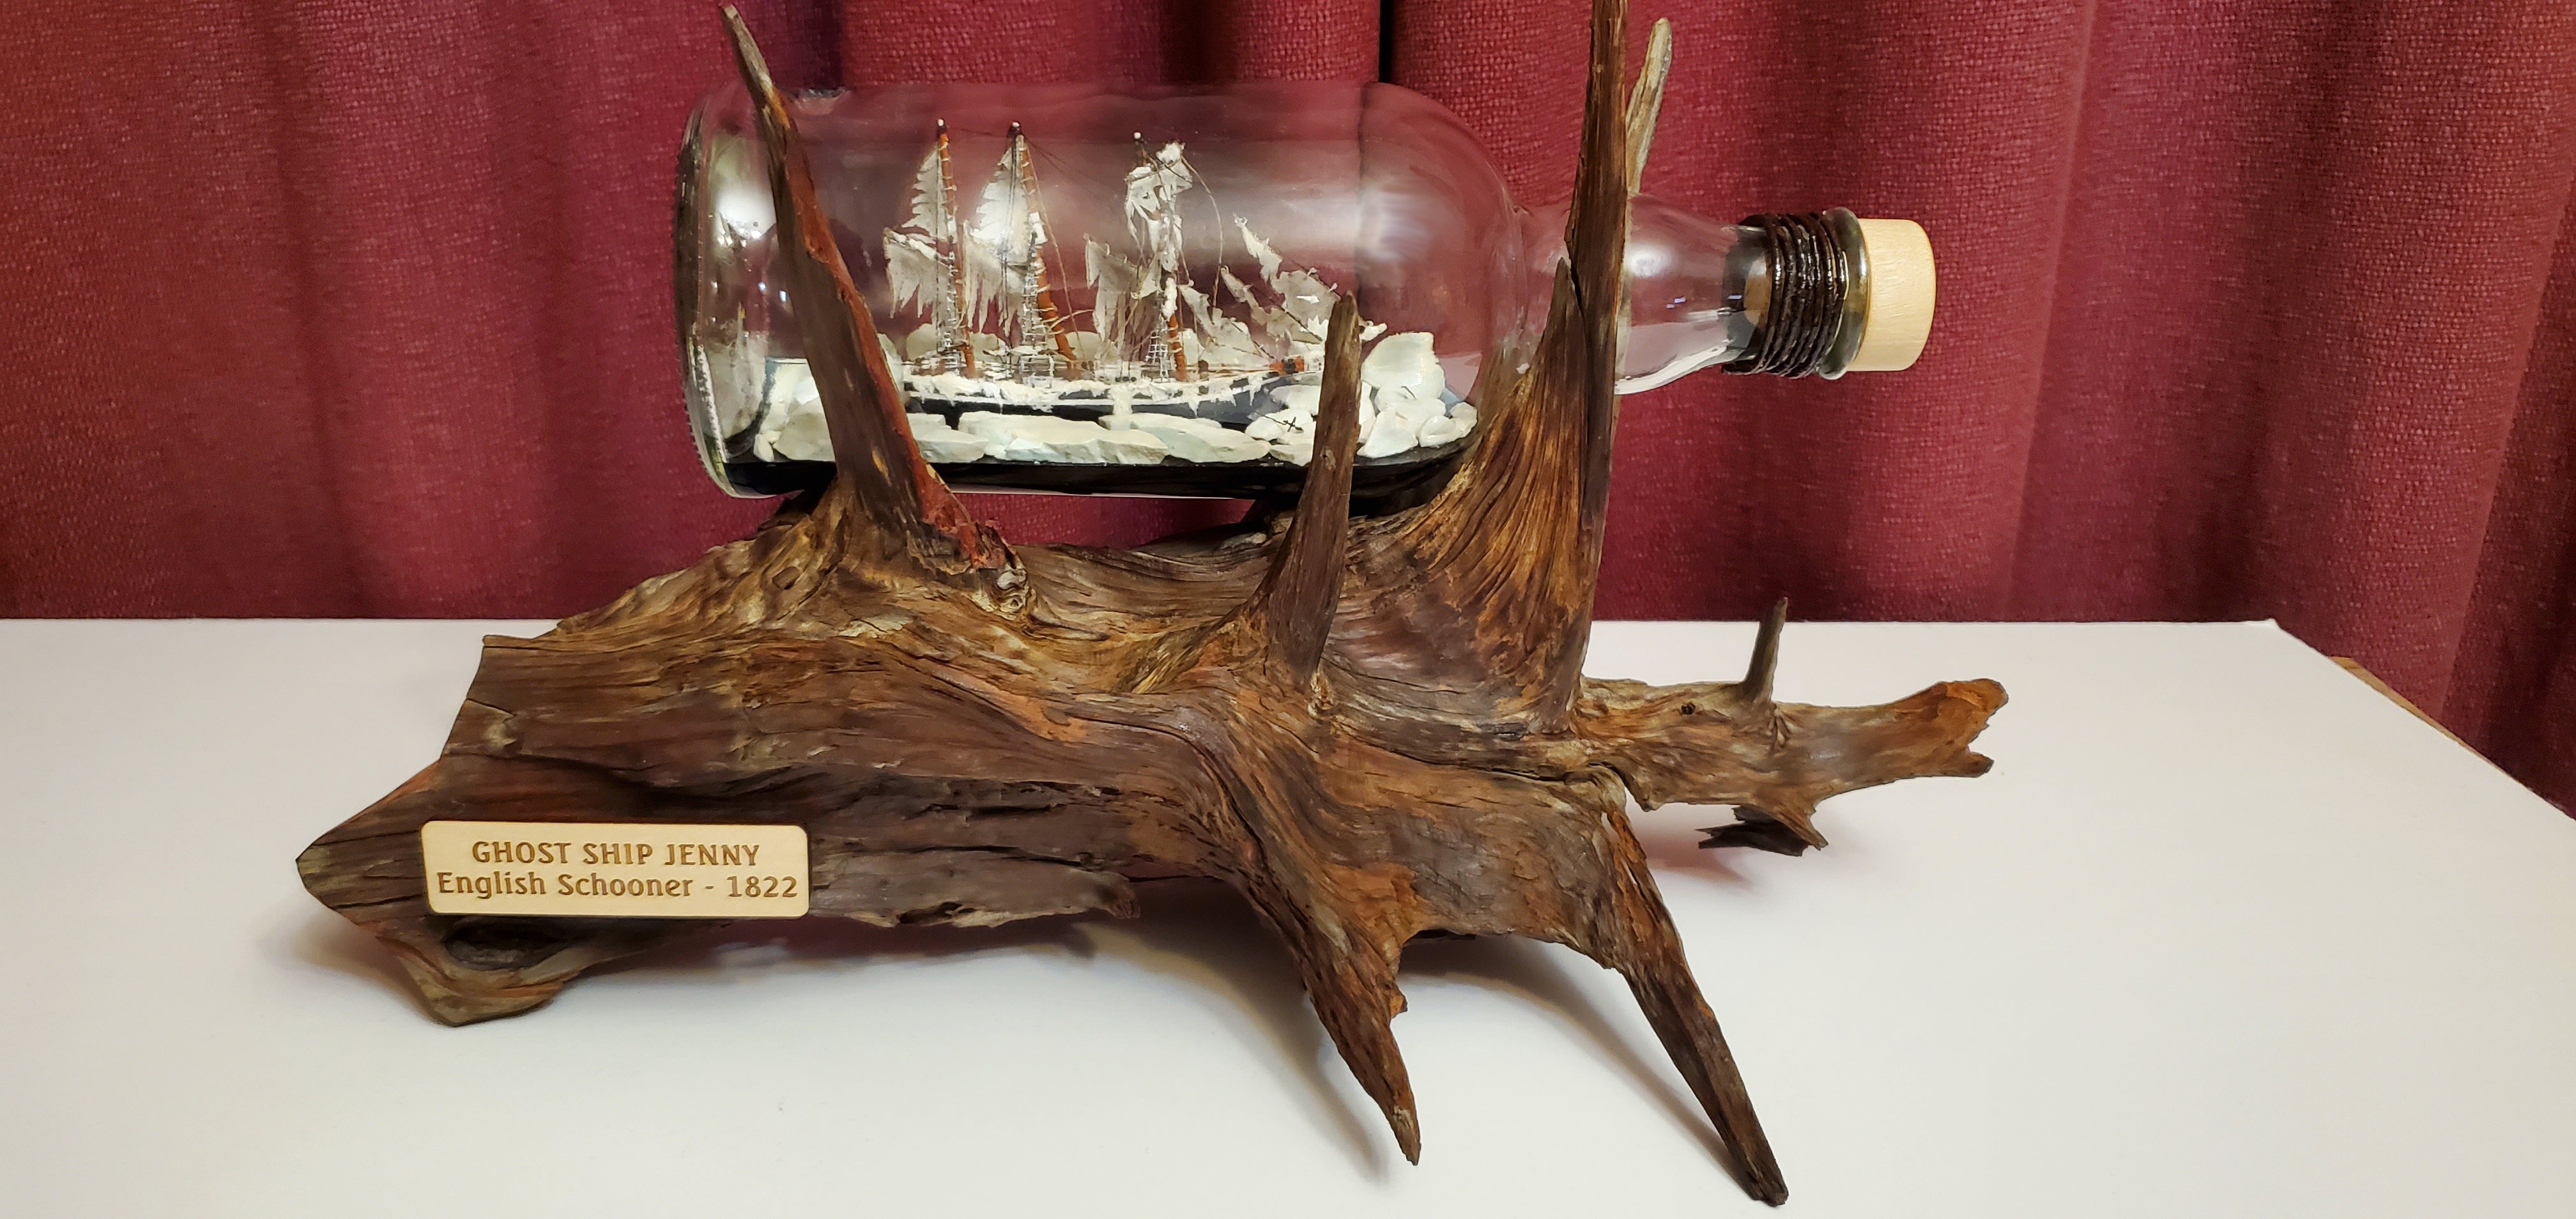
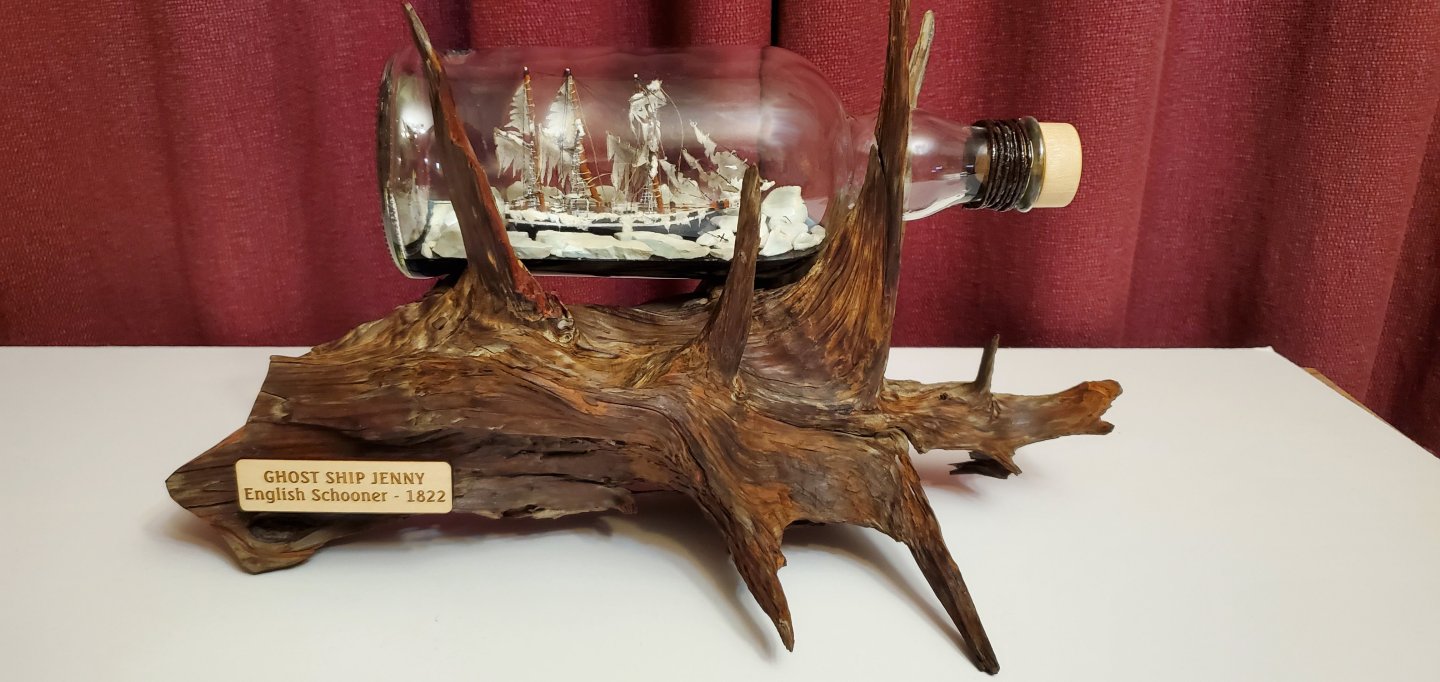
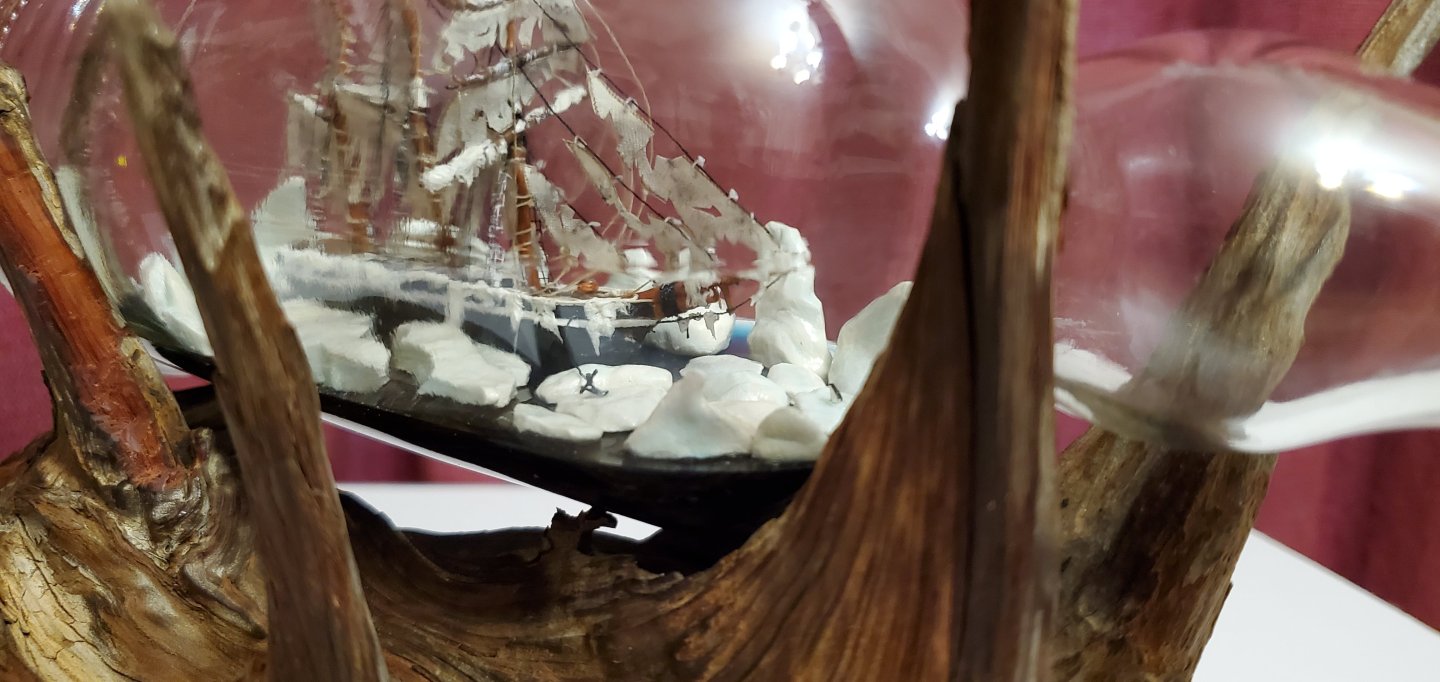
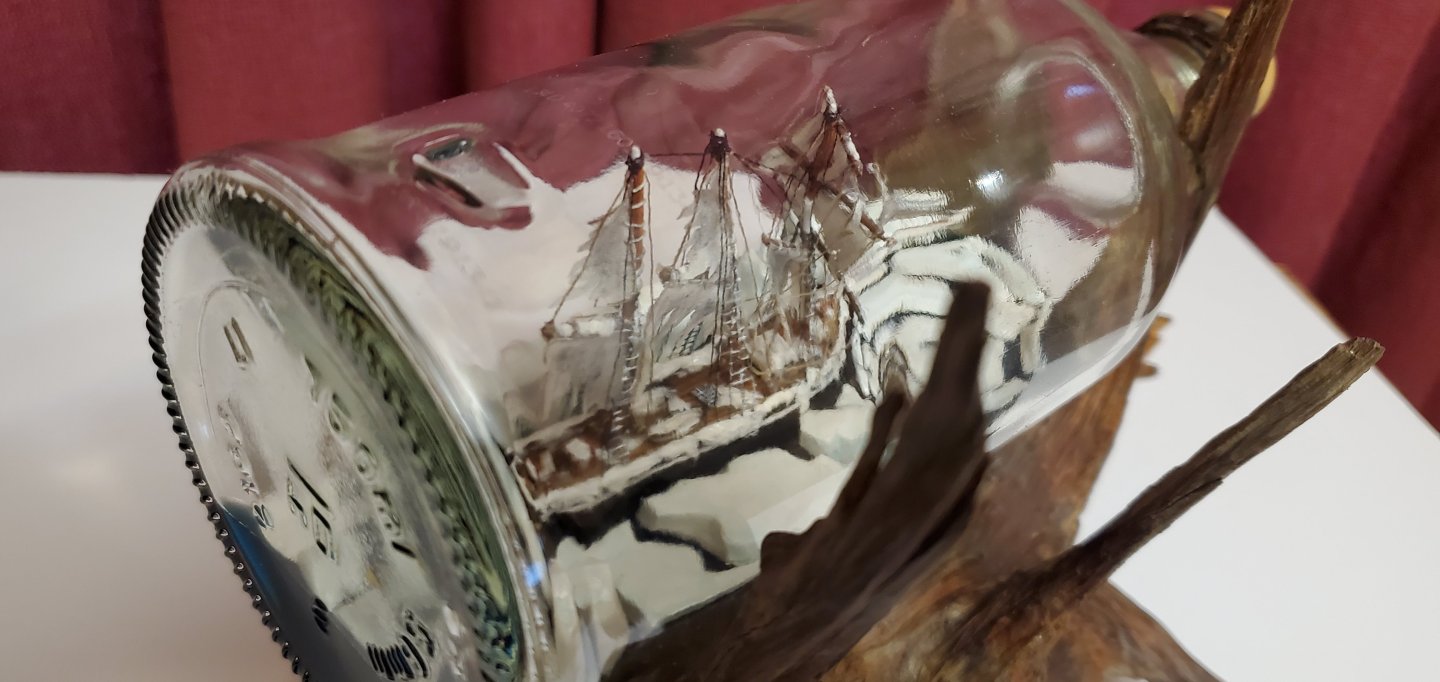
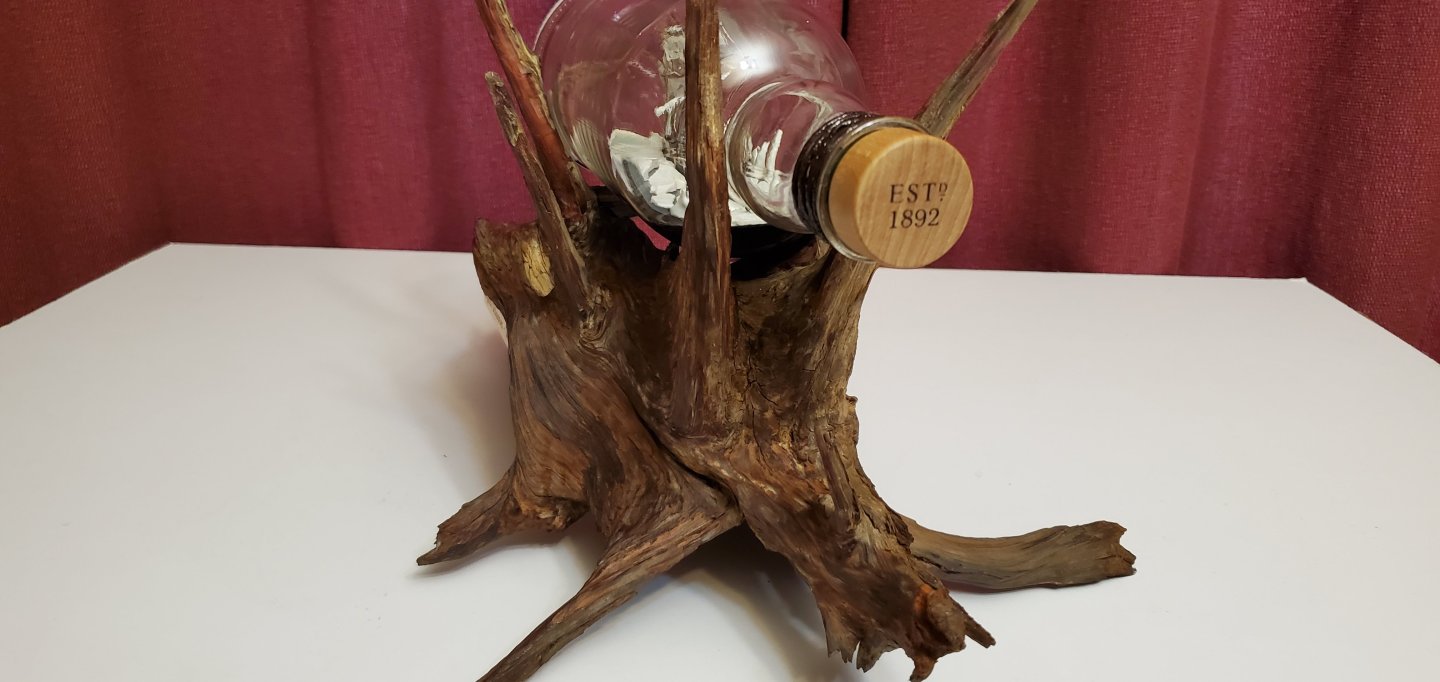
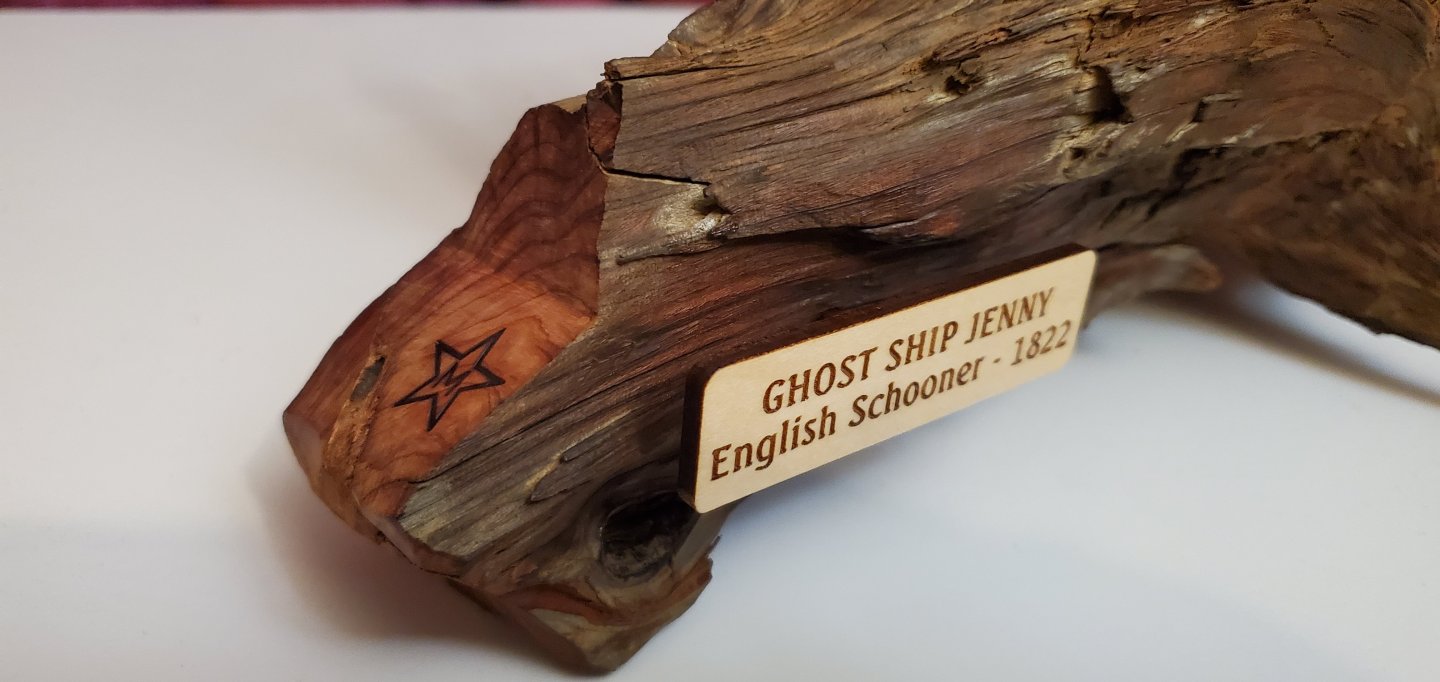
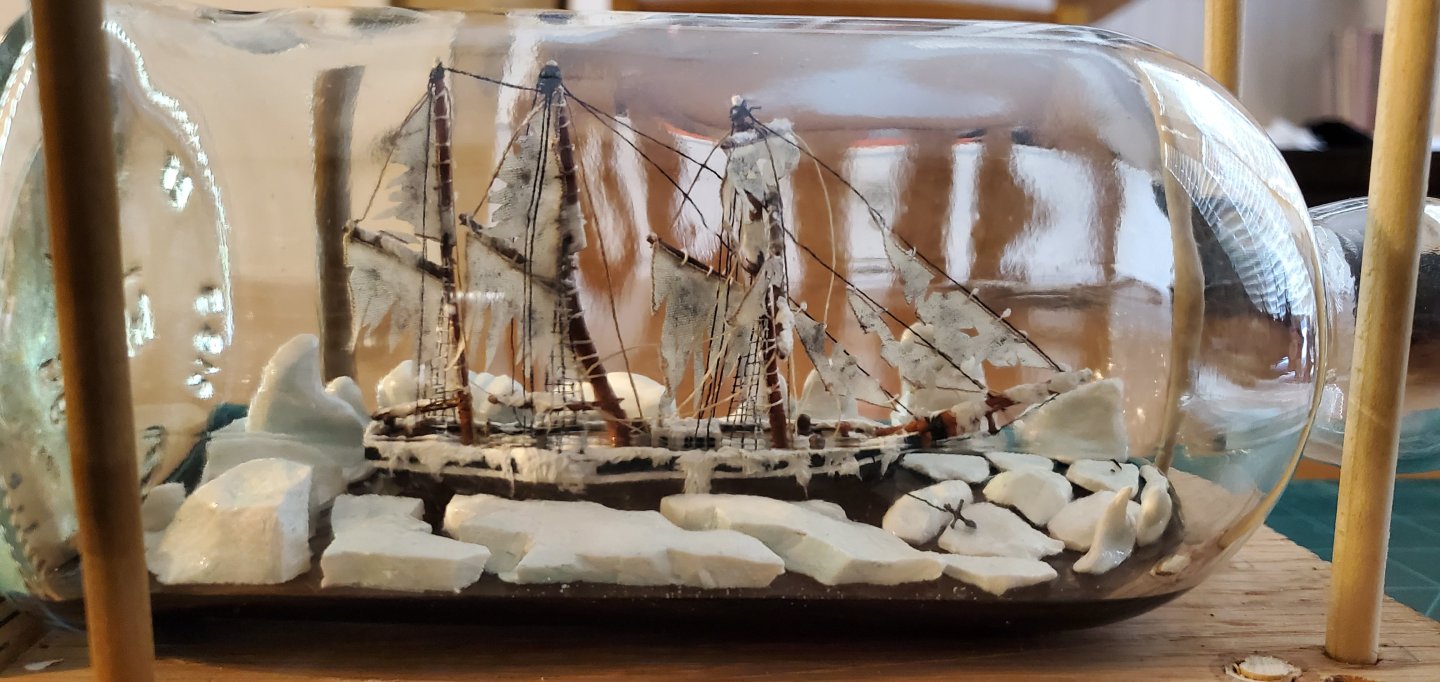
The Ghost Ship Jenny is complete! Before I get to the final update, I want to give sincere thanks to everyone that followed along on this short but entertaining journey: @Keith Black, @Knocklouder, @Ian_Grant, @gsdpic, @gjdale, @Scottish Guy, @FriedClams, @Canute, @Javelin, @mtaylor, @GrandpaPhil, @Thukydides, @Bryan Woods, @JacquesCousteau, @John Fox III, @hollowneck, @Landlubber Mike, @ccoyle, @Coyote_6, @BLACK VIKING, @CiscoH, @Rik Thistle, @Ryland Craze, @Paul Le Wol, @Mike Y. I can never thank y'all enough for your support, suggestions, critiques, and humor! Now the final update. To finish up the Jenny, I wanted to mount the bottle on something that would look a bit spooky, maybe a little eerie - something that would add to the mystique of a ghost ship. A while back, I found this root ball from a fallen cedar tree that looked cool (actually a juniper tree, but we call them cedars in Austin). I kept it knowing that I’d eventually find a use for it. The bottle and the root ball turned out to be a perfect match. The root ball rests stable and level on its side, and the bottle fits right in between the “tines” of the roots. The cedar wood is very hard, weather resistant, and lasts forever. They are commonly used for barbed wire fence posts around here. However, they will still flake off strands of thin bark so I decided to seal the surface, trying to keep as much of the natural color as possible. I ended up doing a 50/50 mix of Minwax semi-gloss poly and thinner. The mix kept the poly from darkening the wood too much and allowing the natural variations to show through. Here’s the completed project.
- 109 replies
-
- 23
-
-

-
- Ghost Ship
- Jenny
- (and 2 more)
-
Job well done, Bob! You are a helluva lot better at ship modeling than you give yourself credit for!
-
Let Captain Marvin know that Choco Taco and I are on board and ready for the action! Let's Git R Dun!!!
-
Best MSW comment of the year!!! 🤣🤣🤣
-
Count me as a simpleton too, Gary! I was also mesmerized even though most of the eclipse, including the 90 seconds of totality here in Austin, was obscured by clouds. Your pictures are fascinating. As for your build, superb work and detail as always. I particularly like how the ageing on your bulkhead planking turned out. So well done!
-
Congratulations on a fantastic build, Bob! She looks truly magnificent. Job well done. And Choco Taco gives it 2 wings up and says he can't wait to see it in next year's NRG calendar!!
-
Another option might be breaking the the top pieces of each of your 2 layers in half (at slightly different lengths to maintain the randomness of the edges). This would thin out the existing layers and give you 4 layers (or steps if you will) of roughly equal thickness.
-
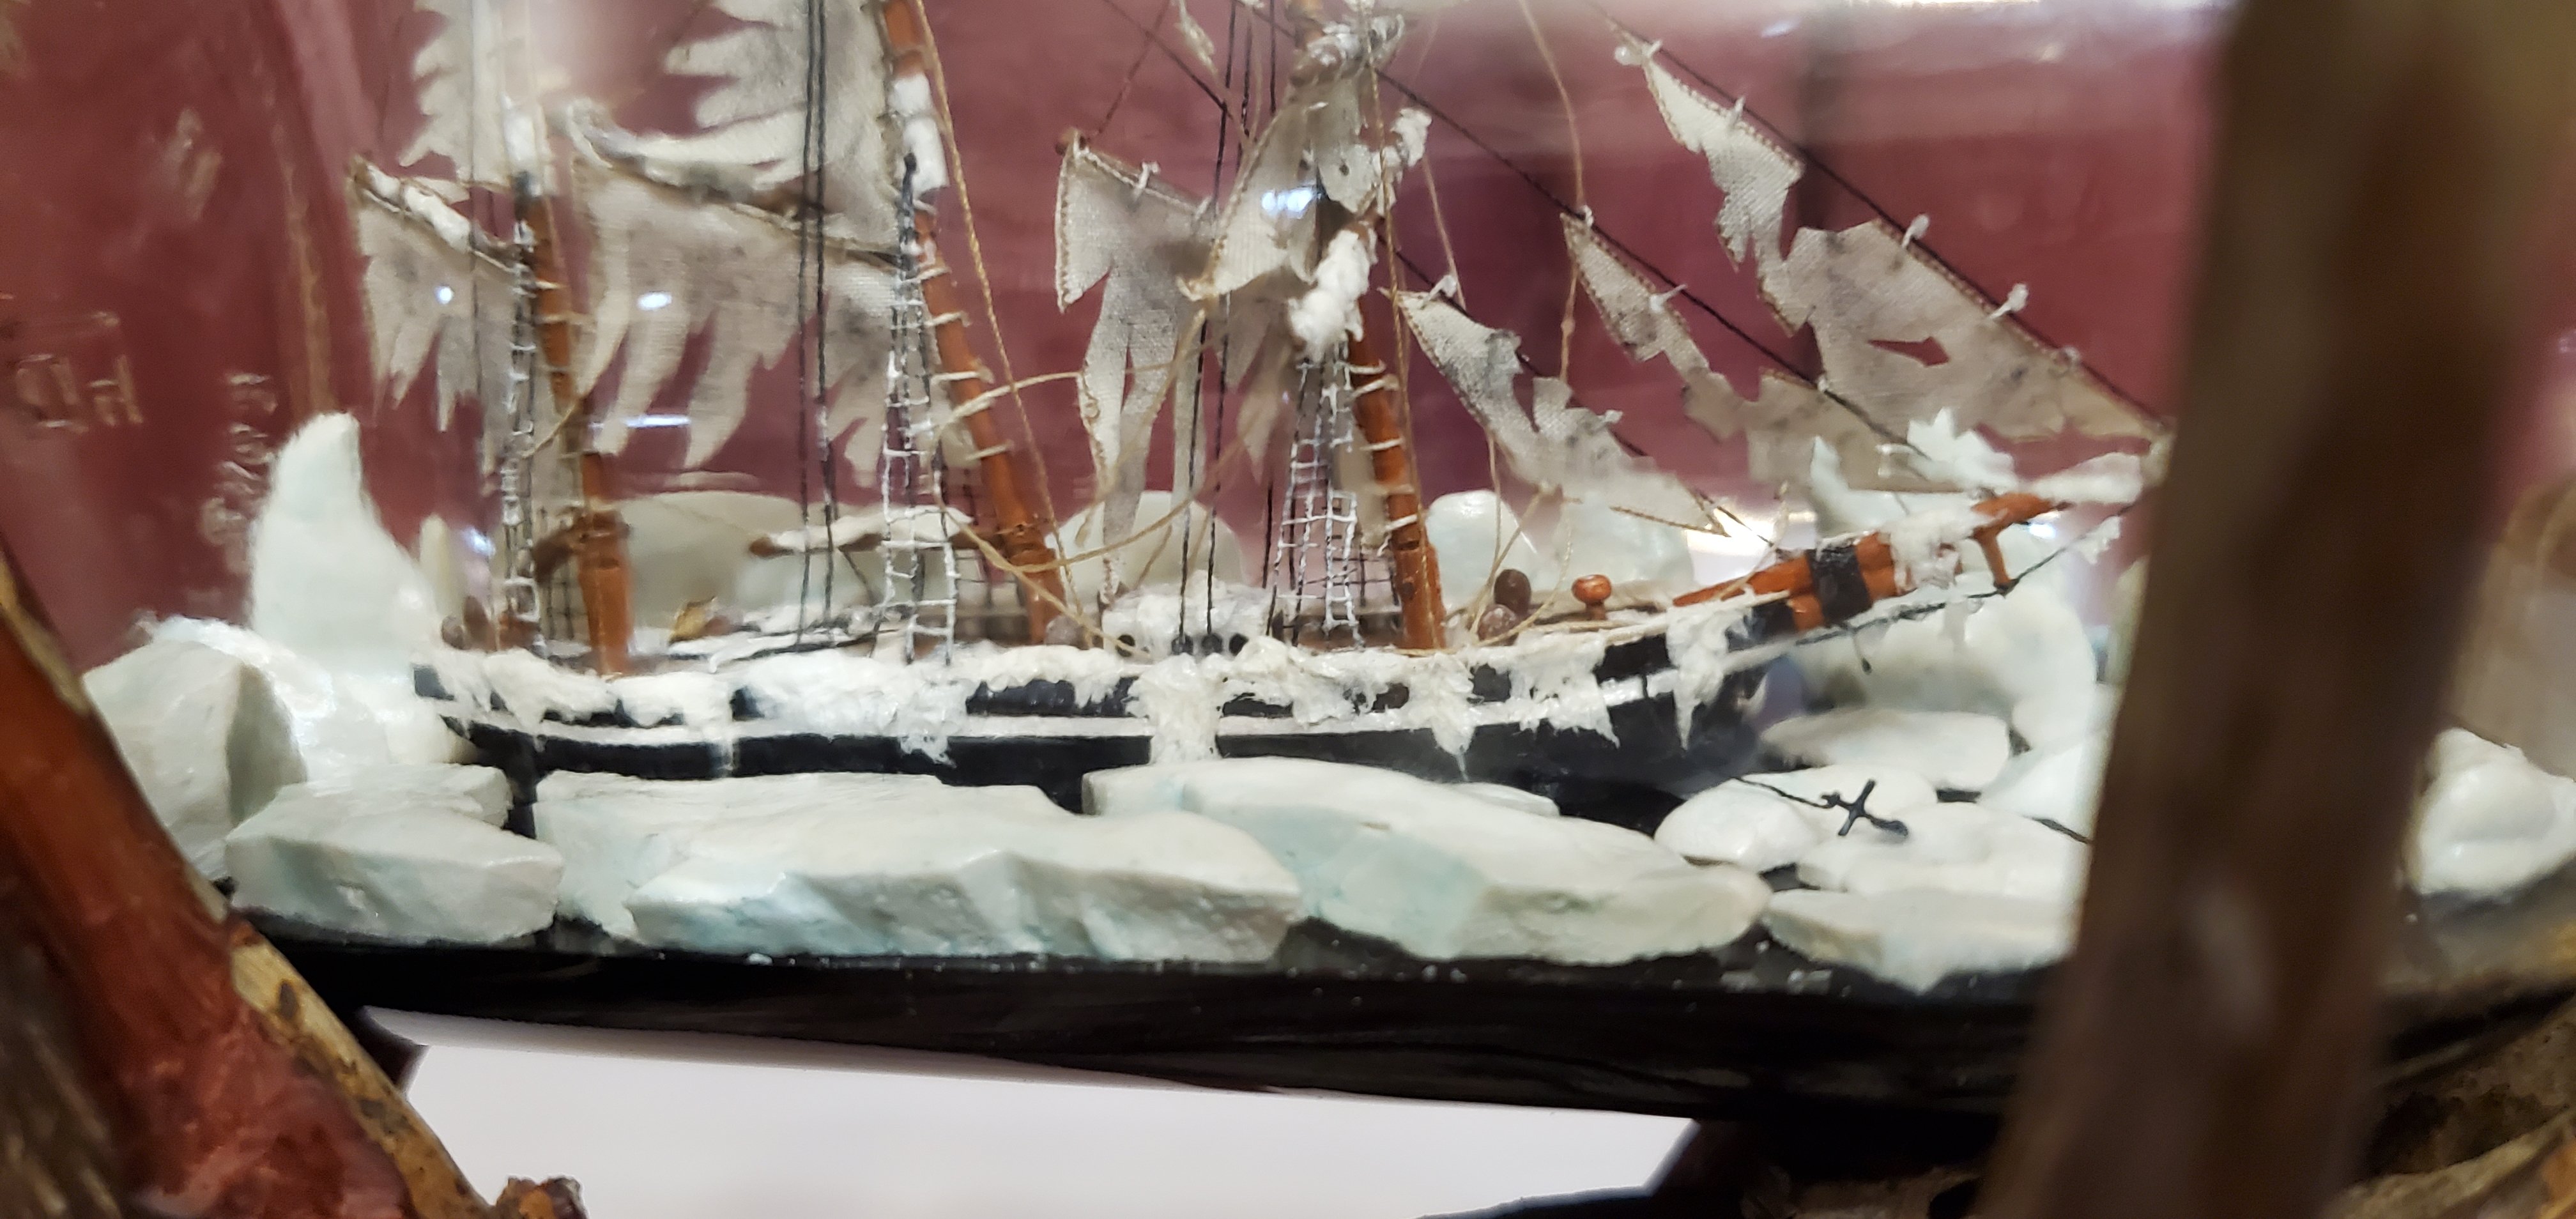
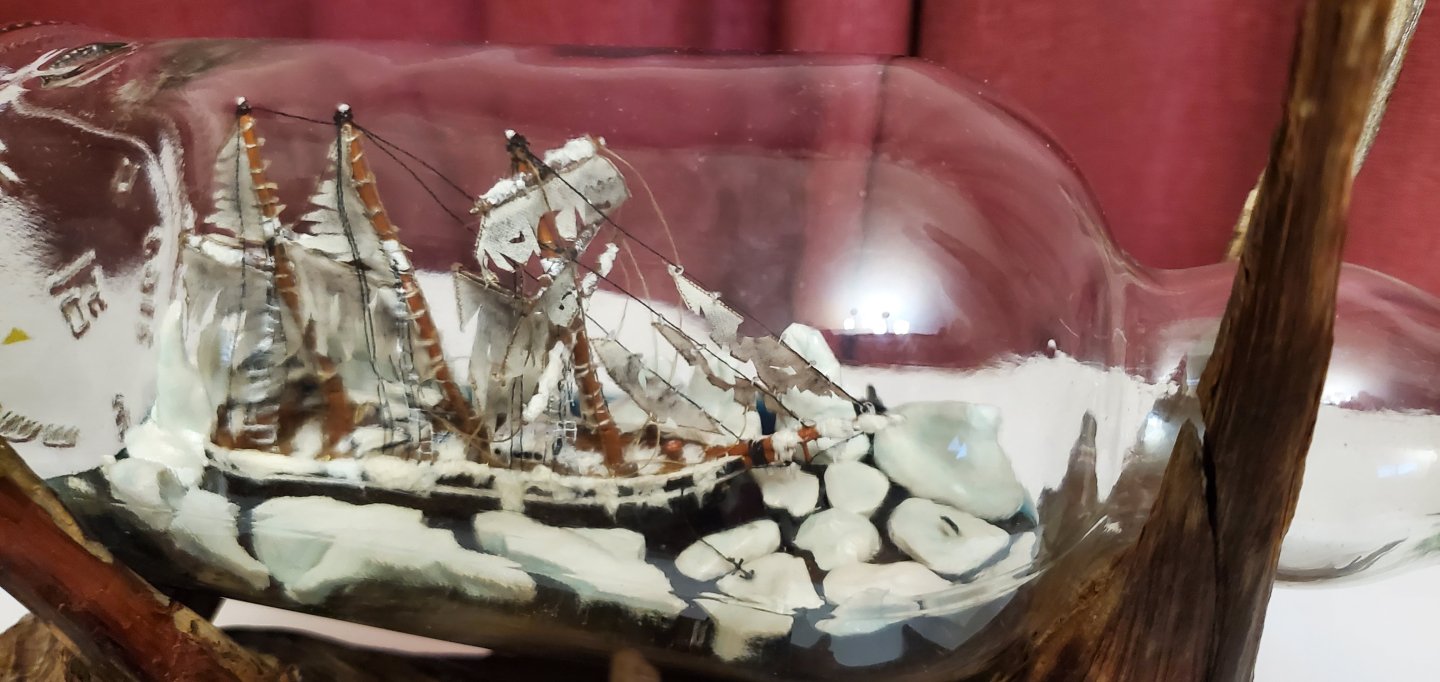
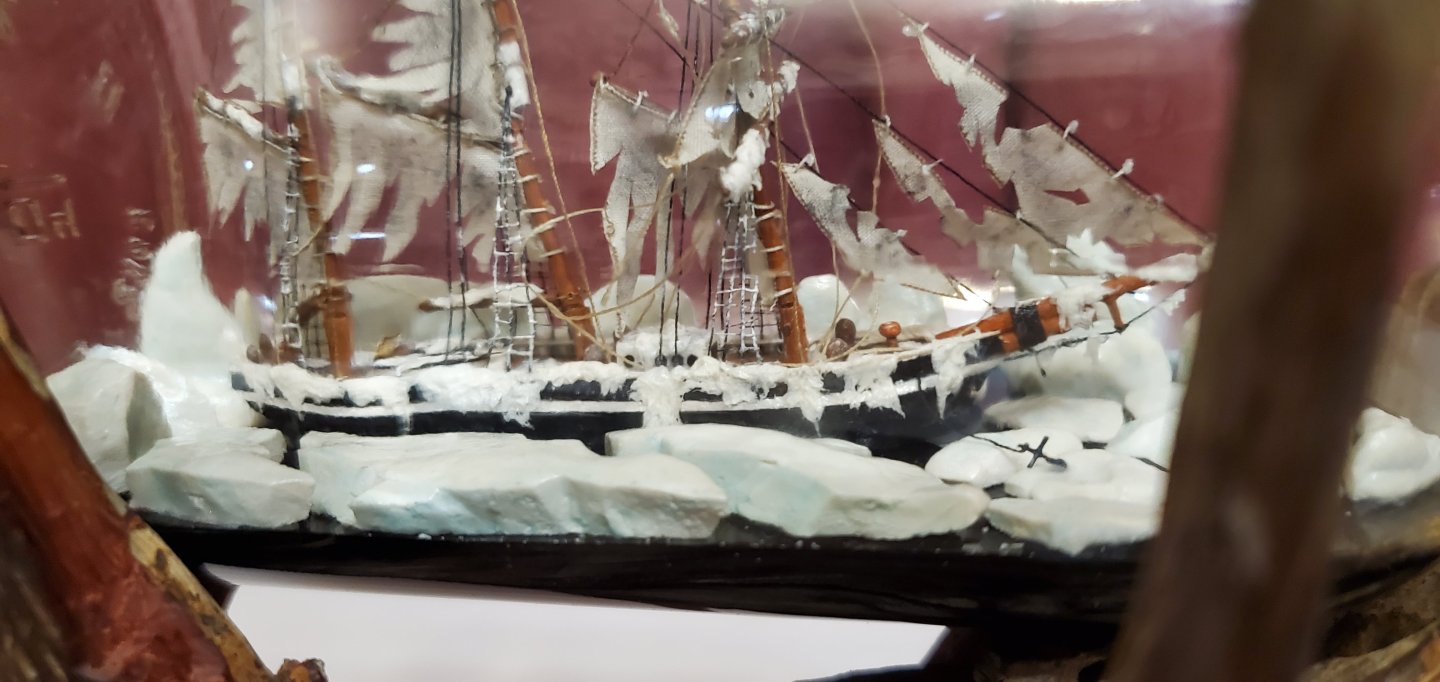
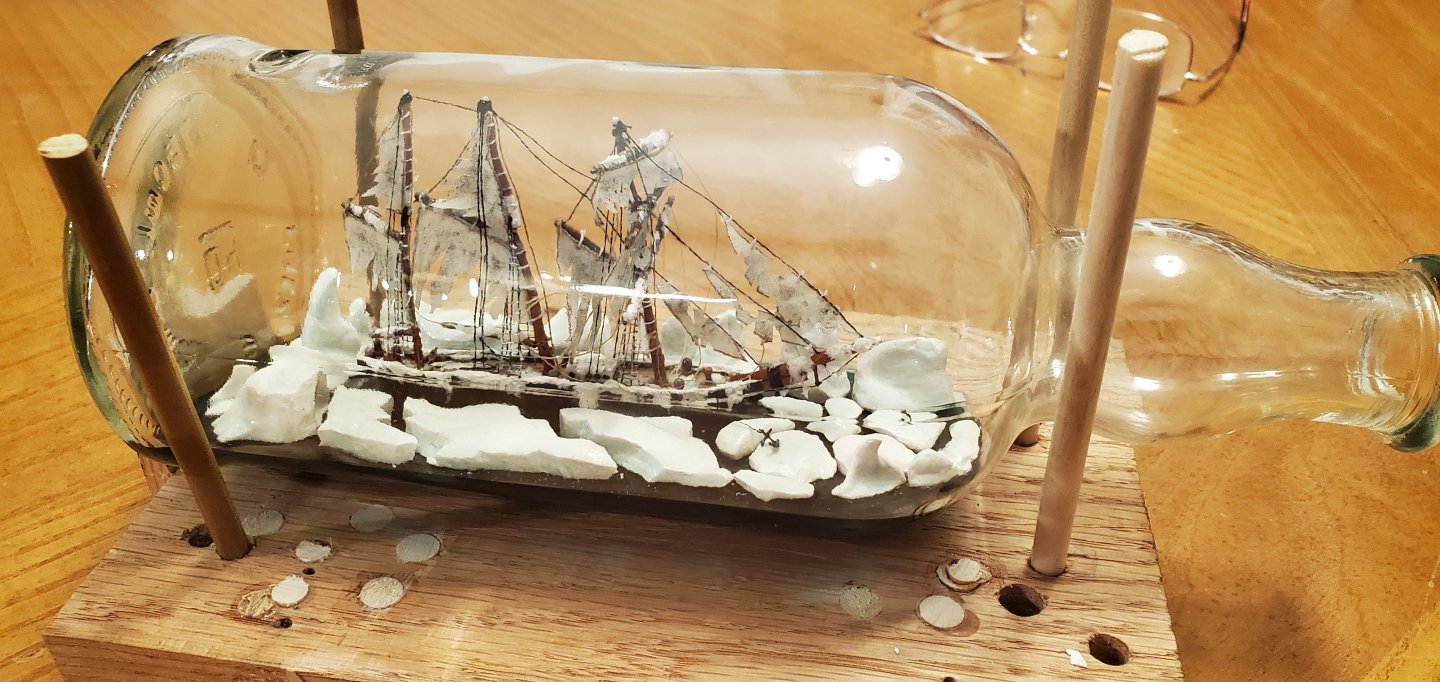
As Lee Corso would say, "NOT SO FAST, MY FREIND" And welcome aboard @gjdale! Always glad to have you along for the ride! Well, I got the Jenny inside the bottle without incident, although I did have to shave off a slight bit of ice from one spot on the bulwarks to get her to fit. As usual, I left no room for error. After the glue was set and Jenny was firmly ensconced into her new home, I raised the masts, untangled the sails, and haphazardly tied off the ends of the running rigging I had left loose. And then it happened. I left the Jenny unattended overnight, woke up this morning, and found THIS inside the bottle. I scoured the house to see if there were any others planning on joining the invasion, but didn't find any. So I'm pretty sure it's just a lone renegade. I'll leave the stopper off the bottle in case it changes its mind and wants to get out. Here's what the whole thing looks like now. Still working on the final presentation.

- 109 replies
-
- 14
-
-
-
-
- Ghost Ship
- Jenny
- (and 2 more)
-
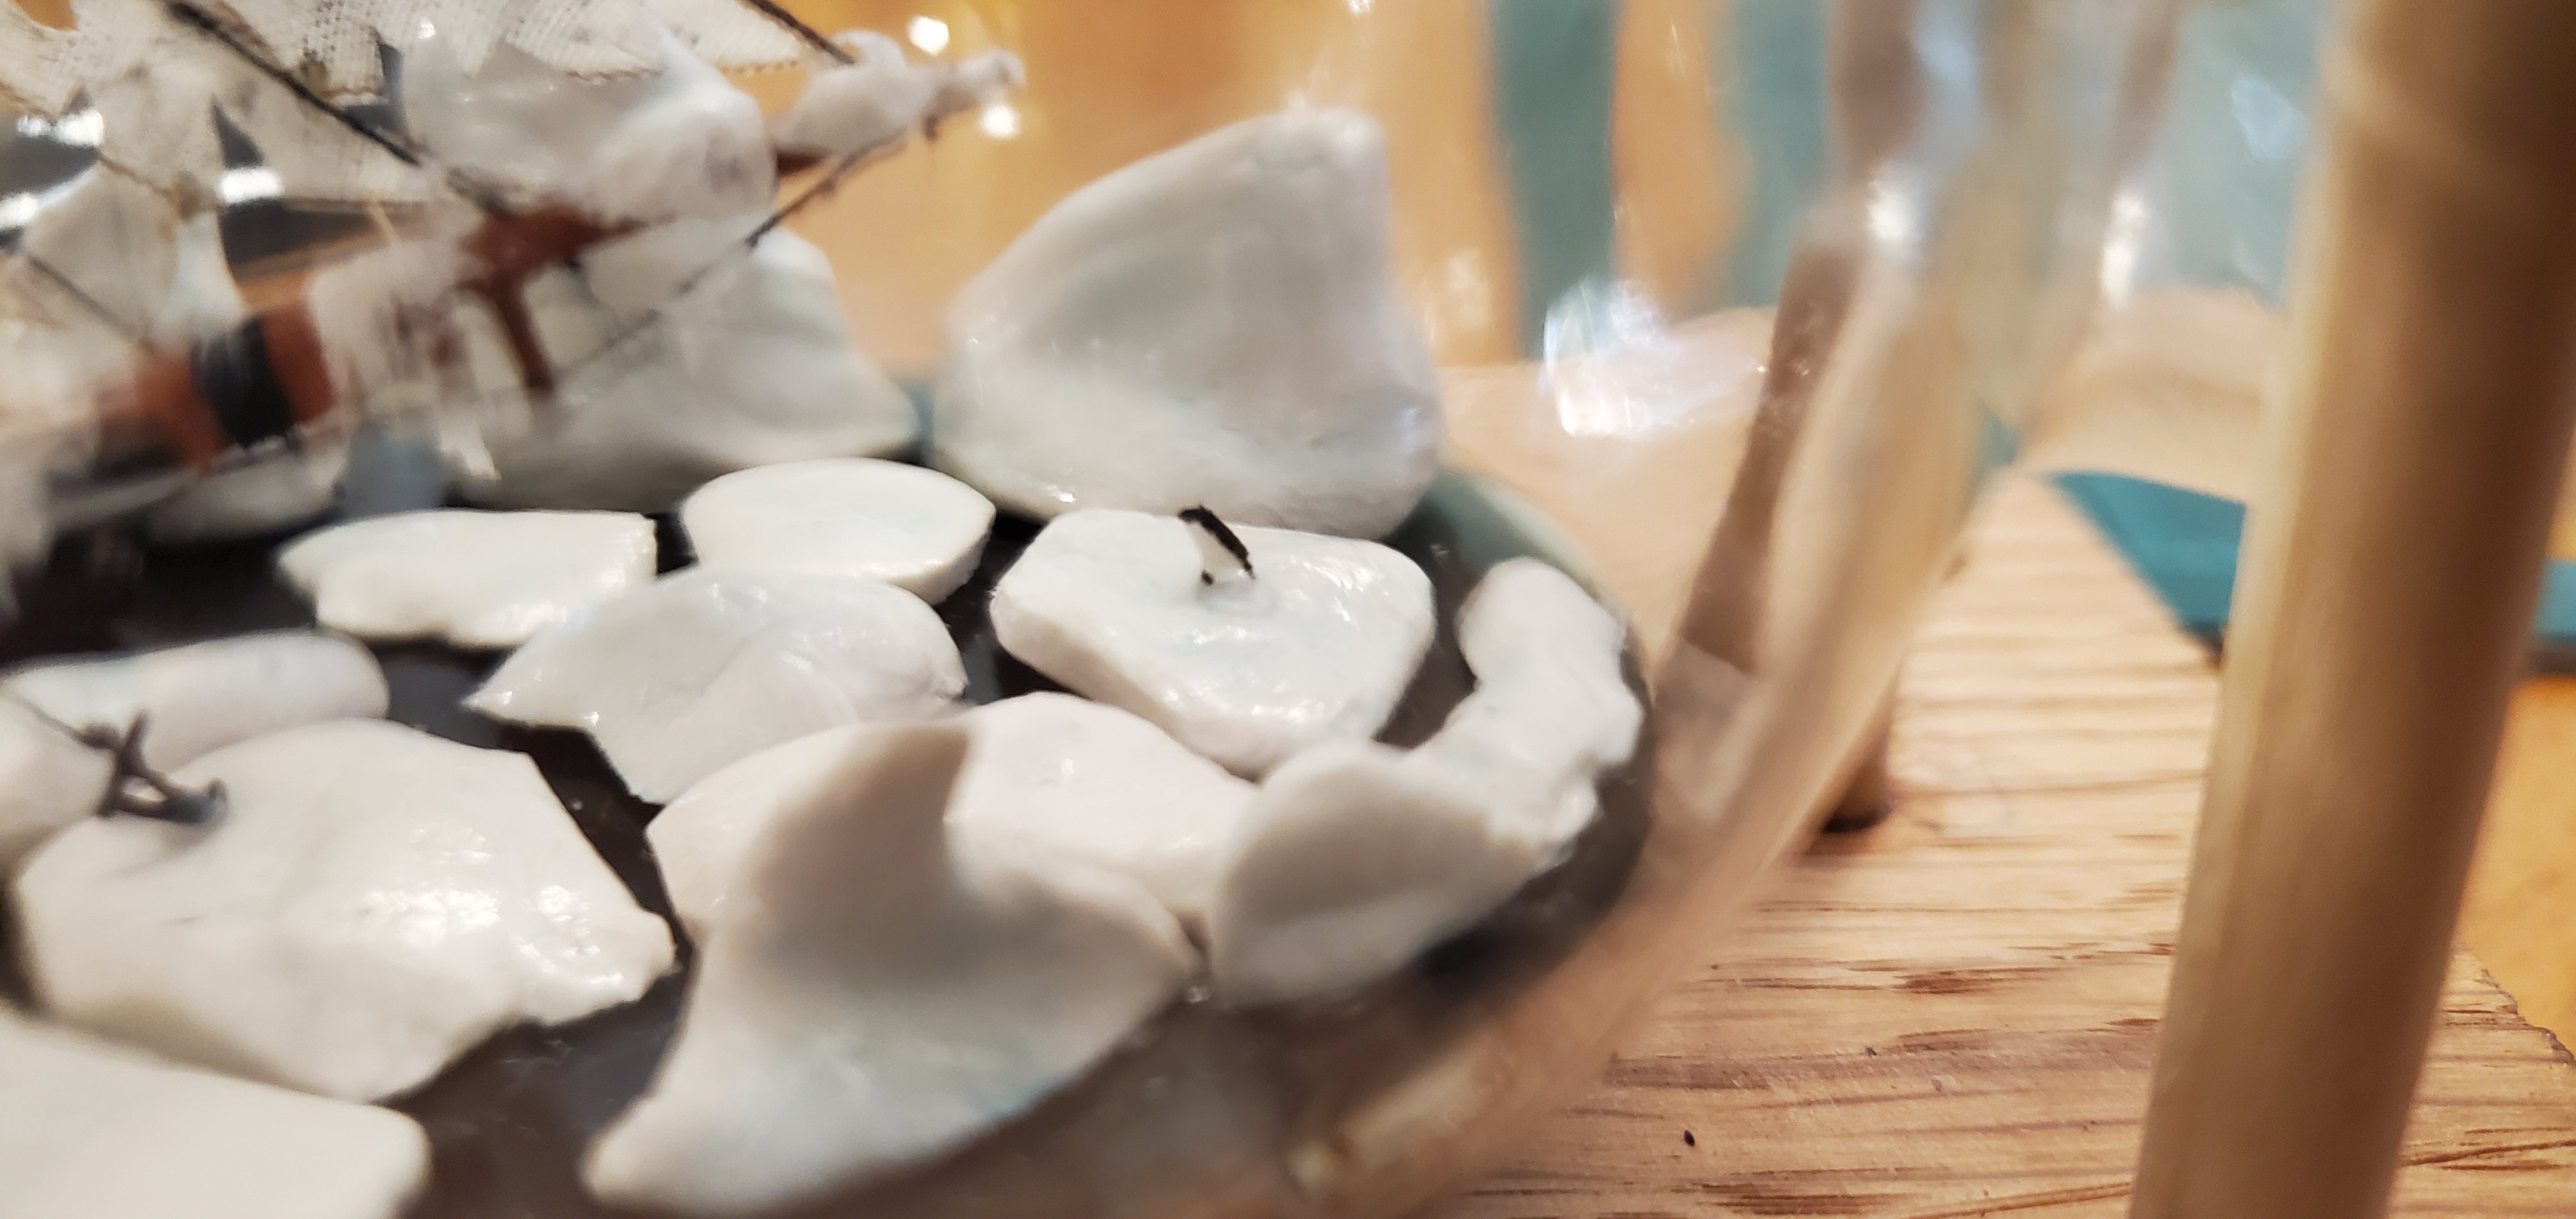
Hey Javelin. It's definitely too late, but I actually did think about that earlier. I quickly dismissed the idea because of what I saw the epoxy resin do in my 2 previous builds (as well as your sea installer project). If you recall, as the epoxy resin cures it tends to crawl up edges that it's in contact with. As small as my icebergs are, I was afraid the resin would crawl all the way up to the top edges of the icebergs and look terrible. Most iceberg pictures I found had a pretty sharp distinction at the water's edge, so I wanted to match that look Totally agree. I started off with a just little bit of ice and frost in various places around the ship and then kept adding small bits at a time. I finally forced myself to stop and say "good enough" to keep from going overboard.
- 109 replies
-
- 6
-
-
- Ghost Ship
- Jenny
- (and 2 more)