


Glen McGuire
-
Posts
1,321 -
Joined
-
Last visited
Content Type
Profiles
Forums
Gallery
Events
Posts posted by Glen McGuire
-
-
1 hour ago, Keith Black said:
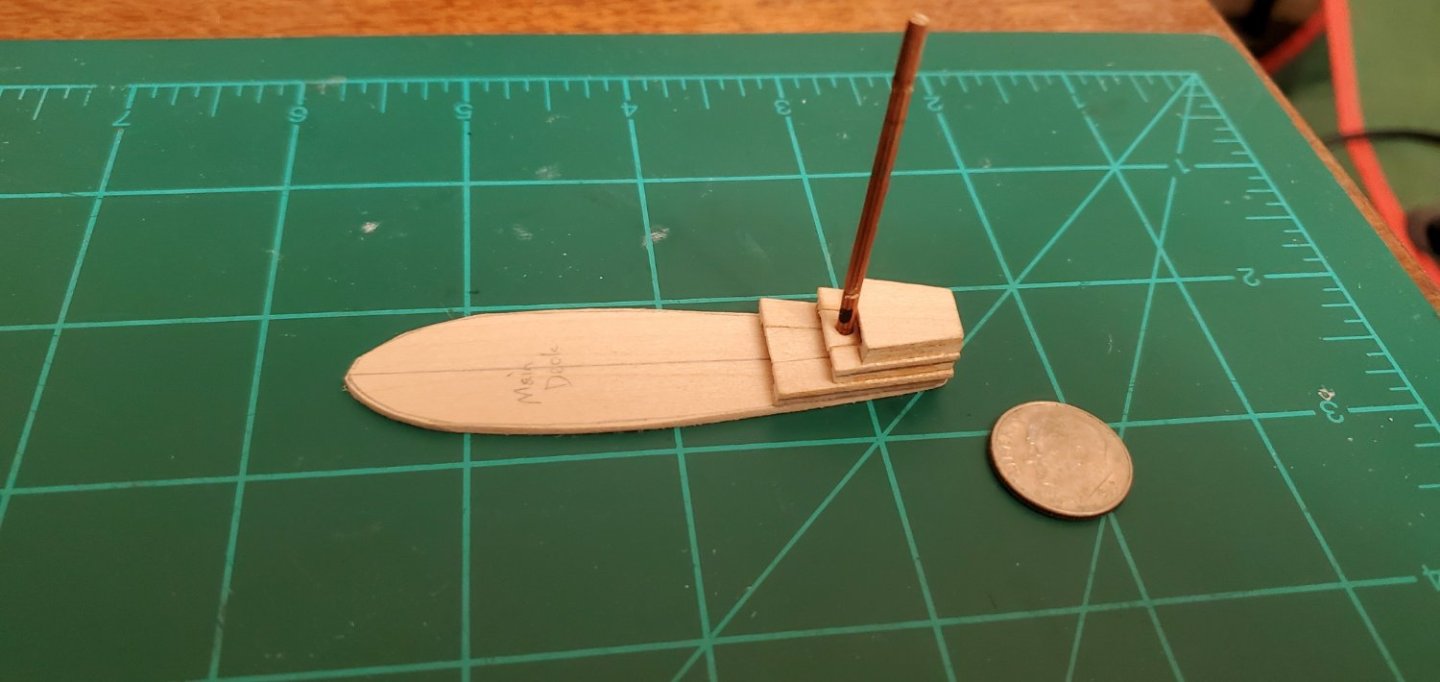
Glen, the hull passes through the opening without issue?
Yes! Each half of the hull fits thru easily. They will be joined together once inside the bottle. Then the main deck (with masts, yards, and sails attached) will be inserted into the bottle and glued to the hull. The main deck will be a more challenging fit since the main and mizzen masts have to fold over and lay on top of that tall poop deck. According to the plans I've drawn it should fit ok, which means in reality it probably won't be anywhere close.
-
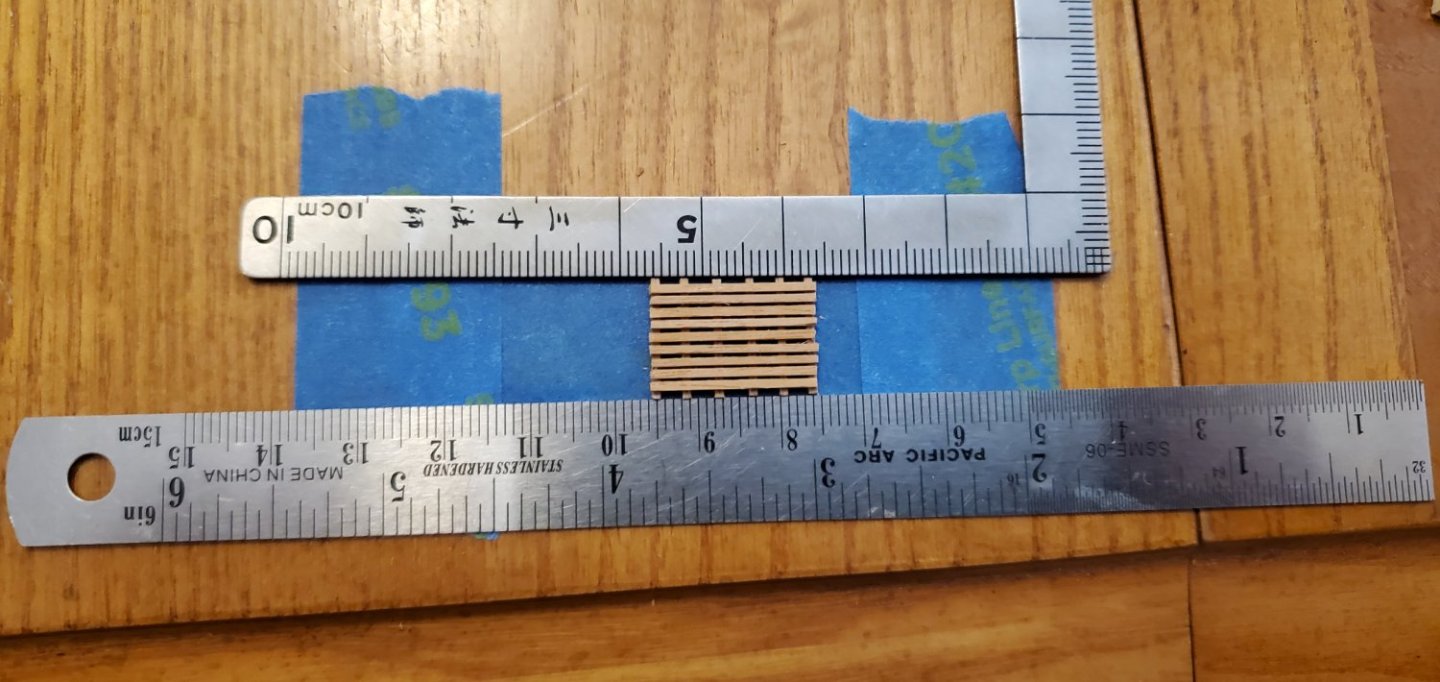
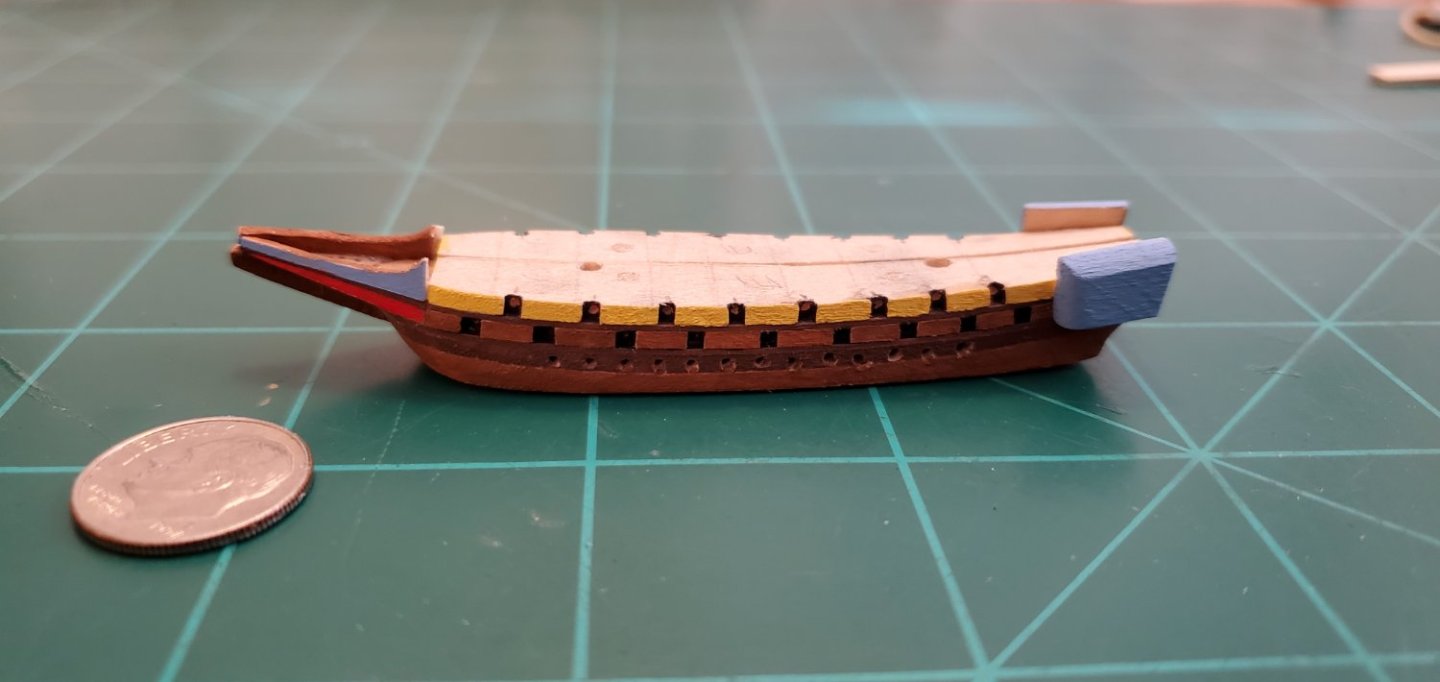
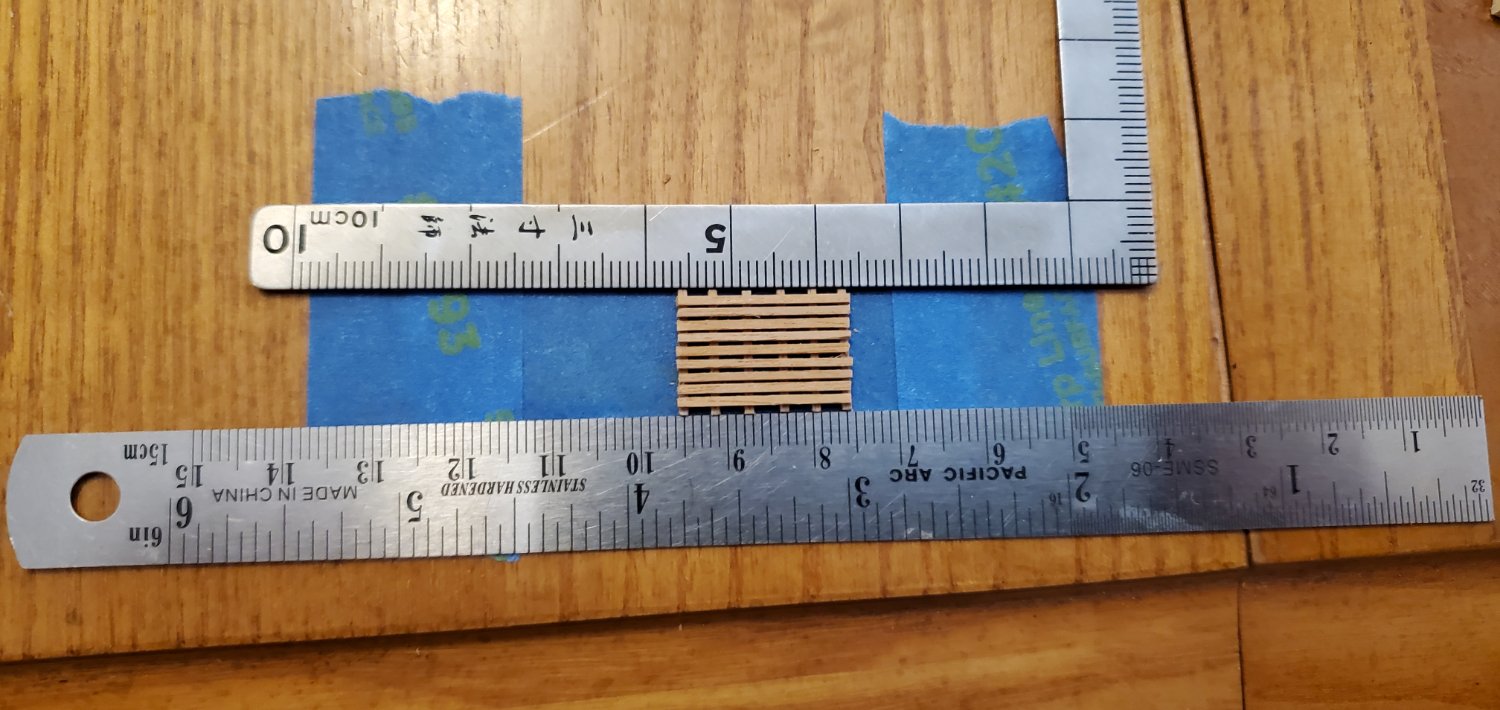
Returning to the main deck assembly, I made a crutch for the ship’s boats. I was struggling with keeping all the lower slats aligned while laying the top slats in place. So I eventually tried sticking the lower ones on painter’s tape to keep them still. It worked well.
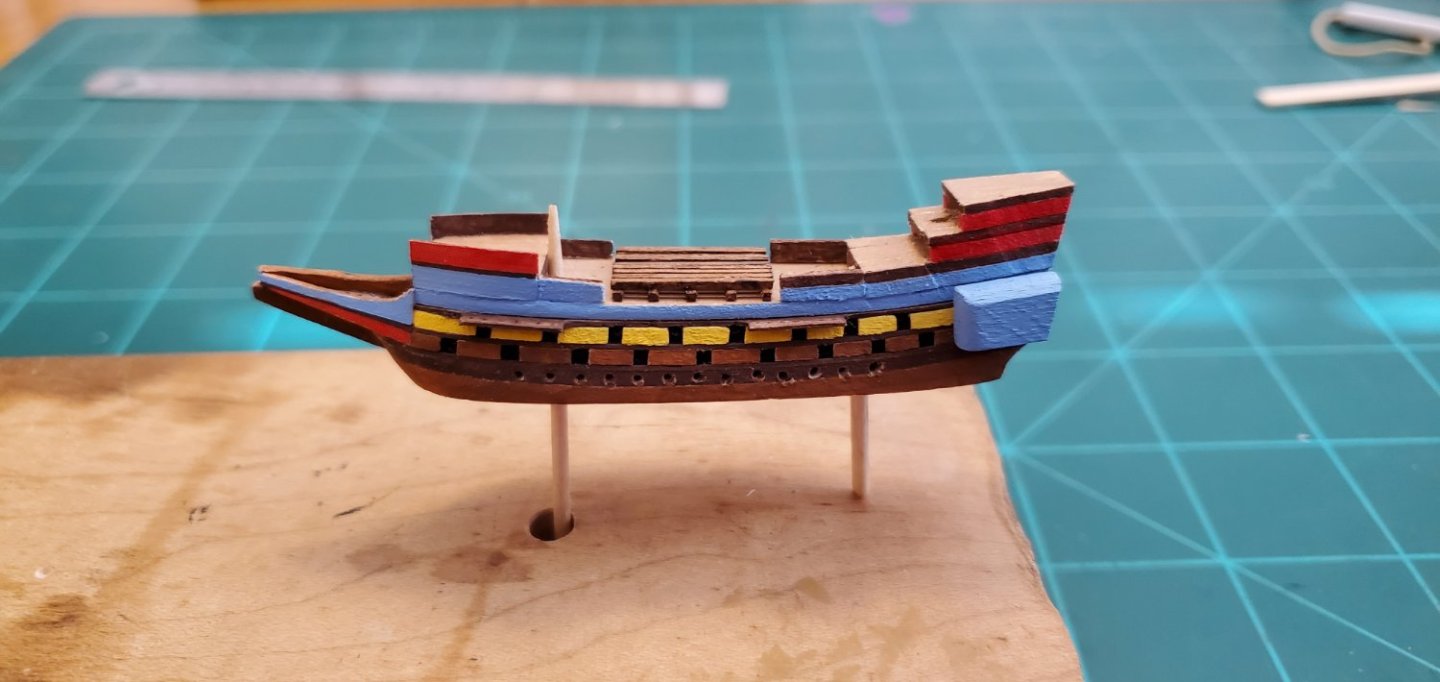
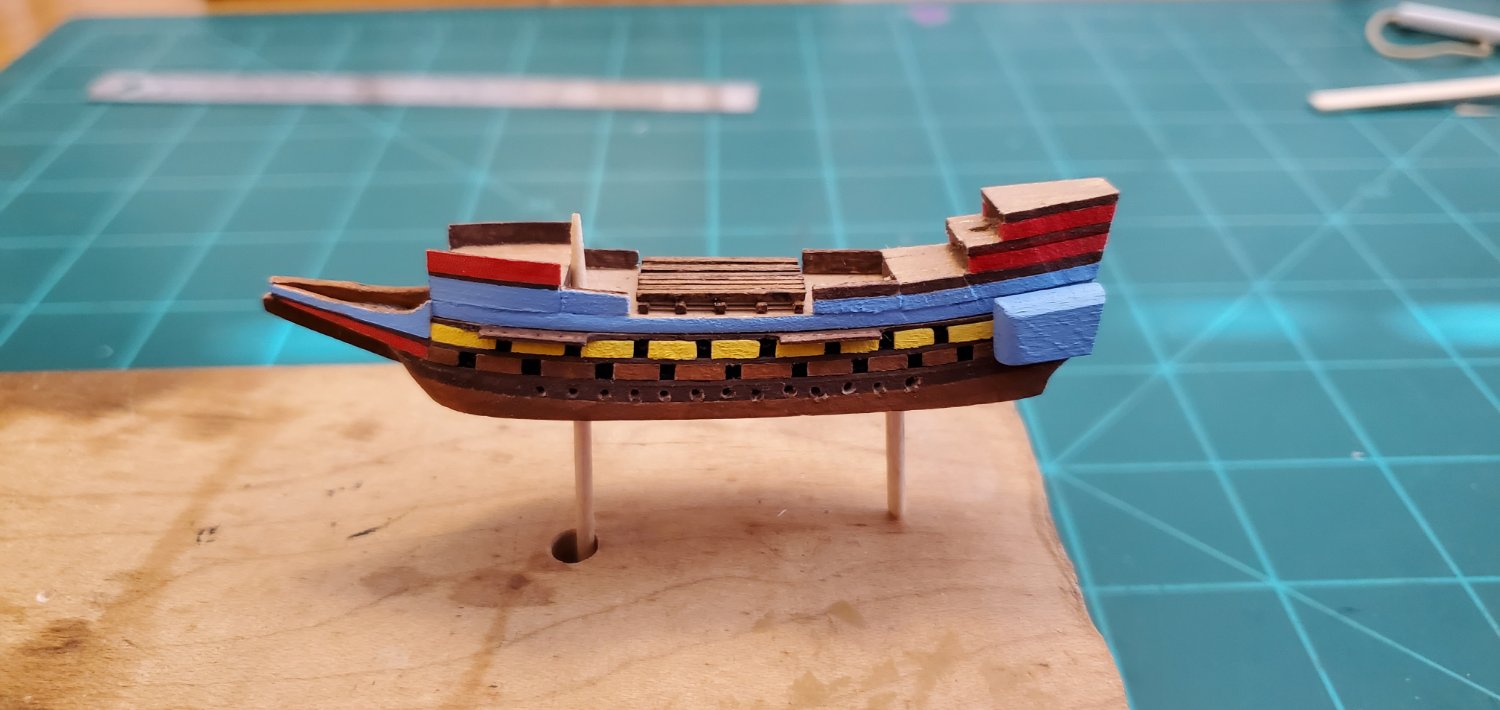
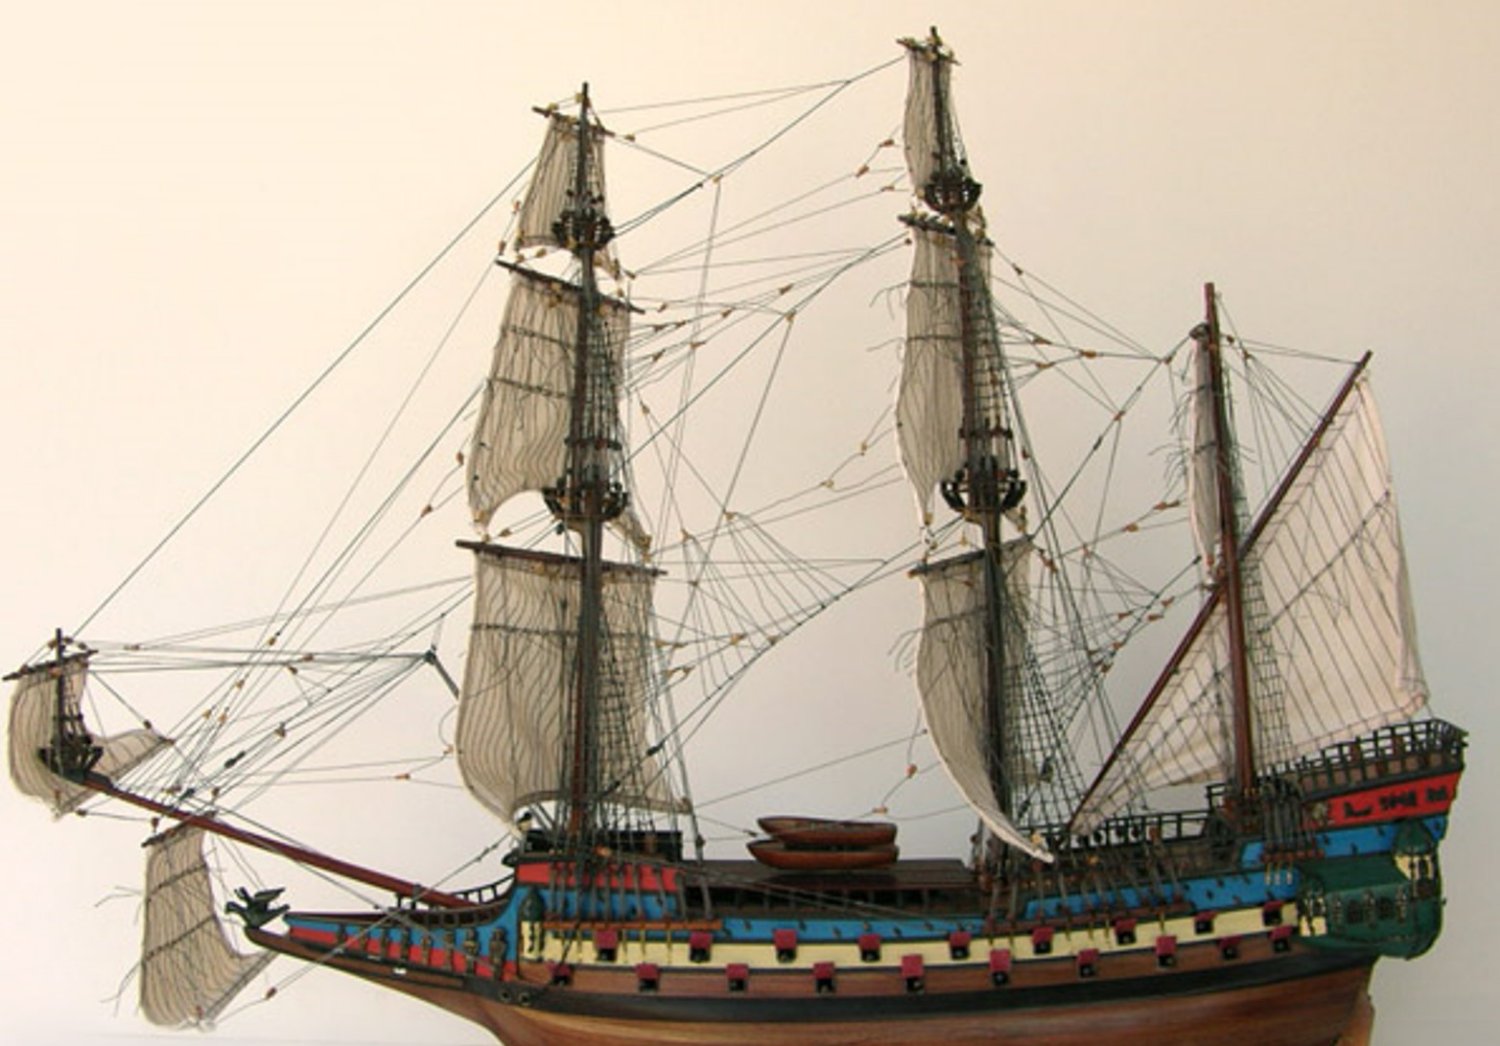
I finished painting the main deck assembly, added the crutch and some bulwarks, then dry-fitted it on top of the lower deck assembly for a look. The last pic is the what I am loosely basing my ship on, although I do not plan on adding the spritsail or sprit-topsail.


- Knocklouder, GrandpaPhil, Ian_Grant and 8 others
-
 7
7
-
 4
4
-
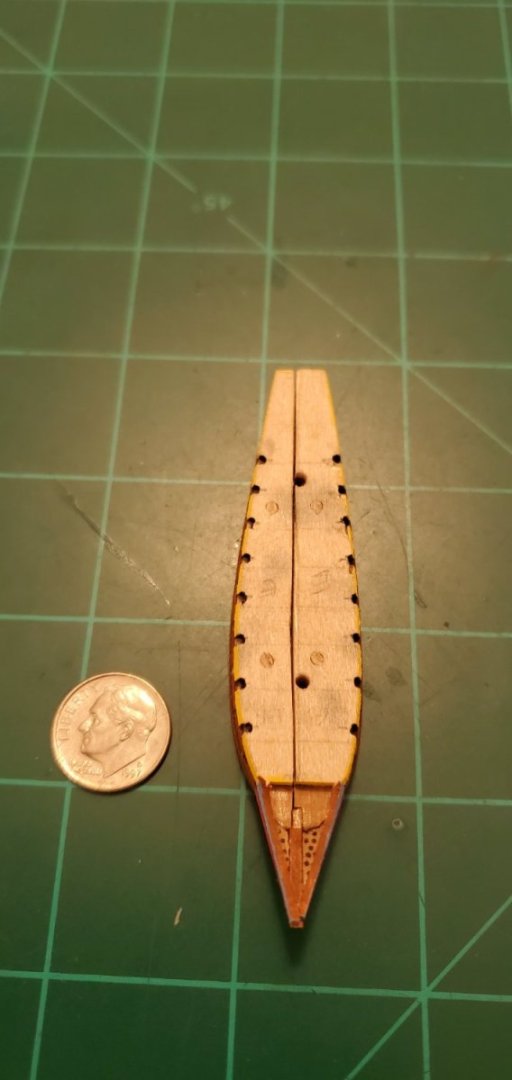
I added the knee and head on the bow along with an attempt at the associated grating. The grating was a particular challenge. I eventually cut a small piece of veneer into the tiny triangular shapes and drilled a bunch of little holes. I think it gives a reasonable impression. But like so many other details, it will likely be invisible once the ship is inside the bottle. As you can see, I decided not to split the knee in half. The halves of the hull join easier with the knee fully intact on the port side.


- Ian_Grant, Landlubber Mike, gjdale and 3 others
-
6
-
49 minutes ago, Ian_Grant said:
that's called "tumblehome". Kept higher-up weight nearer the centreline, for stability.
That's an interesting term. I had not heard it before. Thanks for the education, Ian!
- Keith Black and mtaylor
-
2
-
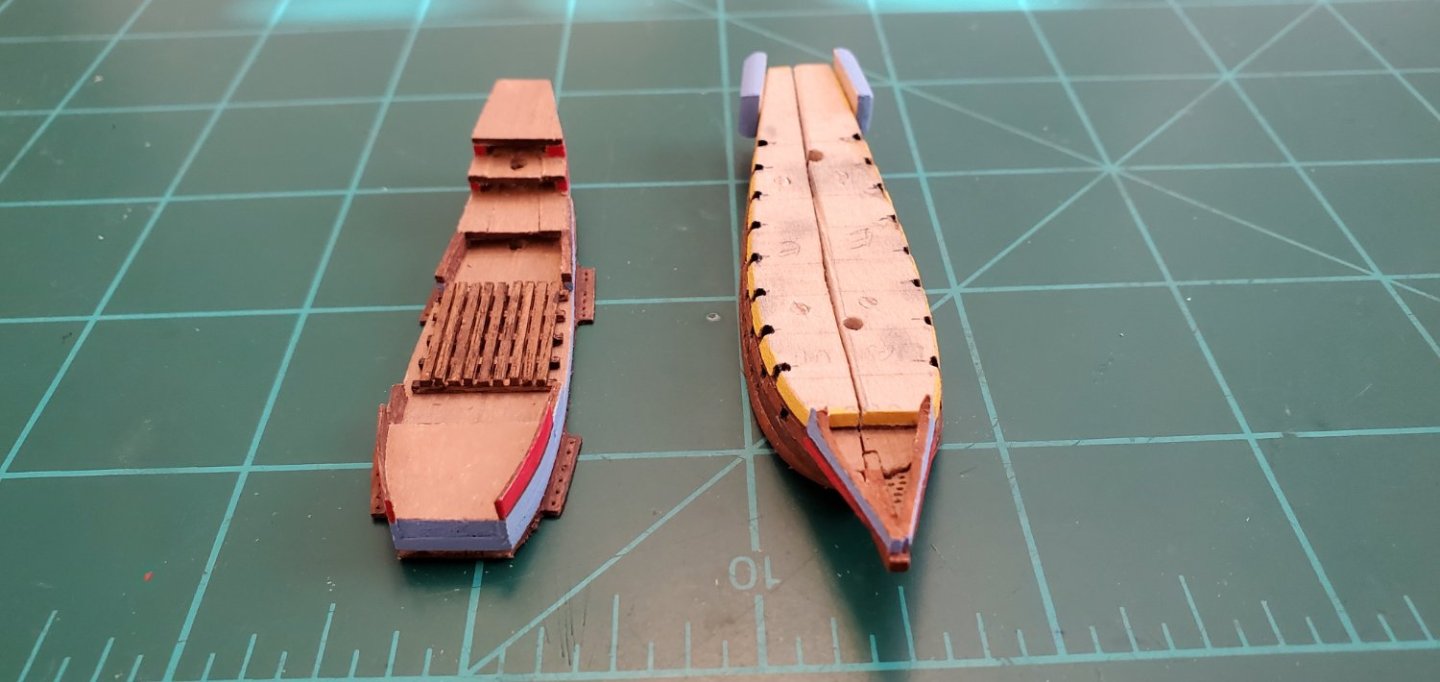
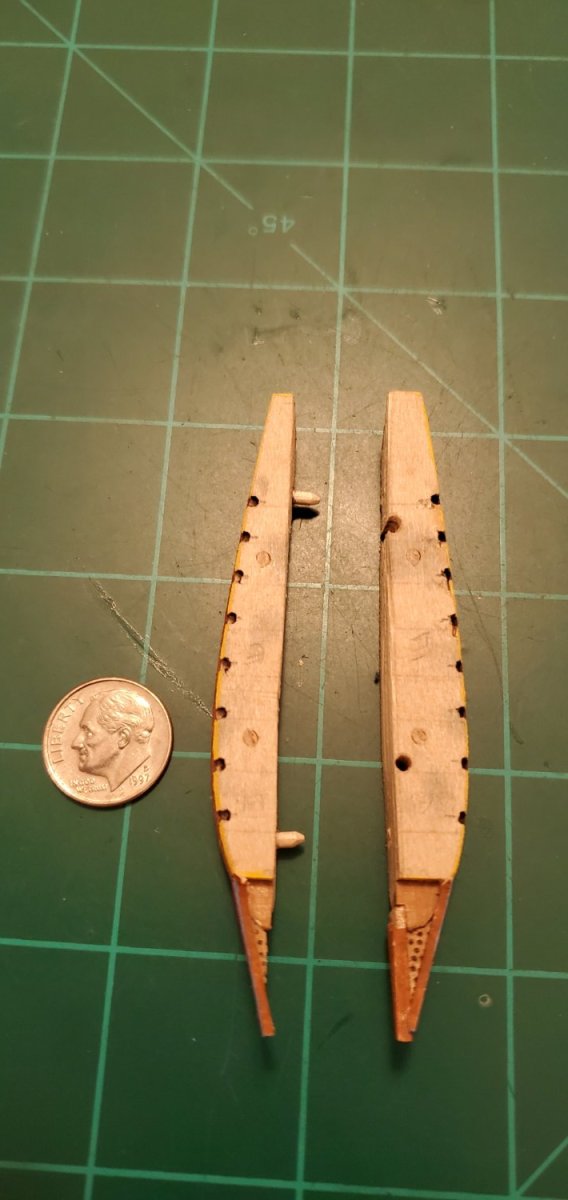
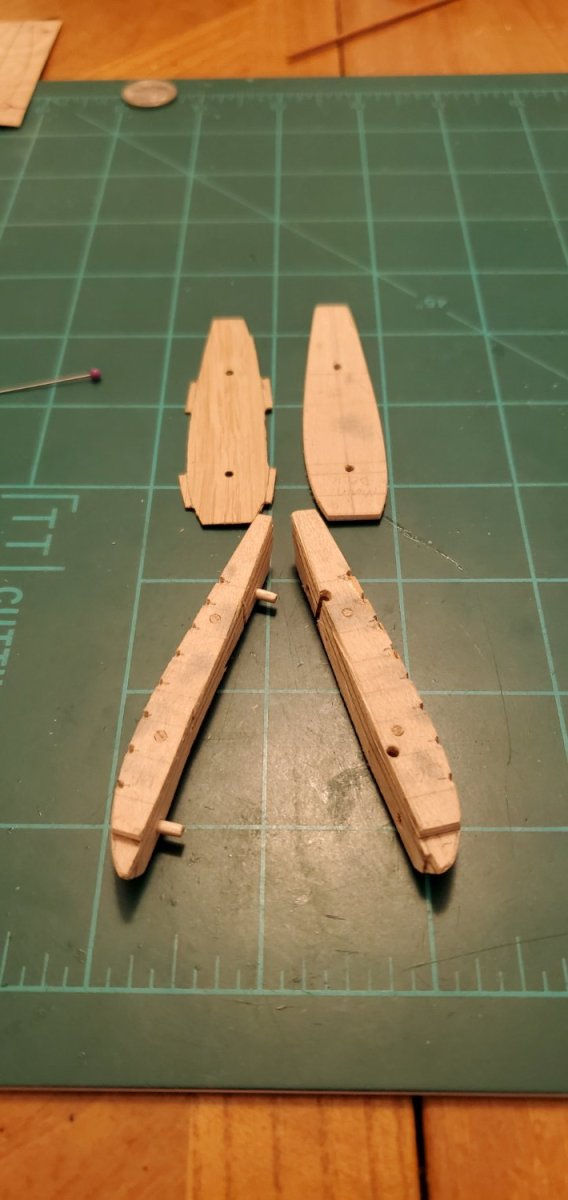
The comedy of errors continues. I finished up the split pieces of the hull as well as the main deck and a veneer spacer. I did a width check on the main deck to see how it would fit thru the bottle opening. It was pretty close but looked manageable. But it also looked like something was missing. Hmmmm. Then it hit me. I somehow forgot about the channels. UGH. No way would it fit thru the opening with channels added to the width.
So not only did I need to add channels, I also needed to narrow the width of the main deck as well as the entire lower deck assembly. And when I sanded the gun decks down to size, it erased most of the gun ports I had carefully cut and drilled holes for. Long story, short - Lots of rework on the entire hull and main deck.
However, there was a silver lining. I had not noticed before how much the profile of a galleon tapers from the waterline to the deck. It's sort of like wide hips and a narrow waist. So all the rework gave me a chance to give the hull its proper narrowing from waterline to deck.
Anyway, here's some work-in-progress pics. The first pic shows yet another screwup courtesy of a slip while sanding. In the upper right and corner of the stern, you can see another patch job. Fortunately, this will be covered up by the quarter gallery. The last pic shows the lower hull assembly after rework. I stuck in a few cannon barrels and oars to get an early idea of what it's going to look like fully equipped. I really like the cannons with open ends vs the solid wire I used on previous models, even though it's so tiny I'm not sure the effect will be visible once it's inside the bottle.


-
14 hours ago, BANYAN said:
Love the bread-and-butter building technique
Thanks, Pat. It works particularly well with this ship as you will see later when I get it painted. The oar deck and gun decks are different colors so having them as separate, individual layers sure makes the painting easier!
- mtaylor, Keith Black and BANYAN
-
3
-
50 minutes ago, gjdale said:
Nice recovery Glen!
Thanks, Grant. I wish that was the last one. Unfortunately I know there are many more to come! This hull plan is proving to be a struggle. But the mule is out and we are gonna git r done!
- mtaylor, gjdale and Keith Black
-
3
-
Thanks, Benjamin! Long ways to go on this one!
- Knocklouder and Keith Black
-
2
-
8 hours ago, Keith Black said:
Oh yeah, and exactly when is that gonna happen?
")
It's a very long and complicated process. I'm still in the concept phase!
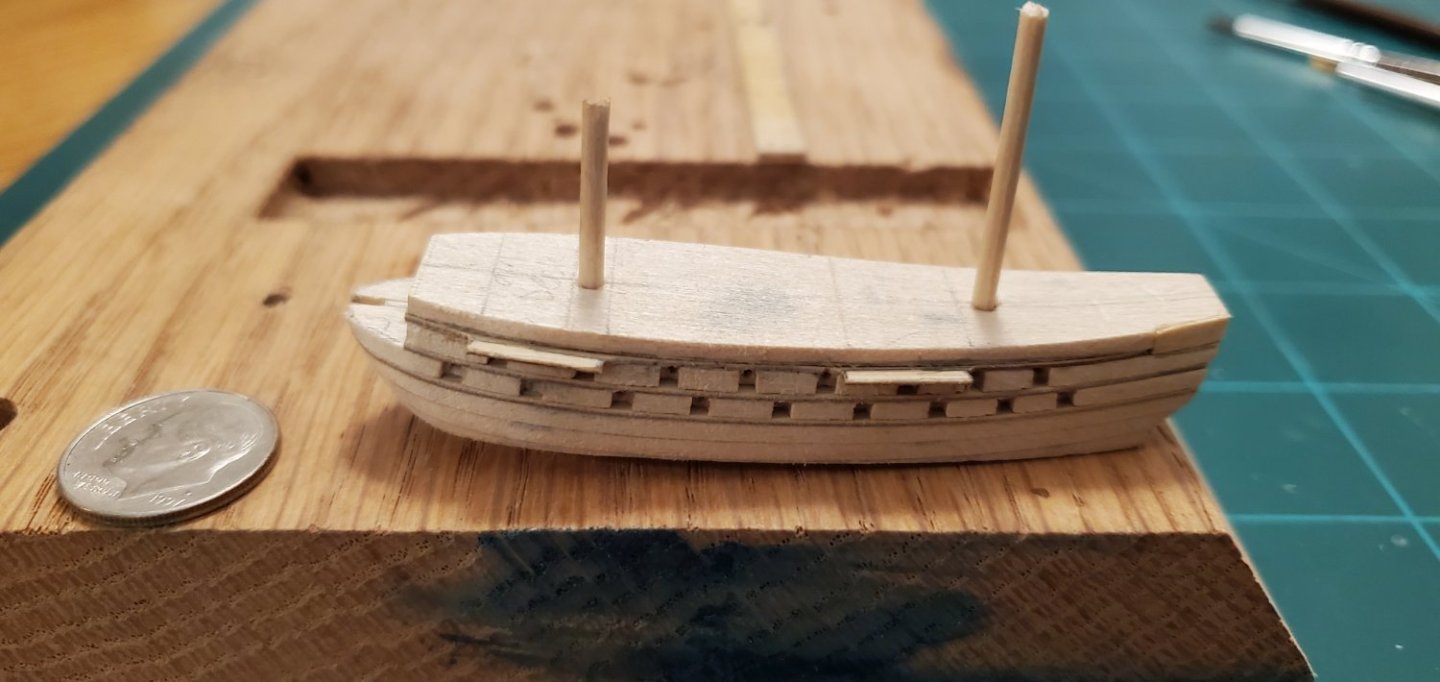
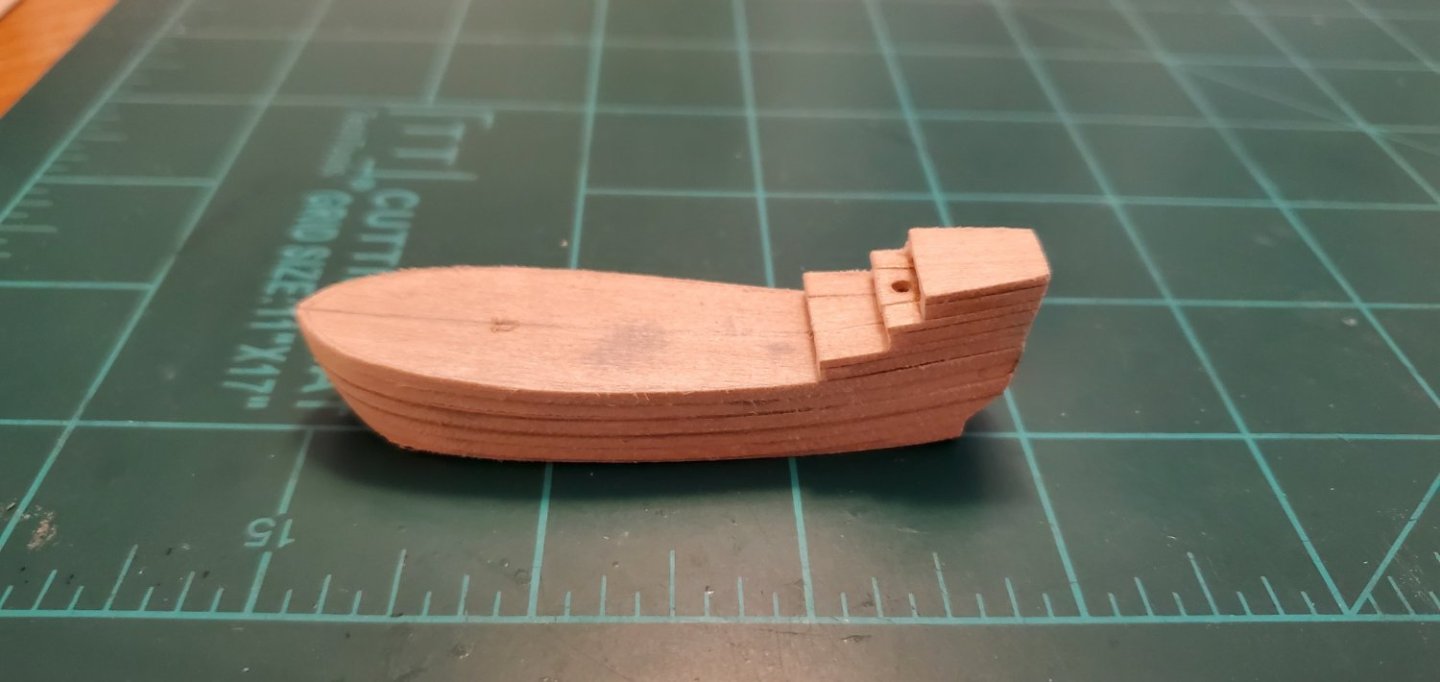
Back to the adventure of the Adventure Galley. The hull is taking shape, although as usual, it's 2 steps forward and 1 back. I've got 8 layers - bottom layer, oar deck, veneer spacer, lower gun deck, spacer, upper gun deck, spacer, main deck. The first pic shows all the layers stacked and sanded into the basic outline of the hull. The 2nd pic shows the hull with the bottom sanded flat at the water line, the bow and stern shaped, and the quarter/poop deck assembly resting in place (unglued). Afterwards, I sliced the whole thing right down the middle.
And then a screw up. If I ever drew something correct the first time it would probably start snowing in Laredo. I got the gun ports cut for the port side lower gun deck. The 1st pic shows the technique using a thin diamond cutting wheel on my Dremel. Then I started on the port side upper gun deck. After 4 cuts I checked my alignment with the lower gun deck and the stagger was way off. The upper gun ports were not squarely between the lower ones. Ugh.
One of the most helpful comments I've ever read was on someone's build log when I first discovered MSW. I wish I could remember who made the comment. The builder was distraught because they'd made a wrong cut, but the commenter said something to the effect of, "Relax, it's wood. You can fix it." Such great advice. So rather than me cutting and bending and drying and shaping another gun deck layer, which would have taken forever, I plugged the holes, sanded them down, and cut new holes. Thank you again to whoever made that comment! In the last pic, you can see the gun ports of both decks properly aligned.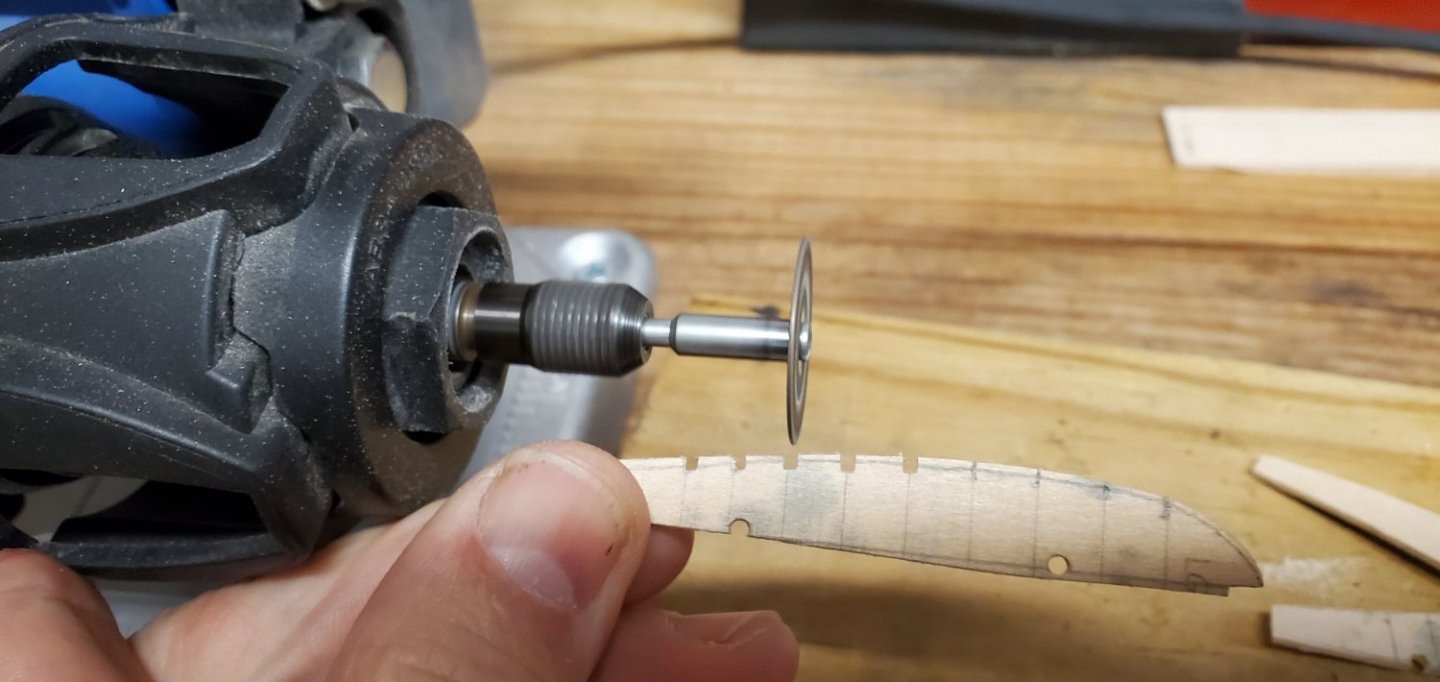


-
2 hours ago, Ian_Grant said:
oar looms within the hull, each with a swivel joint. Then all you would need is a vertical arm to oscillate this linkage back and forth
😵😵😵 Uh...uh...uh... I think I'll stick with carving penguins.
- Keith Black, mtaylor, gjdale and 1 other
-
 4
4
-
8 hours ago, Keith Black said:
did you use up all that fine screen you bought?
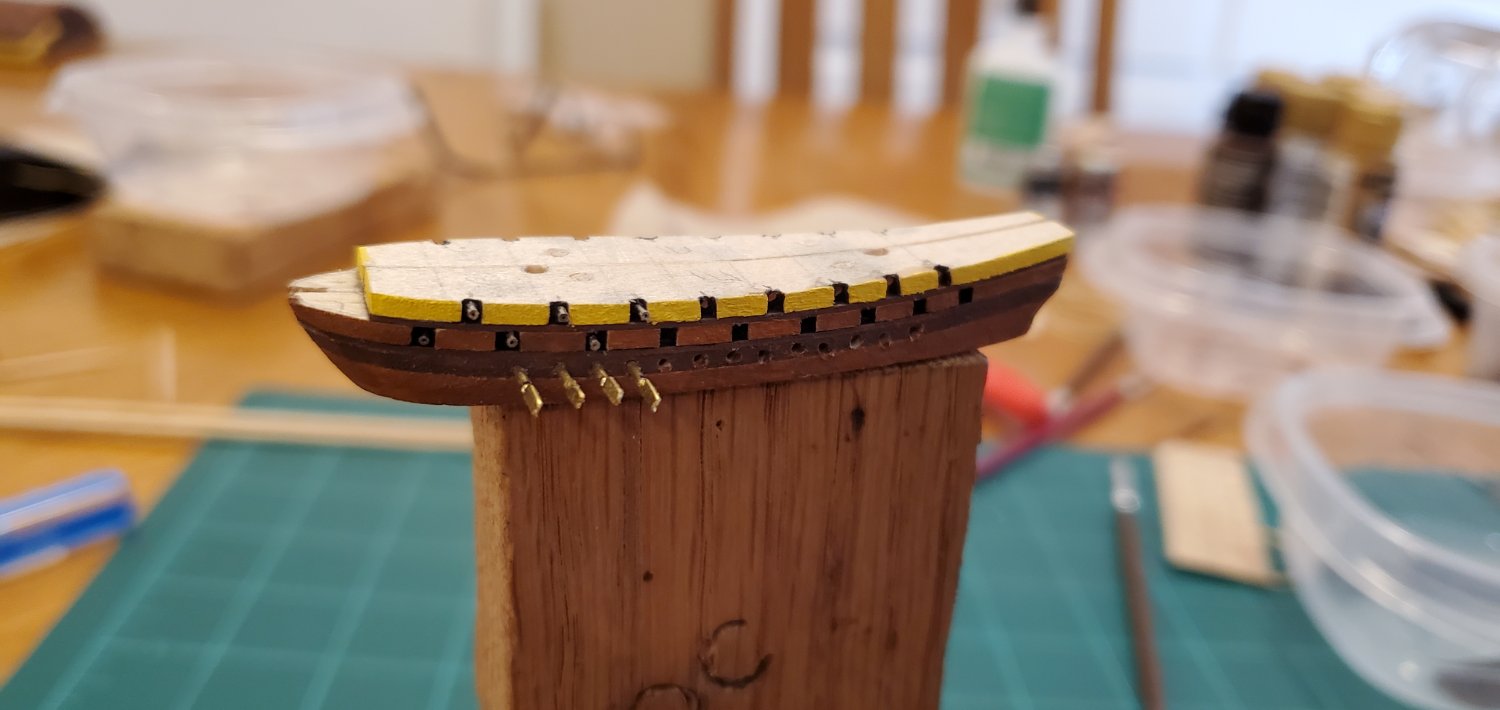
Gosh no!!, I've got enough of that stuff to last for a few lifetimes of modeling! But the weave is too small for the railing on this ship. Actually, my first thought was using music wire (about 1/64" diameter). I soldered a short piece as a test. The wire is pretty good from a scale standpoint, but the pictures of the ship show an obvious wood railing. So even though it's going to be a little thick, I decided to go with wood. However, I do reserve the right to go back to wire if the wood rail doesn't look good when I attach it!

- Ian_Grant, Keith Black, GrandpaPhil and 4 others
-
7
-
I started gluing the hull layers together (1st pic). While waiting for the glue to dry, I worked on a bunch of miscellaneous things. No real logic to the order, just different things I knew needed to be done at some point. So I will have a bunch of semi-finished piece parts lying around waiting for completion and their turn in the eventual assembly process.
Cut the hidden hinge (John Foxx special) on the foremast and main mast:
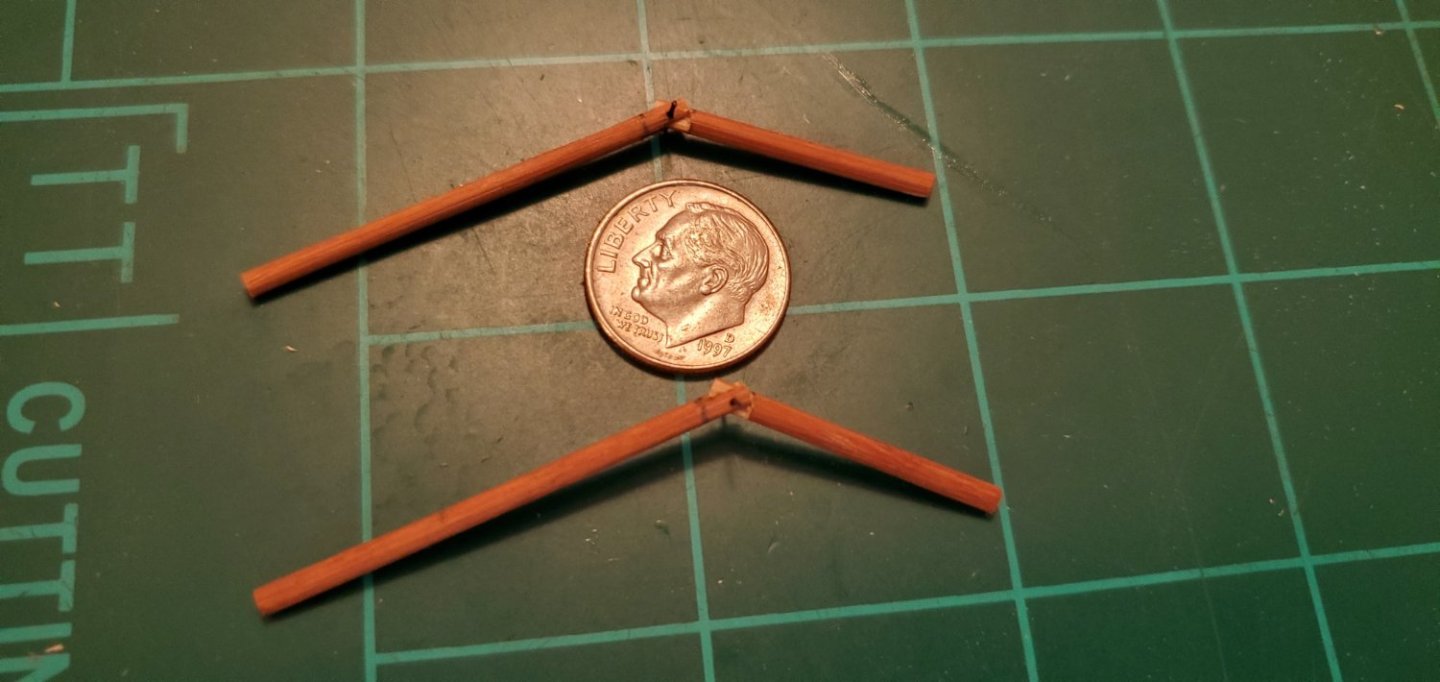
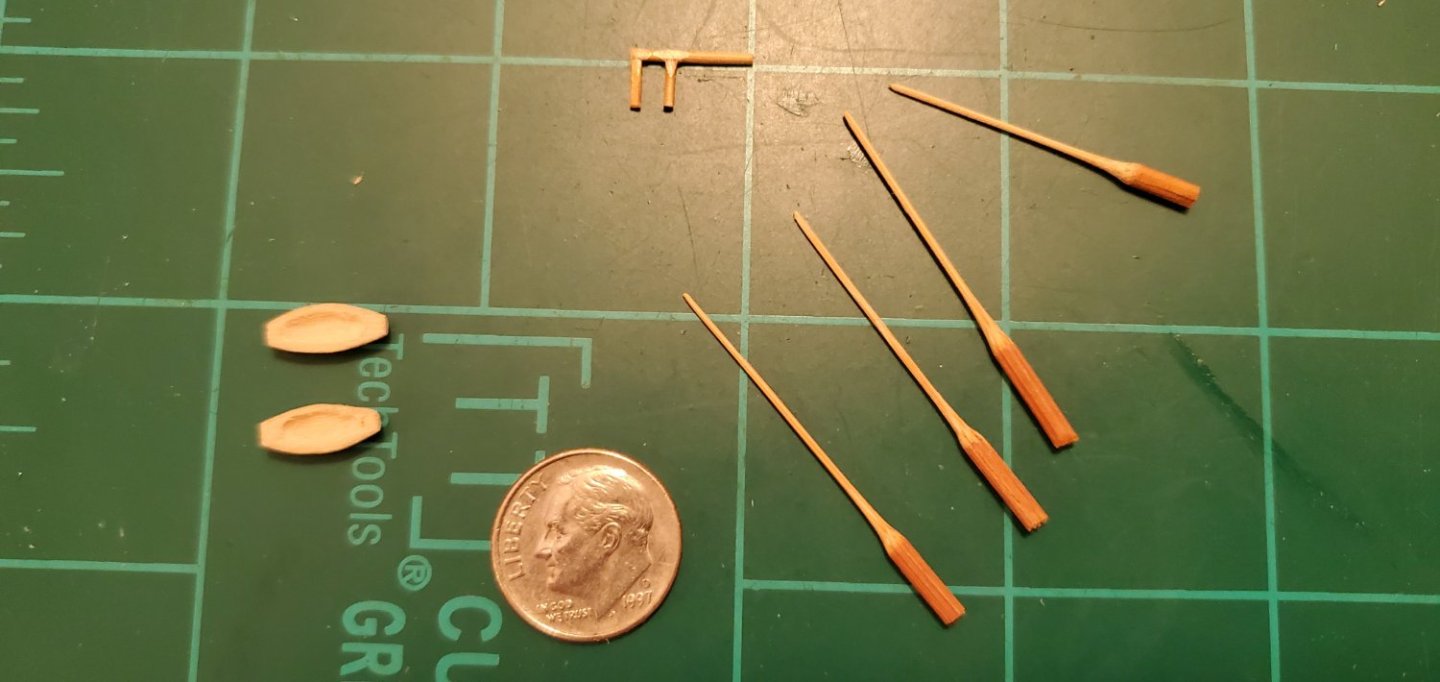
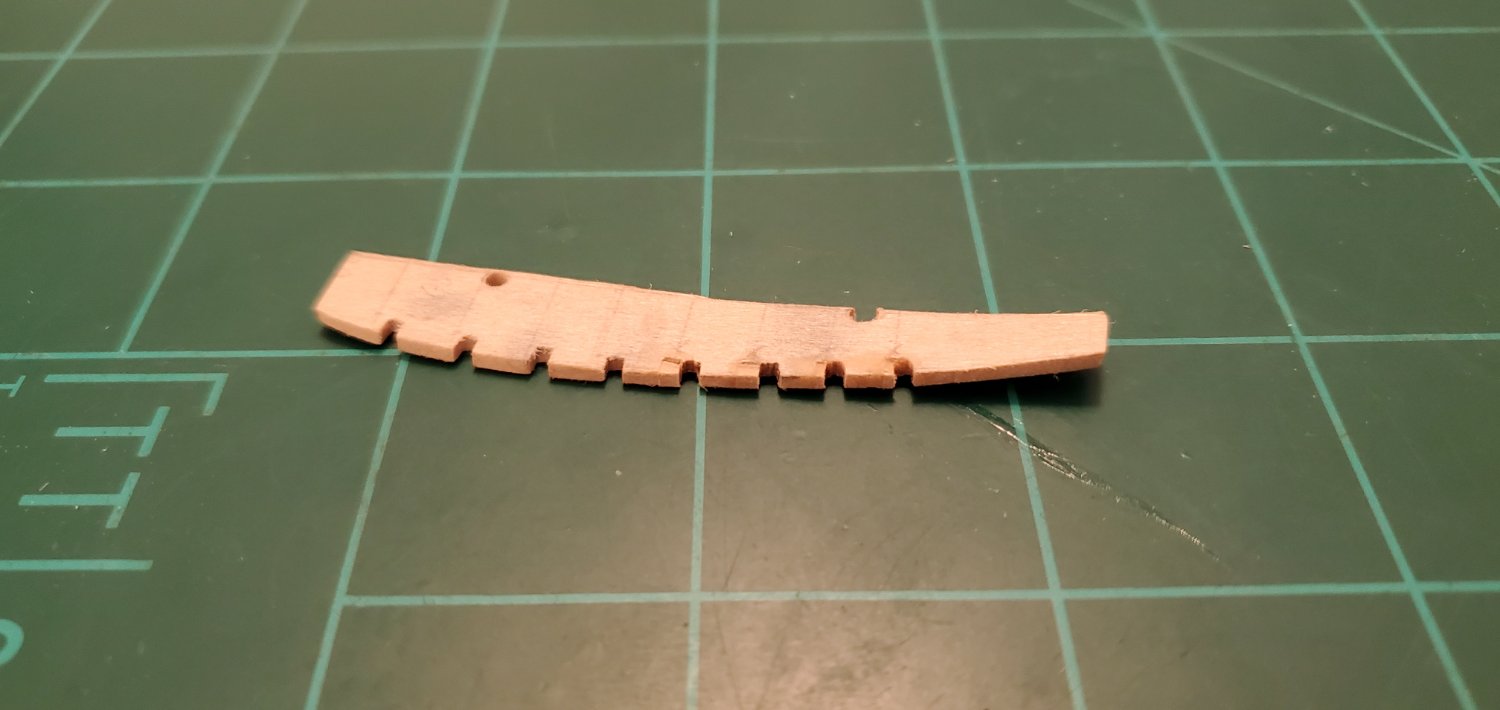
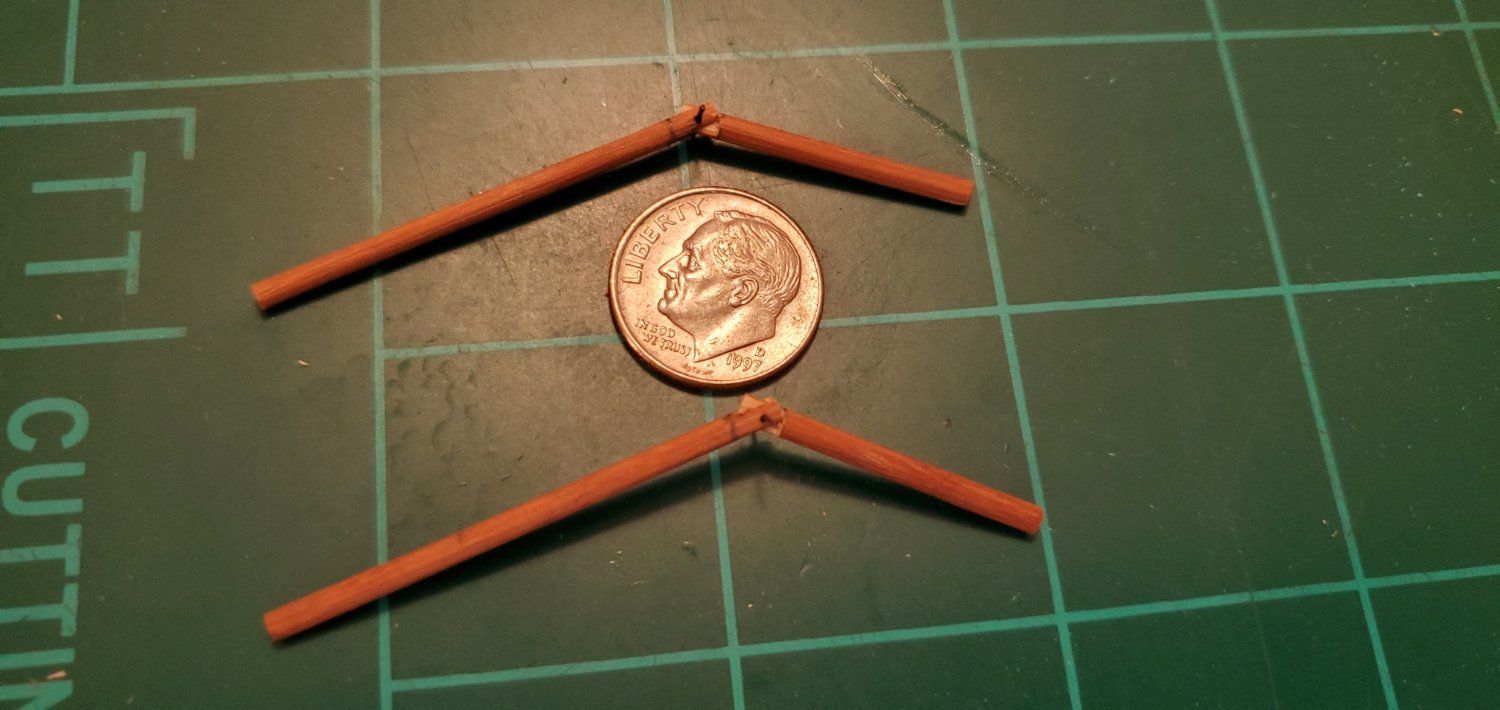
Carved the ship's boats and made some pieces for the wooden railing which will circle the poop deck and some other areas. The railing pieces are made from bamboo shoots run thru the drill lathe to
< 1/32" (fragile):
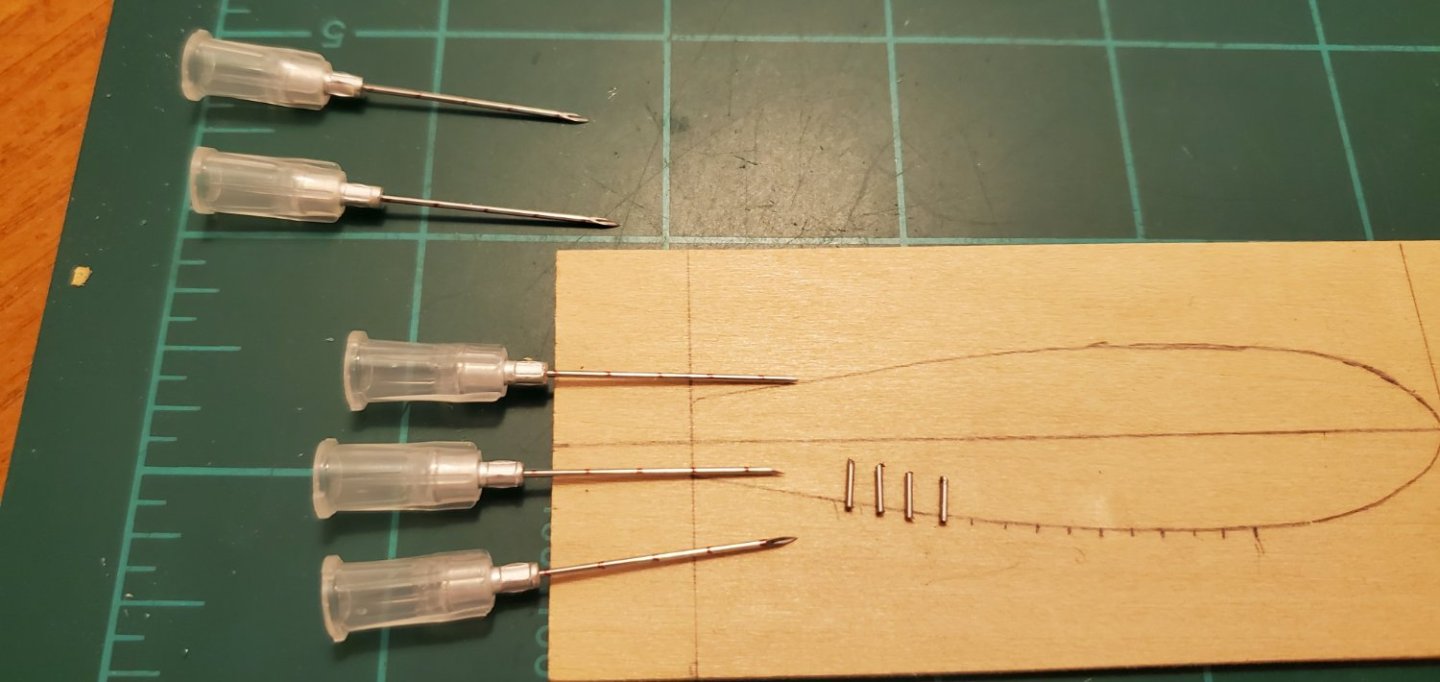
Started making the 34 cannon barrels. I'm "borrowing" livestock needles originally bought for my cows (22 gauge) and cutting them into 5mm pieces. I like them because they are hollow giving them a bit of realism even though nobody will ever see it once the ship is in the bottle.
-
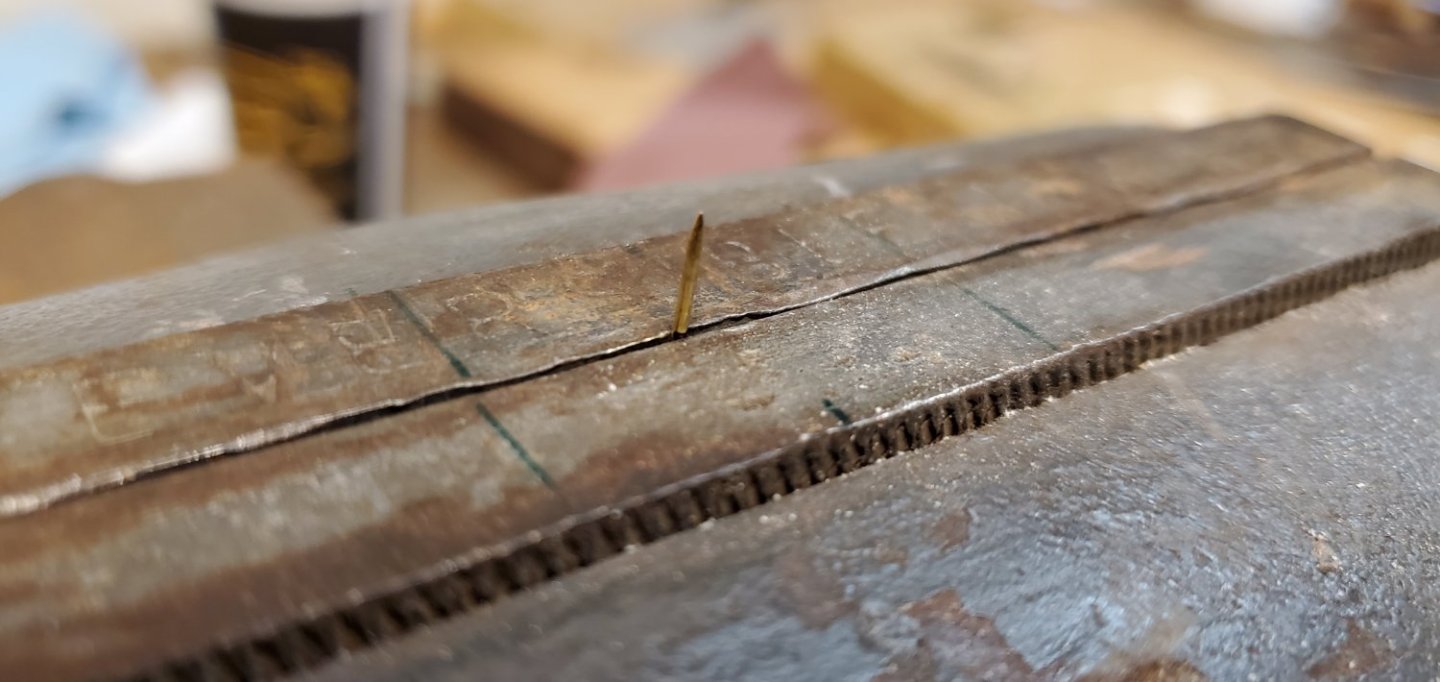
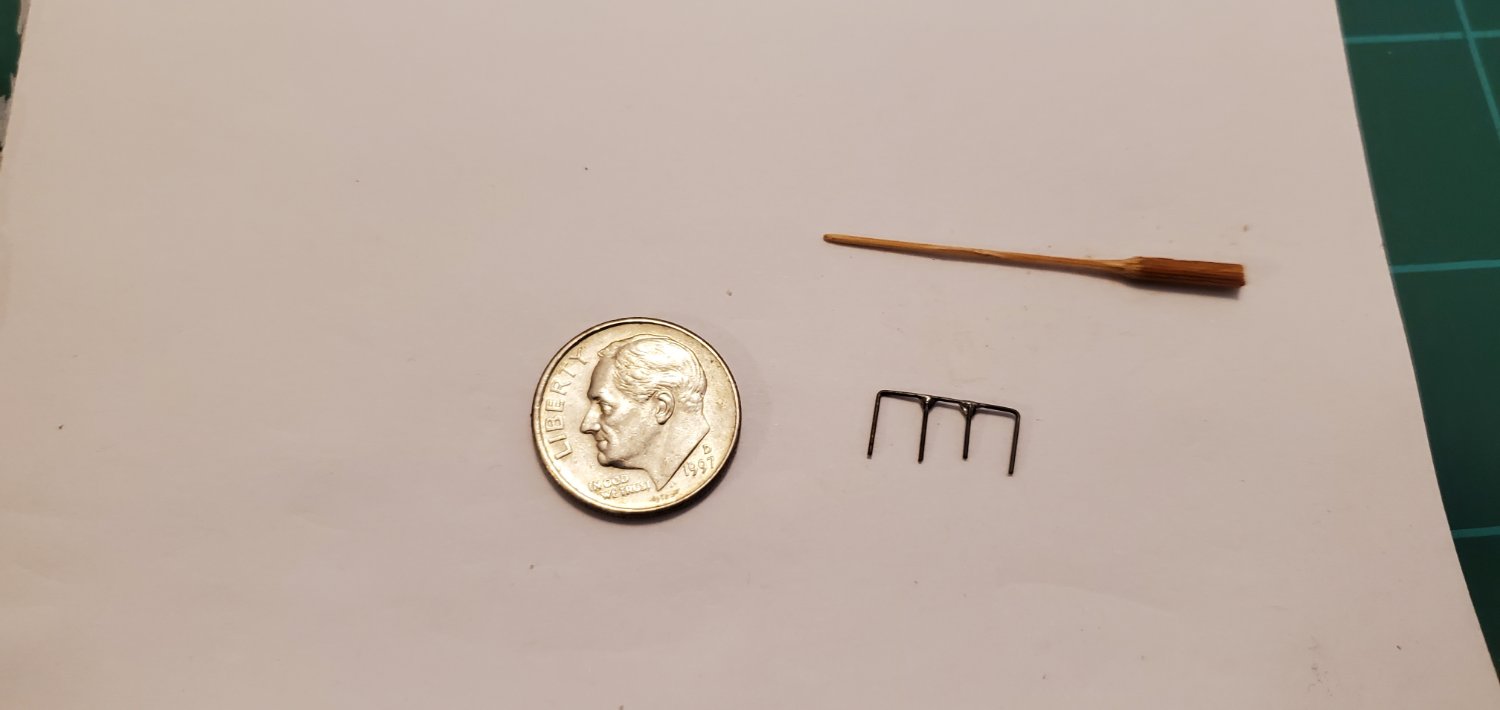
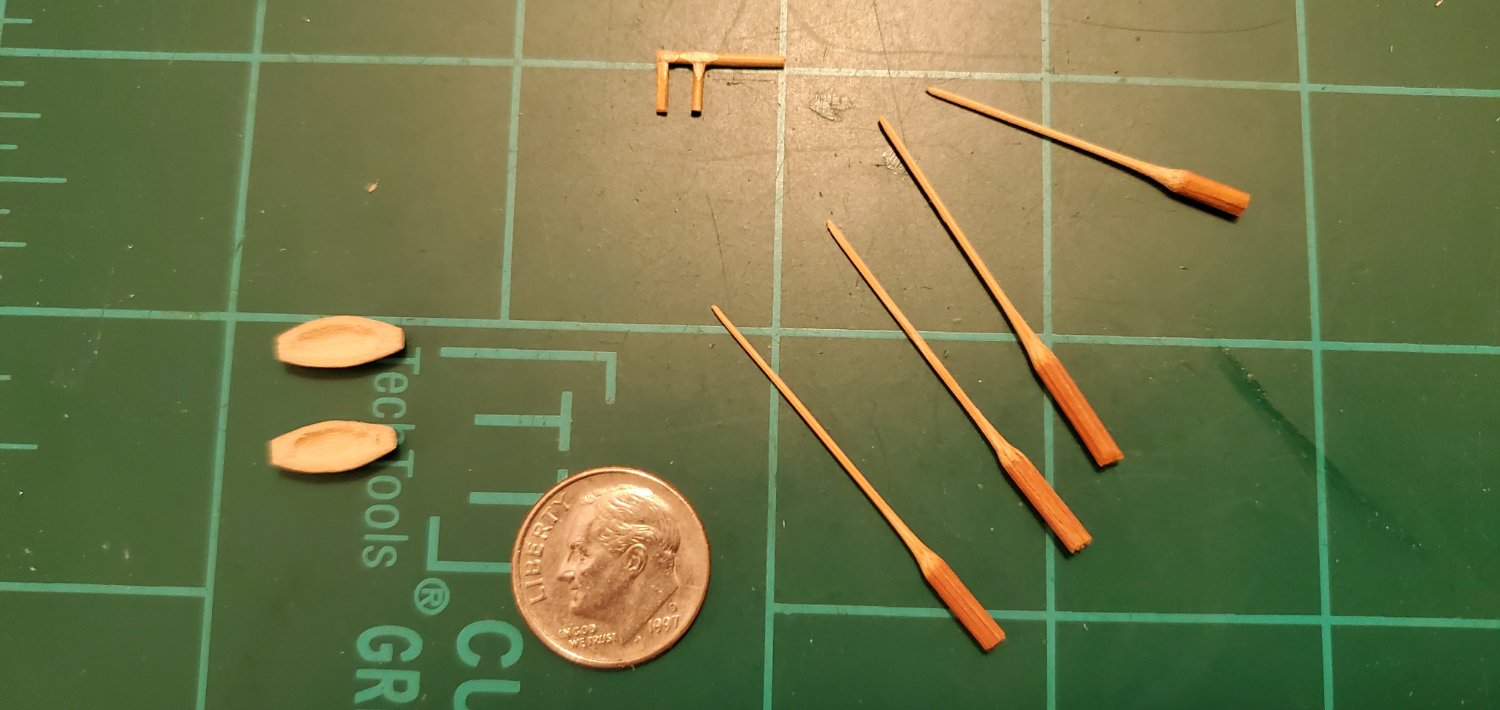
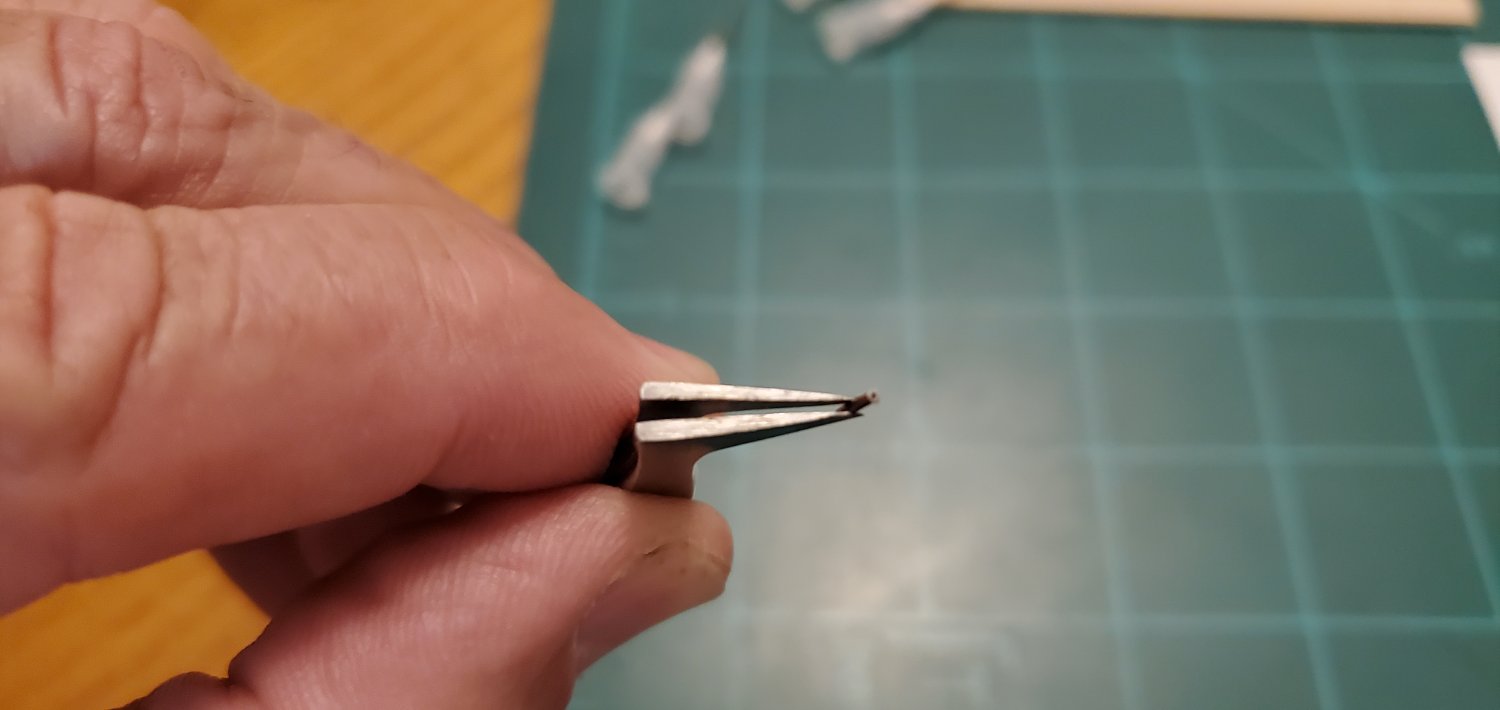
While the layers of the hull dry under the high-tech bending jig, I began work on the oars - 14 on each side. I tried carving out tiny oars from wood but they are just too small and fragile at the size I need. So another plan B – brass eye pins.
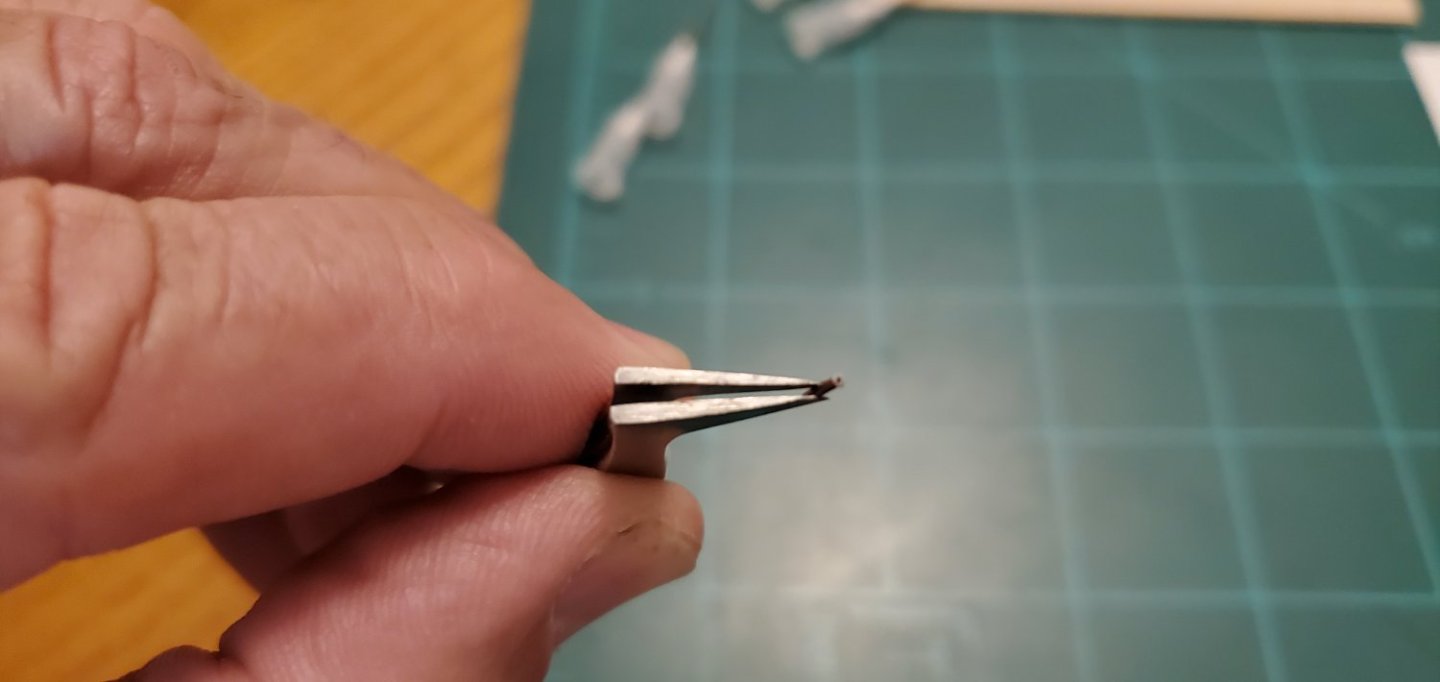
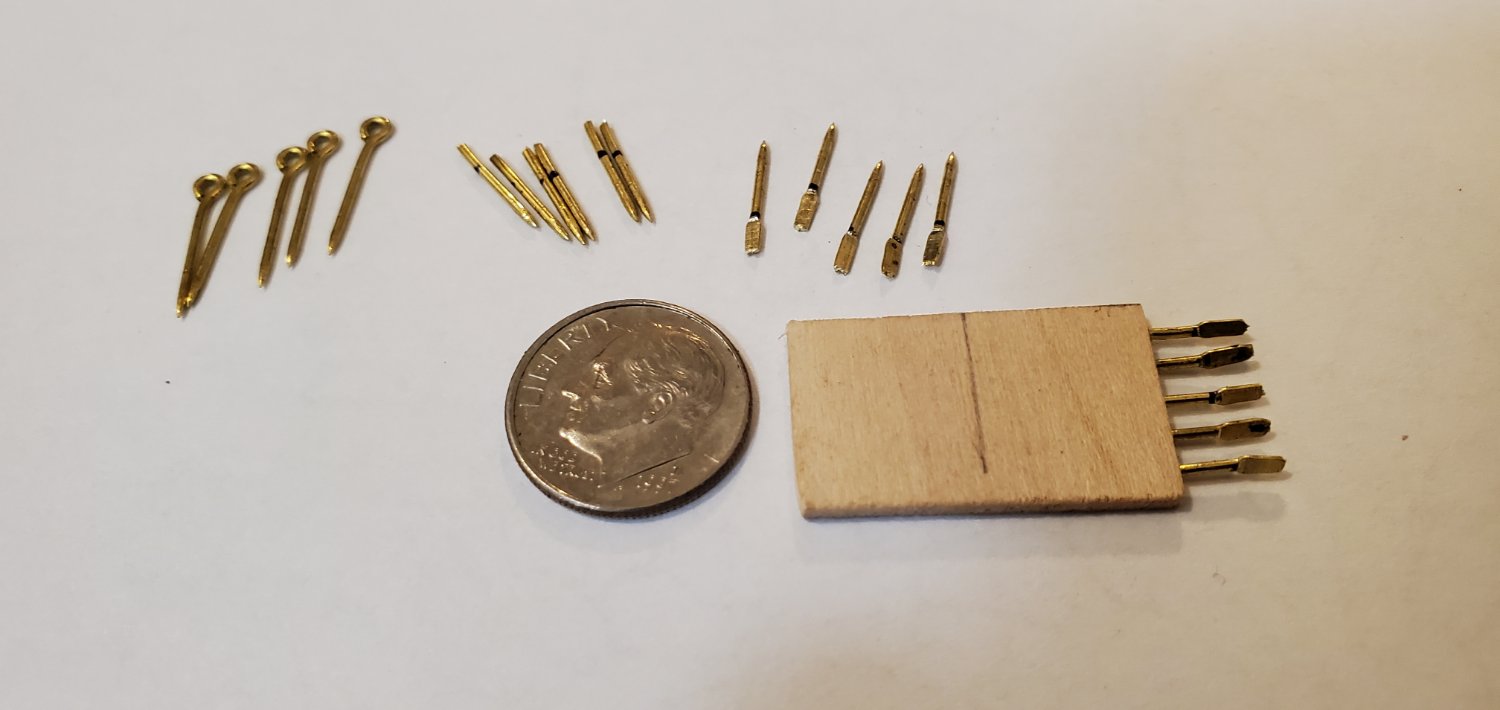
The 2 pics below illustrate the transformation of 9/16” eye pins to oars. I snip the eyes off, mark the pin part for the paddle length, put the pin in the vise, and squeeze. Voila! Instant oar. Unfortunately I have to squeeze them one at a time since the jaws on my old vise are so pitted.
I drilled some holes in a small piece of basswood that’s the same thickness as my deck layers for a test look at the bank of oars. Now if I could only get @Ian_Grant to start working on a micro-servo mechanism to move them in a rowing motion…
-
17 hours ago, gjdale said:
Am I the only one here who doesn’t just happen to have heavy pieces of railroad track lying around waiting to be used to bend wood?
I've got 6 pieces of varying lengths in my garage. It's amazing how many times I use them for something. I won't call them duct tape, but they come in handy for more things than you would imagine!
- Keith Black, BANYAN, mtaylor and 1 other
-
4
-
-
If I was a design engineer, the manufacturing floor would string me up. Nothing I draw on paper ever works when I try to build it. But hey, design changes and revised cost estimates are the lifeblood of defense contractors, right?
My grand build plan described above is yet another example. I woke up in the middle of the night thinking about my model (hopefully I’m not the only one out here that does that) and realized my plan was not going to work. The shrouds and backstays would have to be attached inside the bottle. There are probably more skilled builders that could pull that off but I did not want to try it myself. So I came up with plan B. My puzzle will still have 4 pieces. The first 2 pieces are still the split hull, but will only be built up as far as the bottom of the main deck. The third piece will be the upper and lower quarterdecks along with the poop deck. The fourth piece will be the main deck. Attached to it will be the masts, channels, shrouds, backstays, and the quarter/poop deck assembly.
So the assembly plan will be insert the split hull pieces and glue together. Next, insert the main deck assembly and glue to the hull. I’m pretty confident this will work.
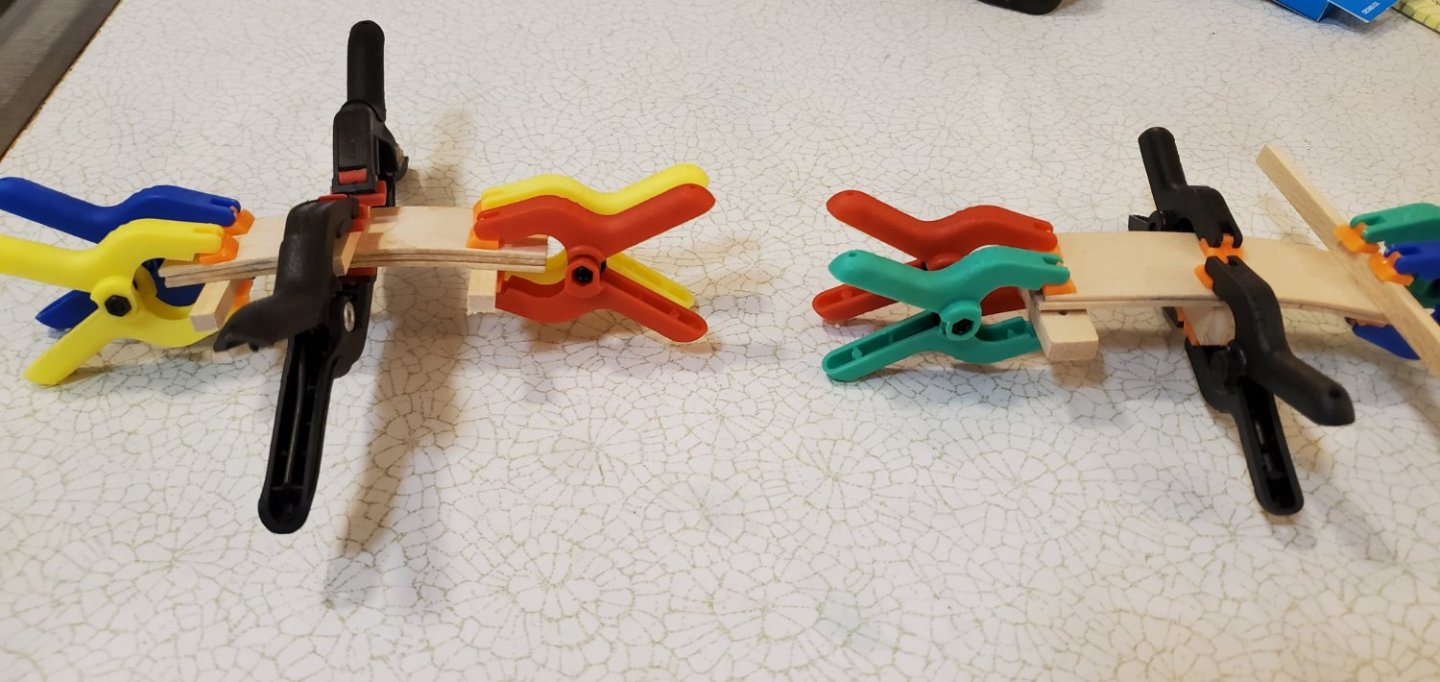
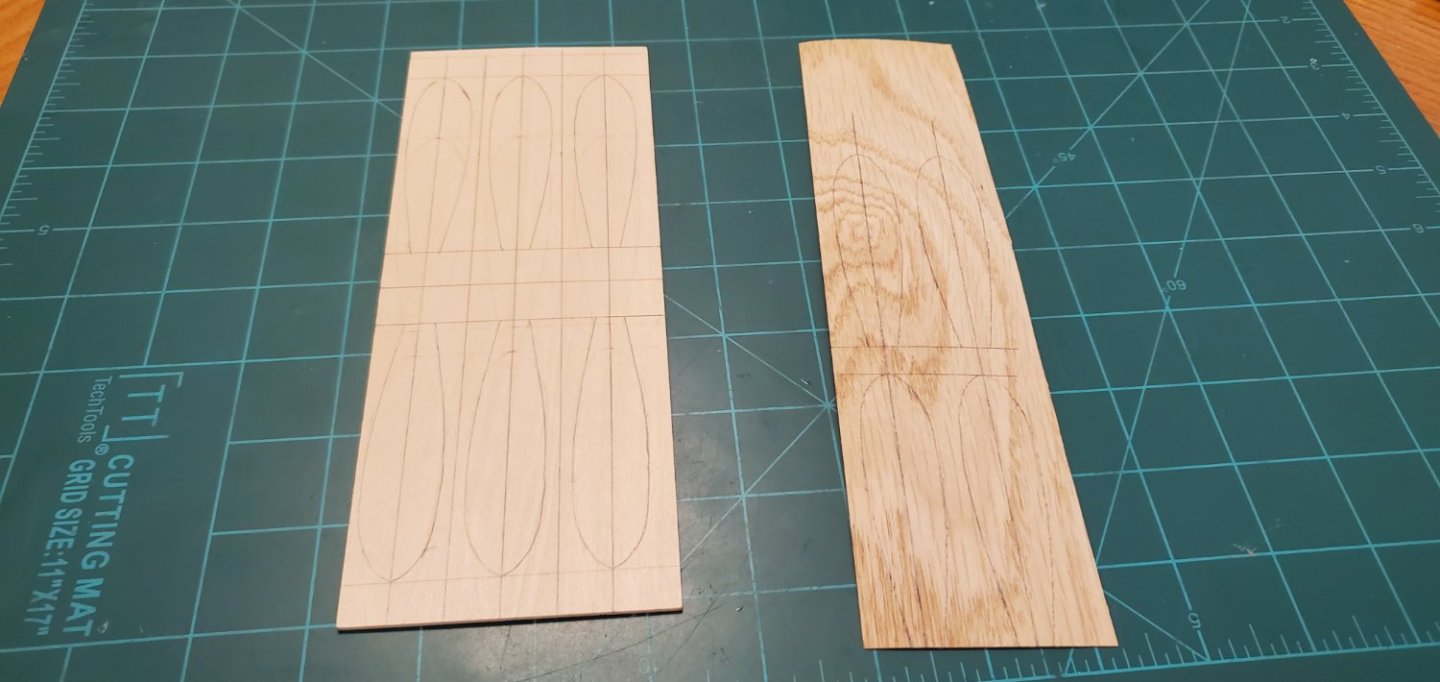
Now, to see if I can build this thing. The first step is making the layers for the hull. The ship’s profile has a prominent upsweep from the center to the bow and stern, more pronounced towards the stern. So I’m in the process of bending my deck layers with my heavy pieces of railroad track. Coincidentally, the curvature of the top surface of the track is very close to the upsweep I need.

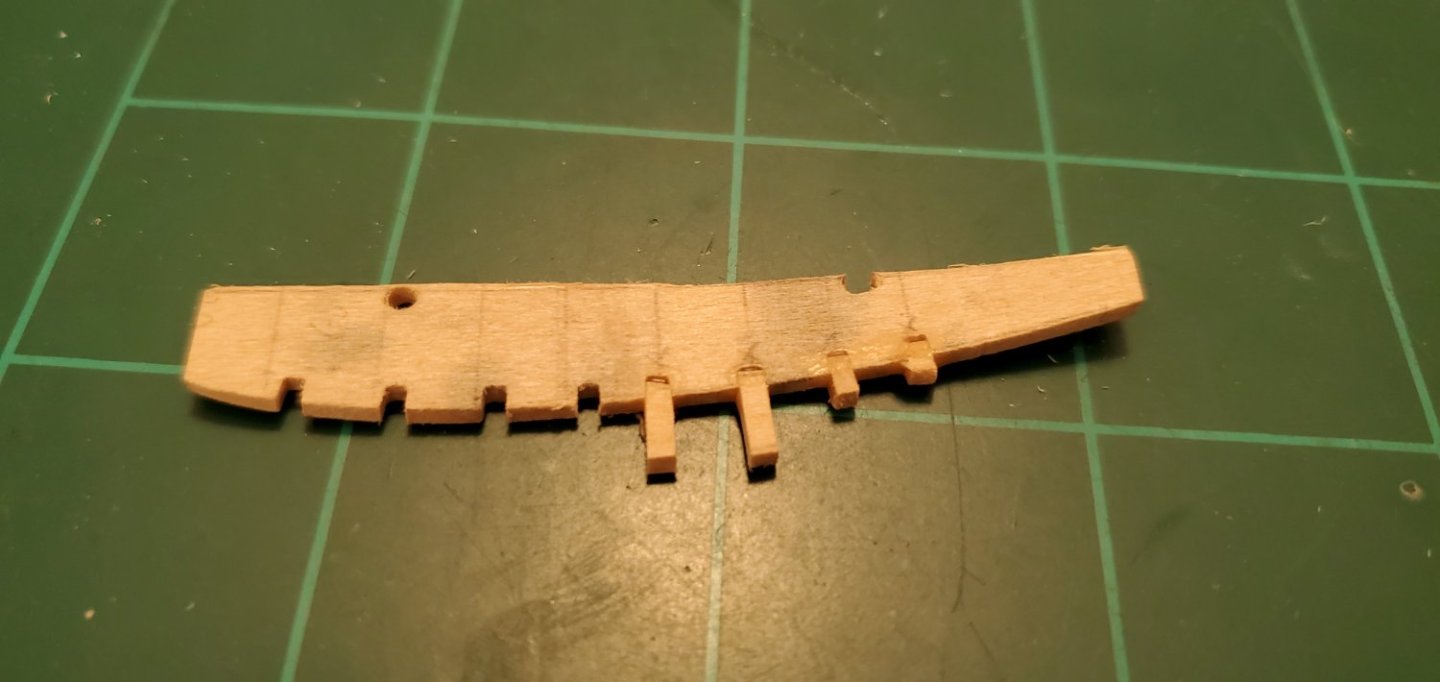
Next is the upper and lower quarterdecks and the poop deck. As you can see, my change in design plan caused rework on the quarterdecks where I had to fill in a cutout I'd left for the mizzen mast to slide into. The last pic has the assembly and mizzen mast dry-fitted in place.

- Keith Black, GrandpaPhil, gjdale and 5 others
-
8
-
15 minutes ago, Egilman said:
A master at work my friends...
Could not agree more!
-
7 hours ago, Benjamin sullivan said:
great job, very creative methods i will be following along.
Thank you, Benjamin! Glad to have you aboard for this!
@gjdale @Ian_Grant OK, I will definitely check out Blackadder and report back!
- mtaylor and Keith Black
-
2
-
2 hours ago, gjdale said:
Or to quote Blackadder, a plan so cunning you could pin a tail on it and call it a fox!
I love the quote! But you got me again on "Blackadder". Had to google that one. Now I just hope I don't end up looking like Prince Regent on this project, who apparently was a "fop and idiot" from what I just read. 😃
- mtaylor, gjdale and Keith Black
-
3
-
Hope you are doing ok, Mark. Looking forward to seeing the next steps on this beauty!
- Keith Black, druxey, mtaylor and 3 others
-
6
-
1 hour ago, mtaylor said:
Pity that there's not some way for a bottle to have a removable bottom and after the ship is in, put the bottom back on without having look like it was removed.
Oh wouldn't that be nice, Mark! But I reckon that would be cheating too. It'd be like planking a regular ship model with a can of spray-on planking!
- Keith Black and mtaylor
-
2
-
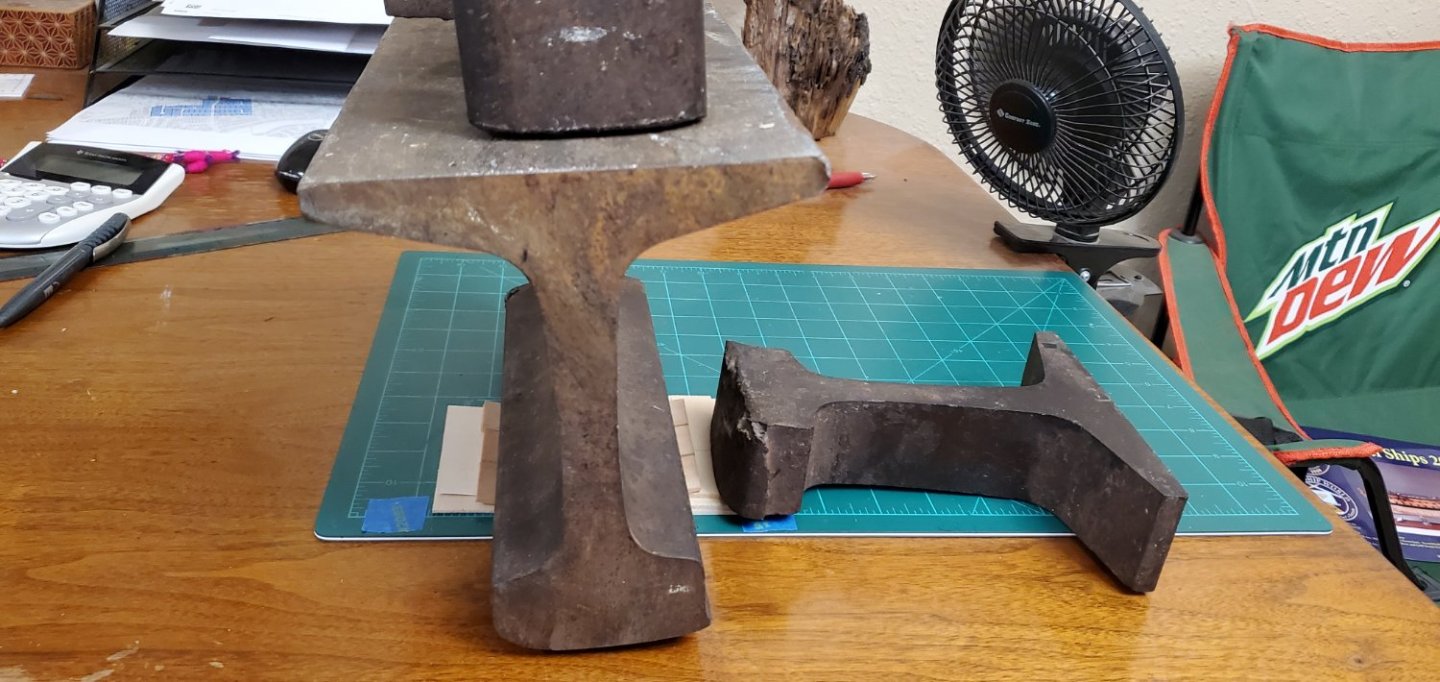
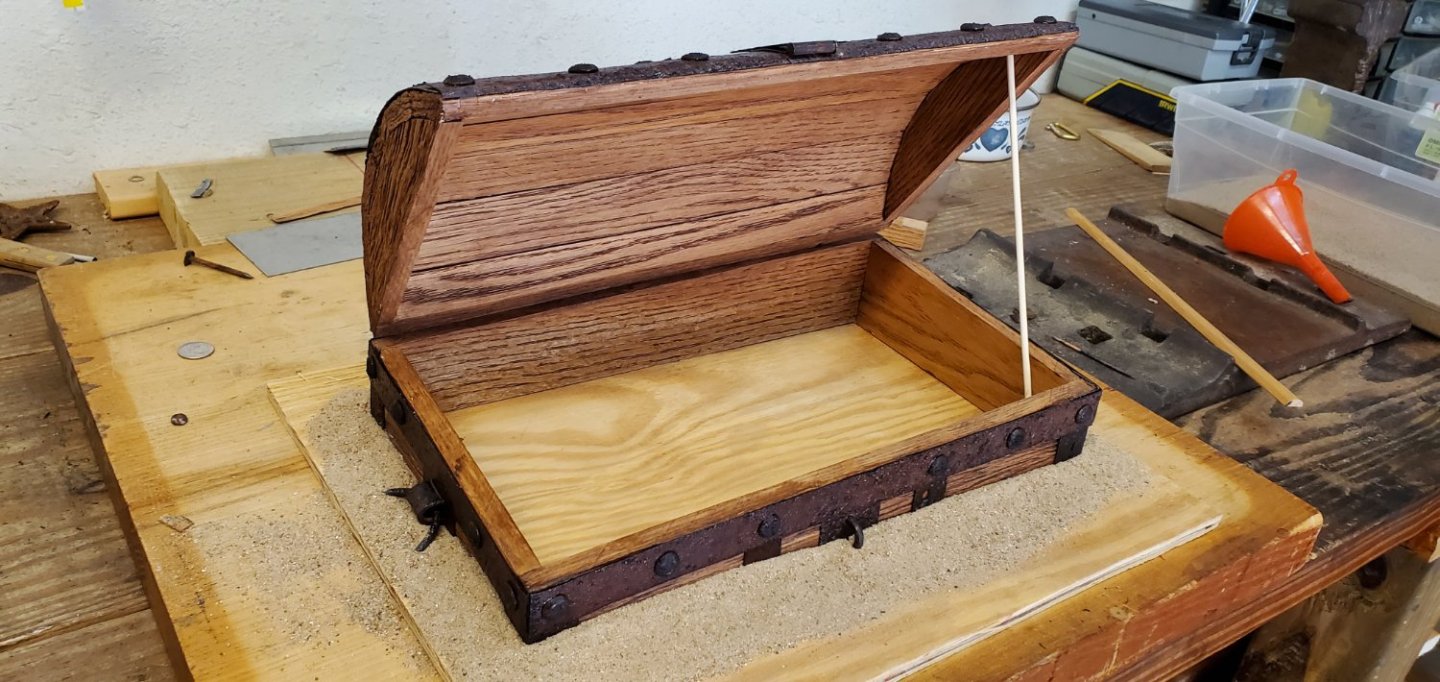
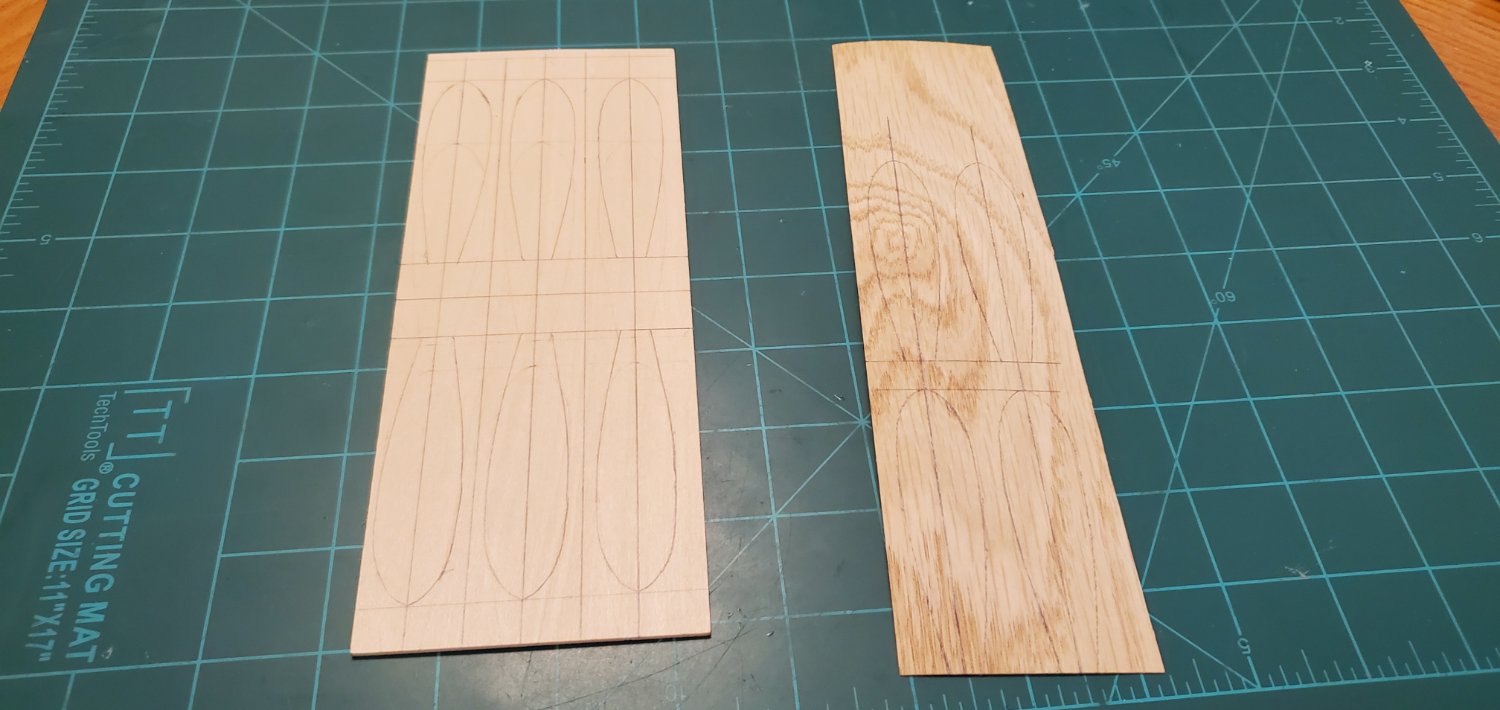
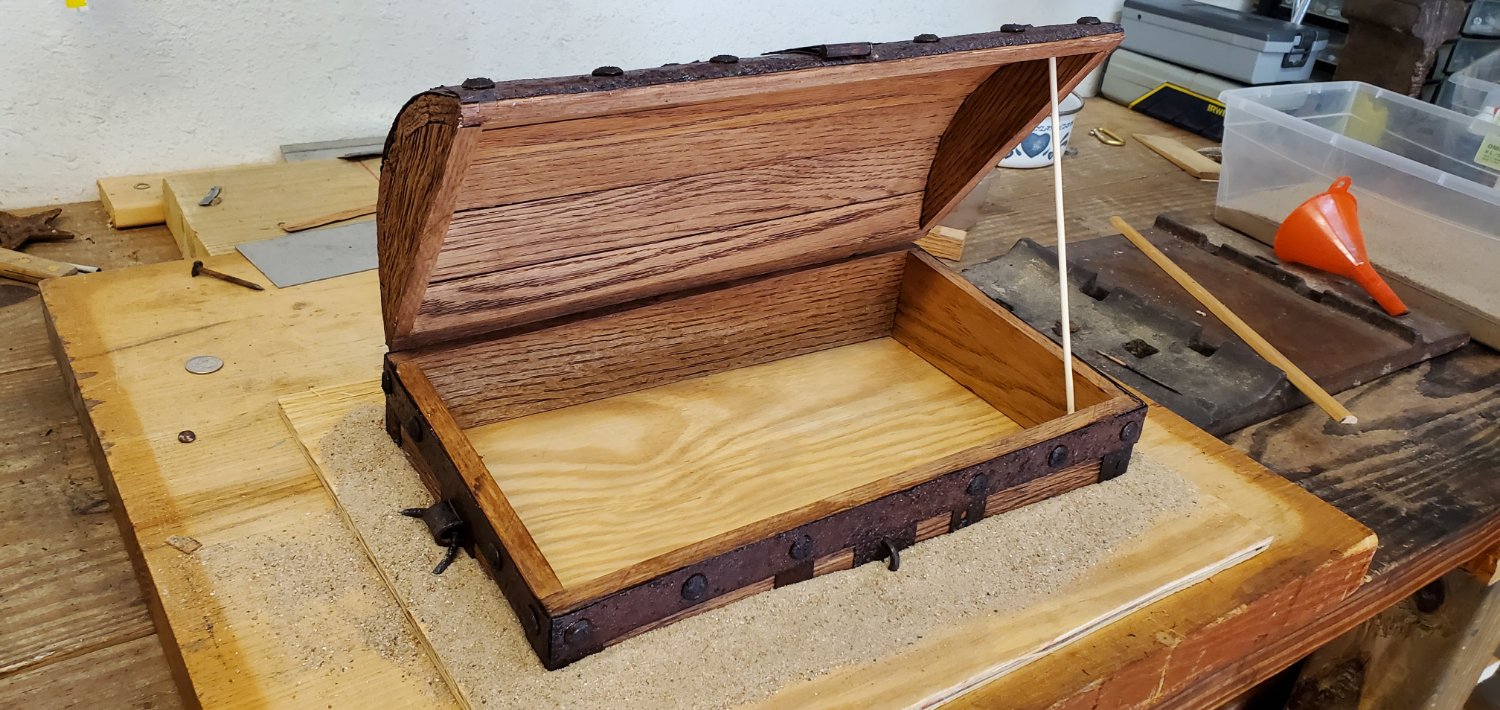
With the treasure chest done, it's time to start building the ship. However, It’s taken me a while to figure out how to build this ship the way I want it to look and get it inside the bottle. There are 2 main challenges. First are the oars. They add considerable width to the overall profile so there’s no way to fit a solid piece hull with extended oars thru the bottle opening. So that's going to necessitate a split hull. I did my first split hull with the Zheng He treasure ship on my last build and that went ok. Hopefully I’ll have the same luck here.
The second challenge is the height of the rear portion of the ship. The quarter deck and poop deck are very tall. At the scale I’m using, the height from waterline (the bottom of my hull) to the top rail is 1”. My bottle opening is 13/16” so that’s a problem. I could shorten the poop deck and make the whole stern area much shorter so it fits. But to me, a tall poop deck is an iconic look for an old pirate ship. So I need to make it work.
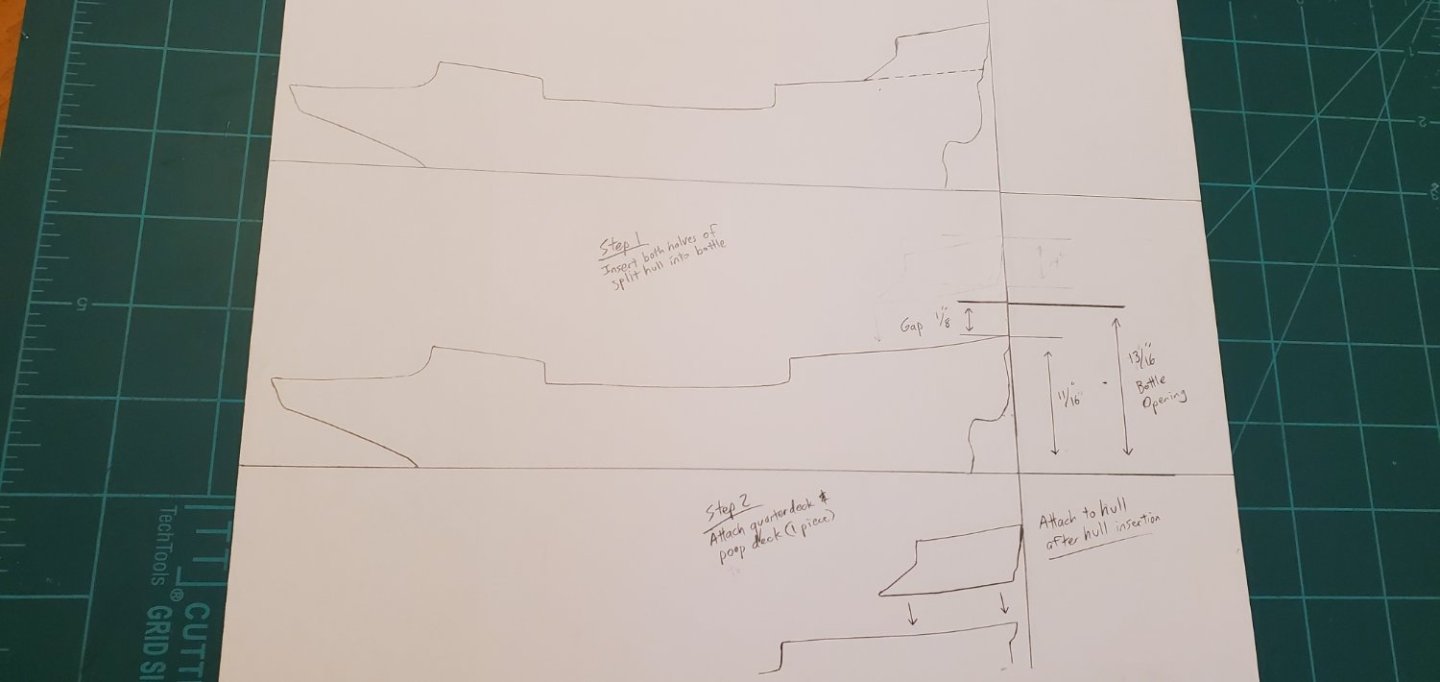
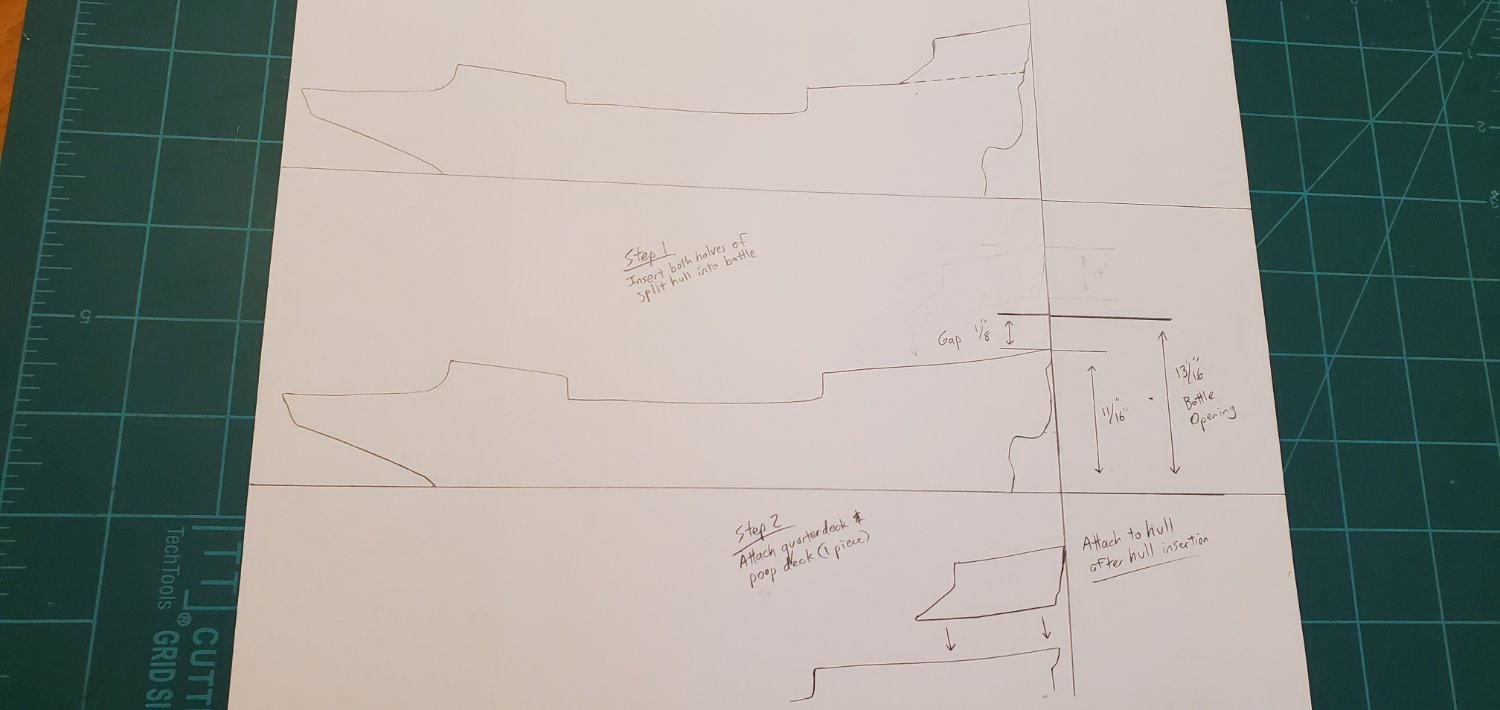
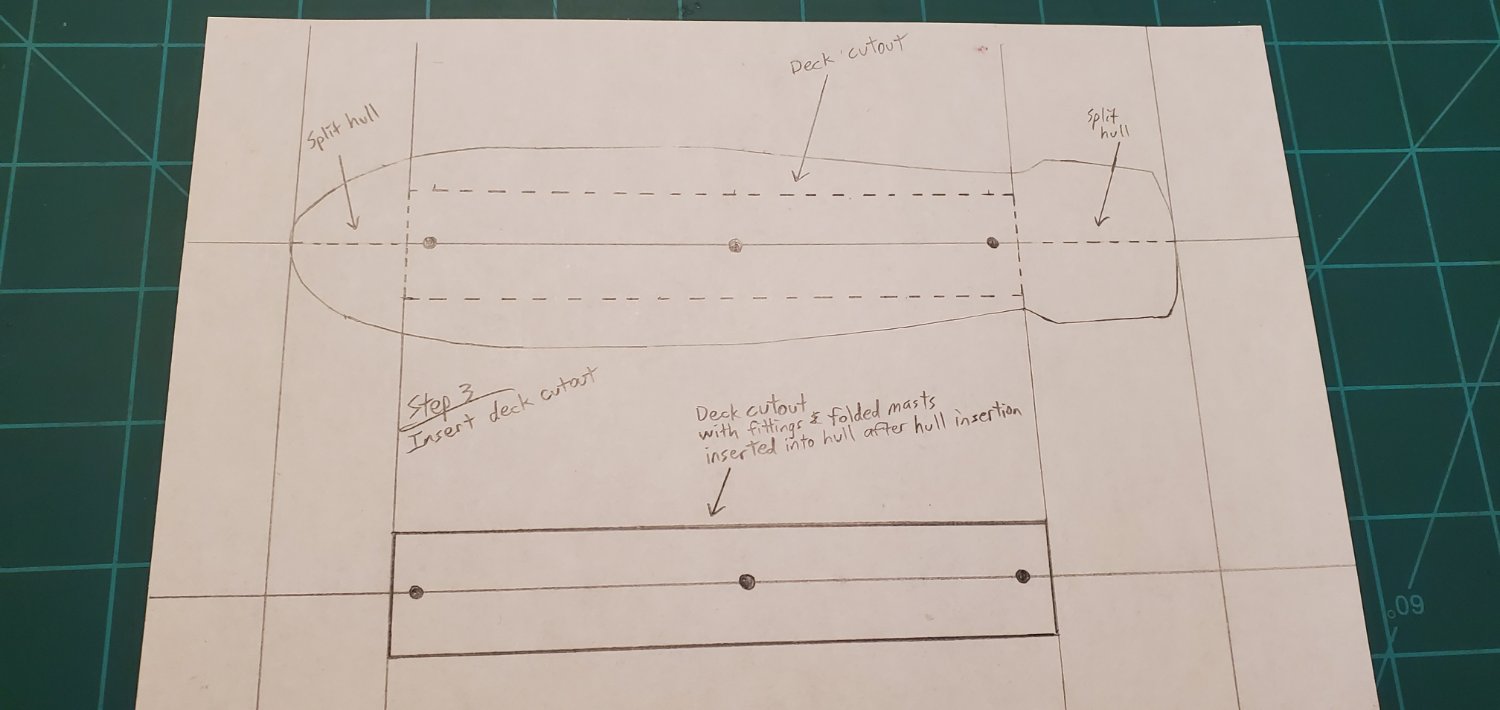
Here’s the plan I came up with which involves 2 things I have not tried before. WOOHOO! First, I’m going to build the hull and quarter/poop deck as 2 separate pieces - actually 3 since the hull will be split. Second, I’m going to cut out a large portion of the deck that contains the mast holes. The deck cutout will be inserted at the end. So all in all I will have 4 pieces for assembly inside the bottle.
The assembly inside the bottle will have 3 main steps: Insert the split hull pieces into the bottle and glue them together (step 1). Insert and attach the quarter/poop deck piece (step 2). Insert and attach the deck cutout containing the deck fittings, folded masts, and sails (step 3).
Below is my pencil sketch of the idea. Simple, right? What could possibly go wrong?

- GrandpaPhil, mtaylor, Knocklouder and 4 others
-
7
-
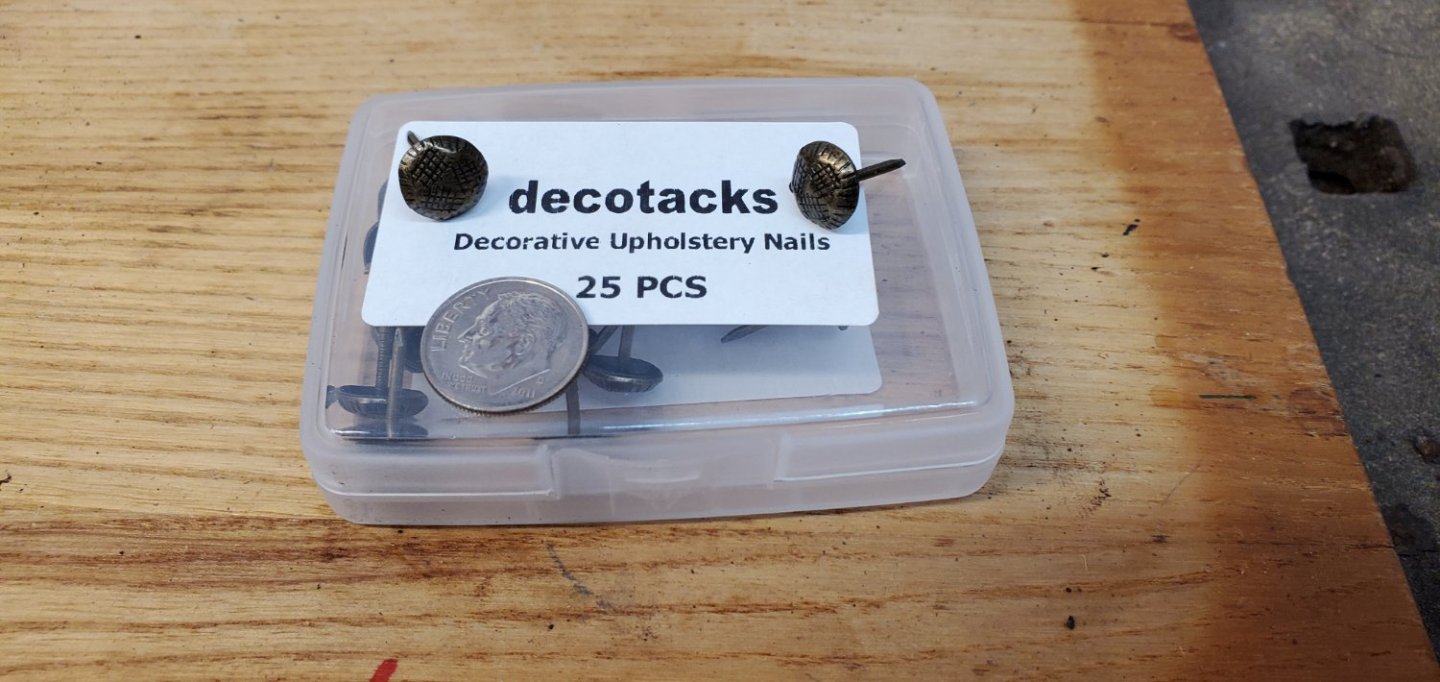
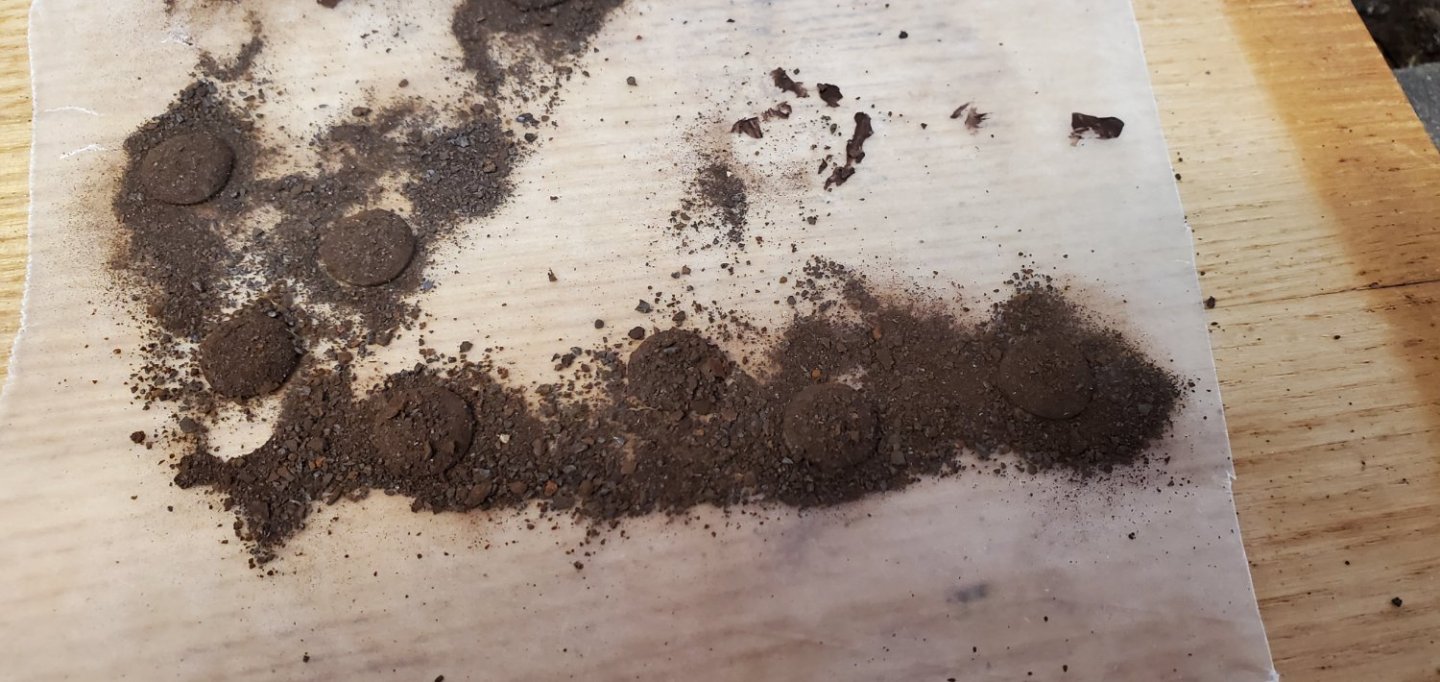
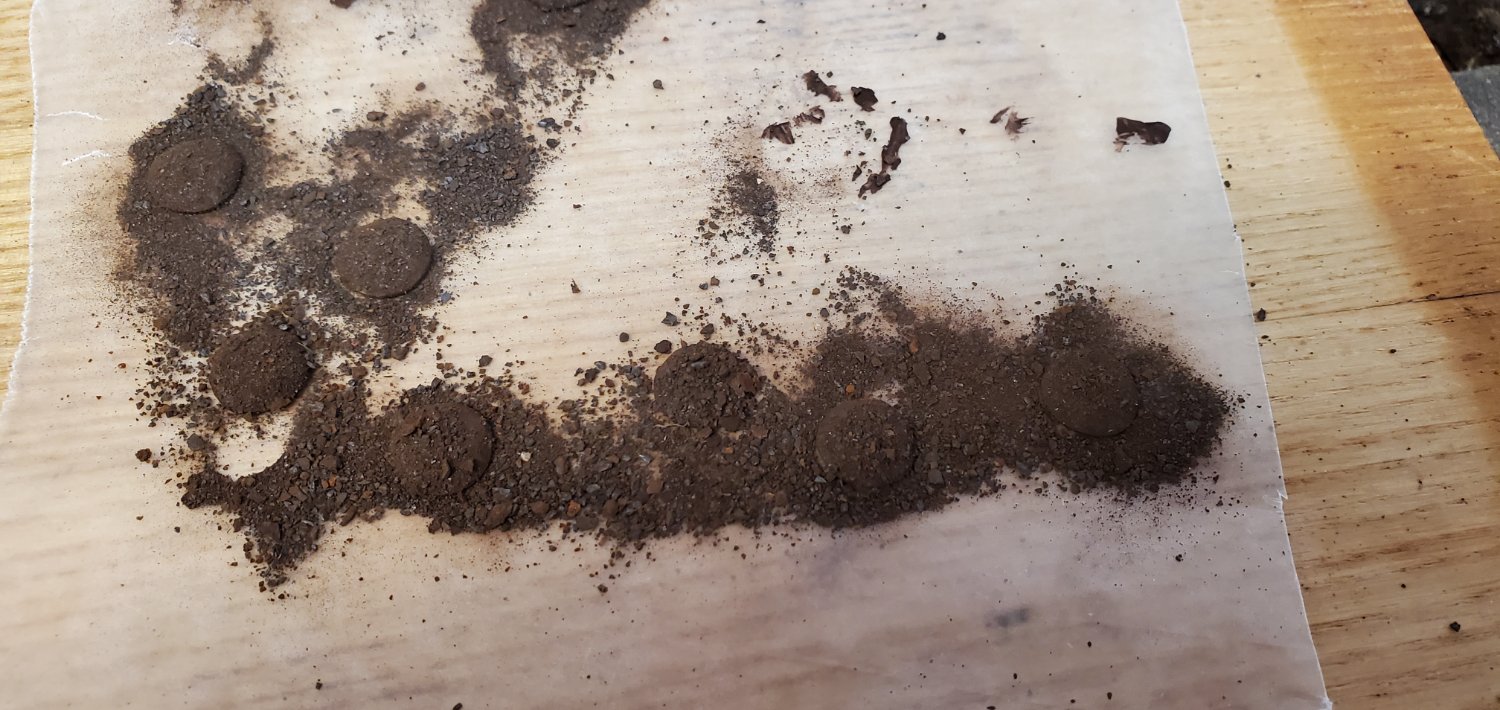
On to the rivets. I tried rusty nail heads as mentioned above but they just didn’t look right. Too flat. Most images of classic treasure chests I found had rivets with rounded heads. So I started digging around for ideas and decided brass upholstery tacks were the answer. I picked up 2 packs of 25 off Amazon for about $7 total. After cutting the pointy part off at the base of the tacks, I thought they looked too rounded (come one, make up your mind!!). So I flattened them just a bit with a hammer.
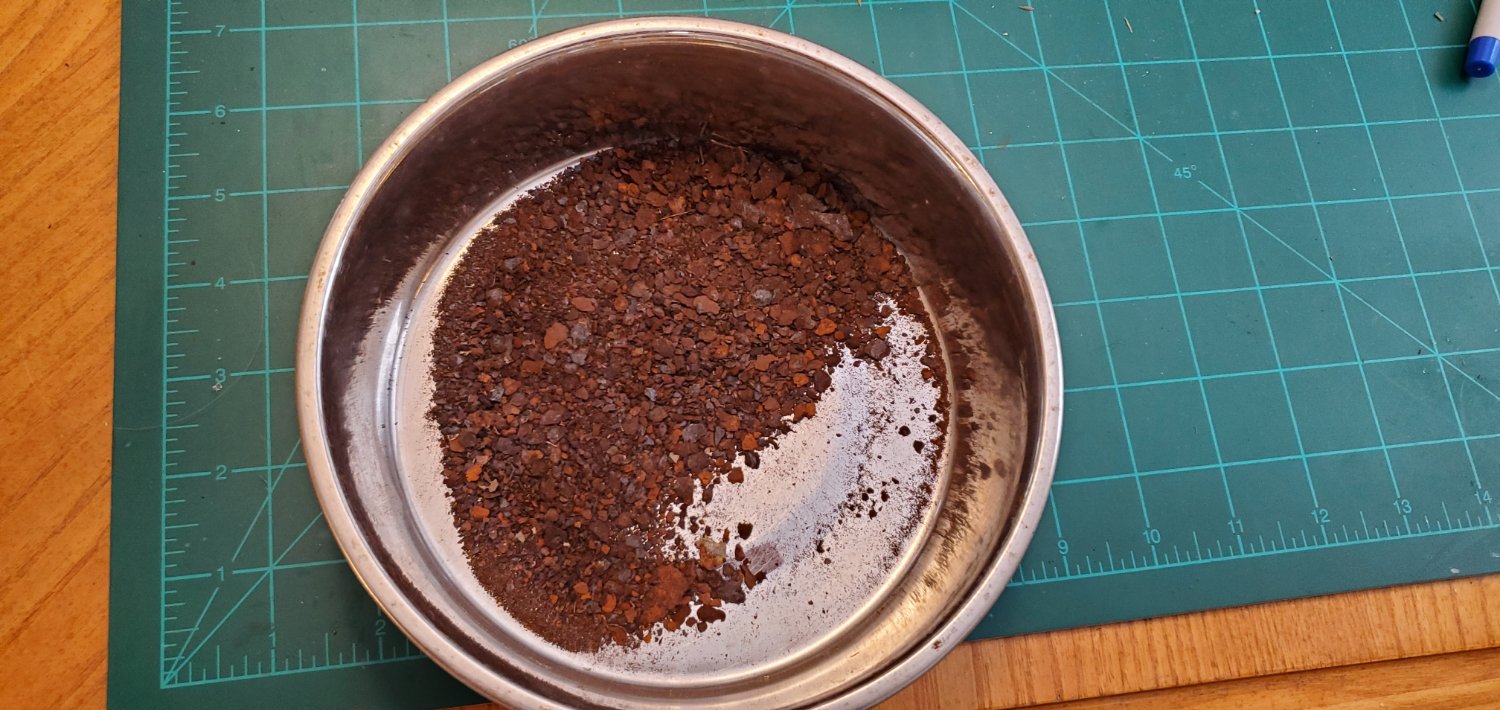
Now, how to age/rust them to match the straps. Hmmm. Here’s where I went back to @gjdale's Foss' Landing build log and reread his well-written instructions on using chalk and alcohol to weather wood strips. Even though I needed to age brass instead of wood, I thought his idea of chalk dust might work for me. But instead of chalk dust, I decided to make actual rust dust from the same gutter pieces I used for the straps. Grant made a great point that weathering is as much about the texture as it is the color. My thought was that the rust dust would give me the both the color and texture I wanted. So I used a putty knife and scraped a bunch of rust chips into a bowl. Then I took a hammer and pounded it into a fairly fine powder.
To affix the rust power to the tack heads, I tried CA glue, white glue, and epoxy. None of them worked very well. Then I got the idea of painting the heads and sprinkling the dust on while the paint was still wet. I mixed a couple of Testors enamel colors (rust and flat black) to create a rust color that pretty well matched my rust dust. I wanted a color that blended with the rust dust in case any of it showed thru. Then I sprinkled the rust dust, waited for it to dry, then sprayed it with clear coat to seal and lock everything in place.

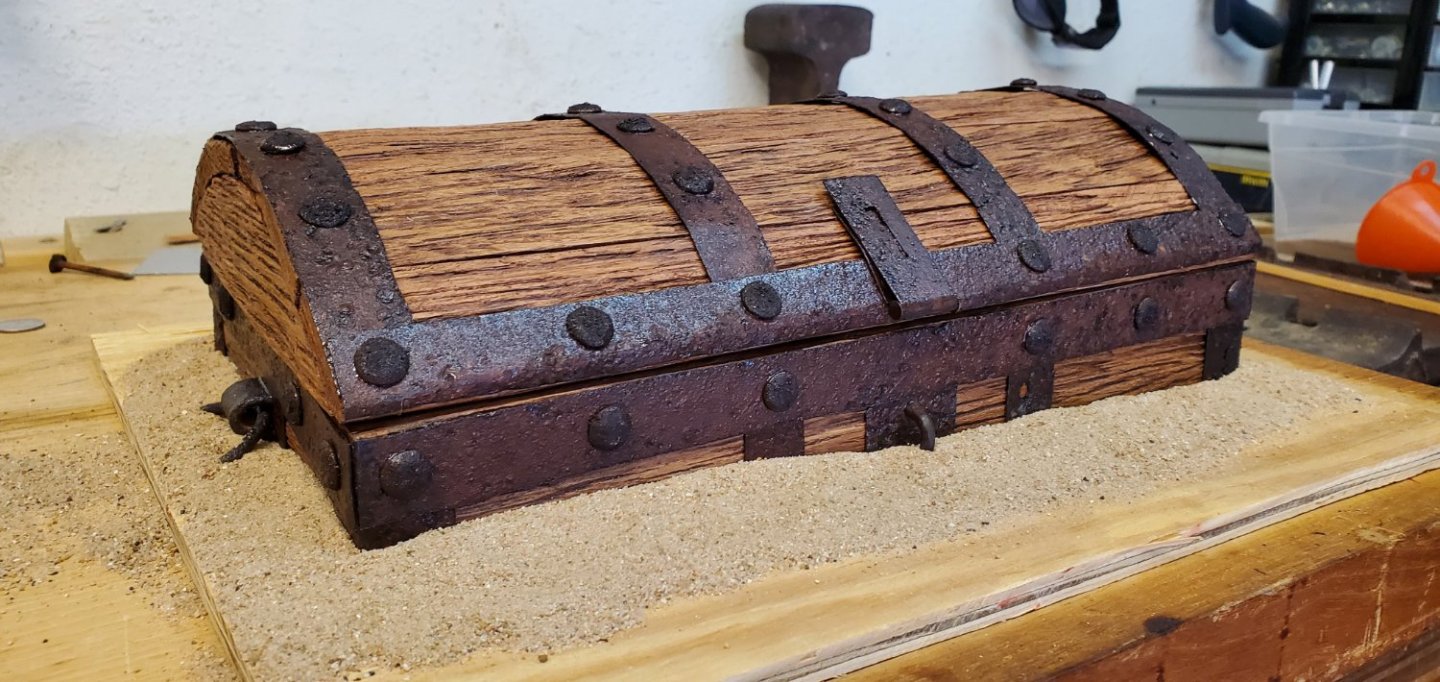
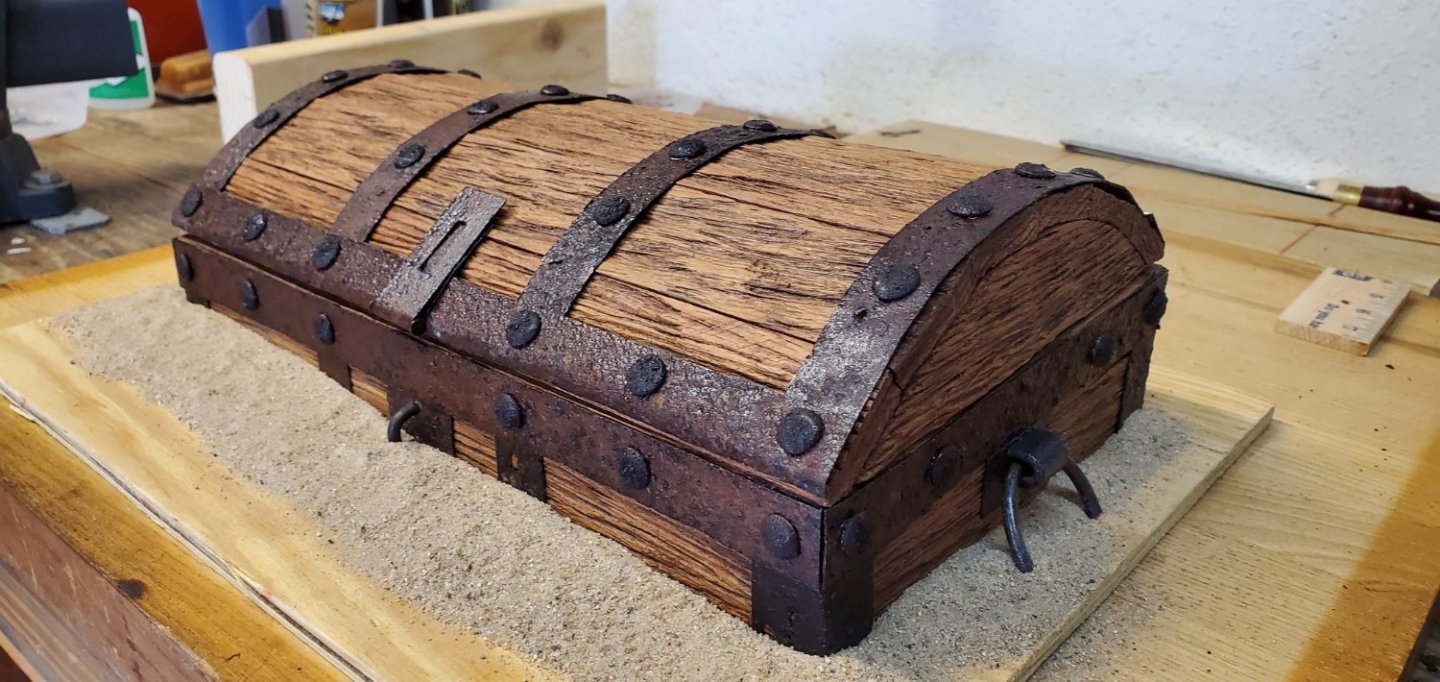
Here's the chest with all the rivets attached and set in some sand to get a preliminary look. I'll probably go with a more whitish sand for contrast in the final setup.
-


Adventure Galley by Glen McGuire – FINISHED – 1/400 - BOTTLE
in - Build logs for subjects built 1501 - 1750
Posted · Edited by Glen McGuire
I'm still trying to figure out what horse pucky is, but in the meantime, it's time to move to the mast construction.