


Glen McGuire
-
Posts
1,837 -
Joined
-
Last visited
Content Type
Profiles
Forums
Gallery
Events
Posts posted by Glen McGuire
-
-
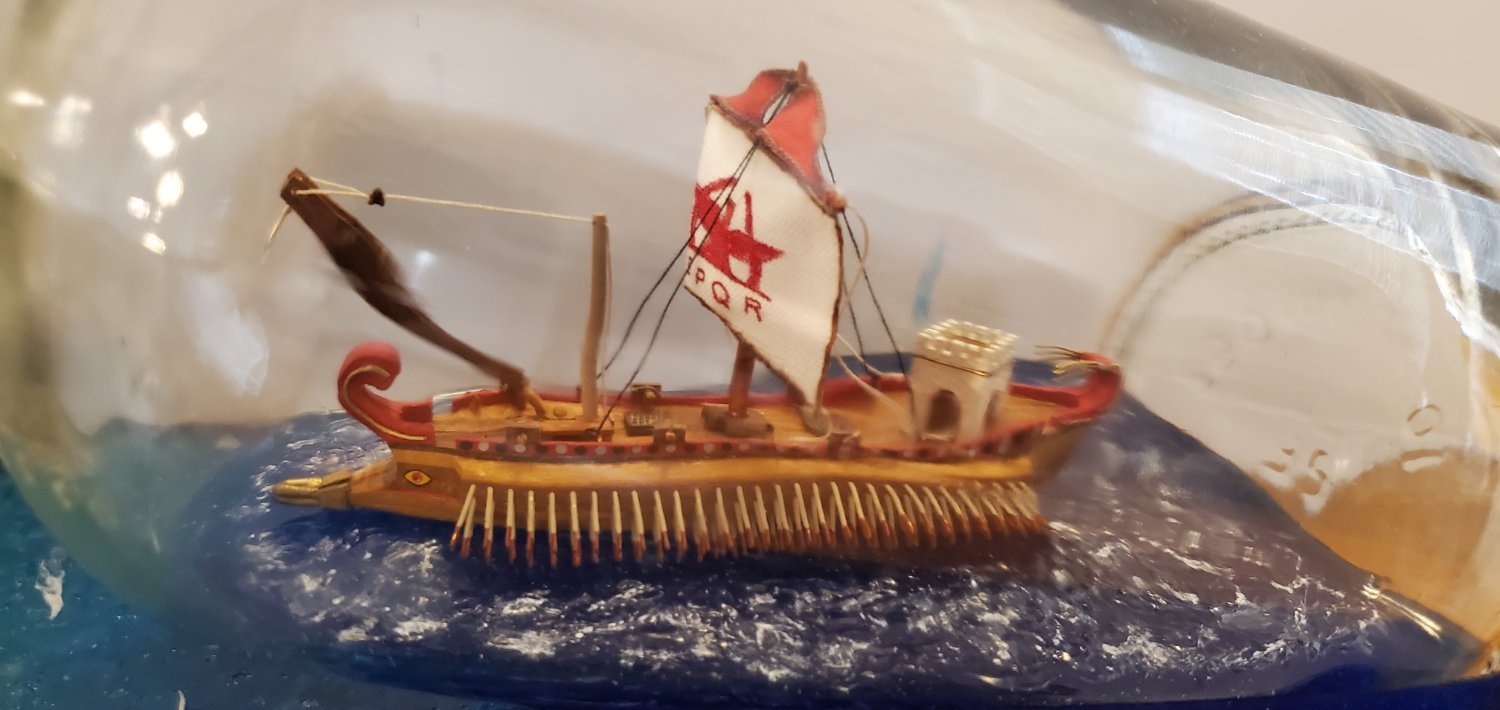
Hey O.B.one, sorry I'm way late to the build log. Just stumbled upon it today. That is a well-crafted ship. Looks very nice inside the bottle. I'm anxious to see how your sails turn out (I prefer fabric ones myself).
I hope you are saving that polka dot material for your next build!
")
- O.B.one, mtaylor and GrandpaPhil
-
 3
3
-
-
On 10/9/2023 at 12:52 AM, BANYAN said:
About 3 remakes later.... see the result (acceptable I think).
Third time's the charm? I would say those booms are way more than acceptable. They look great and the uniformity of all three is superb.
- mtaylor, Knocklouder and Keith Black
-
3
-
Fantastic job, Bryan. A real work of art!
- Knocklouder and Bryan Woods
-
1
-
 1
1
-
Lookin' good, Steven.
- mtaylor and Louie da fly
-
1
-
1
-
1 hour ago, Snug Harbor Johnny said:
The well-organized (and neat) builder may never know the sheer joy of finding something that was thought to be forever lost !
Sooooo true! If I had a dollar for all the times I've said to myself, "It's GOT TO be around here somewhere..."
- Keith Black and mtaylor
-
2
-
Nice work on that helicopter, Bob! And your priorities are in good order - kiddos first!! Keep that ticker in good order too!
4 hours ago, Knocklouder said:PS captain Marvin says he staying lol
If he ever changes his mind, the longhorns here will welcome him to the herd.
- Dave_E, Keith Black, Gabek and 2 others
-
5
-
On 9/26/2023 at 8:39 AM, LegoKing5522 said:
I kind of like the look it gives the model a little more detail, I think.
I agree with you. I like the look. Very nice work so far!
-
That is a beautiful model, Jason. Congratulations on your fine work.
-
-
-
8 hours ago, Ian_Grant said:
but wait - there's more!
Blue-footed boobies doing a mating dance?!?! OMG! Not sure how anyone will ever top that!

- Canute, mtaylor and Keith Black
-
2
-
 1
1
-
Welcome, Giuseppe!!
- mtaylor, JeffT and Keith Black
-
3
-
That planking looks really good, Bob. I can't believe how fast you got that done. As for this comment, however...
13 minutes ago, Knocklouder said:Captain Marvin says" time to plank the starboard side, get it right this time or I am going to jump ship and join @Glen McGuire crew, where they are havin a BBQ, Beer and Burgers
Capt Marvin is welcome as long as he doesn't say those B words around my cows! They are very sensitive!
- Gabek, Knocklouder, Keith Black and 2 others
-
2
-
3
-
Thanks to each of you for all the kind words!
17 hours ago, gsdpic said:Maybe the first time on MSW that the builder used his own livestock as the prototype for part of the build!
That made me laugh!! And it will probably be the last time. Unless maybe @Keith Black or @Knocklouder or someone else gets a penguin in their pen.
16 hours ago, ccoyle said:Not only is this a fine model, but it's also the 1400th finished build log at MSW!
Whoa! 1400 done. Now THAT is cool! Thanks for sharing that info, Chris. What an amazing place this is!
 16 hours ago, BANYAN said:
The sea surface turned out really well, you have a gift for making water look realistic.
Thank you so much, Pat. I keep working on it, trying different things (most are suggestions from y'all), and trying to get better.
9 hours ago, John Fox III said:I had a ball following along, looked forward for each update, thanks!
Thank you, John. I have learned a lot (ok, stolen/borrowed 😃) from looking at your work!!
4 hours ago, Thukydides said:Outstanding and very unique build. You have done a great job.
Thank you, Thukydides. You had some really good suggestions along the way. Now if I could just figure out how to say your name!
10 hours ago, Keith Black said:After every build I think, he can't top this but you always do. I'm so looking forward to your next creation.
15 hours ago, gjdale said:Congratulations on completing yet another outstanding build Glen. I can't wait to see what's next.
Thank you, Keith and Grant. And thanks for your helpful ideas during the build. Not sure what the next project will be. I don't have anything in mind yet, so I'll probably just sit back for a while and enjoy everyone else's work.
- GrandpaPhil, Thukydides, Canute and 3 others
-
6
-
Your Albatross is a beautiful ship, Paul! I hope you will reconsider doing build logs for your future efforts. I'm sure some of us could learn some things from you!
- Keith Black and mtaylor
-
2
-
-
10 hours ago, Ian_Grant said:
This build will be hard to top.....
Actually, Ian, I think the build log will be harder to top than the build itself! This has been by far the most entertaining build log for me thanks to all of y’all. Over the last few months, we’ve somehow worked all of the following into the conversation:
- Historical figures like Eratosthenes, Polybius, Archimedes and Heron as well as Byzantine pictures of ancient vessels.
- Animals like penguins, war penguins, war dolphins, war pigs, climbing cows, Galapagos penguins, iguanas, and something called blue-footed boobies. 😲
- Less than appealing animal related things like iguana snot, seagull poop, and my personal favorite - sacred scowts scat.
- Movies and TV shows like Indiana Jones, White Men Can’t Jump, Rocky, Toy Story, Mission Impossible, and Get Smart.
- Other miscellaneous topics like the Galapagos’ Post Office Bay, the calculation of manpower per oar, and the devil’s own green matchheads, just to name a few.
- And on and on and on…
Seriously though, I want to offer a sincere thank you to everyone that took part in this build along the way: @Keith Black, @Ian_Grant, @Knocklouder, @Javelin, @Louie da fly, @BANYAN, @gjdale, @mtaylor, @Canute, @Thukydides, @GrandpaPhil, @John Fox III, @Landlubber Mike, @Roger Pellett, @CiscoH, @Bryan Woods, @gsdpic, @FriedClams, @Boccherini, @ccoyle, @Snug Harbor Johnny, @O.B.one, @hollowneck, @Ryland Craze, @JacquesCousteau, @VitusBering, @Chief Mark, @chris watton.
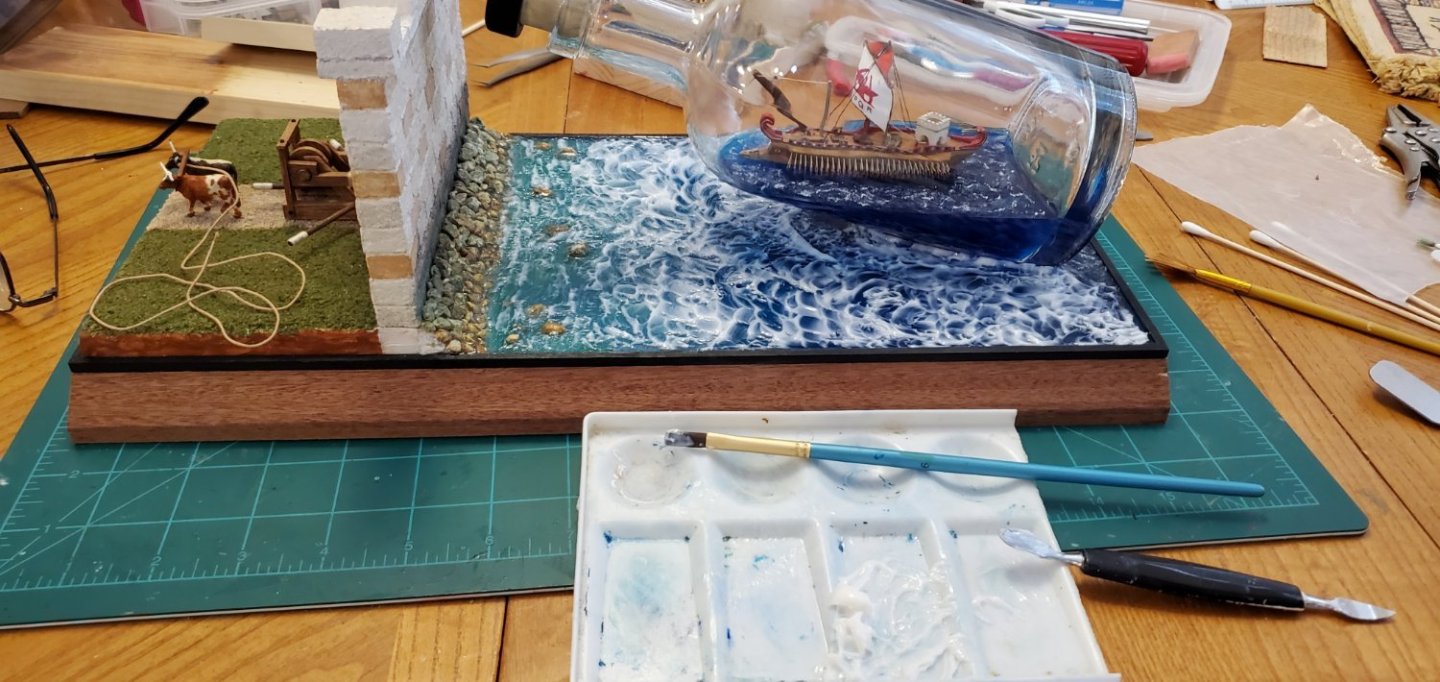
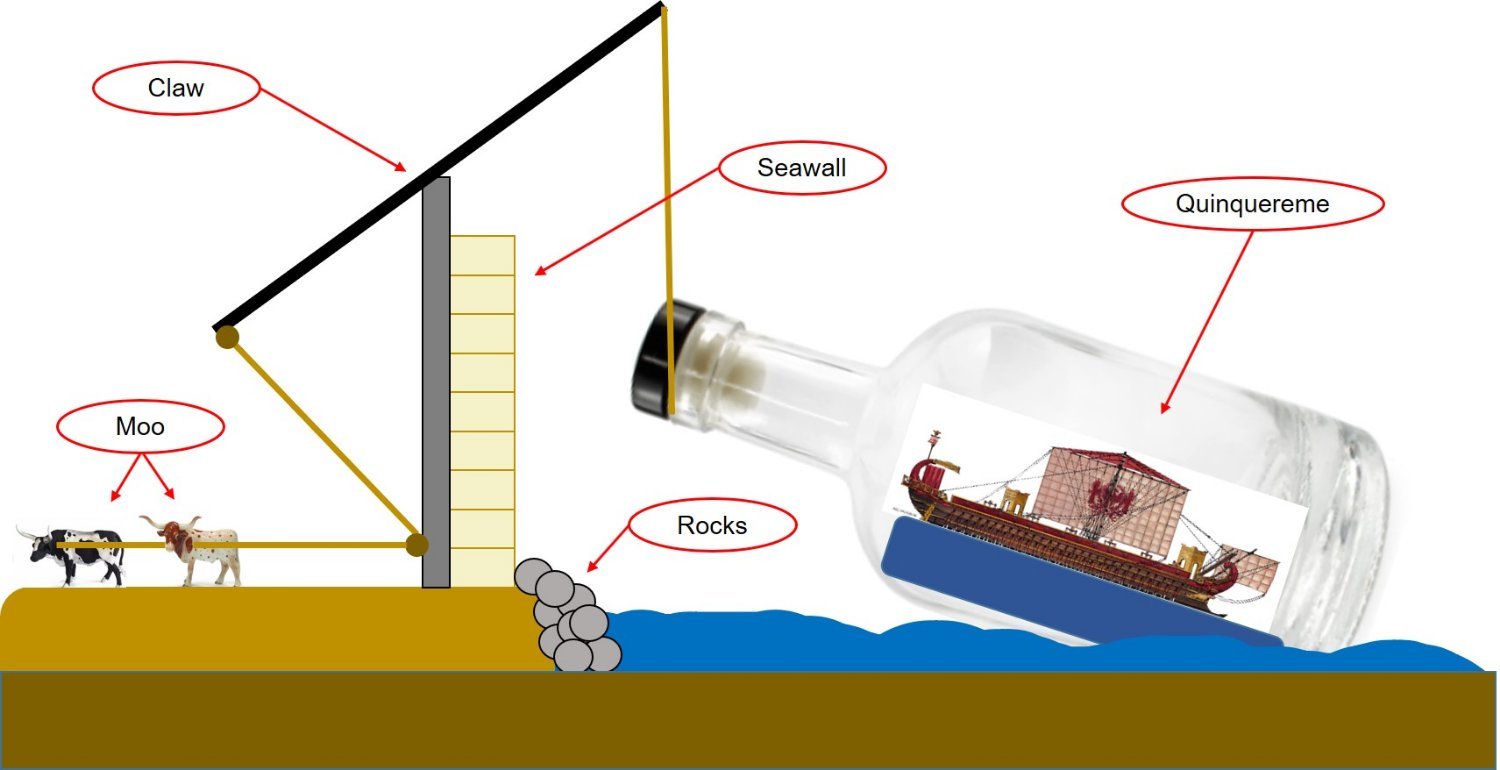
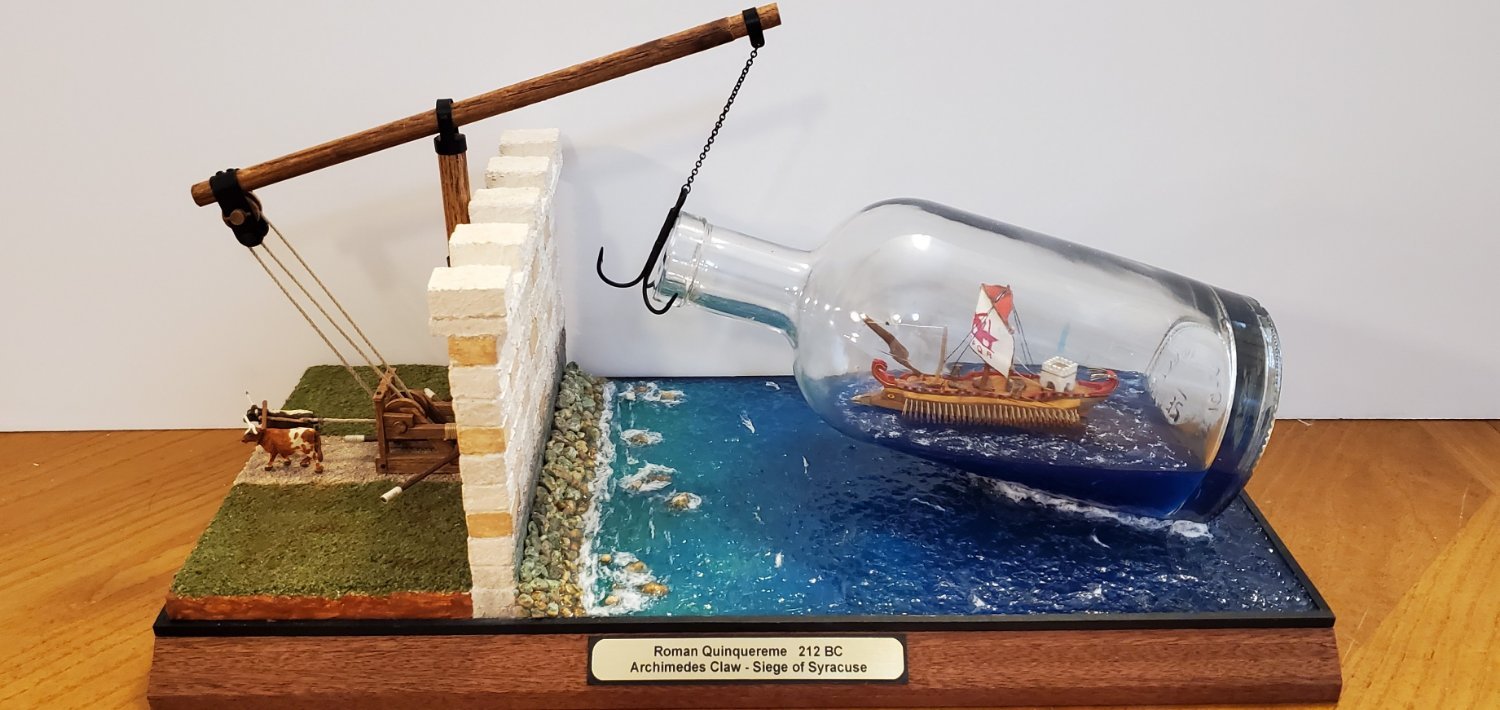
Whether you popped in every so often or stuck with it for the whole dang production, your comments, suggestions, and encouragement on the myriad of issues I encountered pushed me forward and helped make the build so much better than it would've been had I just tried this on my own. And your sense of humor kept me smiling and laughing every step of the way. I simply cannot thank each of you enough. Y'all are my heroes.Here are pictures of the completed project. I'll start with the original concept drawing for comparison of the idea to the finished product.


-
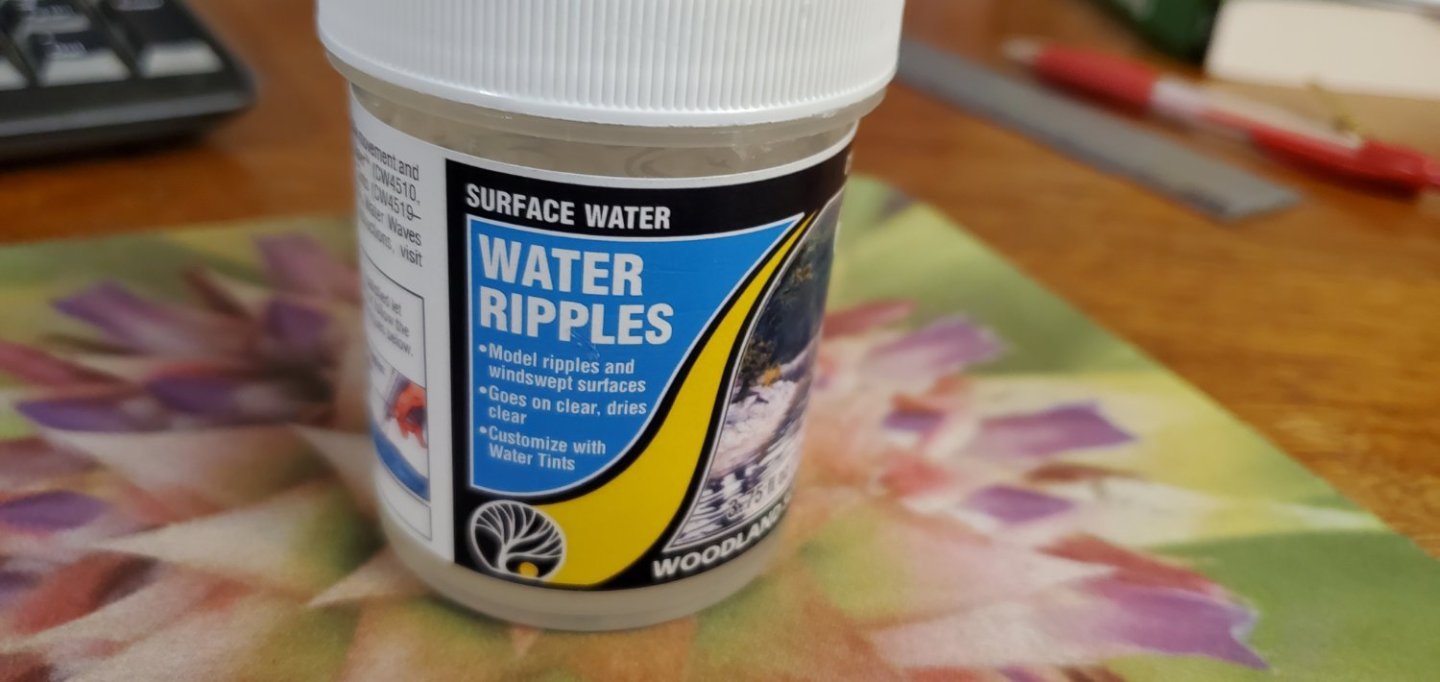
The acrylic medium gloss gel finally dried, but I was not satisfied with the look. It just did not set up very well and did not really seem like natural looking water movement. Usually, I use it inside the bottle in a small, confined space, so maybe it does not work as well over a larger area. Or maybe I just did a poor job of working it into wave shapes. Regardless, I decided on a plan B and ordered some Woodland Scenics - Water Ripples and watched some Youtube videos on how to use it.
The Woodland Scenics product definitely has a different consistency than the gloss gel I used previously. I started out by trying it on the far back corner of my base that will be mostly out of sight. I spread it on a small area using a little spatula to dab it around and then let it dry to see the results. I really liked how it kind of self-settled into more natural looking water waves and ripples. Satisfied with my test area, I covered the whole base with it. Going forward, I think it will be my go-to for water texture.
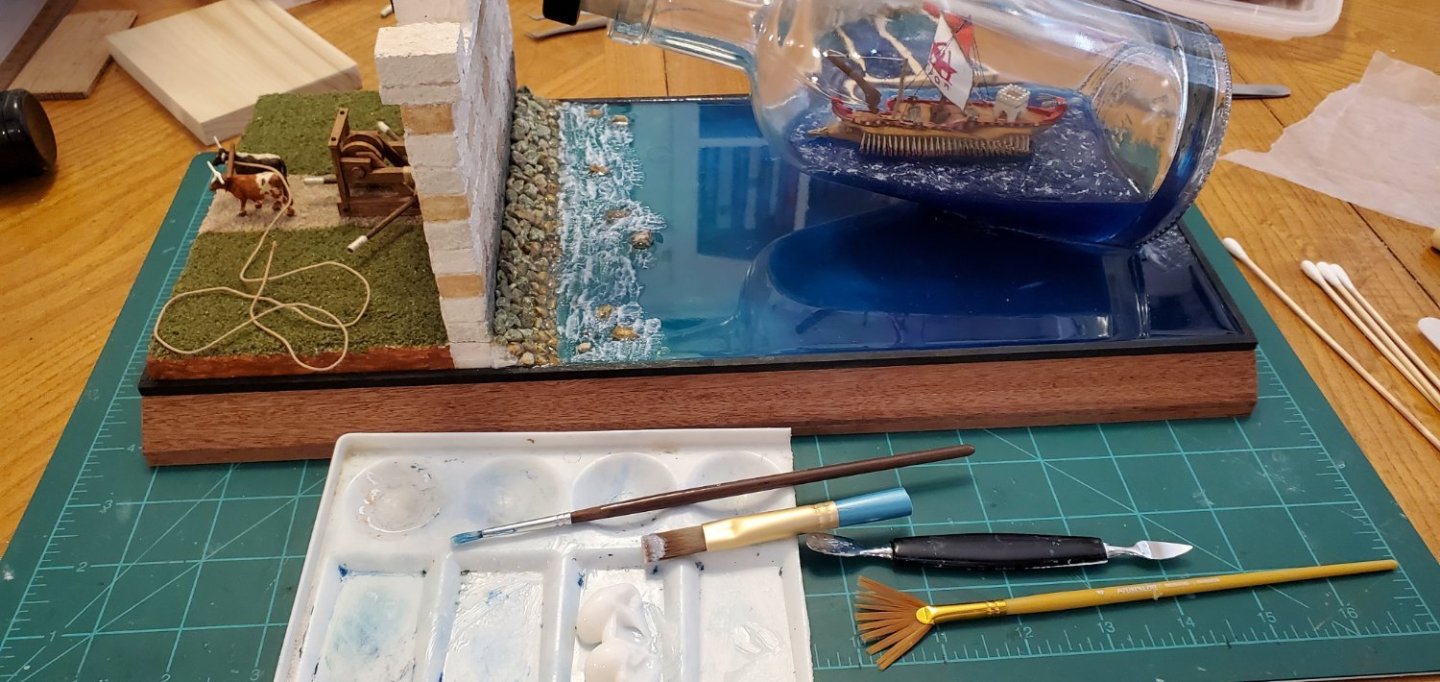
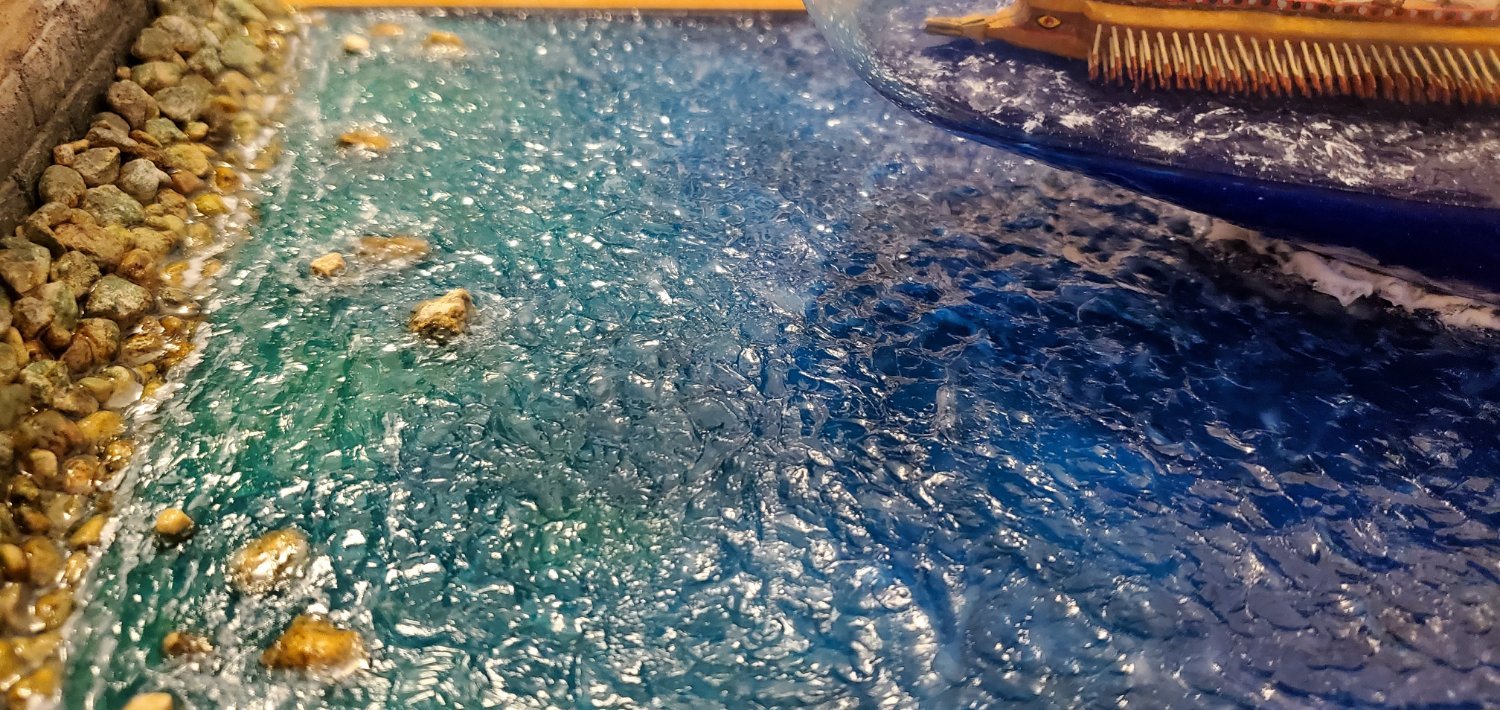
Here's a good look at a larger area of the water after the Woodland Scenics product dried. So my water now has 4 layers to give it a real 3D effect – paint, epoxy resin, acrylic gloss gel medium, and the Woodland Scenics product. But I don’t think I’ll use the gloss gel in the future. I'm really happy with how the different colors of the water turned out.

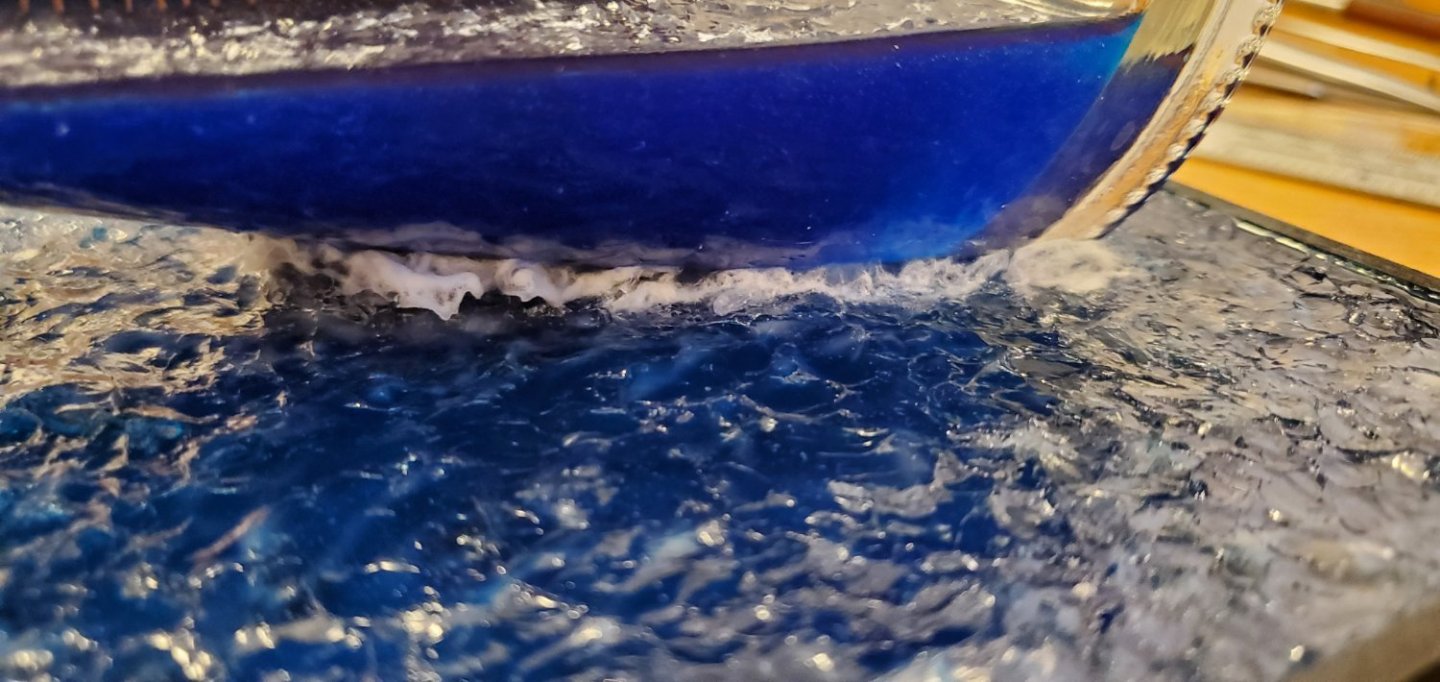
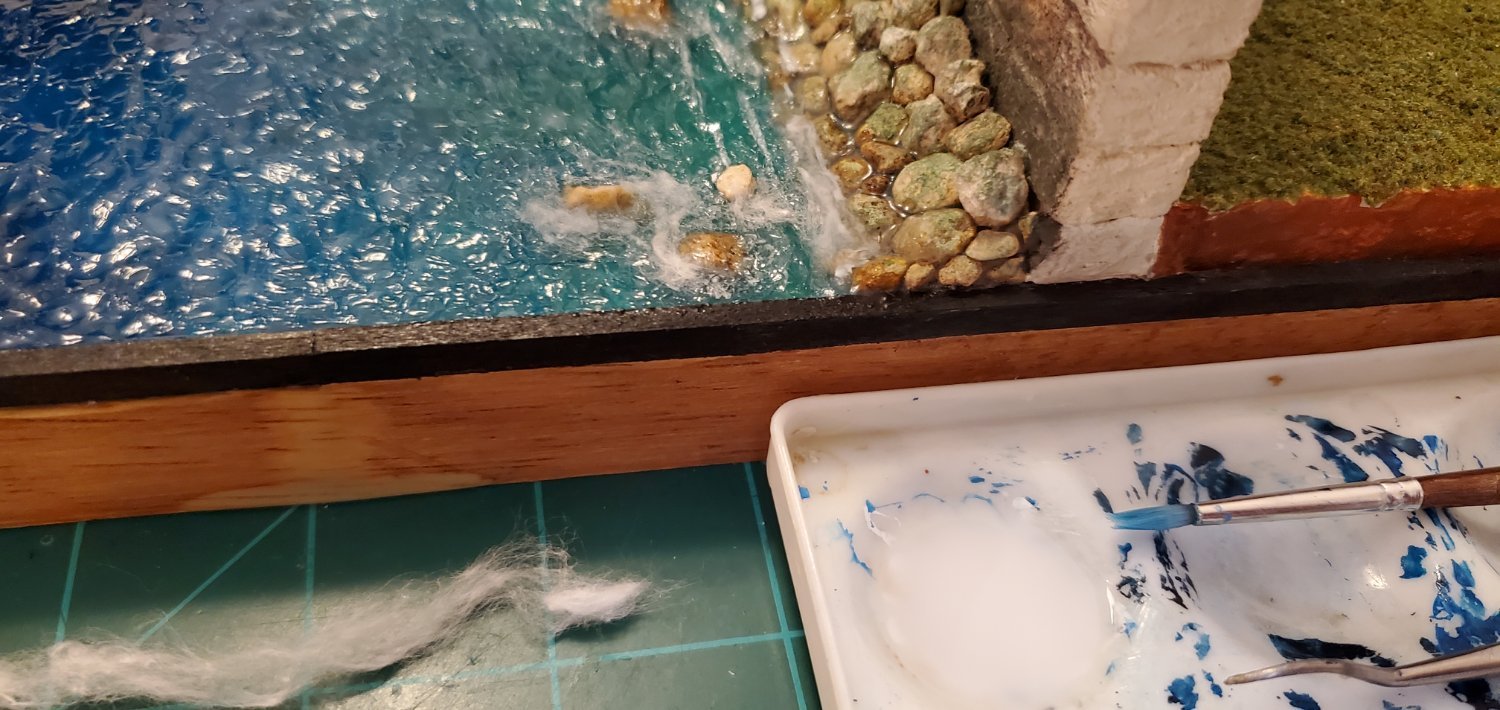
Next, I wanted to add some froth to the area under the bottle where the edge of the bottle meets the water. For that I used cotton unfurled from the ends of q-tips diluted with white glue.
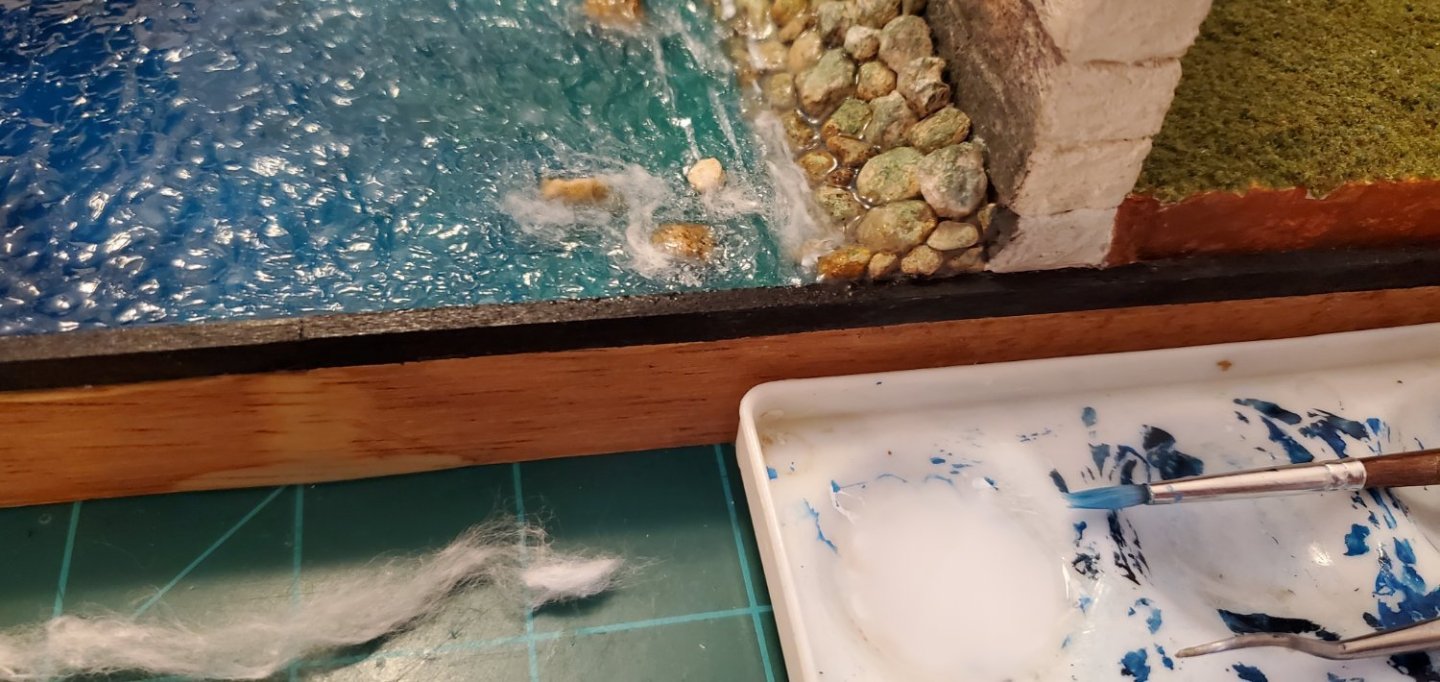
Next, I added a few random, small whitecaps around the deeper parts of the water. Then I finished it off by adding foam where the water hits the rocks at the shoreline. I made the whitecaps and foam with q-tip cotton and diluted white glue like I did for the froth underneath the boat. I like q-tips for this better than cotton balls because the q-tip cotton will unfurl into longer strings which are good for lining the edges of small waves.
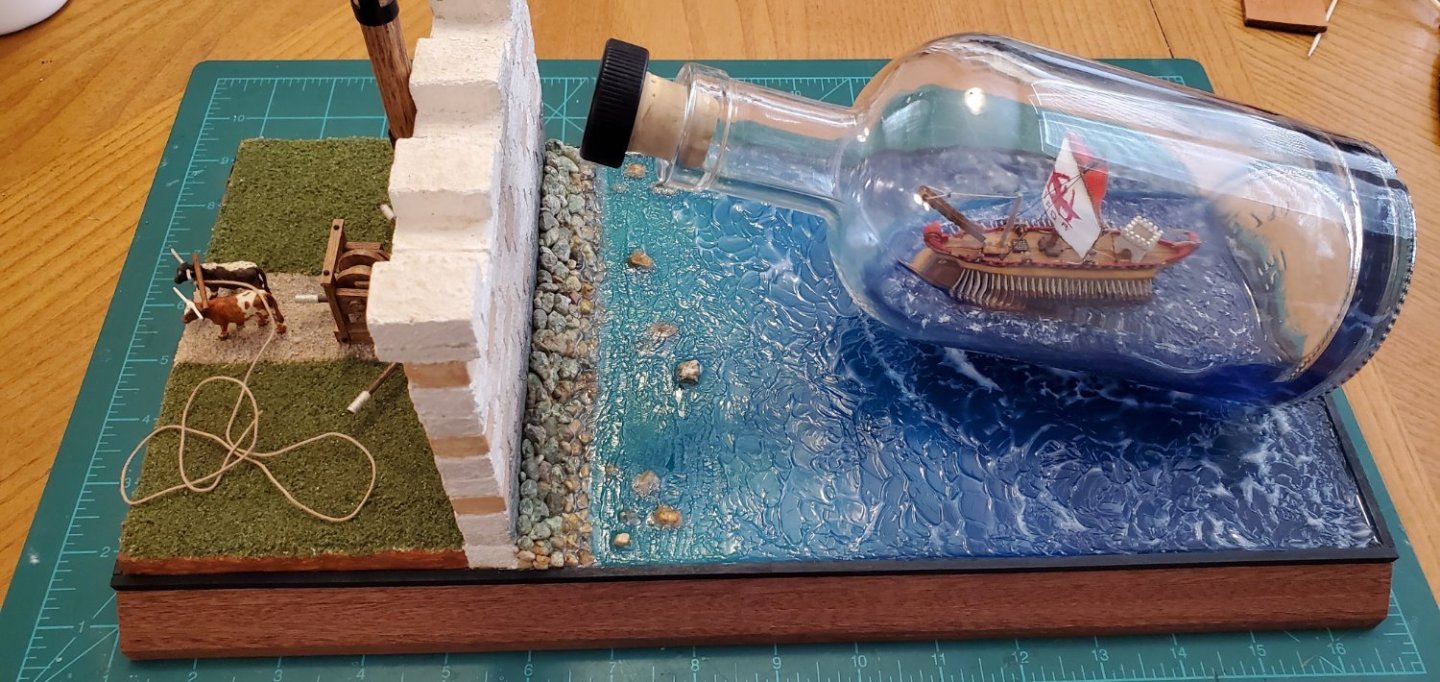
The last thing I did was revisit my grass on the other side of the wall. I thought the green looked too much like a golf course (too uniform) so I dirtied it up a bit with some random brownish splotches.
And with that, I’m calling this beastie done. I’ll take some final pics and put them in the next post.
- Bryan Woods, Canute, Knocklouder and 10 others
-
5
-
 8
8
-
5 hours ago, Knocklouder said:
Sacred Scowts Scat
You didn't really say that did you? LOL!!! We are exploring new depths in this build log!
5 hours ago, Knocklouder said:Did you know Christopher Columbus brought the start of the Texas Long Horn cattle when he came to America the second time in 1493?
Actually I did know that. And there were other famous explorers who played essential roles in the early development of the Texas longhorn breed. In brief, Columbus brought Spanish horned cattle to Santo Domingo in the Dominican Republic on his second voyage to the new world as you mention. In the early 1500s, Spanish explorer Gregorio de Villalobos took some of the Spanish cattle to mainland Mexico. Cortes also took some of those Spanish cattle from Santo Domingo to Mexico to support his expeditions. In 1540, Coronado rounded up several hundred of the now Mexican horned cattle and used them to supply his expedition that would search for the golden Seven Cities of Cibola. These became the first cattle to enter what is now Texas and were the forbearers of what became Texas Longhorns.
That's a very abbreviated version of their history as recorded by J. Frank Dobie in his 1941 classic, "The Longhorns". That book is considered the Bible around here for longhorn history.
- Canute, Bryan Woods, mtaylor and 2 others
-
5
-
-
A couple of digressions during paint drying sessions...
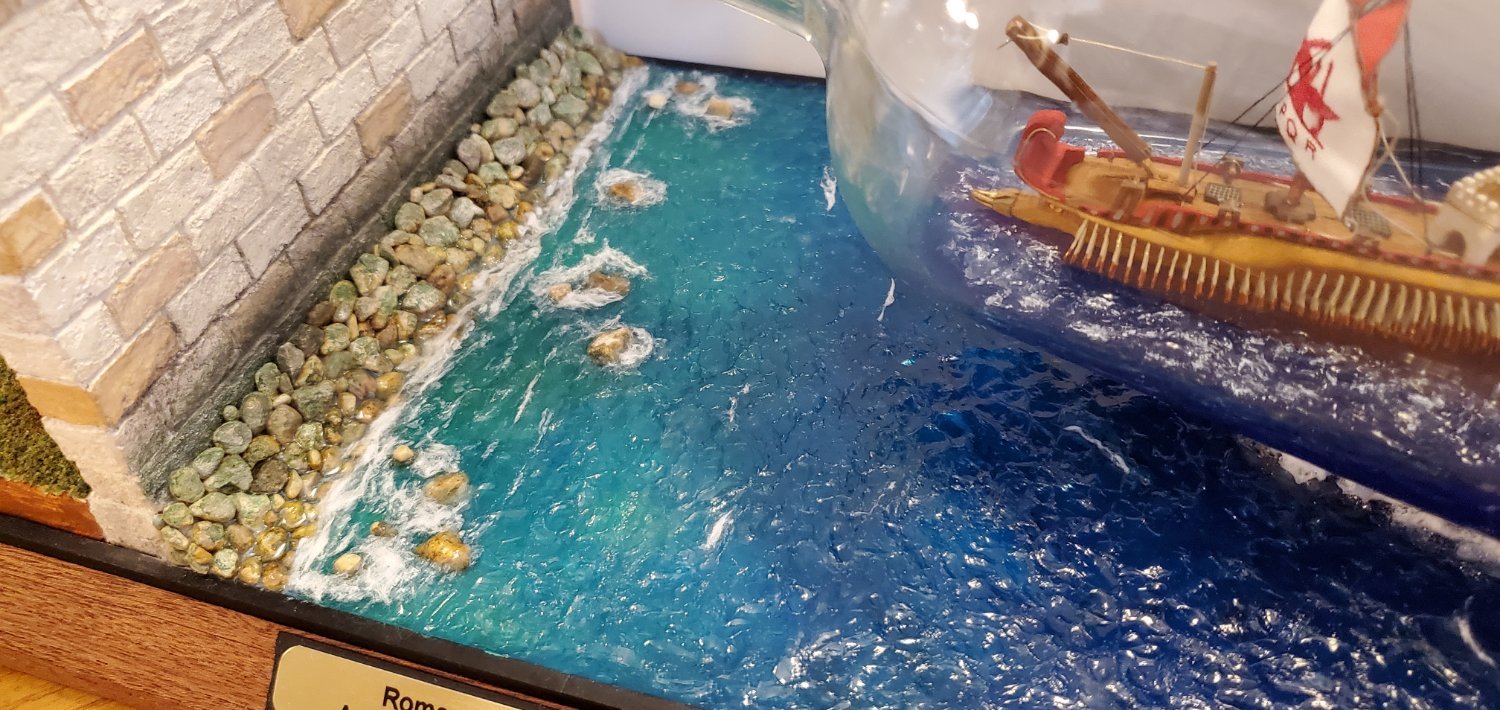
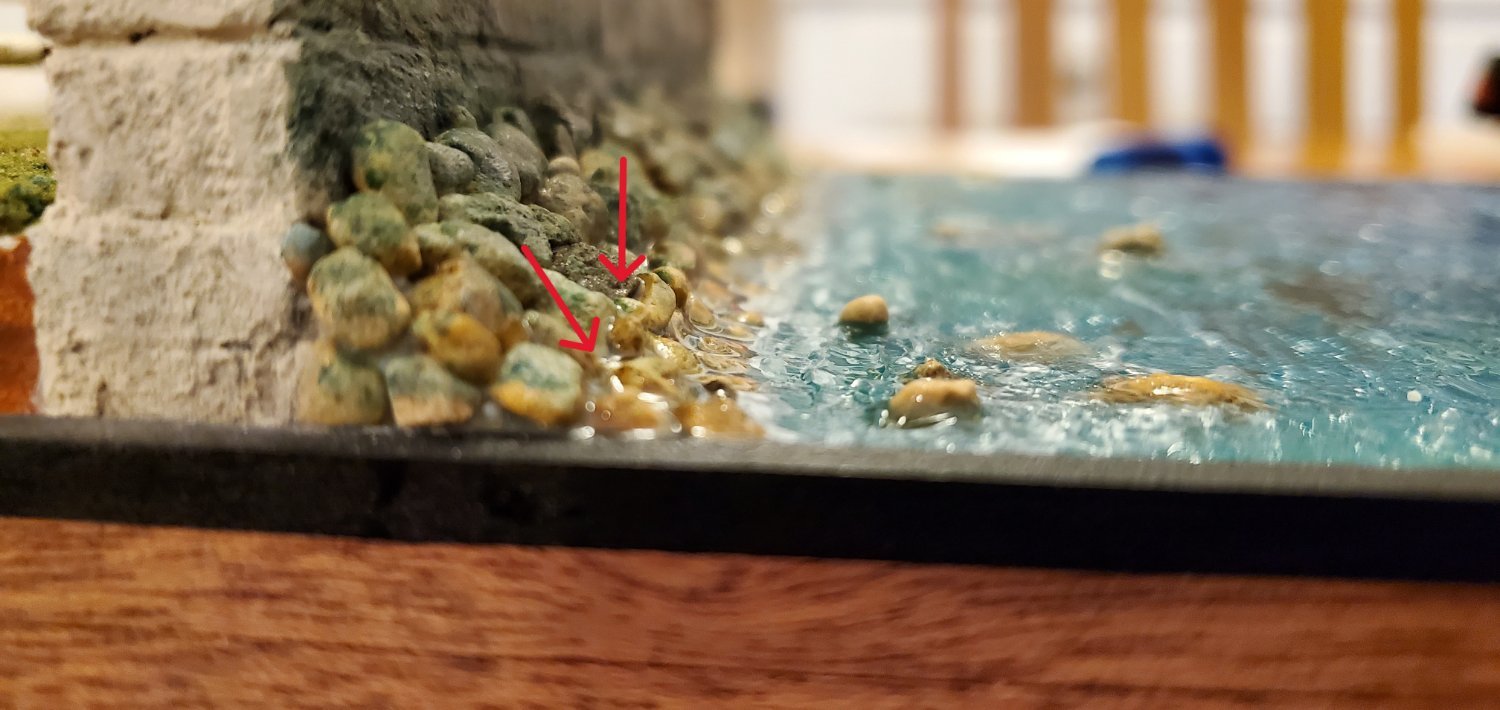
First, I noticed an interesting characteristic of the epoxy resin I use. It seems to leach upward given the chance. A few hours after pouring the epoxy resin into my base, I noticed that more rocks below the base of the wall looked wet than anticipated. A closer look showed that rocks well above the water line of the epoxy resin were indeed covered in epoxy. And it pooled in the small cavities between the rocks above the water line. In all, the epoxy resin looks to have leached up about 1/8". In this case it's ok and actually adds to the effect of water meeting the rocks. But I'll have to pay attention for future use if I don't want that look.

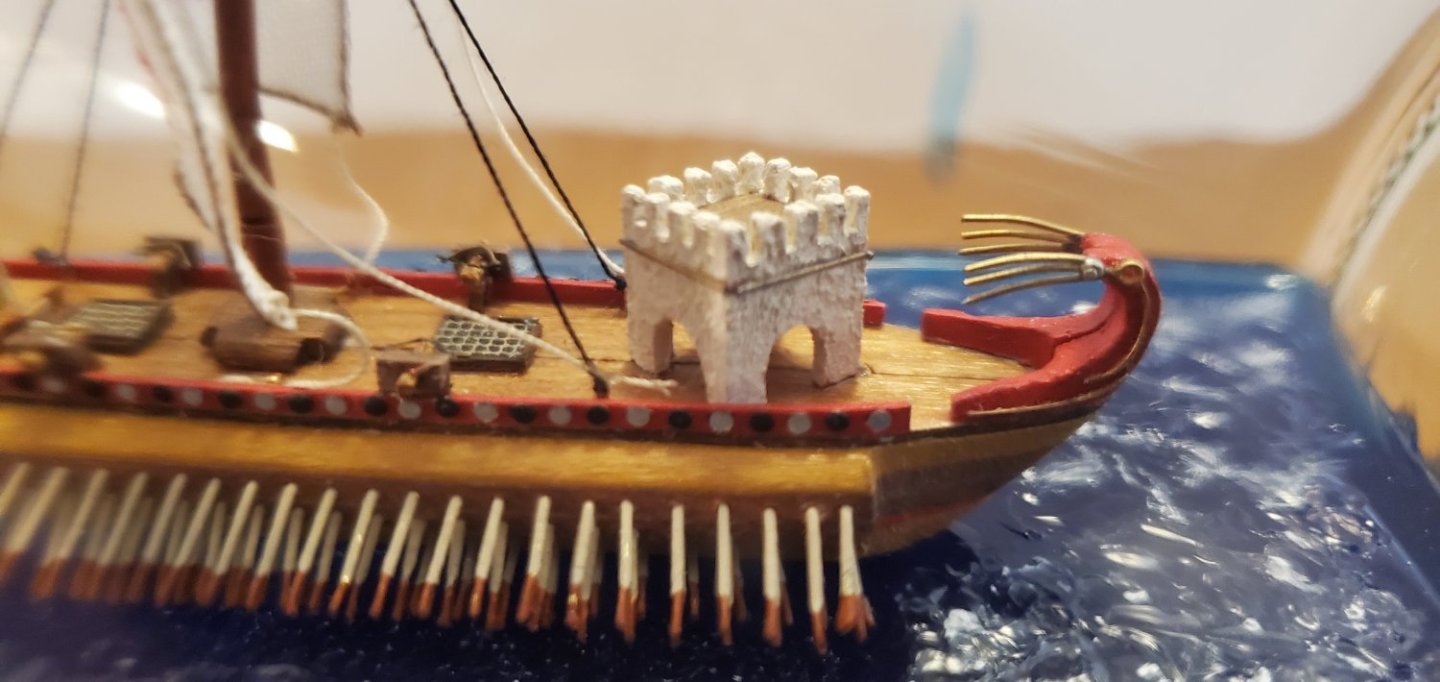
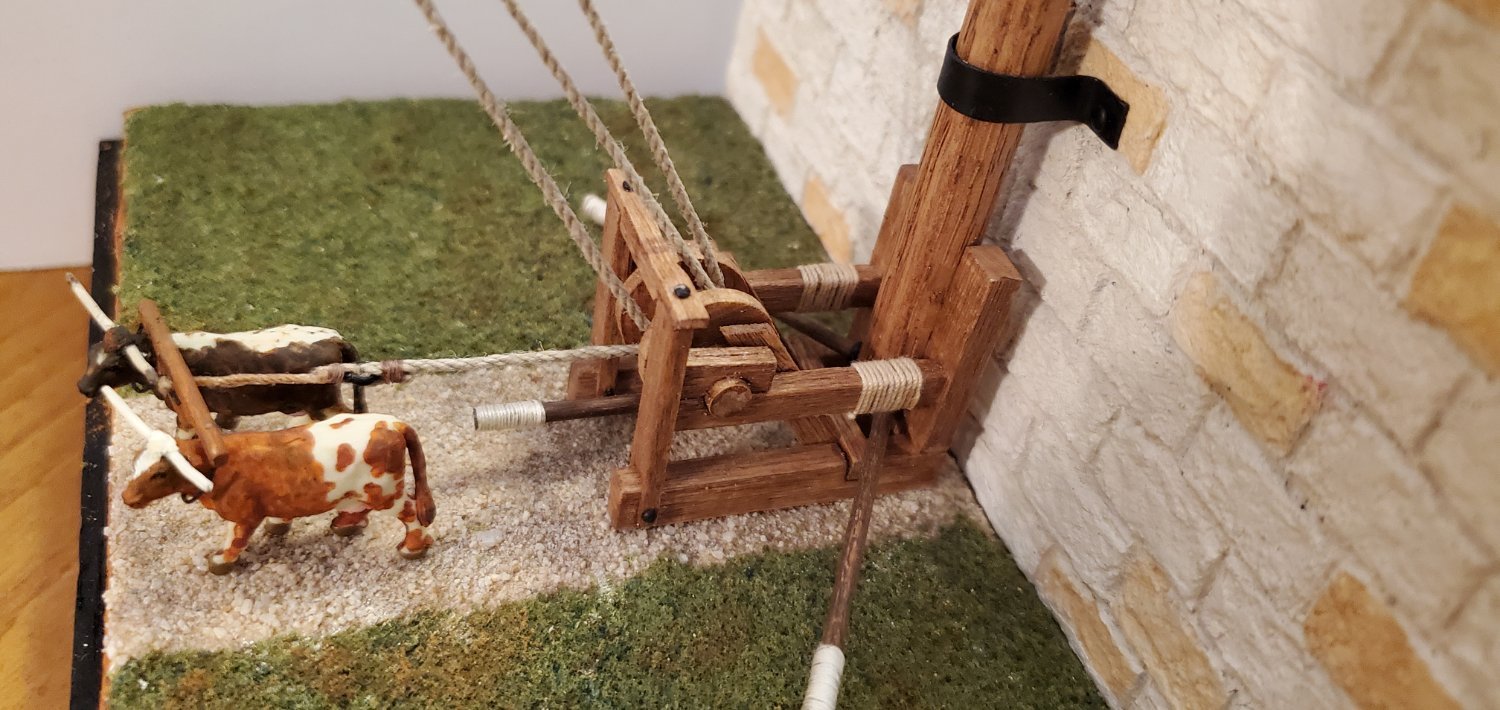
Second, I was texting pictures of the build progress to a friend of mine. I sent him the 1 below. He asked what the cow was doing on top of the wall. I told him it was stationed up there to watch for incoming Roman ships during construction of the project.
My friend replied, "Oh. So it's a scowt!" 🙄🙄🙄
I told him he'd fit in well with the MSW crowd here.

-
After plenty of dry time, the bottle feels securely in place. I think the process above worked well.
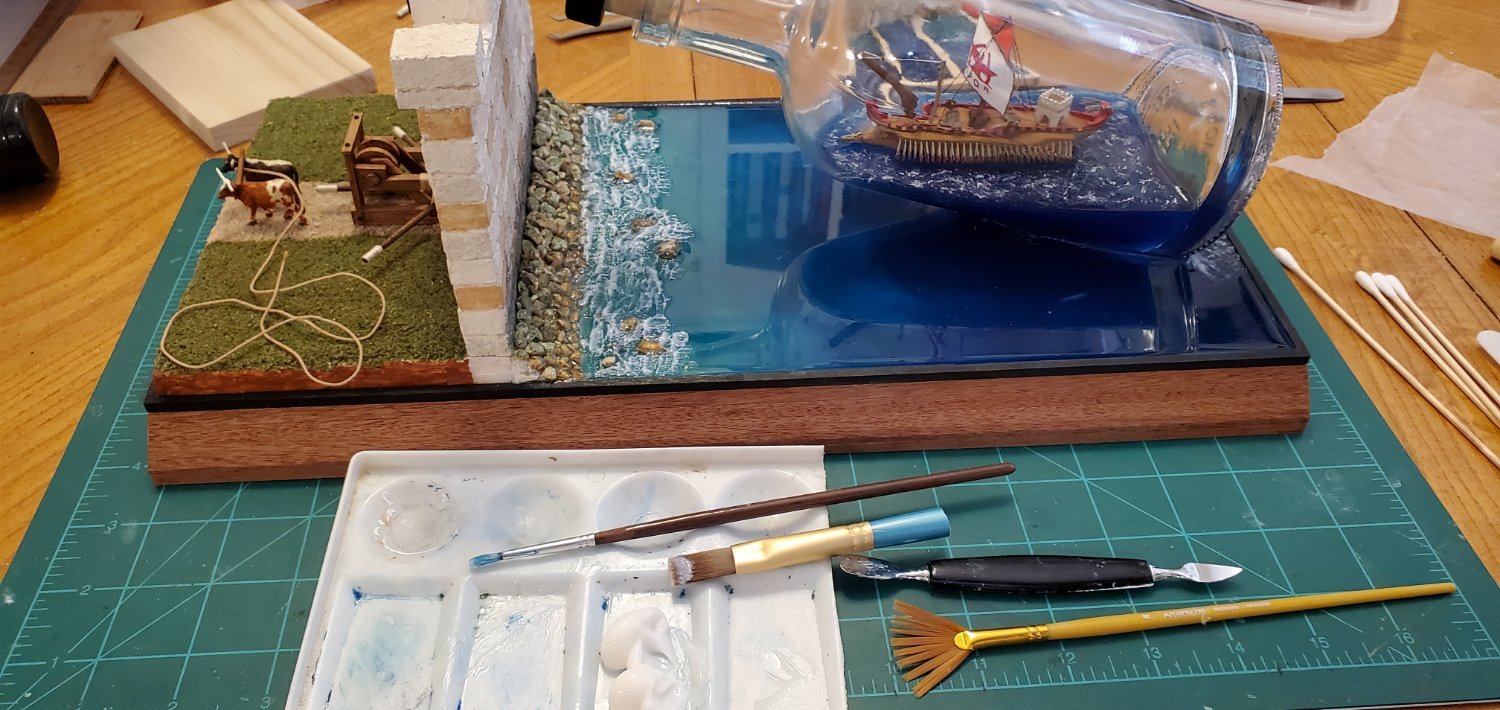
Now it's time to try and bring some life to the water. All the pictures I see of the real Syracuse sea wall show pretty calm waters around the jutting peninsula where the wall stands. That means I don't want to go overboard with wild churning seas like I did for the Kraken. So the first step here is adding a layer of small waves and ripples. For that I use acrylic gel gloss medium. It goes on white, but the pictures below show how it begins to clear as it dries.
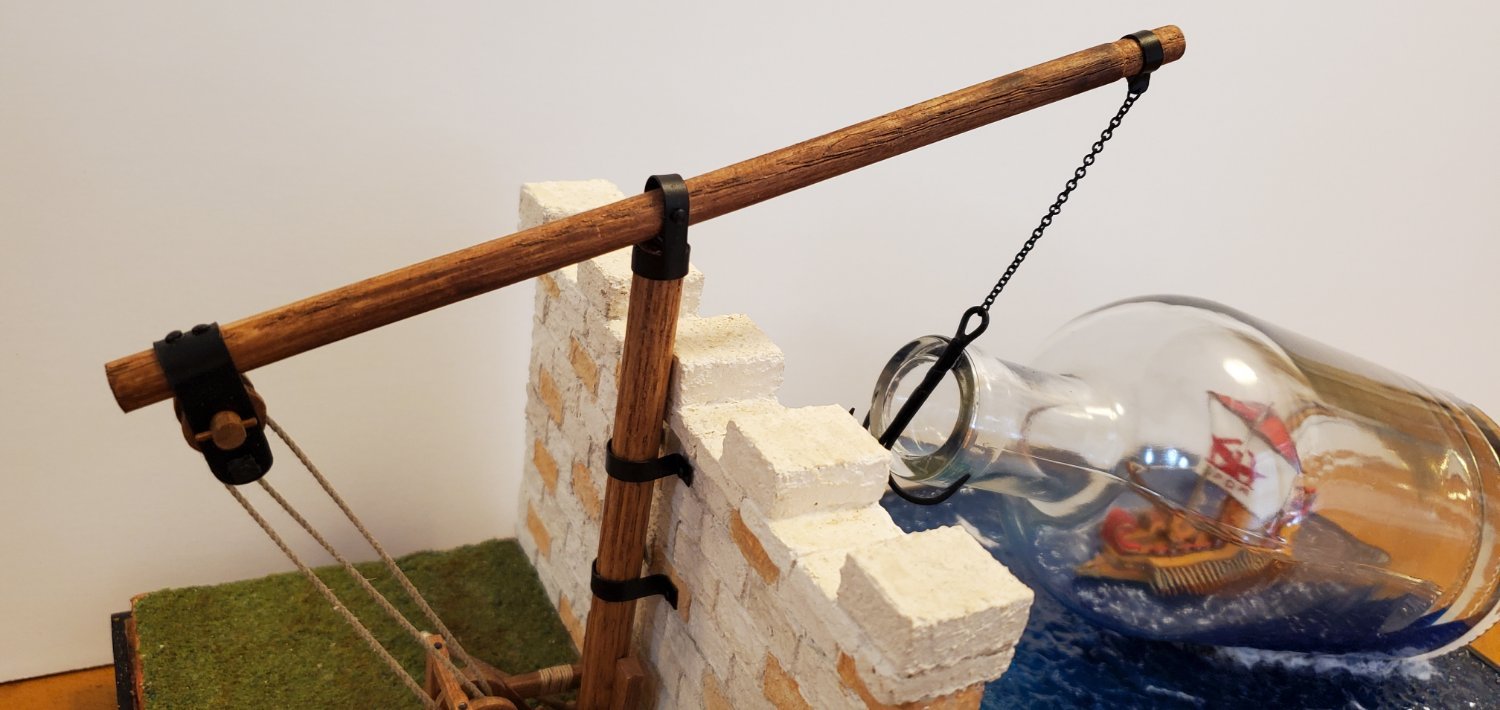
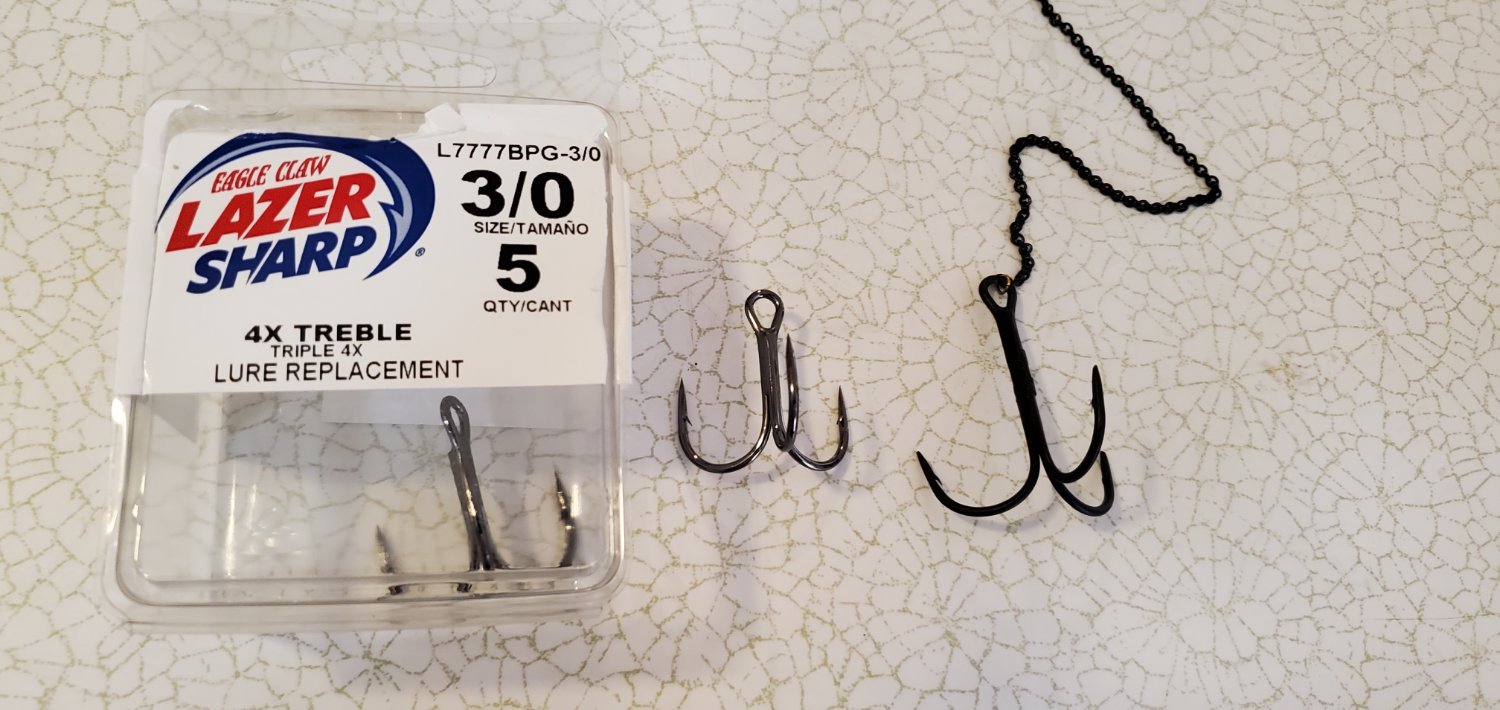
While the gloss gel was drying, I turned my attention to the claw's hook that will grasp the raised tip of the bottle. I wanted something that resembled a grappling hook. I know absolutely nothing about fishing and proudly own the title of the world's worst fisherman, but I figured there had to be some kind of fishing hook that would work. So I visited an unfamiliar aisle in the sporting goods store and found a package of large treble hooks that looked promising.
The first thing I did was file off the sharp tines a bit so I didn't do something stupid with the hook. Next, when I placed the hook against the bottle's opening, it fit nicely underneath, but wasn't tall enough for the tie loop to clear the top edge of the bottle's opening. So I took a couple of the other hooks, cut off pieces of the shank, and solder-spliced them together for a longer shank. It came out ok.

-
3 hours ago, Javelin said:
We understand....😂
LOL!!! I knew I wasn't the only one!
On 9/10/2023 at 9:36 PM, BANYAN said:You do realise that you have set a very high bar for yourself now don't you
Bars, bottles, Bundaburg...they all go together, don't they?


1921 Bluenose by John Ruy - FINISHED - Model Shipways - 1/64 scale - Canadian Fishing Schooner
in - Kit build logs for subjects built from 1901 - Present Day
Posted
Totally agree with Chris. The carving skills on display with the small parts are particularly impressive. Well done, John.