Glen McGuire
-
Posts
1,985 -
Joined
-
Last visited
Content Type
Profiles
Forums
Gallery
Events
Everything posted by Glen McGuire
-
 That makes two of us, Mark! I'm gonna need a Foster's lager and a canoe when this is done.
 -
OMG, I better paint that water blue quickly! But then again, thanks for giving me an idea for my next project!!!
-
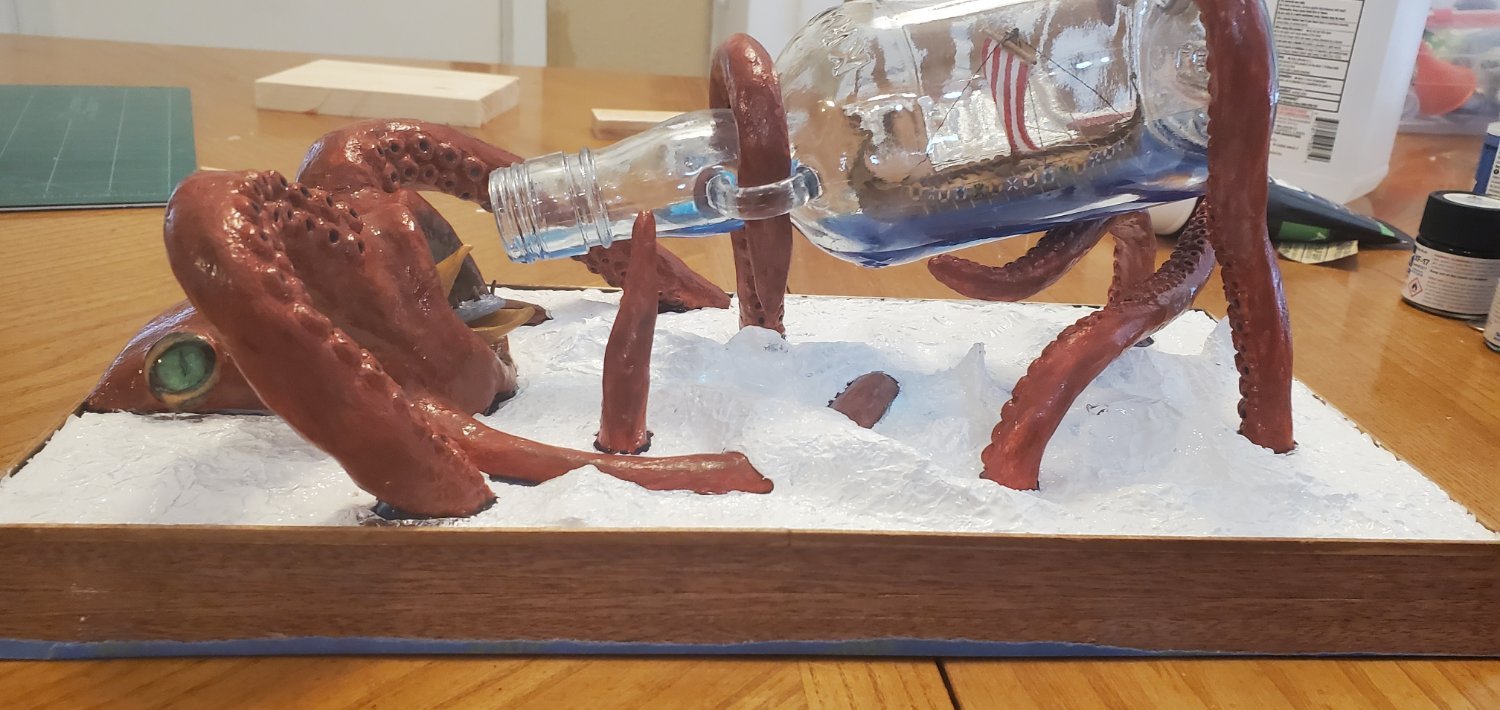
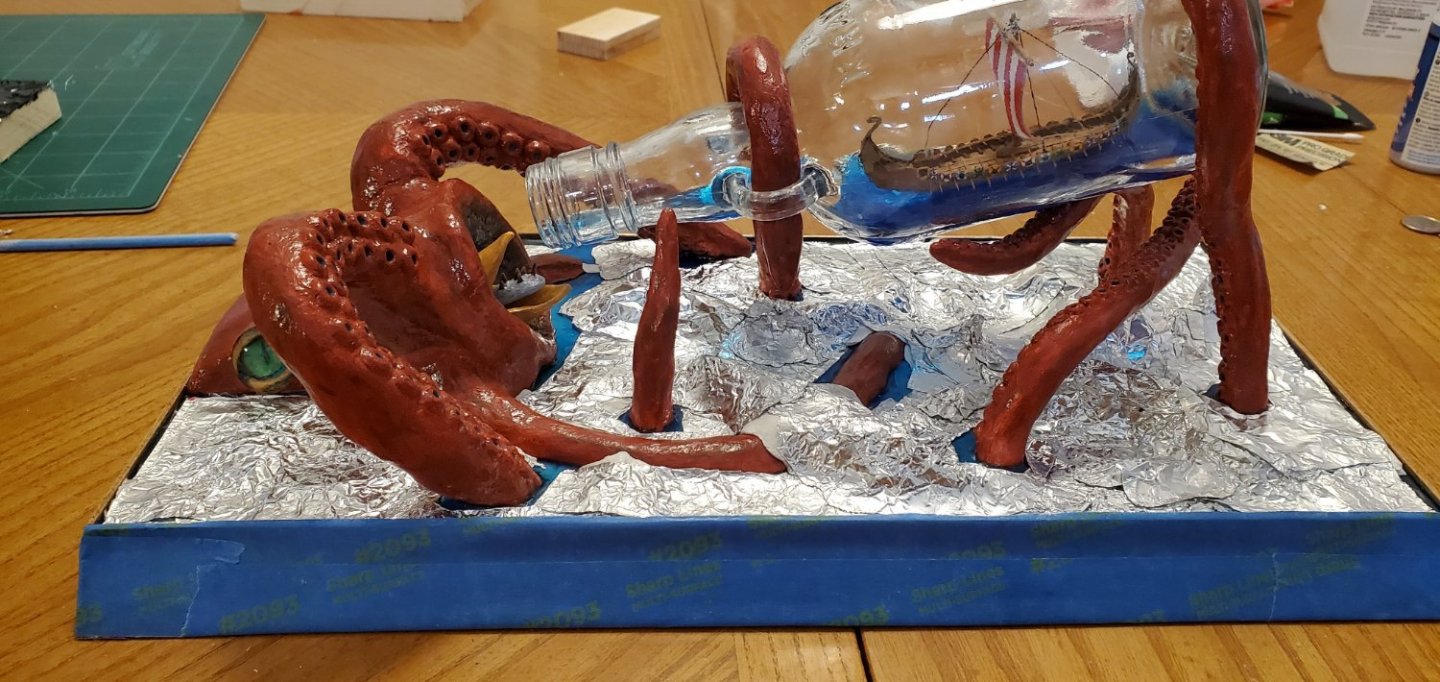
Diving head first into the water. I decided to go down the wrinkled aluminum foil path. I want the scene under and around the bottle to look like an angry swarm of tentacles whipping around. So there is going to be a lot of churn and froth in the water where the tentacles are. I think the aluminum foil will work best for that effect. I started with a thin layer of epoxy resin to provide a smooth base and to also fill in the little grooves and gaps where the edges of the kraken meet the base. I know, it looks like he's in a kiddie wading pool! Next, I used some of the modeling clay to build up the waves. Step 3 was adding the wrinkled aluminum foil. As you can see in the above pic, my layer of foil is a patchwork quilt of many pieces. It would have been much easier (and a much better look) to cover the base with a single sheet of foil so I would not have all those straight-edge lines going everywhere. But since I'm doing the water last, after everything is already in place, I've got to do it this way. So to erase all the egregious straight lines, which obviously you would never see in real water, I added a layer of thick, white, acrylic paint. Next step is the real painting effort.


- 240 replies
-
- 13
-

-

-
Looking good, Keith! And good to see you making steady progress on your beautiful model!
-
What about pieces of glitter? Would they be too big? They would give the windows a bit of a shiny effect sort of like a glass reflection (maybe).
- 51 replies
-
- 3
-
-
- Sea Installer
- Bottle
- (and 1 more)
-
Beautiful work, Grant! What are the dimensions of your base?
-
What a challenging (and interesting) project! But I know you are up to the task, Steven.
- 740 replies
-
- 2
-
-
- Tudor
- restoration
- (and 4 more)
-
Yes, yes, and yes! Wait, what??? "Back into clay"??? Does that mean that you could have been giving me tips all along on how to deal with that messy junk??? I did choose the air-dry stuff though. I kept imagining myself sticking that thing in the oven, not hearing the timer going off, and returning to find a black, smoldering mess. Careful now. We don't want @mtaylor adding more comments about making love in a canoe. 😳
-
Thanks, O.B.one! And yes, I am going to add water to the base. However, I've never done water outside a bottle before, so I have not figured out exactly what my approach will be. I've found some videos that use paint over aluminum foil that turned out nice, so I may go that route.
-
Love the hair clip clamps! Such a great idea. Gonna get some of those today.
-
Thank you Ian, Bob, Mark, Pat and Keith for the comments. The beast stretched me well beyond what I thought my abilities were going in. And double thanks to Keith for his comment early on: That gave me a good laugh but was also extra motivation to try and pull this off!!
-
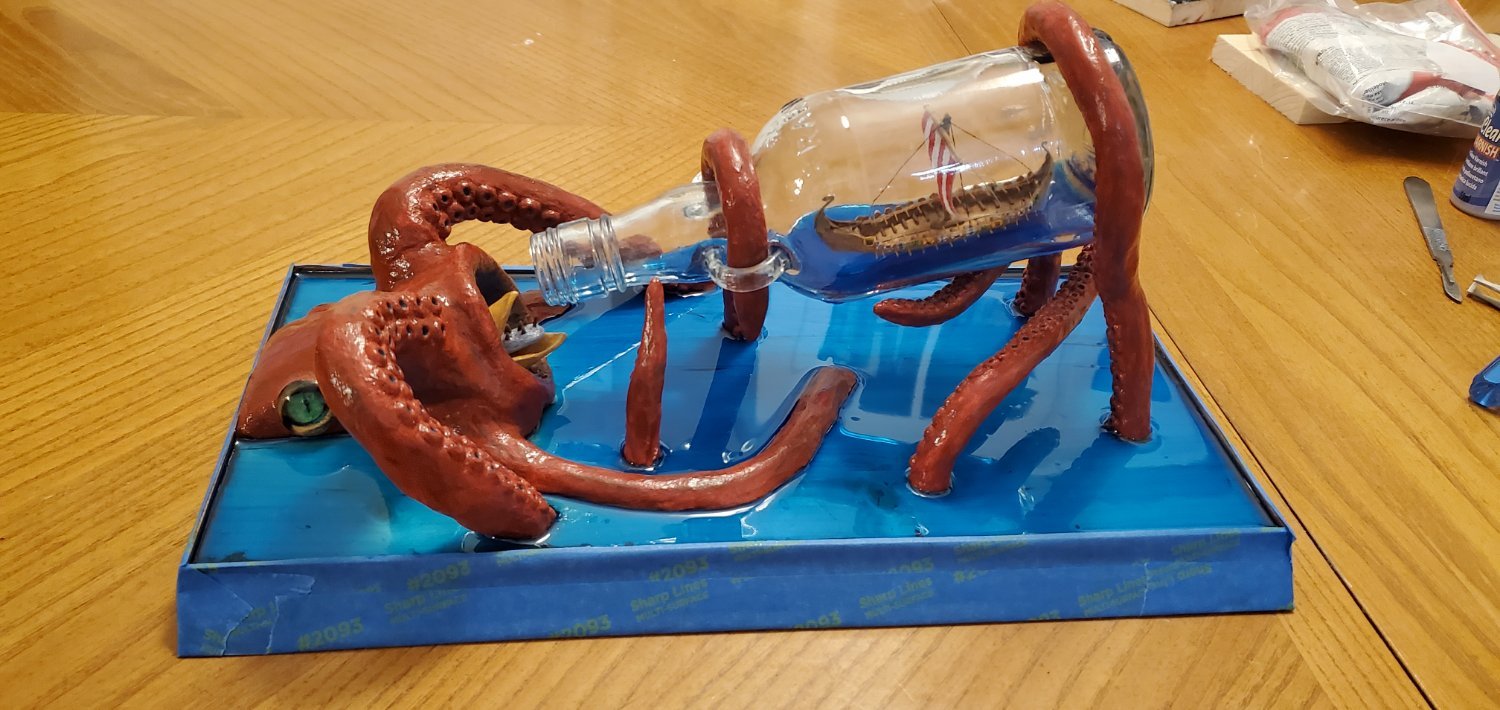
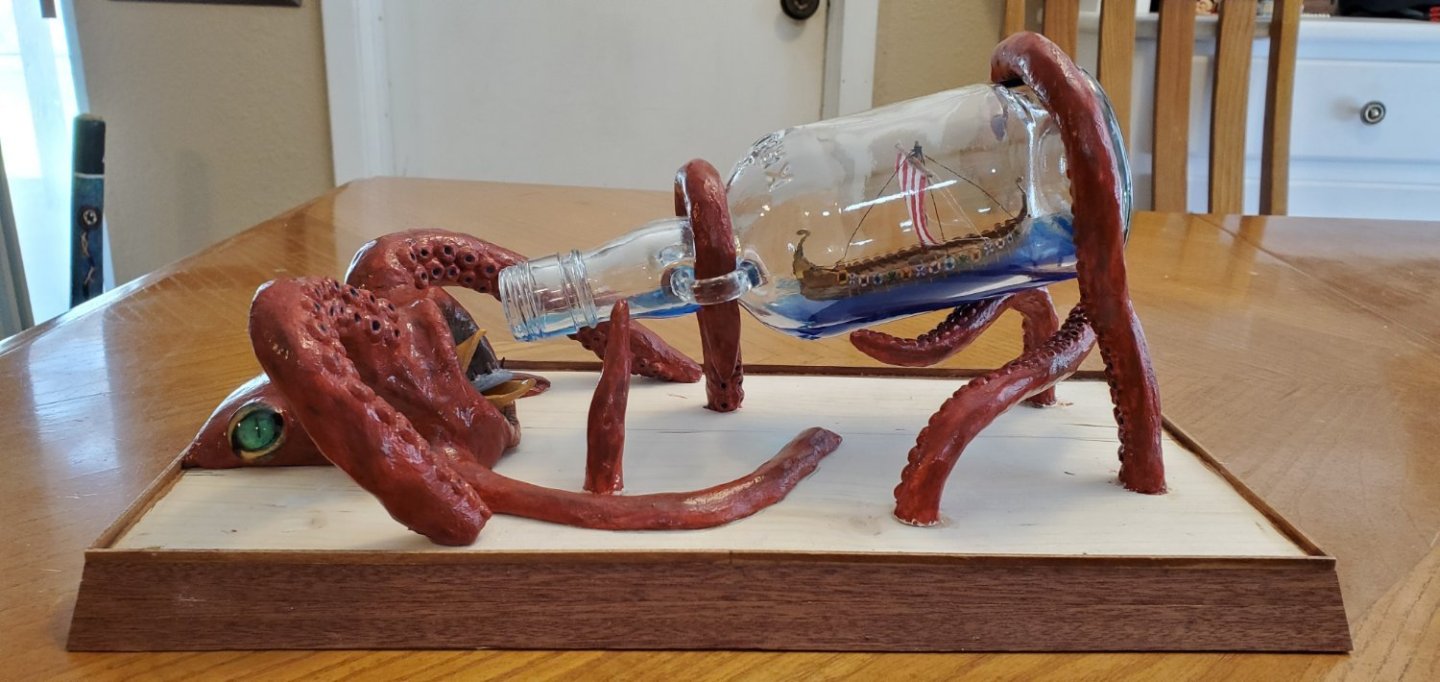
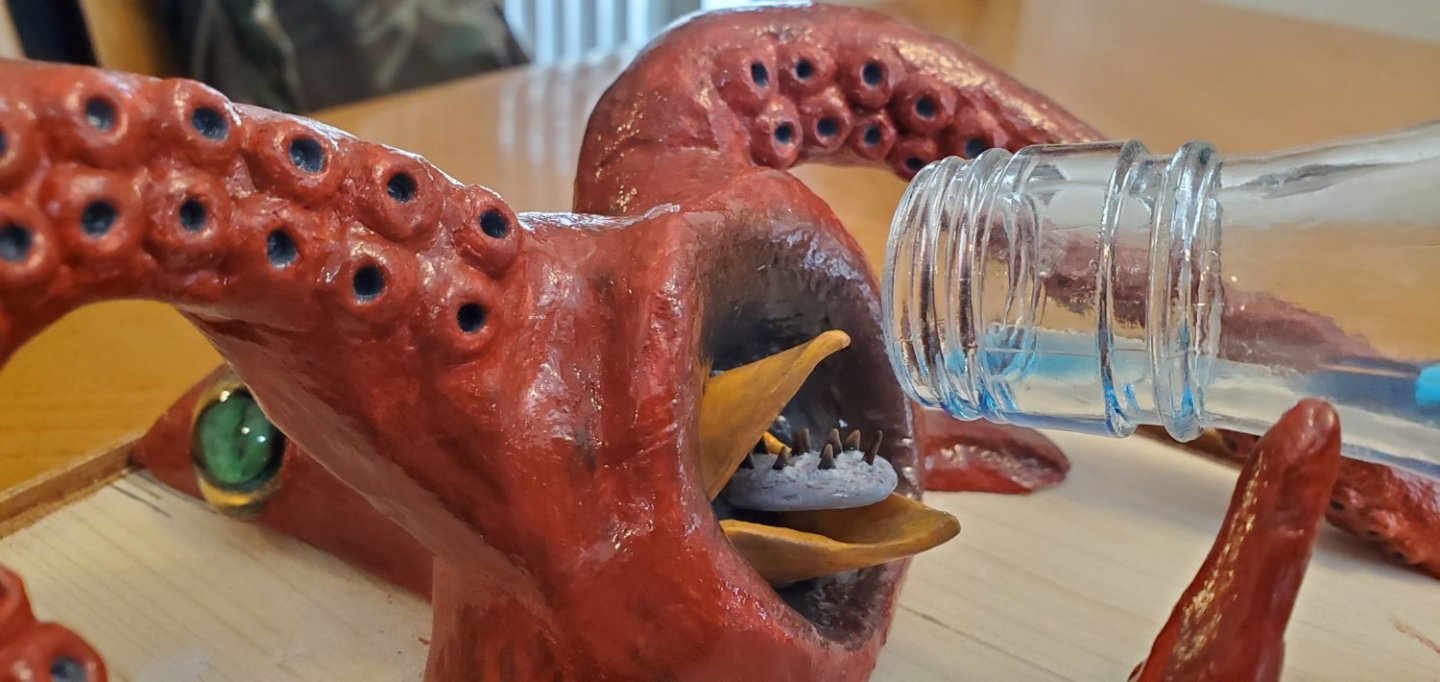
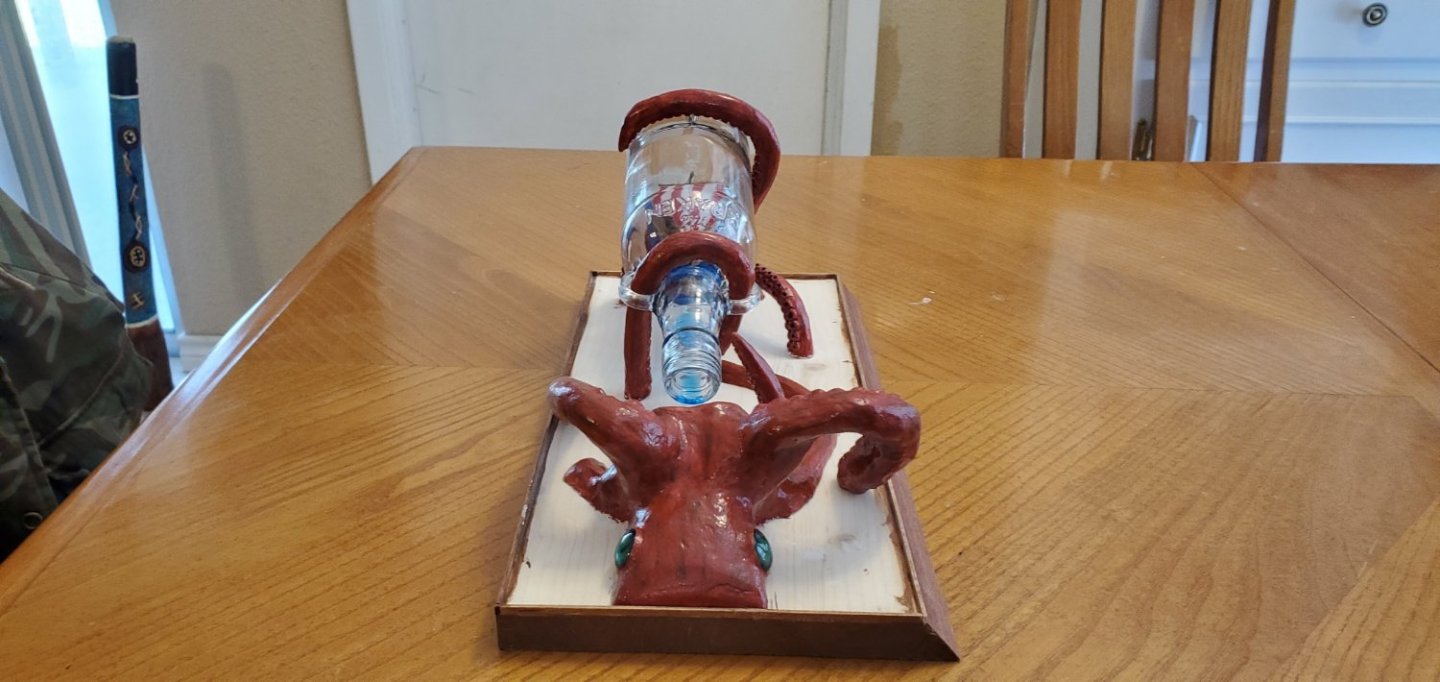
With visions of impaled penguins forever floating around in my head, the strangest build log on MSW continues! Thanks again to @gsdpic for bestowing that honor upon this effort! I spent the last week experimenting with paint schemes and techniques for the kraken. Again, I'm trying my best to make something that resembles the Jules Verne description from 20,000 Leagues Under the Sea. He describes the kraken's color as such: "Its unstable color would change with tremendous speed as the animal grew irritated, passing successively from bluish gray to reddish brown." I decided that in my rendition, the beast is pissed off because his prey is inside the bottle and he cannot easily get to it. So I worked on a shade of reddish brown that I thought would display the appropriate level of irritation. Since his color is fluid, I used varying thicknesses of the paint to give slightly different shades of the reddish brown. I also added some subtle streaks of dark bluish gray that are more visible on the close up shots below. Another step was using the same dark bluish gray to color the inside of each sucker which added some depth to their appearance. The last thing I did was add a heavy coat of gloss varnish to give everything a wet, slimy look. After I finished painting the whole beast, my color consultant friend selected the eyes from the 20 pairs to choose from. I liked her decision. I probably spent the most painting time on the open maw that surrounds the beak and tongue. For that, I wanted a shading gradient that went from the reddish brown of the outer skin to the dark, bluish gray of his color when calm. I also redid the tongue completely, making it larger with a few more teeth and changing the color. The previous red just got lost in everything. I also decided to add two more tentacles that will barely protrude above the water's surface (no suckers visible). The first is the long curving tentacle on the near side that goes towards the middle. The second is a short stub that disappears quickly into the water on the far side on the beast's mouth. I want the whole thing to appear as an angry swarm of tentacles fighting with the bottle. Here's what the whole thing looks like from the end zone seats. When my color consultant friend saw it from this angle, she said, "WOW, it really does looks like a giant squid!" The beast is finally done (along with my short-lived sculpting career)! On to the final chapter of this Quixotic saga - the water effects.

- 240 replies
-
- 14
-
-
-
Just found your build log for this. I'm on board to watch another interesting project! Do you have a pic of the bottle this will reside in?
-
Fantastic work, O.B.one!!! I love the floating bottle effect with the base you chose. Well done, sir!
-
Welcome Joe! You have found the best website on the entire interweb!!
-
Ladder looks fantastic, Phil!
-
The final result looks great, O.B.one! Congratulations! I hope you always have adequate space and this does not end up in the bin! This has been a really cool project to follow. I always find it interesting to see someone try new techniques like this!
-
Interesting, Ian. The only thing I know about "derecho" is that it's Spanish for "right". Never heard of it applying to weather. Thanks, Gary! Yes, I'm definitely enjoying this build. But I think I'm enjoying the comments even more! Particularly this one from Keith... OMG, Keith!! You are kraken me up!! Somebody please make him stop!!!!! 🤣
-
Such good advice, and for a lot of things, not just ship models! Thanks for the comments, O.B. One. I've been trying to follow the Jules Verne - 20,000 Leagues Under the Sea description of the Kraken. It's been years since I watched any of the Pirates of the Caribbean movies. I may have to revisit those this weekend.
-
@GrandpaPhil Thanks for checking in, Phil!! Hey Pat, I do give thoughtful consideration to all suggestions. Except, of course, @Keith Black and his penguins! 🤣 I've got the biggest live oak in the neighborhood in my front yard (trunk is about 3' in diameter) and somehow it escaped with only minor damage - maybe 6 medium size branches split off. Really dodged a bullet there as it shades the whole house from the afternoon sun. Lost power for 3 days, but no complaints. Things could have been so much worse.