Glen McGuire
-
Posts
1,974 -
Joined
-
Last visited
Content Type
Profiles
Forums
Gallery
Events
Everything posted by Glen McGuire
-
 I like the 2nd option. The knot and rope look like they lay more naturally than the first.
- 312 replies
-
- 4
-

-

-
- Chile
- Latin America
- (and 6 more)
-
Looks like a Canadian version of the Texas two-step!
- 44 replies
-
- 2
-
-

-
- Scientific
- Billings Boats
- (and 1 more)
-
Pretty sure I spotted him hanging out with my longhorns. They are a bad influence. Sorry about that, Bob. Regardless, looks like you are off to a great start. Looking forward to watching this come together.
- 44 replies
-
- 2
-
-
- Scientific
- Billings Boats
- (and 1 more)
-
Glad to see you back at work, Roel!
-
Pile has been in contact with me inquiring about bottles for Bob's next project.
- 46 replies
-
- 3
-
-
- Golden Hind
- airfix
- (and 2 more)
-
That is so awesome, Bryan. What wonderful and well deserved sentiments expressed in the card. Hats off to you!
-
Not that I am biased, but I think it's time for another SIB!! Your Golden Hind is a beauty. You get better and better with each build!
- 46 replies
-
- 3
-
-
-
- Golden Hind
- airfix
- (and 2 more)
-
Yes. But I certainly would not make any conclusions based on my opinion!
- 457 replies
-
- 3
-
-
-
- sternwheeler
- Hard Coal Navy
- (and 1 more)
-
Instead of plastic wrap, you might try wax paper. It's easier to handle than thin plastic wrap. That's what I use for similar applications. Regardless, great job on those sails, JC! They really look nice.
- 312 replies
-
- 5
-
-
-
- Chile
- Latin America
- (and 6 more)
-
Late to the party, but I'm here for the grand finish. Nice work so far. You've done a great job, Bob!
- 46 replies
-
- 2
-
-
-
- Golden Hind
- airfix
- (and 2 more)
-
Those barrels are tiny, indeed, and look near impossible to drill out. I use veterinary needles (intended for cattle) for my very small SIB cannon barrels. They are cheap and come in a variety of gauges/thicknesses. Something to consider if you want that hollow cannon barrel look. Although the one on deck above looks to have a bit of a taper, which the vet needles do not have.
-
Thank you, Keith! But this SIB will not be going north. She will be making her home on a beautiful 250 acre hill country ranch about an hour west of Austin. I built this one for an old college roommate that wanted something special to give to his wife for a milestone birthday.
- 106 replies
-
- 3
-
-
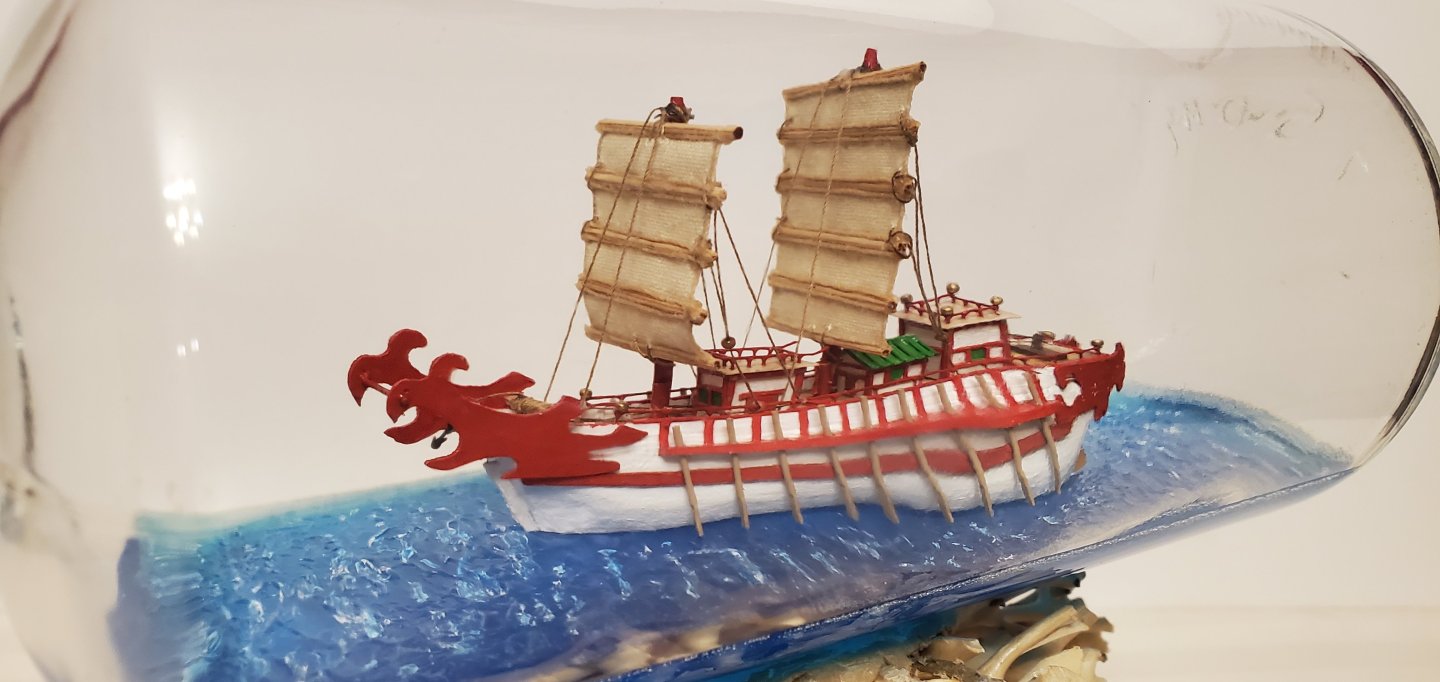
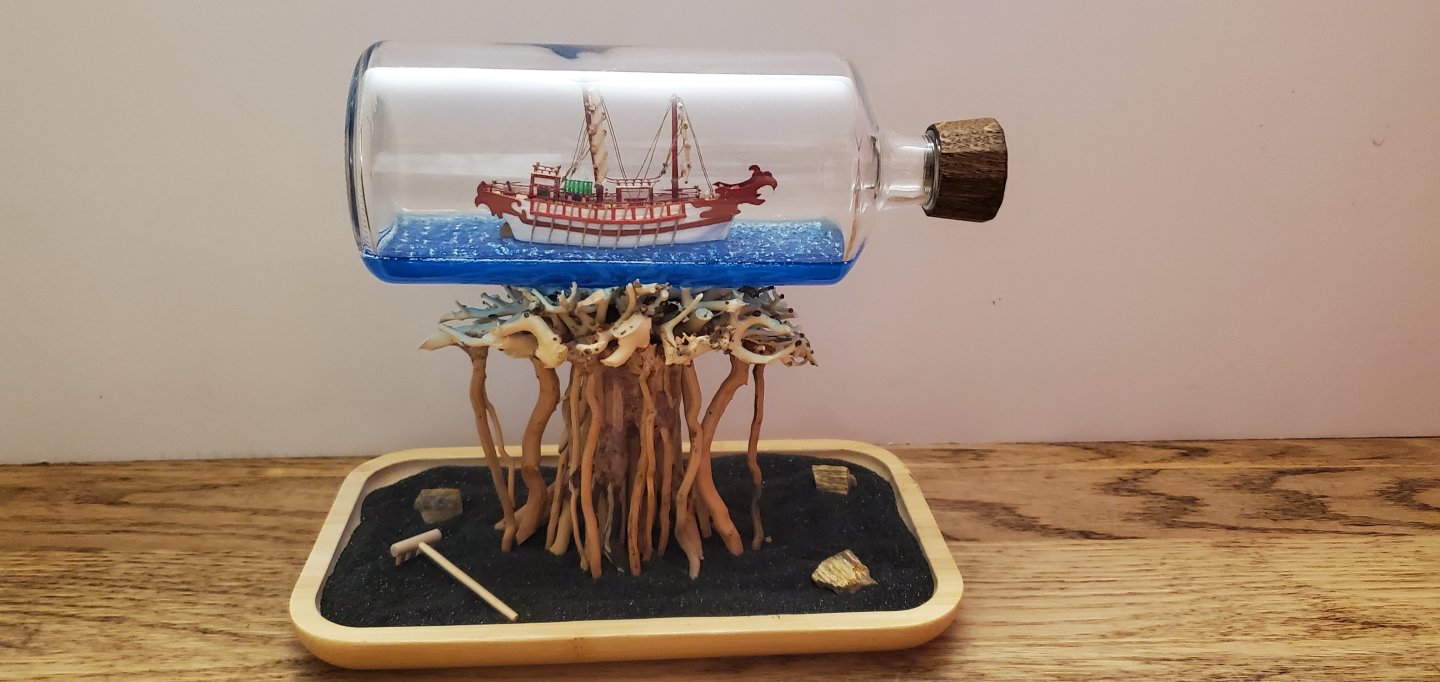
- Kentoshi-Sen
- bottle
- (and 1 more)
-
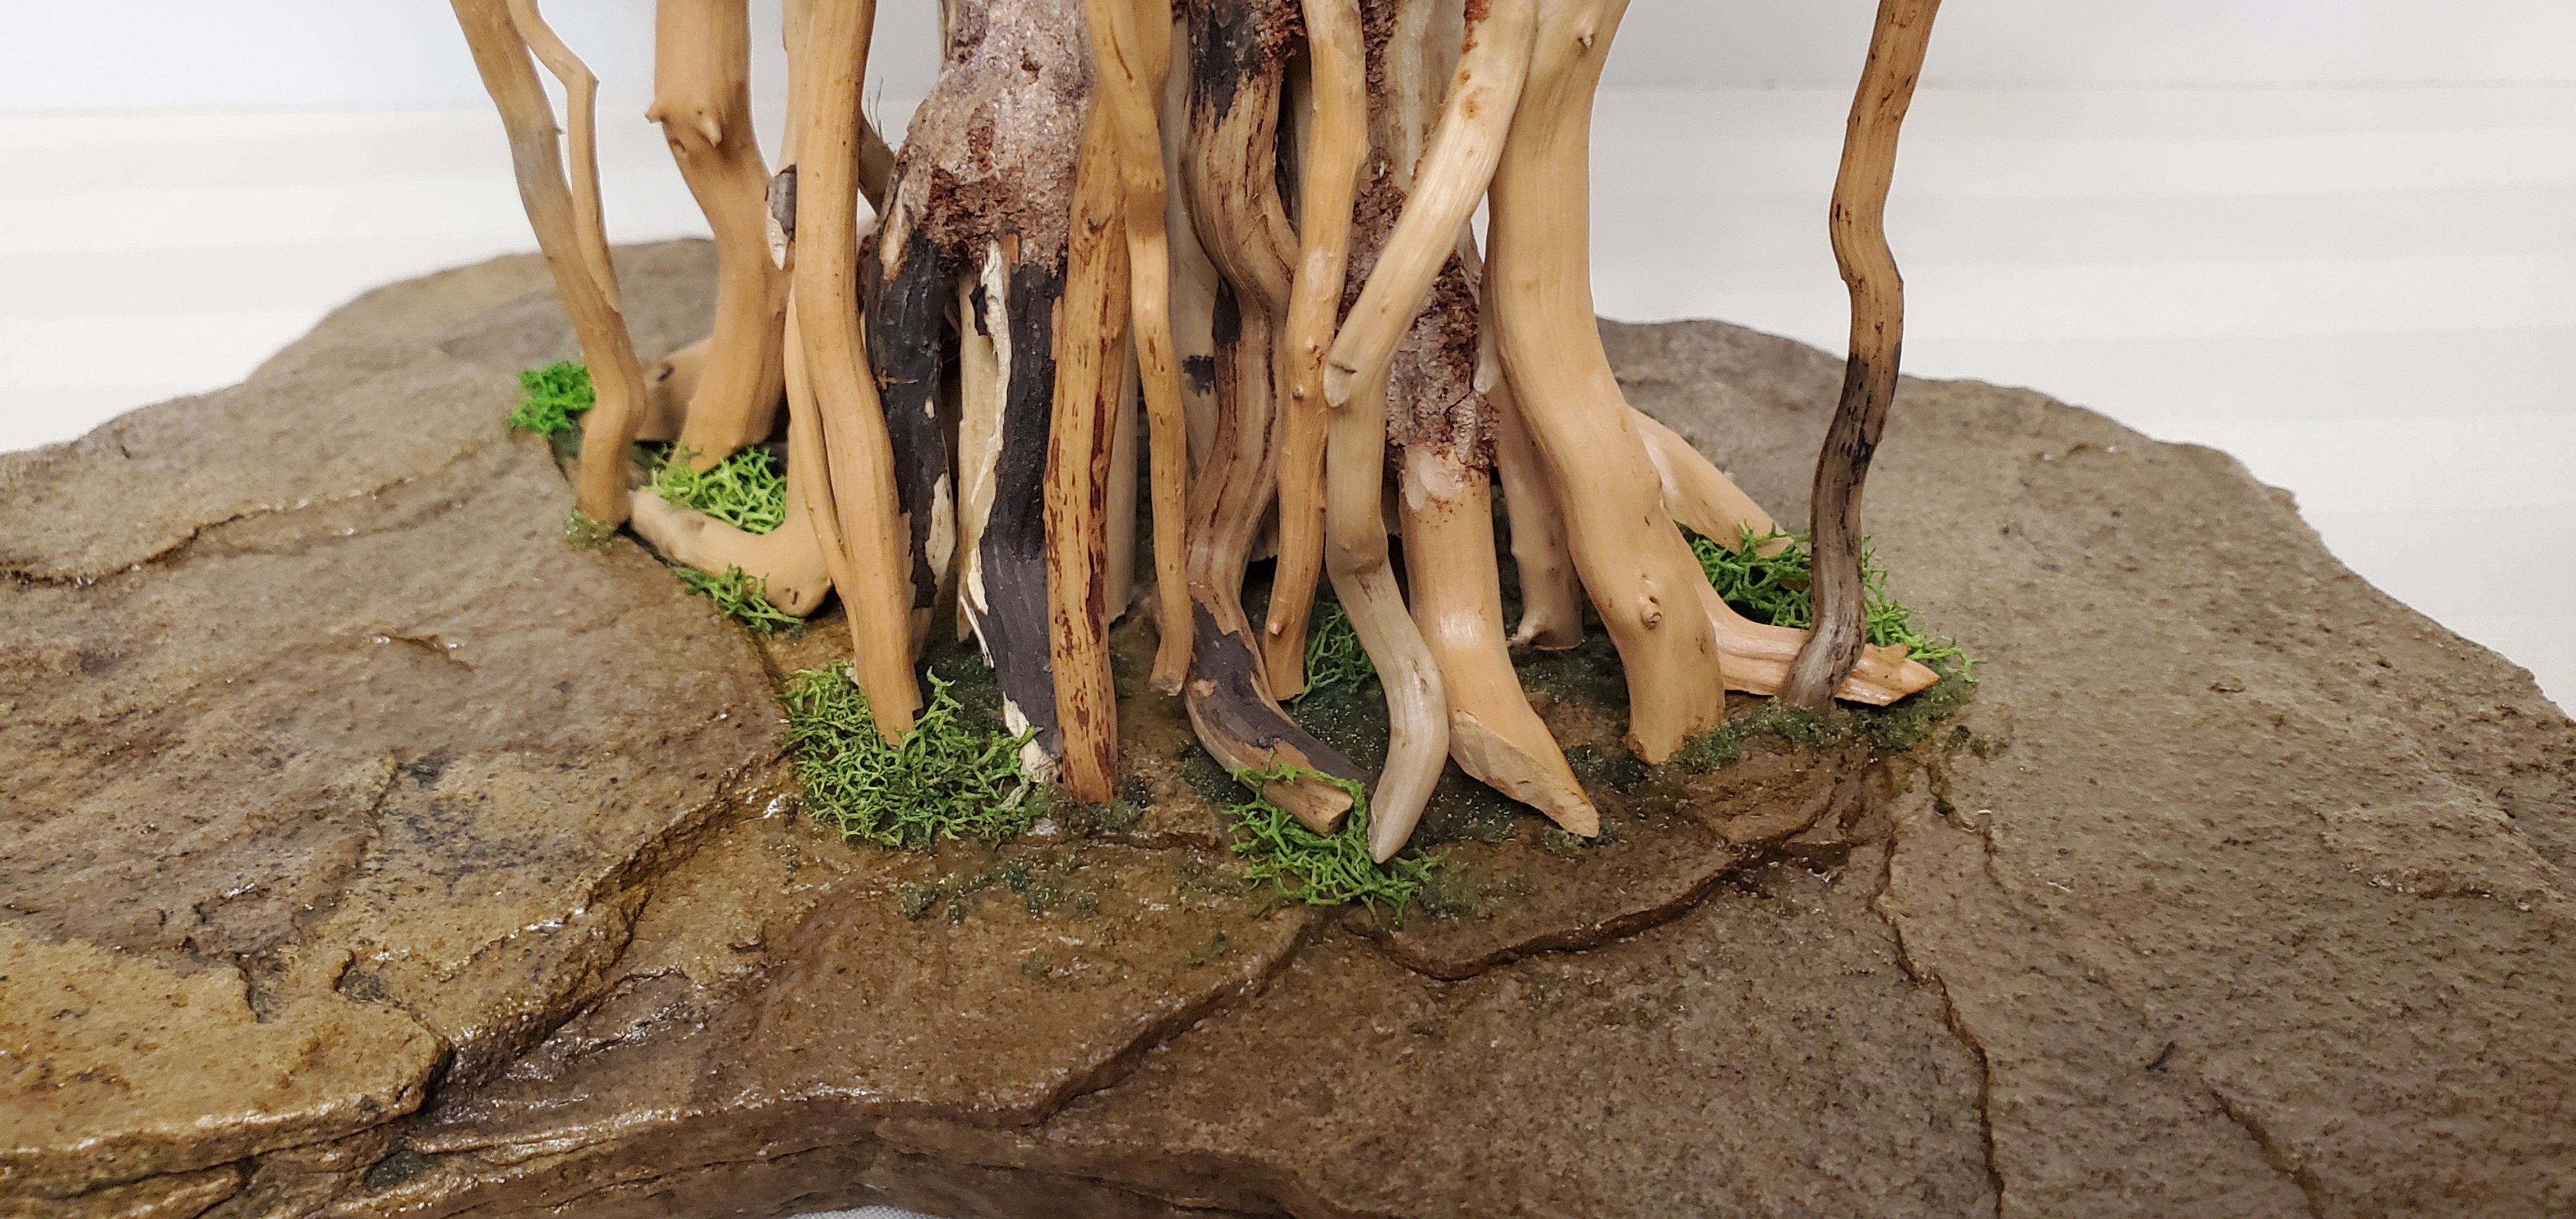
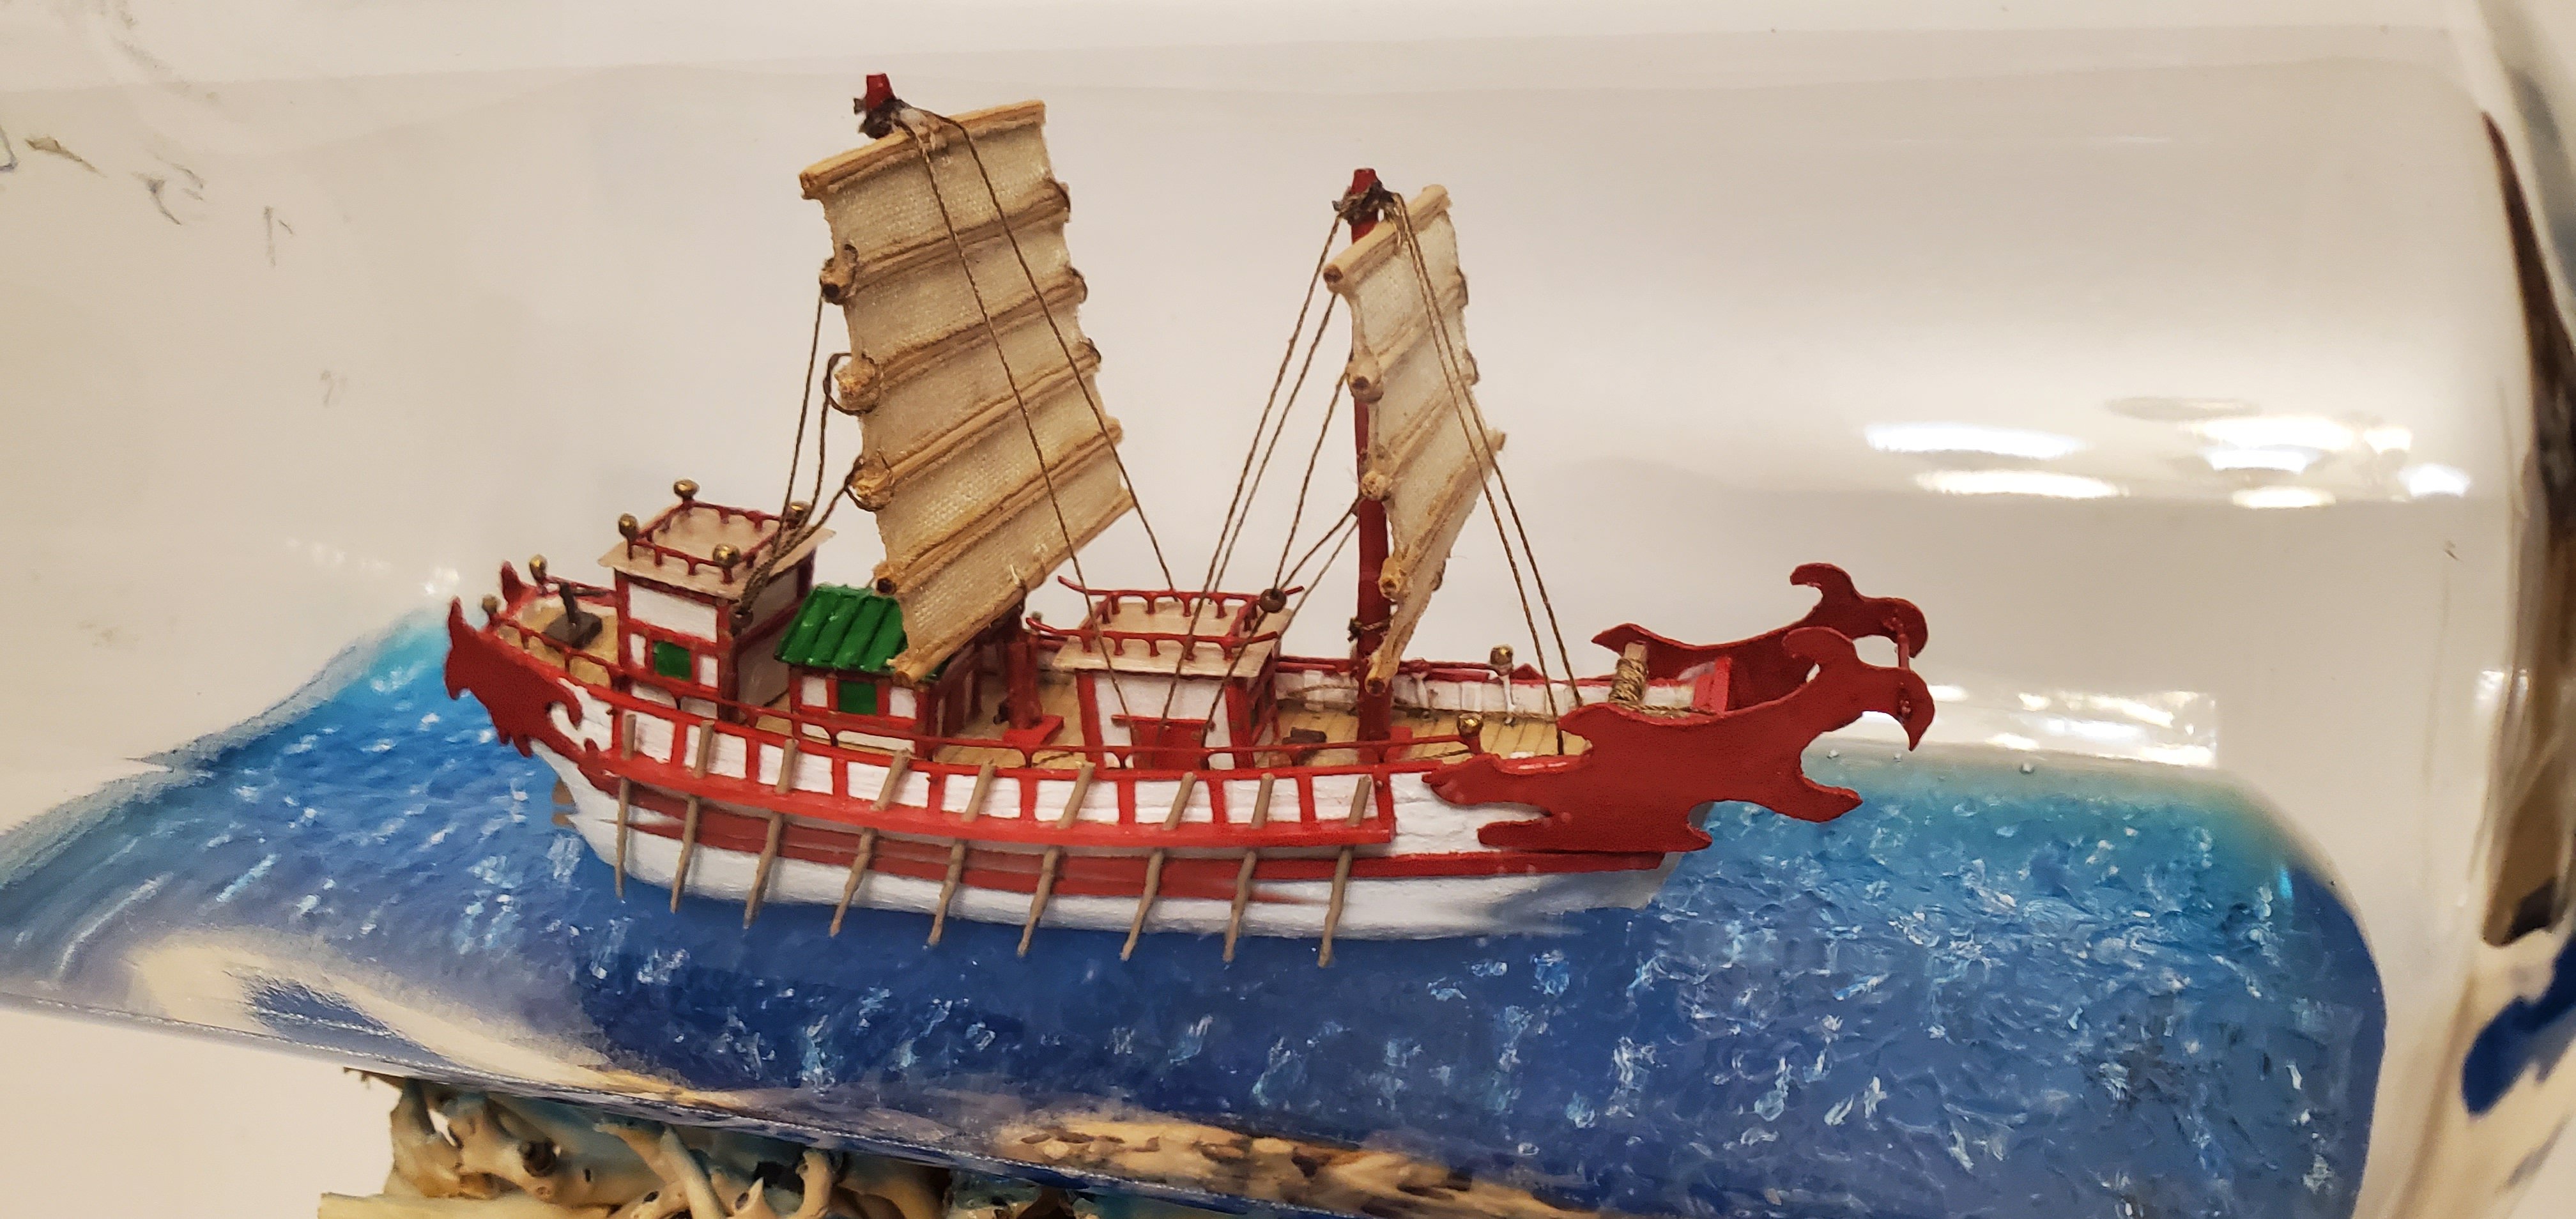
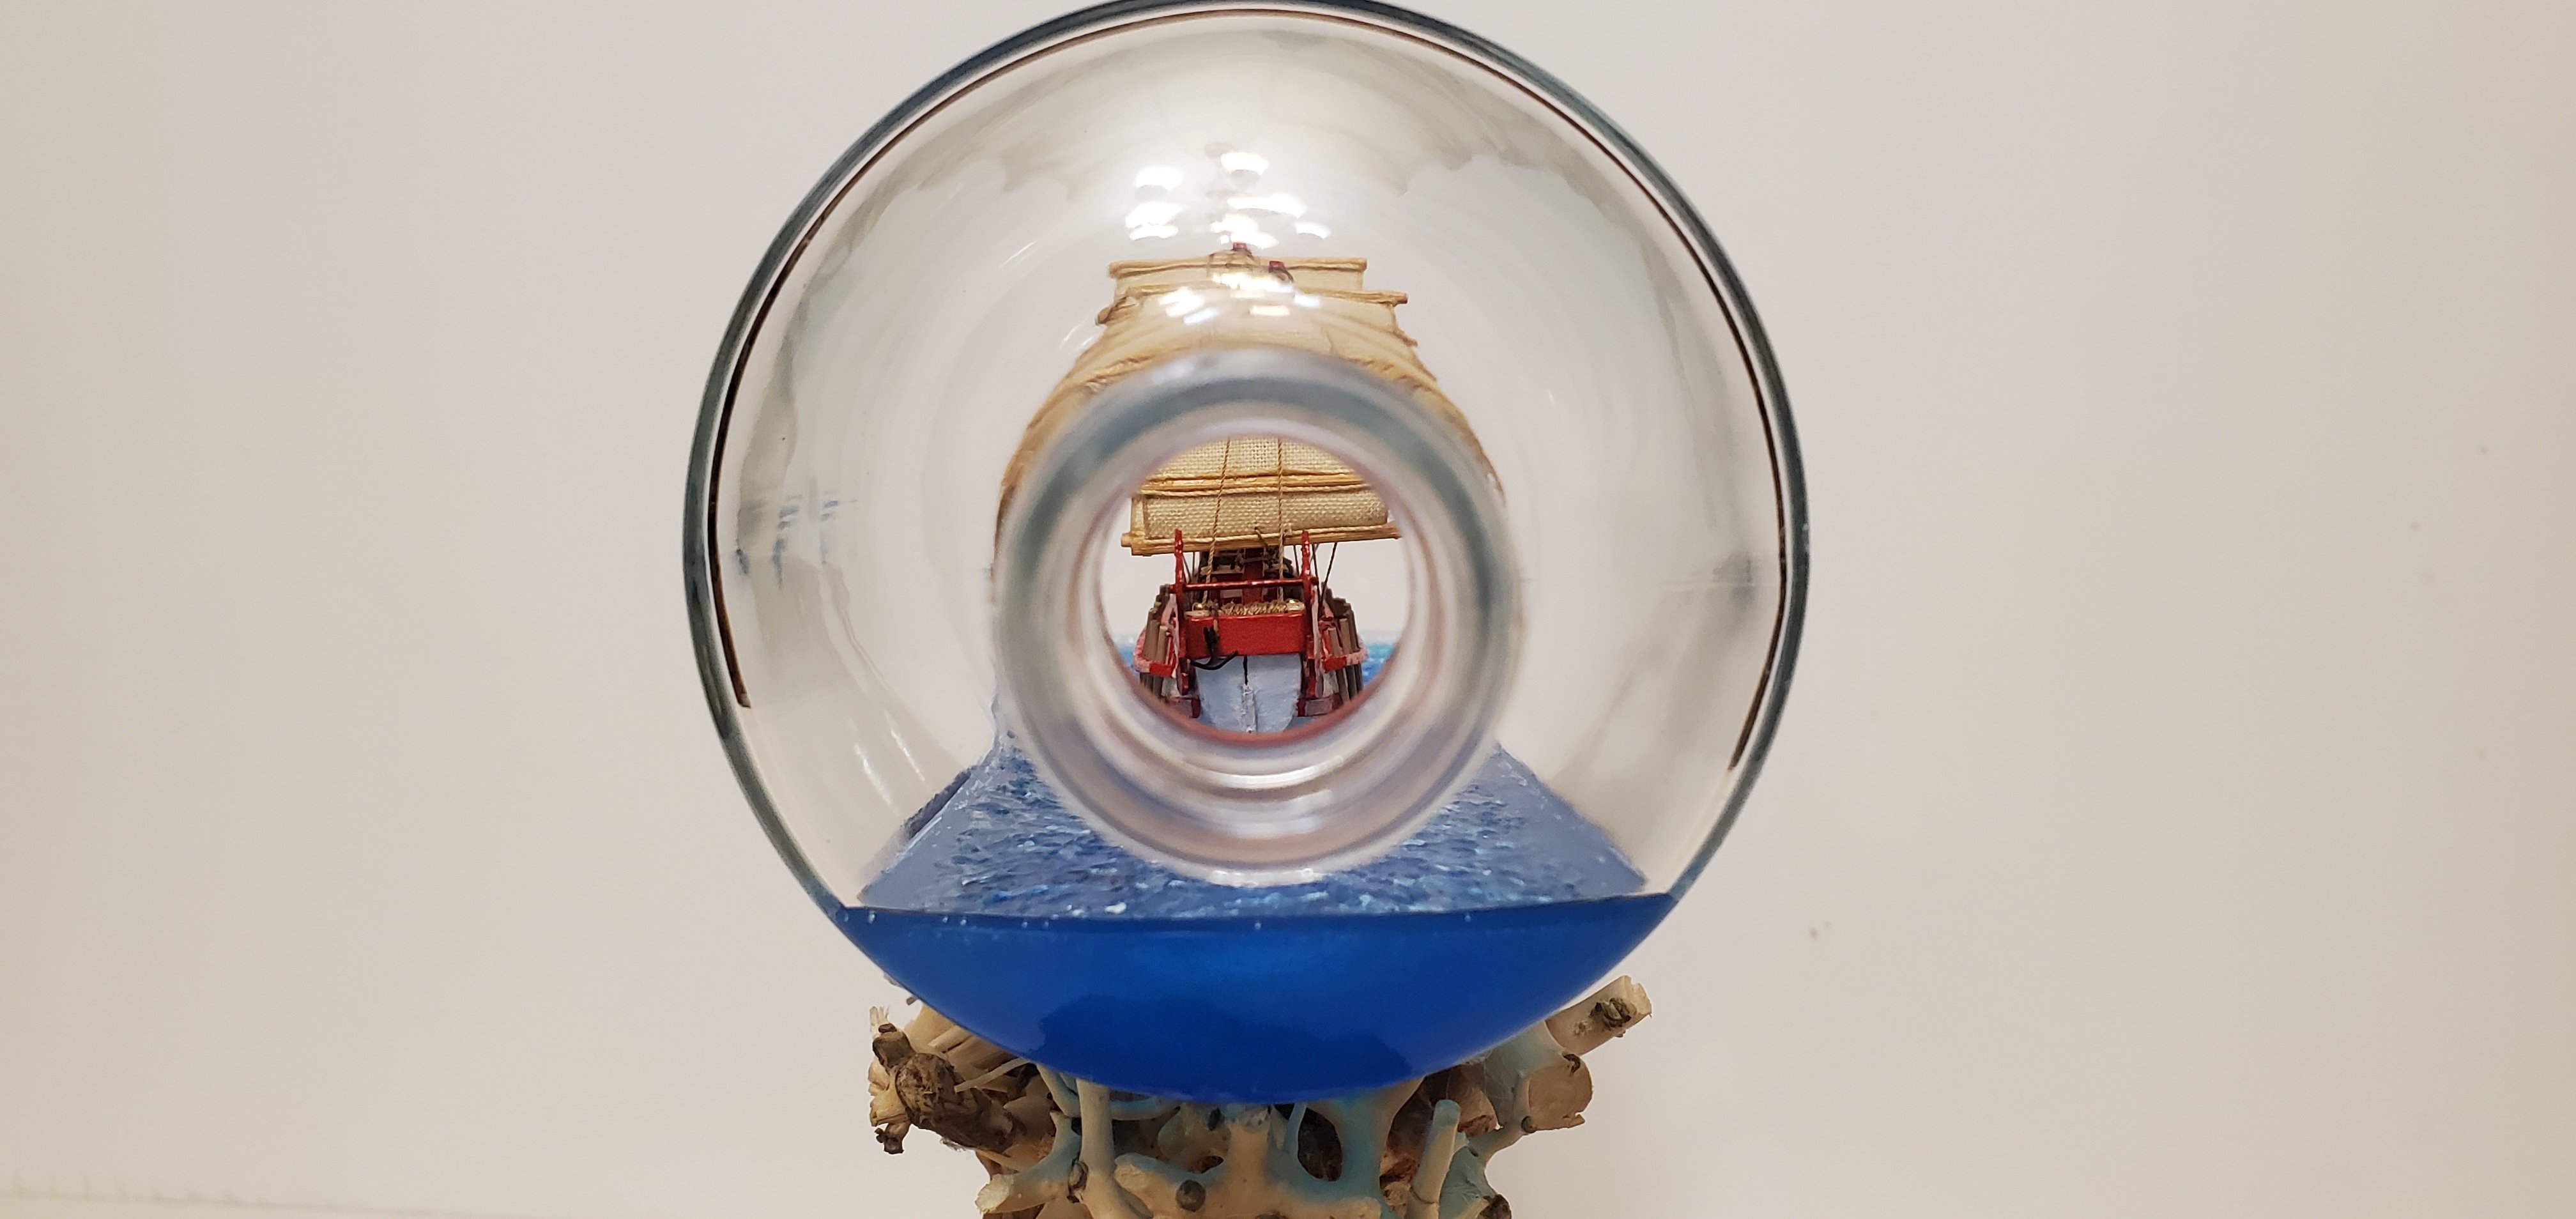
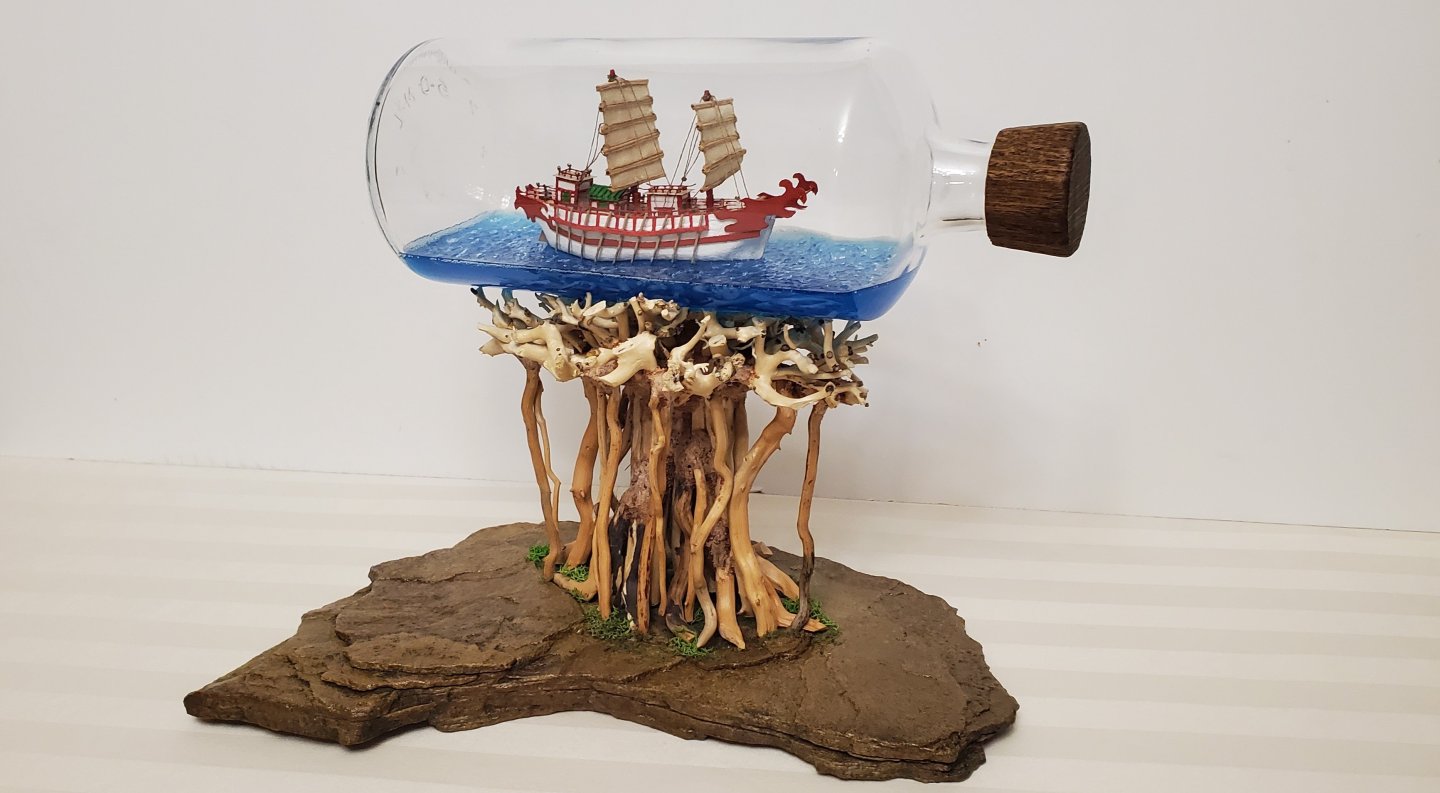
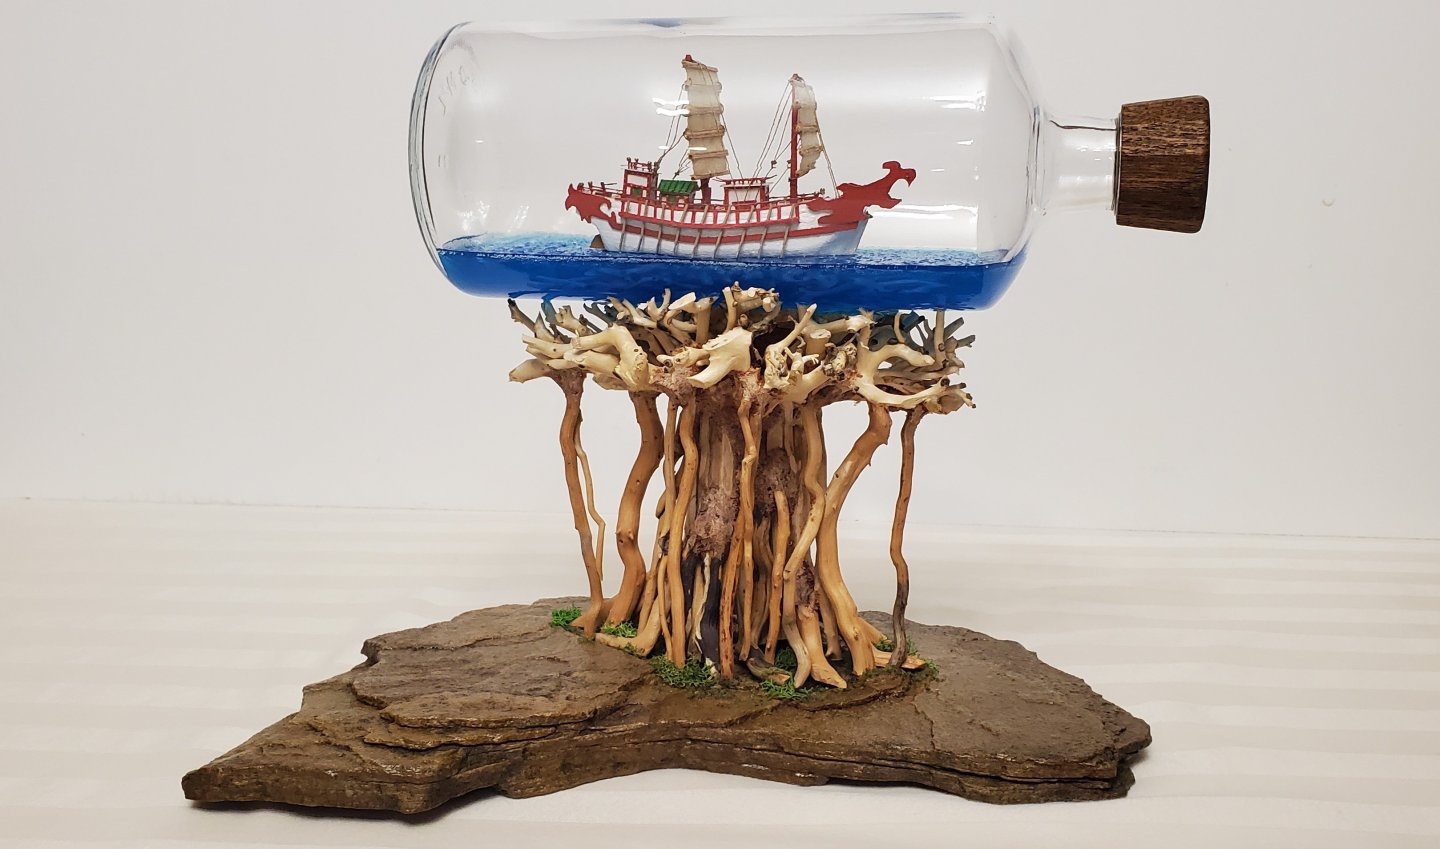
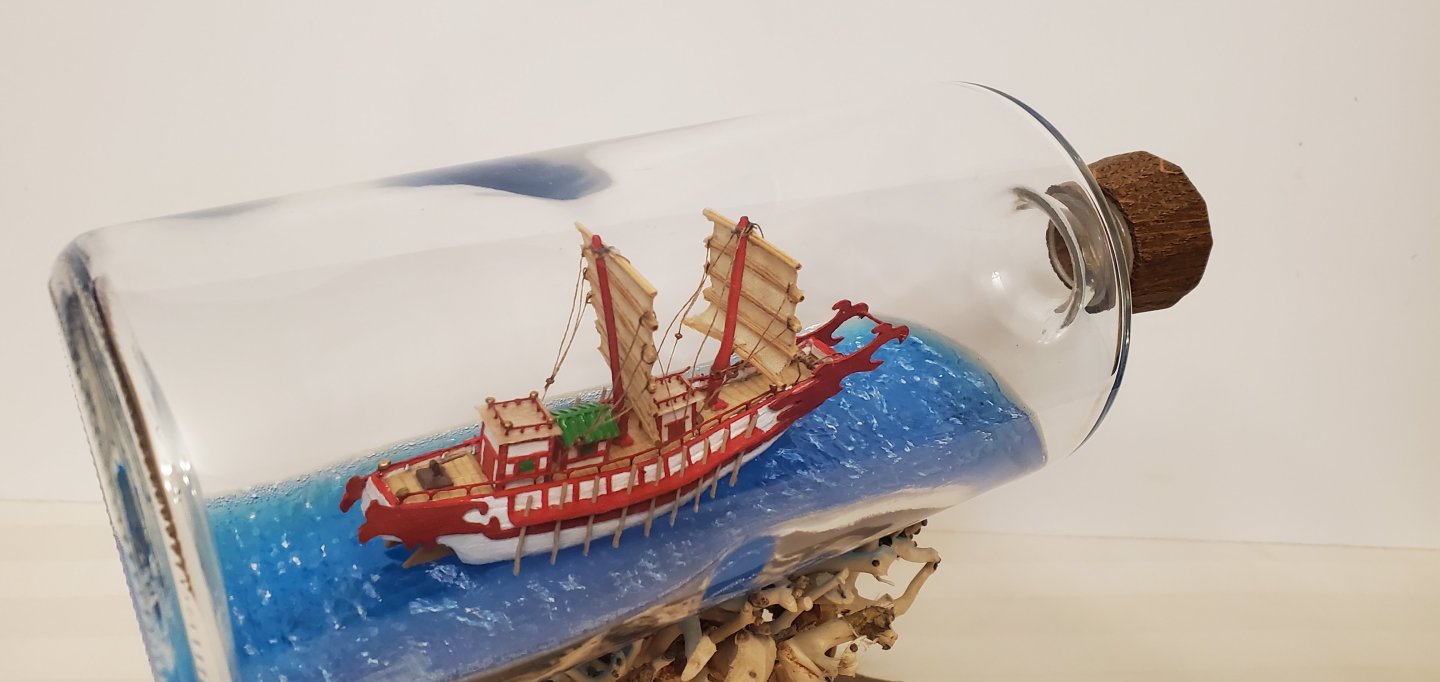
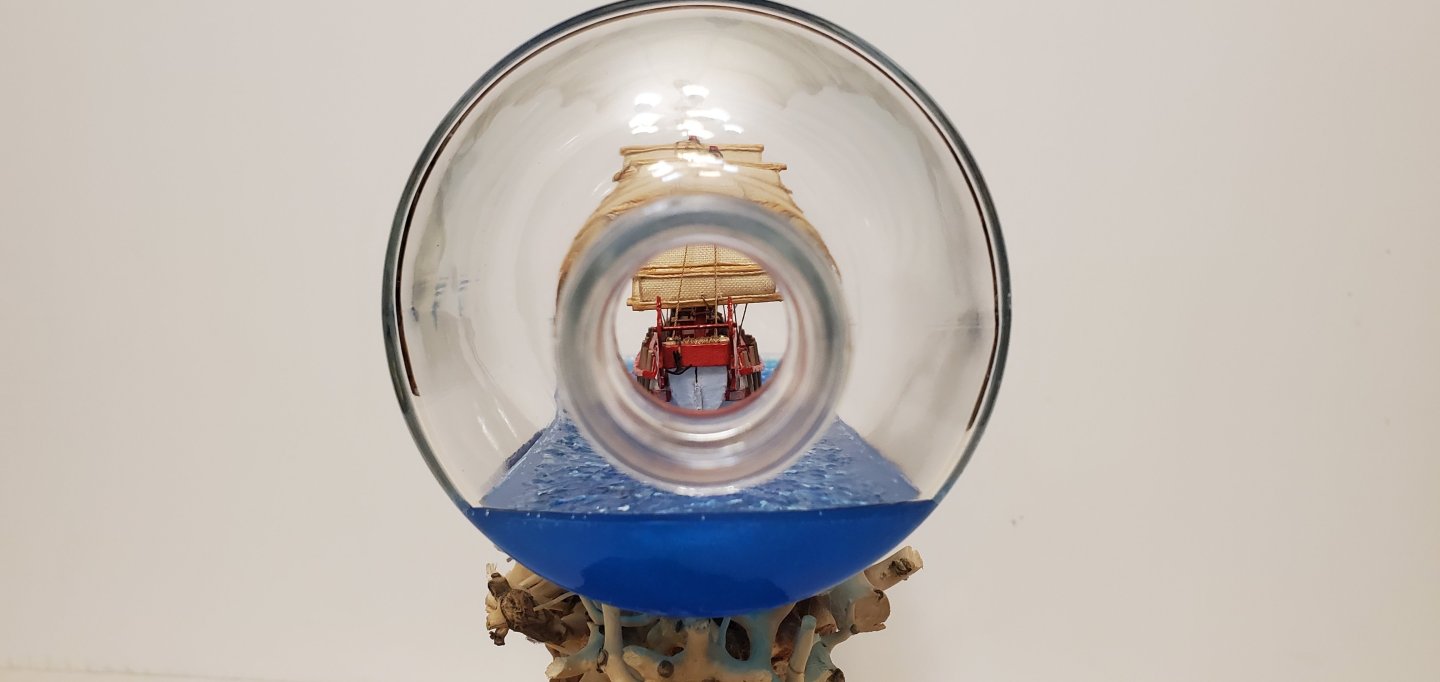
The final vote tally was 26 - 2 in favor of the rock. Voters included all you fine people here on MSW as well as assorted family and friends. Thank you for helping me make a difficult decision. Now, about the other suggestions: I'm going to side with Keith on this one. I think the picture that I took distorts the depth perception somewhat and makes that front left part of the rock look more prominent than it really is. If you saw it in person, Roel, I believe you would like it as is. Regarding the moss at the base of the driftwood - as I mentioned above, I really liked that idea. And I also agreed with those of you that suggested it did not need much, just a touch of color to help with the transition. So I used some fake grass leftover from my Archimedes' Claw build and put a few mossy patches around the roots. I didn't think it was quite enough, so I stole some green stuff from a neighbor that does floral arrangements. It's a little bushier than the moss, but I don't think it went overboard. I also did one other thing to help with the visual. In the previous pics, I thought the top surface of the bonsai driftwood looked too much like a mushroom with the bottle balancing on top rather than resting in a cradle like I had envisioned. So I did some pruning on the backside and added some supporting branches at the ends to flatten out the support structure. Here are the final pics: Here's a better angle showing the flattened cradle: Up close and personal with the greenery: Other assorted angles:


- 106 replies
-
- 18
-
-

-
- Kentoshi-Sen
- bottle
- (and 1 more)
-
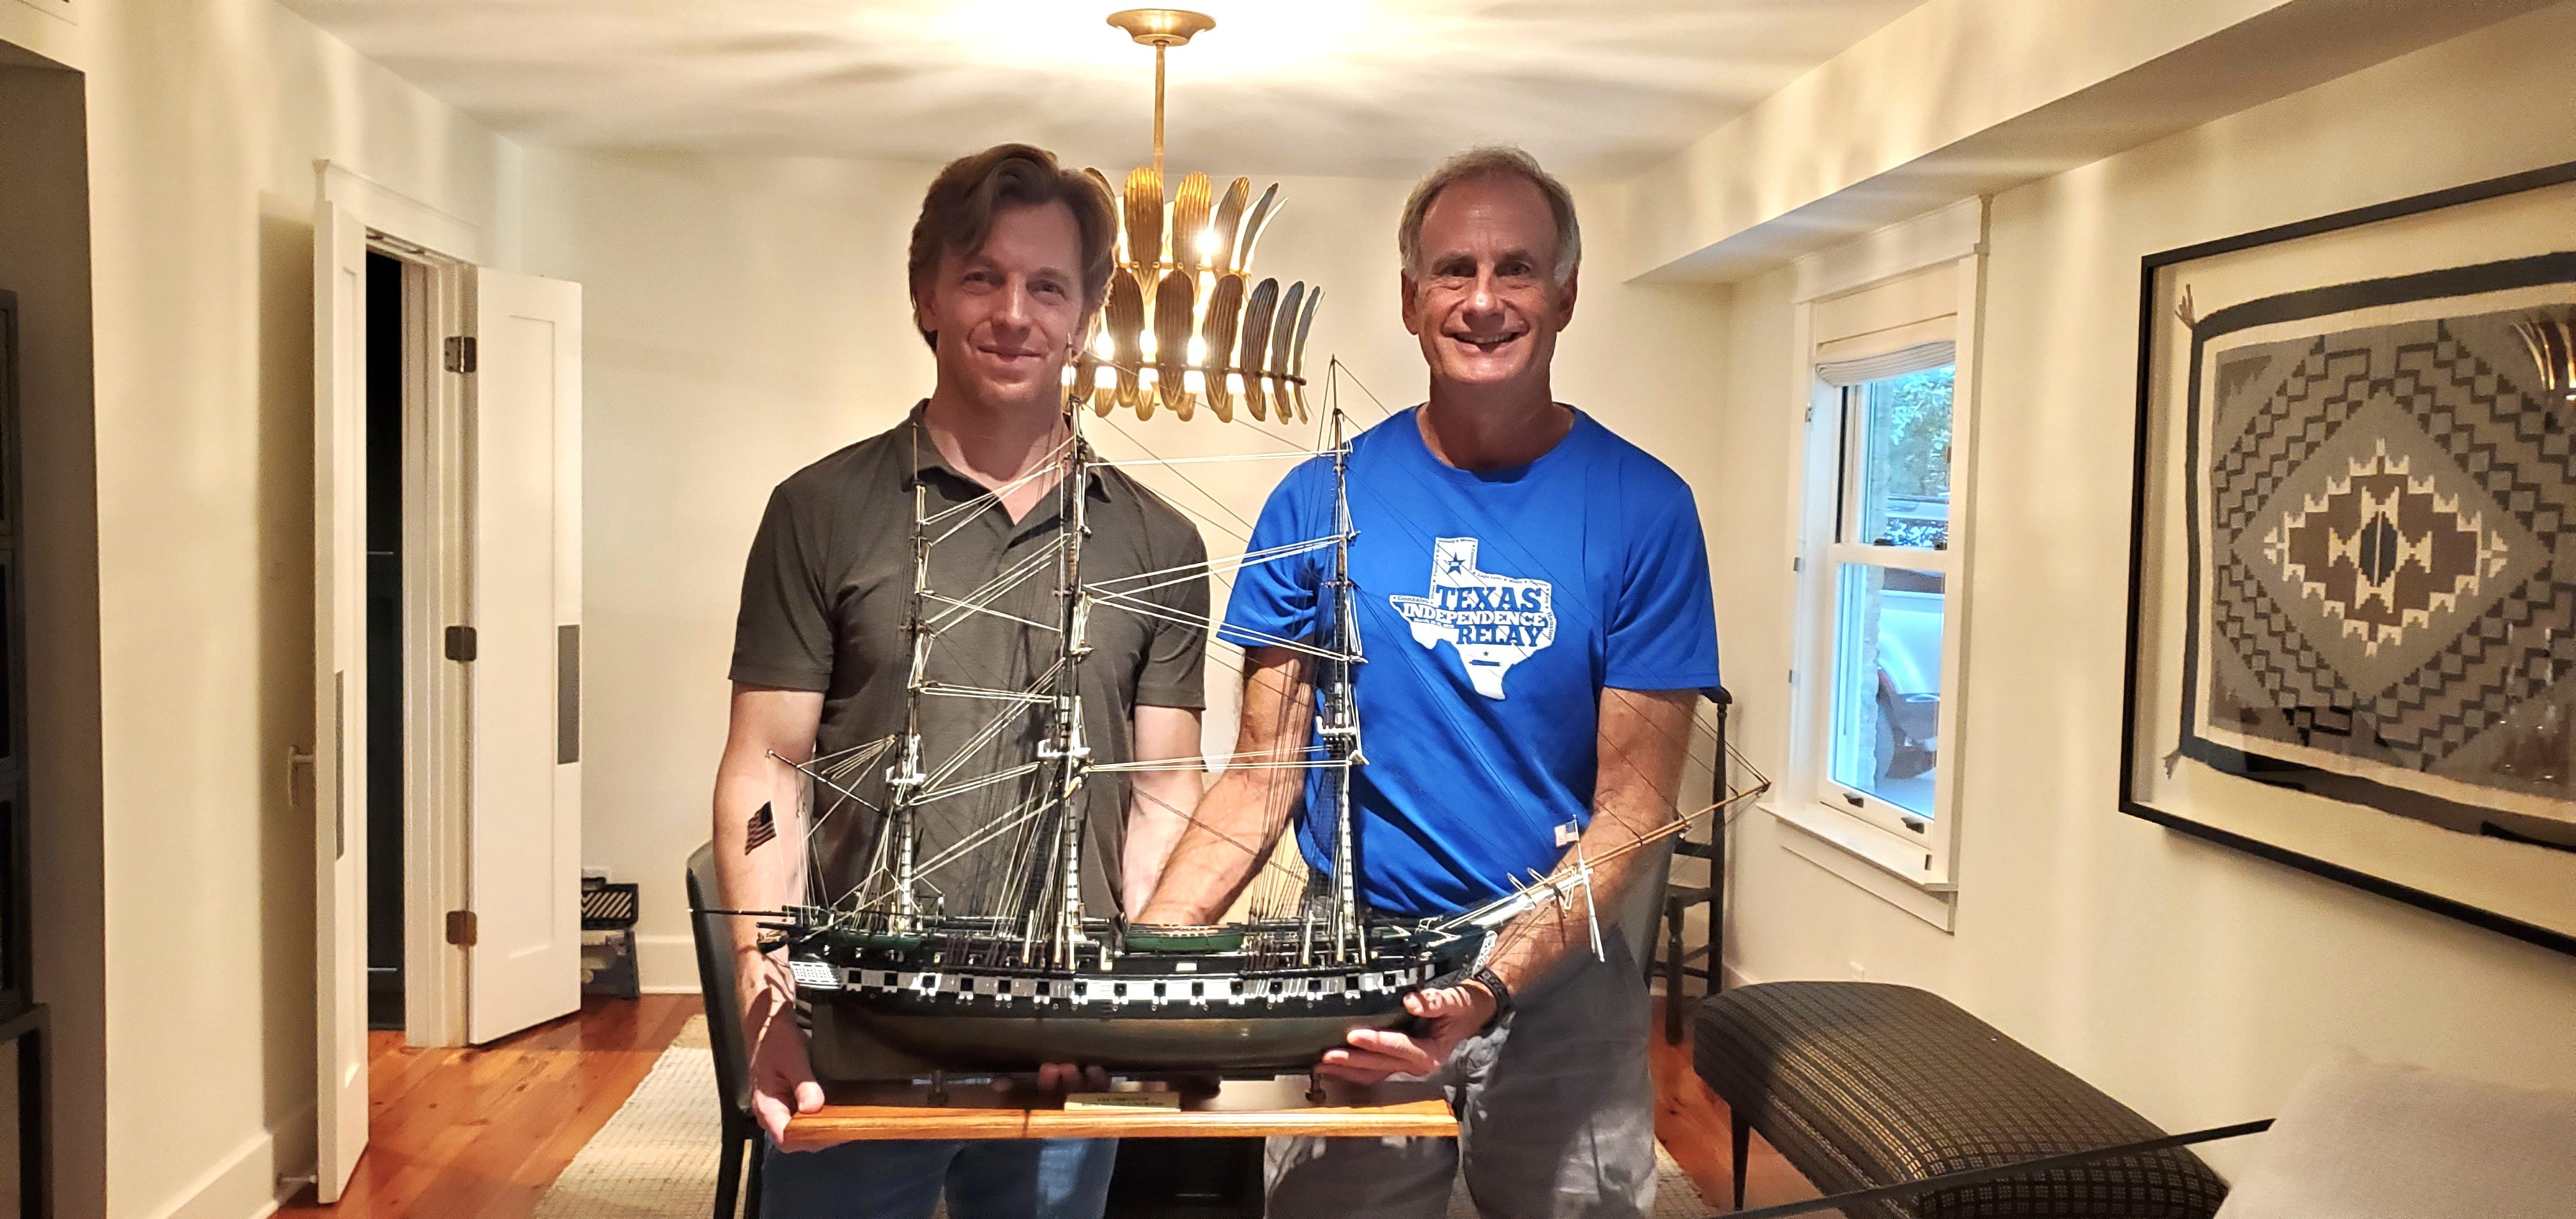
Closing out the build log here. My son and I delivered the ship to Carson last night. All the pressure was on my son as he had to hold the model in his lap and not let anything happen to it while I drove the truck. We got it to Carson's house safe and sound (whew!) where he surprised me with two very nice bottles of rum - Chairman's Reserve from St. Lucia and Holmes Cay single cask from Guyana. I thought @BANYAN's Bundy was potent at 37% alcohol by volume but the Holmes Cay is 60%. Whoa! Gonna have to be careful with that one. Now I've got rum from dang near every corner of the world! I just wish I could share a tipple with all of y'all that took part in this fun journey over the past 8 months. Thank you again!

- 301 replies
-
- 15
-
-
-
- Constitution
- Bluejacket Shipcrafters
- (and 1 more)
-
Javelin, always asking the tough questions! 😃 The answer is that I'm working on it. I really like the idea, so we will see if I can come up with something that looks decent. Thanks to @Thukydides for the original suggestion and the others that seconded it.
- 106 replies
-
- 3
-
-
- Kentoshi-Sen
- bottle
- (and 1 more)
-
Despite a few absentee votes remaining to be counted, the Associated Press has called the race and declared victory for the rock in a landslide! Full disclosure - the rock was my first choice and I was already drilling holes into it to secure the driftwood when the idea for the Zen garden popped into my mind. So I had to explore it. But I guess the golfers are right when they say, "first sight is usually right." Thank you to everyone for not only your vote, but also for including a reason. Everyone looks at something (especially something artistic) from their own unique perspective and I found it fascinating to hear how each of you viewed the 2 different presentations.
- 106 replies
-
- 12
-
-
- Kentoshi-Sen
- bottle
- (and 1 more)
-
Fabulous work, Paul. The lines are so clean. Very pleasing to look at.
-
I just found your new build log. I'm in for the ride too!
- 44 replies
-
- 1
-
-
- Nave Egizia
- Amati
- (and 1 more)
-
Thank you to everyone for your comments above. Now I'm in a quandary and gotta ask for some help here. Normally, I get an idea in mind about what I want the SIB presentation to look like and I'm rock solid about it. This time, however, I'm waffling. I've got 2 ideas and I cannot decide which I like better. I keep going back and forth, so I thought I'd put it out for a vote on MSW and see which one y'all like better. For the first one, I stuck with the entire Japanese theme from top to bottom - Japanese whiskey bottle, bonsai driftwood cradle, and Japanese Zen garden base. For the second one, I swapped out the Zen garden for a natural rock base (it came from my ranch so there is no Japanese tie). So if you would be so kind, please take a moment to look at the 2 pics below and let me know which one you believe is the better presentation. Thank you for your help!

- 106 replies
-
- 10
-
-
-
- Kentoshi-Sen
- bottle
- (and 1 more)
-
It's ridiculous how many times that happens. I'm convinced there is an invisible black hole surrounding my work area that those things fall into. Regardless, that is really nice detail you are adding. She is looking good.
-
I was with Eric and Wefalck at first, but the more I look at it, the less I see dinghy bow. It does look like there's a keel, but it seems to stop abruptly at the black thing. The top end of the black thing looks like it's looped around the end of the keel thing. If it's a keel, you can see the end sticking thru the black thing. That doesn't make sense to me. Could the white thing be a cover of some kind and the black thing is a tie-down? Maybe a dinghy cover? Also, the white doesn't lie flat on the slanted roof, but level with the water. I'm stumped.
- 457 replies
-
- 3
-
-
-
- sternwheeler
- Hard Coal Navy
- (and 1 more)
-
I agree with JC. Very nice work on the paint job. Looks fantastic. Now about that mystery box in the background...
- 90 replies
-
- 2
-
-
-
- Friendship Sloop
- bluejacket shipcrafters
- (and 1 more)
-
If anyone knows about piping, it's got to be Roel!
- 457 replies
-
- 5
-
-
-
- sternwheeler
- Hard Coal Navy
- (and 1 more)
-
I've been following your build log and you are doing an incredible job on the Prince. Based on the the work I've seen, I think you'd sail thru a Constitution build just fine. And speaking of the Prince, I actually have that same kit from Constructo (won it in a raffle). Sadly, I've been poaching parts from it for my SIBs and some of this Constitution work. If I do ever get around to building it, your log will be a great resource.
- 301 replies
-
- 3
-
-
-
- Constitution
- Bluejacket Shipcrafters
- (and 1 more)