MORE HANDBOOKS ARE ON THEIR WAY! We will let you know when they get here.
×


Glen McGuire
-
Posts
1,911 -
Joined
-
Last visited
Content Type
Profiles
Forums
Gallery
Events
Everything posted by Glen McGuire
-
 Agree with Mark. Your ability to duplicate all the intricate piping and mechanical structures based on your own pictures and memory is what amazes me the most.
 -
I am on board and caught up on all the posts. This looks like an interesting and fun project, Mike!
- 47 replies
-
- 3
-

-

-
- Annapolis Wherry
- Chesapeake Light Craft
- (and 1 more)
-
Lula and the pile driver look better together than chips and queso! Superb work, Keith!
- 732 replies
-
- 5
-
-
-
- Lula
- sternwheeler
- (and 1 more)
-
It just needs to be in a video game! Then the kids won't be able to put it down! Nice work so far on this, Bryan. It's gong to be interesting to watch this one unfold.
-
No constructive criticism here, Steve. That is superb work. When it looks that good with a super closeup picture, you know you have done well.
-
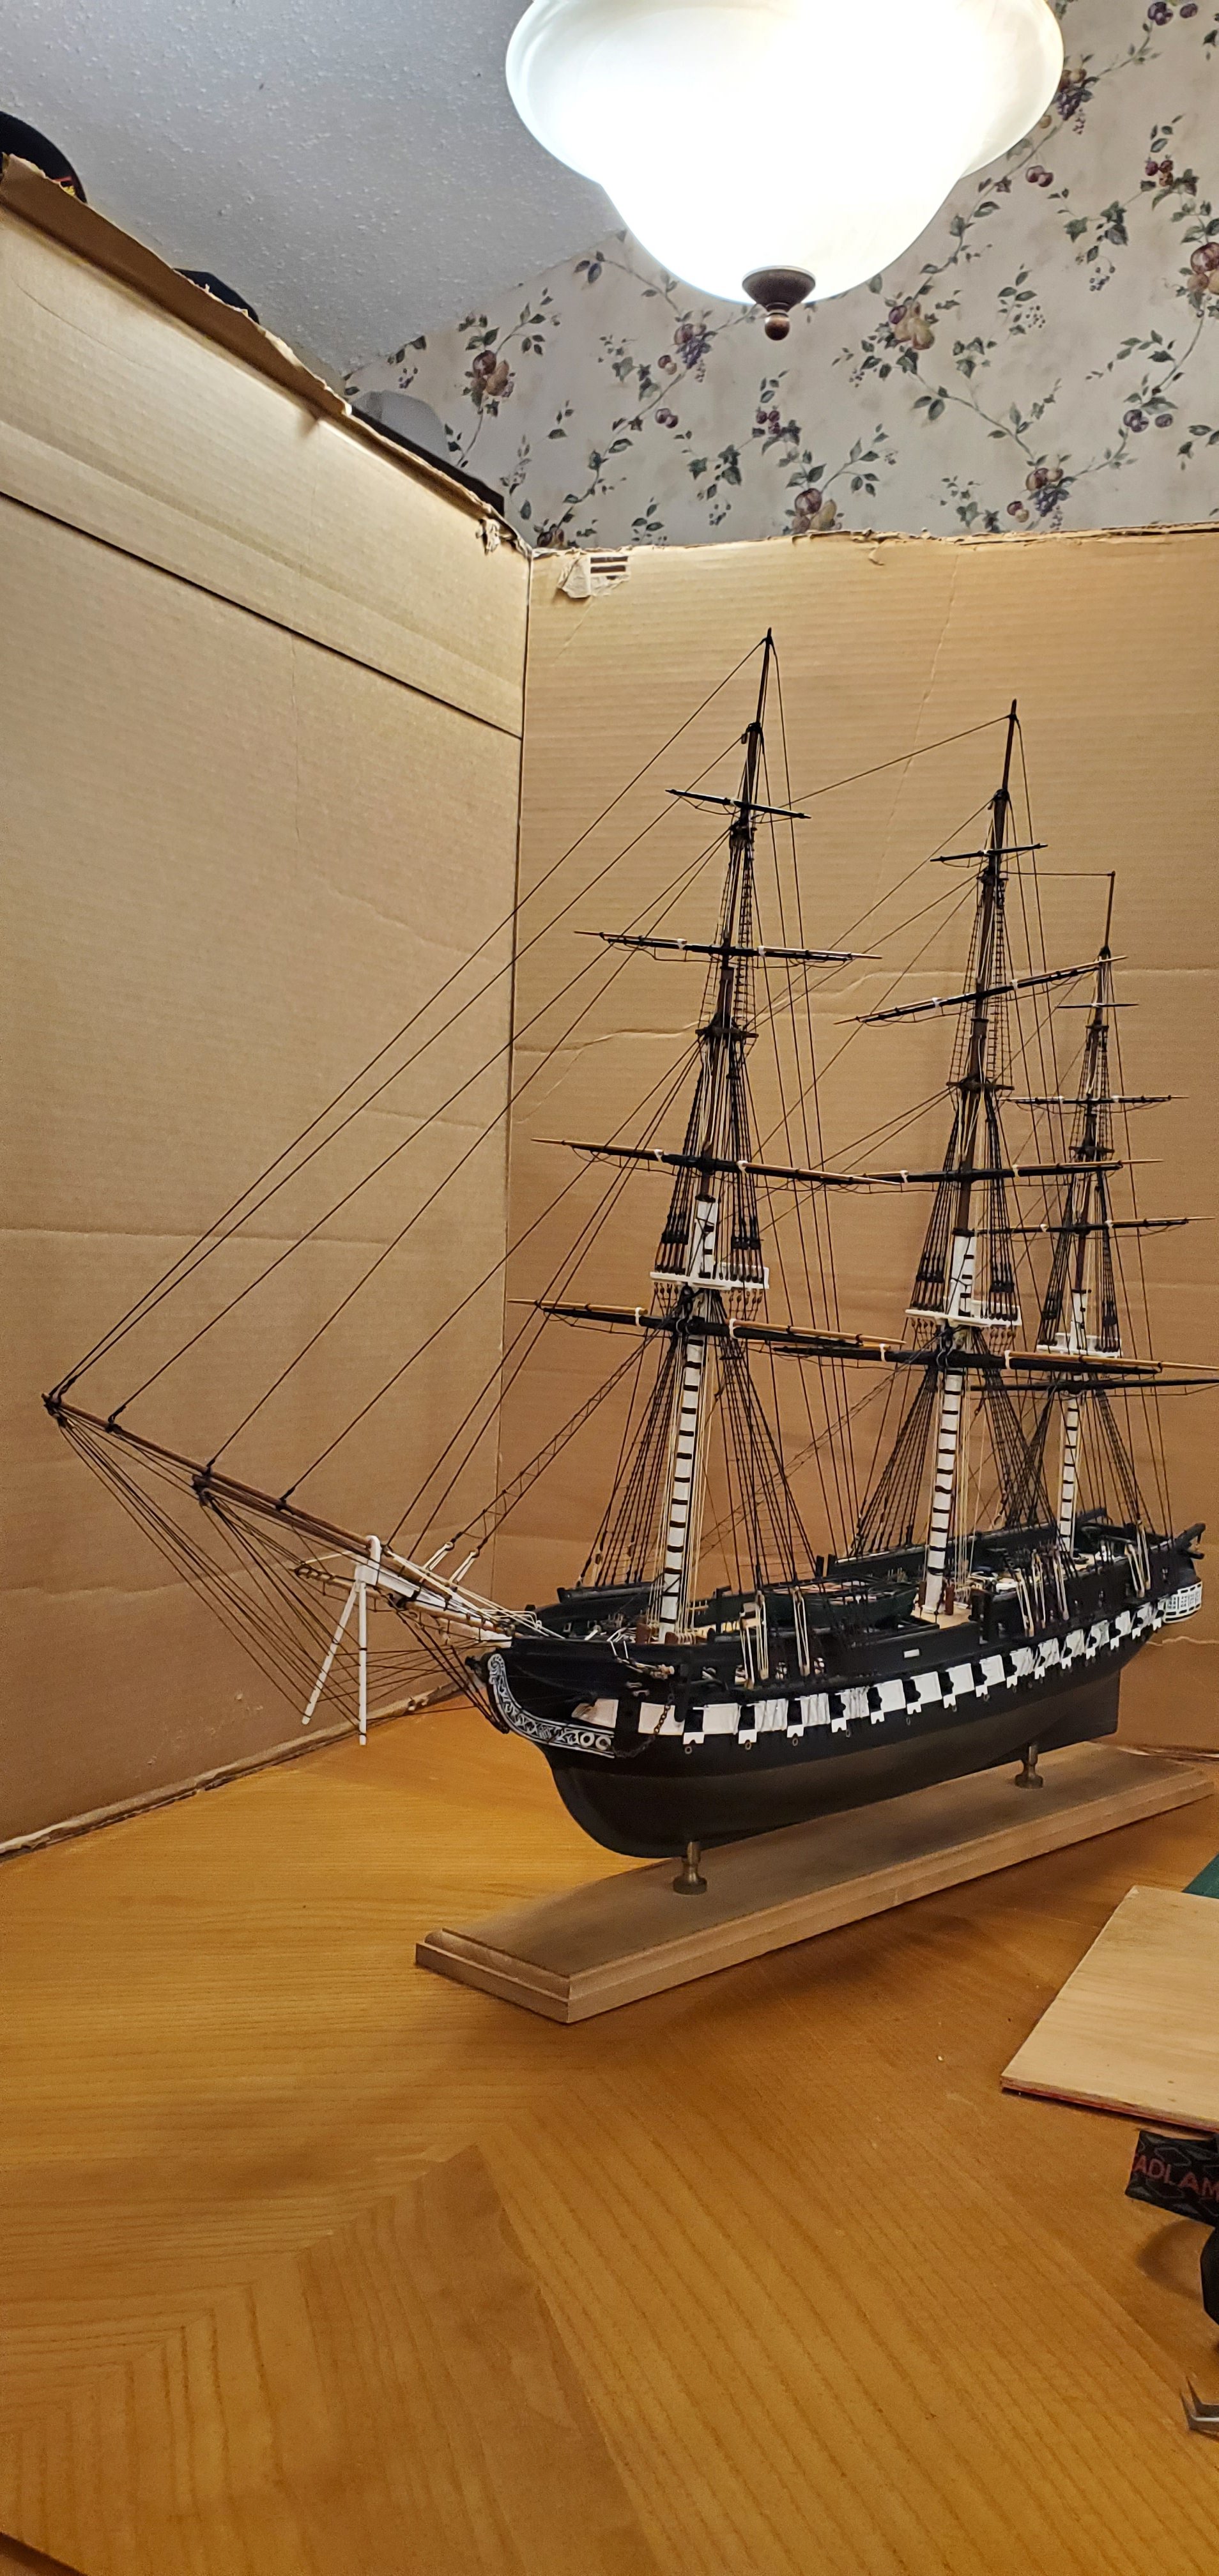
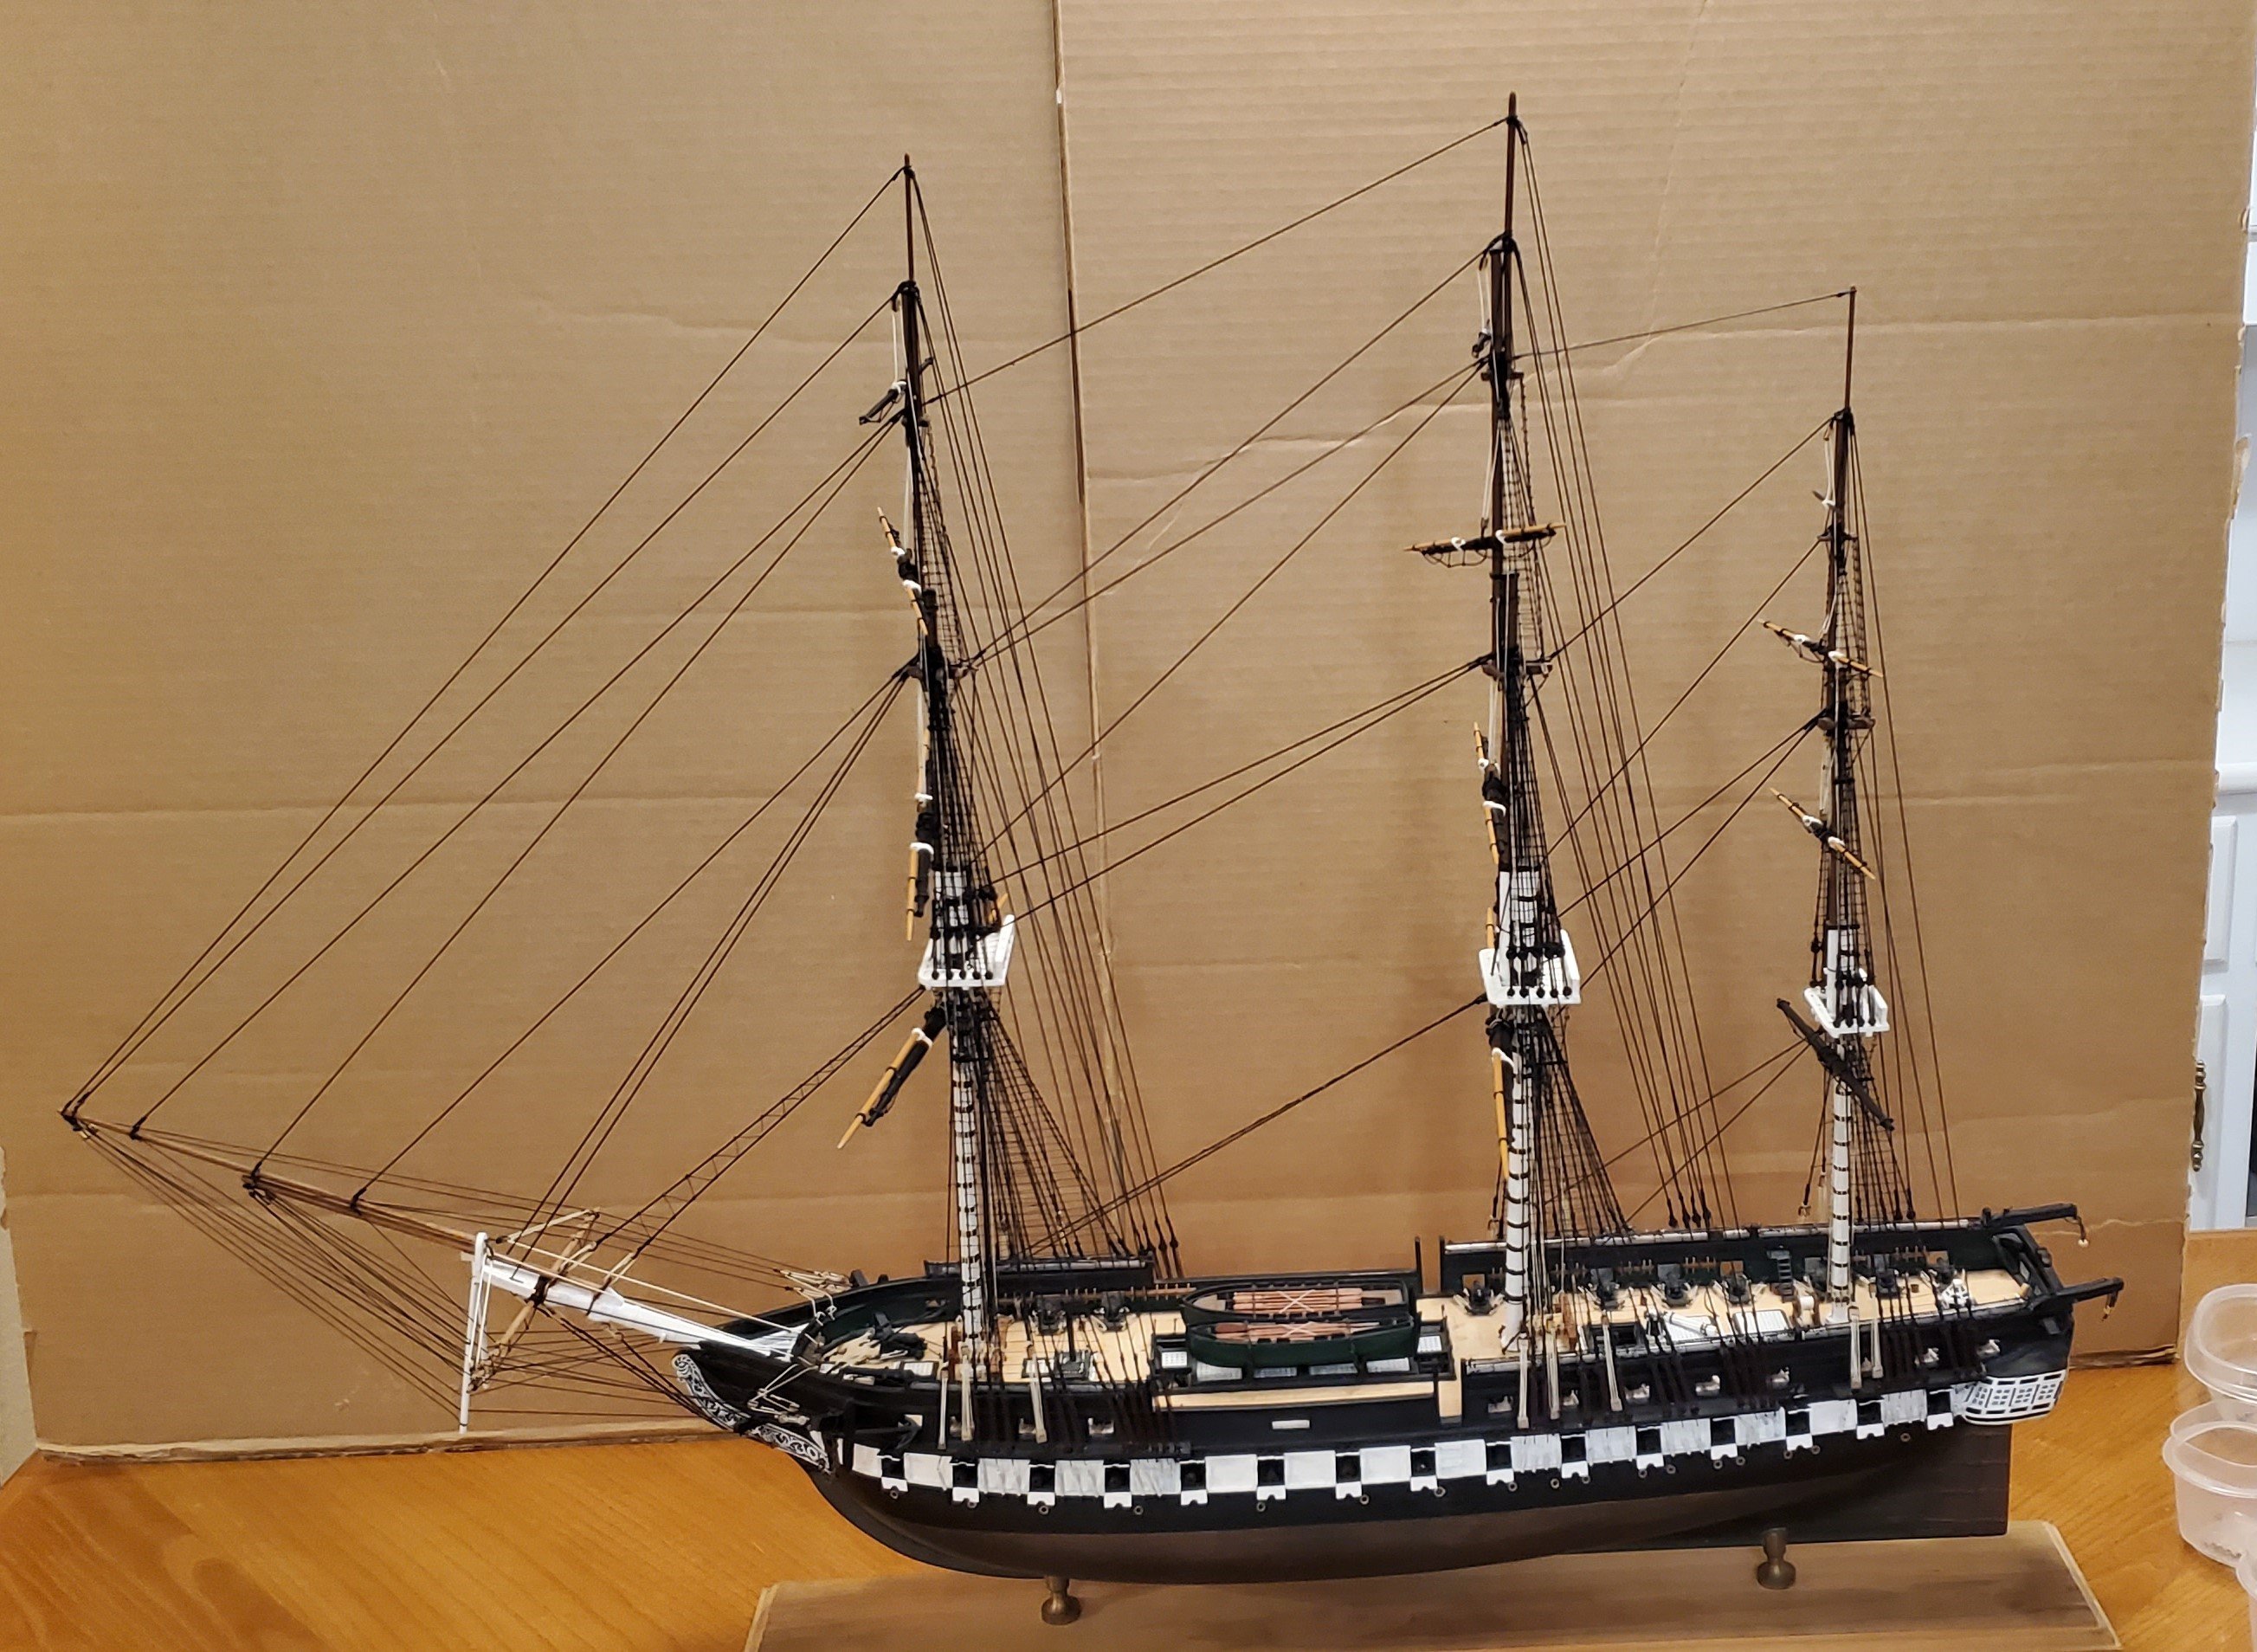
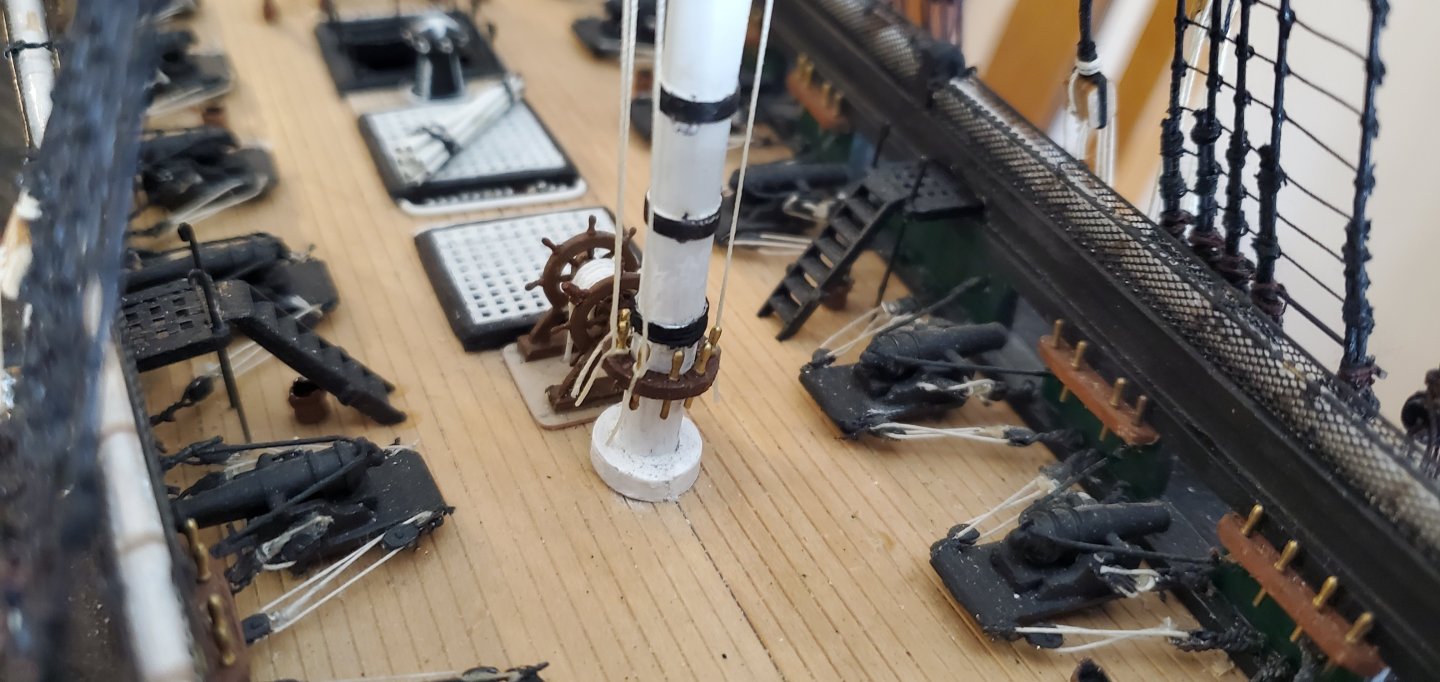
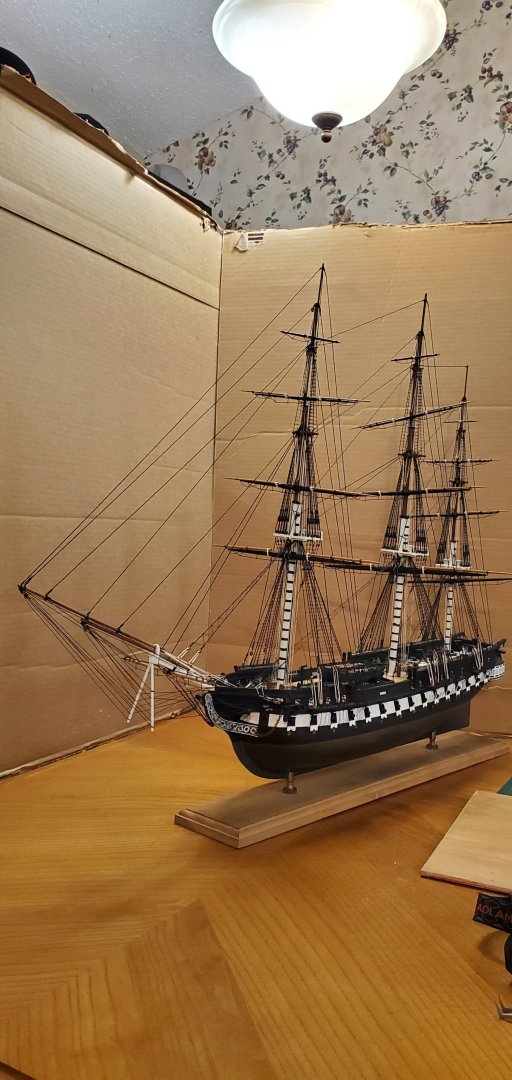
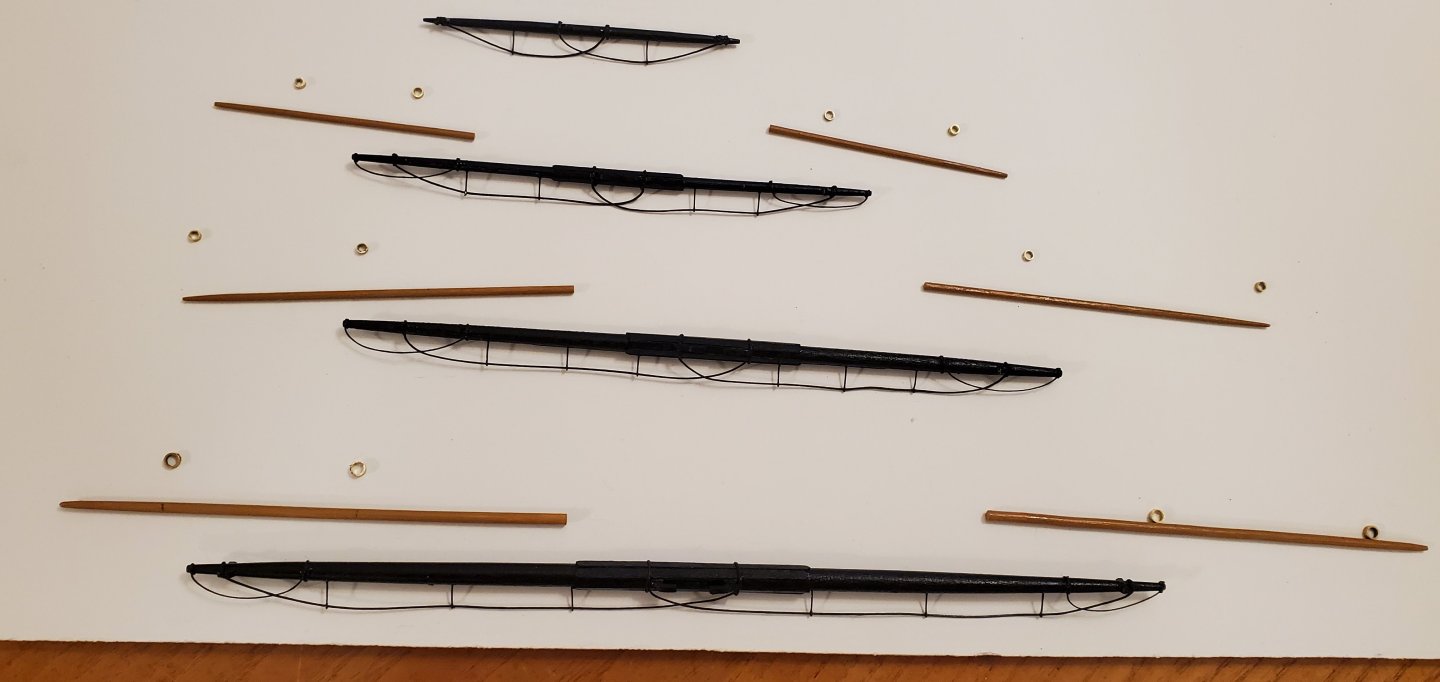
It is truly amazing to get that close and see how immense those things really are. That makes sense now. Thanks for the explanation, Henry. Yes! Wouldn't it be great if all of us had such access to the real life version of whatever model we are working on! Only in our dreams!! And back to the task at hand. Without an SIB in work, I've been able to focus on the Constitution and get a lot of work done (although I'm still on impulse power compared to @Knocklouder's usual warp 9 speed!). The next thing on my to-do list was making the saddles that are affixed to the top gallant and royal yards and provide the buffer against the mast. Here's one of the yards with the saddle attached and eyepins in place. Adding the single-row parrel tied off to the eyepins. Here's the fore topmast yard installed. I was starting to tie off some of the halyard lines to the fife rails at the base of the fore and main masts when I realized the mizzen mast did not have anything near it to off lines to. A quick peek at the instructions told me I needed to add a spider ring around the base of the mizzen mast. I had to poach some belay pins from some of the rails inside the bulwark to outfit the spider ring. My ring is cut in half since the mast is already installed, preventing me from sliding the ring over the end of the mast and into place. Mizzen spider ring installed. And then it was rinse and repeat on hanging the remainder of the top gallant and royal yards. Shortly thereafter, another milestone reached - all the yards are hung! WOOHOO!!! I really need @BANYAN to send me some of that Bundy rum so I can properly celebrate these milestones!! The yards are a bit wonky since I have not added lifts or braces yet. But I believe she is starting to look a bit majestic now with her arms spread wide!


- 301 replies
-
- 22
-

-
-
- Constitution
- Bluejacket Shipcrafters
- (and 1 more)
-
You are the Ratline King! Lookin good!
-
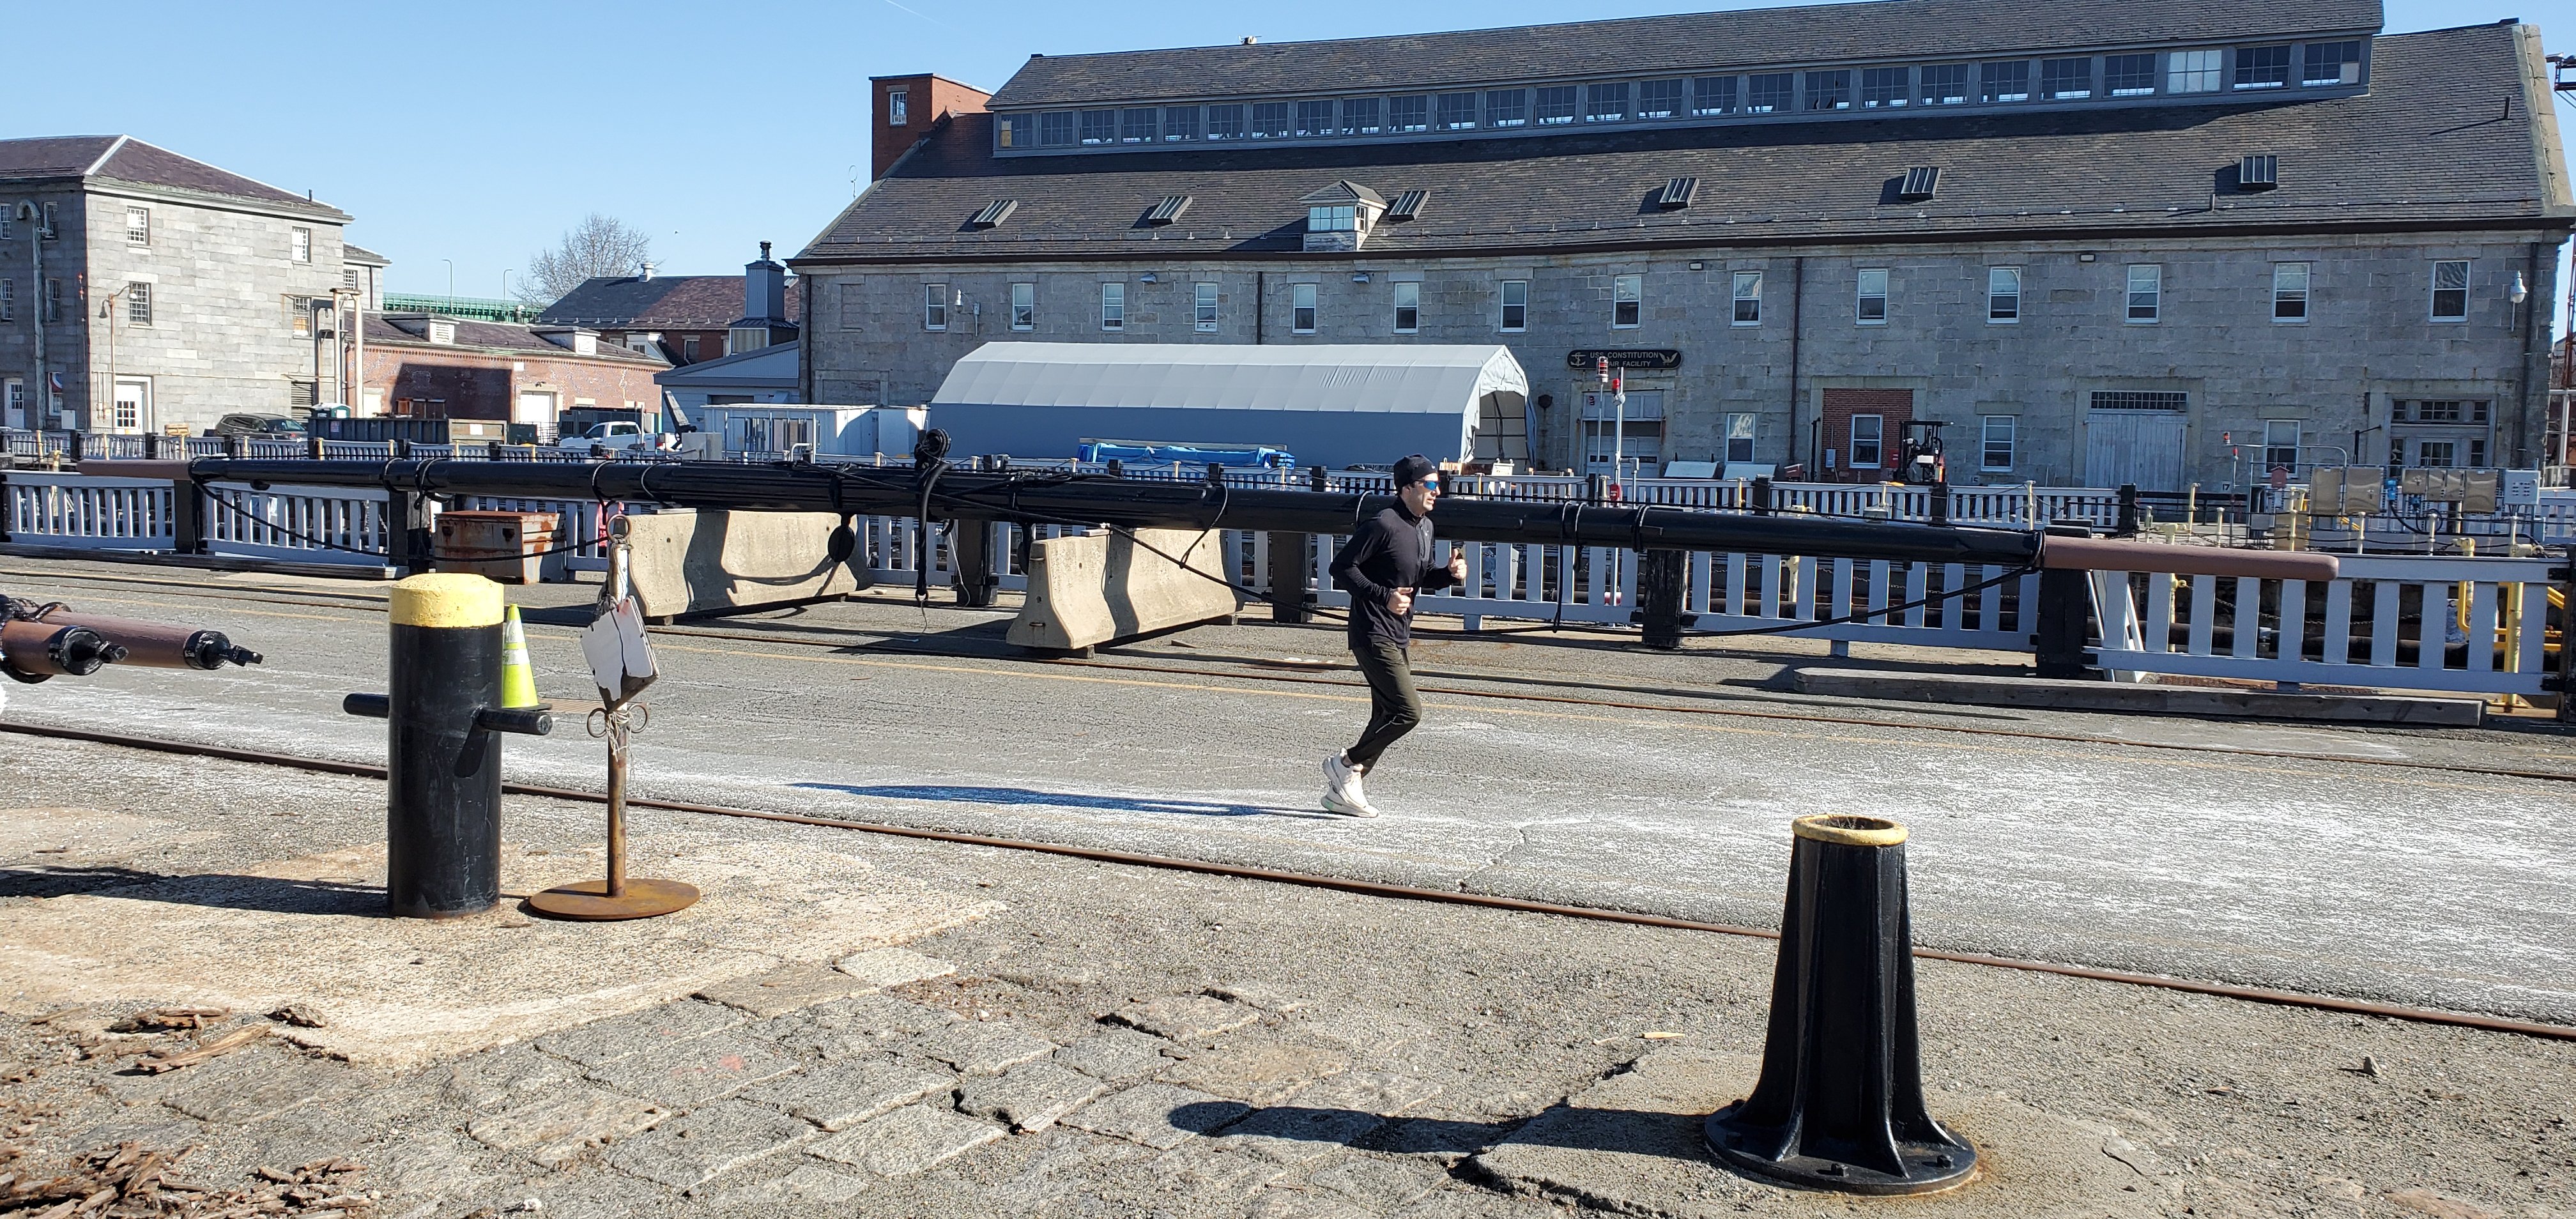
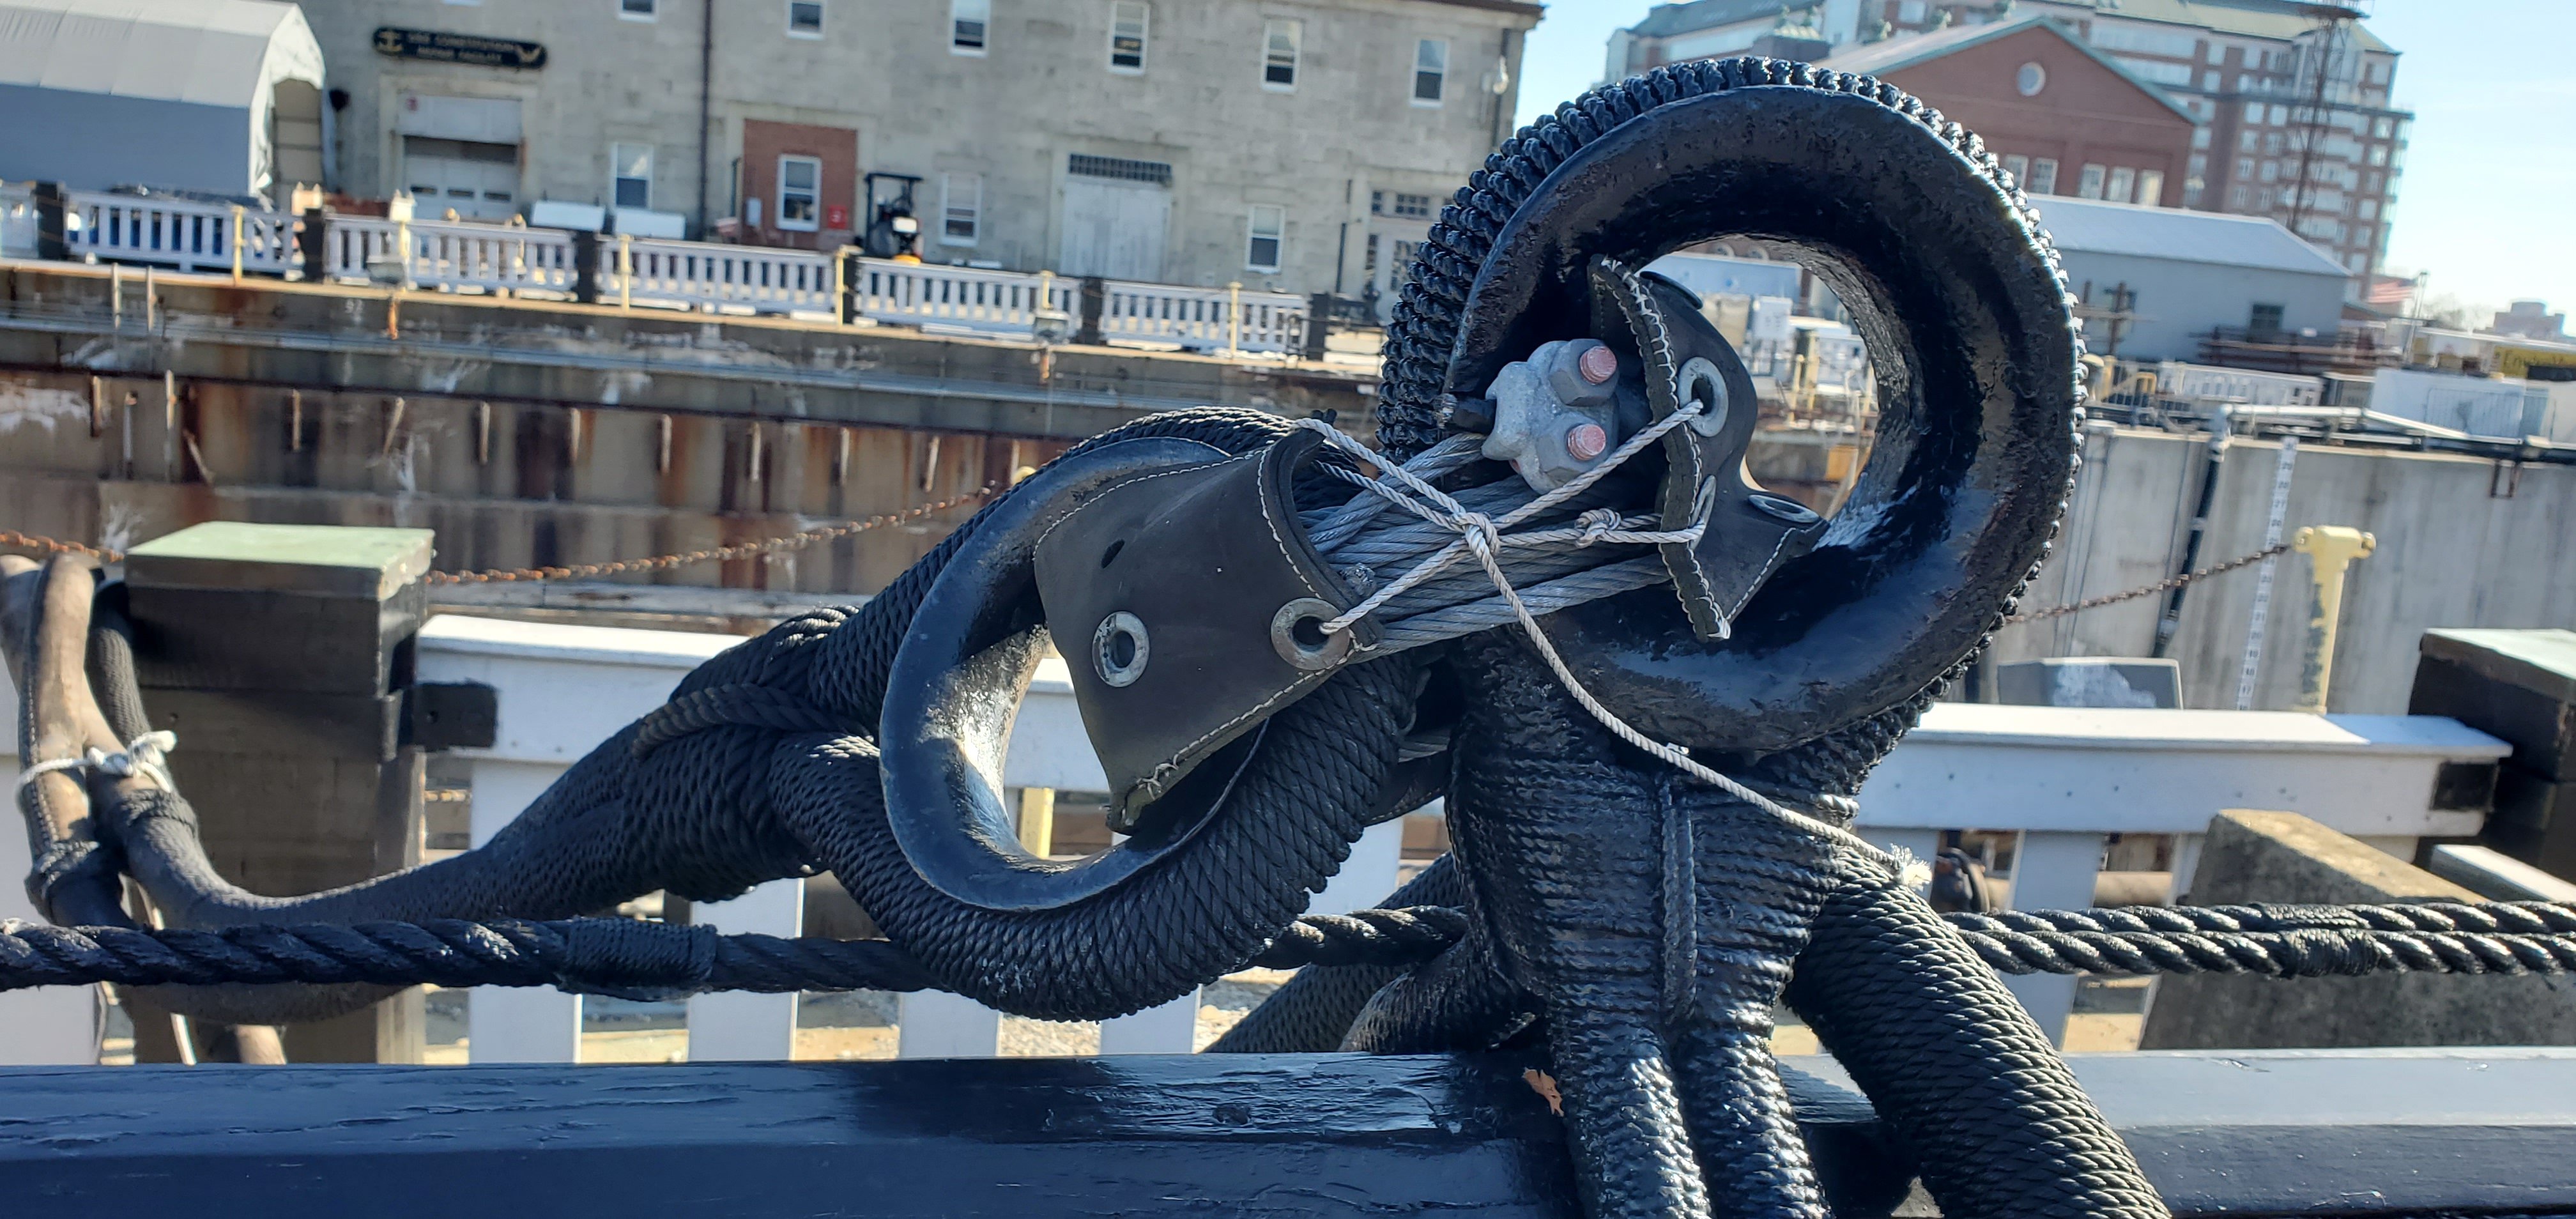
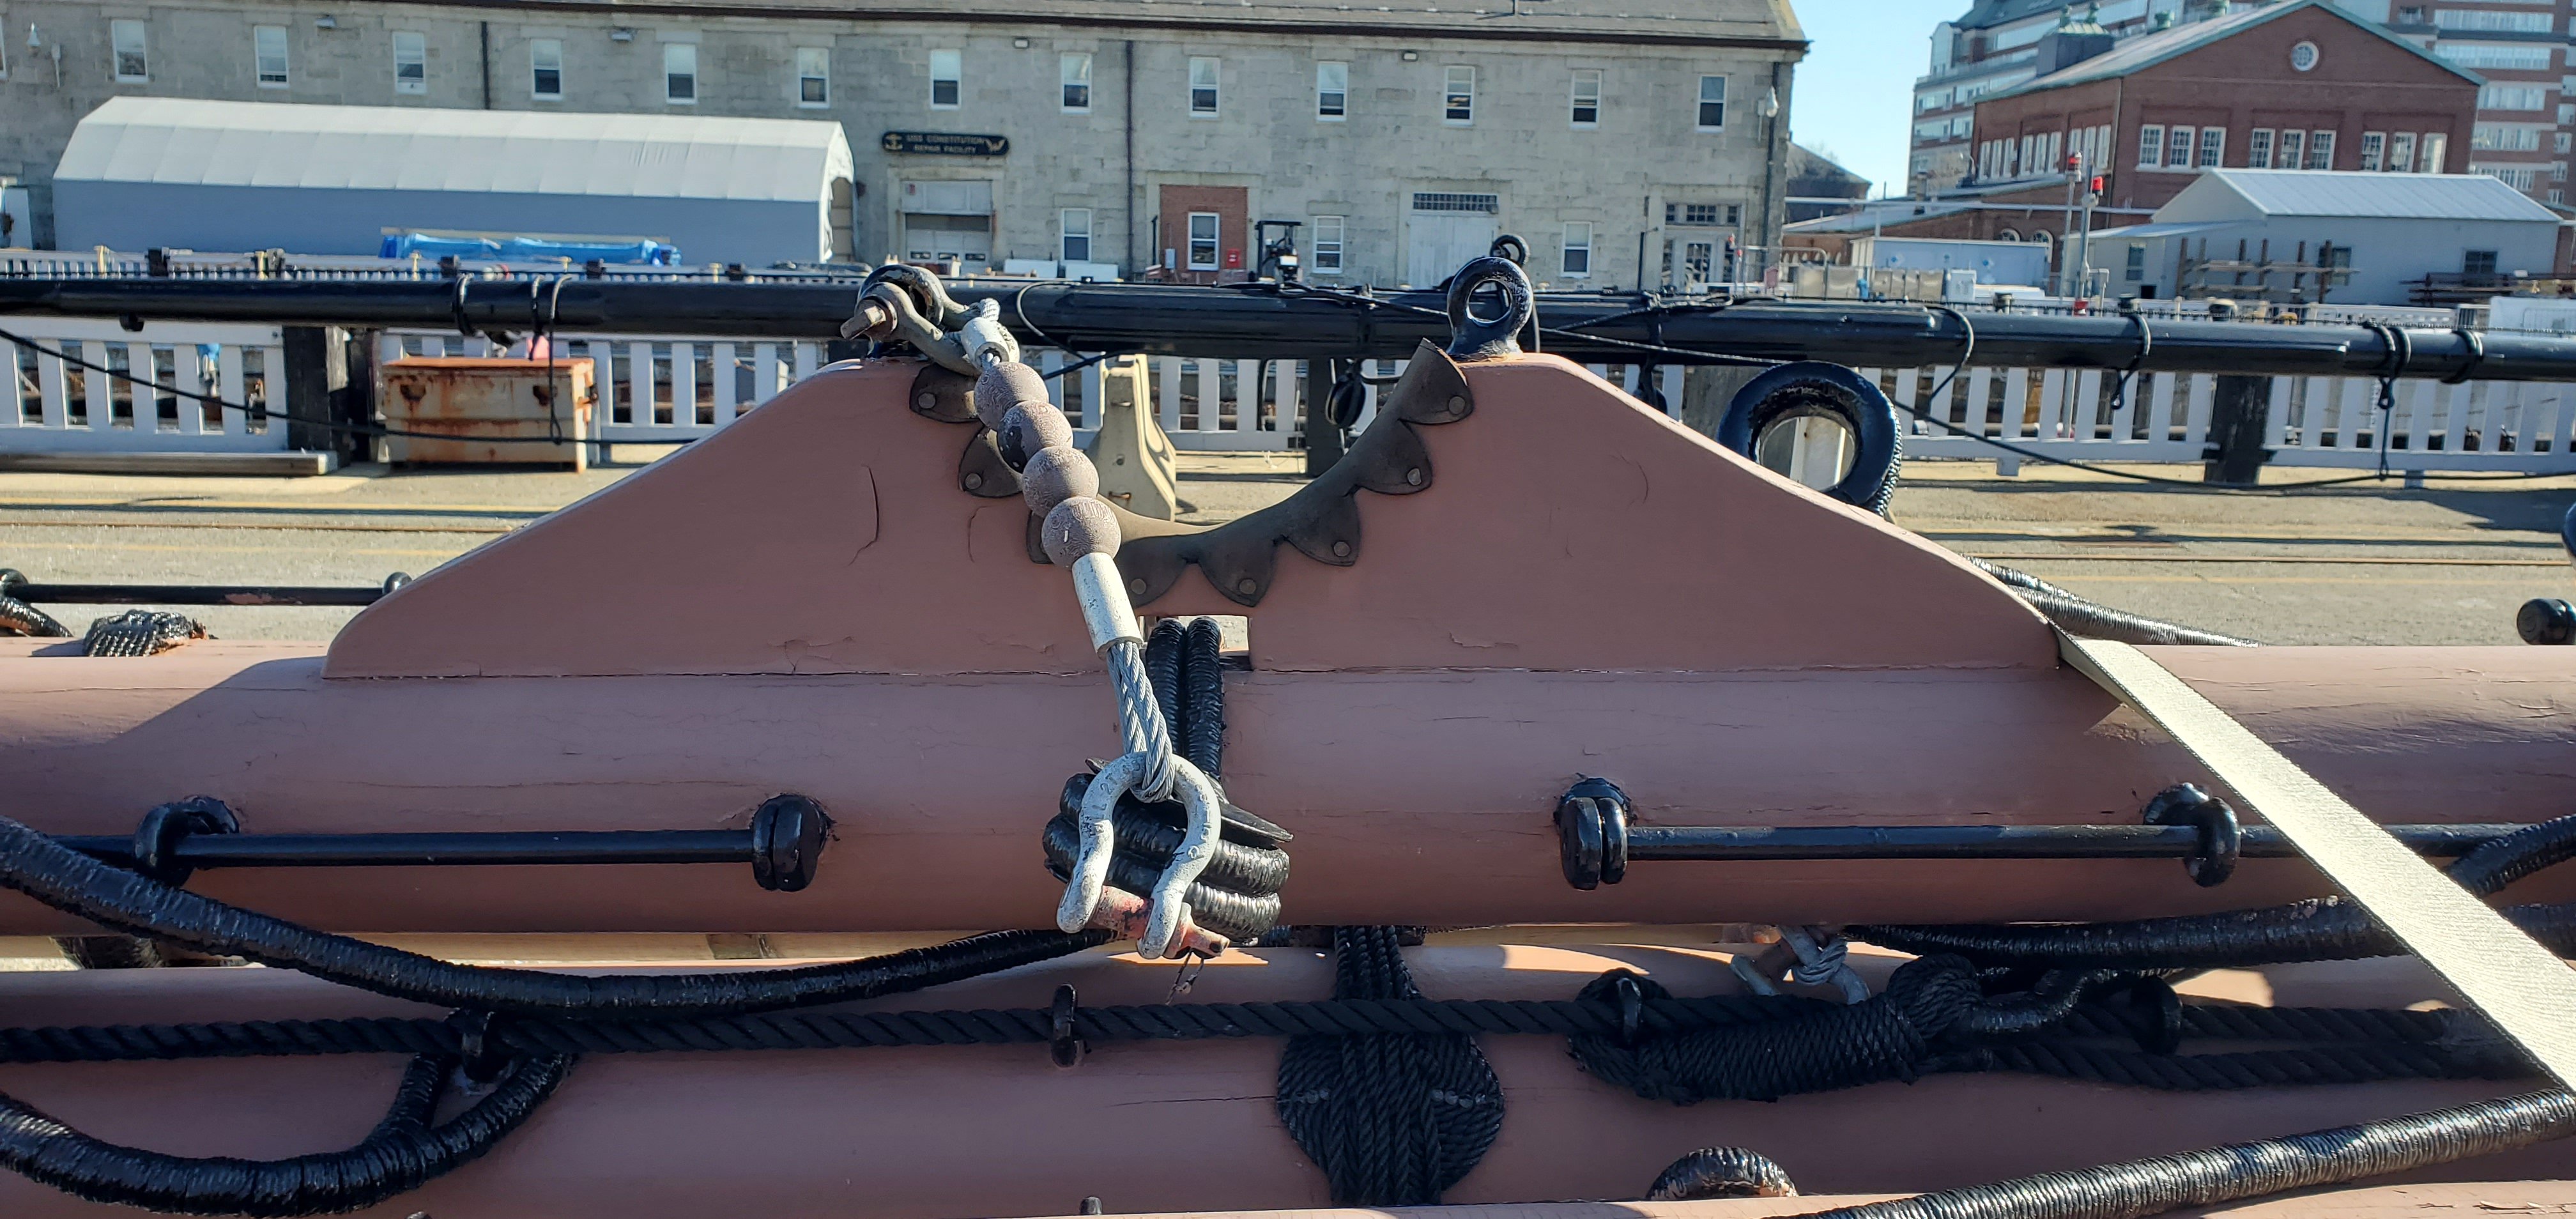
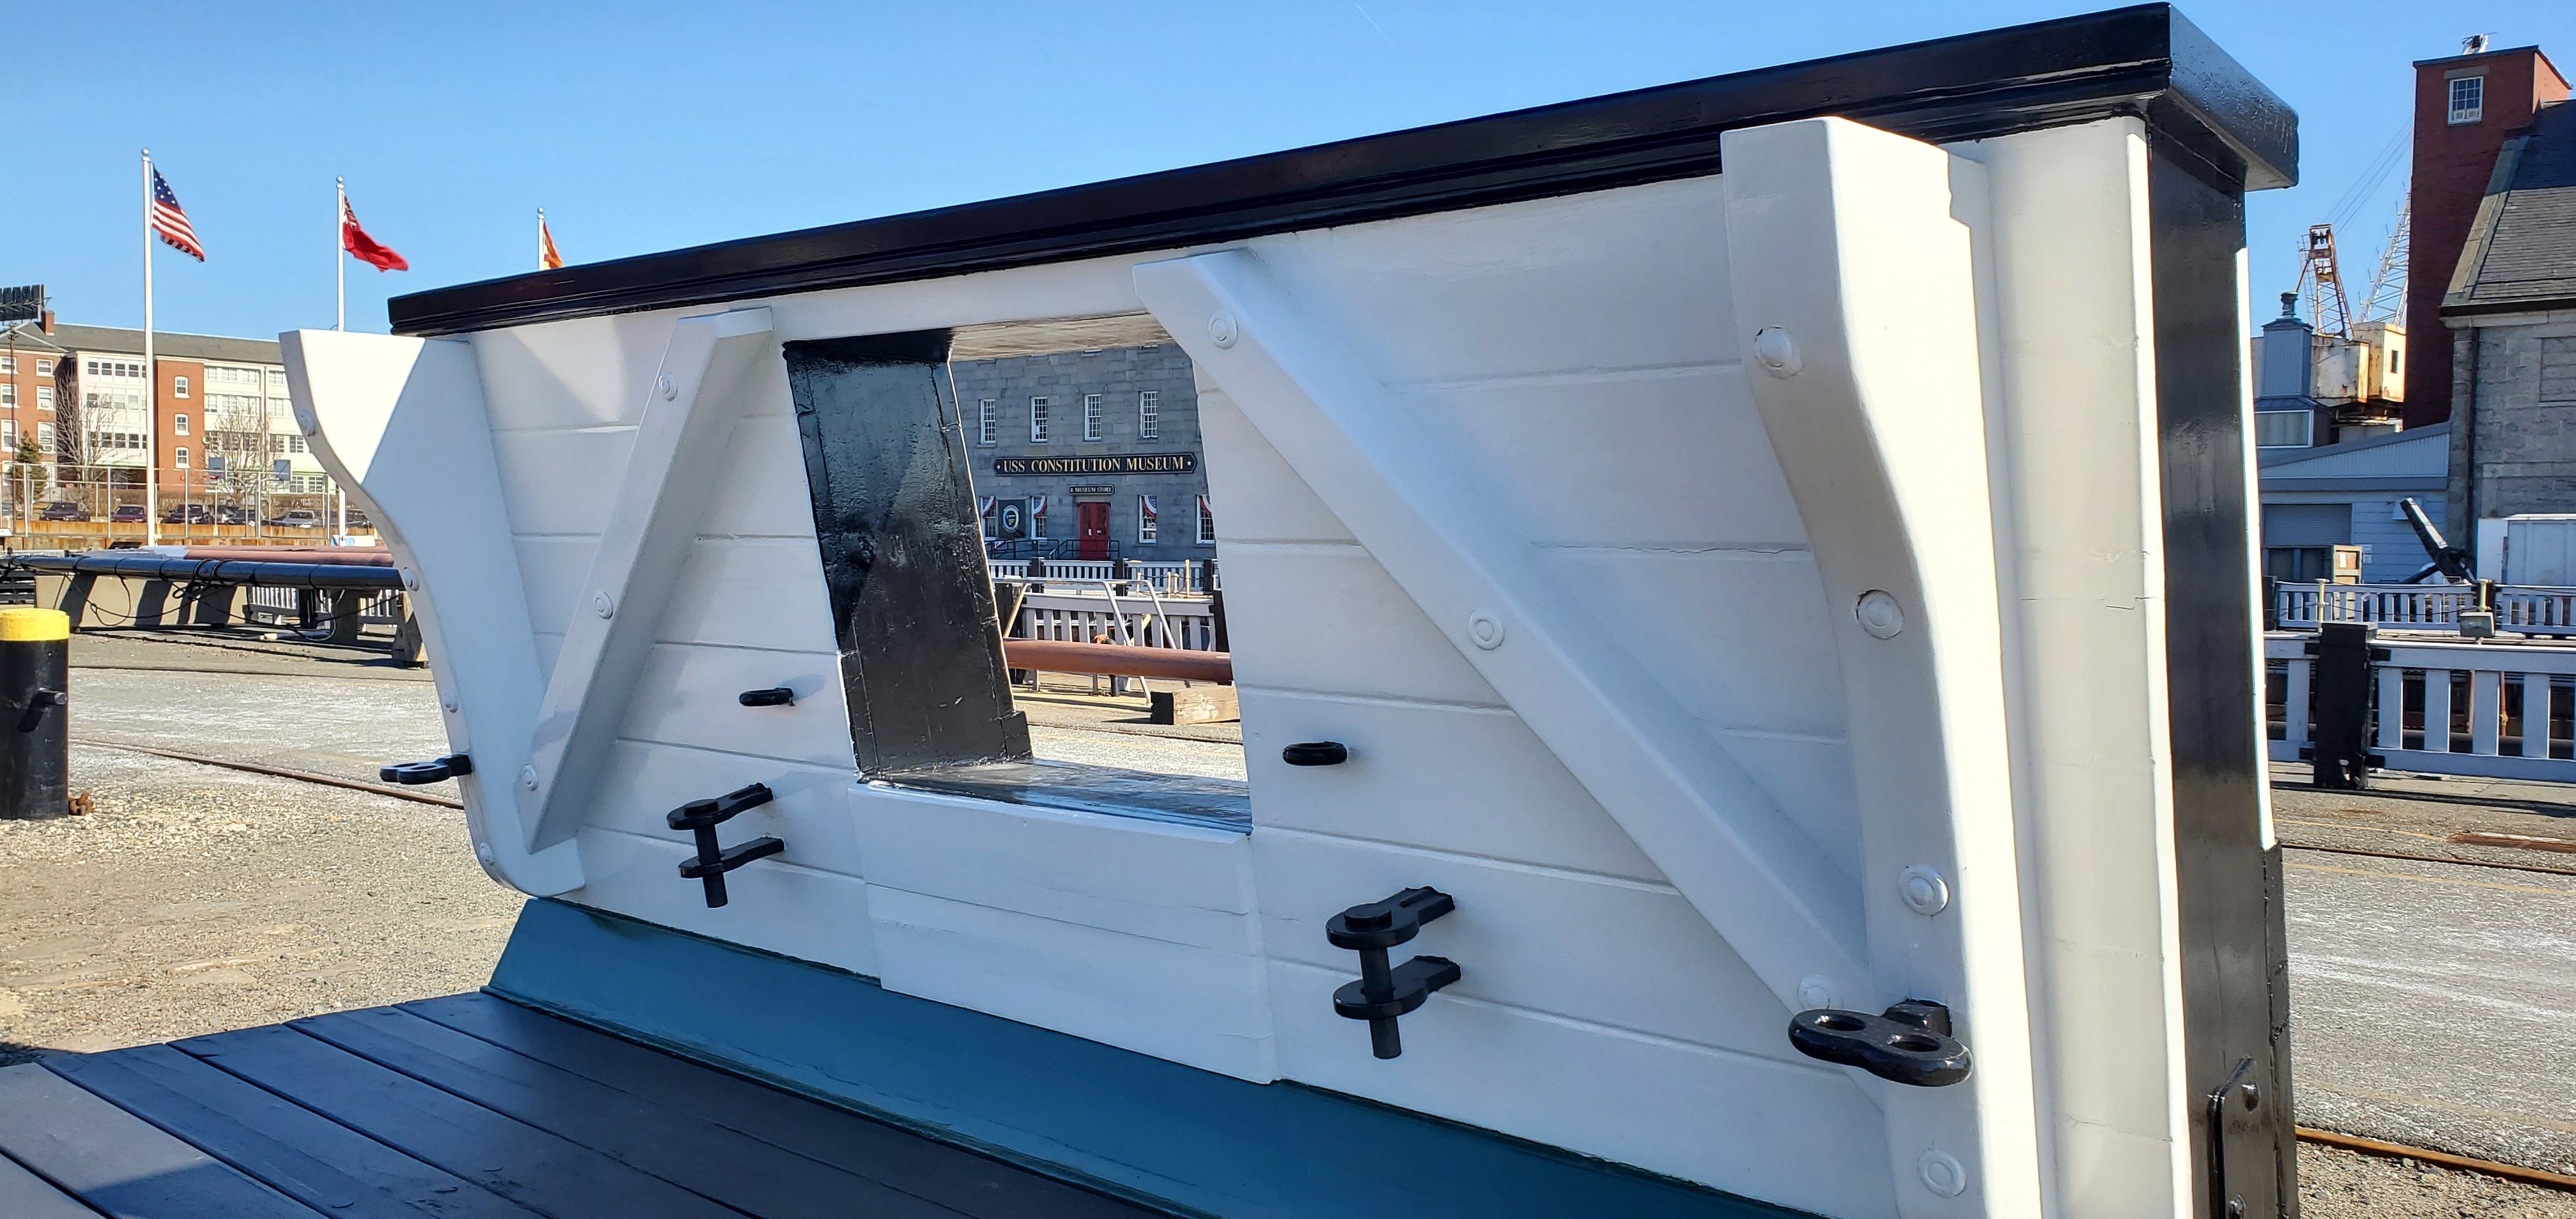
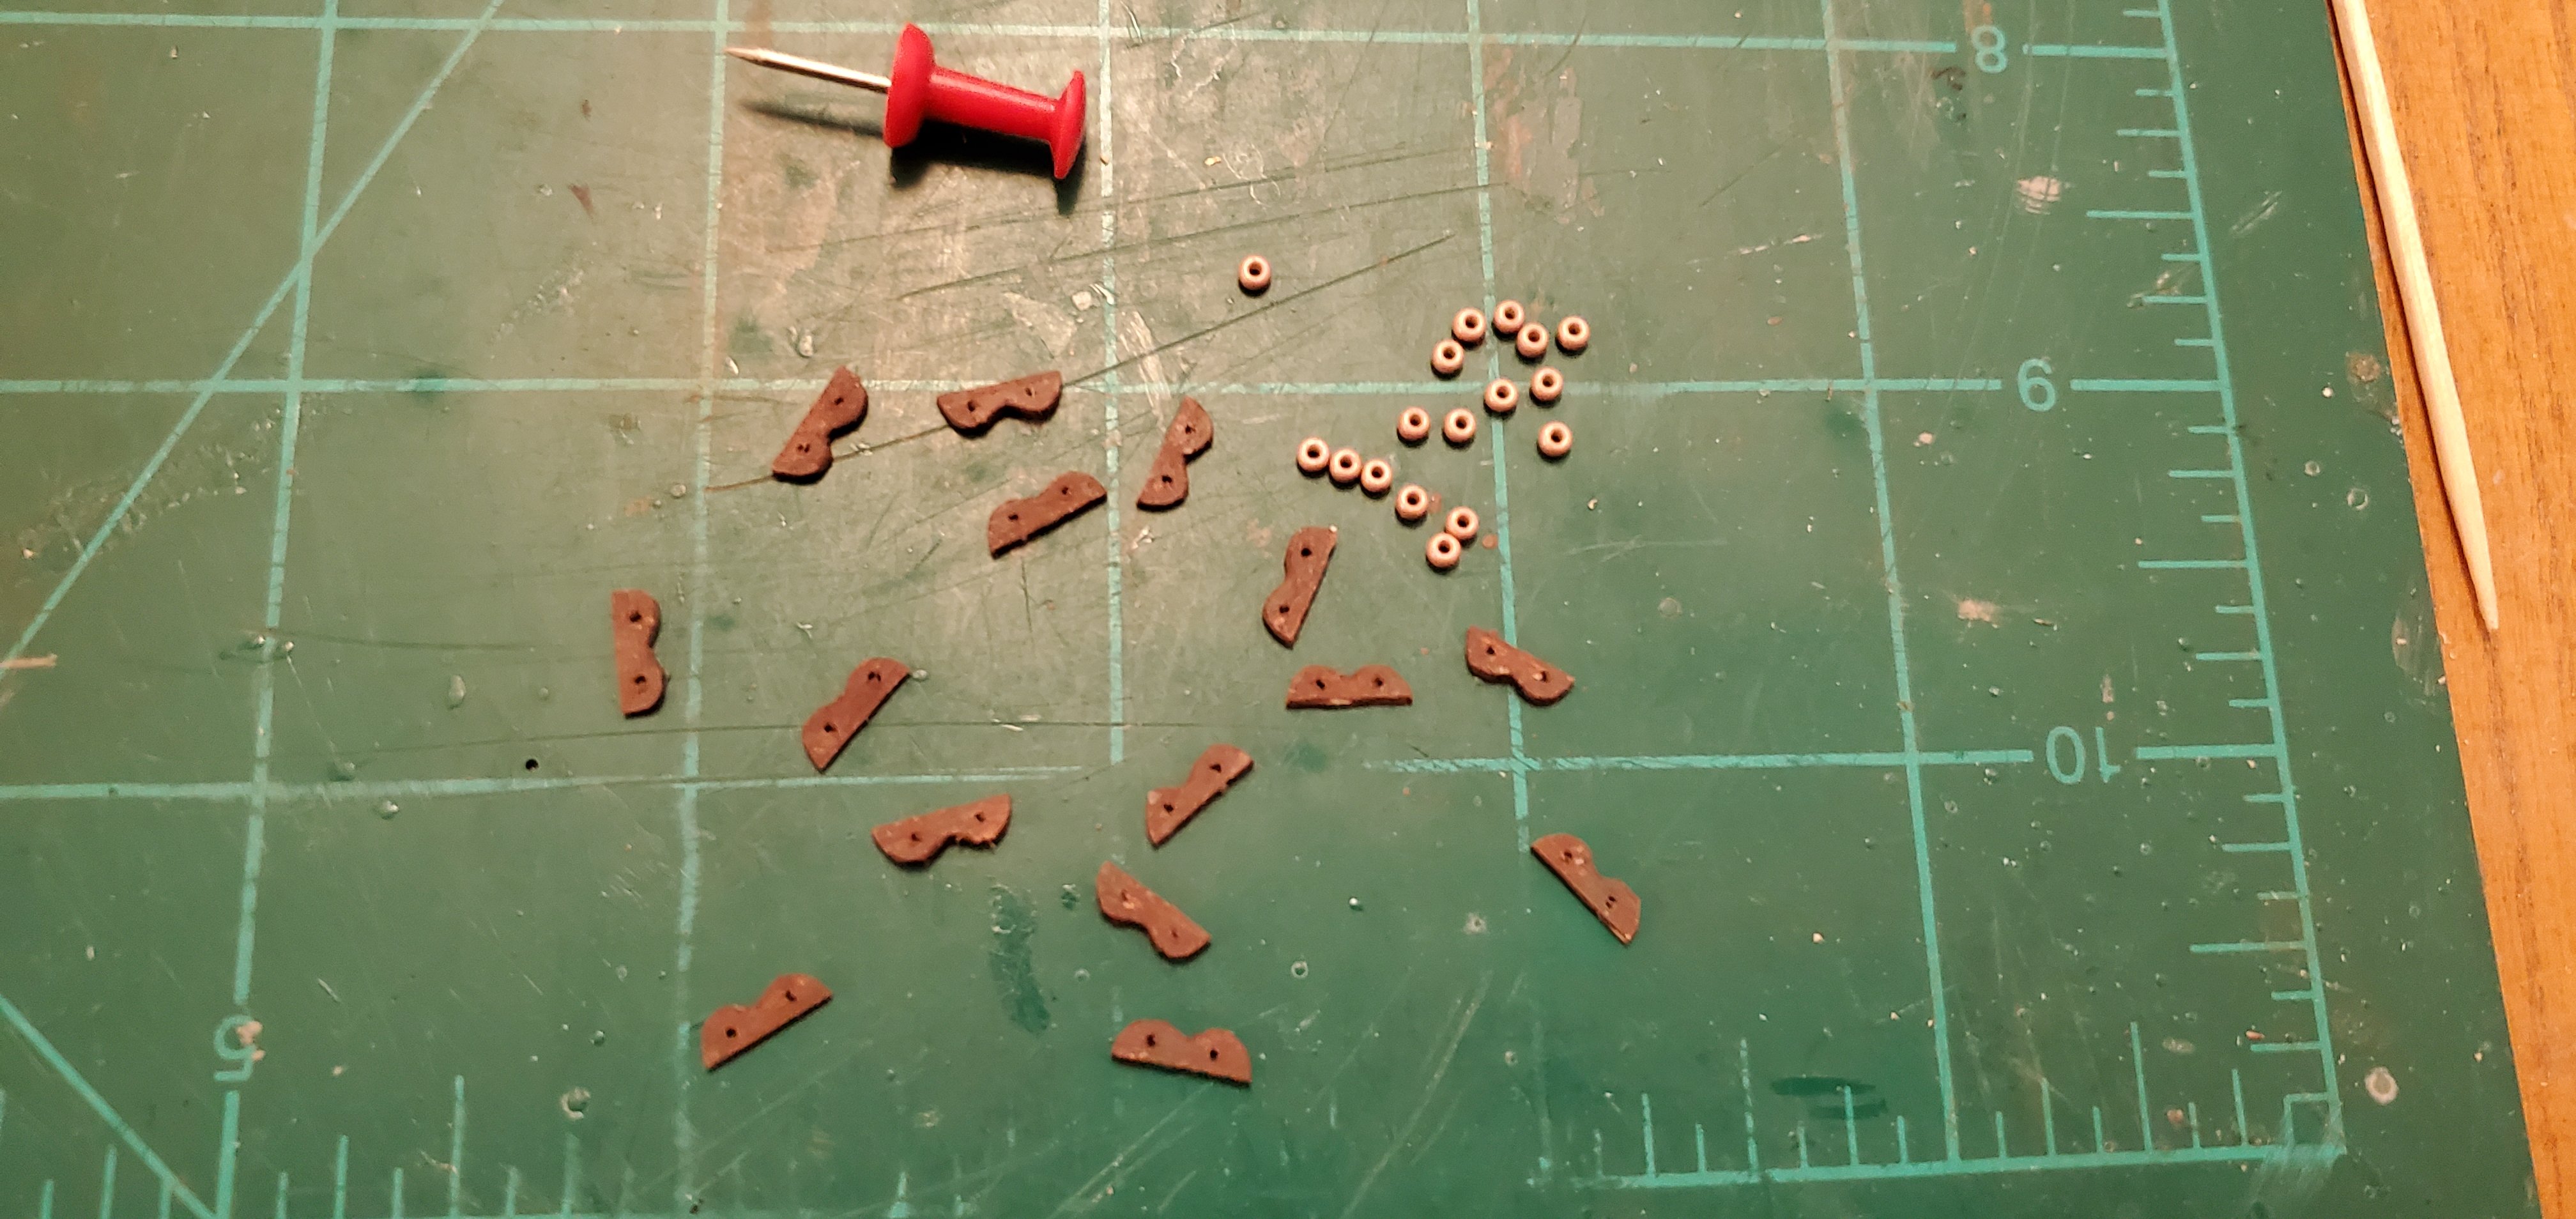
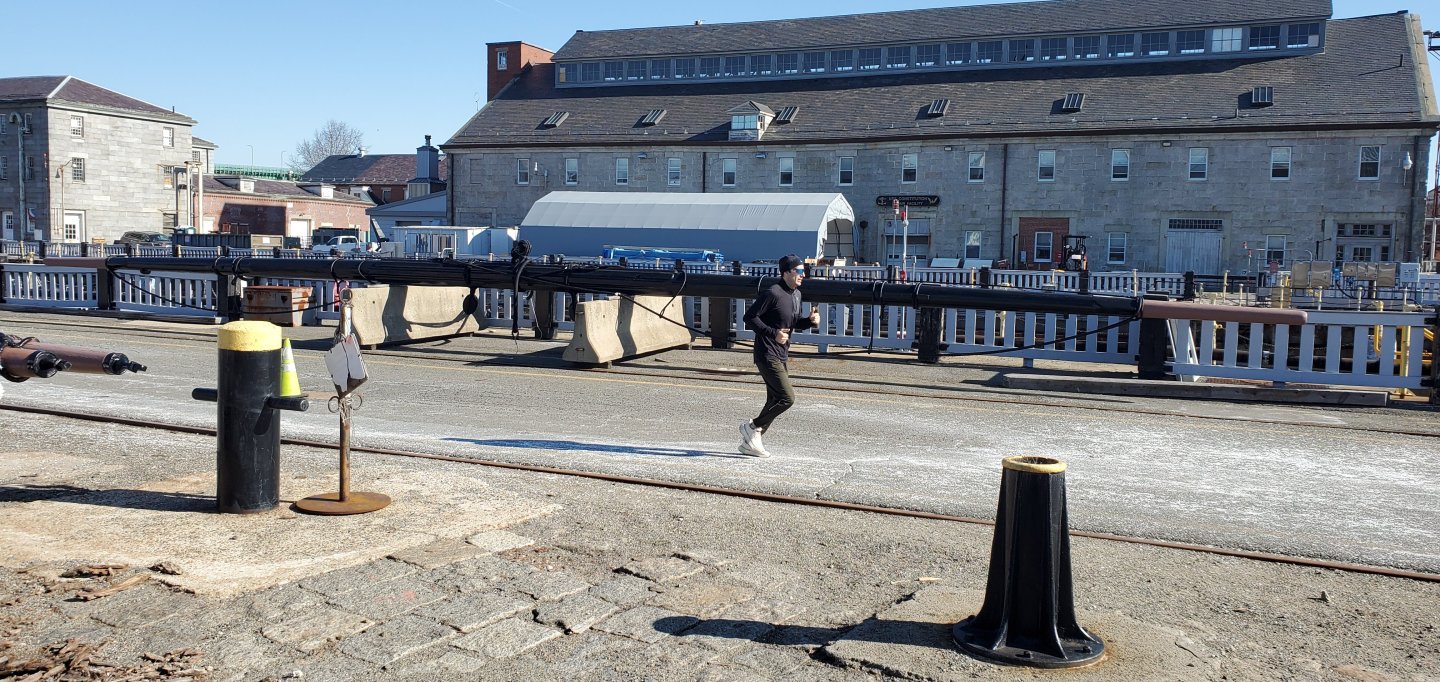
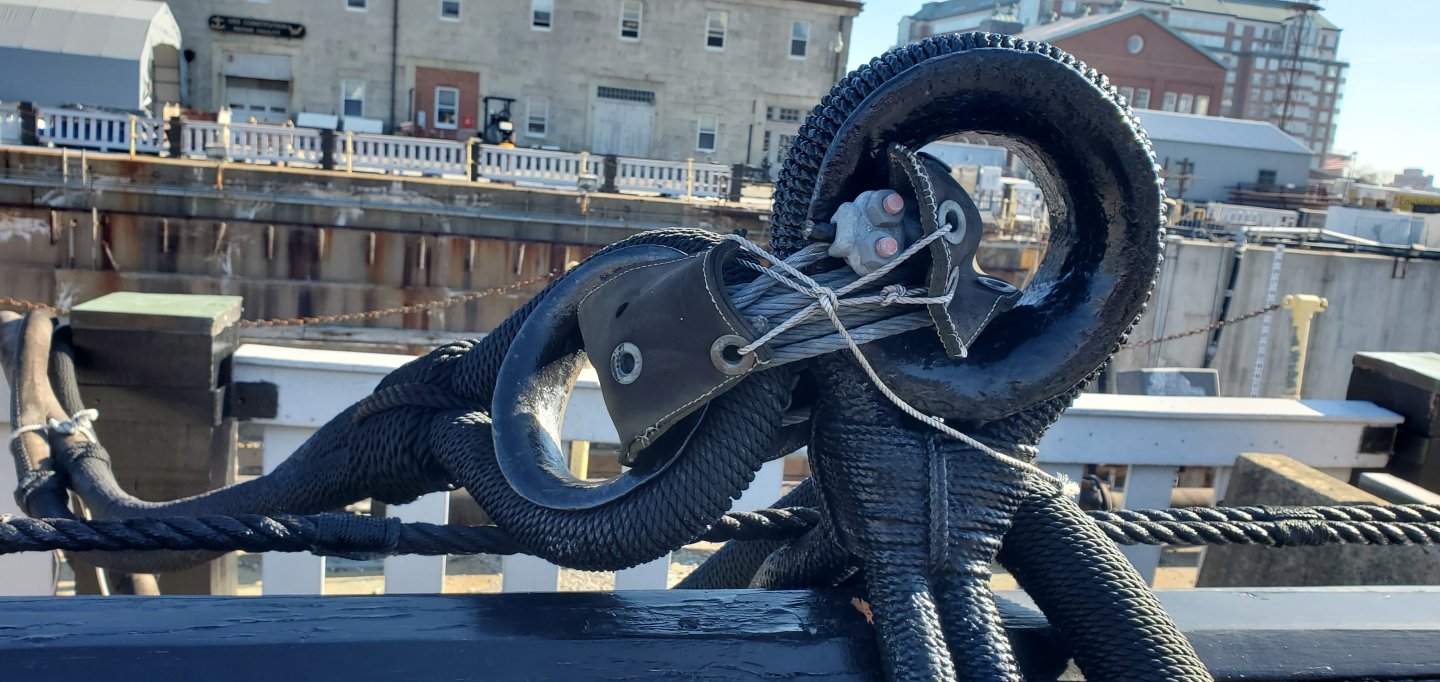
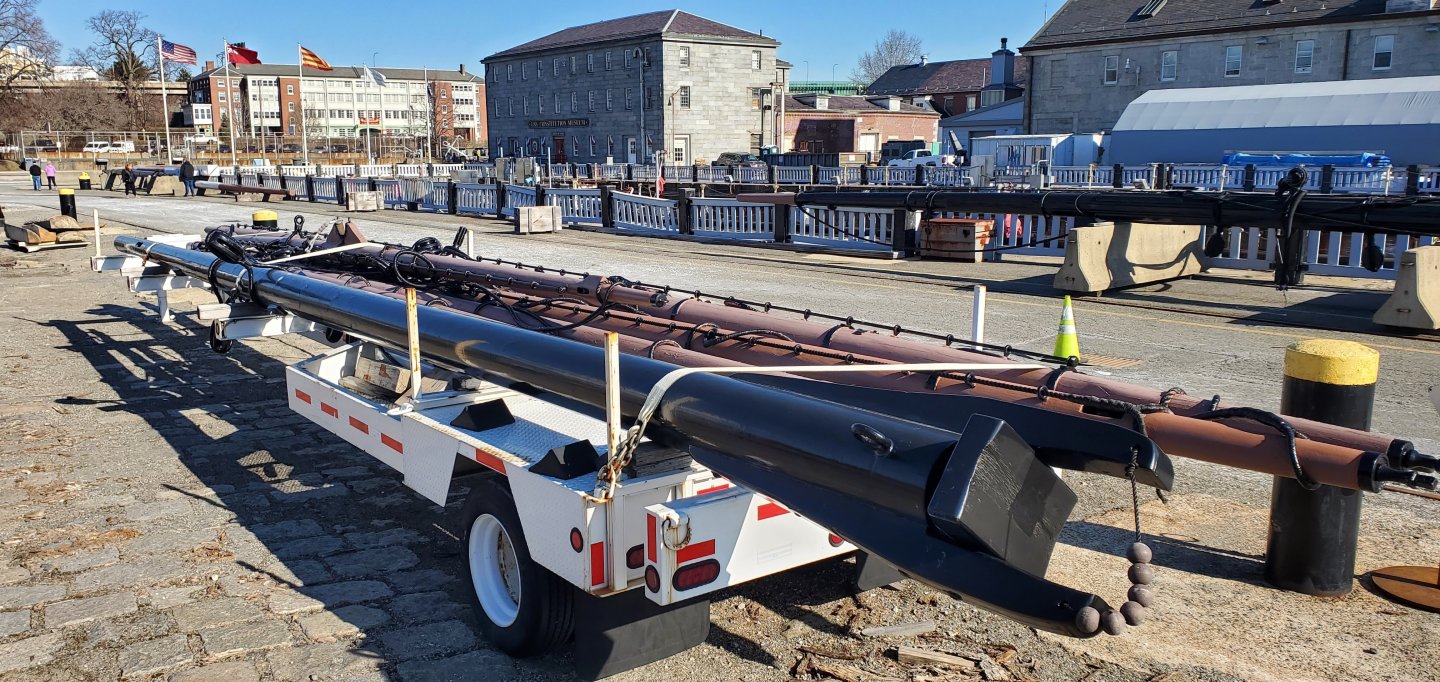
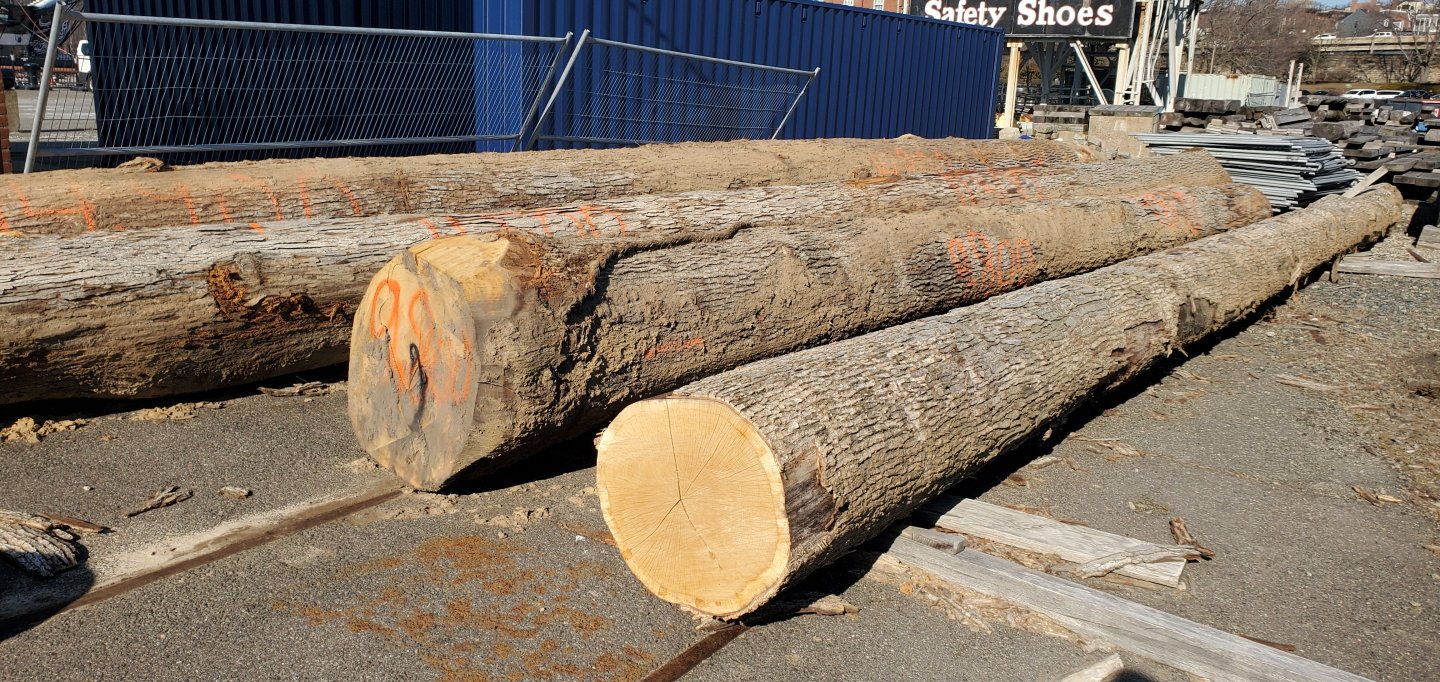
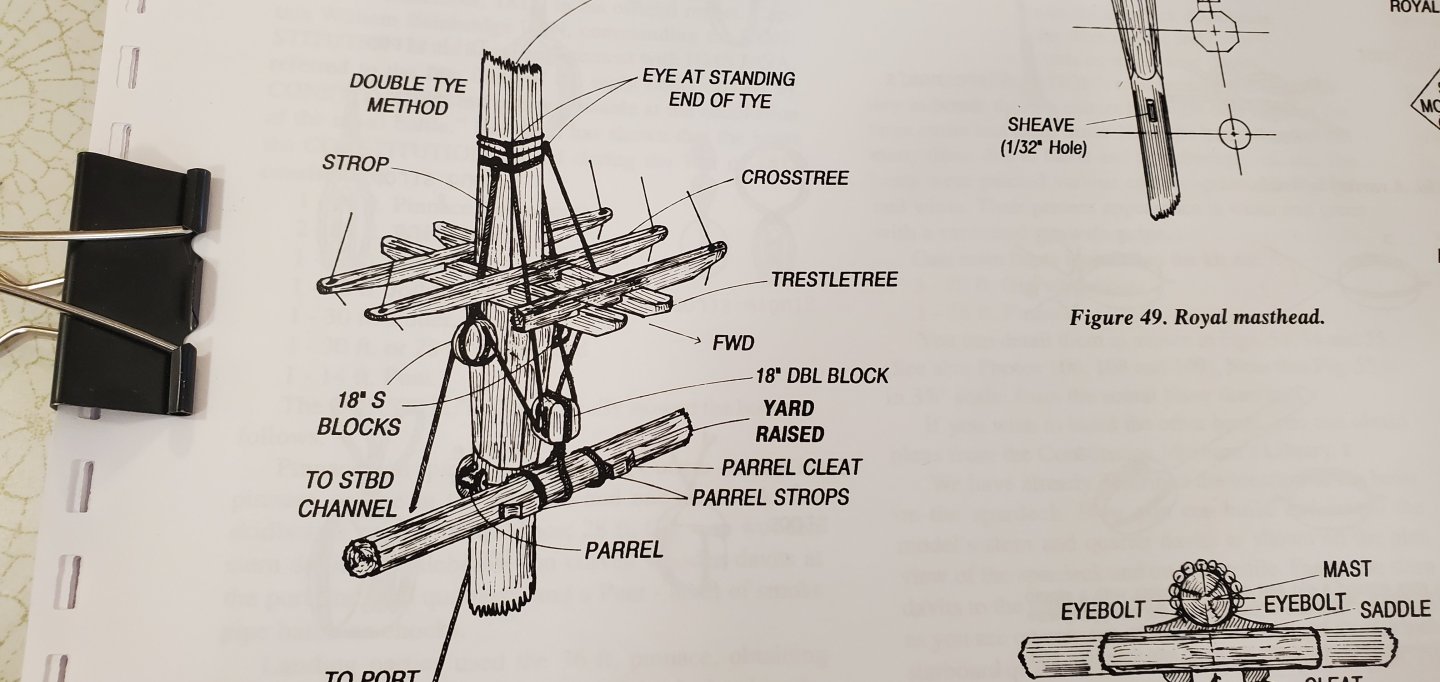
They are already accustomed to a lot of colorful language coming from the house during these builds, so they might appreciate that new hum! I was in Boston the past few days retrieving my SIBs from the ship model show after it concluded at the USS Constitution museum. Olha Batchvarov, who is a superb ship modeler with a great youtube channel, took part in the show/competition and put together a very nice video highlighting many of the models in the show. If you want to take a look at it, here's the link: https://www.youtube.com/watch?v=d1sGeEI7xfo&t=10s Winter is an interesting time to visit the Charleston Navy Yard, where the USS Constitution is docked. All the yards, top masts, top gallant masts, royal masts, and things above are removed from the ship and you can find some of them lying around the yard. It's a great opportunity to have an up close look and get a real perspective on how large they are. Plus, some of the rigging is still attached, which is helpful to me for the stage I'm at with this build. Here are a few pics I took while wandering around the area. The first is either the main yard or the fore yard. The jogger gives you a good idea of how long and large the yard actually is. The Constitution museum is the boxy gray building in the background on the far left. There was a discussion earlier in this build log about the slings that hold up the main yard and the fore yard. The question was whether the rope was eye-spliced or looped around an iron ring. Fortunately for me, the sling was still attached to that main (or fore) yard so it gave me the the opportunity to take a close look at how it was configured. As you can see in the pic below, the rope for the upper part of the sling is looped around an iron ring with a throat seizing. The rope for the lower part of the sling is double-stacked around the yard and another iron ring. This is basically the way I configured my slings (except I did not double-stack the rope for the lower part), so I feel good about what I've done. Here's a trailer holding some assorted smaller yards and what I believe is the gaff (painted black) because it has that block in the middle which I would think is for a lift. The next couple of pictures are helpful for what I was working on right before I left for Boston - the saddles and single-row parrels (single-row meaning one row of trucks) for the top gallant yards. There were 2 things I was trying to figure out from the BlueJacket instructions. First, the drawing showed 2 eyebolts, but I was not sure exactly where they belonged. Second, I could not tell from the drawing if the single-row parrels had ribs in between each truck. Based on these pictures, the answer is no. WOOHOO!! I was not looking forward to making 50 more of those tiny things! And then there's this. It appears to be a freshly painted section of the bulwark including the gun port. I can't see them cutting out a section of the actual bulwark on the ship and inserting this, so I'm not sure what it's purpose is. Maybe it will be put in the museum? And finally, some very large timbers lying around. I'm curious to know what's in store for these giants, but there was nobody around to ask.


- 301 replies
-
- 16
-
-
-
- Constitution
- Bluejacket Shipcrafters
- (and 1 more)
-
Uh, that would be me - the world's worst fisherman. 😠
-
Those penguins are AMAZING, Gary! I am so jealous!!!
-
Thanks to everyone for the kind words on the parrel. The biggest challenge was making 1 of those dang ribs and then trying to make 30 more that were identical. So don't look too closely at them as I don't think I quite achieved 6 sigma in my process variation. In the middle of it all, I started thinking about @Ian_Grant and the way he's been using 3-D printing on his WW1 Battle Cruiser Restoration. Hmmmm!
- 301 replies
-
- 5
-
-
- Constitution
- Bluejacket Shipcrafters
- (and 1 more)
-
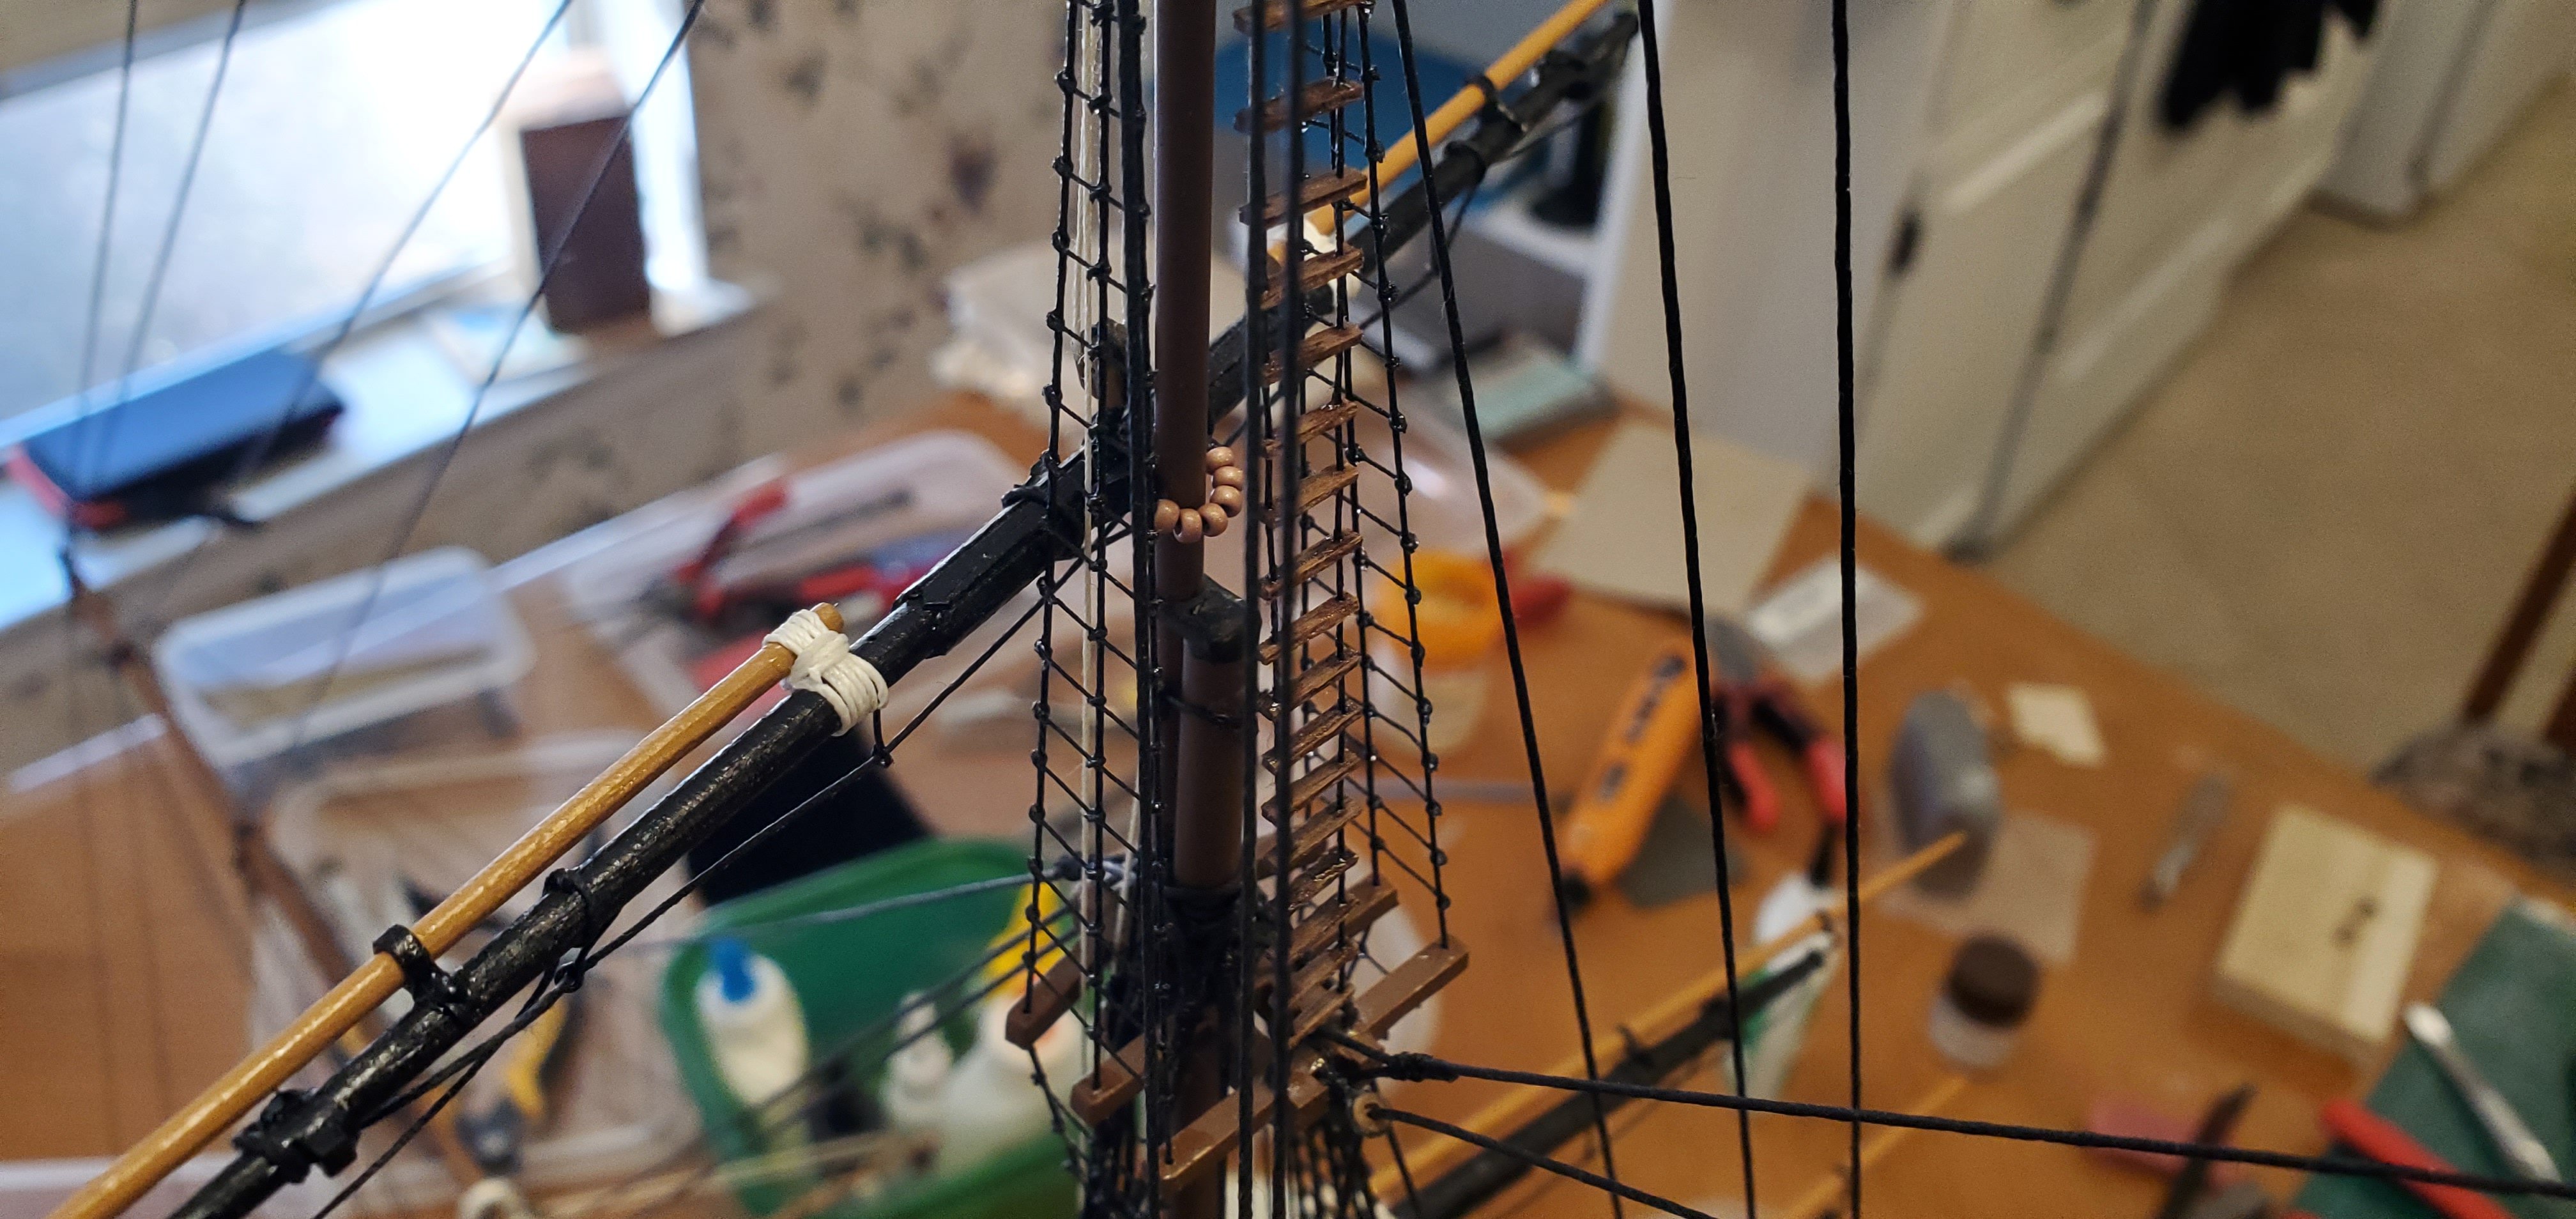
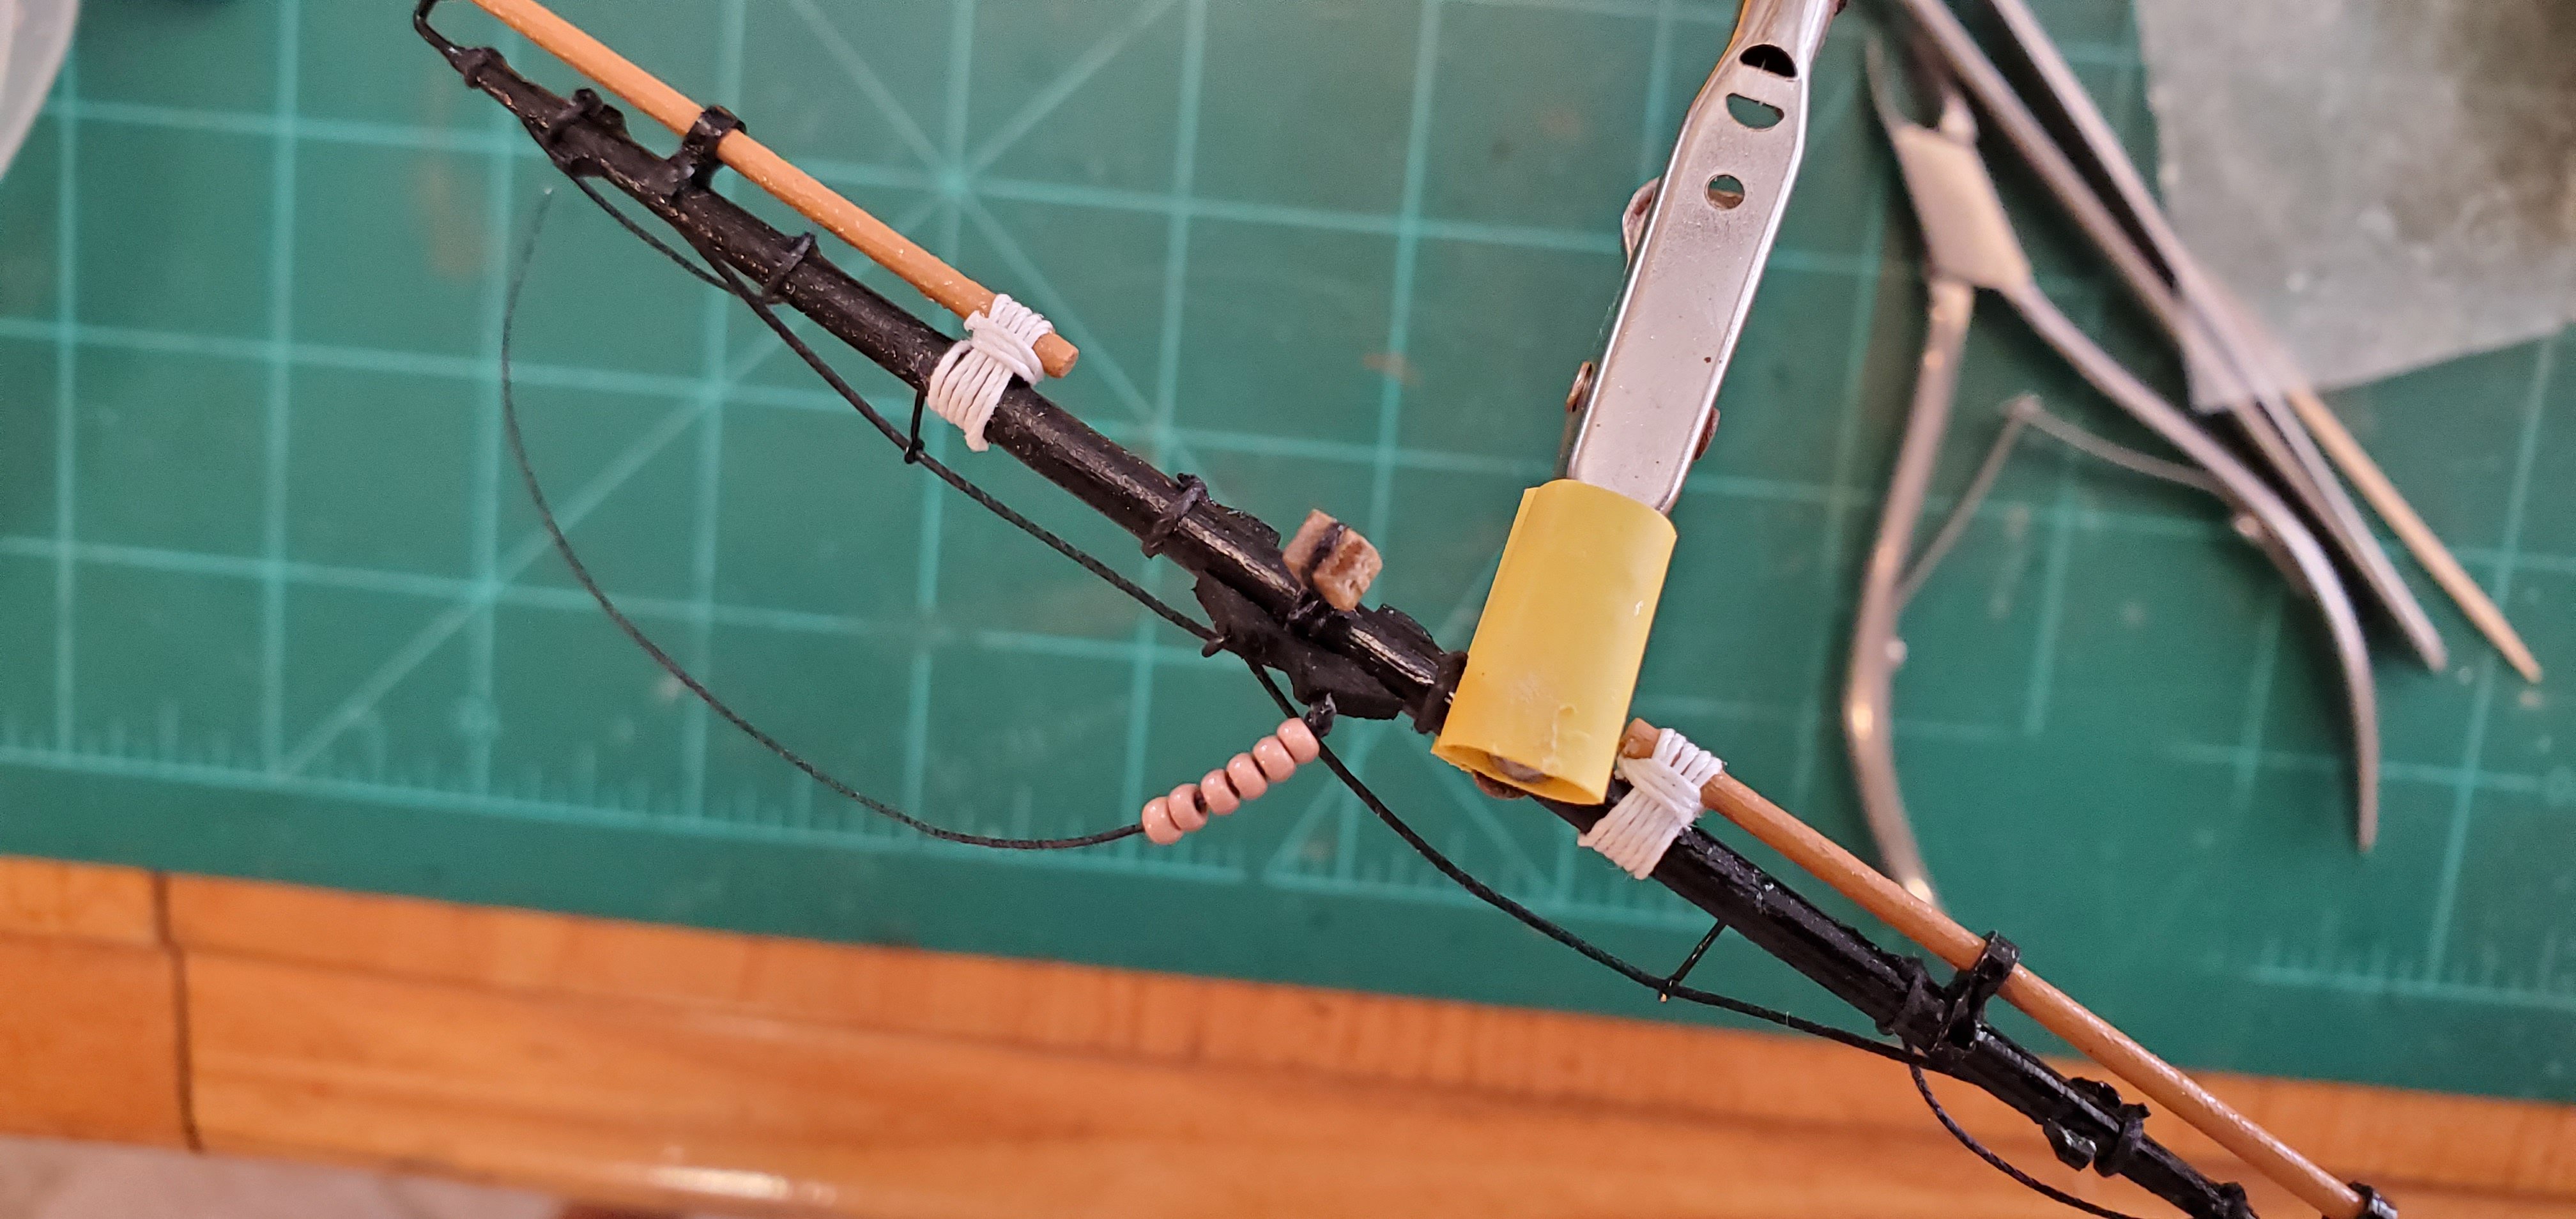
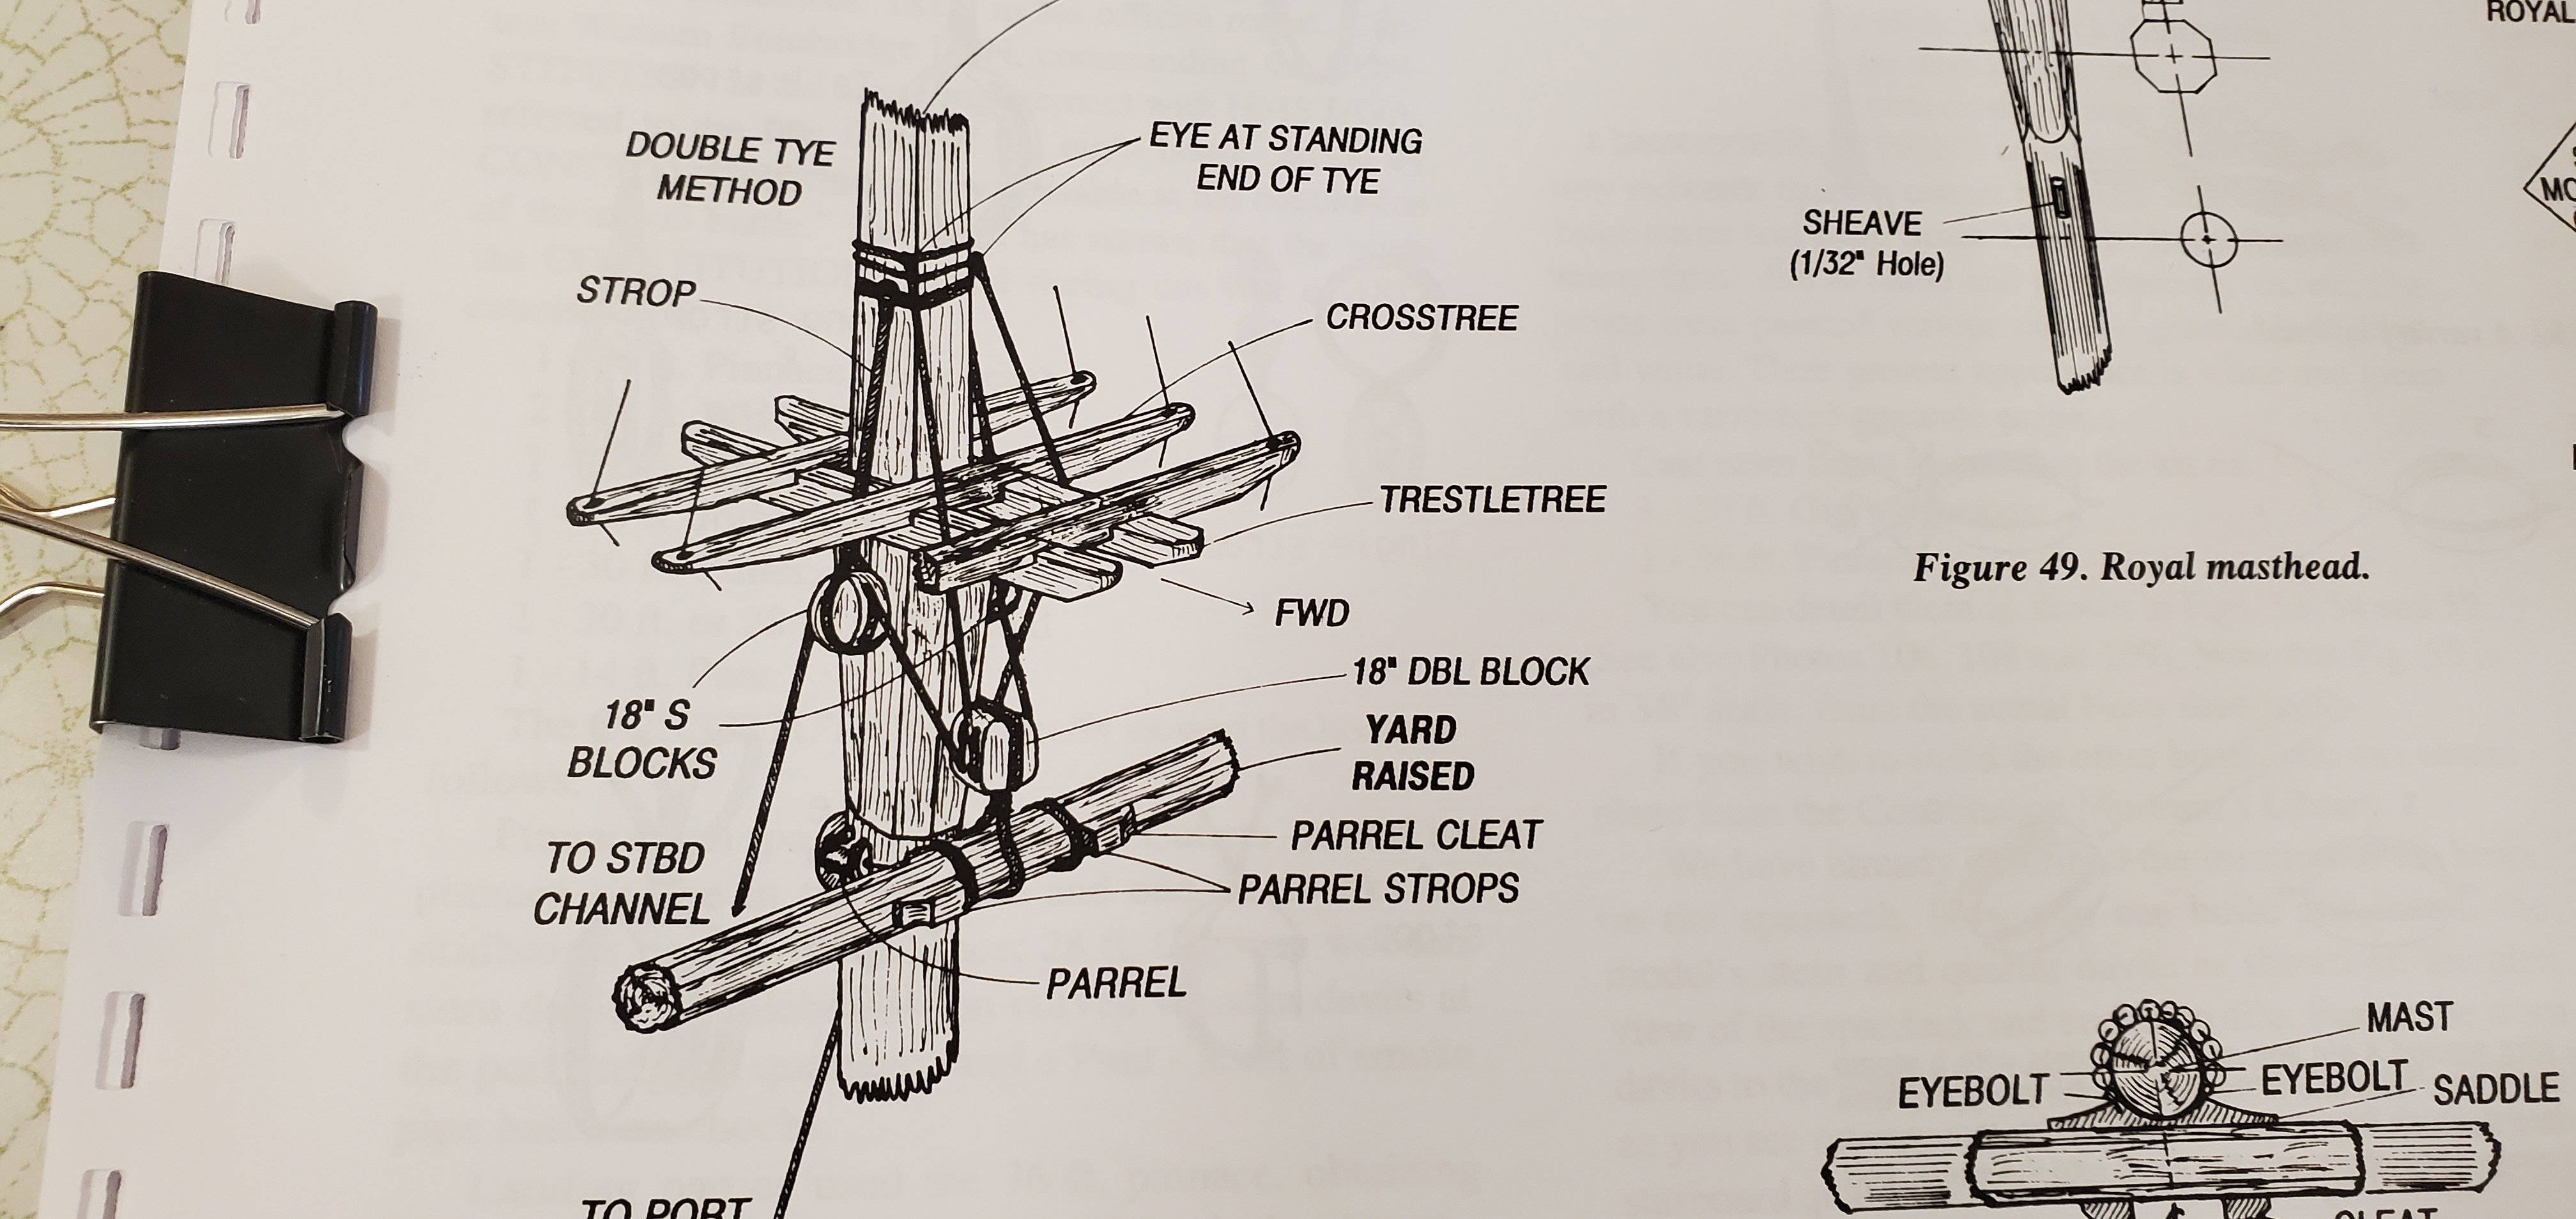
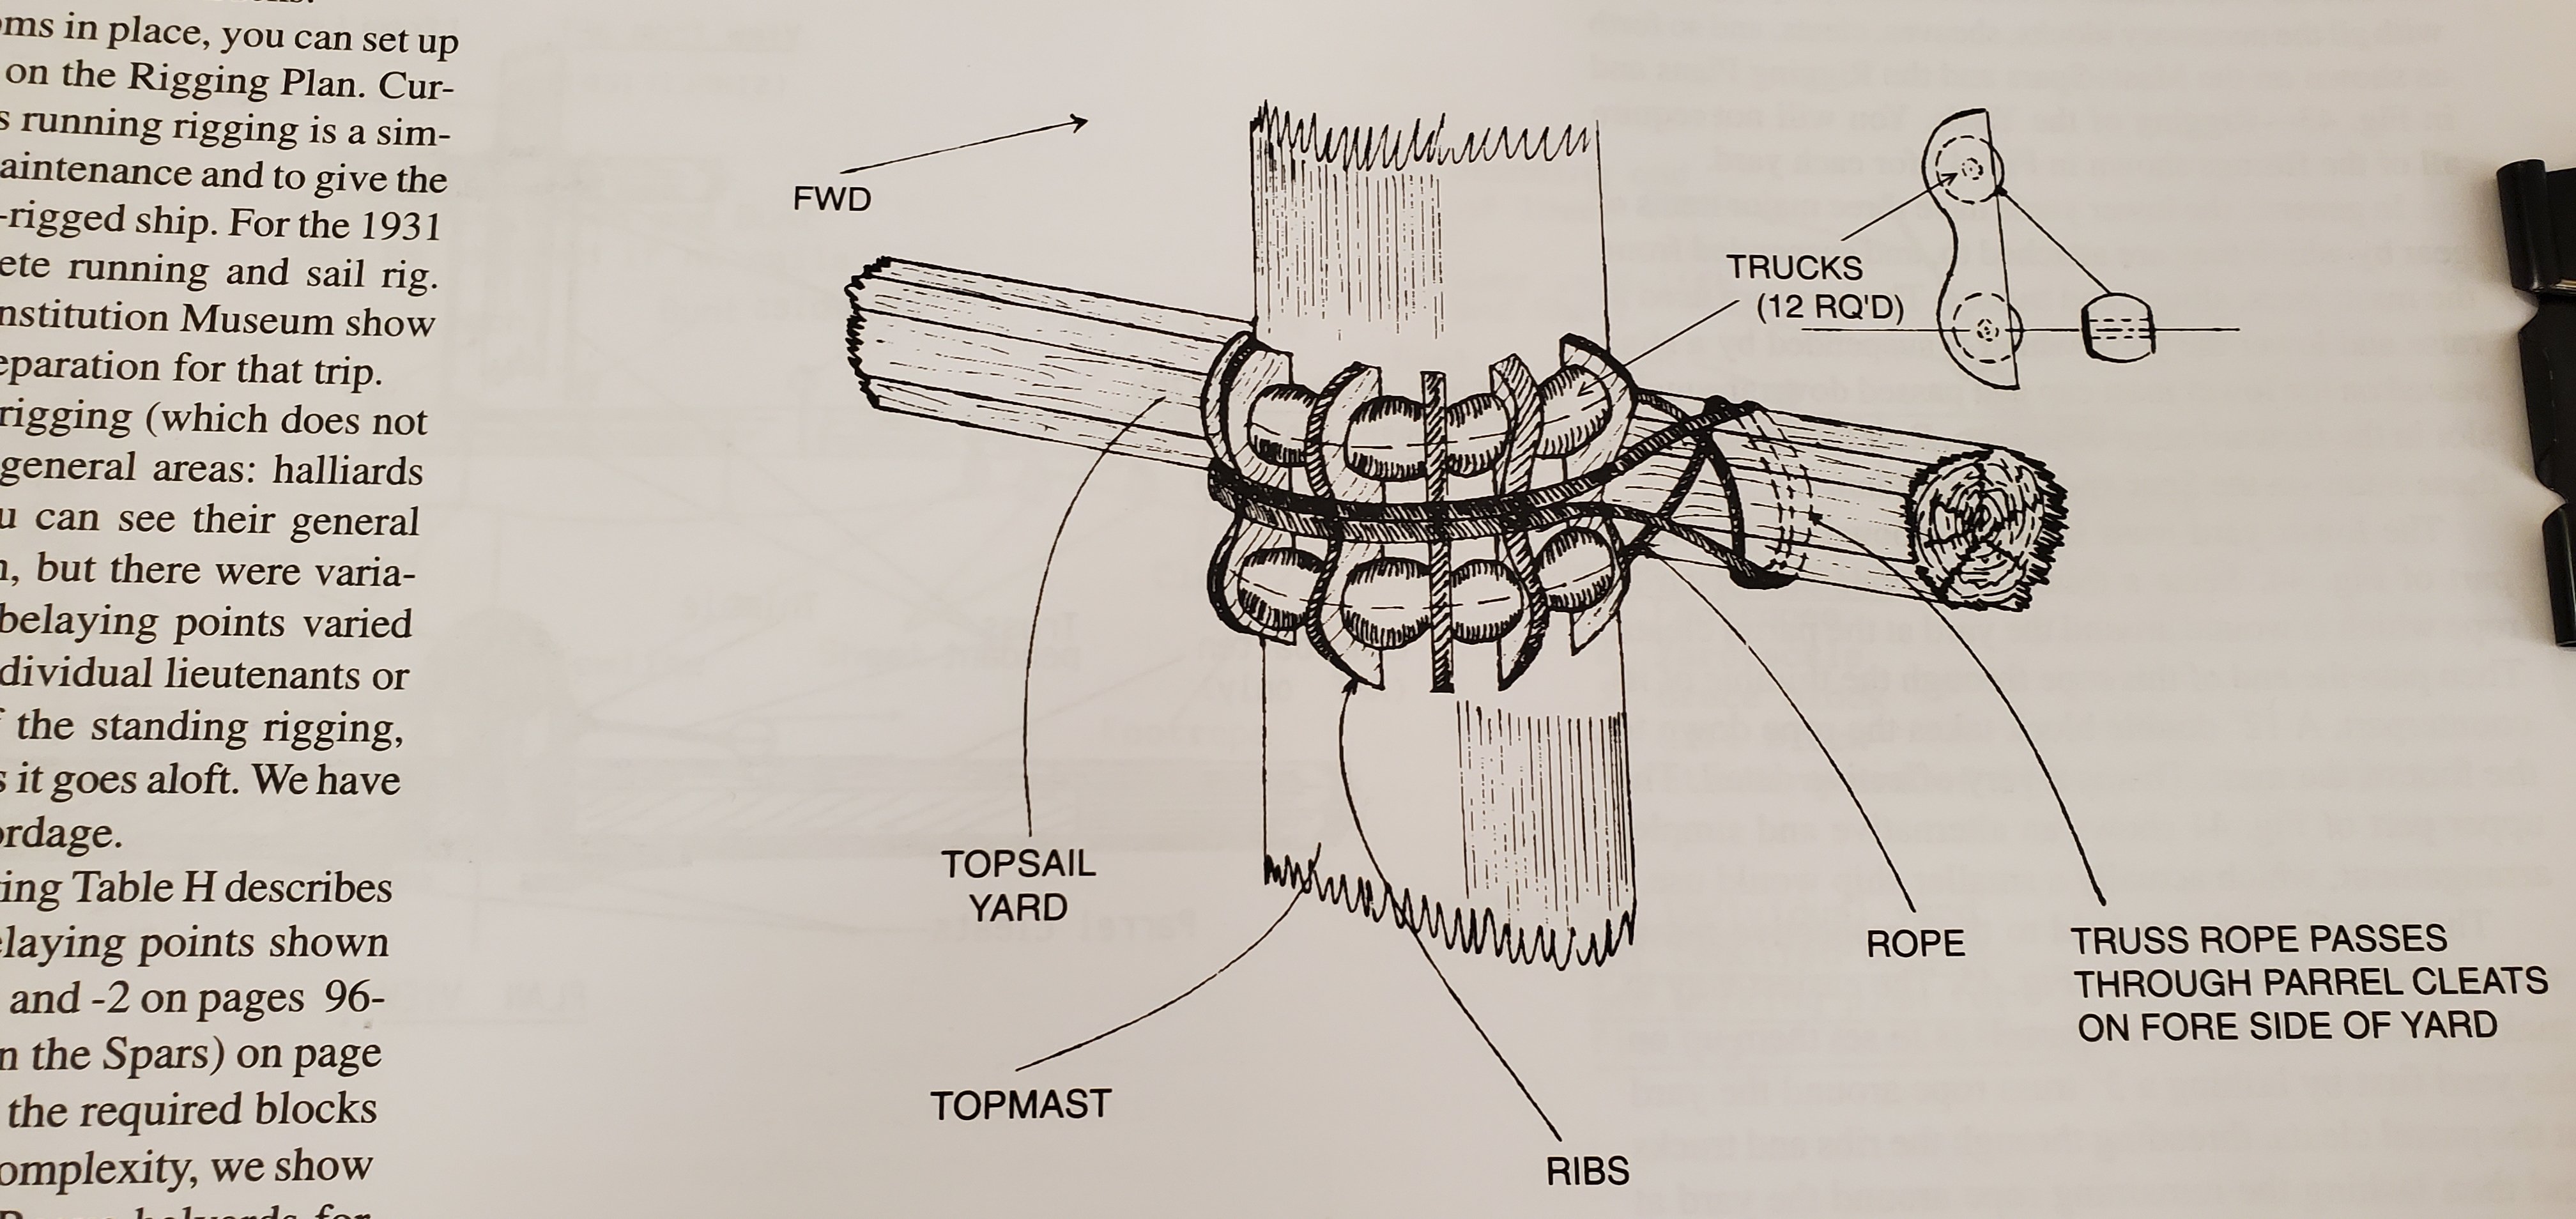
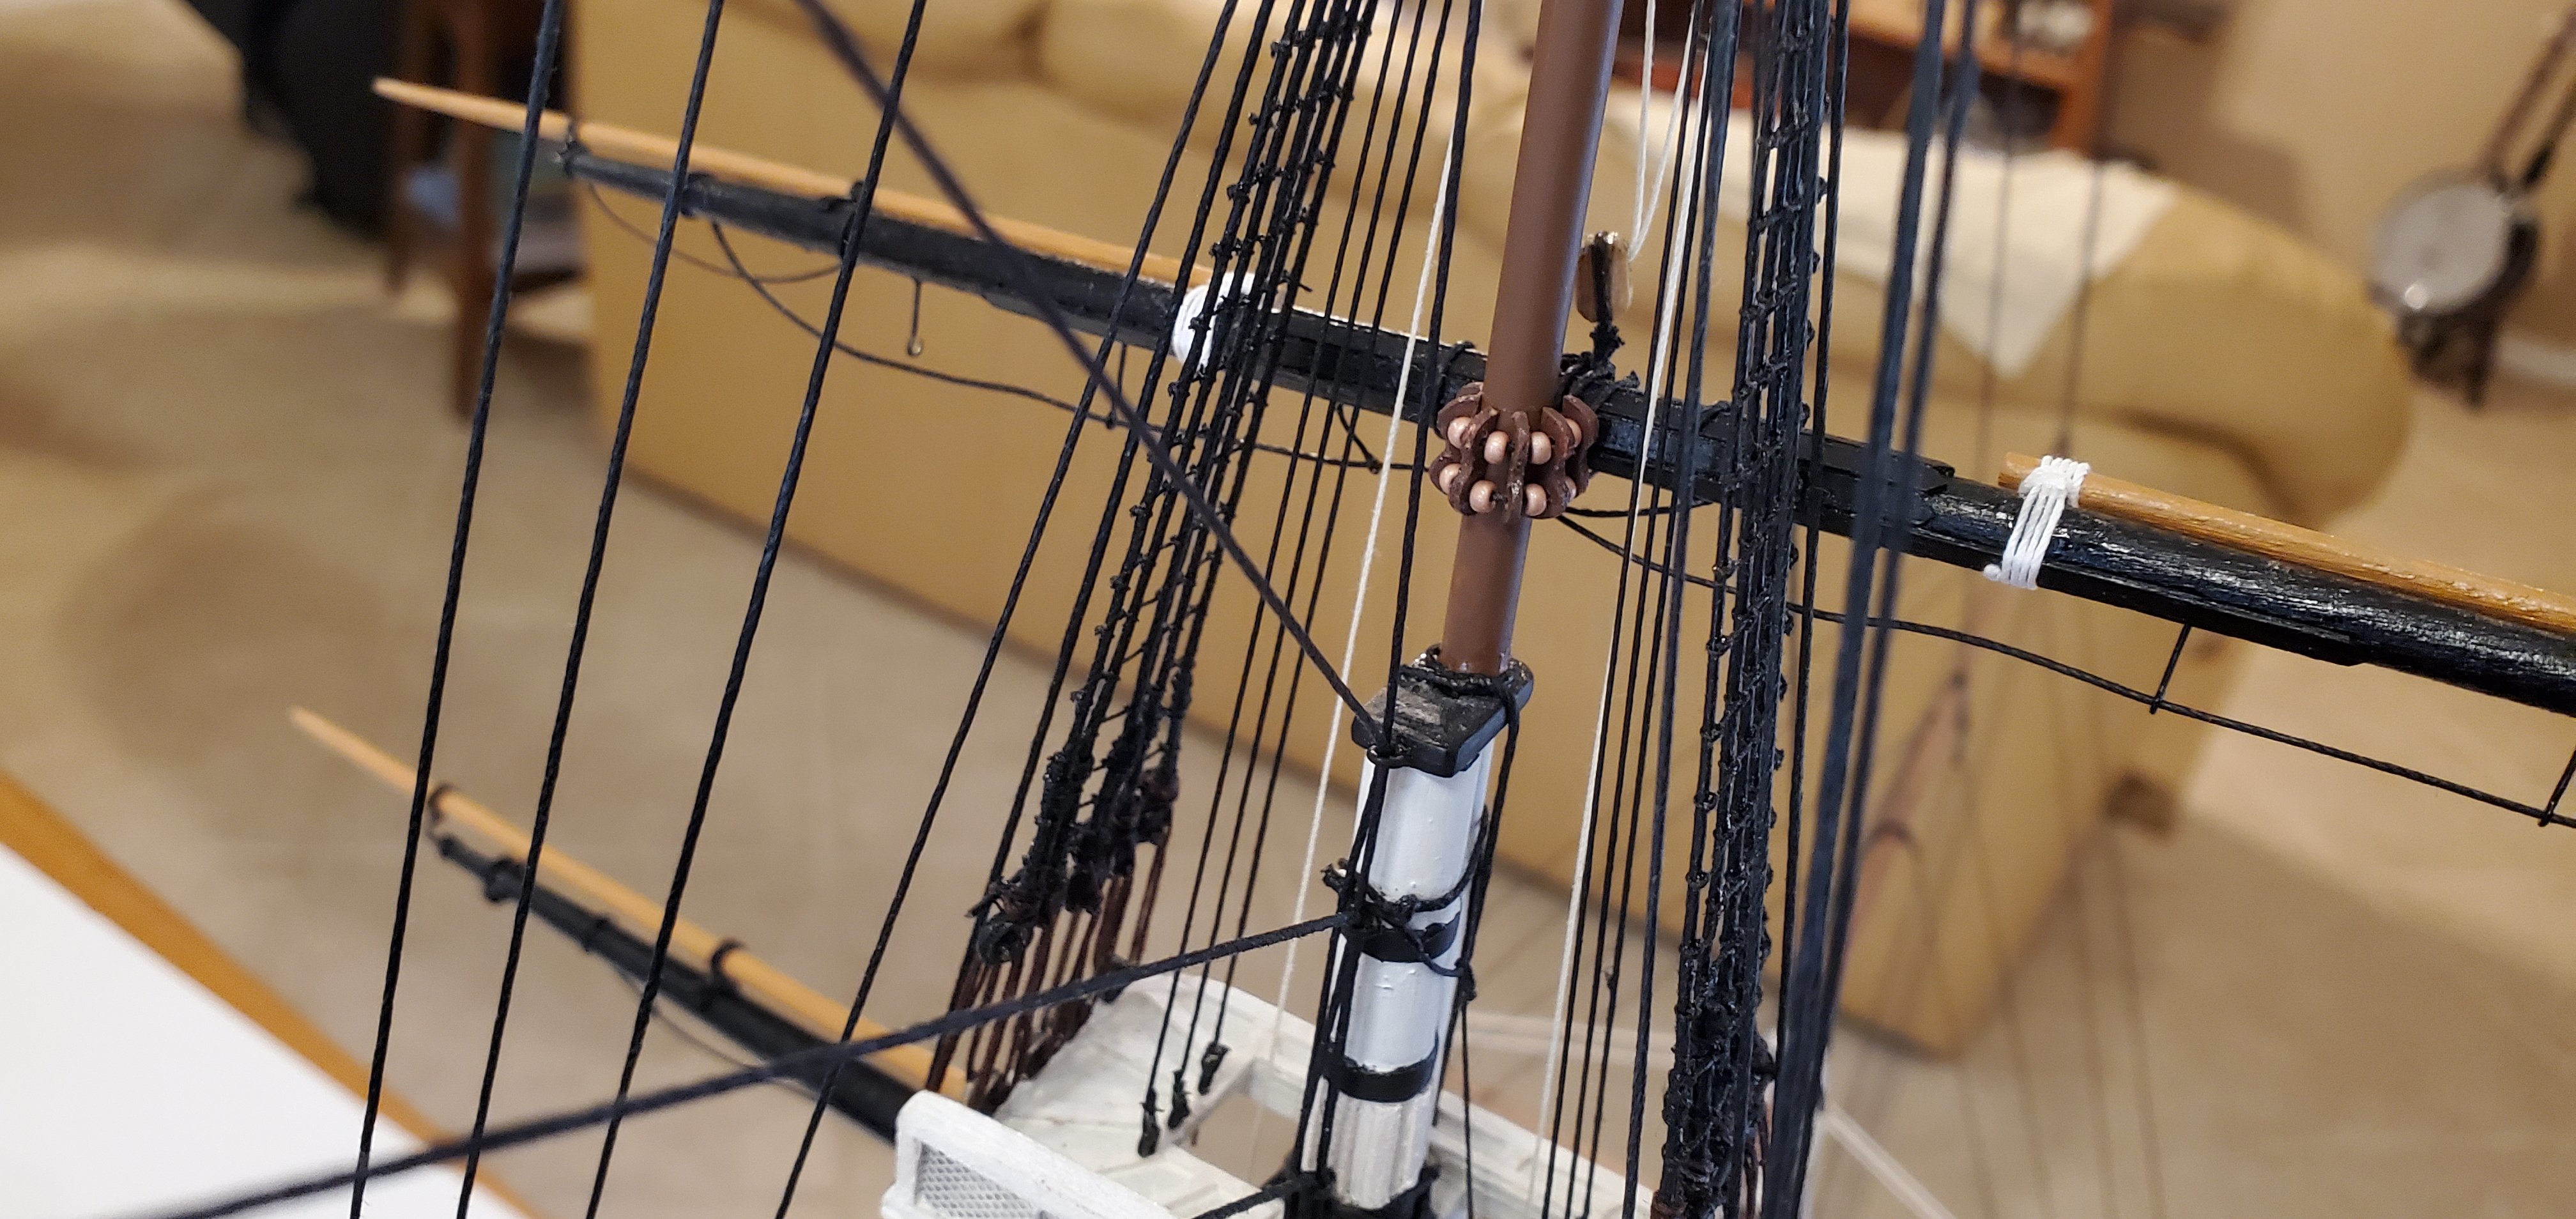
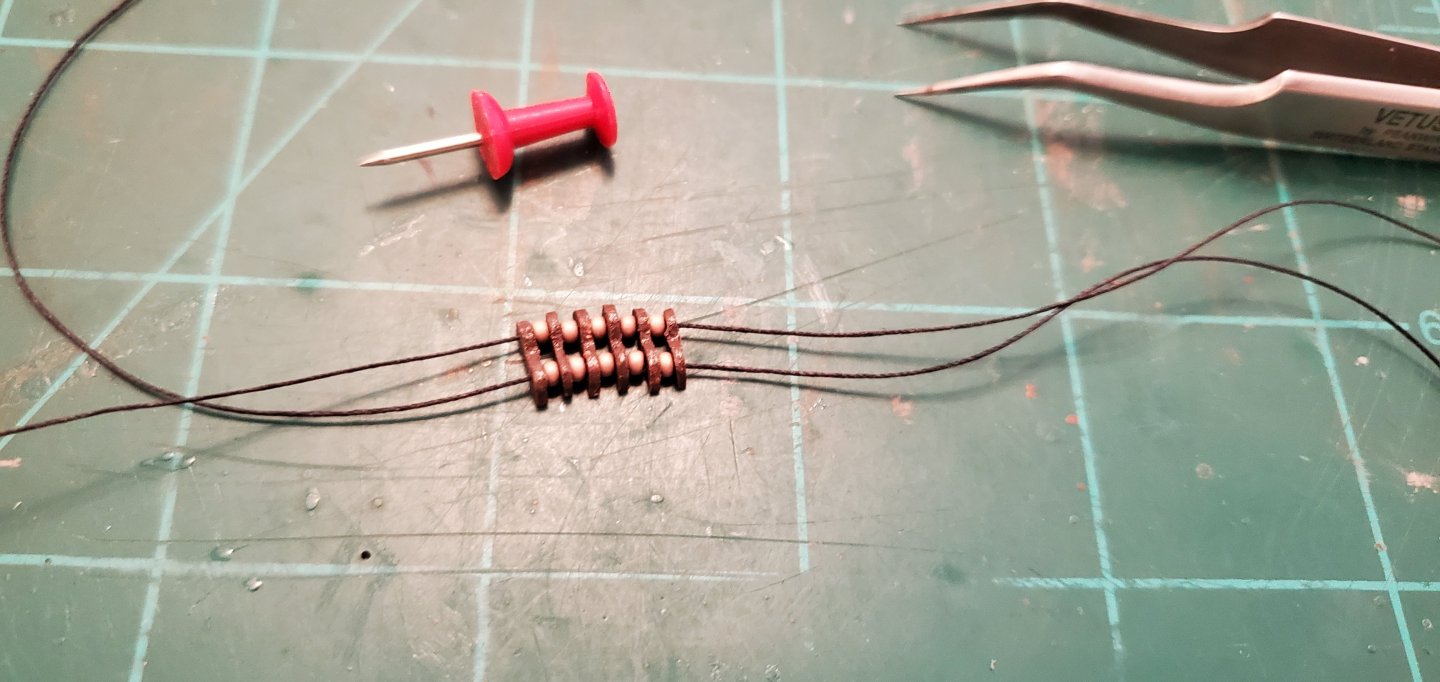
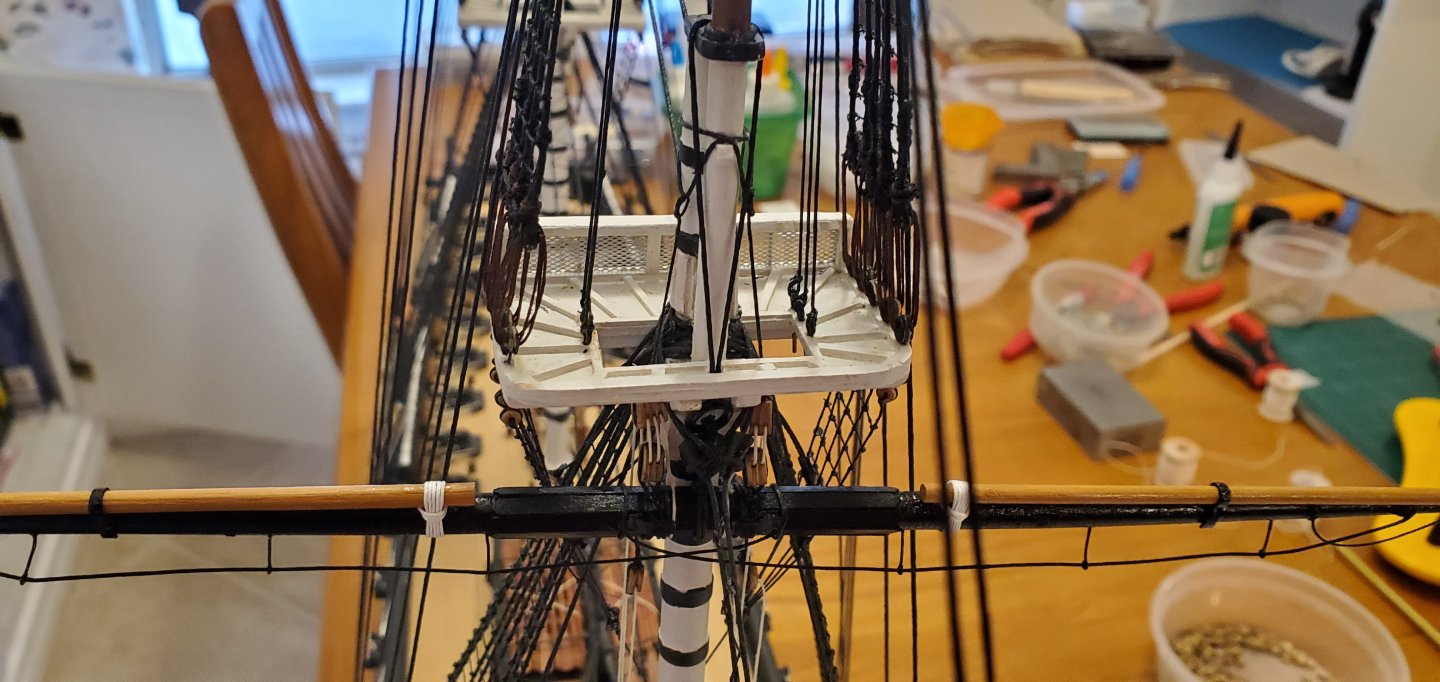
I went back and reviewed other build logs and I can see where some rig the truss pendants just as you describe. When I read the description and look at the picture from the BlueJacket instructions, I still don't see the the rigging going upwards to the mast top and then back down. But what you describe makes sense, so I will go back and see if I can reconfigure what I've already done. In the meantime, I got the main lower yard hung (which means I will need to reconfigure 2 sets of tackle) and started work on the fore topsail yard. The topsail yards are hung with different rigging than the lower yards. Rather than a sling, the lower yards have a double block in the center of the yard with 1 line tied off above the crosstrees and the other running through 2 single blocks on each side of the mast just below the trees and then down to the deck. Here's the picture from the instructions. The yards is secured to the mast with a parrel which includes a double row of trucks. I assume these trucks act as rollers to facilitate the yard being raised or lowered. I'm using 2mm beads for the rollers with the dividers made from 1mm thick basswood. Here's the fore topsail yard hung with the parrel in place. And the front view.


- 301 replies
-
- 16
-
-
-
- Constitution
- Bluejacket Shipcrafters
- (and 1 more)
-
I'll take "Things you won't hear in Texas" for $200, Alex.
-
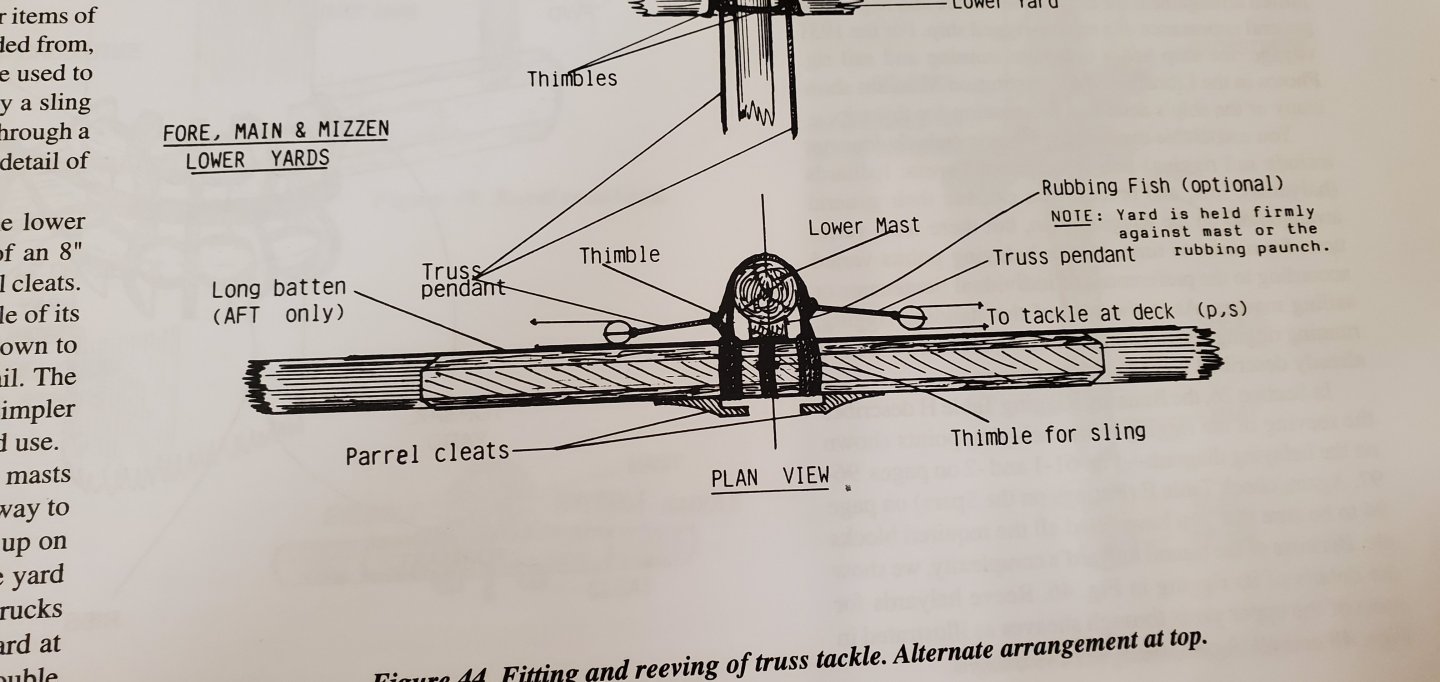
Hey Henry! Thanks for the explanations on the sling and the truss pendants. That makes a lot of sense. I've been trying to follow the BlueJacket instructions as close as I can and they seem to read a bit differently, unless I am interpreting them wrong (which is a distinct possibility!). For the sling, the instructions say, "Set up over masthead, brought down through hole in foretop, and set up to sling thimble on yard with a lanyard." Throughout the instructions, thimbles seems to be interchangeable with bullseyes. I did not have any bullseyes large enough for this application so I decided to fashion brass rings as a substitute. Unfortunately, there were no pictures of the sling in the instructions to help. Regarding the truss tackle pendants. I really had a hard time interpreting what the instructions were saying, and that's even with a picture! As I mentioned above, I must have read it a hundred times trying to figure it out. Here are the instructions and the accompanying picture. "Seize a thimble into one end of a 8" rope which is wound around the yard at the parrel cleats. Then pass the end of this rope through the thimble of its counterpart. A block takes the rope down to the foot of the mast." I'm not 100% sure, but I believe I matched what the instructions were telling me to do. Perhaps there are multiple ways to rig the trusses depending on the timing of the construction or restoration?
- 301 replies
-
- 6
-
-
- Constitution
- Bluejacket Shipcrafters
- (and 1 more)
-
Amen to that, JC! The SIB work has definitely prepared me for drilling tiny holes in things and threading line in hard to reach places! You are probably right, Keith. I don't see any other logical way to accomplish that. Yes! What I would give for some detailed photos with labels, etc! I read the BlueJacket instructions about 100 times, then I study bunches of build logs with lots of great pics ( @xken and @KurtH have build logs that have been incredibly helpful), but I always seem to need a shot from a different angle to help me figure out exactly what to do. 😃 The truss pendants in particular!
- 301 replies
-
- 4
-
-
- Constitution
- Bluejacket Shipcrafters
- (and 1 more)
-
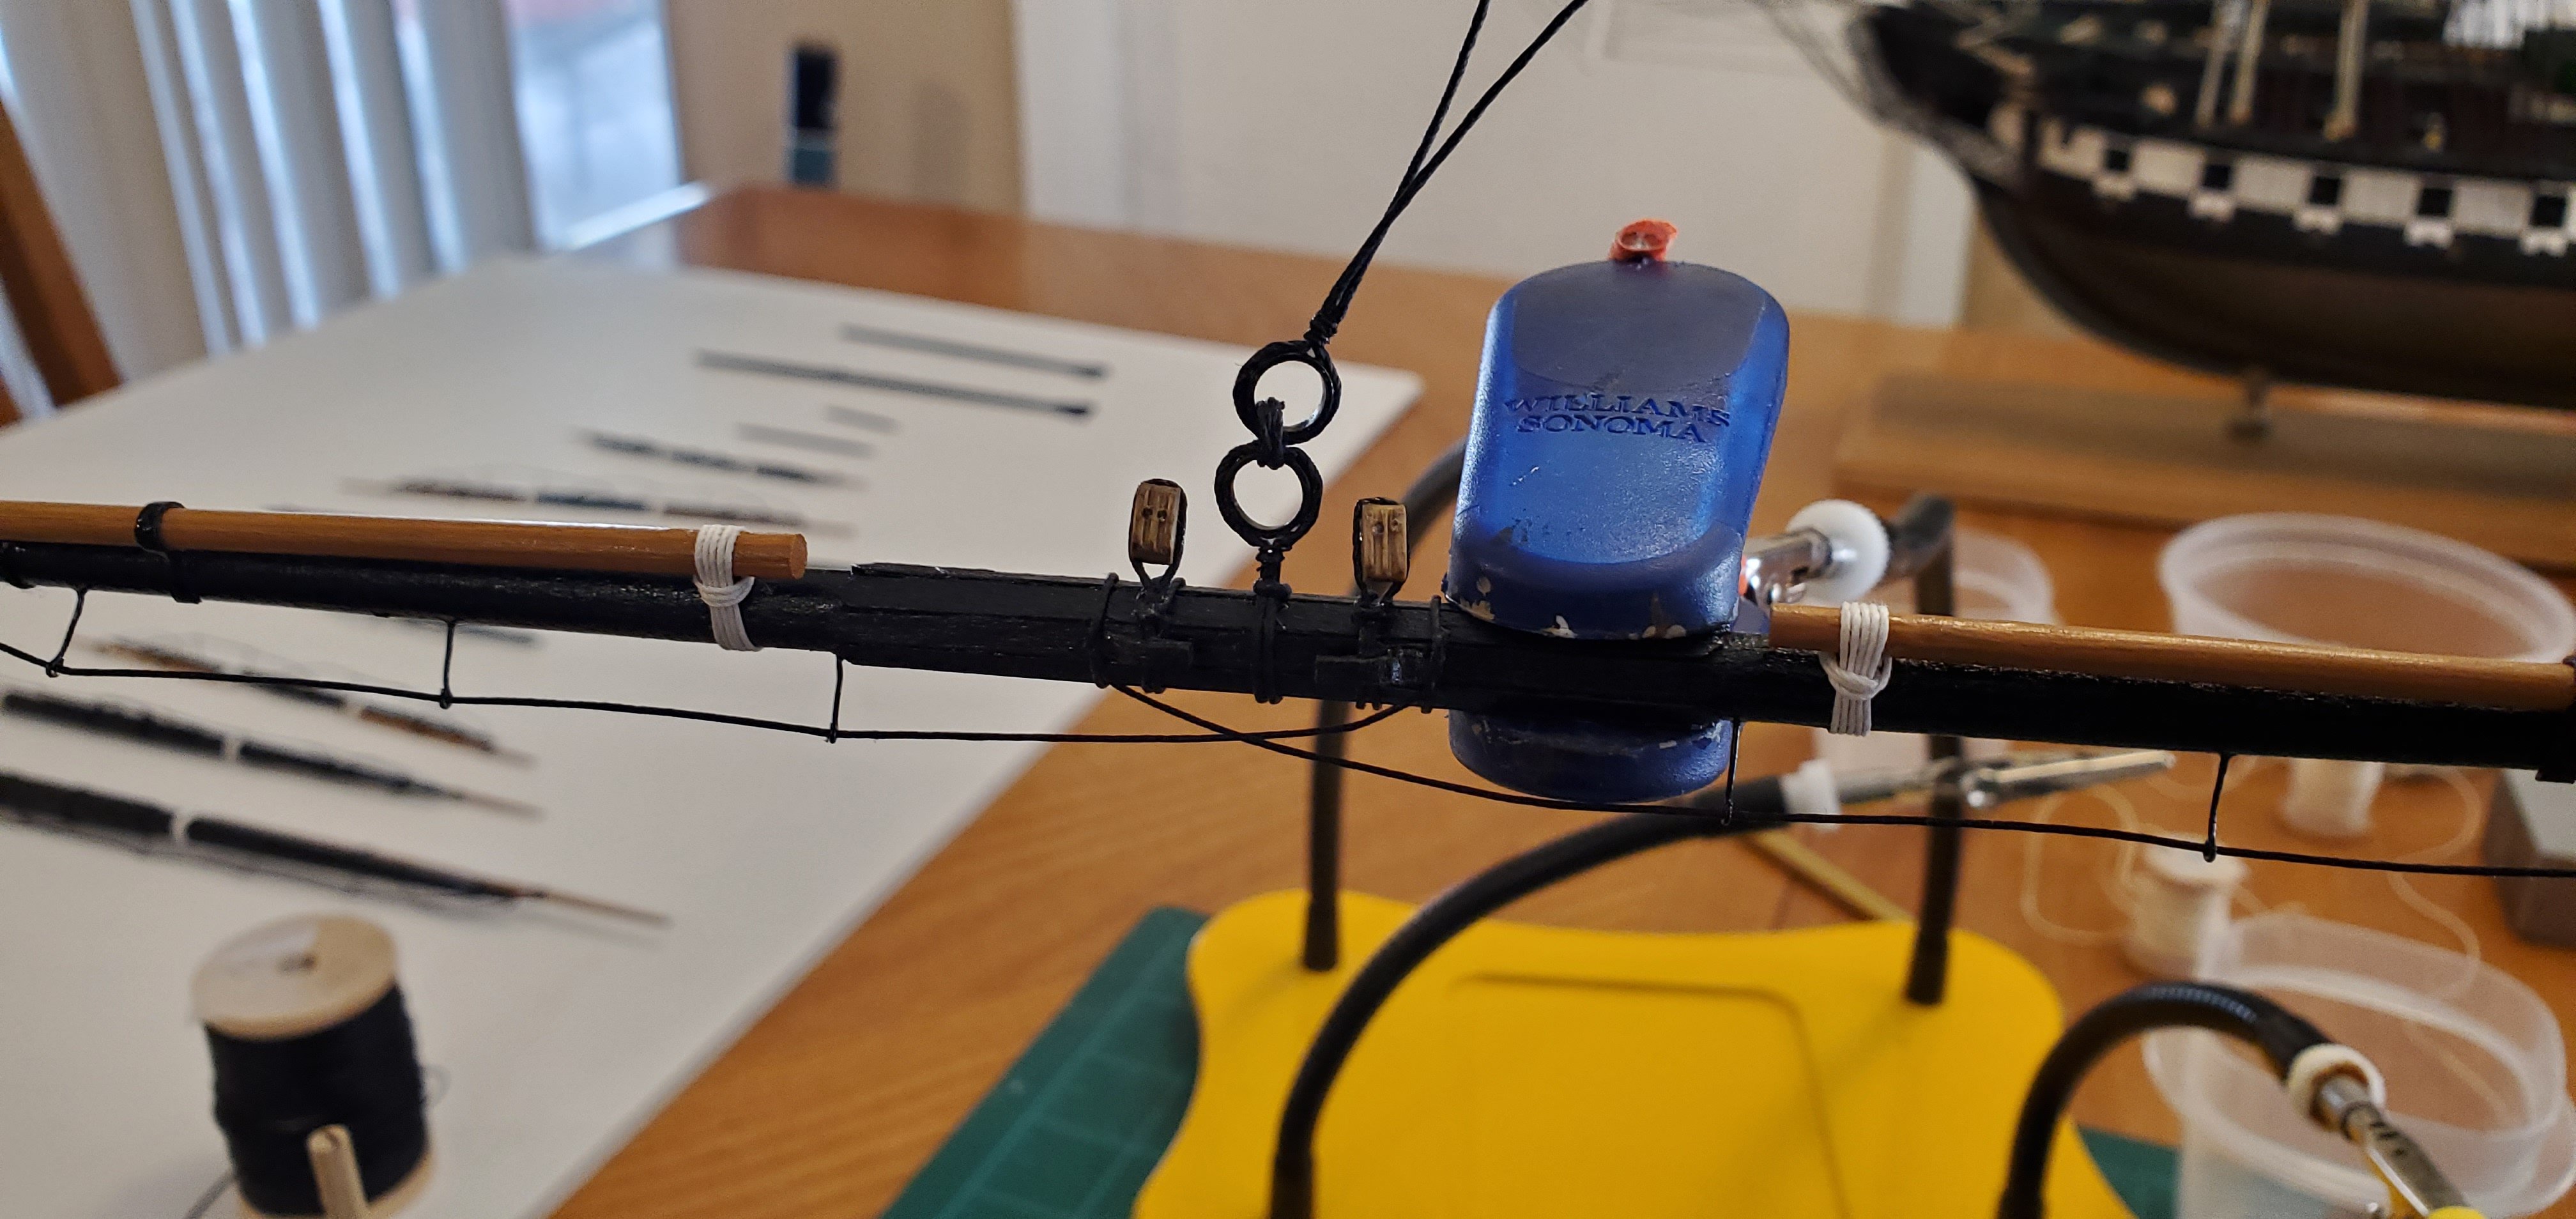
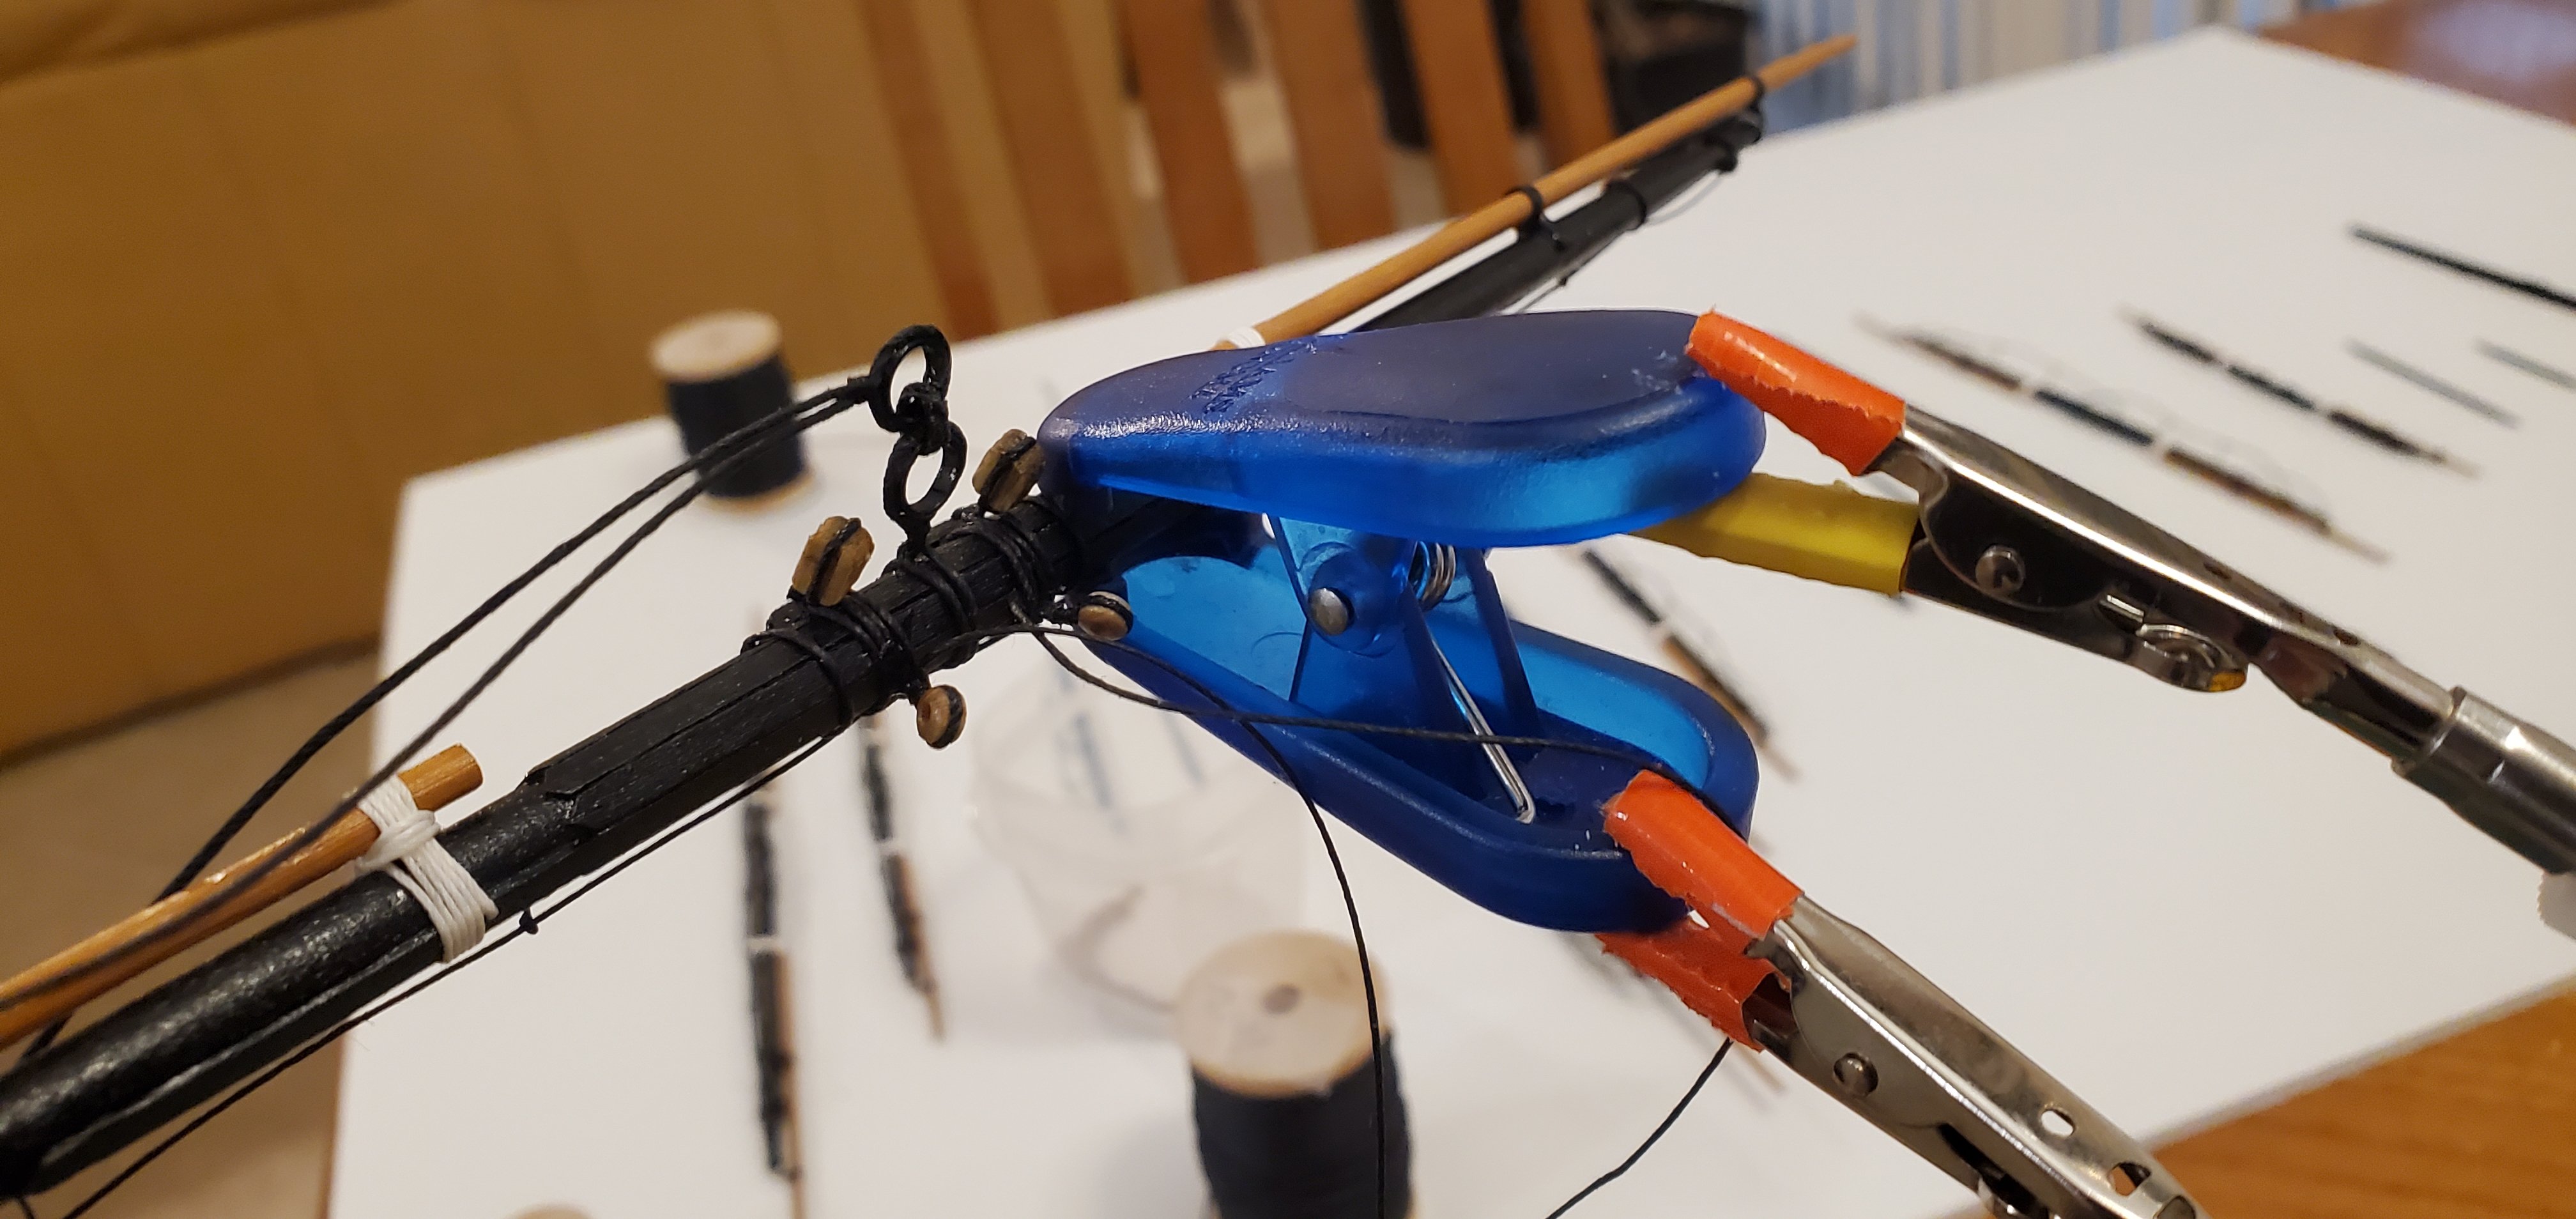
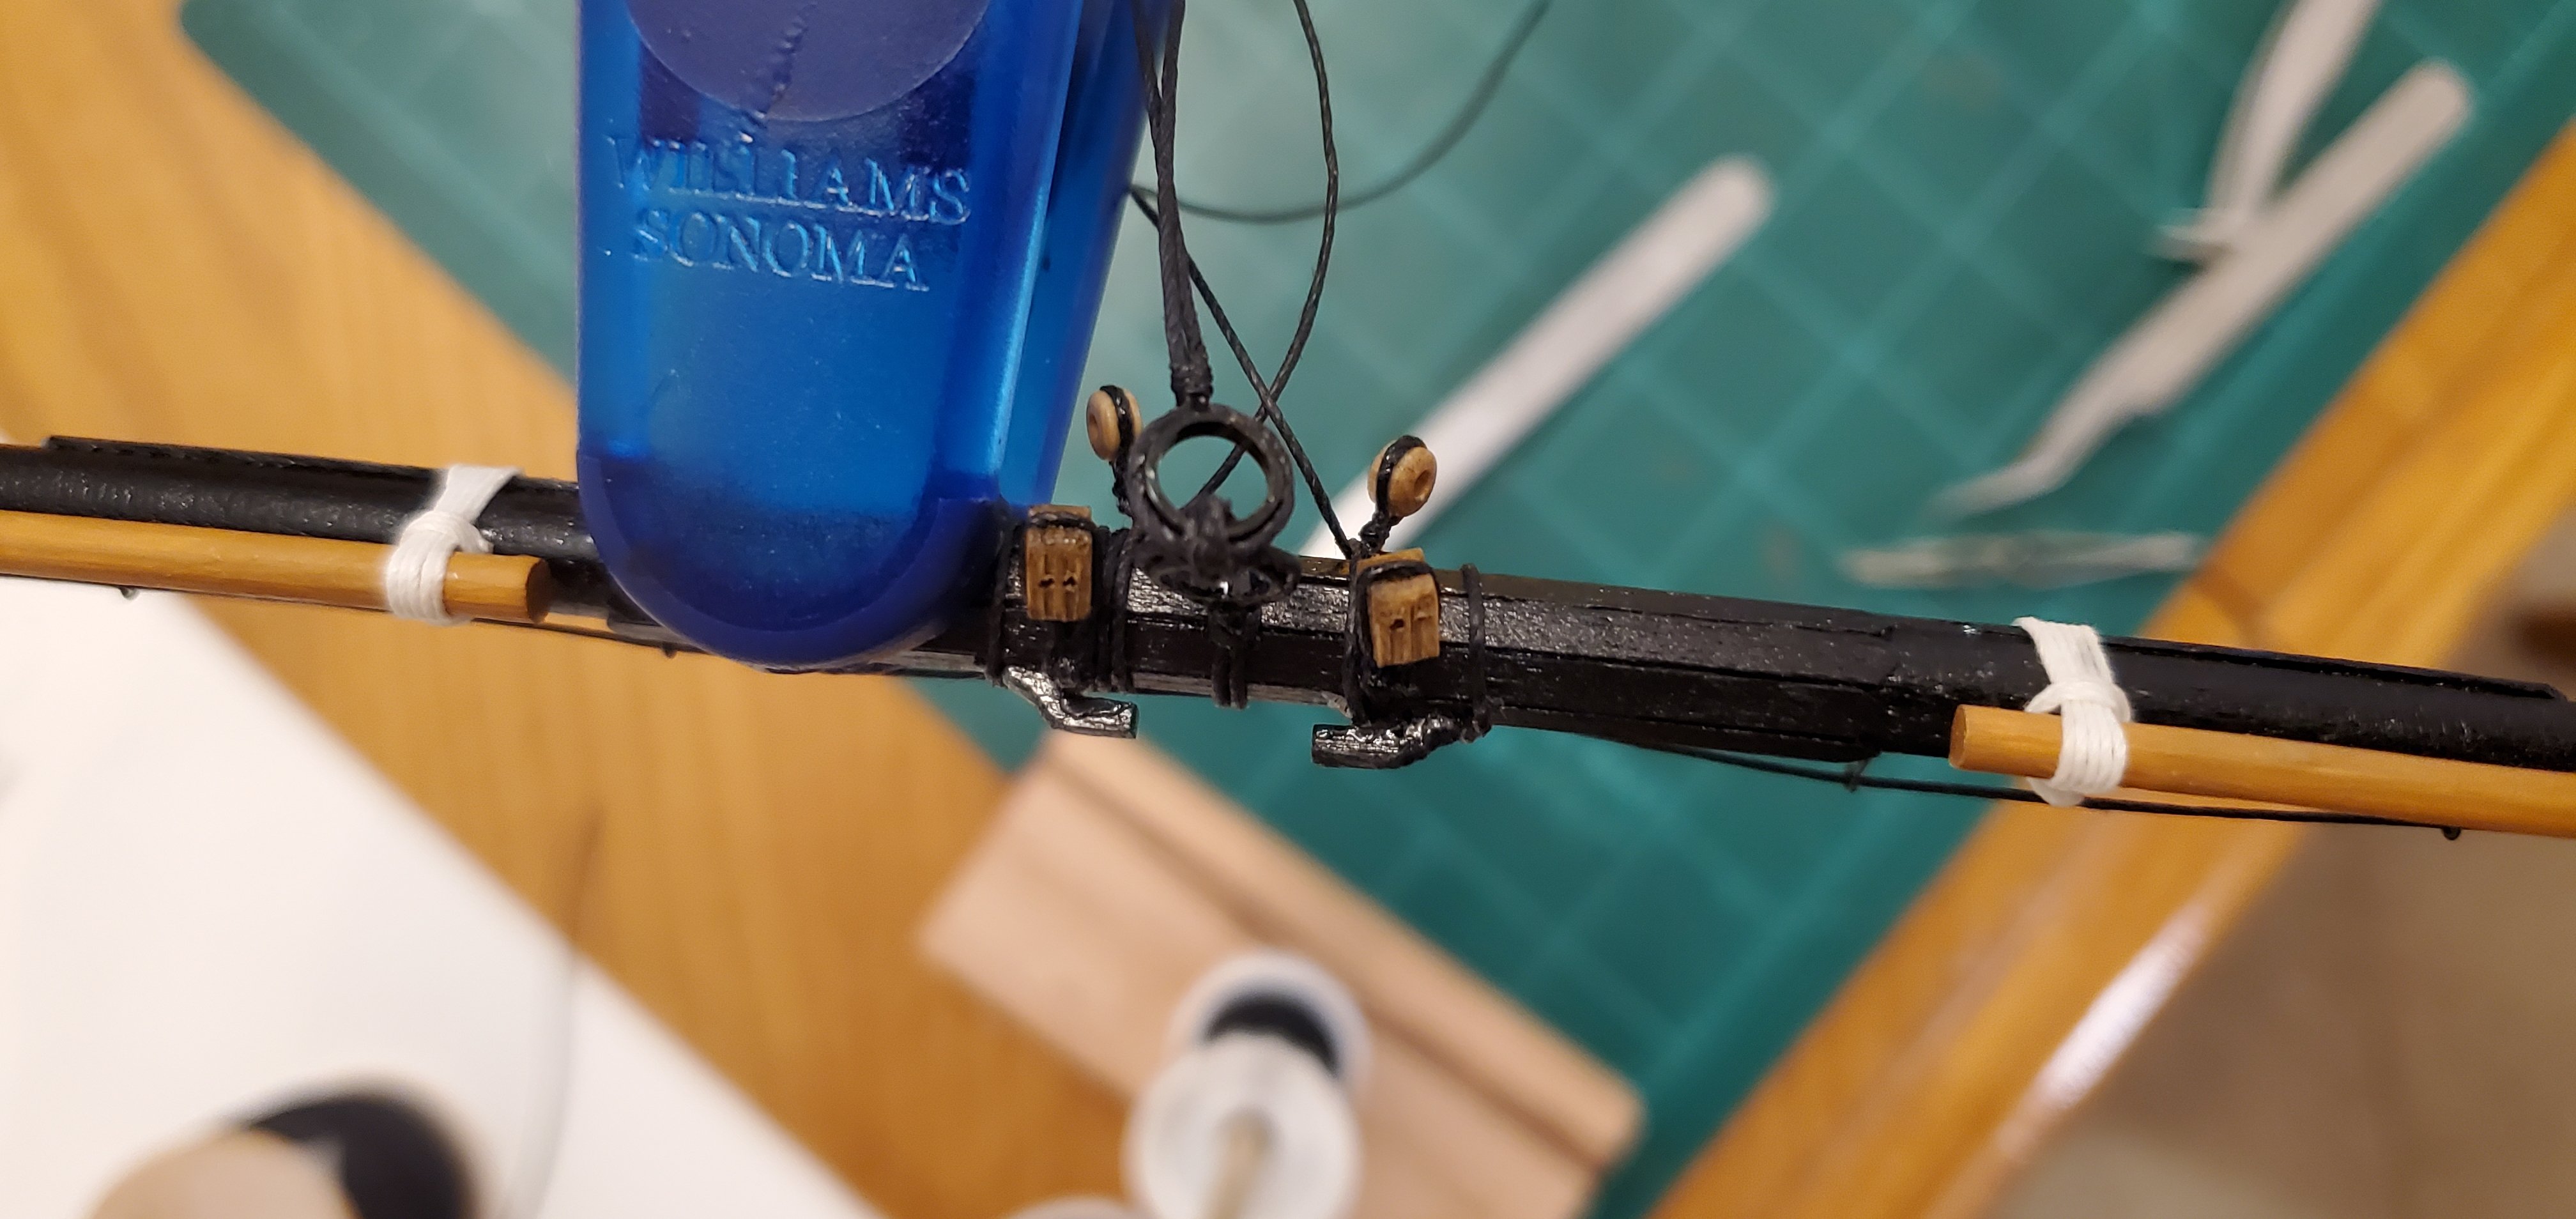
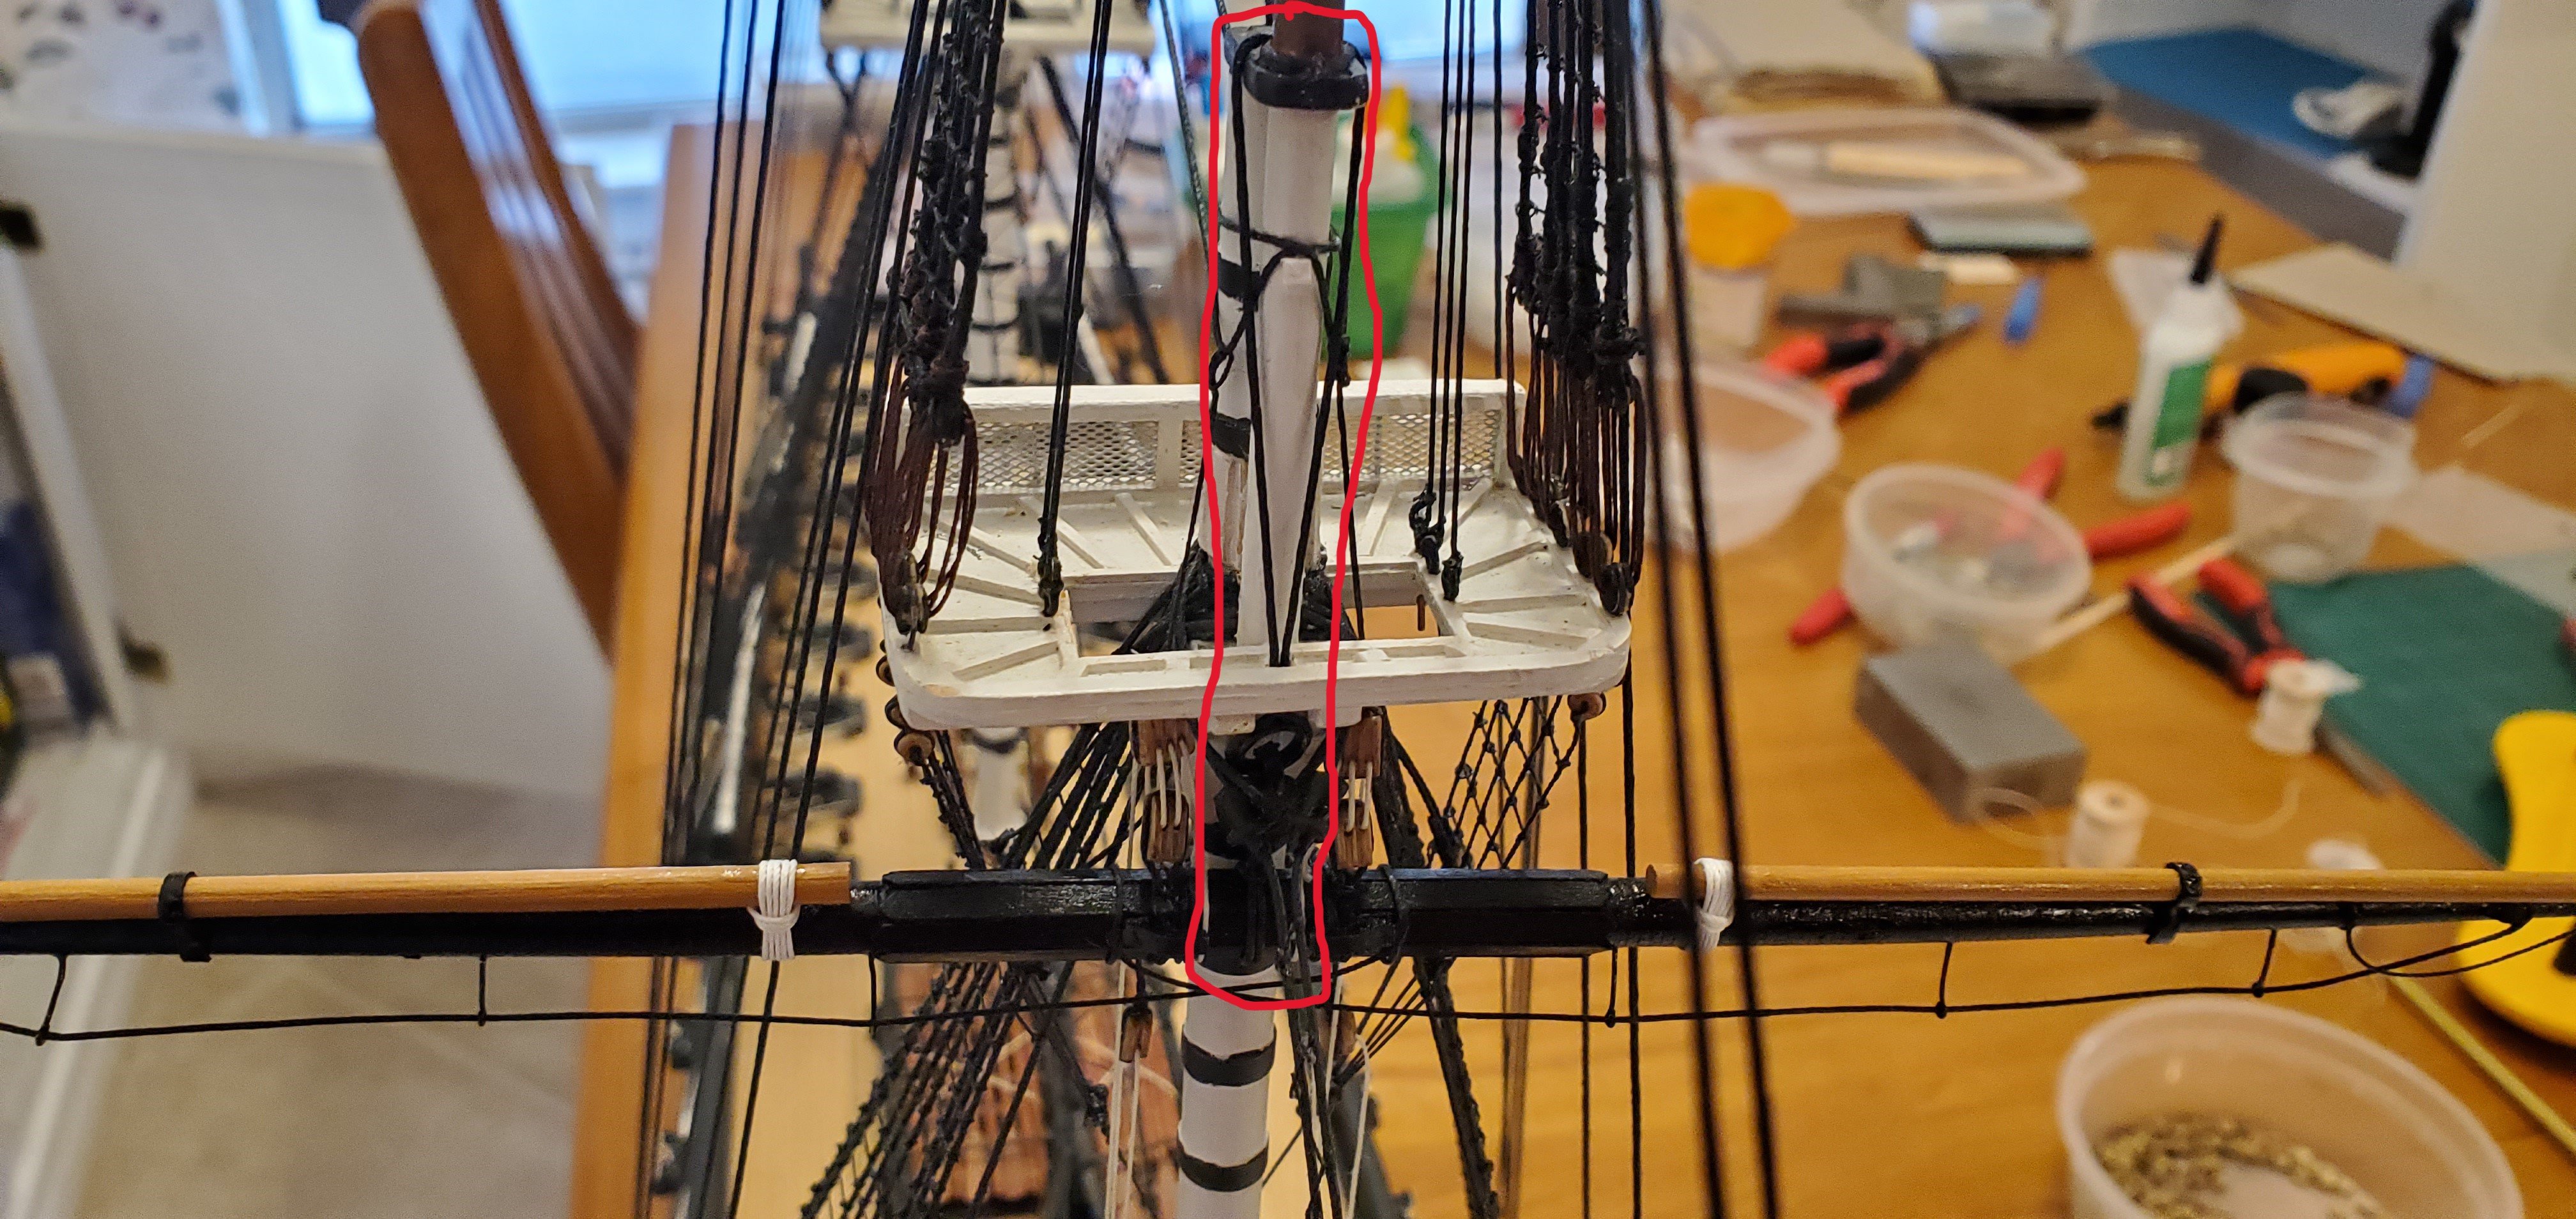
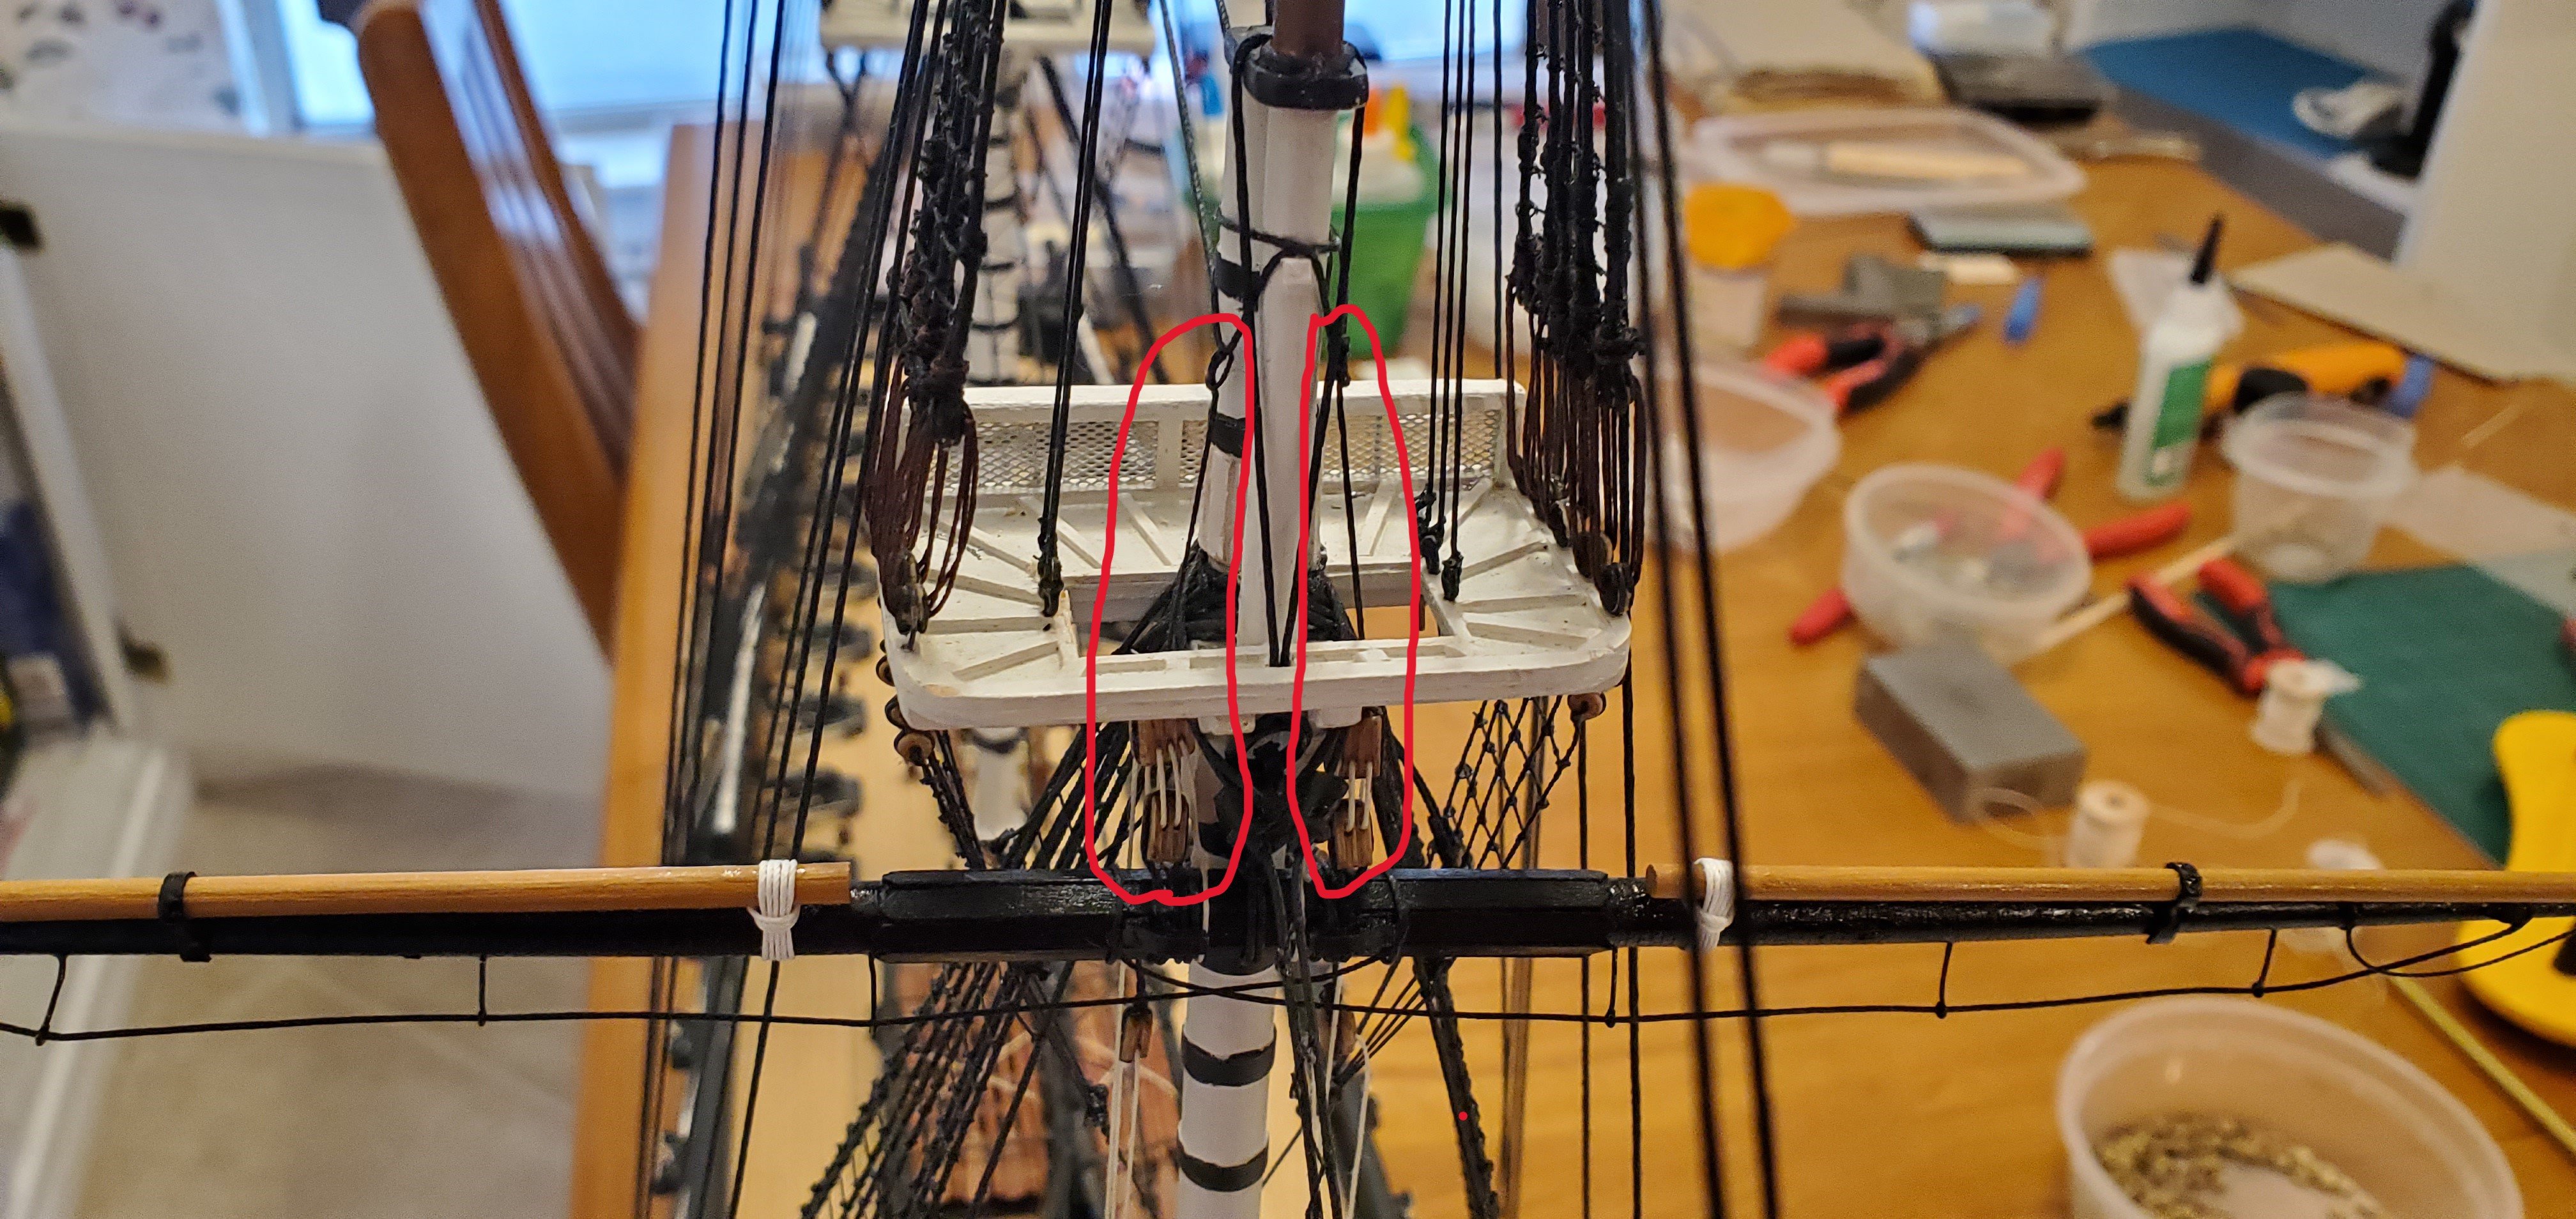
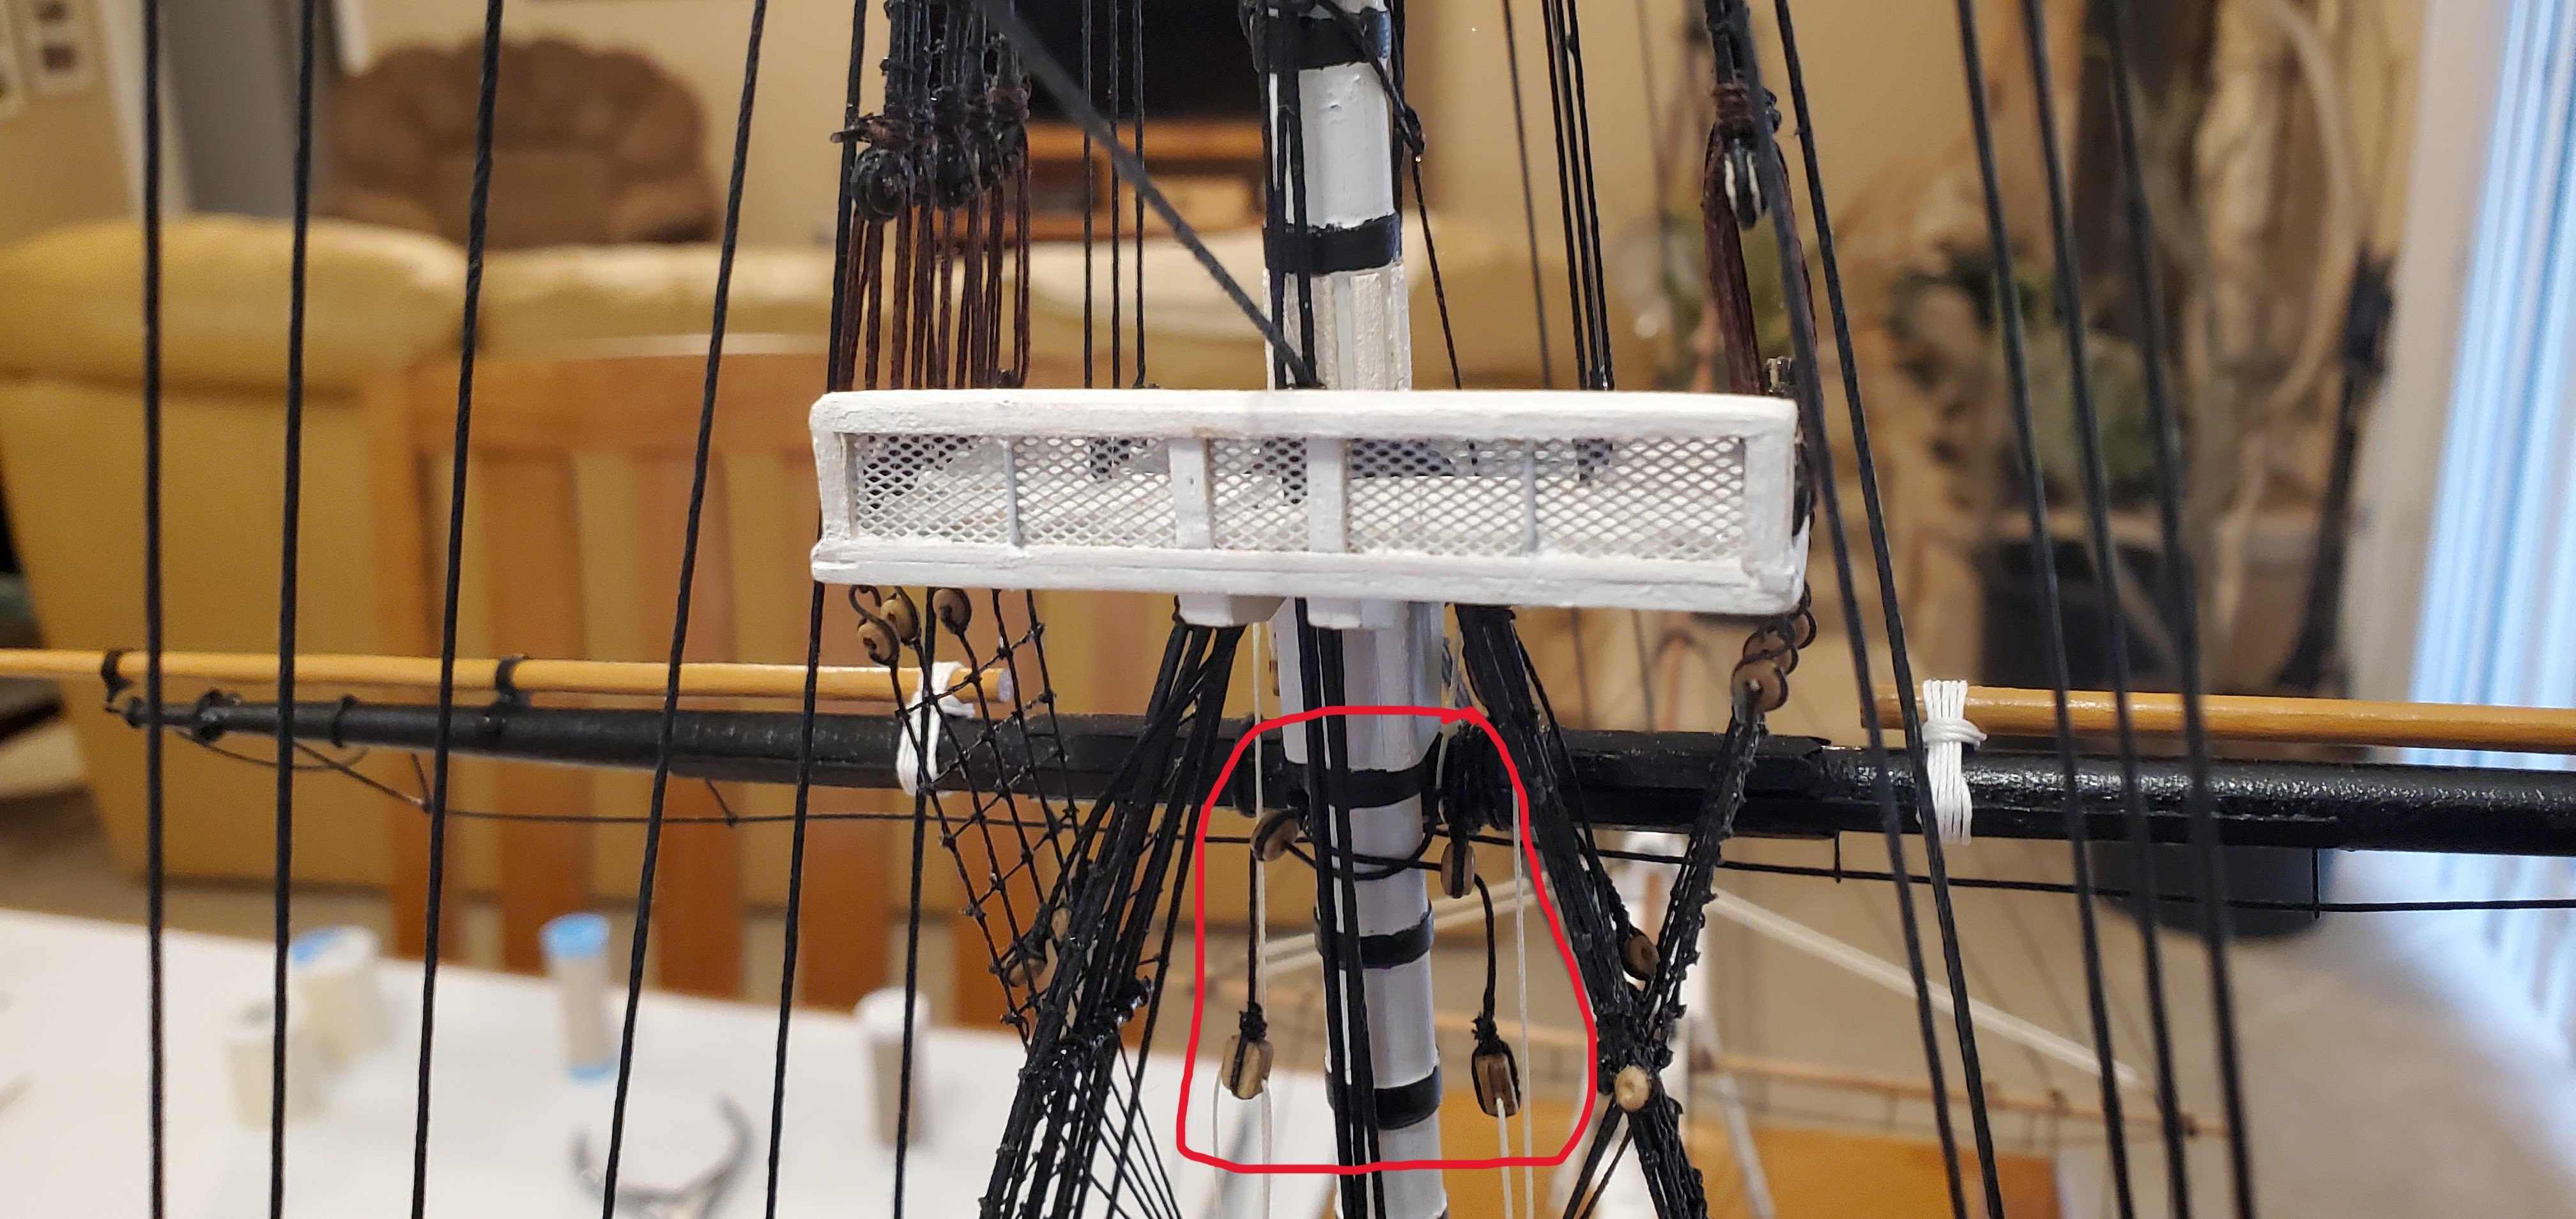
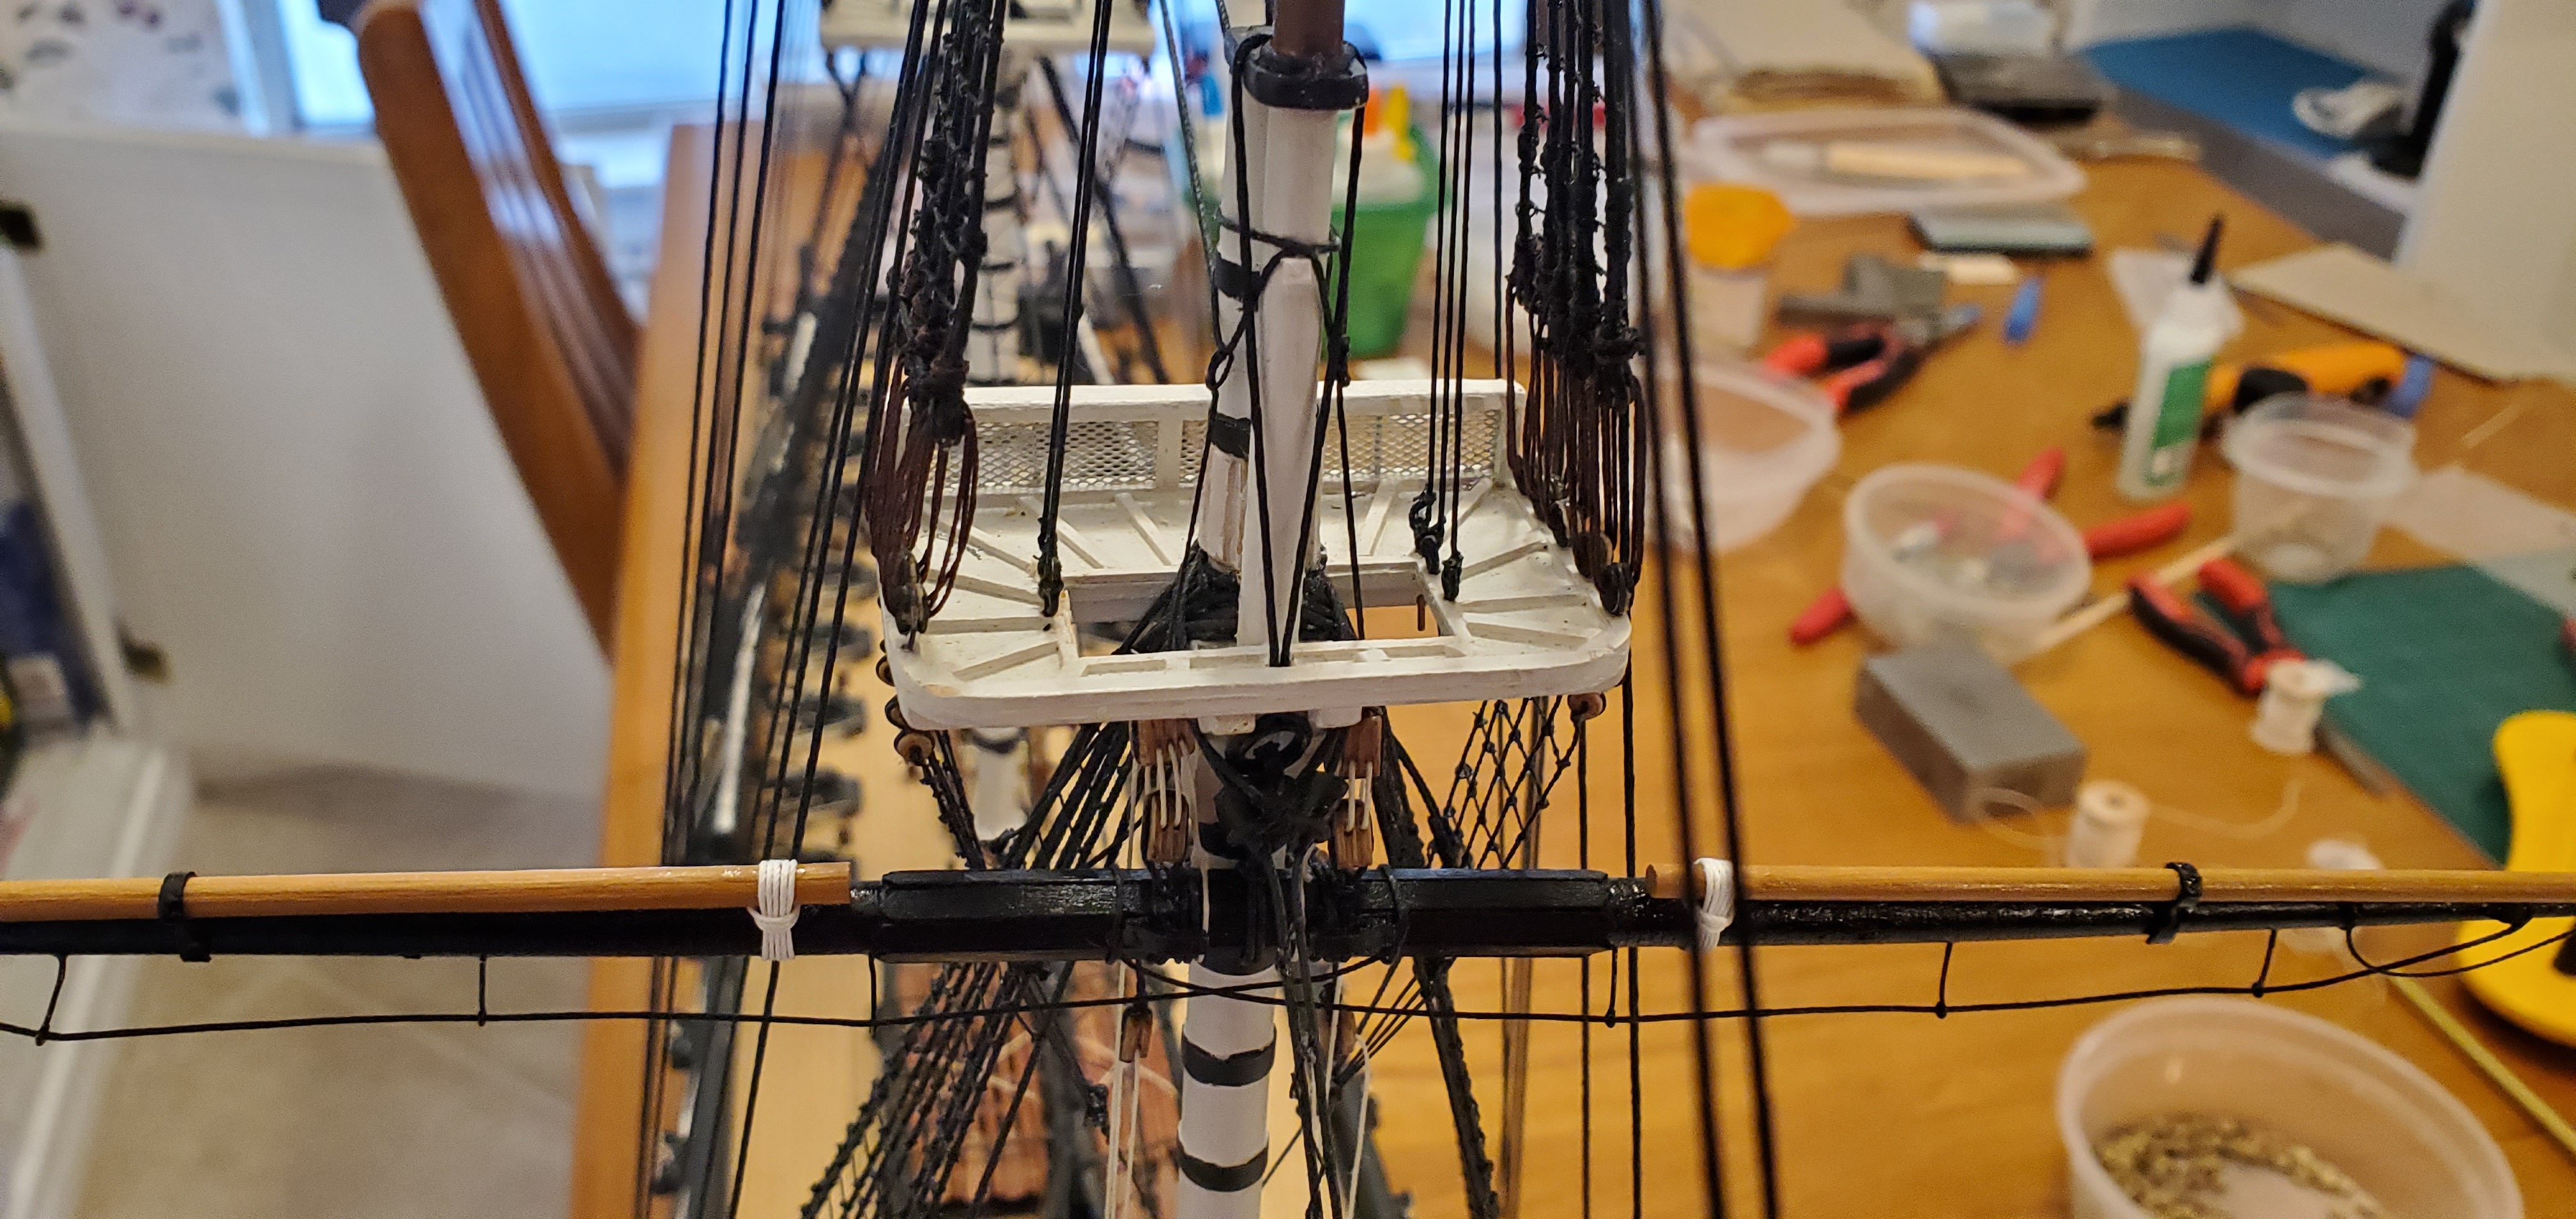
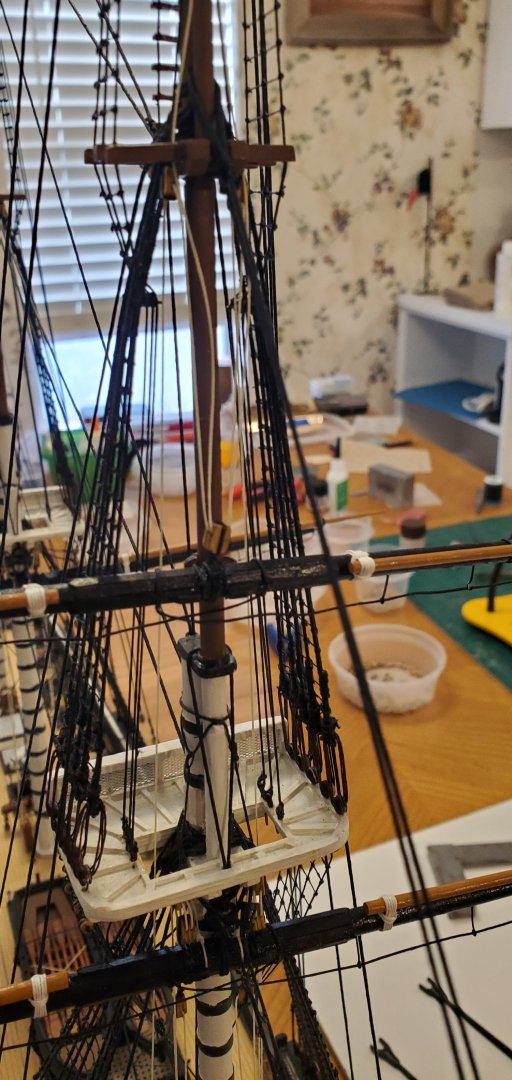
Time to hang the first lower yard, which will be on the fore mast. It's a somewhat complex trio of items that hold the yard in place (at least complex for me trying to figure it all out). There's a sling that is composed of connected rings. The bottom of the sling is wrapped around the middle of the yard. The top of the sling wraps around the top of the mast top. The way I understand it, the purpose of the sling is to be the primary weight bearer of the yard. Although I'm not sure how it gets disconnected when the yard is lowered. The second item of the trio is the jeer blocks which are used to raise and lower the yard. There are 4 jeer blocks in total. The lower ones (seen below on either side of the sling) are double blocks that are attached to the yard inside the parrel cleats. The upper blocks will be added later and are attached to a sling wrapped around the mast top. The third item in the trio are the truss pendants which hold the yard against the mast. One end of the pendant is seized to a bullseye. The line is wrapped around the yard, runs behind the mast, thru the bullseye on the other side and then is seized to a block where another line takes it to the deck. And here is the yard in place. Below I've highlighted the sling which holds up the yard. Here's the full set of jeer blocks in place. The upper jeer blocks are triples. Here are the truss pendants in place. And here's what the whole thing looks like without all the red circles. This process will be repeated for the main and mizzen lower yards.


- 301 replies
-
- 11
-
-
-
- Constitution
- Bluejacket Shipcrafters
- (and 1 more)
-
Stunning work, Gary. As usual!
-
Welcome aboard from a fellow Texan!
-
Very nice lines. Well done.
-
I think the trim is black, but a weathered or faded black. Really nice job on the LULA lettering, Keith. I've got a feeling that was a whole lot more difficult to do than it looks.
- 732 replies
-
- 7
-
-
-
- Lula
- sternwheeler
- (and 1 more)
-
I call BS on that, Bryan! I've seen your work and it is high quality with great attention to detail. Don't underestimate yourself! Thanks, Mark. I could not solder a lick before I started ship modeling a few years ago. I continue to be amazed at how many different skills you have to learn to be able to do this hobby!!
- 301 replies
-
- 6
-
-
- Constitution
- Bluejacket Shipcrafters
- (and 1 more)
-
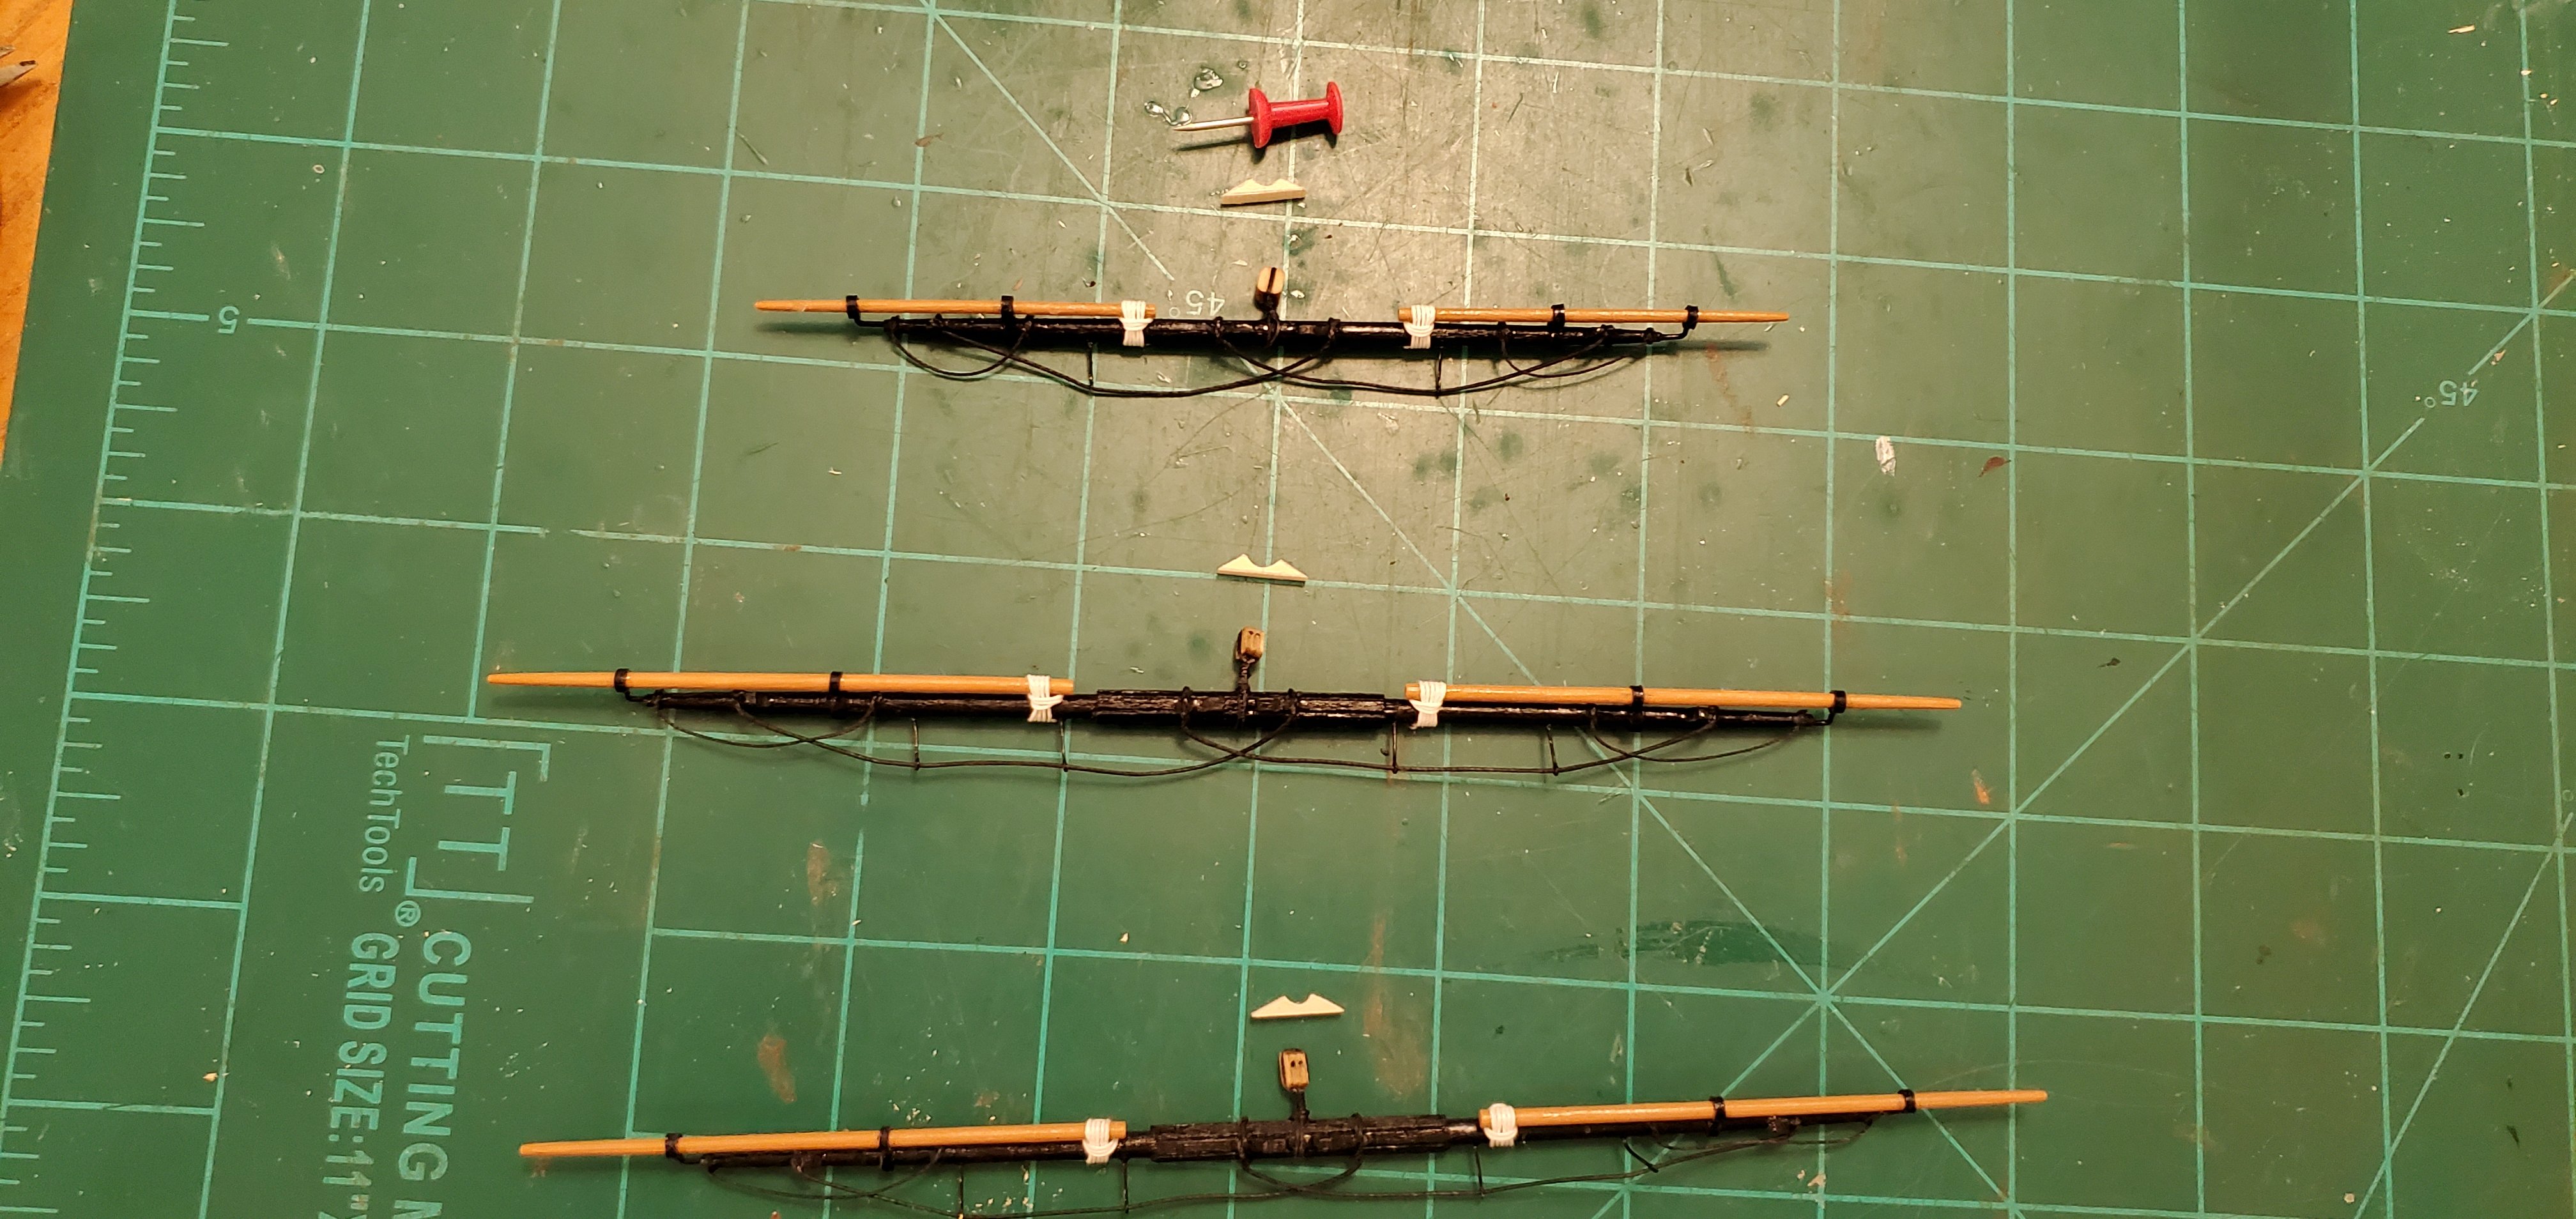
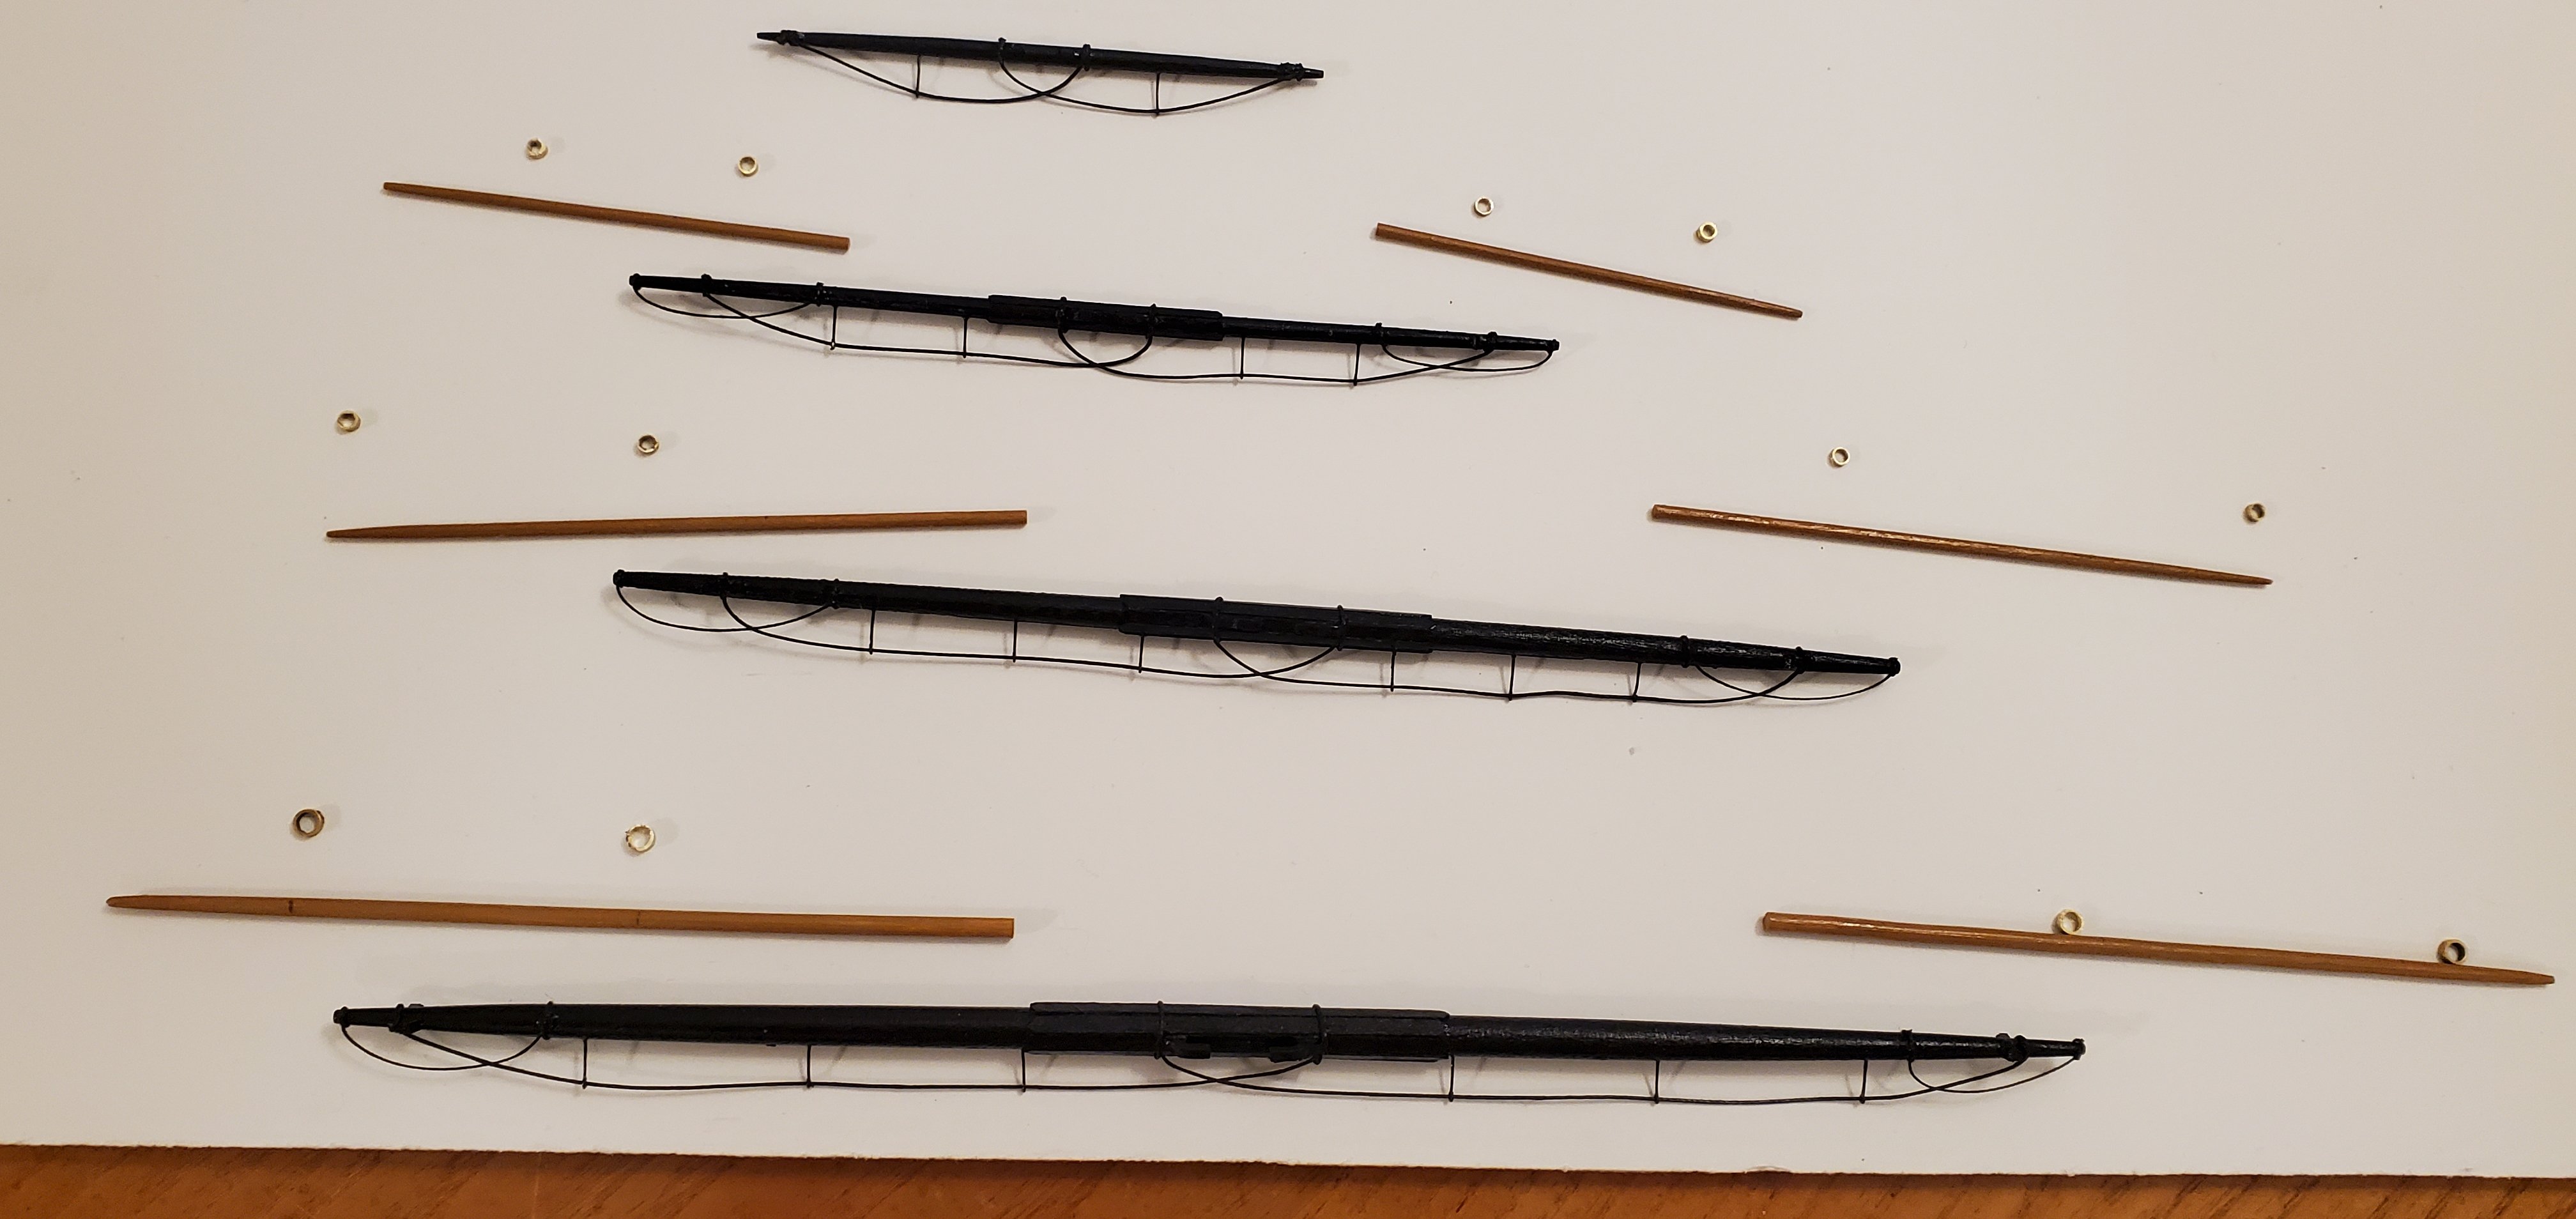
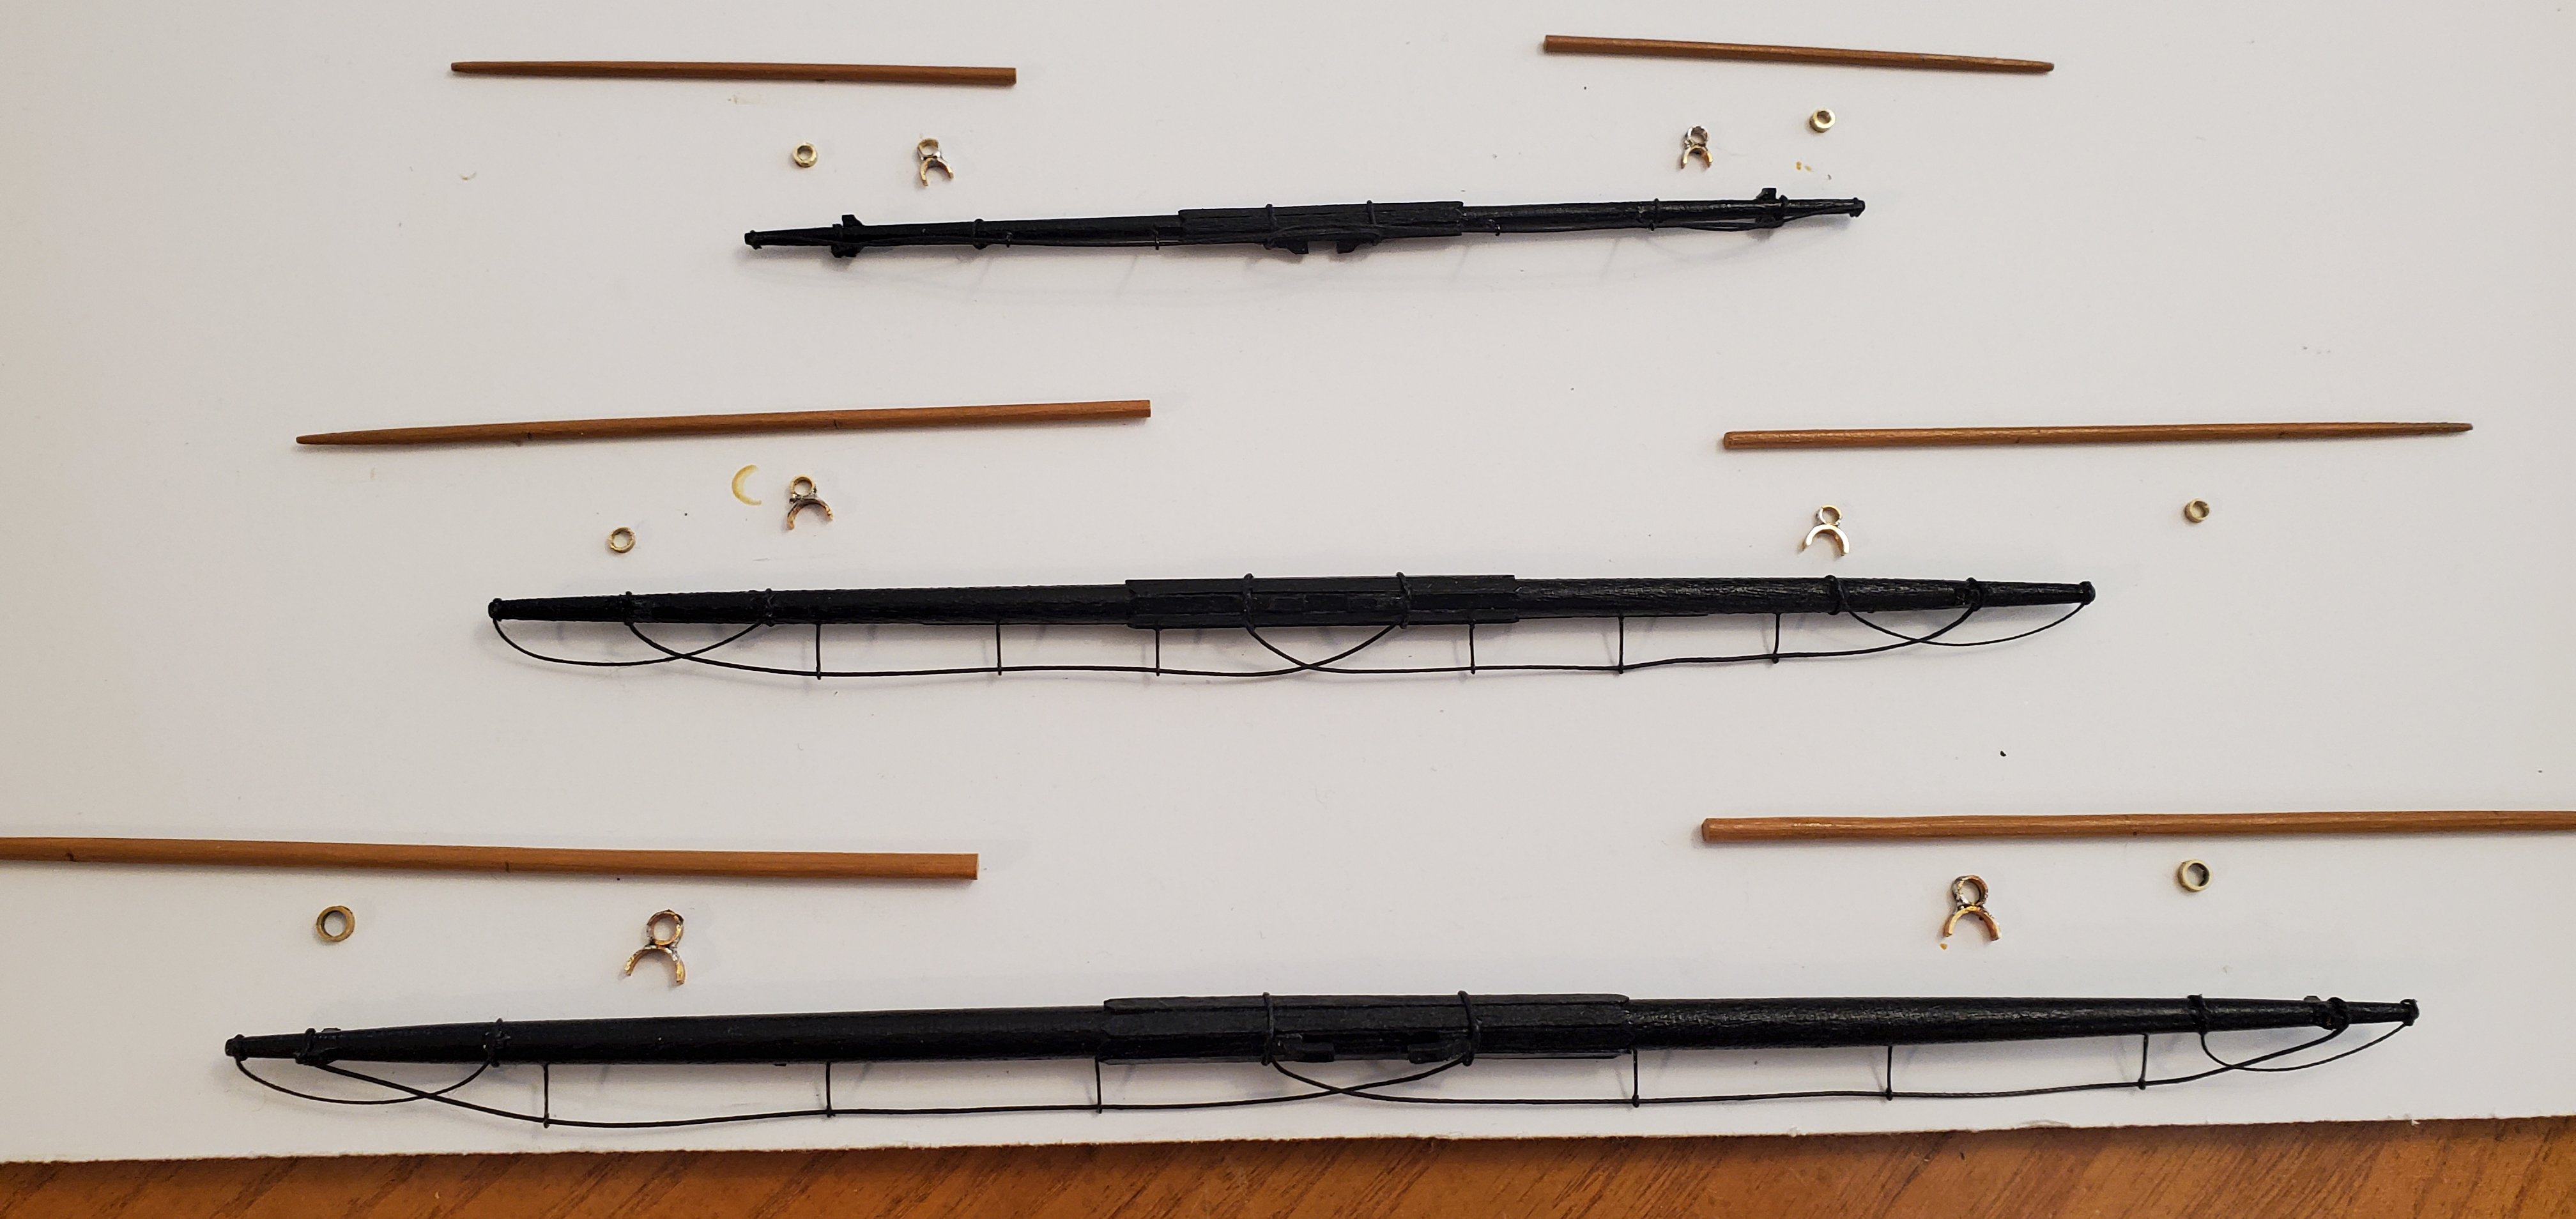
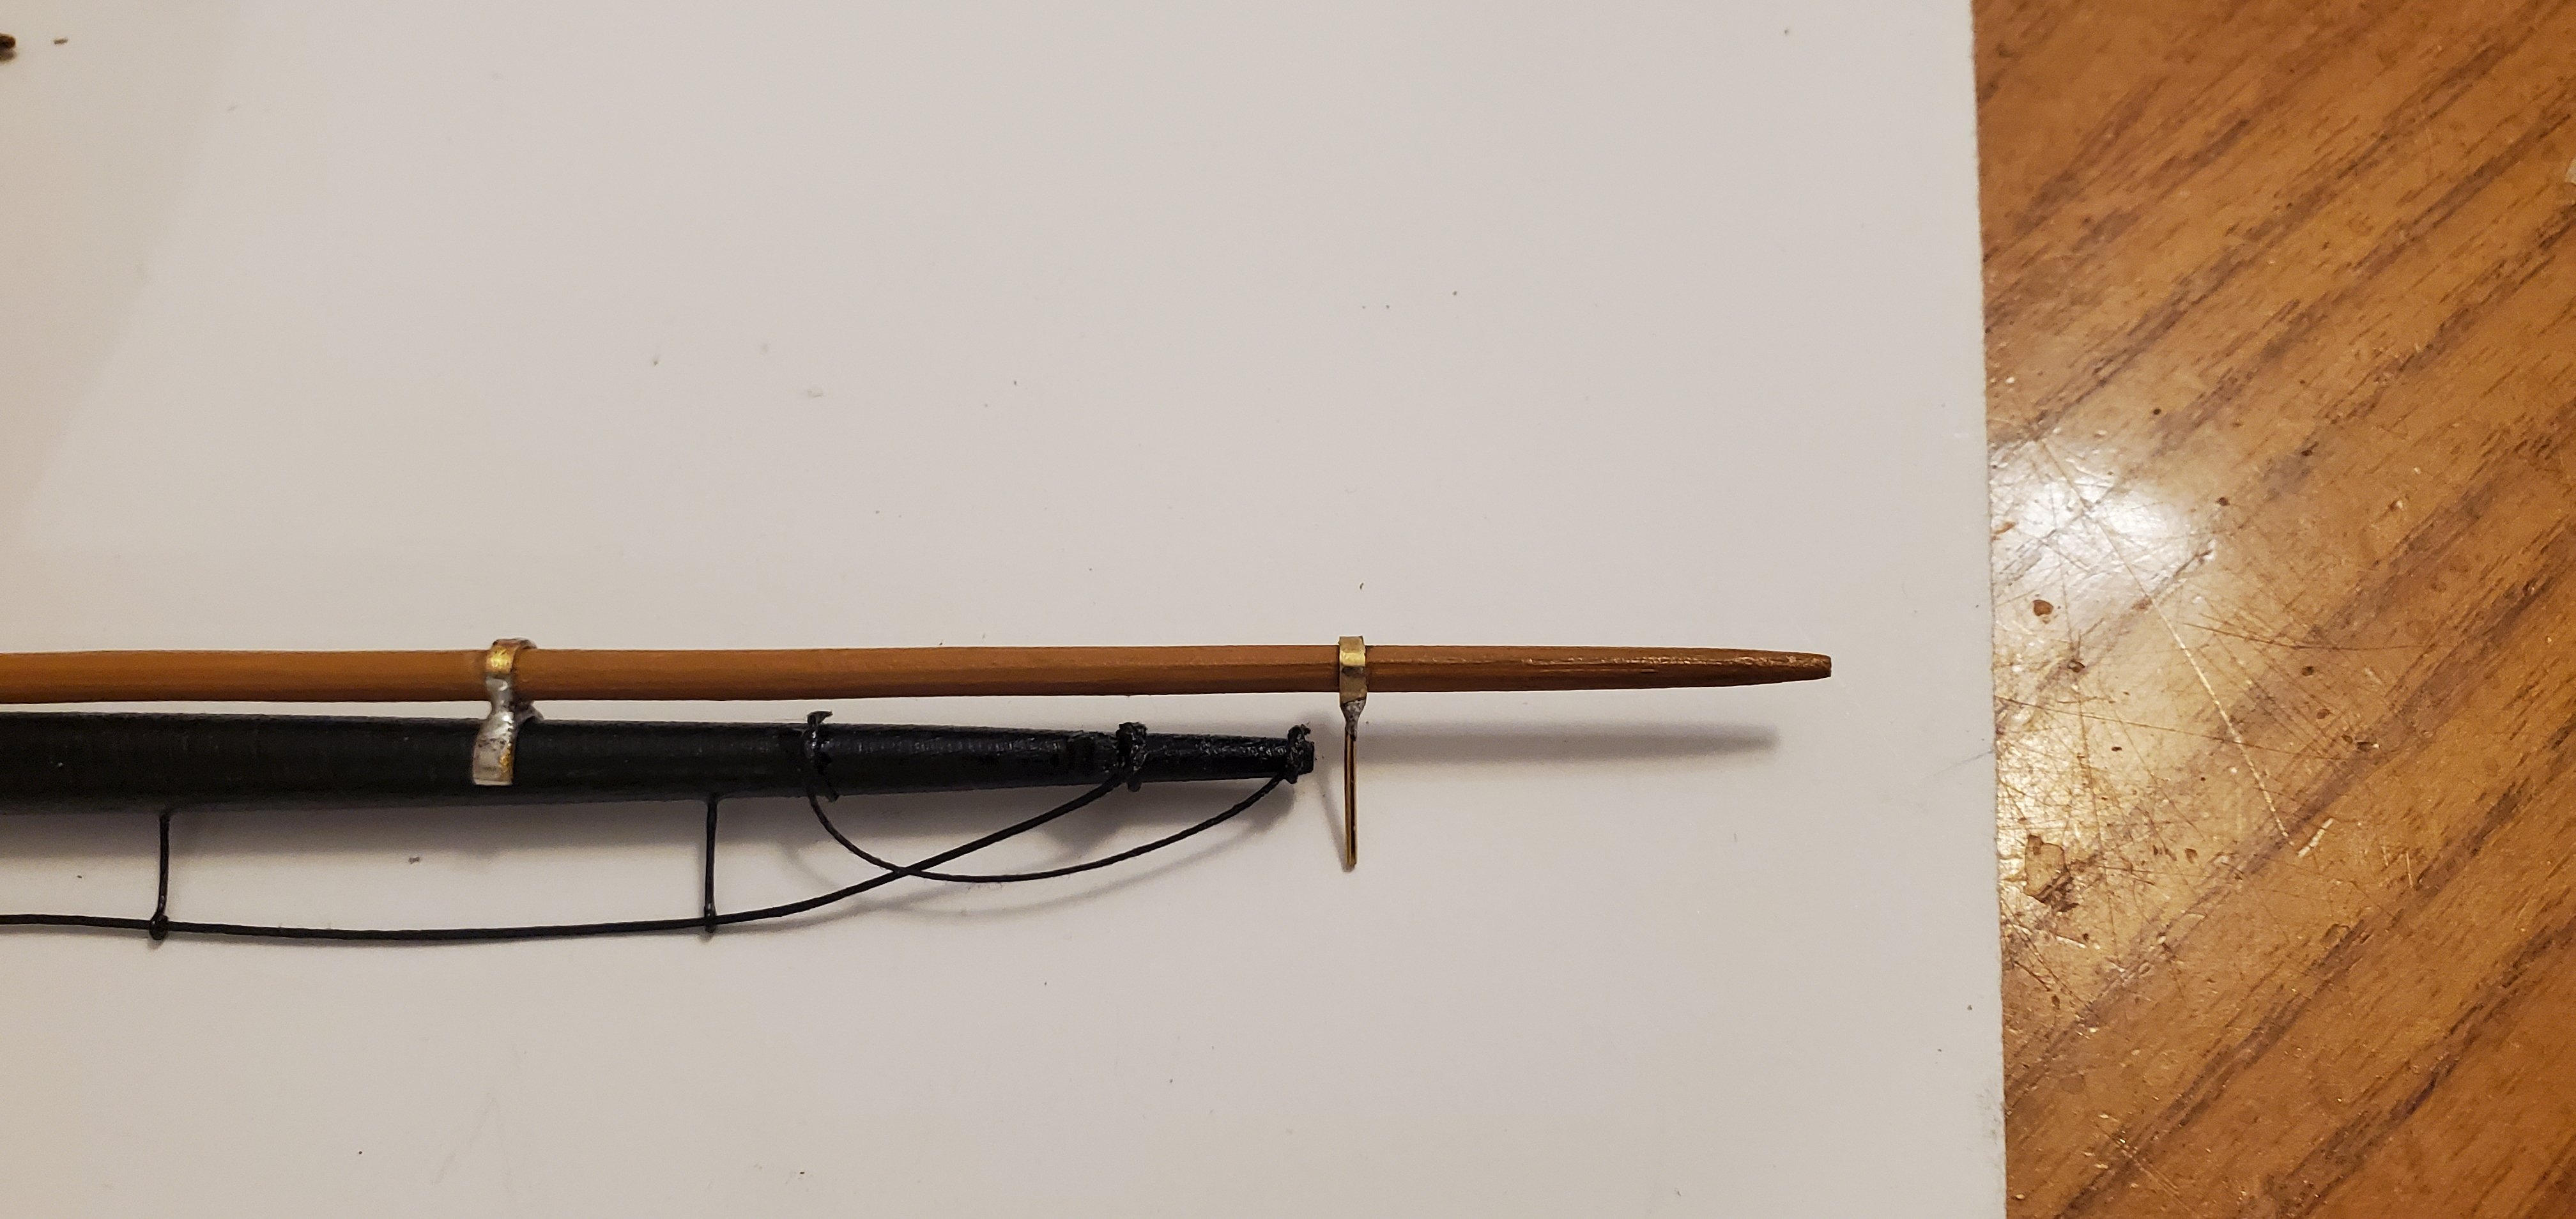
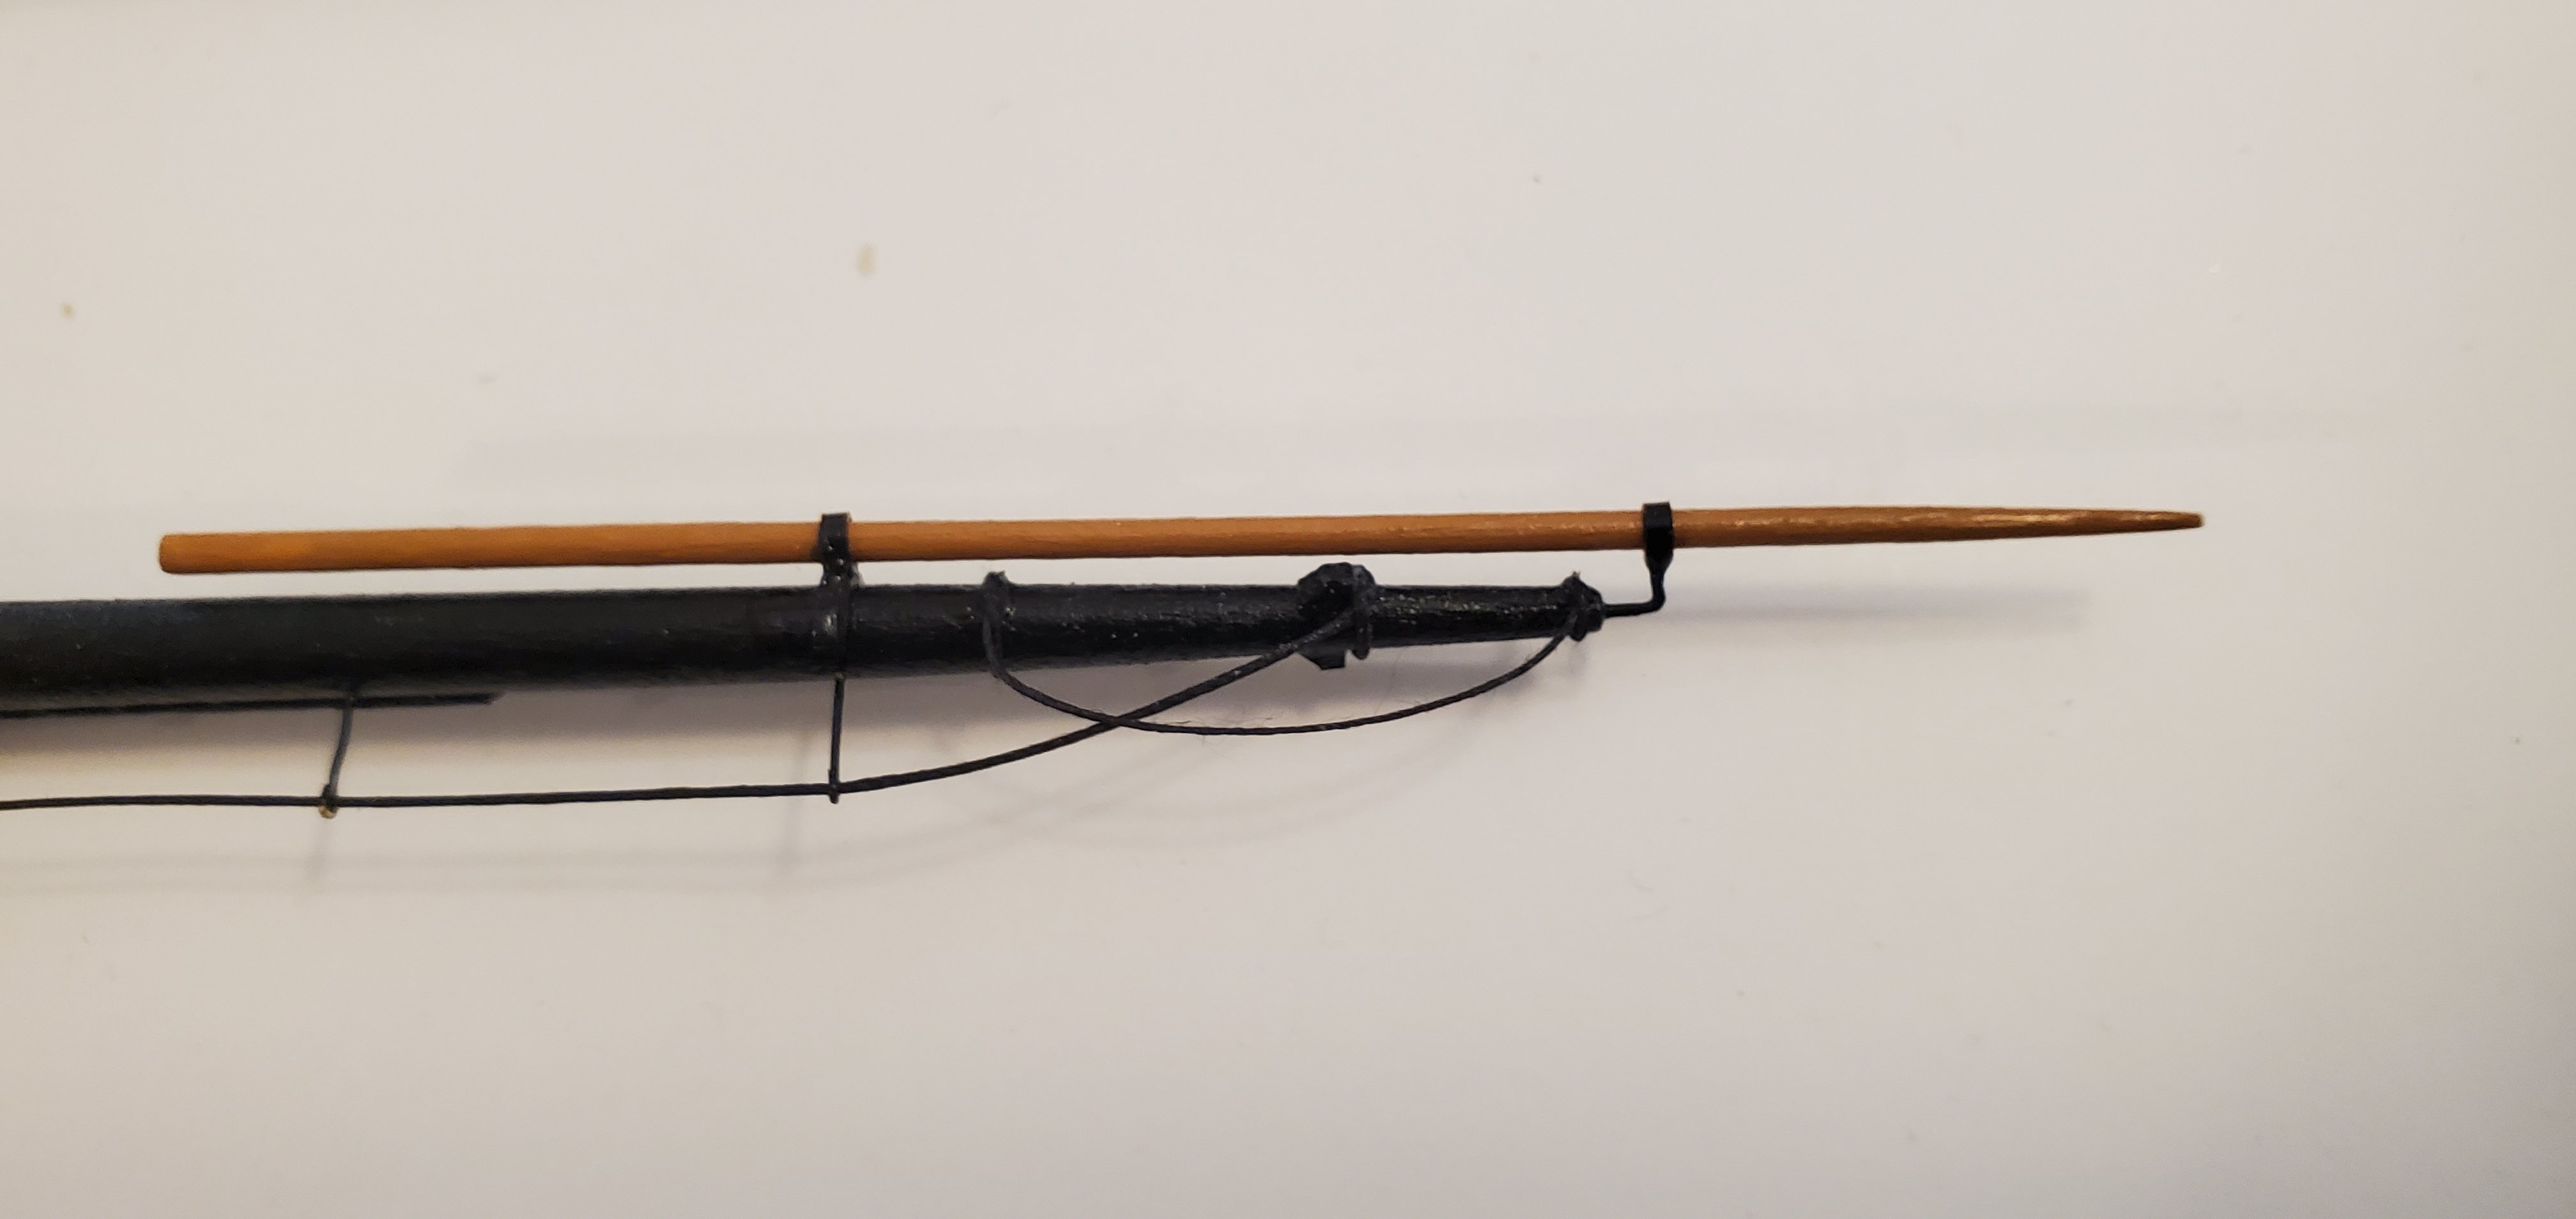
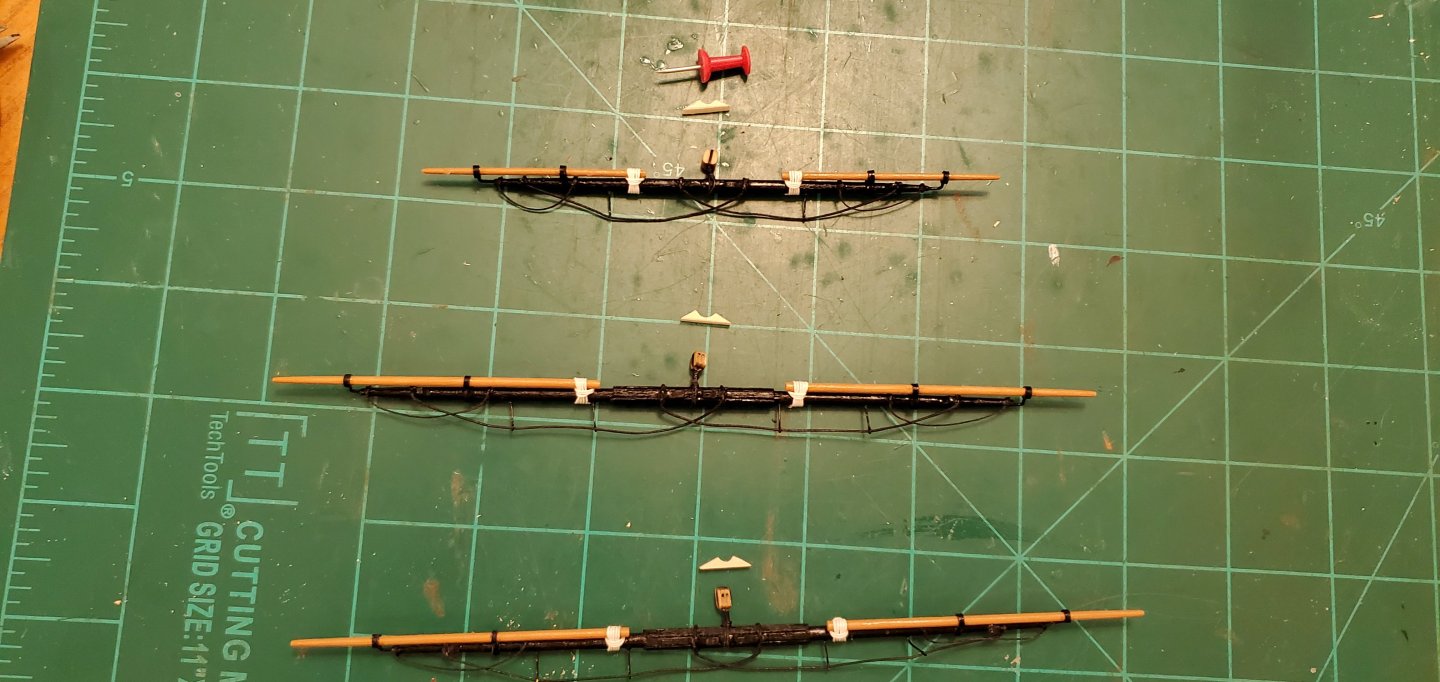
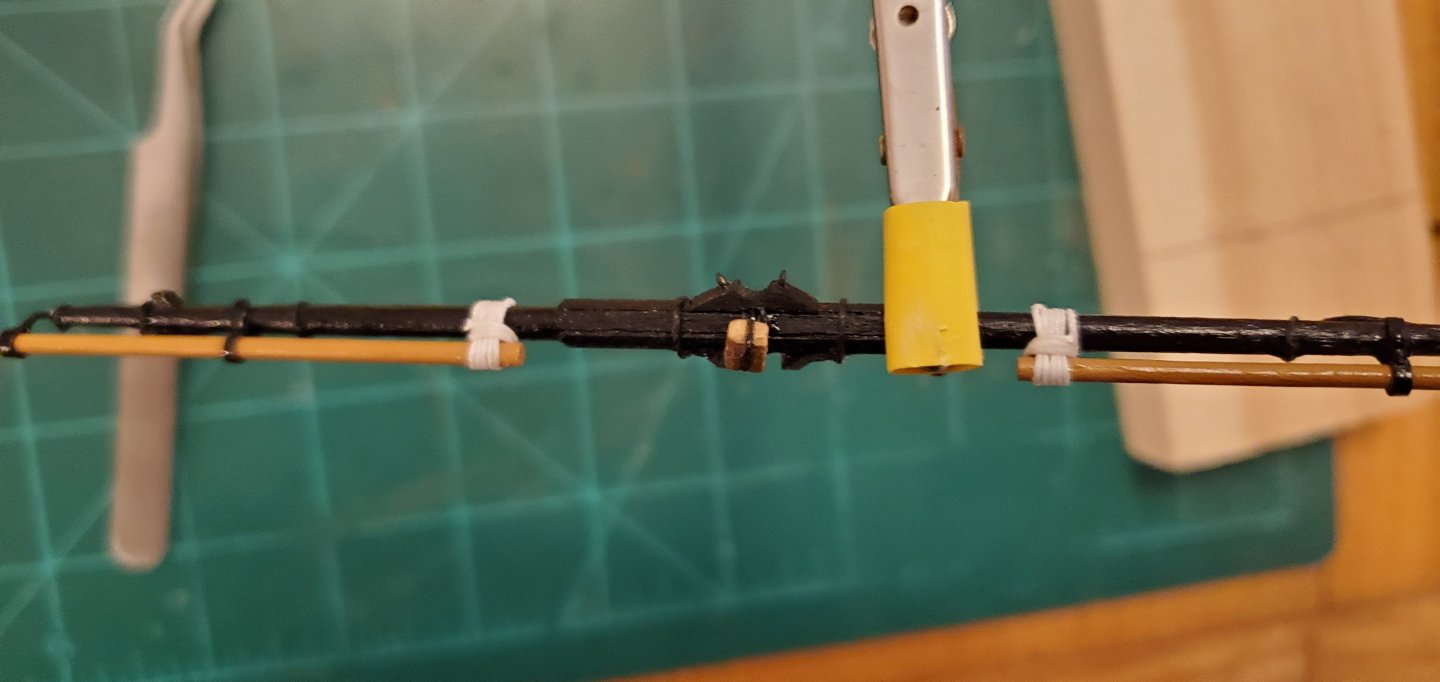
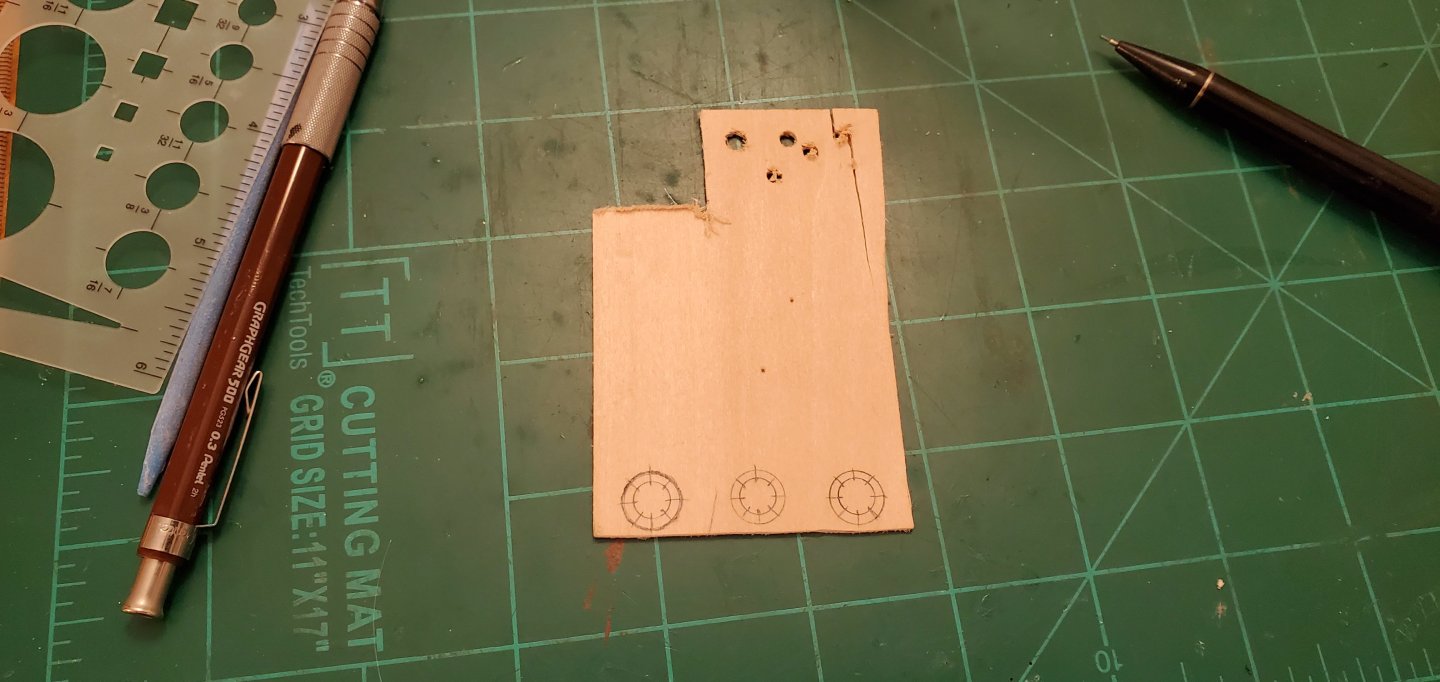
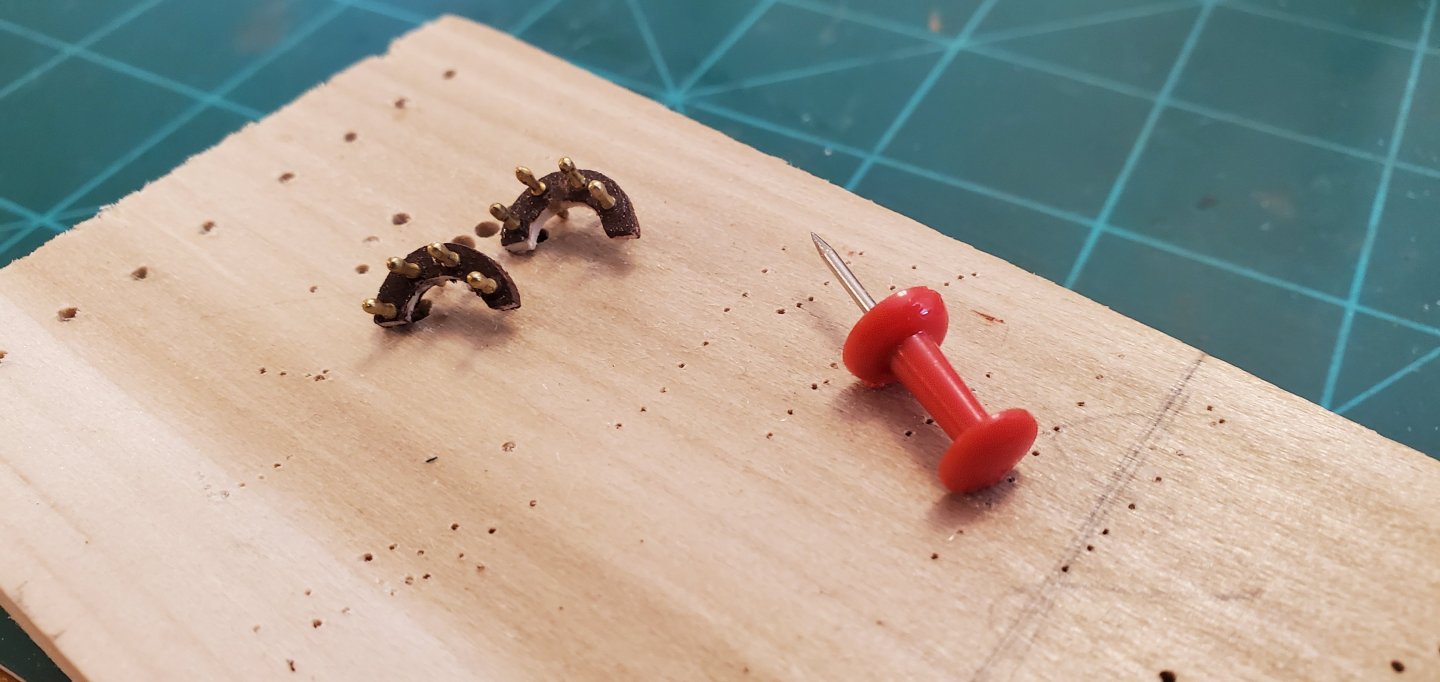
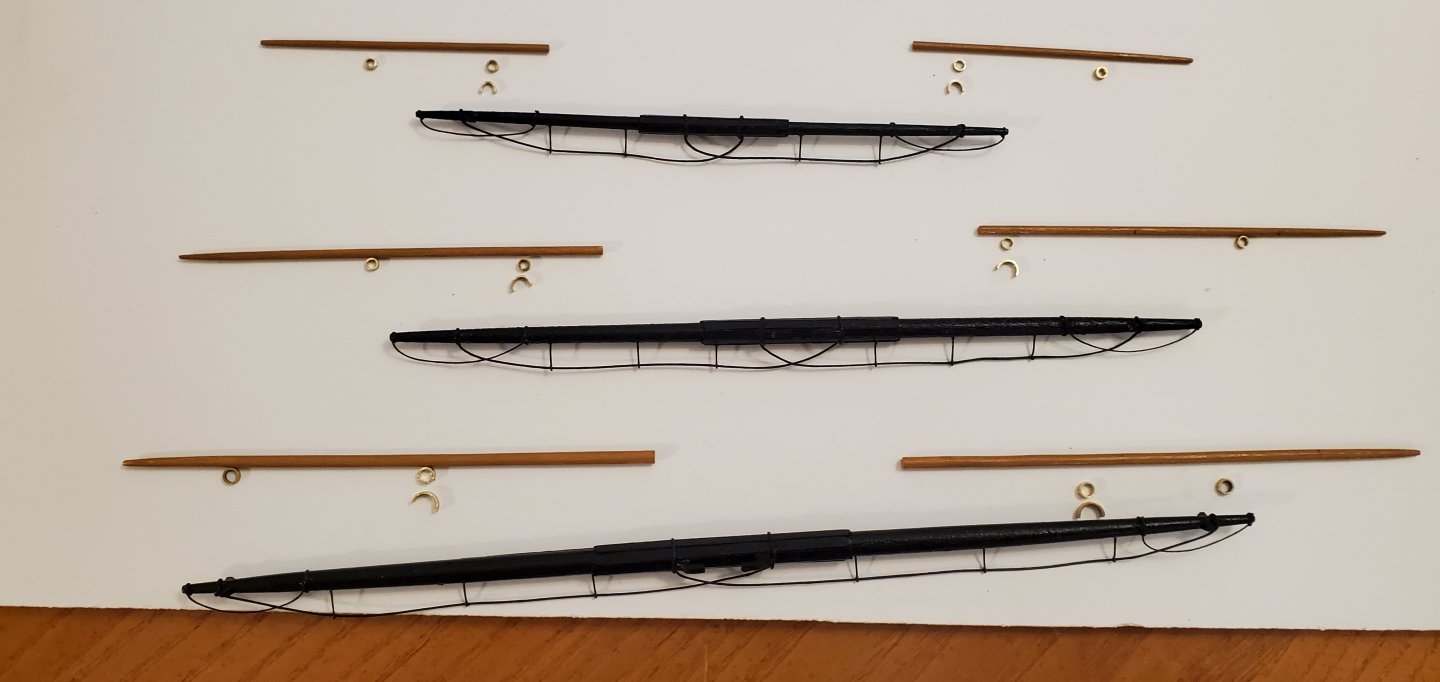
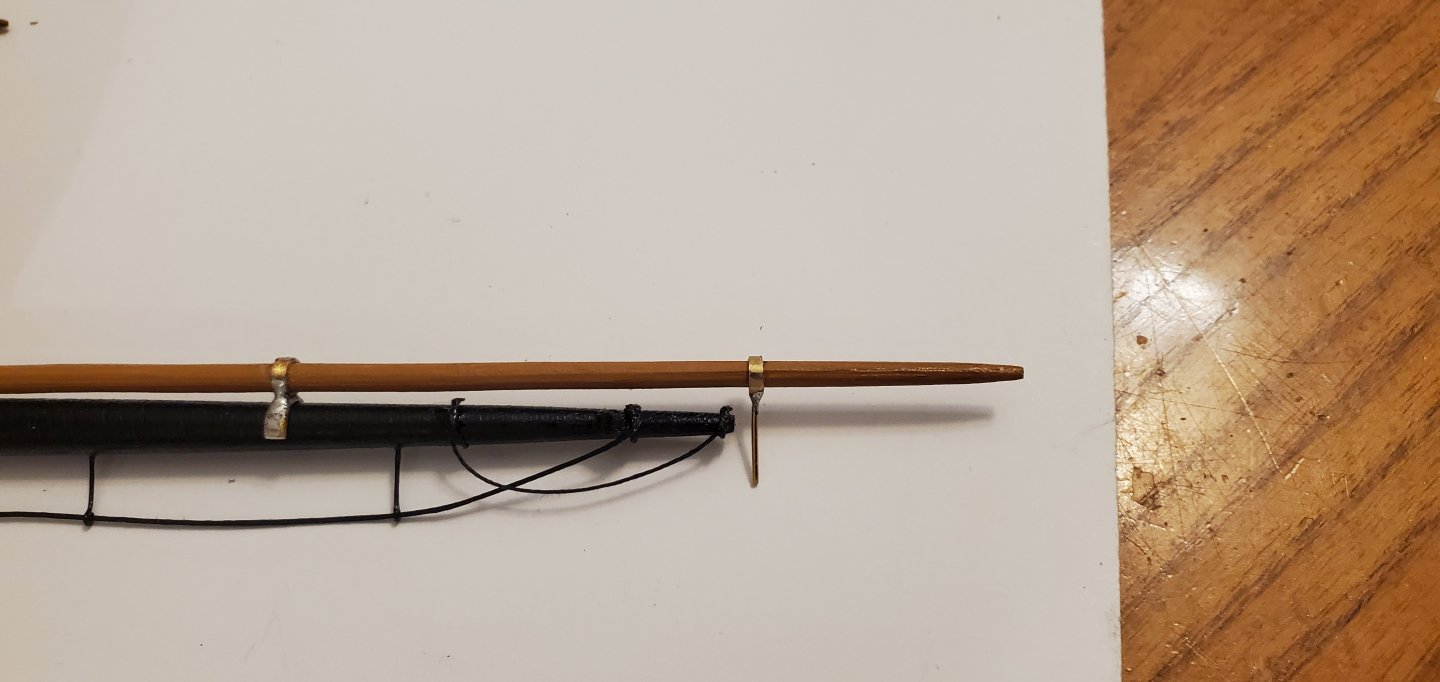
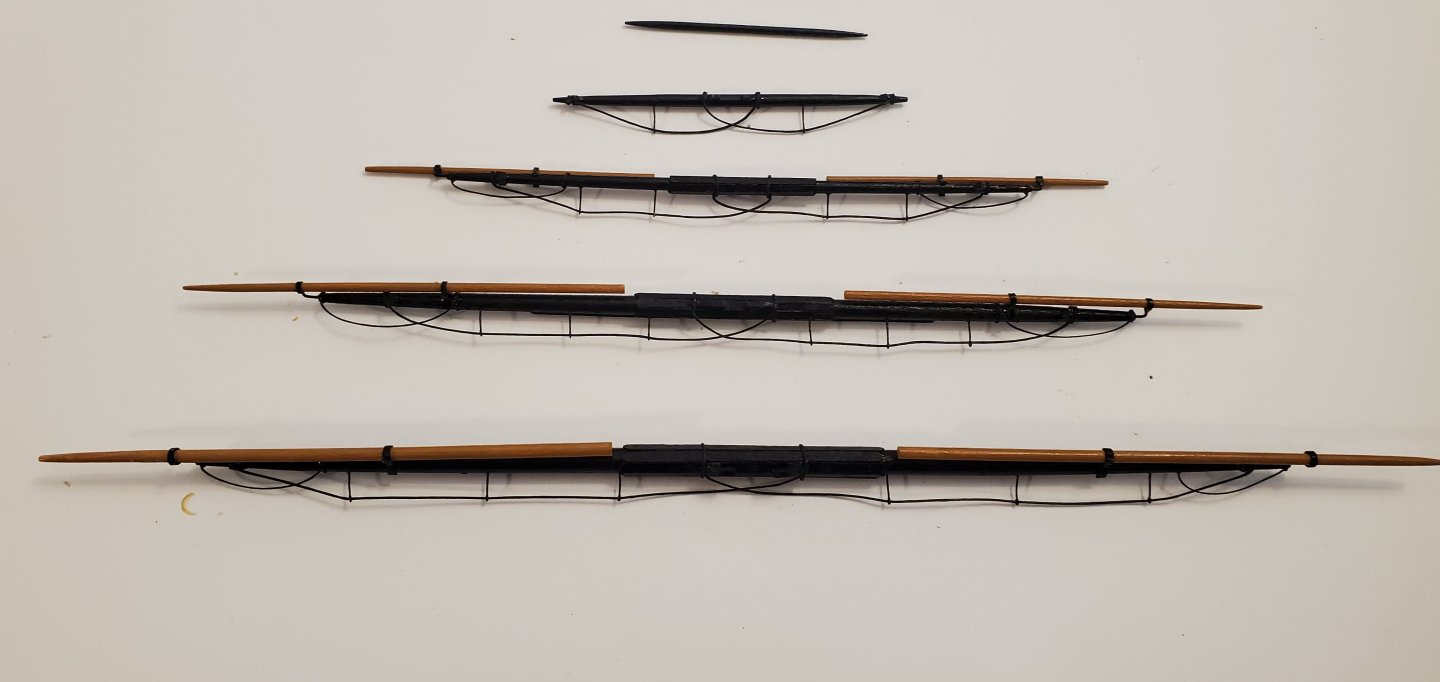
Well Pat, in the absence of Bundy here in central Texas, I settled for a few tots of Ol' Sailor Jerry's fine spirits! Glad you are checking in, Carson! Slowly but surely the team here is gettin' it done!! And now on to the studding sail booms (I always thought they were called yardarms but I seem to have been mistaken about that). There are 8 yards that have studding sail booms - The lower 3 on the fore and main masts, and then the 2nd and 3rd lowest yards on the mizzen. The crojack yard is not so equipped. The booms are offset forward at a 45 degree angle to the vertical plane of the yard as it hangs from the mast. Each boom is held in place by passing through 2 rings called studding sail irons. The inner iron looks like a figure 8 with a portion of the bottom cut off forming a saddle that rests on the yard. The outer iron is a simple ring attached to a rod bent at a 90 degree angle that feeds into a hole in the end of the yard. I used brass tubes and wire for my irons. I started with brass tubes of various inside diameters. Of course none of them quite matched the diameter of my booms, so I had to drill out each of them to fit. The rings below are for the fore mast yards. Next, I cut pieces of brass tube in half to make the lower half of the inner iron that will rest saddle-like on the yard. Next step - soldering the top and bottom half of the inner irons together. Next, I soldered a small piece of brass wire to each ring for the outer irons. Here's a closeup of 1 pair of irons dry-fit (before I bent the wire on the outer iron). Here are the foremast yards with the booms and irons in place and the irons painted black. And a final closeup. The fat end of the boom will be lashed to the yard, which is next on my to-do list.


- 301 replies
-
- 16
-
-
-
- Constitution
- Bluejacket Shipcrafters
- (and 1 more)