

Gregory
-
Posts
3,170 -
Joined
-
Last visited
Content Type
Profiles
Forums
Gallery
Events
Everything posted by Gregory
-

Somehow I twisted my hull
Gregory replied to CJensen's topic in Building, Framing, Planking and plating a ships hull and deck
The stem is not square to the table or the camera. The perspective is skewed. I don't see any reference on the transom to show me where the problem lies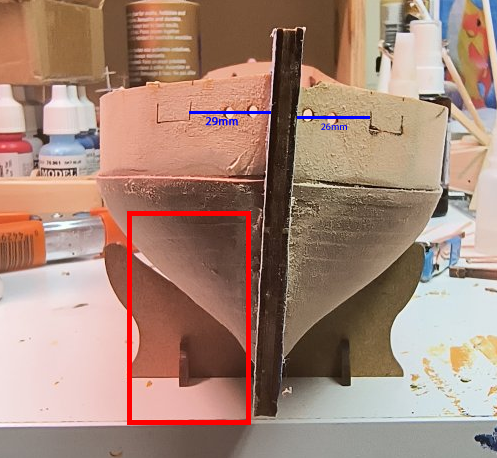
-
Somehow I twisted my hull
Gregory replied to CJensen's topic in Building, Framing, Planking and plating a ships hull and deck
If the hull really is twisted, (bent, warped ) by a noticeable amount, the only resolution would be to do it over. The problem is not really that apparent to me from the image above. On what plane is the hull " twisted" ? The stem is not square to the work table, or perpendicular to the line of sight. A straight on view where the deck is visible might be provide more information. What do you see if you sight along the keel itself? Do you have an image like that above, but with the hull inverted? -
I just bought a used copy on eBay for $10... Long overdue addition to my library. It looks like the new revised edition is a few dollars more, but the info about the revised edition says its about finishes an adhesives, and I am already fairly locked in on my preferences in that regard.
-
Oh, wow! I just learned more than I ever knew about wood just by reading the free sample on Amazon.
-
The wood for the strips and the laser cut parts could have come from different trees. There may be different trees represented just among the strips, or at the least different parts of one tree. The only reasonable assumptions you can make about the color variation with age, among several pieces of wood, is when you know it was milled from the same stock.
-
A search for "black prince" does return one build log . If you have any specific questions, I'm sure someone will try to help.
-
If that information is not included in the plans they do not appear to be very useful for building a model ship. Have you considered getting a kit? The contents of a kit will give you a good idea of what is required in the way of plans, material and instructions to build a model, even if you decide to go ahead with a scratch project. You might take a look at some of the kit reviews here to see what is required to build a ship model. Here is a log where James builds the prototype for HMS Harpy, a Vanguard kit. It will give you a good idea of what materials are needed even if you make the parts yourself. You can also see how the plans and instructions show how things should look.
-
The plans do not show anything? Usually, with a POB model there are instructions for 'stepping' the masts and bowsprit. Without seeing your drawings it would be difficult to suggest anything. You could look at just about any kit build log to see how it is accomplished. There is usually an opening in the deck and some type of cut-out in the backbone to locate the masts in their proper position.
-
It would still be interesting to know a build that you are trying to emulate. The Lynx is an American built Schooner. You might look at builds like Niagara or Prince de Neufchatel.
-
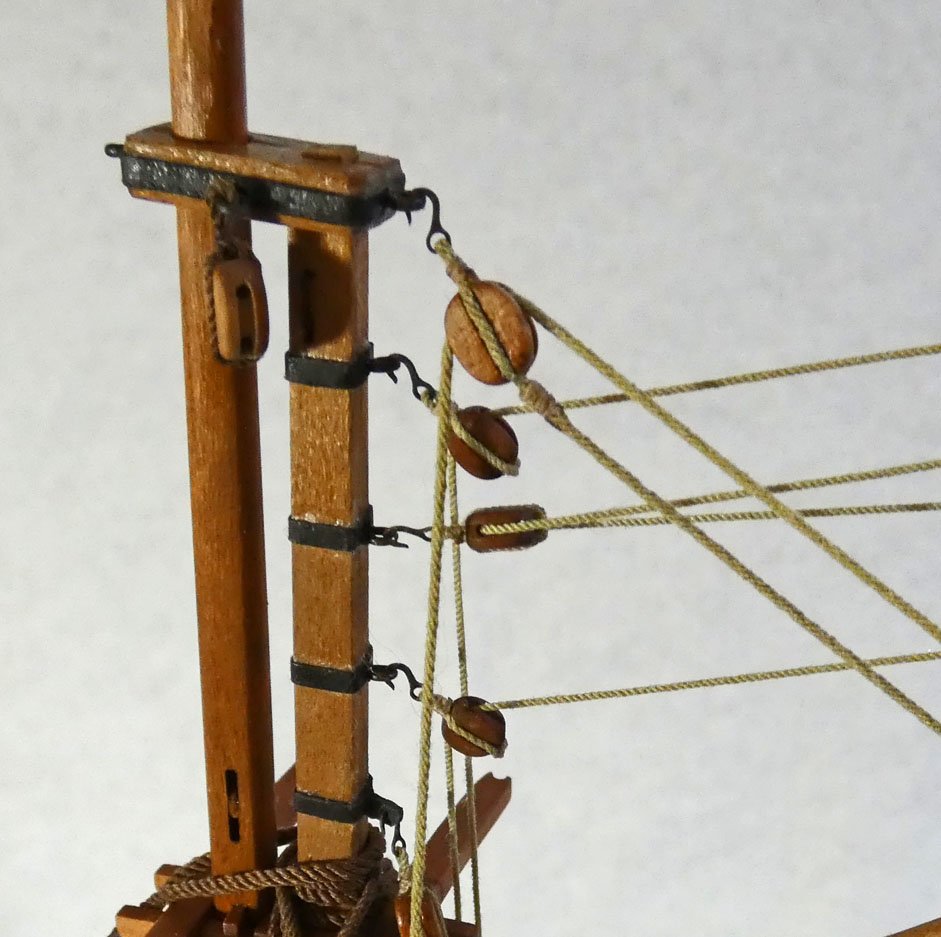
It would be interesting to see the source for the sketch you came up with. 3 And 4 might be for some other part of the ships rigging.
-
The Fiebing's is alcohol(ethanol?) based but I seemed to have gotten pretty good penetration. I would suspect the formulation might be different across intended applications. One caveat to keep in mind is that DrPR talked about using shellac on some of his block rigging and the dye was bleeding into the rope. Not a problem if you don't use shellac.
- 714 replies
-
- 2
-

-
- lady nelson
- victory models
- (and 1 more)
-
OK that brings up my next observation. I never cared for the bright look of Syrens boxwood blocks, but there was not any alternative that came close to the shape/quality. Myself and others found that the boxwood did not take traditional wood stains very well. I experimented with Fiebing Leather Dye .. Just another option you might consider. The difference in color here is the lighting. With hindsight I would have polished them a bit more. I would like to get more of the look I see on contemporary models.
- 714 replies
-
- 2
-
-
- lady nelson
- victory models
- (and 1 more)
-
Are those the newer Printed blocks from Syren?
- 714 replies
-
- 1
-
-
- lady nelson
- victory models
- (and 1 more)
-
A steady feed is important also. Stopping can cause burns.
-
The top one would be a goal for me..
-
Mini Table Saw recommendations
Gregory replied to captainscott's topic in Modeling tools and Workshop Equipment
I’m at a loss by what you mean by “thick” . What are the dimensions of the stock, and what do you want to end up with? -
I recall the variance on the Byrnes has been discussed before. Something like .005 at the back of the blade, so not easy to measure.
-
I just cut a 1/16 strip from a 1/4 sheet of cherry with no burning. This is with a Proxxon FET and a Malco .03 blade 3" 90t. ( CT303012000) It's a fairly used blade, but mostly for basswood strips. I noticed this piece of cherry was well seasoned and not particularly aromatic as it can sometimes be. I suspect if it has more sap it might have more of a tendency to scorch. I don't know if I do everything properly, but it works for me. I try to keep pressure against the fence right in front of the blade and avoid putting pressure on the blade itself. I keep the blade fully elevated for maximum tooth contact with the wood. I have had burning/scorching problems, but mostly with harder woods like mahogany and walnut, and older blades.
-
Chuck, I have always felt your Cheerful rig reflected what would have been actual practice for functionality and proportion. I don’t think anyone can go wrong by using it for reference. Is that Roger’s model mast way too tall, or is that just a perspective thing?
-
I would really enjoy seeing those. For some reason, the pics of Cheerful in the gallery suffered from poor lighting. Perhaps you could post yours in the Gallery?
-
Falkonet is out of Russia, so very hard to source right now. You might check on eBay from time to time..
-
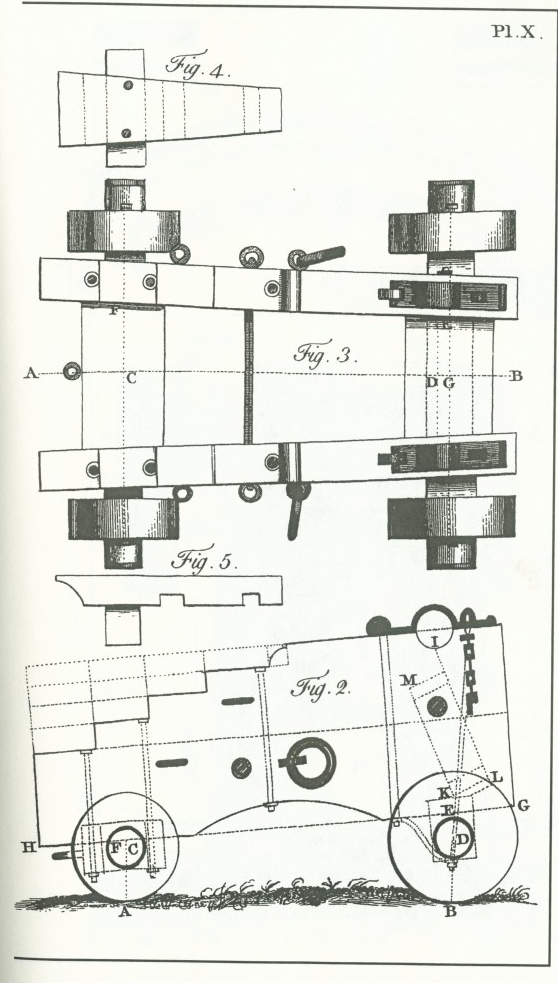
A detail I like about the Thorsminde artifact is that the eyebolts are countersunk. we don’t see them modeled like that very often.
-
This is a contemporary(1775) drawing that has showed up in several discussions. An artefact from Thorsminde. This is a 3D reconstruction of the artifact carriage.

-
That certainly helps, but “steps” have been mentioned a couple of times. Is there another term that applies?
-
To follow along, I could use some labels. ”steps, brackets”?

