-
Posts
2,054 -
Joined
-
Last visited
Content Type
Profiles
Forums
Gallery
Events
Everything posted by AJohnson
-
Yes I did spot when first looking into the box, there are a few parts not required for the S2.C/Ds This is a common theme with the more recent Airfix releases, they must have a whole production run/alternative version release dates mapped out. Shows some forward planning to get the most/economy out of the initial moulds. I have the new 1/24 Spitfire Mk.IXc in stock and that is definitely set up for future releases including retracting tail-wheel, clipped wings, broad-chord “shark-fin” rudder, whole new engines forward of the firewall. So take your pick - Mks. VIII/XXII/XXIV(high back) might be on the horizon. 😁
-
Both those pictures show the ledge the "flaps" rested on, Egilman got this covered. 👍 Btw. did you spot the "Dash-cam" on the top of the tail in the second picture, this must be one of the ground taxiable Buccaneers? Looking at the mould of the Airfix kit it looks like it might benefit from a bit of thinning above the front tilt limit of the tail plane, if I could be bothered, the photos seem to show it is thinner?
-
Yeah I think that is correct, I don’t understand the mechanism or why it was used but the whole elevator/tail plane tilted on top of the tail unit and also the traditional elevators moved up independently. Hopefully someone more knowledgeable will know why? Sure there would be a reason, maybe to do with the aircraft being design to go near supersonic at low altitude, a design feature to avoid “flutter” is it on the elevators?
-
Glad to see you back at your "Nisha", you won't get any comments from me on delays to building "Nisha"! 😆 From memory Chris does provide a plan for "Nisha" when it had no sails and alongside, but this involved having the gaff/boom down and bowsprit pulled inboard, so quite a radical 'look' (But it would make the model even smaller for displaying.) 😄
-

Handley Page Heyford by RGL - FINISHED - Matchbox - 1/72
AJohnson replied to RGL's topic in Non-ship/categorised builds
Very nice job again Greg. 👏 -
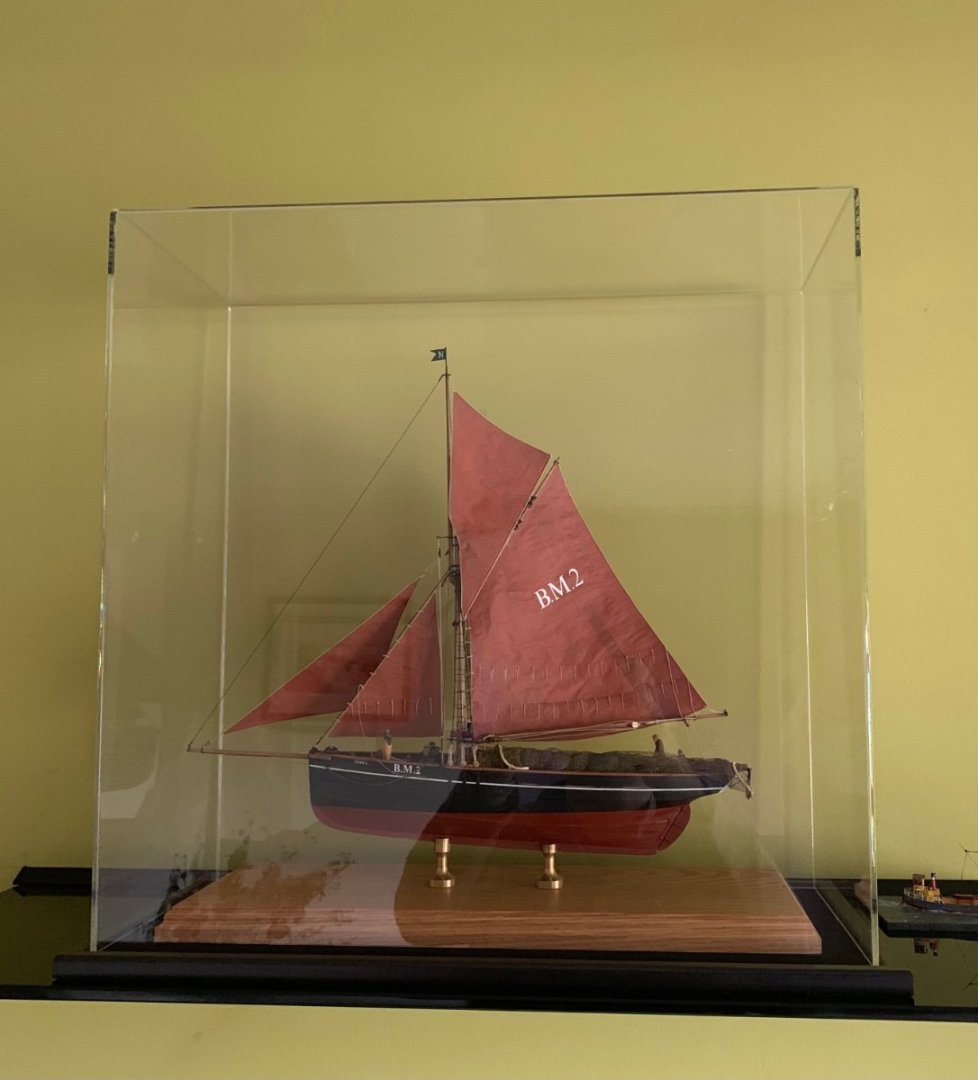
Made to Measure by acrylicdisplaycases.co.uk, 3mm case on black ash base with black velvet inner. Nice but not cheap, delivered it is almost as expensive as the basic Nisha Kit was when I bought it!
- 206 replies
-
- Vanguard Models
- Brixham trawler
-
(and 2 more)
Tagged with:
-
The “Nisha” is now in it’s new home, decided that having gone to the trouble of adding sails it needed protection from dust.
- 206 replies
-
- Vanguard Models
- Brixham trawler
-
(and 2 more)
Tagged with:
-
The walnut parts can be very brittle along the grain. If you can, make some new ones from the sheet the kit parts came from. For drilling try putting tape on top and drill through that, it can help reduce the damage caused by drilling, also I'd use a hand held pin vice to drill rather than an electric drill as it might be too fast and causing the fragile Walnut grain to lift as you drill.
-

Handley Page Heyford by RGL - FINISHED - Matchbox - 1/72
AJohnson replied to RGL's topic in Non-ship/categorised builds
That takes me back, the coloured sprues for those that couldn’t afford the paints! Yep, that one hit every branch when it fell out of the Tree Ugly Tree! But I’ll be following for old times sake! 👍
About us
Modelshipworld - Advancing Ship Modeling through Research
SSL Secured
Your security is important for us so this Website is SSL-Secured
NRG Mailing Address
Nautical Research Guild
237 South Lincoln Street
Westmont IL, 60559-1917
Model Ship World ® and the MSW logo are Registered Trademarks, and belong to the Nautical Research Guild (United States Patent and Trademark Office: No. 6,929,264 & No. 6,929,274, registered Dec. 20, 2022)
Helpful Links
About the NRG
If you enjoy building ship models that are historically accurate as well as beautiful, then The Nautical Research Guild (NRG) is just right for you.
The Guild is a non-profit educational organization whose mission is to “Advance Ship Modeling Through Research”. We provide support to our members in their efforts to raise the quality of their model ships.
The Nautical Research Guild has published our world-renowned quarterly magazine, The Nautical Research Journal, since 1955. The pages of the Journal are full of articles by accomplished ship modelers who show you how they create those exquisite details on their models, and by maritime historians who show you the correct details to build. The Journal is available in both print and digital editions. Go to the NRG web site (www.thenrg.org) to download a complimentary digital copy of the Journal. The NRG also publishes plan sets, books and compilations of back issues of the Journal and the former Ships in Scale and Model Ship Builder magazines.


