
HOLIDAY DONATION DRIVE - SUPPORT MSW - DO YOUR PART TO KEEP THIS GREAT FORUM GOING! (Only 69 donations so far out of 49,000 members - Can we at least get 100? C'mon guys!)
×


AJohnson
-
Posts
2,034 -
Joined
-
Last visited
Content Type
Profiles
Forums
Gallery
Events
Everything posted by AJohnson
-
 100% and I think we come back better for it! I got stuck and frankly a bit fed up with my Bounty build, had a year long break from it and built a few other projects, learnt some more and now can't wait to get stuck back into the Bounty. A change is good, looking forward to seeing you back on this Dave when you get your Mojo back! 👍
 -
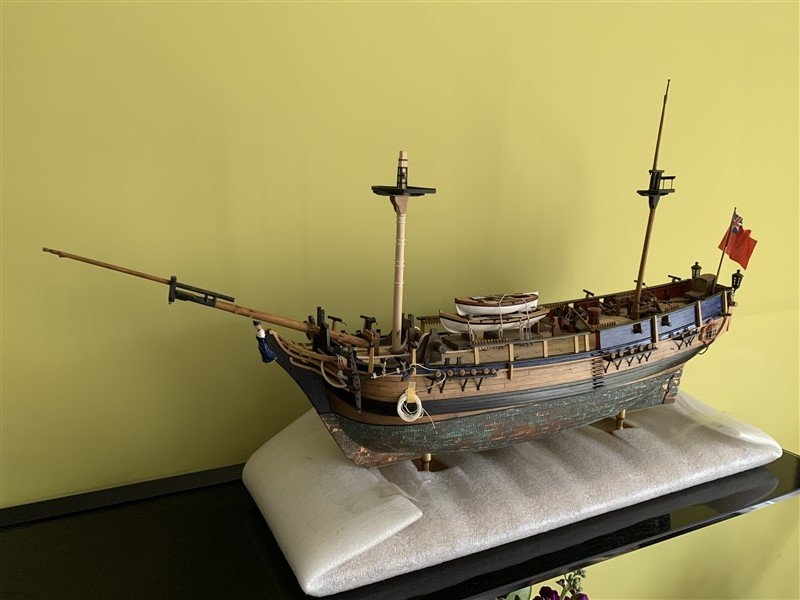
Thank you all for your kind words, it helped hugely in this build that the kit just went together really well, so that I could put most of my "effort" into adding my own details and not have to wrestle with the kit itself, so credit to Chris for that. Talking of "wrestling" kits, time to blow the cobwebs off this sadly neglected one...
- 206 replies
-
- 8
-

-

-
- Vanguard Models
- Brixham trawler
- (and 2 more)
-
Think you are right Brian do a trial one and let us all have a look, perhaps using a tiny amount of PVA glue instead of C-A thereby avoiding marks if you change your mind?
-
How fragile would they be if in the open position? I think it may look nice with some open, but I know I would probably keep knocking them off as i'm so clumsy! 🤐
-
Looks like you had a great day Glenn, very envious, its been years since I last was up there.
-
Excellent looking rigging David, did you make that serving machine or is it bought?
- 310 replies
-
- 3
-
-
- Diana
- Caldercraft
- (and 1 more)
-
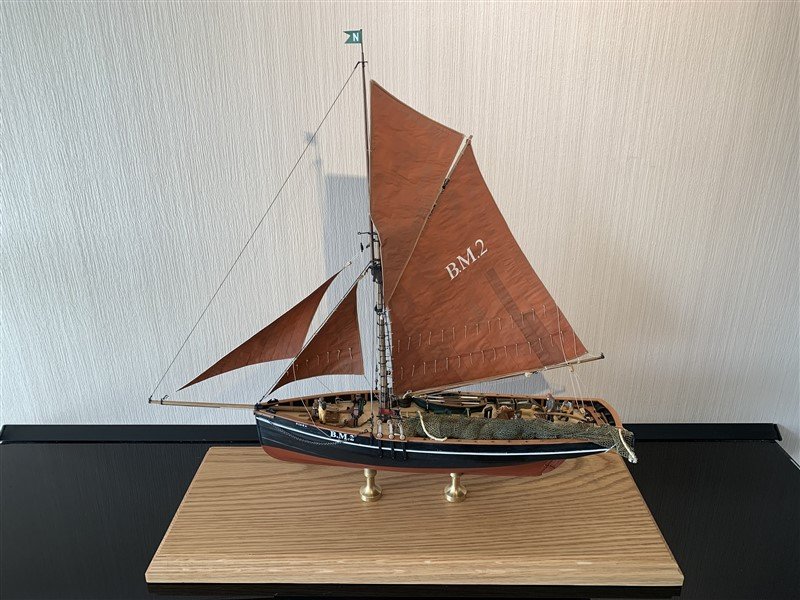
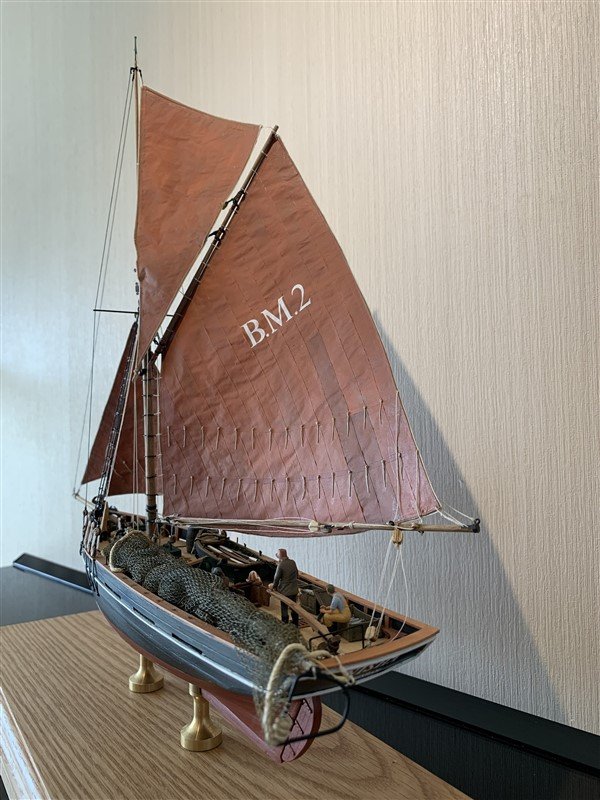
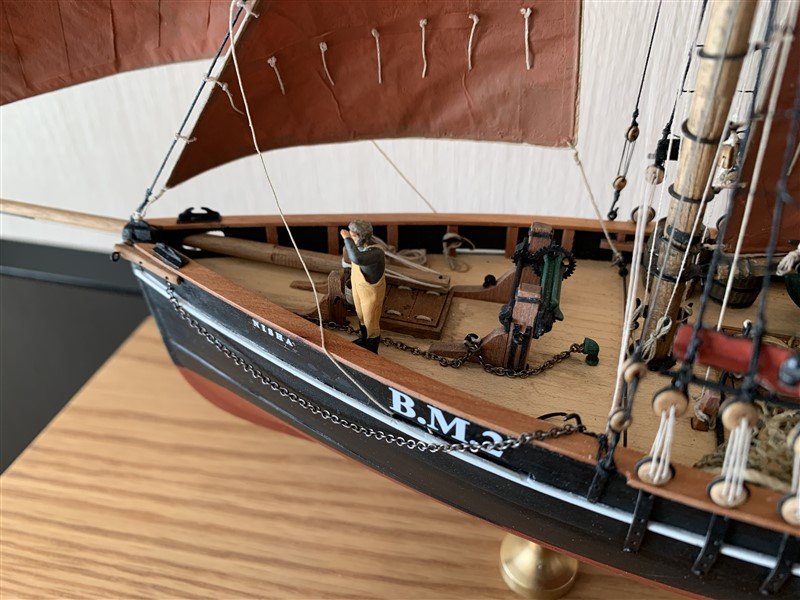
Final round of pictures of the finished article. Thanks to everyone who has followed along and encouraged and advised over the last year and a bit and to @chris watton for a great kit. Now I have to get a wriggle on (🐌 more like!), I have my Caldercraft Bounty to finish and one of two other projects to do before Vanguard's HMS Surprise is released!


- 206 replies
-
- 25
-
-
-
- Vanguard Models
- Brixham trawler
- (and 2 more)
-
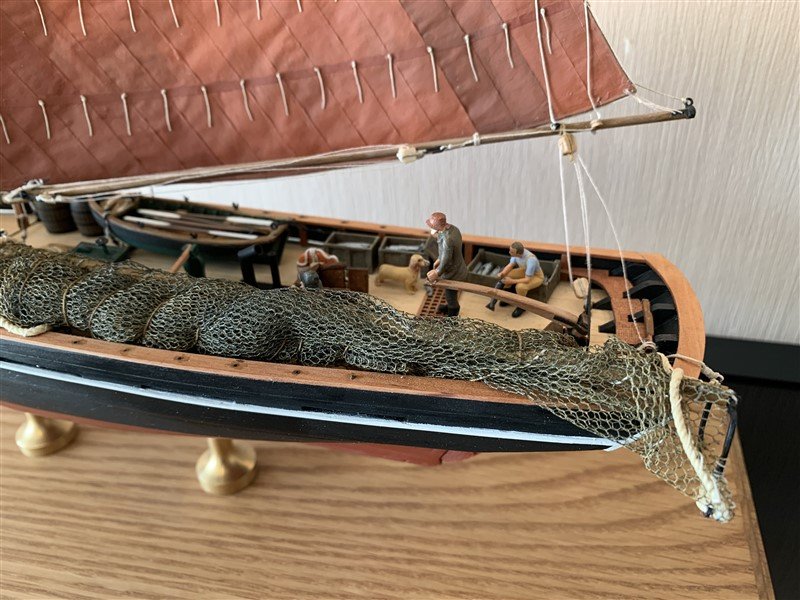
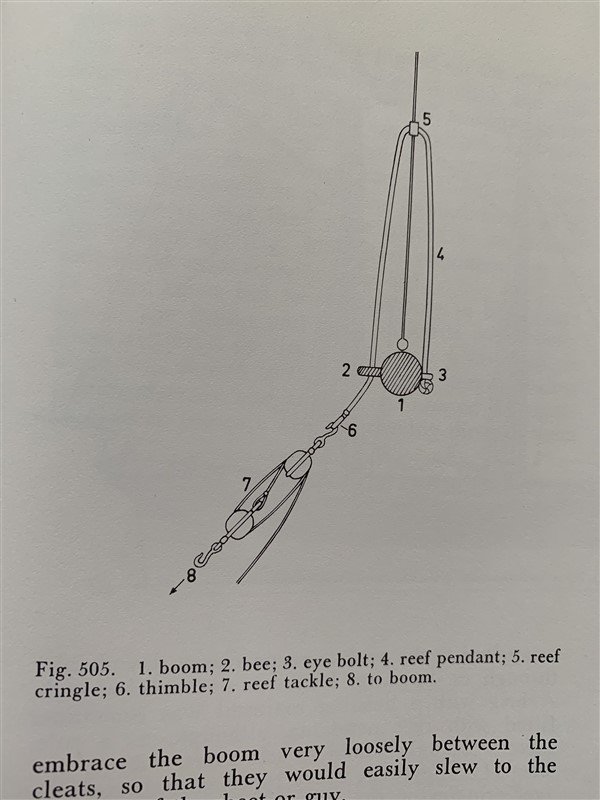
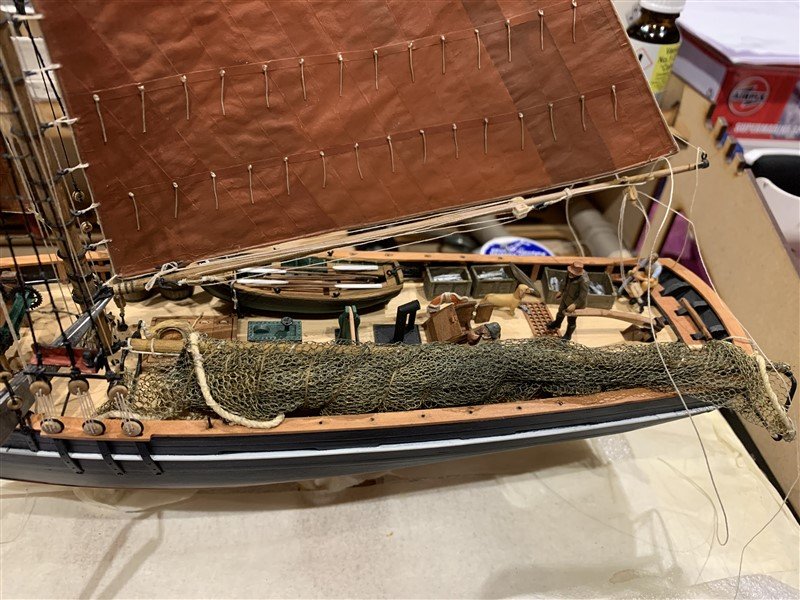
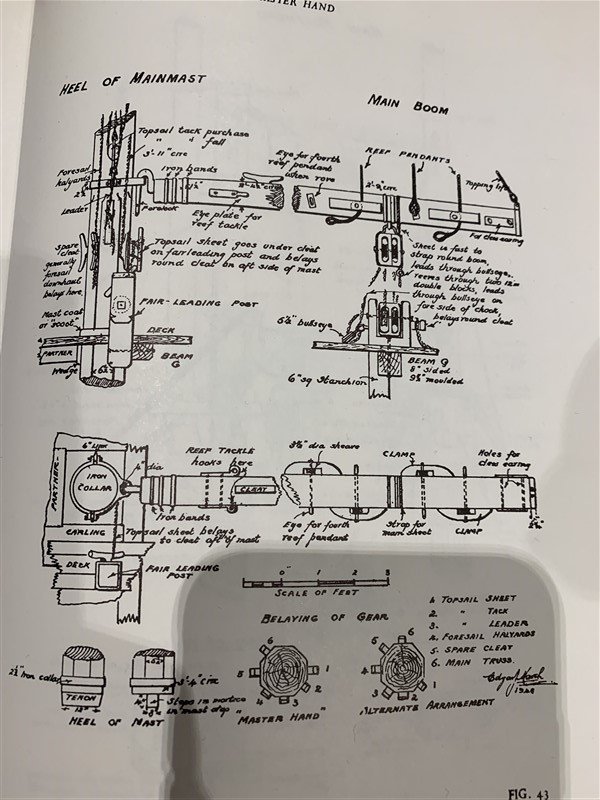
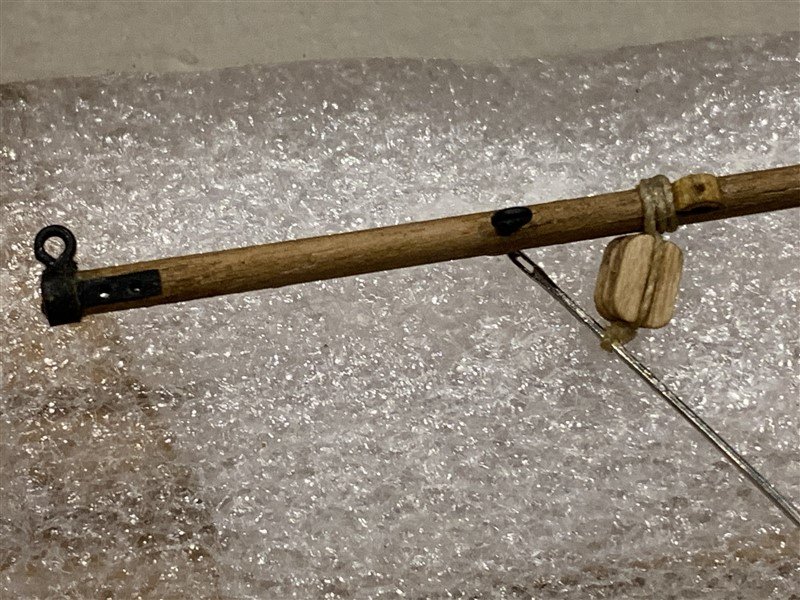
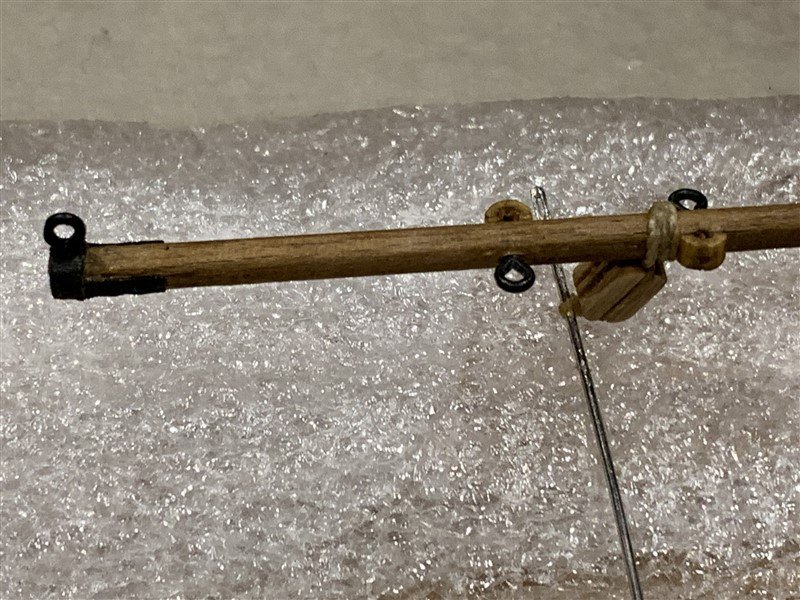
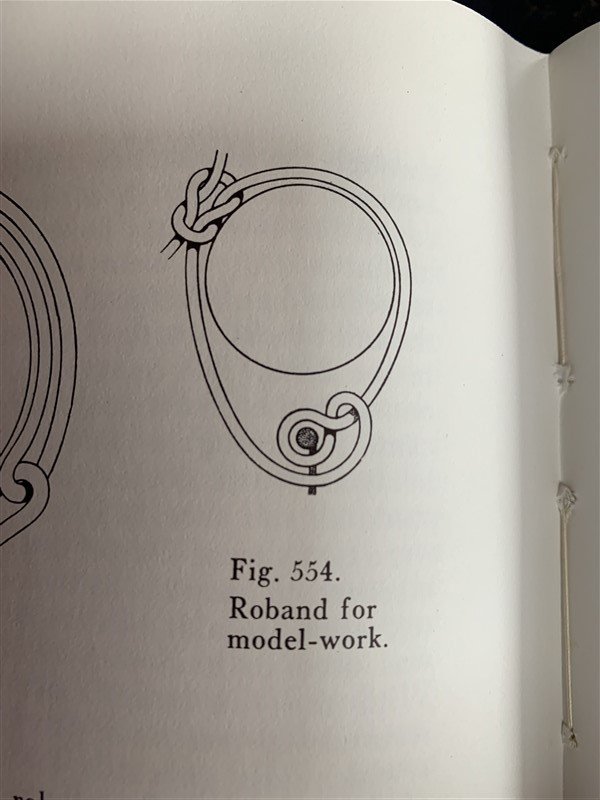
Well this is it, finally finished! Final few bits of rigging details to show you then I will upload some picture here and in the Gallery. E. W. Petrejus in his "Irene" book came to the rescue for the reef tackle details. So with that all attached to the boom it was just a matter of add the final parts of rigging to hold the boom in place and stiffen the threads with varnish to "push" the mainsail over to one side to simulate the effect of the wind. I had to move the crewman filleting the fish as he would have had his head bumped by the lower block! (must plan this stuff better in future!) Next post will be the "big reveal"!

- 206 replies
-
- 10
-
-
-
- Vanguard Models
- Brixham trawler
- (and 2 more)
-
Planking is looking good Edward, the effort you putting into it will show when all sanded and sealed.
-
Agreed a really neat build. Love the look of the wood strip.
- 57 replies
-
- 1
-
-
- marisstella
- batelina
- (and 1 more)
-
Really looking forward to seeing this one done, didn’t know there was a catapult set available, that will be some display! 😁
-
Very impressive looking Alan, you have the patience of a Saint! 😇
-
Great build Mike, thank you for sharing the finished result!
-
Thank you for sharing, what project are you doing next?
- 53 replies
-
- 1
-
-
- brig-sloop
- Caldercraft
- (and 2 more)
-
Very nice Andy, a great looking “Wimpey”!
-
Outstanding Brian I hope you have a suitable toast when you get the Secret Vessel to the coast. Nice old table as well!
- 68 replies
-
- 2
-

-
-
- Morel
- Master Korabel
- (and 1 more)
-
Well hope she had a safe journey, well done anyway!
- 53 replies
-
- 4
-
-
- brig-sloop
- Caldercraft
- (and 2 more)
-
Well done Glenn! Wow one month to build Nisha! Bet Chris is happier with customers of your build rate than mine, he'd be as poor as the proverbial "Church Mouse" otherwise! 🐭
- 48 replies
-
- 2
-
-
-
- Nisha
- Vanguard Models
- (and 3 more)
-
Great news, well done! Hope to see some pictures soon! 😁
- 53 replies
-
- 1
-
-
- brig-sloop
- Caldercraft
- (and 2 more)
-
These are very well painted, do you have count of the number of soldiers that you have finished now?
-
Agreed those are very nice enhancements over the kit parts, well worth the effort I think Andy!
-
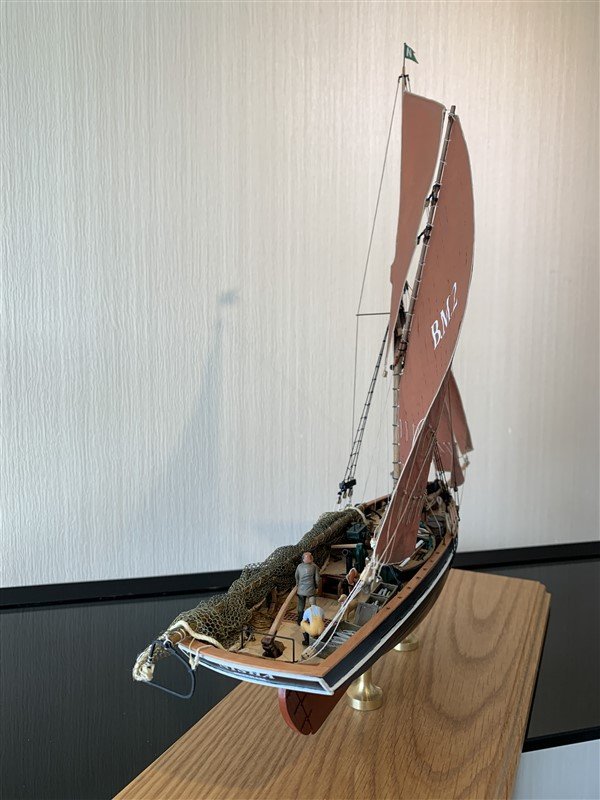
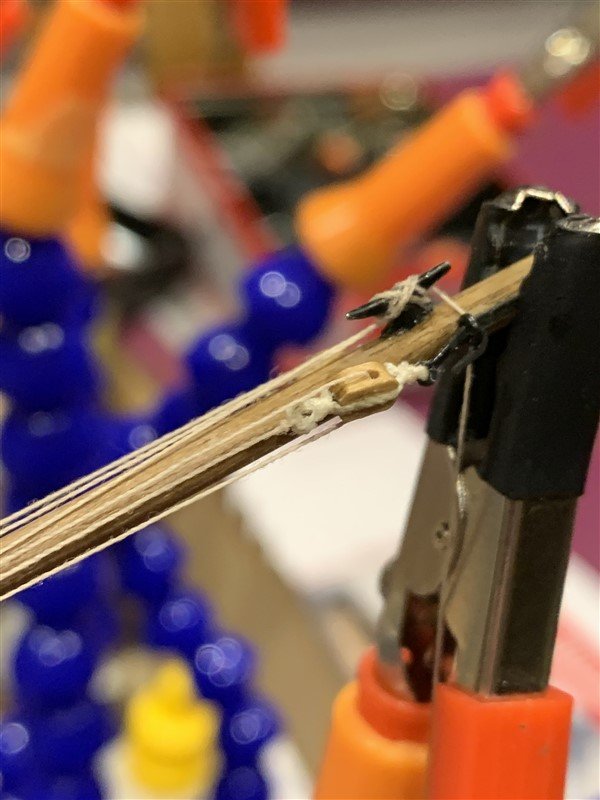
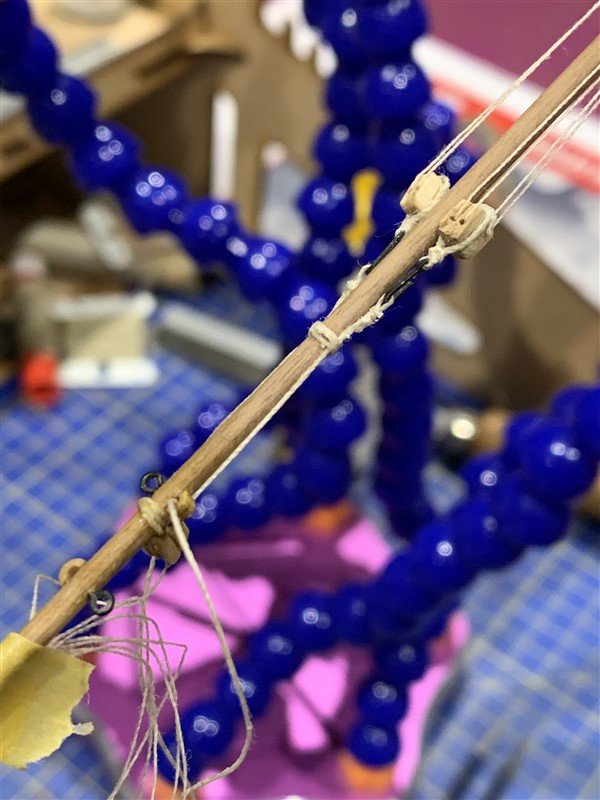
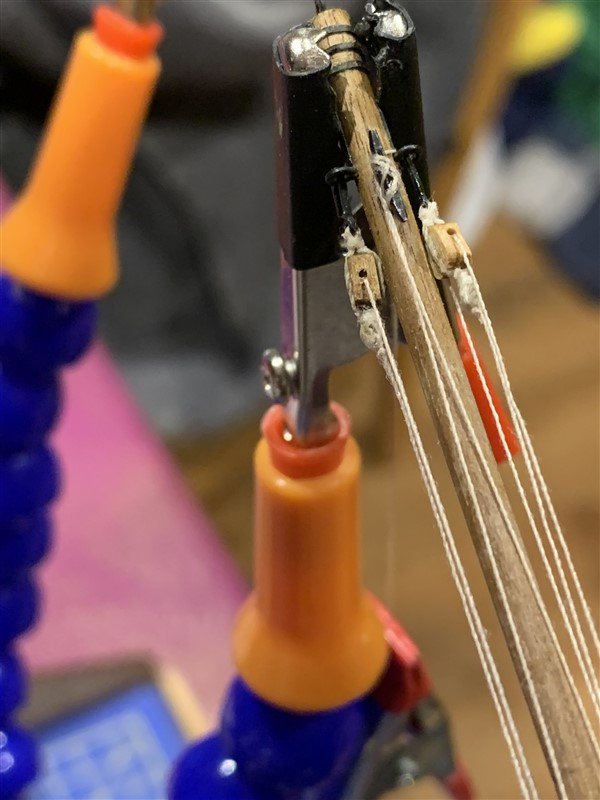
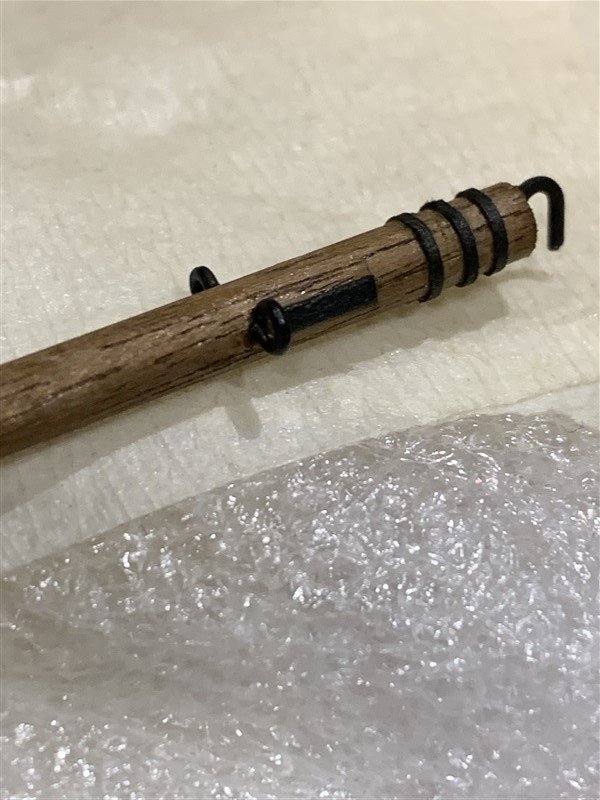
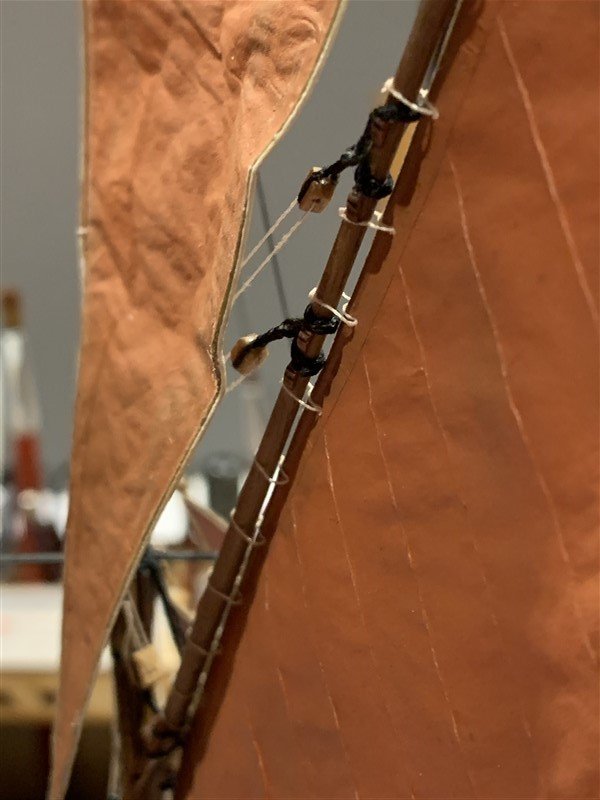
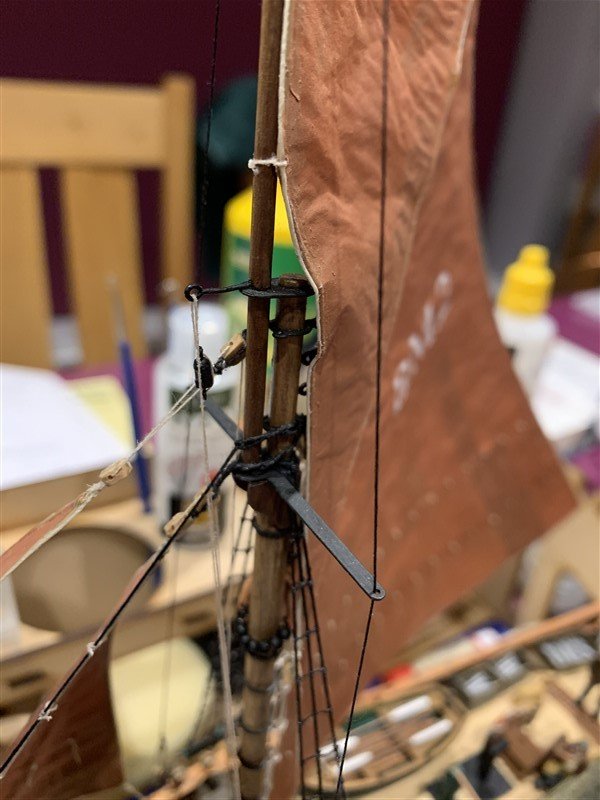
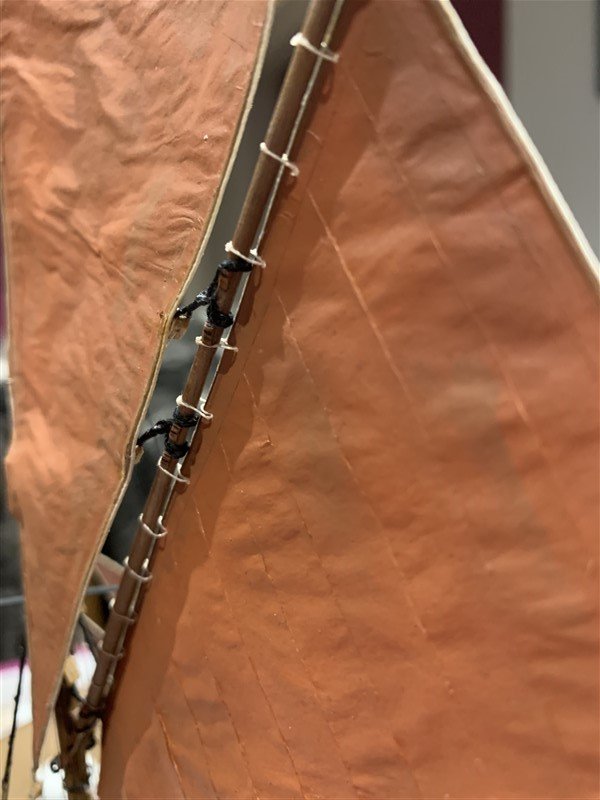
Work on the boom, pinching a few details from March again. I added Reef Pendant eyes and clamps, a top lifting eye and plates made out of card for the clew earing. At the mast end added card strips to simulate iron bands and more eyelets and card for Reef tackle plates, all I need now is to work out what the hell the Reef tackle looked like! 🤔 Also still to add a cleat or two I think. Thanks for dropping by and the likes! 😁
- 206 replies
-
- 8
-
-
- Vanguard Models
- Brixham trawler
- (and 2 more)
-
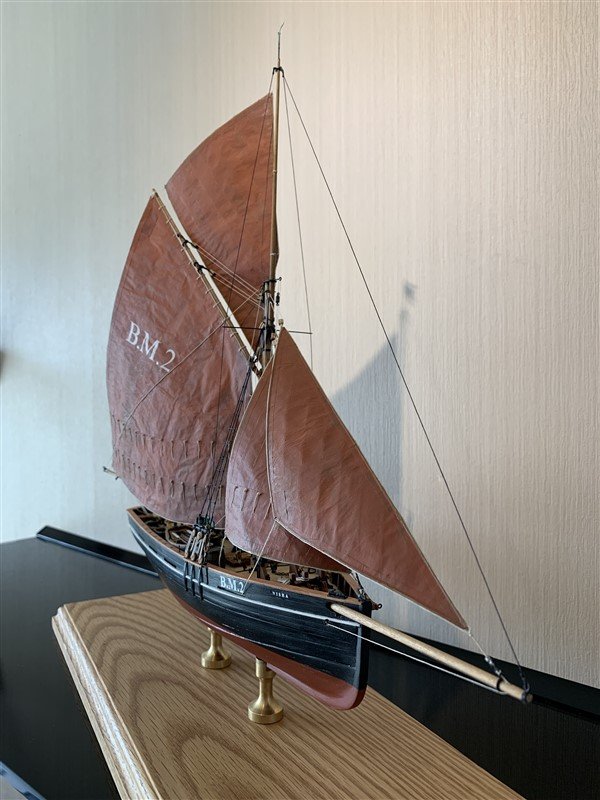
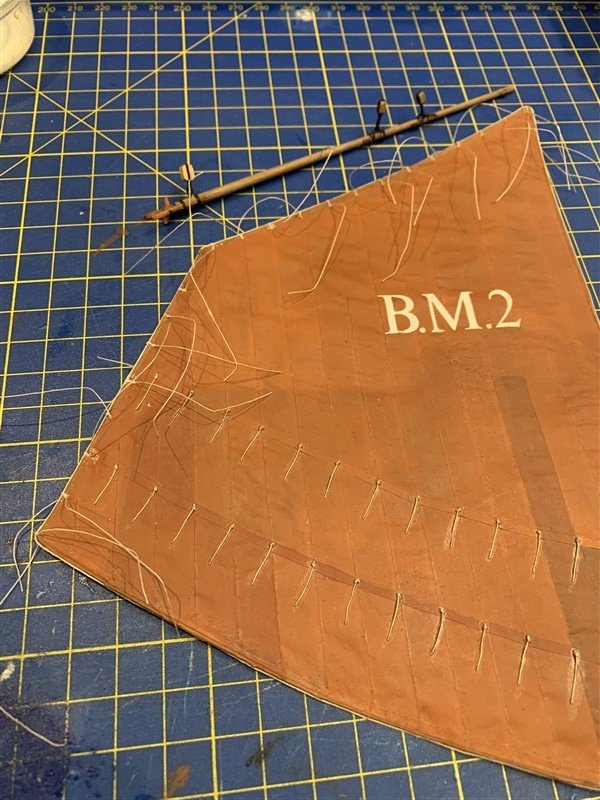
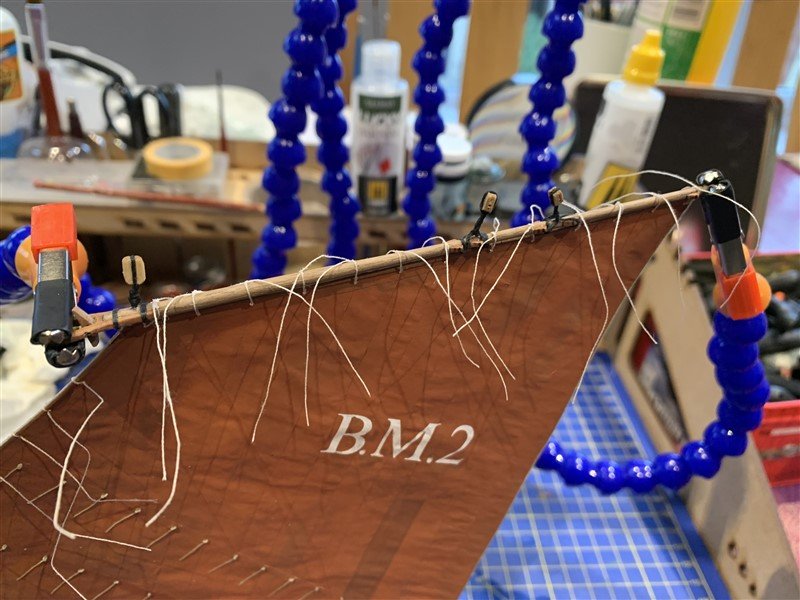
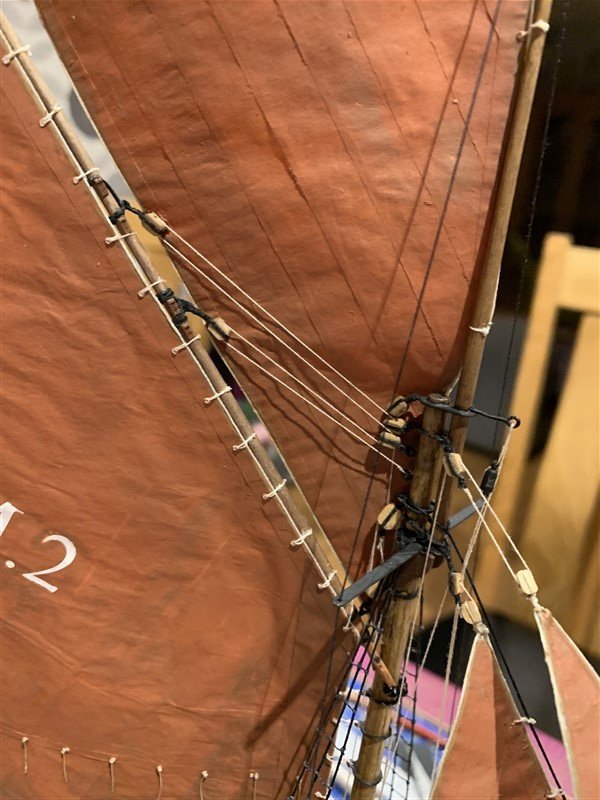
Thank you very much Alan & Brian, the Main and top sails are now on; with the aid of the relevant section of how to do rigging in "Modelling the Brig of War IRENE" by E.W. Petrejus (A really useful book), but with minor tweaks still to do before I can call them finished, this included a few delicate sessions bending the trapped wire just under the bolt rope to simulate the Topsail being bent against the running rigging and masts. Same also for bending the Mainsail into a gentle curve, I have been studying all the photographs in Edgar J March to get the shape I'm after. Next post will have the work I have been doing on the Boom.
- 206 replies
-
- 10
-
-
-
- Vanguard Models
- Brixham trawler
- (and 2 more)
-
Great job! 👏
