


CaptnBirdseye
-
Posts
153 -
Joined
-
Last visited
Content Type
Profiles
Forums
Gallery
Events
Posts posted by CaptnBirdseye
-
-
-
1 hour ago, ubjs said:
¨Interesting note there. As a retailer of kits, I see this on a regular basis.
Another way to ask this question would be, "why are you building models?"
Another view of this, is it really that important that you finish the model?
If you have fun and enjoy building why bother if its not finished, but that was maybe what you wrote.
")
I dont have a problem taking up a build that I have left, if I get the inspiration. My ¨problem¨ is that after a while I feel bored and continue with some other building project, a boat or modelrailroading.
I dont know if its me or the persons around me that have a problem with me not finishing models, something to think about as well.
I have to admit, the pleasure, for me, is in the building. However as different things pique my interest at different times, i can tend to stop and start a kit - but for me that's what keeps it fresh and interesting. Just my take....
18 minutes ago, James H said:I have a delayed HMS Victory prototype by Amati, and I'm currently building Vanguard Models' Ranger fisher.
Ranger will be done soon, then it's onto Indefatigable.
There is a Mary Rose lurking in the background, and Panart's 'Posto di combattimento', but those are ancient projects now, so don't really count until I ever decide to resurrect them. MK's AVOS is also there, and that will be done as soon as time permits.
That's a good job with the Amati Victory, as i REALLY want that but will need to make some room first 😱 lol
-
You make a good point there Allan! I have done a lot of research into quality tools to have a go at scratch building, but there are 3 areas of concern:
1) Price...... given the chance/choice it would be a full workshop of Byrnes Model Machines, but living in the UK, the shipping alone is prohibative

2) Available space.....i would need my own workshop, not a spare room that i'm 'allowed' to convert.
3) Skill level.... and this is probably the biggest barrier. That and having the nerve to give it a go in the first place 😱
-
-
To be honest, Allan, the planking instructions supplied are woeful! I guess, at this level, OcCre thought everyone would have the experience to know how to plank without detailed instruction 😒
In this respect, the DA version is better. Admittedly, theirs is twice the price, and double planked.
-
Supurb build so far. Watching with interest.
-
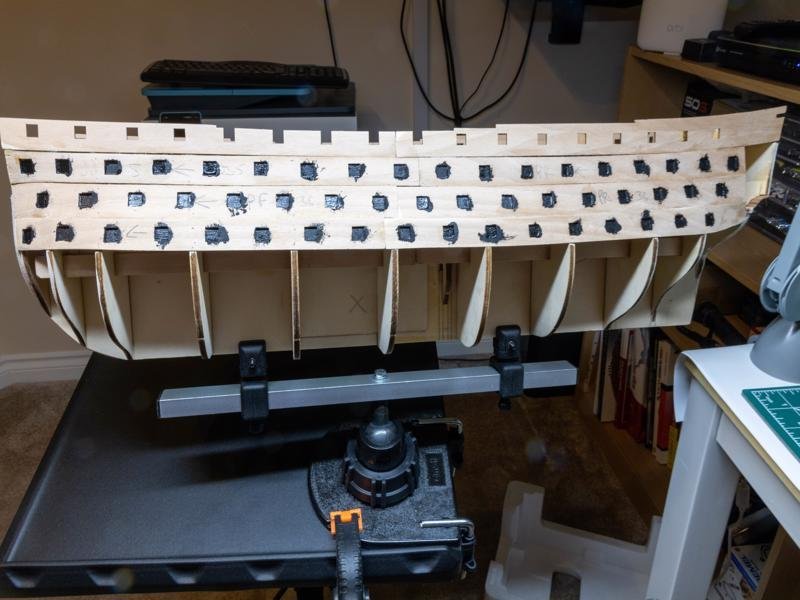
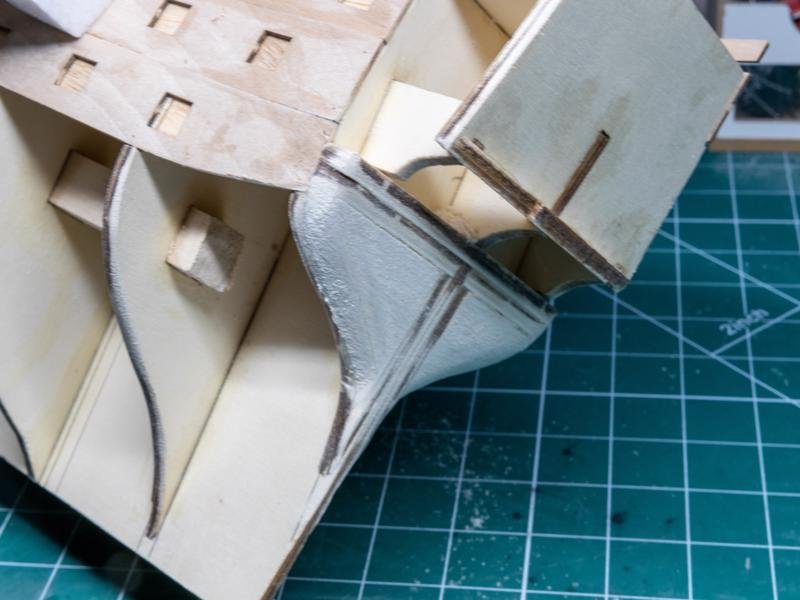
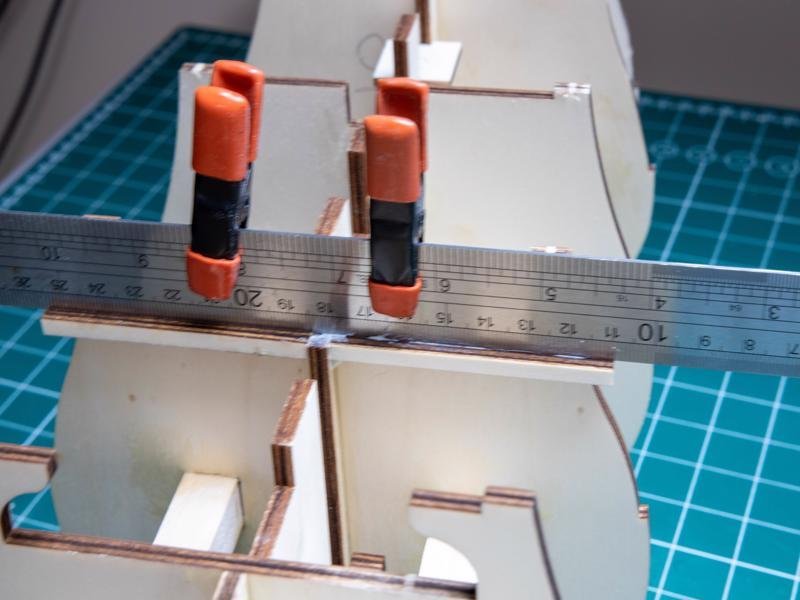
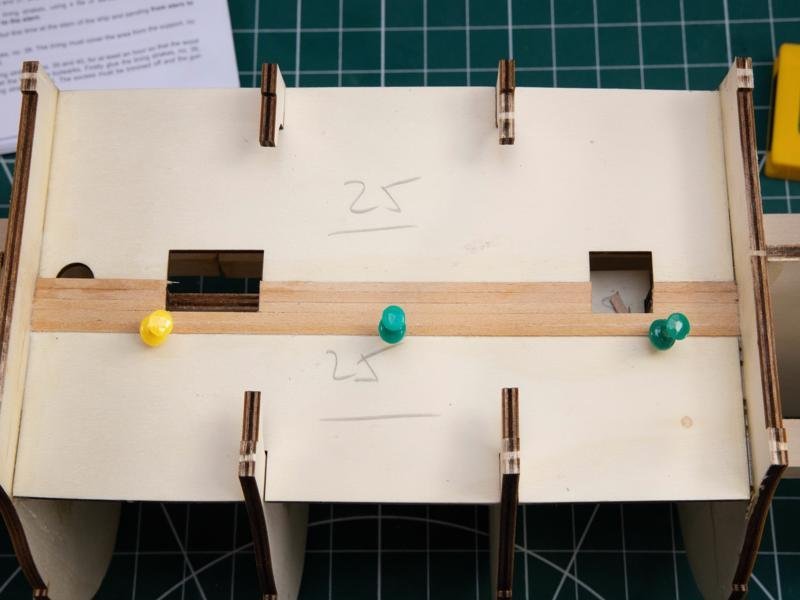
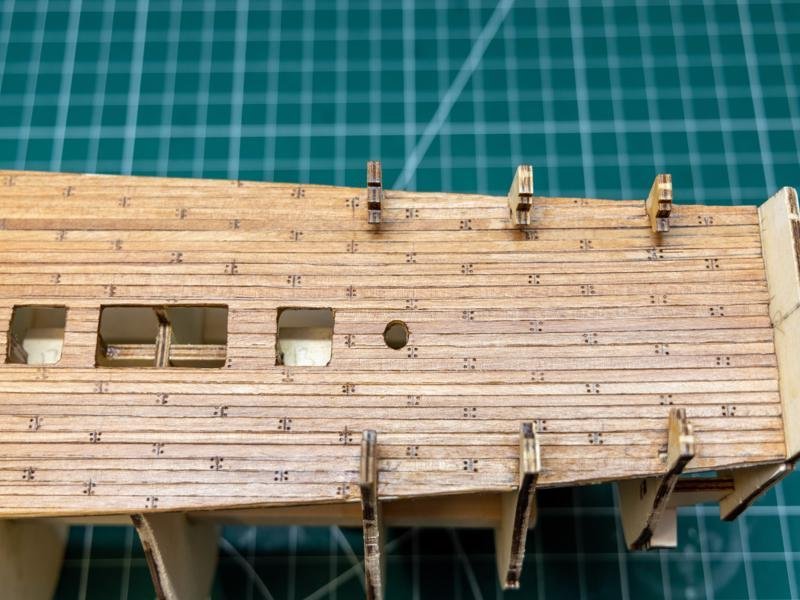
This update involves planking the counter.
Due to the curve below the transom, i had to temporarily use pins to hold the planks on the lower counter in place while the glue dries. When cured, i will sand to shape.
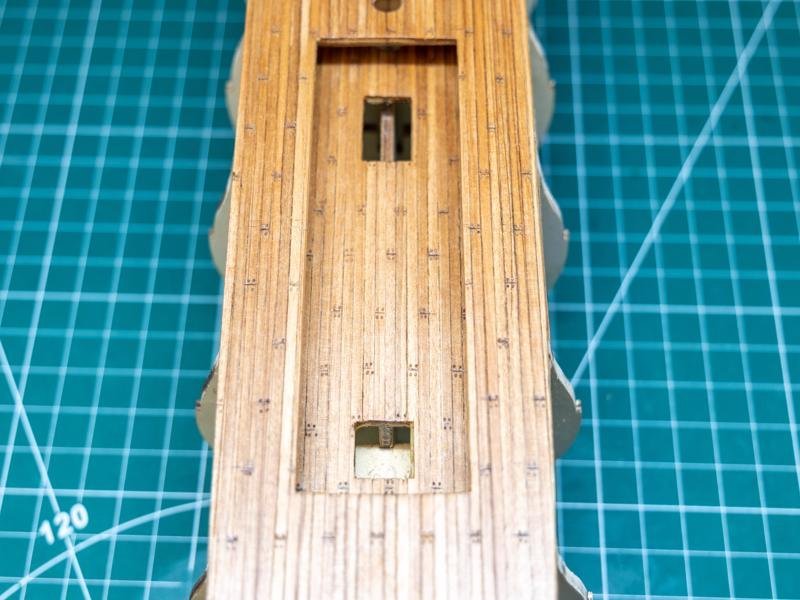
While waiting for that, i thought i would skip forward a bit in the instructions. I had read that once the upper planking was in place, the false gunports need painting black. As many have said, this has disaster written all over it, as the posibility of getting paint on the resulting planks is waaaayyyyy to easy!
So i used some Tamiya X1 Black acrylic to 'black out' the ports before fitting the planks.
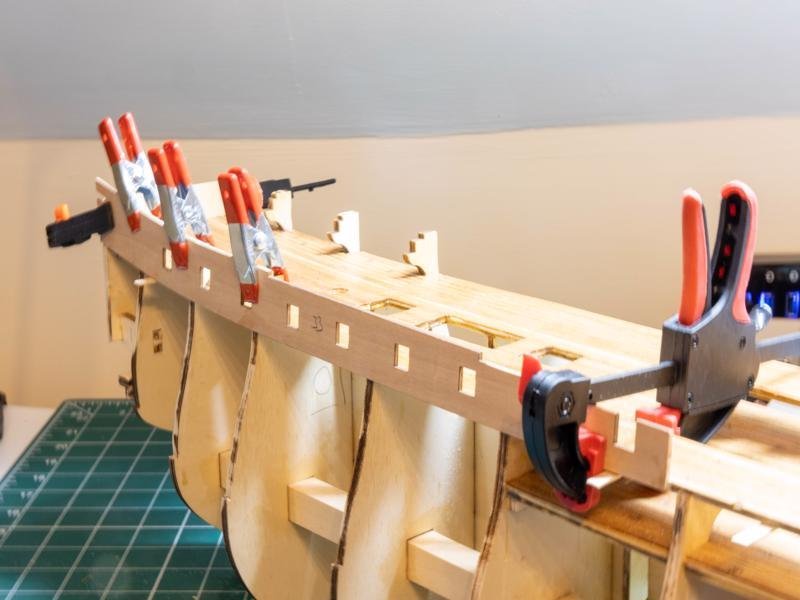
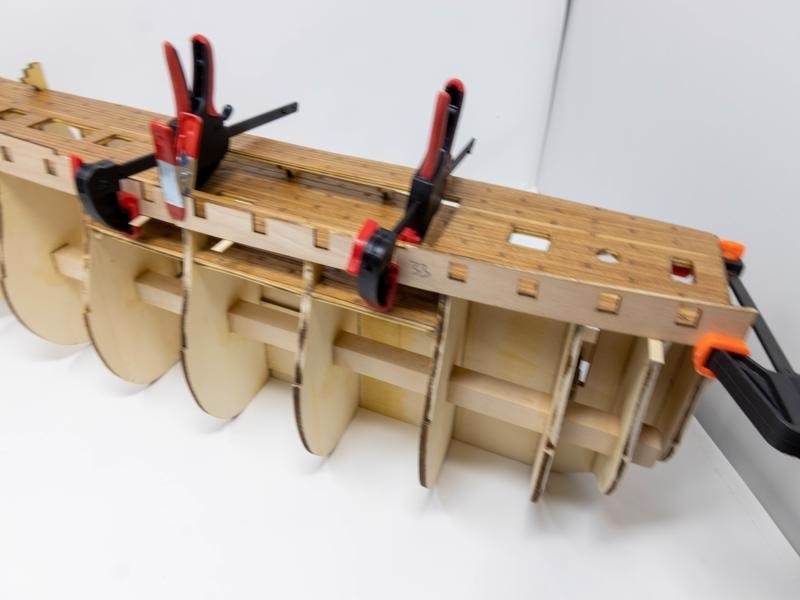
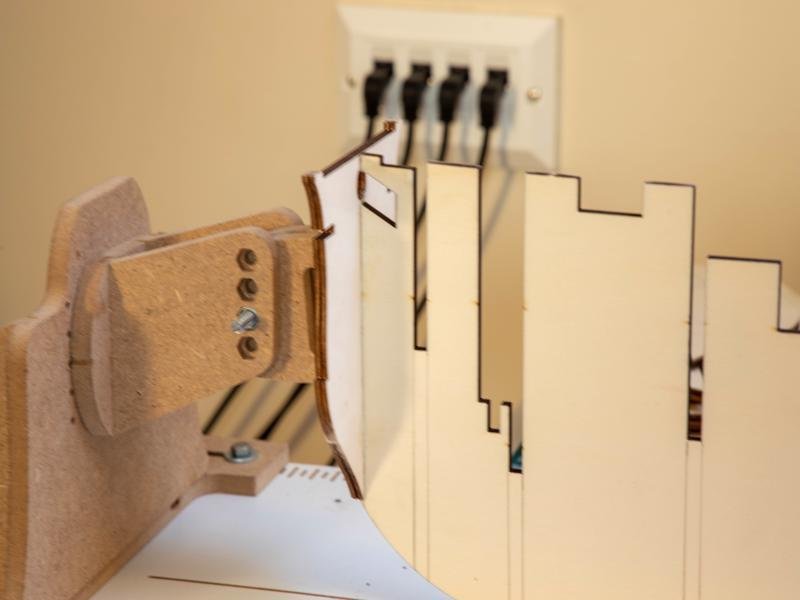
I've found a noticeable drawback with the Amati Keel Clamp, shown in the last picture below. When trying to clamp it to my worktable, the front end has a habit of 'lifting'. So much so that i couldn't use it easily on my workbench so had to adapt my computer table
This bring us up-to-date.

-
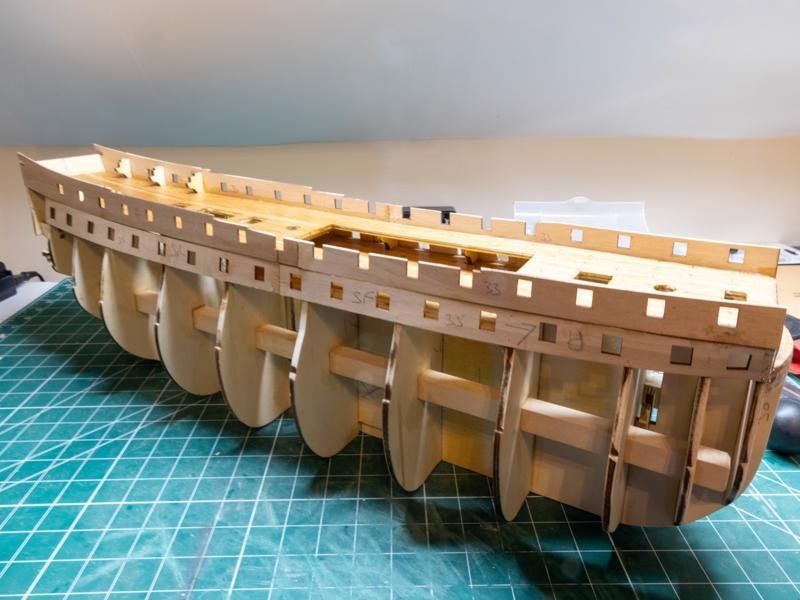
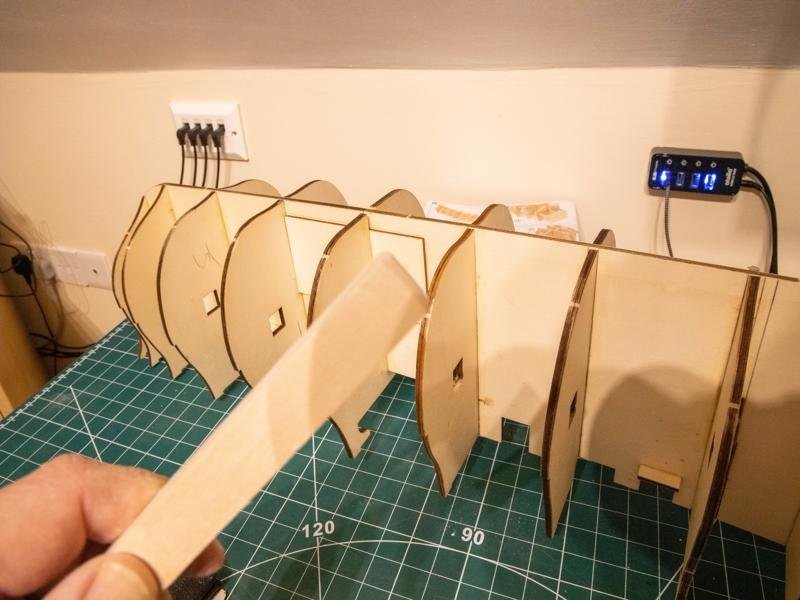
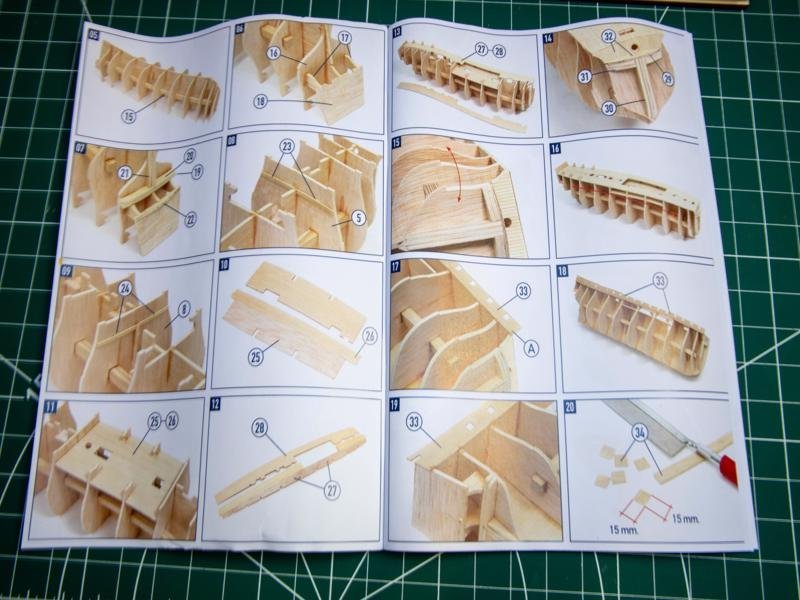
Once all of the bulwarks are in place, it is time to sand everything down, ready for planking

I needed something that would alow me to turn the skeleton upside down without damaging the top bulwark. As luck would have it, i had just recently replaced our home printer and the polystyrene that came with it was just the right size for the hull to sit in Result!
I also added balsa to the bow and stern to help with the lay of the planking.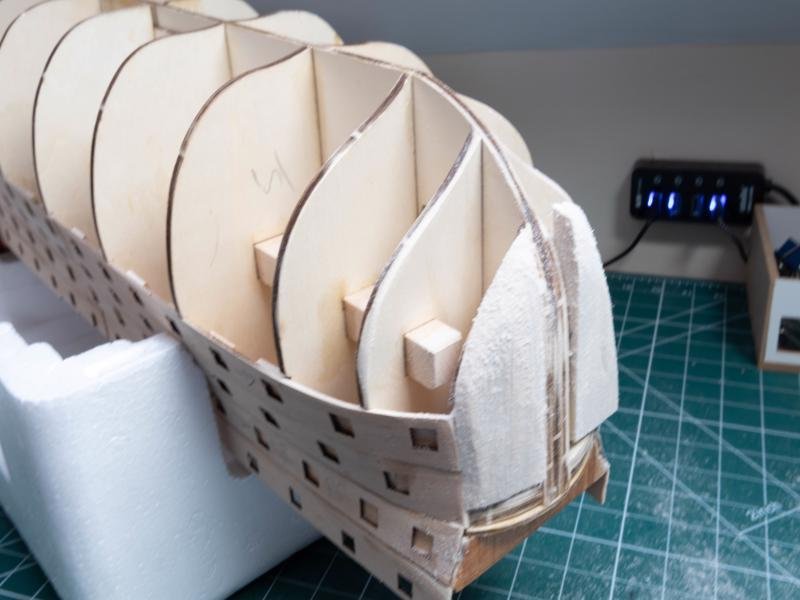
-
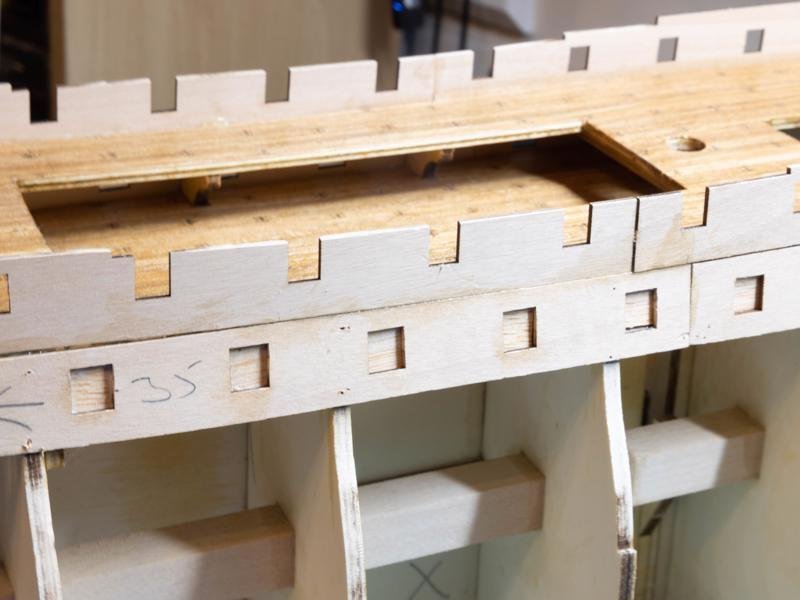
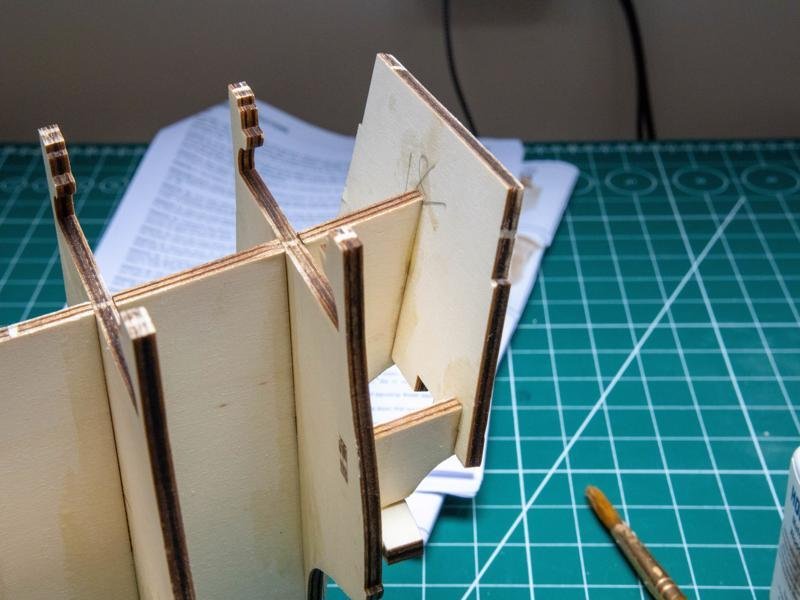
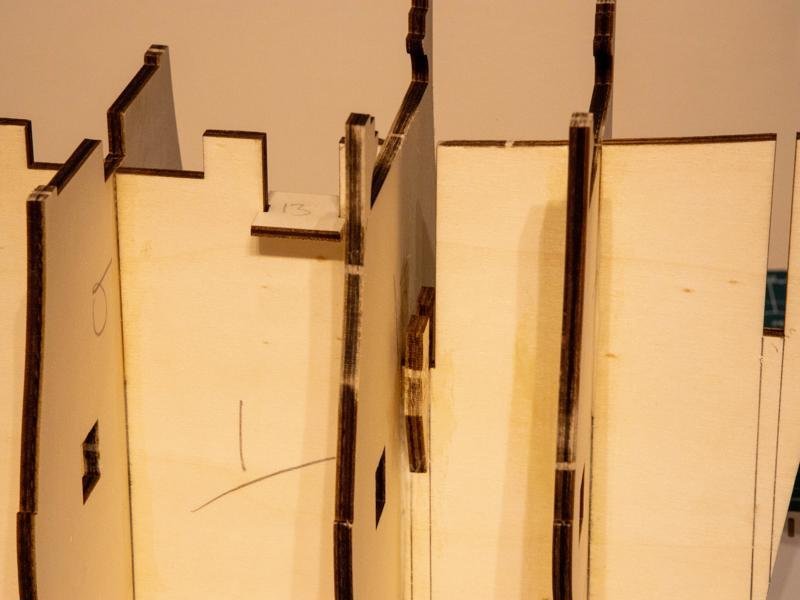
The Bulwarks are fitted next, but strangely to my eyes, you actually start from the top, working downwards

This presents its own problems, like how do you get the upper bulwark to fit along the edge of the top deck? In the end i glued some temporary tabs underneath the top deck, which alowed the bulwarks to sit at the right height (tip i found on Youtube - thank you John Aliprantis). Once one side was glued in place, it was repeated for the other. However, i think if i was to ever build this again i would start from the bottom, ala the De Agostini versionEach side has three rows of bulkarks, which terminate at the notch on each bulkhead. As each row is fitted, 15mm squares are cut and glued in place behind each gunport. Some of these can be a bit of a pain to get in place. Also because of the bulkheads, some of these will need to butt up against them. The bow end on the second row has to be shaped to fit. On the last row the bulwalk didn't avtually meet the notch in the bulkhead. After a little ponder, i decided i would leave it like that and rectify later.
-
-
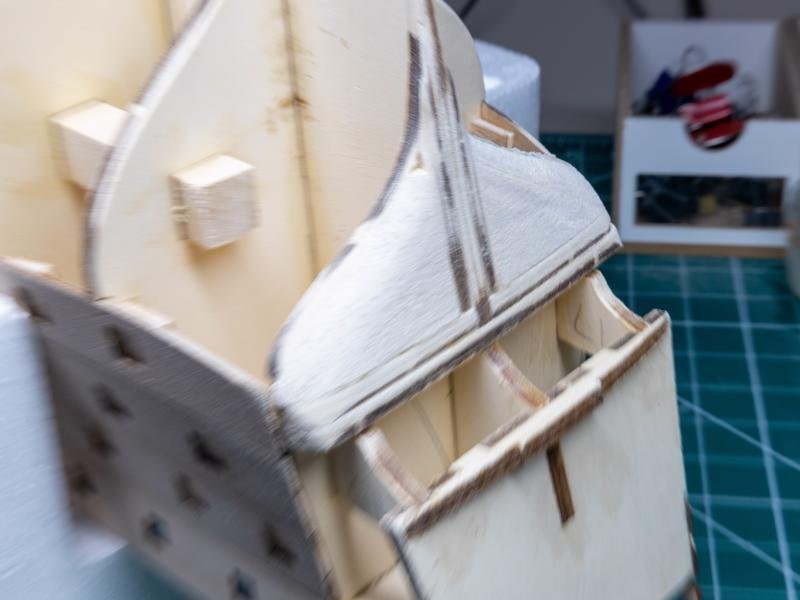
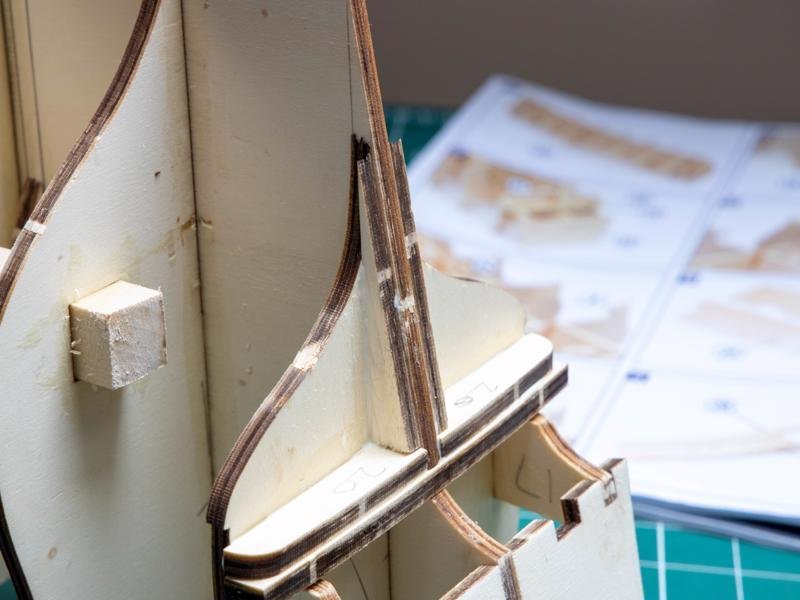
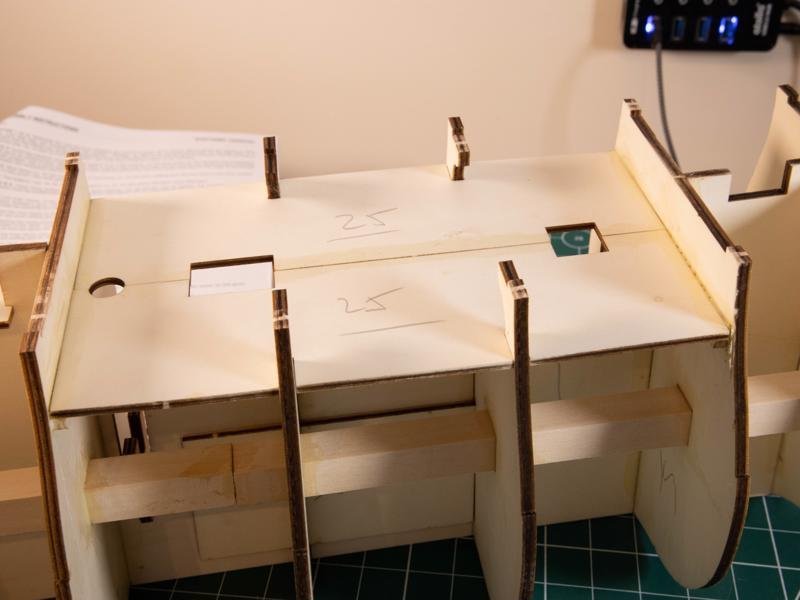
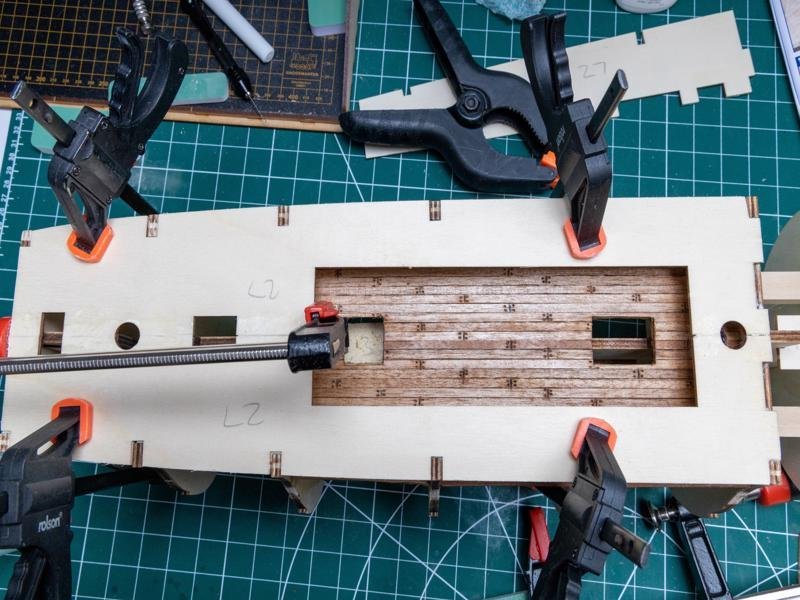
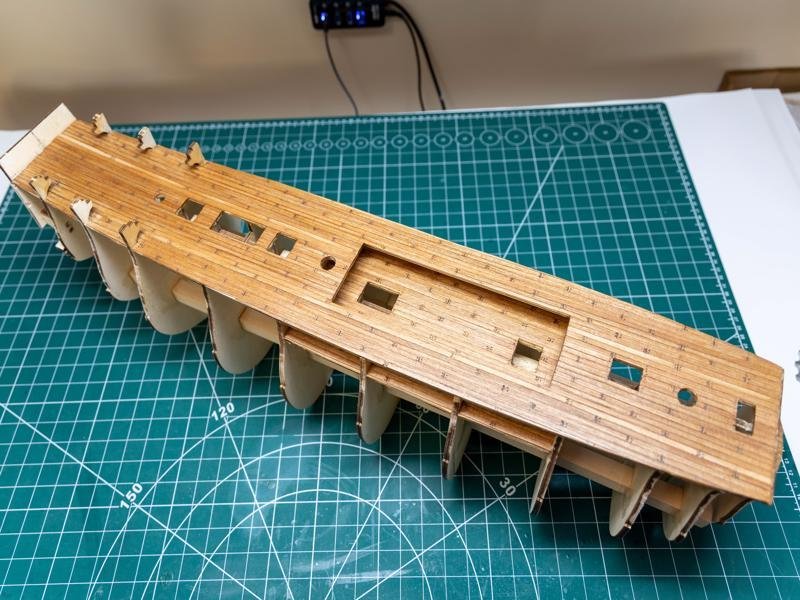
Next, i built up what will become the stern gallery. Straight forward enough, just adding the supports and the end panel.
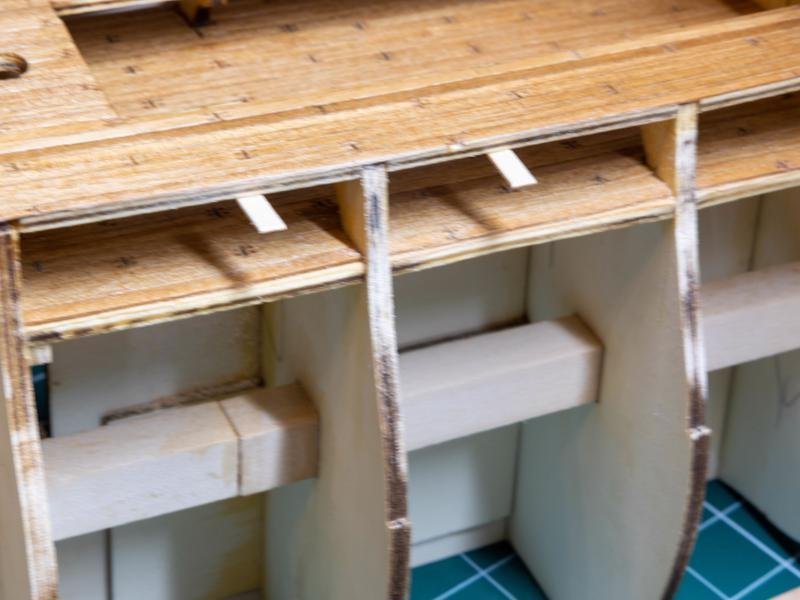
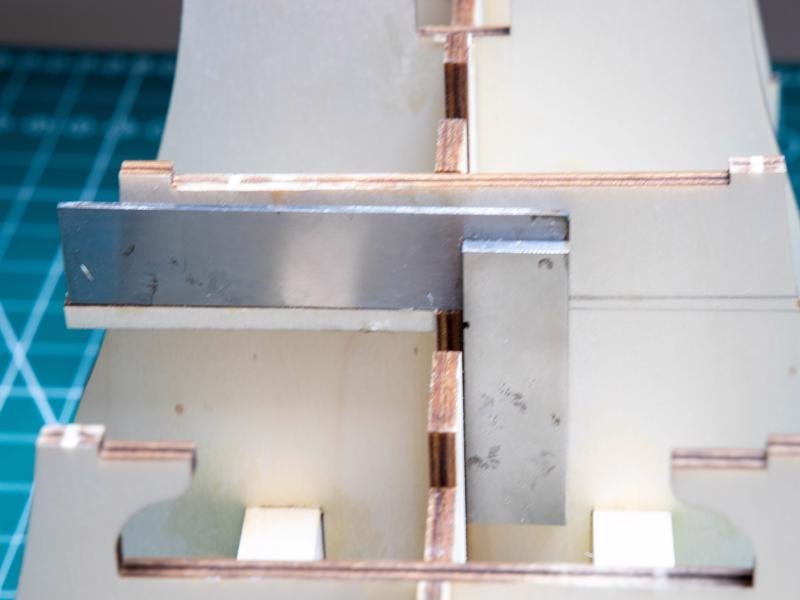
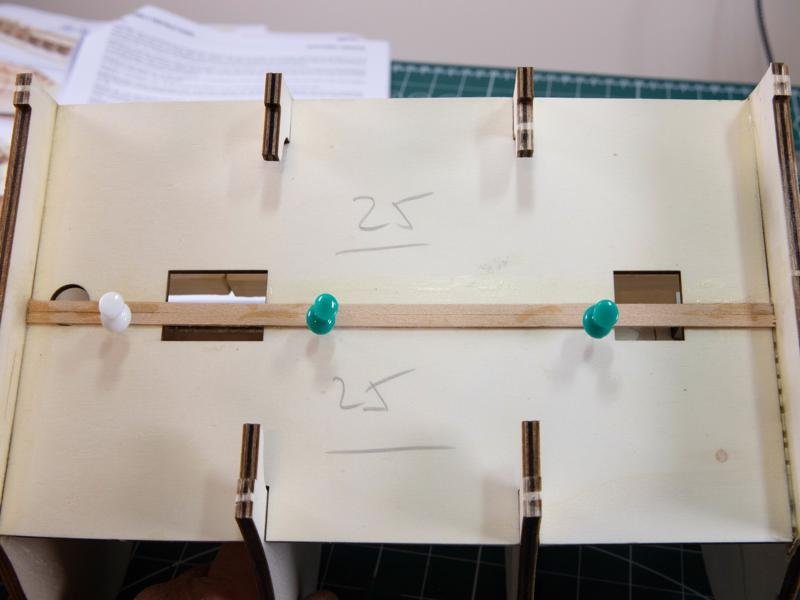
The instructions then ask that you add supports for the lower deck. These seemed a bit flimsy to me, so i used a few of the offcuts from where the hull formers came out of the ply sheet. These, i judged to be the right thickness - thick enough to offer better support to the deck, but not so thick that they interfere with the mast when installed (hopefully!). It is essential that these supports are at a right angle to the false keel, otherwise there are going to be problems when installing the deck itself. I used a set square for the first support, then a straight edge for the second. Seemed to work out ok
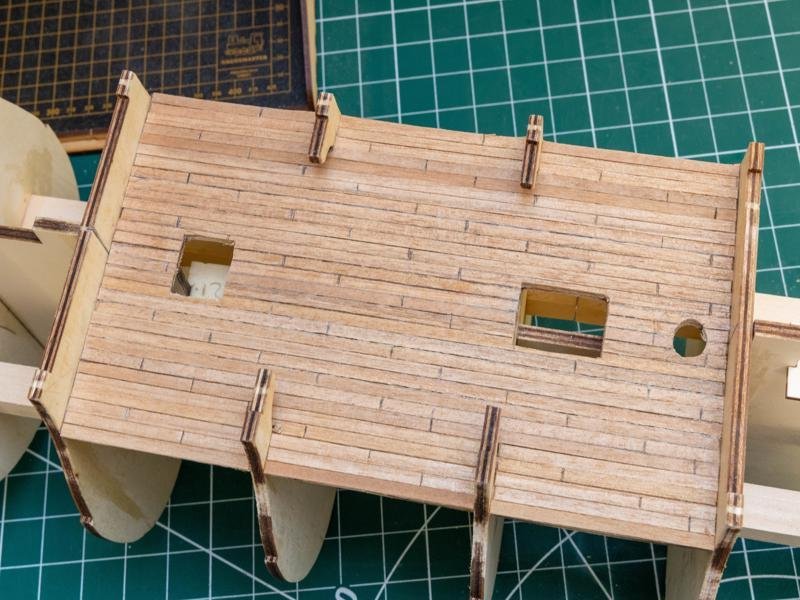
Another deviation was to install the lower deck before planking. No other reason than for personal preference. My thinking being this way you can ensure better fit of the deck.
Started laying the first planks. Decided to use some Tanganyka that i had laying around. The pins are there just to help butt them up against each other until the glue dries. I then gave the planks a coupleof coats of Danish oil.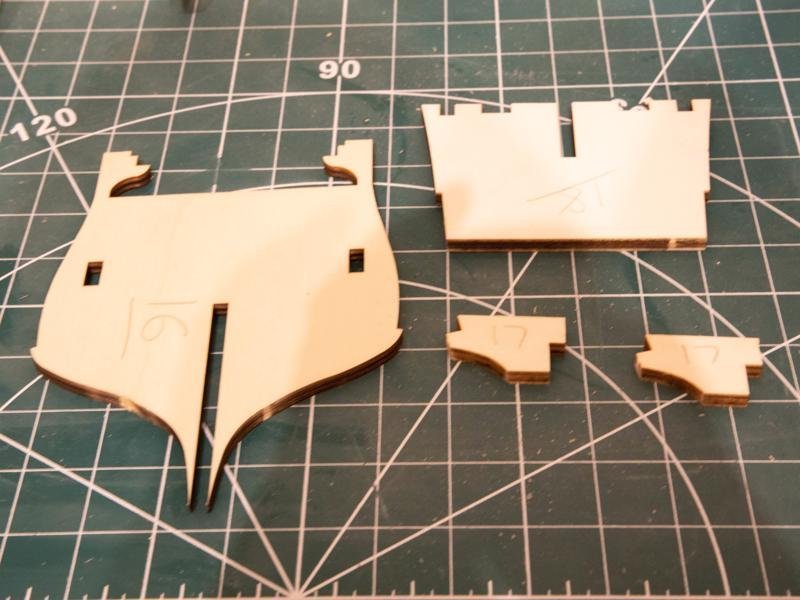
-
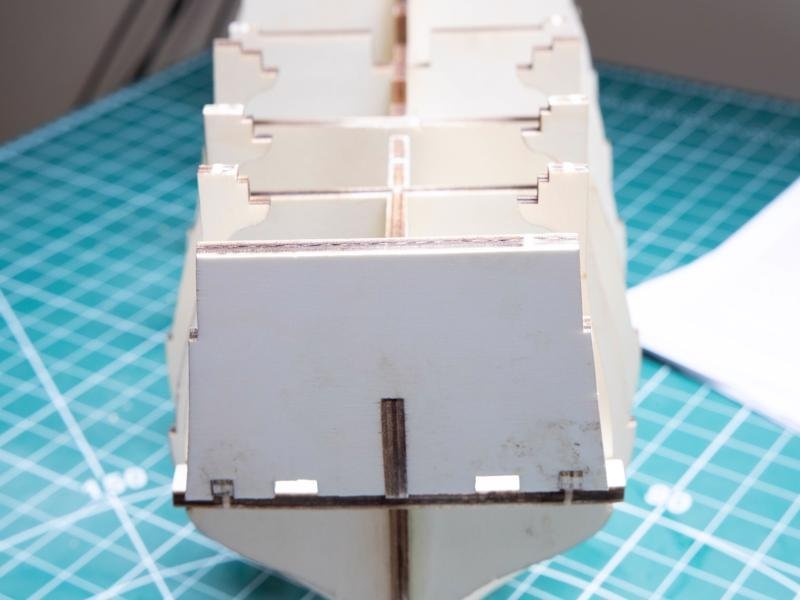
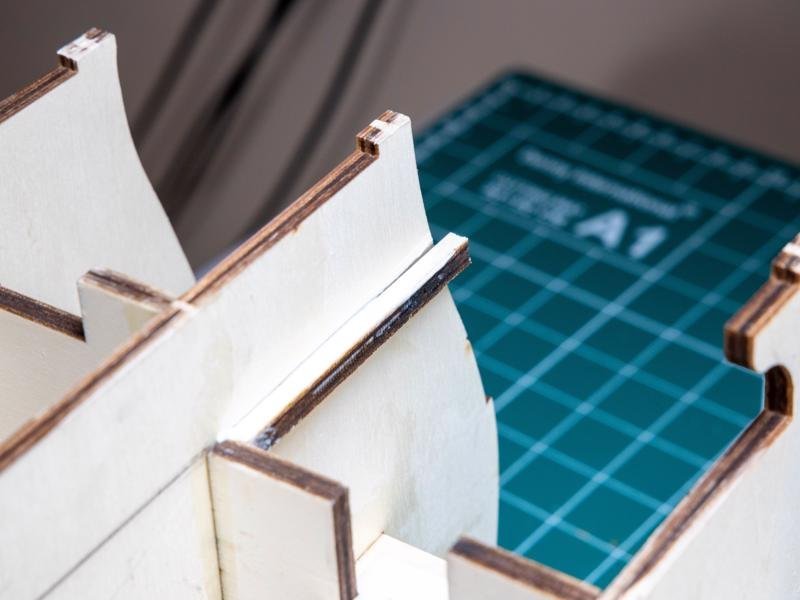
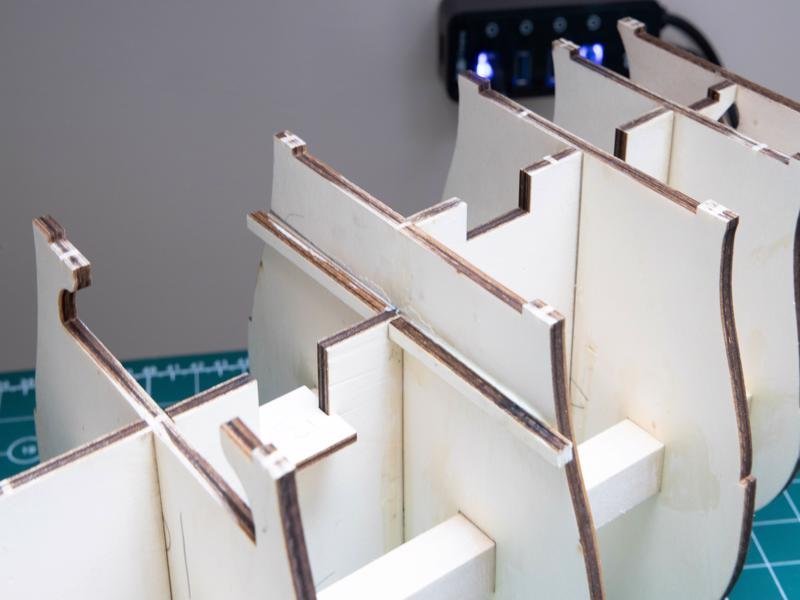
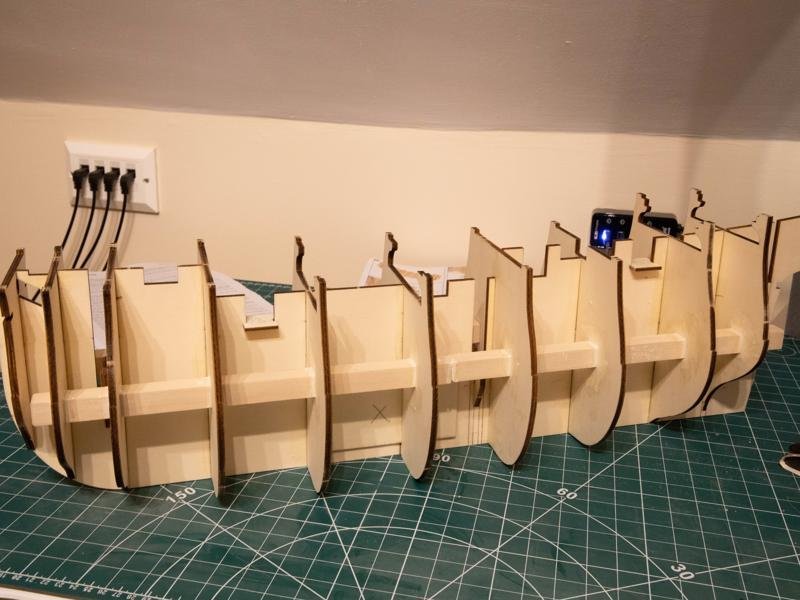
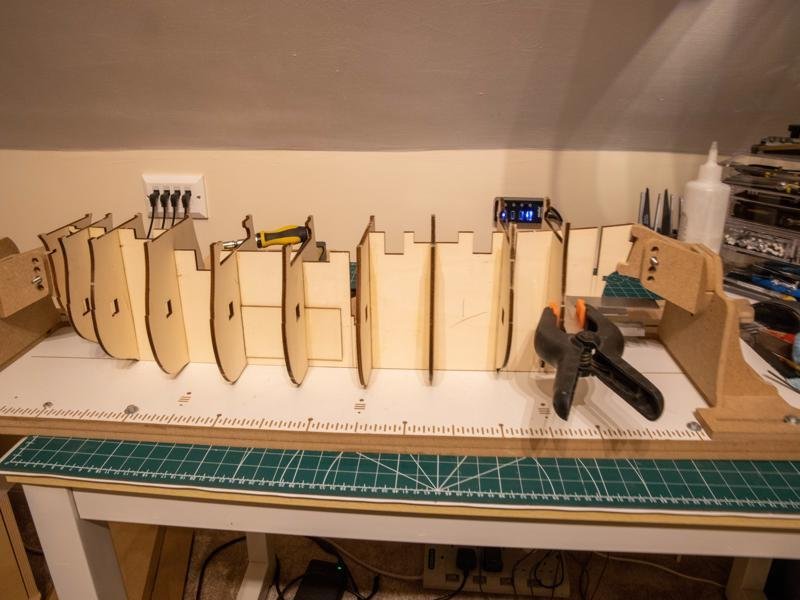
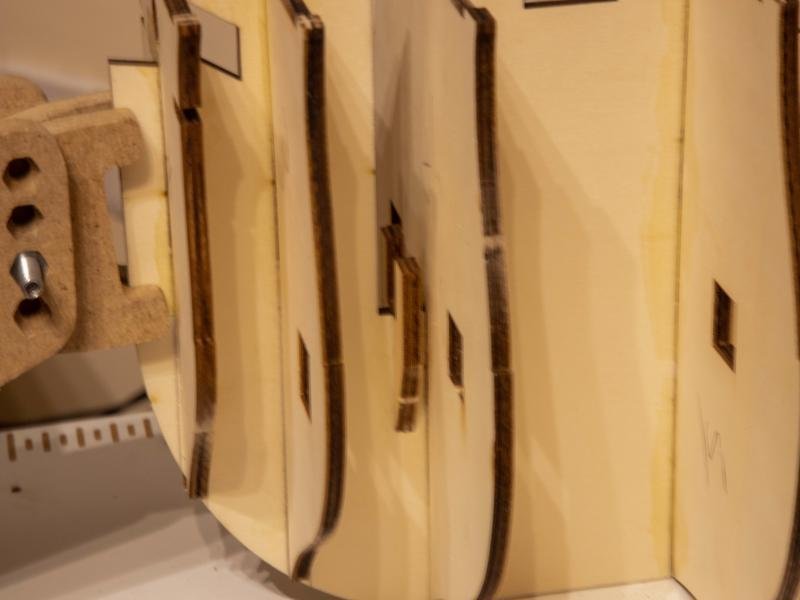
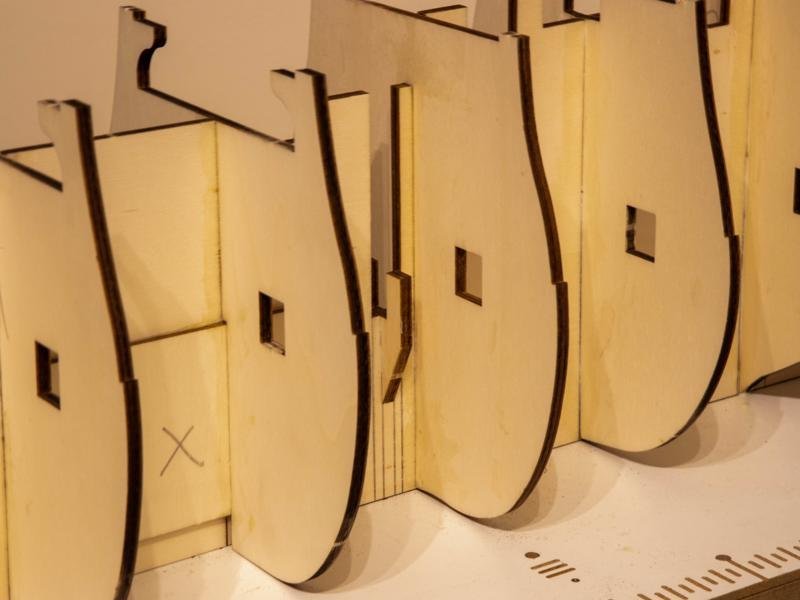
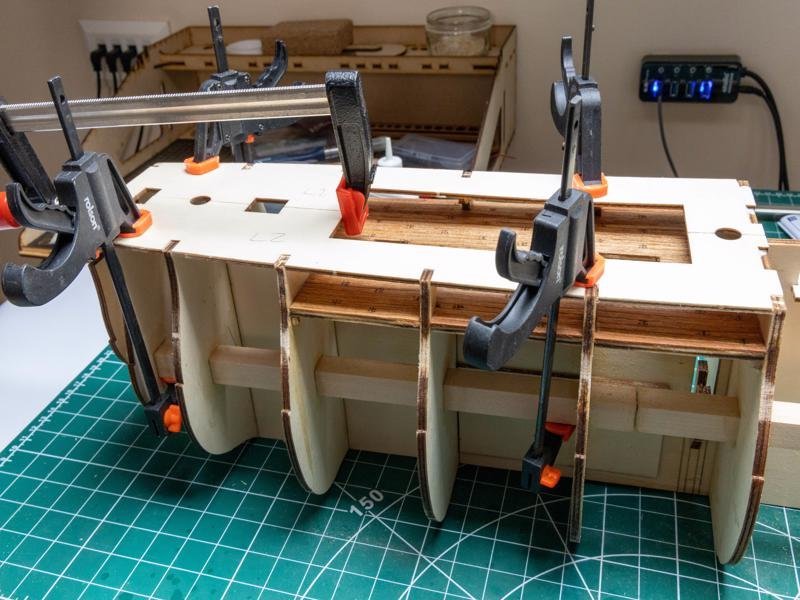
Another small update. The first photo shows all the formers installed, and looking mightily straight
.
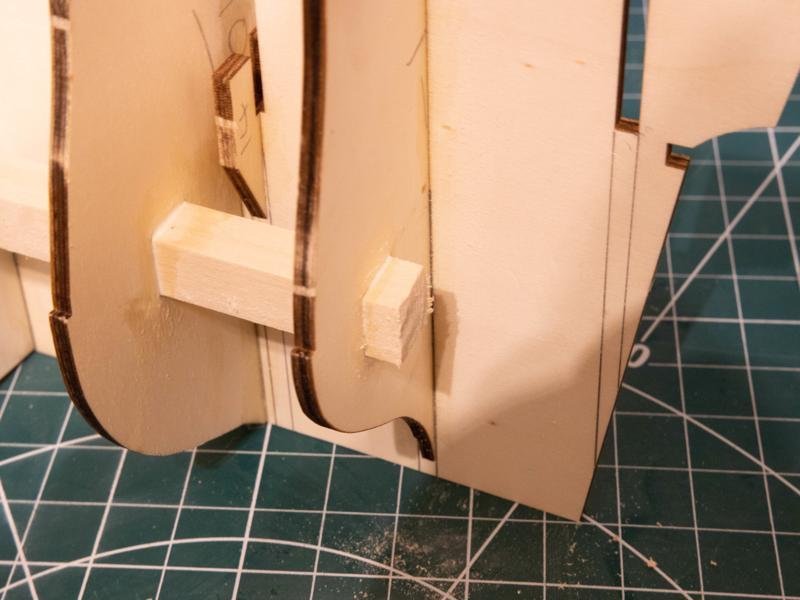
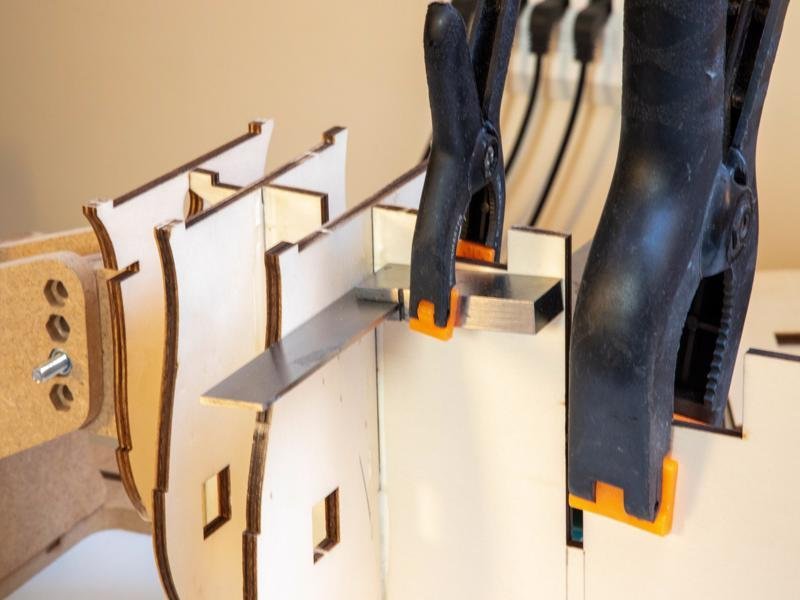
Next came the task of fitting the 'bracing beams' for want of a better word. Inverting the skeleton of the hull, the four beams are prepared to slide through the square holes in the hull formers.
It makes the job easier to give each beam a light sanding, and also to chamfer one end so it slides through easier.
I superglued the ends of the two beams to hold in place, and then added glue where the beam and formers touched. This was repeated for the opposite side.
The beam in situ looked too long to me, so , fearing it would interfere with the hull planking, i removed about 2cm from the stern end.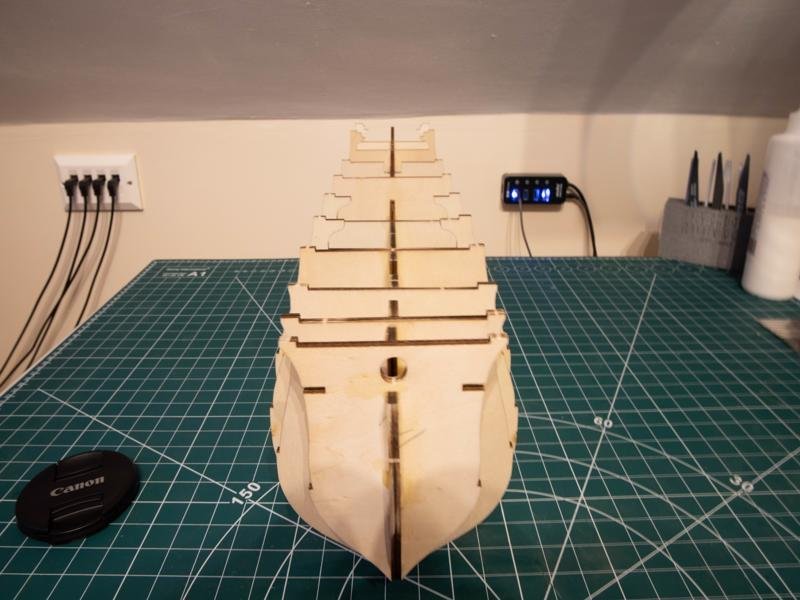
-
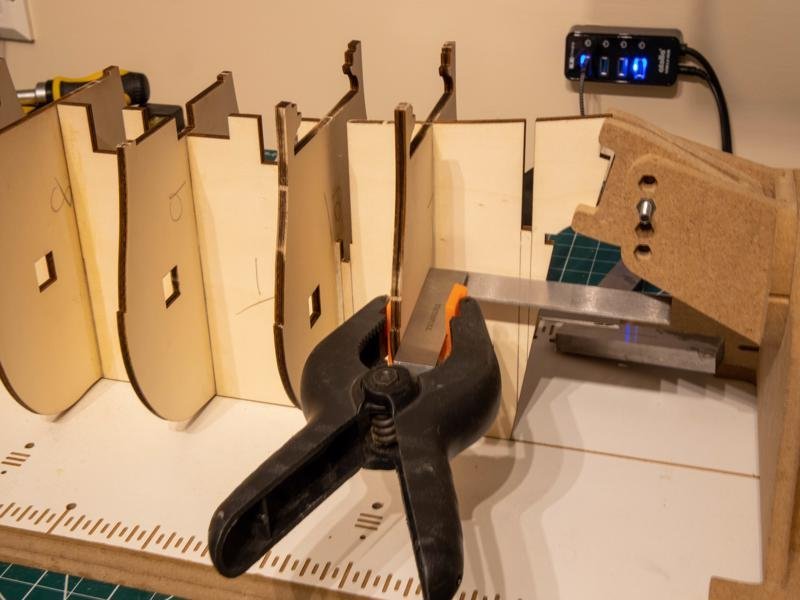
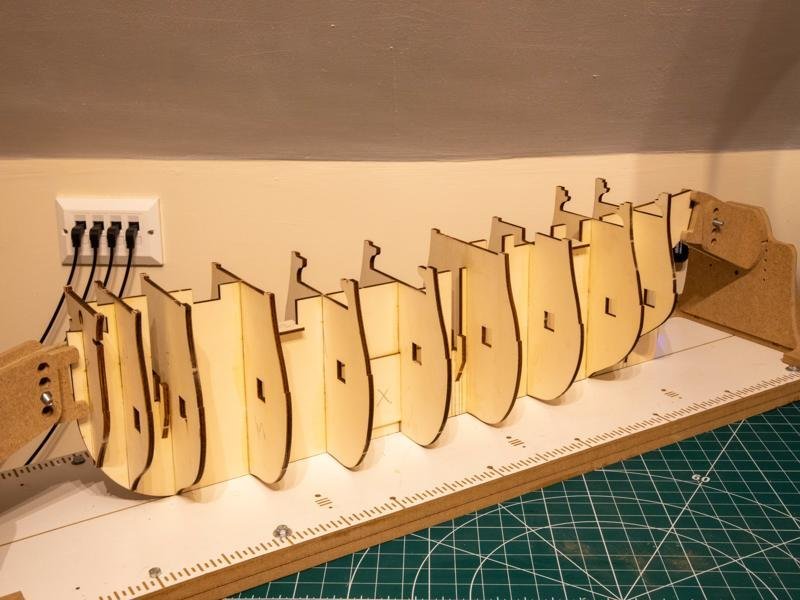
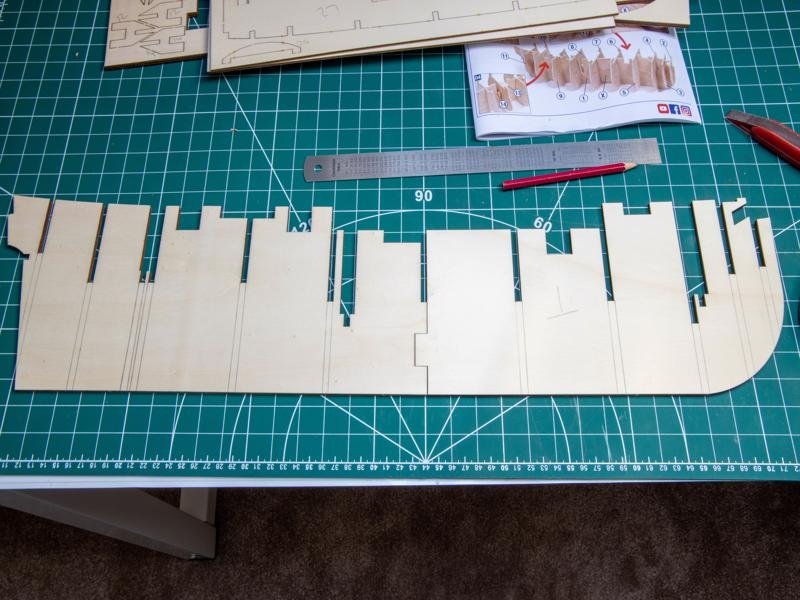
Next task is setting up my Hobbyzone jig, making sure everything is square. The hull formers are then sanded for ease of fitment, and glued in place.
Two things noticed here: no warpage on the keel, and the formers nearly all sat square without having to clamp to a set square! (oddly enough only the first and last former need squaring).
It is important that the hull formers sit suare to the keel, and seated fully into the keel slots, otherwise problems could occur later when fitting the decks.
Once the formers are dry, the mast and deck support braces are fitted. That finishes this first update.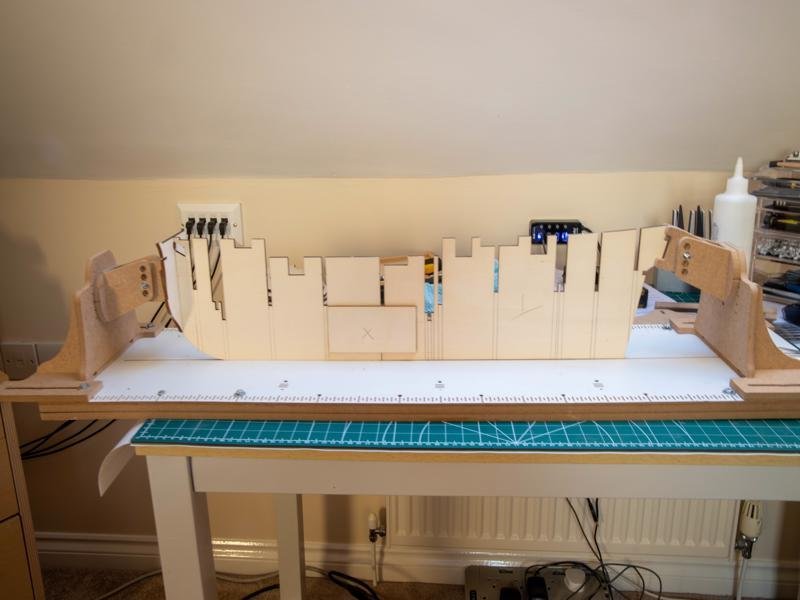
-
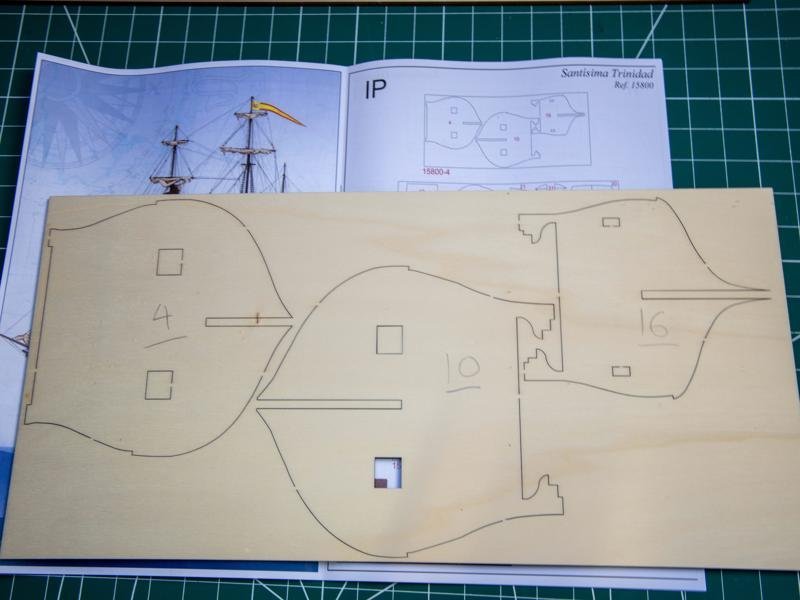
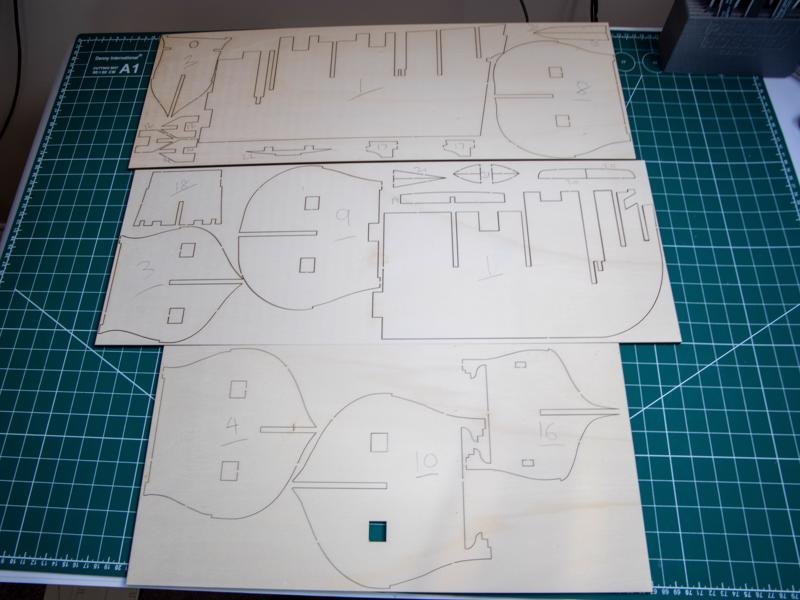
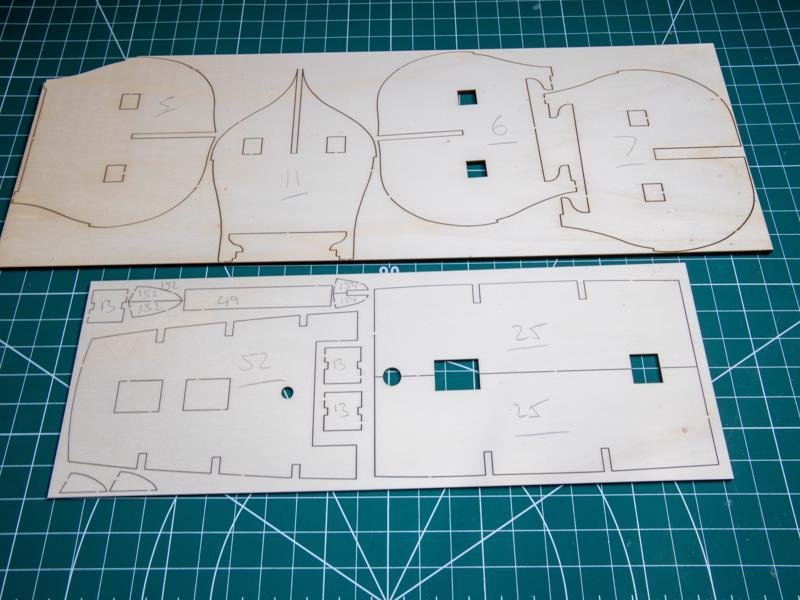
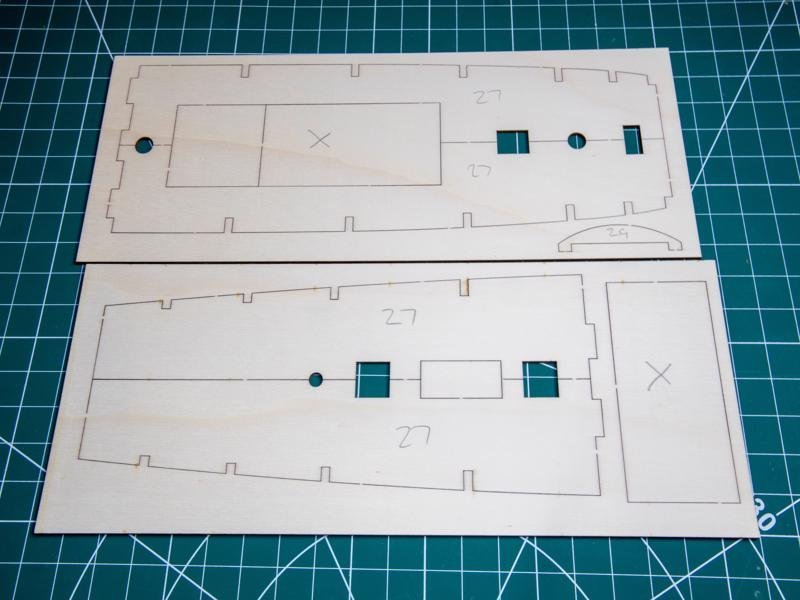
First job, remove all the bulkheads (hull formers) and false keel, clean up the edges and number the parts. I also drew vertical lines on the keel to aid alignment of the bulkheads. The false keel is in two sections, so using a flat work surface, these are glued together and braced over the join on both sides.
-
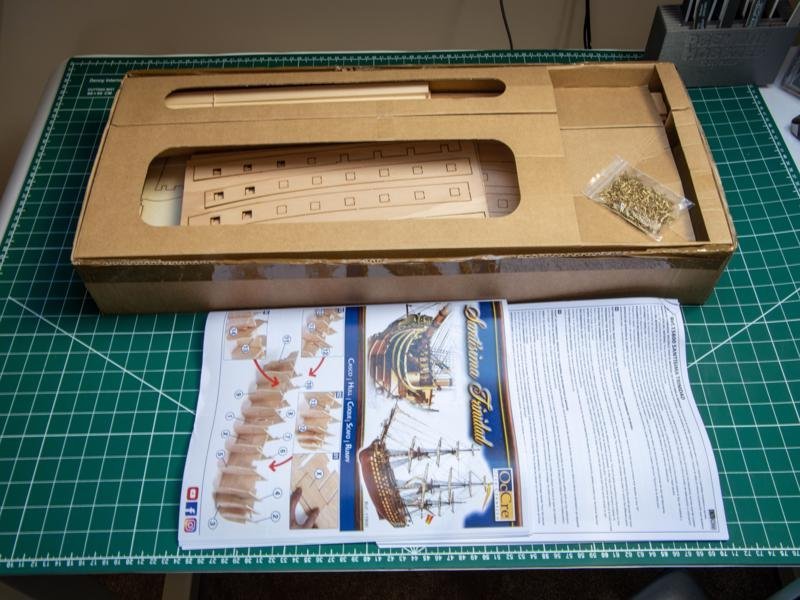
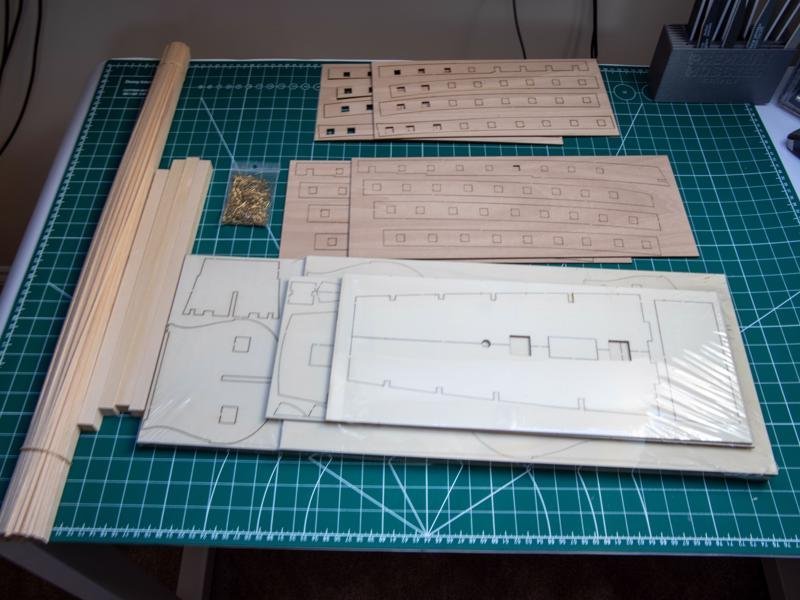
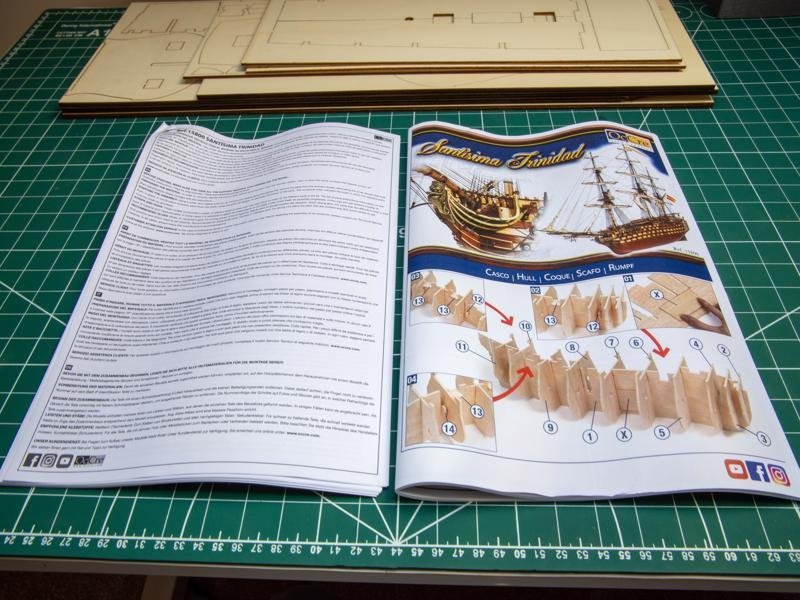
Pack 1 - The Skeleton.
As mentioned, i am buying this in Stages (never knew you could do that with these kits). This will help with storage, but does cost a little more than the full kit though.
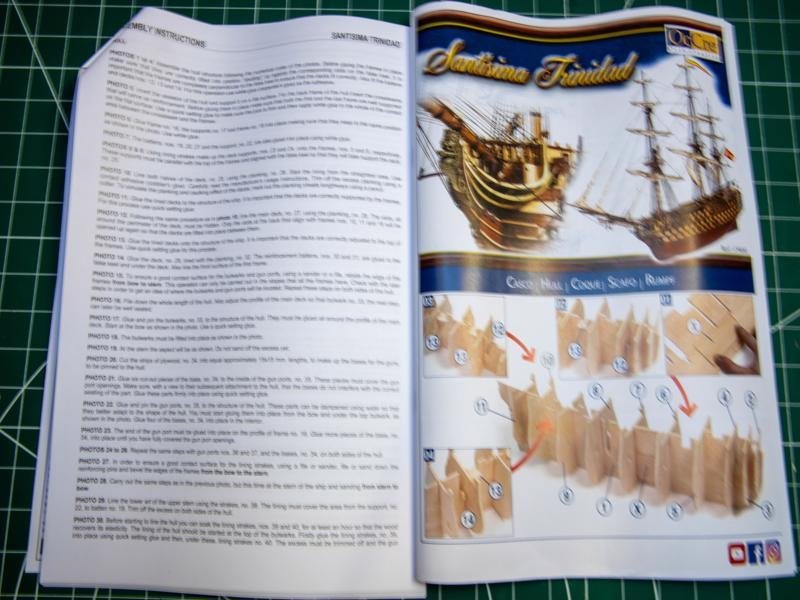
First impressions? The initial box is huge, and well packaged. Pack 1 comprises of 2 false keel sections, Keel brace parts, the bulkheads, 4 rib strengtheners (not in the MS version), pre-cut gun-ports, lower and middle decks, 2 types of wooden planks and a bag of pins. The instructions come in two parts: one full colour and the other numbered instructions.
So Far, so good
-
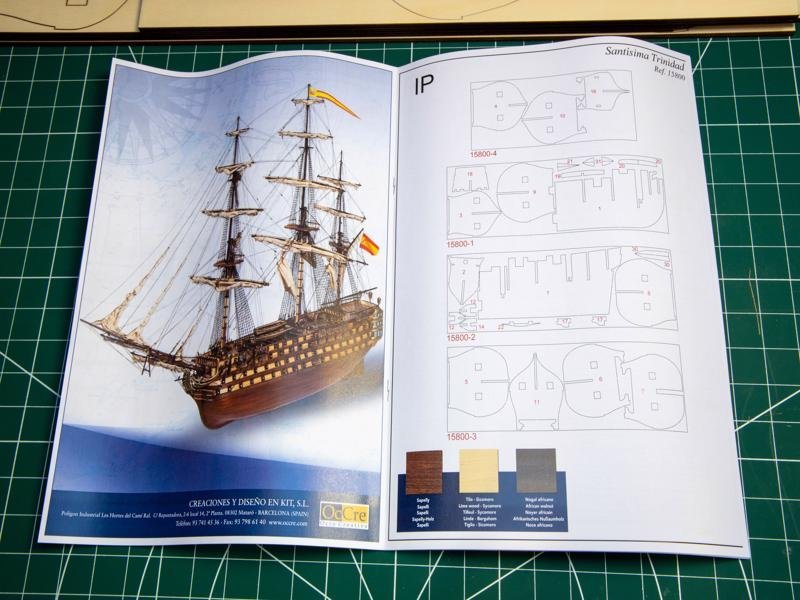
I thought i would share with you my journey to build this leviathan of it's day. I had tried twice to build it with DeAgostini, but theirs has some differences to this one. One thing they both share though is the fact that you can buy them in installments. Well sort of, in the case of OcCre, as it comes in 7 packs instead of 33 with DeAgostini. I wasn't even aware that Occre did this, but in my case it makes sense, as i can buy the packs when i need them and not having to store packs unnecessarily.
Anyway, i started this back in February last year, but i hope it will be of interest to some of you, so i would like to share my build with this forum. Any hints, tips and general advice welcome as always. I will try to bring this diary up-to-date as soon as I can. In the meantime……enjoy!
-
-
You might want to think about doing a production run on the name plate 😀 Boiund to be takers out there! Very well done 👍
- hollowneck, mtaylor and Blue Ensign
-
 2
2
-
 1
1
-
-
Looking good Eck 👍 I was wondering about double planking. What do you think?
-
-
Am i the only one who has multiple builds on the go at the moment? All at different stages in their build. I do a bit to one, then put it aside while the glue dries or whatever, then pick up another, etc...
I counted them up last night.
1) Hachette 1/200 Bismarck (wooden original) - awaiting hull planking
2) Occre 1/90 Santissima Trinidad - planking again
4) Hachette U96 - unstated as yet
5)Caldercraft 1/64 HM Brig Supply - another awaiting hull planking
6) Vanguard Models Scottish Fifie - ditto
7) Vanguard Models Scottish Fifie ( yes i have 2) - yep, awaiting hull planking
8/ Vanguard Models 1/64 HM Flirt Master Shipwright Edition- second planking
9) Artesania Latia Arab Dhow - planking
Is that enough to be going on with 😂😂😂 Can anyone see a pattern emerging here?
-
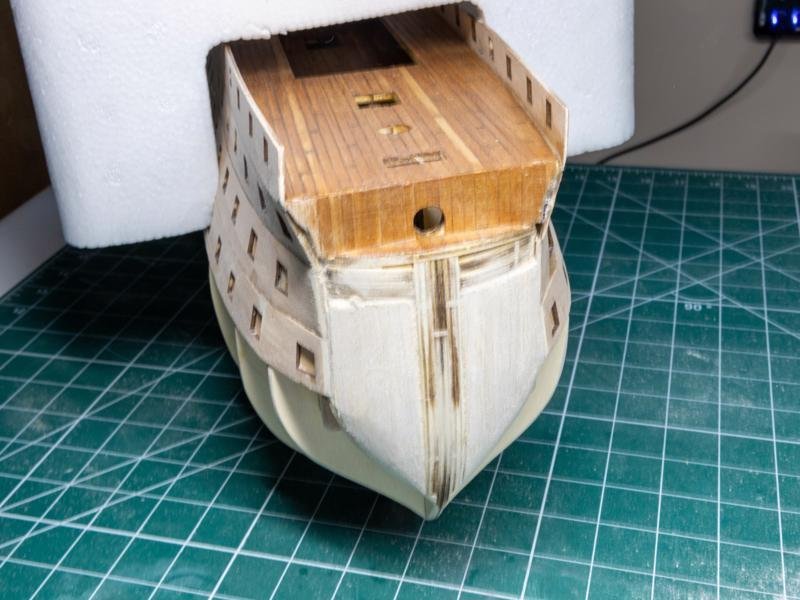
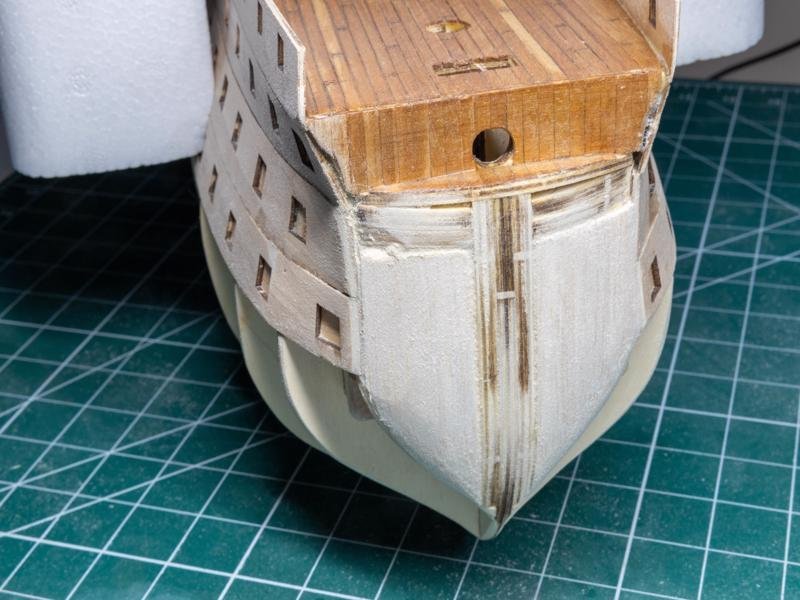
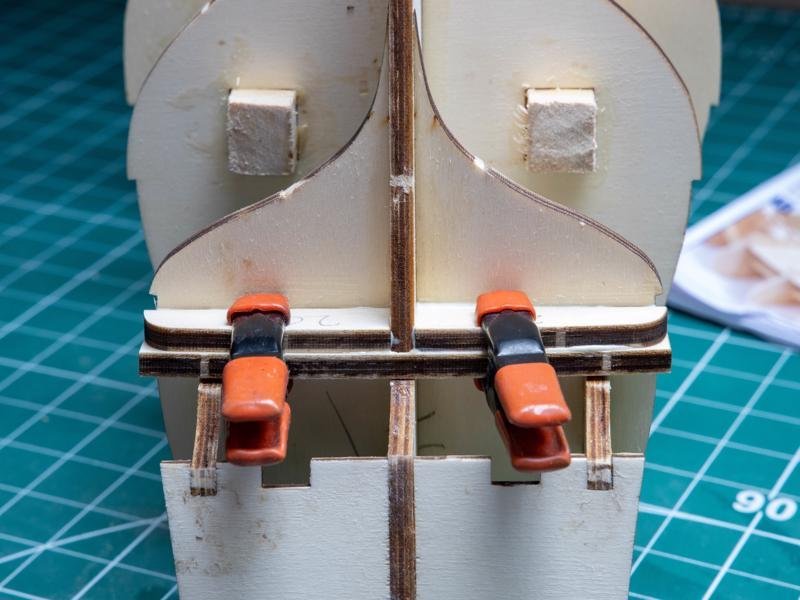
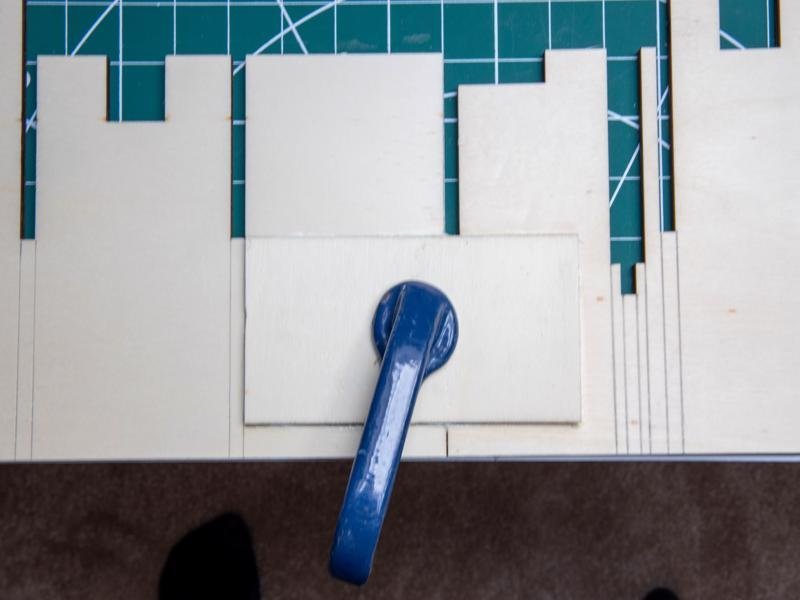
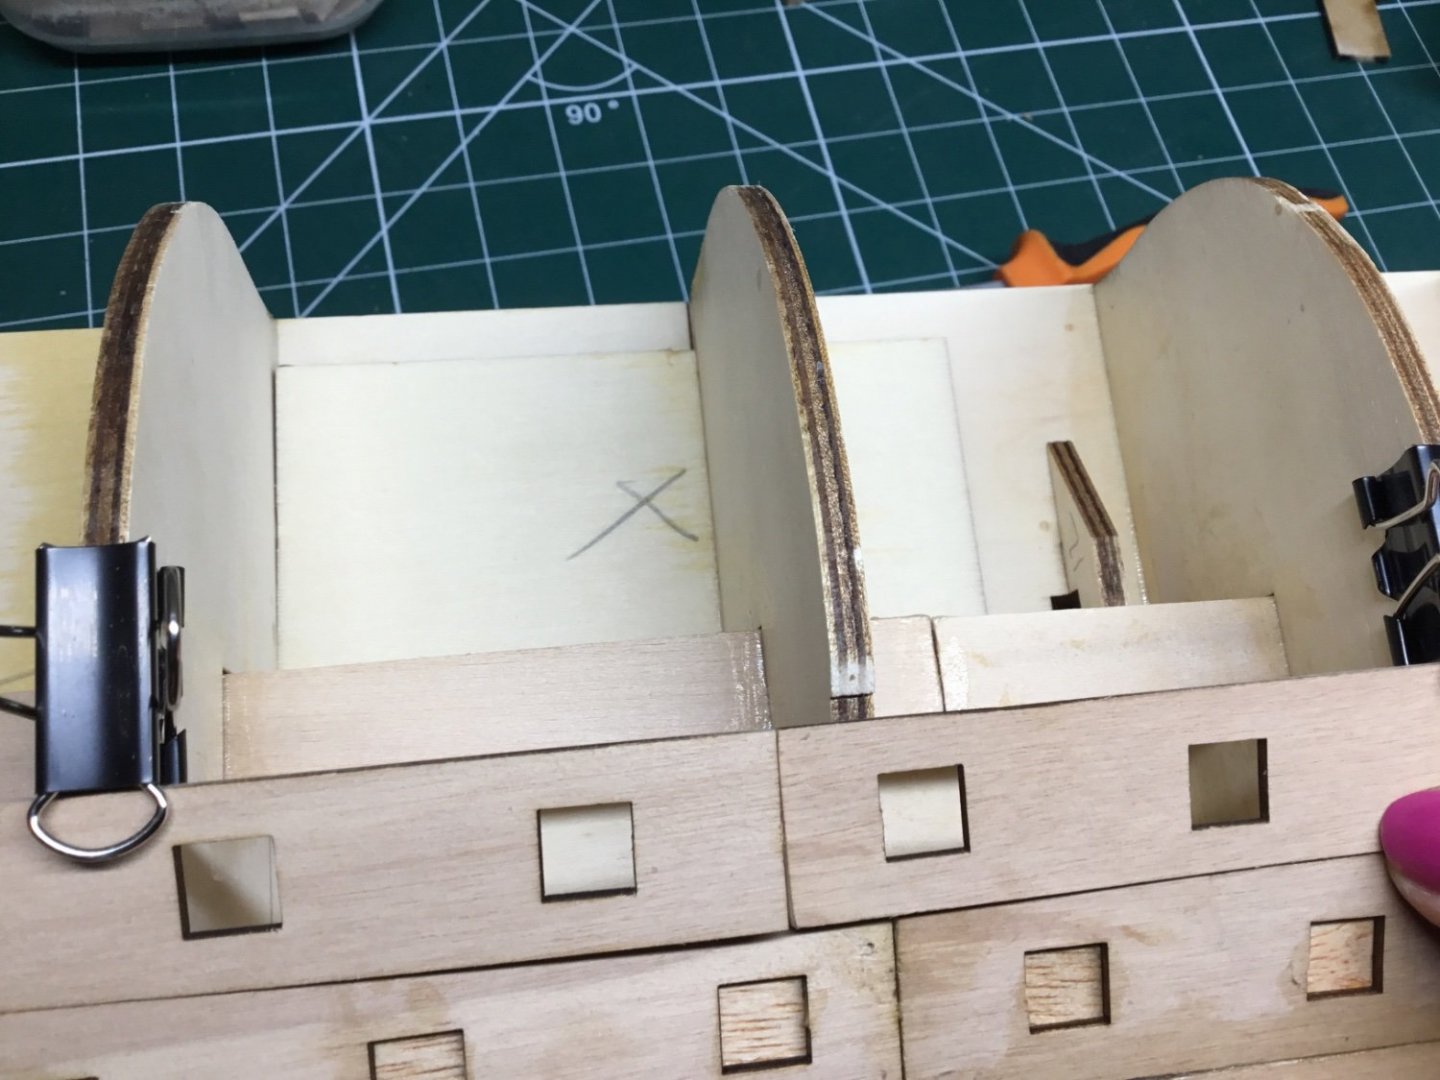
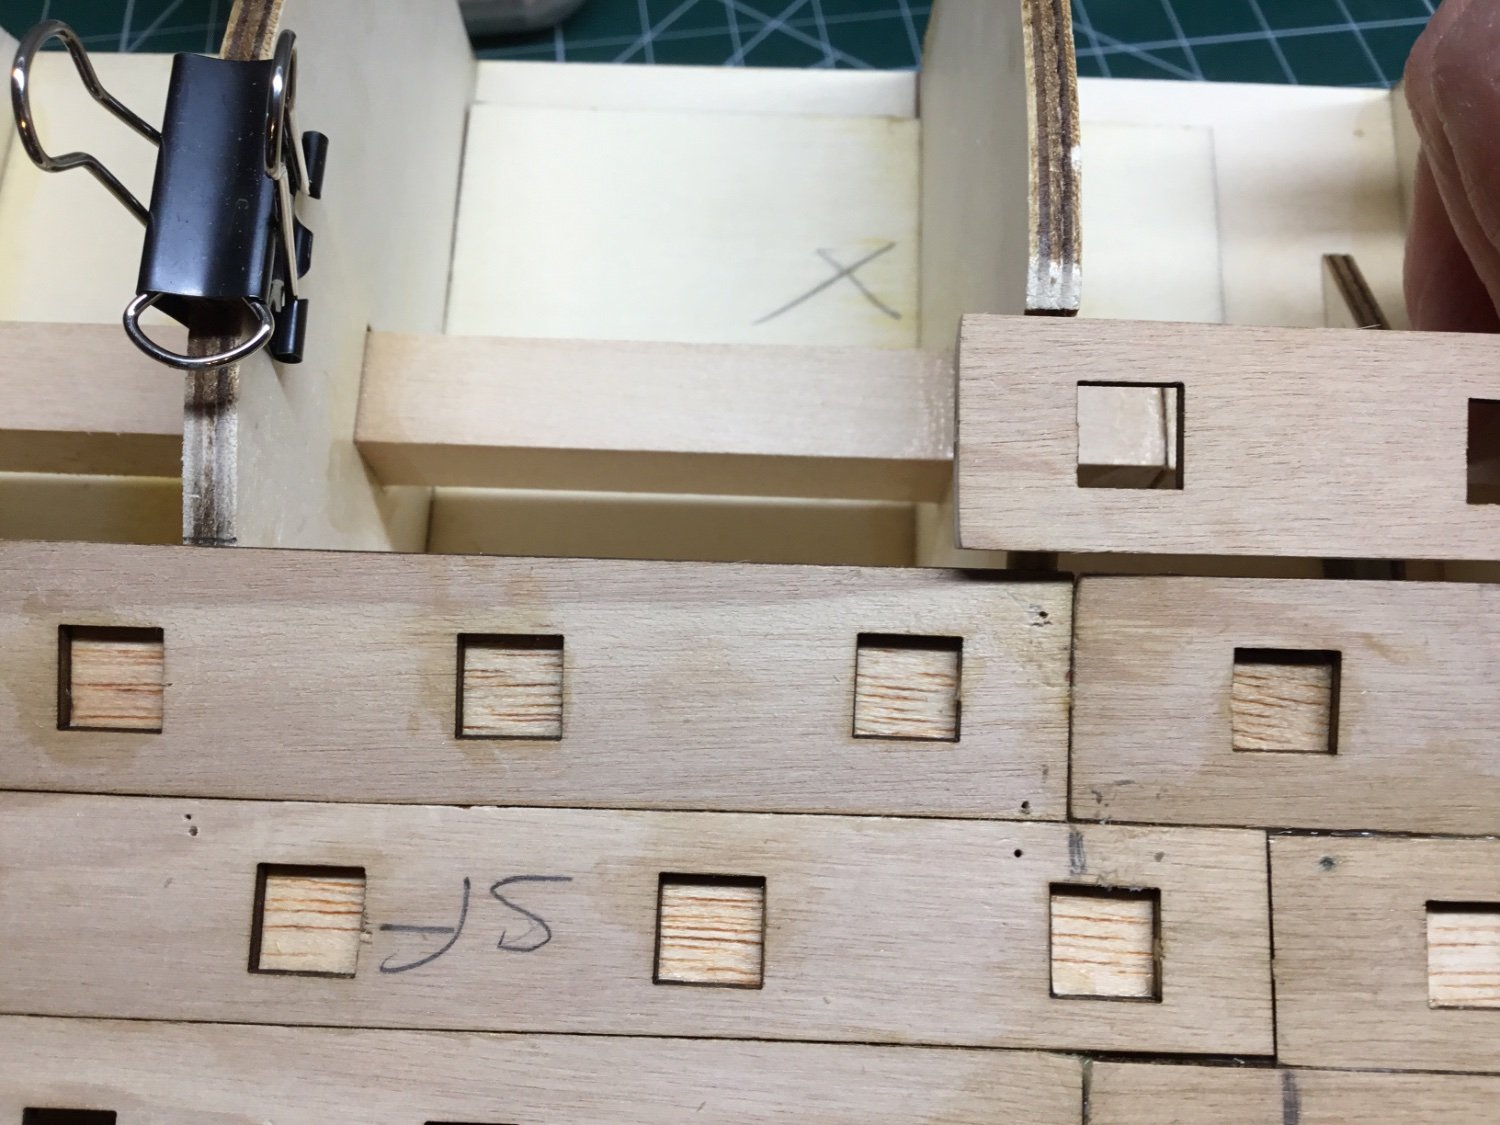
Ok having thought on this overnight ( yes I probably am over.thinking this), but I feel the best solution would be to lay the false gunport tight up against the upper one and build up the notch on the bulkhead so it sits tight. After all the planking will cove it anyway.
unless anyone has a better idea?
-
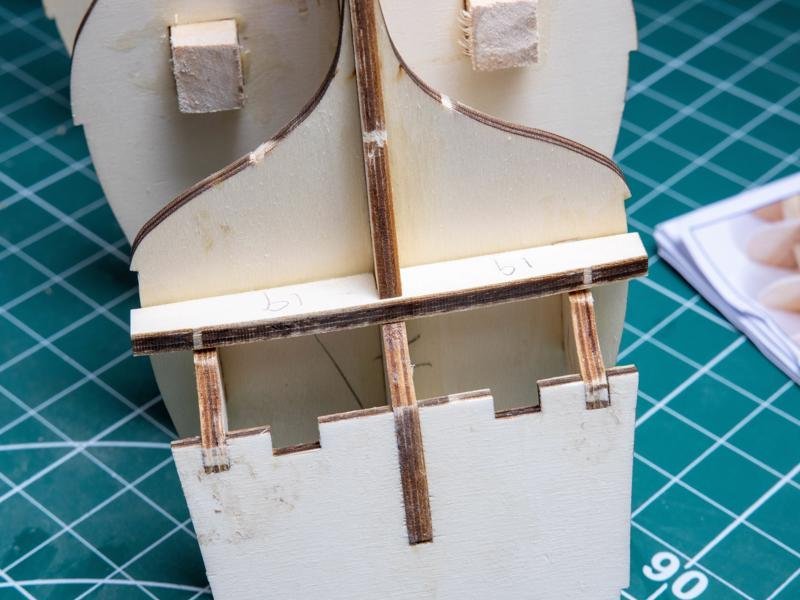
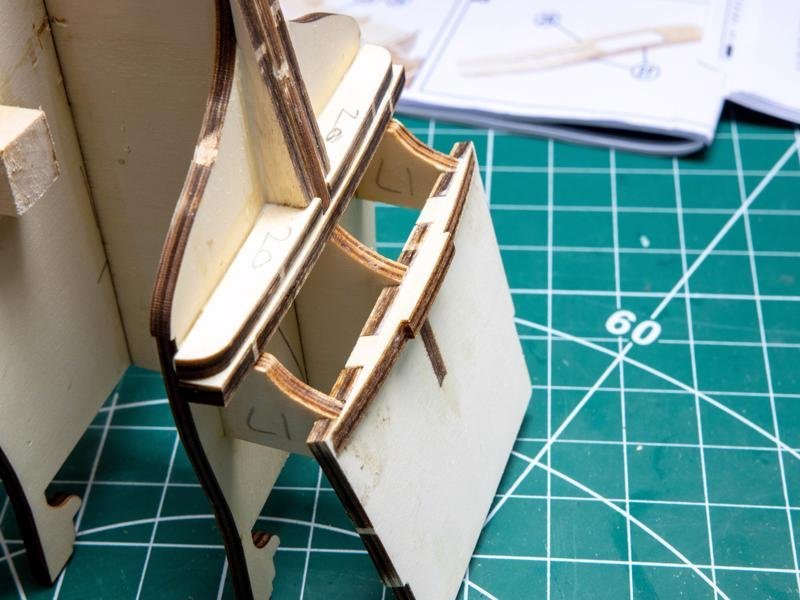
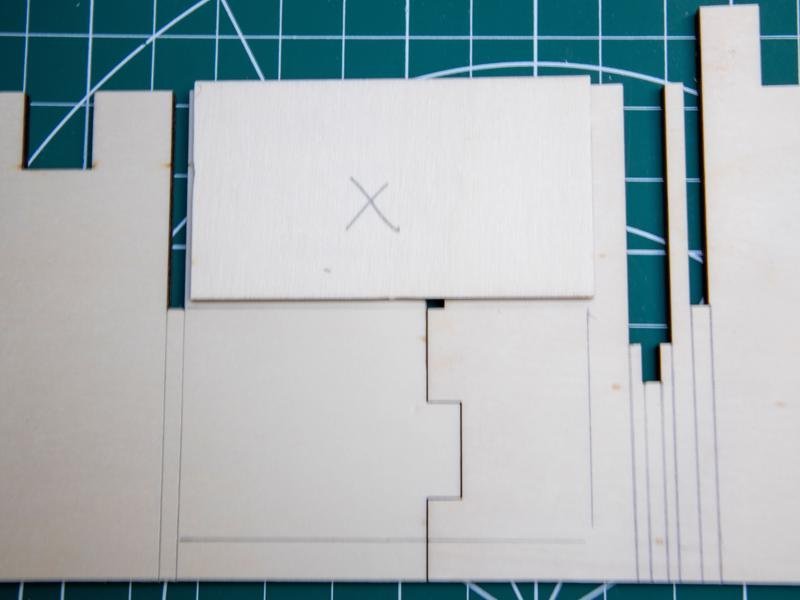
I wonder if one of you kind members could give me some advice please? I’m building the Occre Santissima Trinidad and have reached the point where the false gunports are fitted. The port side fits in the notches of the bulkheads, but the starboard side is a few mm off, as shown in the photo. What would you guys do? Fit the lower edge into the slot on the bulkhead , or mate it to the one above and fill in with a shim?
Thanks in advance.


HMS Victory by Heliart - DeAgostini - 1:84
in - Kit build logs for subjects built from 1751 - 1800
Posted · Edited by RockinBudgie
Very nice planking on the longboat. And a very good start! I'm always worried about breaking thos ribs.... they look very brittle 😱
Will be following your build.