


ted99
-
Posts
235 -
Joined
-
Last visited
Content Type
Profiles
Forums
Gallery
Events
Posts posted by ted99
-
-
^^ Yes, I initially thought that it would be a ho hum build but there is a huge amount of detail associated with the flight deck that goes completely unreported. Unreported because, as has been observed, there are few carrier builds on offer. I started with the Amati Bismarck because I was attracted by the complexity of the build. Then got the "Battleship bug" to build the significant WW II battleships so Yamato and Missouri kits were added. Reading the history of those ships made clear that the two most significant types of vessels in WW II were the Submarine and Carrier, with Battleships very much relegated to secondary roles. So, I did the only two sub kits extant in 1:200 and they really were ho hum builds. After CV-6, I'll be taking the 1:200 Trumpeter Missouri out of the closet to build. I got the Trumpeter1:350 USS Texas kit from eBay, along with the Pontos detail set, and I might build it before Missouri. Last of the Drednoughts, with some local interest for Houston.
- mtaylor, Canute, Old Collingwood and 1 other
-
 4
4
-
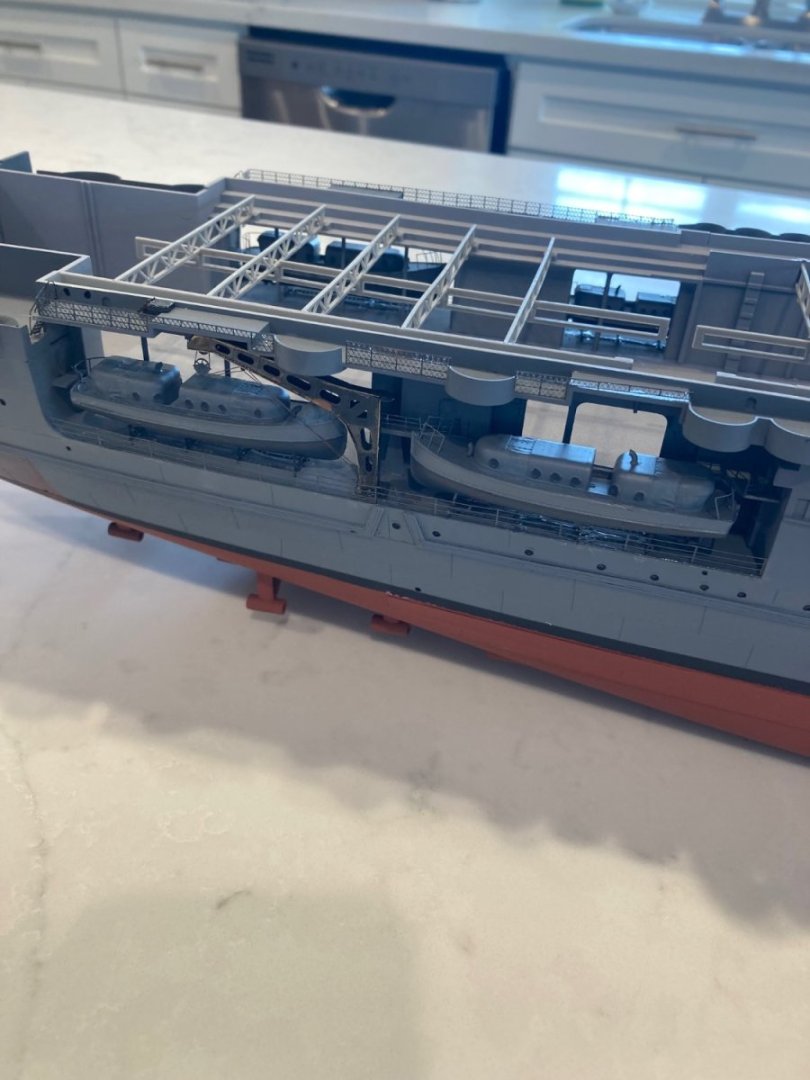
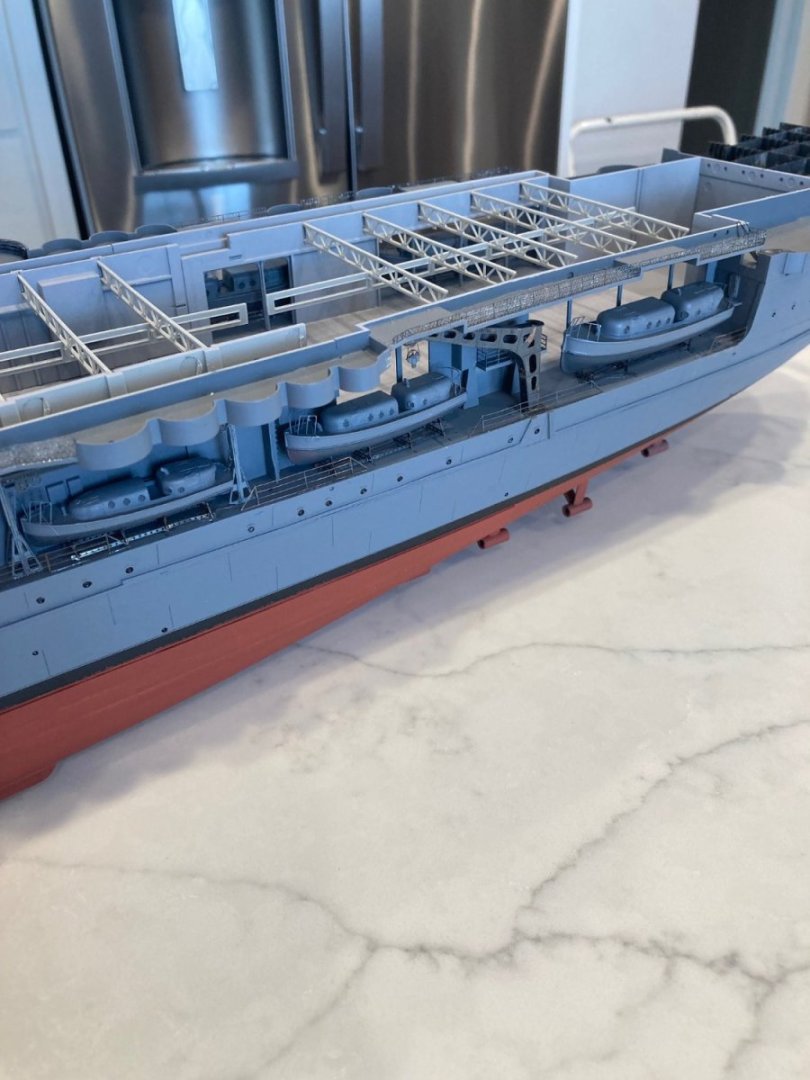
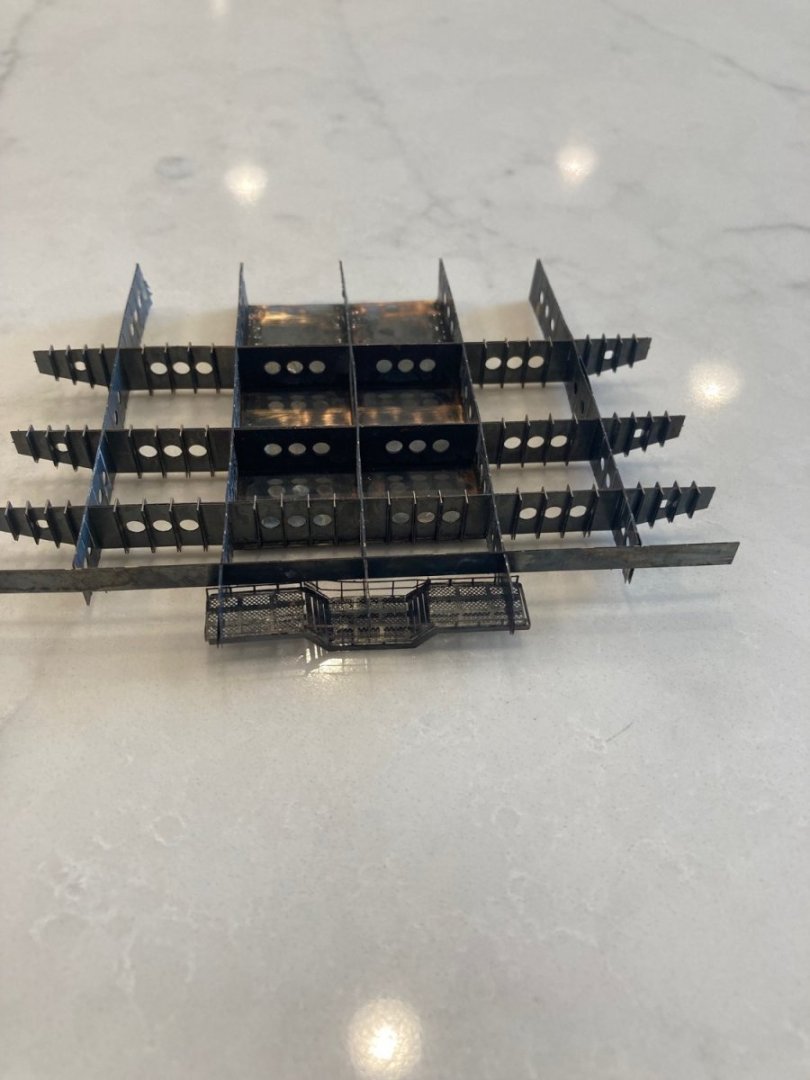
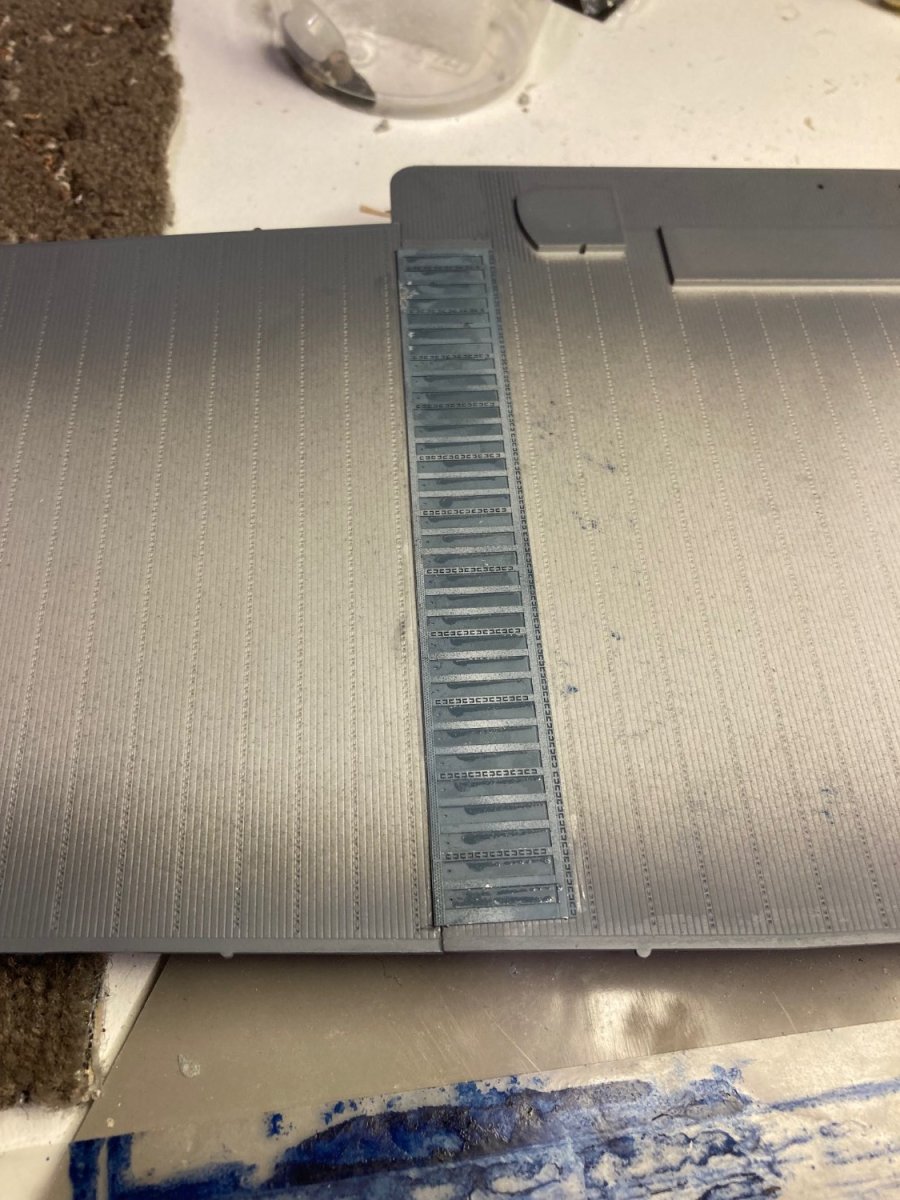
OK. Forward part of the decking complete. I added the metal pieces around the sides of the wood decking, also. I'm not going to put in all of those hatches in the small square cutouts until the end. Same techniques as before.


- king derelict, mtaylor, Nunnehi (Don) and 7 others
-
8
-
 2
2
-
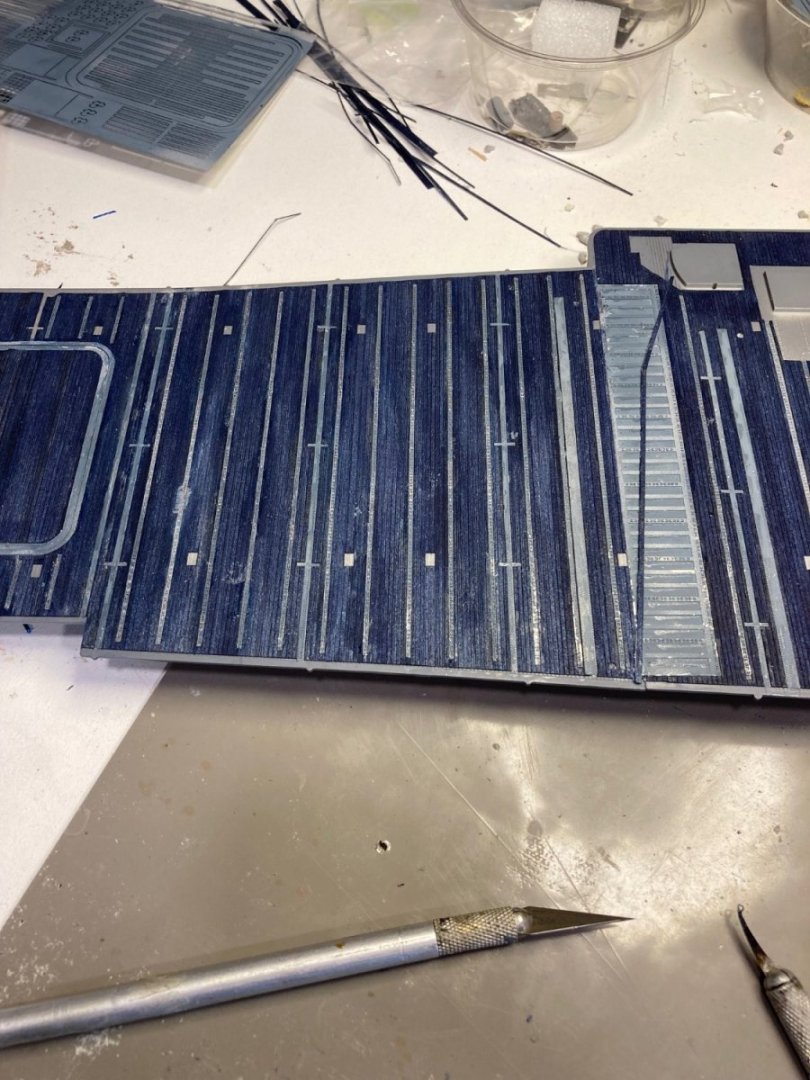
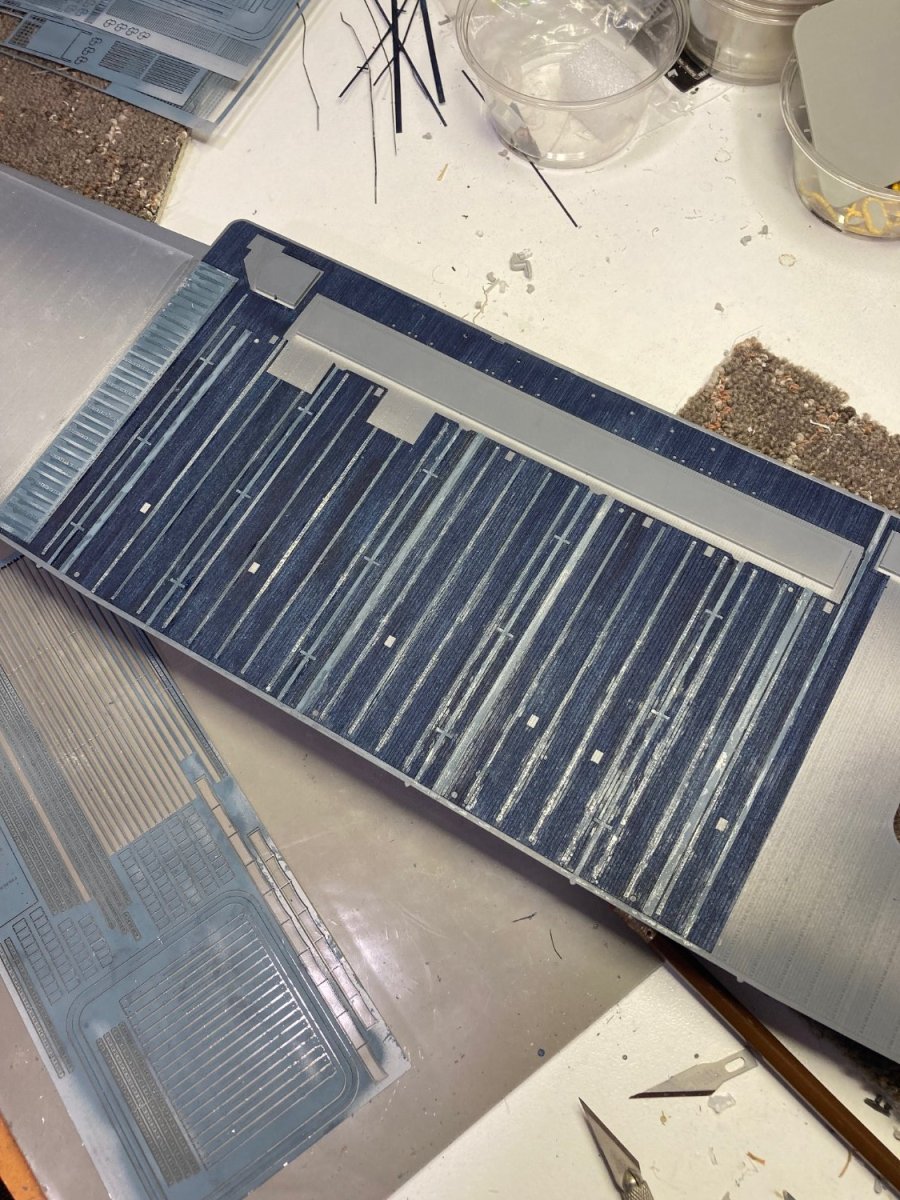
Future builder alert! I was wrong to use the center island decking and the large PE piece at the bow end as the "index" for starting the deck installation. When I completed the center part, my next action was to do the next piece of decking toward the bow, which included the forward elevator. There is absolutely no ambiguity about placement of the wood decking around the elevator. It goes where it goes, and I started the gluing of the area around the elevator first, working from left to right. When I got to the join between the previously-applied decking at the island, the decking which included the elevator was one-board too long and had to be trimmed off. The first picture shows the trimmed board. This means that the molded-in placement of that large piece of PE I initially used for my index did not match the MK1 wood decking.
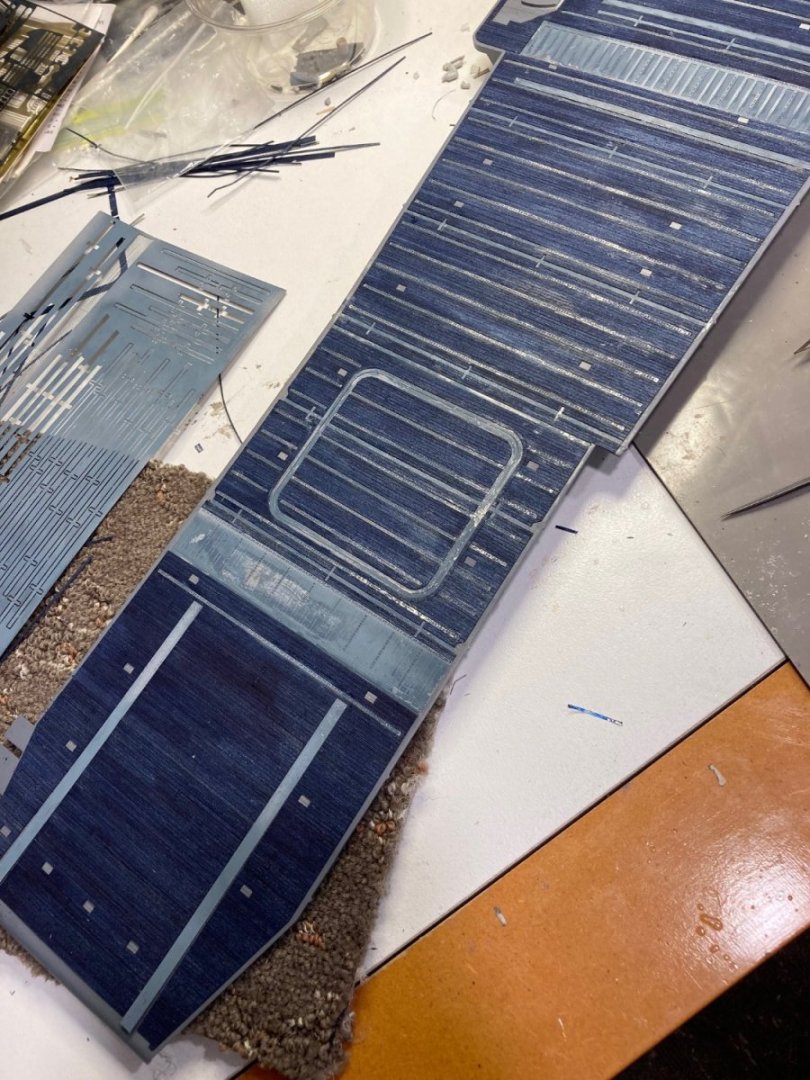
Doing this part of the decking was similar to the first, otherwise. When I completed the decking around the elevator, the last piece at the bow was next. Dry fitting that piece showed that I would have to add a board to get the forward end of the wood decking to align with the forward-most edge of the Flight Deck. I could have done this with one of the pieces of wood that were removed from the die cuts, but instead cut off a piece of the SS PE and glued it to the large forward piece of PE. The second picture shows the beginning of the attachment of this forward-most piece of decking. The only variant in assembly from the previous two pieces is the order of gluing. I have started the two PE pieces for the catapults at this time and will wick CA under them as I glue down the piece of decking between the two catapults. I'll do the two pieces of decking to the outside of the catapults last. These sections are easy to get out of alignment and really need to have the catapult pieces in place for a snug glue up.
I expect that when I finish up at the bow, the next piece of decking I attach going aft from the center island piece will need to have a board added. Since that piece includes the mid-ships elevator, there is no doubt about it's location. We'll see.
-
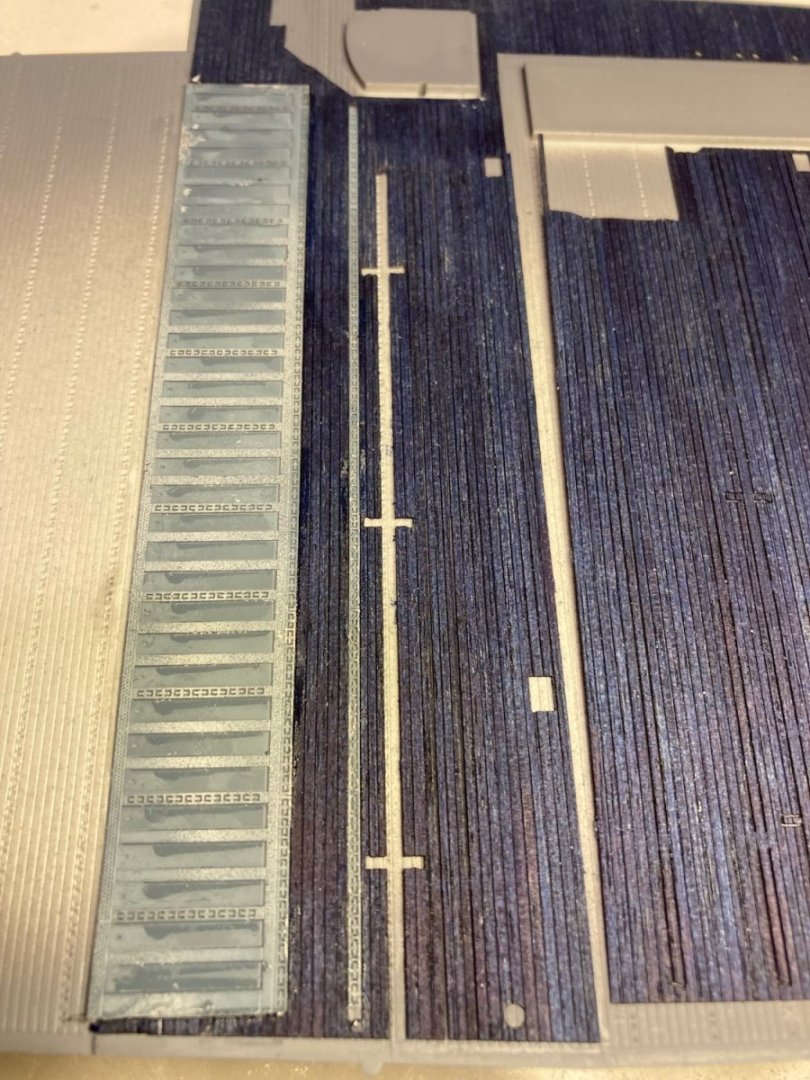
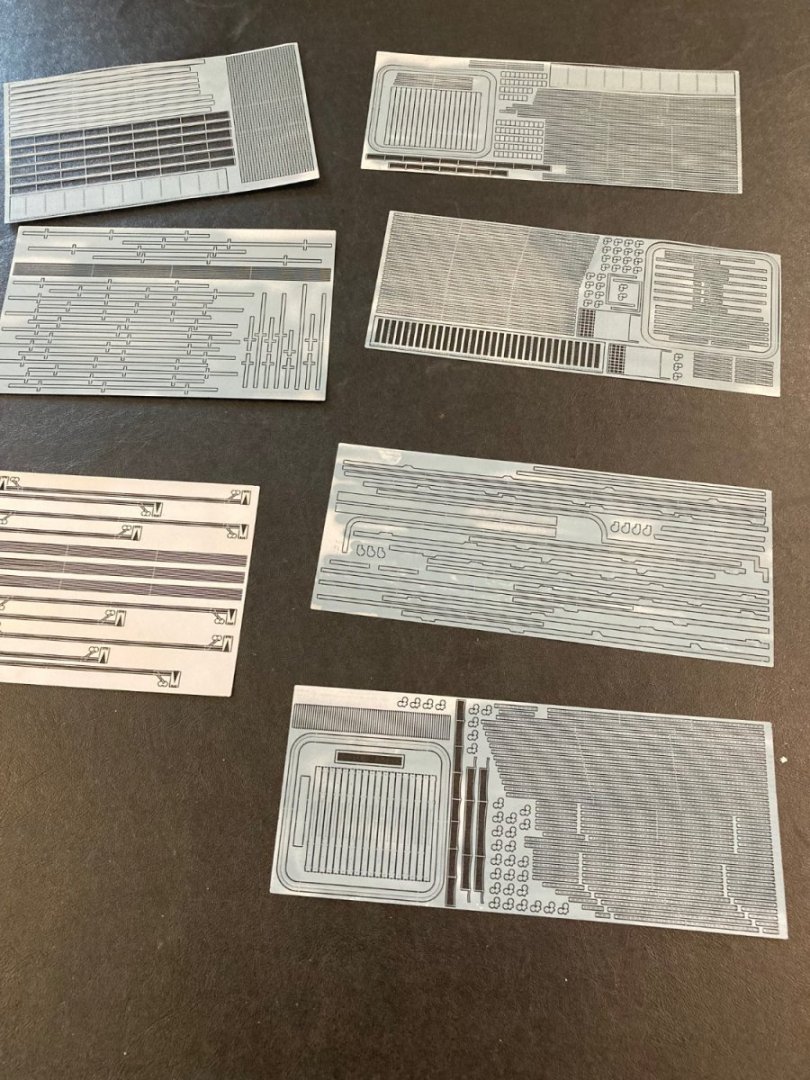
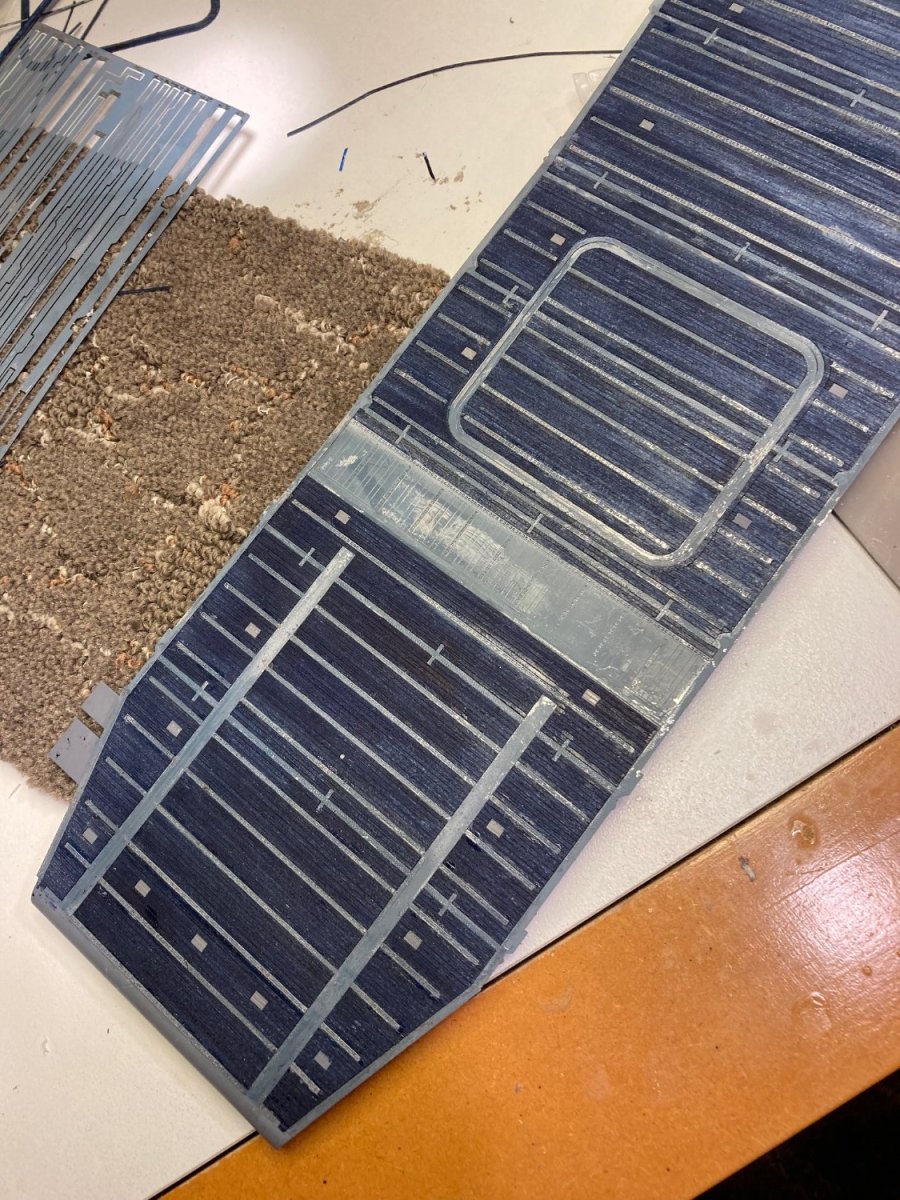
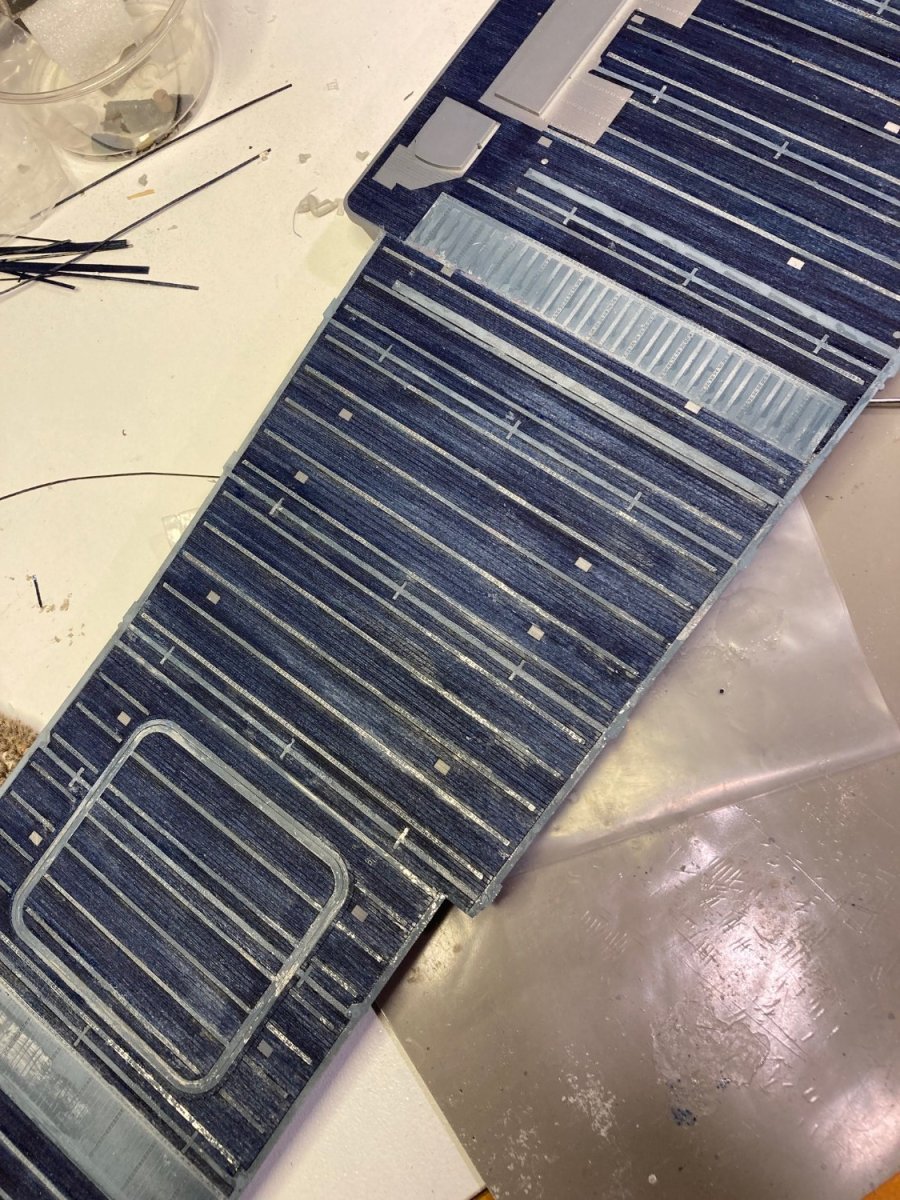
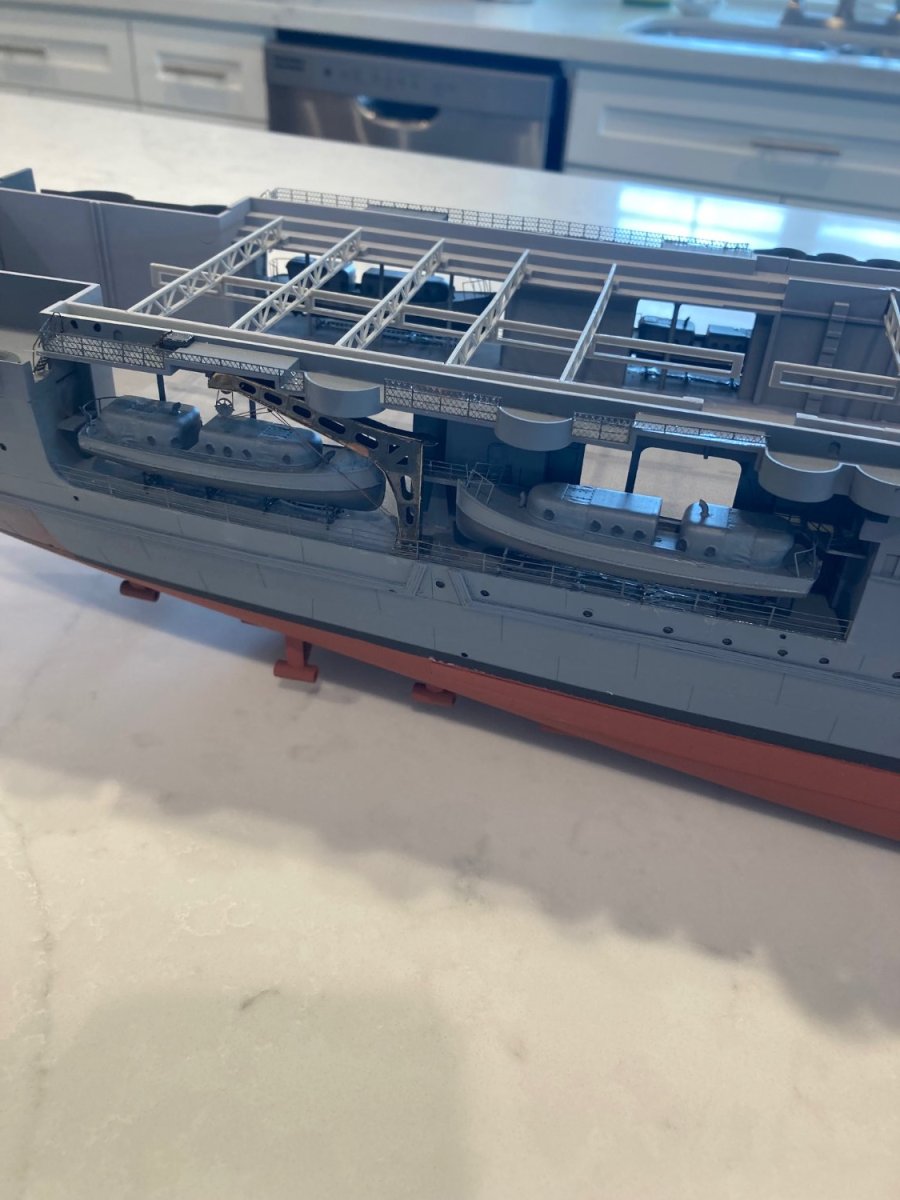
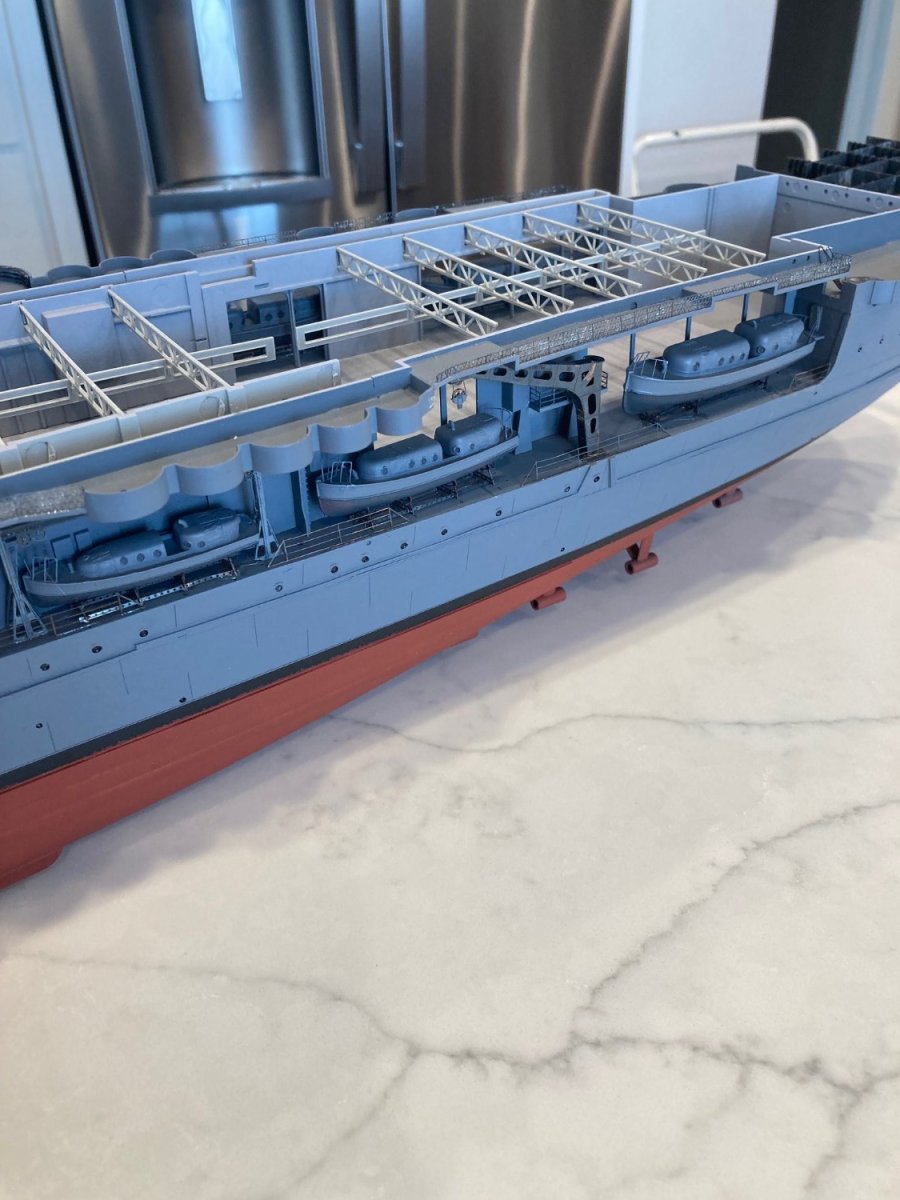
Well, this has been interesting. Unlike my previous battleship builds, one cannot just glue down the wood deck. All the PE deck details go inside die cutouts on the deck sheets and if the whole sheet is glued down, one cannot remove the cutouts. The process is close to, but not quite, board by board. My process was as follows:
1. Pick an index part from which the chosen deck piece can be positioned. I picked the central deck piece located at the Island, so that I can work toward each end of the deck from the center. With that choice, the index part was obviously the large double-layer panel at the bow end. The Trumpeter molded deck has the location of this piece molded into the deck and dry-fitting the central wood piece showed that it was a good fit, so I attached it with CA.
2. I fitted the wood deck butted up to the PE detail and used thin PE to wick under the edge next to the PE piece to attach the end of the wood piece to the plastic deck. The PE did not wick too far under the wood to prevent removing the die cut. After removing the die cut, I used wicked CA under the edges to attach the wood to the plastic deck in the immediate vicinity of the die cut. I then placed the SS detail strip inside the cut out and used thin CA to attach it. The remainder of the wood deck (to the right in the photo) remains loose. I continued this process from left to right as I worked up the wood deck. There are so many of these PE insets that pretty much all of the wood deck has been attached to the plastic deck through wicking.
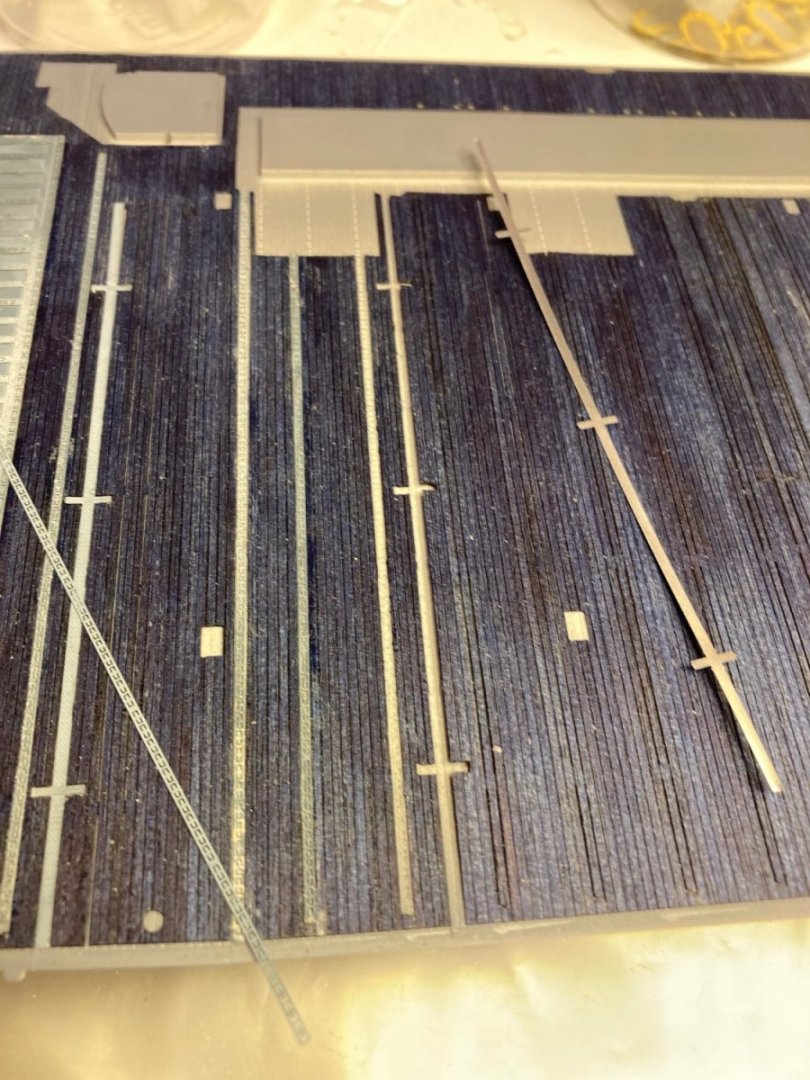
3. Pictures 3 and 4 show this progression. All this deck detail looks pretty good and gives a unique aspect to a Carrier build that might otherwise be pretty blah.
This deck detail is SS PE and is more difficult to work with than Brass. First, it's very hard to cut from the sheets due to the hardness of the SS. Same for filing down the remaining attachment nubs on the sides of these very thin pieces. Second, it doesn't take acrylic paint very well. I etched the SS sheets in vinegar prior to priming with Tamiya light gray primer, allowed the primer to harden off for a week, and then used the color coat. Despite that, using a mandrel to press the narrow pieces down flat into the die cuts of the wood still caused scratching with the SS surface showing through. Oh well, it looks like "pre-weathering" of those pieces showing wear from flight operations.
I'm proceeding to the left toward the bow with the next piece of decking.


-
-
I'm not an experienced air brusher, so take my comments with a grain of salt. Works well. Using Mission Models acrylic straight from the jar. Good control and pattern. Not having an air hose a big plus. I doubt that it would be useful for painting a 1:200 hull, but for subassemblies it is OK. Next thing I will be using it for is the deck aircraft where I will be using Tamiya acrylic, thinned about 15% with X-20A. Will report on that when I do it. So far, I'm happy as I only have a very intermittent need for an air brush and very little shop space. I painted the PE sheets flat on a board that was suspended on balcony railings outside. Wind always a problem. When I do the aircraft, I'm going to try it inside and see how the overspray goes, using a cardboard box on it's side as a "spray booth".
- king derelict, ERS Rich, mikegr and 2 others
-
5
-
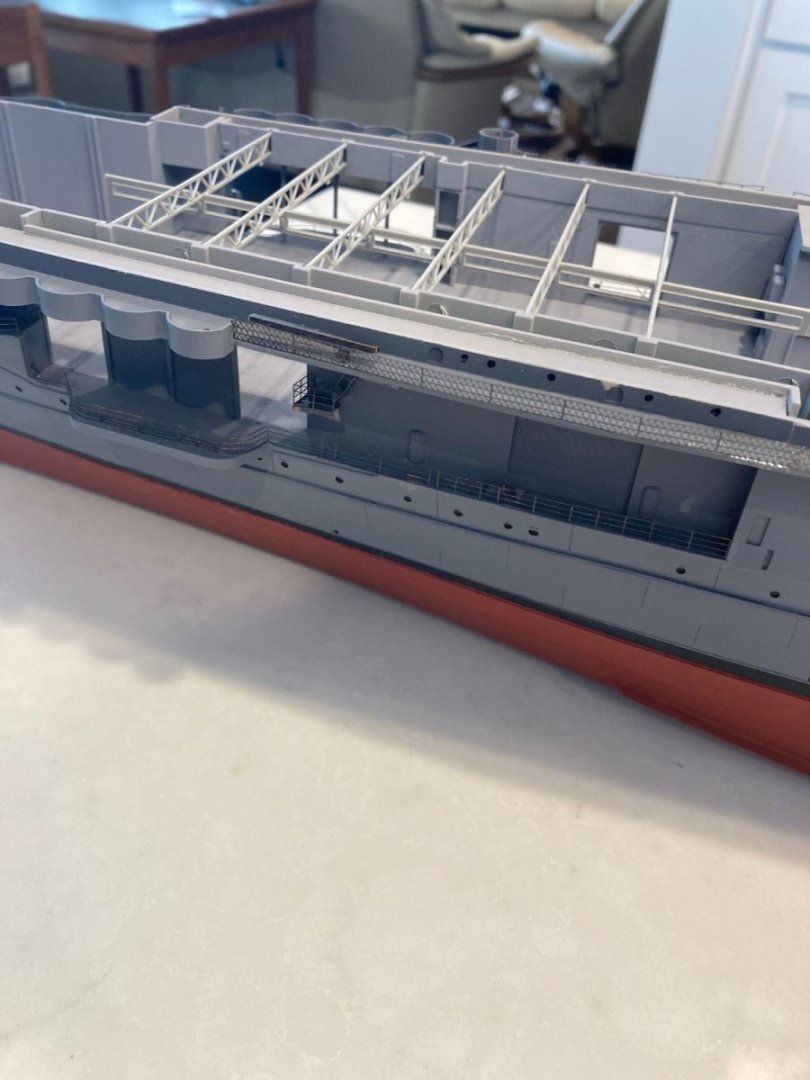
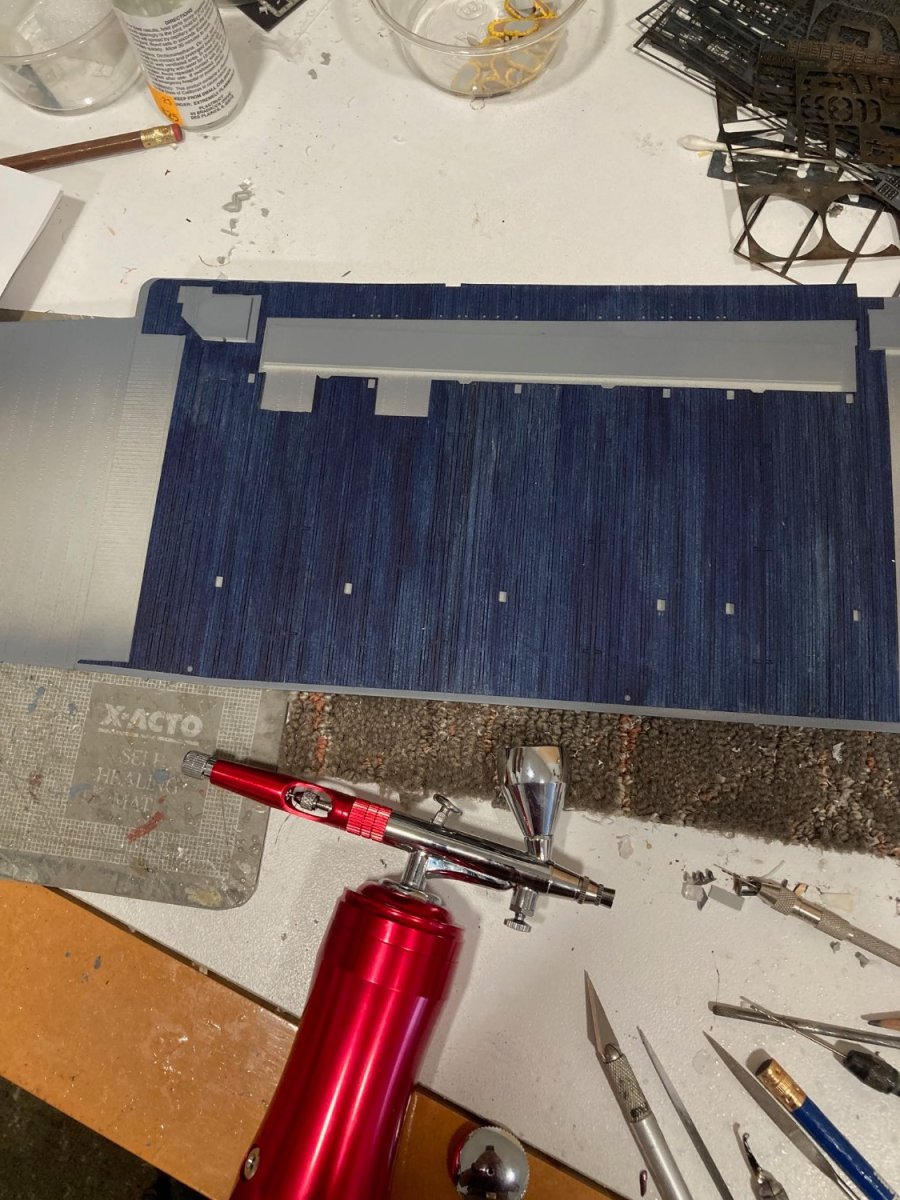
Setting up work on the flight deck. I stained the wood-colored deck that came with the Mk 1 detail set with "Navy Blue" Minwax semi-transparent stain. Oil based, so no warping of the wood. Primed the SS PE deck detail sheets with Tamiya light gray primer and then air brushed with Mission Model "US Navy Flight Deck Blue" using the Micro-Mark battery-powered air brush. The air brush worked out OK. I'm sure it's not as good as a real air brush, but it's ideal for my situation in a Retirement Home condo. Especially as I can use paint colors that are not available in spray cans.
I'm going to start on the decking at the center island where I'm sure of the location and can use it as the register for the subsequent pieces being added. The picture shows it dry-fitted. Lots and lots of PE pieces interior to the wood deck and it's going to be a learning process as I go forward. air brush sitting below the flight deck.

-
Lack of motivation lately. Just doing railings and ladders, which are boring. Have completed that as far as I'm going to go and now going to start the Flight Deck. Never done anything like this before, so it's going to be interesting. I would have liked for the Midwest Model supply video of the CV-6 to have gotten this far, but no luck. The videos have been very helpful
- GrandpaPhil, yvesvidal, hof00 and 6 others
-
9
-
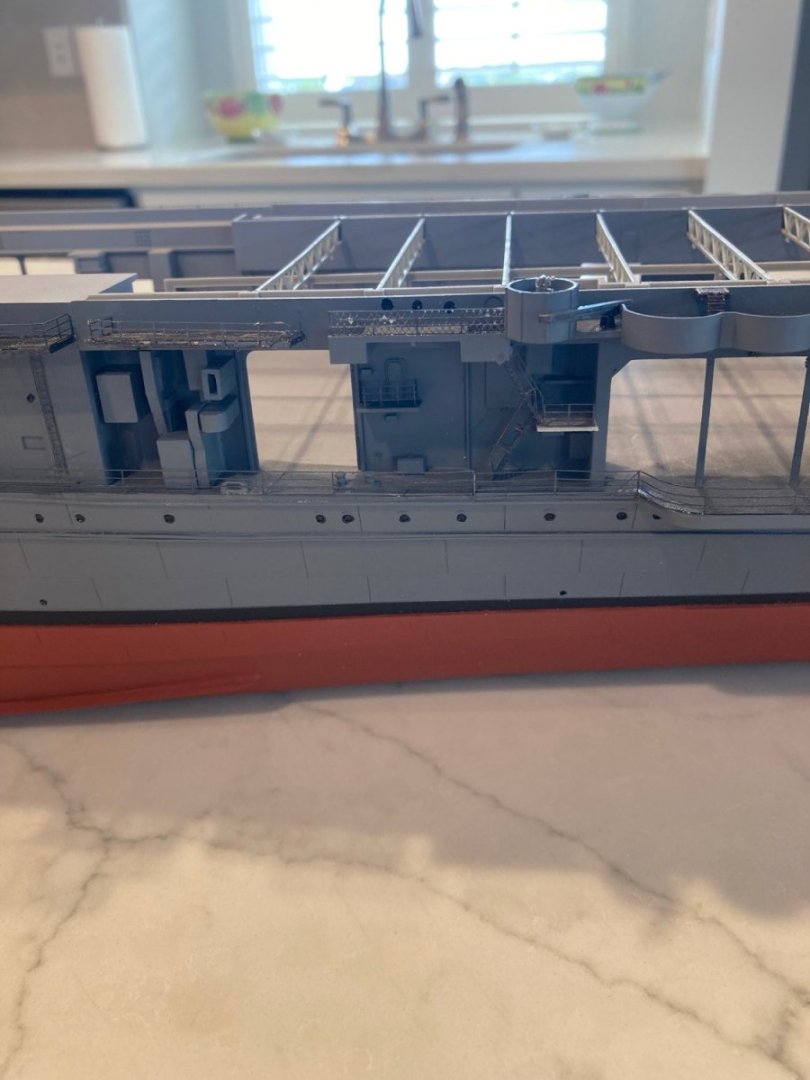
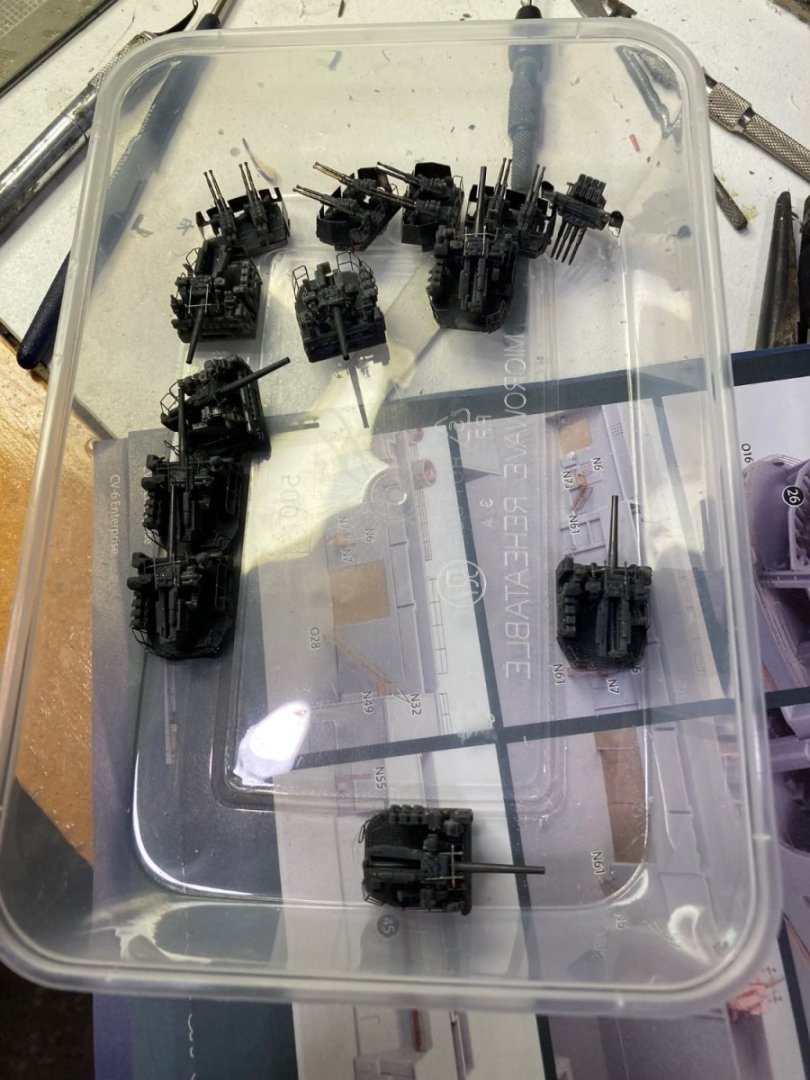
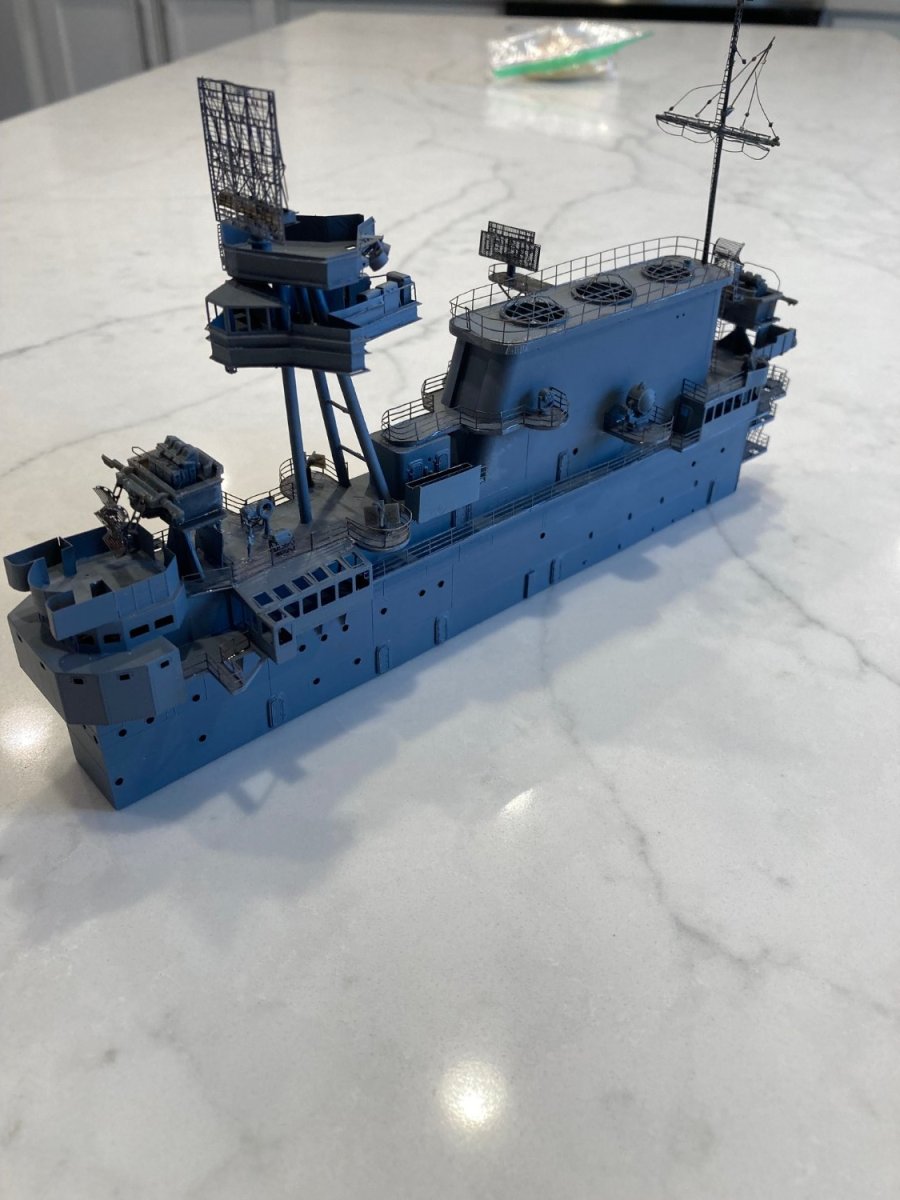
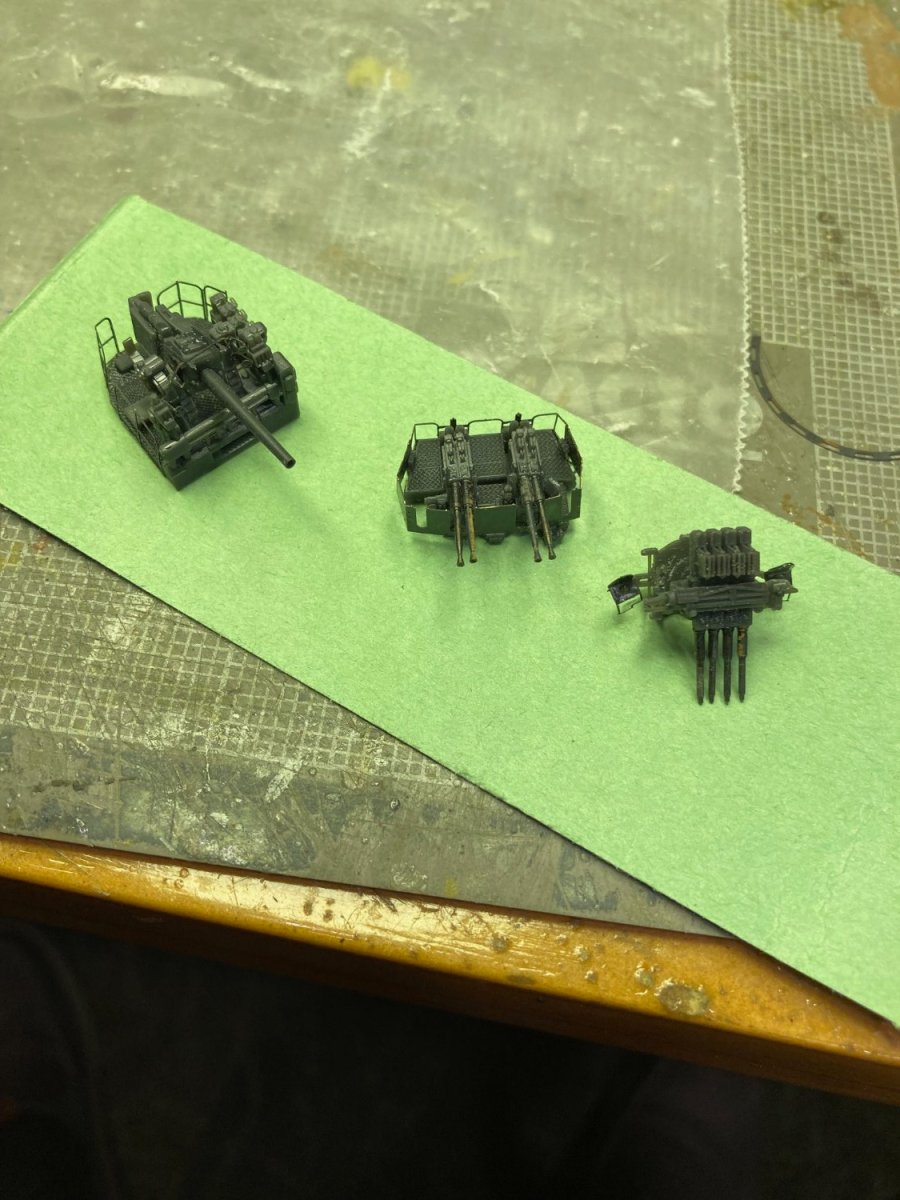
Continuing with the little bits. Pictures of the AA guns and the Island. Lots of bits for the Island and I've completed all the pieces I can do, until it's mounted on the deck. My first time working with 3-D printed details. They are excellent for the amount of detail included. Compared to the equivalent pieces in the Amati Bismarck kit, the detail is extraordinary--but there is not a lot of "building" going on there. Overall, I think they are an improvement for the hobby. But, they do require a new technique to detach them from their "base". Still working out different ways to do this. ie: nippers, #11 exacto, fingers, or a combination of all.
Just painted the added belt armor on the hull, in preparation to adding the MK I details on the perimeter of the hanger deck.
Also just painted the MK I wooden deck pieces "Navy Blue". Used Minwax semi-transparent stain. Really soaked into the wood deck, while preserving the "printed" board lines. It's oil-based so no warping problem. These deck pieces have a LOT of SS PE metal dividers between the boards, which I will paint with Mission Models acrylic Flight Deck Blue 21 before attaching with CA glue. This will be a first for me and it looks to be very challenging. I plan to start in the middle at the Island and work toward each end. I think that will give me the best chance of getting all the pieces in the correct place. Any advice on the use of a primer on the SS PE before the Mission Models paint? Currently thinking a very light coat of Tamiya light gray primer spray, but is a primer necessary?


-
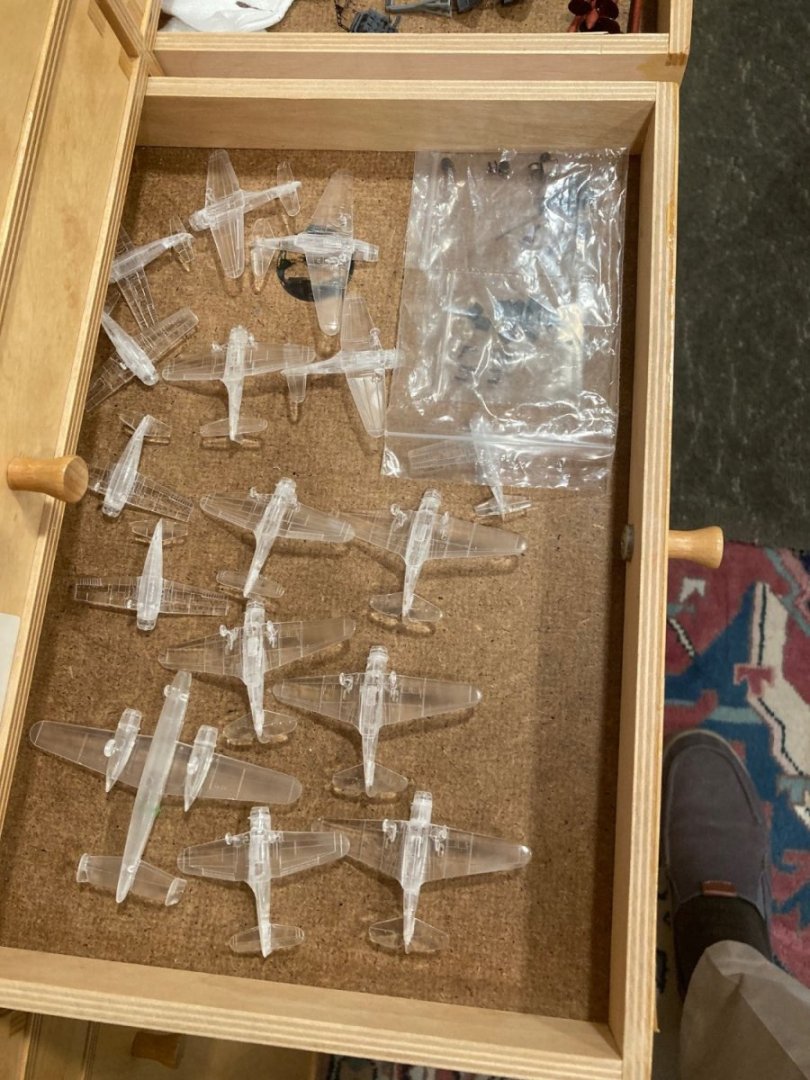
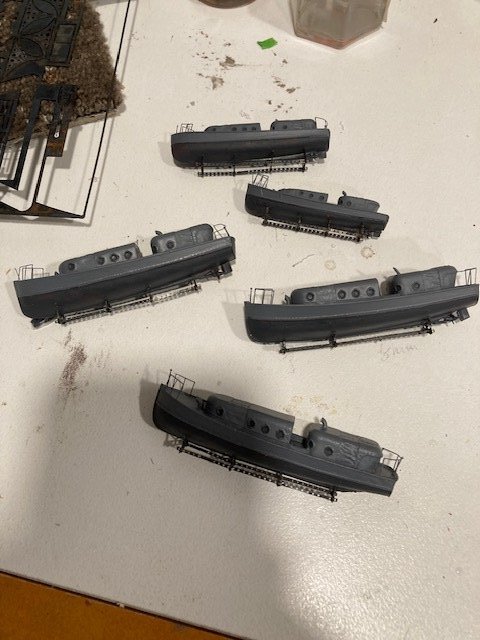
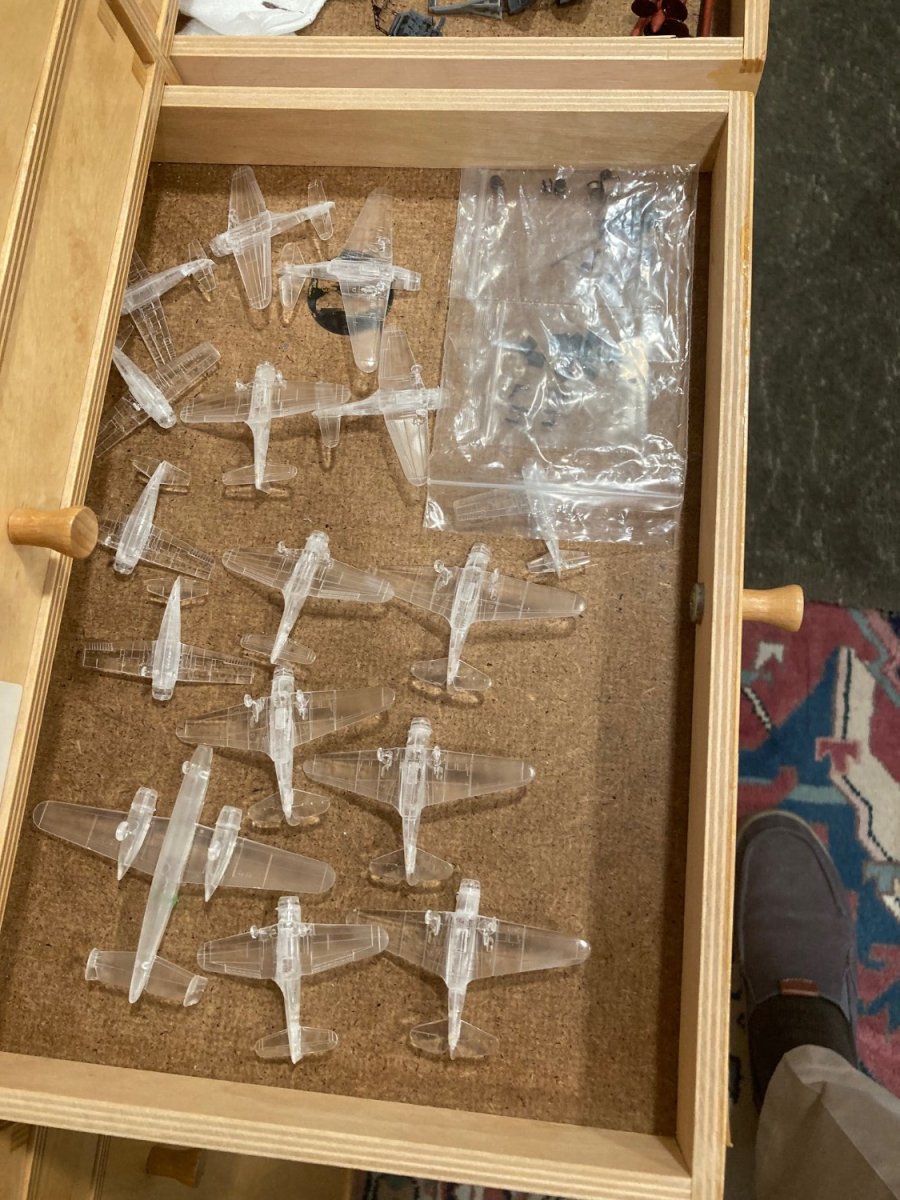
As I said in an earlier post, thought I'd do one for the deck "Just for fun". CV-6 was part of the TF that launched the B-25 raid, but as you said, did not actually carry one. The scale shows that the B-25 was only a little larger than the "regular" planes carried by CV-6, which was interesting to me.
- mtaylor, yvesvidal, Roger Pellett and 1 other
-
4
-
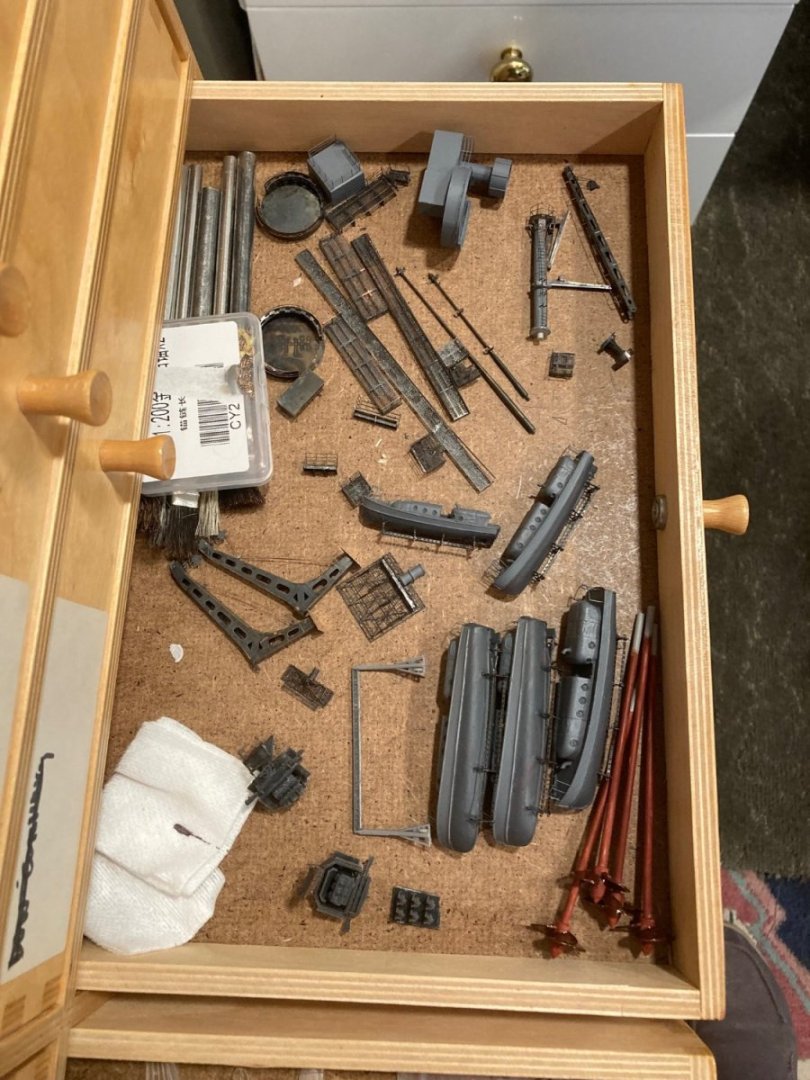
Been piddling around with subassemblies. Planes awaiting paint. The drawers are being used as "resting" places out of the way until assembled on to the hull.
Been watching other U-tube videos of CV-6 assembly and it's very evident that the Pontos detail set is FAR superior to the MK I. Well worth the extra cost. Plus, the MK I "instructions" are so skimpy that I expect that I'll have a lot of parts left over because I can't find where they go.
- yvesvidal, Canute, king derelict and 1 other
-
4
-
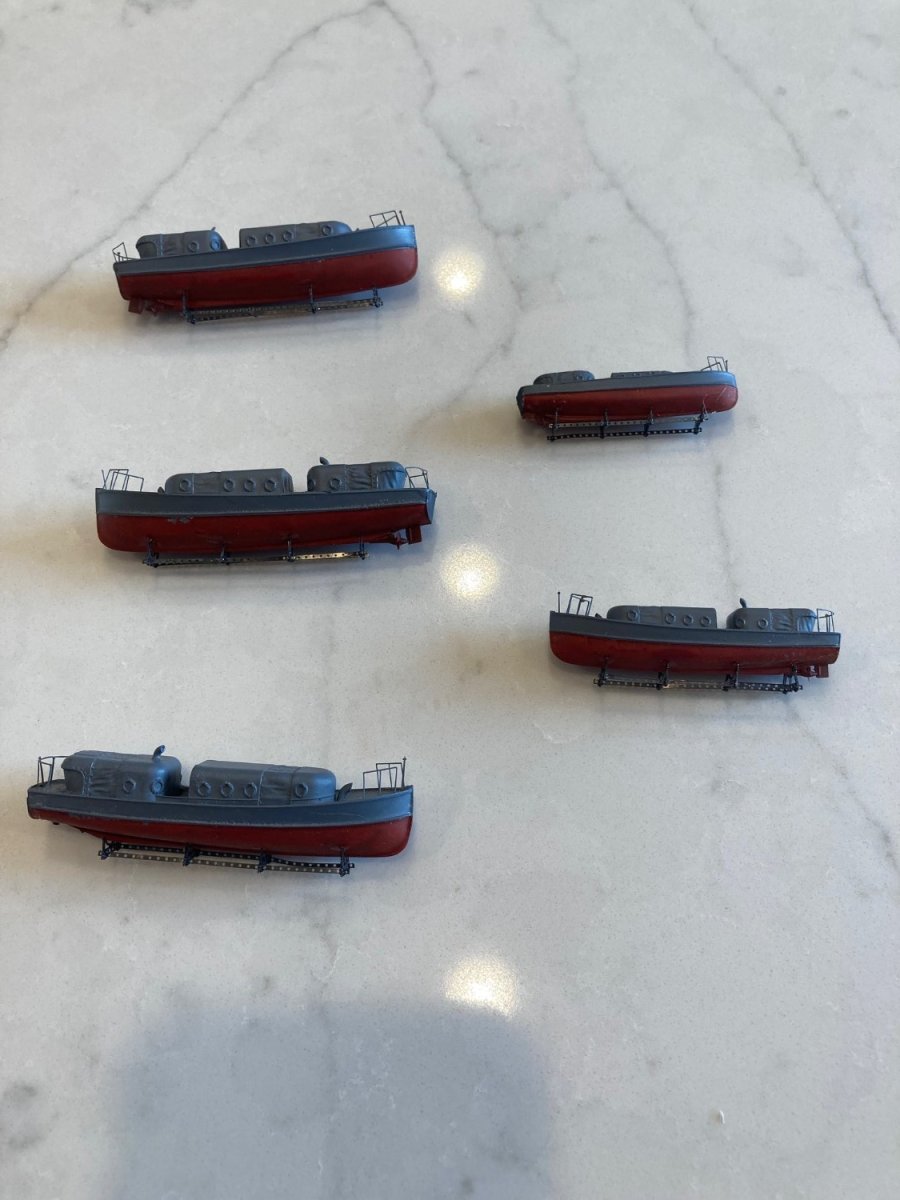
After repainting--much better.
- Roger Pellett, Canute, mtaylor and 2 others
-
5
-
-
Interesting. I'll be painting the "portholes" a very dark gray. Could do the bottoms, too if this info is confirmed. The Enterprise photos are B&W, so either color would come out dark gray in the photo. They would certainly look better that way and my memory from my surface craft days is that in the 70's the boat bottoms were dark gray/black--but I think tin/copper in bottom paint was prohibited by then, so might not be a good indicator.
-
-
Just watched the last two CV-6 videos (7 & 8) from MidWest Model shop. I'm struck by how much better the Pontos detail set is, compared to MK 1. And, from the glimpse of the Pontos picture sheets, these are MUCH better as well. If I were doing it again, I would go with the Pontos detail set.
-
I did, but I was unable to extrapolate the dimentions--just did an "eyeball" on proportions. Thanks for those actual numbers. My calculator says that 6' is .36" at 1/200, so my current strips extend 1/2" below the bottom of the boot stripe. That makes the lower extent a little deeper than scale. More exact would have been making the second strip on the bottom a 1/8" wide strip. I could add a further 1/4" strip to the top and that would take the belt to the top of the boot stripe. That would mean repainting the red AND the black, though--and buying another package of the 1/4" strips. Something for future builders to take note of. Do all this before any hull painting. By the way, thin CA did a good job of attaching the styrene strips--which I "had" to use to avoid stripping the paint back to the plastic. It wicked beneath the strips nicely. I think that would be the preferred method even on bare plastic as it would be difficult to keep the plastic cement "wet" over it's full length and the "wicking" method might leave a small residue at the edge which would prevent a close join of the next strip. The CA did not leave an amount of residue that caused any problem.
-
Those photos are fantastic. No pictures of any white outlines of the elevators. There appears to be a difference in texture of all of the metal deck fixtures compared to the wood decking, but they are the same color. The white numbers along each side (and middle) of the Flight deck are present. The big number "6" is black. Interesting to see that the "6" is oriented in the direction a landing pilot would see on both fore and aft. I would have wondered if the numbers were reversed, but it's clear that they are not. Trumpeter provides a decal sheet with the small numbers, deck elevator outlines, and big "6" in white. Clearly, I will use the small numbers, but paint the Flight deck metal fittings, including the elevator surrounds, Navy Blue (# 21 from Mission Models). I'll be staining the MK I wooden deck with Minwax semi-transparent Navy 286. I'll do some test swatches by adding some black to the #286 to see if it needs to be a little darker to match the #21. I'll experiment with making a mask of the big "6" to spray it flat black.
Looked at all the pictures to see if any showed the armor belt. There was one of damage at the port stern that "might" show the aft end of the armor belt. If so, it extended about halfway into the boot stripe. If I get really ambitious, I'll add a 1/8" .020 strip to the top and bottom of the two 1/4" strips I have already put there. That should accommodate the extra curvature of the hull at each end without drama.
- Ryland Craze, mtaylor and Canute
-
3
-
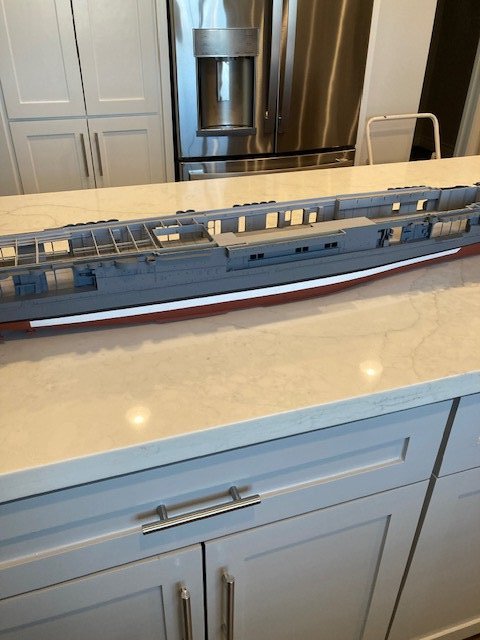
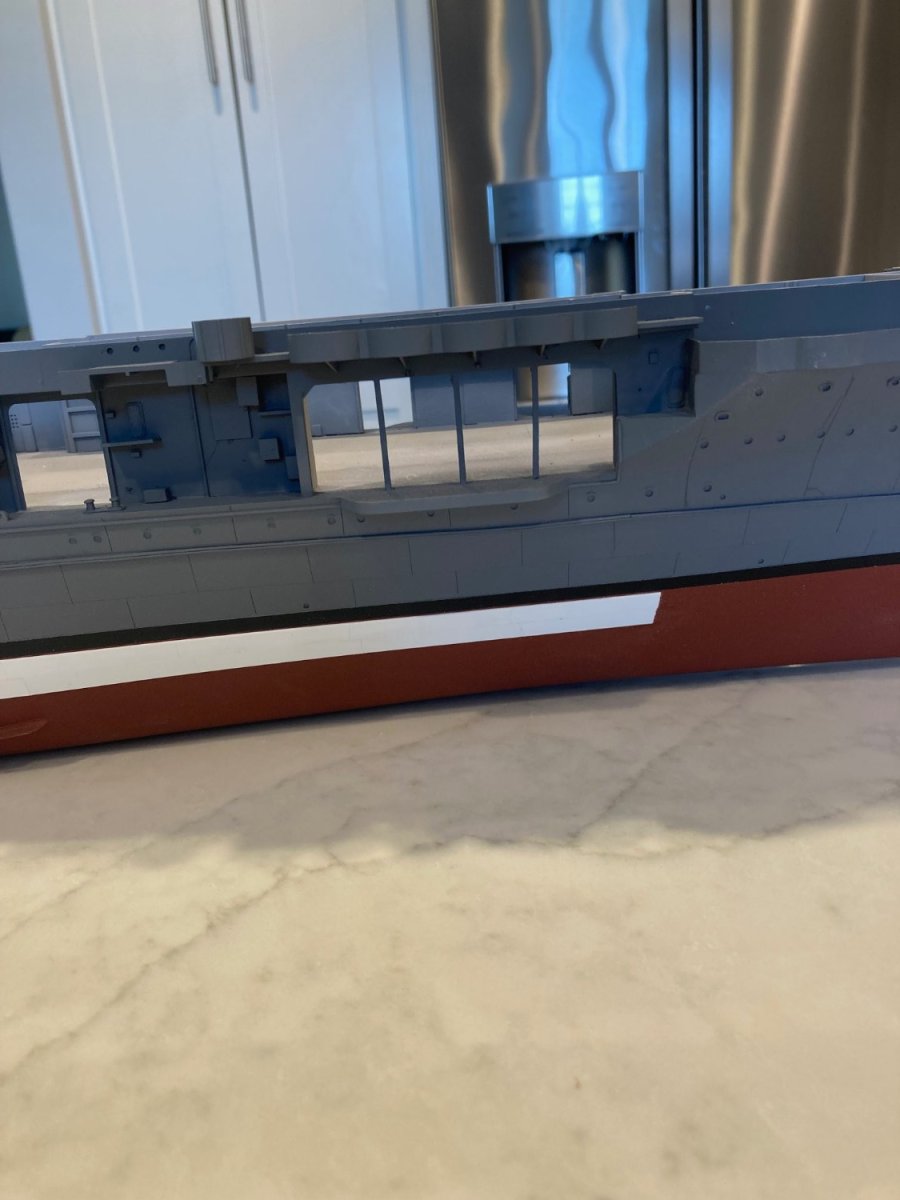
I resisted as long as possible, but had to do it. Added the belt armor to the sides. Used .020" x 1/4" strips. Much easier than I expected. No compound curves. Extrapolated location from the hull drawings. I think the belt extended into the boot stripe and could have gone a little lower, but this seems to be "good enough for Government work".
The Trumpeter box art shows the surrounds around the elevators being white and white numbers along each side of the flight deck. Was this done? Seems like it would be a good aiming target for dive bombers.


- mtaylor, Rick310, king derelict and 4 others
-
7
-
-
Got it. Thanks. Rechecked the MK 1 pictures and the front tub guns ARE the 1.1" quad AA, not the Bofors. The Trumpeter kit instructions don't say what kind of guns those on the side were, but the MK 1 instructions say they are .50 cal AA. MK 1 has better "printed" versions of these, and I will be replacing the Trumpeter guns with them, later. From experience, I can say that these .50 cal guns would have been useless as AA--which the Armament page you provided says. Nothing like actual experience to wise up the Buships mavens far from the battle. The Ukraine experience should be proving to be VERY useful in figuring out what works in a peer-level conflict. Had a lot of proximity to the M2 APC in Vietnam, which was largely useless in the mountainous triple canopy battlefields where we engaged in set-piece battles with the NVA. But, looks like they are working well in the open-level assault for which they were designed. Learning a lot about the vulnerabilities of Division Hq. and the utility of drone recon, too.
-
MK 1 has it as a 40mm Bofors quad.
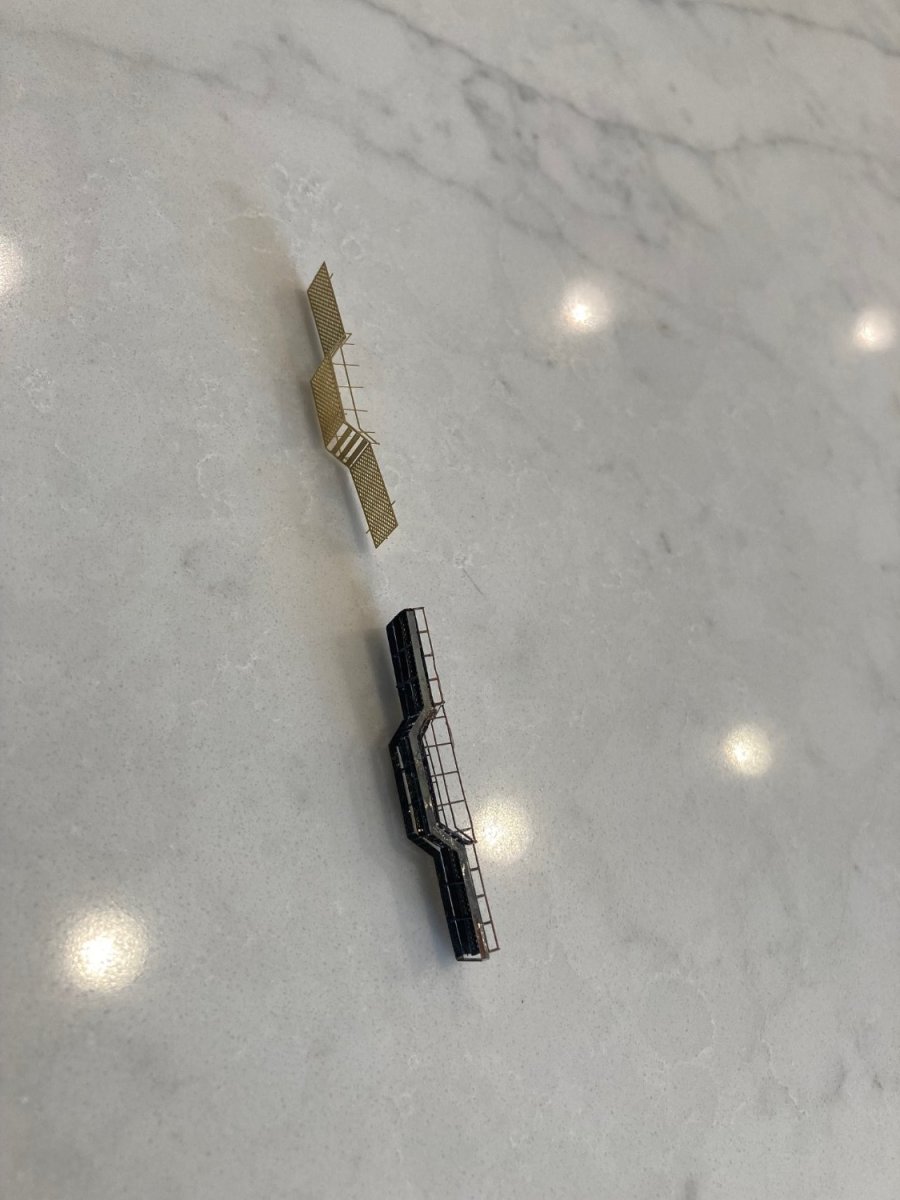
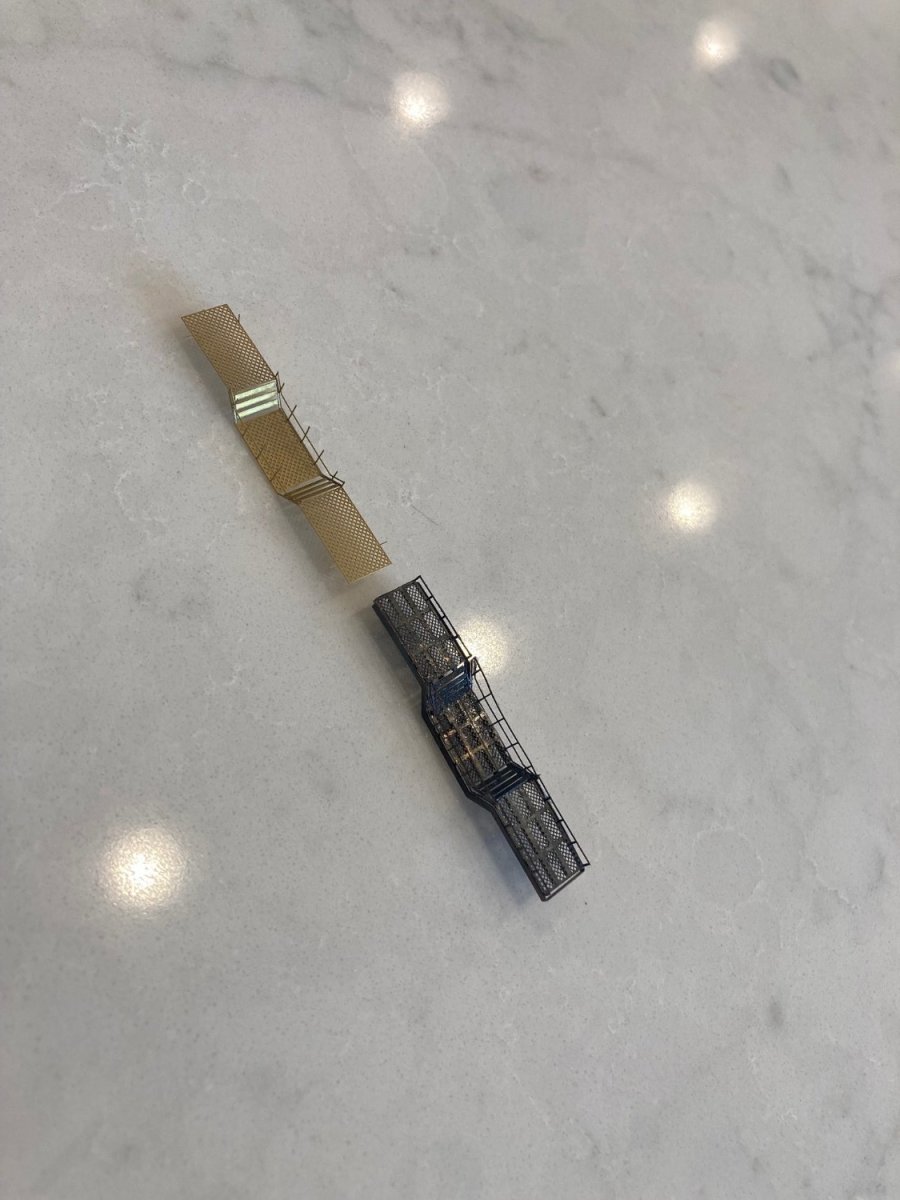
For comparison, pictures of the aft platform for the "Landing Paddle Officer" as provided by Trumpeter and MK 1. Trumpeter has "some" PE brass included, most of which is replaced by MK 1.
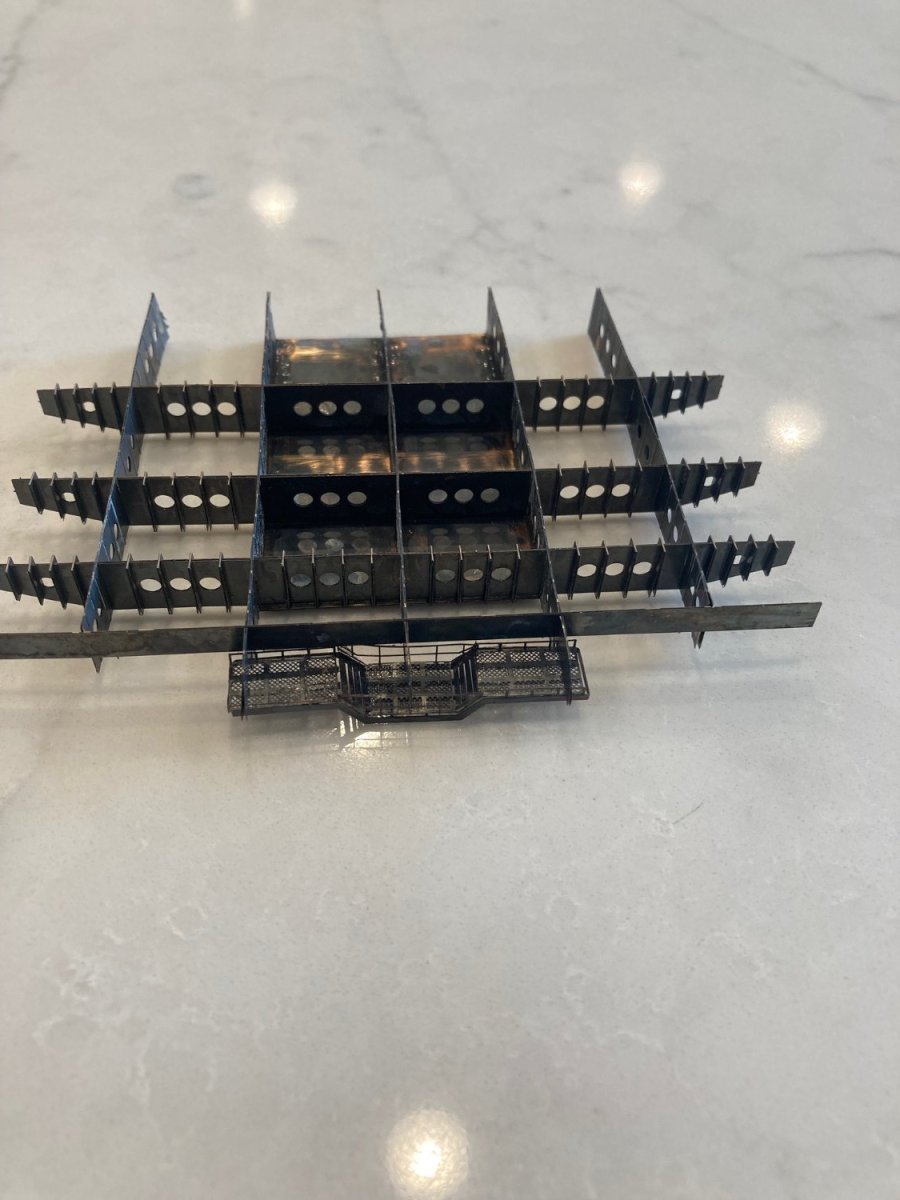
Last picture shows where I think the platform is mounted, based on a VERY imprecise diagram from Trumpeter. Seems to me that this is a little restricted, though, because it's located beneath the longitudinal Flight deck supports. I think a better place would have been on the end of the supports? Anyone have a photo or plans of this area?

.thumb.jpg.7e4007d7567c5ea89adfbe4009f40e8e.jpg)

- GrandpaPhil, mtaylor, king derelict and 2 others
-
5
-
-
Generally speaking, mid-1943 to '44. Wanting Measure 21 colors. Would have put on the armor belt if the Wiki site had not confused me with "blister"--the strip you showed in the drawing was easily doable, but not willing to strip off the bottom paint to add it, at this stage, for .040". Your resources and willingness to help have been very much appreciated. I cut out the edges of the stern flight deck for the AA guns that were included with the Trumpeter kit. I guess they left that option for someone doing an "early" CV-6.


.jpg.2c2eb16b278bf4e6512a2a9643908de3.jpg)
USS Enterprise (CV-6) by ted99 - Trumpeter - 1:200 - PLASTIC
in - Kit build logs for subjects built from 1901 - Present Day
Posted
^^^Is there a way to correct this? Haven't looked at the kit, except to verify that the wood deck fit.