HOLIDAY DONATION DRIVE - SUPPORT MSW - DO YOUR PART TO KEEP THIS GREAT FORUM GOING! (Only 20 donations so far - C'mon guys!)
×


Paul Le Wol
-
Posts
1,016 -
Joined
-
Last visited
Content Type
Profiles
Forums
Gallery
Events
Everything posted by Paul Le Wol
-
Rigging Diameter, Early 1900s Workboat
Paul Le Wol replied to JacquesCousteau's topic in Masting, rigging and sails
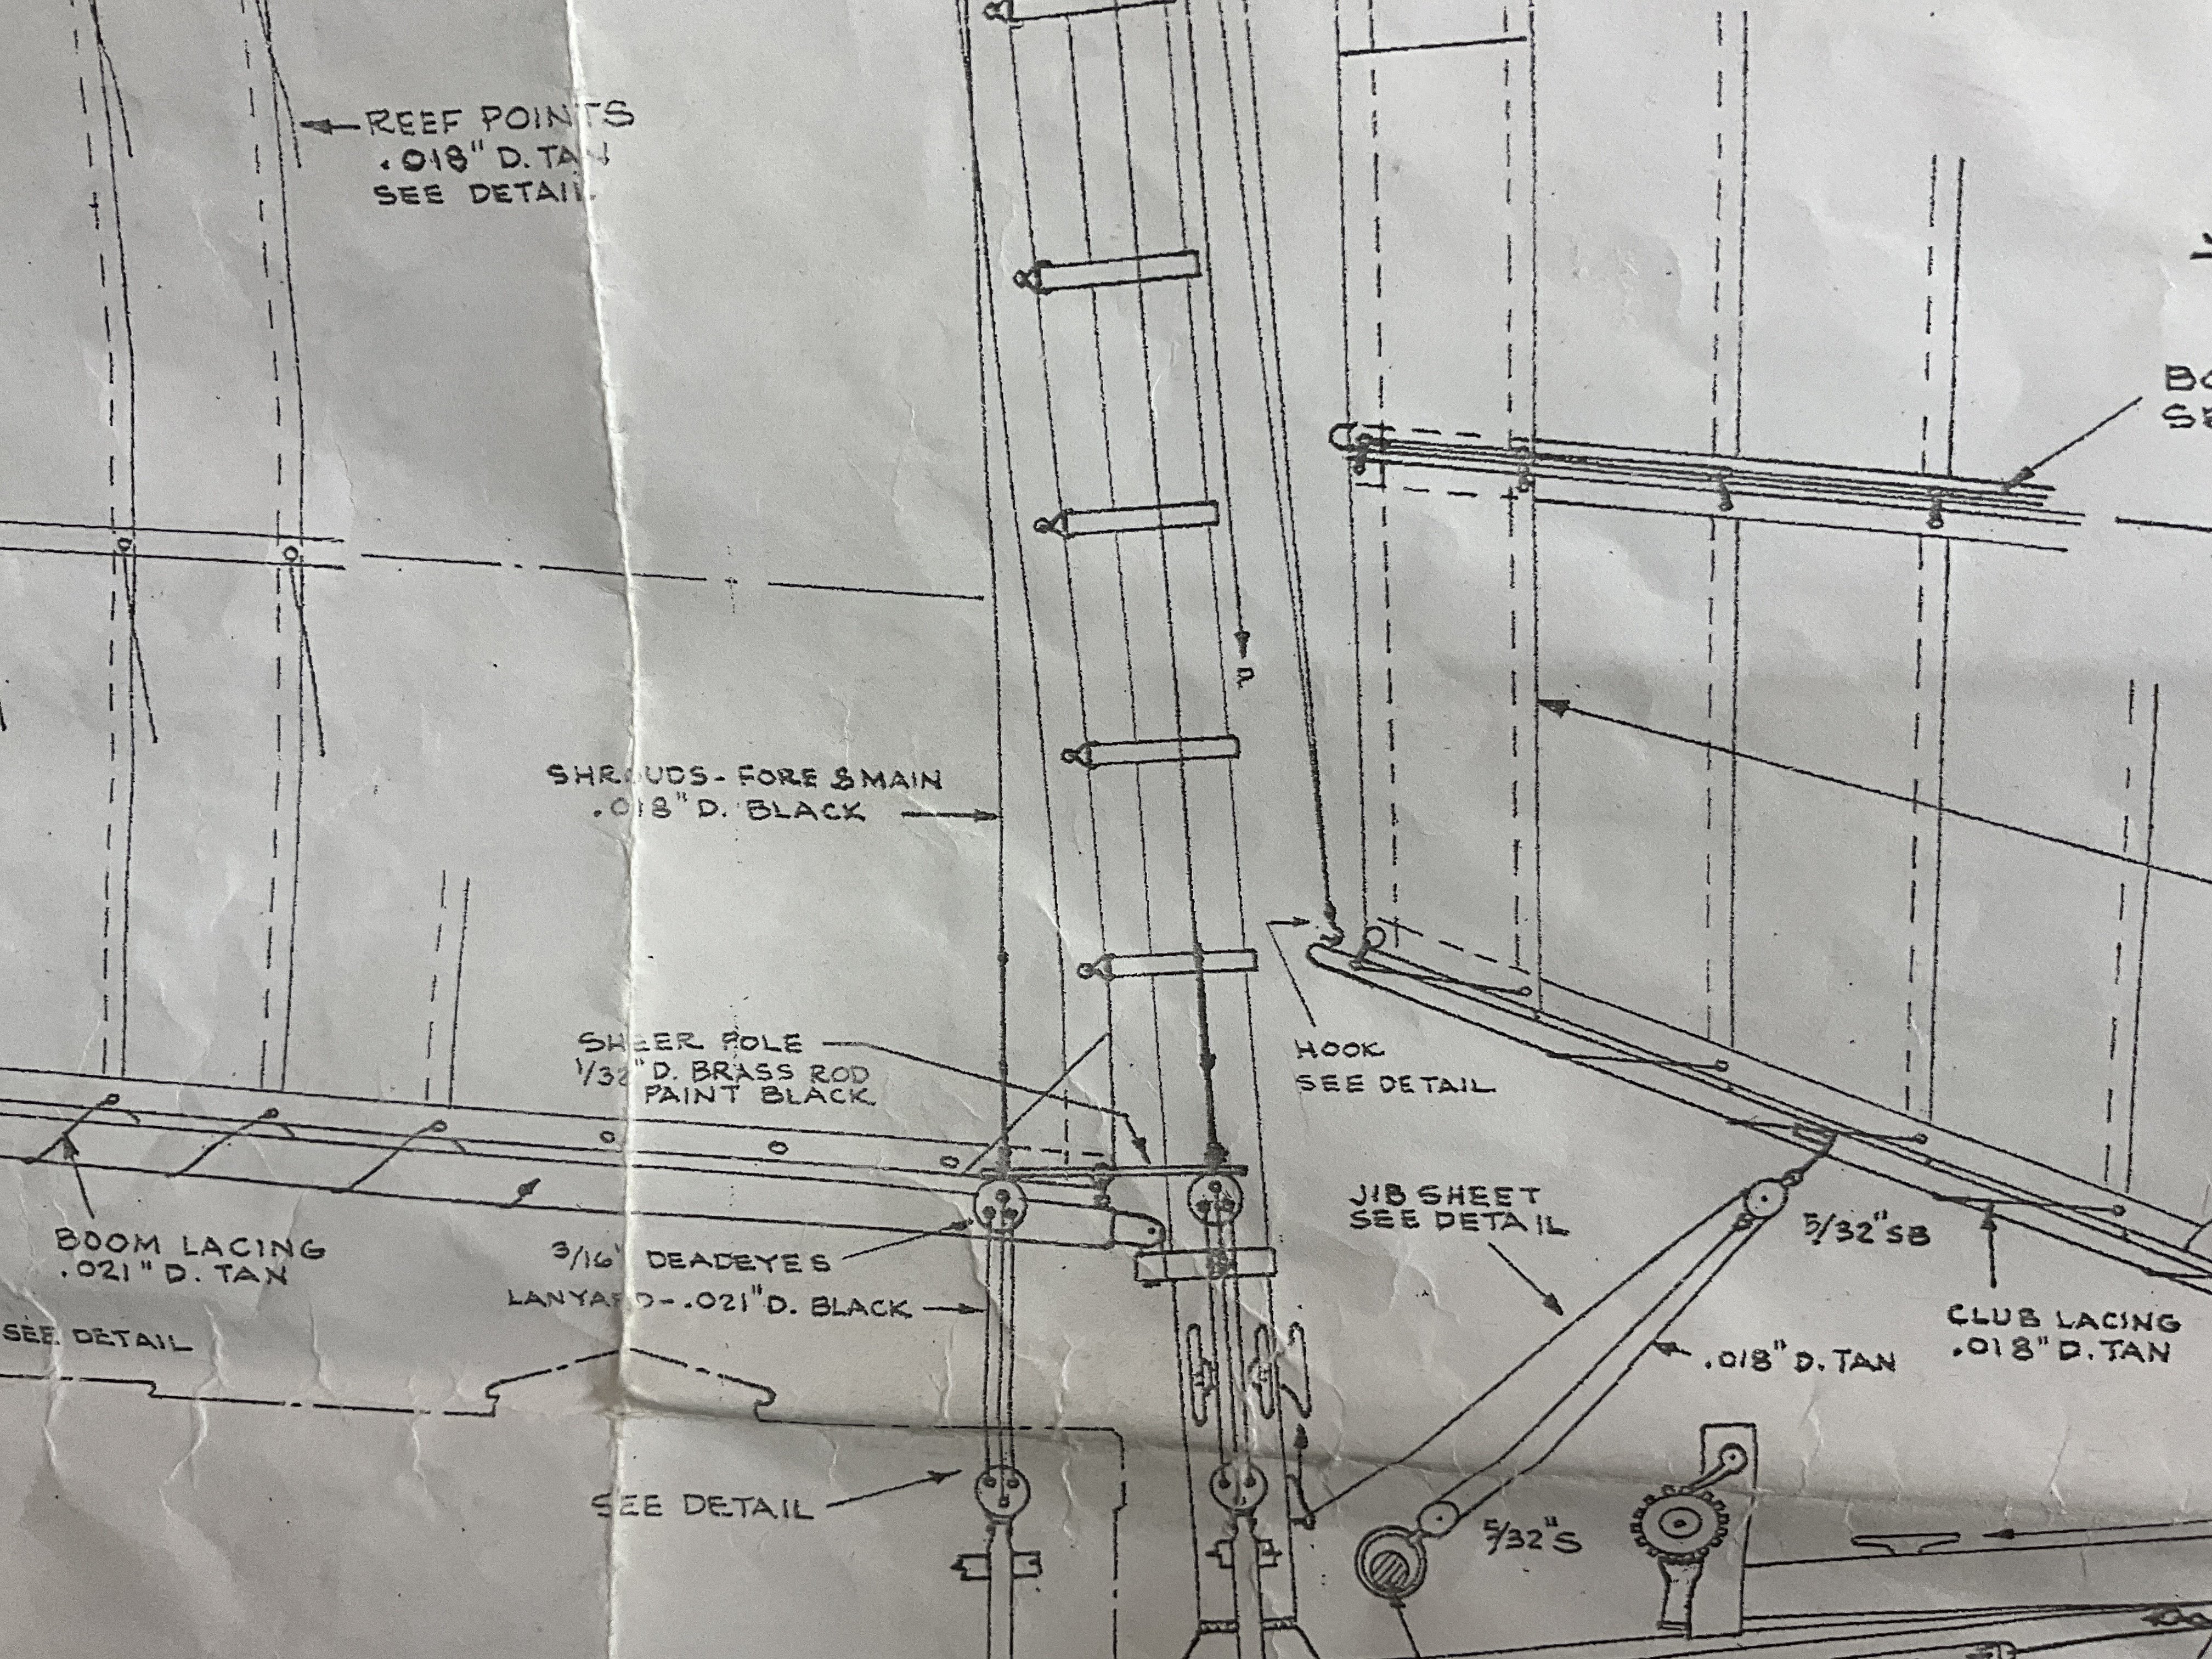
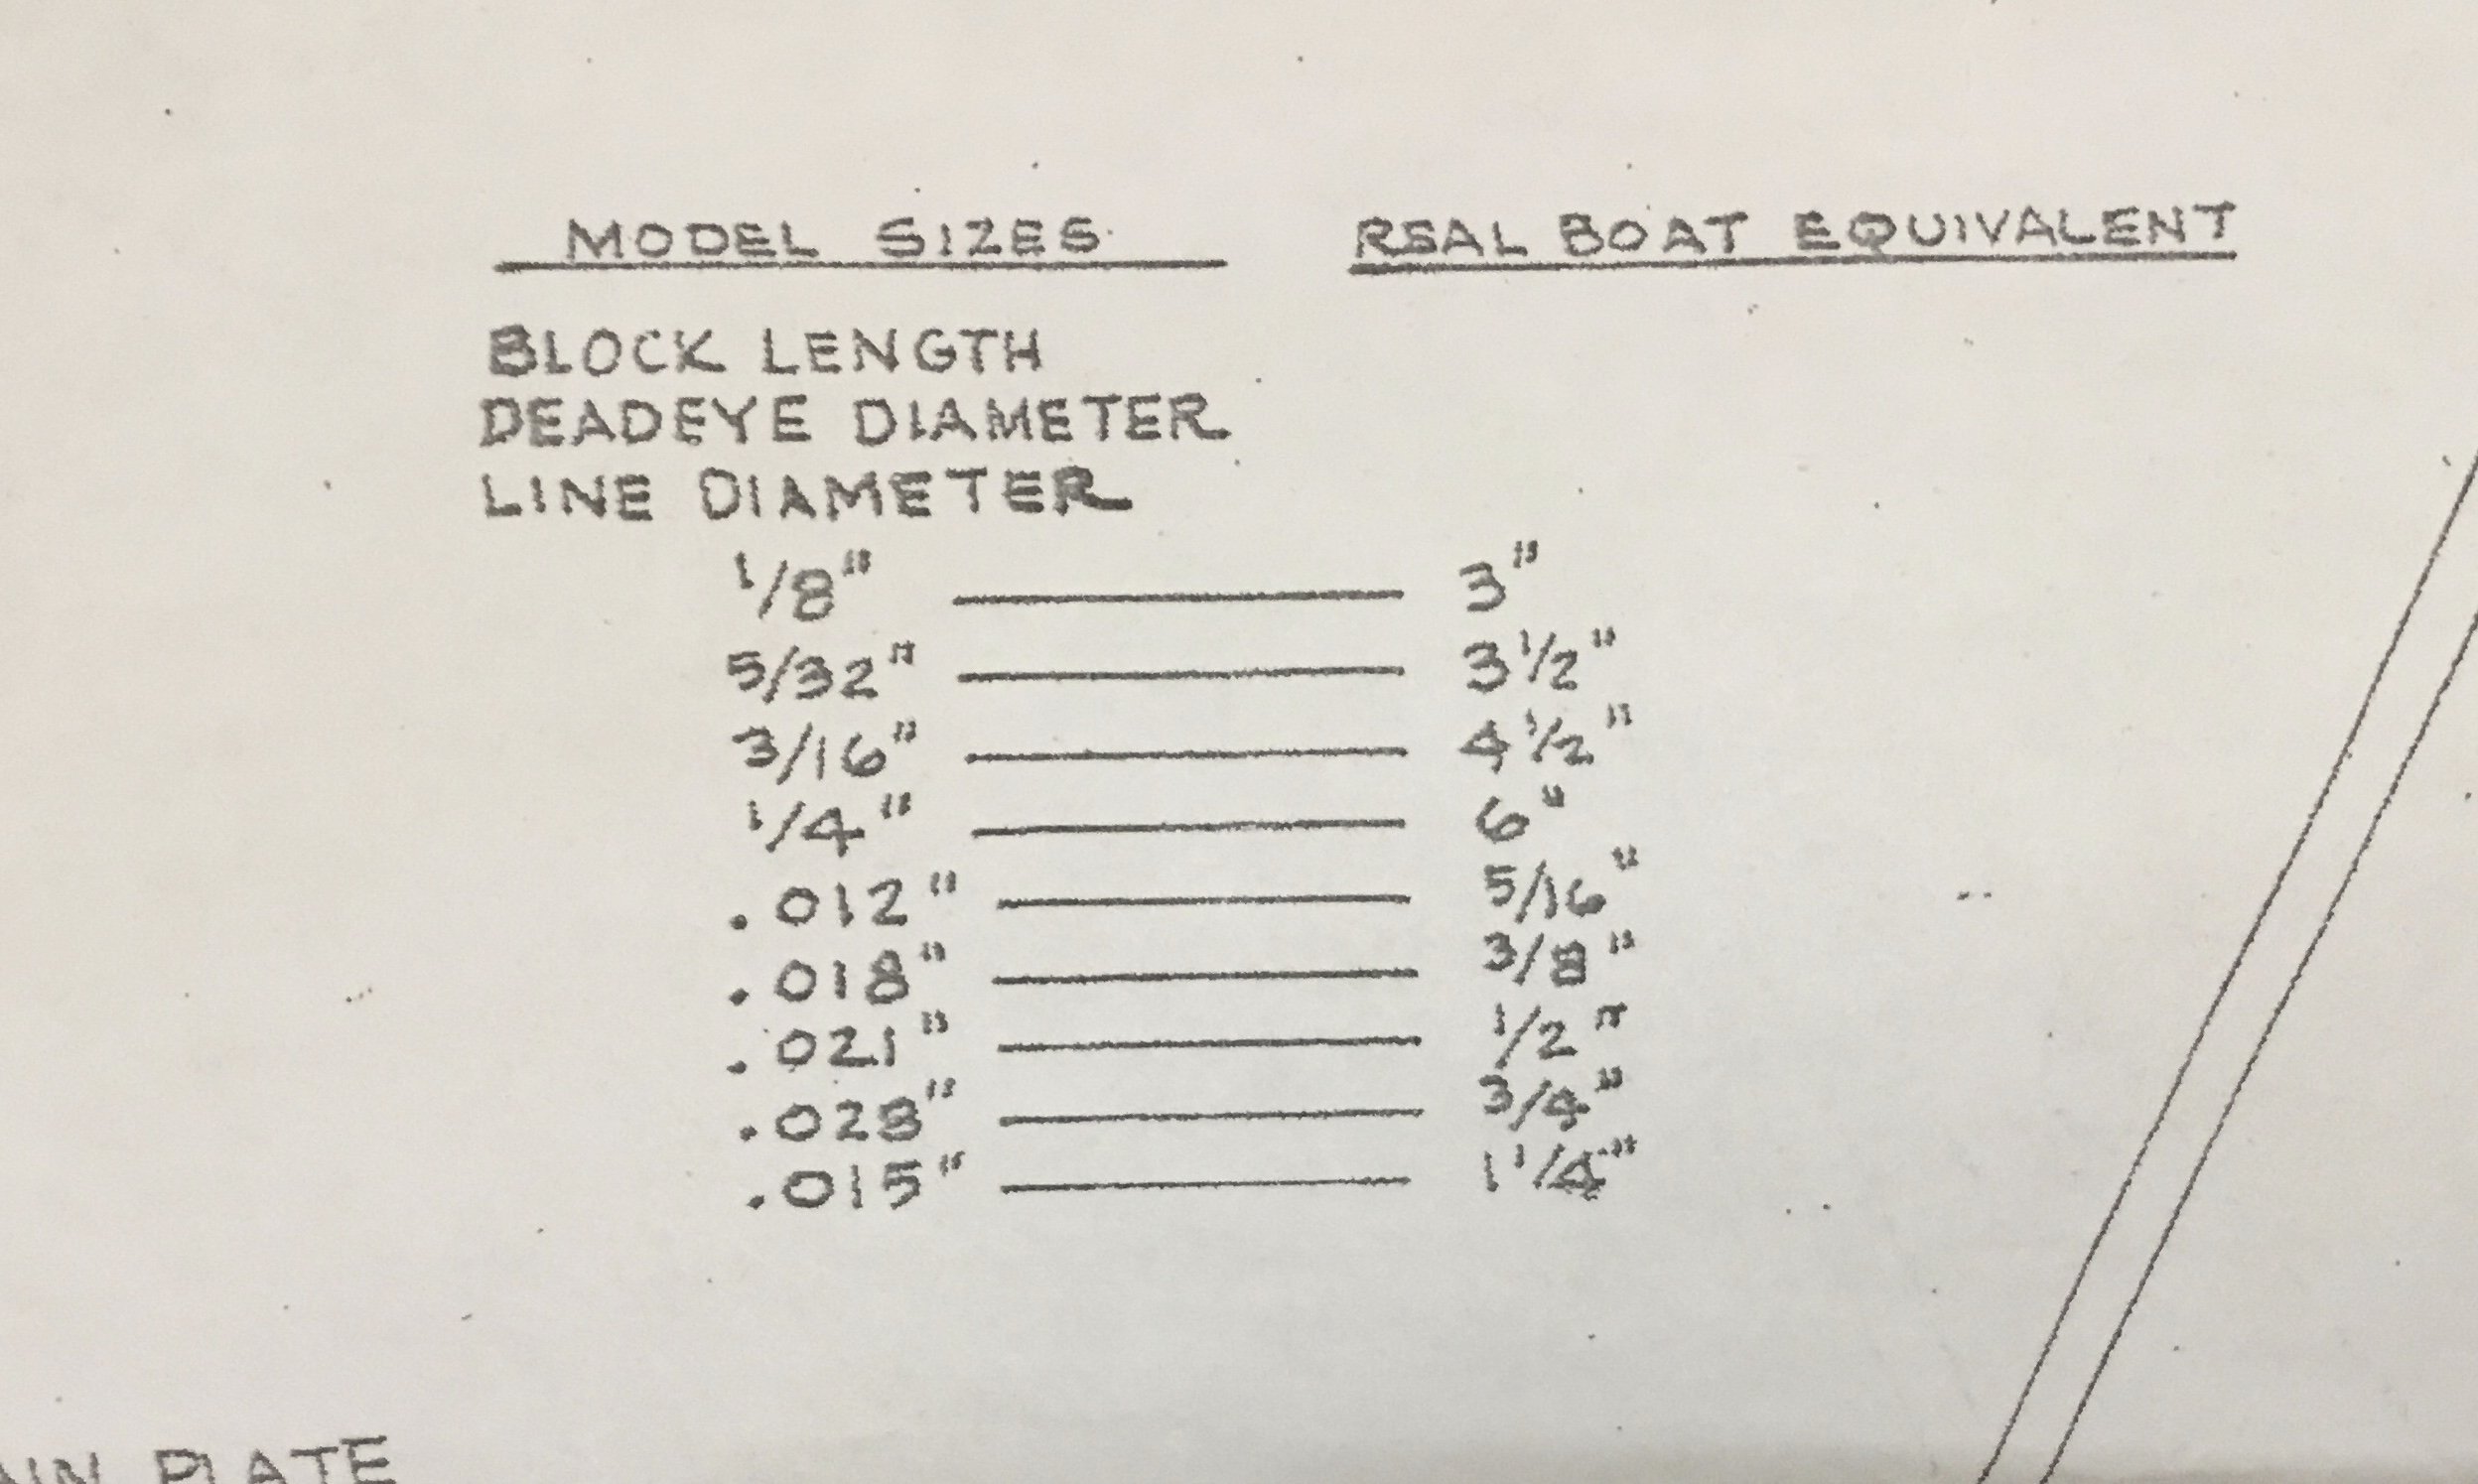
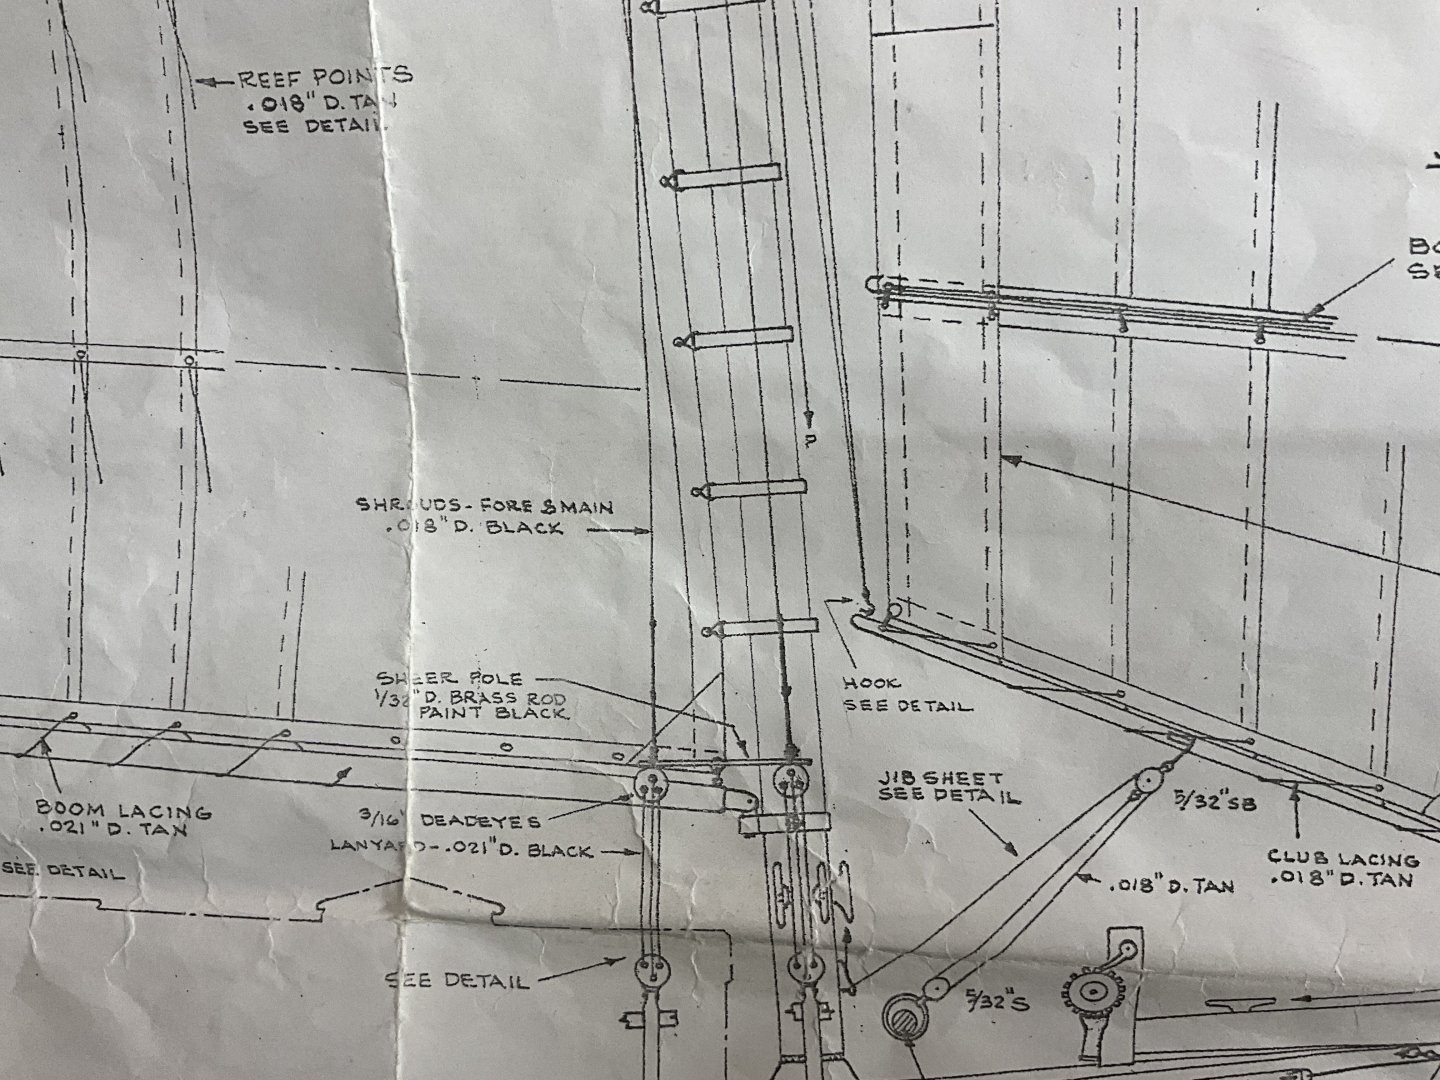
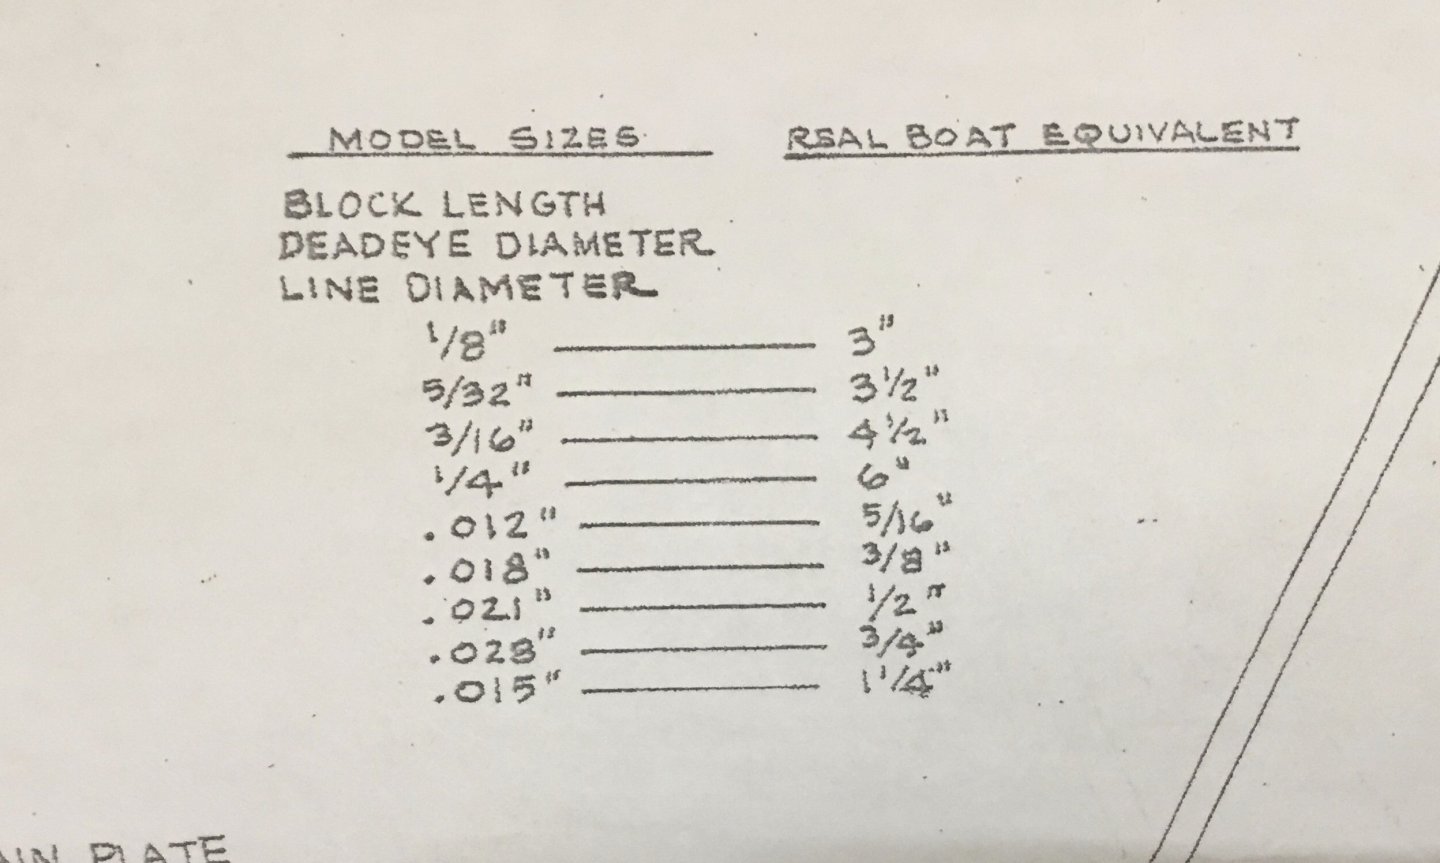
Hi Jacques, I have been using Model Shipways rigging plans for the Glad Tiding to help rig my sharpie because they are rigged similarly although the pinky is a bit larger vessel. Both are 40 some odd feet long and 1/24 scale. The Pinky also has wire standing rigging which scales to 3/8”. So 1/4” (.009”) wire for your 1/32 scale Lancha seems reasonable. Here’s a few pictures of the plans.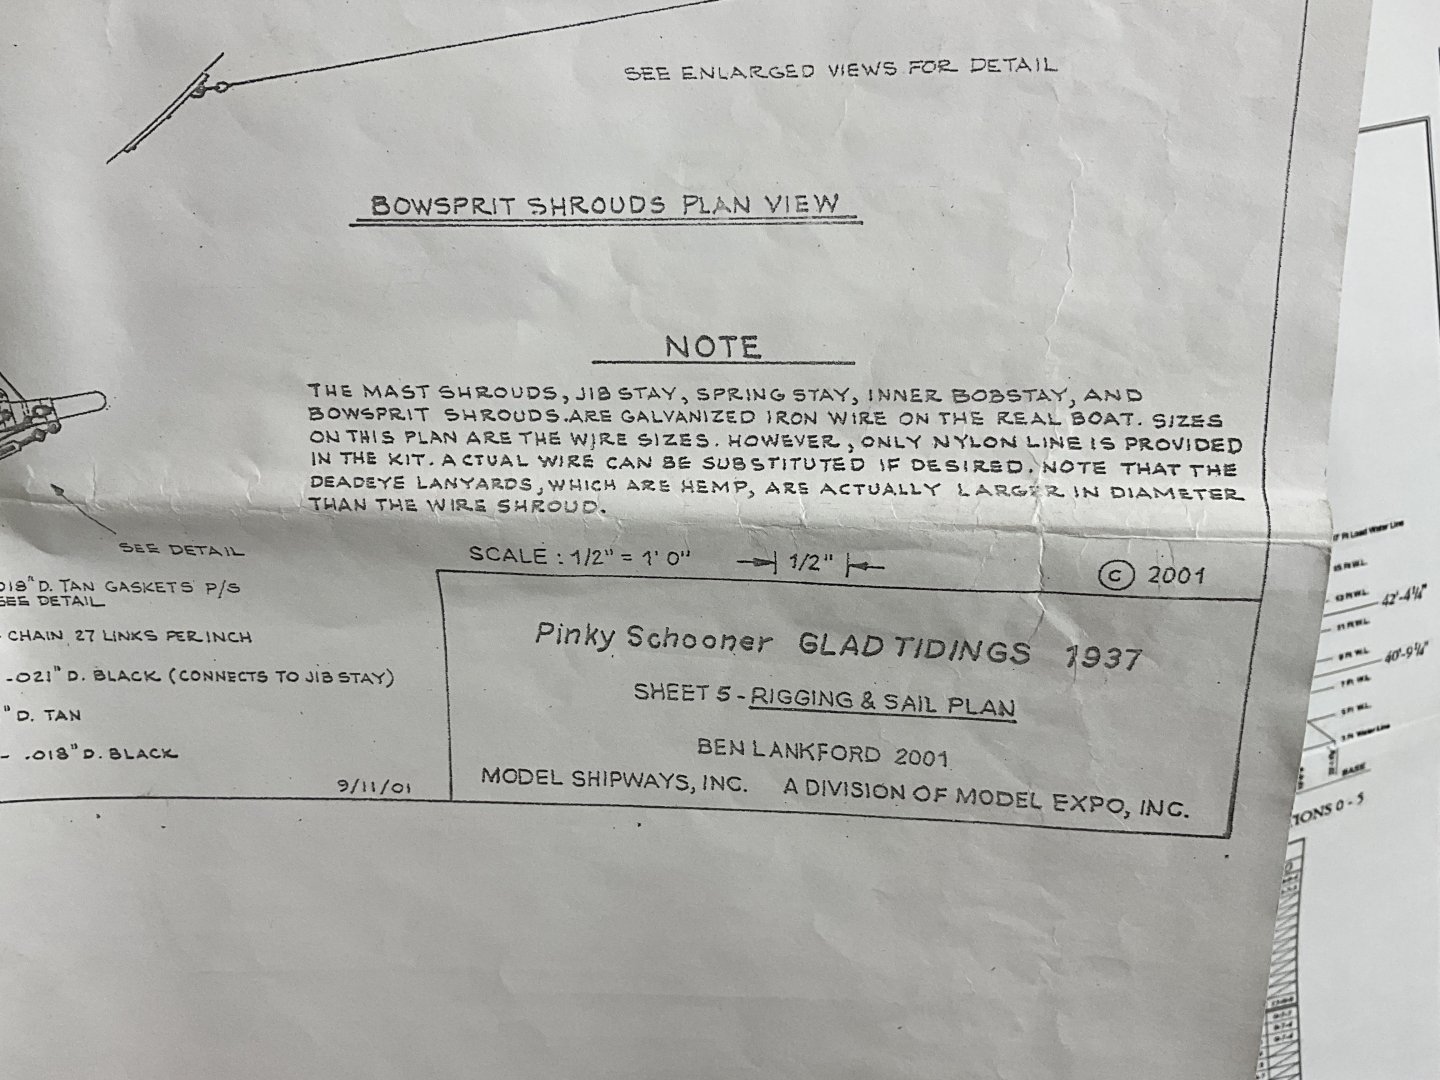
-
Hi Gary, thank you for your comment. I appreciate it very much!
- 201 replies
-
- 4
-

-
- Oyster Sharpie
- first scratch build
- (and 1 more)
-
Hi Jacques, I just stumbled across Javier Baron’s wordpress site. ( barcosbaron.wordpress.com ) . After scrolling through his “ Tecnicas de Construccion “ post I was reminded of your question about squaring. If you haven’t already been there it is worth the visit. The man is a genius
- 312 replies
-
- 3
-
-

-
- Chile
- Latin America
- (and 6 more)
-
Bill, congratulations on finishing your Revenue Cutter. She looks gorgeous!
- 89 replies
-
- 1
-
-
- bluejacket shipcrafters
- revenue cutter
- (and 1 more)
-
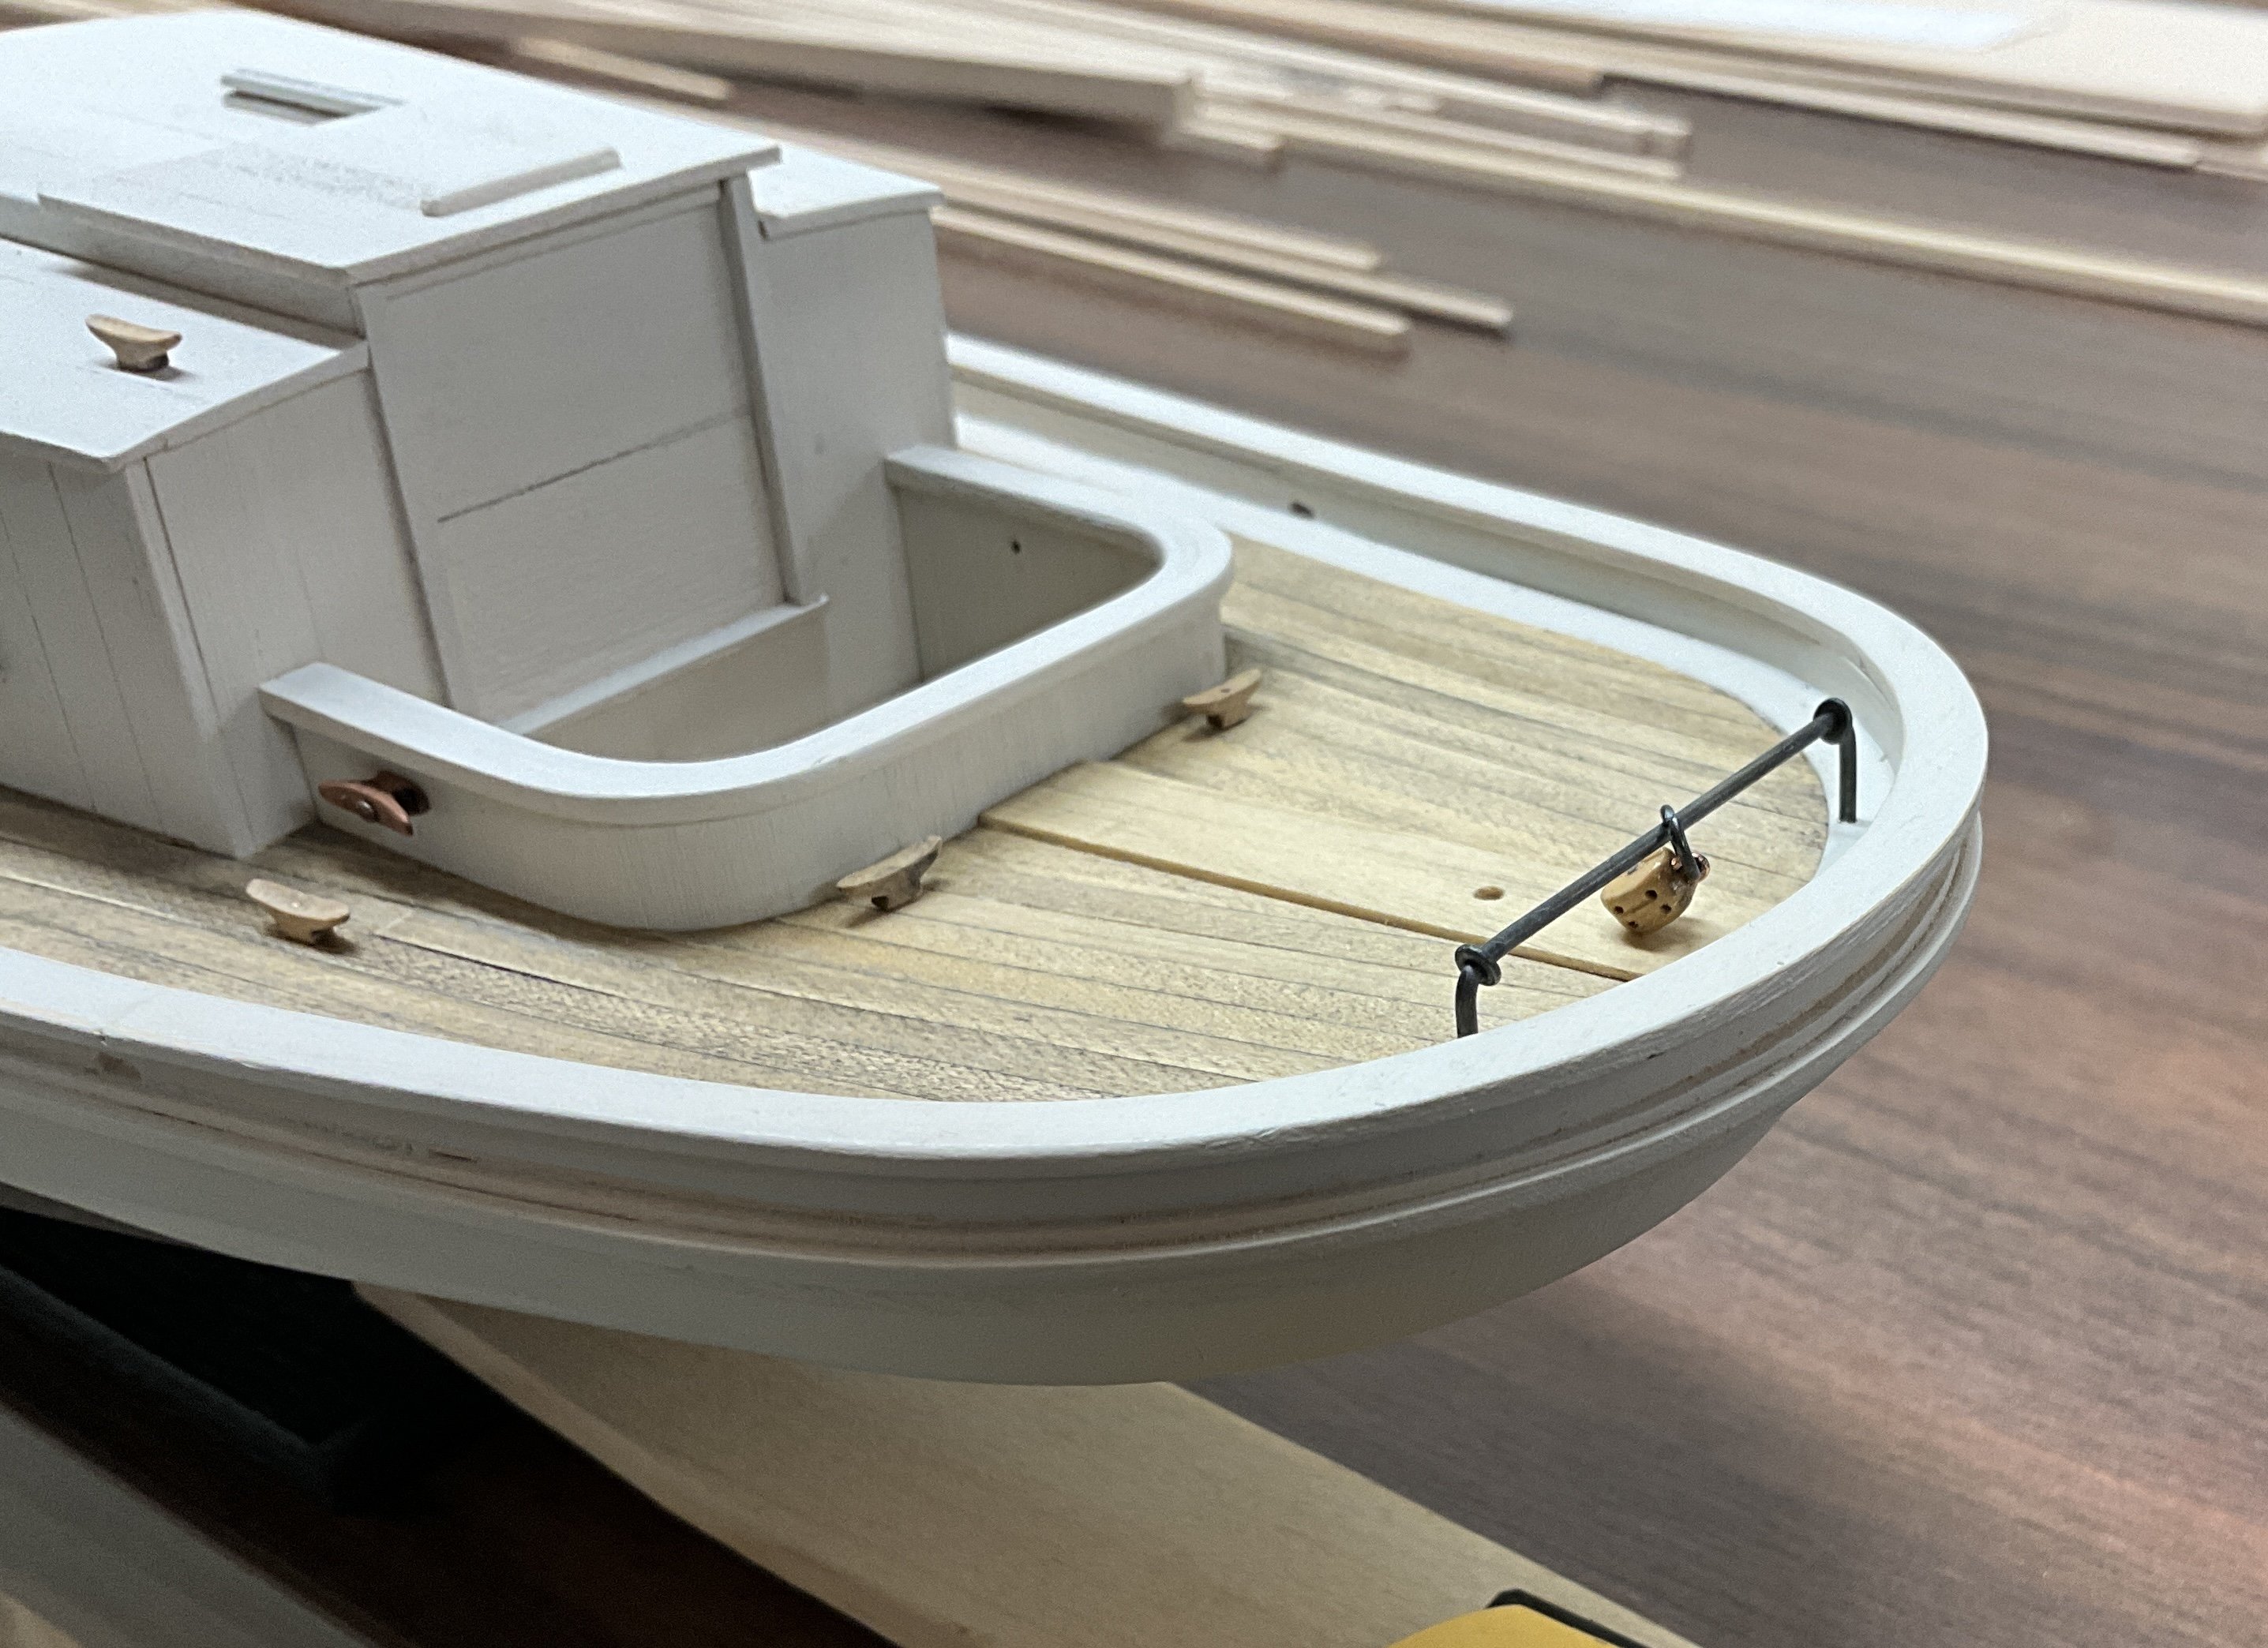
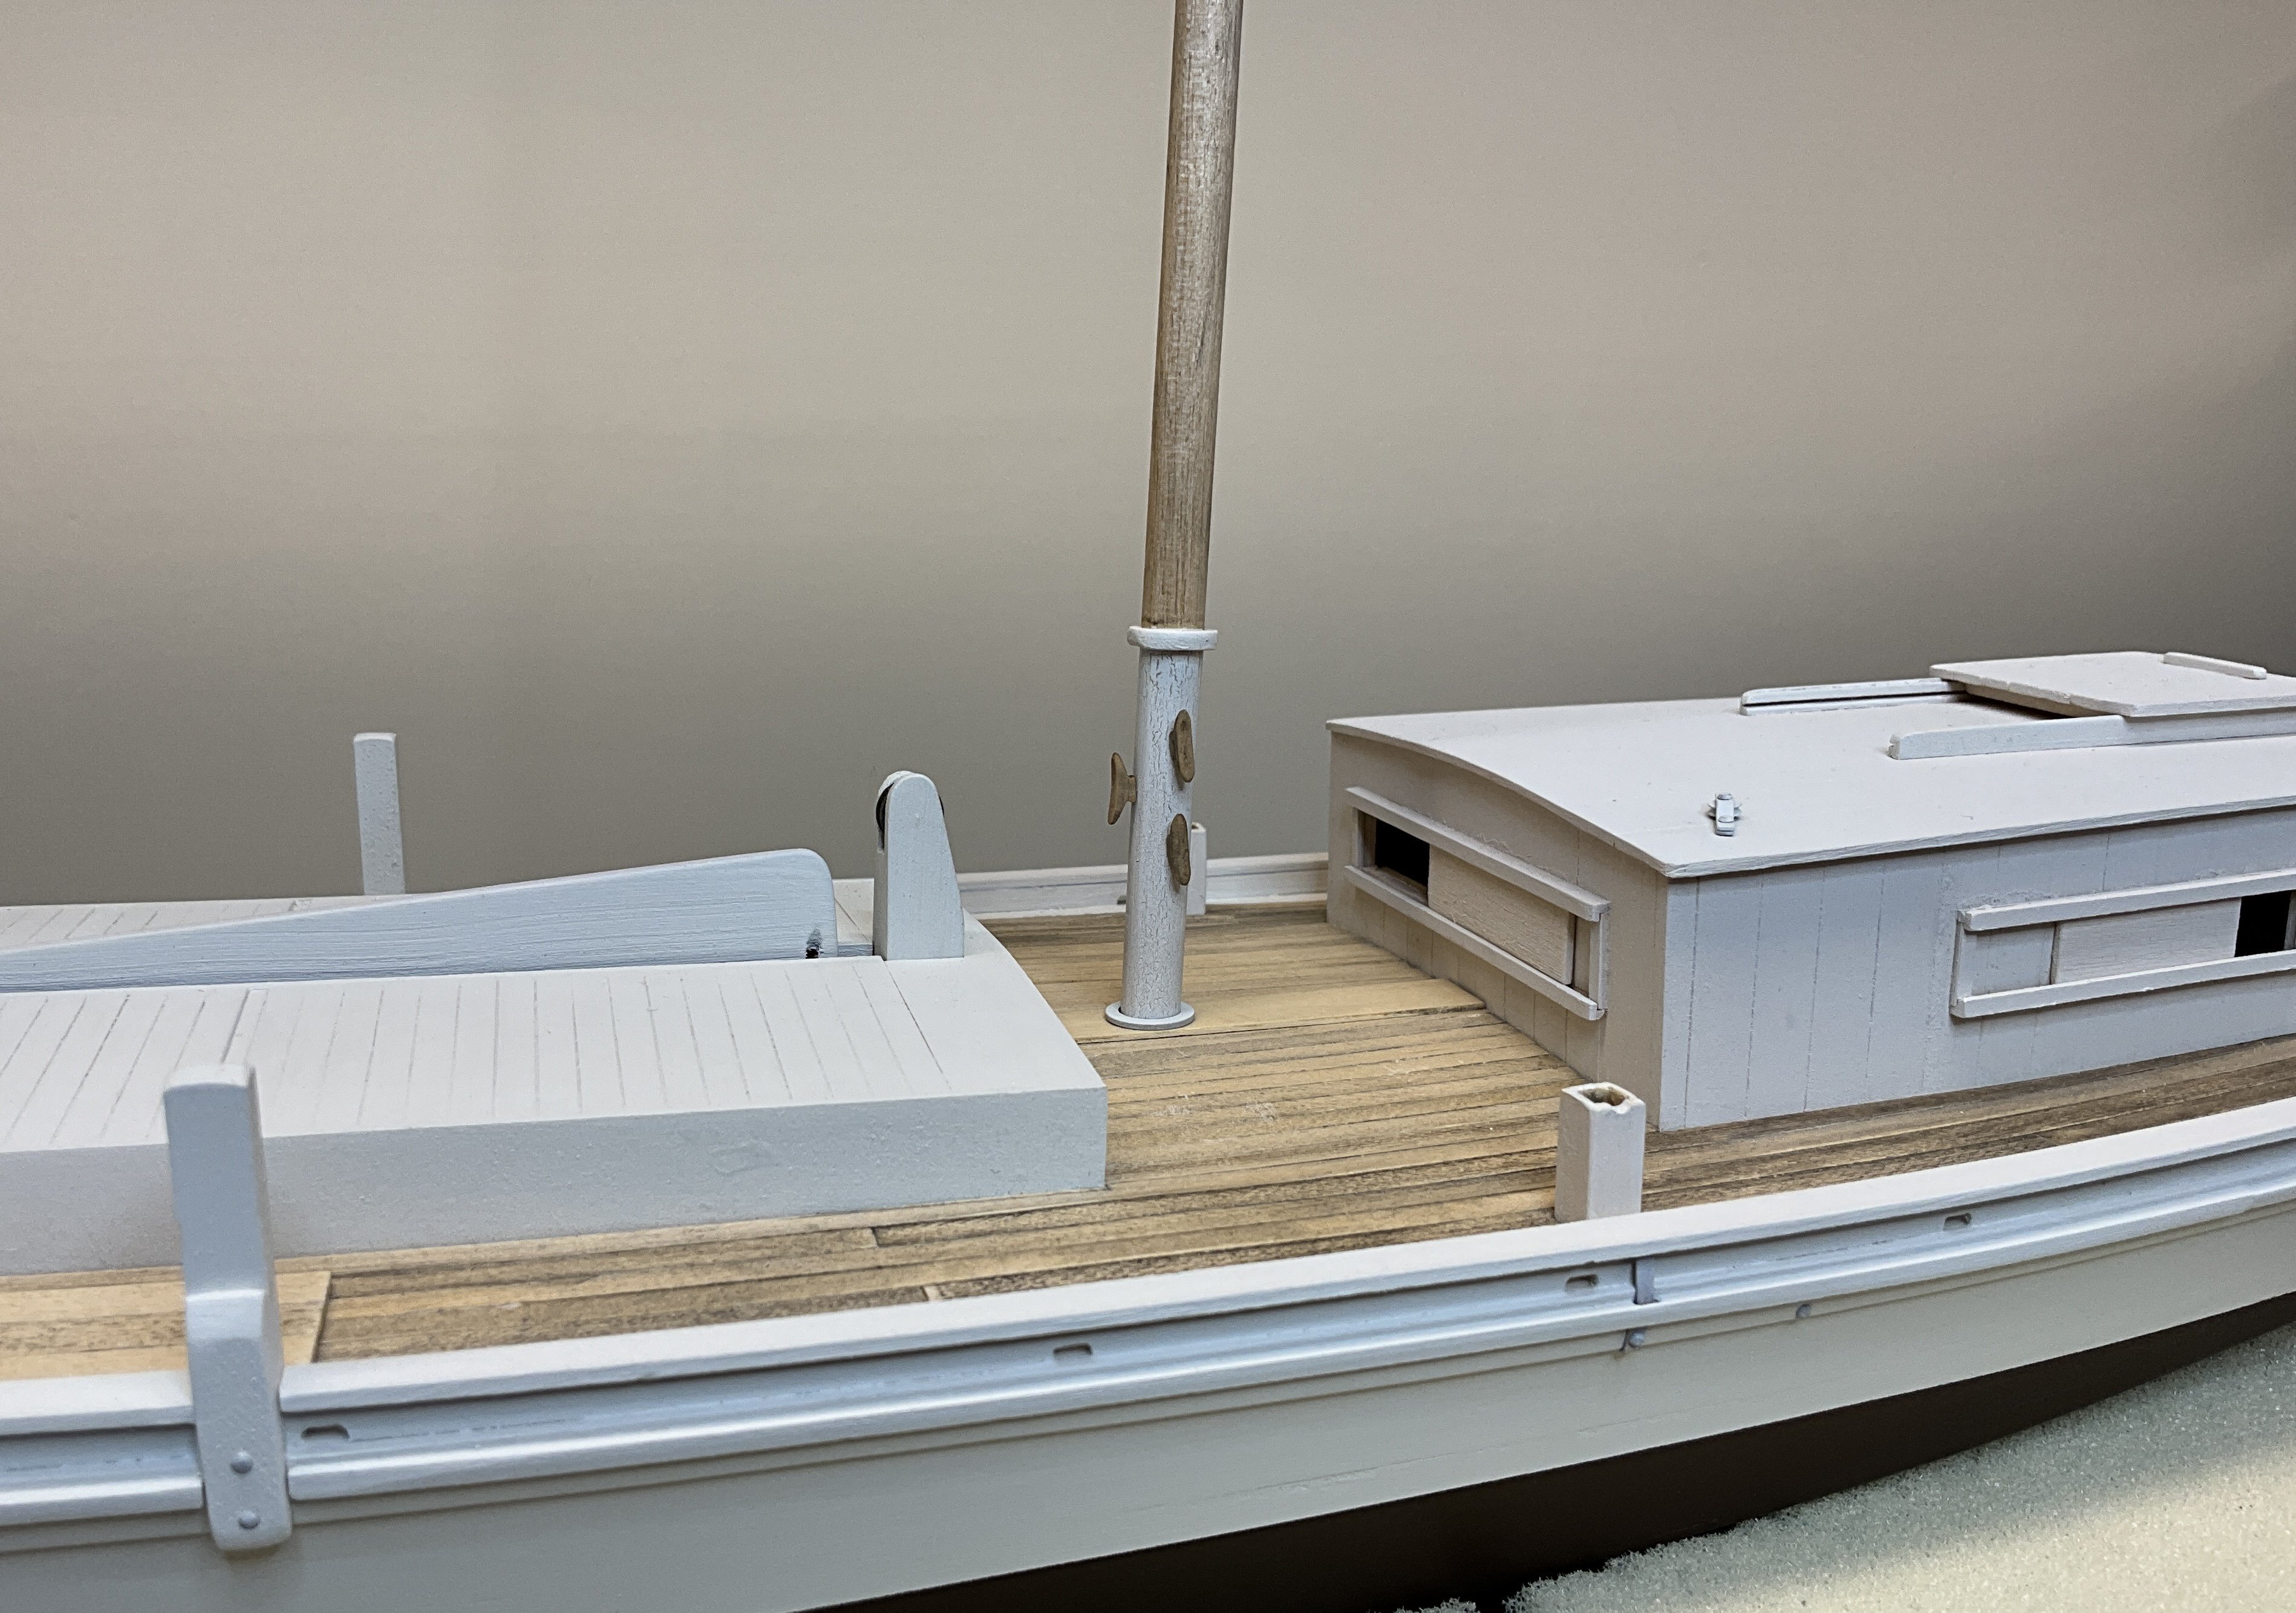
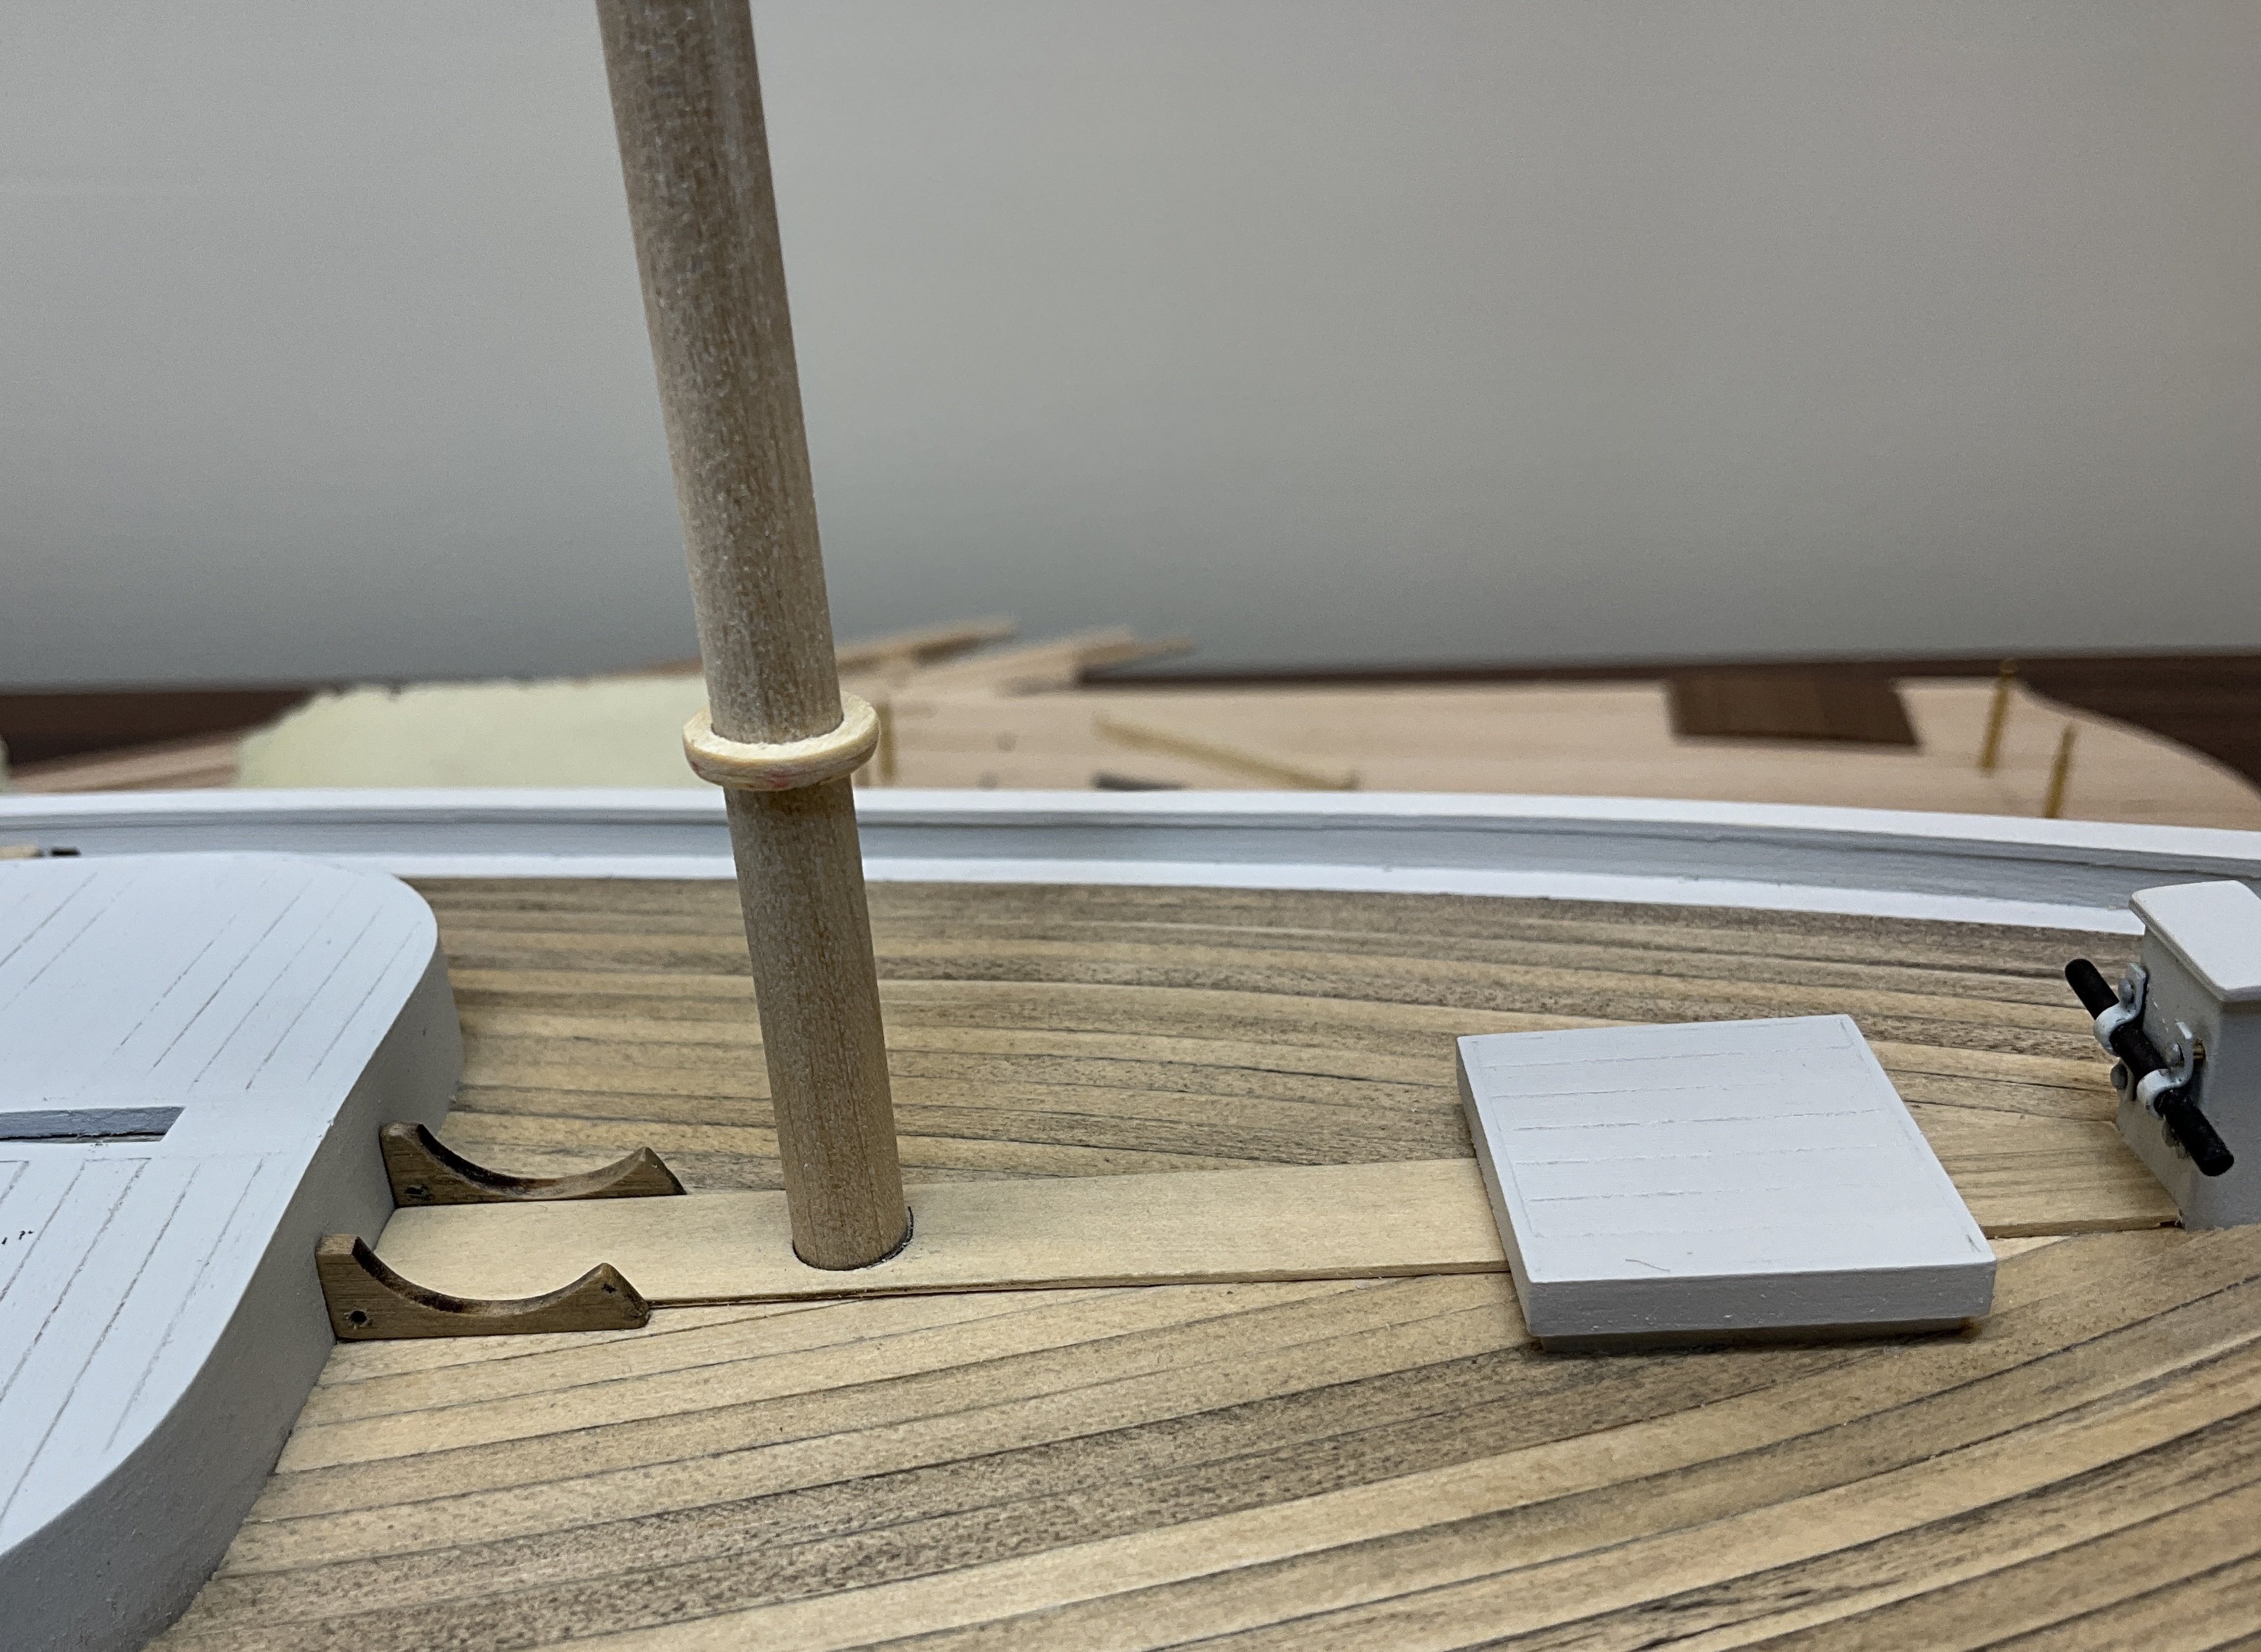
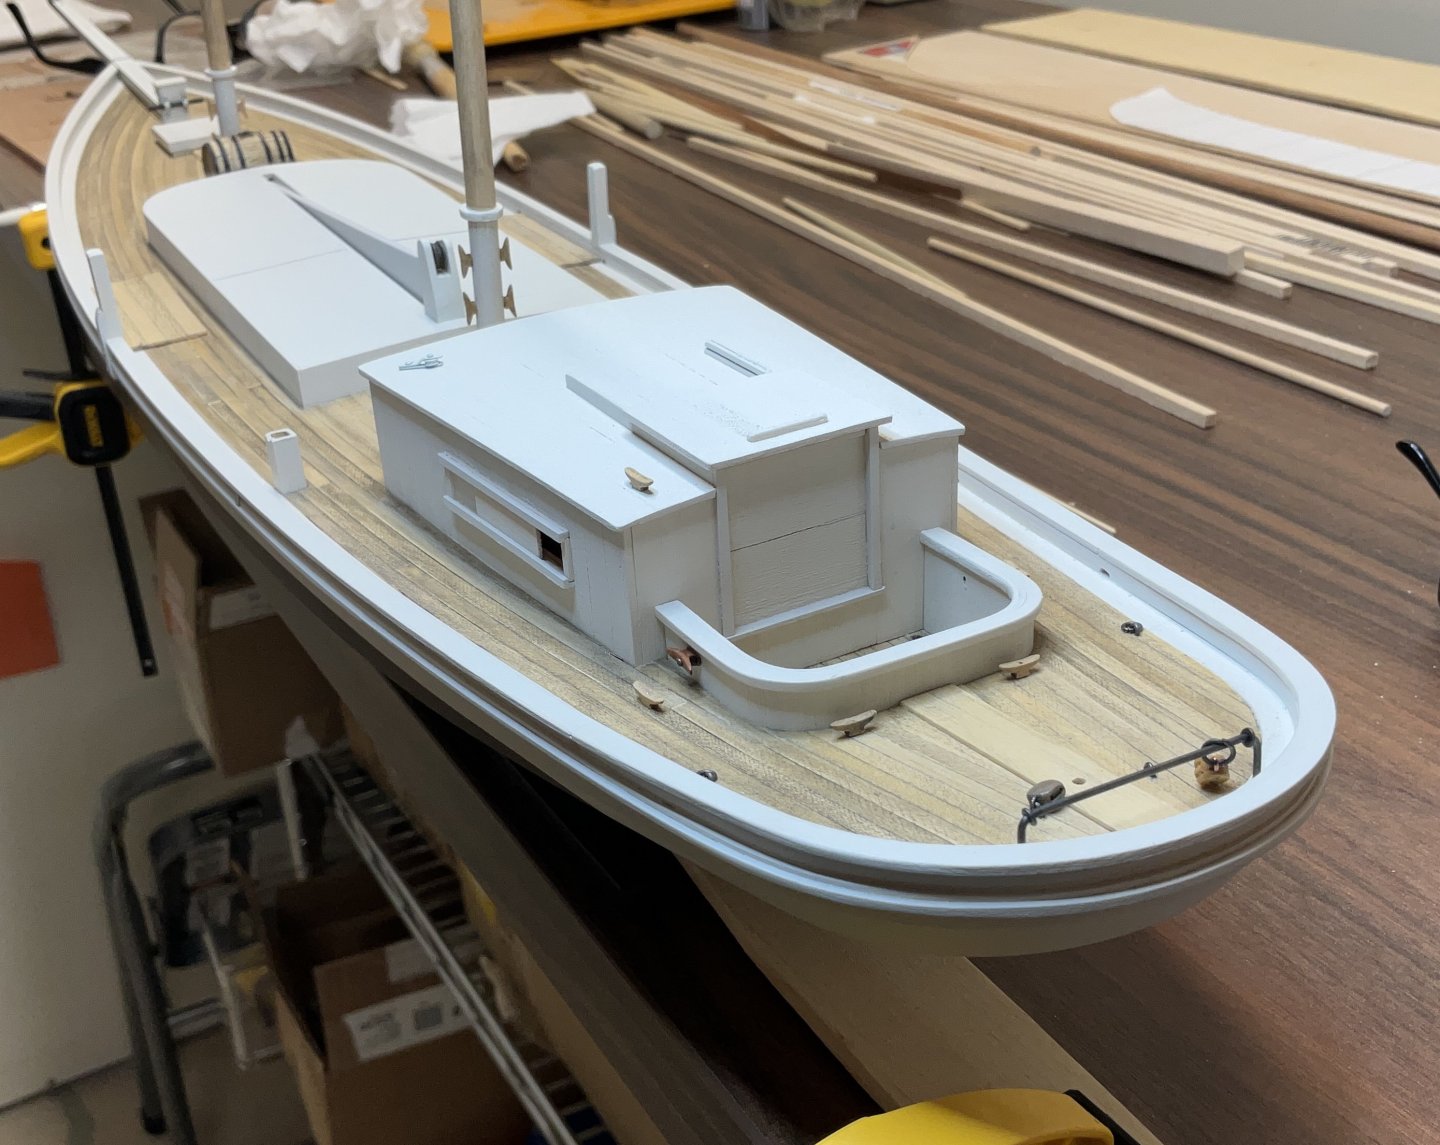
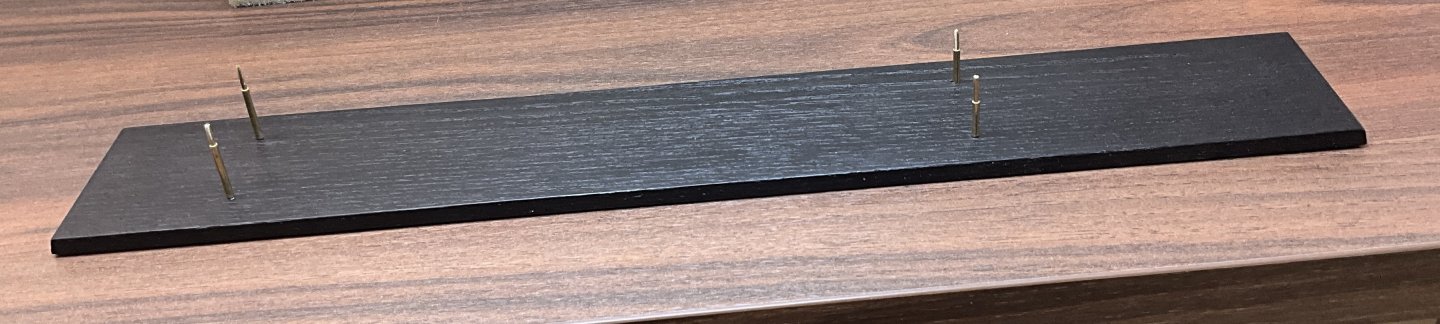
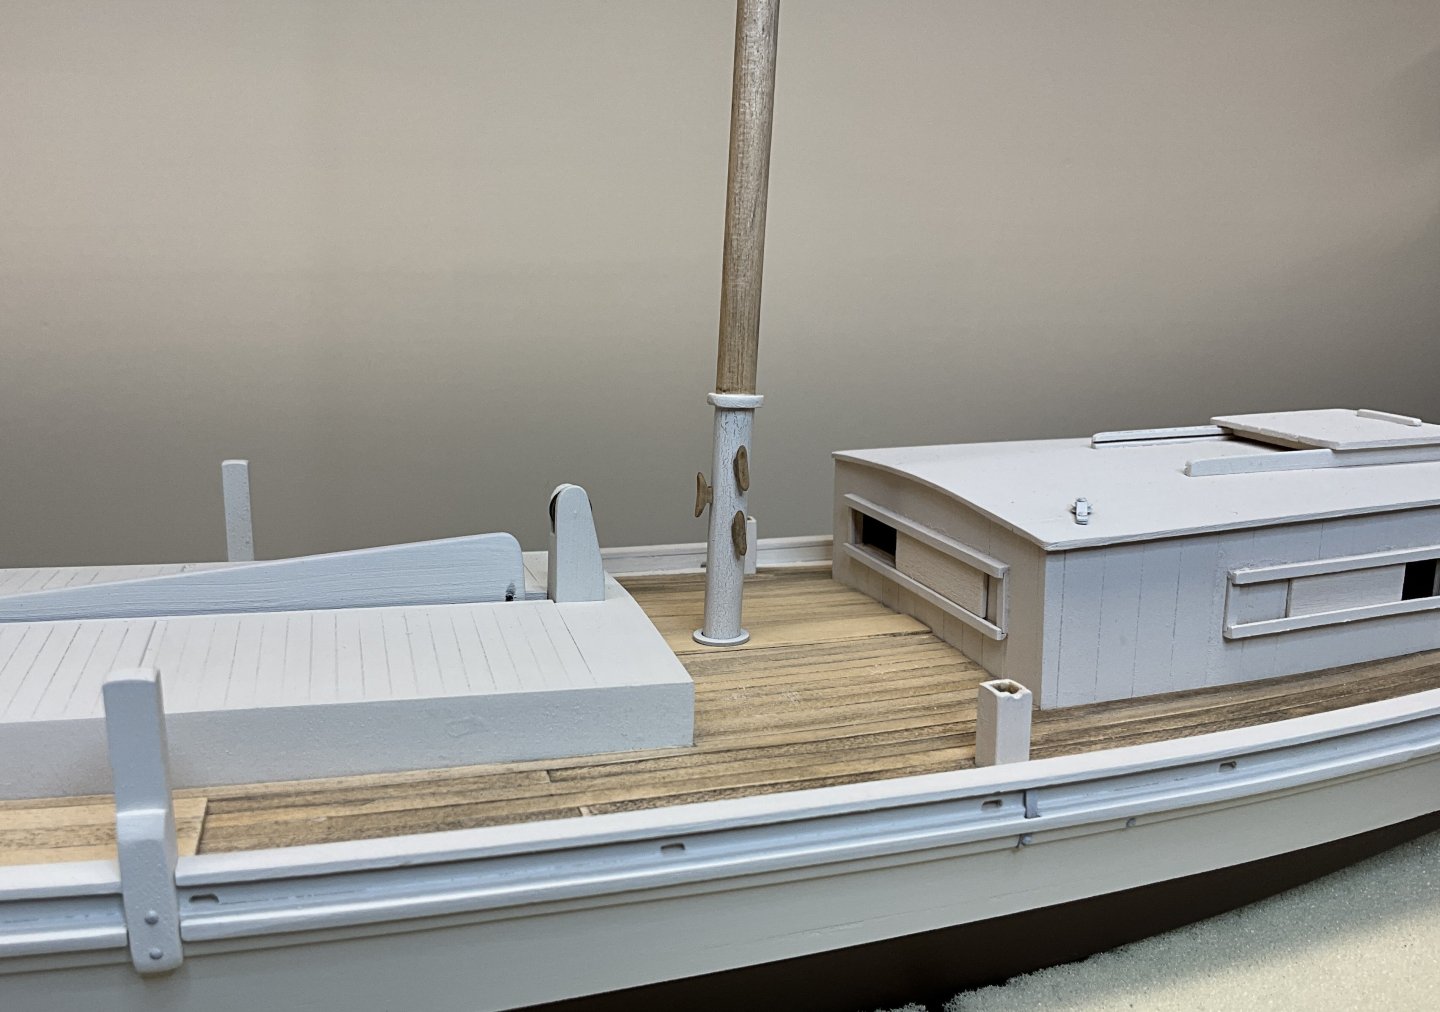
Hi Everyone. Thanks to all for your Comments and Likes. They are appreciated very much. The masts have been painted and the cleats attached. They are friction fitted into place and I don’t think that they will need to be glued. Once they were stepped I thought it would be a good time to mount the model on to the base. The base is a piece of 1/4” x 2 1/2” oak that was bought from Home Depot’s “ Hobby Department “. It was painted with Liquitex Basic Ivory Black. The stand offs are 1/16” brass rod covered with 3/32” brass tube cut to the appropriate length and then 1/8” aluminum tube was slid over that to give it a heavier look. I liked the look of the aluminum more than the brass for this boat. Don’t know if it’s a big concern but I did apply NoAlox between the brass and aluminum to prevent any possible reaction. The horse for the main sheet is made from 3/64” steel rod and the stops for the traveller ring are made from #22 ( think) steel wire that has the black coating burned off. I like it because it doesn’t need painting. Now comes the slow process of converting the blocks that I have to internally stropped. Hope to see you soon.

- 201 replies
-
- 10
-
-

-
- Oyster Sharpie
- first scratch build
- (and 1 more)
-
Looking for a USCG 47’ motor lifeboat kit
Paul Le Wol replied to DanS's topic in Wood ship model kits
Hi Dan, welcome to MSW. Dumas makes a 36’ ( kit #1258 ) and a 44’ (kit # 1203). I have never built a Dumas kit so I can’t give an opinion on them. Good luck with your search. -
Keith, congratulations on completing this marvelous project and on finding such a hard working crew!
-
Chris, congratulations on finishing the Lobster Smack and the “Fleet”. The group shot is perfect. Beautifully done!
-
The only thing I would add is that your Half Hull project turned out great using single 1/32” planking. Unless you can source 3/64” wood I think you would have to go with 1/32” as 1/16” may be a bit difficult to shape to your bulkheads. Nice companion shot with the Rancho!
- 312 replies
-
- 3
-
-
-
- Chile
- Latin America
- (and 6 more)
-
Jacques, congratulations on finishing the Peapod. The lobster trap is amazing!
- 65 replies
-
- 3
-
-
-
- Maine Peapod
- Midwest Products
- (and 1 more)
-
Hi Mike, good luck with your Round Stern! These are wonderful boats.
-
Hi Chris, everything is looking great. The bowsprit turned out very nice!
-
Jacques, I am very happy to see that you are continuing to scratch build these very interesting working boats. Great introduction. Good luck with this project!
- 312 replies
-
- 2
-
-
-
- Chile
- Latin America
- (and 6 more)
-
Hi knipster, welcome to MSW. This is a beautiful project you are about to start. The only thing I can think of regarding the planking showing would be that it may be difficult for it to remain consistent depending on the amount of sanding that is needed. If you head over to the new members section and introduce yourself you may get more responses to your questions. Good Luck!
- 1 reply
-
- 1
-
-
Thank you John. This was an enjoyable little project.
- 201 replies
-
- 4
-
-
- Oyster Sharpie
- first scratch build
- (and 1 more)
-
Thank you Keith and Gary. Always great to hear from you guys
- 201 replies
-
- 4
-
-
- Oyster Sharpie
- first scratch build
- (and 1 more)
-
Hi Jeff, beautiful work and a great build log. Well done!
-
Jim, congratulations on completing your Grand Banks Dory. A superb job!
- 56 replies
-
- 2
-
-
- grand banks dory
- Midwest Products
- (and 2 more)
-
Doug, congratulations on finishing your Gretel. She is beautiful. Good luck with your next project!
-
Keith, your work with the pastels is amazing. What a difference they make!
-
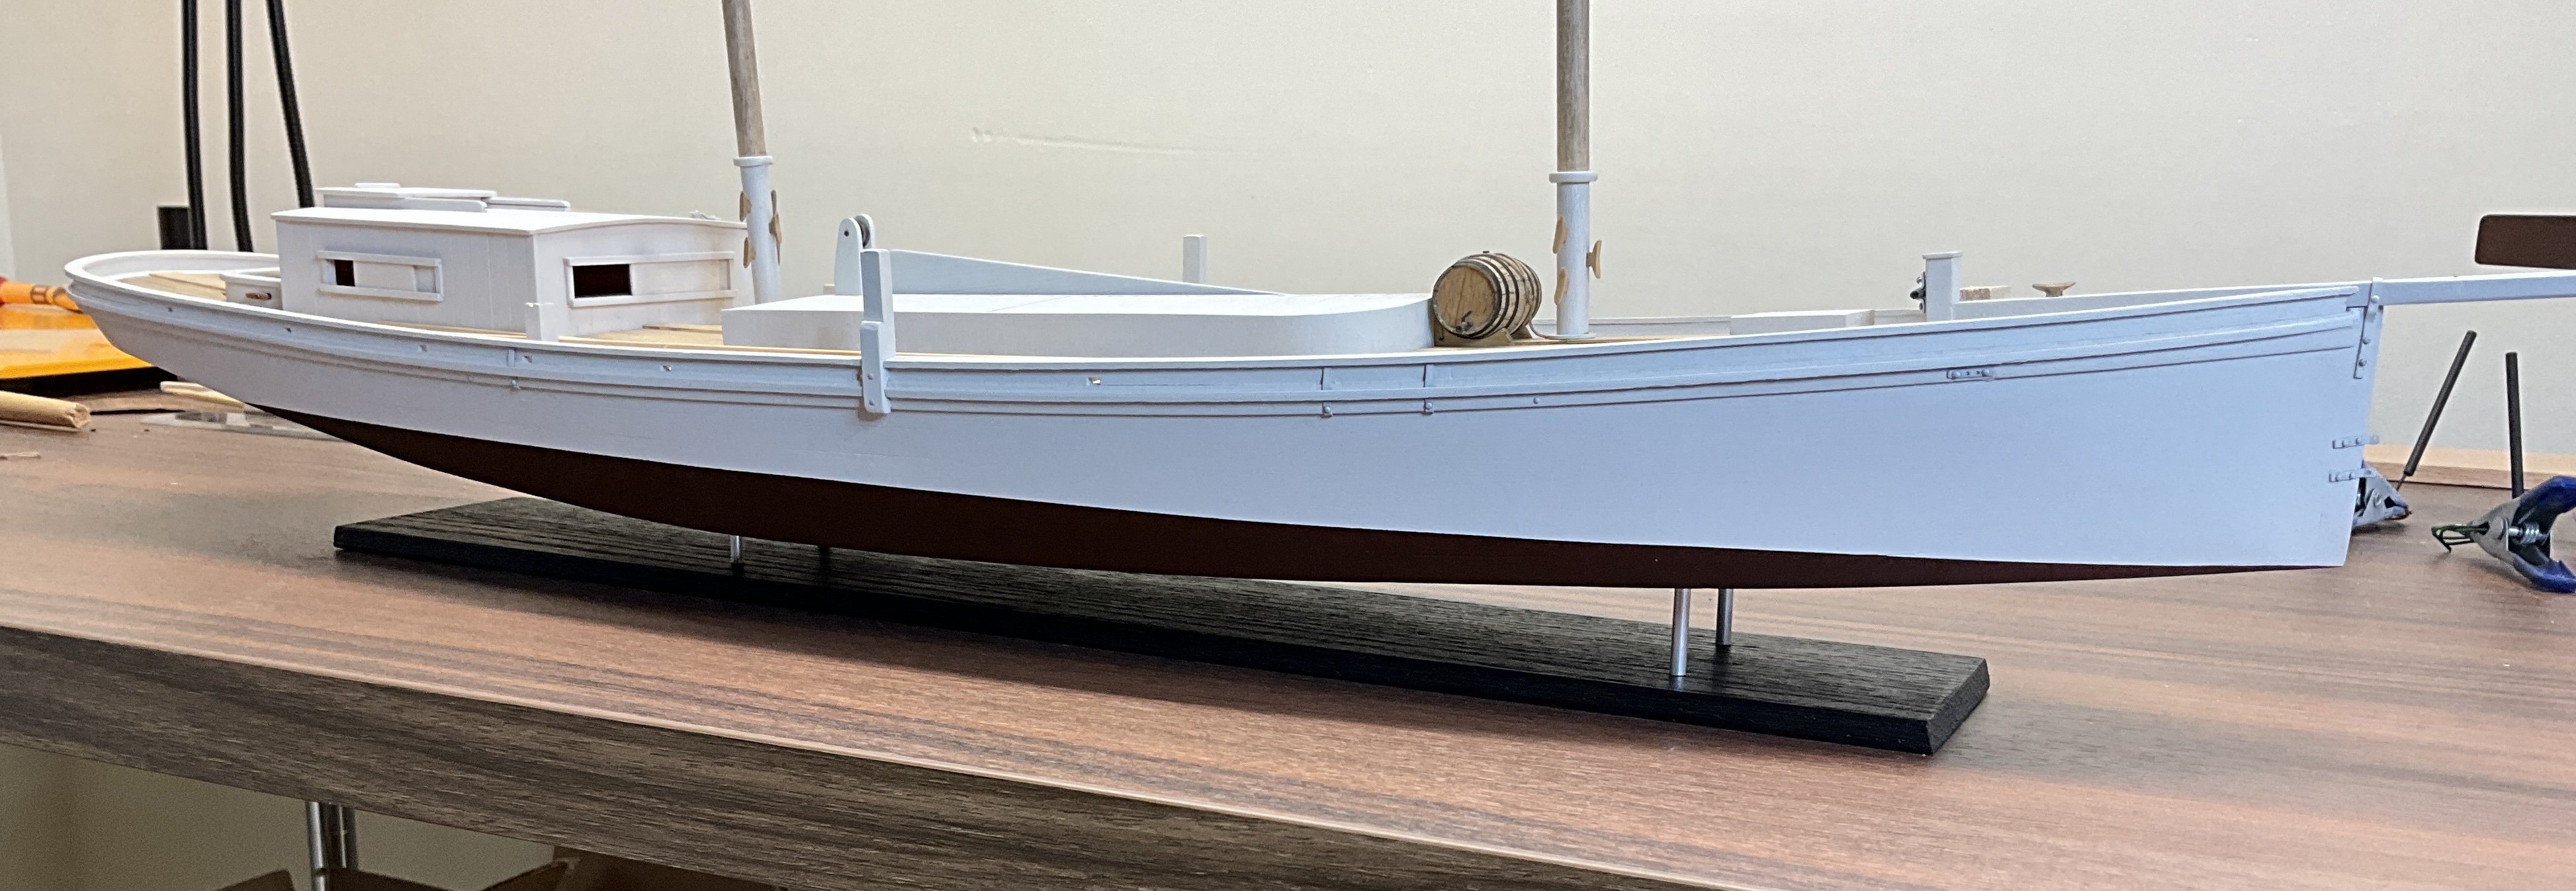
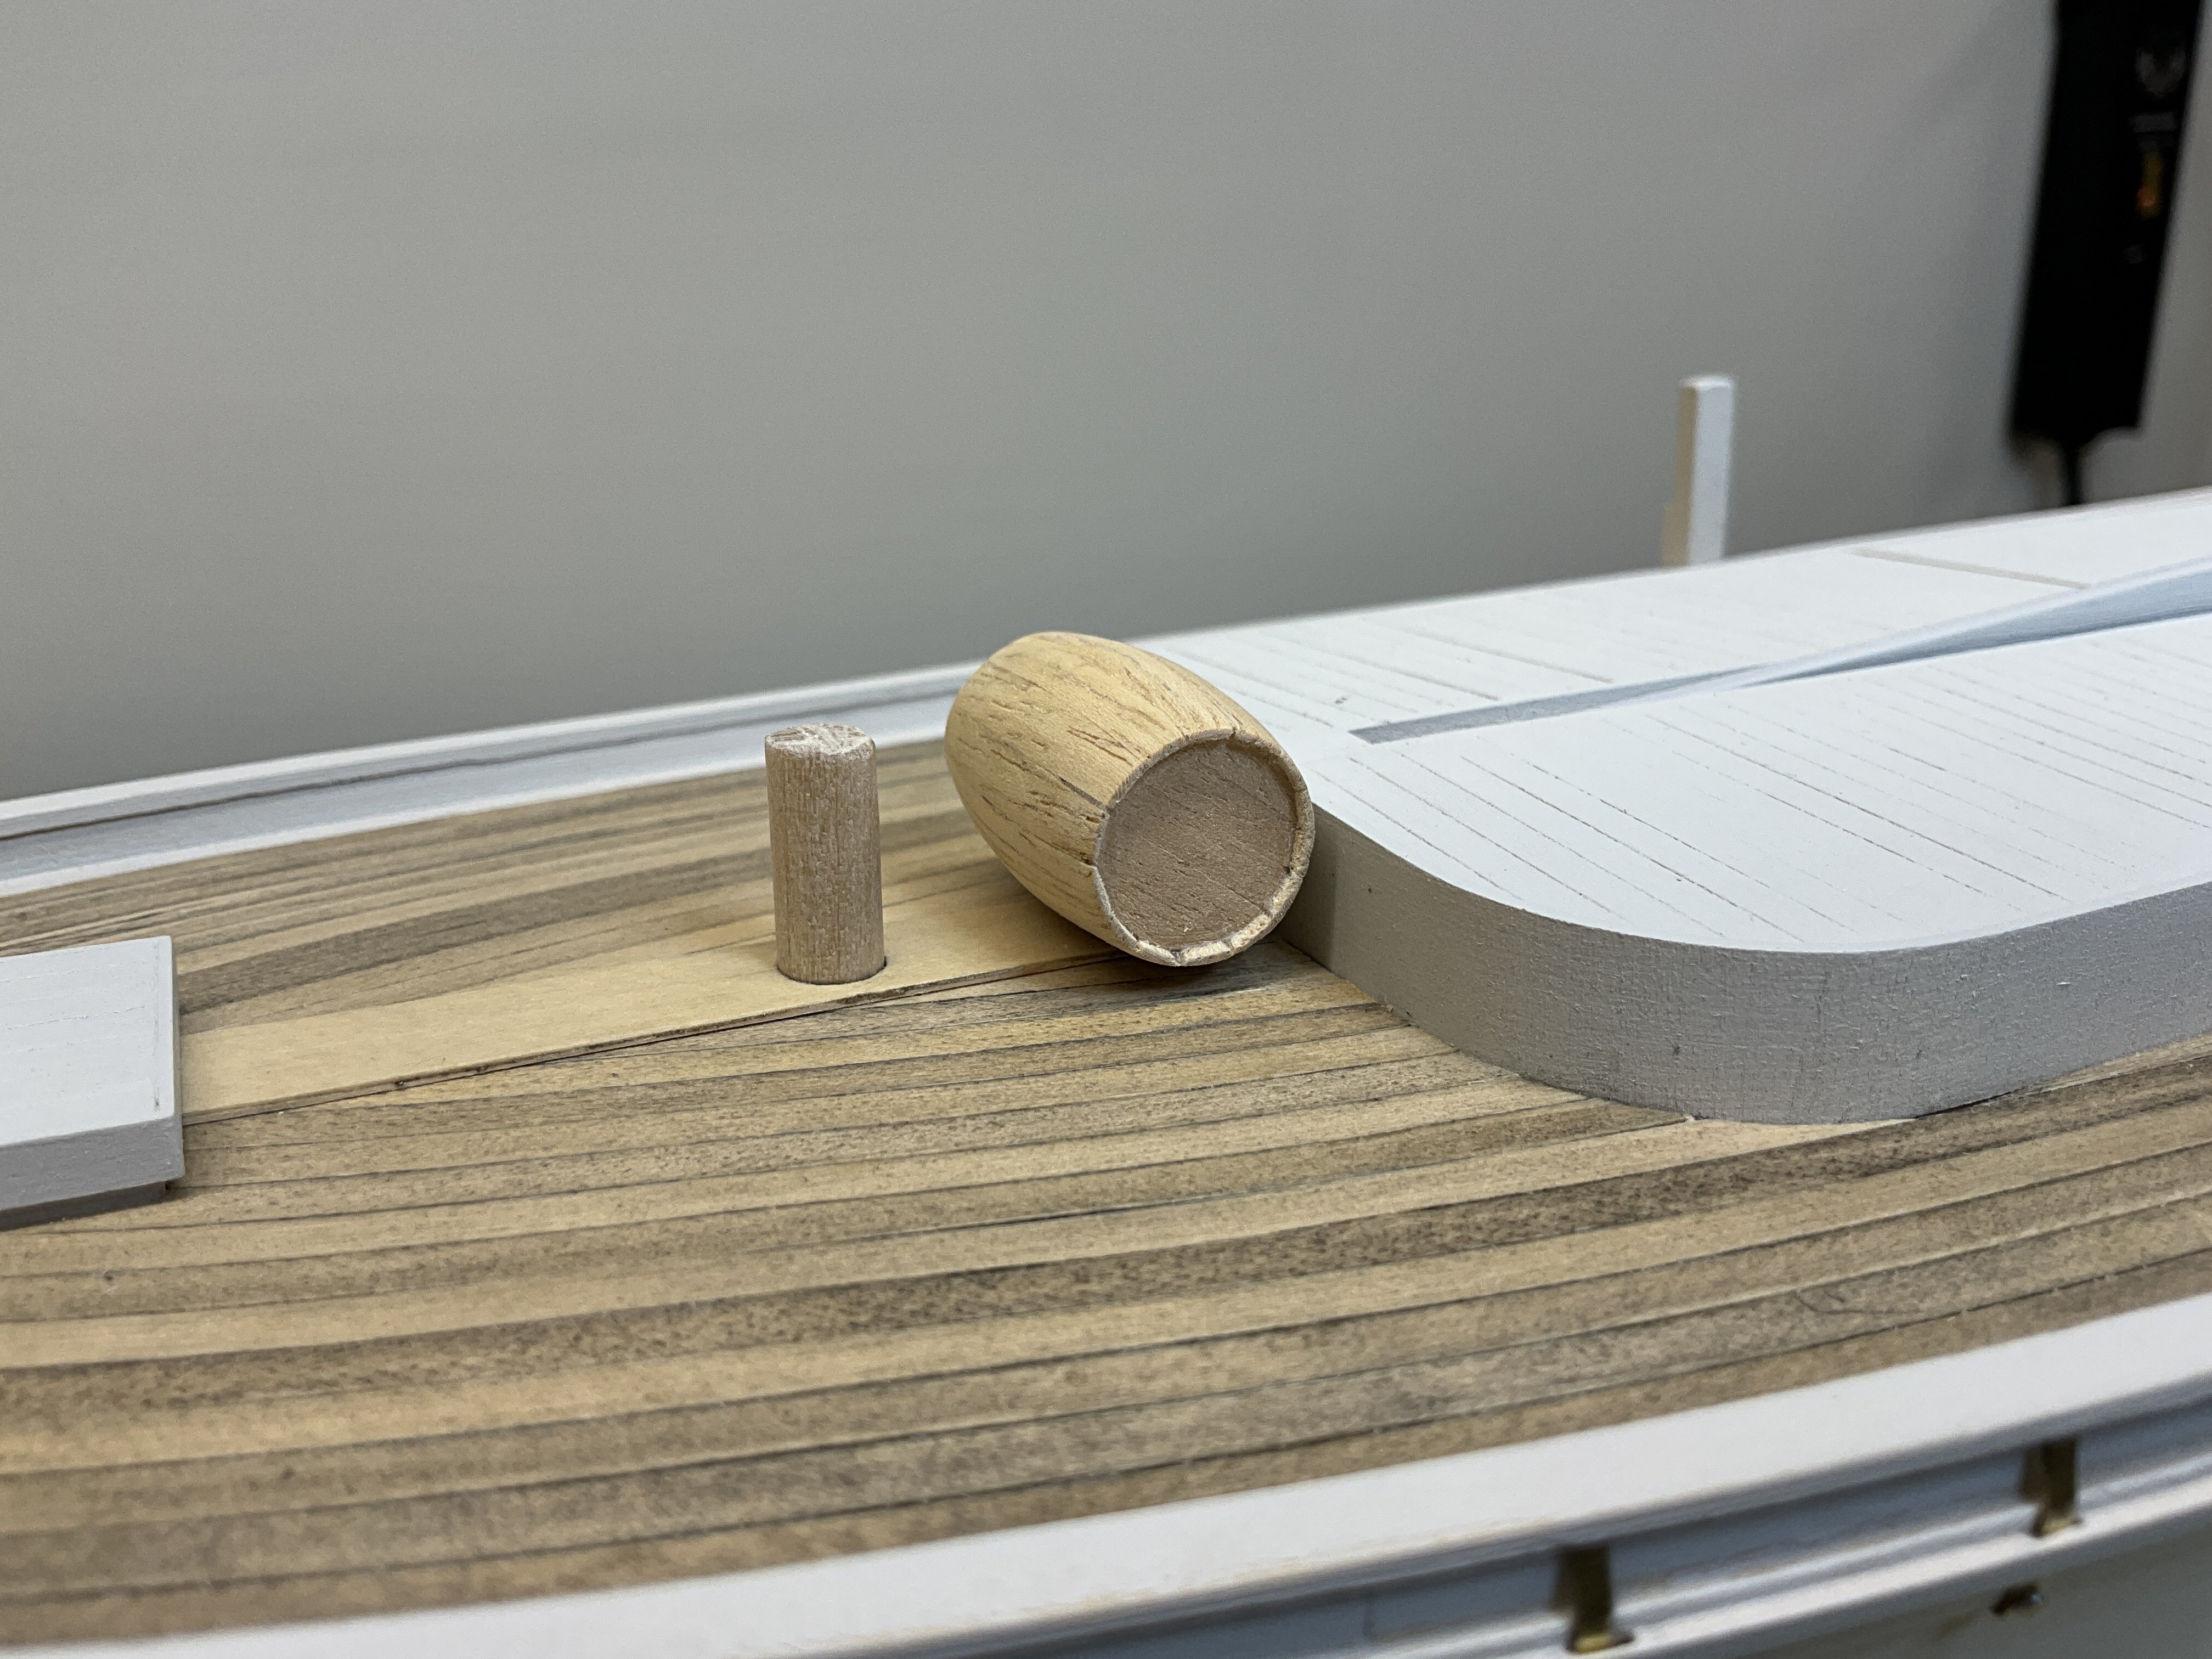
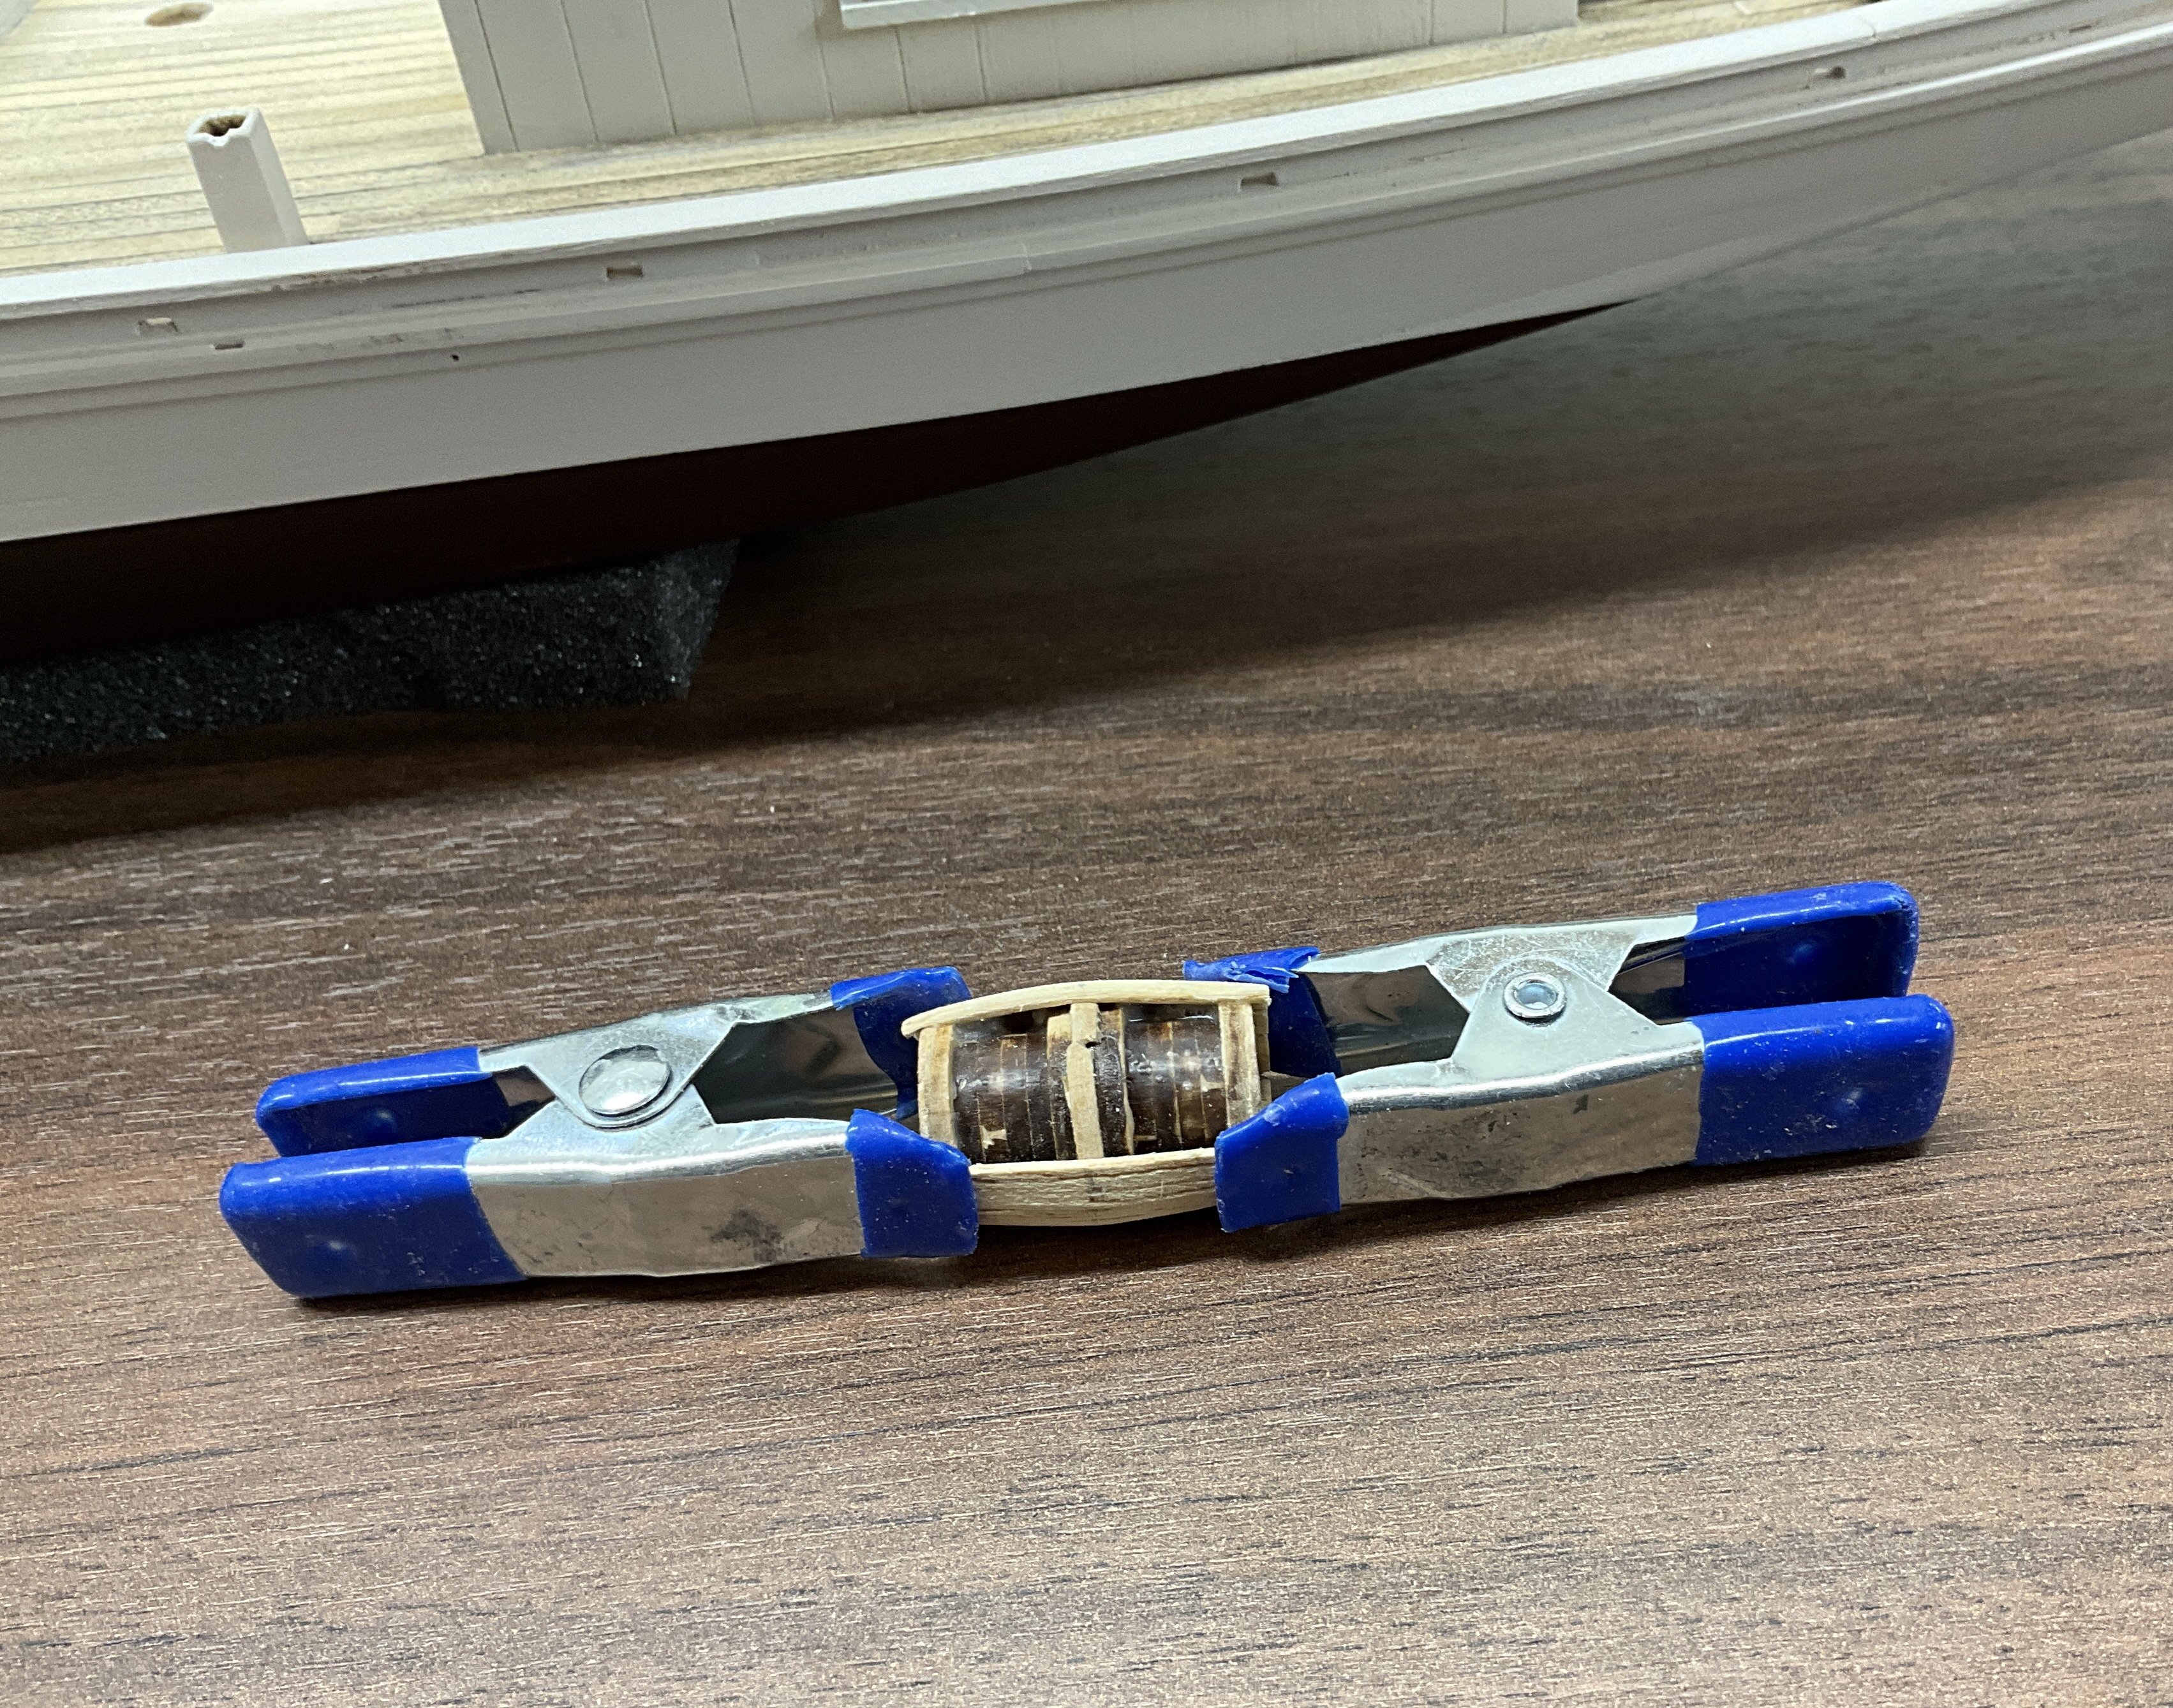
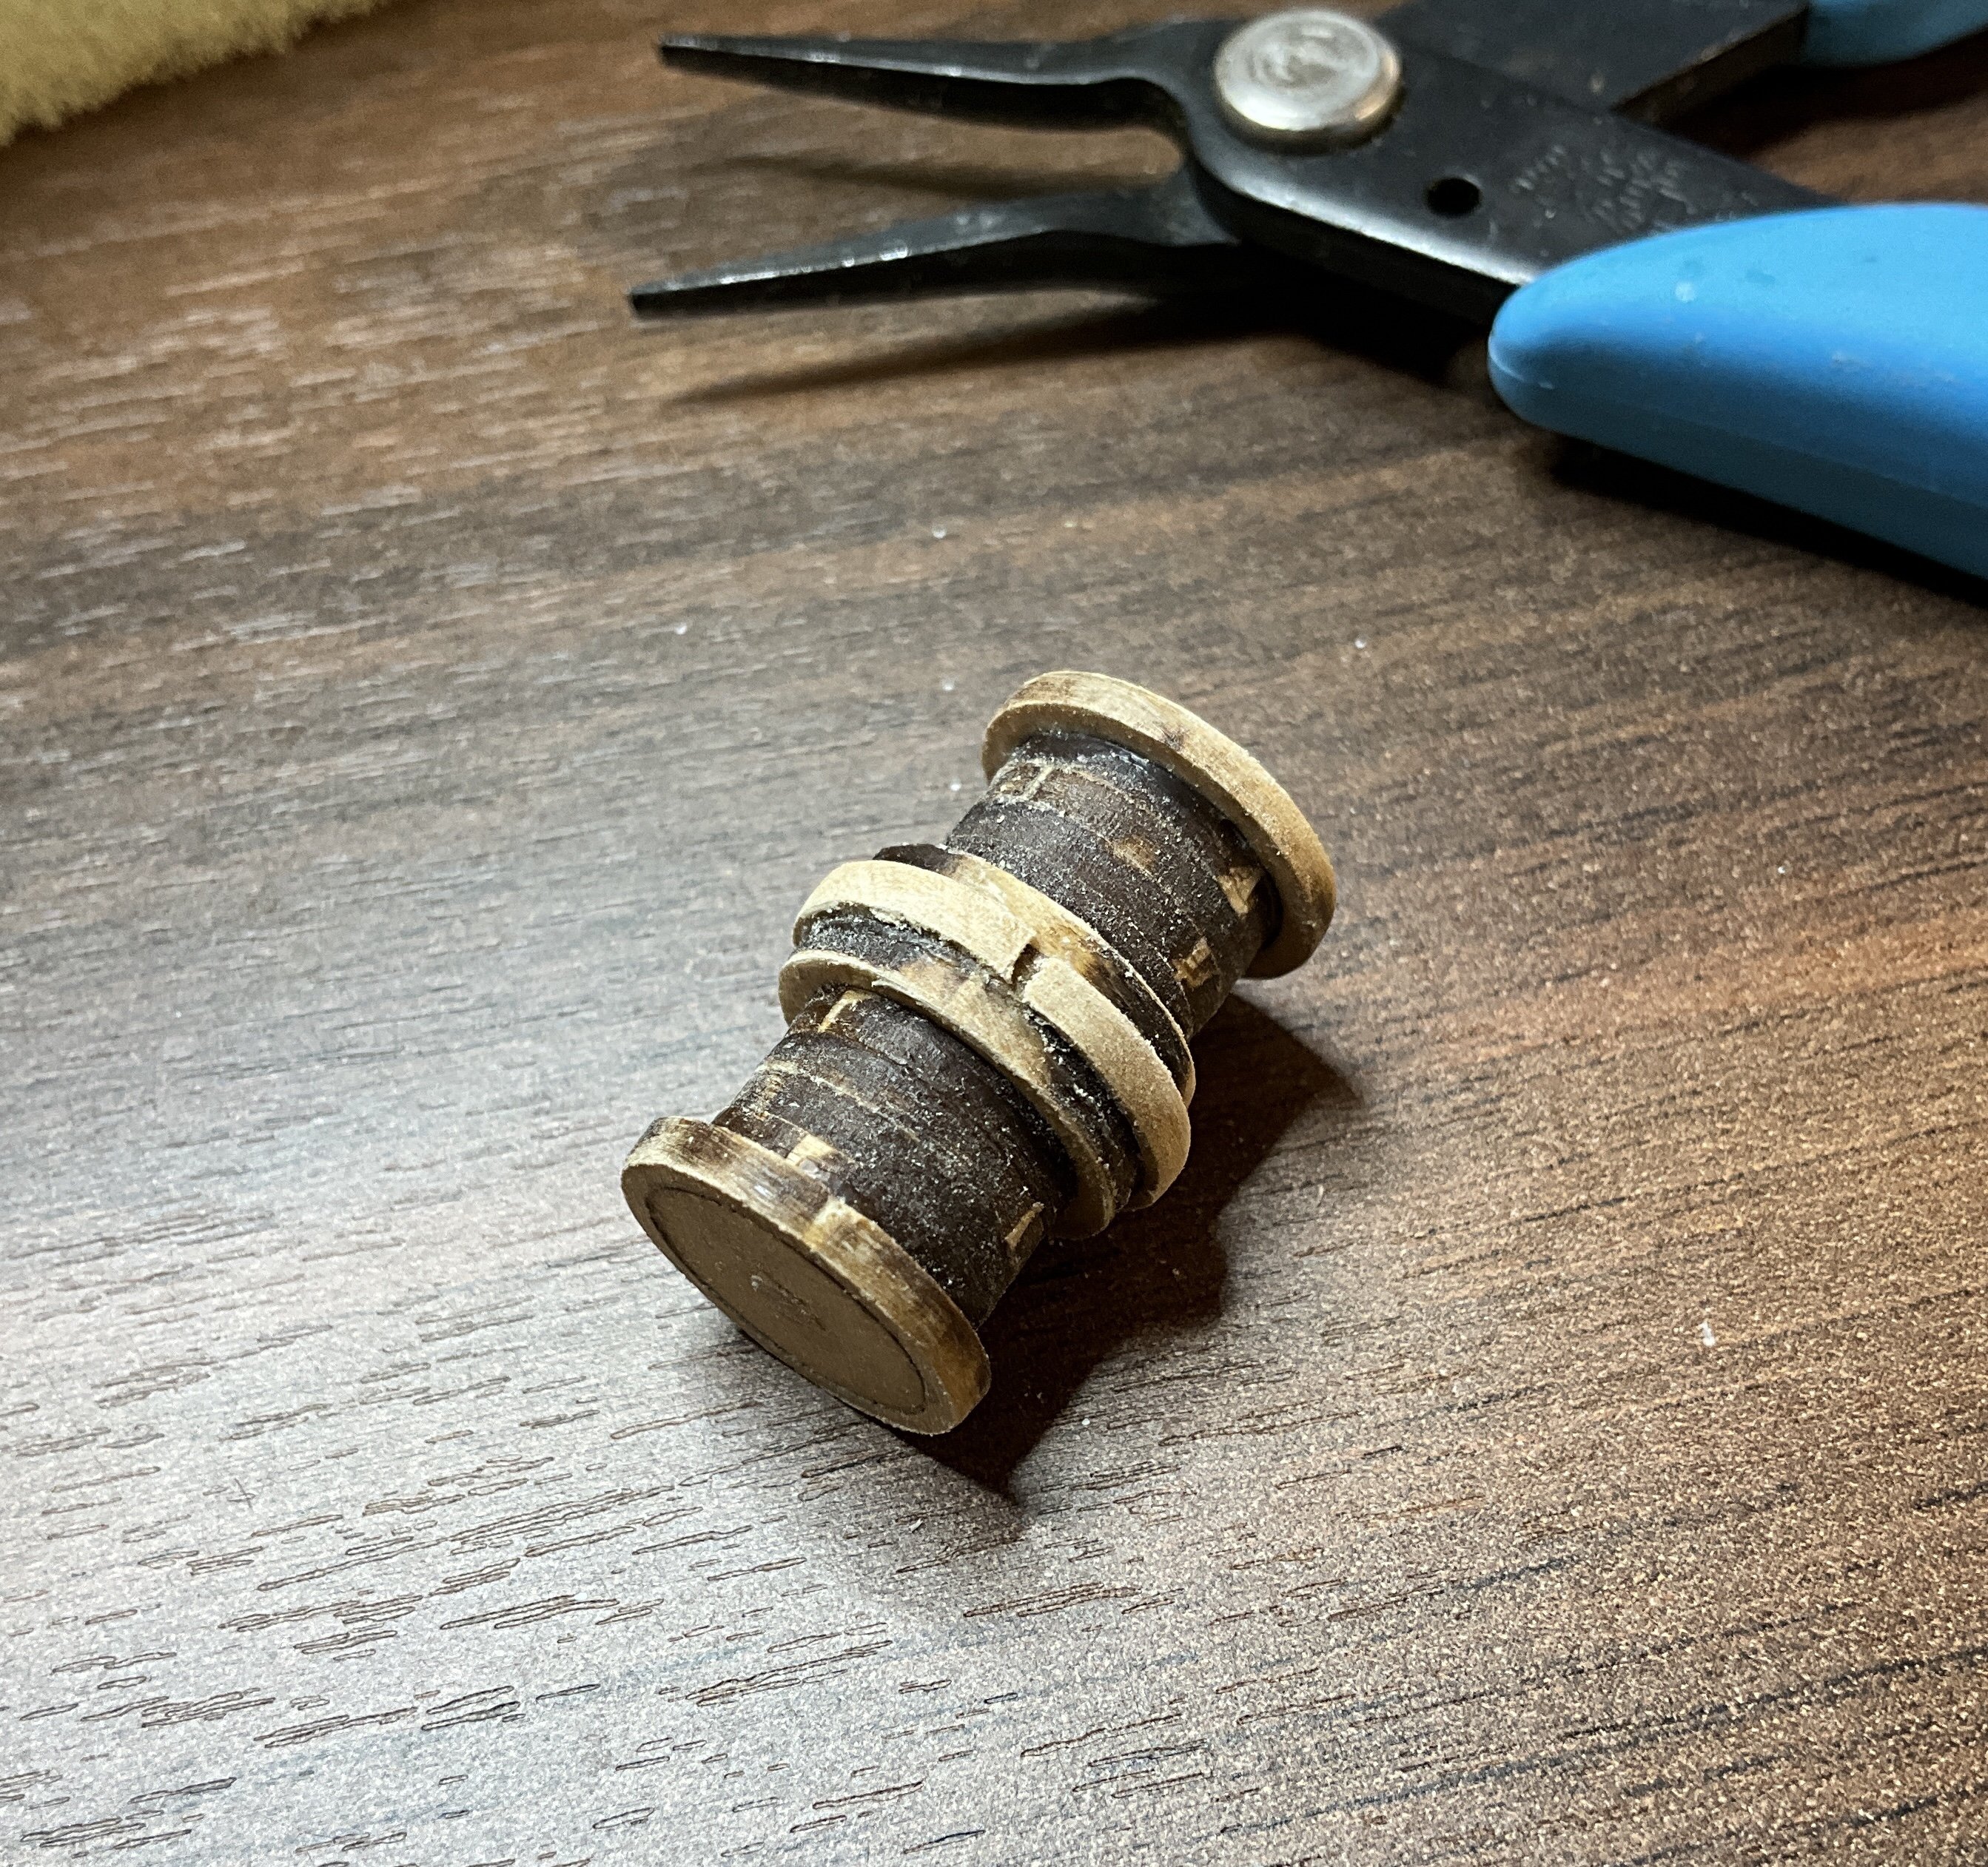
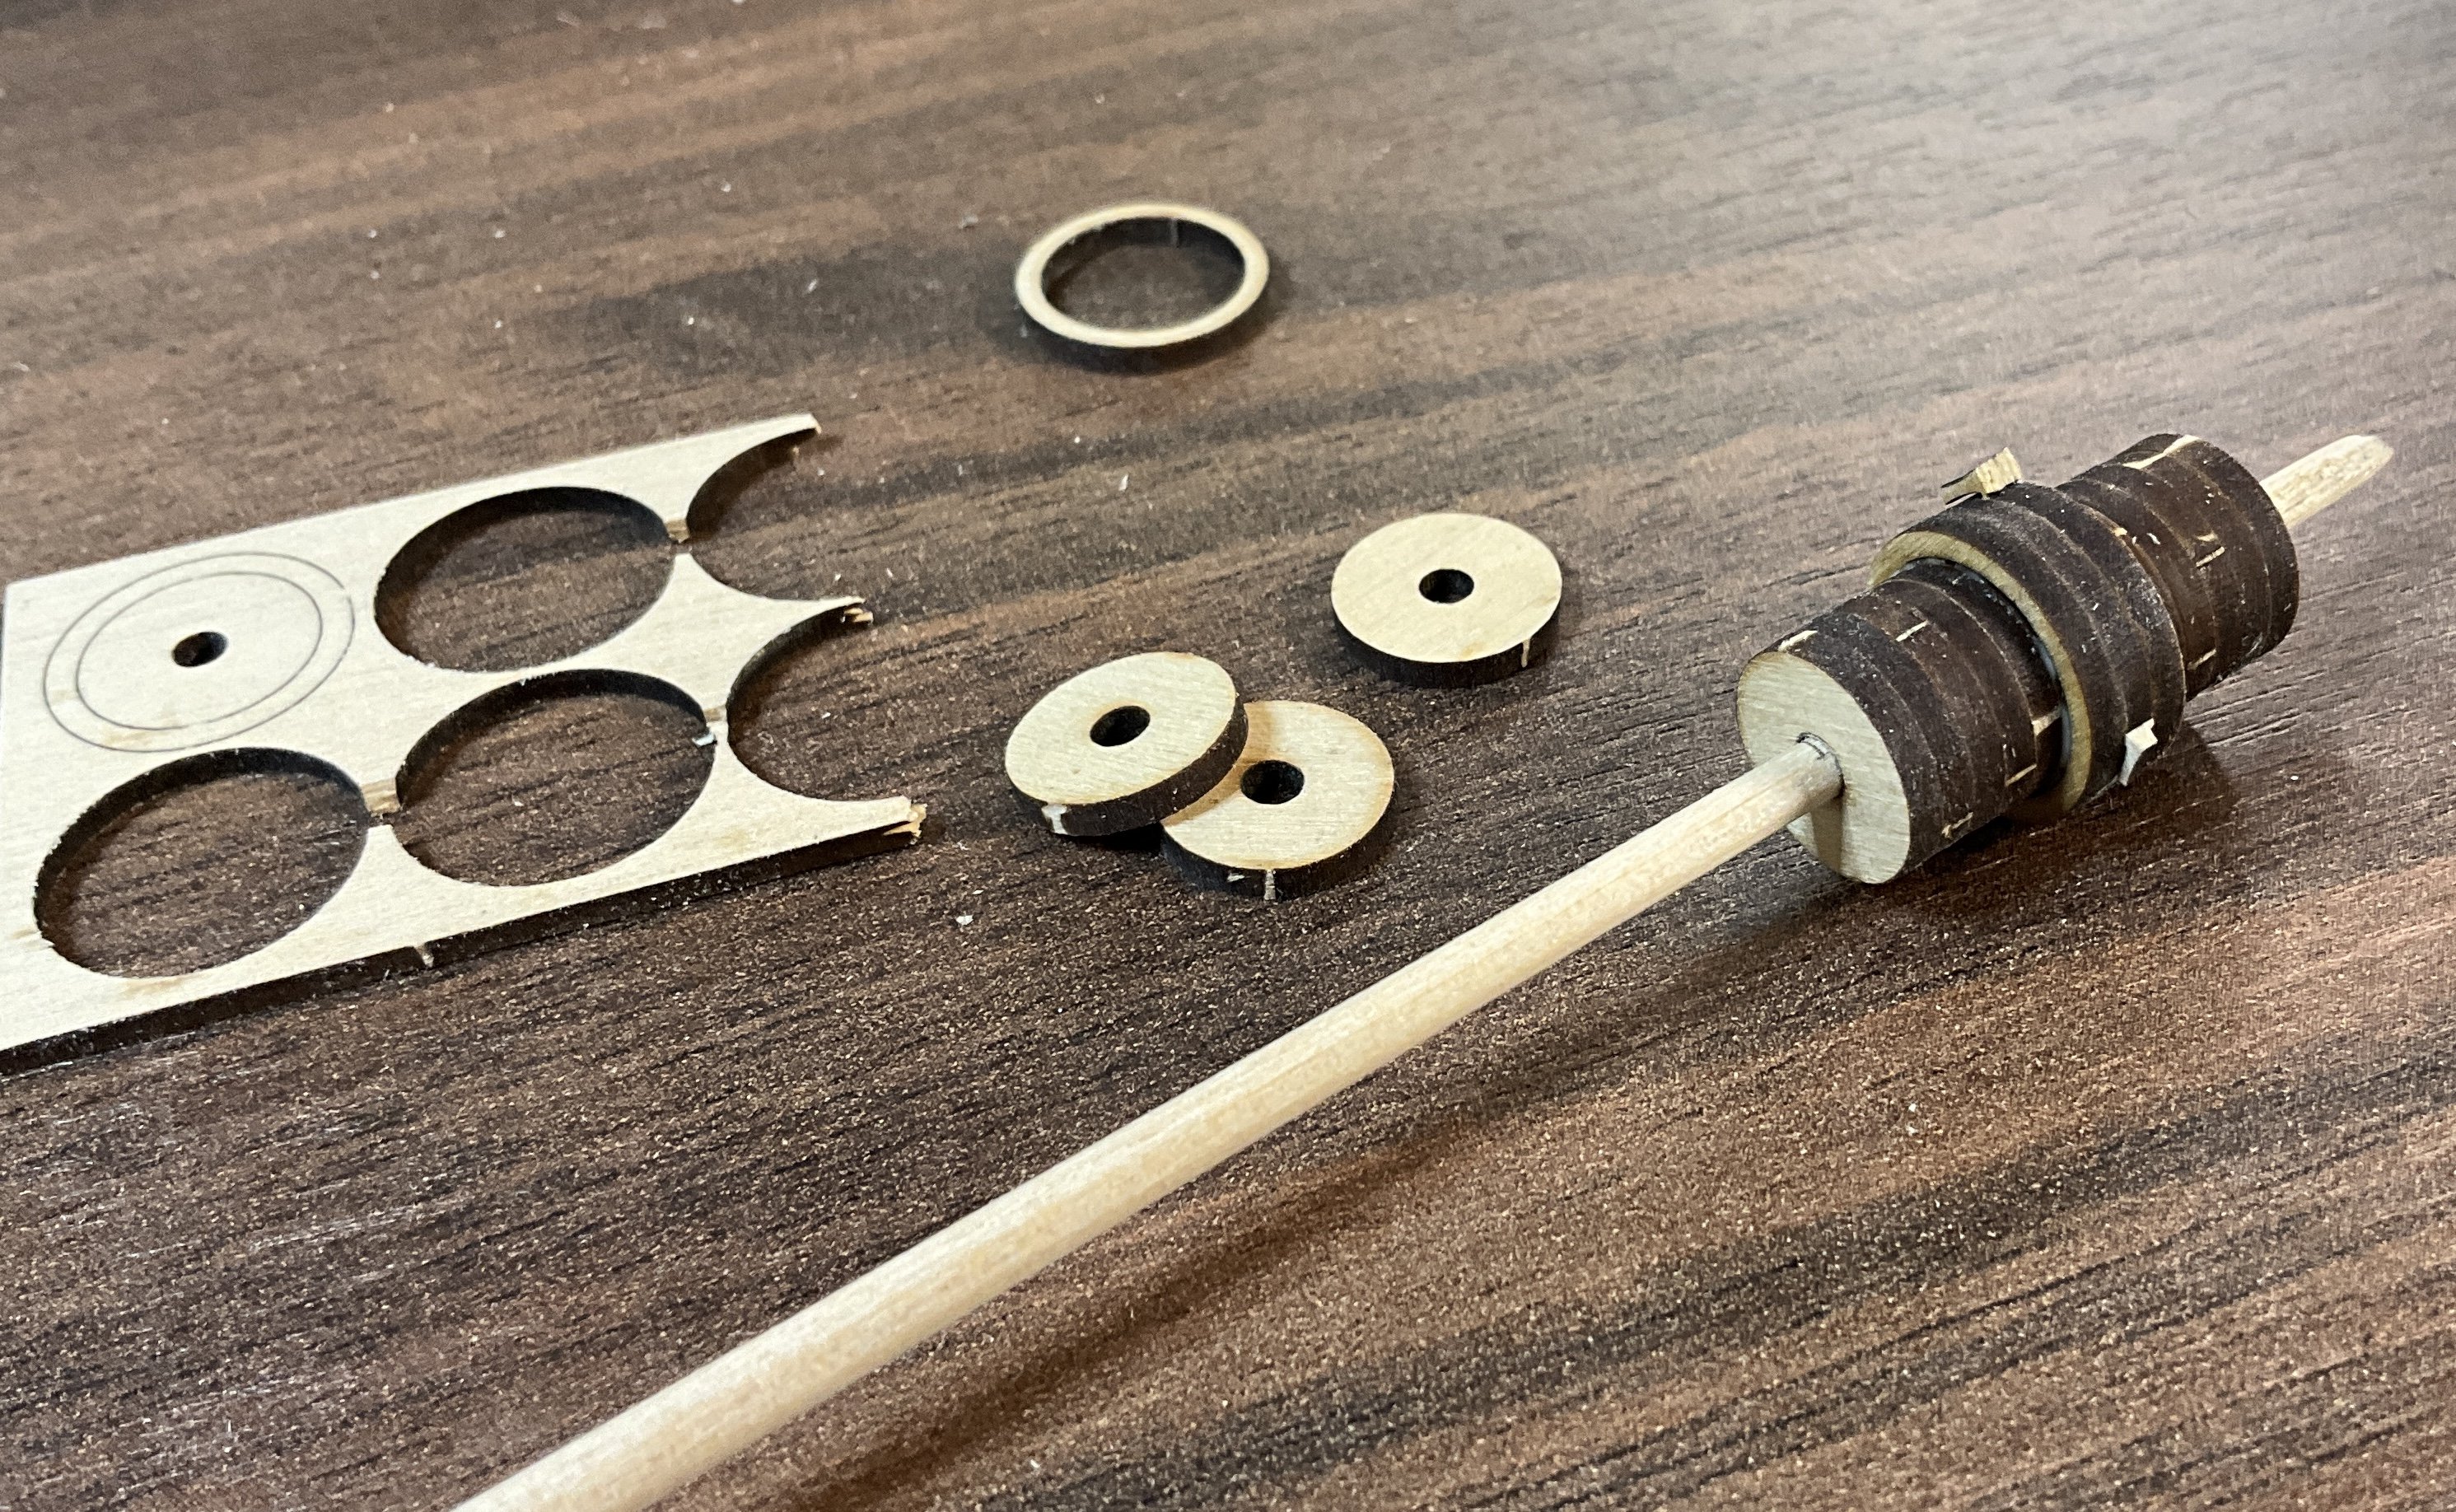
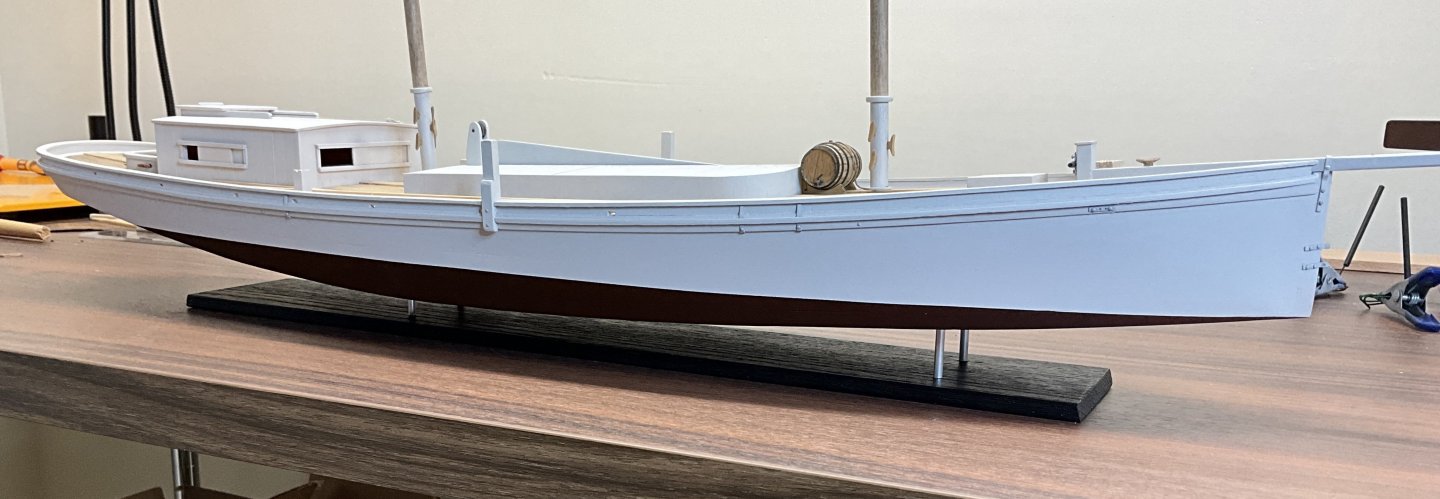
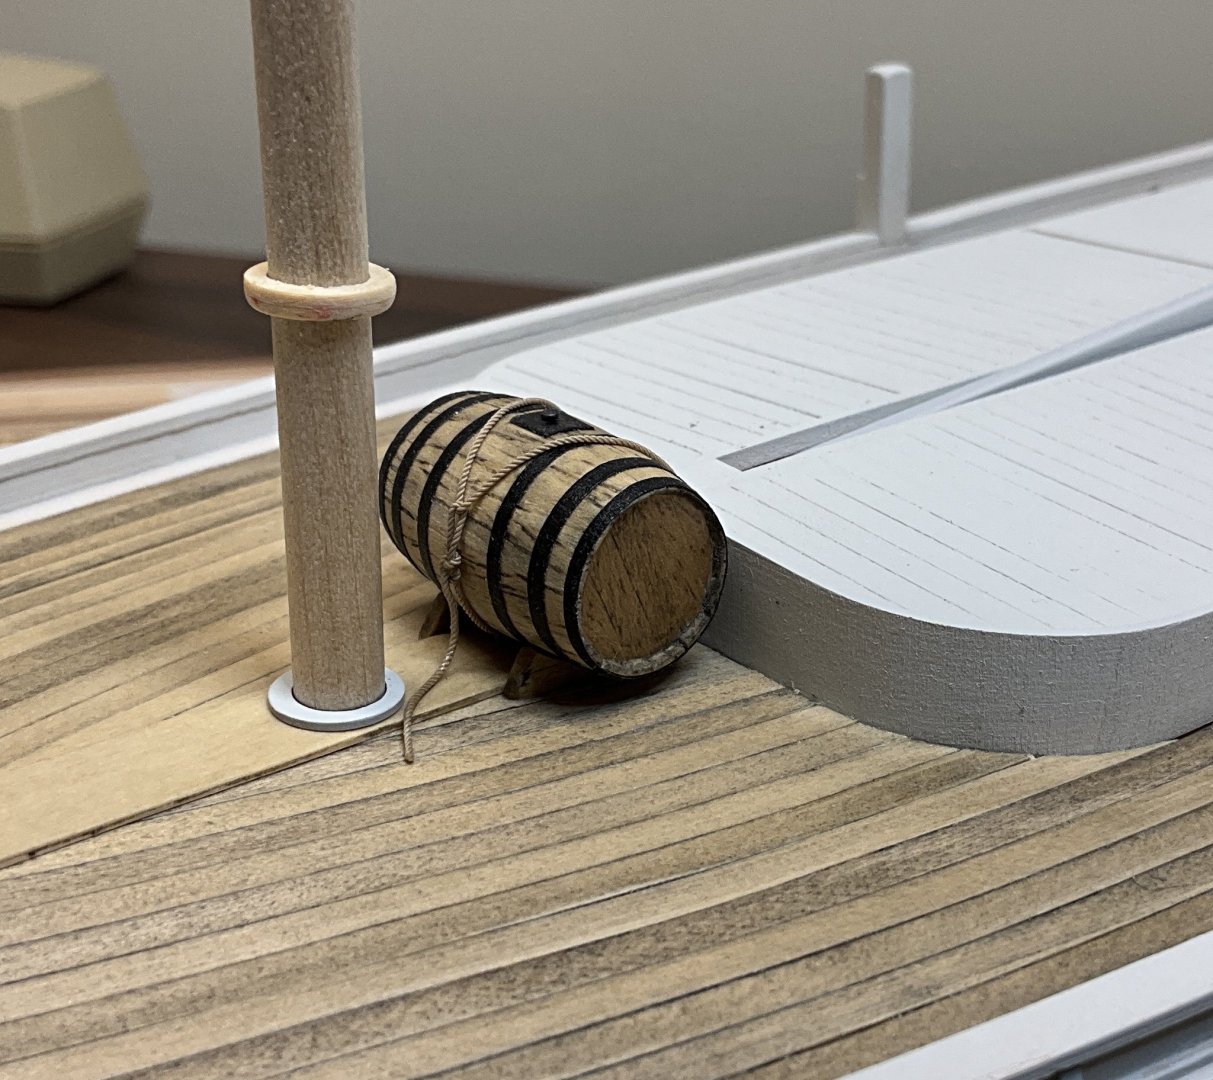
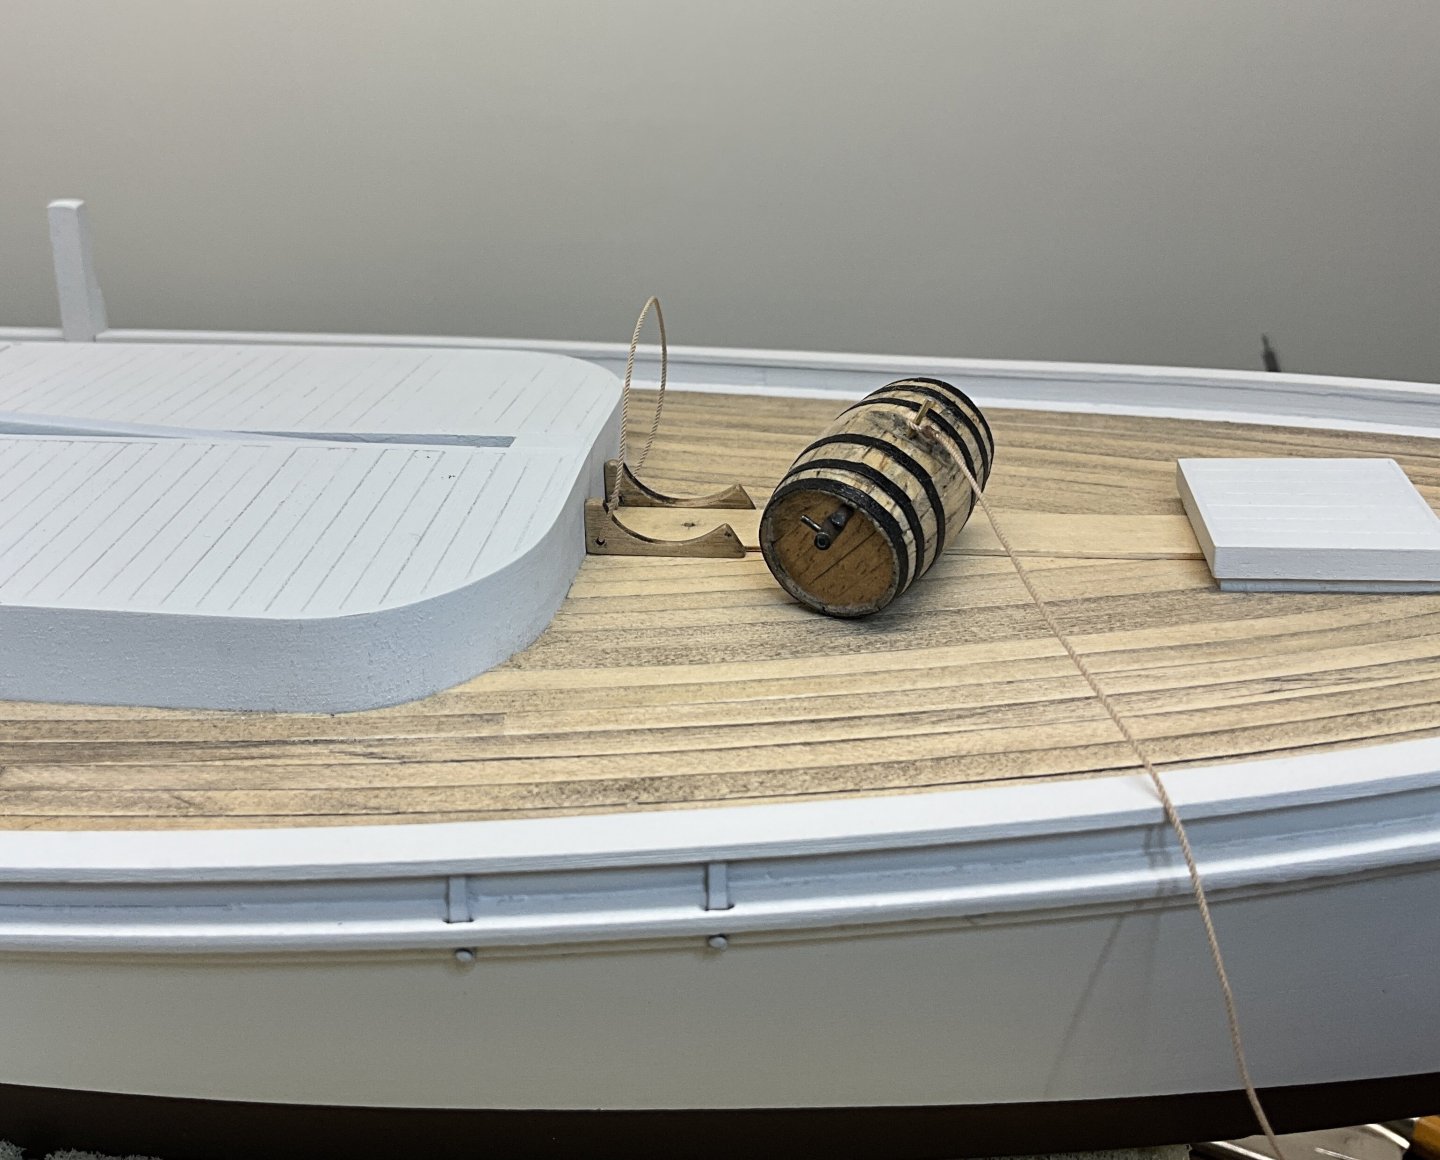
Hi Everyone, just a small update. Thanks to all of you for the Comments and Likes. The water barrel was started a while ago and now is the time to mount it as it will be easier to lash it down before the foremast is stepped. The innards of the barrel where made from leftover parts from a previous build. They are mast hoops and their carrier sheets from Glad Tidings. The heads were made from 1/8” x 1/32” strips of wood glued together and then glued to the ends of the former. The staves were shaped, soaked , clamped in place and glued after drying. So it took a day to finish one strake. The stand for the barrel was also made from the carrier sheet for the mast hoops. Holes were drilled in the bottom back corner and a loop of rope was secured to the stands by a knot tied in each end after being pushed through the hole. The rope coming out from under the front of the barrel had an eye made in one end that was slipped over a pin that secures the barrel to the deck. The barrel hoops were made from 1/8” chart tape cut down to just under 1/16”. The ends of the tape were were glued with CA where they overlapped under the barrel. The barrel was then lashed down. Now that I think about it, the rest of the updates will be smaller. Lots of little things to do now. My thoughts and prayers are with everyone that was and is in harm’s way. Hope to see you soon.


- 201 replies
-
- 12
-
-
-
- Oyster Sharpie
- first scratch build
- (and 1 more)
-
Jacques,congratulations on finishing the half hull project. This is an exceptional result. Very impressive.
- 82 replies
-
- 3
-
-
-
- half hull planking project
- half hull
- (and 2 more)
-
Hi Ian, thank you for your generous comment. I appreciate very much!
- 201 replies
-
- 2
-
-
- Oyster Sharpie
- first scratch build
- (and 1 more)
-
Glen, l see you’re on track for another great build!
- 185 replies
-
- 6
-
-
-
- Flying Dutchman
- Black pearl
- (and 2 more)
-
Looking great Jacques. I keep thinking how good she looks sitting on that rough-sawn wood