Paul Le Wol
-
Posts
1,062 -
Joined
-
Last visited
Content Type
Profiles
Forums
Gallery
Events
Everything posted by Paul Le Wol
-
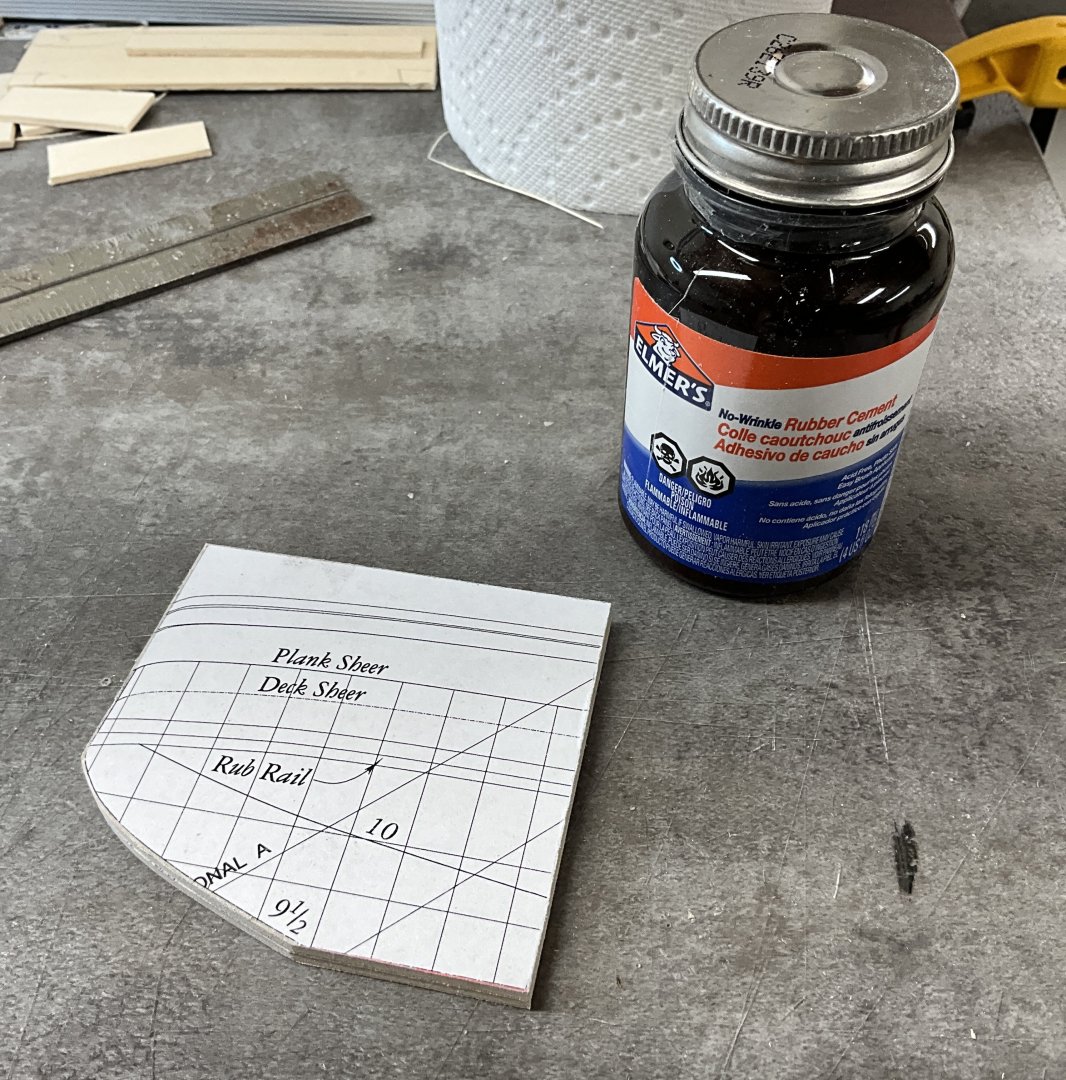
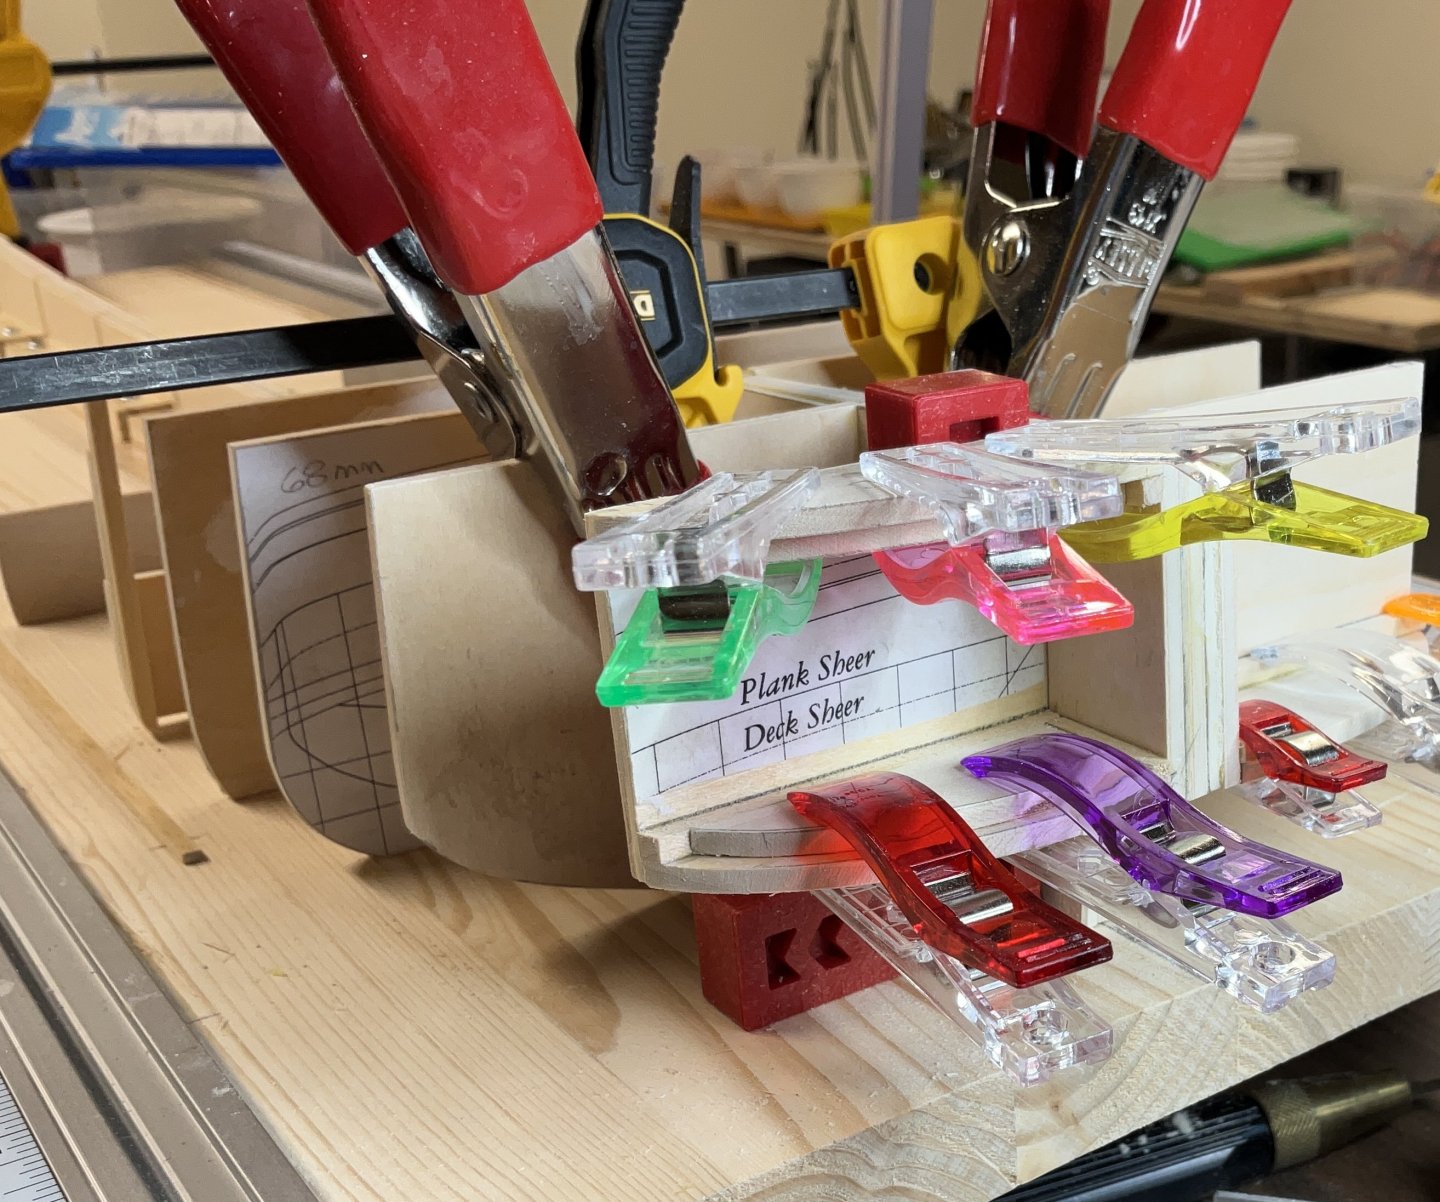
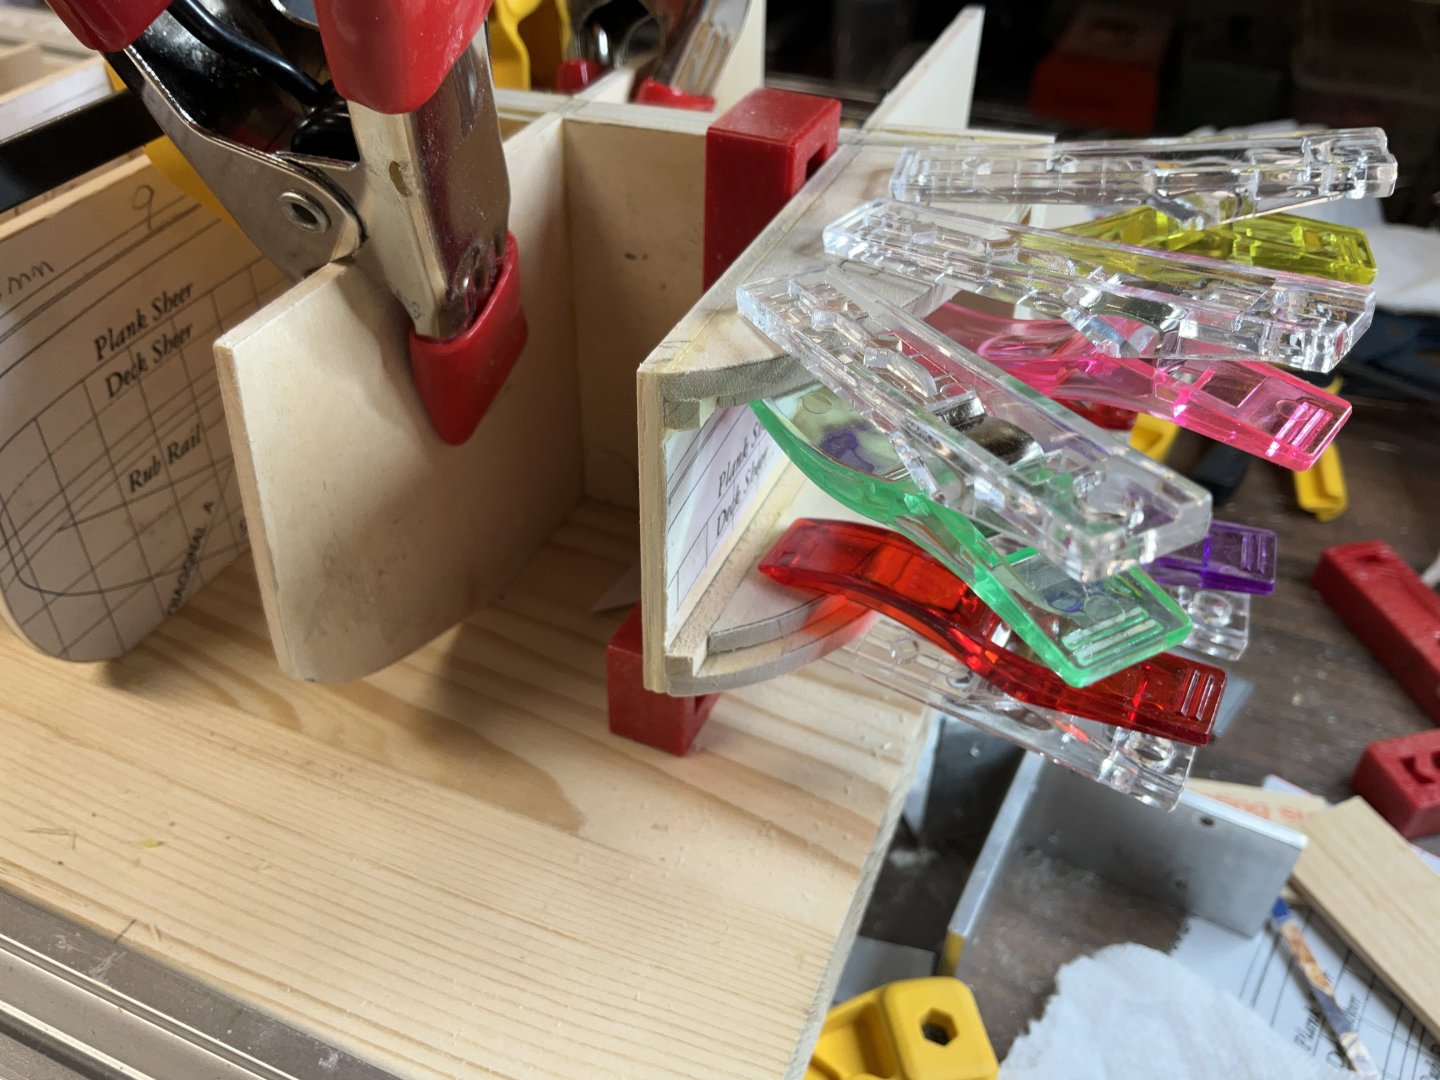
Hi Phil, thank you for the advice. I’ve been using the Elmer’s rubber cement for temporarily sticking the paper to the wood. I’ve only been removing the paper and rubber cement where there wood needs to be glued. As you say it is easy to remove. Been using yellow PVA for gluing the wood. Once the hidden work is finished I’m going to switch to white PVA and/or CA. One drawback to the Elmer’s rubber cement is its odor although that goes away fairly quickly.
-
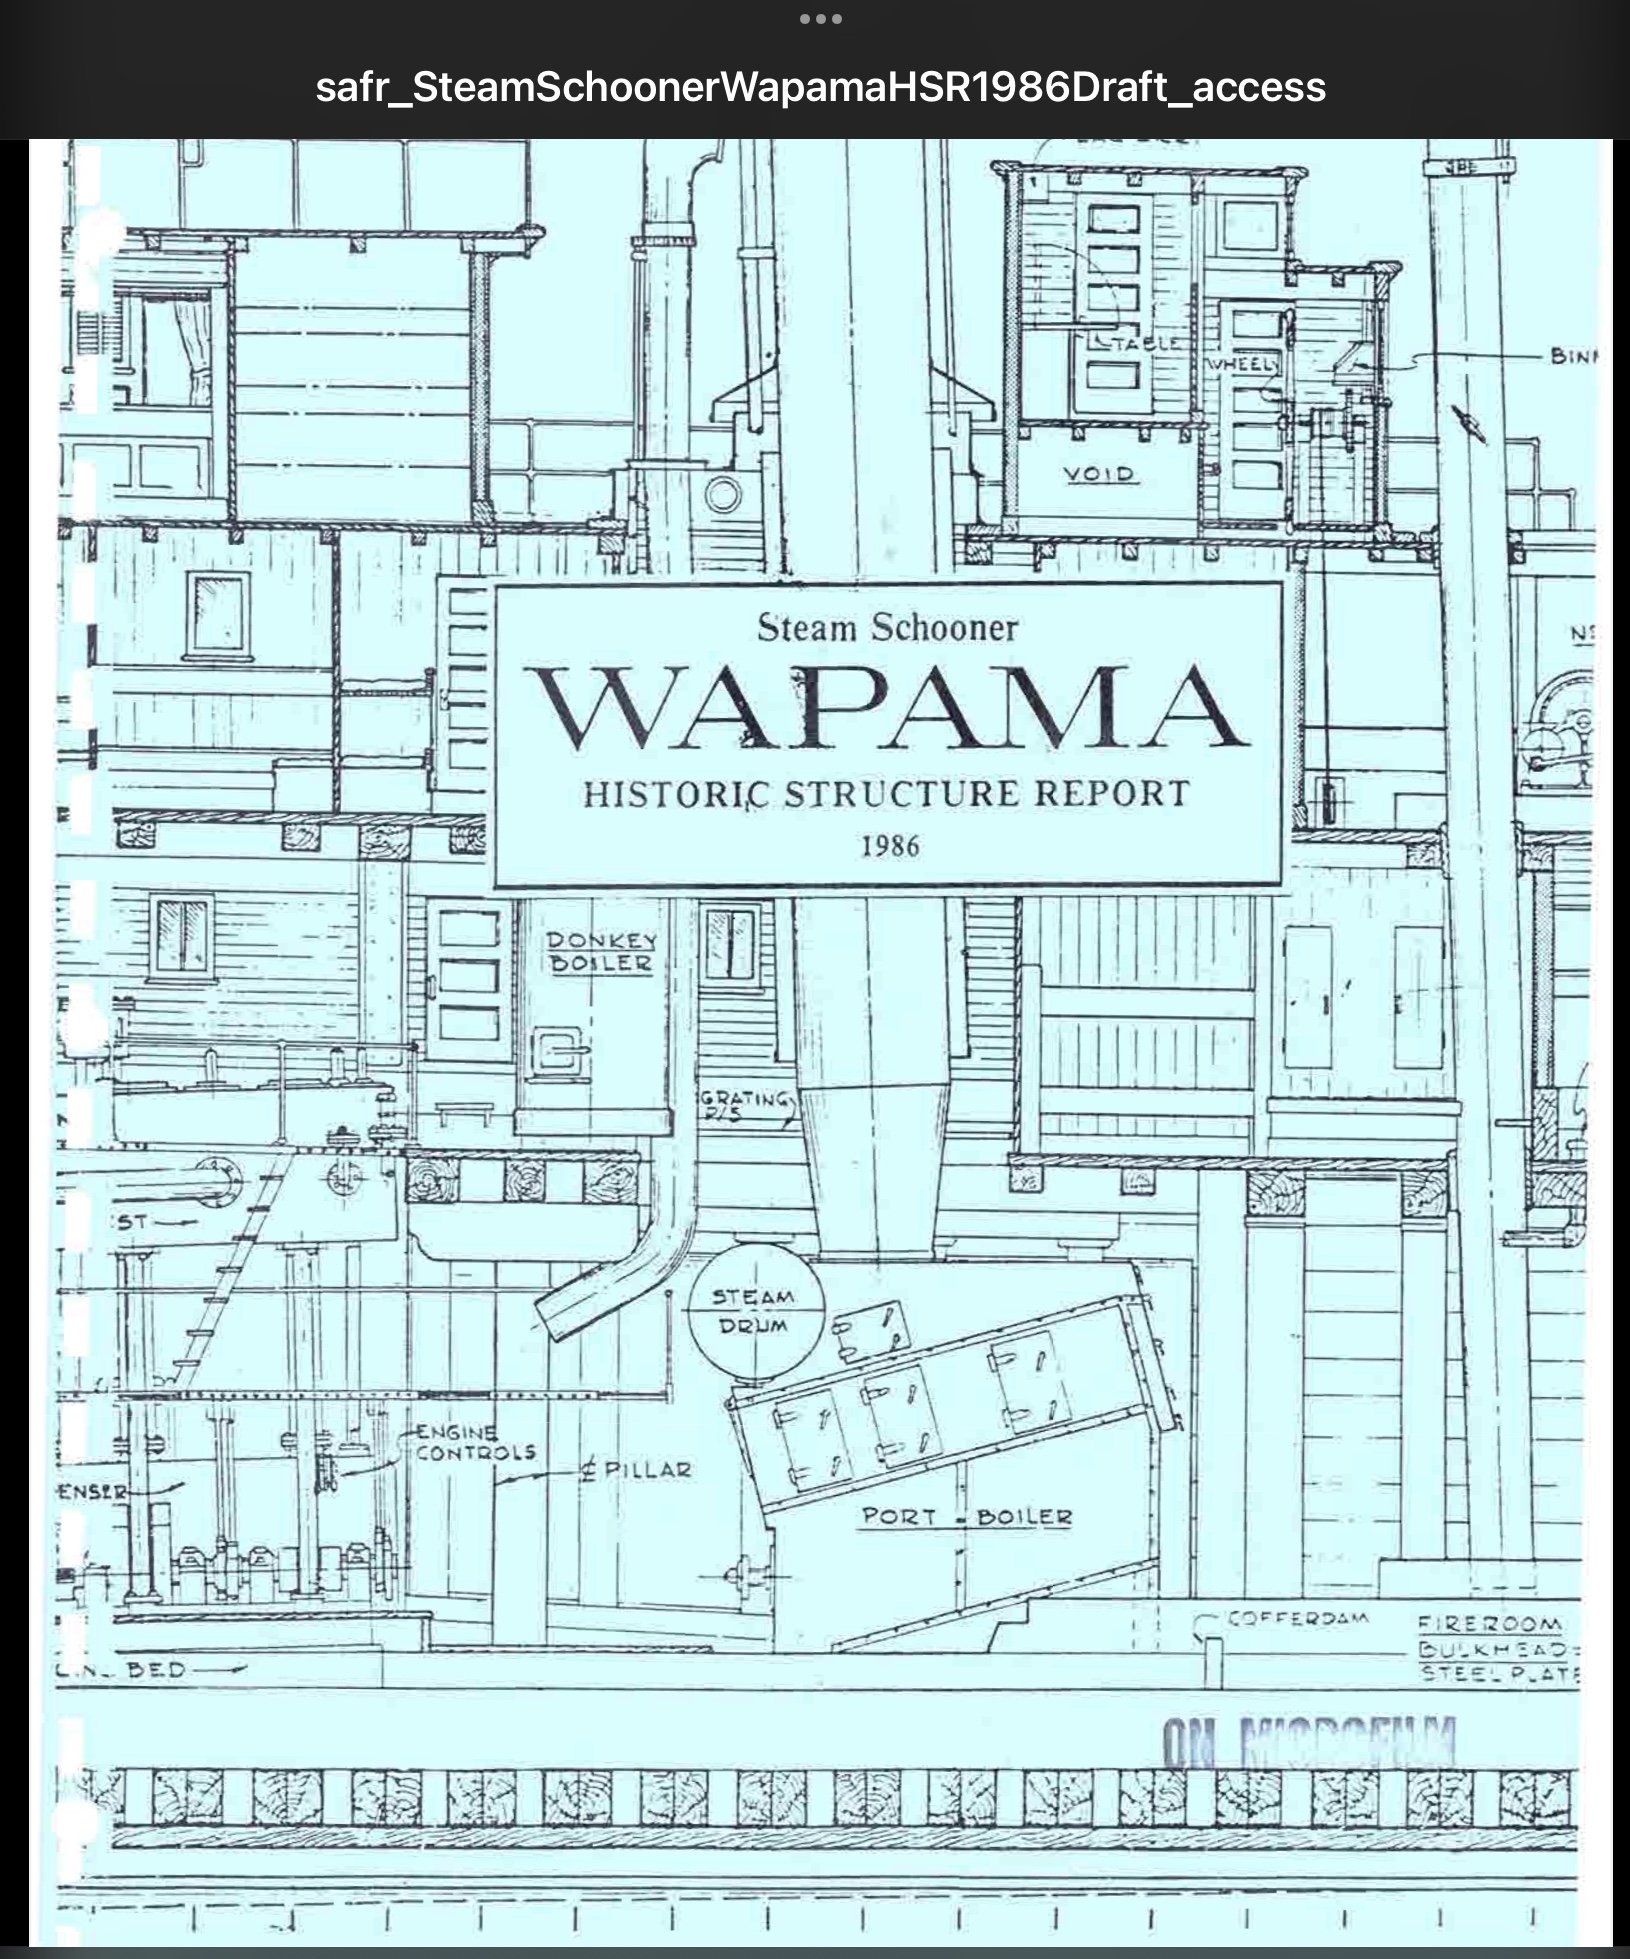
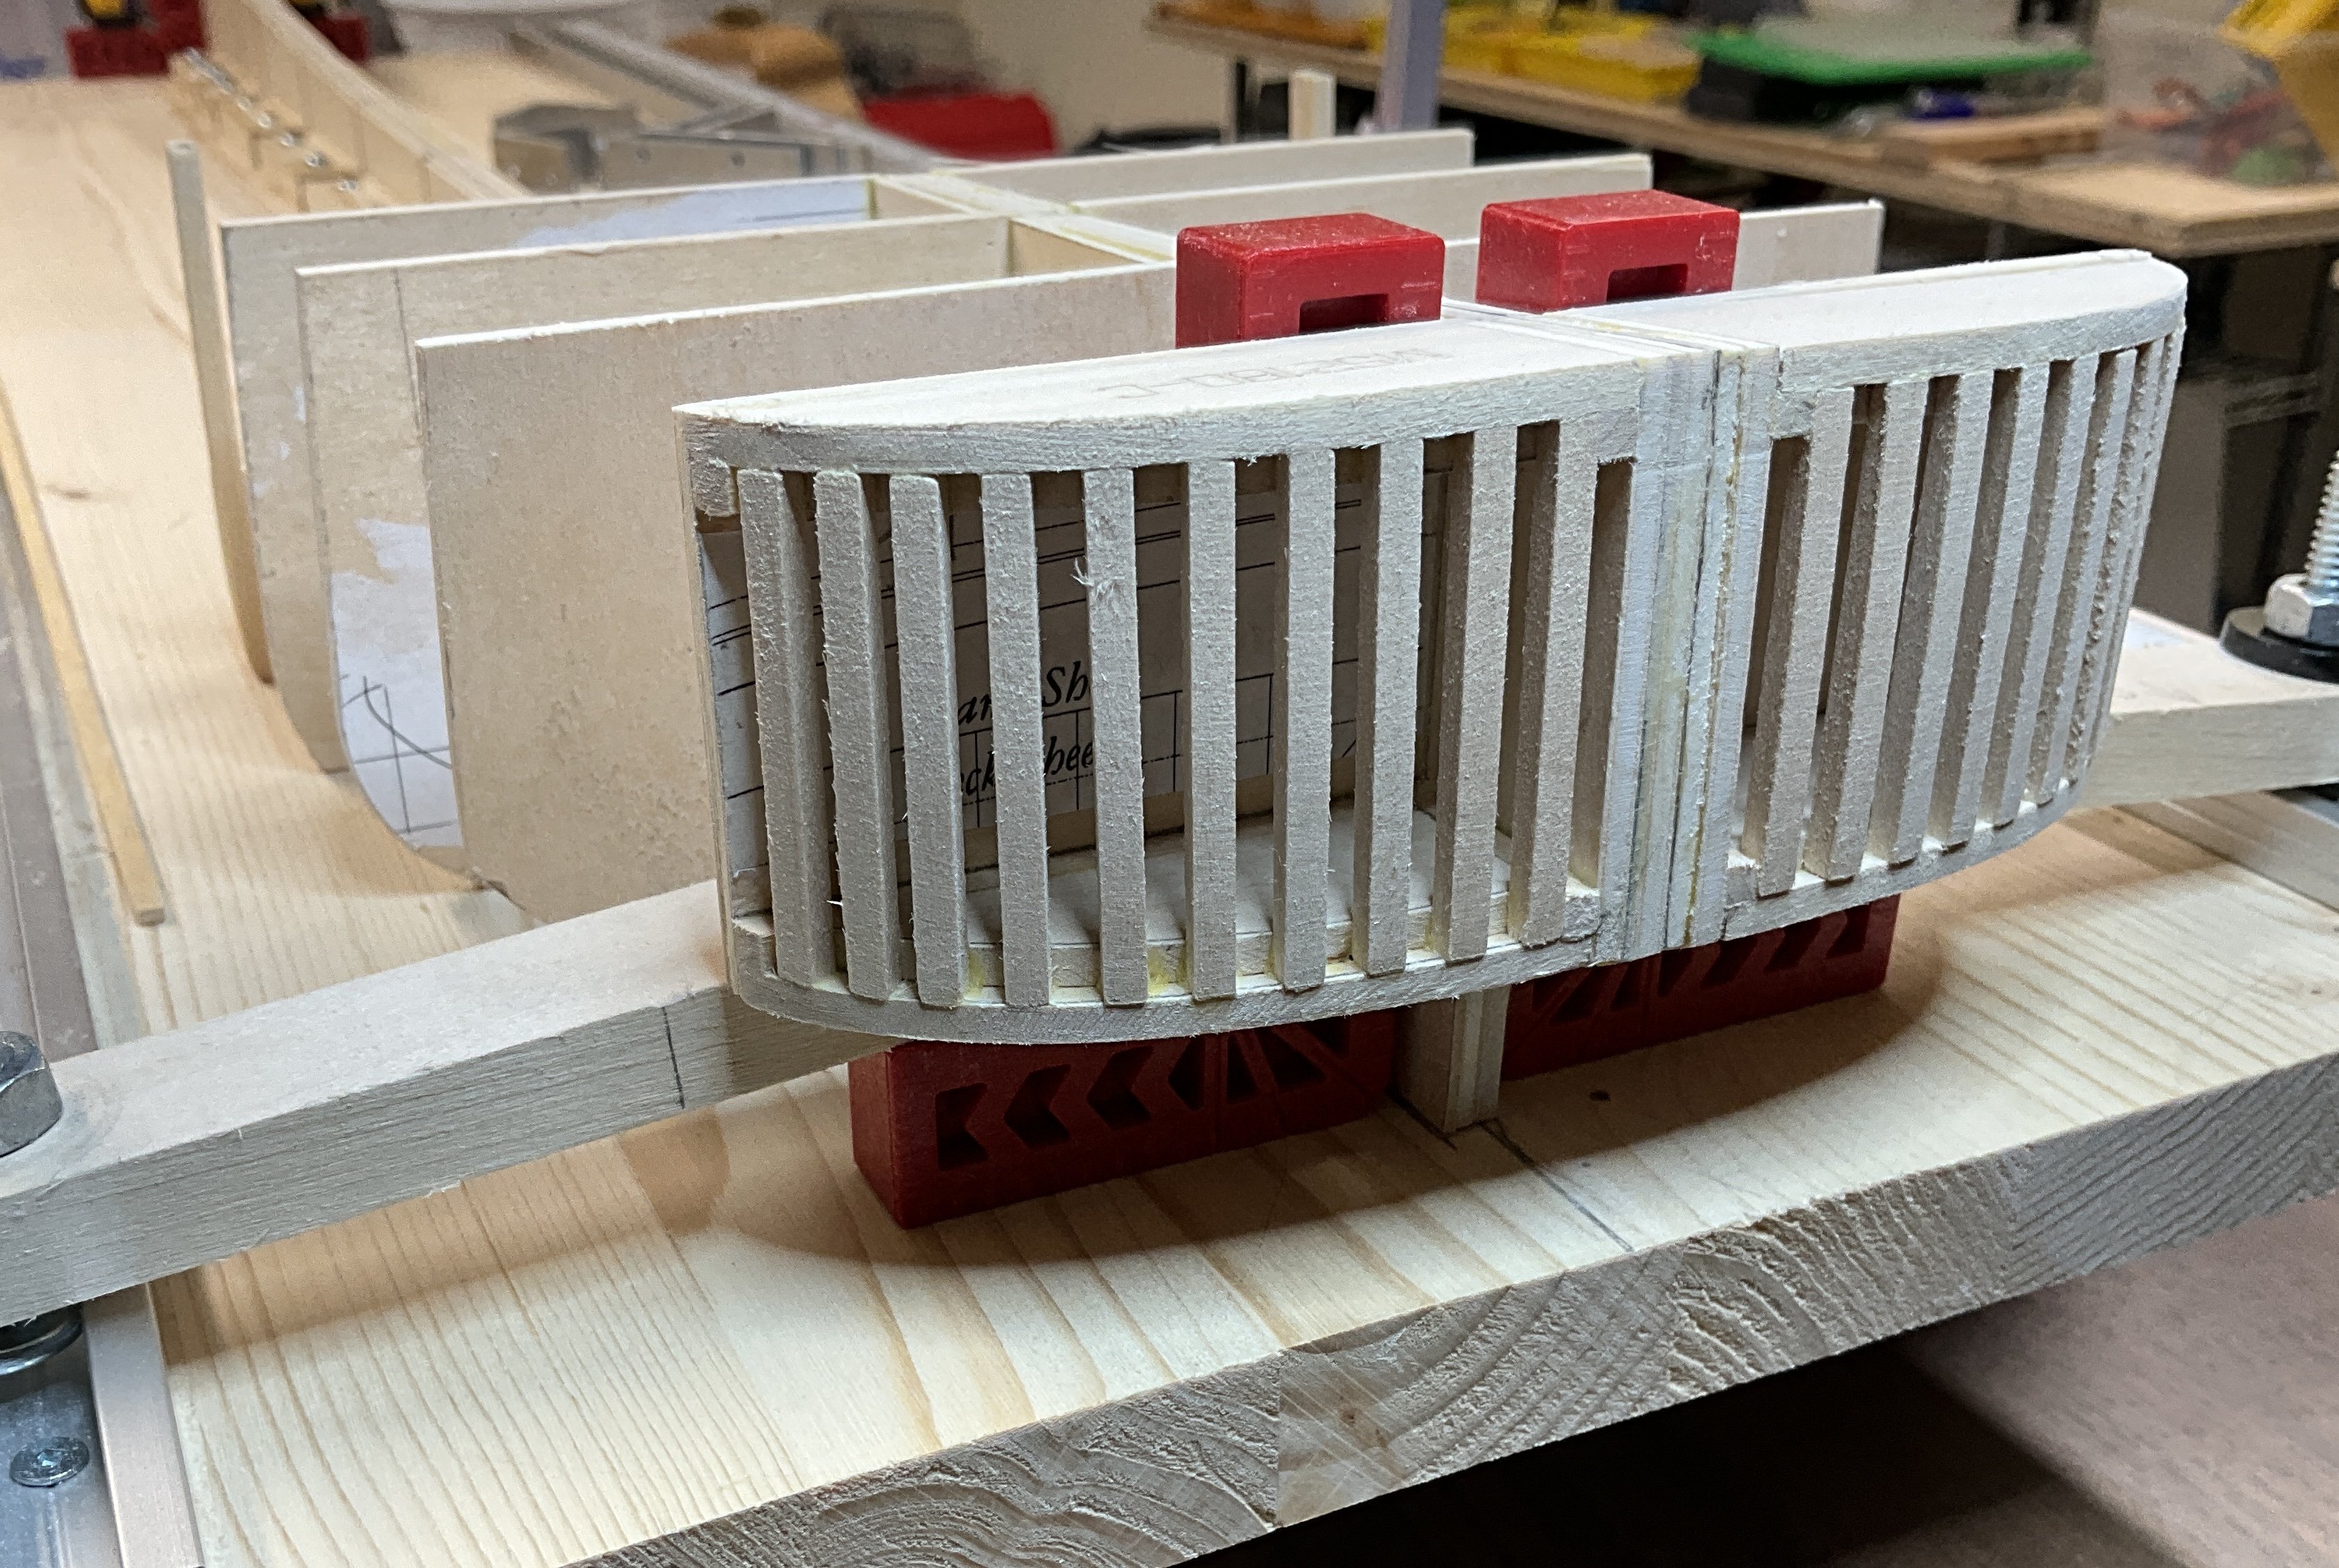
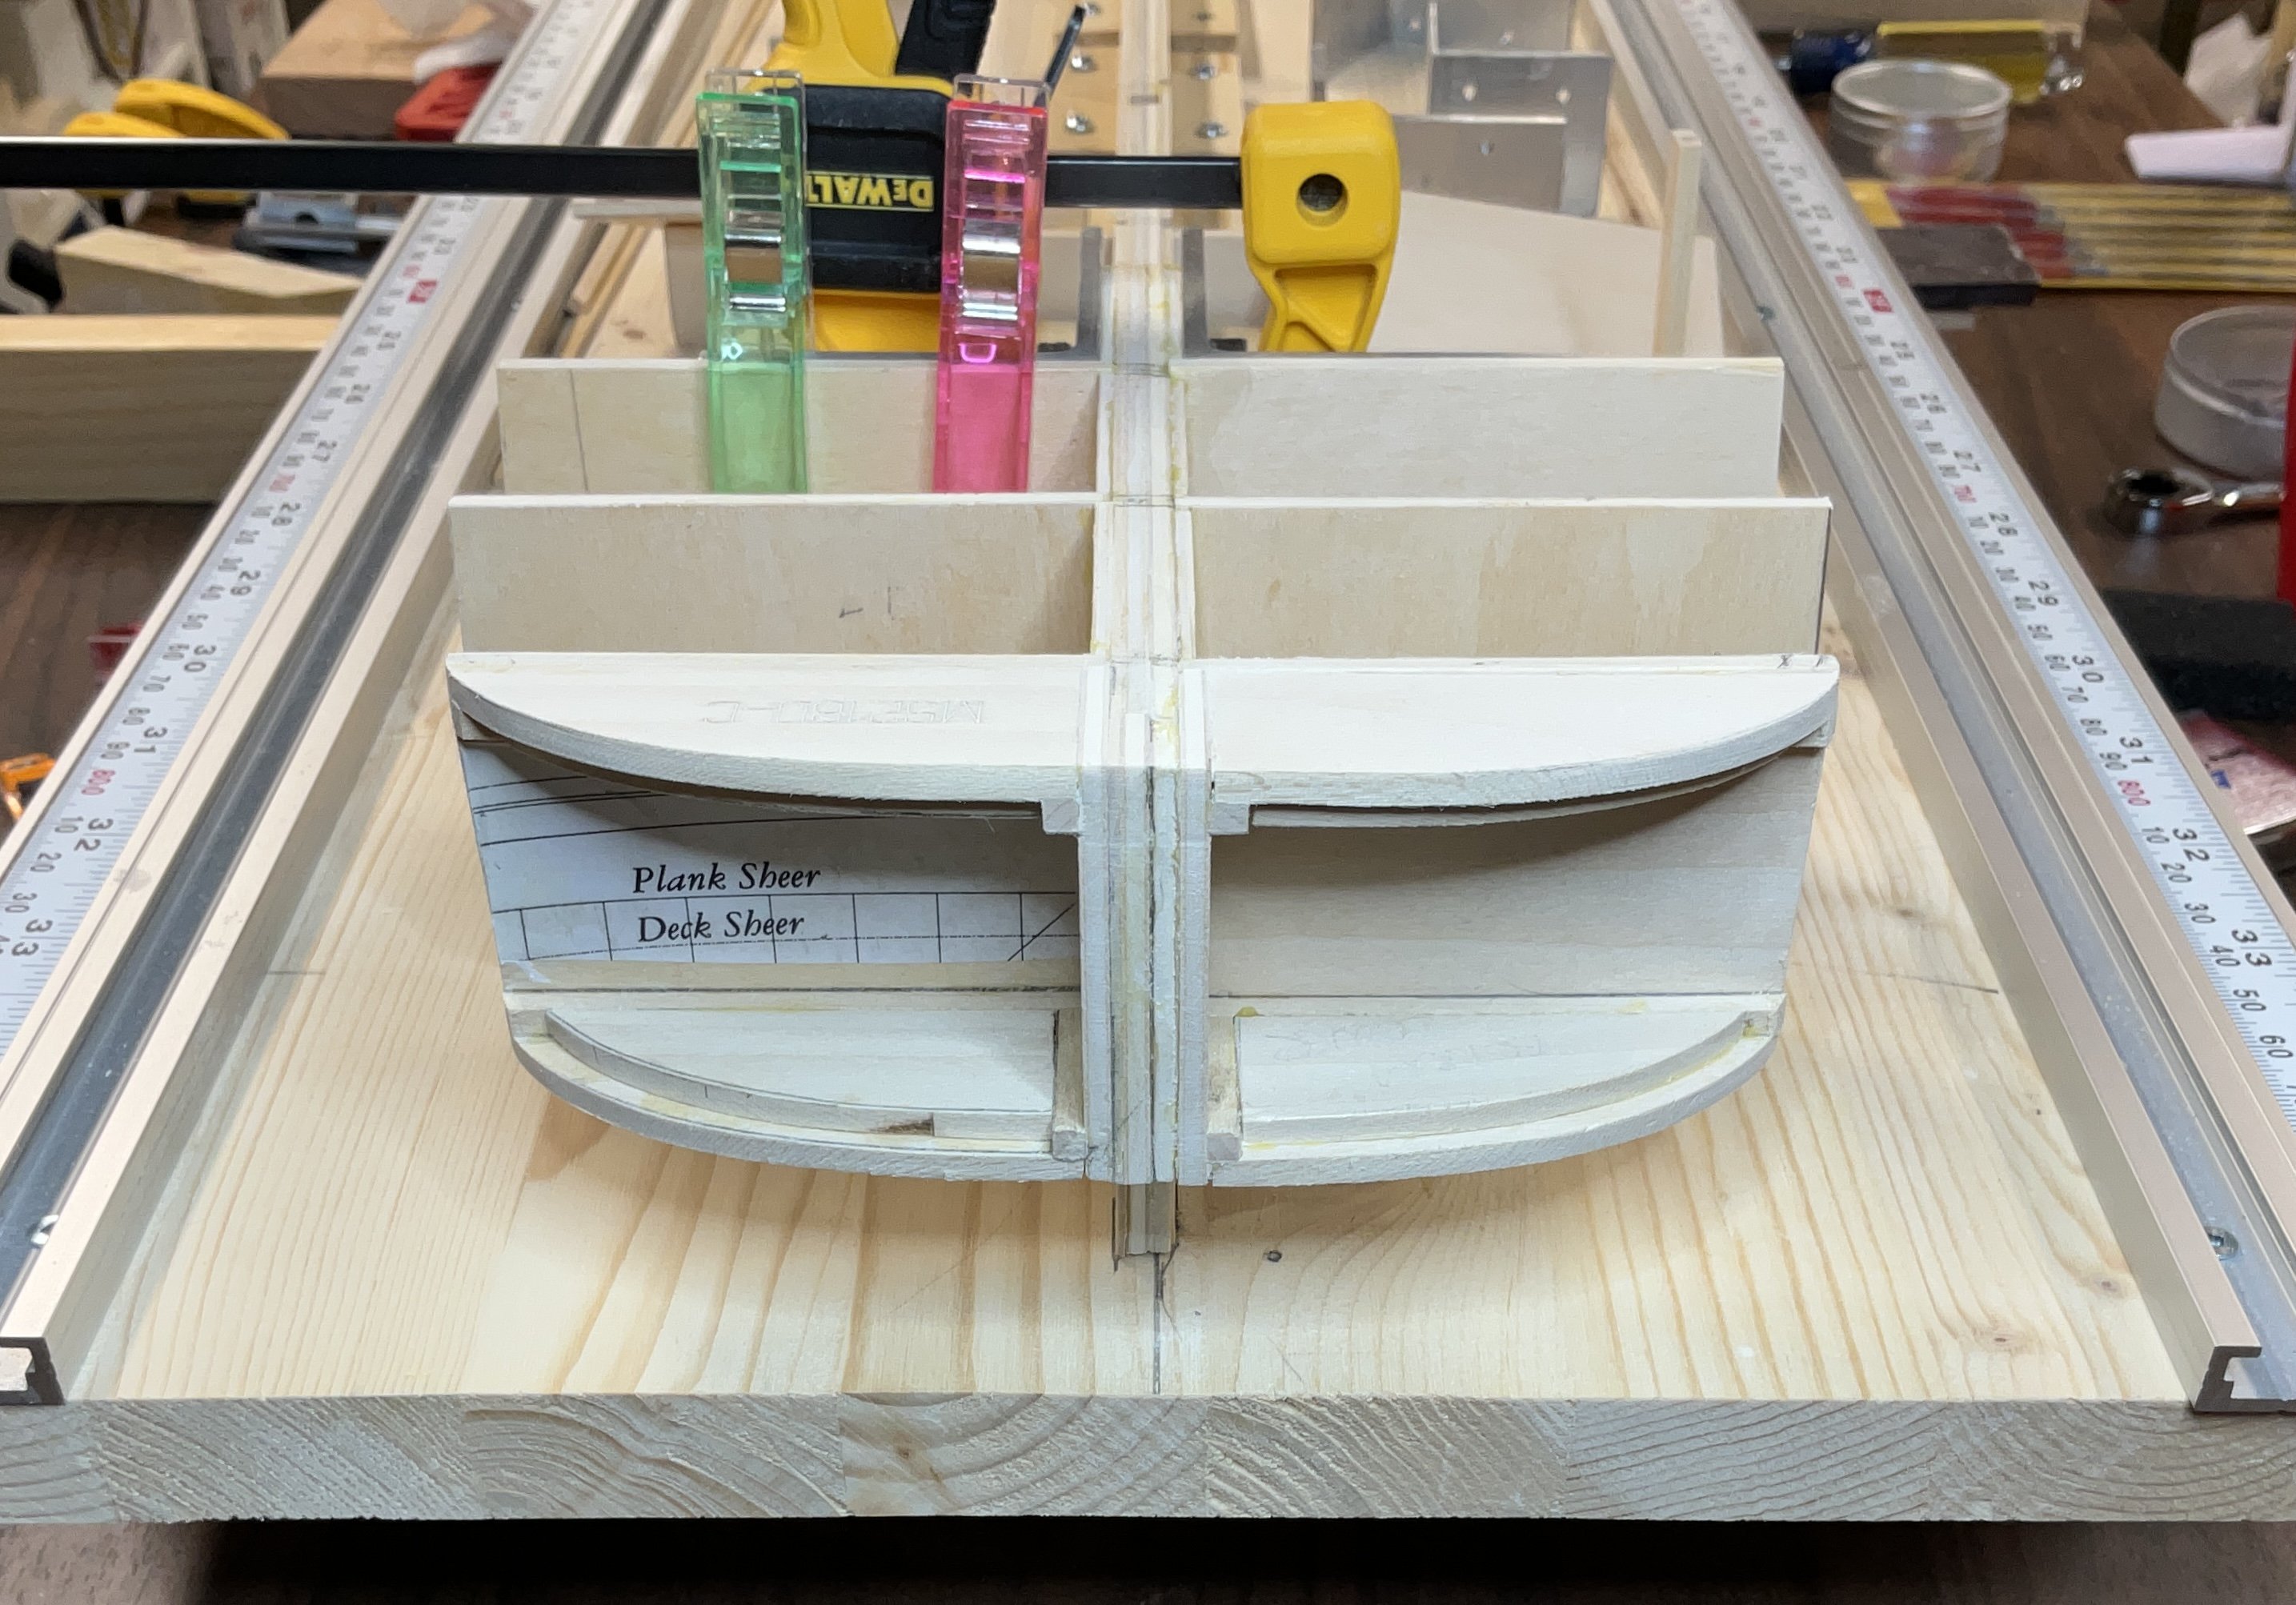
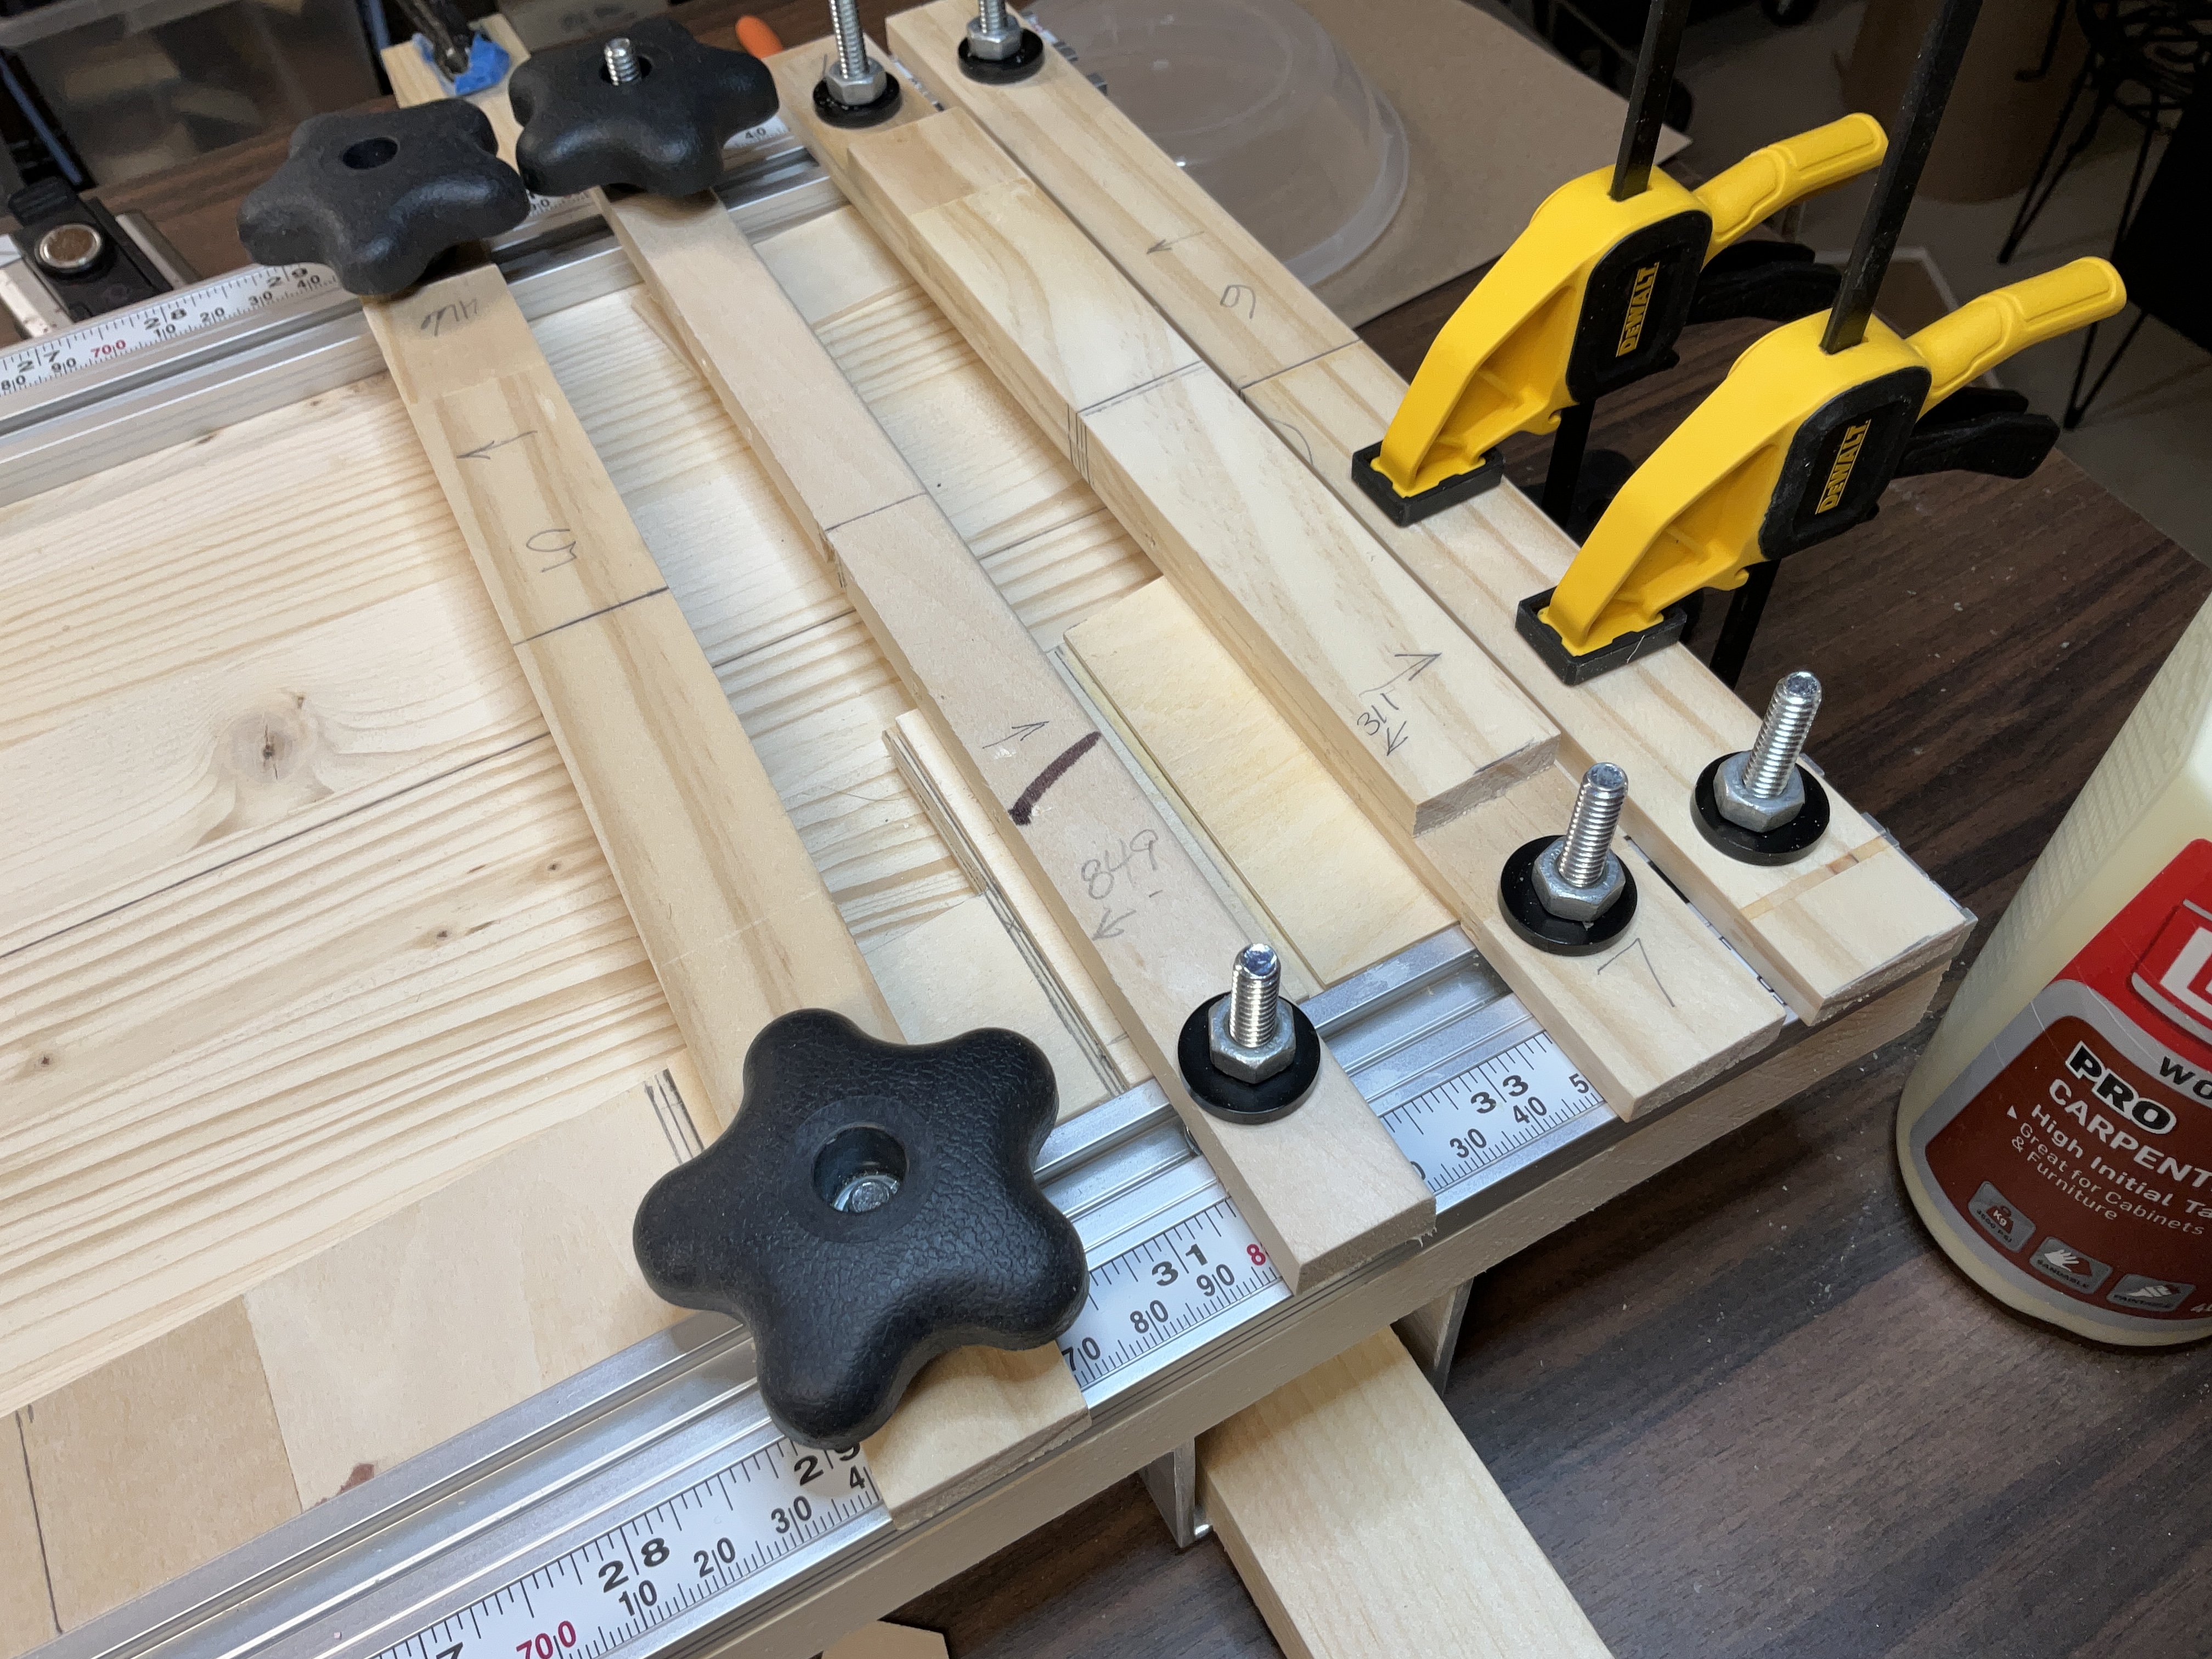
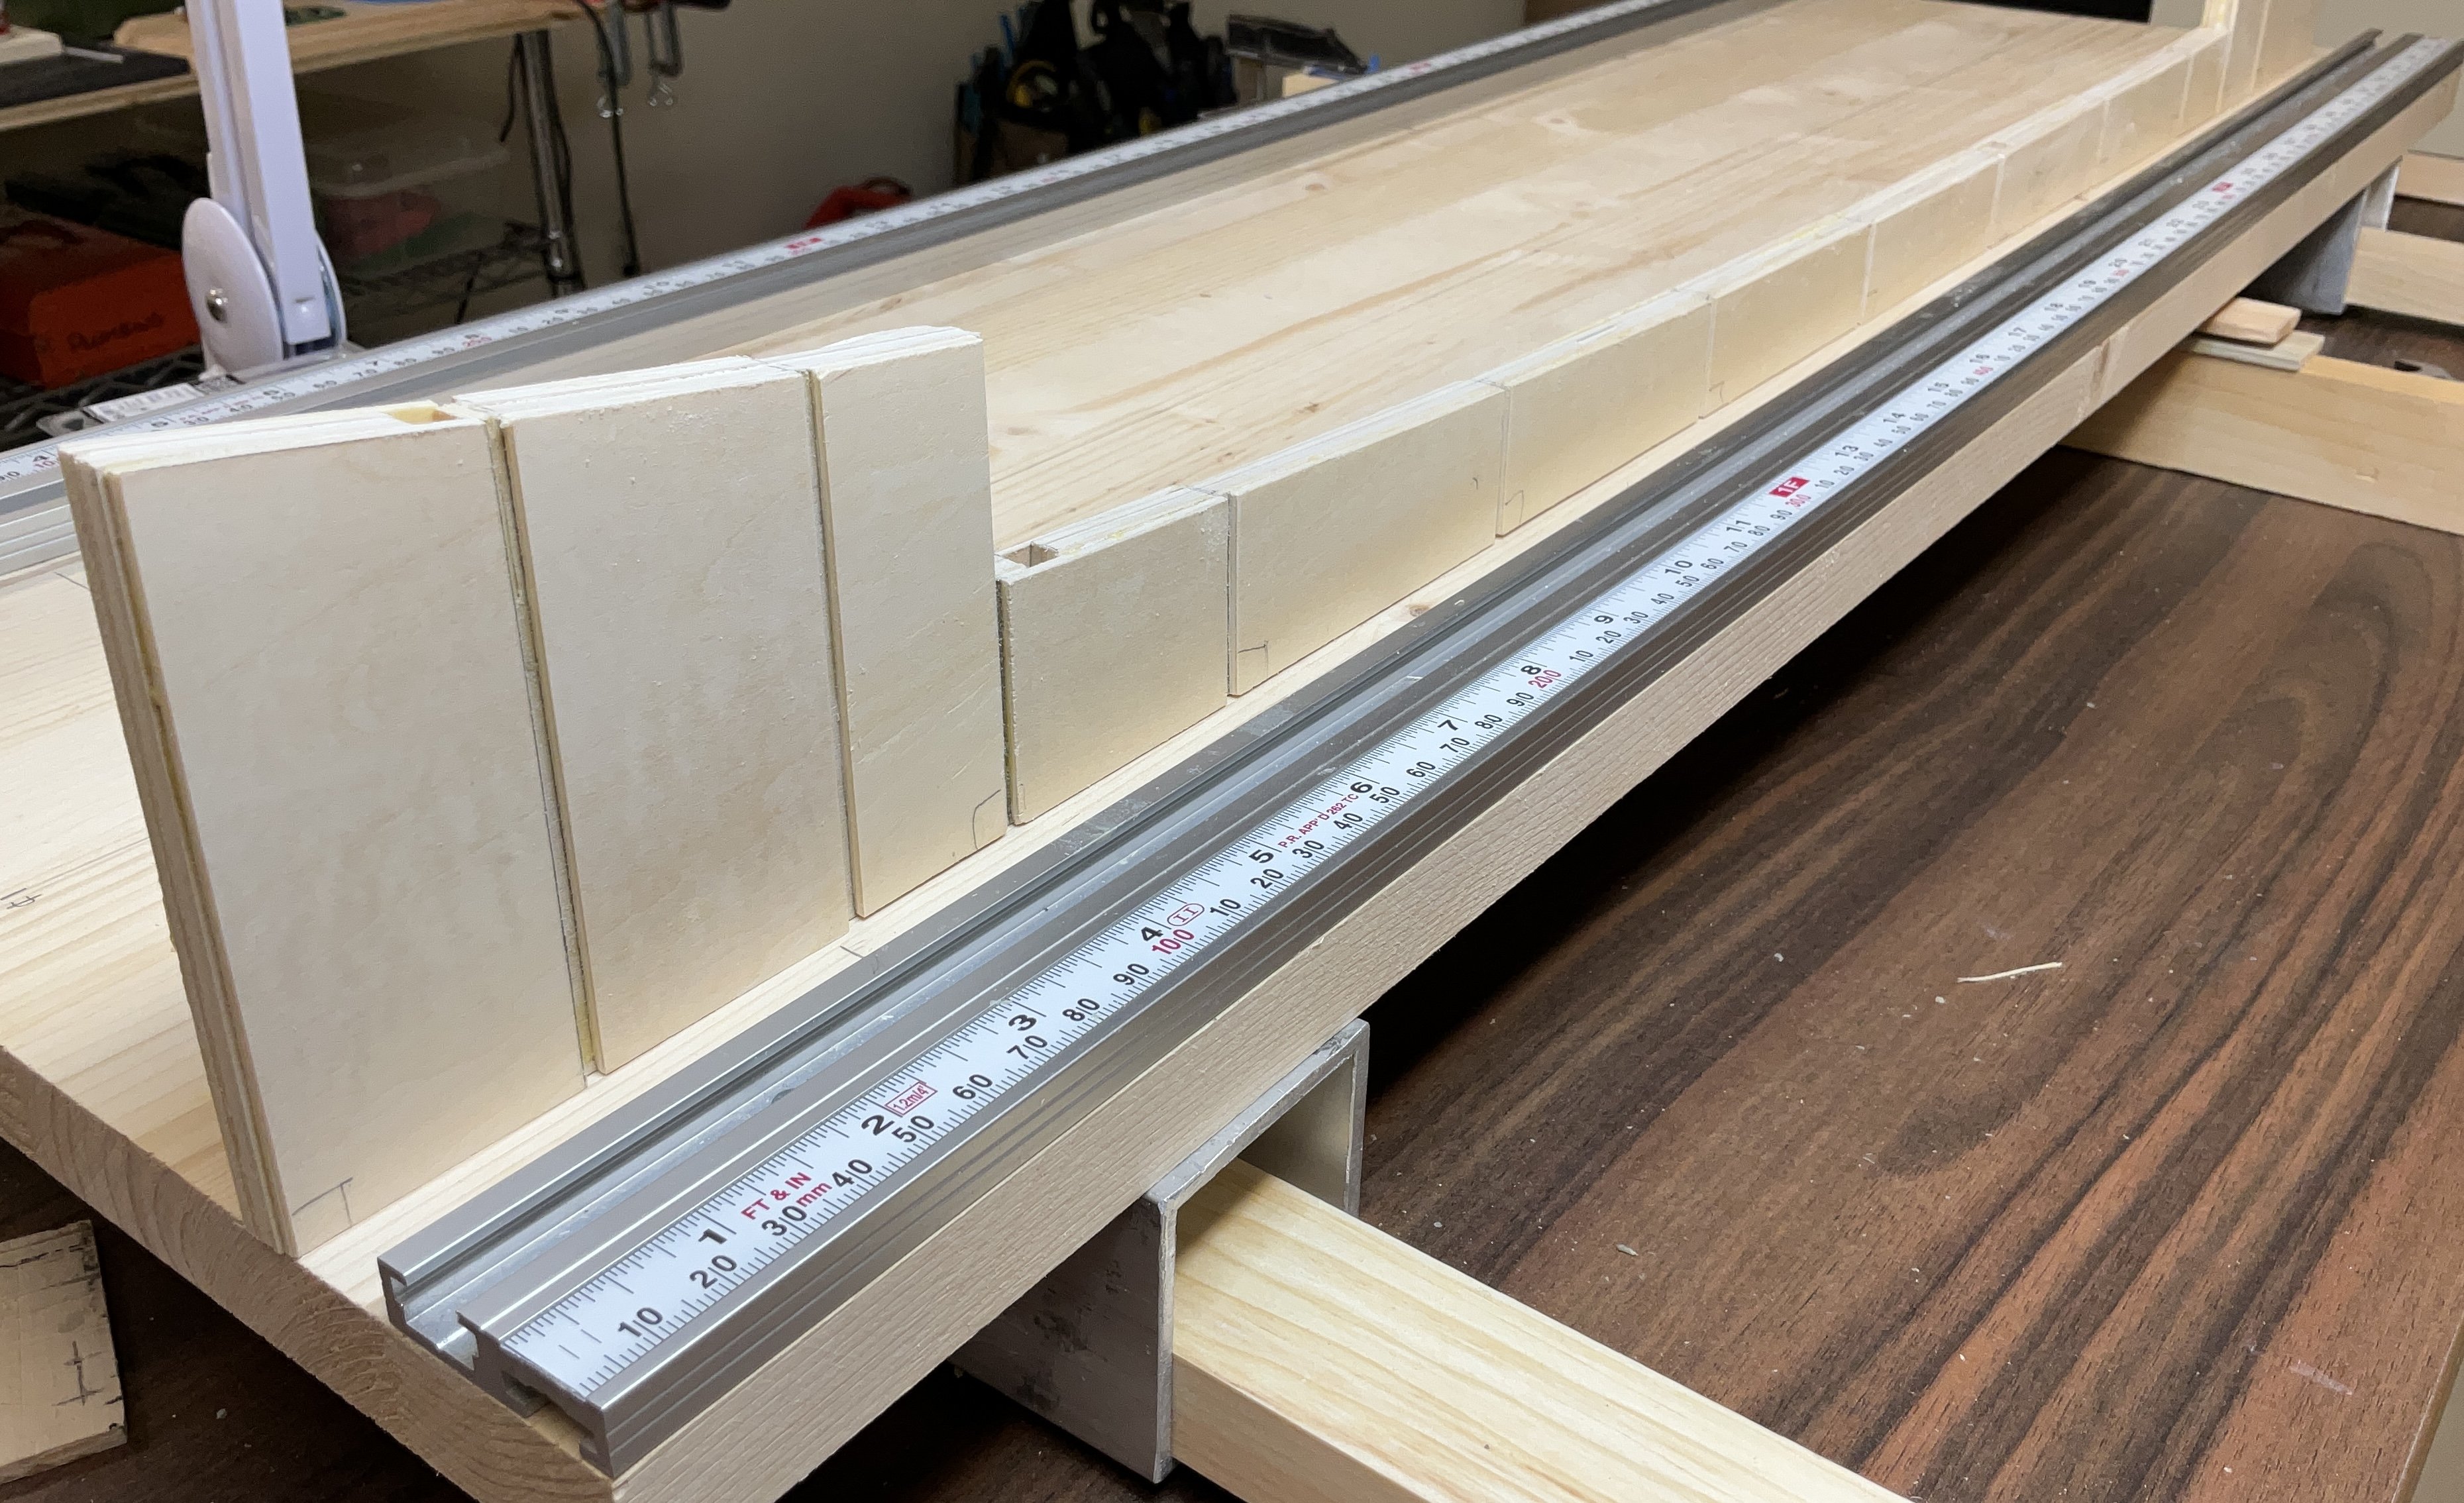
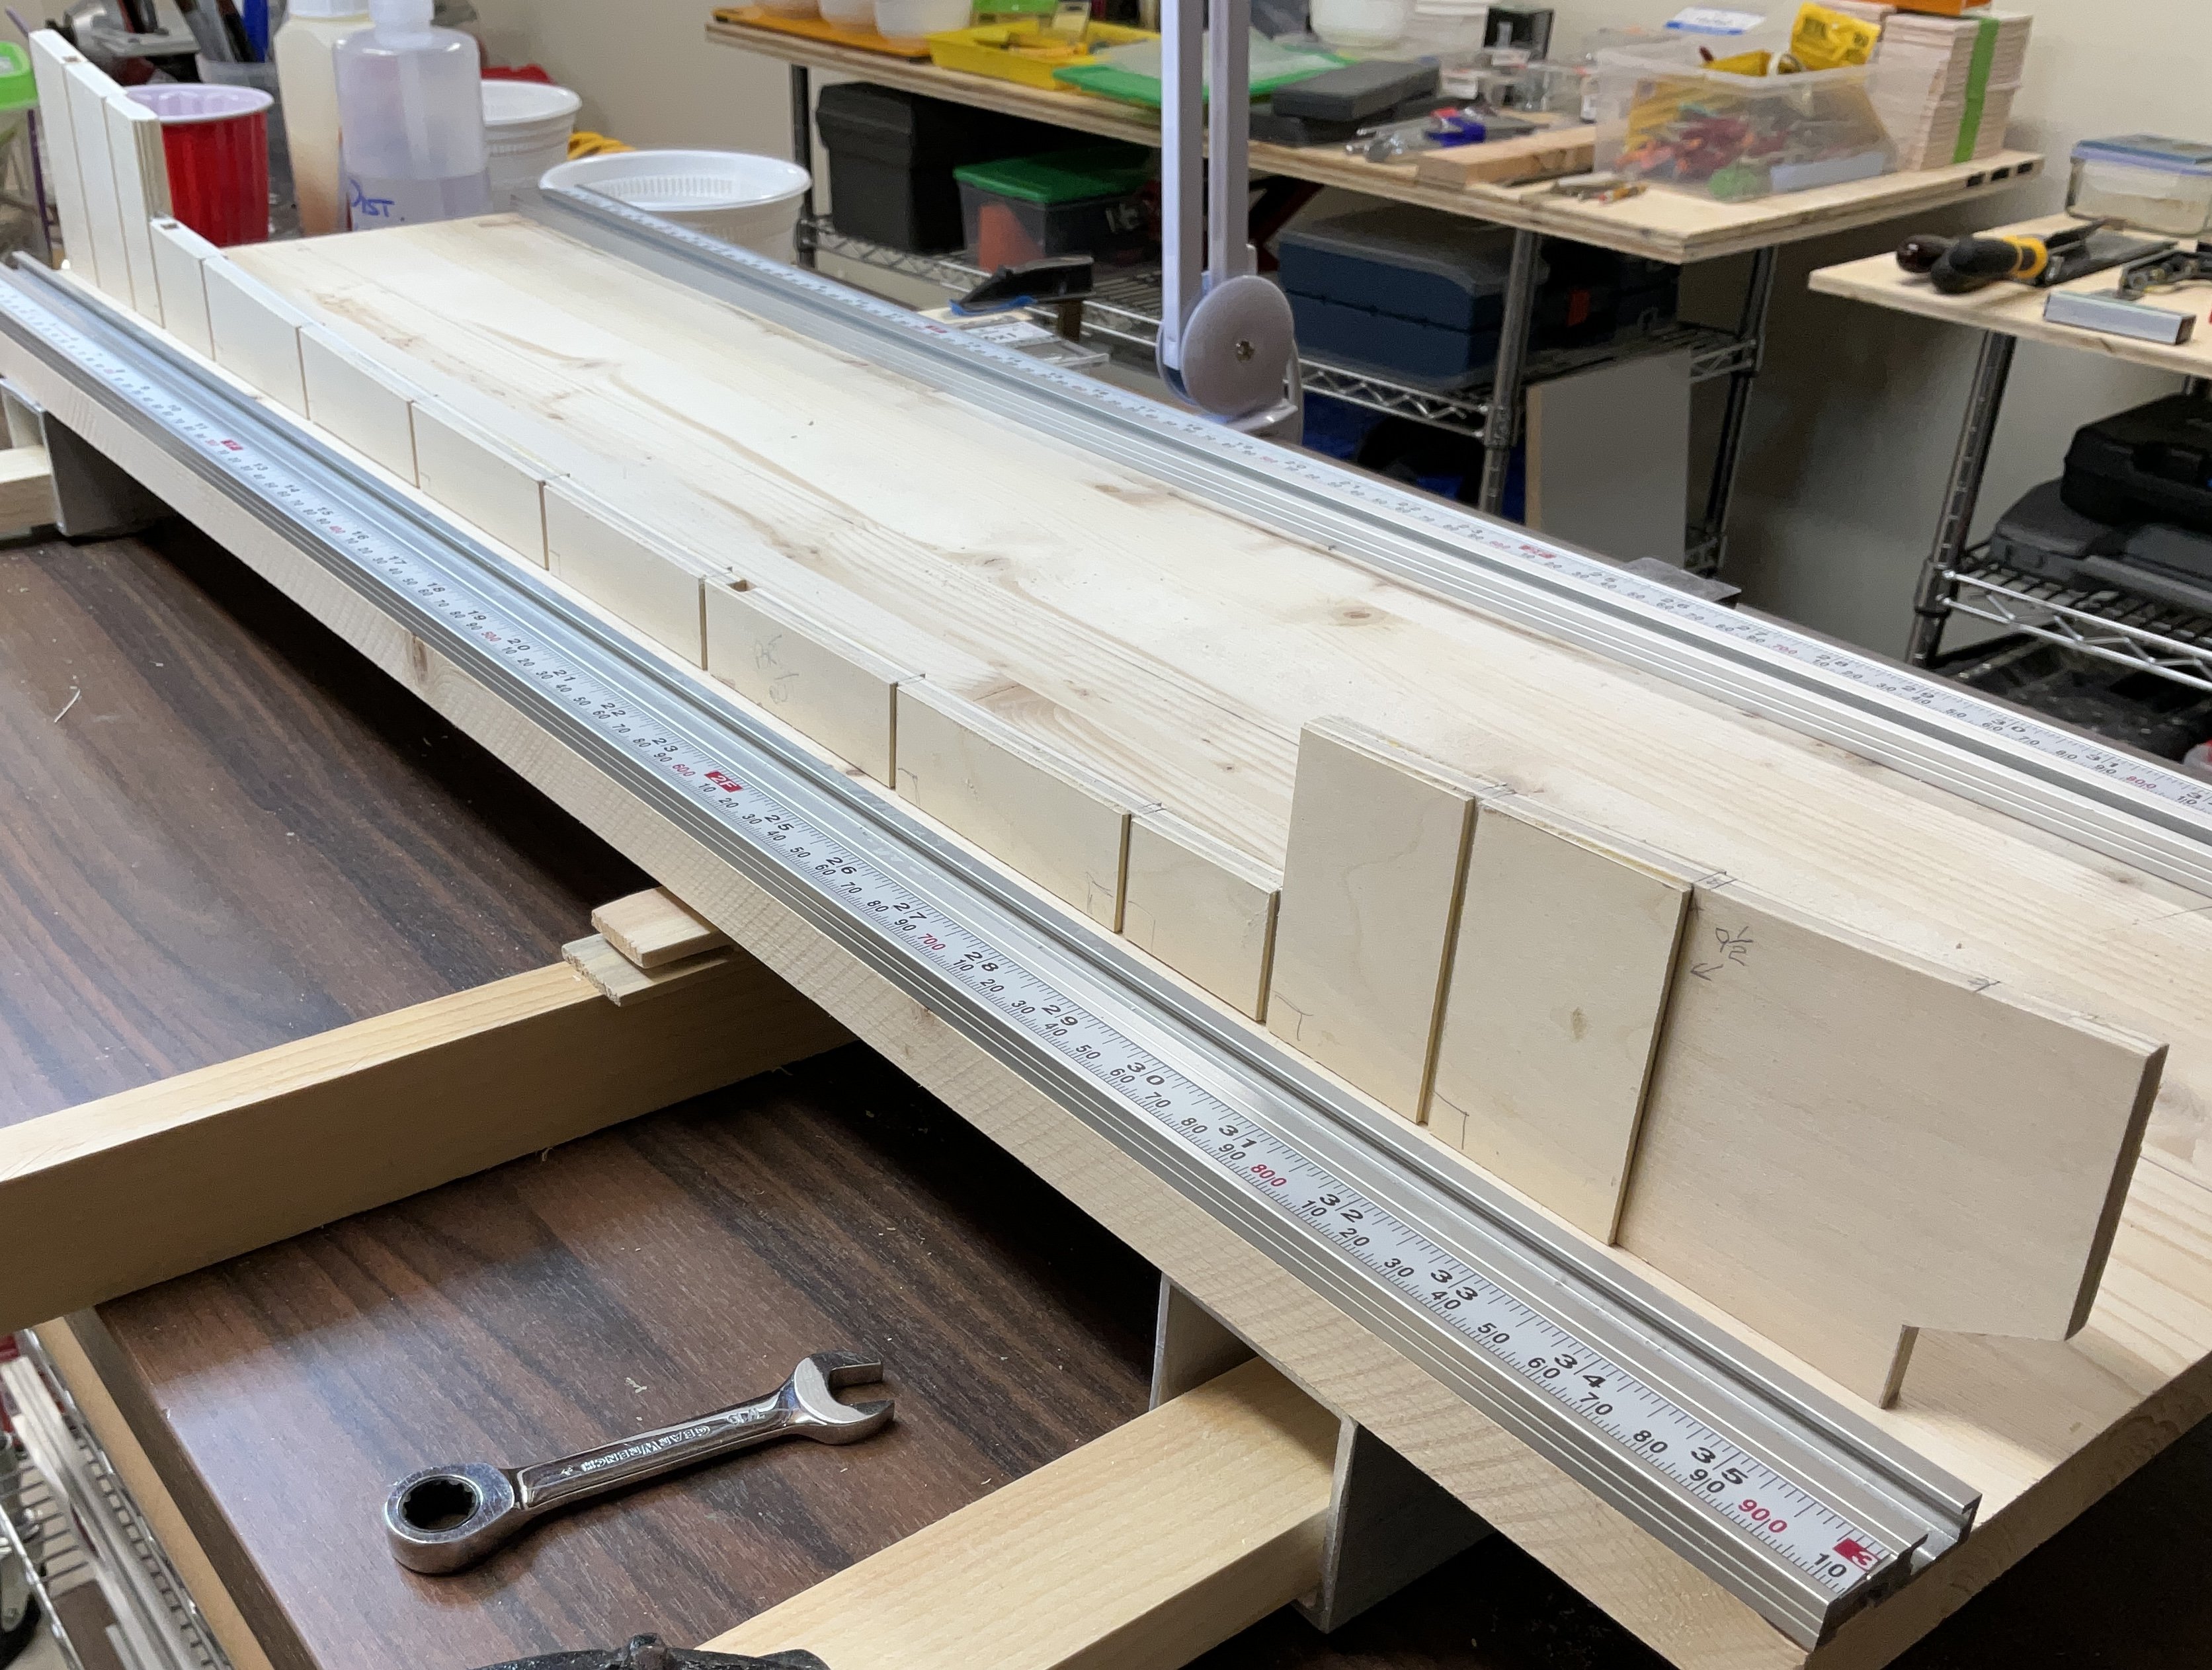
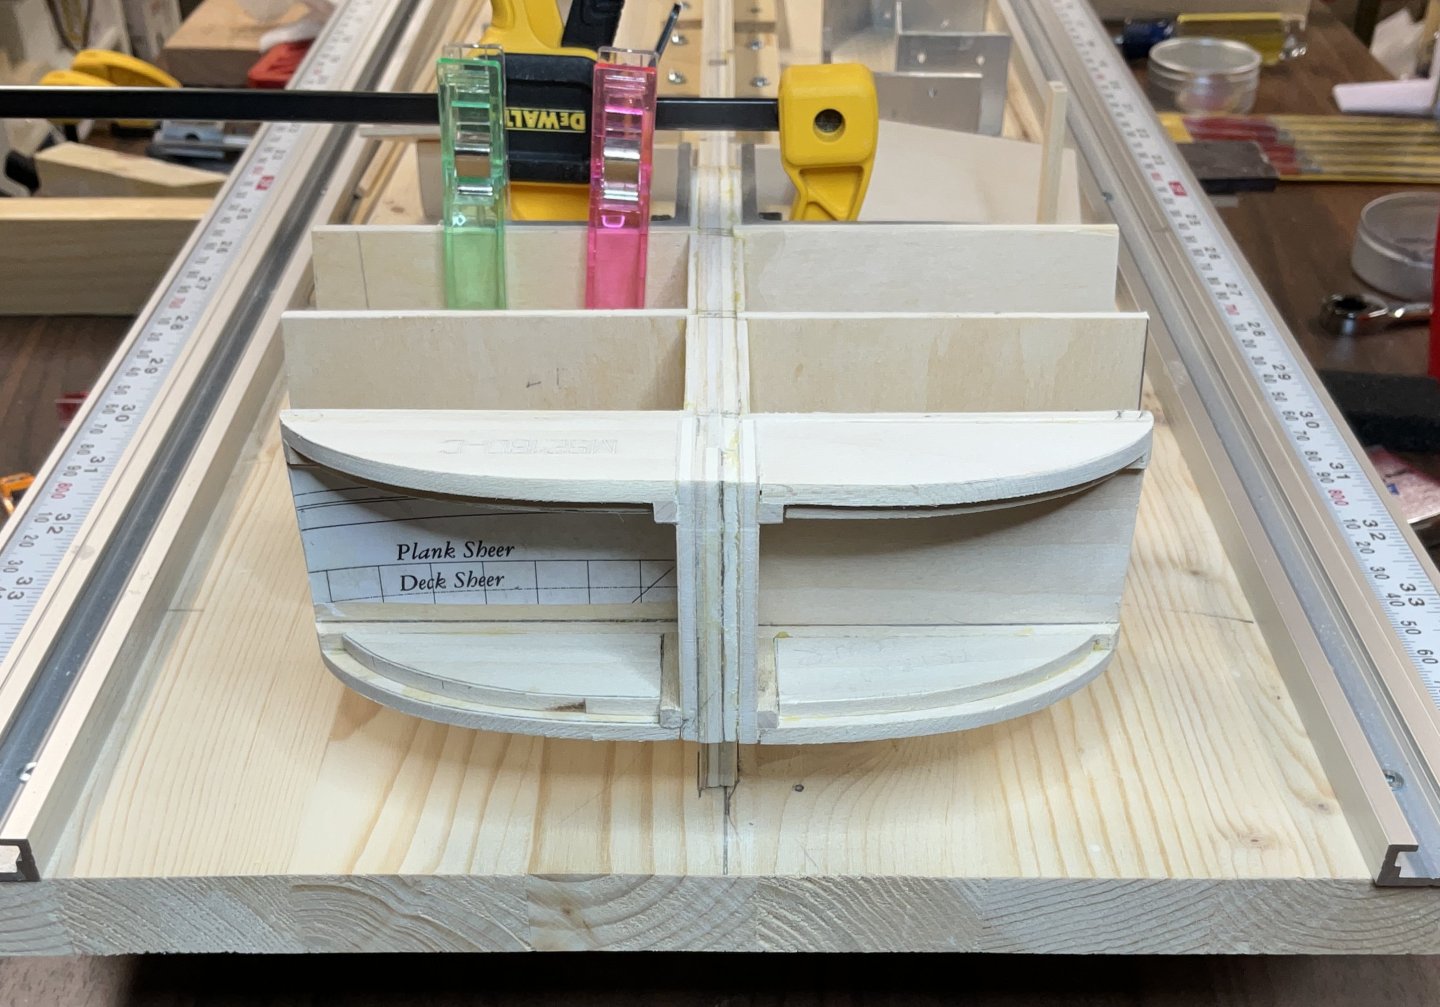
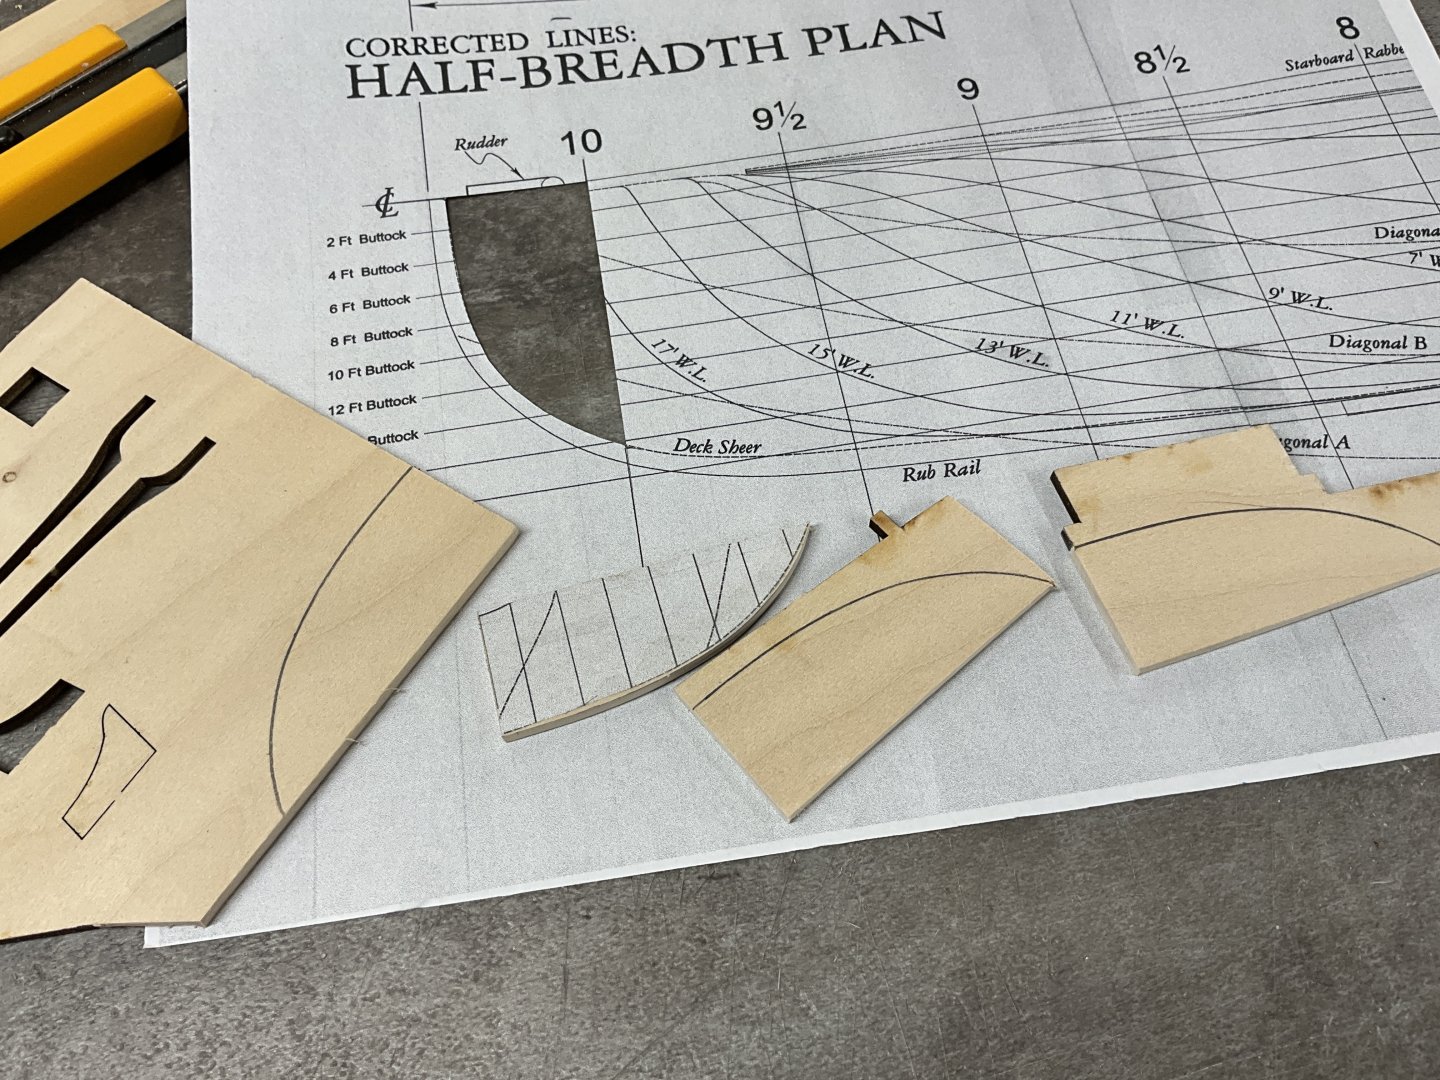
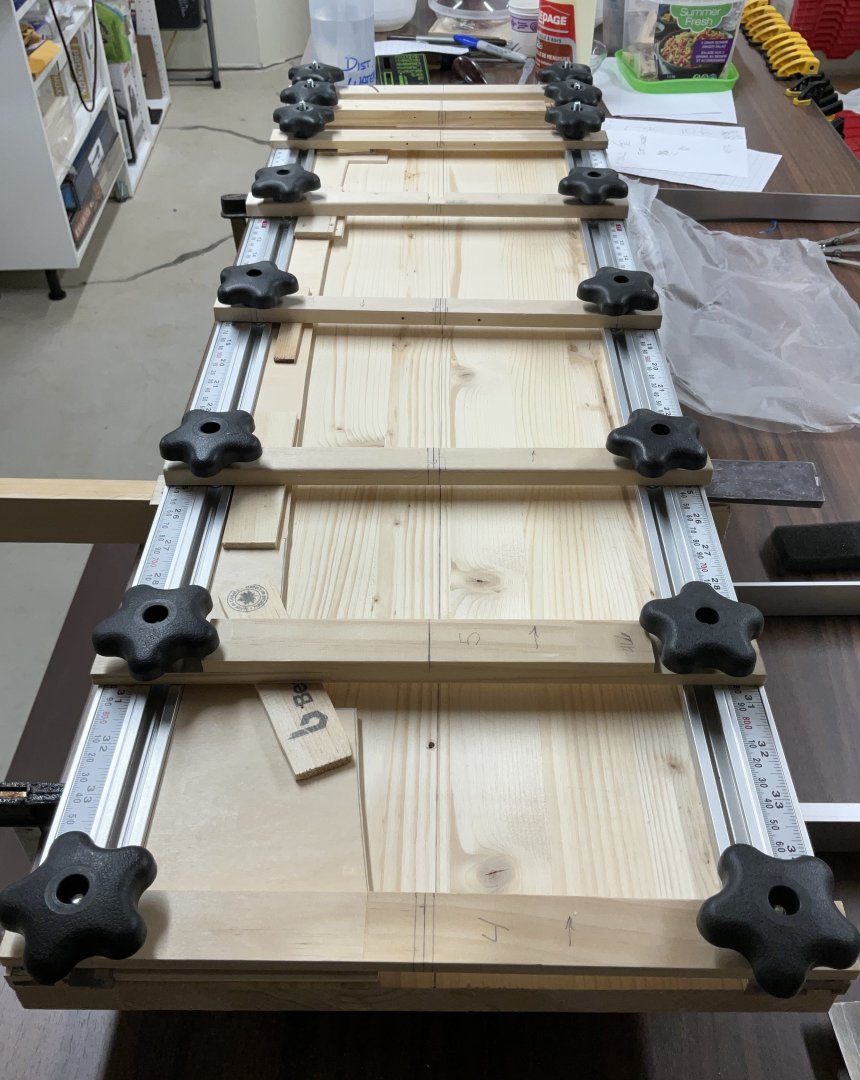
Hi Everyone, I hope you are all well. Thank you for all of your Comments, Likes, and support. I have been reading this report that @bruce d posted a link to in his topic “ 1915 steam schooner Wapama - detailed tech book and plans “. Thank you Bruce. Tons of details! In my opening post it should have been mentioned that the hull of Wapama was built by St Helens Shipbuilding Company in St Helens Oregon and towed by Steam Schooner Multnomah to San Francisco for completion. Work on the bulkheads has begun. They are made from the 1/8” plywood. They will be beefed up with 1/8” basswood later on to give the hull planking more gluing area. I started at the stern because it is the most complex part of the hull and didn’t want to get too far in case it needed some revisions. Left over 1/8” carrier sheets from Model Shipways are being used wherever possible. It is of nice quality. The area aft of the last bulkhead was “caged” with 1/8” x 1/8” basswood strips. The bulkheads that extend up to the cabin deck are all glued in place. The next bulkheads will just go up to the main deck. Thanks for dropping by. Hope to see you soon.


-
Hi Jacques, your Lancha Chilota looks great. Since the beginning of your build log you have posted photos of these boats resting on their sides at low tide. Have you ever considered displaying your model in this manner? Just thinking out loud 😀
- 312 replies
-
- 4
-

-

-
- Chile
- Latin America
- (and 6 more)
-
Hi Bill, thank you very much. I’ll be on the lookout for the start of your build. Looking forward to it.
-
Hi Yves, @yvesvidal thank you for sharing your thoughts and ideas. They are most welcome and interesting!
-
Hi Steve, thank you for your generous offer. I have located your article for the NRG. Beautiful work. I have lots of reading to do.
-
Hi J. , no such thing as a bad photo of Wapama. When you see a brilliant model like this it gives you a better idea of what you’re aiming for. Thank you!
-
Hi John, I am very happy that you have found this log!
-
Bob, congratulations on finishing your Duchess of Kingston. Beautifully done!
- 207 replies
-
- 2
-
-
-
- vanguard models
- Duchess of Kingston
- (and 1 more)
-
Wow, what an amazing photo. One that you could look at for a long, long while!
-
Dream of building full size to reality of building models
Paul Le Wol replied to J Snyder's topic in New member Introductions
That would be a great project. I hope that you are able to start on it one day. -
Thanks very much for the offer J. I’ll be sure to let you know if I need some advice. Feel free to jump in if you see me messing up!
-
Dream of building full size to reality of building models
Paul Le Wol replied to J Snyder's topic in New member Introductions
J. Snyder, welcome to MSW! Whenever I hear Wapama I’m all ears. Good luck with whatever you decide to build. -
Hi Jacques, perhaps the owner of Quenita had the open stern to make deck cleaning easier?
- 312 replies
-
- 3
-
-
- Chile
- Latin America
- (and 6 more)
-
Hi Gary, thank you very much. The HAER drawings, photos, and documentation are incredible and don’t leave much to the imagination. When you download the TIFFs and convert them they turn out very clean and clear. Hopefully this will become a reasonable facsimile of Wapama.
-
Hi Phil, thank you for sharing your memories. She must have been a sight to behold.
-
Thank you Jacques, it is kind of up-sized but I have a 40” wide display cabinet that needed filling 😀
-
Thank you Chris, @ccoyle, I’ll be looking at that photo a lot.
-
Thank you for your support vossiewulf. It will be needed!
-
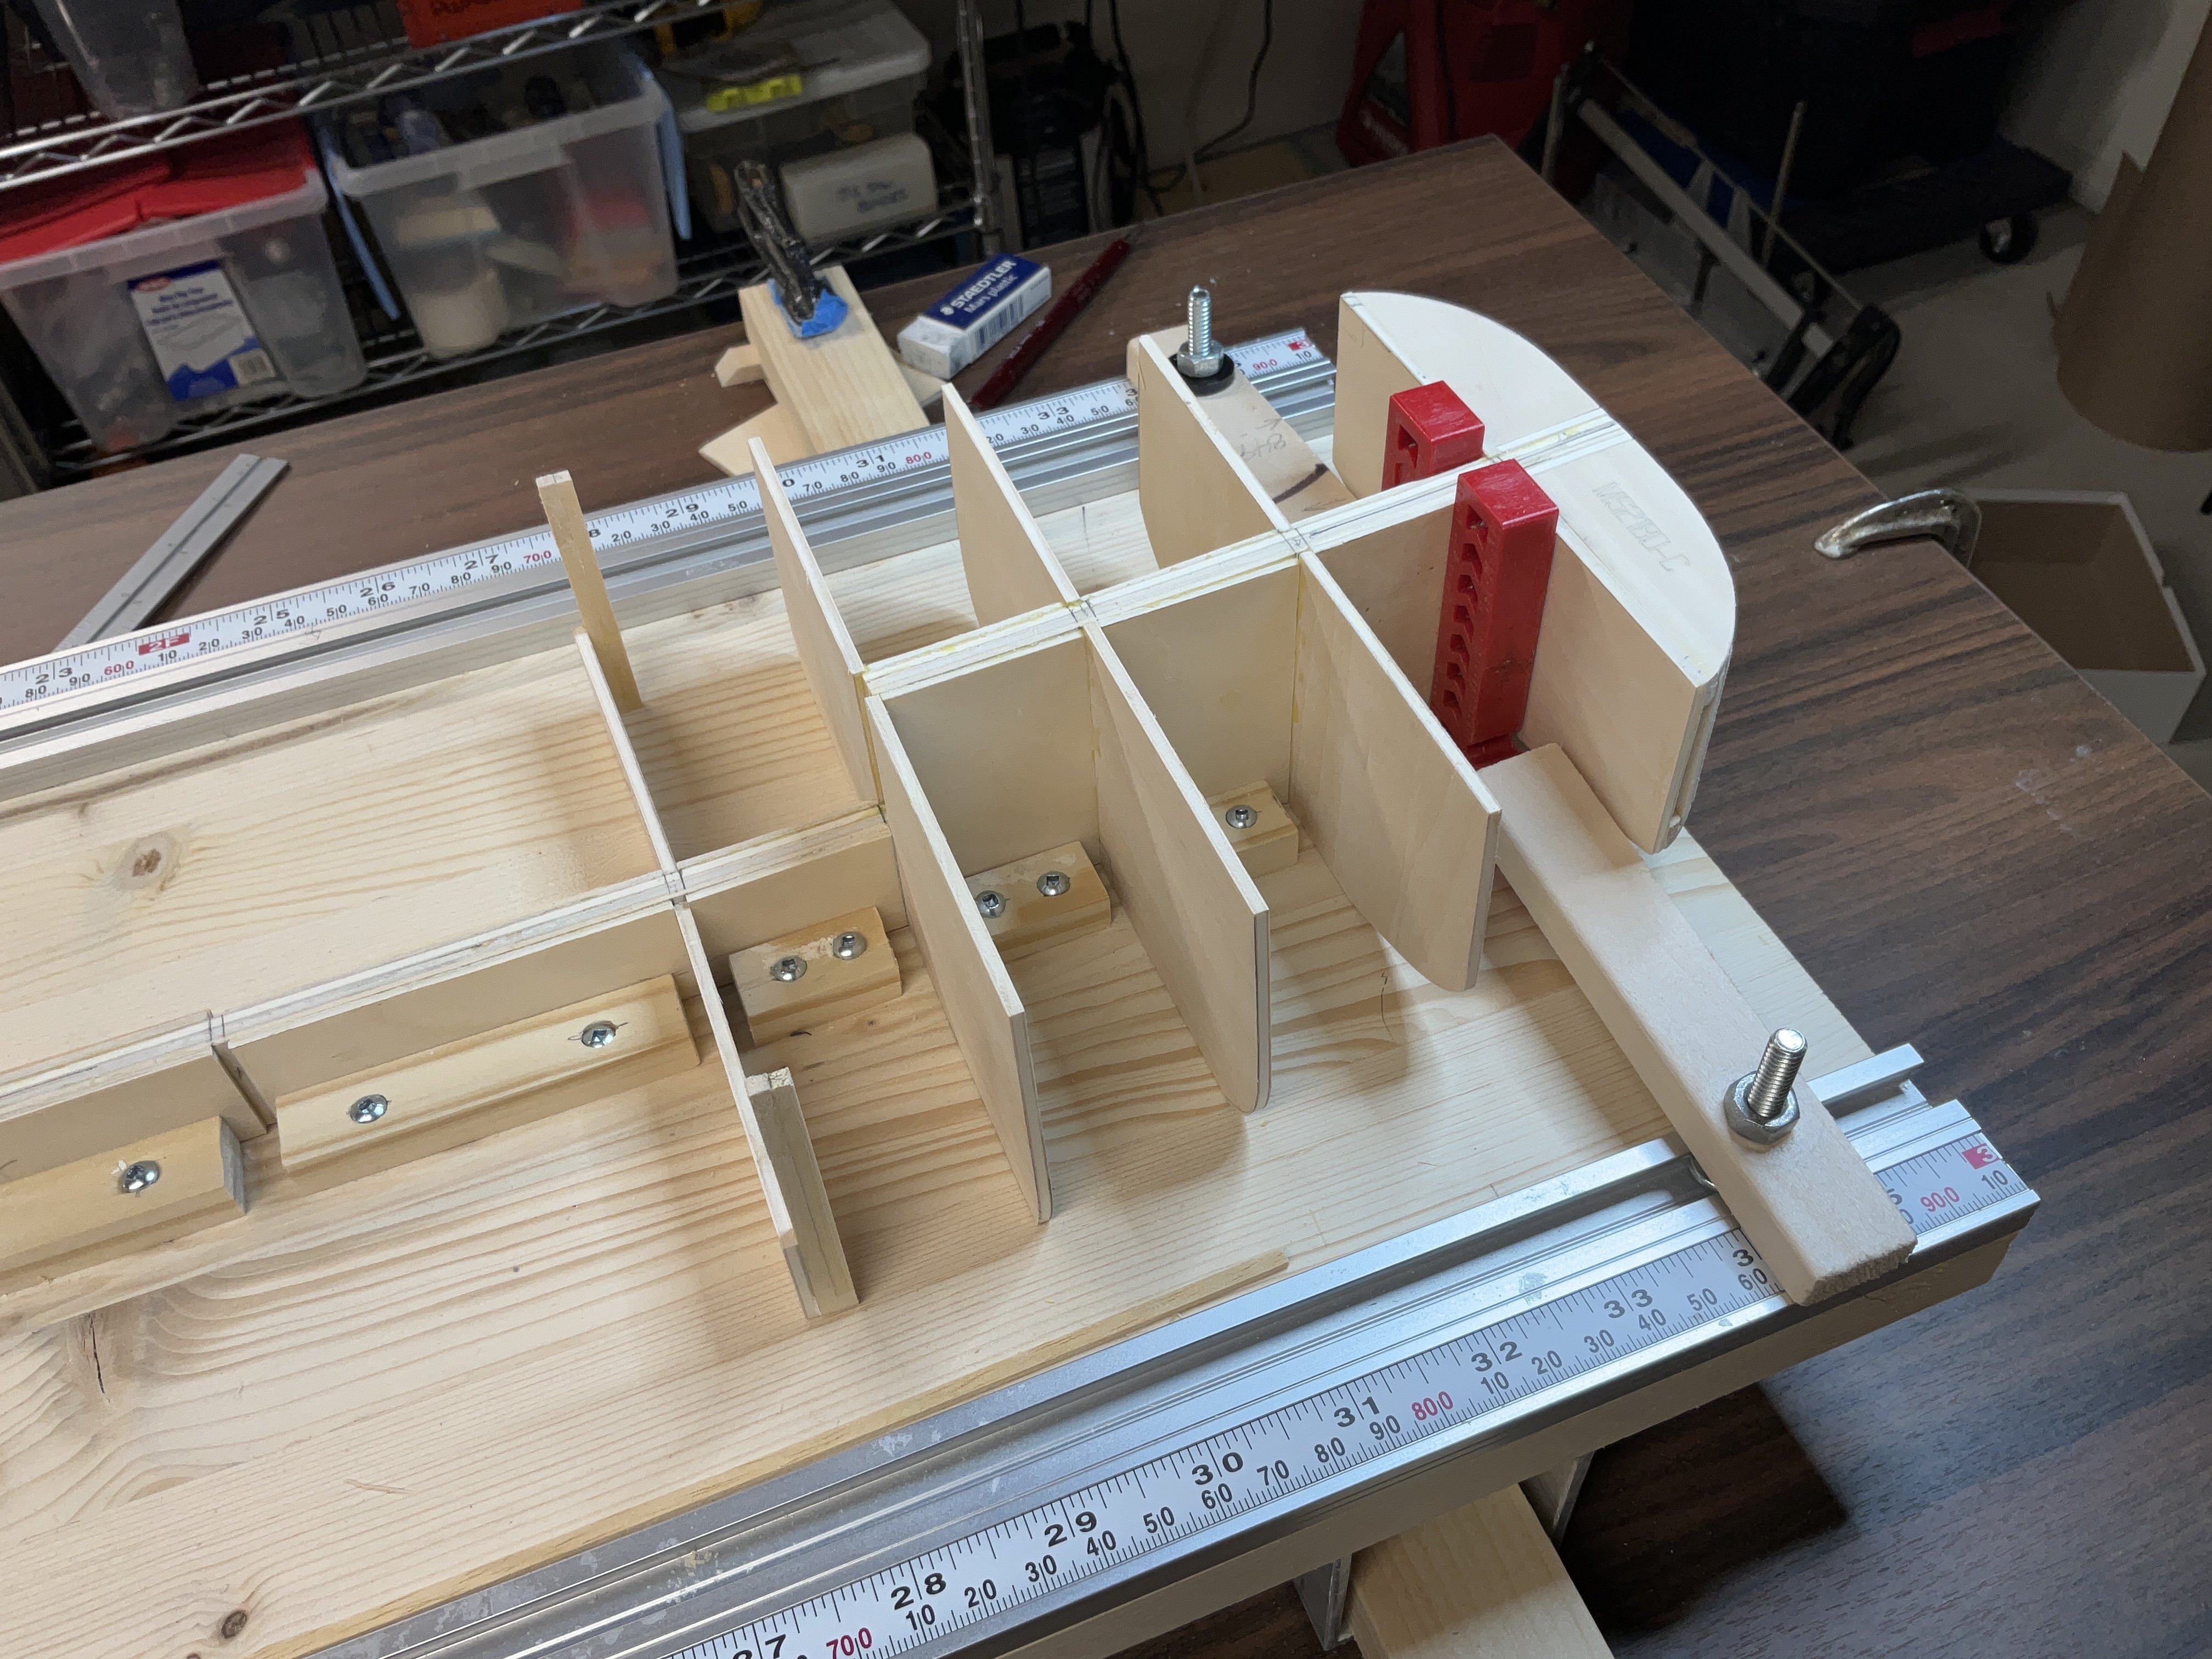
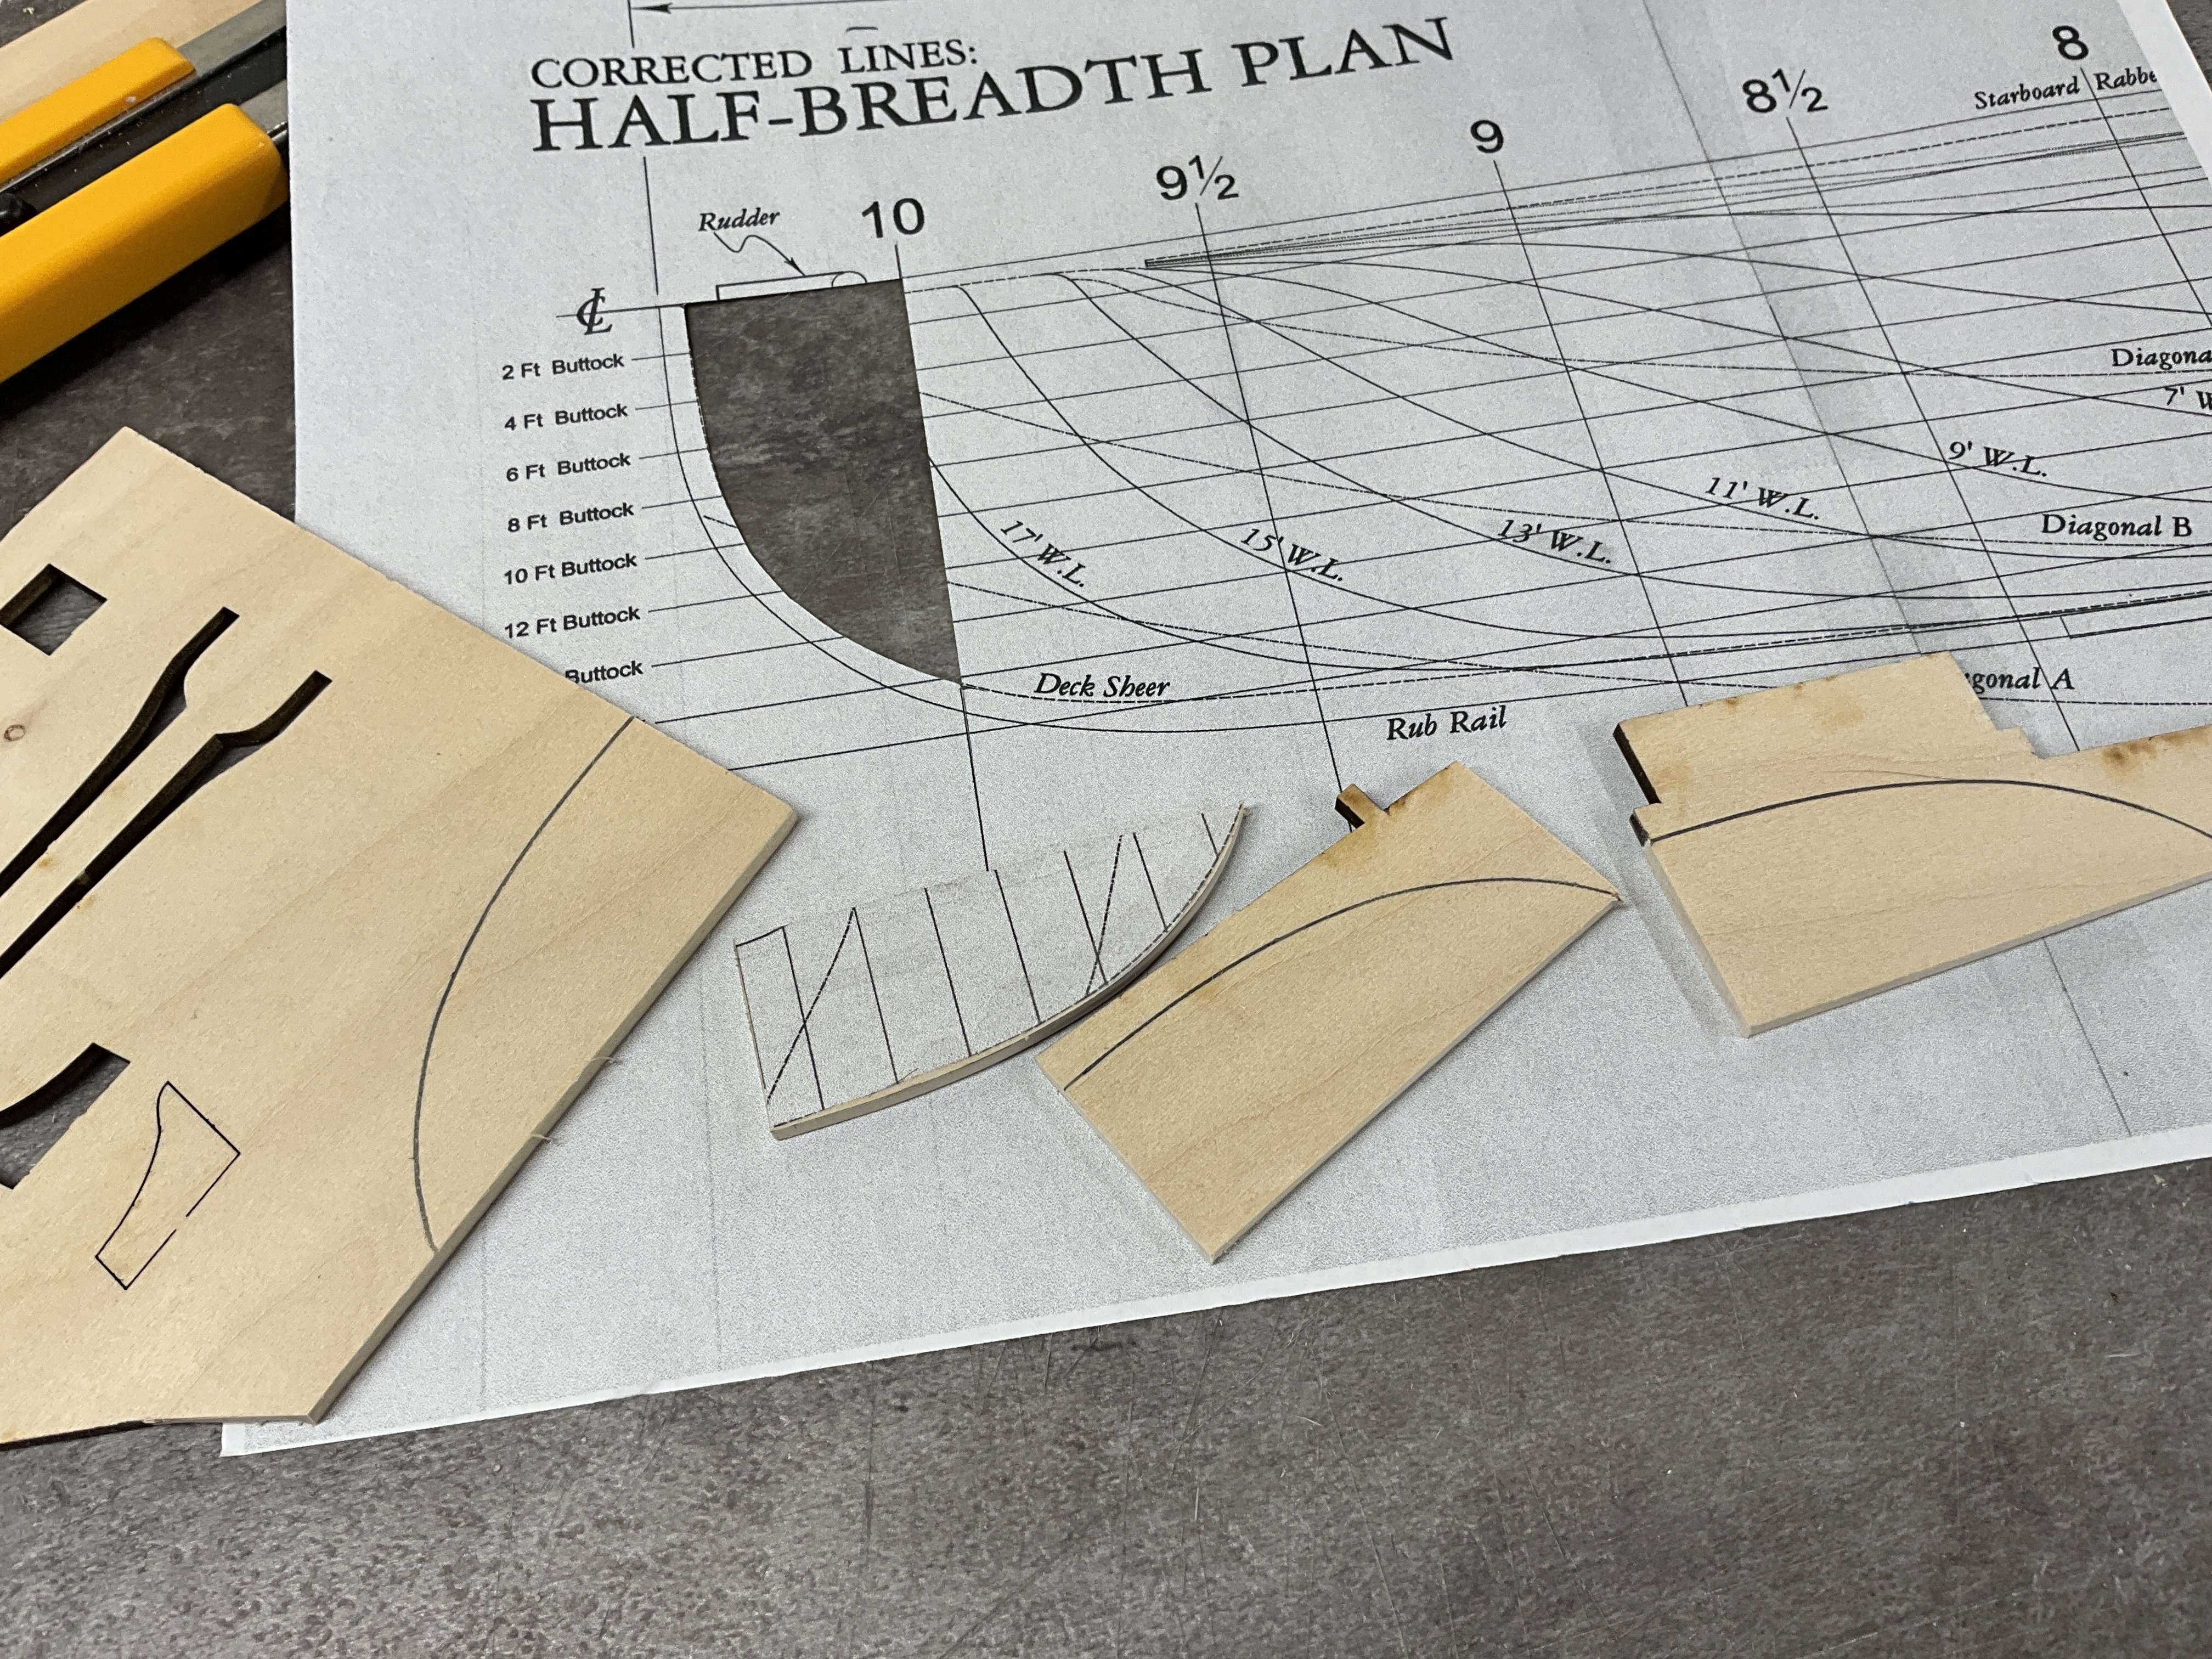
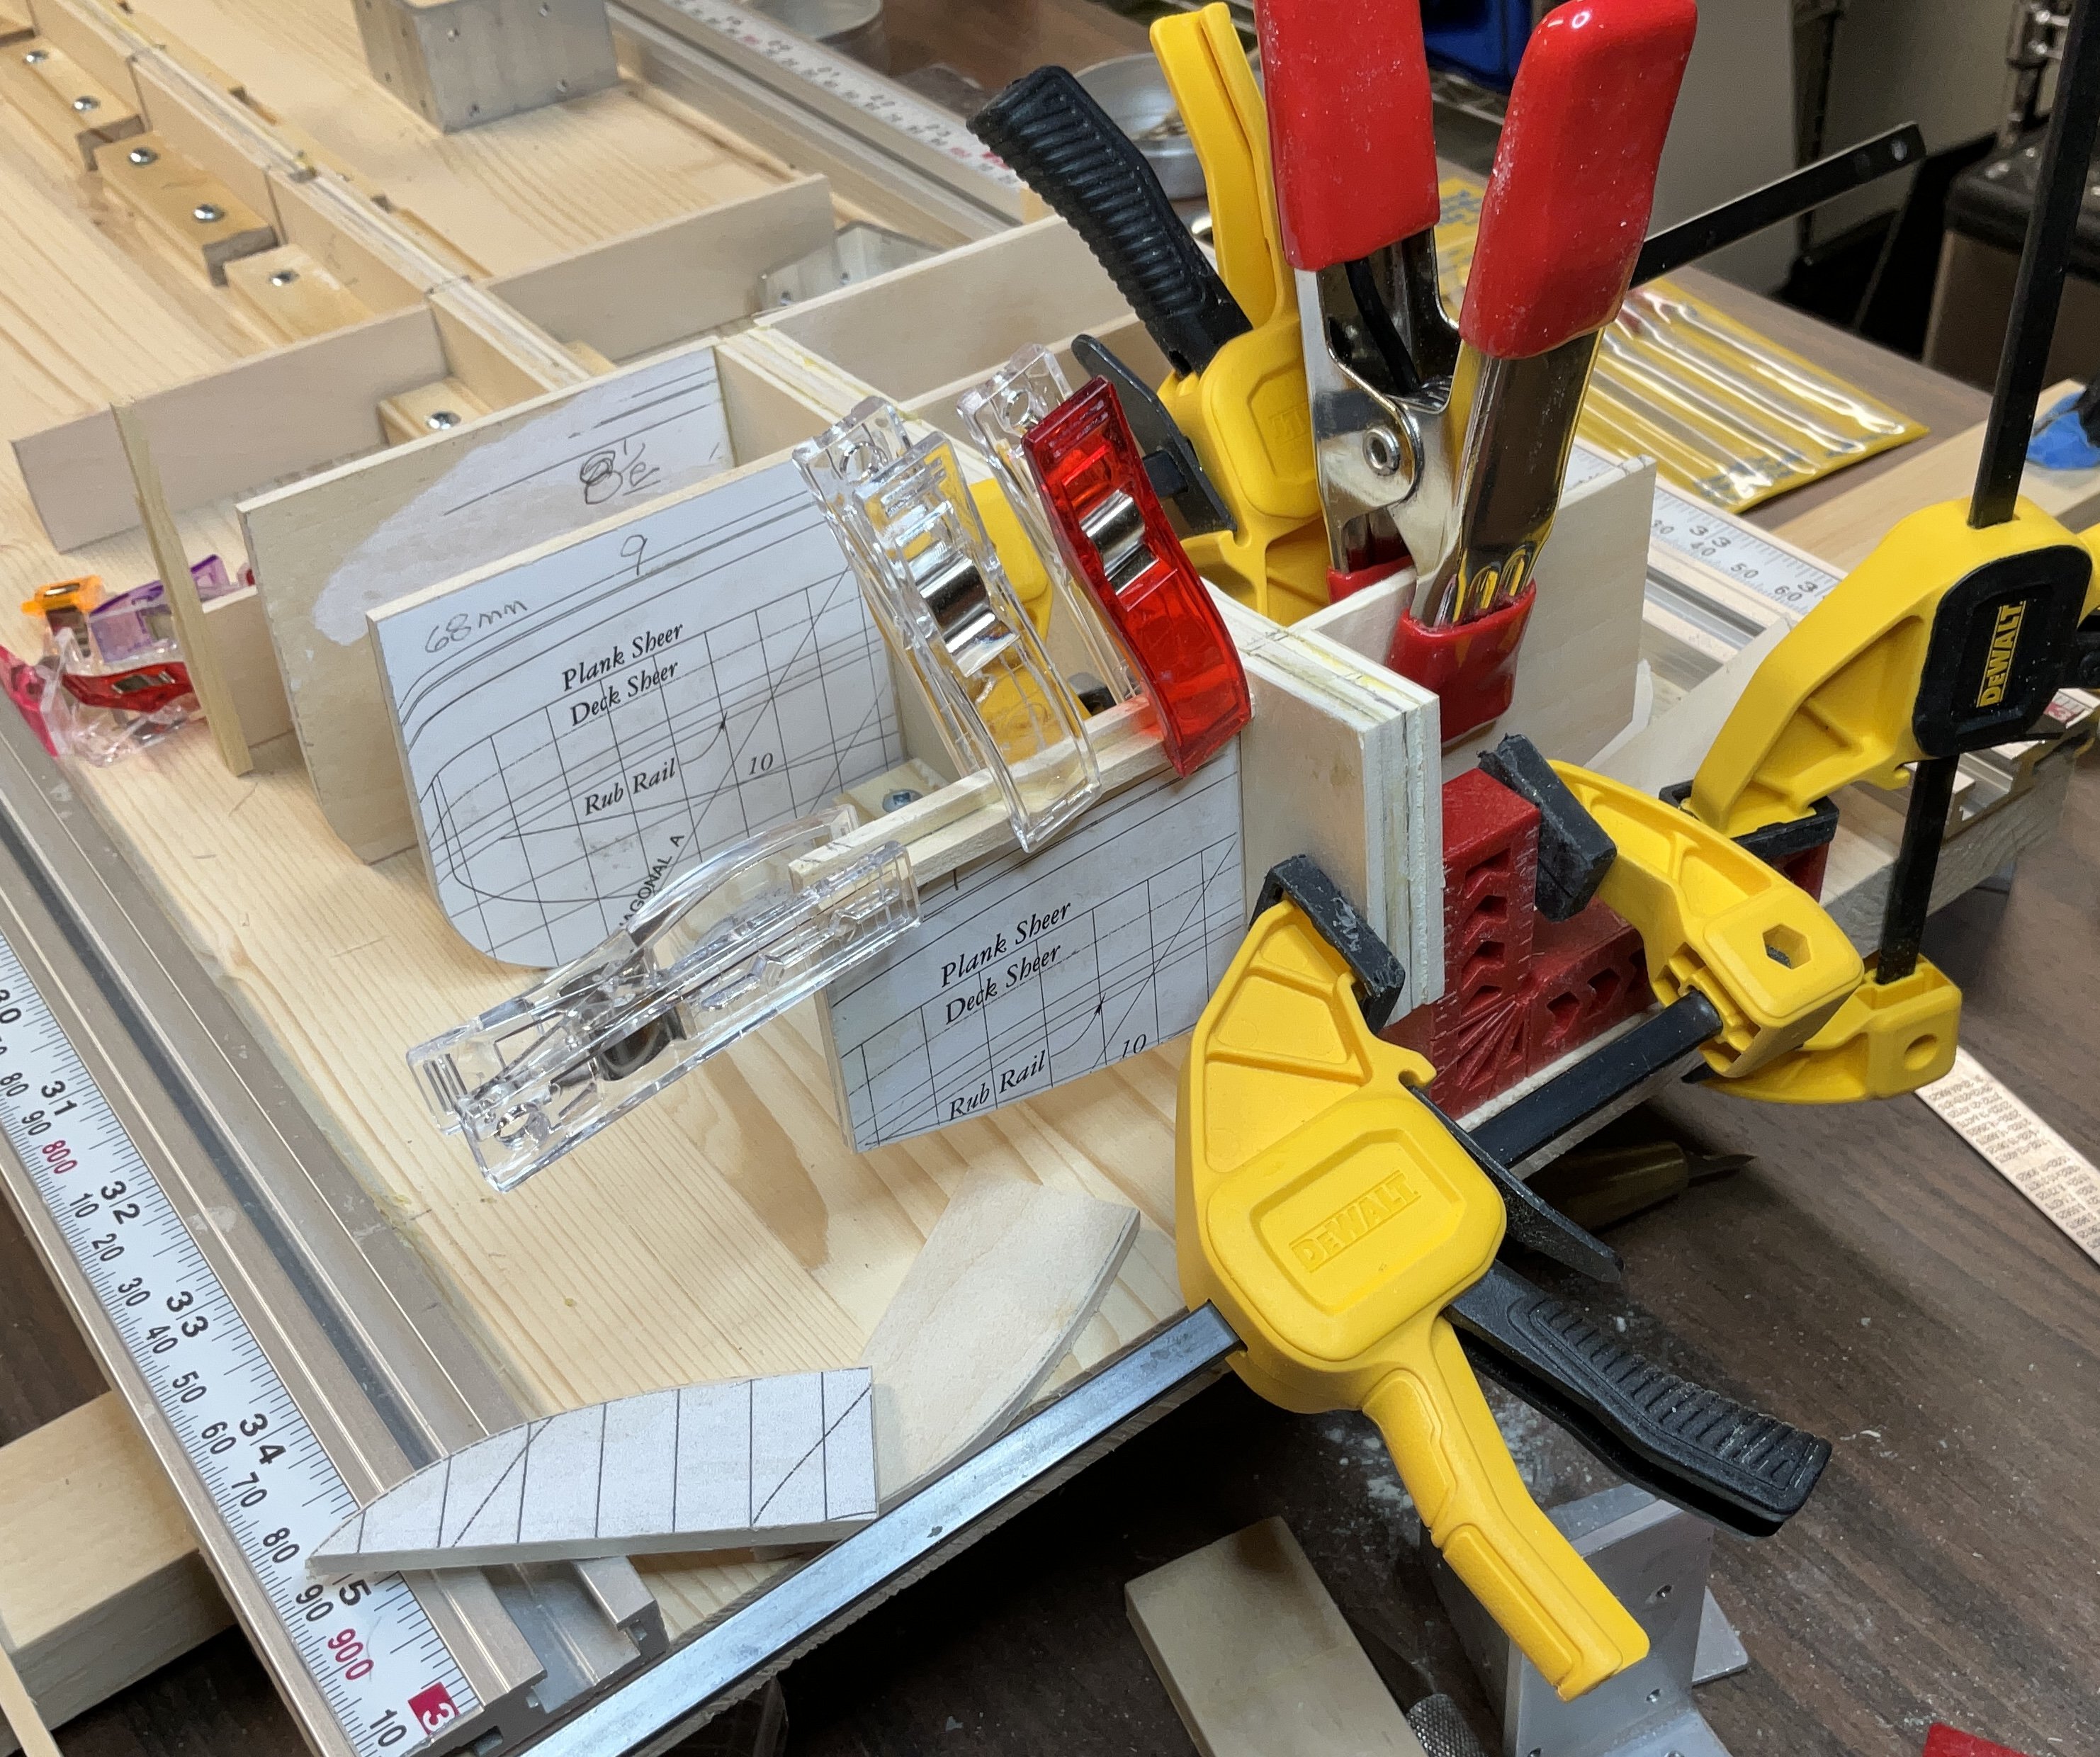
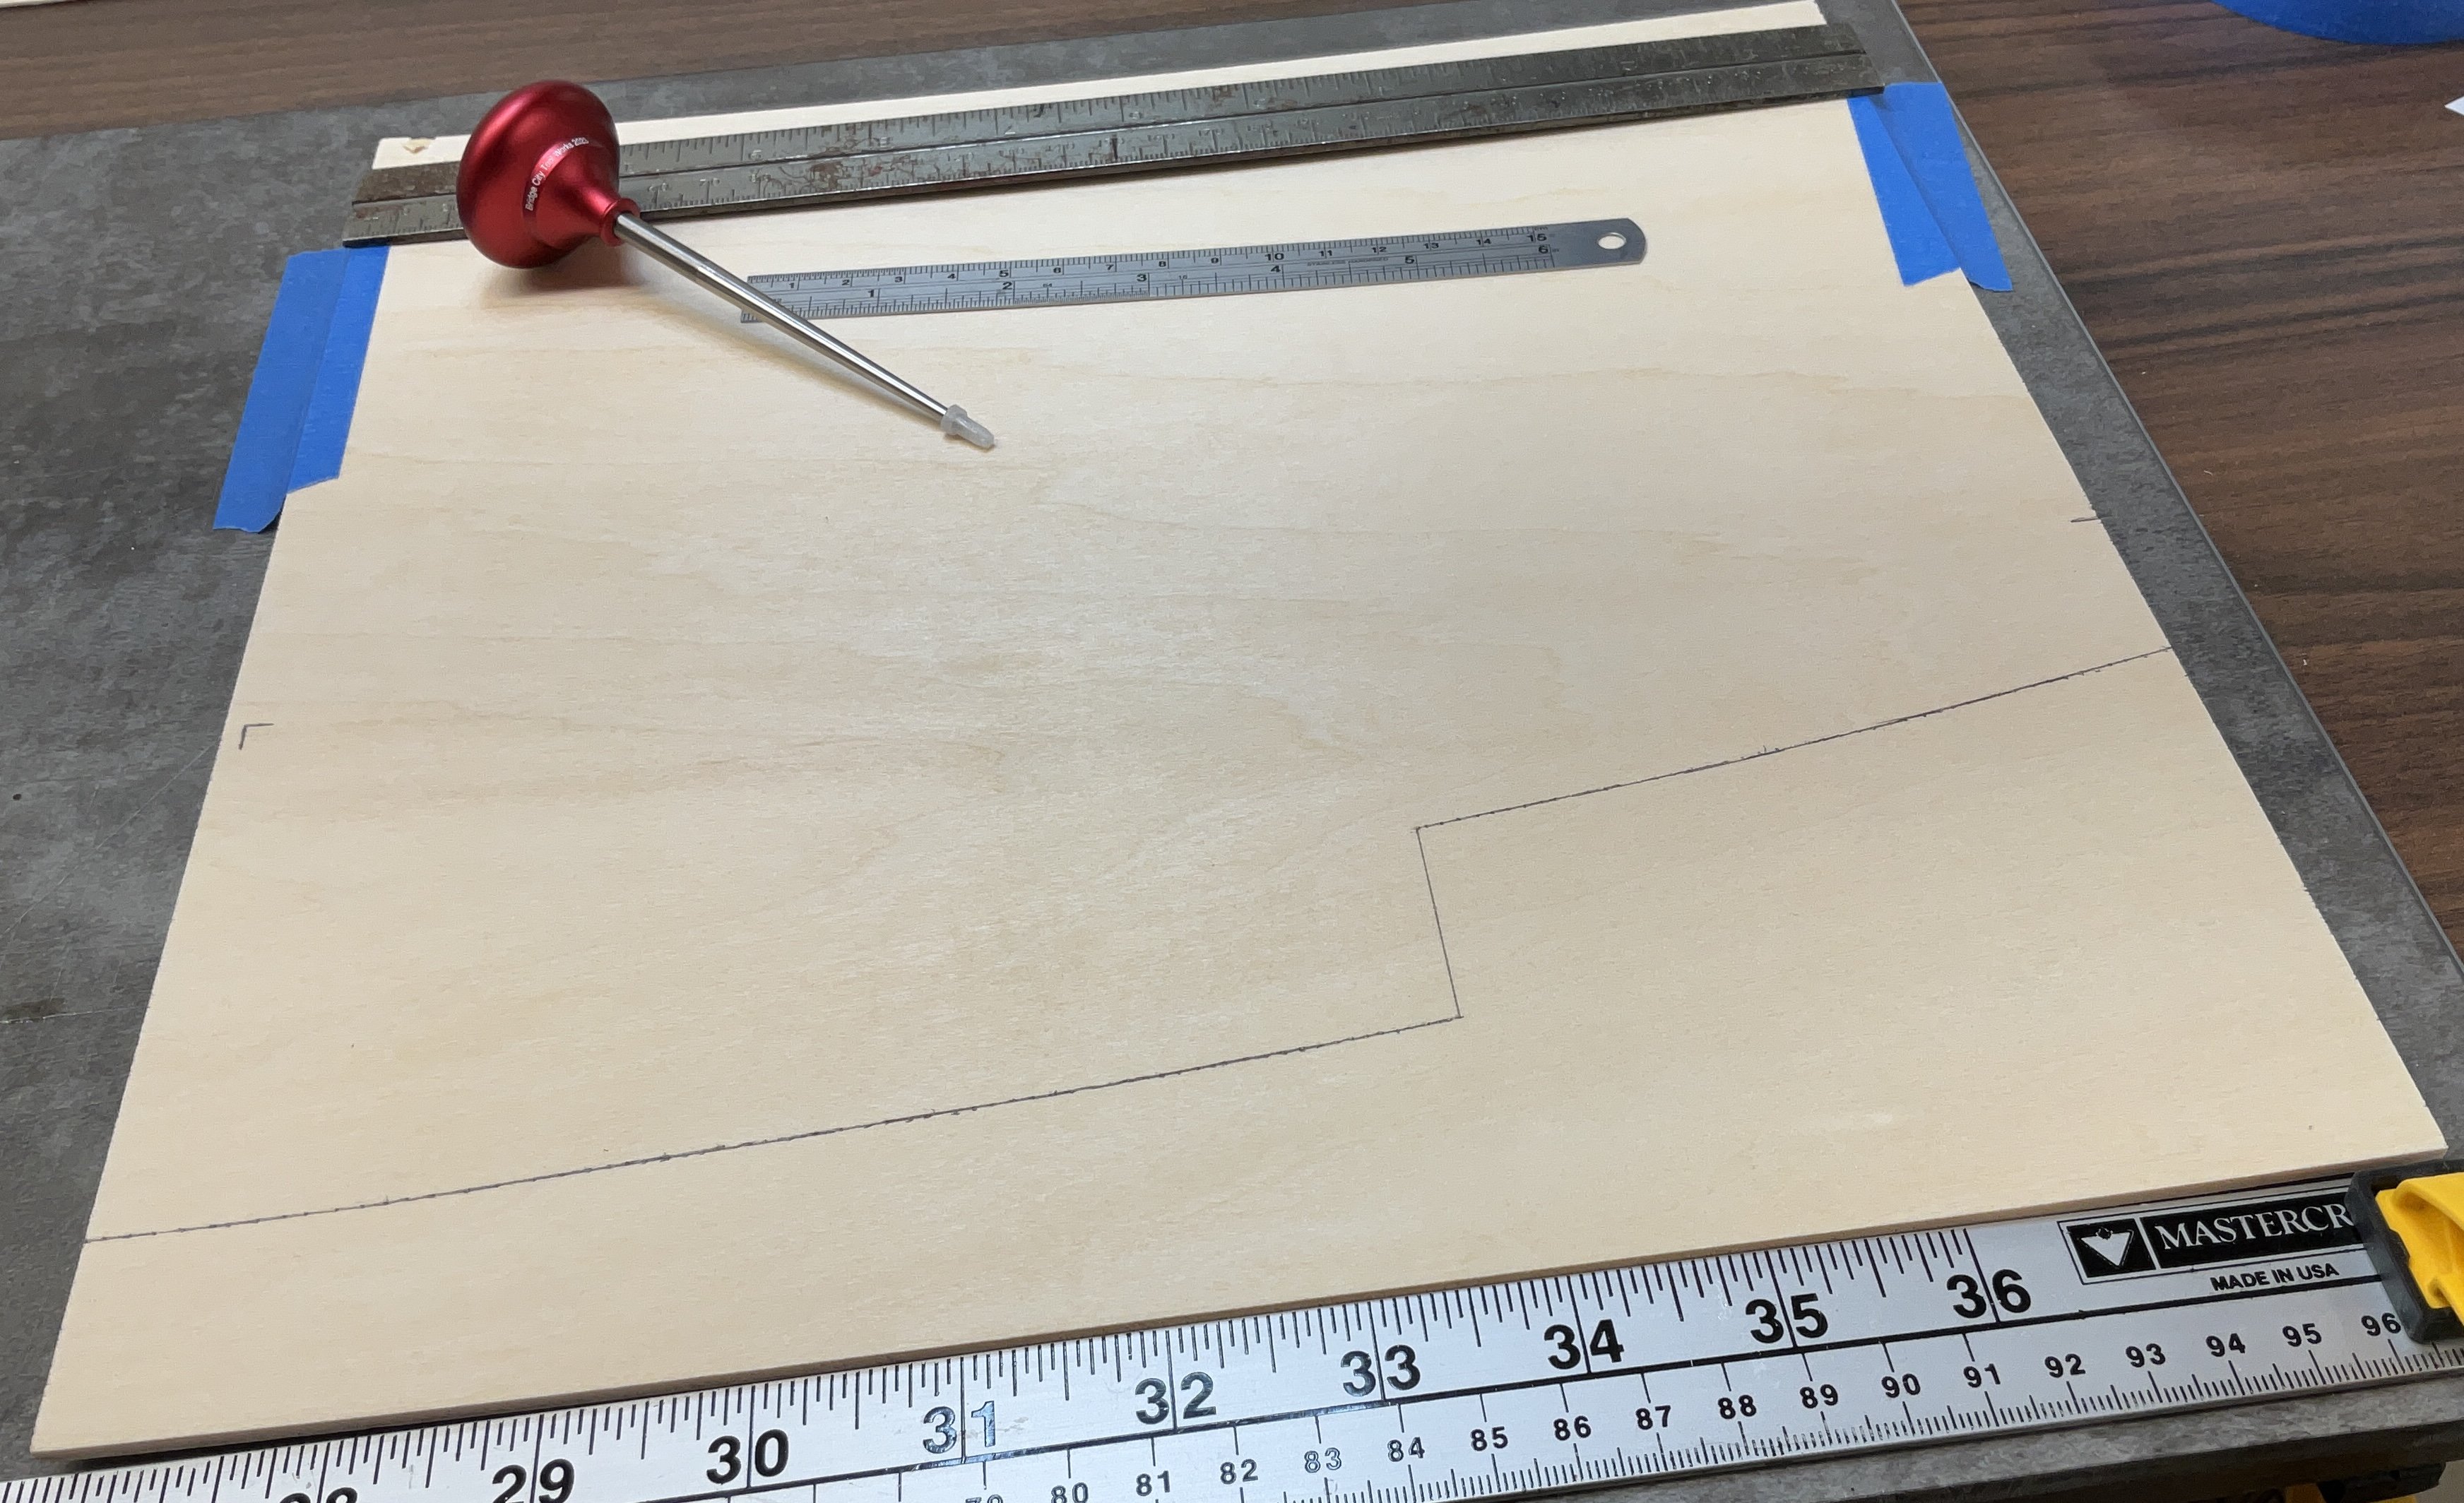
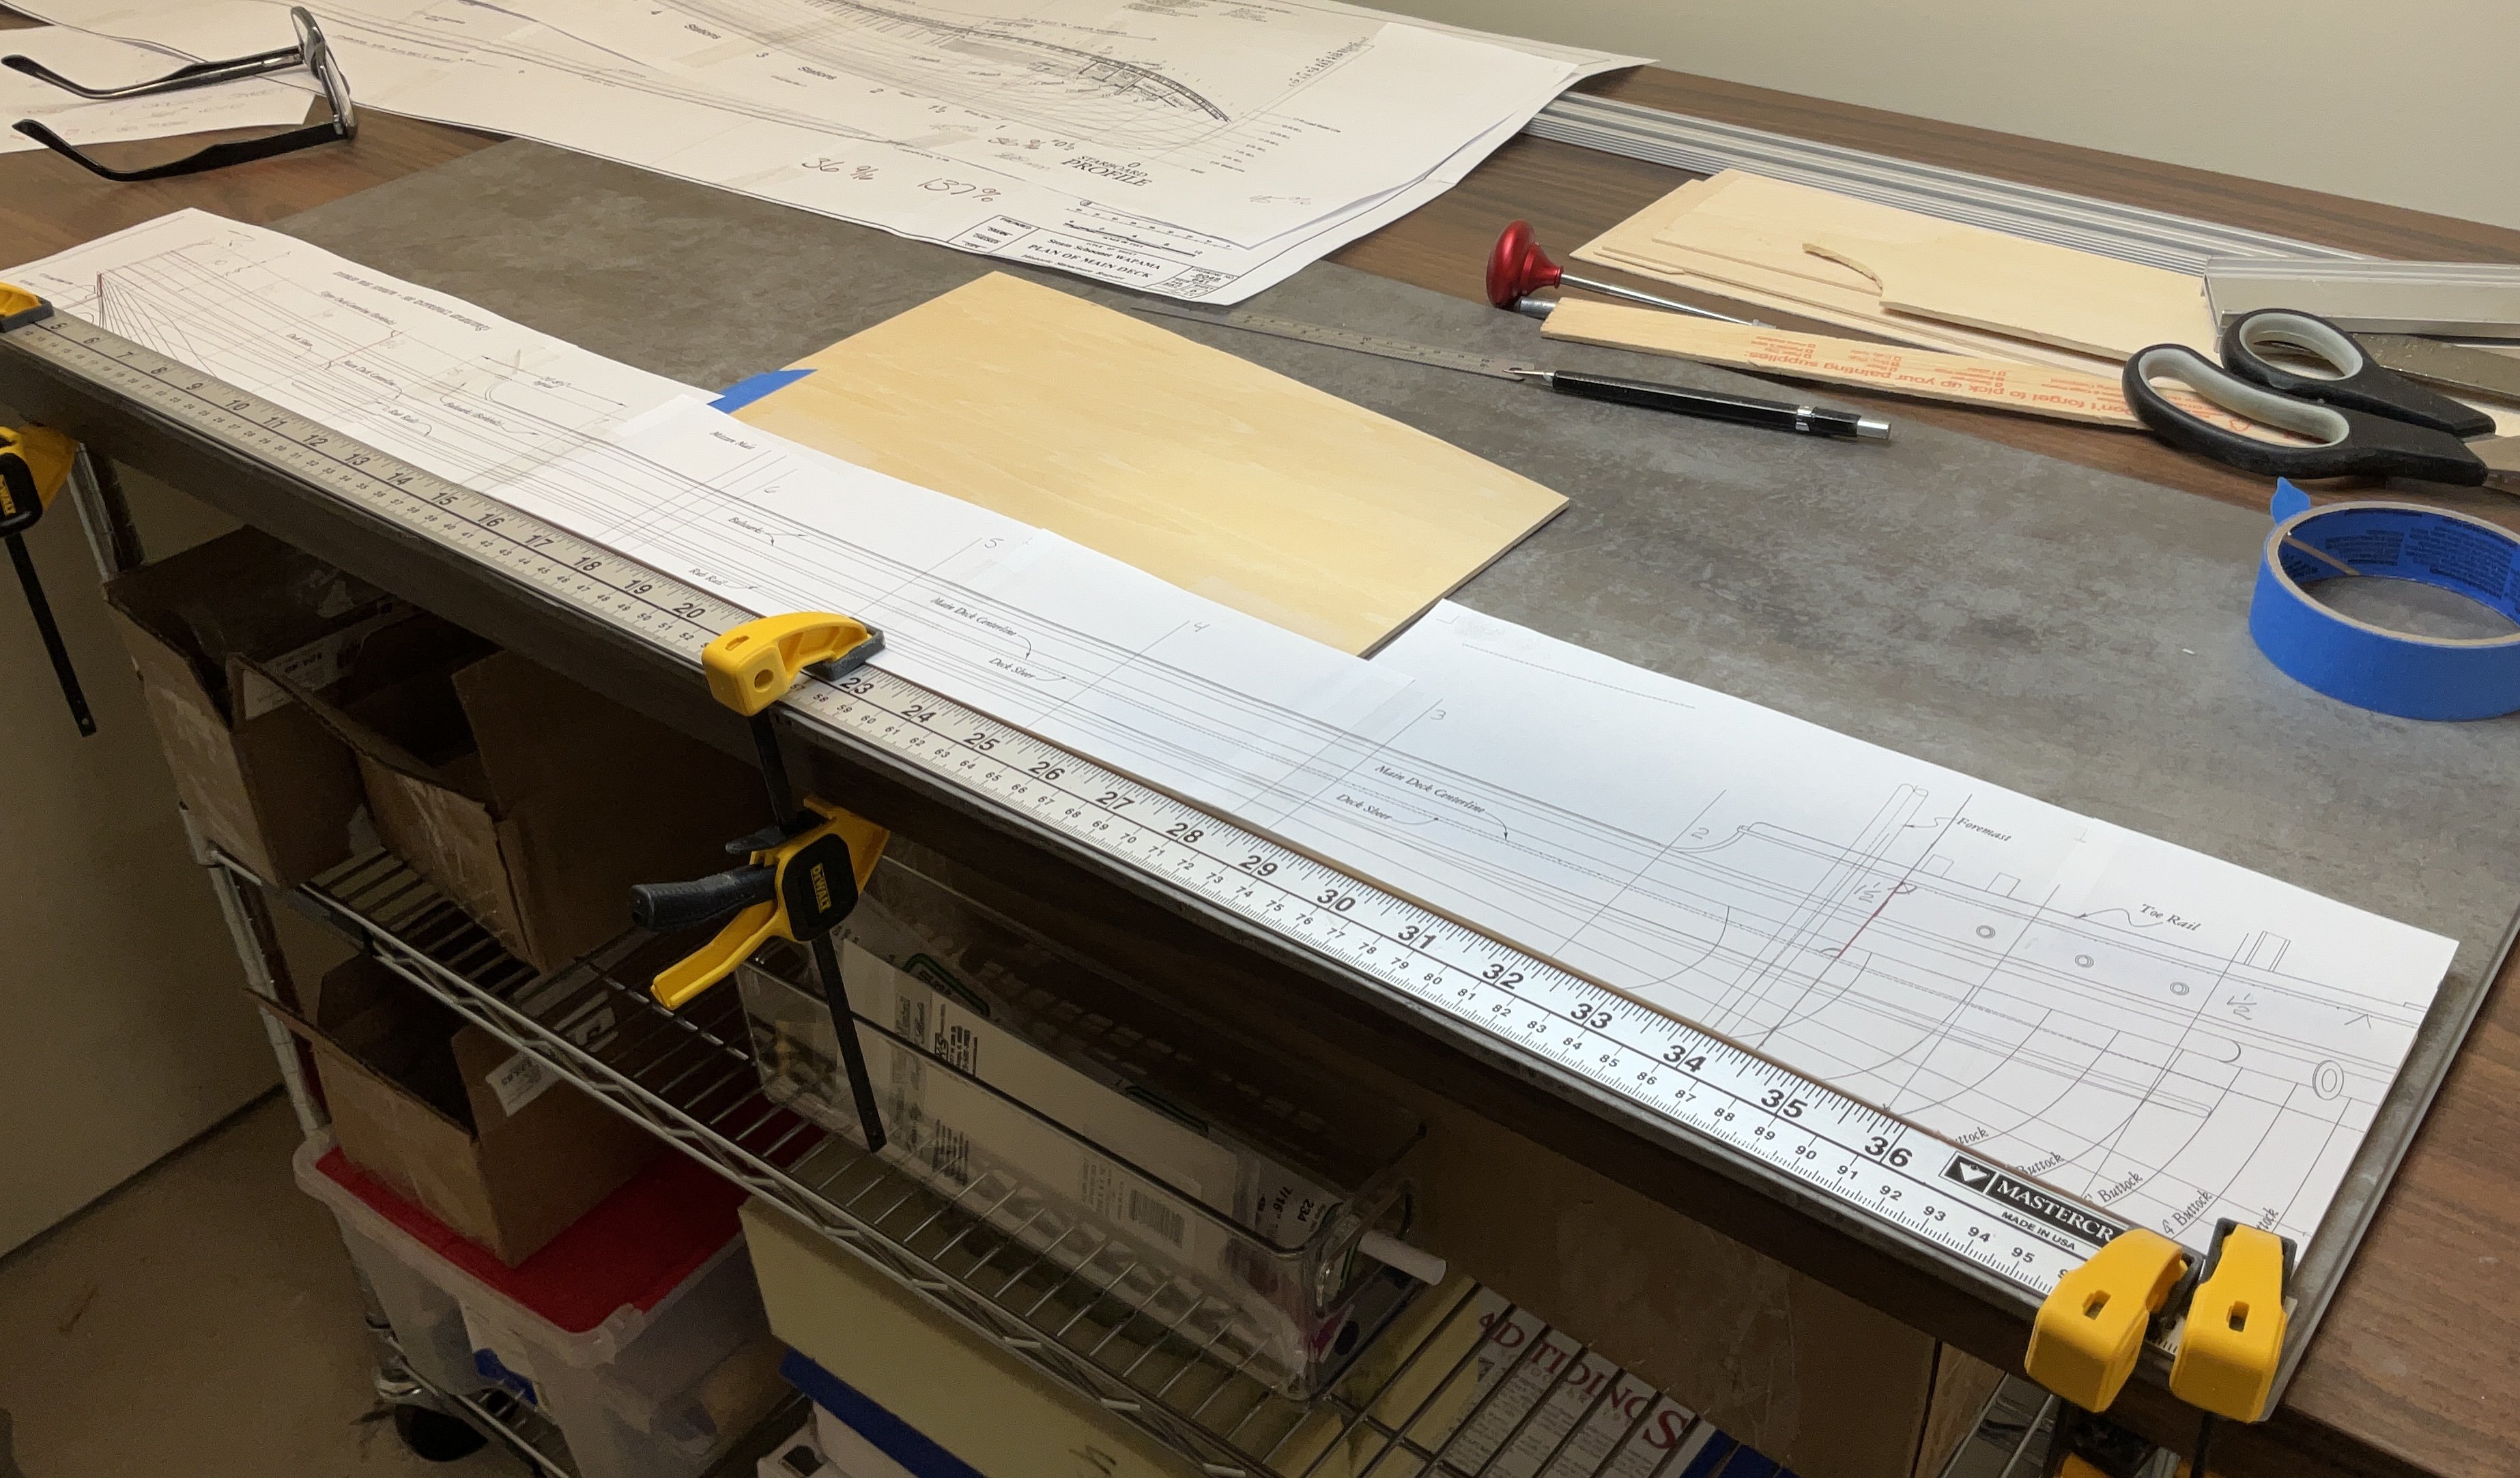
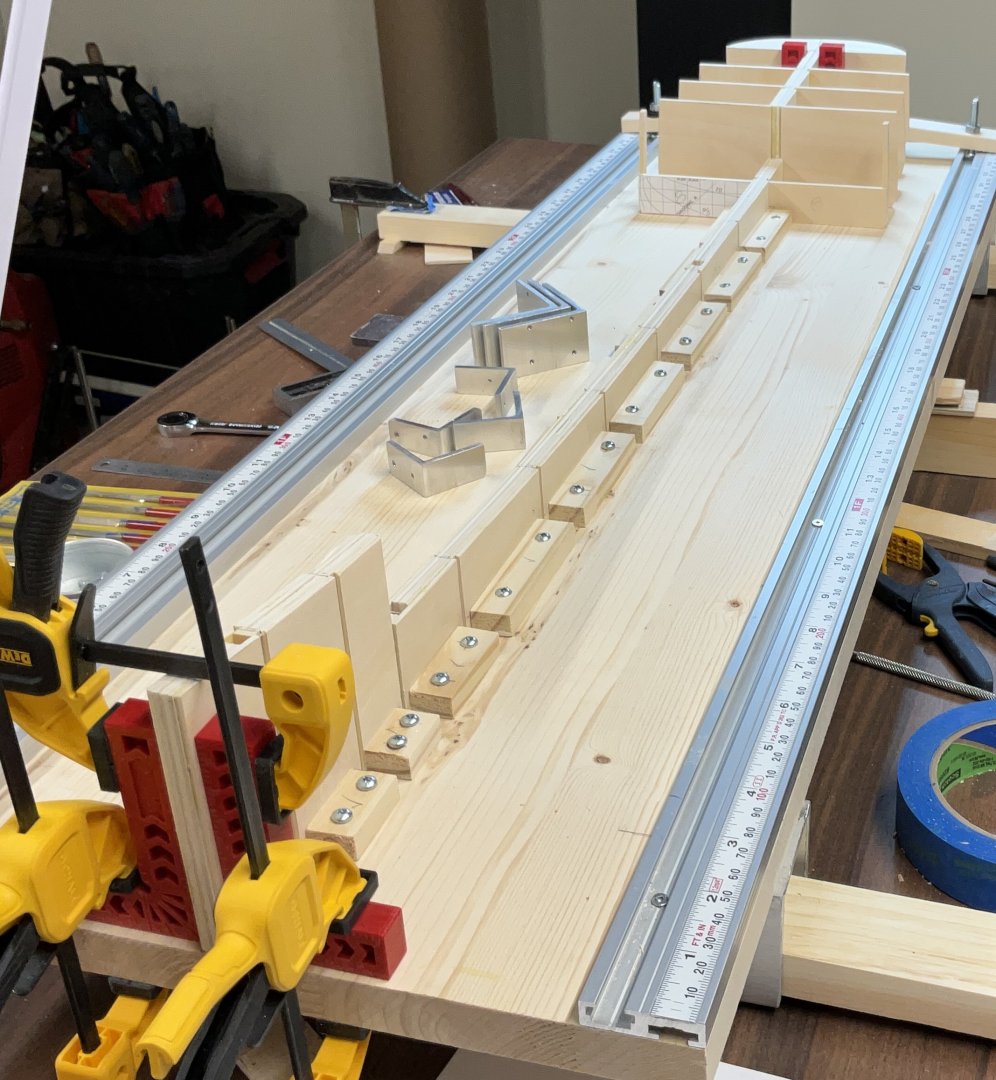
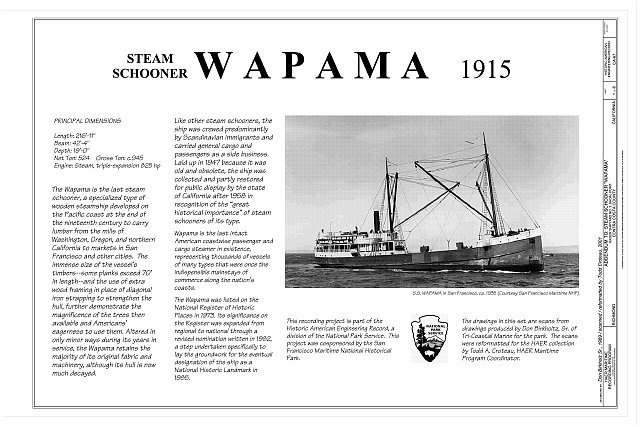
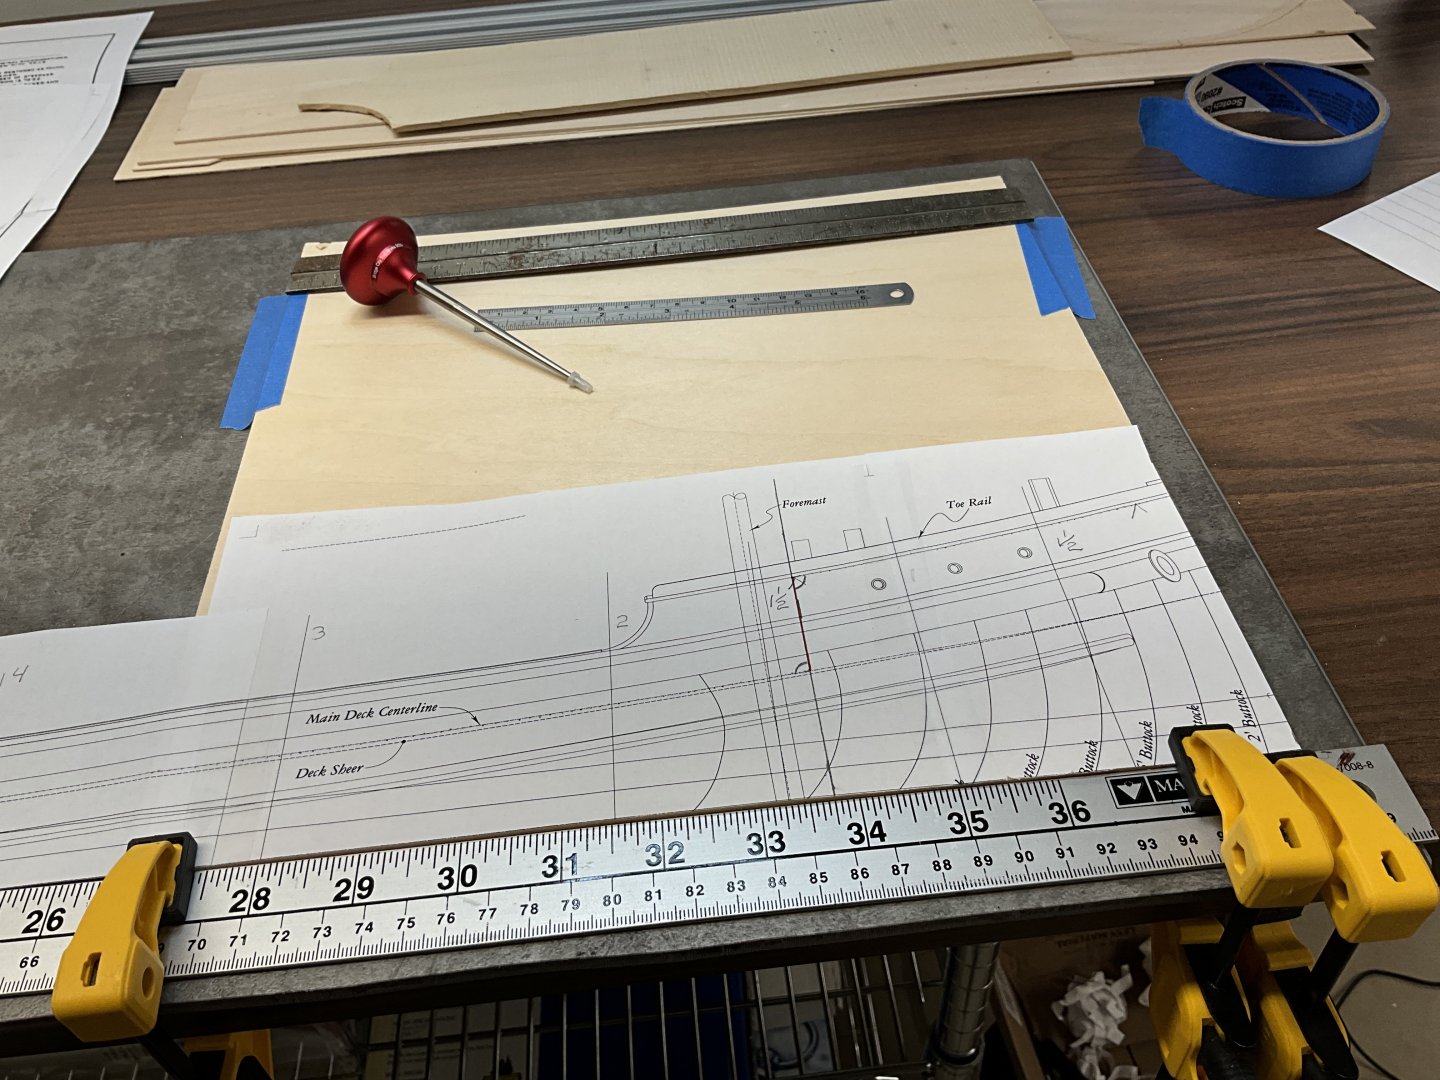
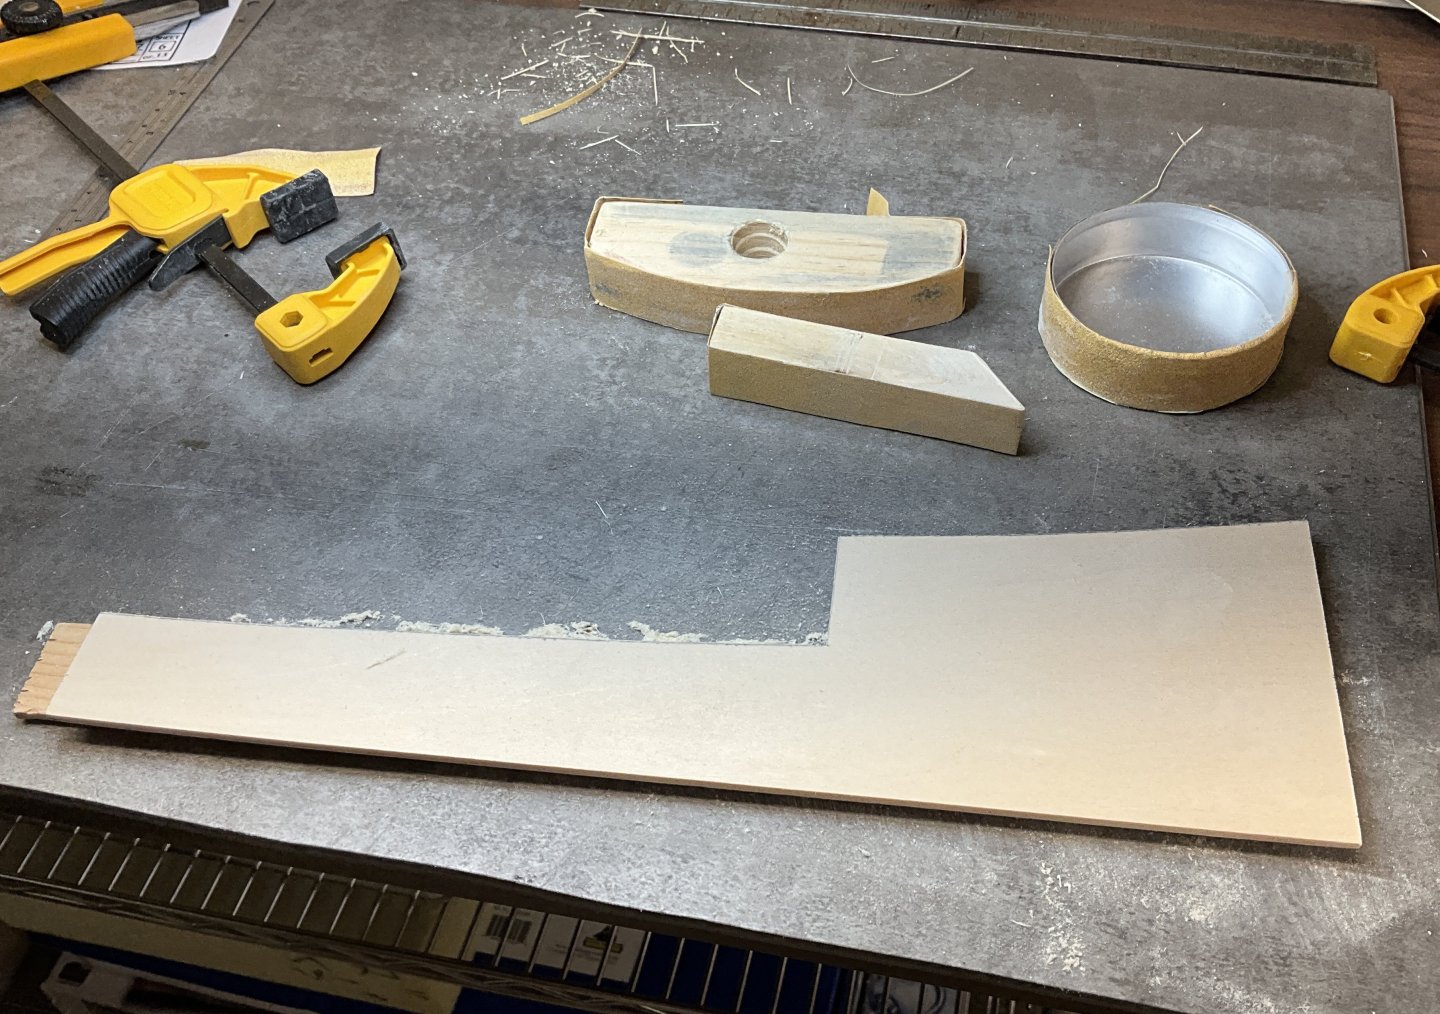
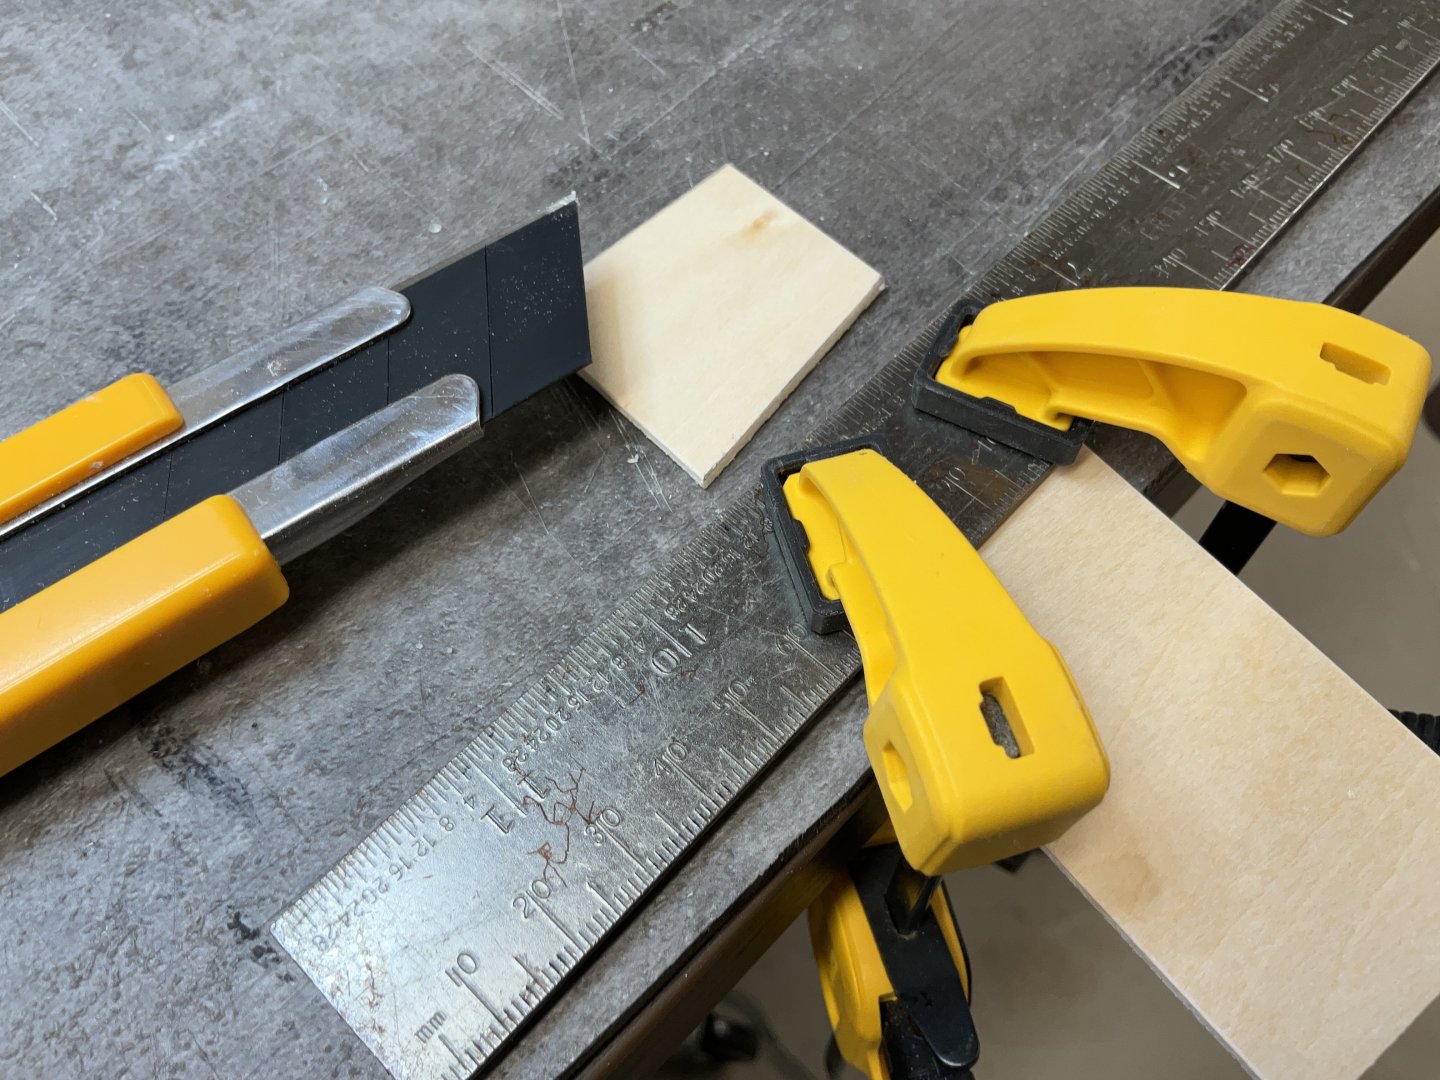
This will be a waterline model of SS Wapama, built by Kaiser Shipyard #3 in Richmond California and launched in 1915. She plied the waters of America’s Pacific Northwest bringing lumber from the mills to markets in California. Passengers and general goods were also transported. I am using the Historic American Engineering Record drawings from the Library of Congress website. These drawings are scans of drawings produced by Don Birkholtz Sr. of Tri-Coastal Marine for the National Park Service. The TIF files were downloaded and opened in an old version of Adobe Elements. They were then cropped and converted to high quality PDFs. The PDFs were opened in a free version of Foxit reader and printed using the tile function. Lots of cutting and taping together. I wanted to use my 36” build board so the drawings ended up being 1/71 scale which results in a model approximately 36.5” LOA and because it is waterline, it will be about 17’ high. I had a very difficult time trying to source basswood plywood locally so I ordered 1/16” and 1/8” basswood plywood from Amazon that come in 12’ x 12” sheets. The 1/8” sheets were 7/64” x 11.75” x 11.75”. Overall it is of good quality. The bulkhead former is made from two layers of plywood and one layer of 1/32” basswood sheet which results in a thickness of 1/4”. The non-destructive tracing method was used to trace the plans onto the plywood. An awl was poked through the drawing and the resulting holes were joined together with a ruler and pencil. I’m using a retractable knife with the 1” black blades to cut the plywood so eight pieces of plywood were cut and then glued together. Notches for the masts and Samson post were cut into the former and then 1/16’ plywood spacers were glued on each side to register where the bulkhead sit . They also box in the slots for the masts and post. After cutting the plywood with the knife I used the Ultimation sander to square up the sides. Here is the former ready for the bulkheads to be attached. Next will be prepping the board for mounting the former. Hope to see you then.


-
A celebration is well deserved Jacques. Your planking is outstanding!
- 312 replies
-
- 4
-
-
-
- Chile
- Latin America
- (and 6 more)
-
Gary, the stern rail and deck planking are exceptional. Wow!
-
Looking good Andrew. There are builds of Miss Adventure at “rcuniverse.com” and “ rcgroups .com” . Not sure if they are finished but they were well on the way when I looked.
- 72 replies
-
- 1
-
-
- Miss Adventure
- Model Shipways
- (and 2 more)
-
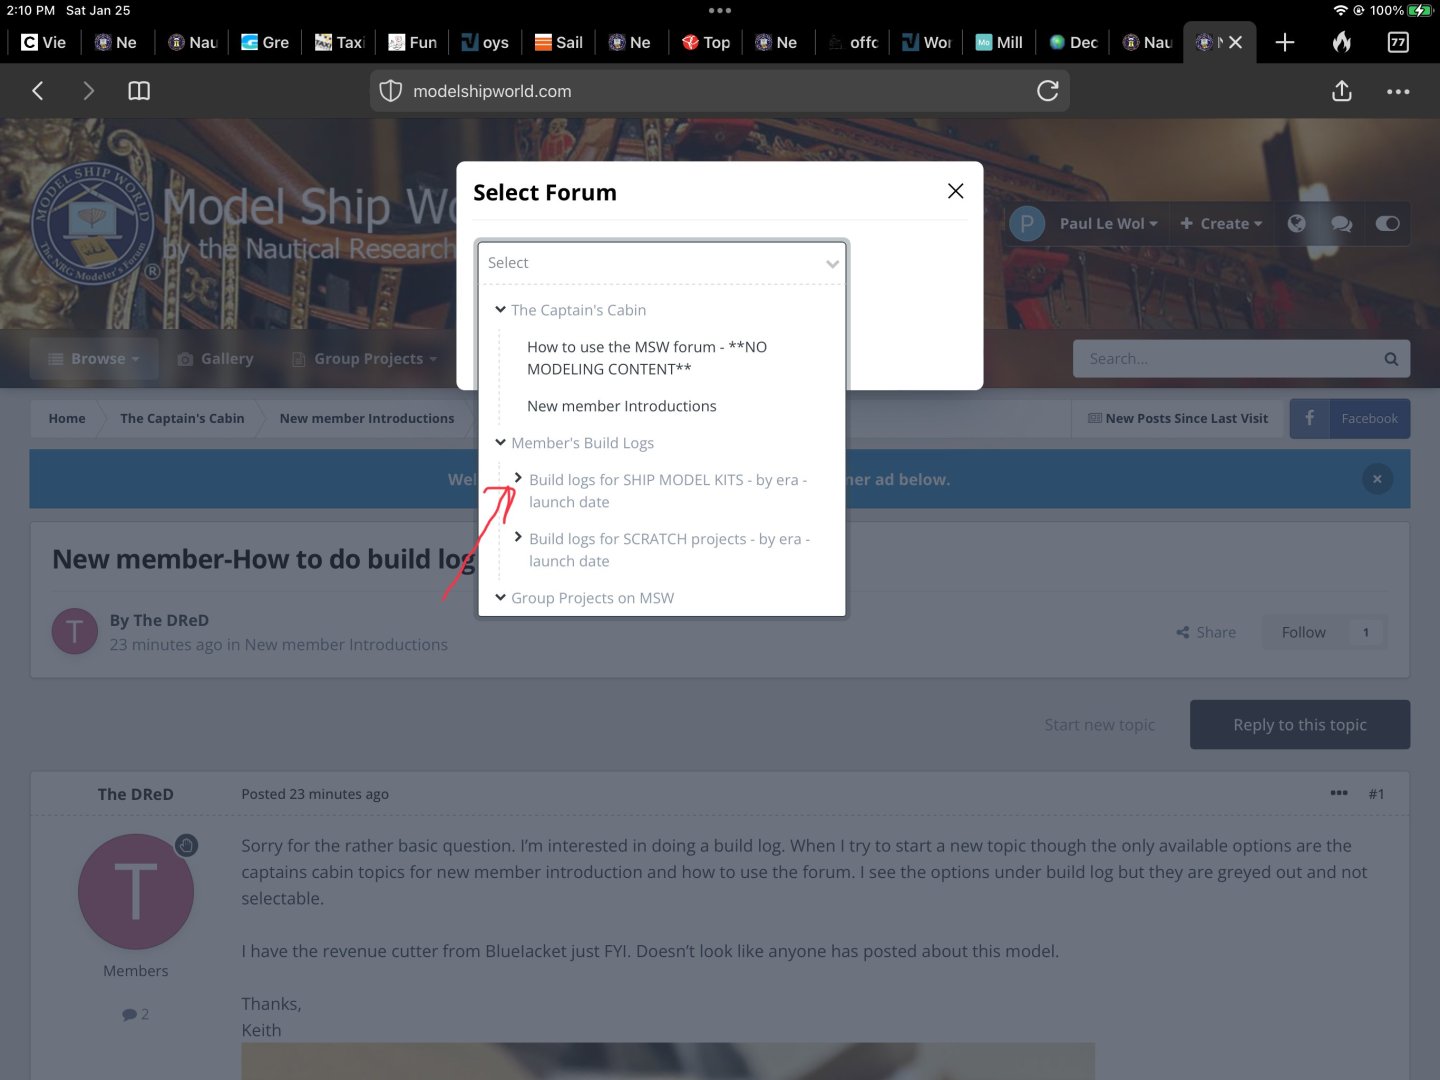
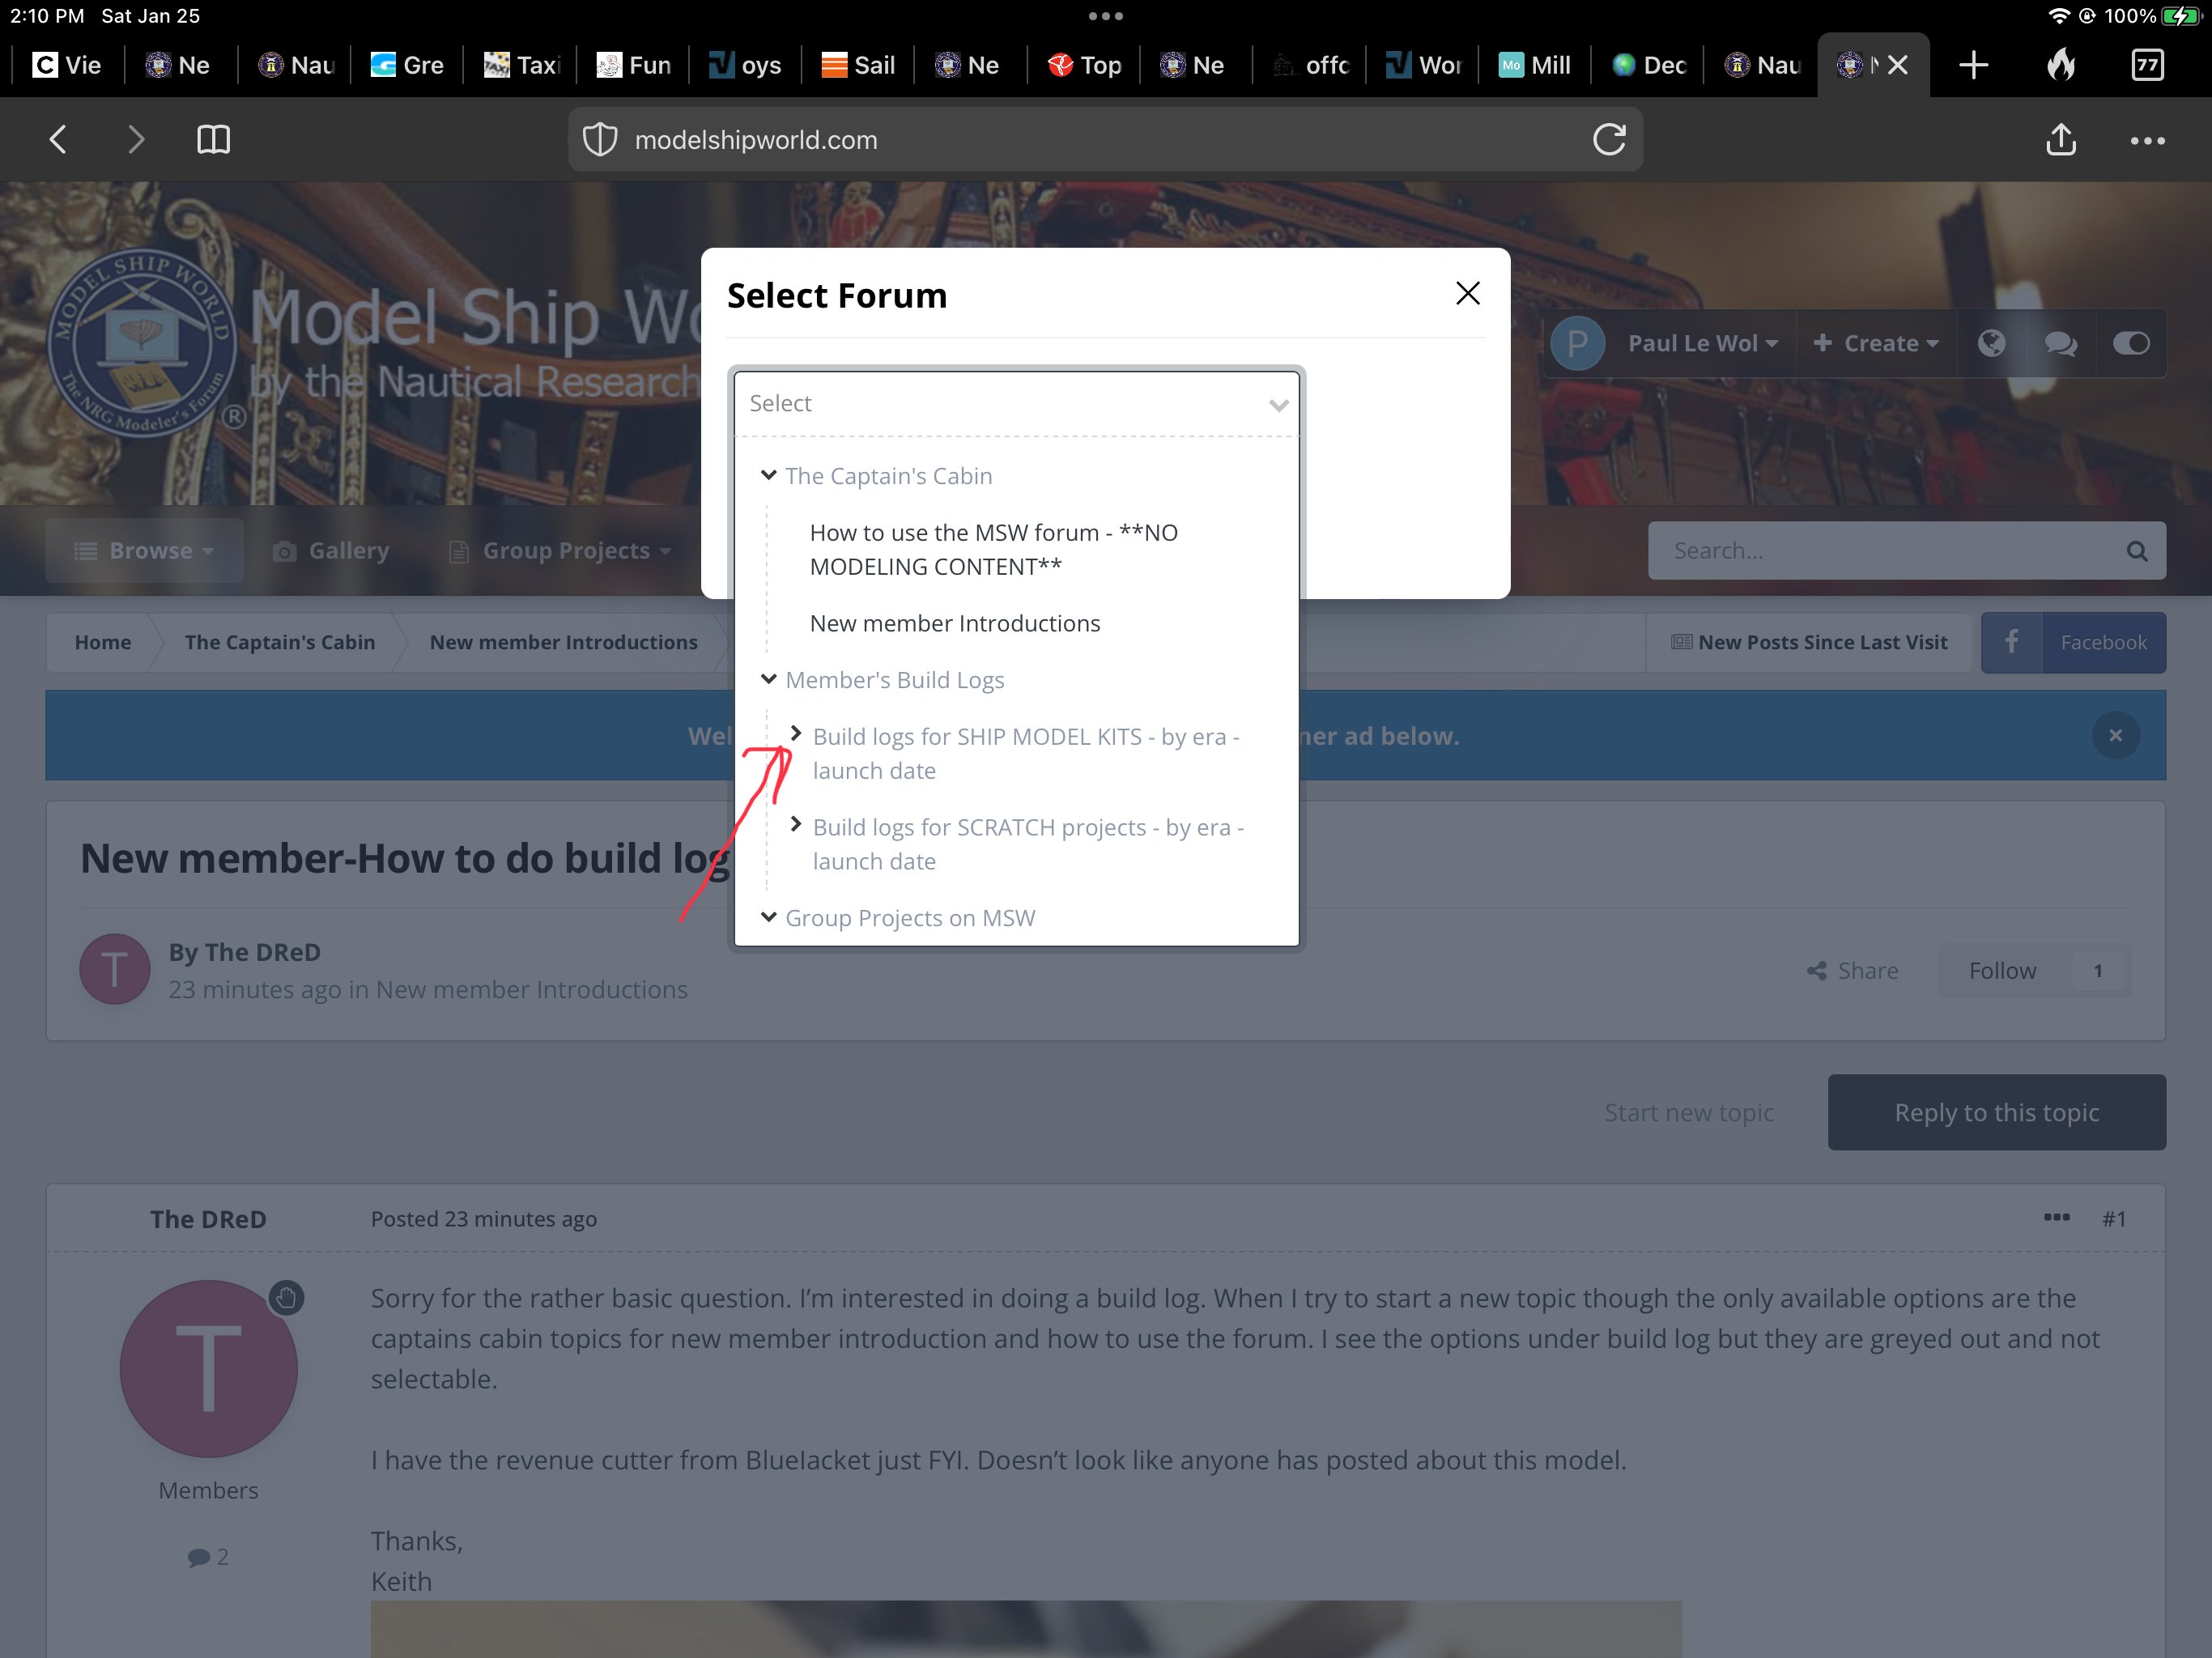
Hi Keith, welcome to MSW. When you start a new topic, I think you have to click on the drop down arrow to the left . Only it is selectable on my iPad