Paul Le Wol
-
Posts
1,060 -
Joined
-
Last visited
Content Type
Profiles
Forums
Gallery
Events
Everything posted by Paul Le Wol
-
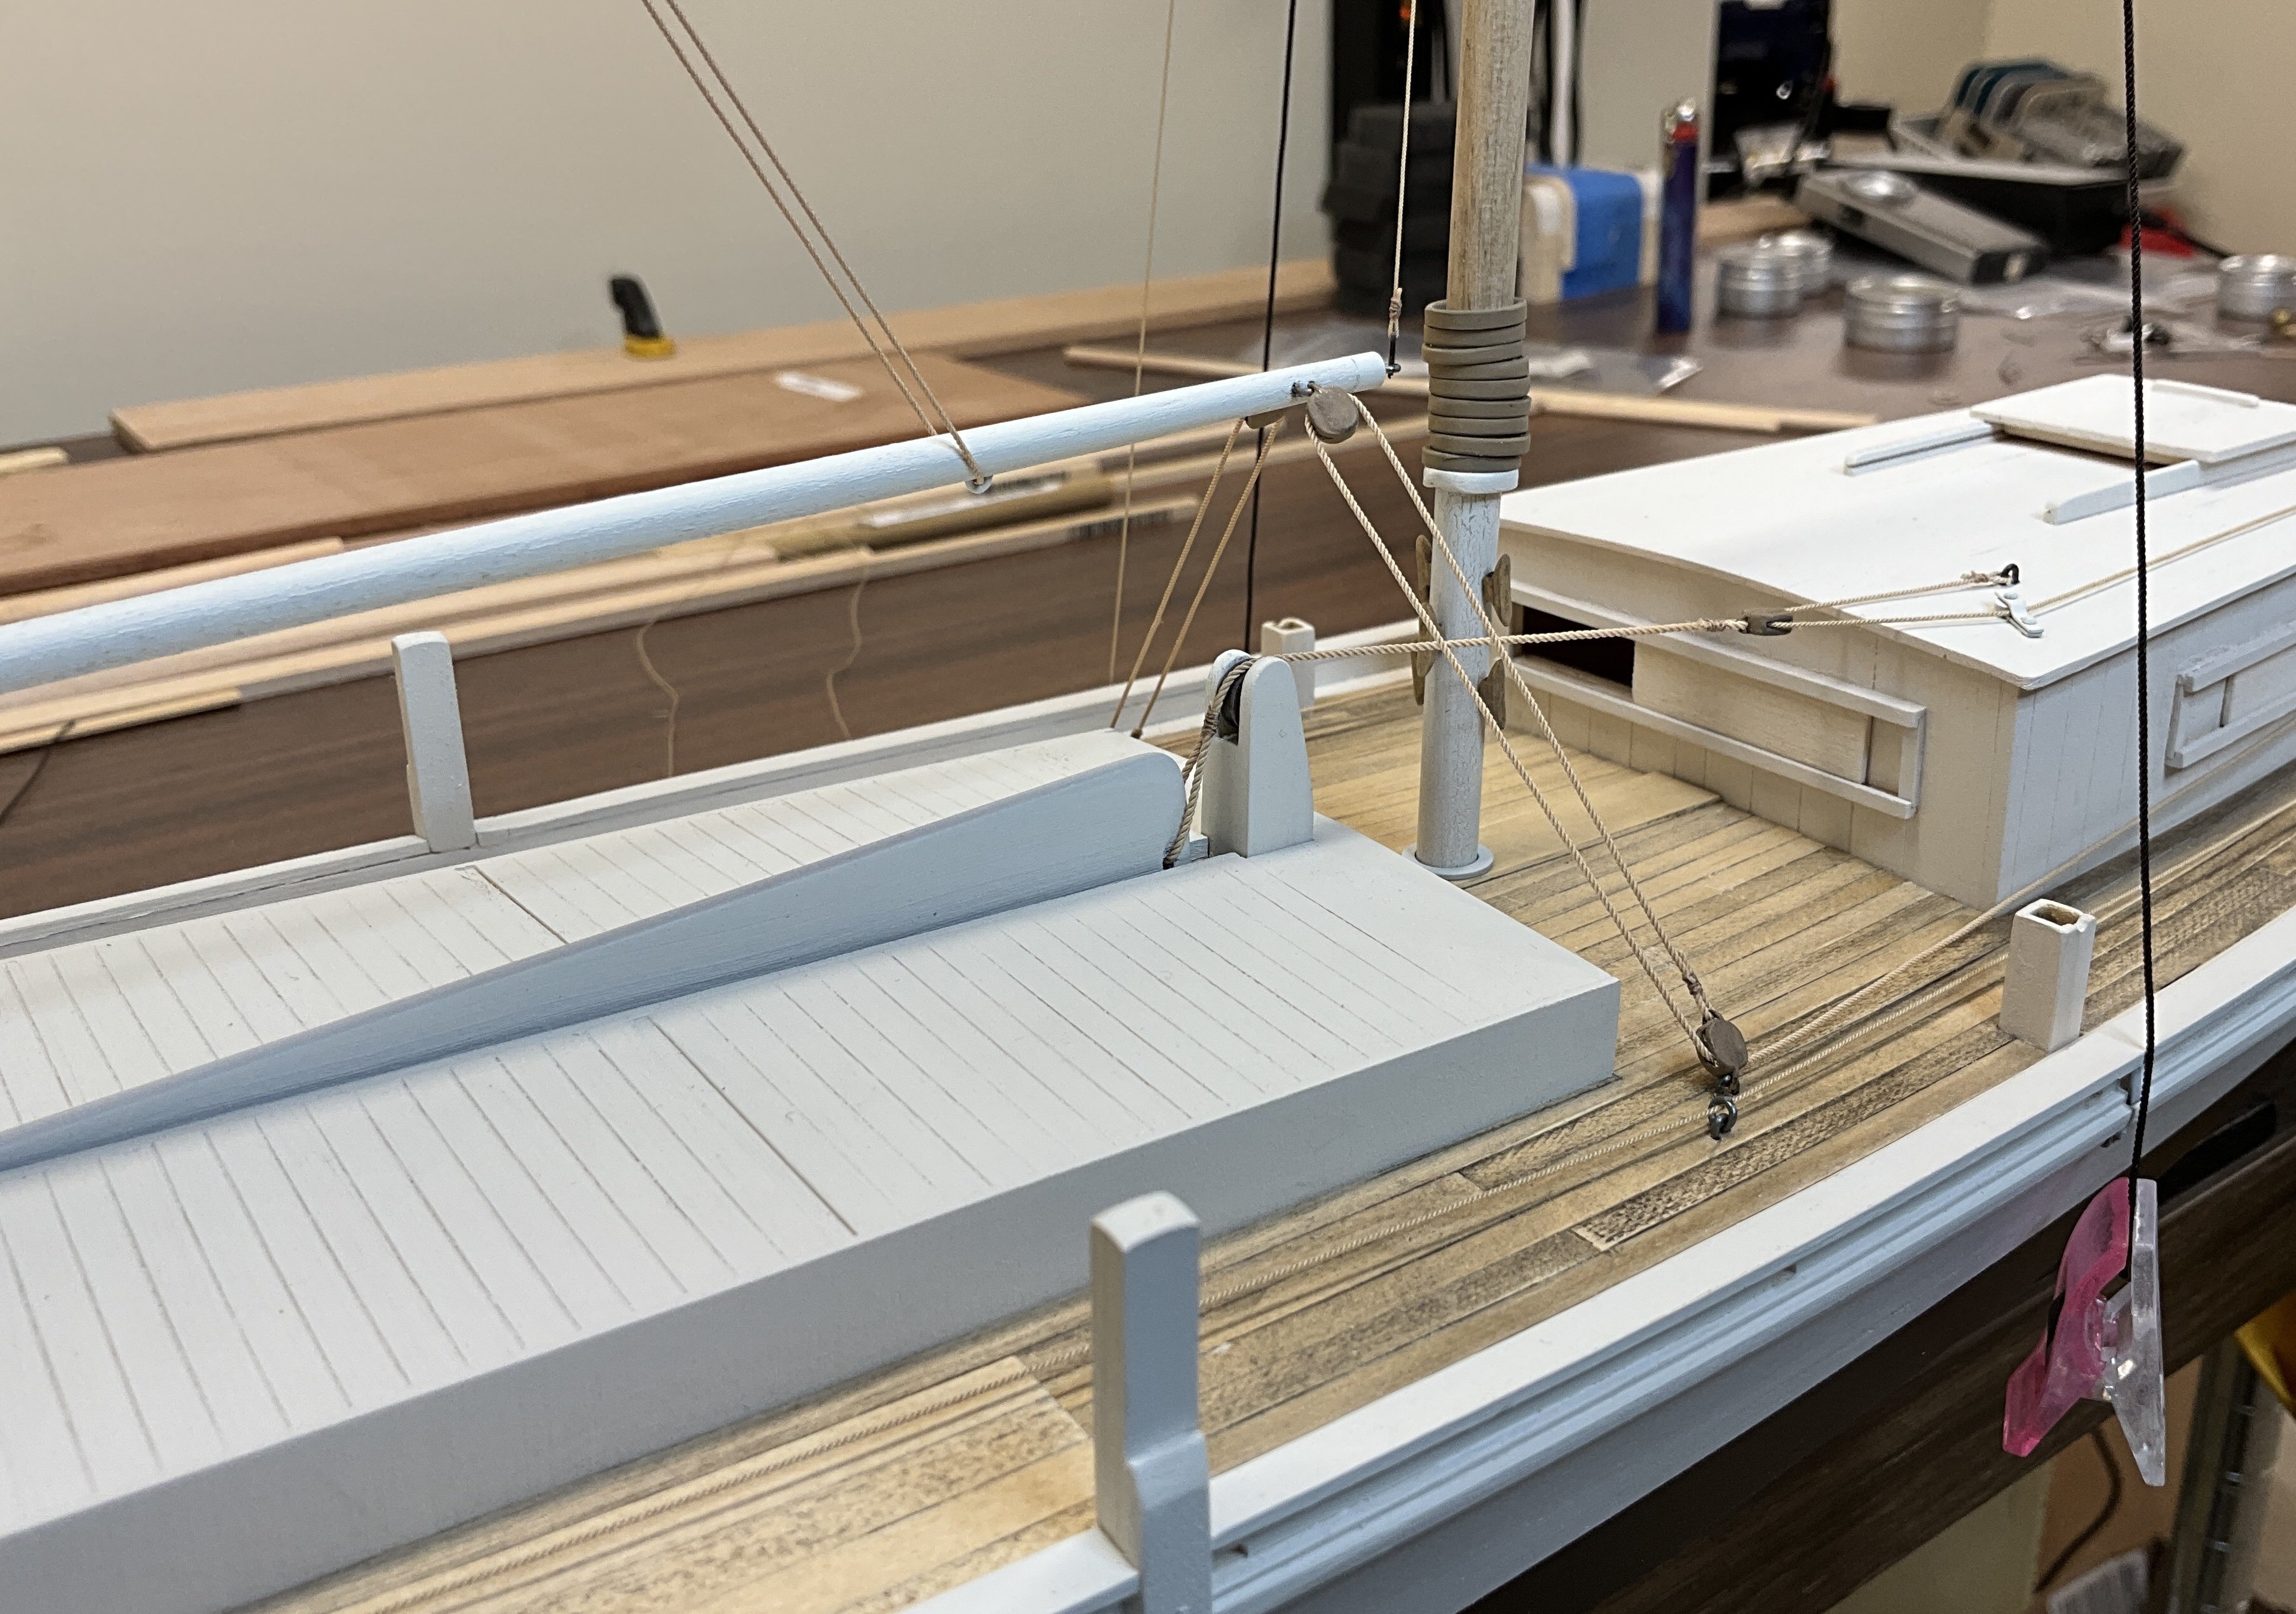
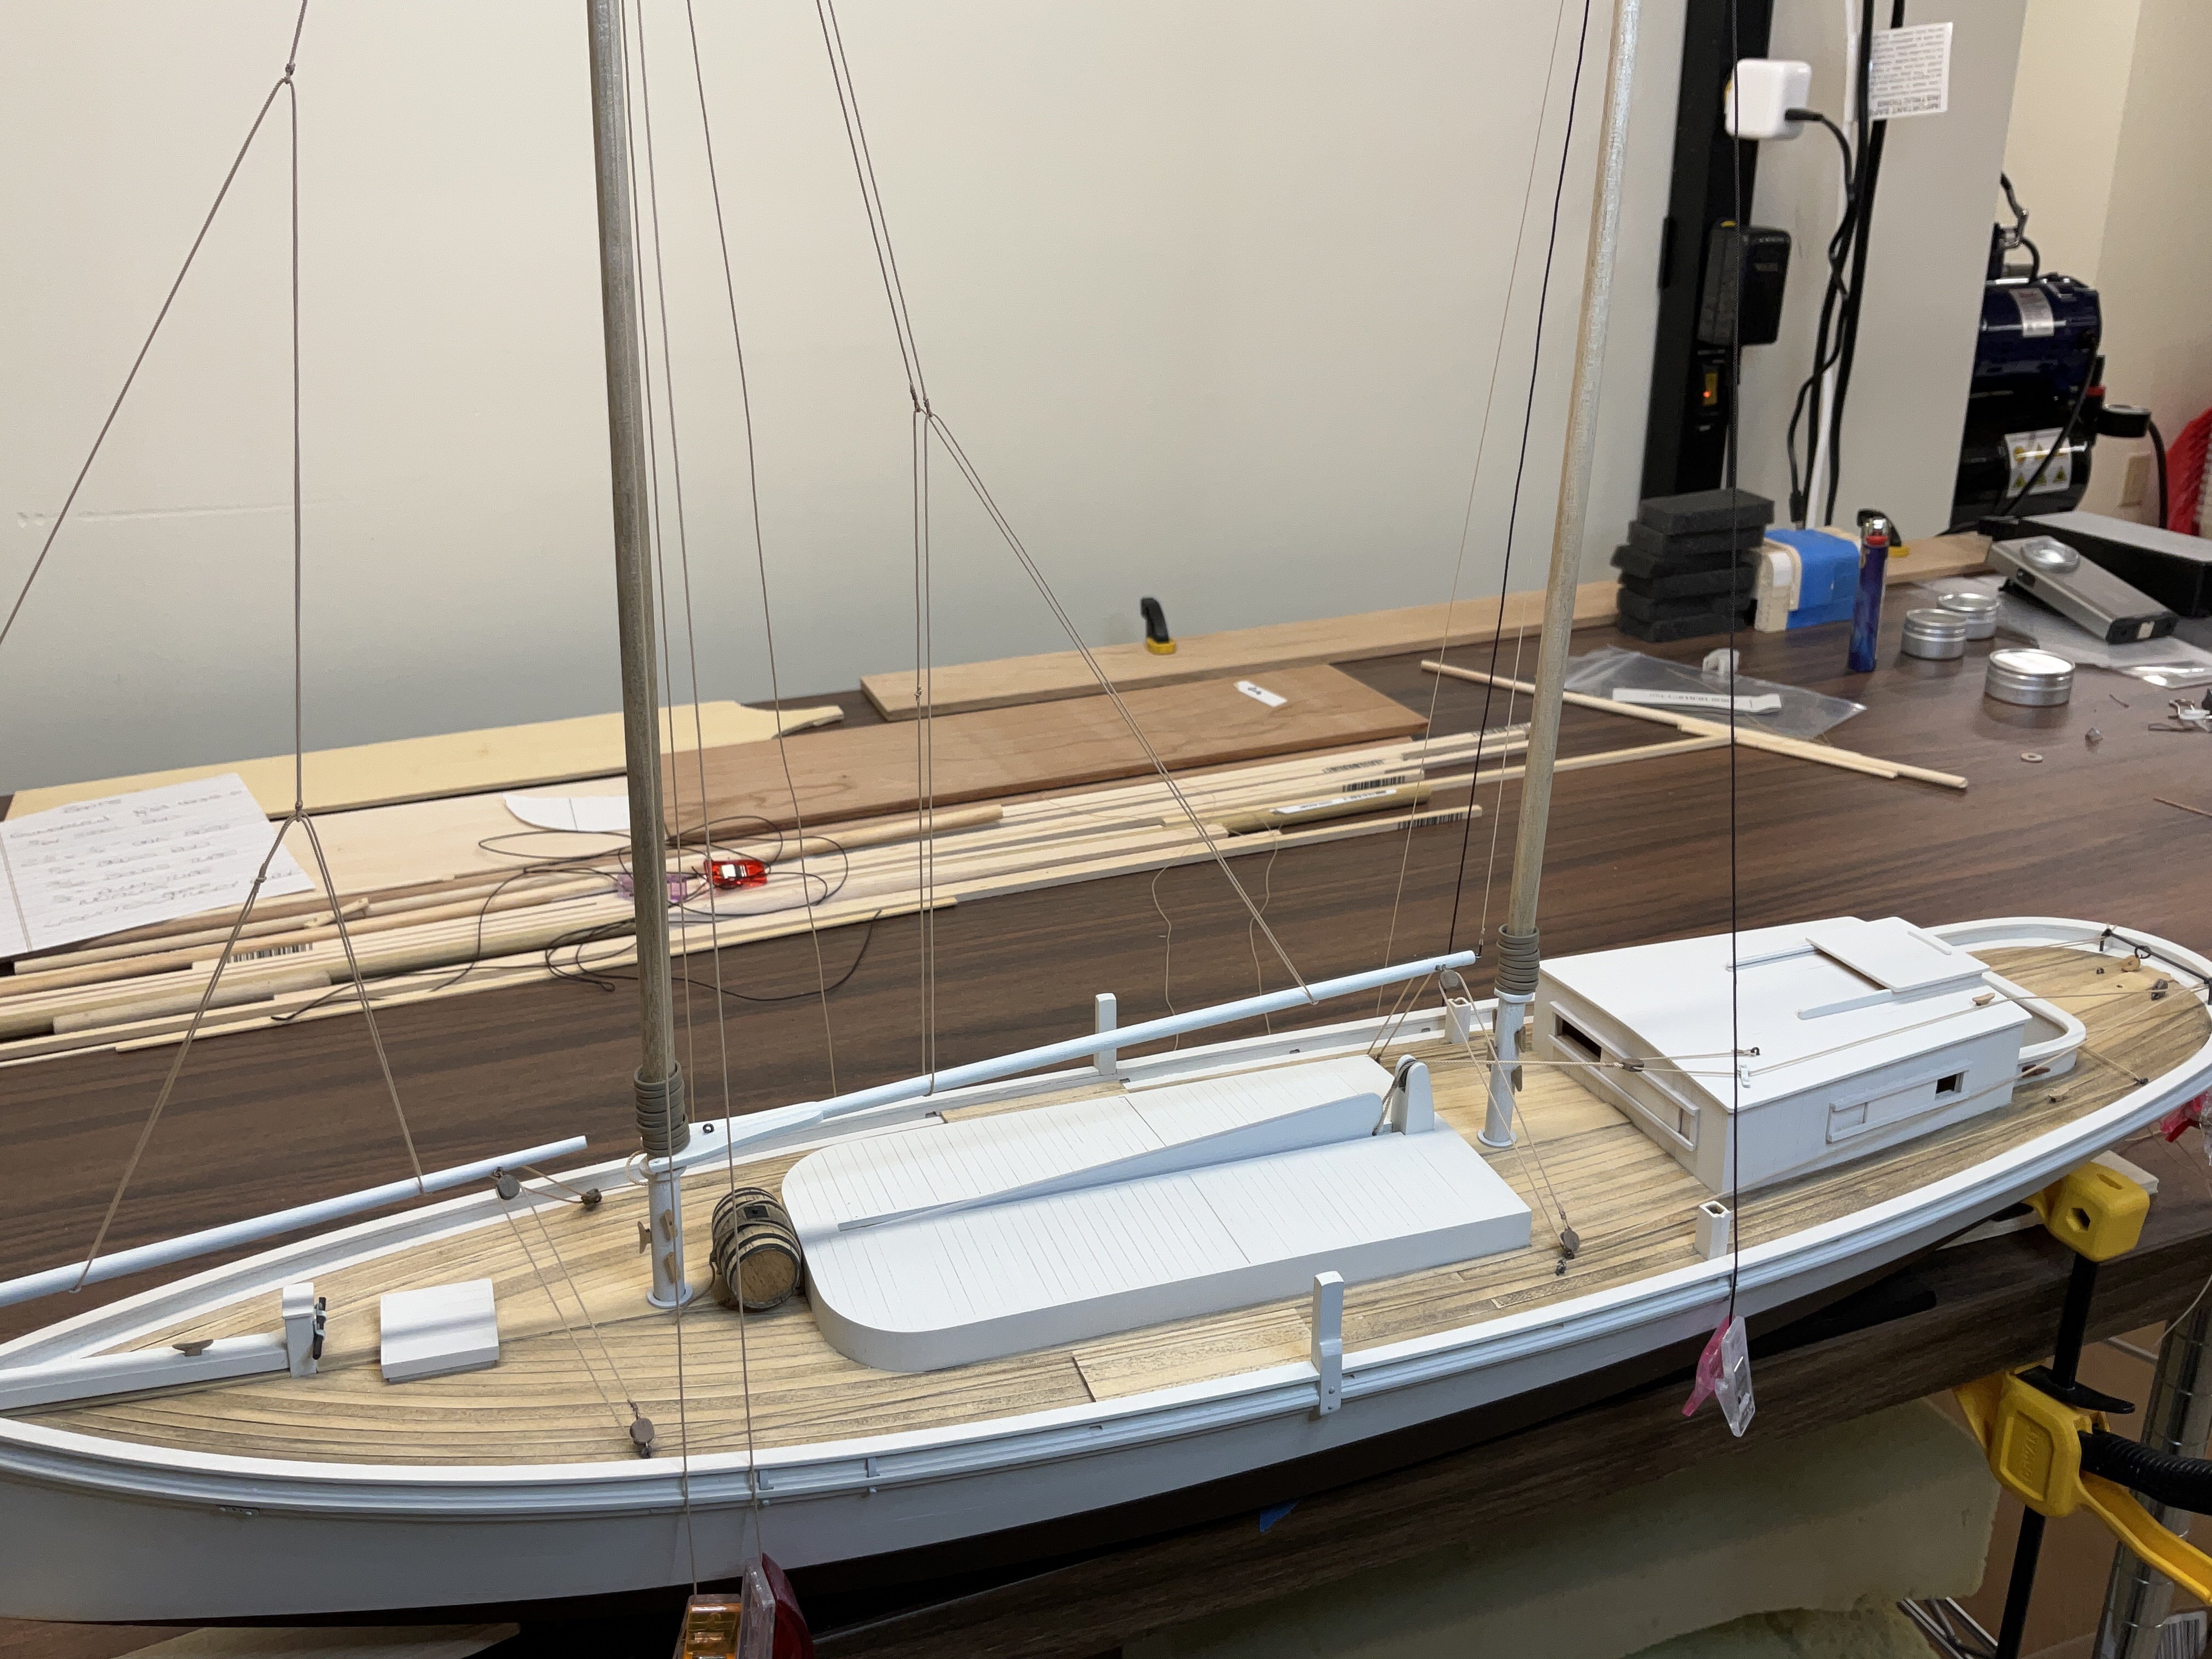
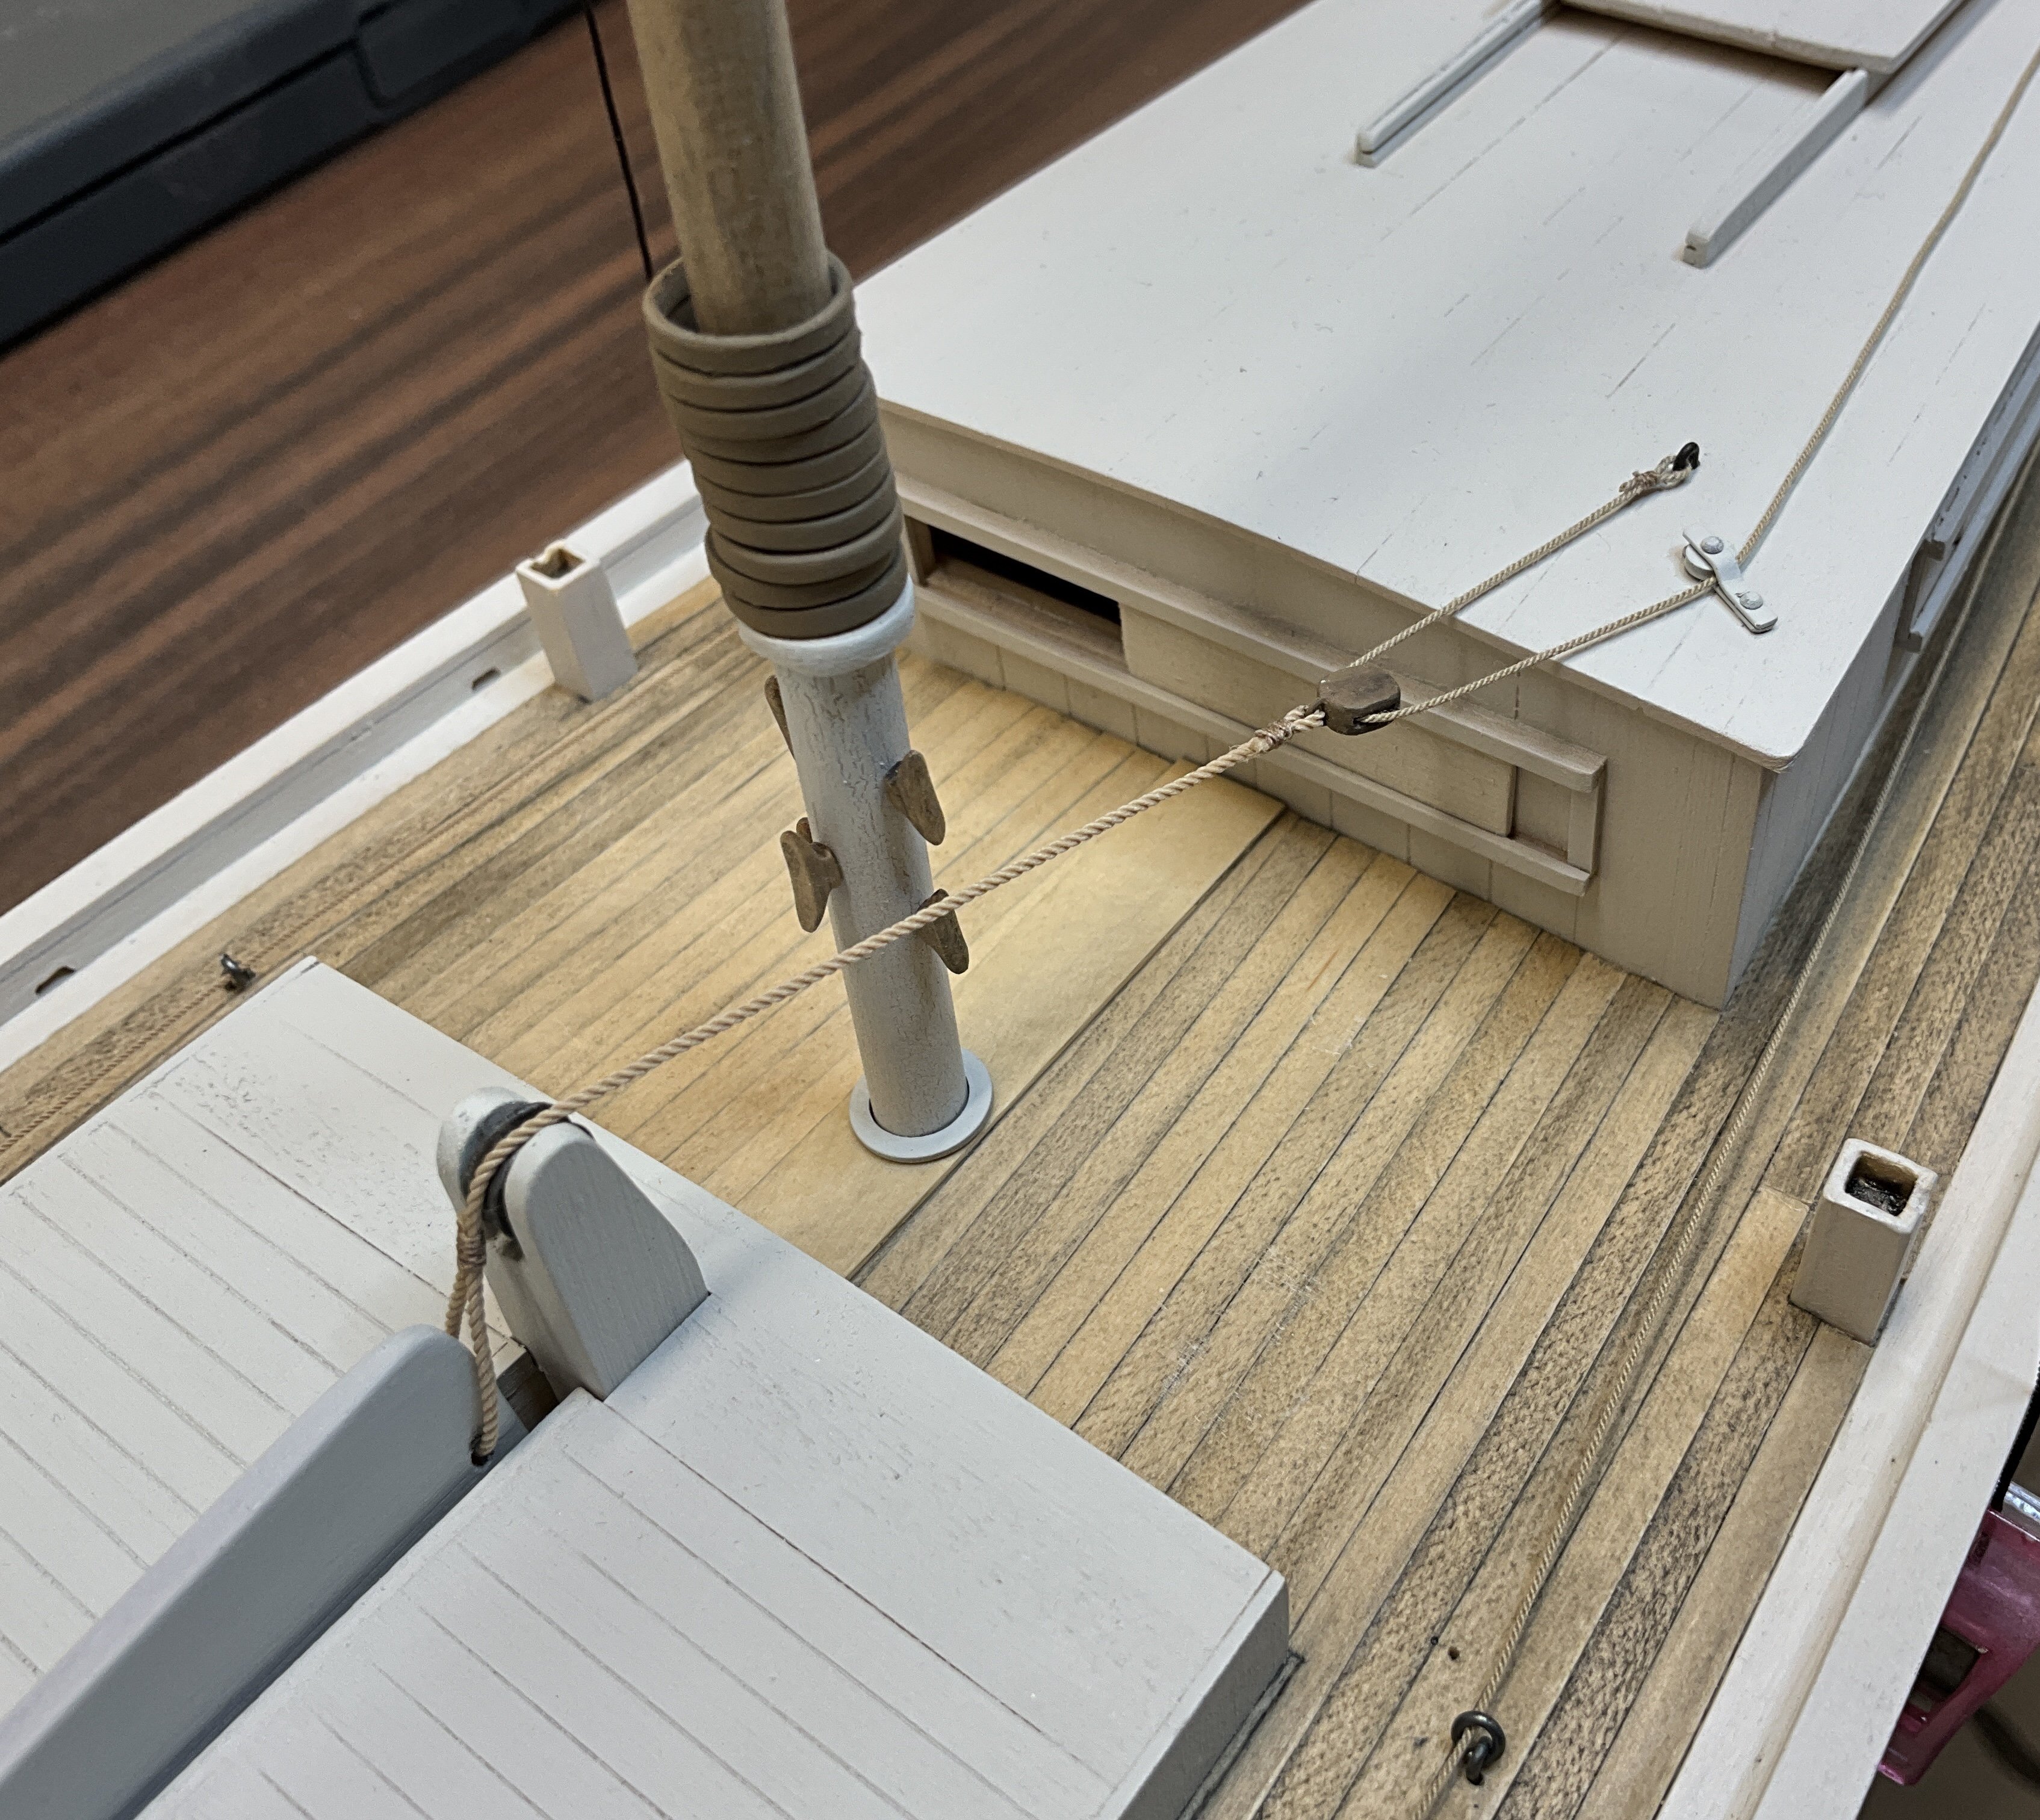
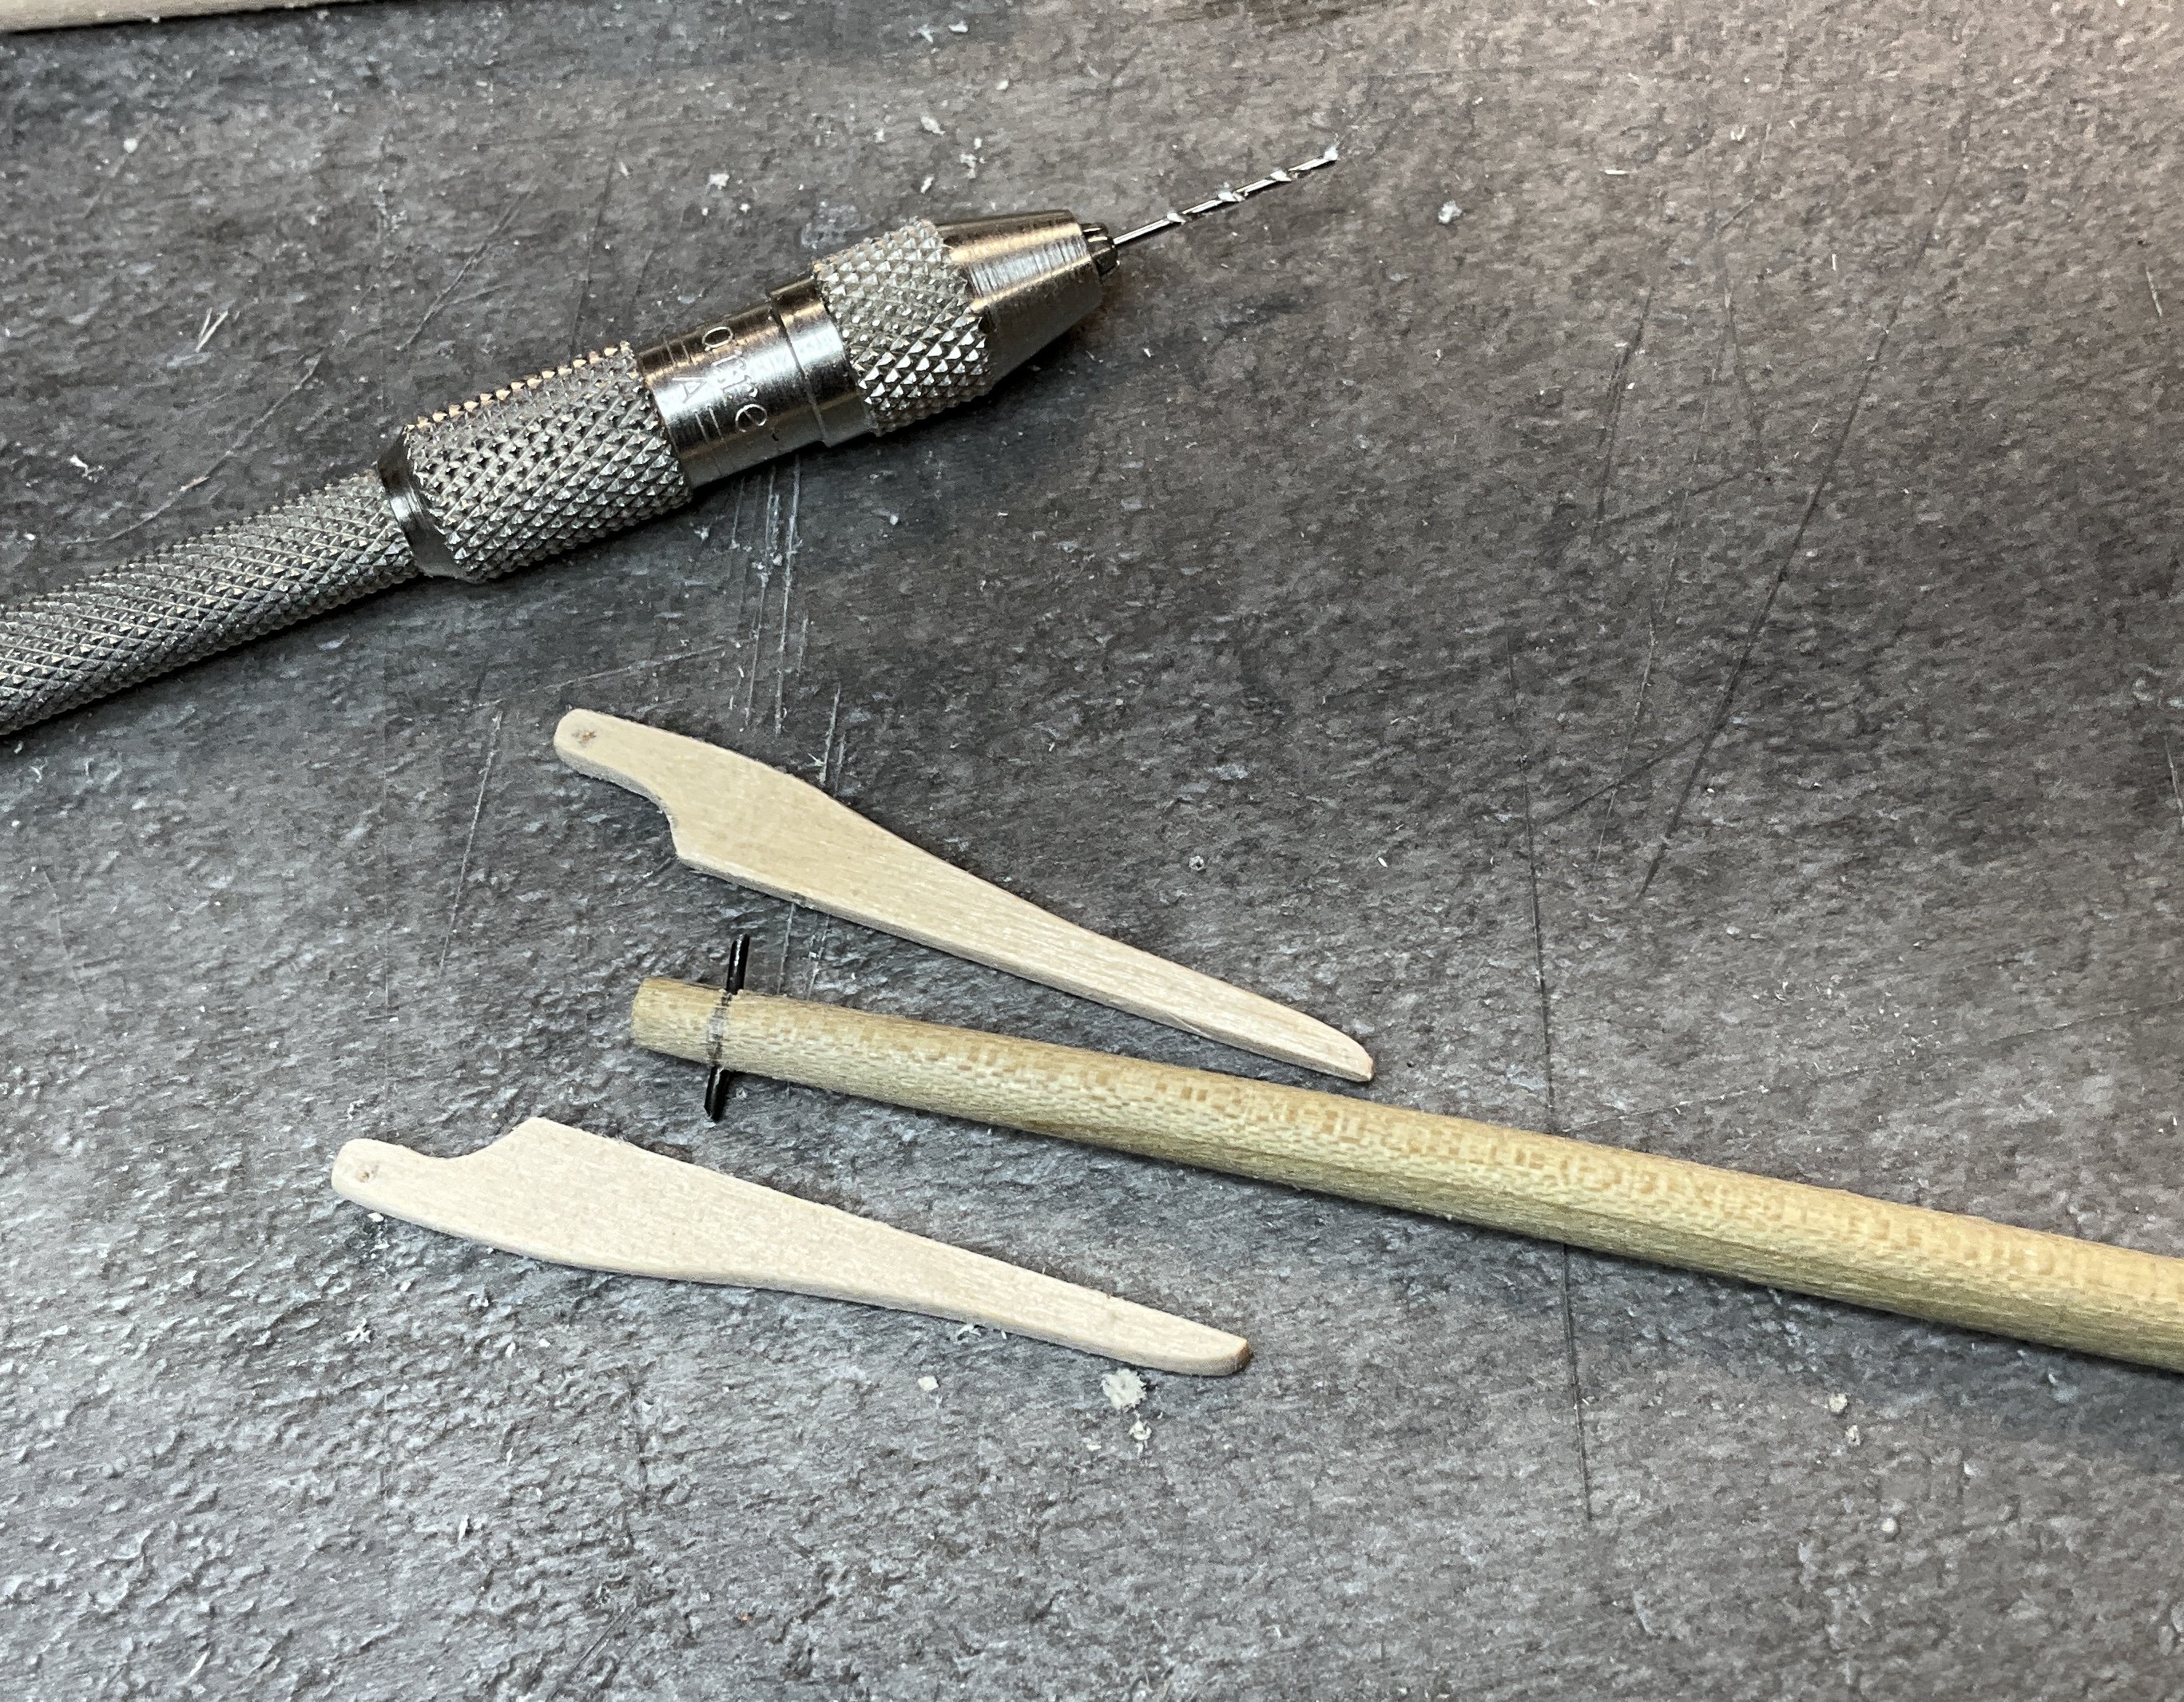
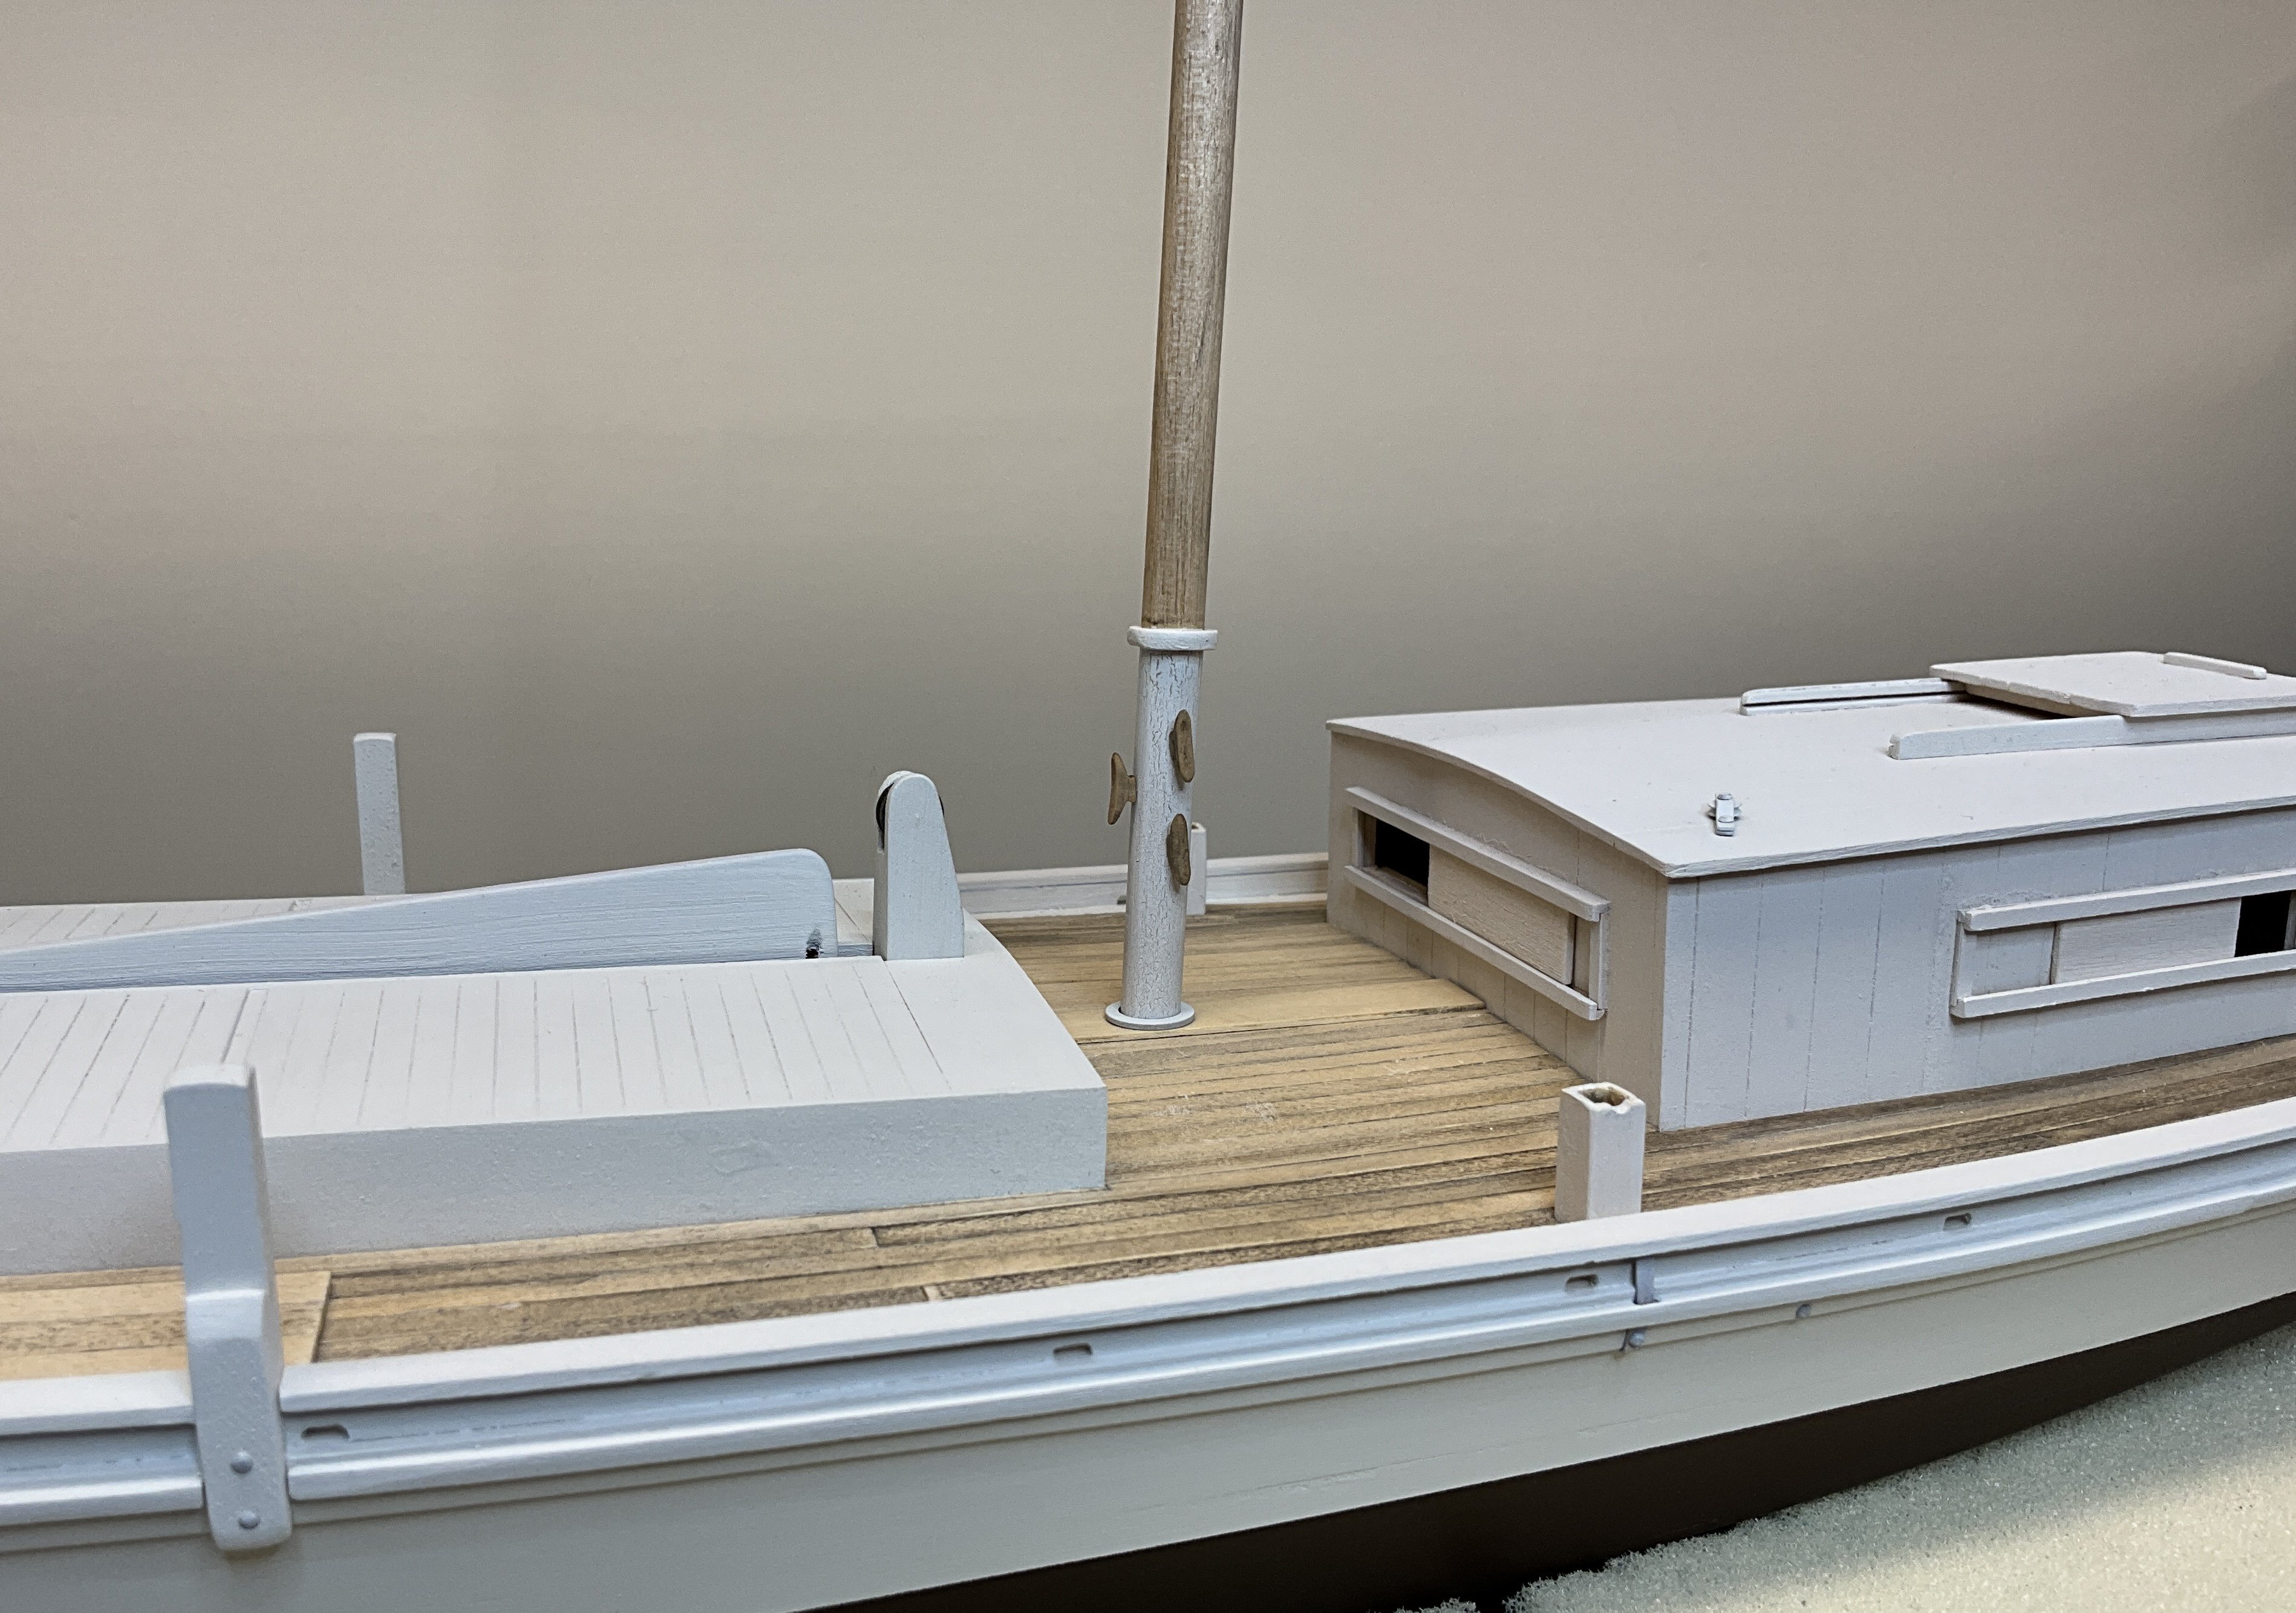
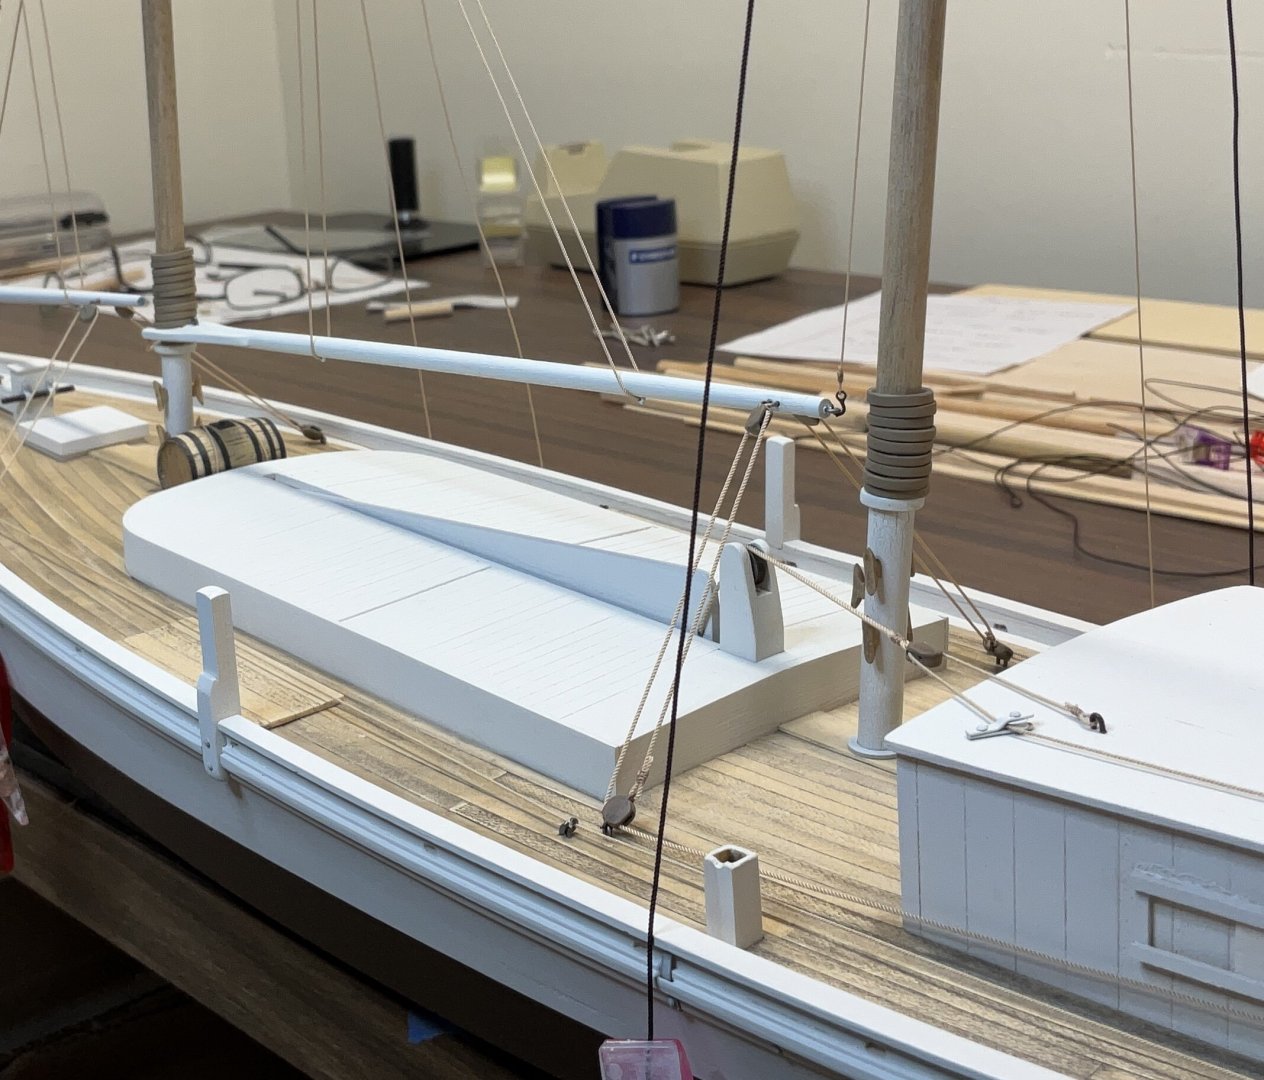
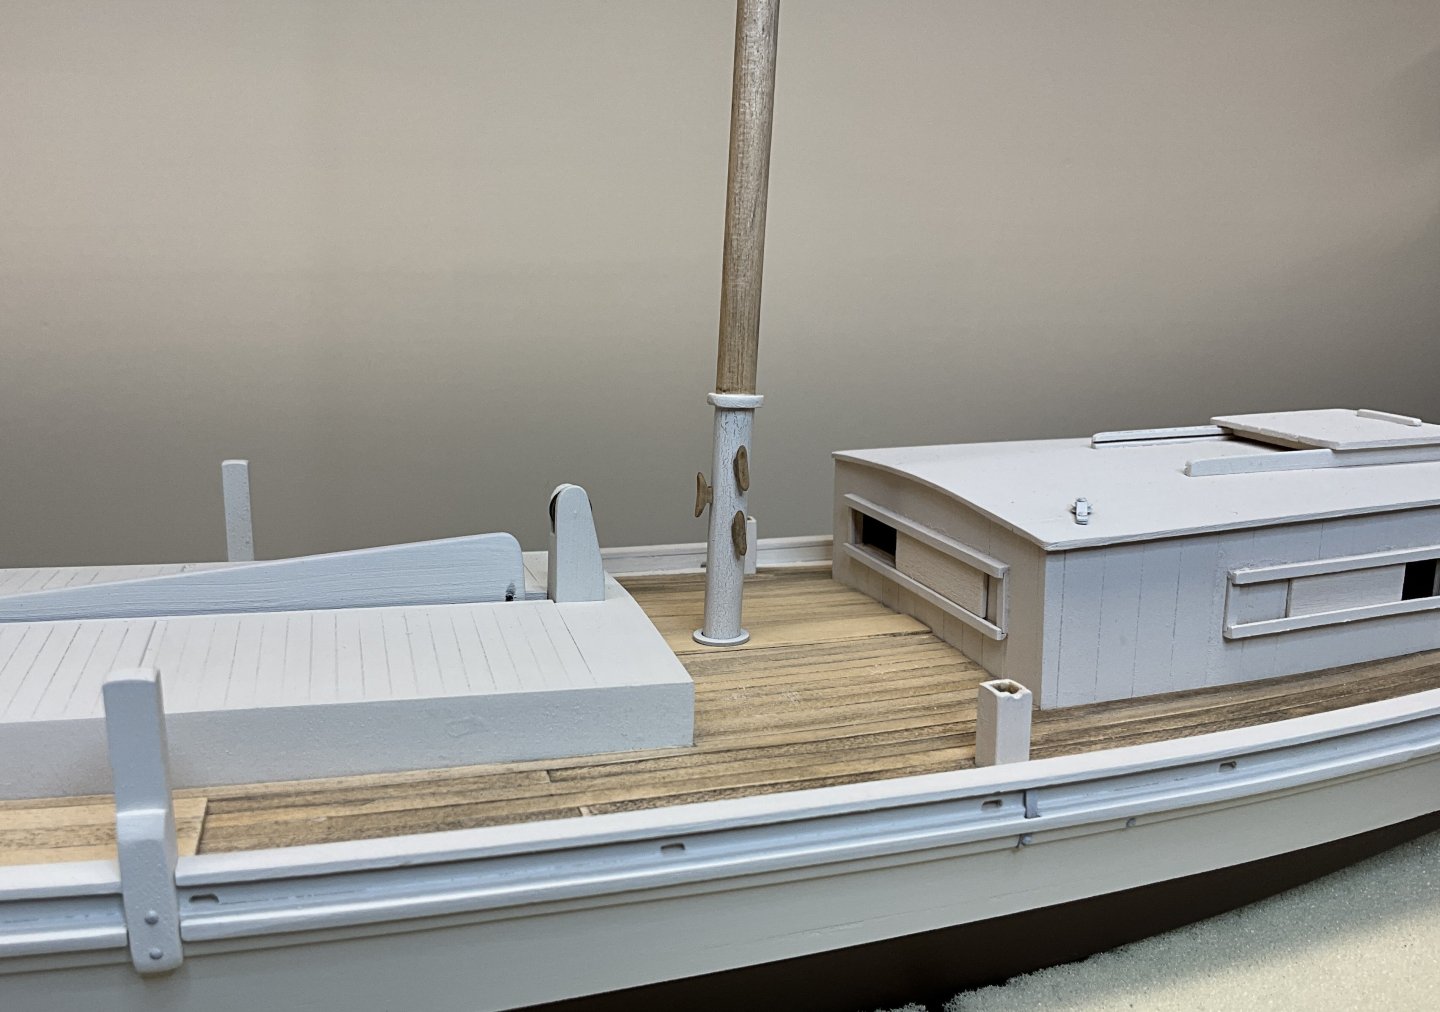
Hi Everyone, I hope you are all well. Thank you very much for your Comments and Likes. The fore boom has been made, painted and installed. Before mounting it I wanted to rig the center board lanyard. The rope attached directly to the center board is.023” and the rest of the lanyard is.018”. I forgot to mention last time that the mast hoops were made from 3/8” styrene tube and painted with Vallejo Old Wood. When I first put them on the mast they looked a little small so I made 20 more using 7/16” styrene tube. They ended up looking too big so I went with the 3/8” ones. This is the fore boom being made I would like to thank Joe @Thistle17 for posting the photos that David Bennett of the North Carolina Maritime Museum sent him. They are on Joe’s “Florida Sharpie Fishing Schooner of 1899 “ build log. They help a lot with trying to understand how these boats were rigged. The fore boom topping lift runs through an 1/8 inch block mounted on the main mast. The rope used is .013”. I’m guessing about how the lazy jacks are routed and tied off. Using 3/16” blocks at the top of the masts and bringing them down to a cleat. It is a real balancing act to get the sheets, lazy jacks and topping lift all tensioned properly. The main boom is being worked on but before it is installed I would like to finish the stove pipe on the cabin roof and the rudder. Thank you for dropping by and hope to see you soon.


- 201 replies
-
- 14
-

-
- Oyster Sharpie
- first scratch build
- (and 1 more)
-
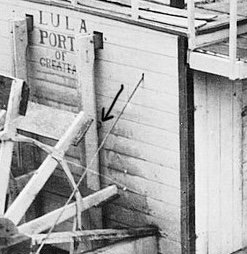
Whatever this is it seems like it might be behind the post .
- 732 replies
-
- 6
-

-
-
- Lula
- sternwheeler
- (and 1 more)
-
Hi Keith, there does seem to be something between the starboard post and the wall about six rows of siding down from the top. Maybe a support?
- 732 replies
-
- 4
-
-
-
- Lula
- sternwheeler
- (and 1 more)
-
Really nice refit hamilton, I think the owners will be very pleased.
- 19 replies
-
- 3
-
-
- glad tidings
- model shipways
- (and 1 more)
-
Hi Cisco, I agree that your windows look very good. Really like how you used mica for the glass. We’ve all come to realize that cameras cannot be satisfied.
-
Dan, congratulations on finishing your Flattie! Beautiful boat and beautiful photos.
- 38 replies
-
- 2
-
-
-
- Chesapeake Bay Flattie
- Model Shipways
- (and 2 more)
-
Glenn, sorry to hear this news. Have you considered using something like styrene tubing possibly cut in half length wise, glued and clamped.
-
Hi Toni, welcome to MSW. Your project looks very interesting. I look forward to seeing your progress.
-
Keith, the finish on the hull is amazing but more importantly is the doll house going to be a separate log?
-
Hi Bob, good to see that you are back to work. Everything is looking great!
- 207 replies
-
- 6
-
-
-
- vanguard models
- Duchess of Kingston
- (and 1 more)
-
John,congratulations on finishing your yawl. Beautifully done! Is there going to be a ship in this yawl’s future?
- 28 replies
-
- 1
-
-
- 22 ft yawl boat
- Vanguard Models
- (and 1 more)
-
Very nice photos Jacques. It’s always interesting to see how crews rigged their boats.
- 312 replies
-
- 3
-
-
- Chile
- Latin America
- (and 6 more)
-
‘Robert and John, thank you both for the wonderful feedback!
- 201 replies
-
- 4
-
-
- Oyster Sharpie
- first scratch build
- (and 1 more)
-
Chris, exceptional work! I especially like the photo from last night with the fade to black border. ( Can’t remember what that is called. )
- 85 replies
-
- 11
-
-
Gary and druxey, thank you gentlemen for your very kind words!
- 201 replies
-
- 4
-
-
- Oyster Sharpie
- first scratch build
- (and 1 more)
-
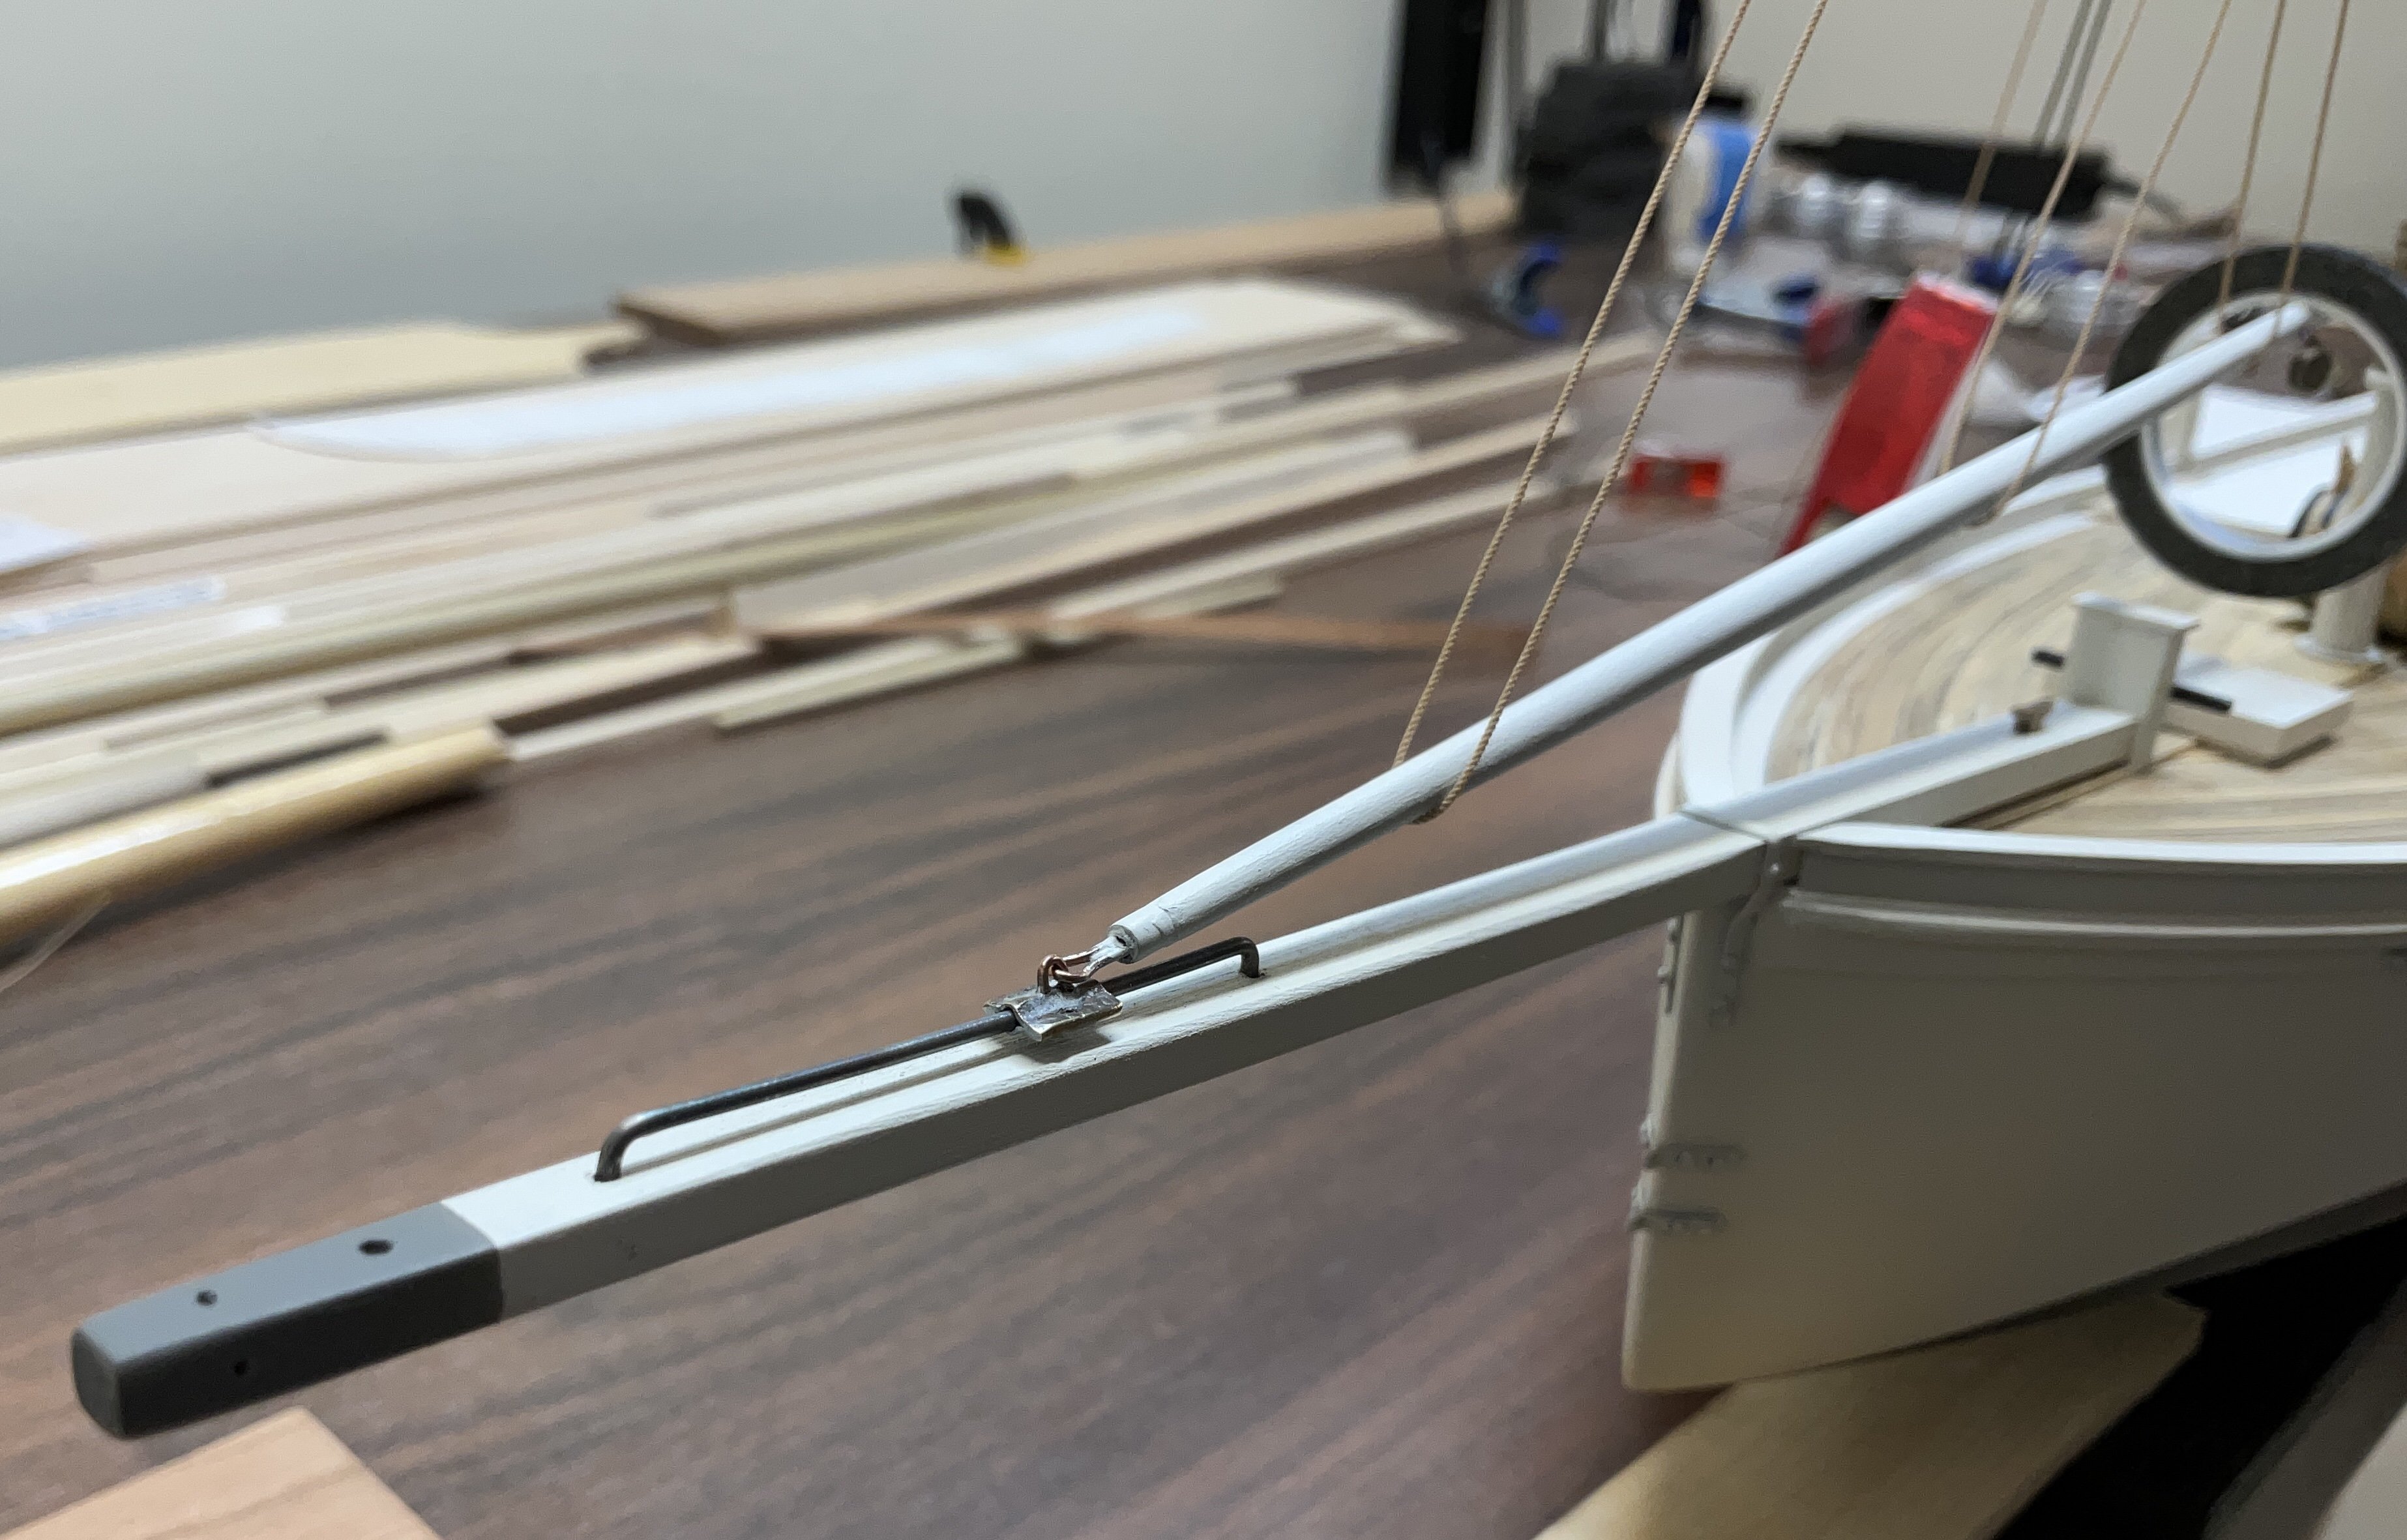
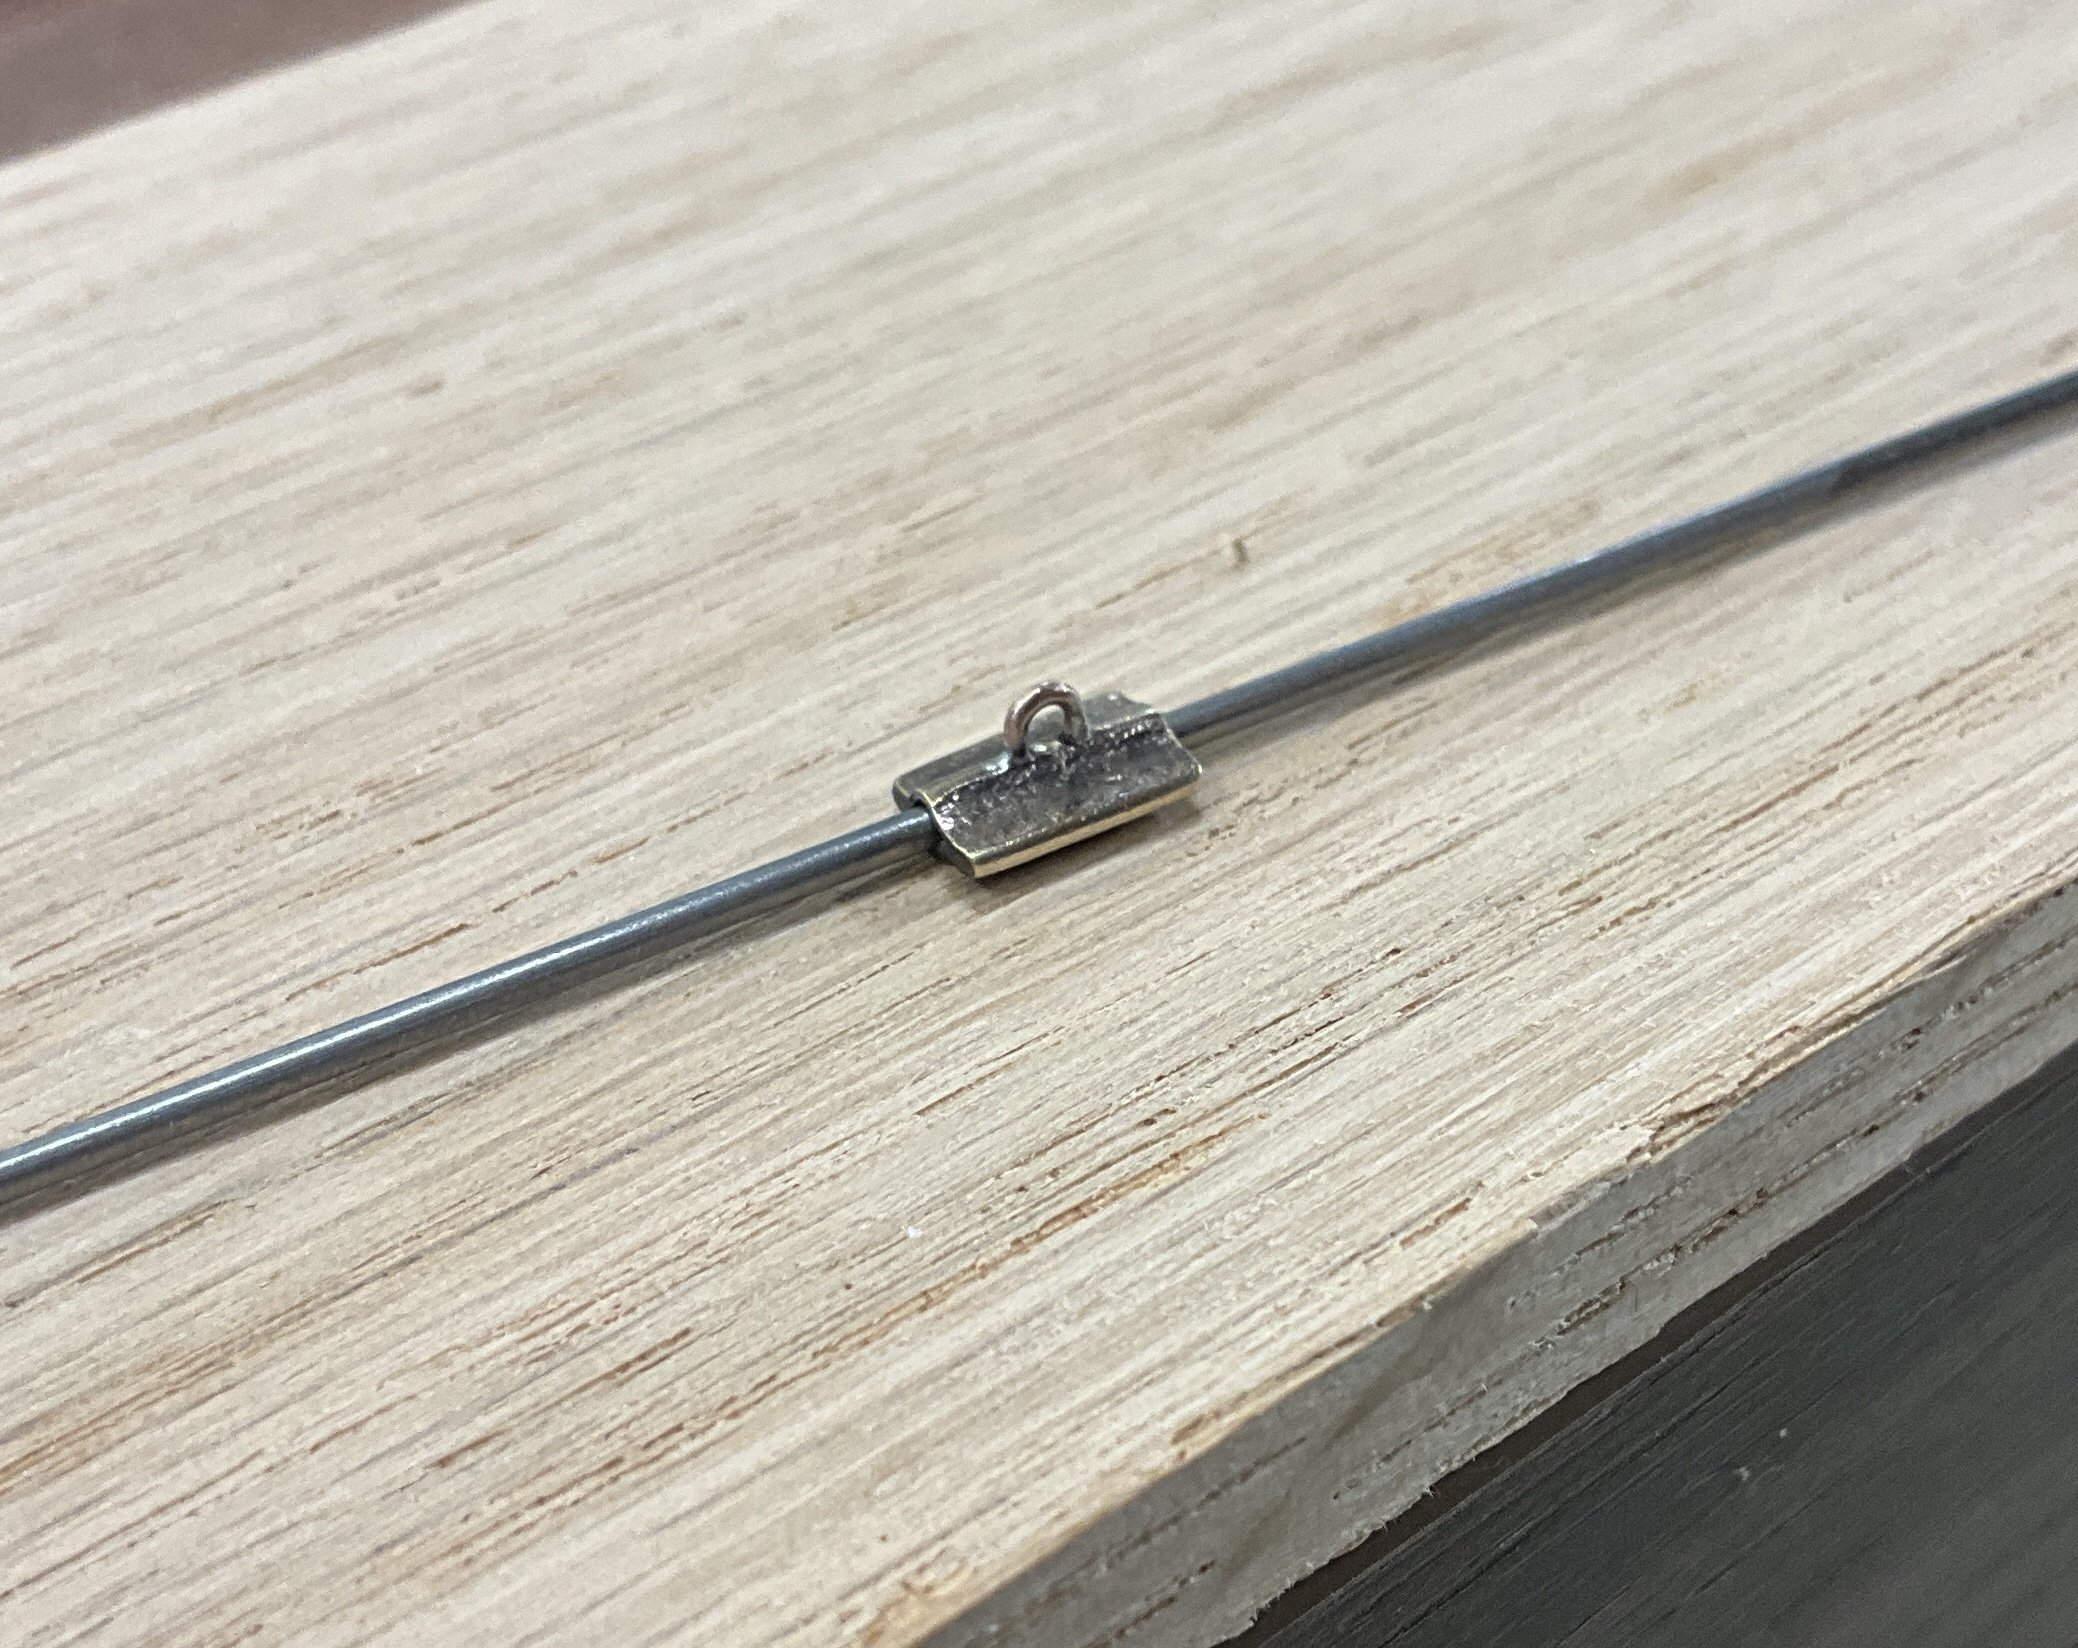
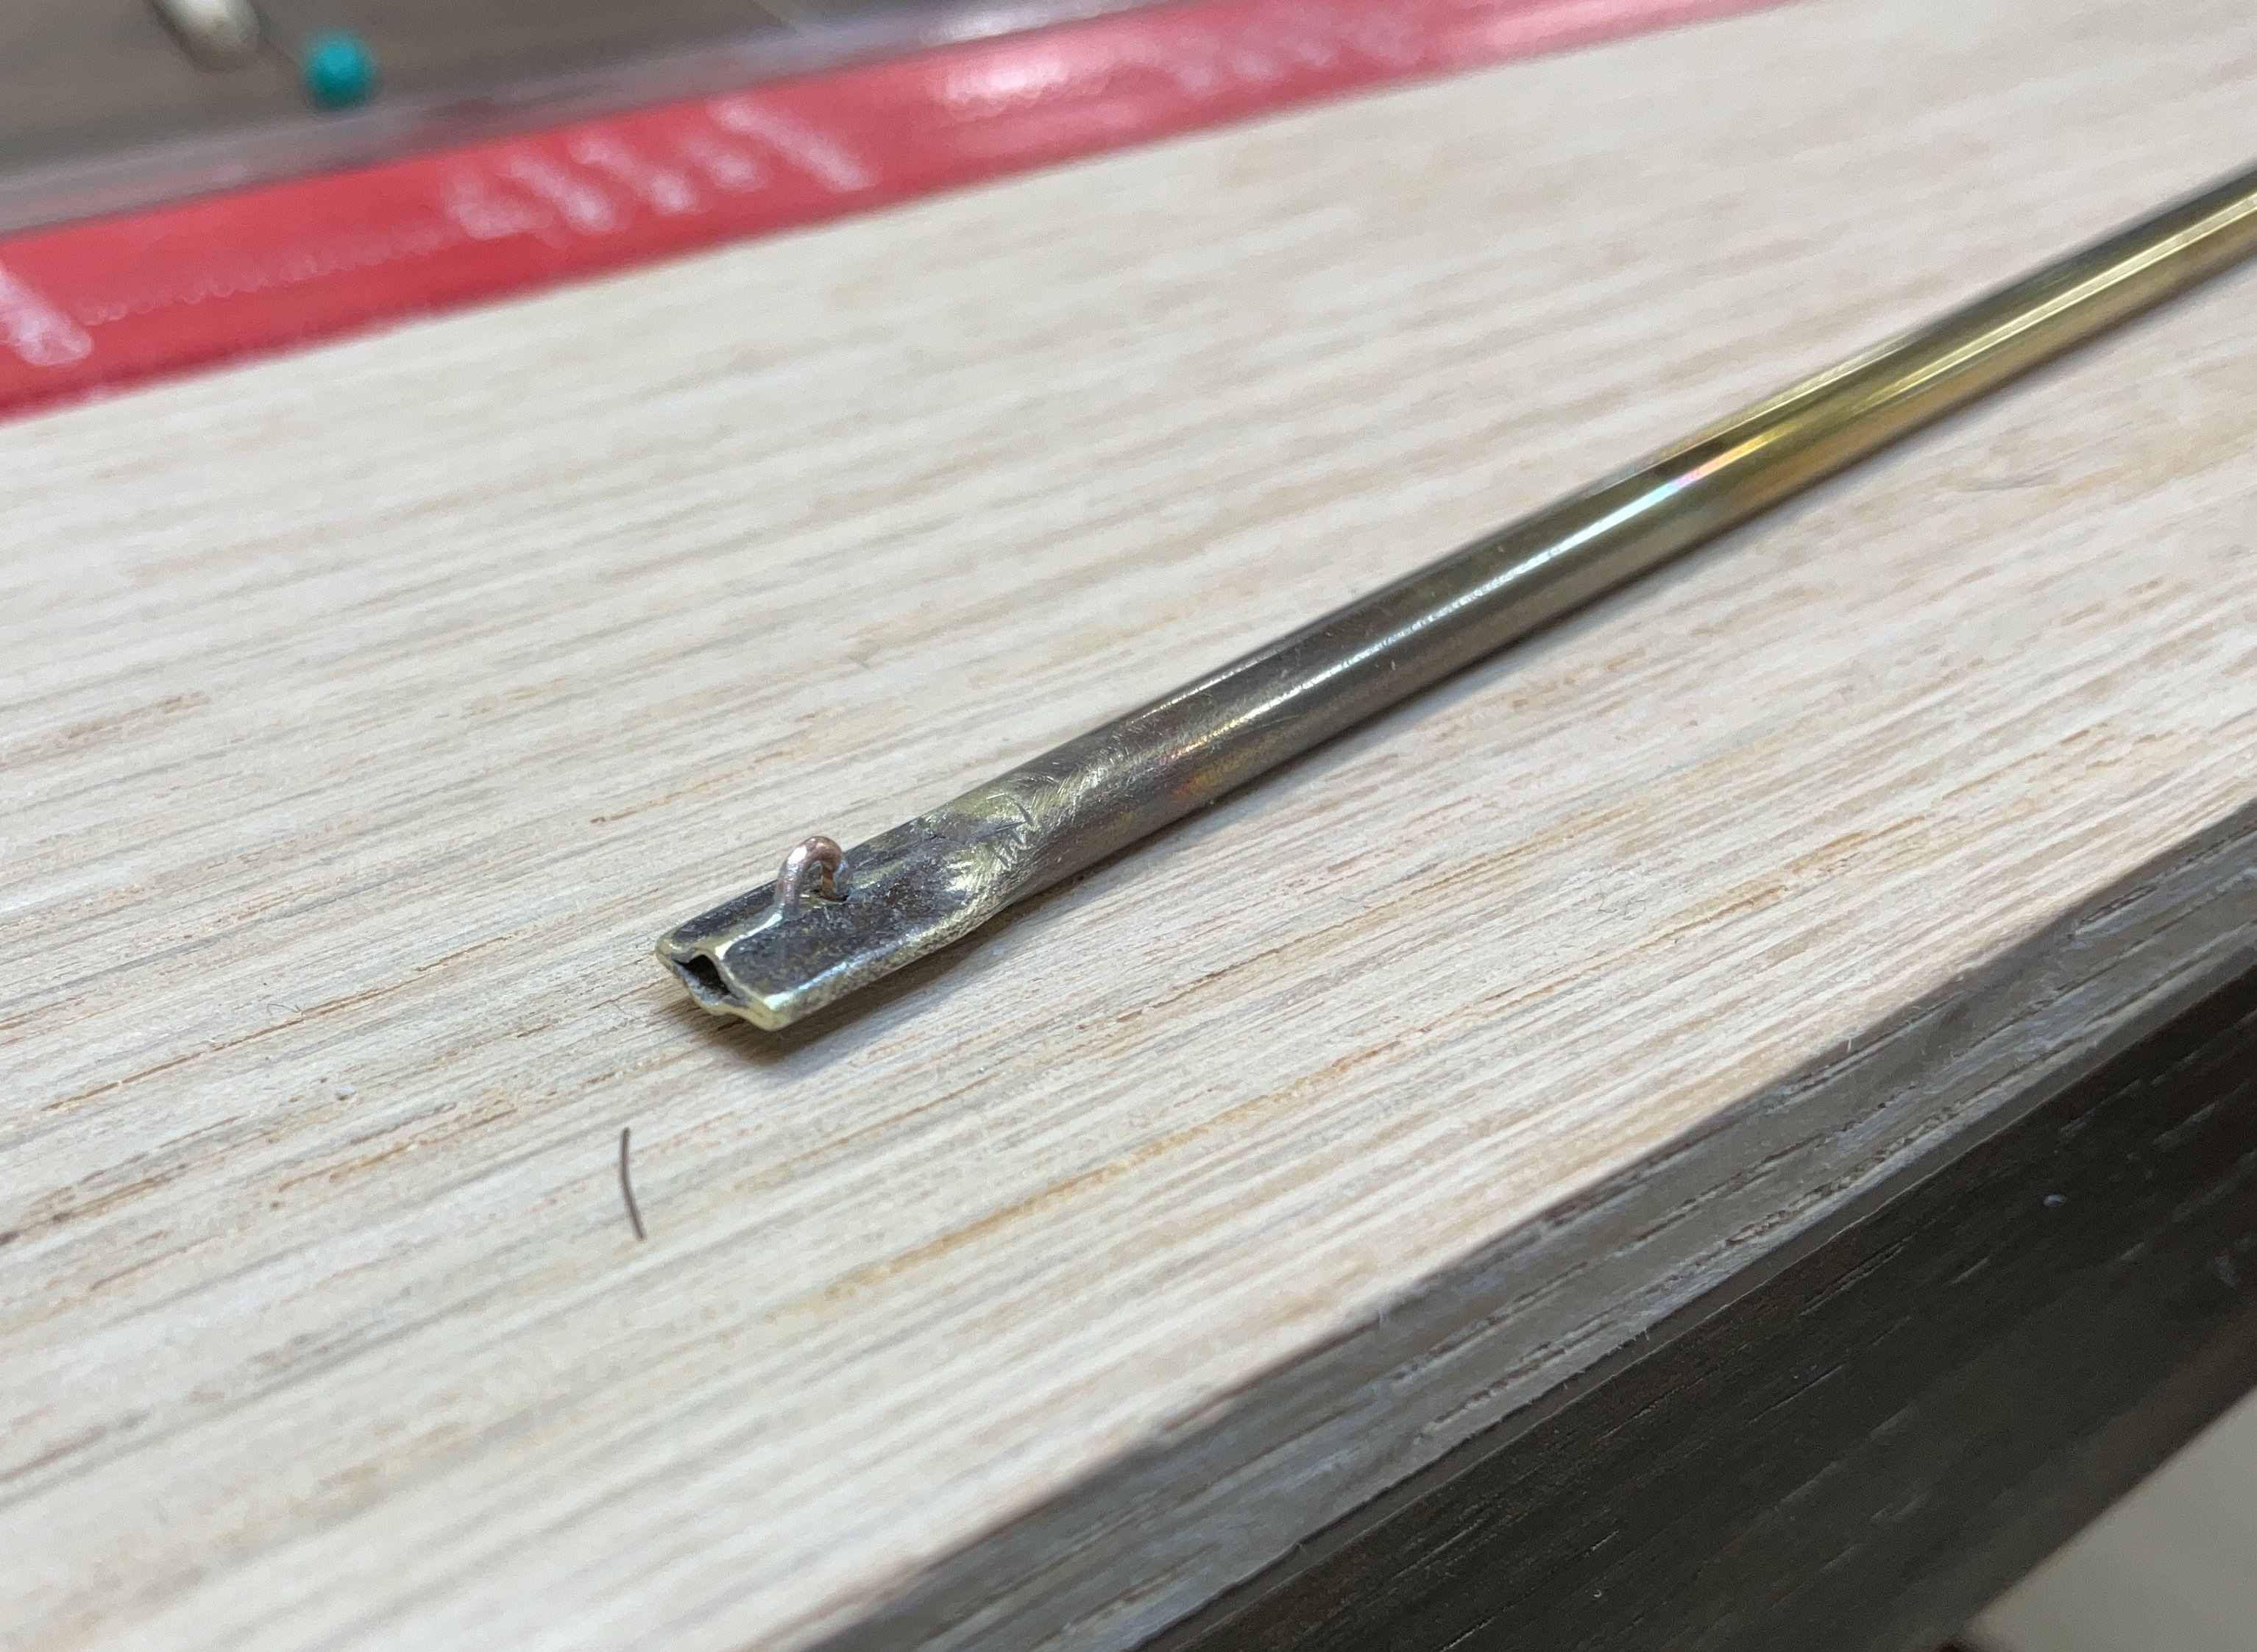
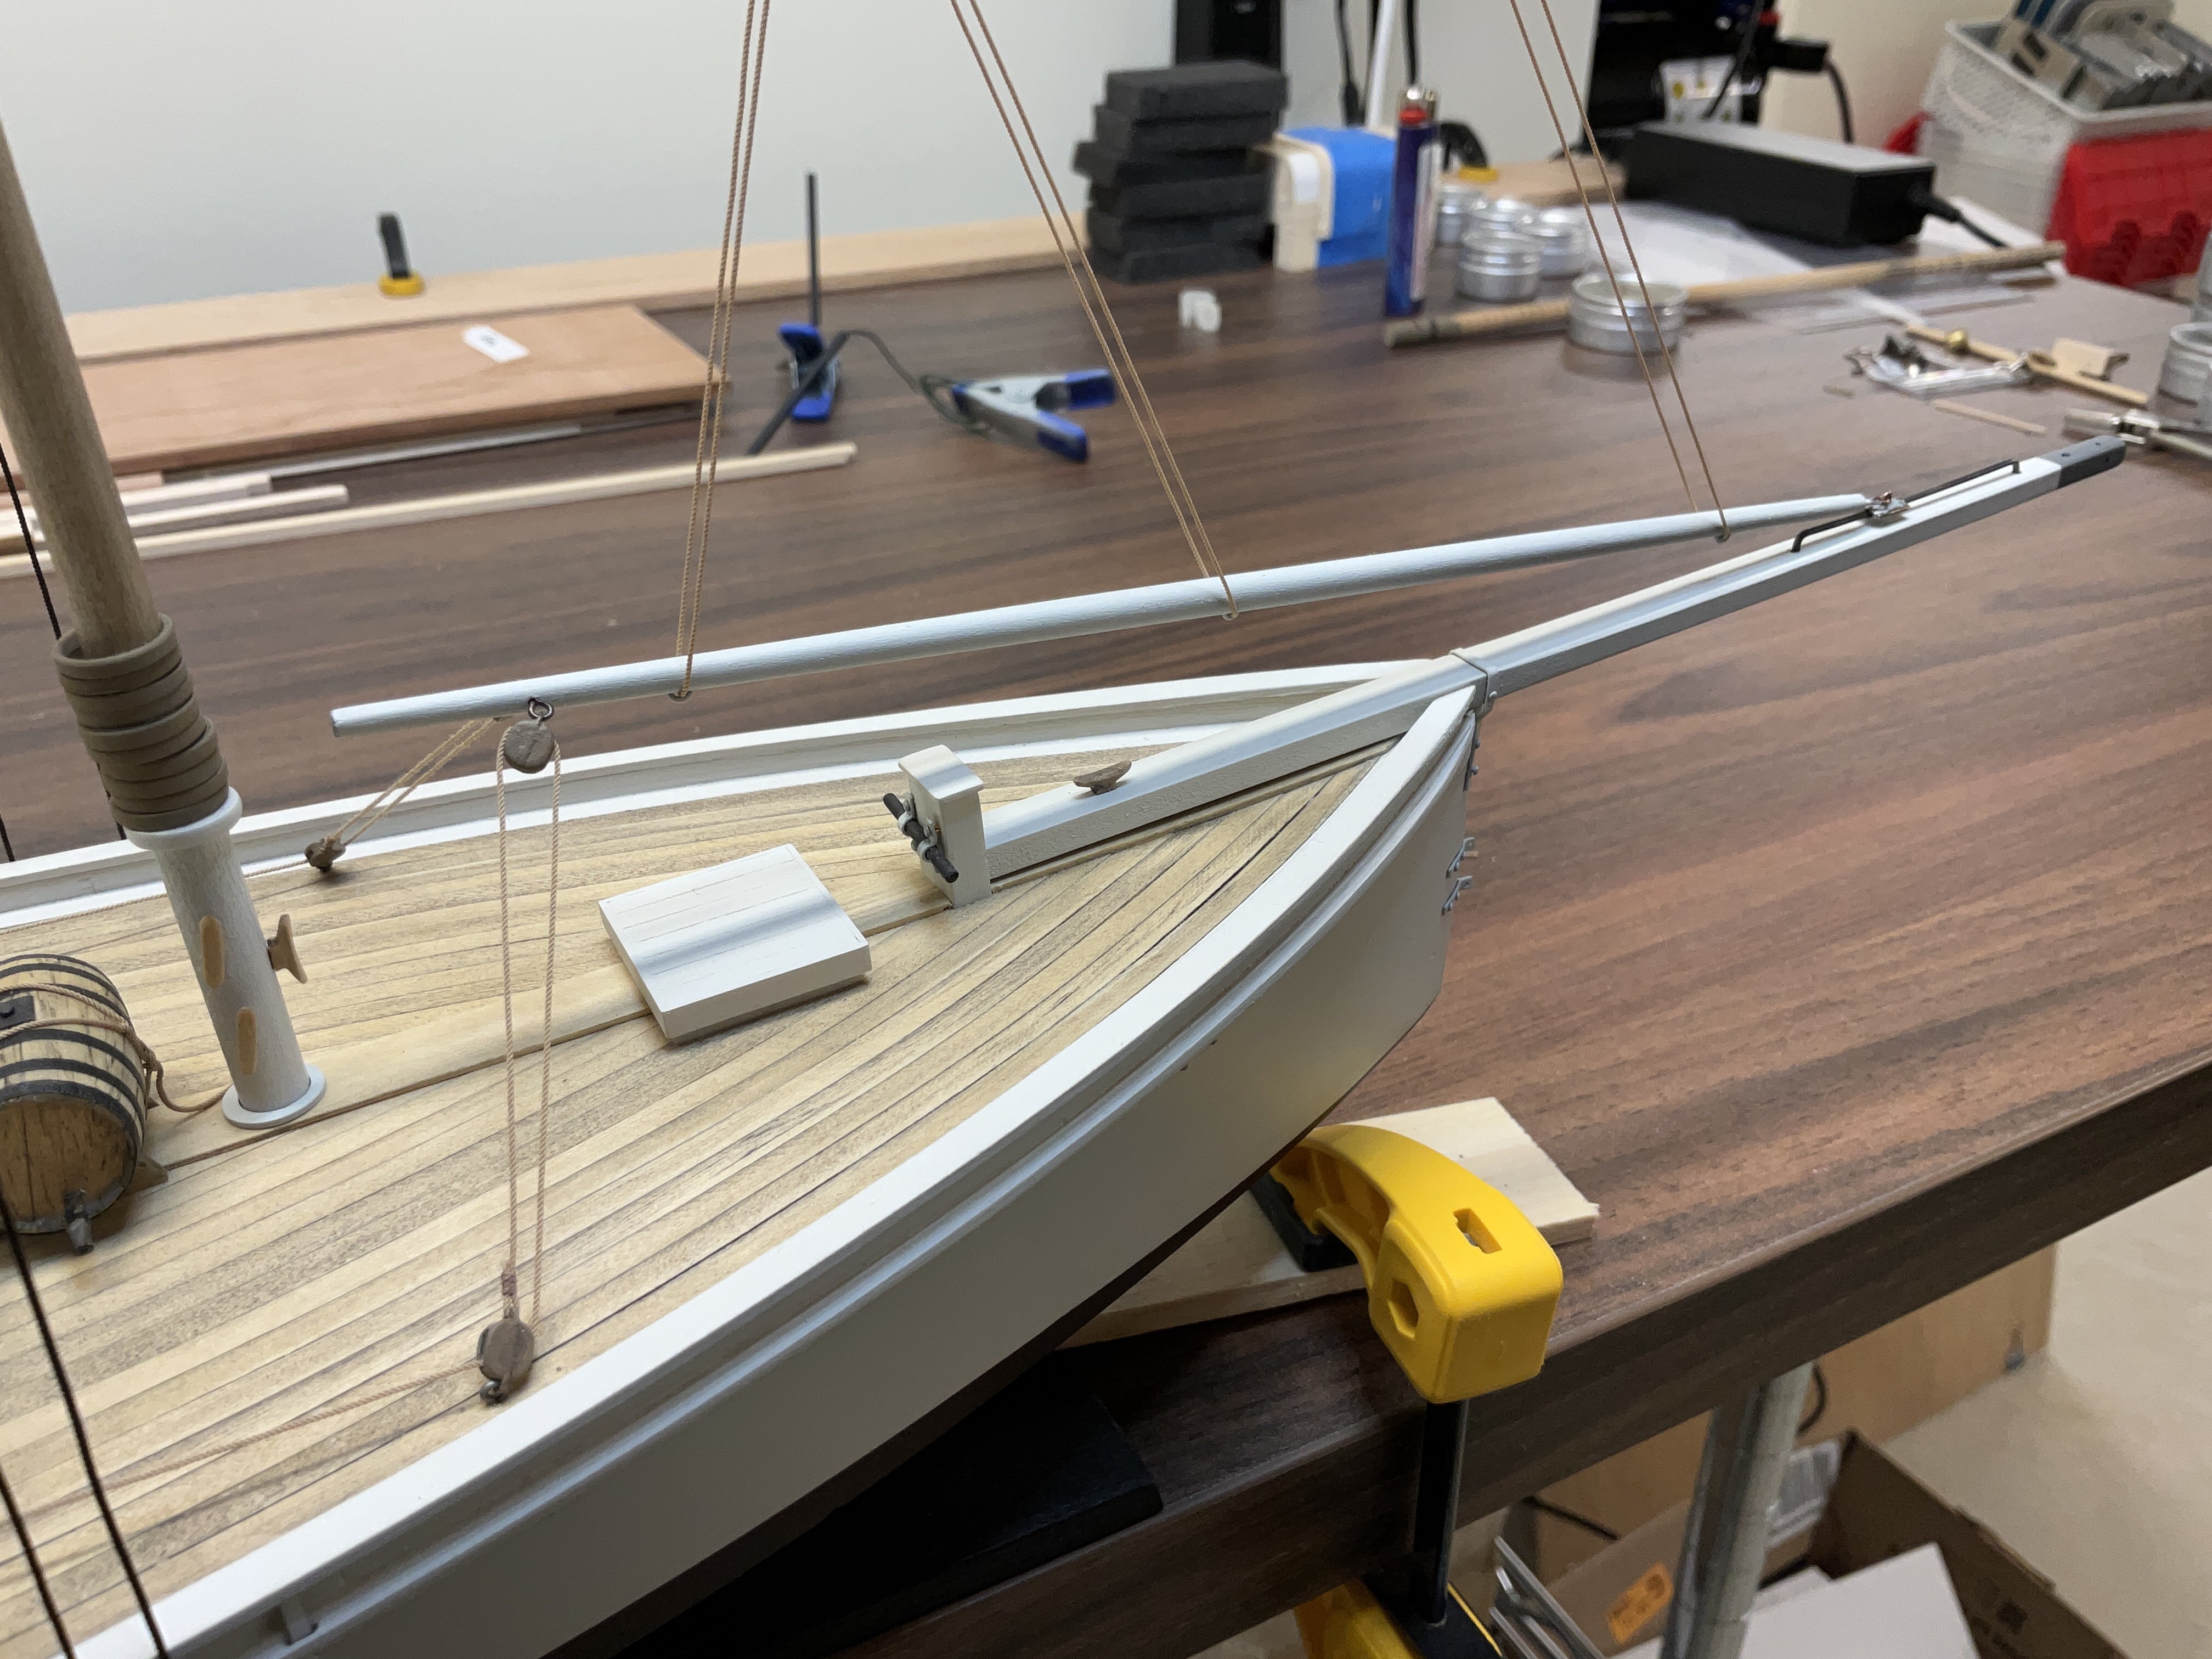
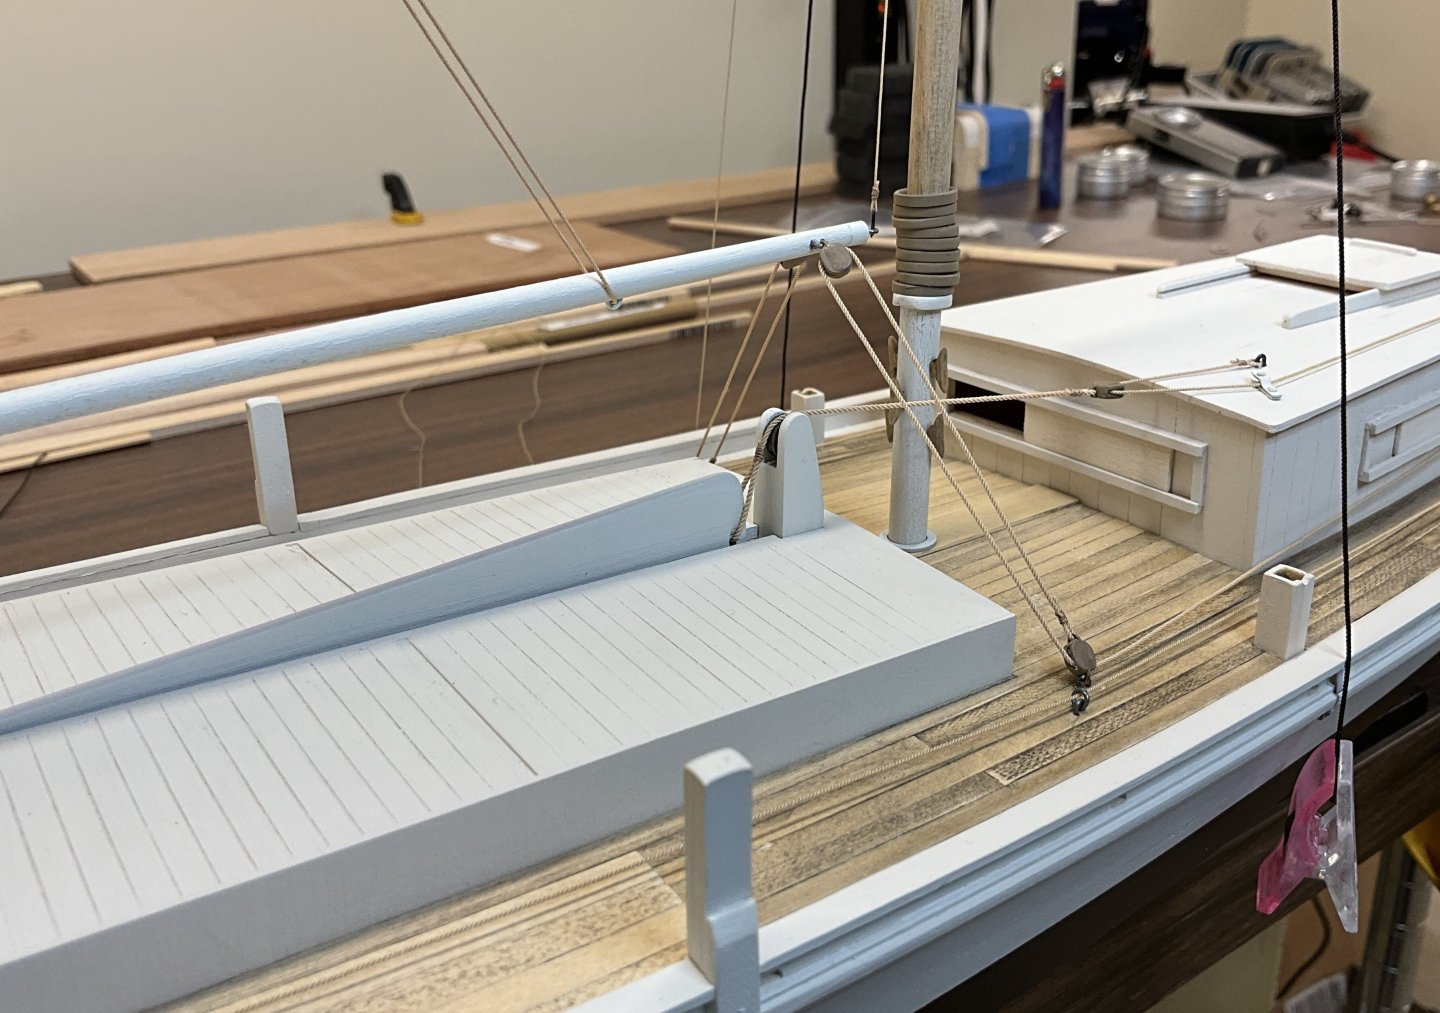
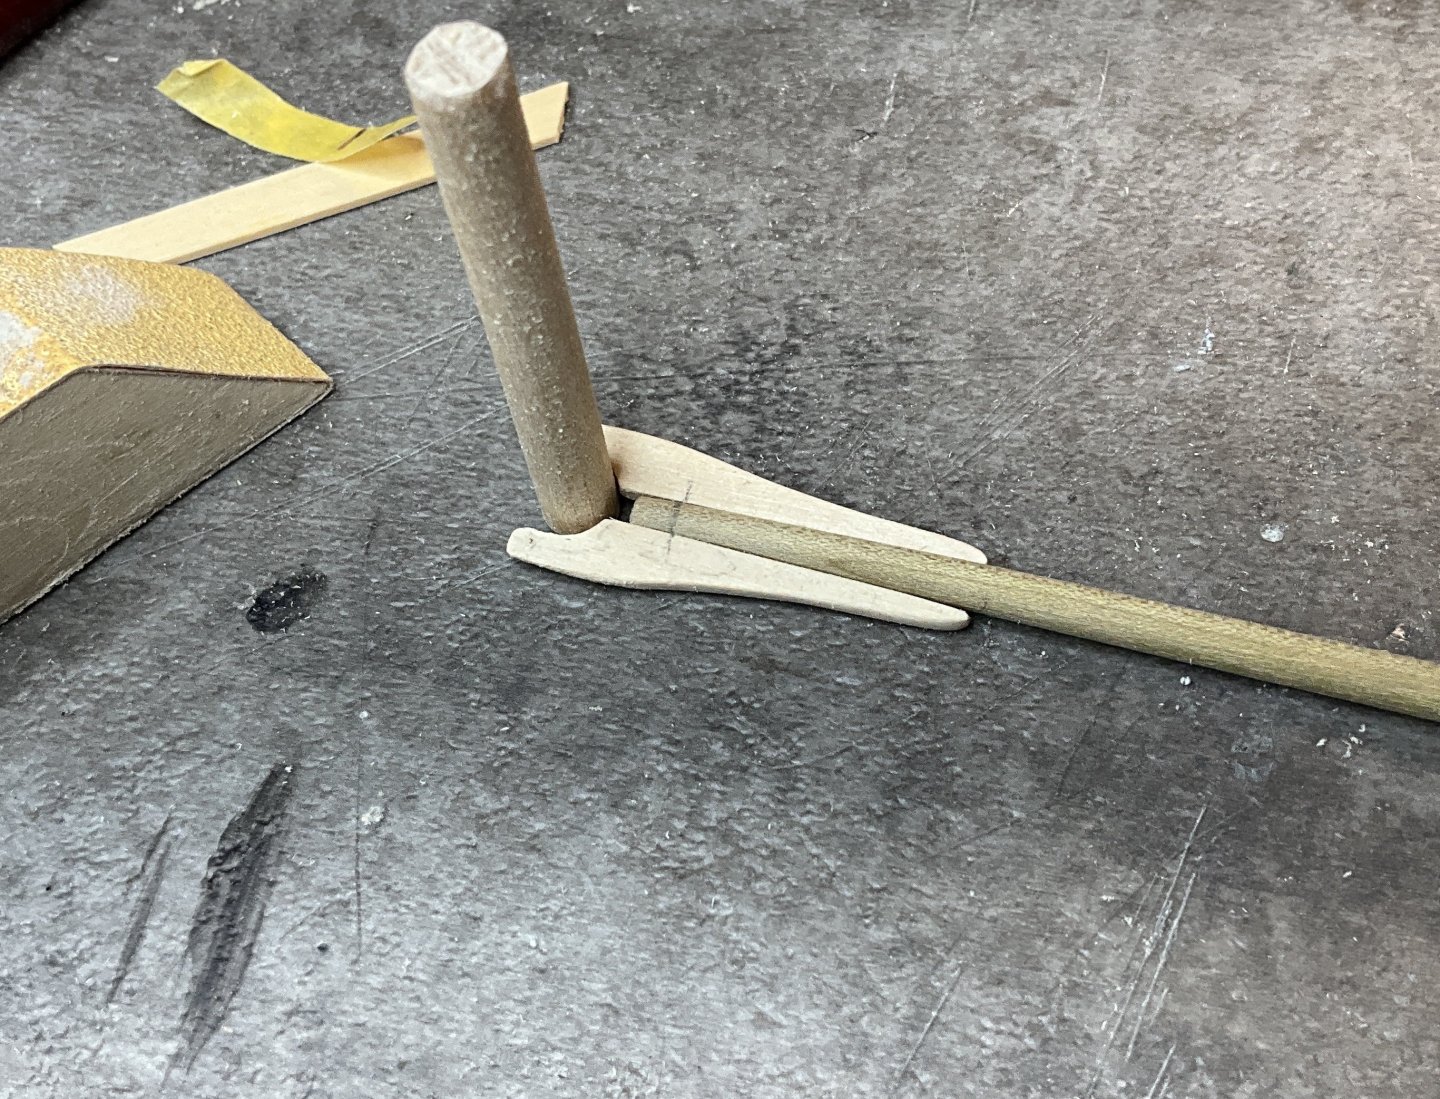
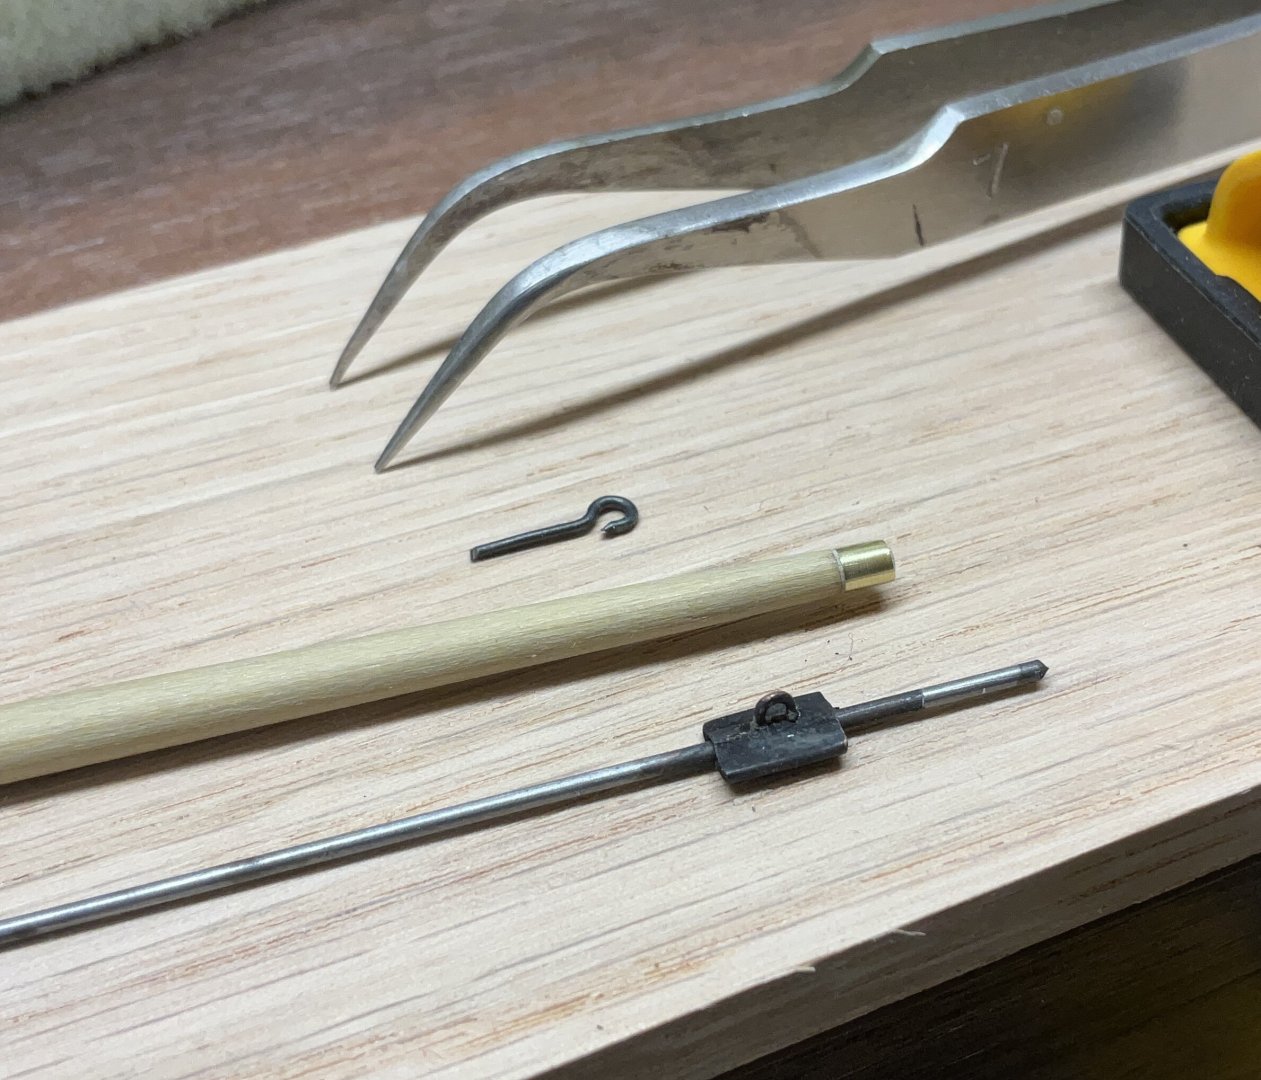
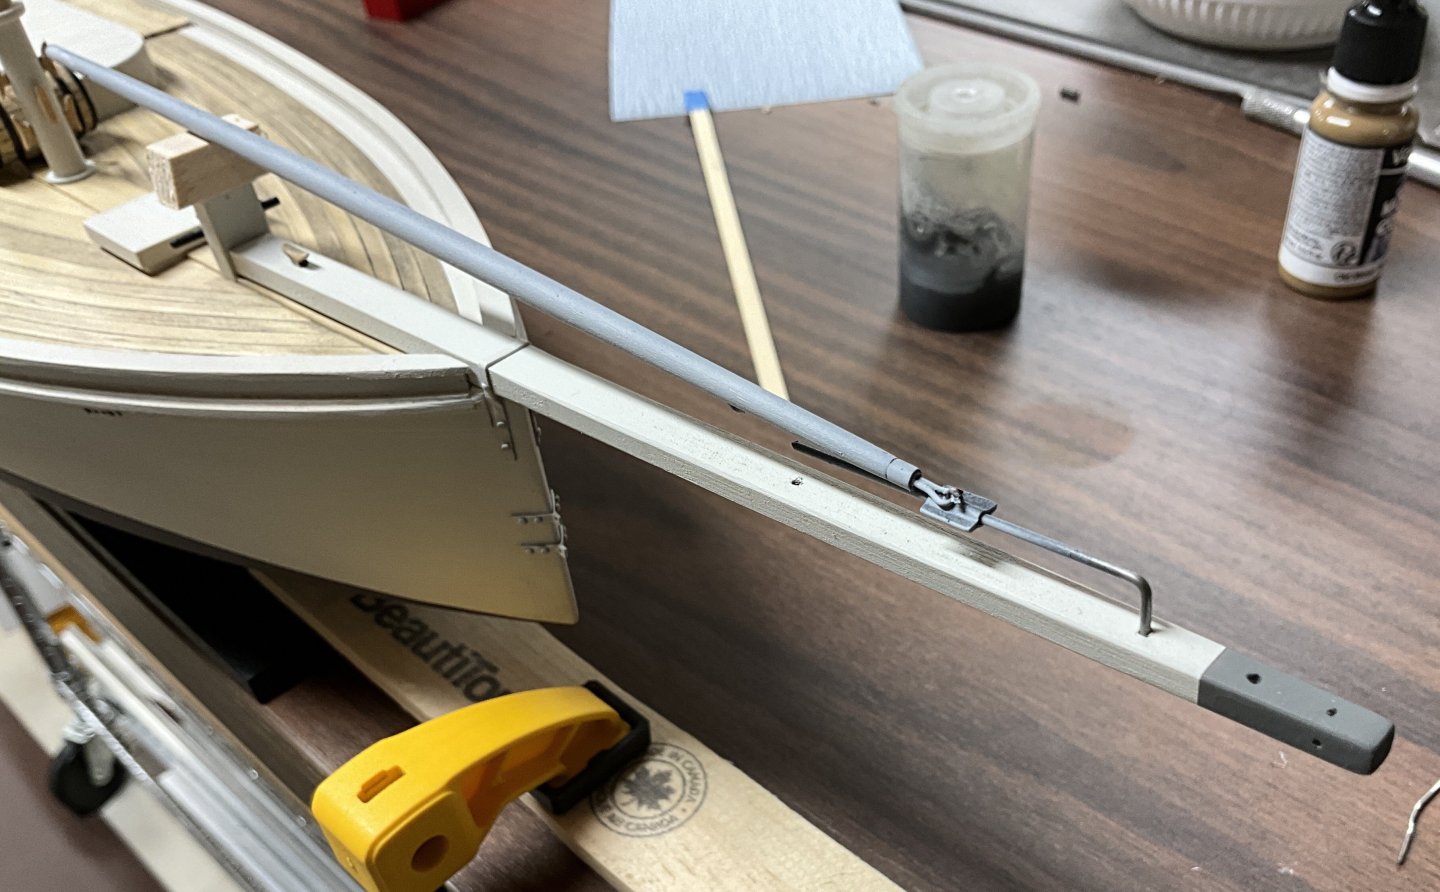
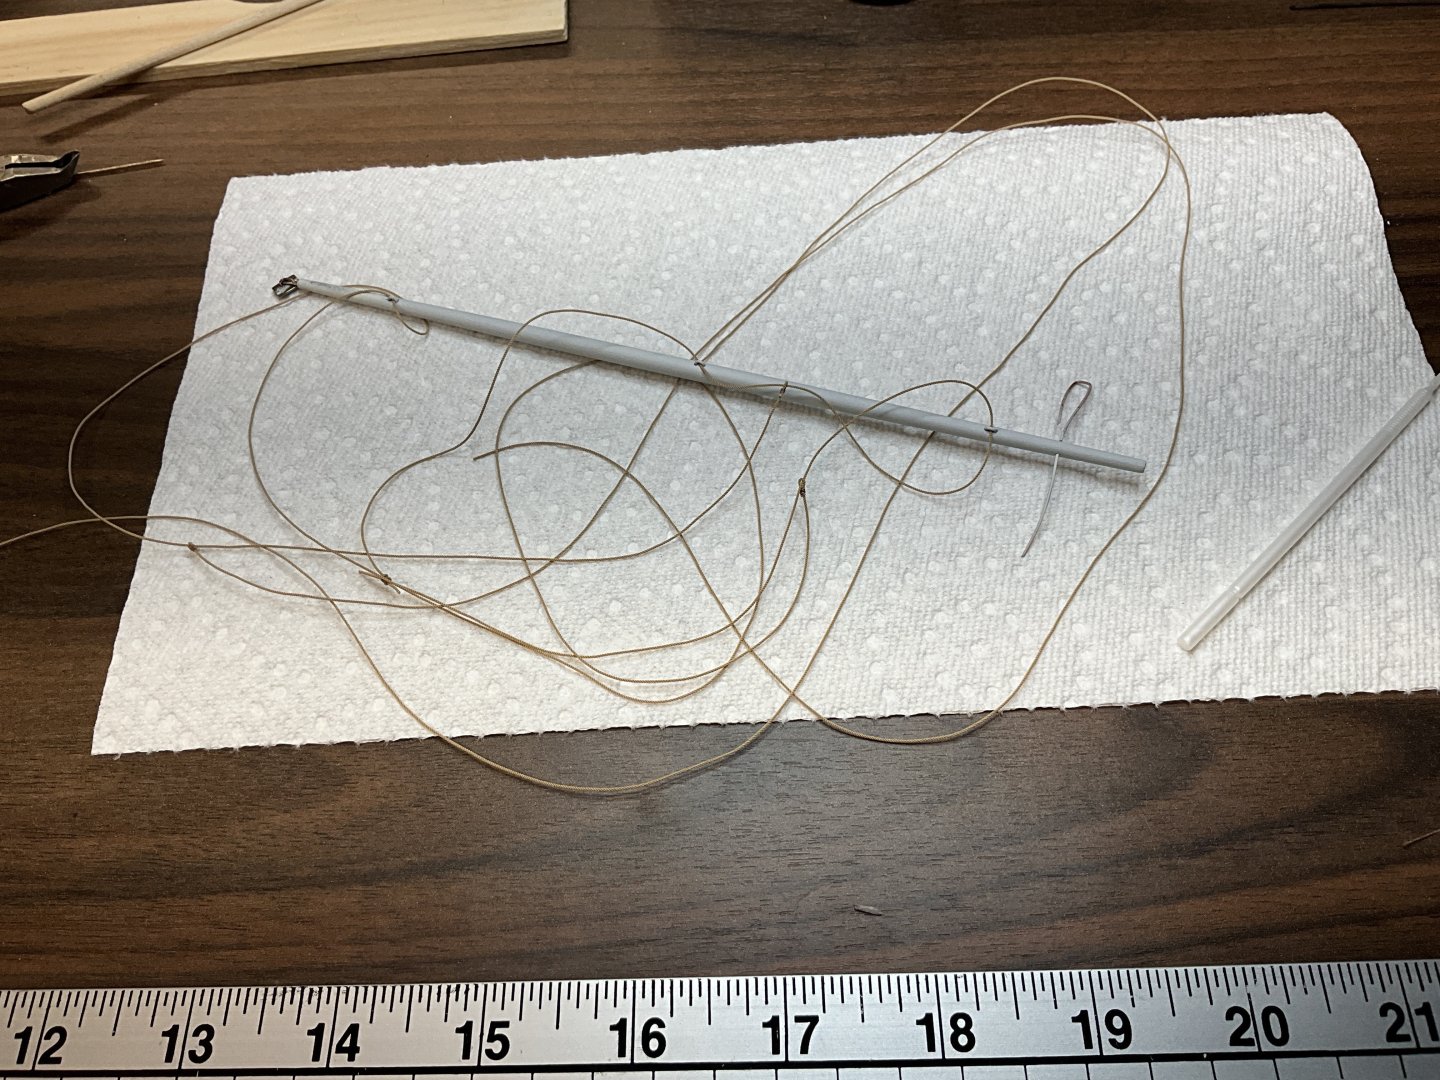
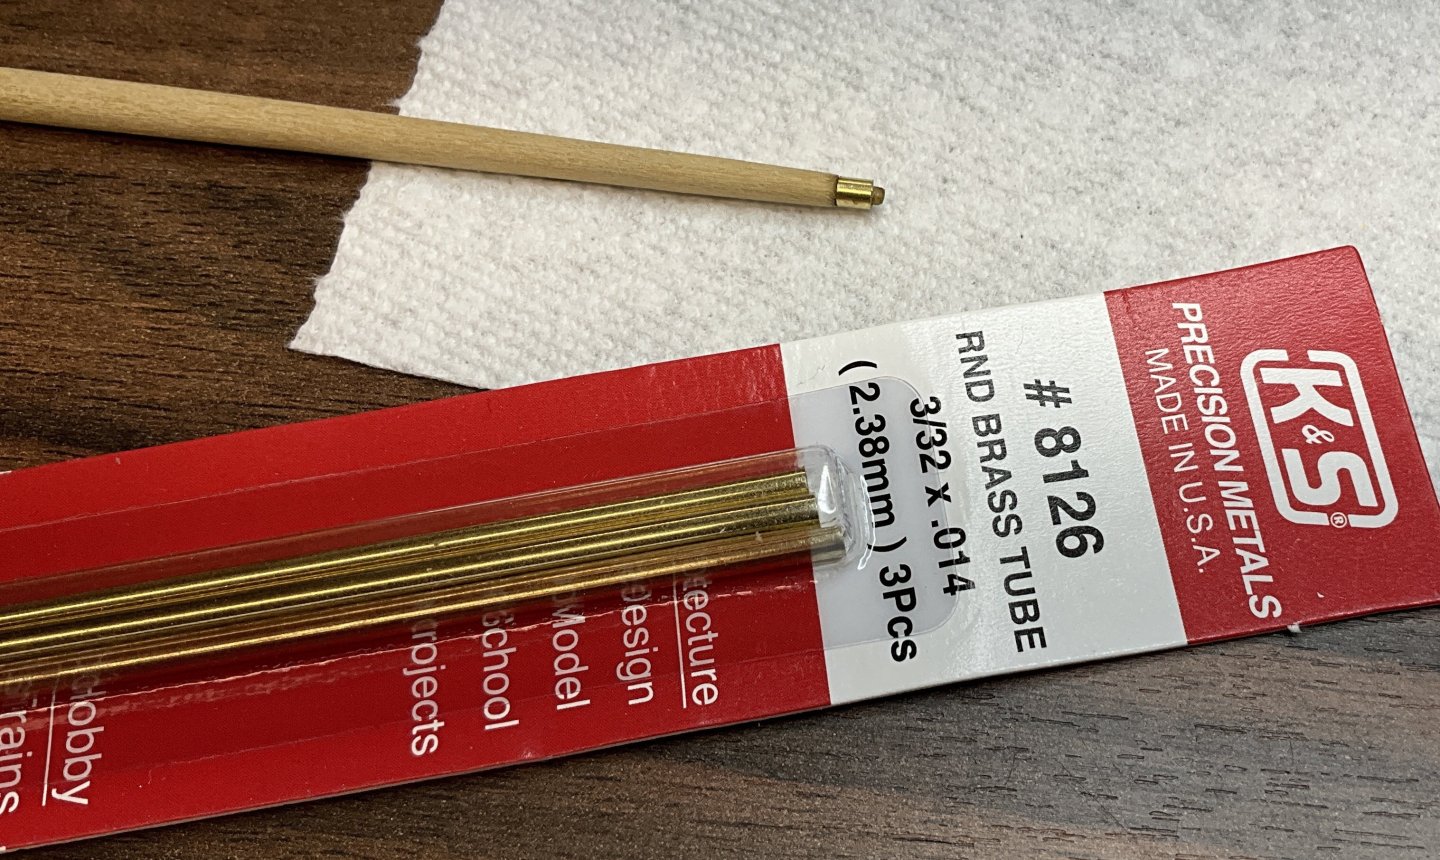
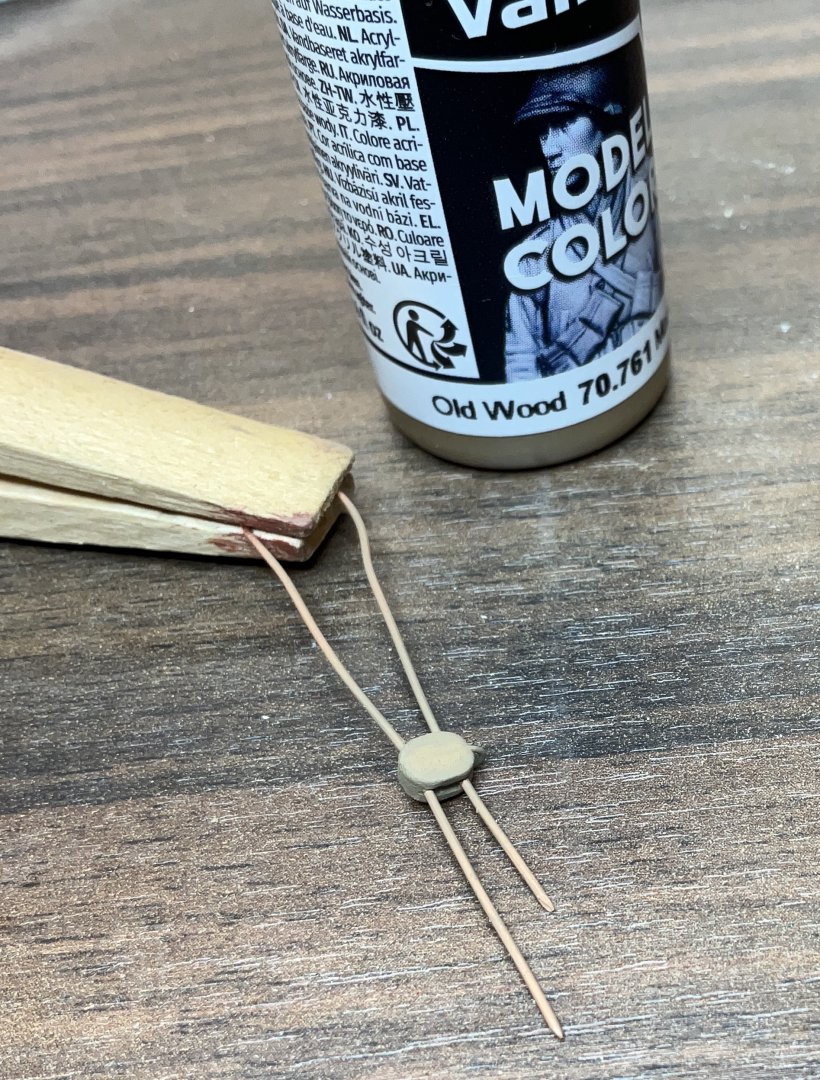
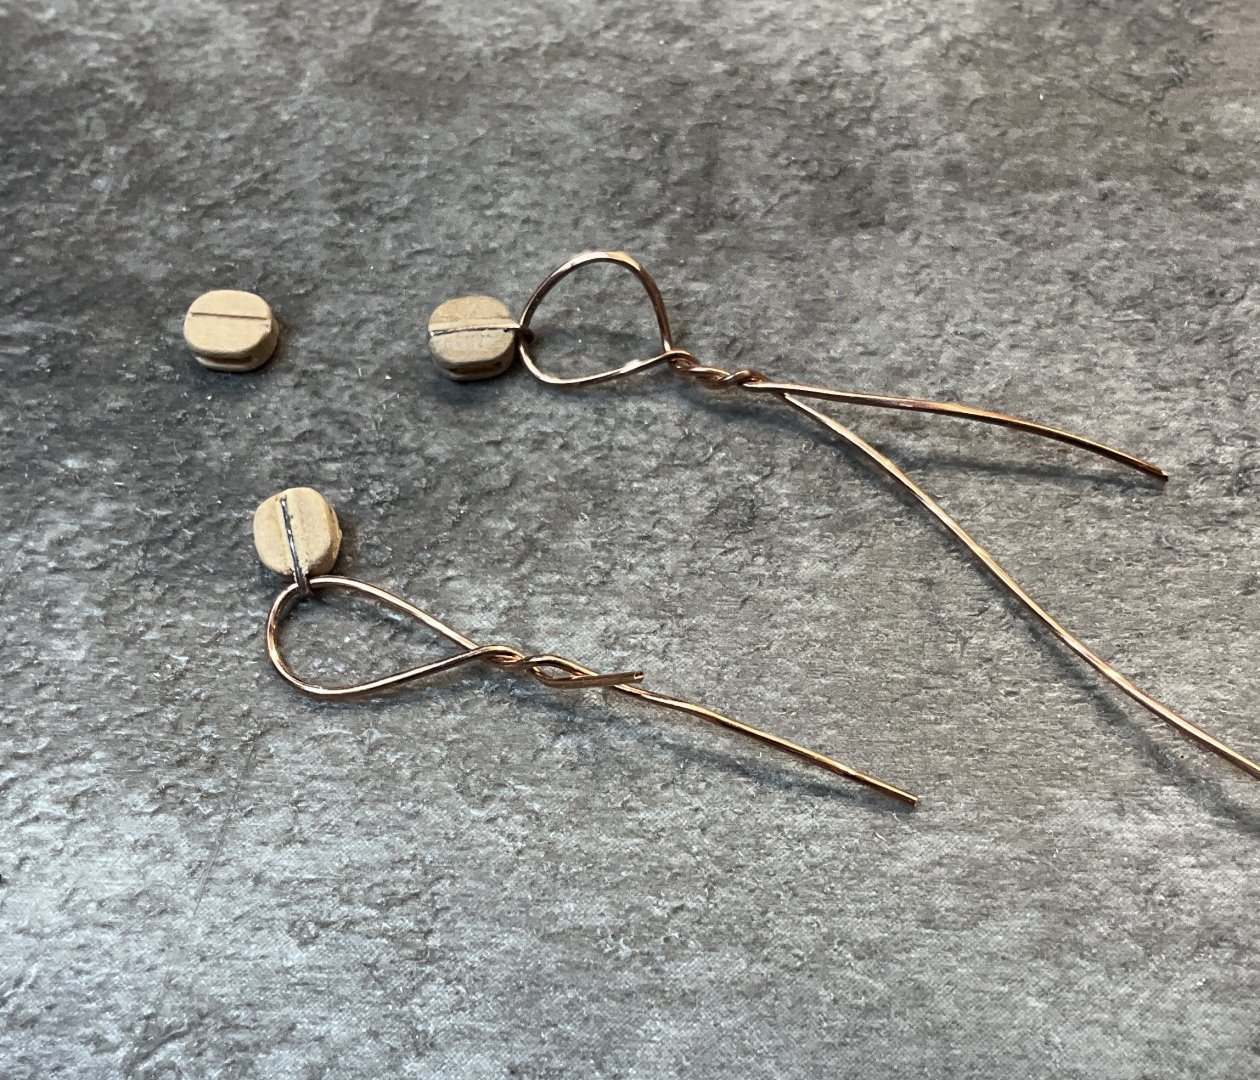
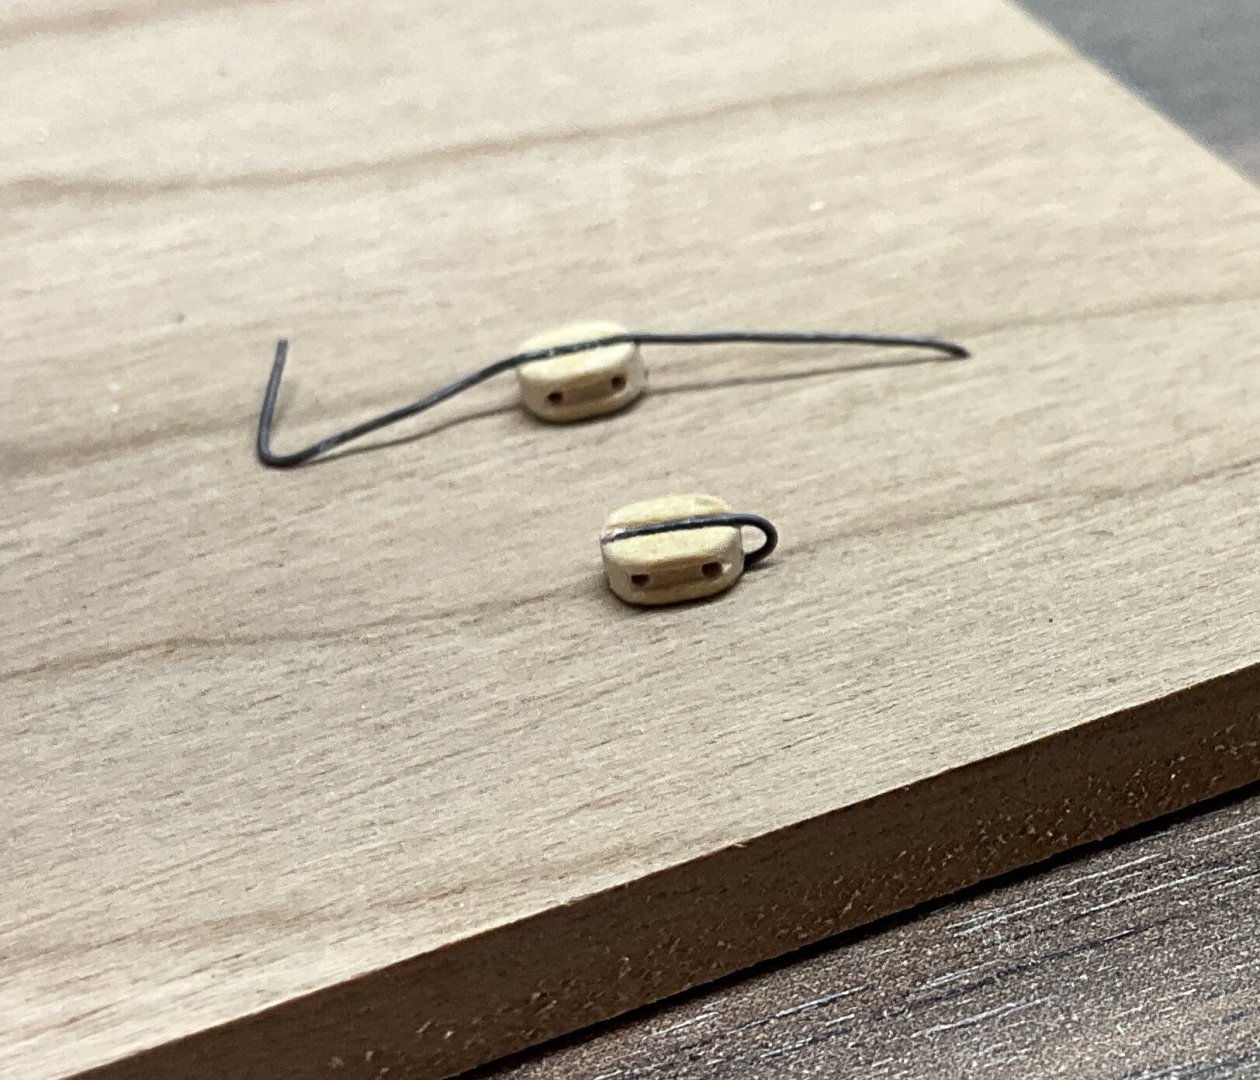
Hi Everyone, I hope you are all well. Thank you for your Comments, Likes, and visits. This update is about the installation of the jib boom. The first image was clipped from a photo posted on “ villagecraftsmen.blogspot.com”. I haven’t mastered adding a link yet but on the right side of the page is a blog archive menu. These photos are under 2013 / September / NC Sharpie Schooner. Lots of interesting articles in these archives and thanks to them for sharing these high definition images. After looking at the traveler rod and car for quite some time I decided right or wrong that the car was a plate with a swivel mechanism for the jib boom attached to it. This was loosely clamped to the rod enabling boom to slide fore and aft. So the adventure of making this started. A 1/16” steel rod was slid inside a 1/8” diameter brass tube. Stakon pliers were used to squeeze the tube until it clamped the rod. The tube with the rod inside it was heated and the tube was flattened on either side of the rod in a vise. Holes were drilled in the tube and a copper loop was soldered in place while the steel rod was still inserted. A ferrule for the end of the boom was made from 3/32” brass tube I blackened the traveler car but that ended up being removed. I then assembled and primed everything but the primer didn’t stand up very well with all the handling so the primer was removed from the brass parts. They will be painted once the boom is installed and rigged. The blocks were converted to internally stropped by attaching 28 gauge annealed steel wire with CA. Wood filler and primer was applied a number of times. Every time I took a picture I would see that they needed more work. Finally they were painted with Vallejo Old Wood. They look okay if you’re riding by on a horse. The jib sheets and the lazy jacks were rigged and left to settle in. The fore boom will be next.


- 201 replies
-
- 14
-
-

-
- Oyster Sharpie
- first scratch build
- (and 1 more)
-
Hi Gary, glad to see an update to your Pelican build. Everything looks so good!
-
Rigging Diameter, Early 1900s Workboat
Paul Le Wol replied to JacquesCousteau's topic in Masting, rigging and sails
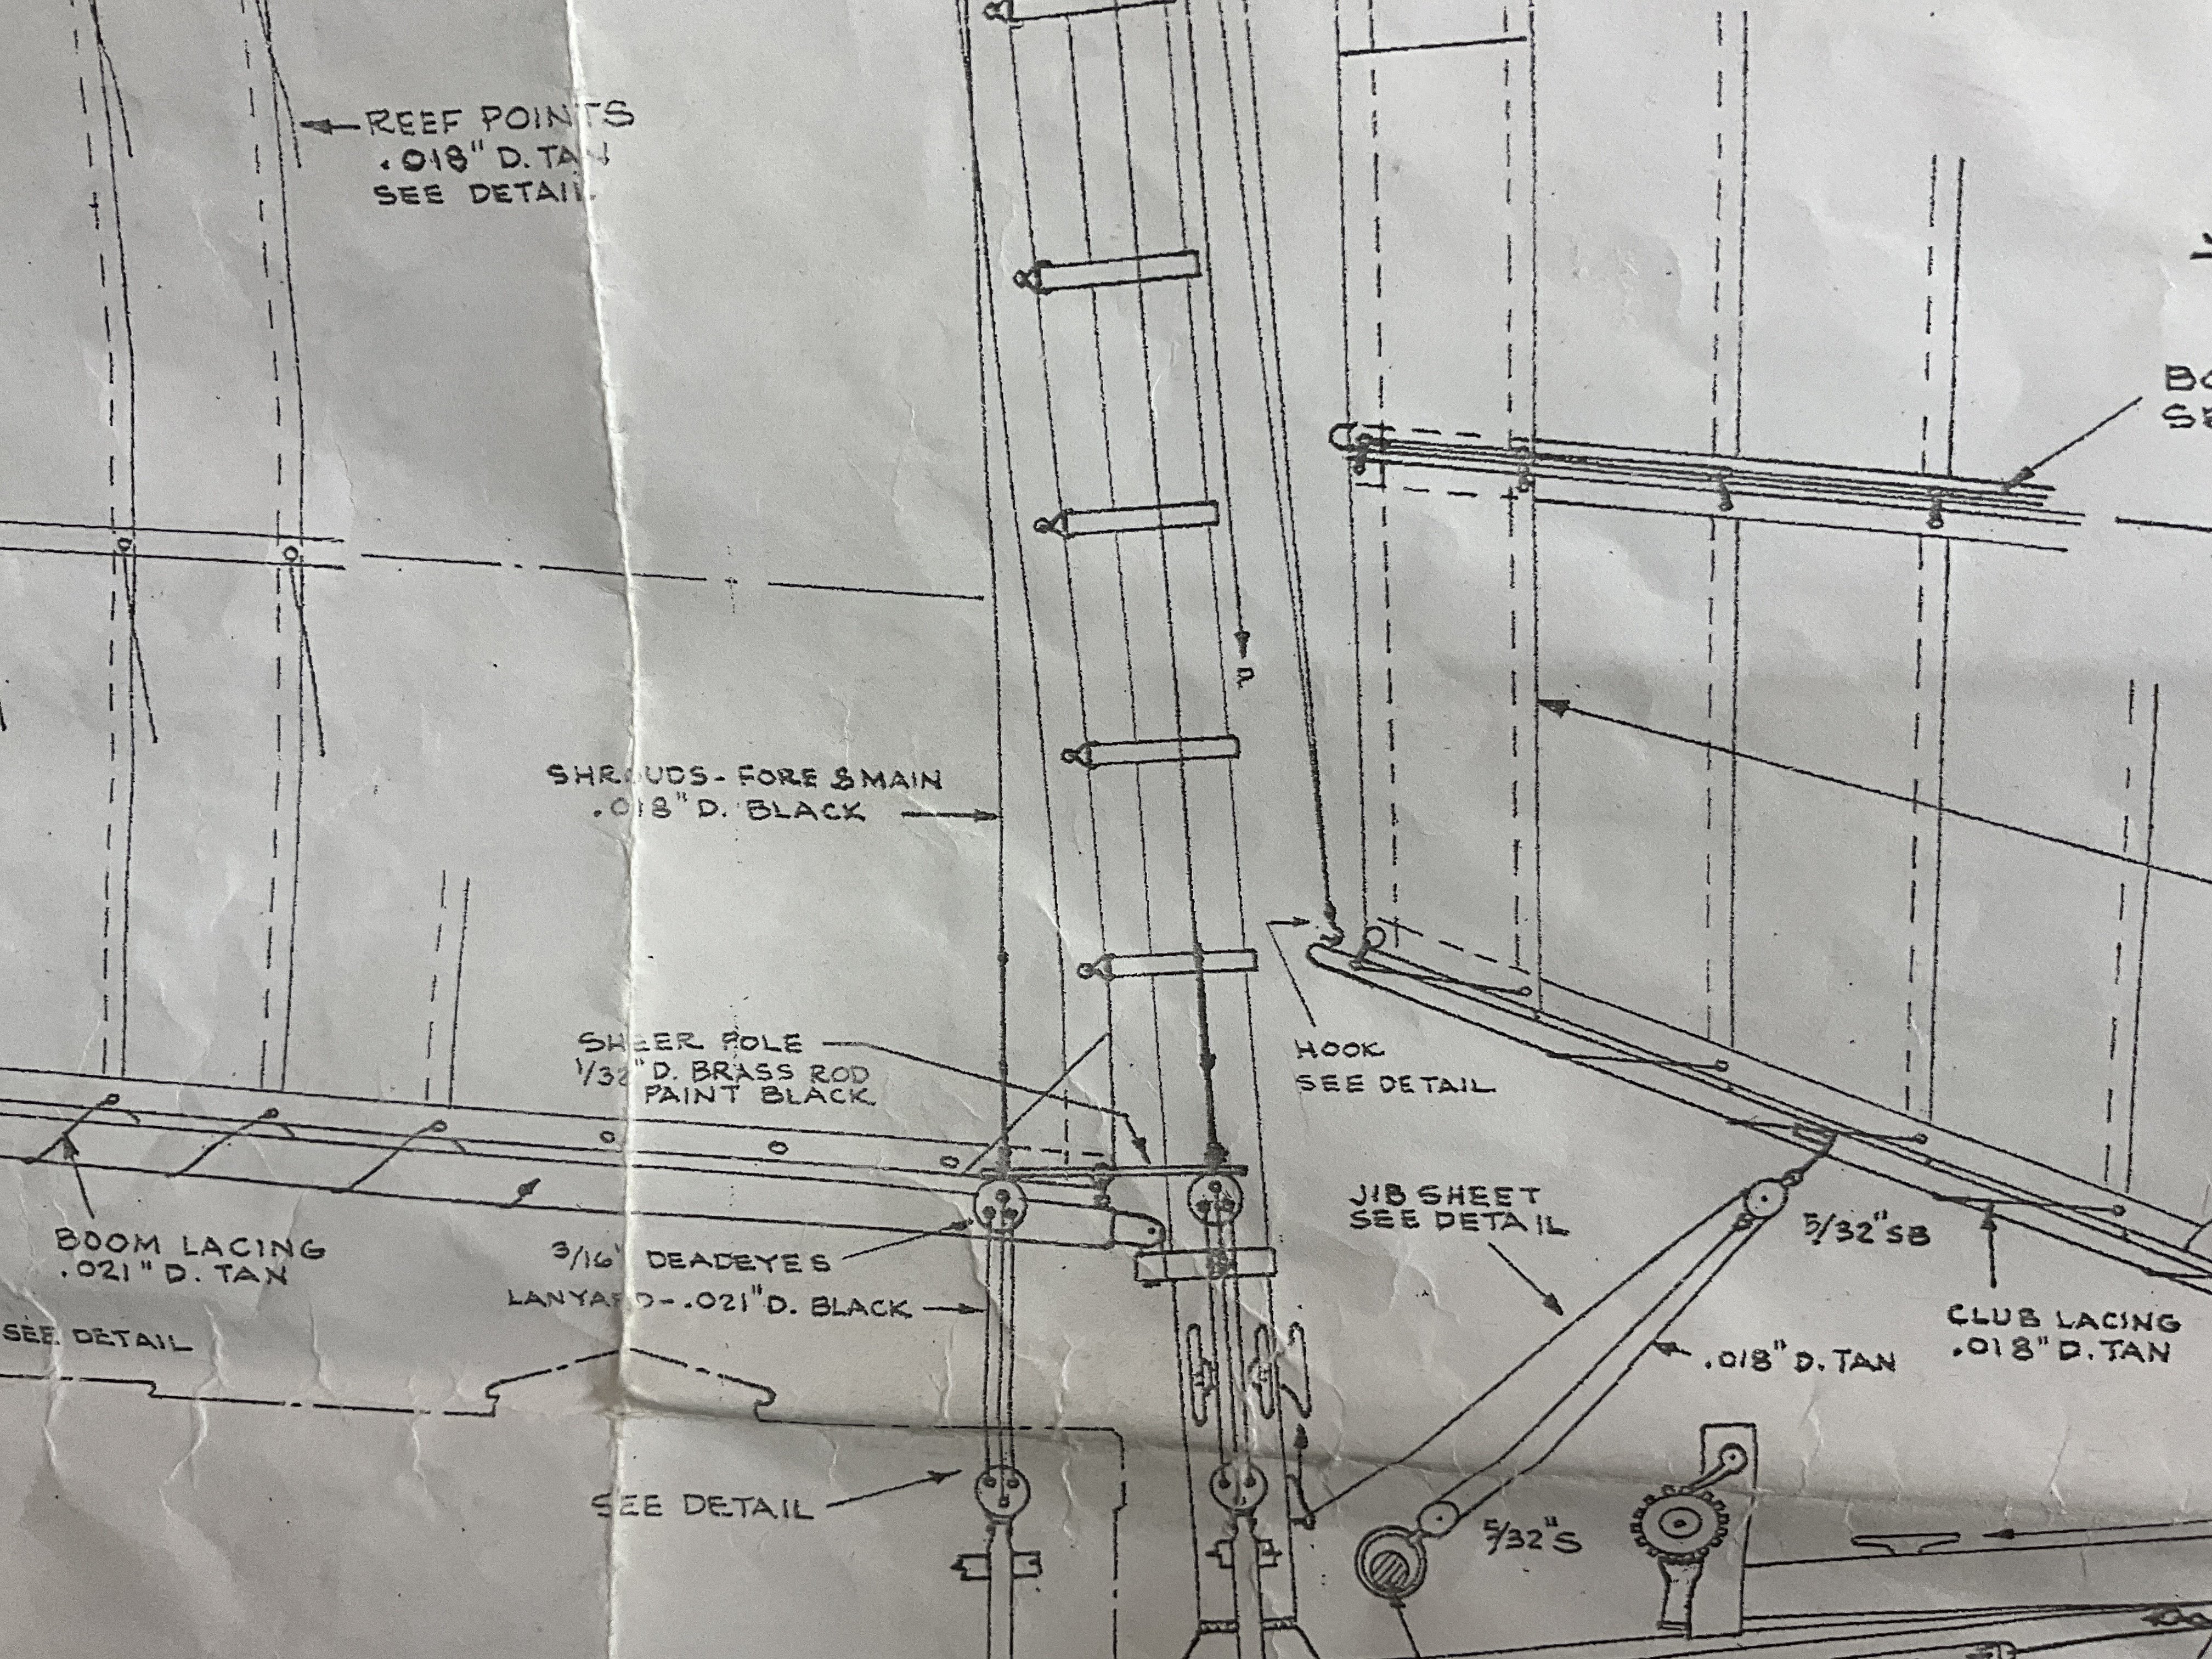
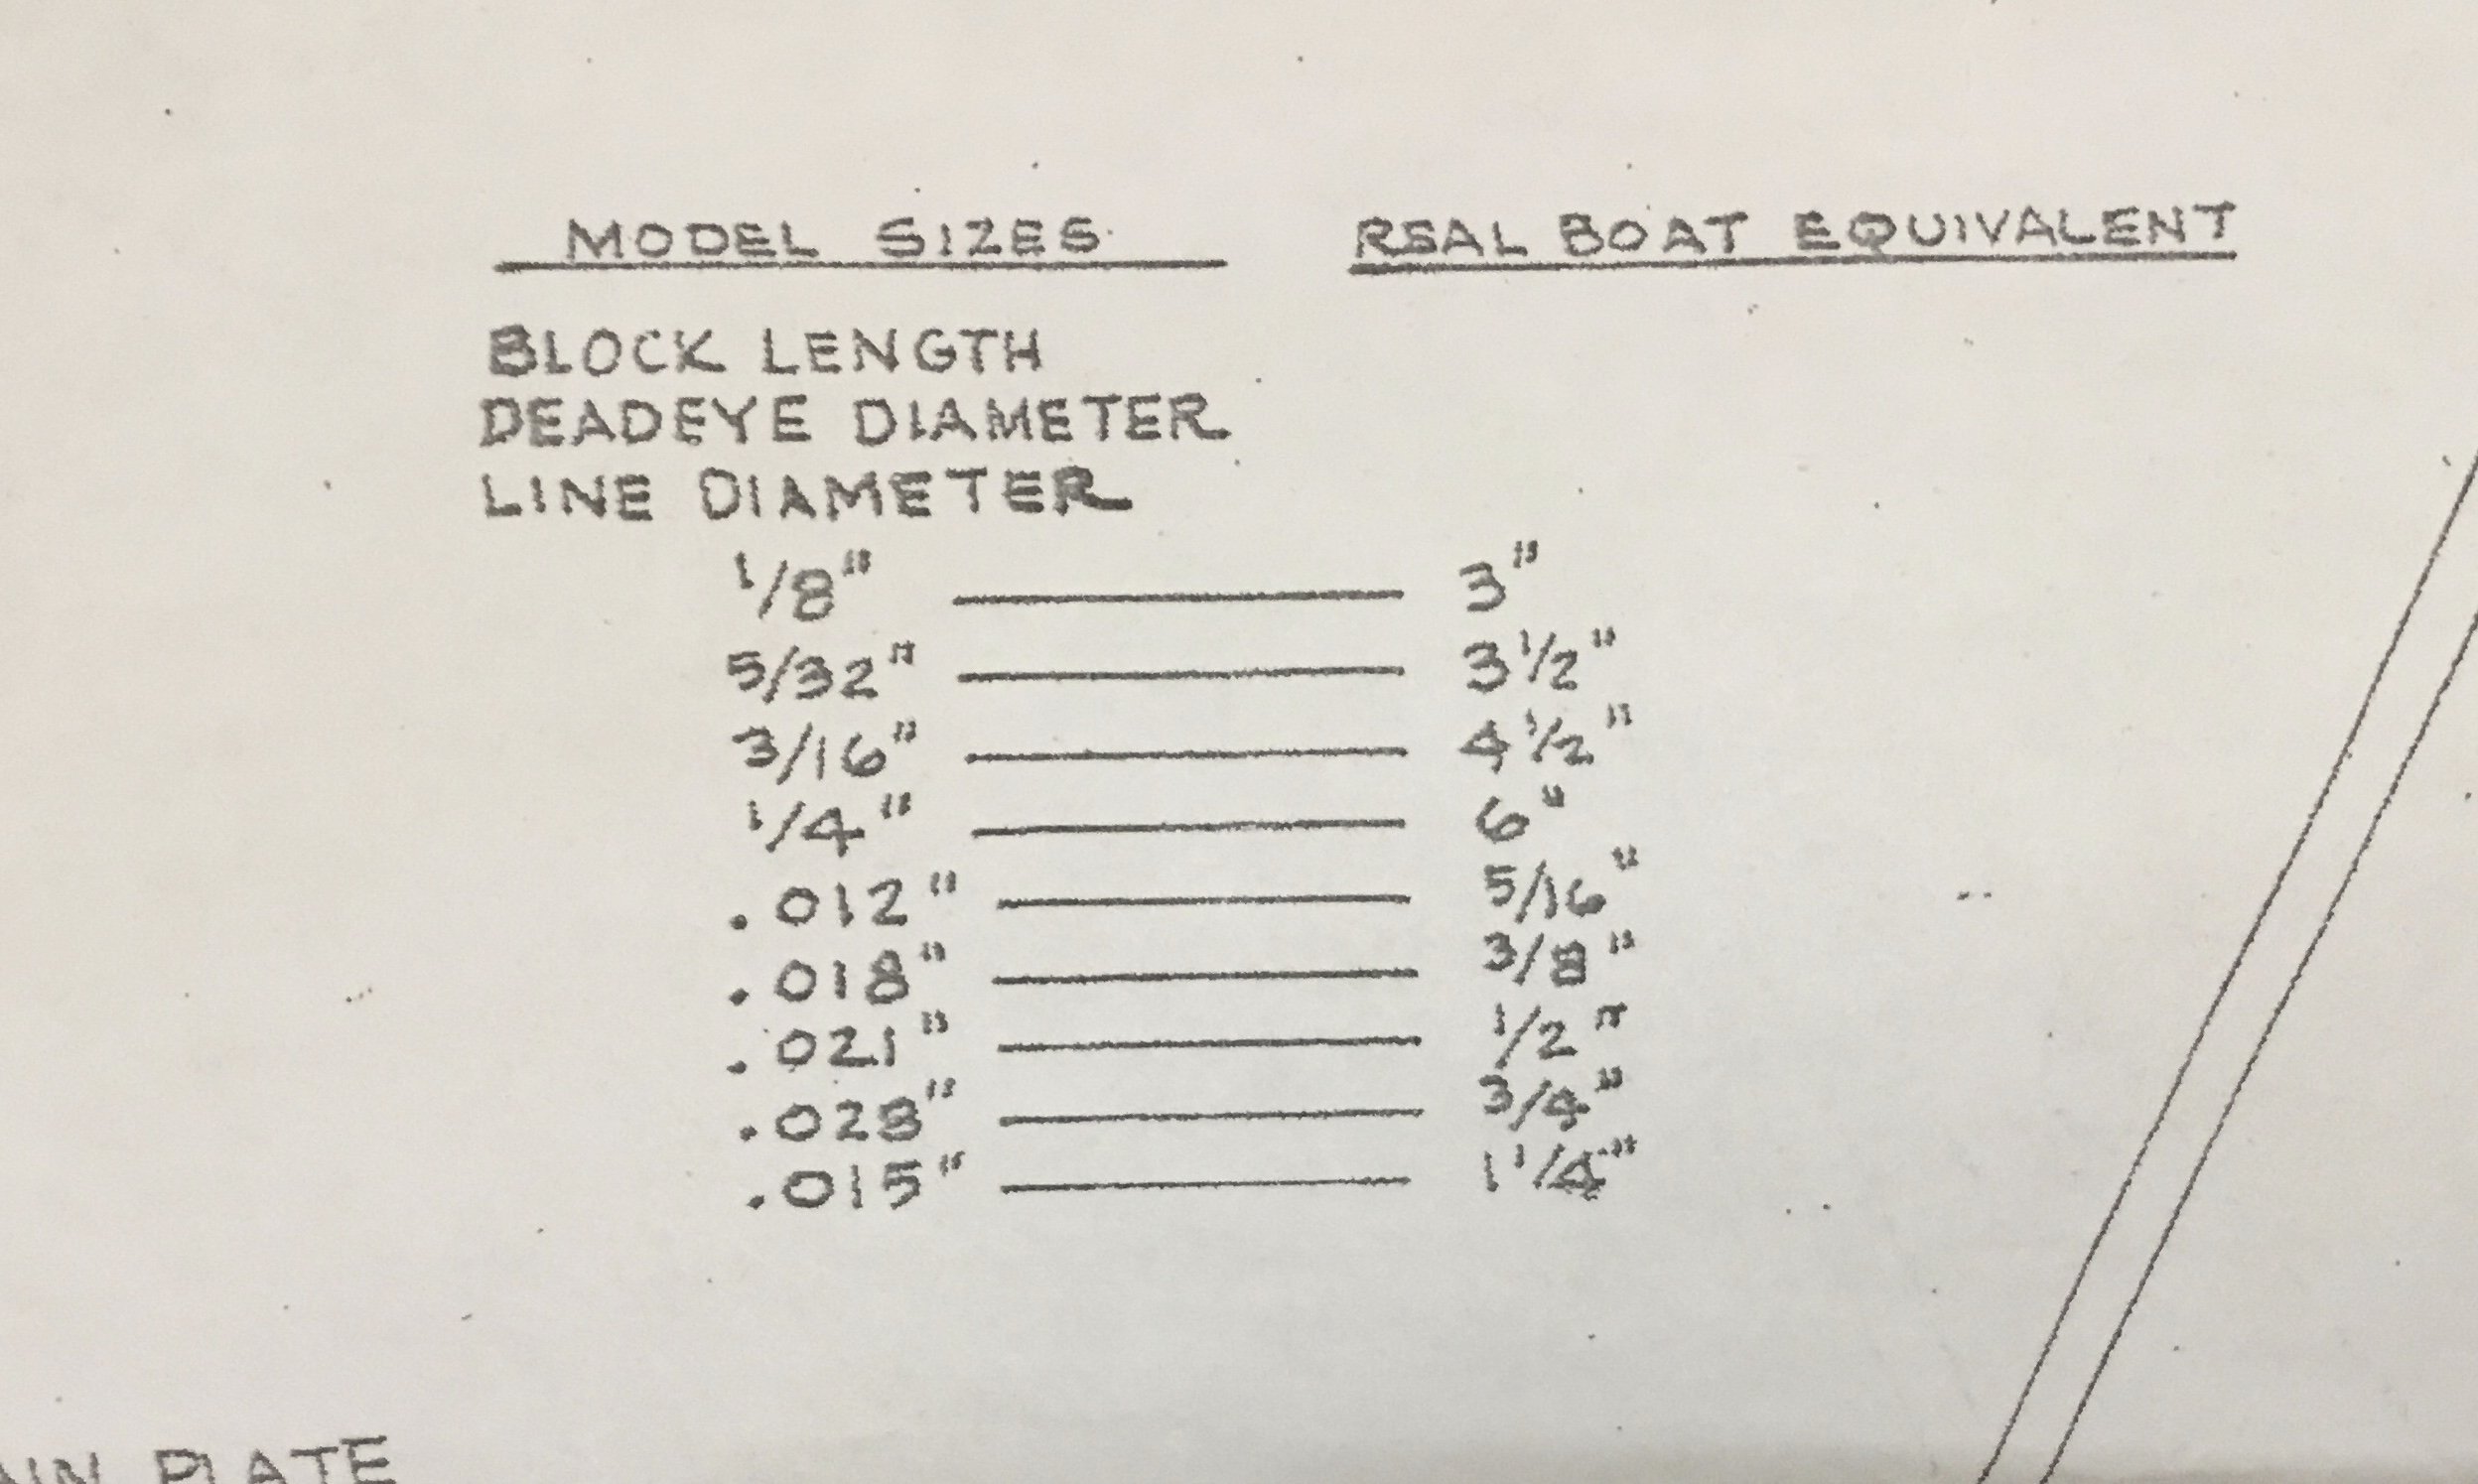
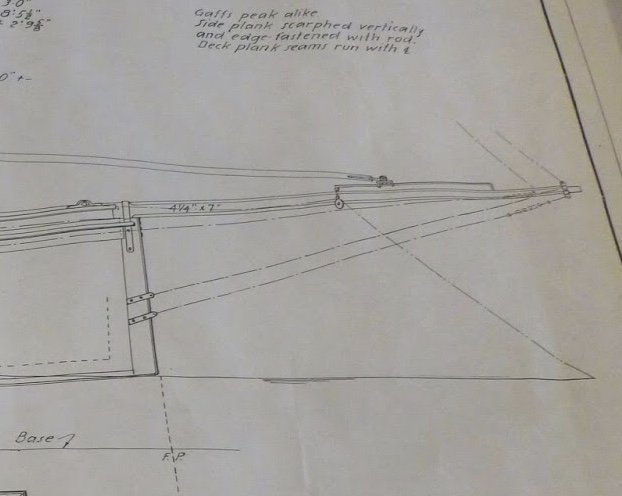
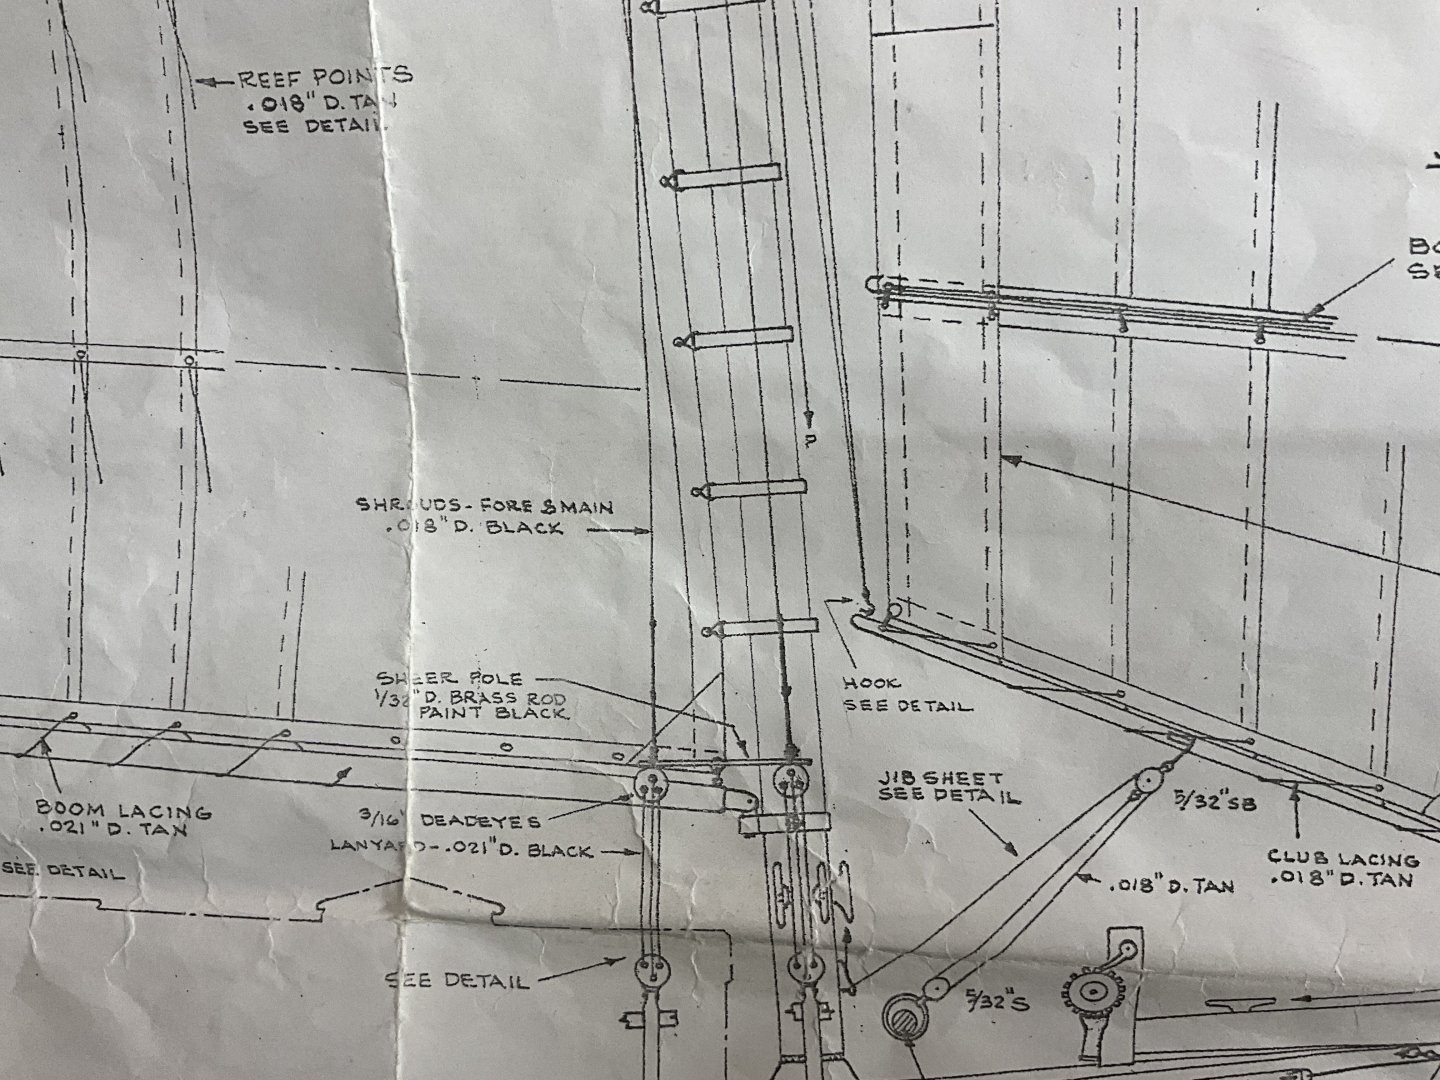
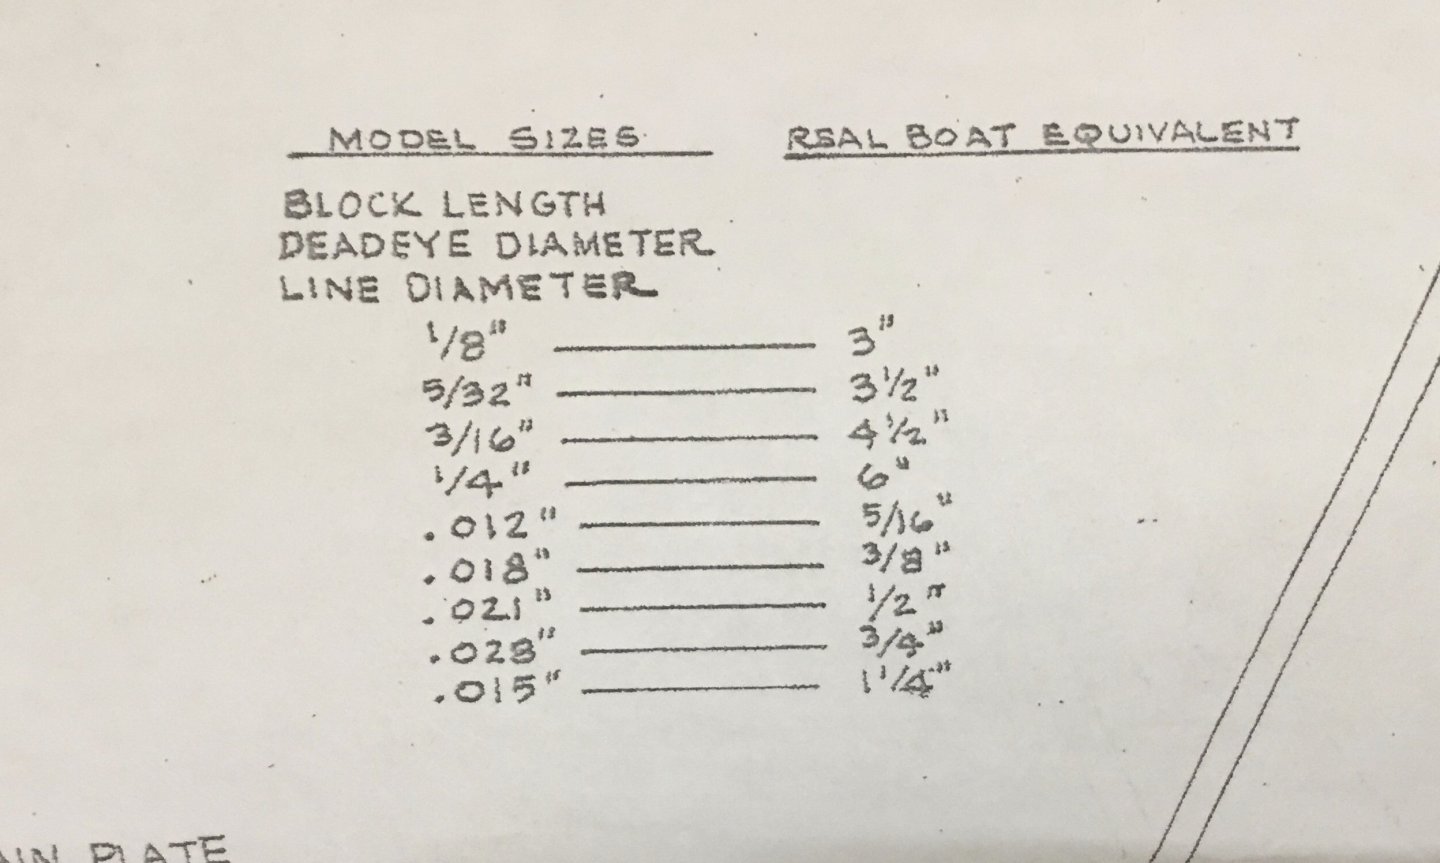
Hi Jacques, I have been using Model Shipways rigging plans for the Glad Tiding to help rig my sharpie because they are rigged similarly although the pinky is a bit larger vessel. Both are 40 some odd feet long and 1/24 scale. The Pinky also has wire standing rigging which scales to 3/8”. So 1/4” (.009”) wire for your 1/32 scale Lancha seems reasonable. Here’s a few pictures of the plans.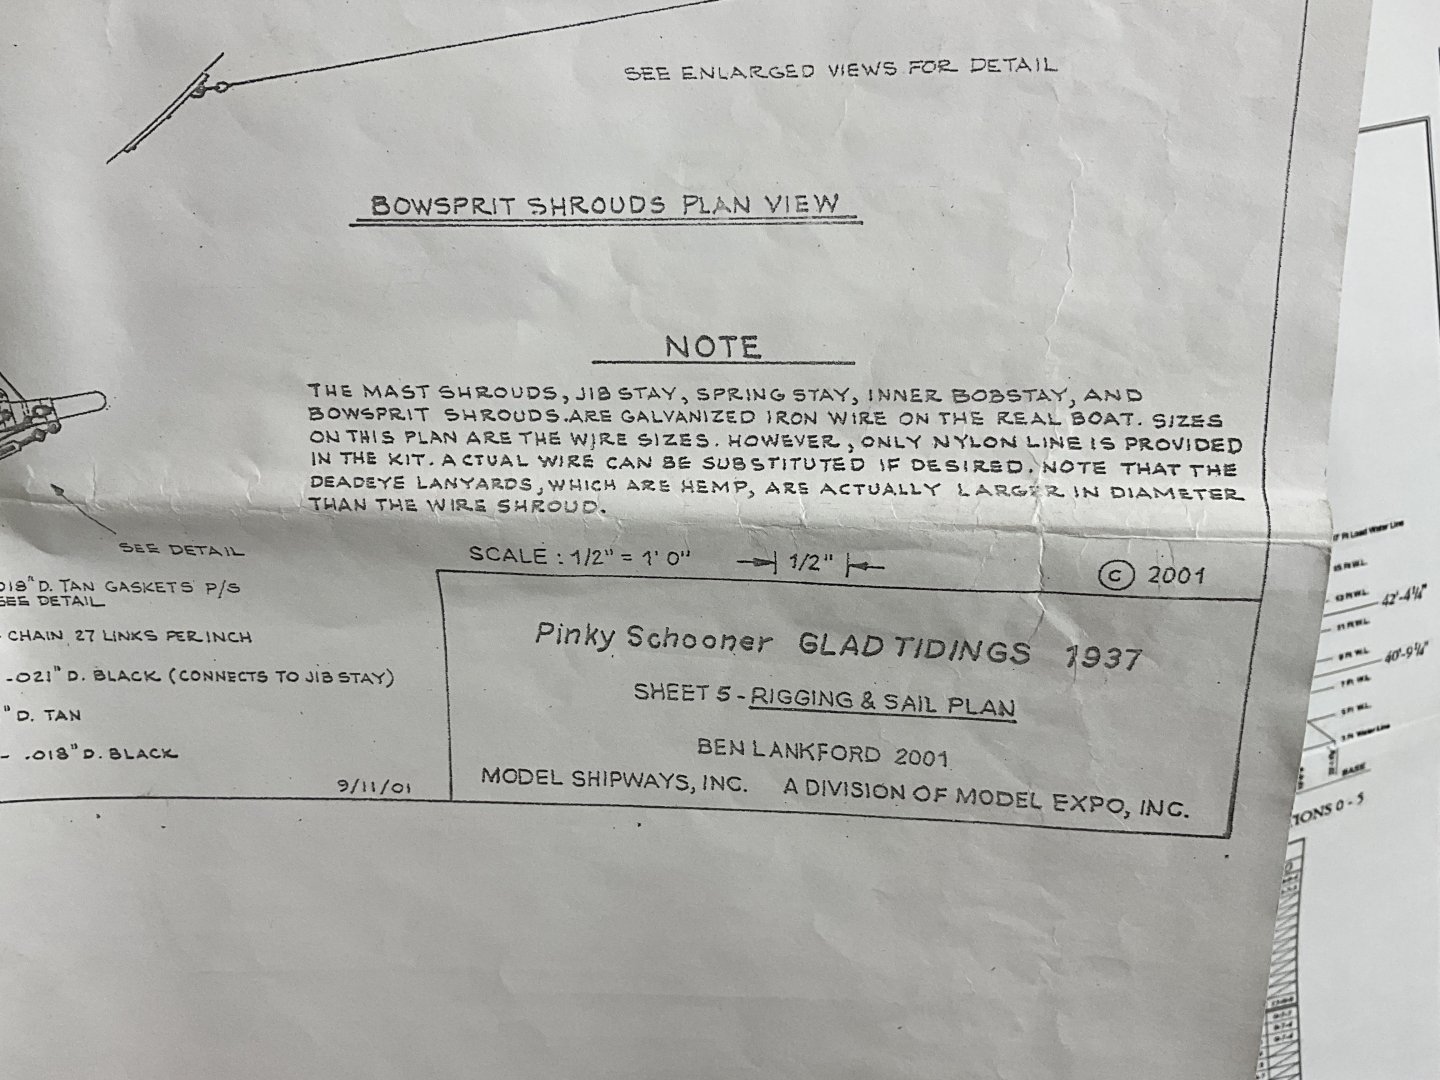
-
Hi Gary, thank you for your comment. I appreciate it very much!
- 201 replies
-
- 4
-
-
- Oyster Sharpie
- first scratch build
- (and 1 more)
-
Hi Jacques, I just stumbled across Javier Baron’s wordpress site. ( barcosbaron.wordpress.com ) . After scrolling through his “ Tecnicas de Construccion “ post I was reminded of your question about squaring. If you haven’t already been there it is worth the visit. The man is a genius
- 312 replies
-
- 3
-
-
-
- Chile
- Latin America
- (and 6 more)
-
Bill, congratulations on finishing your Revenue Cutter. She looks gorgeous!
- 89 replies
-
- 1
-
-
- bluejacket shipcrafters
- revenue cutter
- (and 1 more)
-
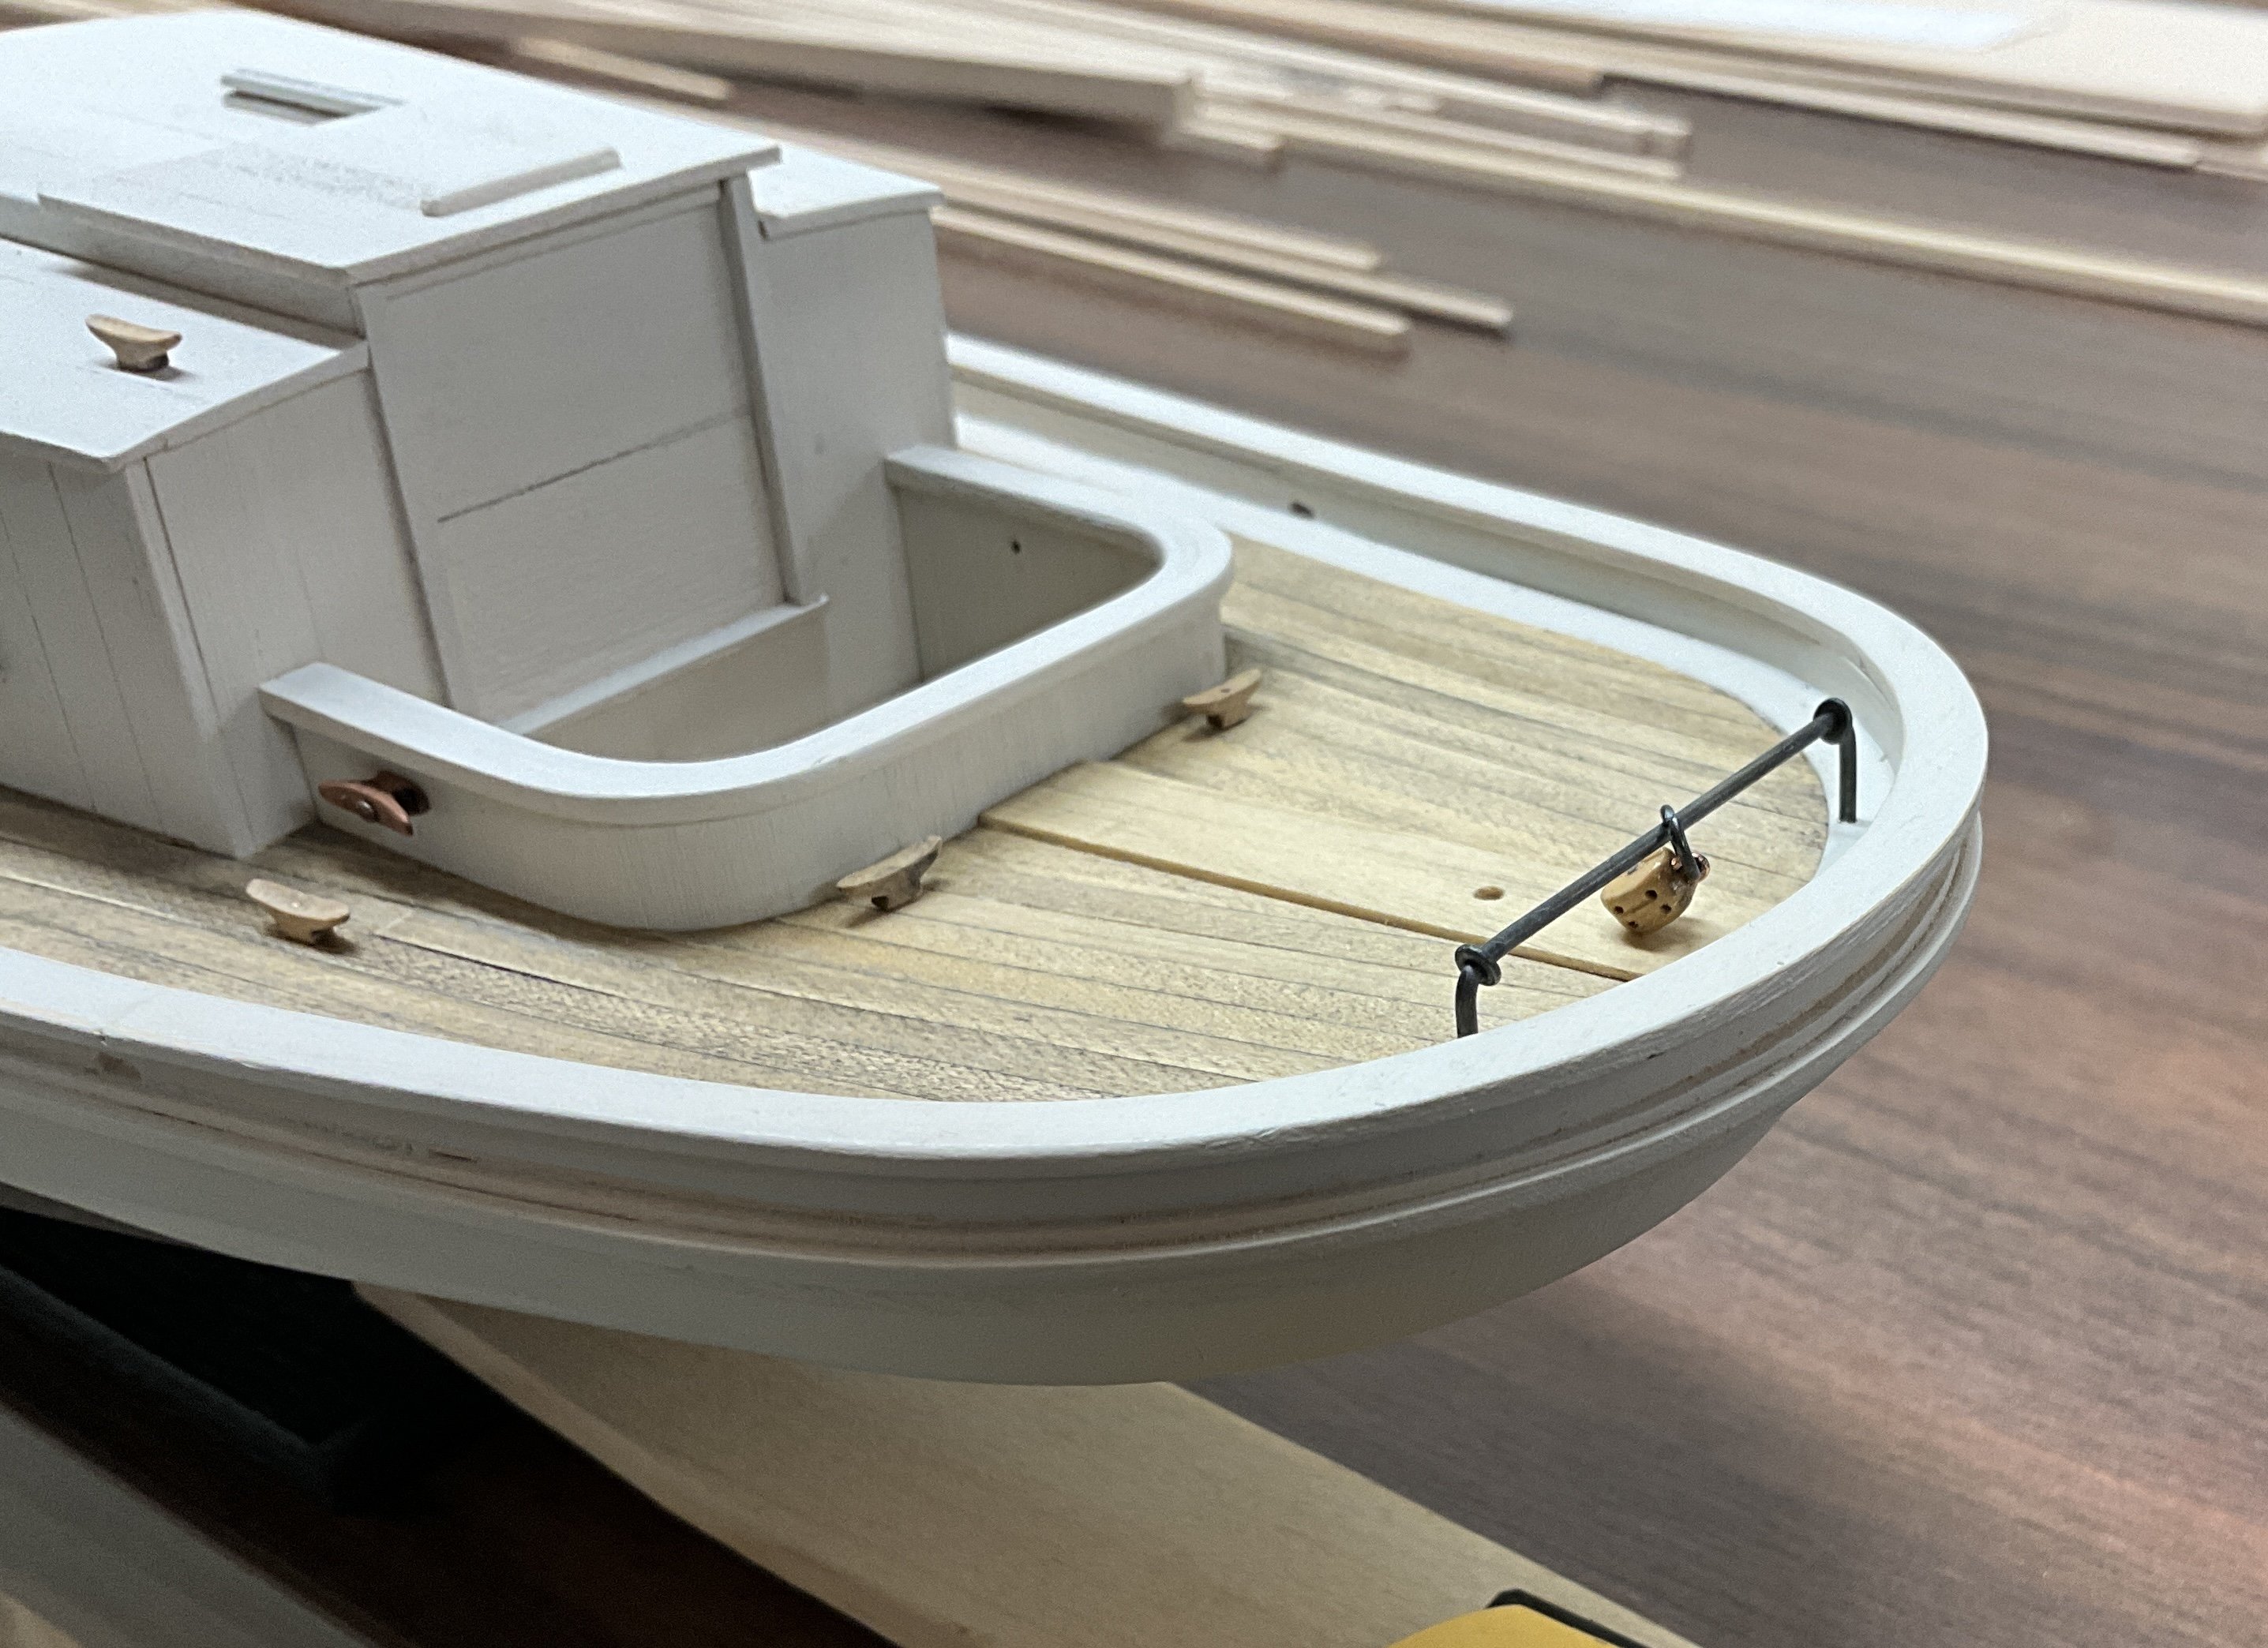
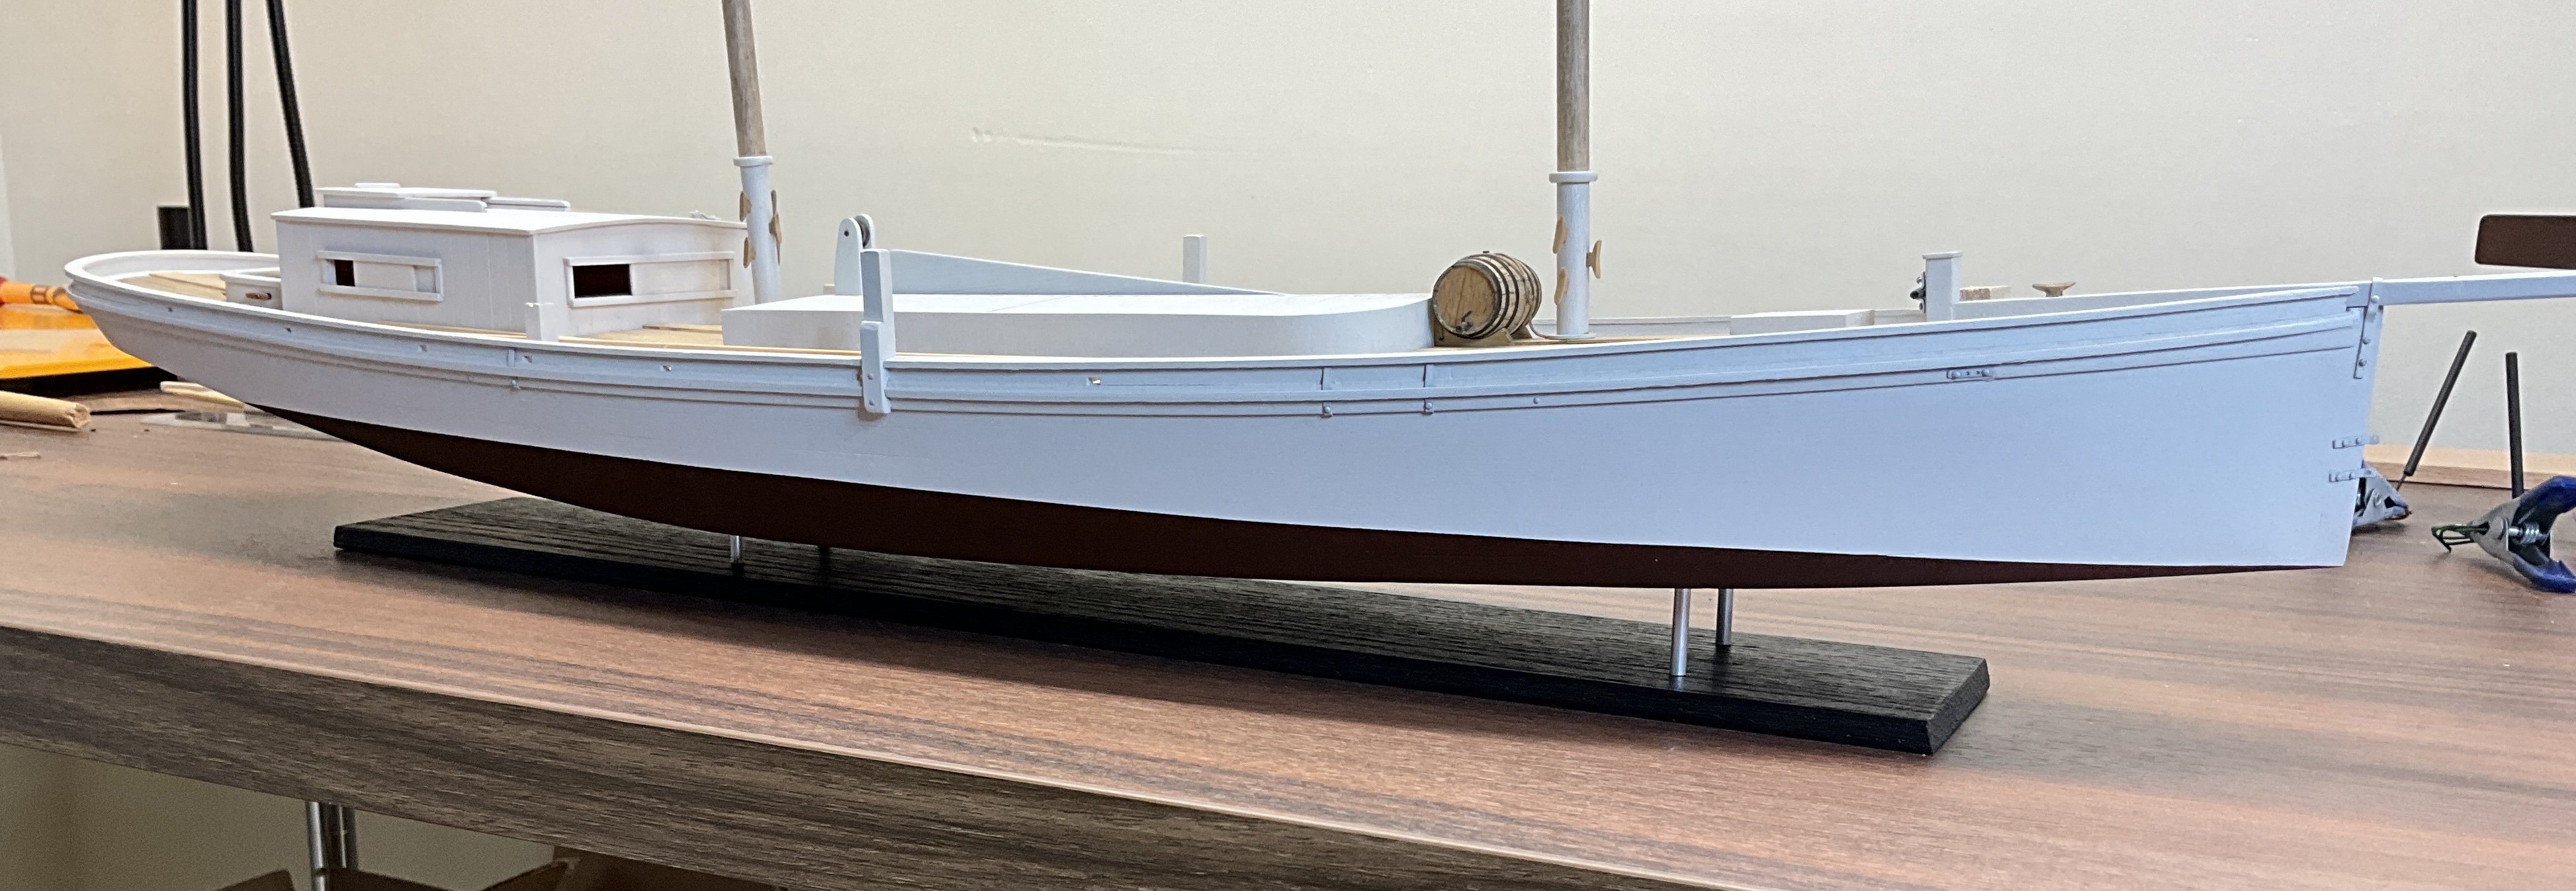
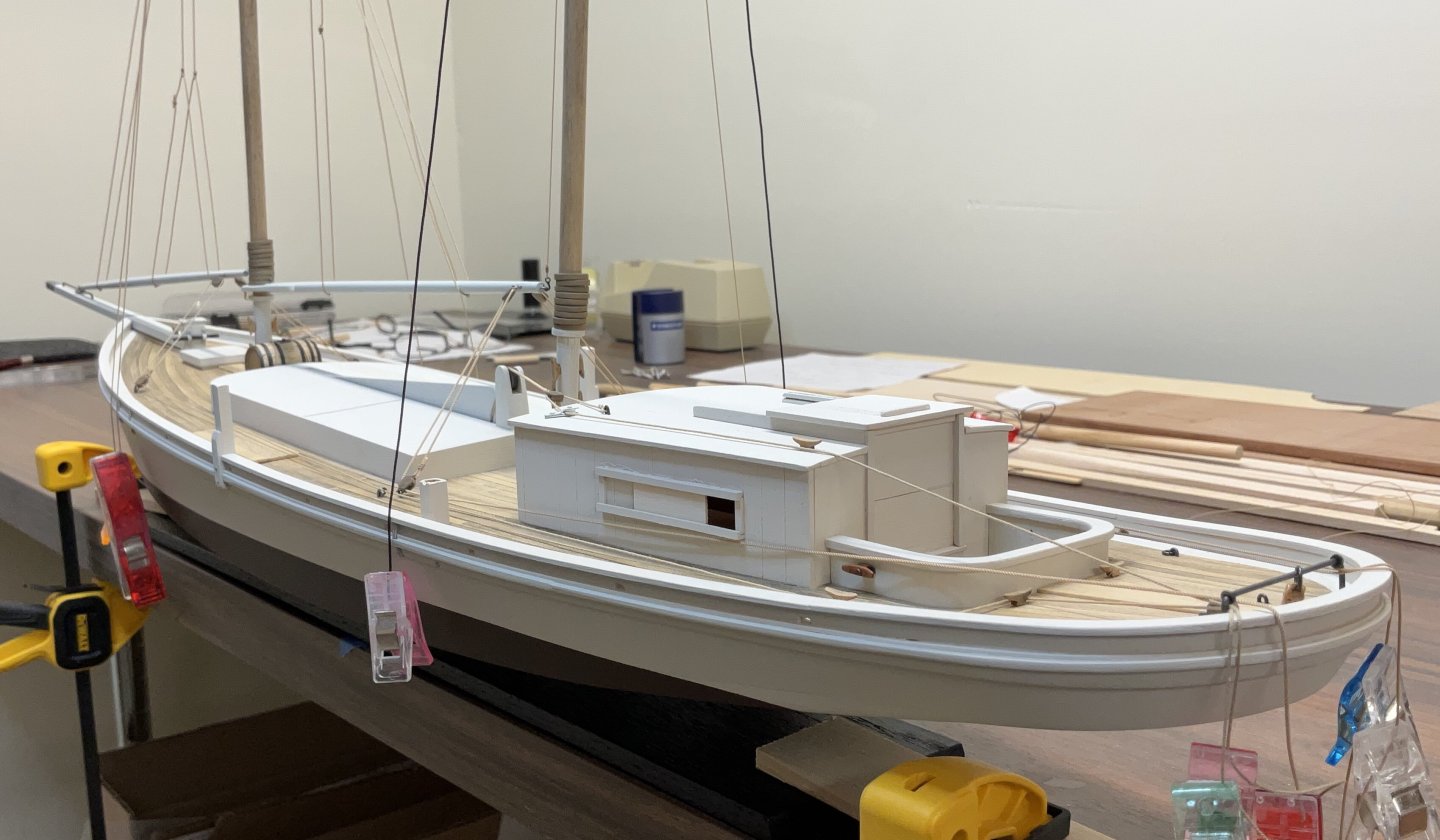
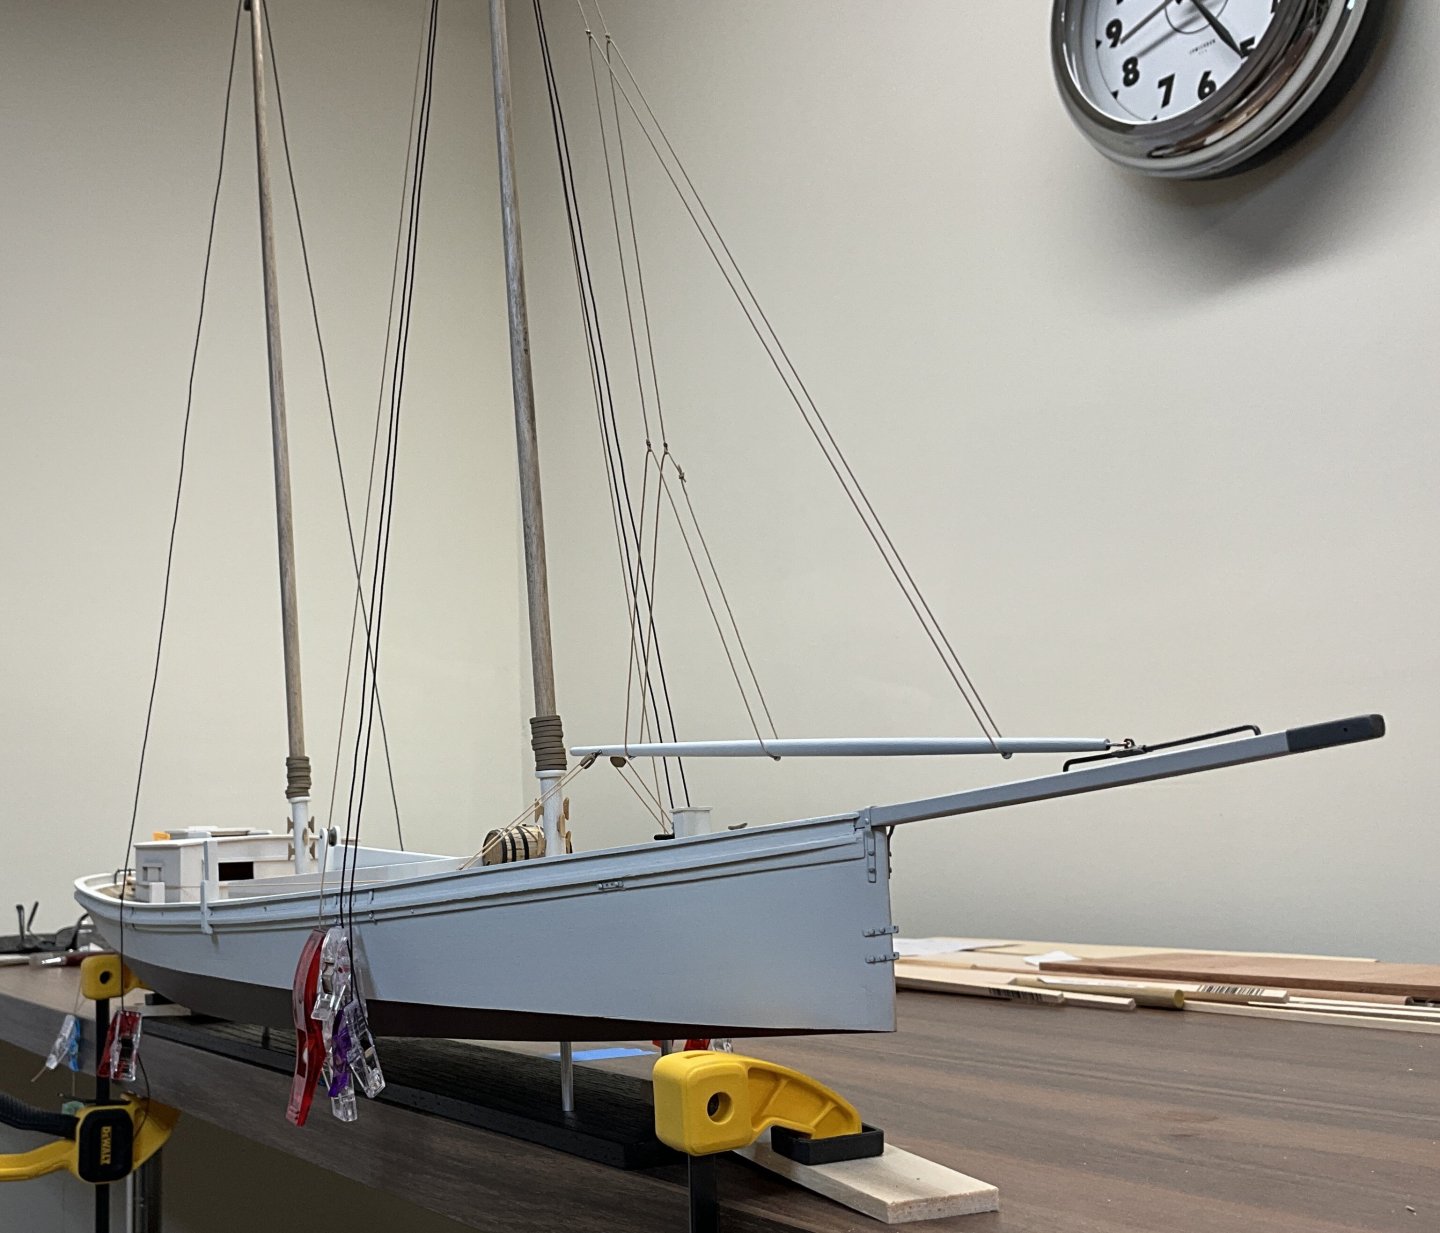
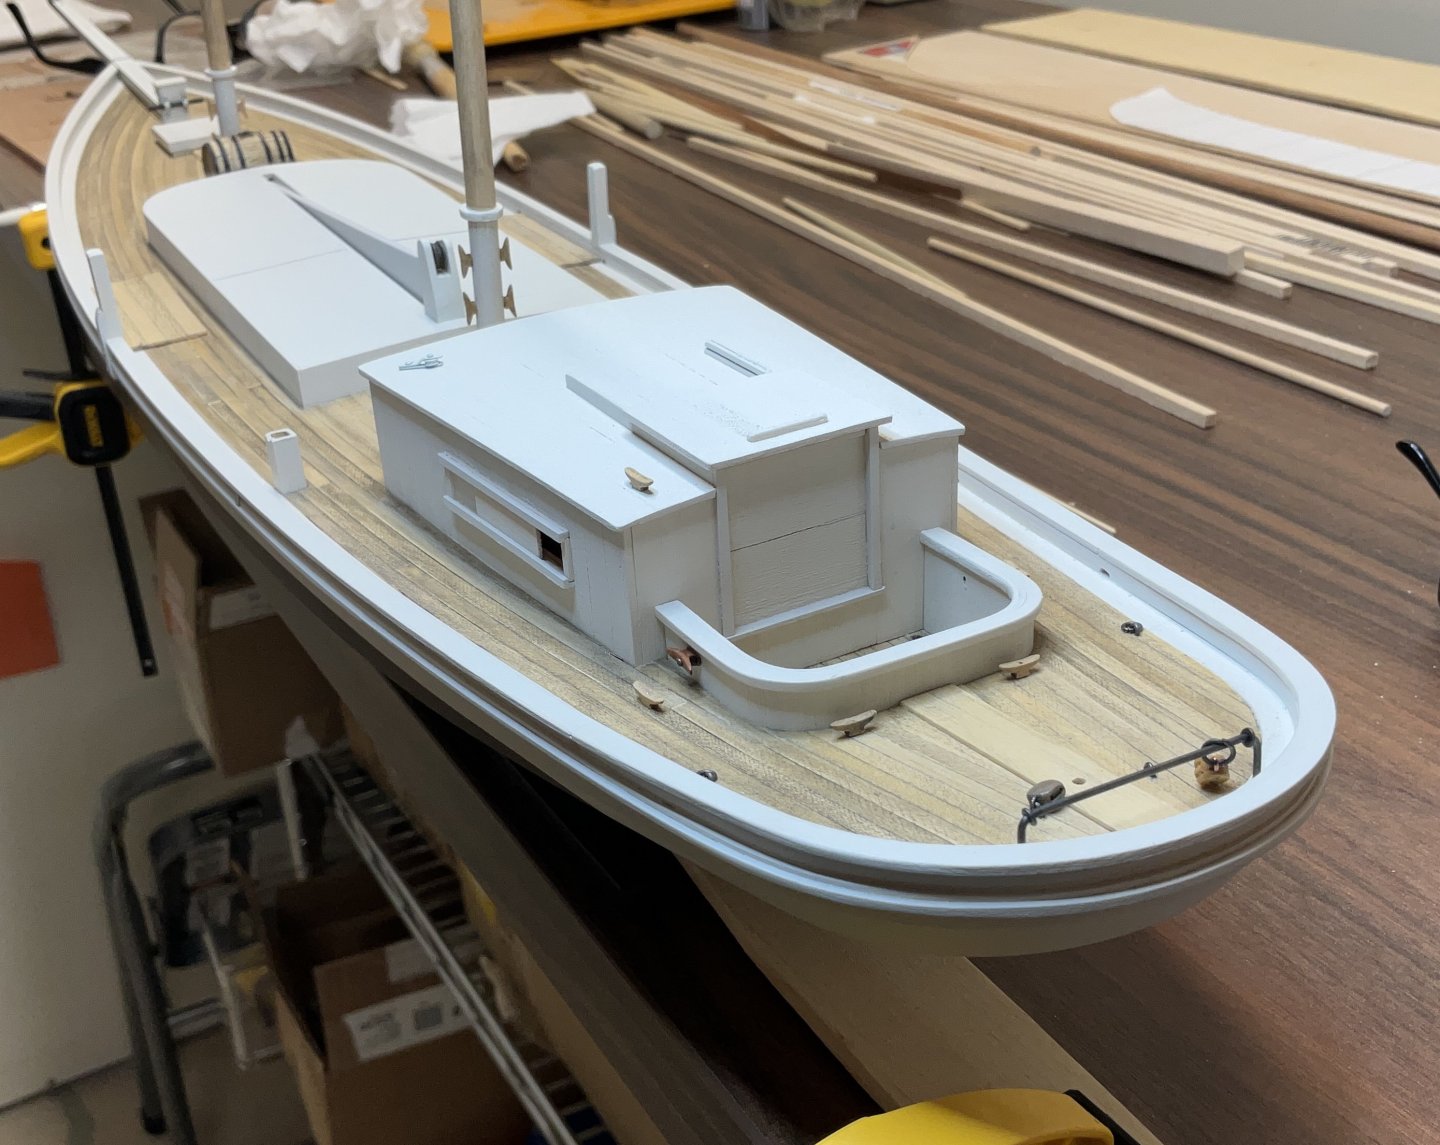
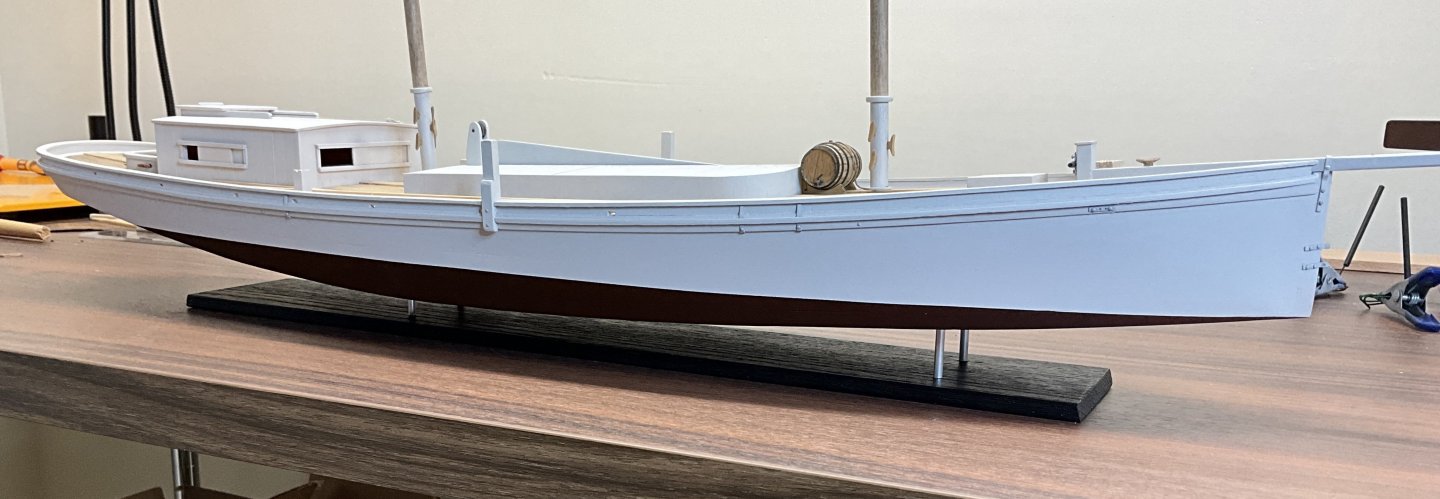
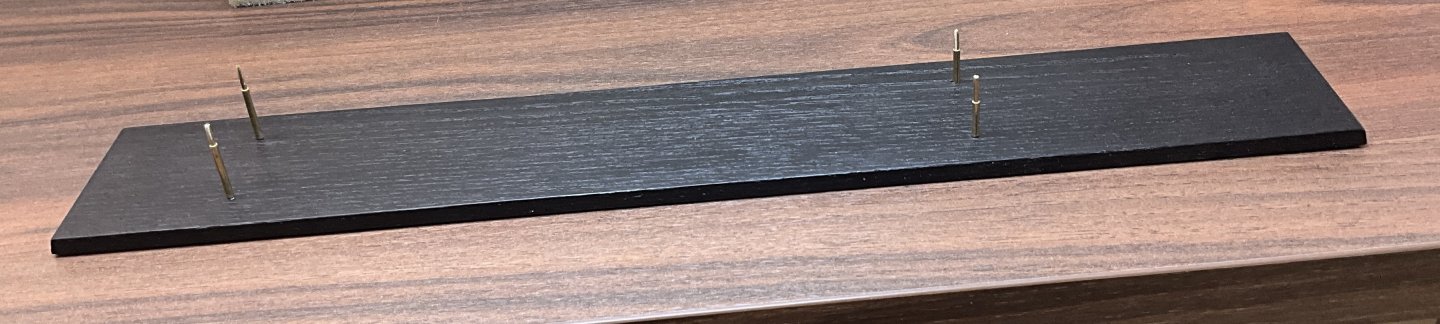
Hi Everyone. Thanks to all for your Comments and Likes. They are appreciated very much. The masts have been painted and the cleats attached. They are friction fitted into place and I don’t think that they will need to be glued. Once they were stepped I thought it would be a good time to mount the model on to the base. The base is a piece of 1/4” x 2 1/2” oak that was bought from Home Depot’s “ Hobby Department “. It was painted with Liquitex Basic Ivory Black. The stand offs are 1/16” brass rod covered with 3/32” brass tube cut to the appropriate length and then 1/8” aluminum tube was slid over that to give it a heavier look. I liked the look of the aluminum more than the brass for this boat. Don’t know if it’s a big concern but I did apply NoAlox between the brass and aluminum to prevent any possible reaction. The horse for the main sheet is made from 3/64” steel rod and the stops for the traveller ring are made from #22 ( think) steel wire that has the black coating burned off. I like it because it doesn’t need painting. Now comes the slow process of converting the blocks that I have to internally stropped. Hope to see you soon.

- 201 replies
-
- 10
-
-
-
- Oyster Sharpie
- first scratch build
- (and 1 more)
-
Looking for a USCG 47’ motor lifeboat kit
Paul Le Wol replied to DanS's topic in Wood ship model kits
Hi Dan, welcome to MSW. Dumas makes a 36’ ( kit #1258 ) and a 44’ (kit # 1203). I have never built a Dumas kit so I can’t give an opinion on them. Good luck with your search. -
Keith, congratulations on completing this marvelous project and on finding such a hard working crew!
-
Chris, congratulations on finishing the Lobster Smack and the “Fleet”. The group shot is perfect. Beautifully done!