HOLIDAY DONATION DRIVE - SUPPORT MSW - DO YOUR PART TO KEEP THIS GREAT FORUM GOING! (Only 13 donations so far - C'mon guys!)
×


Paul Le Wol
-
Posts
1,010 -
Joined
-
Last visited
Content Type
Profiles
Forums
Gallery
Events
Everything posted by Paul Le Wol
-
Hi Gary, thank you for your comment. It is really appreciated.
- 201 replies
-
- 3
-

-
- Oyster Sharpie
- first scratch build
- (and 1 more)
-
Thanks @JacquesCousteau for your comment on the weathering. I was kind of debating about how far to take it. I think it will end up being semi-grunge. Thanks @druxey for your comment on the bending. I was thinking about the cockpit wall for the longest time wondering what the best process would be.
- 201 replies
-
- 6
-
-
- Oyster Sharpie
- first scratch build
- (and 1 more)
-
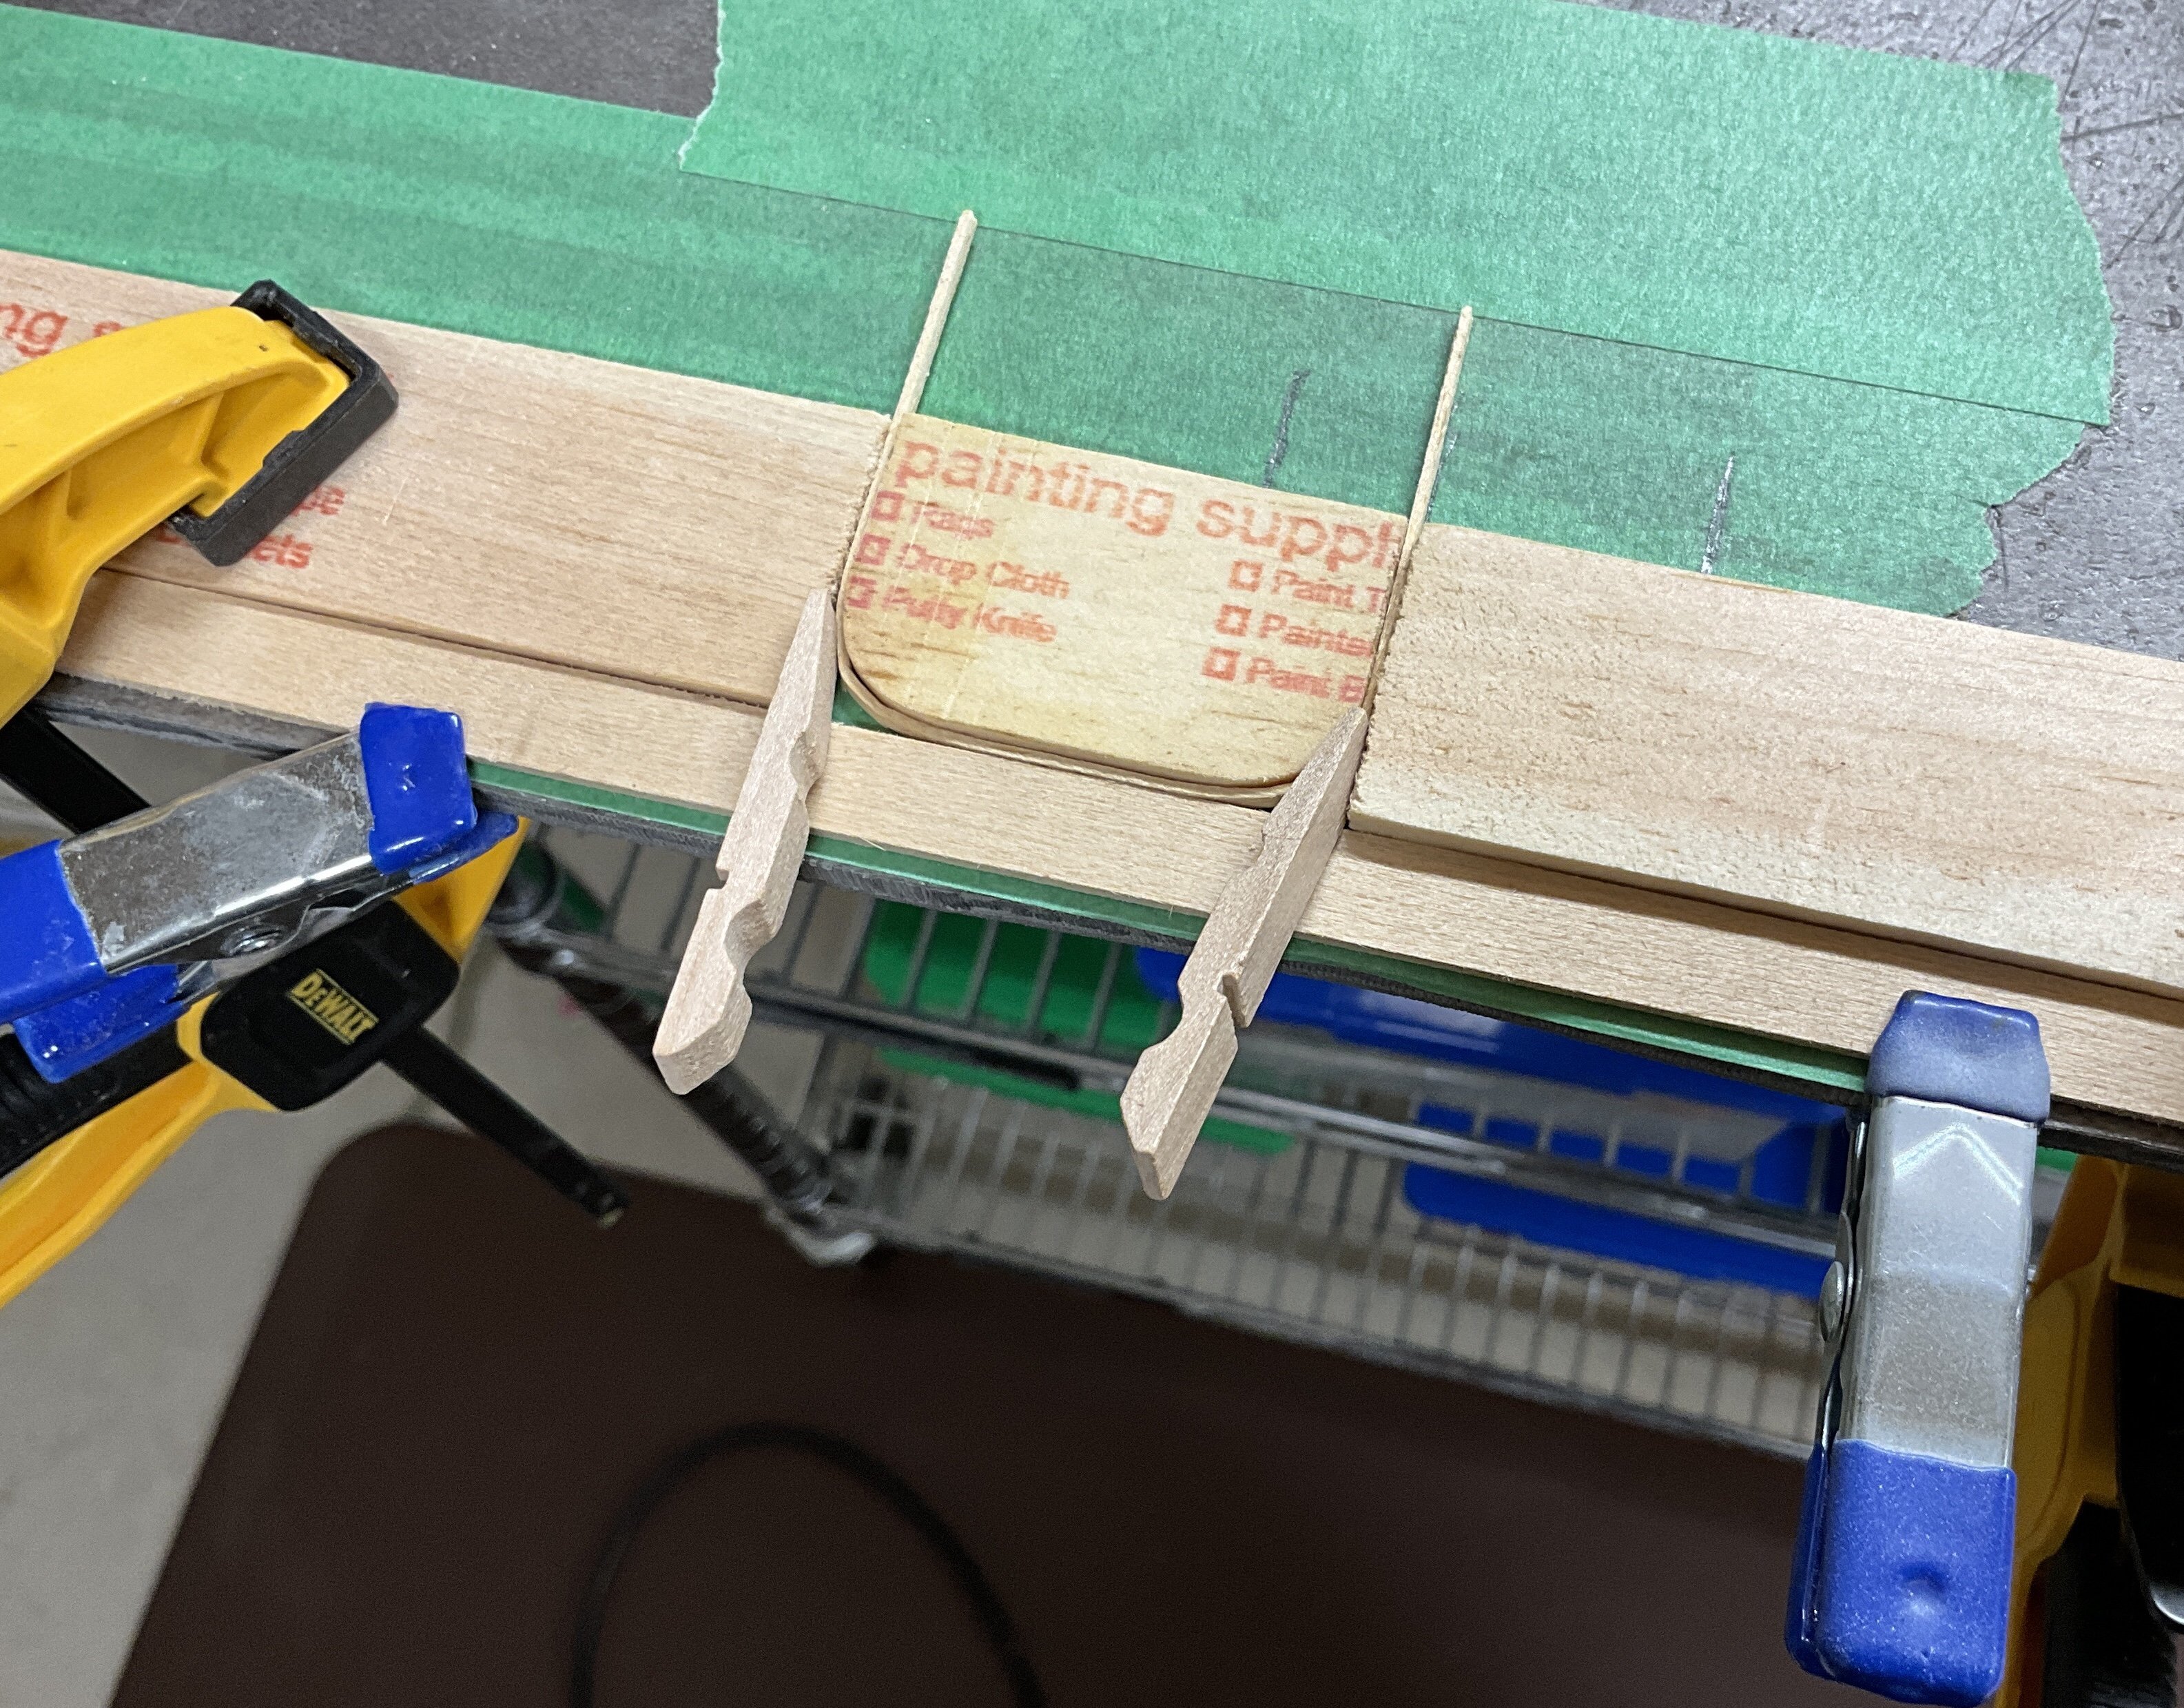
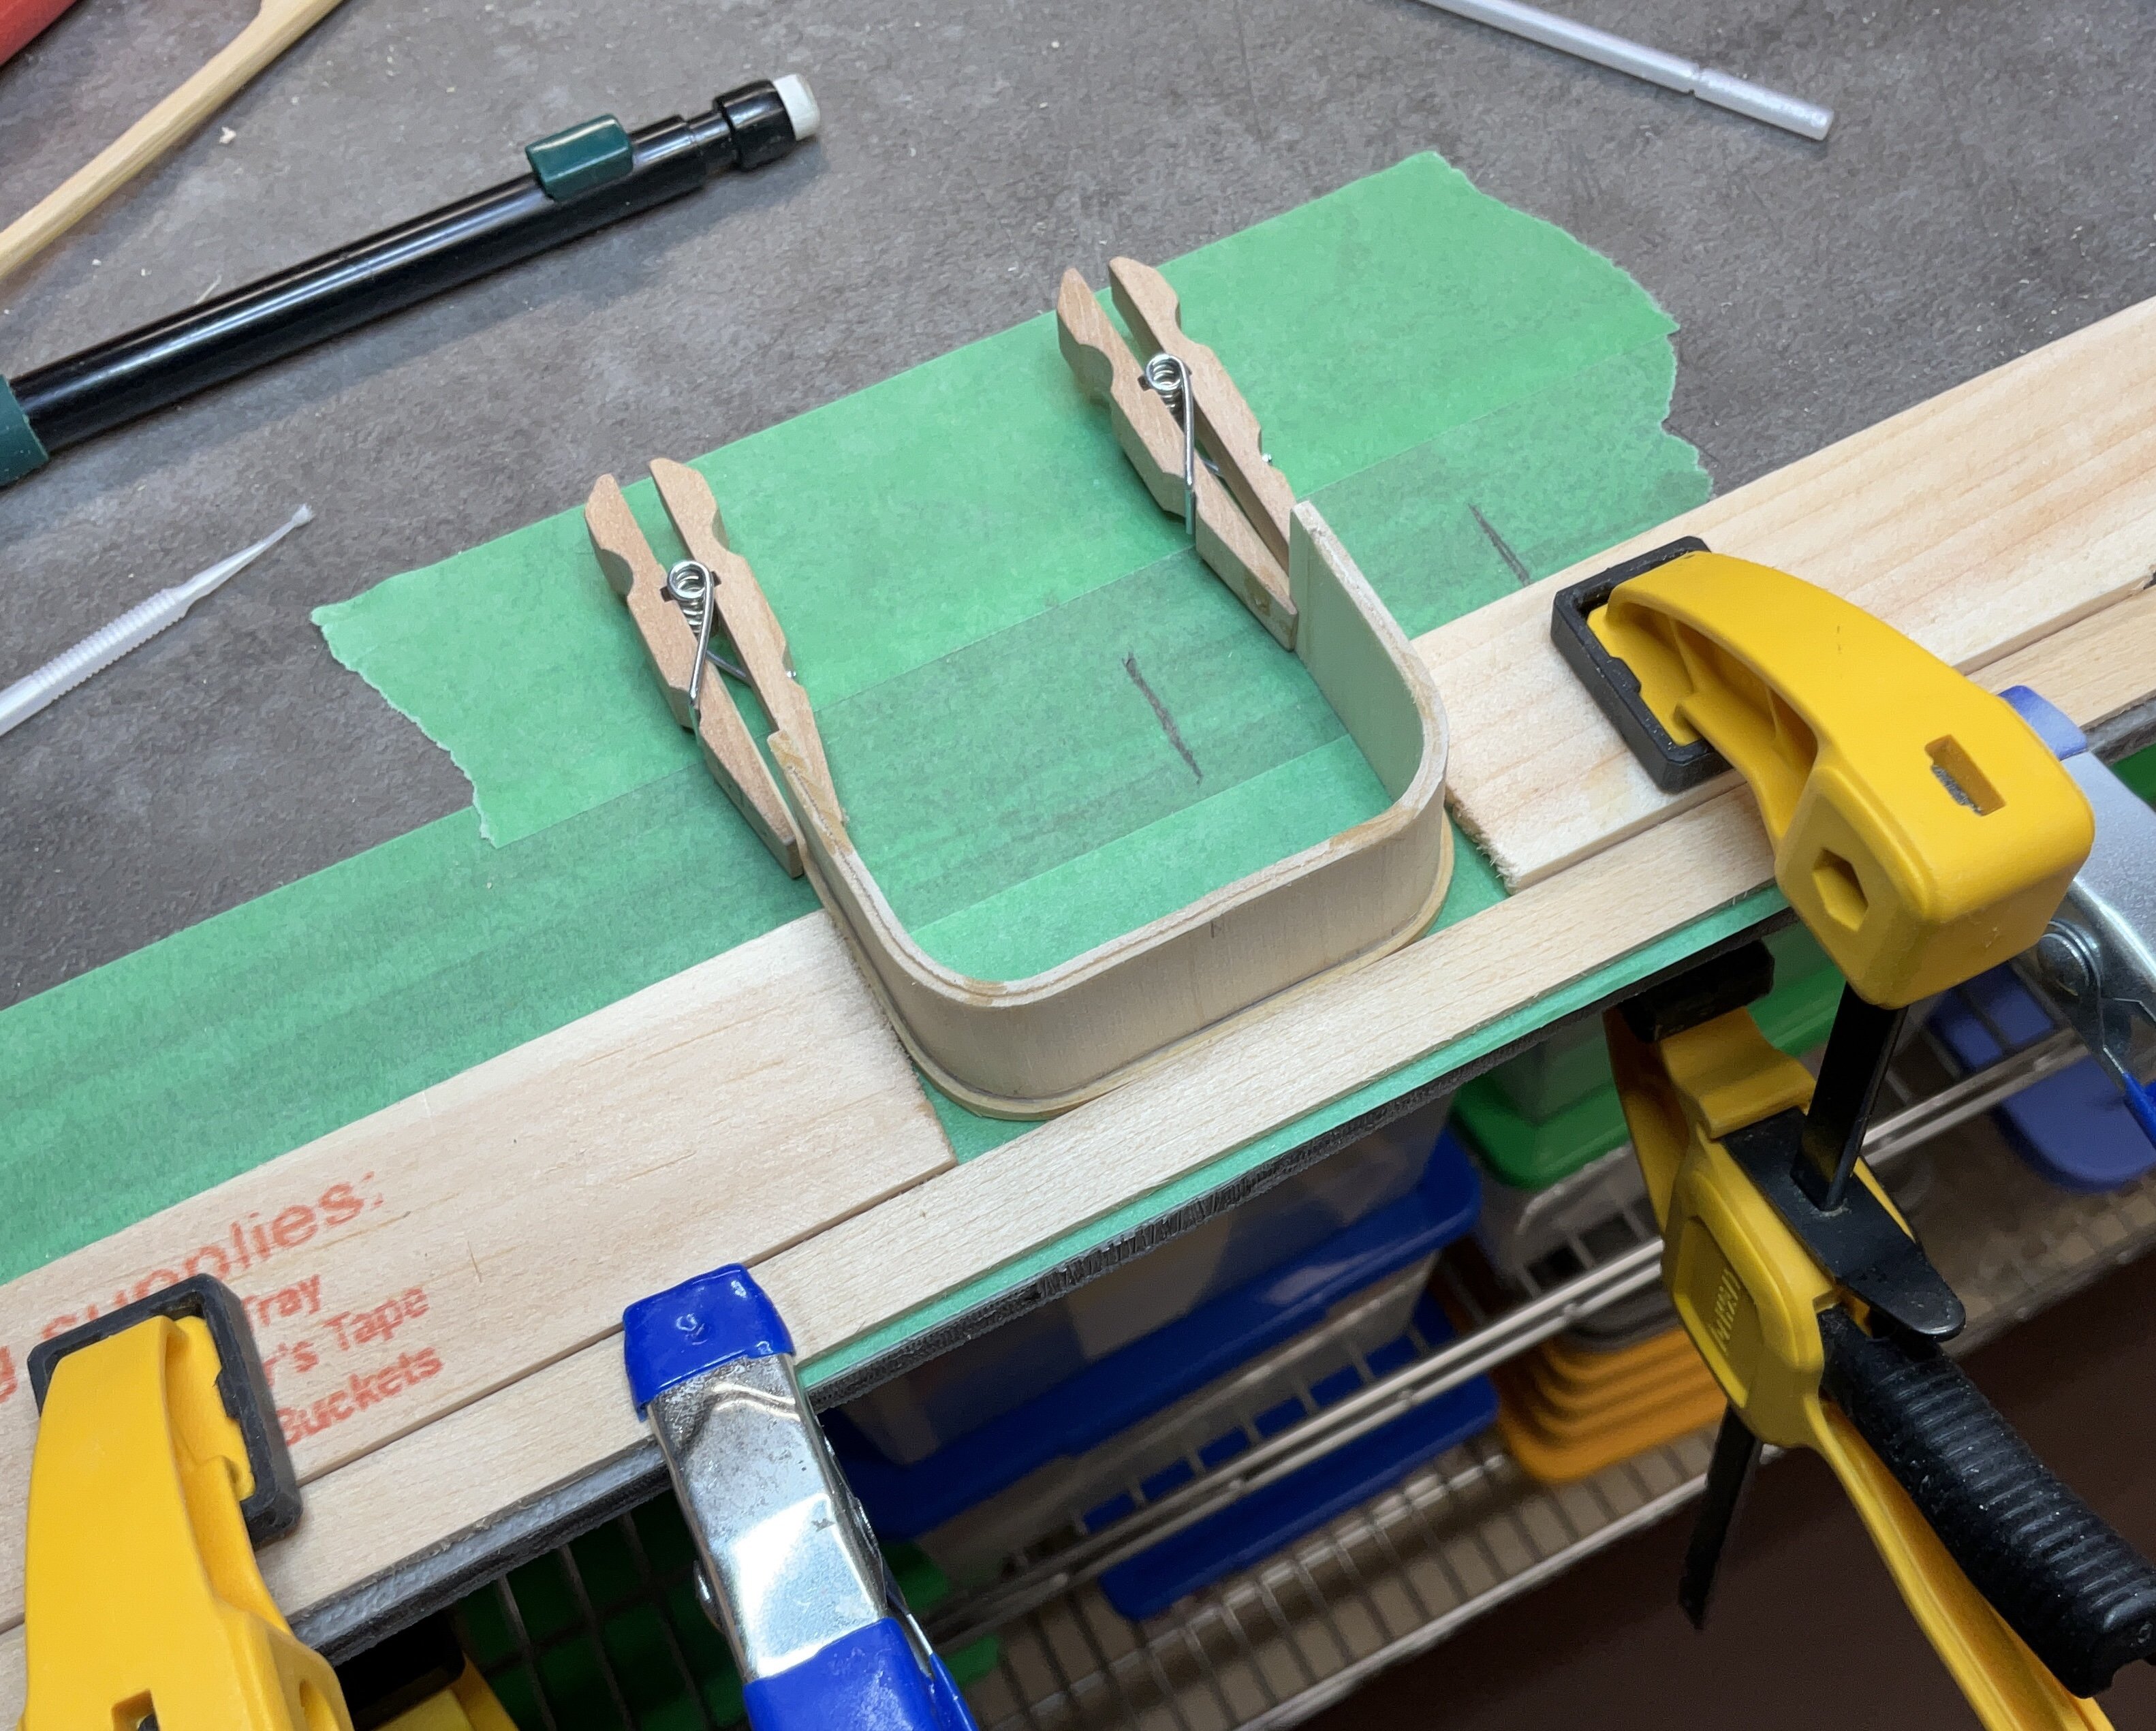
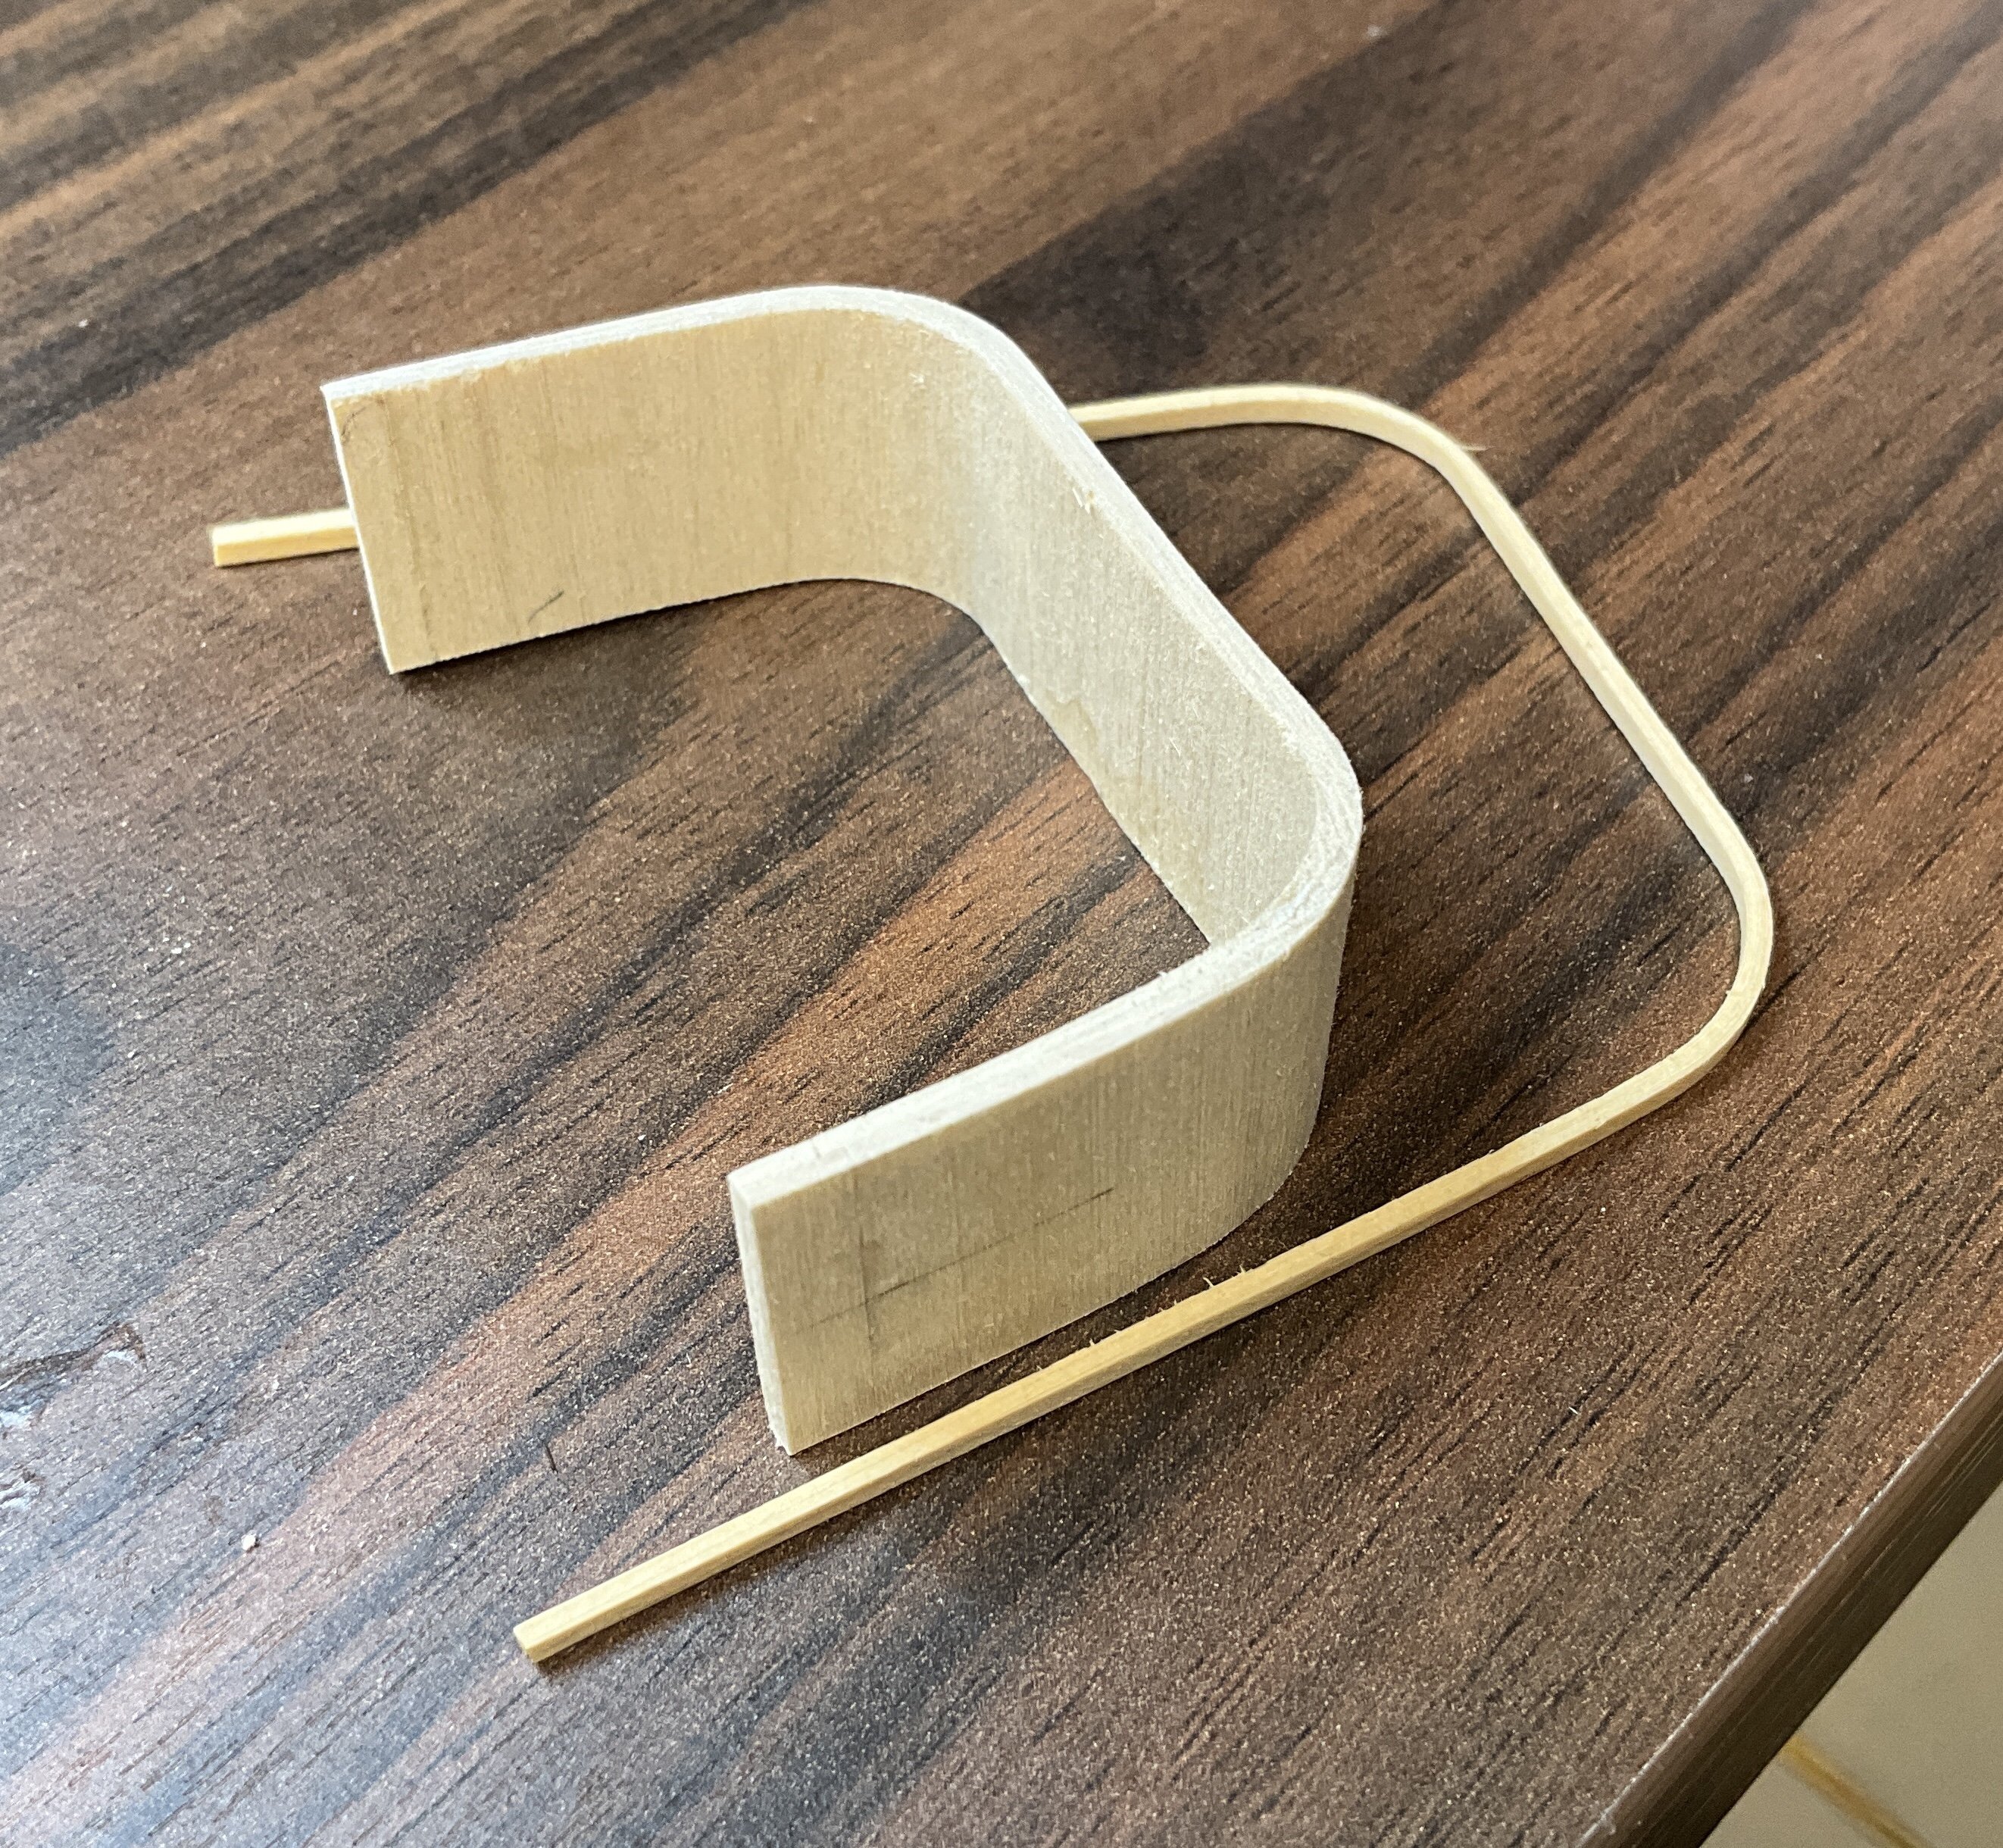
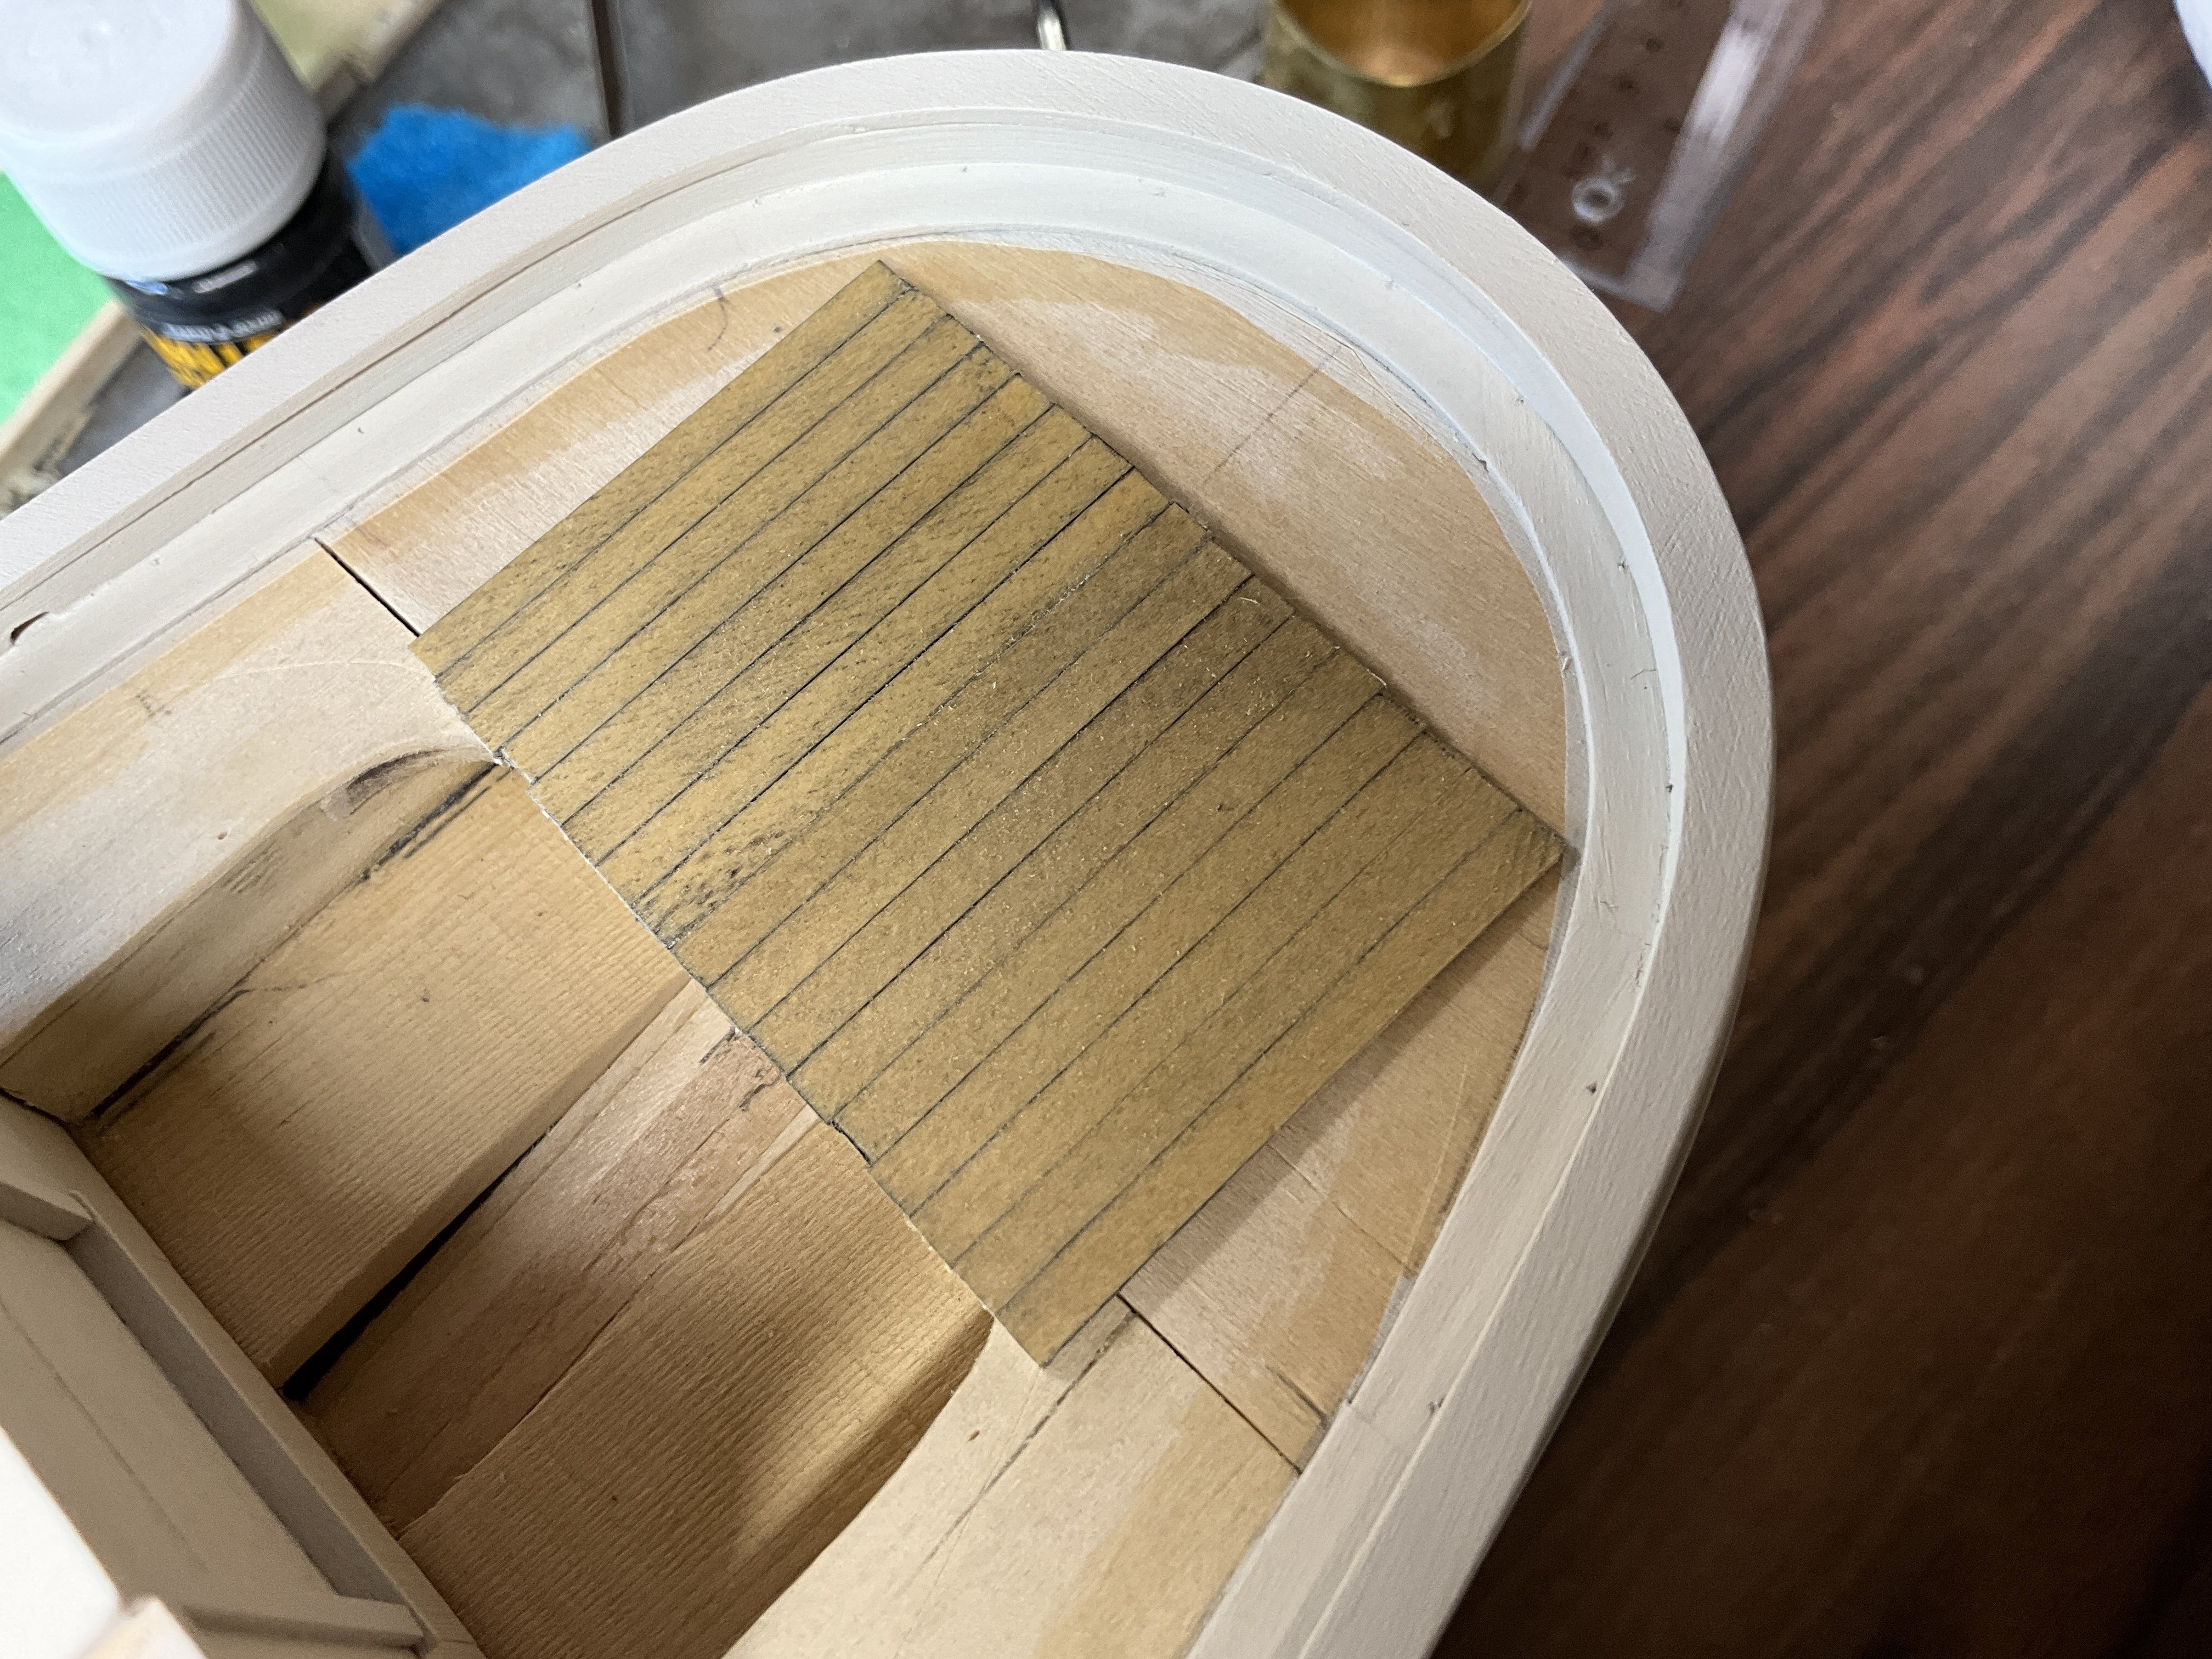
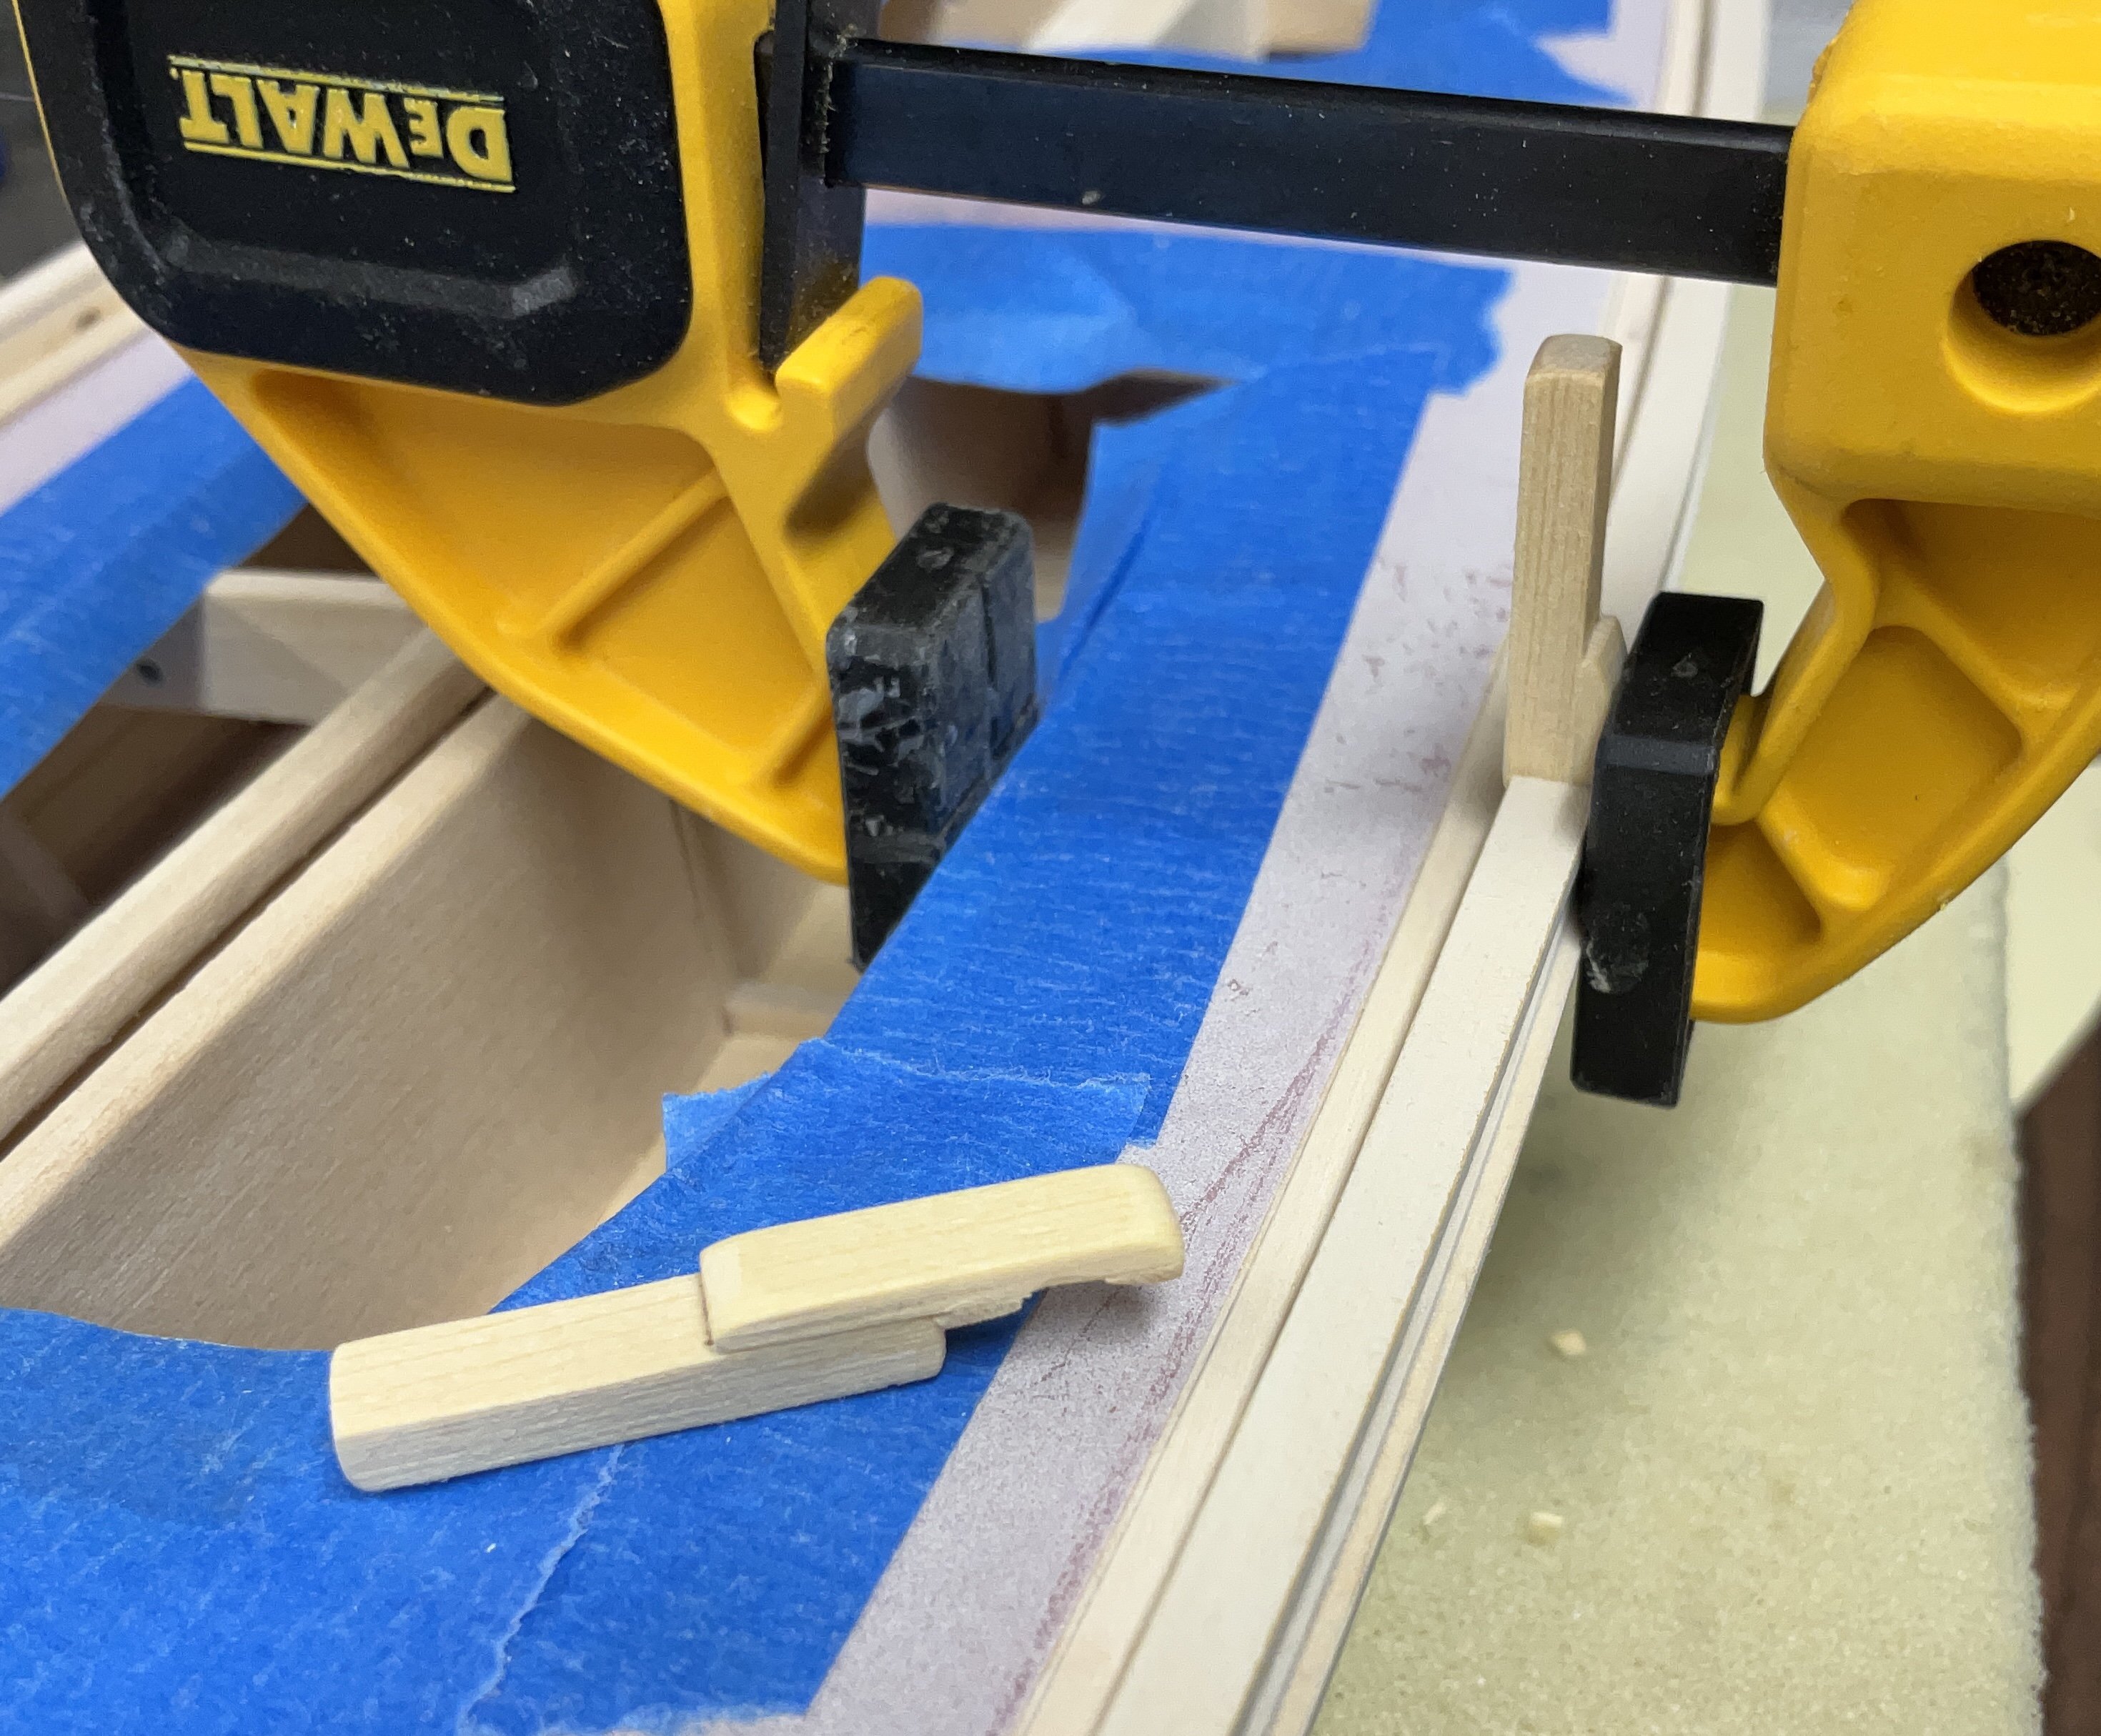
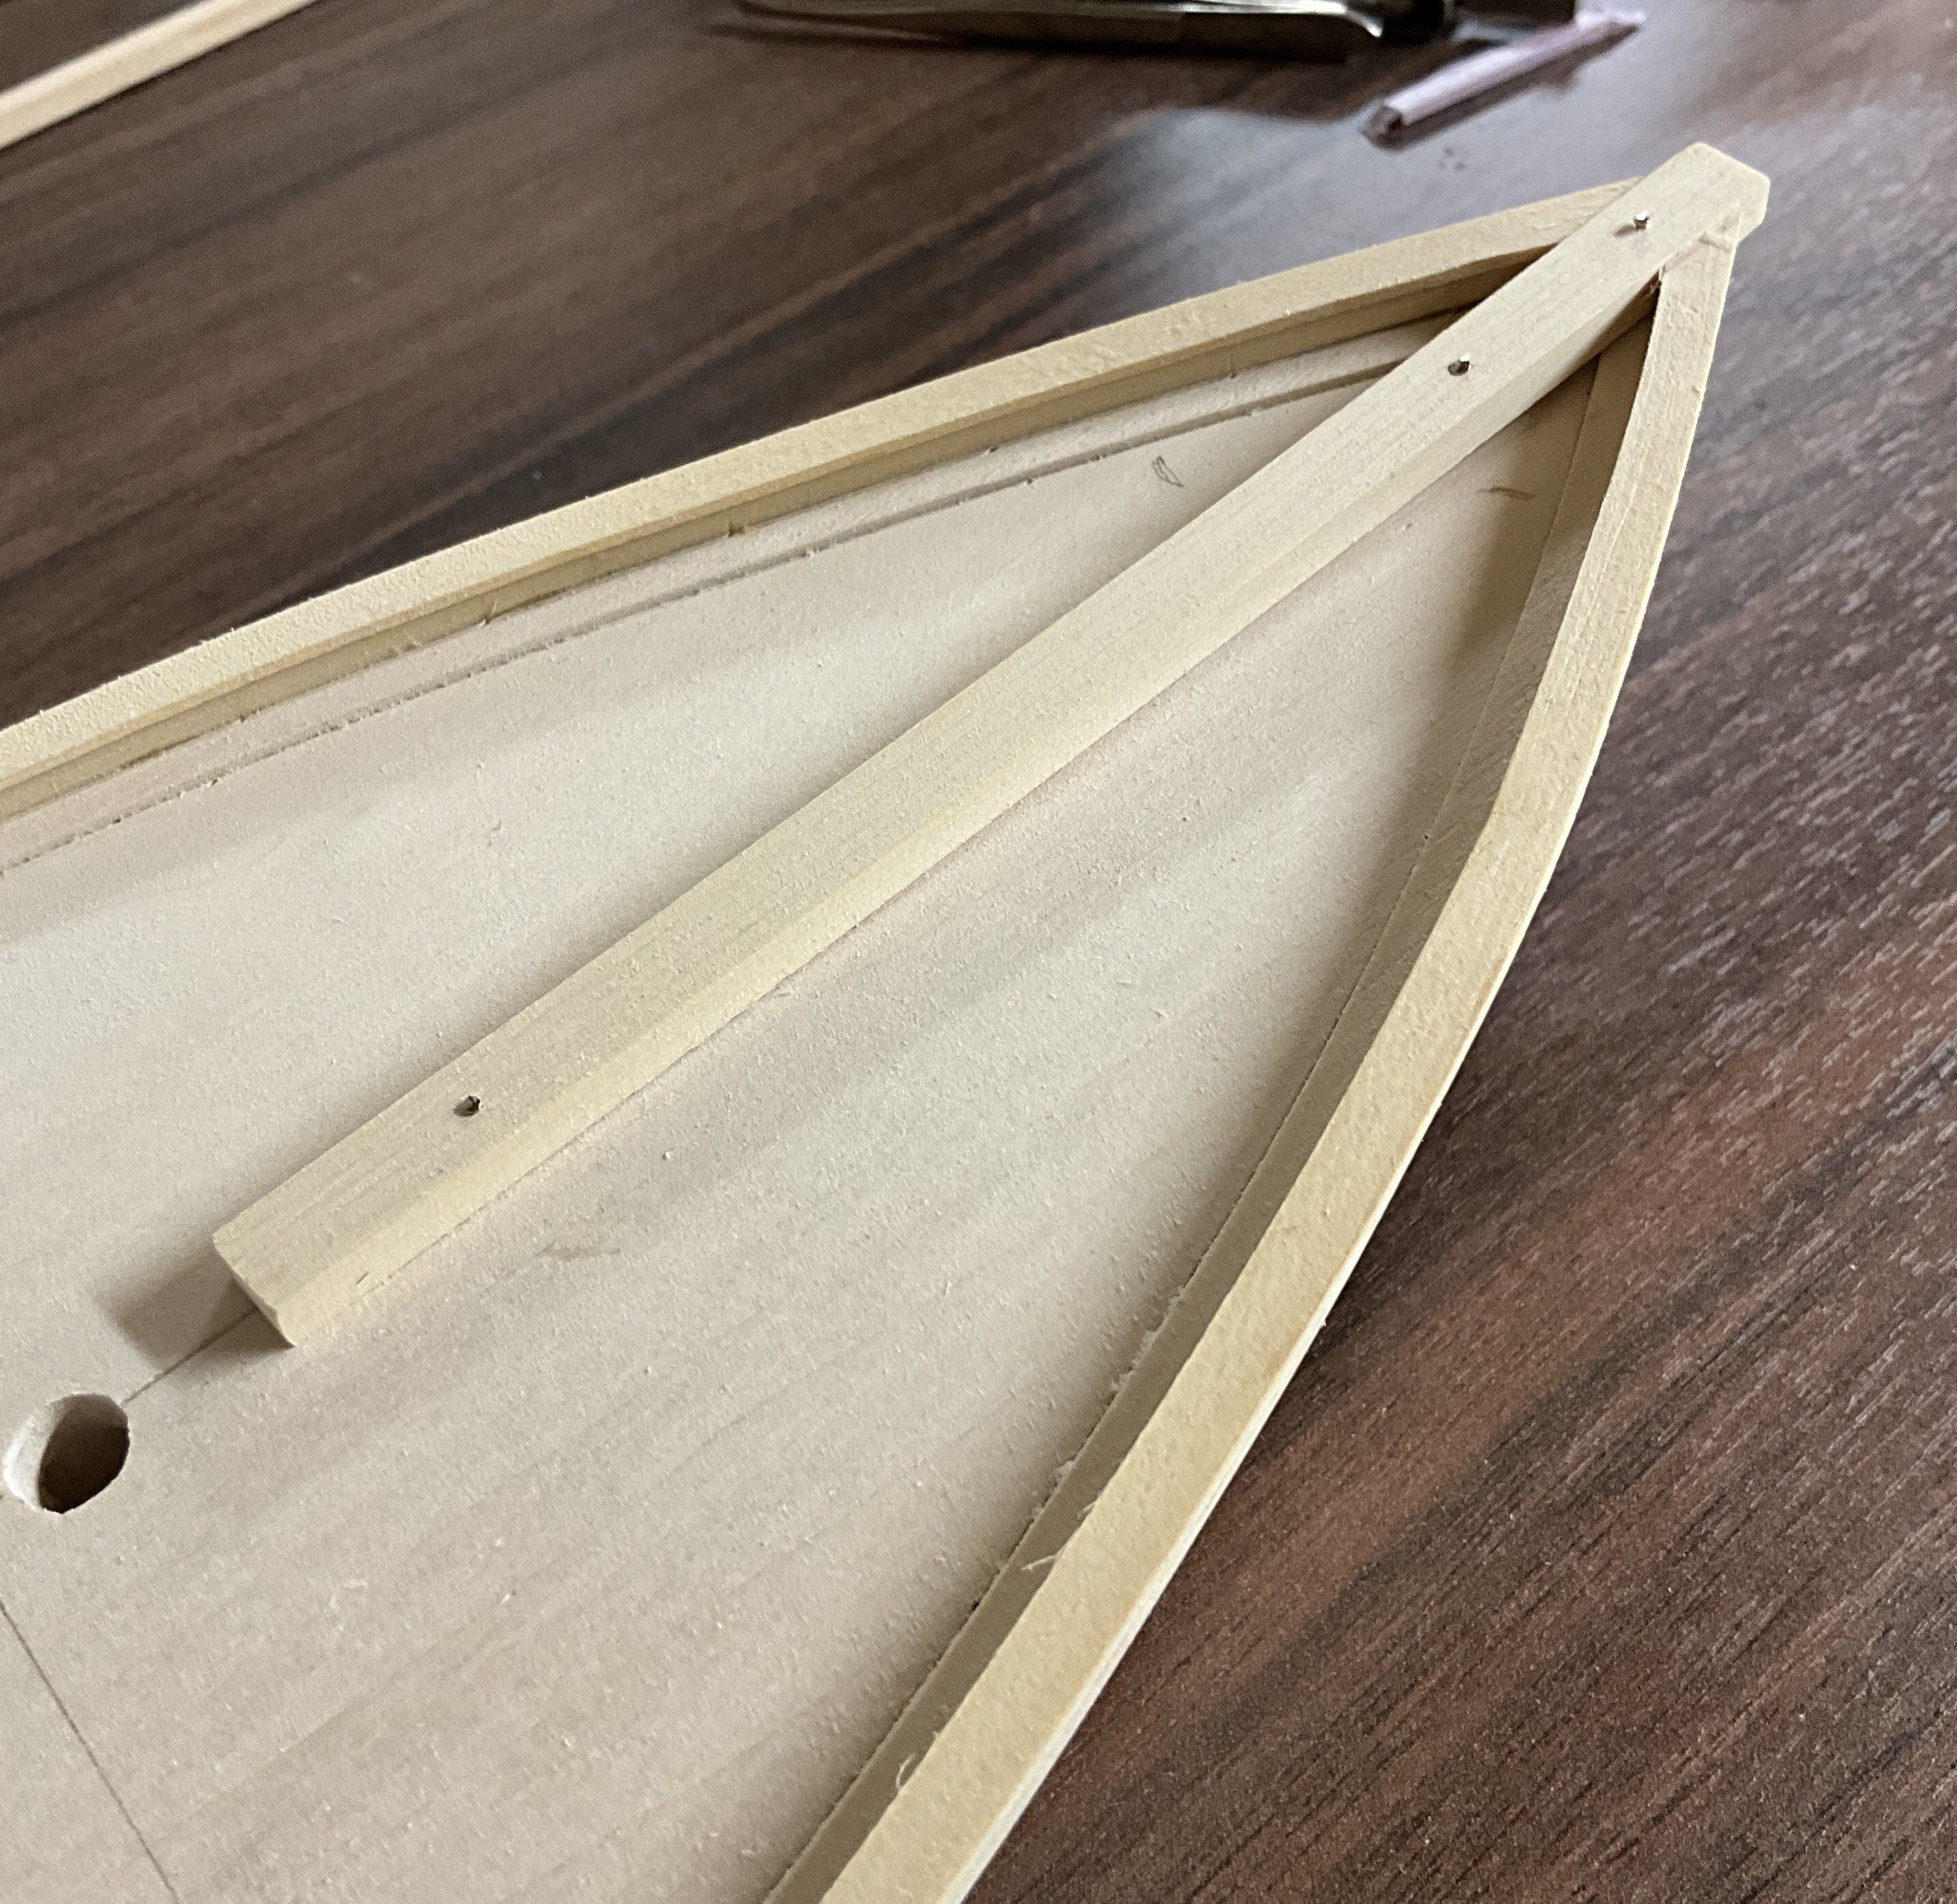
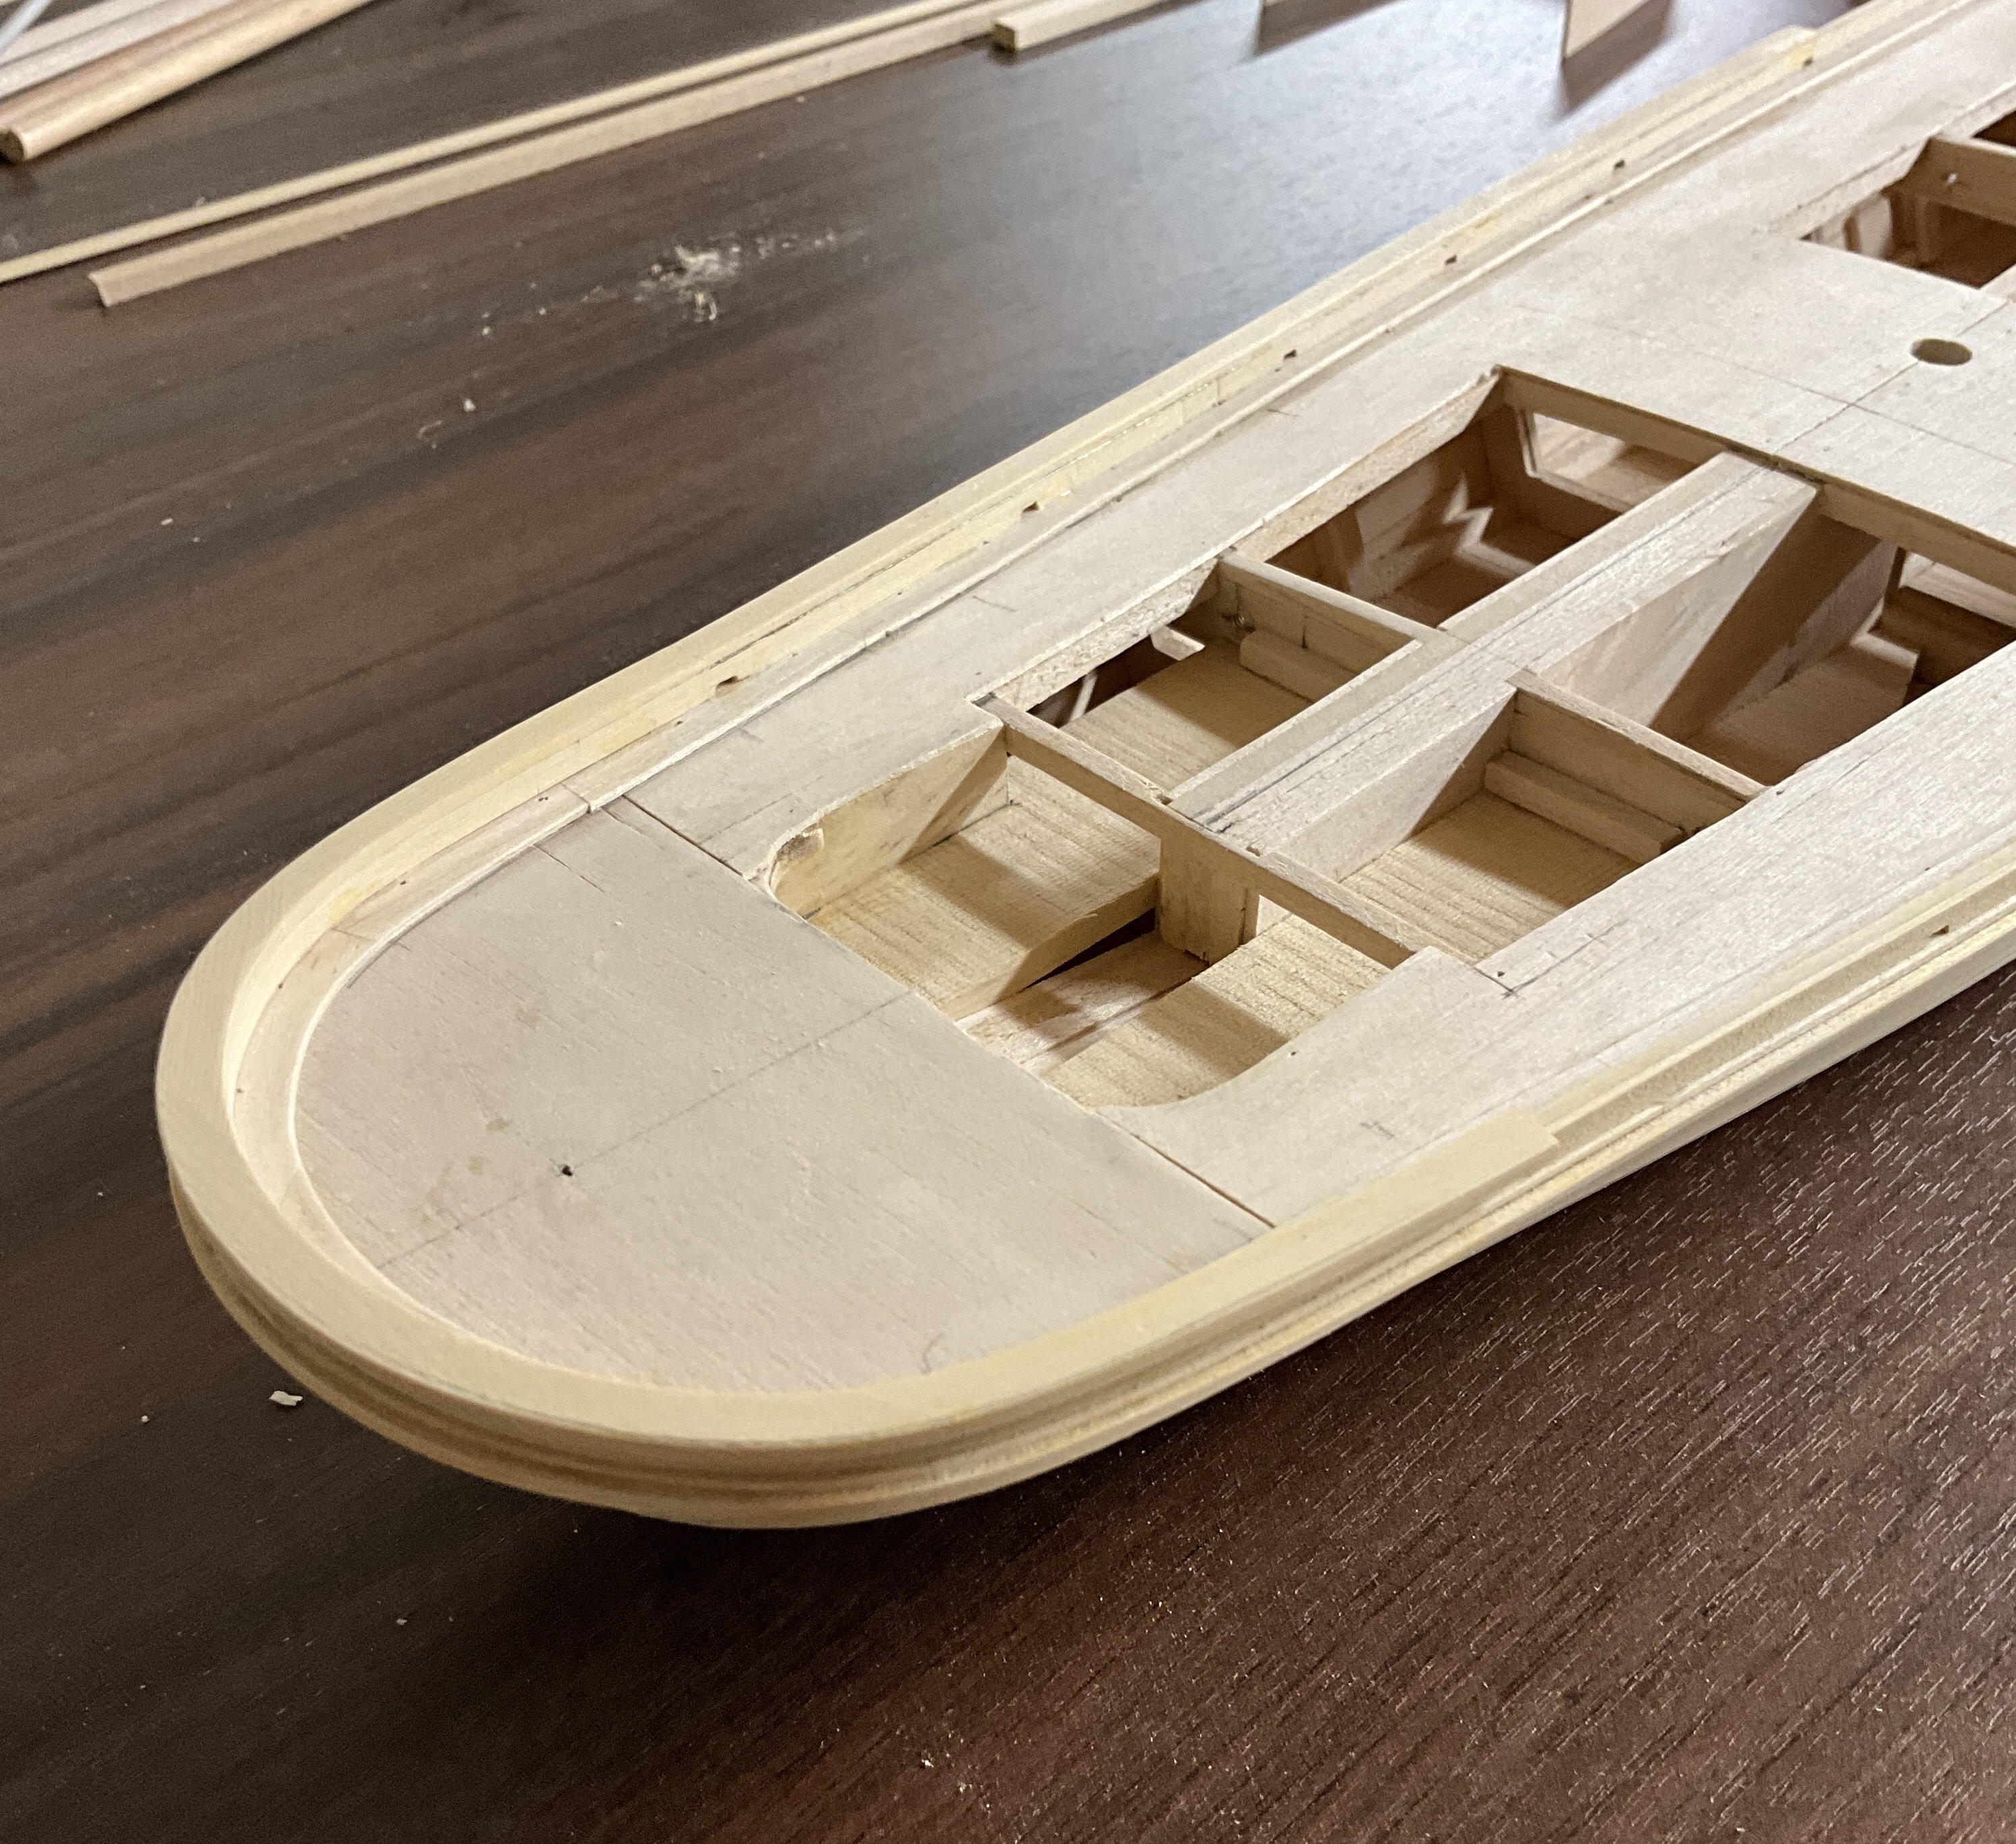
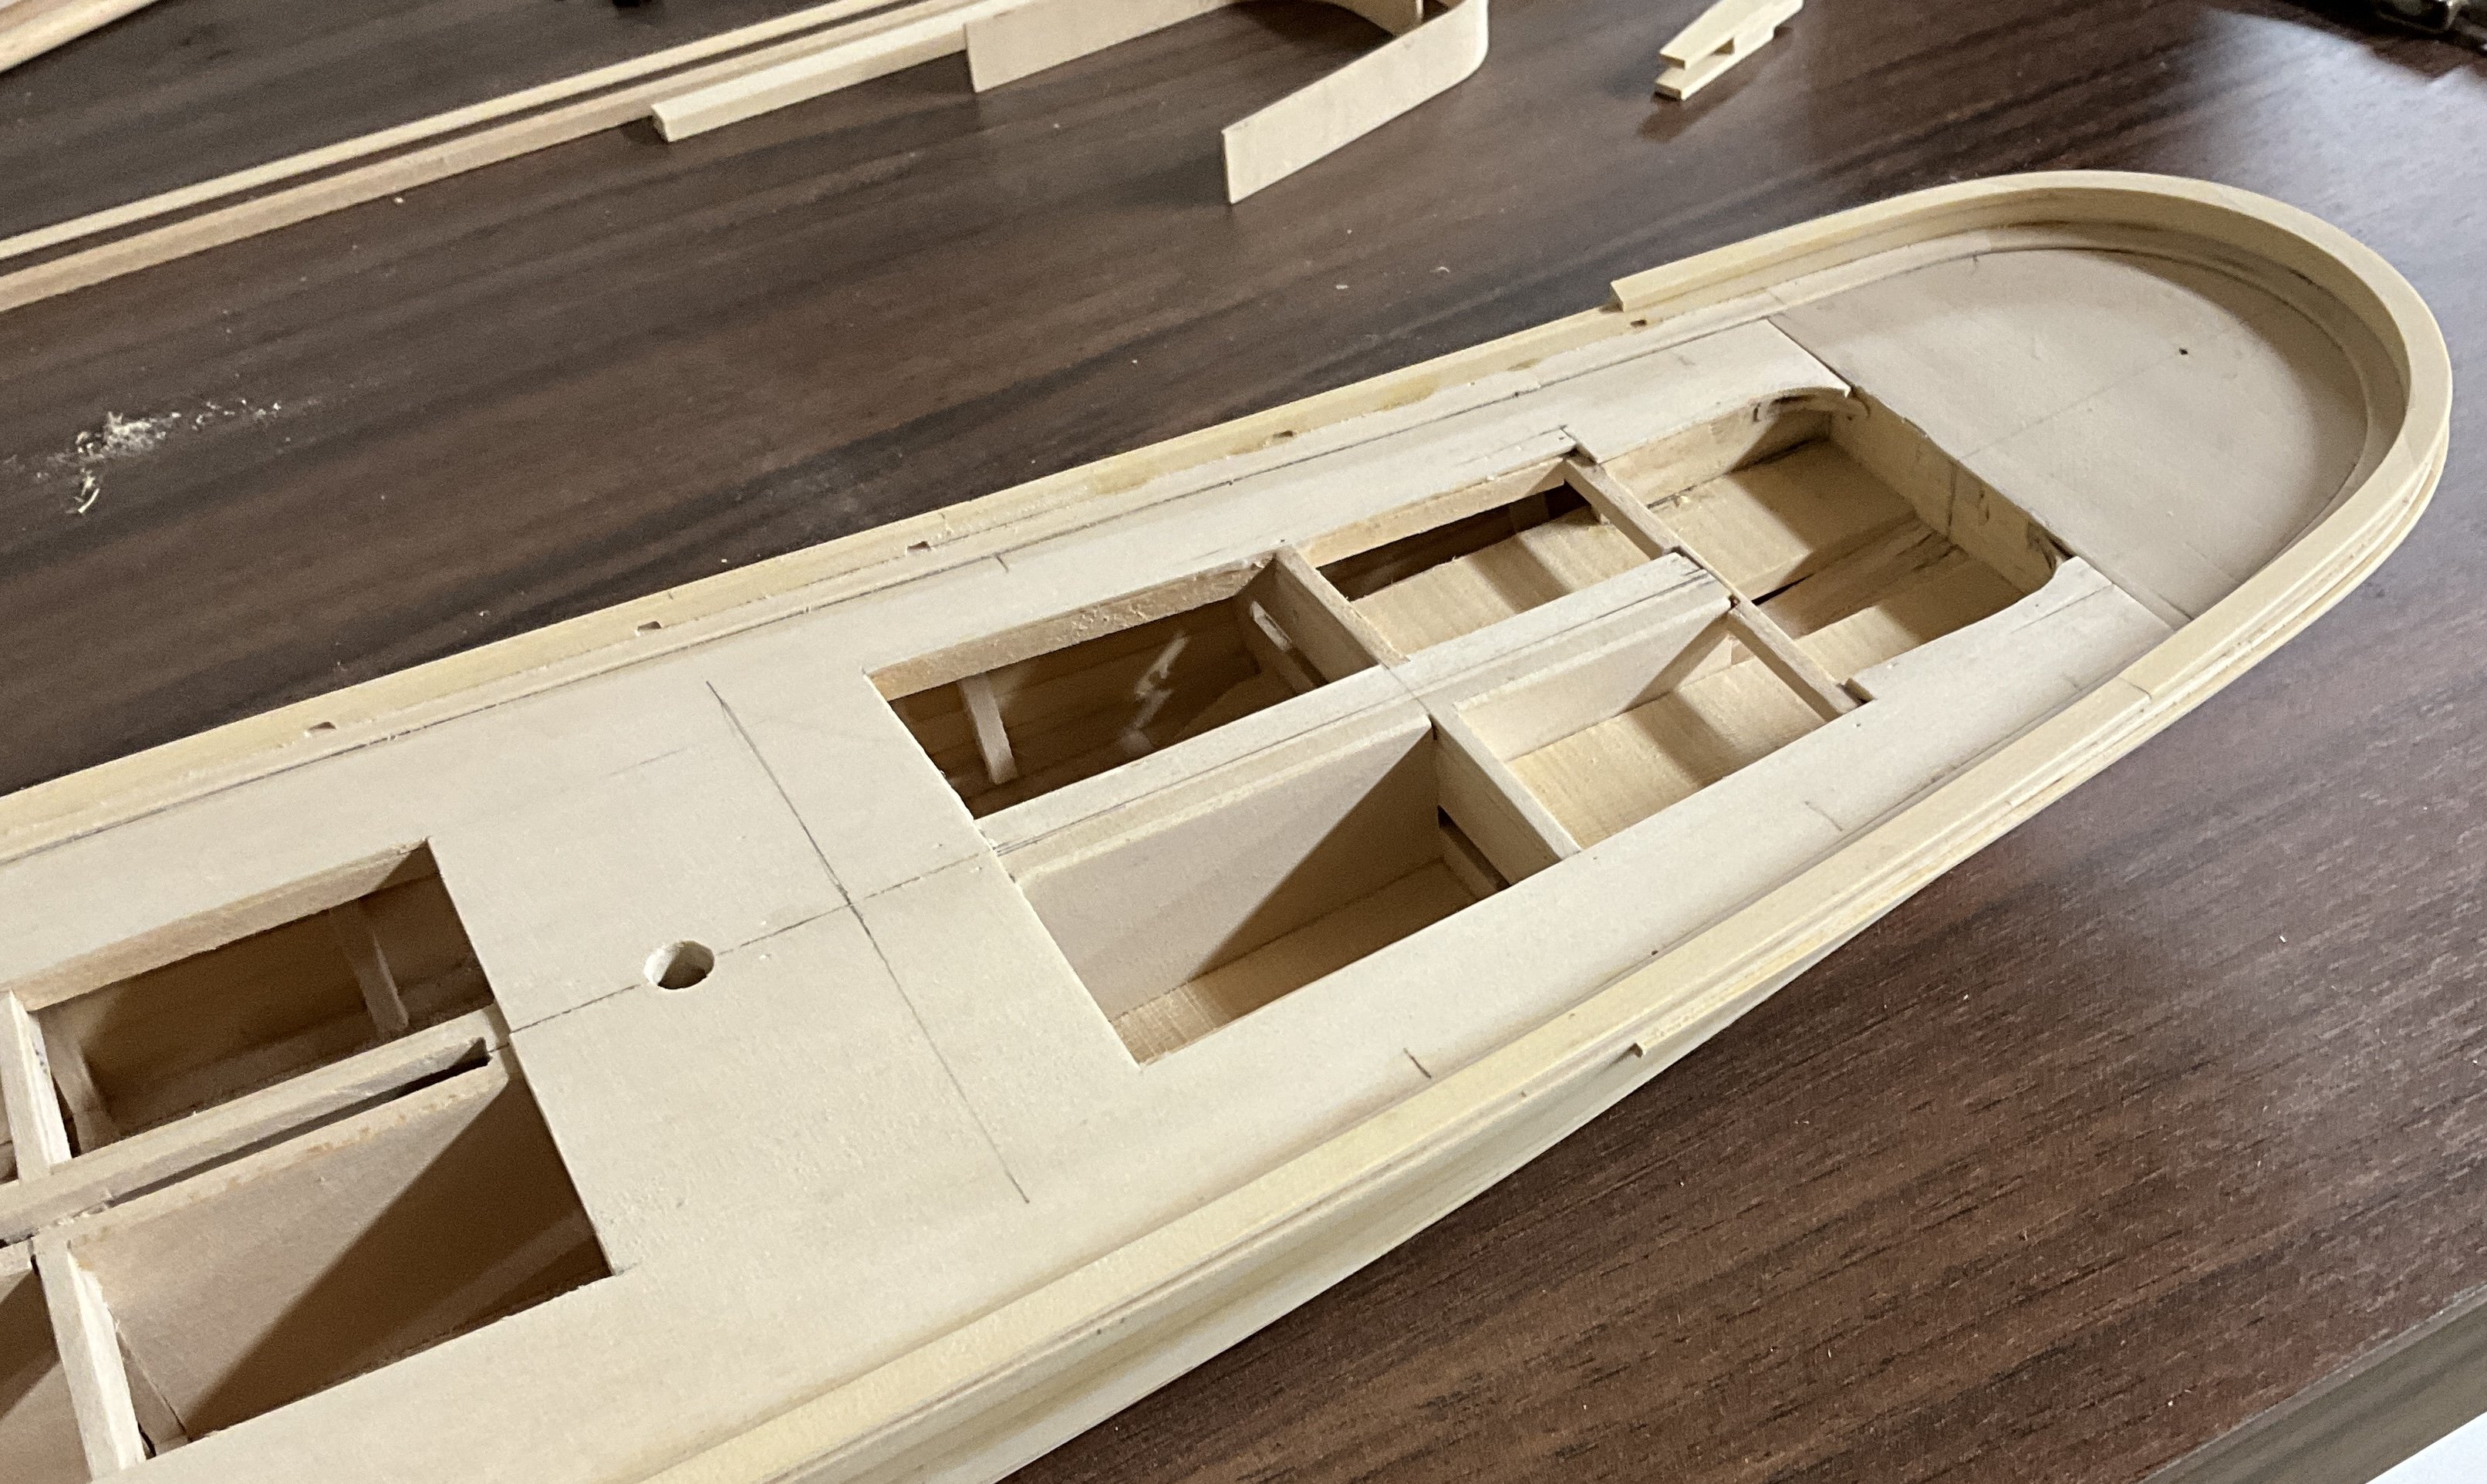
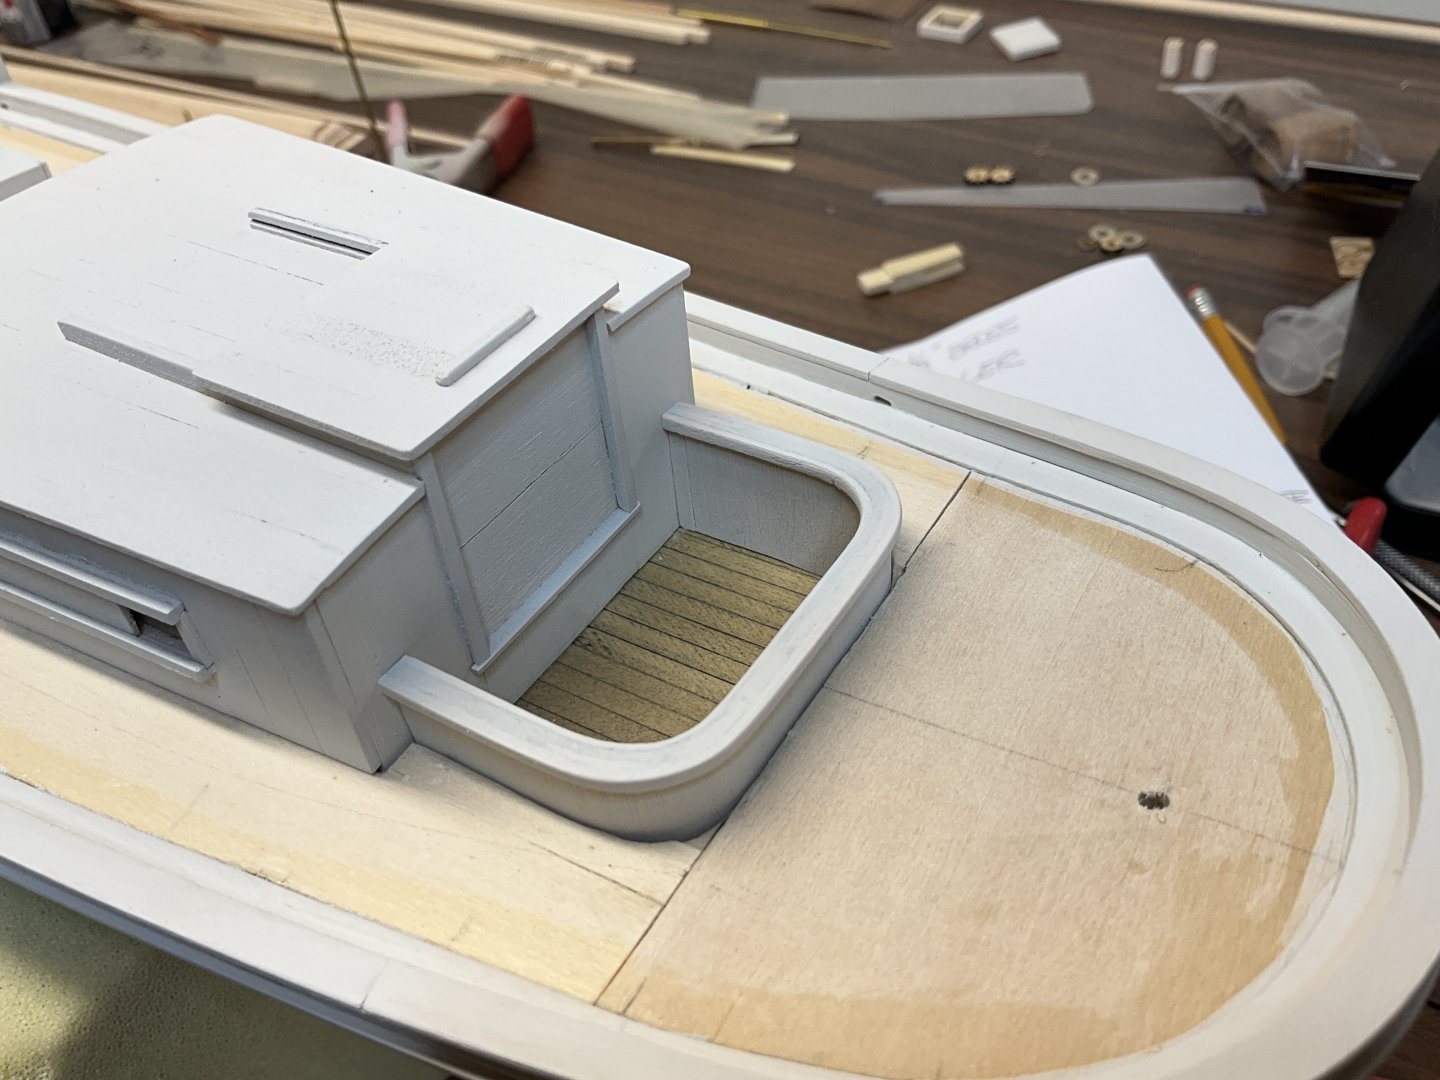
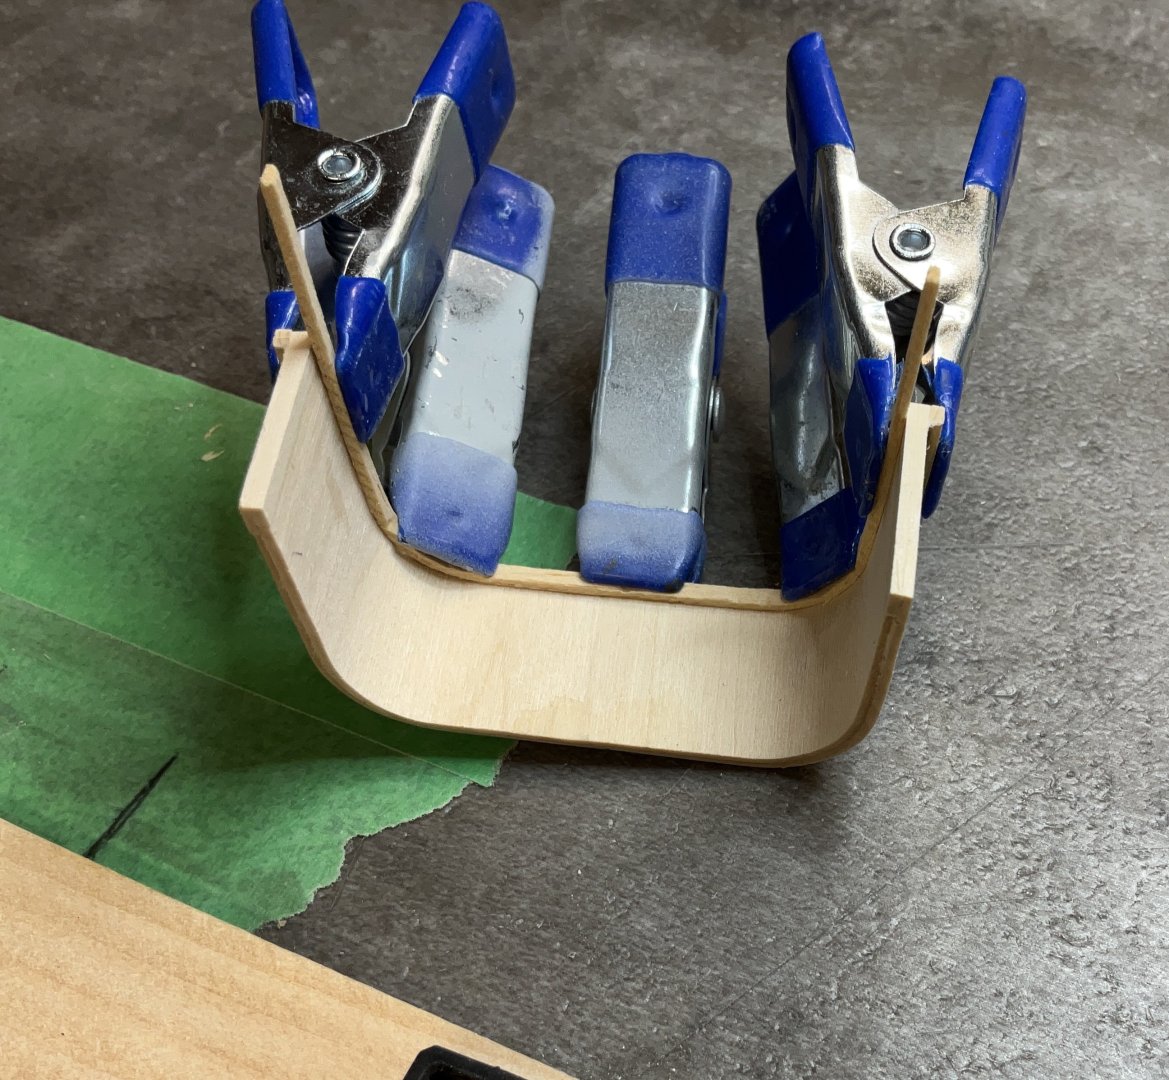
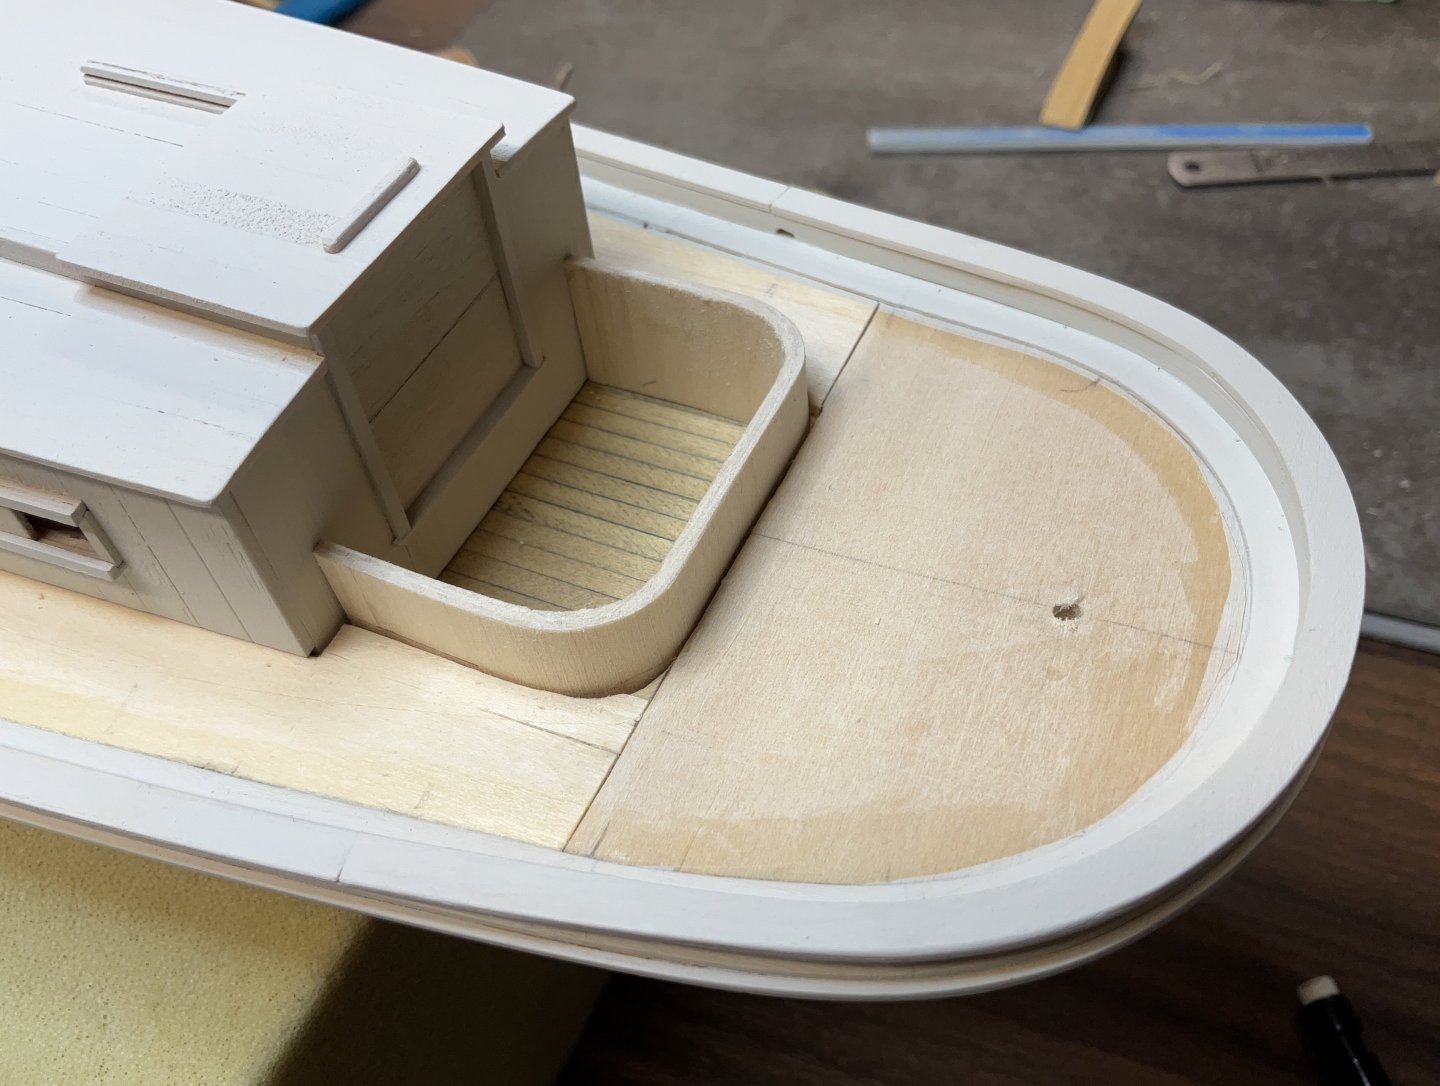
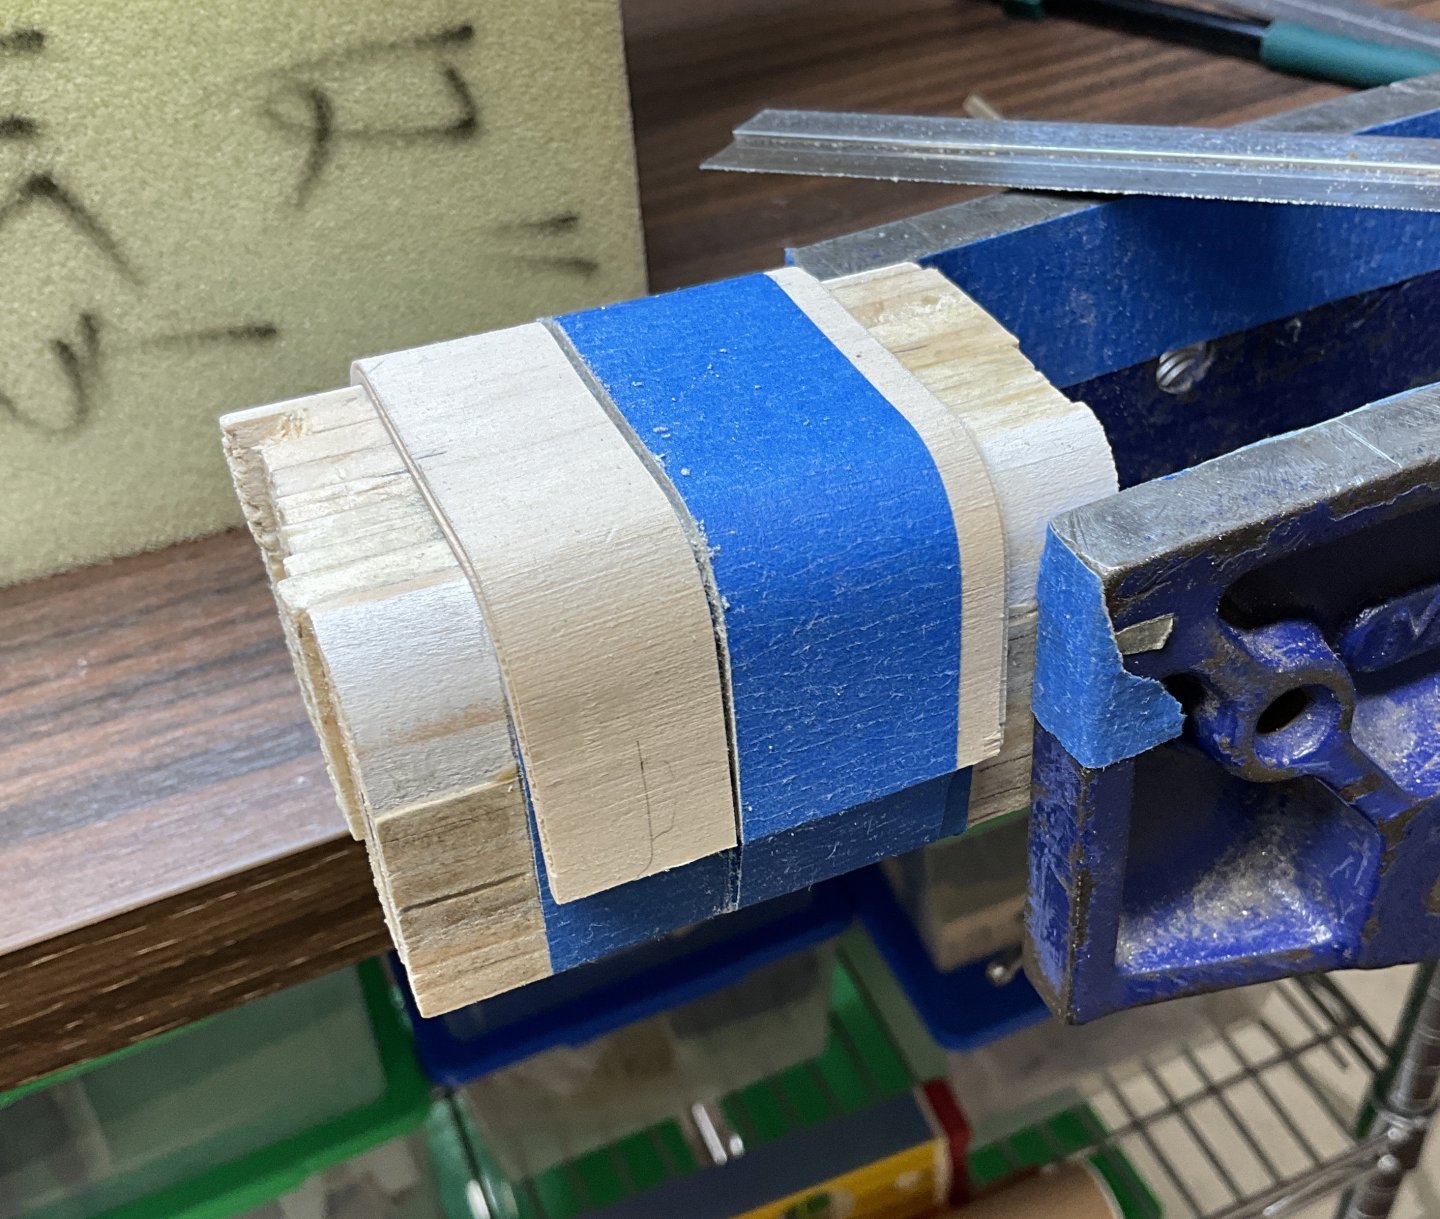
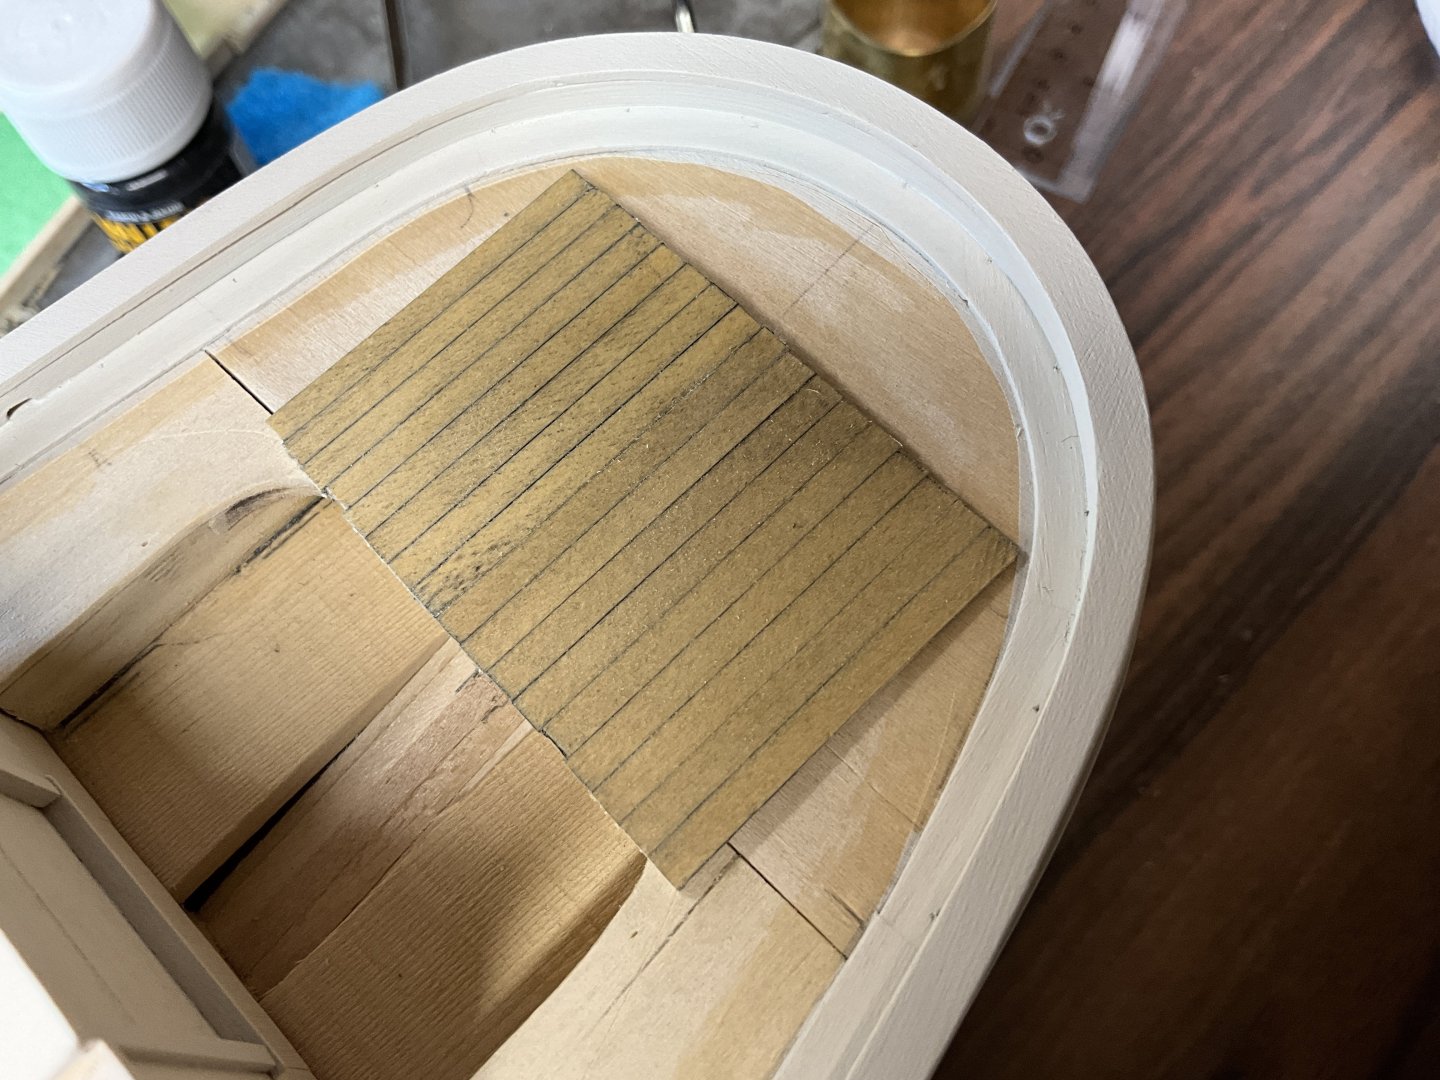
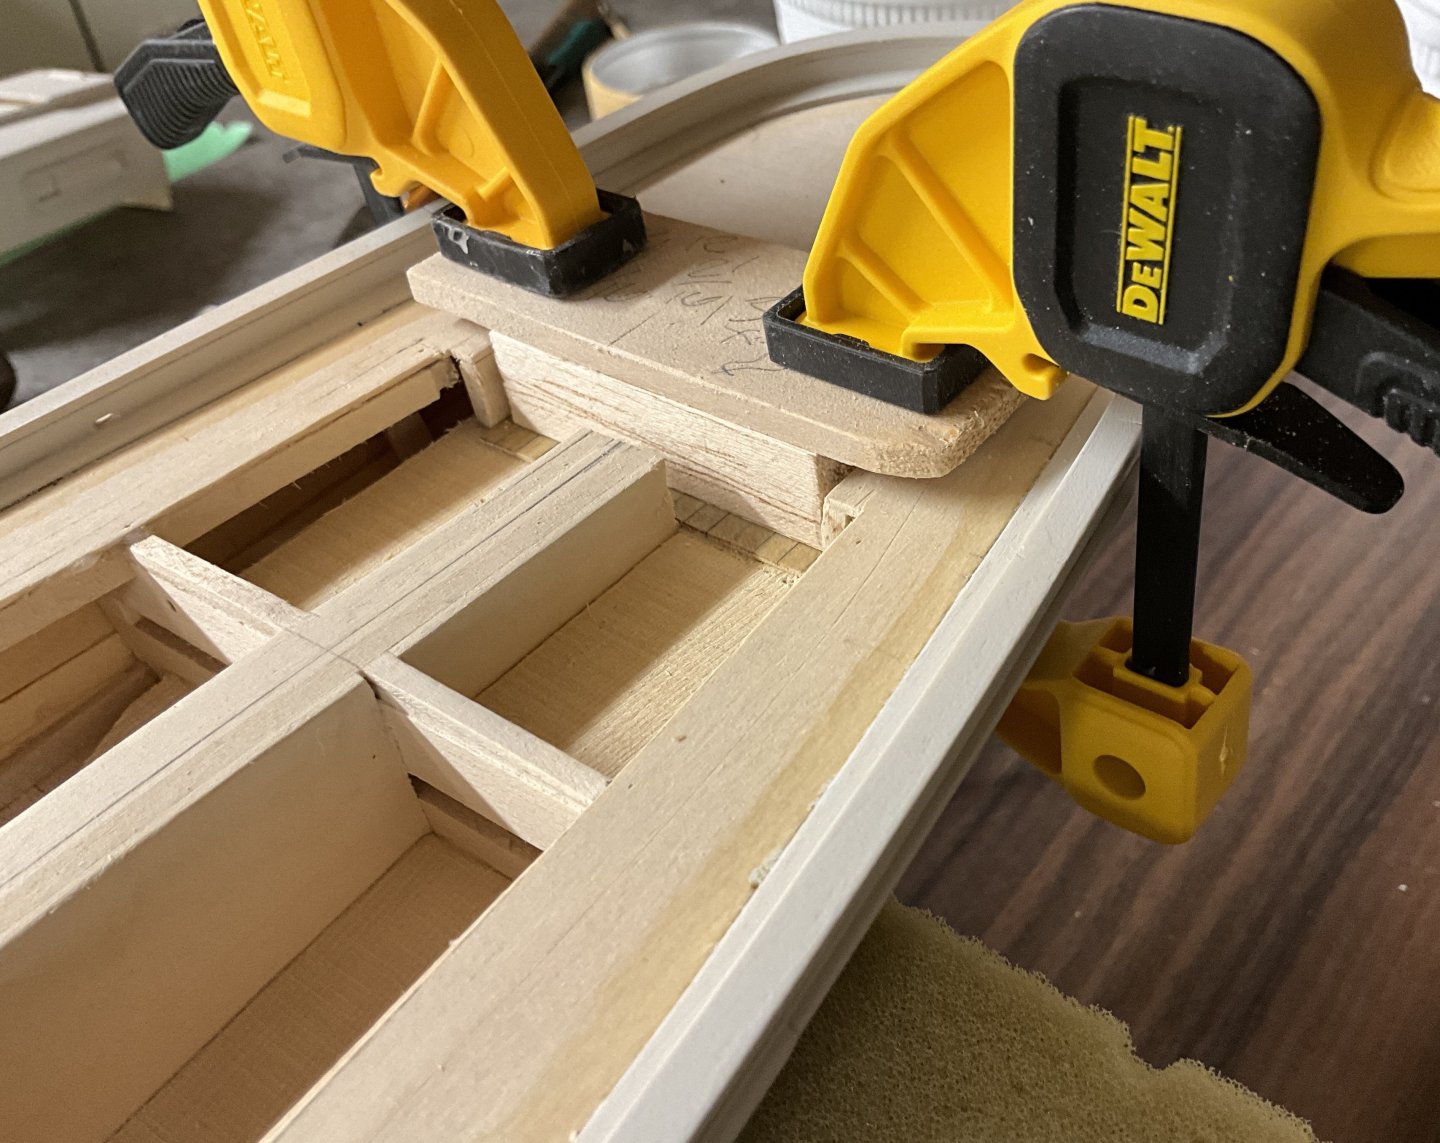
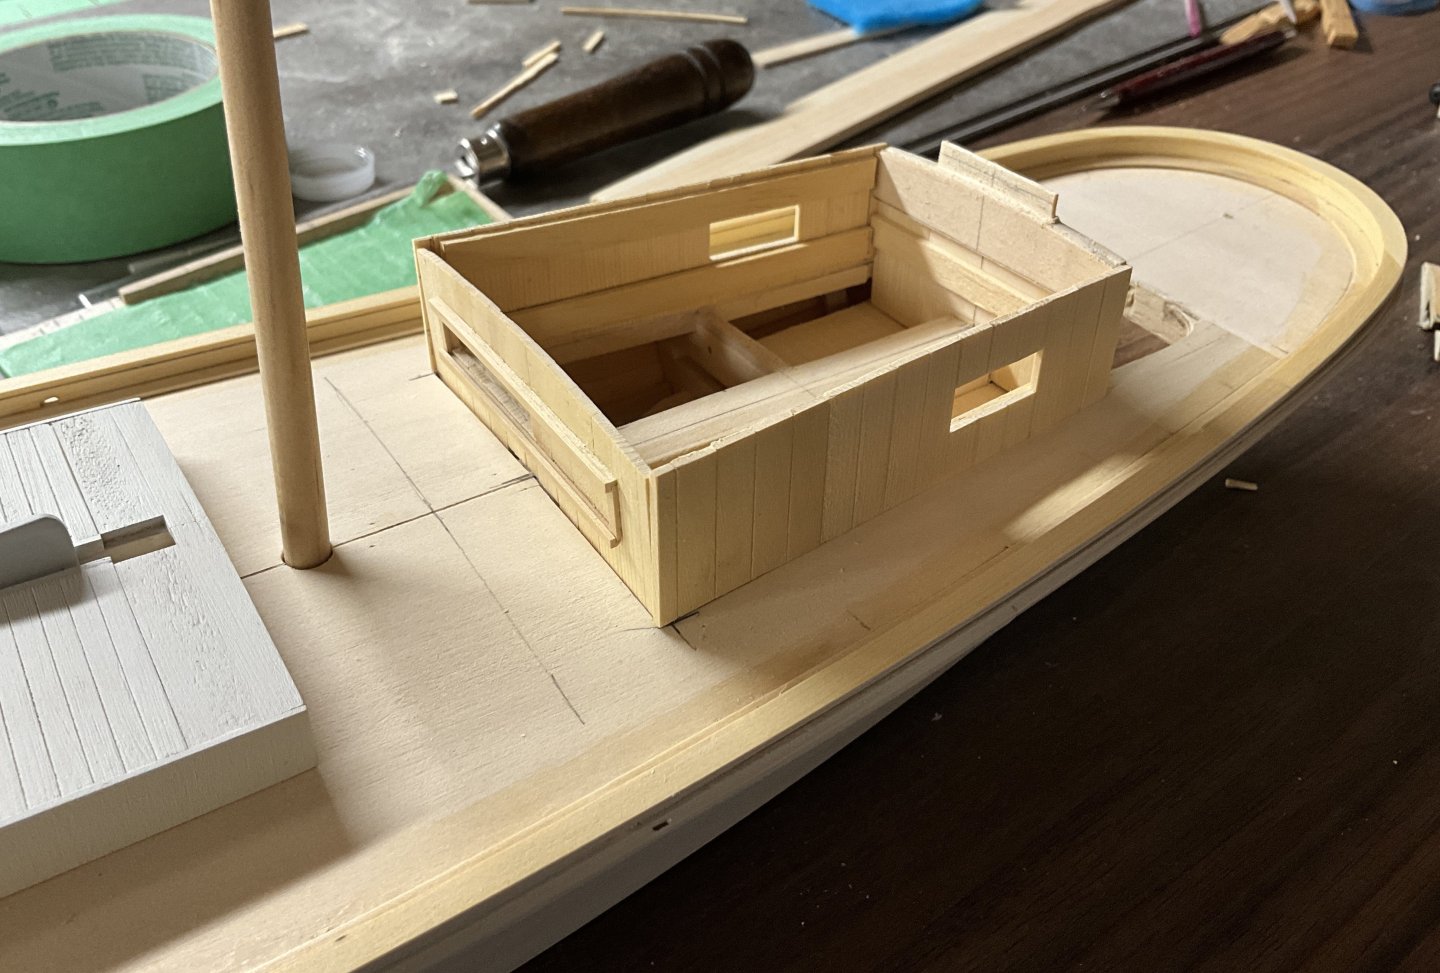
Hi Everyone, thanks to all for your Comments and Likes. The past week was spent working on the cockpit. The floor was glued together and cut/sanded to size. Before gluing, the strips of AYC were sealed with WOP tinted with Vallejo Dark Slate Grey pigment . ( 1/2 tsp. / oz. ). The floor was then glued into place. The cabin’s aft wall sits on top of the floor so this was glued in next. The cabin wall material that was shaped a little while ago was taped back on to the mold and a piece 3/4” wide was cut from it and given a test fit. The remainder of the wall material that was still taped to the mold was used to shape a strip of 1/32” x 1/16” boxwood that wood become the outer edge of the wall’s cap. A jig was made to keep it honest while gluing. A smaller mold was used to shape a strip of wood that would become the inside edge of the wall’s cap. This strip was then glued to the inside top edge of the wall. The cap was sanded and thinned wood filler was applied to fill gaps in the lamination. After some sanding and a few coats of paint the wall was given another test fit. Next I’ll be heading to the bow to start the deck planking. Hope to see you there.


- 201 replies
-
- 15
-
-

-
- Oyster Sharpie
- first scratch build
- (and 1 more)
-
Thank you John, I think that’s the look I was going for. 😀
- 201 replies
-
- 3
-
-
- Oyster Sharpie
- first scratch build
- (and 1 more)
-
Thank you Keith, I really appreciate your comments.
- 201 replies
-
- 2
-
-
- Oyster Sharpie
- first scratch build
- (and 1 more)
-
Glen, congratulations on finishing this fine creation. Your friend must be very pleased to see her suggestion come to fruition.
- 235 replies
-
- 6
-
-

-
- Banshee II
- Bottle
- (and 1 more)
-
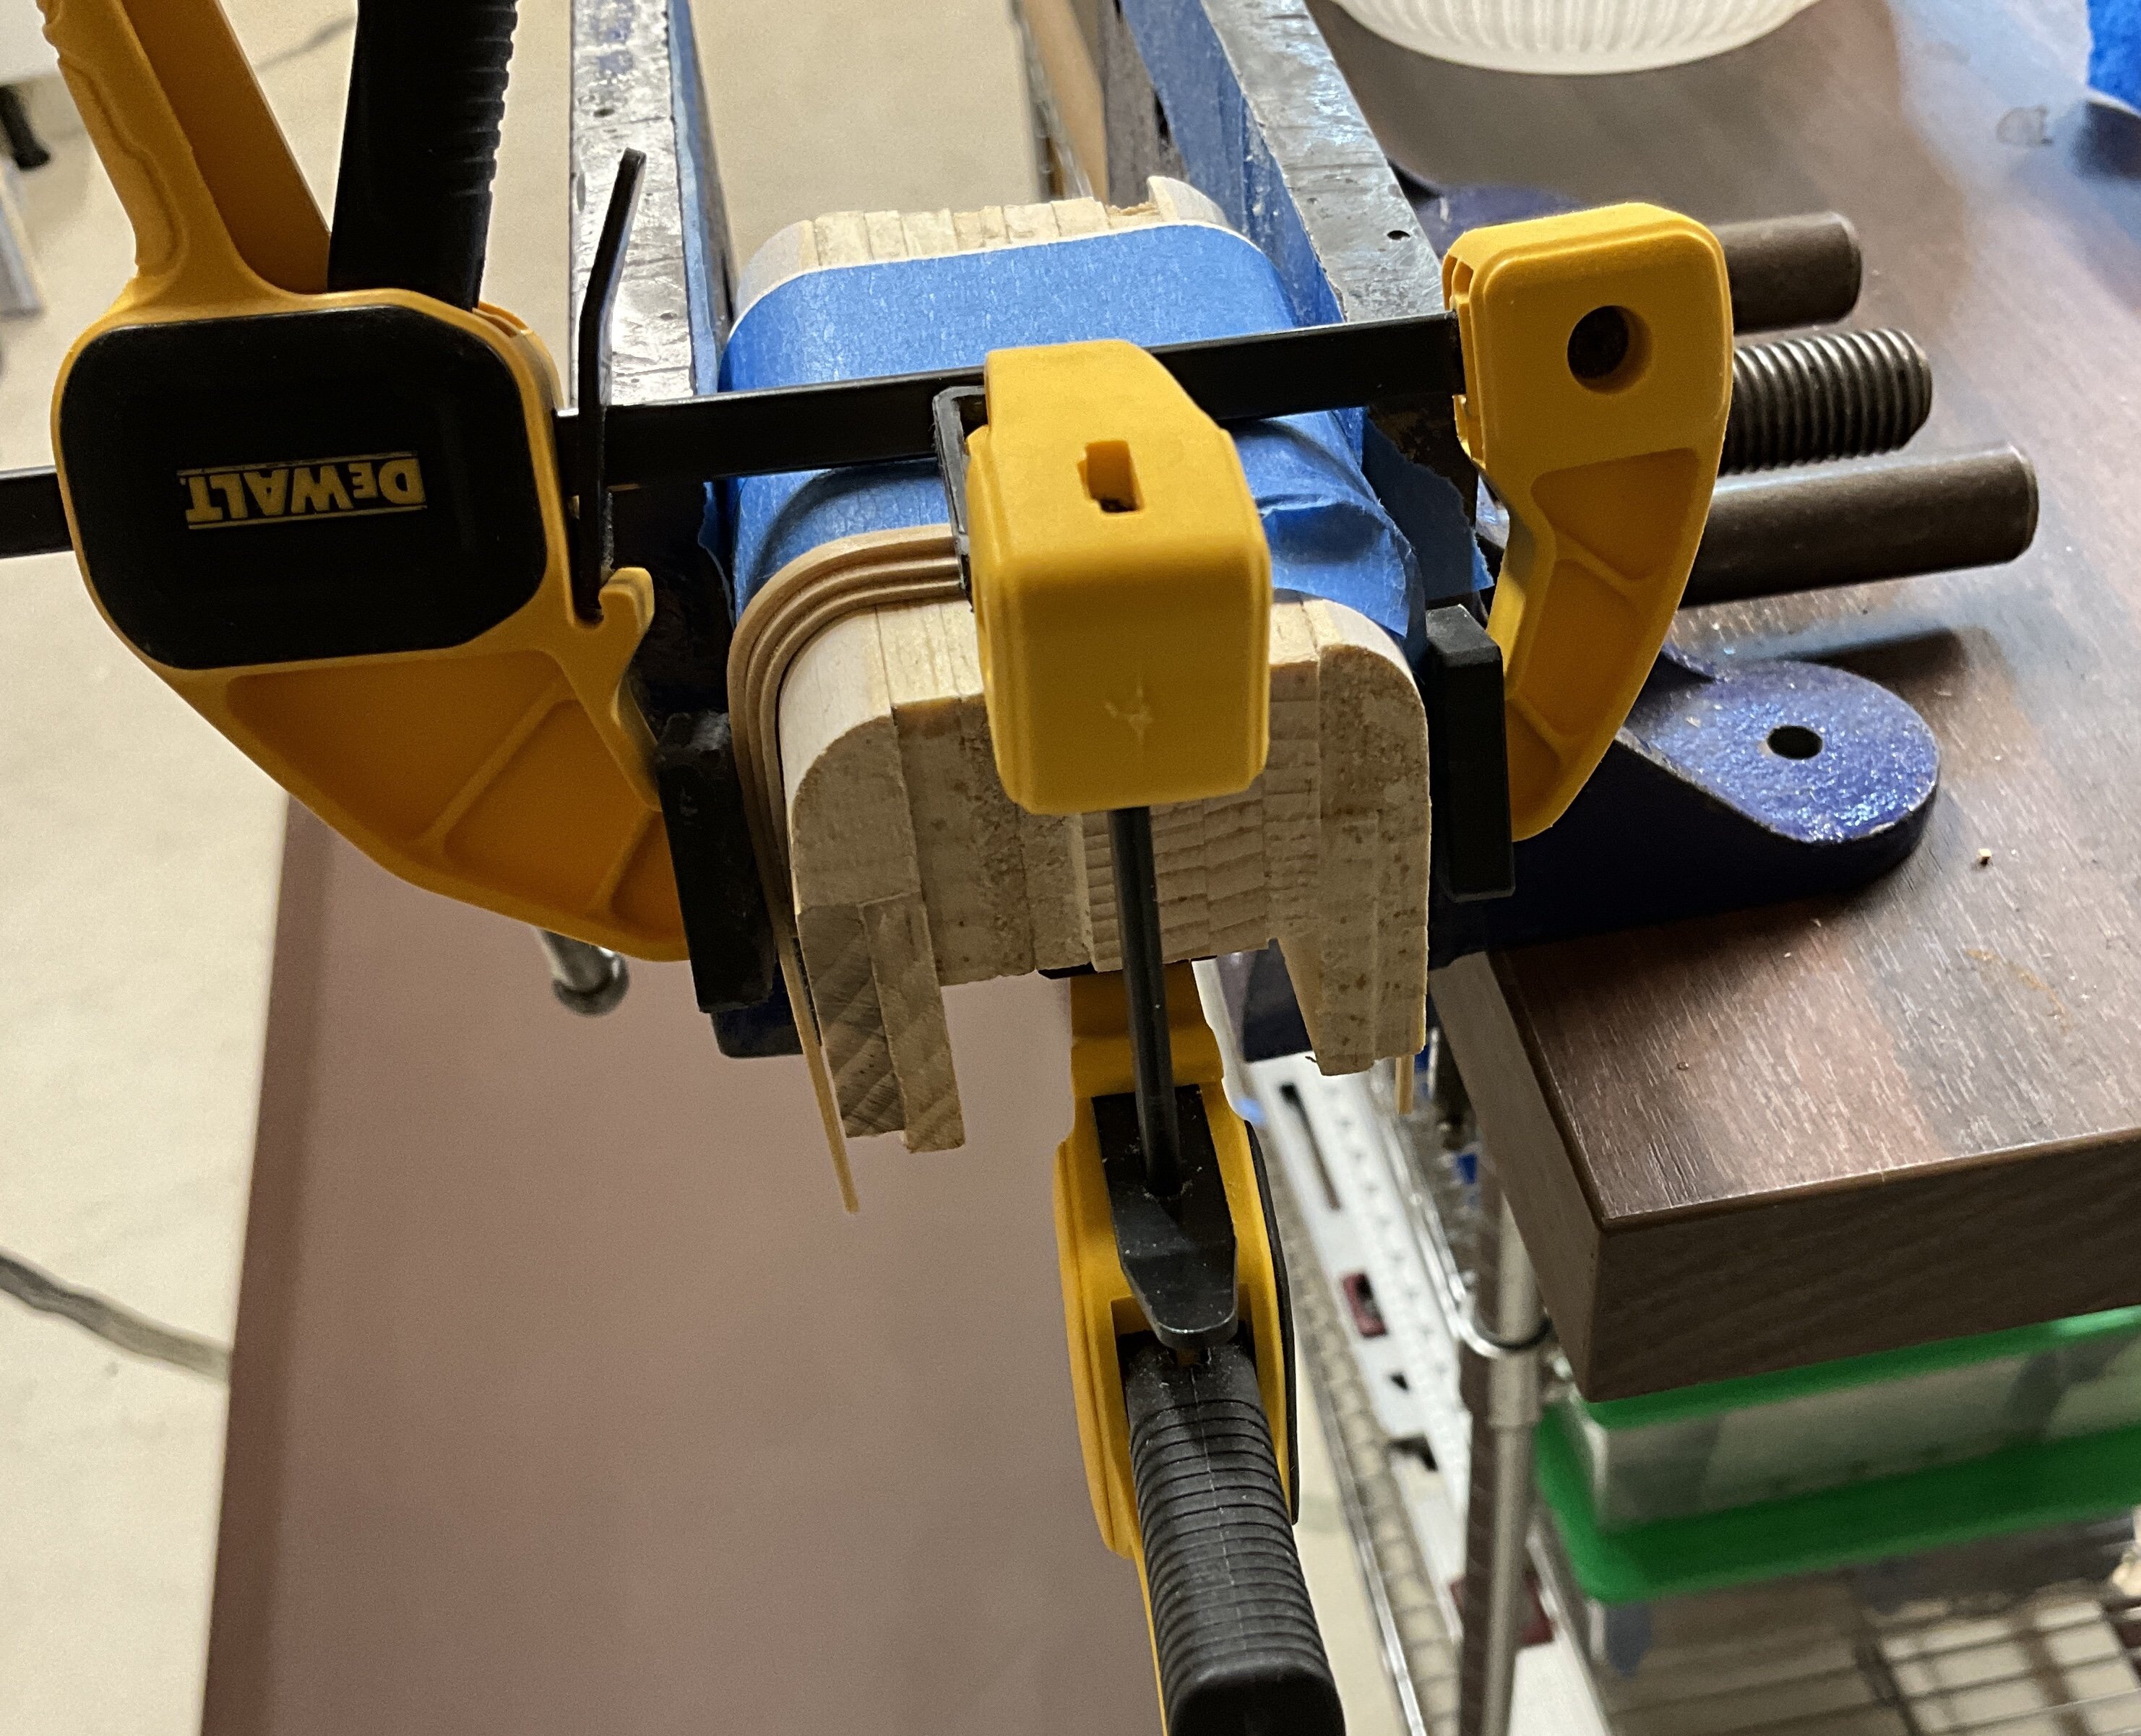
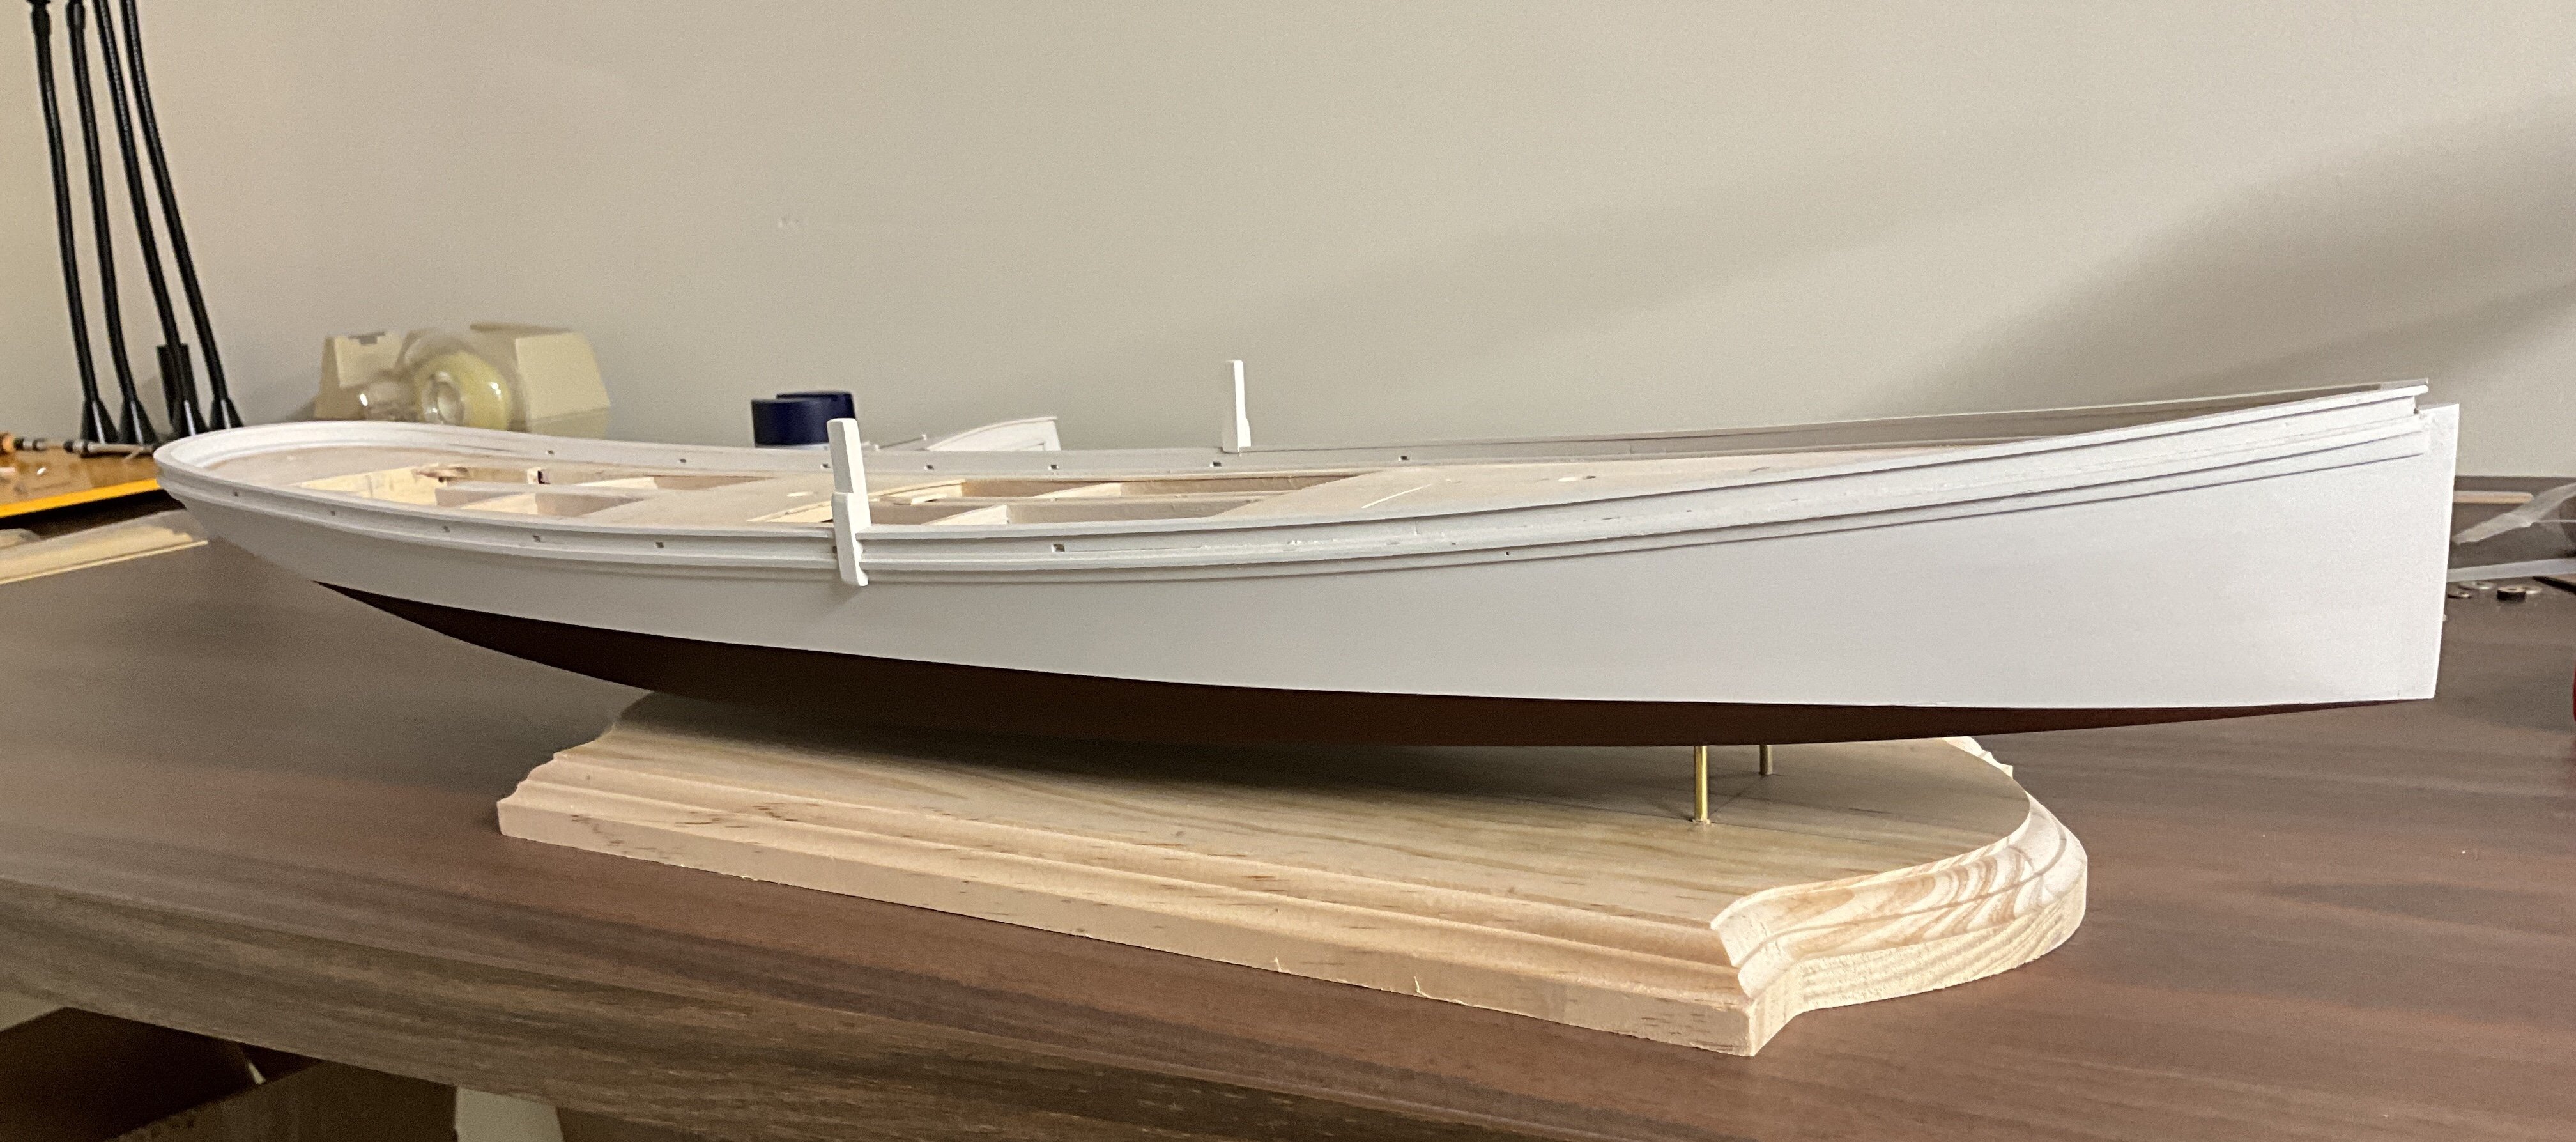
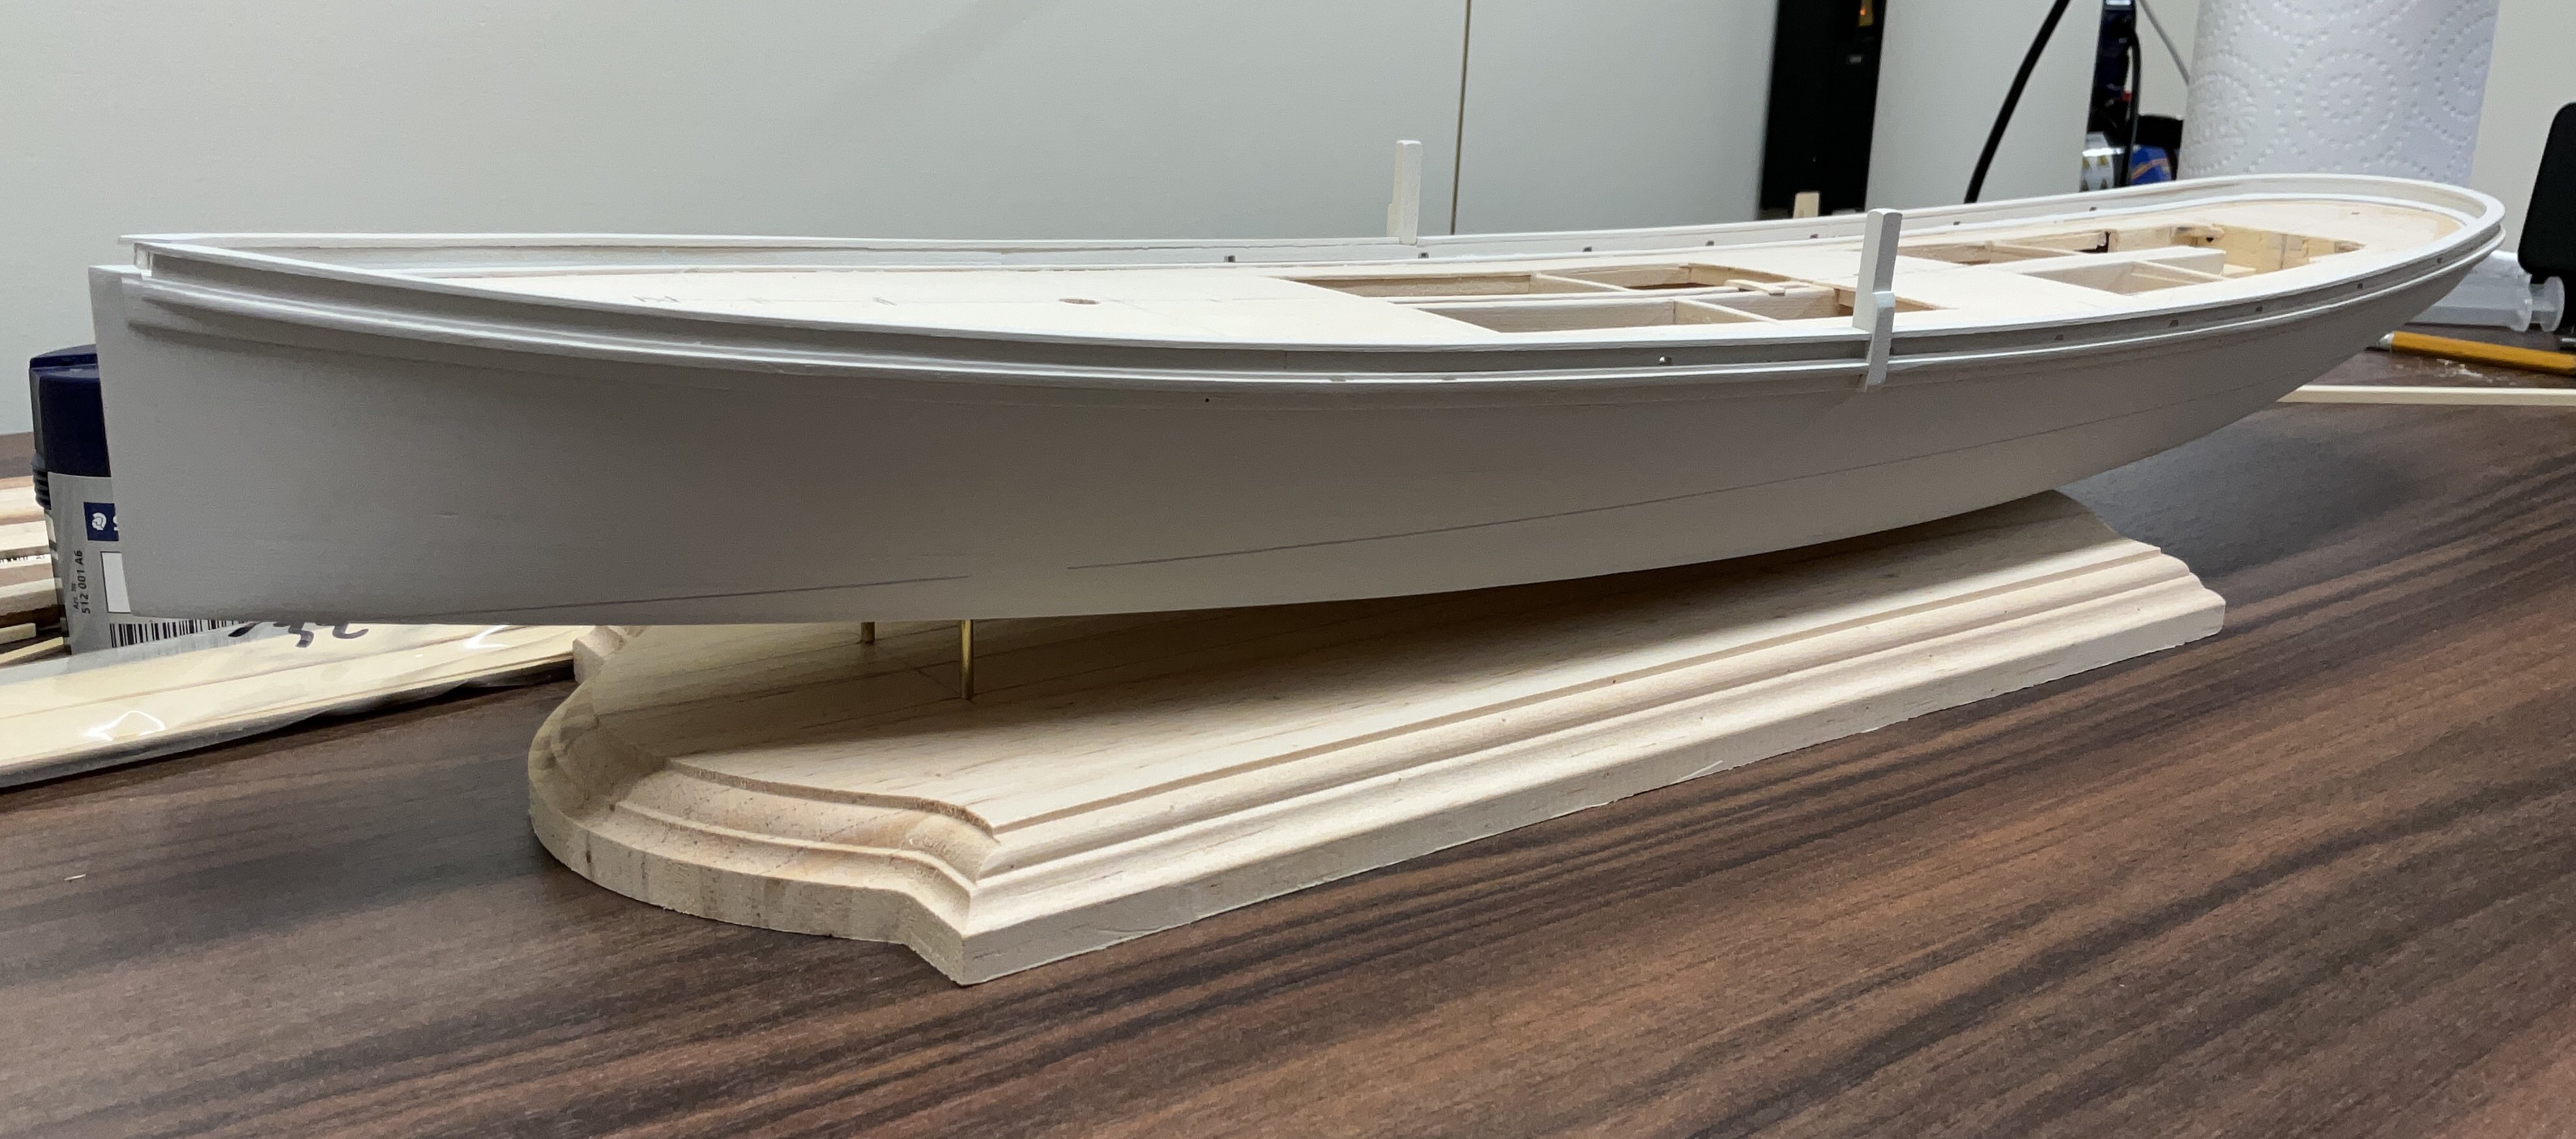
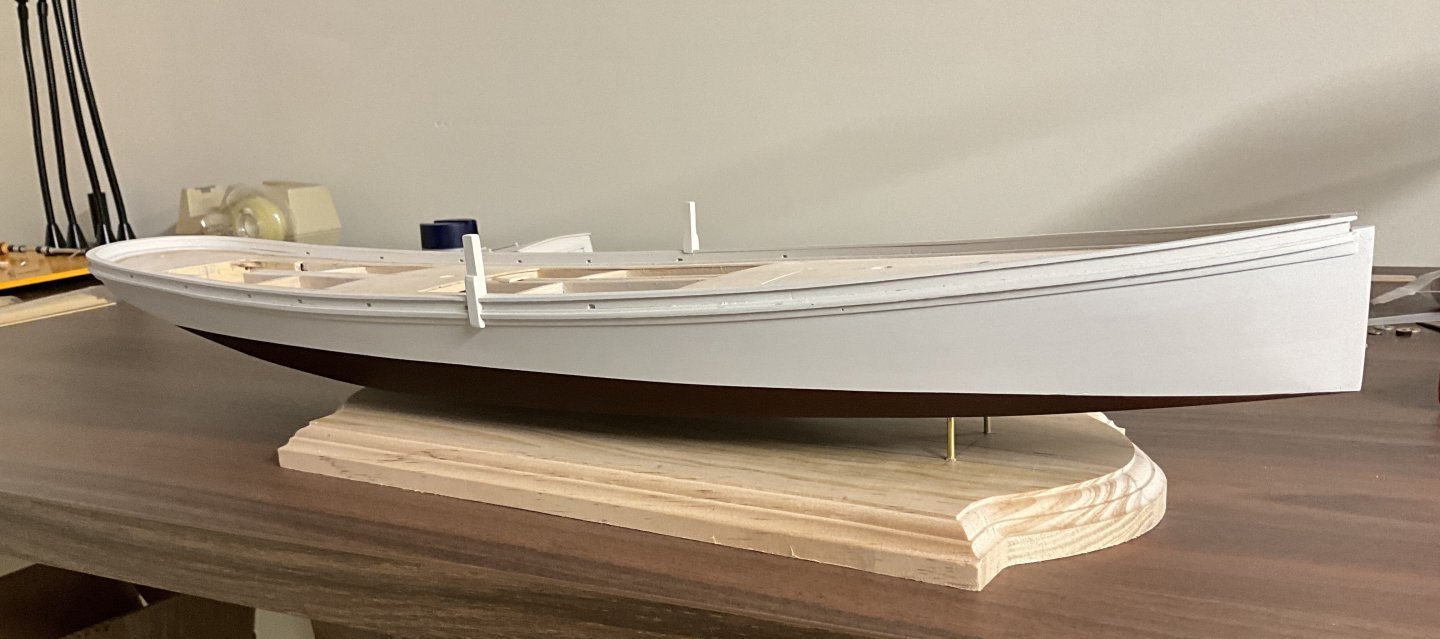
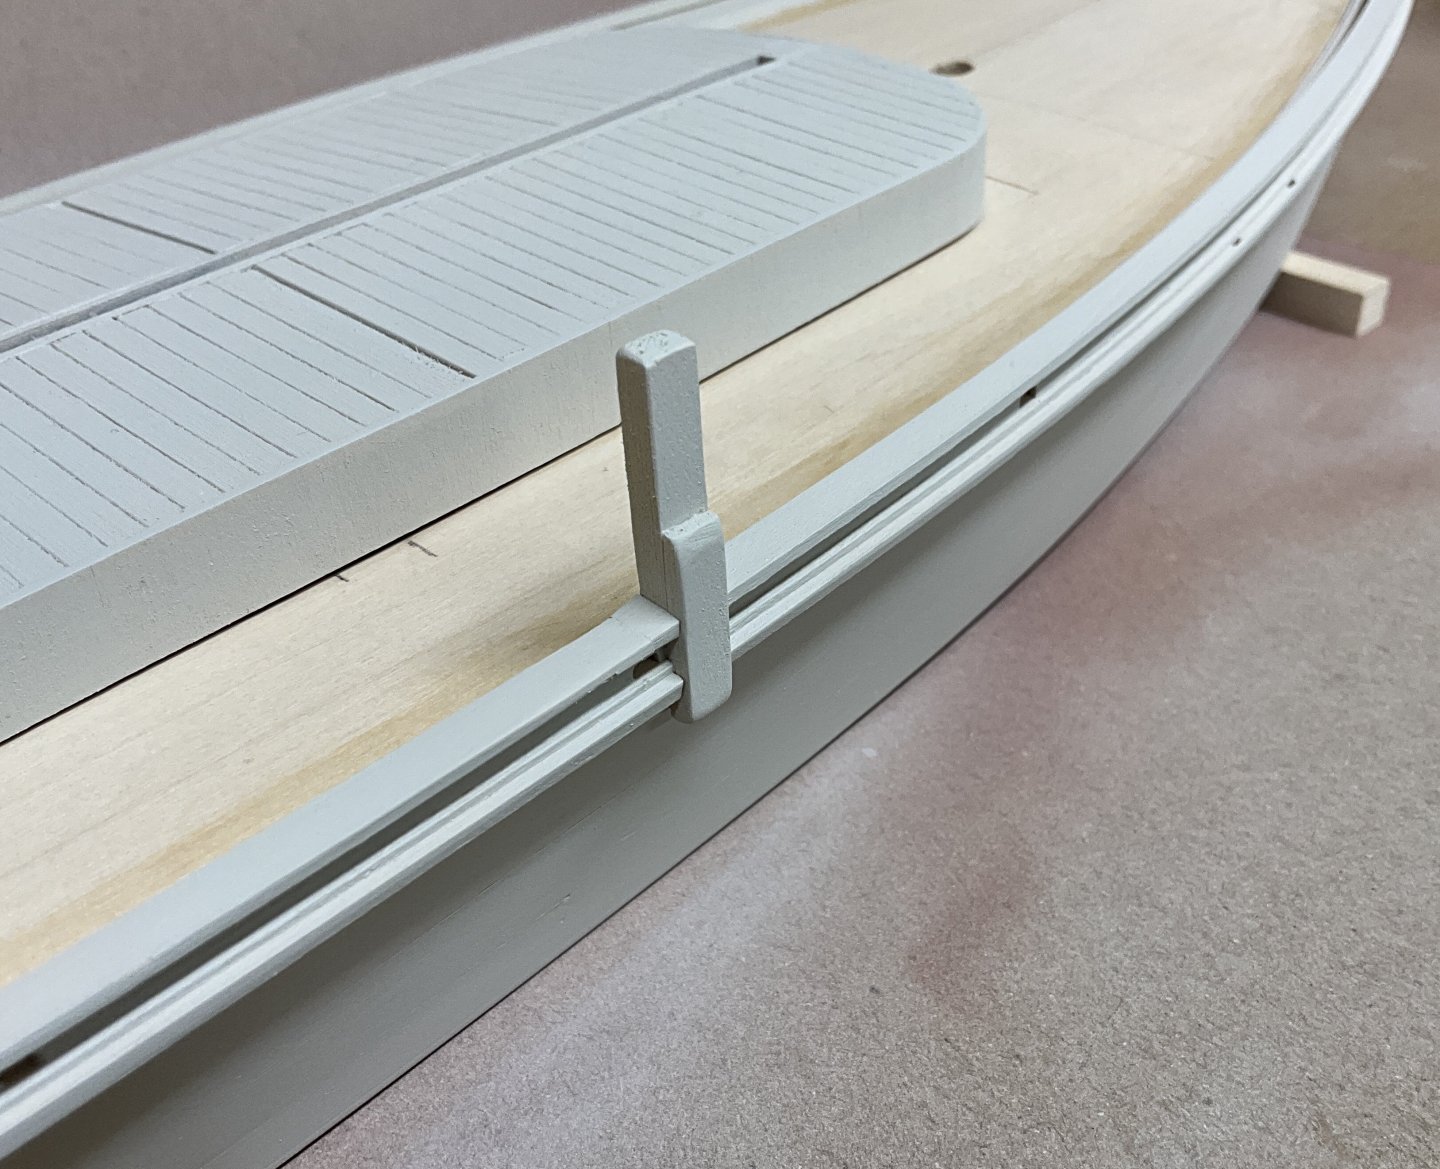
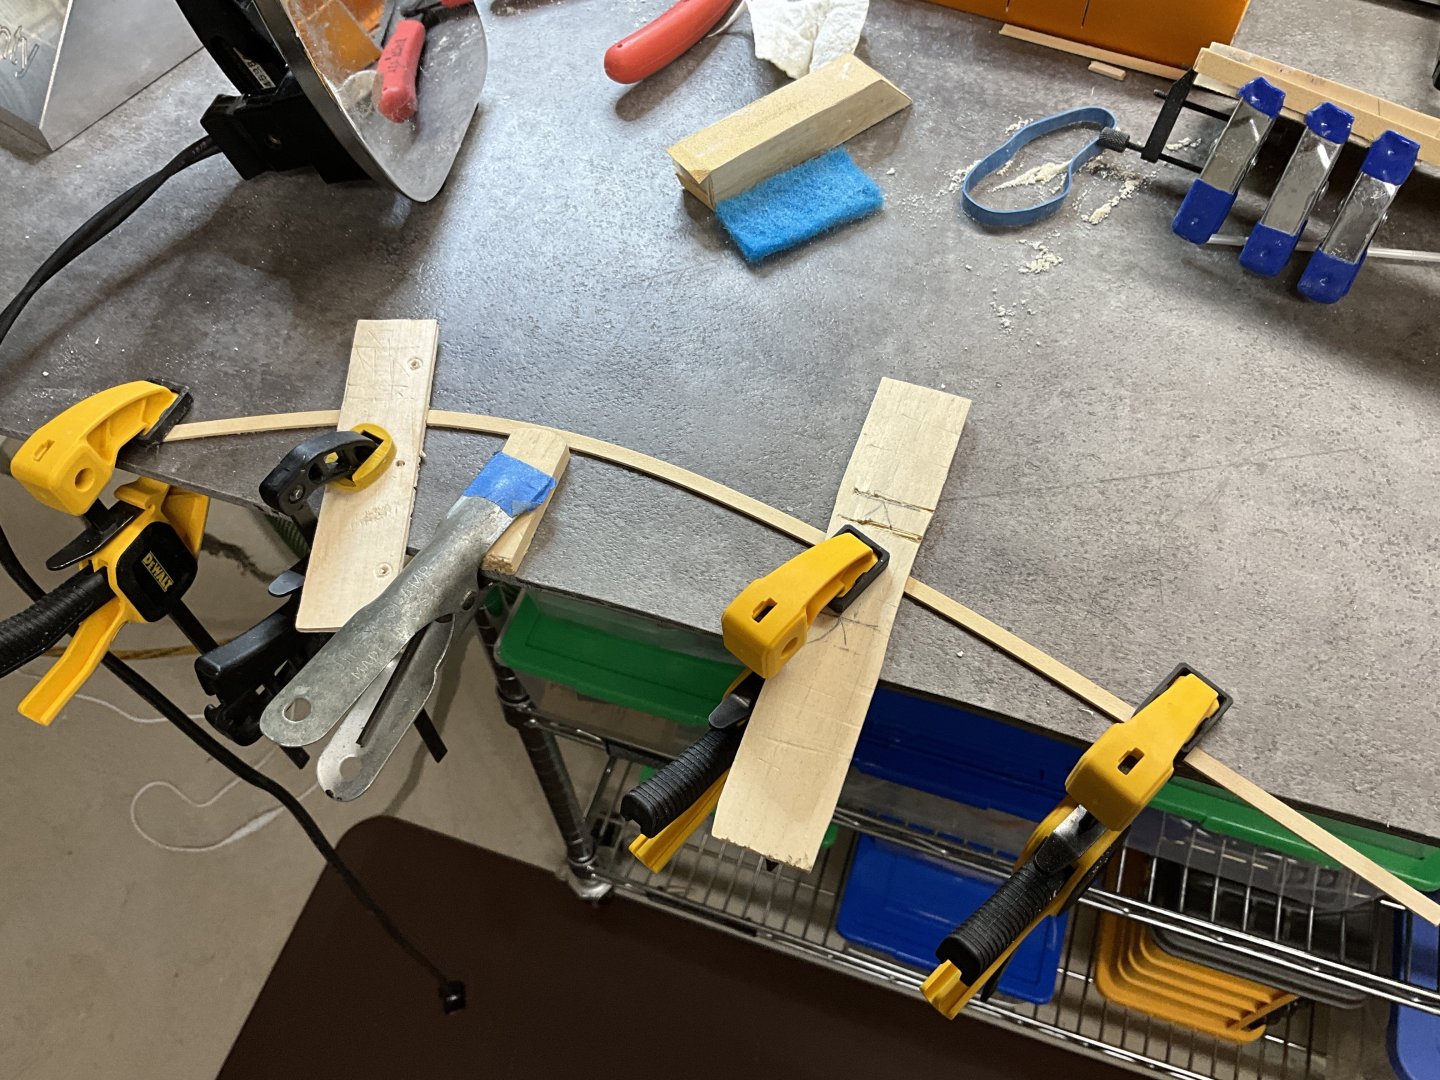
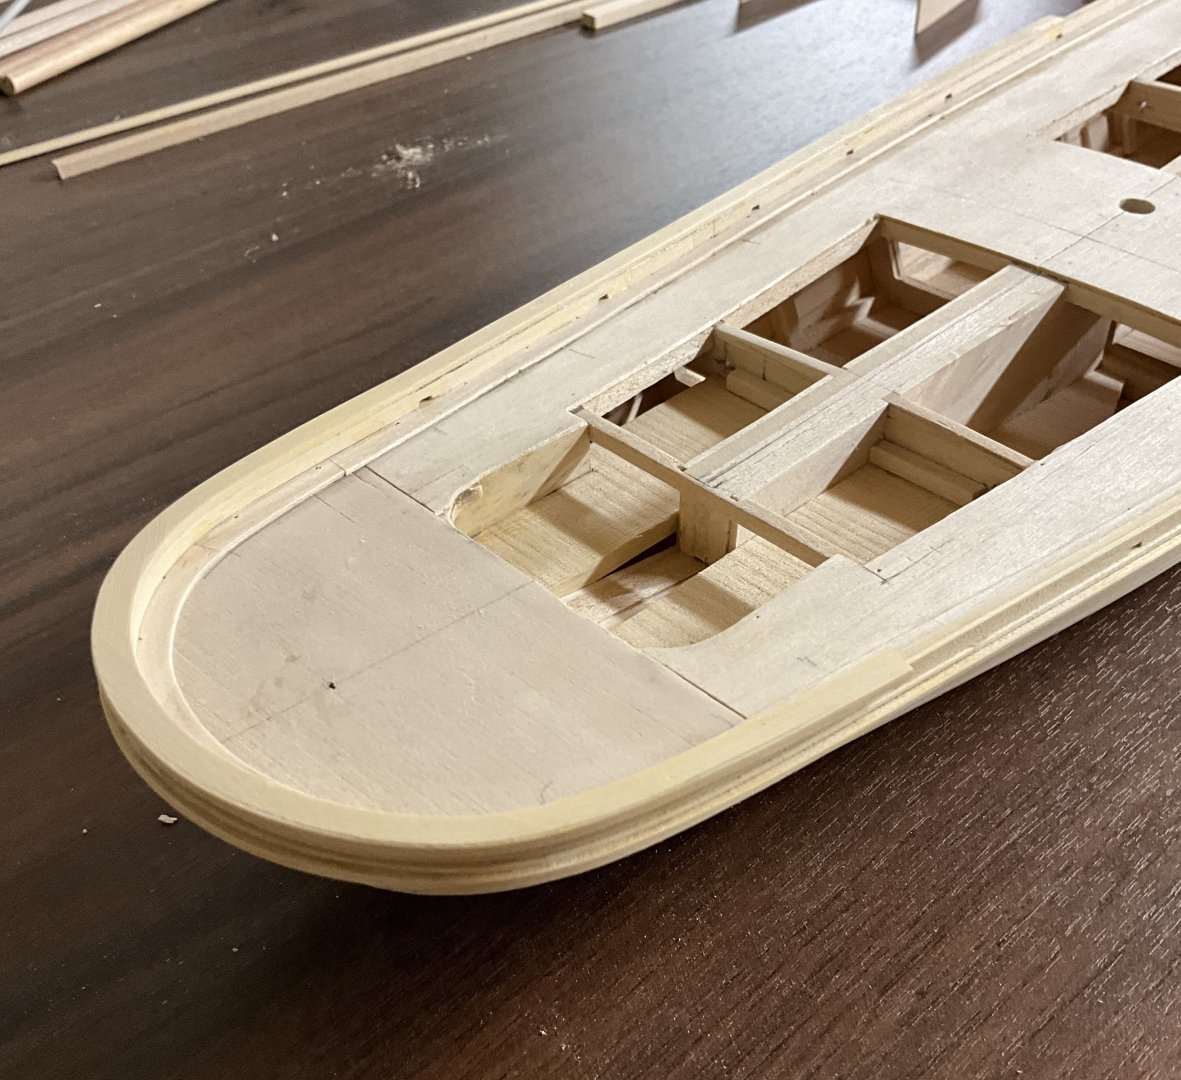
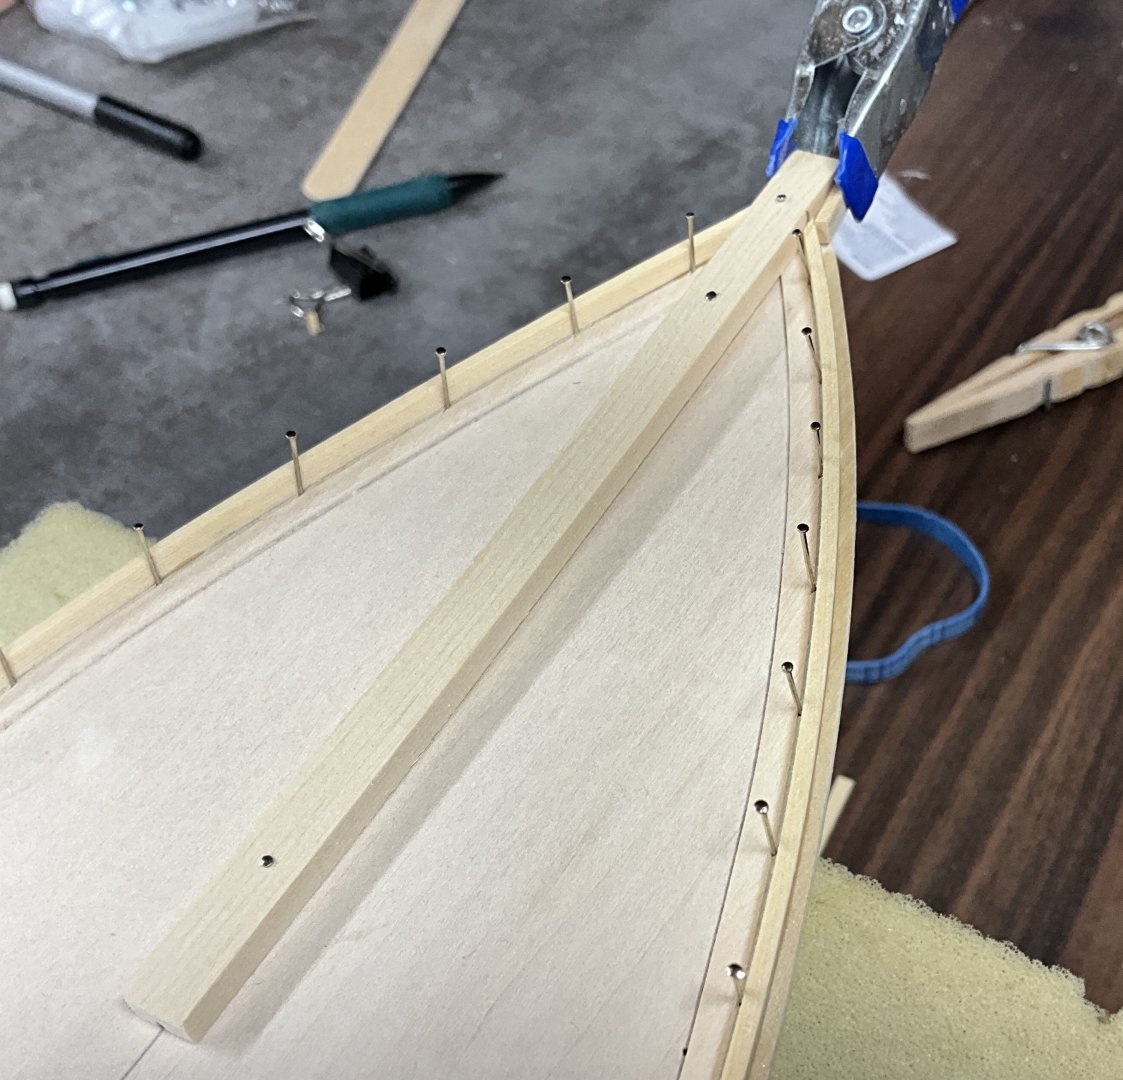
Hi Everyone, many thanks for all of the Comments and Likes. About a month ago I started working on the cap rails and in that time they were completed and the hull painted. Between coats of paint the deck furnishings were being worked on. A piece of wood 3/16” x 5/16” was pinned to the deck as a placeholder for the bowsprit. The bulwarks were finished to the bowsprit and then the cap rails were made. The cap rail around the stern was cut from a sheet of AYC and assembled in the same manner as the covering board. I decided to use a strip of wood at the bow instead of cutting the cap rail from a sheet. It was a bit of a battle to get enough bend. Should have used a more rounded piece of wood for the jig. You can see a bit of a kink in the rail but the strip was wide enough that it could be sanded out. This is where the painting started. First a coat of clear shellac and then around 6 coats of thinned paint. The posts that support the dredge roller were added halfway through the painting because the cap rail and the rub rail needed to be notched. The white - grey was finished being applied and then a few days later the hull red was applied below the waterline. I had the wooden plaque laying around so the boat was mounted on it in order to scribe the waterline and to show how it will sit. Next comes a bit of sanding and touch up work. Then on to the deck. Take care of yourselves!


- 201 replies
-
- 14
-
-
-
-
- Oyster Sharpie
- first scratch build
- (and 1 more)
-
Hi Dan, your lobster smack is coming along very nicely. You’ve probably seen in other people’s build logs suggestions that they look at Chuck’s tutorials on plank bending where it shows using jigs and heat provided by a small iron. Once they cool they tend to hold their shape. If the plank needs a twist you can clamp one end to the bench and use a heat gun to bend and twist the plank with your free hand. I’ve noticed that if planks are soaked in water for too long they lose their ability to gently curve from one bulkhead to the next. Instead they bend at the bulkhead and head straight to the next one. This is of course just my opinion 😀. Good luck with your build!
- 37 replies
-
- 3
-
-
- Model Shipways
- muscongus bay lobster smack
- (and 1 more)
-
Hi Keith, thank you for showing how you bent the transom planking. I would never have thought of bending one length and cutting. I looked at the photo of the long circular bent plank for the longest time before realizing what it was for.😀
-
Thank you very much John. I hope that you had a great holiday!
- 201 replies
-
- 4
-
-
- Oyster Sharpie
- first scratch build
- (and 1 more)
-
Thanks Gary, the Alaskan Cedar is very nice to work with. It will sand to as smooth a finish as you want and it holds a clean edge. Very nice for making small parts and it takes heat bending without breaking as long as you take it slow. All in all I like it a lot. Joe at Modeler’s Sawmill is very good to deal with._
- 201 replies
-
- 5
-
-
-
- Oyster Sharpie
- first scratch build
- (and 1 more)
-
Hi Keith, I’ve come across photos of a few oyster boats ( not sharpies) that have sliding wood panels as opposed to glass windows so I thought that it wouldn’t be too far of a reach for a sharpie to be equipped in a similar manner. The subject kind of reminded me of a book I had read a long time ago. I think it was a Louis L’Amour western where he was talking about buildings in the old west not having glass windows because it was expensive and difficult to get. I always enjoyed his books. Might have to pick another one up someday 😀
- 201 replies
-
- 4
-
-
- Oyster Sharpie
- first scratch build
- (and 1 more)
-
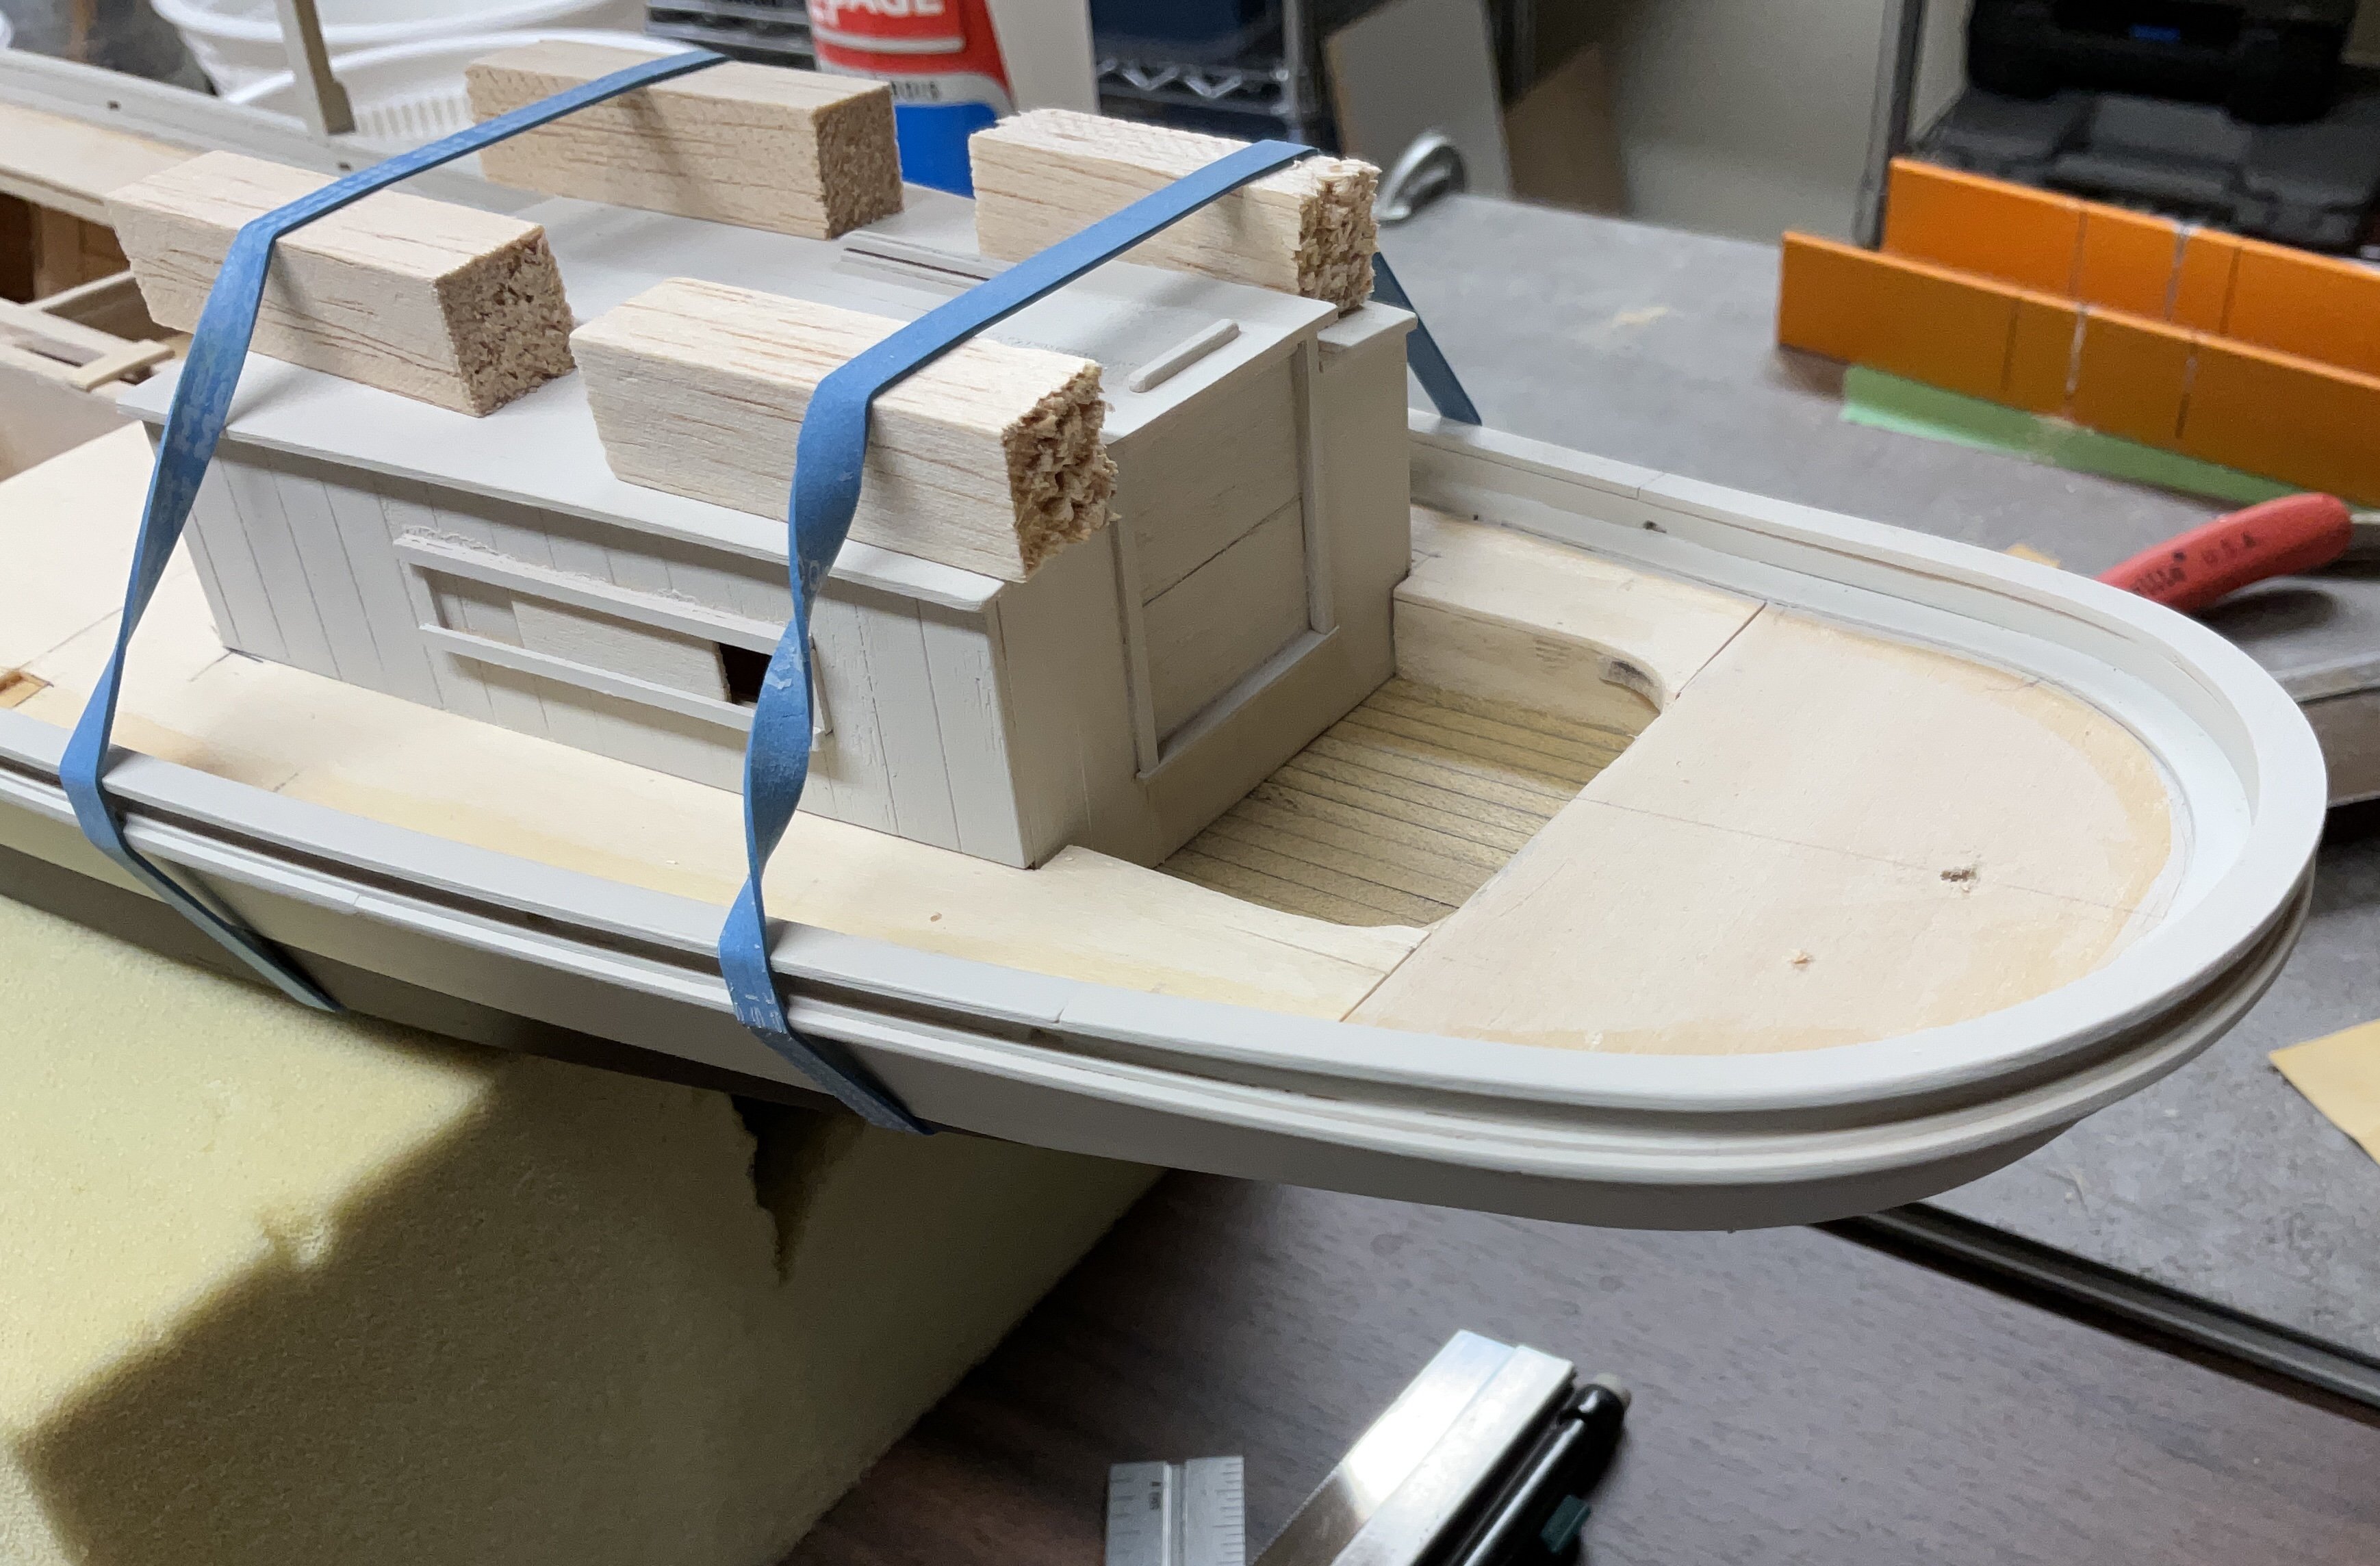
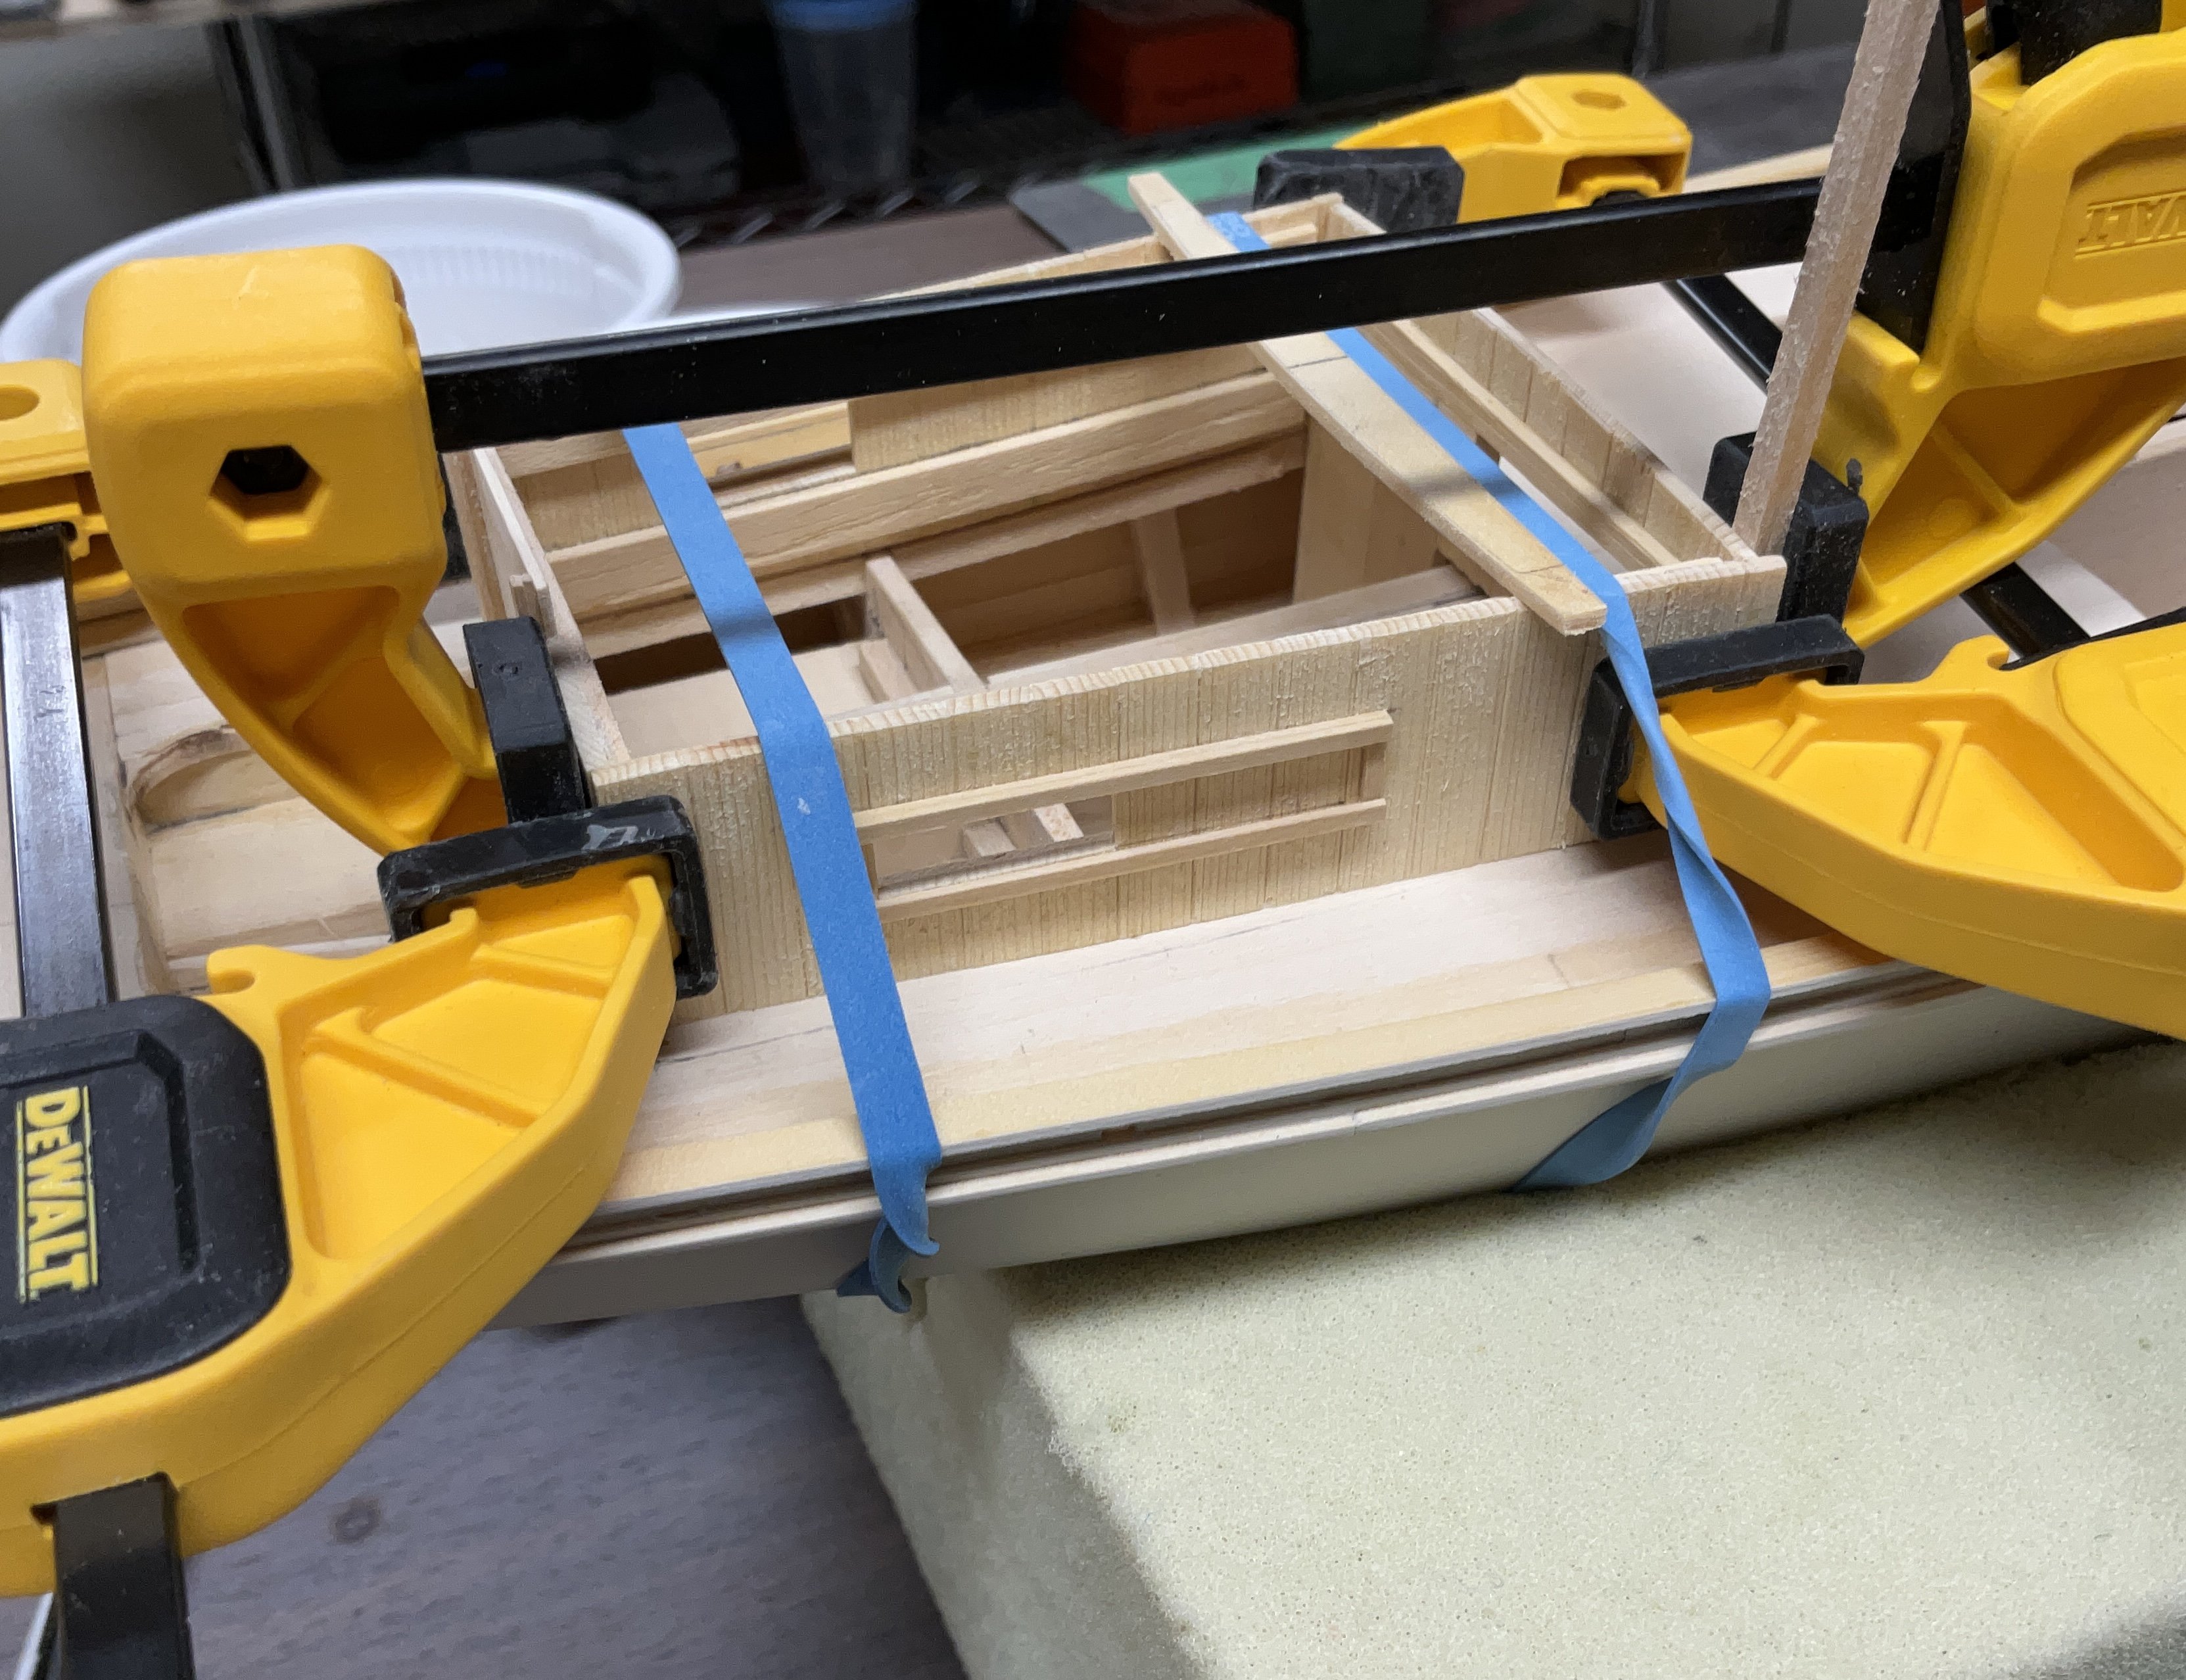
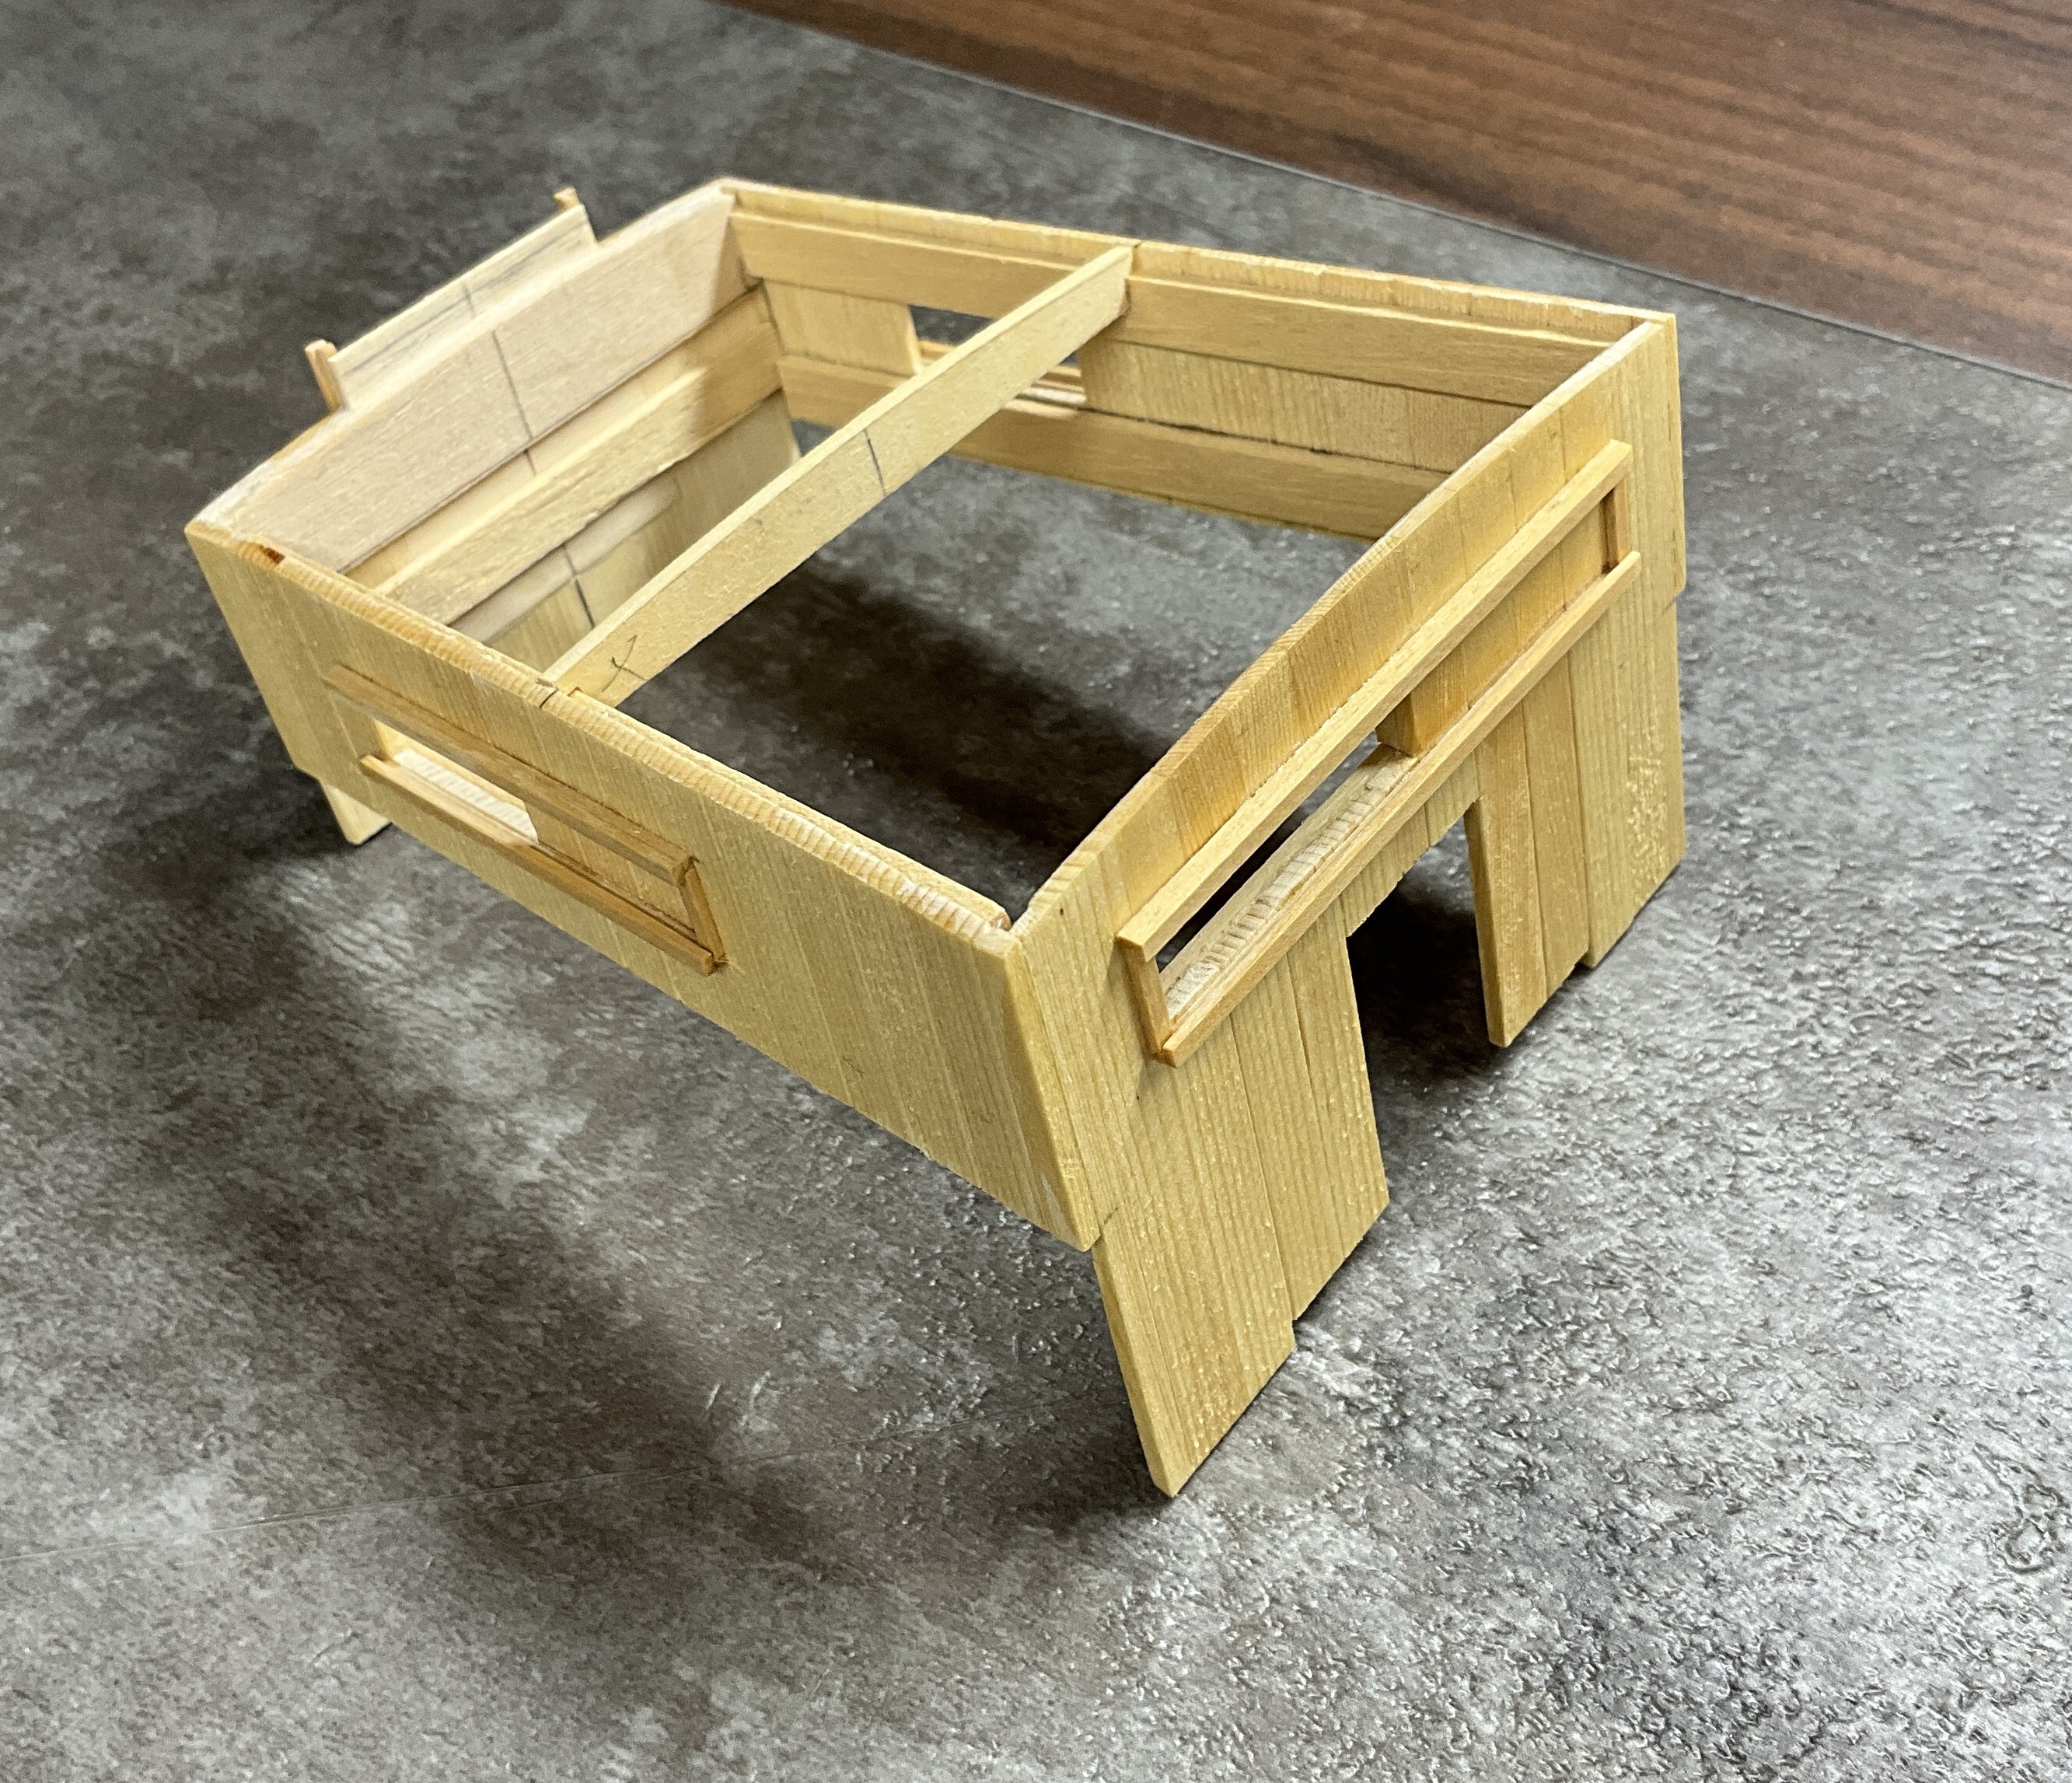
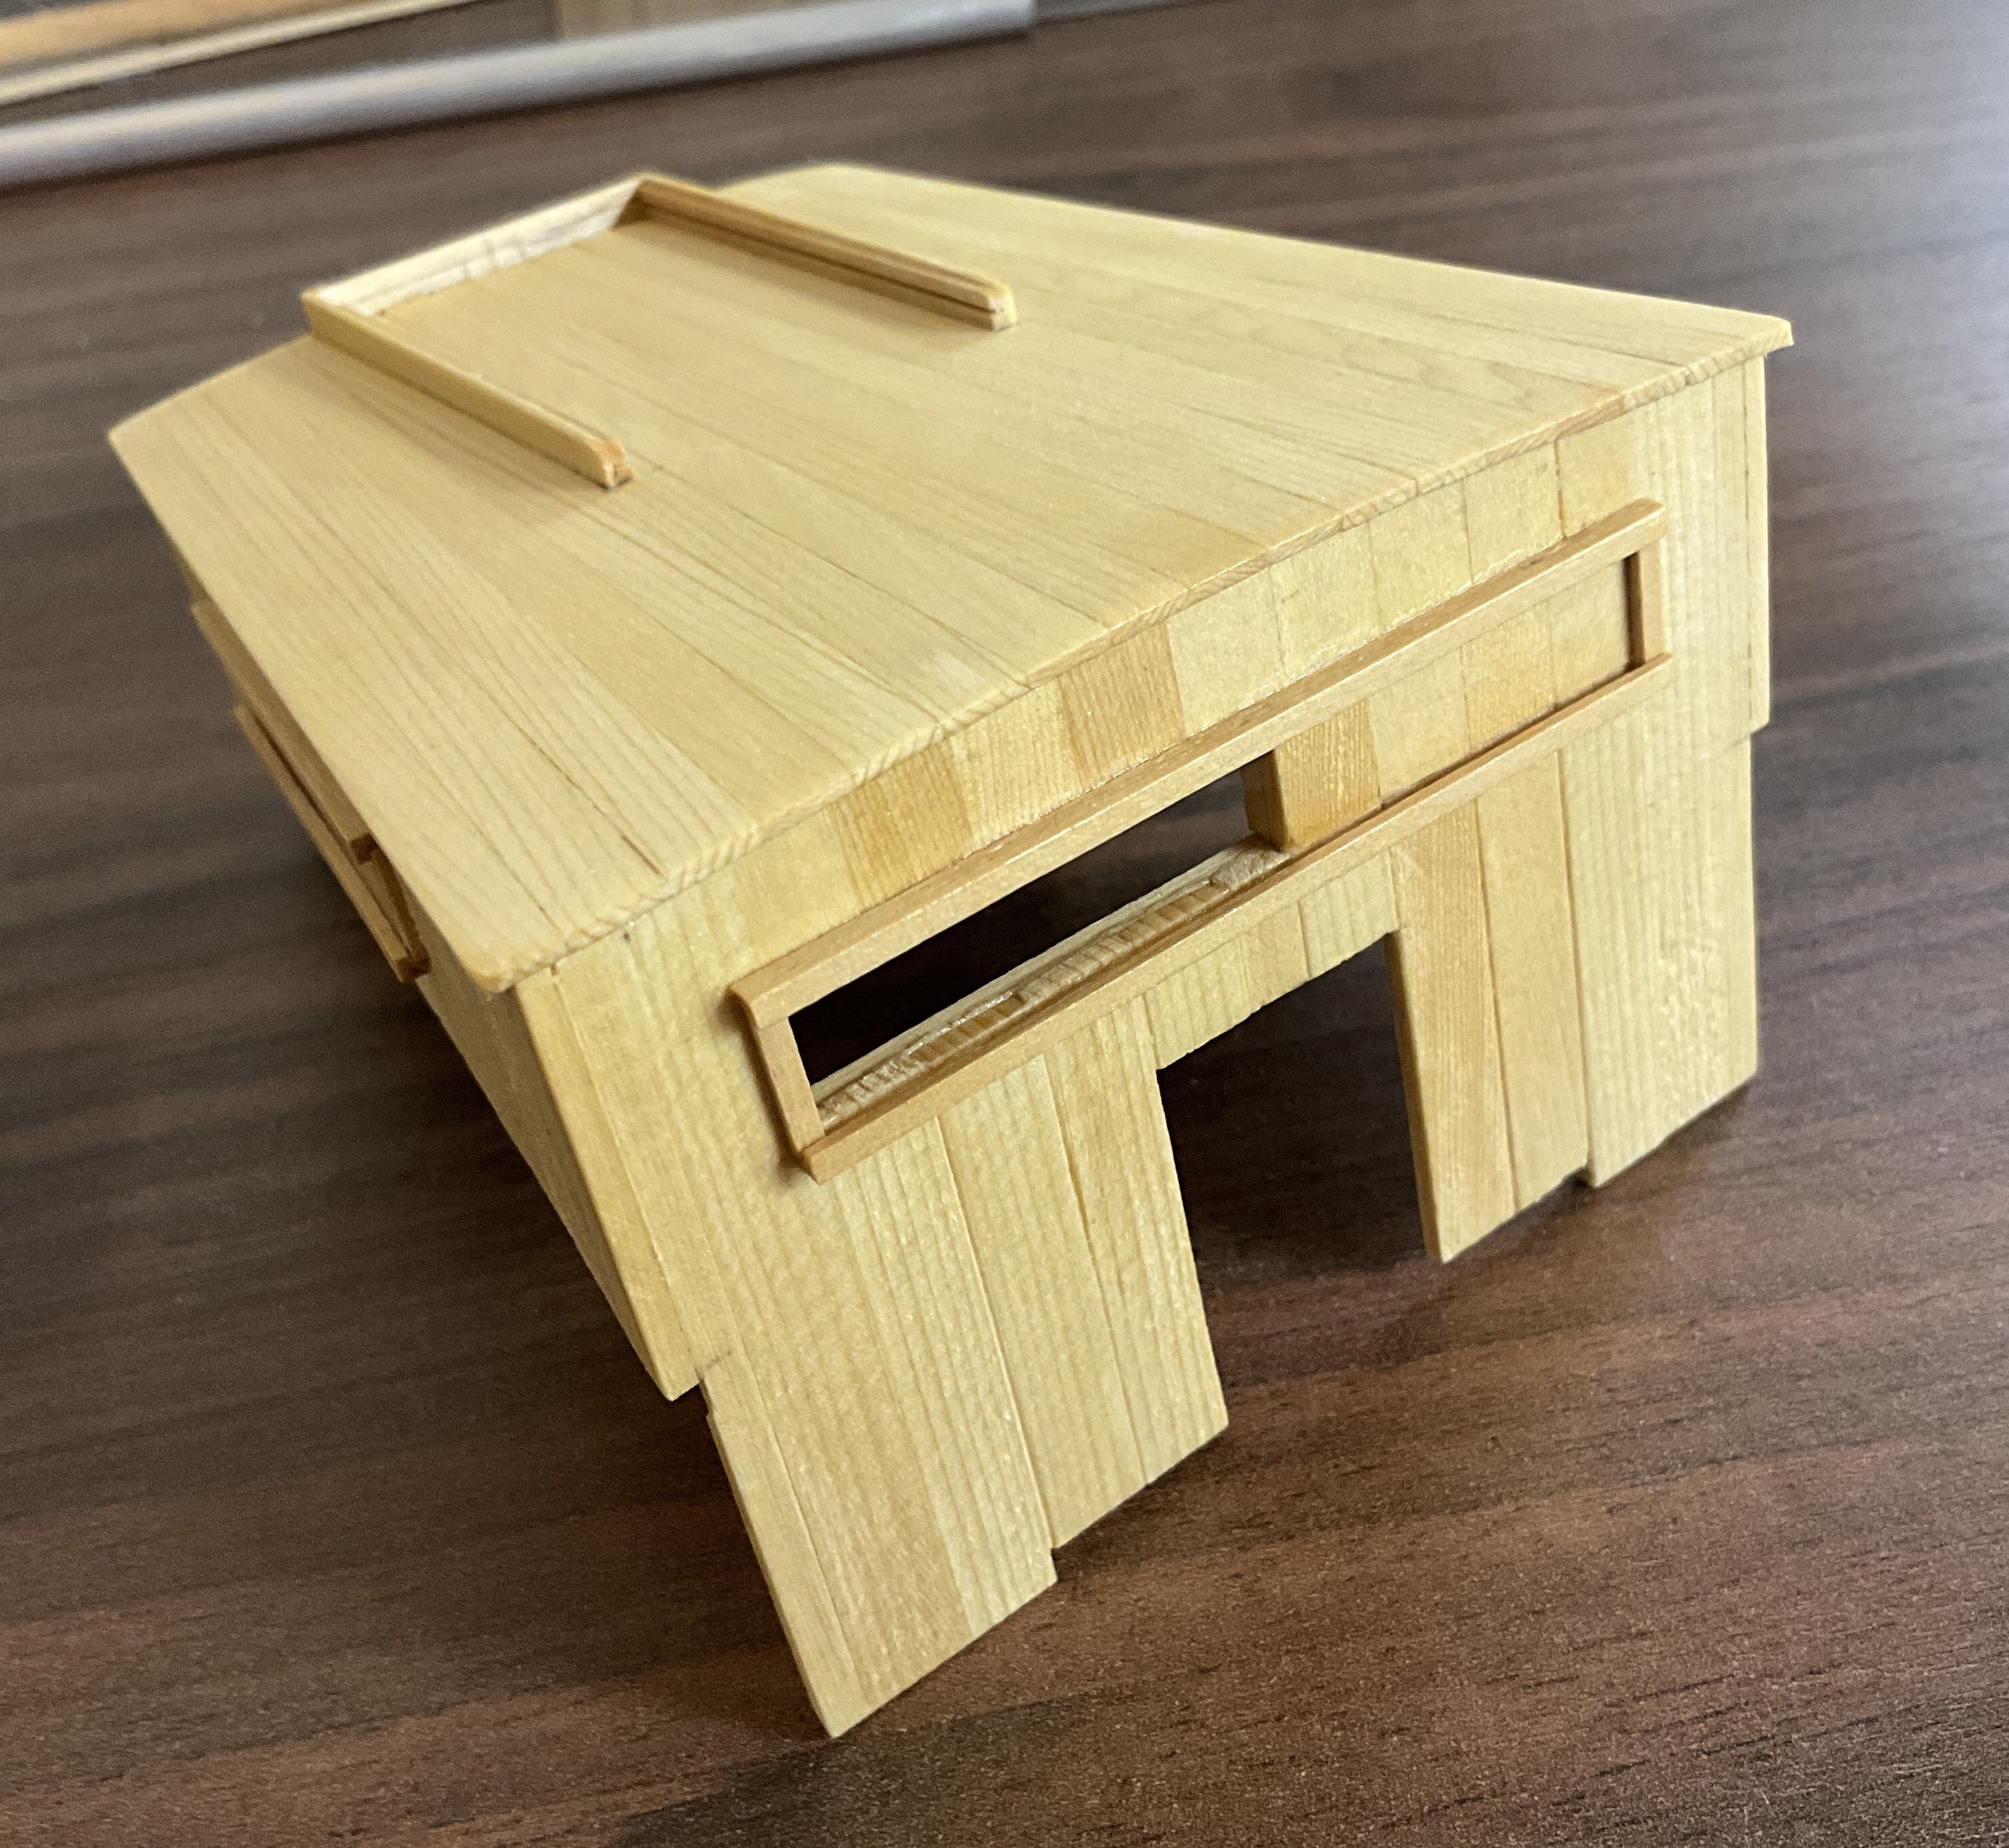
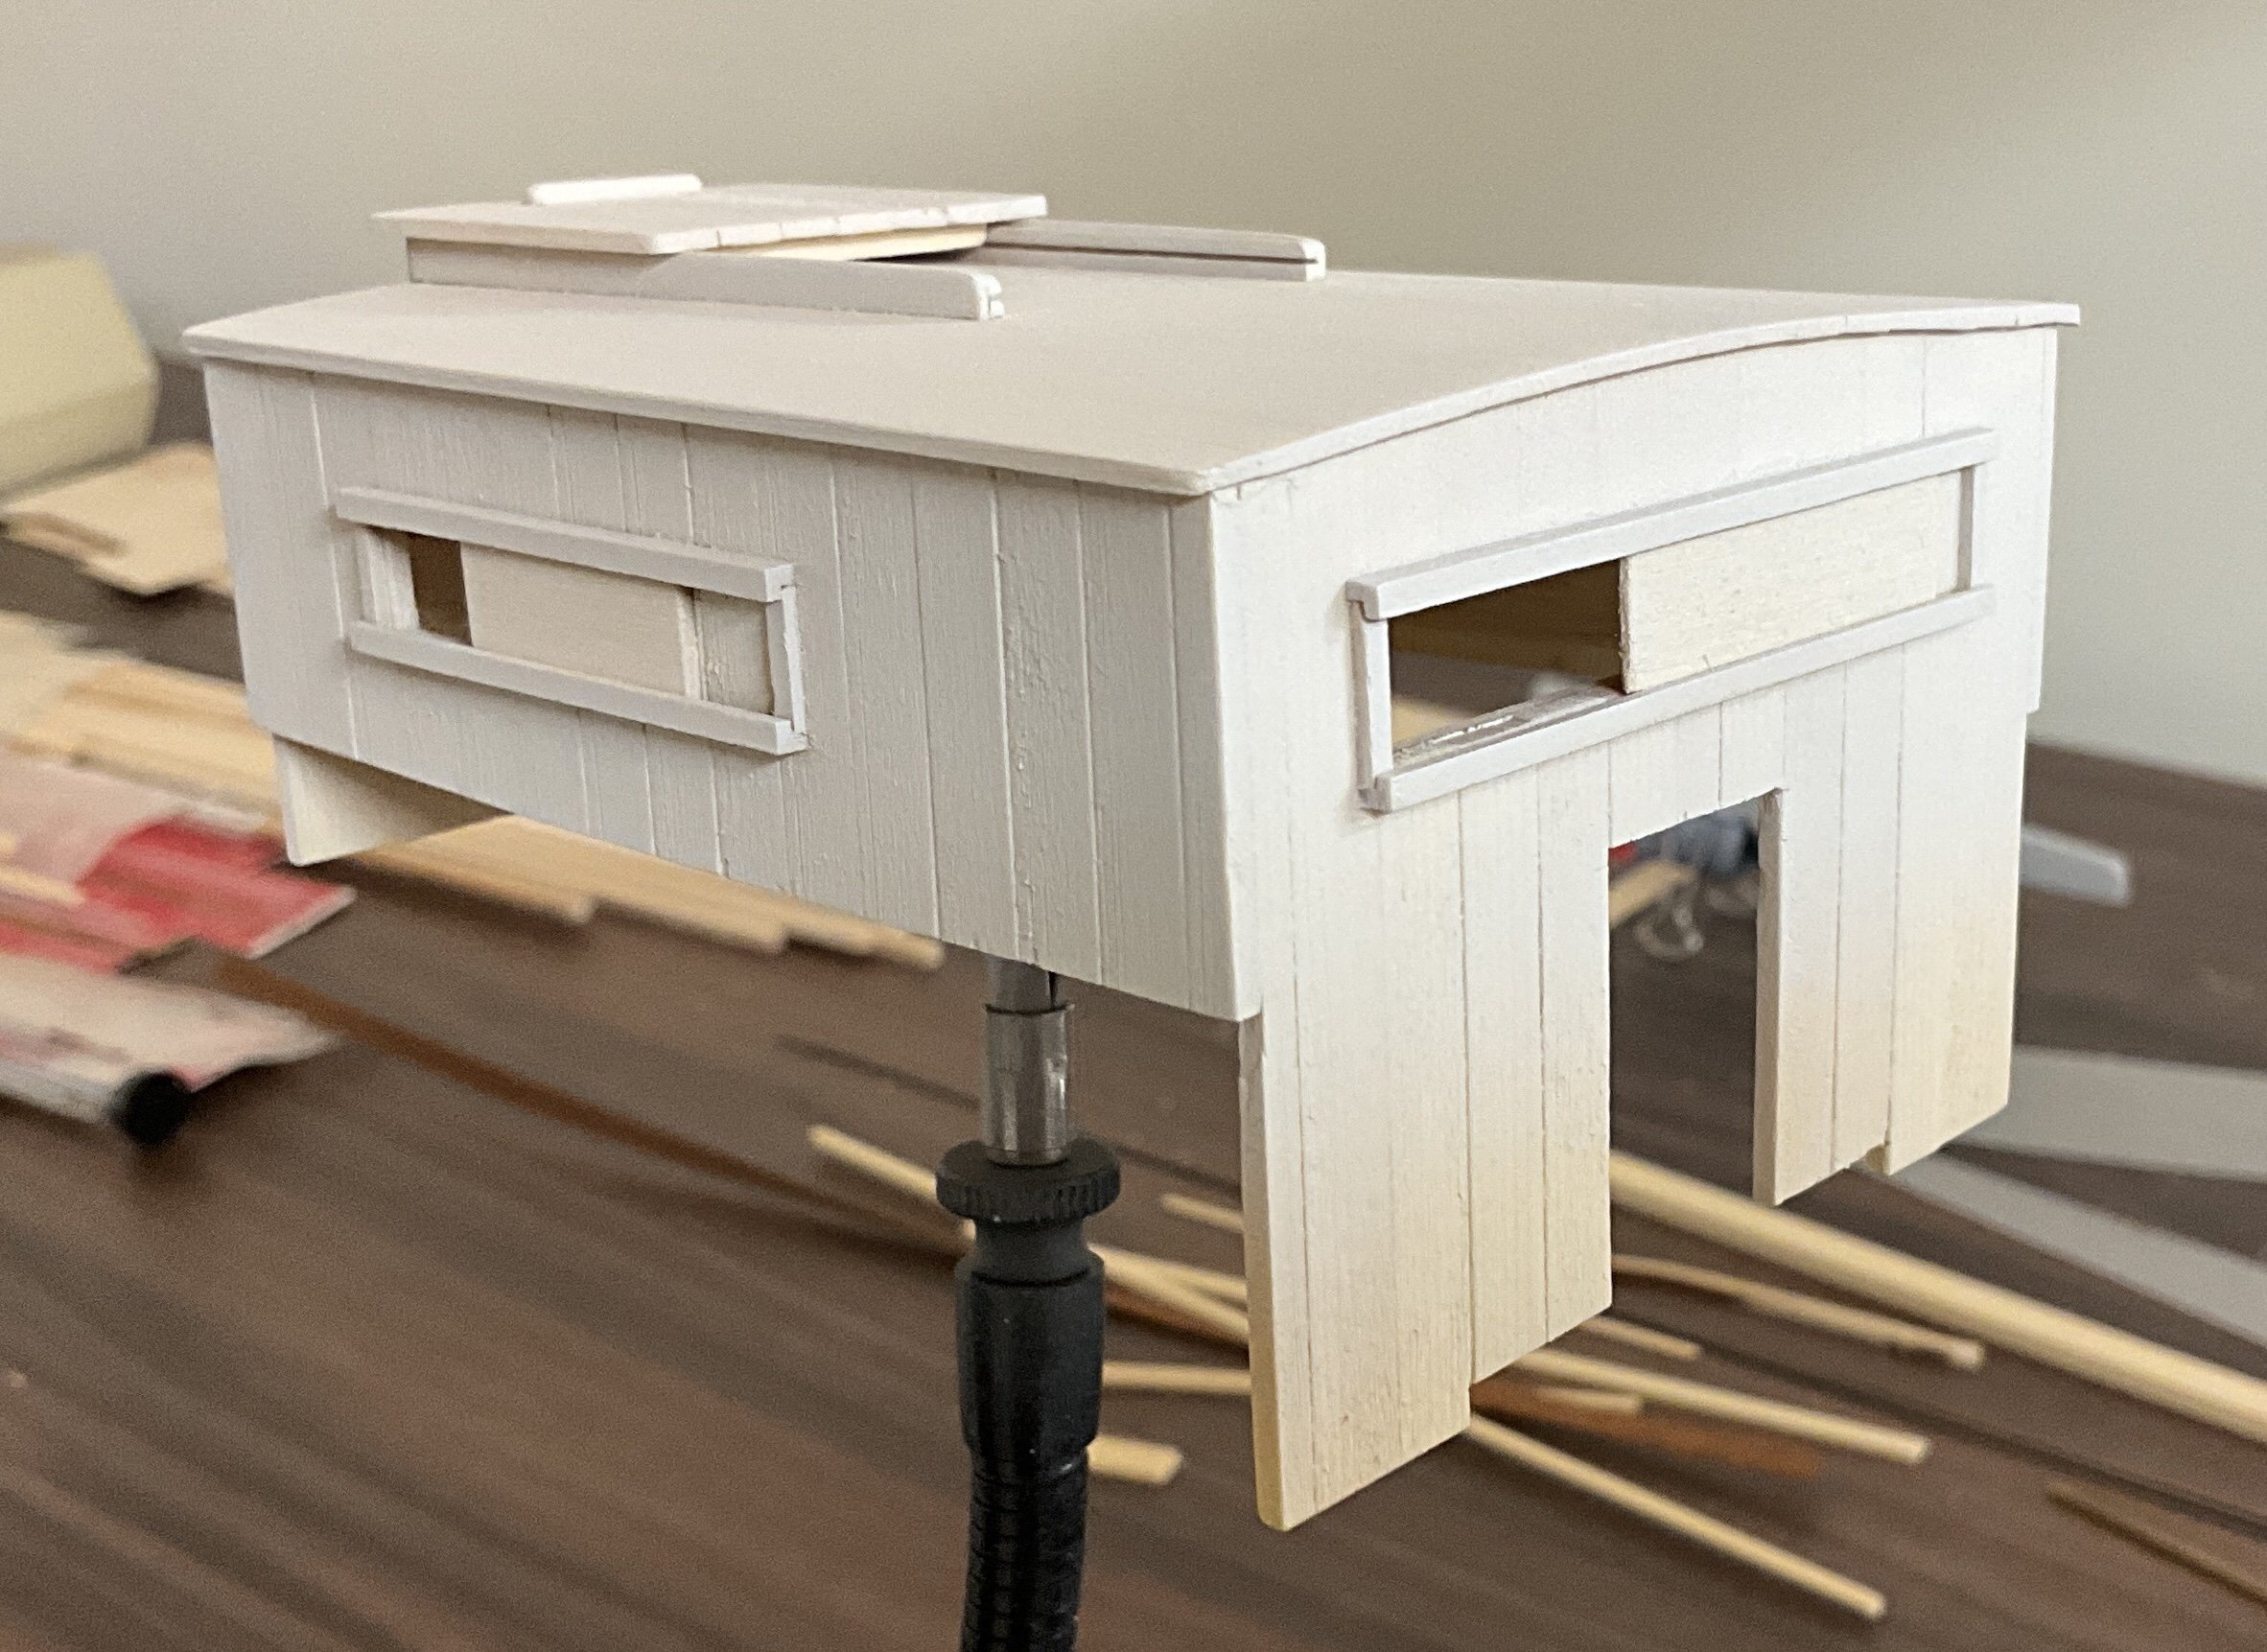
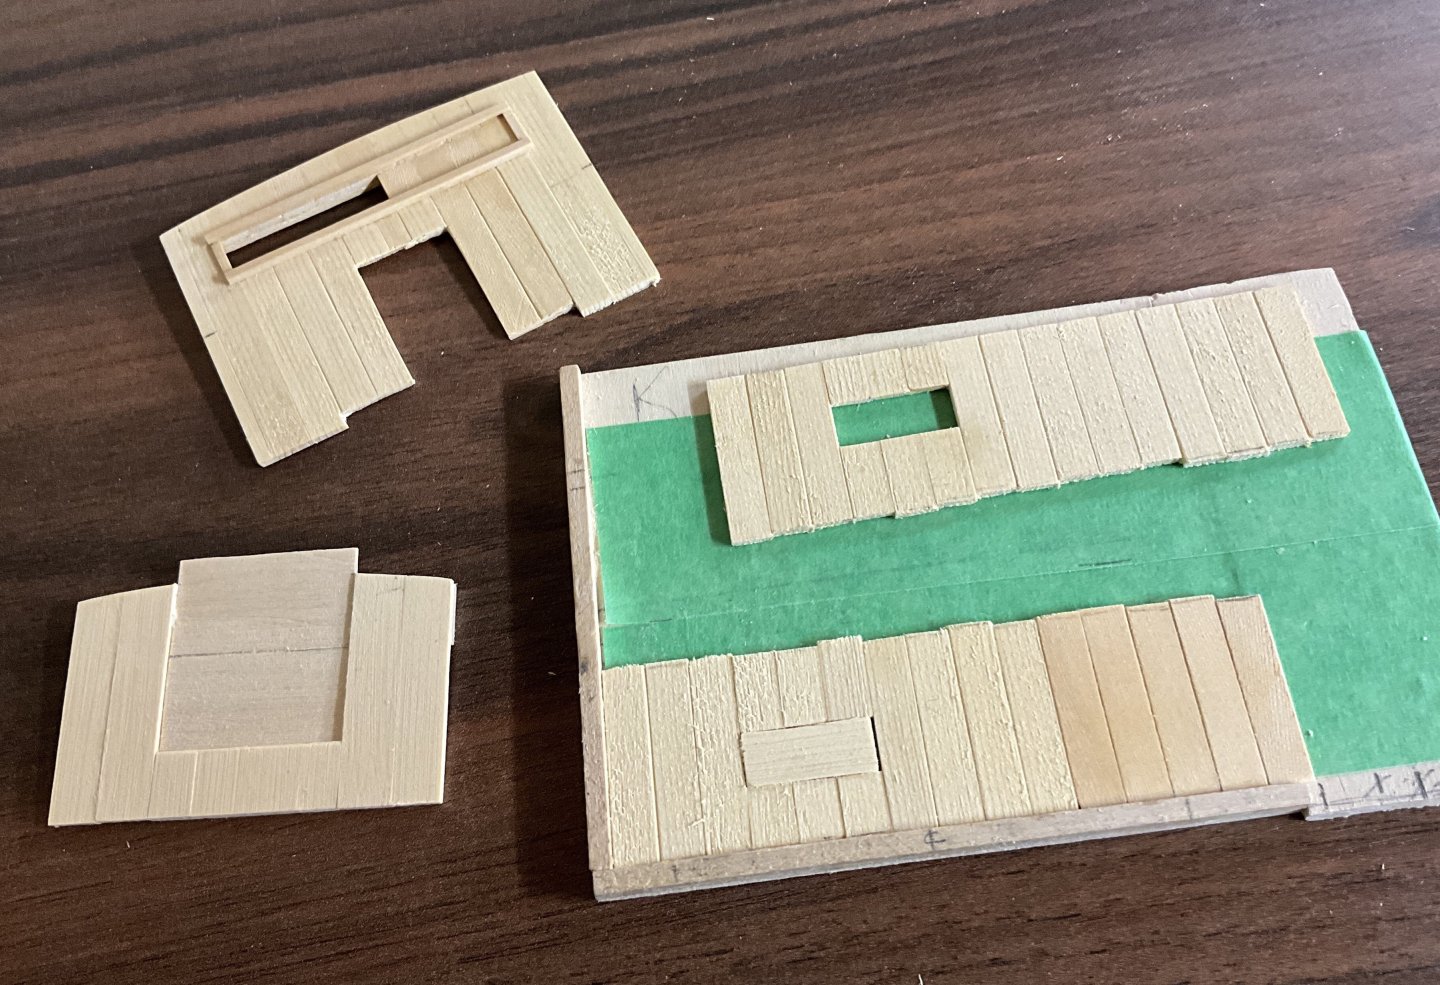
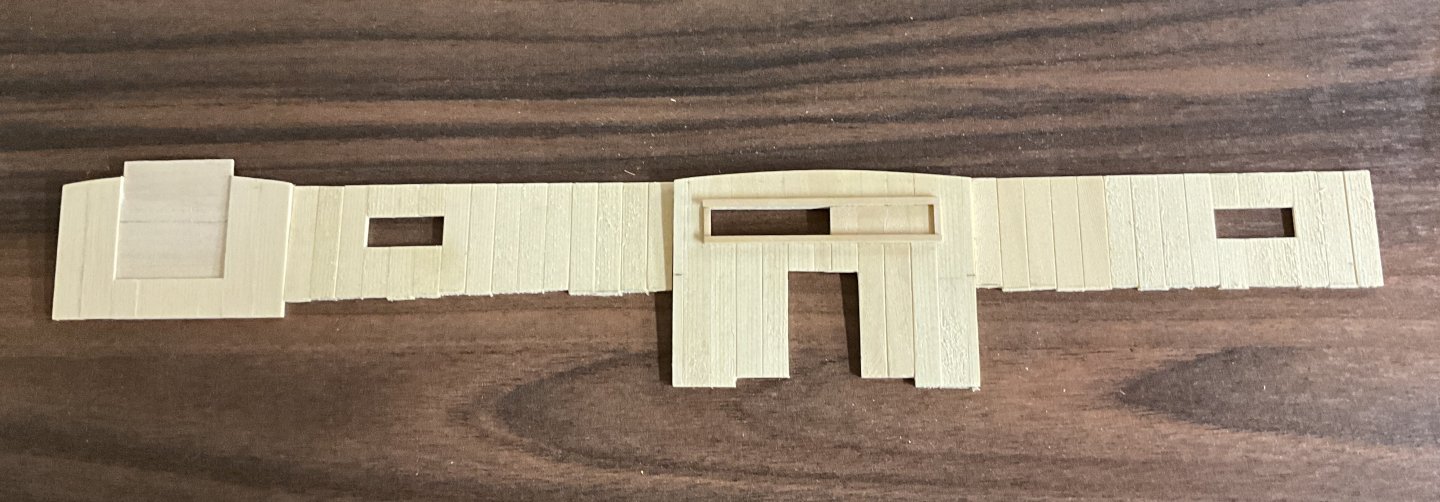
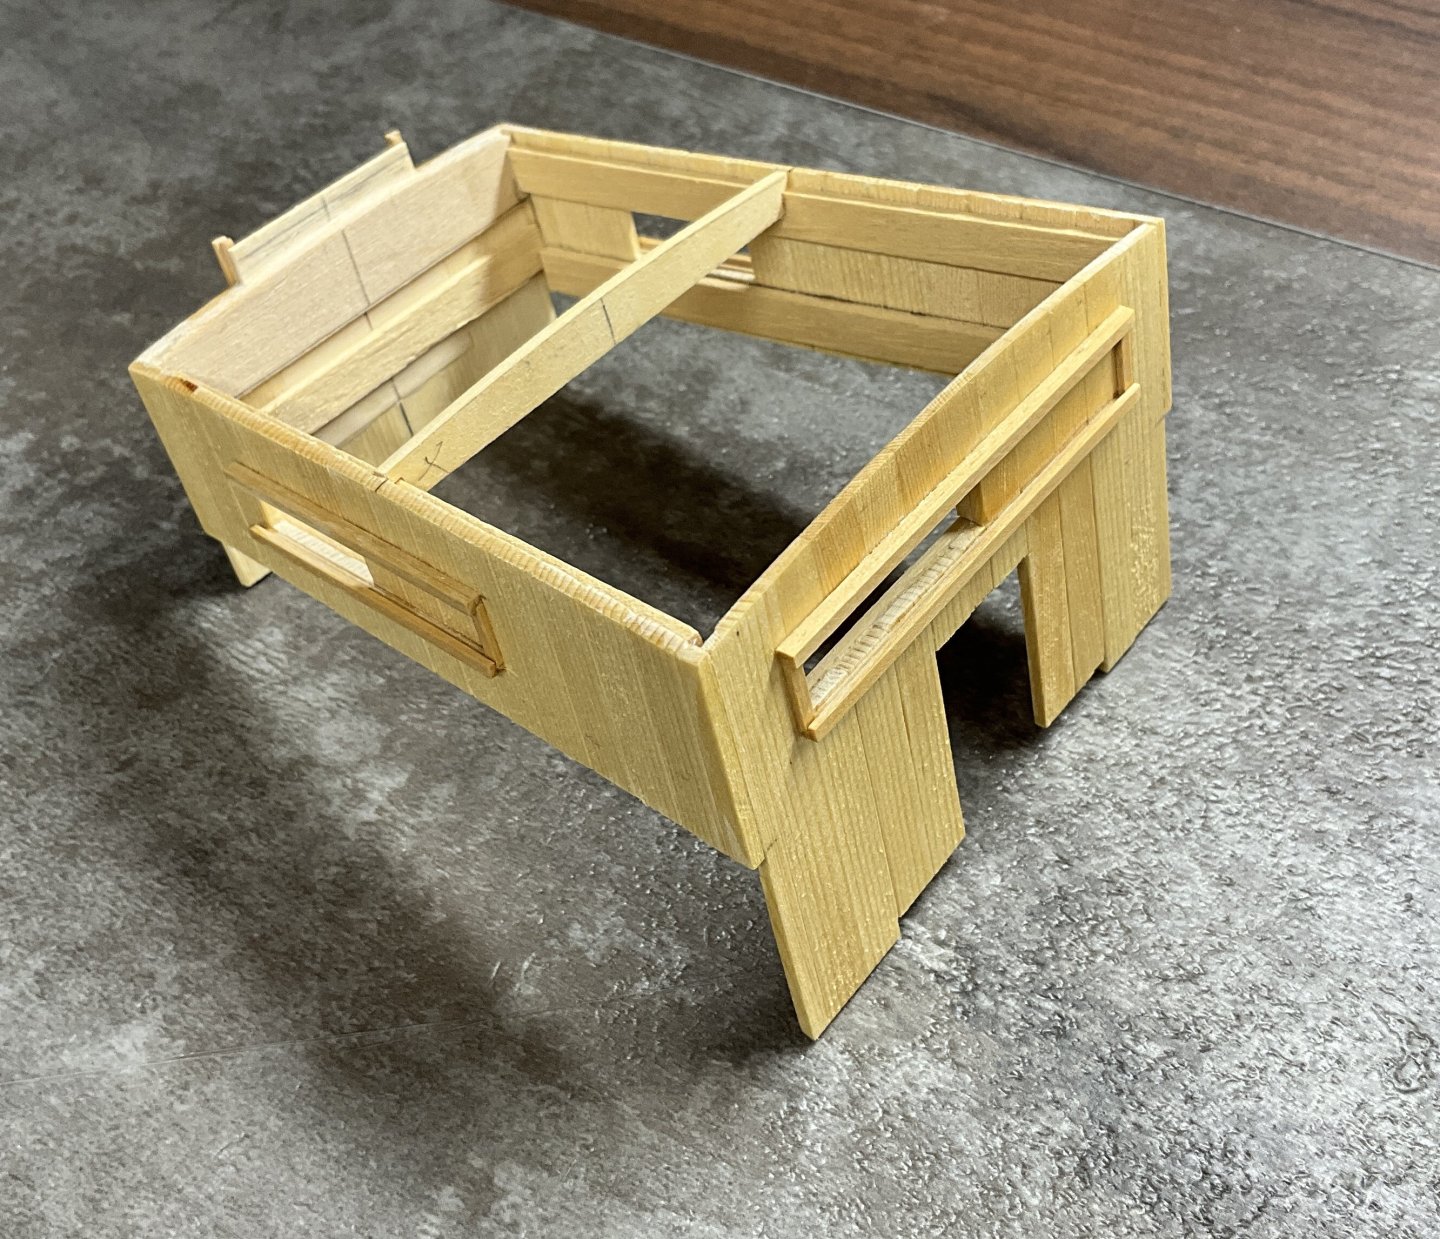
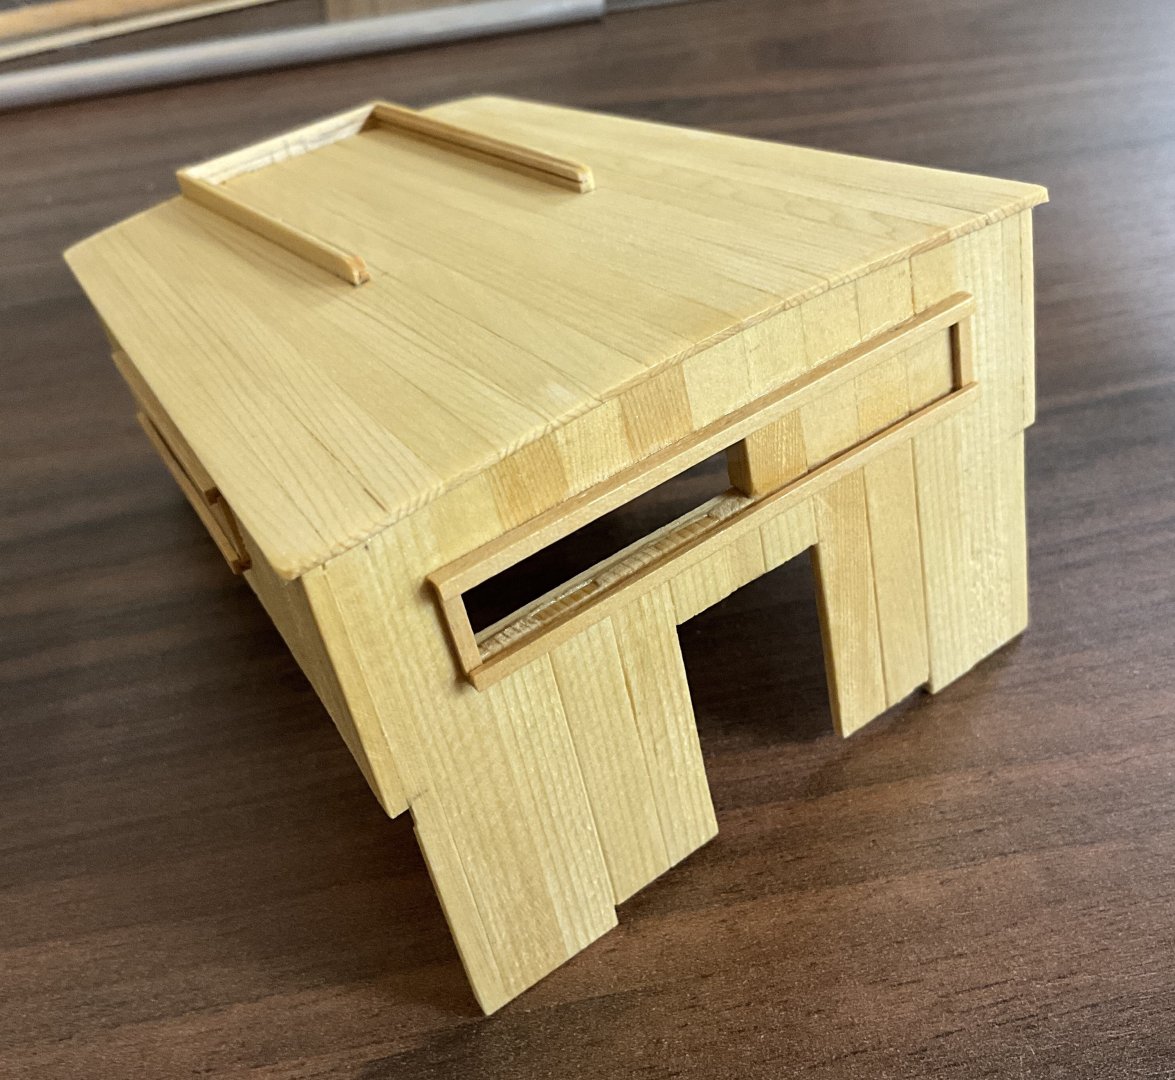
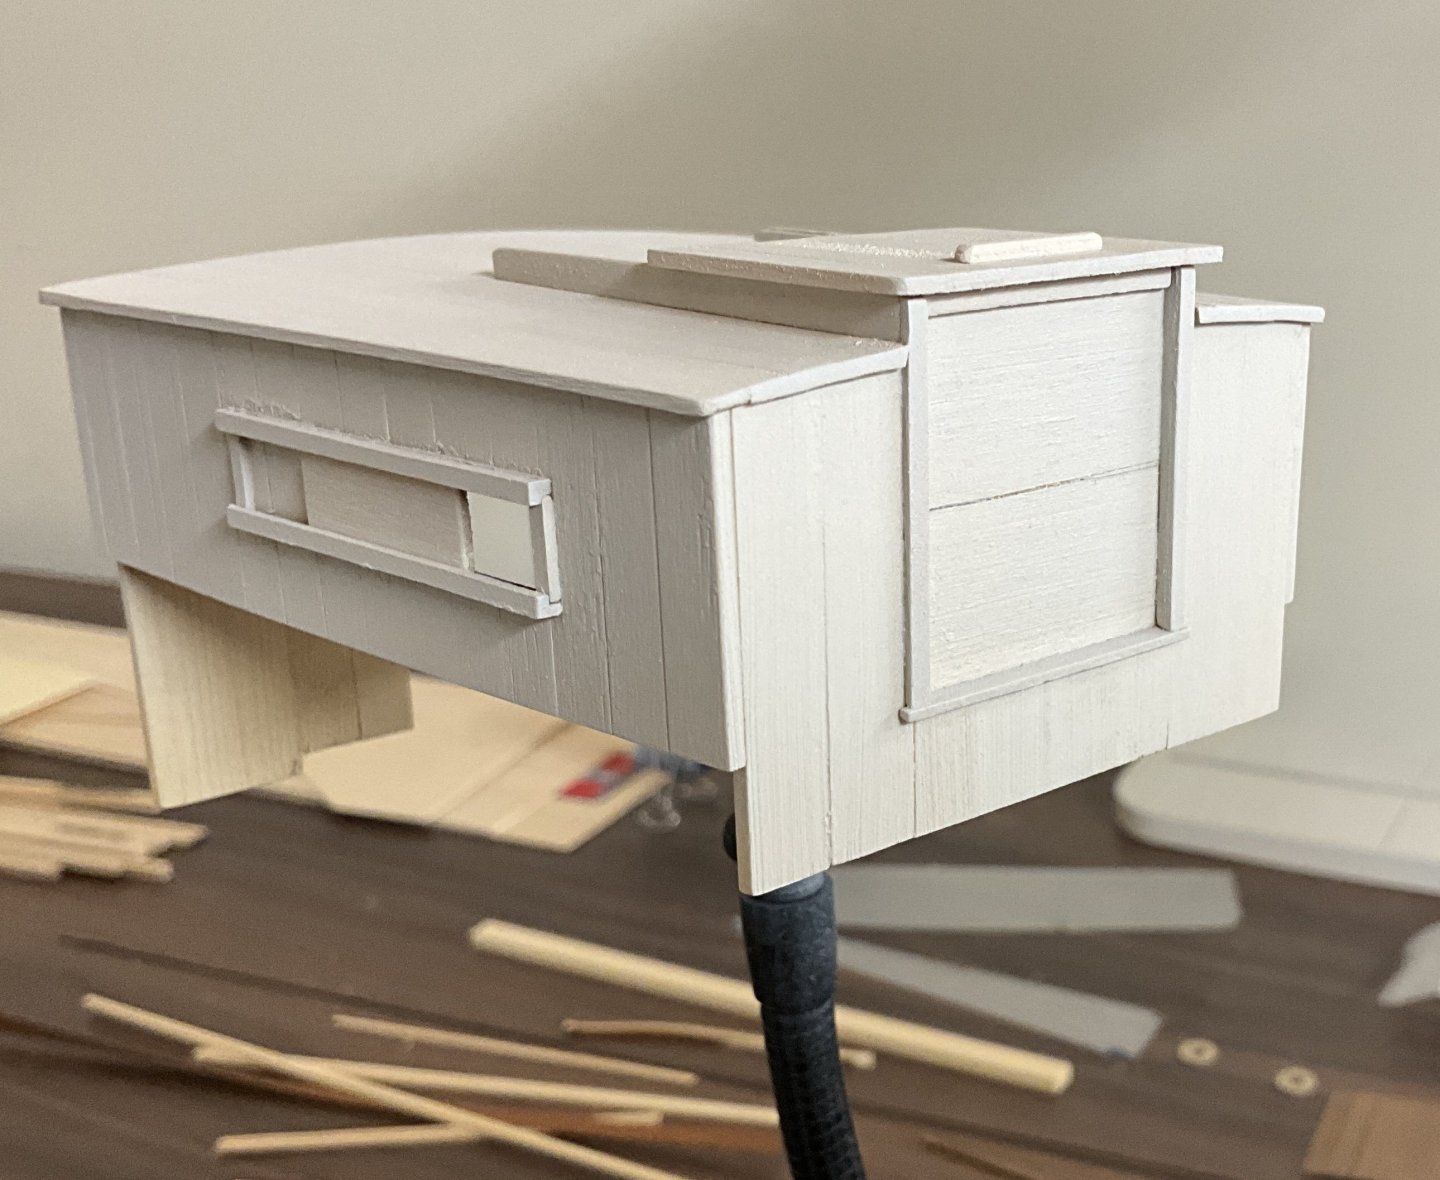
Hi Everyone, thanks to all of you for the generous support. While working on the cap rails and painting the hull I was also working on the cabin. It is just about complete so this update will be about that process. There’s a lot of angles and curves to the cabin. The four sides were made from 1/16” x 1/4” AYC and after a lot of trimming, tweaking and dry fitting they were ready for gluing together. The window frames are made from boxwood strips. A 1/32” x 1/32” strip is glued to the back of the 1/32” x 1/16” strip to create a channel. I found it easier to glue them together while sitting in place. After the glue was dry the cabin was removed. A beam was added to support the 3/64” x 3/16” roof planks and then a coat of clear shellac was applied Sliding wood panels were used in the window frames instead of glass. My story is that some of the builders of these boats couldn’t afford glass. A few coats of paint later is when I noticed that I had forgotten the drainage holes in the sliders. Splash boards were used instead of doors because the cockpit is not that big. Now it’s back to painting the hull. Hope to see you soon!


- 201 replies
-
- 11
-
-
- Oyster Sharpie
- first scratch build
- (and 1 more)
-
Hi Gary, beautifully done. Those 3/4 bow and stern photos are something to behold.
-
Good luck with your San Martin!
-
Hi Mikki, you are off to a great start. I thought I was the only person to have ever owned a Surface 😀
-
Bob, congratulations on finishing your King of the Mississippi ! Beautifully done. Good luck with the Duchess of Kingston.
- 87 replies
-
- 3
-
-
-
- King of the Mississippi
- Artesania Latina
- (and 2 more)
-
Thukydides, congratulations on completing Alert. Beautifully done!
- 562 replies
-
- 3
-
-
-
- vanguard models
- alert
- (and 2 more)
-
Hi tmj, thank you for your kind comment, Welcome to the build log!
- 201 replies
-
- 3
-
-
- Oyster Sharpie
- first scratch build
- (and 1 more)
-
Hi Gary, that you for your comment and thank you Jacques for the original comment. Much appreciated!
- 201 replies
-
- 3
-
-
- Oyster Sharpie
- first scratch build
- (and 1 more)
-
Hi Colin, thank you very much for your comment and for the suggestions. Lots of interesting content there.
- 201 replies
-
- 4
-
-
- Oyster Sharpie
- first scratch build
- (and 1 more)
-
Hi Keith,thank you for your comment. You are very kind. This has been an enjoyable build probably due to its simple lines.
- 201 replies
-
- 4
-
-
- Oyster Sharpie
- first scratch build
- (and 1 more)
-
Eric,congratulations on completing Peerless. Such a fine result. I’m going to miss your updates on this very interesting time and subject. I like the johnboat leaning on its side. More work but hey. Maybe if Peerless is mounted in a diorama the johnboat will be put to work.