Paul Le Wol
-
Posts
1,062 -
Joined
-
Last visited
Content Type
Profiles
Forums
Gallery
Events
Everything posted by Paul Le Wol
-
Hi Chris, what kit and scale is this? I was looking at @ahb26 build log of the Midwest/Model shipways kit and he looks to have used narrower planks in the cockpit.
-
Beautiful work Jeff. Your build log is excellent! Really enjoy reading it.
-
Fine planking Jacques. Looking forward to your finishing updates
- 82 replies
-
- 2
-

-

-
- half hull planking project
- half hull
- (and 2 more)
-
Hi John, what I said to Keith.😀 Thank you!
- 201 replies
-
- 5
-
-
- Oyster Sharpie
- first scratch build
- (and 1 more)
-
Hi Keith, your comments always give me a smile. Thank you.
- 201 replies
-
- 4
-
-
- Oyster Sharpie
- first scratch build
- (and 1 more)
-
Thank you Jacques, I appreciate your comments very much!
- 201 replies
-
- 5
-
-
- Oyster Sharpie
- first scratch build
- (and 1 more)
-
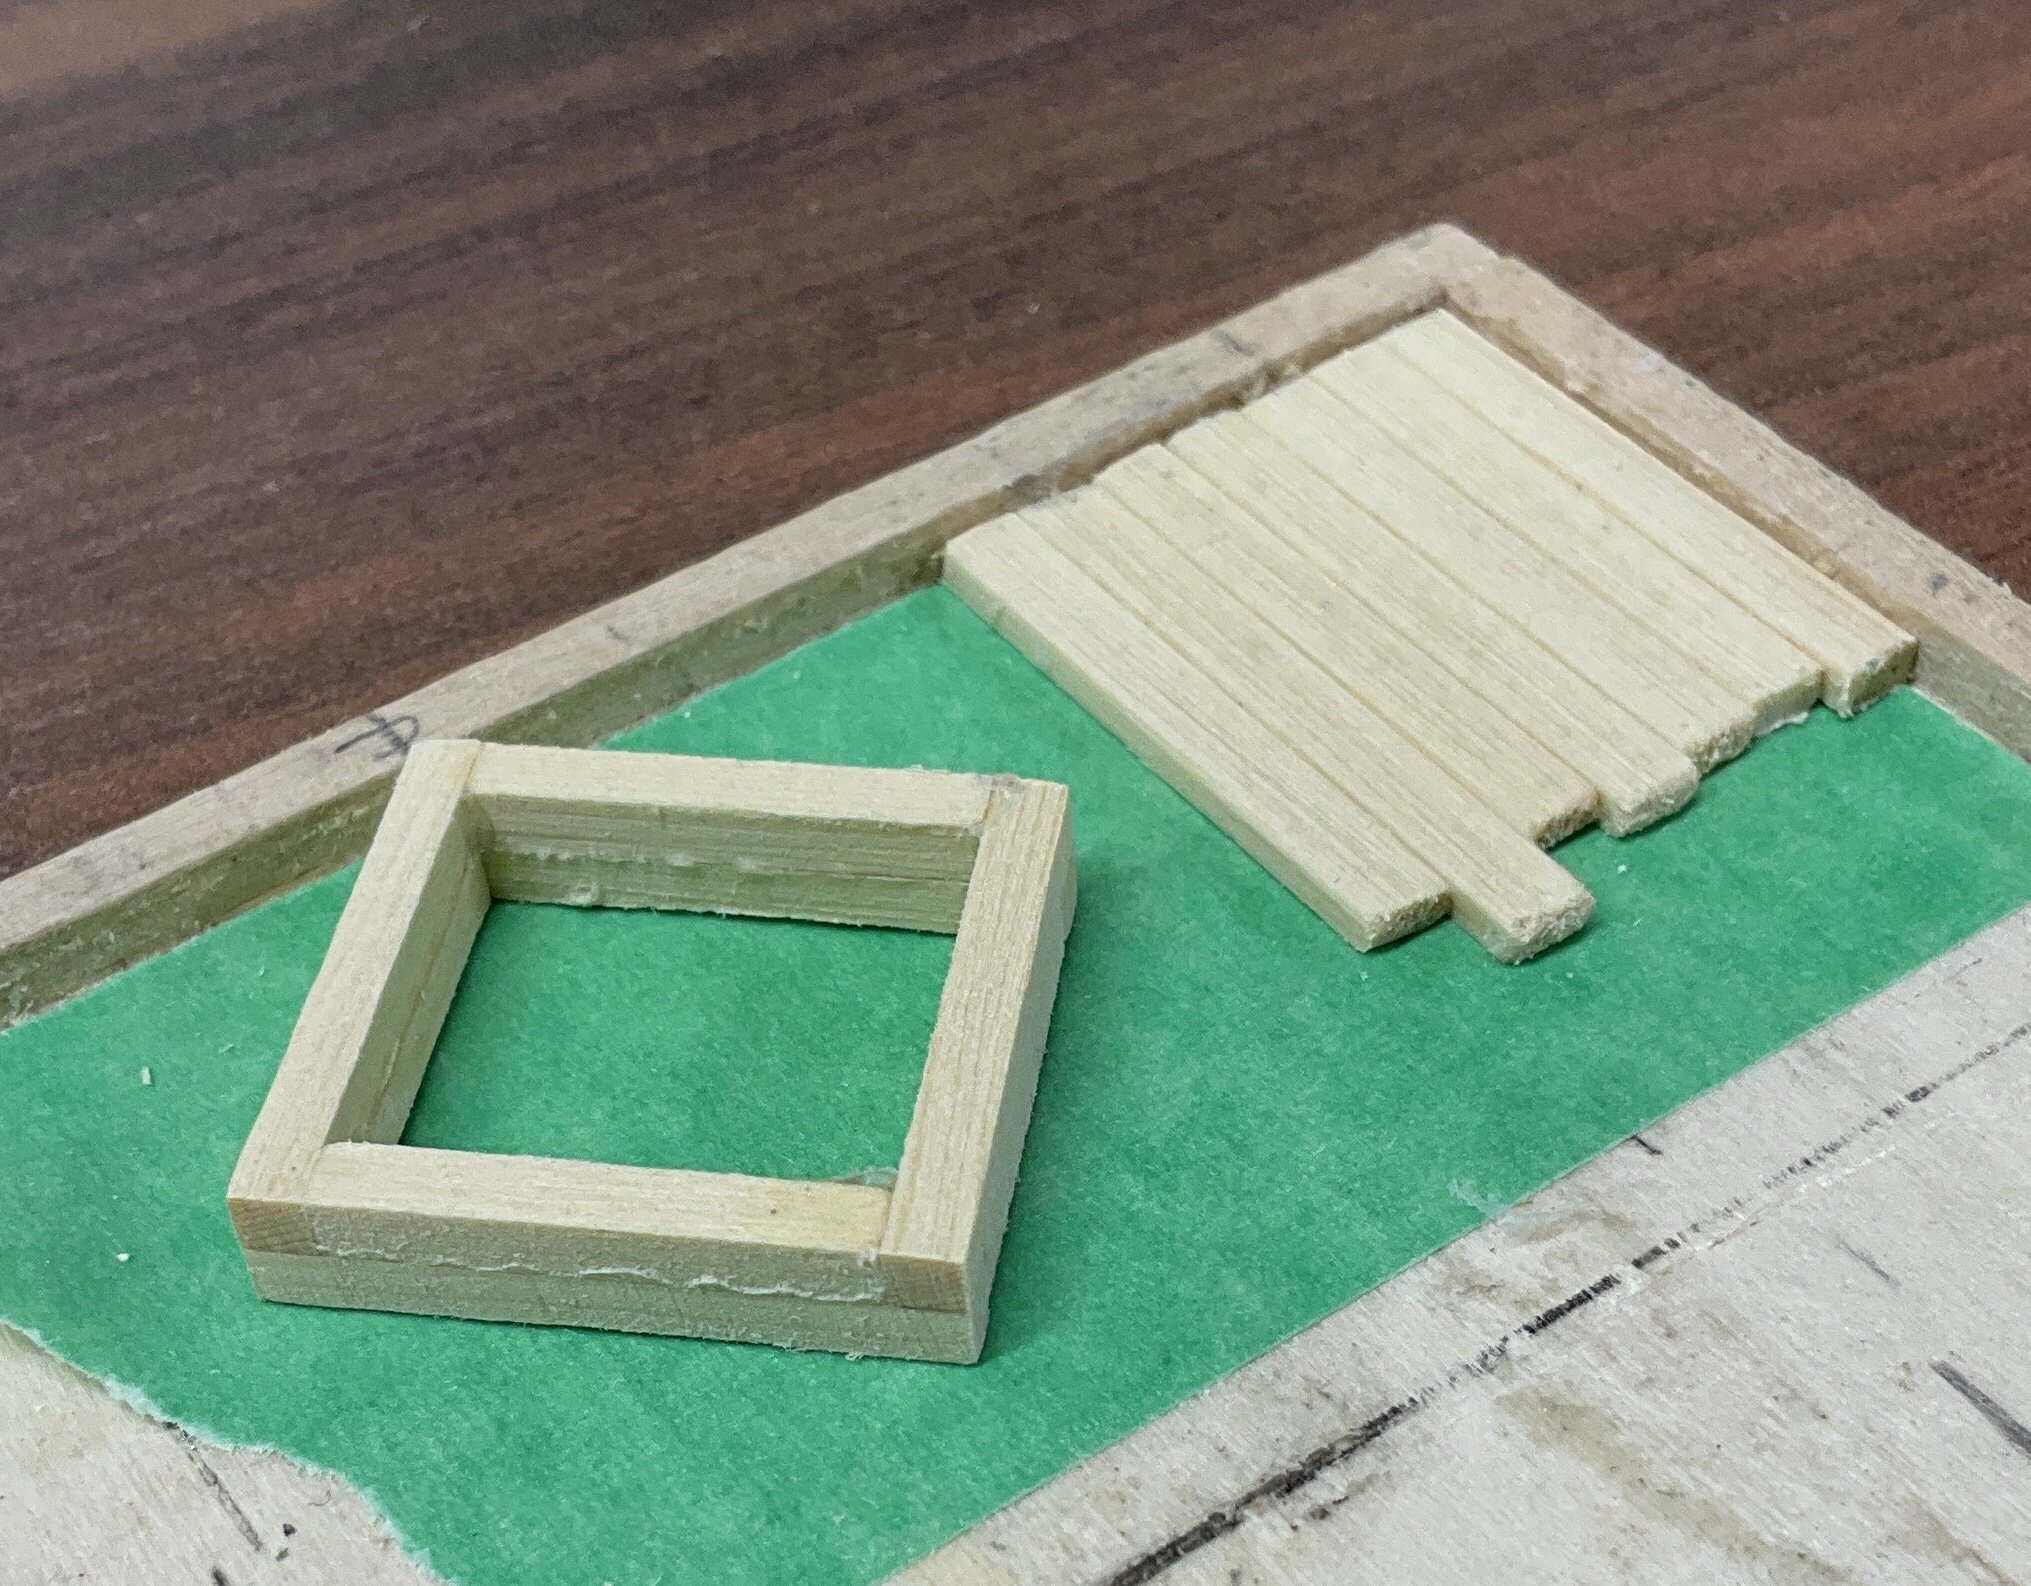
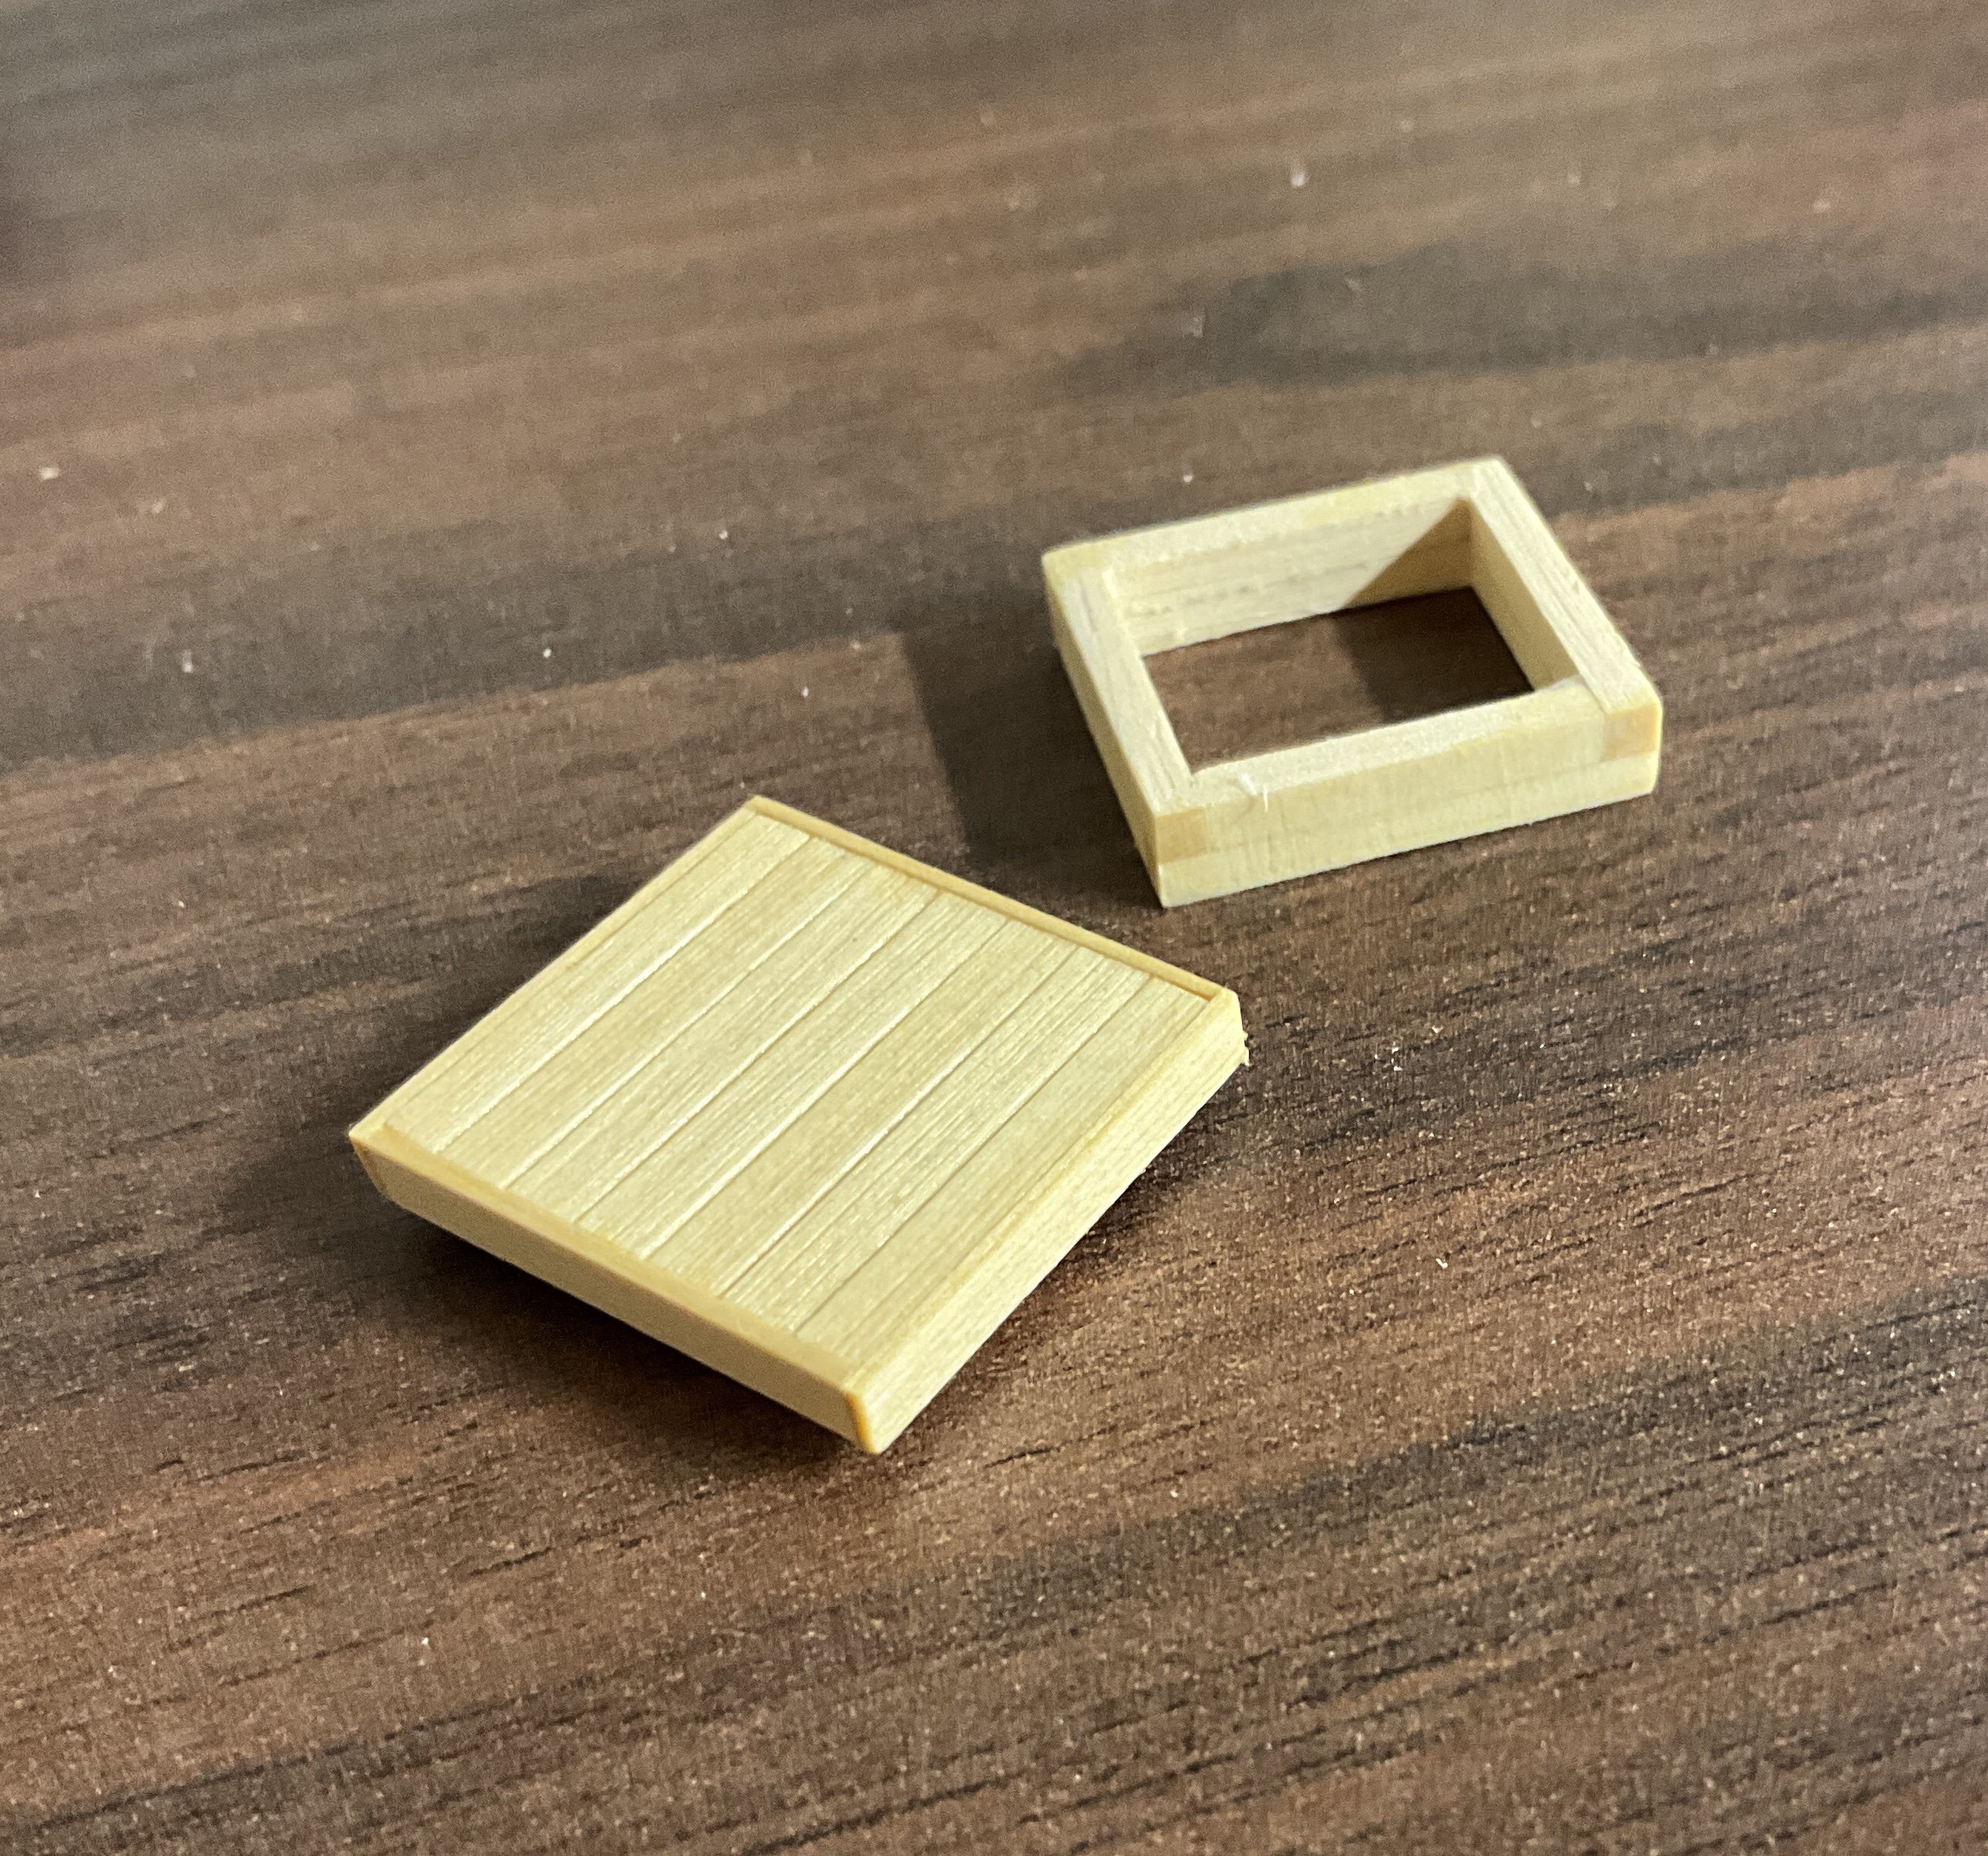
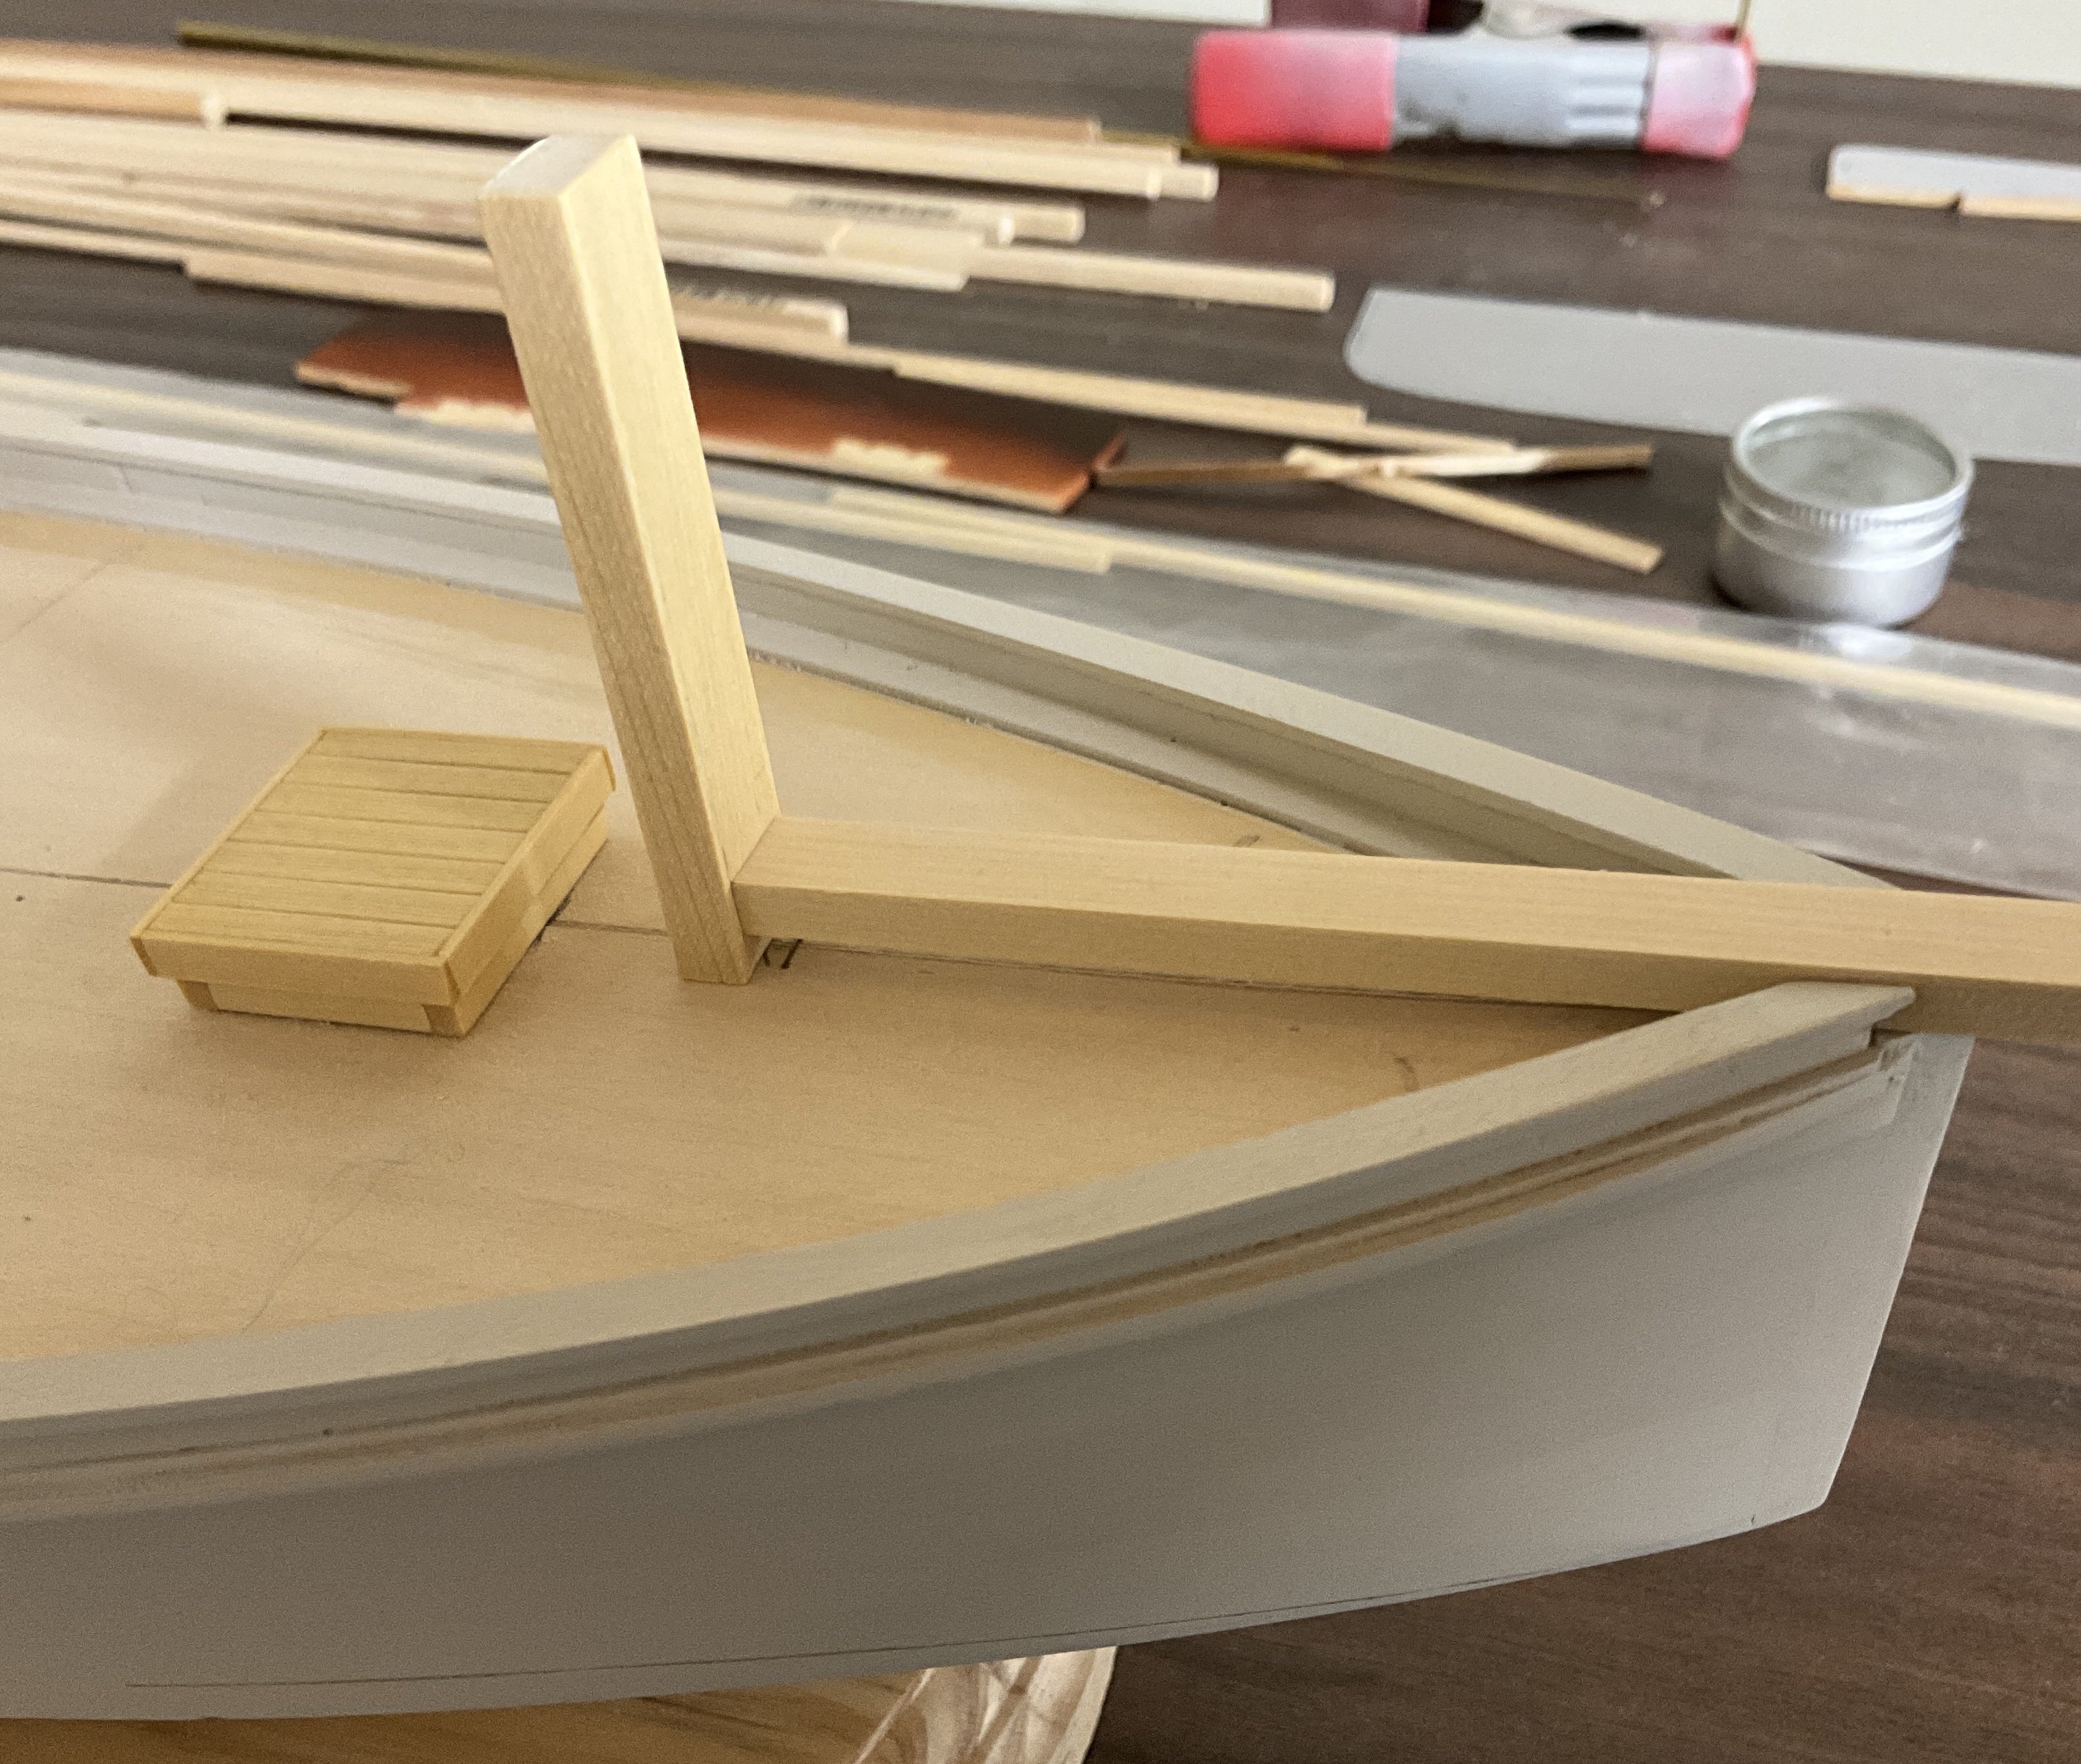
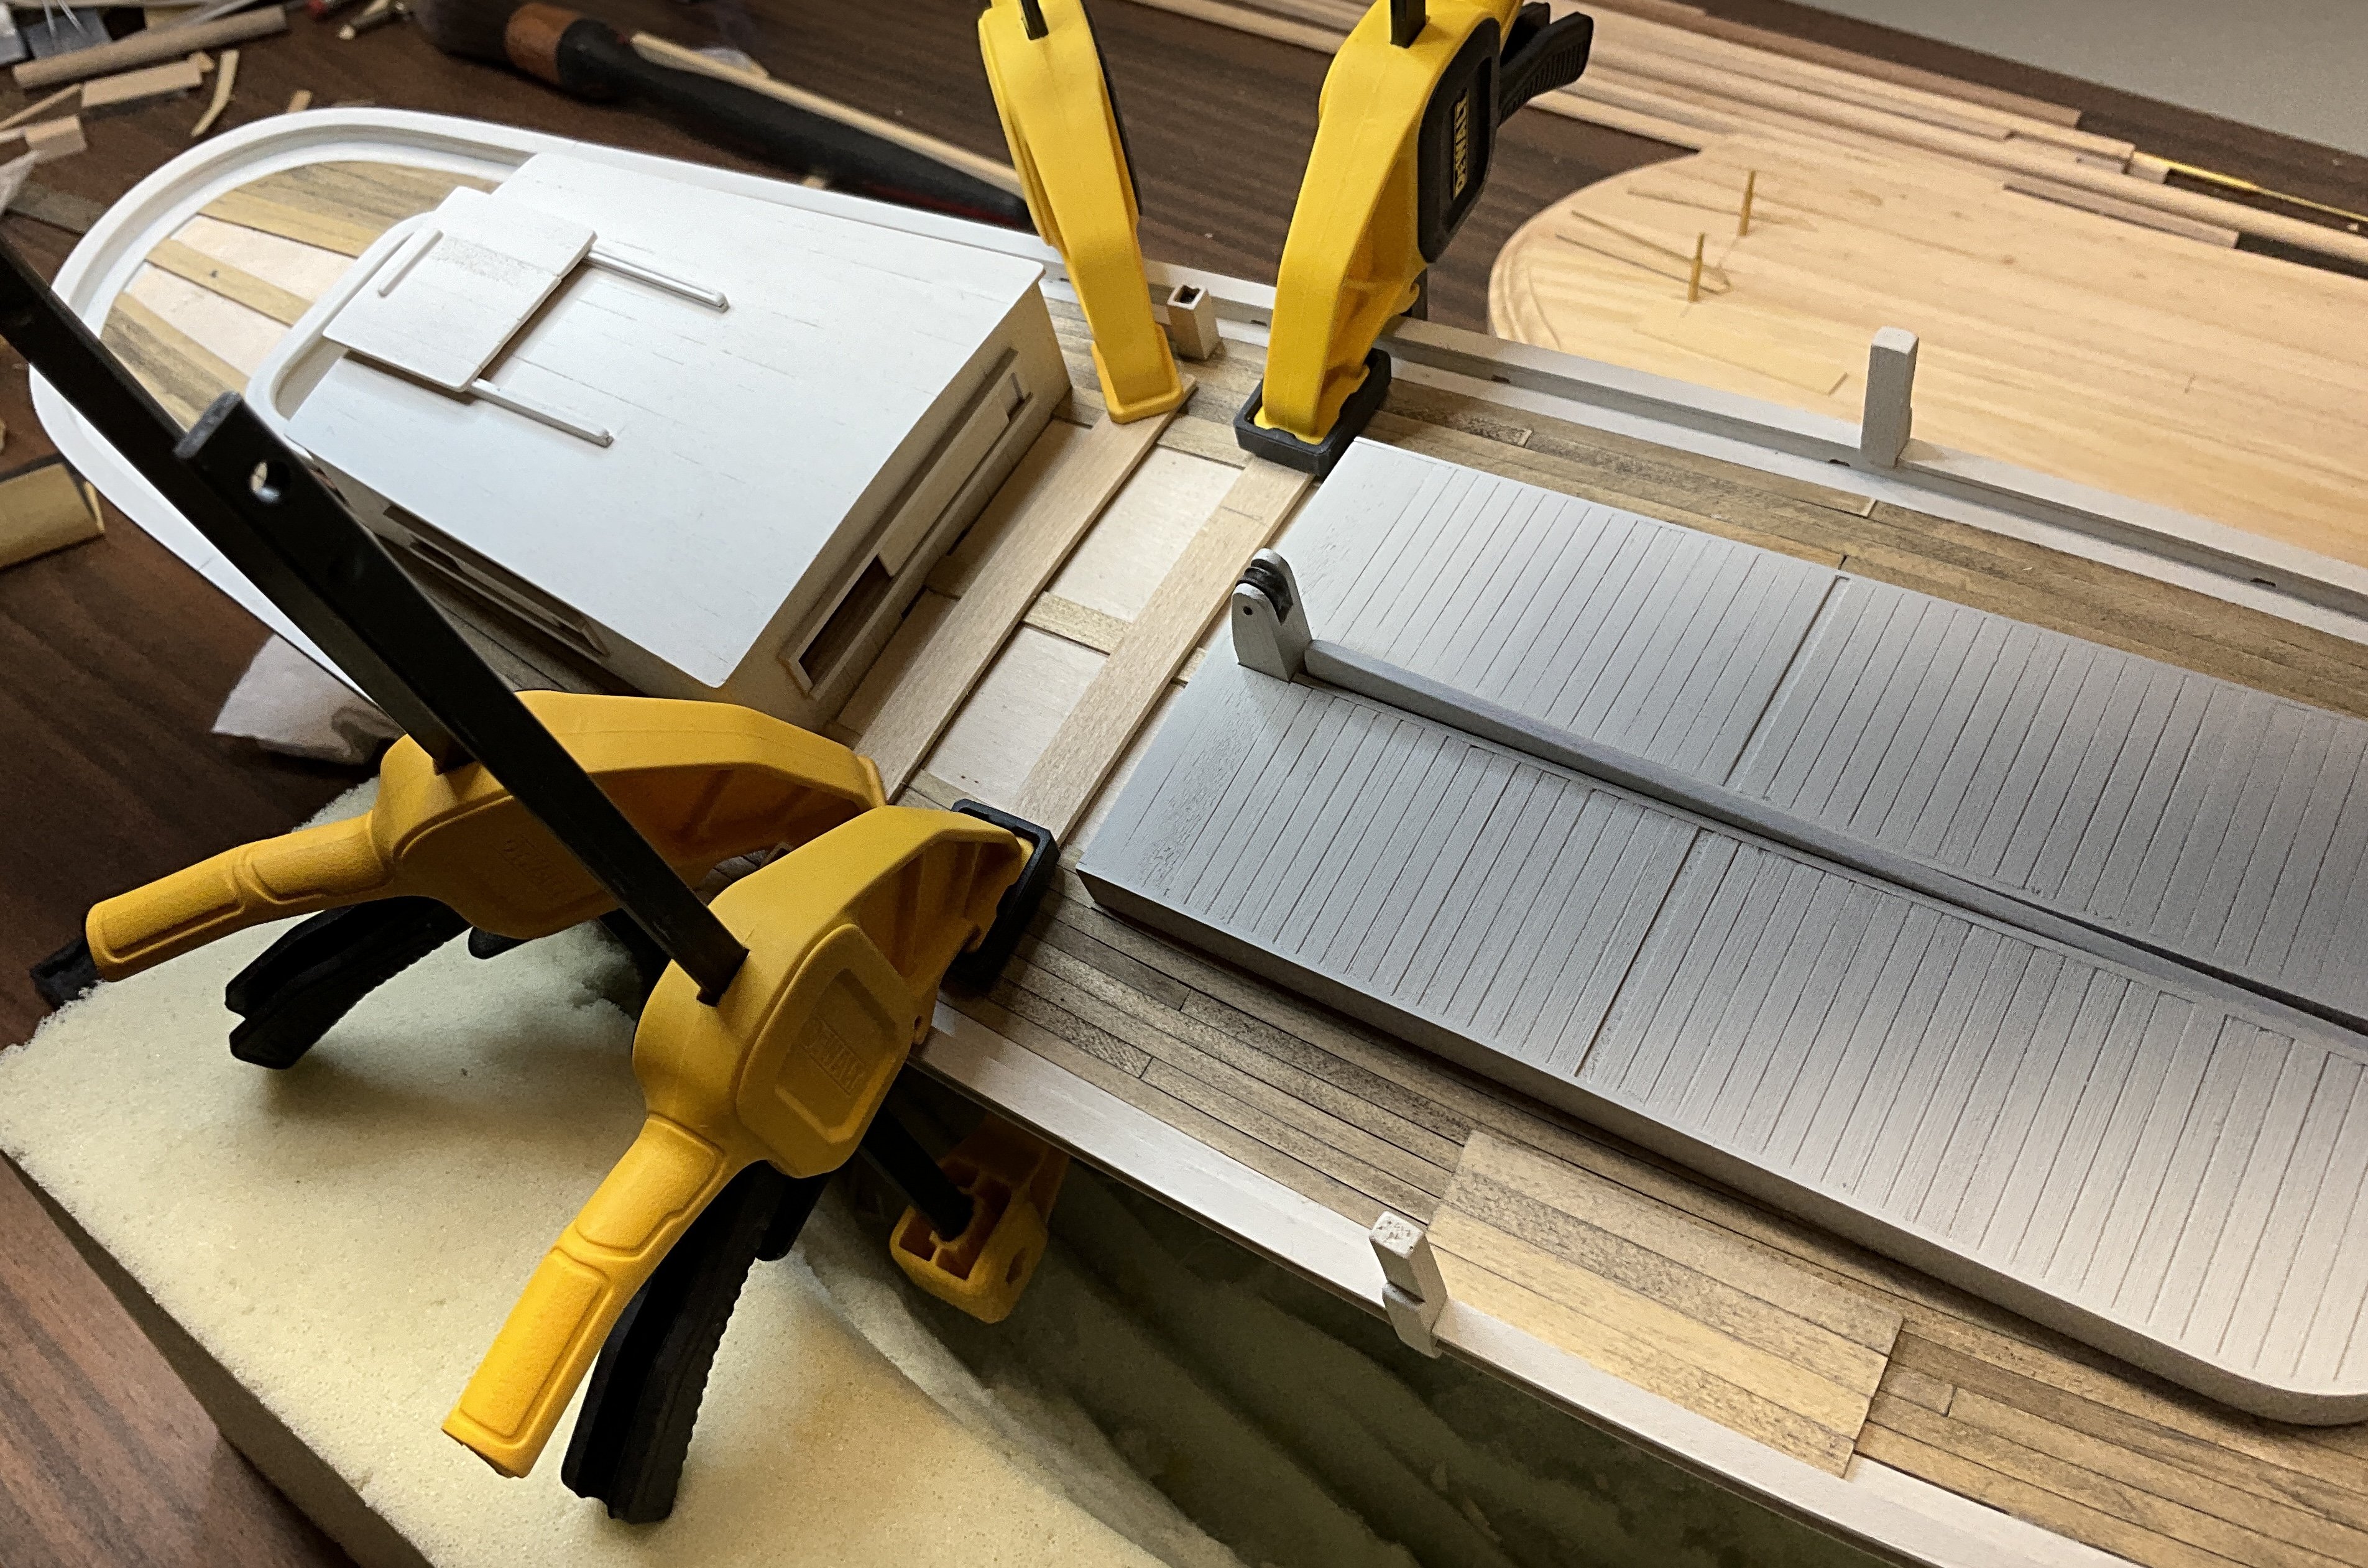
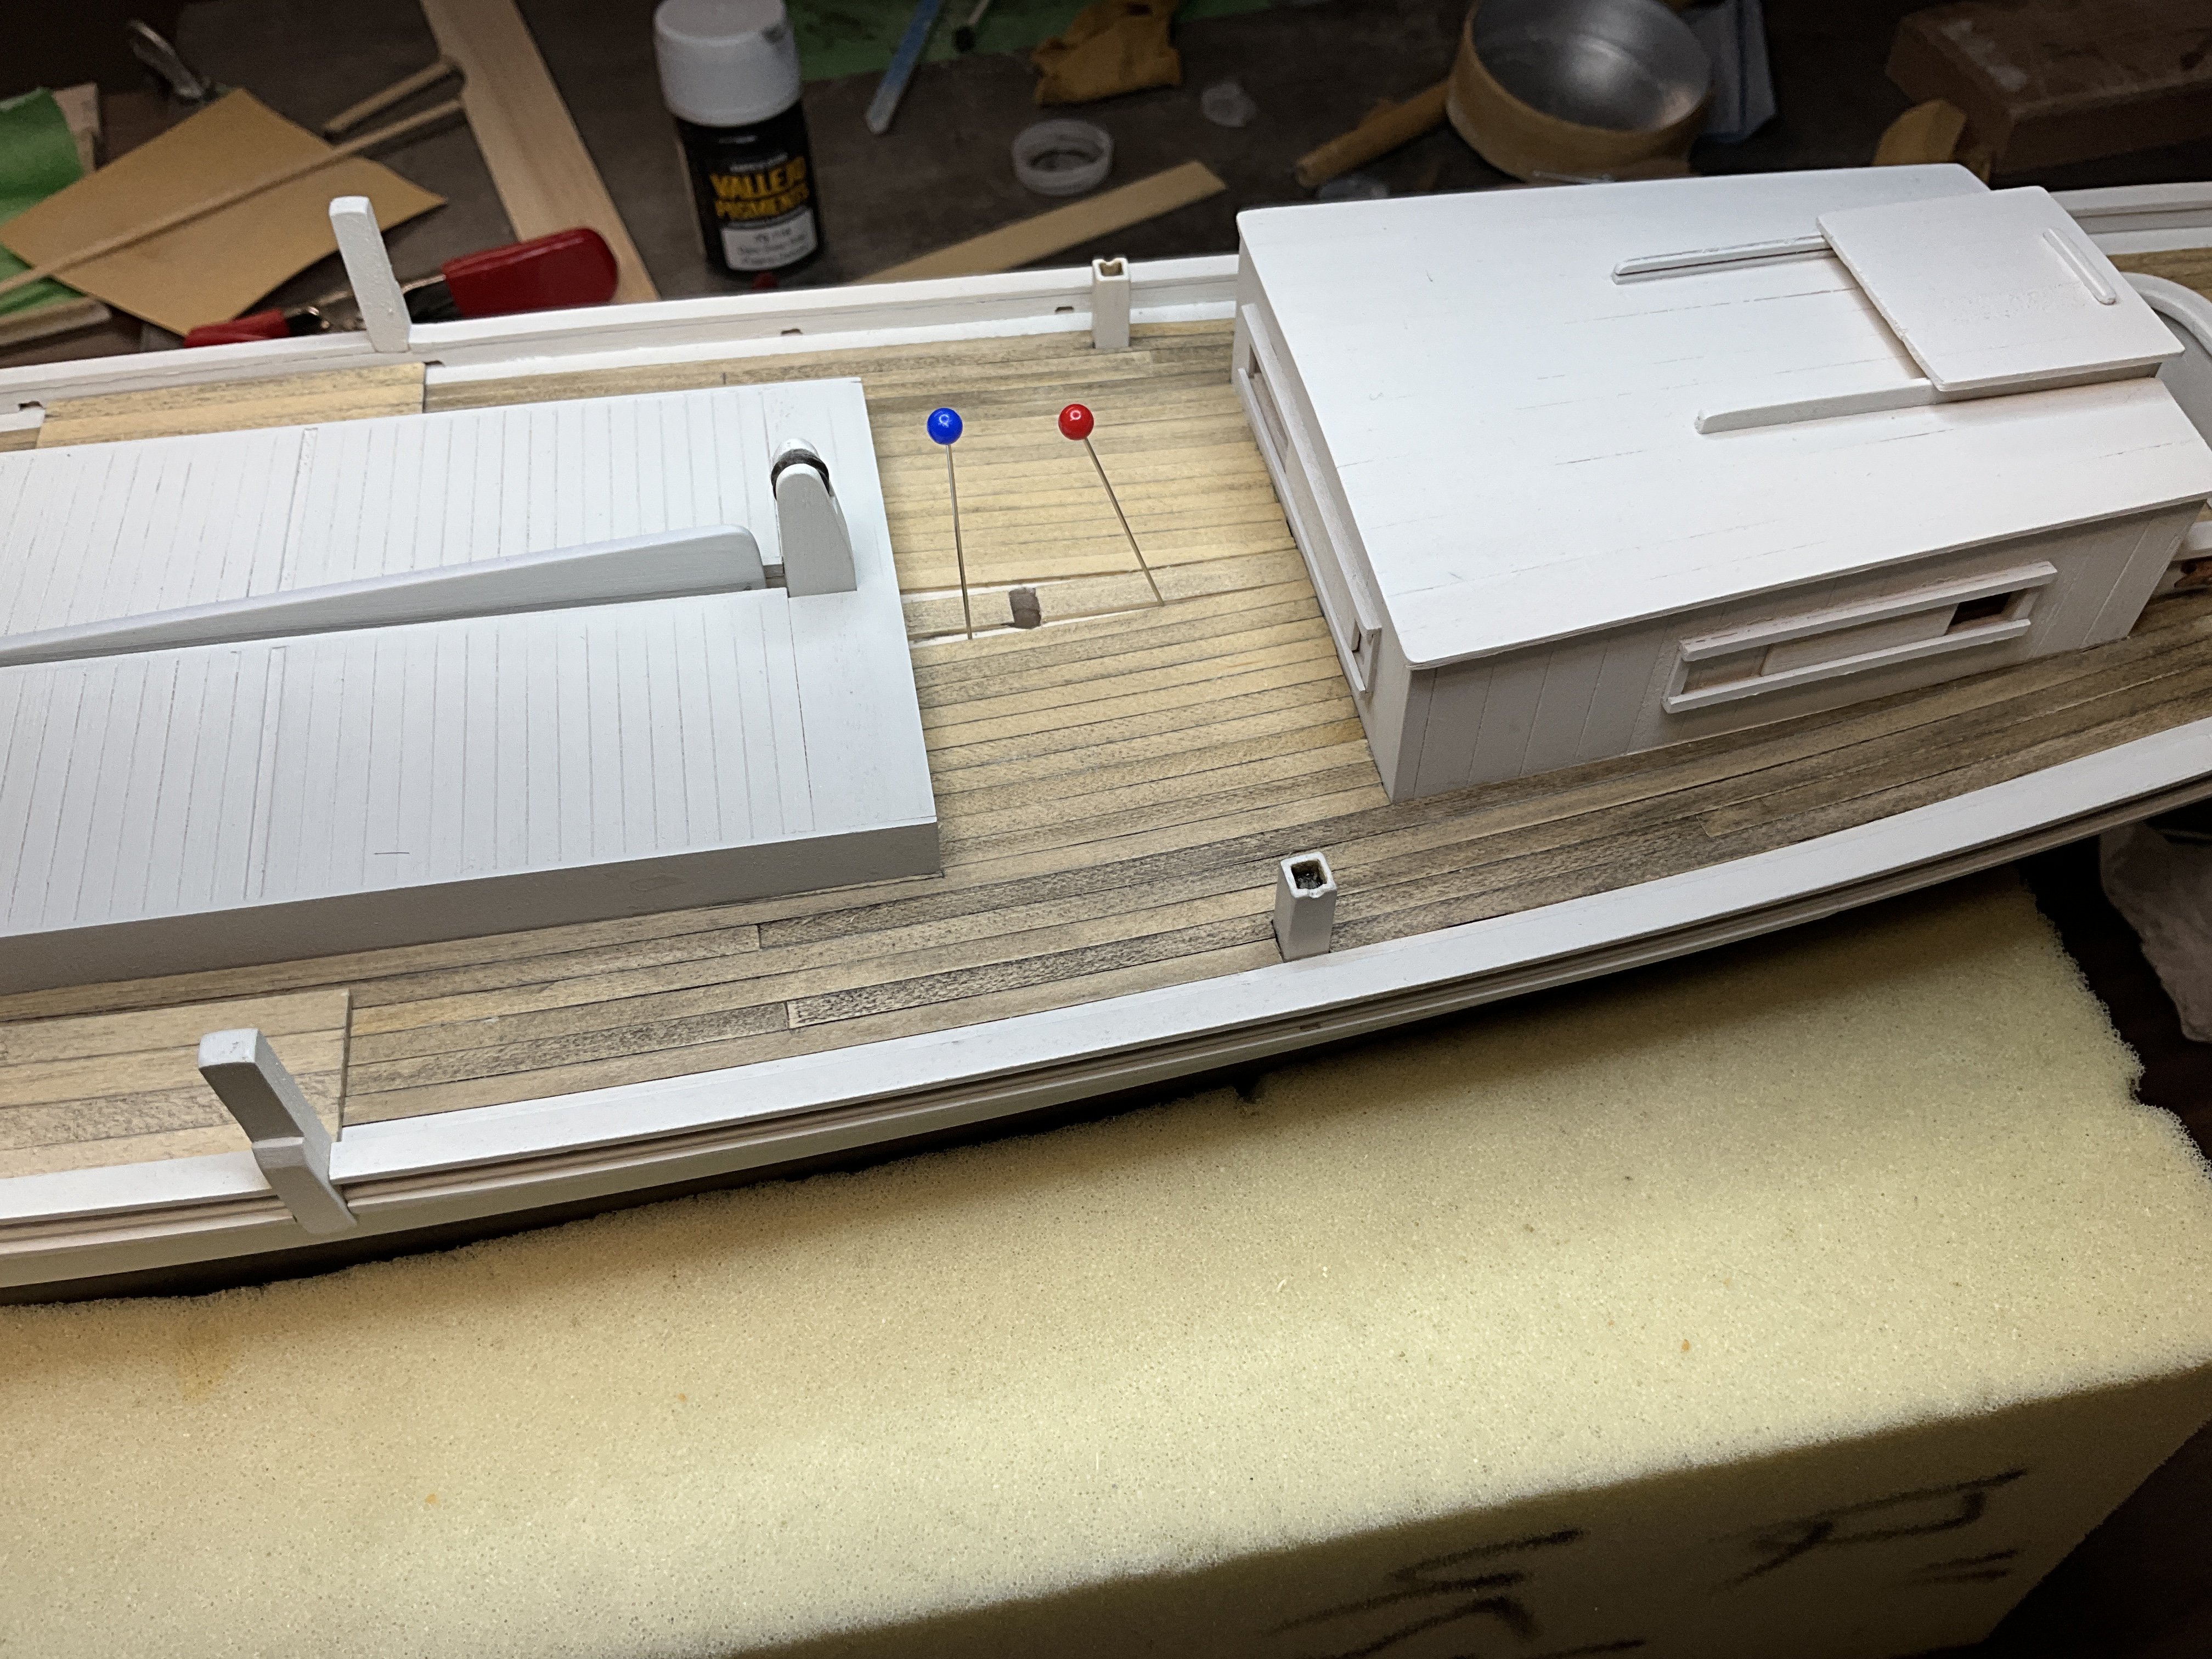
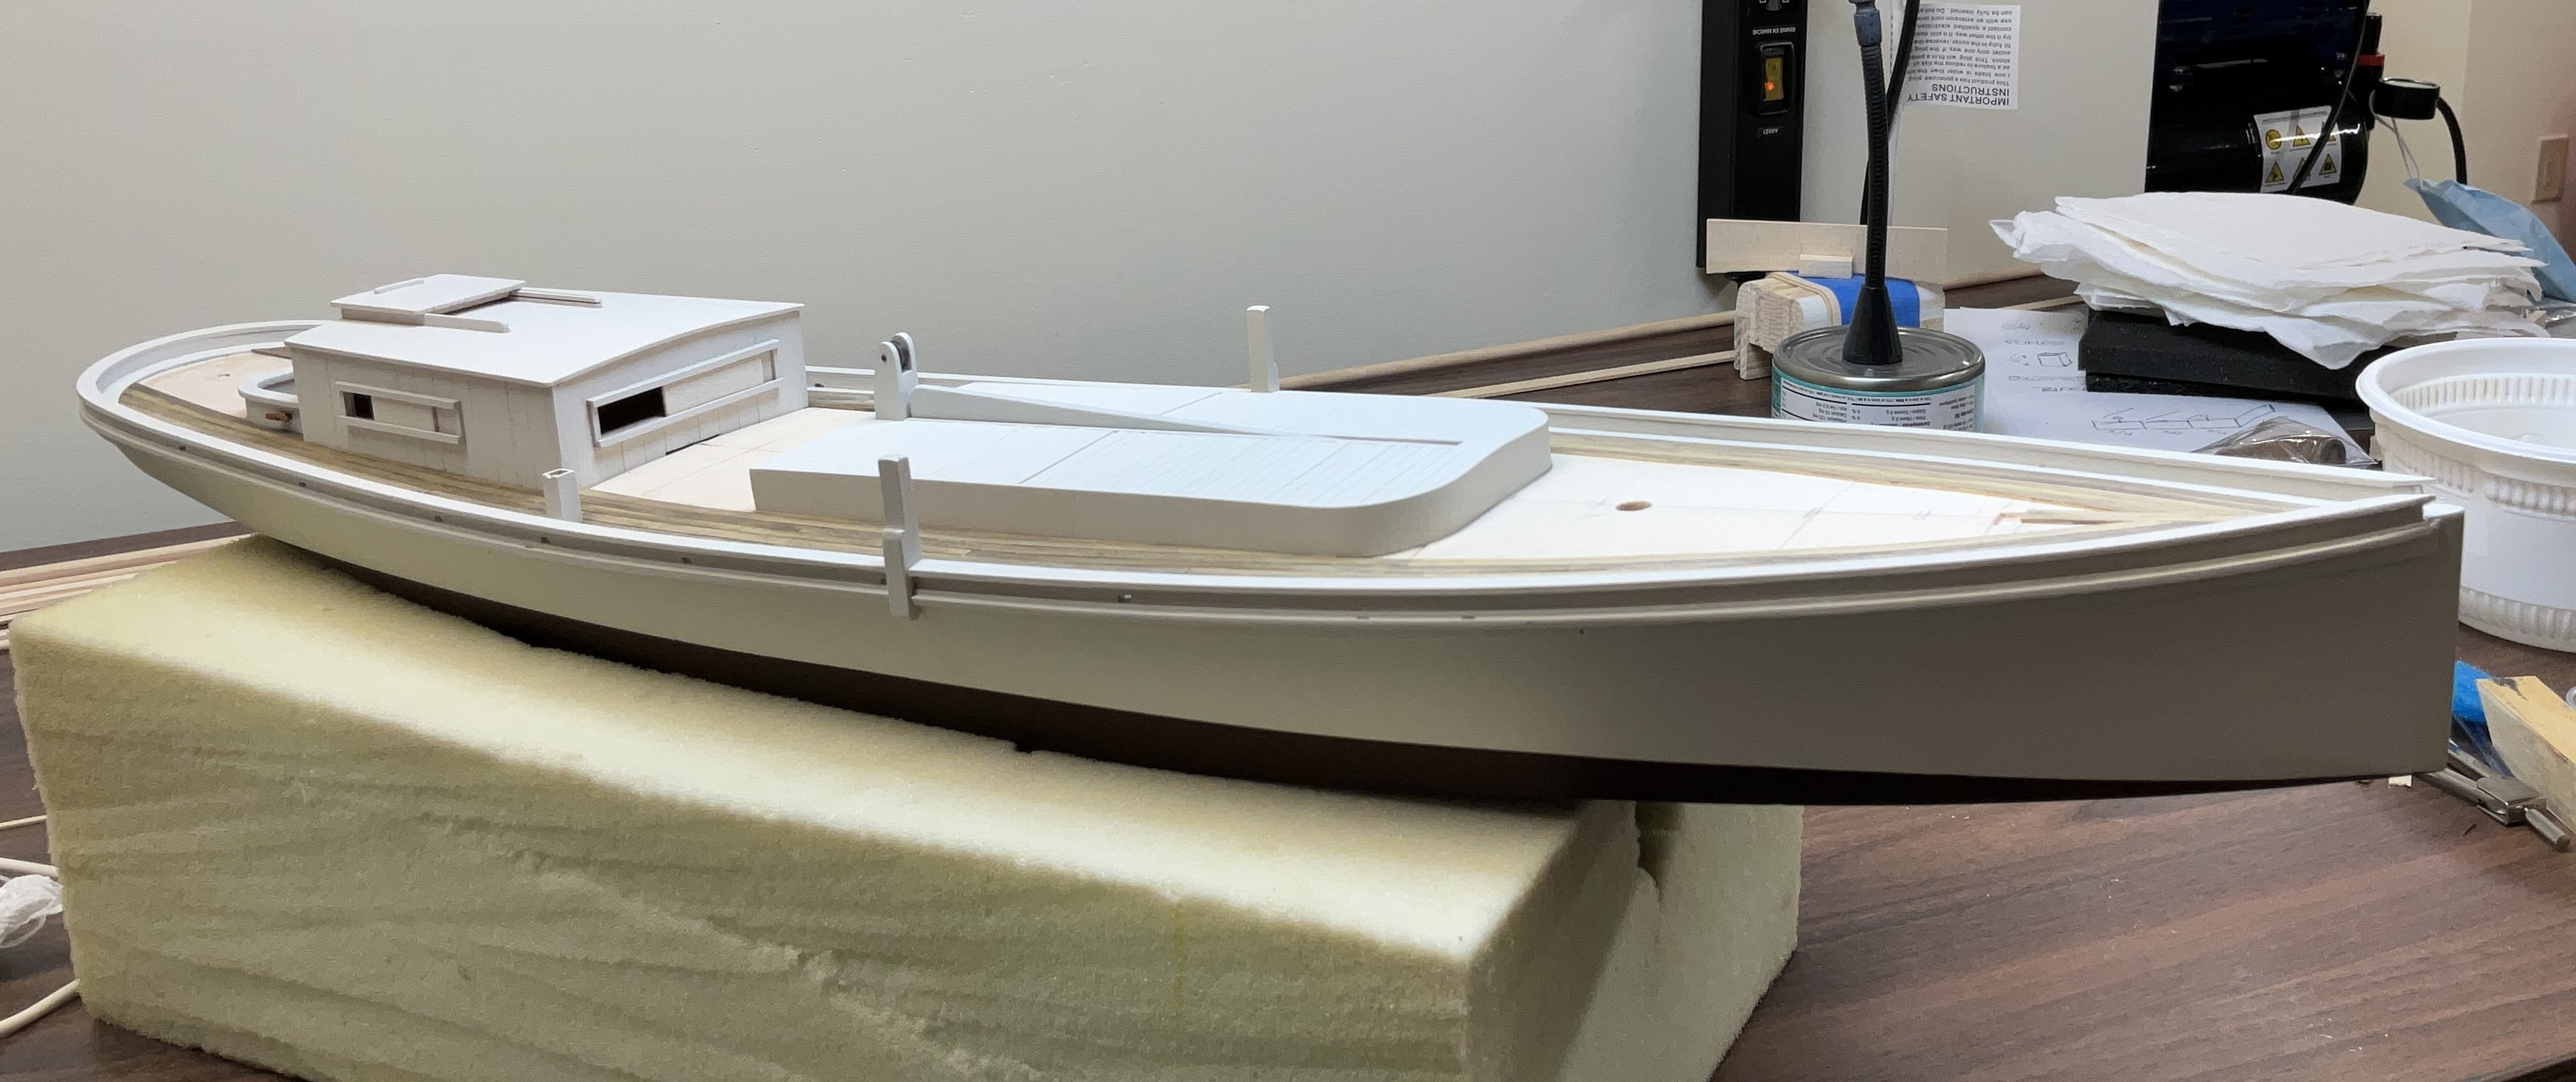
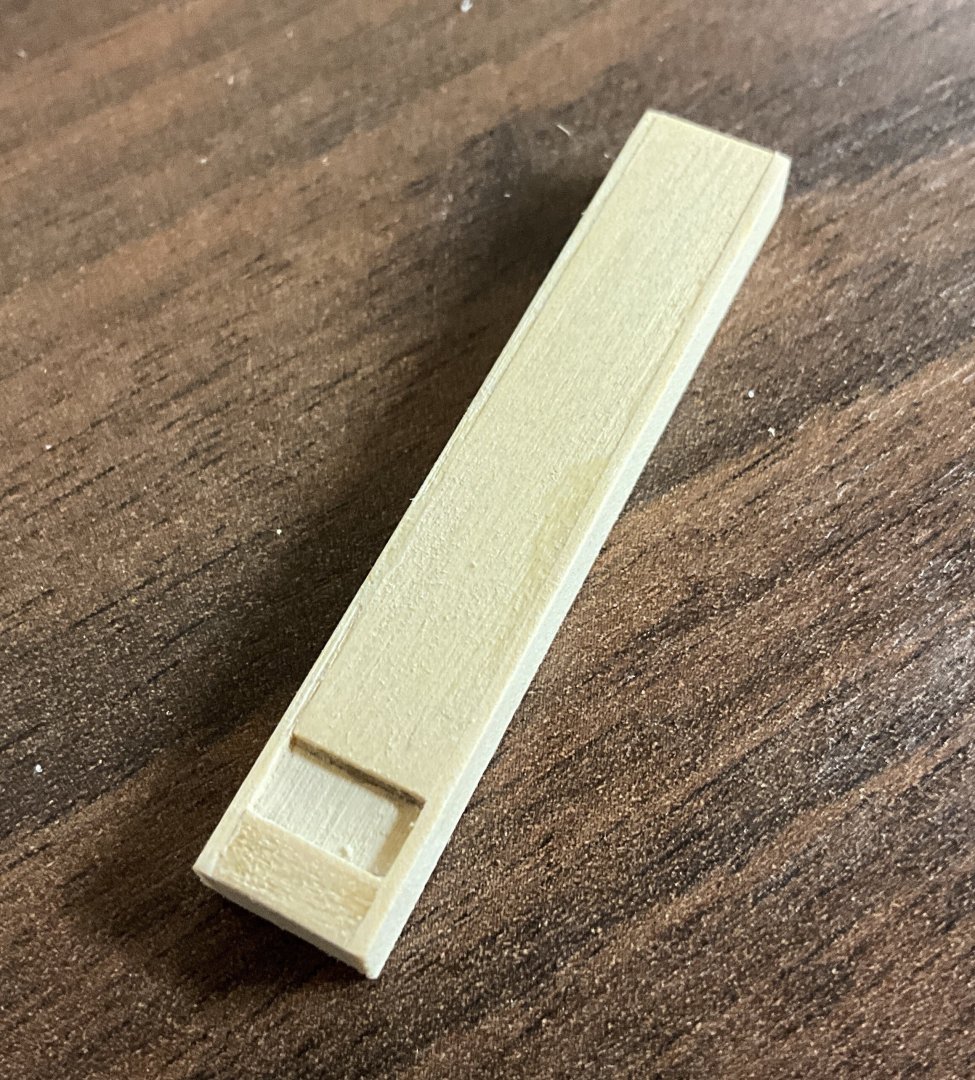
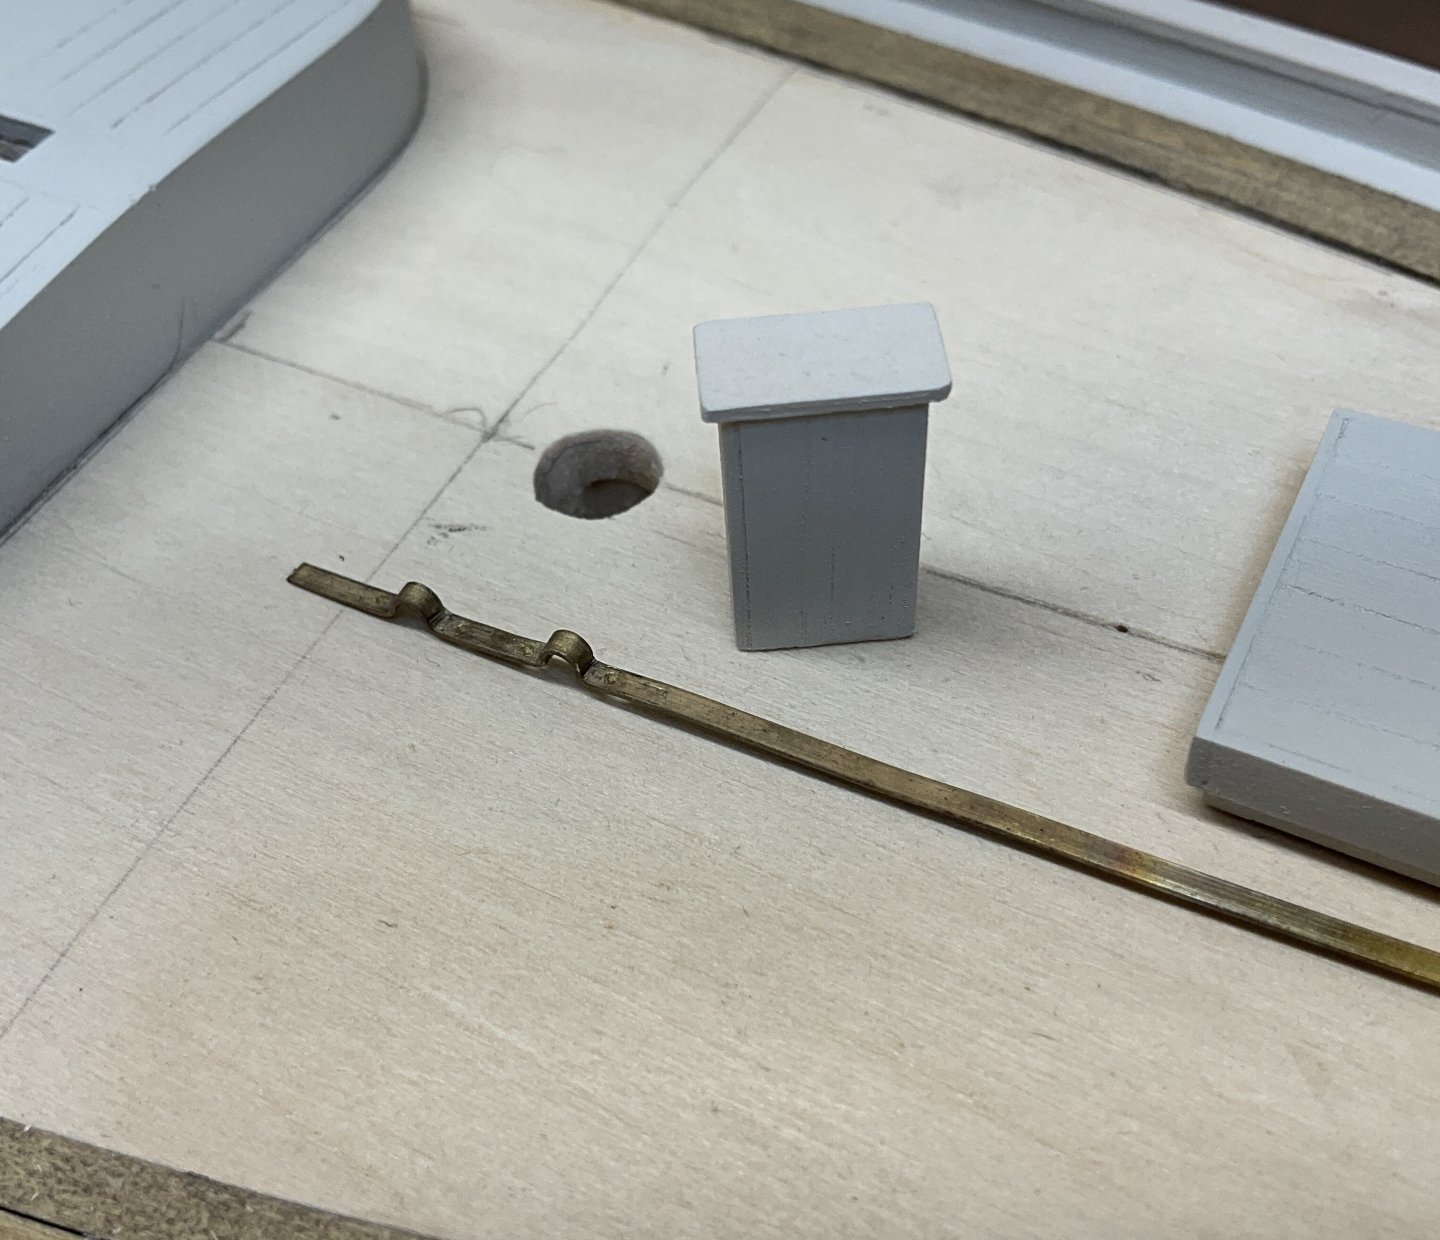
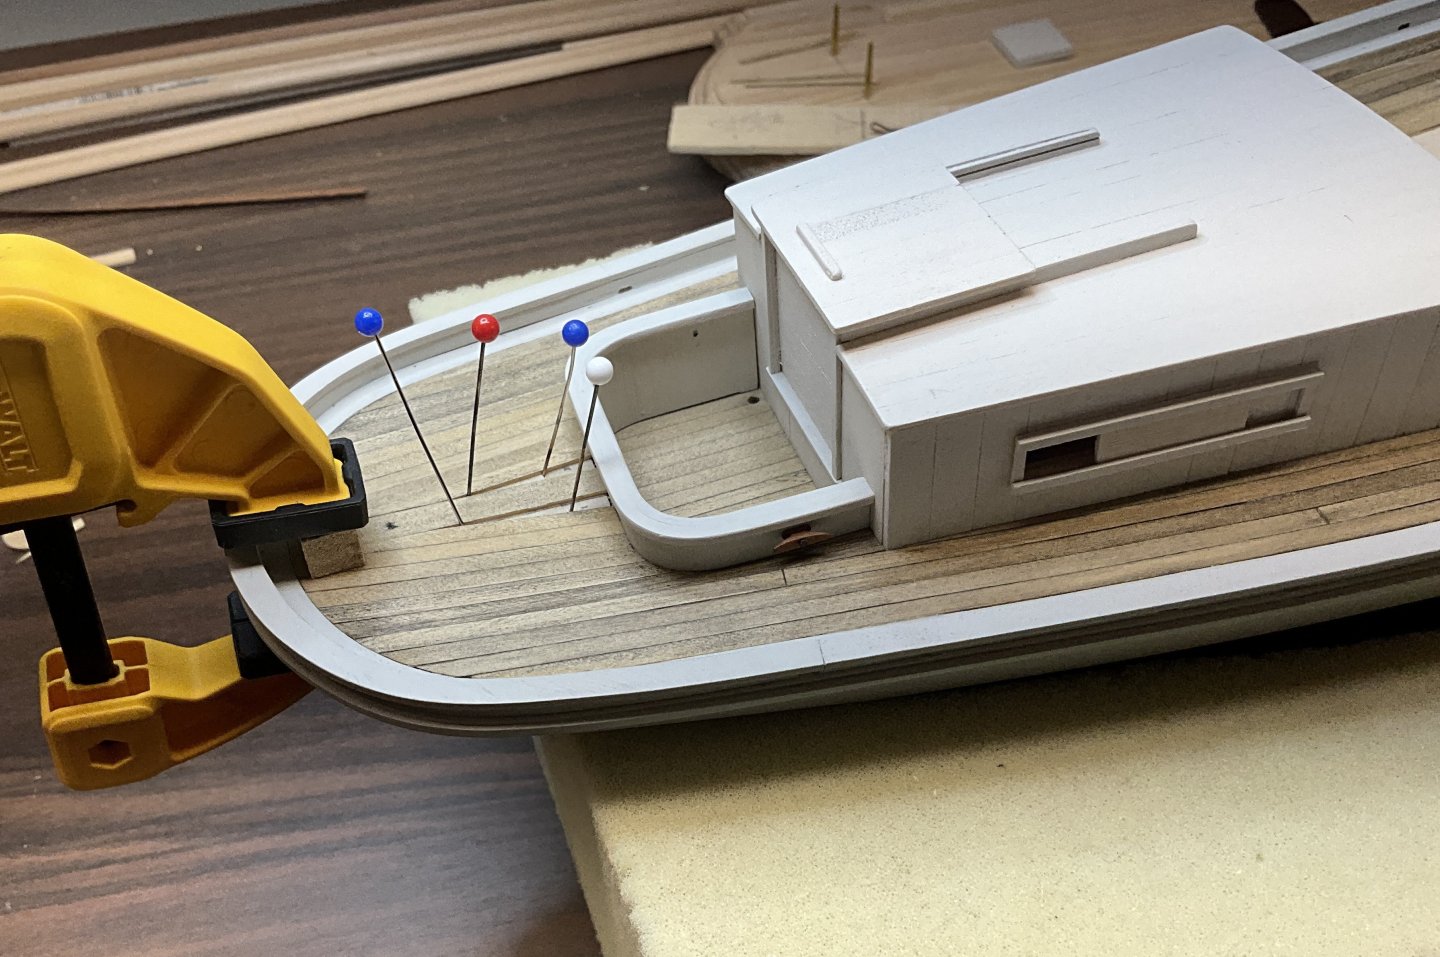
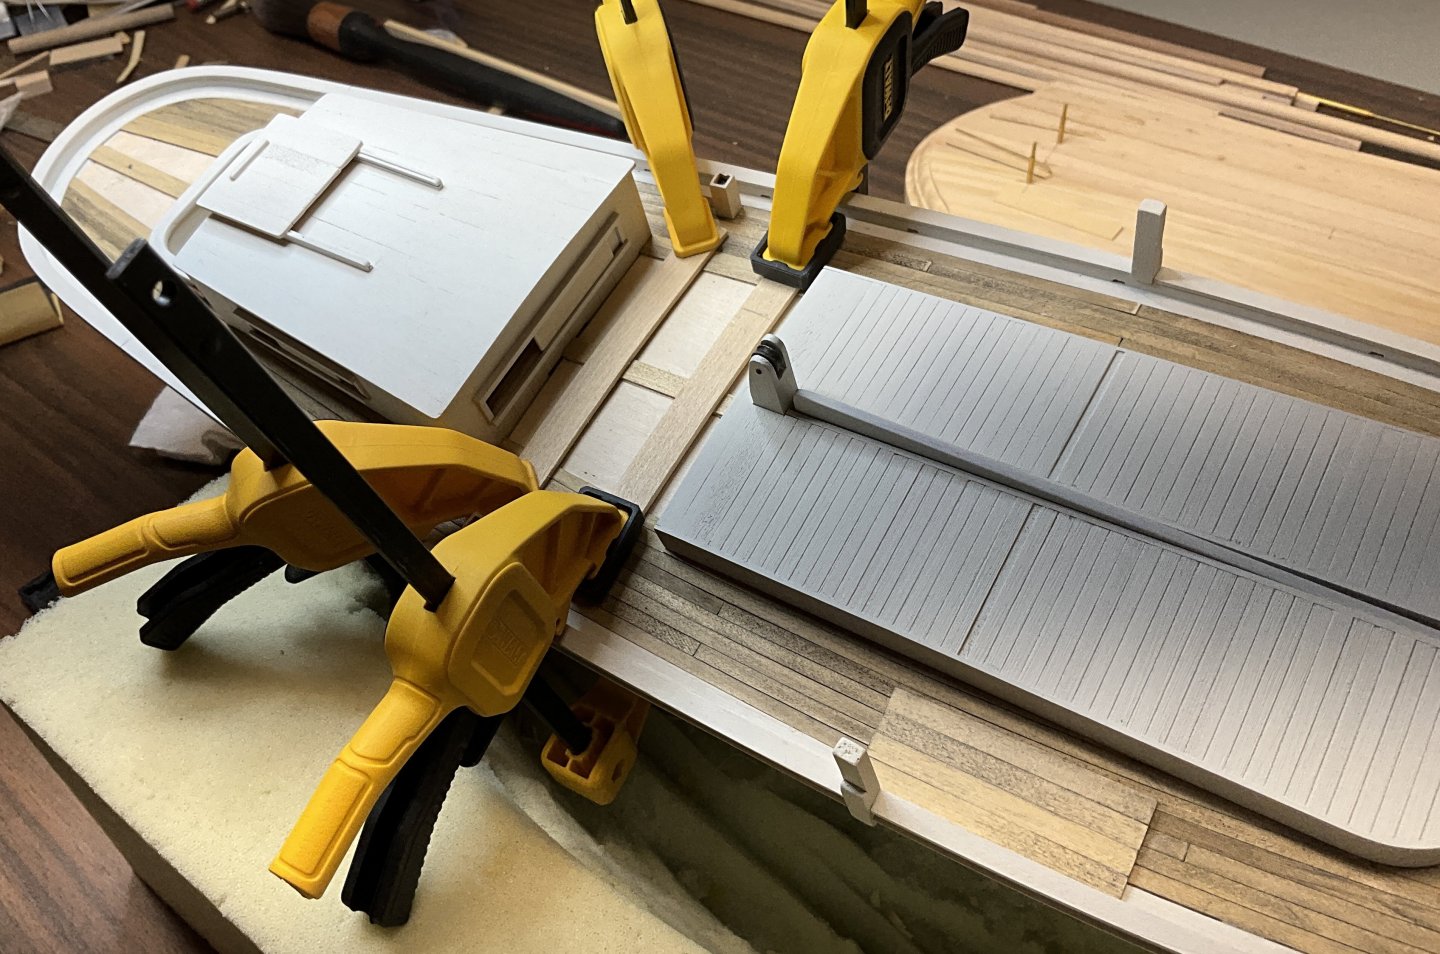
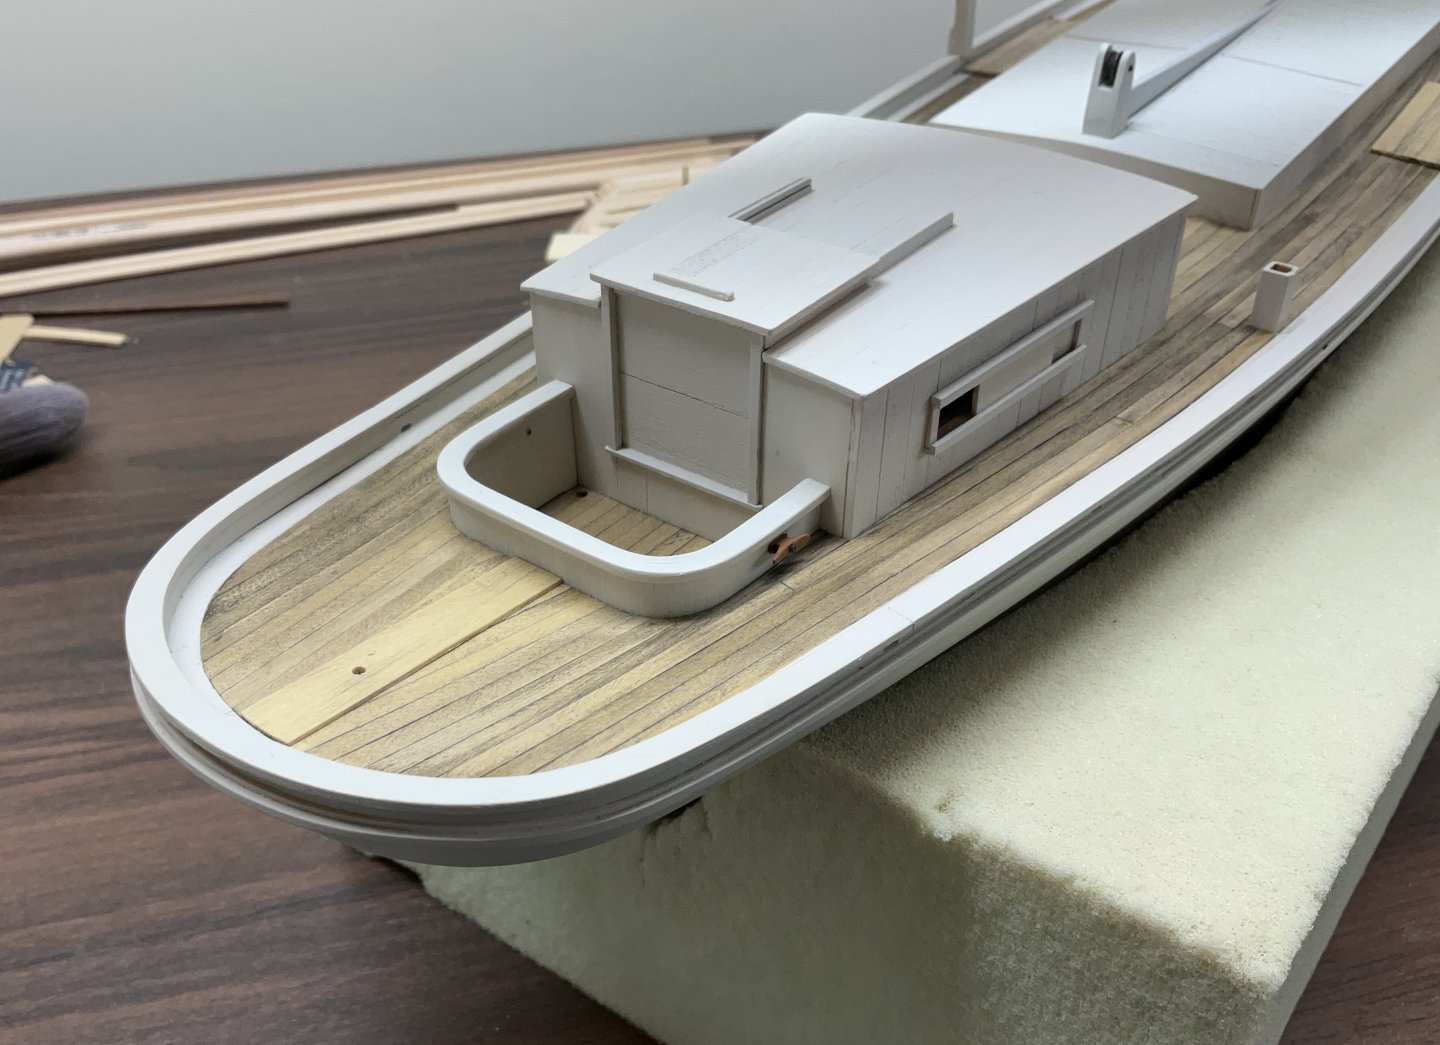
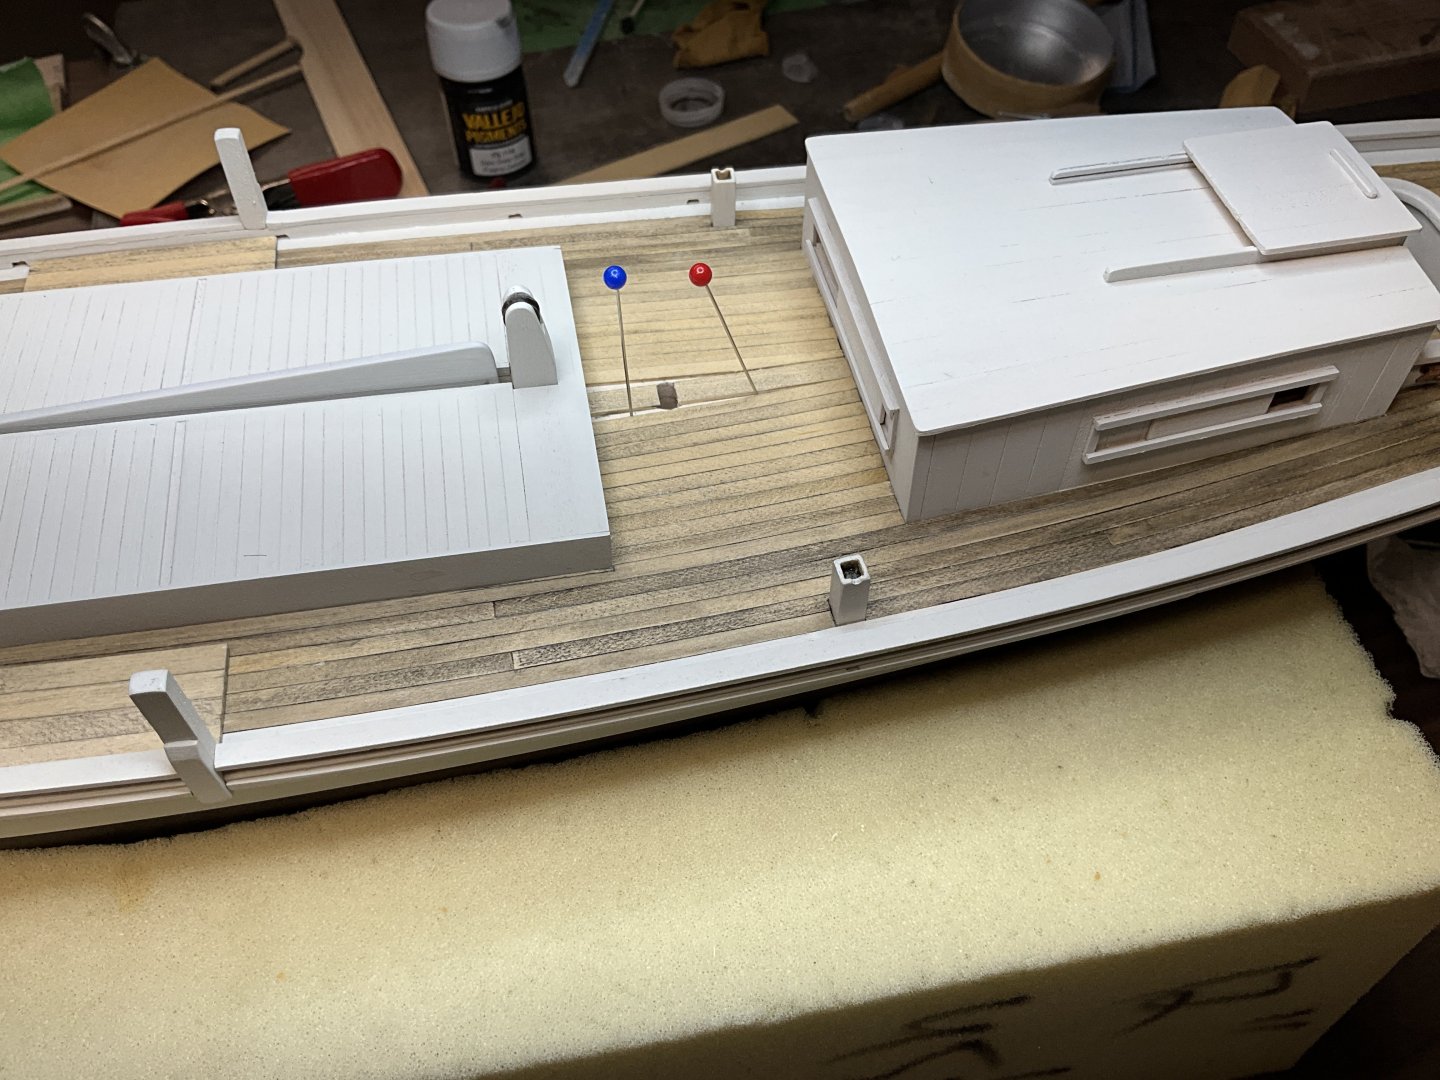
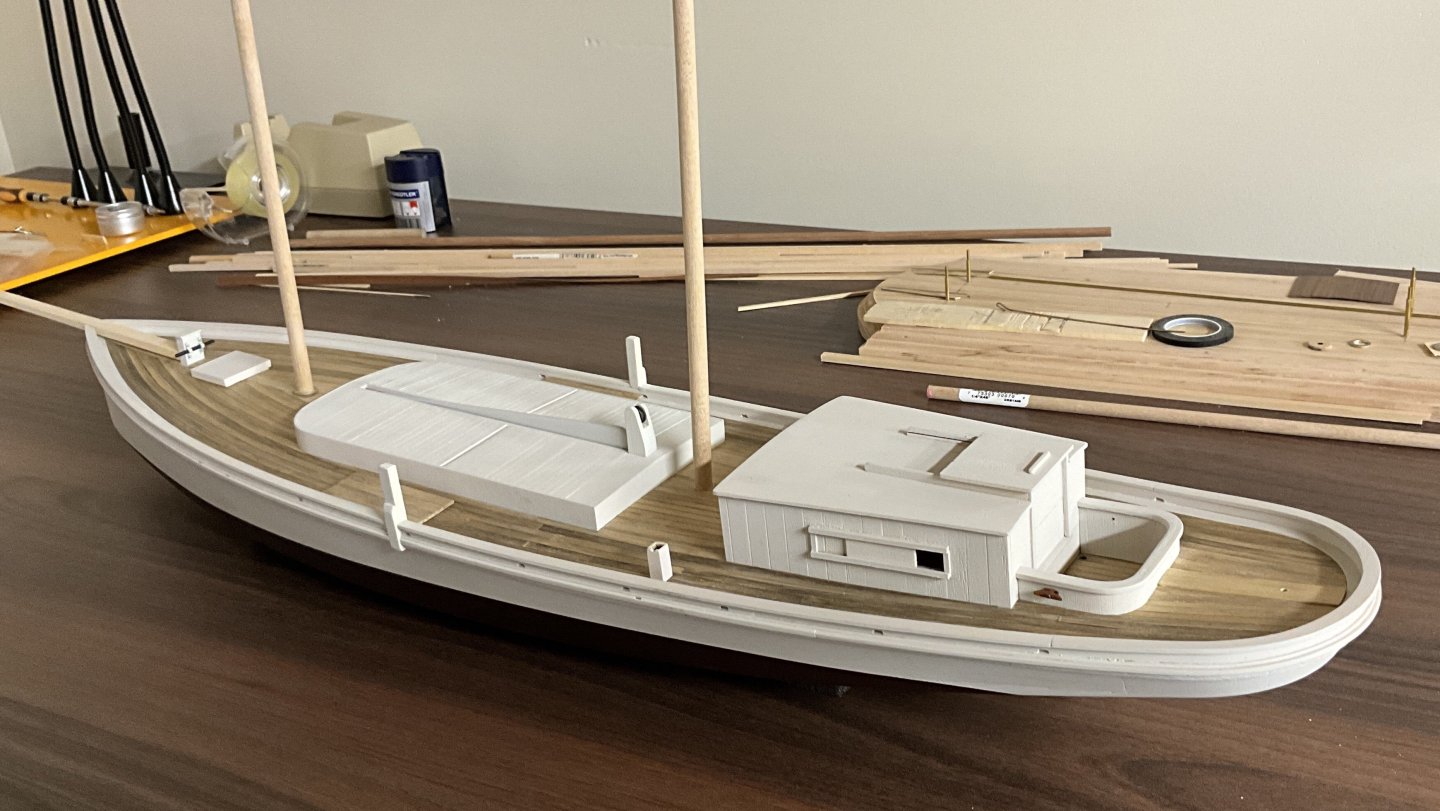
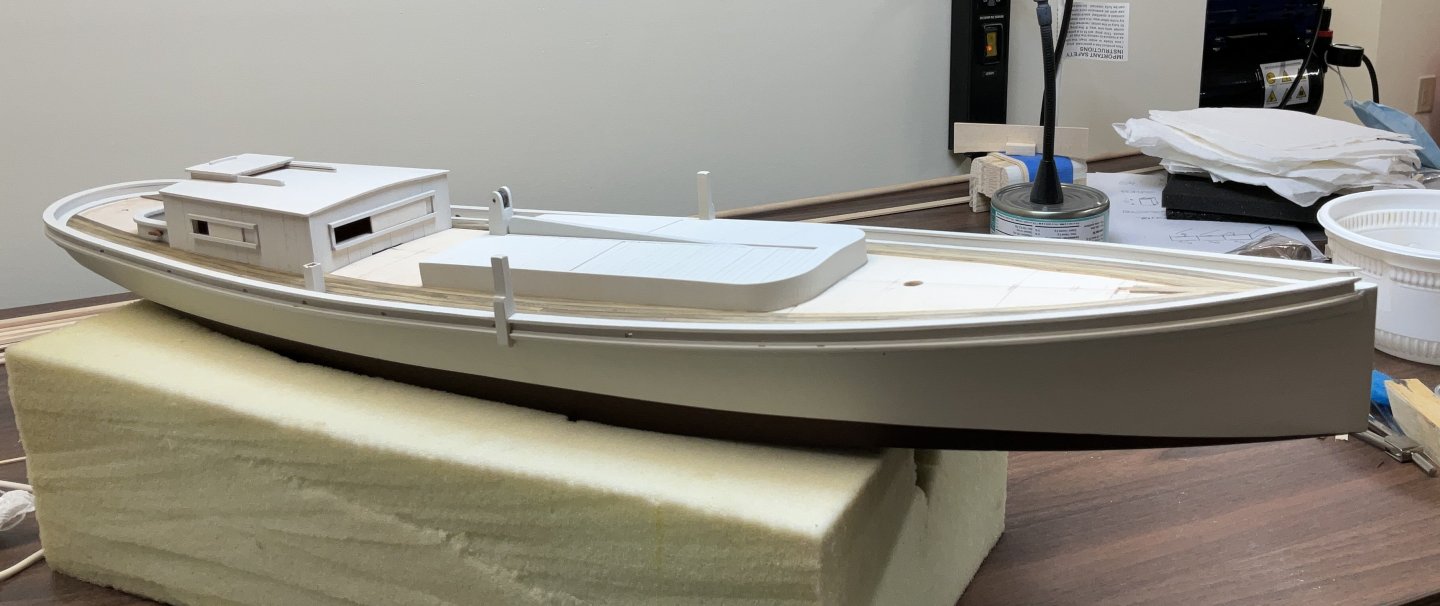
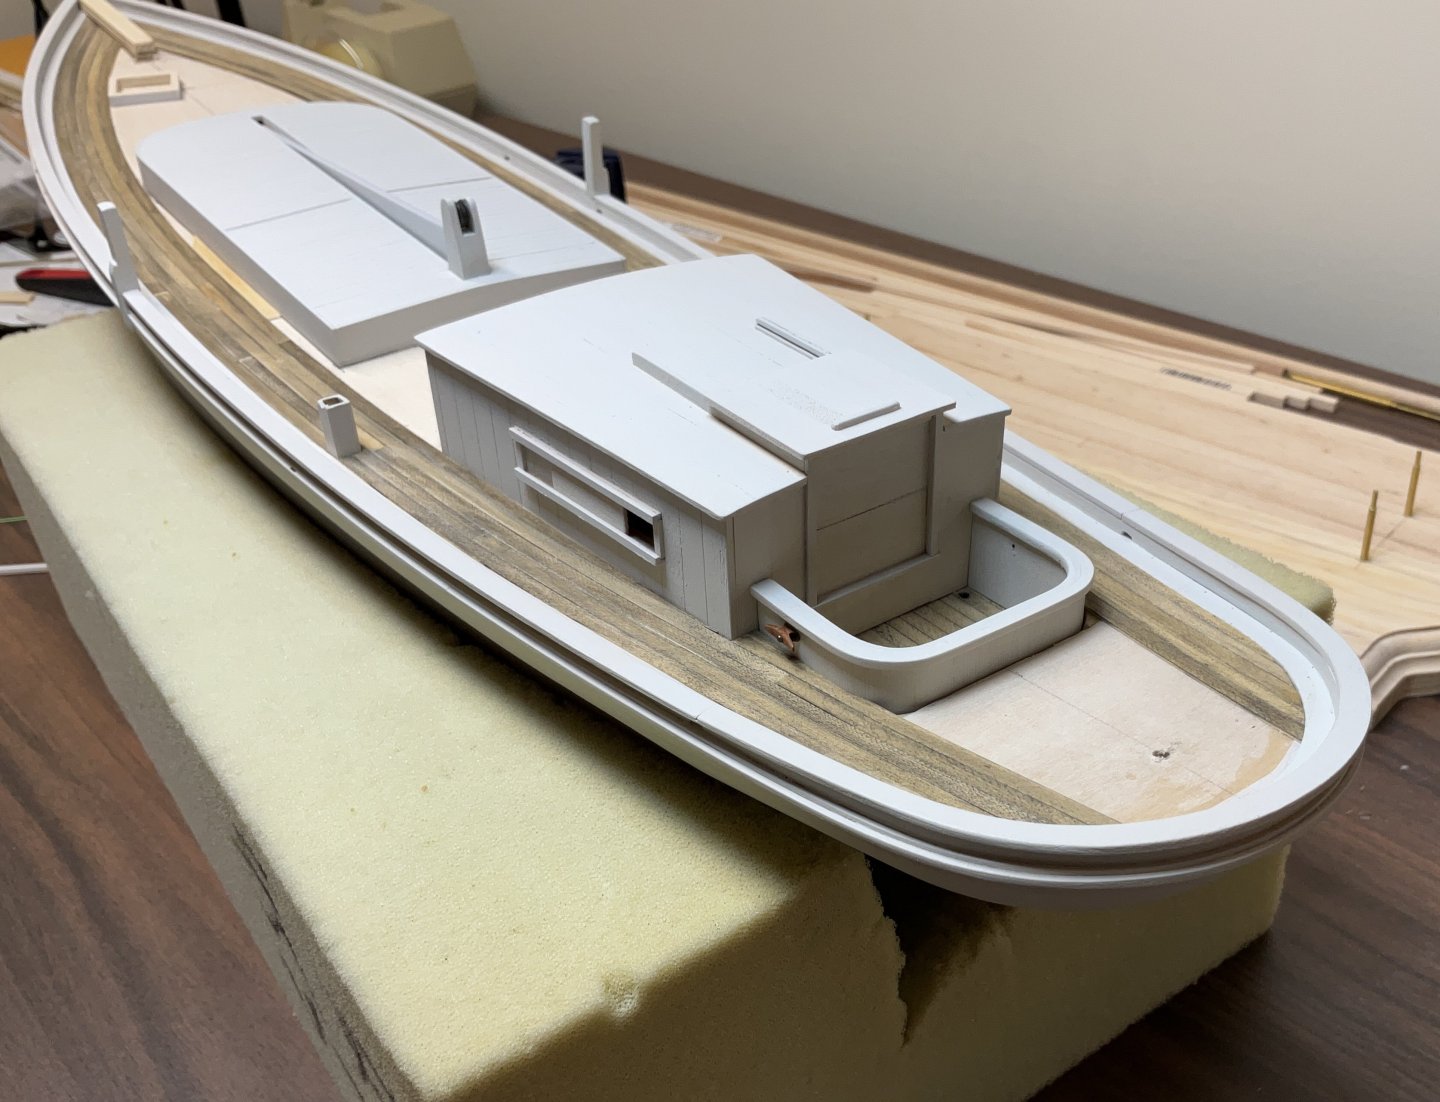
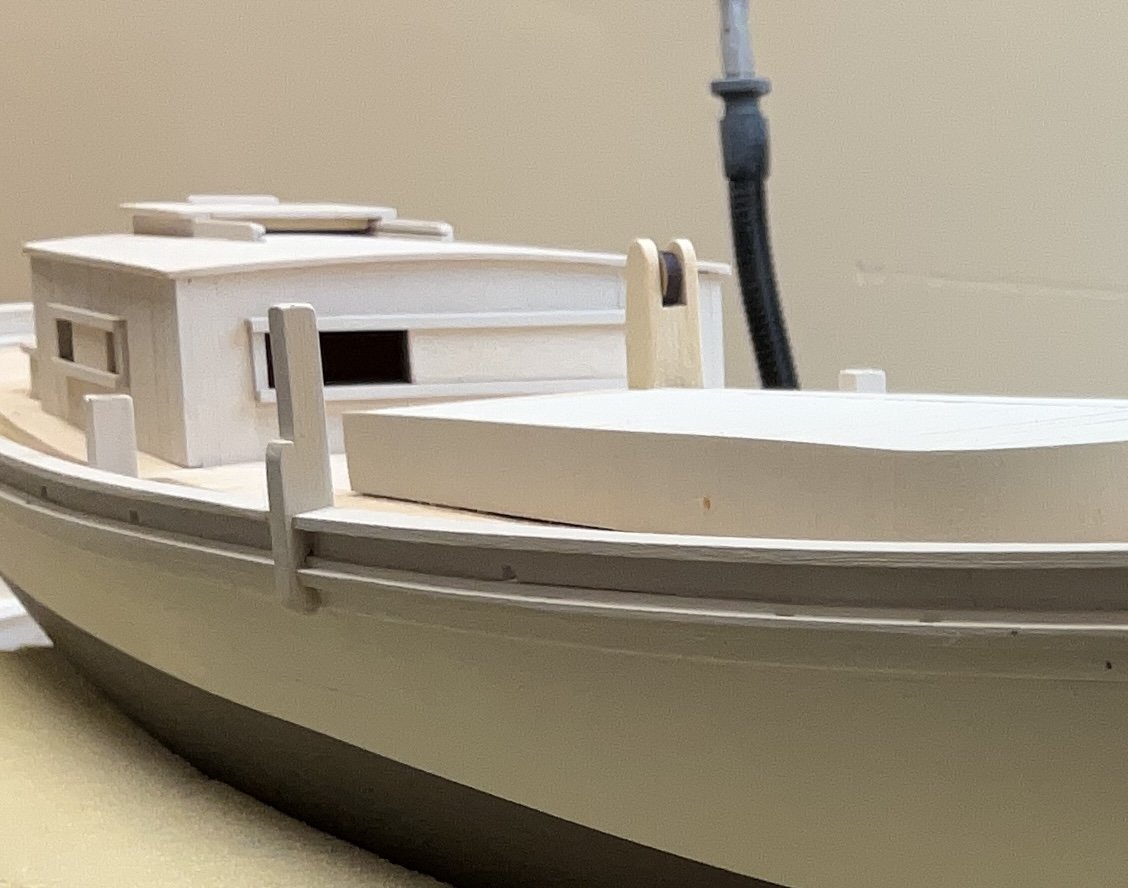
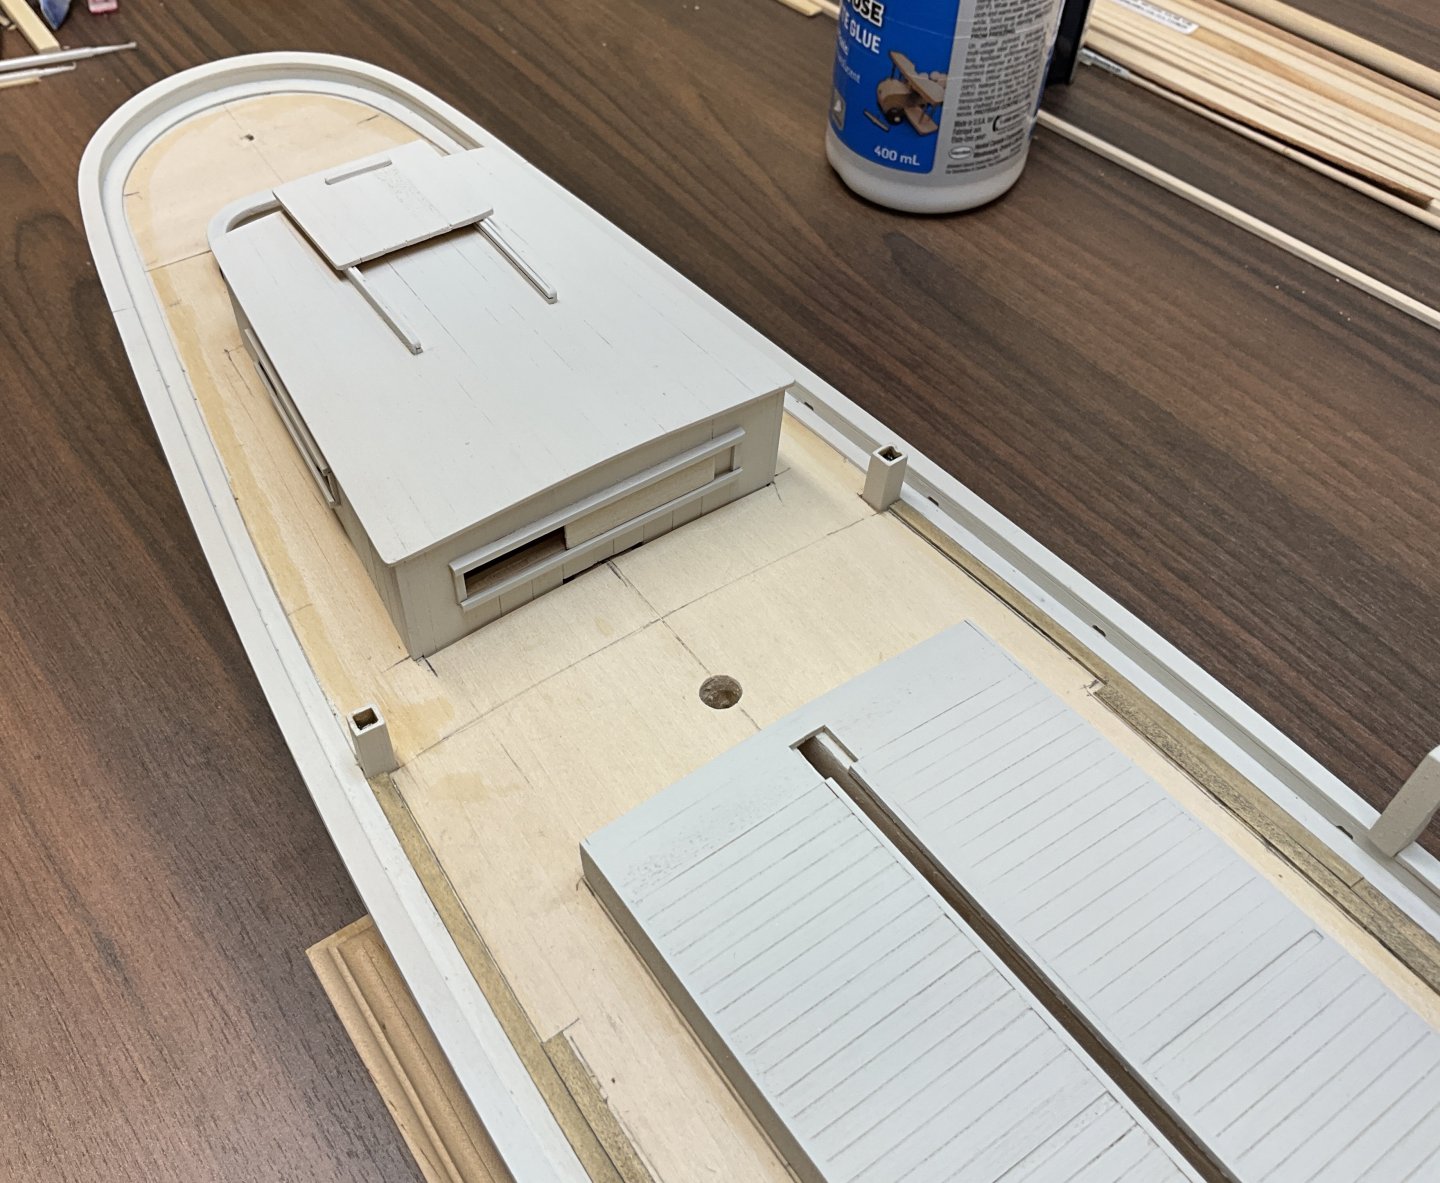
Hi Everyone, thank you very much for the great Comments and Likes. I have just finished planking the deck. The samson post and the forward hatch were completed a couple of weeks ago so they were ready to install as I got to them. According to what I’ve read, some sharpies had “ boxtop “ hatches where the top slides down over the coaming and sits on the deck. Because there is a king plank that sits proud of the deck planks, there will be a gap which would probably help to reduce rot if water cannot be trapped there. ( Just an opinion ) The samson post was made from the same strip of wood as the bow sprit but was sheathed in 1/32” ayc sheet to build it up to 3/8” x 1’4”. A space was left for the bow sprit to fit into. It was left long just to make it easier to hold onto. The post was shortened and the shaft for the windlass was attained with brass straps. The planking then continued. Some of the planking turned out a bit dark so every once in a while I would sand an area and use a cotton swab dipped in methyl hydrate to try to lighten it up. It’s an ongoing process. This last photo is how it stands now. Test fitting masts and getting ready for metal work. I forgot to mention that I made some boards to protect the deck from the dredges. Pretty sure they will be used. Hope to see you all soon.


- 201 replies
-
- 14
-

-
-
- Oyster Sharpie
- first scratch build
- (and 1 more)
-
Hi Glen, it was good of you to step up to help. This is a fine looking model. Good luck with her.
- 301 replies
-
- 8
-
-
-
- Constitution
- Bluejacket Shipcrafters
- (and 1 more)
-
Beautiful work Keith. If I could make props like this, I’d be building a lot of upside down boats!
-
Hi Jacques, the seizing is looking good. Not sure if this is how you are doing it but in the past, using cotton thread, I have started with a clove hitch. Dab some diluted pva on it. Wrap the free ends around the back and tie an overhand knot on the front. Keep doing this until seizing is the desired length. Then apply diluted pva to the cotton thread and when dry snip the ends off. The overhand knots will keep the tension and you don’t end up with as much unraveling. You just have to make sure the overhand knots are butted tightly up against each other. It might be worth a try. Congratulations on your successful move!
-
Hi Stuka, nice start and nice choice. Cutters are great. Good luck.
- 129 replies
-
- 1
-
-
- vanguard models
- Sherbourne
- (and 1 more)
-
Congratulations Dave, this has been a wonderful build and log.
-
Dave, good luck with this amazing looking model!
-
Caferacer, congratulations on finishing your Benjamin W Latham. Beautiful work and great presentation!
-
Thanks Keith, you gotta love those greyhounds.
- 201 replies
-
- 4
-
-
- Oyster Sharpie
- first scratch build
- (and 1 more)
-
Thank you @KeithAug, @Jim Lad and @bdgiantman2 for your comments. I appreciate them very much.
- 201 replies
-
- 3
-
-
- Oyster Sharpie
- first scratch build
- (and 1 more)
-
Thank you very much Gary. I should have the hang of this staining just as the last plank is laid. 😀
- 201 replies
-
- 4
-

-
-
- Oyster Sharpie
- first scratch build
- (and 1 more)
-
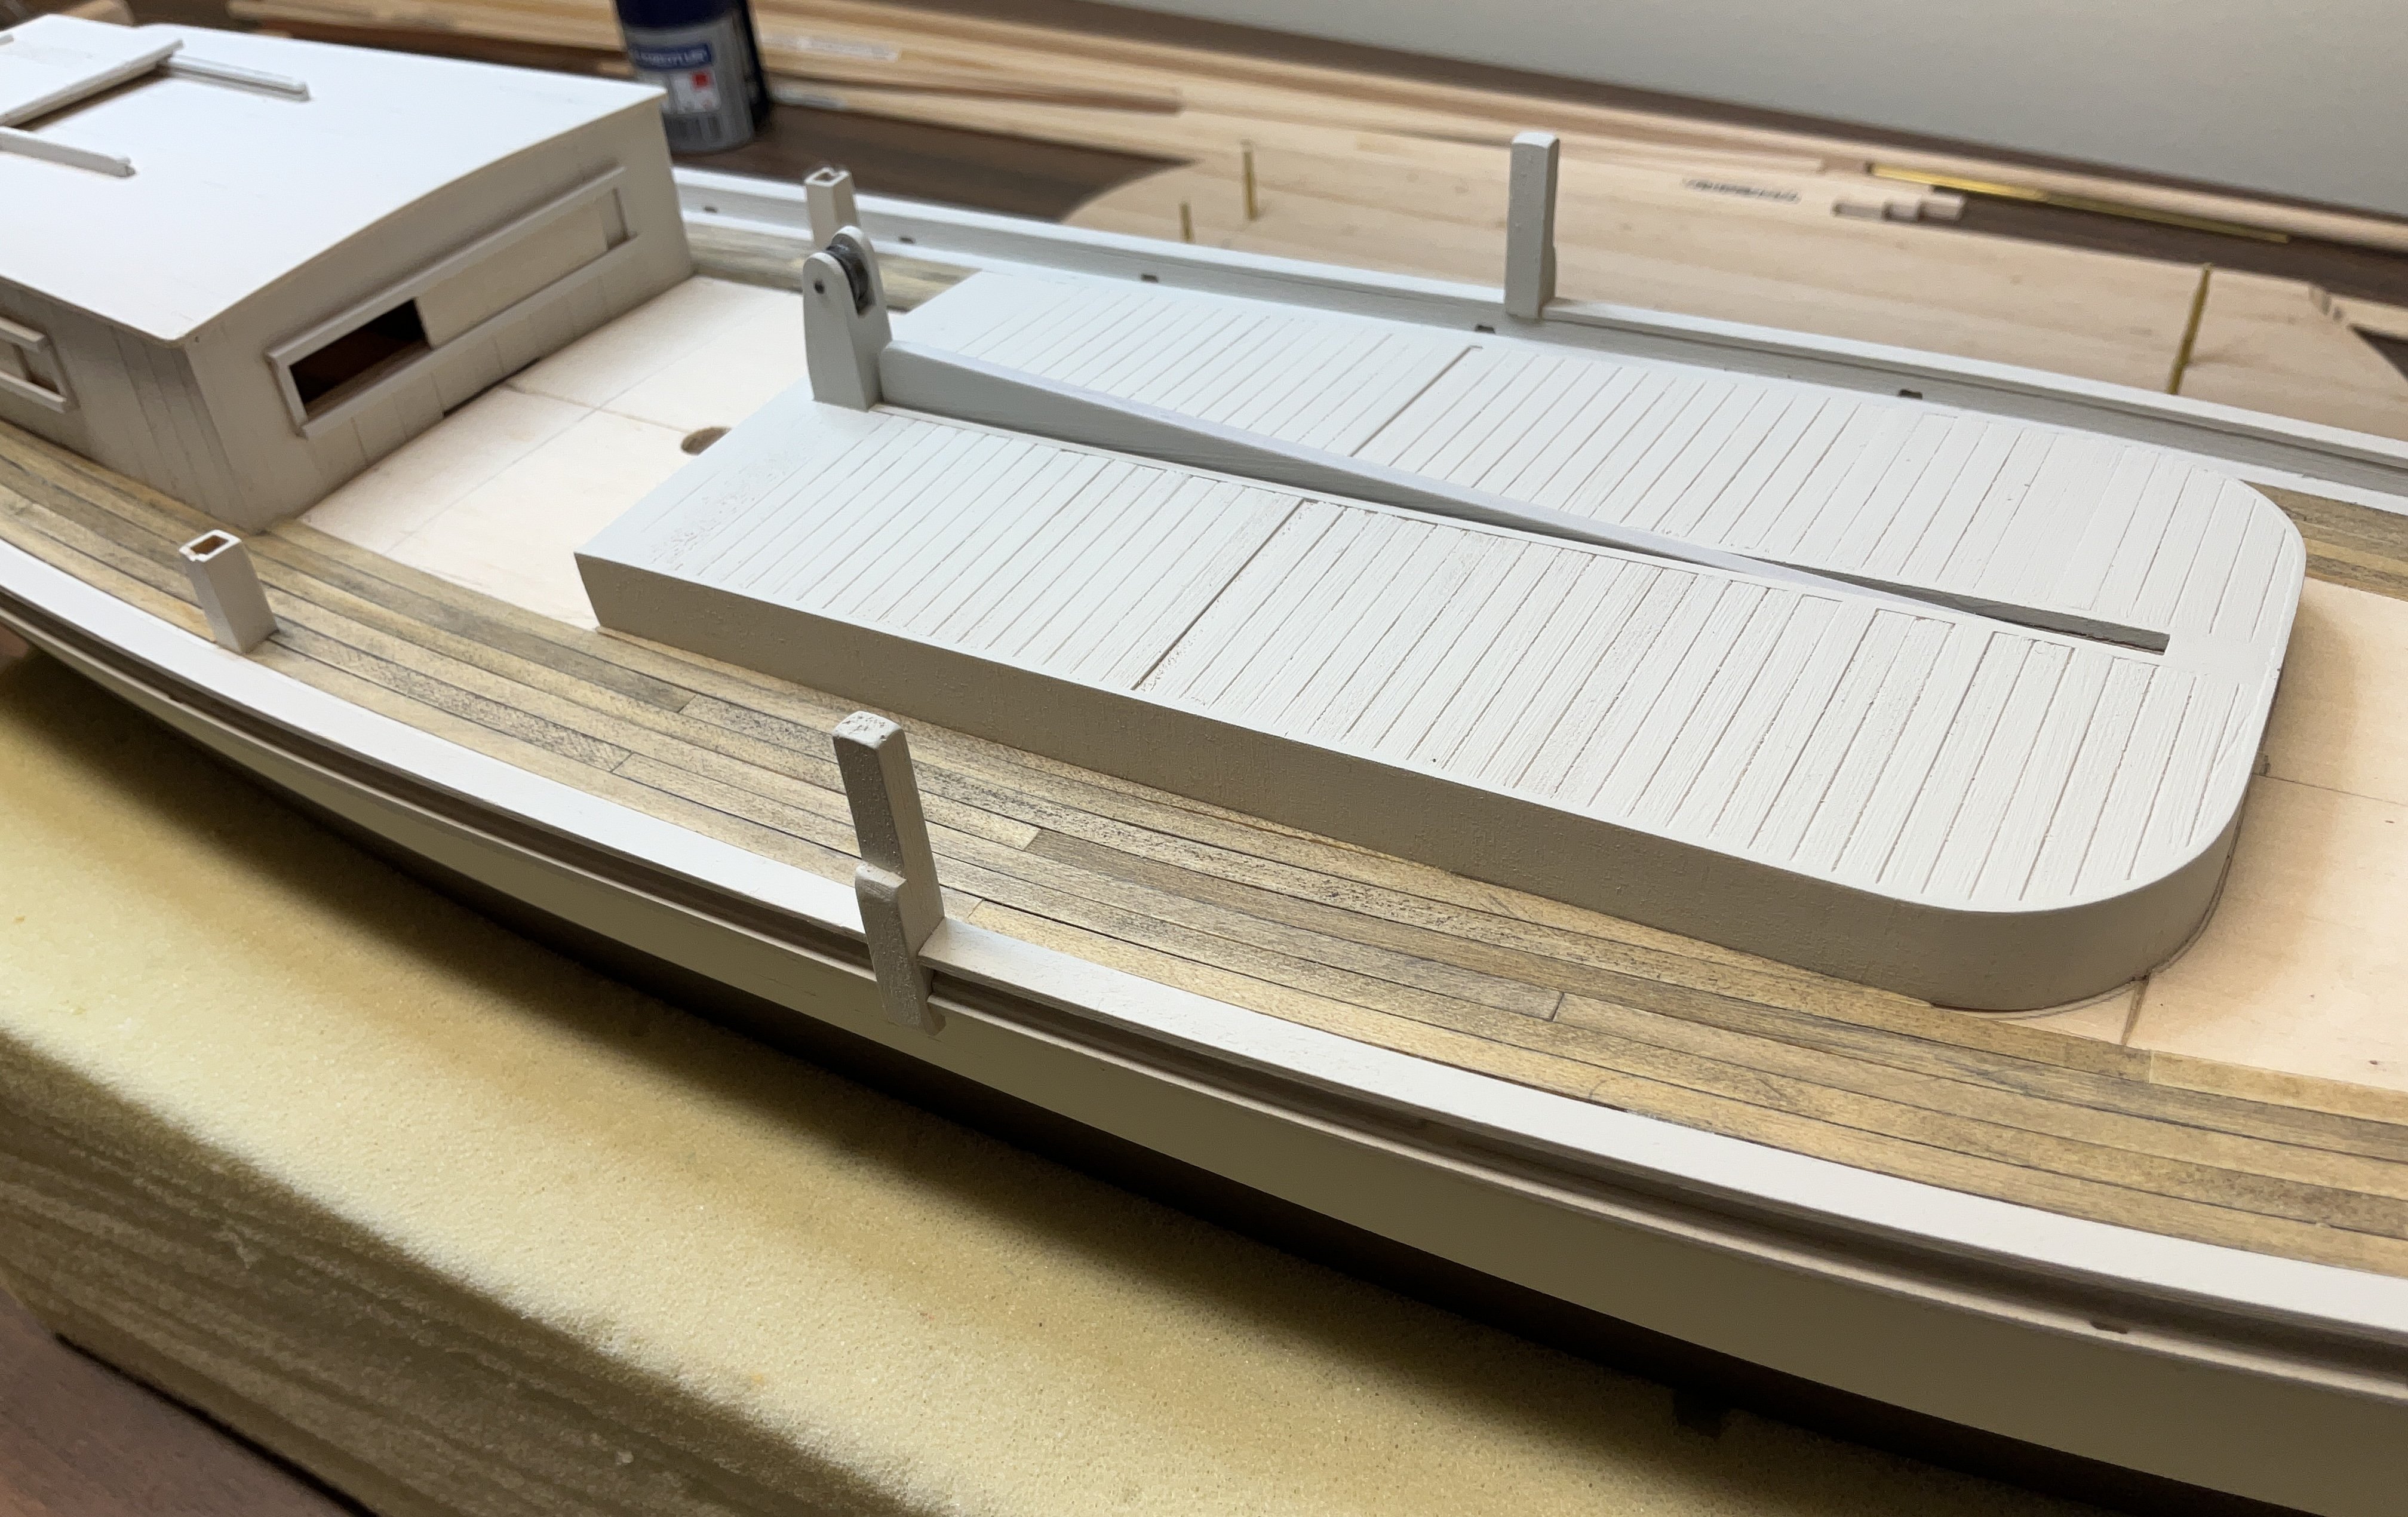
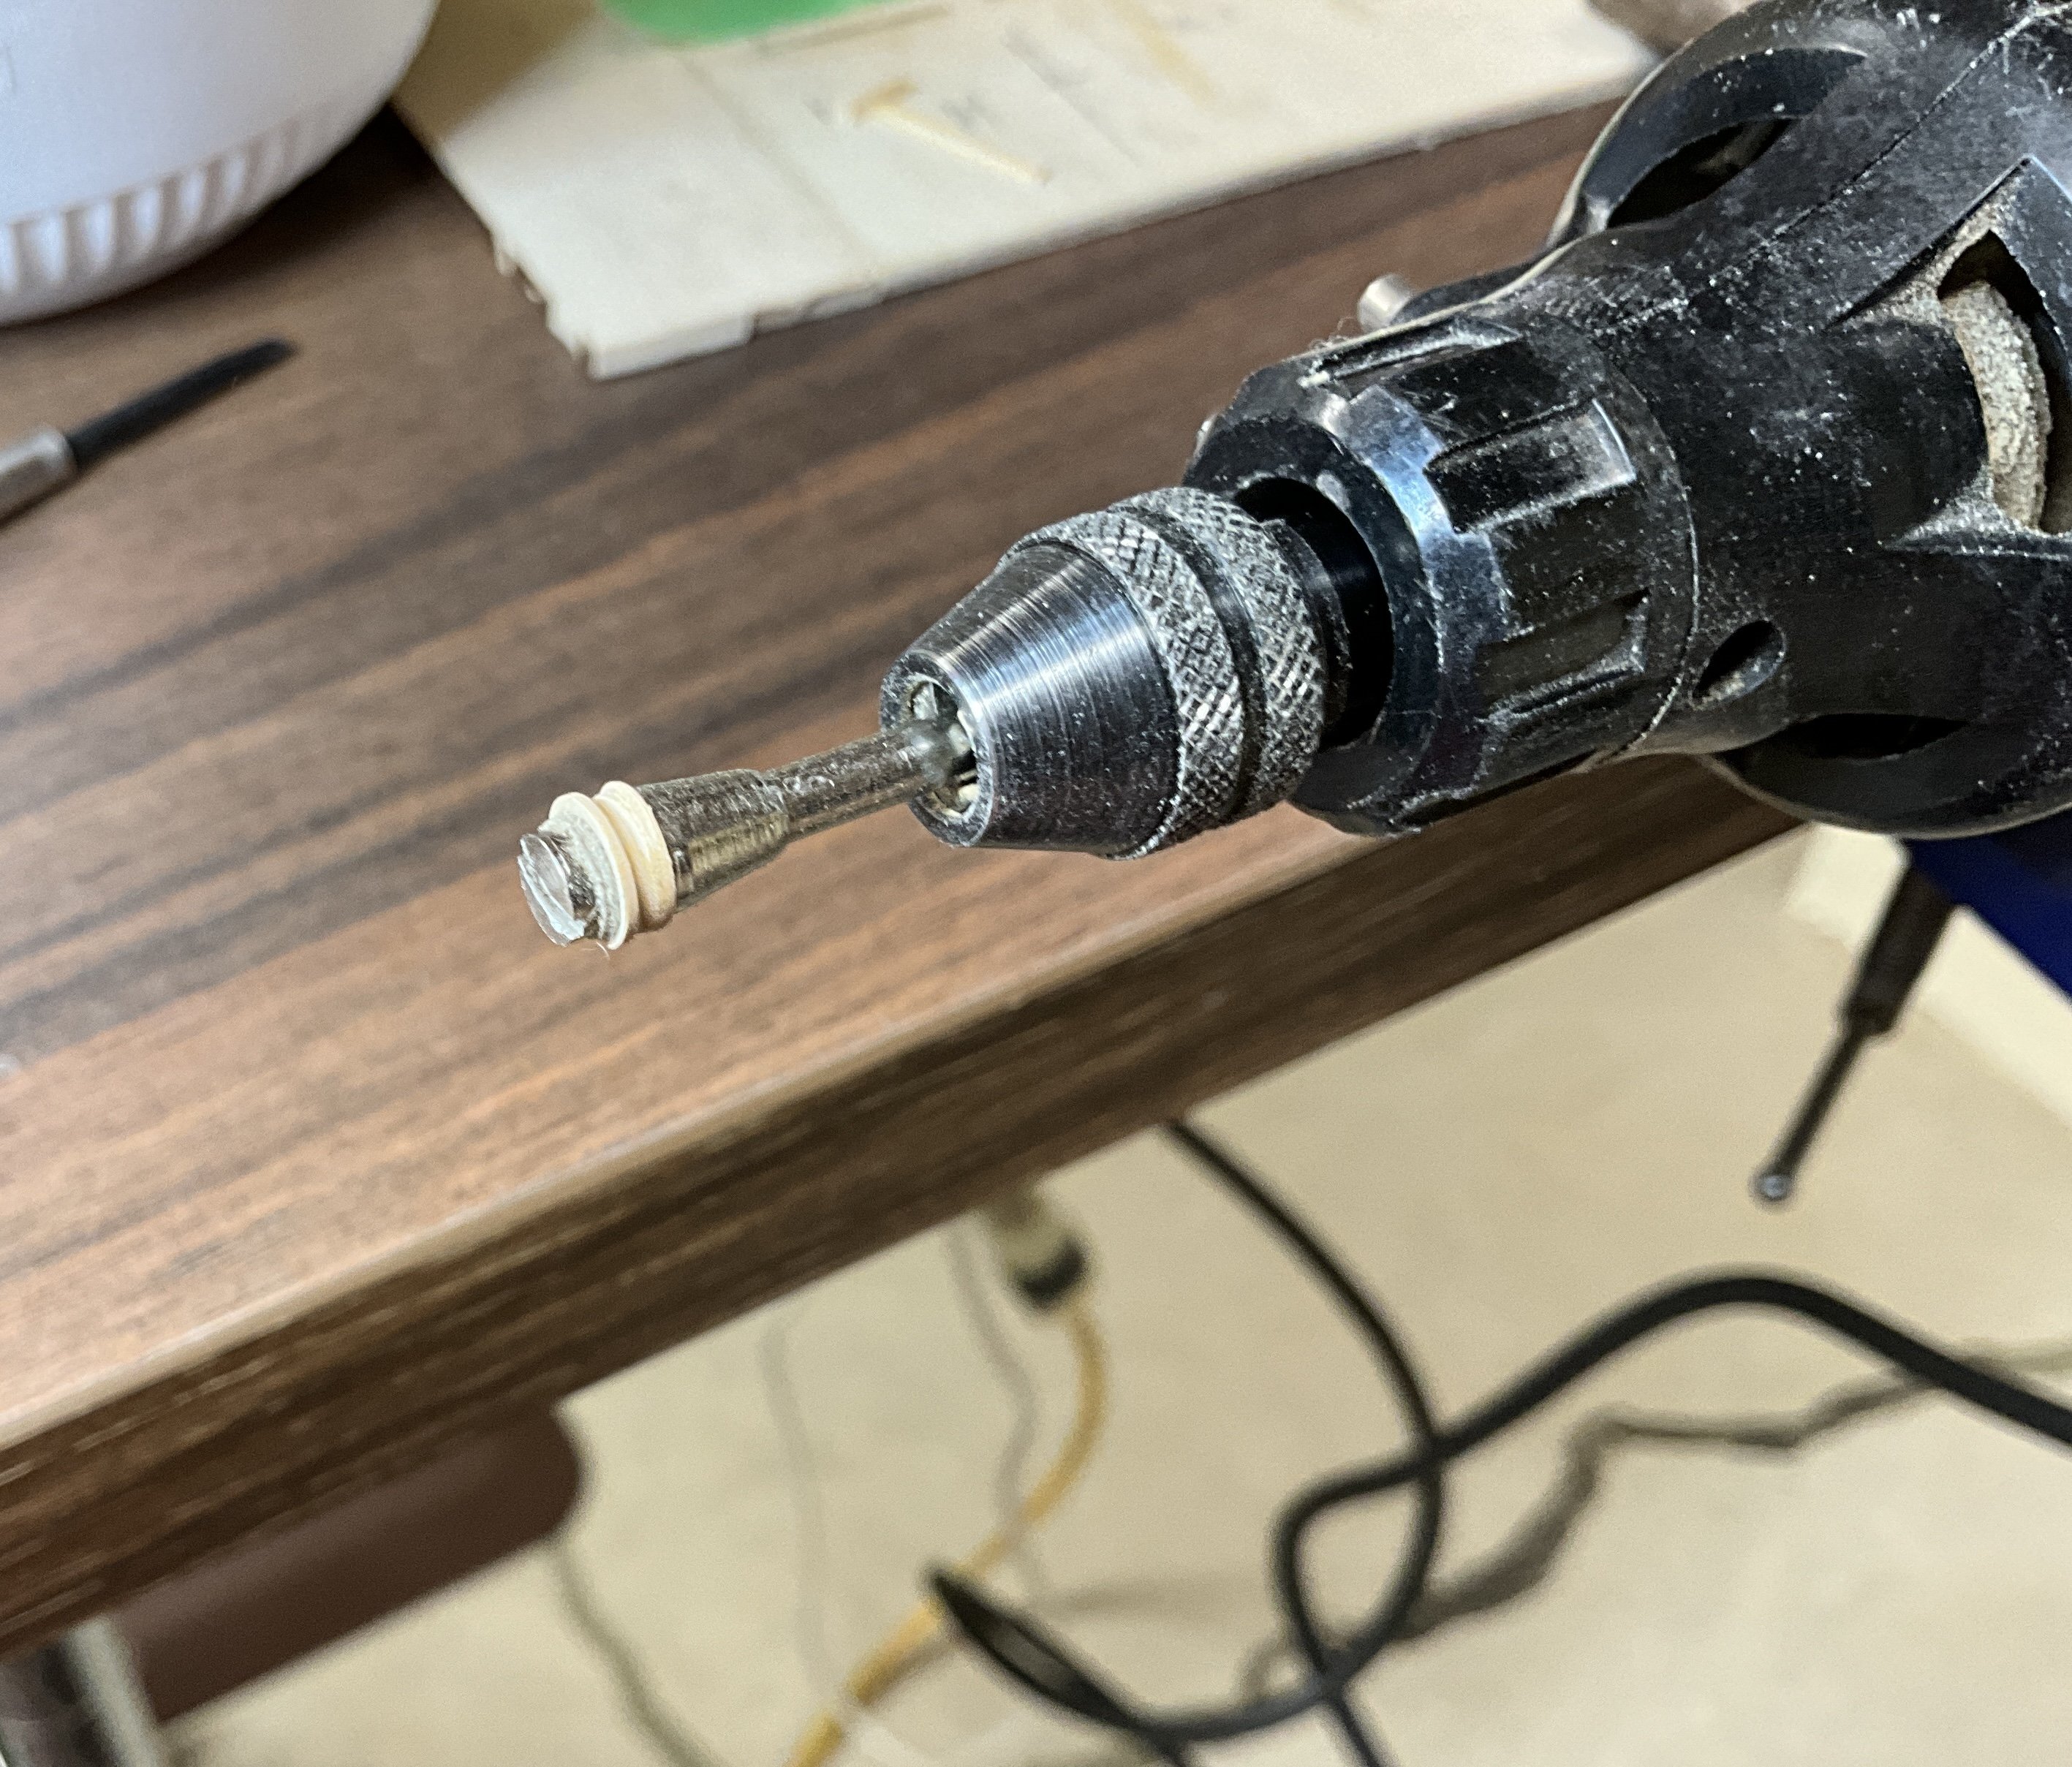
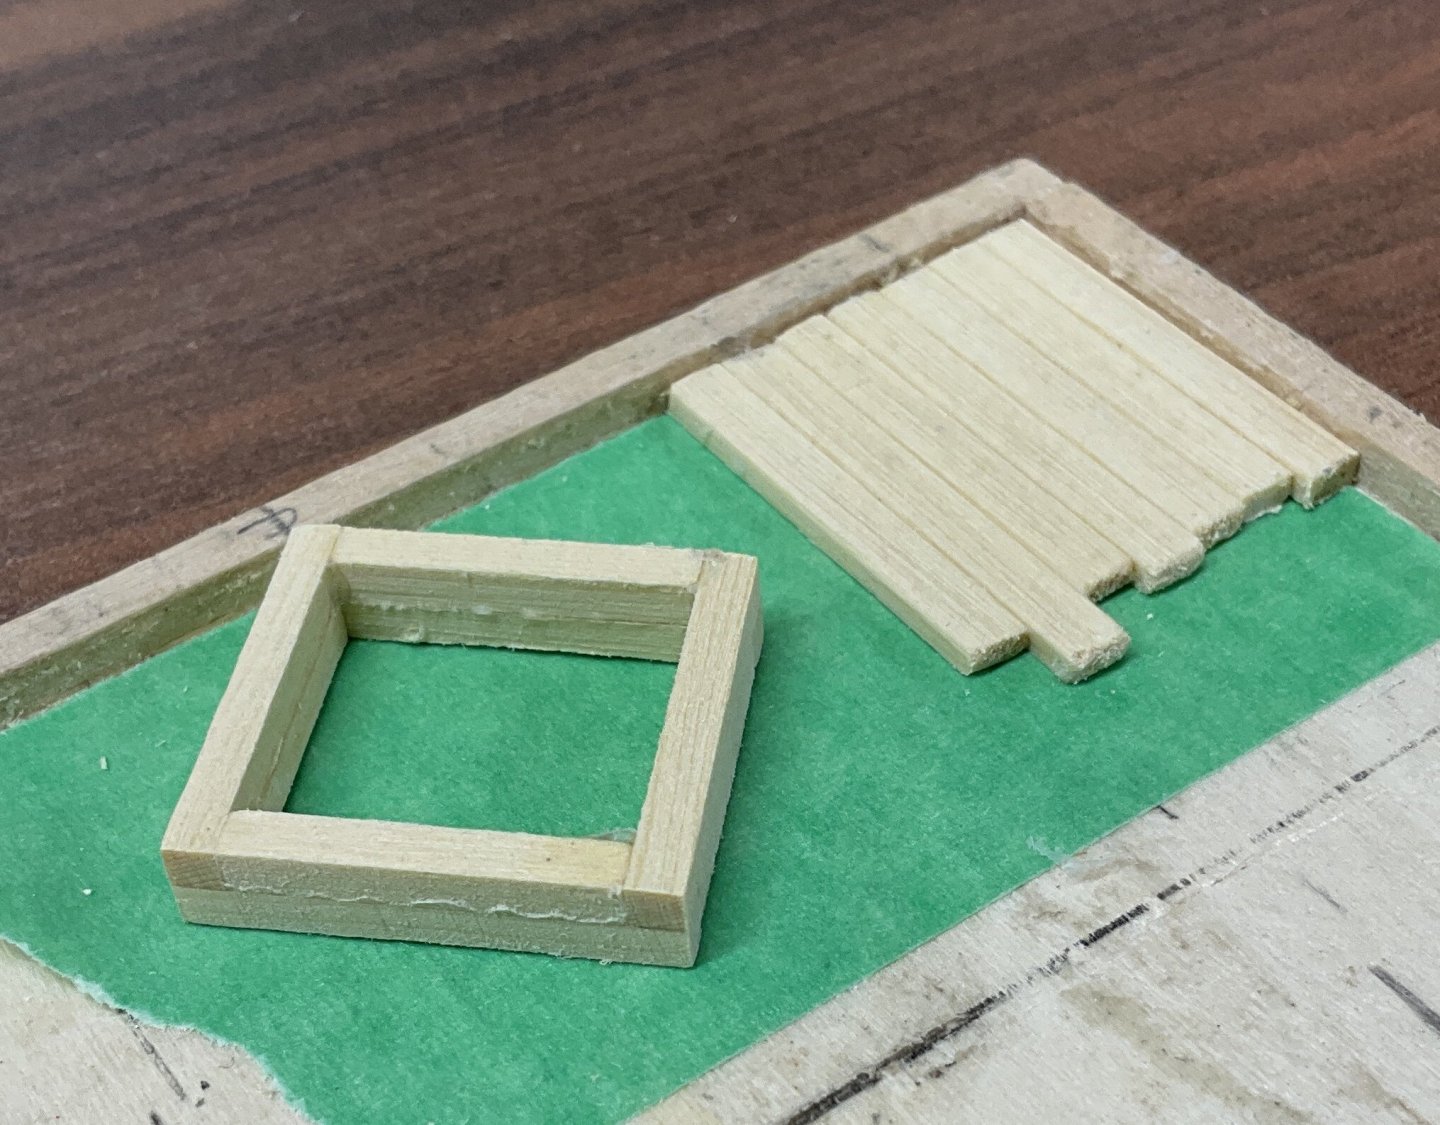
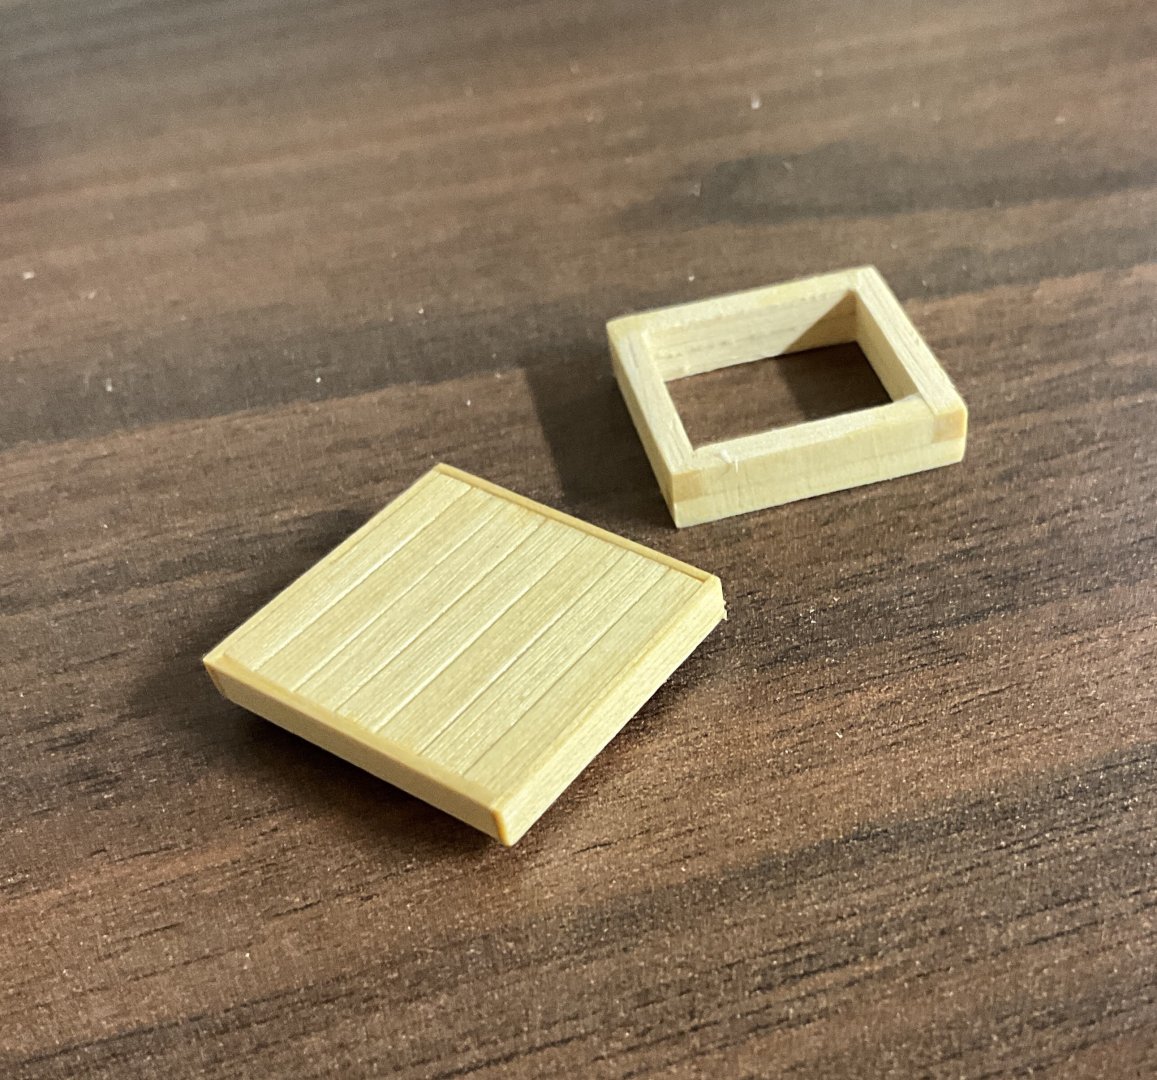
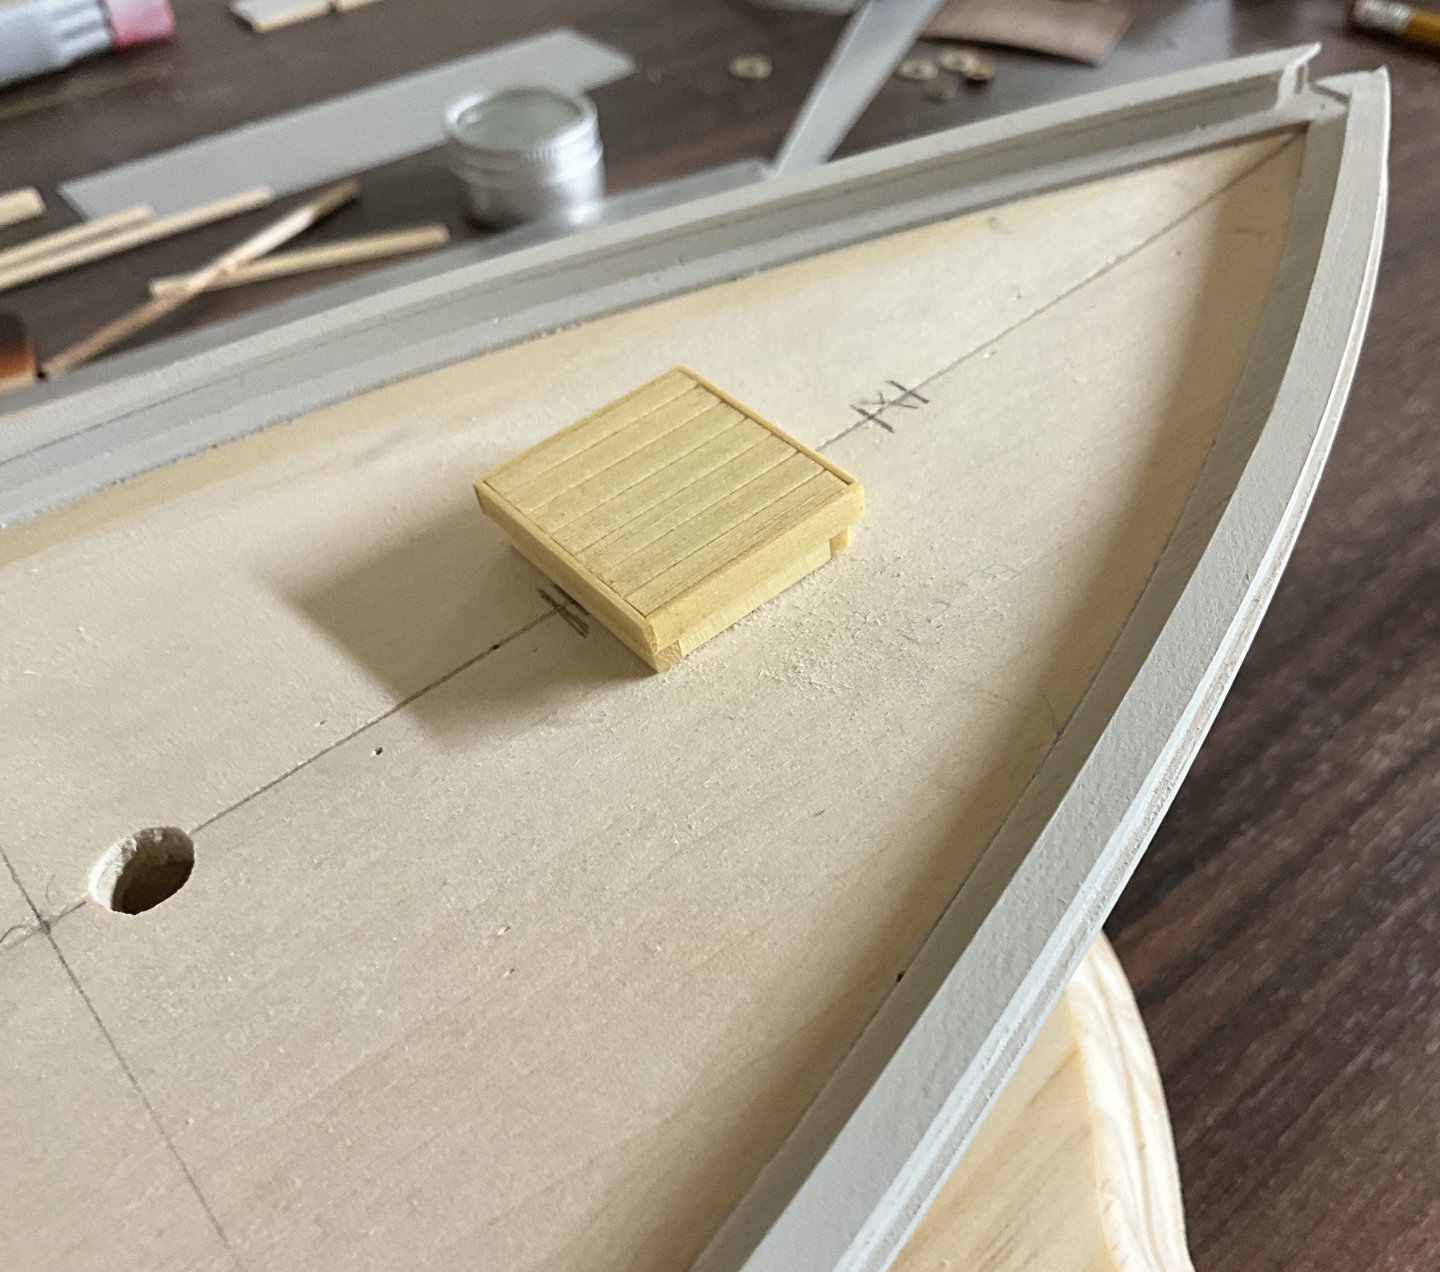
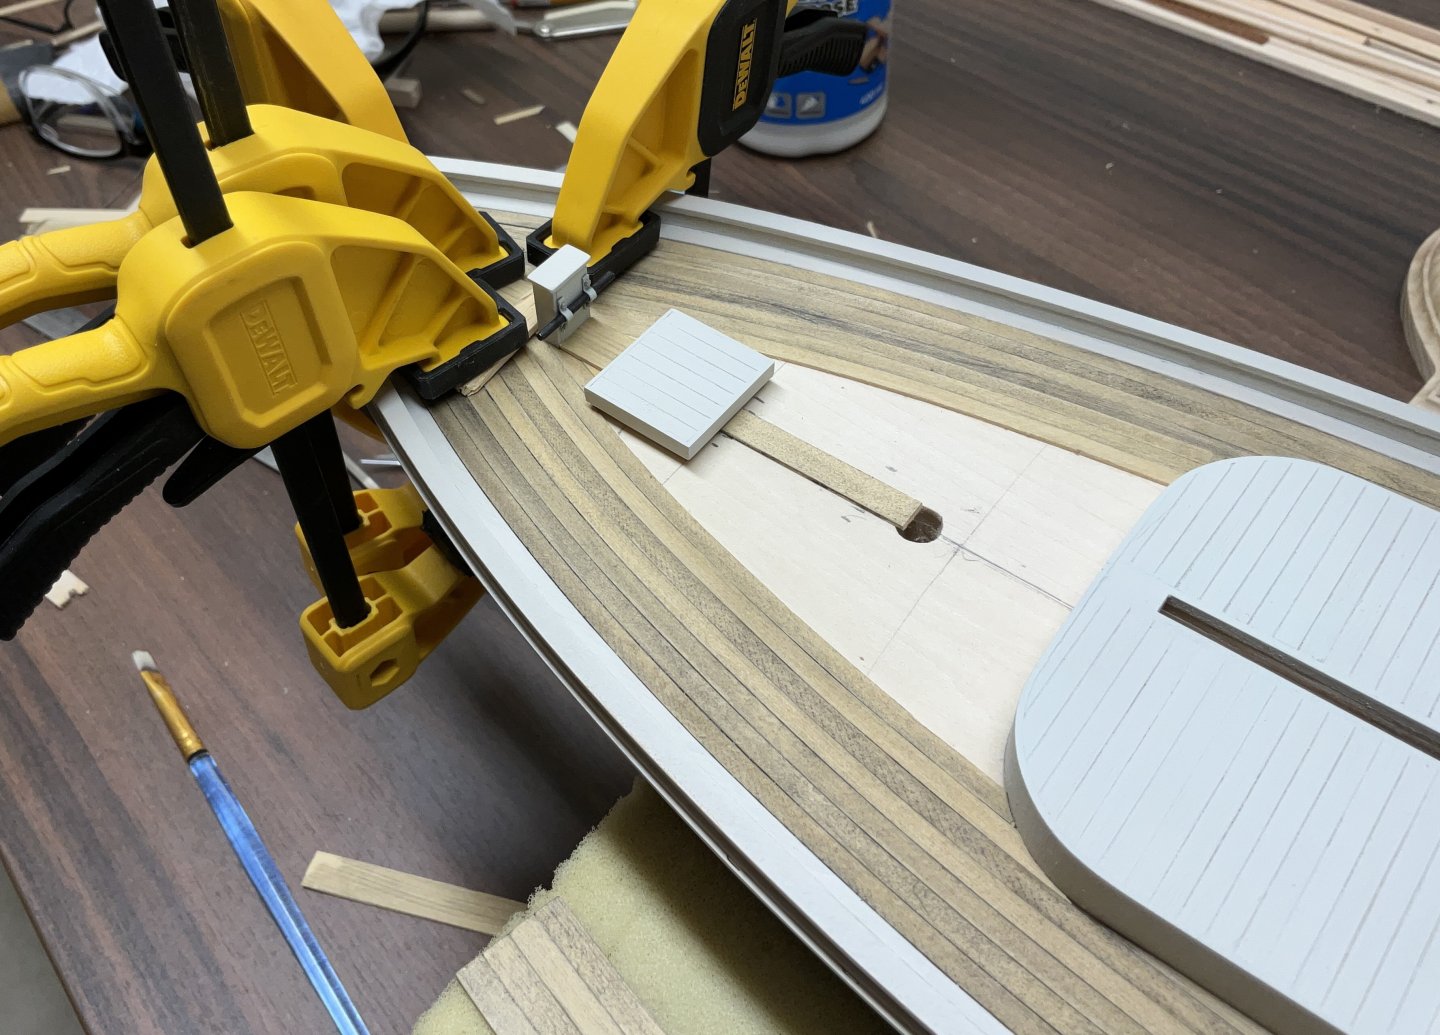
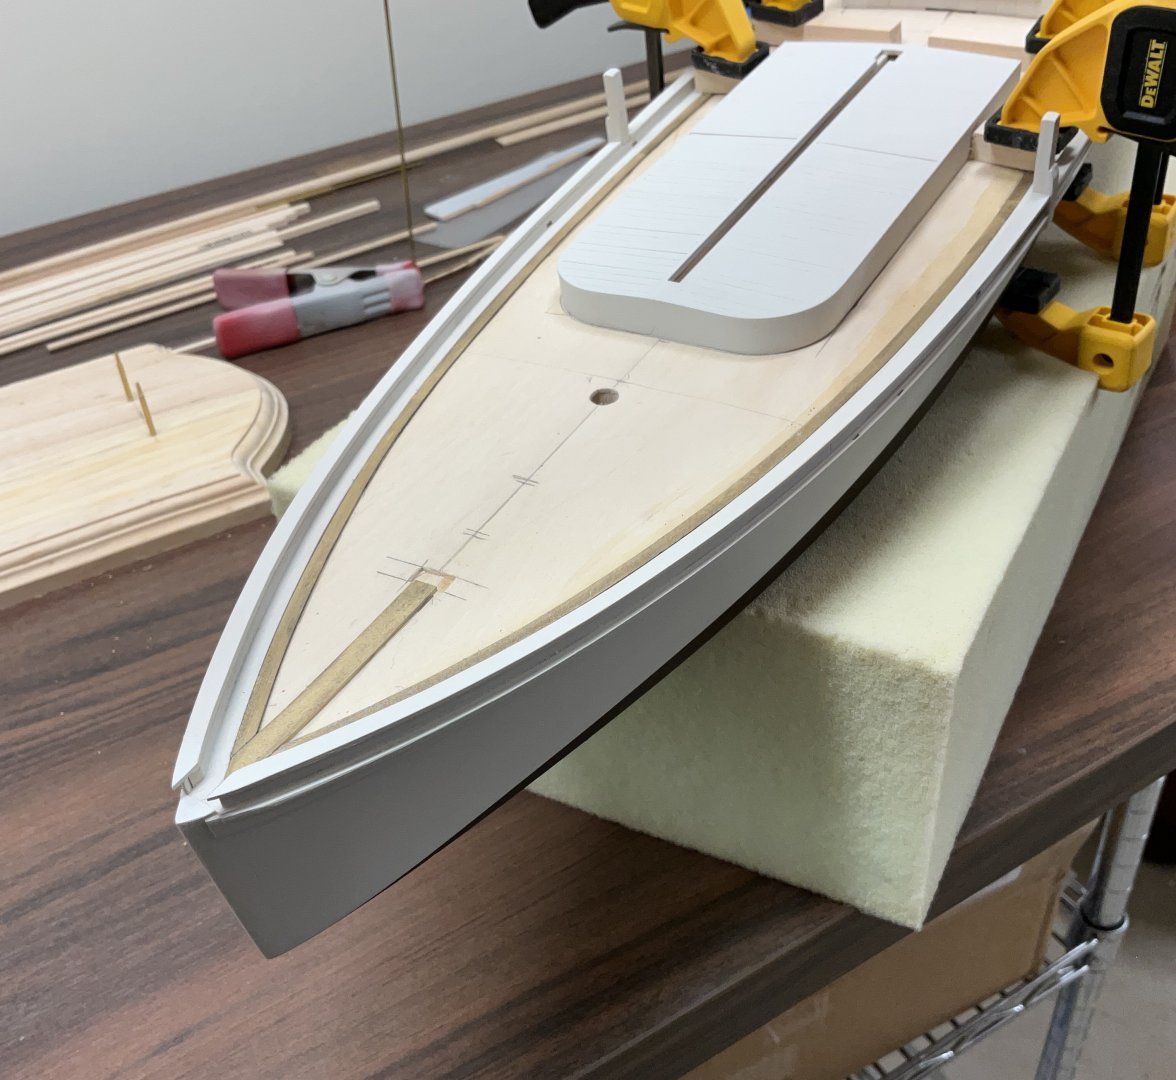
Hi Everyone, I hope you are all well. Thank you for your generous Comments and support. The deck planking is underway. I went with the curved planking that was shown in a previously posted photo, and king planks. I’m guessing on whether or not king planks were used but they certainly make the planking easier to lay. Each plank is edge bent and sealed with the WOP/ pigment mixture before gluing to the sub deck. The excess glue can then be removed with a damp brush or cloth with worrying about it affecting the stain penetration. I use a pipette to put the WOP in a bottle cap, dip a cotton swab in the pigment and then mix the two together. This is usually enough to stain one or two planks. The results vary depending on how much the wood absorbs but generally they are close enough. If I was going to do it again I would probably use 3/32” wide planks instead of 1/8”. Both for looks and bend-ability. The pump wells were installed when I got to them. They are made from a 1/8 x 1/8” strip of wood sheathed in 1/32” strips that result in a 3/16” x 3/16” box. The 1/8” core was made shorter than the sheathing to give it the hollow look. A spare carronade carriage truck was used to make a sheave for the center board hoist. It was mounted to a cutoff blade spindle and shaped. And then the planking continued. Hope to see you soon.


- 201 replies
-
- 13
-
-
-
- Oyster Sharpie
- first scratch build
- (and 1 more)
-
Hi Gary, you have just de-mystified how to obtain such clean results on what seems to me to be a very challenging part of the build. Very nice!
-
Hi Bill, he is using something like these. I bought them at Lee Valley when I was picking up some Starbond CA. They don’t clog but every so often you have to cut a bit off of the tip

-
Thanks Keith, I’m not sure where they make clothes pegs these days but they don’t seem to be very good anymore. 😢
- 201 replies
-
- 5
-
-
- Oyster Sharpie
- first scratch build
- (and 1 more)
-
Gunboat Philadelphia 1776 by tmj
Paul Le Wol replied to tmj's topic in - Build logs for subjects built 1751 - 1800
It’s good to keep those supervisors on their toes. -
Rik, the deck planking looks great. The clinker planking is a very nice detail.