Paul Le Wol
-
Posts
1,036 -
Joined
-
Last visited
Content Type
Profiles
Forums
Gallery
Events
Everything posted by Paul Le Wol
-
Eric,congratulations on completing Peerless. Such a fine result. I’m going to miss your updates on this very interesting time and subject. I like the johnboat leaning on its side. More work but hey. Maybe if Peerless is mounted in a diorama the johnboat will be put to work.
-
Hi Jacques, your half hull project is looking great. Your planking skills are second to none!
- 82 replies
-
- 3
-

-

-
- half hull planking project
- half hull
- (and 2 more)
-
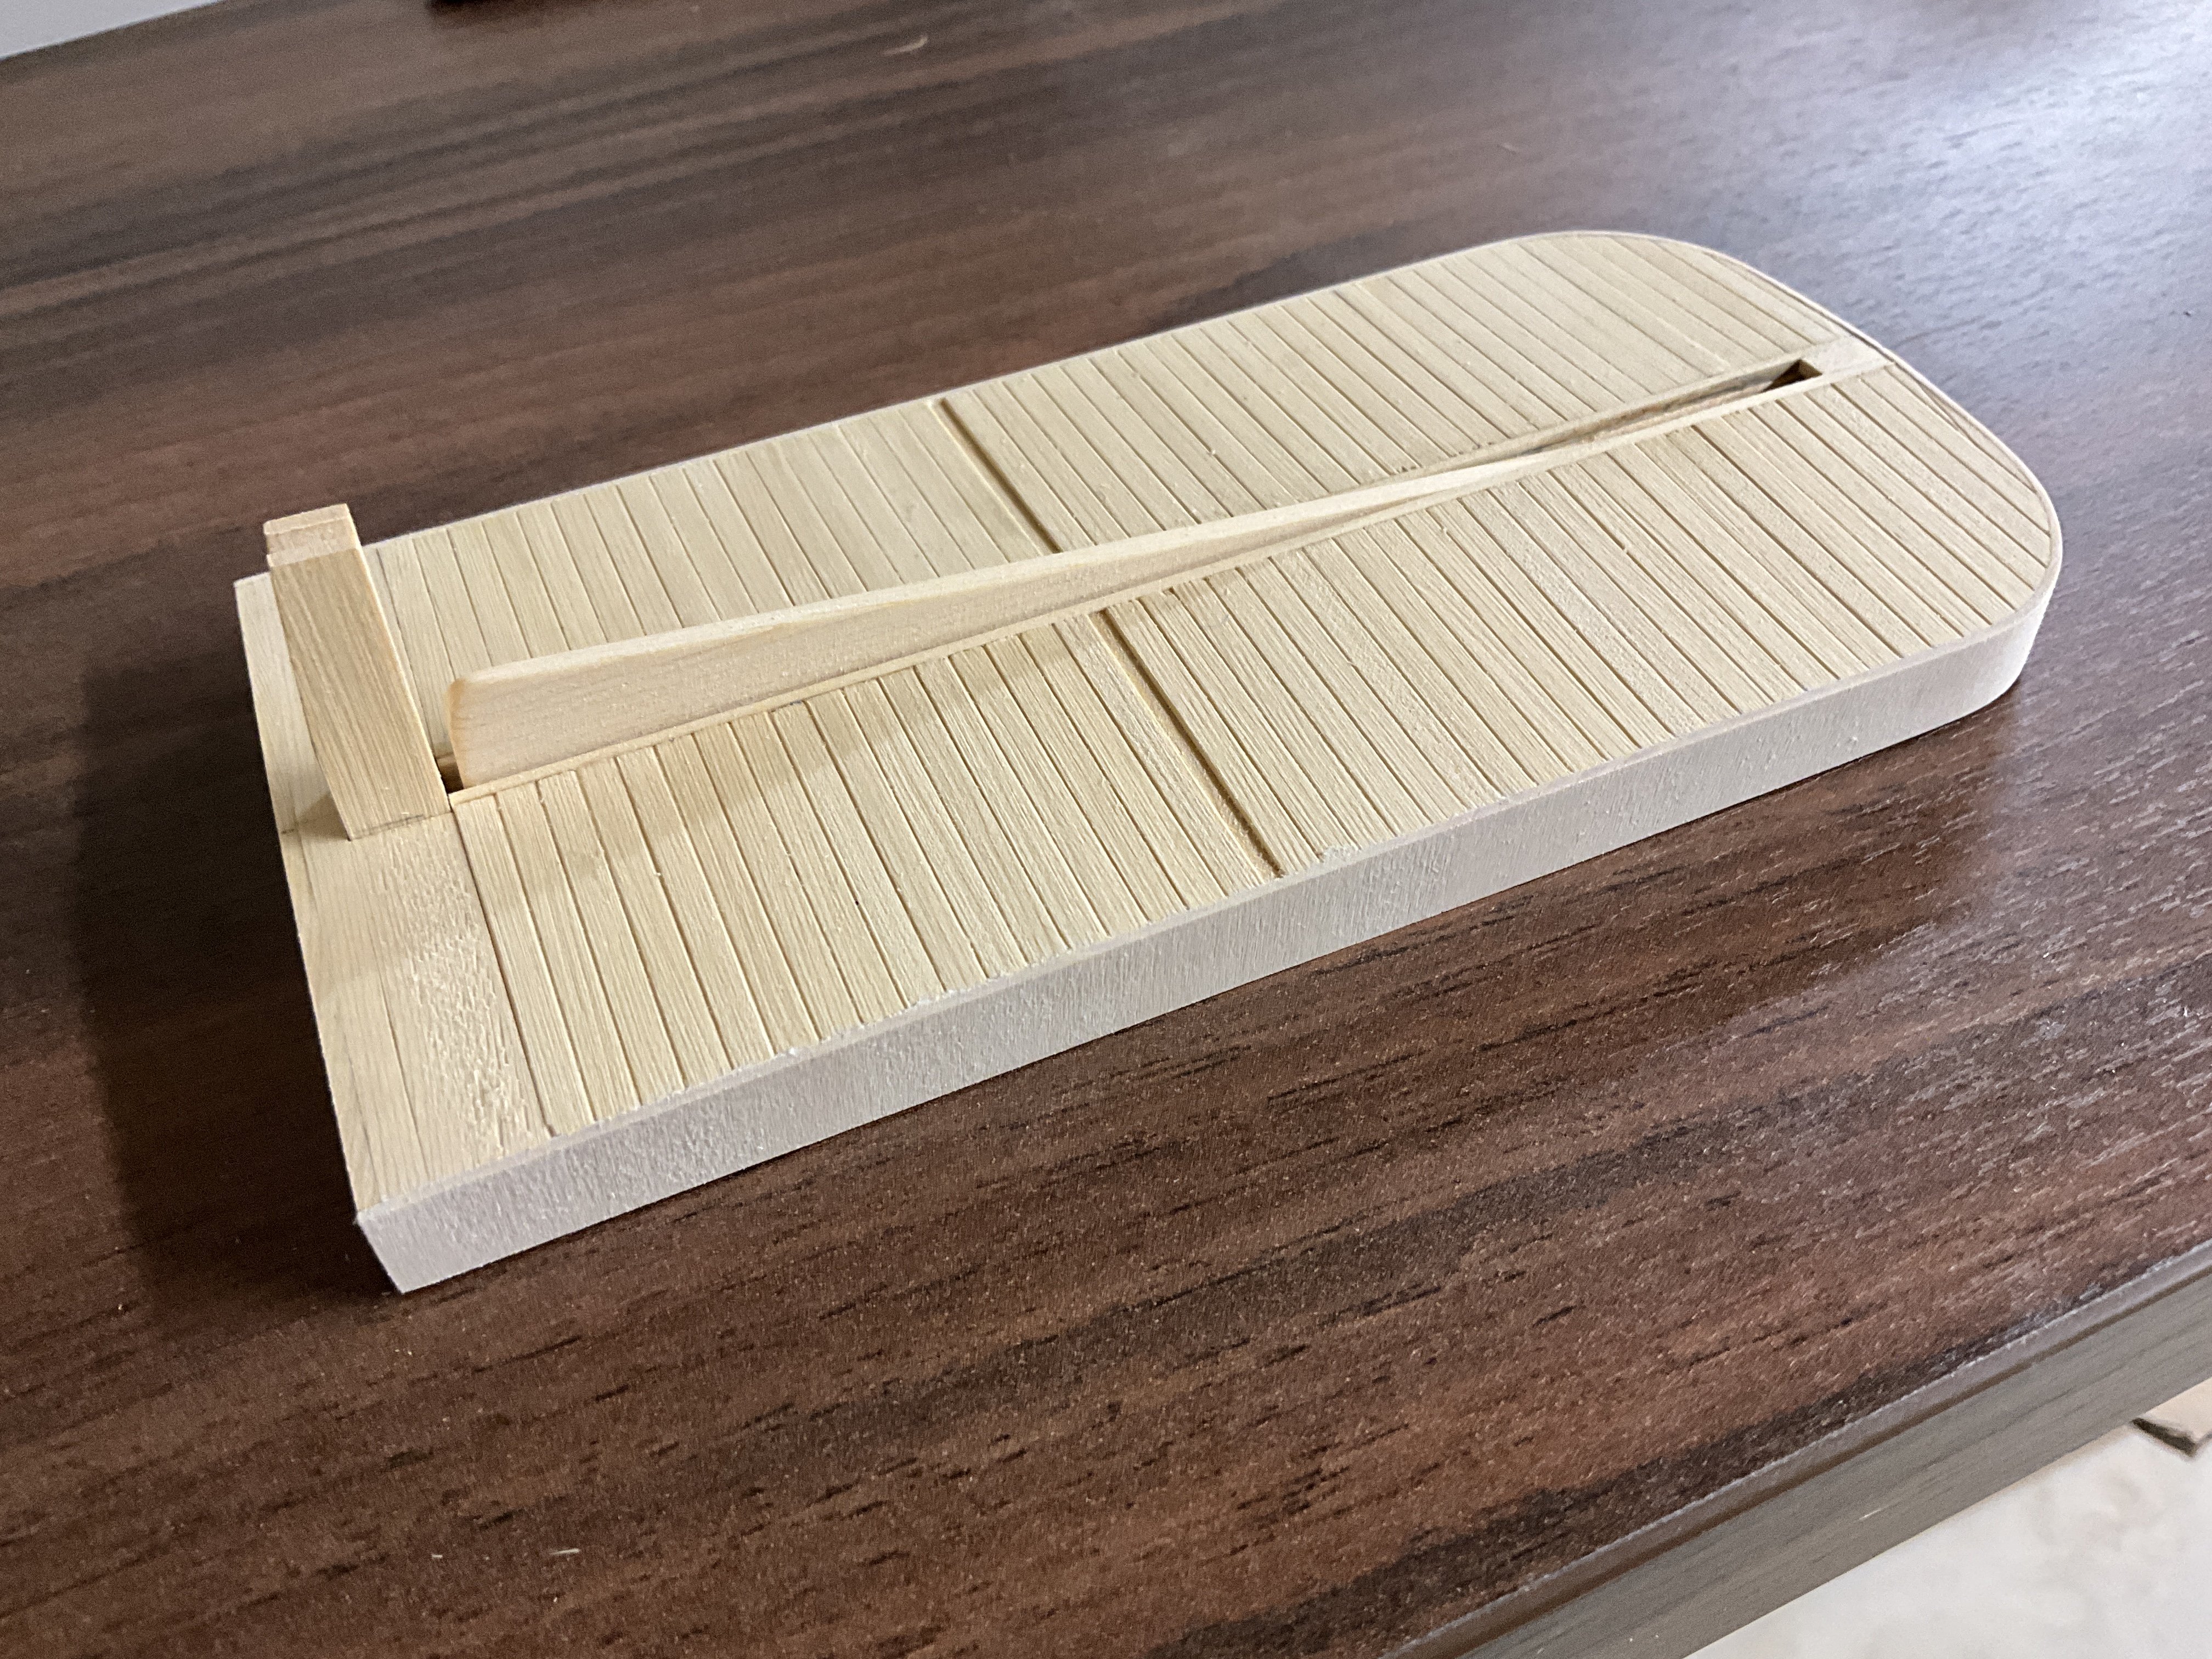
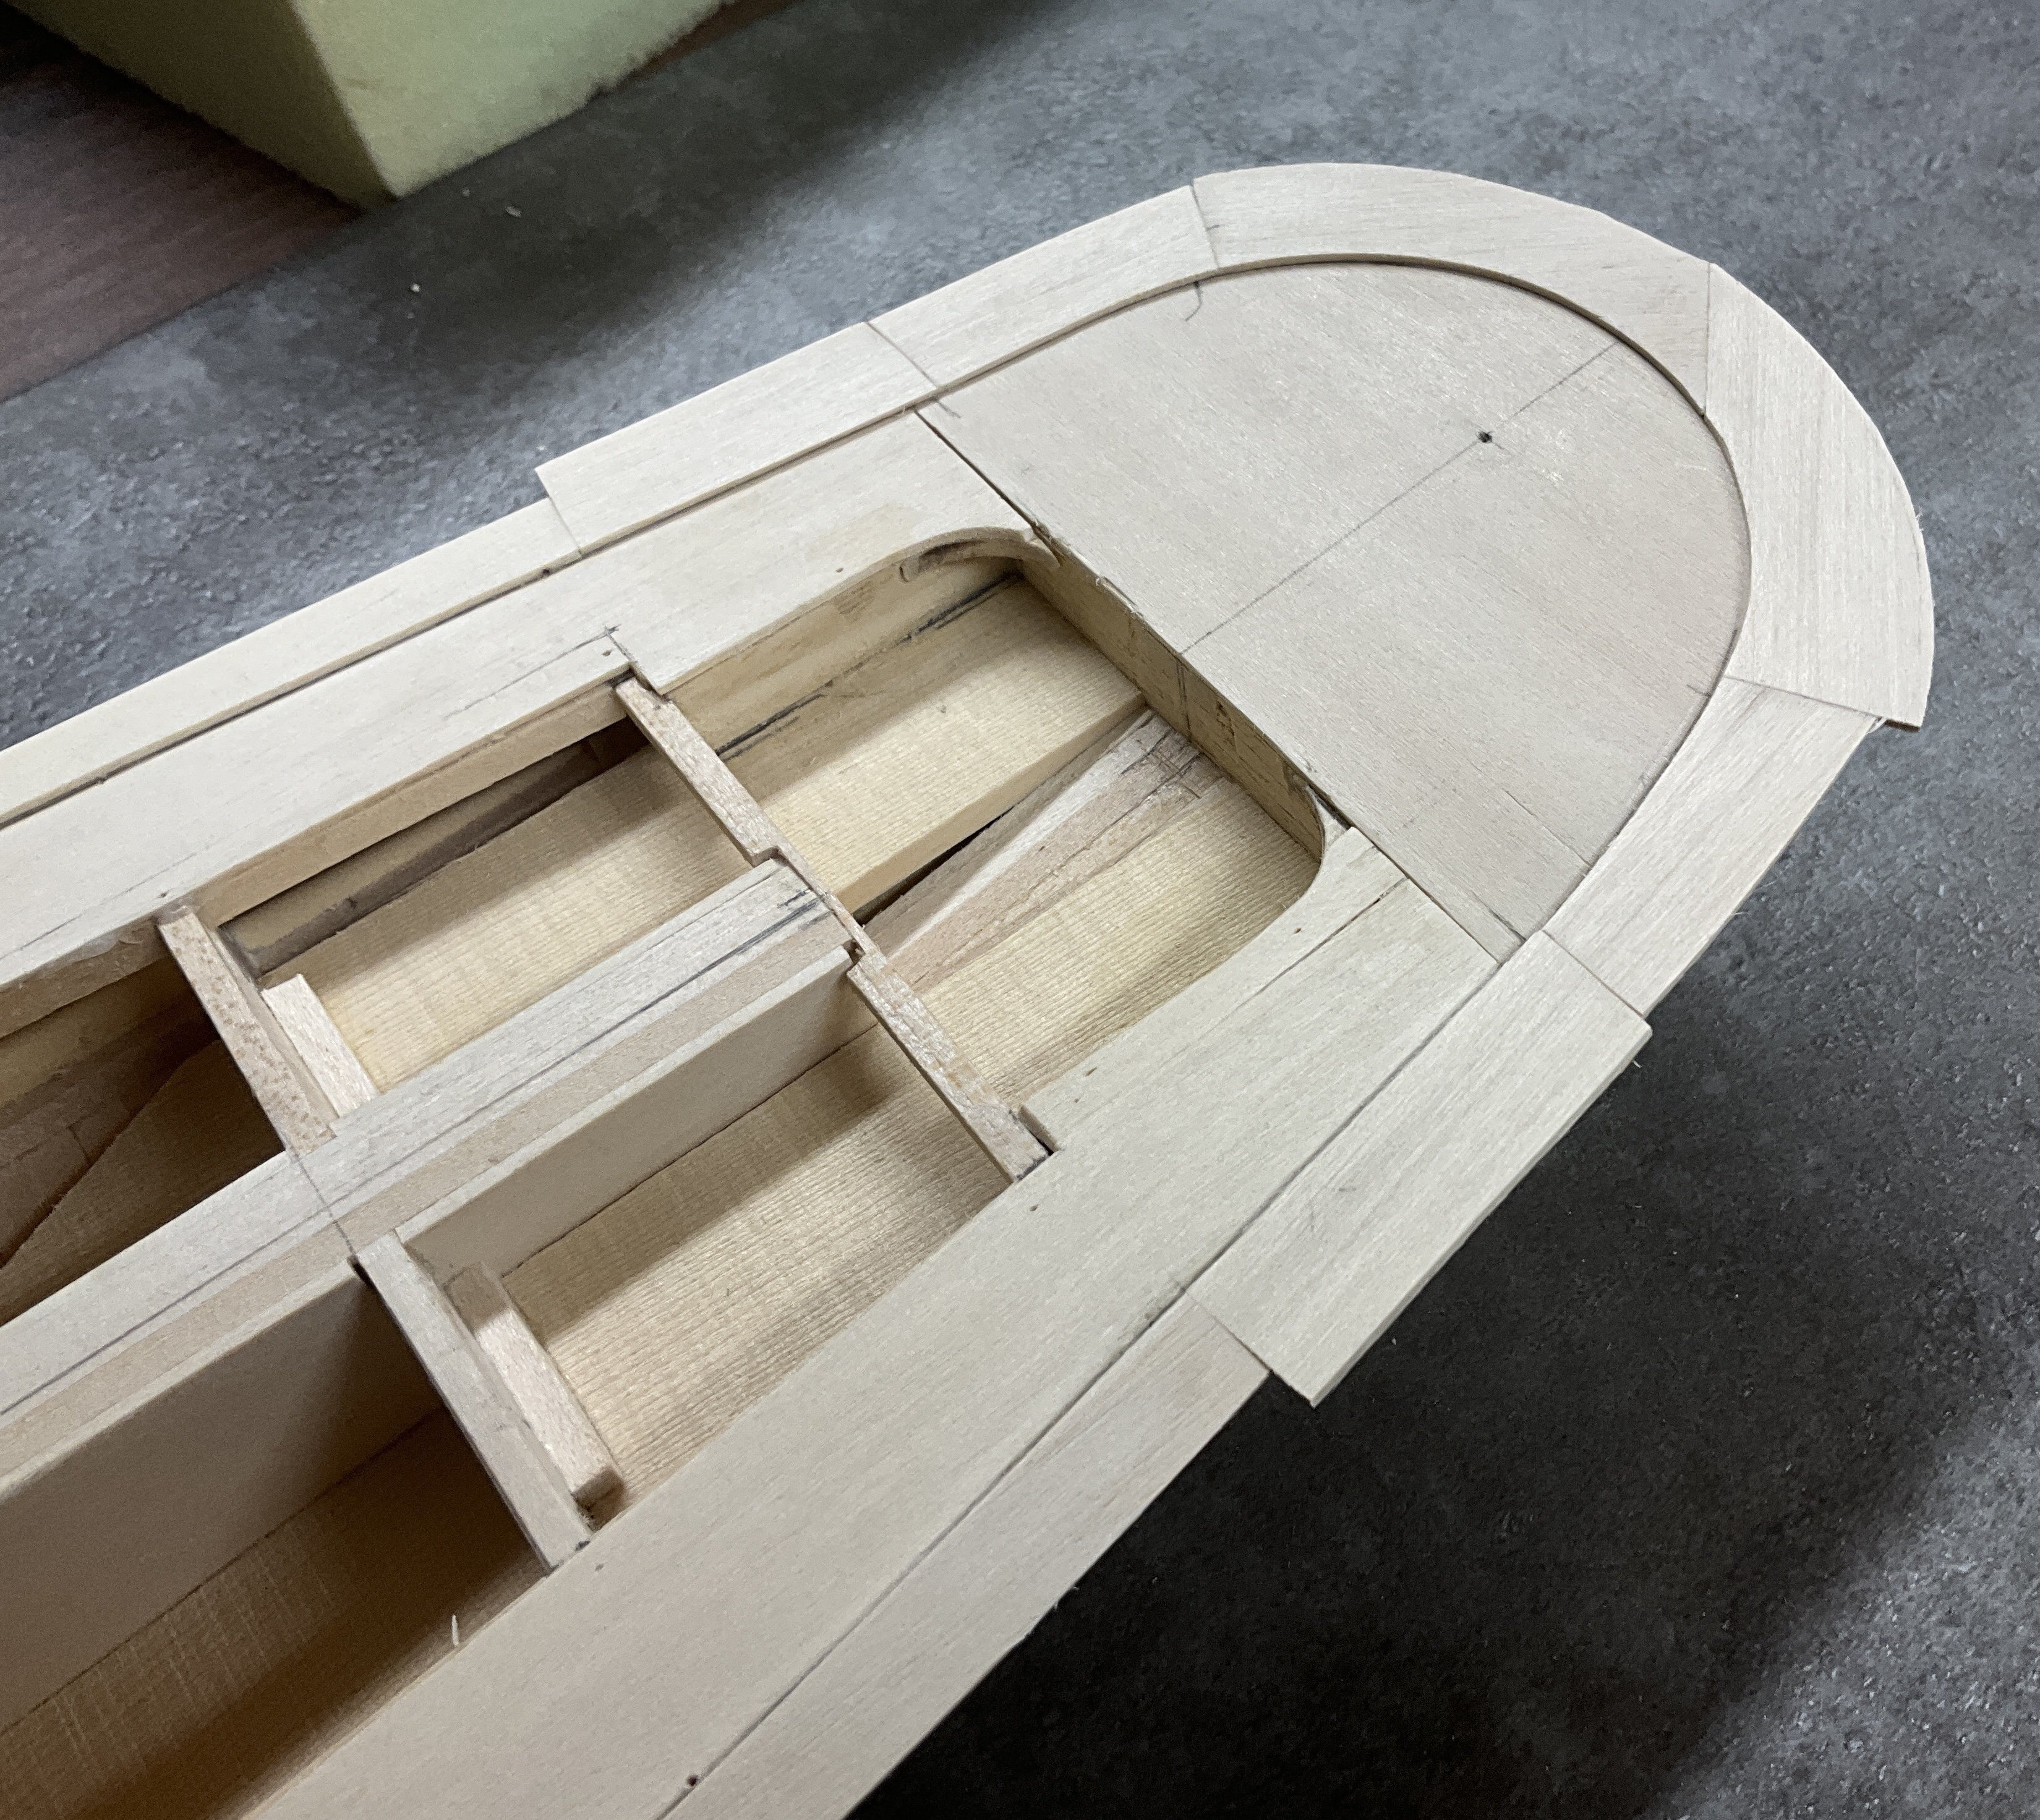
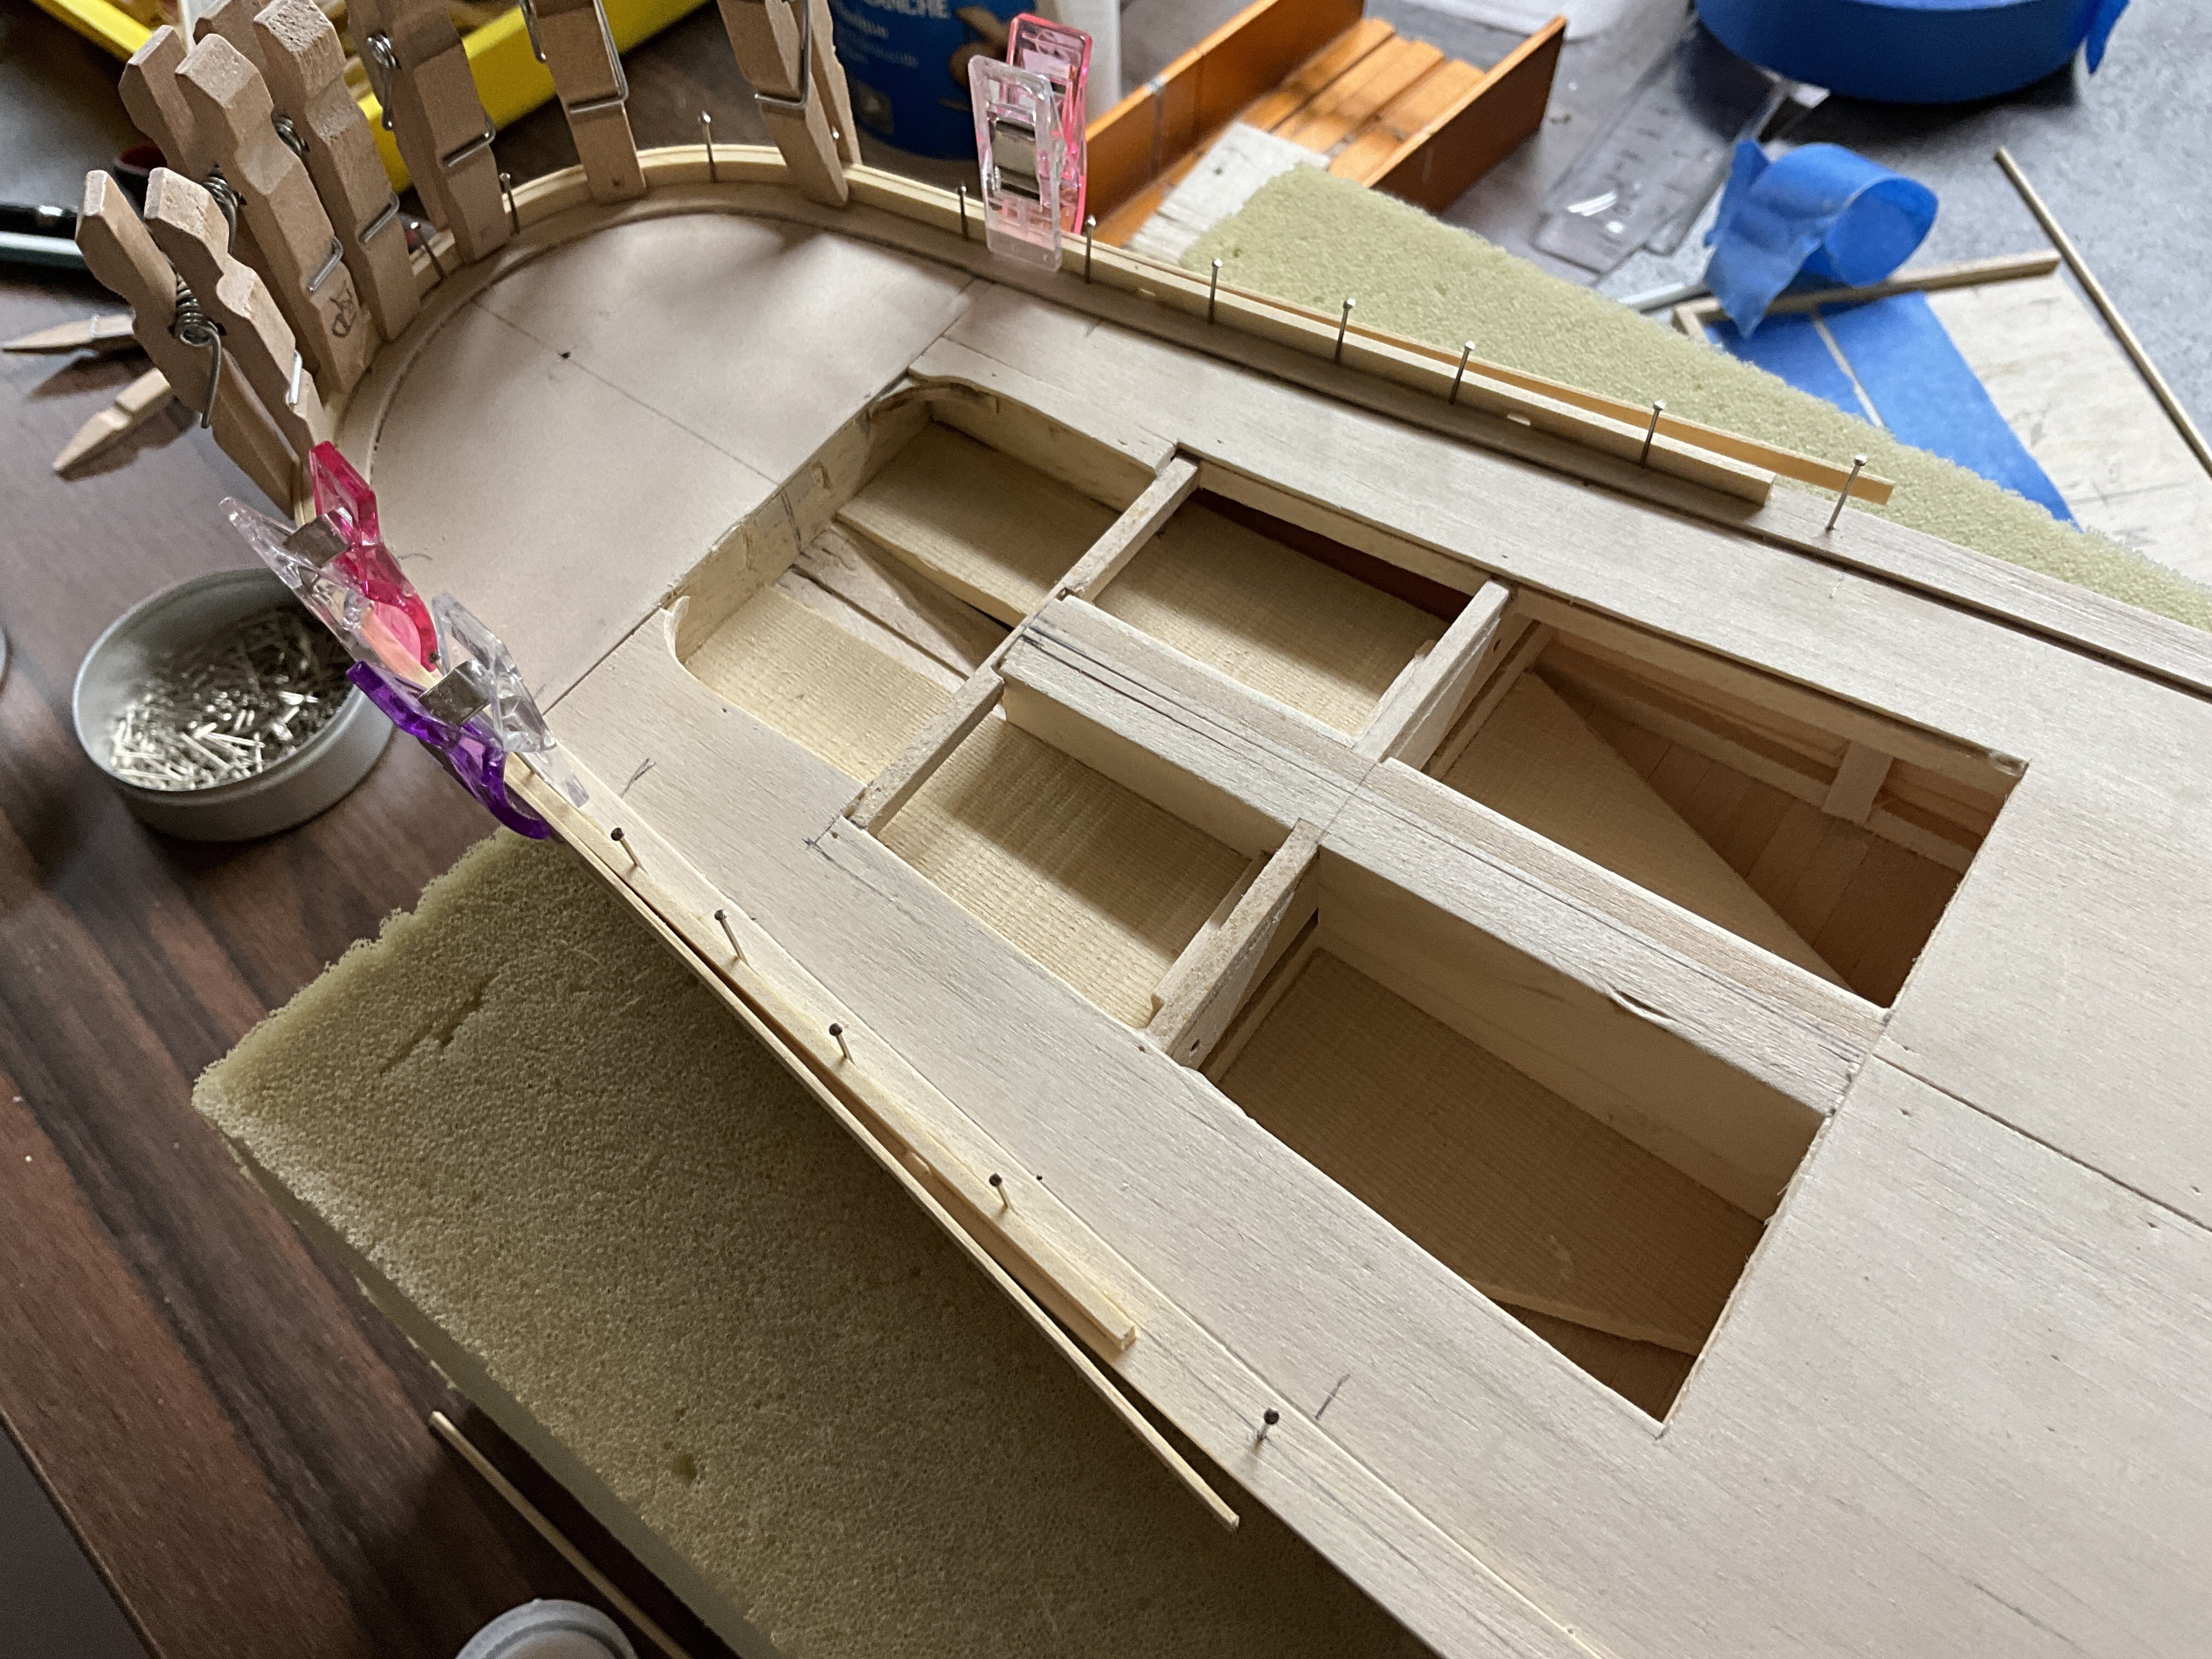
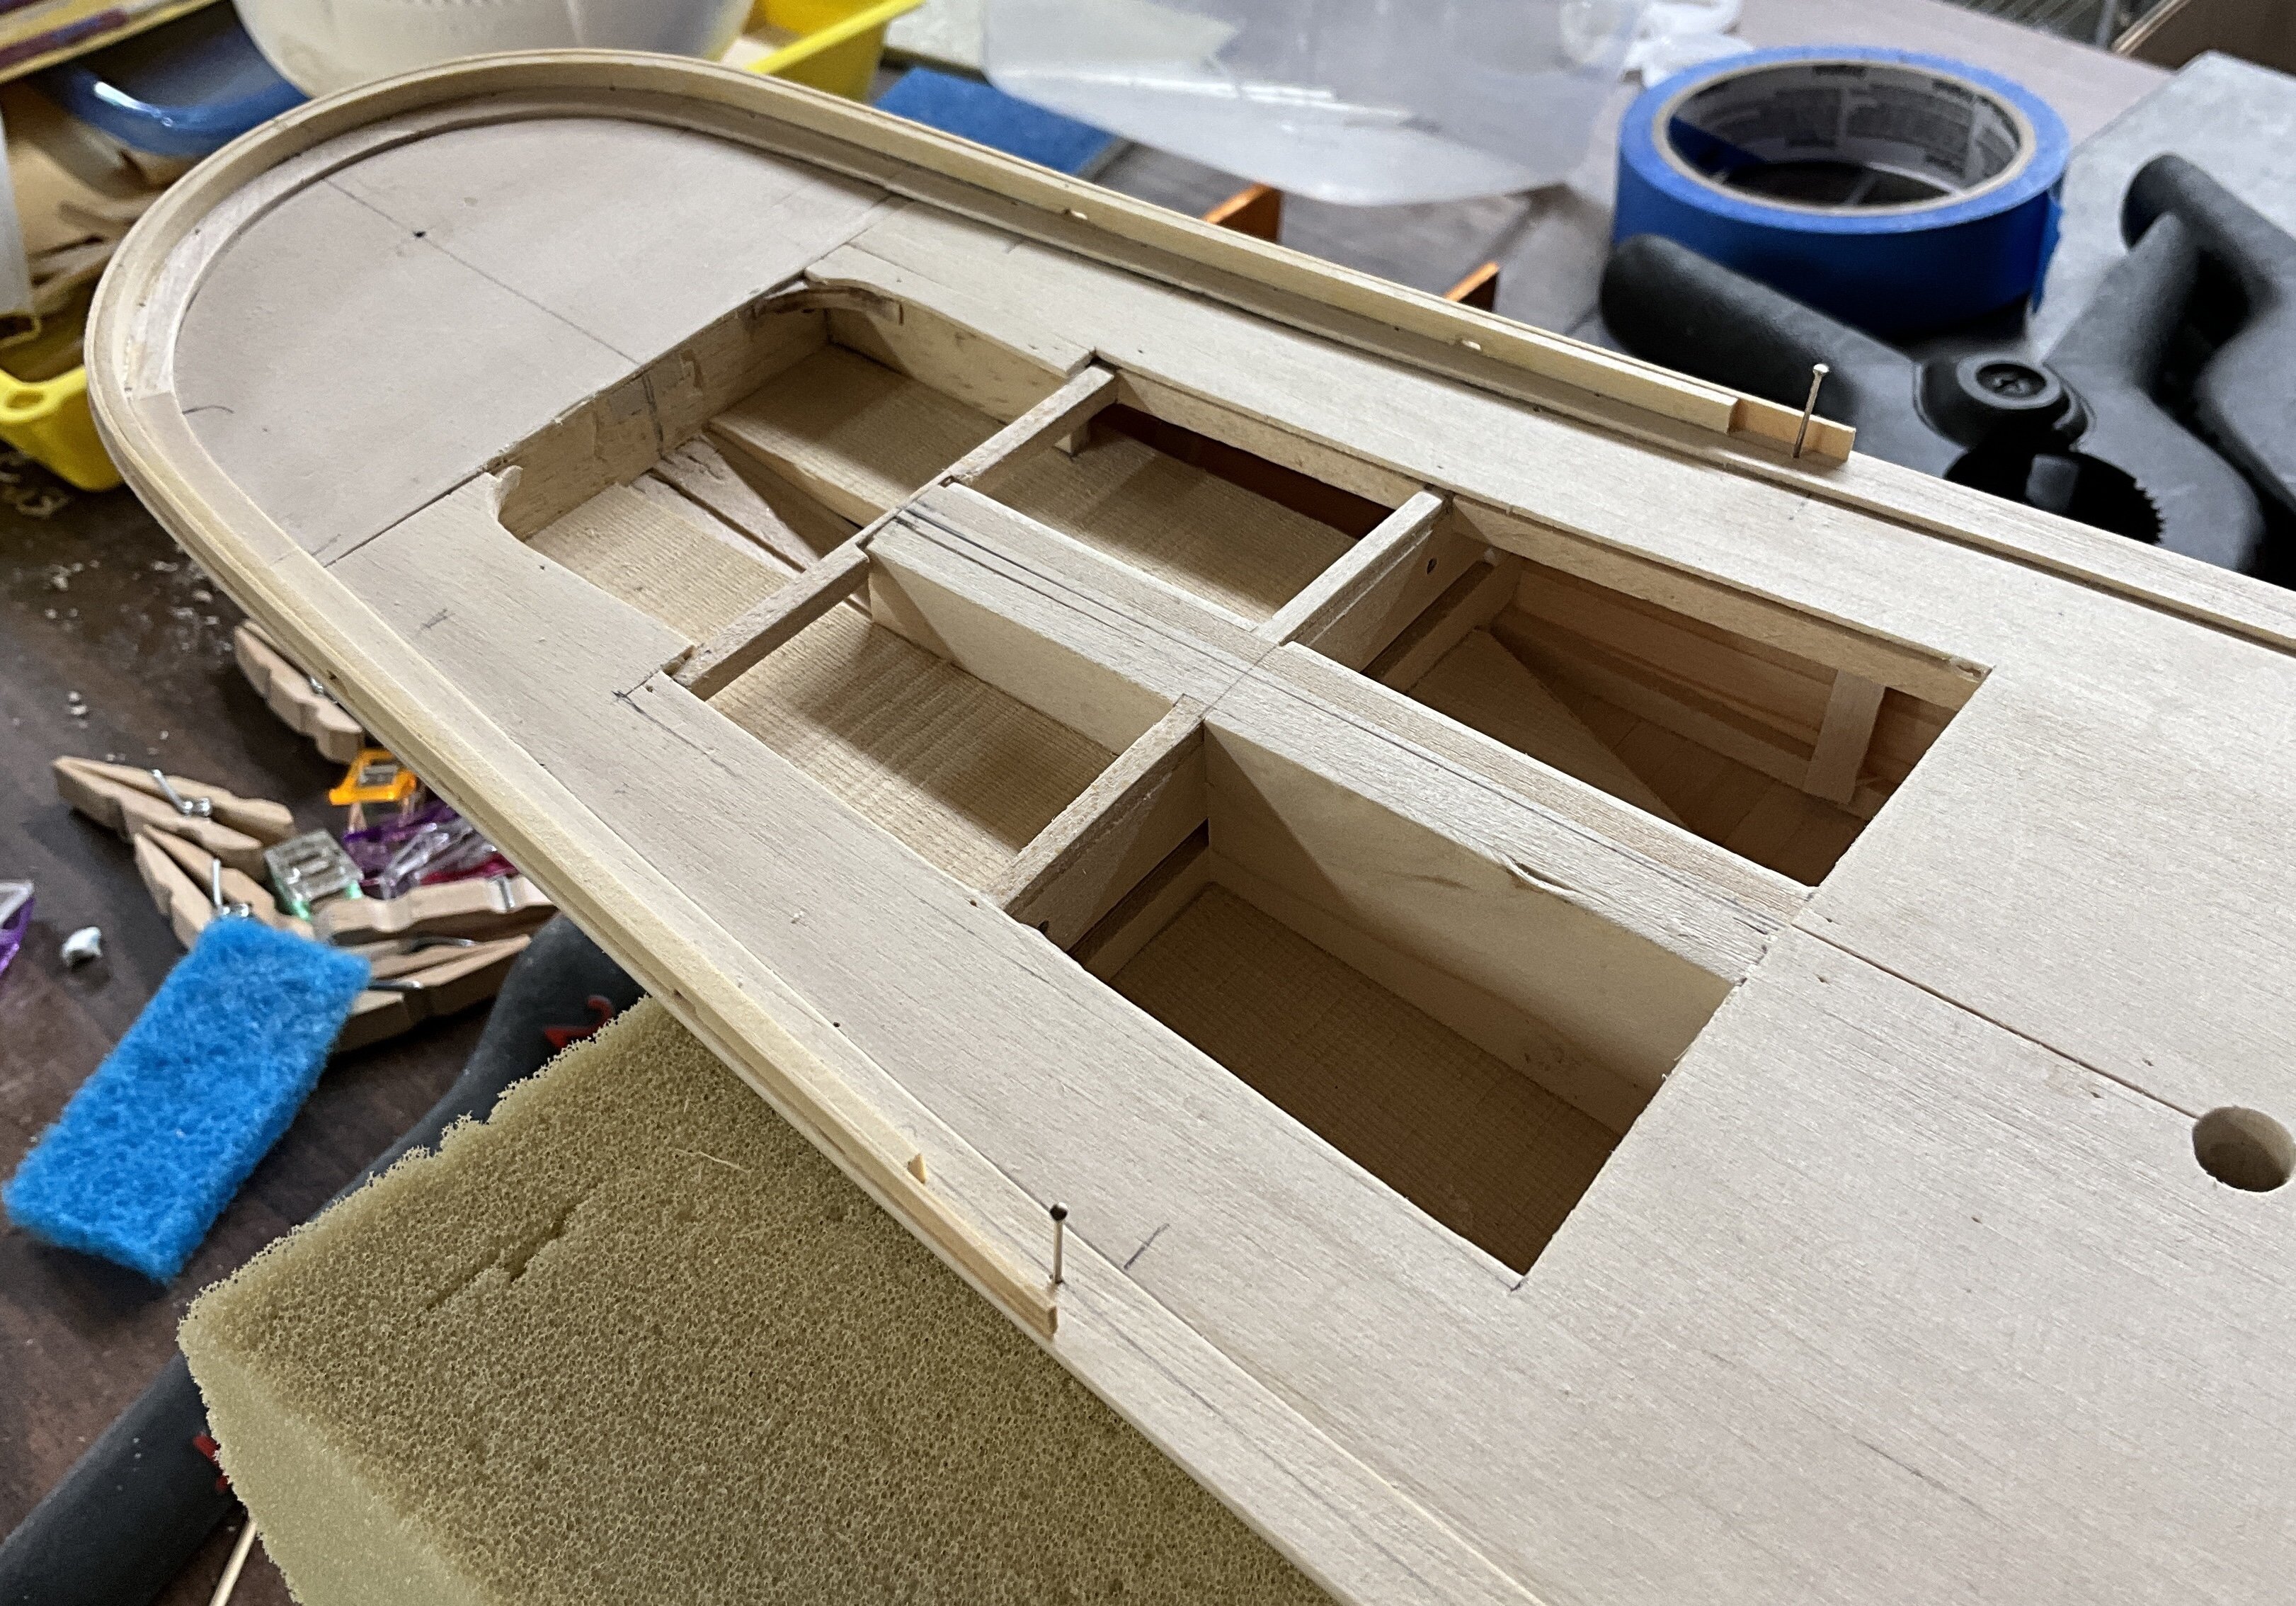
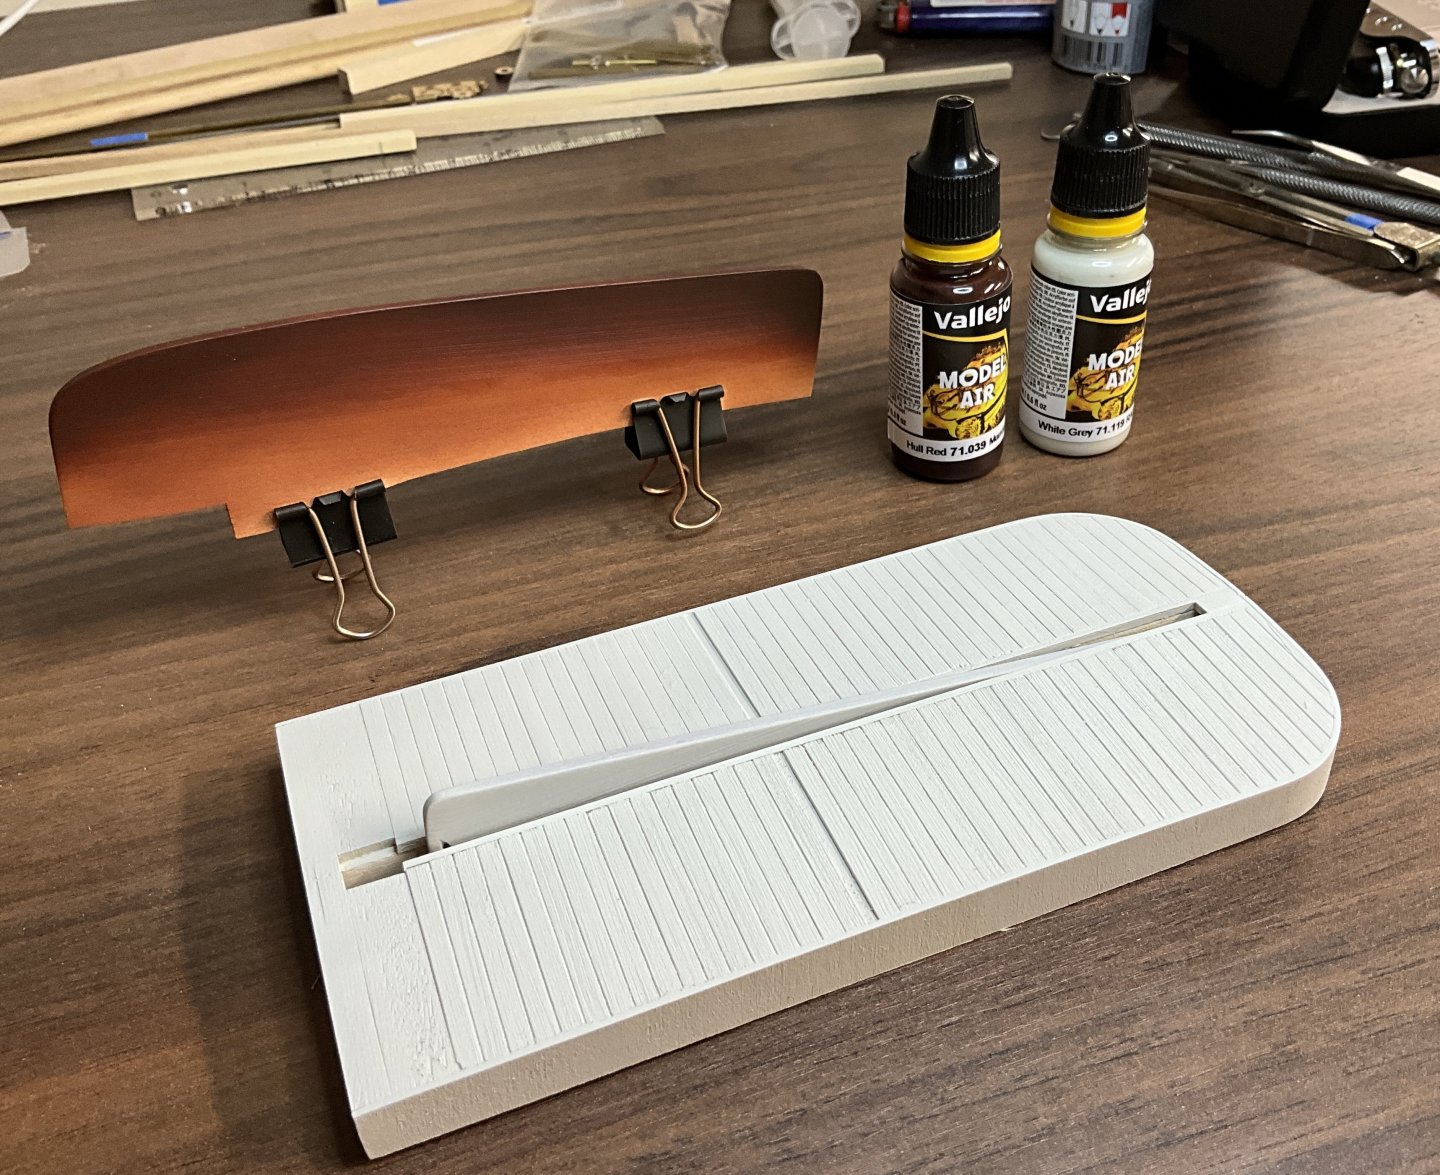
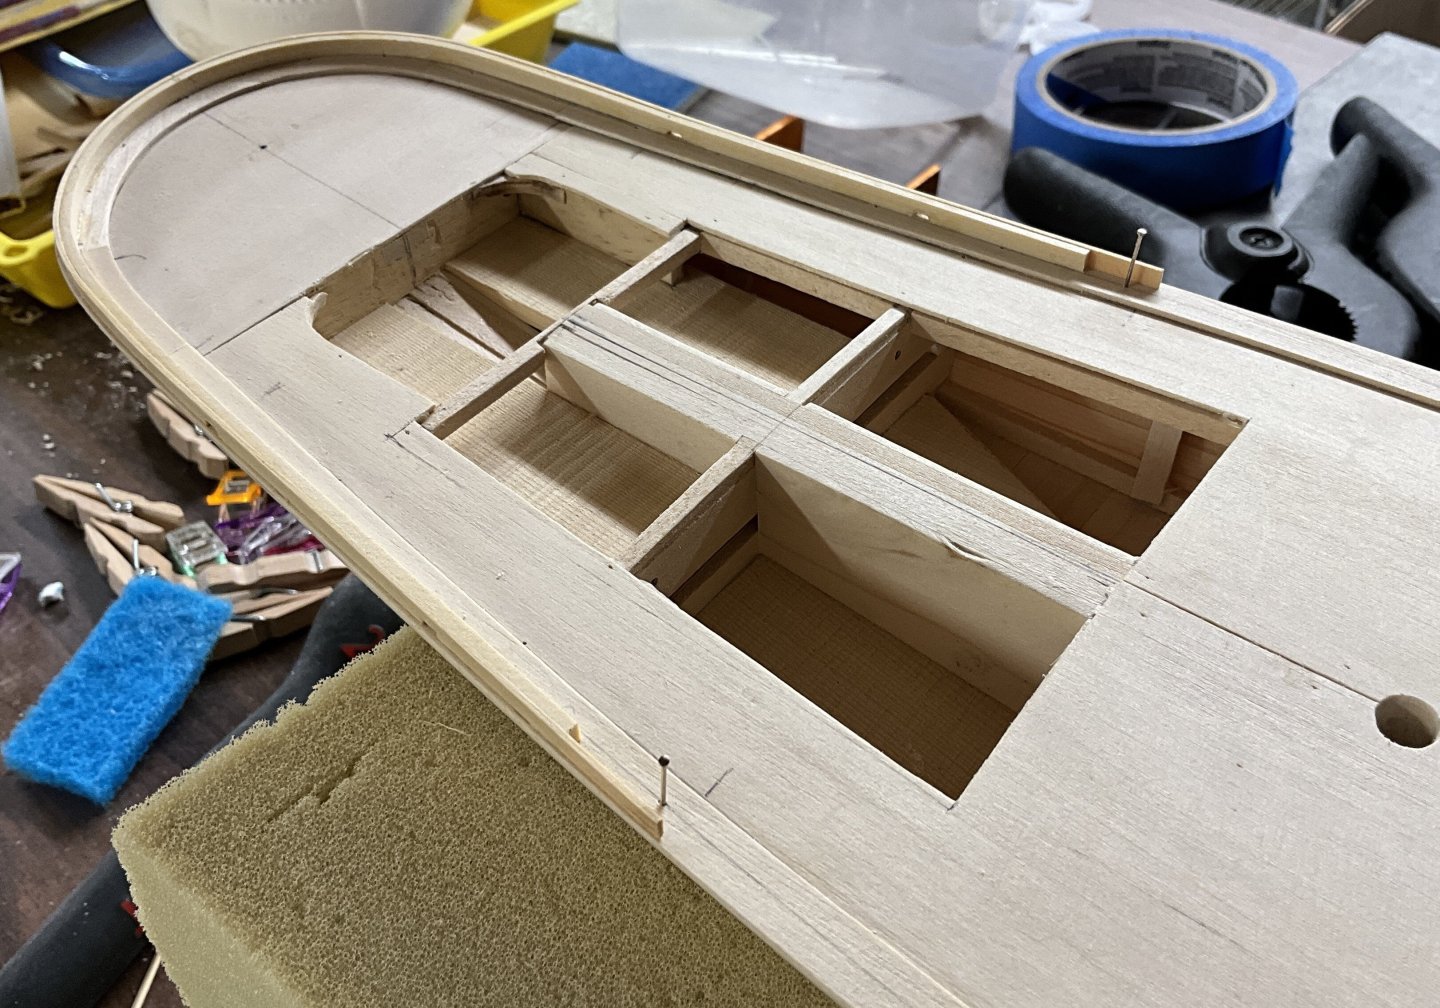
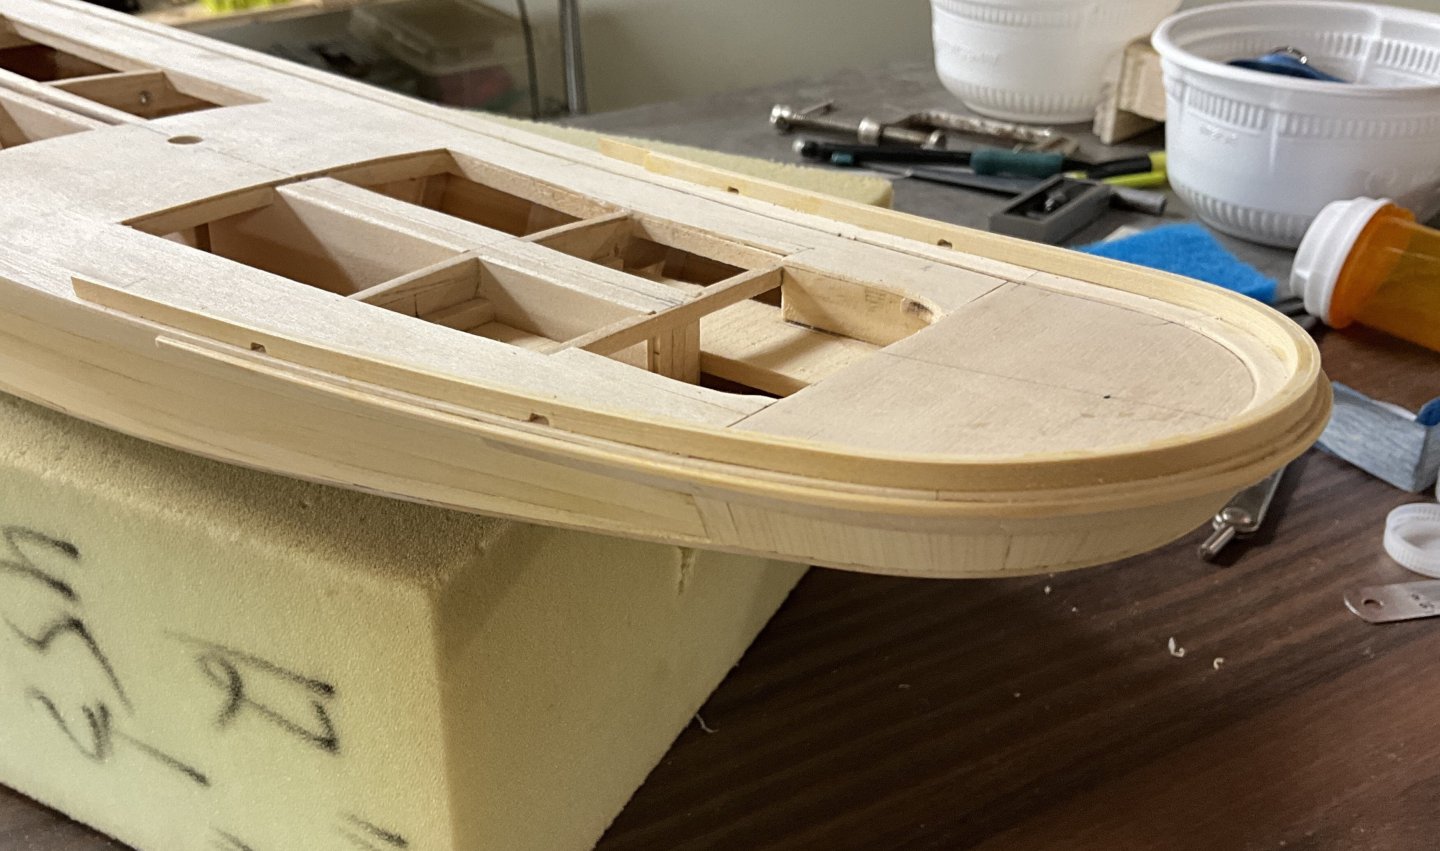
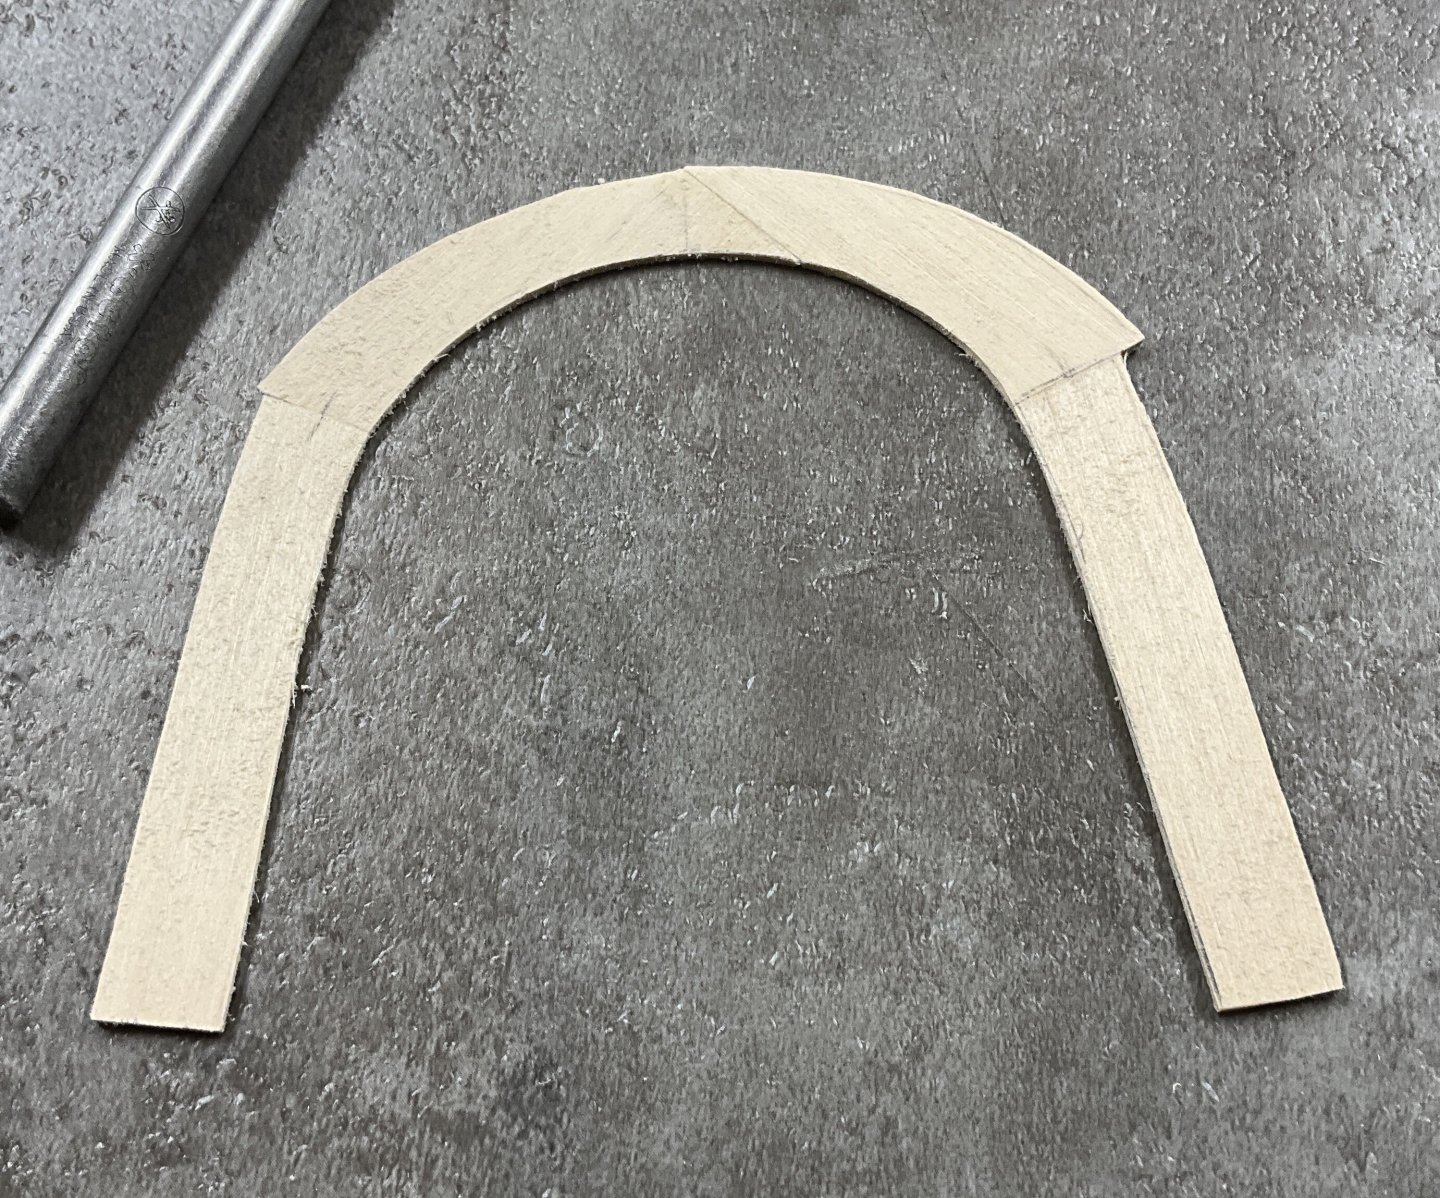
Hi Everyone, hope you are all well. Thanks you very much for the Comments and Likes. I have just about finished the main hatch. Still needs some hooks for the oars and rings for the covers. The covers sit in a rabbet inside the top of the coaming. I’ve never seen a photo or diagram of what happens at the rounded front end so this is my take on it. Here is a section from Chapelle’s drawing. It cuts through the hoist for the center board. The frame of the hatch was used to shape the 1/32” skin that will give the effect of the rabbet. The covers were glued together and then glued to the frame Once the covers were sanded flush with the frame the 1/32” basswood was glued to the frame with lots of overhang. The 1/32” basswood was sanded flush and then a coat of thinned clear shellac was applied. The center board was made in two pieces because I didn’t want to cut the two beams that run through the slot in case something sprung. The top of the center board and the main hatch were painted with Vallejo White Grey and the bottom of the center board was painted with Hull Red. The White Grey is more Grey than I thought it would be. See how it looks once the hull is painted. The Hull Red is kind of a really dark mahogany color. The cap rails are attached and just need to be sanded thinner. Hope to see you soon.


- 201 replies
-
- 13
-

-
-
- Oyster Sharpie
- first scratch build
- (and 1 more)
-
Hi Rik, superb planking, great build log and a beautiful ship!
-
Hi OC, if you have a USB port on that laptop maybe you can borrow or find a cheap usb keyboard to plug in. Good luck with your laptop. Love your work!
-
Hi Rik, thank you very much for your kind comment. I have been quietly admiring your beautiful work on the Hooker Ship. A year or so ago I bought Ab Hoving’s book on 17th Century Dutch Merchant Ships. I think that I was intimidated by what seemed to be very complex hulls. I will follow your build with great interest.
- 201 replies
-
- 5
-
-
- Oyster Sharpie
- first scratch build
- (and 1 more)
-
Glen,congratulations on the successful completion of Banshee II. Beautifully stressful videos. I think I need to go lay down now!
- 235 replies
-
- 6
-
-

-
- Banshee II
- Bottle
- (and 1 more)
-
Hi Keith, thank you for sharing your memories of this wonderful piece of equipment. A great start to a very interesting project. Good luck!
-
Hi Cisco, thank you for your comment. I appreciate it very much.
- 201 replies
-
- 4
-
-
- Oyster Sharpie
- first scratch build
- (and 1 more)
-
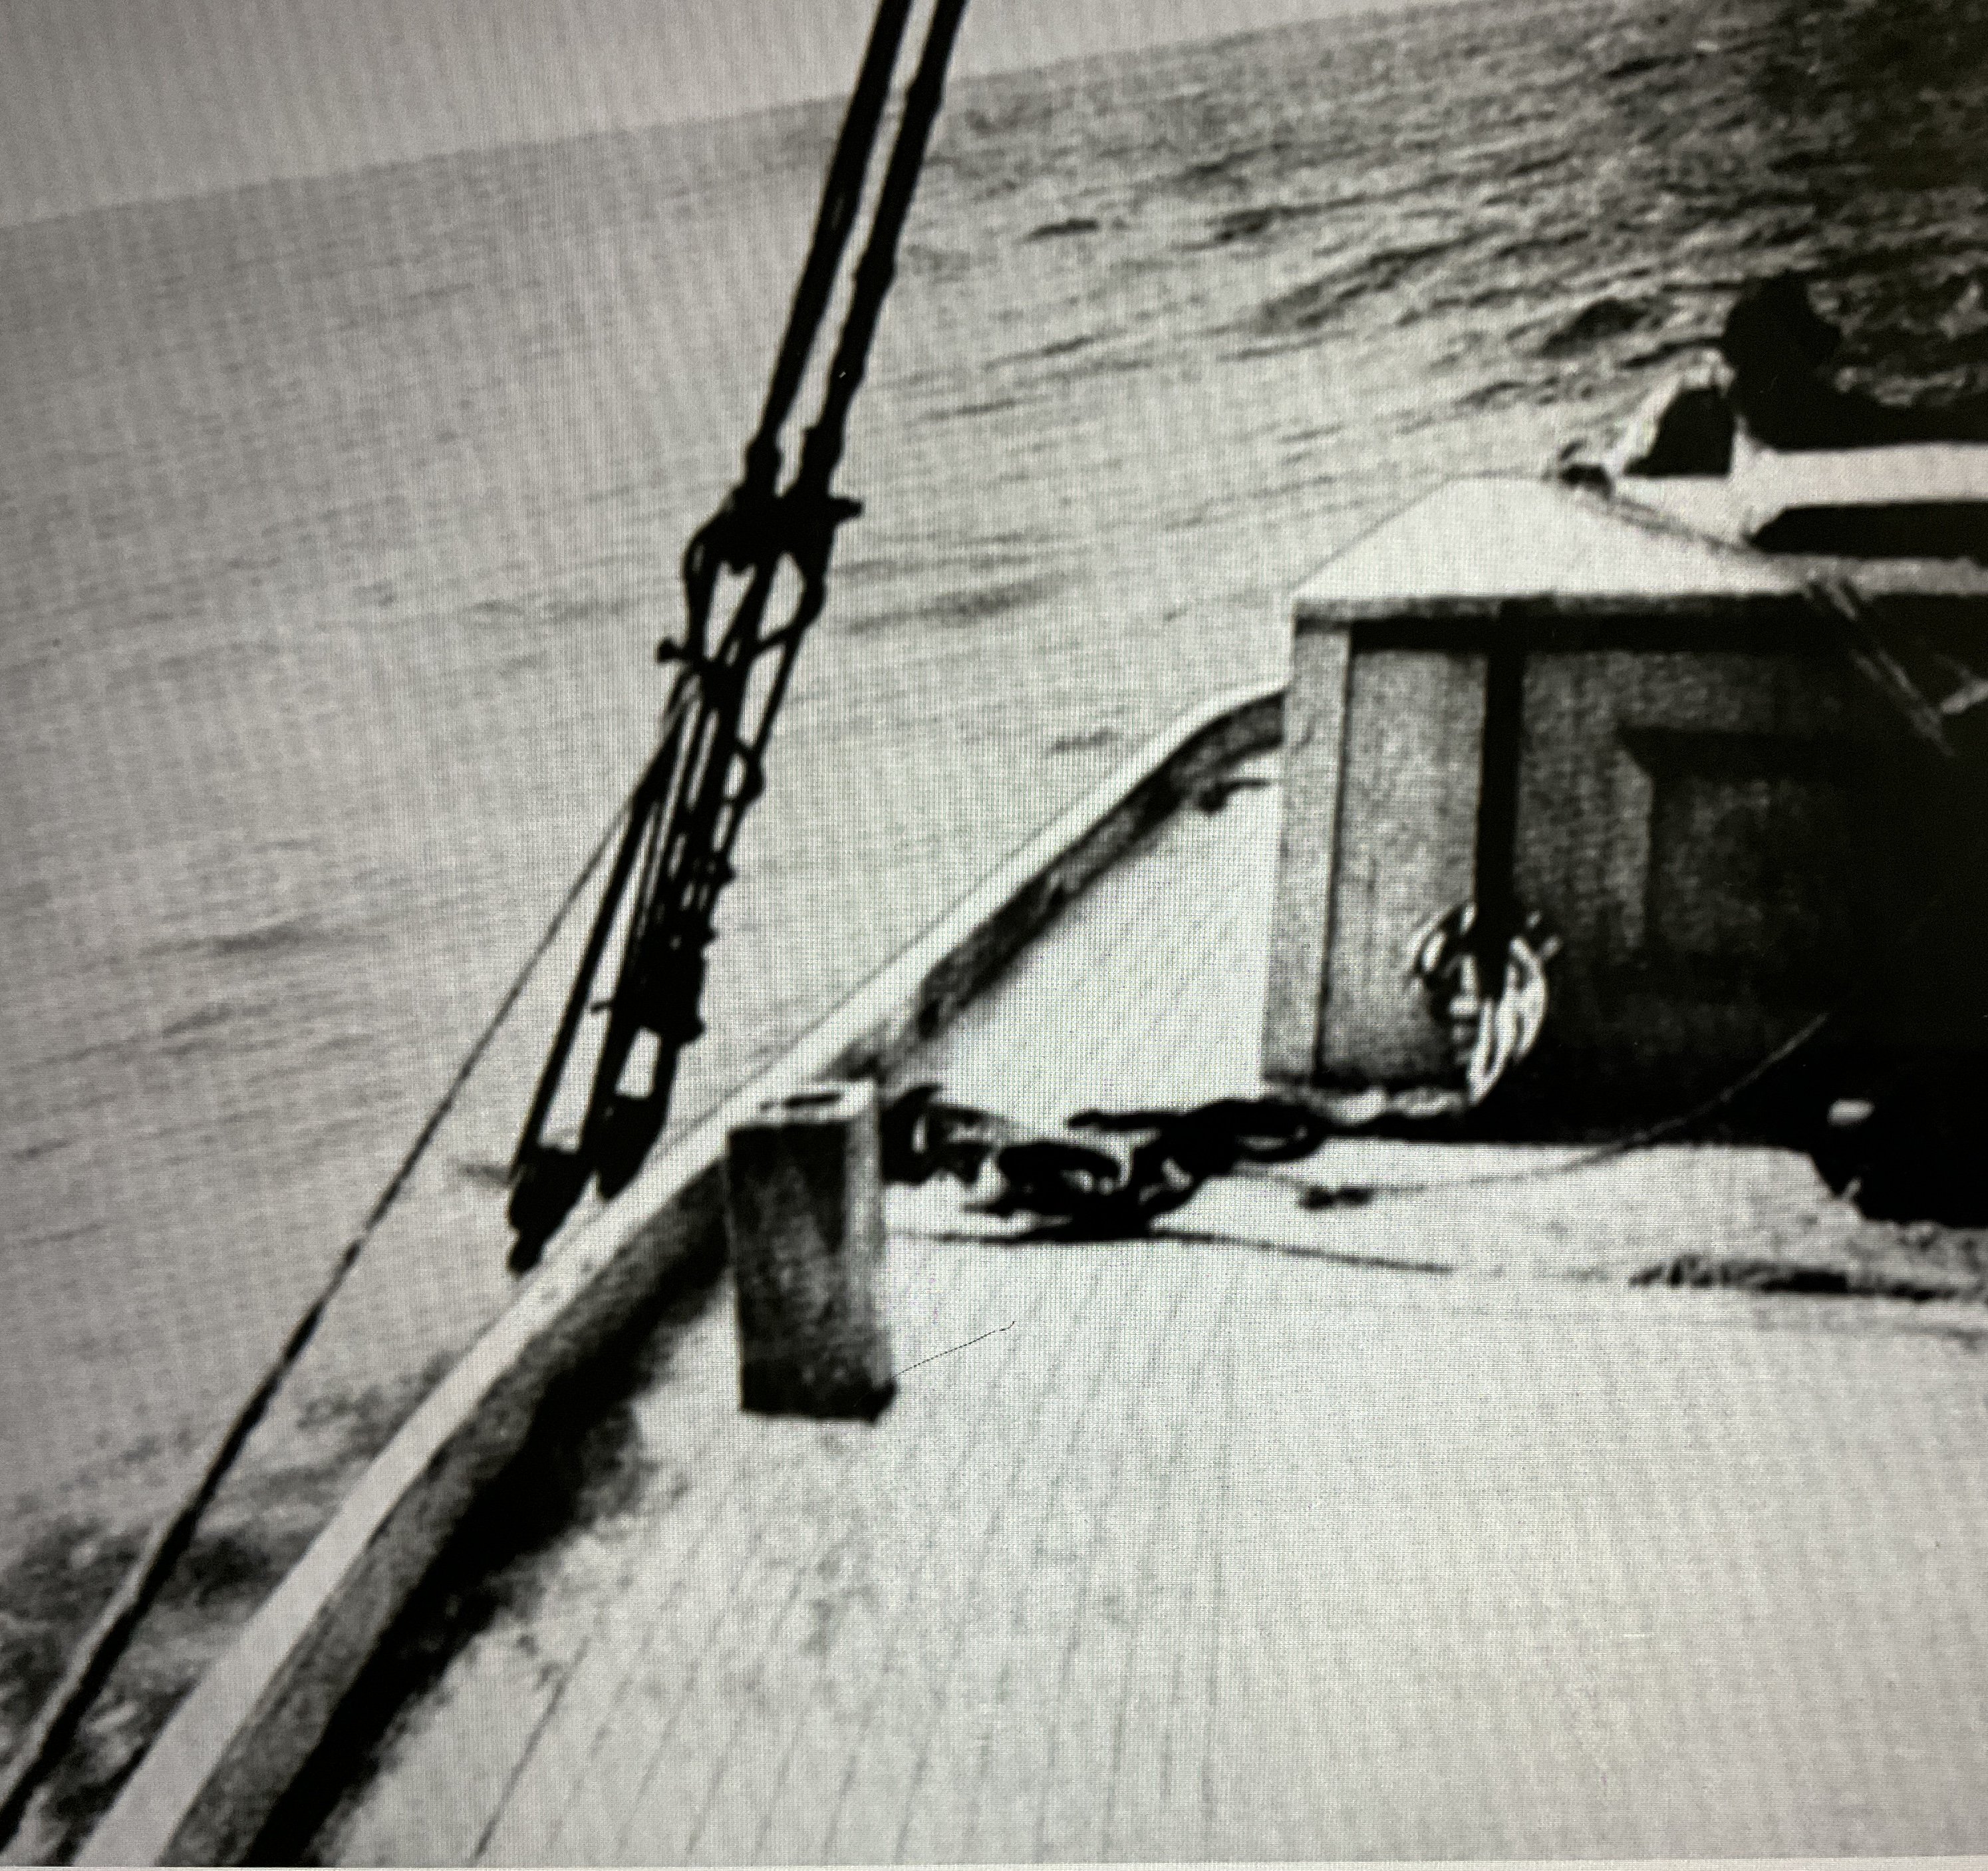
The University of Wisconsin- Madison library has a photo of the Myrtle Corey tow boat that shows what looks to be a large patch or access panel in the wall where the arms go through. I think that wefalck’s comment is right on the money. Your Peerless is looking great!
-
Gunboat Philadelphia 1776 by tmj
Paul Le Wol replied to tmj's topic in - Build logs for subjects built 1751 - 1800
Would it be possible to cut the two planks free and move them ahead a bit. Might be worth a try as long as the new joint looks as good as the others. -
Jacques, the Peapod is looking great. And very nice colors too.
- 65 replies
-
- 2
-
-
-
- Maine Peapod
- Midwest Products
- (and 1 more)
-
Hi Gary, thank you for your very nice description. The sandwich was good but I think I’m going to have to give them a rest for a while. 😀
- 201 replies
-
- 4
-
-
- Oyster Sharpie
- first scratch build
- (and 1 more)
-
Hi Keith, Thanks very much. Always appreciate your comments.
- 201 replies
-
- 3
-
-
- Oyster Sharpie
- first scratch build
- (and 1 more)
-
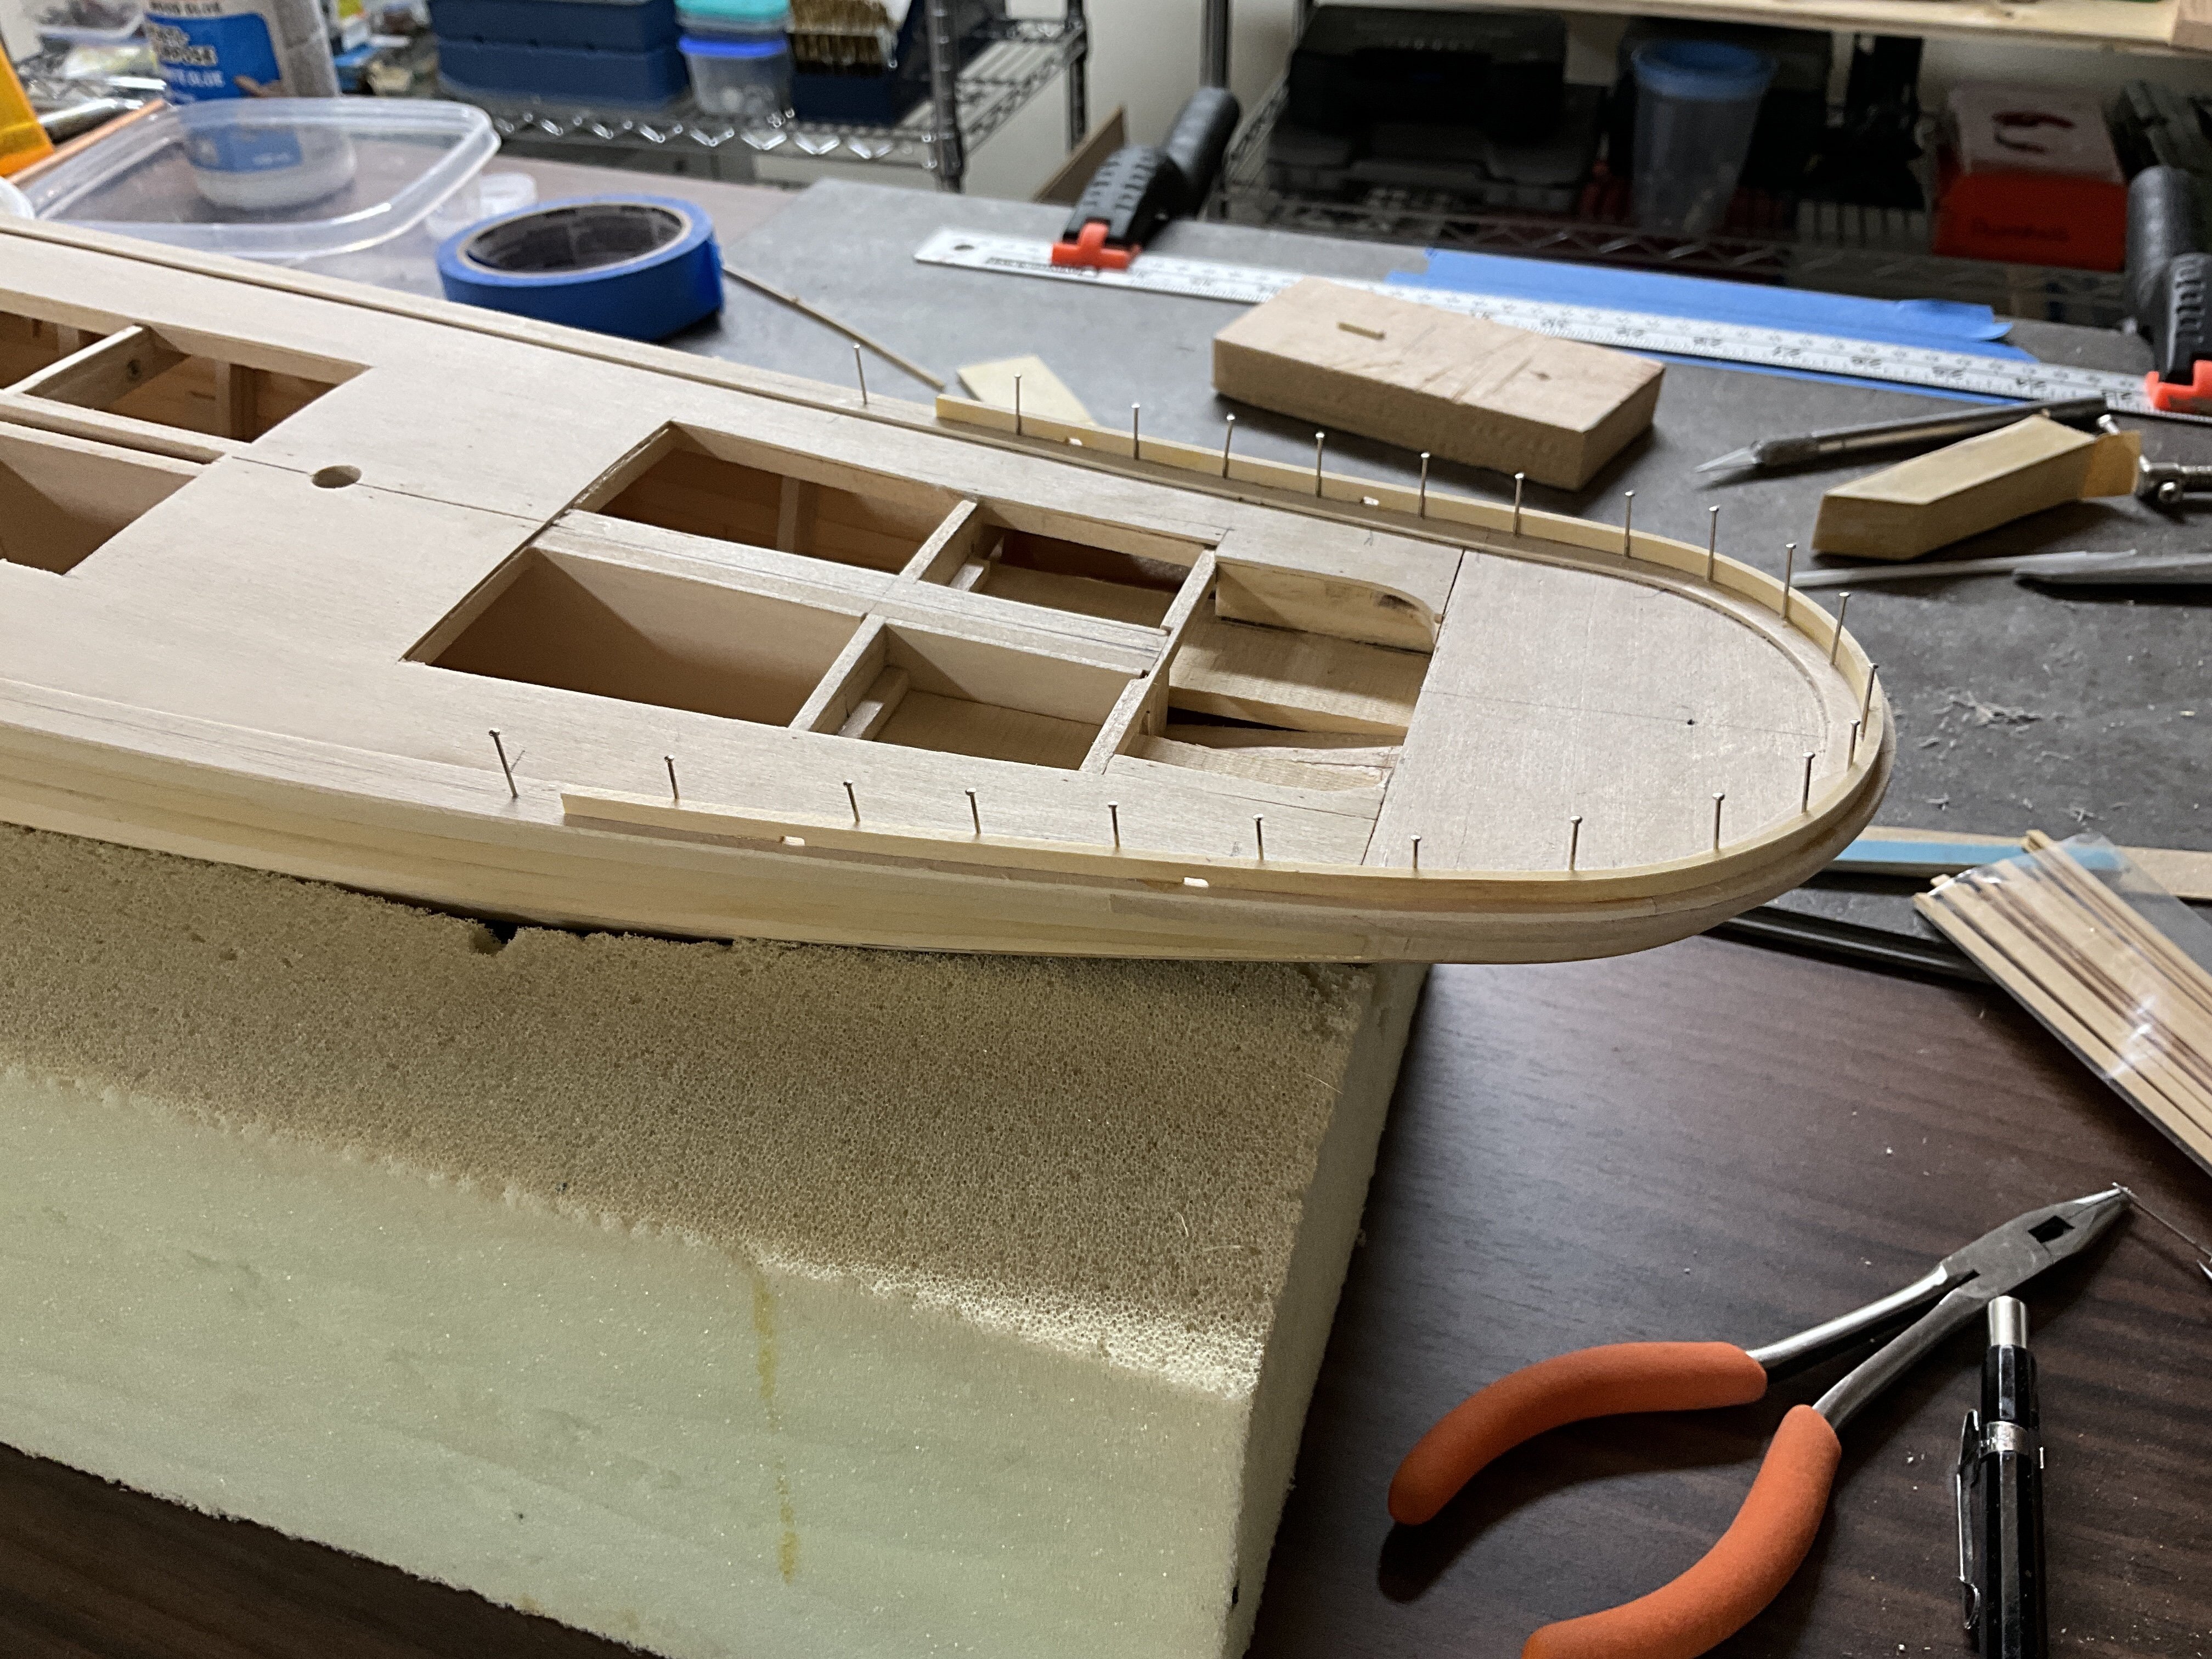
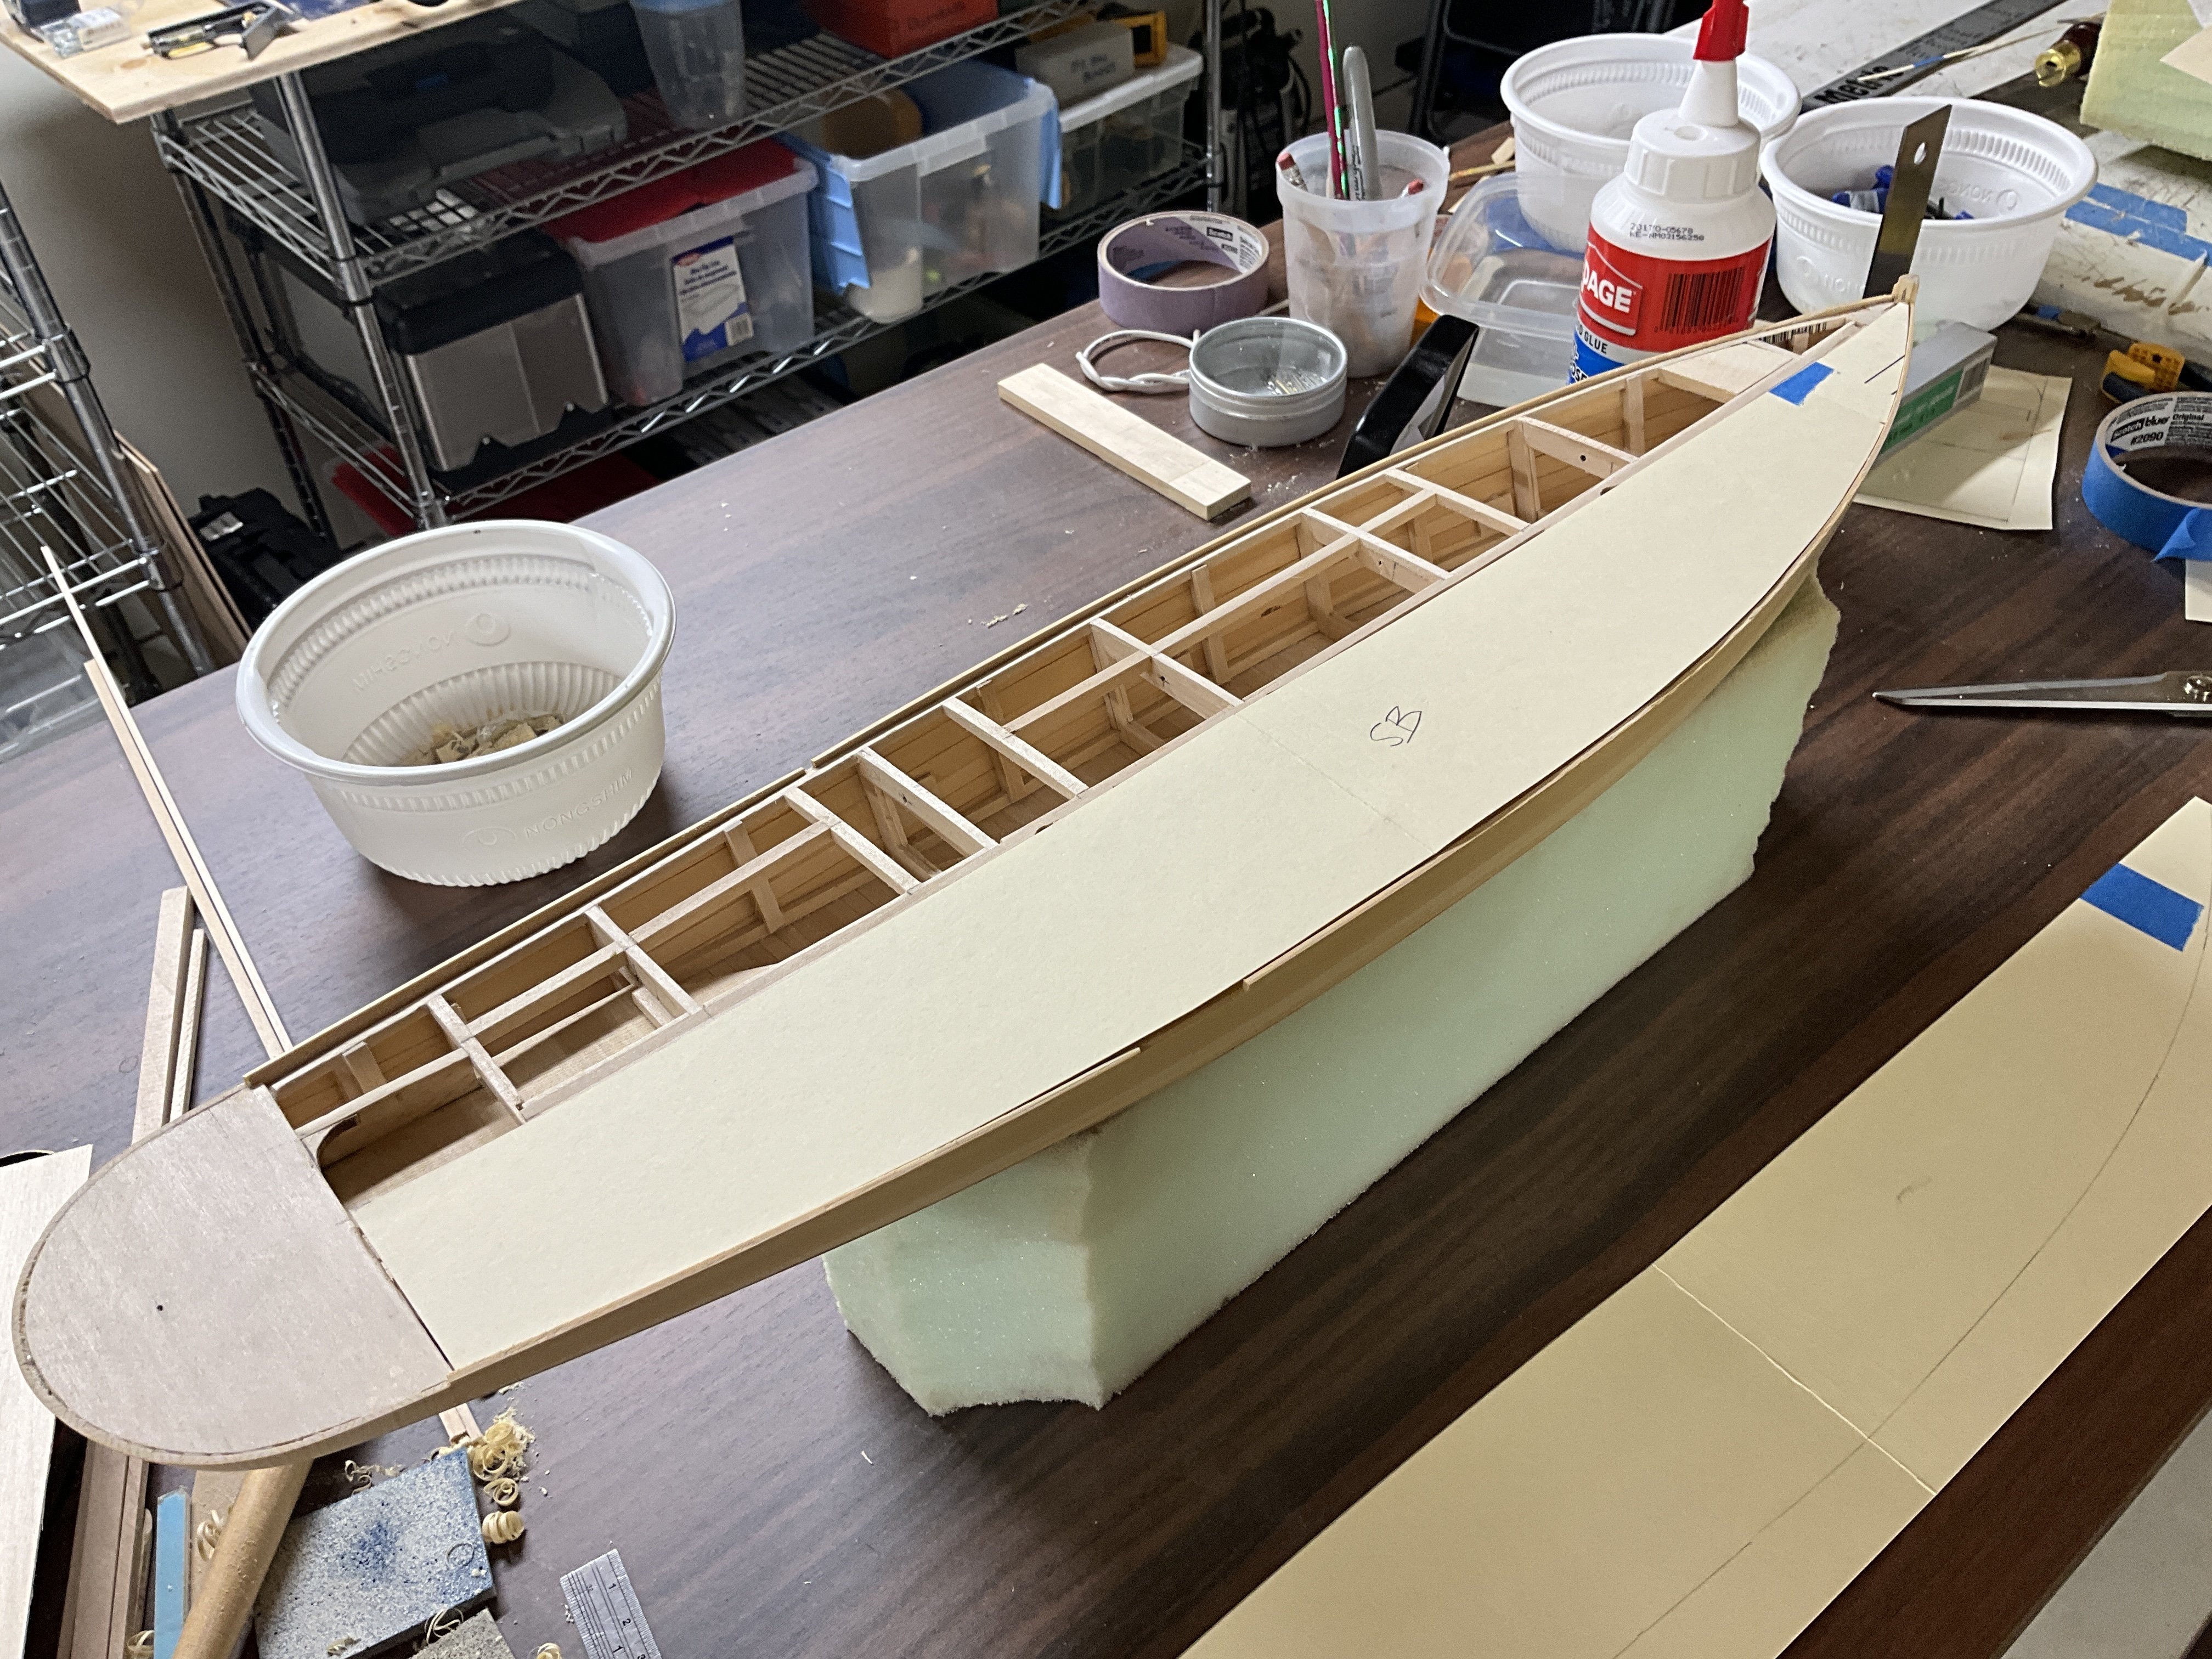
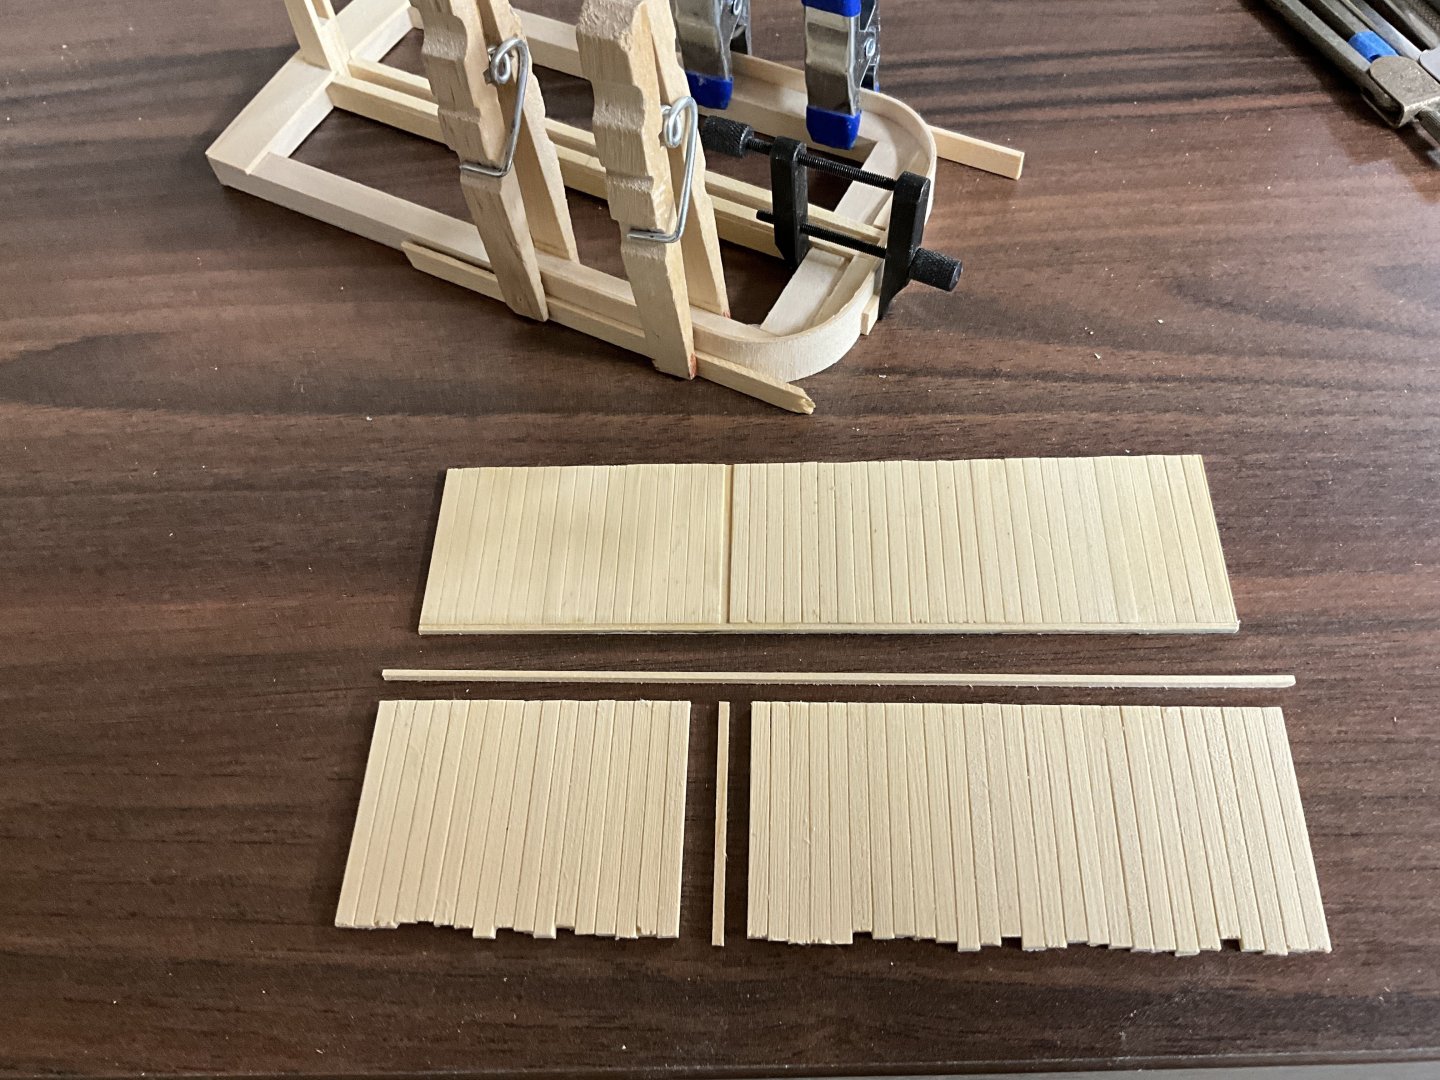
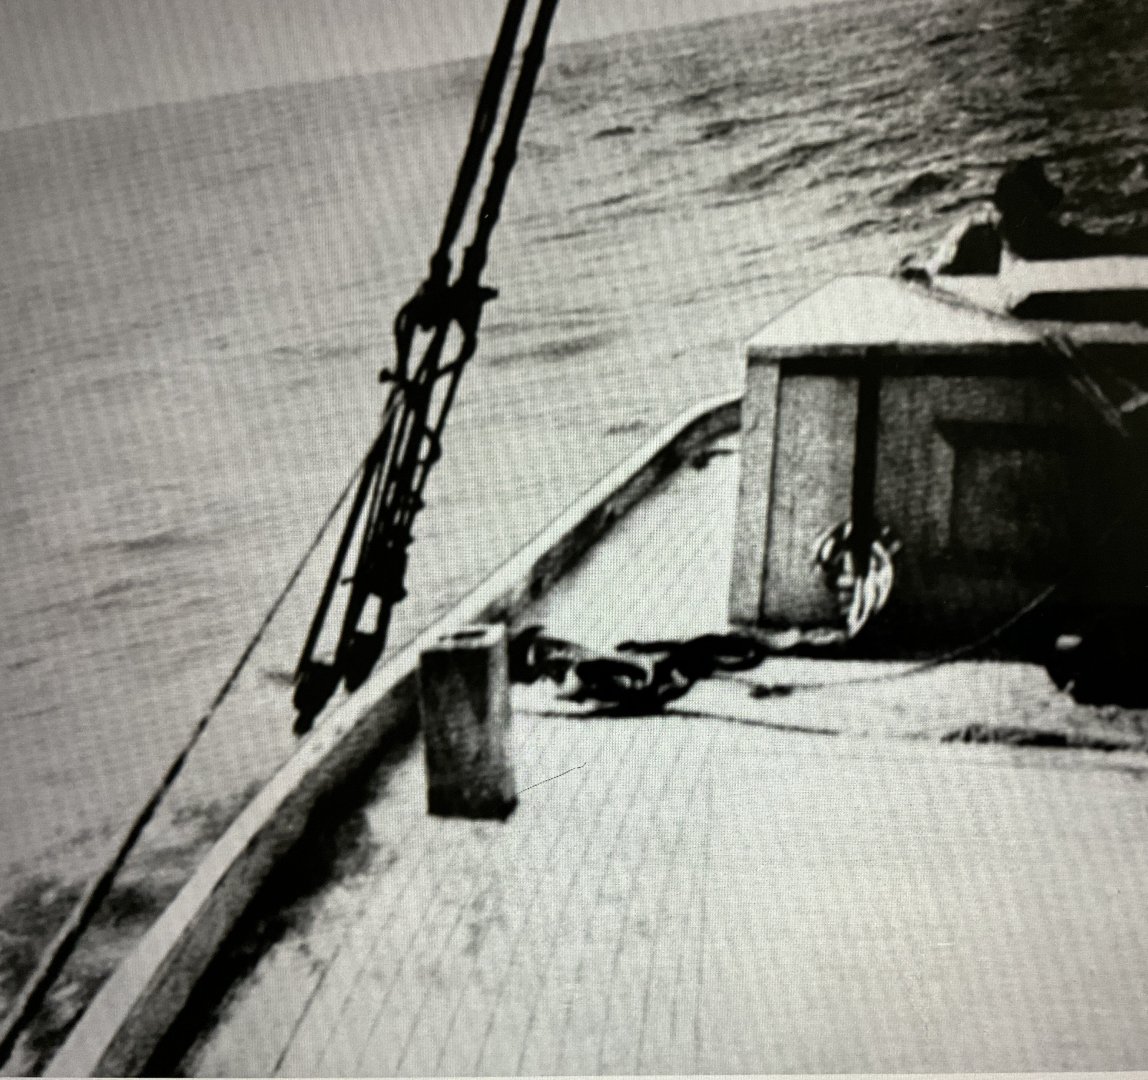
Hi Everyone, thank you for your Comments, Likes, and for visiting. In a previous post I mentioned a photo in the Project Gutenberg ebook “Migrations of an American Boat Type”. The photo was described as one of a North Carolina Sharpie schooner under sail. This is the photo. I like the way the deck is planked and I think that it will be easier to attach the bulwarks and cap rails on to a covering board rather than directly on to the deck planks. The off-cuts of the sub decks were used to make the covering boards. ( I’m pretty sure that’s what they are called ) The cut edge was sanded to match the false wale and then cut wider so that it can be sanded flush with the wales. A line was scribed onto the sub deck to mark the inboard edge of the board. Pins were pushed into the sub deck along this line to make gluing in place easier. The board running around the round stern is made out of five pieces butted together. Didn’t want to attempt scarf joints because they wouldn’t really be seen. An empty tuna can was used to shape the bulwark. The first part of the bulwark was made out of 1/16” x 1/8” AYC. A line was scribed on the covering board that will show the inboard edge of the rail and again pins were pushed in along this line to aid in gluing. CA was used here. The process was repeated using a 1/32” x 1/8” strip of AYC. This strip used glued to the outside of the first strip with PVA and made a little longer for joining the next section of the bulwarks to this one. The rub rail running around the stern was next. It is made from 3/64” x 1/16” AYC and was shaped on the same can. It was attached about an inch at a time using CA. Next will be completing the bulwarks up to the stem and then the cap rails. Hope to see you then.


- 201 replies
-
- 16
-
-
- Oyster Sharpie
- first scratch build
- (and 1 more)
-
Gary, whenever you post an update I smile because I know I’m in for a treat! 👍
-
Chris,congratulations on finishing your Salmson 2. What a great outcome!
-
Hi Gary, thank you very much for your comment.😀
- 201 replies
-
- 4
-
-
- Oyster Sharpie
- first scratch build
- (and 1 more)
-
Thanks very much Rick. I really appreciate your comment!
- 201 replies
-
- 3
-
-
- Oyster Sharpie
- first scratch build
- (and 1 more)
-
Hi Ian, good to hear from you. Thank you for the encouragement.
- 201 replies
-
- 3
-
-
- Oyster Sharpie
- first scratch build
- (and 1 more)
-
Hi John, thanks very much for your comment. There’s not a lot to these boats but I think that’s what’s so special about work boats.😀
- 201 replies
-
- 7
-
-
- Oyster Sharpie
- first scratch build
- (and 1 more)
-
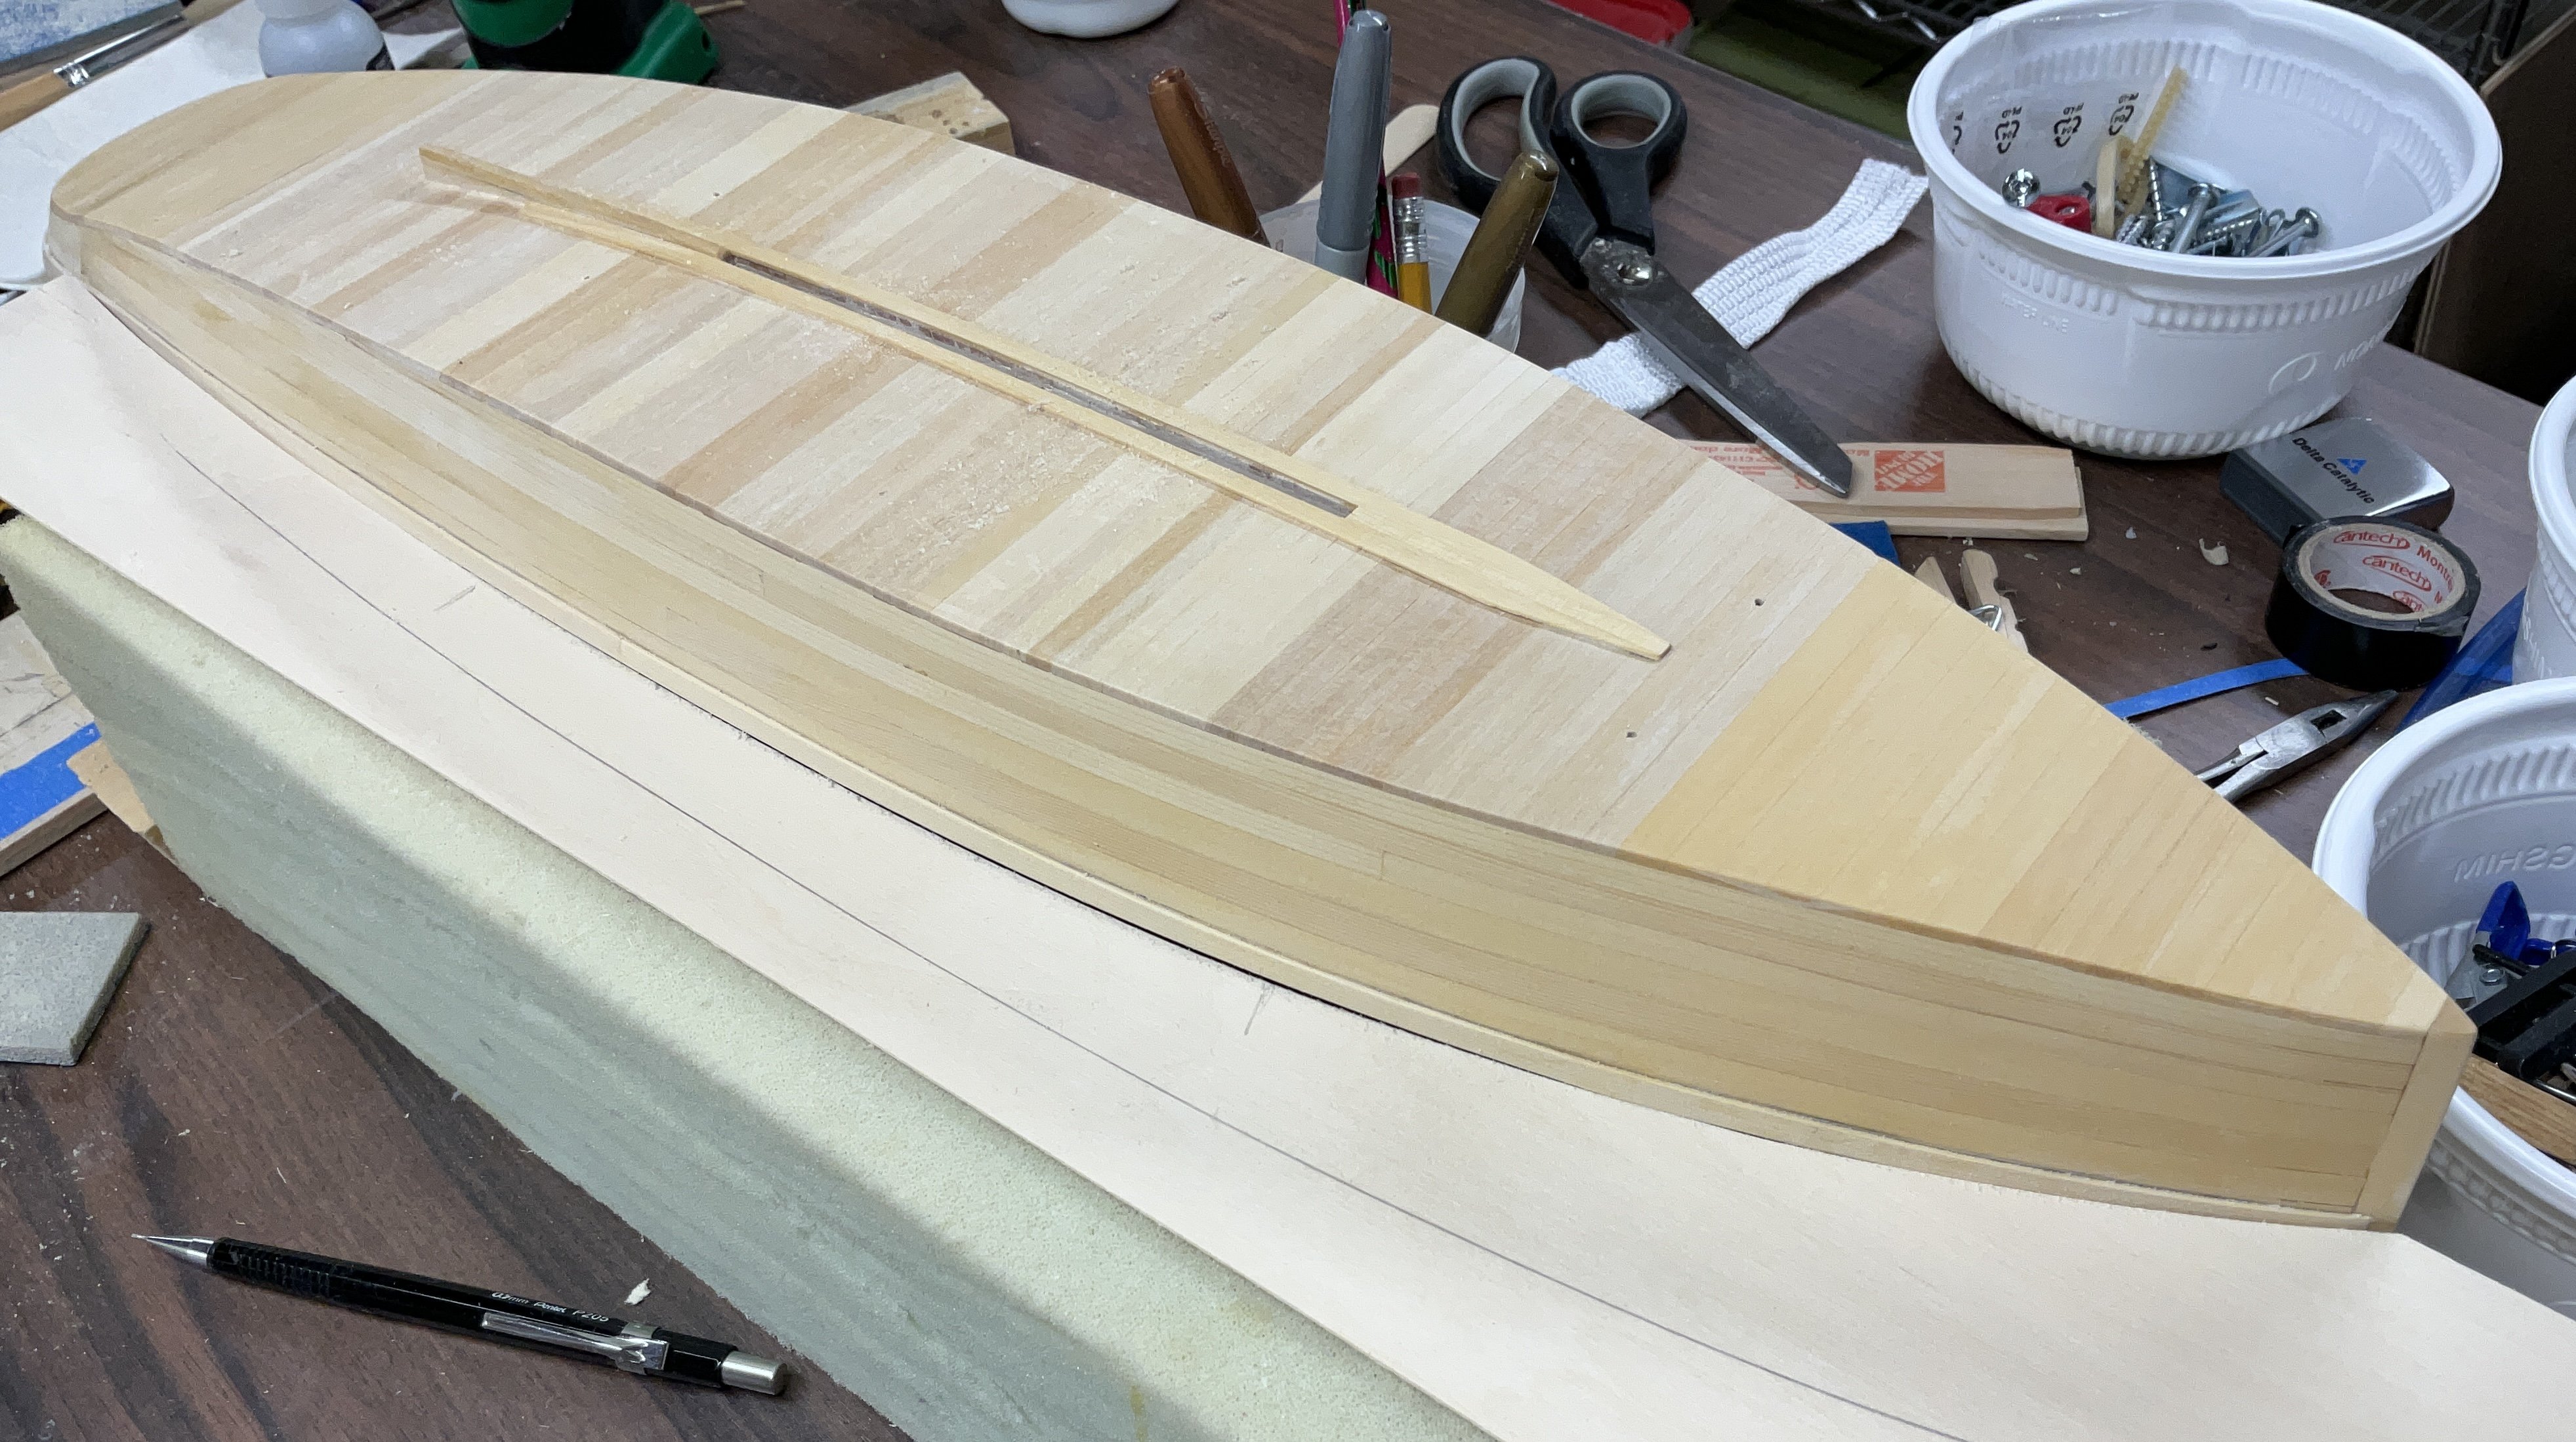
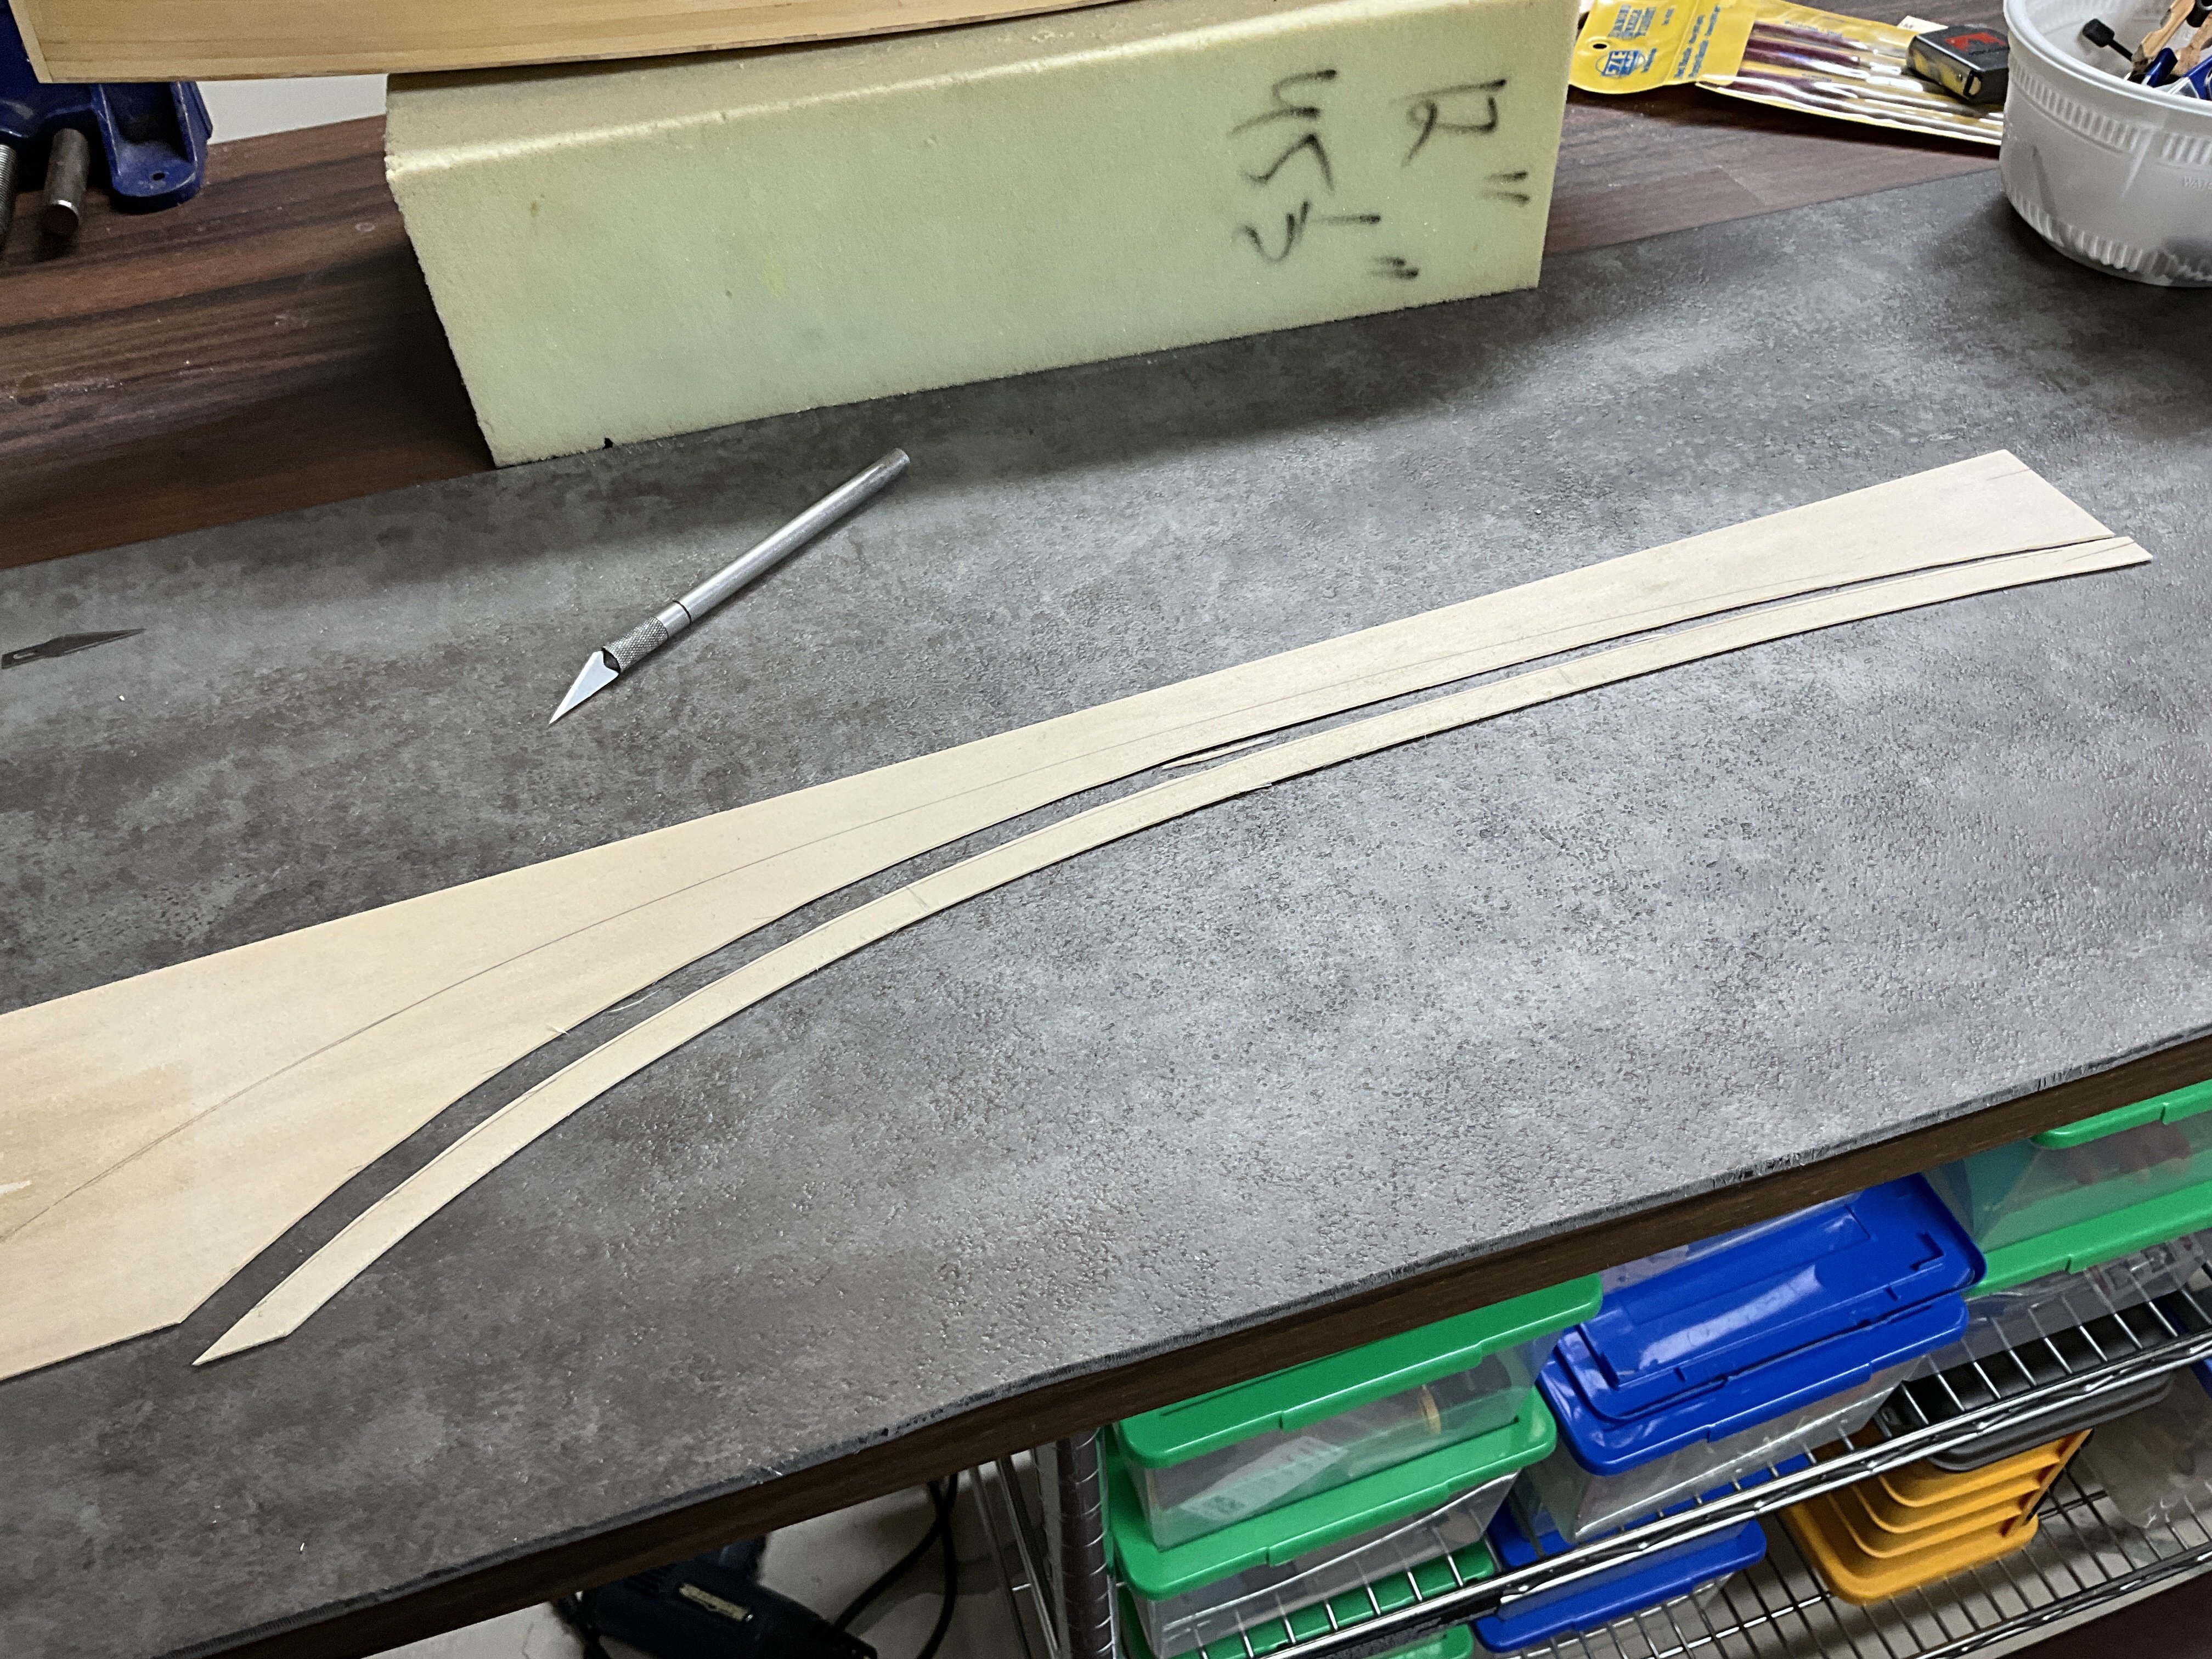
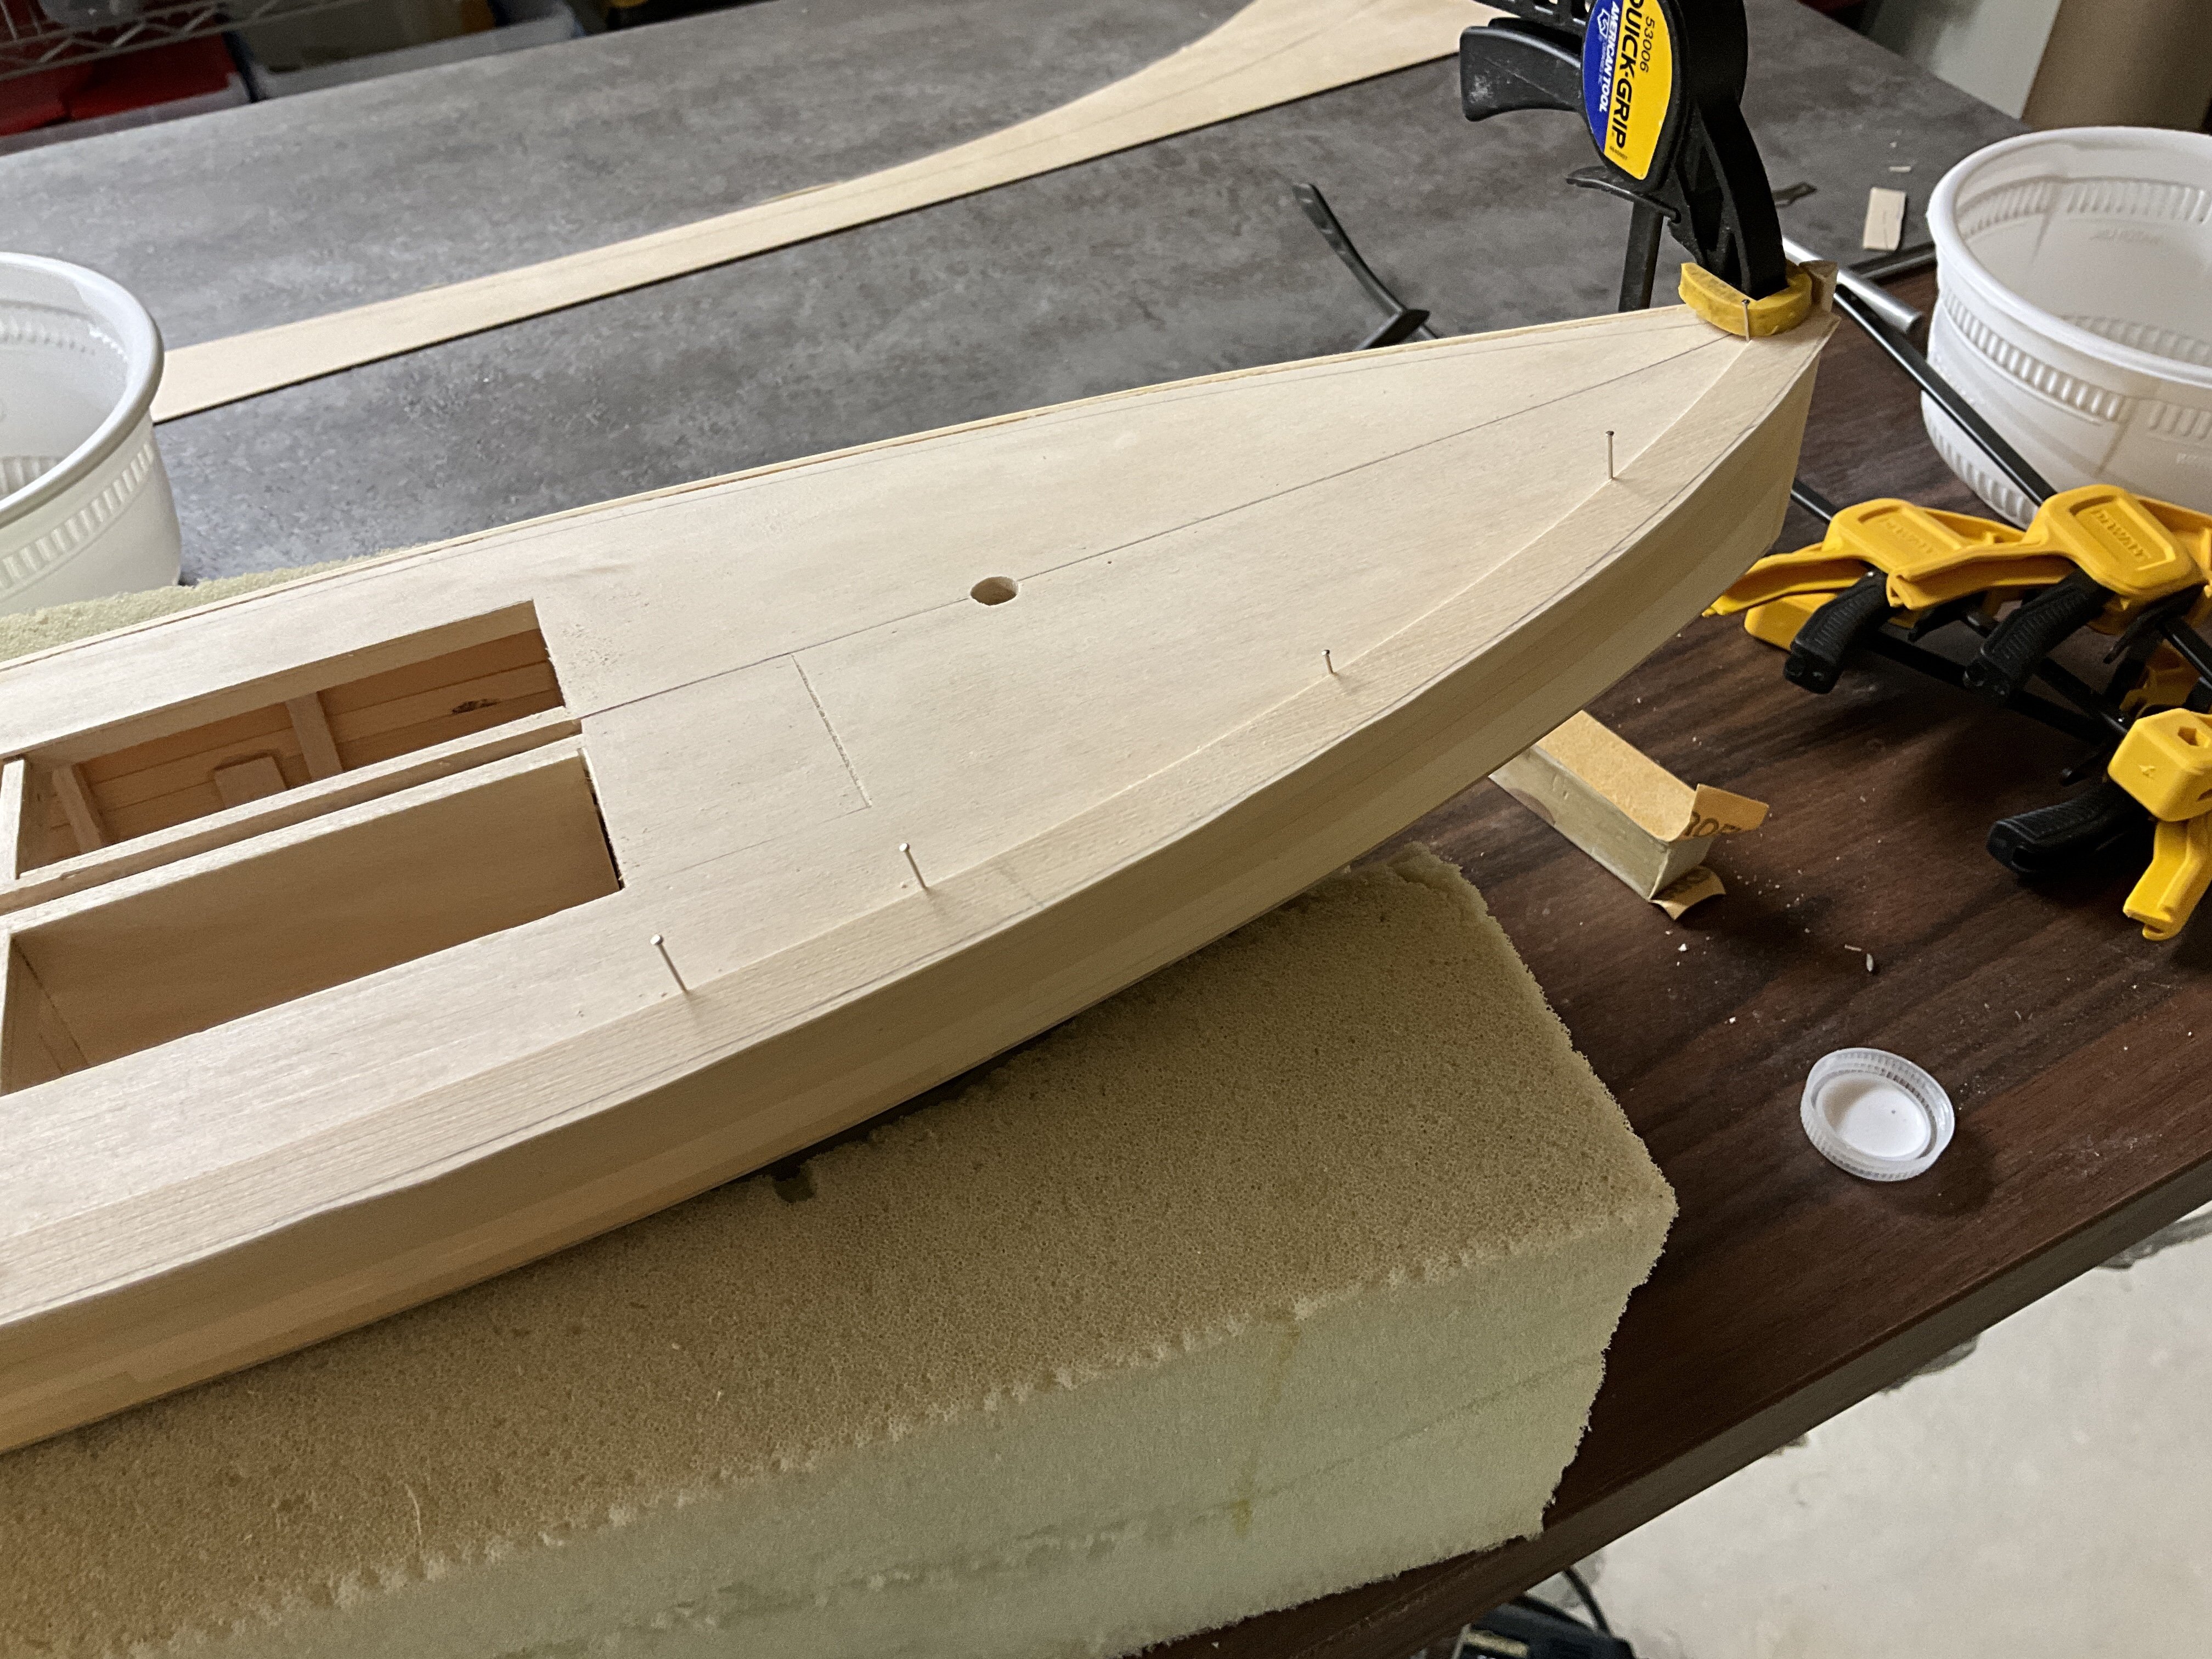
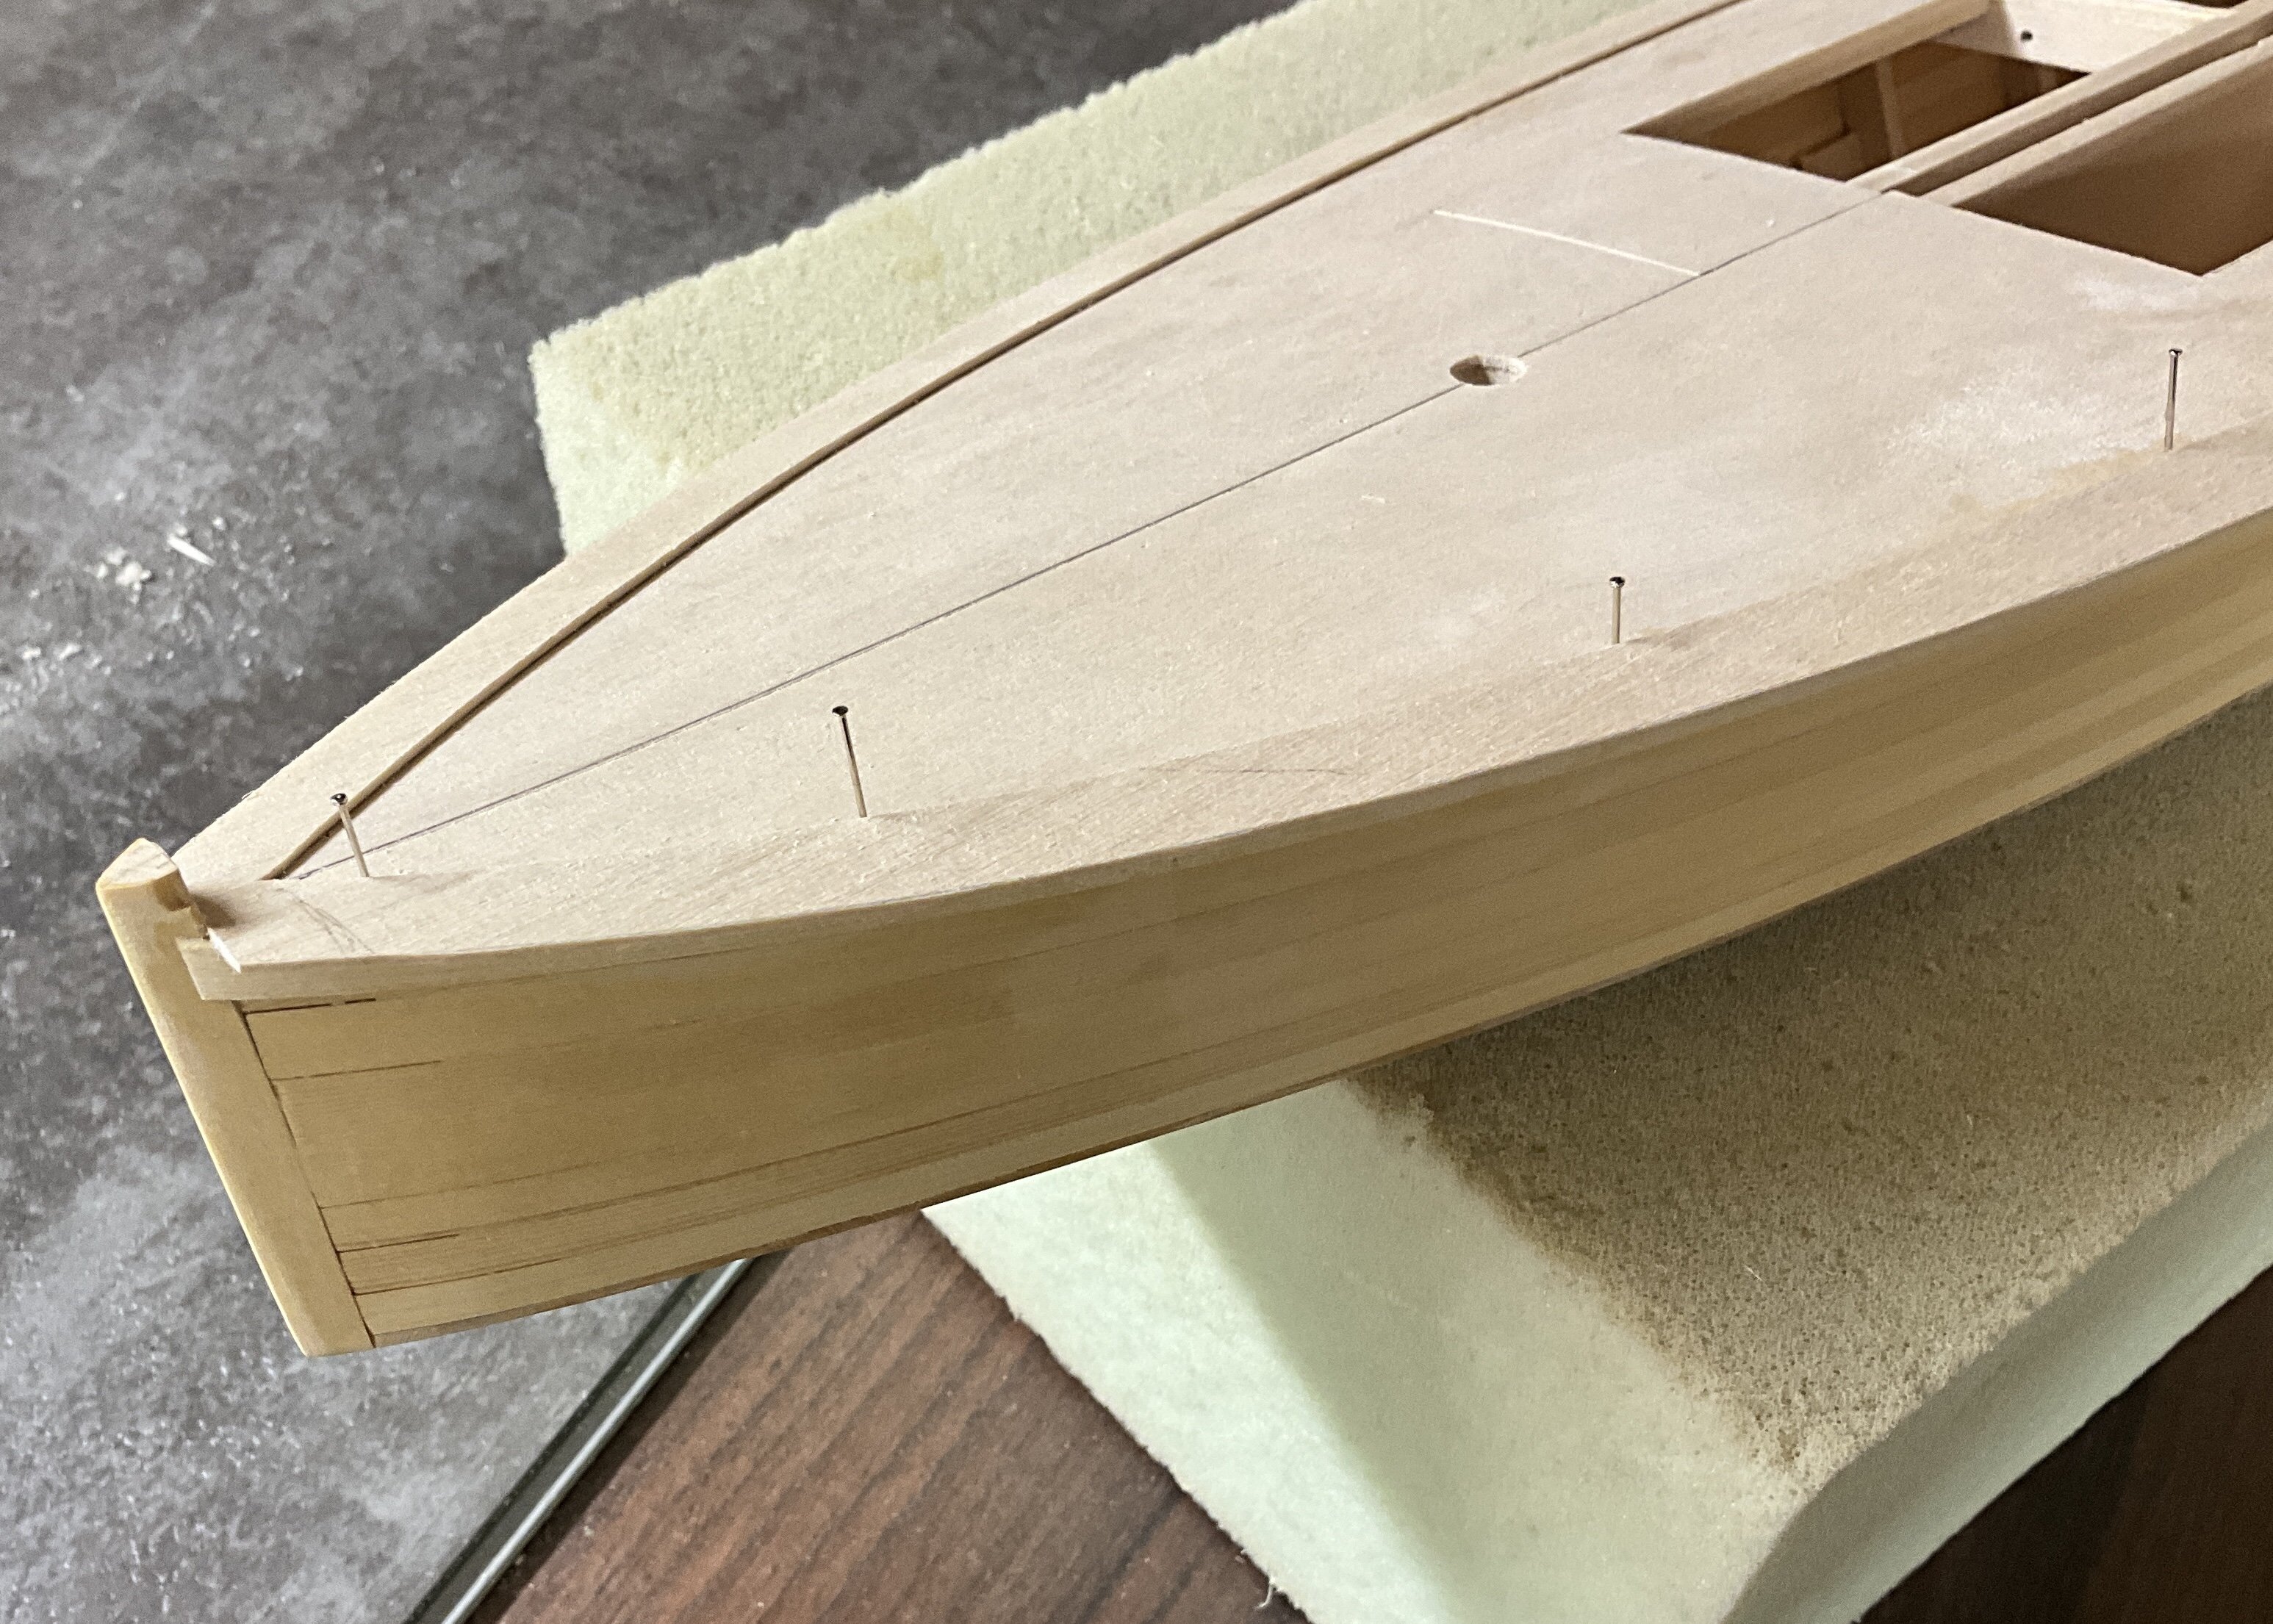
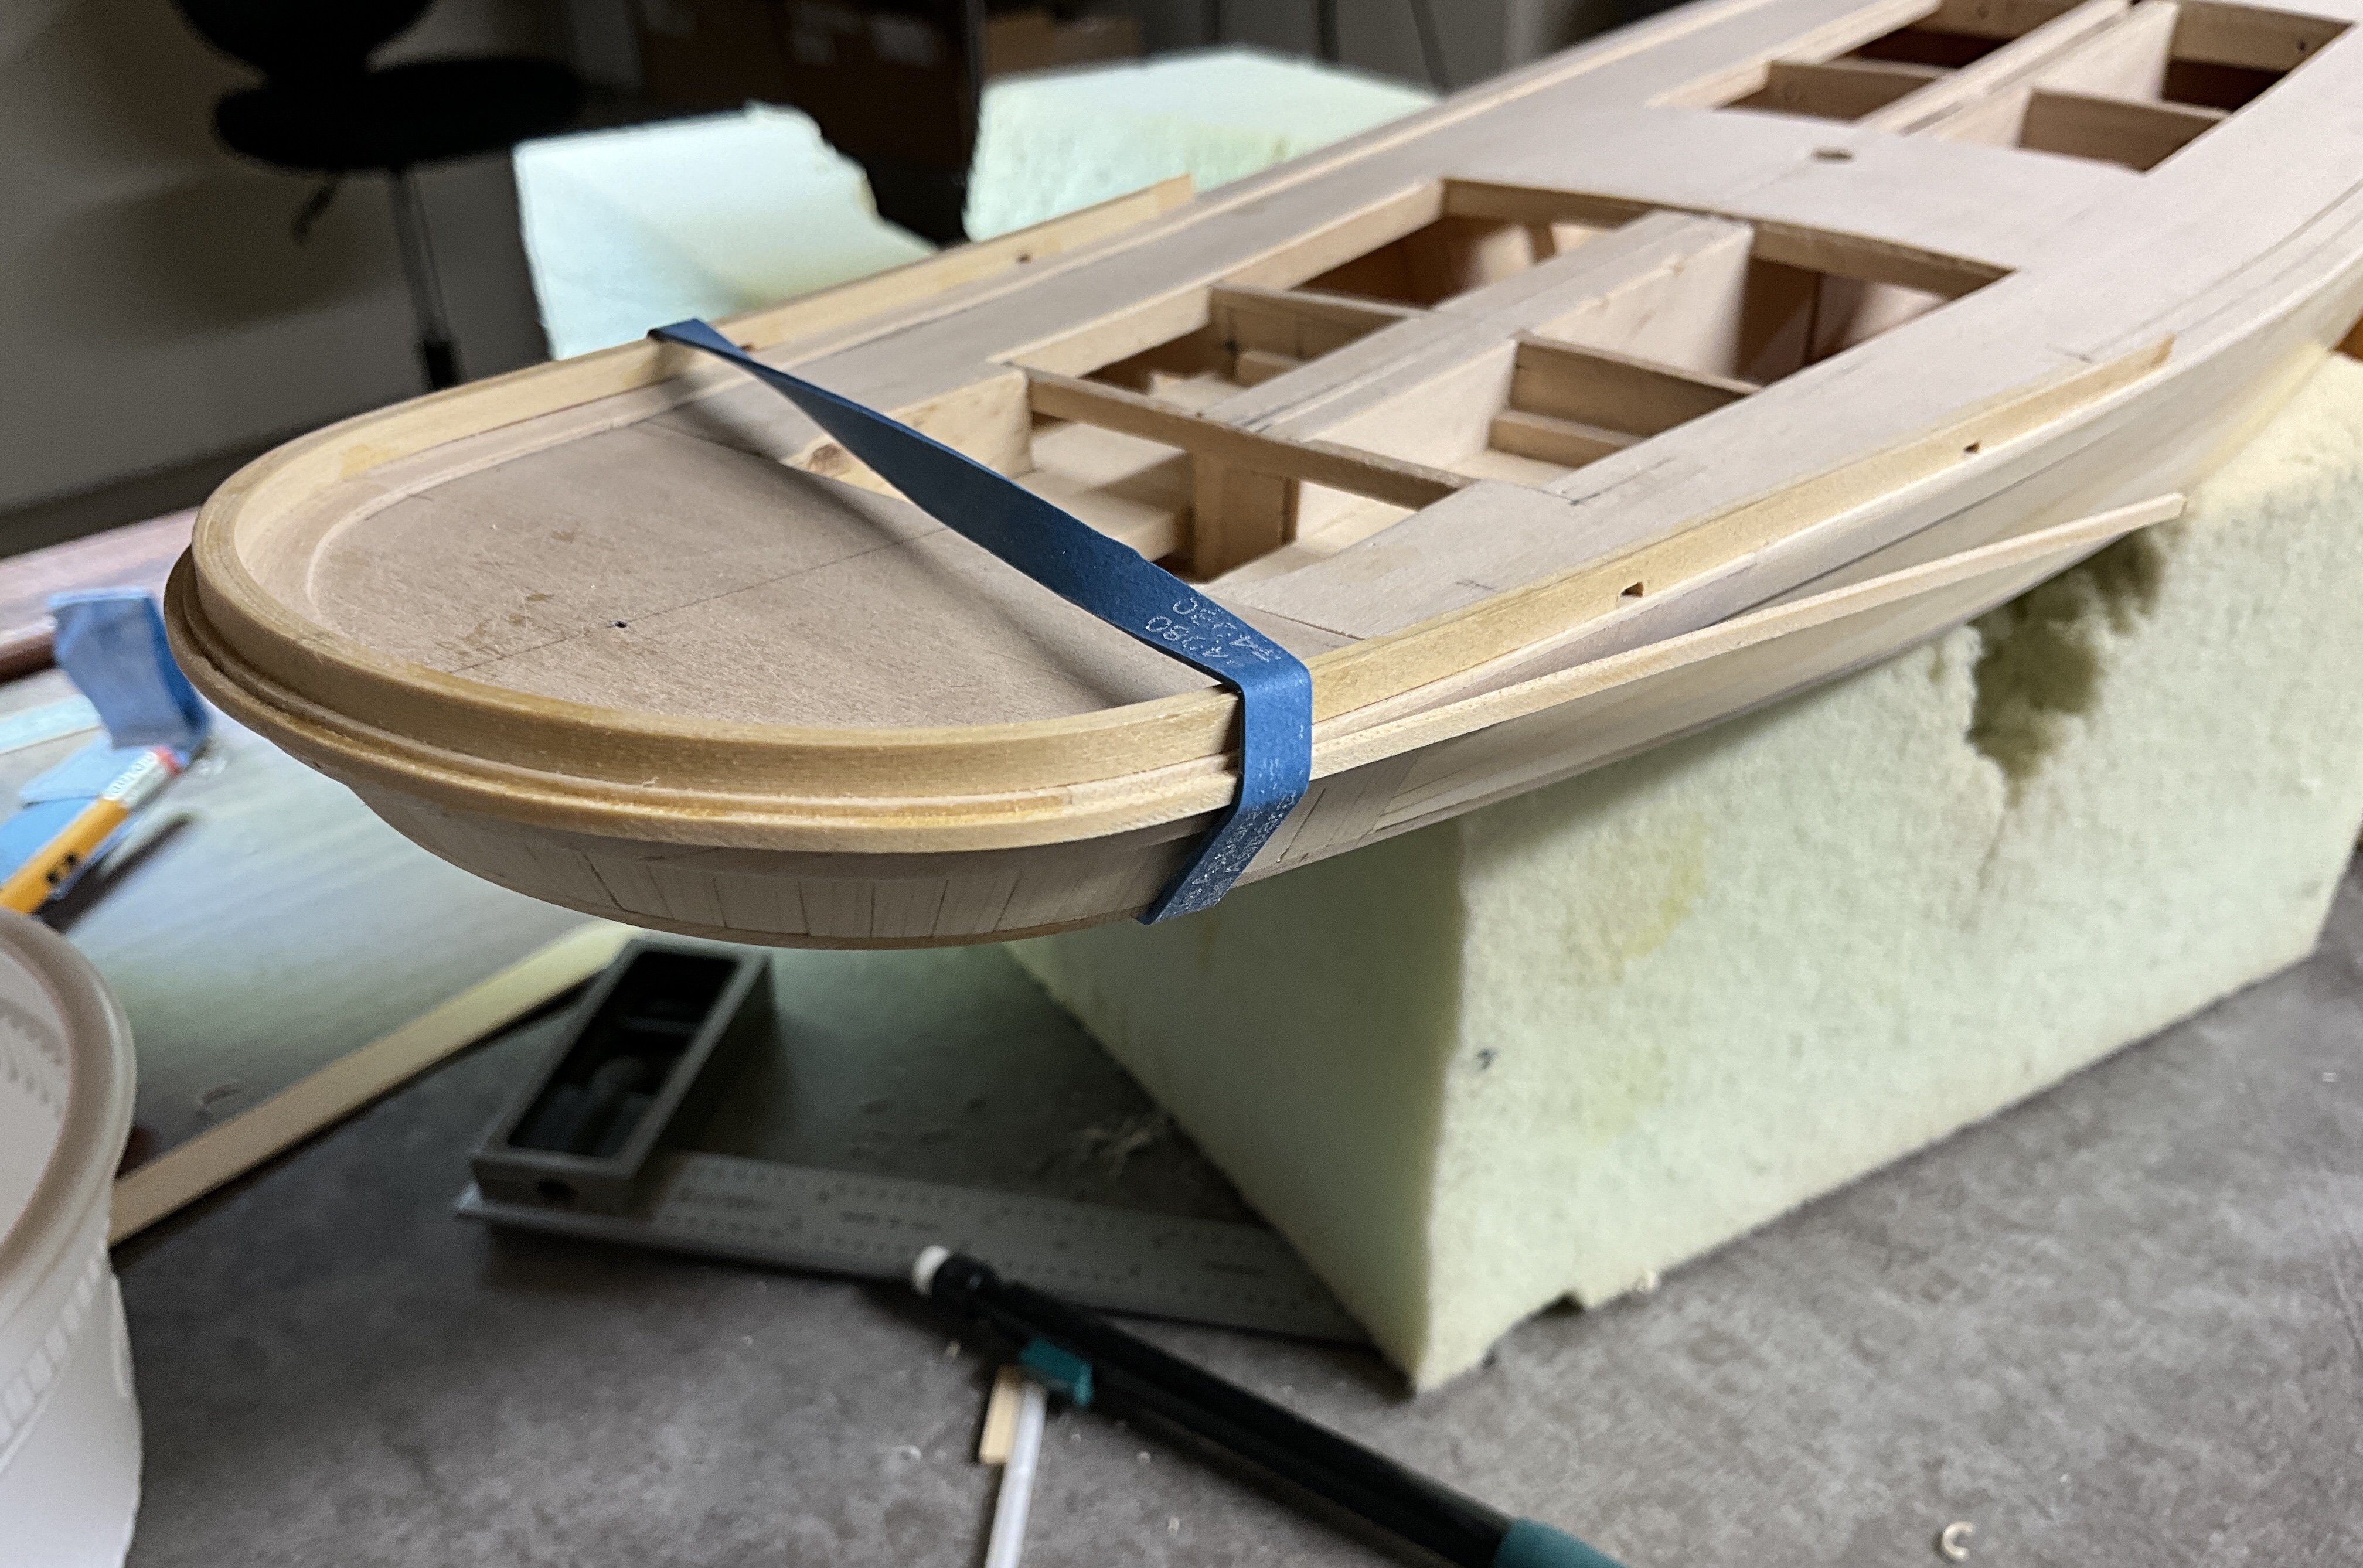
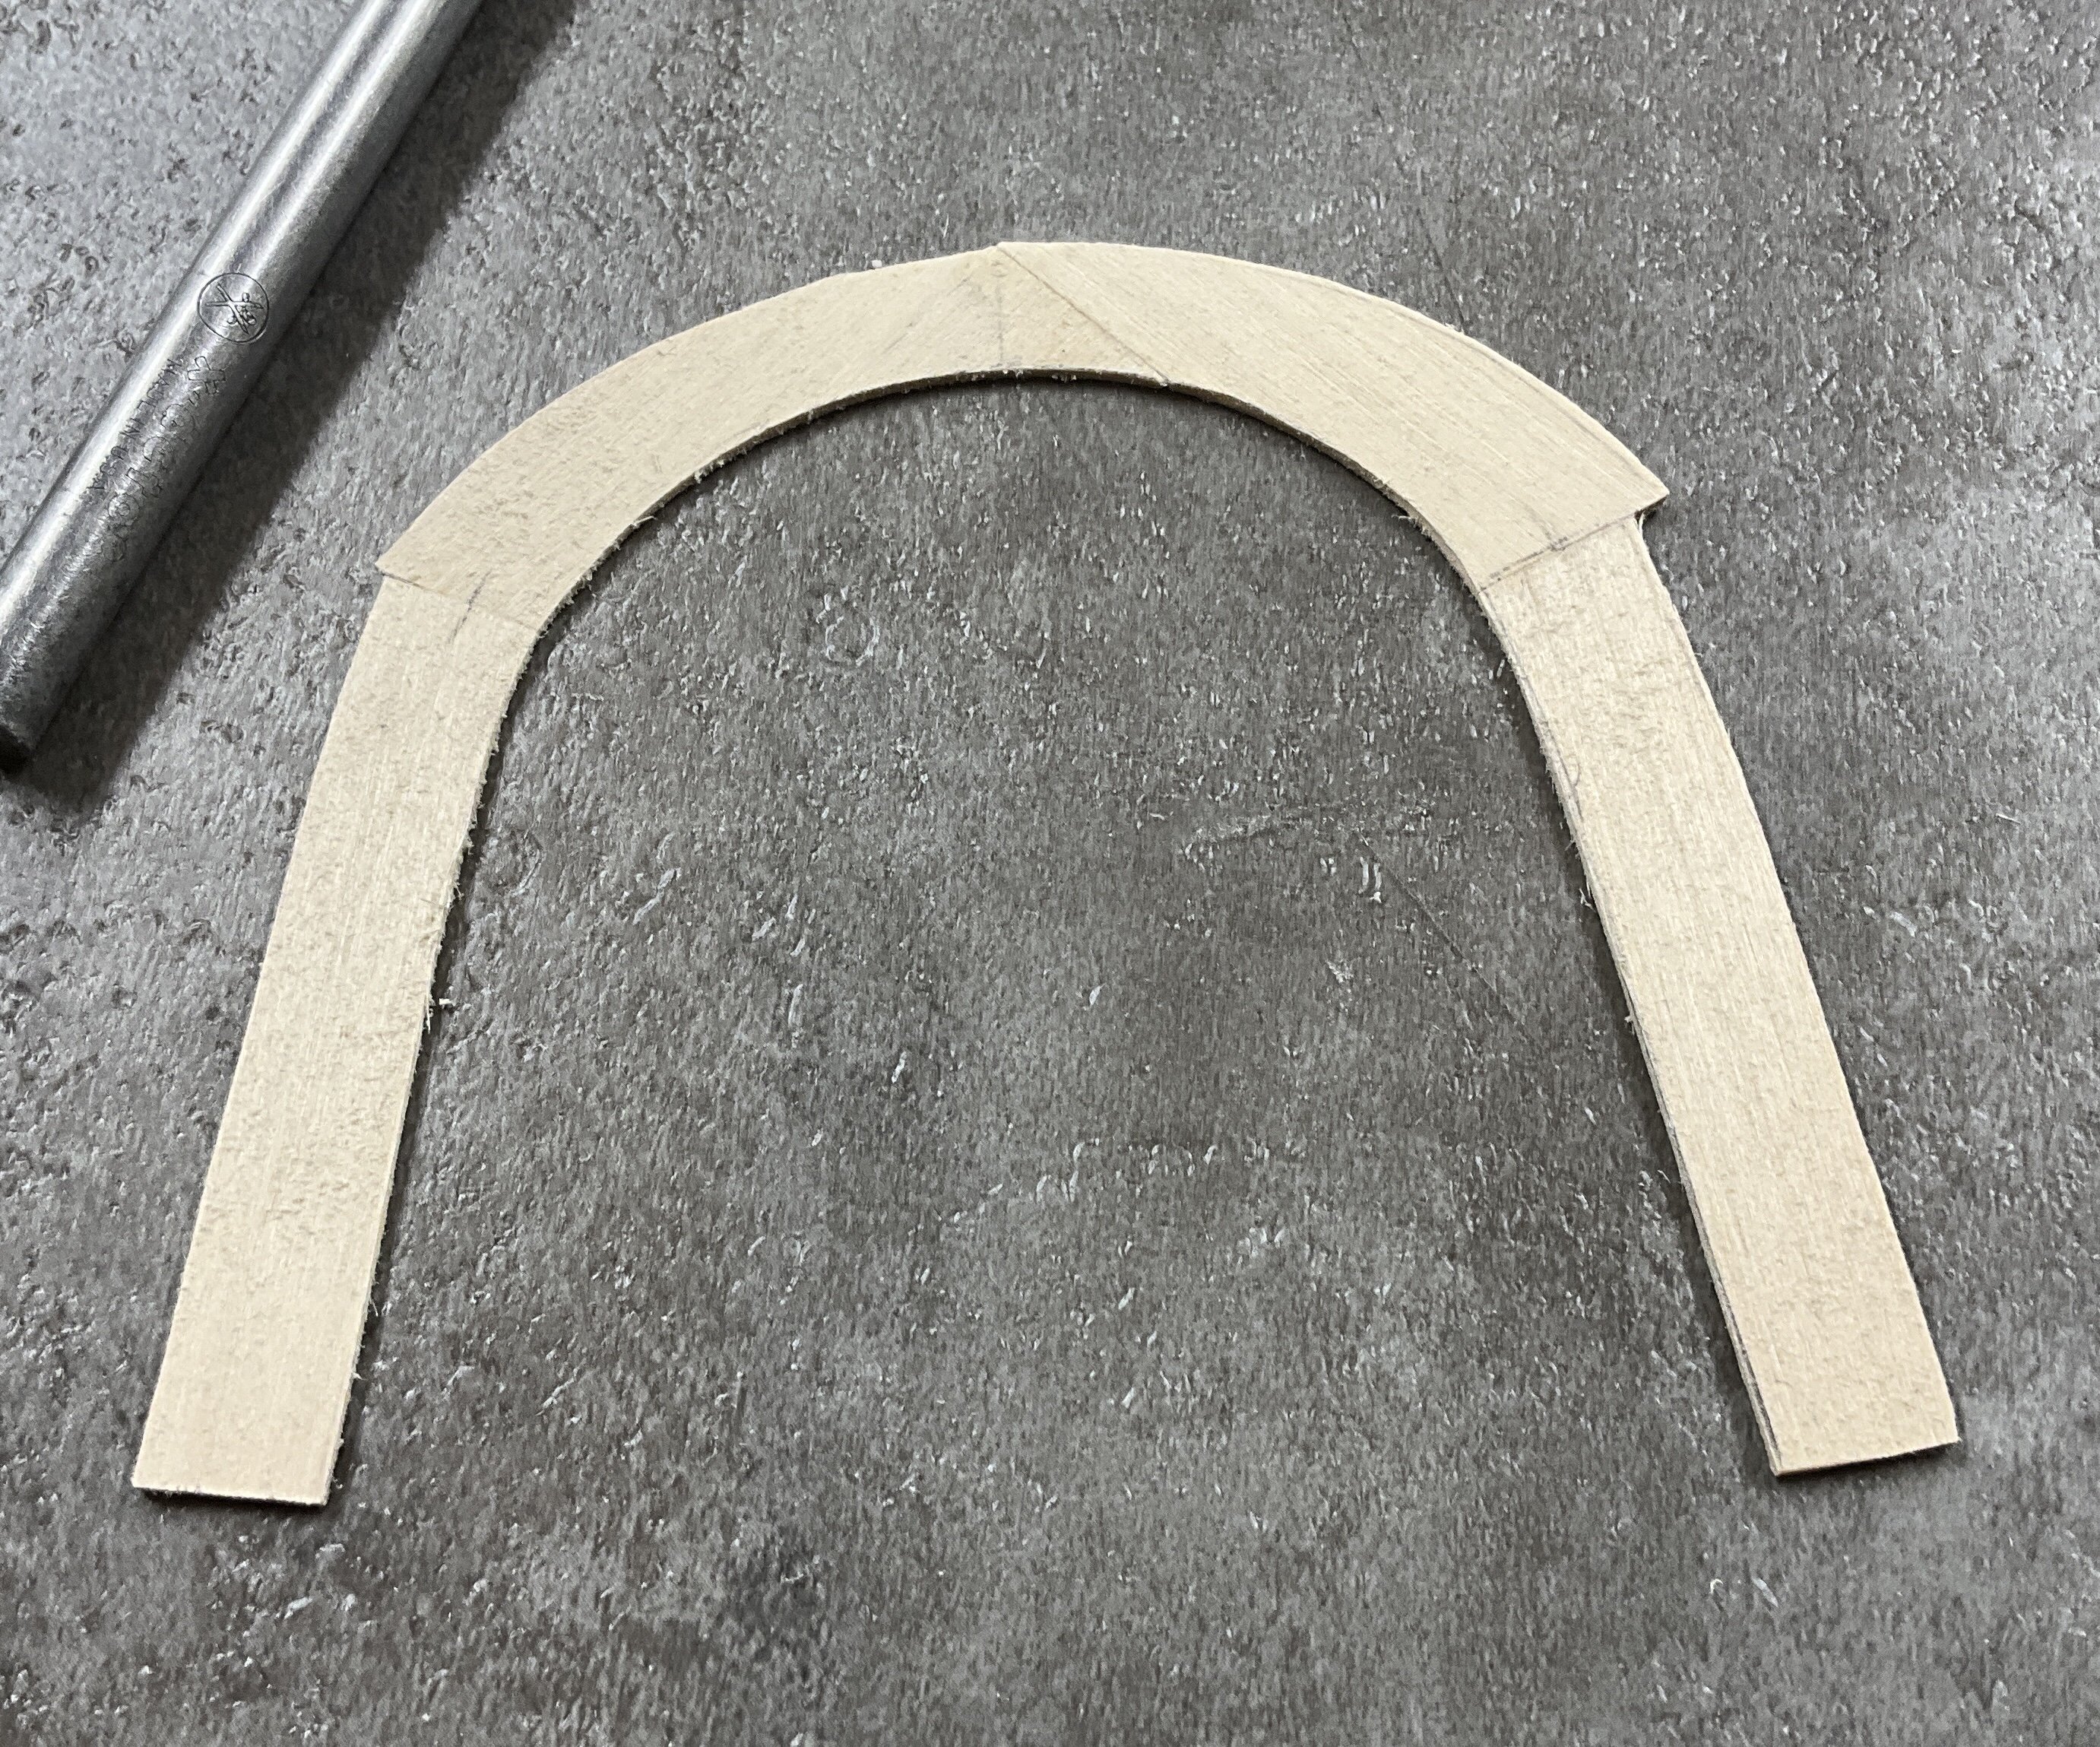
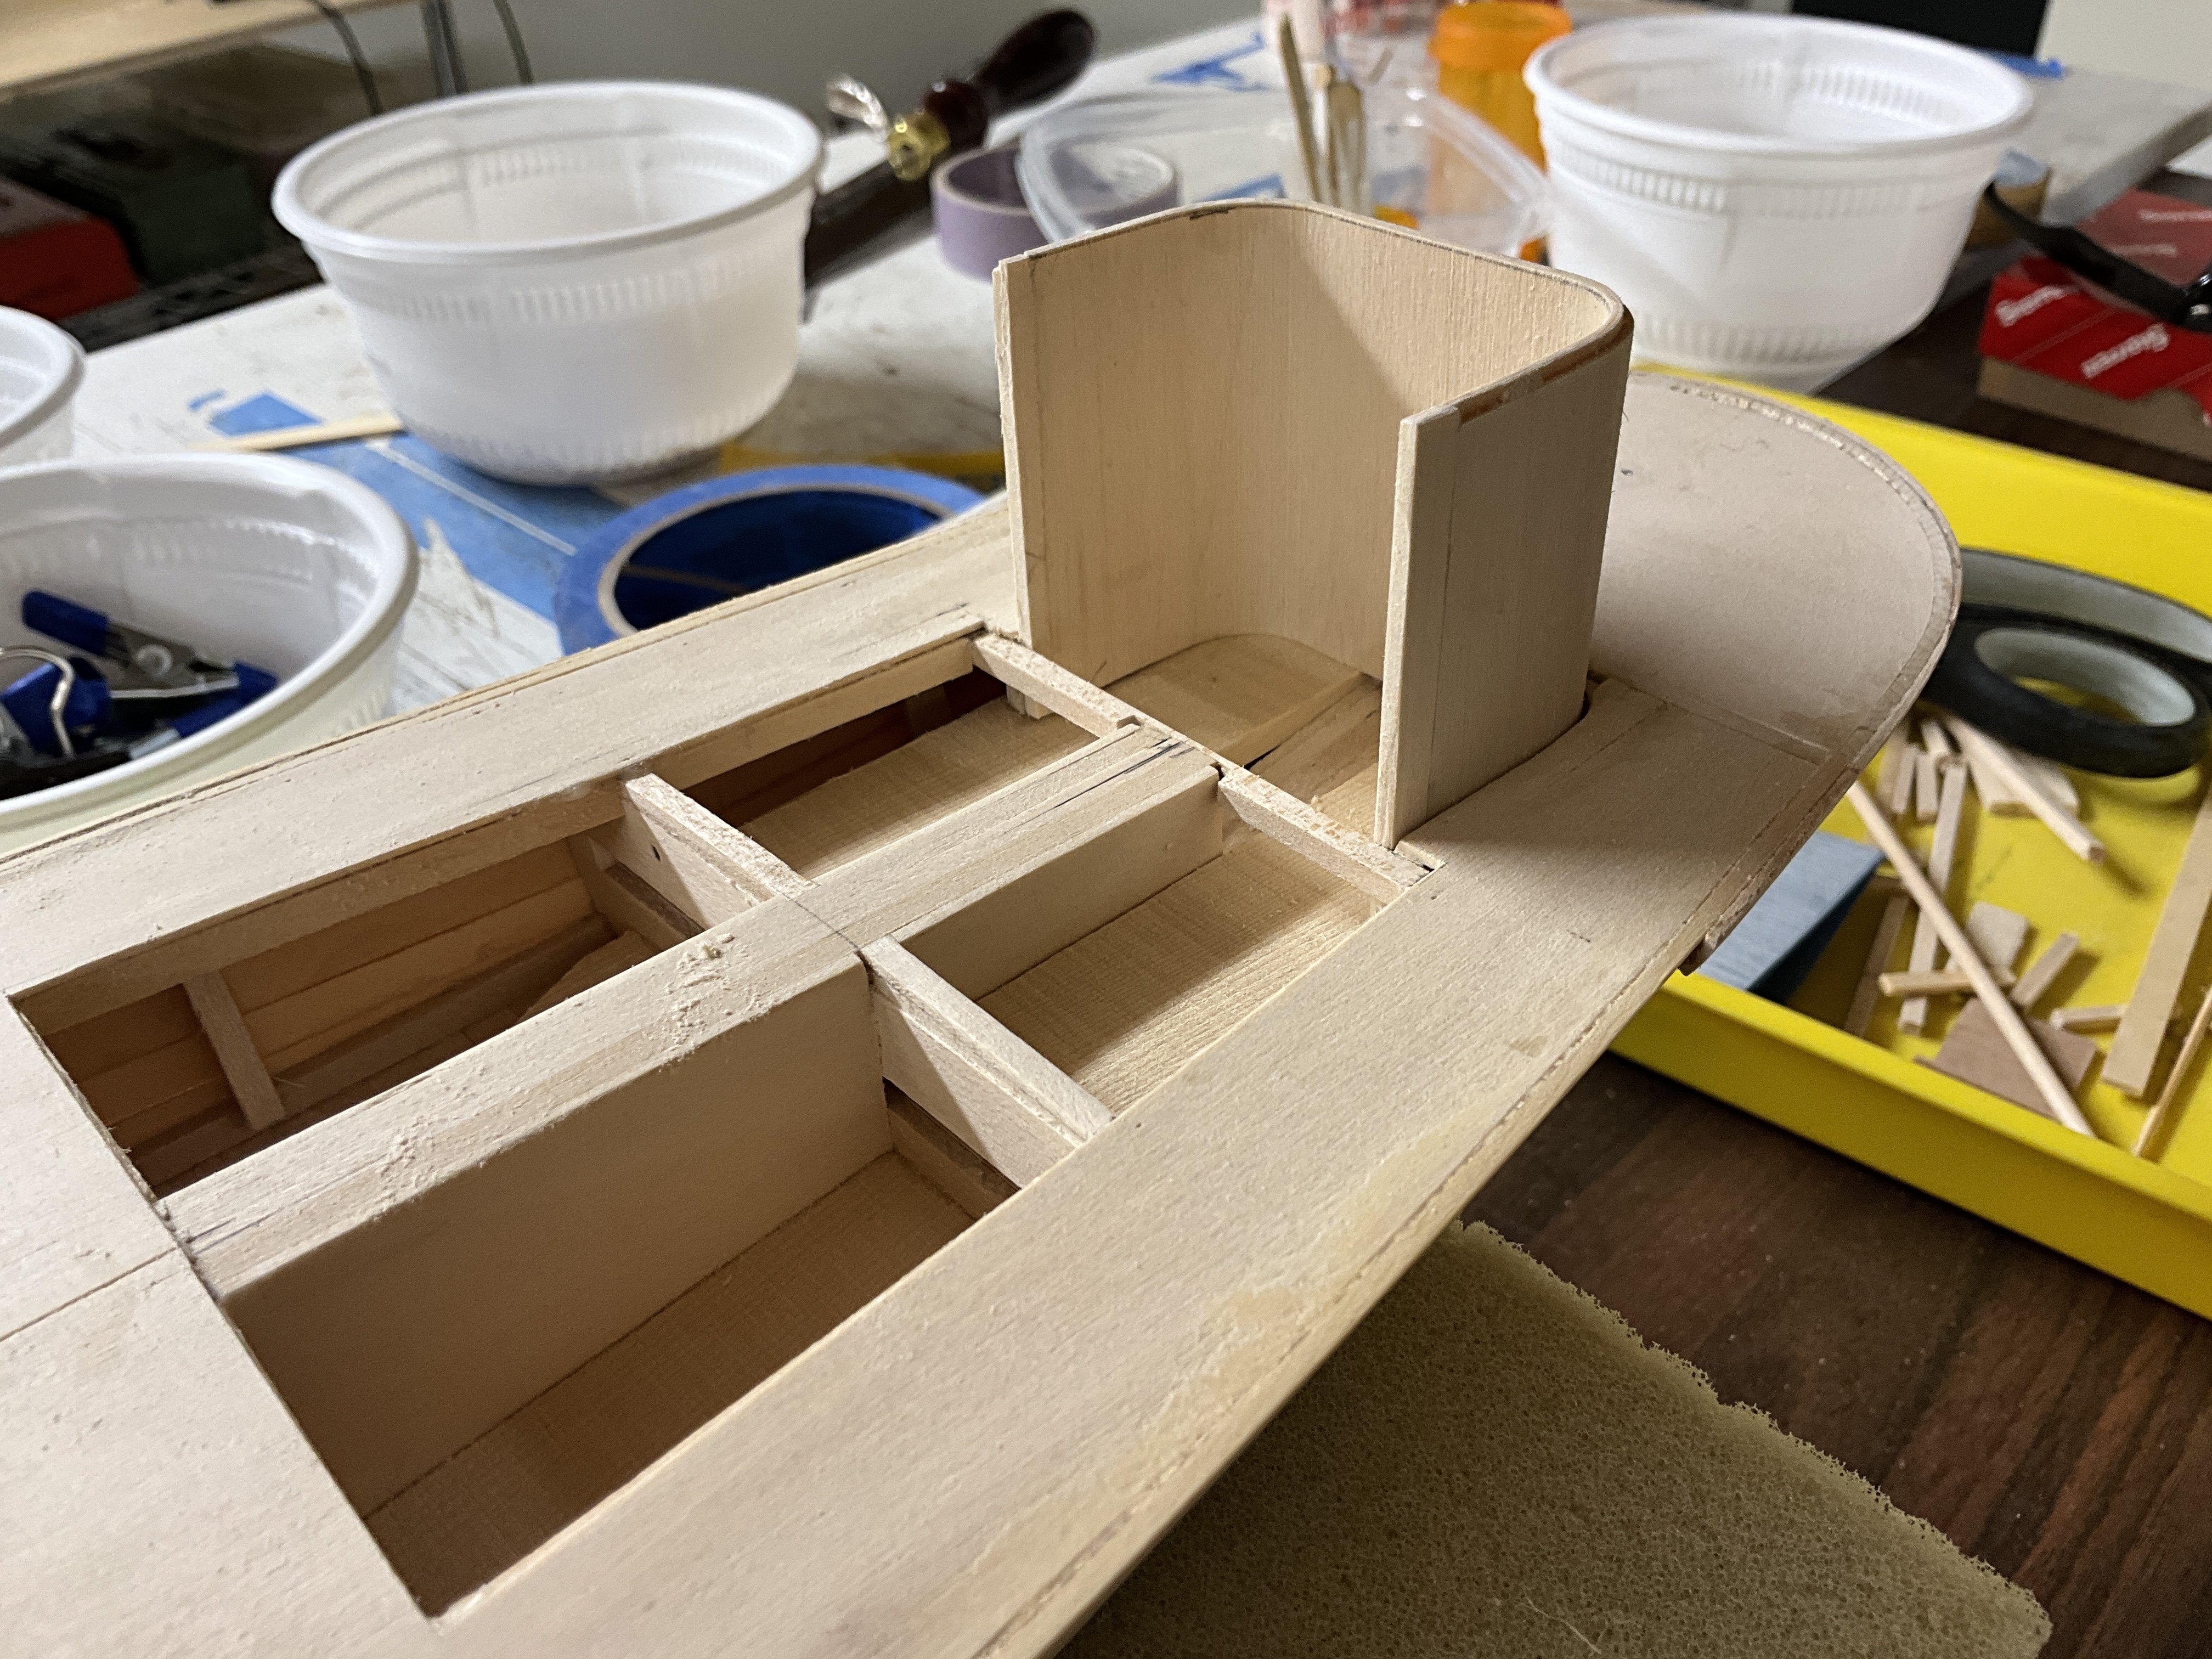
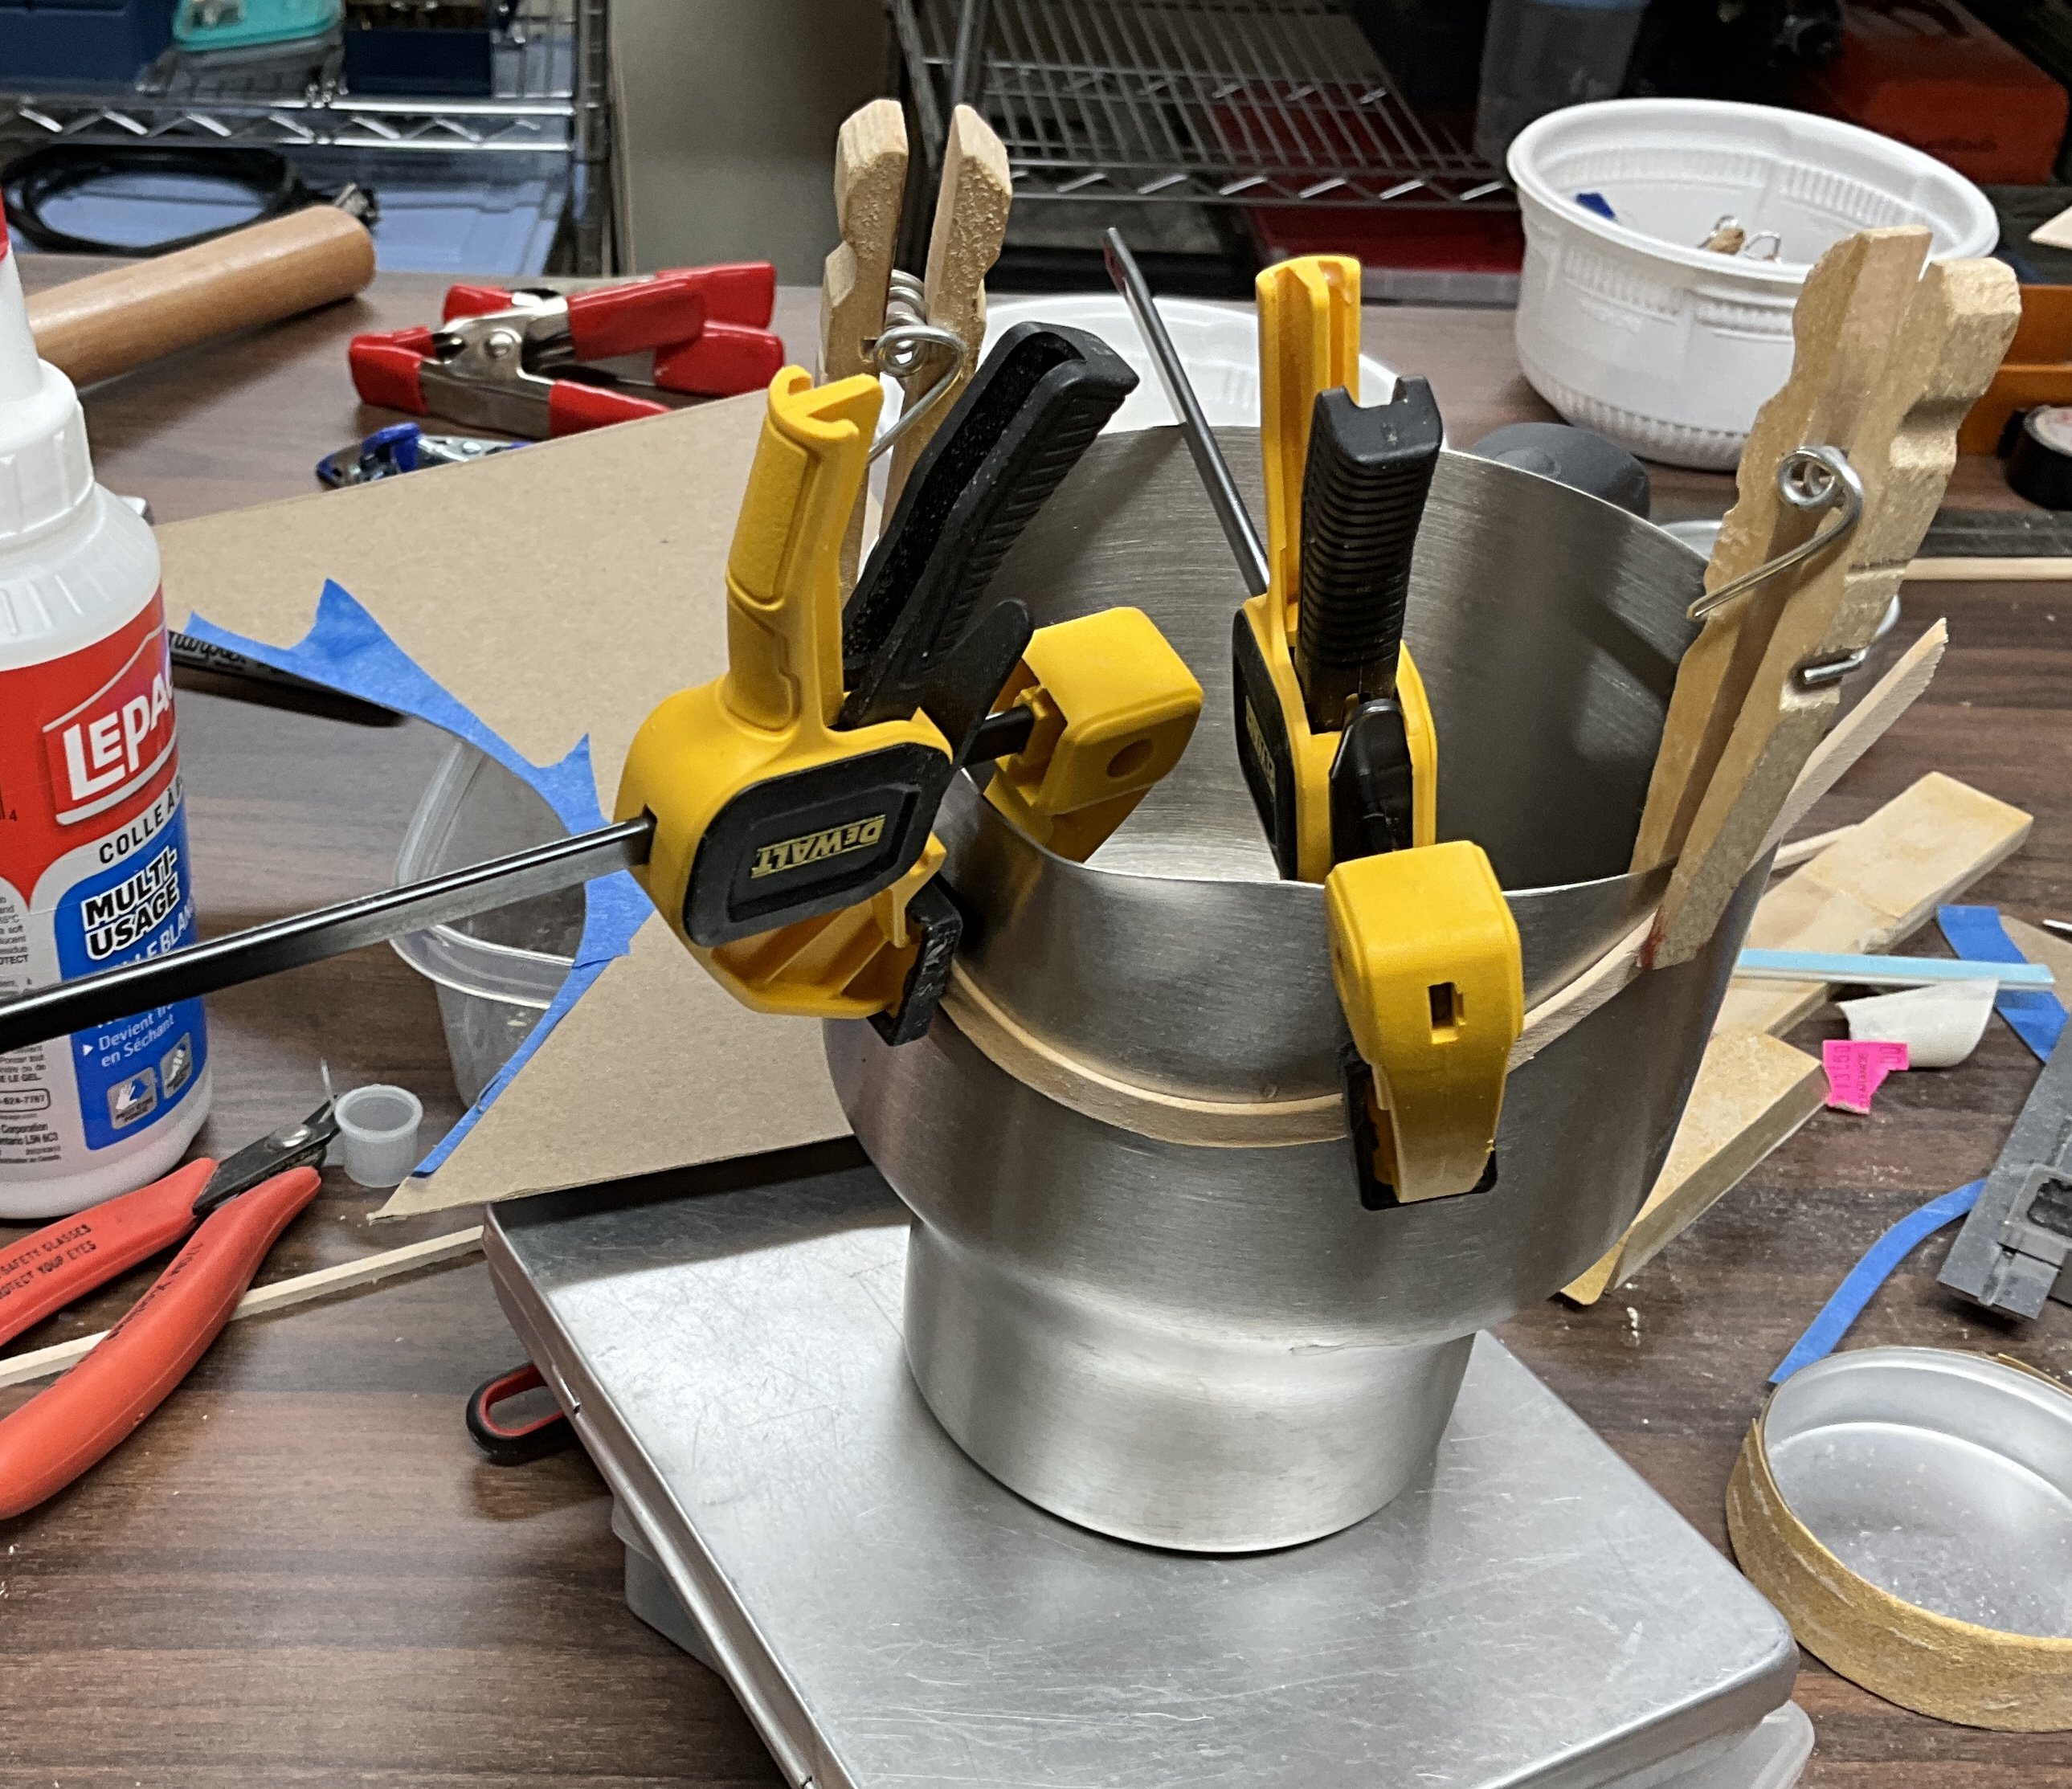
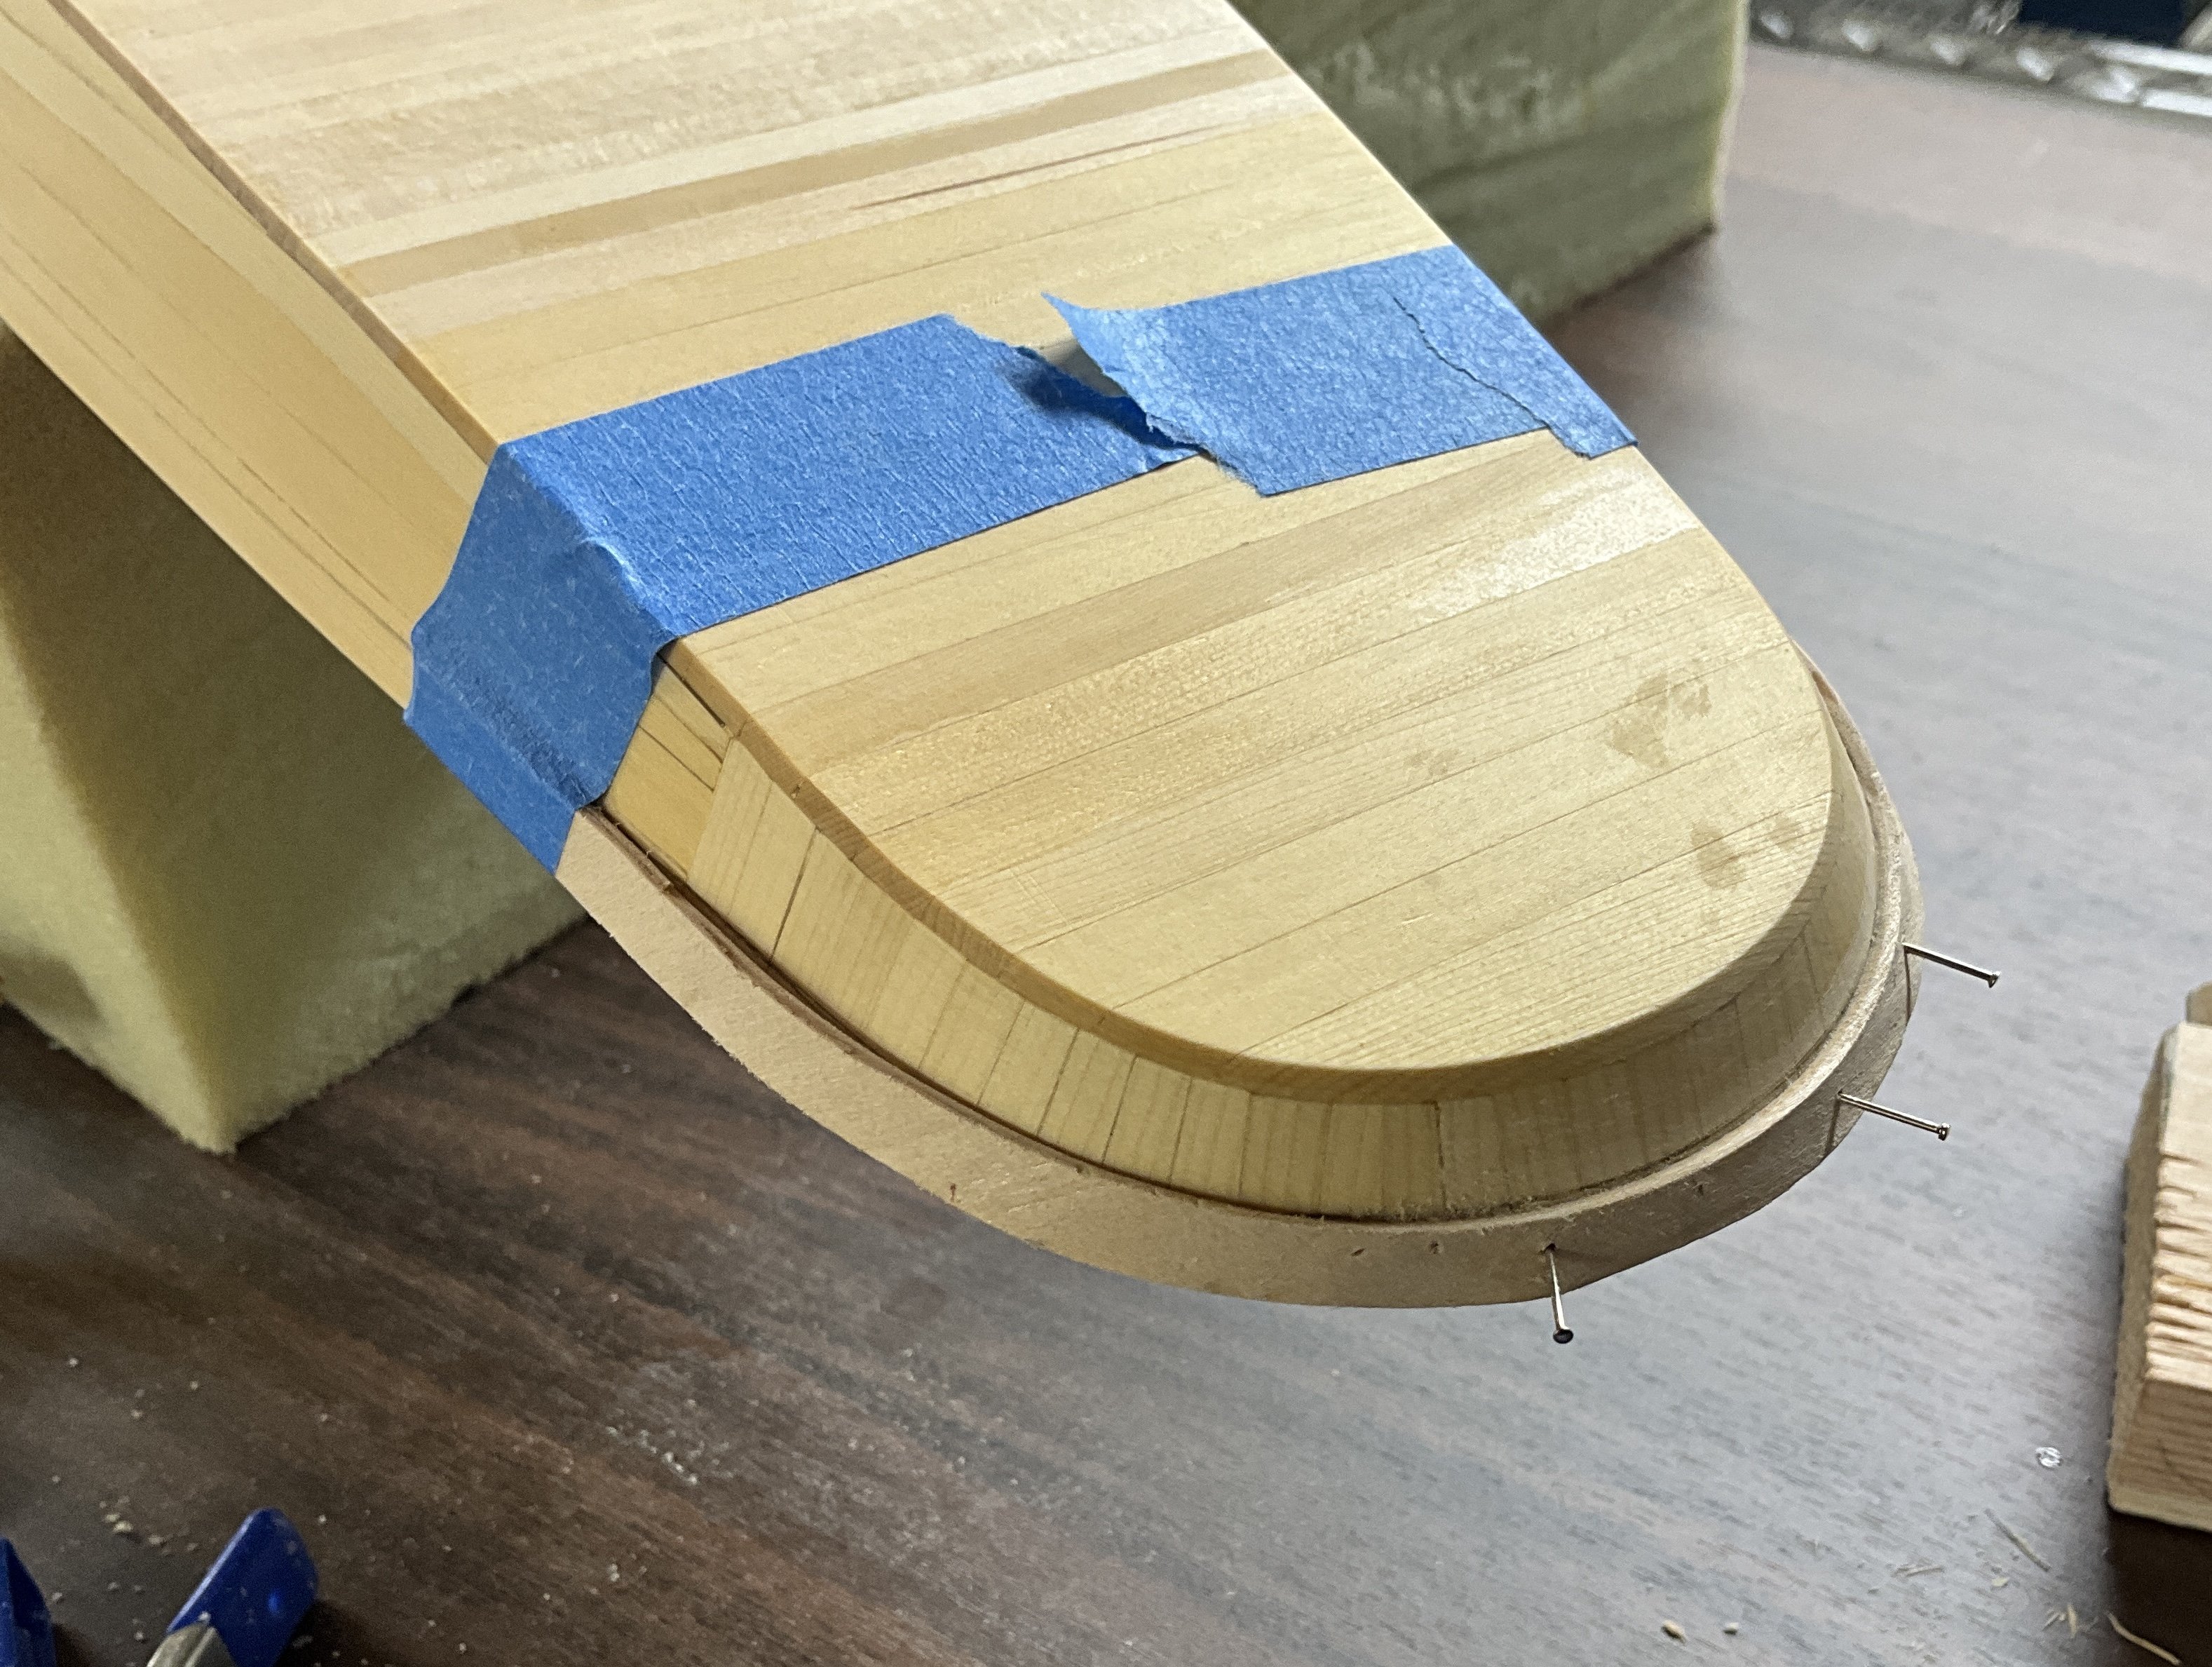
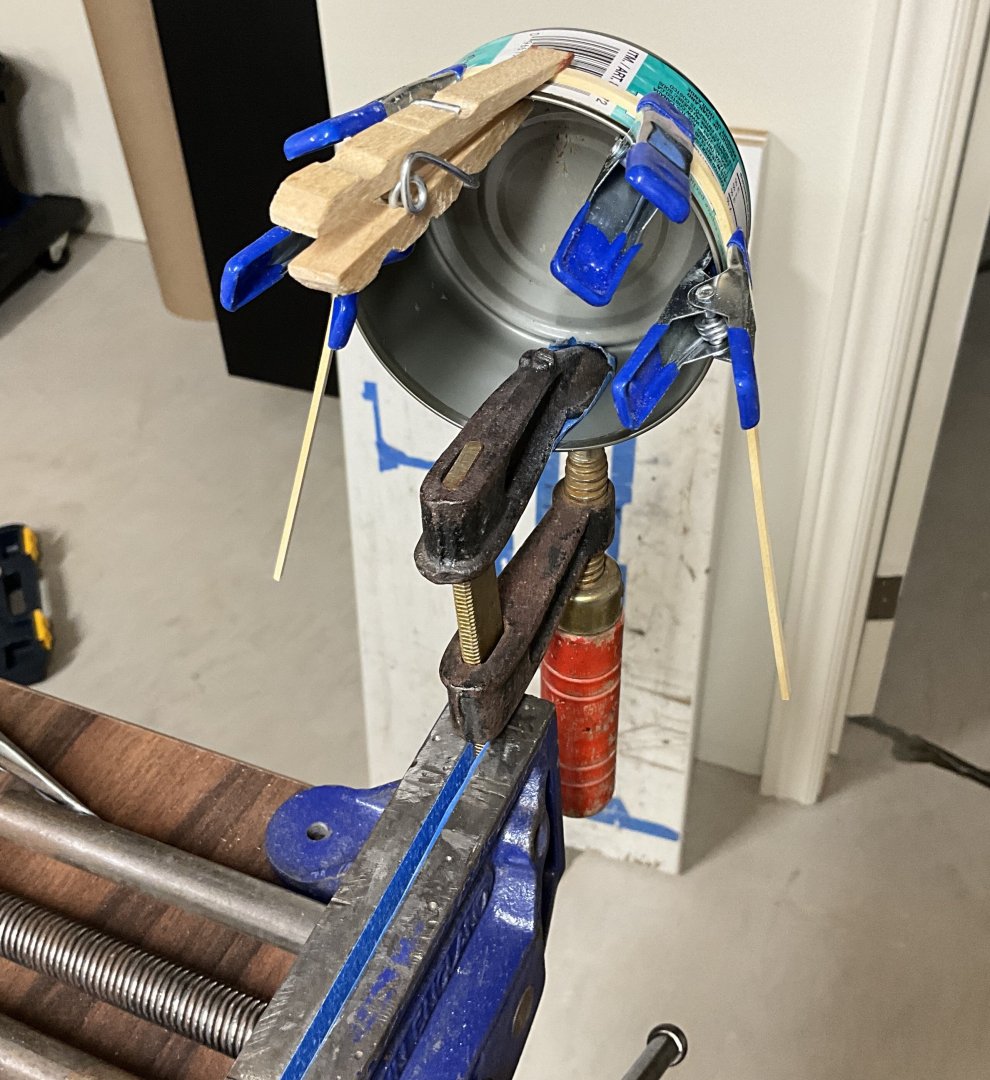
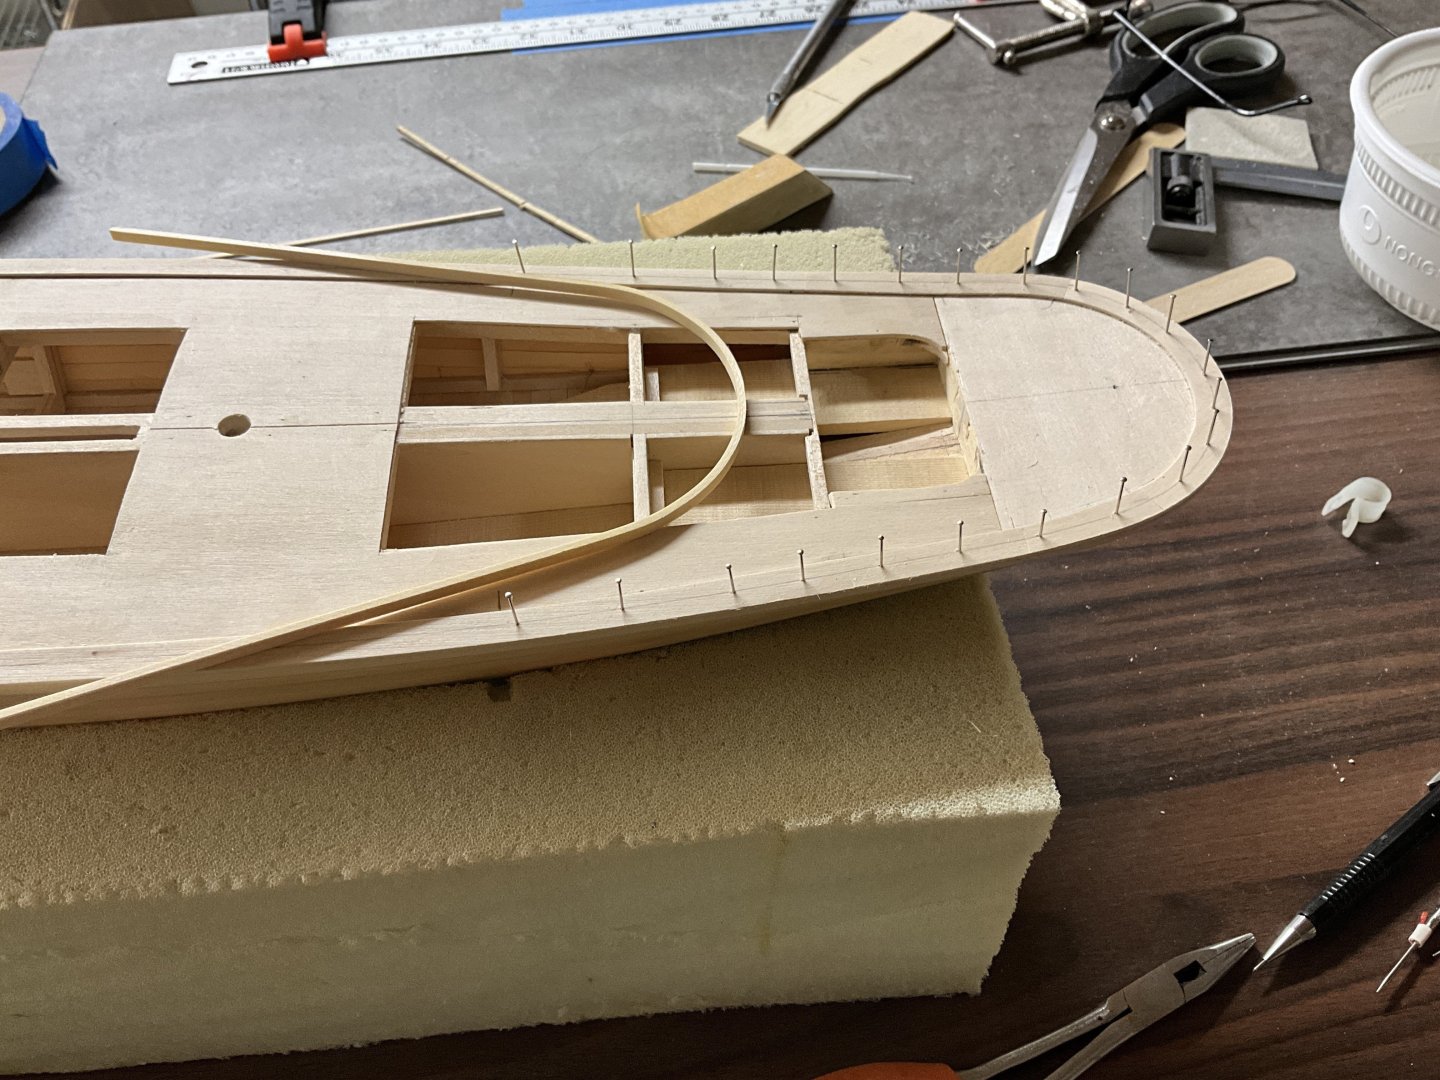
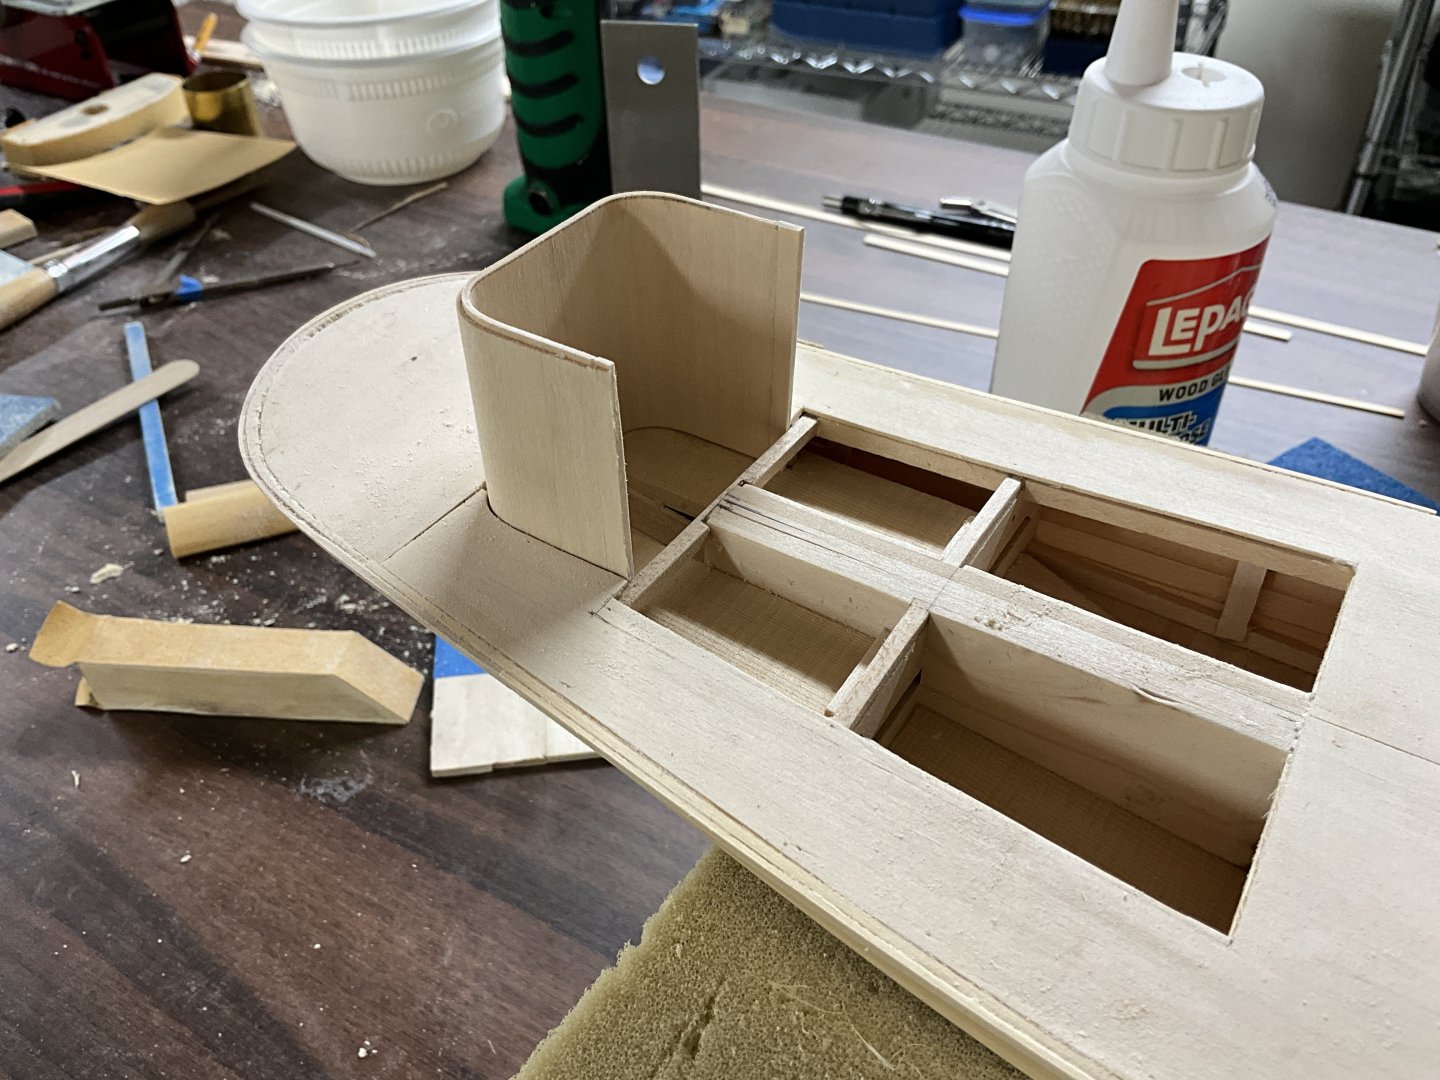
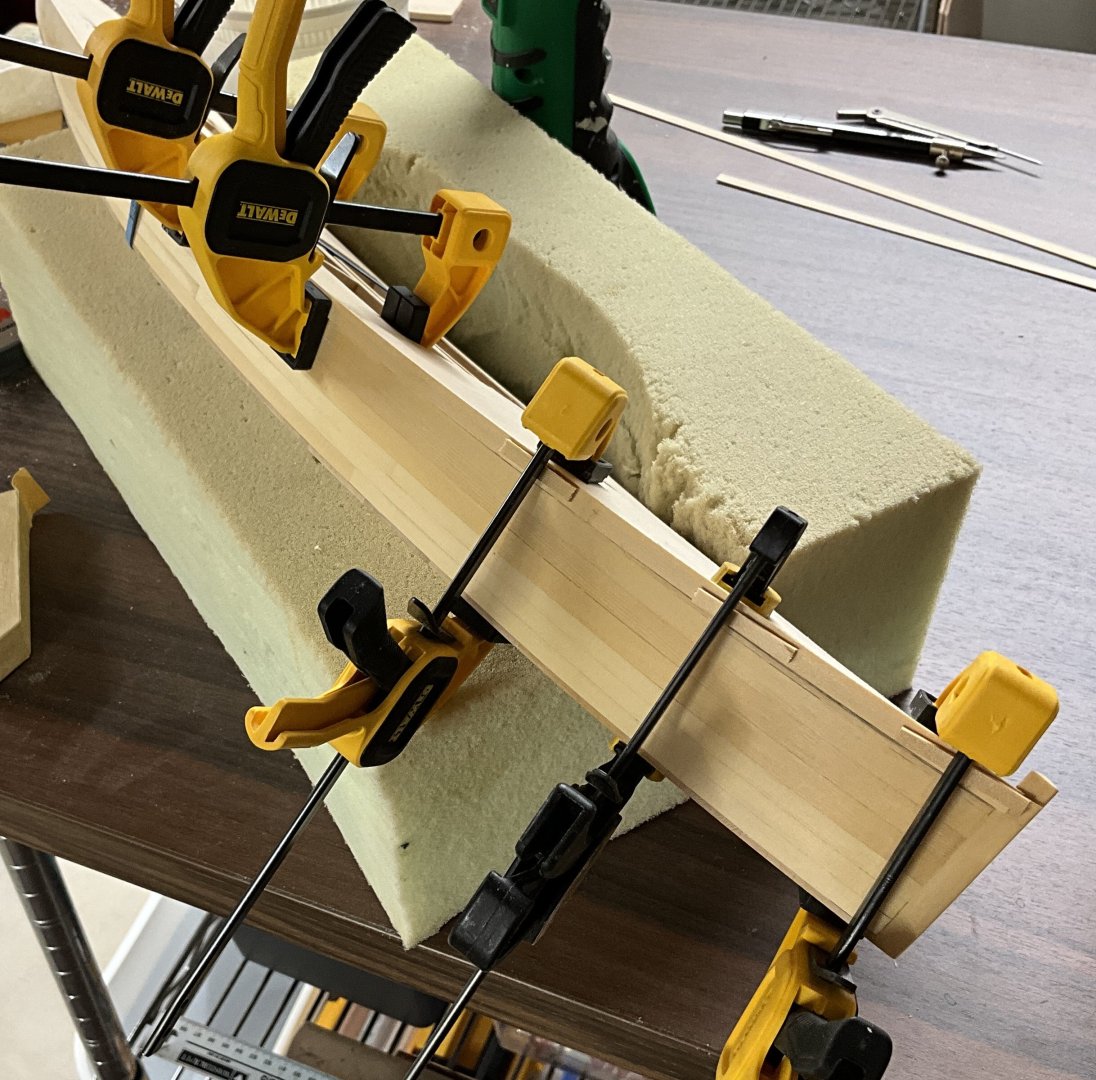
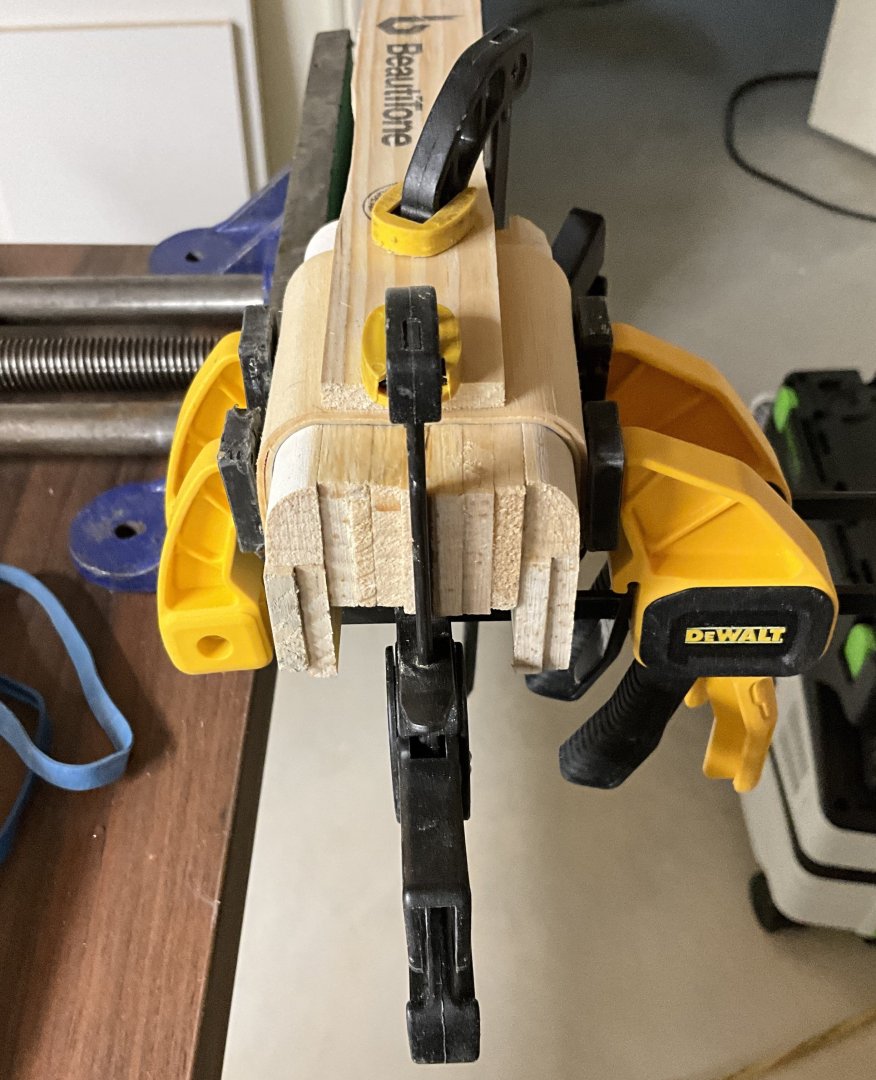
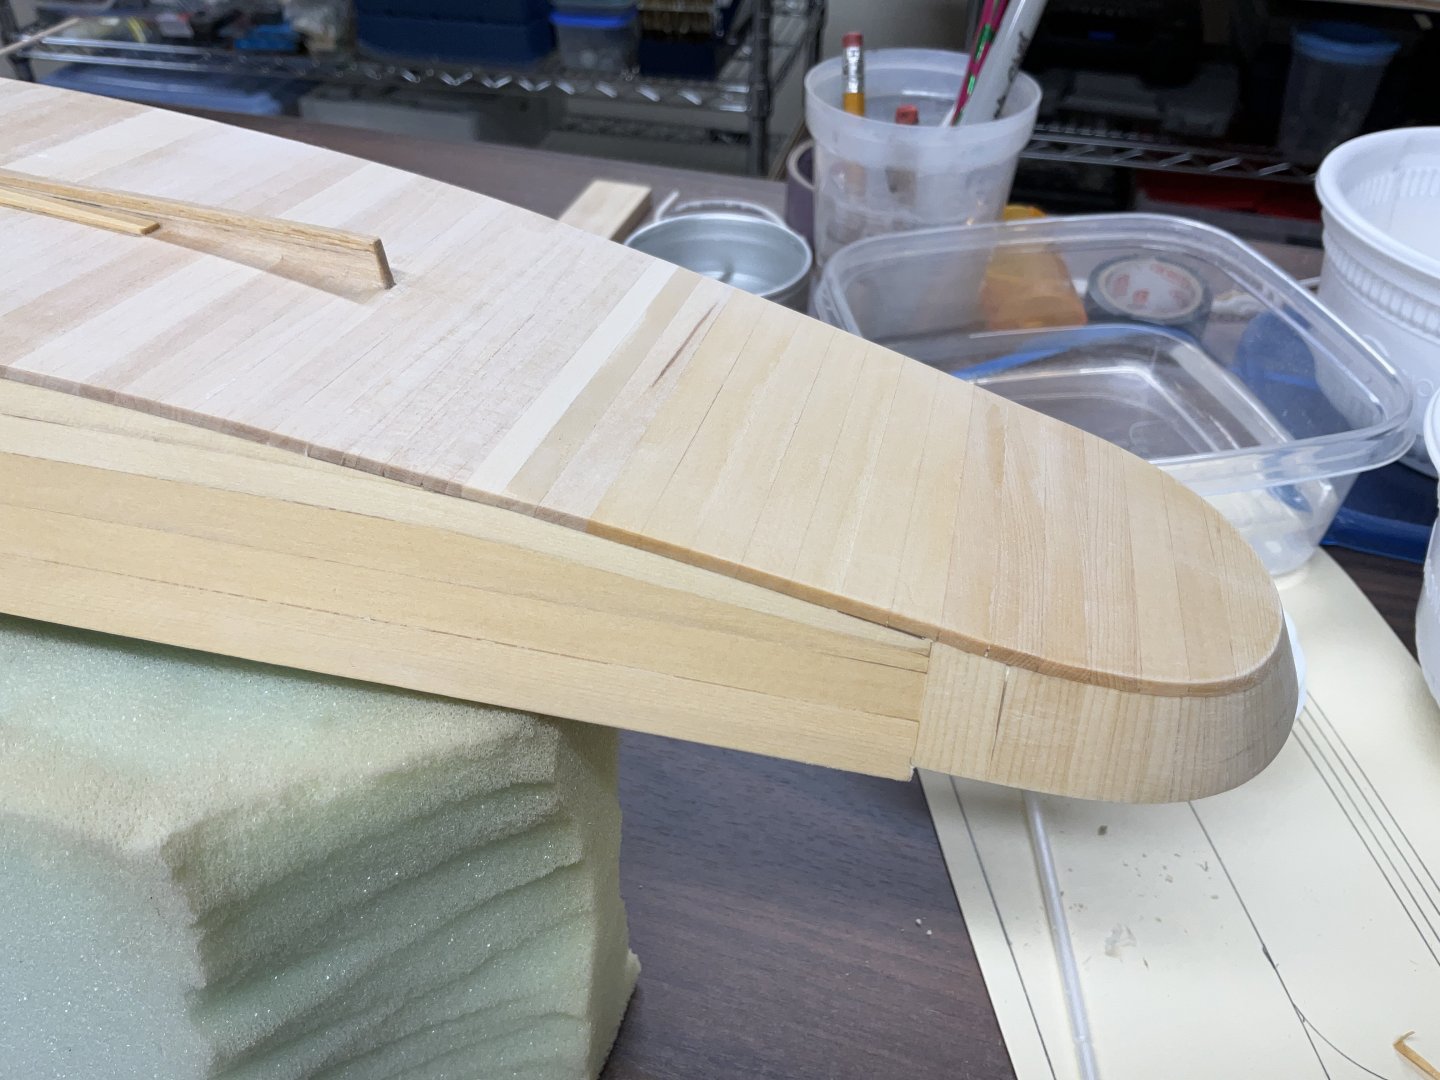
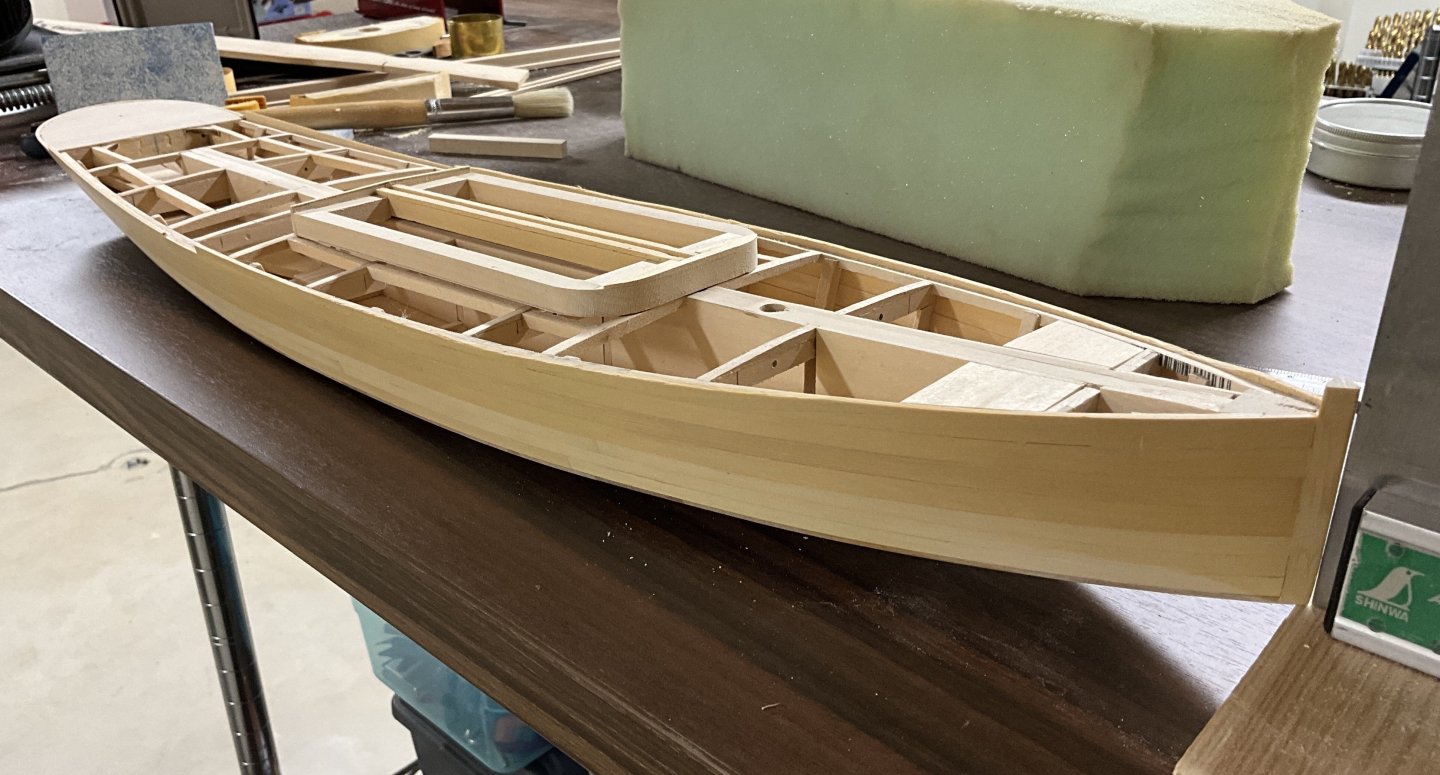
Hi Everyone, thank you very much for dropping by and Liking. Quite a while ago I cut and shaped the part of the false wale that wraps around the stern. I posted this picture previously but figured I’d post it again as a reminder. Attached it about an inch at a time using pins, PVA and CA. It Is made out of 1/16” basswood sheet but will be sanded down to 1/32” to match the false wales that continue up the hull to the stem. A template for the sub deck was made using a file folder and used to mark a sheet of 1/32” basswood sheet. Once the sub deck was attached the sheer was sanded down to it. A 7/32 x 1/32” strip of AYC was used for the rest of the false wale and sanded back down to the sub deck leaving it about 3/16” wide. During the times the glue was drying I made a mould to shape the curved cockpit walls. Shaped one piece of 1/32” basswood sheet that was soaked in water for a few minutes. The grain is running vertically so it wasn’t difficult to shape. Let that dry for a couple of days and then glued another piece on top of the first piece. Gave it a test fit to see how high it needed to be. Made some more parts for the main hatch. The center board crane was built up out of 5/16” x 1/16” AYC. Then more test fitting. That’s about it for now. Hope to see you soon.


- 201 replies
-
- 18
-
-
-
- Oyster Sharpie
- first scratch build
- (and 1 more)
-
Hi Dave, welcome to MSW. Congratulations on completing this fine Nina. I hope to see your next project in a build log soon. Ooops, I’m editing this because I guess you are not quite finished.
-
Harvey, congratulations on finishing your Okahumkee! She is perfect in every way.👍
- 40 replies
-
- 3
-
-
- Okahumkee
- sternwheeler
- (and 1 more)
-
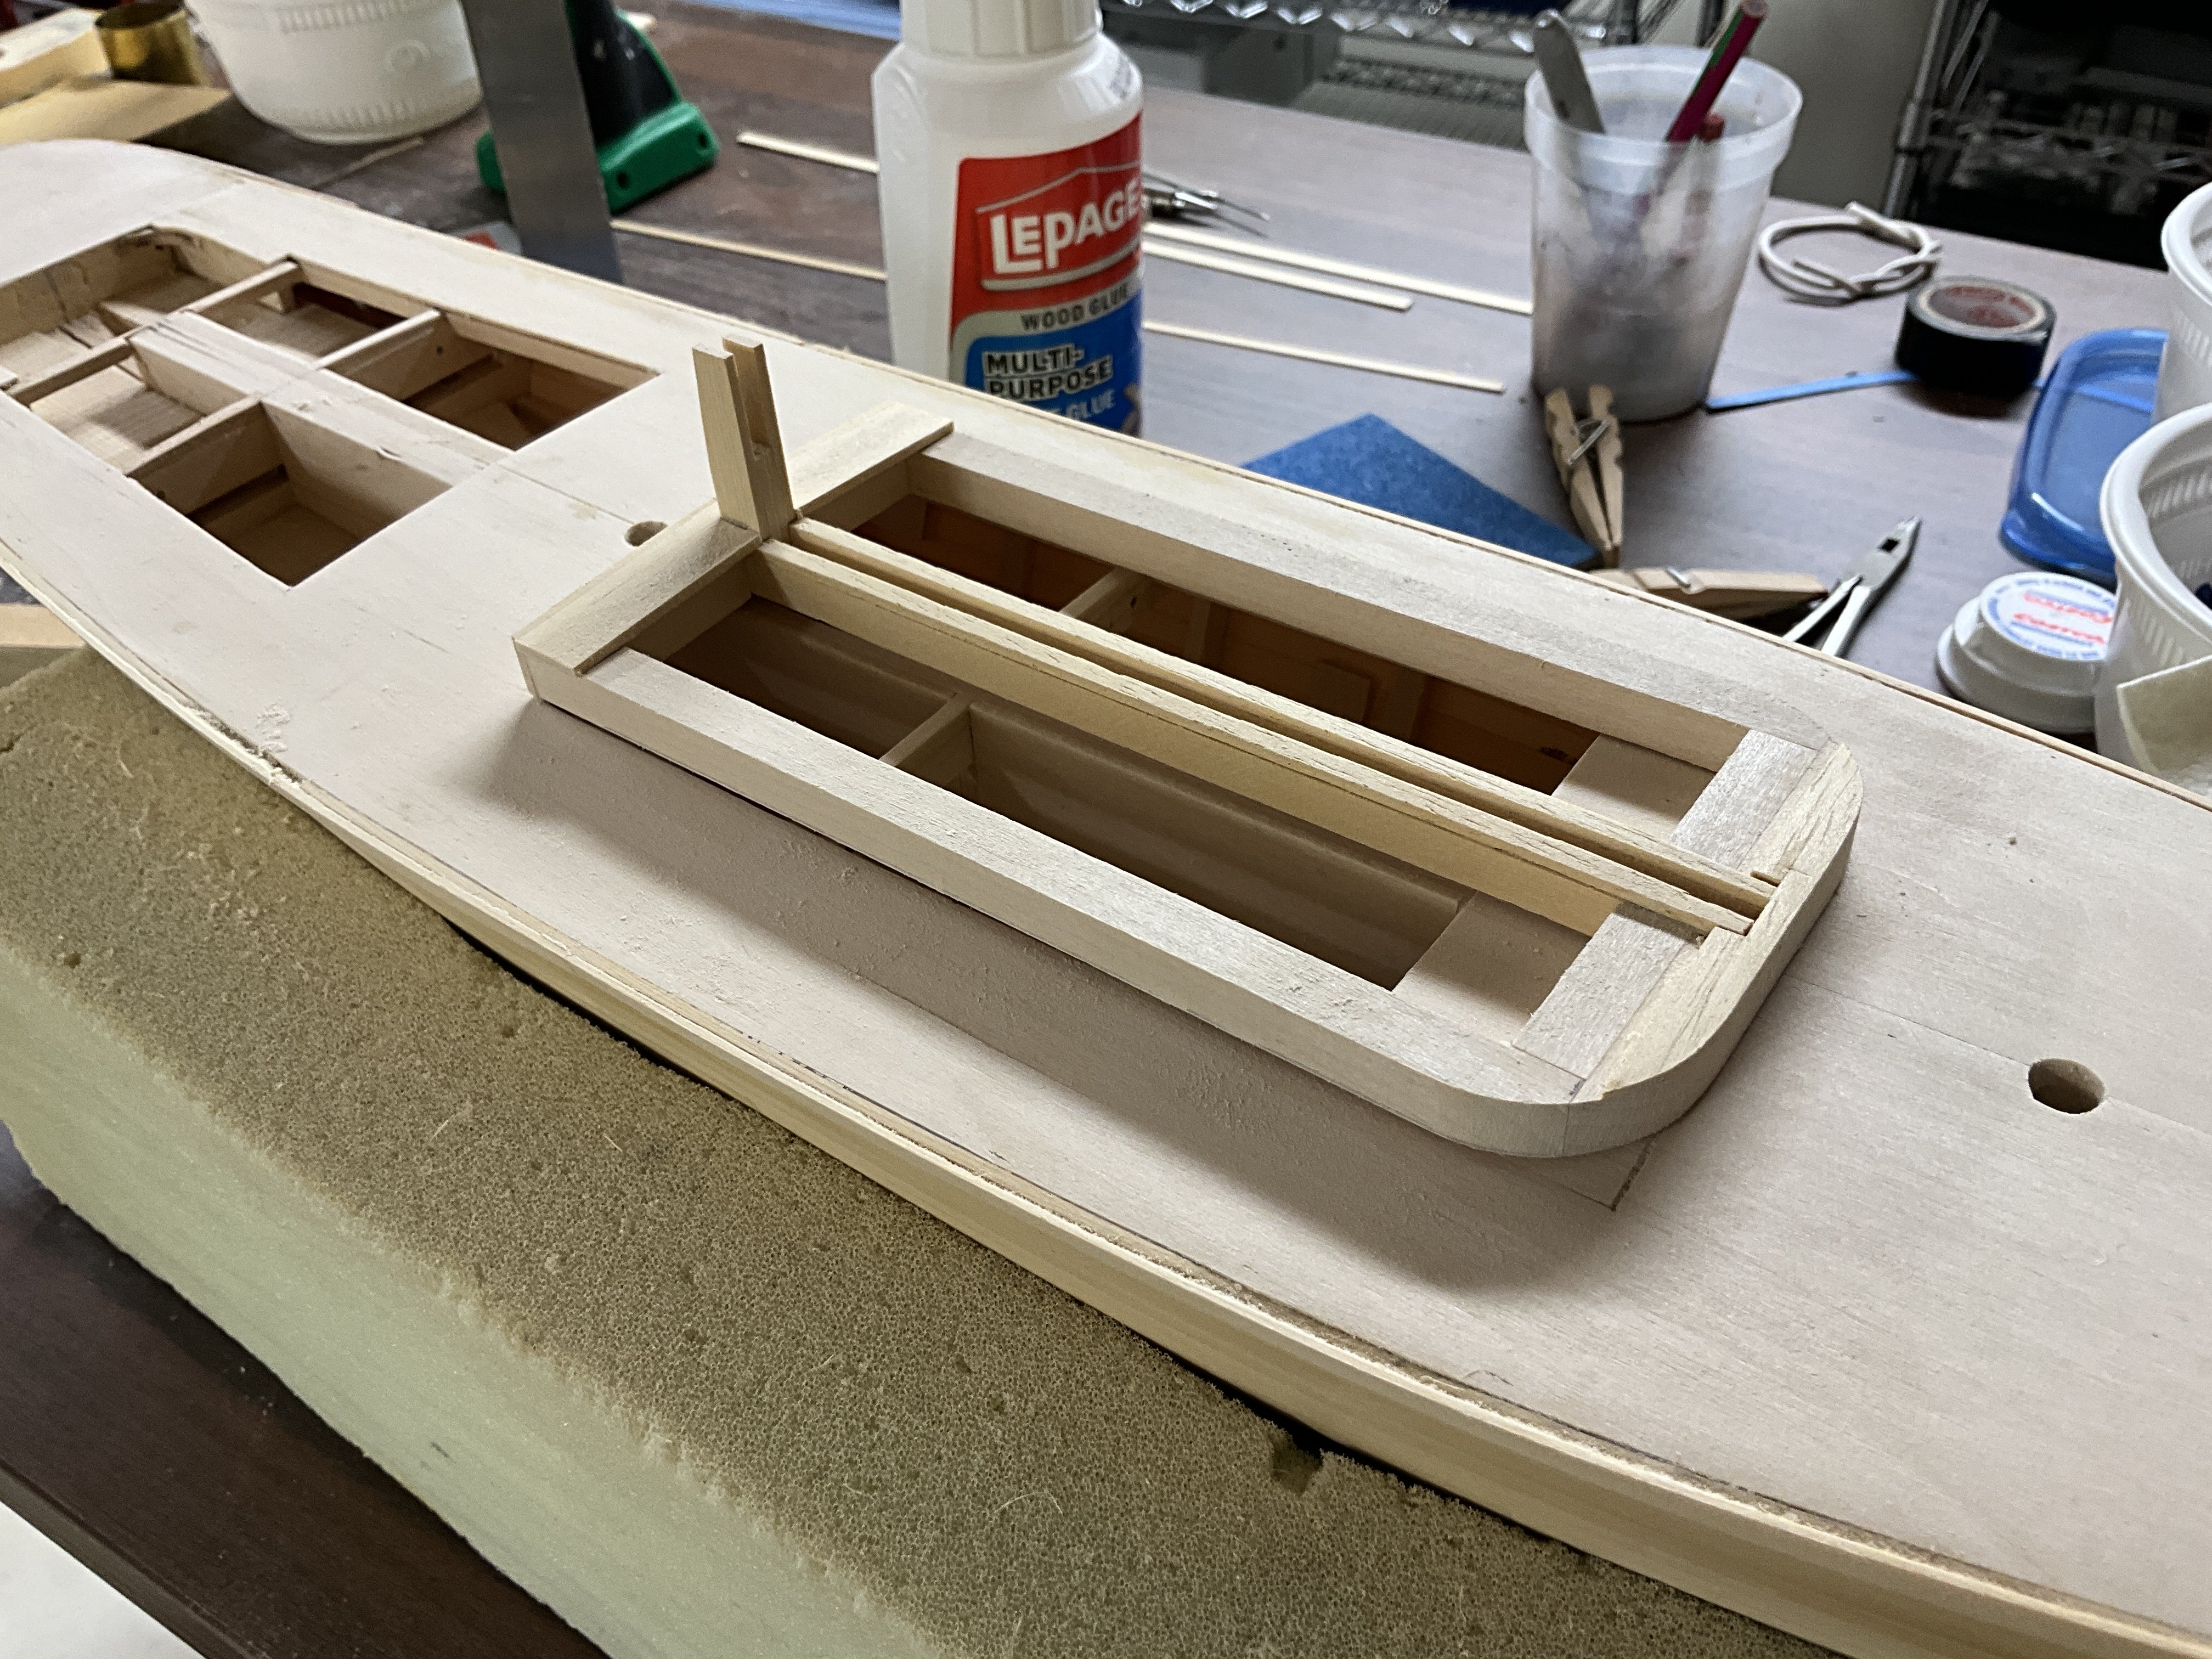
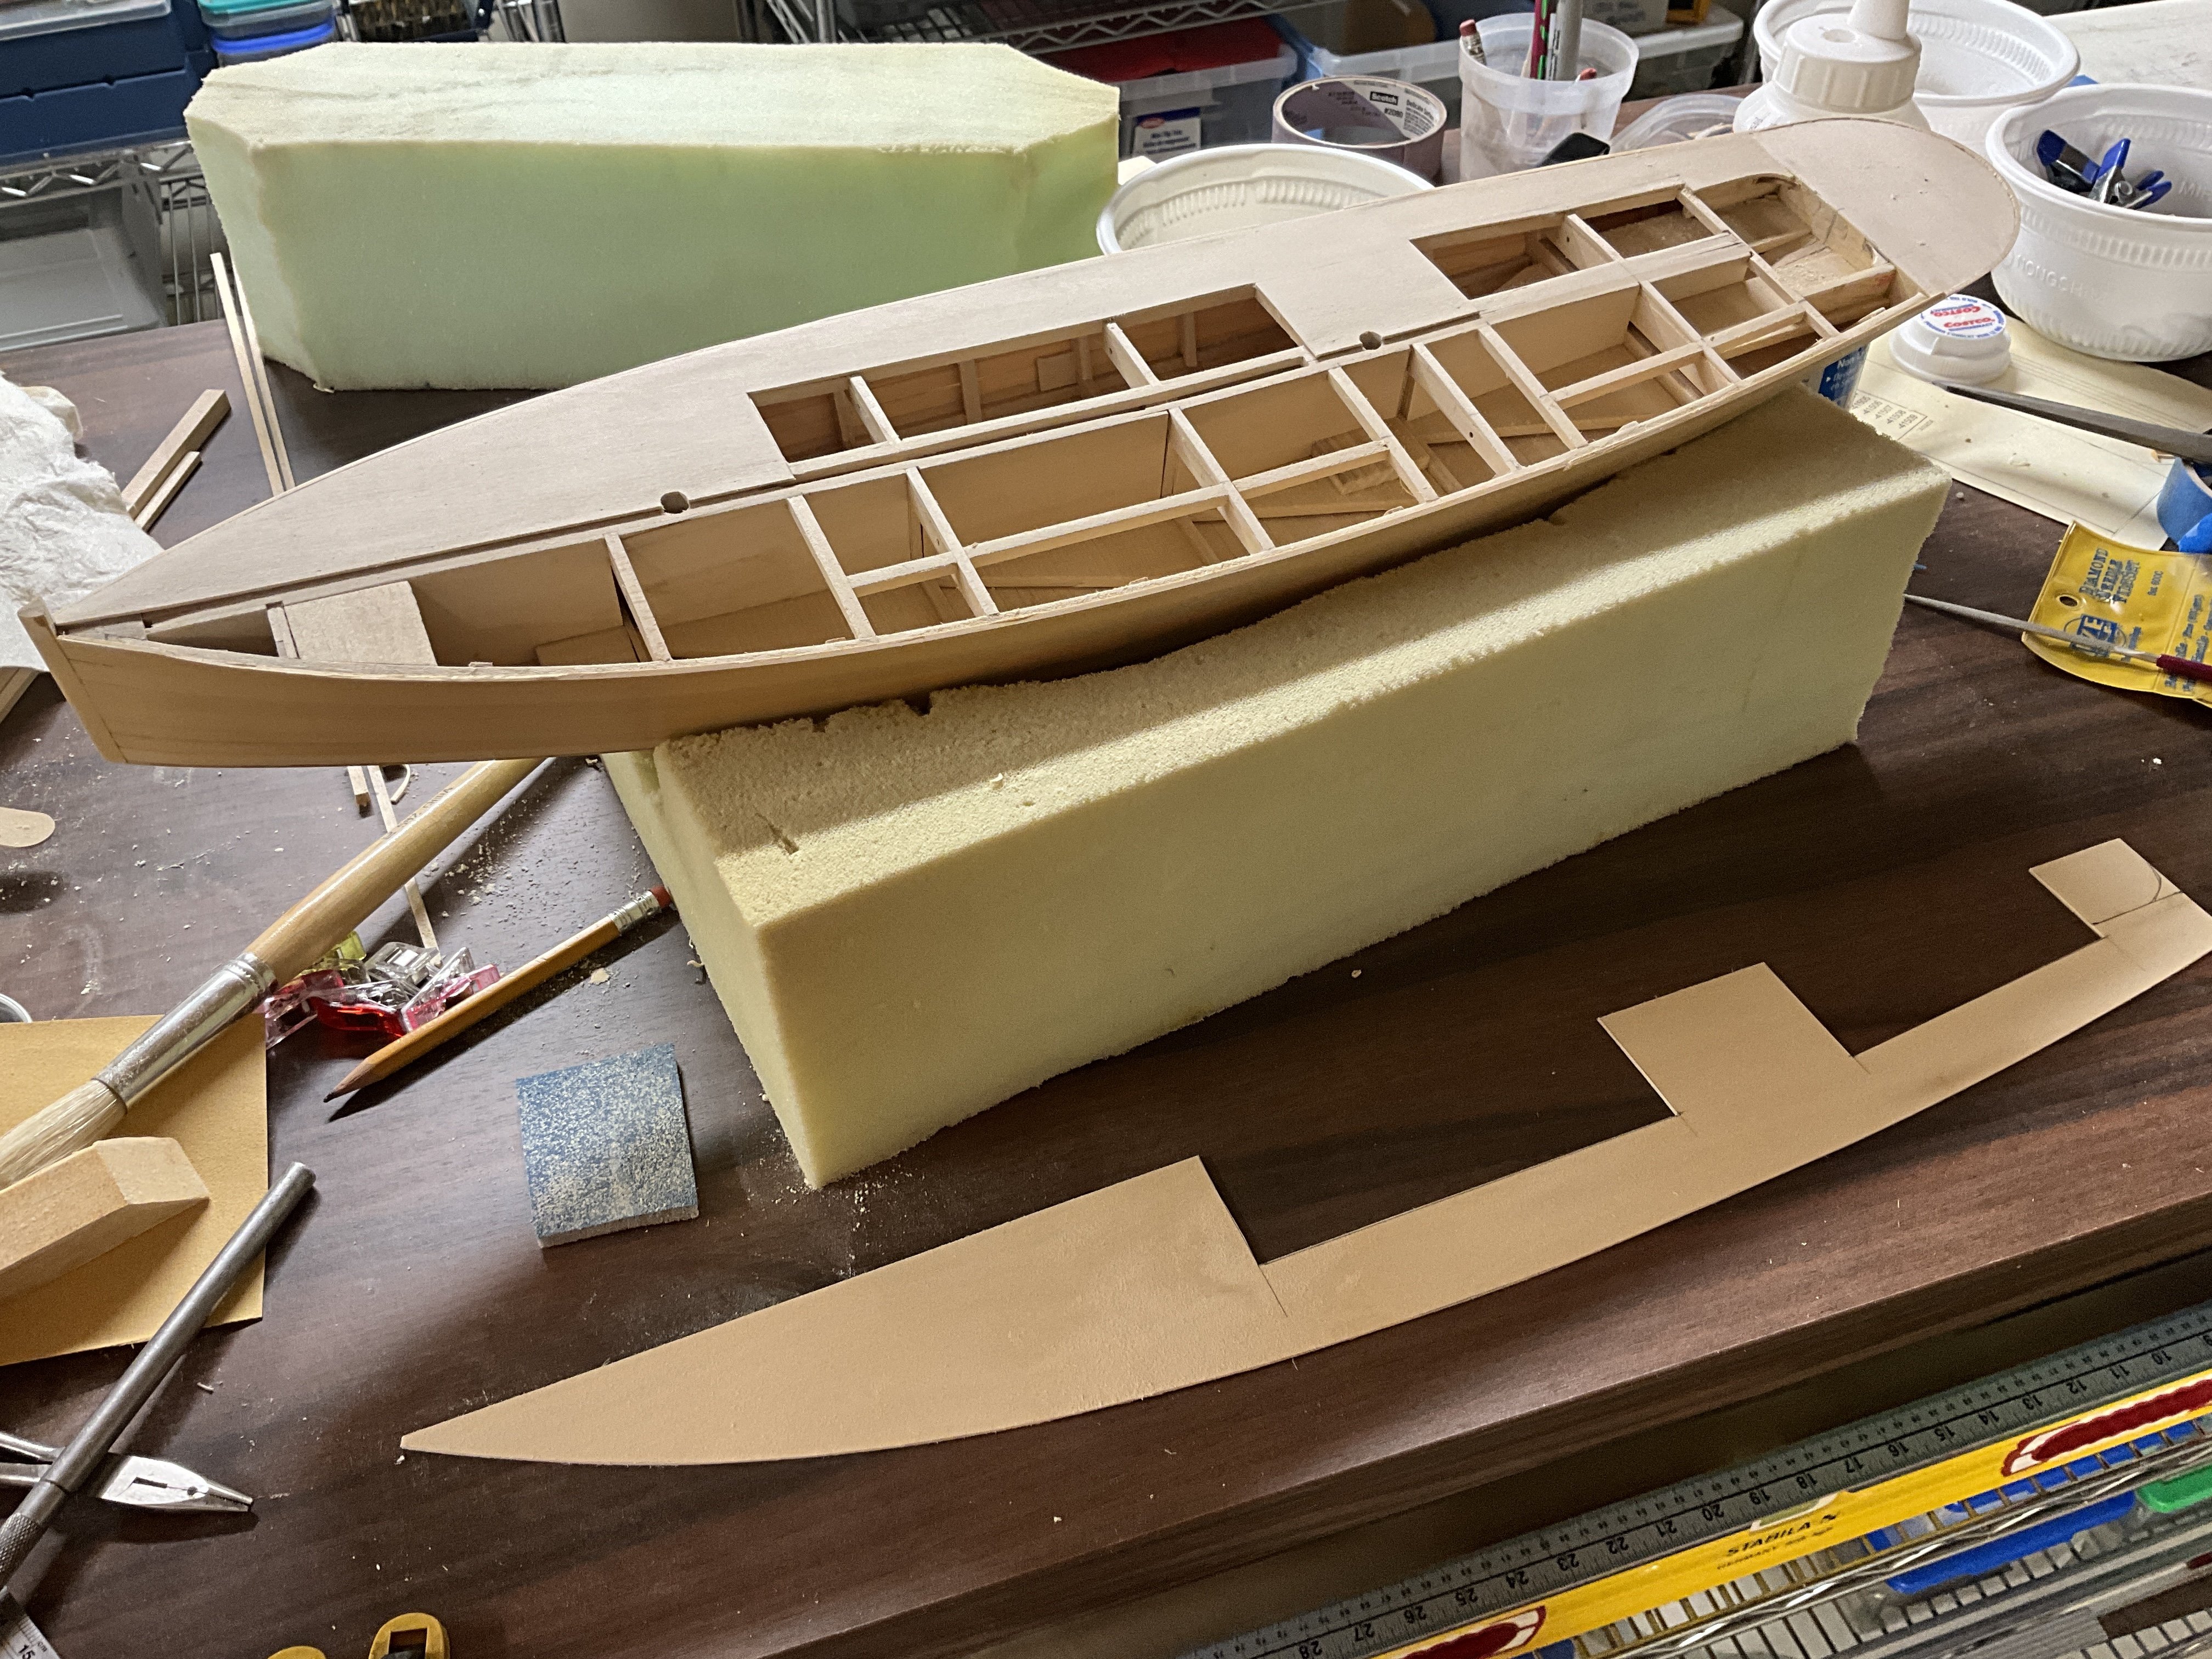
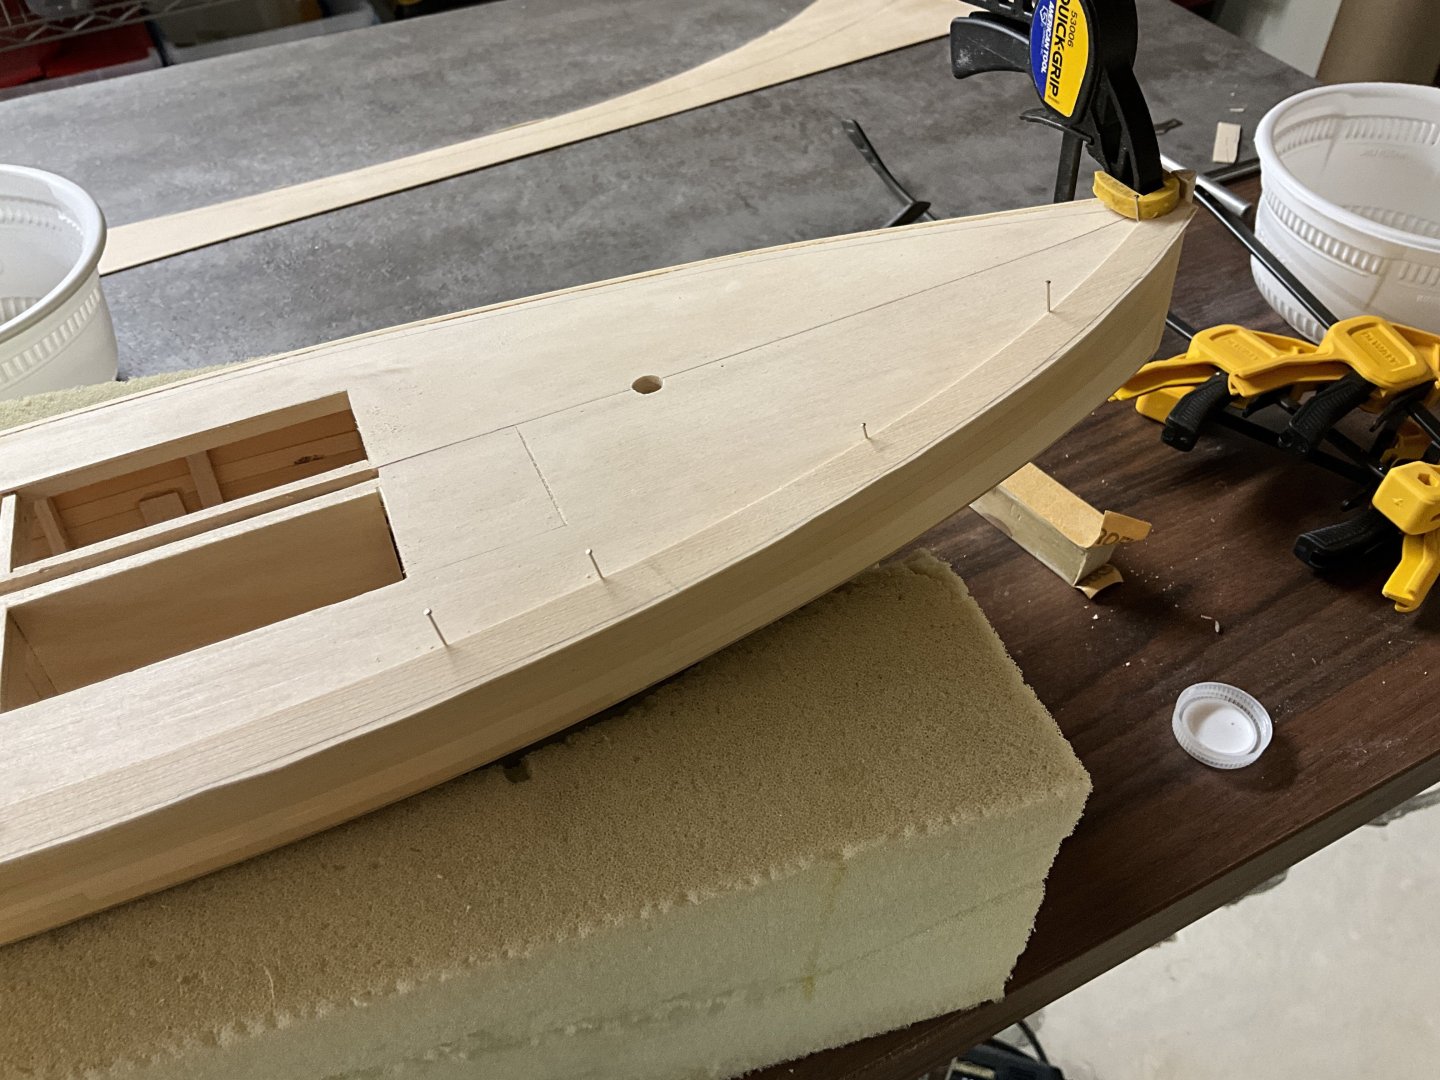
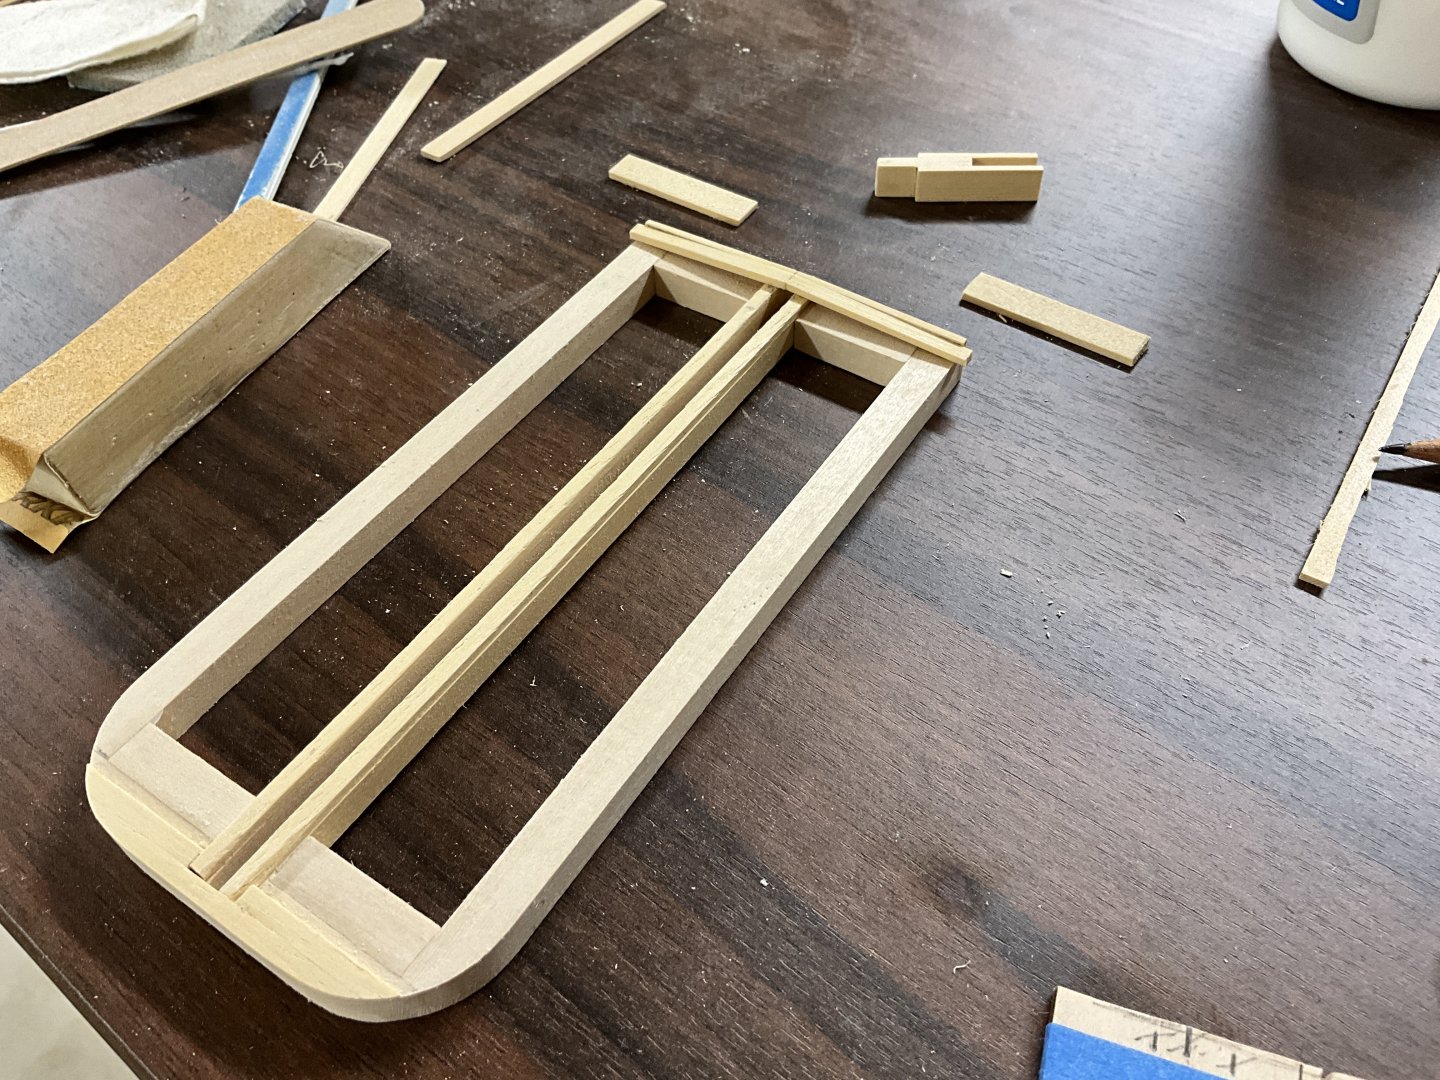
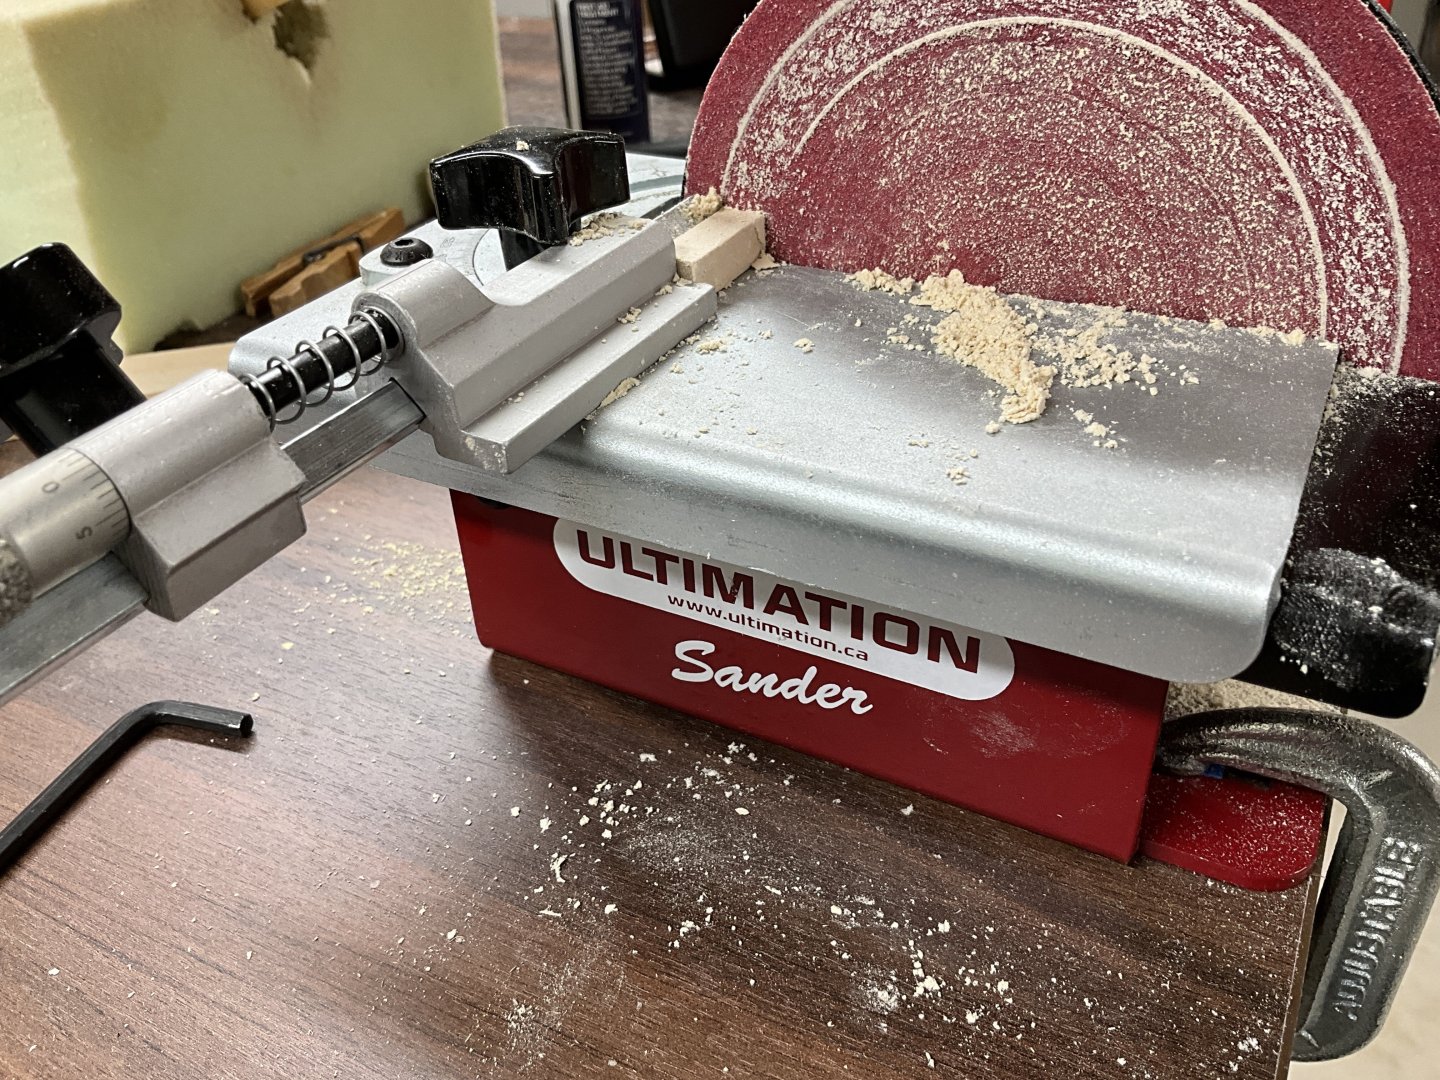
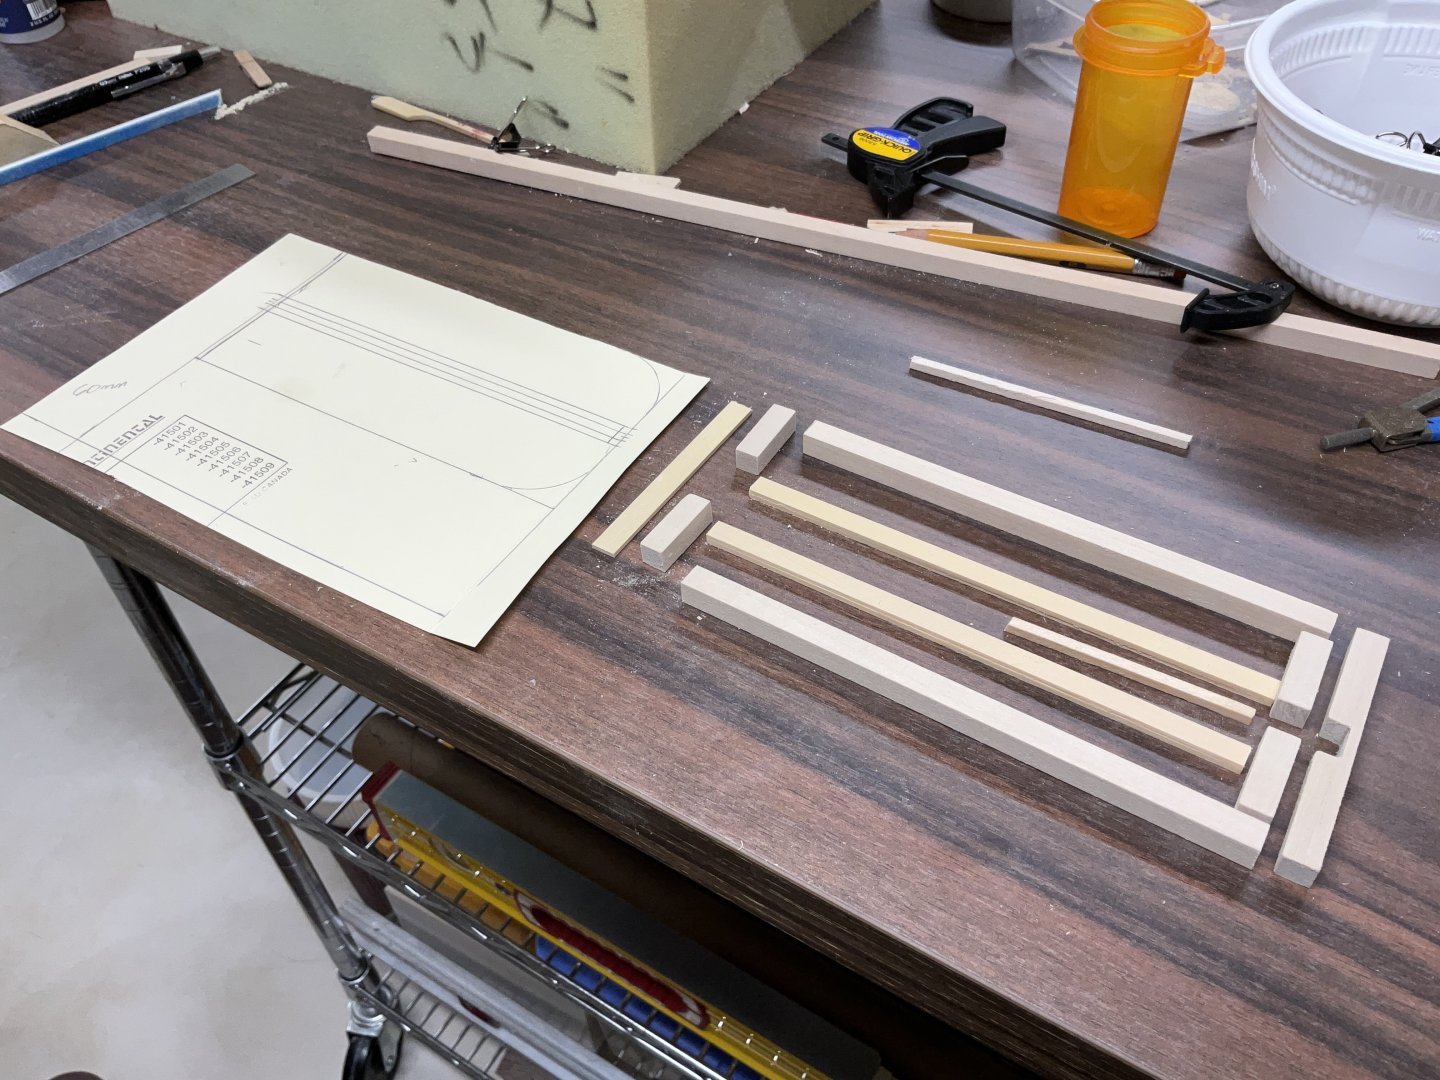
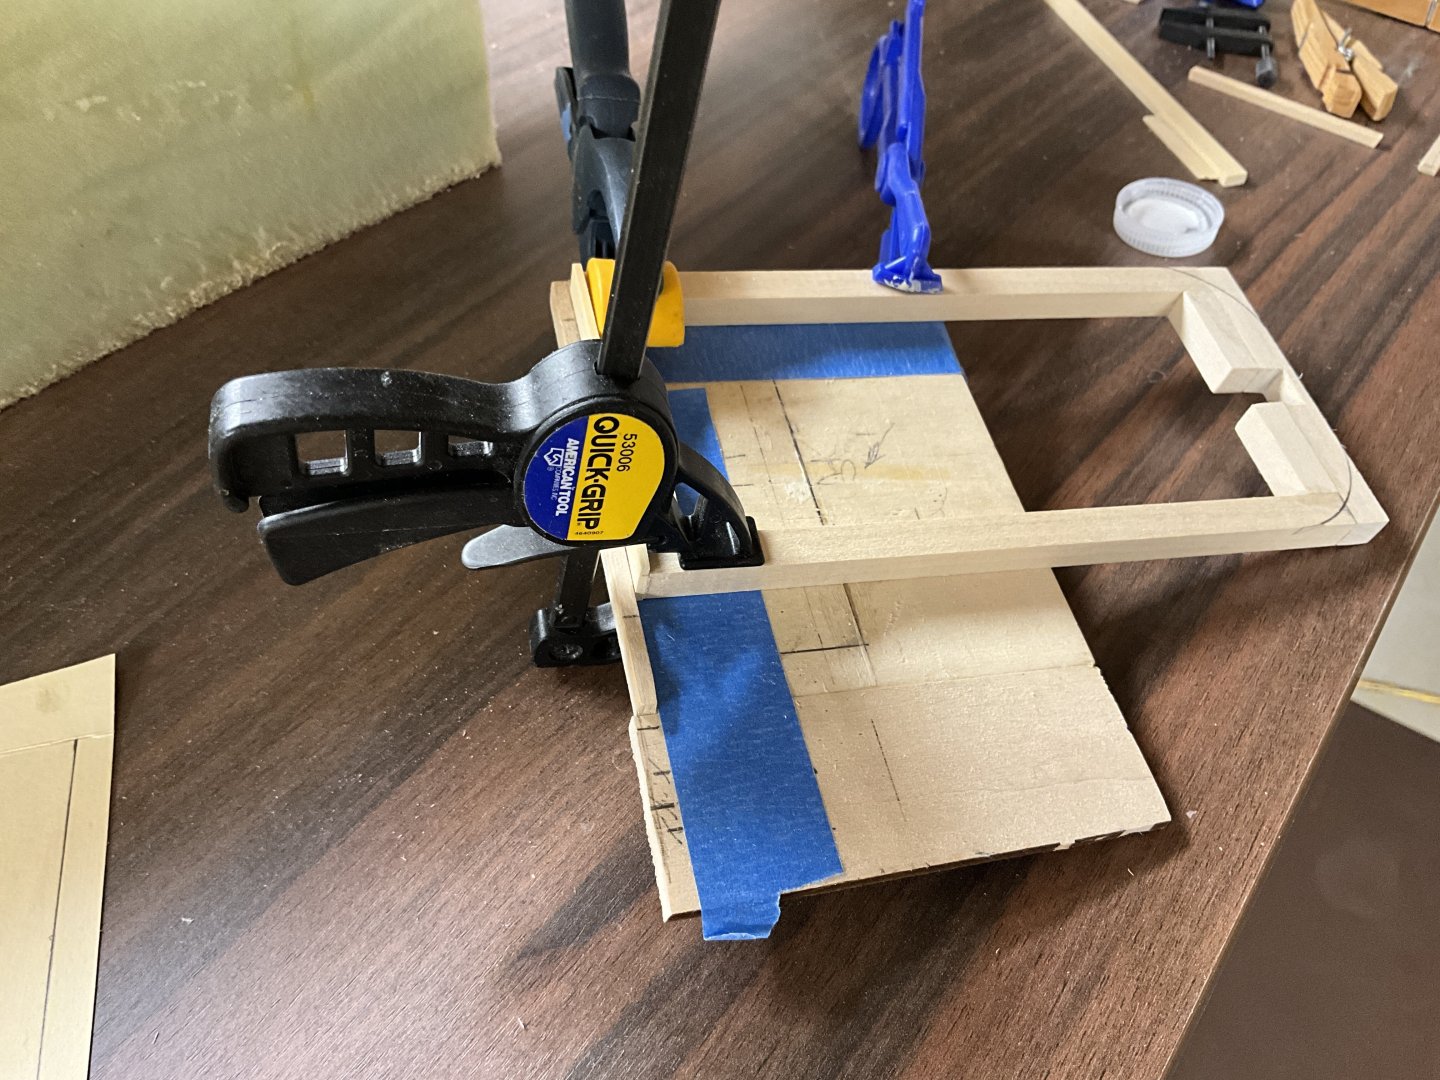
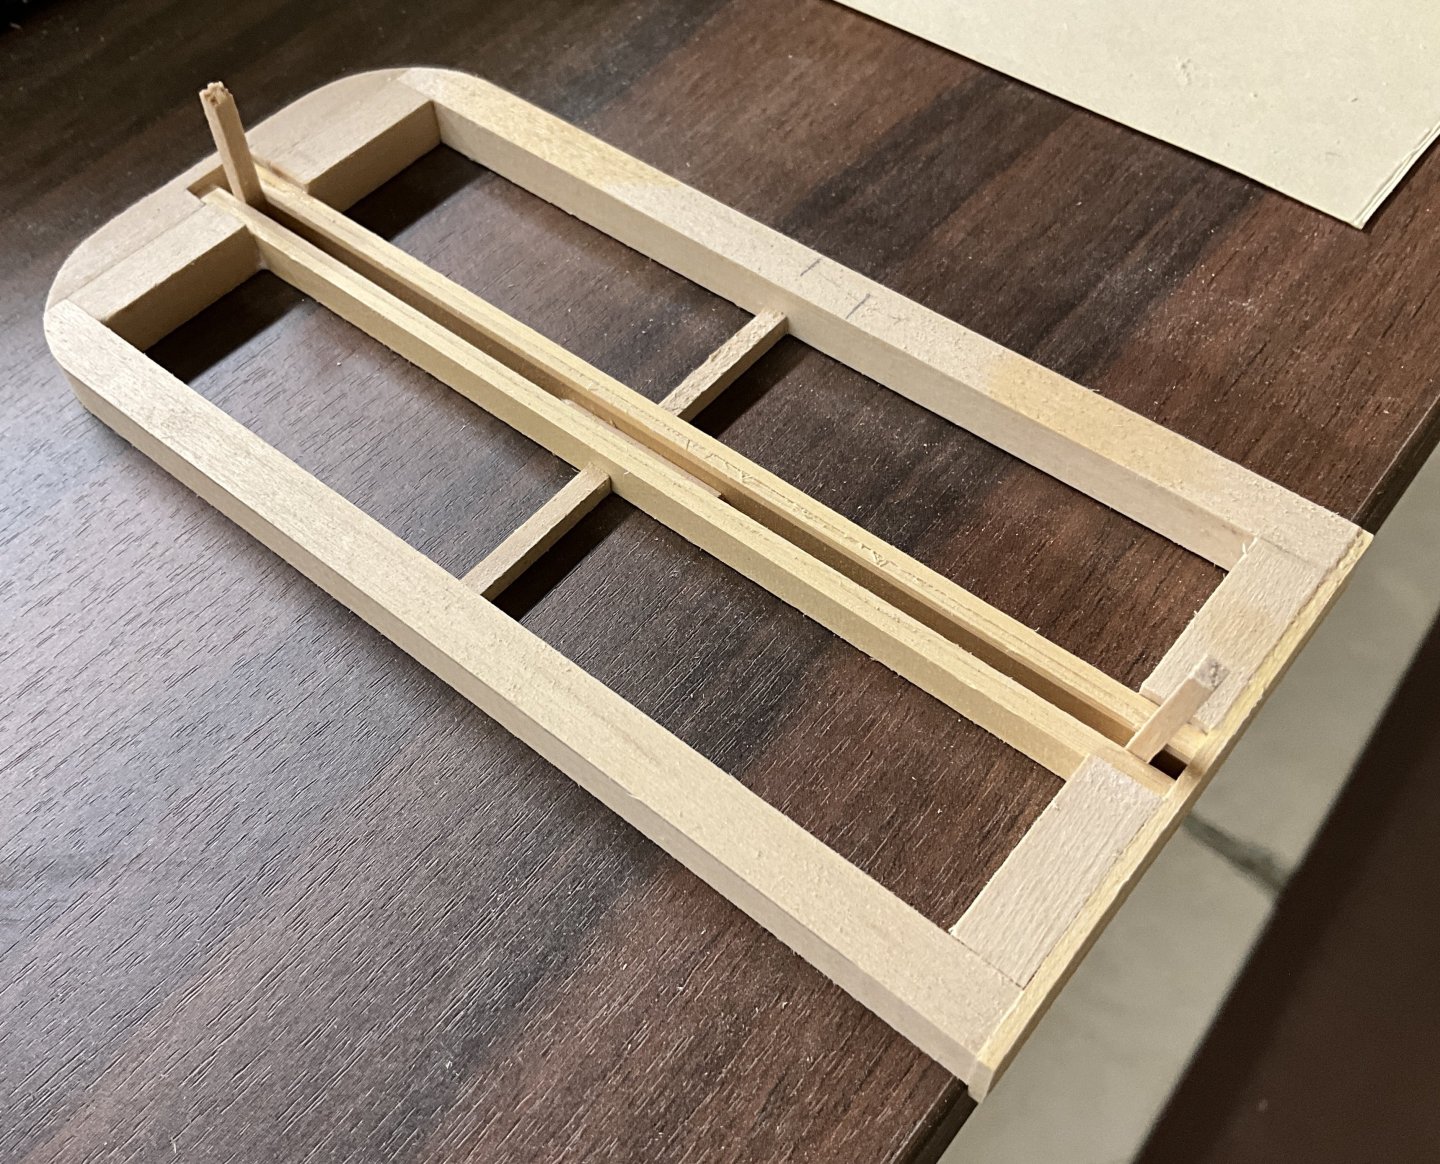
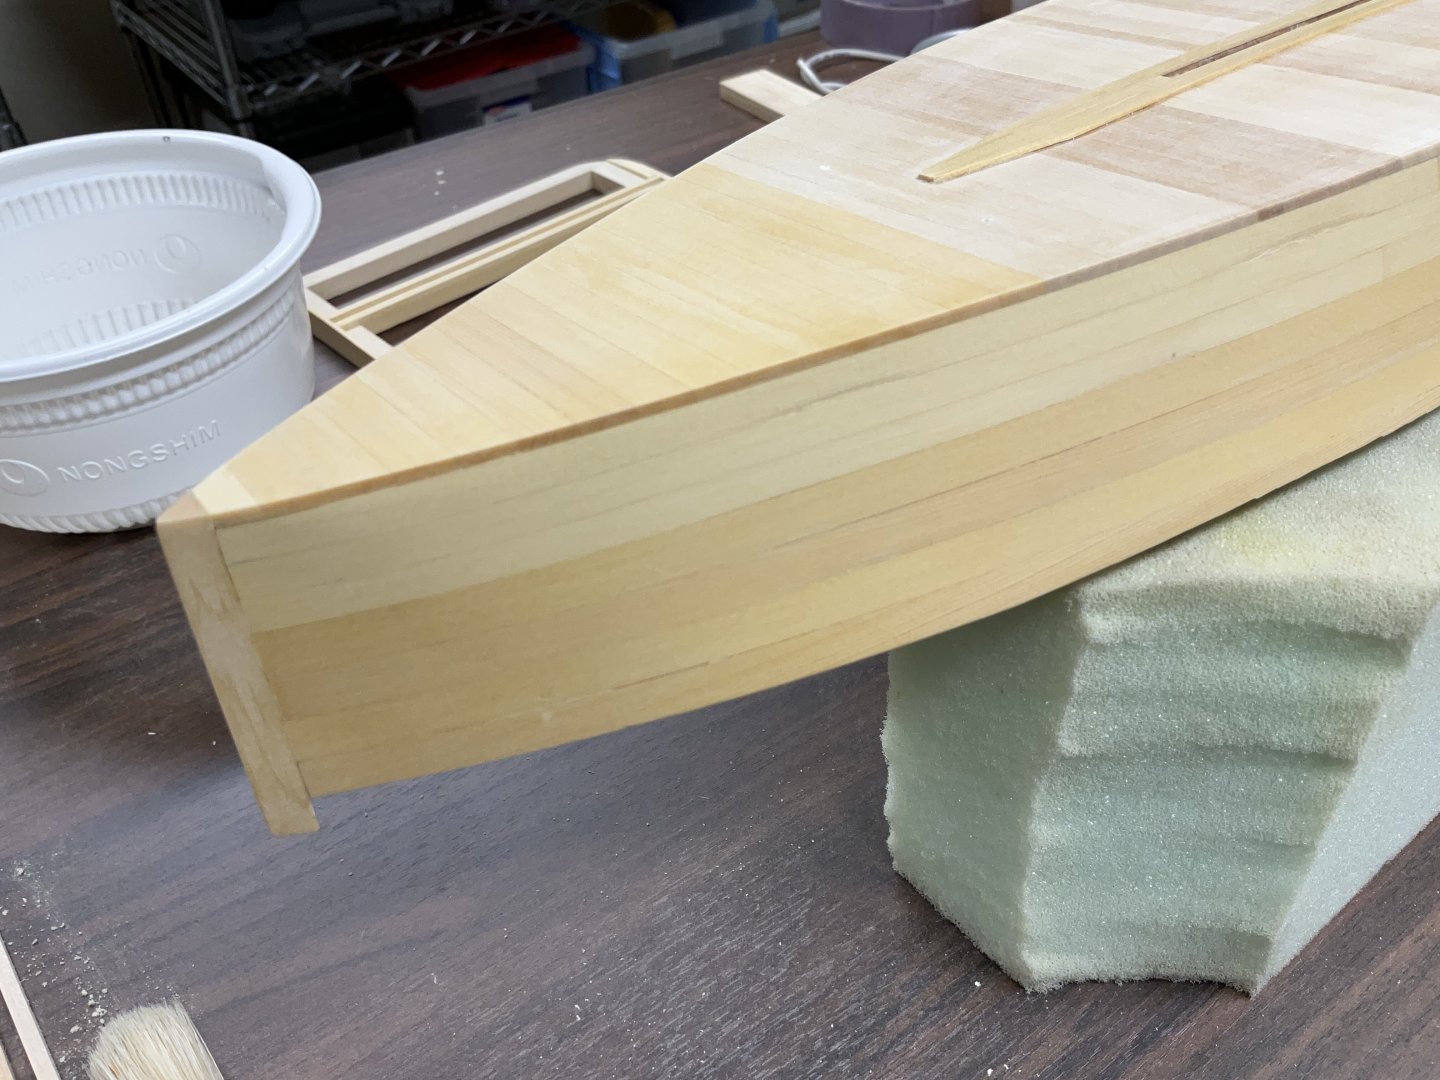
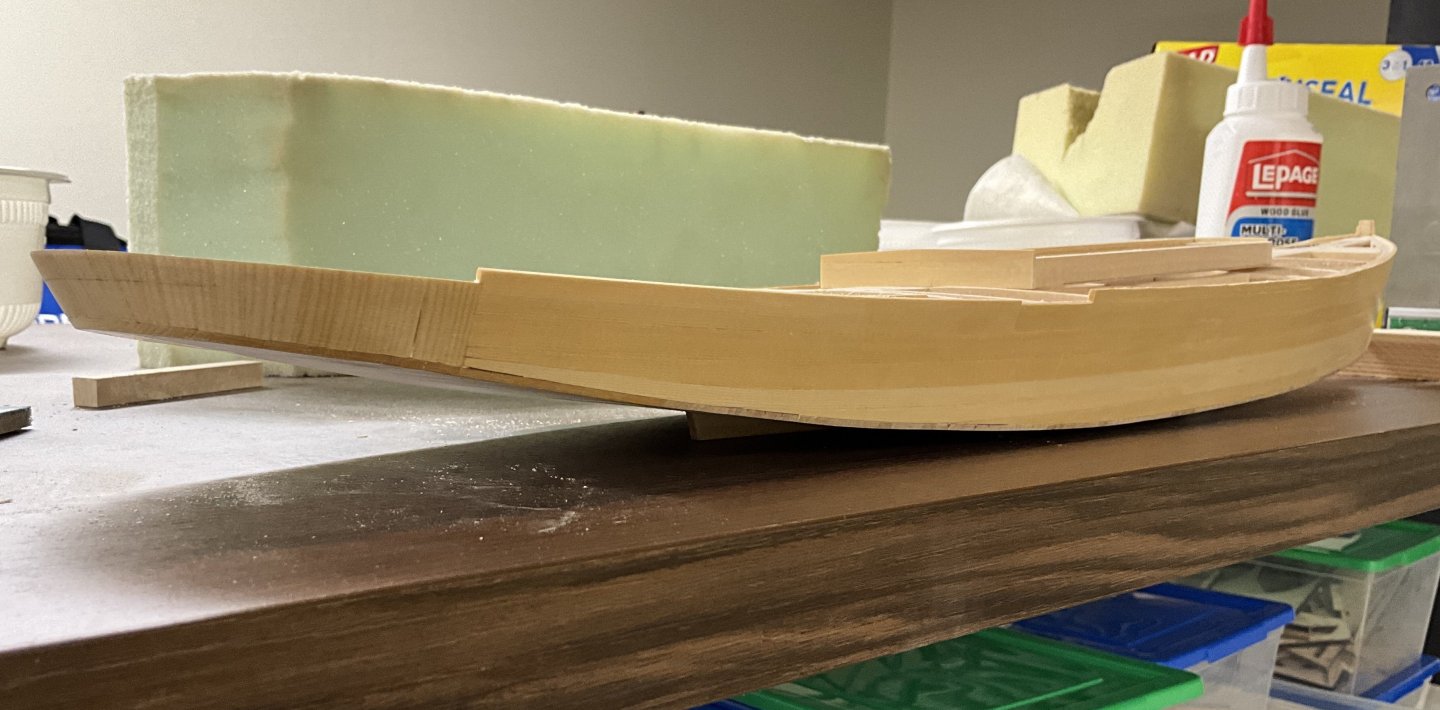
Hi Everyone, thank you very much for your Likes and Comments. The hull planking is finished. While the glue was drying I laid out the main hatch. Actually had a chance to use the repeater attachment on the sander. It worked very nicely. The perimeter pieces are made from 5/16” x 5/16” basswood that was left over from a Model Shipways kit. The sides of the center board slot are made from 2 pieces of 1/16” x 1/4” AYC glued together and mounted so that they will sit 1/16” off the deck to allow for the crown. All of those pieces were assembled. Going to wait for the sub deck to be laid before tweaking it. Lots of angles and curves going on. I gave the hull planking a good scrub with 150 grit sandpaper. Probably go over it again with 220 grit paper. This is her waiting for the sub deck which will be cut from 1/32” basswood sheets, and the main hatch getting a test fit. Hope to see you next time.
- 201 replies
-
- 19
-
-
-
- Oyster Sharpie
- first scratch build
- (and 1 more)