


allanyed
-
Posts
8,143 -
Joined
-
Last visited
Content Type
Profiles
Forums
Gallery
Events
Posts posted by allanyed
-
-
Jerry,
Before the introduction of train tackle, the running (out) tackles were unhooked and used as train tackle when needed. The use of the tackle as train tackle depended on whether the guns were on the lee or windward side. The hooks facilitated this action. When separate train tackle came into use, it would be used as necessary to hold the leeward guns in place during reloading so the running tackle was no longer needed for this purpose. At this point, the running tackle hooks were often moused so they could not be easily unhooked. This means they were maintained in place when the guns were fired, not unhooked.
An interesting note is that the breech was not in a straight line, but dropped down to a ring on the carriage that was lower than the ring on the bulwark.
This added a lot of friction to slow the recoil.
The above is from Volume II of Caruana's English Sea Ordnance.
Allan
- captain.jerry, mtaylor, Canute and 1 other
-
 4
4
-
Umeckt
Try contacting them directly, they would be your best source.
Info@corel-srl.it
I love what you can find on the internet in 2 minutes.
Allan
-
Just noticed this thread picked up again. If it matters after all this time, I used to use materials from Micro Mark and it was no problem, but then changed to Polytek in Easton Pennsylvania as they specialize in resins and silicones and are experts in the field.. You can discuss your project and problems with them and they will suggest the proper product. I do not have any materials on hand right now so cannot tell you which one I used. Relative wall thickness is important. Better thicker than thinner.Allan
-
-
Al,
If you are not happy with the filling and sanding after you try to fix one or more, you can still remove them and throw them out and put on new ones. Lots of opinions for you to consider, and they are all free
 Don't forget, the slots will have slight angles to them to match the angle of the shrouds.
 Allan
-
Al,
A picture of what you have done so far would sure help here. It sounds like you have already drilled the holes that are suggested in the plans but you can fill them with some sanding dust and glue. There should not be any holes other than for eye bolts in some cases. . Normally the slots are only as wide as two strands of the strop wire, 1.6mm in your case, and the depth of the slot is equal to one diameter, that is 0.8mm. With a slot that is 0.8 mm deep, you can more easily cut this with a chisel or sharp blade rather than a saw.
Allan
-
-
-
There are some very nice sets of plans free for downloading at the Library of Congress including the schooners Lettie Howard and Ernestina. Both are beautiful vessels and can be built POB, POF, or solid hull.
Google Library of Congress and the vessel name and the series of plans and photos will come up. They can be downloaded in TIFF and a few other formats and are quite clear when enlarged. For the Ernestina, www.loc.gov/pictures/item/ma1719/ When it opens, on the left side of the page, click on drawings or photos as you wish to see.
Allan
-
Imack
The vertical dimension of the keel does not change except for a slight upturn of a perhaps 6 inches at the forward end to allow a boxing joint to be made to tie to the lower stem piece. The width does in fact change as it tapers slightly forward and aft. My point in bringing this up is that you are a beginner and we love having new blood here, but listen to those that have been there. Do a simple model first, or, if you really want to do a more technical model, plan to spend a year or two or more. You have more mentors available here than you would probably want, so you are lucky fellow compared to those of us that had only what few books we could find in the library back in the day. Take the advice of those that have been there before you.
Allan
-
iMack
Regarding your question about the thickness of the keel and frames, the keel varies forward and aft from center. A frame's siding varies as they rise as does its moulded dimensions.
If you had posted this two days ago I would say you were doing an April Fools joke. Please say 6 weeks is a typo and you meant 60 weeks.
Allan
-
Eddie
If you live in the US near the ocean, there may be help. The Lettie is in NY. New England has several Gloucestermen that serve as examples and there may be appropriate schooners on the West Coast. Nothing like seeing the real thing to get it right. If you live other than in the US, I am sure there are plenty of members that may be able to steer you to an applicable schooner.
If you do not have access to the actual boats in the water, The American Fishing Schooner is your best bet, book wise, IMHO. I have used it in guiding me through 4 schooners over the past few years. You can also find schooner photos on the internet for some fine up close details although most are under sail.
Allan
-
Don't worry about not having the milling machine, it won't work for a rabbet as the rabbet is dynamic for the most part and the set up on the mill would be static. The Fully Framed Model Vol. I describes the process very well on pages 44 and 45.. A SHARP vee gouge and/or knife and chisel will do the job beautifully if you follow the advice of Russ and take baby steps.
Allan
-
-
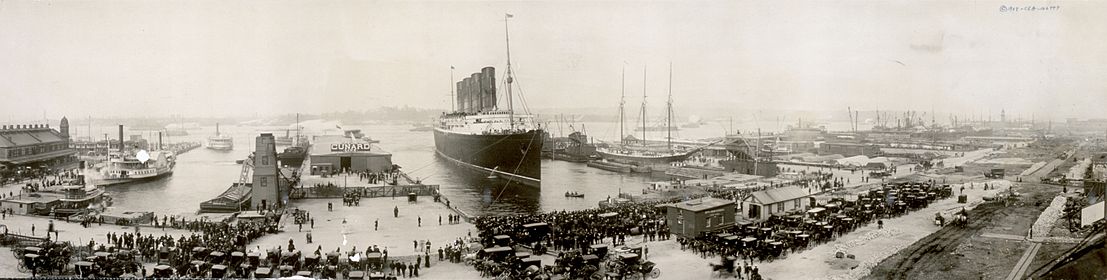
We are nearly at the 100 year anniversary of the sinking of the Lusitania. I would like to recommend Dead Wake by Erik Larson which goes into the background of many of the passengers and crew of the Lusitania under the command of Captain William Thomas Turner as well as the German submarine U-20 under the command of Kapitanleutnant Walther Schwieger. She was torpedoed a little after 2 in the afternoon of May 7, 2015 and sank in 18 minutes.
This is a non-fiction work but nearly reads like a novel. Mr. Larson has done his homework and written a book that is not to be missed. I could go on for a long time on this book but suffice it to say that it is "must read" for anyone with any interest in maritime history, the history of WWI, or history in general for that matter.
Allan
-
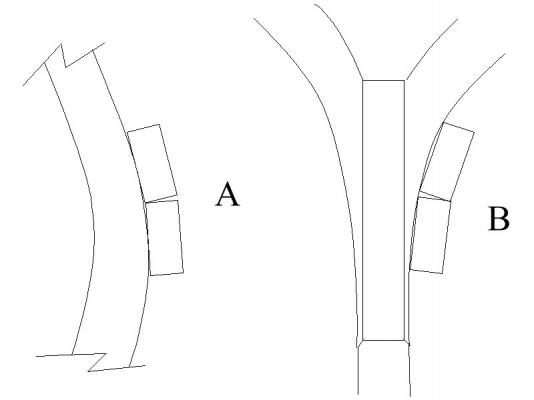
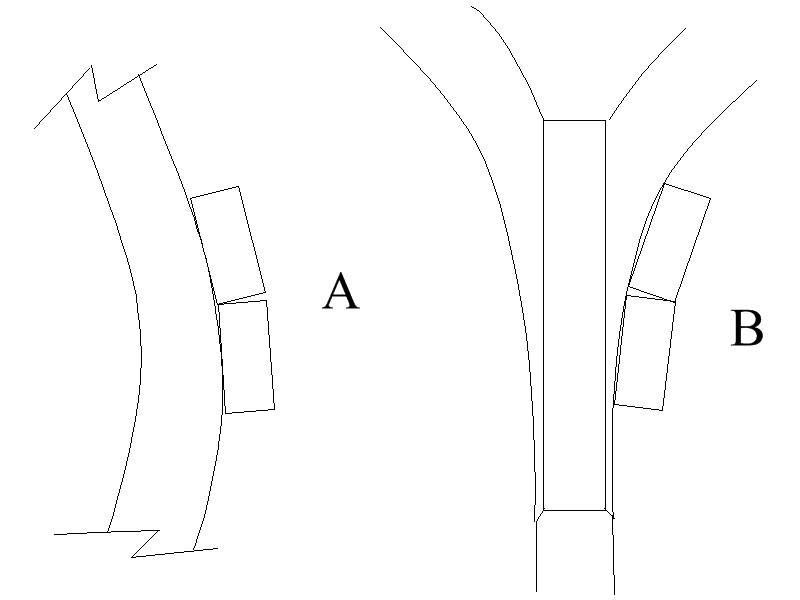
Keith,
Another item to consider......if the edges of the planks are not properly beveled, you will either start with gaps as in A, or create gaps when sanding areas like B in the sketch. The sketch is exaggerated for illustration purposes, but at some points of the framing where the curve is relatively severe, this problem worsens.
Allan
-
-
David
Is the L&H painting by Geoff Hunt? Looks a lot like his style. Would love to have the money for one of his originals!
Thanks
Allan
-
Thanks for sharing the video!
Allan
-
The winter has been especially harsh in our neck of the woods but as much as I look forward to Spring this year, I kind of regret better weather coming as it might be the Siren call to get you out of the house and away from the Y.A. build. Such actions will surely disappoint those of us following your build.
Allan
- CaptainSteve, GLakie, mtaylor and 4 others
-
7
-
-
Fam,
If the drawings show the ship as horizontal, which I assume they are, the vertical height of the hawse hole is also the diameter assuming the hawse holes are round. Keep in mind Druxey's point about the angle at which you open up the holes.
Allan
-
Jim,
A complete description of properly rigging and securing the bower and kedge anchors can be found in pages 137 -143 in Volume IV of The Fully Framed Model by David Antscherl. Additional good descriptions can be found in Lavery's Arming and Fitting on page 53-54 as well as Darcey Lever's The Young Sea Officer's Sheet Anchor and James Lees The Masting and Rigging of English Ships of War .
There is more than just having a line that goes through the cat sheaves to a block and hook. Once the anchor is raised, it has to be brought up to the hull and secured. Fish davits come into play for this chore. Keep in mind that after 1773, the fish davits were shortened and secured to the fore channels with a shoe. Many plans do not show these very clearly, if at all.
Allan
-
I used to be a member of the New Jersey Ship Modeling club, but I do not remember the name of the member that showed this. You may want to PM Chuck Passaro as he is an active member of the club and may have a recollection, or if not, he can ask the membership. I believe their monthly meeting is tomorrow night. It has been some years since I saw the technique so only the older members may remember.
Good luck
Allan
Gaps between planks - are they possible to fix
in Building, Framing, Planking and plating a ships hull and deck
Posted
Pasanax
It may be too late for your current model, but the edges of the planks need to be tapered so they fit properly. Do a search of this forum and you will see it has been brought up in the past and there are sketches of what I described in words. If it was me, I would remove the planks and start again, but that is just one opinion. The caulking lines would only be the width of a piece of tissue or paper which is described in the planking tutorials, and the gaps you show are quite a bit more from what can be seen in your photo.
Allan