HOLIDAY DONATION DRIVE - SUPPORT MSW - DO YOUR PART TO KEEP THIS GREAT FORUM GOING! (Only 44 donations so far out of 49,000 members - C'mon guys!)
×


HIPEXEC
-
Posts
2,698 -
Joined
-
Last visited
Content Type
Profiles
Forums
Gallery
Events
Everything posted by HIPEXEC
-
 Nice work. I hope you didn't have to cut in all those gunports!
 -
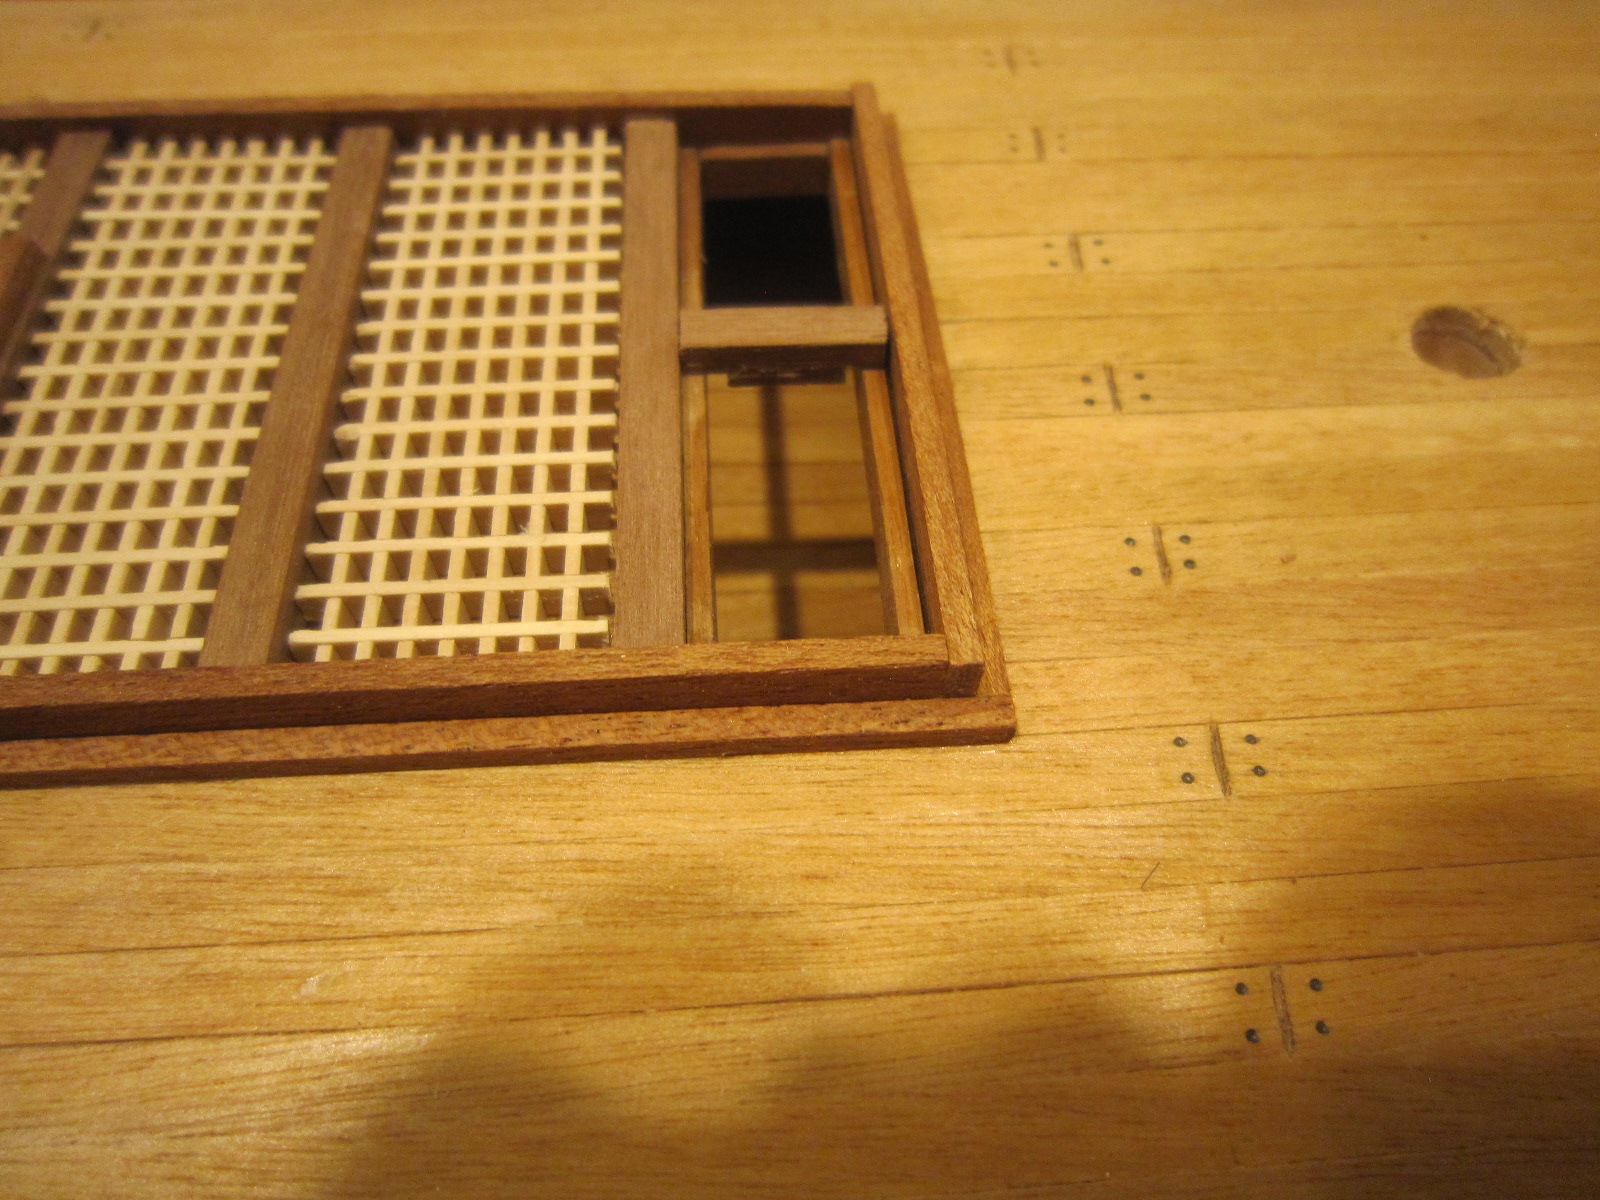
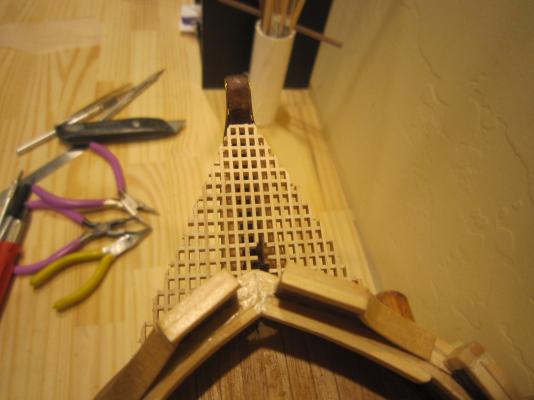
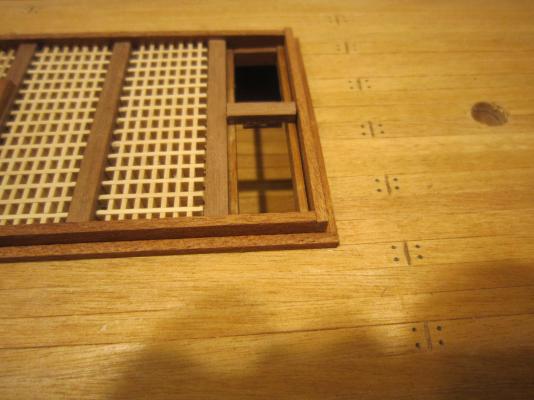
Finished trimming the bow grate. Now I'm still waiting for Constructo to mail me the 2mm x 2mm Ayous trim I need to finish the roundhouses so I can finish the whole bow section.
- 1,756 replies
-
- 7
-

-
- constitution
- constructo
- (and 1 more)
-
My razor saw worked just fine. Some tiny corner pieces fell off, but I just glued them back on. The bow section is a difficult shape. I put scotch tape over the areas to be sawed and it held everything just fine.
-
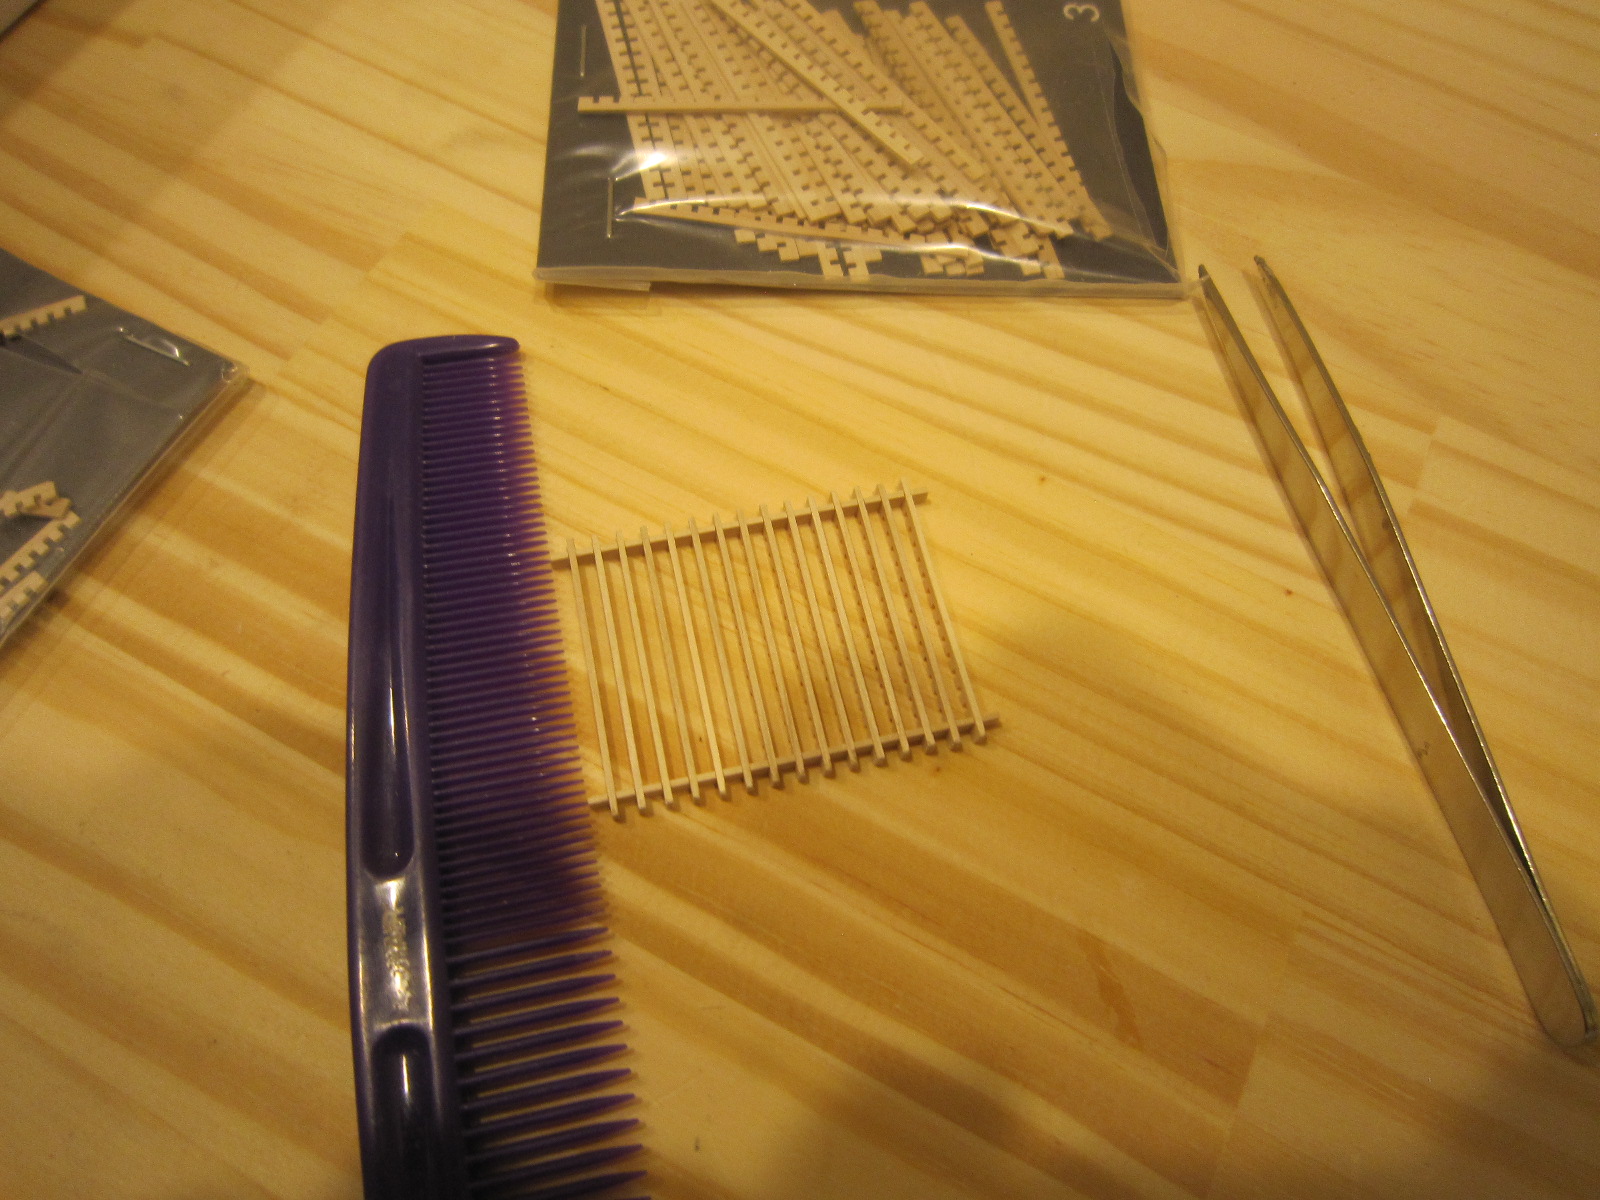
How do you make the cuts on the grate? With a knife or saw?

- 1,756 replies
-
- 3
-
-
- constitution
- constructo
- (and 1 more)
-
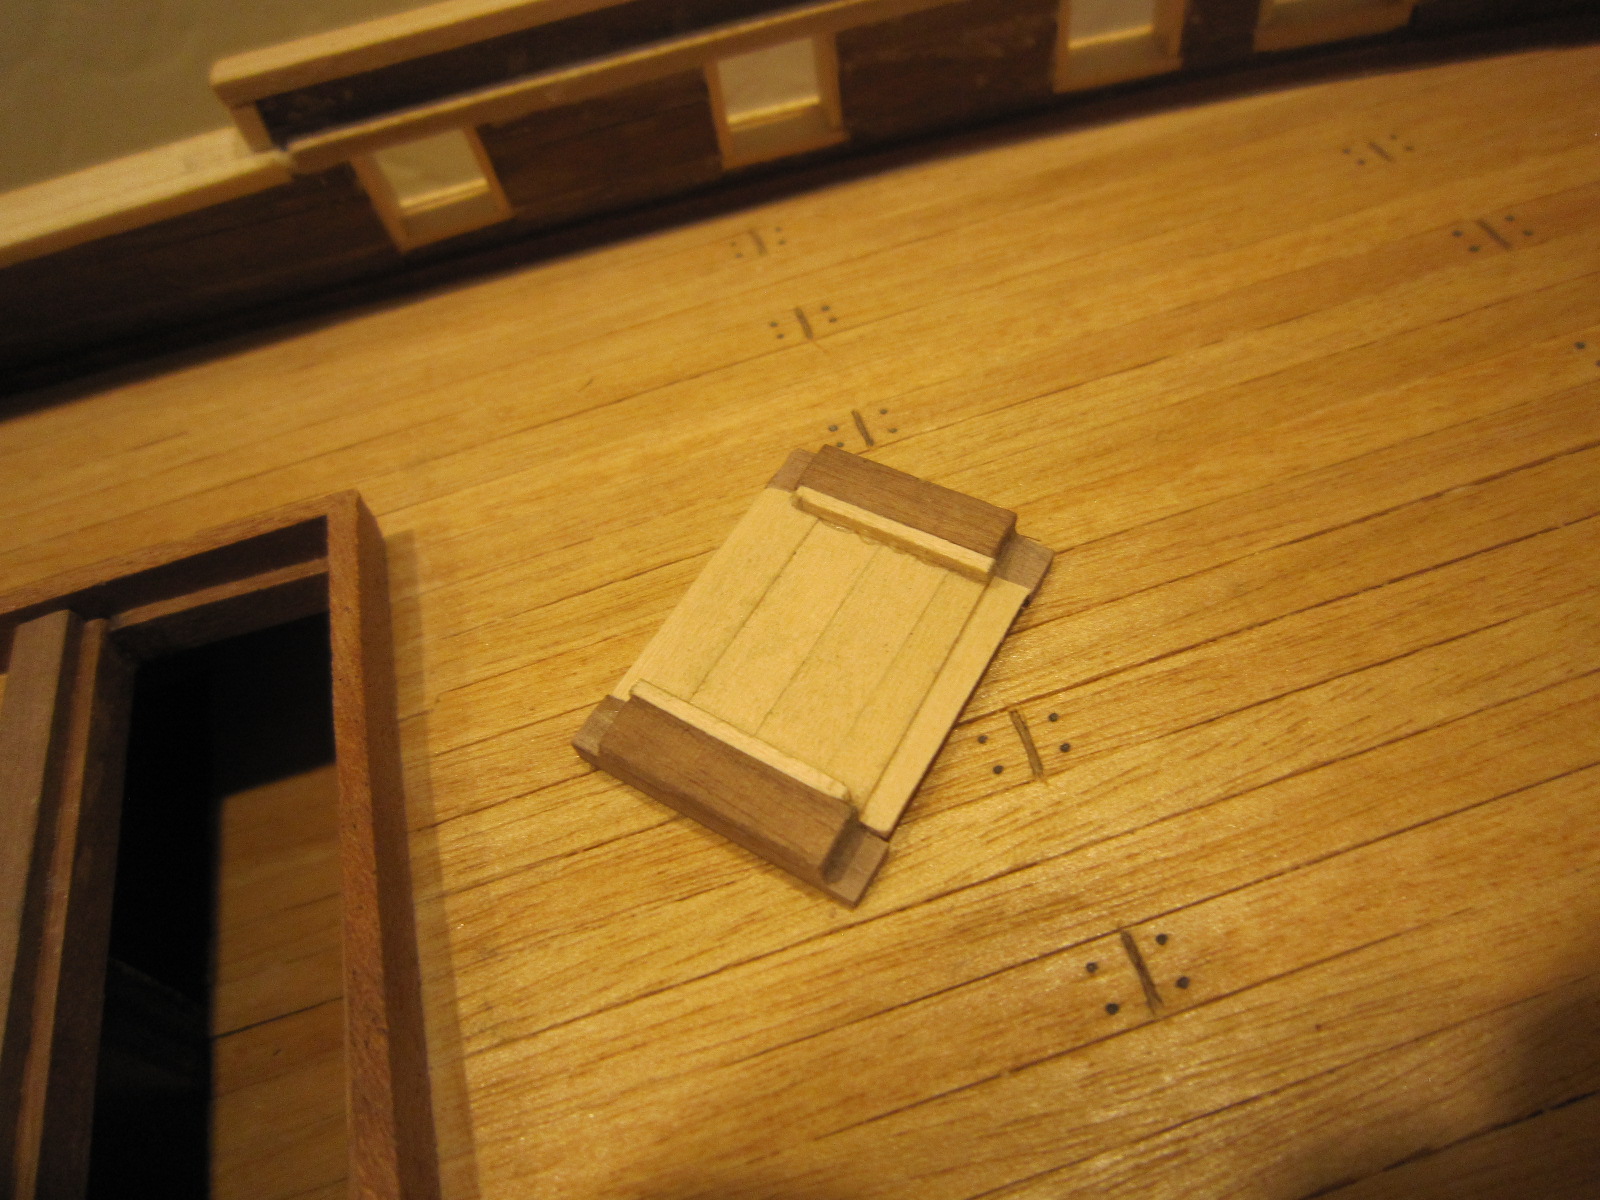
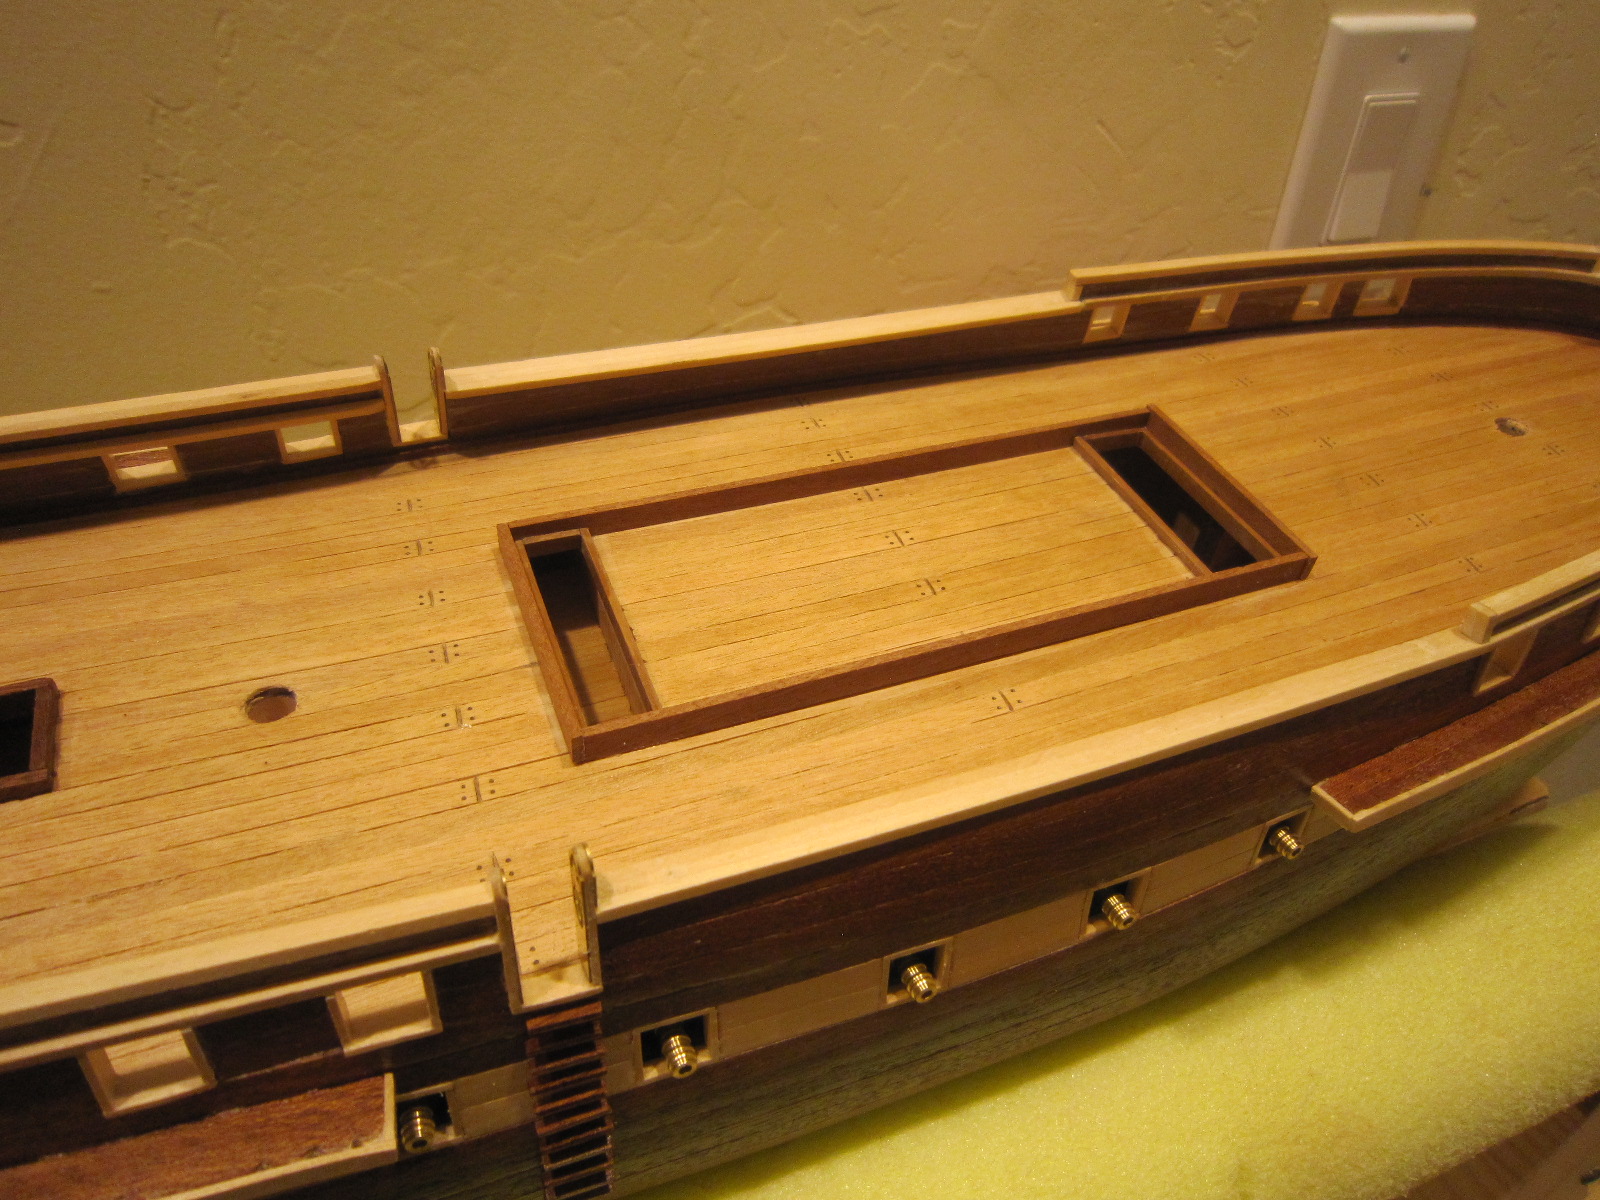
Finish trim on the main hatch. I had to curve the trim to match the arch of the deck. Made and glued on the boat chocks. Made the bow area grate. Wow...what a job. Now I have to trim it to fit.
- 1,756 replies
-
- 2
-
-
- constitution
- constructo
- (and 1 more)
-
Lookin' good!!
-
I couldn't do it without all your support. I look at your builds frequently to get ideas.
-
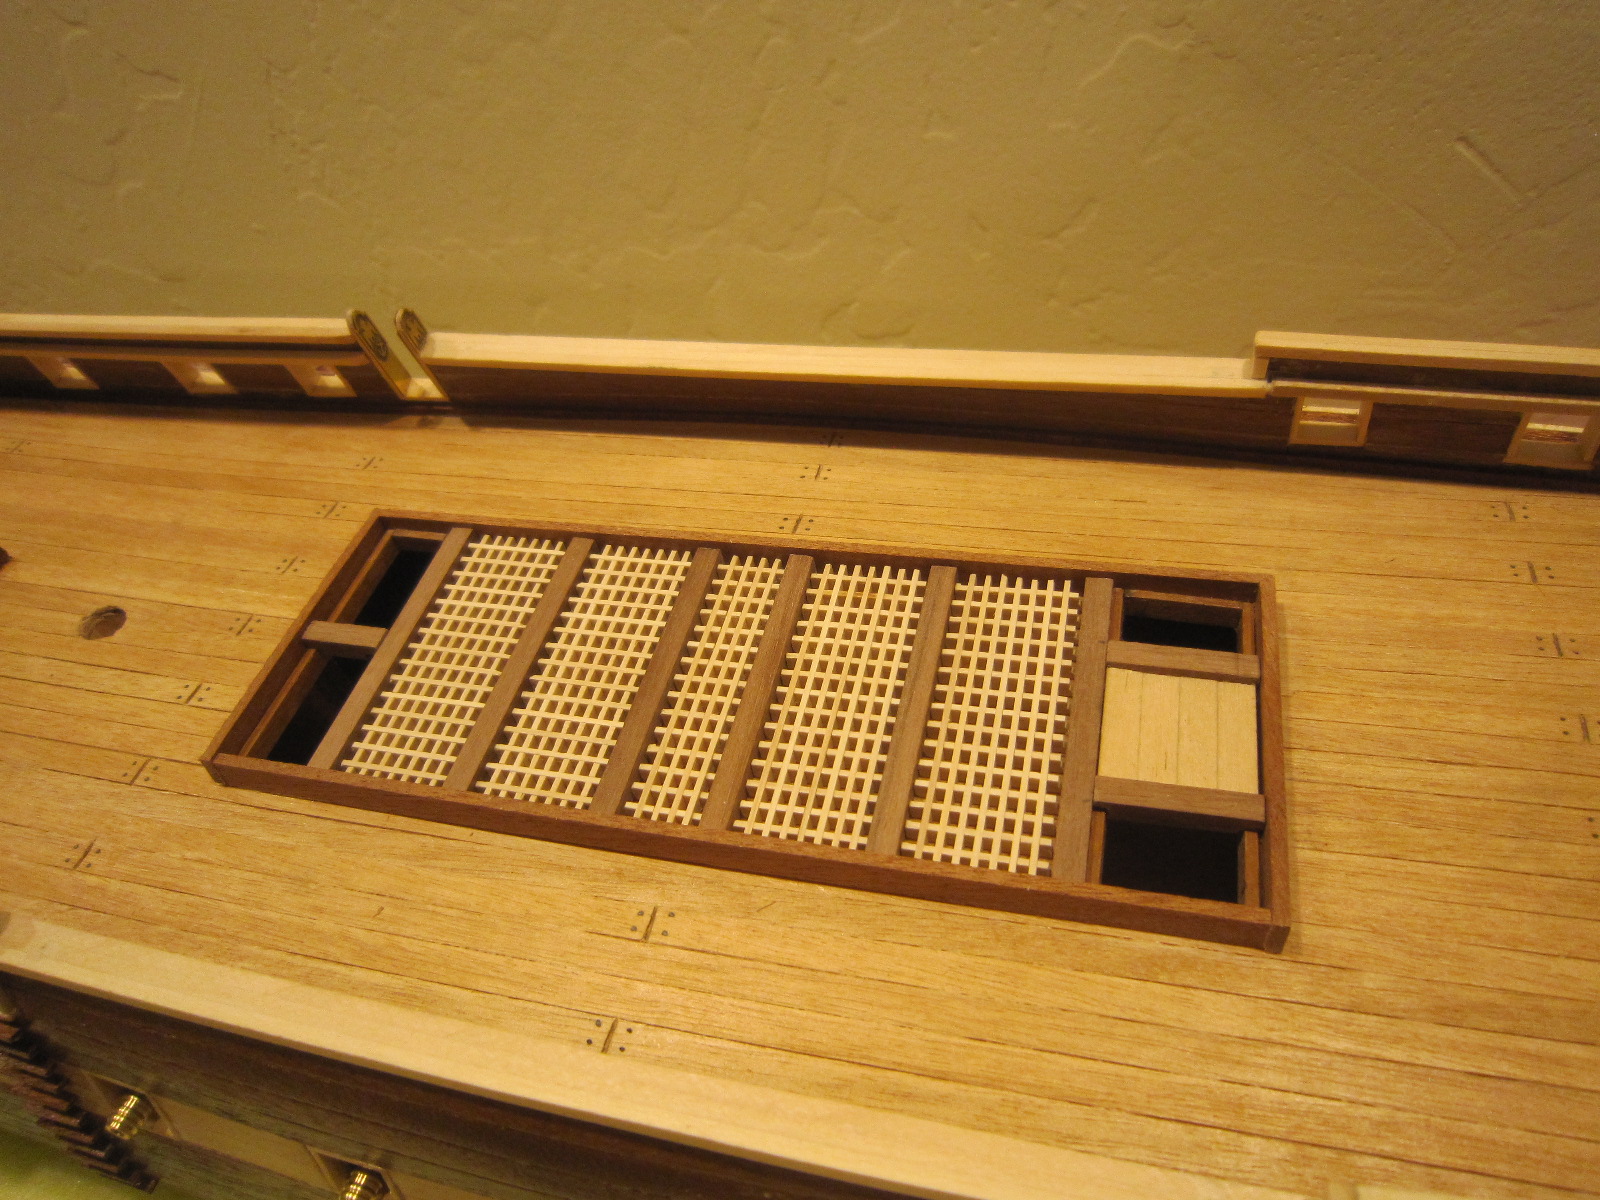
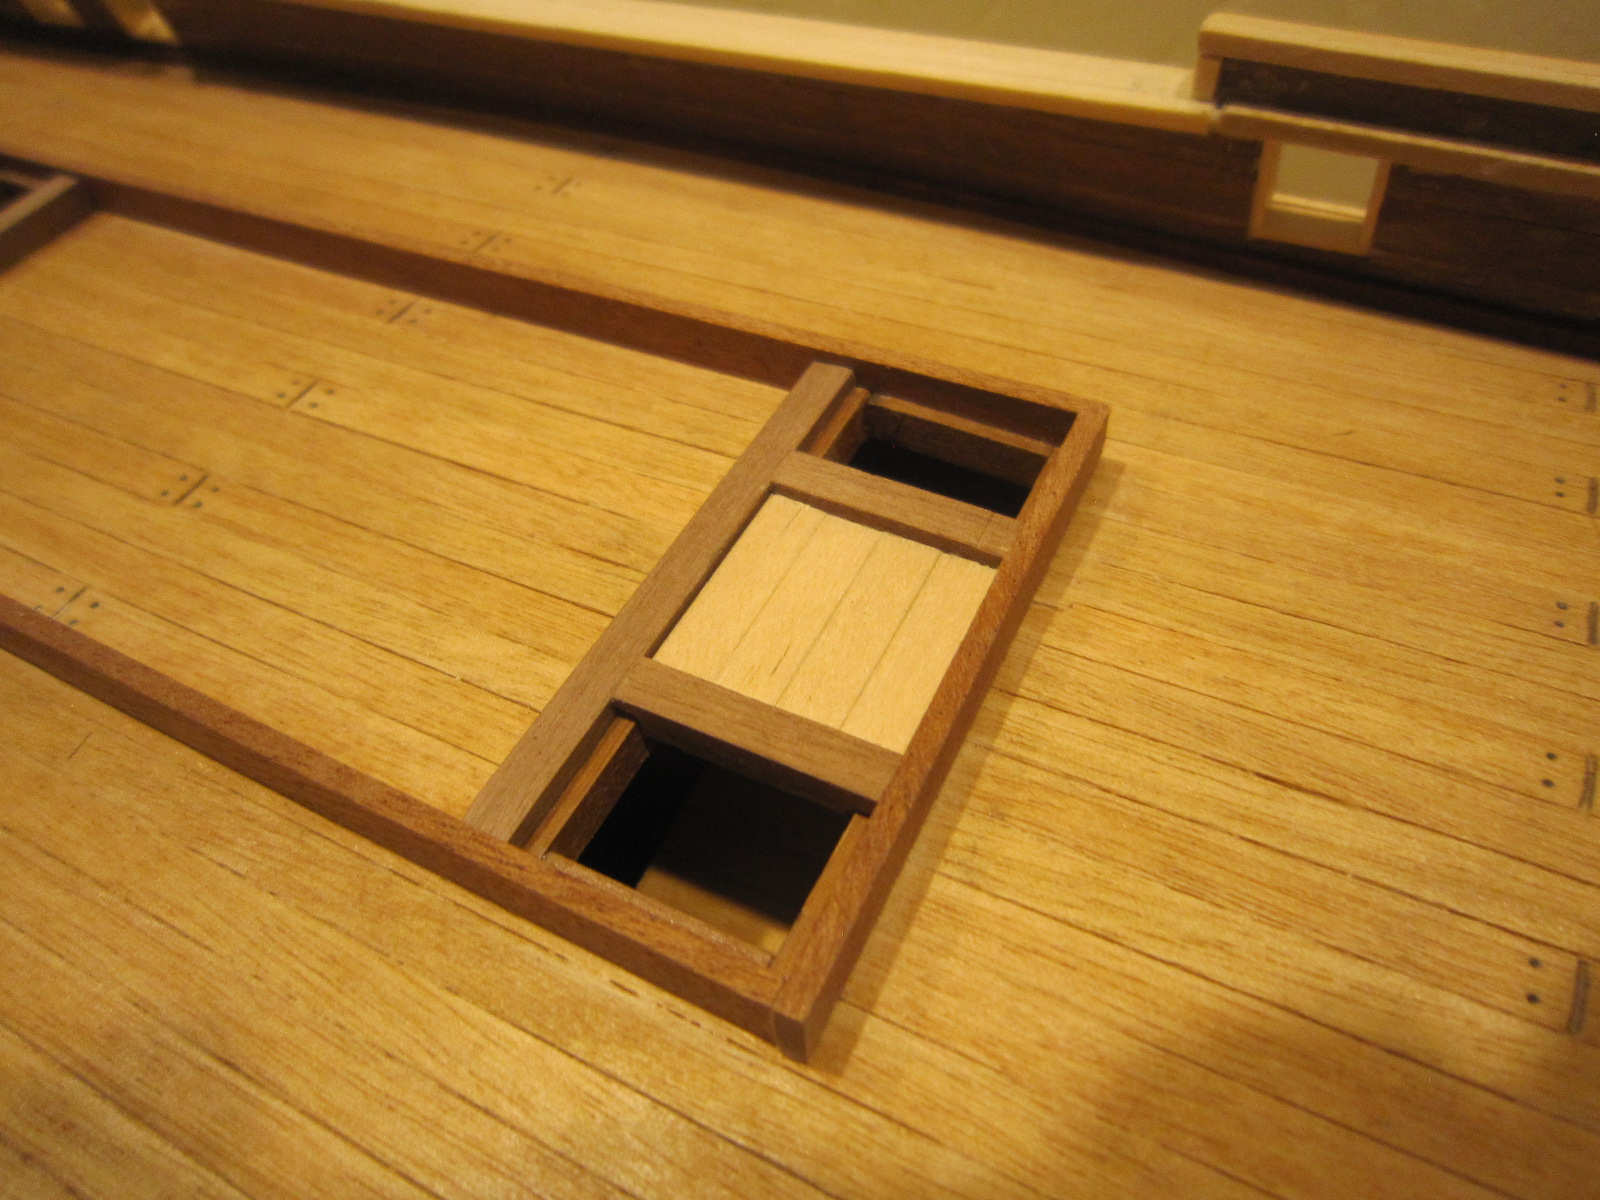
Main hatchway finished except for the boat cradles and brass. If it weren't for Sjor's tip, I'd still be fumbling around trying to build them.

- 1,756 replies
-
- 3
-
-
- constitution
- constructo
- (and 1 more)
-
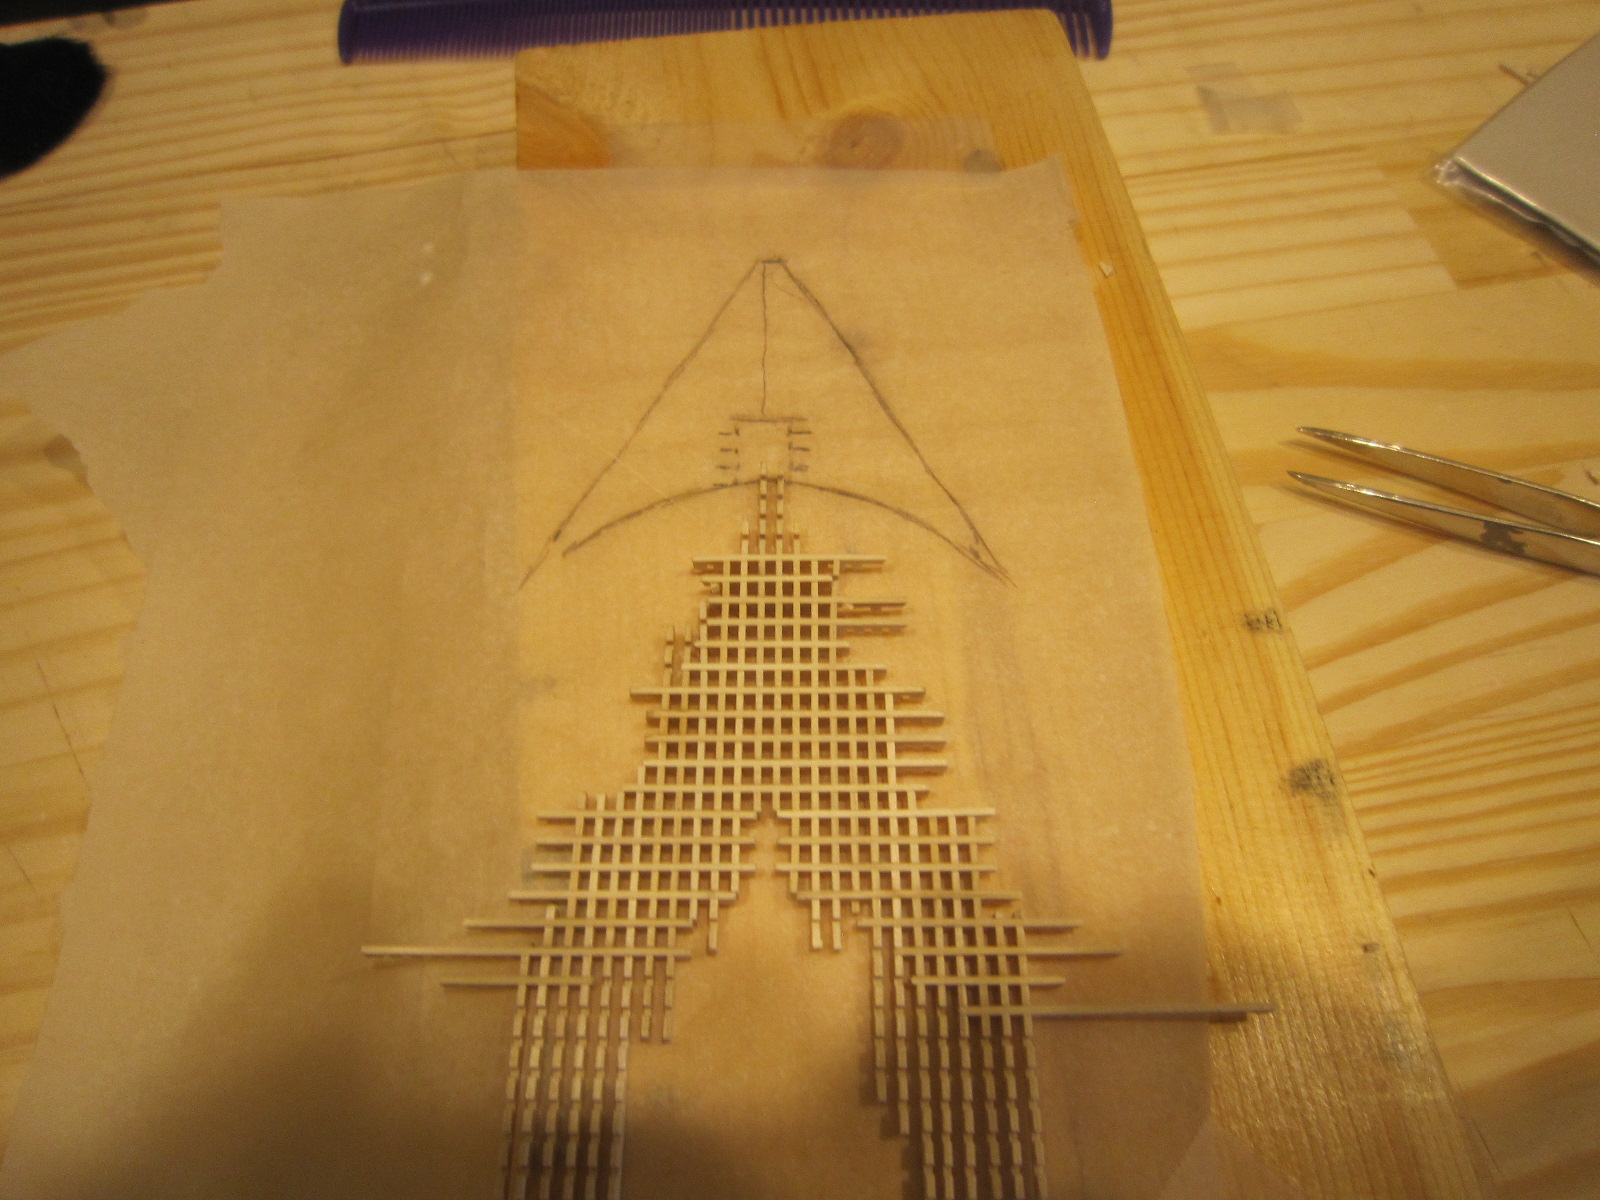
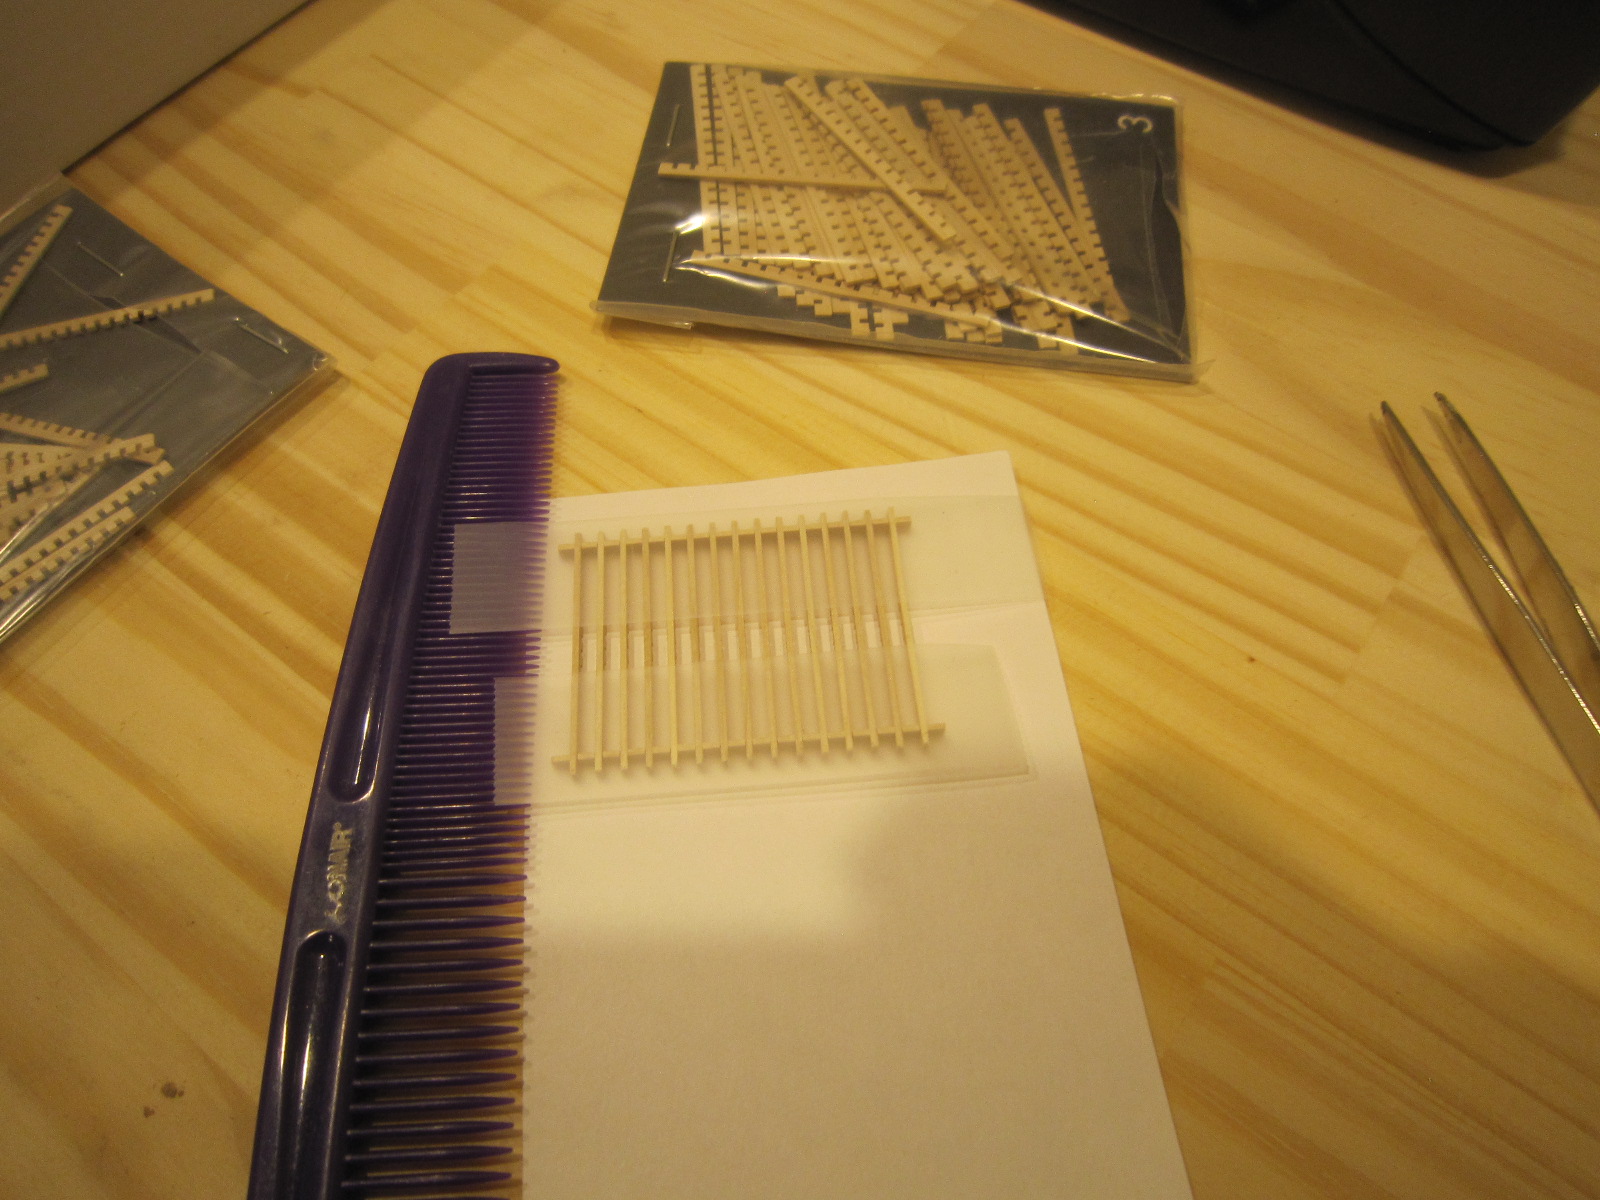
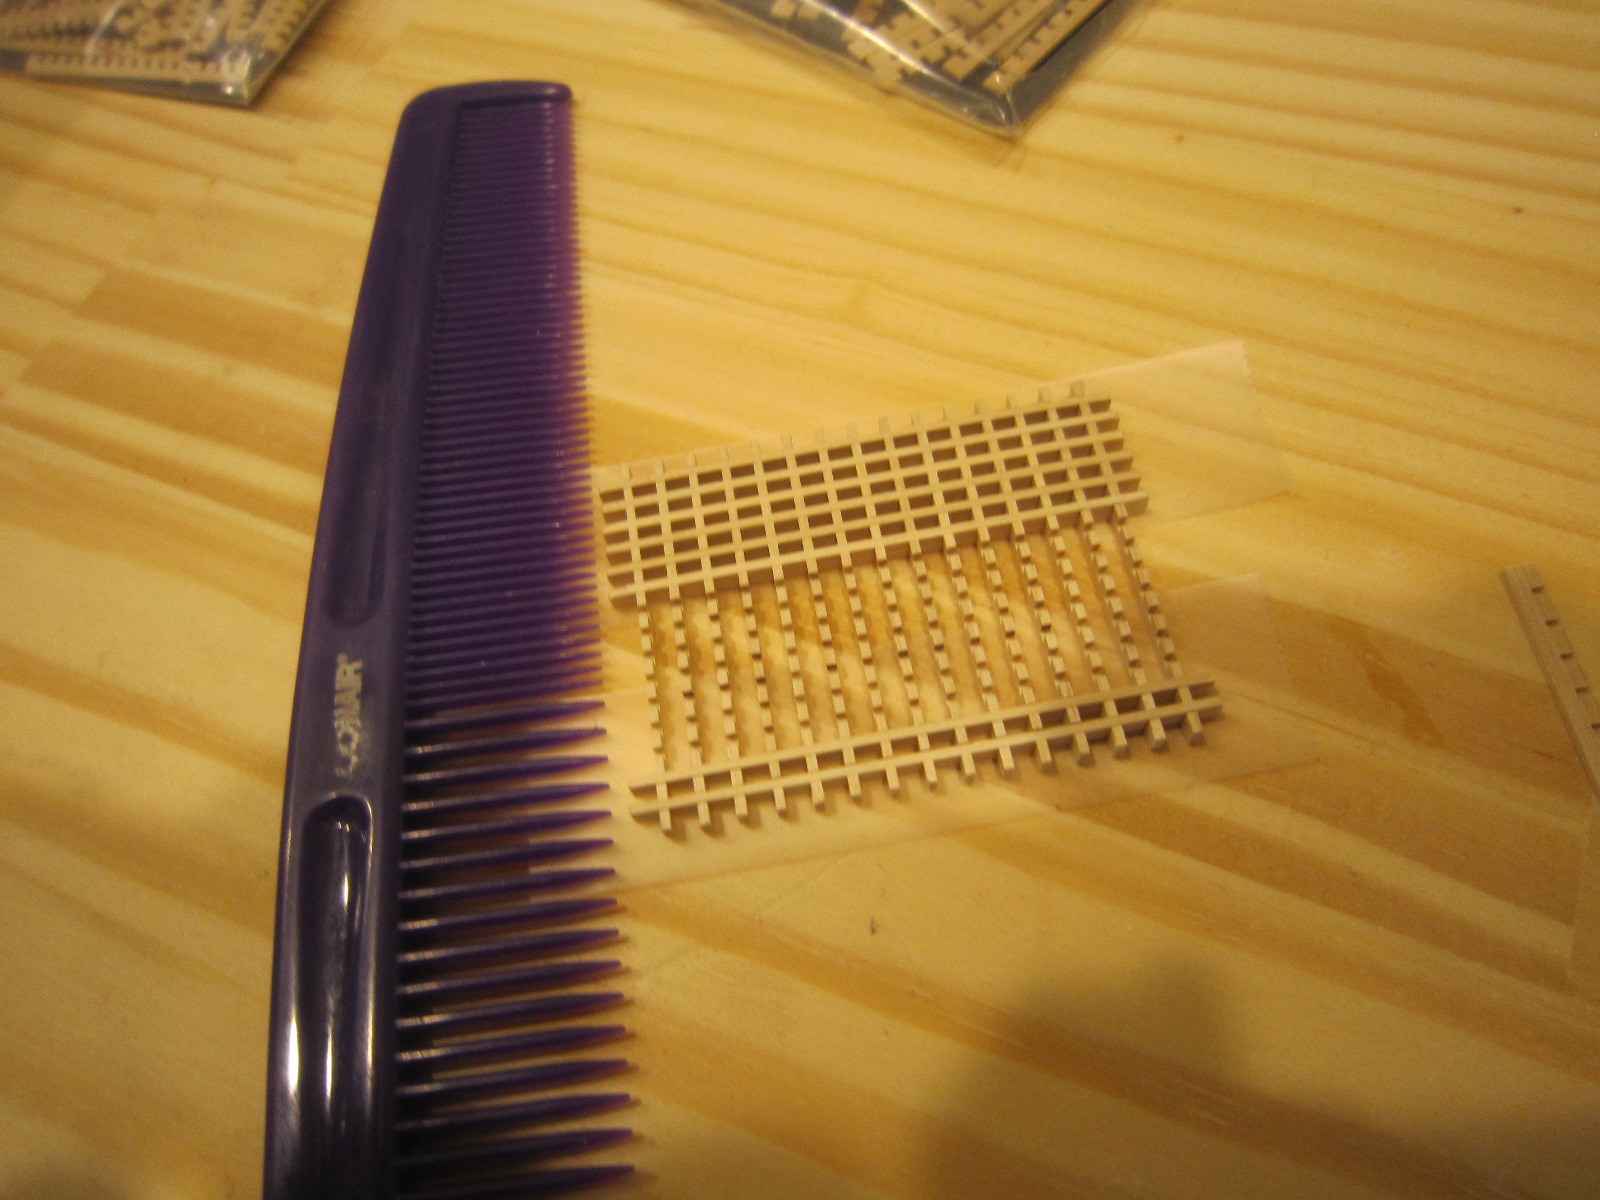
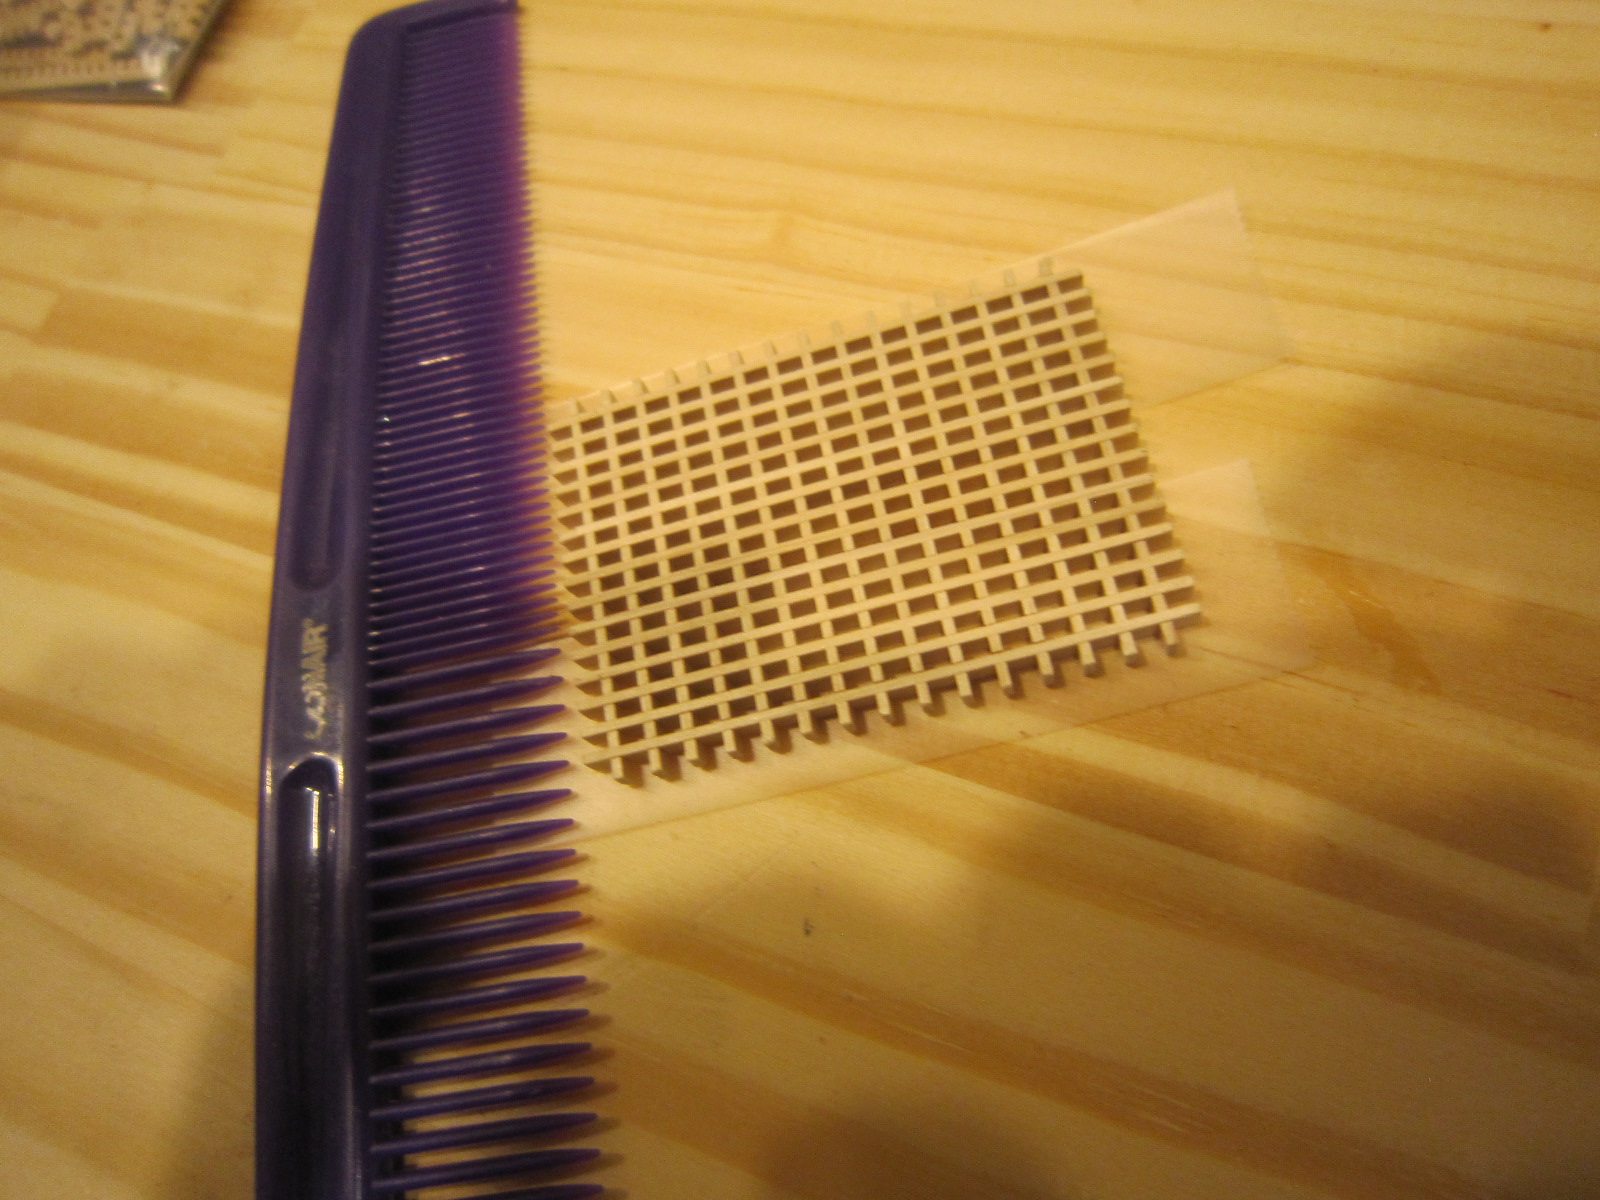
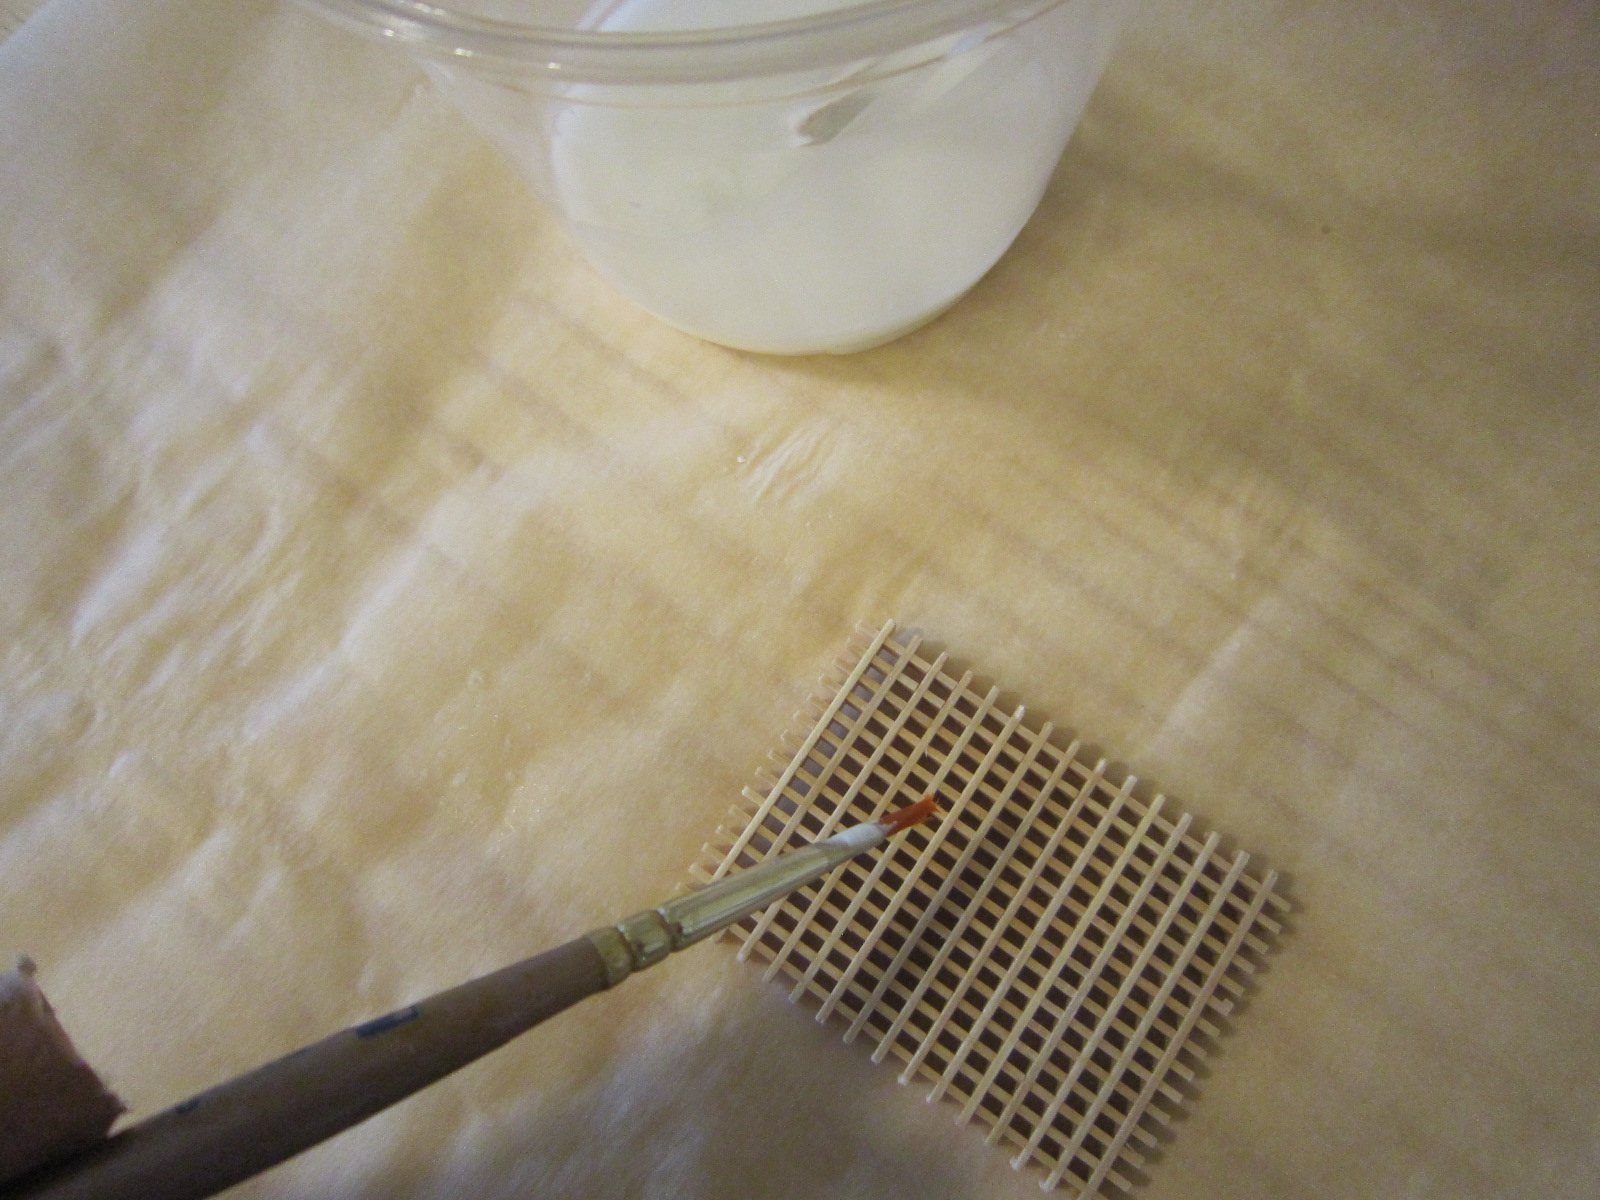
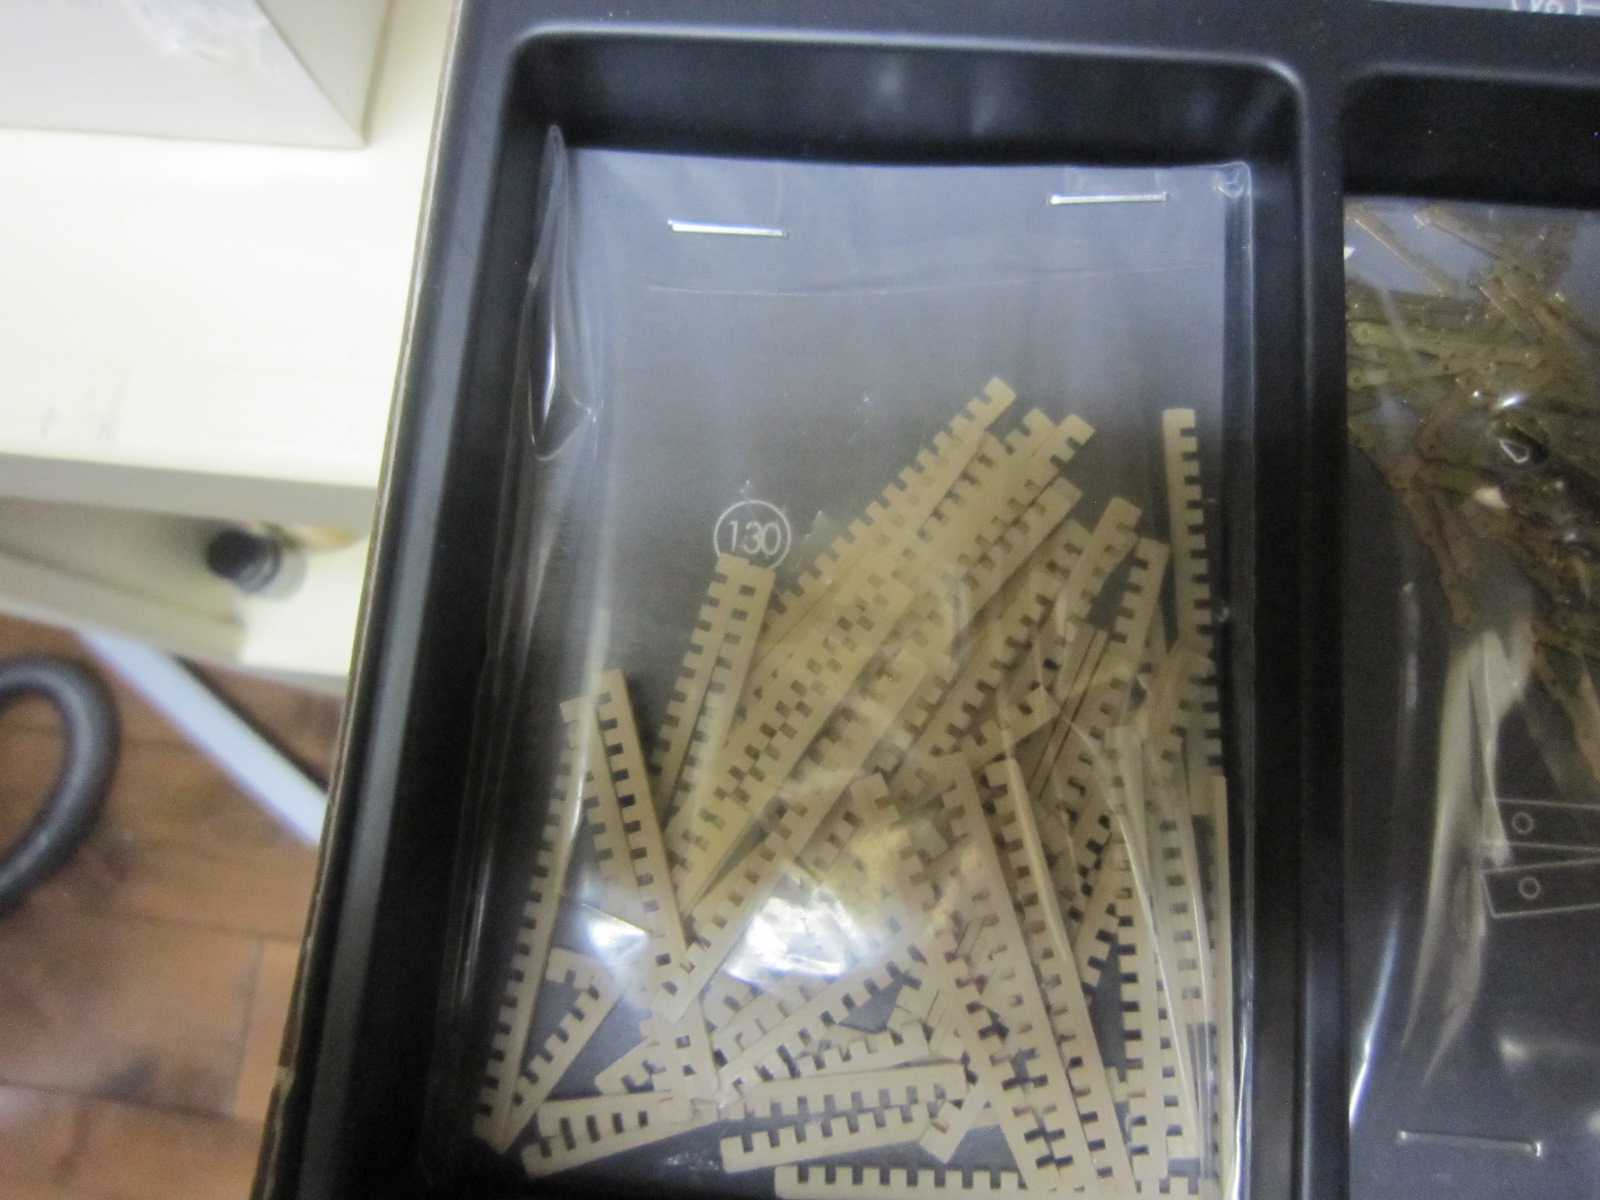
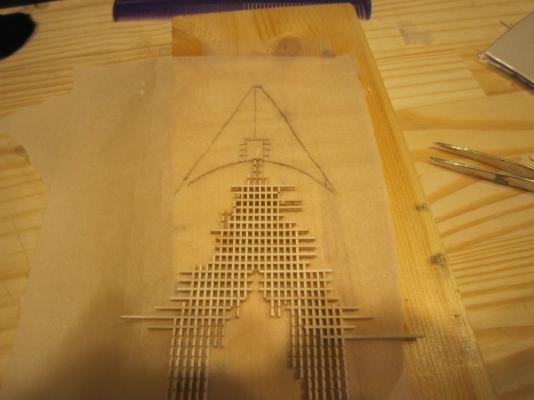
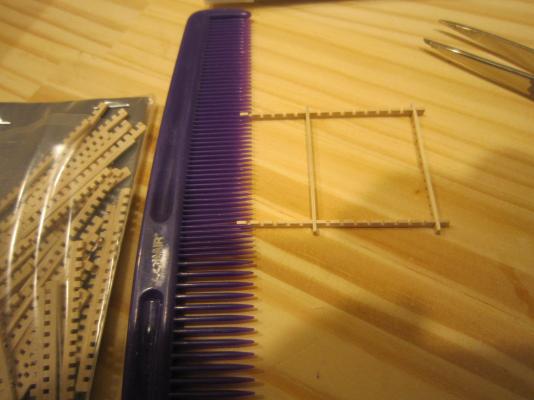
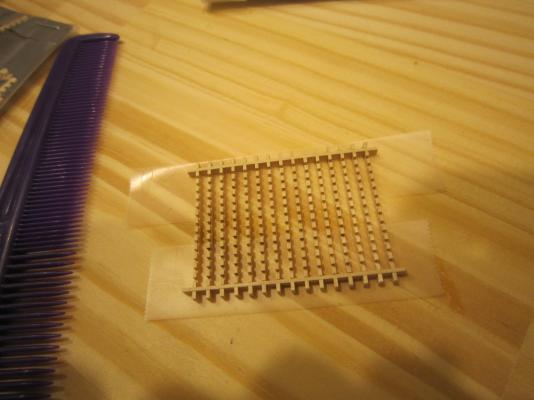
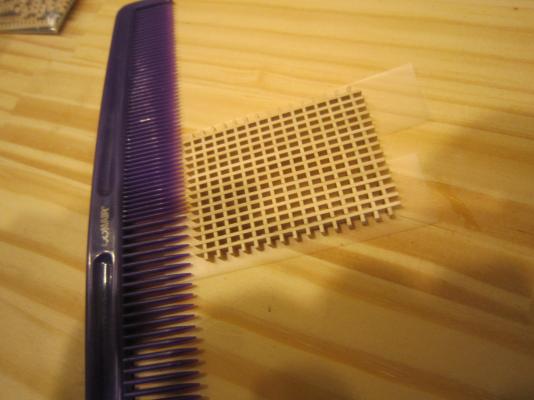
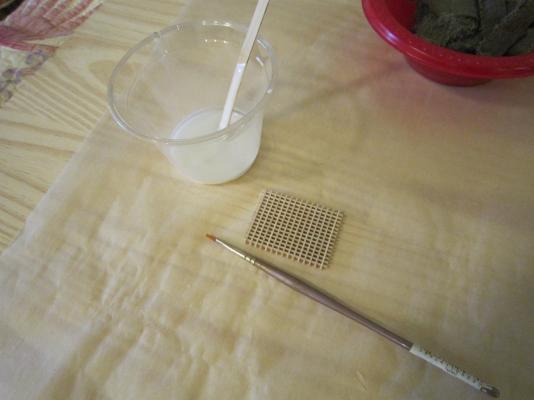
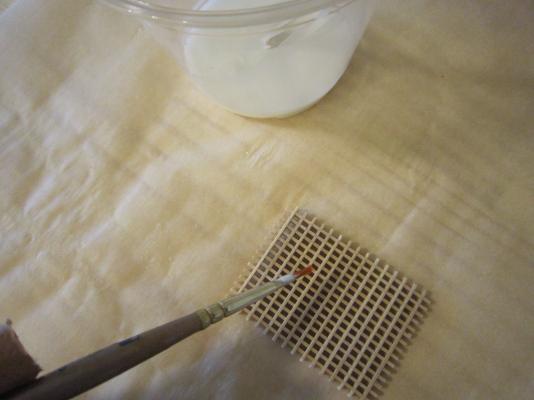
My first grate! I used a comb for a jig to get started, then I laid out the first course, then used scotch tape to hold them together and flipped it to add the last course, then used a 3x5 card to lay it on wax paper for Sjor's diluted PVA glue bath. Hooray....it worked.


- 1,756 replies
-
- 8
-
-
- constitution
- constructo
- (and 1 more)
-
Sjors, Thanks for the tip. I shall attempt to build the grates.
-
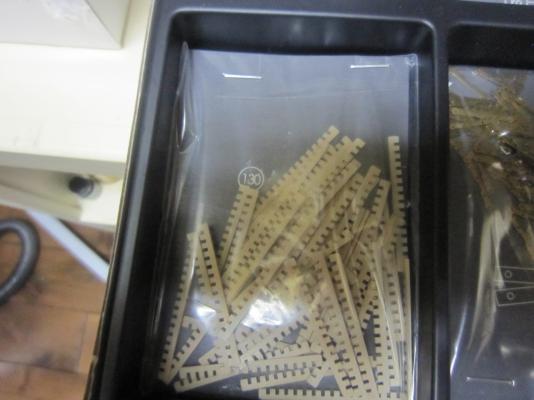
HELP! Any tips how to make gratings out of these pre-cut pieces Constructo gave me? I have to make quite a few of different shapes.. I suppose a jig of sorts would help, but that would take some precision cutting tools that I do not have. Maybe some mildly sticky pads to hold the rows of pieces while I snap the top layer on? I have no idea. I just tried to put some together with no success.
-
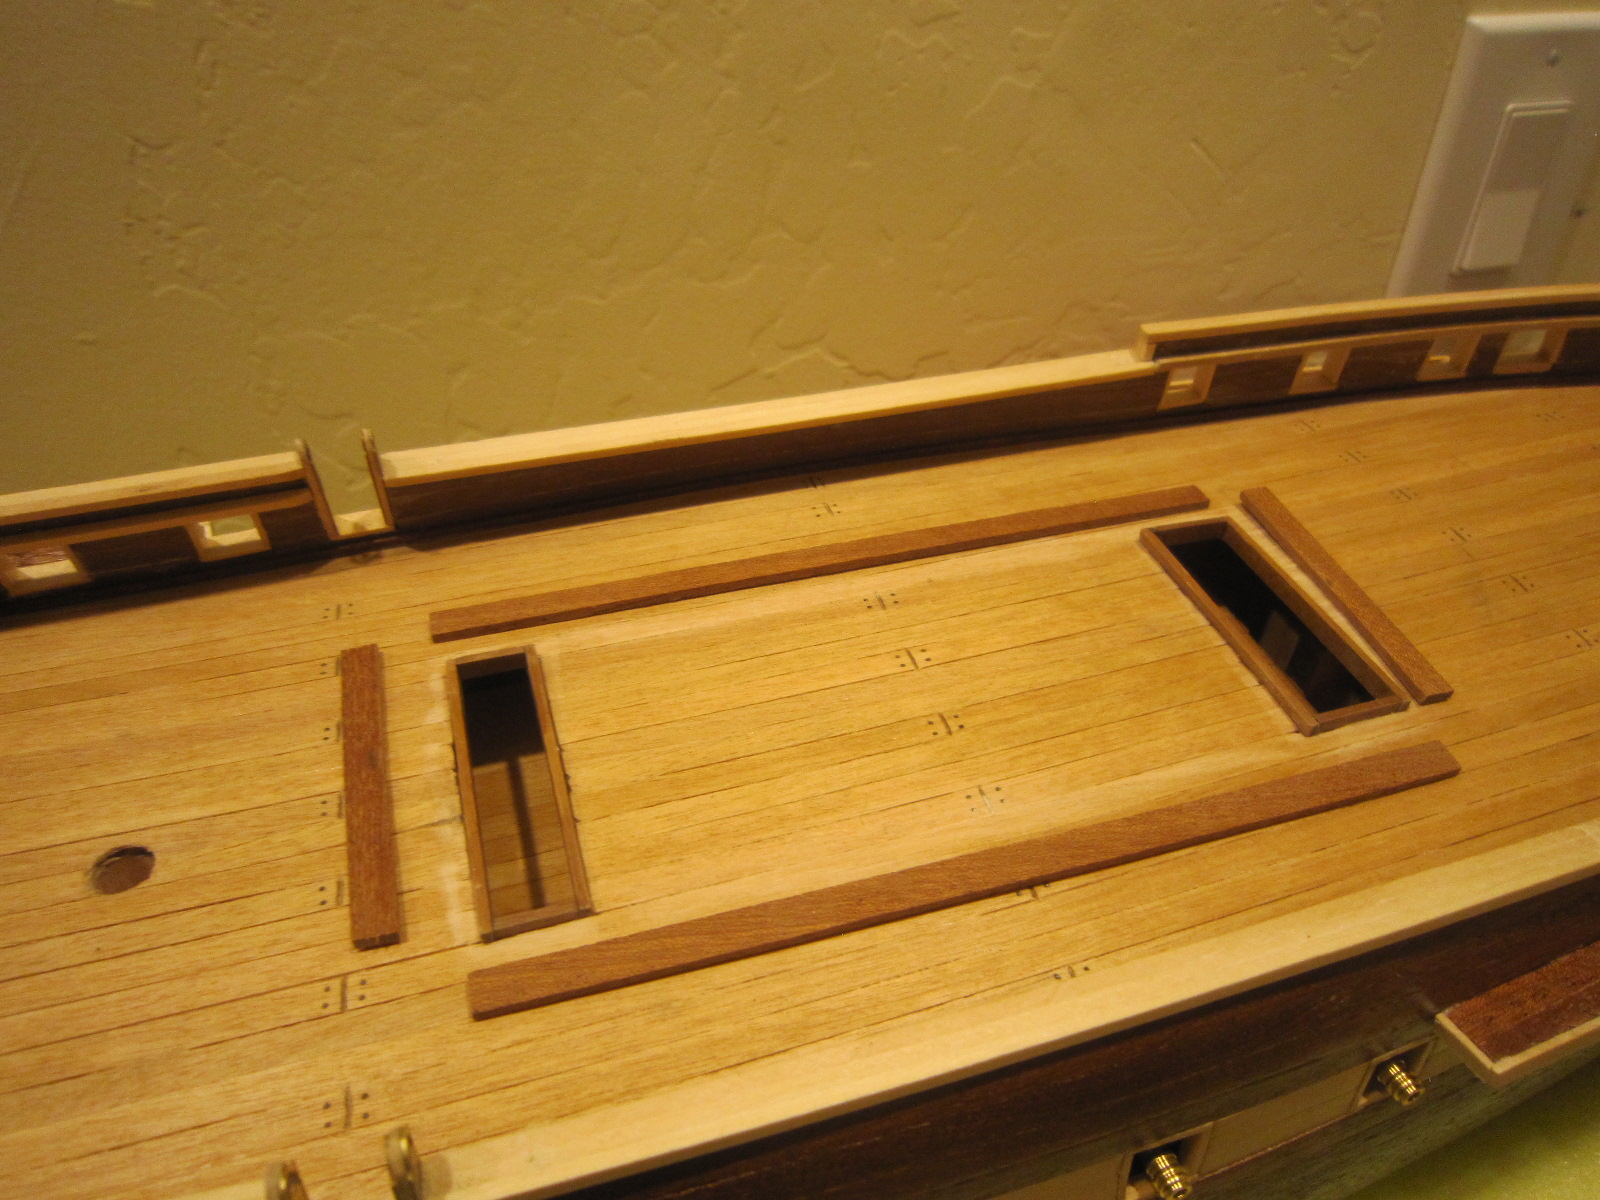
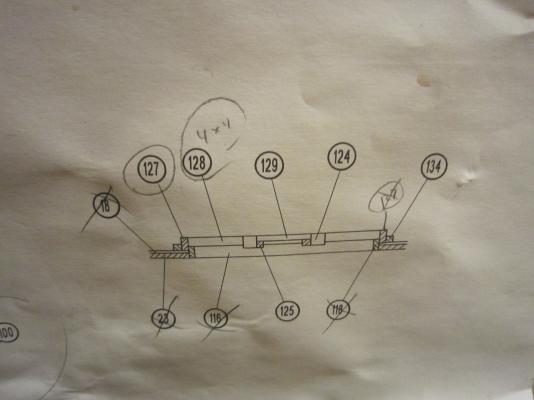
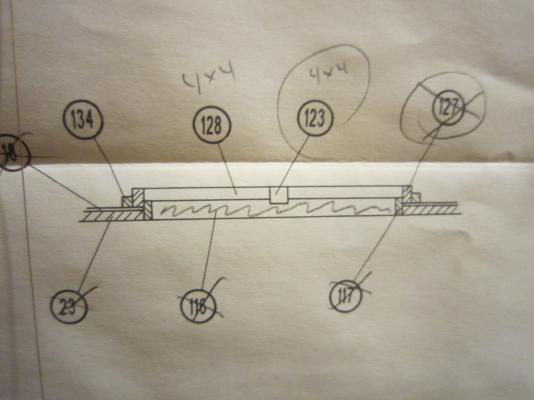
More power to all of you who do that fabulous mini carpentry work. Your stuff makes me envious. I struggle to get these thing straight, level, square, etc. Here's the deck hatch I had to figure out from Constructo's very confusing drawings.


- 1,756 replies
-
- 4
-
-
- constitution
- constructo
- (and 1 more)
-
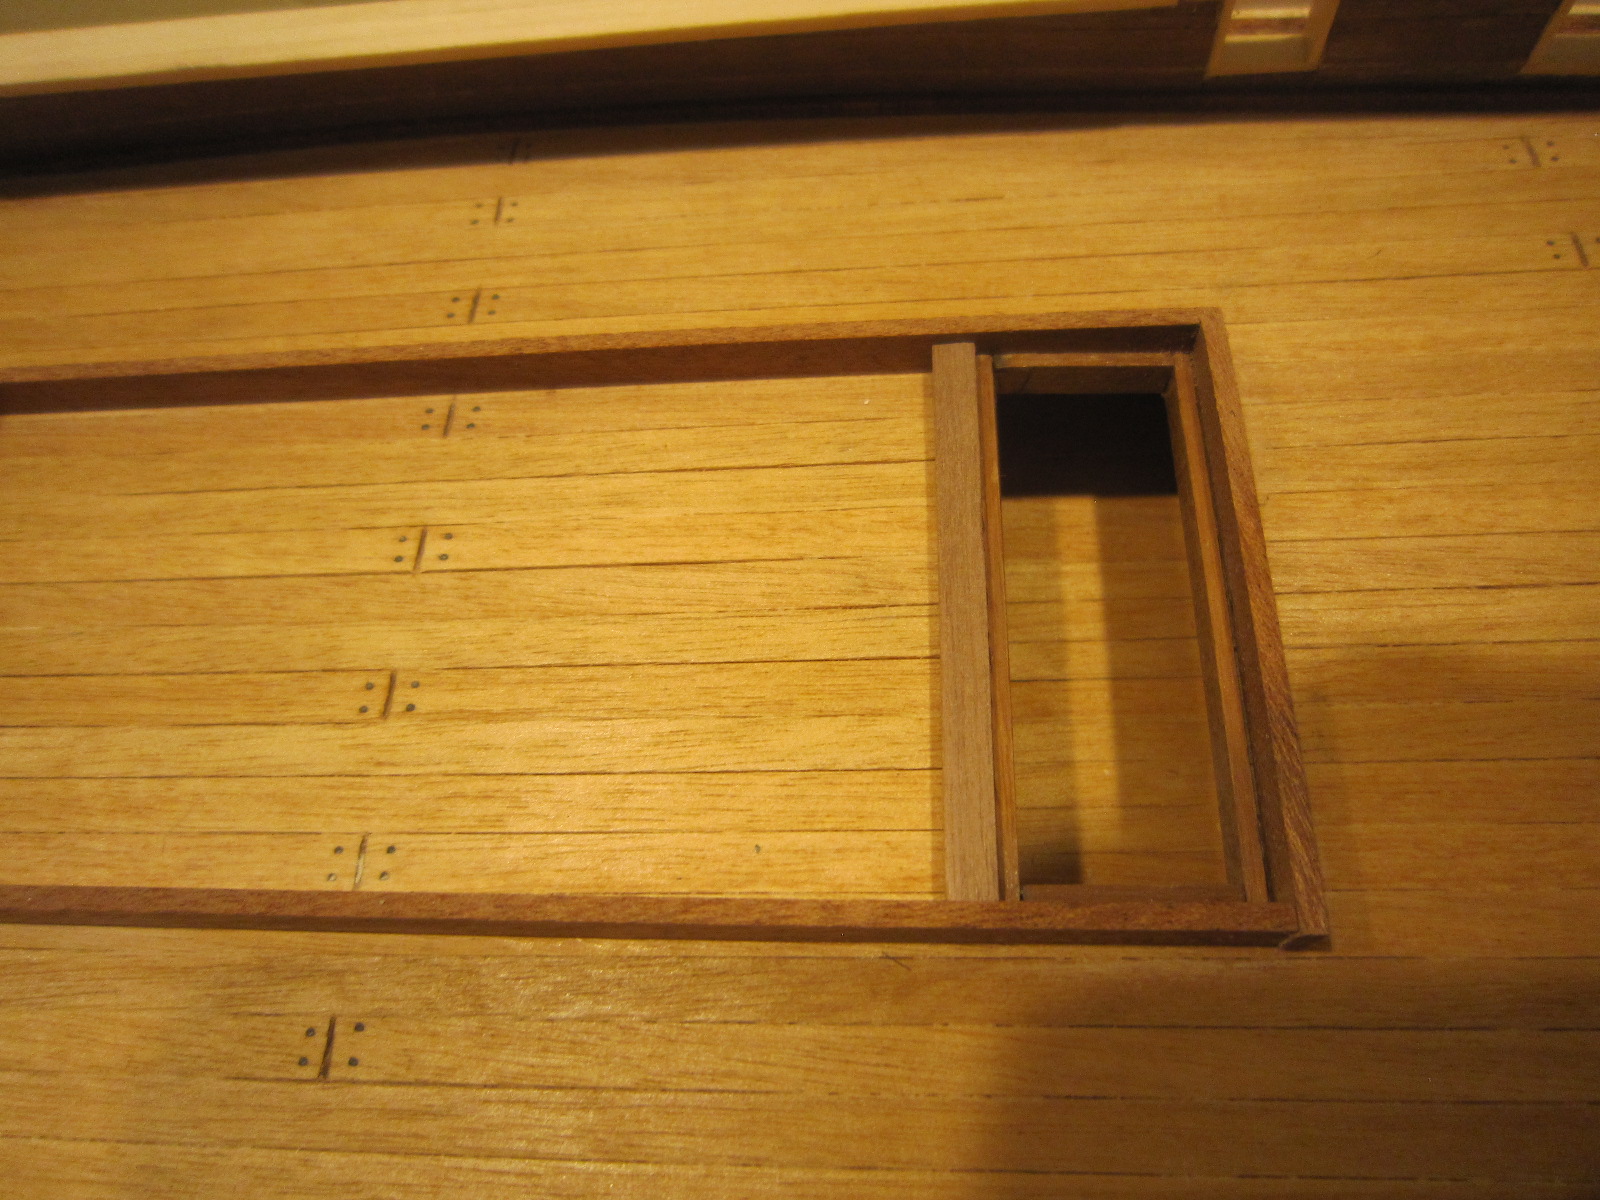
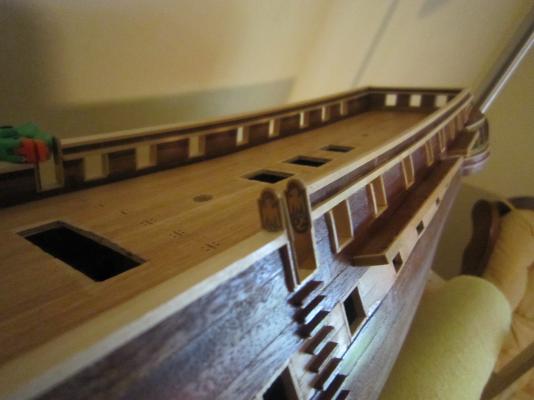
Now I see why Constructo had me plank below decks. At the time I thought it was a job never to be seen again. Wrong! Below decks are quite visible and I will build stairs to get down to them.

- 1,756 replies
-
- 4
-
-
- constitution
- constructo
- (and 1 more)
-
Wow! Your detailing is amazing! Great work.
-
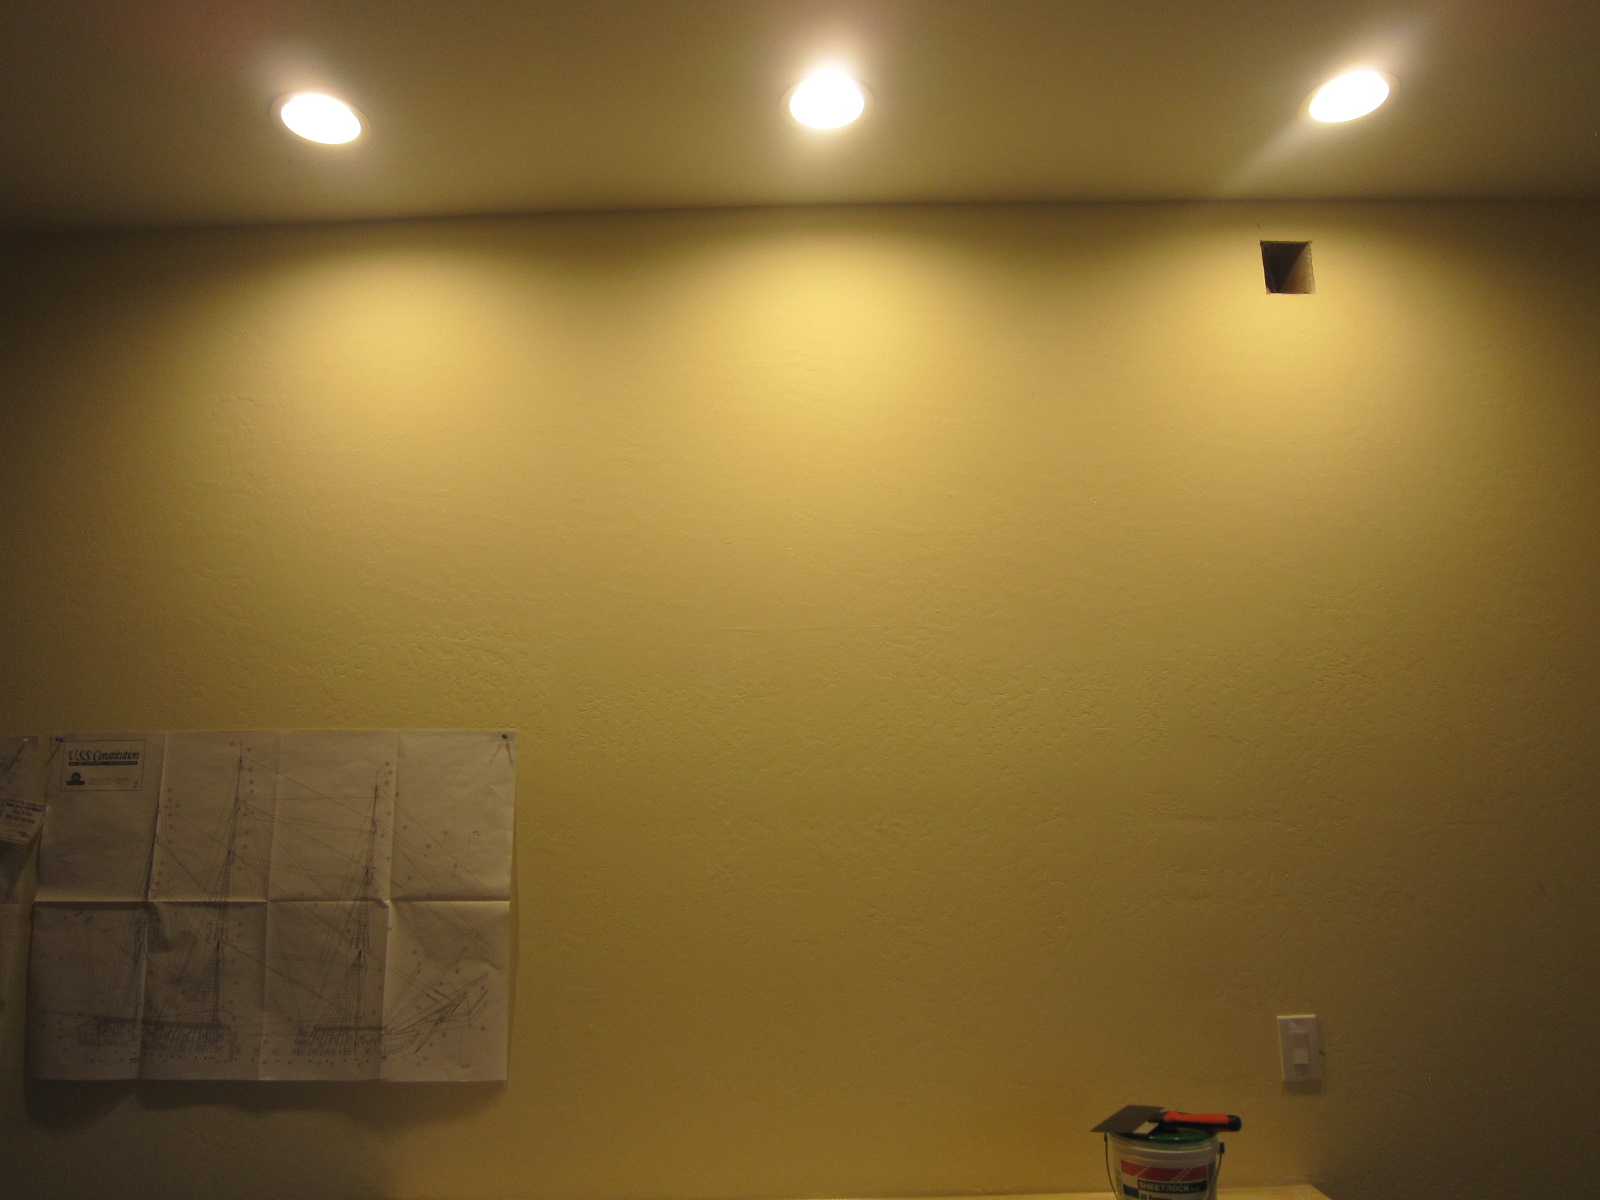
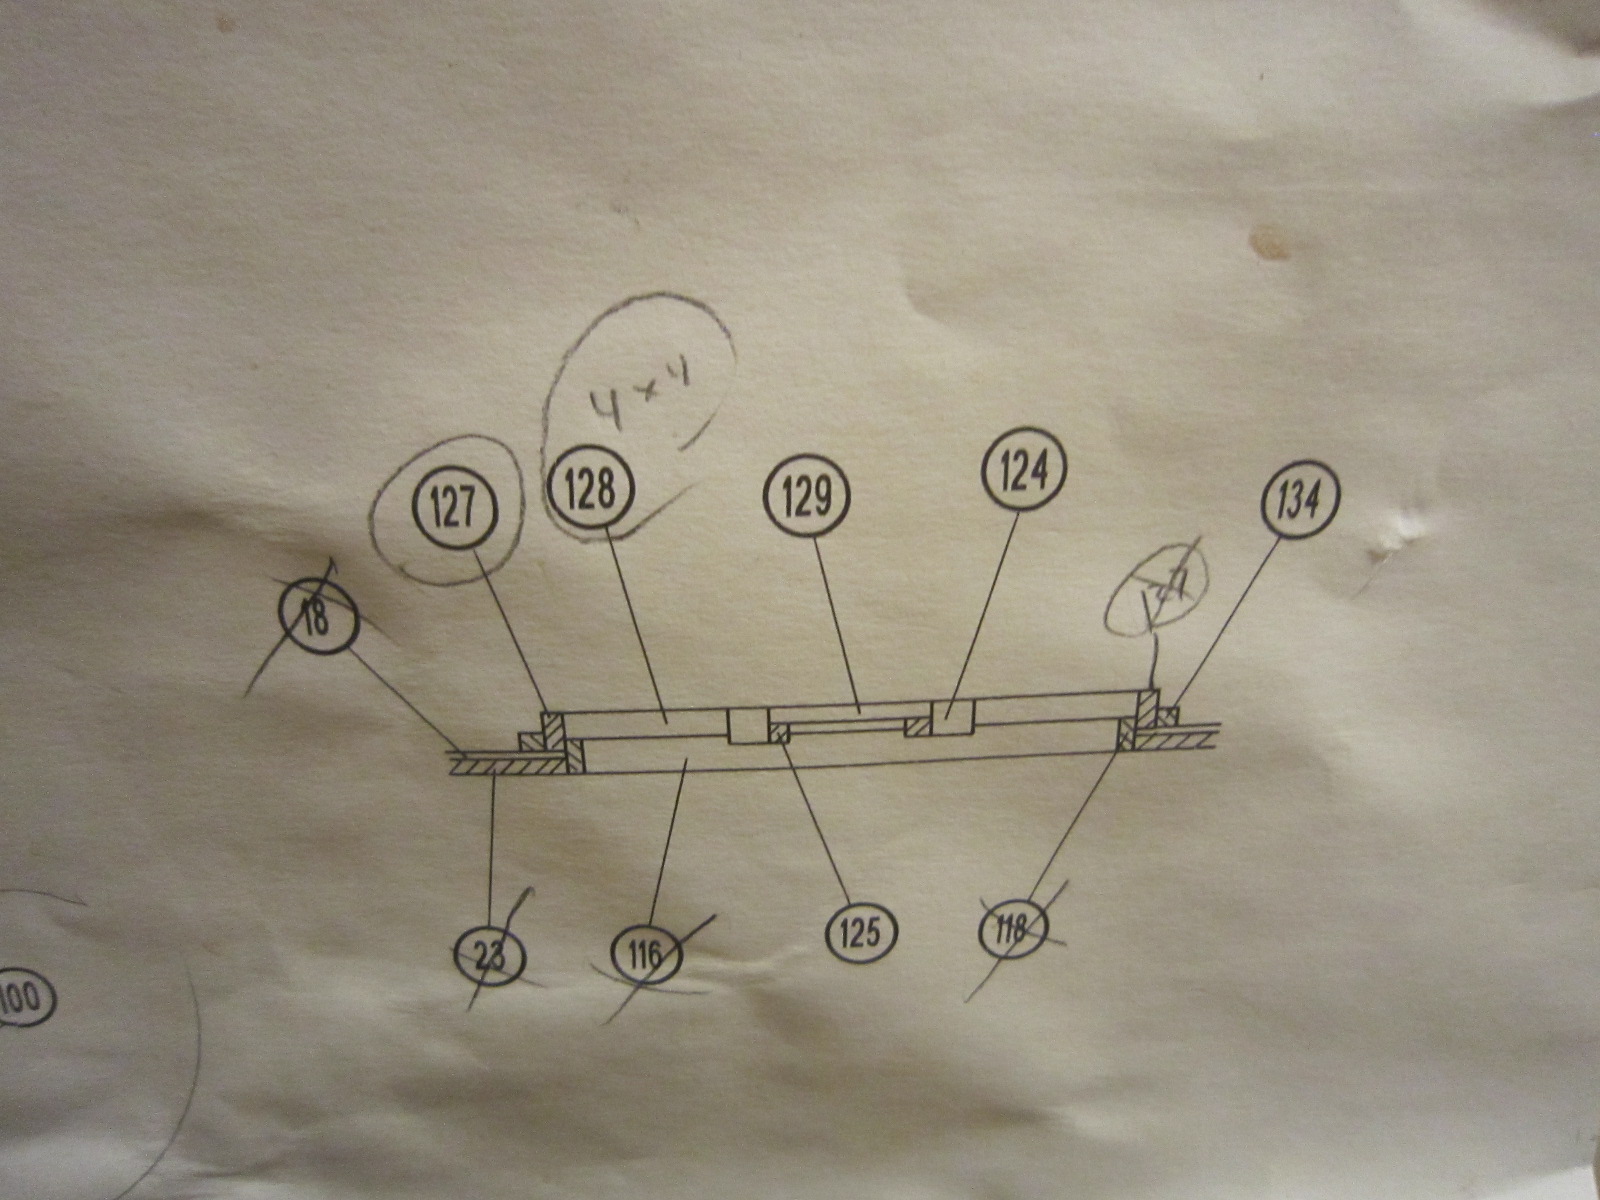
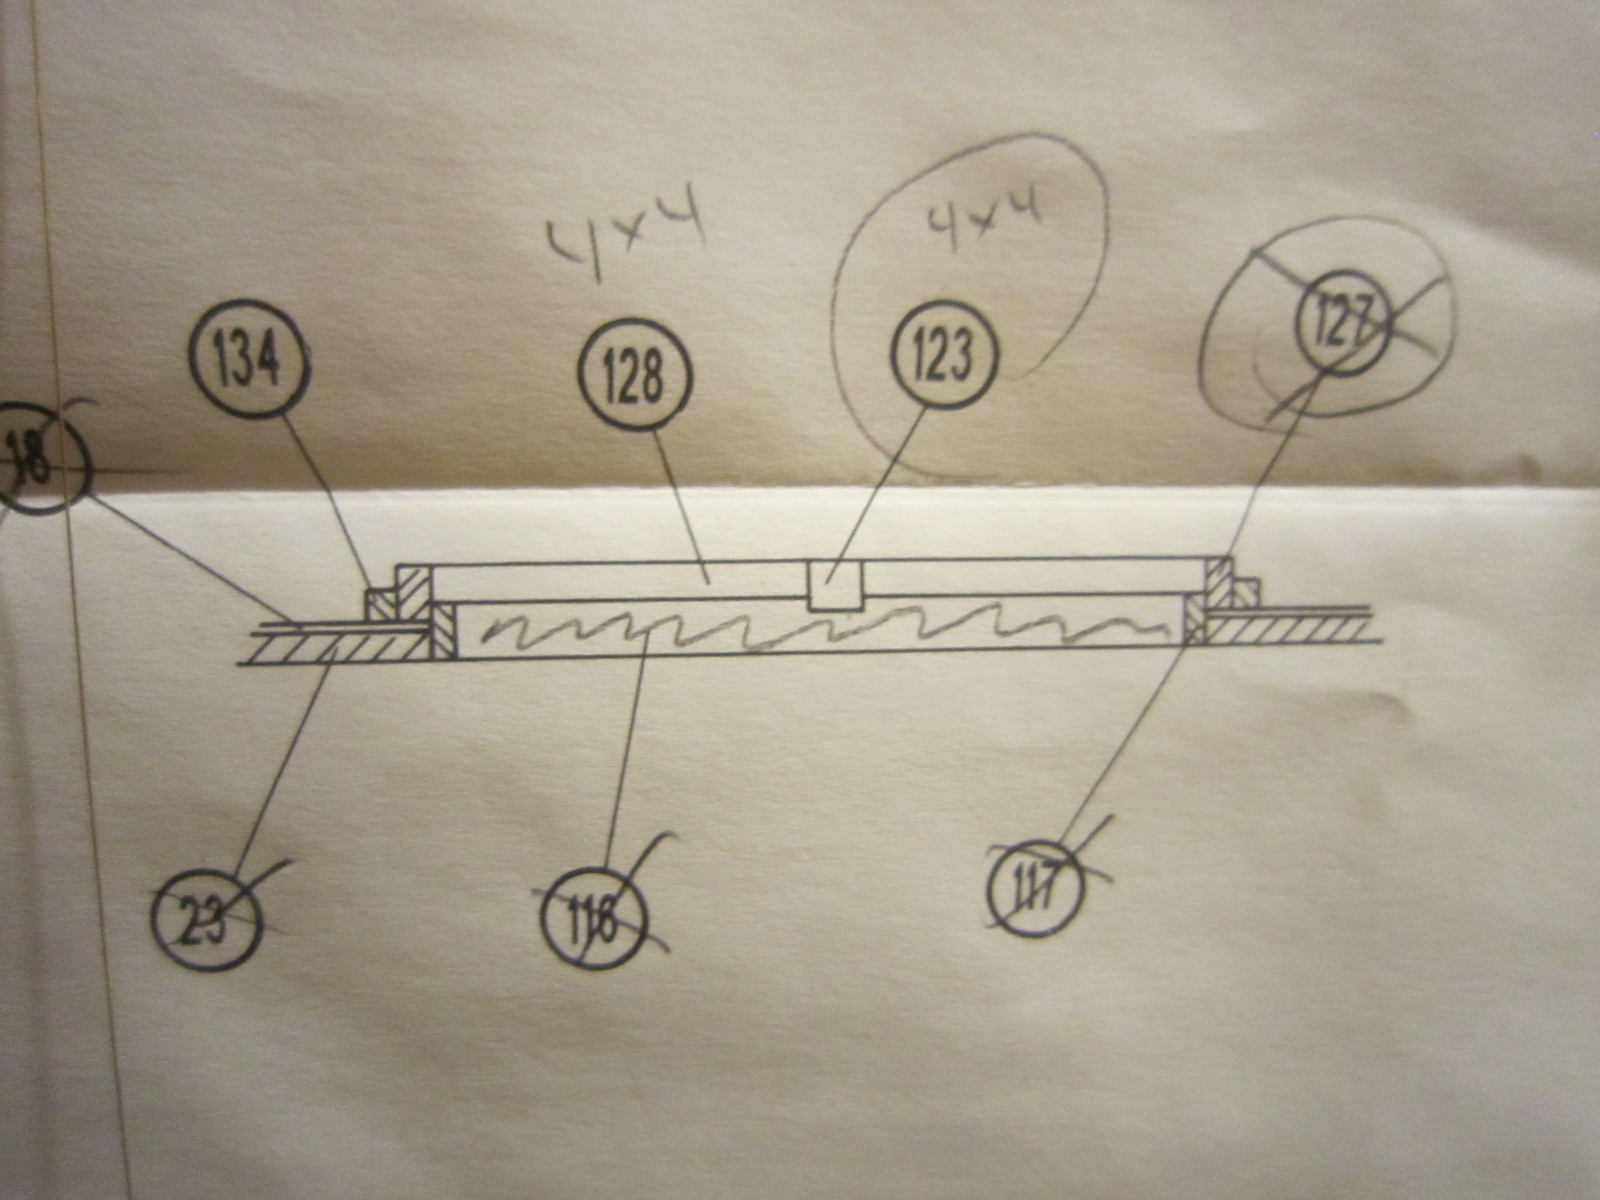
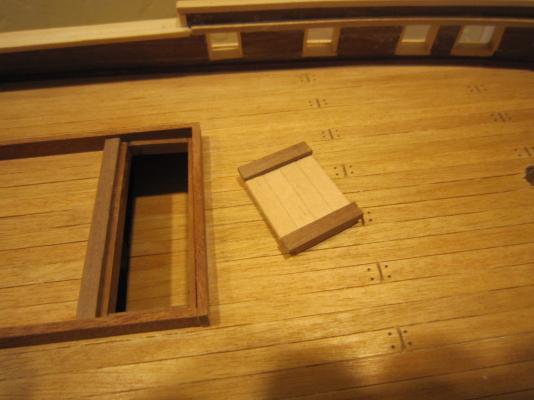
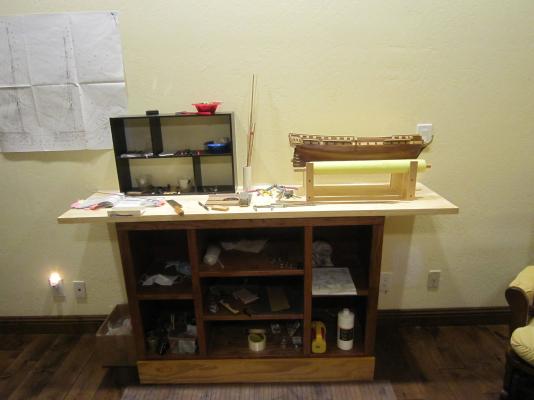
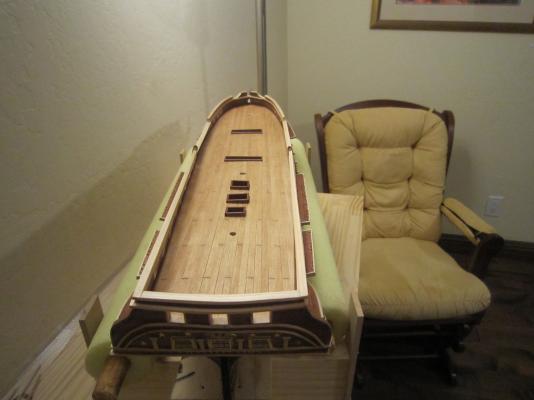
My electrician has just installed some great new halogen lights over my workbench. Wow...what a difference! I'm working on the deck trim and even though Constructo has finally given me three drawings and a photo of the large grated area on the main deck. I'm having a tough time figuring out exactly what to do. I'm just plunging ahead doing what I think will result in the whole structure looking like the photo. I guess if I knew what the deck structure did I'd have a better idea how to build it.


- 1,756 replies
-
- 2
-
-
- constitution
- constructo
- (and 1 more)
-
I love my Dremel, but you have to very careful with it. It gobbles up material faster than you can comprehend it. Once the material is gone....it's gone. Good luck.
-
I'm enjoying your build. As for beveling....you will also have to bevel individual planks so their edges match as they round the bulkheads. Keep up the good work.
-
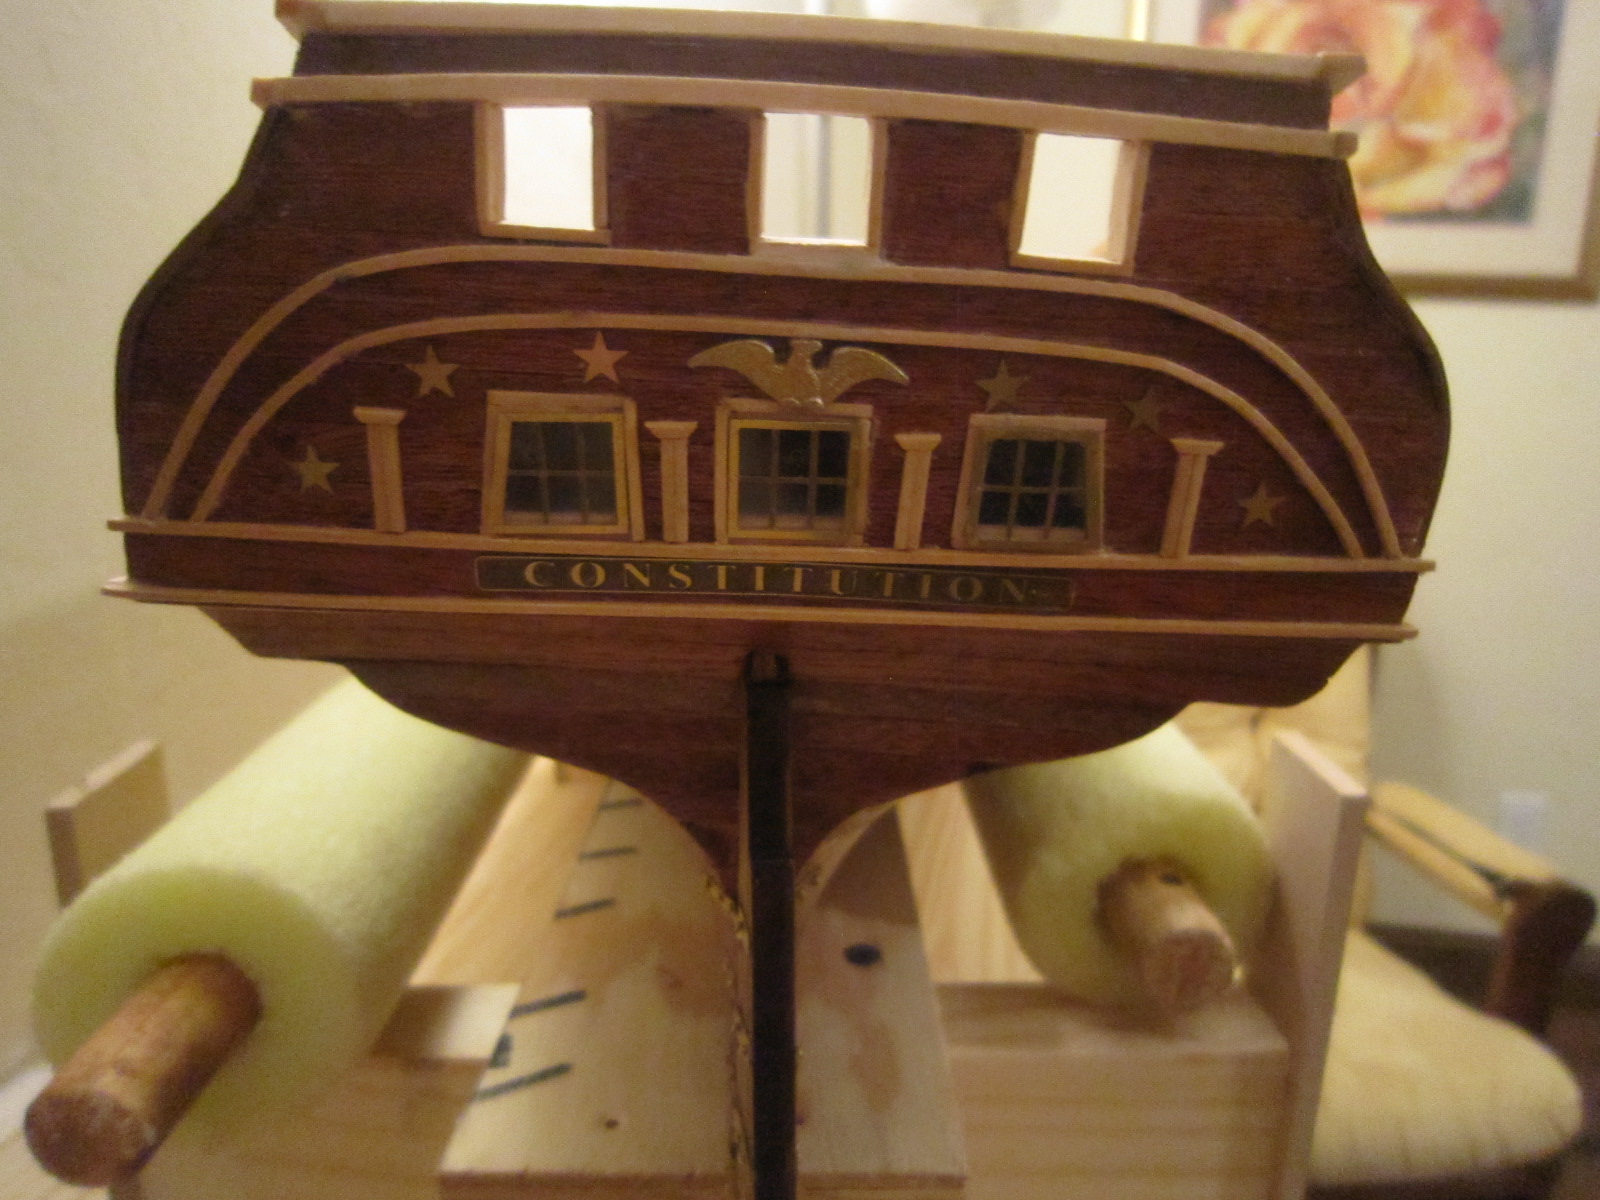
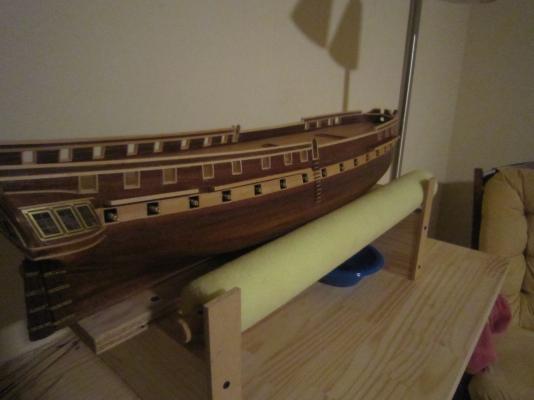
Working on the transom. Found an eagle on E-Bay..better than Constructo's. Still some work to be done to clean it up. False cannons are all glued in. Some deck trim glued in.

- 1,756 replies
-
- 6
-
-
- constitution
- constructo
- (and 1 more)
-
HMS Victory is the Mount Everest of ship modeling.
-
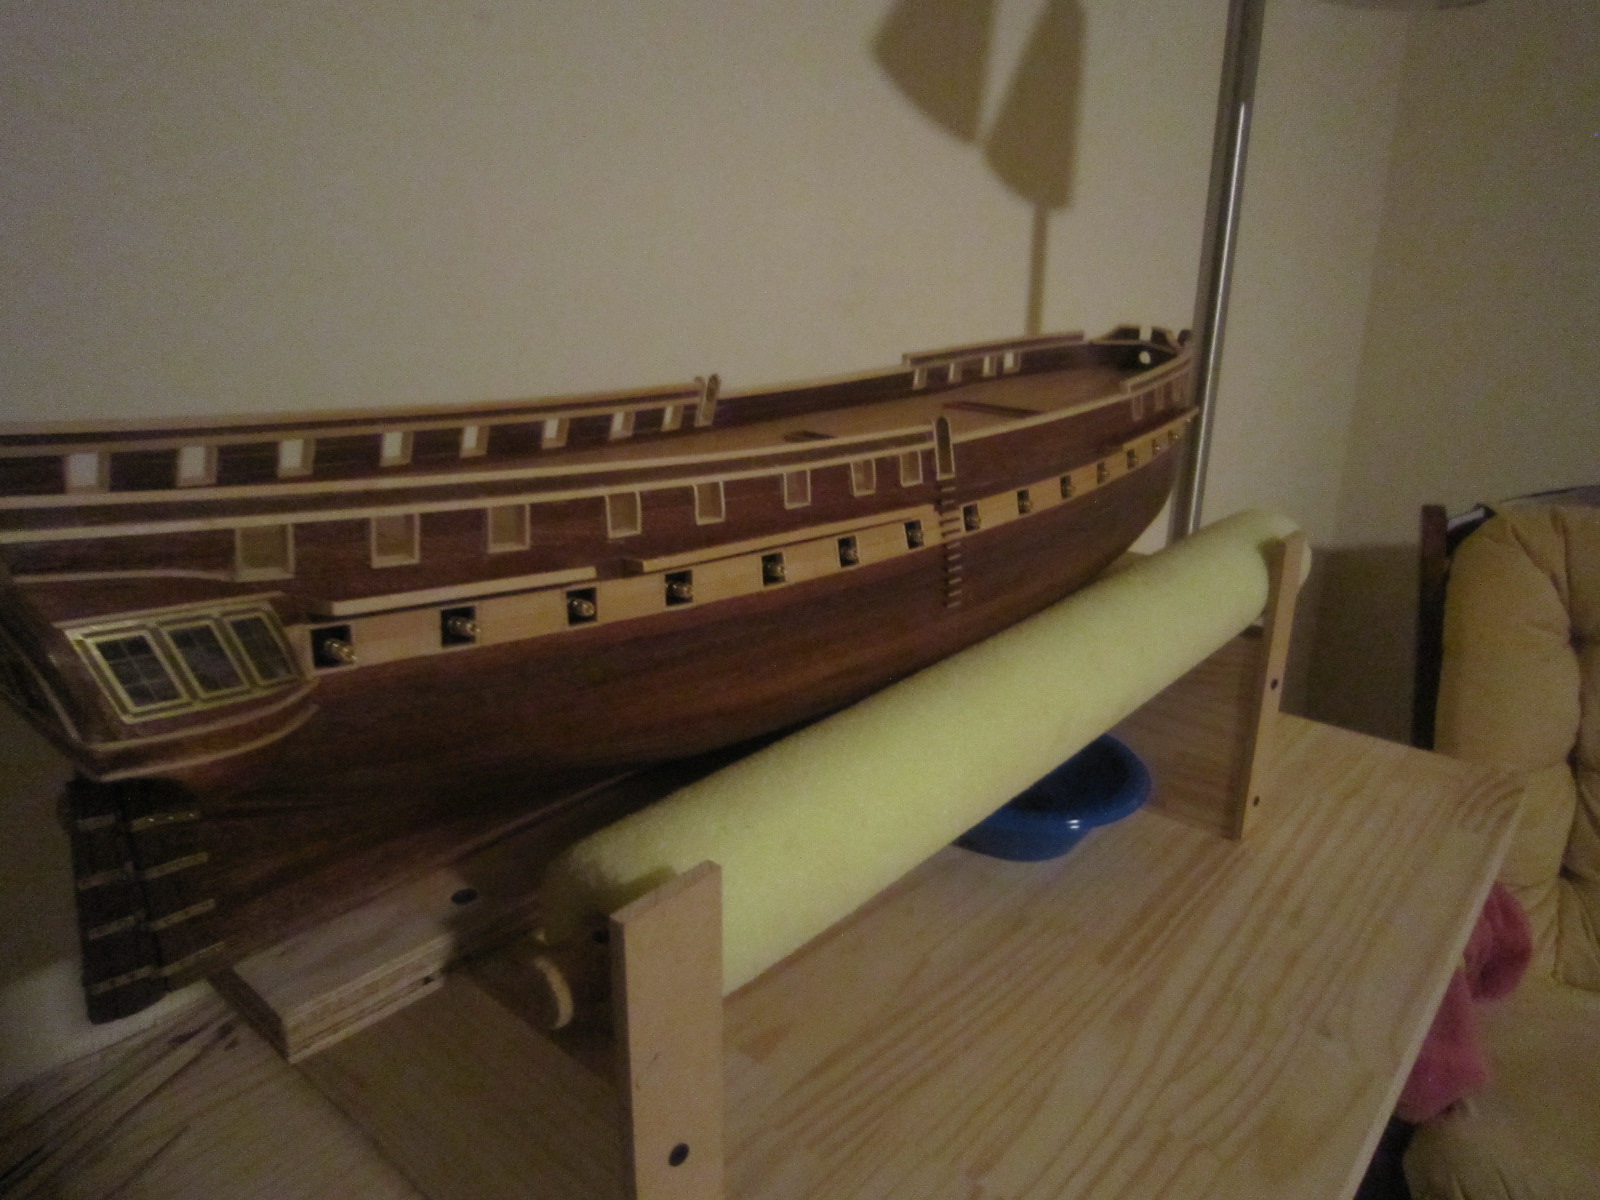
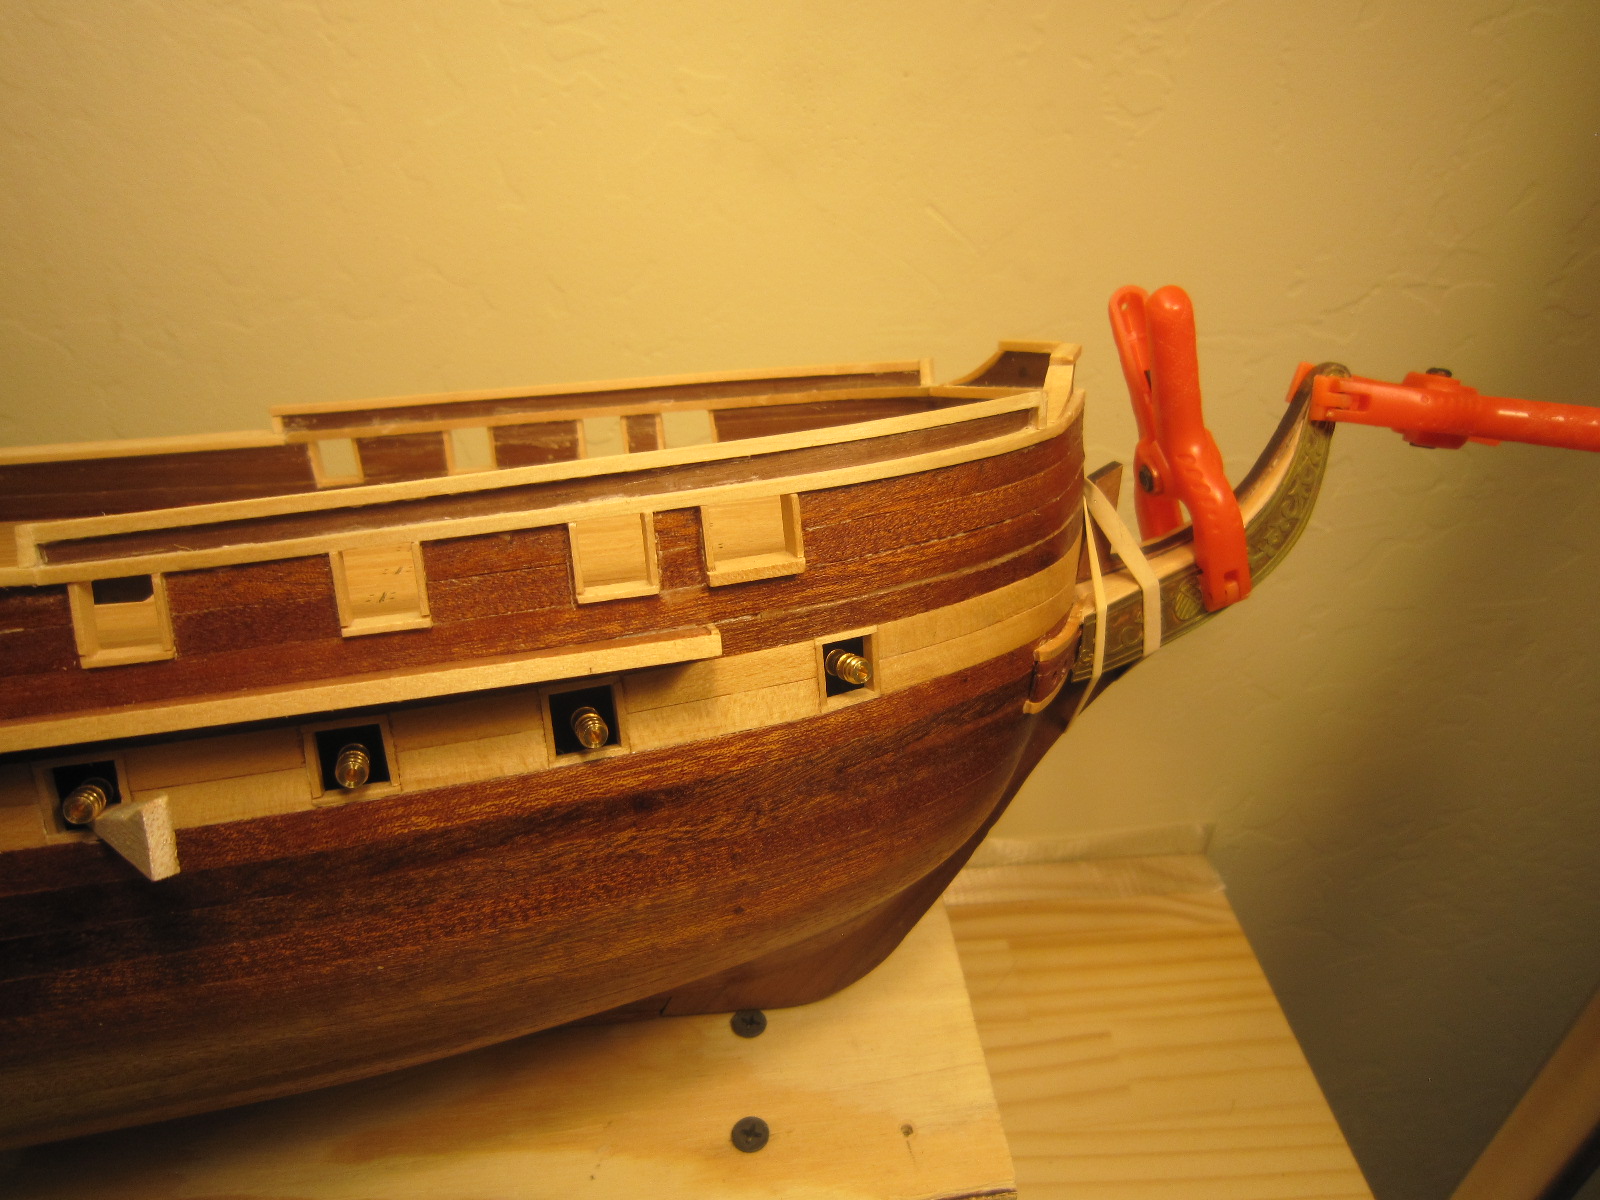
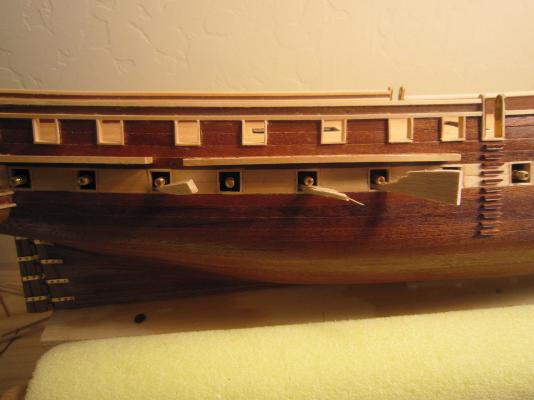
While I'm pondering my next steps, I'm mounting the cannons so I can construct and mount the gunport covers. If I put the covers on before the cannon, my fat fingers won't let me insert the cannons into the holes I'd drilled way back in November. I've also glued on the starboard bow ornament. The wooden wedges will be removed when the glue dries. A comment about Constructo: They give you a nice kit, but the drawings and instructions are extremely lacking in many areas. I have to figure out an awful lot on my own. When I built my first kit, the instructions were much better.

- 1,756 replies
-
- 5
-
-
- constitution
- constructo
- (and 1 more)
-
You're right....I will recover.
-
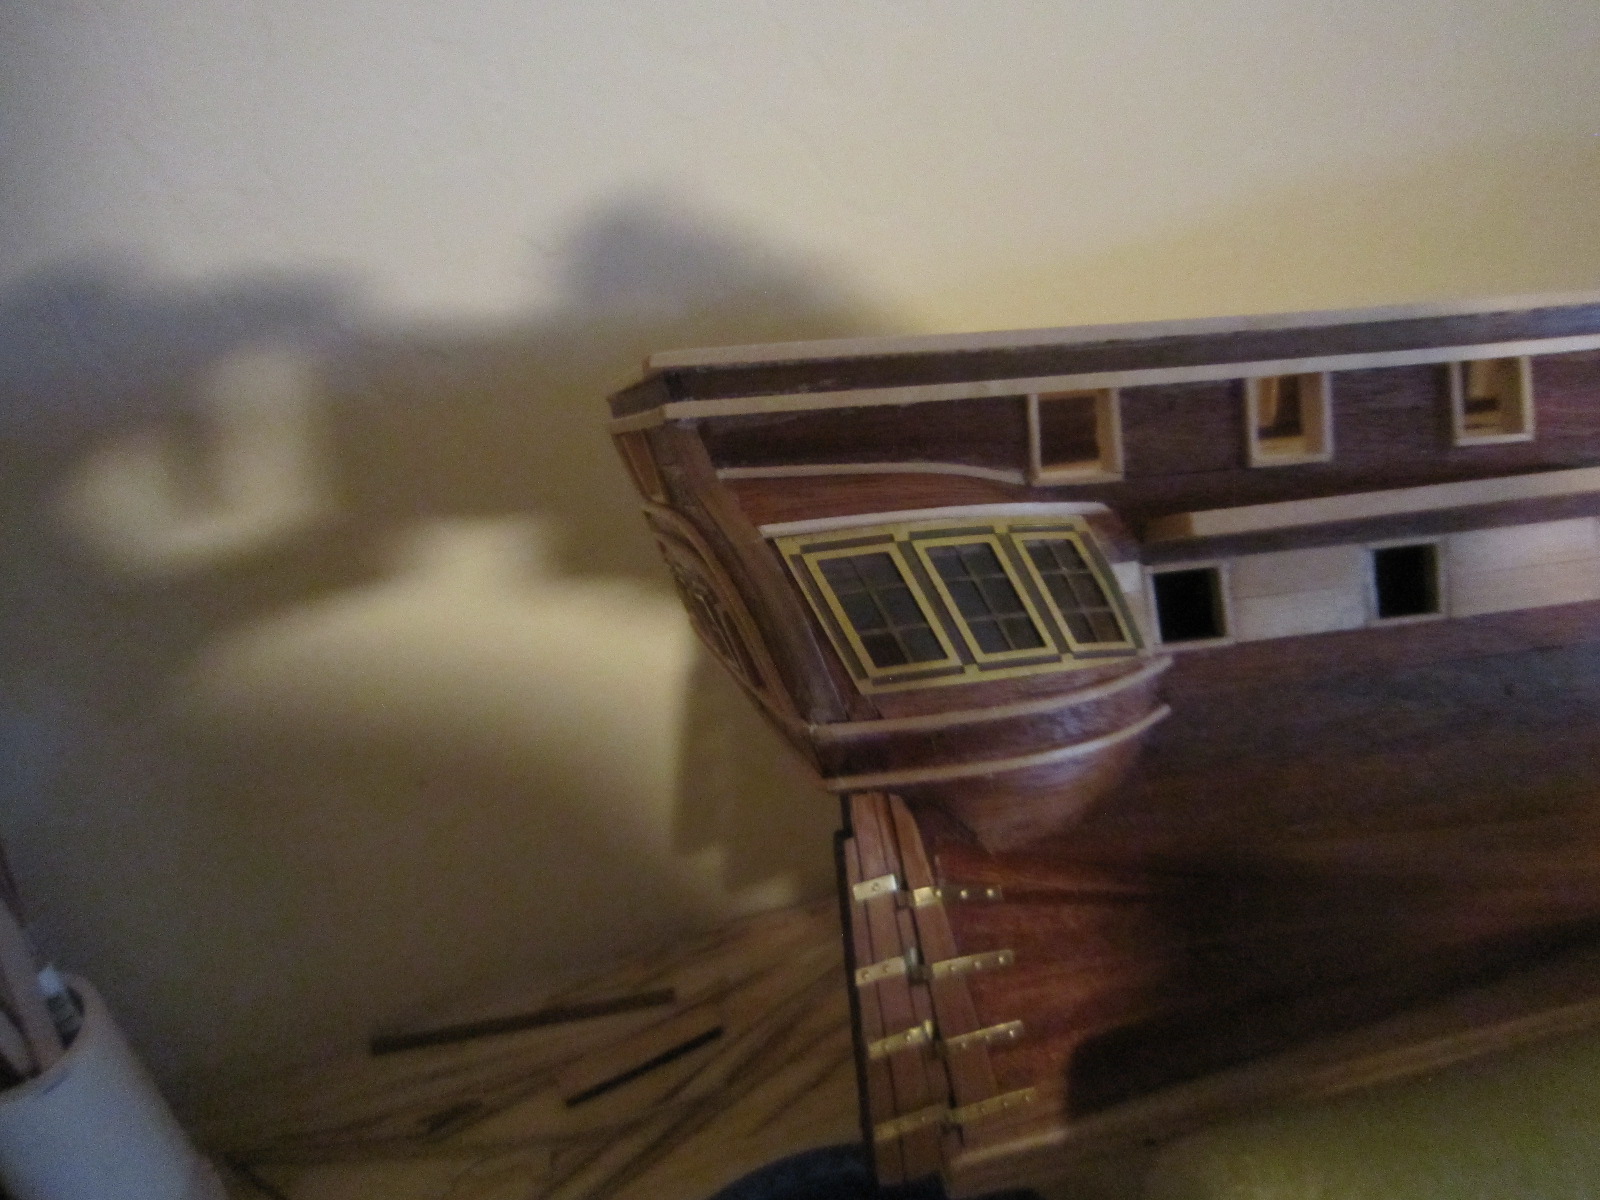
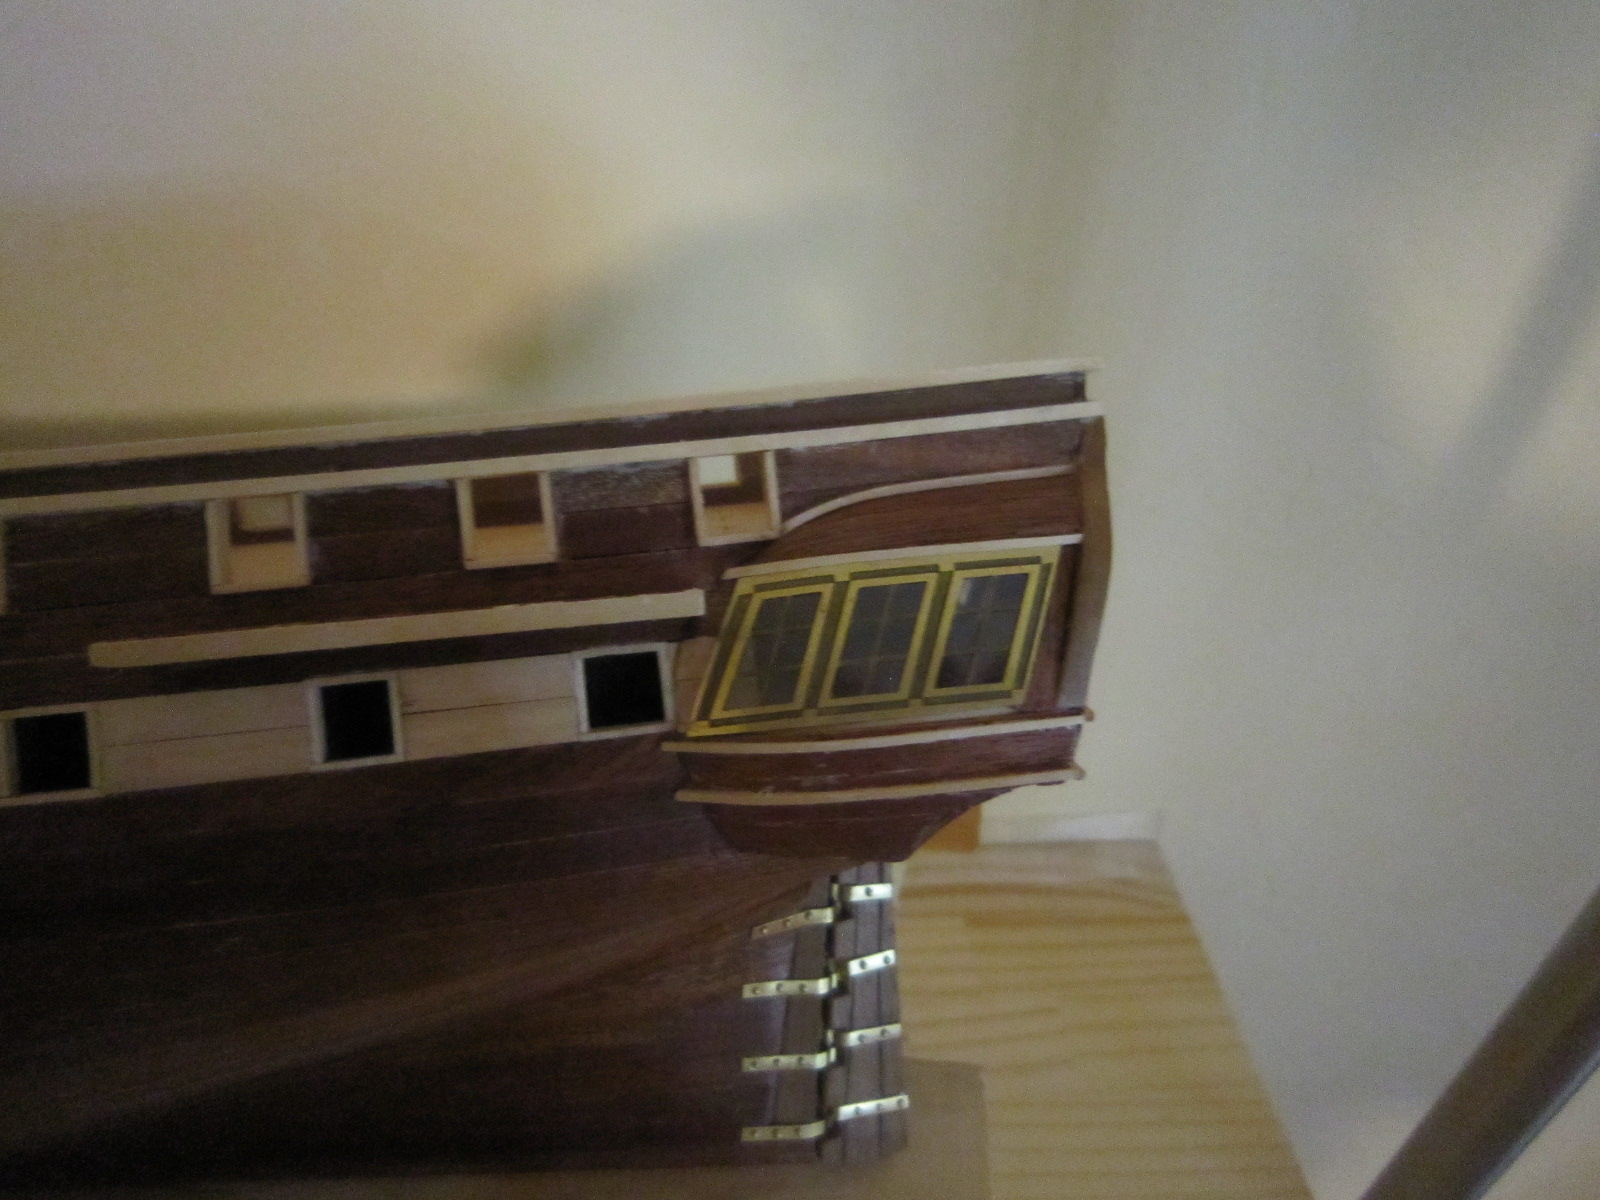
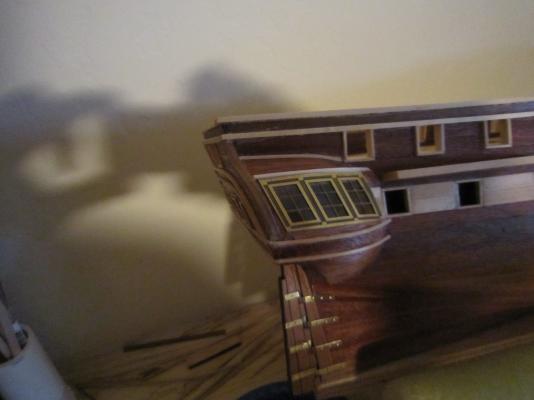
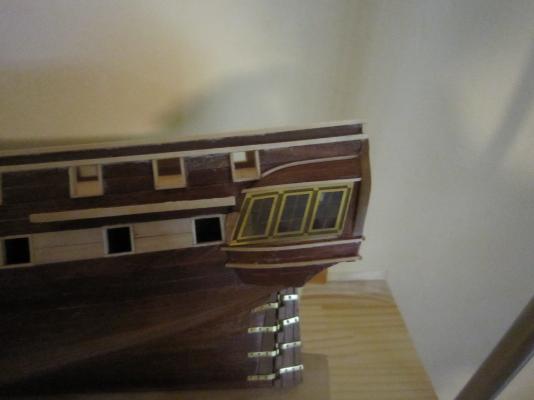
I salvaged the starboard gallery windows, but I have no idea how I'll salvage the aft windows. I don't even want to show you them. They are a product of one of the few pre-cut pieces Constructo provides. The per-cut holes were too big, so I had to shrink the holes before installing the windows. Now I don't like the way they look, so I'll probably tear them all out and start over. Oh well! They say model ship building is a series of error corrections. The first error we make is starting!
- 1,756 replies
-
- 3
-
-

-
- constitution
- constructo
- (and 1 more)
-
Port gallery windows went in fairly well. I need to work some more on the starboard windows and the aft windows have to be done over. The adornments for the entry are in.
- 1,756 replies
-
- 3
-
-
- constitution
- constructo
- (and 1 more)
-
PVA Ph neutral. It dries clear and I tested it by gluing a piece of brass to wood. It stuck like it was welded.