Azzoun
-
Posts
335 -
Joined
-
Last visited
3 Followers


About Azzoun

- Birthday 01/01/1979
Recent Profile Visitors
5,483 profile views


-
 Azzoun reacted to a post in a topic:
HMS Victory By Mort Stoll by a Caldercraft Kit Embellished to show Lower Decks
Azzoun reacted to a post in a topic:
HMS Victory By Mort Stoll by a Caldercraft Kit Embellished to show Lower Decks
-
 TomShipModel reacted to a post in a topic:
Prince de Neufchatel Random Updates
TomShipModel reacted to a post in a topic:
Prince de Neufchatel Random Updates
-
hollowneck reacted to a post in a topic:
Prince de Neufchatel Random Updates
-
Canute reacted to a post in a topic:
Picket Boat #1 by k-slak - Model Shipways - 1:24
-
Ryland Craze reacted to a post in a topic:
Prince de Neufchatel Random Updates
-
Chuck reacted to a post in a topic:
Prince de Neufchatel Random Updates
-
Tony Hunt reacted to a post in a topic:
Prince de Neufchatel Random Updates
-
Dr PR reacted to a post in a topic:
Prince de Neufchatel Random Updates
-
JacquesCousteau reacted to a post in a topic:
Prince de Neufchatel Random Updates
-
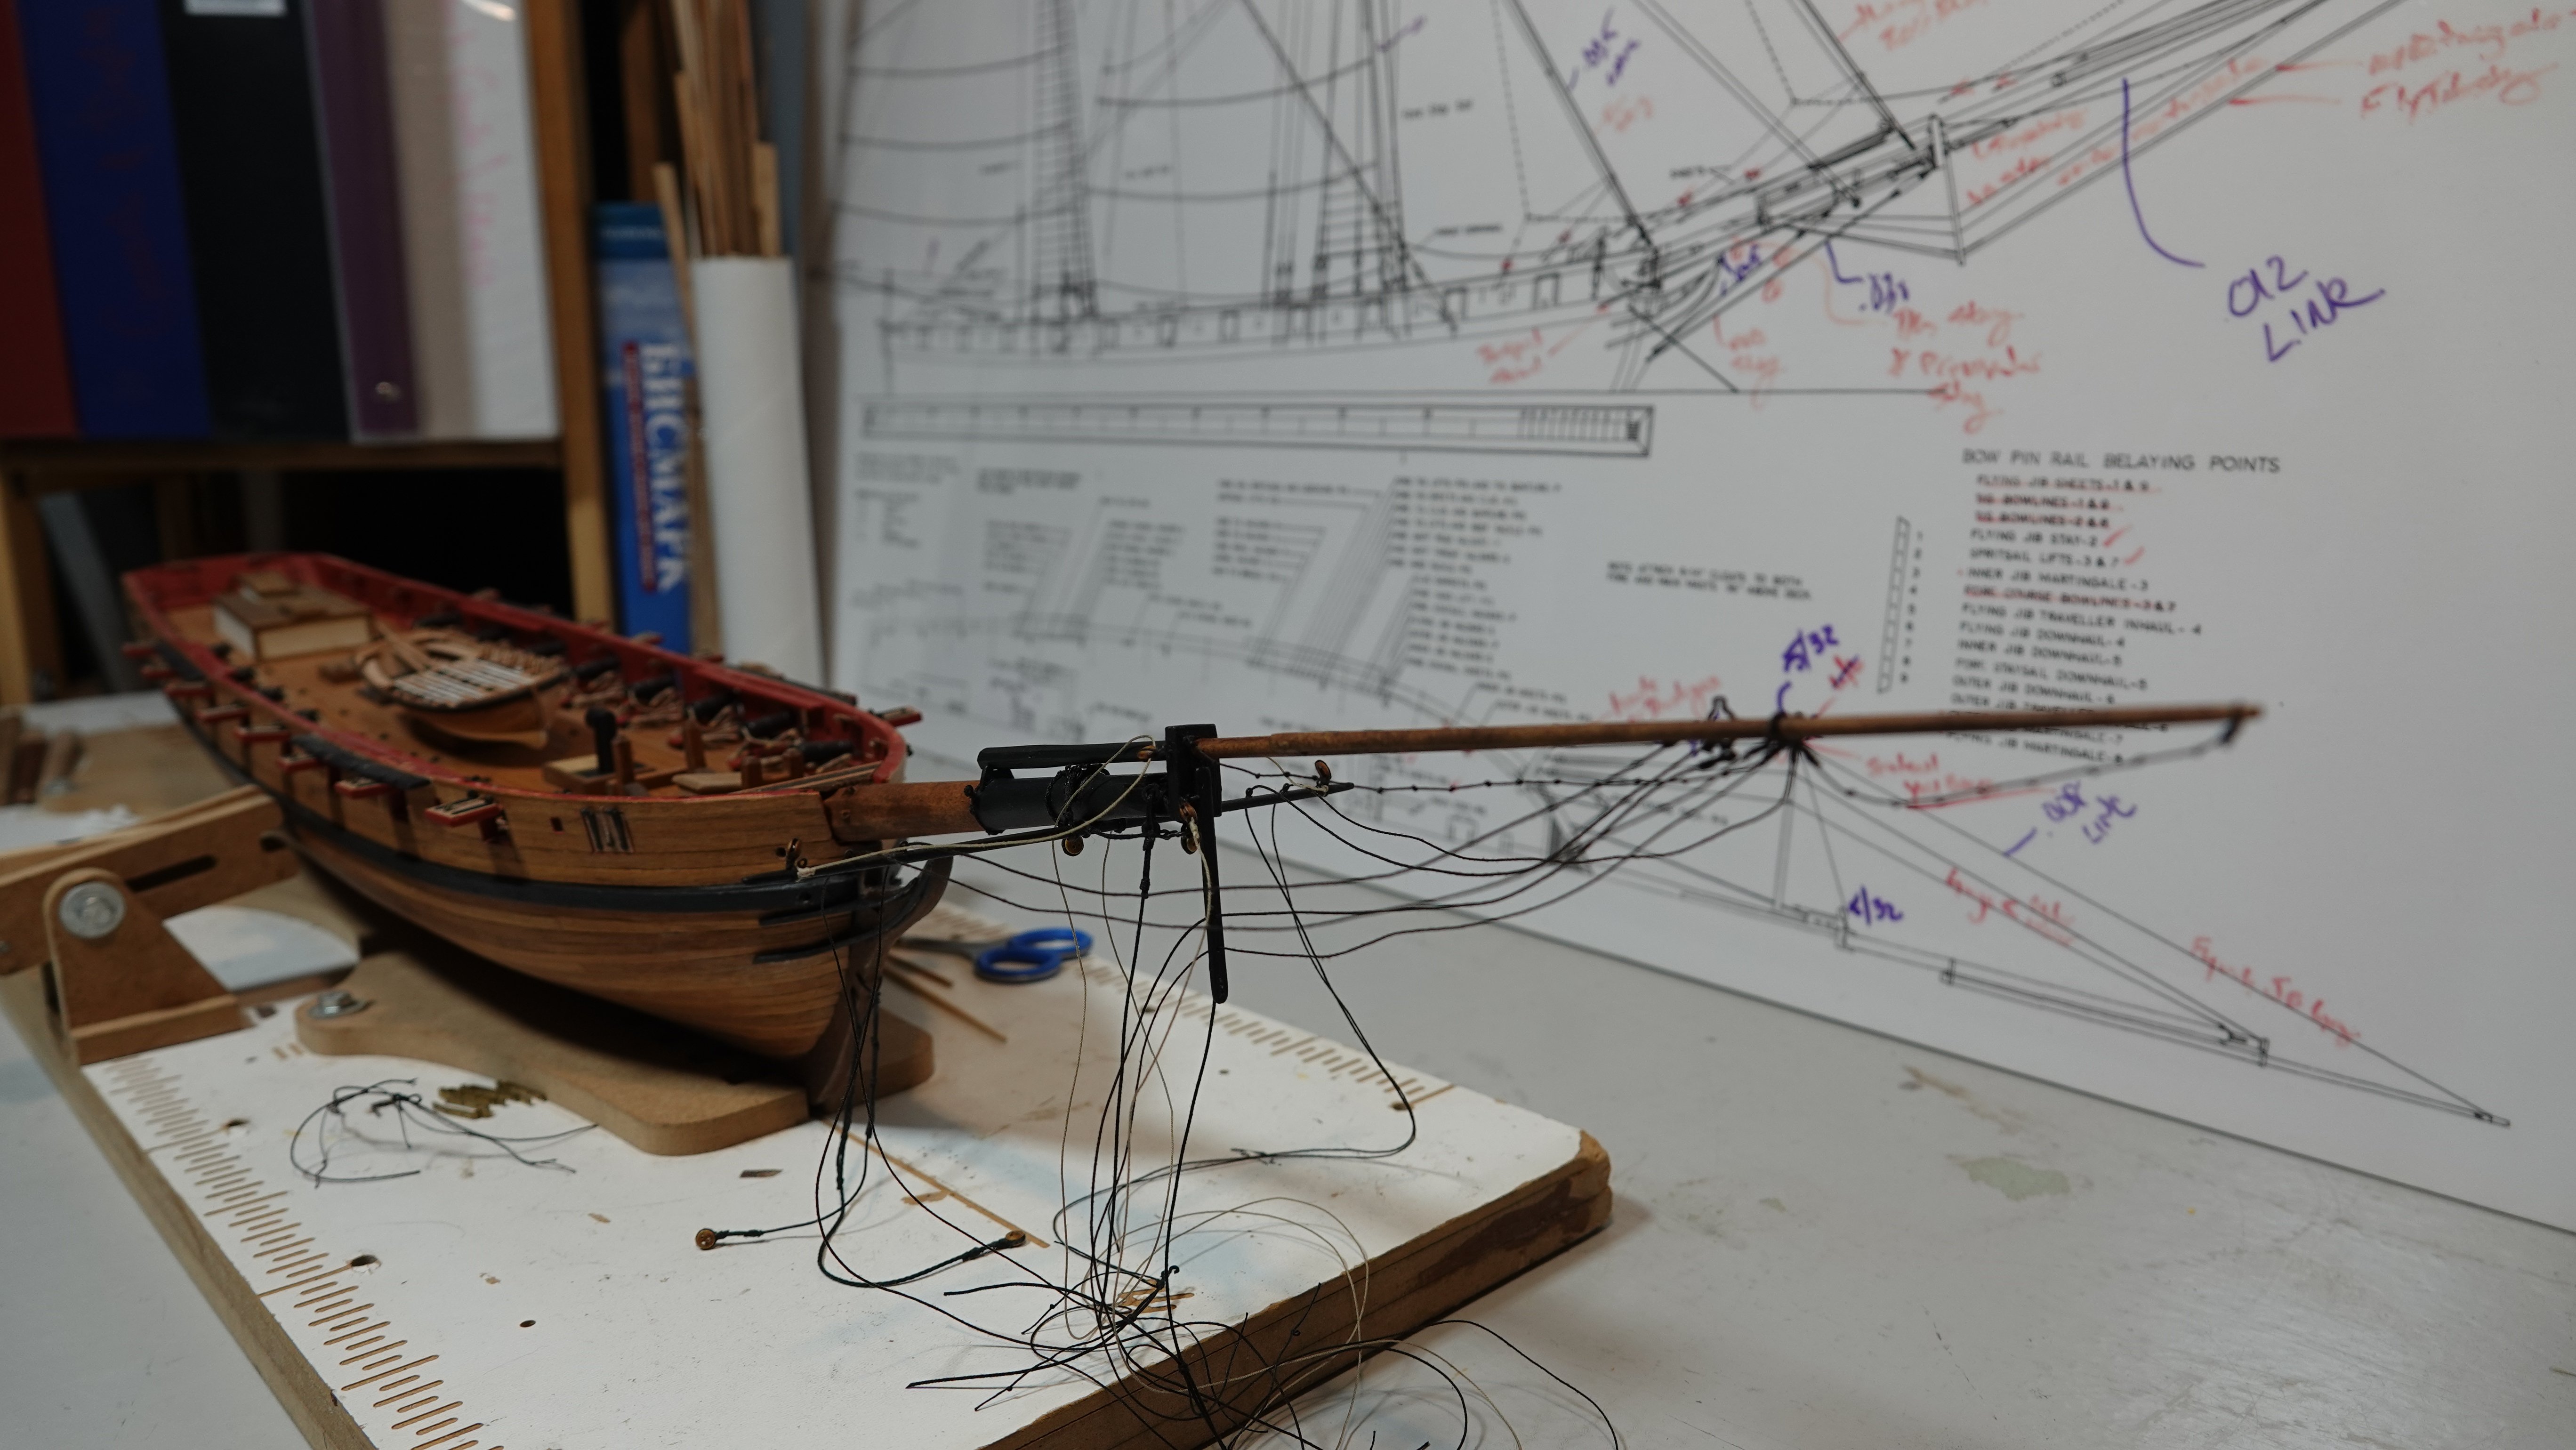
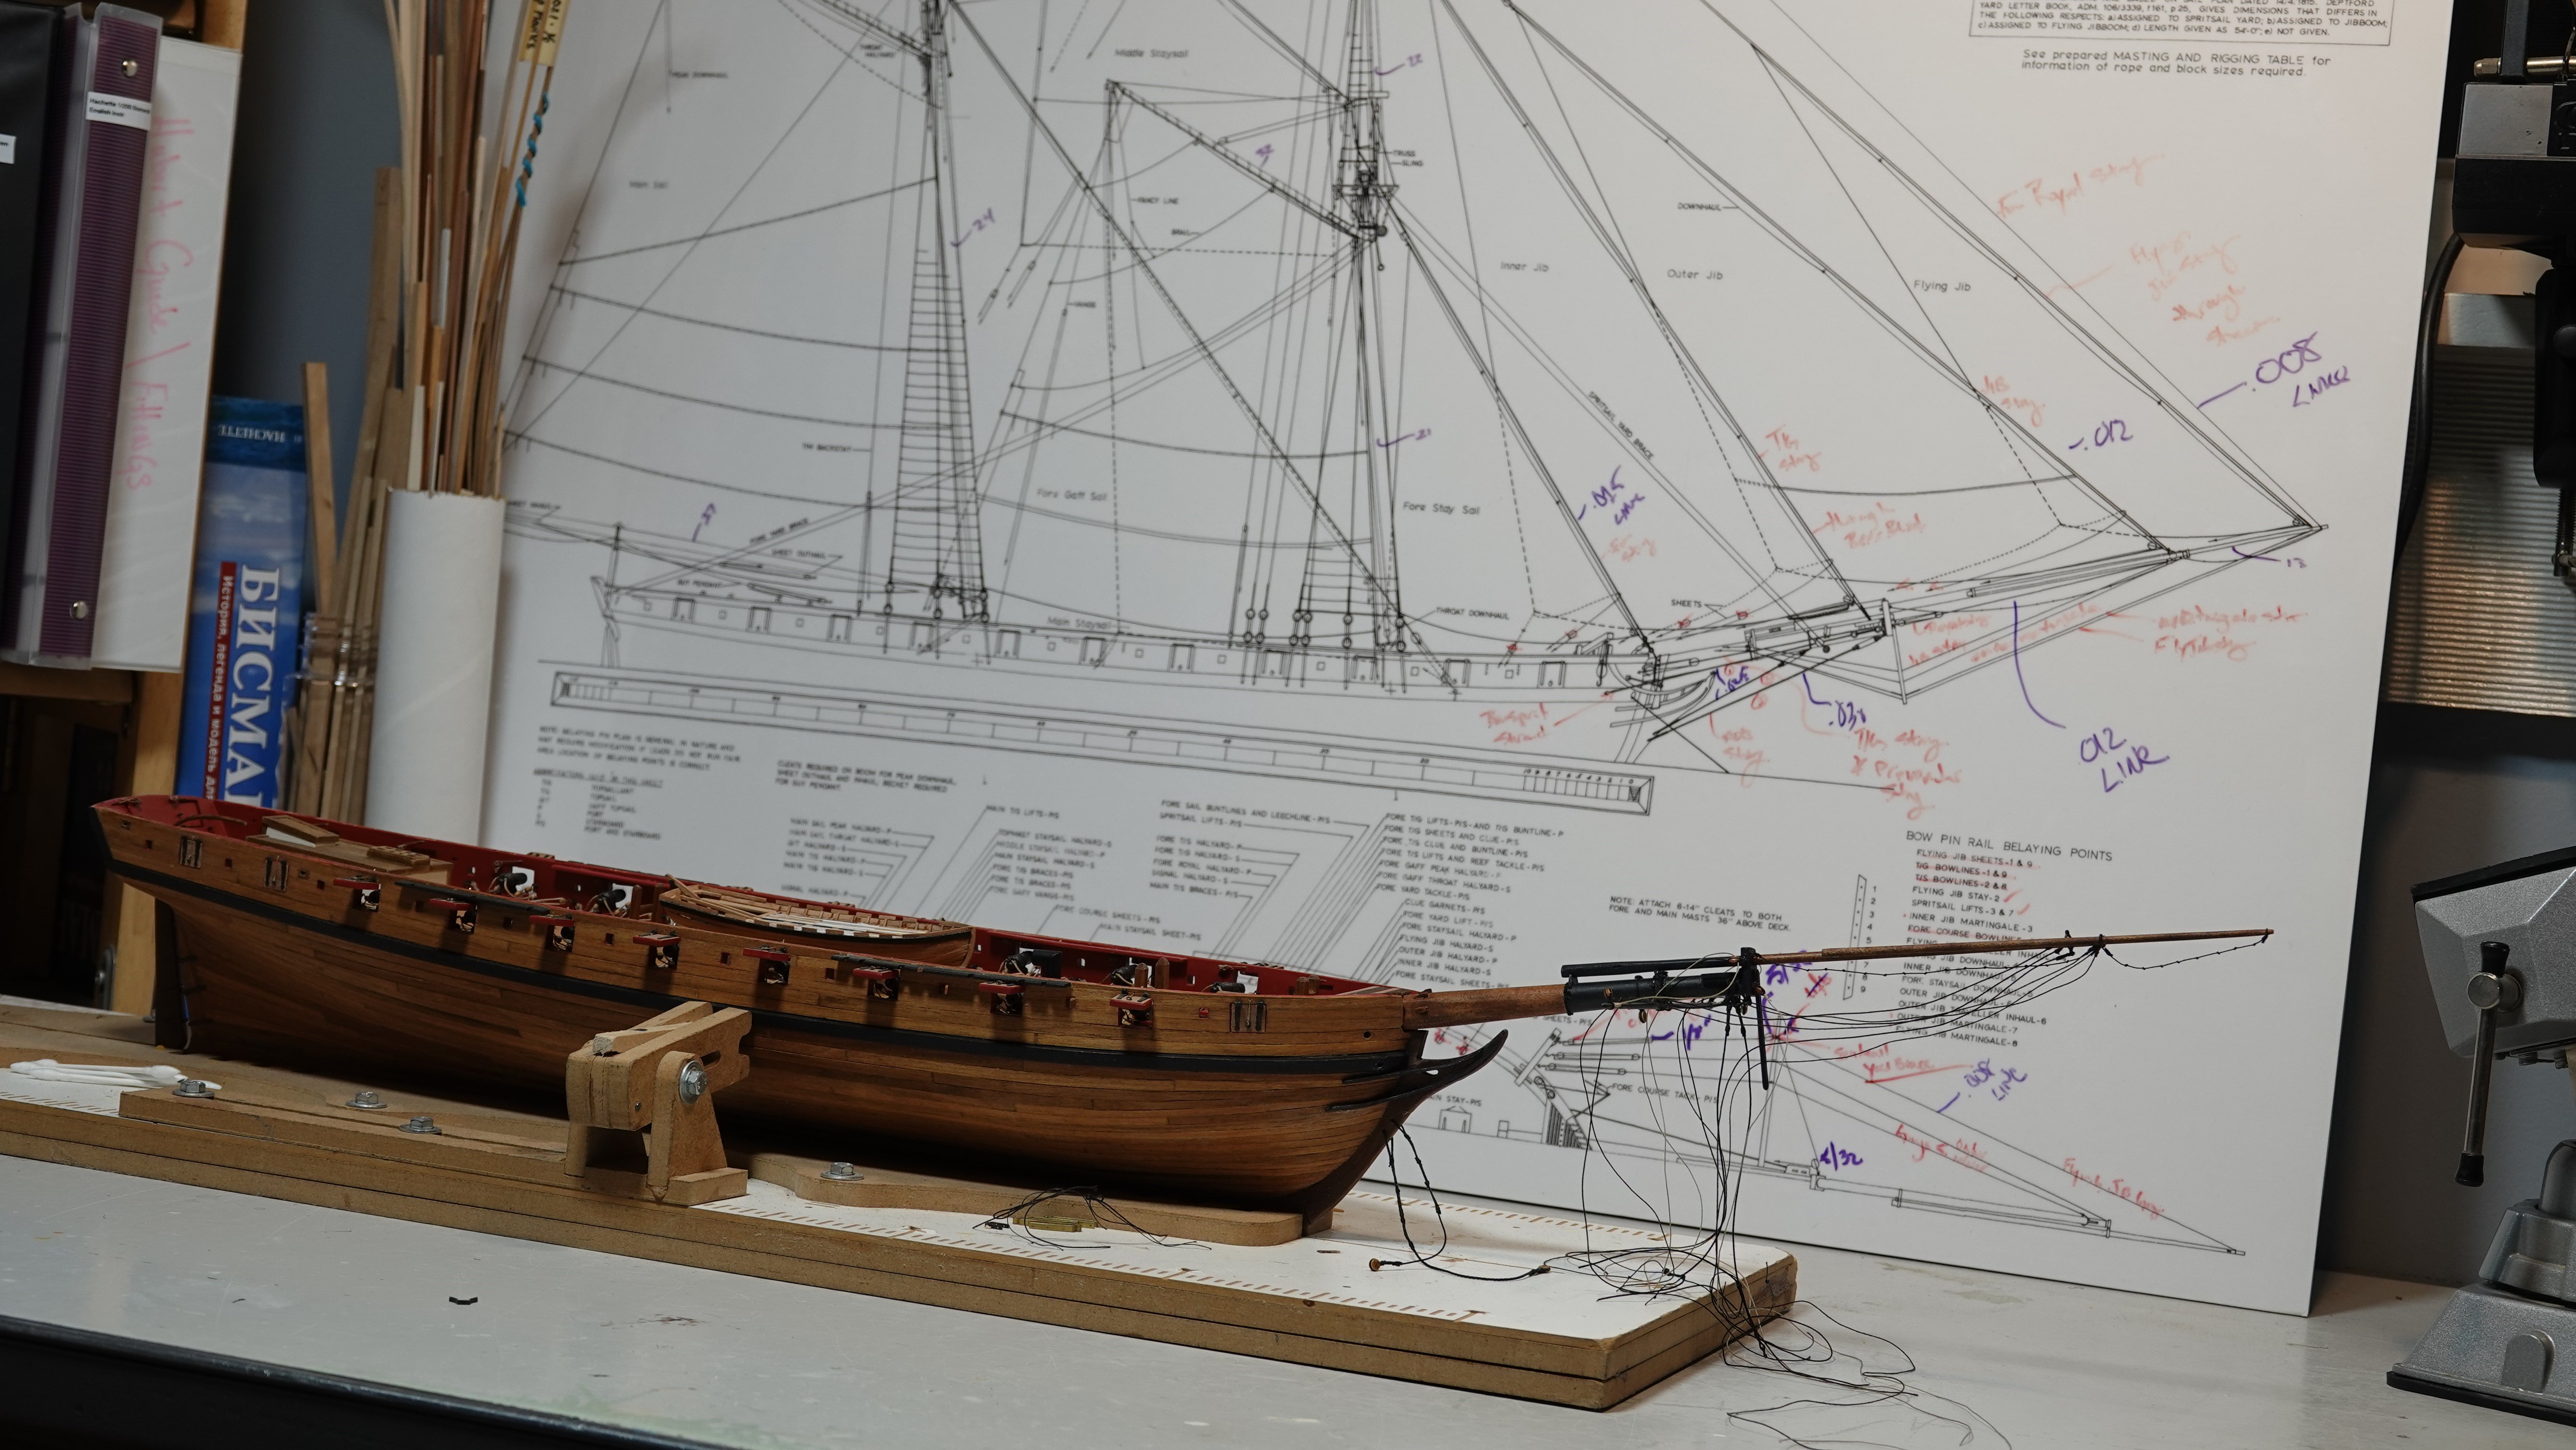
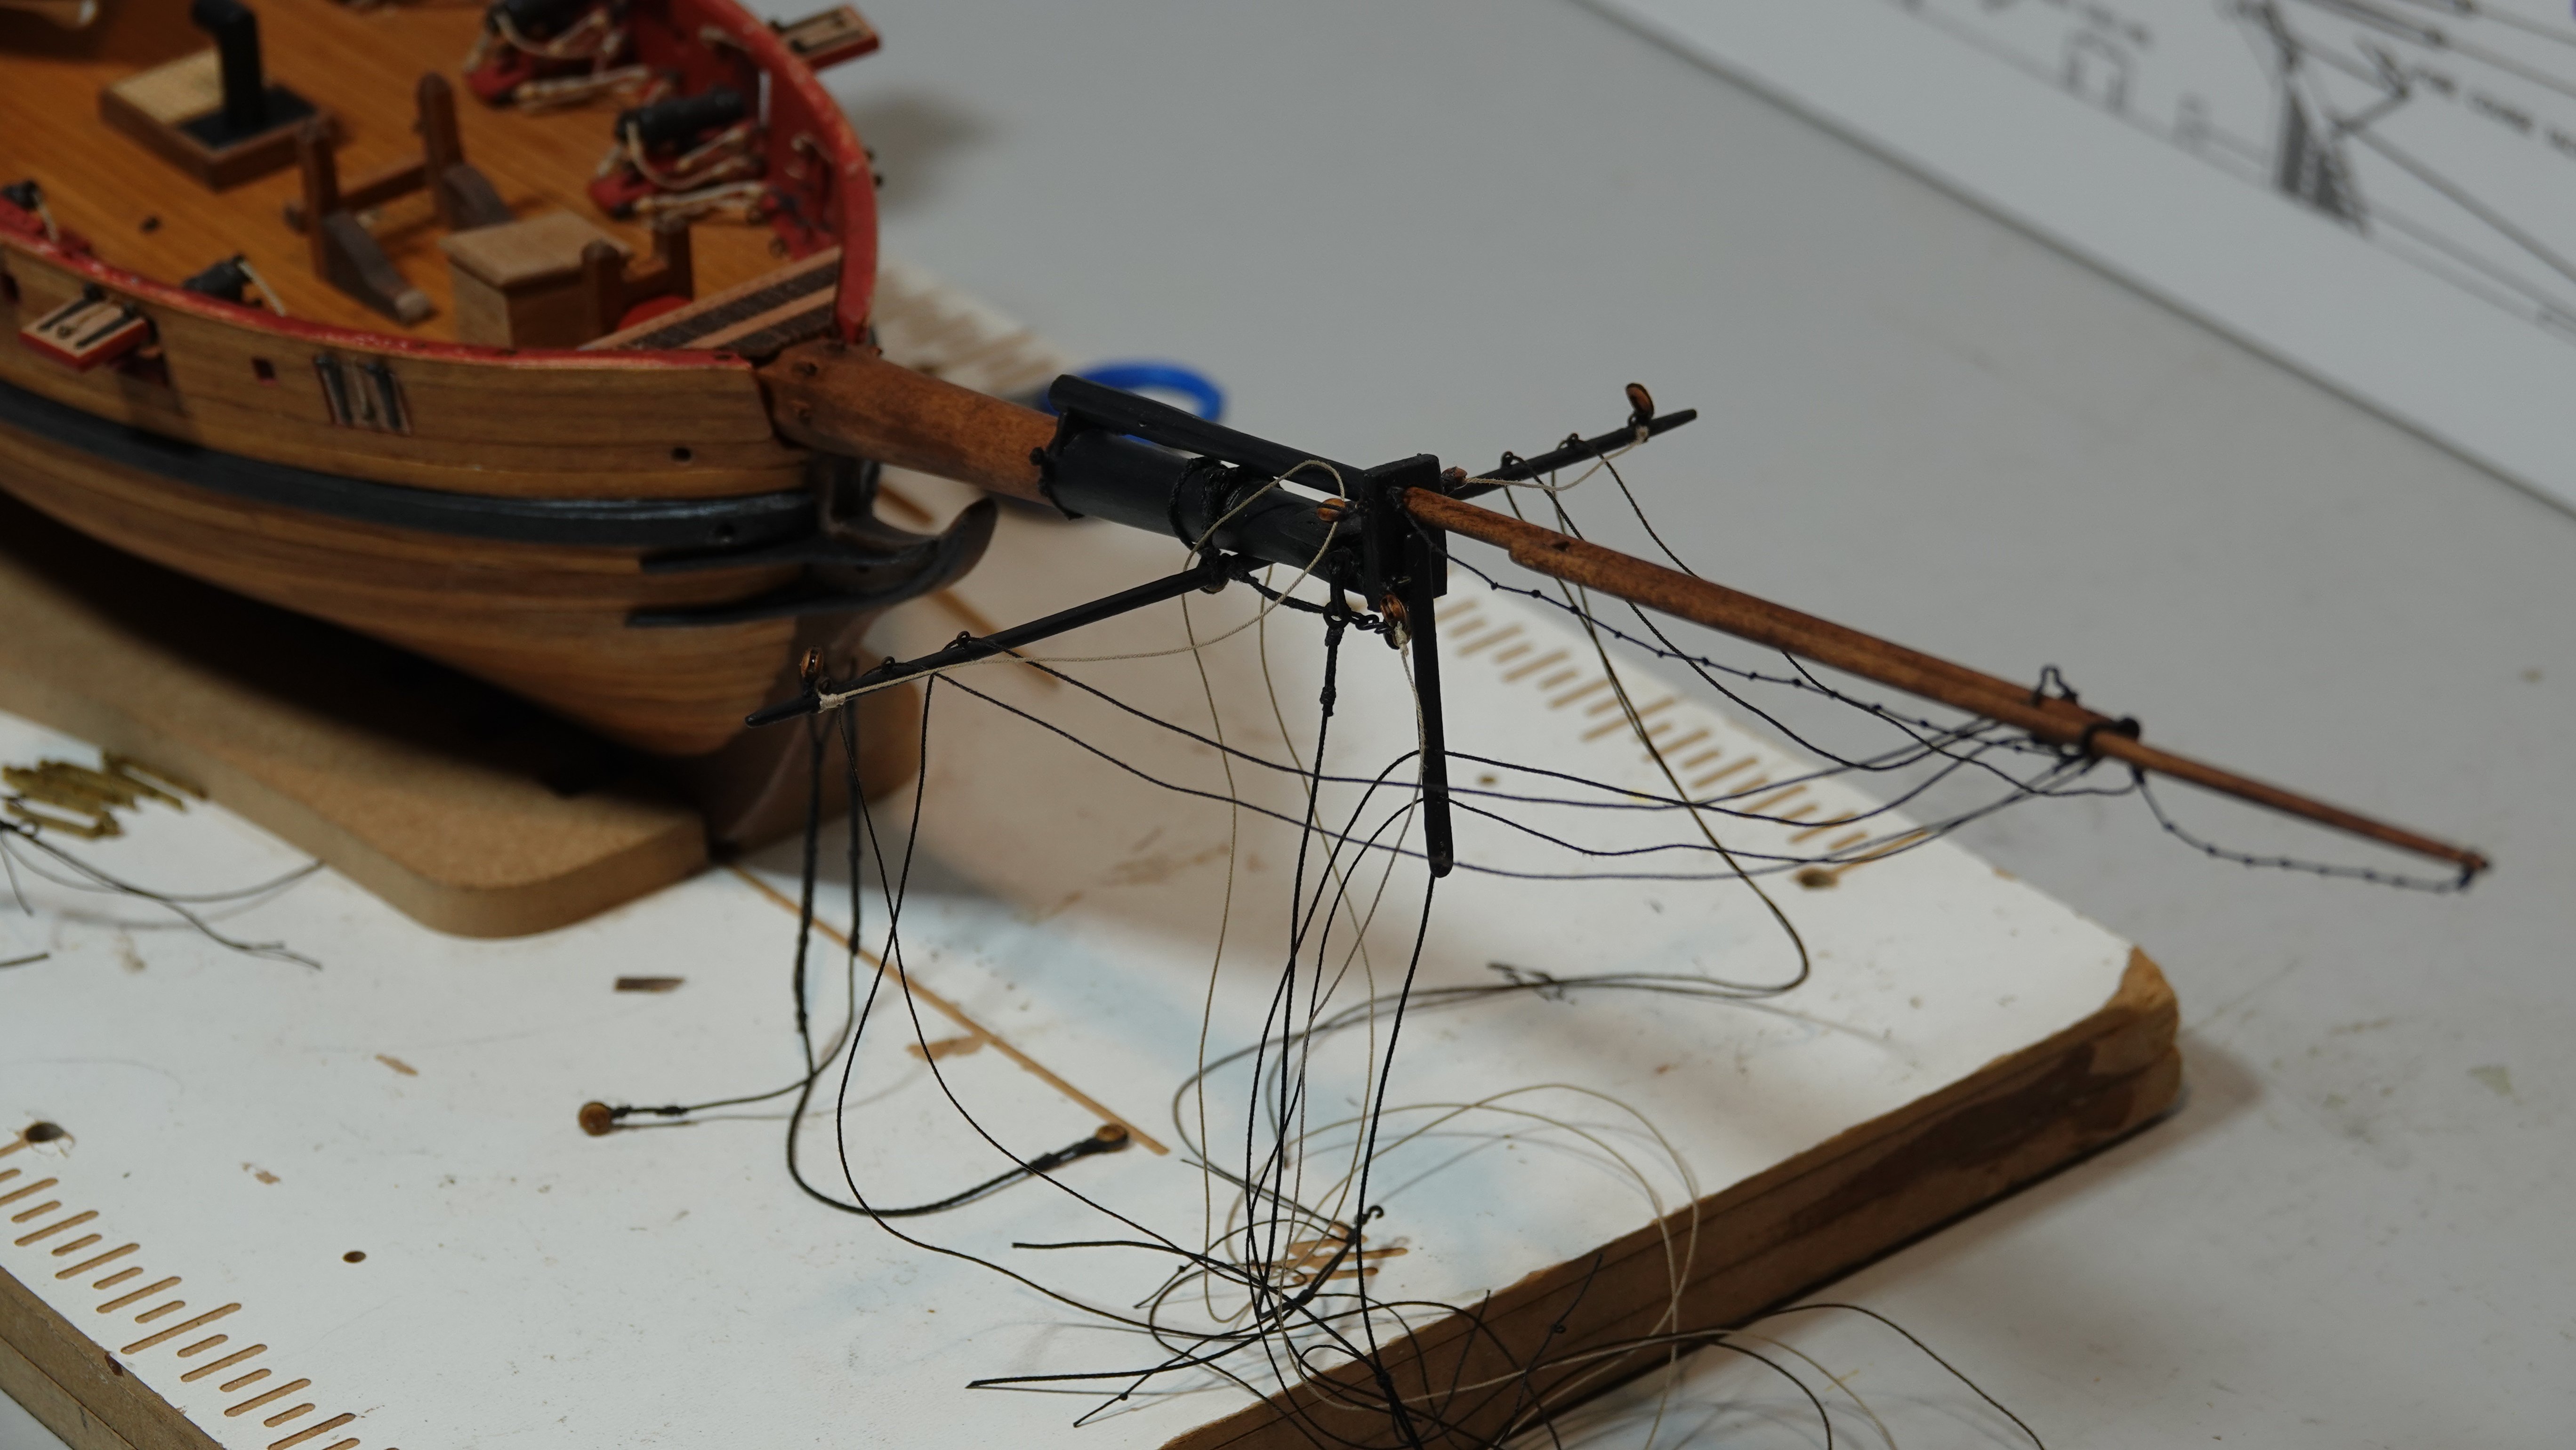
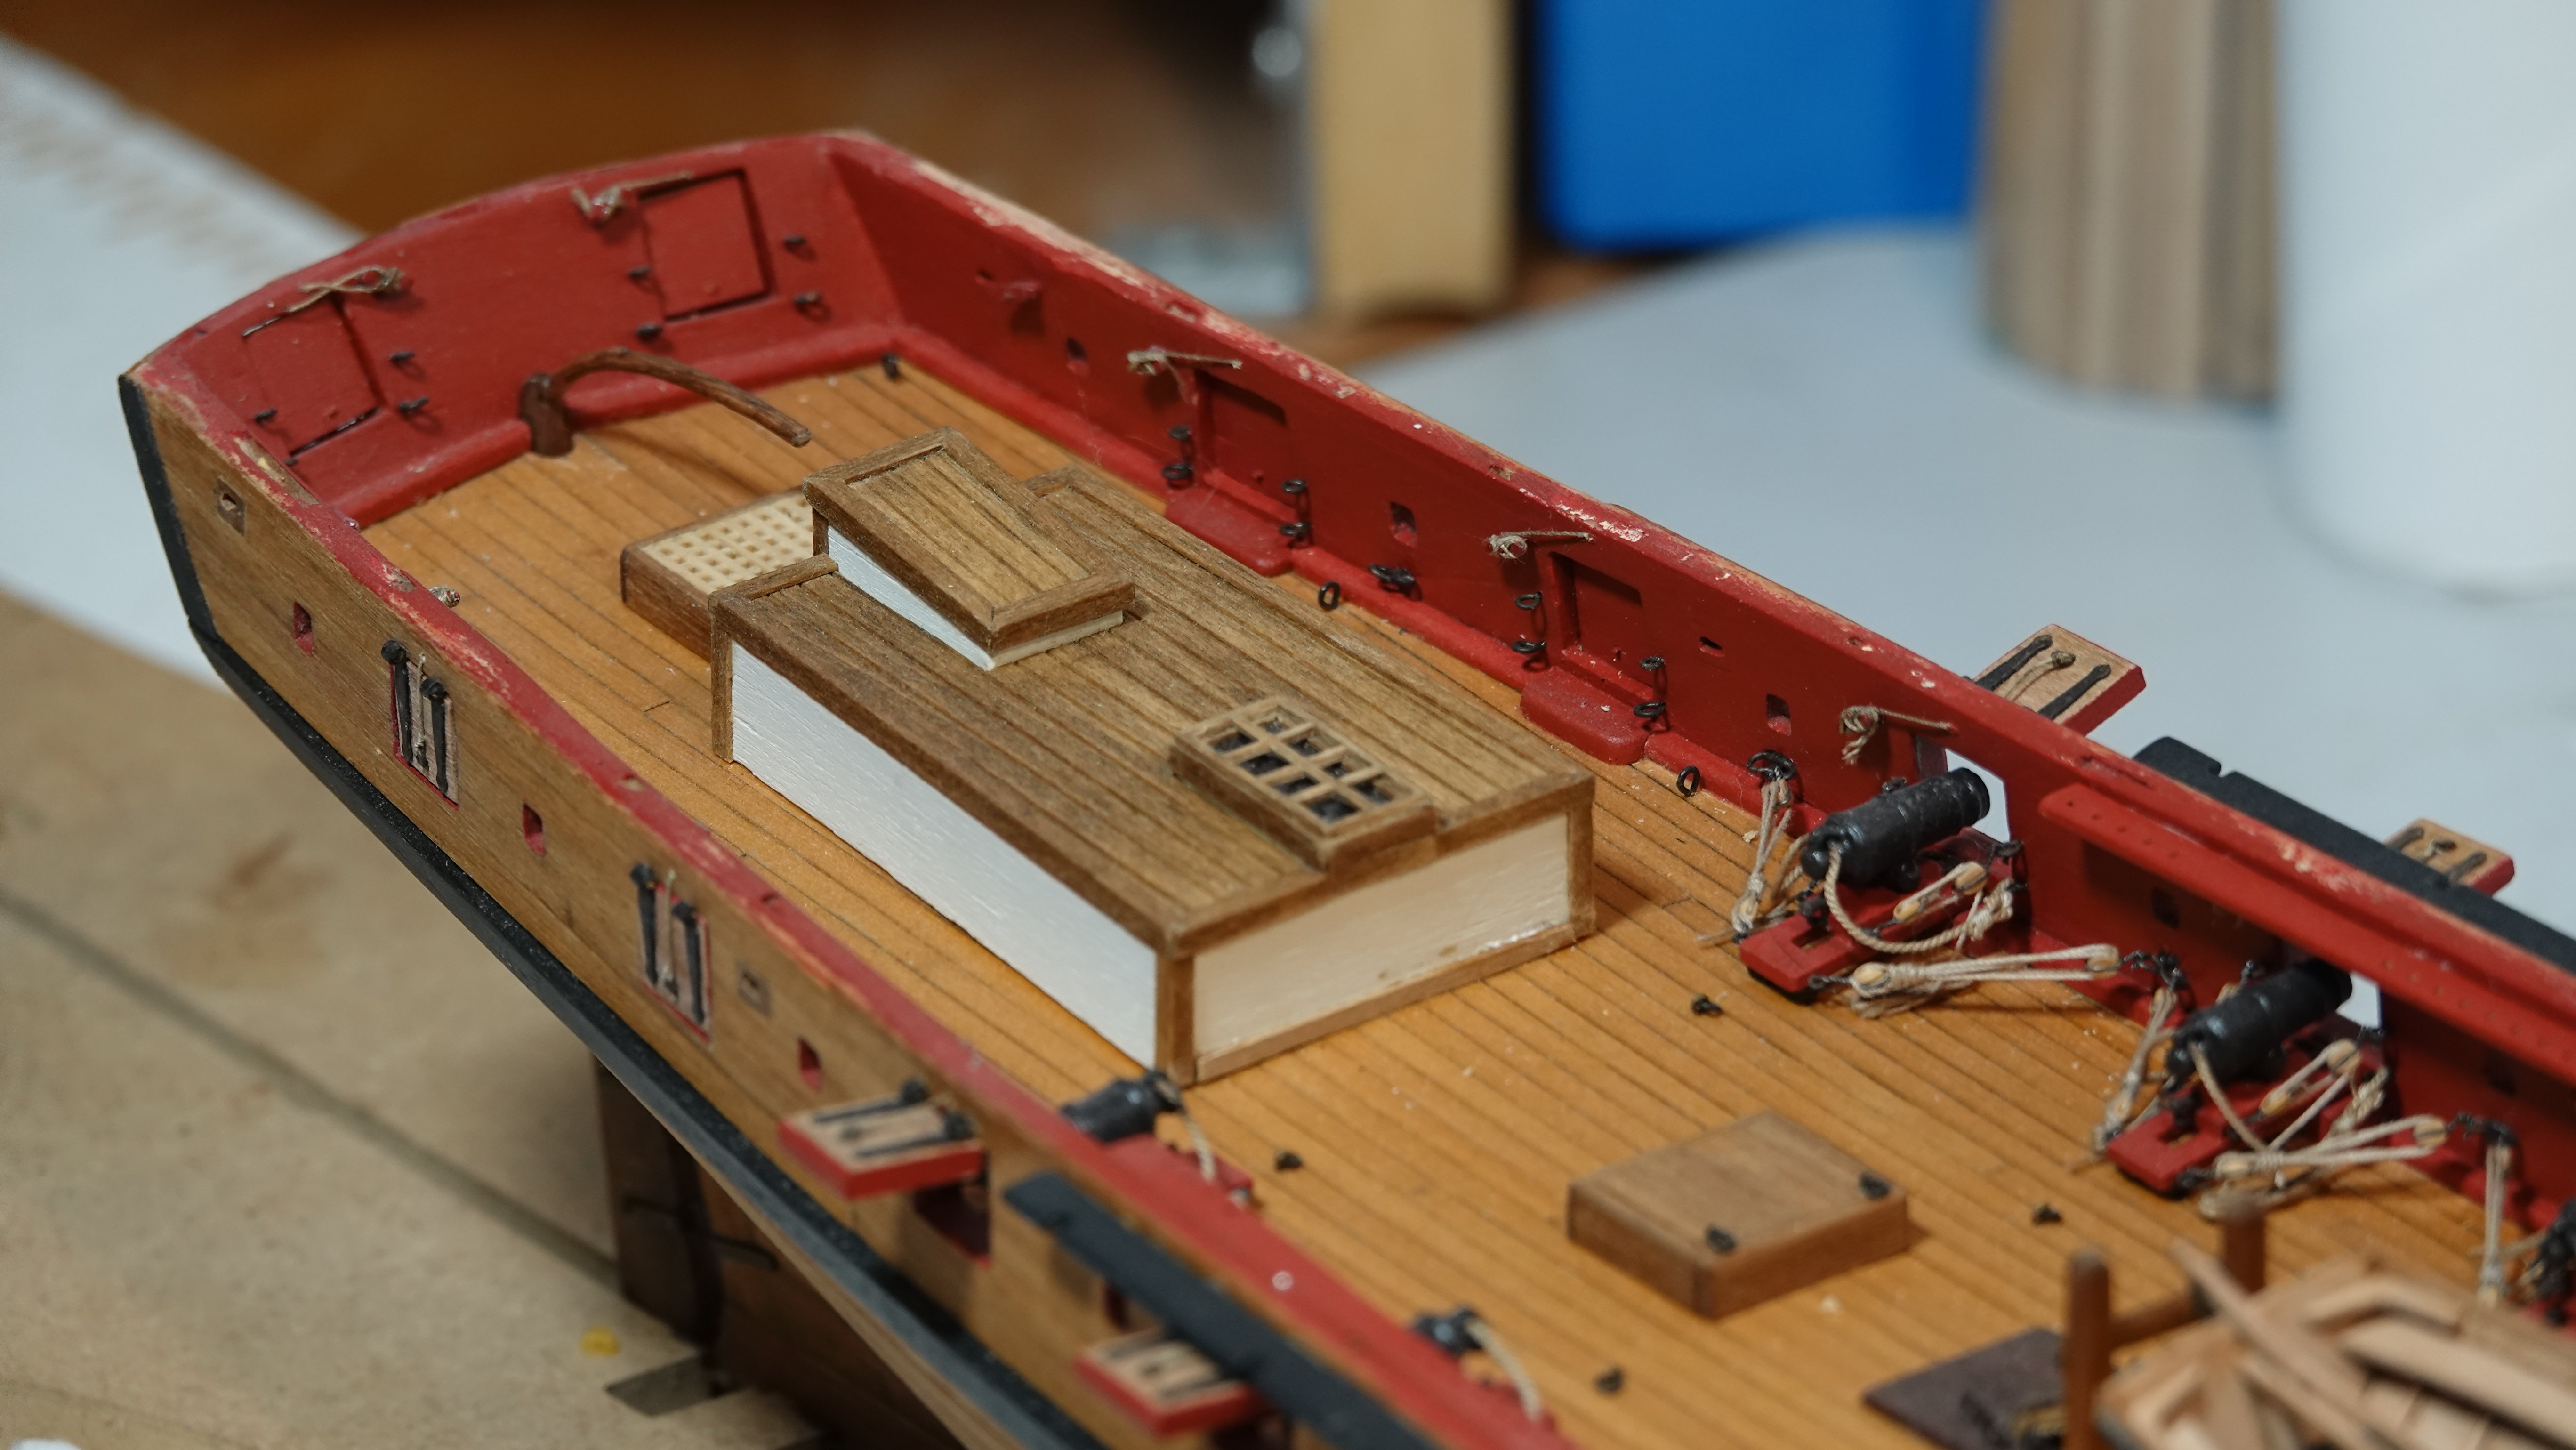
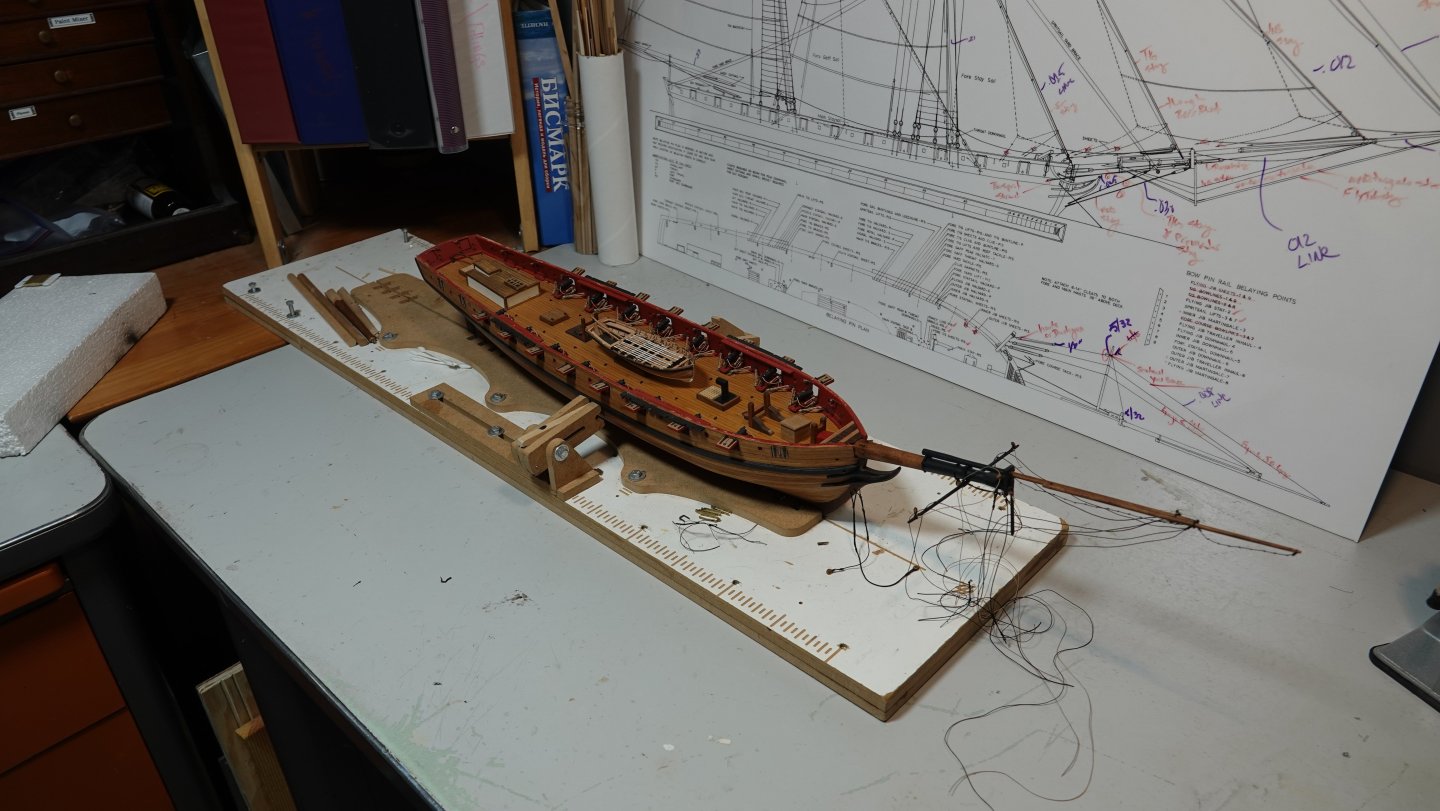
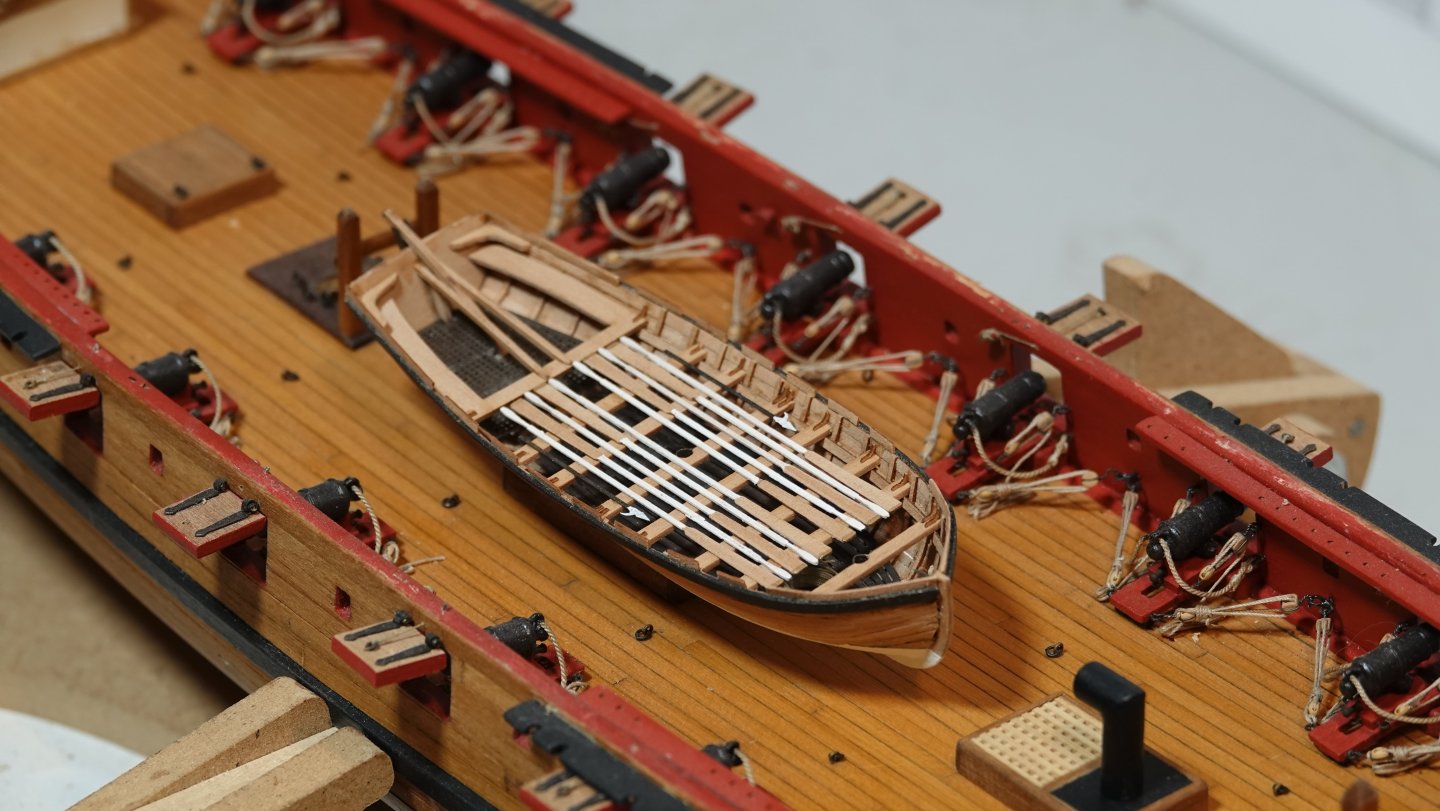
 I don't know that I would call this a build log I have a number of other pictures in between where I left off my general build log and this. I've been working the bowsprit for a while now, all fabricated from milled boxwood. I'm following Chappelle's plans that I had obtained from the Smithsonian, then had laminated onto foam board so I can take notes with dry erase markers. Finishing the bowsprit will allow me to finally install the cap rails which would give the hull a much more finished look. The ship's boat is a kit from Vanguard. Enjoy.
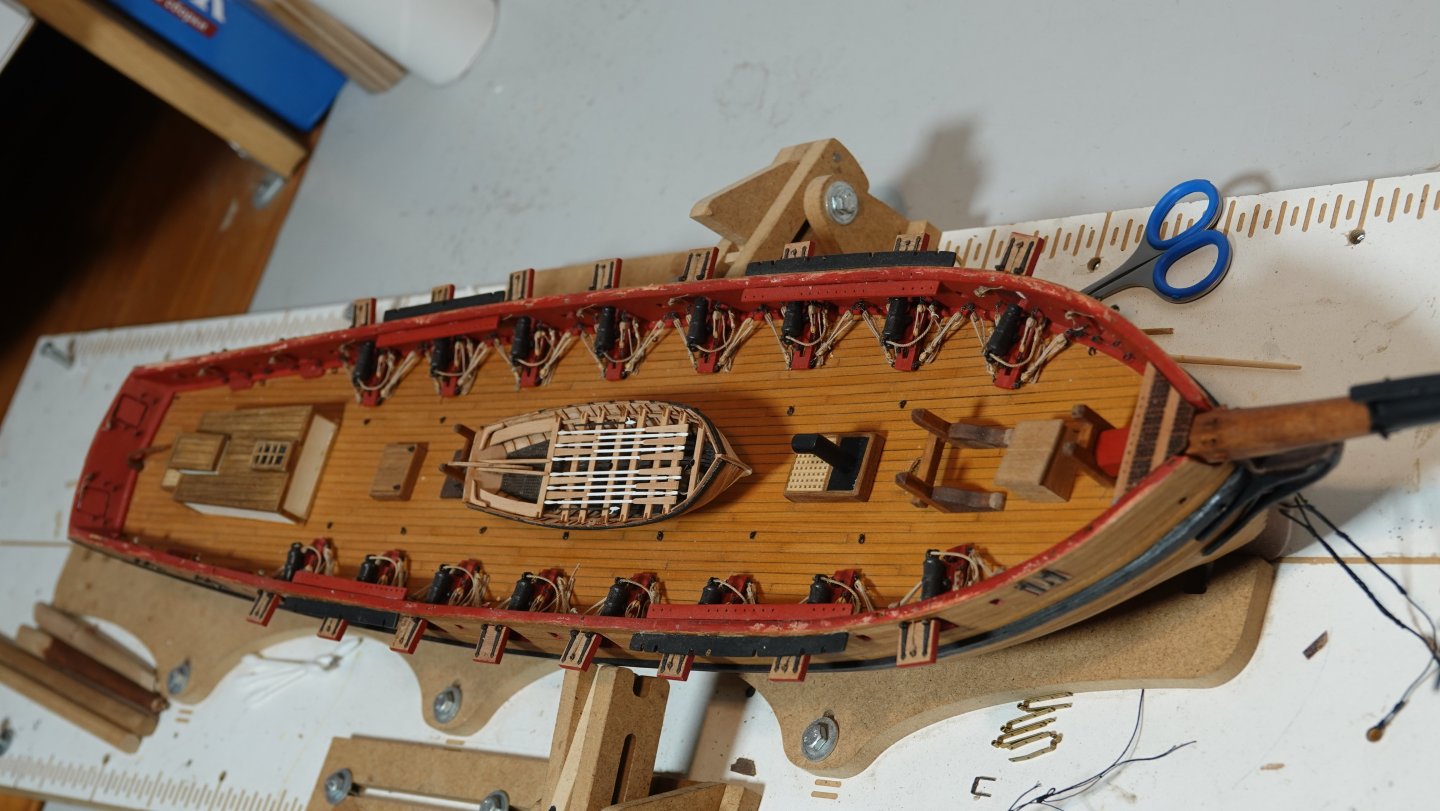


-
- 7
-
-
k-slak reacted to a post in a topic:
Picket Boat #1 by k-slak - Model Shipways - 1:24
-
Keith Black reacted to a post in a topic:
Picket Boat #1 by k-slak - Model Shipways - 1:24
-
Very nice clean build! As someone who has built this model, I have lamented over the fact that I left the pipes silver. I suggest considering if you'd like that in the final build prior to final assembly. In hindsight, I wish I had blackened them or maybe made them look rusty. just a thought, looking forward to seeing more! Joshua
-
Azzoun reacted to a post in a topic:
Syren Ship Model Company News, Updates and Info.....(part 2)
-
Amazing! I'm ready to buy the disc sander when it's available!
-
Chuck, I'd do one of those!
-
Oh Eric.. you mean this puzzle of the Bombardment of Algiers... here it is completed and mounted 9,000 pieces

-
What about making it RC capable?
-
Stunning.. I love this topic, really well done!
- 144 replies
-
- 2
-

-
-
- Harriet Lane
- Model Shipways
- (and 1 more)
-
Looks great Al, maybe you could also a create a scaled up version for the Model Shipways NewBedford Whale boat ??? Looking forward to seeing this available! Joshua
-
Hey there Bryan, may i suggest using a pin vice and hand drilling it - you'll have a lot more control and accuracy. Good Luck, Joshua
- 44 replies
-
- 1
-
-
- Nave Egizia
- Amati
- (and 1 more)
-
I hope you got some big , beautiful blocks! Sorry for the bill!
-
Azzoun reacted to a post in a topic:
Ships in Scale Magazine Sails Again!
-
Azzoun reacted to a post in a topic:
USS St. Louis (CL-20) by highlanderburial - FINISHED - 1/200 scale - 3d Print and 1/150 Restoration
-
I ran across someone in OHIO selling this kit, left to him by his grandfather or father. Let me know if you want me to connect you two. Joshua
-
Azzoun reacted to a post in a topic:
Start planking with gun ports, pros and cons?
-
Azzoun reacted to a post in a topic:
USS St. Louis (CL-20) by highlanderburial - FINISHED - 1/200 scale - 3d Print and 1/150 Restoration
-
If you're talking about the Model Shipways kit, the brass cannon is over scale - I've scratched my own but the photos look accurate from my research. I did make mine on sleds for my own artistic license. Joshua
-
Hello to you from New Jersey!