NavyShooter
-
Posts
704 -
Joined
-
Last visited
Content Type
Profiles
Forums
Gallery
Events
Everything posted by NavyShooter
-
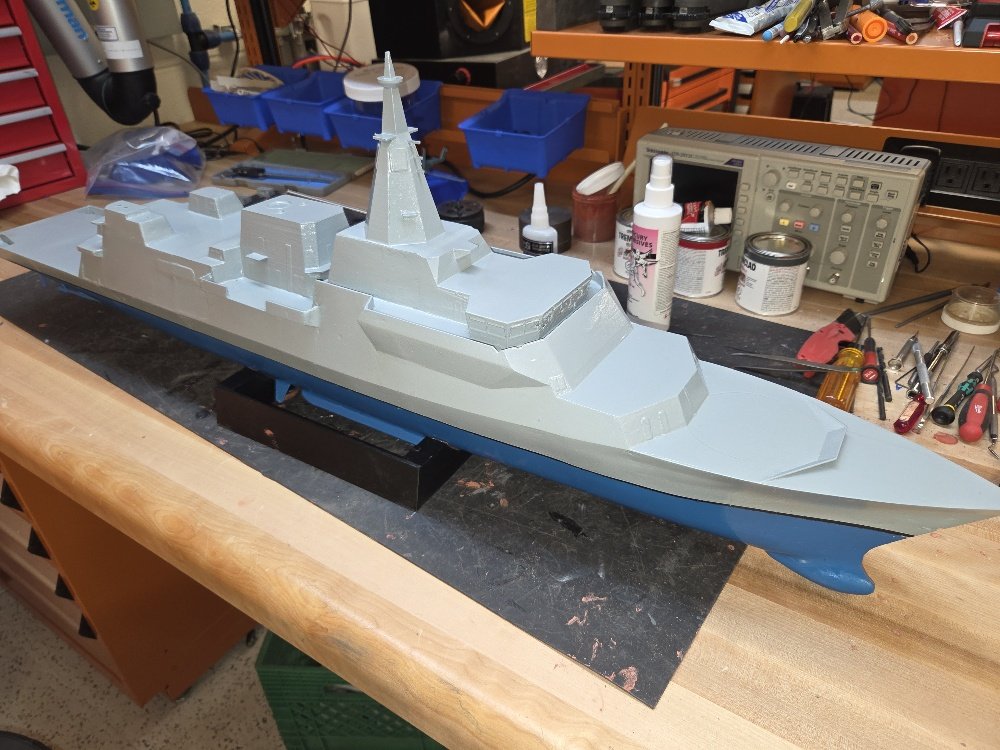
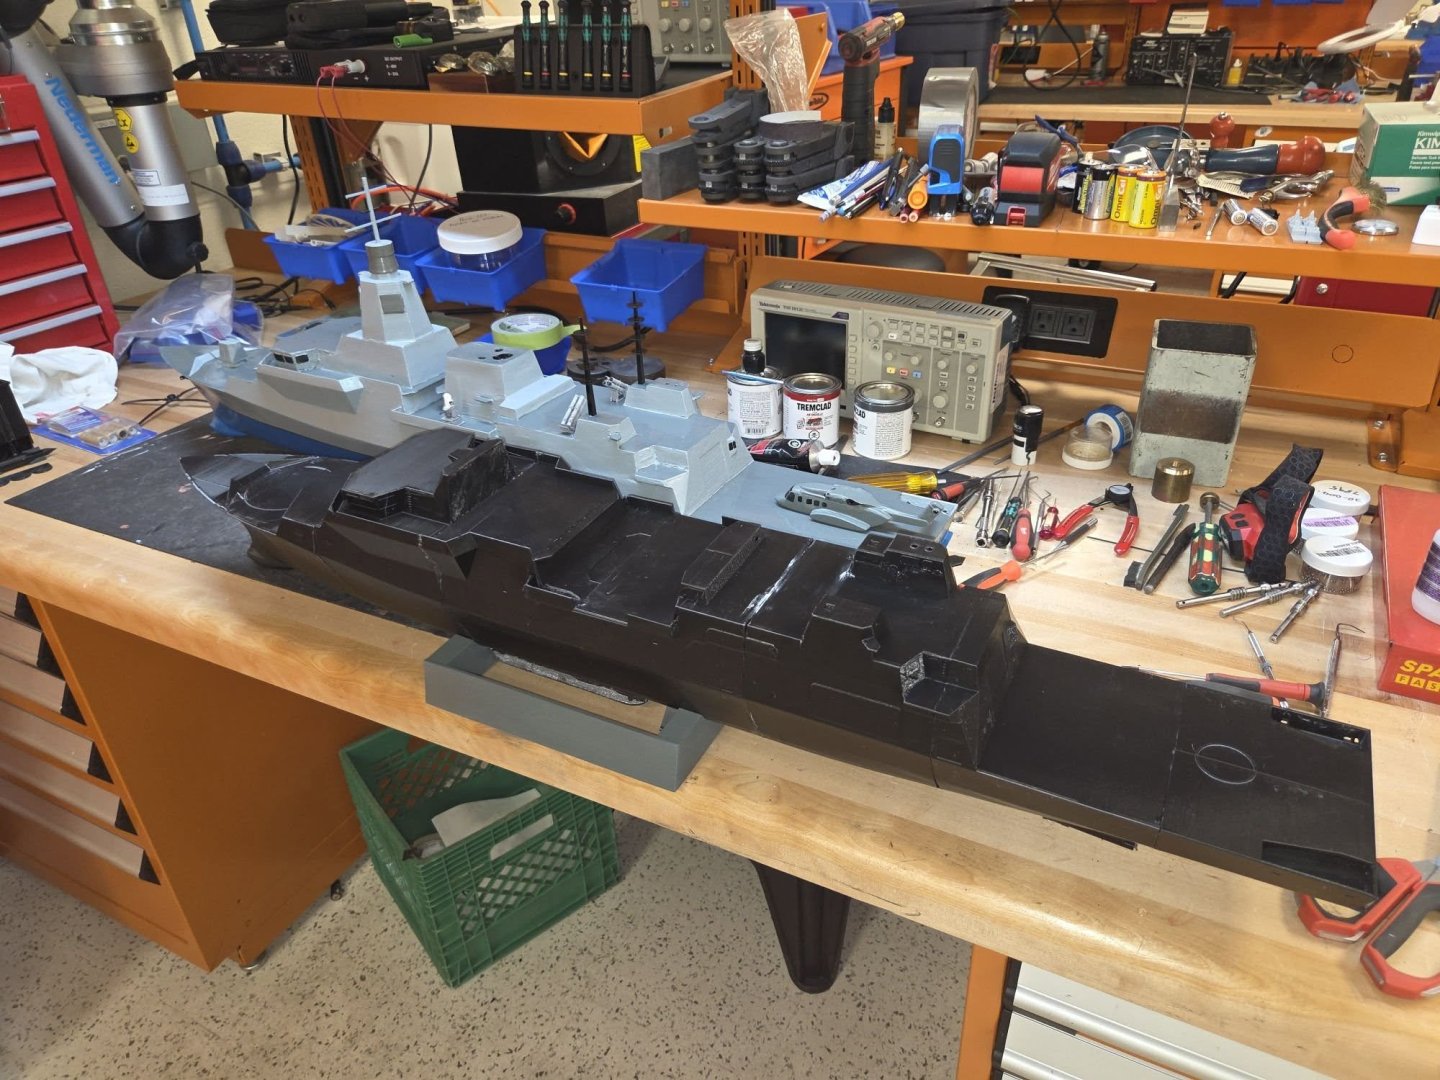
 OK, so, paint is applied, I need to paint the decks (tomorrow) and then we can start glue action to put some of the little bits on!
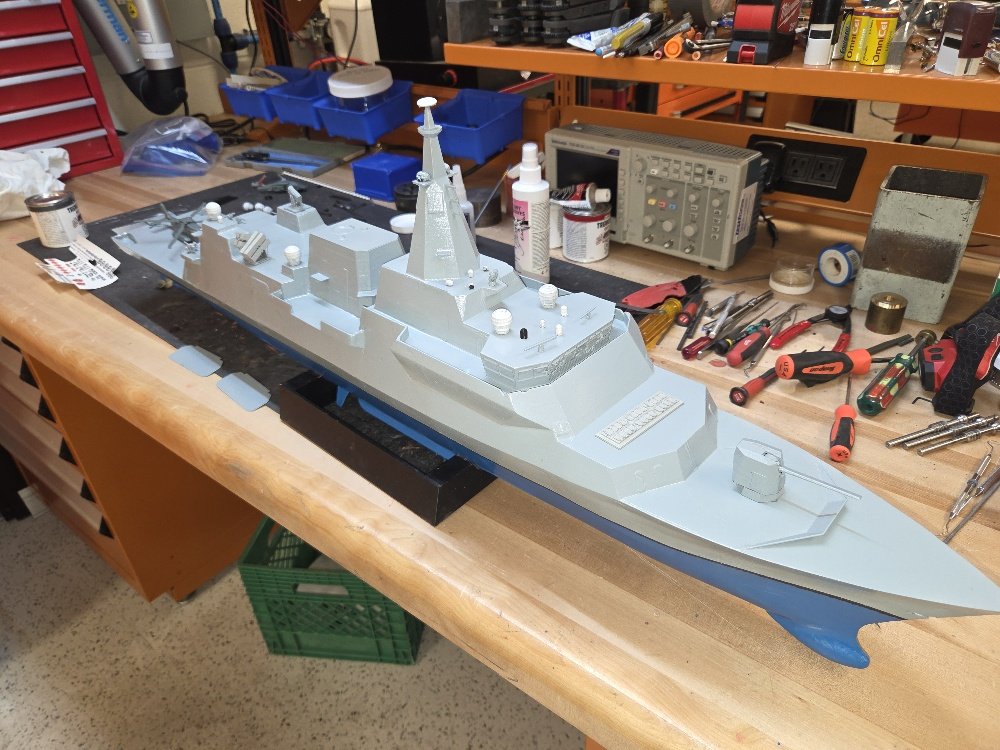
- 66 replies
-
- 5
-

-
- Type 26
- City Class
- (and 2 more)
-
Ian, I will suggest that BOTH platforms would have a Nav Radar. A longer one with longer pulse-length that will perform better in the rain, and a shorter one that's more precise, but susceptible to weather impact. Also, being a ship conducting passenger travel, it may be required by IMO regulations to have 2x Nav Radar sets. As for lights - you should have a white masthead steaming light. Brad
- 24 replies
-
- 3
-

-
-
- ferry
- Europic Ferry
- (and 1 more)
-
Looks like a neat build! Are you planning on having the ramp functional?
- 24 replies
-
- 1
-
-
- ferry
- Europic Ferry
- (and 1 more)
-
Anddd.....bumped into a buddy over the weekend who's working on the project, and it turns out I had the right version of the RAM launcher initially.... The 11 shot SeaRAM launcher is (I think - based on my assumptions) designed for ships that need a stand-alone AA missile system. The 21 shot launcher is designed for ships that have an integrated Combat Management system and don't need a launcher with it's own integral detection/engagement Radar system. So. Back to the 21 shot launcher I guess.
- 66 replies
-
- 1
-
-
- Type 26
- City Class
- (and 2 more)
-
The CIWS I had on V1 was the 20mm Phalanx...and that's not the right version. Turns out the 'correct' version (for now, conceptually) is the 11 shot SeaRAM launcher with the radome. So....here we go. Some more 3D design work.


- 66 replies
-
- 5
-
-
- Type 26
- City Class
- (and 2 more)
-
Hull #2 got a layer of blue today...then some minor putty addition, some sanding, and a final layer of blue to set over the weekend. Next week will see me getting the ship's side Gray done on the uppers, painting the 'non-skid' parts, then detailing. This one's probably going to be done by the end of next week. NS


- 66 replies
-
- 4
-
-
- Type 26
- City Class
- (and 2 more)
-
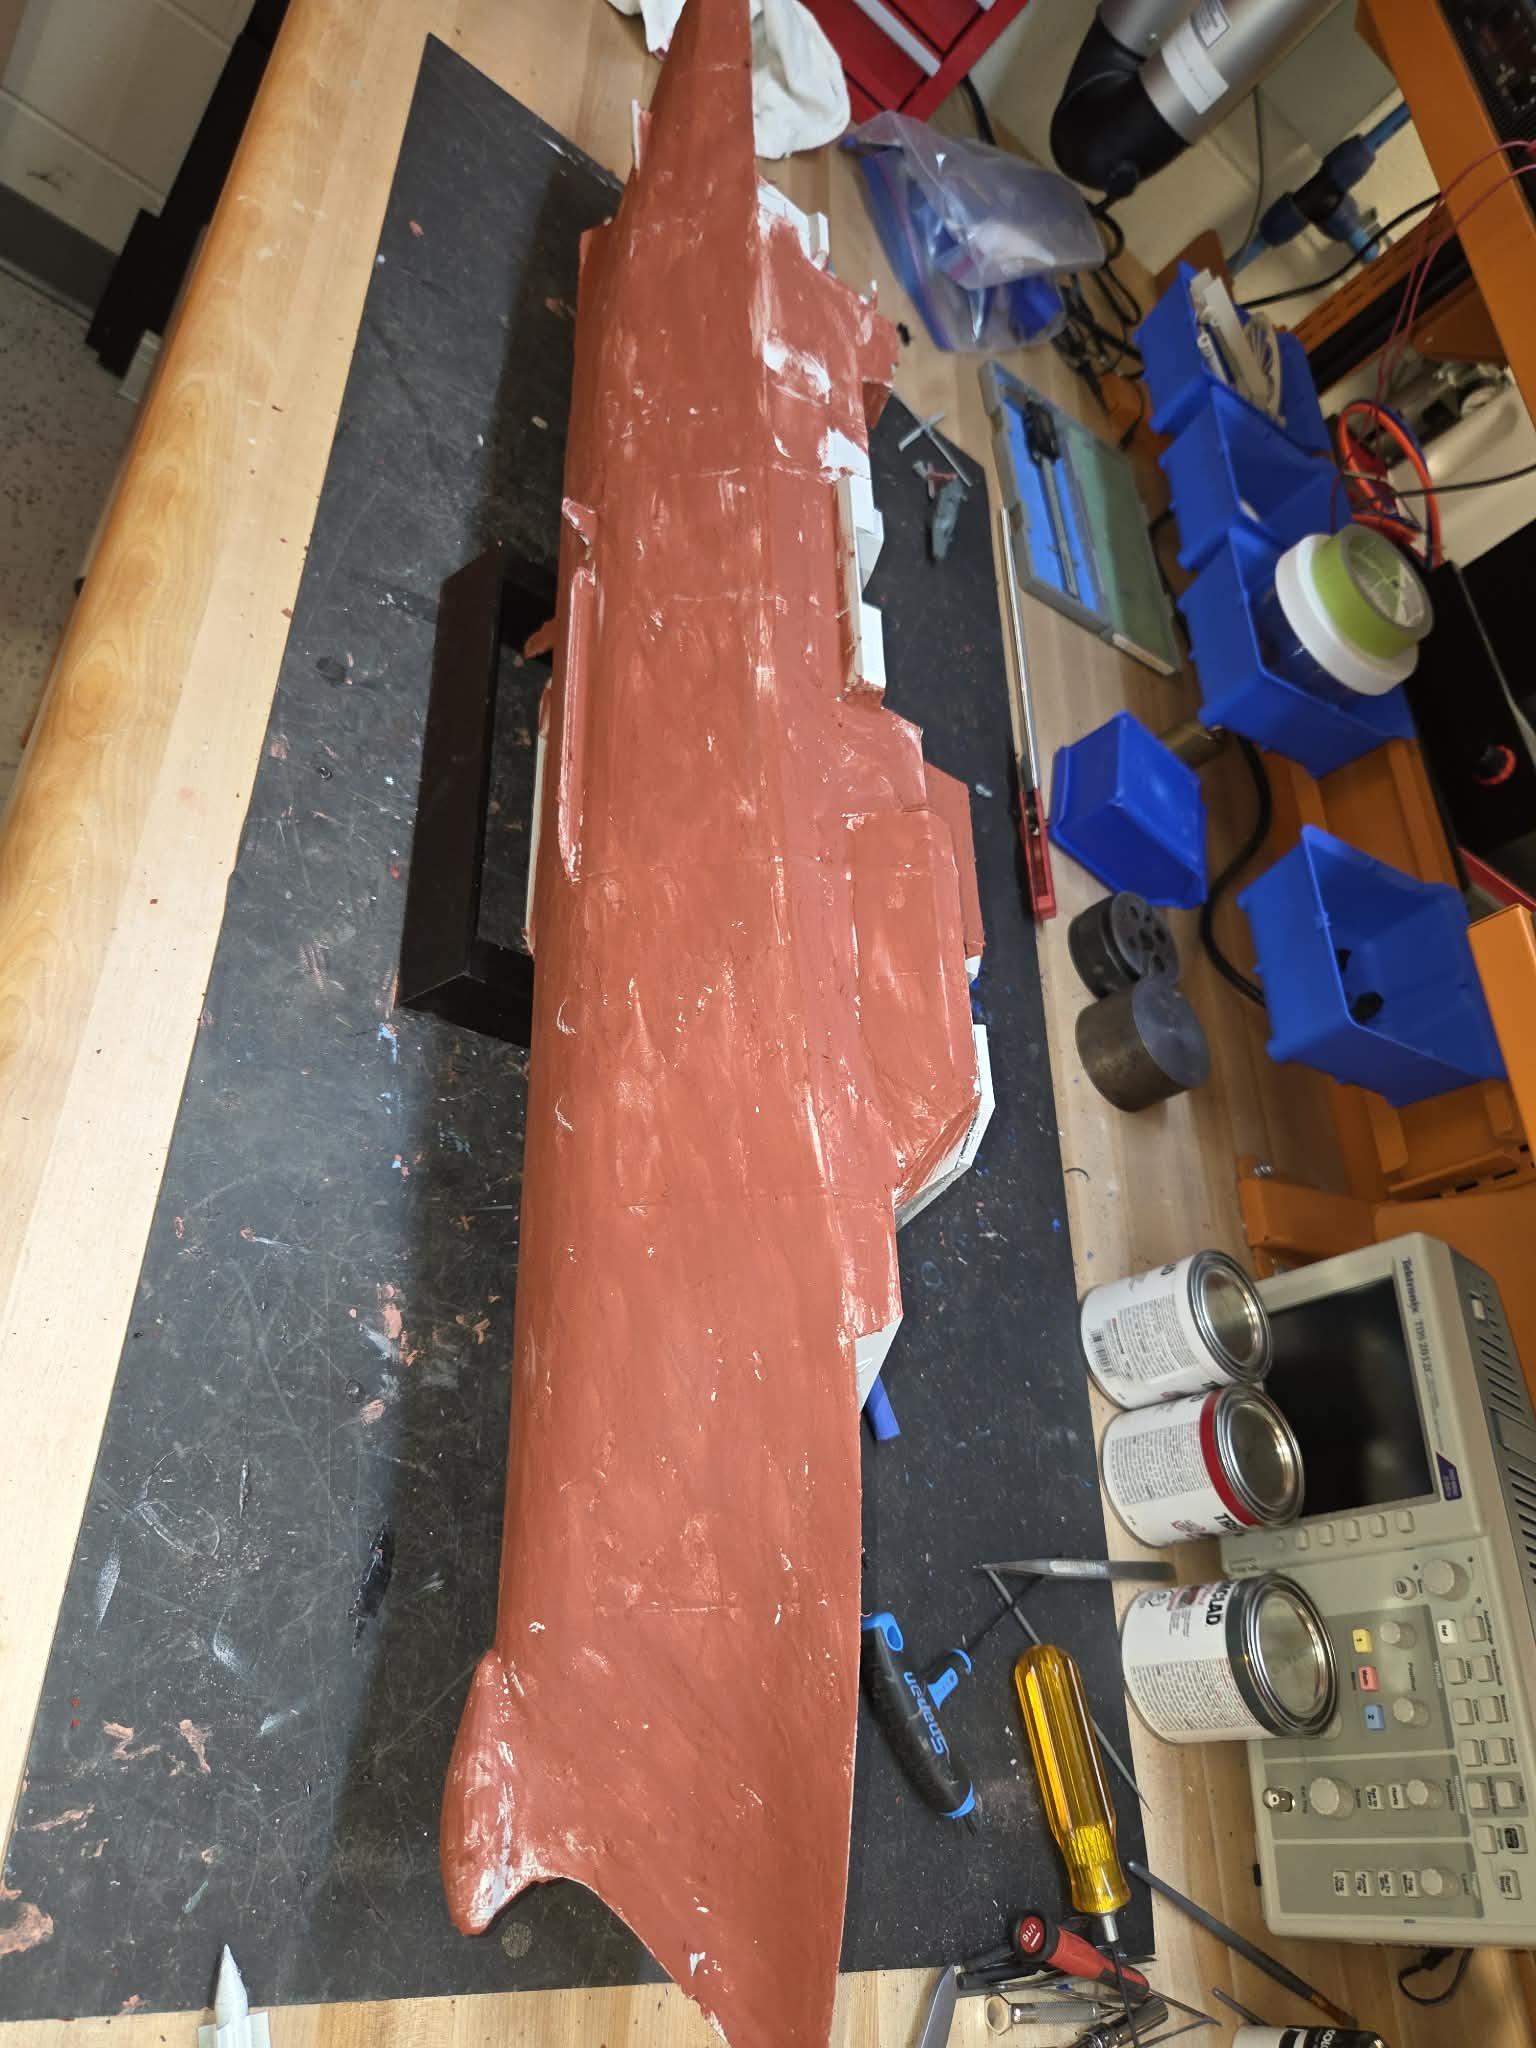
Today she got another shot of putty which dried quickly and got sanded, finished the sanding with some 180 grit - good enough for this one. At end of today, she's gray primed, and almost ready for some blue on the hull. I need to print and add the prop shafts in the morning then I'll be able to paint.


- 66 replies
-
- 4
-
-
- Type 26
- City Class
- (and 2 more)
-
I gave her a shot of primer yesterday before I headed home and she looked - OK.


- 66 replies
-
- 4
-
-
- Type 26
- City Class
- (and 2 more)
-
Well, hull #1 was presented to my unit's CO yesterday - she was quite pleased with the Fraser. Moving along with V2, she got a dose of putty, then some sanding yesterday morning.


- 66 replies
-
- 3
-
-
- Type 26
- City Class
- (and 2 more)
-
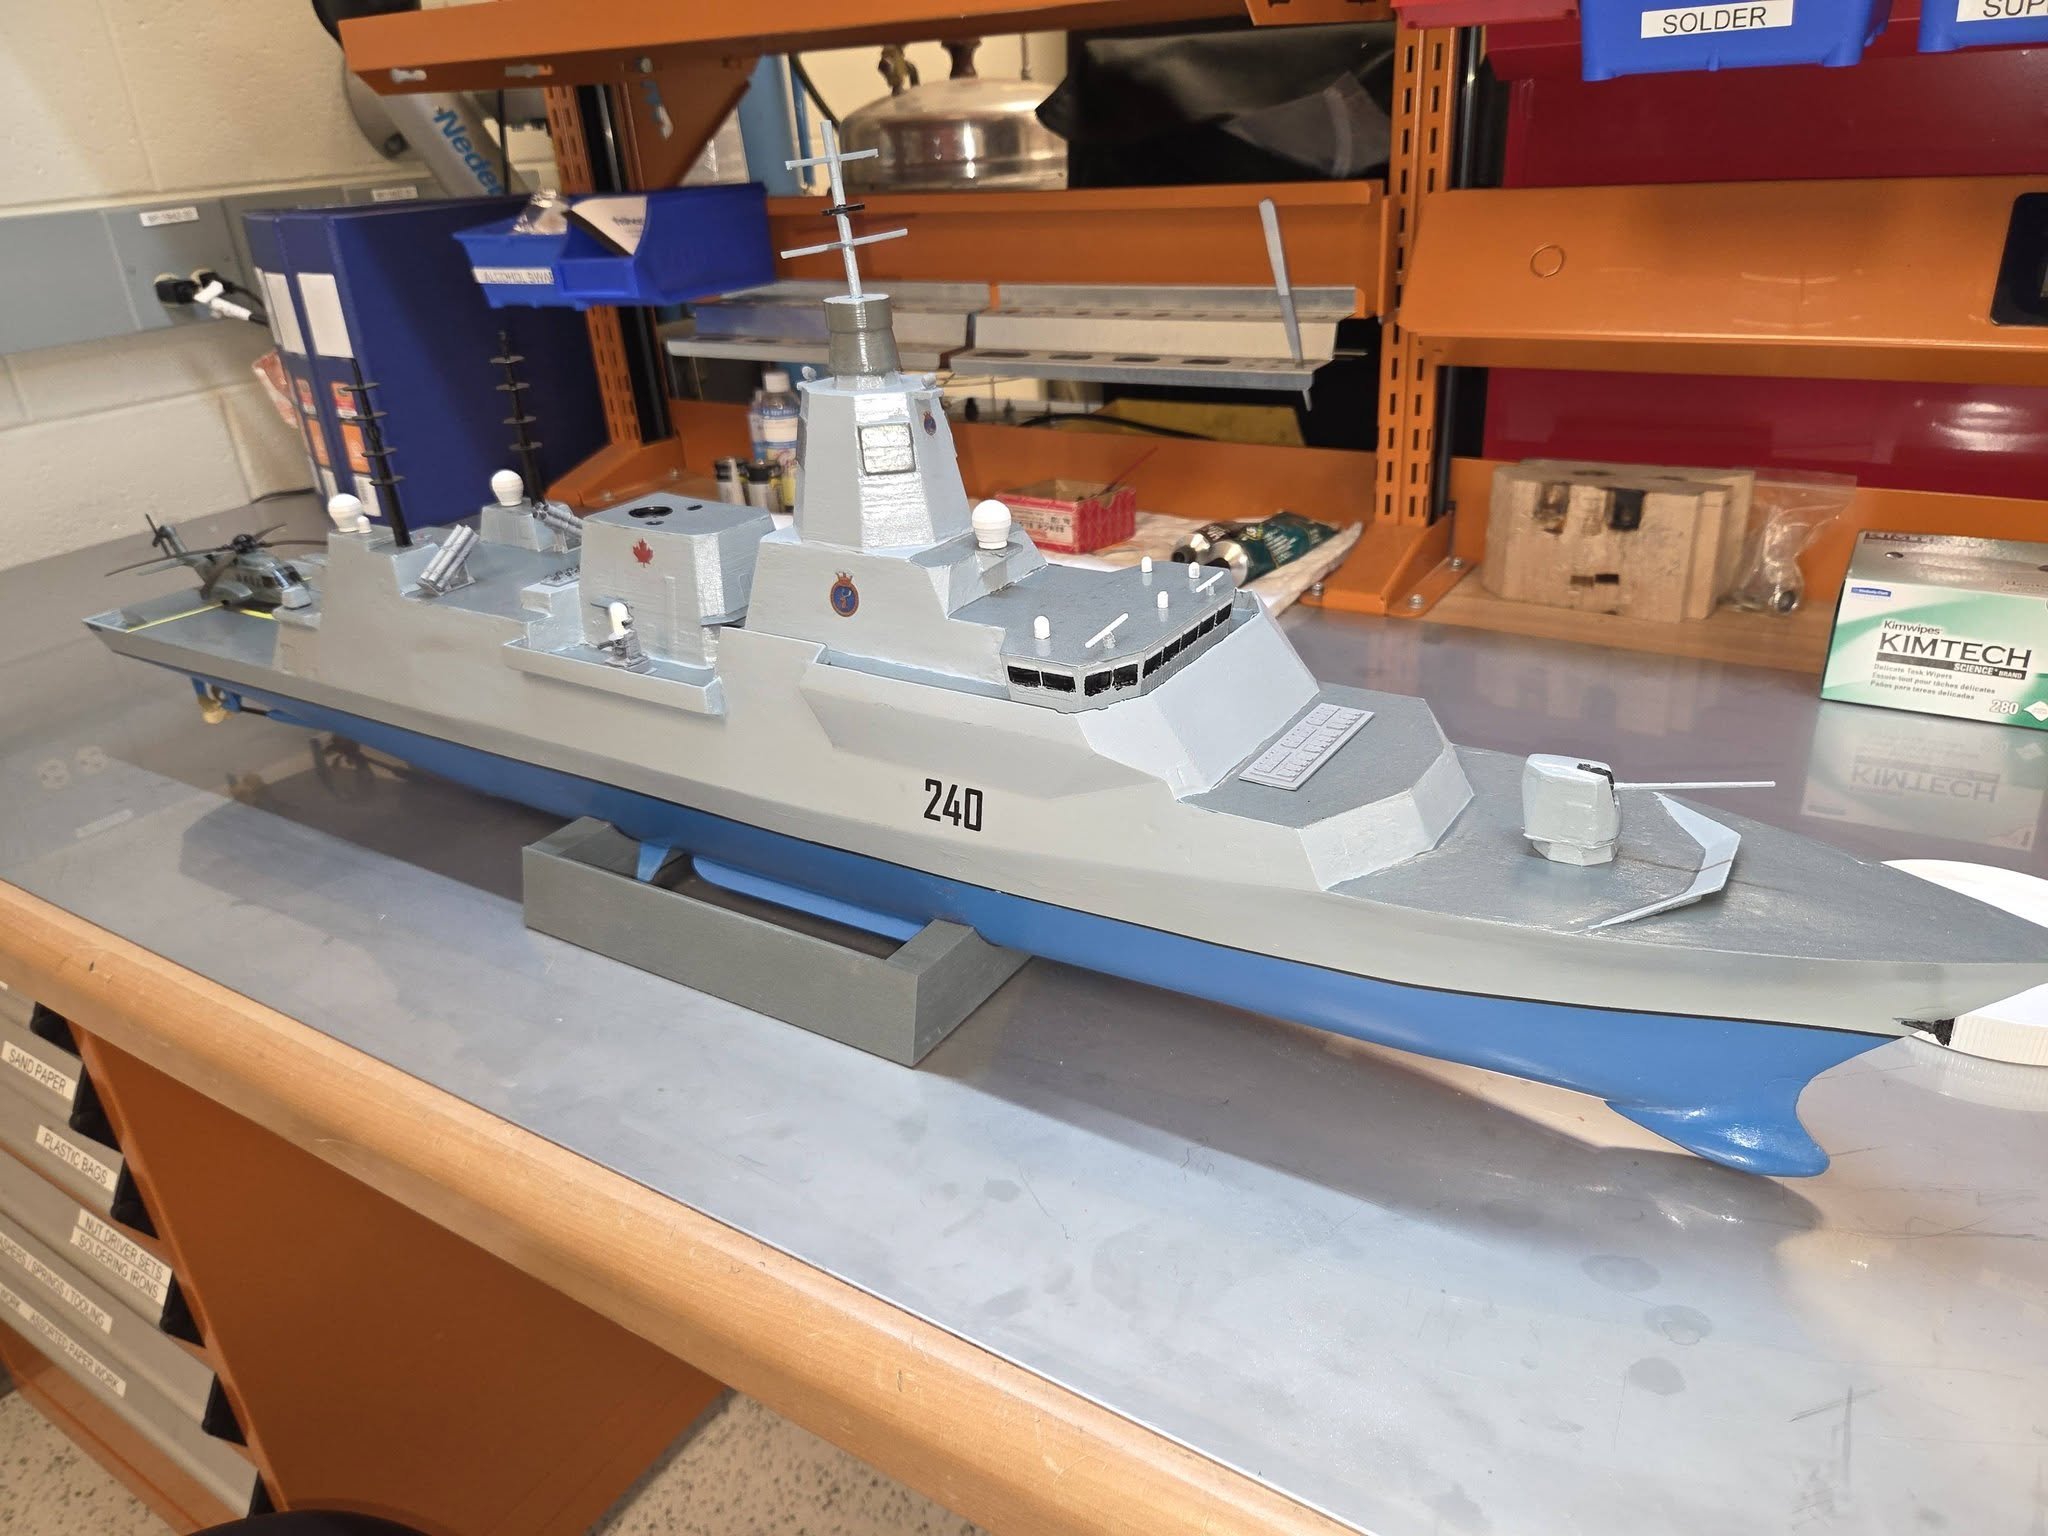
And here we are, HMCS Fraser DDH 240 is complete. Decals are applied and clear-coated. I'm generally pleased with how she looks - hull #2 will be better - second coat of putty was just applied. Hull #2 will also have a more accurate weapons loadout - I've made a model of both the SEA RAM launcher and the NSM, so CIWS and Harpoon will disappear on the next version.


- 66 replies
-
- 6
-
-
- Type 26
- City Class
- (and 2 more)
-
Alrighty, Calling V1 complete - it's headed for the CO's office first thing next week. She will hopefully appreciate it. My hope is also that other leadership around the base will see it and will go "HEY, I WANT ONE TOO" and my day job will get busier making these....I figure I can put out about 1/month of this quality. More detail will take longer. V2 got a layer of putty today and will dry over the weekend.


- 66 replies
-
- 4
-
-
- Type 26
- City Class
- (and 2 more)
-
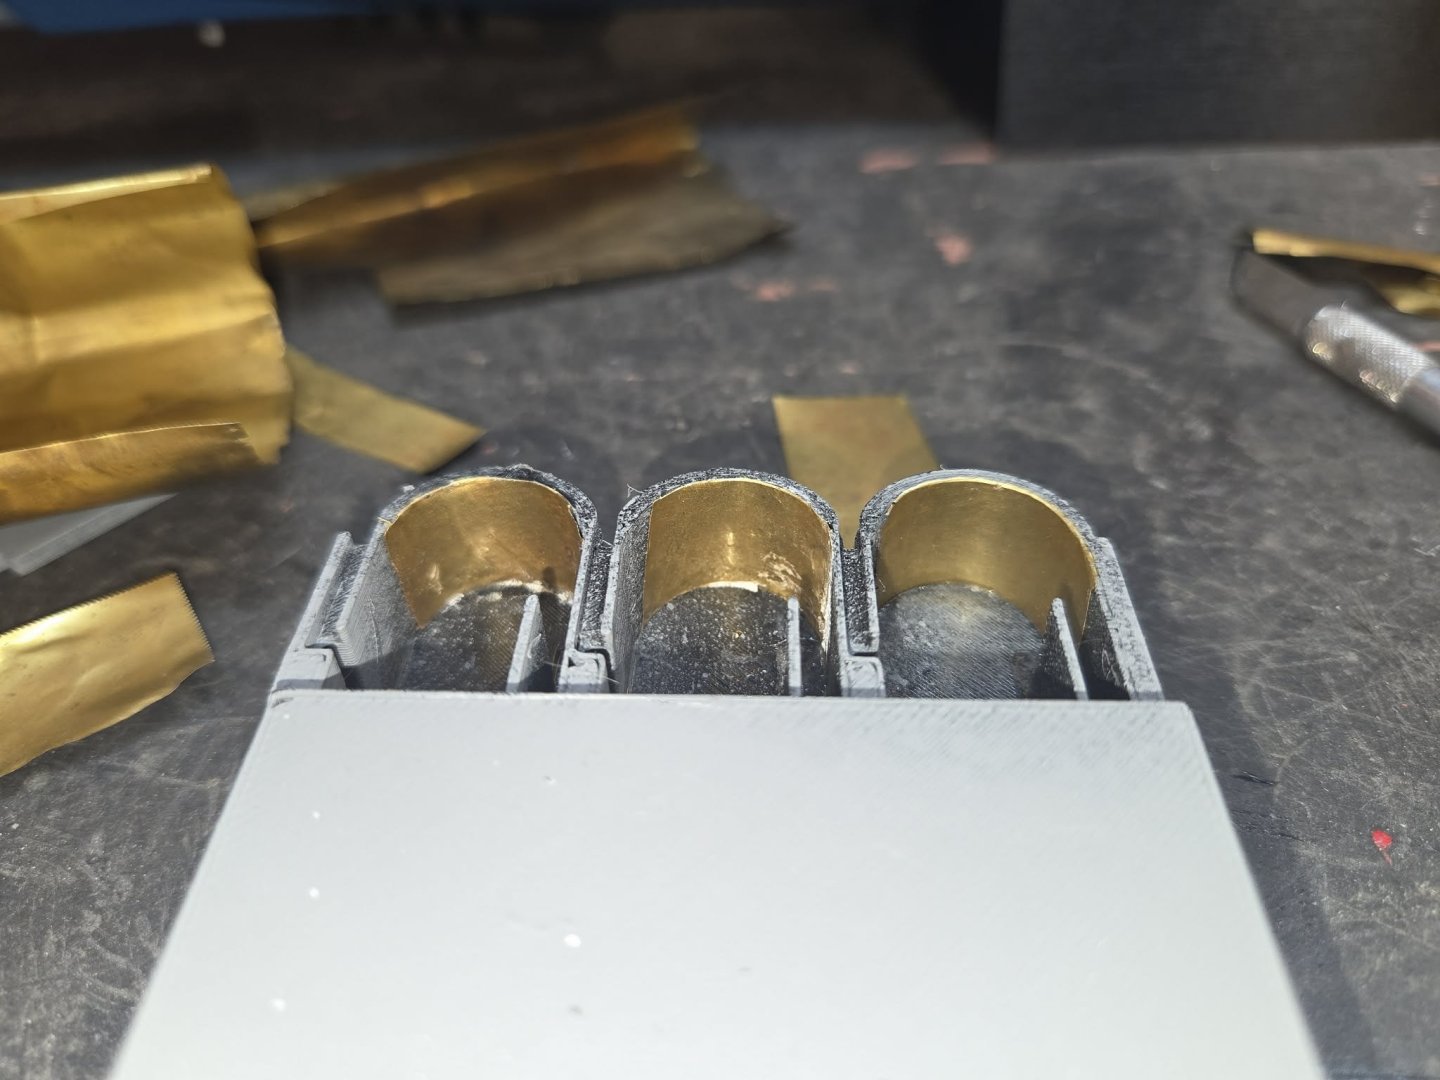
David, Visible in one of the images is the brass plate I glued in place in the bottom of the launch tube (J-tube) to see if it'll work for me as a heat deflector. Intent is to have the module effectively disposable after firing so that I won't have to worry about burn through. I'm going to be testing this a bunch before firing from the ship. Good news is that with 3D printing, I can do rapid prototyping and adjust files to match the reality of needing more strength/etc. I also have, through work, access to some 'fancy' filaments that will take more heat than just PLA or PETG, so that may end up a path I follow. NS
- 66 replies
-
- 1
-
-
- Type 26
- City Class
- (and 2 more)
-
Yes Ian, that's the Bondo stuff - I have tried the acetone/brush method as well, but didn't apply it with this model. I might try that with the 2nd hull. The amount of putty needed meant that I thought I'd need a lot more than just brushing it on would provide. As for the missiles - working on test-firings. I found a model rocket calculator program online to run some pre-launch numbers for me: https://www.translatorscafe.com/unit...-max-altitude/ It lets you calculate based on known info and known engine performance stats, how well the rocket will perform. Based on what I plugged in, the rocket I've designed will fly a maximum of 6 meters up - if it actually stabilizes out of the tube (unlikely) so it'll go up a max of about 20 feet or so - which is actually acceptable to me. 🙂 Firing from the ship in the pond will be planned to happen beyond that 'theoretical' effective range. The rockets cost about $0.18 each to print - so I'm not worried about recovering them much. The igniters almost cost as much as the motors....
- 66 replies
-
- 2
-
-
- Type 26
- City Class
- (and 2 more)
-
Welcome aboard!
-
So, the VLS plan is on hold for a couple of weeks until I get some new model rocket ignitors in hand that I ordered tonight. The Estes 2 wire ones are too finnicky to be consistent. I've found one that looks like it'll work better - I guess we'll see in about 2 weeks. NS
- 66 replies
-
- 1
-
-
- Type 26
- City Class
- (and 2 more)
-
I understand that the 'newest version' may actually have RIM-114 missiles in the 21 packs instead of CIWS. The armament mix is still a bit in flux - I hear that the 5" gun is changing as well from Leonardo to the USN version due to AEGIS integration simplification issues. (Adding a non-US 5" gun would require an adapter in the middle between AEGIS and the gun interface - all of which would require testing/certification that Canada is trying to avoid. Getting the US 5" gun that's already certified with AEGIS is a low risk solution.)
- 66 replies
-
- 1
-
-
- Type 26
- City Class
- (and 2 more)
-
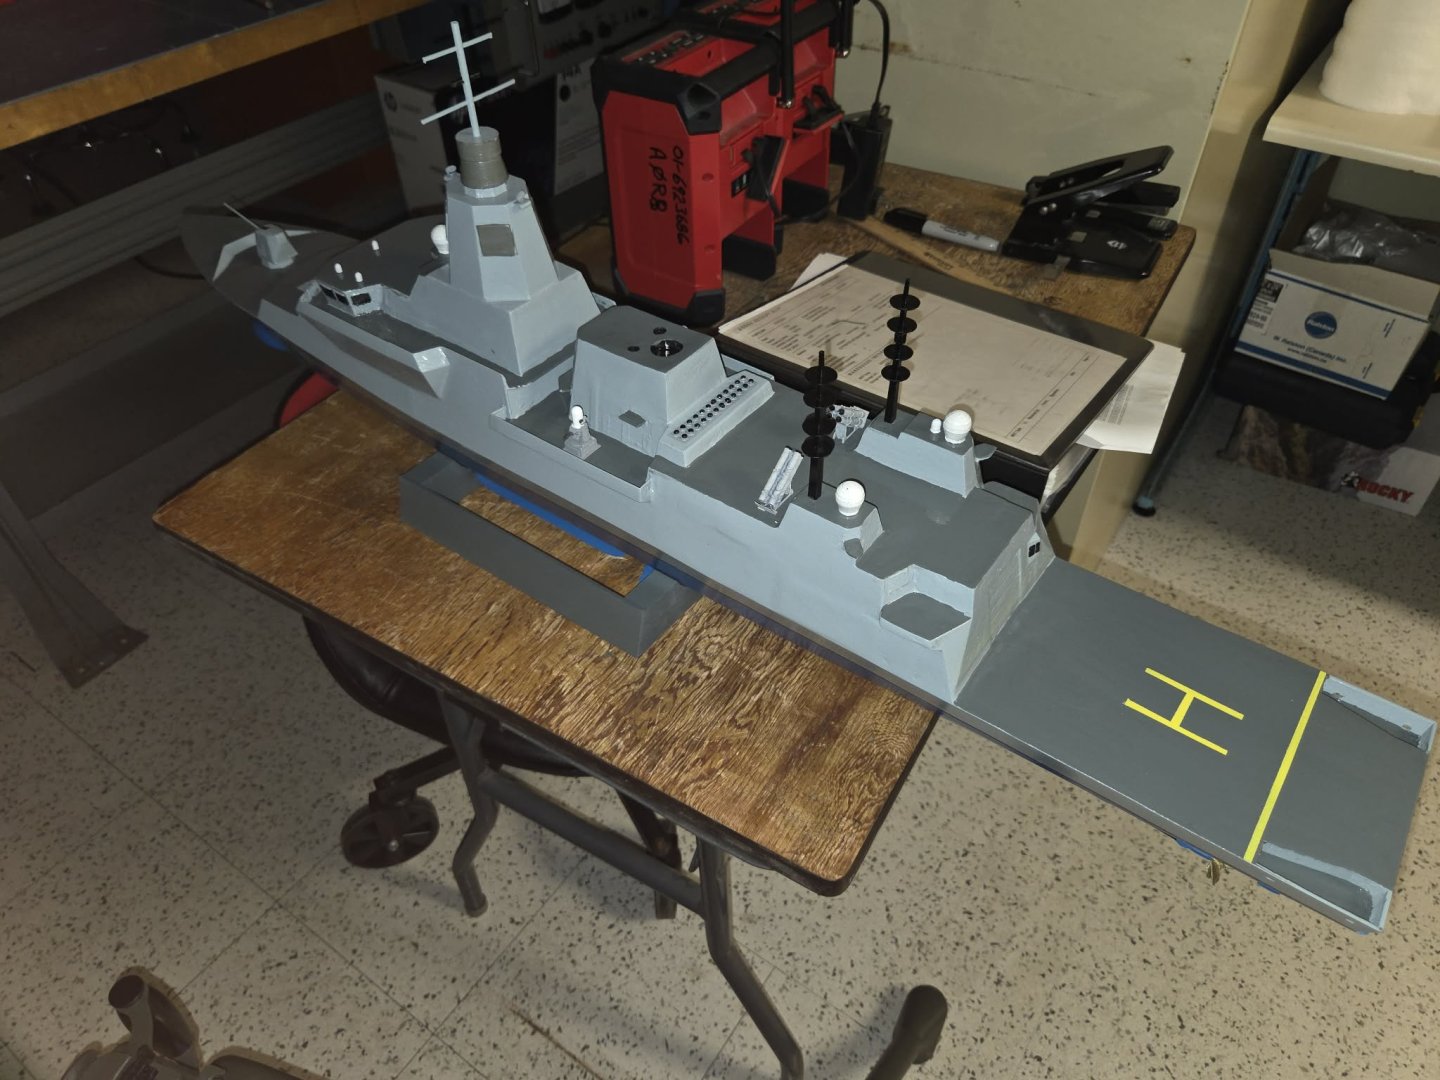
And here's the 90% complete model - a few little details left to add.

- 66 replies
-
- 5
-
-
- Type 26
- City Class
- (and 2 more)
-
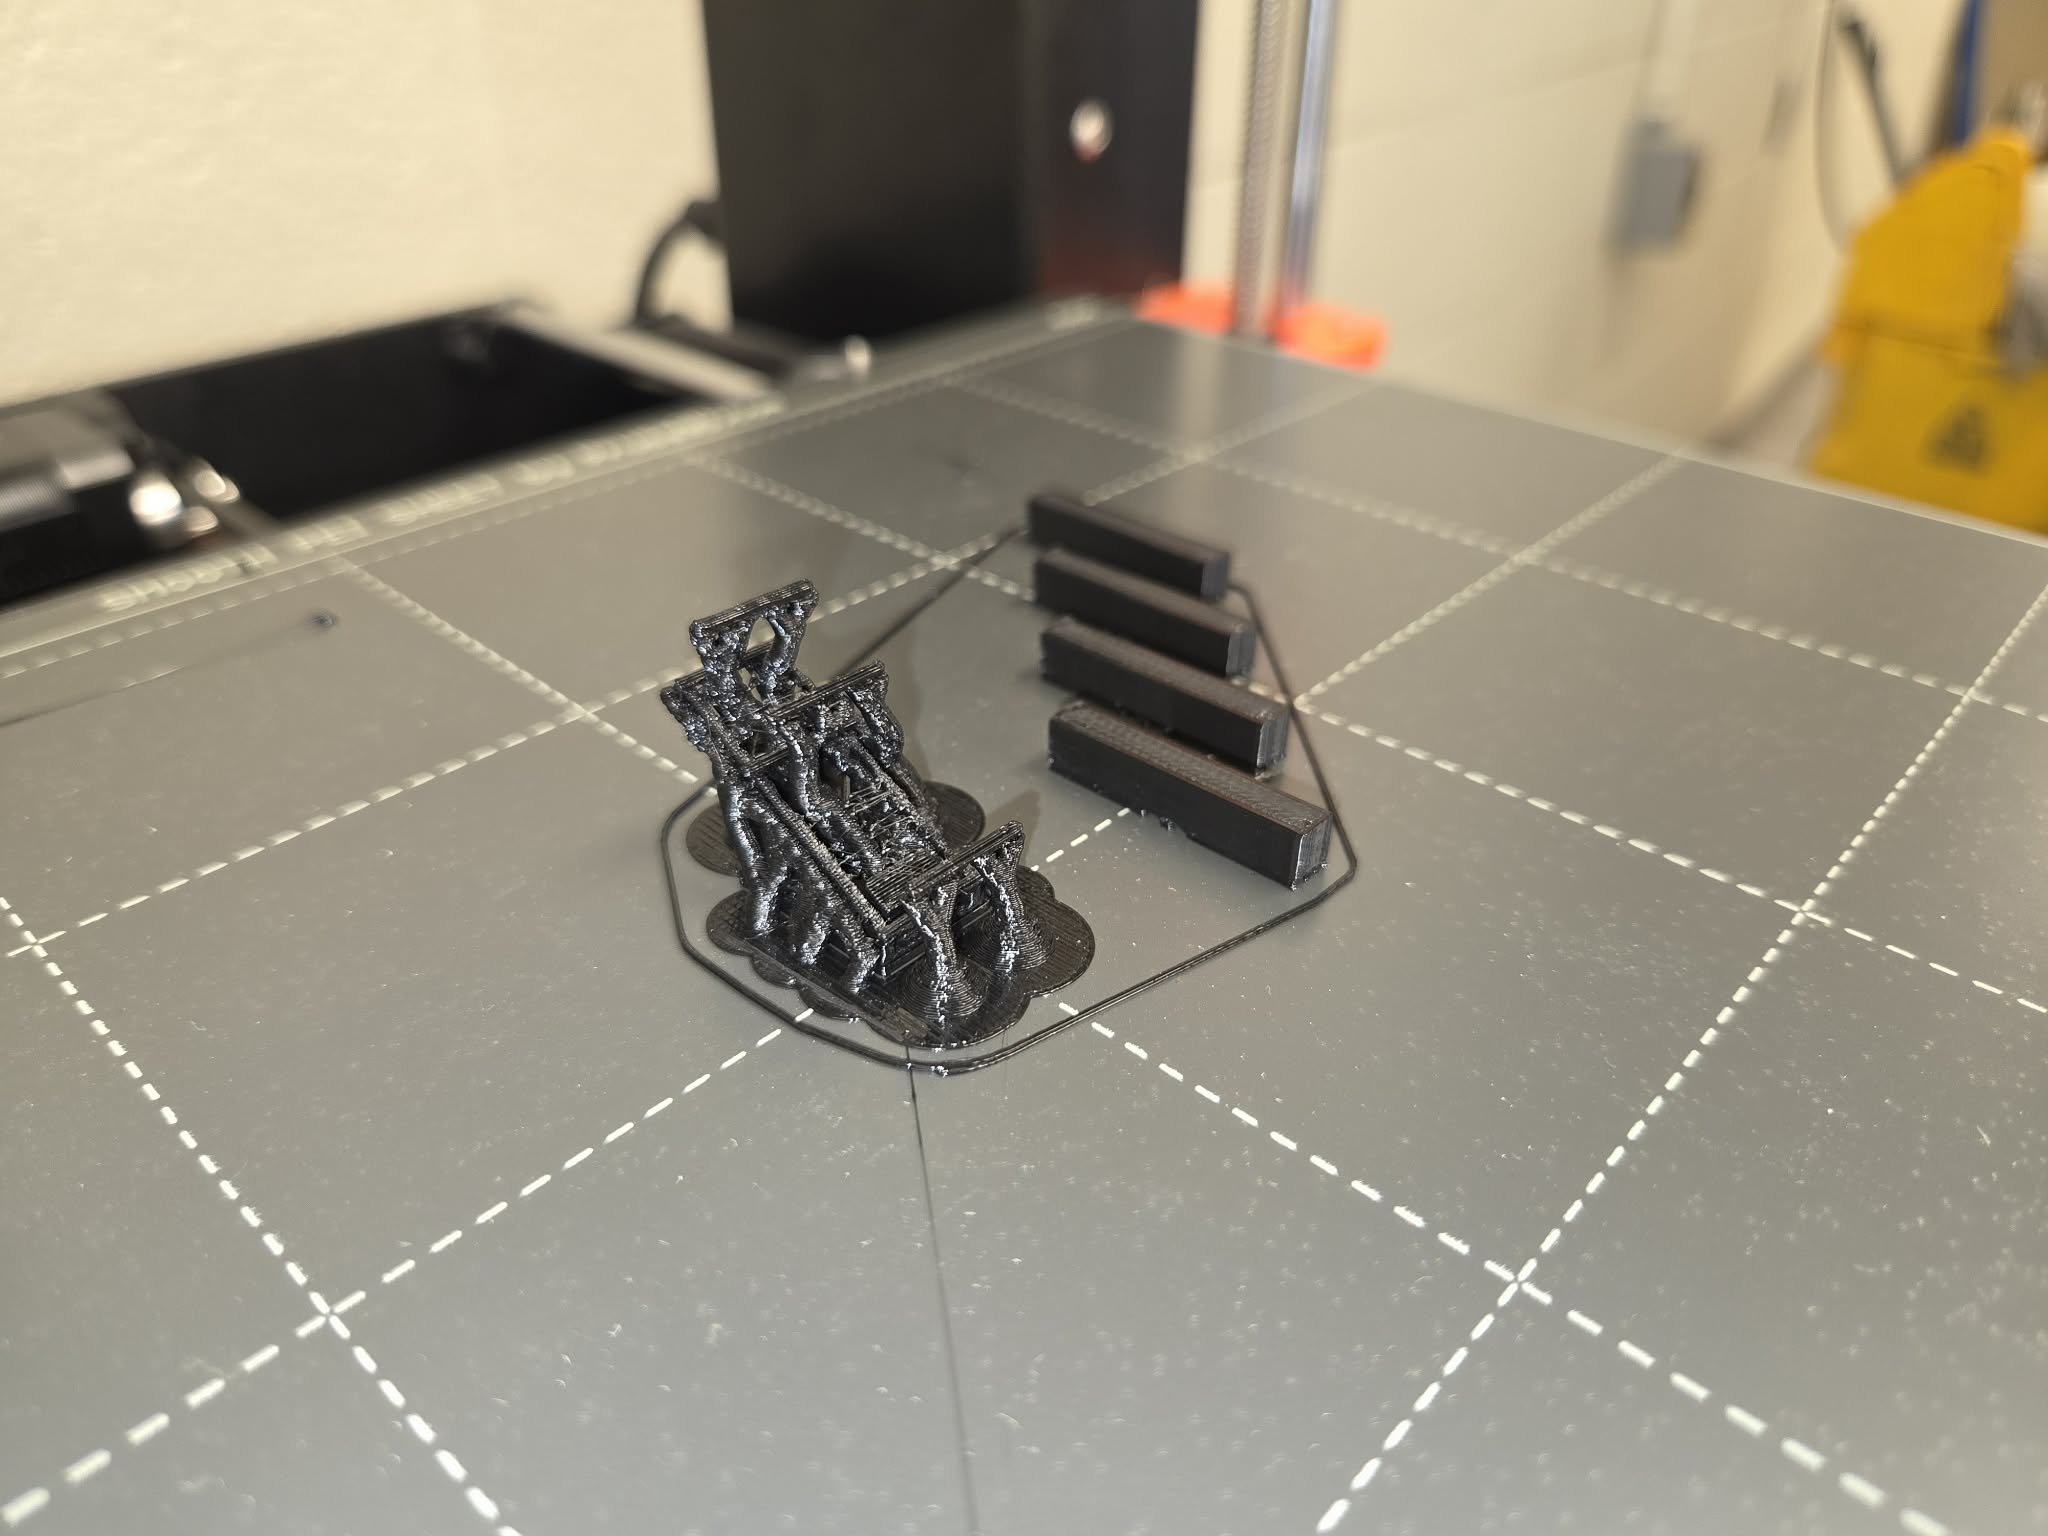
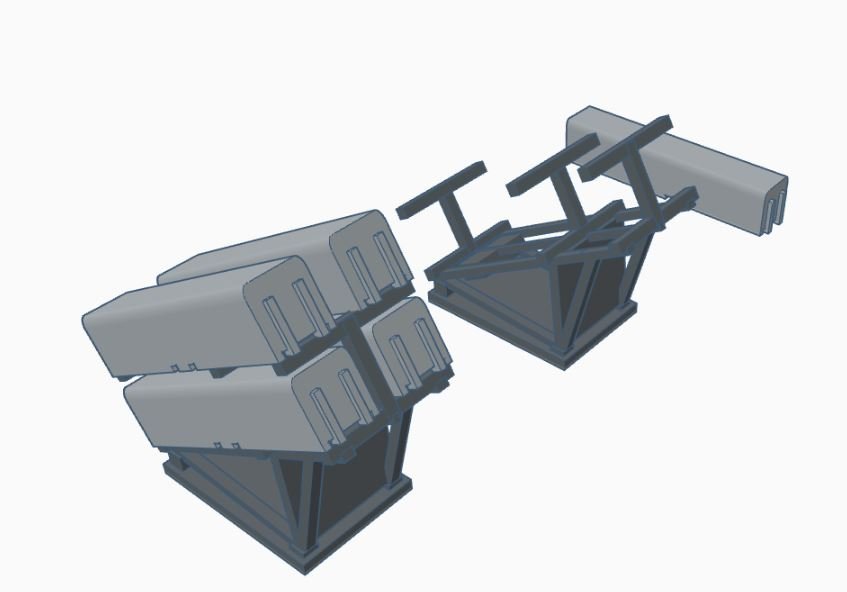
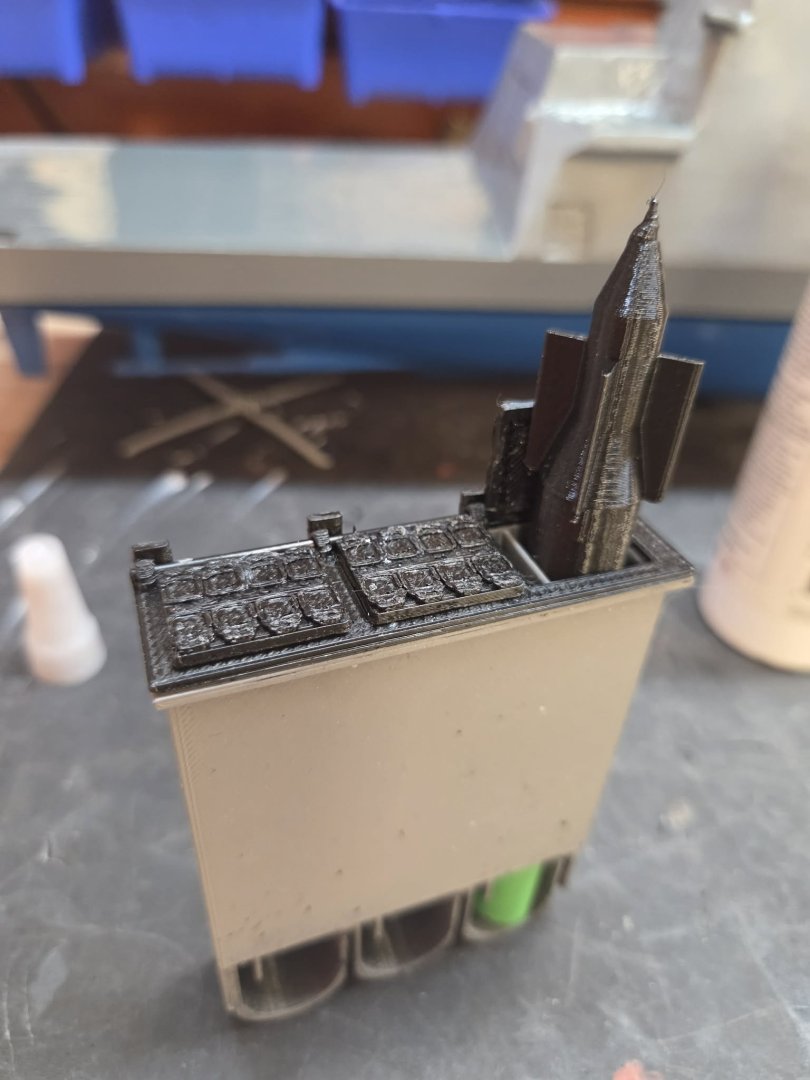
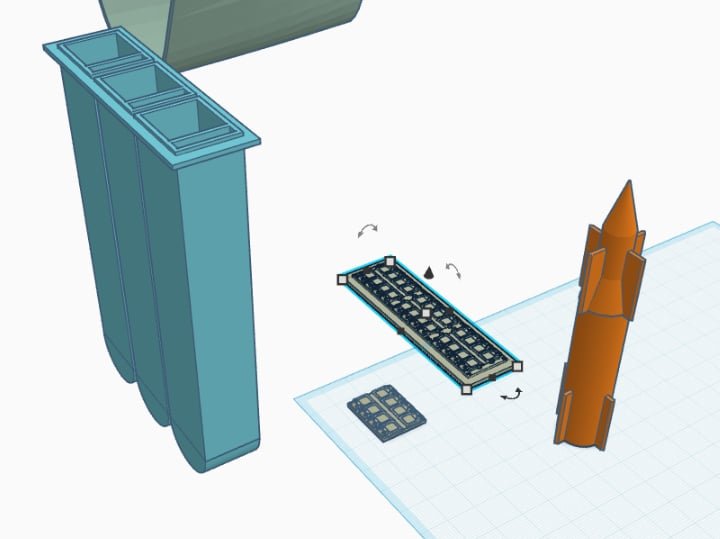
Naval Strike Missile cells have been designed and printed now.


- 66 replies
-
- 3
-
-
- Type 26
- City Class
- (and 2 more)
-
OMG, as a past CSM and now DSM at an Army Unit (Drill Sgt Major) I can definitely concur that spittle would have been mid-air in that circumstance, and that's the perfect face to deliver it. Well done sir!
-
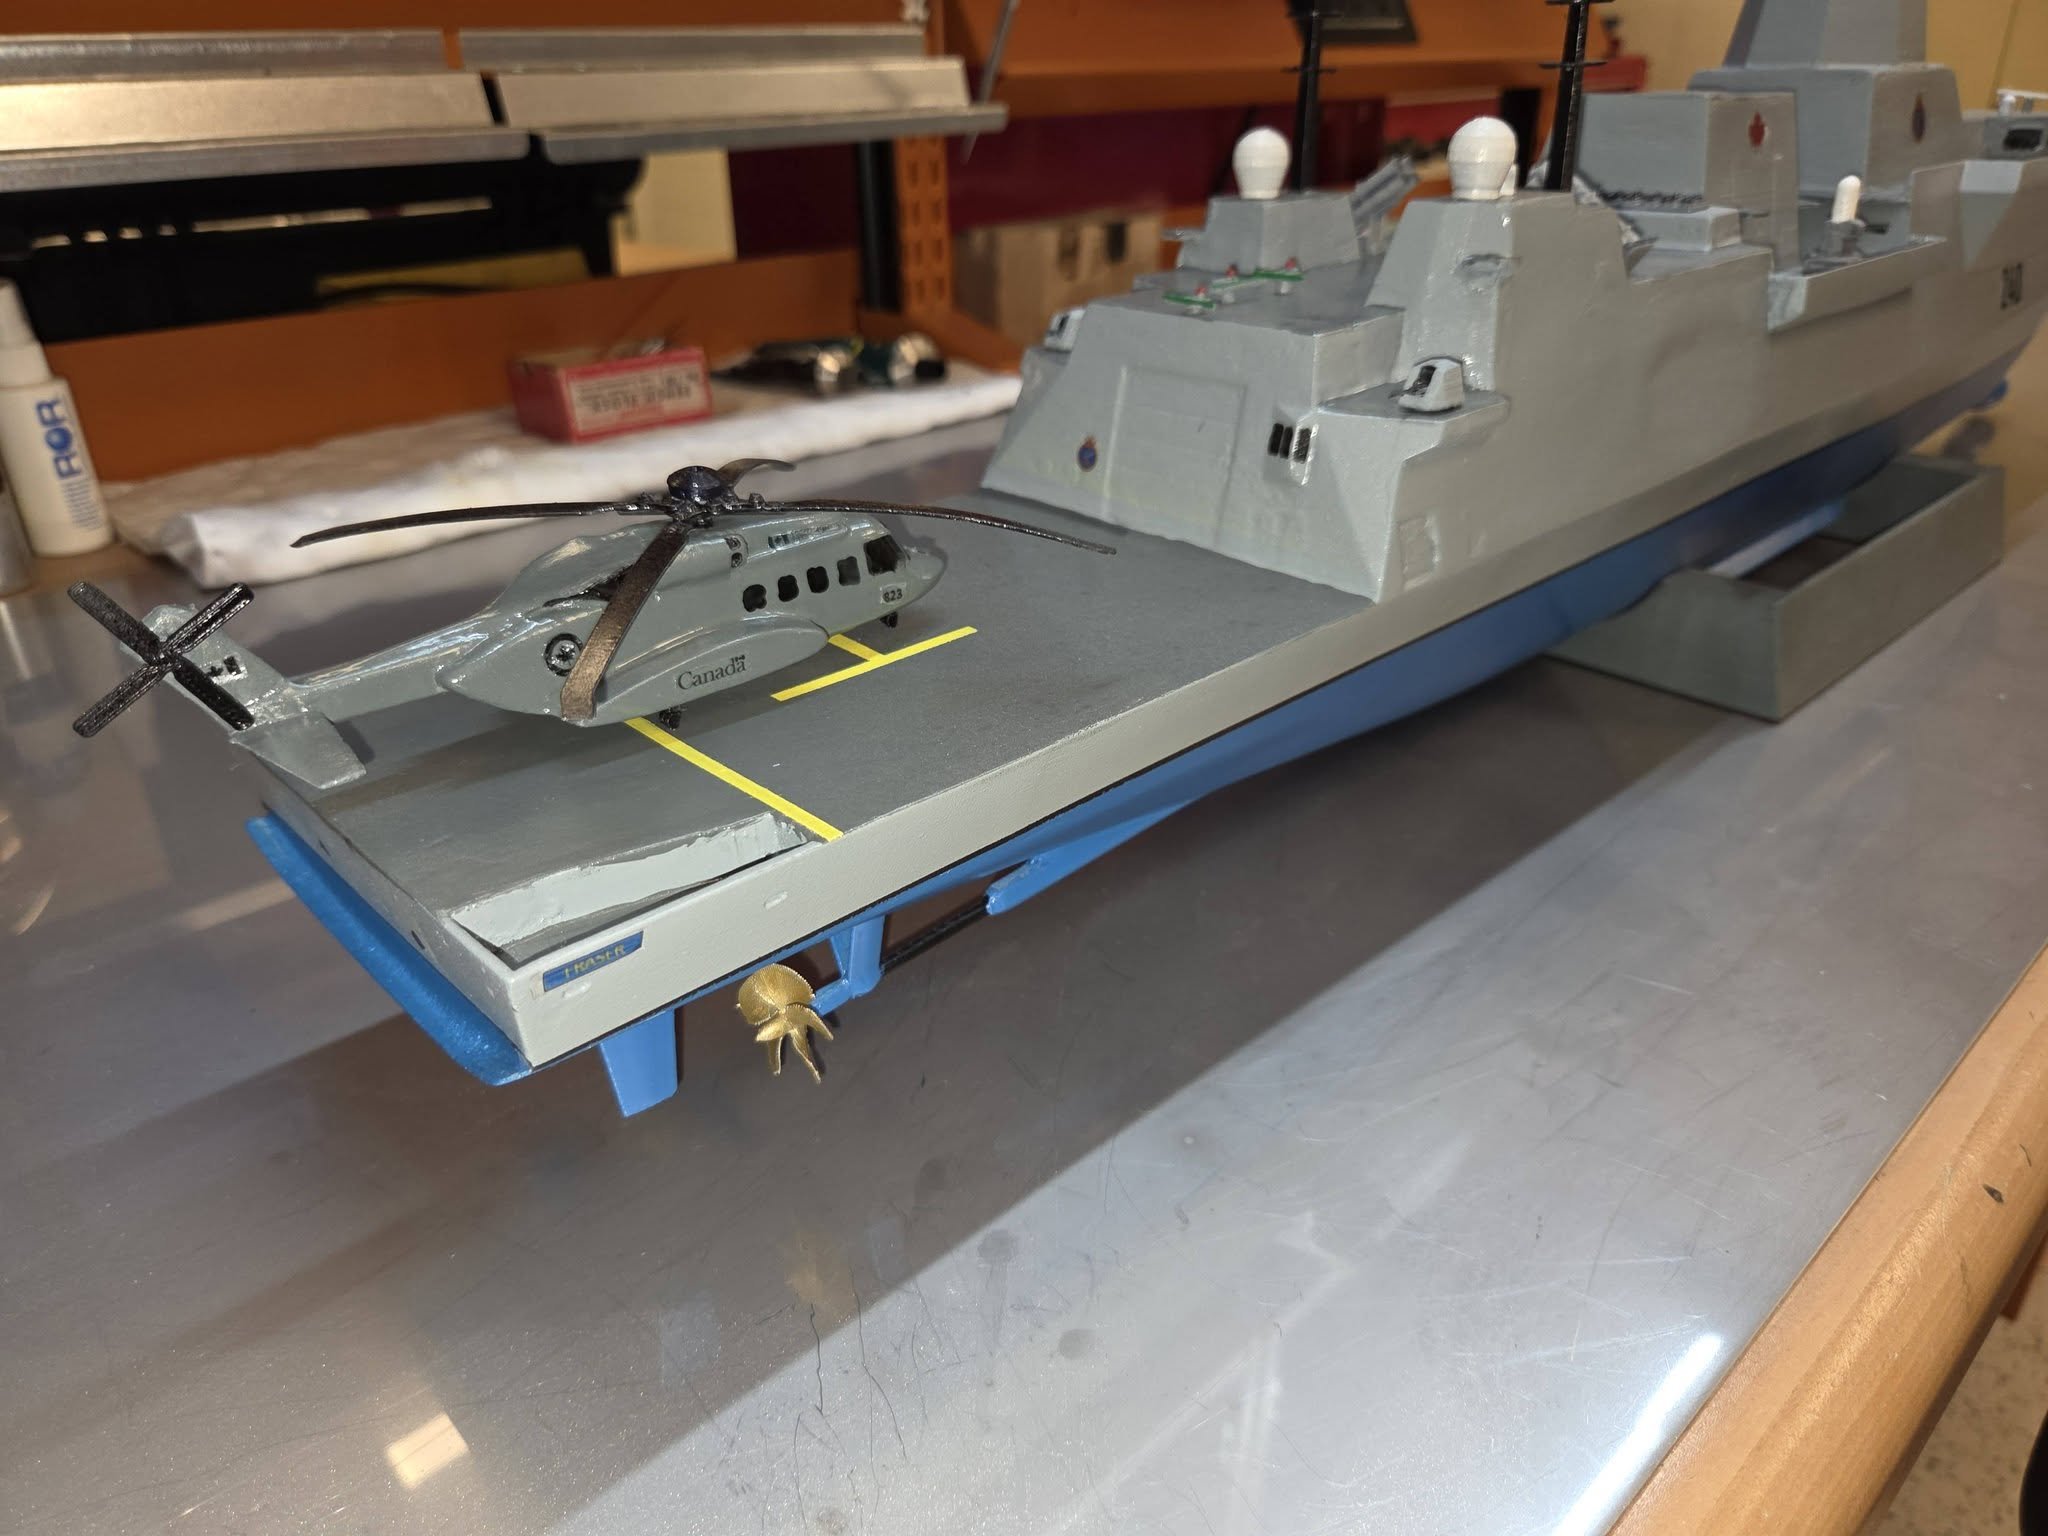
So, the first one of the builds is almost complete - I've got some of the detail bits added on as of this afternoon, and painted a nice "H" on the flight deck along with a rear limit line. It's not perfect, but hey, it's looking OK. I'm going to be presenting it to the CO of the unit next week once I get the last bits done. Speaking of last bits, I decided to do up a Naval Strike Missile launch tube set in CAD tonight and have shared it on makerworld as of a few minutes ago (still showing as 'pending' though) in case you feel the need to download and print a set of Kongsberg NSM's for any of your projects. Oh, and I spent a few minutes today gluing together the hull of RCD #2 - this one is now much thicker, and should be able to be sanded before I add the many layers of putty to pretty things up. Pictures below... How many River Class am I going to end up making? Probably at least 4. I've got the one headed to the CO, I'm going to do the black one up for display at my office, then I'm working towards an R/C one, and hey, why not do one more up to sail in the Public Gardens too? We'll see....
- 66 replies
-
- 2
-
-
- Type 26
- City Class
- (and 2 more)
-
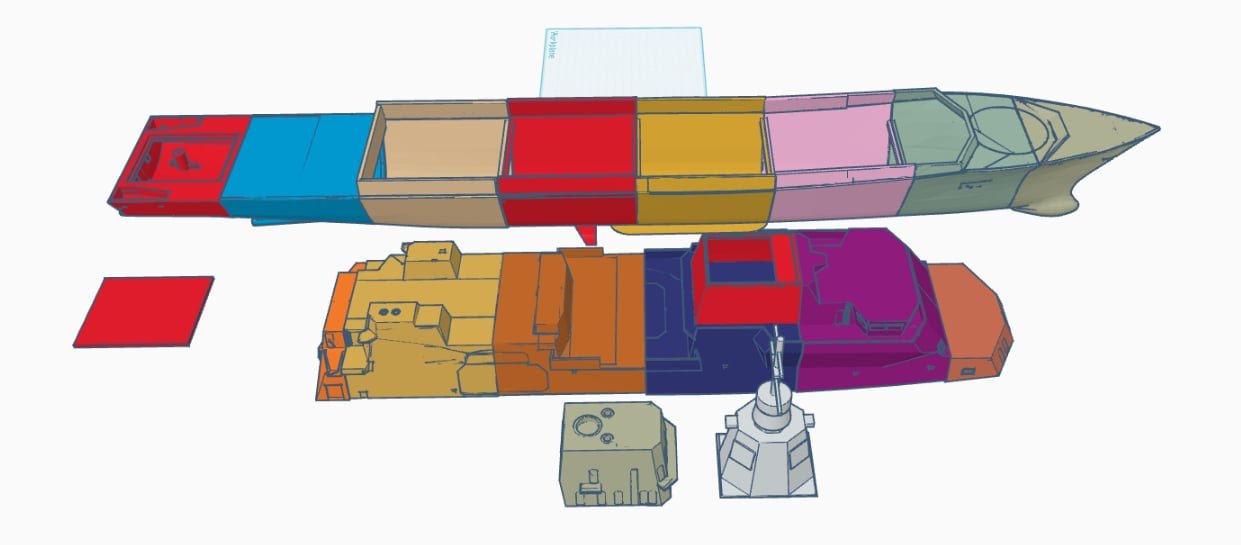
Of note, this build thread is now going to actually encompass 3 hulls - maybe more. Hull 1 is the one already pictured....she got a second coat on the decks today, and tomorrow will get details glued on...and some touch-up paint added to bridge windows and such. Hull 2 is the improved static file set that I've just finished printing and will start assembly of tomorrow. I'm going to try some spray on putty stuff that someone suggested (seems like stucco - I'll see if it works.) Hull 3 will be the R/C version that will incorporate the VLS - hope you're all patient enough to wait for that one. I've not yet finished that file set. Good news though - once the files for the RC Version are done, and I've posted a completed picture/video of the build to credit the original designer, he has agreed that I can share the files with people here that might wish to make their own Type 26.
- 66 replies
-
- 3
-
-
- Type 26
- City Class
- (and 2 more)
-
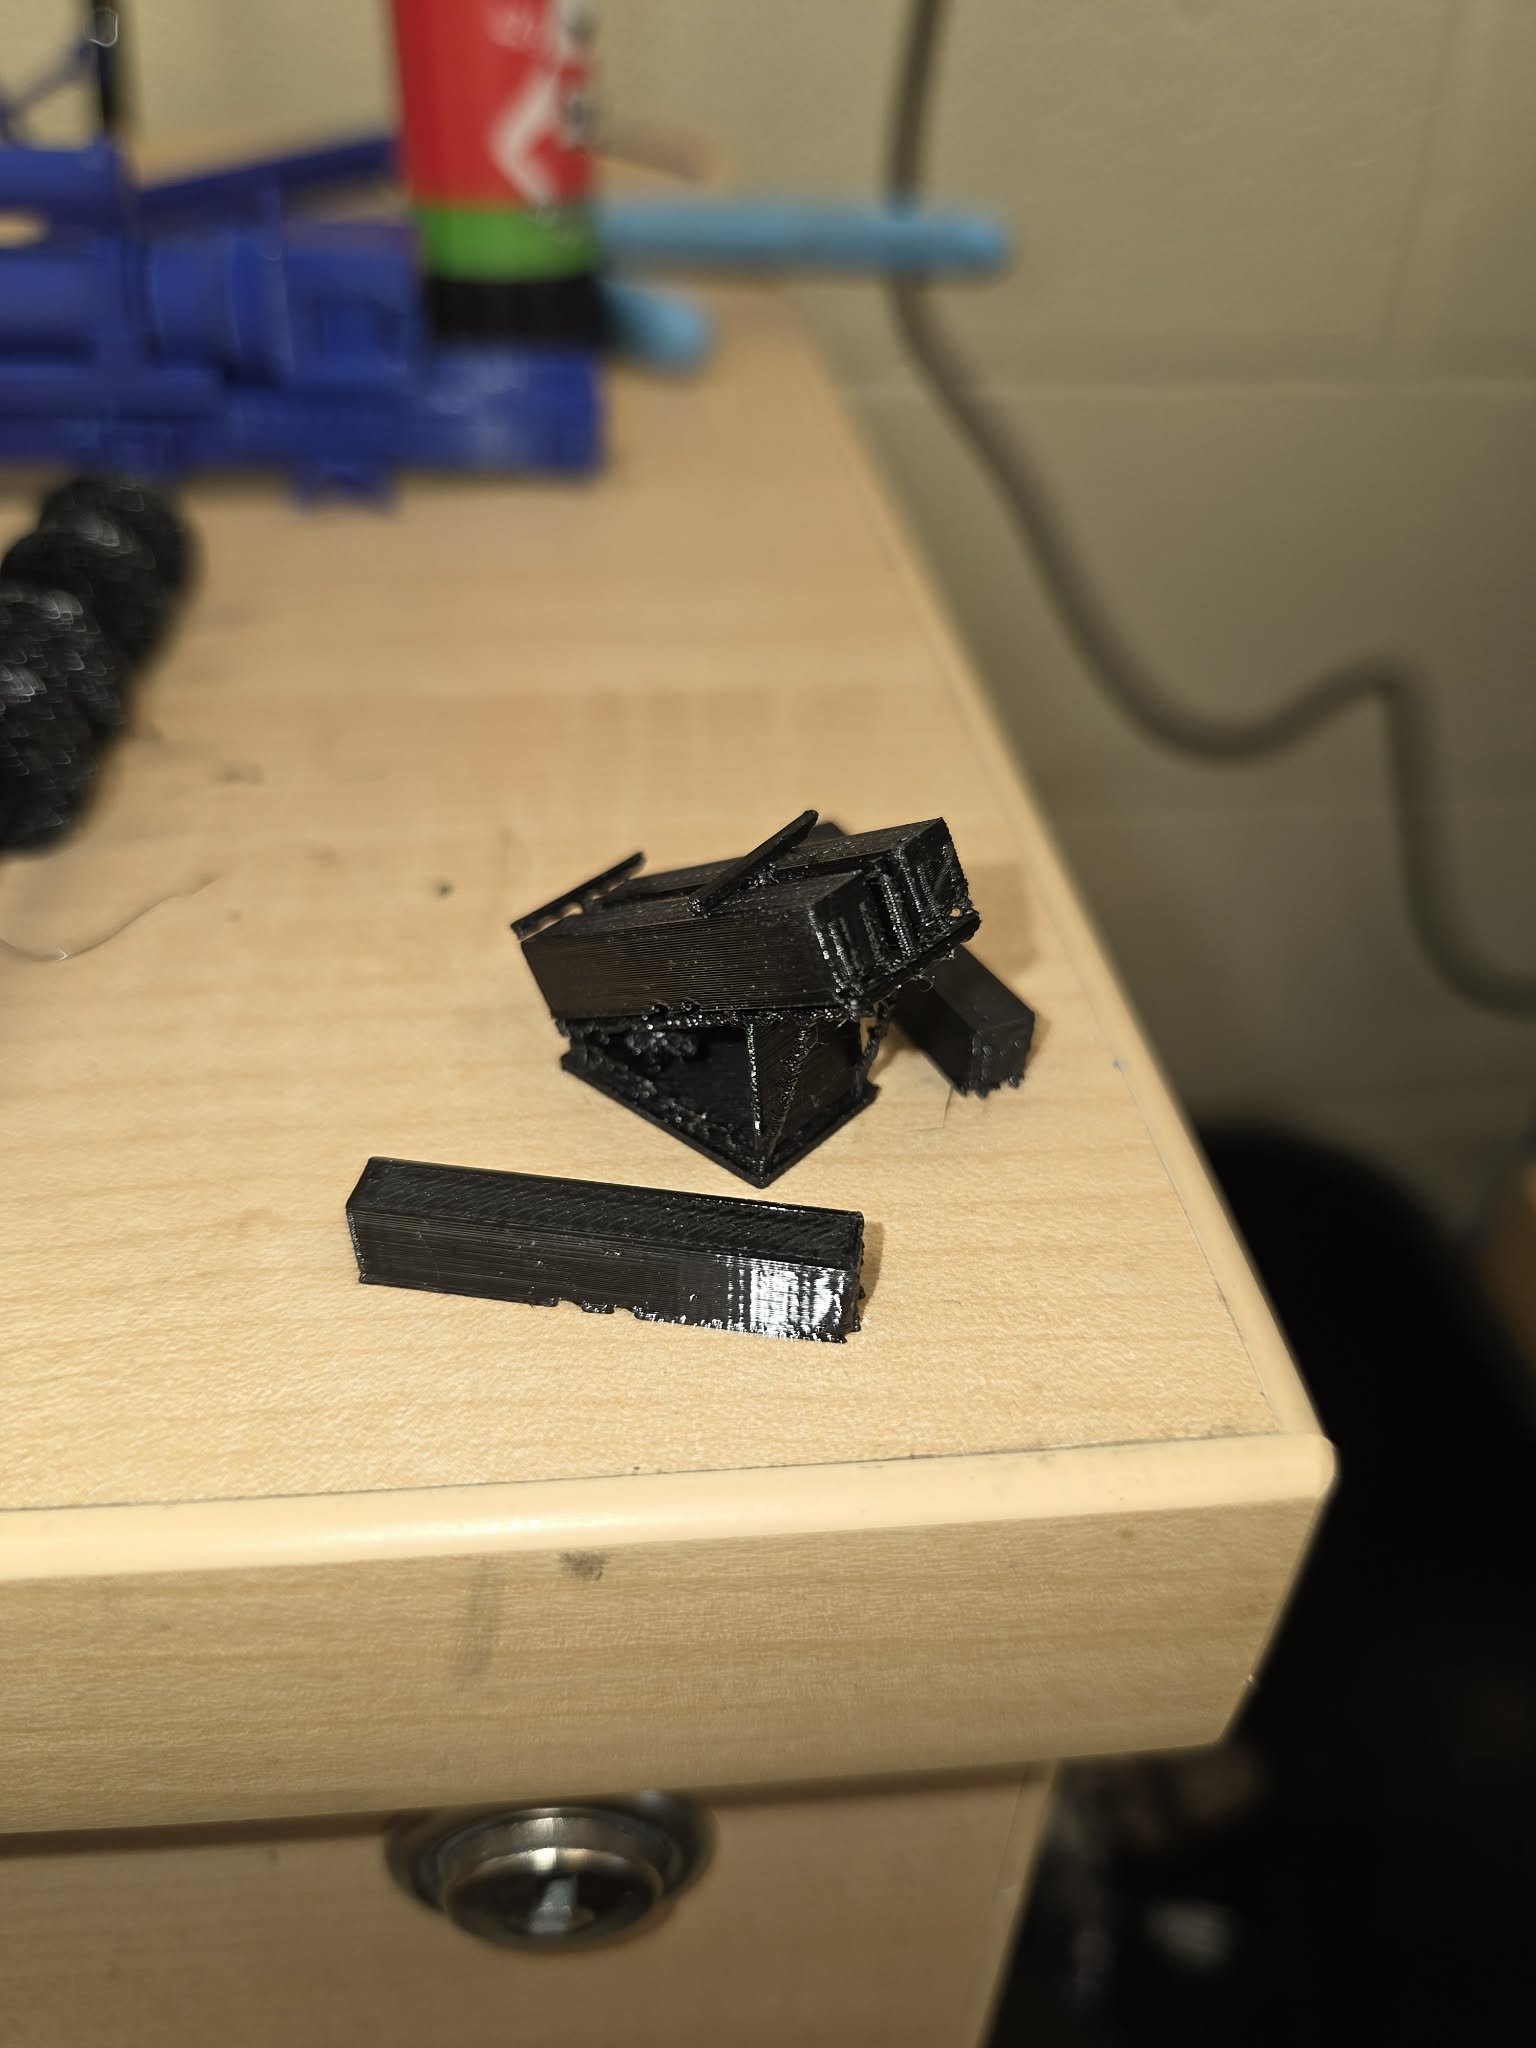
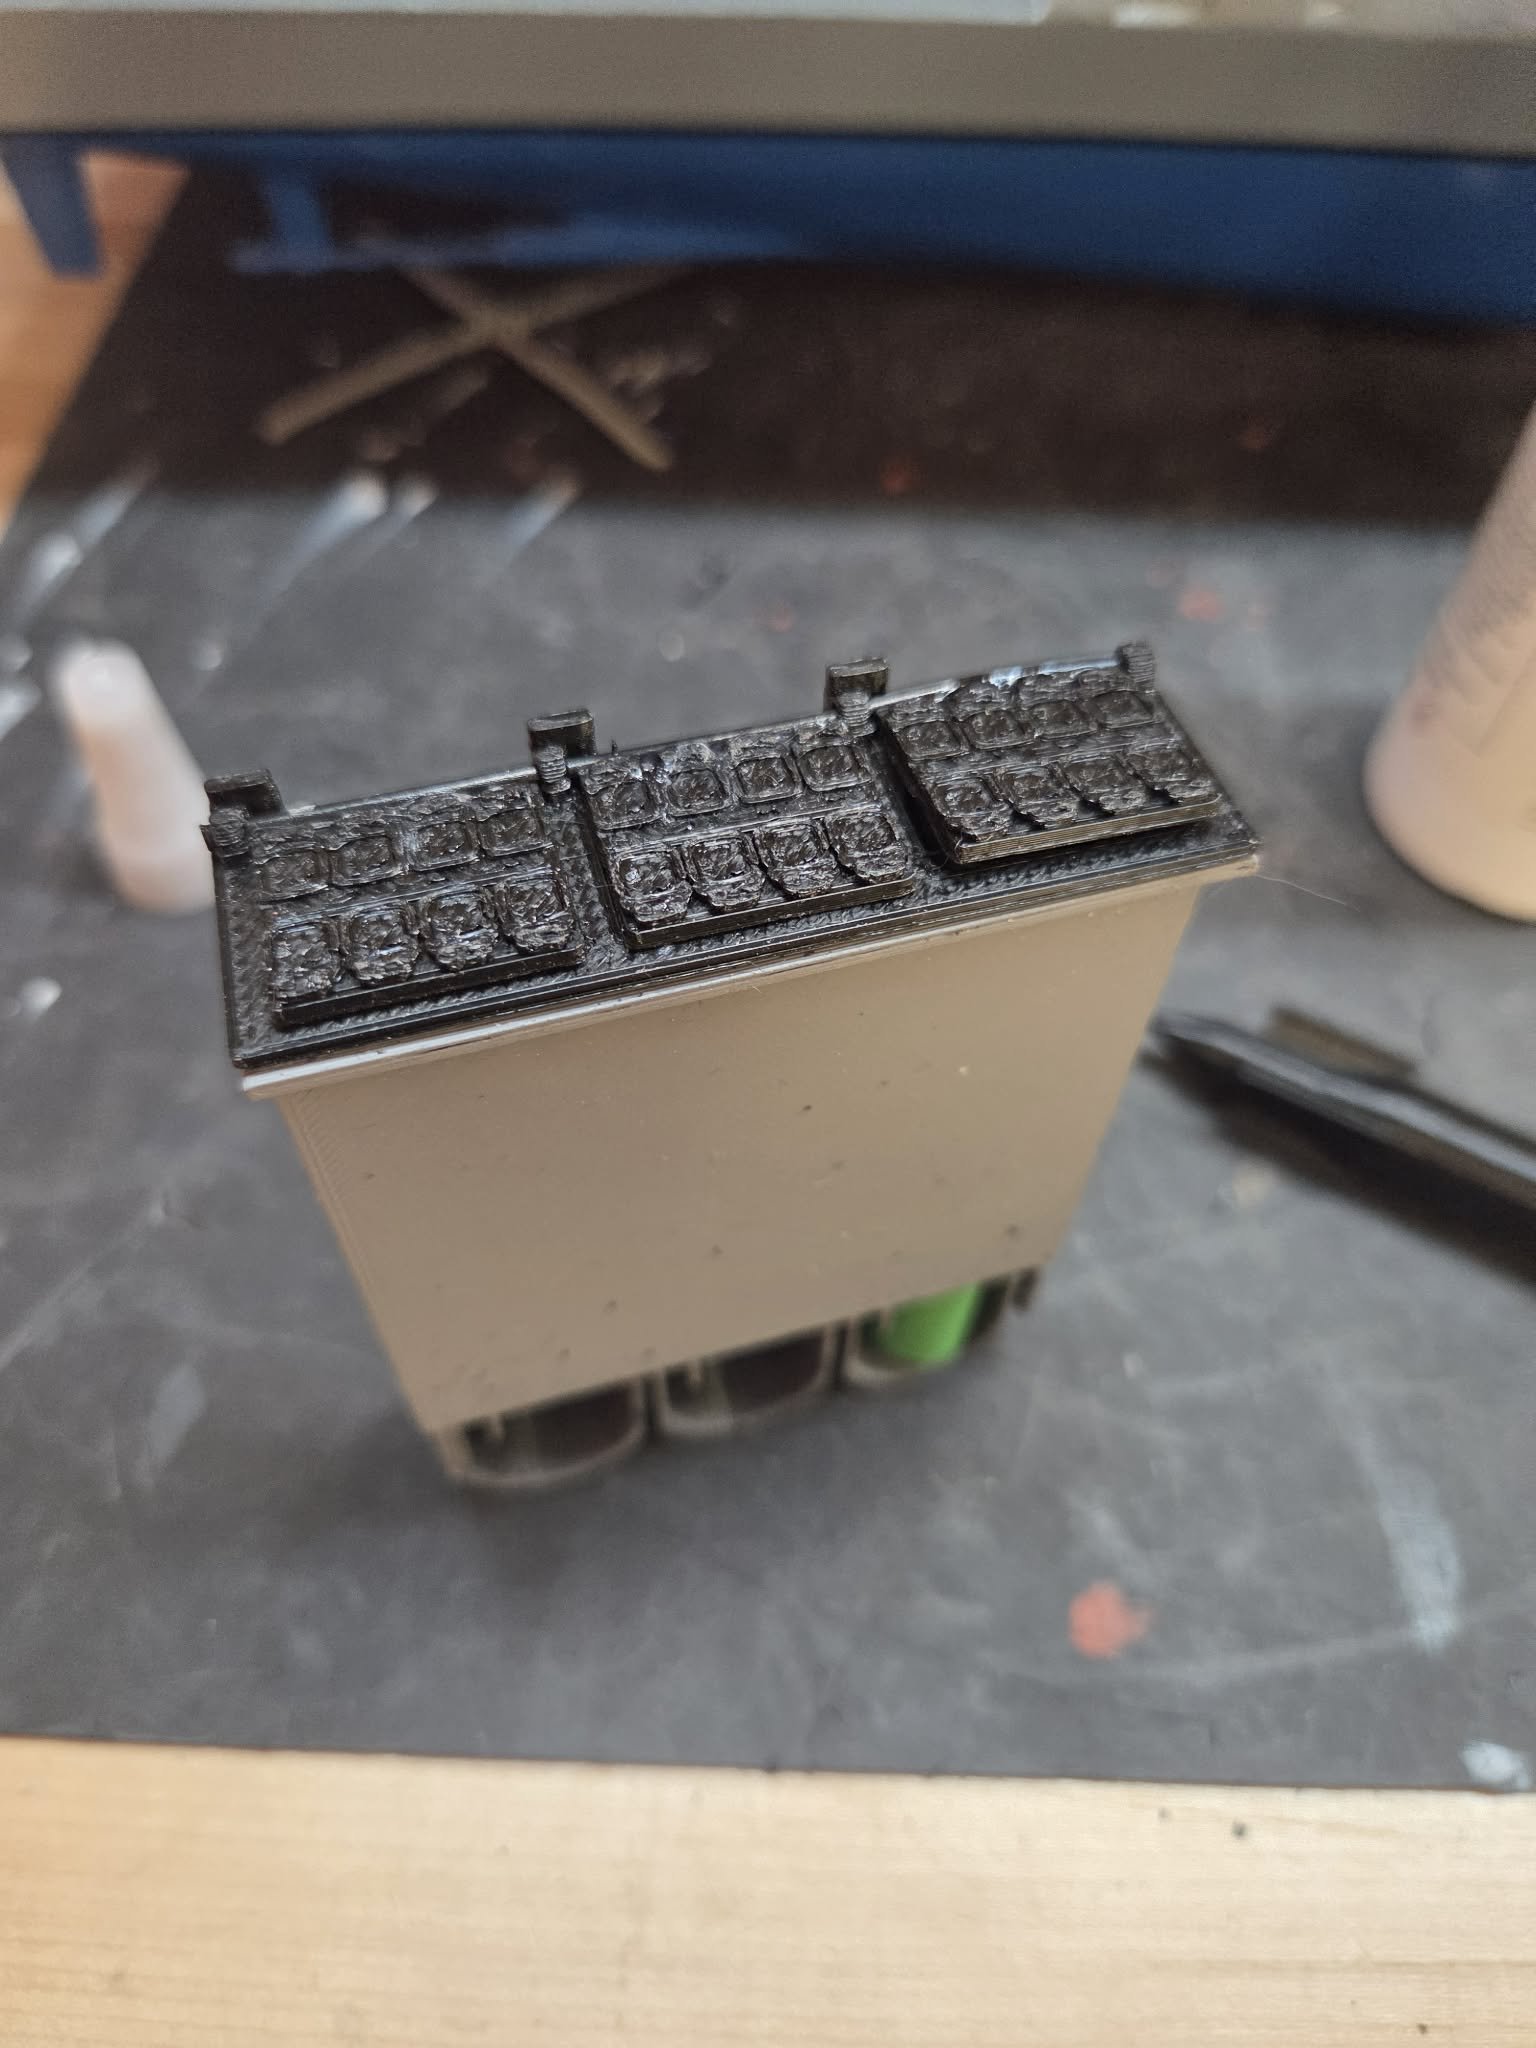
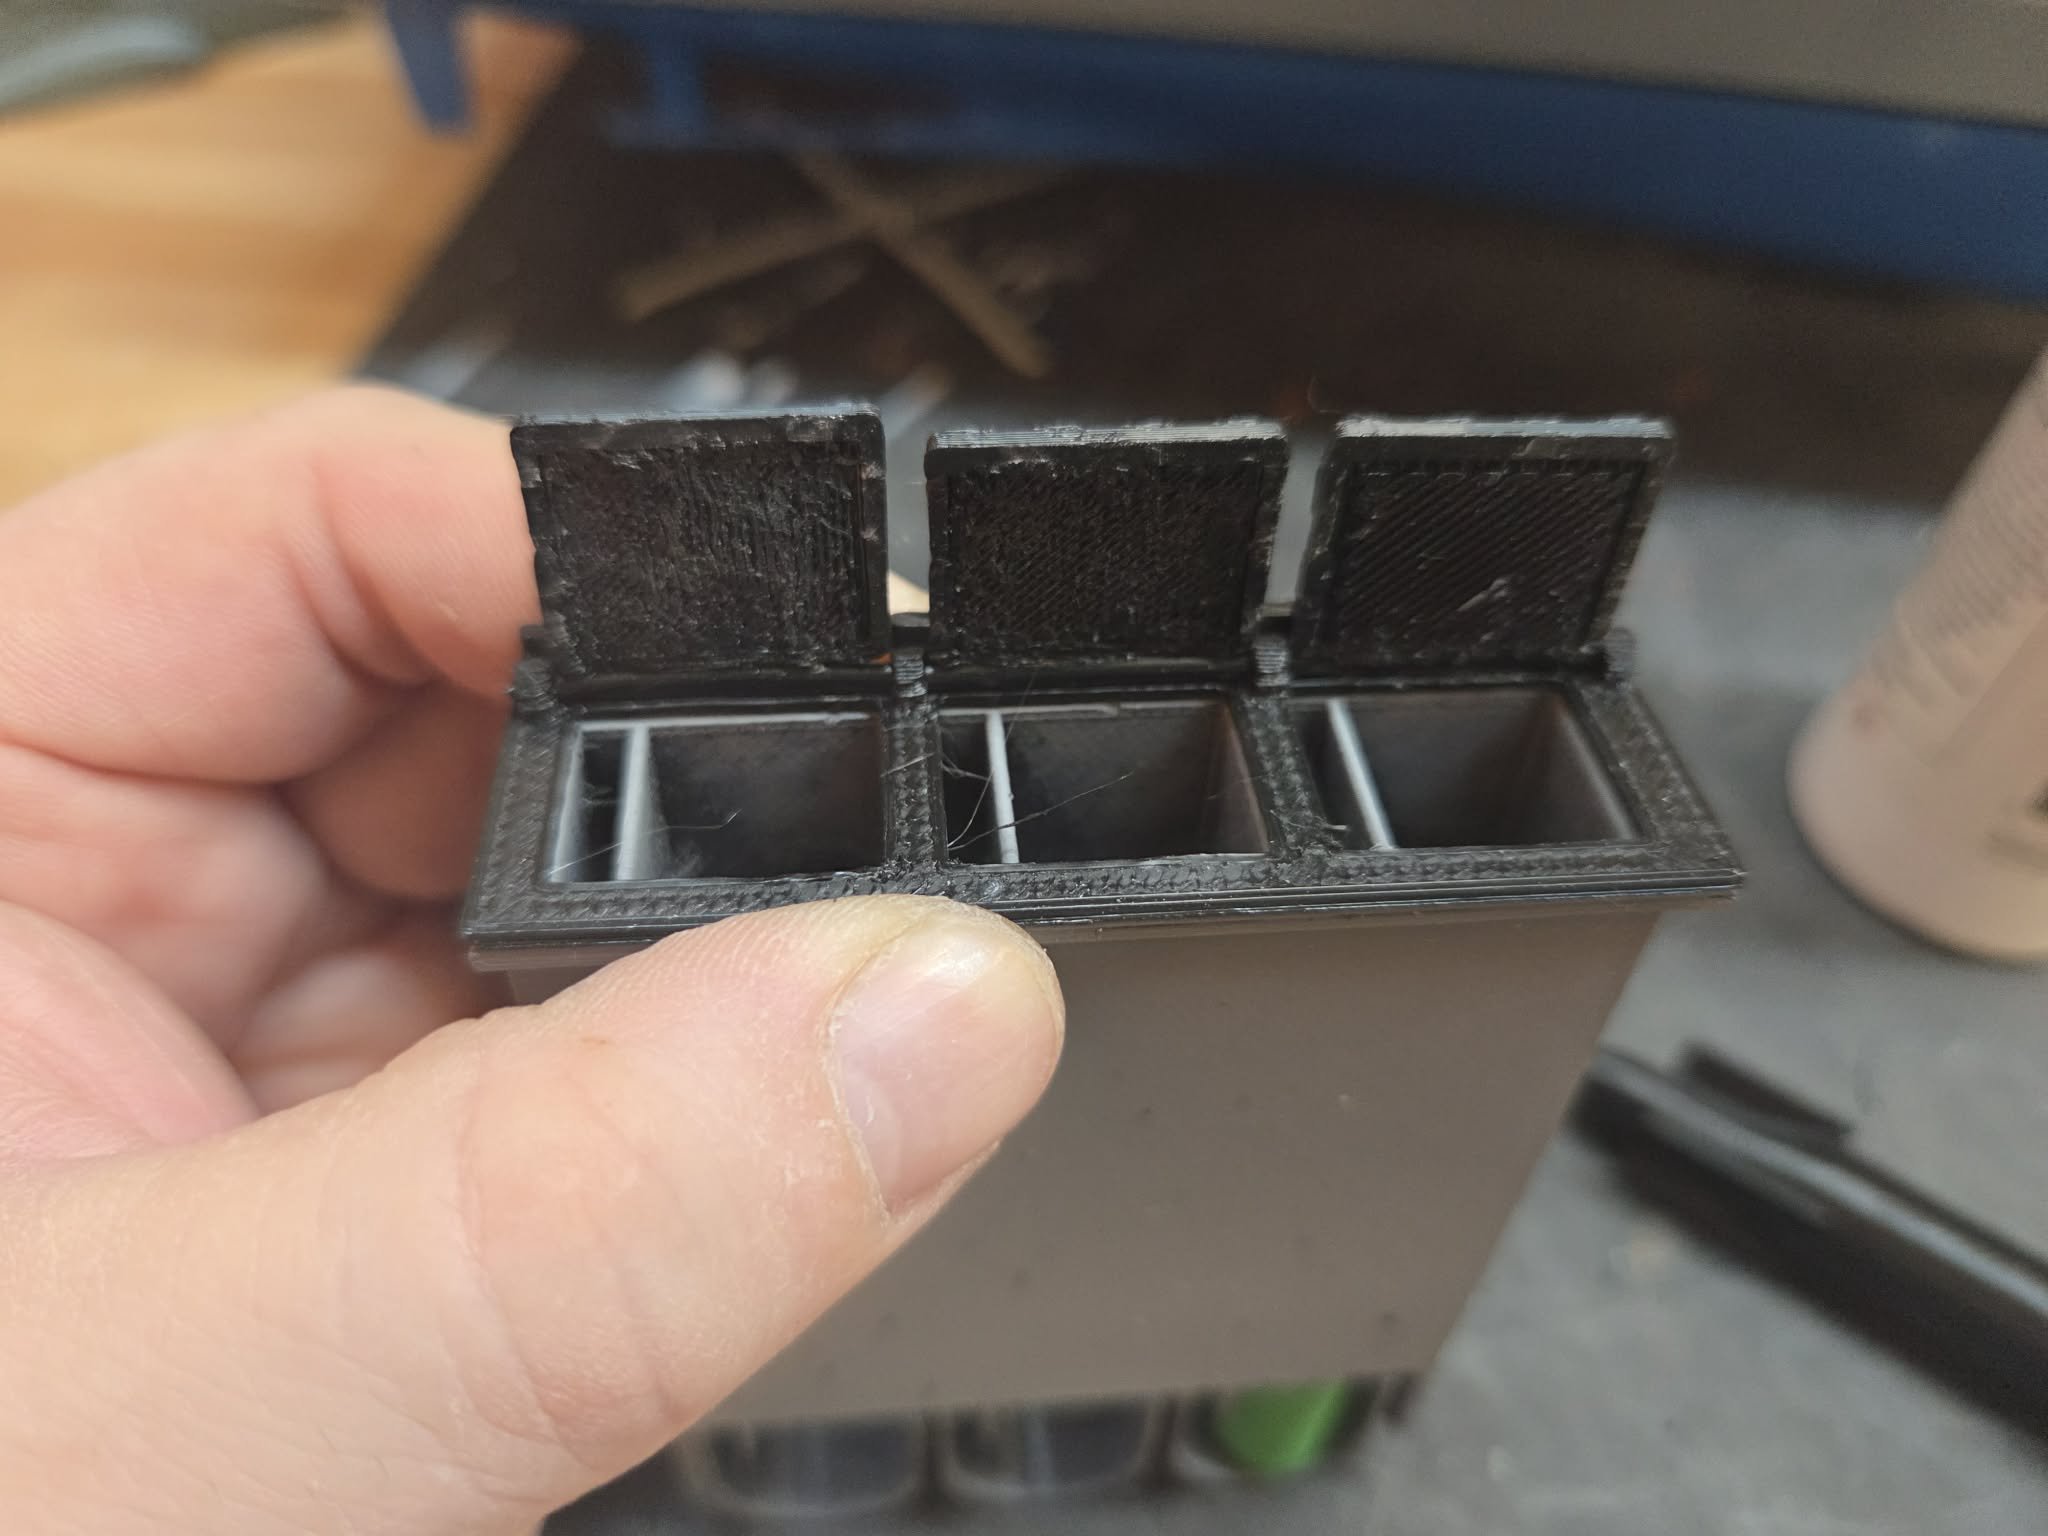
OK, the really really good thing about 3D printing is that it's very quick to shift from 1 version to the next in the prototyping stage. V3 got glued up today with brass inserts in the bottom of the J-Tubes, and I tested the 'doors' (flaps really) Here's some pictures. Each 8 cell 'pack' of the MK41 is a single tube in this scale. Version 4 is now heading to the printer once we get power back after the ice storm tonight - I needed a bit more space for the wiring channels and there were a couple of fit issues I had to solve. I'm trying to keep it simple so I can use them as effectively disposable launch tubes, but if I can re-use, I will try.


- 66 replies
-
- 4
-
-
- Type 26
- City Class
- (and 2 more)
-
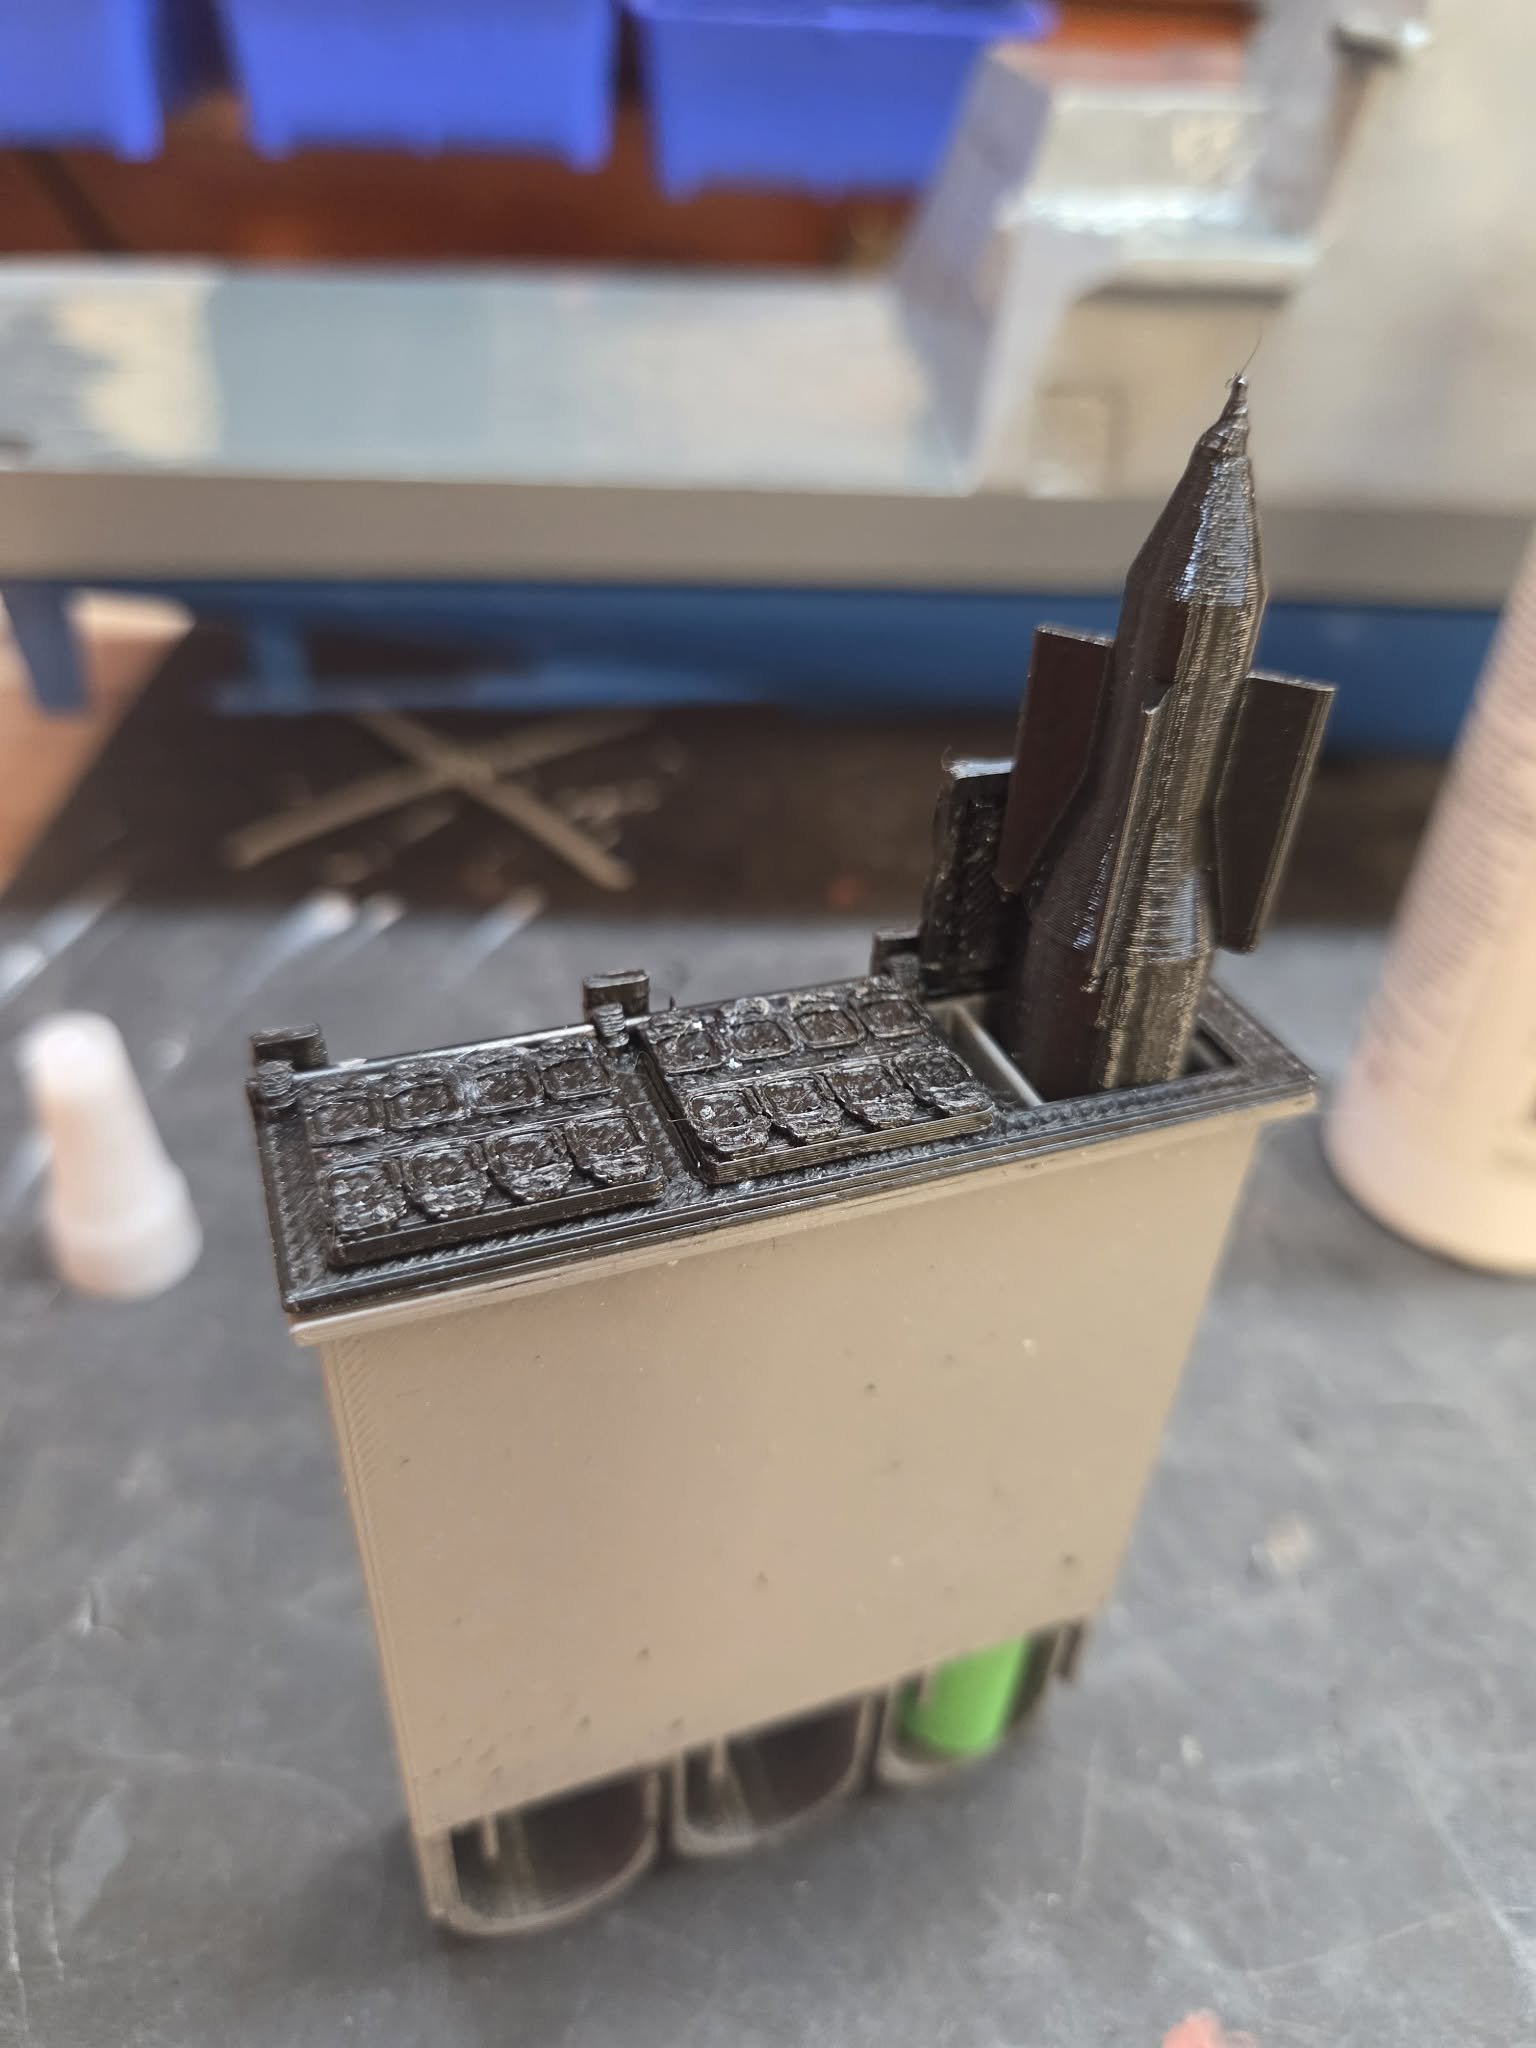
And...a few more hours of CAD work down the trace, and here's the 95% solution that I'm going to try printing I think. And...if I'm going to have a Type 26 that's got a VLS system, I'd best have a functional VLS to go with it.... Sizing it to take 3 cells with a 14.5mm rocket body to accept a 1/2A Estes 13mm rocket. We'll see if/how this works out.
- 66 replies
-
- 5
-
-
- Type 26
- City Class
- (and 2 more)