
HOLIDAY DONATION DRIVE - SUPPORT MSW - DO YOUR PART TO KEEP THIS GREAT FORUM GOING! (Only 13 donations so far - C'mon guys!)
×


DocRob
-
Posts
1,257 -
Joined
-
Last visited
Content Type
Profiles
Forums
Gallery
Events
Everything posted by DocRob
-
 That is an interesting story, Jack. I have seen Miles Davis live with his later stuff in 1985 in Berlin. I liked the concert, but prefer earlier recordings. My favorite is the soundtrack of Elevator to the Gallows and I do like the movie as well. Another hobby of mine is collecting and foremost hearing vinyl records on my very decent turntable via a good amp and quality speakers. I have several Miles Davies albums, but my interest is wide spread from classic to punk, with some bias on jazz and world music, but never boring charts stuff. Muchas gracias Alan and Craig, the blue metallic paint is a strange one. It changes it´s looks dramatically with different lightings. My good camera, which I normally use for modelling pics, was not able to render it correct, equal, which parameters I altered. I had to use my IPhone, which did a slightly better job. So much about the objectivity of photography . Cheers Rob
 -
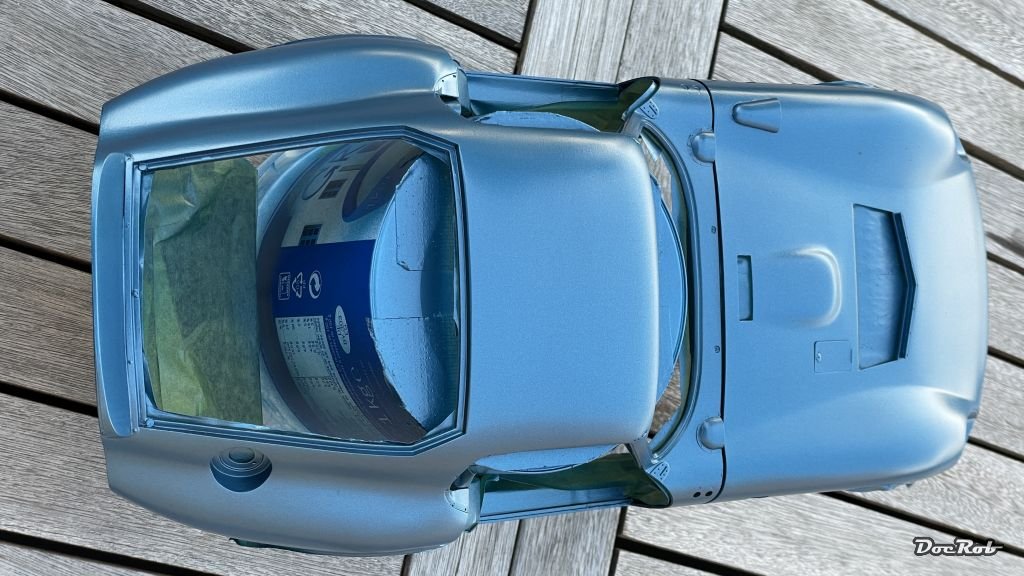
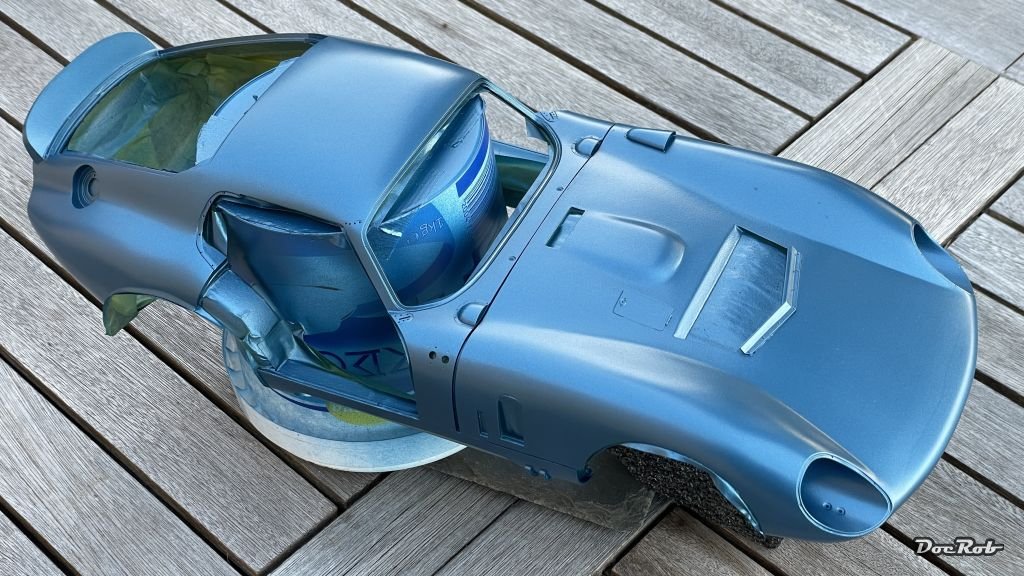
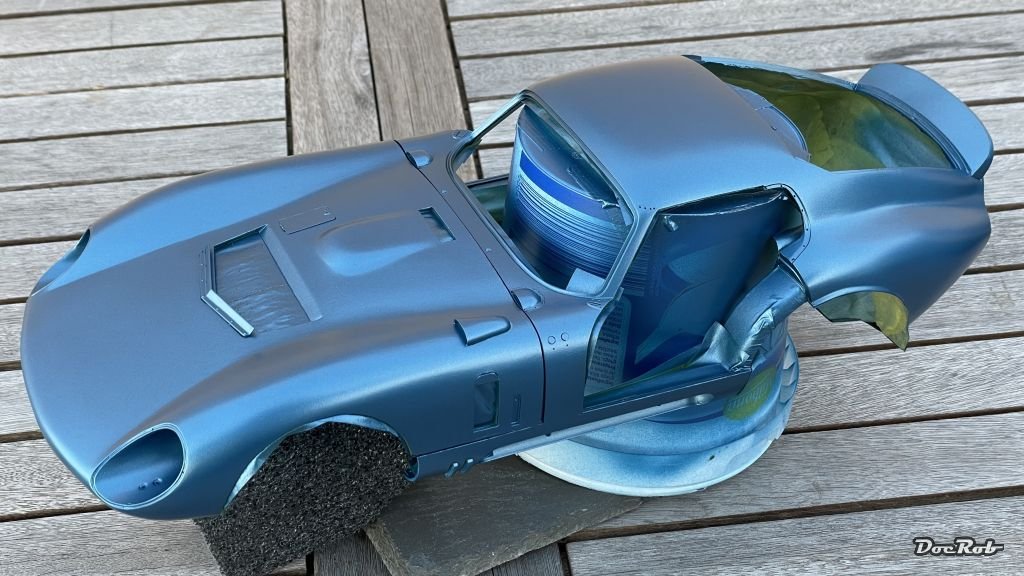
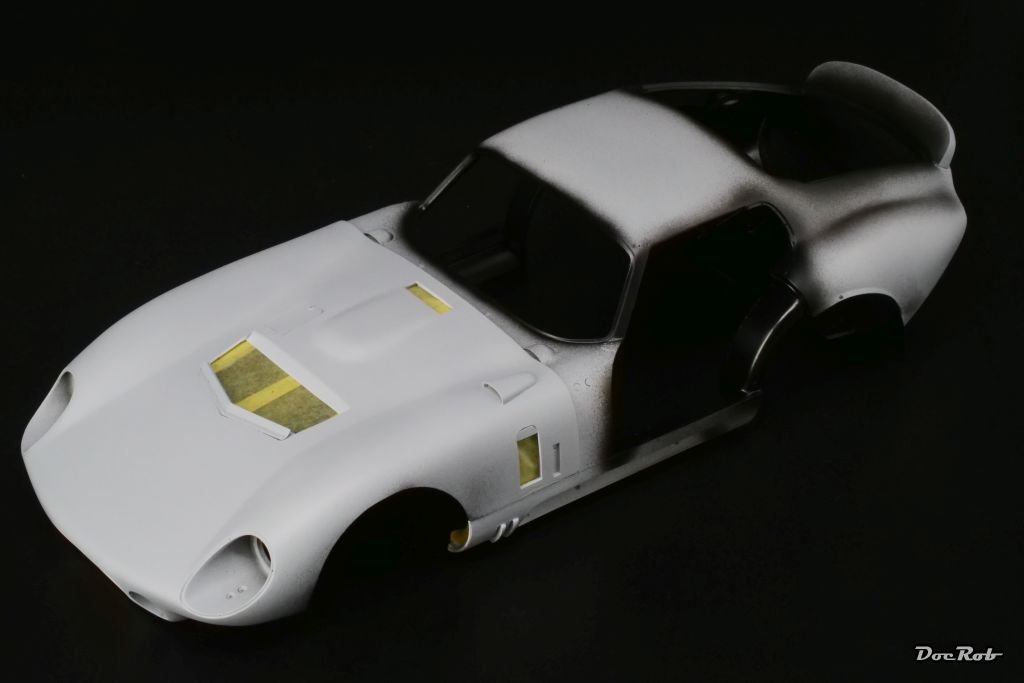
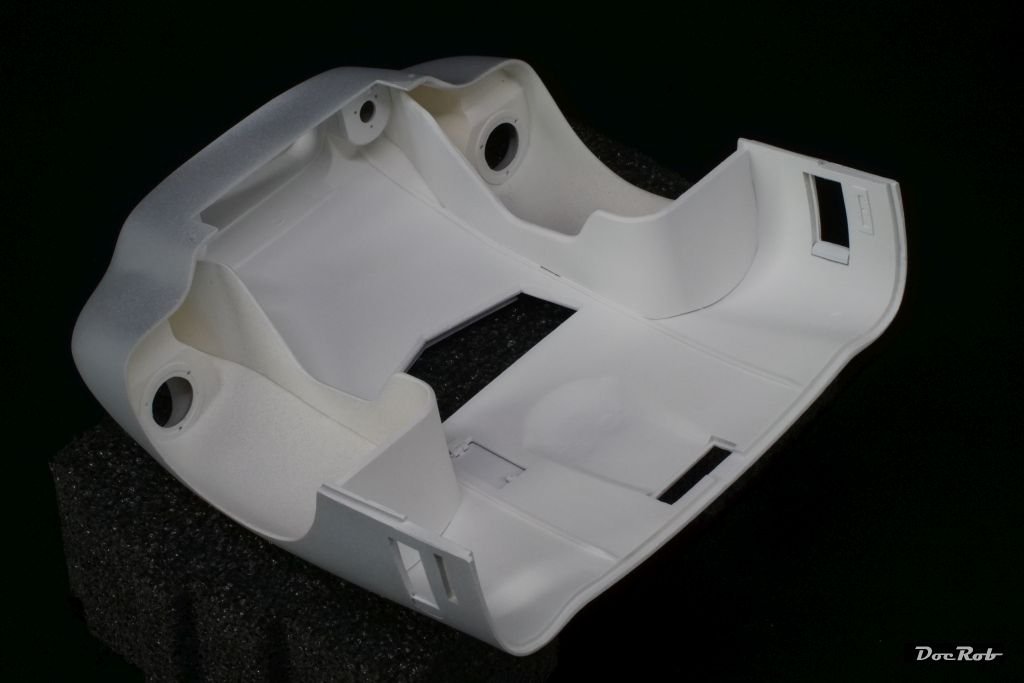
After an intense masking madness session, to protect the interior, I started with the body color. I fear, there will be color lifts with the interior, despite cleaning the resin properly, thorough priming and airbrushing, but this needs to be addressed later. It´s also one of the reasons, why I didn´t mount some of the ready painted inner fairings, before painting the body. A Kind Of Blue from Miles Davis was my soundtrack for the paintjob I used Number Five´s Cobra Blue as the main color. Other than with classic plastic kits, I had not to fear reactions with the resin and could coat a bit more liberal. I airbrushed three medium coats with a drying time of about 20 minutes in between. Number Five colors are ready to spray, but I added about a third of leveling thinner after some testing. They spray very fine and even, with extremely fine metallic grain and dry semi matte and fast. At first, I thought, coverage would be not too good, as the black overspray shined through the first coat, but after some minutes, the paint leveled and became more opaque. Besides the horribile smell, (I always wear a respirator) I absolutely love my first experience with Number Five colors. Besides, I used only one 30ml jar of color for the big Cobra, which is great to my eye. After checking, I found some tiny dots on the bonnet and will lay on a fourth coat tomorrow. Cheers Rob
-
Nice paintwork on elephant and mammoth´s, Phil and a good choice, to paint the leather accessories in red, which enhances the contrast. Cheers Rob
-
Great work on chassis and engine, Craig and thanks for sharing your soldering experiences. I will rely on CA as far as possible, but with this tiny framework, I can see the benefits of soldering. I hope you test fittet the body over it. Would be no fun, to separate unfitting parts again. Cheers Rob
-
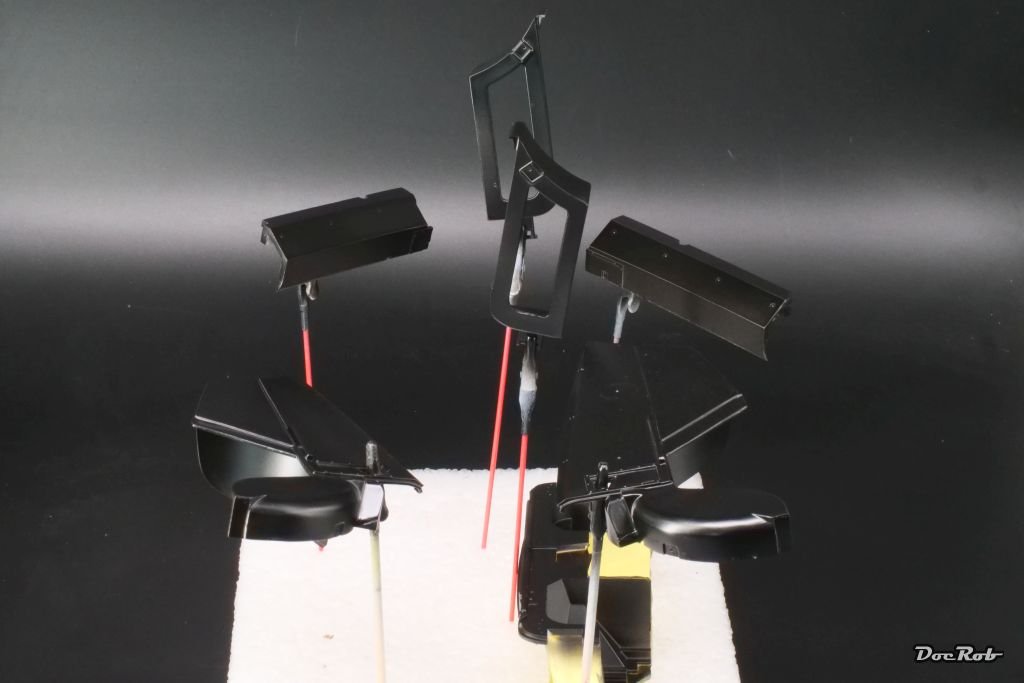
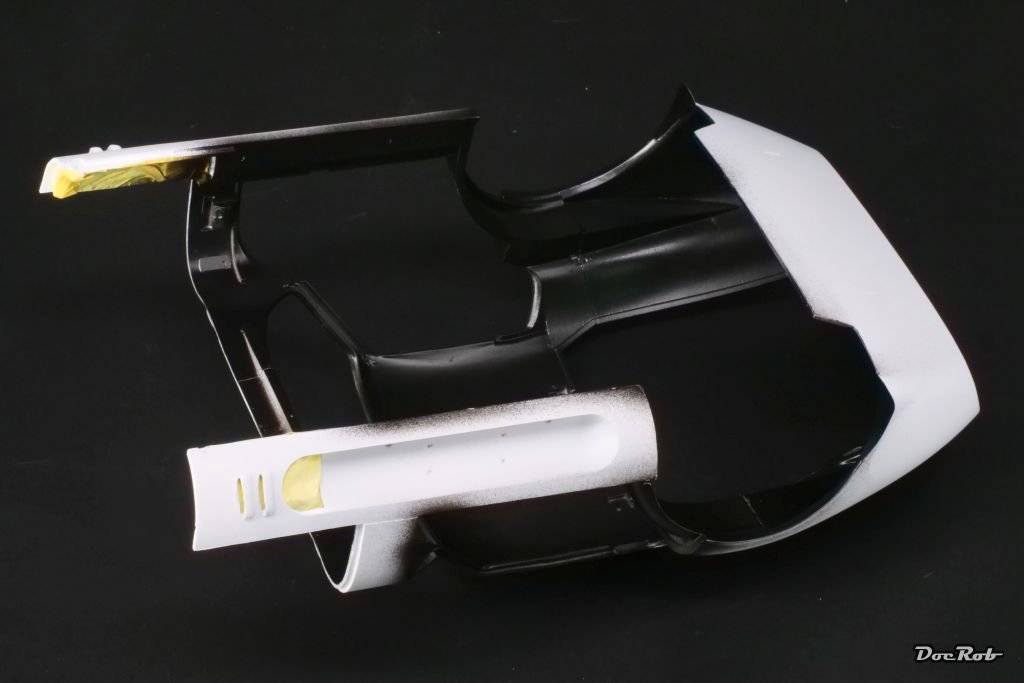
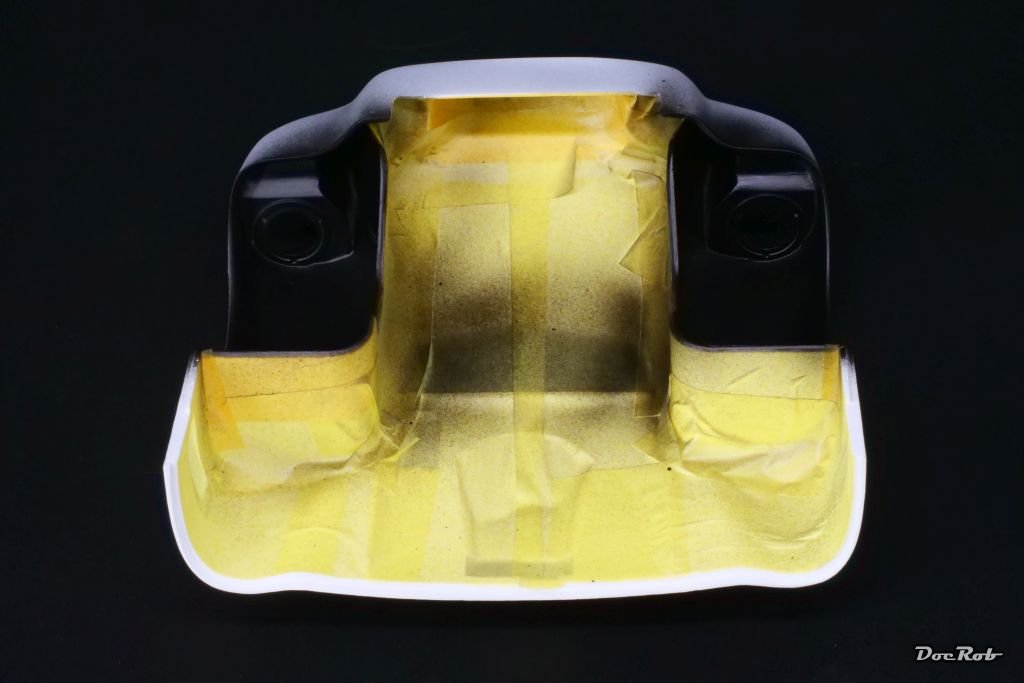
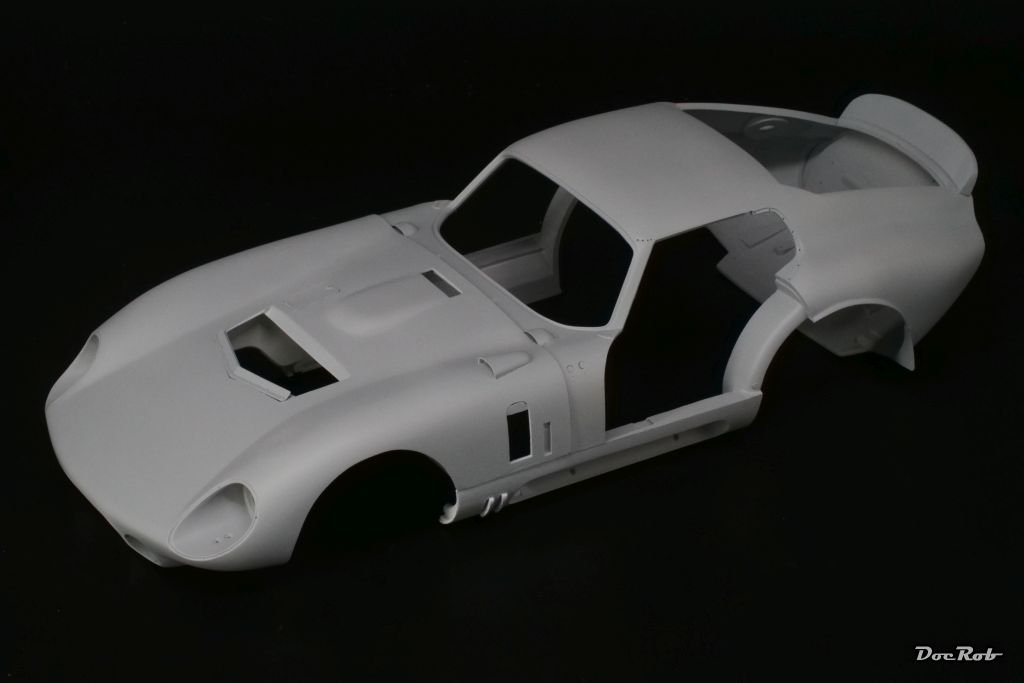
The painting stage has finally begun . I cleaned all the resin body parts in warm soapy water with a large brush and sponge first and then primed everything with Mr. Surfacer 1500 grey. After drying, I sprayed the white sections with Tamiya´s XF white (bonnet inside and firewall and small parts of the main body) These areas got masked then. Finally, I sprayed two jars of Tamiya´s excellent LP-5 semi gloss black onto the inside of the wheel wells... ... and the inside and window framing of the body. Some interior parts got also sprayed during that session. Next will be an intense masking session for the interior and a lot of praying, there are no paint lifts after. Cheers Rob
- 225 replies
-
- 15
-

-

-
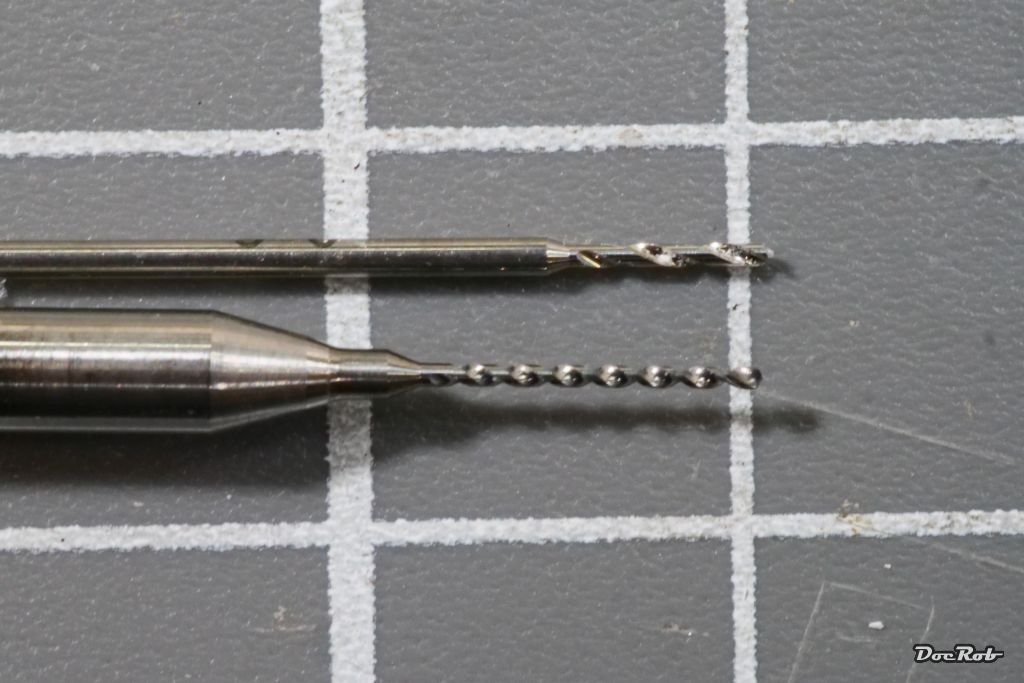
Hopefully these are the last preparations before entering the painting stage, but as often, there was one step back, before advancing. I had to remove the already installed internal framework and internal rear view mirror, because they would have interfered with masking the inside of the body later. I finalized cutting the transparent air scoop vac parts with a pair of fine scissors, sanded them to fit and dry fitted them for drilling holes for the rivets. The first side, I drilled with a 0,6 mm DSPIAE drill bit, which tended to lift up the clear part, when drilling through. I changed to a Tamiya 0,6 mm drill bit for side two and got much better results. No lifting and dramatically less burr, which is a pain to remove with these clear vac parts. When you compare the drill bits, the Tamiya is of the classic HSS style and angles, where the DSPIAE bit is like all the other PCB board drill bits and not good for drilling thin materials, as it "eats" into the material and leaves a lot of burr. Cheers Rob
- 225 replies
-
- 10
-
-
Great work, Dave. Your rigging came out beautifully. I recommended using a 0,5 mm drill bit for getting rid of the burr and cutting a slight cone into the ends of the turnbuckle tubes for better fiddling in the monofilament especially for the second time. I also recommend to cut the micro tubes with a sharp blade rolling them onto a cutting mat. This produces a far cleaner cut, than sawing. Do you plan to blend the color border around the side fuselage Balkenkreuz and Bavarian lion a bit more? Cheers Rob
-
Thank you Alan, the Cobra Coupe build is indeed a complex affair, but that shouldn´t put you off, building these type of kits. The Crocker motorcycle, I built, was a thorough enjoyable project and very rewarding. The Cobra or similar full bodied cars with doors and bonnets are not the best choice for beginning with MFH kits. I learn so many new techniques through the builds, often collected from fellow modelers build logs, that I like to share my experiences as well. Cheers Rob
-
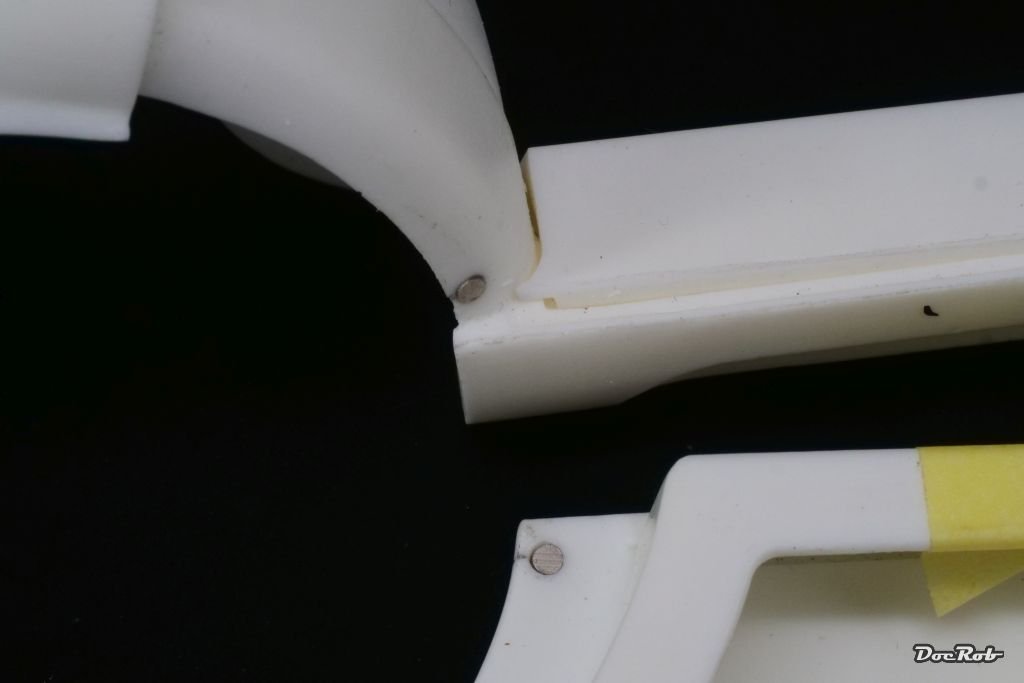
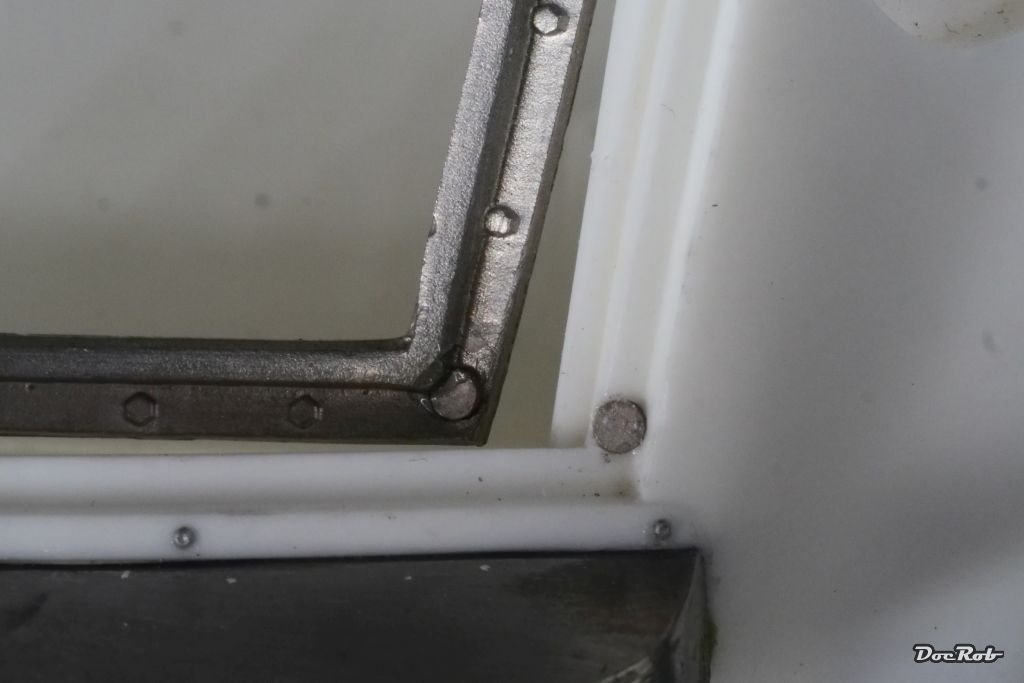
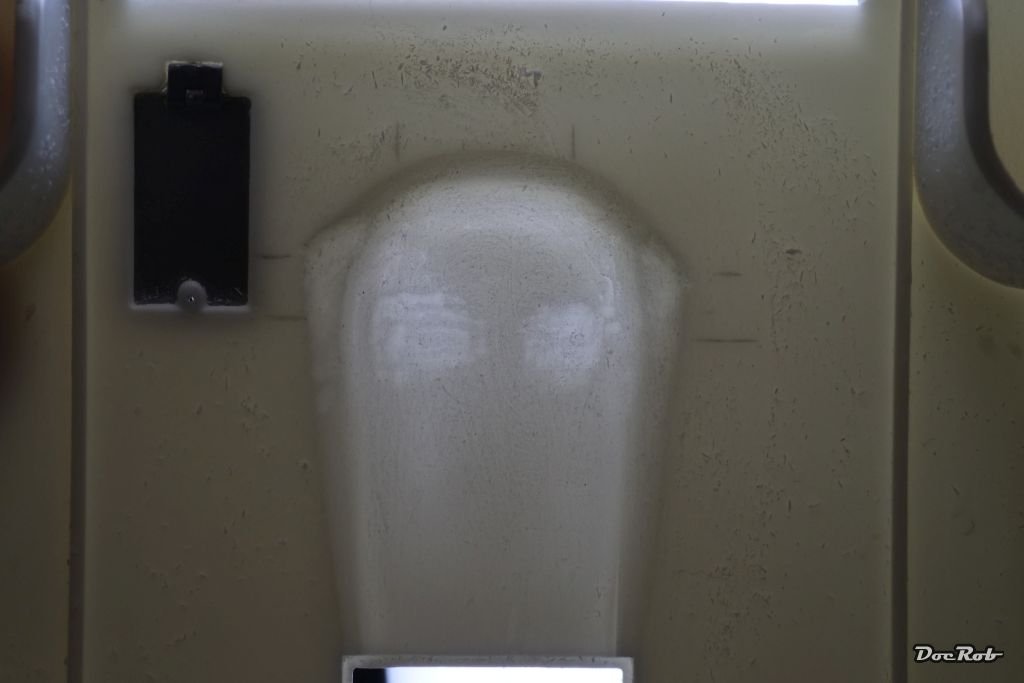
Today, I prepared all the parts, which will be added to the firewall. Again lots of cleanup work and naturally drilling holes for mounting the parts and adding tubes and hoses later. Besides, I added tiny magnets to the rear hatch and the doors. The magnets have a diameter of 2 mm and are 1 mm thick. The doors were pre-drilled with a 2 mm drill bit and cautiously finished with a 2 mm milling cutter, to not drill through the door with the drill bits front cone. You can see the magnet shine through in the doors side view, it was close. The magnets will definitely help, to keep the doors in aligned in good position when closed. Cheers Rob
- 225 replies
-
- 11
-
-
Lots of tools, Kevin. My bench is cluttered with them in the middle of this build. I even think about an in between clean up . Cheers Rob
-
Thank you Mark, I hope that solved the fit issues sufficiently, but even with all the test fitting, I can´t tell for sure, if everything is perfect, until the final assembly. With my backup idea of adding two tiny aluminum rivets, I feel save enough now, to continue with other areas, which need to be addressed before I take out the airbrush. Cheers Rob
-
Wow Greg, I had to catch up a bit on your dio and have to say, it´s one of the most entertaining and educating logs of the last time. Bummer with the resin not curing. I haven´t dared to use clear 2K resin for models bases until now, but used it with furniture. I always poured not more than one centimeter per layer for proper bubble free curing and less heat emission. I love your setting with the slimy ground, the sunken barrels and the worn boat and hope, you will pull through that obstacle ridden phase. Cheers Rob
-
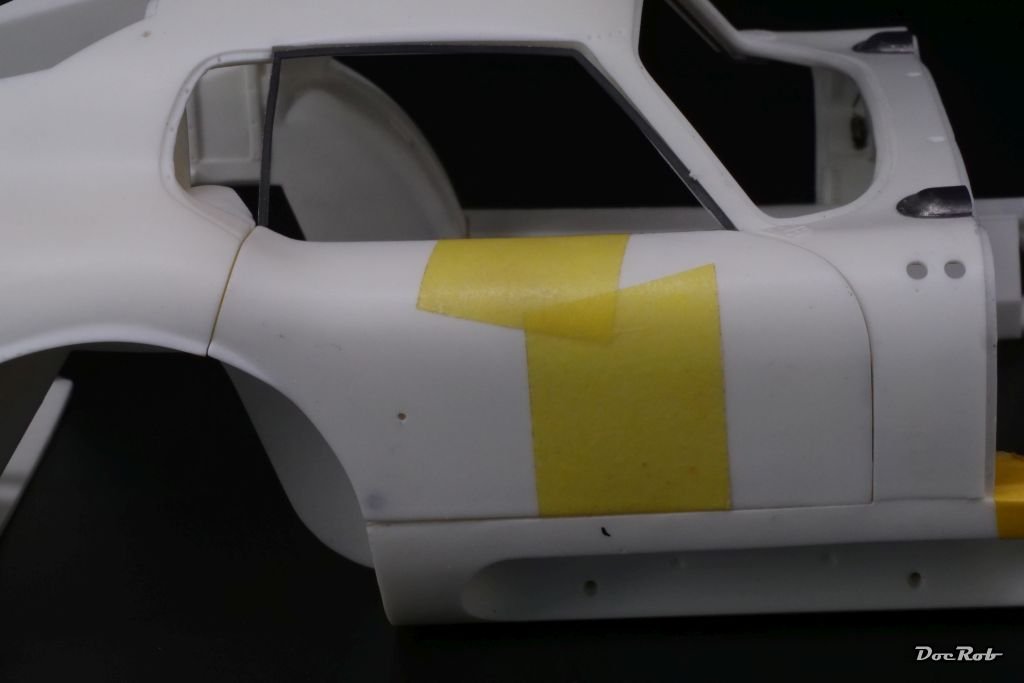
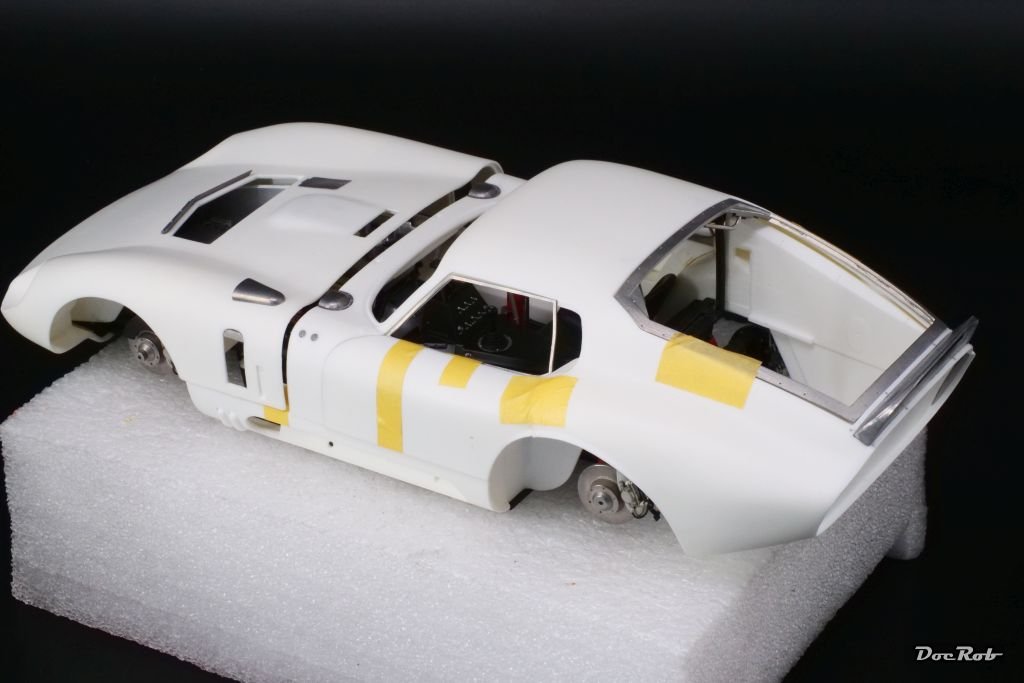
Thank you for showing, Craig. The tape, I used was the only I could find on my island. It´s thin and transparent, but when applied not transparent enough to let the body color look through undisturbed. I will check the tape you mentioned, but as it´s black, I can only use it for the tailgate, where the frame is black. It is difficult to find good double sided tapes here, even through the big A. Many articles doesn´t get sent here, but my wife is in Berlin next week and I will use my chance. Cheers Rob
-
Jaguar XJR-9 LeMans by CDW - Model Factory Hiro - 1:43 Scale
DocRob replied to CDW's topic in Non-ship/categorised builds
Very nice Craig, love the Jaguar in this livery, but prefer the version with open rear wheel wells. I hadn´t any missing parts in my two kits (Crocker and Cobra), but haven´t checked all the others. As I do the checking along cleaning and sorting, I will do it only before I start with a new build. I don´t have the space and assorting boxes, to keep all the parts of all the MFH kits checked, when they arrive here. I usually print out the inventory pages from the MFH site and check against them. These pages are also very helpful during the build for identifying parts. Cheers Rob -
Thank you Craig, I hope the fix will allow a good fit along all the other measures I took. The Februar kit is not a rumor anymore. It´s published on the MFH site. https://www.modelfactoryhiro.com/pic-labo/llimg/12_131_000.jpg Cheers Rob
-
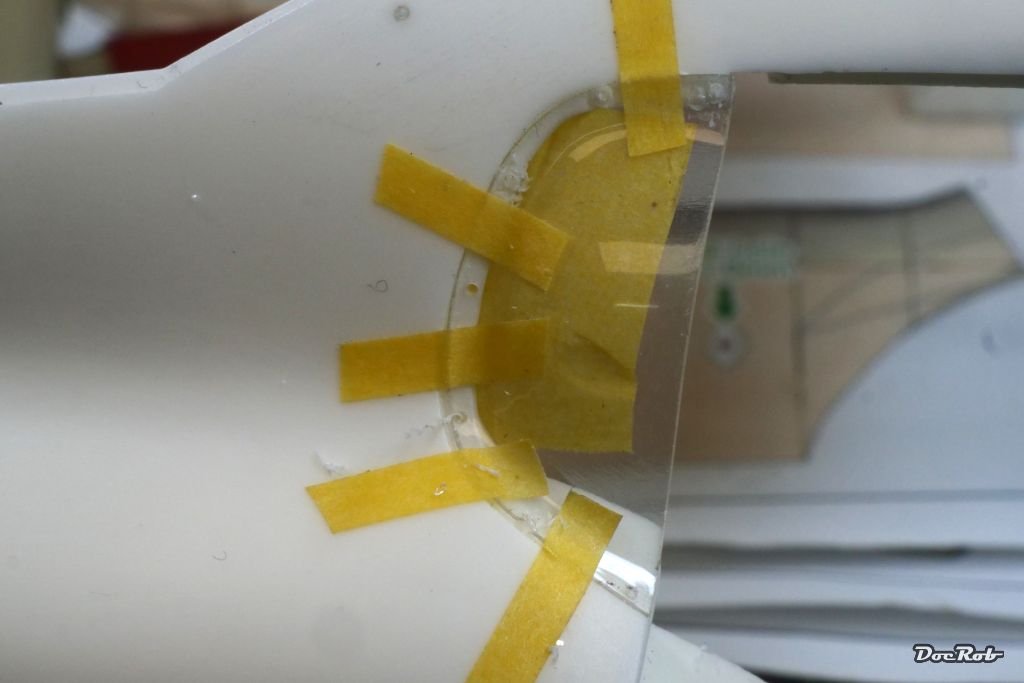
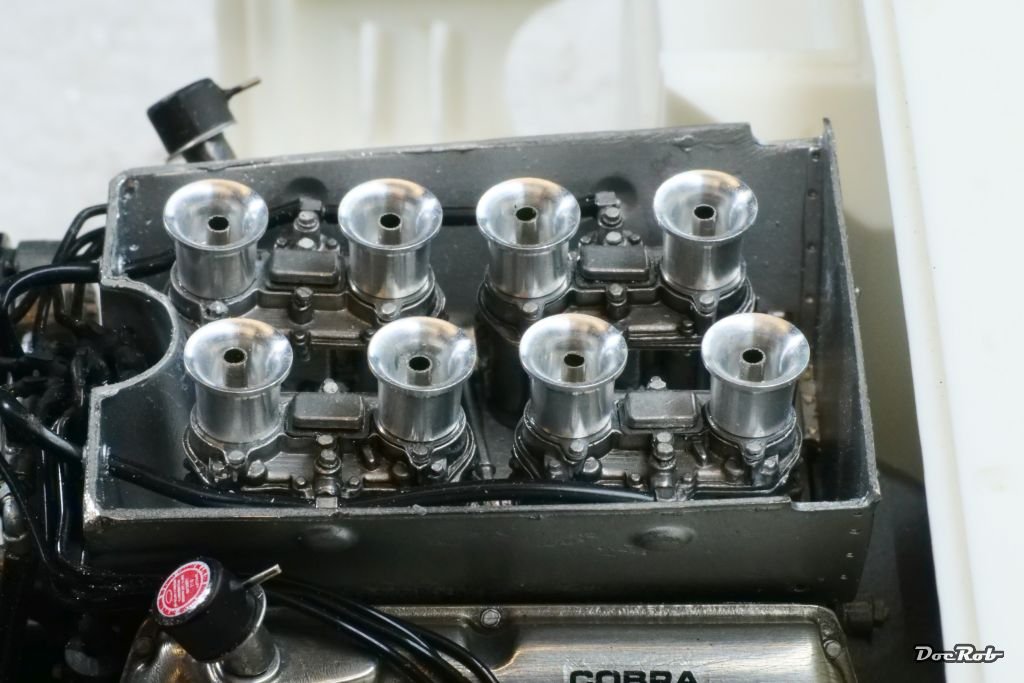
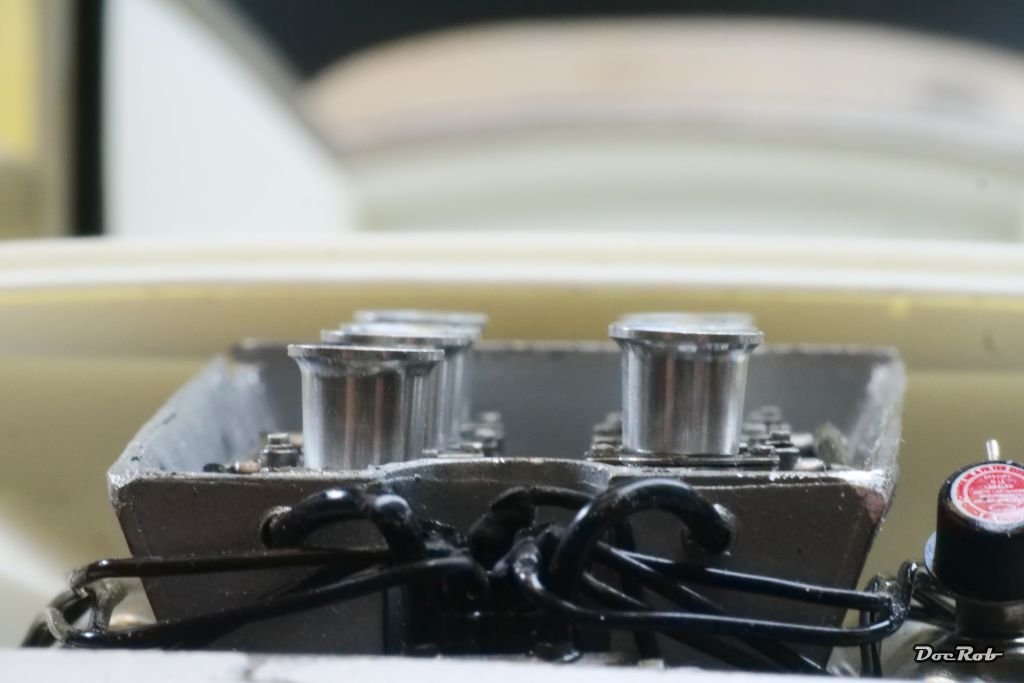
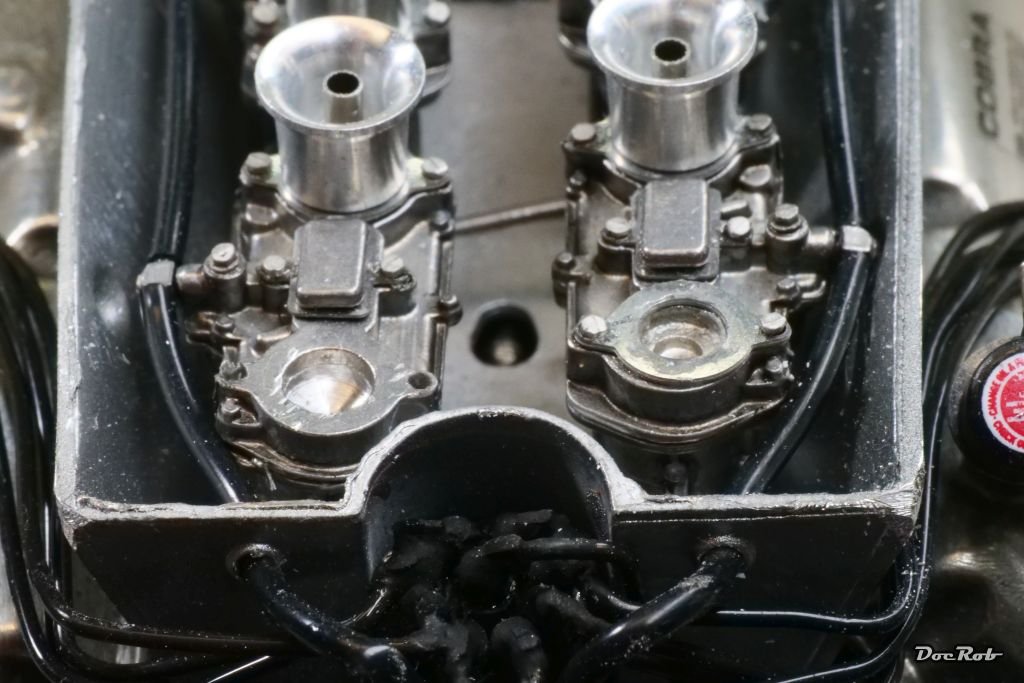
Poco a poco (little by little, like they say here where I live. I forgot to include the engine firewall into my final? assembly check. Getting everything together with the firewall, is extremely delicate, like a 3D puzzle, but after a lot of shuffling and breaking some pats off, it fits. Next, I reworked the areas of the bonnet, which connect with the chassis hinges for a better fit. Some modifications of the existing parts were needed. I also tested, how I could fit my first vac formed window in place with double sided transparent adhesive tape, which didn´t look promising at all. I need some better tape and luckily my wife flies to Berlin next week, where it is easier to get hold of better stuff. Finally, I found another method to lower the obstructing first cylinder funnels a tiny bit for a better bonnet fit. I removed the PE seal? under the aluminum funnel with a sharp blade and deepened the holes, which accept the funnels first with a 2 mm drill bit, then the outer diameter with a 3 mm drill bit (left side without PE and drilled out). As you can see, the front left funnel sits a bit less than a millimeter deeper, than the others. Not a lot, but it sure helps. I reglued the funnels and the rivets besides and like the result. You have to know, that something is missing to find it. Cheers Rob
- 225 replies
-
- 14
-
-
-
Good idea with the magnetic holder for the tiny engine. I have one as well, and will use it for my 1/43 Williams, when time comes. Cheers Rob
-
Thank you for your thoughts ,Mark, I already sanded and grinded the bonnet paper thin (the last pic of post #65), where it obstructs. The intakes are made from aluminum with an insert of stainless steel tube. I will not reduce the height of these. It looks worse on the pictures, but with only a tiny bit of force, I can push the bonnet into place and there, I will secure it with two nearly invisible aluminum rivets of 0,5 mm diameter. Cheers Rob
-
Congratulations, you´ve done it and your DoK looks fantastic. You made it look easy through your log, even with the few obstacles you mastered. I´m a bit jealous, as you browsed seemingly unfazed through the rigging stage, where I still shy away. Cheers Rob
- 207 replies
-
- 3
-
-
- vanguard models
- Duchess of Kingston
- (and 1 more)
-
I like scraping away the molding lines with a sharp blade with MFH kits. Works often better than files do. Cheers Rob
-
I read about the issues with the 917 as well Craig. I think, it´s very difficult to produce extremely high detailed kits and then everything has to fit under the hood literally. The resin bodies are thicker than the real thing and everything has to be assembled absolutely error free with tightest tolerances. I was about to buy the actual re released Alfa Romeo Tipo 33 Stradale, but shied away, because of the swing doors and huge bonnet and rear body. The only log about an Alfa build was a series of YT-videos, actually a double build. With both, the rear end wasn´t fully closed and that put me off. I hope F1 cars are a bit more forgiving, as I plan to build some soon from my stash. At least, there are no working doors or bonnets to take into consideration.
-
Thank you Egilman and you are absolutely right. If there is something minor off, it will haunt you later. I had the same with the Crocker, where I had to seriously tweak some sub assemblies to get everything together. With cars, it´s even more difficult, as tolerances are tight and there are more parts potentially obstructing involved. One difficulty with these cars is, you can´t foresee all the possible implications, which can arise in earlier stages of the build and you can´t really test fit early on. You have to build as precisely as possible and hope for the best. Thank you for believing into my trouble shooting skills. I´m sure, I can sort out the problem sufficiently, maybe with a bit of improvisation. Cheers Rob
-
Thank you Mark, I will not alter the fit of the engine, if I can find another way to solve the problem. The chassis engine combo is one unit now and there is no way to separate these without destruction. Cheers Rob
-
I hope so Craig, there are limits about what I can further do. I may end with a bonnet, which not falls into place by itself, but needs a little push and two tiny rivets for fixing it closed. I could live with that. This is a very critical phase of the build and I don´t want to rush it, but I feel, in the end everything will come together sufficiently. Cheers Rob
-
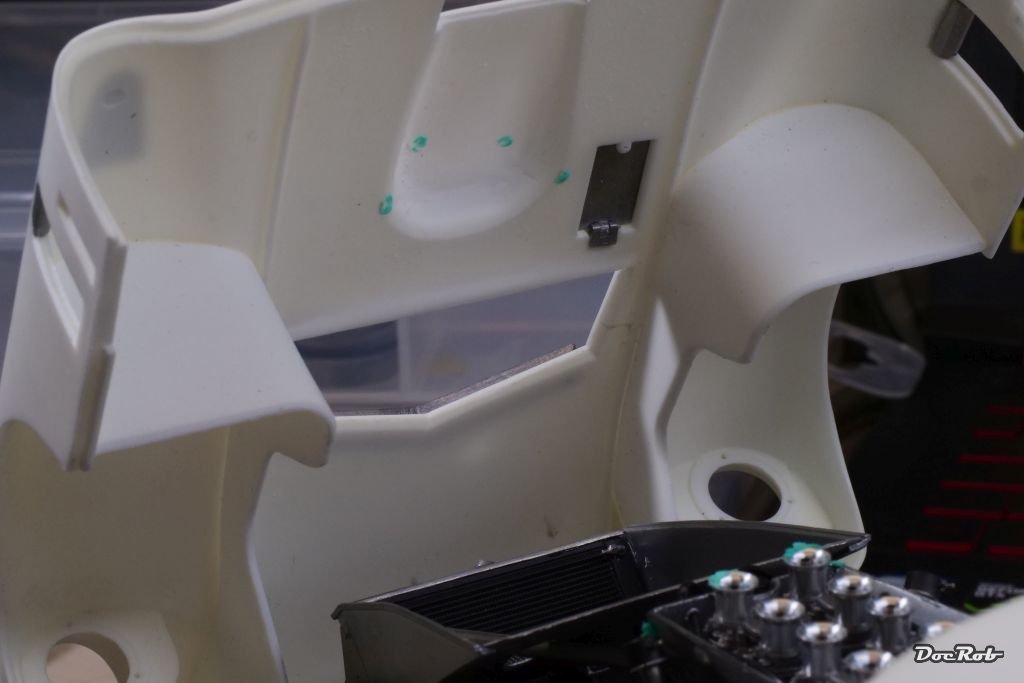
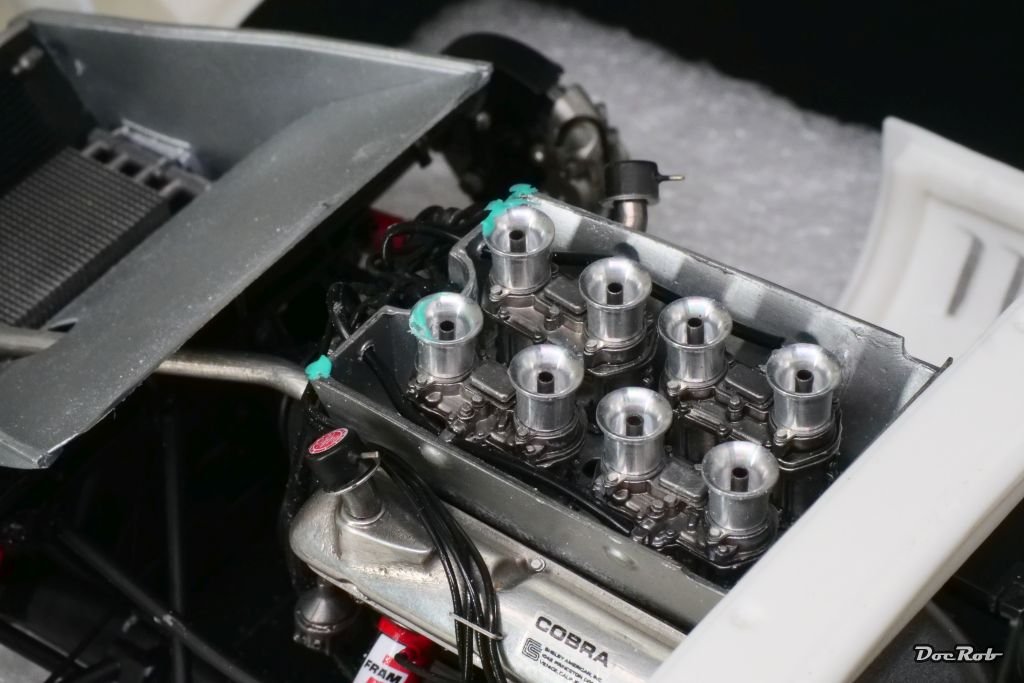
I dreaded the day, but it had to be done. I speak about final test fitting of the main components, in this case the body to bonnet fit. This is quite delicate, as so many parts and sub assemblies are involved and the process is painful with some loosened parts, etc. and takes hours. First, I screwed the body to the chassis. All doors and internal parts are only fixed preliminary. Then I mounted the bonnet to it´s hinges on the chassis and got that: When I force the bonnet down, it will more or less fit, but without locking it somehow, it will open like shown. I tried to identify the protruding parts and attempted to look, where they interfere, not an easy business, with only two tiny openings to see through on the sides of the bonnet. As I identified the possible culprits, I dabbed some liquid mask onto them and closed the bonnet and bingo got the interfering locations. In an iterative process, I removed the material as much as I dared and now the bonnet is paper thin, where the front funnels sit. It closes a bit better now, but not near as perfect as it should. At some point, I have no more possibilities to enhance the fit, as I also thinned the part in front, where the hinges meet the bonnet, to raise the bonnet a tiny bit. I will make a final try and then, I will add two tiny bolts, which force the bonnet into place and can be removed to open the bonnet. Cheers Rob

- 225 replies
-
- 15
-
-
