
Coyote_6
-
Posts
555 -
Joined
-
Last visited
Content Type
Profiles
Forums
Gallery
Events
Everything posted by Coyote_6
-
 I love these Cape stories Phil. Really brings her to life. Good deal.
- 492 replies
-
- 3
-

-
- minesweeper
- Cape
- (and 1 more)
-
Curious construction Phil. Based on the images of the remnant simply scribing them would render the effect, but who would want to scribe 40 something parallel lines onto the hull? Am I right those "gaps" would be 0.005" at 1/48 scale? Yikes.
- 492 replies
-
- 3
-
-
- minesweeper
- Cape
- (and 1 more)
-
Very elegant little pilot boat. Well done!
-
That looks awesome - nice match!!
-
Nice work Phil! I was going to make the joke that "now it's ready for a tarp cover", but didn't think it would be funny. Seriously - nice build. Can't believe how small that is - the detail is awesome.
- 54 replies
-
- 1
-
-
- 18 ft cutter
- ships boat
- (and 1 more)
-
They look good both ways. Nice work!
-
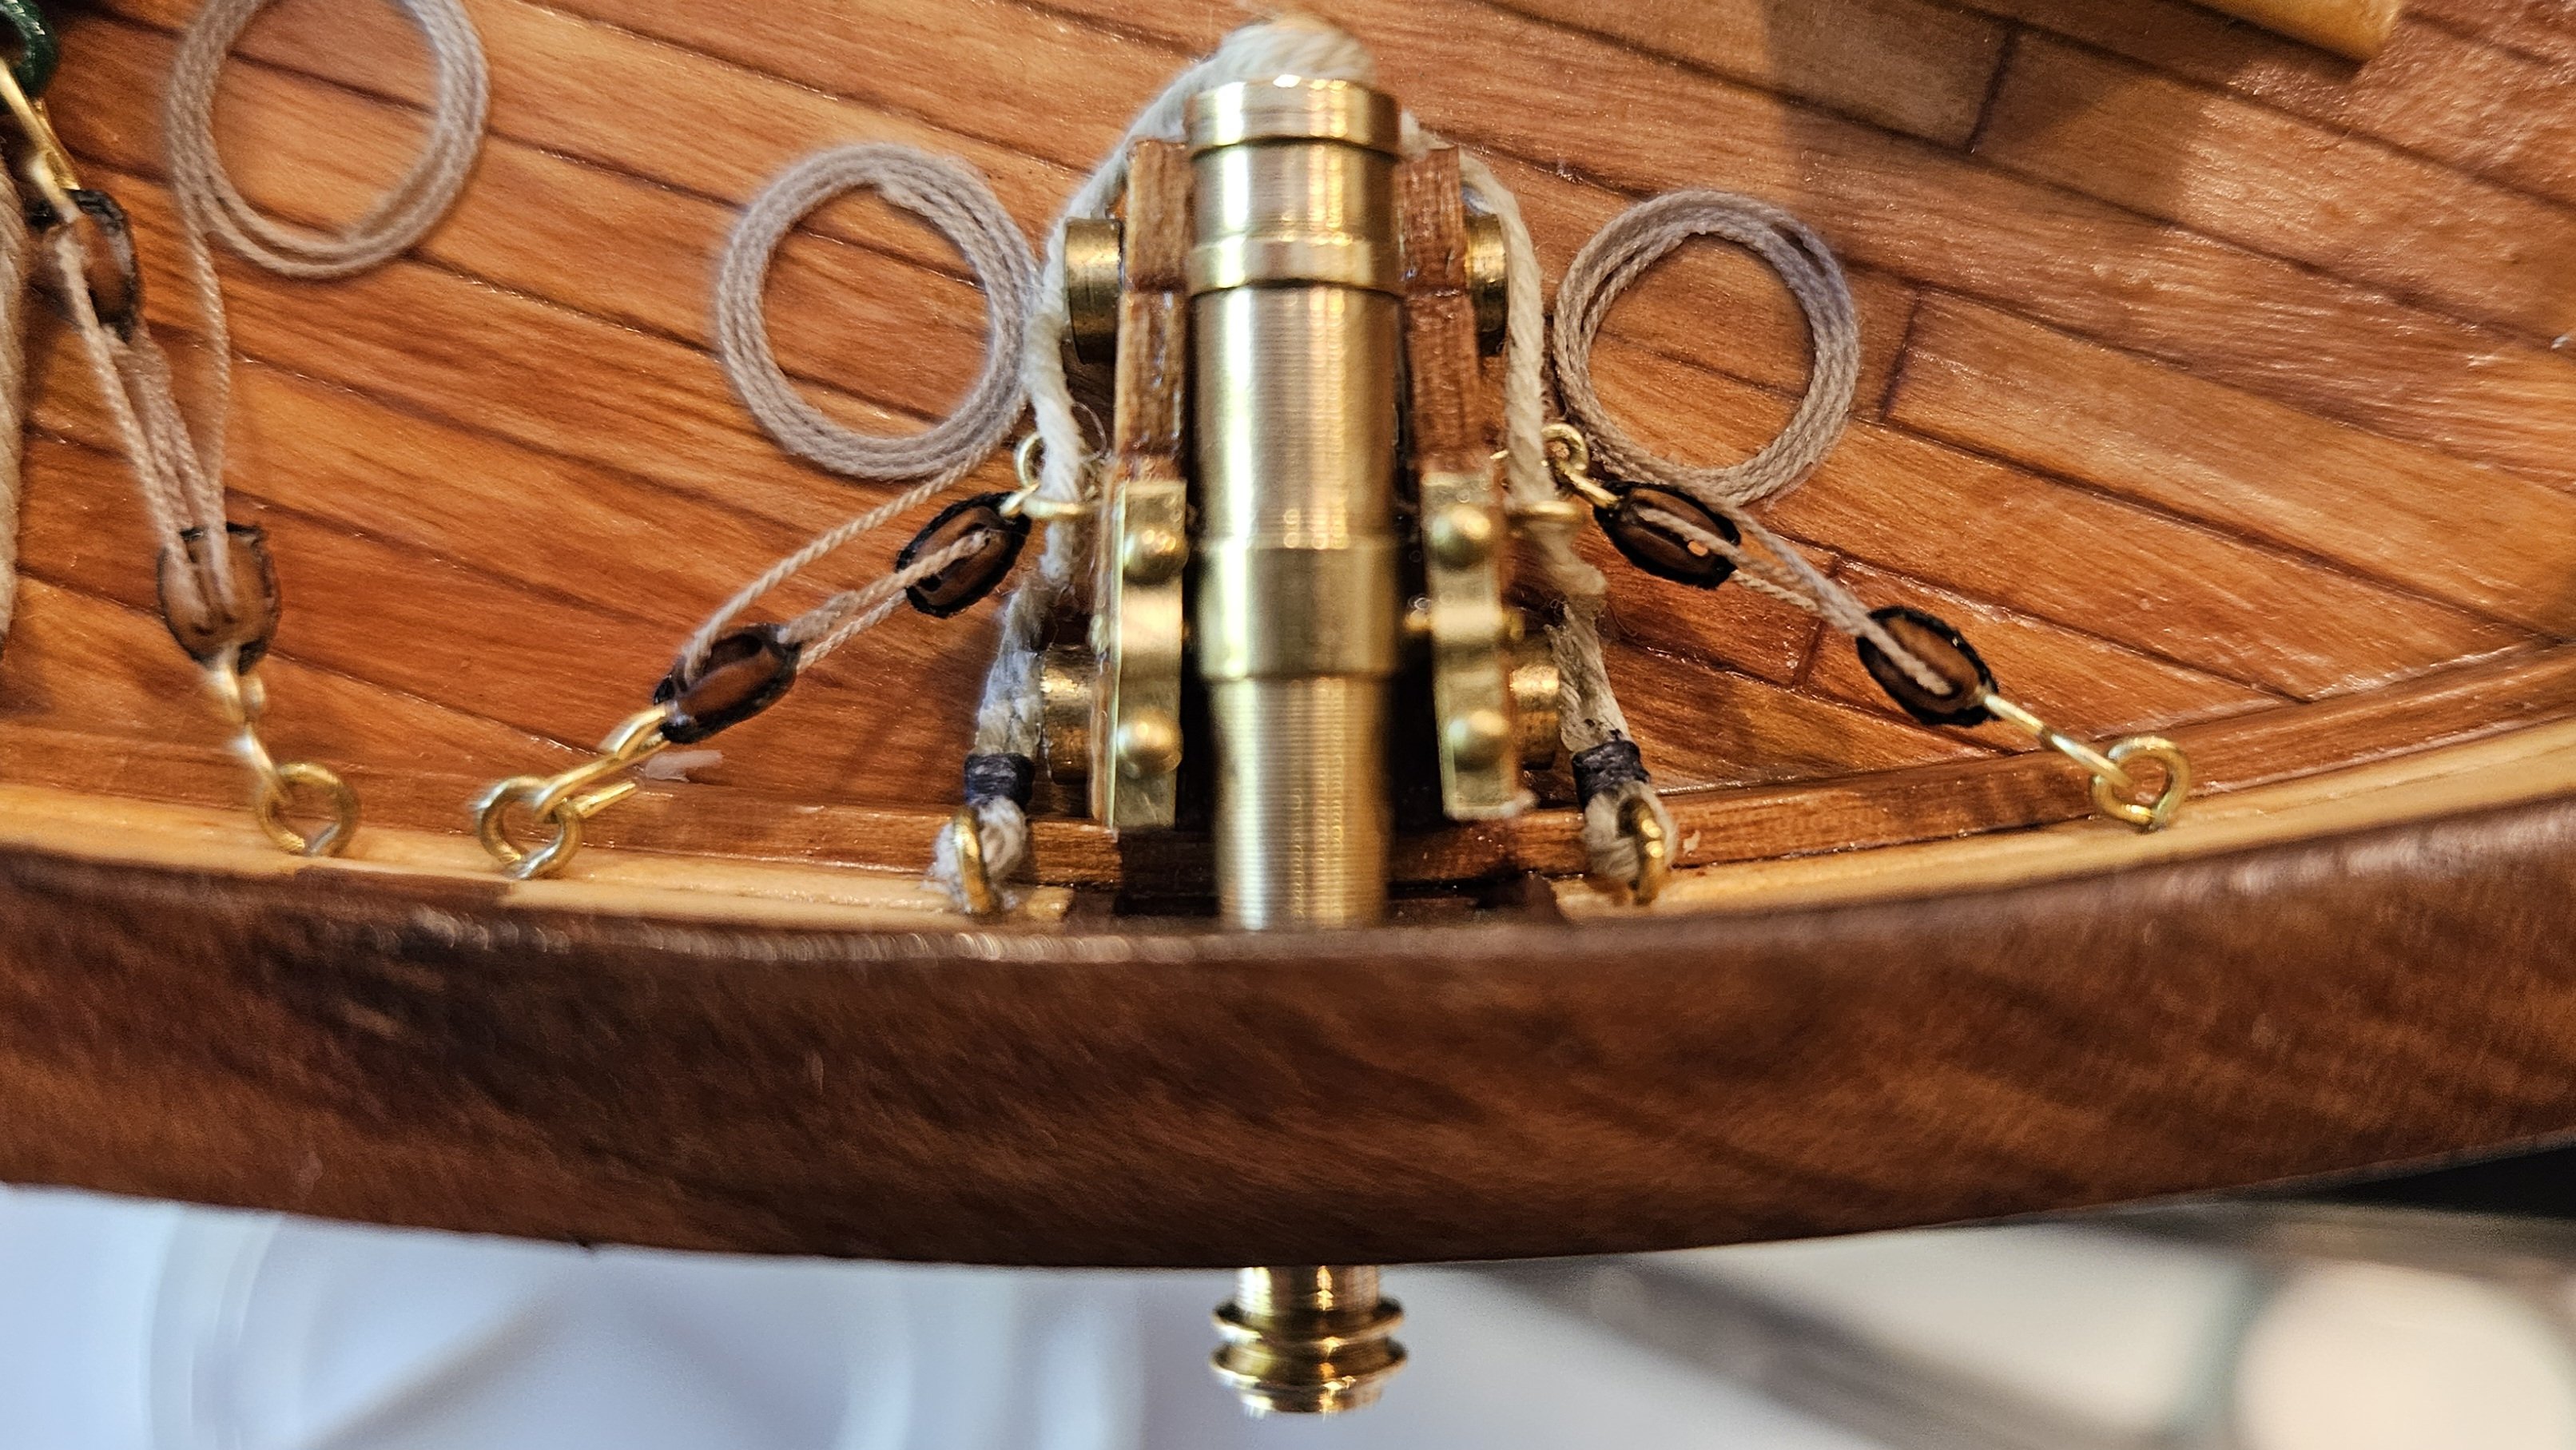
Guns are done! Two 6 lb bow chasers... And the full complement, sixteen 12 lb carronades and the chasers, all rigged and ready for action. Whew.


-
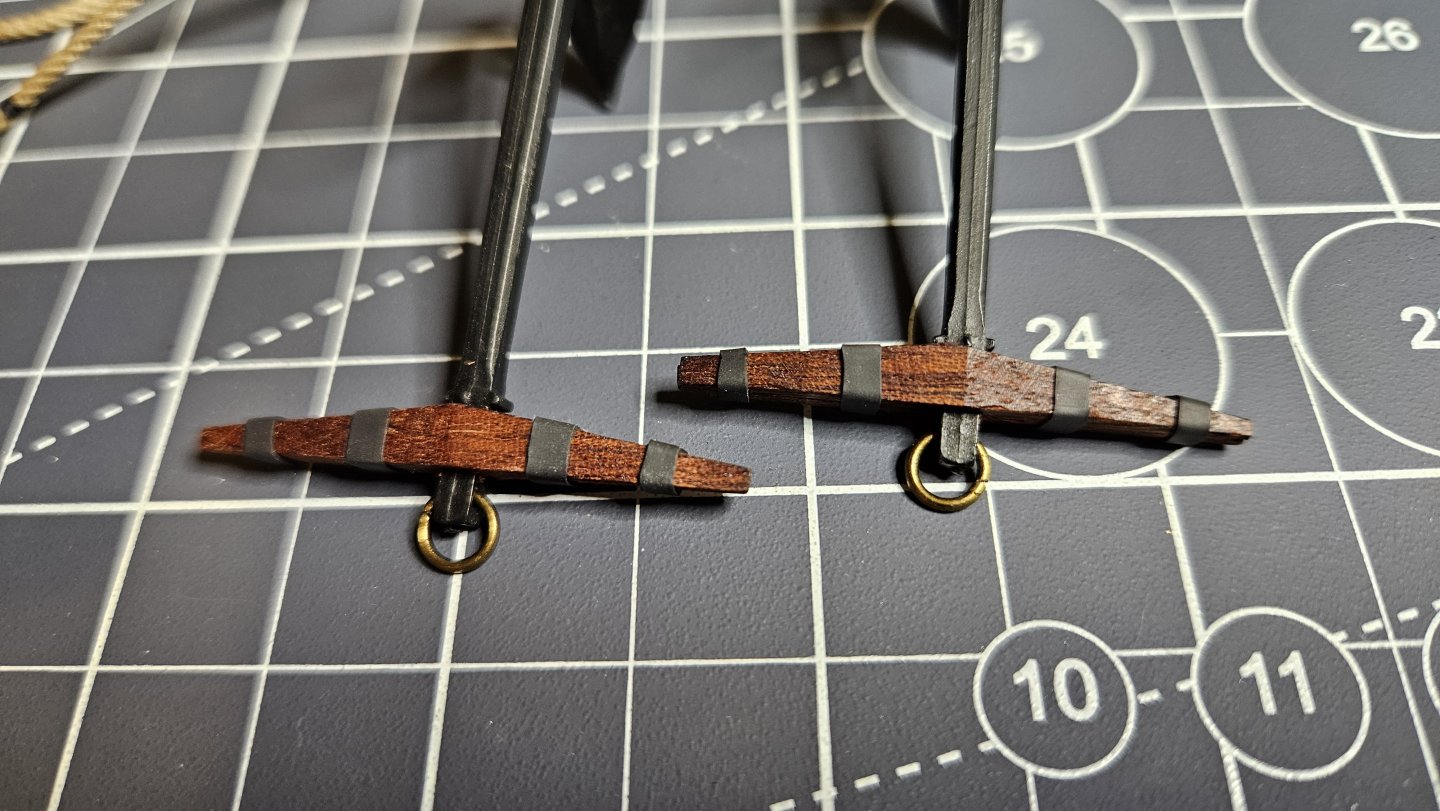
May 2nd, and the anchors are still in one piece, so that is good. The Amati figures should probably be primed before painting going forward. I saw a post where someone banded the anchor stocks with heat shrink tubing so decided to give it a try. Pros include uniform size and square angles/snug fit all around the slanted stocks. Con is maybe the matte look? Could paint, or maybe cover the stocks and bands with satin poly? Thoughts? Anyway, finishing up the rigging on the last chase gun and then getting started on the anchor rigging. Yo ho, yo ho...
-
Awesome Mark. Good choices sir (year round modeling, a personal copy of The Global Schooner) - you will not regret either!
-
Nicely done. Can't wait to see her in the davits!
-
Beckets on bluejacket double block
Coyote_6 replied to Barbara's topic in Masting, rigging and sails
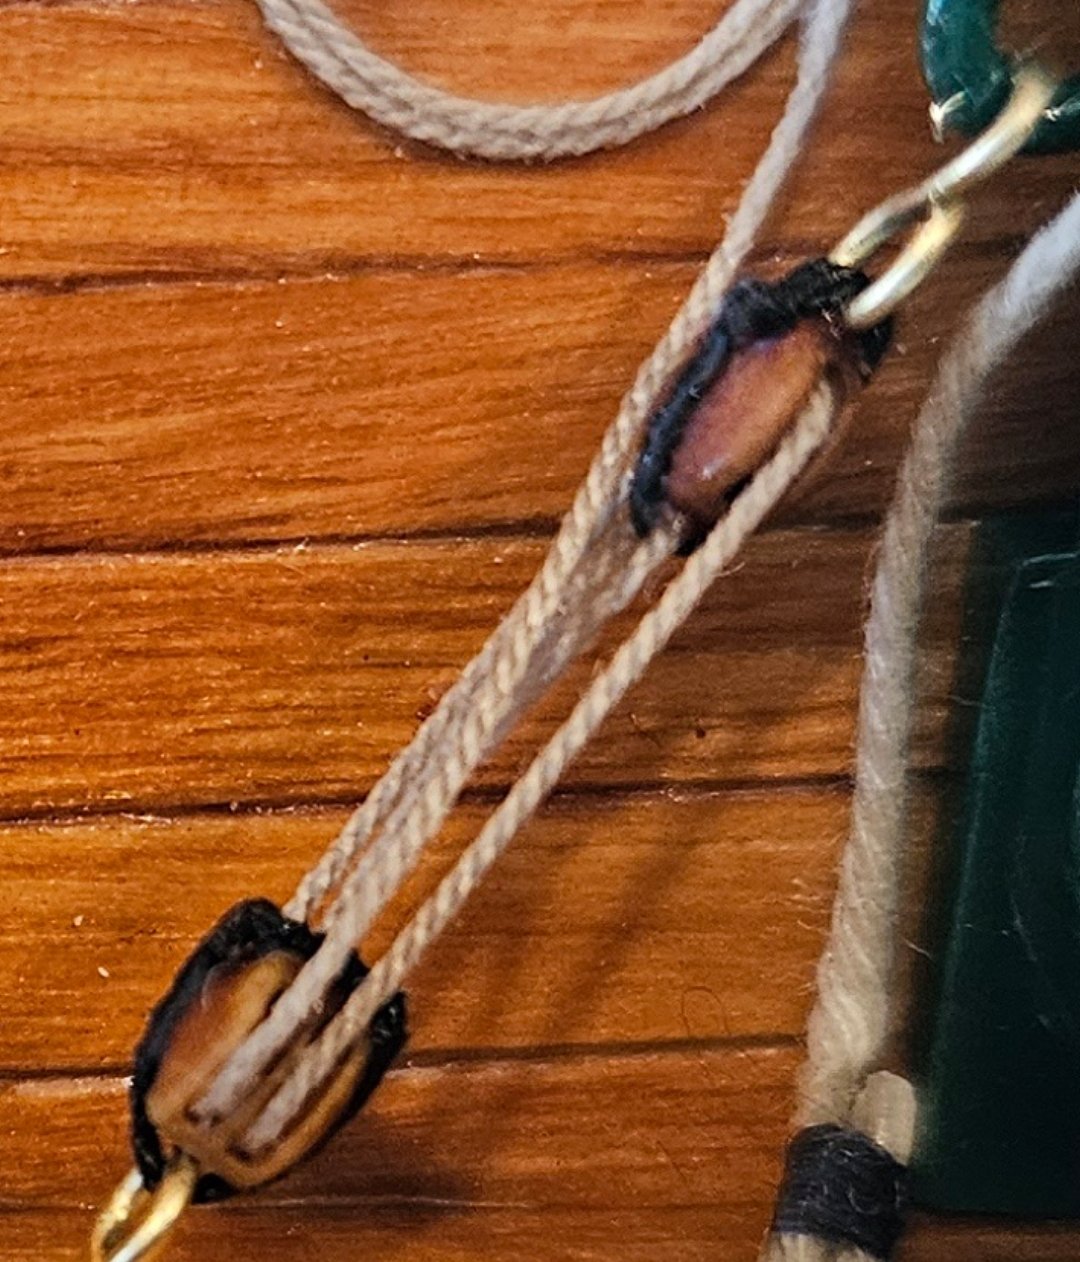
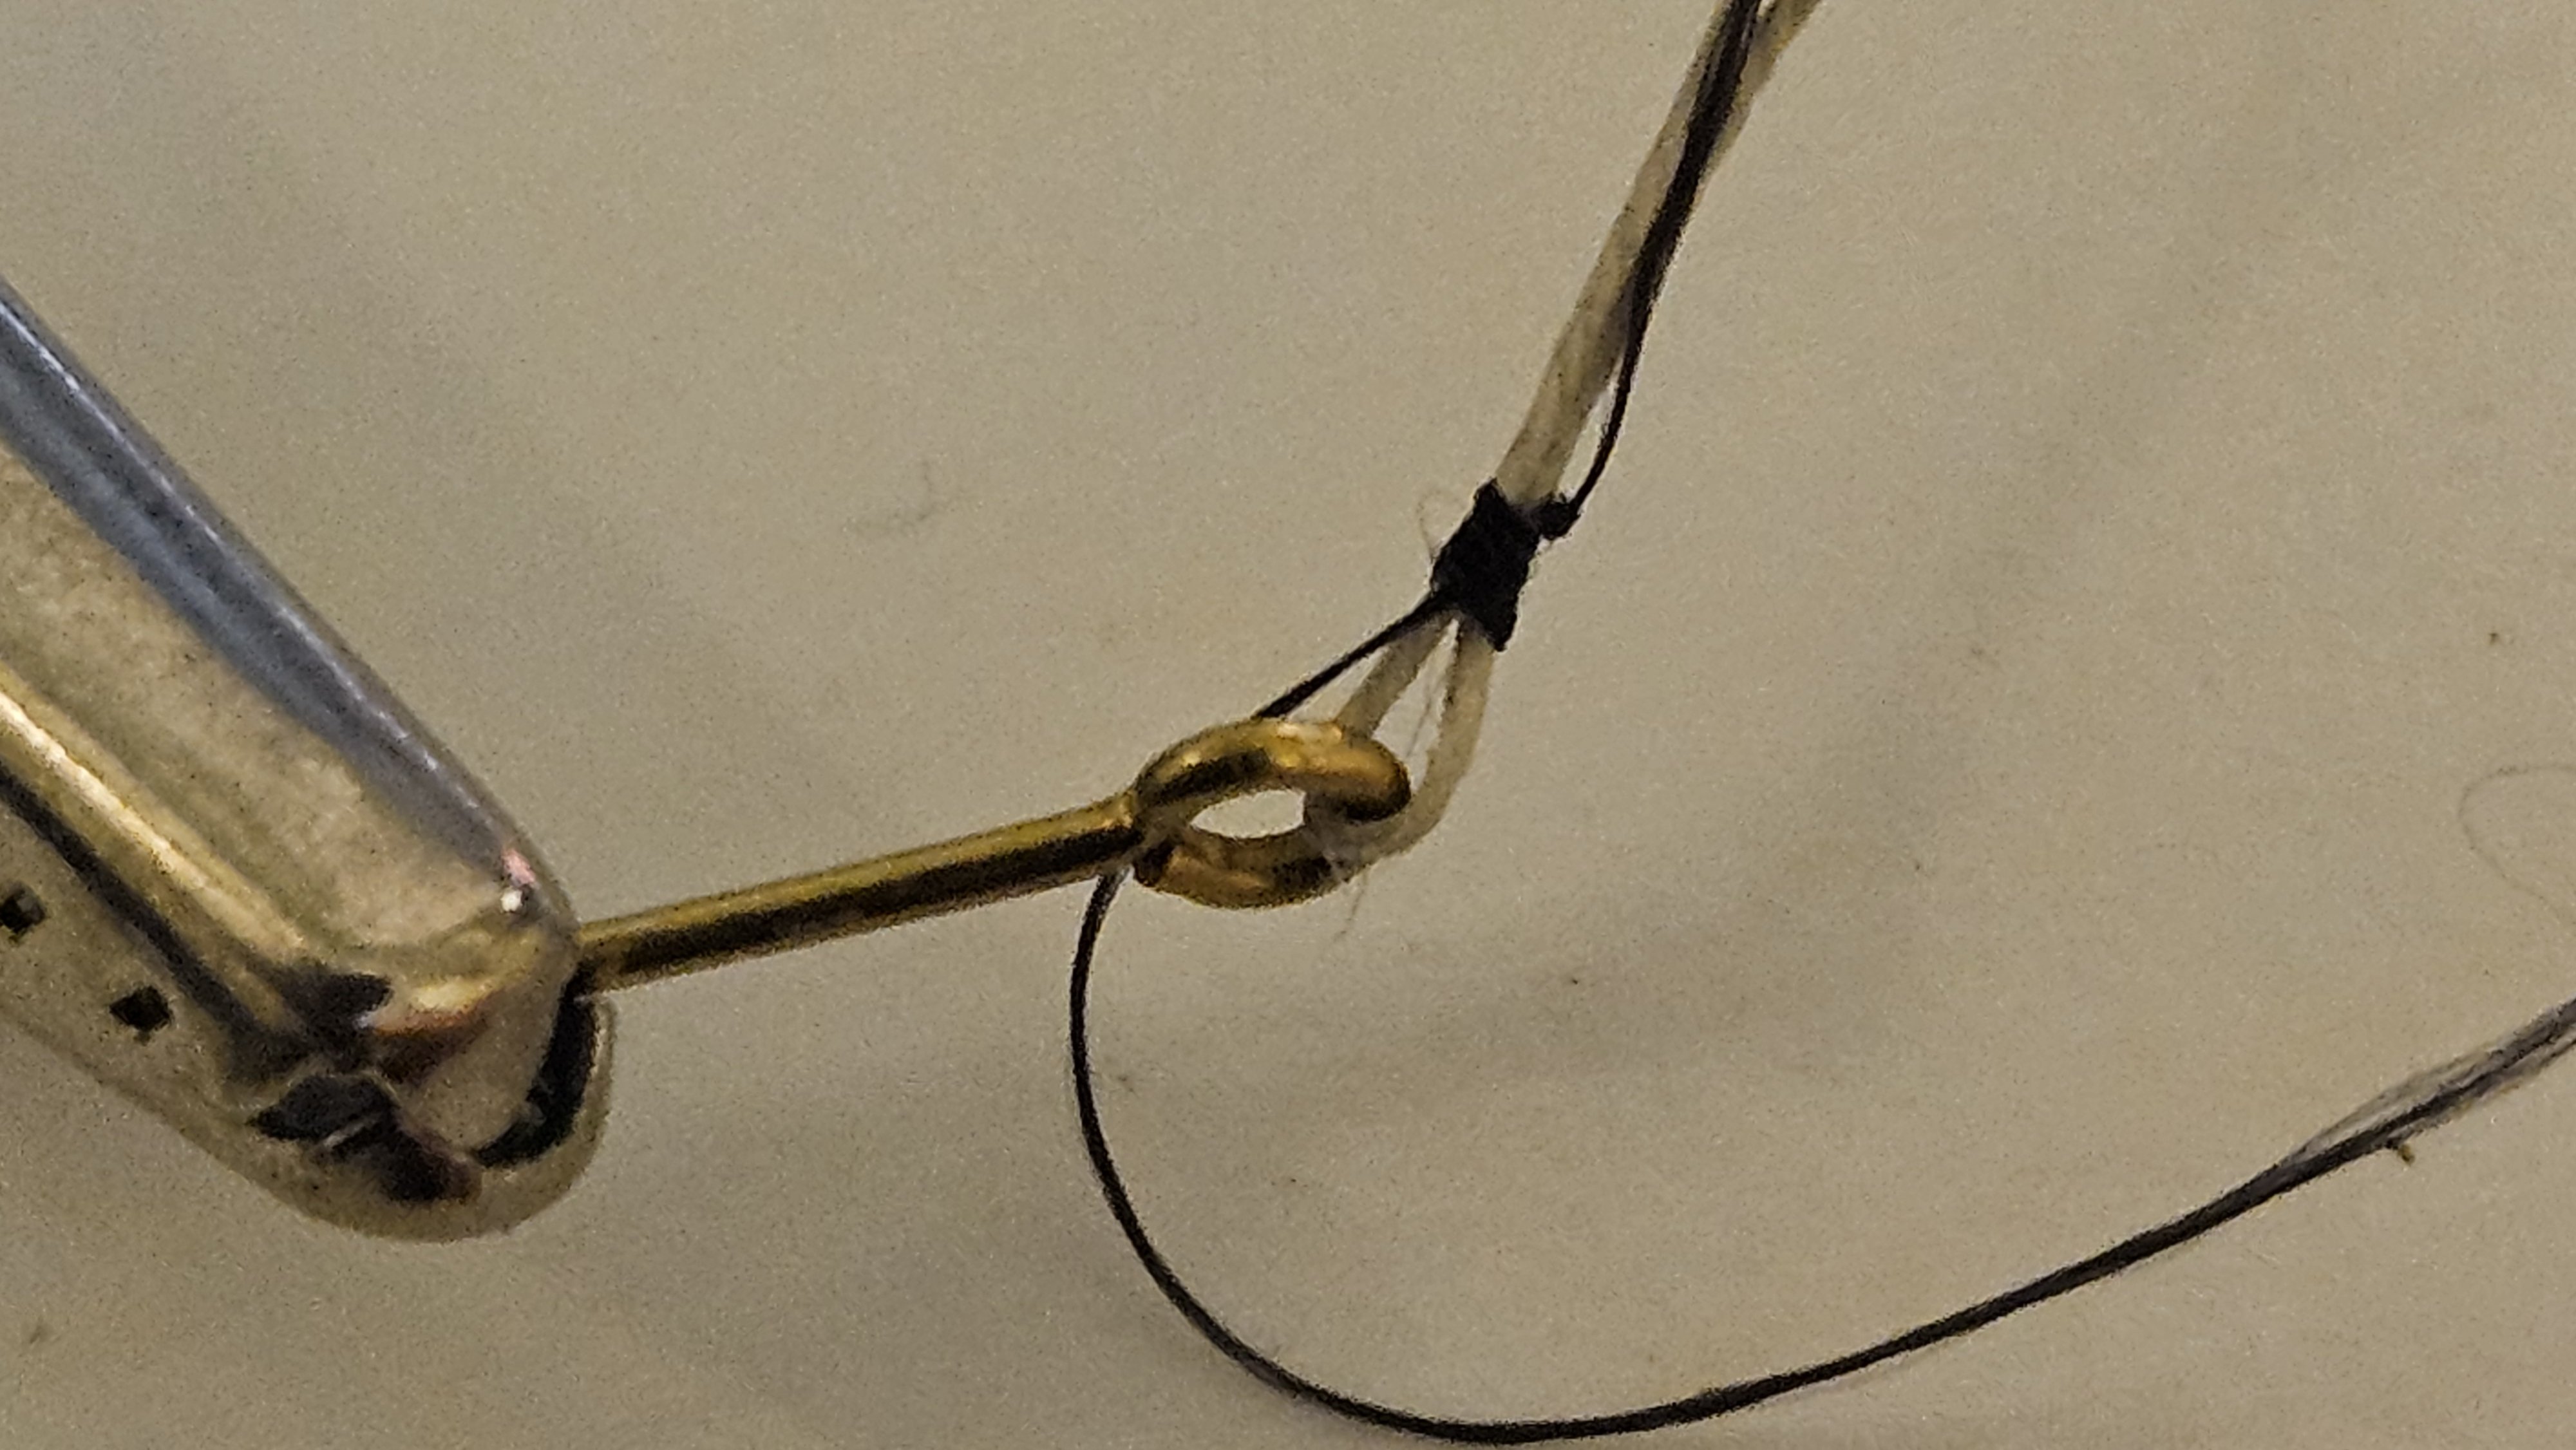
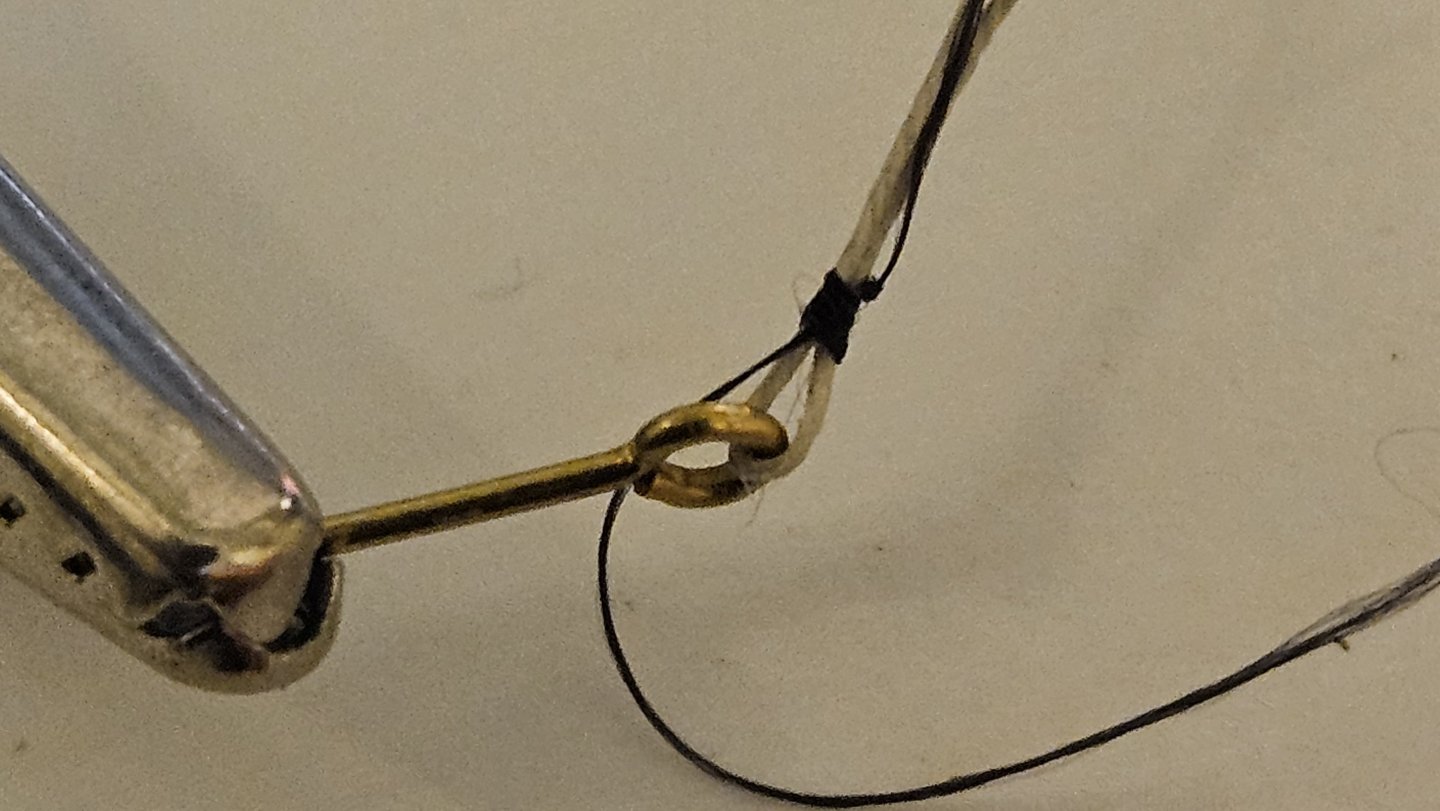
I have just started rigging blocks and have both created beckets and faked them. My gun rigging as an example of faking. 1/8th" blocks with 0.012" rope. The blocks are a correct 7" in scale. The smallest hooks I could make were 7" long (grossly out of scale). If I had used beckets I would have needed another scale 10 or so inches for three beckets and seizings and my blocks would almost touch. So with the lower double block I just inserted what would have gone in the becket (brass hook), skipped the seizing, and closed the strop on the other side with an overhand knot and a dab of thin superglue to penetrate the knot. Side cutting cuticle cutters clean up the loose ends nicely. Otherwise I create beckets thus - form the becket with the stropping line and seize the desired loop. Affix with thin CA glue. When dry, insert desired block against seizing and between the two free ends, secure with overhand knot and thin CA glue. Trim. My tiller rigging has beckets actually seized in but the blocks are much bigger at probably 3/16" to 1/4". Unfortunately my seizings with fine fly tying thread are 10-14 wraps and still almost 1/8" in length. 6-7" of seizing between becket and block would look crazy I think. It is easy to look up how to do these things in the real world (think Lever's Sheet Anchor for example) but translating real world configurations into scale effects is what is hard to find. Here is another great approach. https://modelshipworld.com/topic/16179-my-humble-method-of-making-strops-for-blocks/ Just some thought on my recent experiences.

-
Very nice upgrade Phil. Is that kit thing pressed cardboard or something? Plastic? Anyway very very nice cutter.
-
Beautiful work on this. I will be following! I am especially intrigued by your build as my current build is in the "odd" 1:58 scale, yet here is your beautiful schooner in 1:57! Close enough. It would be fun to see them side by side. This build looks set, but regarding guns in post 18, for future reference the privateer "Grecian" takes an interesting approach to gun ports with lower bulkheads and the effect looks wonderful to my eye. (Borrowed from a Grecian build on MSW) Anyway - great work. I'll be following.
-
Phil! I was just having a little fun with your schooner knowledge over on the Mosquidobit build and it got me thinking - I love the Cape for sure, but in the recesses of your mind their must be an inkling of another schooner/clipper to build? Any comment sir?
-
@Chuck Seiler Looking forward to it sir!
-
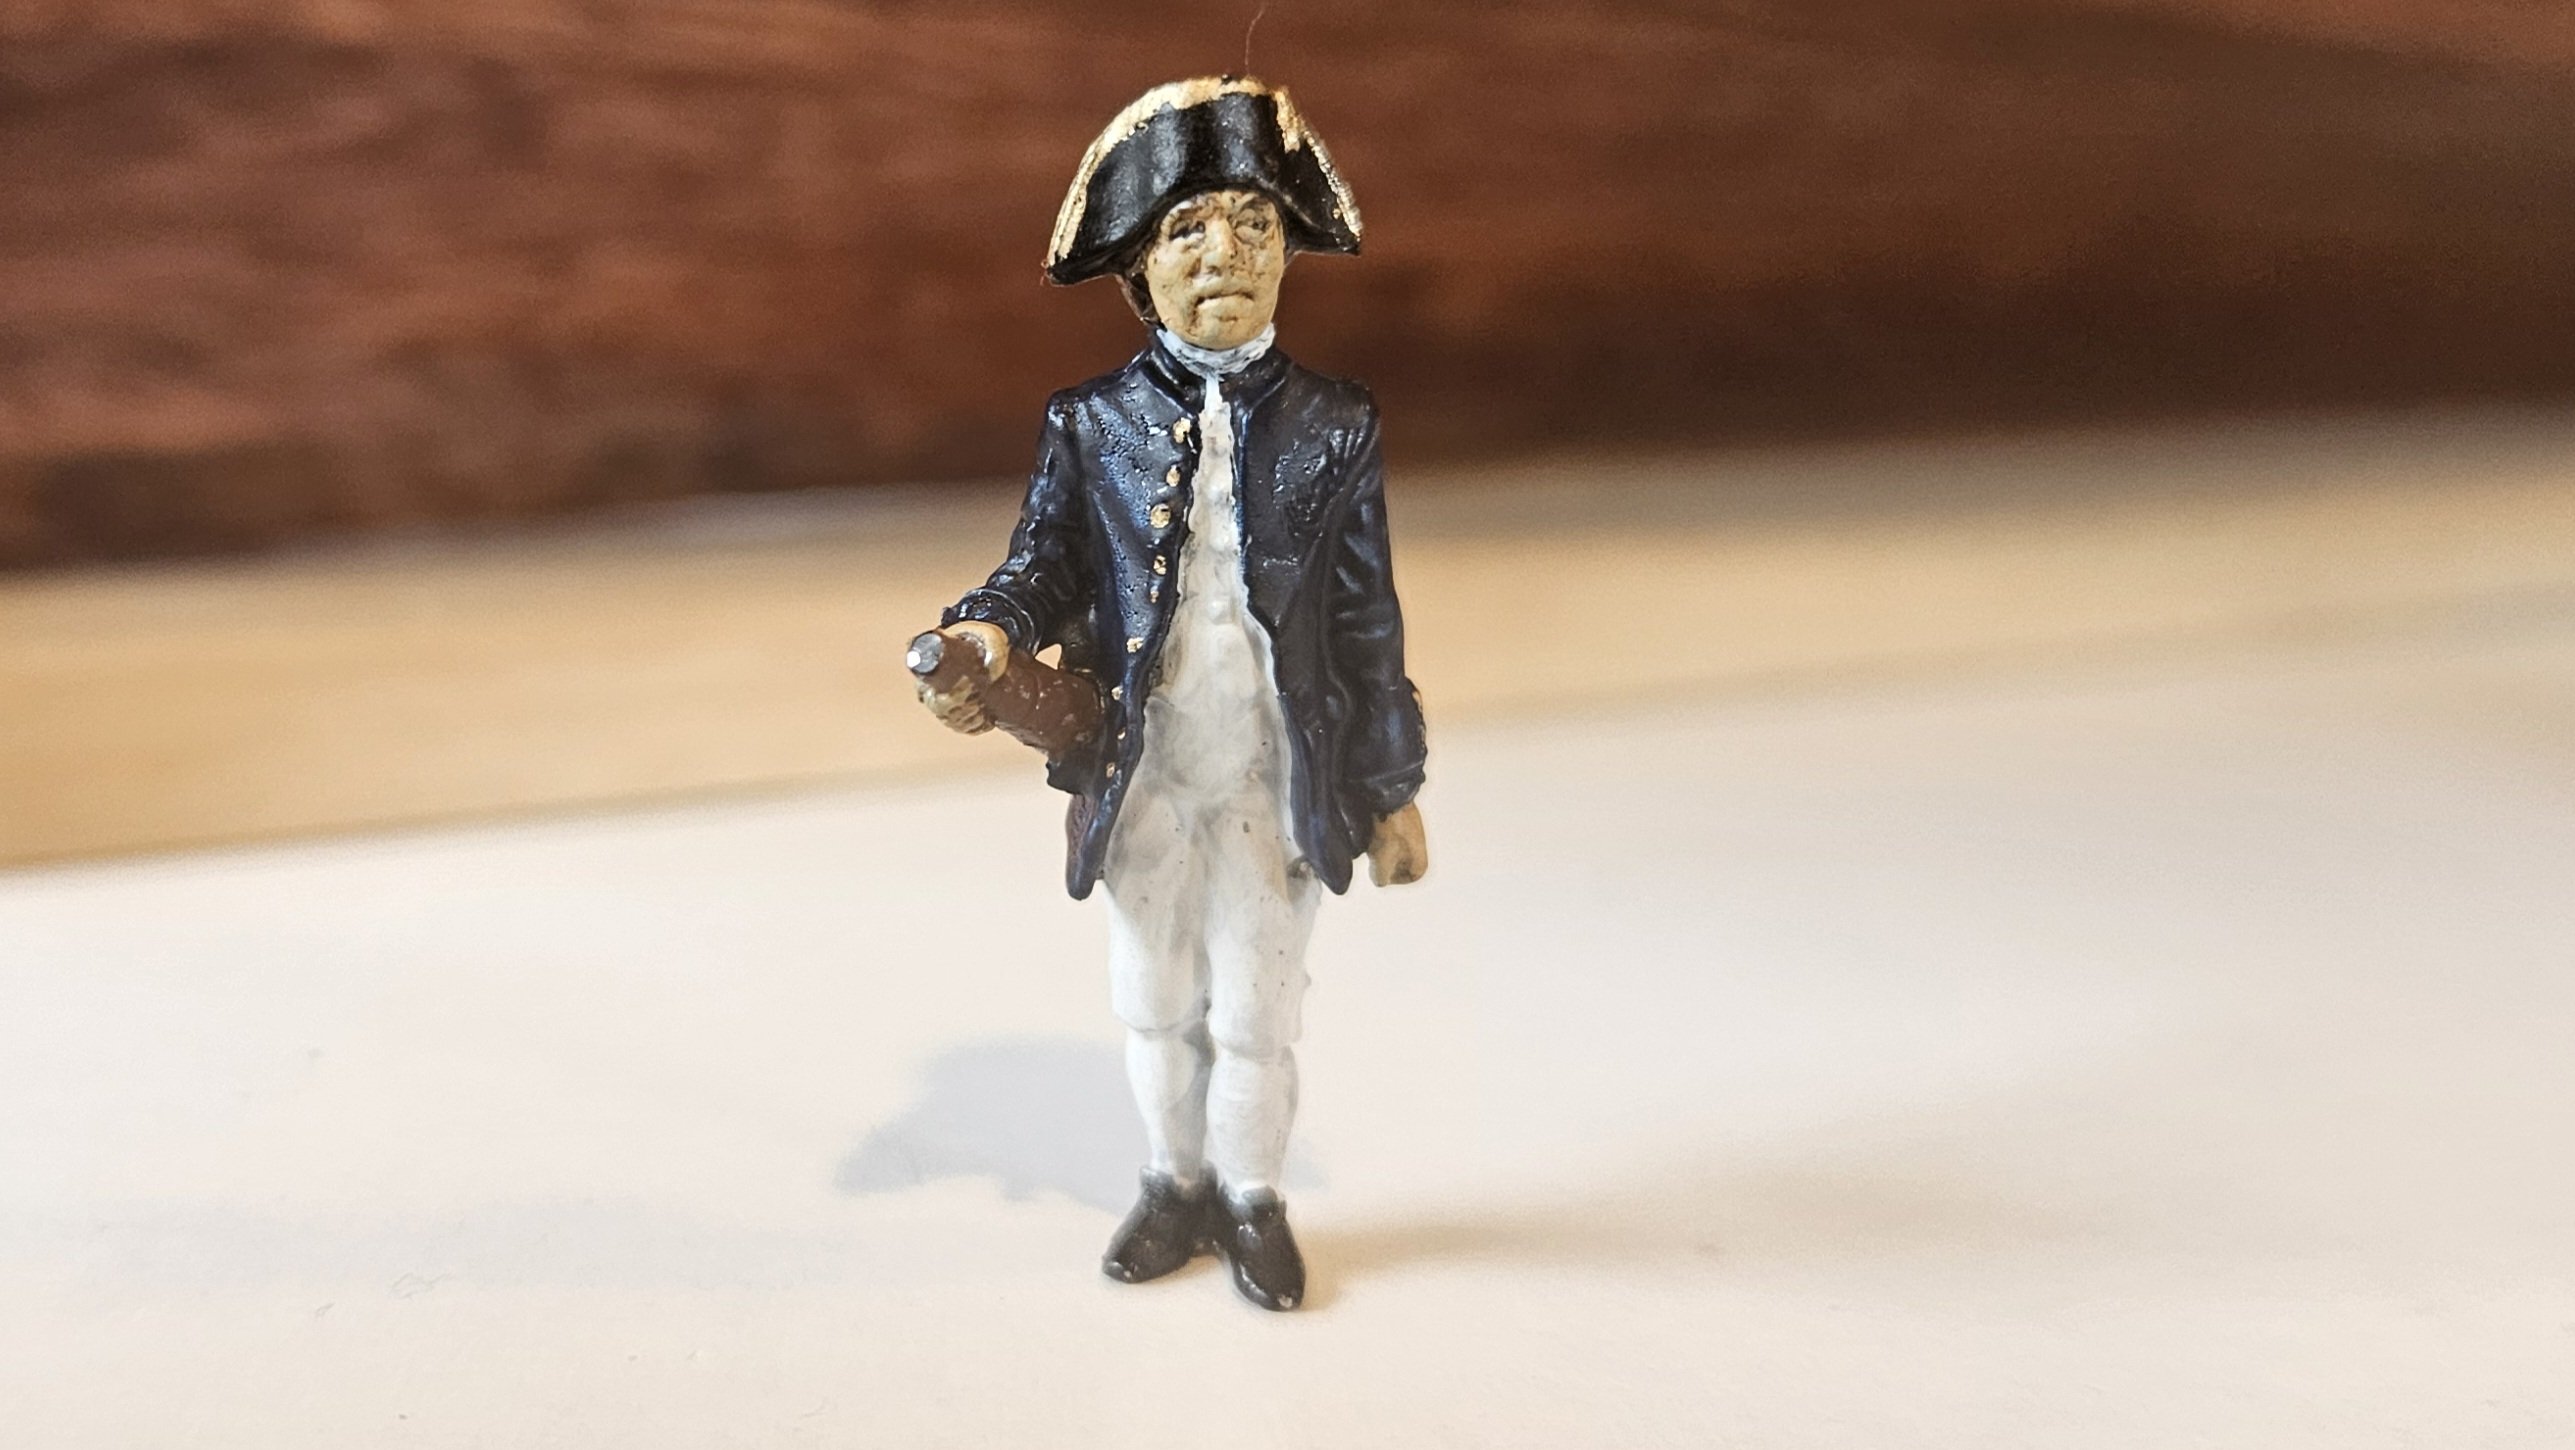
There is truth here, as in everything. At least a privateer affords some leeway. 😉 I like the idea of adding bases so the figures can be placed or removed depending upon the audience. These figures are pretty versatile - if one wanted to spend the time a dremel and Tamiya two part modeling clay would go a long way. Think US Navy 1812 officers cap or saber in scabbord. A good starting point.
-
The Captain has many changes in his sea chest.

-
@Dr PR I like the white of your style better Phil, especially with the taller boots. I may try a redo. Your Captain looks very good!