
.jpeg.882f0a147f14858c9e673da7e13d8ebe.jpeg)
RossR
-
Posts
438 -
Joined
-
Last visited
Content Type
Profiles
Forums
Gallery
Events
Posts posted by RossR
-
-
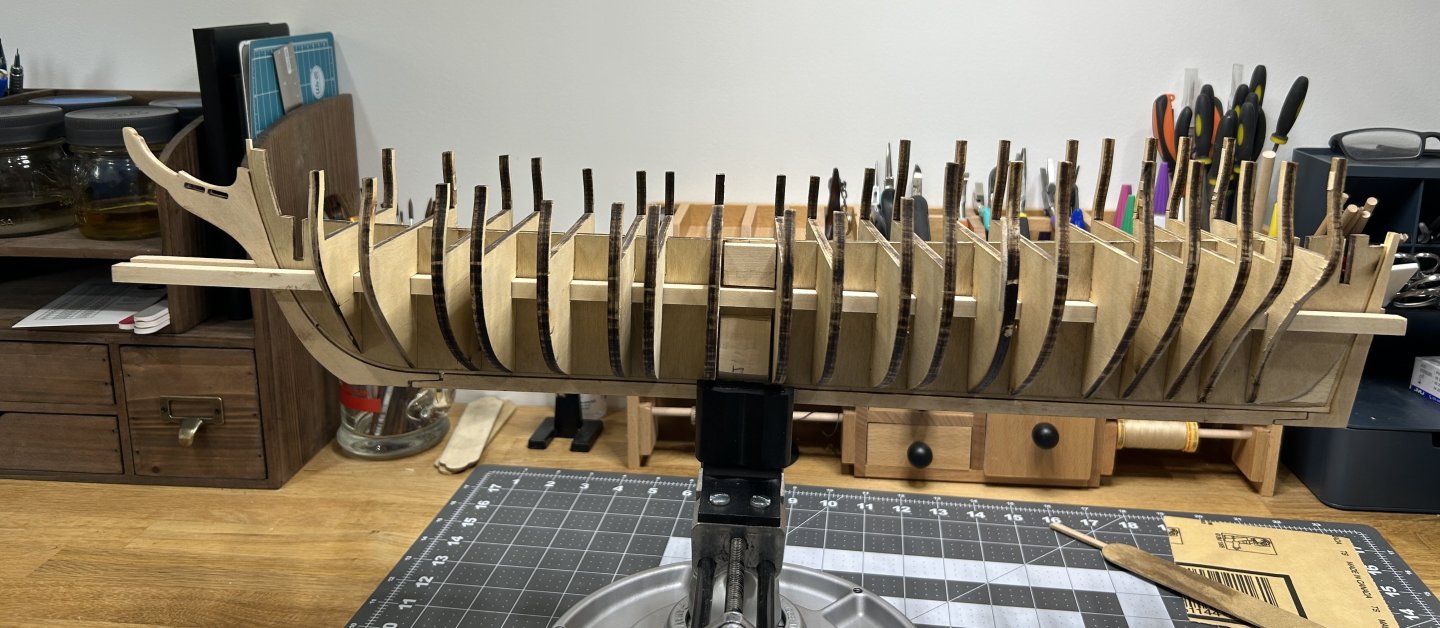
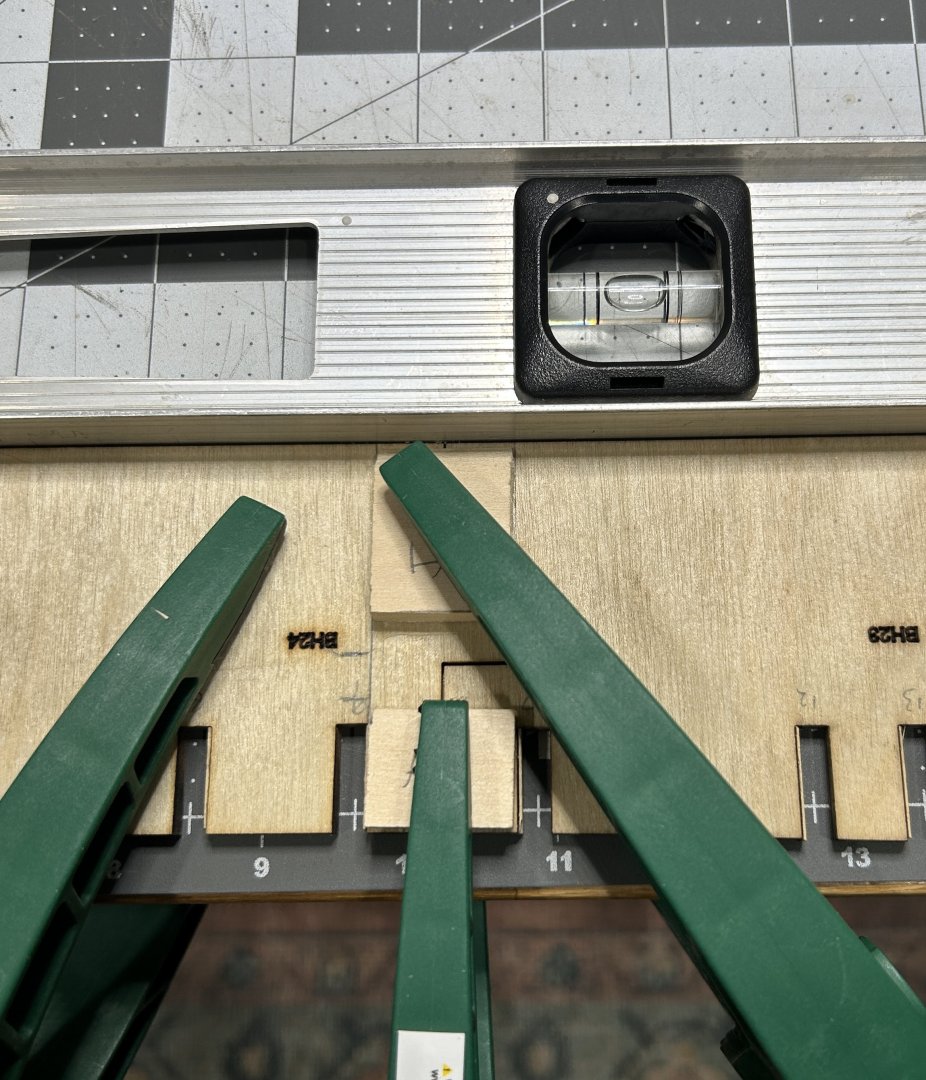
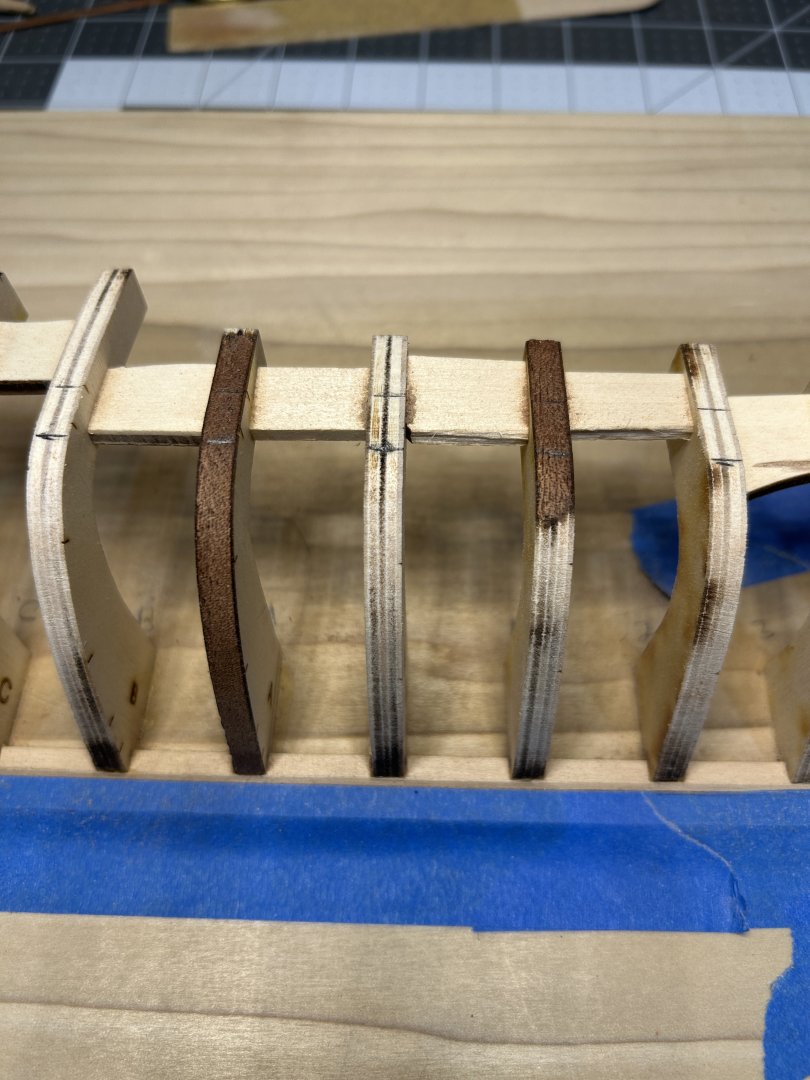
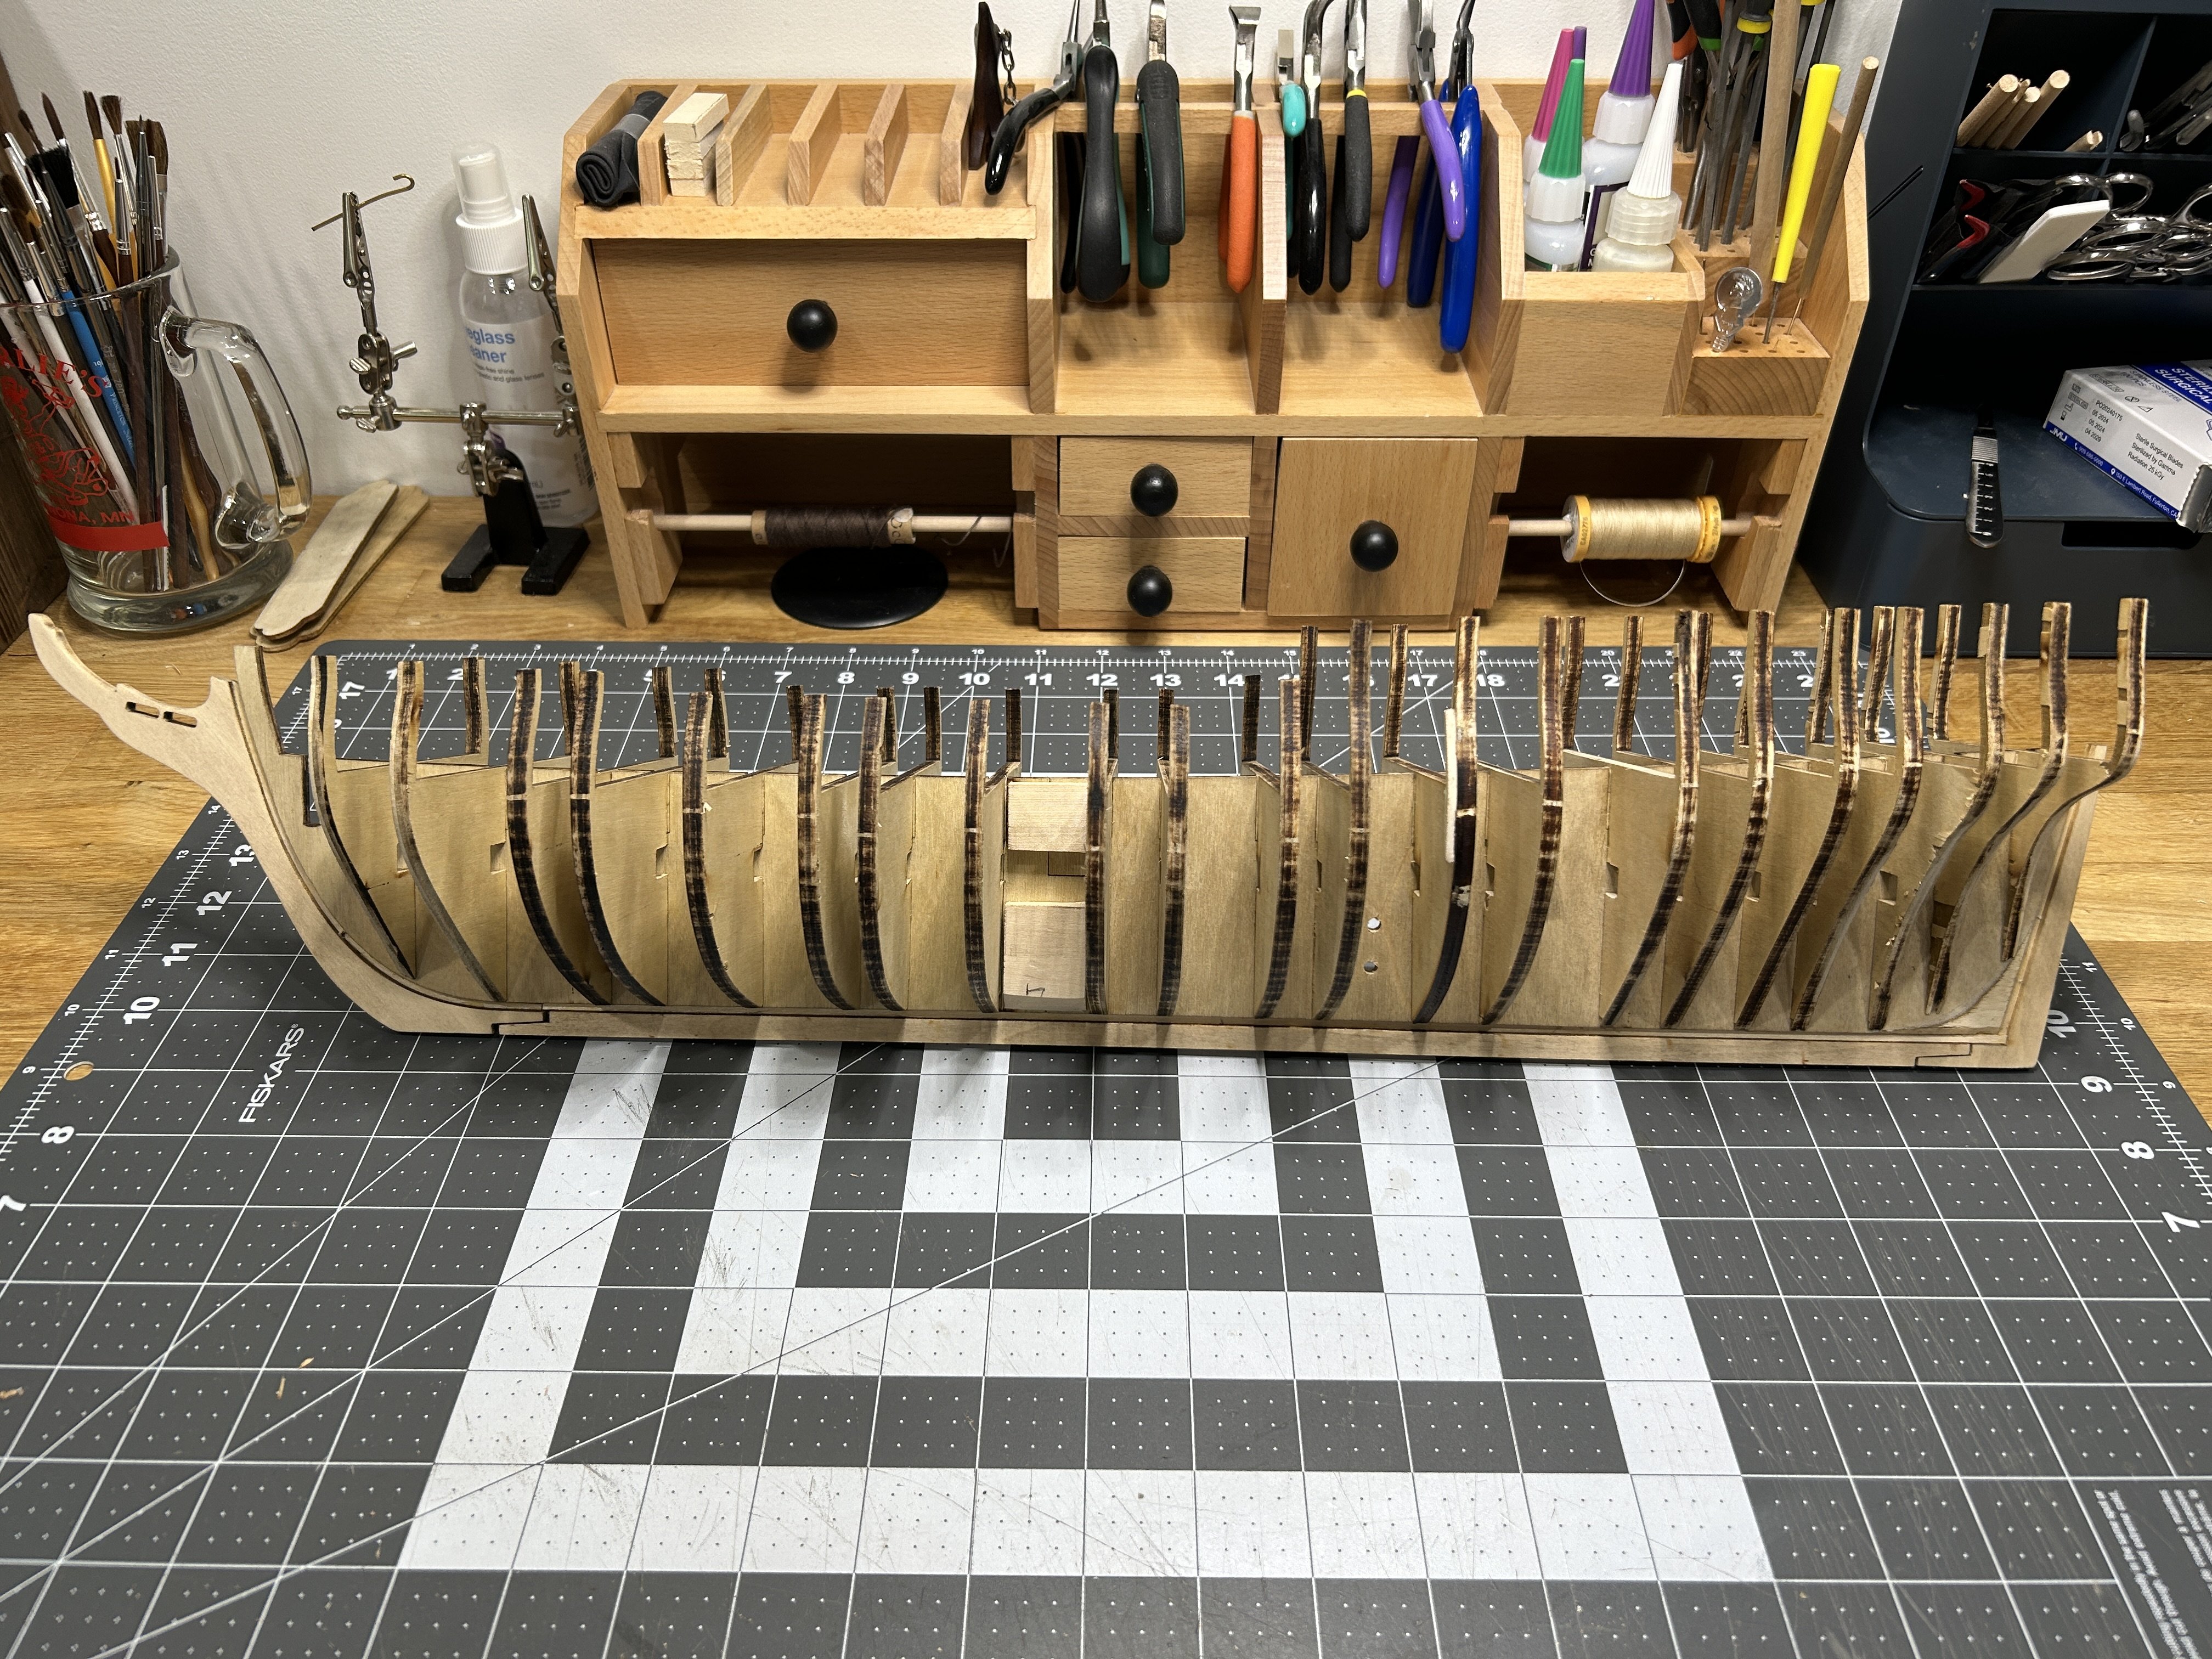
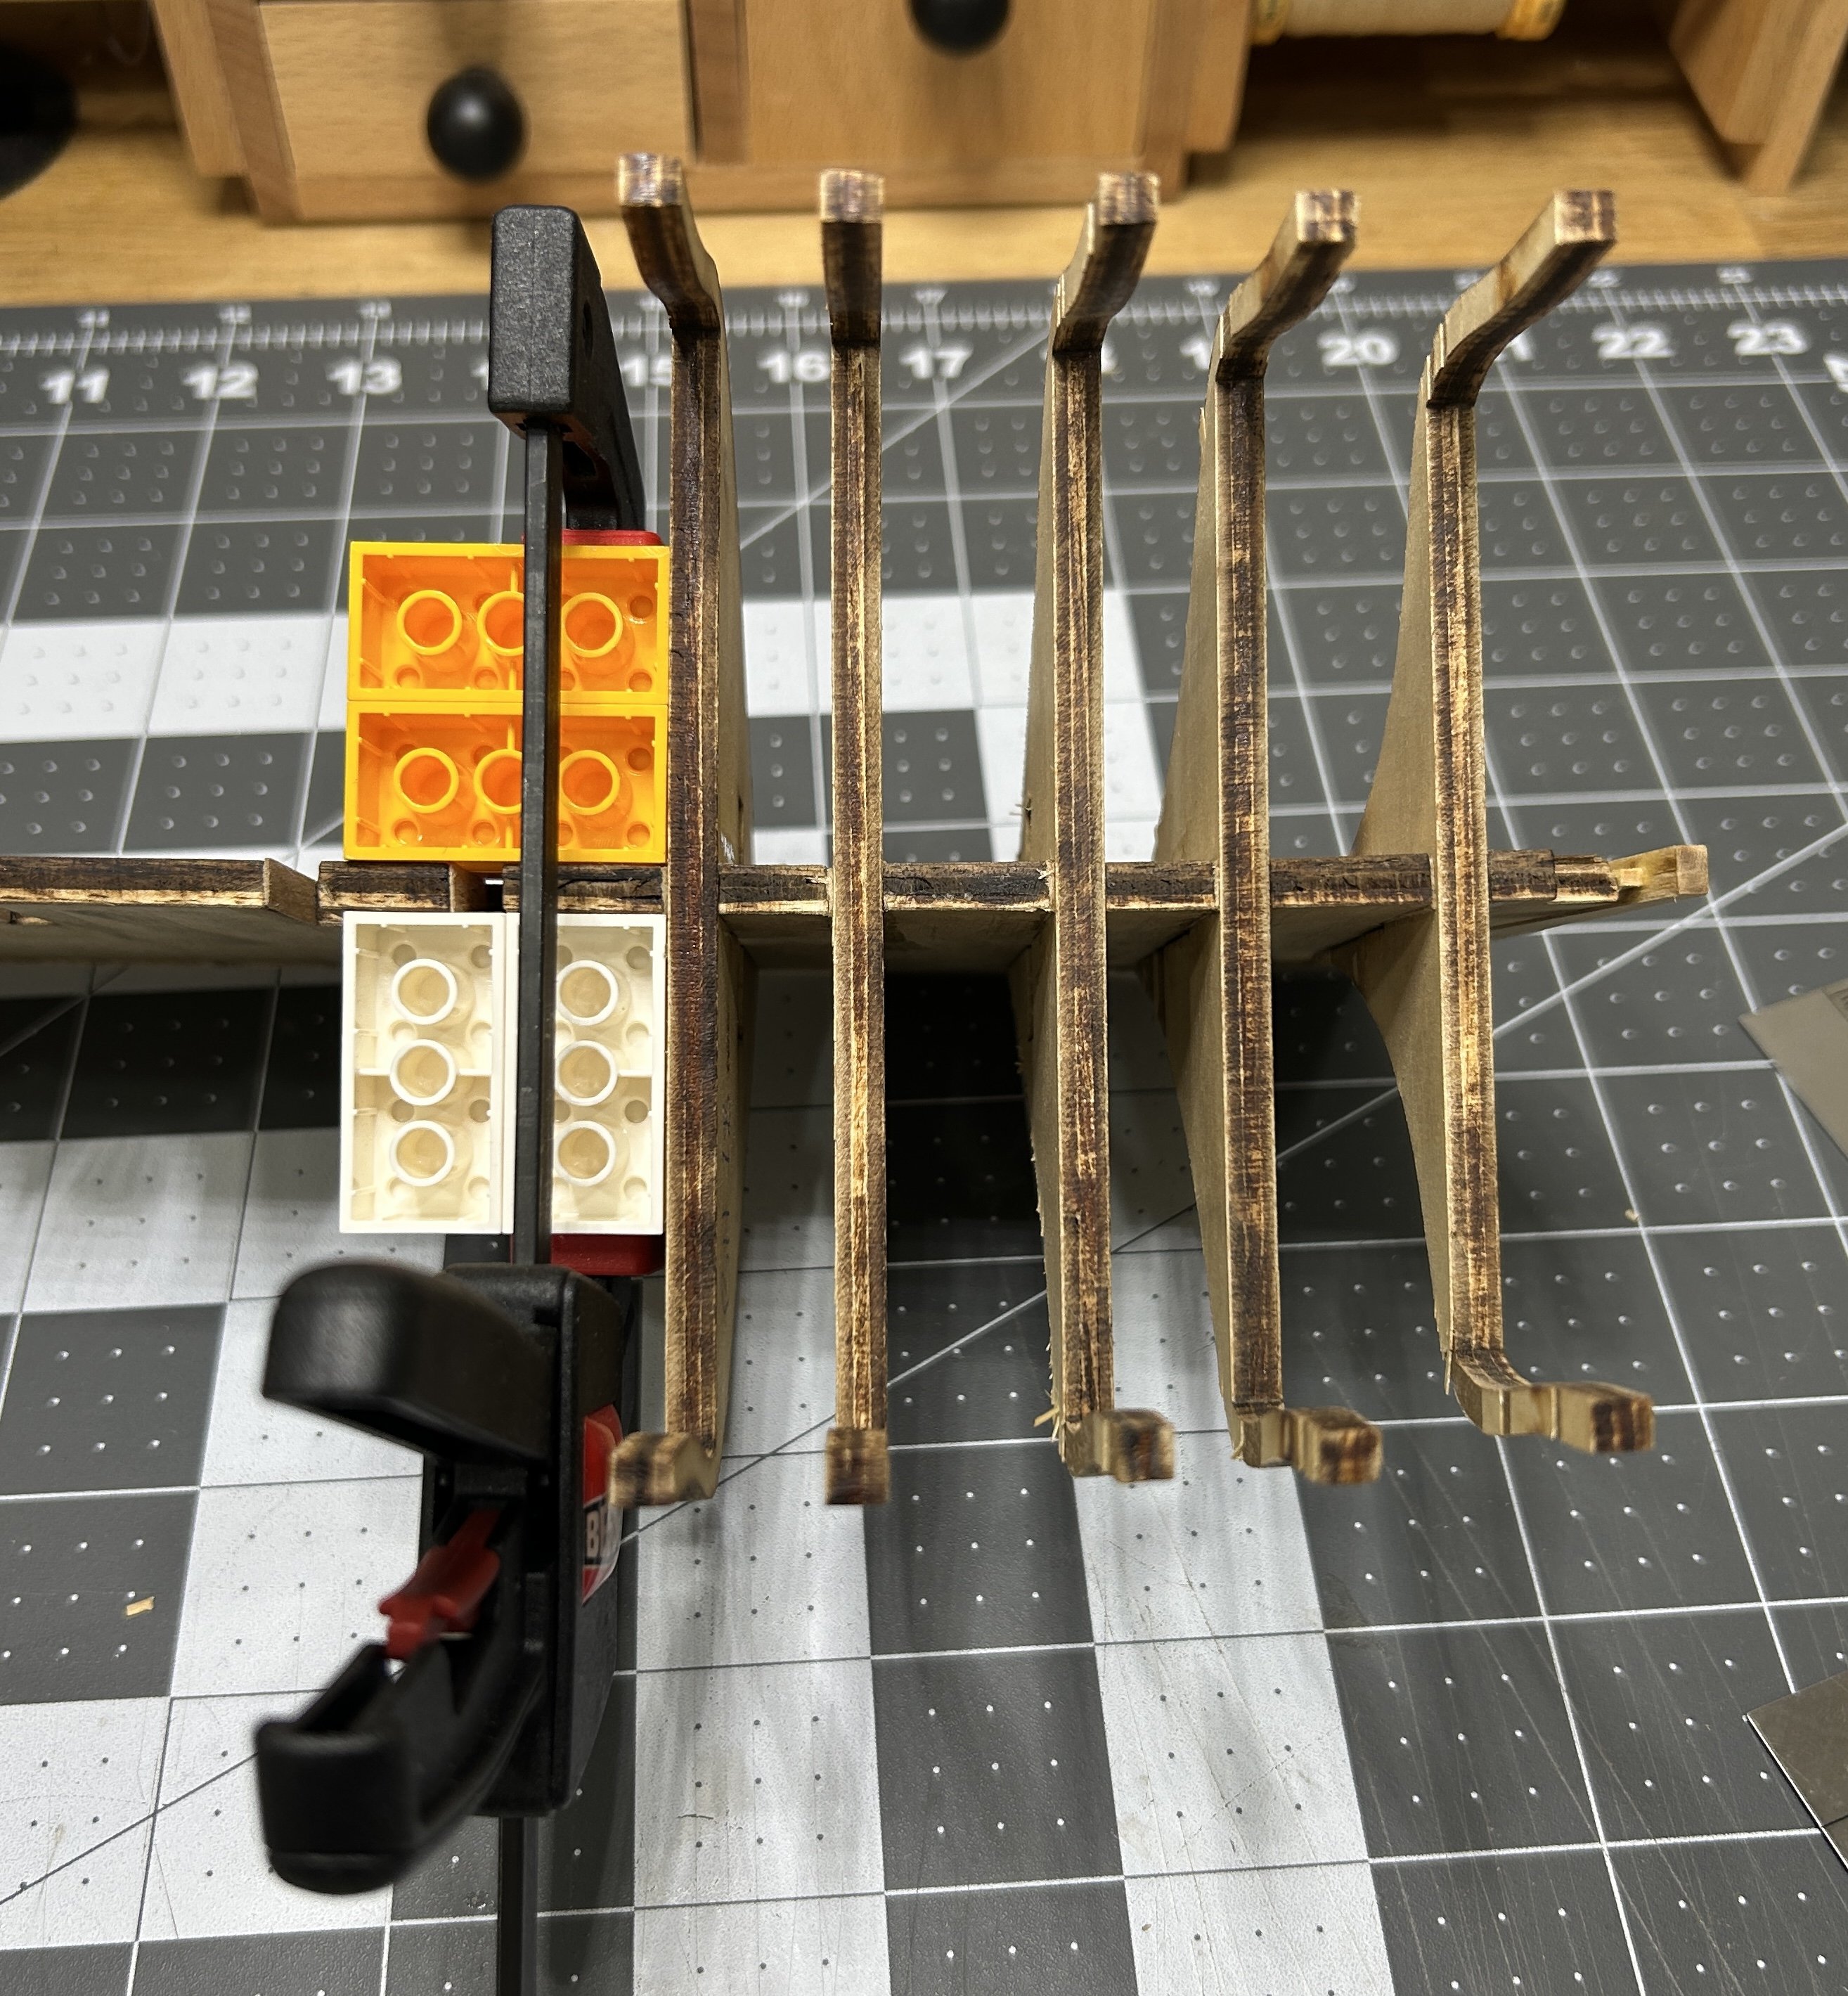
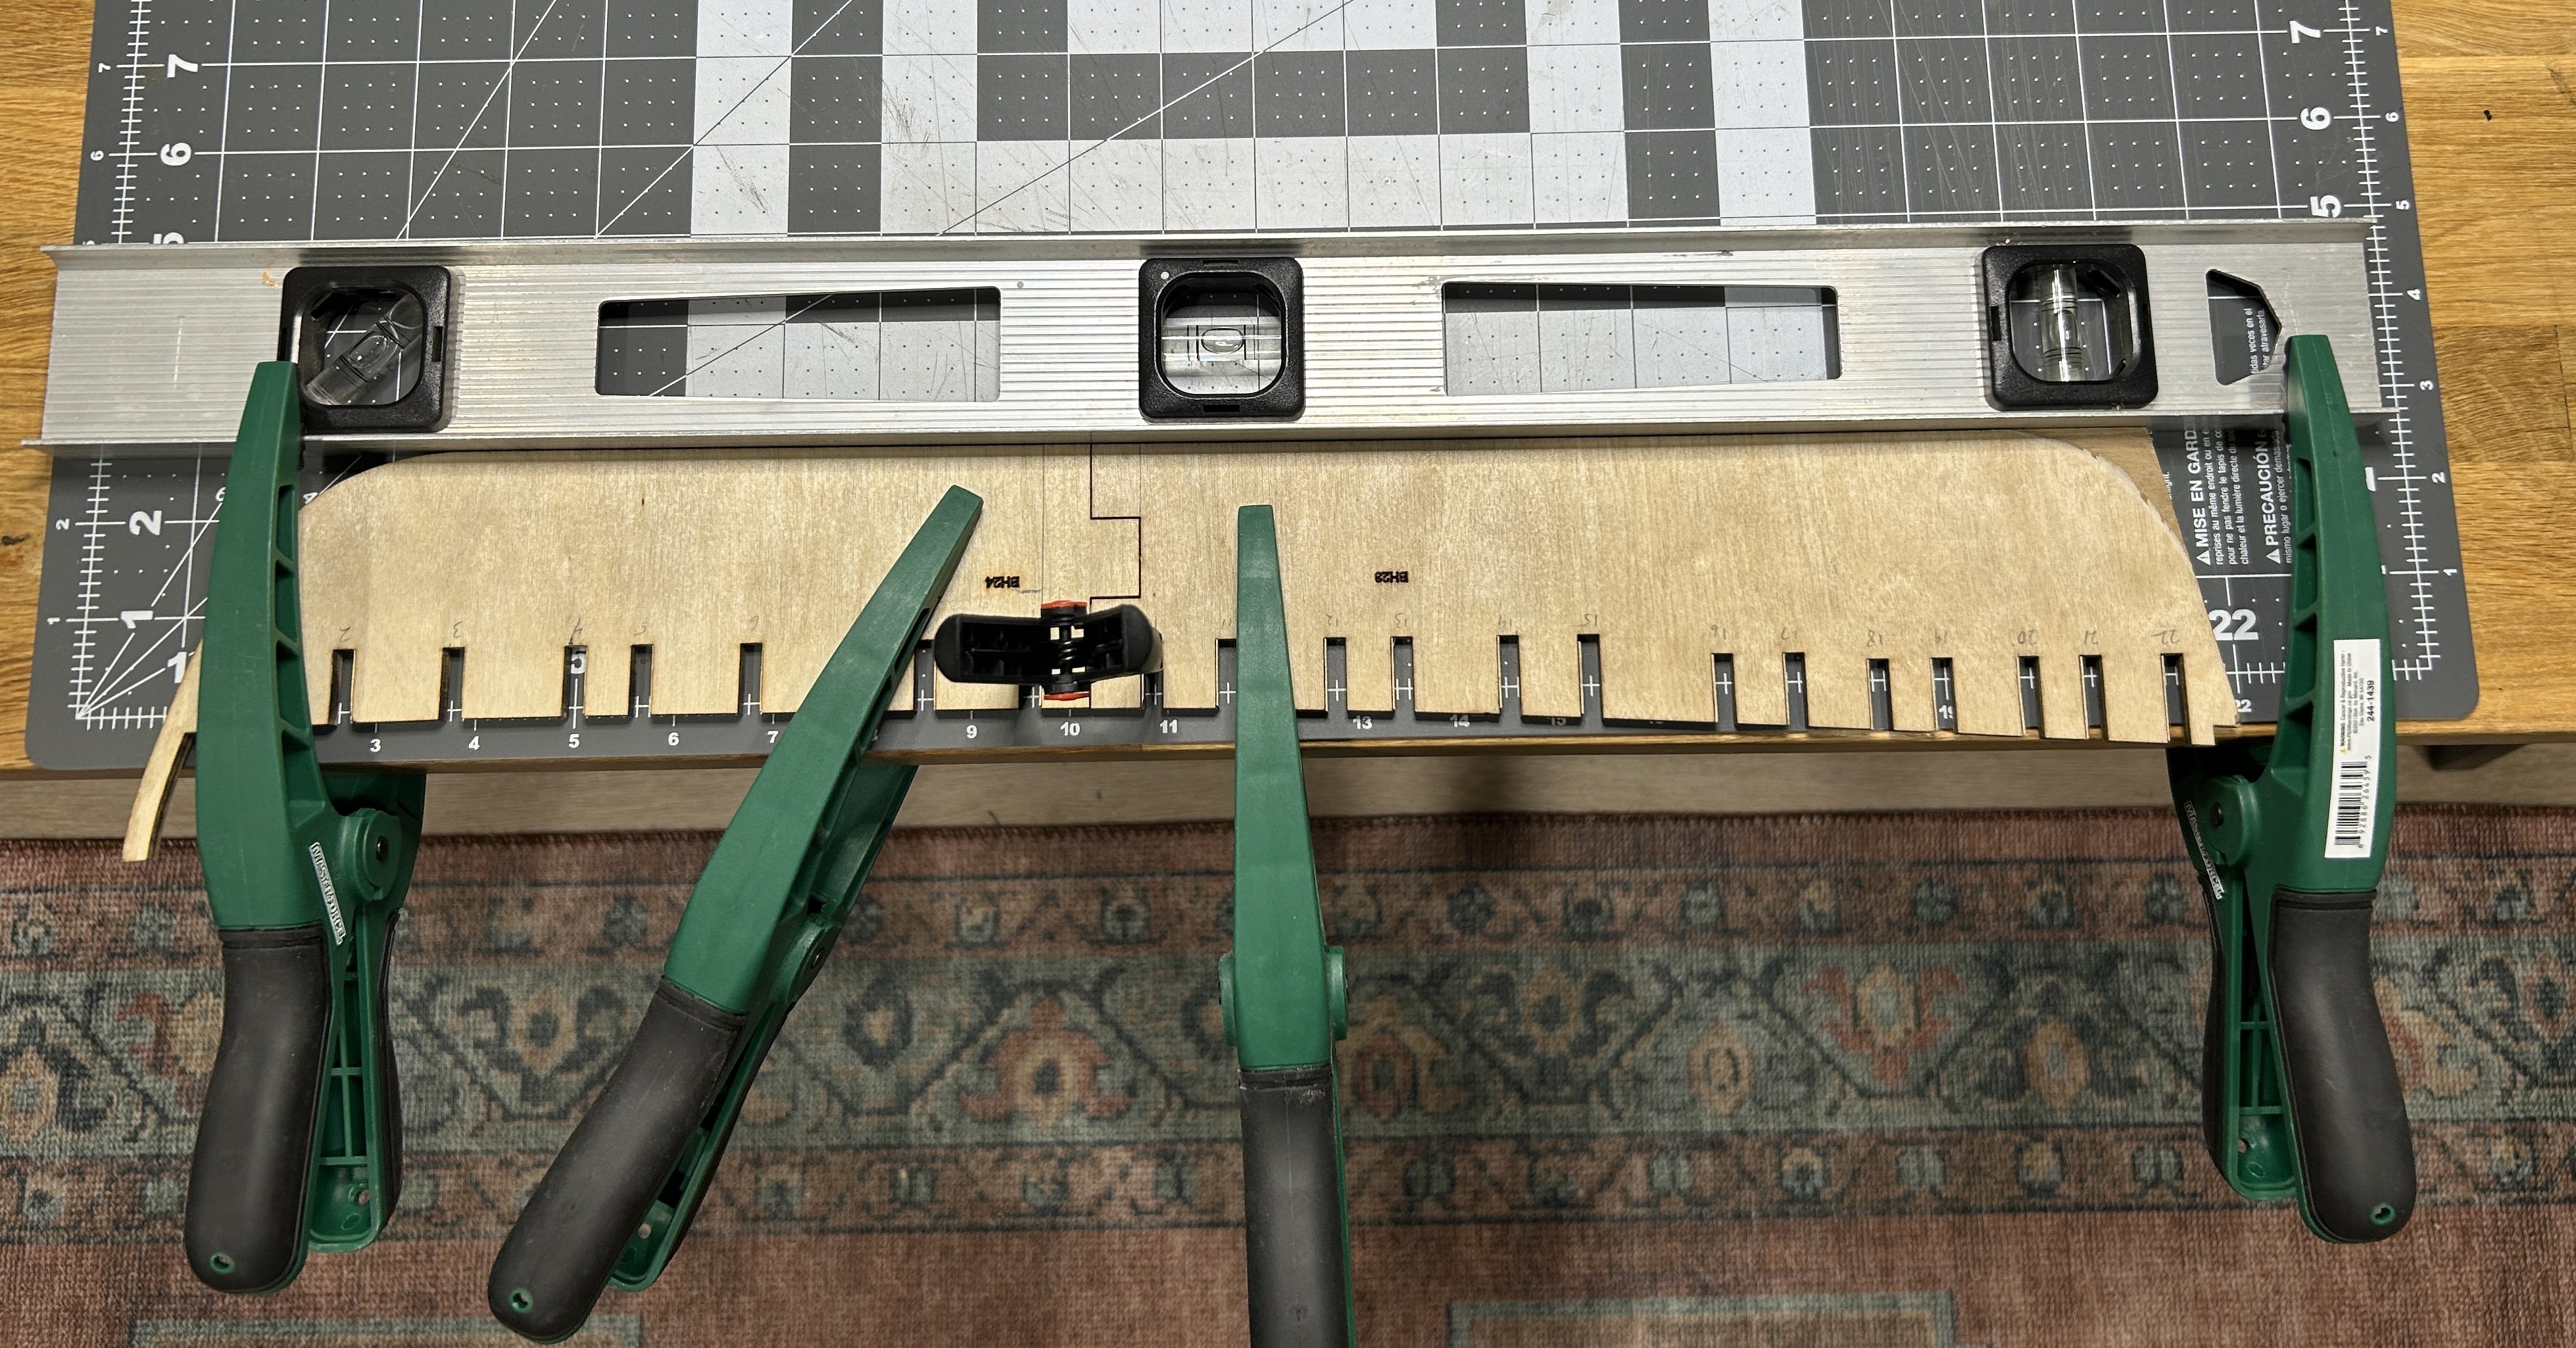
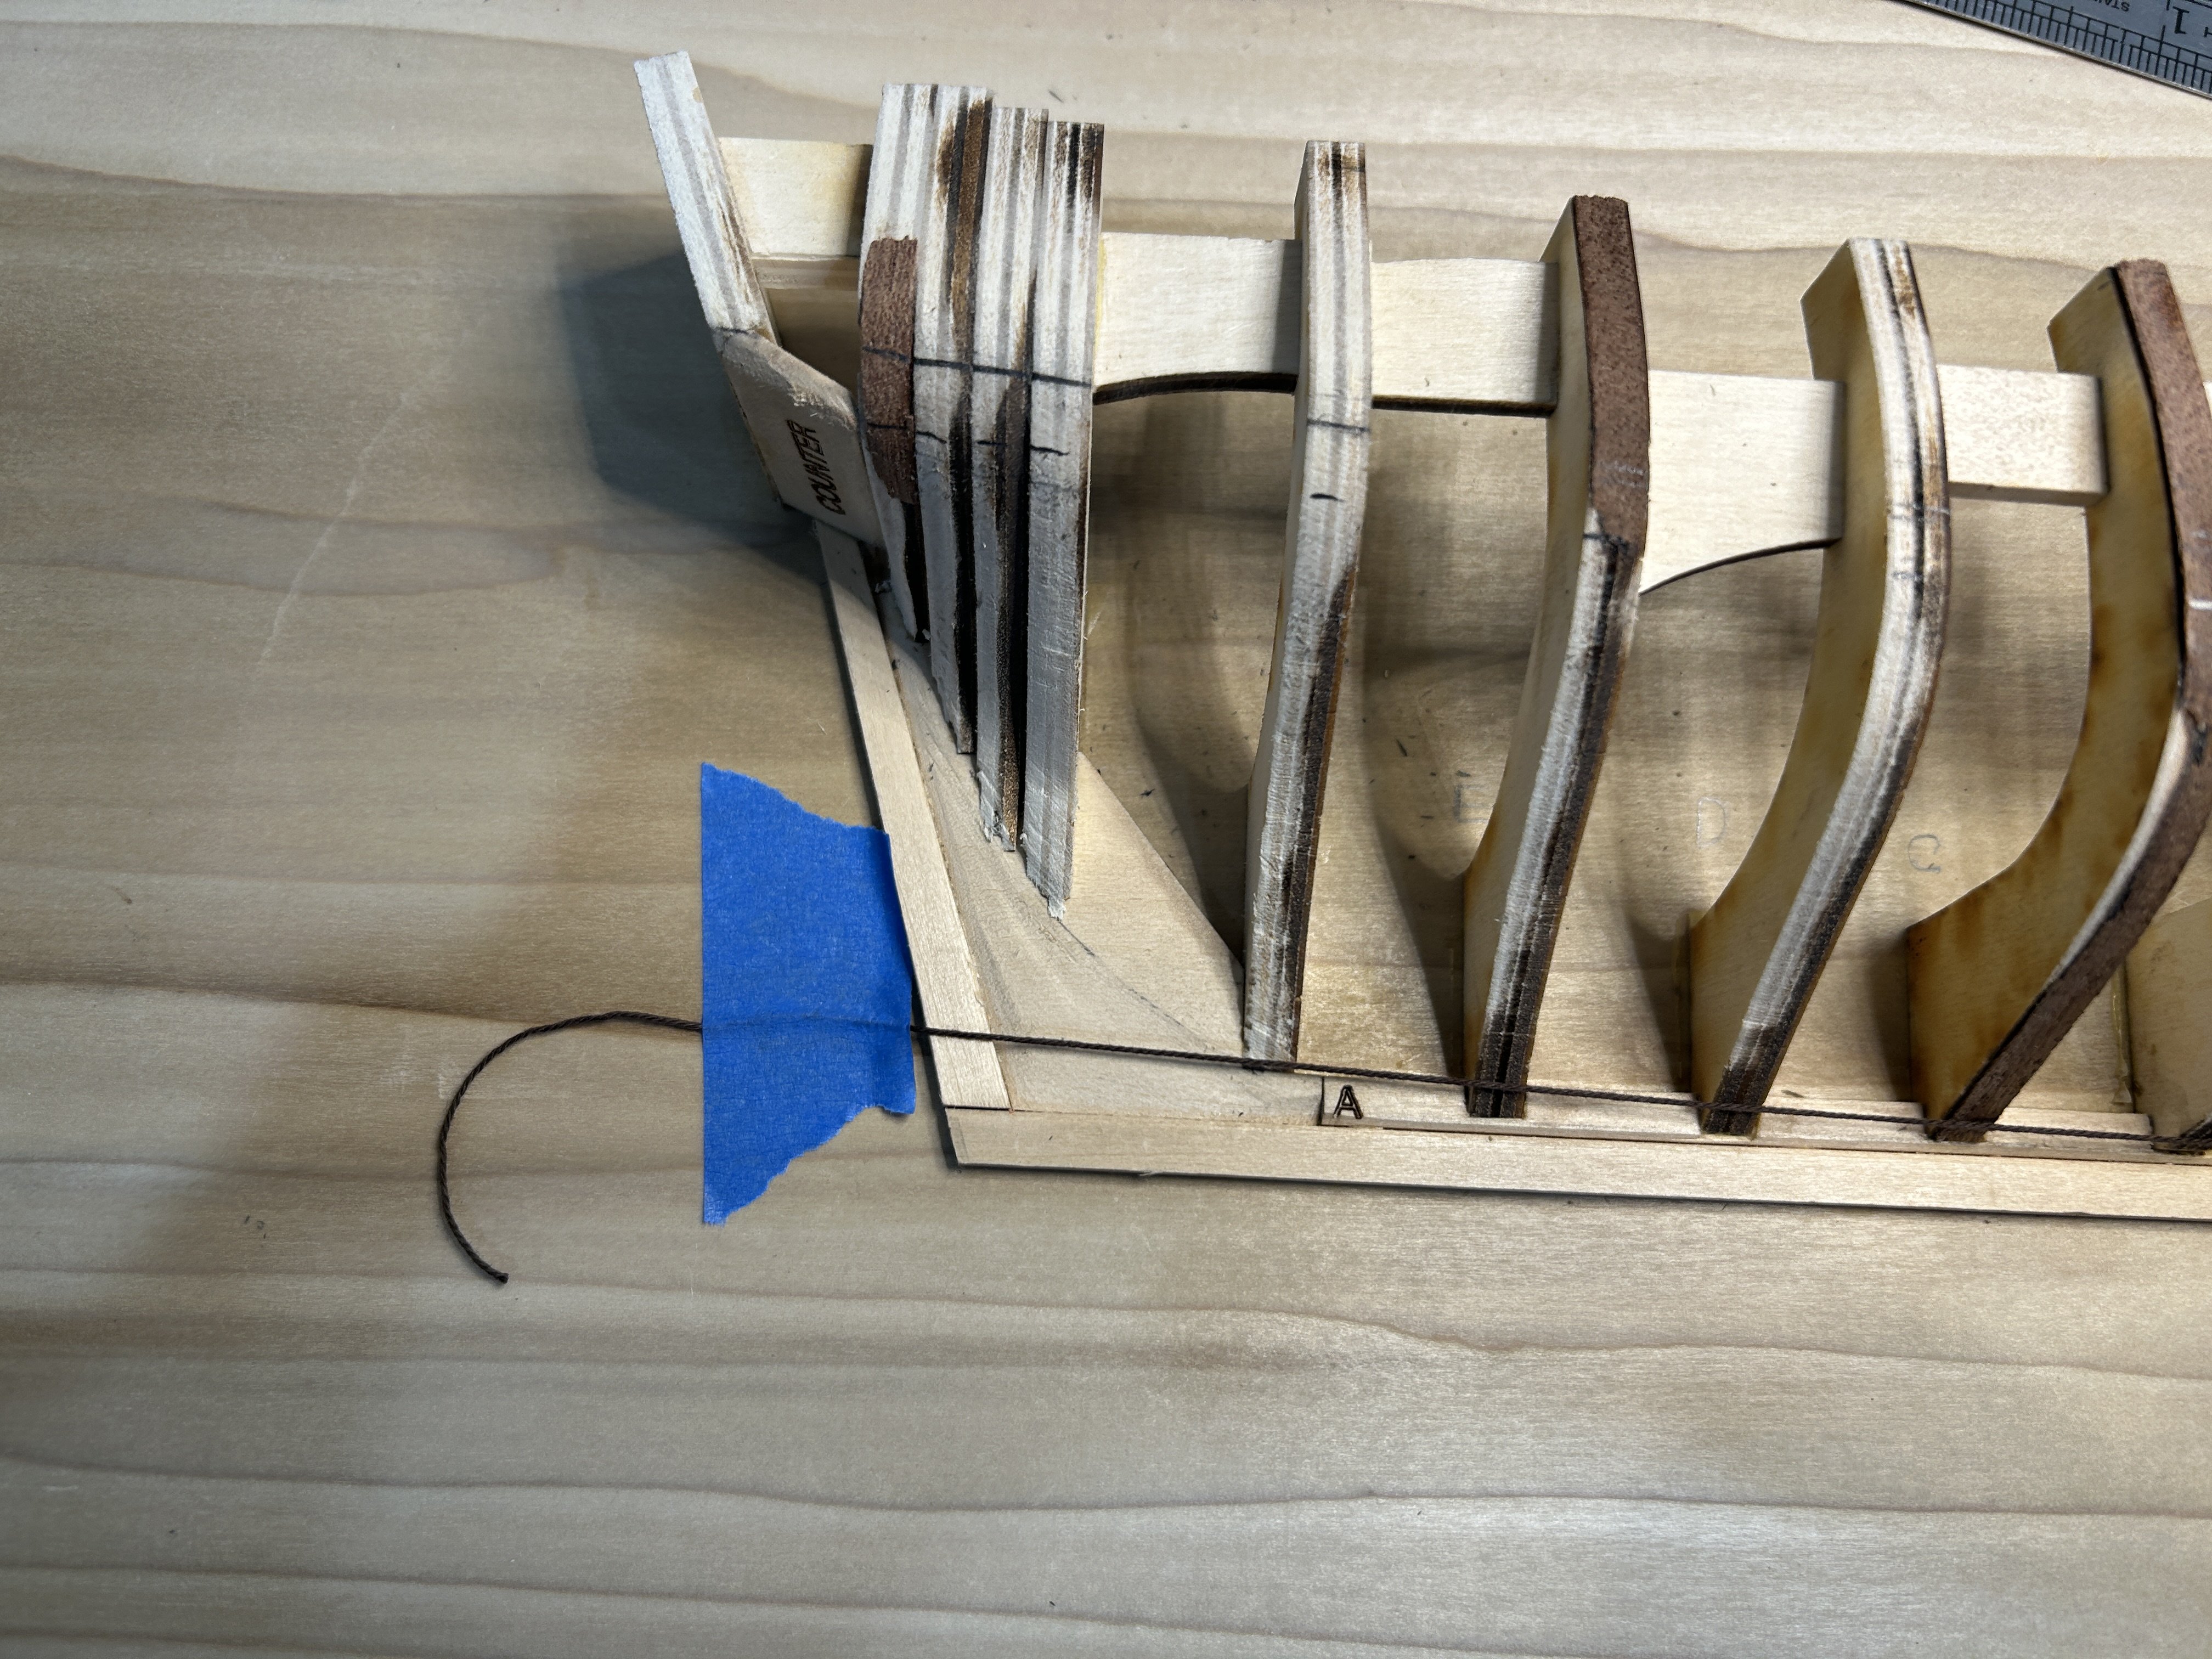
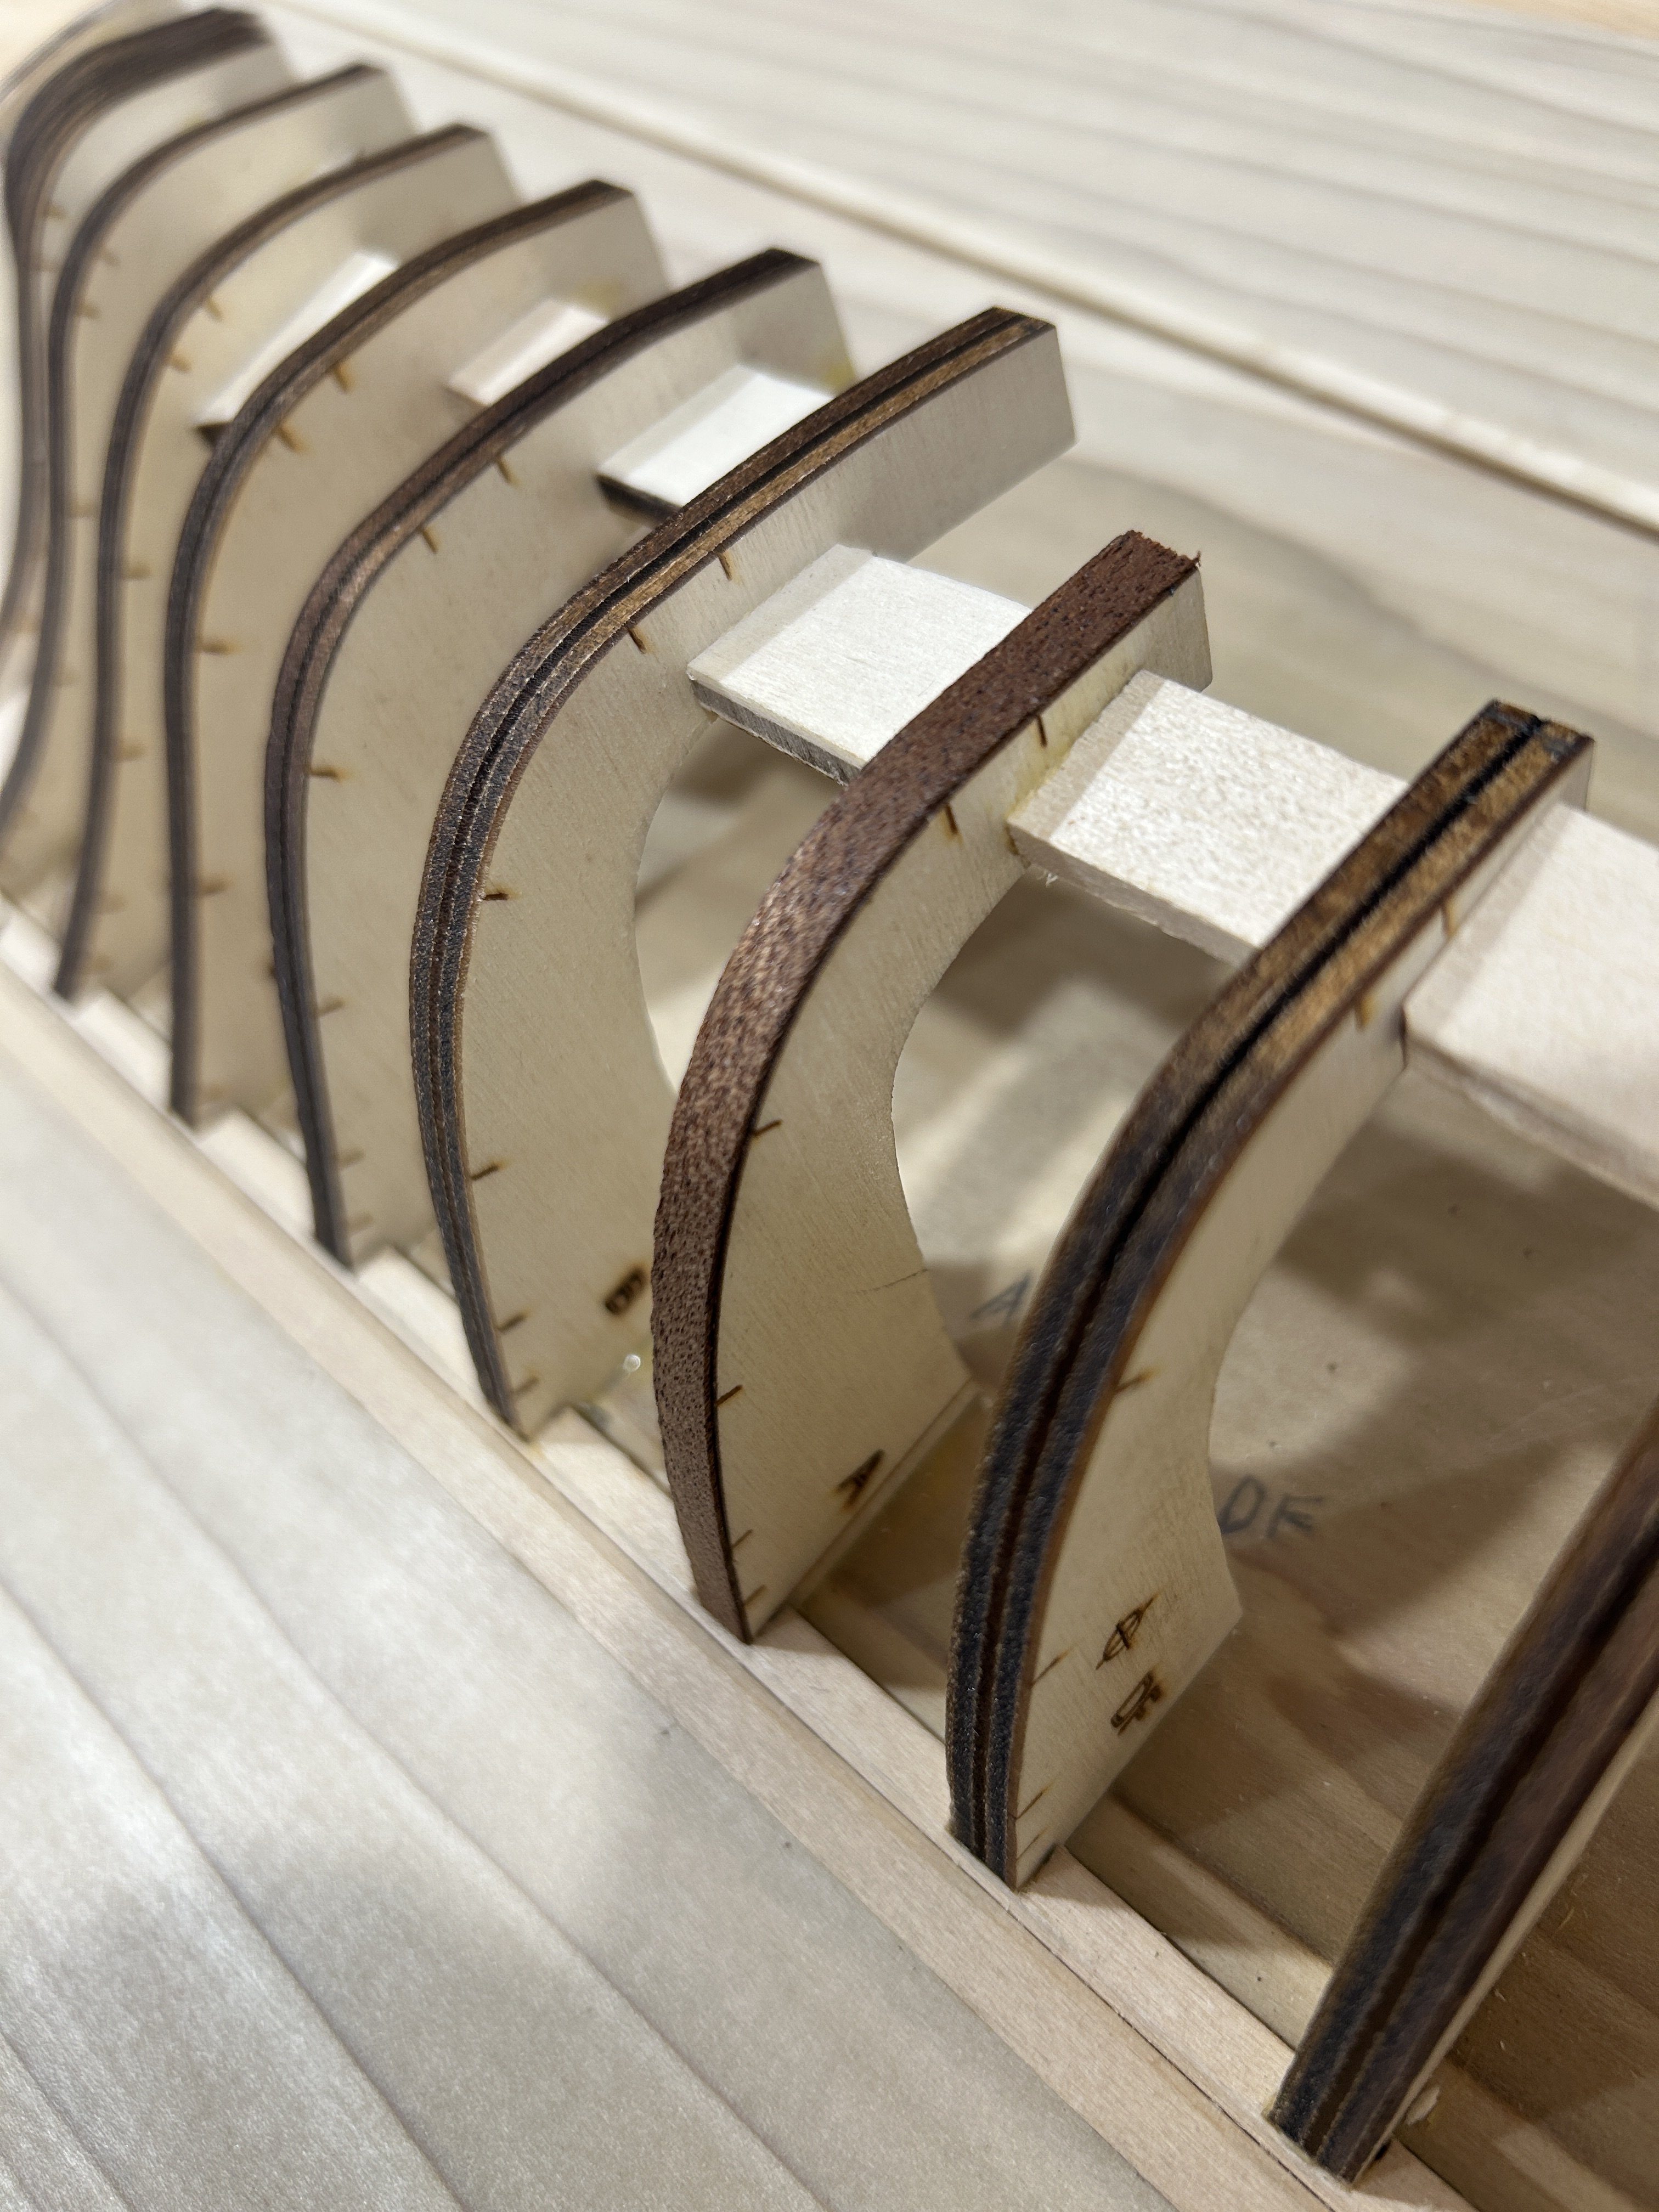
I have made some progress with the Bulkheads. I started by adding all but the most forward bulkheads.

I then added the two strong backs. These pass through the second forward bulkheads through the third bulk head aft. They are 5/16 x 5/16 inch basswood.
.thumb.jpg.faf78bf6bab17286ed74933a1723fcc7.jpg)
I didn't take a picture but I have added the forward bulkheads also, so all of the bulkheads are on. I will start adding the braces between all of the bulkheads next. I think with the strong backs and the braces I will have a very solid framework to plank.
-
Sorry if I missed it, but what is the reason for adding the ratlines every fifth one?
-
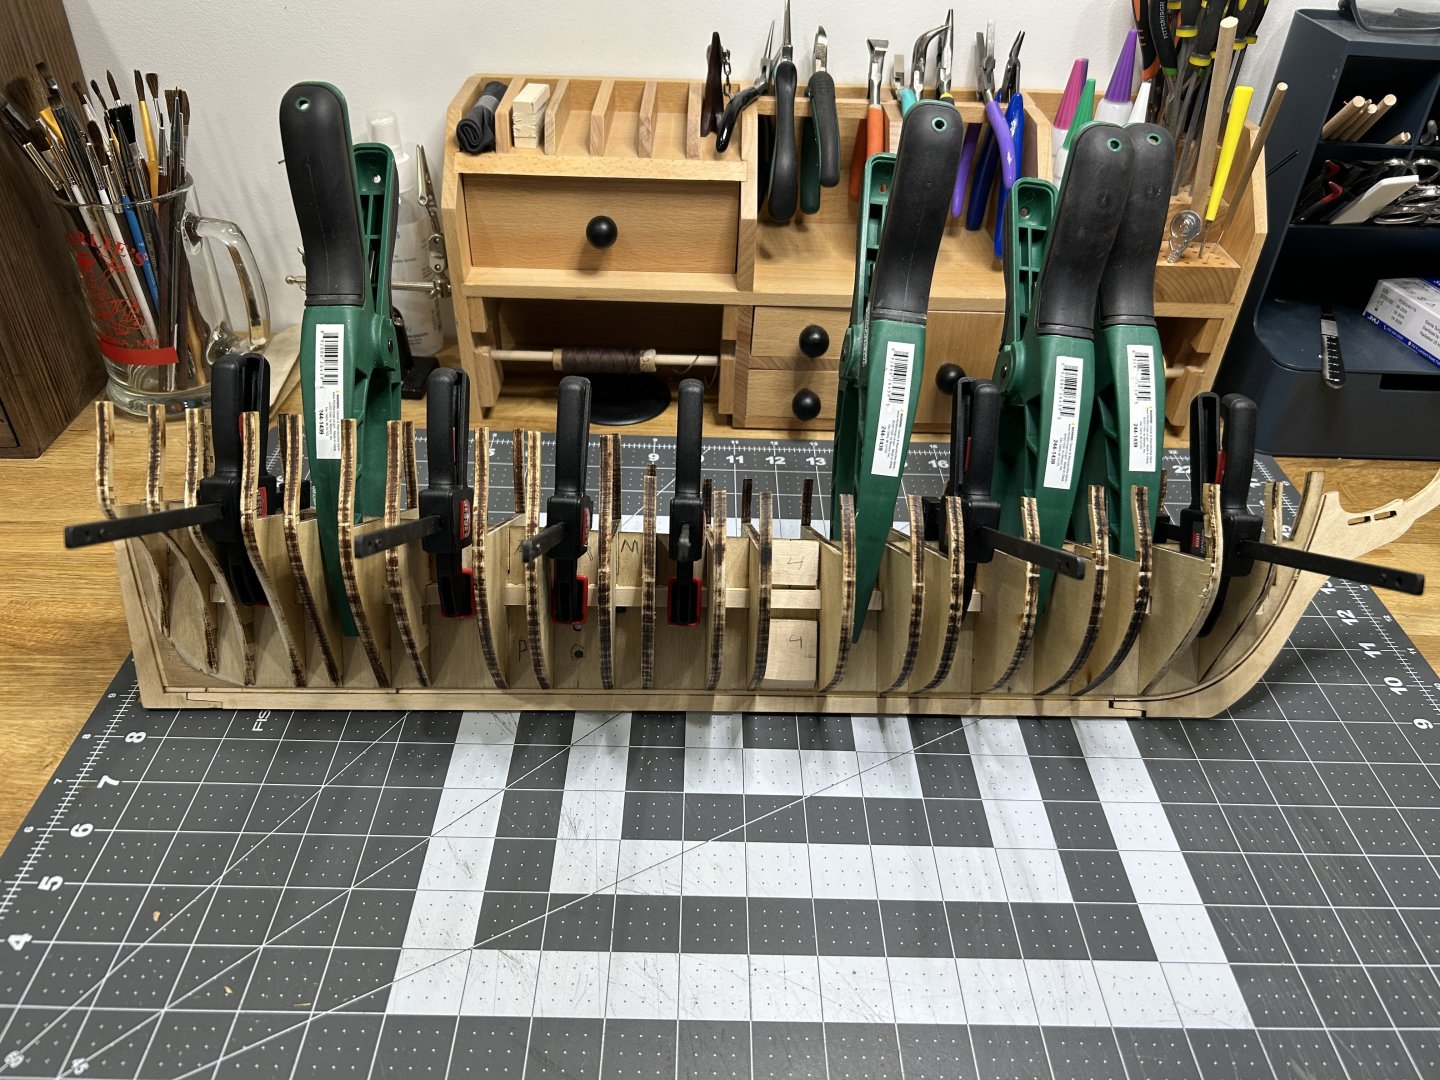
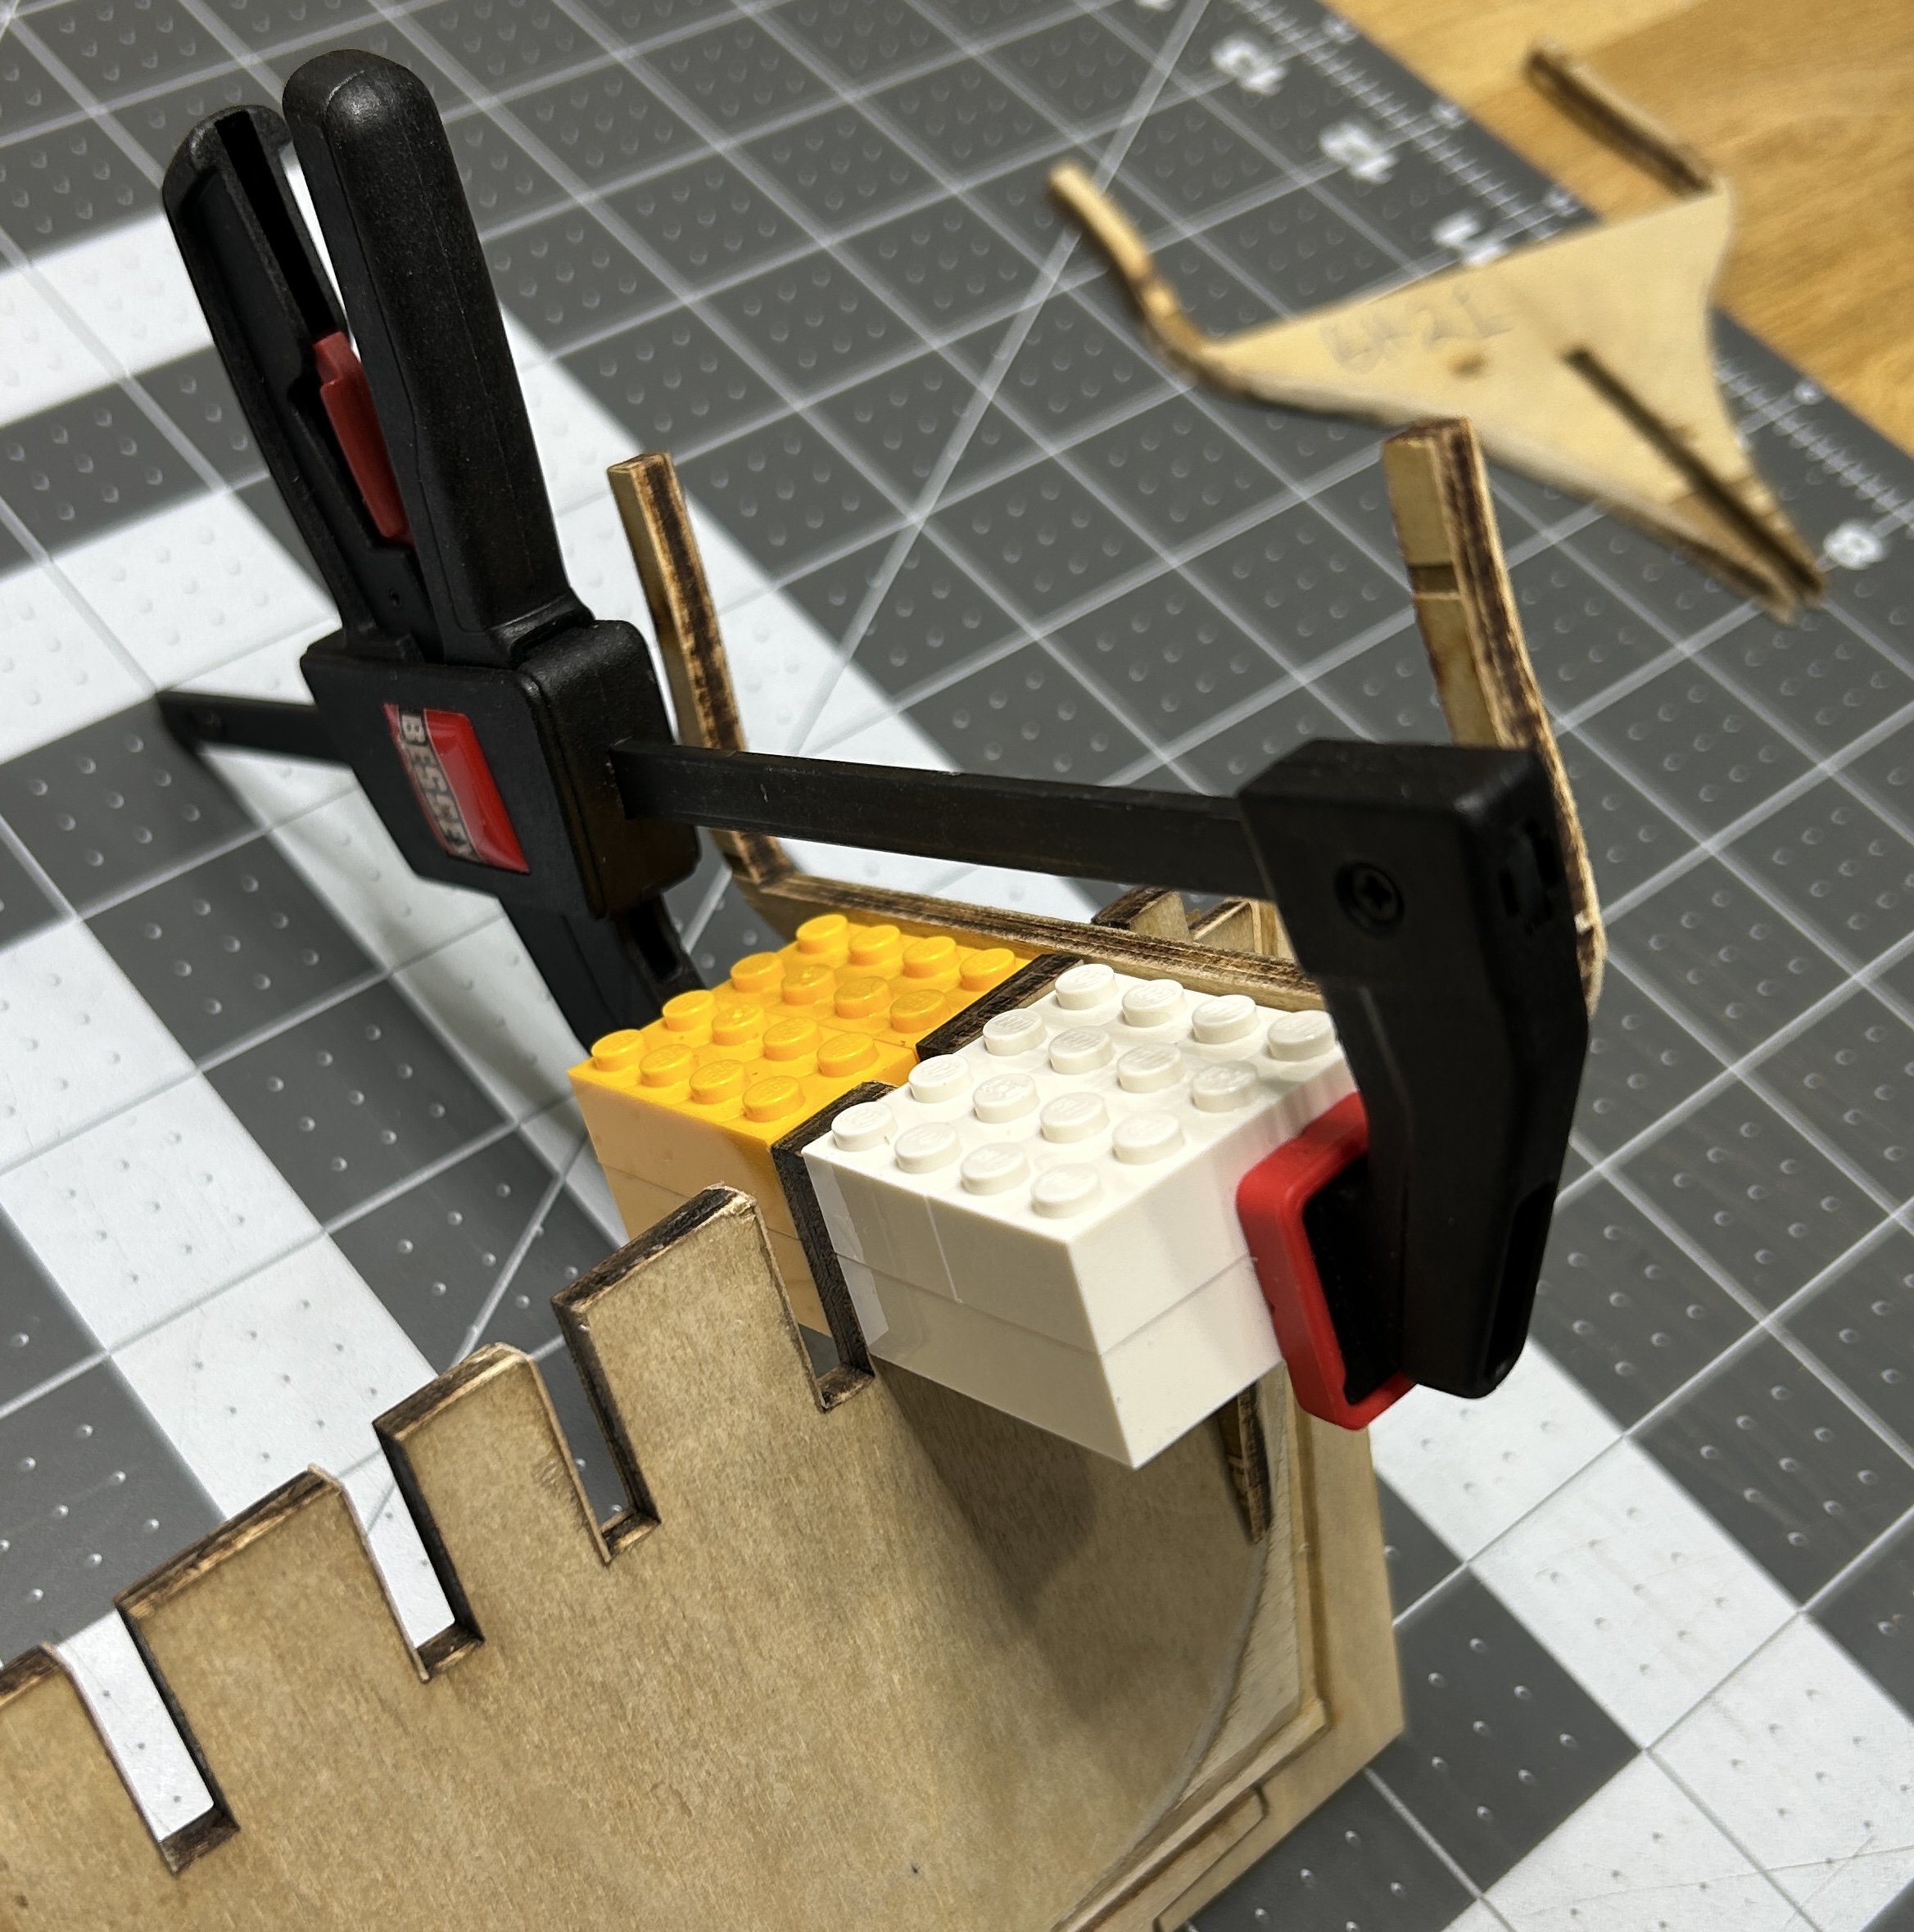
I made some progress on the bulkheads today. I started by dry fitting all of the bulkheads that have the cut out for the strong backs to make sure that the strong backs would go through all of the cut outs easily after they were installed. I need to do a little extra sanding on a couple of the bulkheads to widen the cut outs.
I then started adding the bulkheads starting at the rear. I used Legos to keep the bulkheads square as the glue was a setting up.
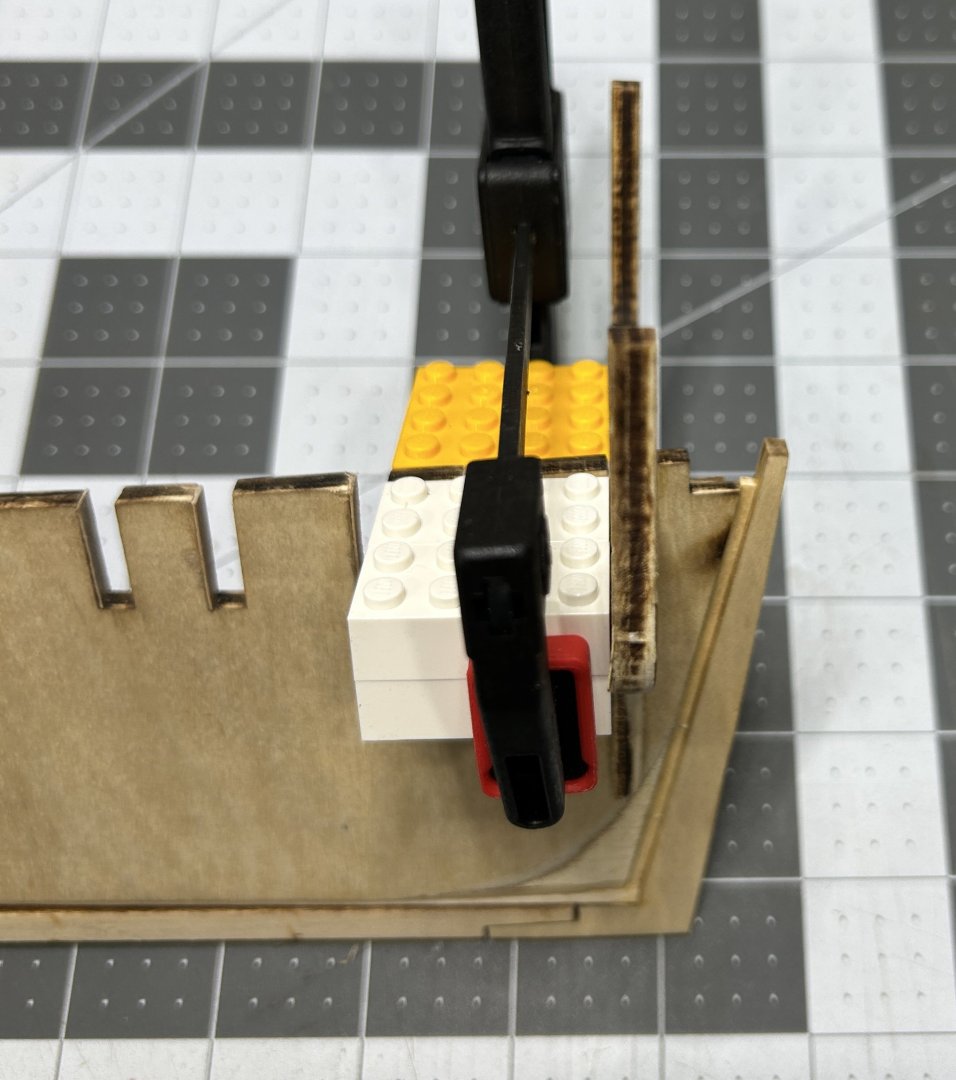
I checked the alignment of the strong back cut outs after every two or three bulkheads. I dry fitted the first bulkhead that the strong backs goes through to confirm that the cut outs all line up.


I am about a third of the way through adding the bulkheads.

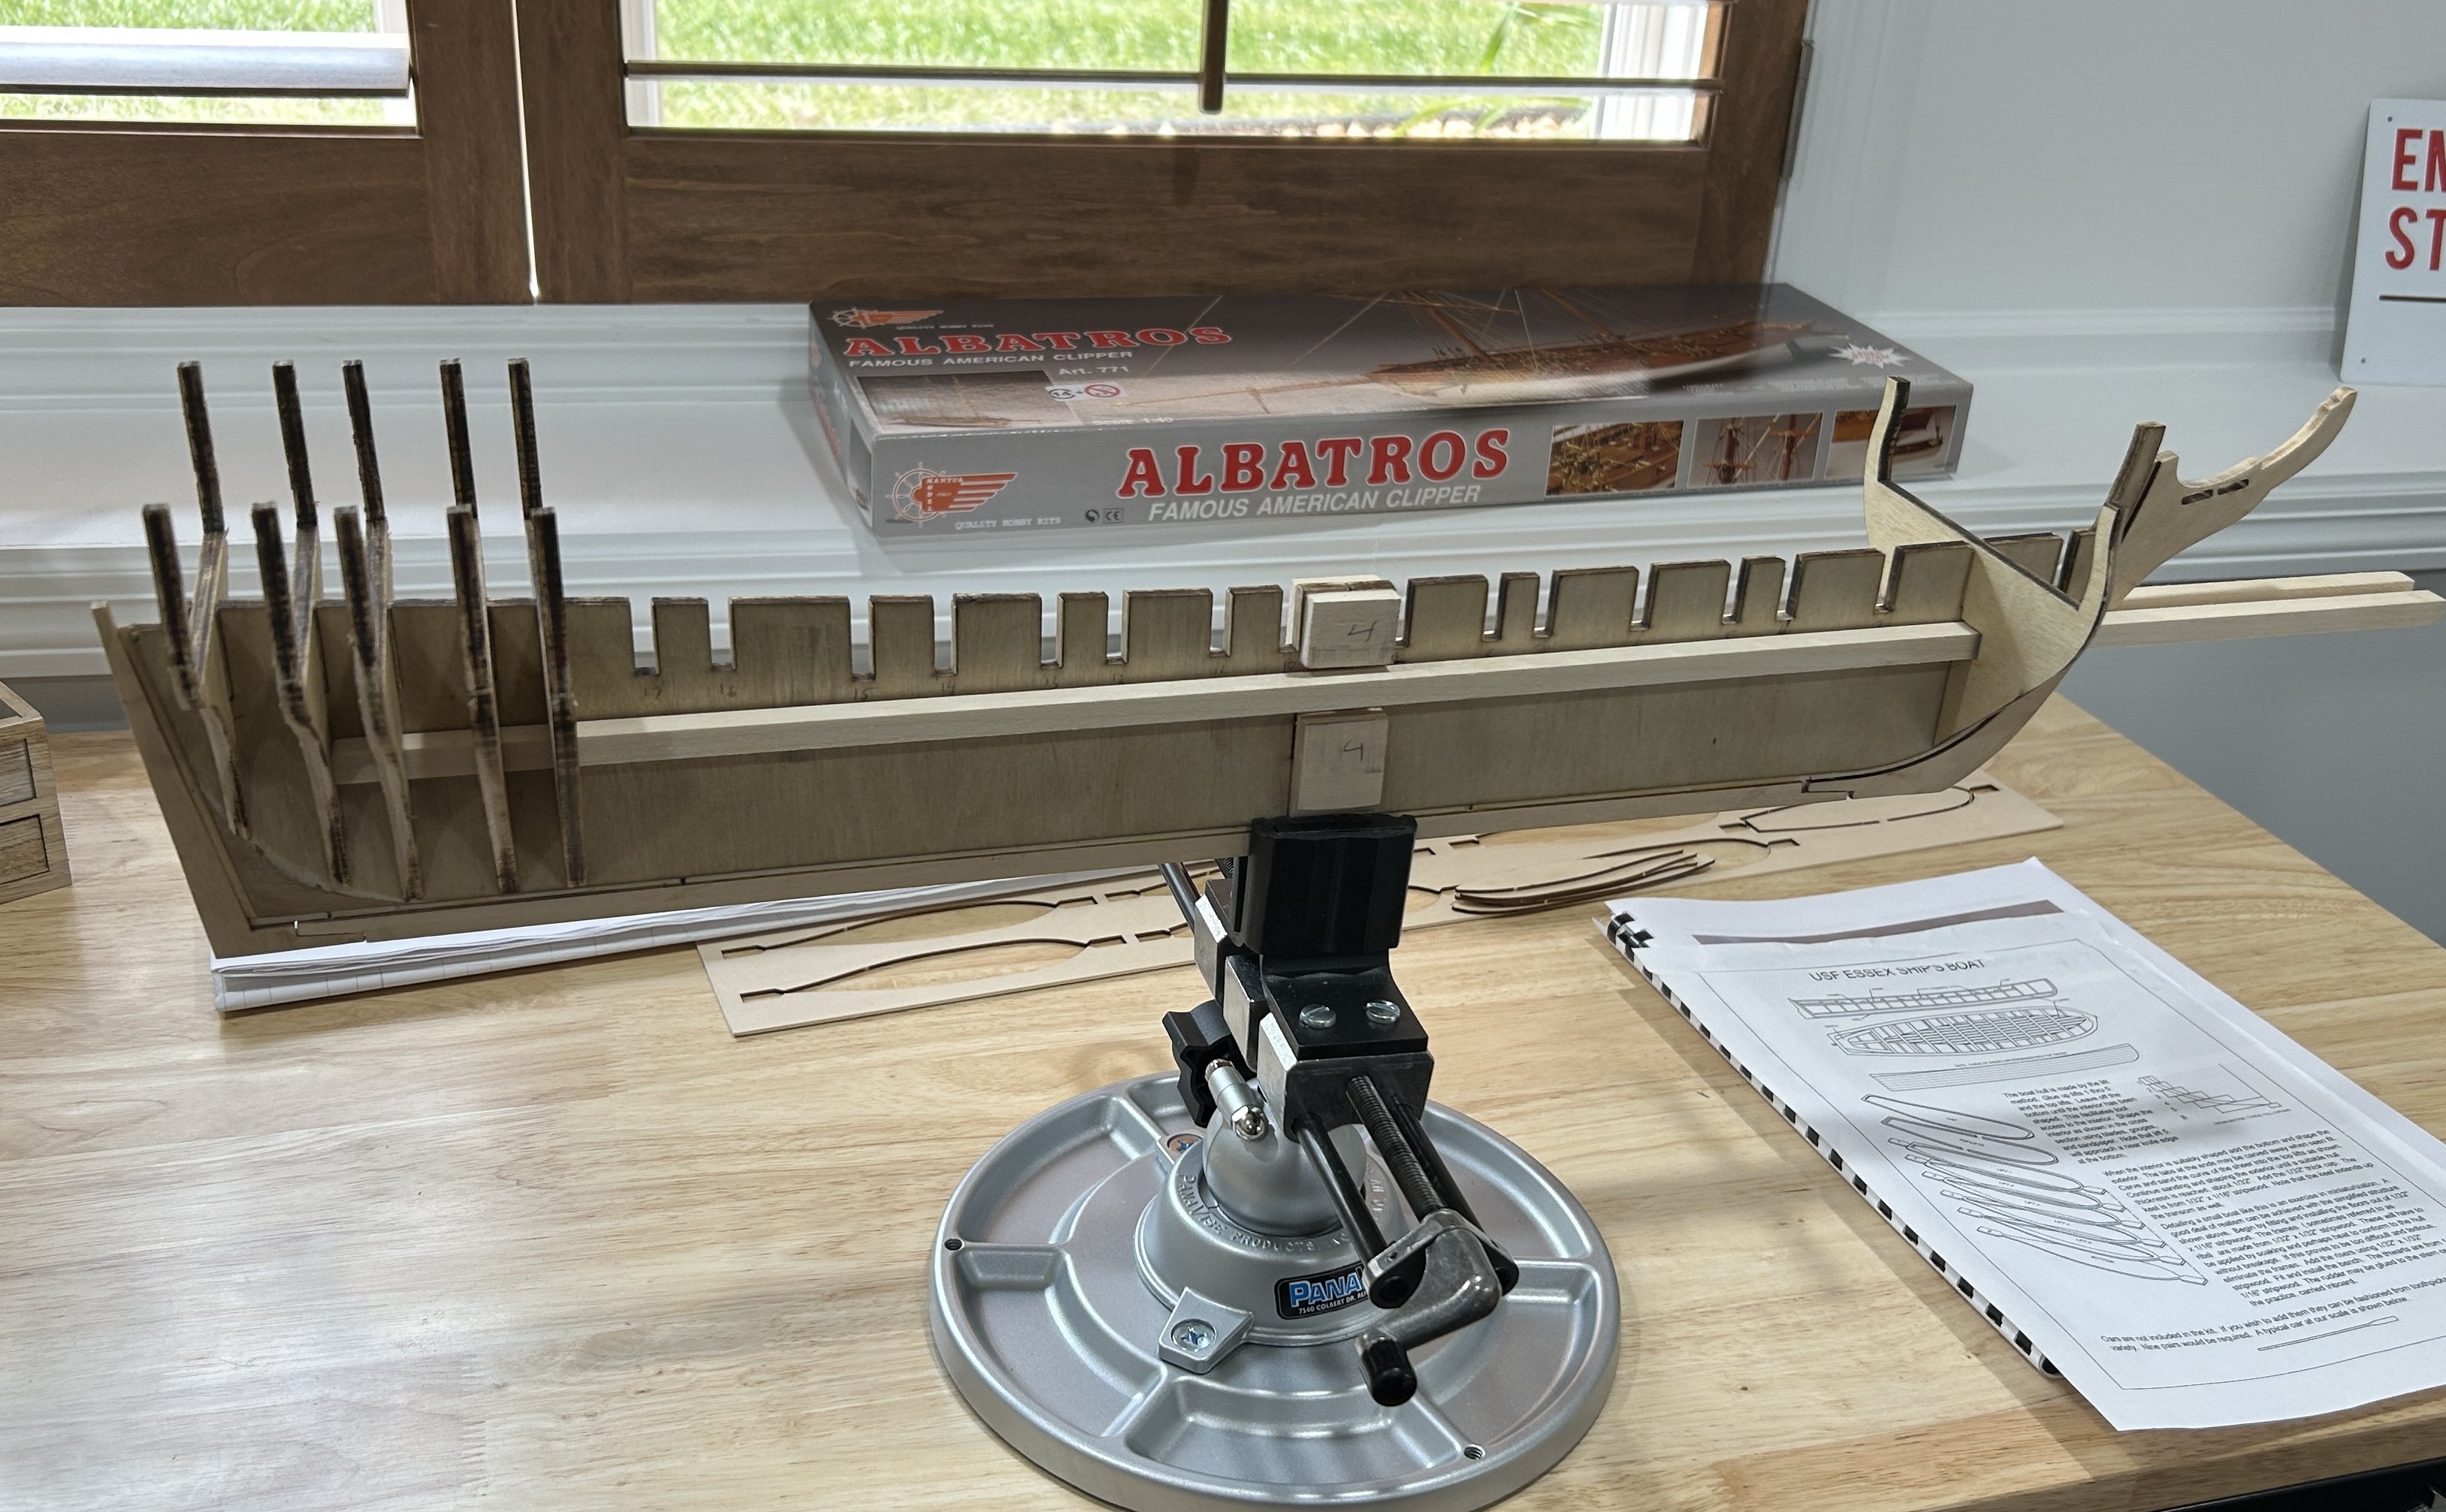
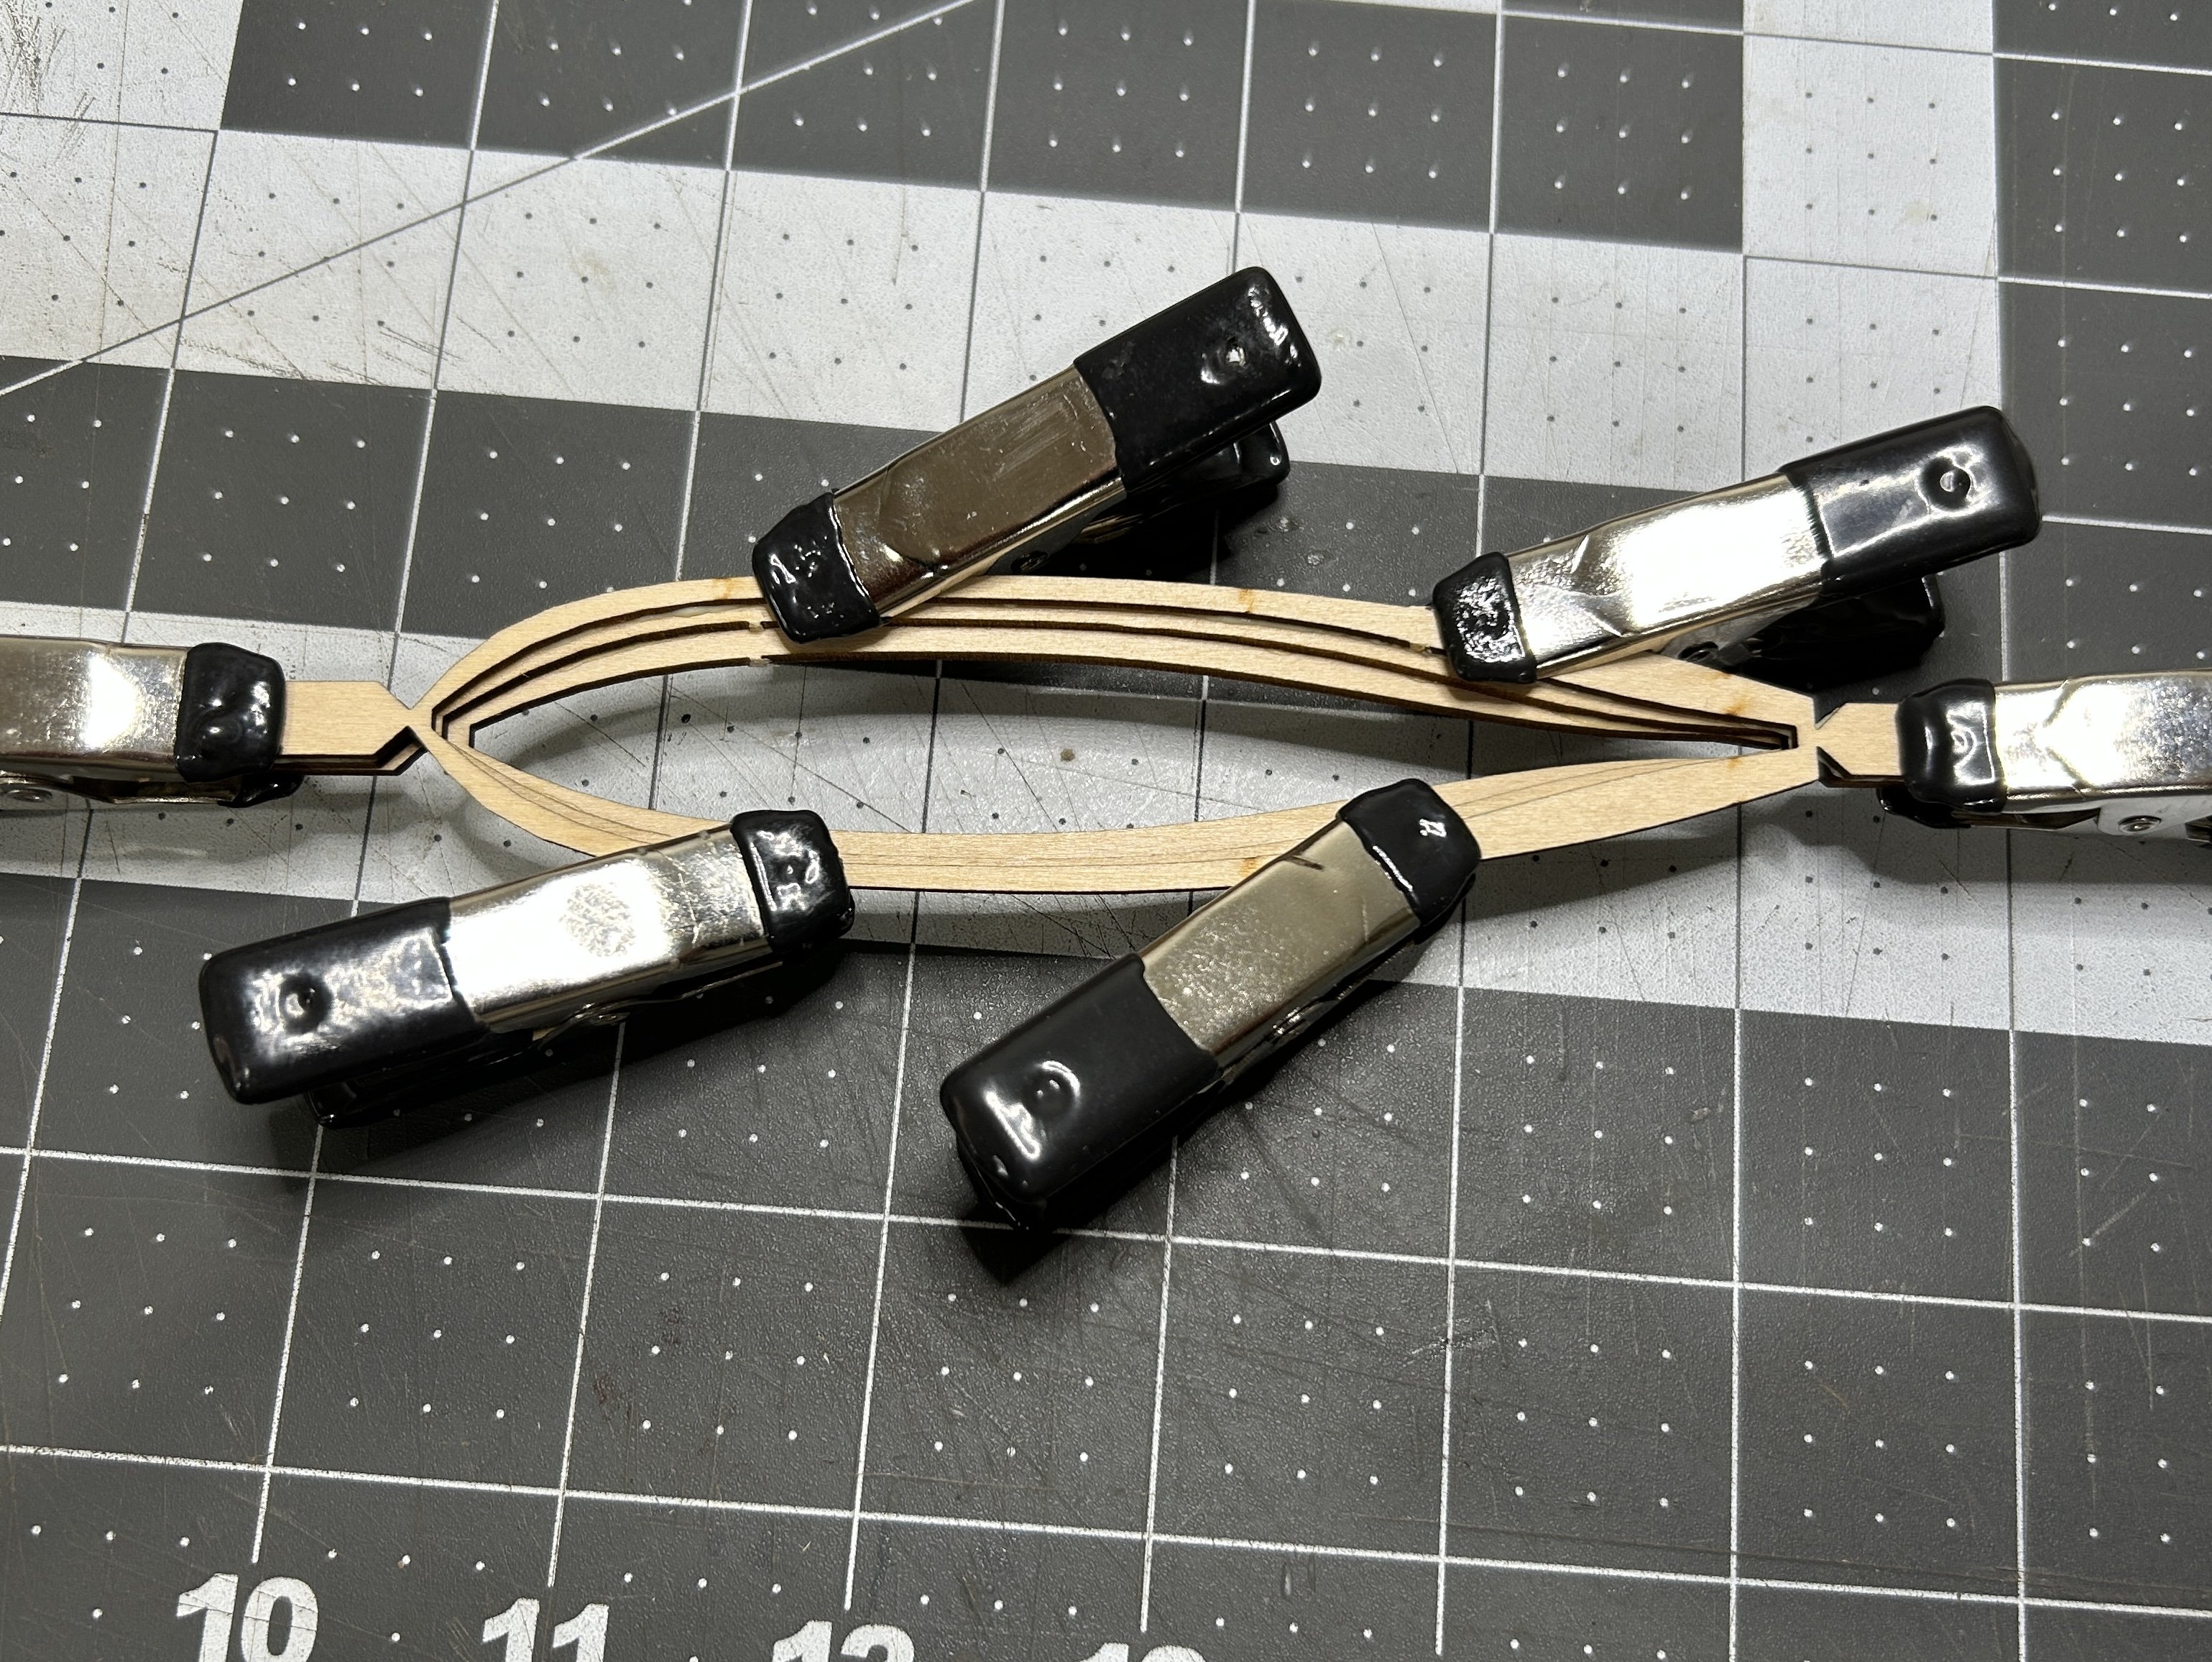
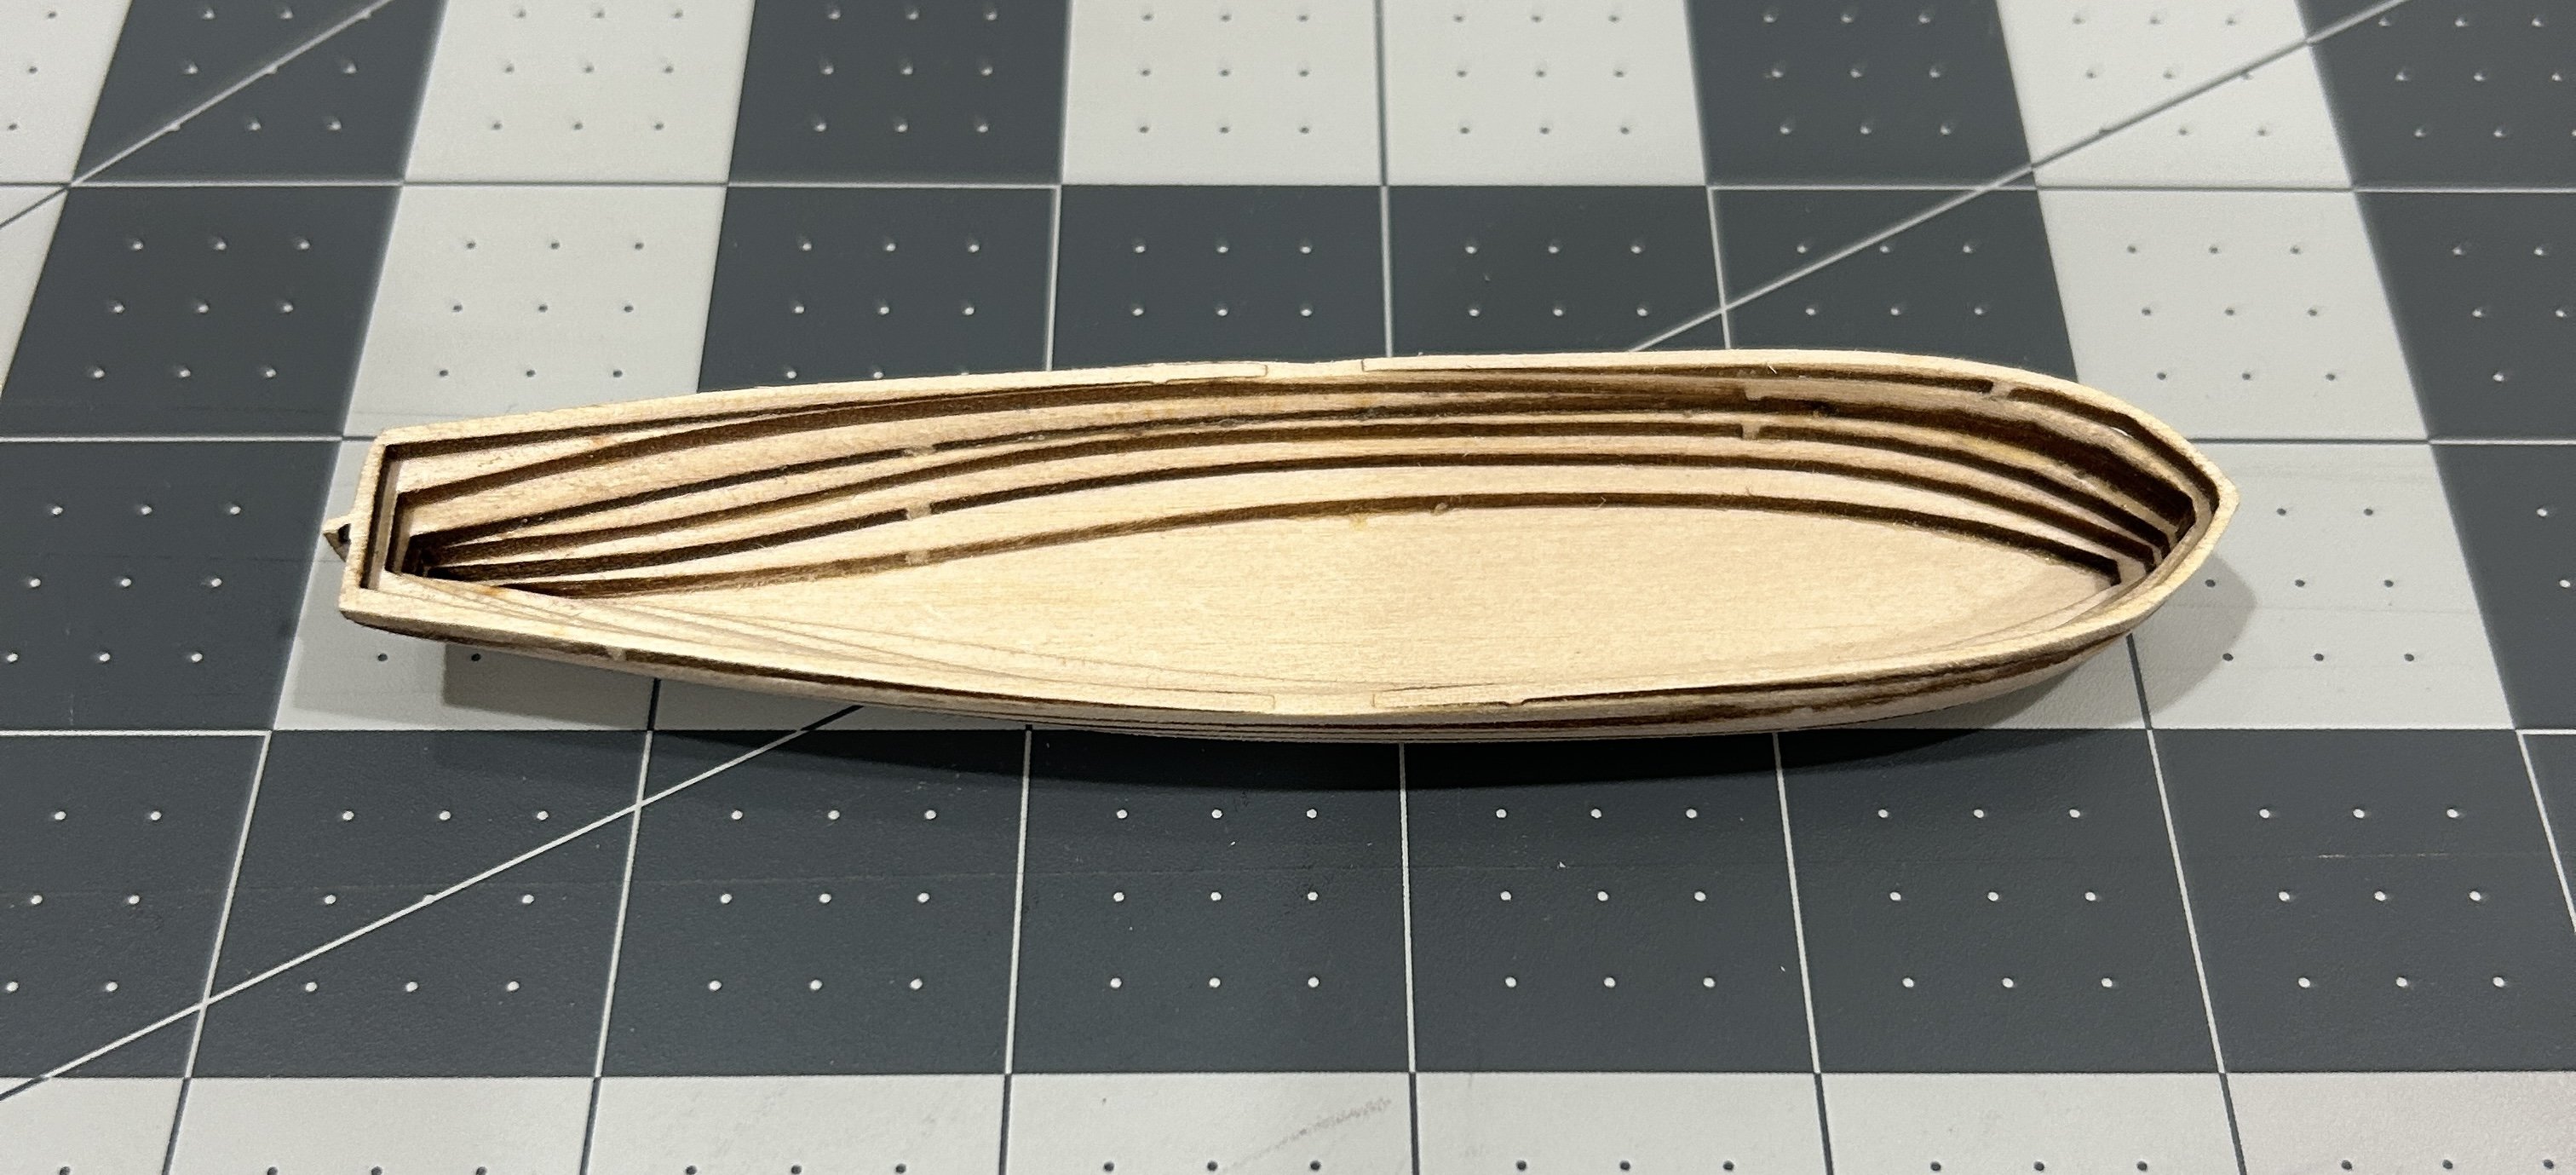
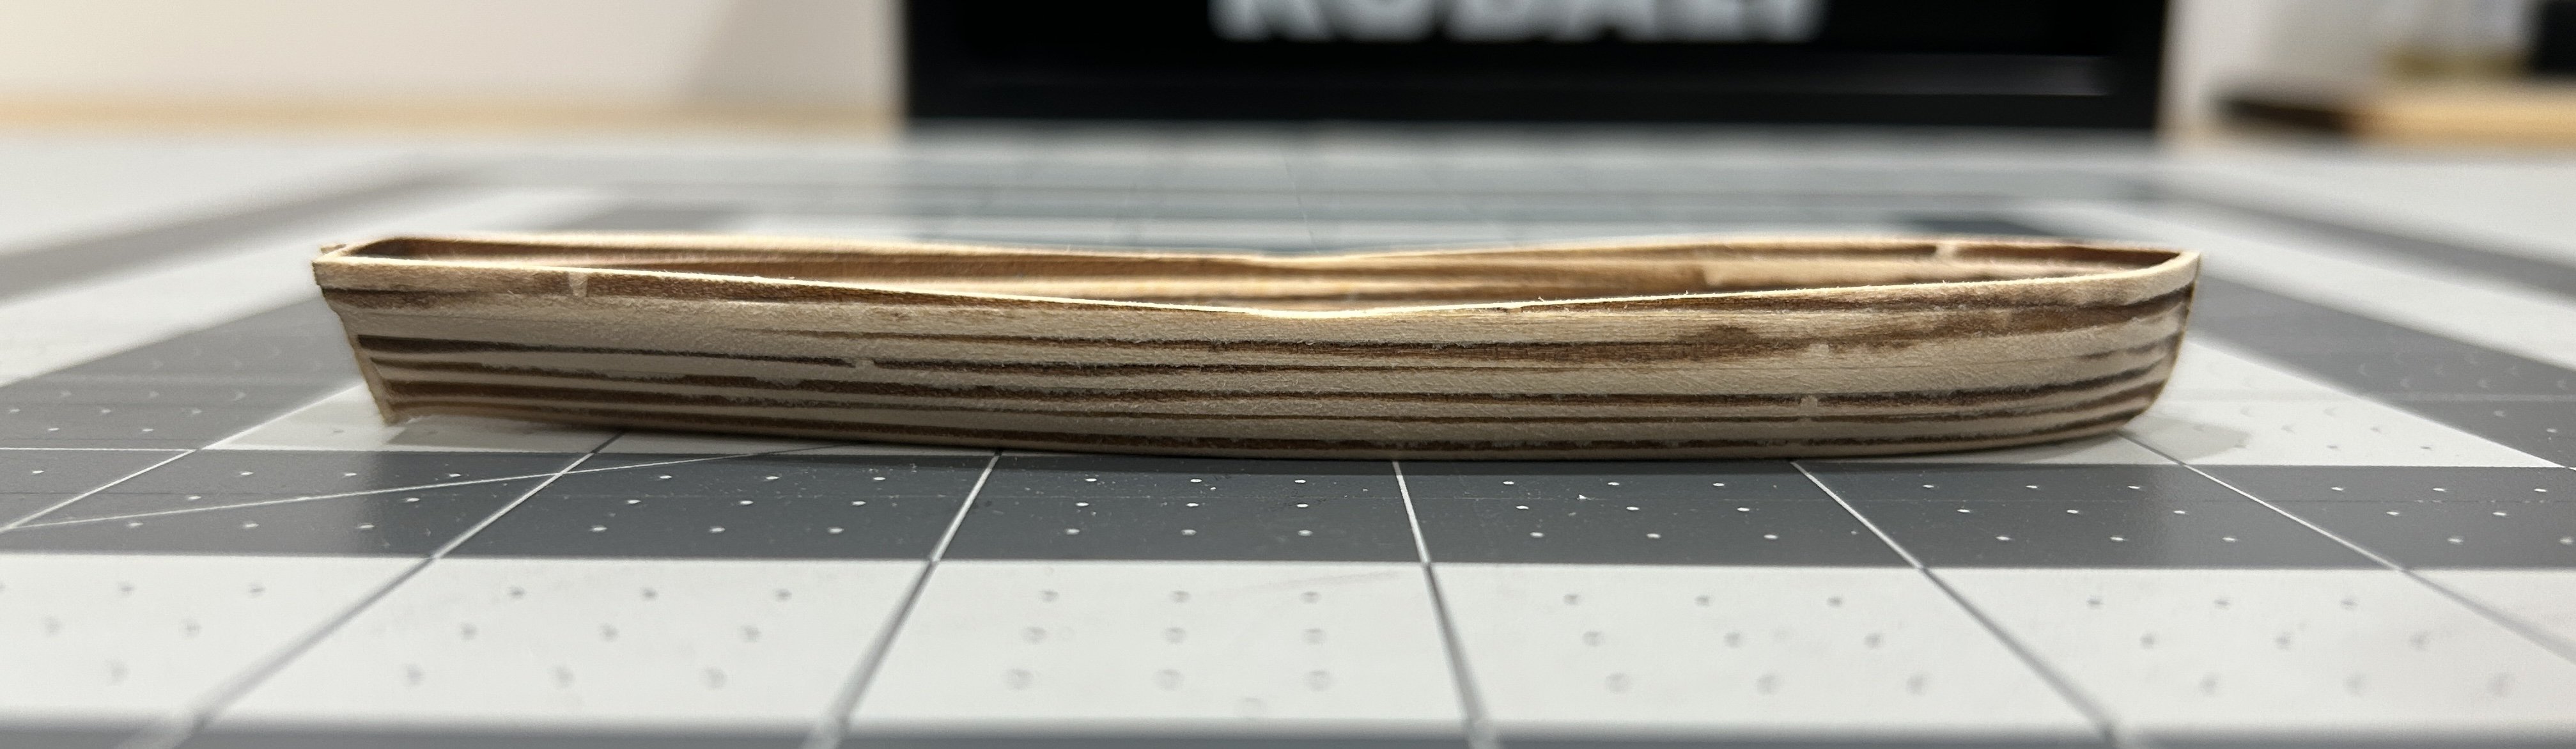
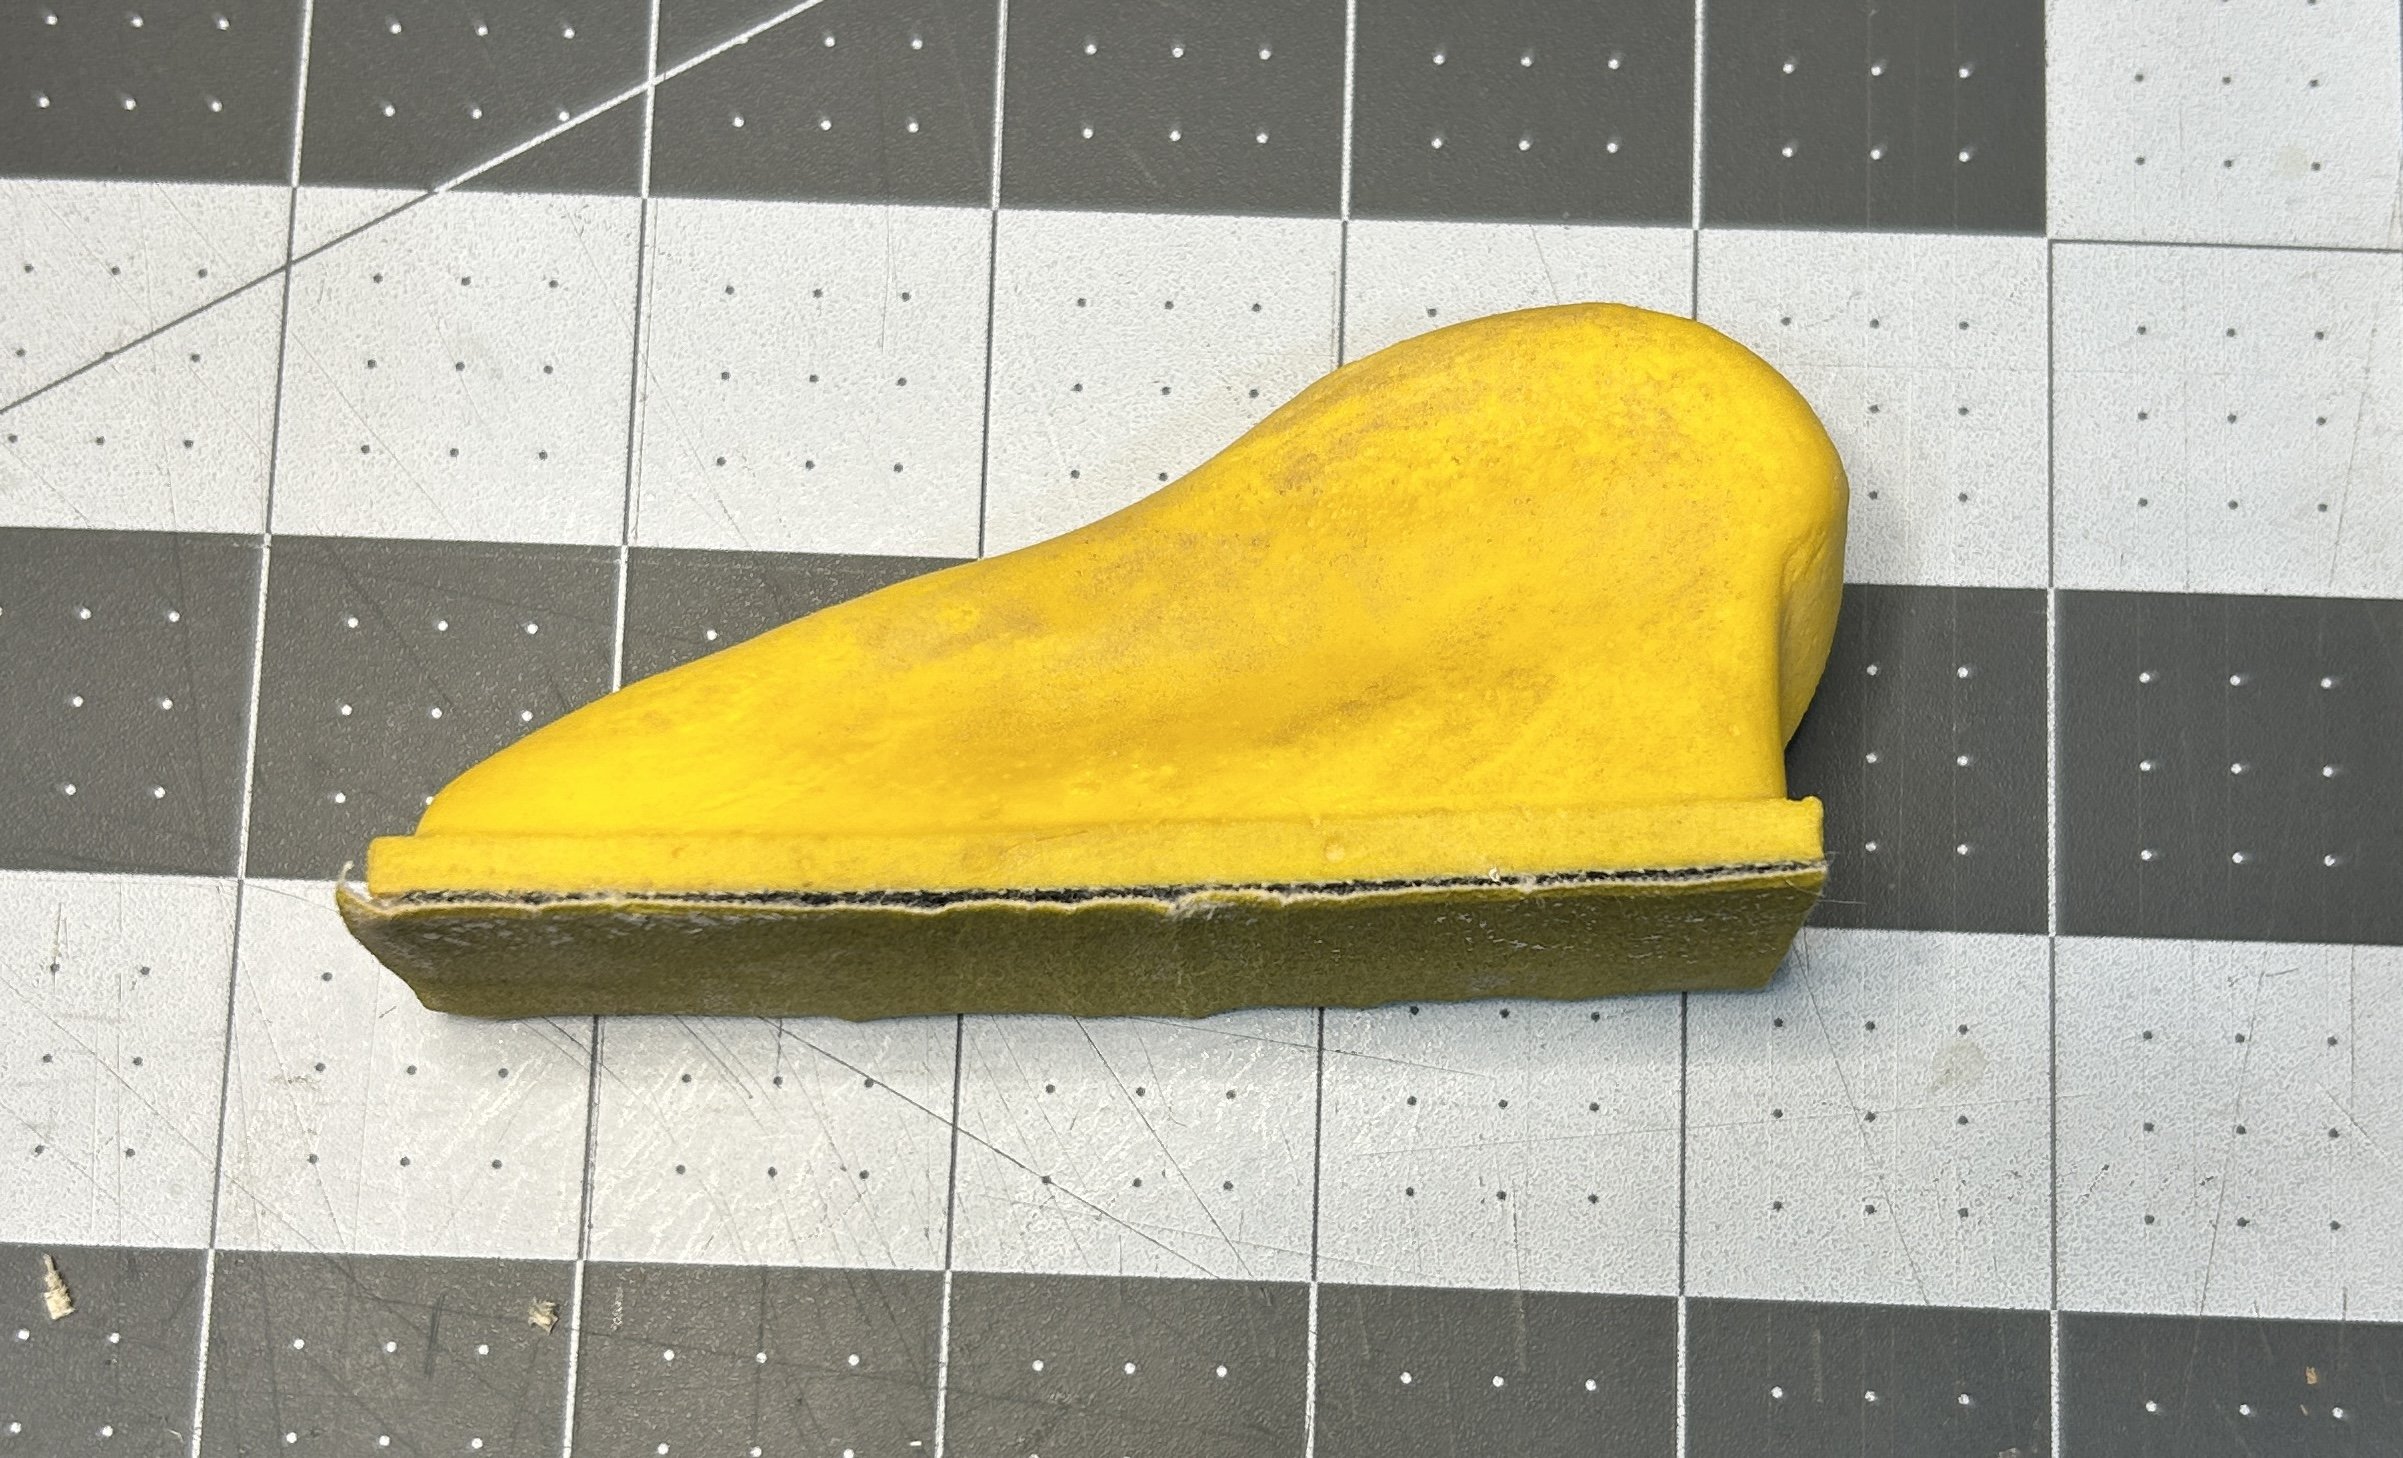
While I was waiting for the glue to dry on the bulkheads I started to assemble the ship's boat. This uses the method of assembling layers of material to create a hull that is sanded smooth on the inside and outside of the hull.
This was my first time building a boat using this technique. I am not sure I sanded enough on the interior, but I am pleased with the exterior of the hull. There is a lot of detail to add, and I will probably wait until I can focus 100% on the boat to finish it.


Hopefully I can get all of the bulkheads installed this week.
- schooner, Ronald-V and Paul Le Wol
-
 3
3
-
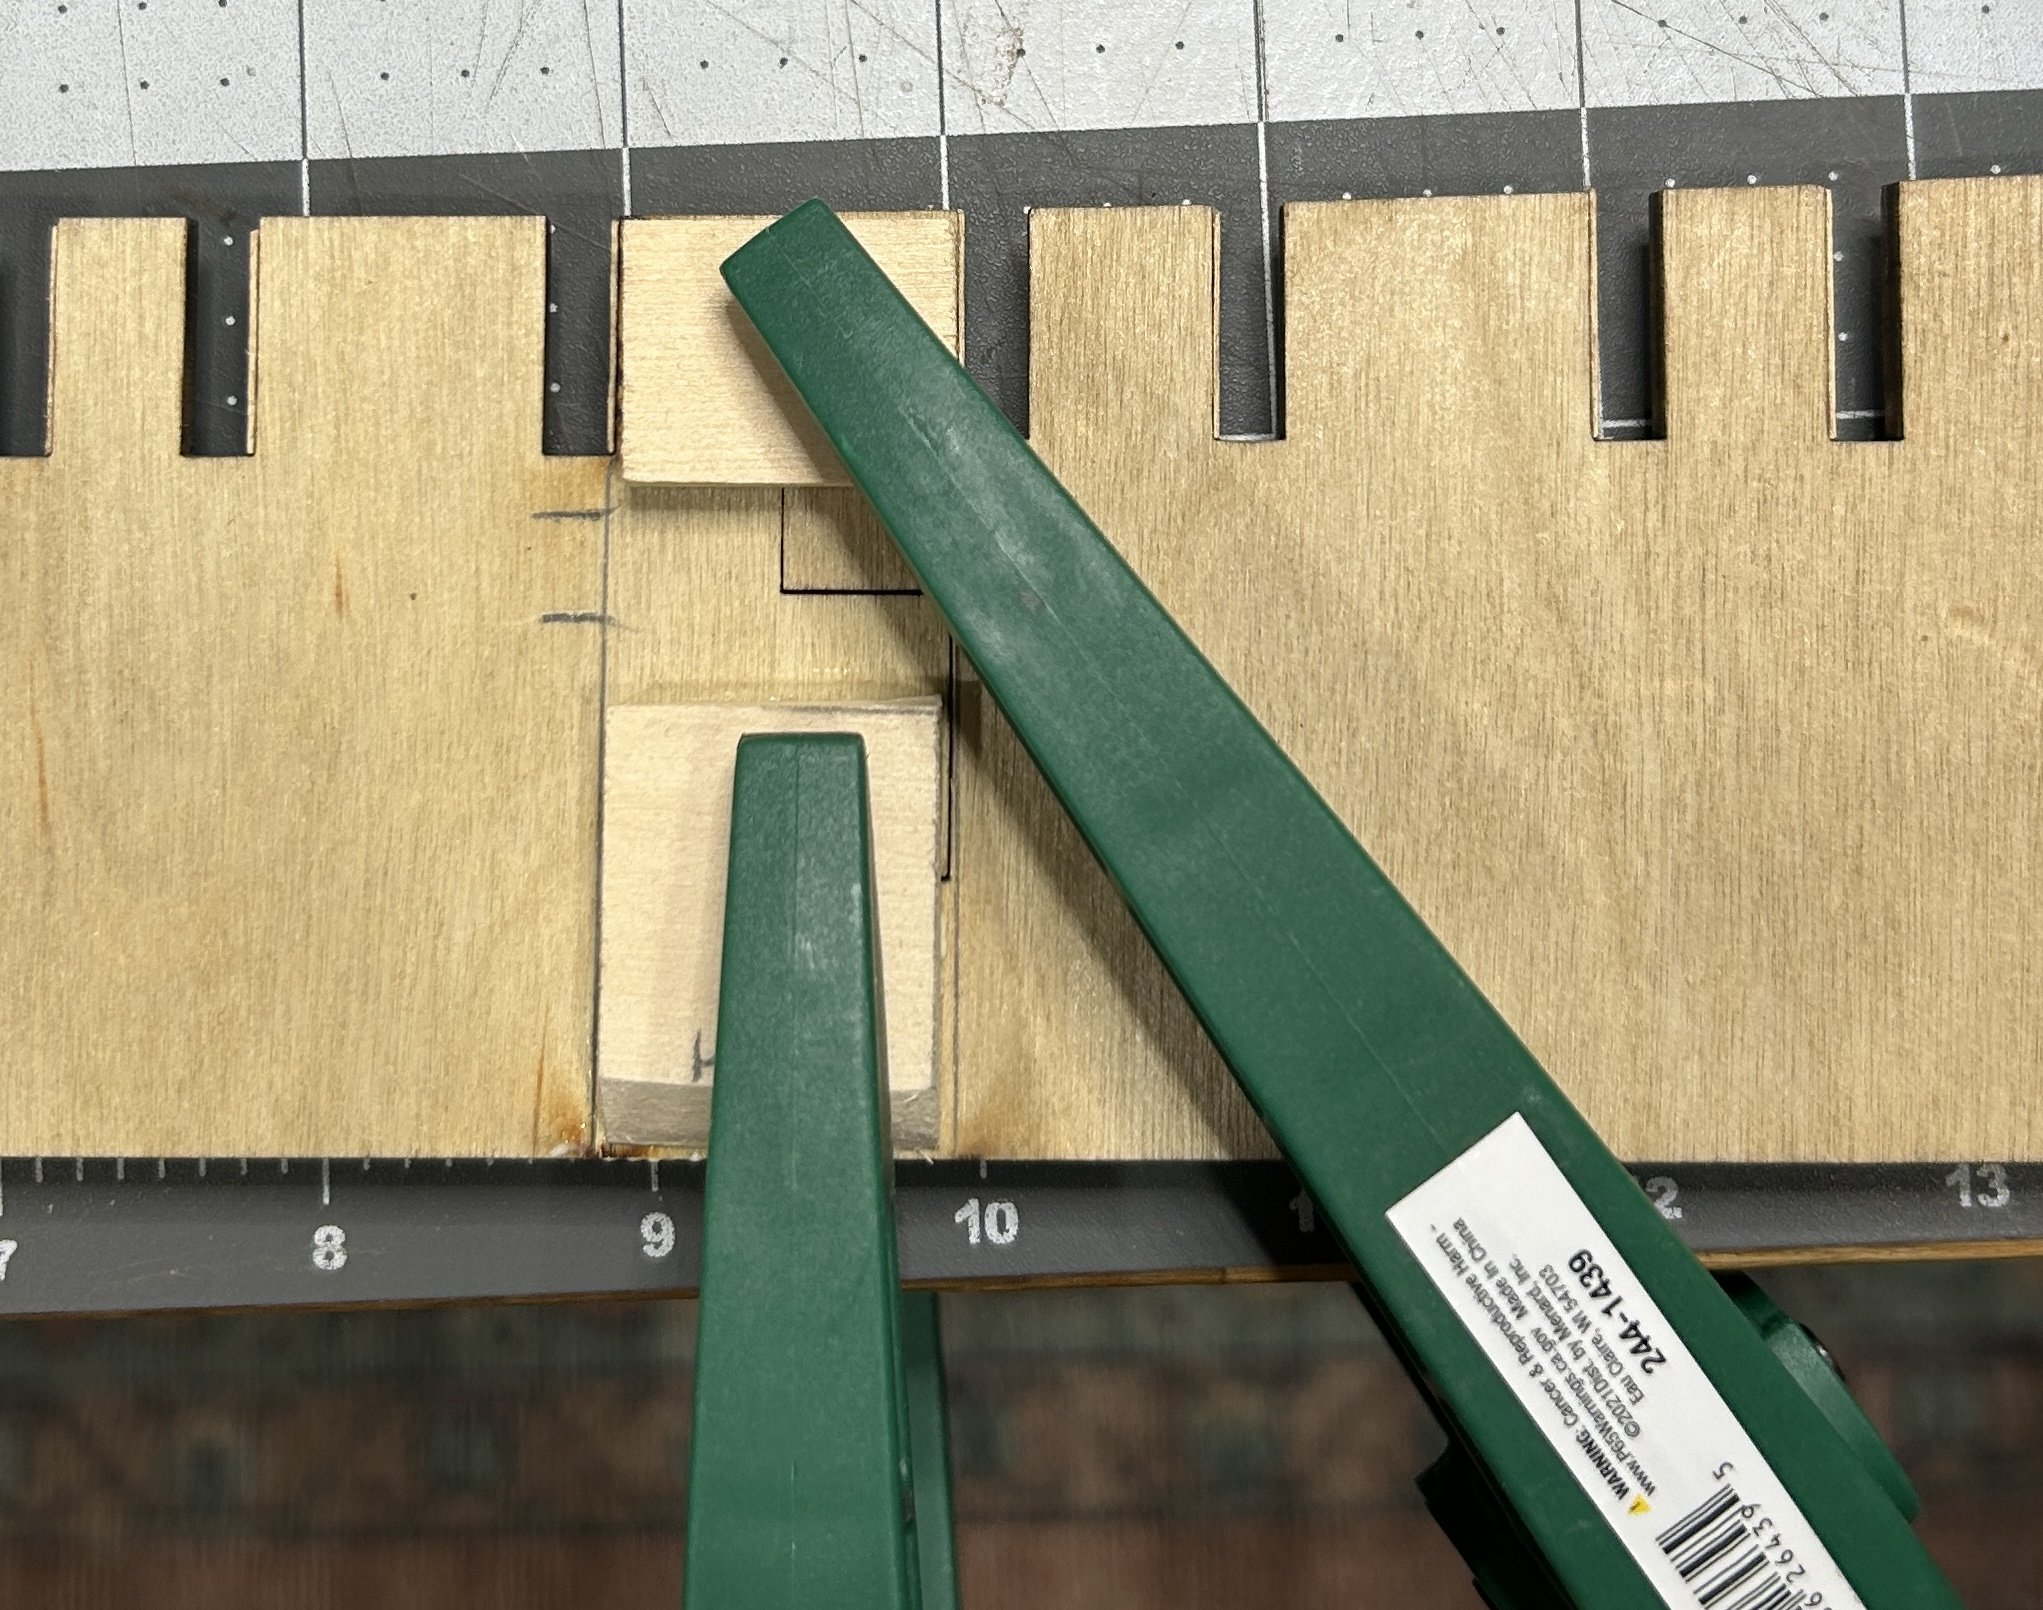
I have glued the two pieces of the bulkhead former together and added some support pieces on both sides of the joint. I left a gap in the support pieces to accommodate the strong back on each side of the bulkhead former.


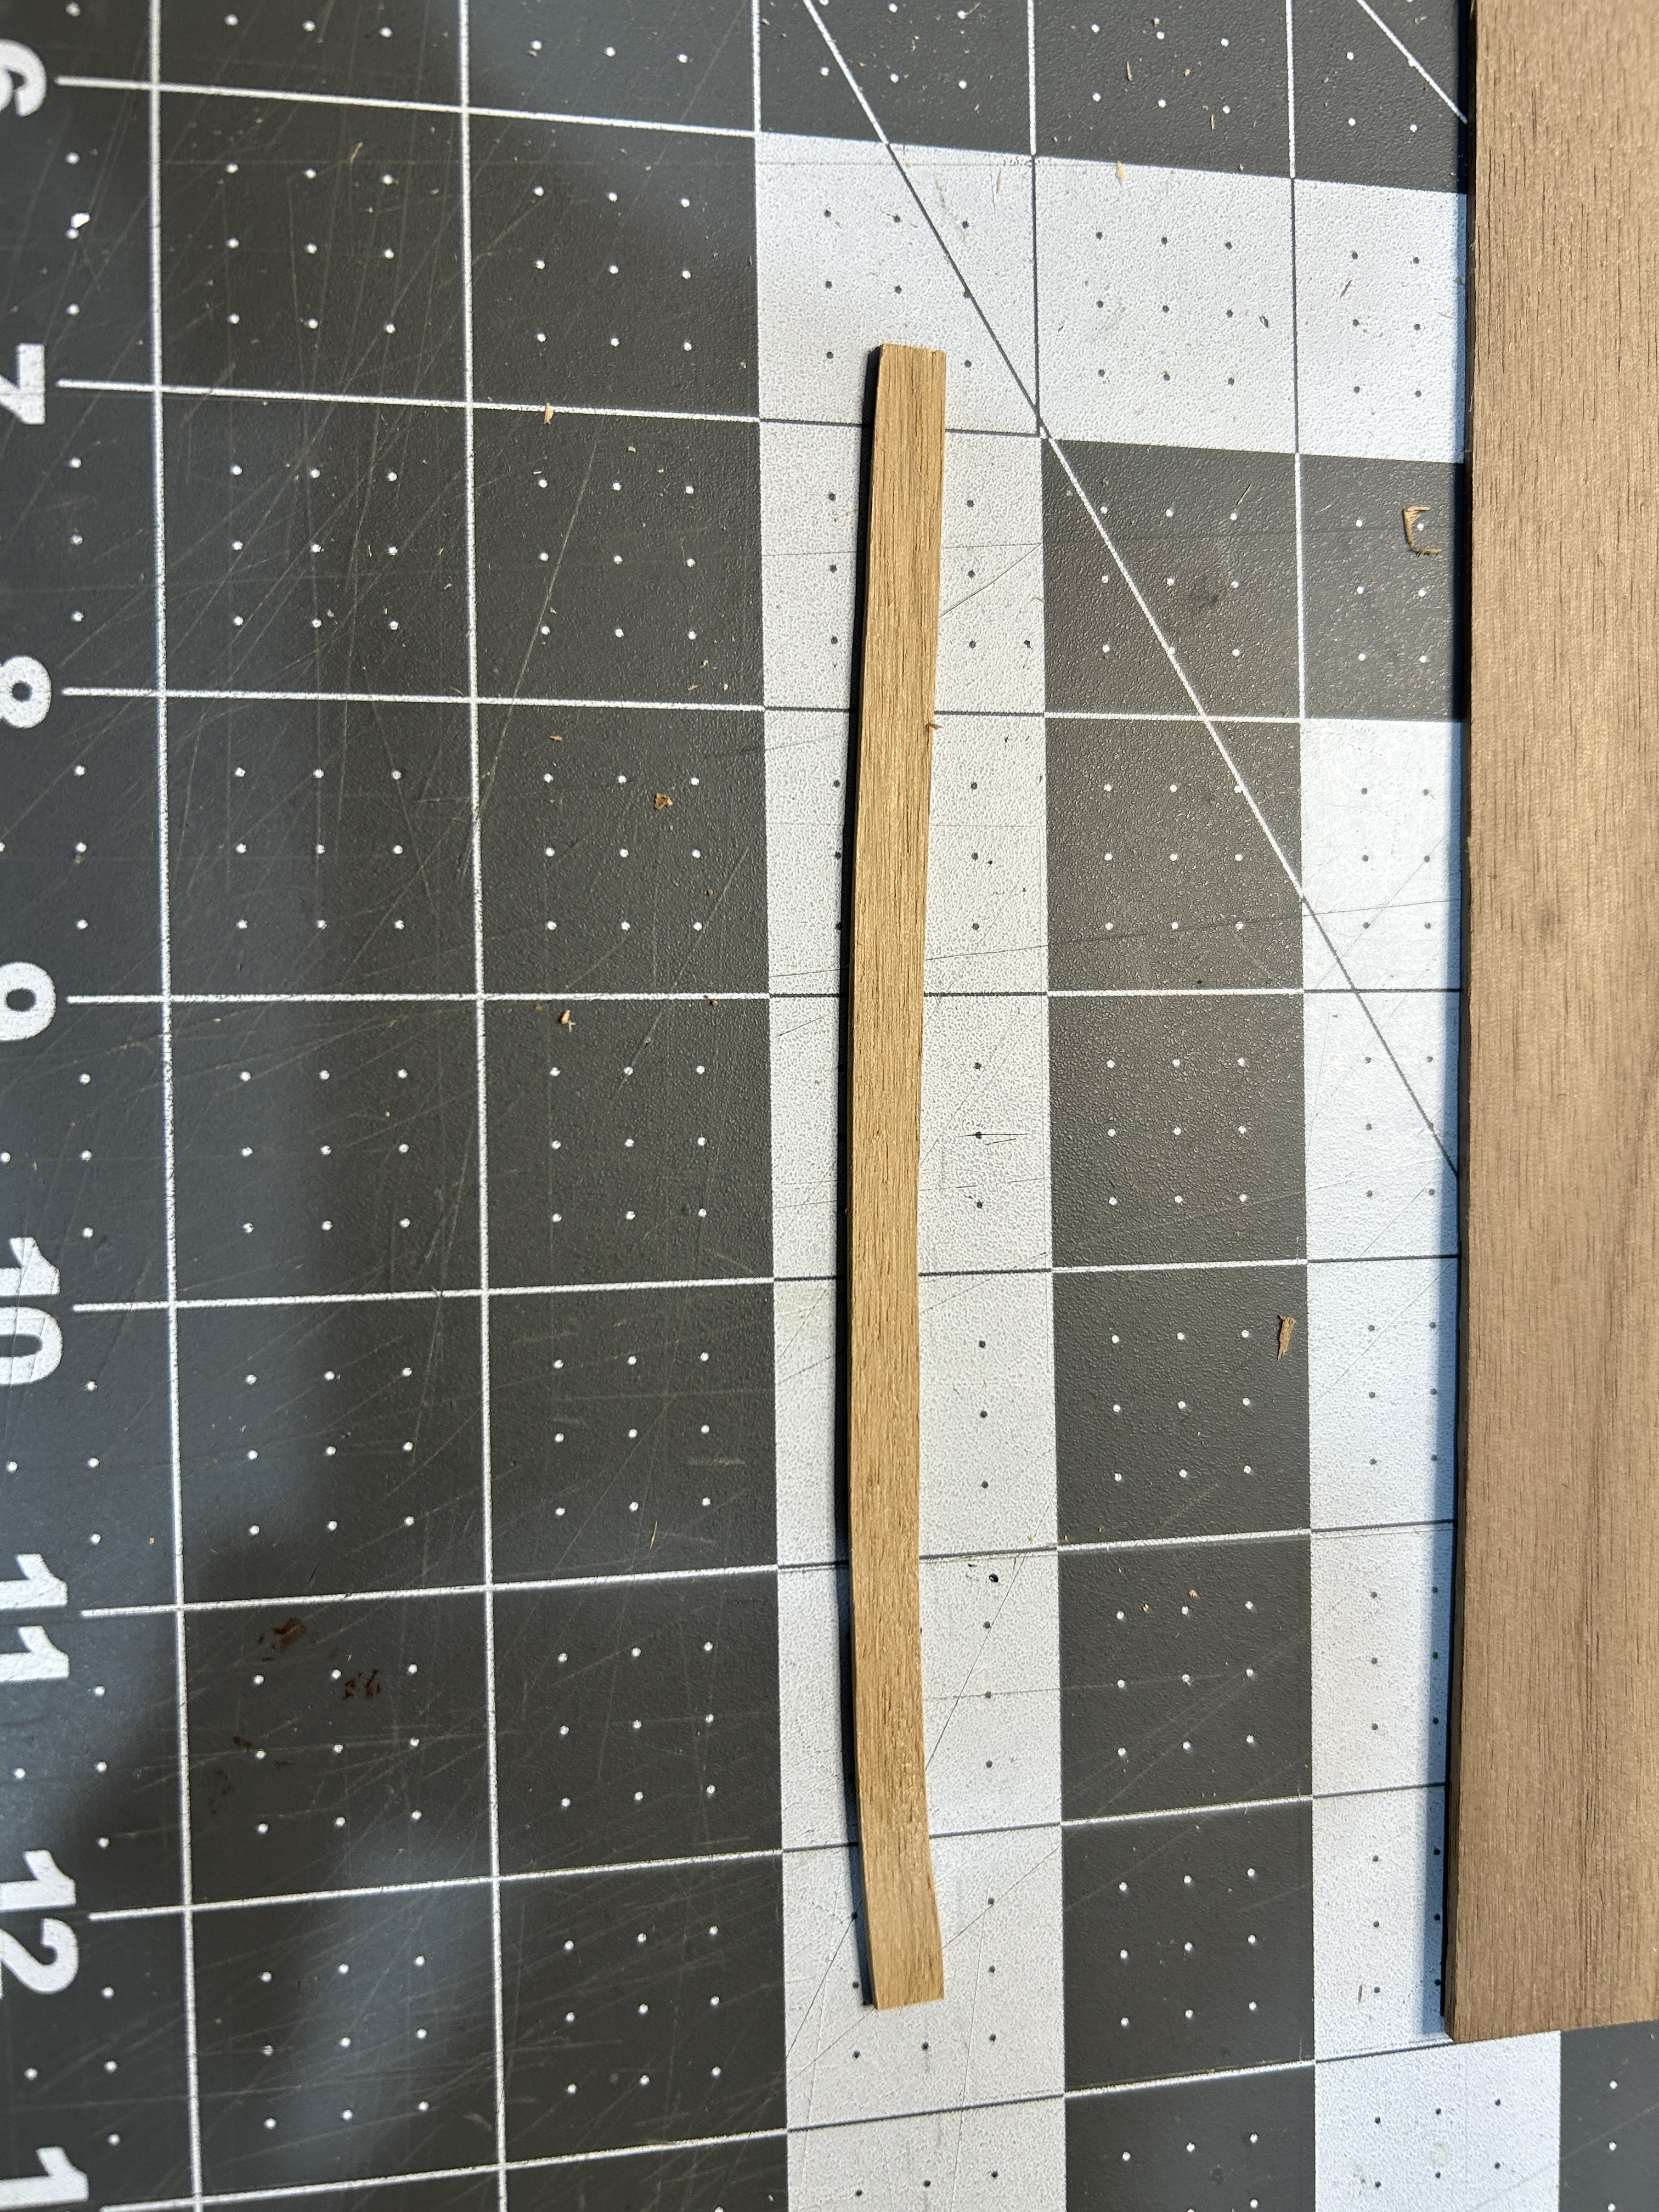
The rabbet strip is 1/16 x 3/32 basswood. I preshaped the rabbet strip after soaking it in hot water for about 15 minutes.
Getting it centered was a little challenging. I used a small drop of CA at the bow to get it started in the center and then used Titebond to secure the rest of the strip. At the stern I was successful with just Titebond.
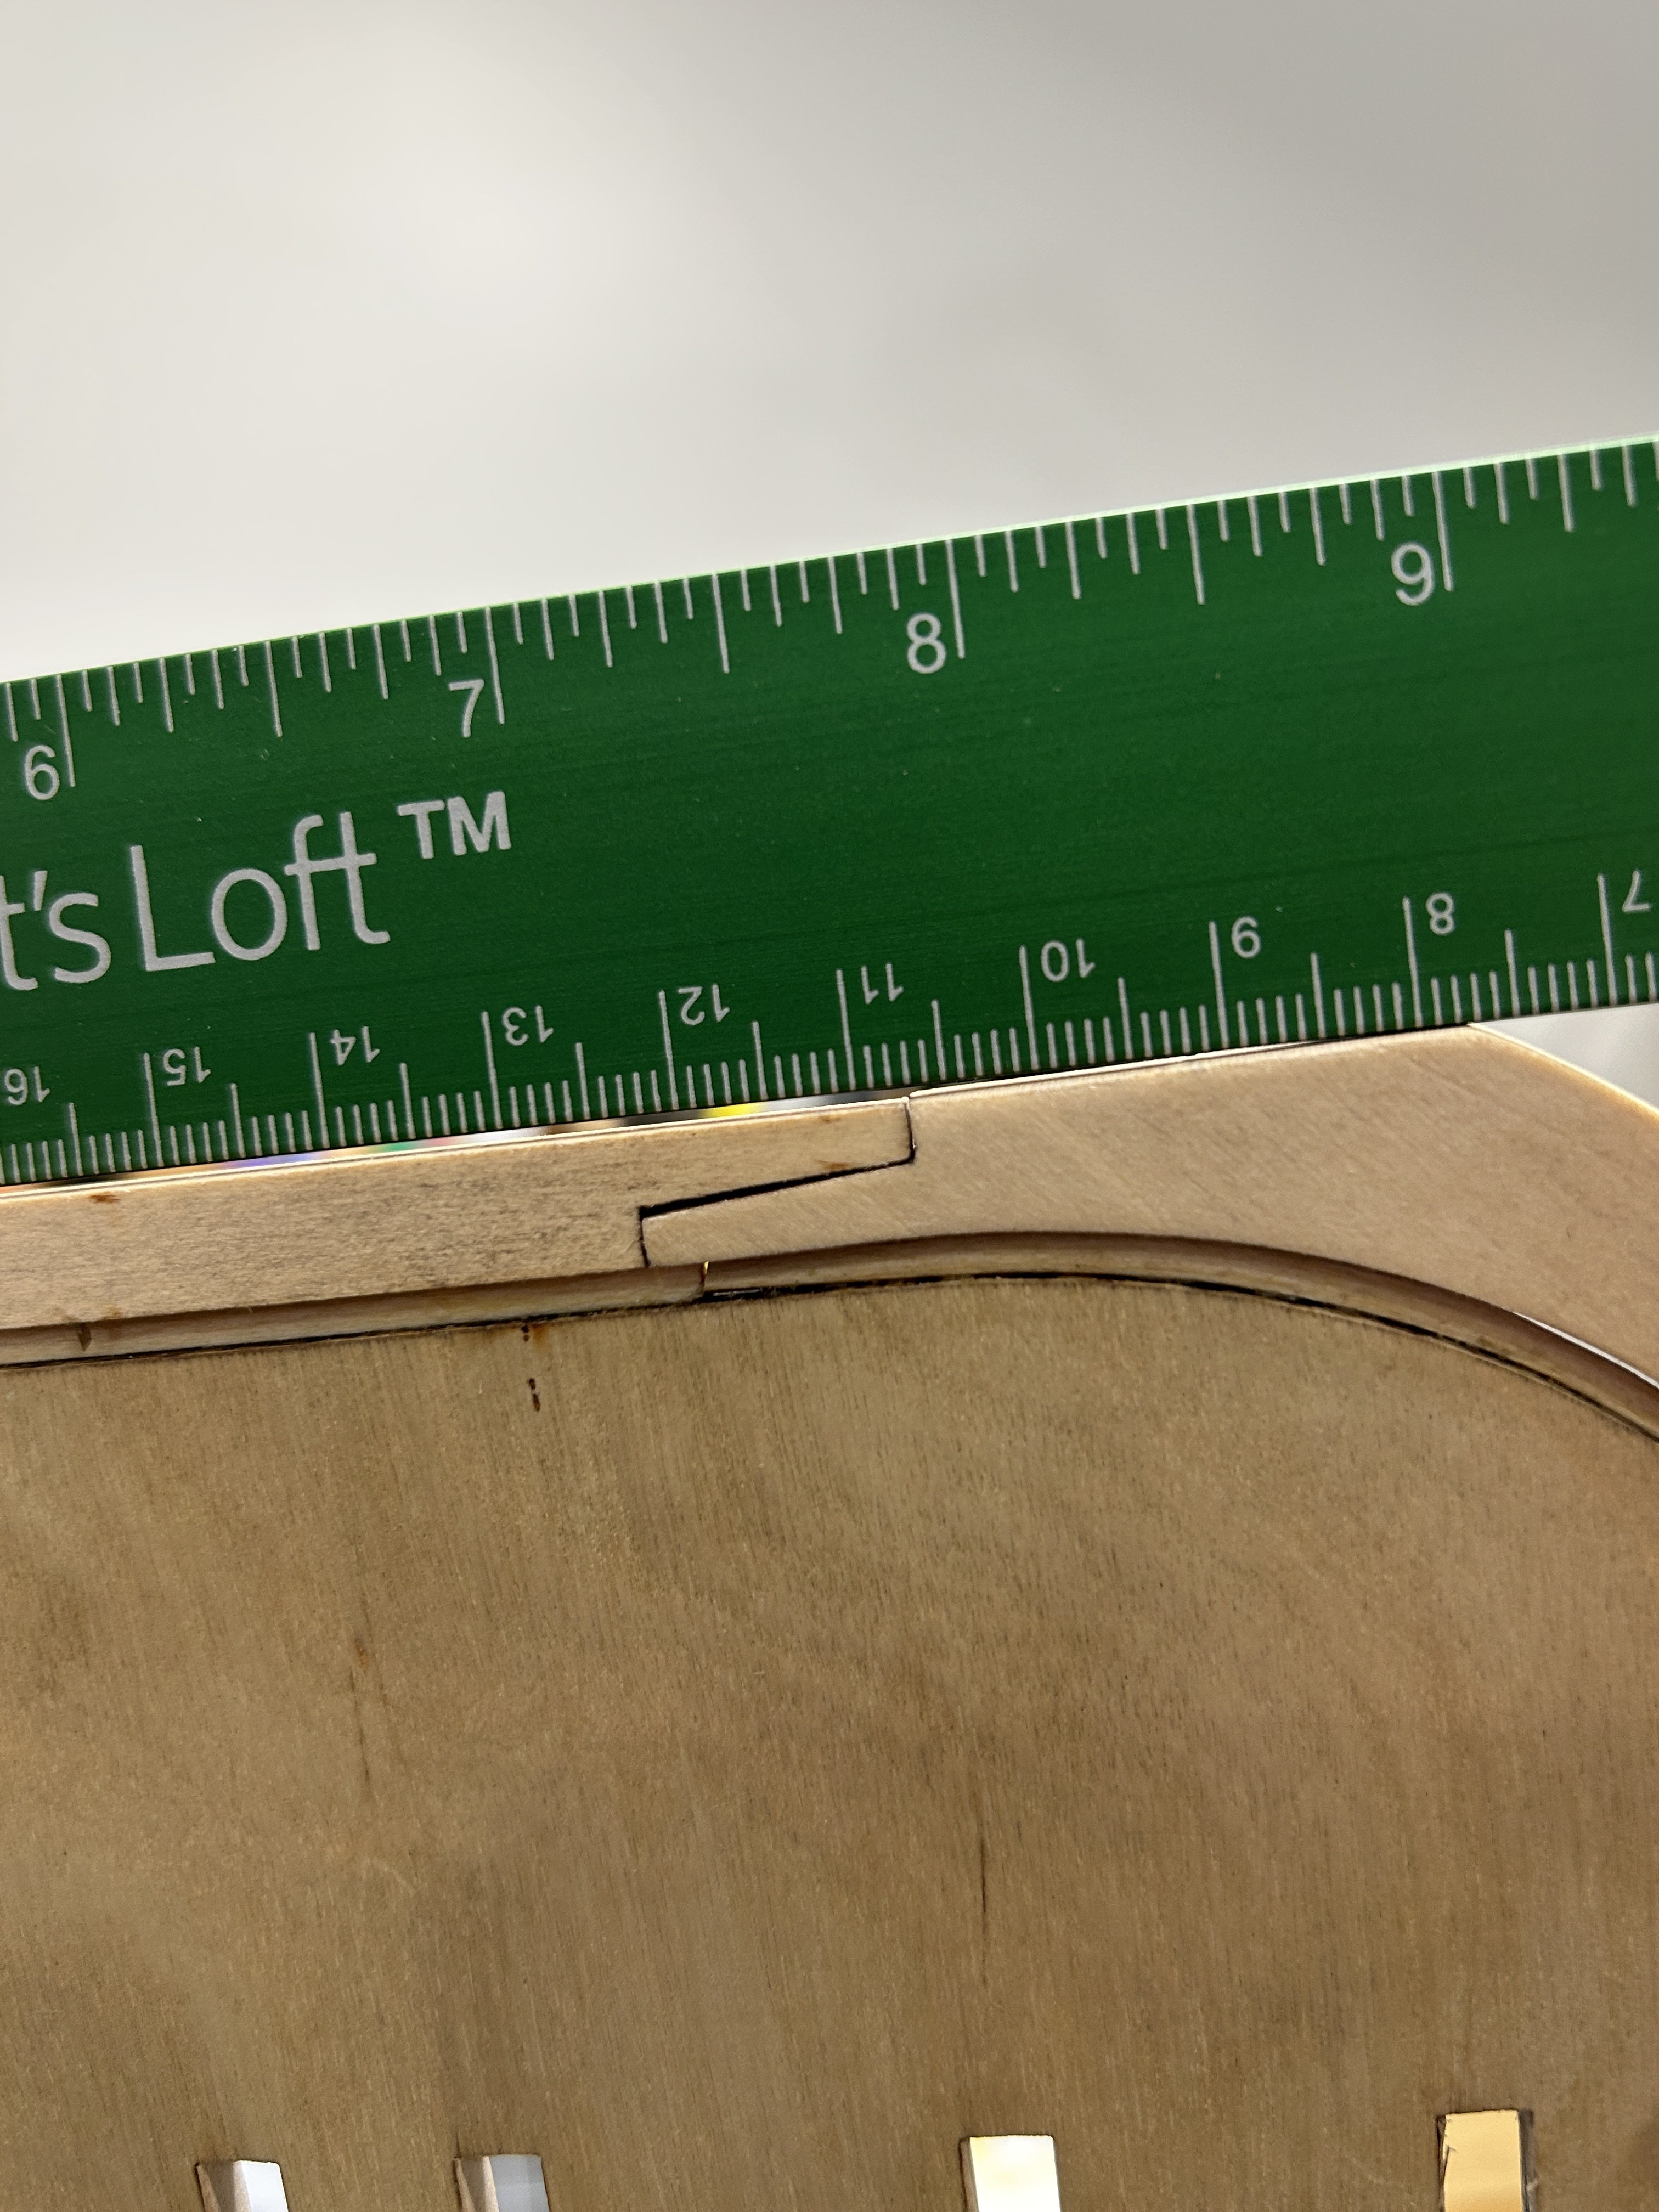
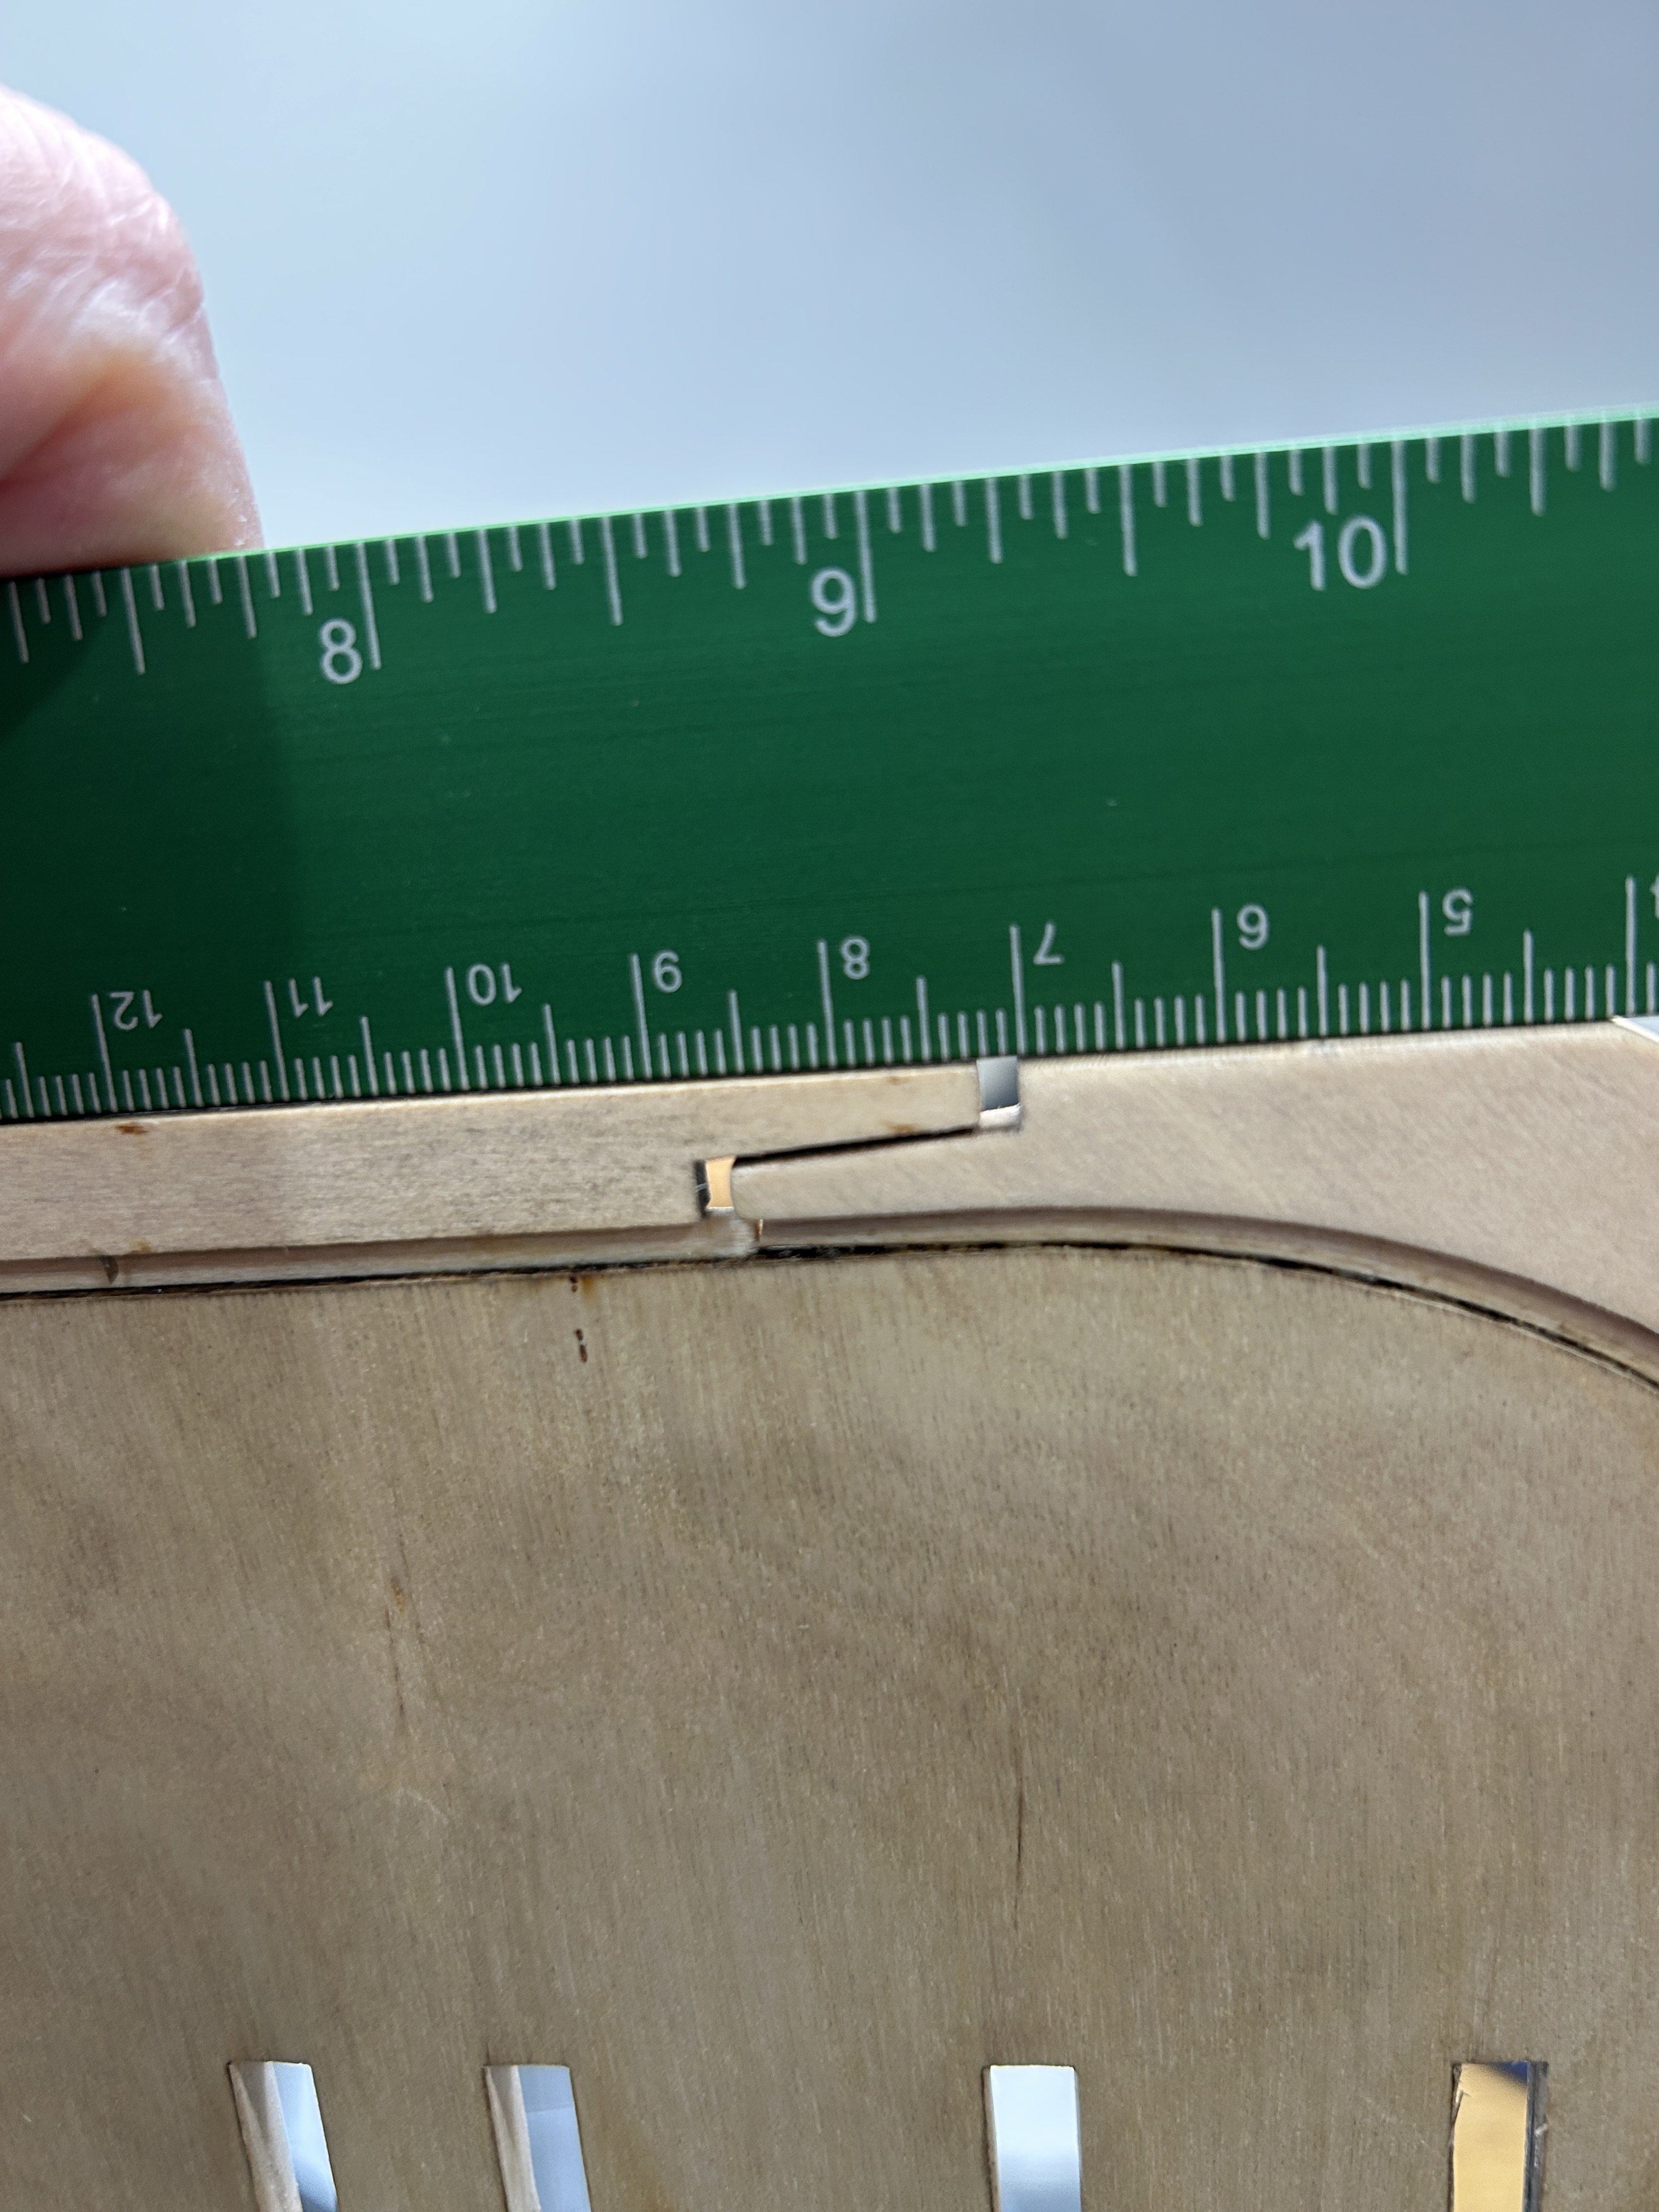
Adding the stern post, keel and stem is also a little tricky. I used only Titebond because I needed a little working time to ensure it was lined up even with the bulkhead former. The stern post and keel went on fine, but when I placed the stem against the keel, the bottom didn't create a straight line with the keel. To get the bottom of the stem and the keel to create a straight line I needed to leave a small gap between the keel and the stem. I will fill this in with some putty and it will be covered with cooper eventually.

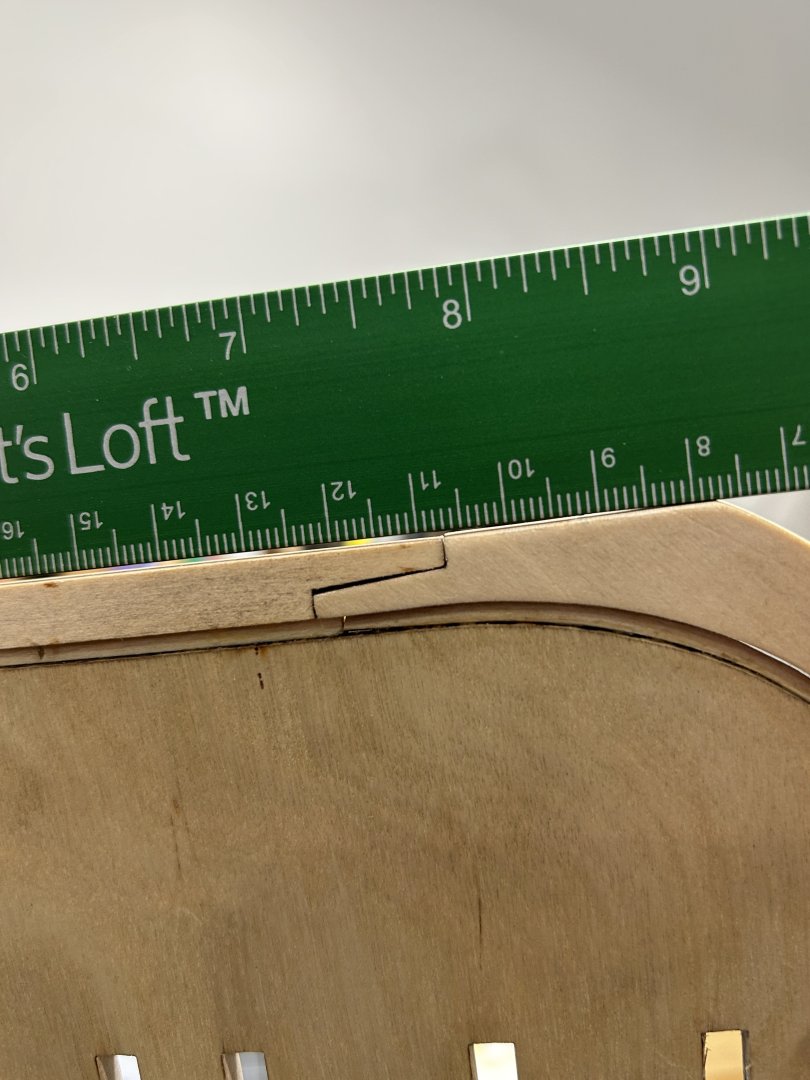

I also pinned the stern post, keel and stem to the bulkheads former to make it more secure.
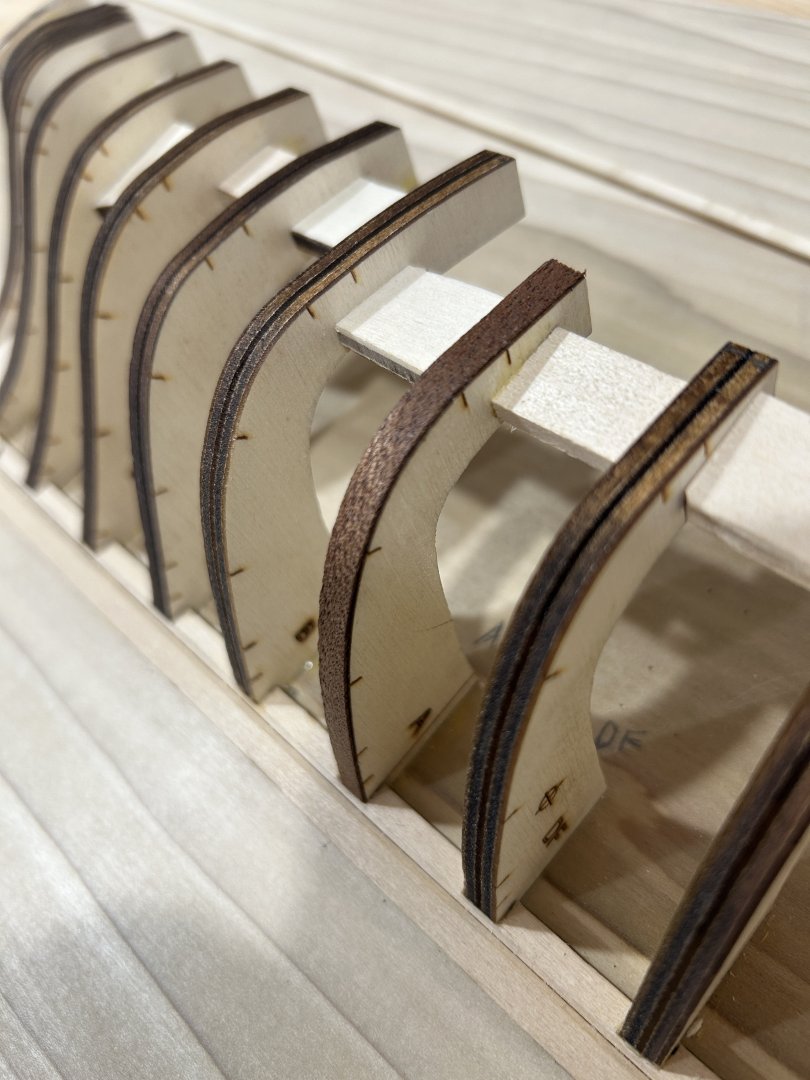
The bulkhead former and bulkheads are laser cut from plywood and they have a significant amount of laser char. More than I experienced with my previous Occre models. The stern post, keel and stem are laser cut from solid basswood and I was happy to see there was far less char and it was easily sanded off these pieces.
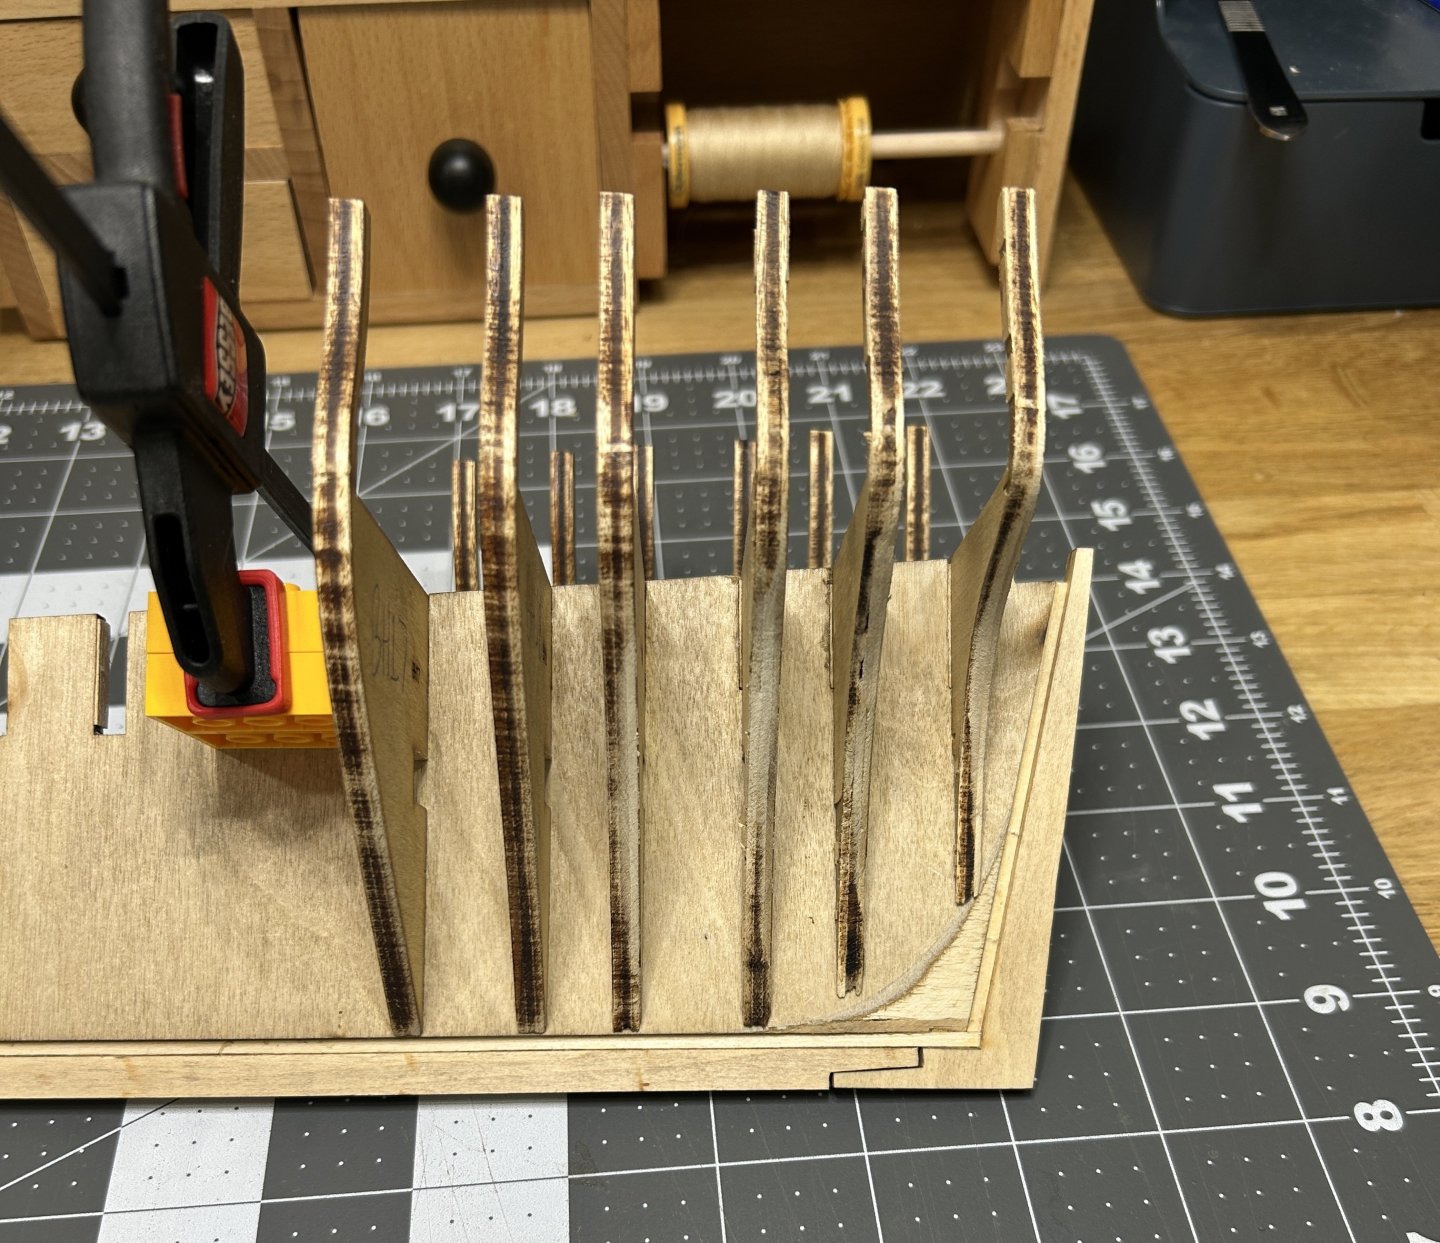
I have almost all of the bulkheads released and the char removed. I will be starting to install them next.

-
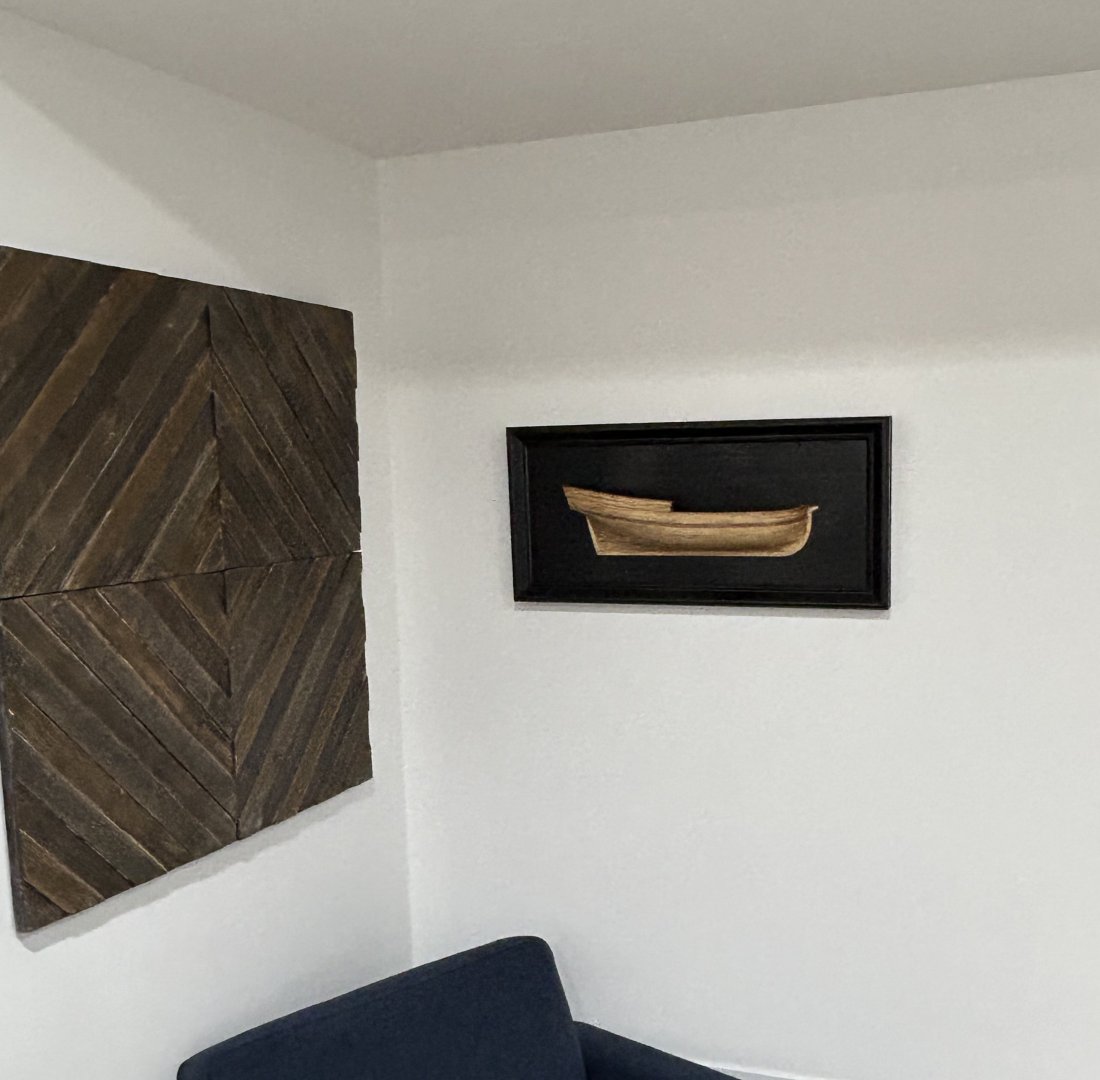
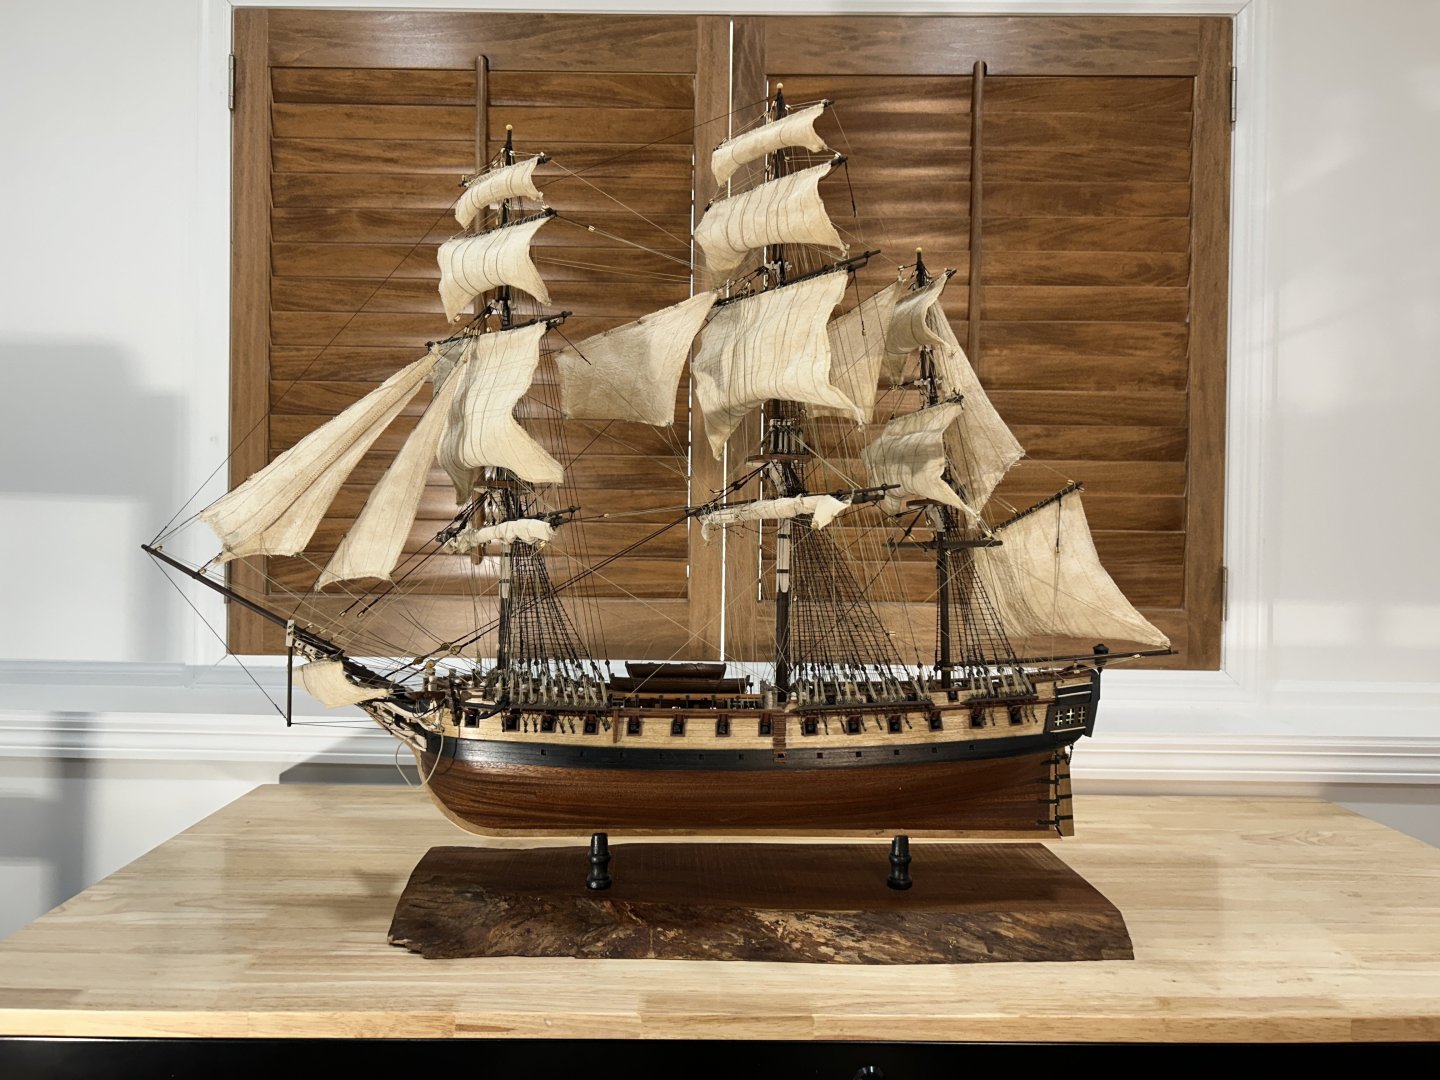
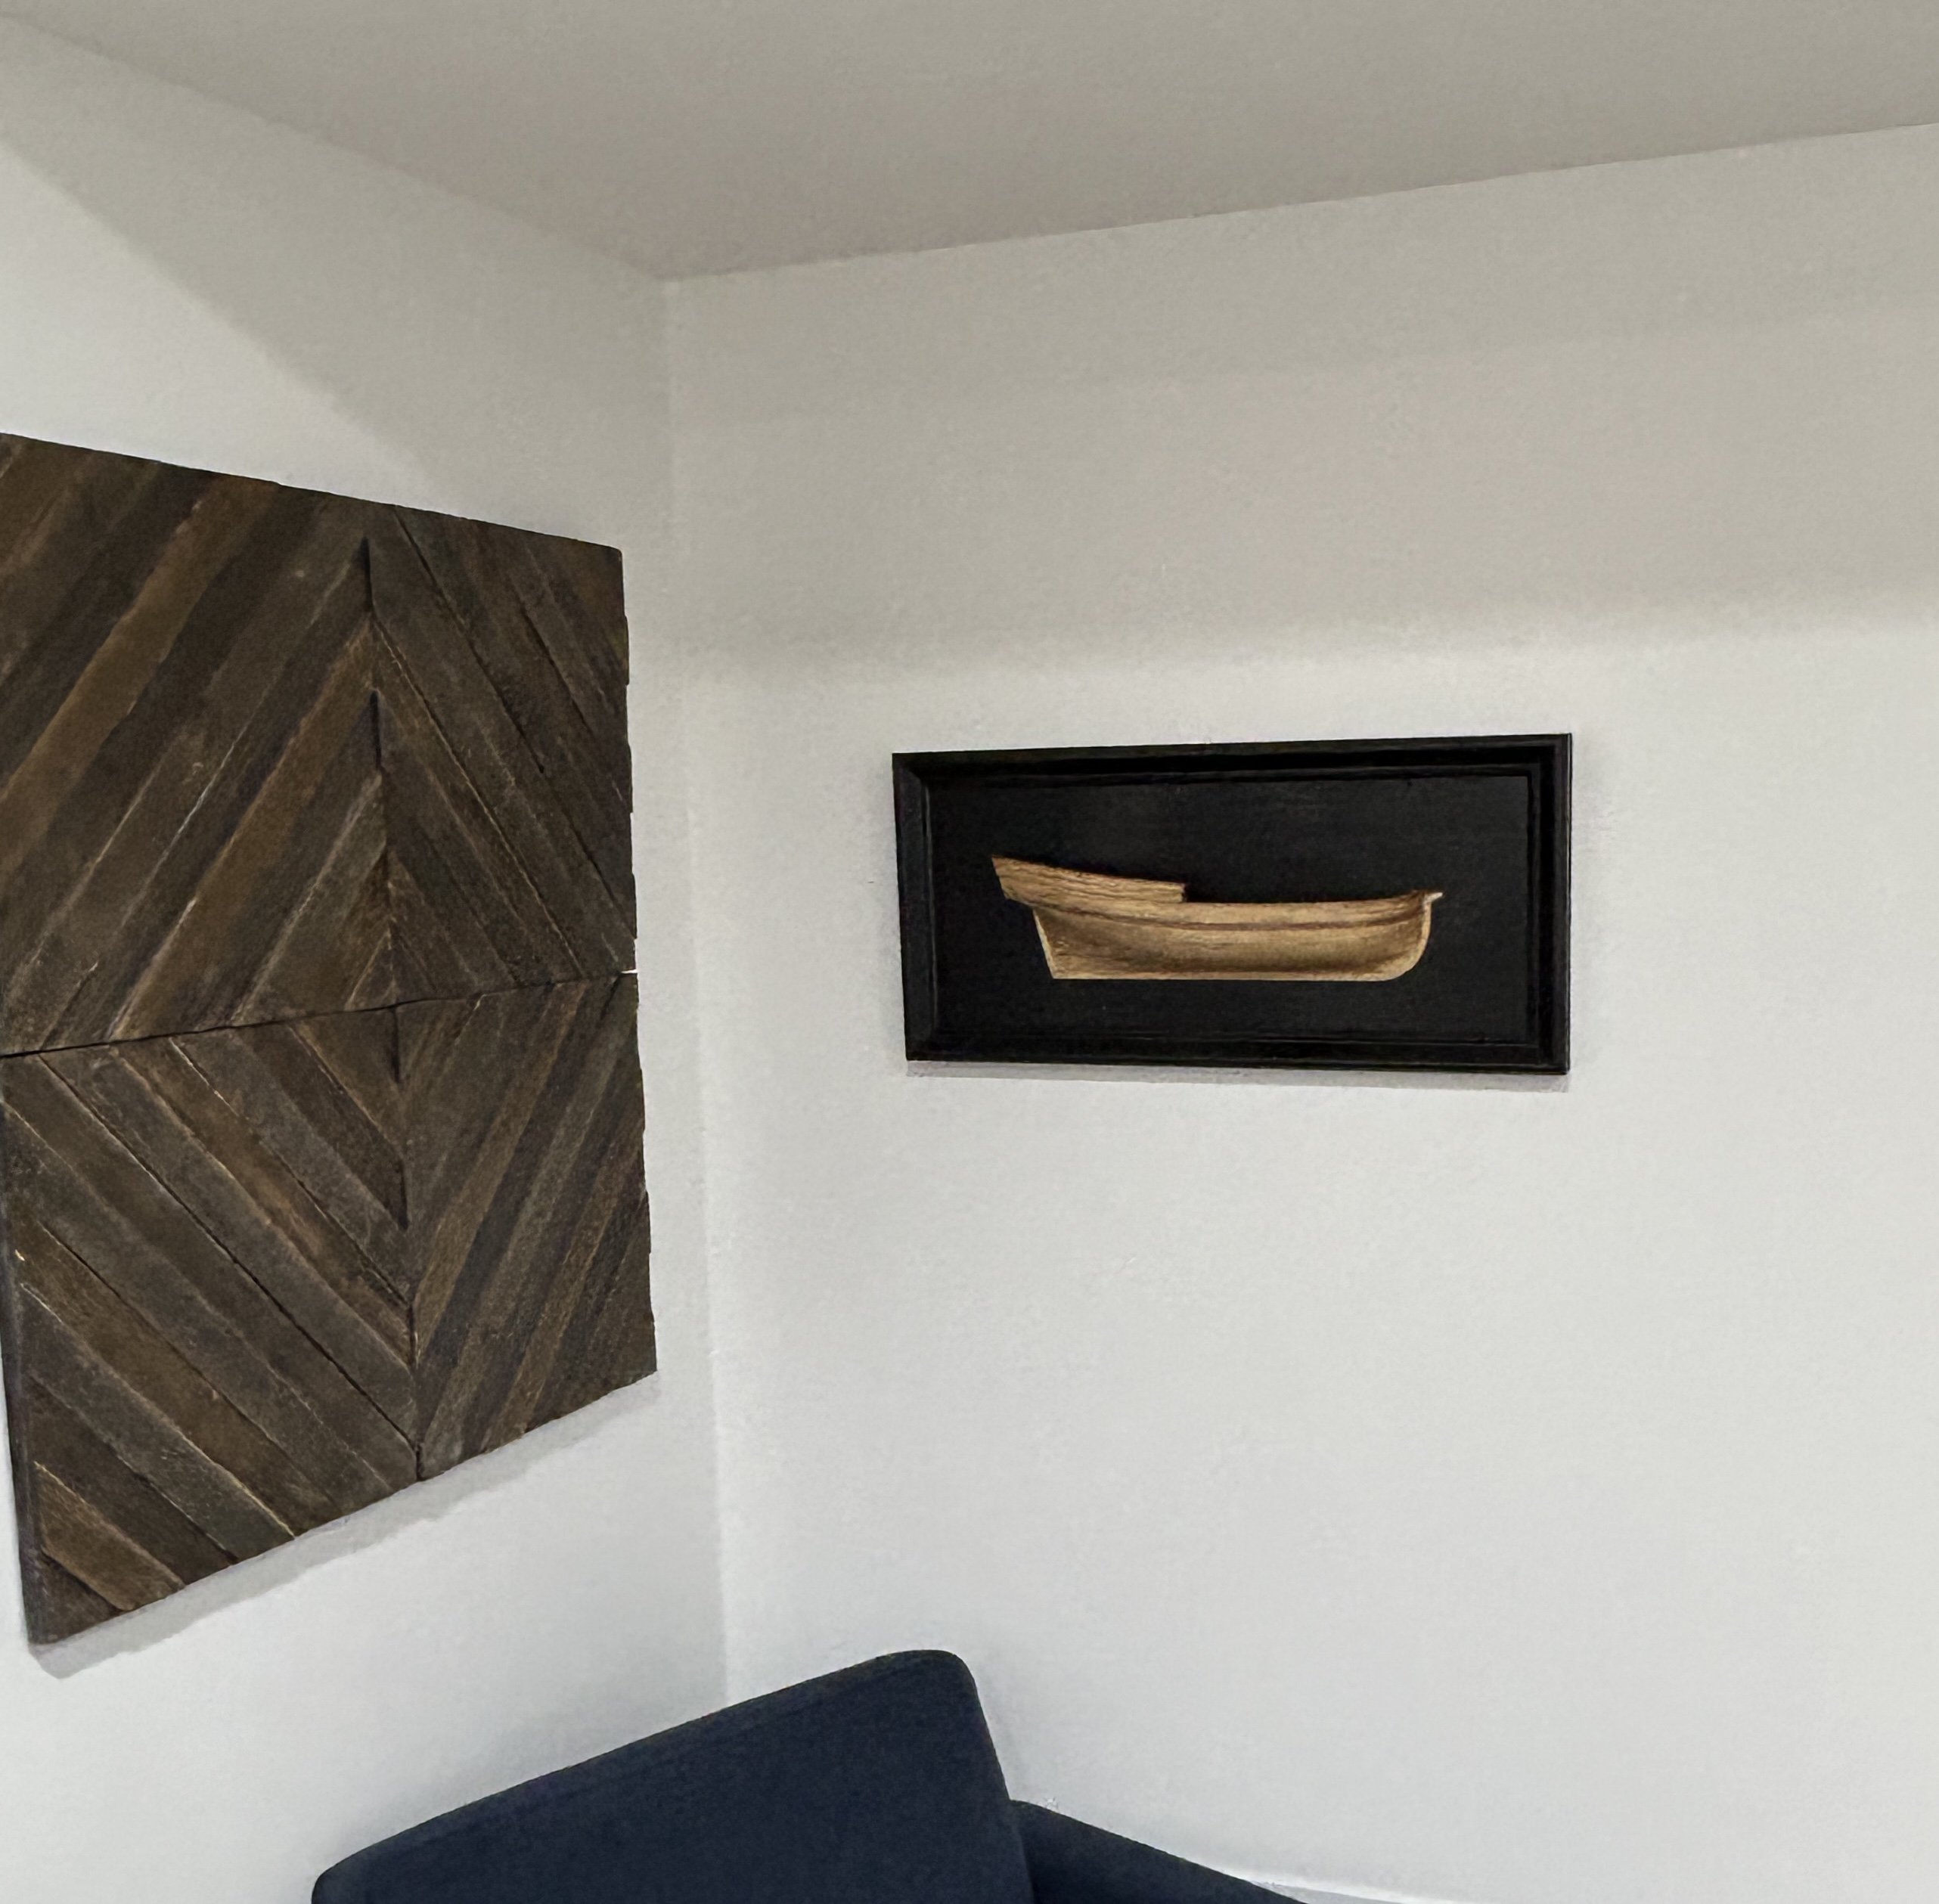
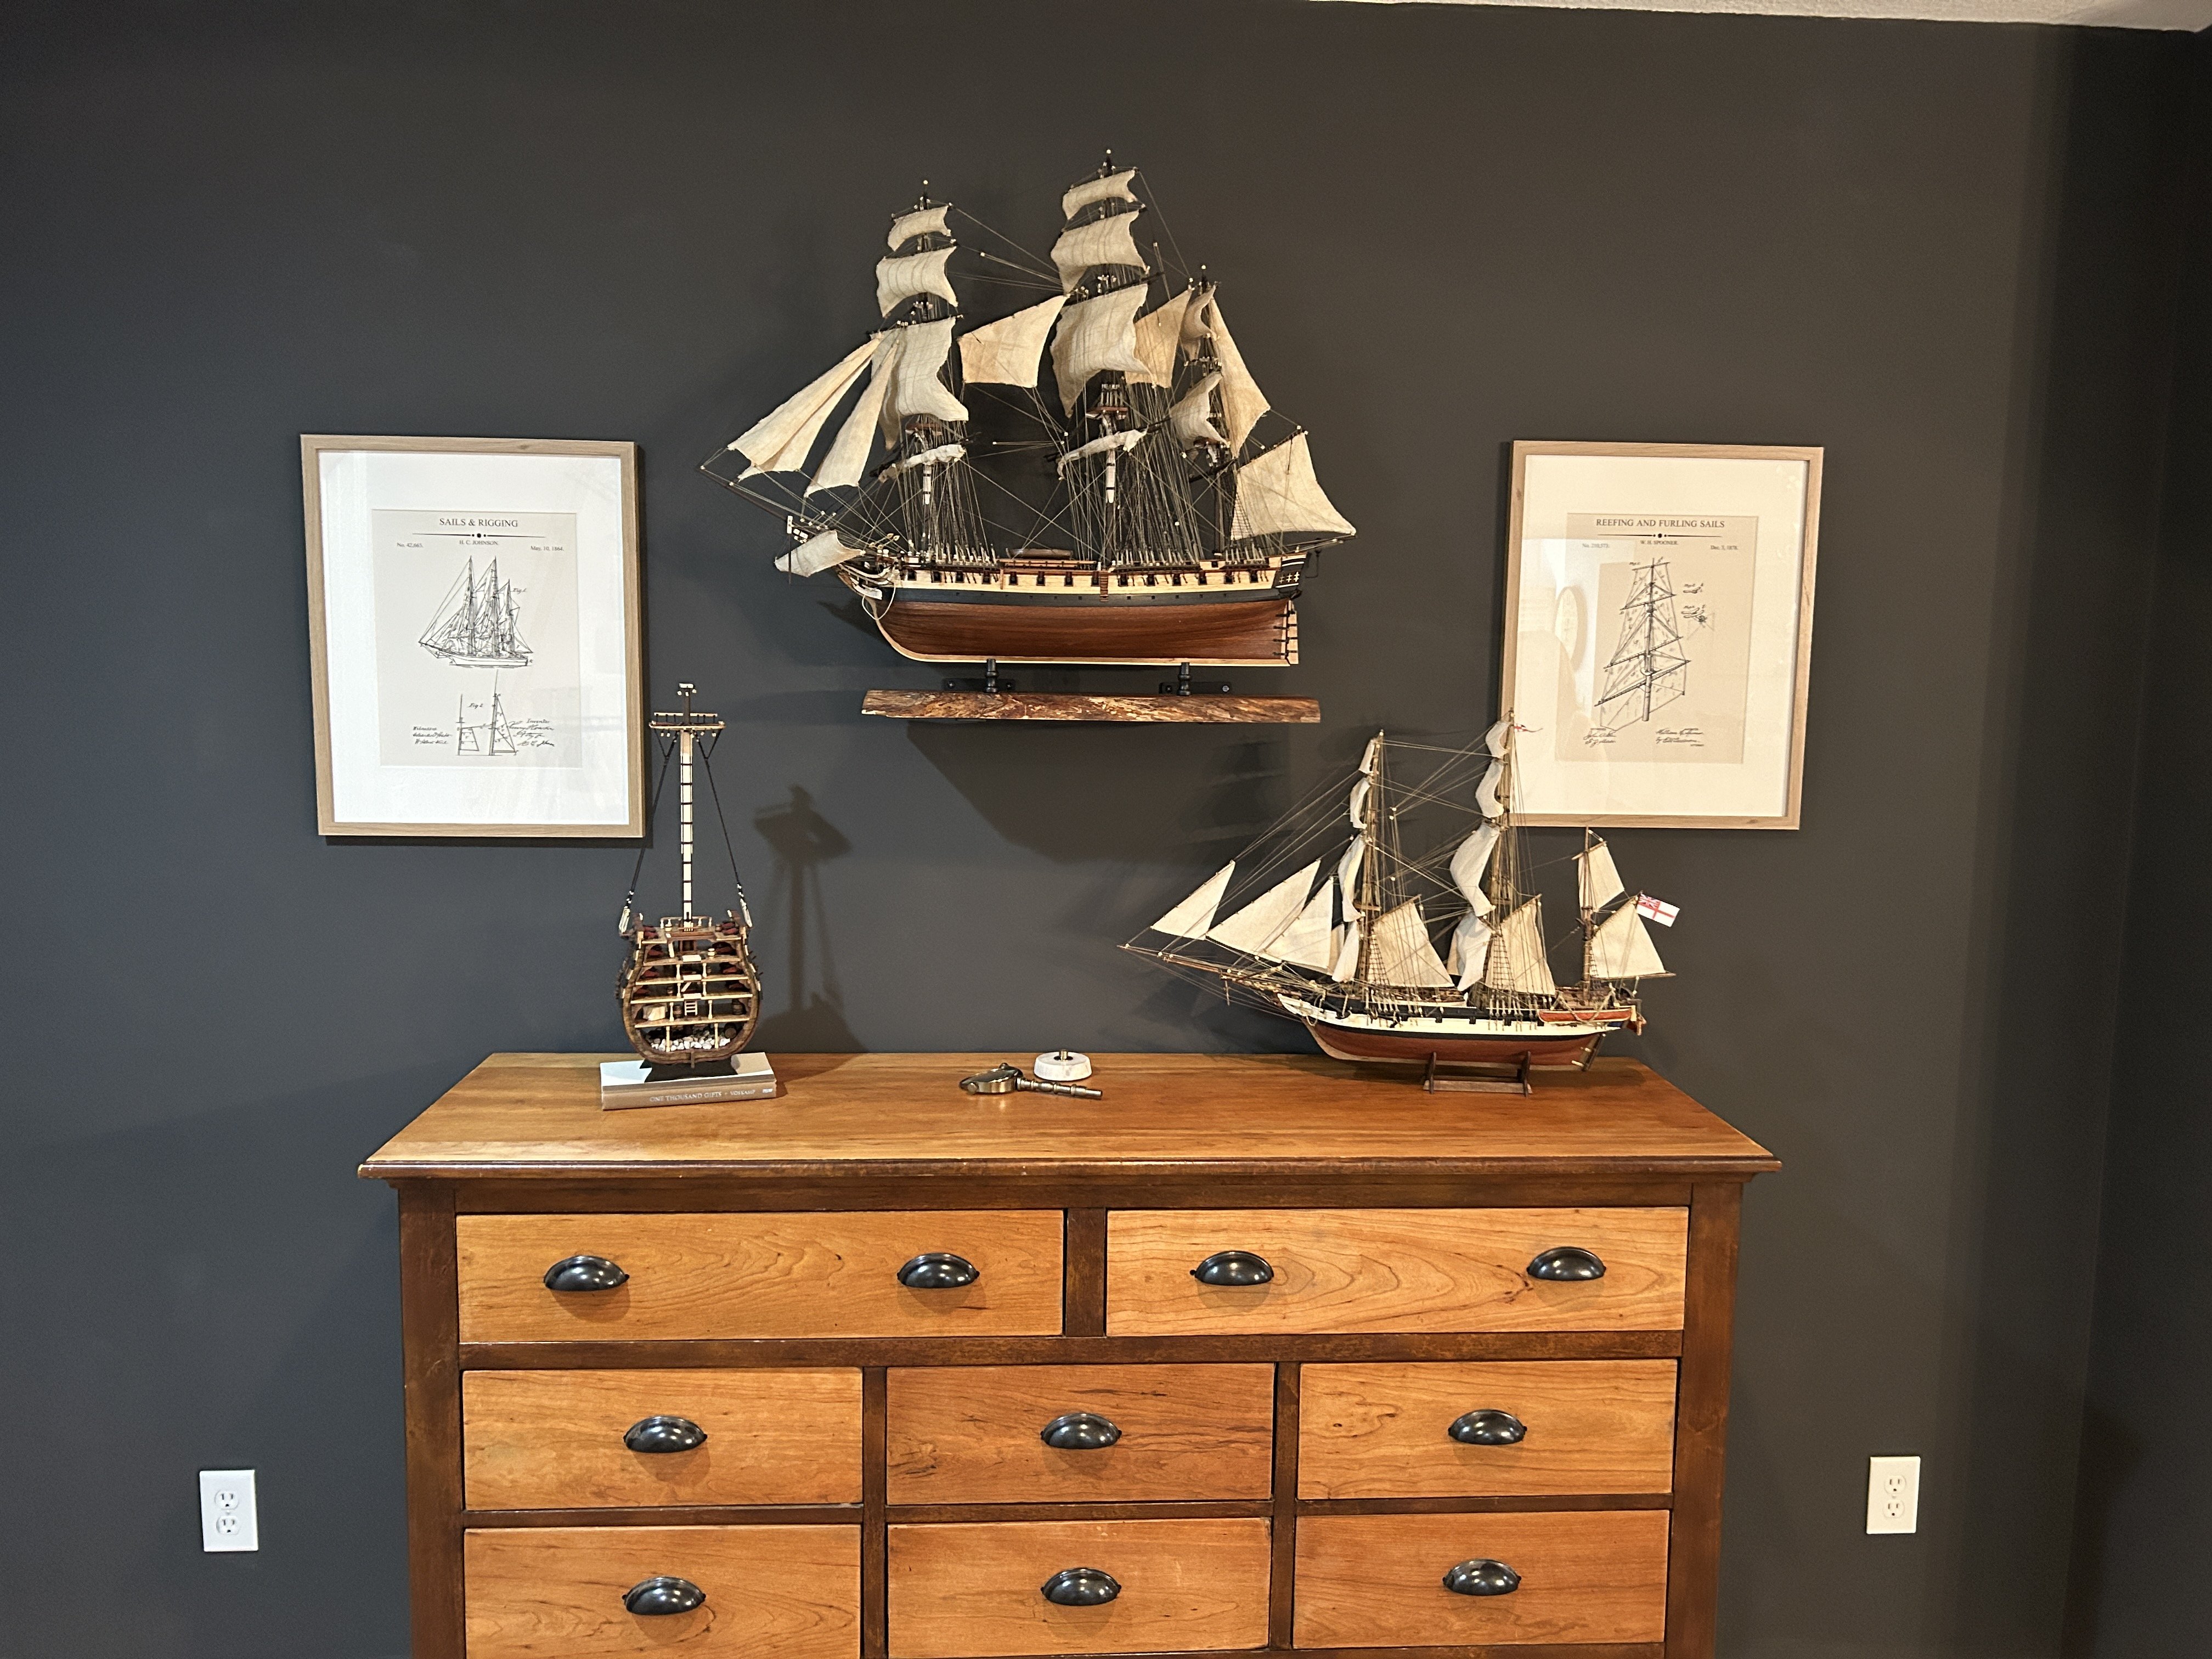
I finally have it hanging on the wall. Thanks for all the nice comments.
-
I had a very productive weekend in the shipyard. In addition to starting my USF Essex, I was able to get the frame added to the Half Hull and the background and frame painted black.

I really learned a lot on this model. In addition to learning how to properly plank, I learned that I need to force myself to be patient at times. It is OK to take off a part and redo something, pre-stain and testing stain first to determine if you will like the result is worth the time, and I learned to use wood glue instead of CA even when clamping isn't possible.
Thanks for the likes and comments.
- palmerit, Dan Poirier, ccoyle and 3 others
-
6
-
Until recently I assumed I would build my Syren next, but I think I felt a little burned out on rigging with my Frigate Diana so I decided to go with the Essex instead. I was drawn to this kit in large part from the details like the pumps, stove, and Binnacle. I am looking forward to building those items. I am also looking forward to building that allows the gun deck to be viewed though areas of the upper decks that are left open. The instructions say that each builder can decide what portion of the upper decks to leave open. I plan to leave as much as possible on one side of the ship open. I think I will plank as much as I need to to support the deck features that are placed along the center of the ship, and leave the area between those features and the margin plank open. I will leave the cannons off on the side of the ship that I left open

As I get started, I am considering a few updates to the kit. I am considering upgrading the blocks (used mainly for the guns), and possibly looking into finding someone to 3D print the gun barrels.
After opening the kit and going through all the parts, if there is one thing that is disappointing, it is the quality of the cast metal parts. The gun barrels will take a lot of time to file/sand smooth. I am a little familiar with the process of die casting parts from a former job, and it is clear that the molds that are being used for these parts have outlived their useful lives.
If model shipways ever wanted to rejuvenate their lineup of models, replacing these metal parts with 3D printed parts would go along way towards making these kits more modern.
The model isn’t designed to have any decks below the gun deck, but the instructions do show an option of cutting away parts of the bulkhead former and certain bulkheads and adding some sections of deck below the hatches in the gun deck. I am not sure how visable those decks will be, and I think I will skip this option.
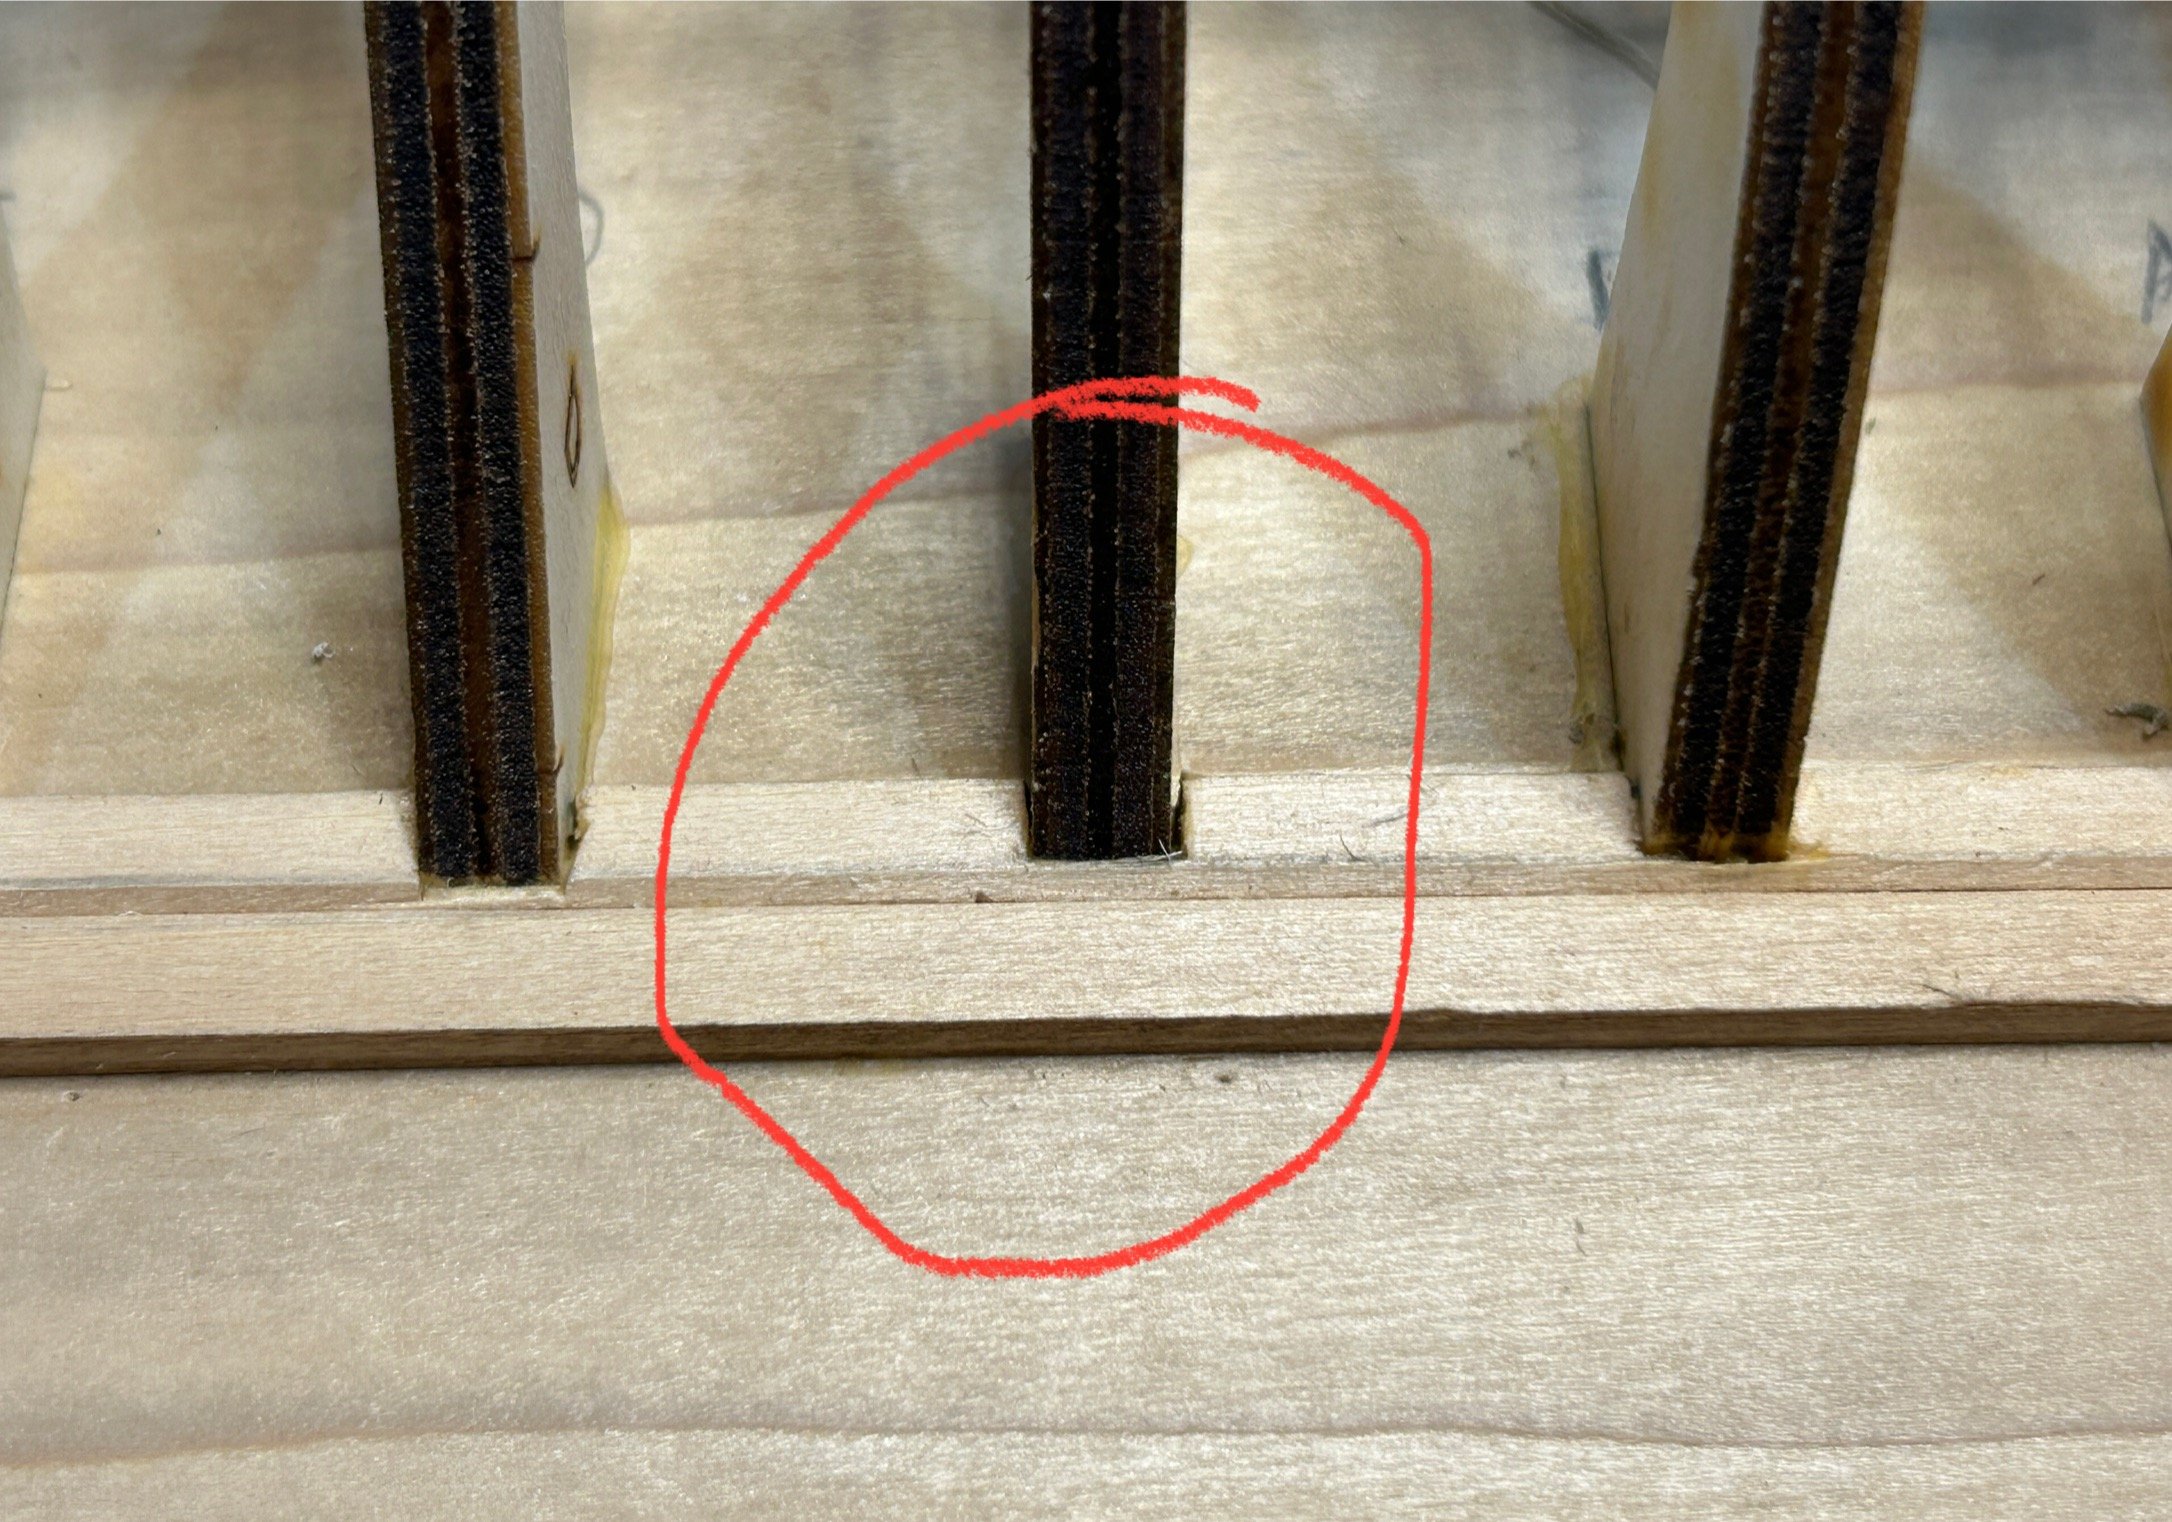
One other option that you won’t see if you look at the online instructions is the optional strongbacks. The bulkheads have been cut with a slot on either side of the bulkhead former to accommodate a 5/16 inch x 5/16 inch piece of wood glued along both sides of the bulkhead former to help keep it straight. I will add this option.

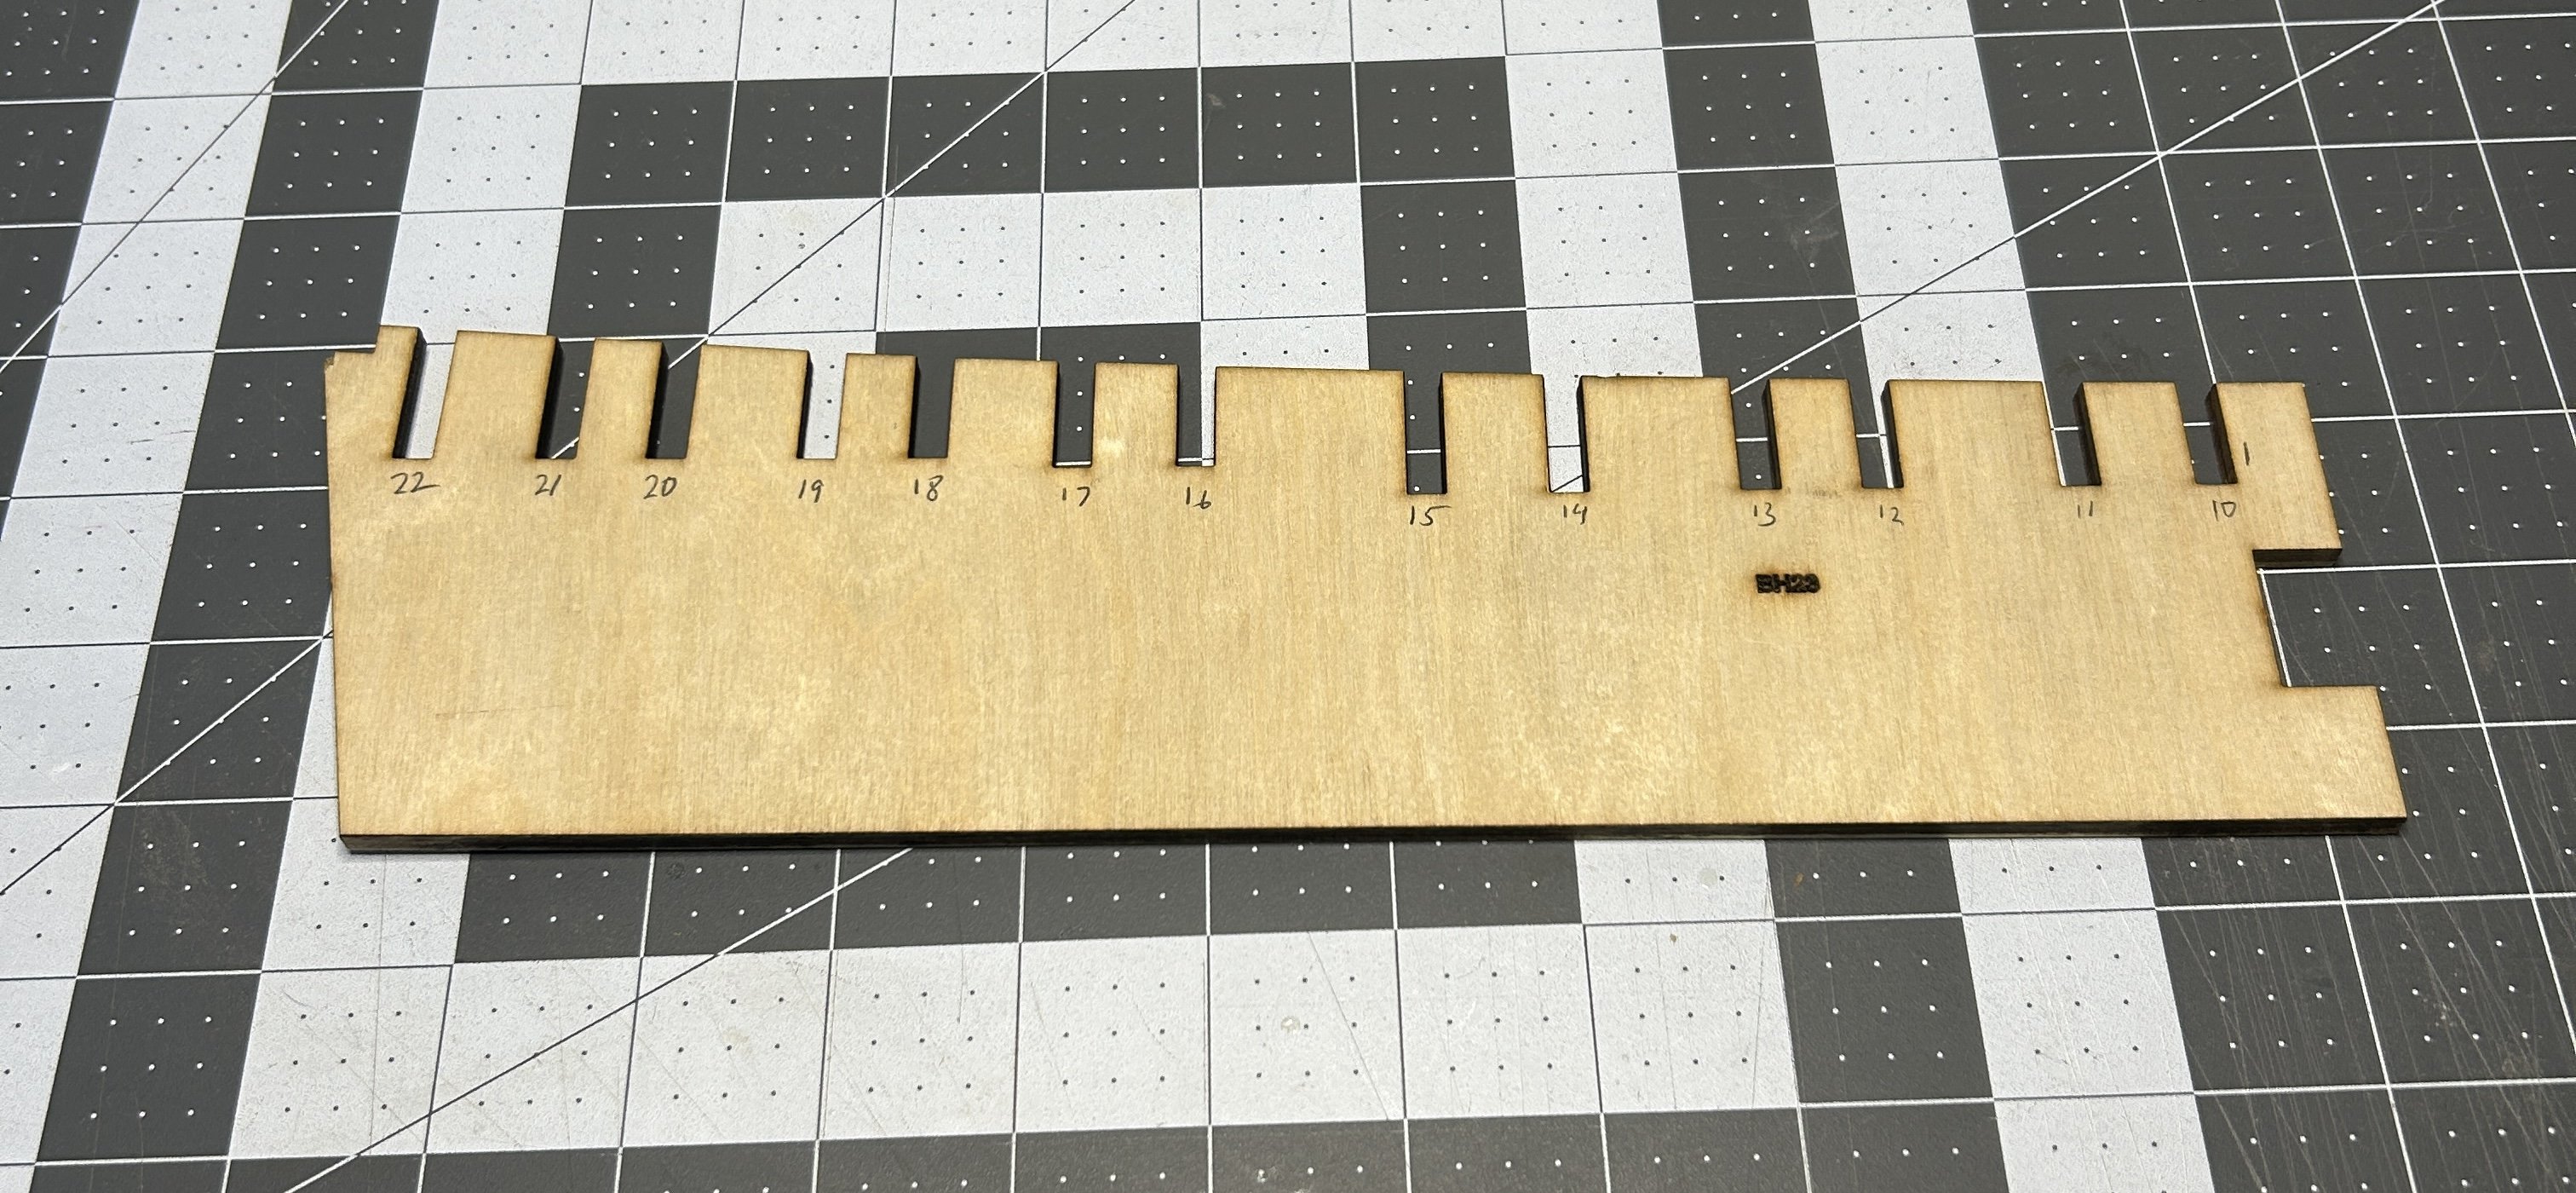
This model has 22 bulkheads spread over about 20 inches, so on average less than an inch between bulkheads. This should provide a good framework for planking the hull. I will need to be patient and be sure to fair it properly. It took me at least two weeks on my NRG half hull, this model has two sides and more bulkheads, this process may take me a month.
I do have more confidence in successfully fairing the hull and planking the hull after the NRG Half Hull. I can’t speak highly enough of this kit if you are struggling with planking. I will expand my planking skills on this model by using the edge bending technique with the 1/16 x ⅛ inch planking material that is supplied with the kit.
The bulkhead former comes in two pieces. The aft section on mine had a slight warp in it so I soaked it in some hot water and used an iron for heat to attempt to flatten it.

I put some weights on it to be sure it stayed flat.

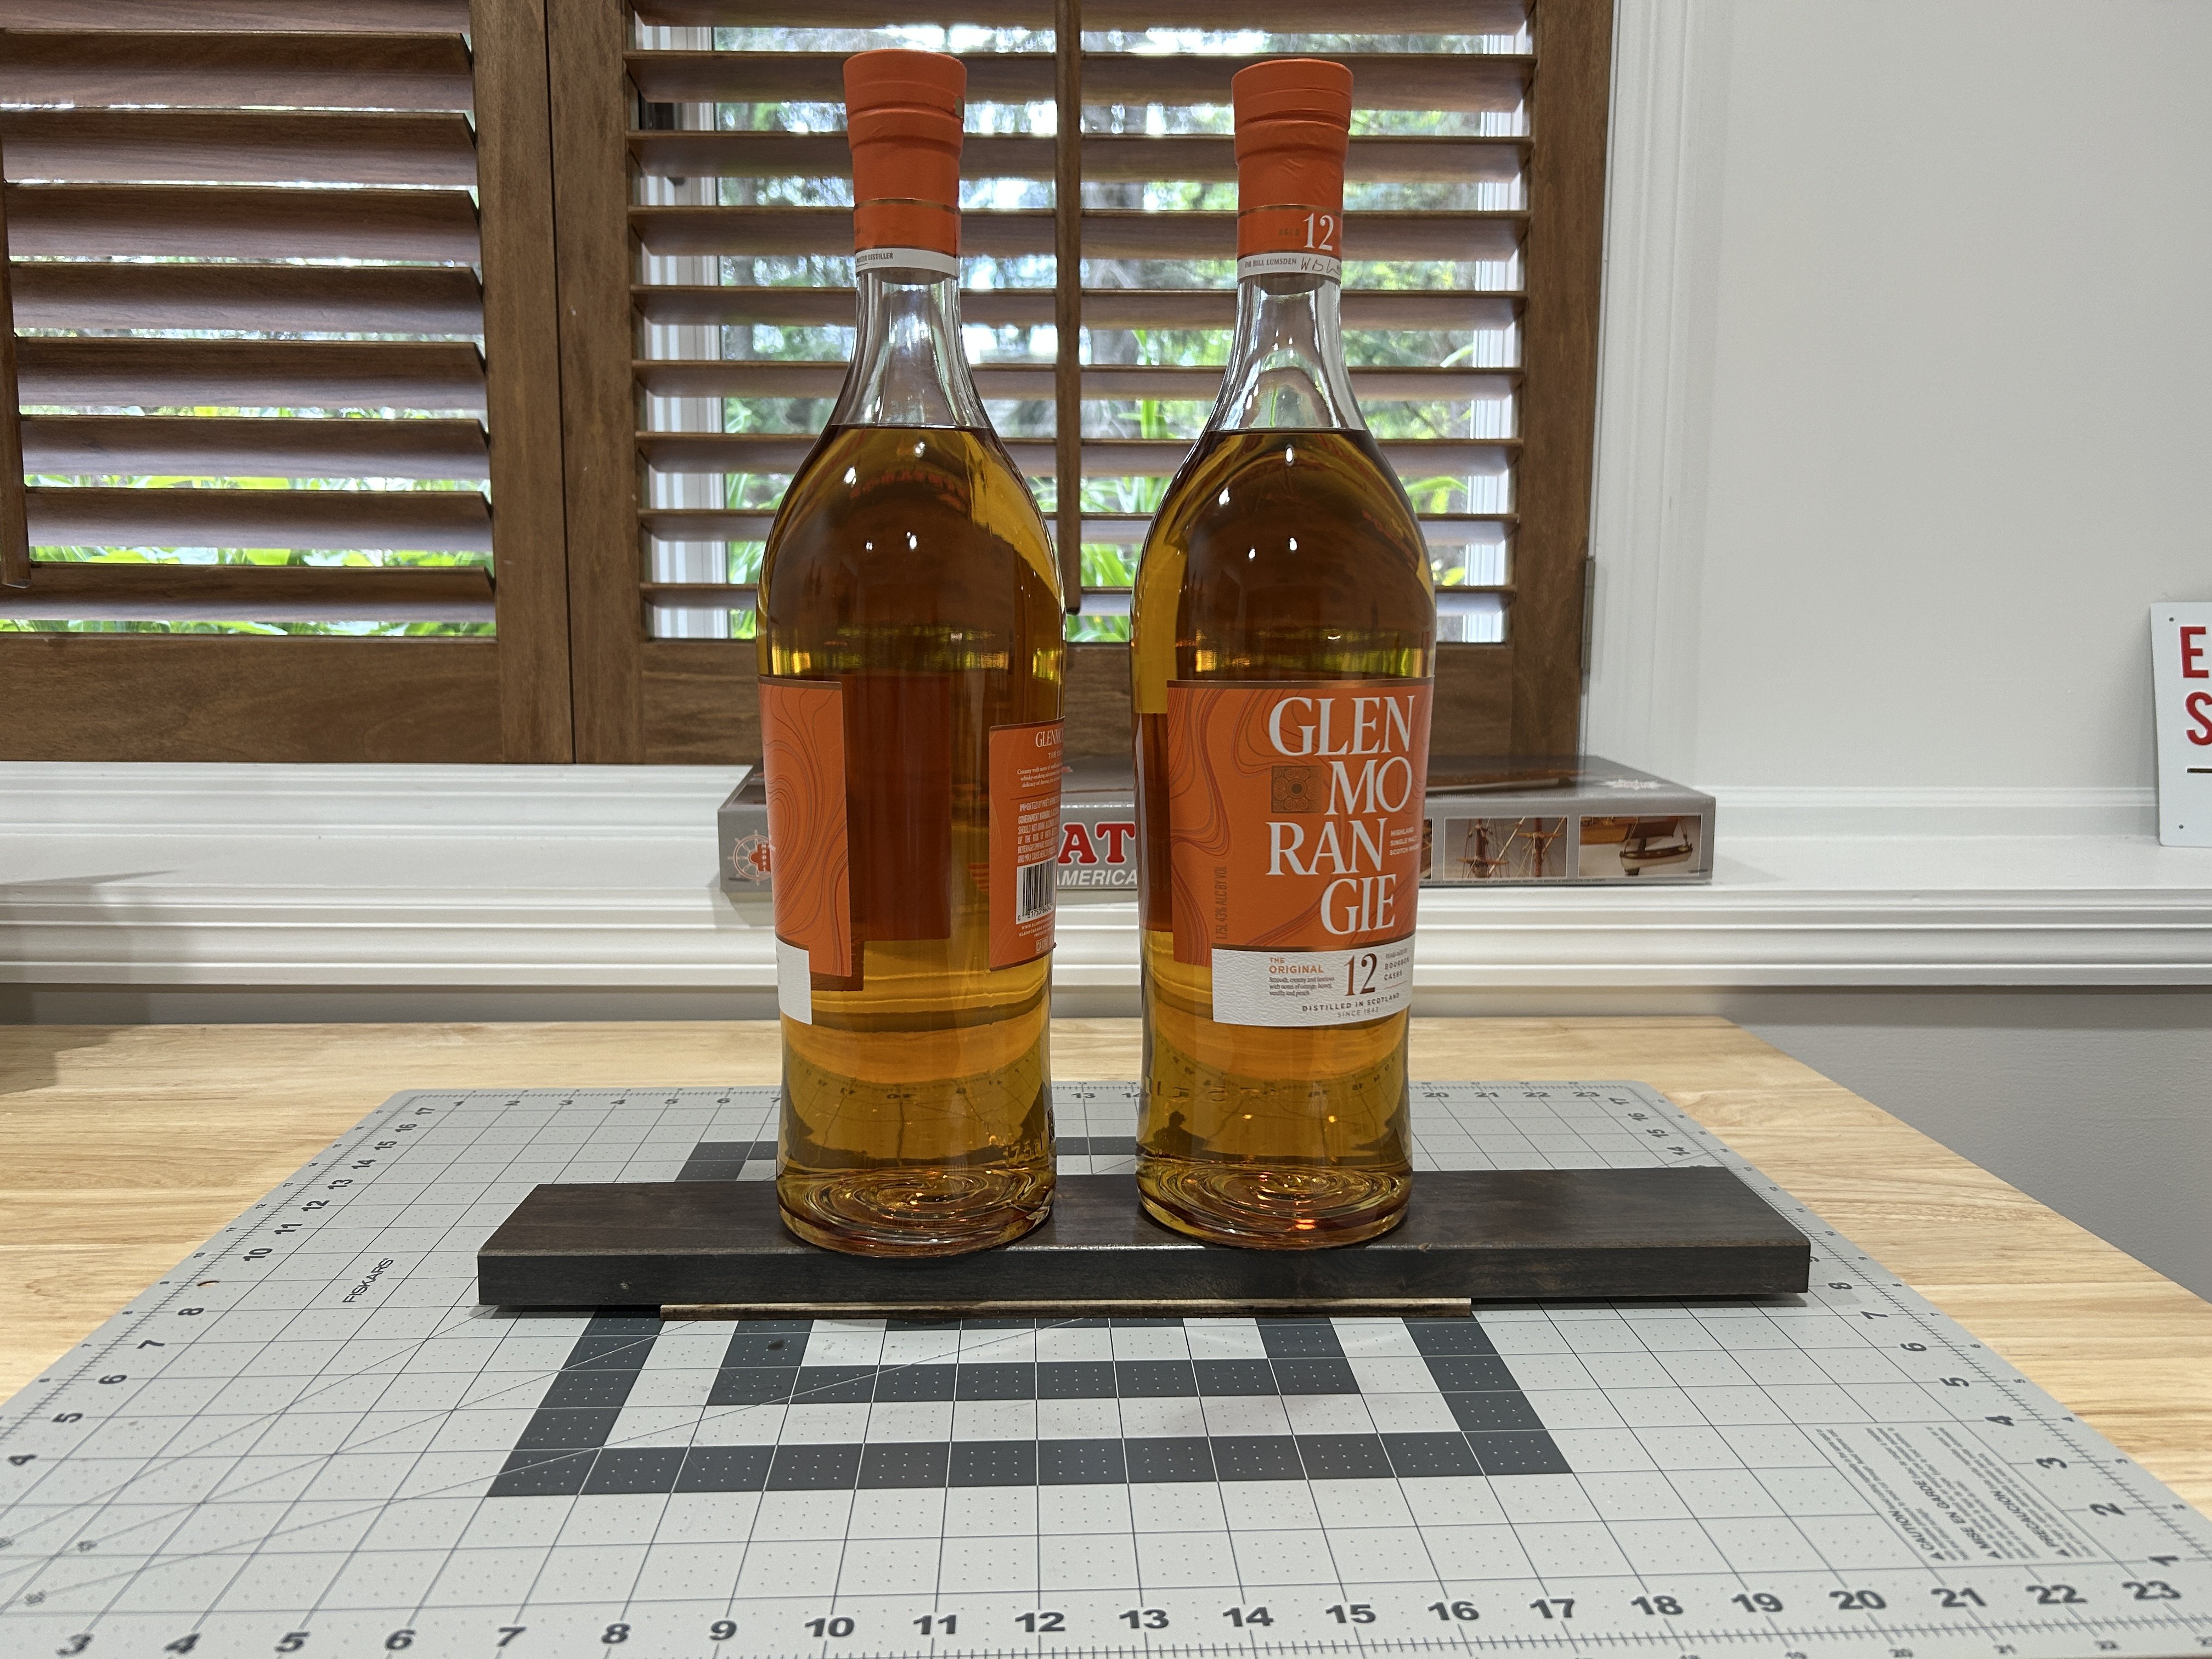
Those are 1.75 liter bottles of scotch. Part of my tariff protection stockpile.
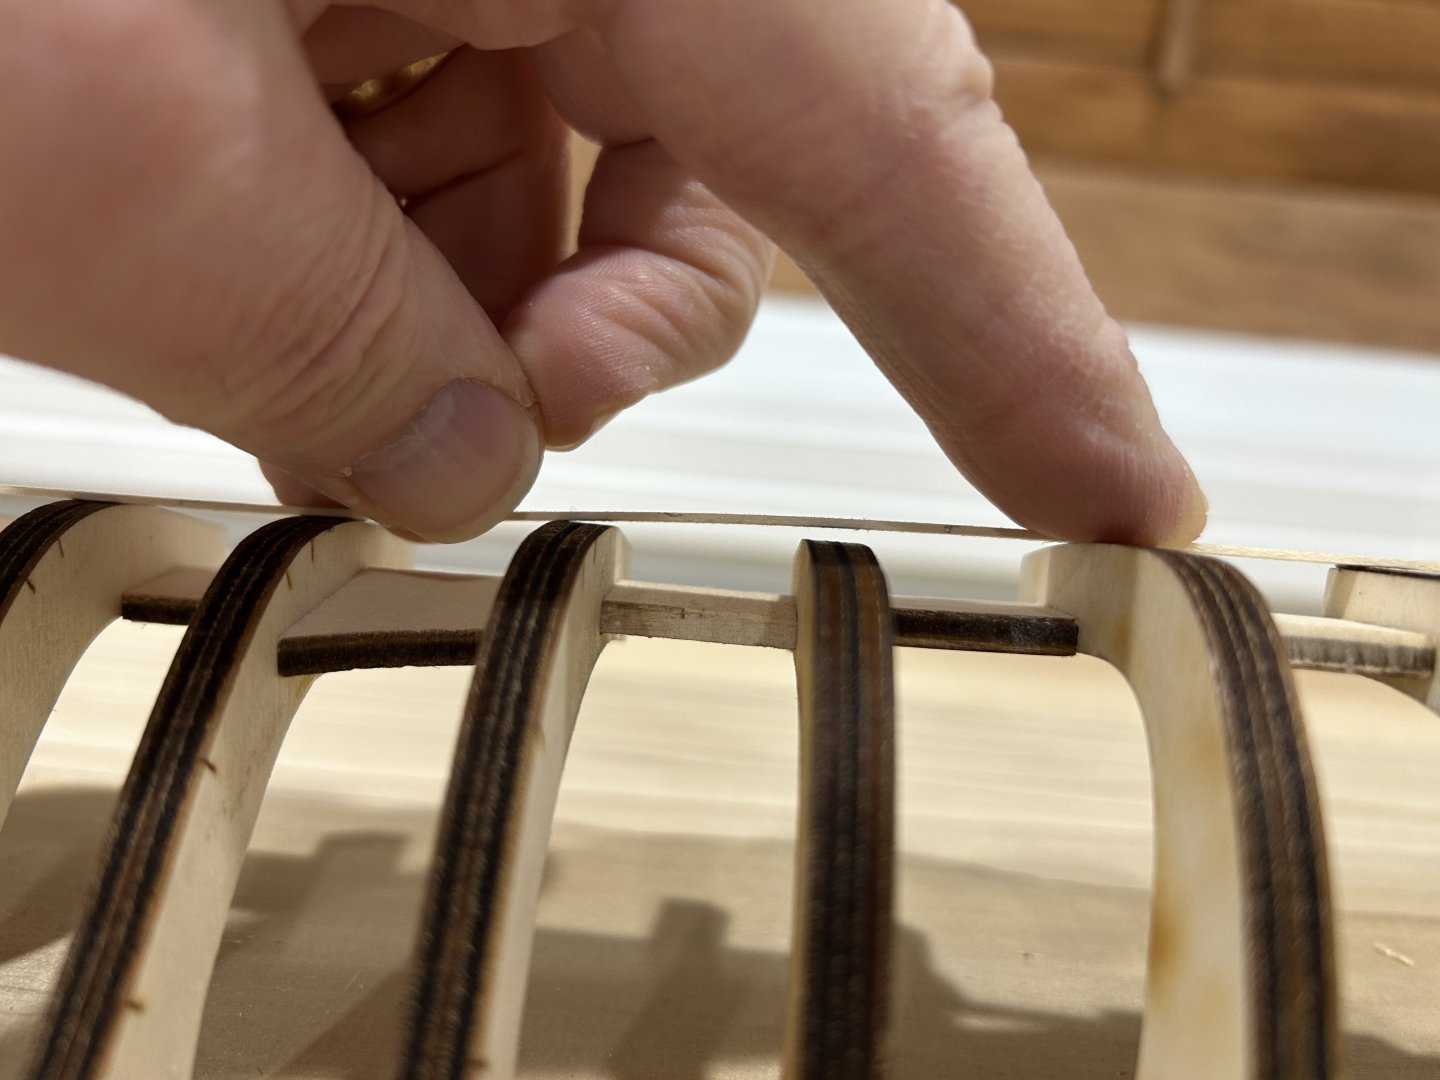
I found that the slots in the bulkhead former are all a little bit oversized, so I have added shims to the slots. I will need to sand a little bit to get a good snug fit.

With 22 bulkheads, I will be spending a lot of time removing laser char so it might be awhile until my next post.
-
-
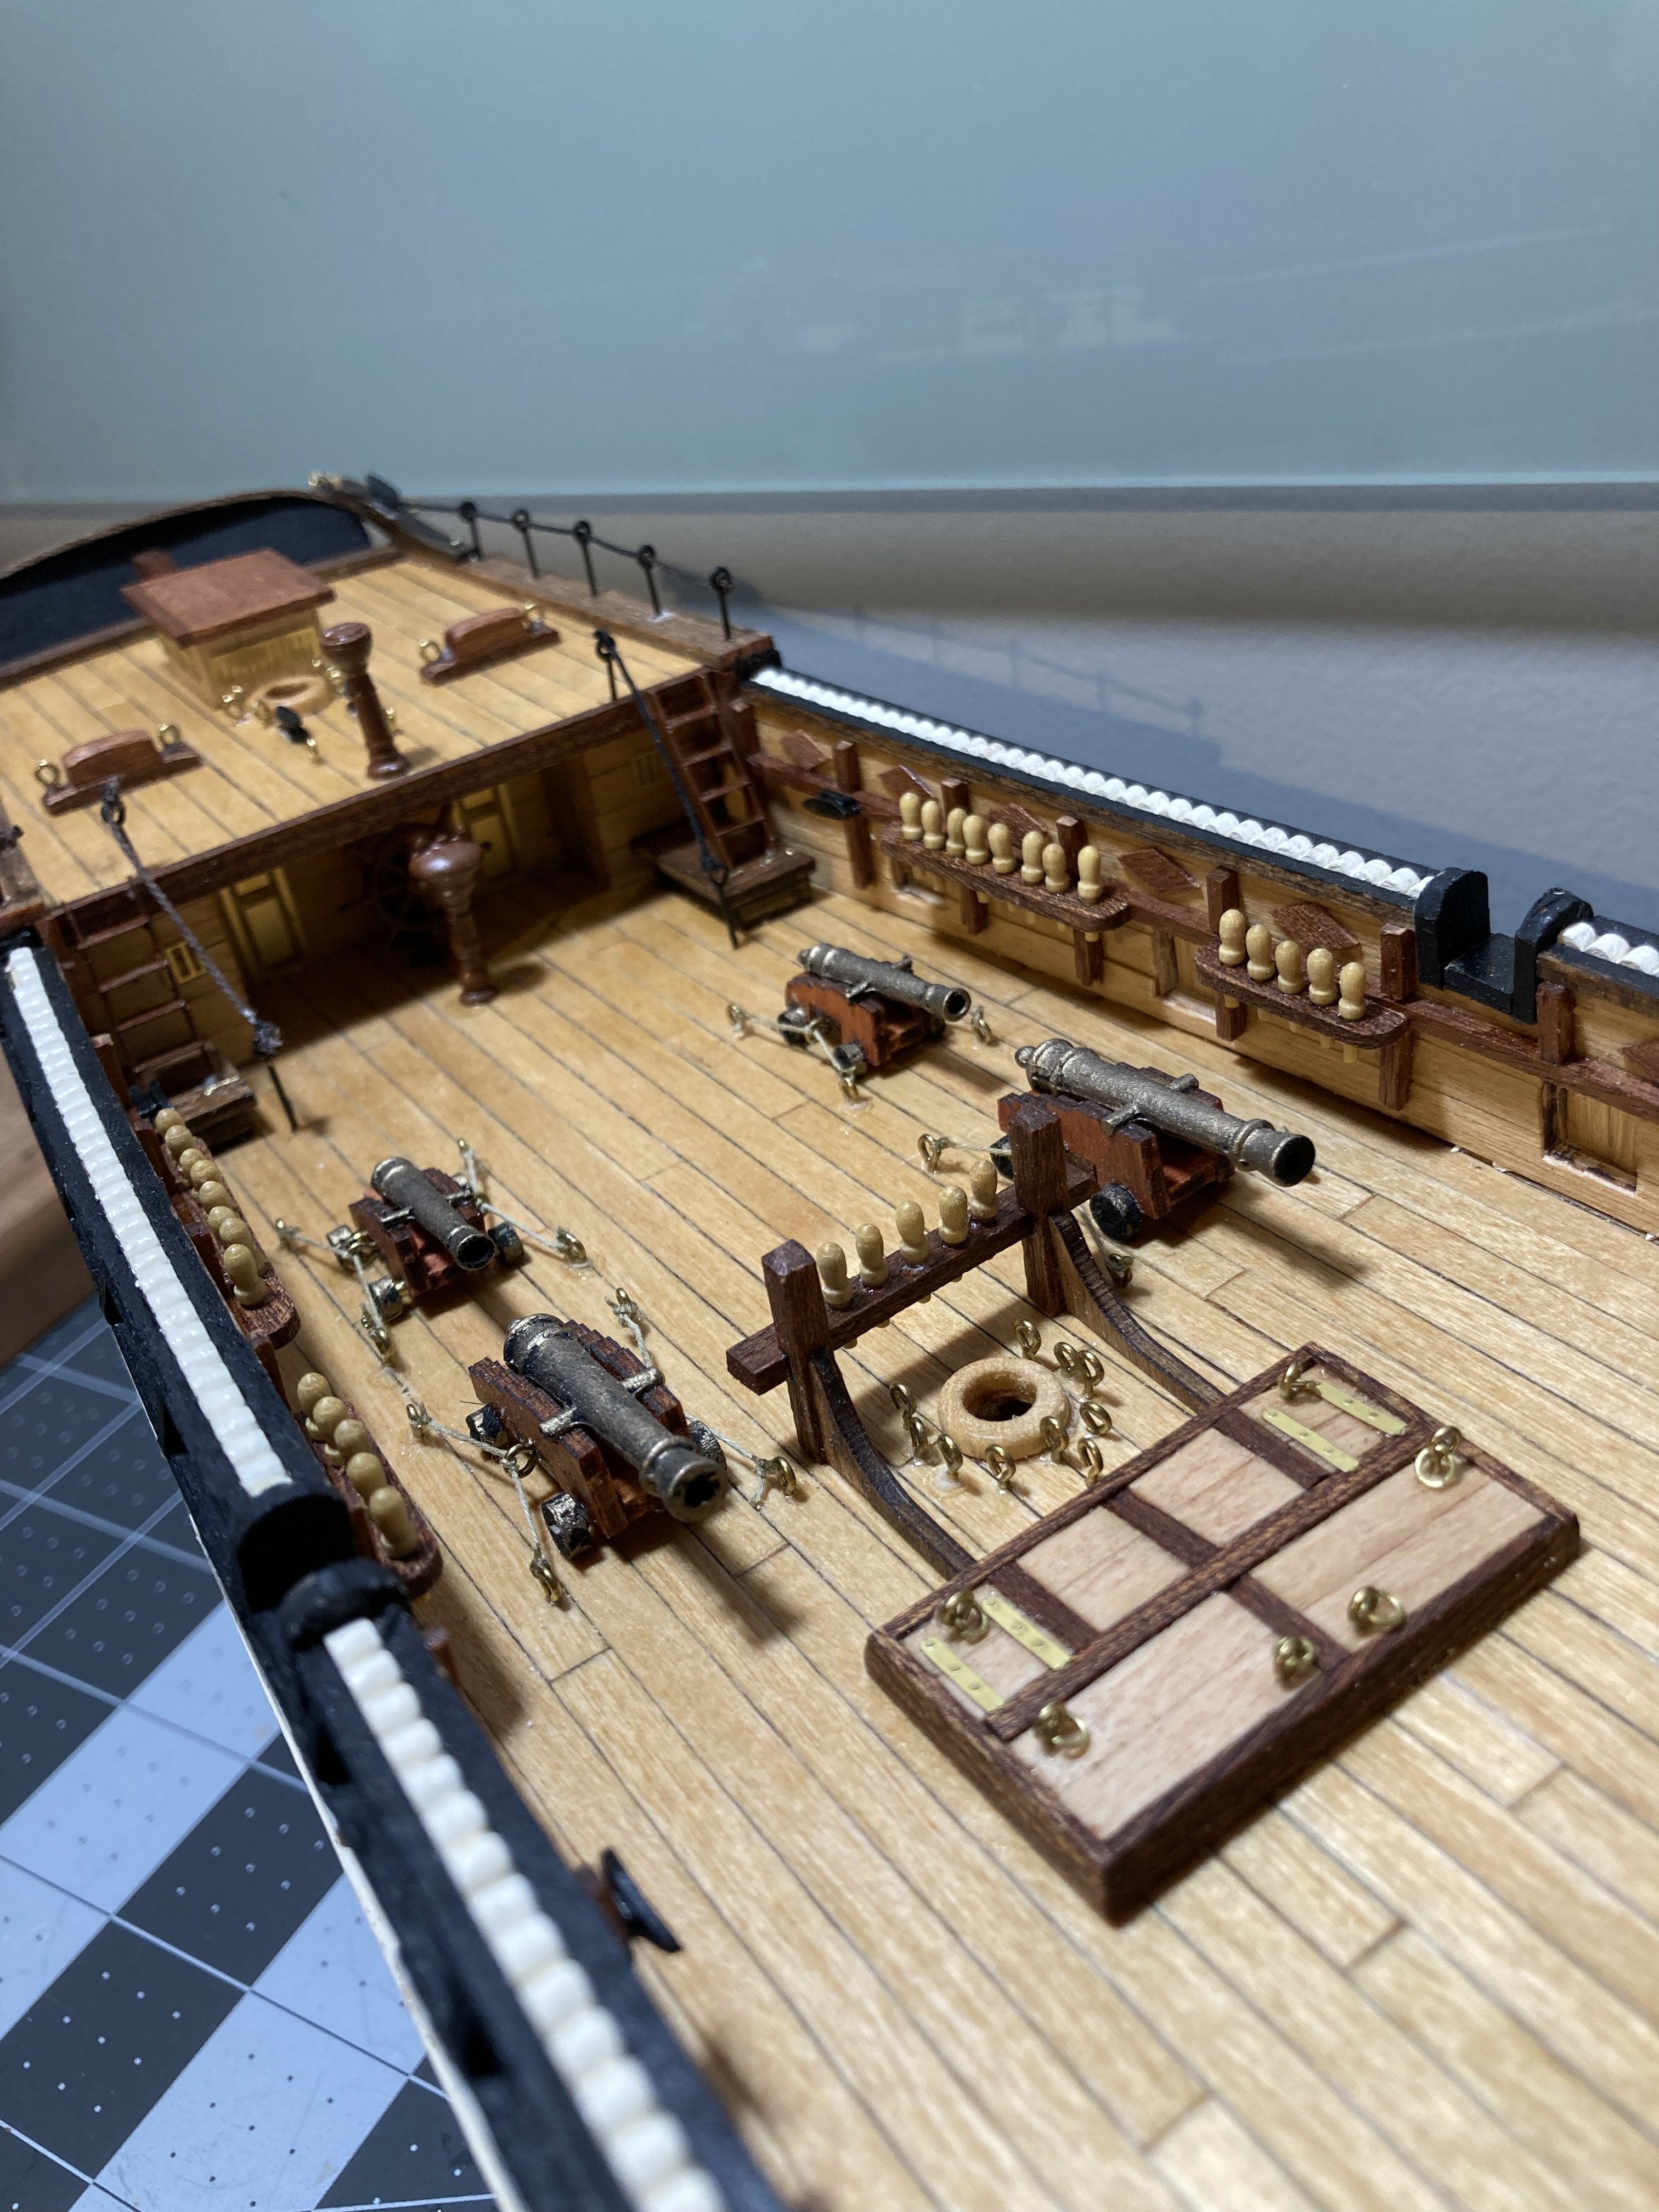
I have completed the planking and added the cap rail. I am really happy with the planking, but I a really disapointed in my staining results. My three previous kits were from Occre and they supply Lime Wood for the light color wood in their kits. I stains up really nicely, and I have not had to worry about using any sort of pre-stain product. Clearly the basswood needed something to help it evenly absorb the stain. I did some research online, and sounds like the only real solution involved a lot of sanding which is not really an option when using 1/32 inch material. I am glad I am learning this lesson on this model and not my Essex or Syren.

Next up will be adding the frame and painting the background black.
-
You may have noticed in some of my photos, the wale was installed using a darker colored wood. I decided to buy some walnut and use that for the wale, cap rail and any of parts that were colored black in the prototype. The wale will consist of 2 layers of 1/32 material. After installing the first layer for the wale, I was not satisfied with the result. I struggled to get a smooth edge. I decided to remove the first layer and create the first layer with a continuous strip of basswood to ensure a nice smooth edge. I used two 1/32 x 1/8 inch strips for the bottom layer. I will complete the wale with the walnut on the second layer.

Here is the model with the first layer of the wale installed and all of the planking below the wale completed.
.thumb.JPG.0f17c11ba09ba56227ee6669028f32a0.JPG)
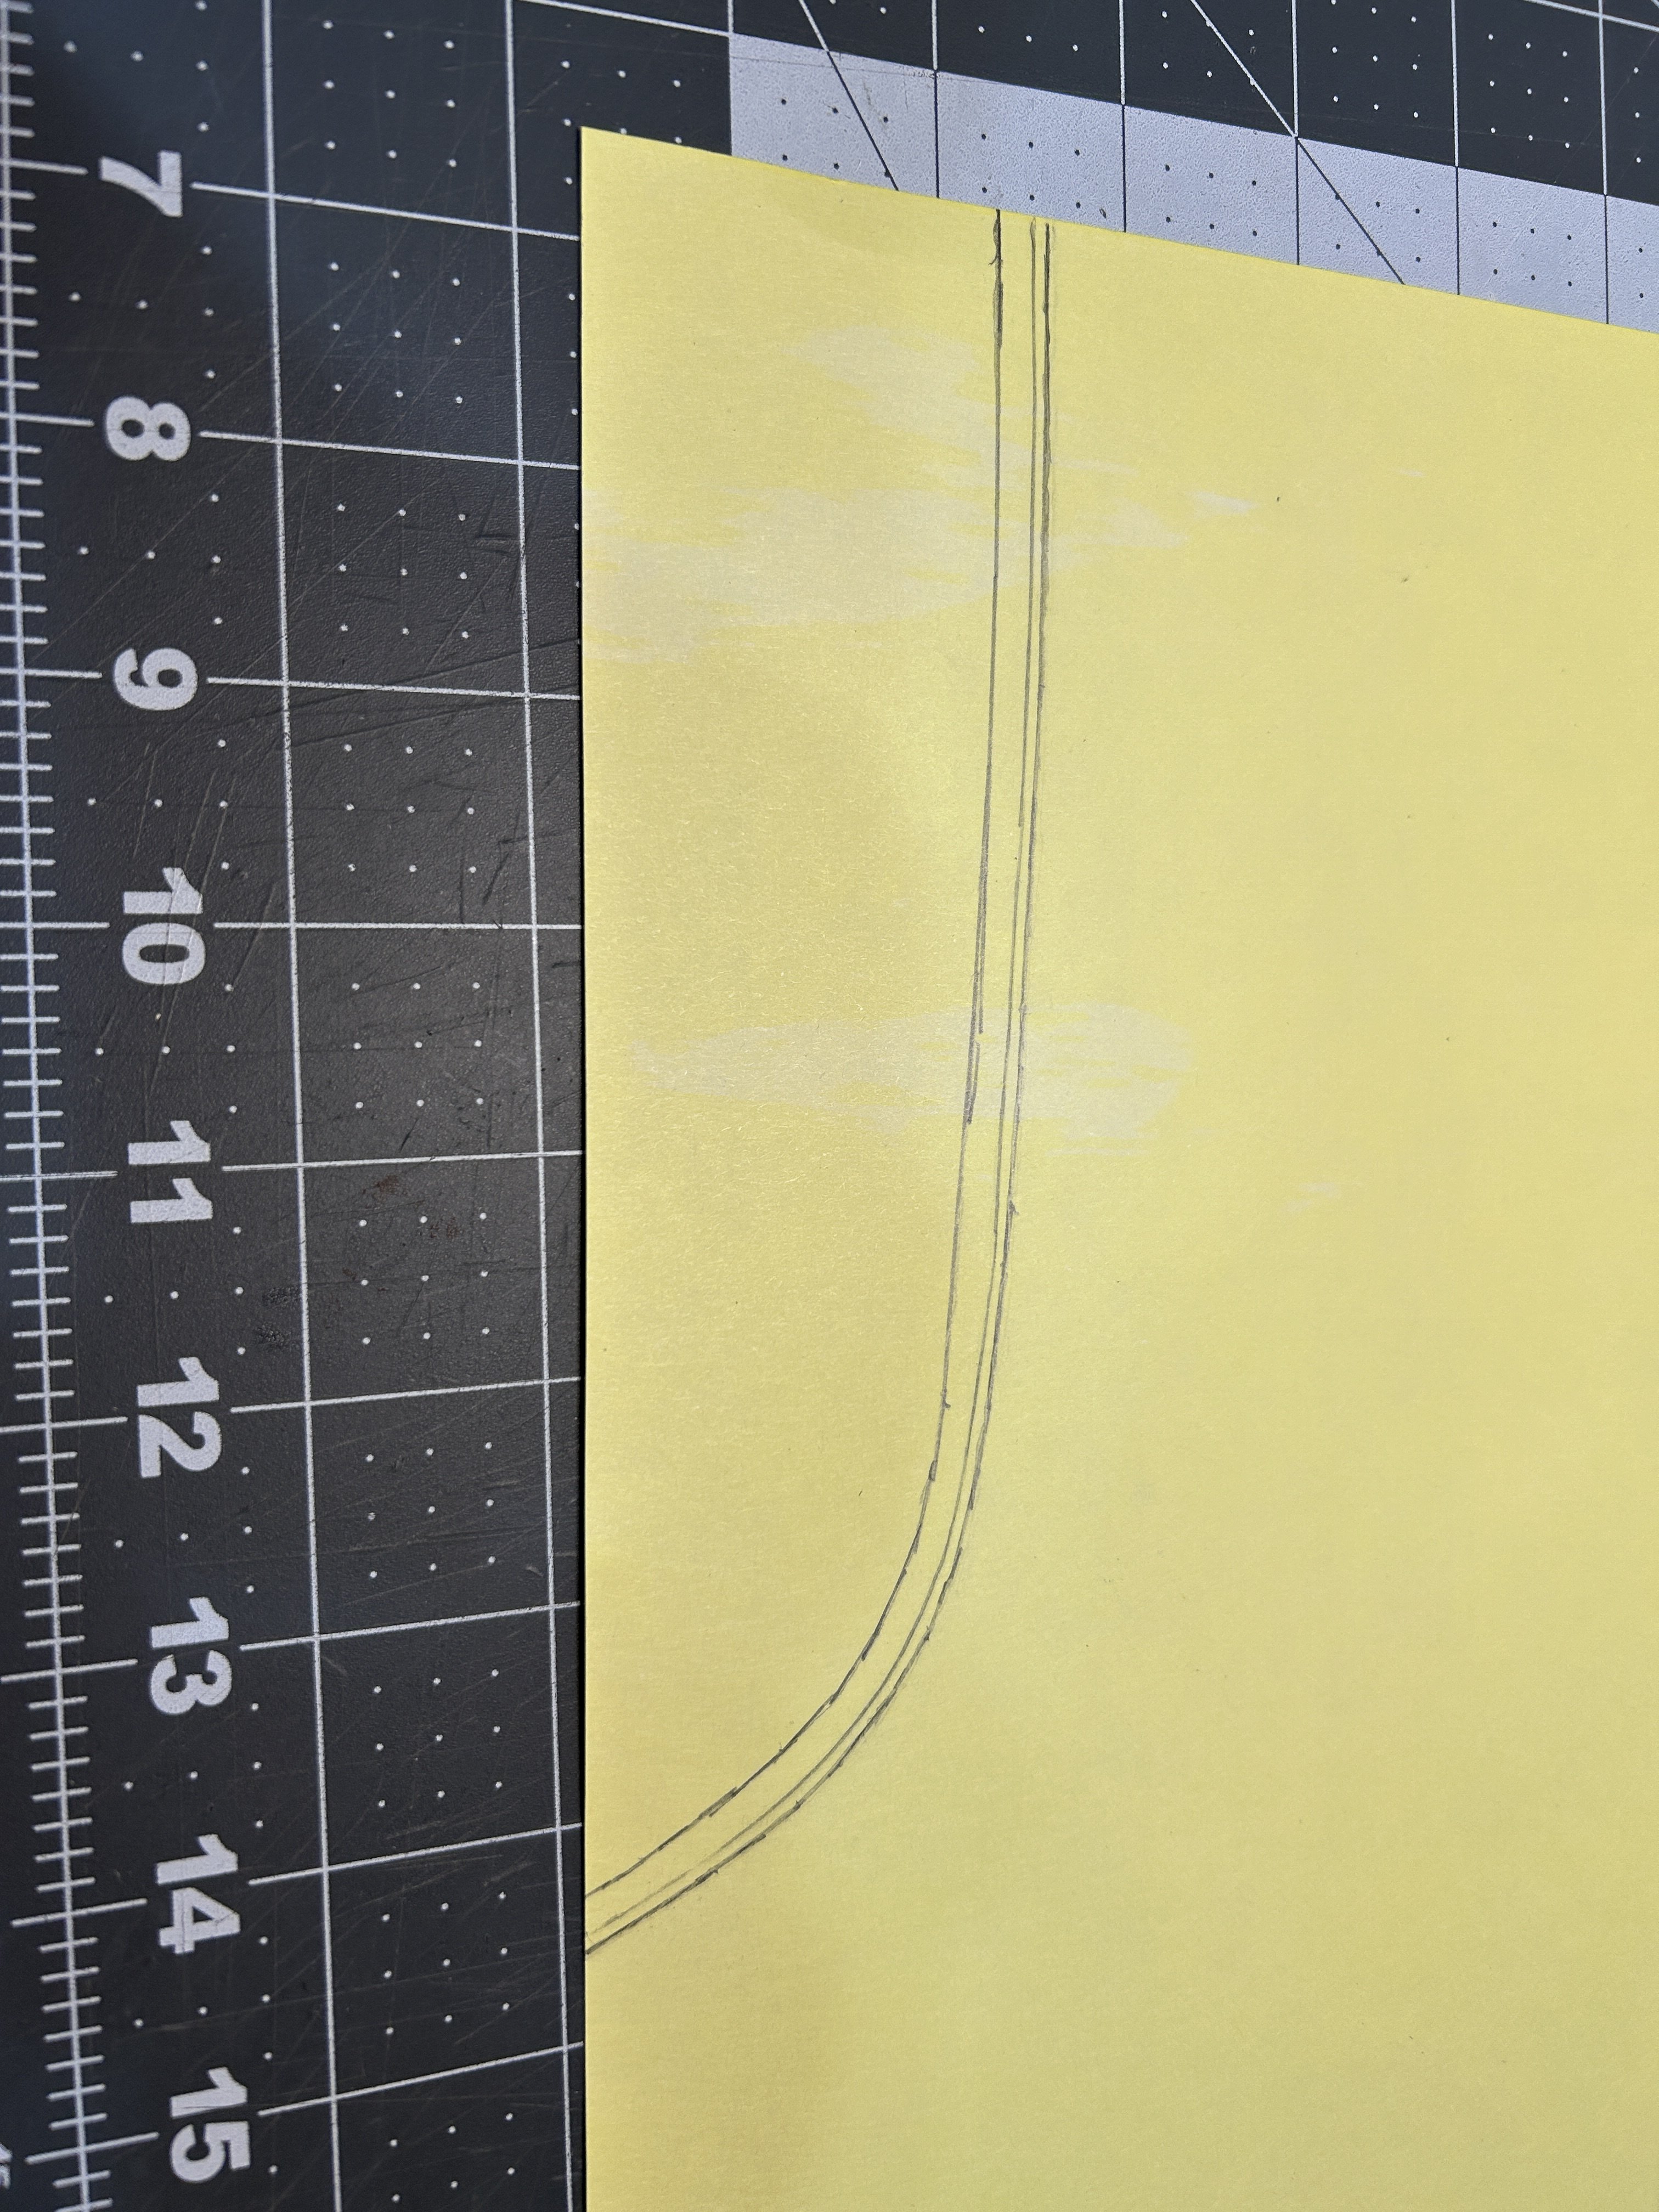
Above the wale I decided to use 1/32 x 3/16 inch basswood strips instead of cutting the pieces out of the basswood sheets.
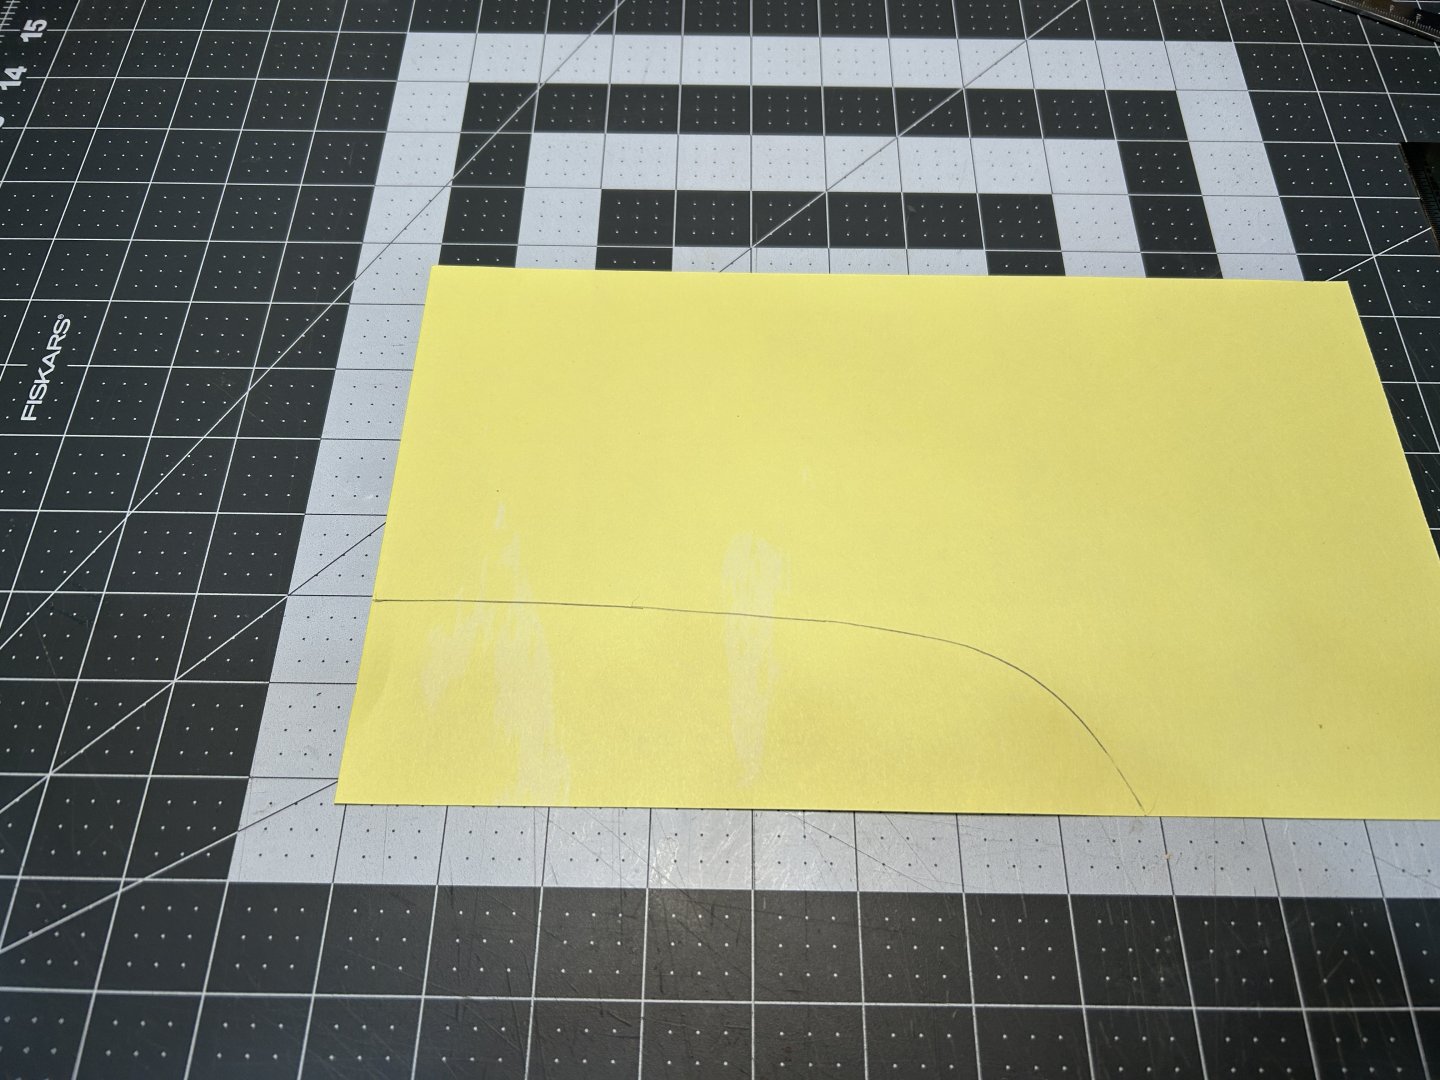
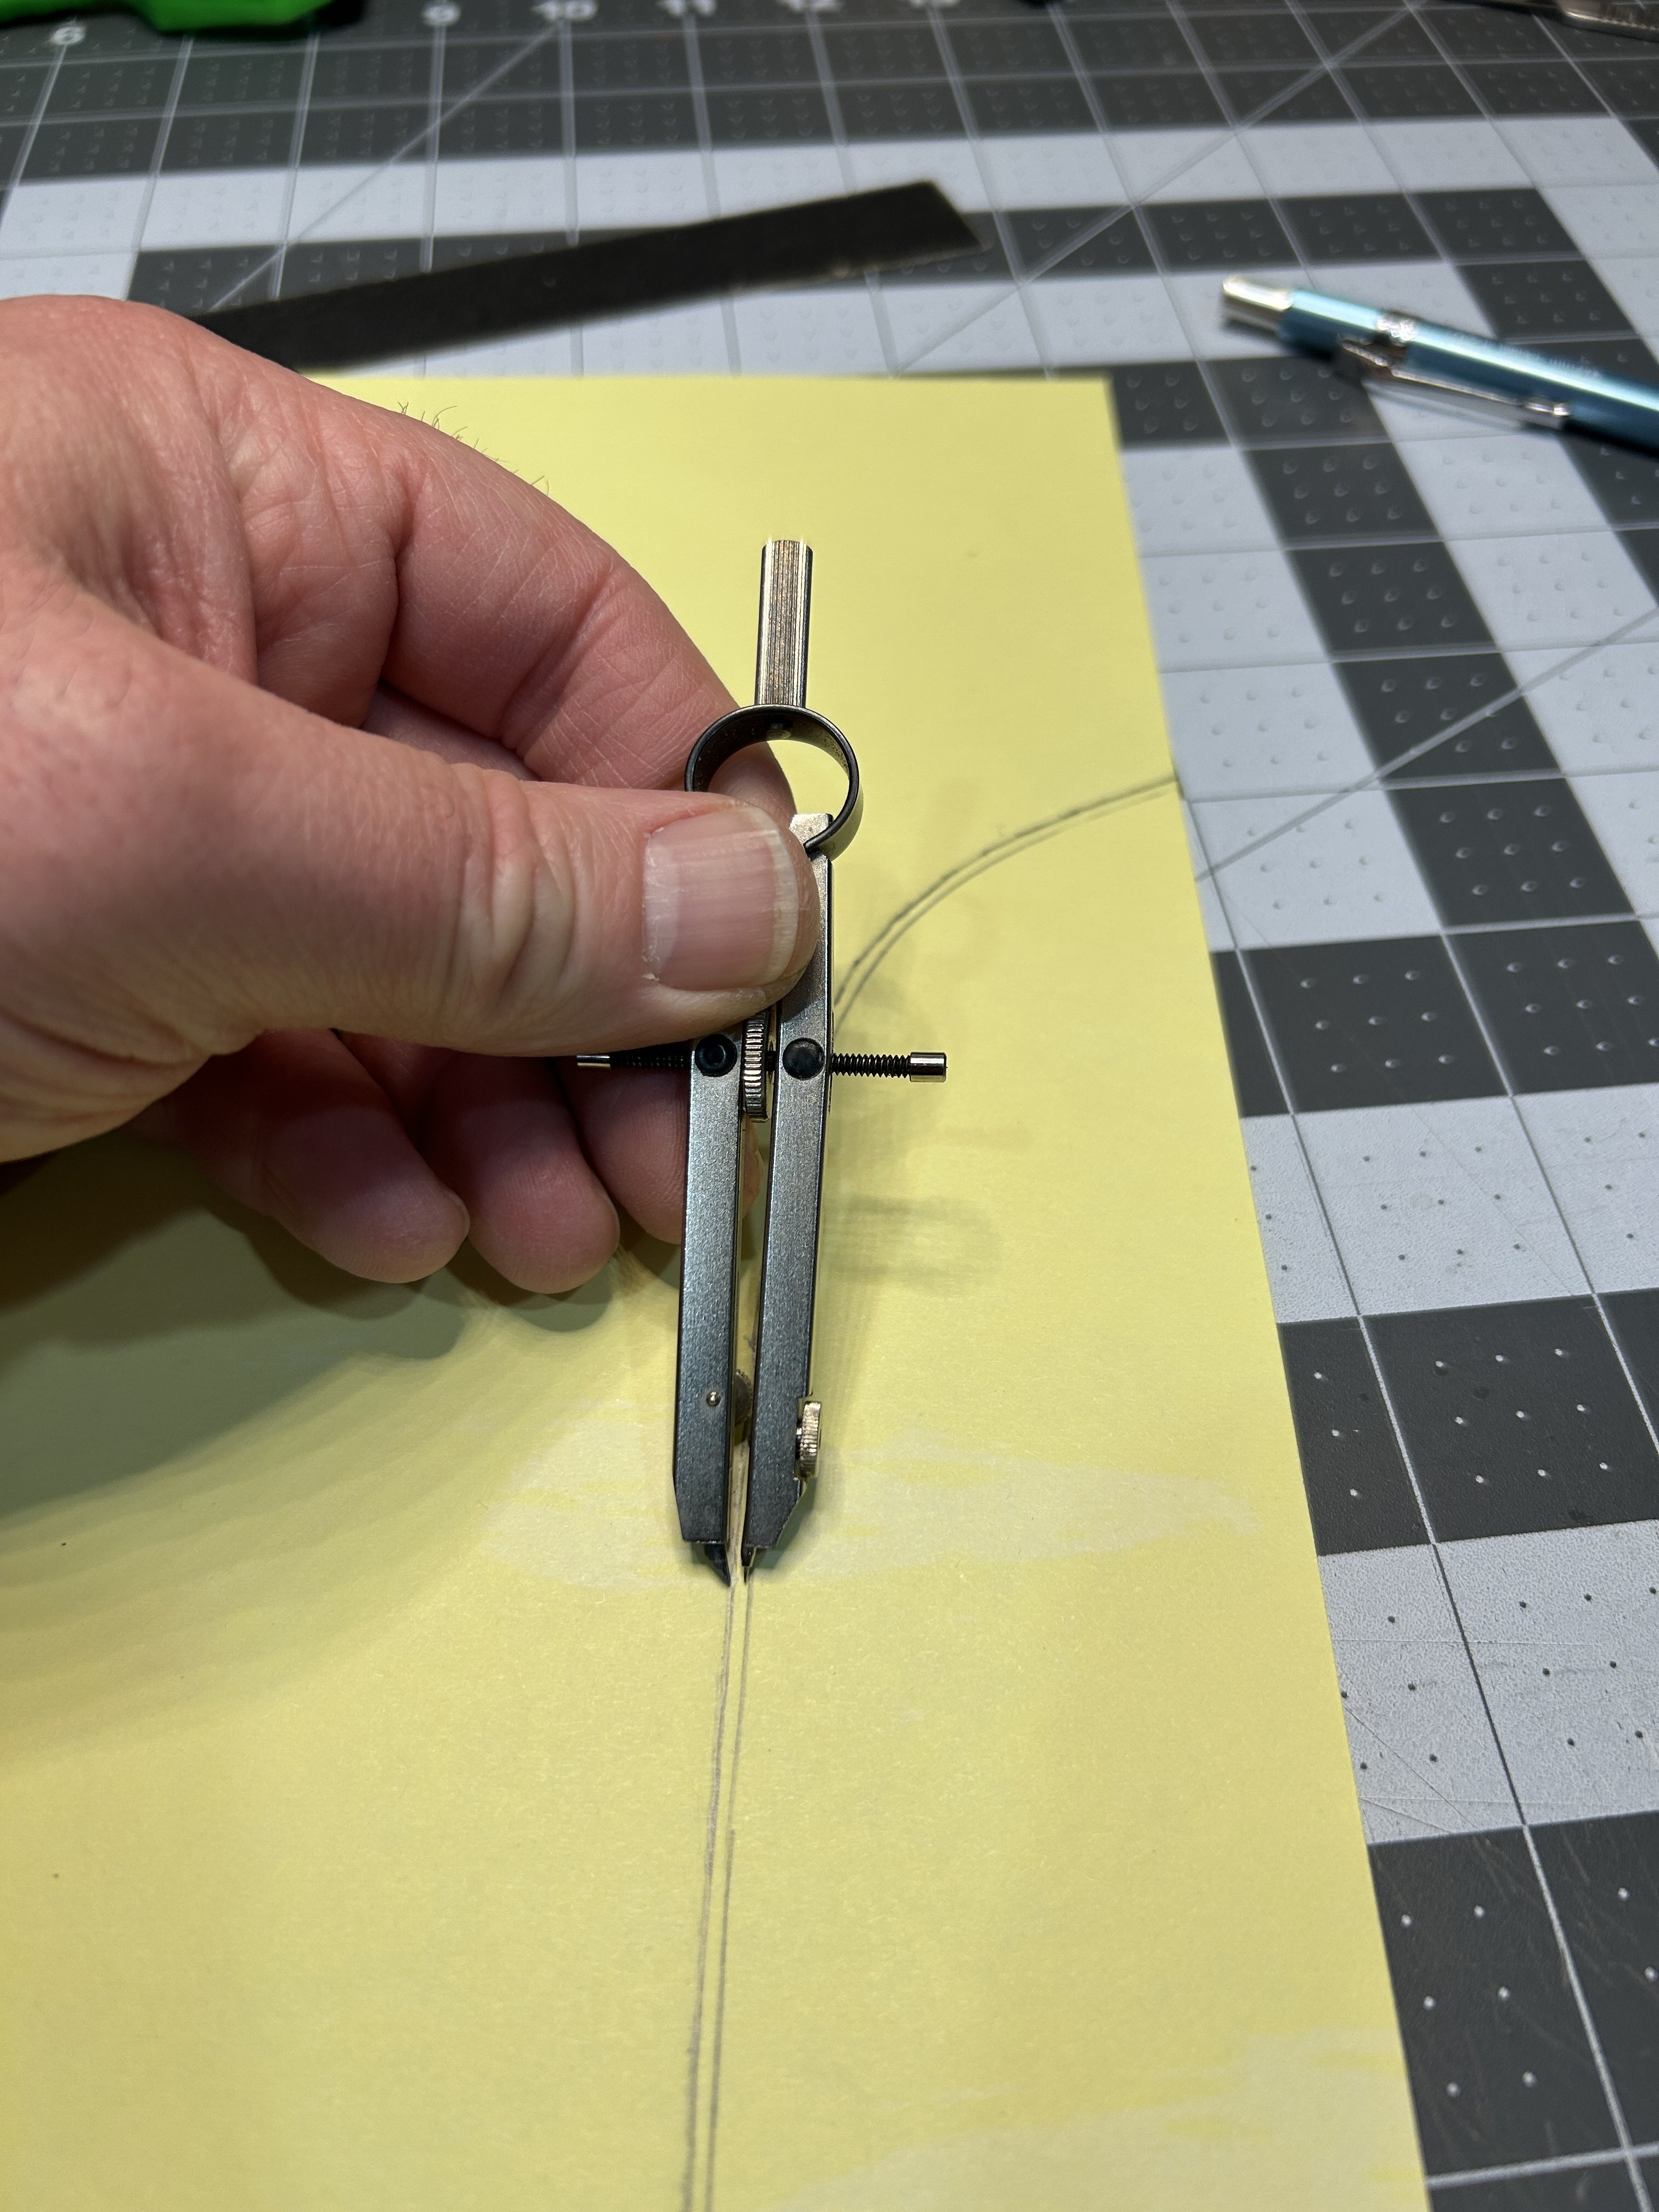
To create the template for the cap rail, I used a piece of cardstock and traced the outside line of the rail. I then used a compass to create the the full width of the cap rail.


Below is the hull with the cap rail installed. I used 1/16 walnut for the cap rail. I thought 1/32 material wasn't substantial enough for the cap rail. I used a hobby knife to cut the cap rail, but that was difficult with that thickness of walnut. I should have used my scroll saw instead.

next I will plank the stern, add the second layer of the wale, and stain and varnish the hull.

-
2 minutes ago, Chuck said:
I literally just made 6 more ropewalks two days ago and they sold out in an hour.
Before my last post I checked your stock on the rope rocket just in case I needed to order one of the last ones. Glad to hear those will still be available. My plan is to try making my own rope after I retired and have more time.
- Jack12477, Canute, thibaultron and 2 others
-
5
-
Love to hear you have a plan. Looking forward to using more of your rope and fittings in the future.
what about the rope rocket and servomatic.
-
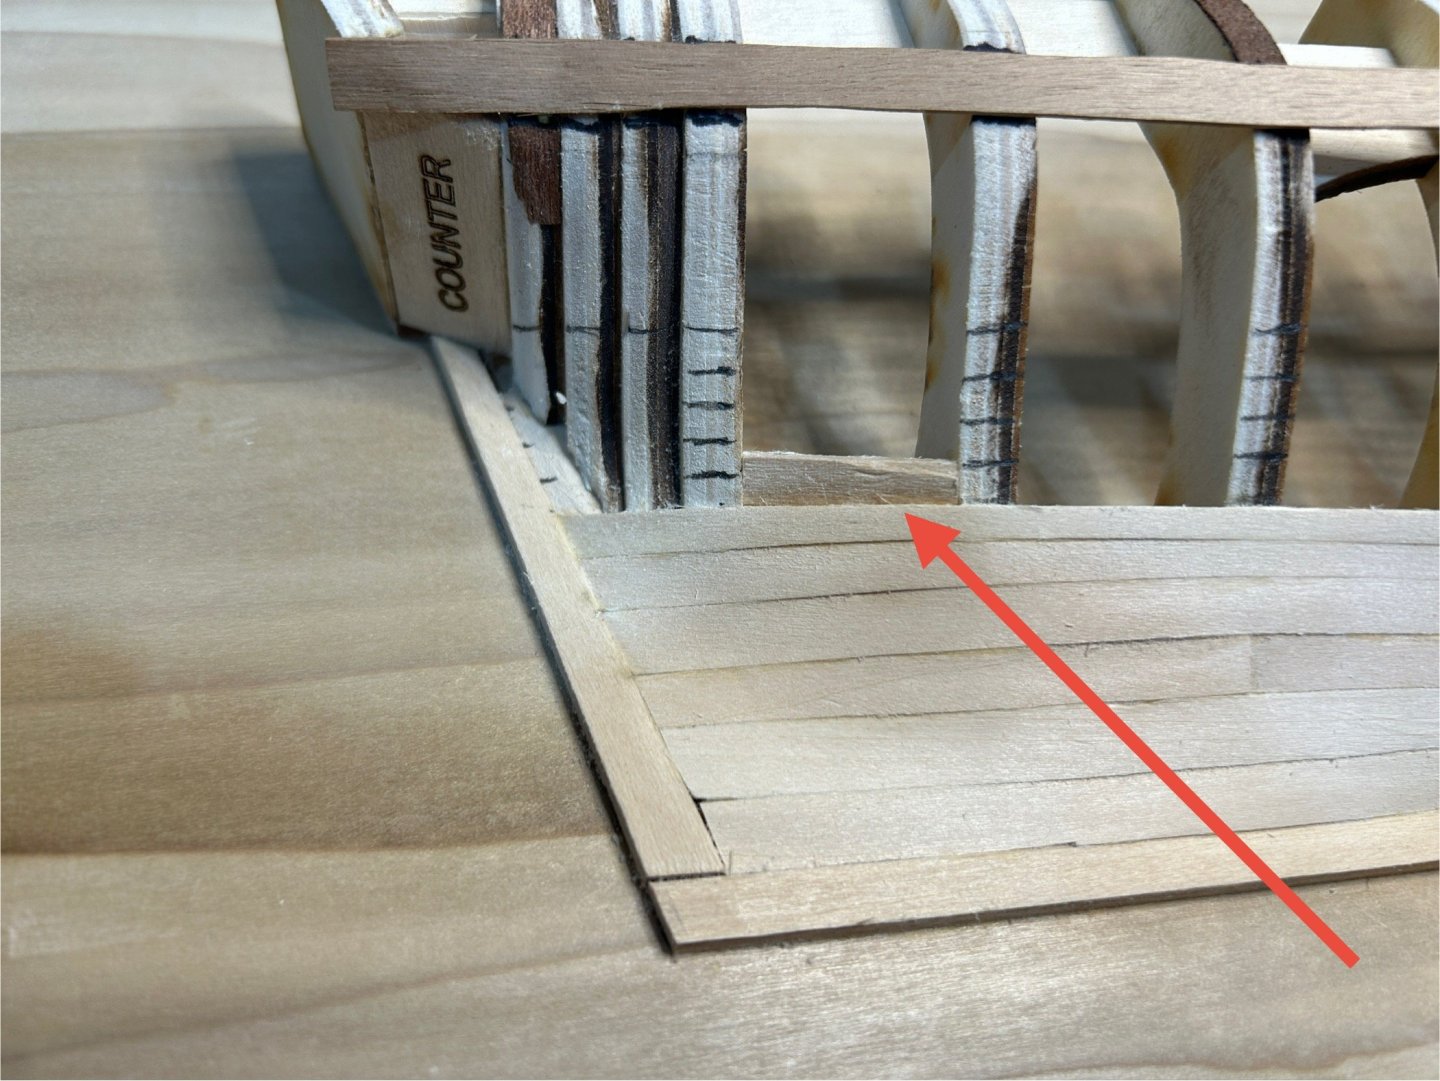
Moving toward the rear, I added a small piece of backing between bulkheads F and G to support the steeler that was added at the stern. Looking at the model now, I don’t think I made the steeler or drop plank look and elegant as I should have. I think I was so focused on getting a good fit between planks I didn’t think about how the plank looked.
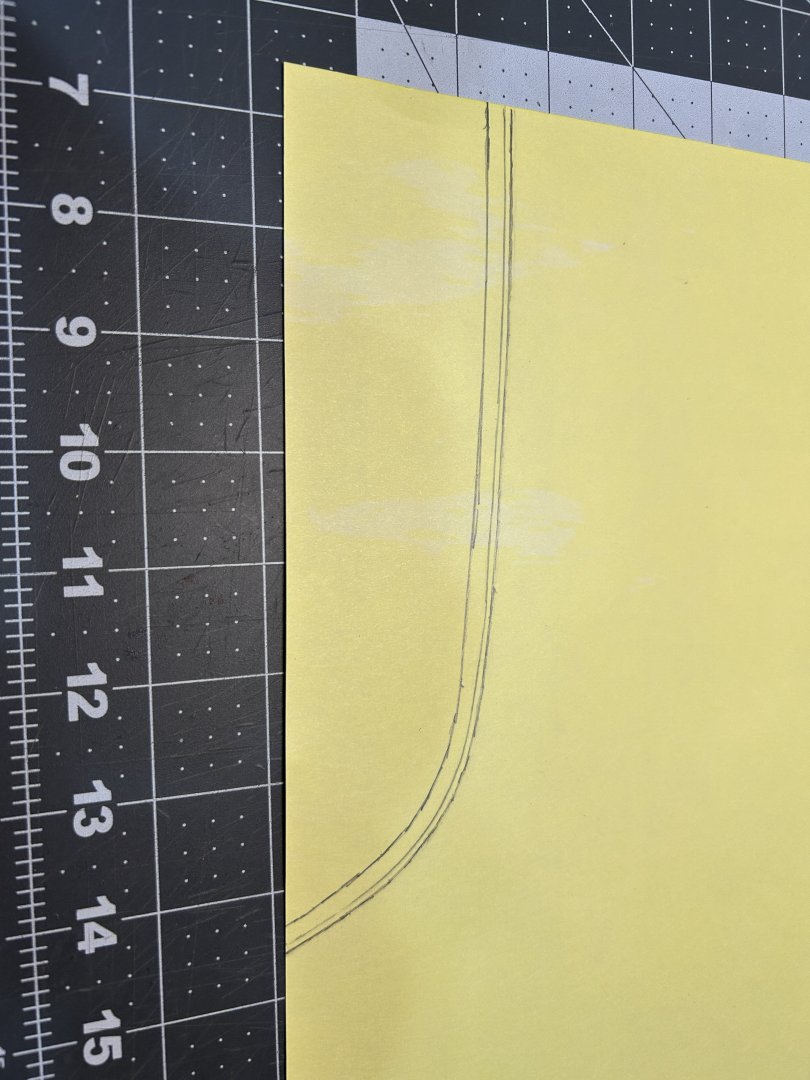
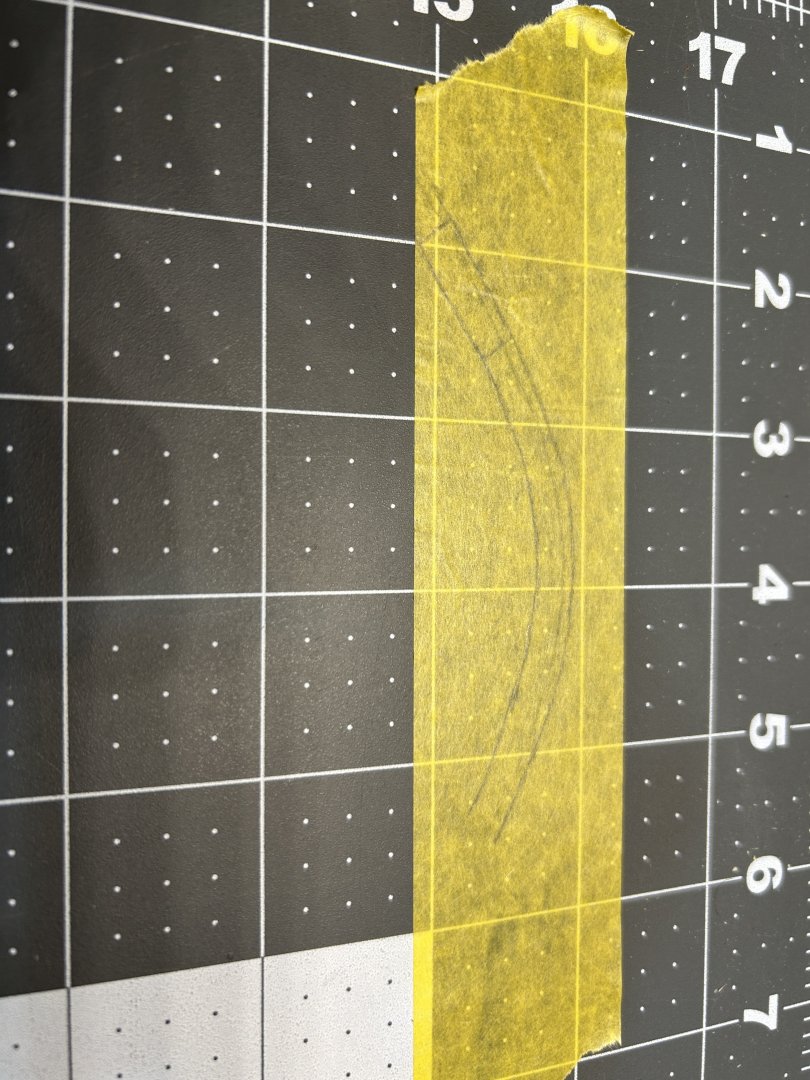
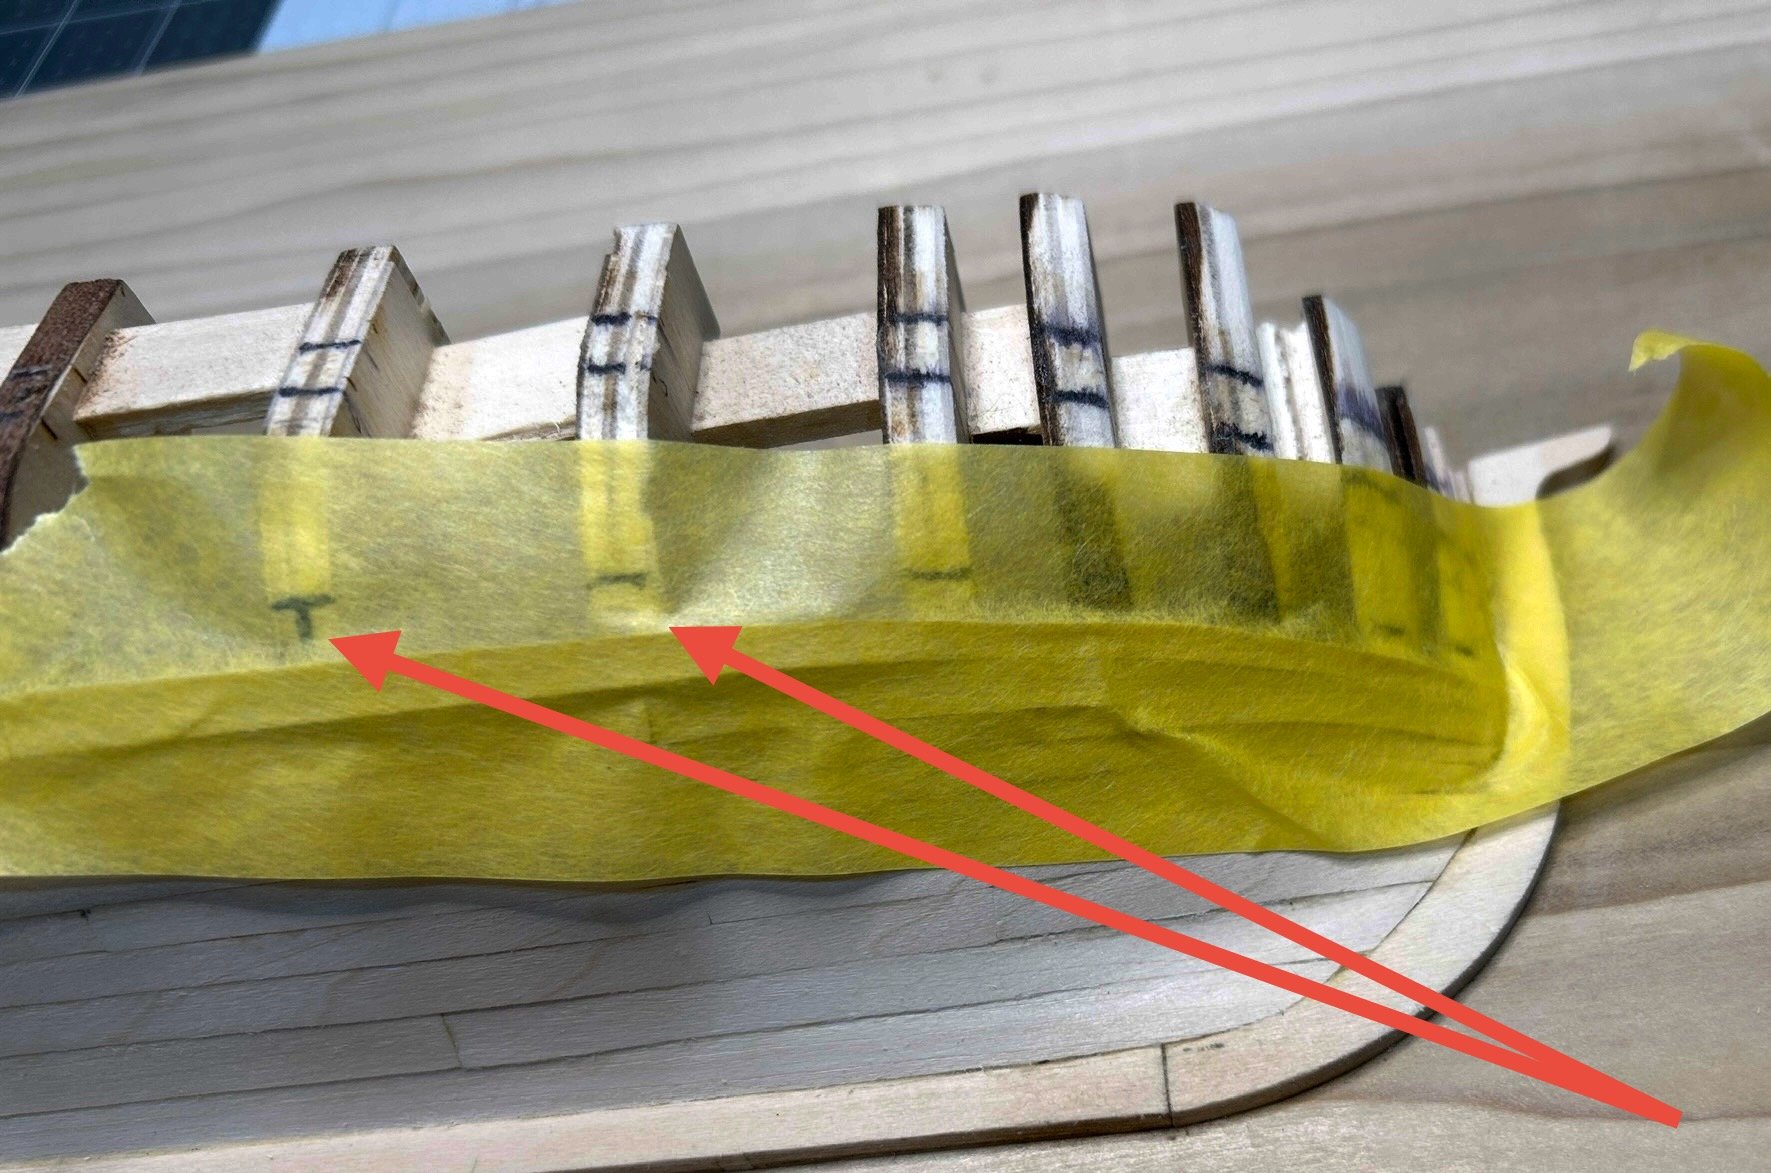
One area where I deviated from the plans was the method that I used to create the tape template. The instructions used blue painters tape and a compass to mark the bottom edge of the plank. Instead of traditional blue painters tape, I used Frog Tape brand Delicate Surface painters tape which is a translucent yellow color. I start my process by making sure that the tick marks on the bulkheads are as dark as possible. I then place the tape across the bulkheads. The marks show through the tape.

I then use a carpenters pencil and lay the lead across the top edge of the plank below the one I am creating and make a pencil mark on the tape to make the mark for the bottom edge of the plank I am creating.
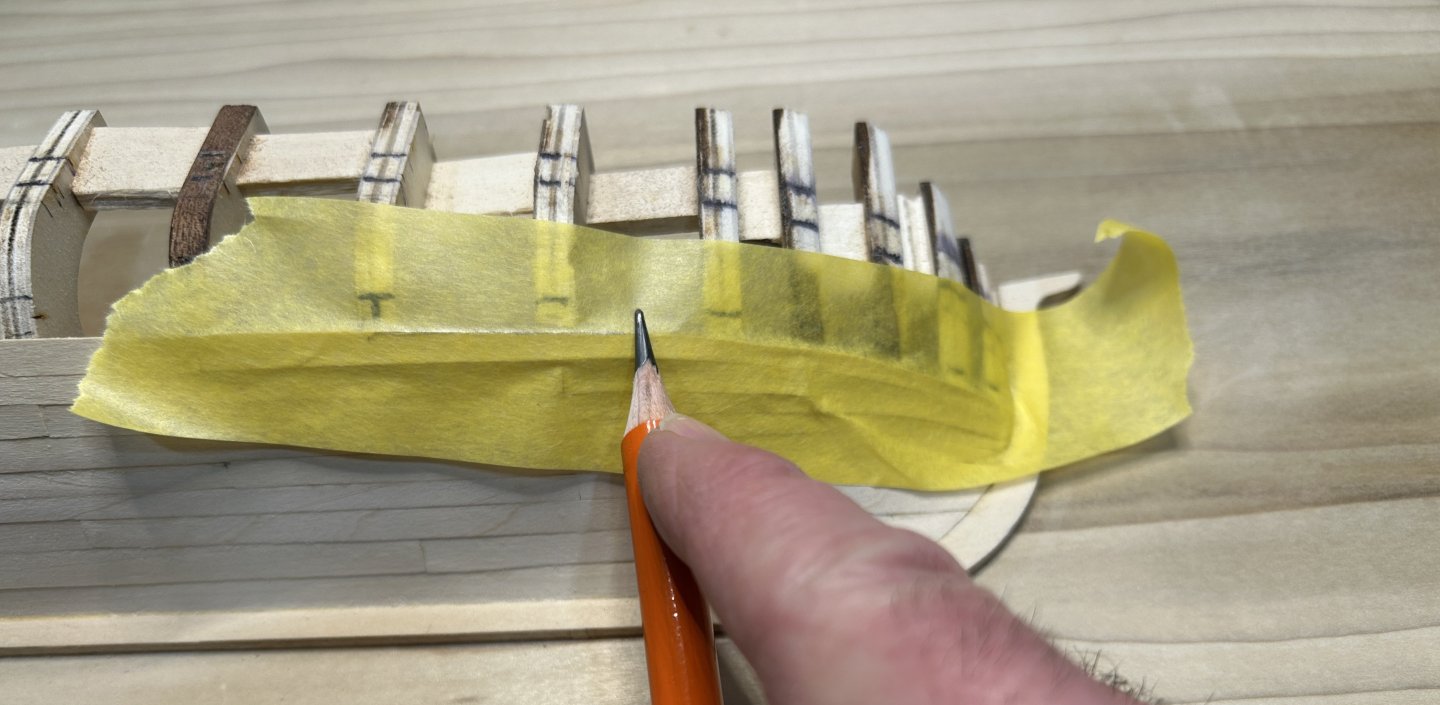
I then trace the tick marks that represent the top edge of the plank on the tape. I put the tape onto a light colored section of my cutting mat and use a french curve, ruler and anything else I can find that connects the tick marks with the correct curve.

I then place tape on my basswood and use a scalpel to cut out the piece.

I leave a little extra meat on each end and use my Ultimation sander to get the angle right so it meet up with the adjacent part and slowly reduce the length until I have an nice snug fit.

A few months ago there was some discussion about knives and other cutting tools and after following the conversations I decided to purchase a scalpel handle and a box of blades. The scalpel blades work great for cutting the 1/32 inch material for this model. The blades are very sharp, but do not stay sharp as long as a good exacto knife blade. You can buy a box of 100 for about 10 cents a blade on Amazon, so even though they don’t last as long, they are a good value.
below are pictures with the bottom two of three belts complete.

I will have more details on the planking process in my next post.
- KARAVOKIRIS, JacquesCousteau and Esap
-
3
-
For fairing the hull I made some sanding sticks out of some paint stir sticks and some smaller ones out tongue depressors. Those in conjunction with this flexible sanding tool were used to fair the hull.

I think fairing a hull is the least enjoyable yet most important steps in building a model. I found I needed to work in small amounts over several days. Frequent checking with a plank and patience are the keys. I shimmed a couple more bulkheads to get things right.
After I was satisfied with the fairing I used a string to determine the line if the garboard strake. I followed the instructions on the with of the garboard and the broad strake.
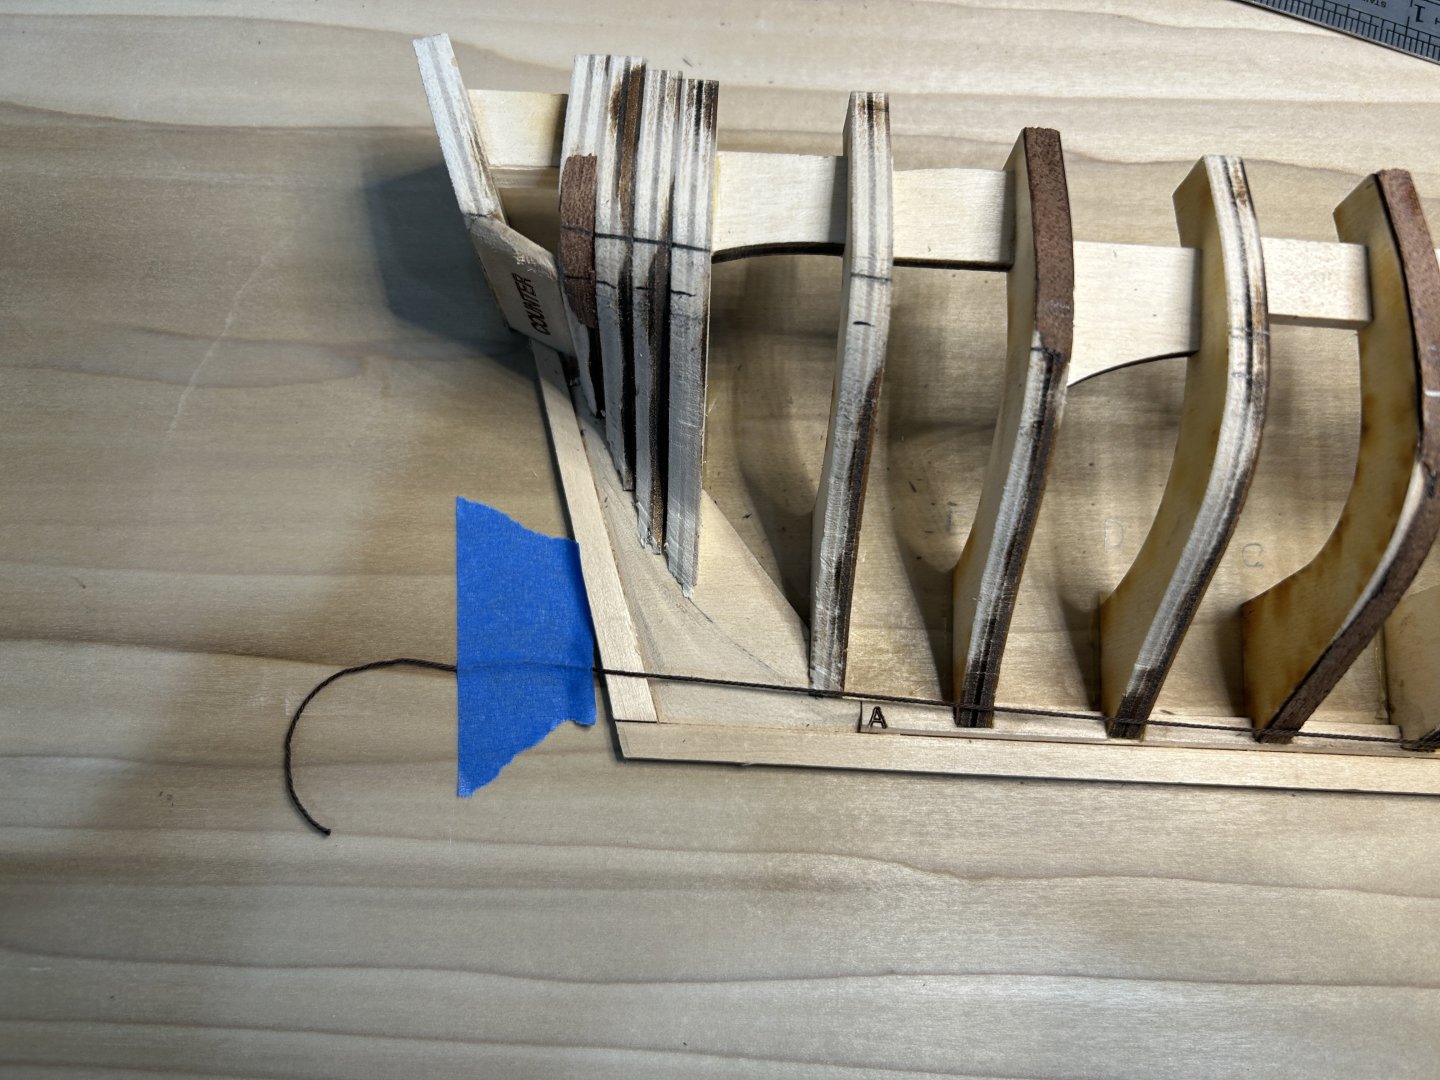


After the broad stake was installed, I created tick strips for each of the bulkheads. Starting with bulkhead A, I marked off 12 equal width blanks using the planking fan. I then repeated that for each bulkhead moving forward. Eventually I dropped one plank from the middle of the bulkhead 4A leaving 11 planks at the bow.
I think one of the most important letters I learned on this project was to take the time to redo things if I am not satisfied with the results. The first plank at the bow above the broad plank was created installed and removed 3 times before I decided the 4th one was worth keeping. I was a little worried at that point thinking every plank was going to require 4 tries before I was successful. However, I quickly became better at creating the tape template for the planks and cutting the planks out.
Creating the plank above the drop blank was one of the more complex planks that I needed to create. It took a couple tries to get one that fit properly, but I am pretty happy with the final result.
I will have more information on the planking on my next post.
-
8 hours ago, John Murray said:
Hi, I will be edge setting and bending the planks as supplied in the kit.
I plan to lay down 5 or so planks each side to thee size suggested and then redo the planking calculations based on new measurements. I plan to redo that every 5 or so planks.
Regarding the taper from the last bulkhead, I plan on assessing those as I fit each plank. I have yet to come up with a solution so will assess on each plank.Glad to hear you will be recalculating every 5 planks. Please post updates as you go. I would be interested in following along.
- robert952 and John Murray
-
2
-
Impressive work on the calculations. I am by no means a planking expert, so I will have more questions for you than answers.
are you planning on edge bending your planks to achieve the required curve at the bow, or will you be cutting curved planks out of sheet stock? If you are edge bending will you make the tapered planks based solely on you calculations?
how will you handle the taper required from your last bulkhead to the bow or stern?
I am near the end if my first successful planking project, so to repeat, I am not a planking expert, but you will likely need to adjust and fit these based on the hull and not just these calculations. They will be a great starting point.
- John Murray and robert952
-
2
-
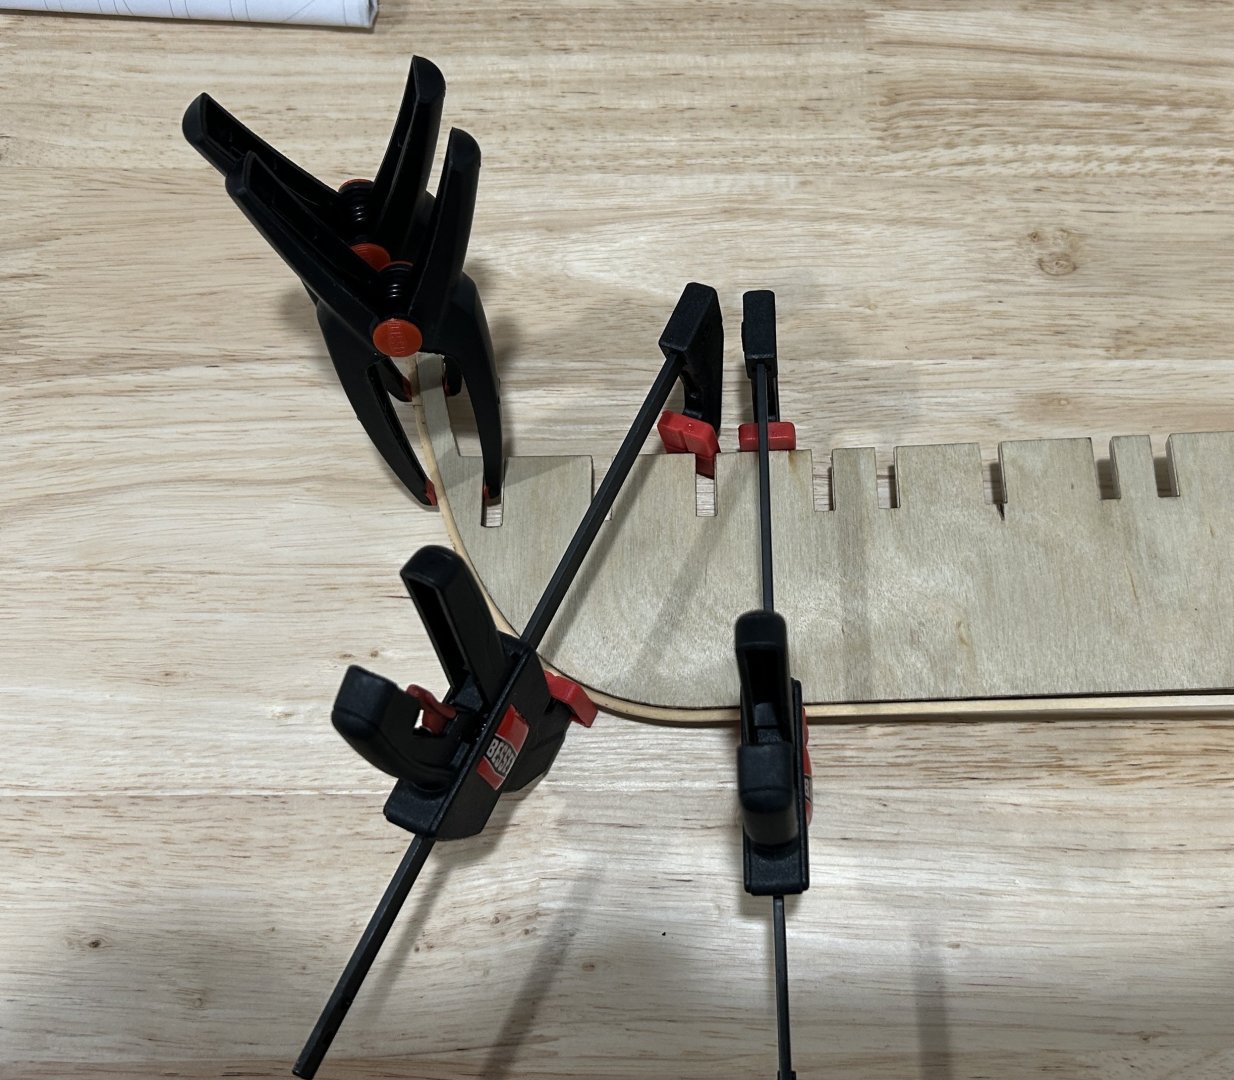
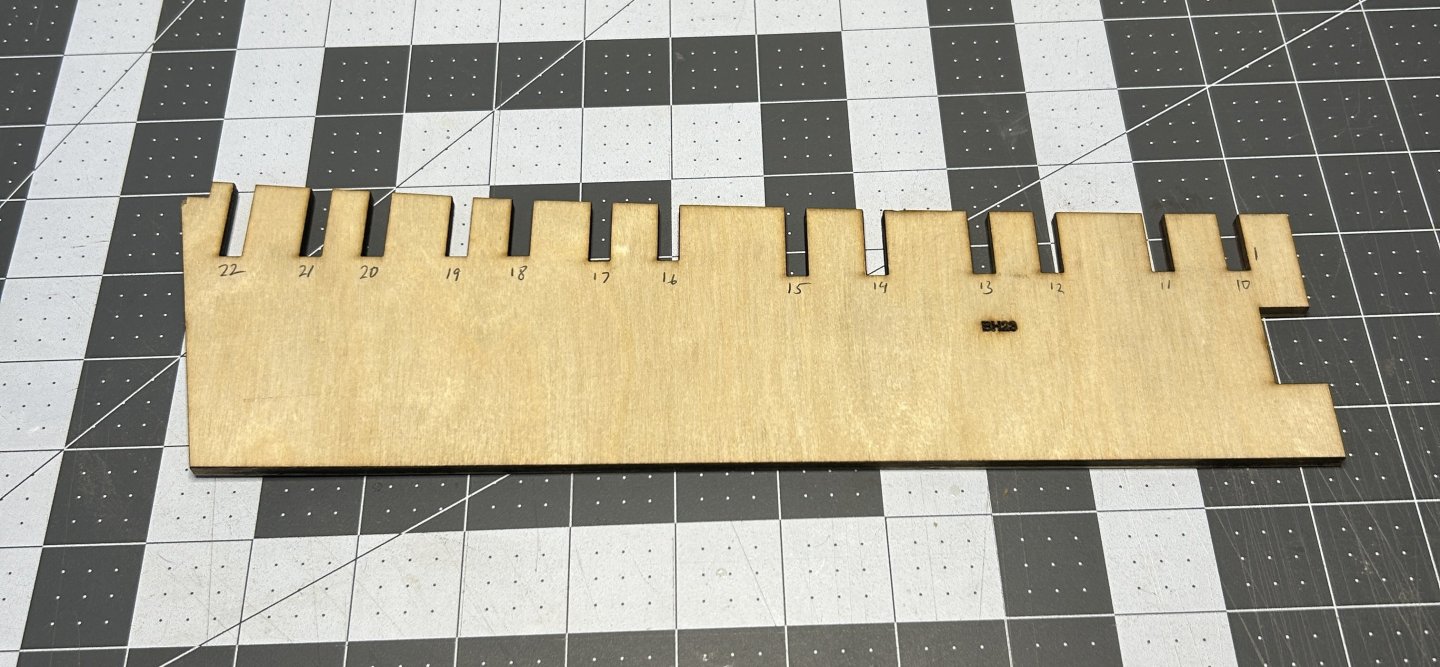
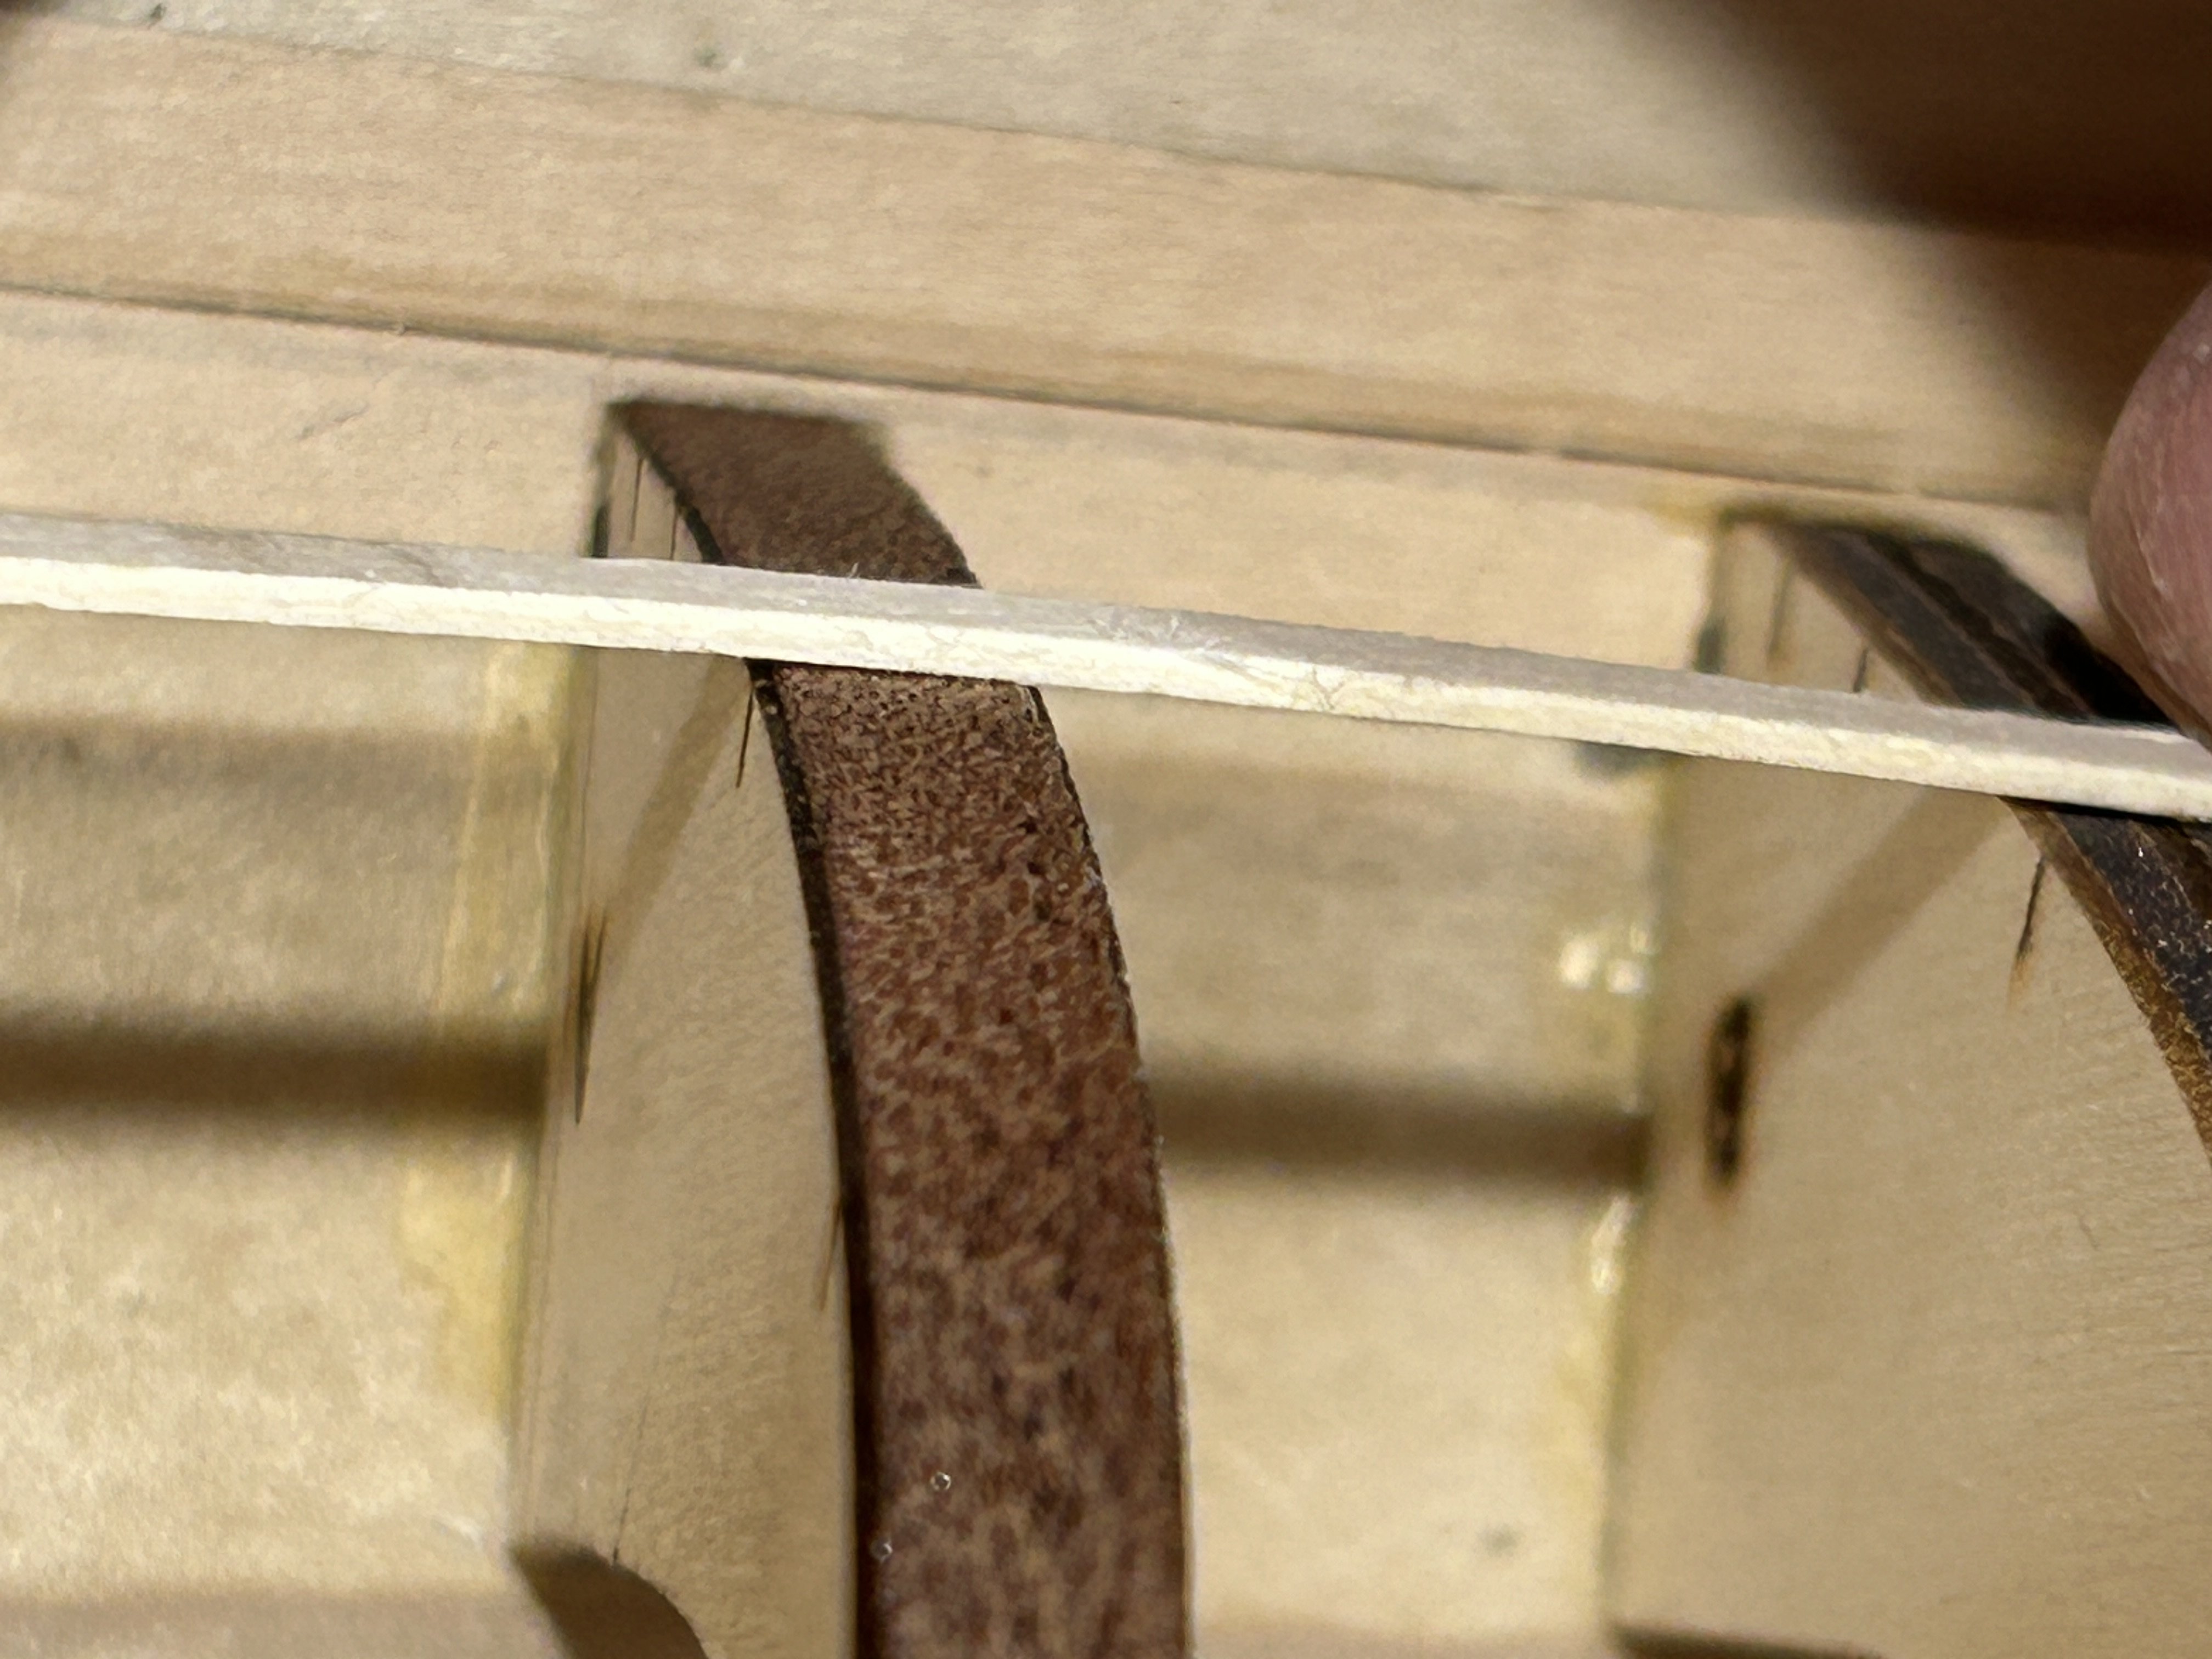
After gluing the keelson to the building board, I used some micro chisels purchased from Lee Valley Tools to deepen the notches that the bulkhead will fit into.
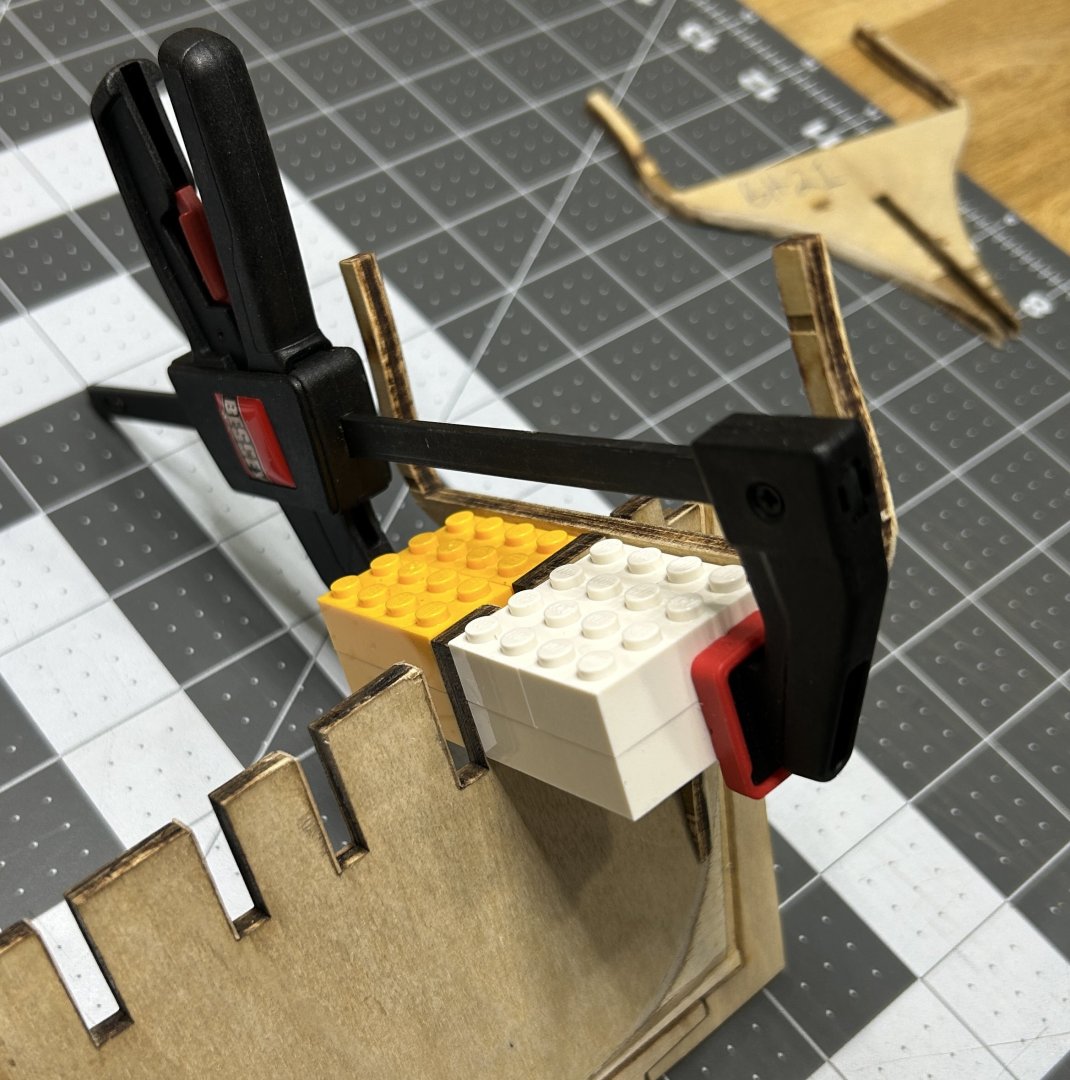
I used a machinists square, legos and a few other items to keep the bulkheads square. I was a little skeptical of how good of a bond I would get to the building board since there was no downward clamping pressure where the two items met. I was pleasantly surprise at how secure the bond is.

The kit came with laser cut pieces to glue between the bulkheads for added strength and stability. I found these were just a bit on the small side to use. At first I worried that it was because my bulkheads were not square, but I never ran into a situation when they were too big, so I decided they must just be a little too small. I used scrap wood to create the parts needed.
It became obvious that some of my bulkheads would require shims. In at least one case it was because I didn’t make a deep enough cut in the keelson.

I had some .6 mm sapeli left over from my Occre builds, and dimensionally it worked great. It is so flexible it fit around curve of the bulkhead easily. The only issue I ran into is the dark color made pencil marks difficult to see.

Next up is fairing the hull.
-
Thanks for sharing this one. Great idea.
-
9 hours ago, SaltyScot said:
It is not unusual for me to have a single malt on my workbench
Me too. Fine line between calming you just a little and calming a little too much, but I enjoy a little scotch while modeling occasionally.
- hollowneck, CiscoH and Ryland Craze
-
3
-
When I started building my NRG Half Hull, I didn’t know if I would do a build log on this one. After the NRG had a sale on this kit a couple of years ago there were a number of really well done build logs and I wasn’t sure If I would have much more to offer. I did take a bunch of pictures along the way, and now that I am a few weeks into it, I have decided to post a build log and share my experience.
I don’t remember which build log mentioned this, but someone commented that they found building on the foam board suggested in the instructions difficult. I had the same concern, so I decided to build my model directly on a piece of poplar that will be the permanent board for display after the model is compete.
The instructions have you glue the print to the foam board. Since my board will be the permanent display board I didn't want to glue the plan to it, but I needed to find a way to transfer critical points to the board I was using. I taped the plan to the board and used a small awl to transfer critical points to the building board.
.thumb.jpg.5827852c29b94c62e1cbbb014cf2f404.jpg)
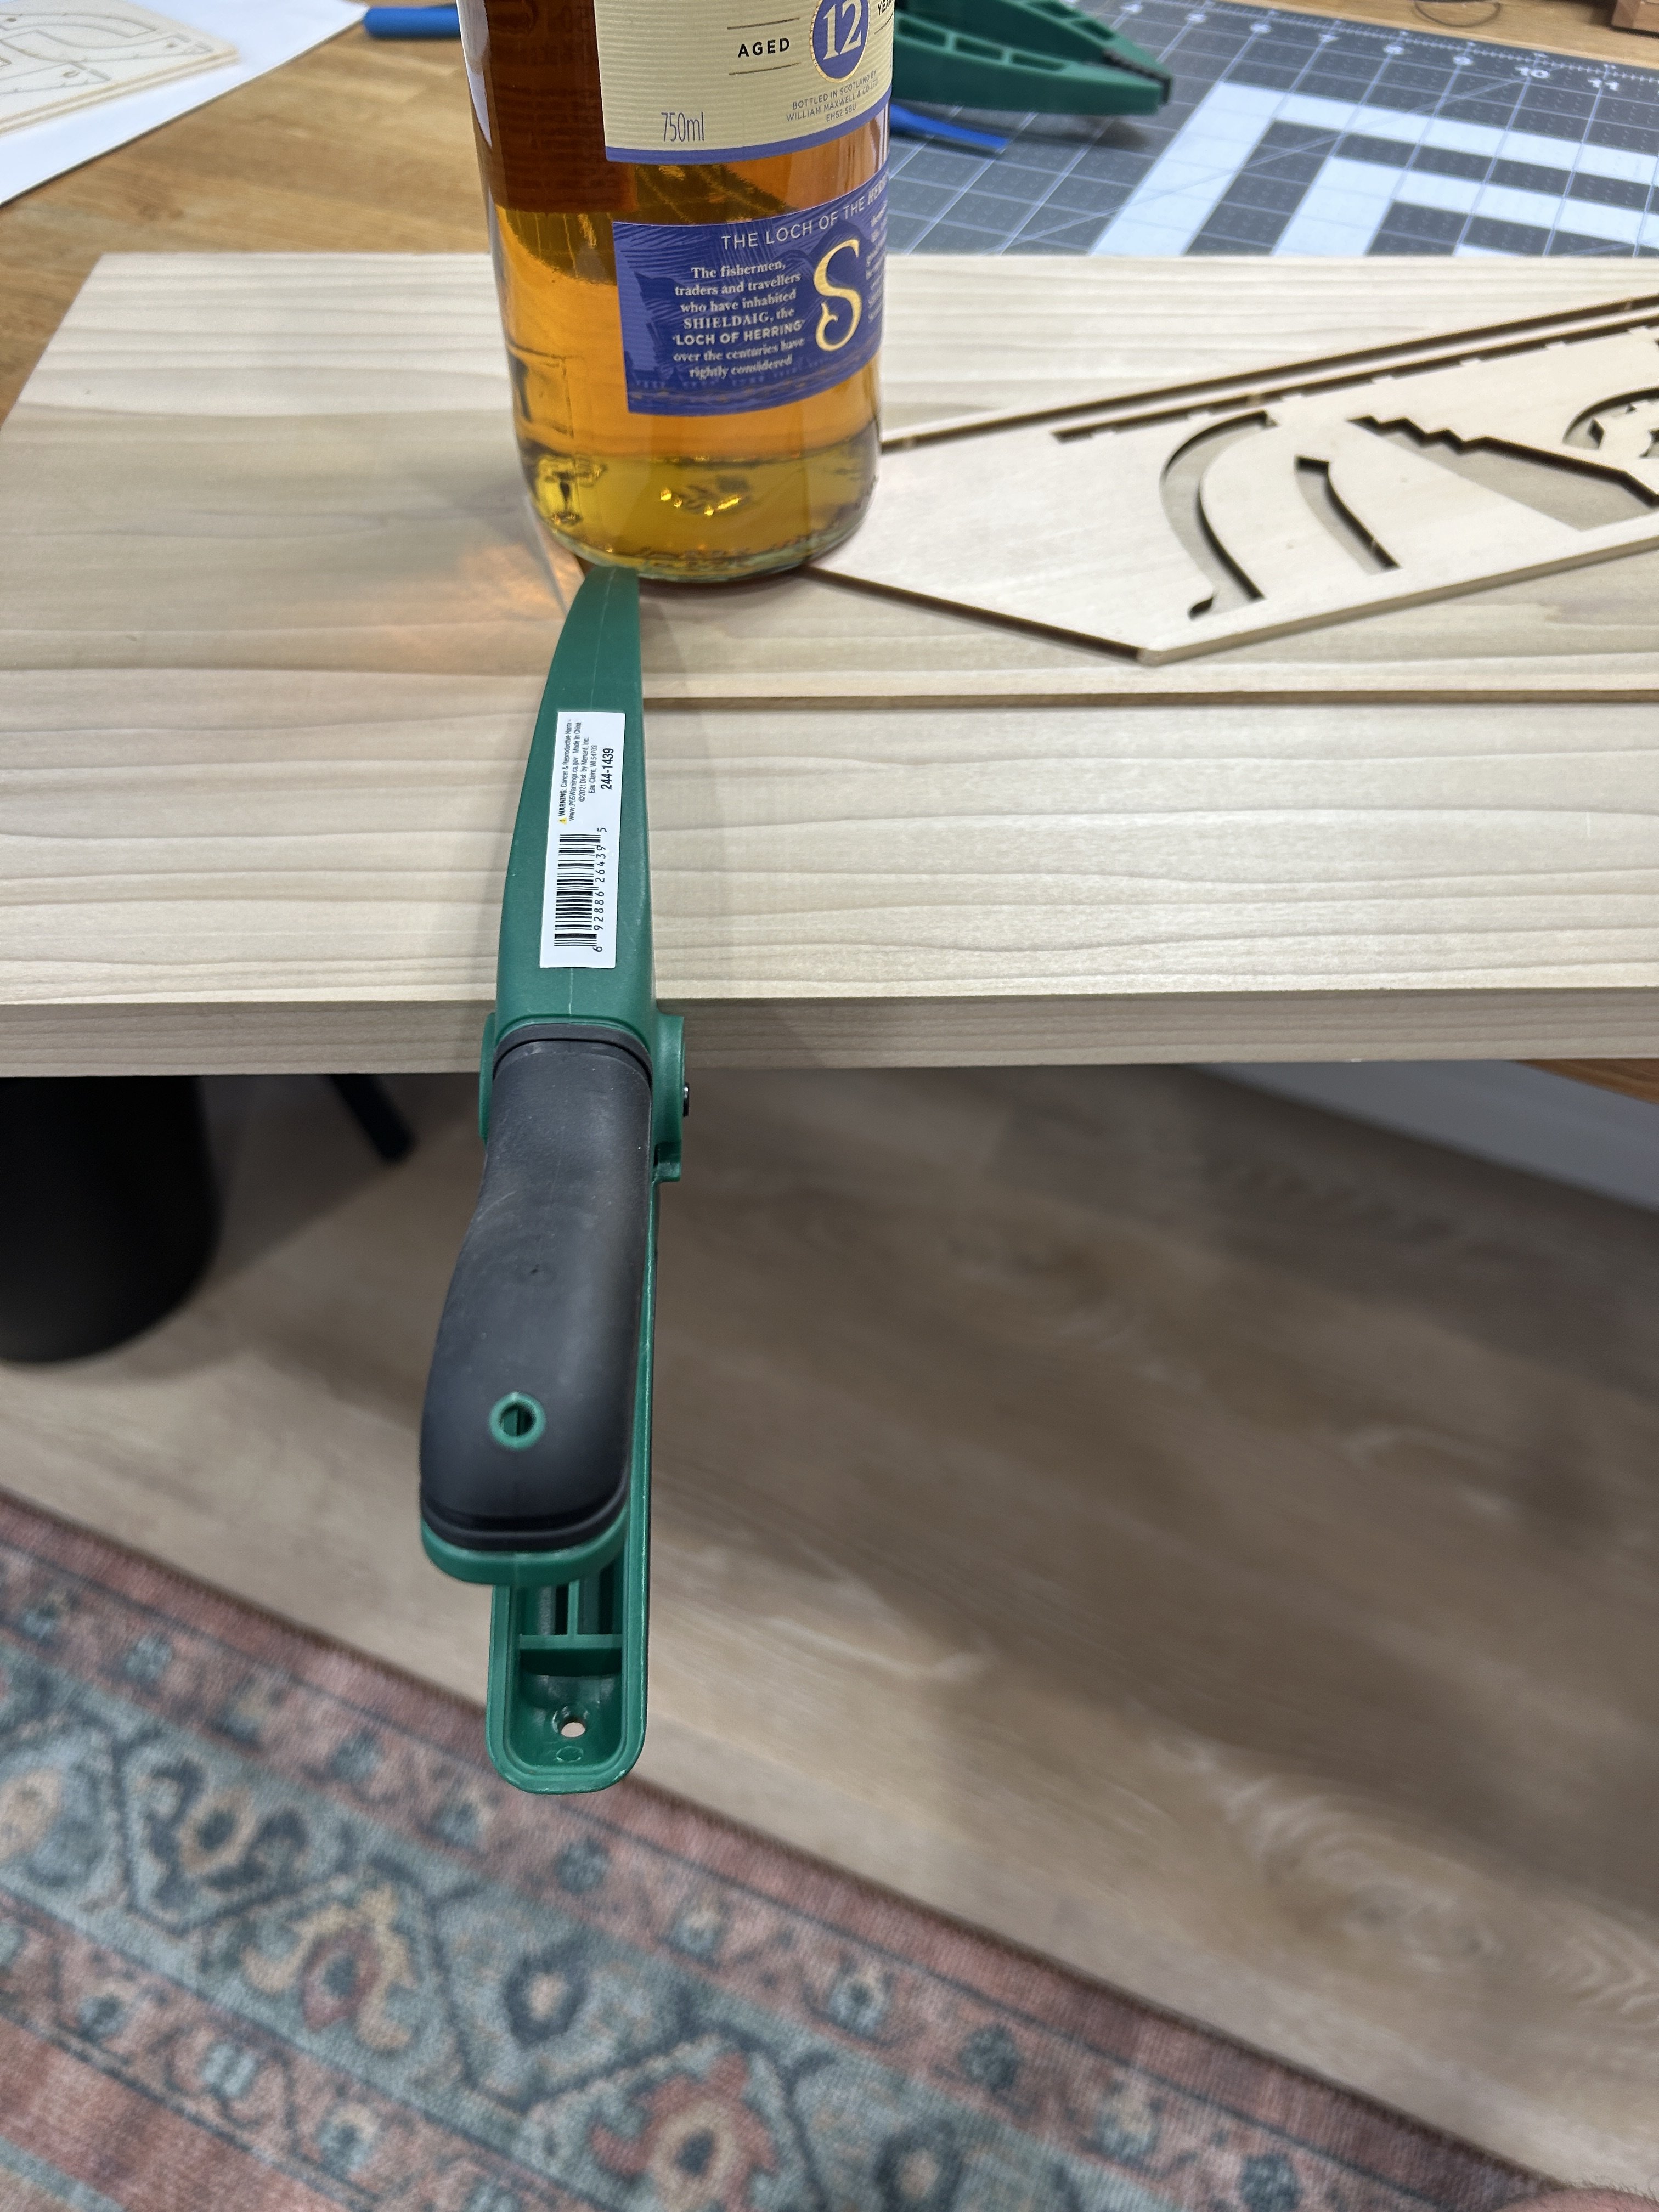
I then connected the dots to have some reference points for gluing the various parts to the building board. I then removed material from the keel, keelson, stem, deadwood and other related parts to create the rabbet. After creating the rabbet, I glued the parts to the building board using the small marks made with the awl to get everything placed properly. The board I used is big enough to accommodate a frame that I intended to add after the half hull was compete, so there was a significant distance to the edge and some parts of the model and clamping created some challenges. I was able to get creative with a bottle of scotch to get a strong bond to the building board. I used Titebond Wood Glue for almost everything on this model.

I will cover attaching the bulkheads next.
-
After two and a half years I have finally finished my Frigate Diana. It took me awhile to determine how I was going to mount the ship. This kit does not come with either a cradle for displaying the final model or for use during the build. I built a crude cradle to use during the build, but I wanted to mount the finished model on a couple of pedestals mounted to a piece of live edge walnut that I already owned. Unfortunately I didn't plan ahead. I should have drilled holes into the bulkhead former to accommodate long pins when I could flip it over. I didn't do that so I had to figure out a way to drill those holes from below with out flipping the model over.
The base is 1 inch thick, and the pedestals are about 1.5 inches high I installed a 4 inch long 1/8 inch diameter threaded rod from the bottom side of the base though the pedestals leaving about 1.5 inches that are inserted into the bulkhead former. The bulk head former is slightly less than 1/4 inch thick, leaving very little margin for error. I did have a problem with one of the holes, luckily it was on the side that is not displayed.

After being in this house for about 10 months so far, thanks to my wife we have found a way to display my models. At the bottom of the stairs to our basement we have a niche in the wall my wife wasn't sure what we wanted to do with. As an early Father's Day present she found a chest of drawers that had been refinished and we decided to use that chest as a way to display my models in the niche. The Frigate Diana's base is mounted directly to a couple of shelf brackets.
I want to thank everyone that viewed, liked and commented on this build log. I really appreciated all of you interest.
I have already started my NRG half hull, and will get a build log started and catch anyone who is interested in that project soon.
After that I though I would build the US Brig Syren that is in my inventory, but I think I will go with the USF Essex instead. Hopefully I get that started in the next 30 - 60 days.

-
Titebond will let go with some alcohol. I brush a little alcohol on the joint and it lets go in about 10 minutes. I have used Weldwood with good results. If you can use the thin CA without making a mess congratulations. I really struggled with the thin CA and threw mine away.
I find my self using Titebond more and more instead of CA, but it is good to have a few options in your tool box.
- Canute and Dan Poirier
-
2
-
We are lucky to have people like you and Chris Watton to push the envelop and use new technology to advance our hobby. I recently purchased some of your printed blocks, the level of detail on the 3/32 and 2mm blocks is just incredible. I will be practicing stropping the 3/32 inch blocks for use in my next build, either the USF Essex or US Brig Syren. The belay pins look great. I will be interested in how the 3/16 pins work out.
- Tossedman, Canute, thibaultron and 3 others
-
6
-
53 minutes ago, James H said:
It absolutely stunk
Are you referring to the smell or performance. It definitely has a strong odor and good ventilation is advisable.
curious if your planking has held up over the years?

.jpg.d280cee3b865550025a1ad7a0b01def1.jpg)


.JPG.dfd3c62a232406d9373a2d8be10e1bcf.JPG)


.jpg.43692a5a2976f69ccaf3ce4b700597f3.jpg)
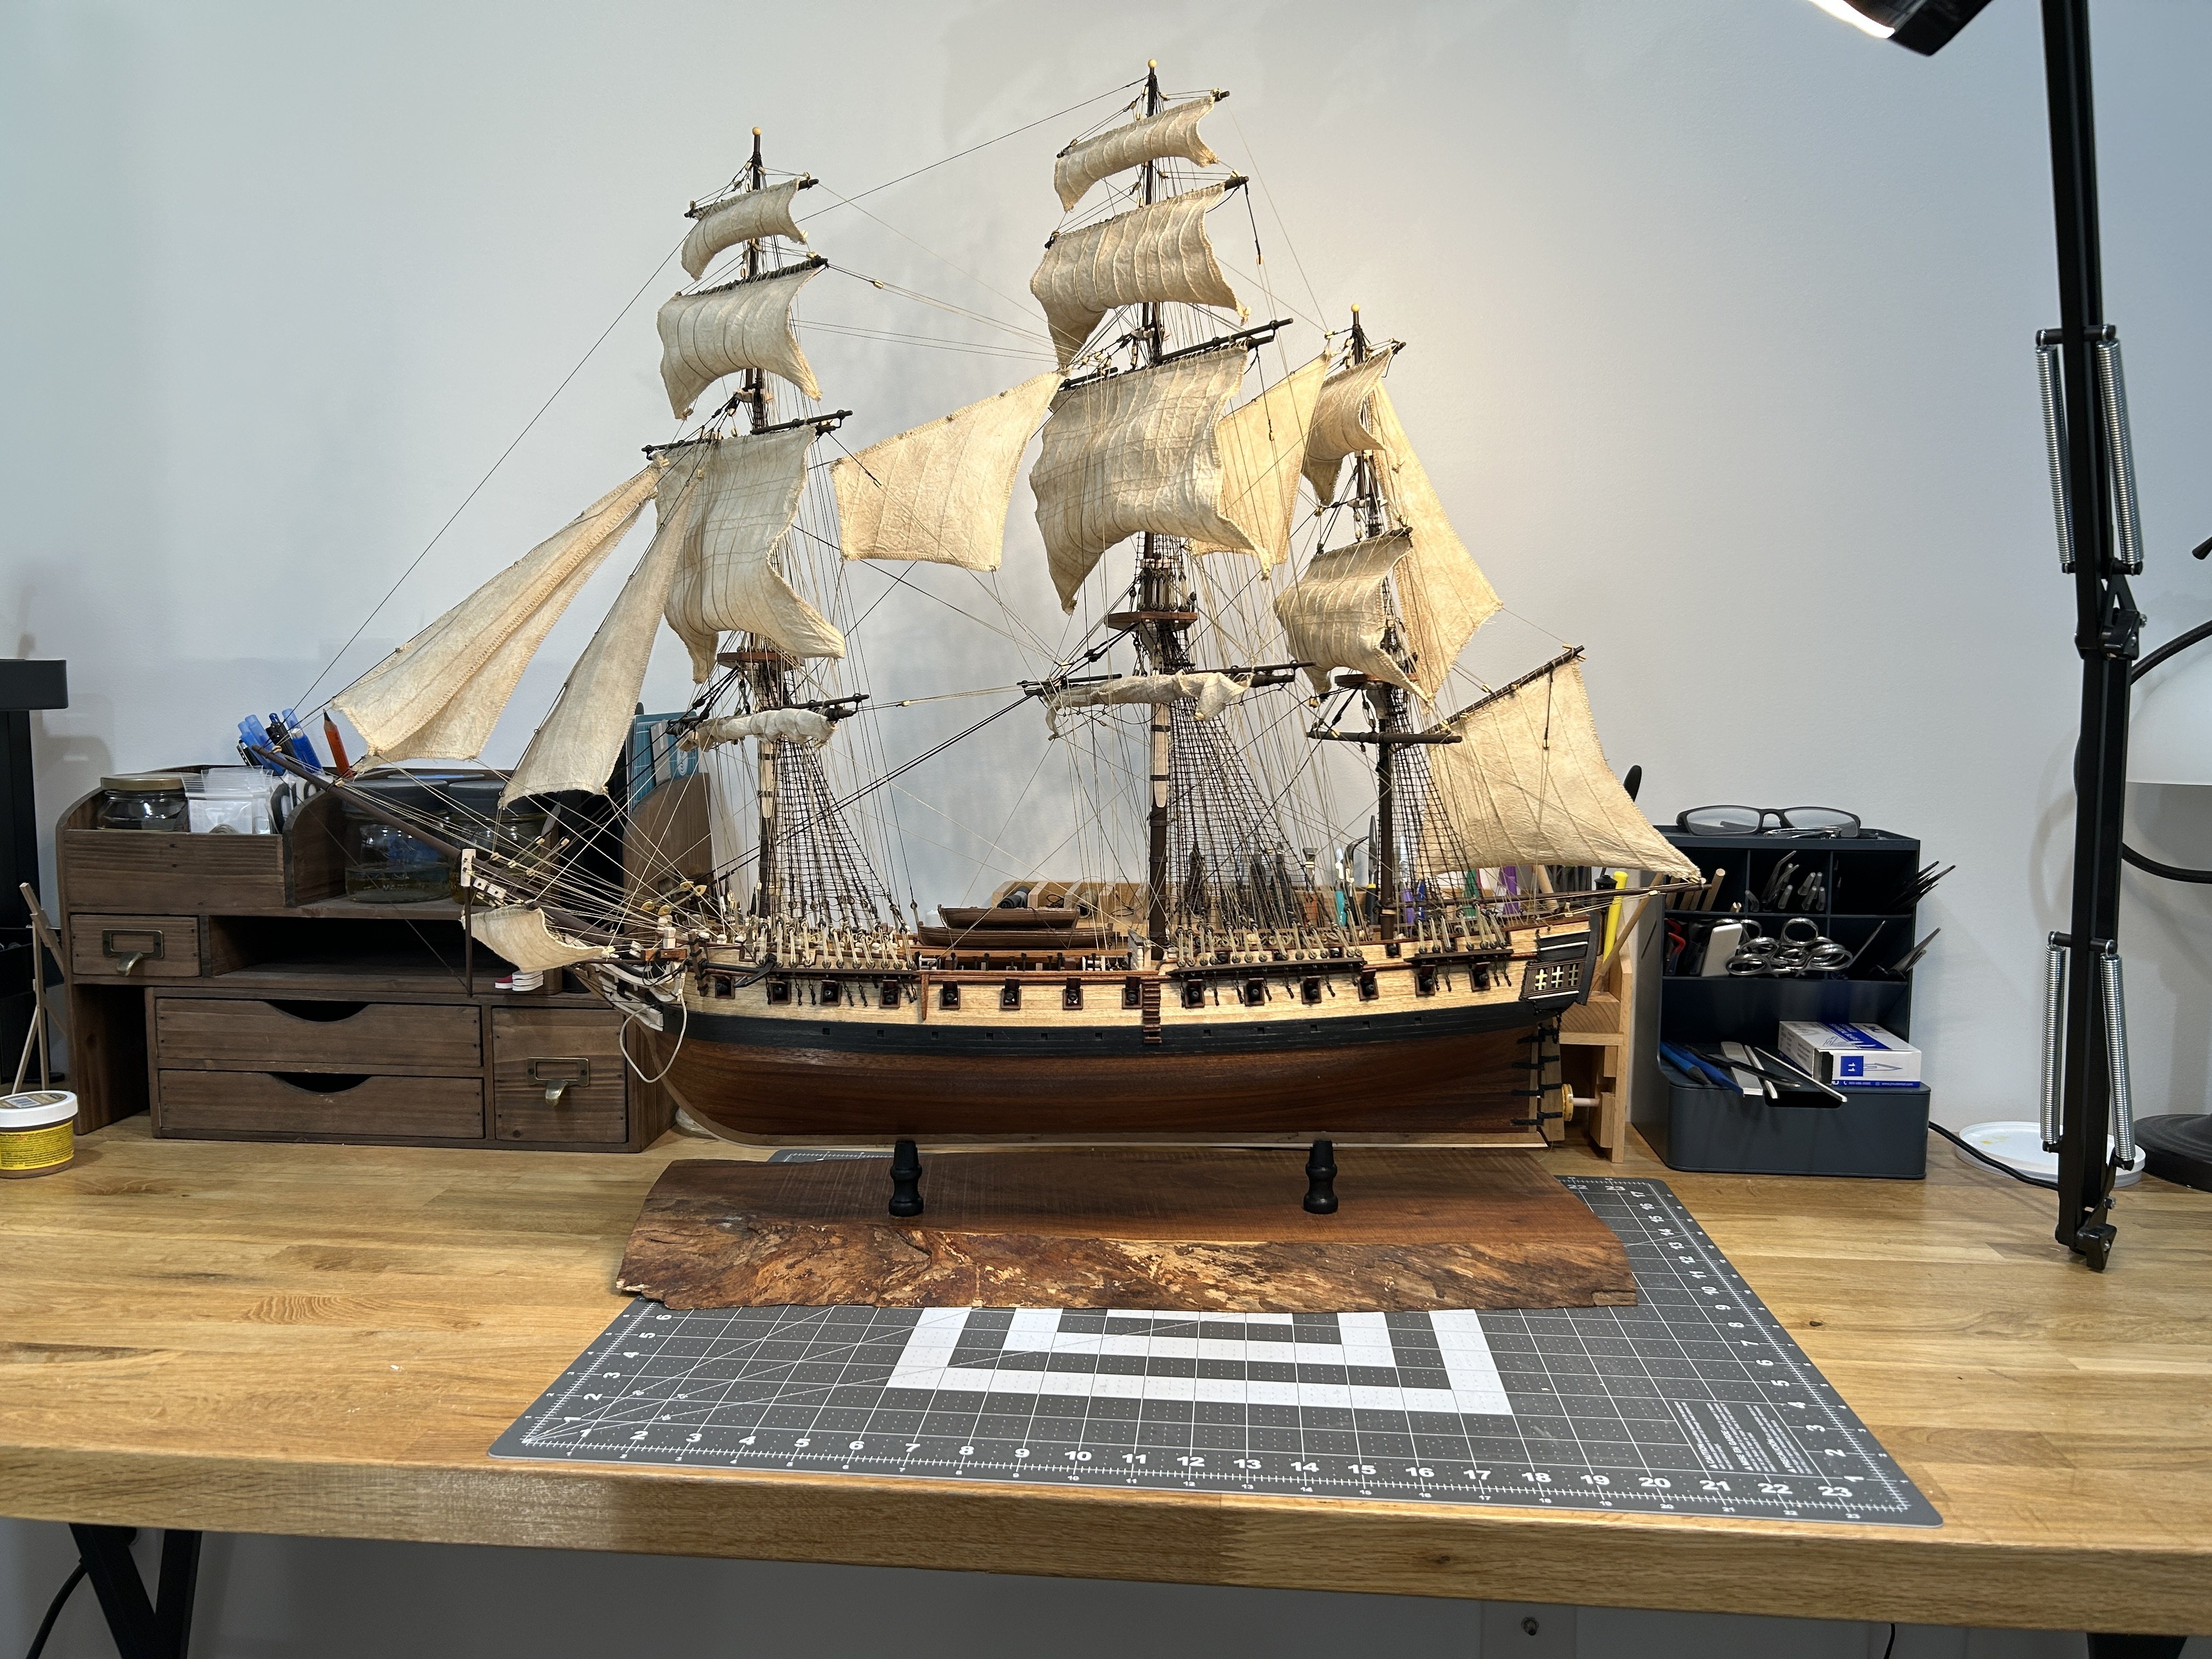


USF Essex 1799 by RossR - Model Shipways - 1:76
in - Kit build logs for subjects built from 1751 - 1800
Posted
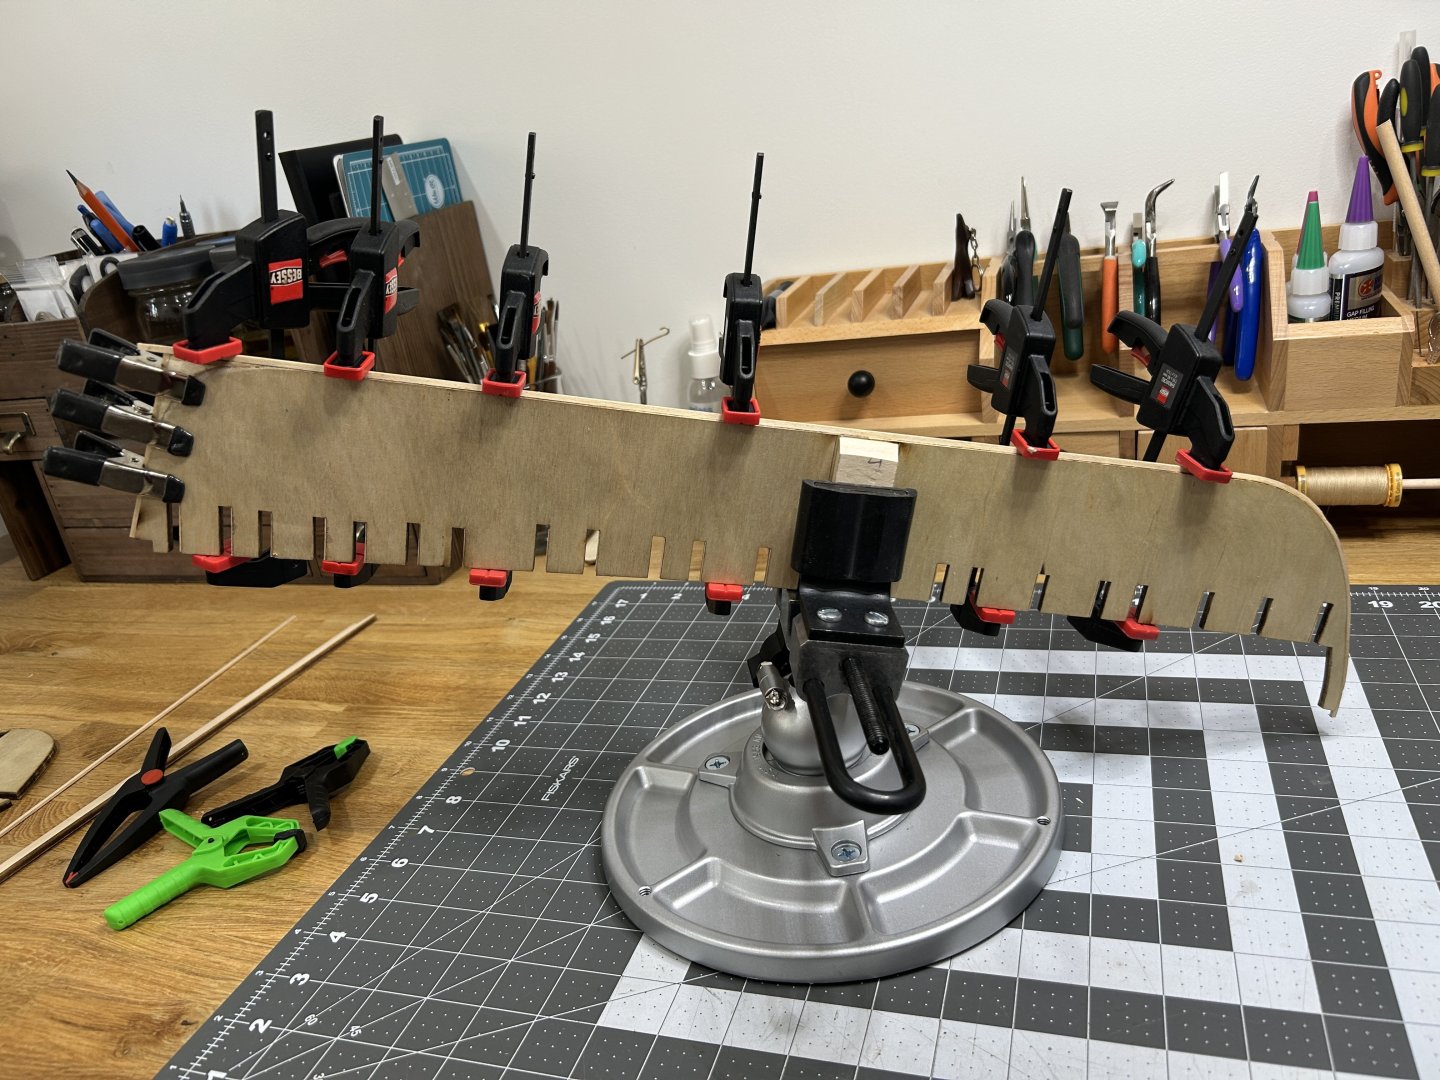
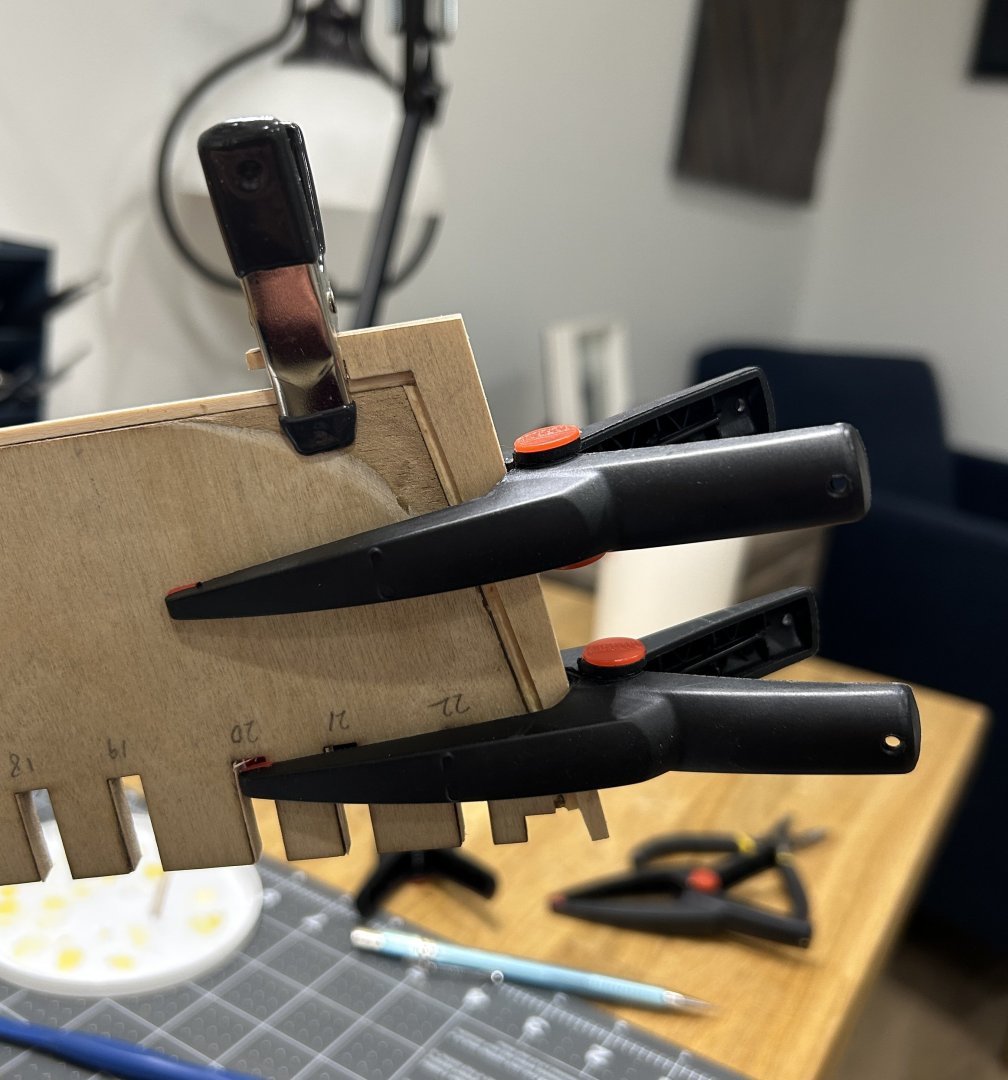
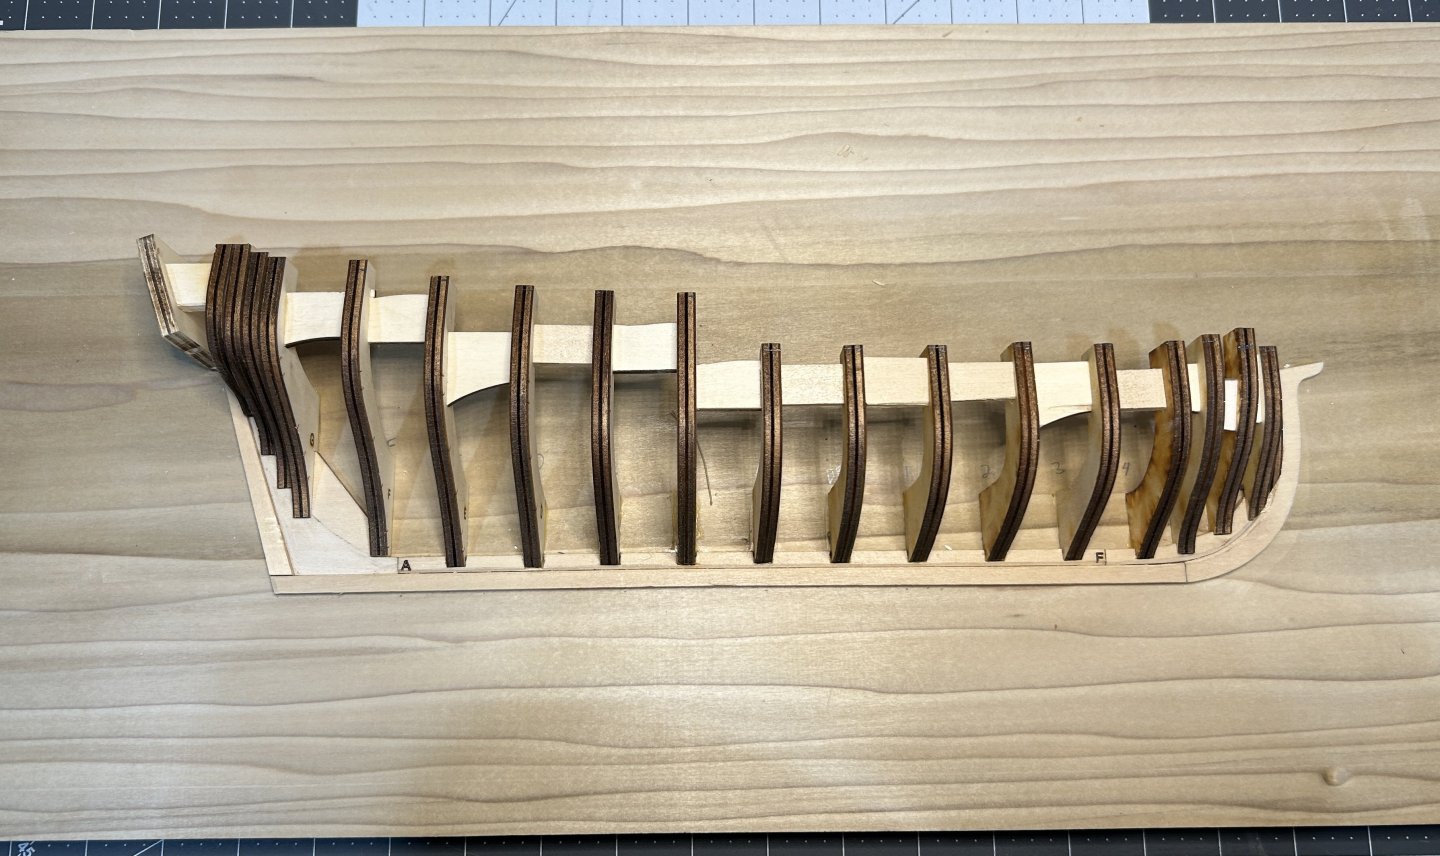
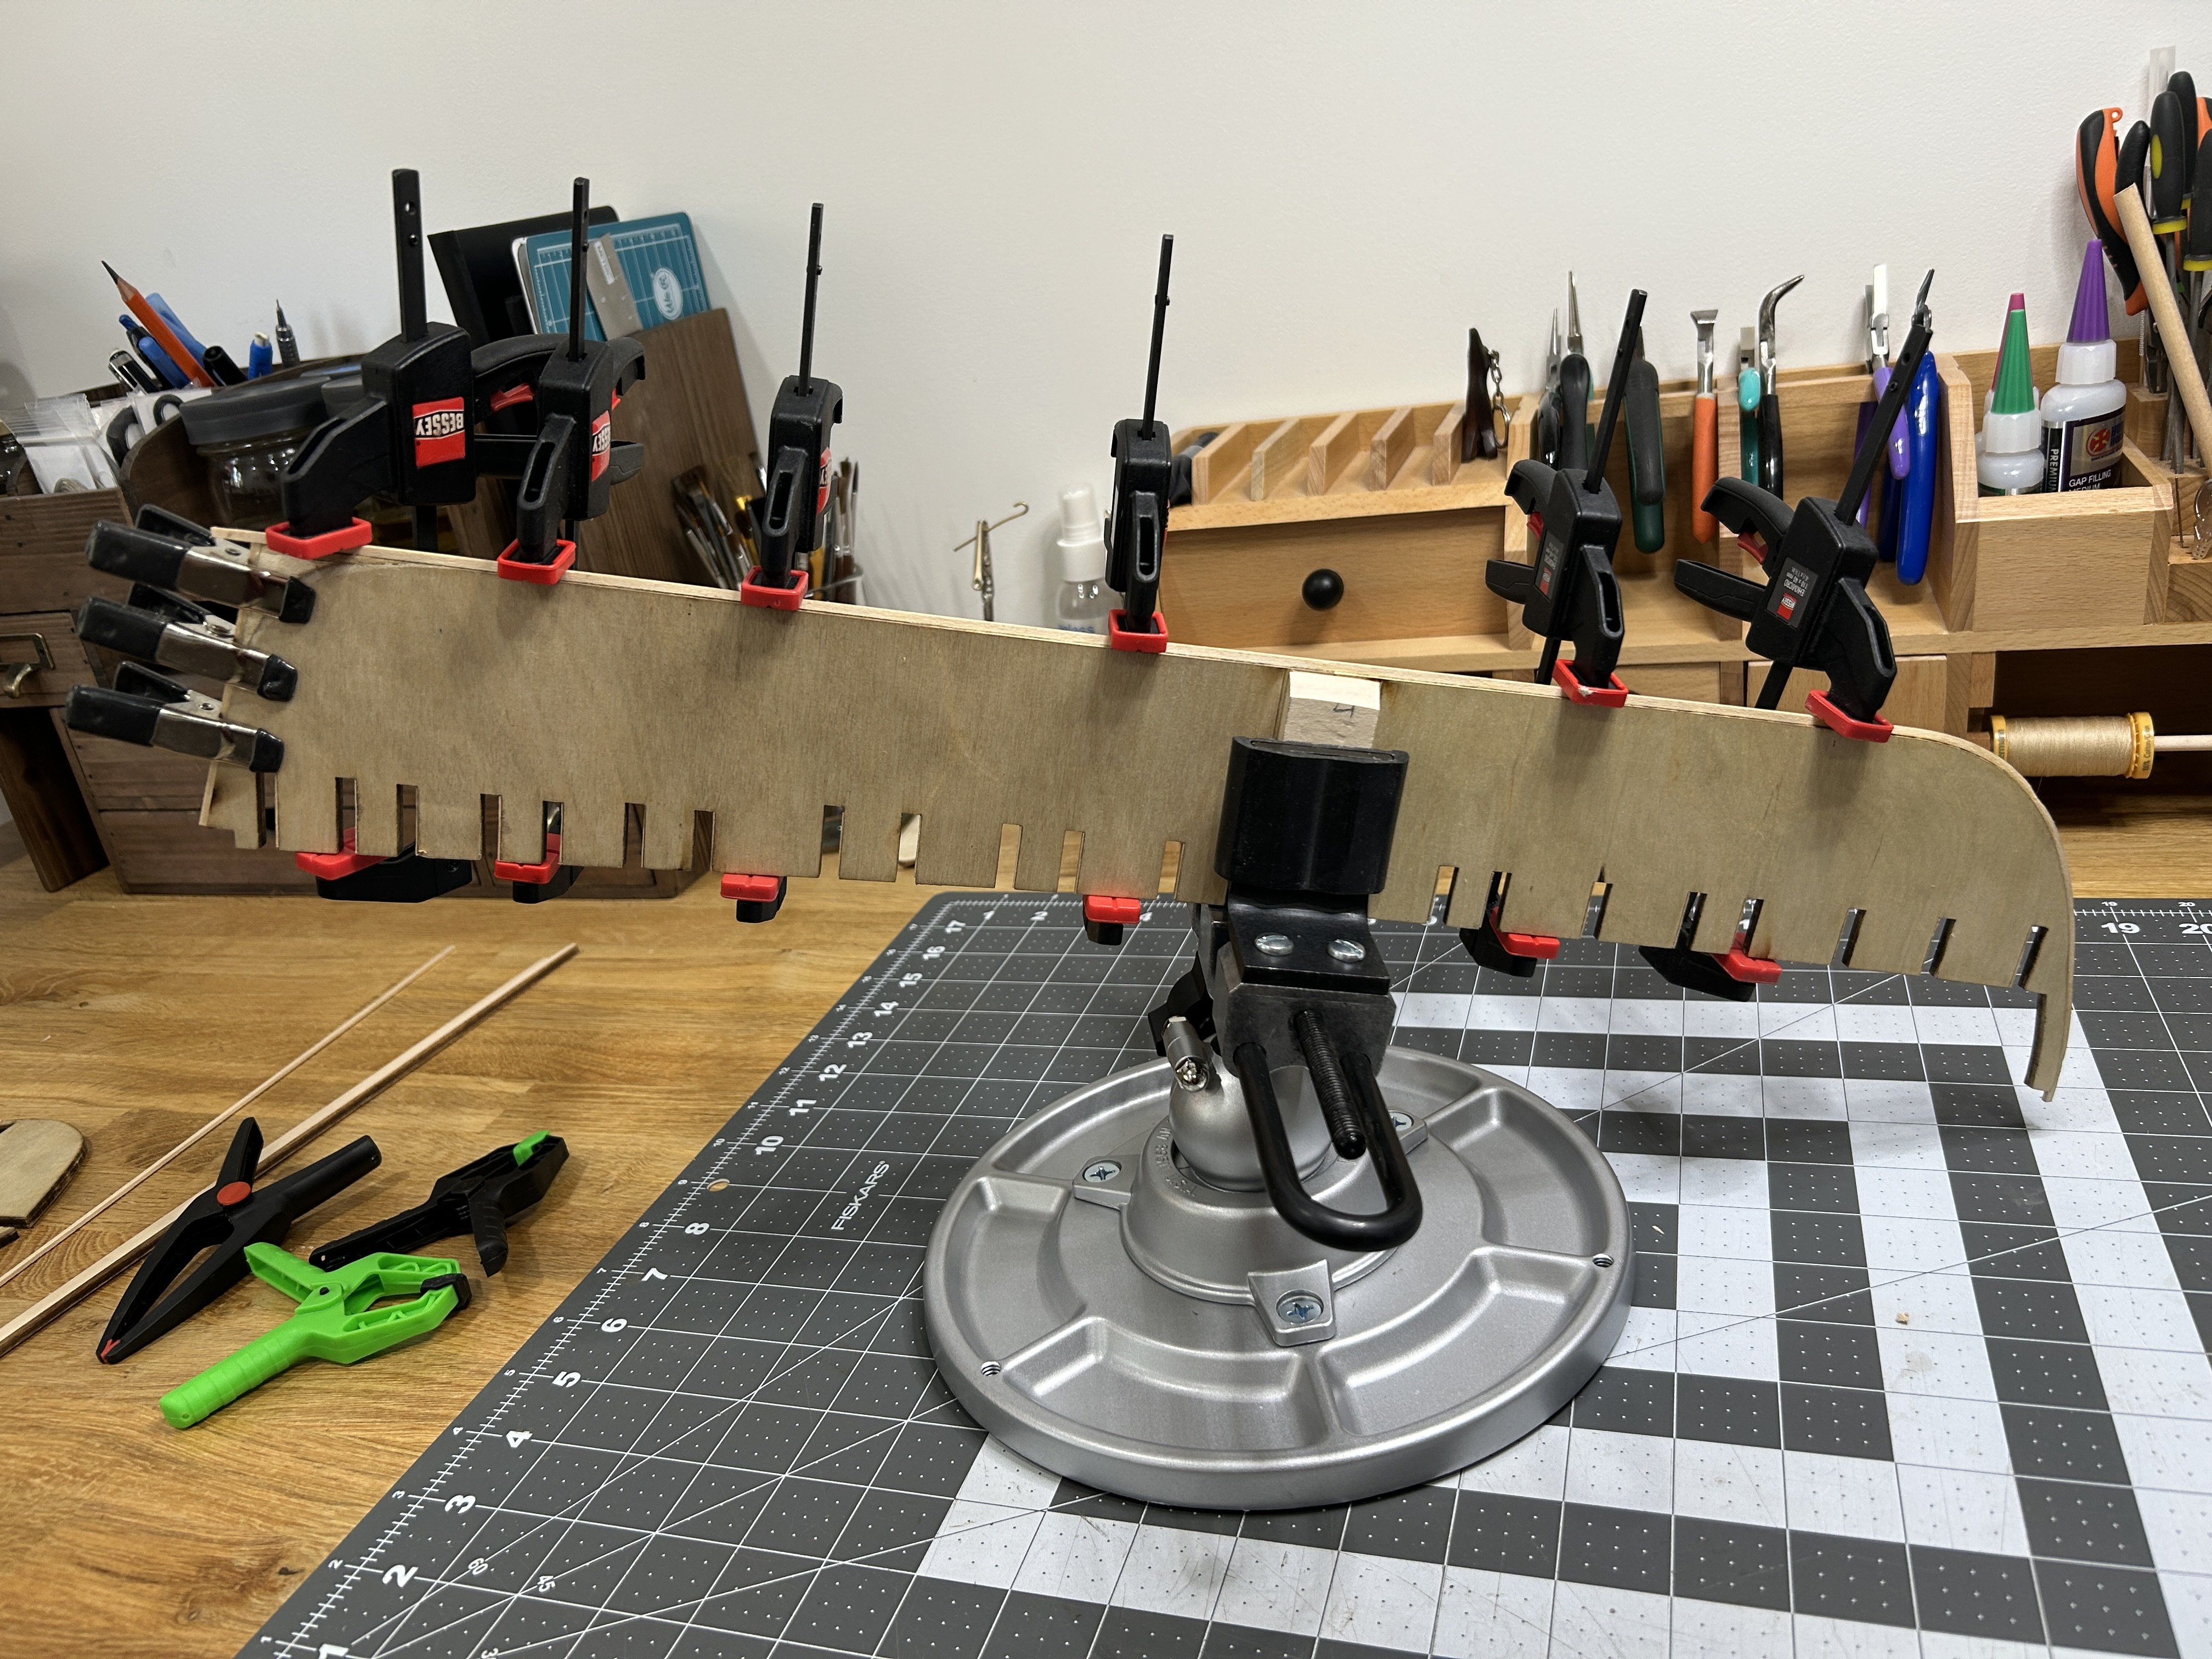
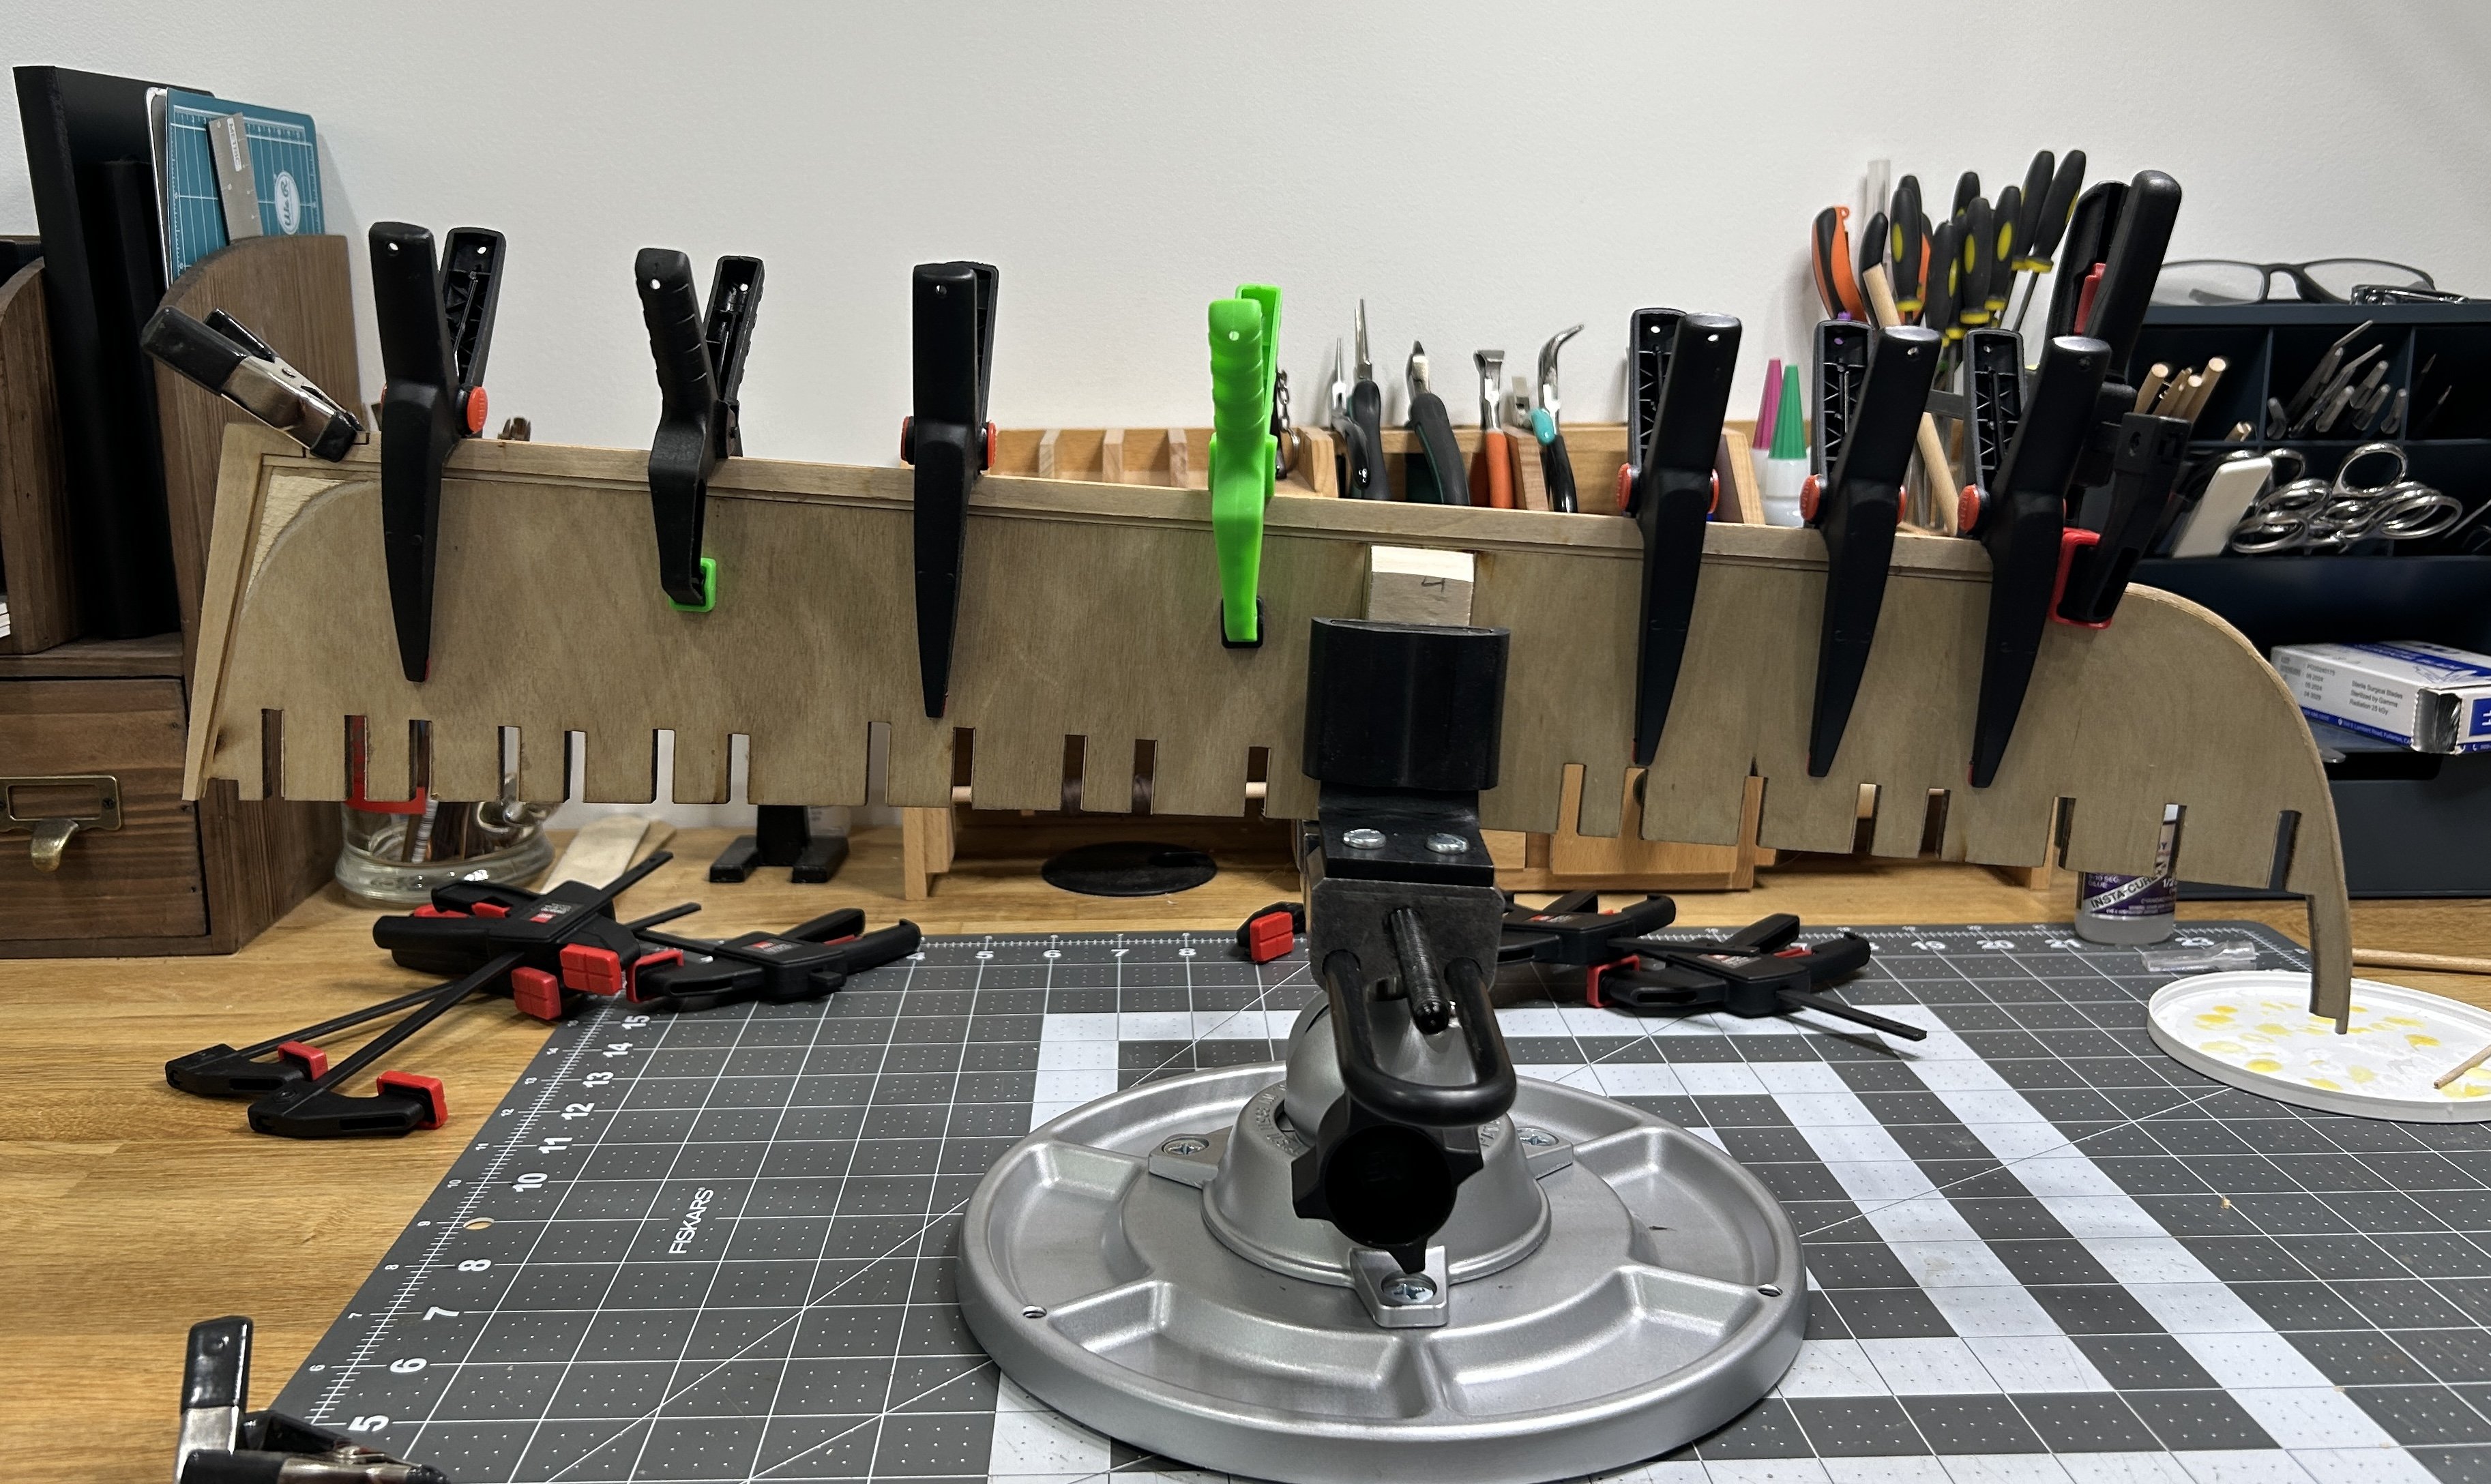
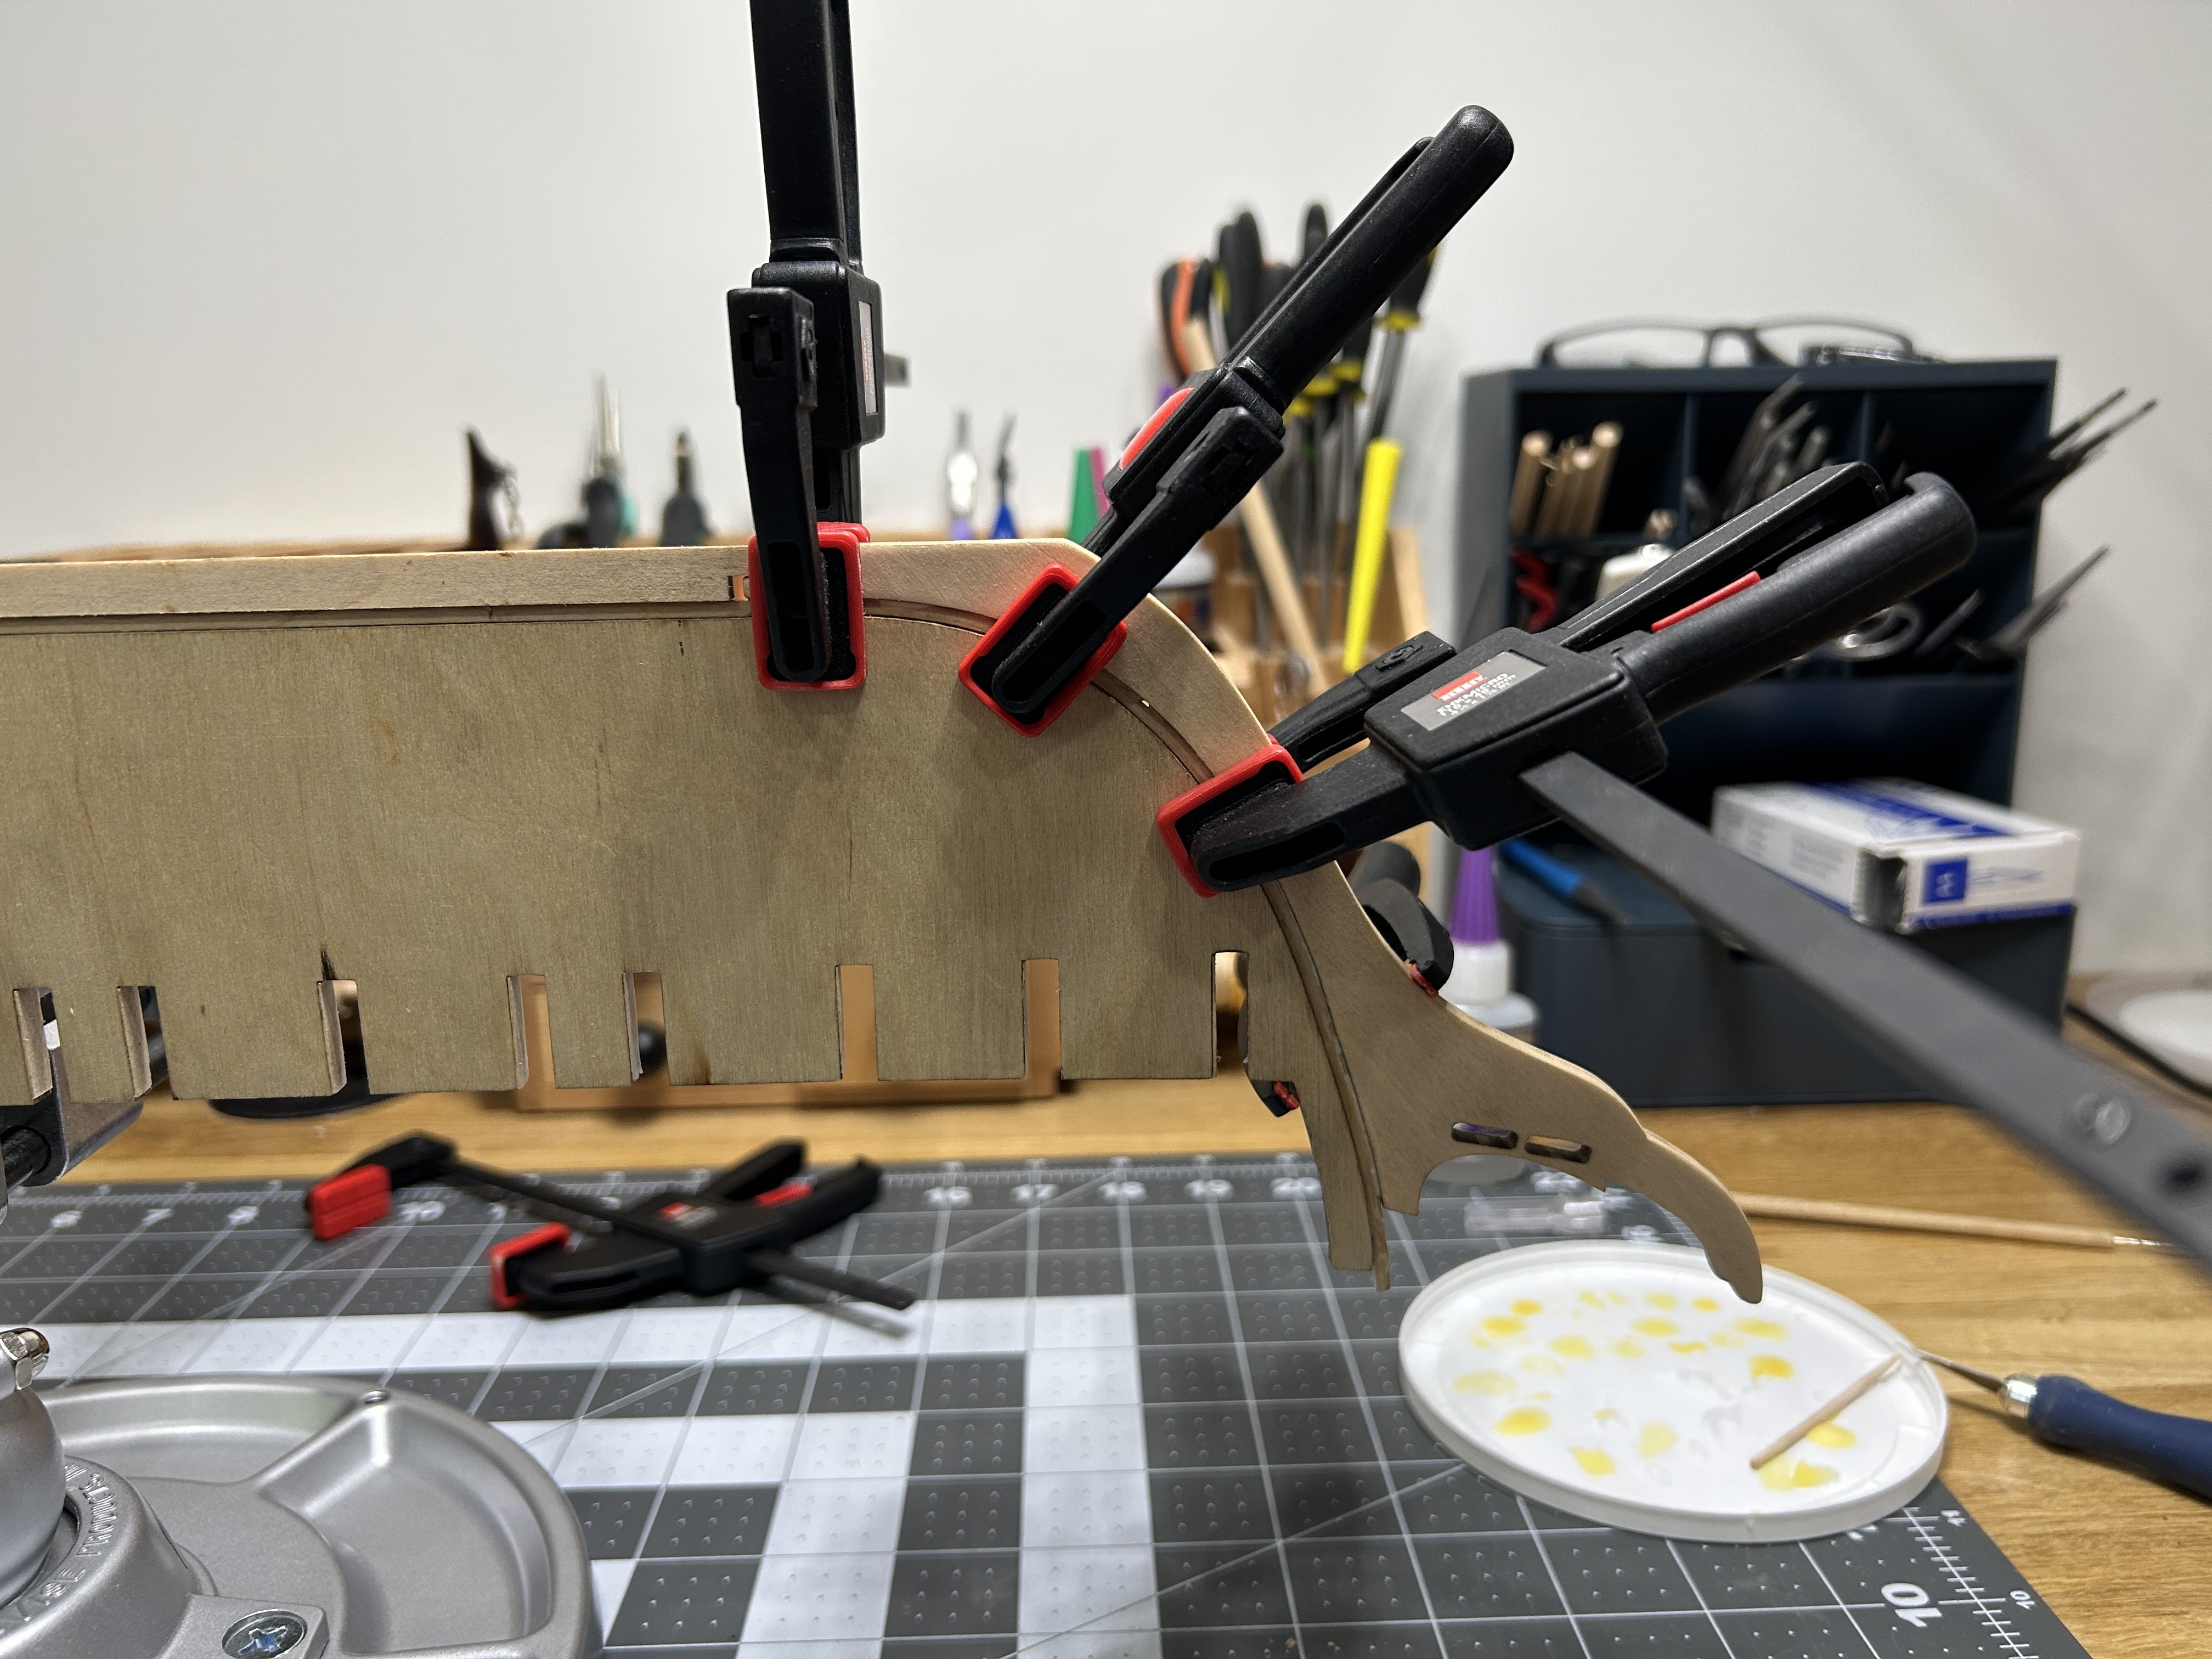
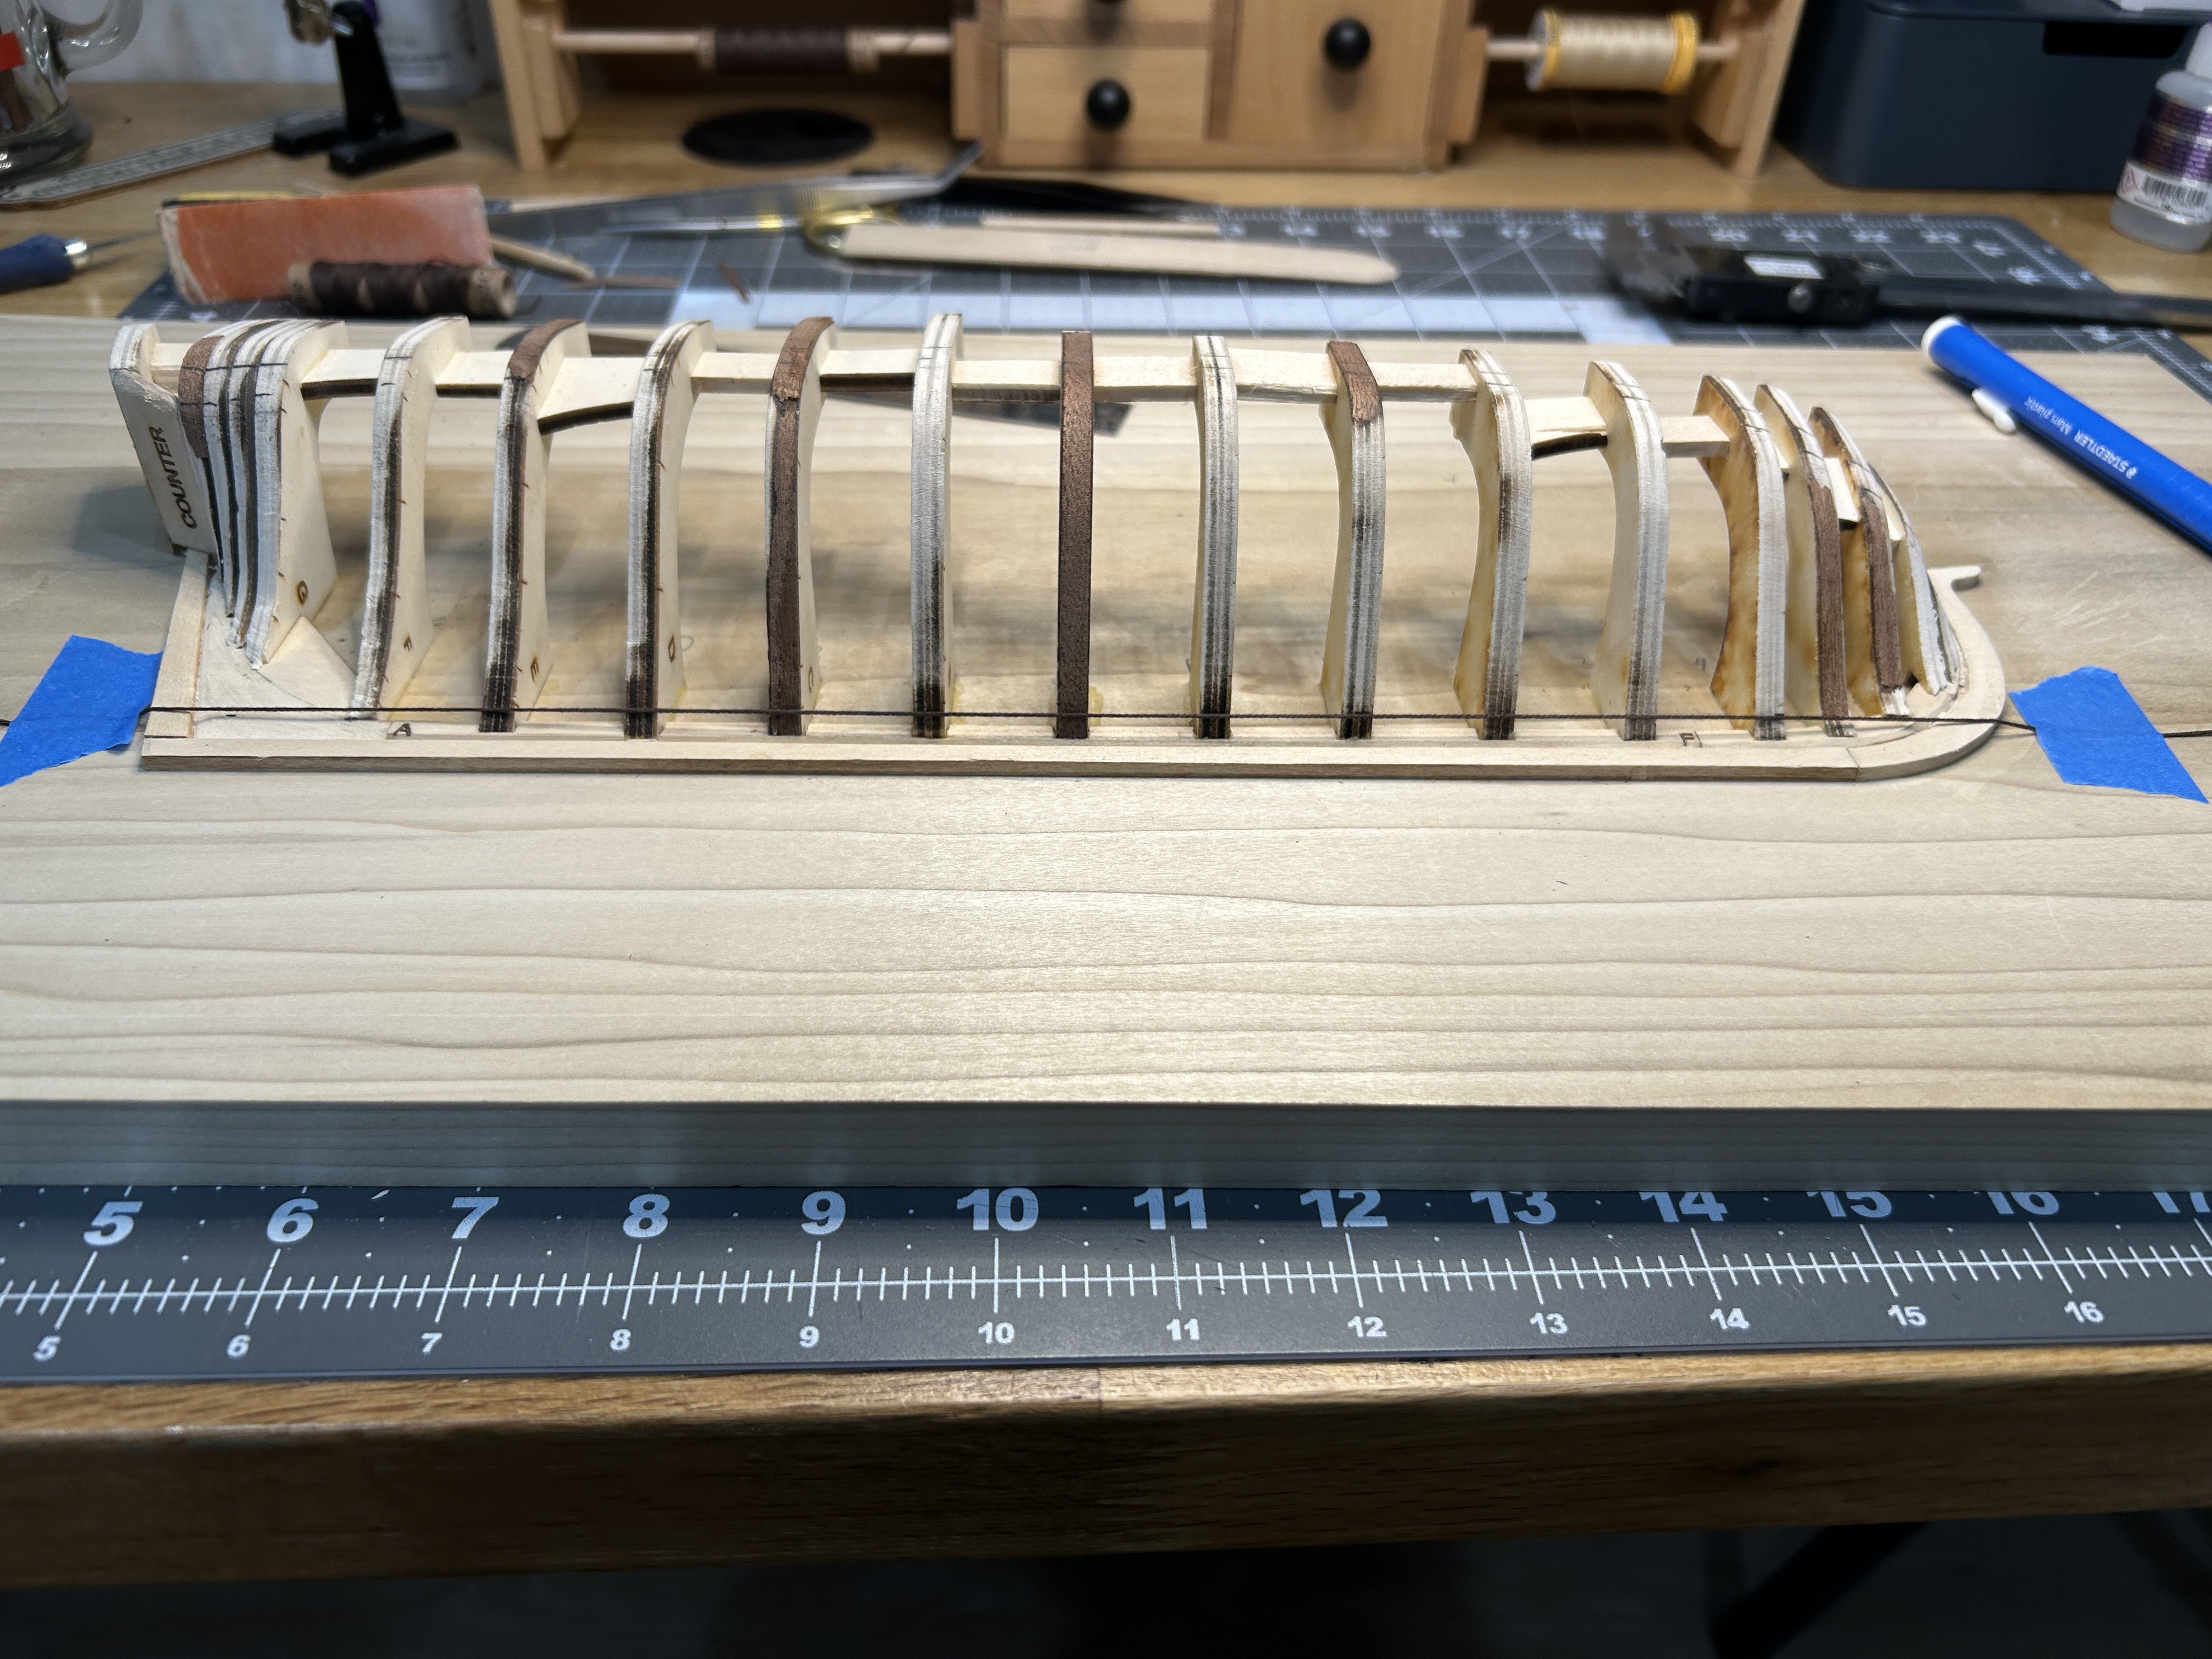
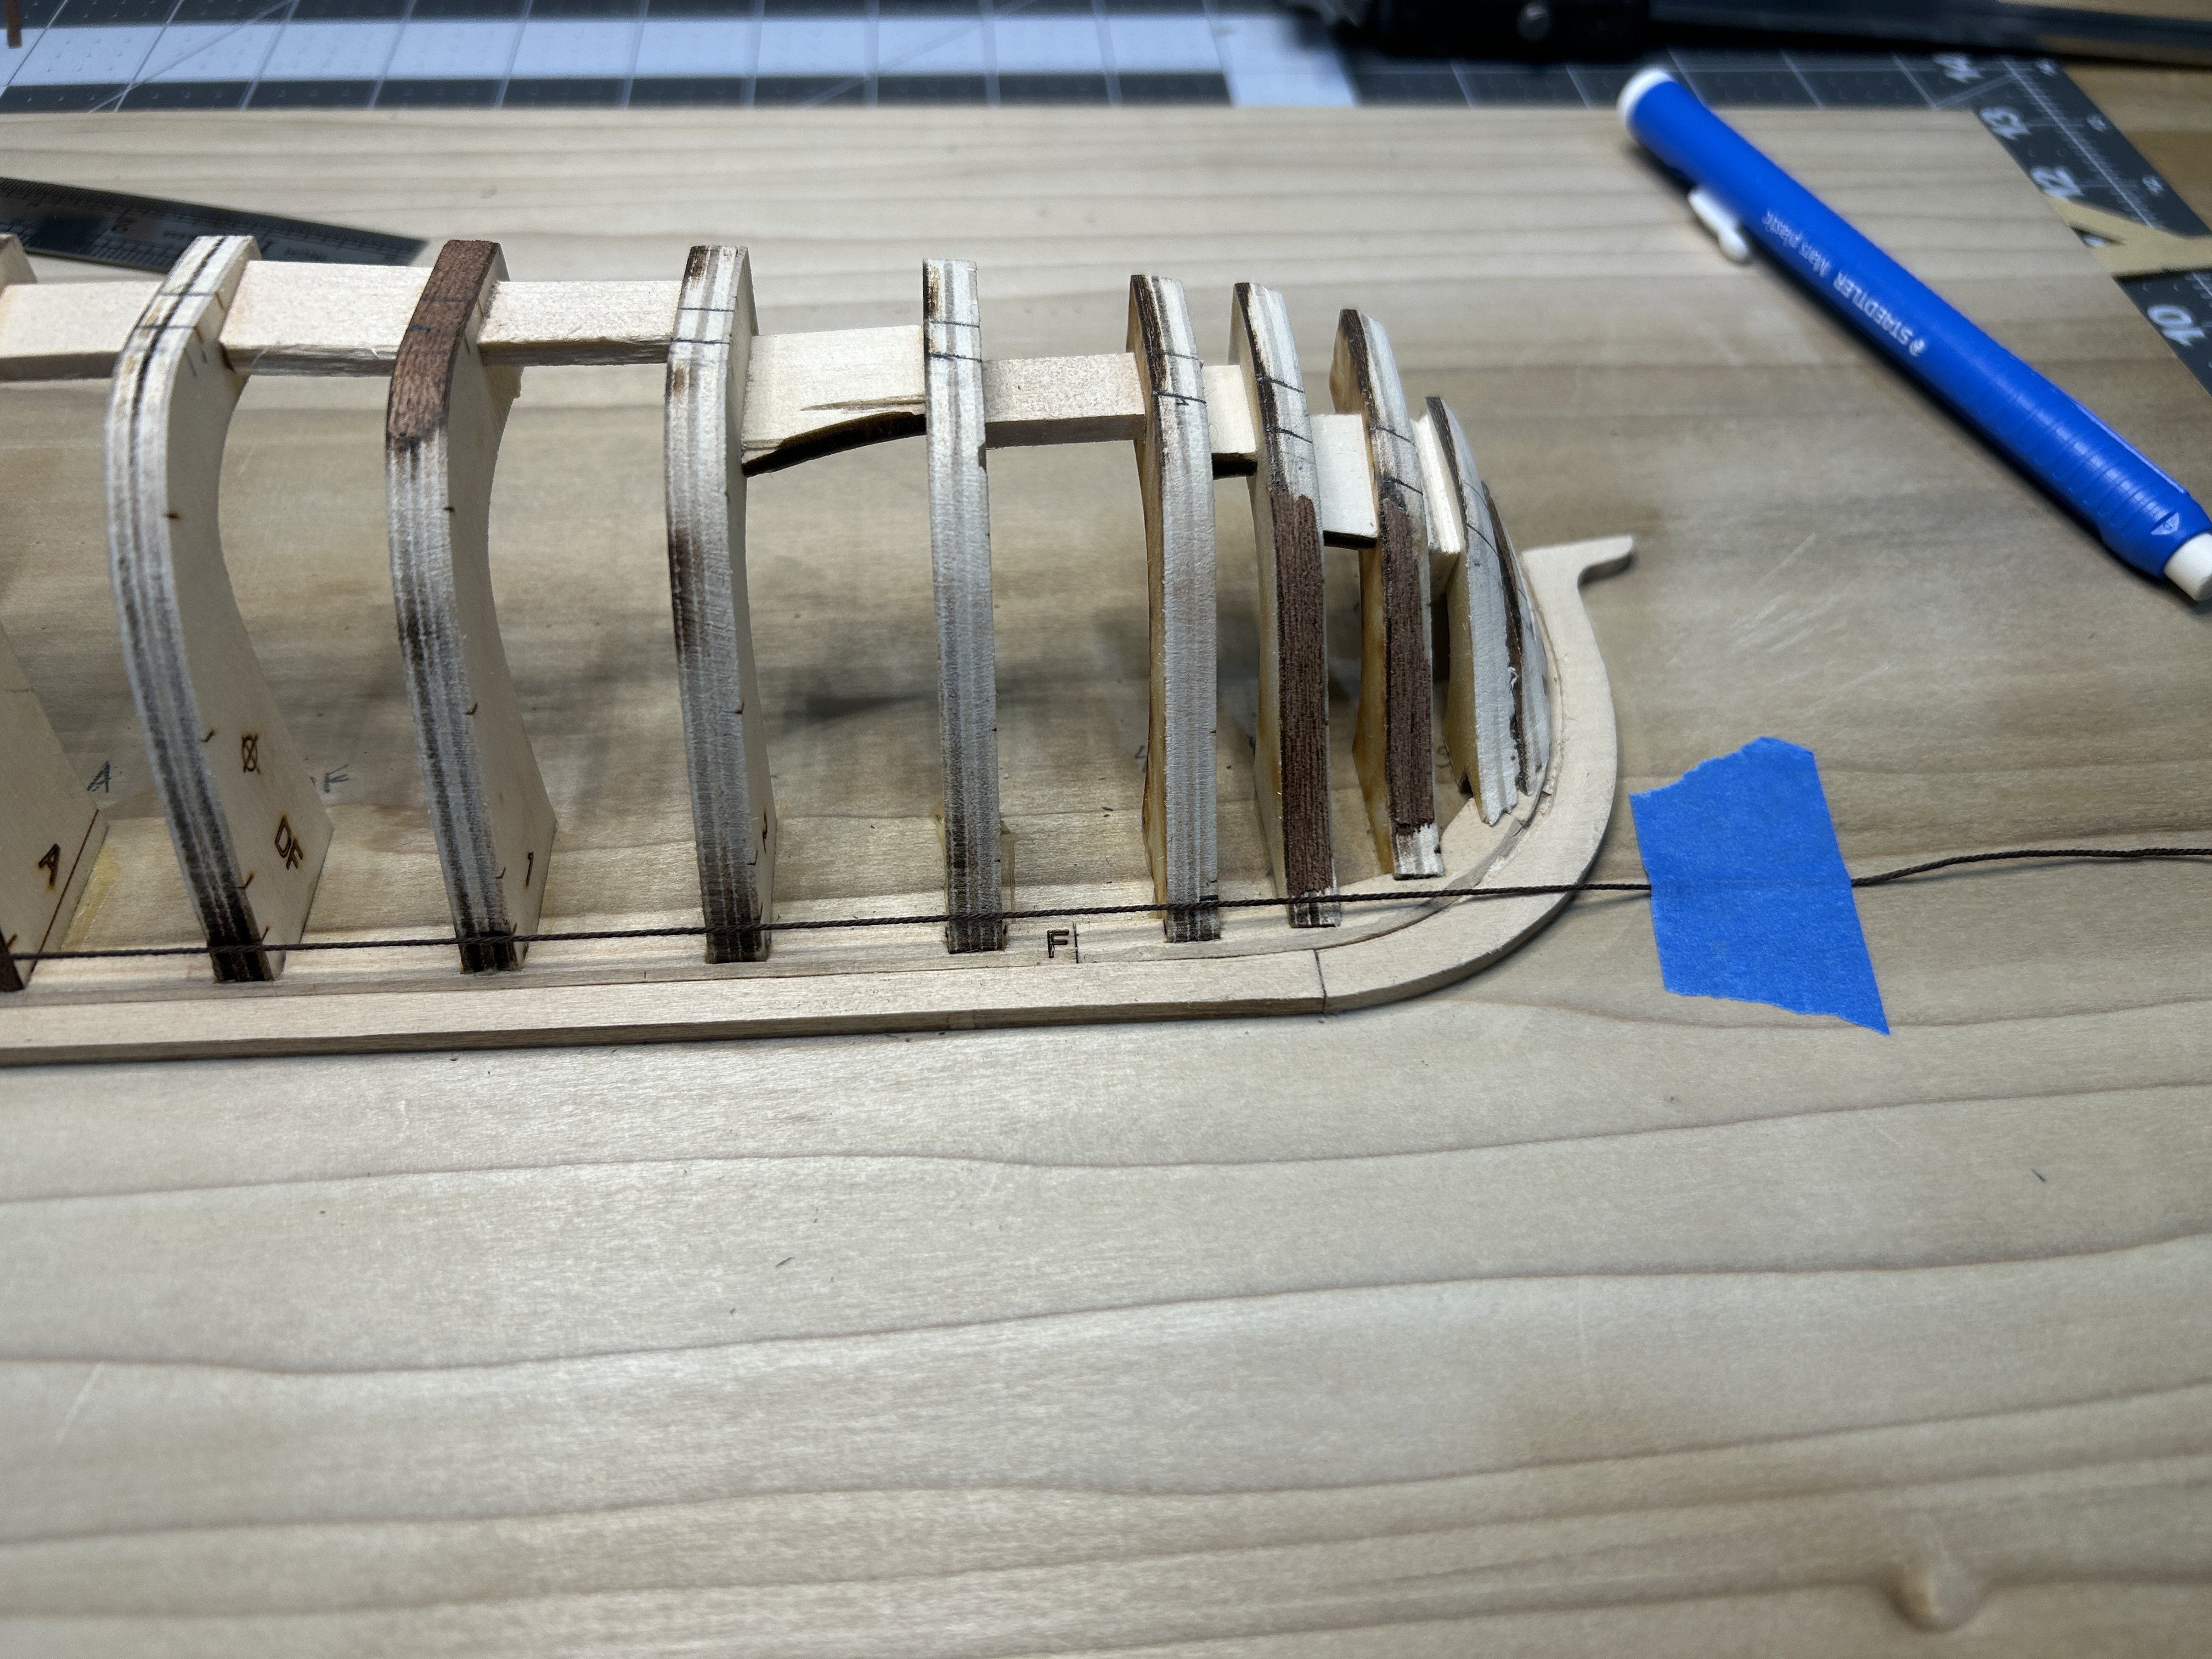
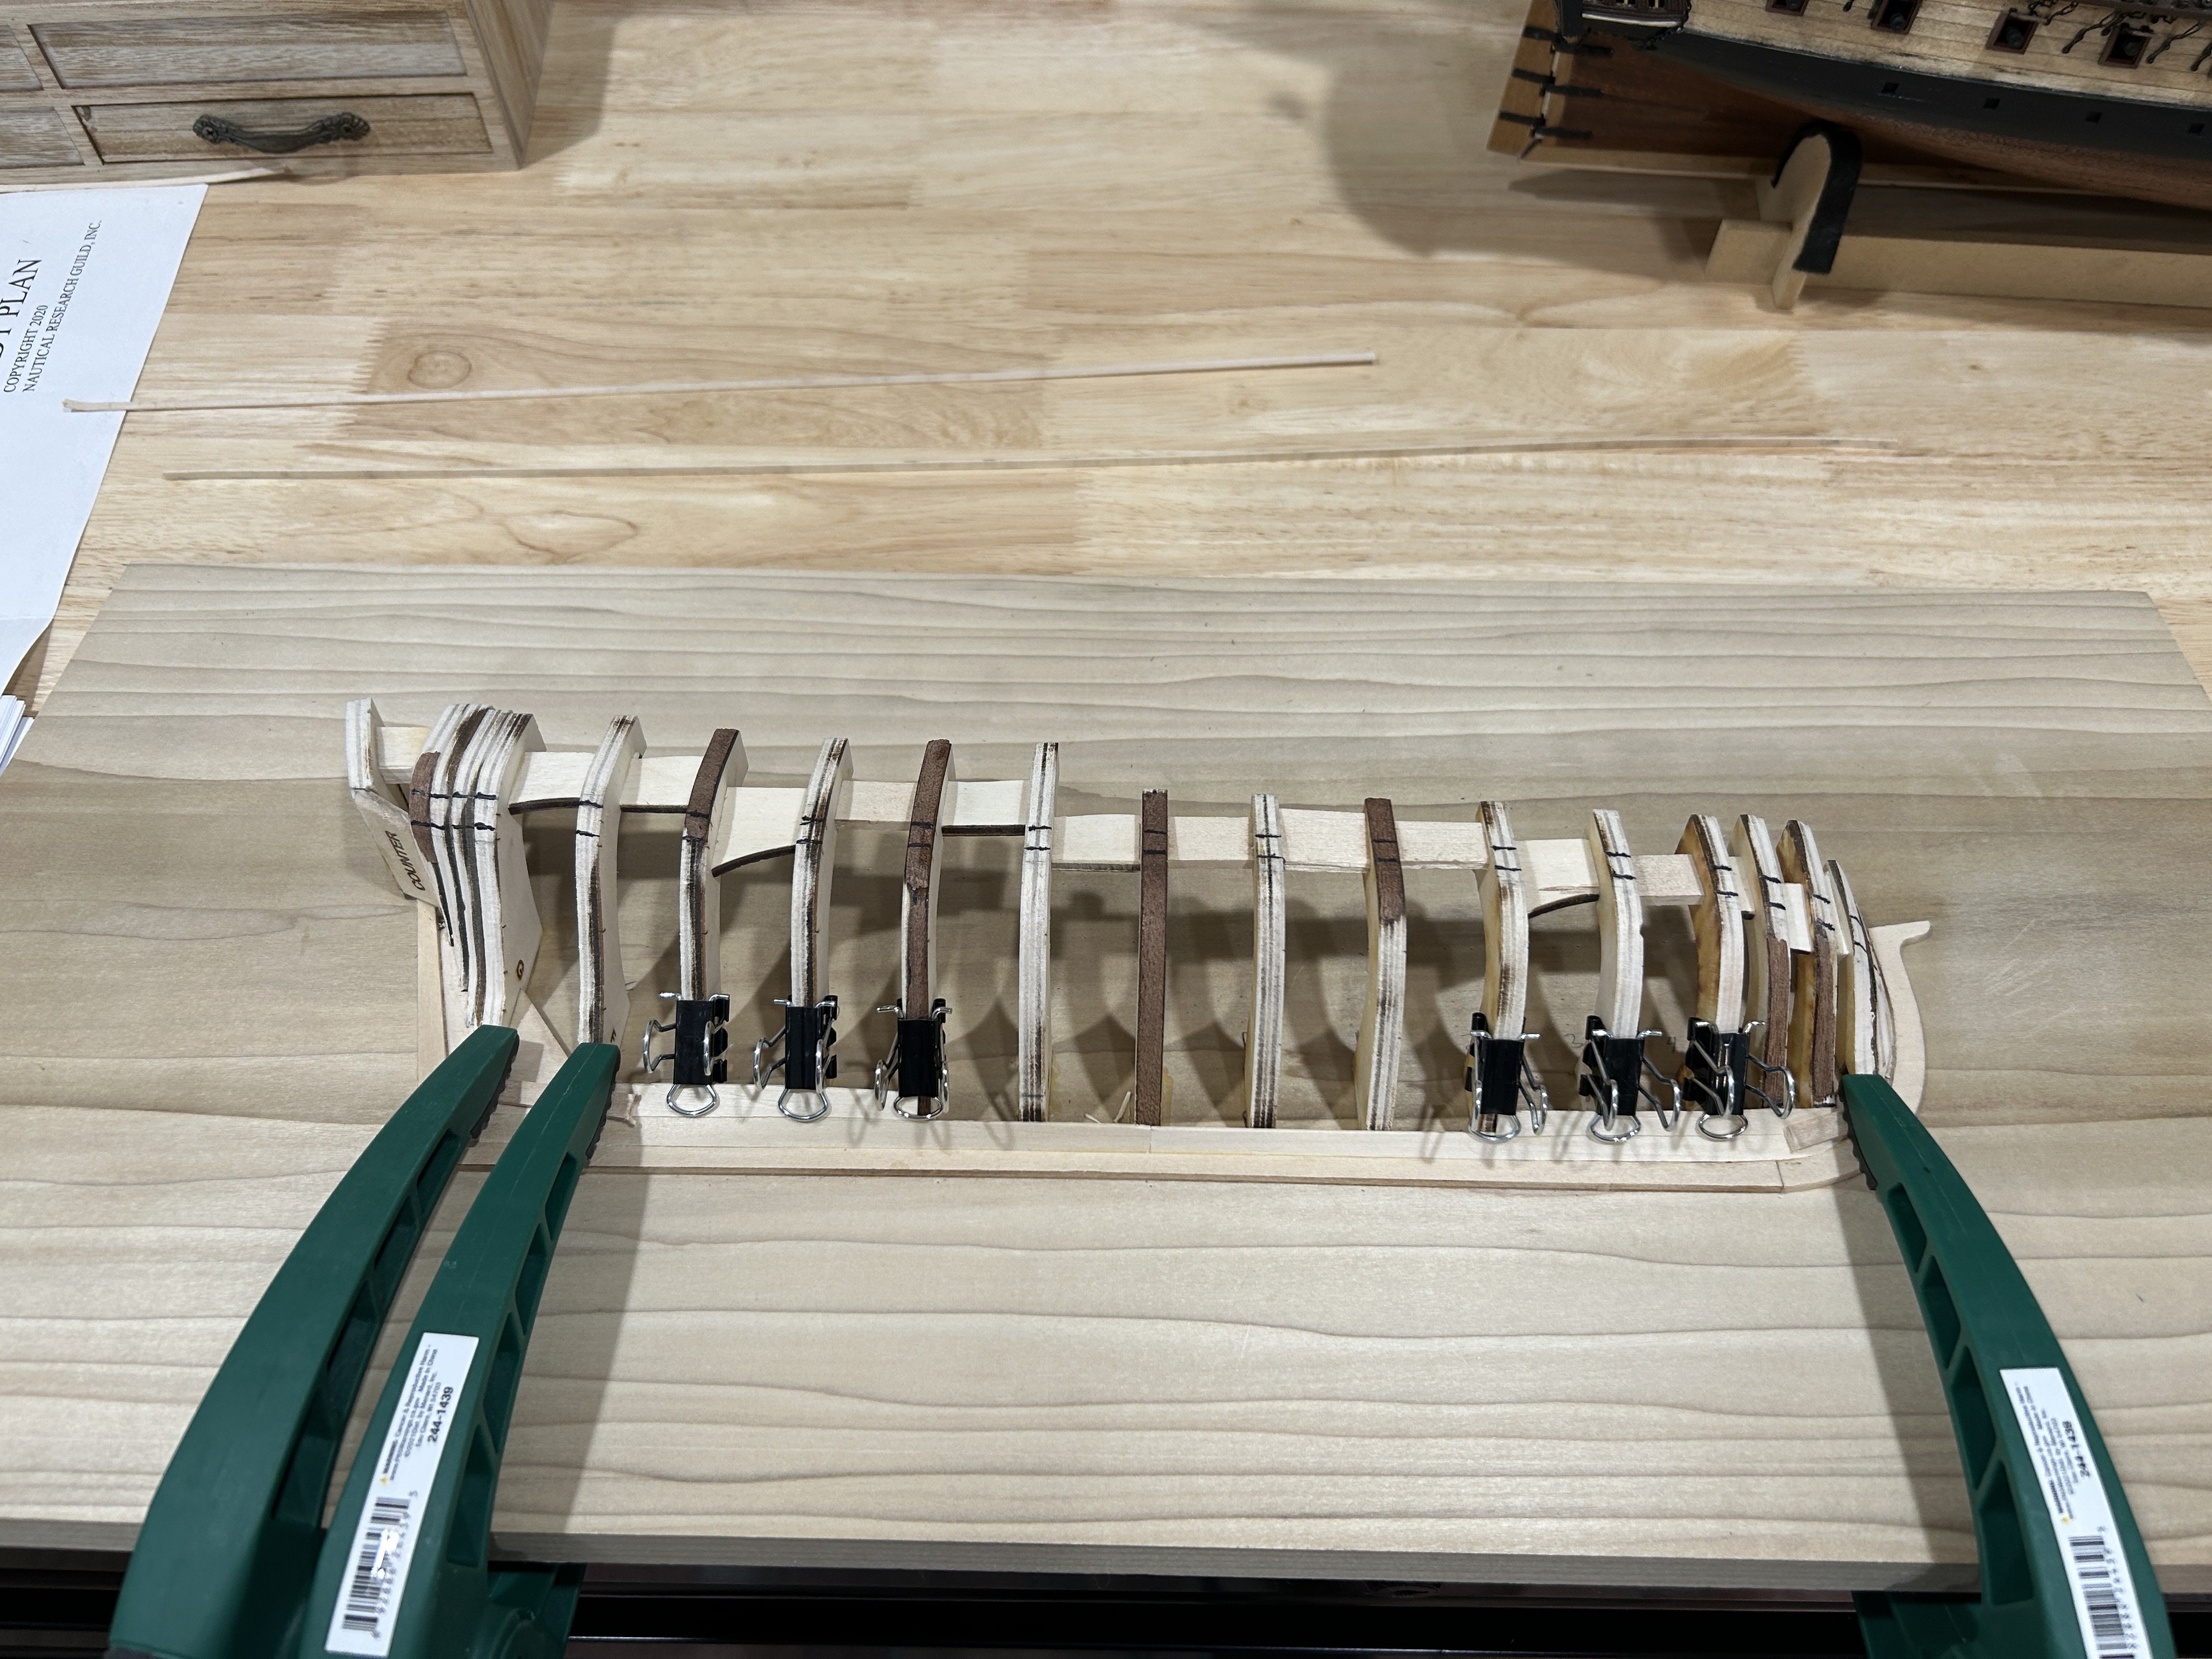
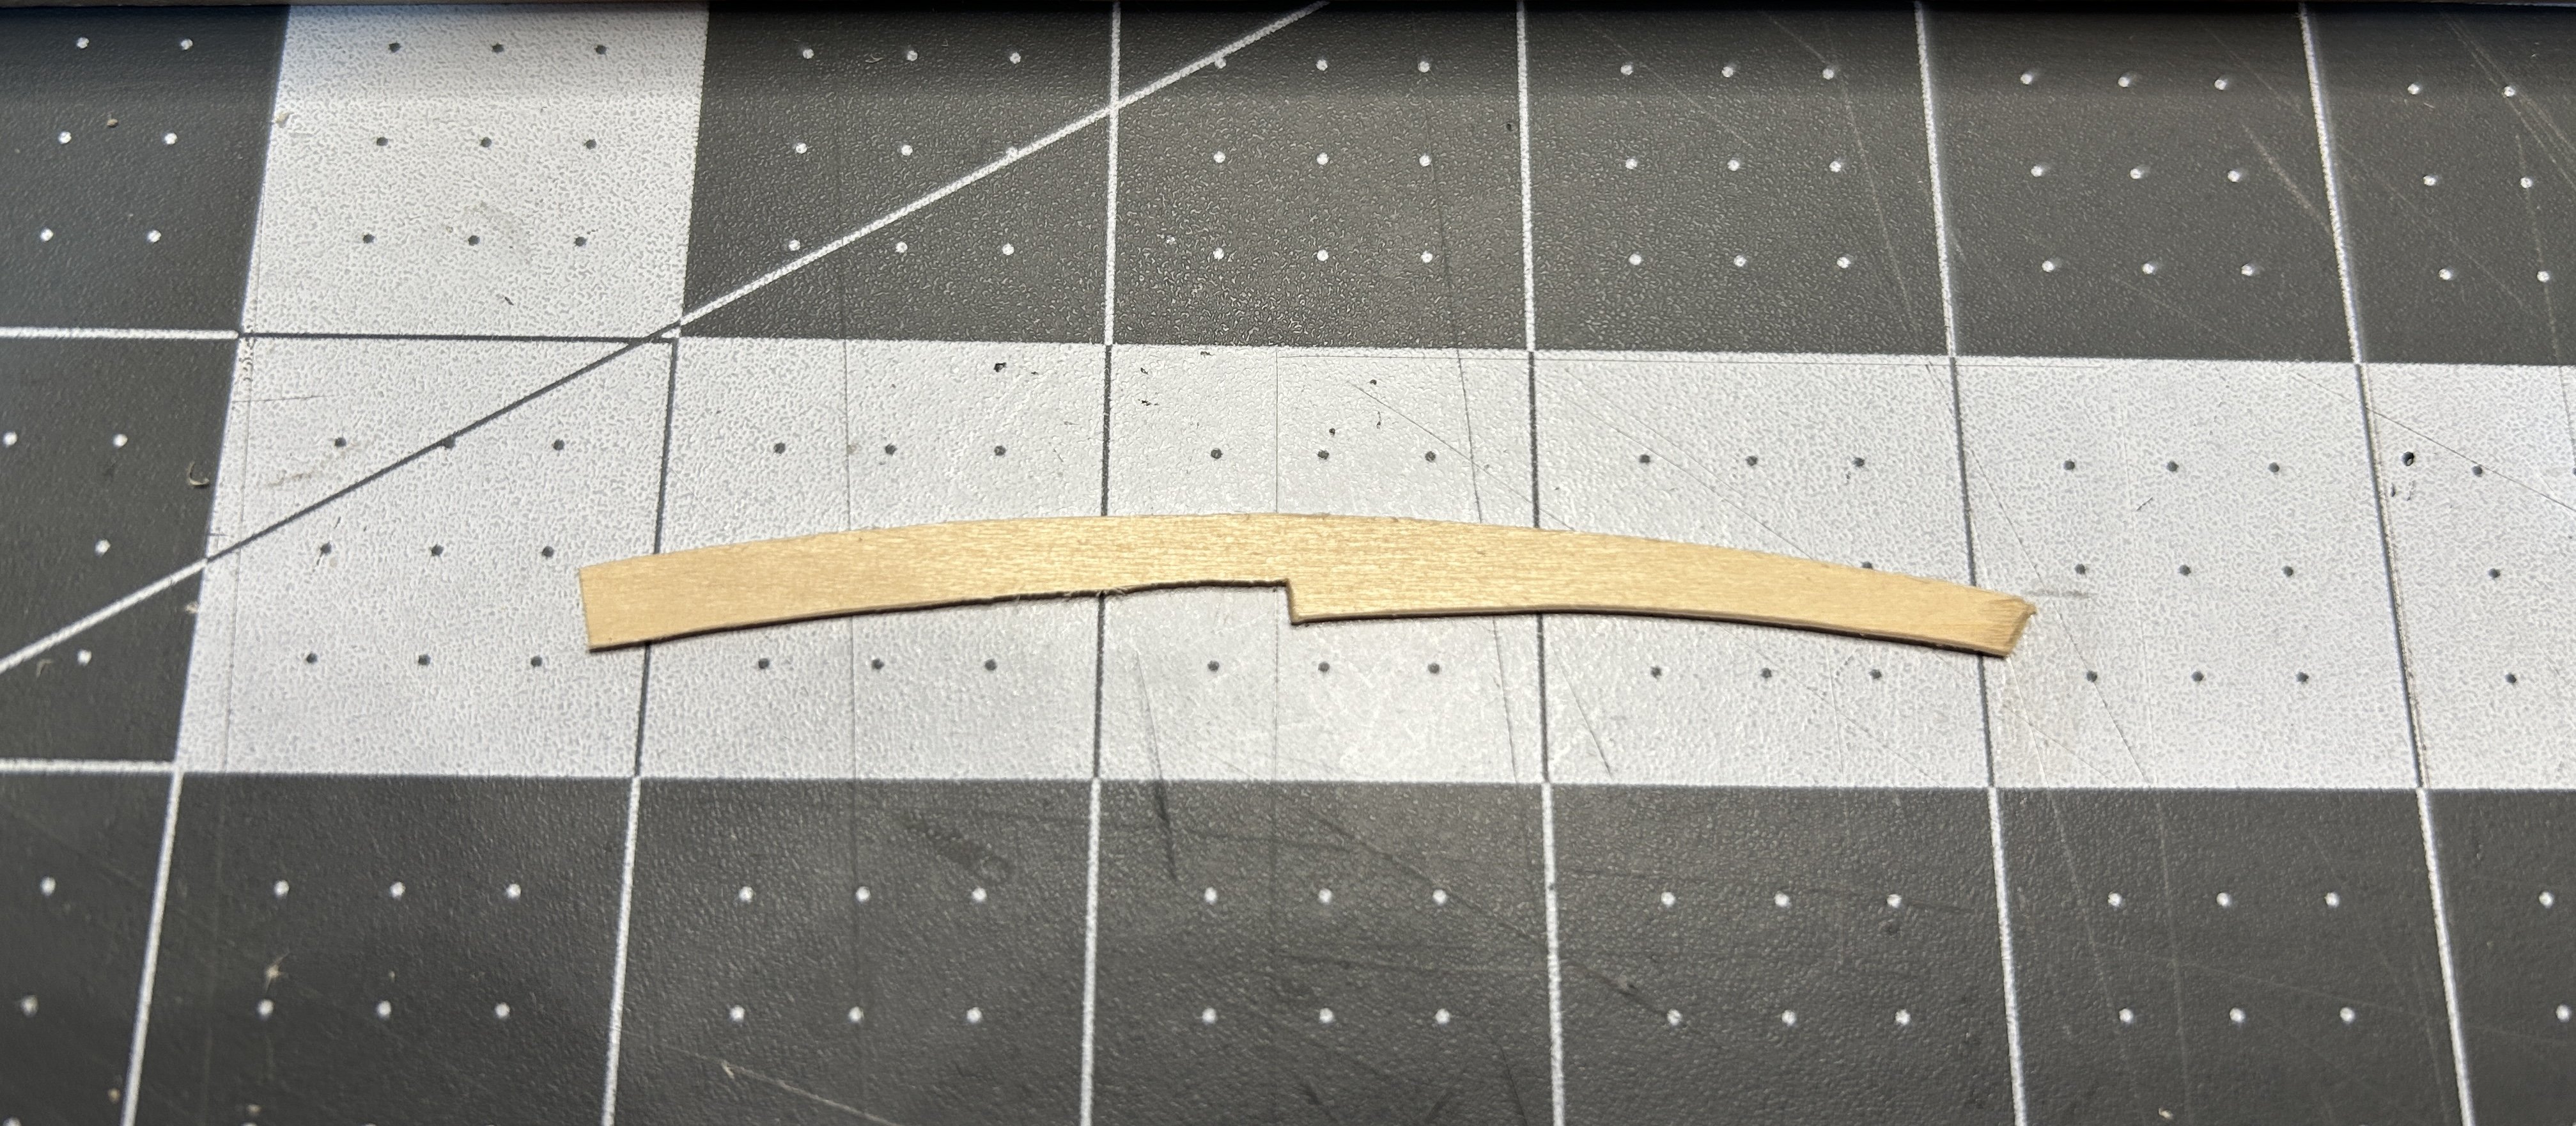
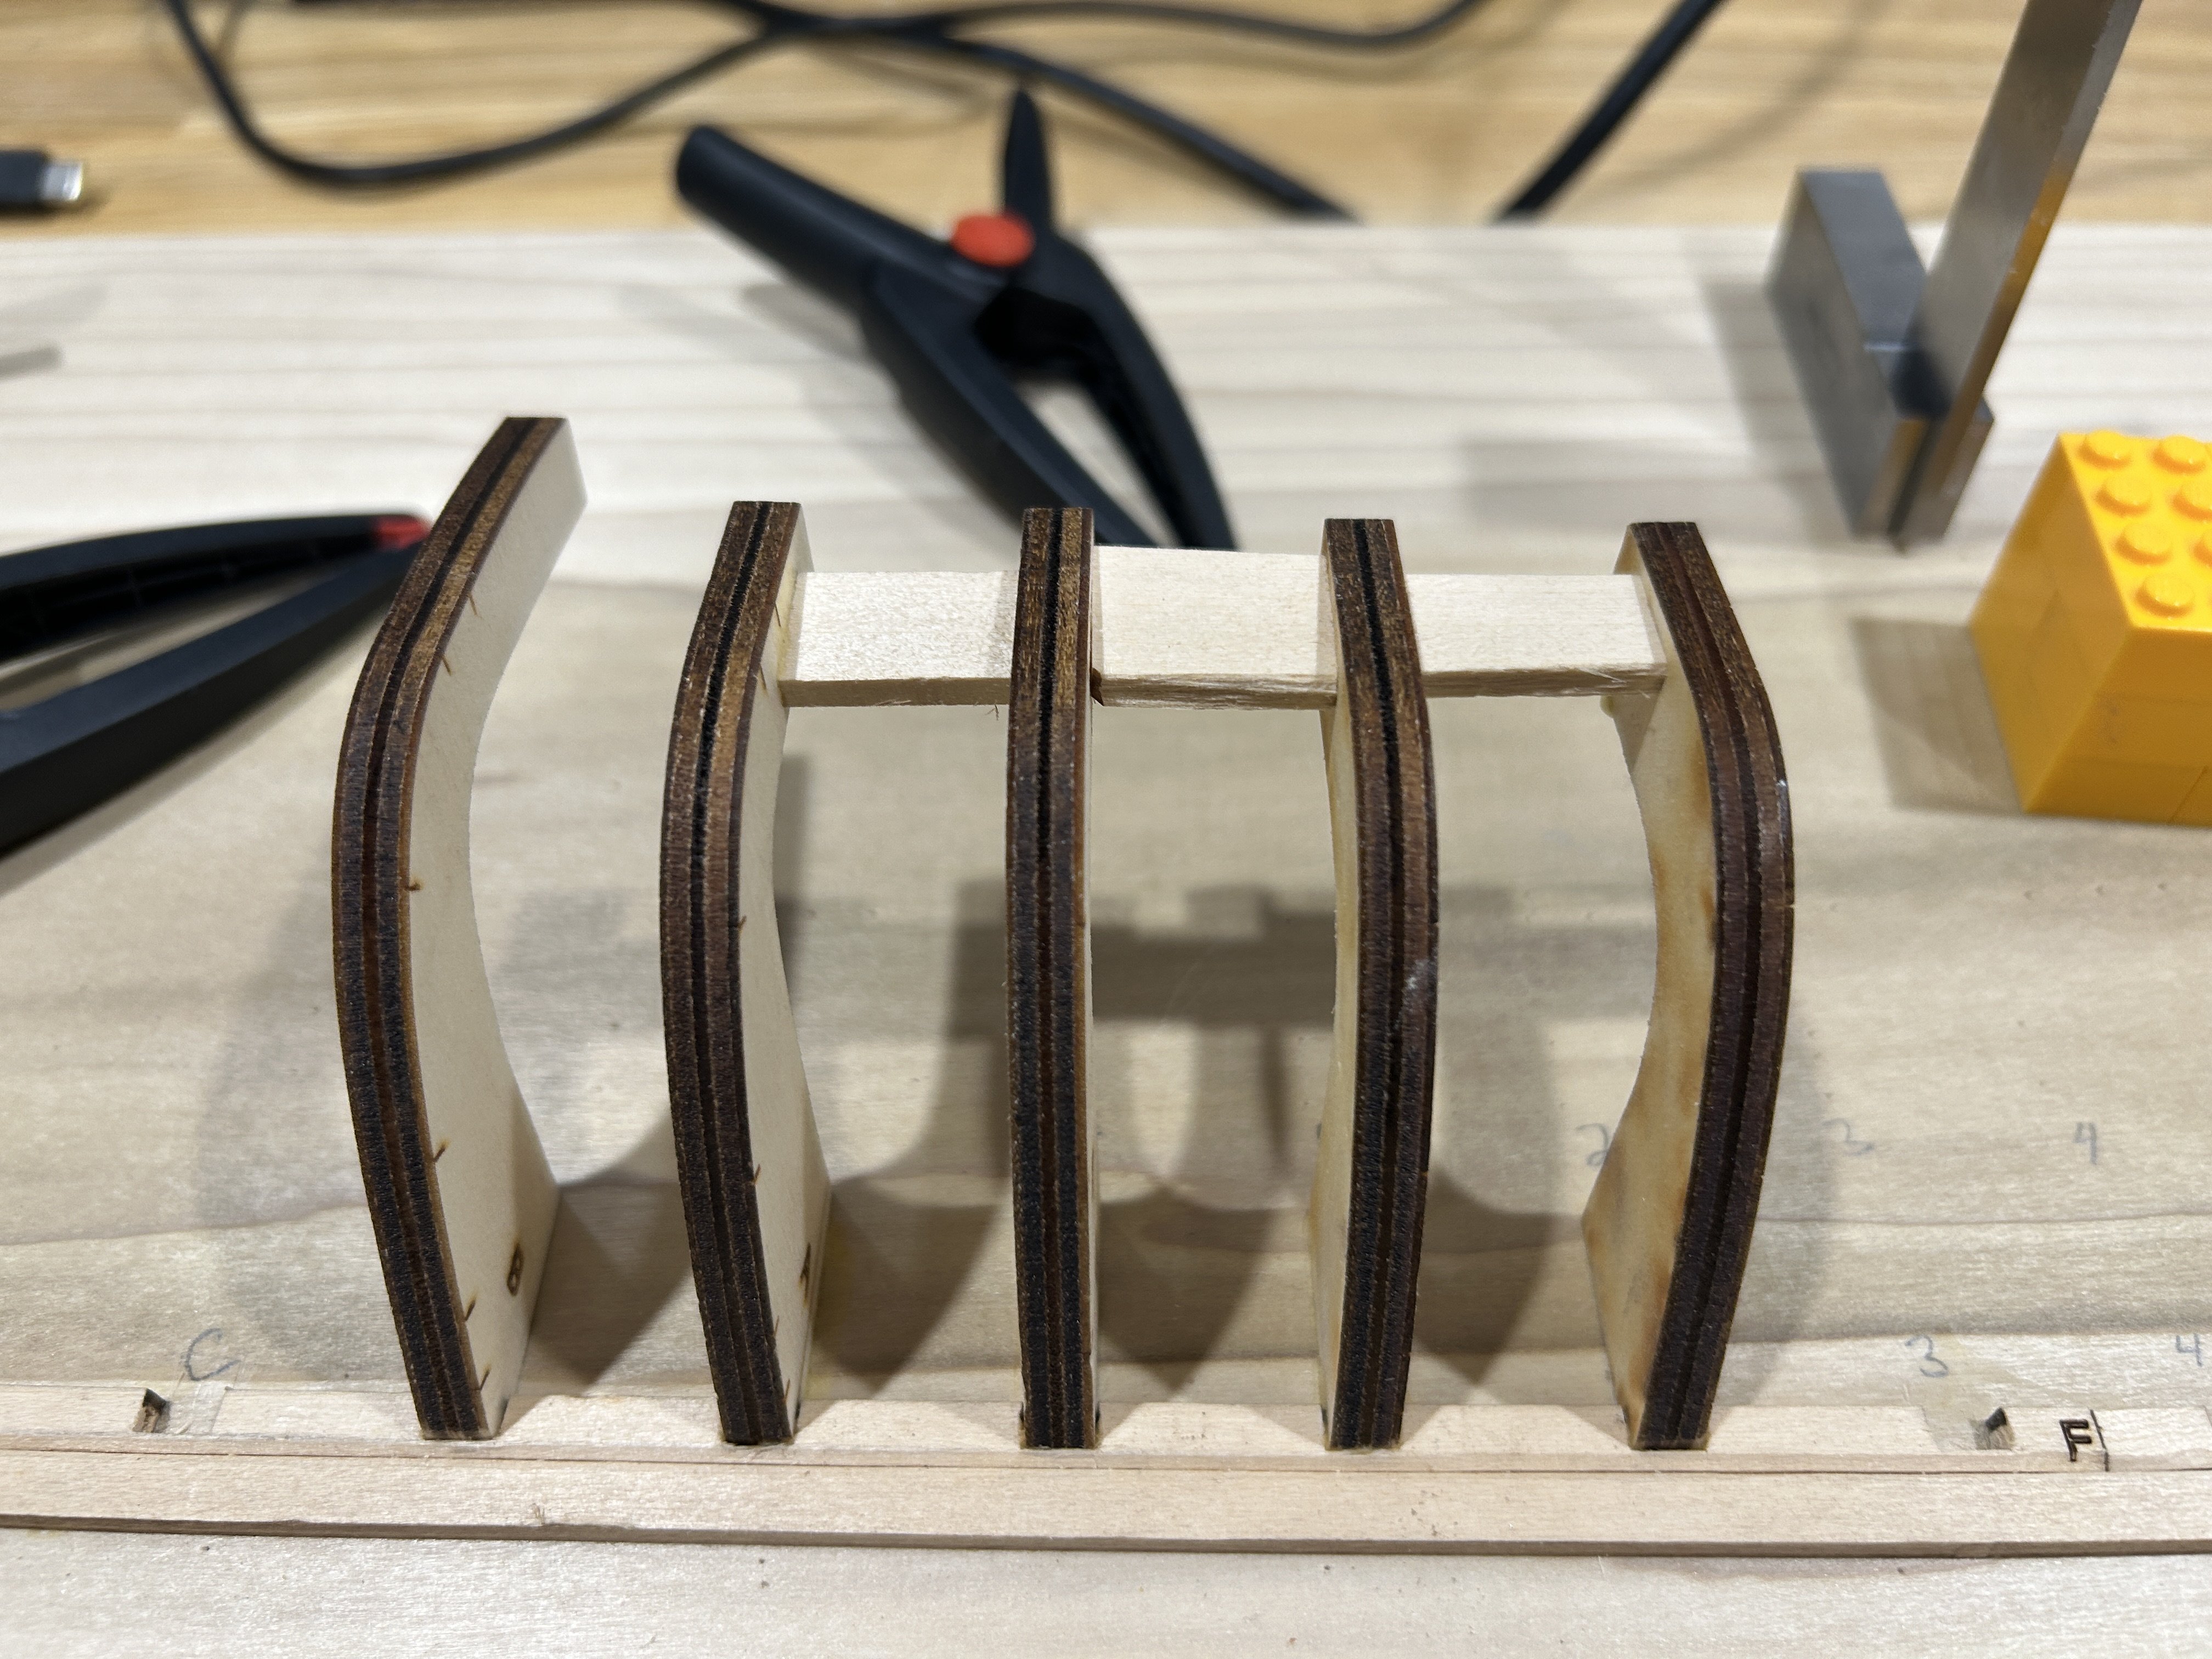
I have all of the braces between the bulkheads added as well as filler blocks for the masts and to accommodate pins if I decide to do a pedestal mount. The braces and fillers are from a sheet of 1/4 basswood I picked up at Joann Fabrics at their going out of business sale. With the braces and the large number of bulkheads on this model, I feel I will have a very sturdy framework for the ship.
You will notice I purchased a swivel vise to hold the ship during this phase of construction. I purchased the vise at Menards for about $85. Menards had a few swivel vices to choose from. I bought one that used a suction device to secure it to the work bench, but the suction didn't hold. The rubber feet on this one grips the cutting mat very well and the base is heavy enough that even when I have the ship tilted it doesn't tip over. The base has holes that can be used to attach to your bench if desired. Being able to manipulate the ship as I added the braces made the work quite enjoyable. This will come in handy as I frame the stern, frame the gun ports and add the upper planking.
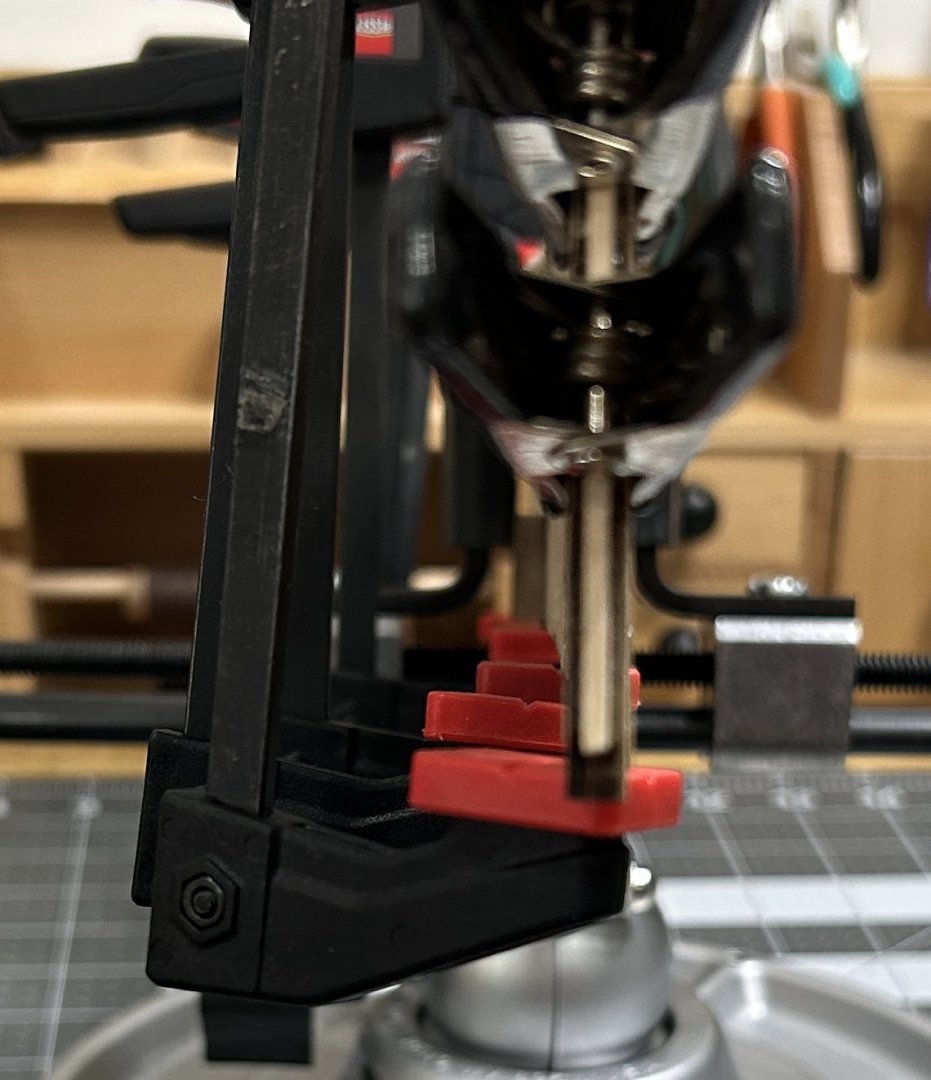
I was quite nervous about clamping on the keel. Even though I pinned it to the bulkhead former, I felt there would have been too much stress on the bulkheads former to rabbet strip to keel joints. My solution was the build a wooden bracket out of the 1 x 2 wood that would attach directly to the front and back section of the bulkheads former and then clamp into the vise. I cut a slot into the vertical sections of the bracket and used 4mm bolt to attach it to the bulkhead former. This keeps any of the stress off the joints between the bulkhead former, rabbet strip and the keel. It also allows me to avoid clamping on the joint between the two pieces of the bulkheads former.
Next up is the fairing the bulkheads. I expect to go slow. If I get a little done every day for 2-3 weeks that will fine. If I get bored or frustrated with fairing the hull, I will take a break and work on the ship's boat that I have started.