Rustyj
-
Posts
2,535 -
Joined
-
Last visited
Content Type
Profiles
Forums
Gallery
Events
Everything posted by Rustyj
-
 Thanks for the kind words VTHokiEE! Also thanks for all the likes.
- 642 replies
-
- 2
-

-
- winchelsea
- Syren Ship Model Company
- (and 1 more)
-
Thank you but it's more a testament to Chucks ability to design superior models and provide such detailed instructions that we can produce such good results. Also thanks for all the likes.
- 642 replies
-
- 2
-
-
- winchelsea
- Syren Ship Model Company
- (and 1 more)
-
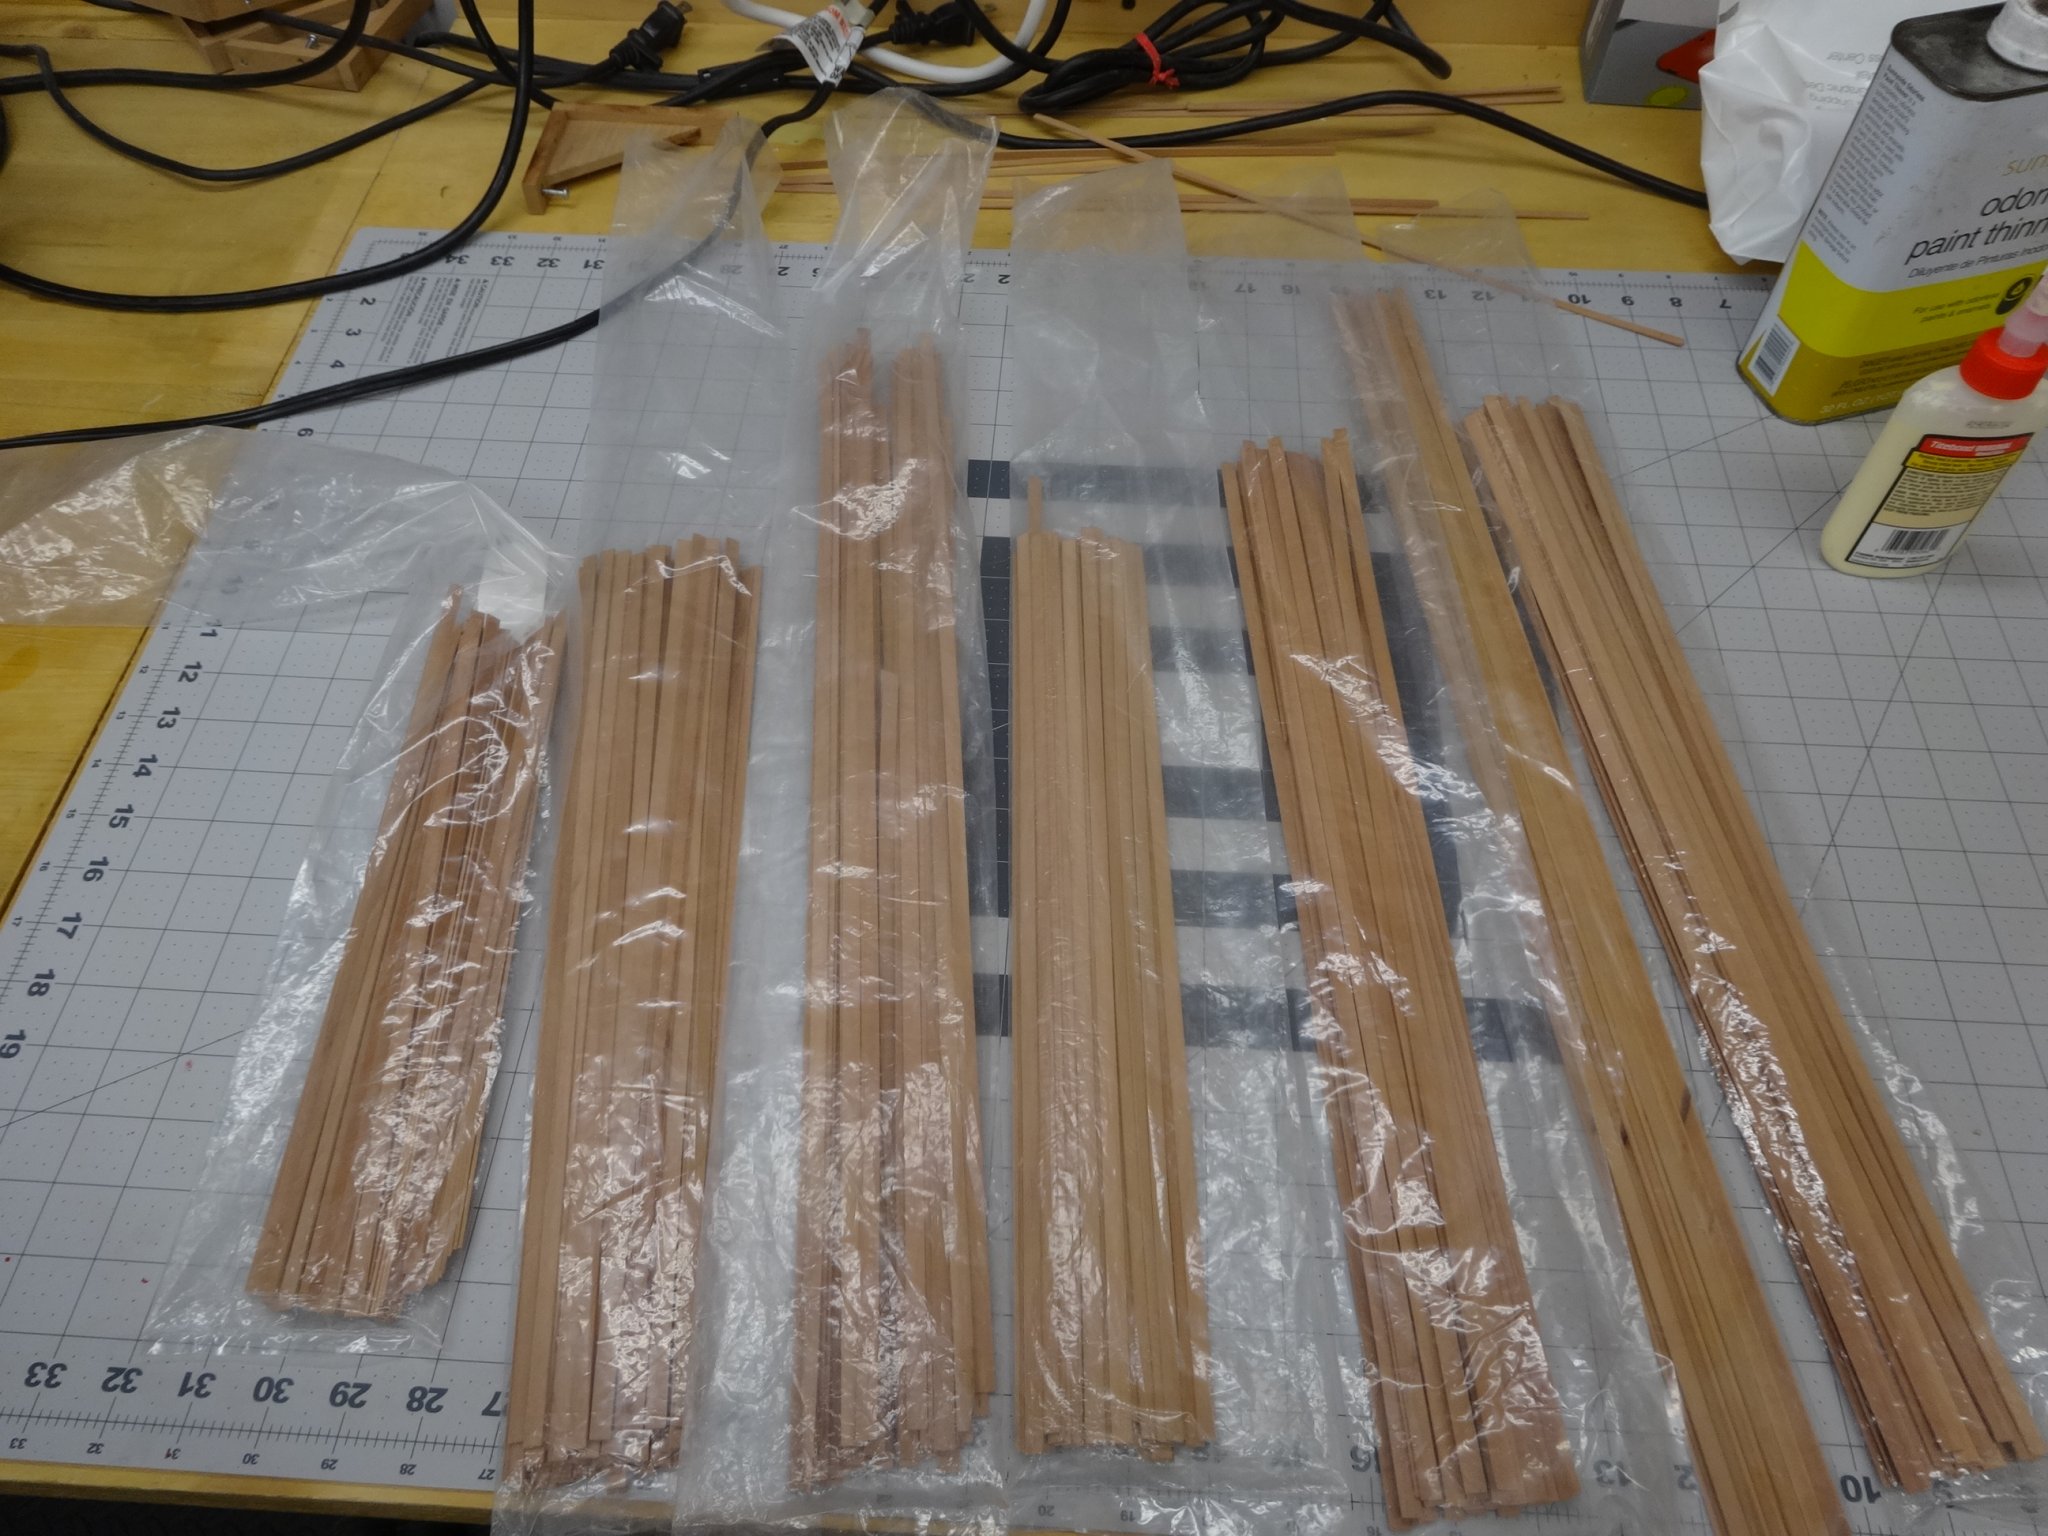
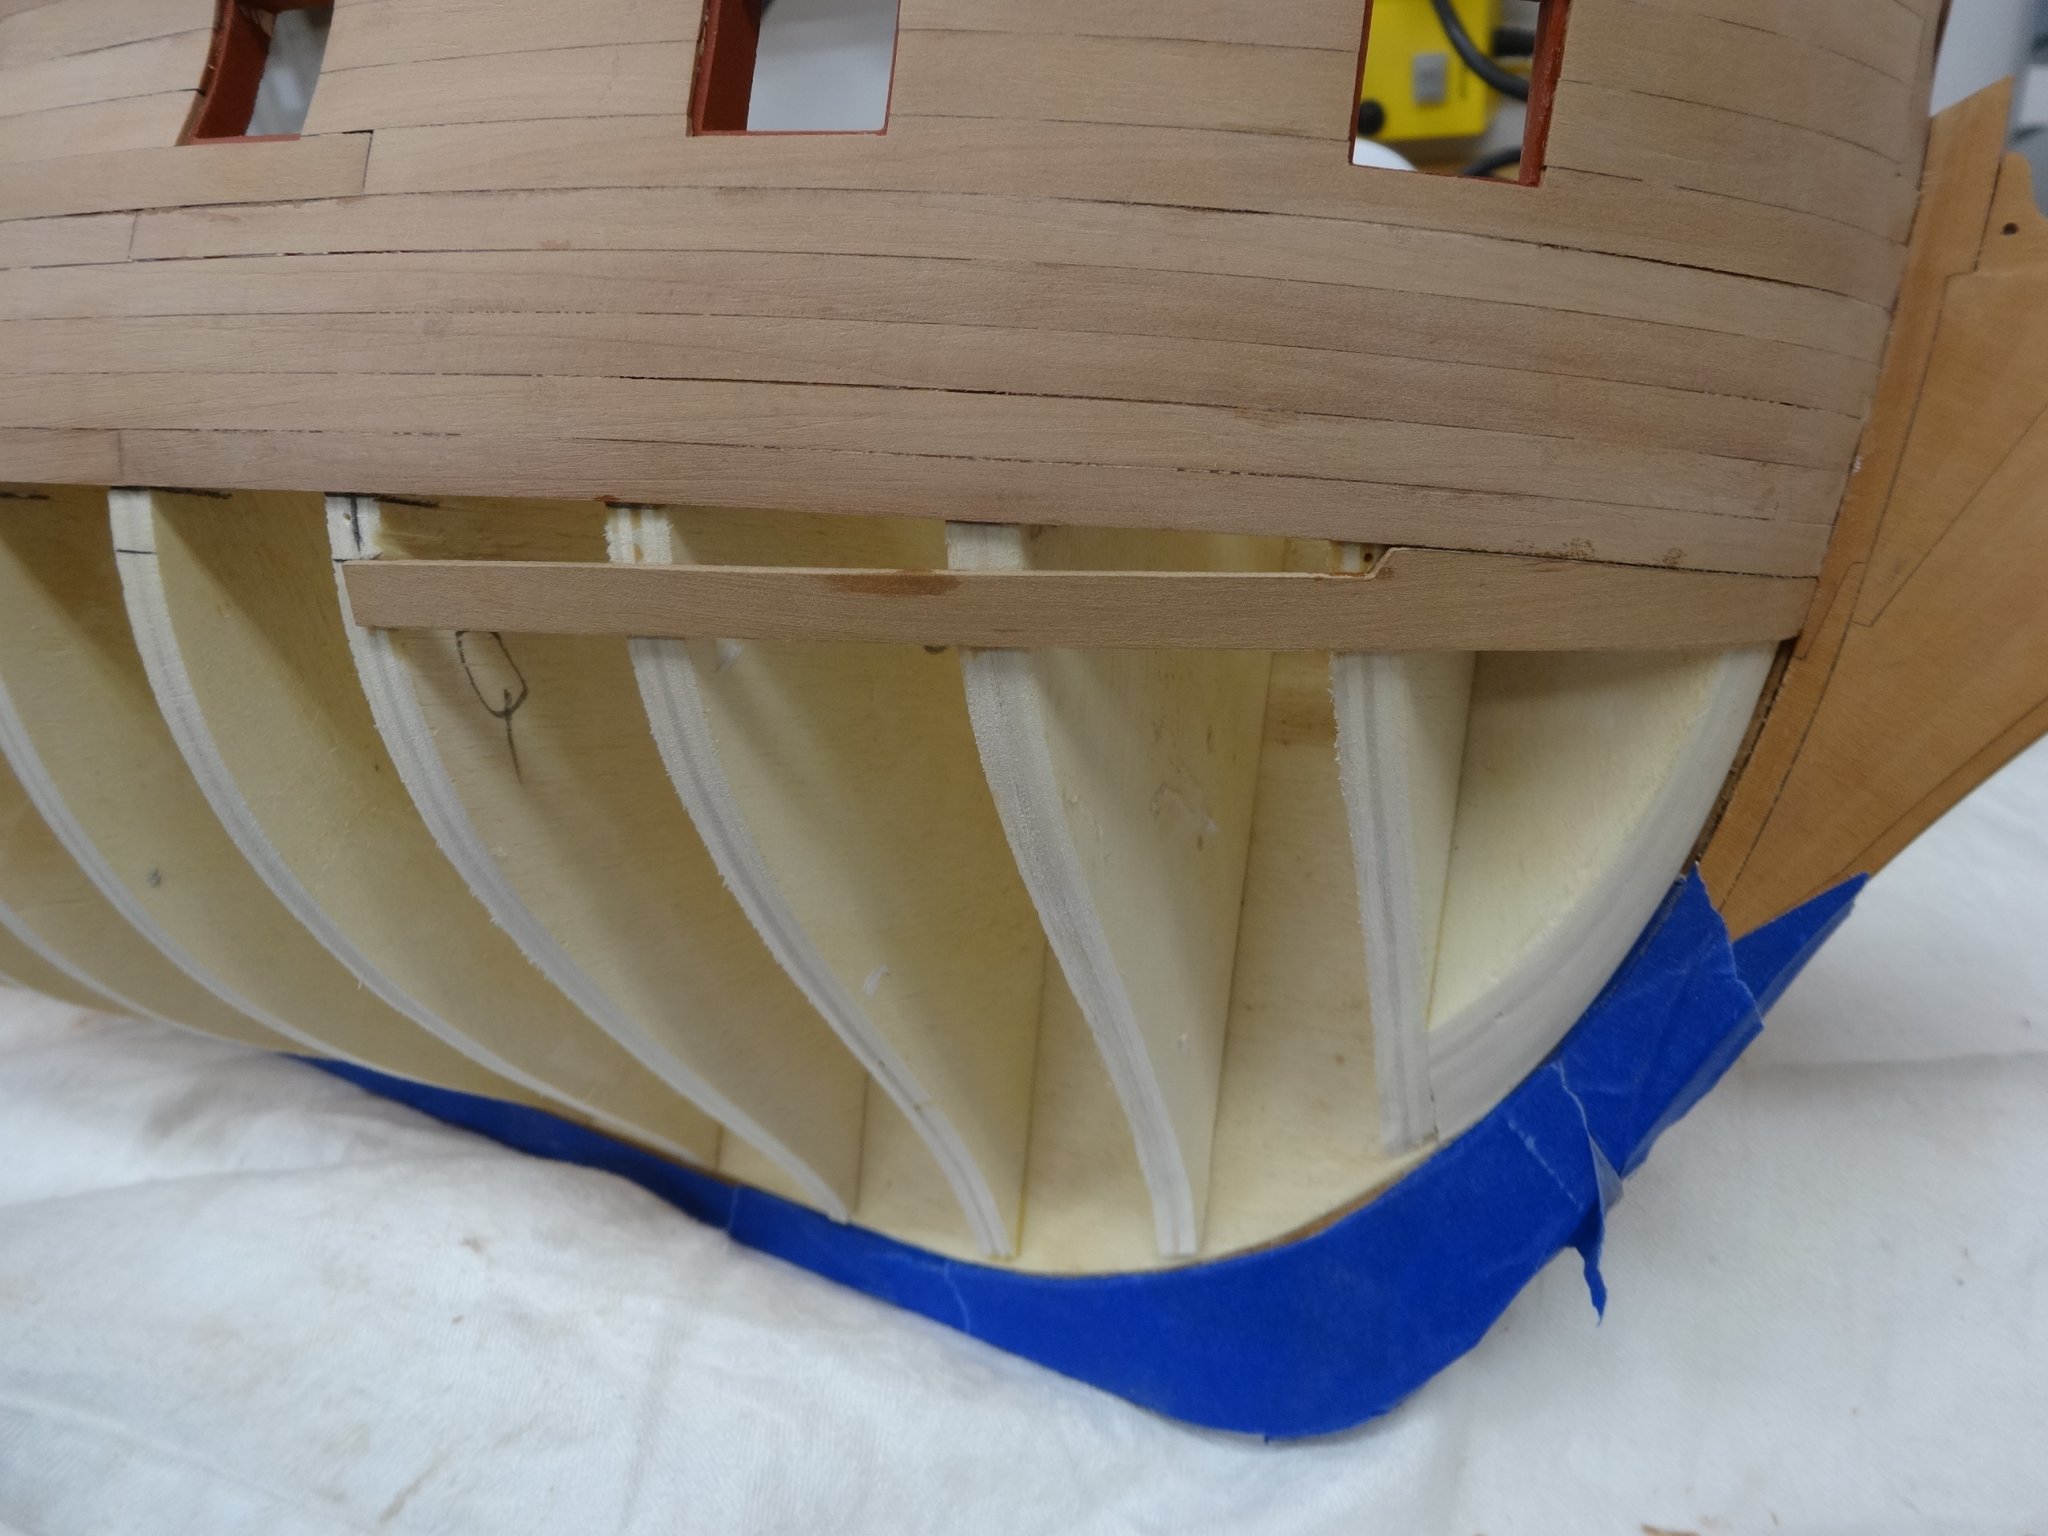
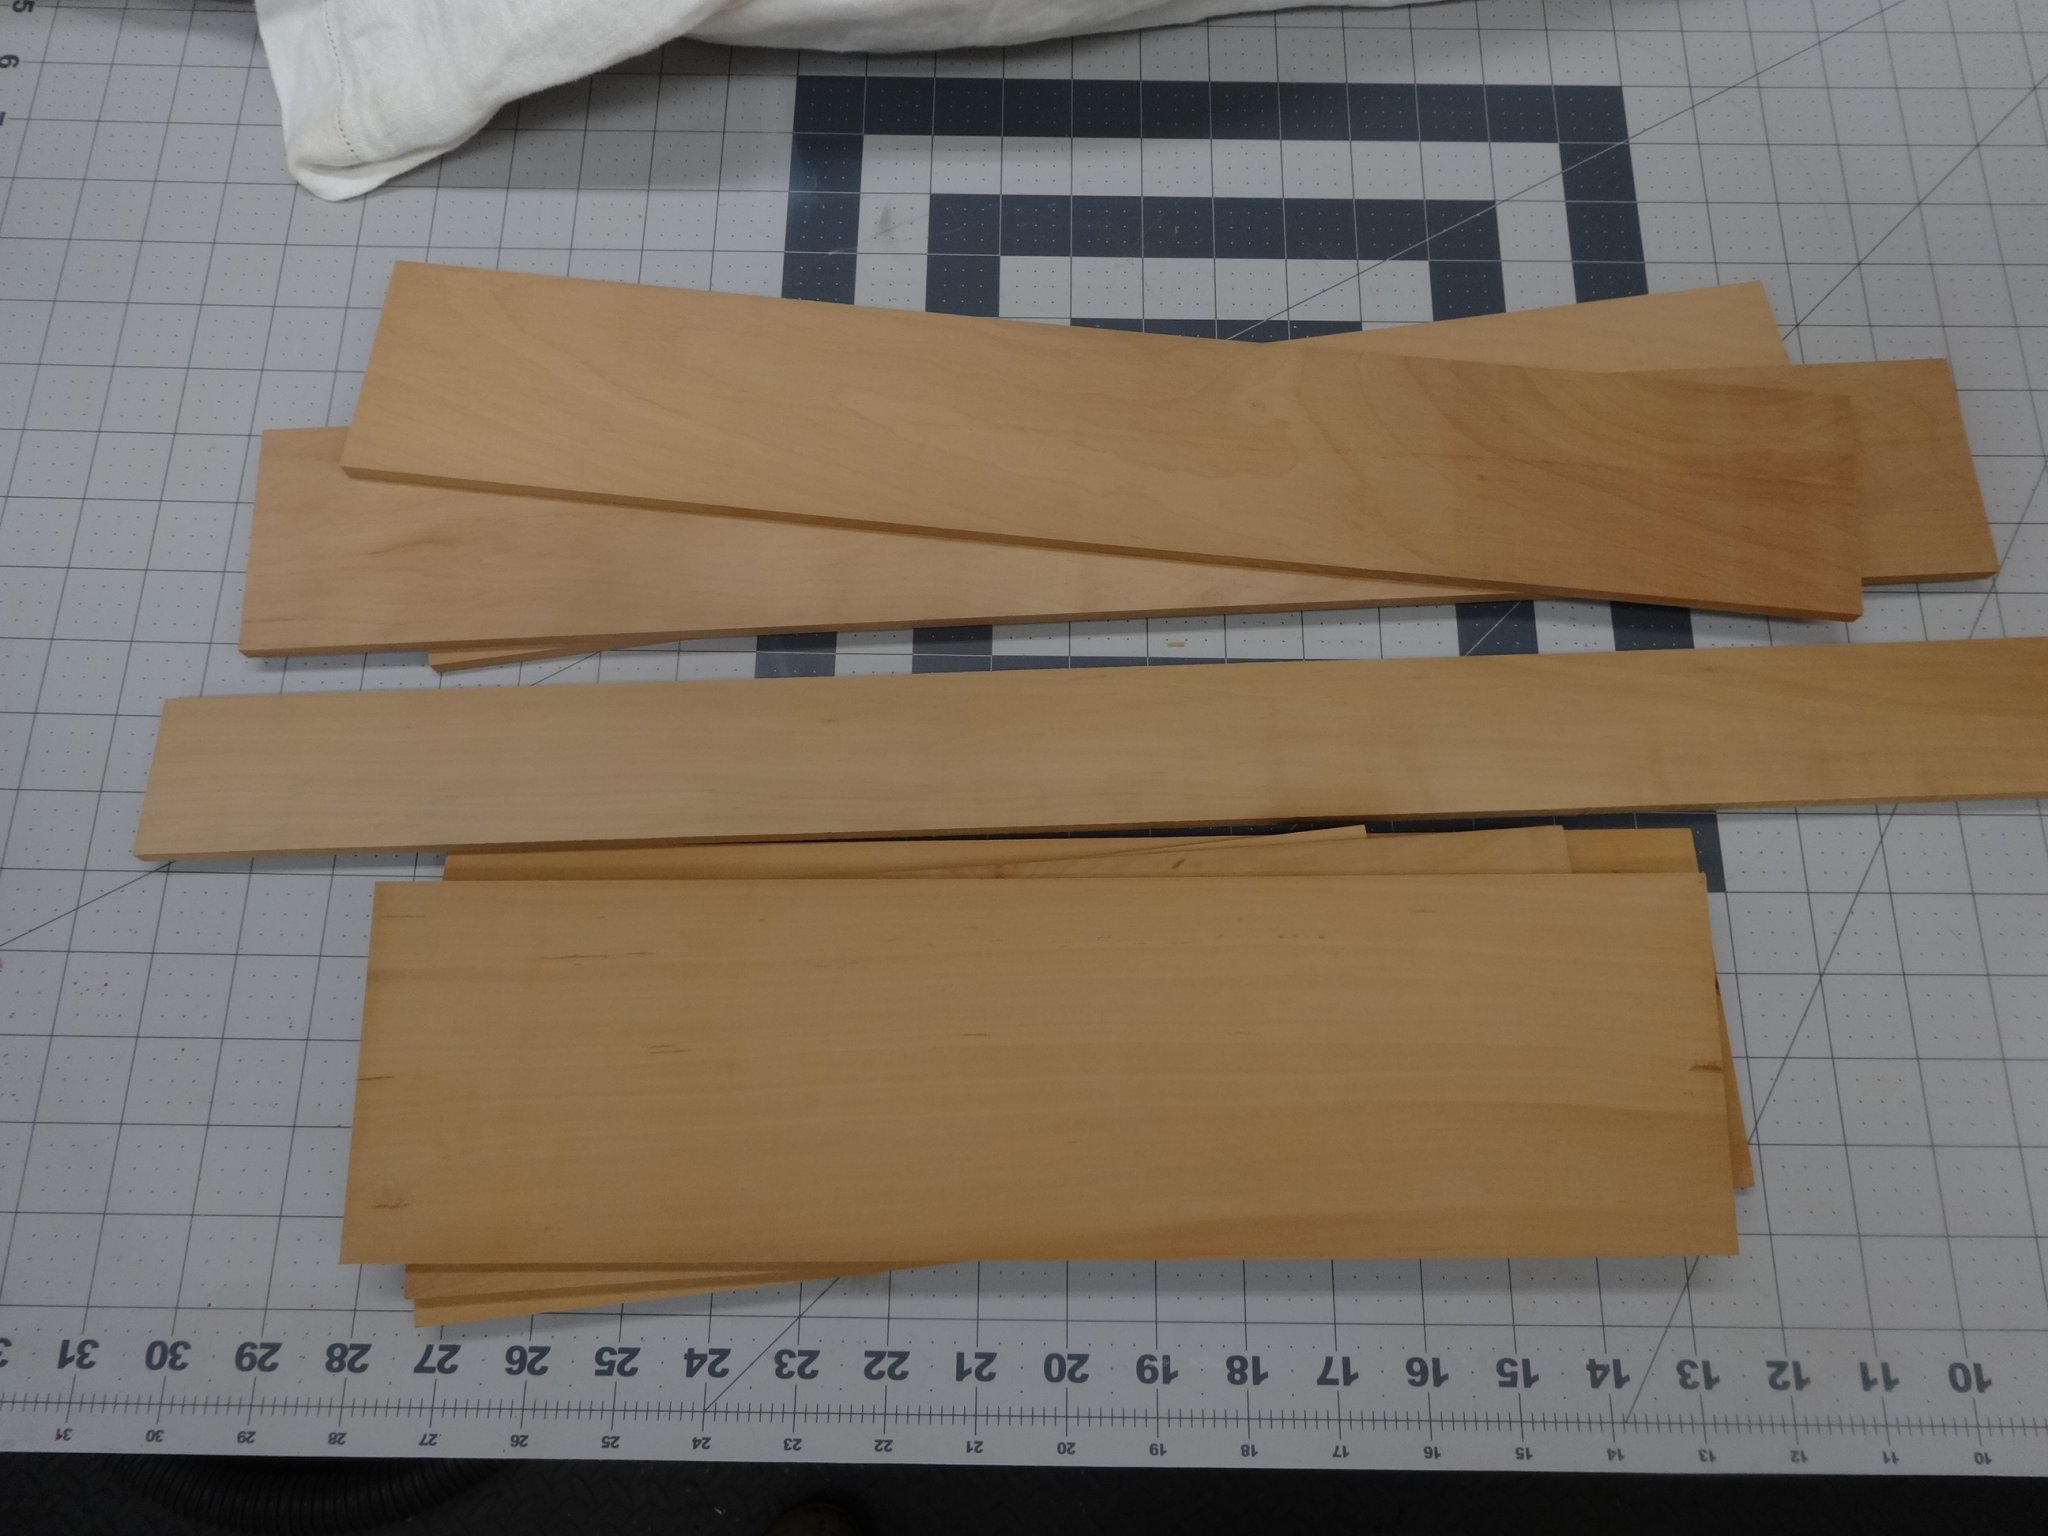
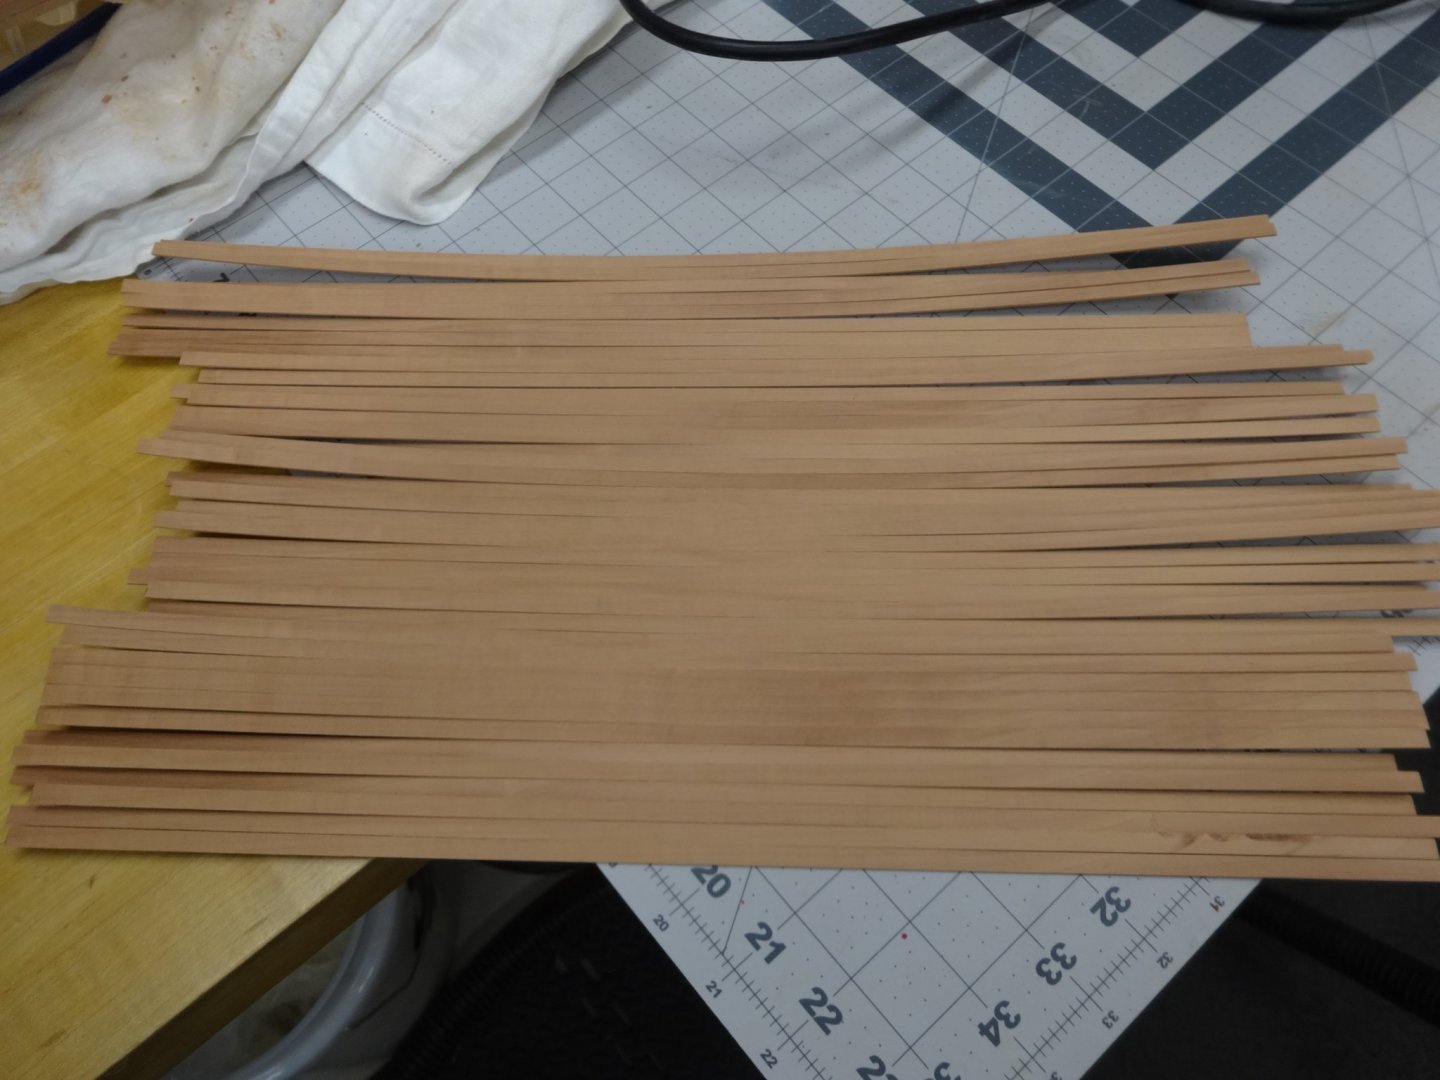
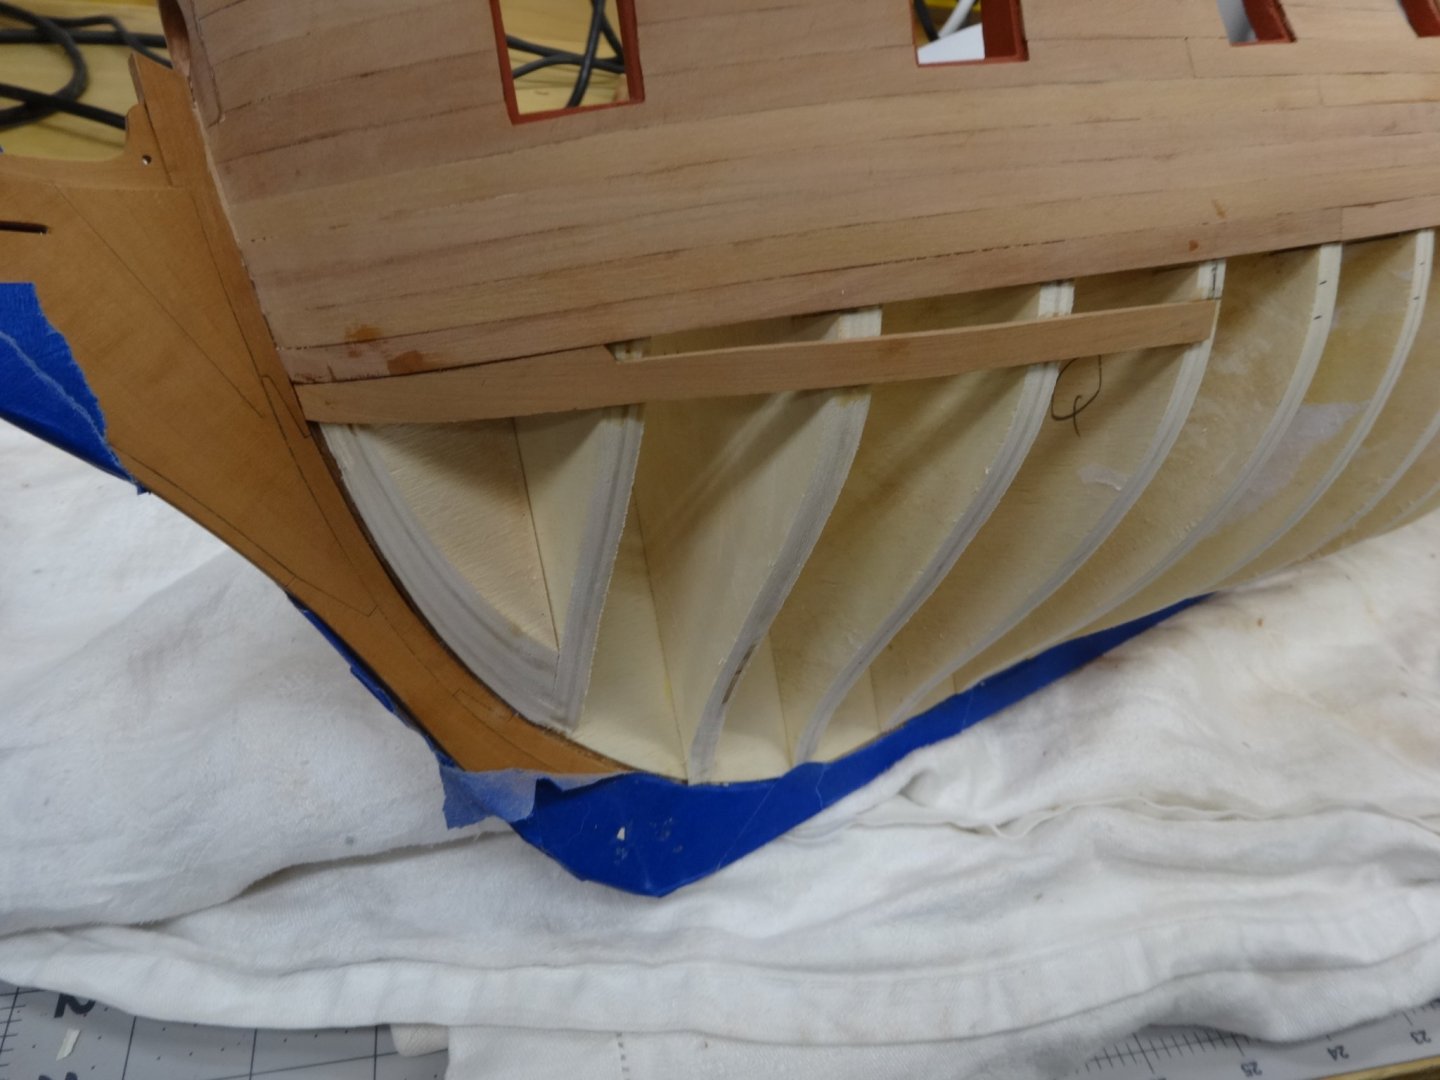
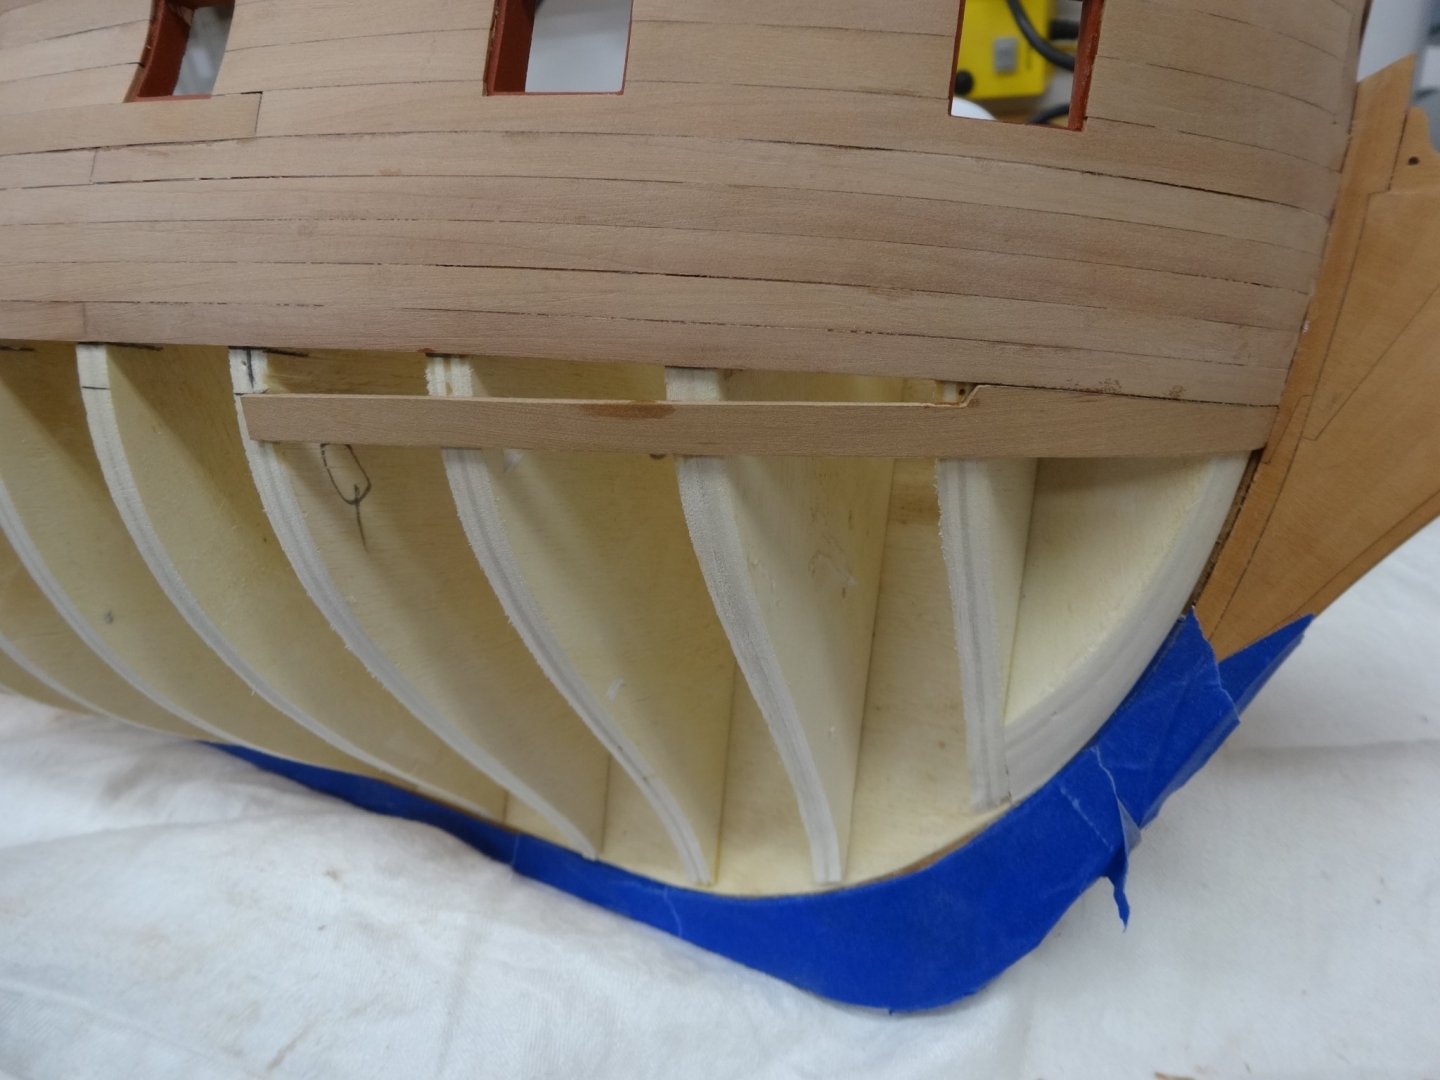
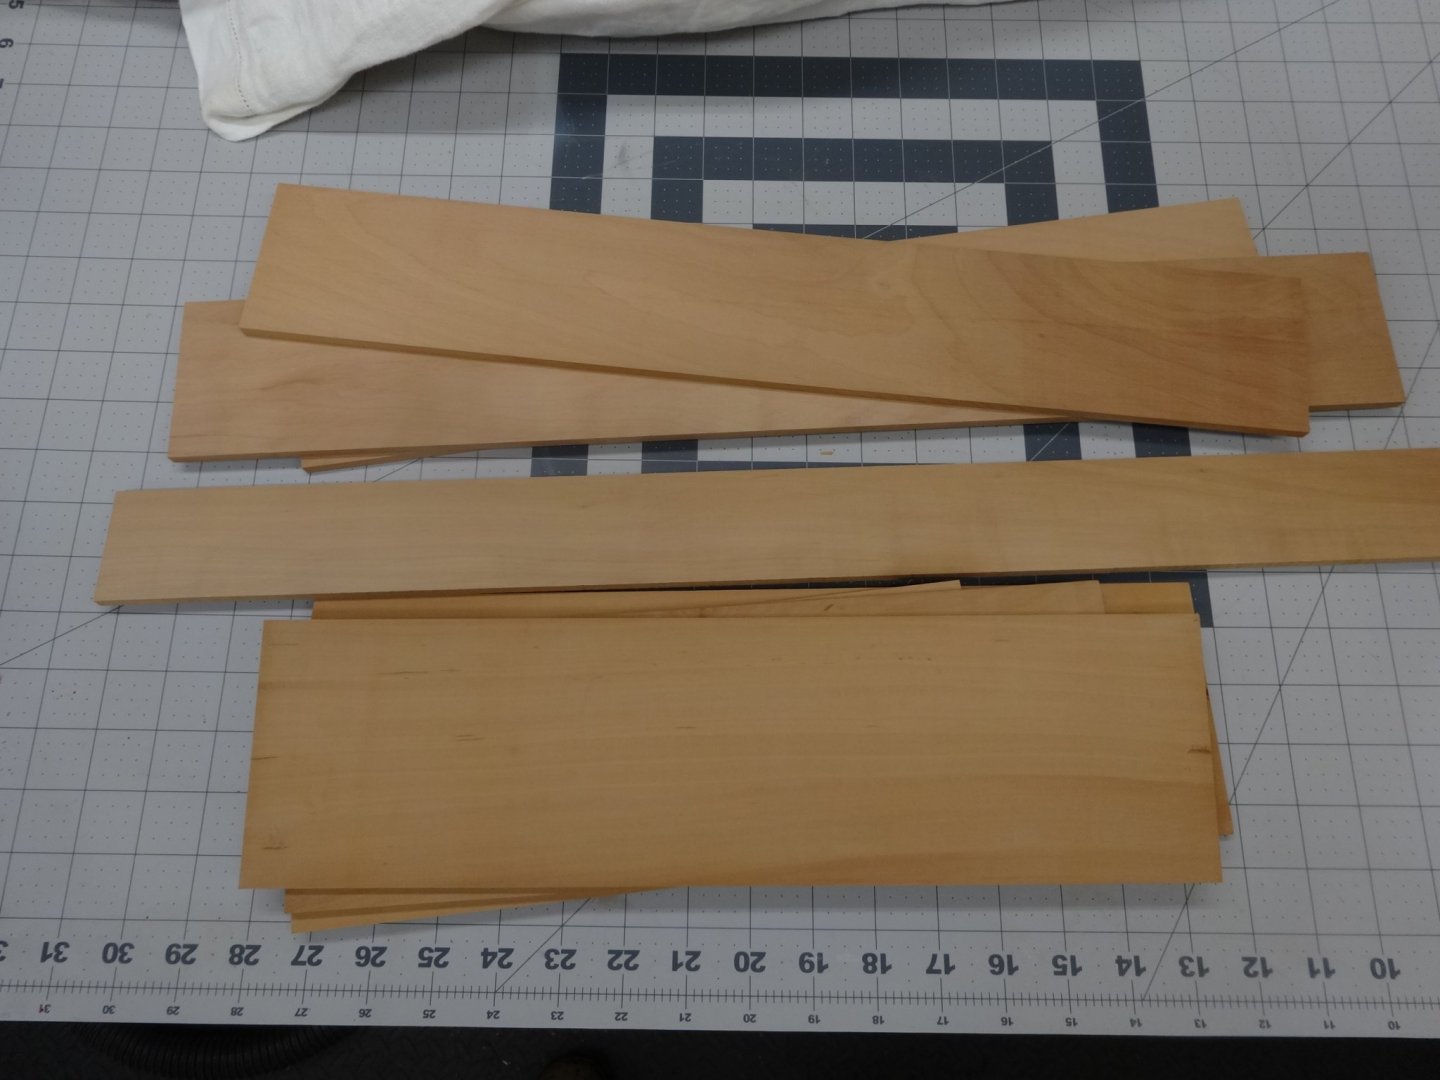
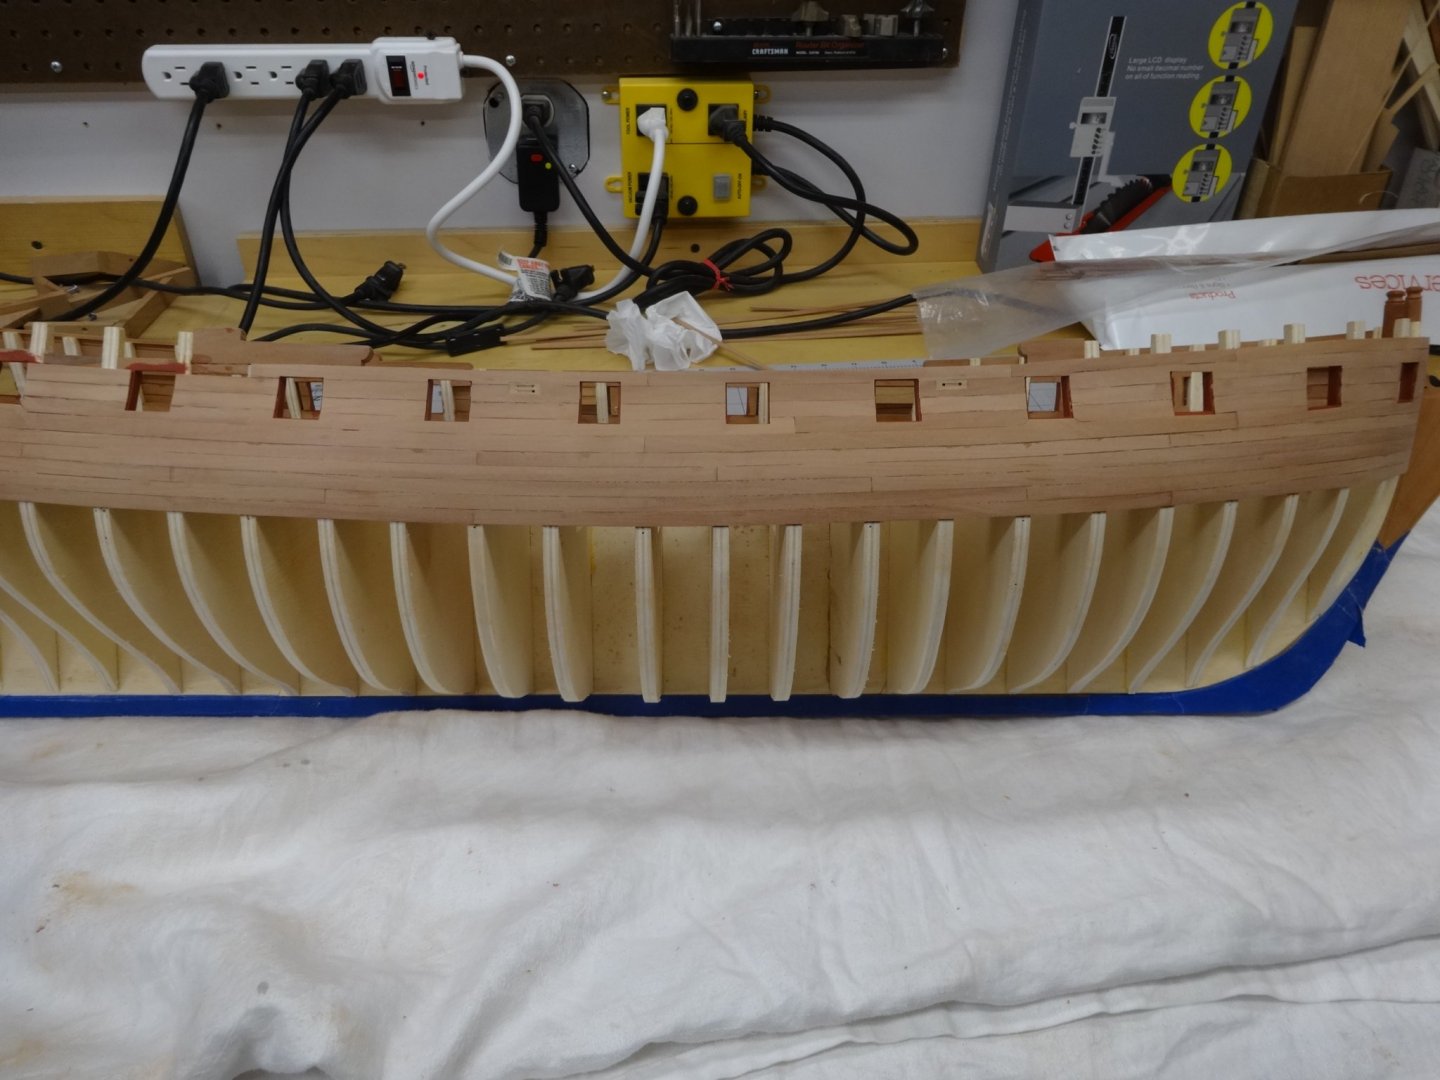
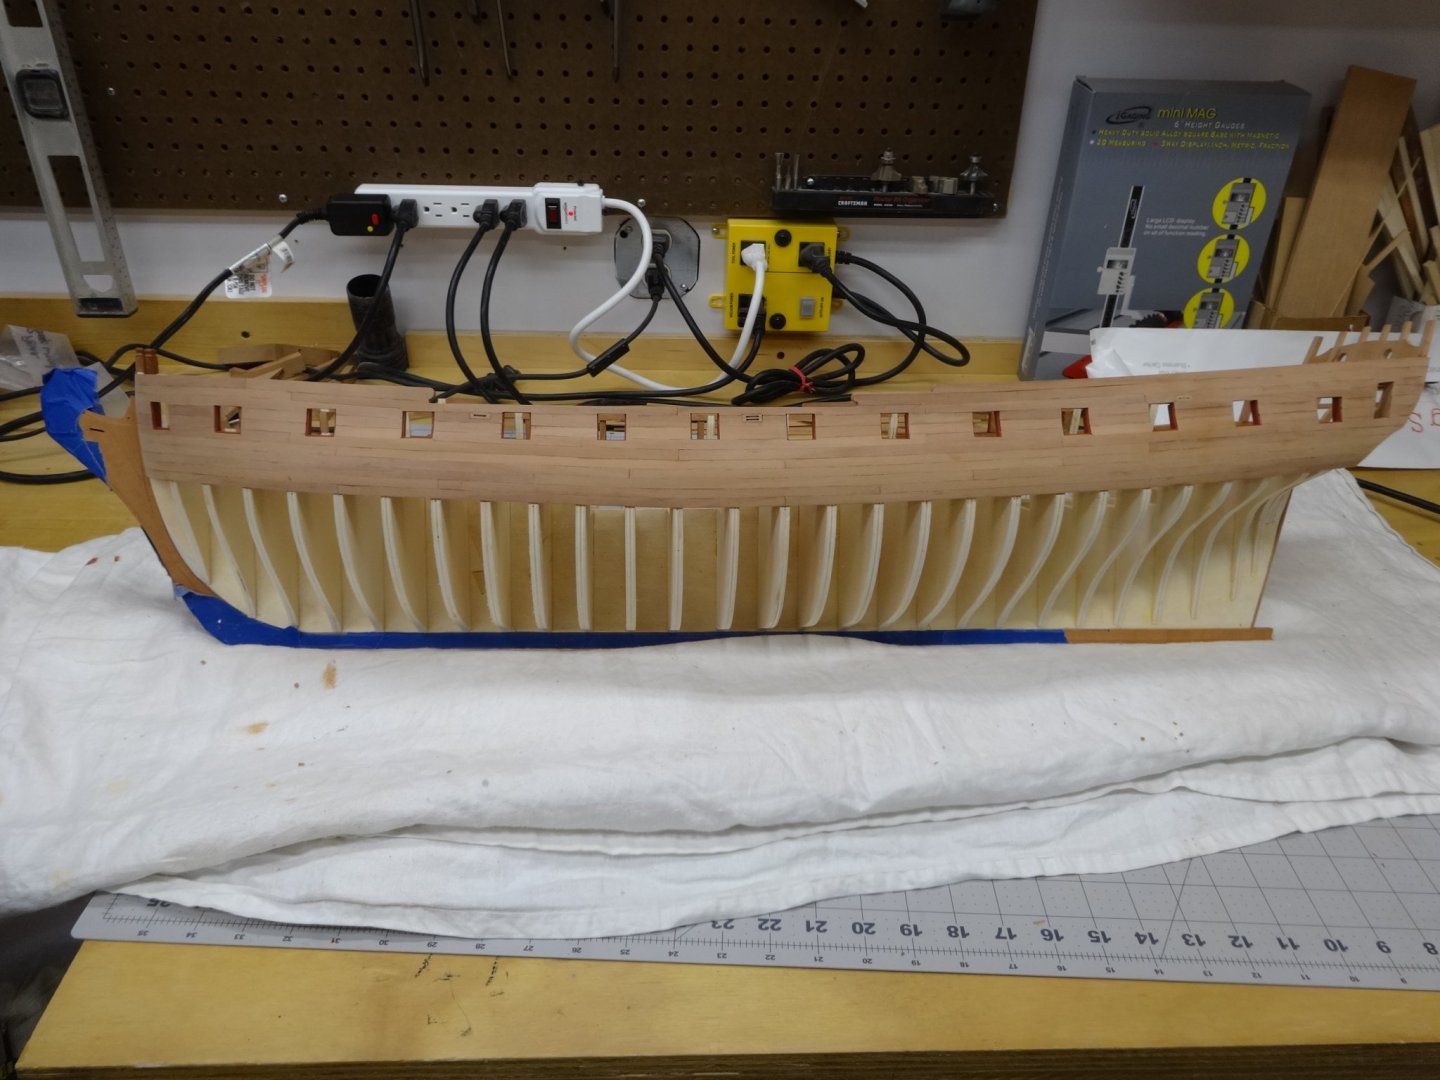
The last few days were spent cutting 250 strips of 1/4"x3/64" for the hull planking. I found it interesting that the strips cut from the same billet changed color not only when you worked your way through the billet but also from end to end. Here is the strips cut from one billet. I separated the strips from each billet into separate packages to aid in trying to use similar planks next to each other. Also strips that look similar end up having a different look when the finished is applied. I cut out the drop plank and placed it after lining off the first two strakes. Well yesterday I thought I would be posting this update but when I looked at the first two strakes below the wales I did not like the way it looked at the stern. I had to remove the last three planks and redo it. I'm happier now. I then applied the first coat of wipe on poly. Next should be putting on the second layer of the wales and the black strake. I'm contemplating finishing planking the hull to minimize scraping the finished wales. I tend to manipulate the hull a lot when I plank. I will hold it upside down, spin it around, have it in my lap etc. Have to think about that for a bit. Hmmmmm


- 642 replies
-
- 26
-
-
- winchelsea
- Syren Ship Model Company
- (and 1 more)
-
Looking great Bob!
-
Looking good Ben. Can't wait to see what's cooking in the kitchen!
- 399 replies
-
- 2
-
-
- winchelsea
- Syren Ship Model Company
- (and 1 more)
-
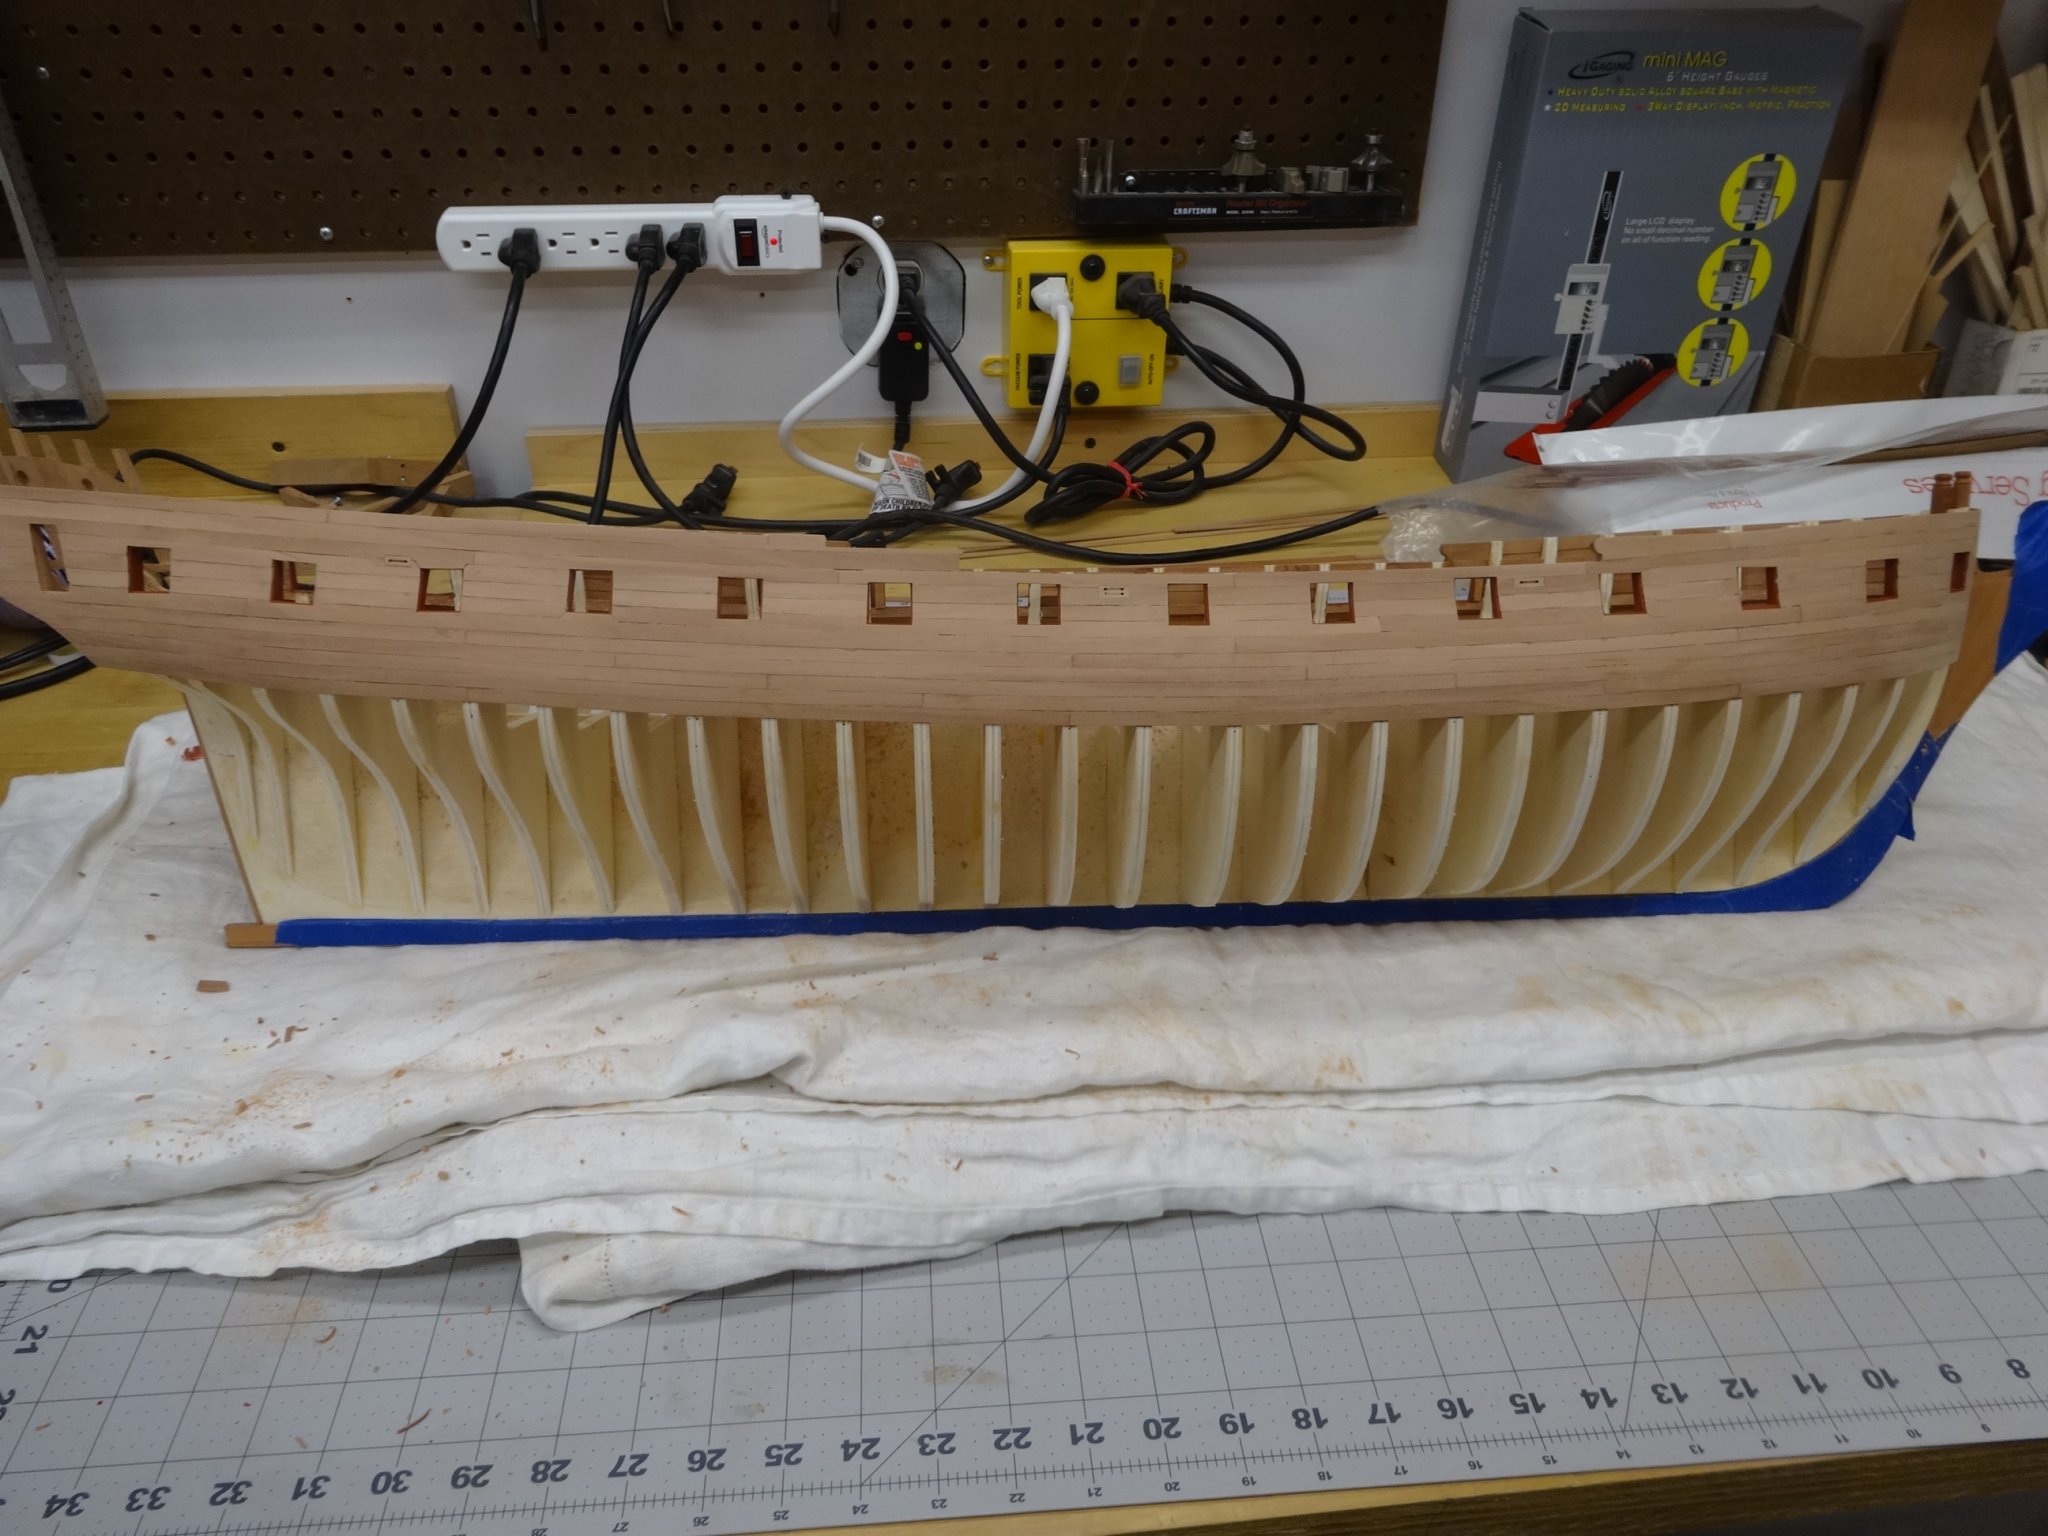
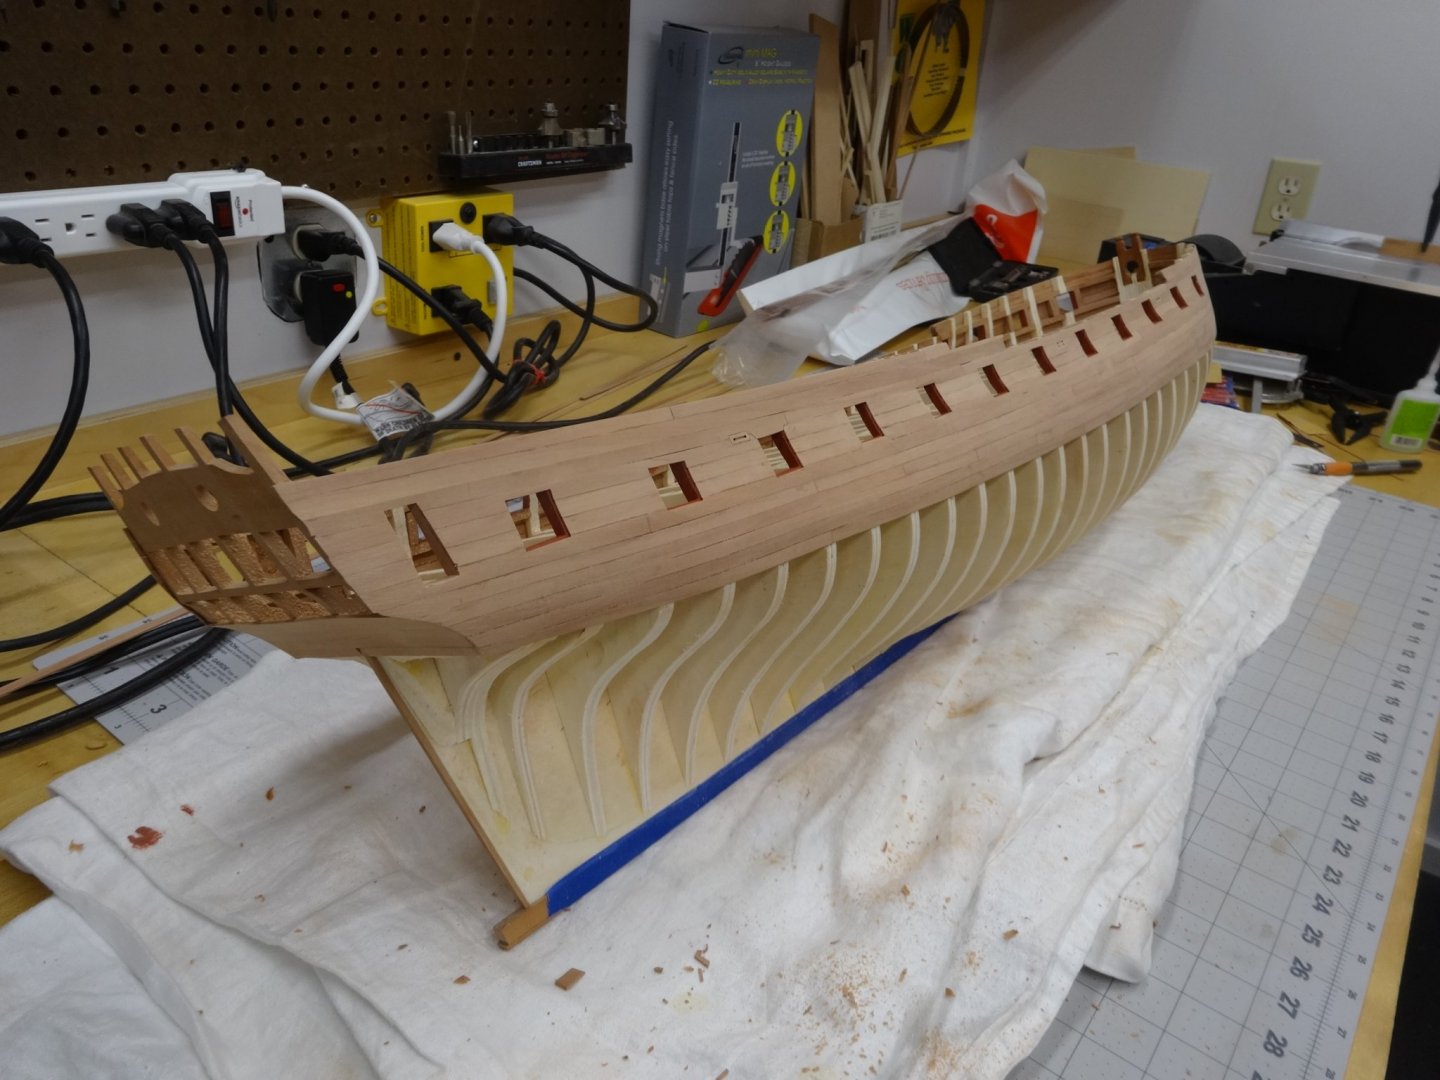
I've now completed the planking above the wales on the starboard side. At this point it's been only sanded with 150 grit. I'll now add at least the first two strakes below the wales before adding the second layer to the wales. Once the two lowers strakes have been added I'll finish sanding and apply a finish. I'll also be spending a lot of time this weekend turning these 1/4" sheets into 3/64" strips. The instructions call for approximately 250 strips. That will take awhile!

- 642 replies
-
- 17
-
-
- winchelsea
- Syren Ship Model Company
- (and 1 more)
-
Very nice work B.E. and your explanations are great!
- 335 replies
-
- 1
-
-
- alert
- vanguard models
- (and 1 more)
-
Welcome aboard Fred. Follow what Chuck says, go slow and enjoy the ride!
-
As expected it's beautiful workmanship and great innovation.
- 1,784 replies
-
- 3
-
-
- winchelsea
- Syren Ship Model Company
- (and 1 more)
-
Thanks JJ. The paint I'm using is Admiralty Paints Acrylic Red Ochre.
- 642 replies
-
- 1
-
-
- winchelsea
- Syren Ship Model Company
- (and 1 more)
-
Hi Ben, I'm undecided on the finish at the moment. WOP, Tung Oil, Sanding Sealer? I guess I'll have to decide soon. Hi Joe, So far so good. Hope to see all of you then. Also thanks for all the likes!
- 642 replies
-
- 1
-
-
- winchelsea
- Syren Ship Model Company
- (and 1 more)
-
Hi Ben, Great to see you making progress!
- 399 replies
-
- 1
-
-
- winchelsea
- Syren Ship Model Company
- (and 1 more)
-
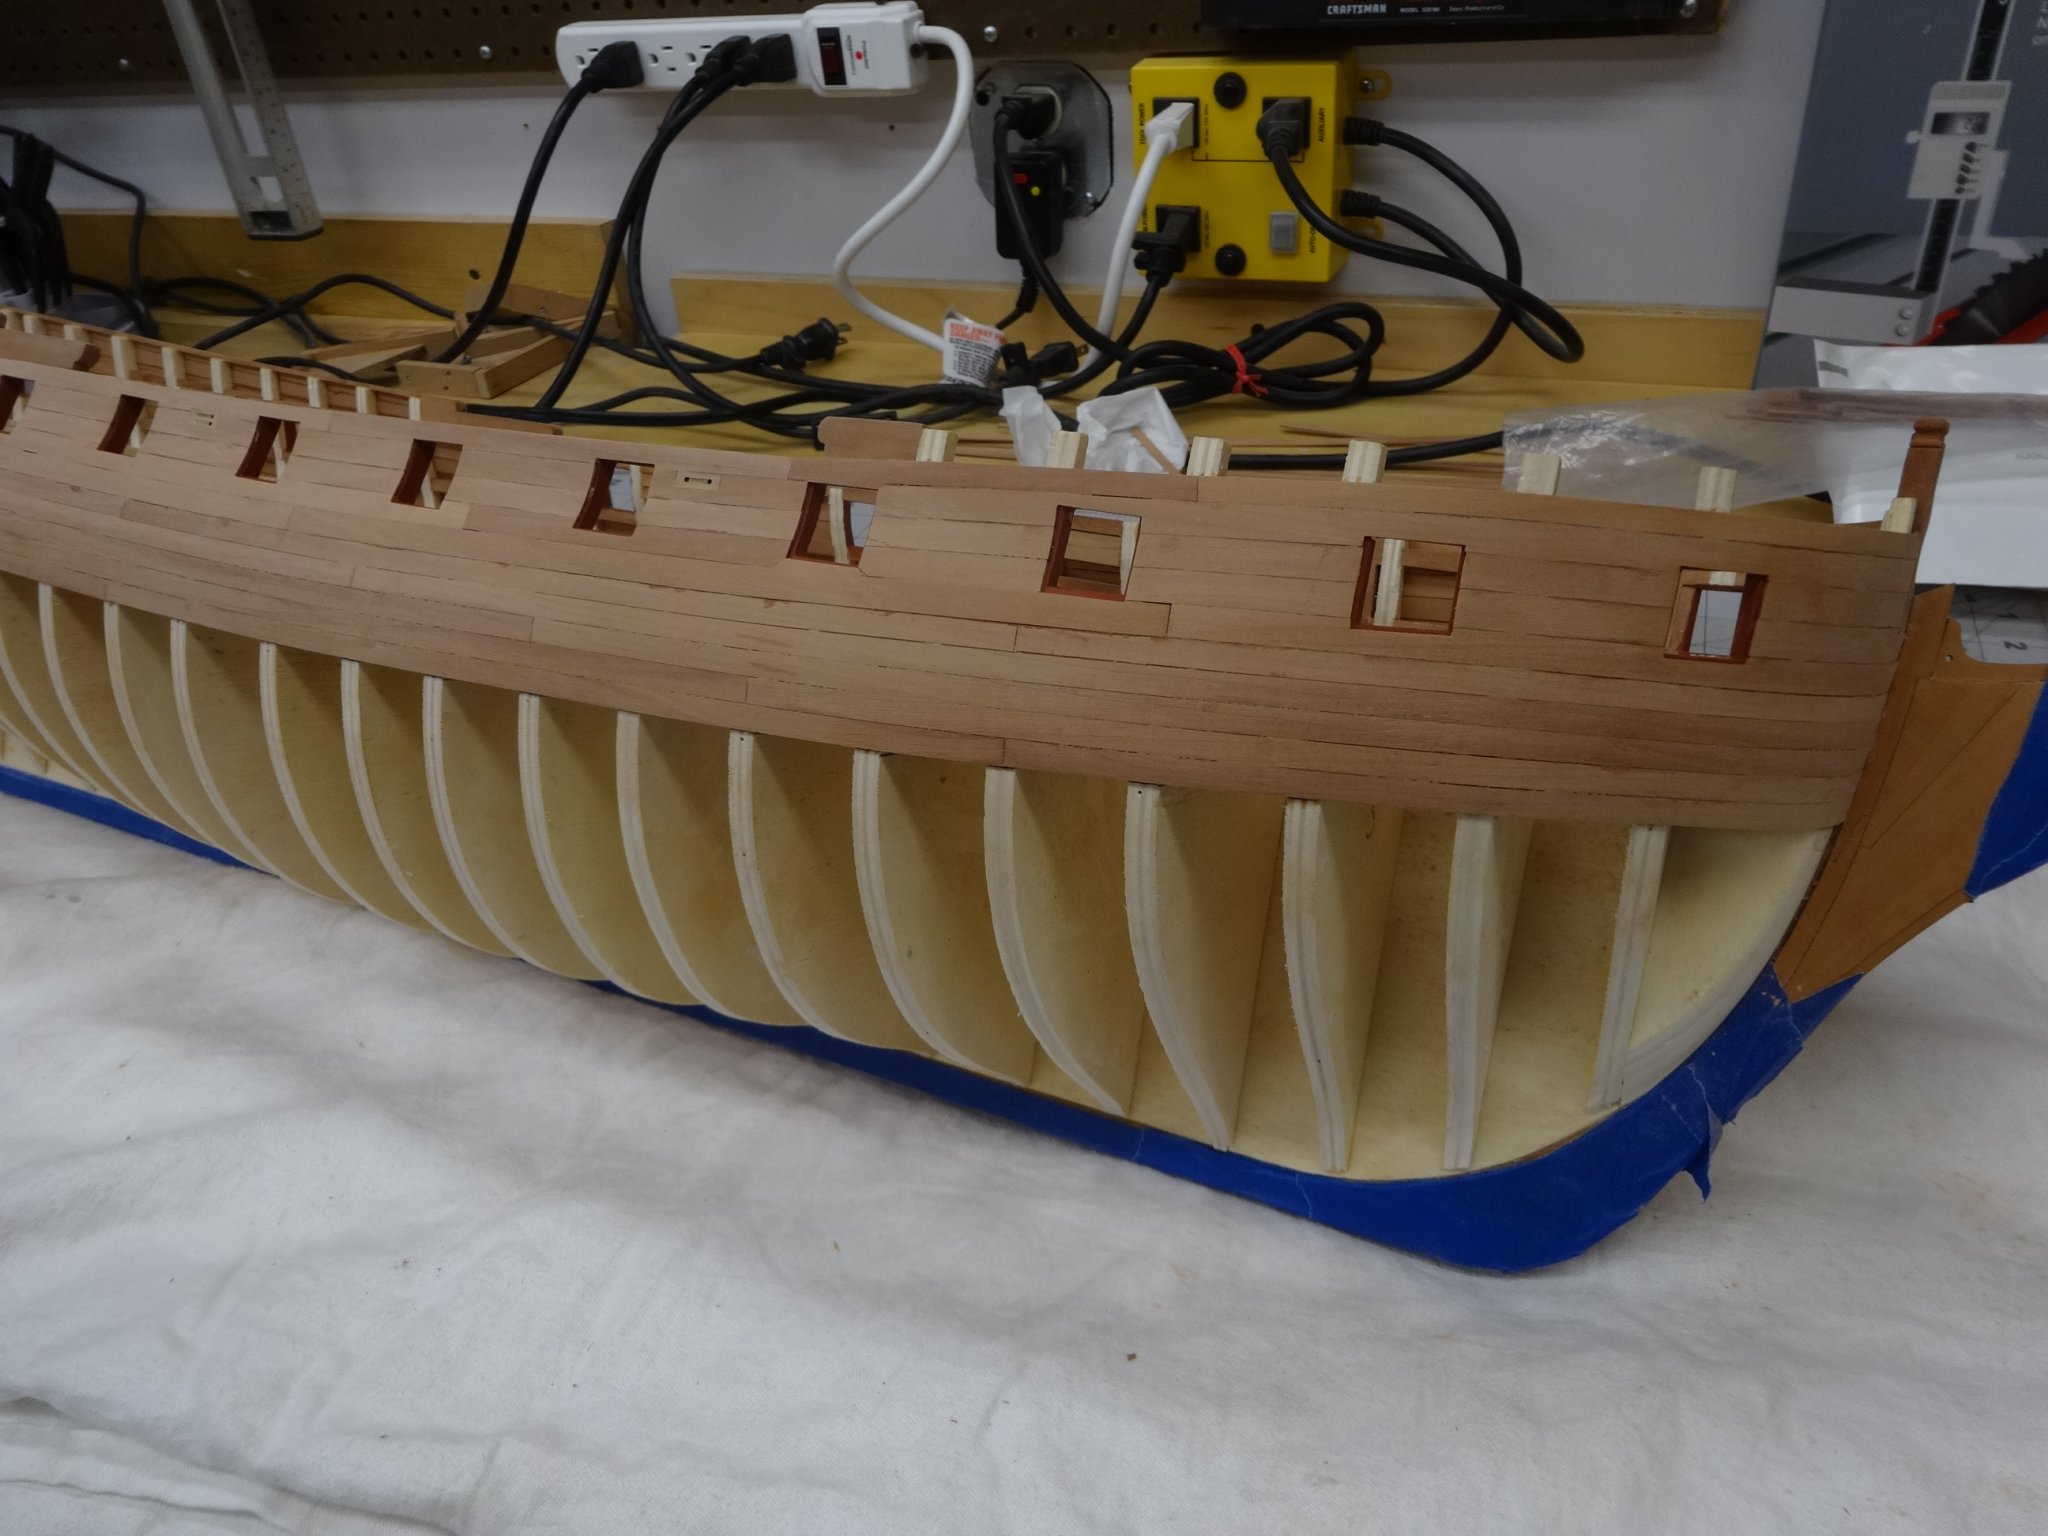
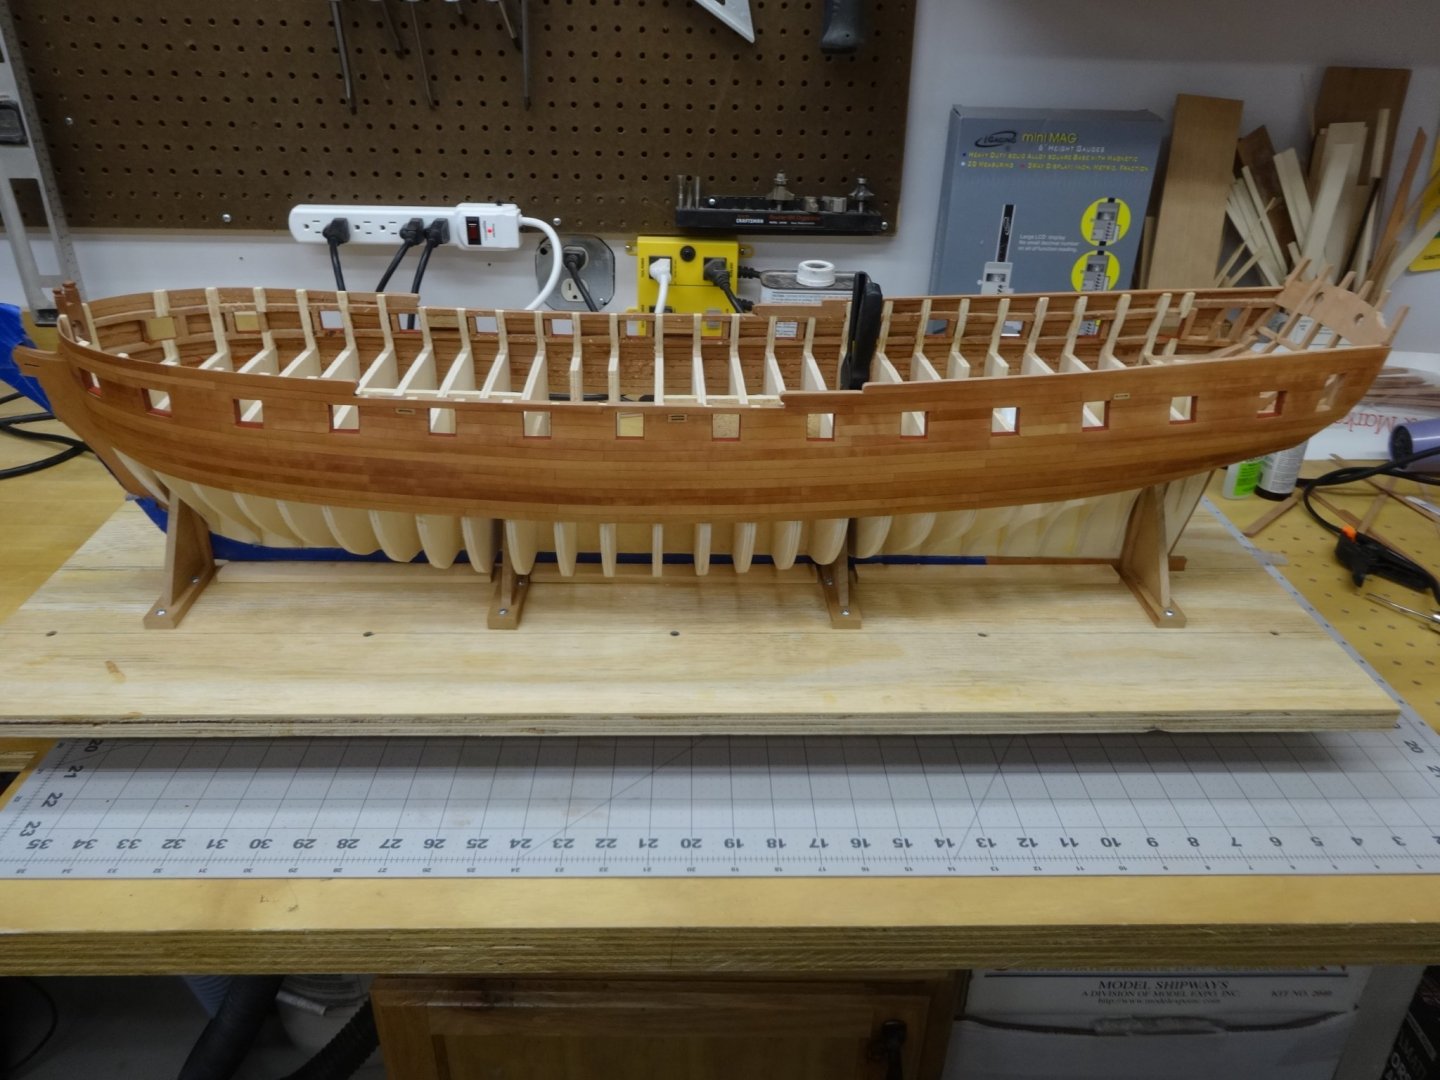
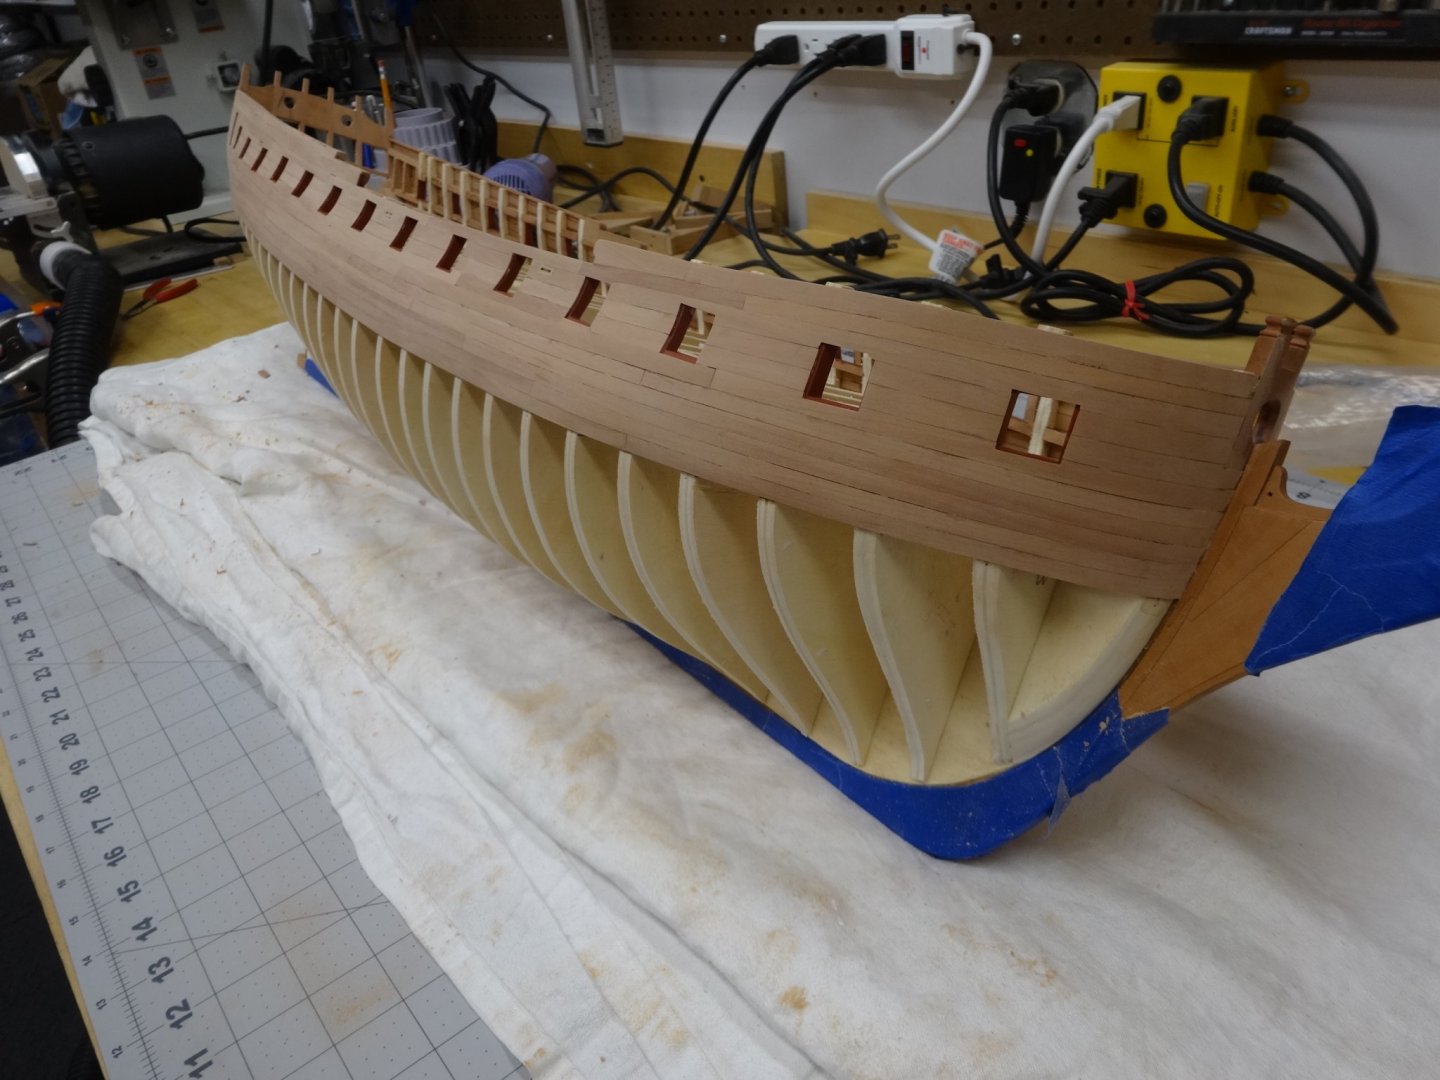
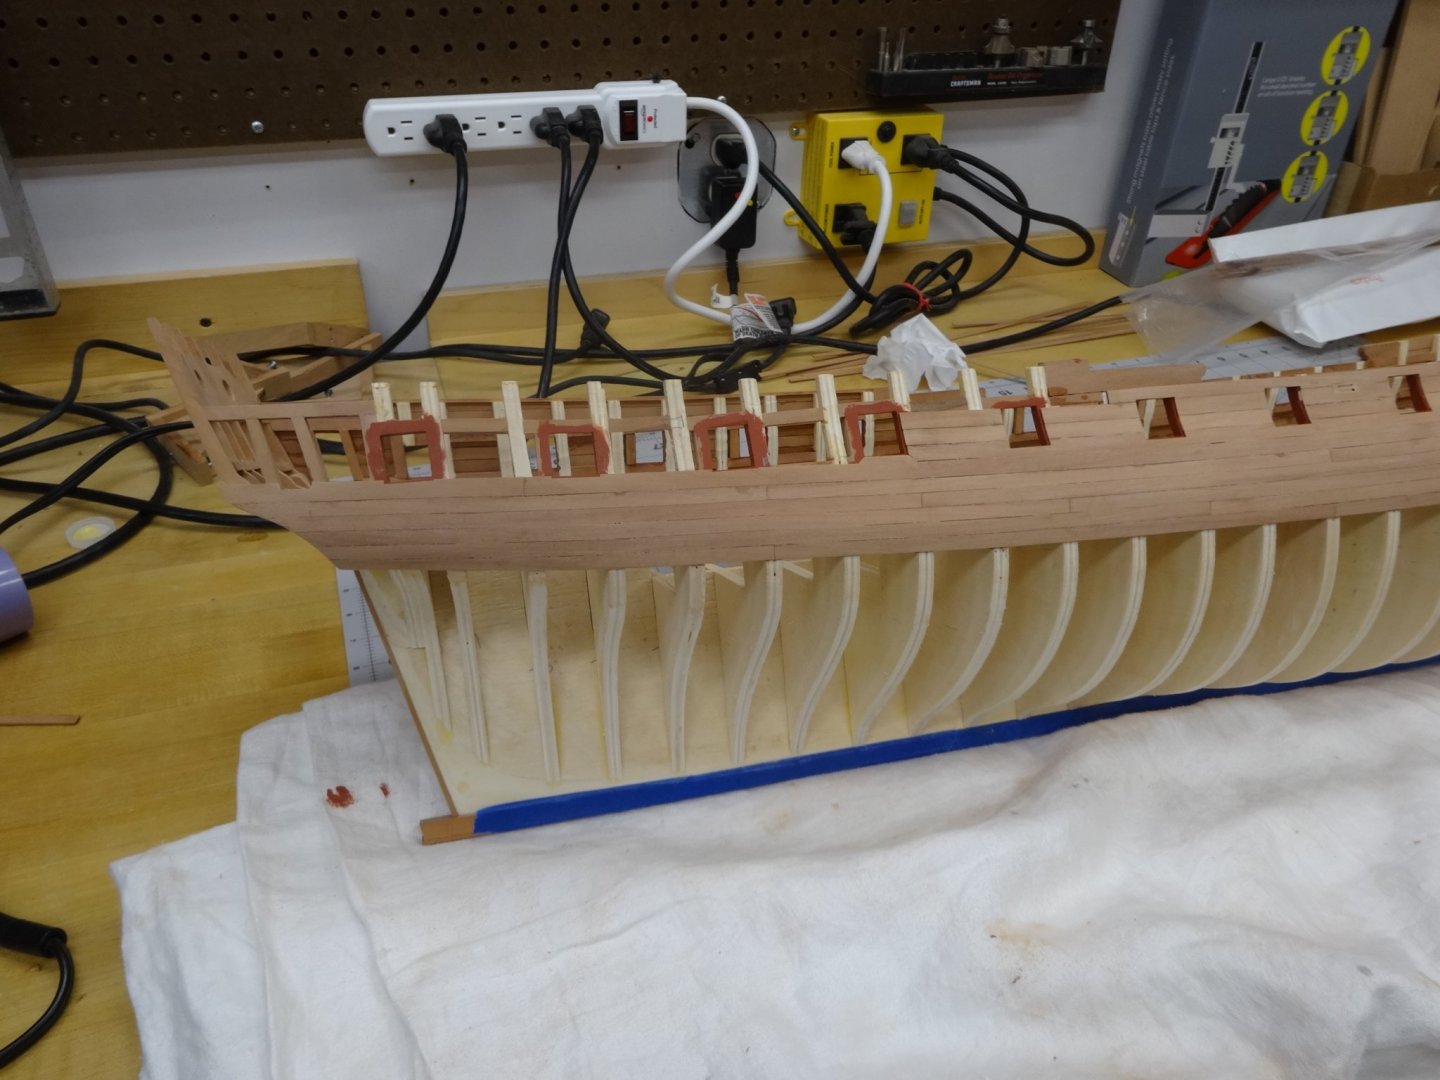
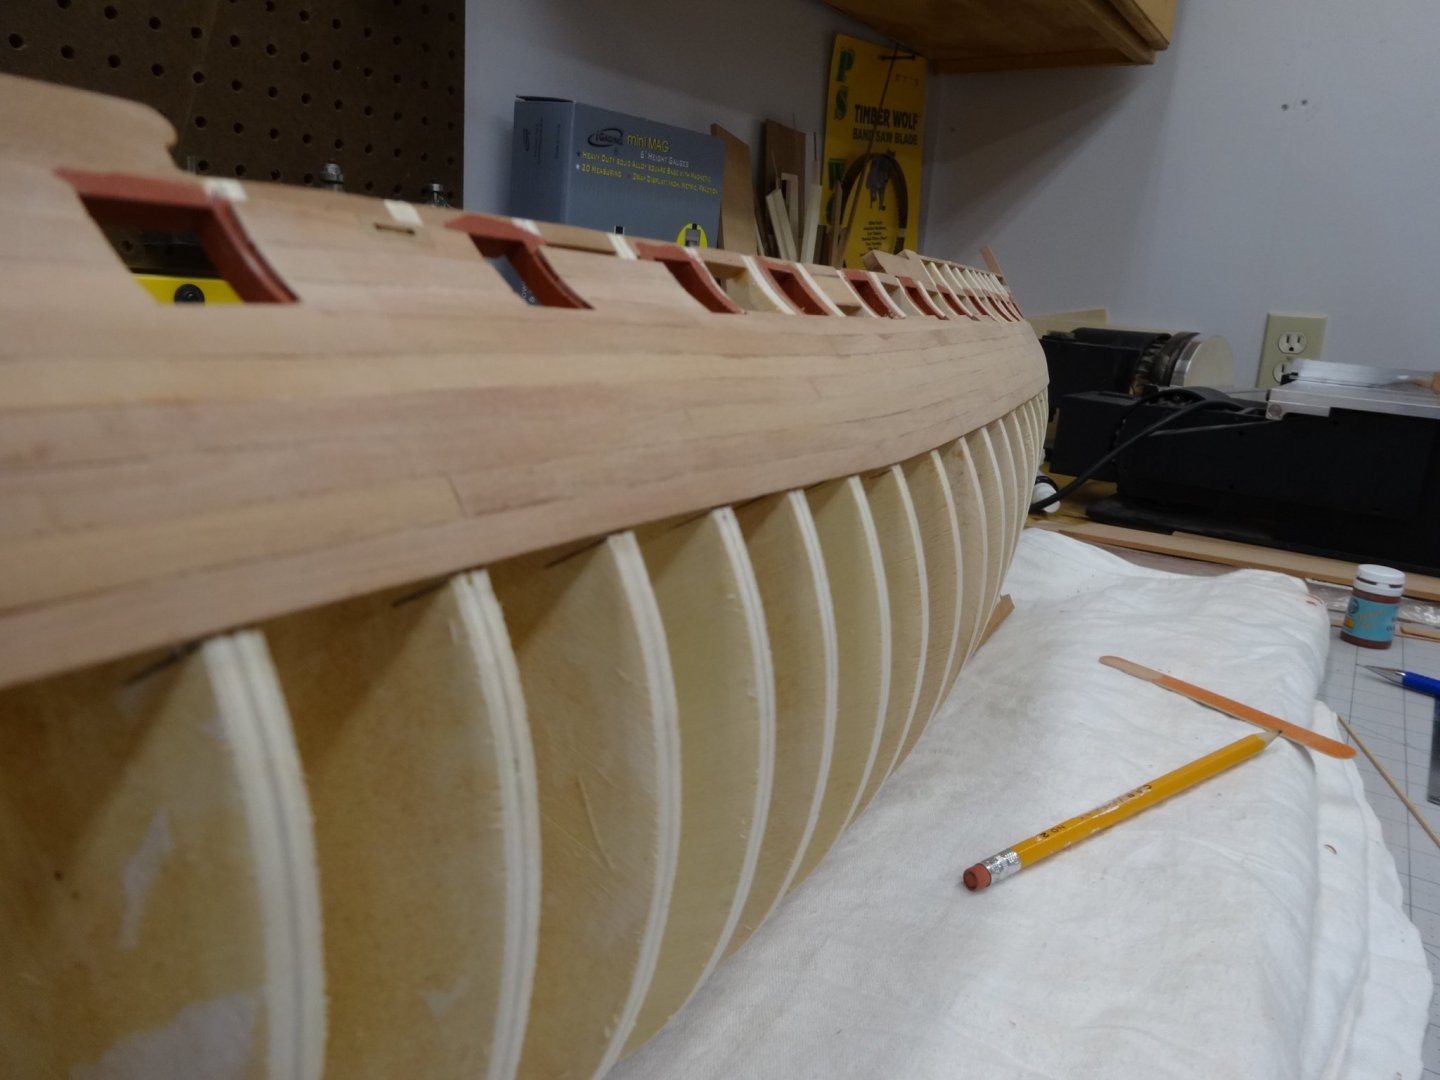
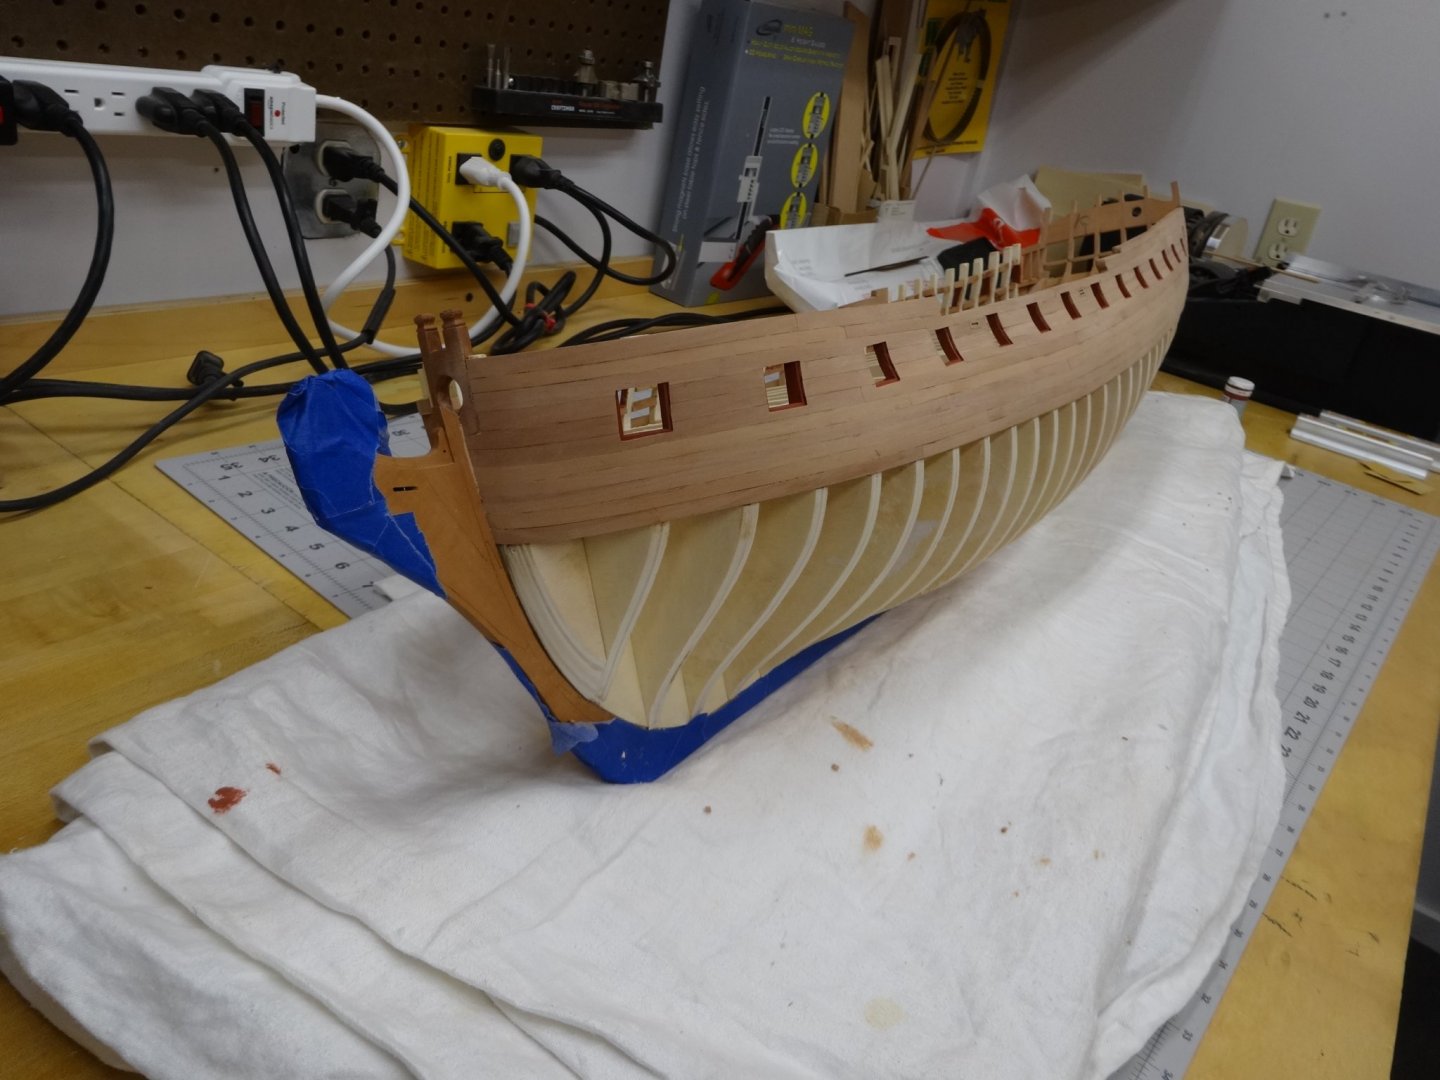
Here's where the Winnie is at in all her dirty glory. I'm happy to say that the starboard side went as it should. I've planked the first 5 strakes above the wales from the bow to bulkhead #15. She's in need of a sanding and a good cleaning. Thanks for stopping by and all the likes!

- 642 replies
-
- 25
-
-
- winchelsea
- Syren Ship Model Company
- (and 1 more)
-
Thanks for the kind words. We all see things we would like to improve. The best thing is pushing on, learning, but most of all enjoying this wonderful hobby. I also agree with start a log. Best way to get help. I’ve been saved many a time.
- 152 replies
-
- 2
-
-
- medway longboat
- Syren Ship Model Company
- (and 1 more)
-
Great planking job!
-
Thanks guys. Oh things going wrong and finding fixes is very common in my workshop. I hope it helps someone out.
- 642 replies
-
- 3
-
-
- winchelsea
- Syren Ship Model Company
- (and 1 more)
-
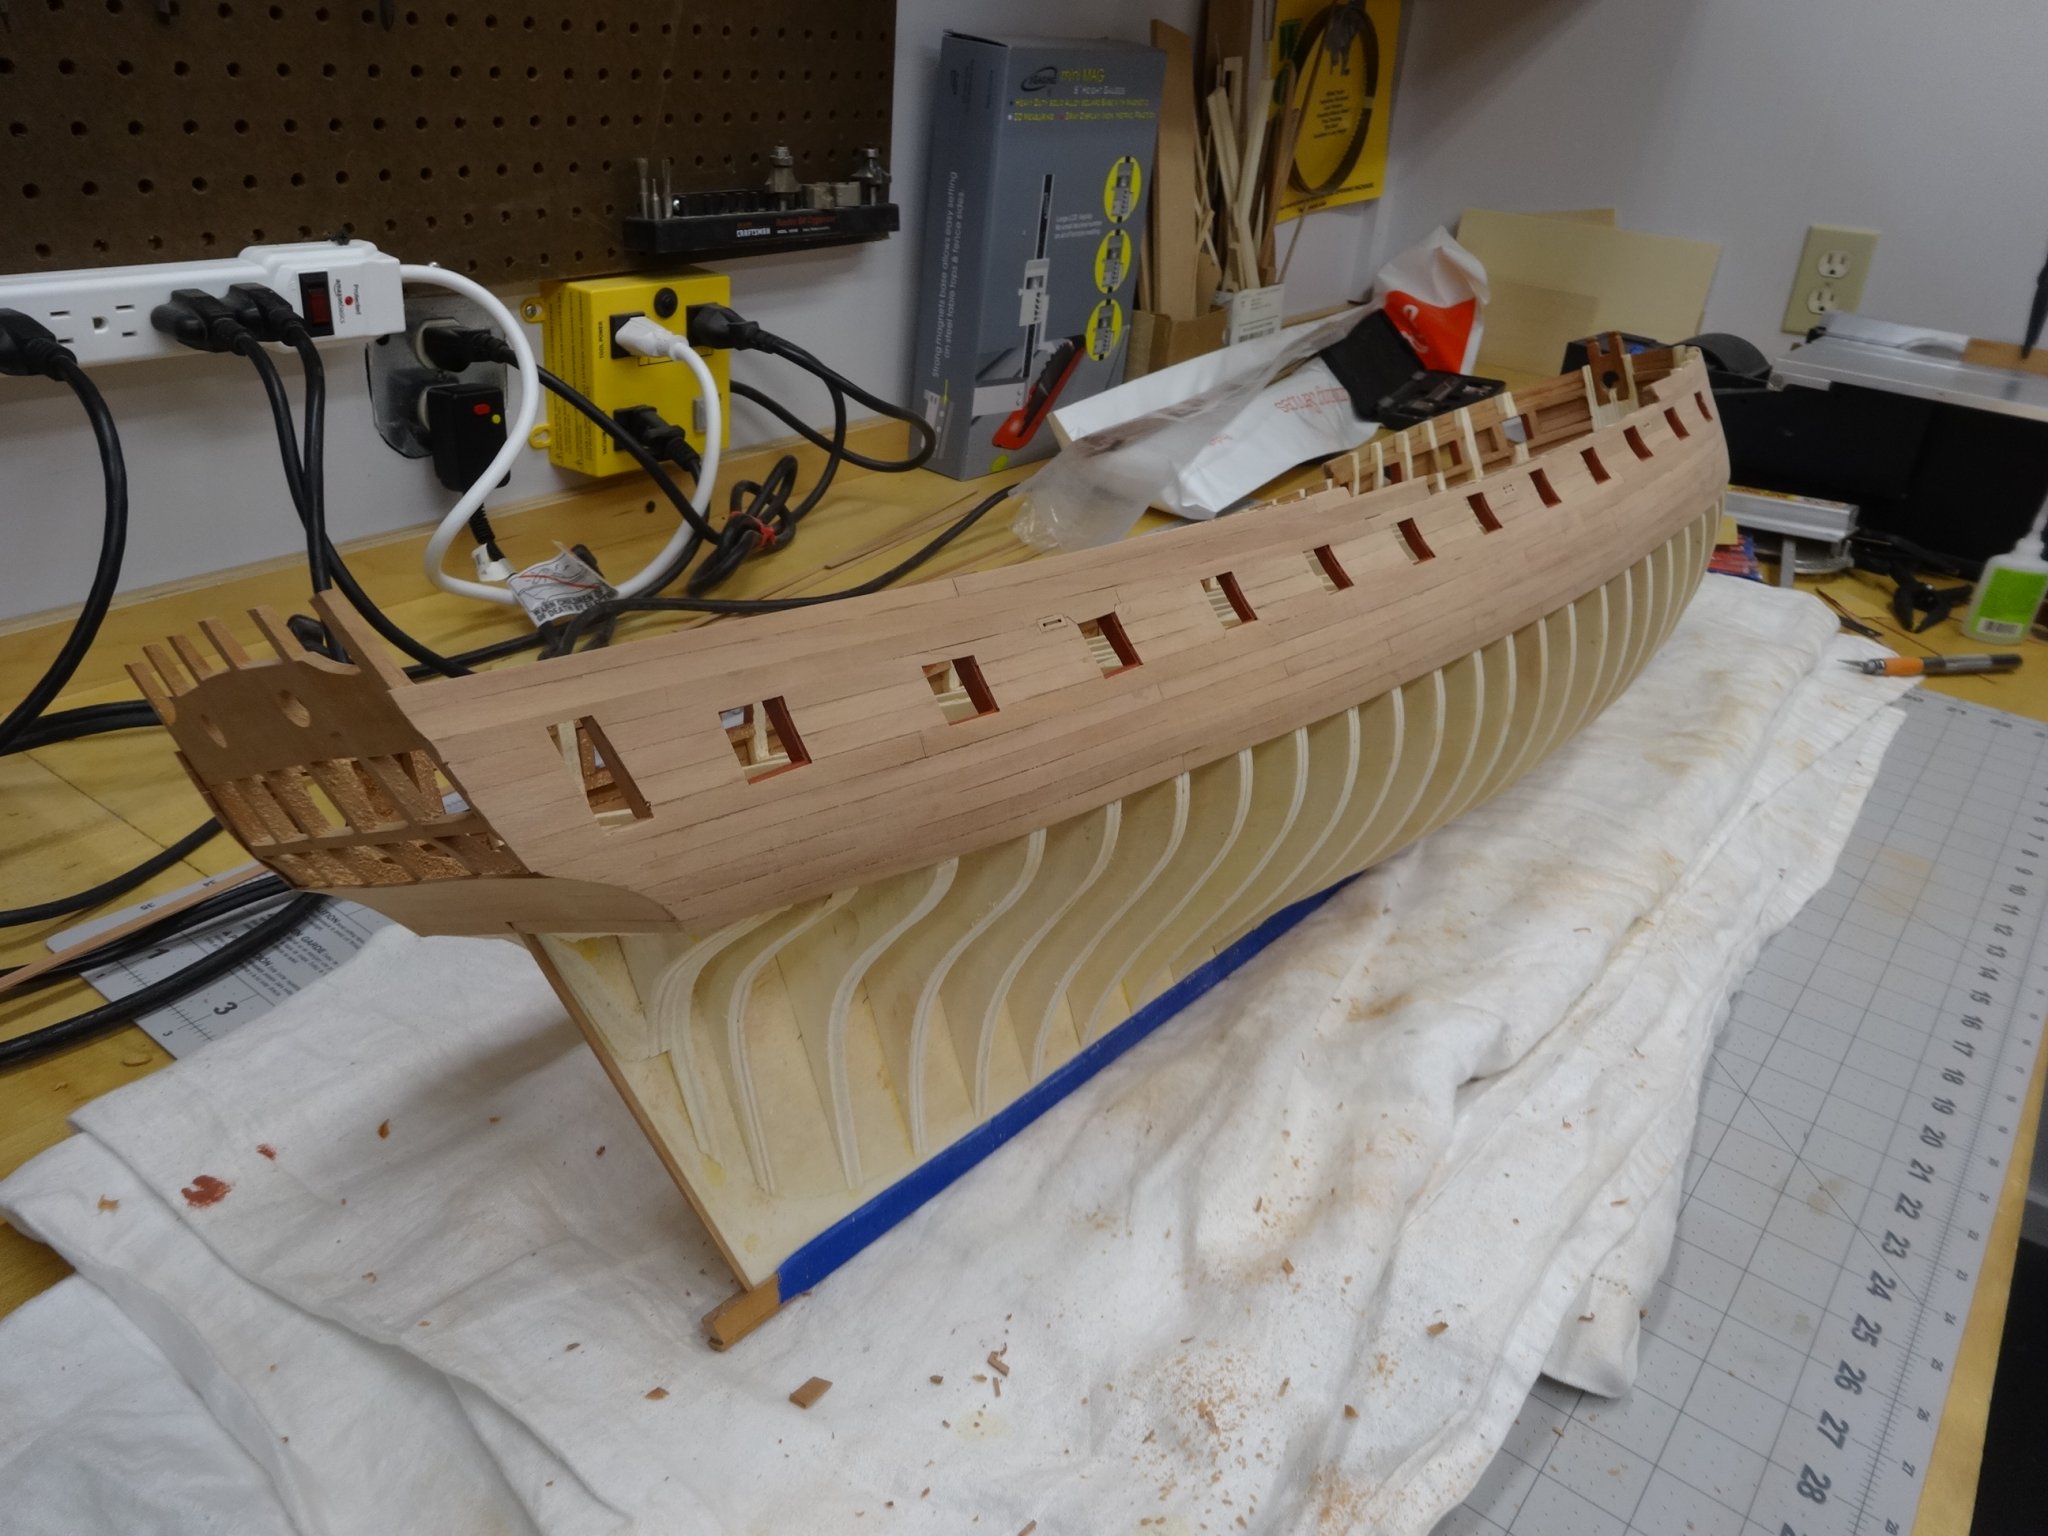
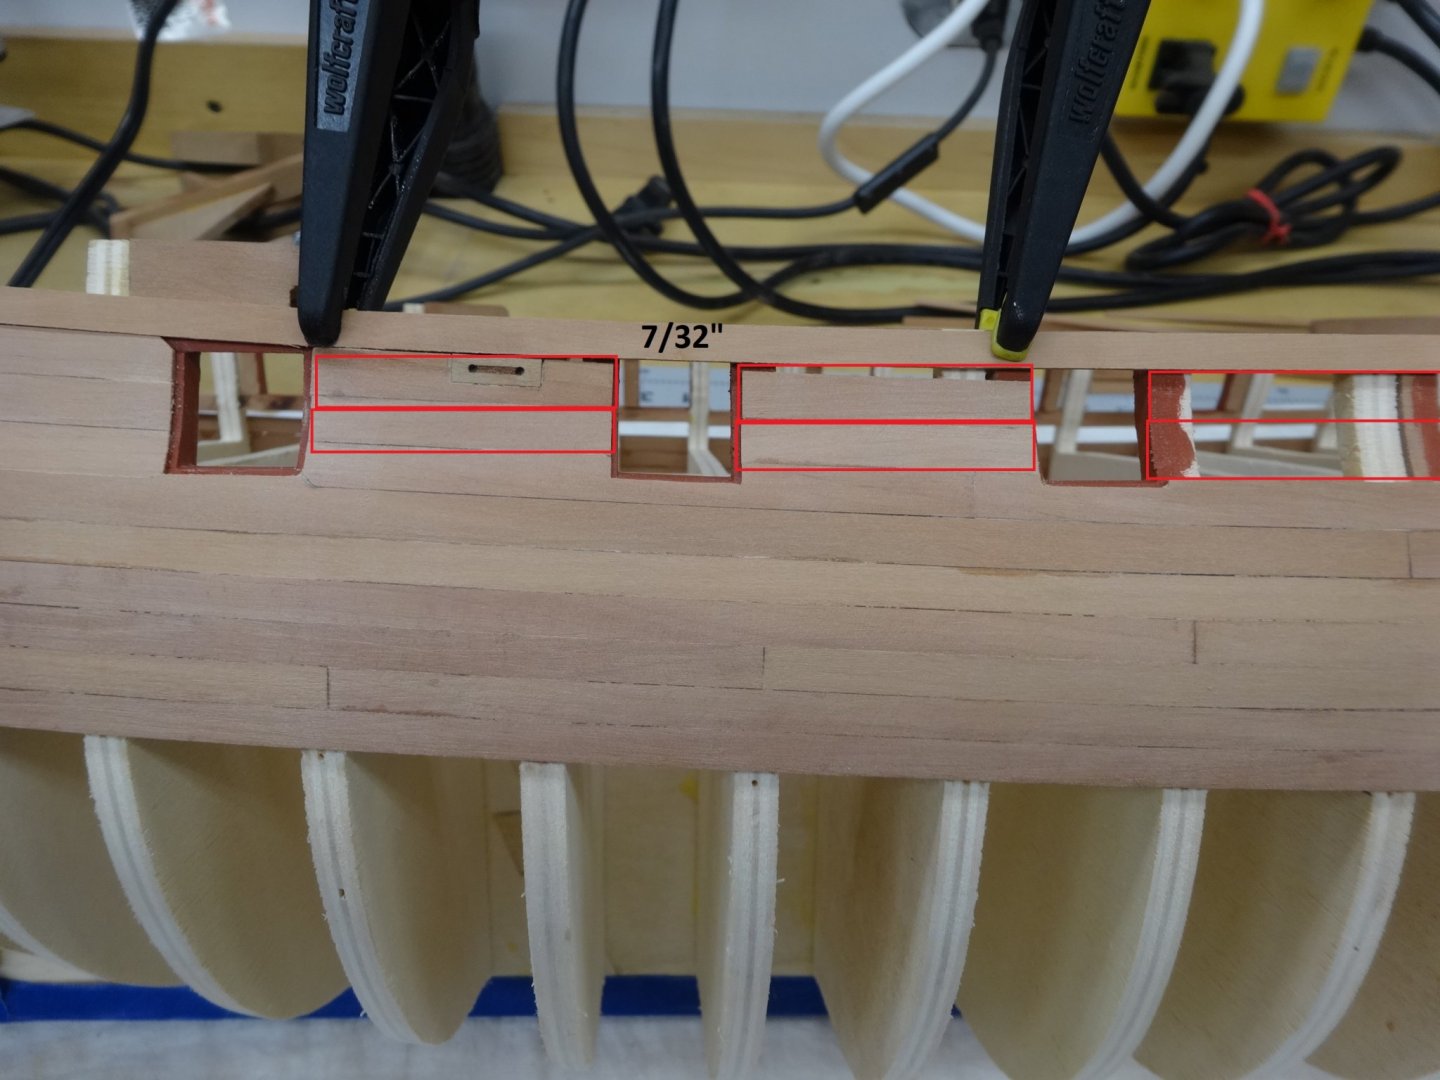
Thank you Chuck for your advice. Also thanks for all the likes too. What I did is replaced the 3/16" 5th strake with a 7/32" strake. Clipped in place. I then measured the distance between the 2nd strake and the 5th strake. These two strakes should have been 1/4" wide but I needed a bit more than that. So I then split the distance between 2nd strake and the 5th strake and cut the two strakes to fit. These are represented by the red boxes in the picture. Each set between the ports had to be custom cut to fit. Once I got past bulkhead "7" I resumed normal planking. Whew I hope that explains it.
- 642 replies
-
- 16
-
-
- winchelsea
- Syren Ship Model Company
- (and 1 more)
-
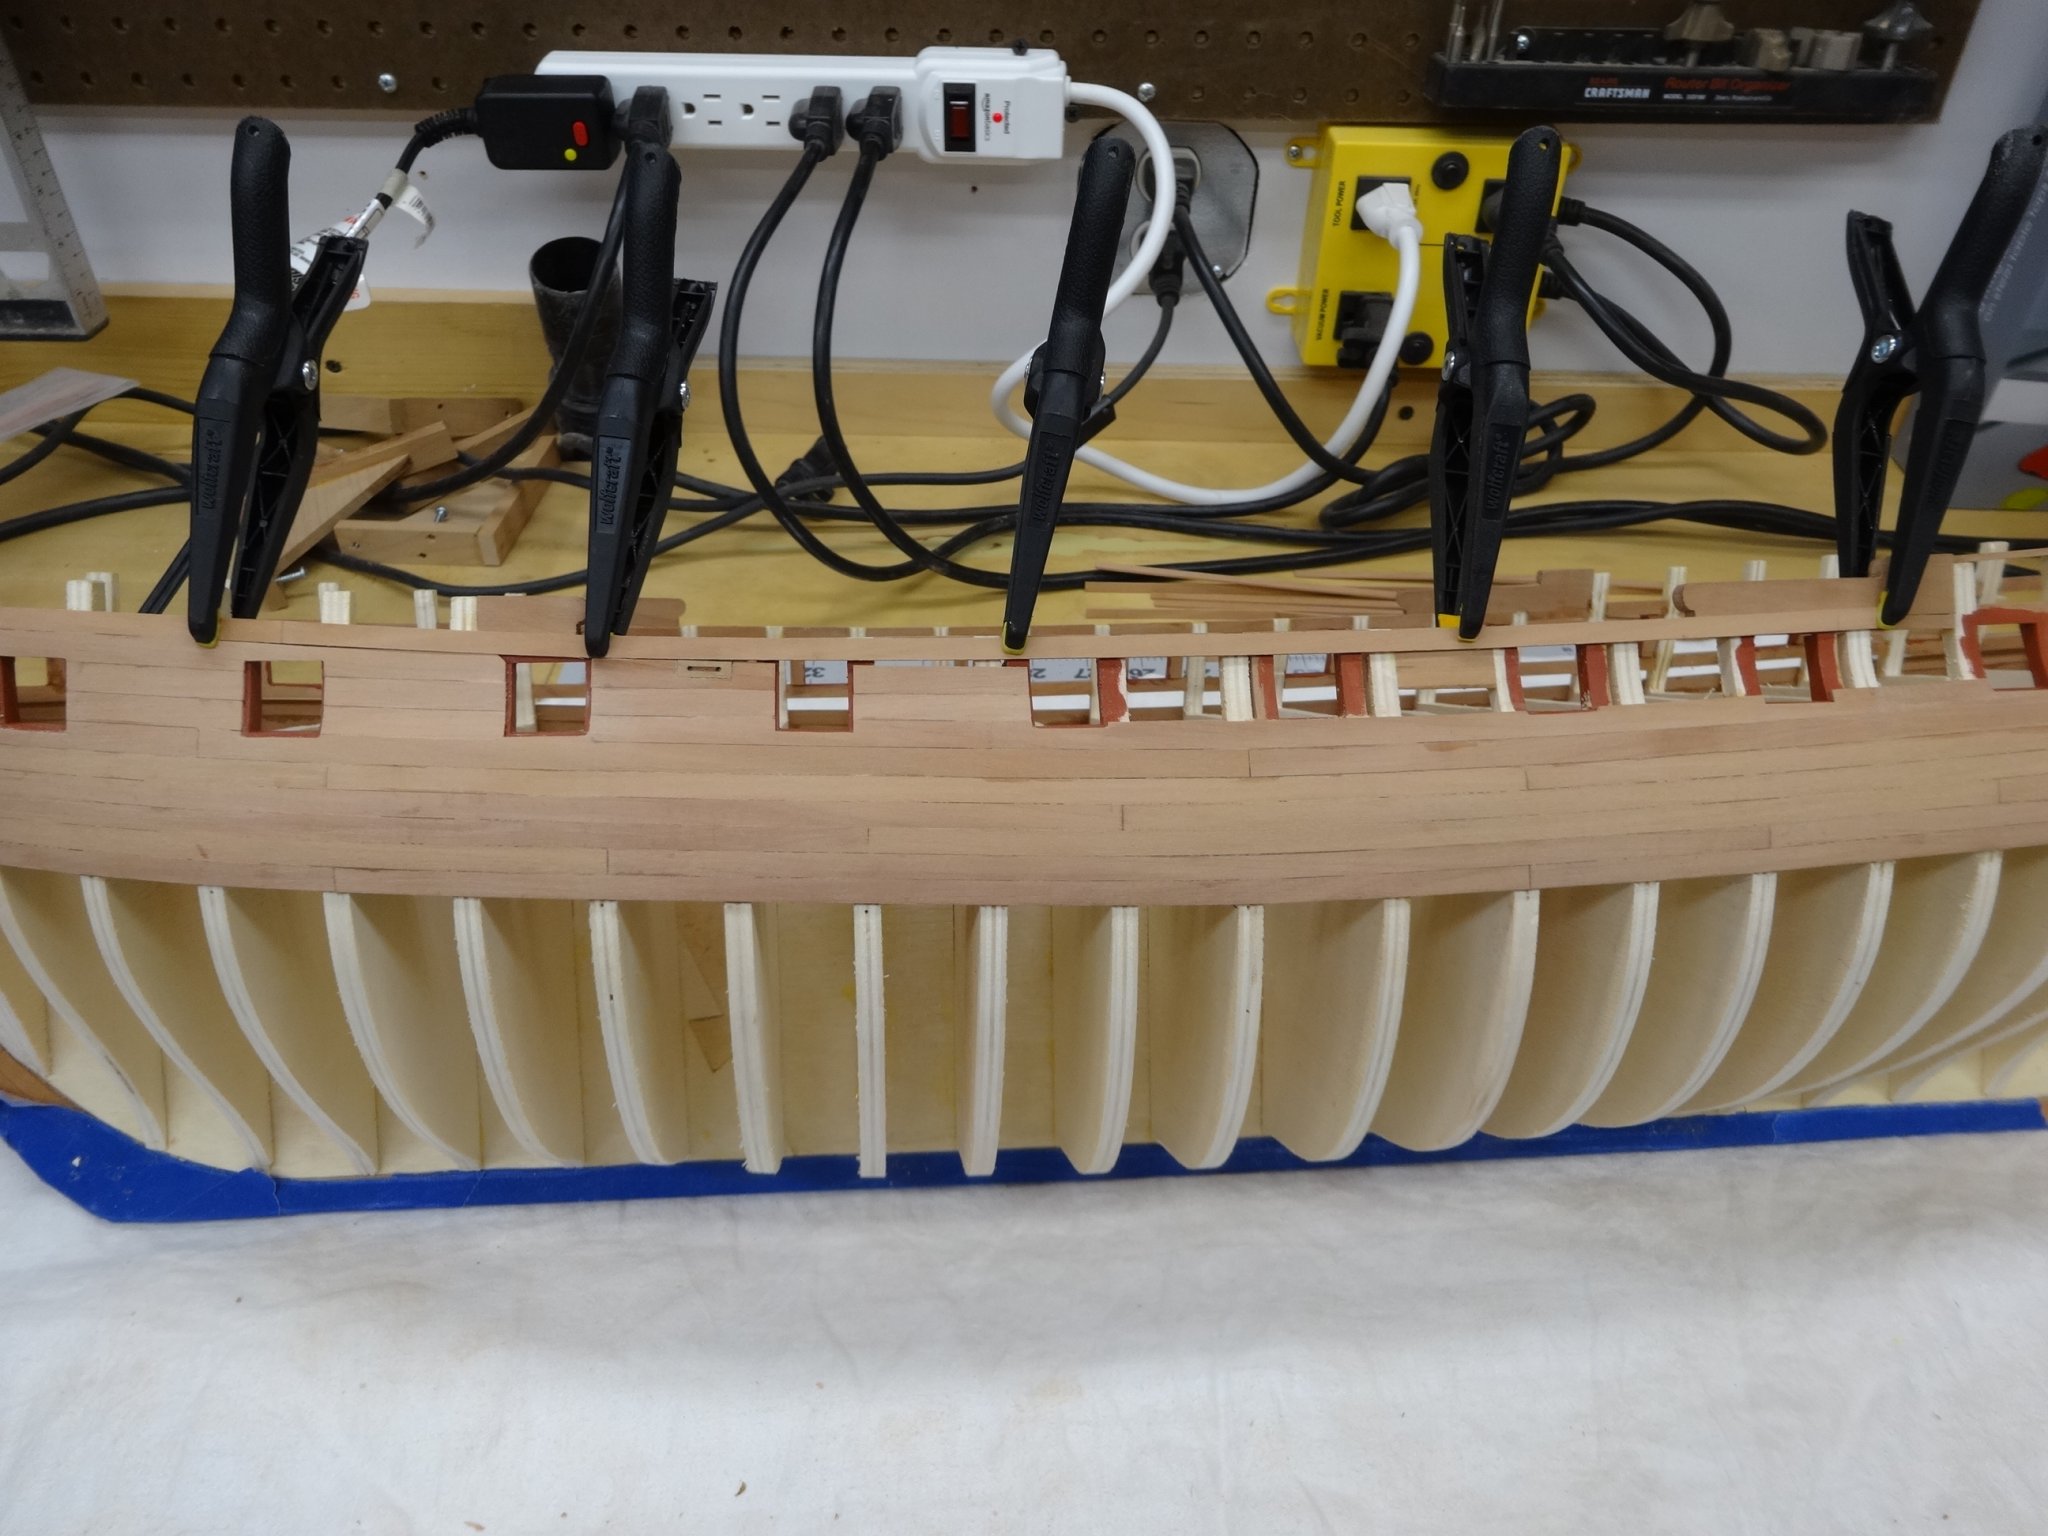
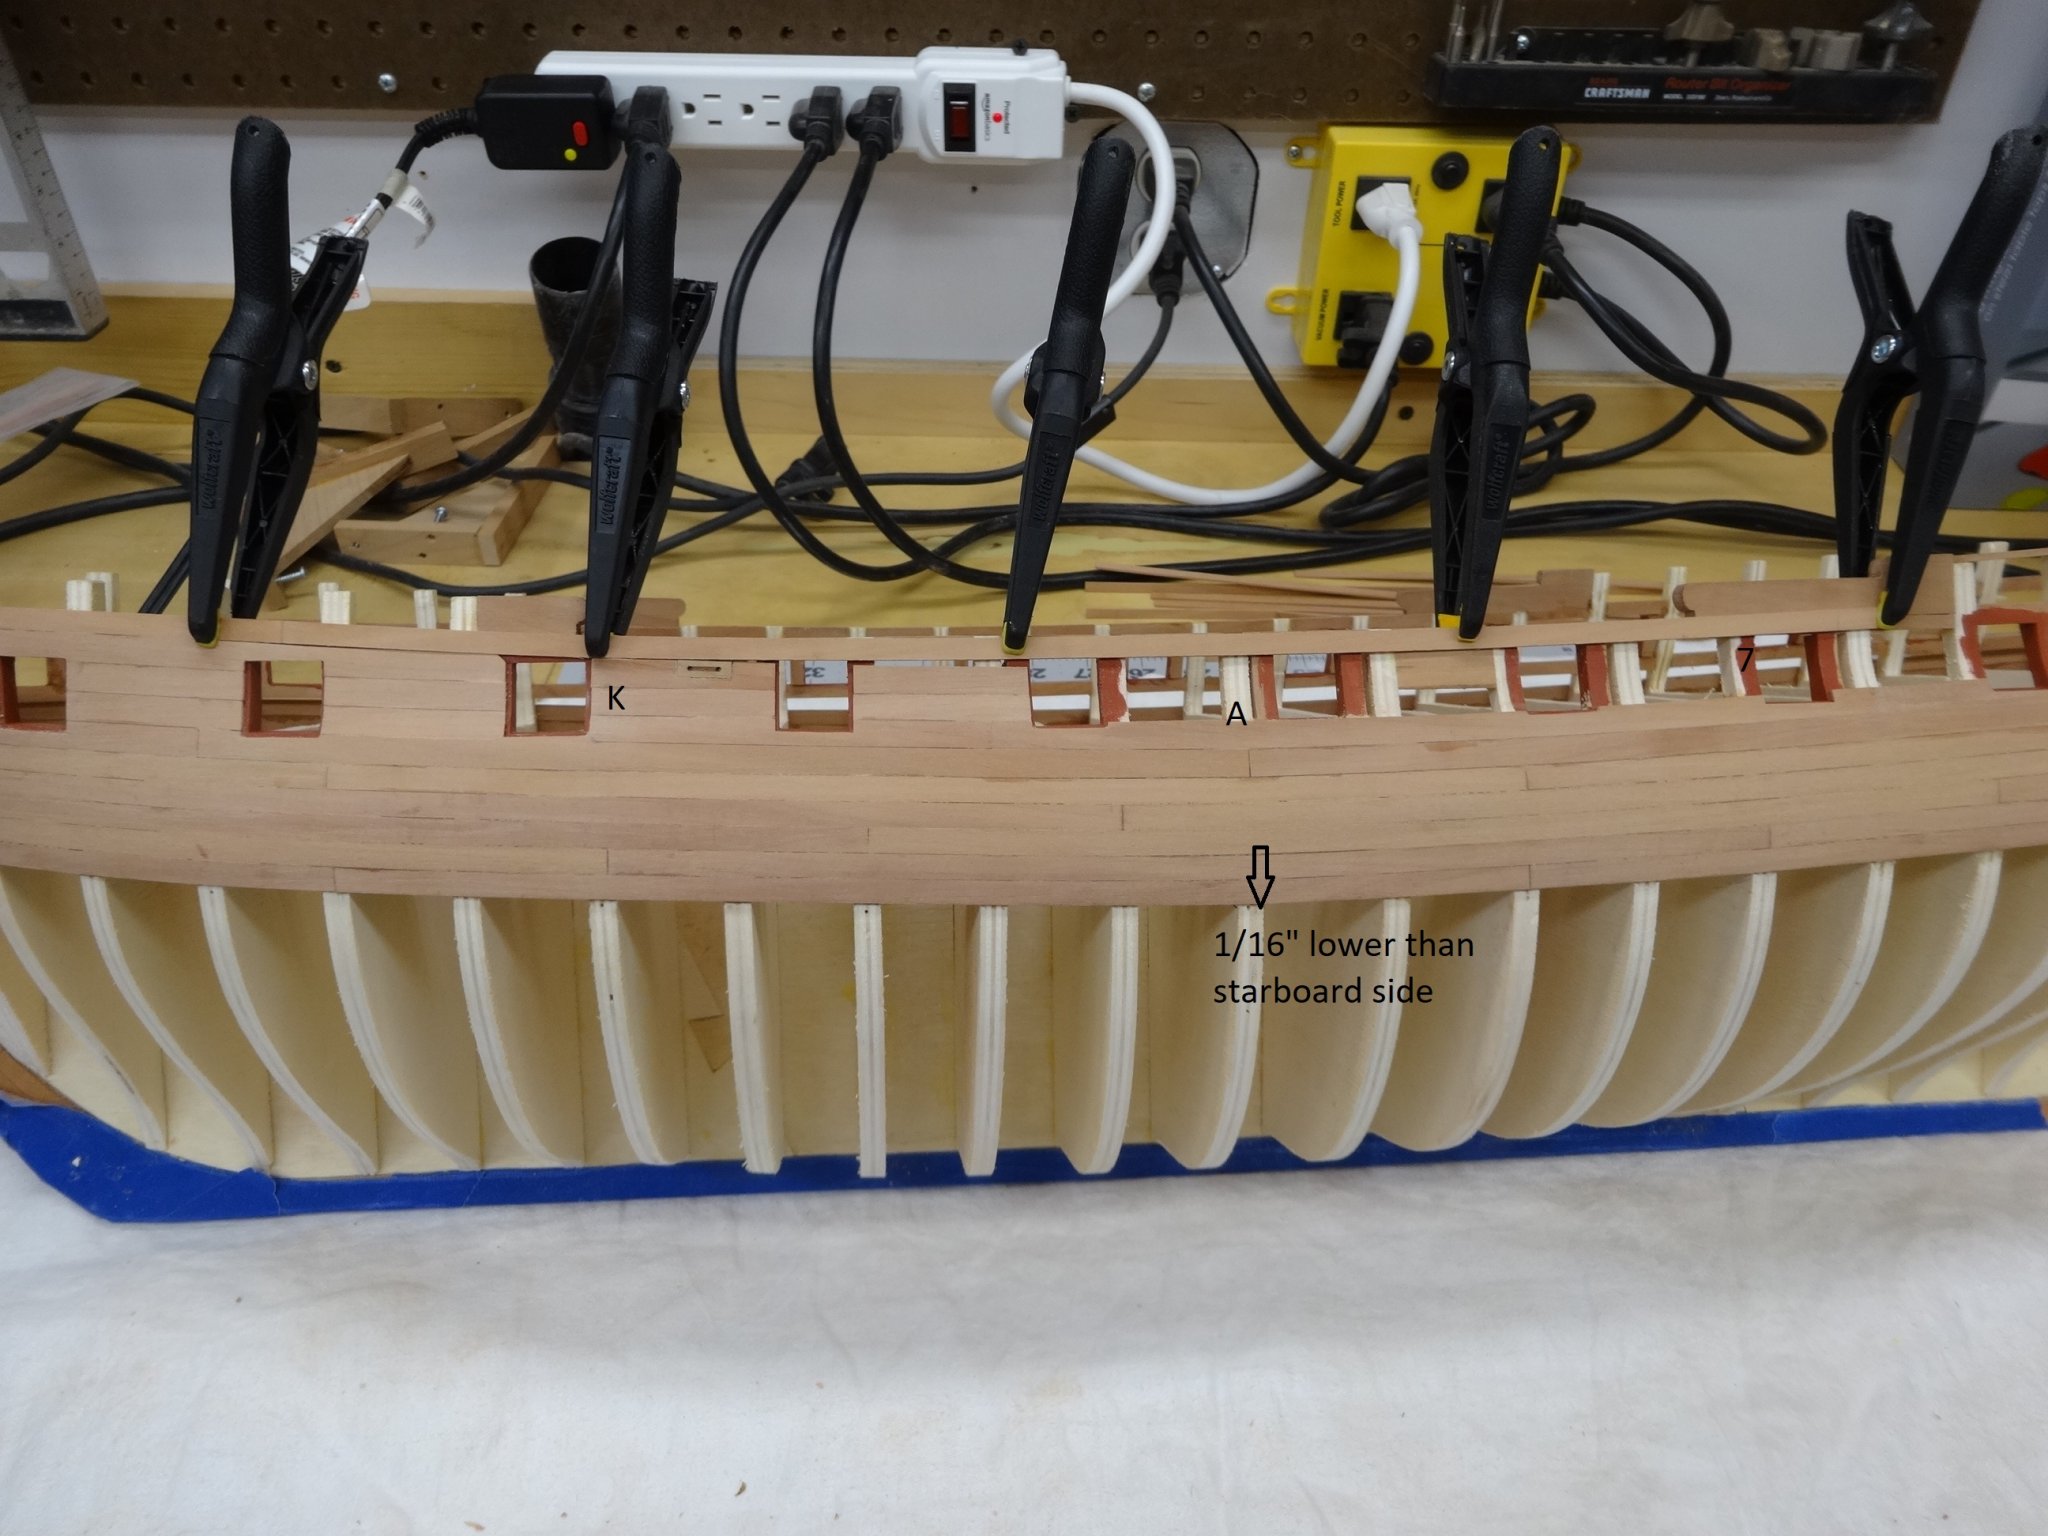
Thanks Joe, No matter what is going on I try to steal whatever time I can. Even if it's 20 minutes and one piece. I've completed the port side upper planking. Unfortunately there was a "HOUSTON WE HAVE A PROBLEM" moment. As I was working from the bow to stern doing two rows at a time by the 4th row at bulkhead "K" I started to see a problem cropping up. I placed the 5th 3/16 strake where should be and you can see the other rows starting to take a dive. Scratched my head for a few minutes, made some measurements and looked at the model from a few different angles. Looking at the next picture you can see what looks like a dip in the bottom of the wales. So I measured some more and determined the wales at bulkhead "A" was 1/16" between bulkheads "K" and "7". The Starboard side was correct. So I pulled the planks off back to bulkhead "K" and the custom fit the pieces between "K" and "7". fit to the proper height of the 5th strake. Thankfully the frieze will cover this and when running the molding the seam adjustment will never be seen. I wanted to mention this so that others will be aware of the consequences of being off a little bit. Anyways here is the completed port side planking. Needs some more sanding and a coat of wipe on poly. On to the starboard side now.


- 642 replies
-
- 18
-
-
- winchelsea
- Syren Ship Model Company
- (and 1 more)
-
That's just the first salvo in the saw dust battle.
- 137 replies
-
- 1
-
-
- winchelsea
- Syren Ship Model Company
- (and 1 more)
-
Excellent planking job Mike. Your workmanship is always an inspiration.
- 607 replies
-
- 2
-
-
- winchelsea
- Syren Ship Model Company
- (and 1 more)
-
Hi Ben, Welcome aboard and It'll be great to watch your build.
- 399 replies
-
- 3
-
-
- winchelsea
- Syren Ship Model Company
- (and 1 more)
-
Hi B.E. Great workmanship and a Happy New Years to you!
- 335 replies
-
- 1
-
-
- alert
- vanguard models
- (and 1 more)