chris watton
-
Posts
2,334 -
Joined
-
Last visited
Content Type
Profiles
Forums
Gallery
Events
Everything posted by chris watton
-
 I have a great wife with a 'Can-Do' attitude! The aim is to one day give up our day jobs and concentrate fully on Vanguard Models..
 -
Eventually yes, carriages, PE parts and barrel for a complete cannon and carriage kit.
-
Yes, Ages of Sail contacted me a couple of weeks ago, and it all moved pretty fast from there. I have been quiet as I am working on finishing Flirt and also in the middle of designs for the 6th kit. I have also given my castor all 3-d files for all sizes of cannon barrels, so I will have samples of each (9, 12, 18, 24 and 32 pounders) next month.
-
I have used this for years now, for mast 'iron rings' and anchor stocks. Better scale thickness than copper strip that used to be in the kits I made years ago, and easier to manipulate. I hear what you say about anchor shanks, Bob, but the truth is I do not like white metal castings so much. The flukes I have for Alertand Speedy are only and do the job fine, but I note the hole for the anchor ring is already filled in on some castings, and the customer should not be expected to have to drill it back out. I used the same method of designing the anchors for Flirt as I did Victory, in the latter's case because they were so large. I was more than happy with the result, and they were exact scale and shape. With a little more spraying, the surface can get as smooth as a casting.
- 109 replies
-
- 3
-

-
- Vanguard Models
- Flirt
- (and 1 more)
-
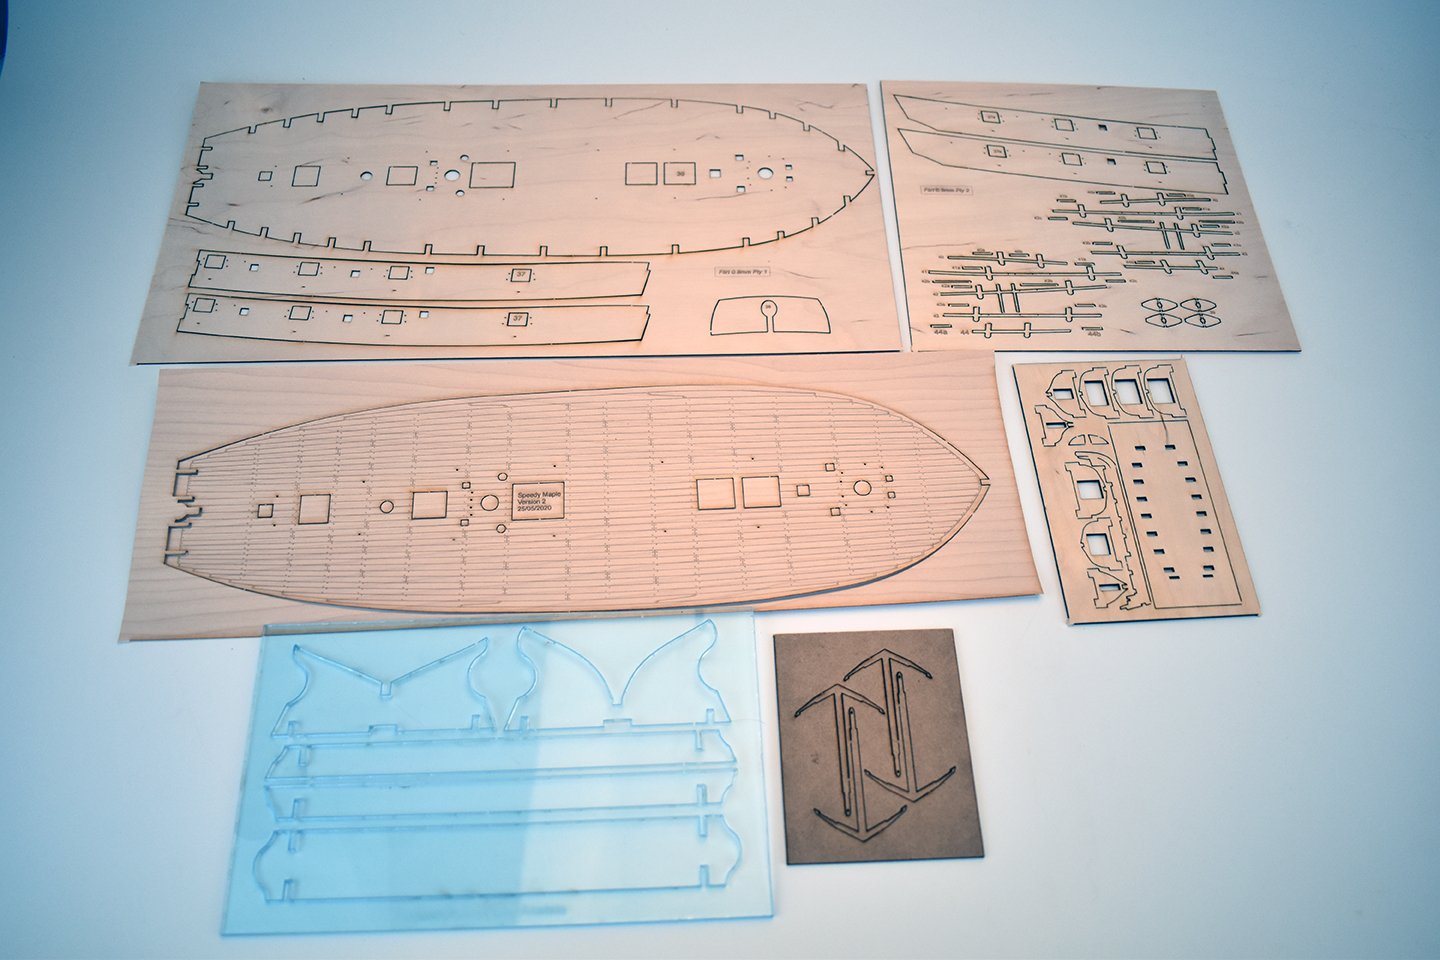
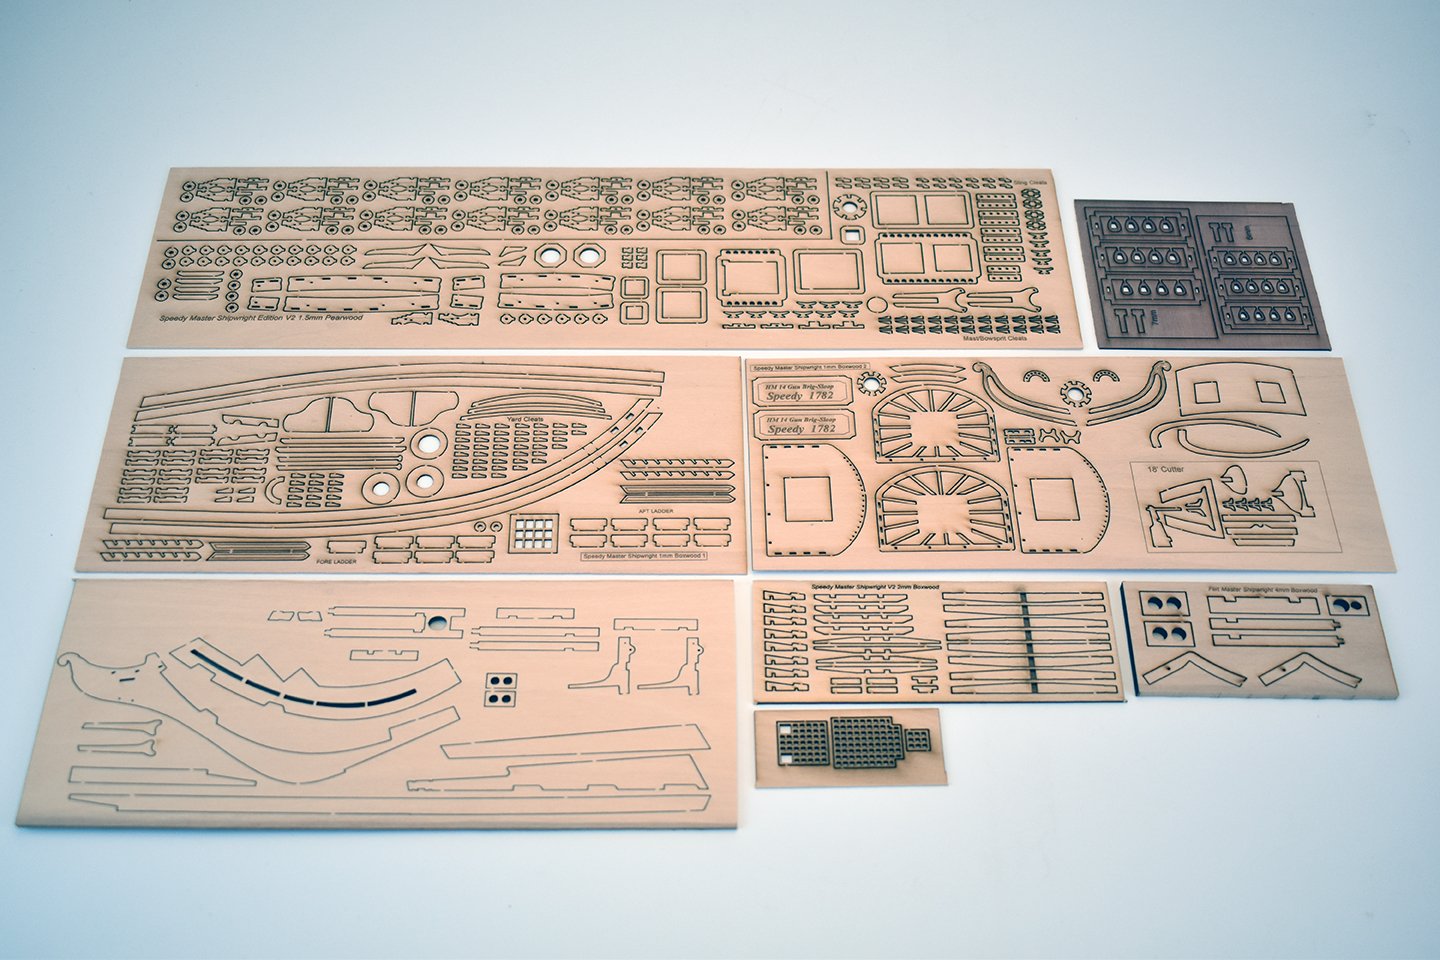
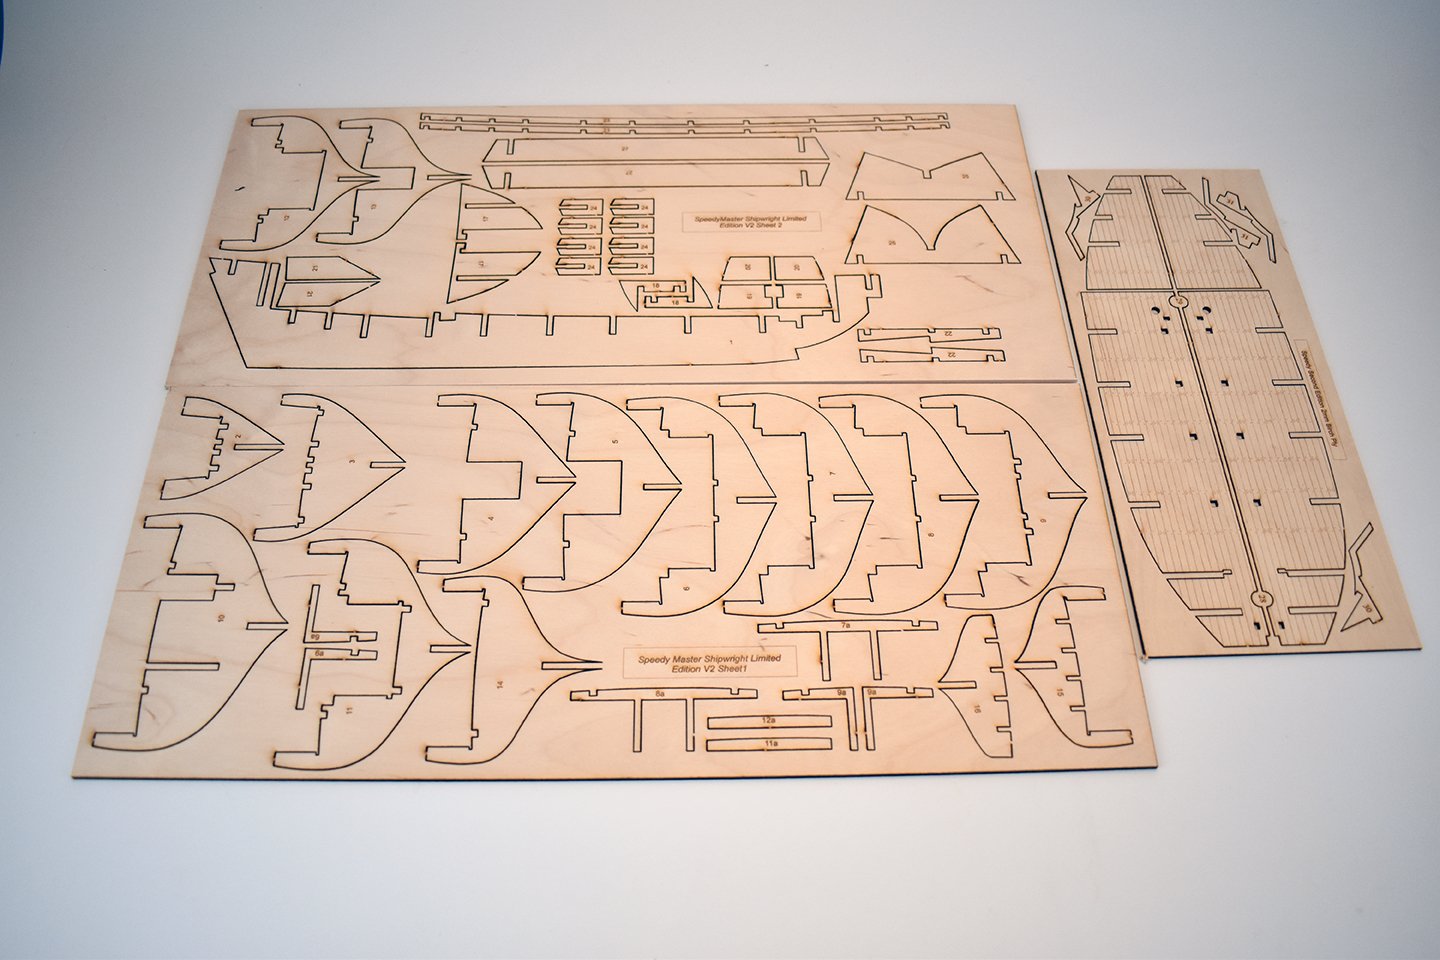
Right, before the Flirt release, I wanted to put together a version 2 of the Speedy Master Shipwright edition. I wanted to produce 10 of these very special kits, unfortunately, because of lack of pear blocks due to lockdown, I only have two full kits available. For this version, I have used all the best materials I can get, no expense spared: The 2 and 3mm MDF has been replaced with high quality birch plywood, with the lower deck showing laser etching All pearwood laser cut sheets are replaced with boxwood, and there is an extra 1mm boxwood sheet containing some parts from the 0.8mm ply and the PE sheets, like lower tops and all mast and yard cleats. There are 17 separate laser cut sheets, which include the ladder and gratings sets. Second planking in boxwood Pearwood laser cut heart blocks in case some want to replace the deadeyes for the lower mast stays Not cheap, but it is about as good as I can make it. https://vanguardmodels.co.uk/product/hms-speedy-master-shipwright-version/
-
If I ever made Sovereign again, I would still model the round tuck, as the square stern shown in the latest book just doesn't look right. Rudder would be next to useless.
-
No need for guilt, as long as you enjoy the build, that's all that matters to me.
- 725 replies
-
- 3
-
-
- vanguard models
- speedy
- (and 1 more)
-
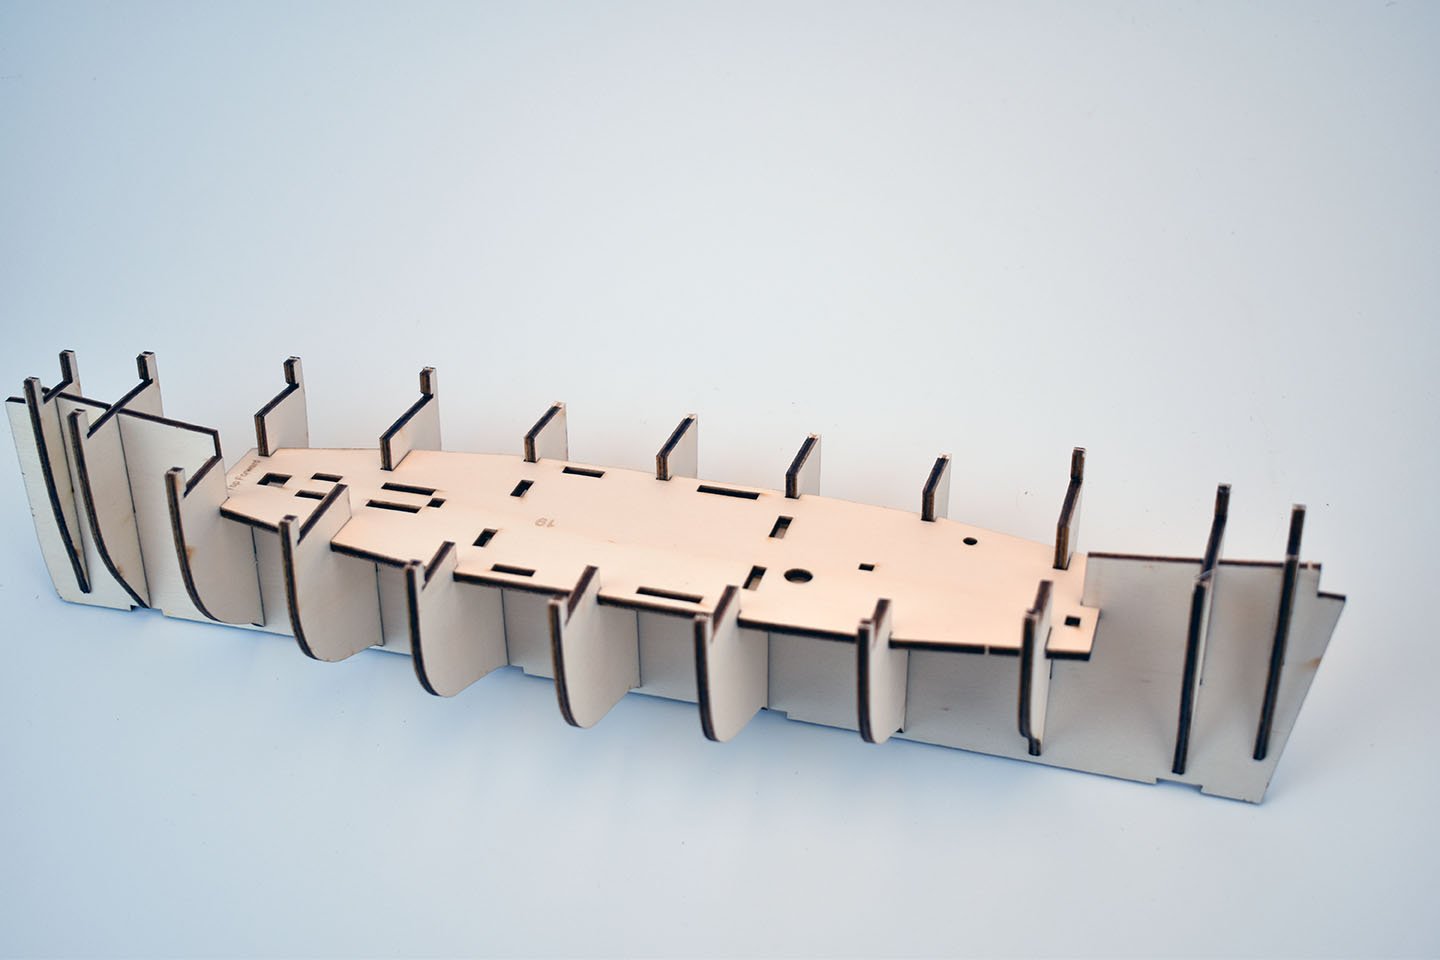
Before deciding on final structural materials, I did buy a batch of 'standard kit' ply, poplar ply, which is used in many kits. I found that it was woefully weak, look how many tabs are missing just from me attempting to dry fit the 0.8mm ply deck! Looked great, presentation wise, but useless for anything else.
- 195 replies
-
- 9
-
-
- lady eleanor
- vanguard models
- (and 1 more)
-
Don't be afraid to bend the 0.8mm deck, I used the best ply I could get, so it is very 'bendy', being 3-ply
- 195 replies
-
- 3
-
-
- lady eleanor
- vanguard models
- (and 1 more)
-
I could certainly do the pumps, but I think I shall do these as I design them for future kits. I will also look at doing hammock cranes, and a few more fittings once lockdown is over and supplies run freely again (PE done in northern Italy, where the virus hit quite hard). I would like to do more cannon barrels and PE to go with the carriages, but regarding the barrels, I would need to find a less expensive method of producing them, as it stands right now, I cannot justify the high cost of producing all barrels in all sizes on the off chance I may sell a few now and again. Again, I will sort these as and when new kits that use them come online. Glad your parcel arrived OK!
-
Cheers Bob, and Ernie! Maybe one day, but I have to be honest, Victorian era ships do not get my juices running so much. My real passion is from mid 18th to very early 19th Century. There seems to a model kit of Endurance already (above)?, I really do not want to develop subjects that are already catered for (unless there are old subjects I have done in the distant past I would like to re-visit and 'make right' and do proper justice to). With that in mind, after my next kit, I will be concentrating on frigates and ships of the line - graceful lines and no smoke stacks. At least for now. ETA - I have added loads of new laser cut fittings over the past week or so, shroud cleats were added yesterday. I am working on a 64th and 72nd scale Brodie Stove, which will be laser cut and a lot of PE. Same with ships boats, but may do these as and when they are added to kits. If there's anything else you think I could do, let me know, laser cutting and PE stuff is no problem.
-
For Flirt, I am including 90 x 2mm single blocks for cannon rigging (anything bigger would look ridiculously over scale next to the carriages) and crowsfeet. For the MS version, I will be including 2.5mm 2 hole pearwood blocks for the cannon rigging. Both sets of blocks are on order, but the Master-Korabel blocks (and my darned Zulu sail sets) will not be available until Russia opens up again, which will be very soon I hope.
-
Thank you There are sail plans for Alert and the two fishing vessels, but not for Speedy. As a rule, I do not like sails on larger kits (although I think they suit smaller vessels more). I did sail plans for Vanguard when at Amati, and I have never seen a single finished Vanguard kit (or Bellerophon or Elephant) with sails attached. If enough ask for them, though, I would include.
-
Yes, all rigging, blocks and dowel for masts and yards. I have sails as an optional extra due to the high cost of them, and I know some prefer to make their own or show the model without sails.
- 100 replies
-
- 1
-
-
- zulu
- vanguard models
- (and 2 more)
-
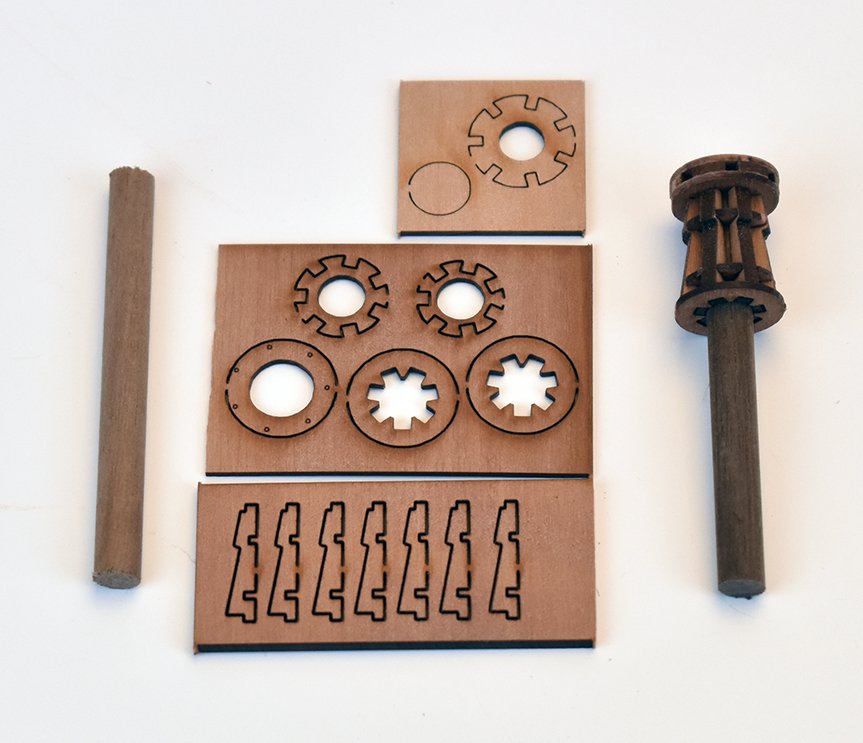
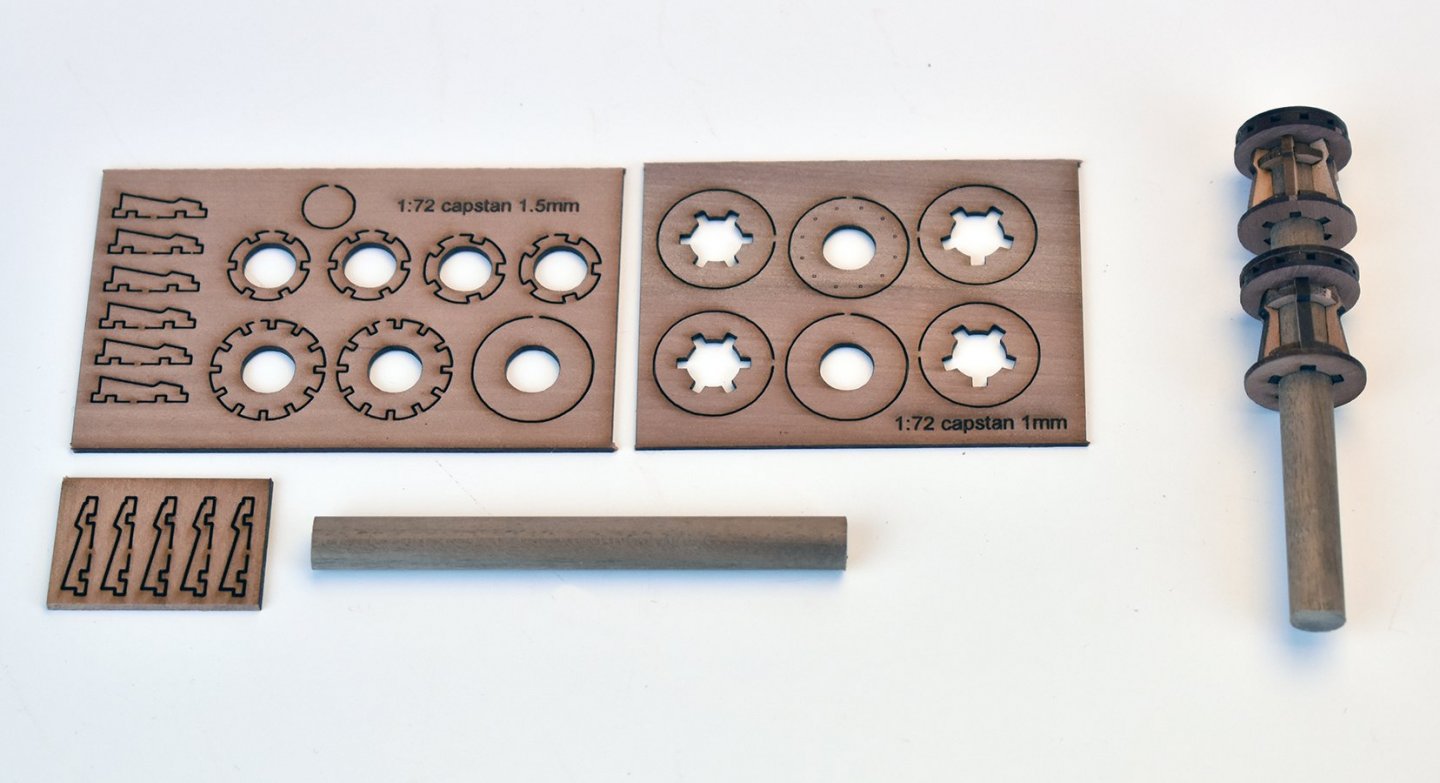
Cheers! I hope to have the Flirt photo etched stuff from Italy in a couple of weeks. I added one more capstan kit to my fittings inventory, a 64th scale double capstan (from a future 74 development). All laser cut fittings are in pearwood, not sure if I mentioned that...
-
The kit is £158 https://vanguardmodels.co.uk/product/order-zulu-lady-isabella/
- 100 replies
-
- 1
-
-
- zulu
- vanguard models
- (and 2 more)
-
It is interesting to note that quite a few contemporary dockyard models, from the 18th to 20th Century have single wood decks with the lines scribed on. In some cases, this even applies to the hull planking. I guess it all comes down to personal preferences and experience. Many kits, if not the majority have deck planking in strips. Trouble is that sometimes, the strips are so wide it ruins the scale effect. At least with etched decks, the lines can be exactly to scale and include the curves of some planks. Some can achieve this with planking separate strips, but a lot cannot.
-
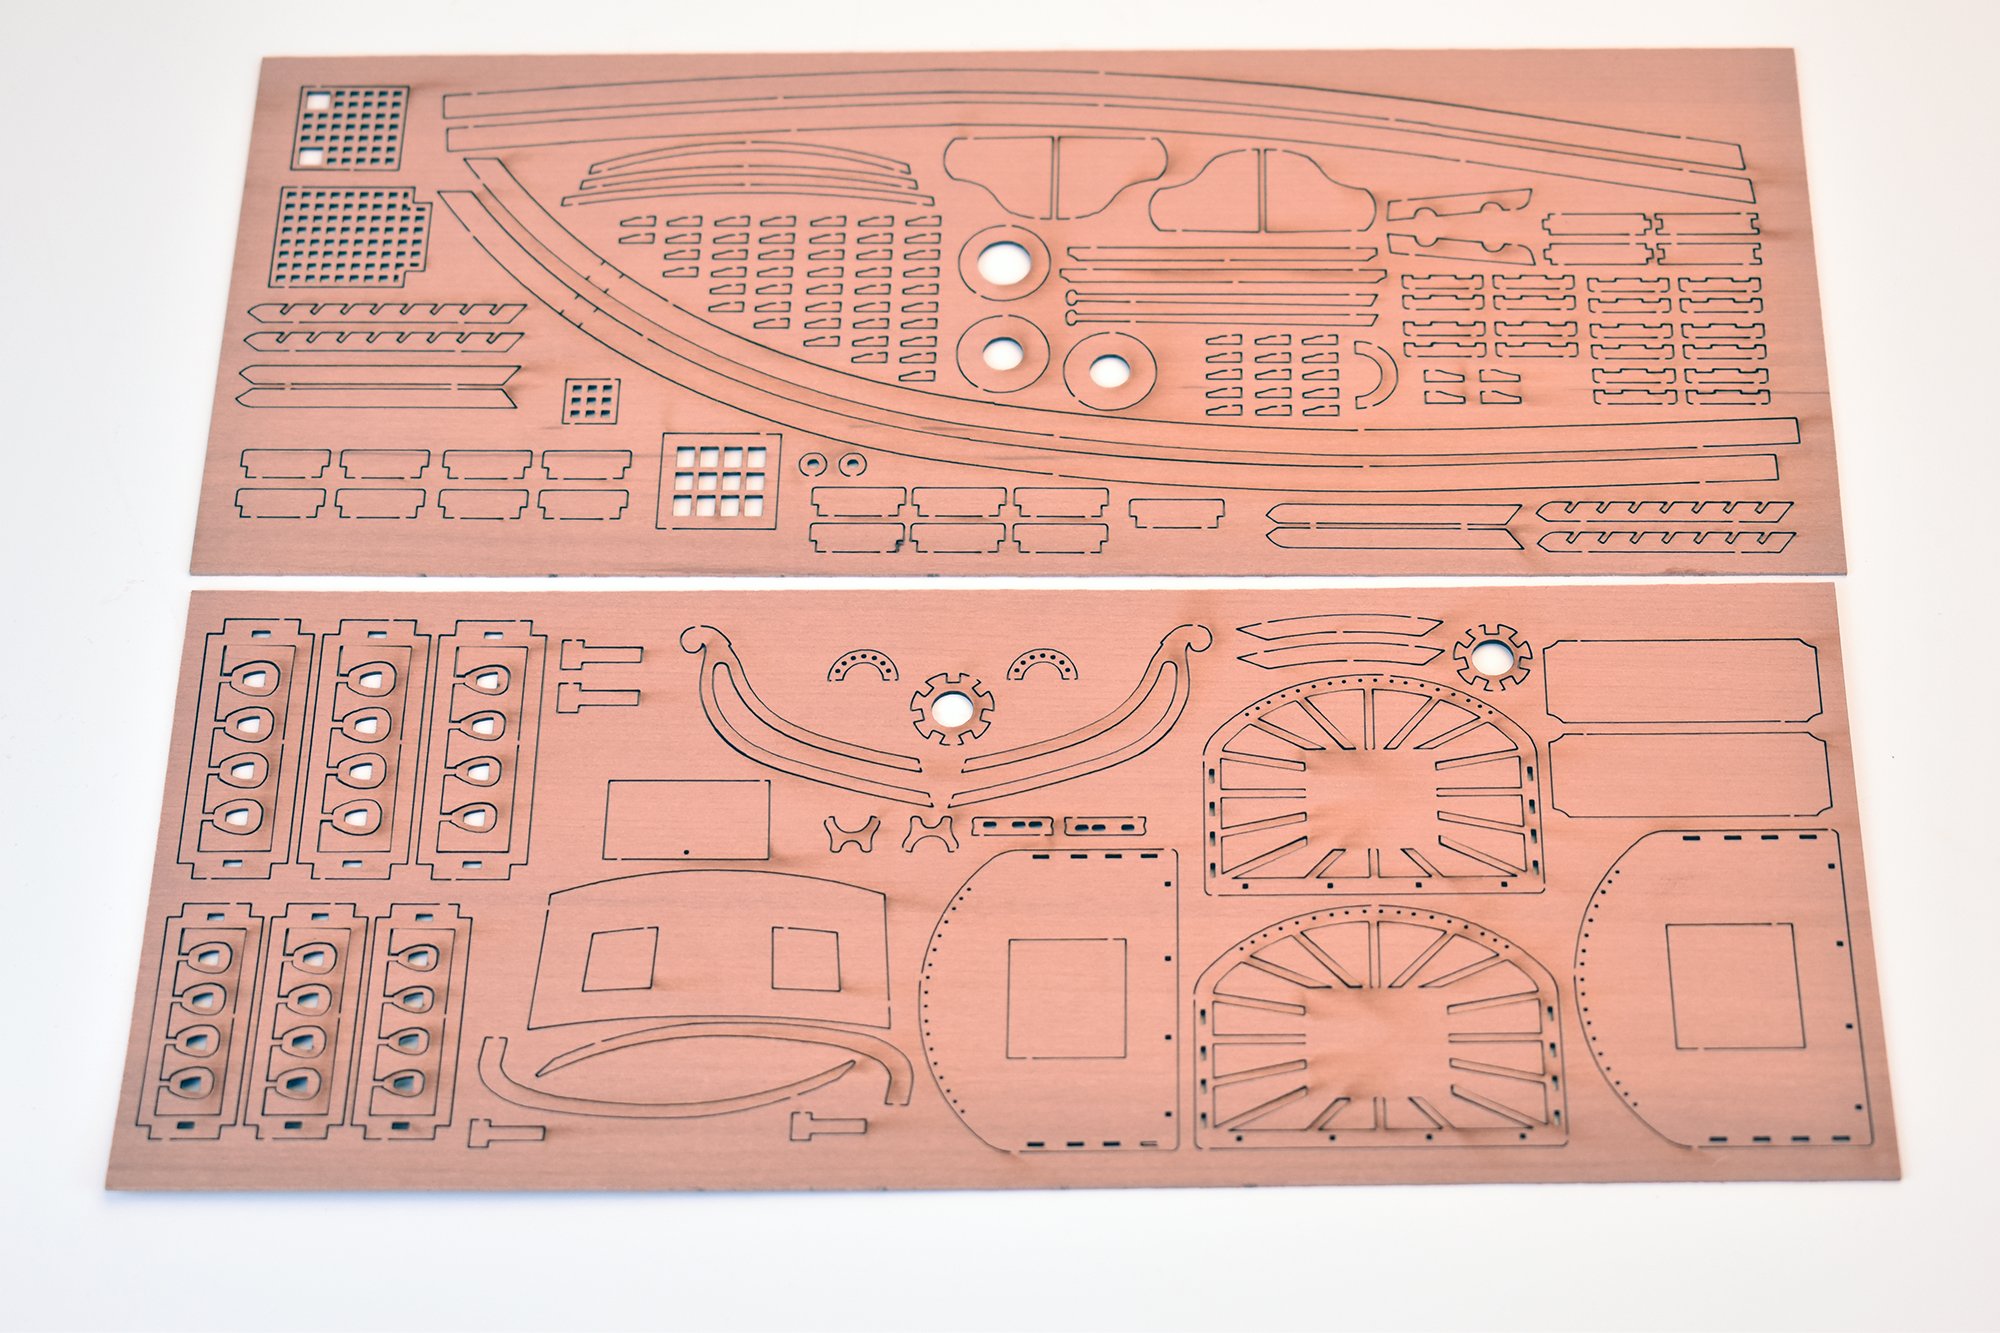
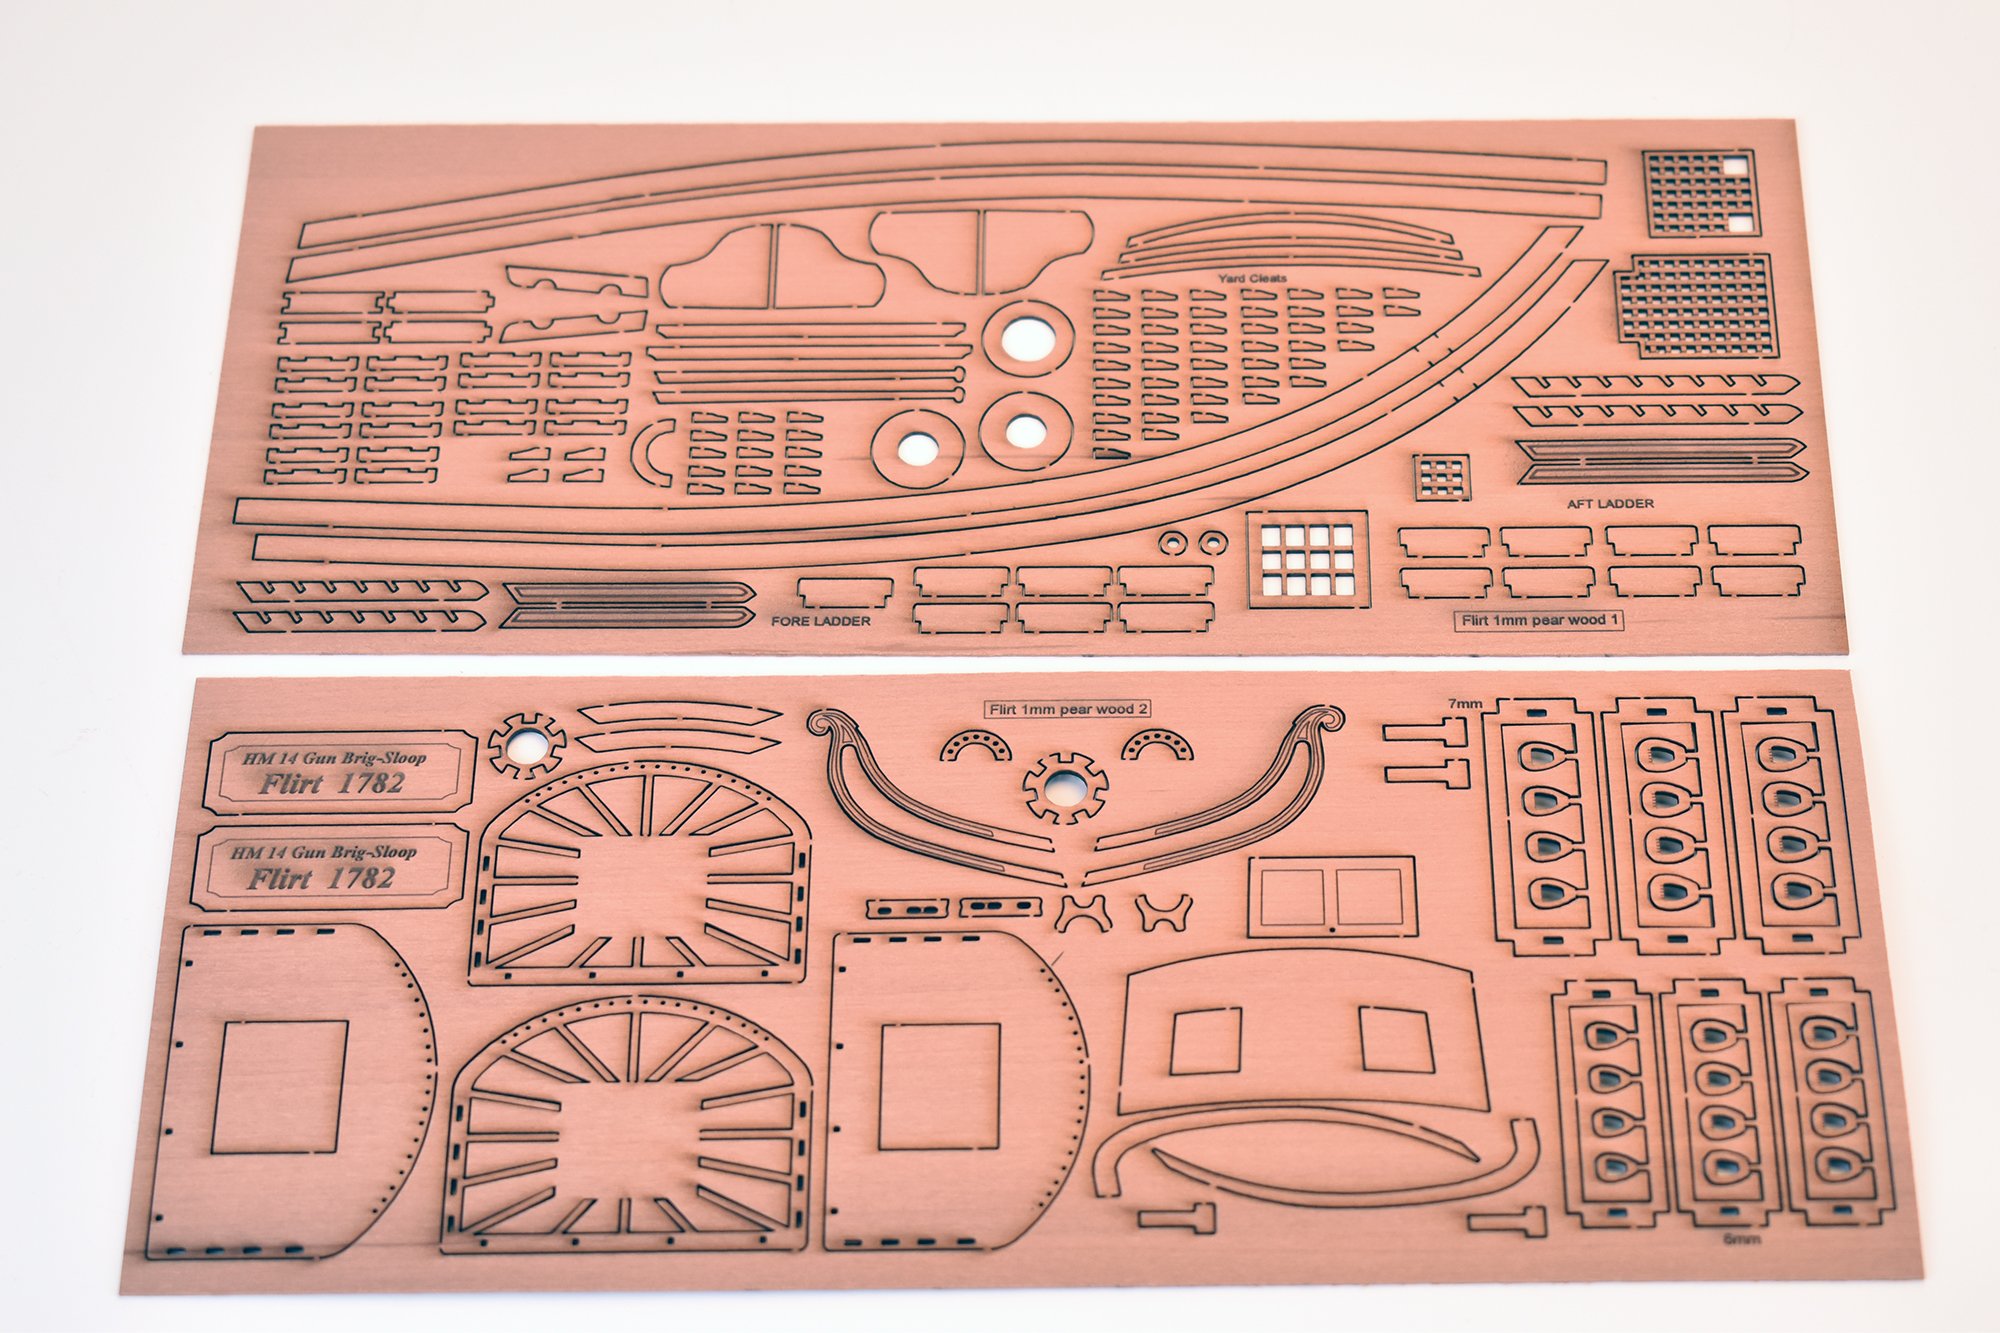
Right, all new fittings have been laser cut and some are already available on the website, with the cannon and capstans coming online very soon. I just finished cutting the final capstan parts, the 20mm high 64th single and the 72nd scale double. Both come with a length of walnut dowel long enough for the capstans and well over a full deck down. Also, I have just started laser cutting the standard Flirt parts, starting with 1mm pearwood. I cut these one sheet at a time (same as the Master Shipwright parts in boxwood) and check each carefully after cutting. I have added a pic of the first sheet cut, both top and bottom views, using my new magnetic 'nail bed'


-
One has to be careful when looking at old photos of these vessels (Fifie and Zulu had same method of mast steps), as many that have been photographed had already been converted to steam power, the Fifie more so as the aft shape made them more conversion friendly than Zulu's. Most photographs show these vessels that already have had an engine and propeller conversion, very few show the pure sailing type.
- 195 replies
-
- 4
-
-
- lady eleanor
- vanguard models
- (and 1 more)
-
I would say Lady Eleanor is slightly more builder friendly, having a more conventional hull (although still double ended) - but the Zulu is more sleek. I have sail sets for the Fifie, but none for the Zulu until lockdown is finished (I have paid for the sails, but they are stuck in Russia (made by Master-Korabel), and will be sent straight out once I have them, for people who have ordered the kit with sails.
- 195 replies
-
- 3
-
-
- lady eleanor
- vanguard models
- (and 1 more)
-
Beware of fitting a tabernacle. My early designs had this, and when researching the sail only versions, it seems the masts were stepped as per the kit. I think the tabernacle was used when refitted with engine and prop due to less space below, as the engine and other gubbins had to have a lot of space. This is something I queried James Pottinger about.
- 195 replies
-
- 4
-
-
- lady eleanor
- vanguard models
- (and 1 more)
-
I can confirm you should receive the kit Thursday, latest Friday (but should be Thursday). UPS are picking it up from me tomorrow (was too late for a pick up today). And thank you! Regarding the binnacle, there is nowhere for it to go on Alert, I am sure it would have had a smaller cabinet, if at all, anyway.