HOLIDAY DONATION DRIVE - SUPPORT MSW - DO YOUR PART TO KEEP THIS GREAT FORUM GOING! (Only 24 donations so far out of 49,000 members - C'mon guys!)
×


JacquesCousteau
-
Posts
1,314 -
Joined
-
Last visited
Content Type
Profiles
Forums
Gallery
Events
Everything posted by JacquesCousteau
-
 Congratulations, the model looks great! It's interesting to see the differences with the Model Shipways kit, too.
- 56 replies
-
- 2
-

-
- grand banks dory
- Midwest Products
- (and 2 more)
-
Yep. Sometimes it's nice to have a build going for a long time and to do all you can with it... and sometimes it's nice to say "you know what? This one's done."
- 65 replies
-
- 1
-
-
- Maine Peapod
- Midwest Products
- (and 1 more)
-
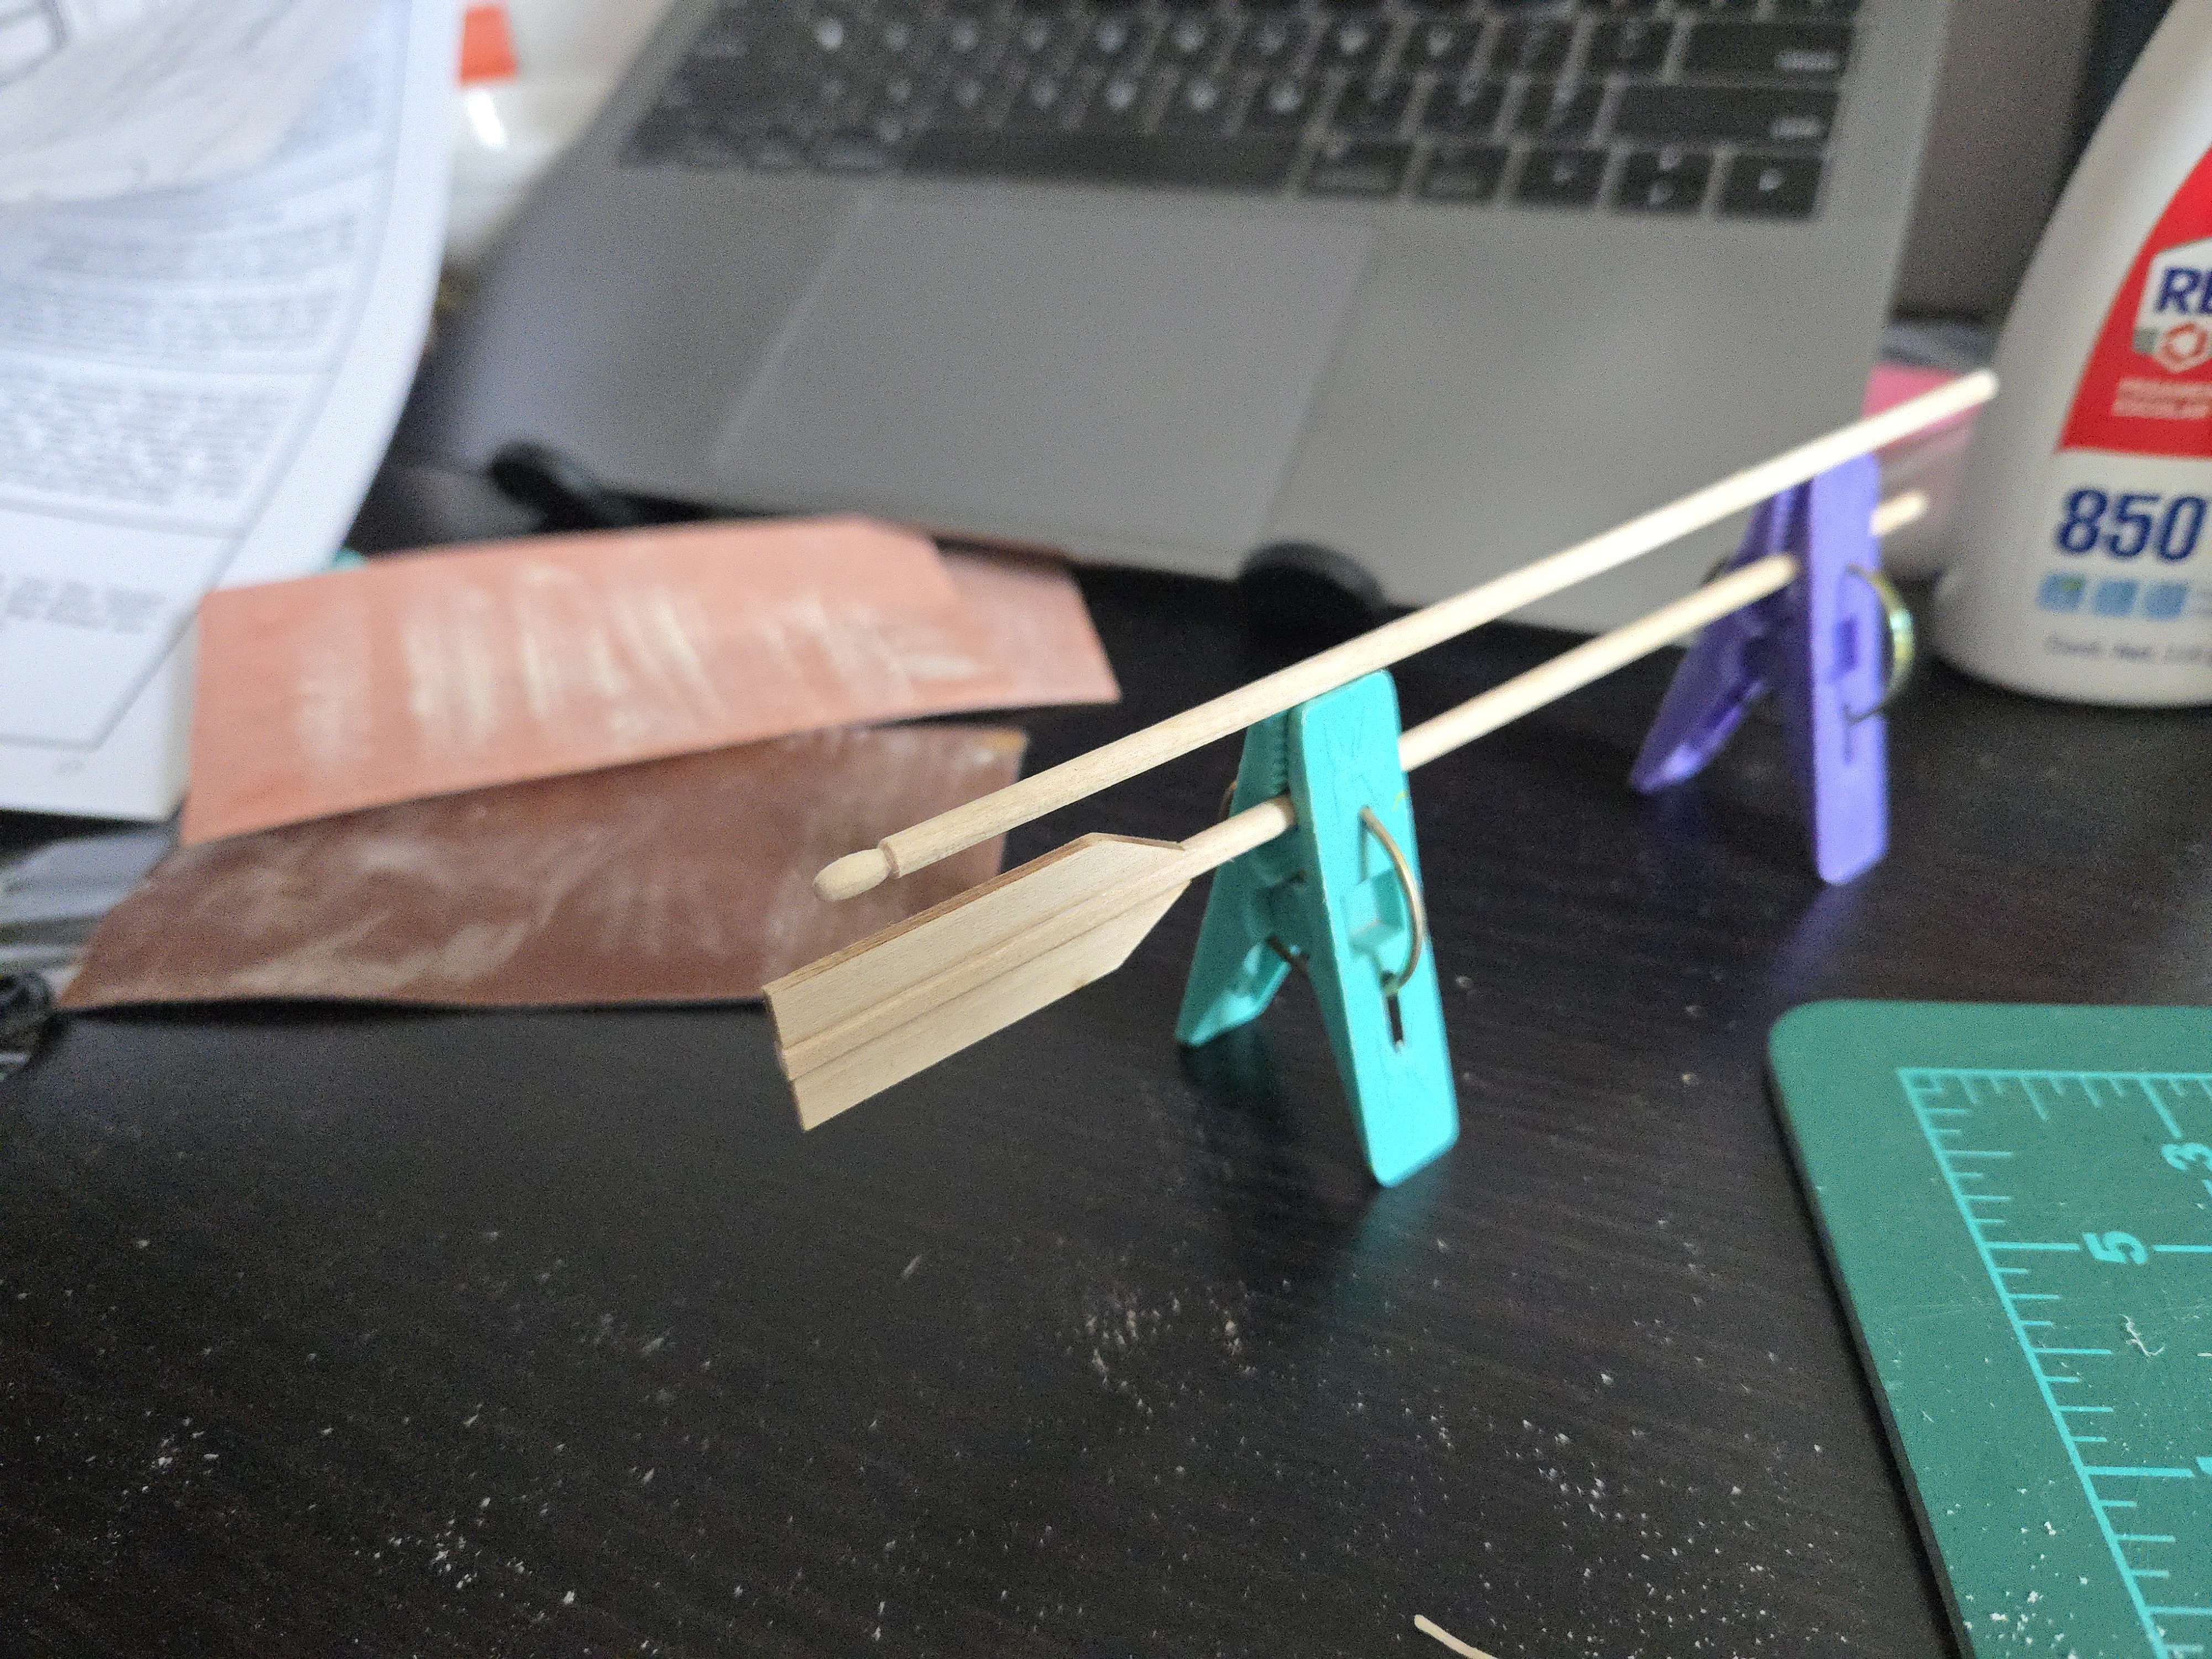
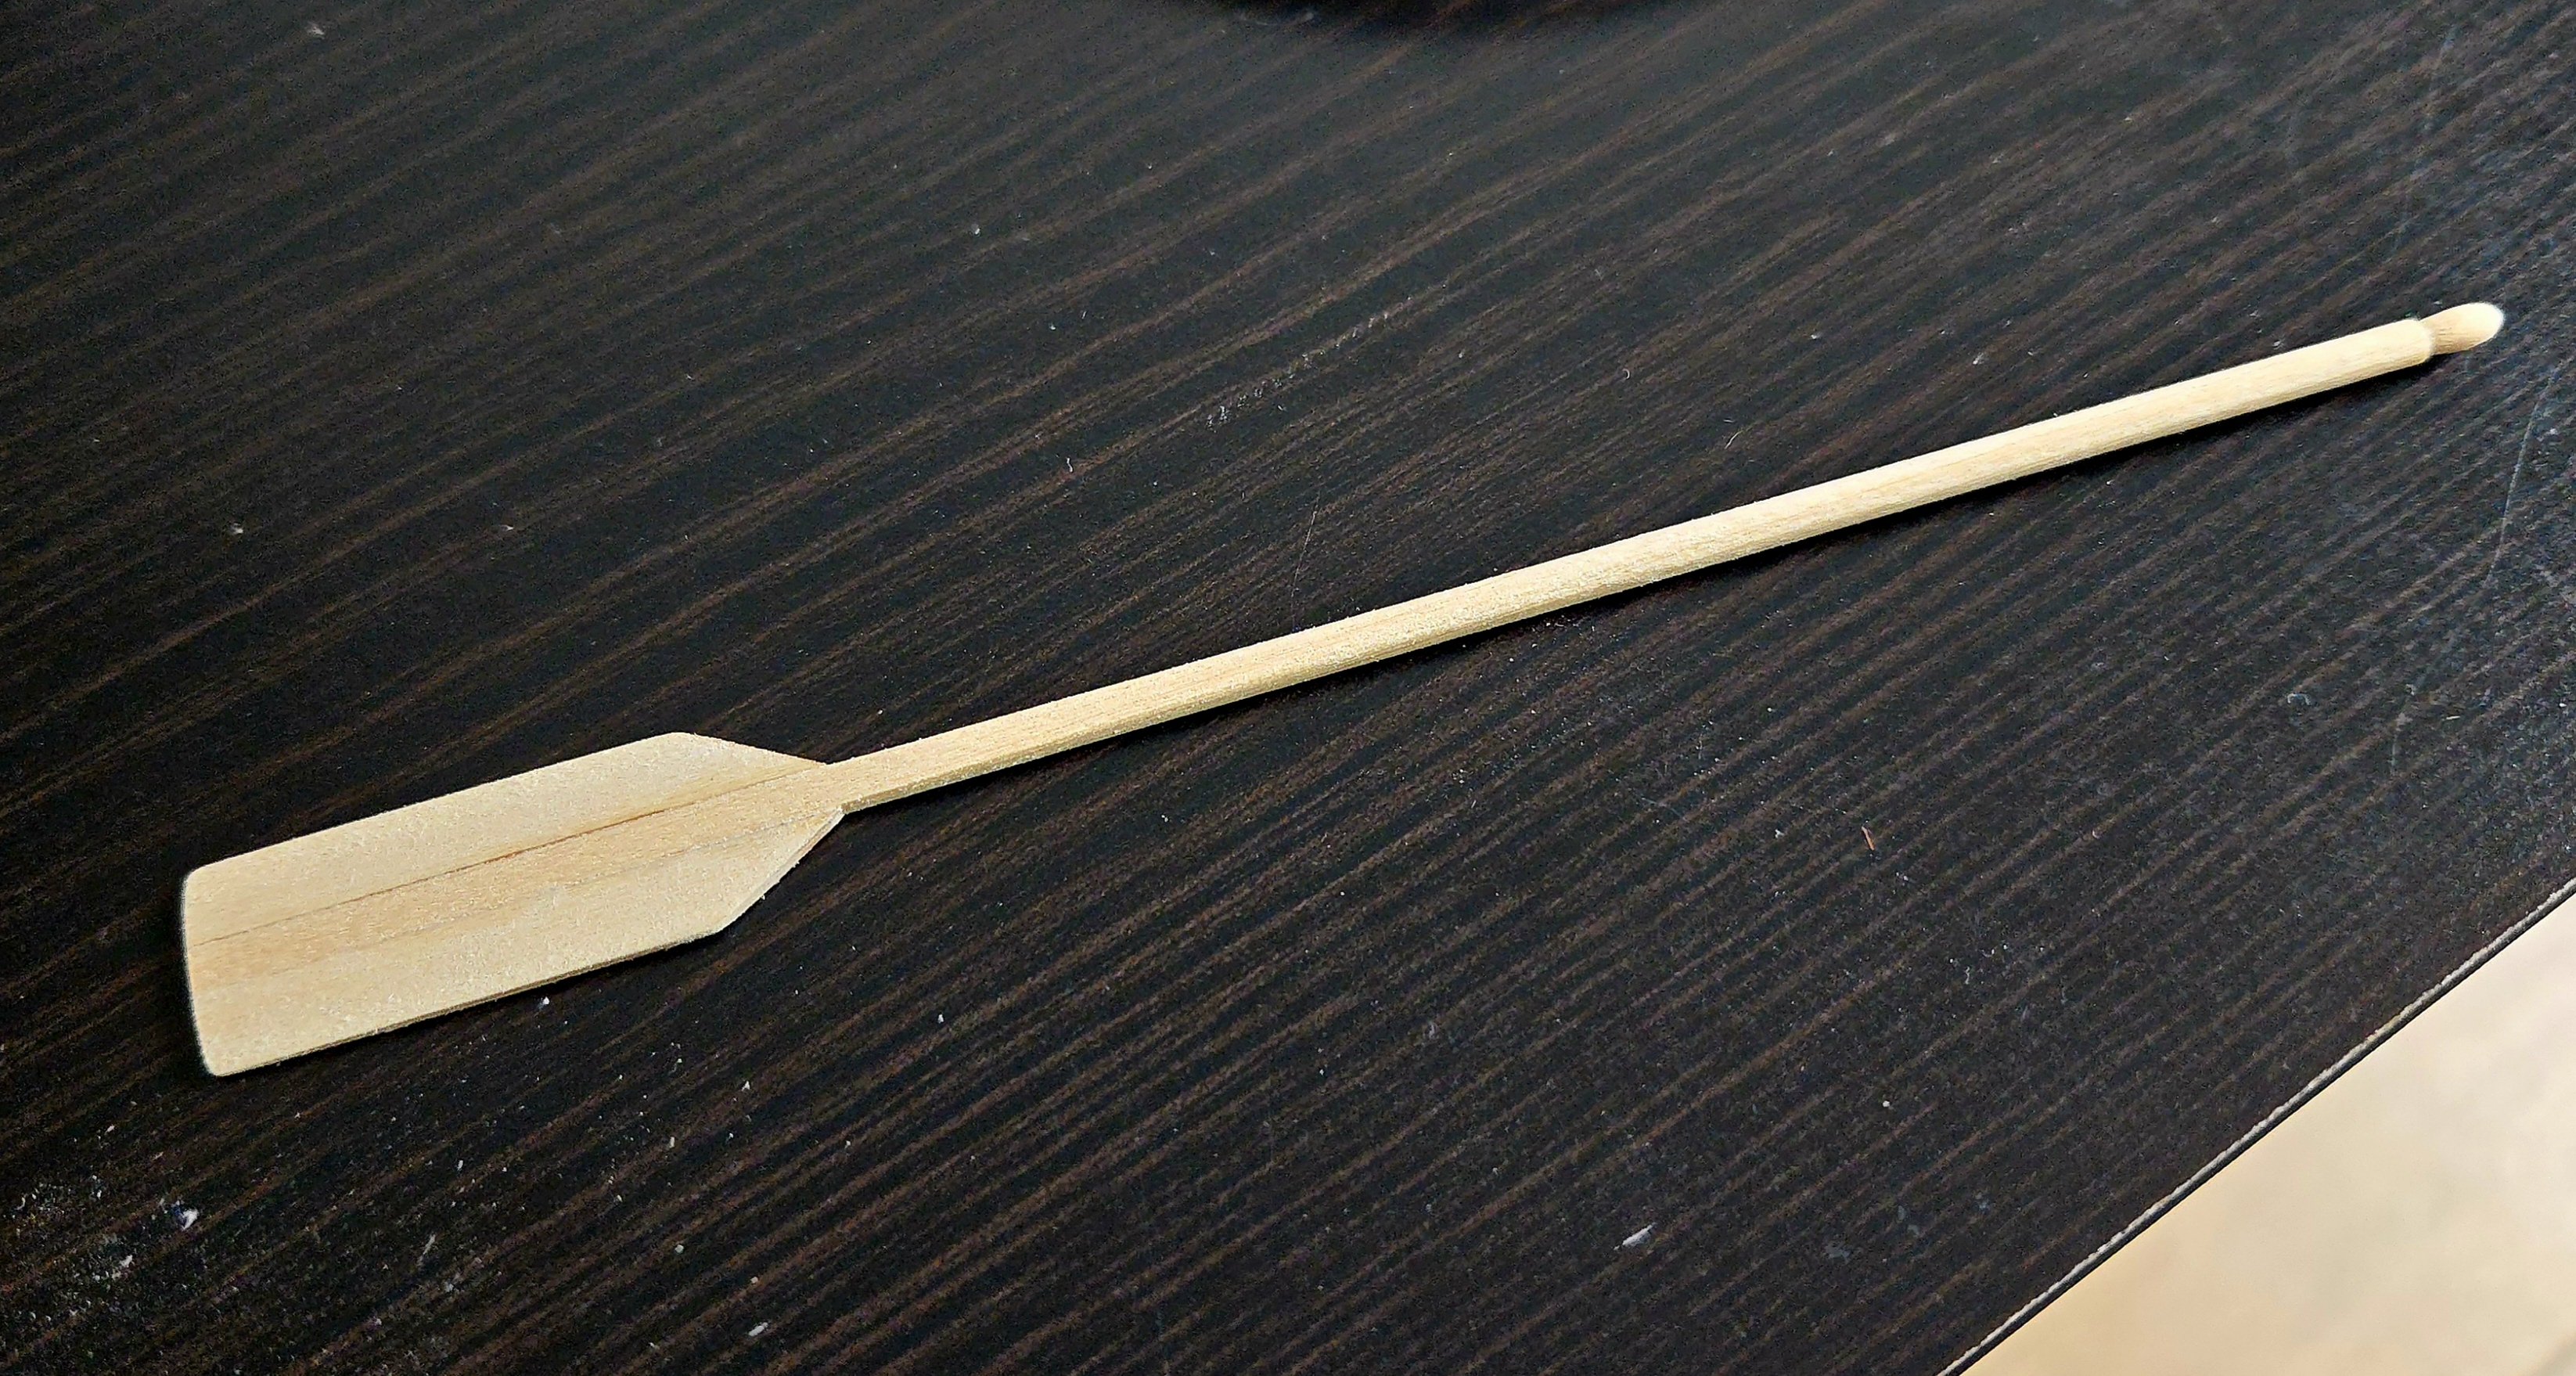
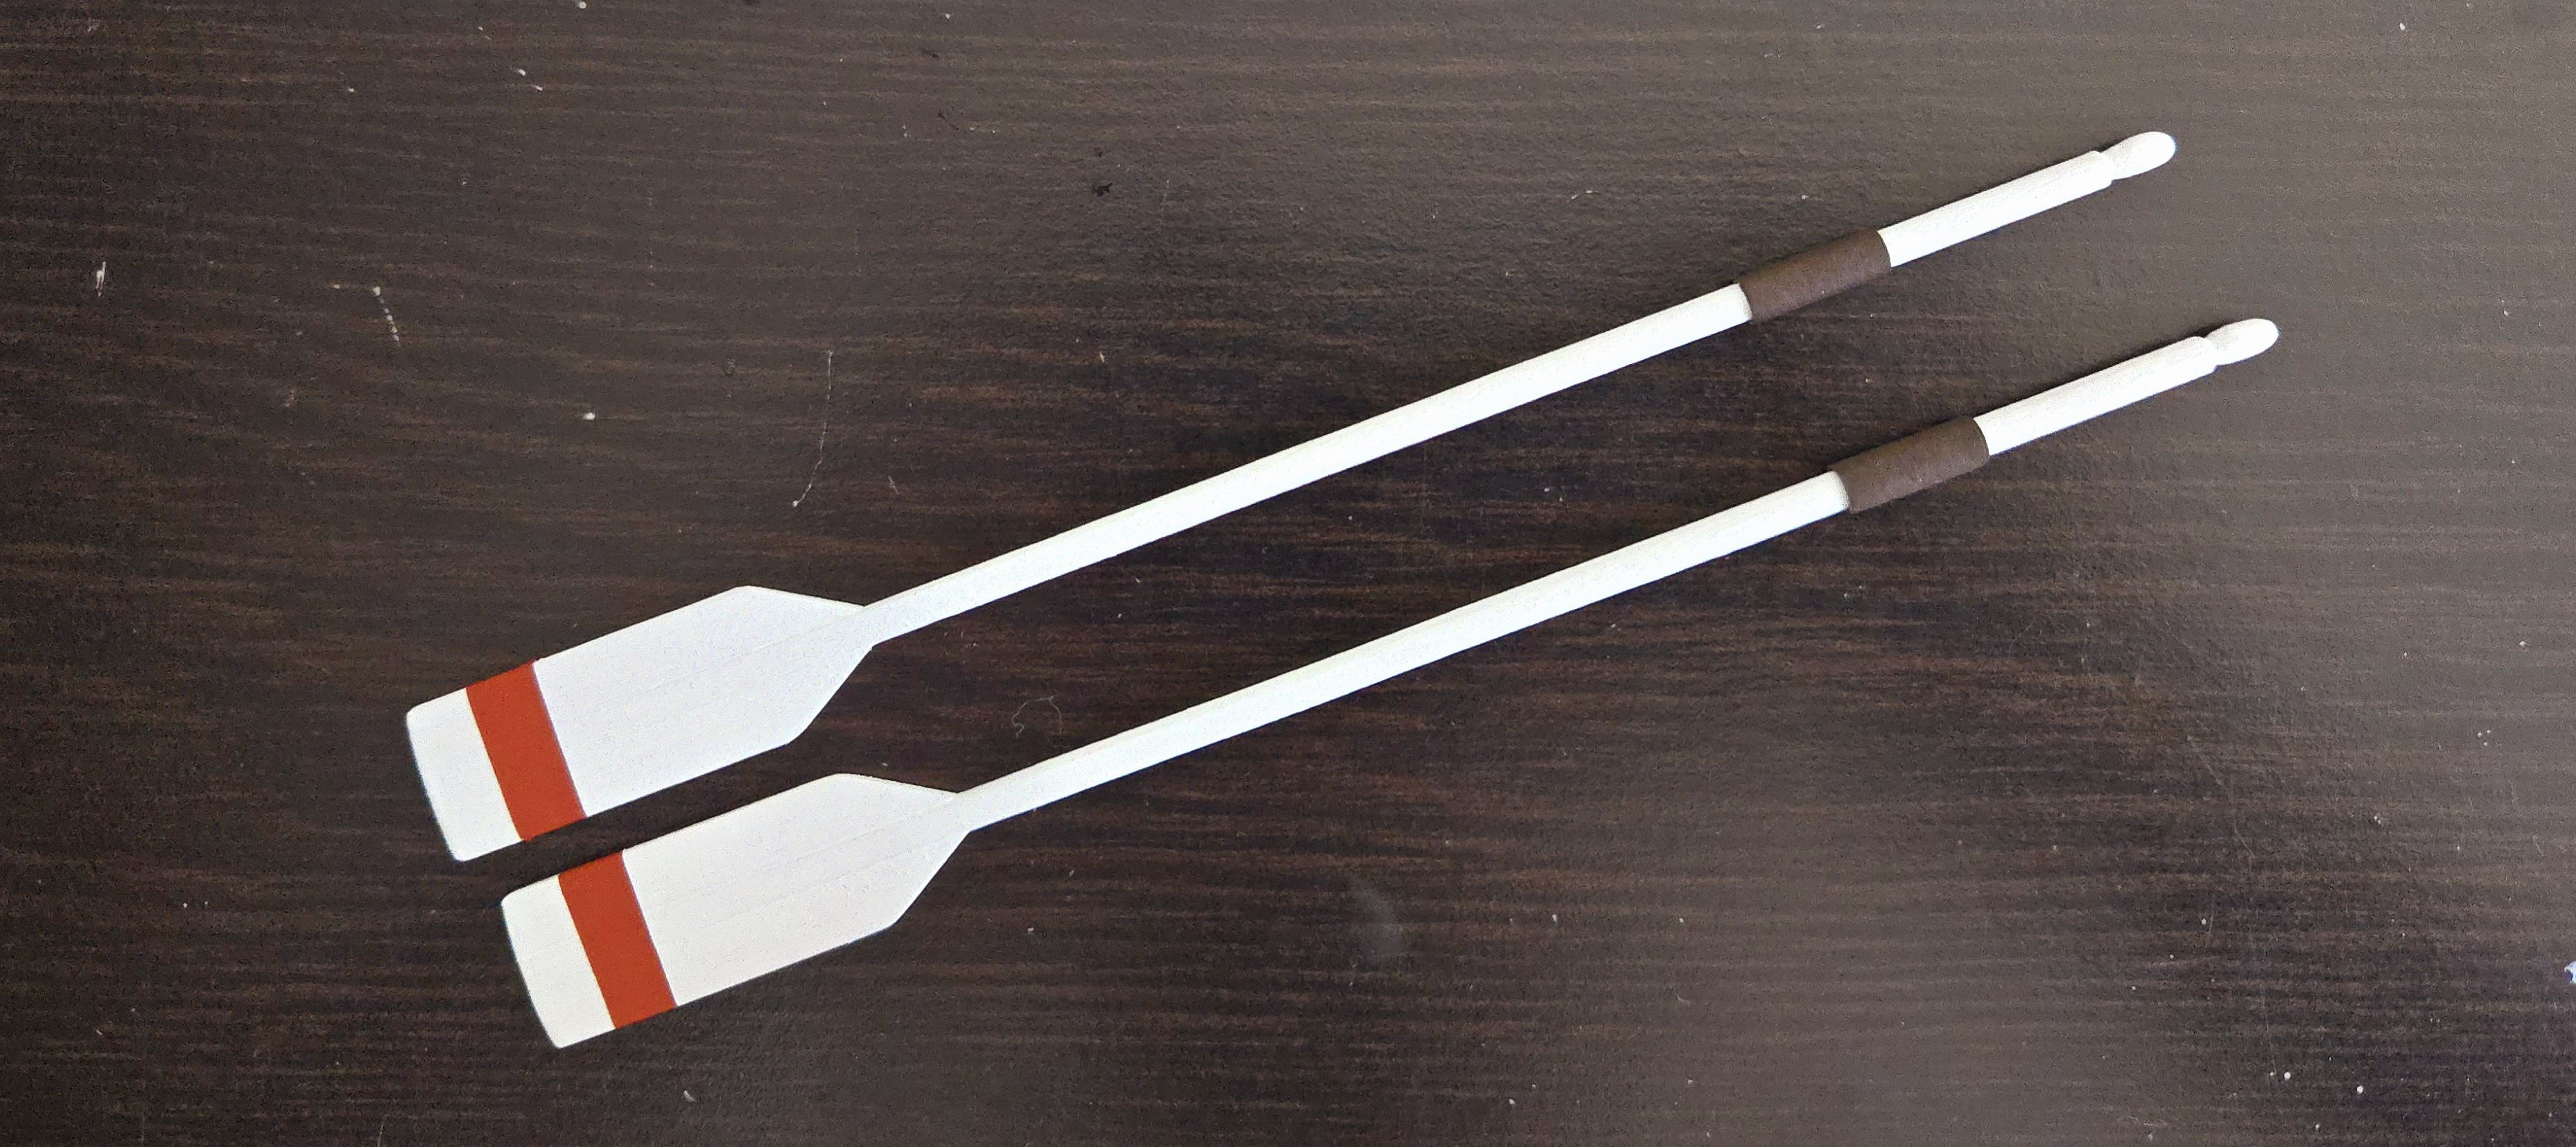
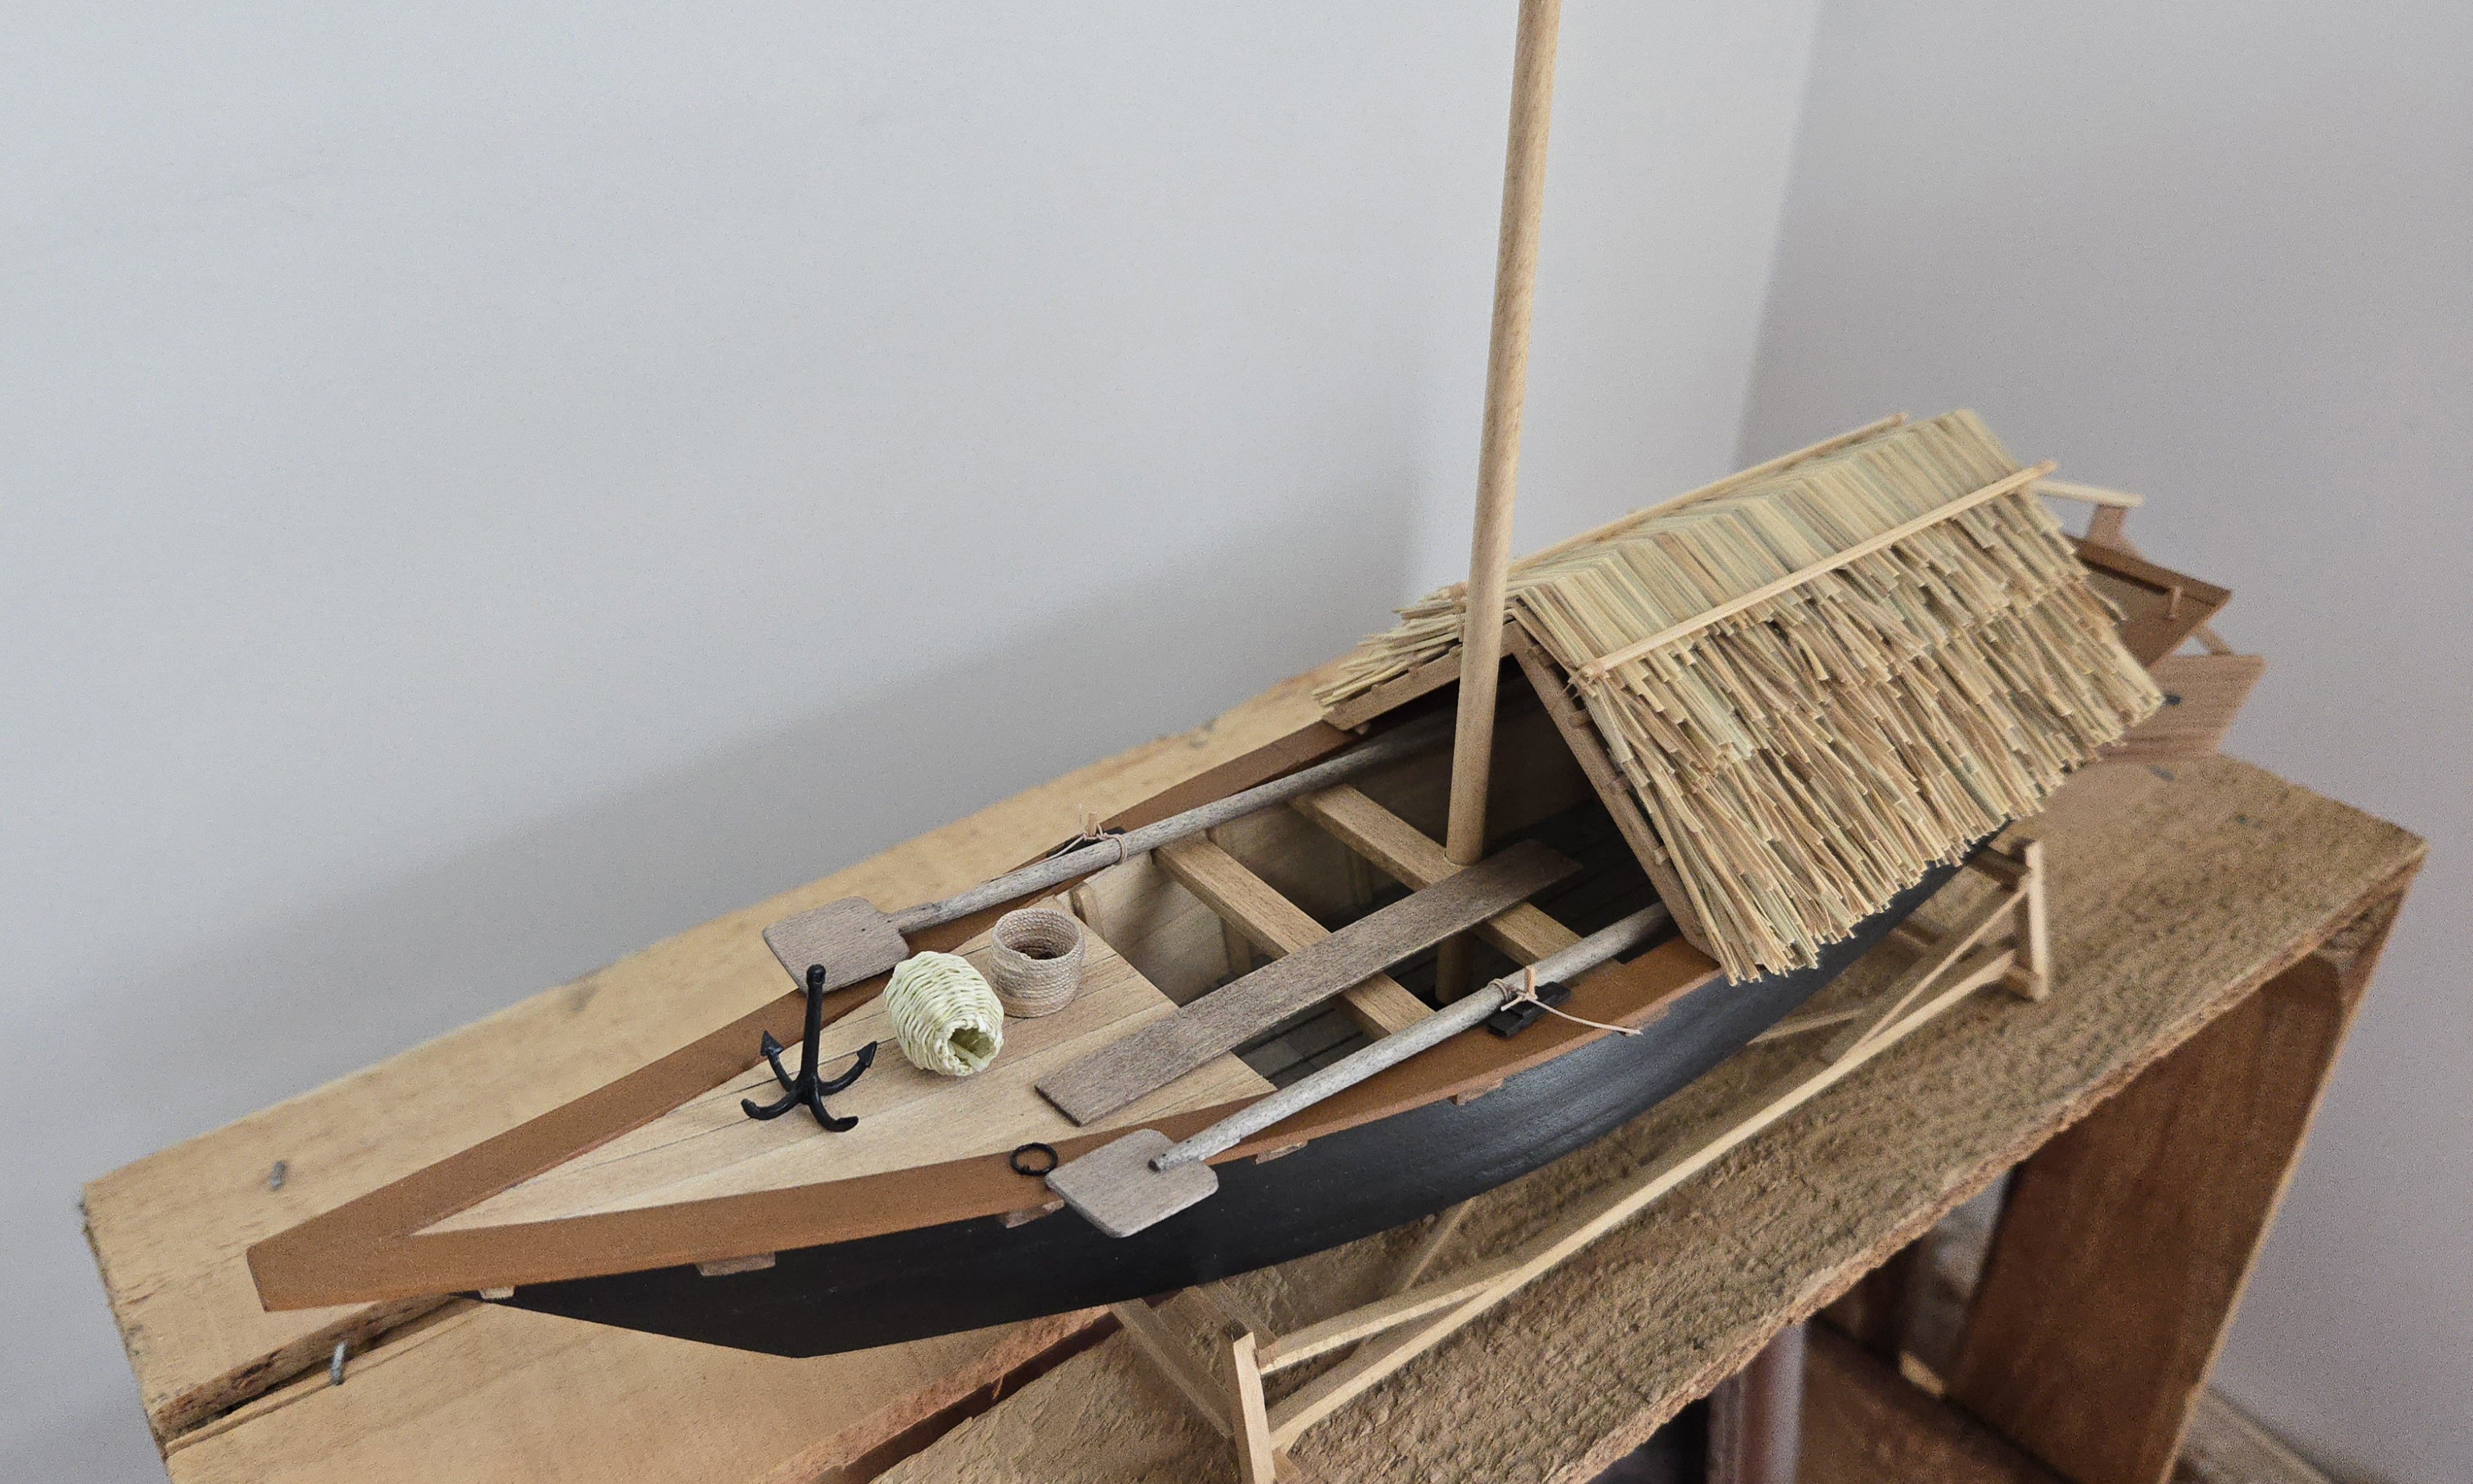
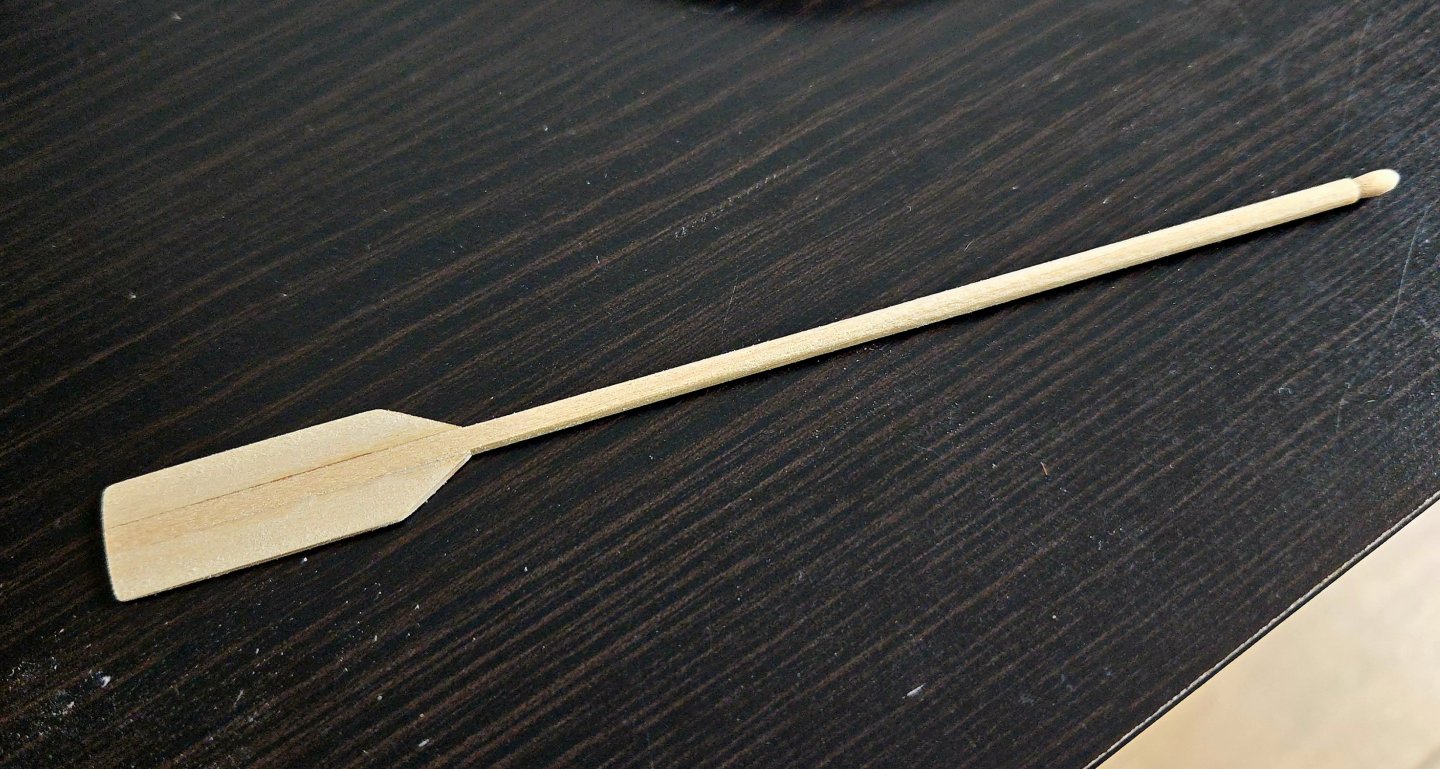
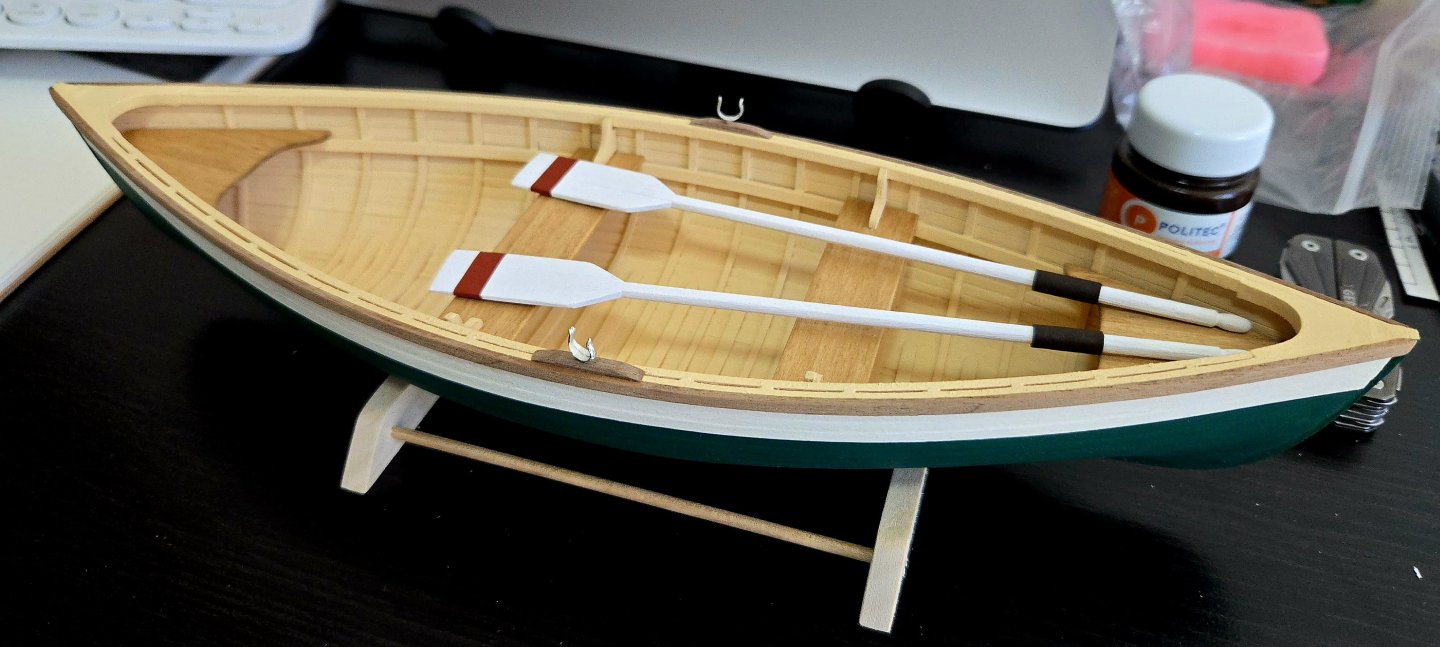
It's been a long time since my last post, but this build hasn't been forgotten. It just got placed on the backburner with the move. I'm looking to start up some new projects soon, but I don't want to have a lot of unfinished builds hanging around, so I'm looking to finish this one. After some thought, I decided against kitbashing this model, except to modify the lobster trap design a bit. Partly because I wasn't able to find all that many photos of old fishing peapods to use as sources, partly because I think an out-of-the-box build looks quite nice, and partly because I'd like to finish soon. First up, the oars. These were pretty straightforward to make. I used my mini-plane to help with the taper. In hindsight, I wish that I had tapered the handles (which are made from 1/8‐inch dowels) a bit more, but it turned out all right. I painted them white to match the stripe on the side, but found it looked very stark until I added a dash of red on the blade and some leather wraps around the handles, which I made out of leftover coffee filter paper from my Canoa de Rancho sail experiment and painted brown. I spaced the oar wraps to correspond to where the oarlocks would be, but I think they look a little close to the handle when not in the oarlocks. They'll be displayed in the model like so: All that's left, then, is the lobster trap!


- 65 replies
-
- 7
-
-
- Maine Peapod
- Midwest Products
- (and 1 more)
-
Thanks! I'll keep an eye out for screen-printing silk. Given that I have a ton of coffee filters already, I think I'll also experiment with trying a single sheet instead of doubling it.
-
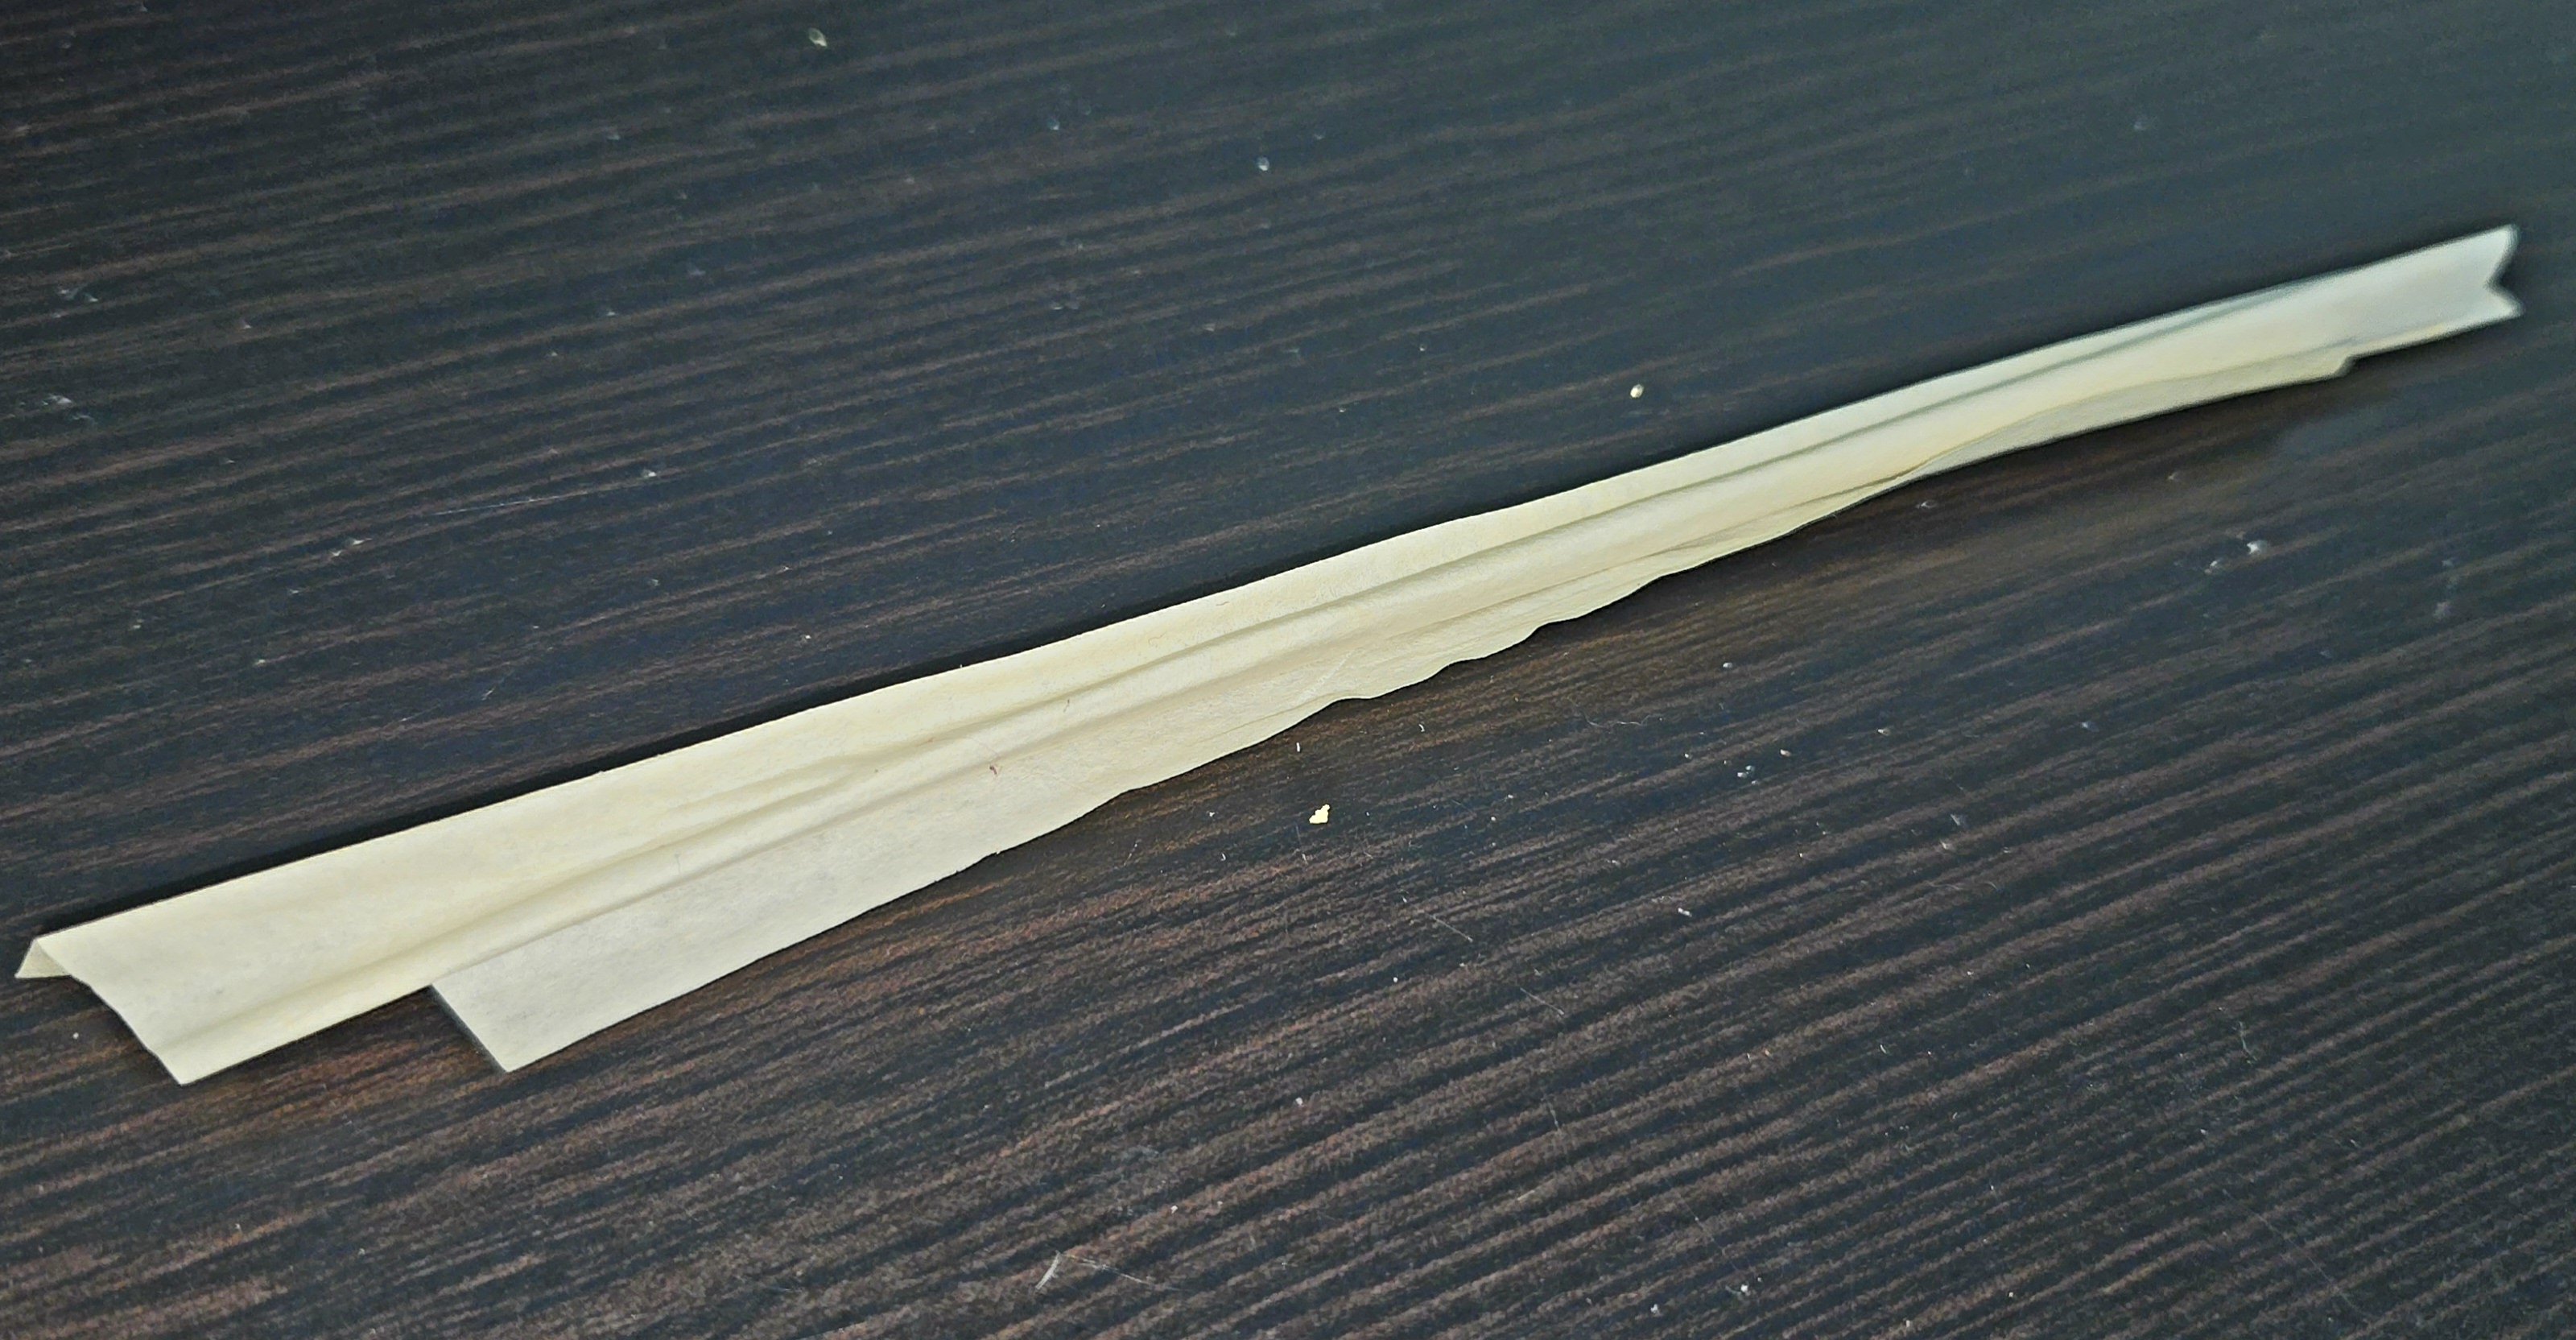
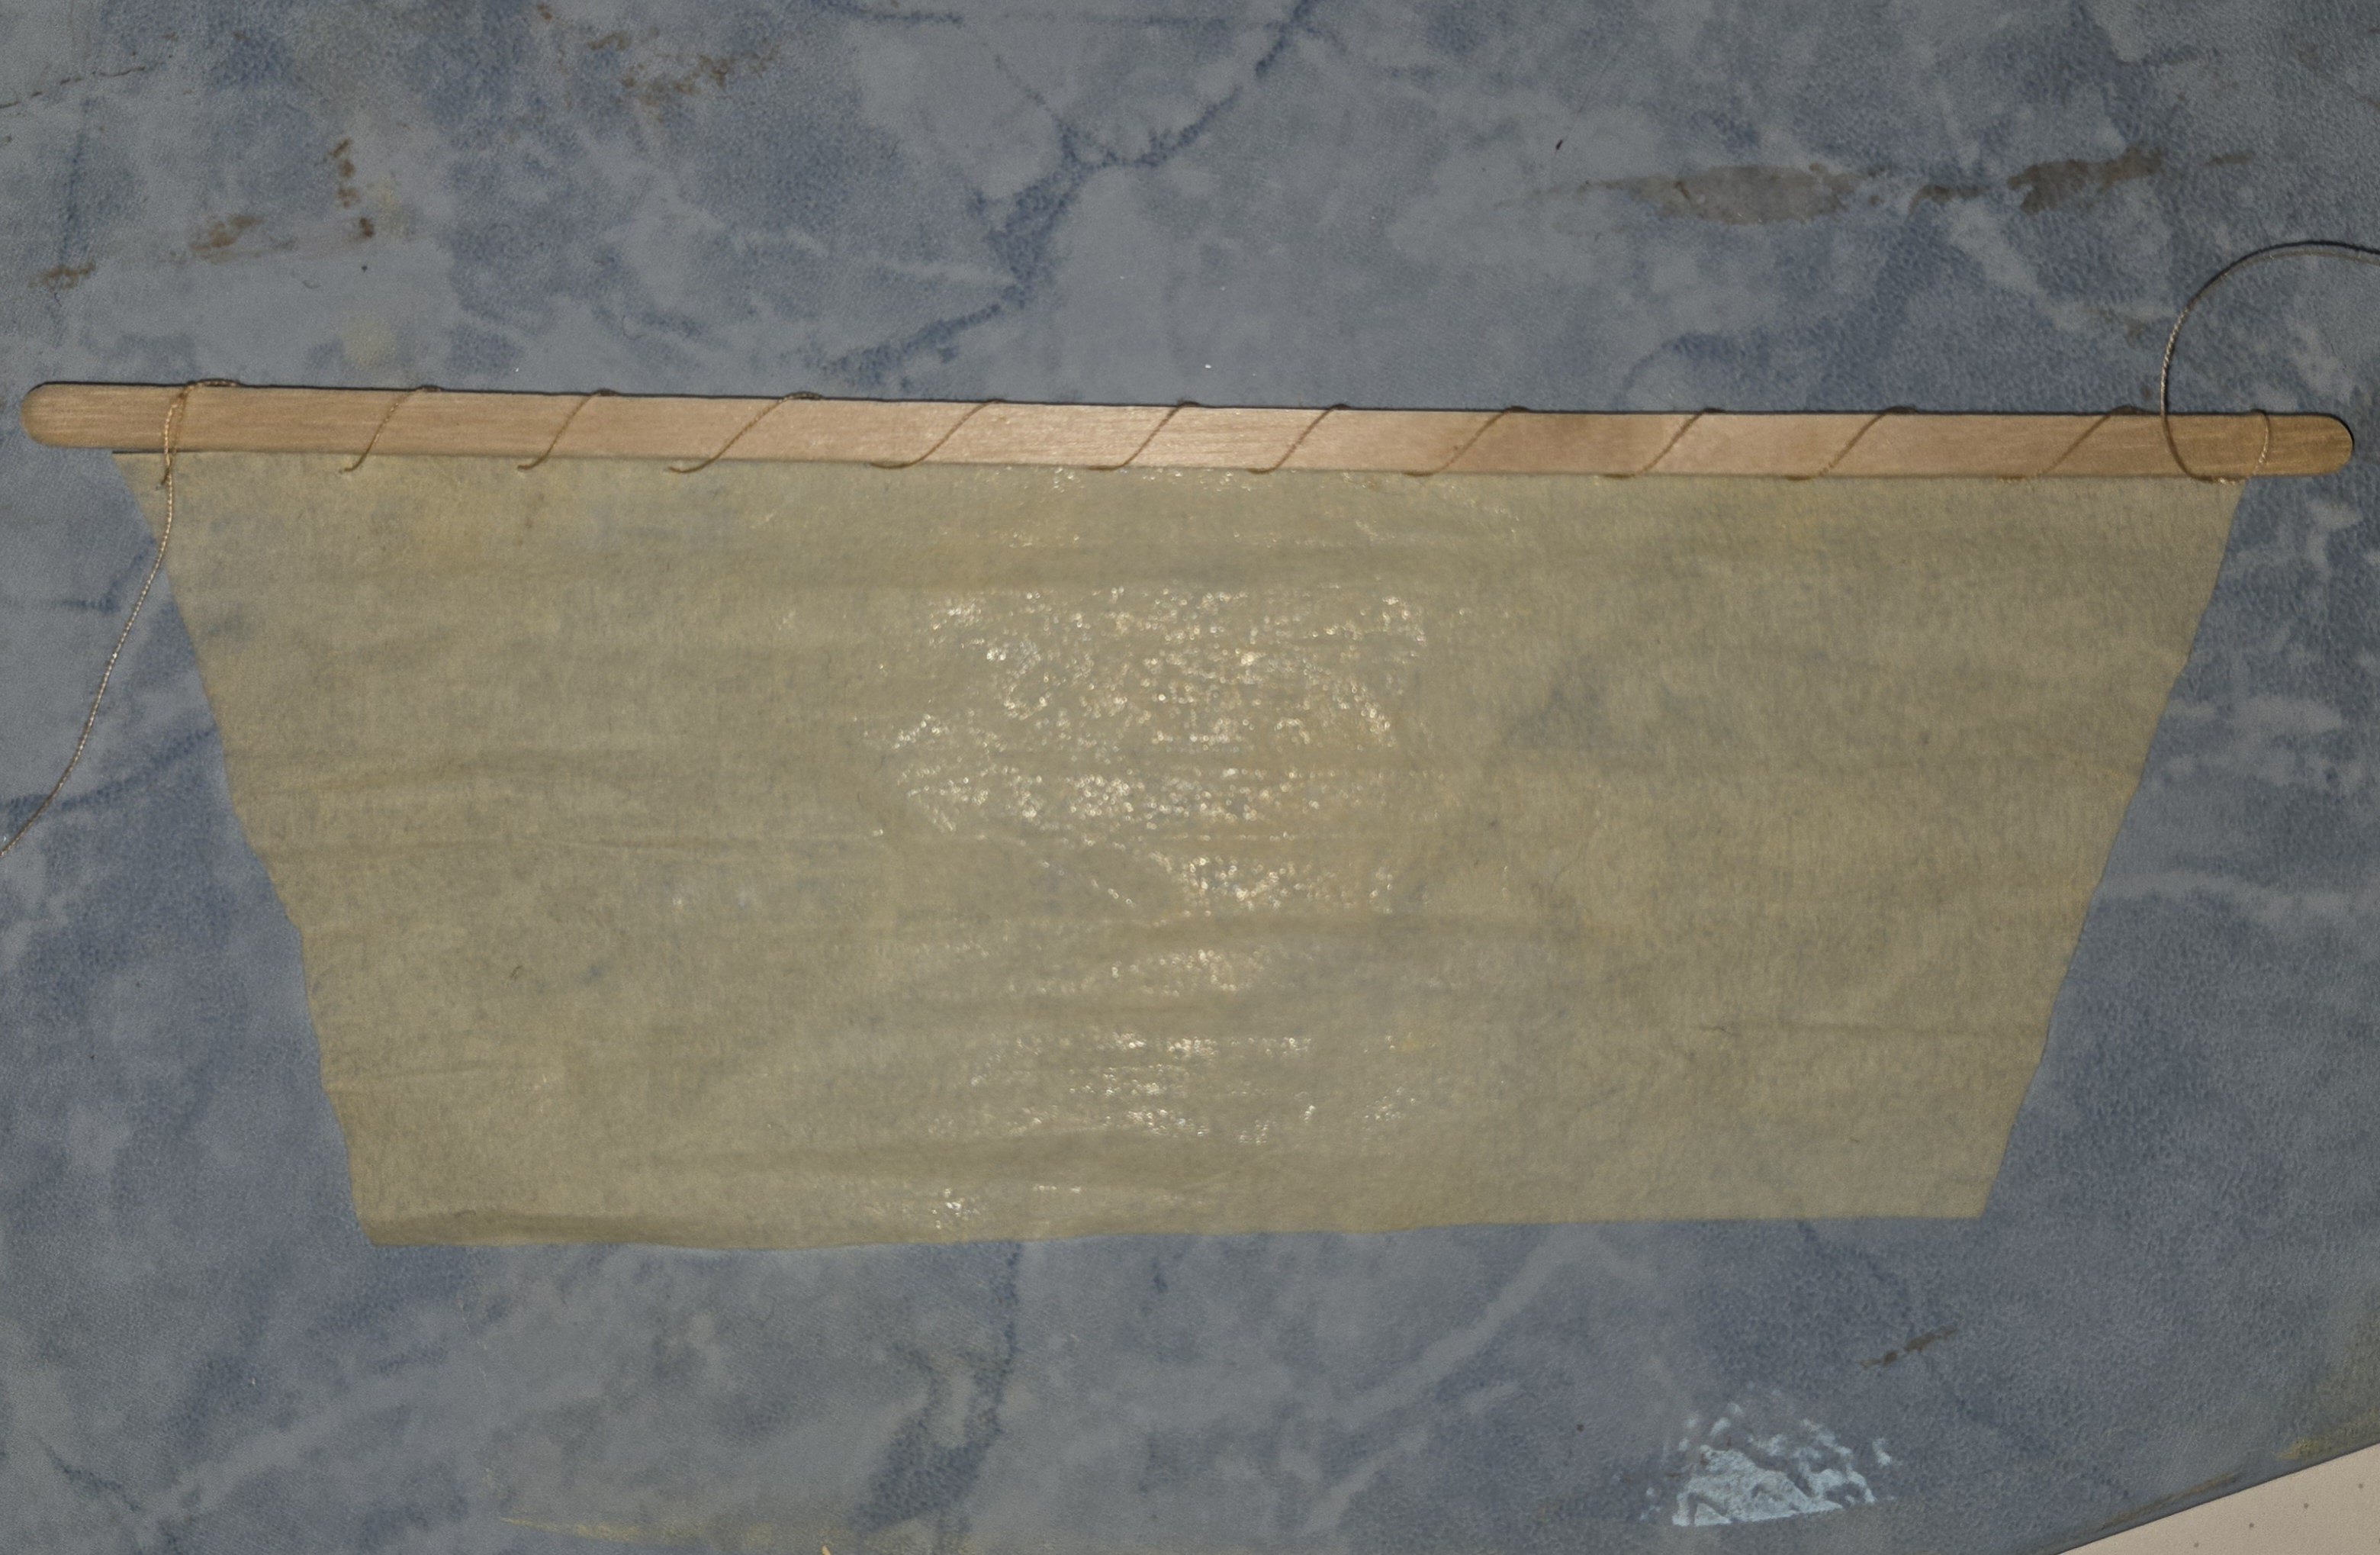
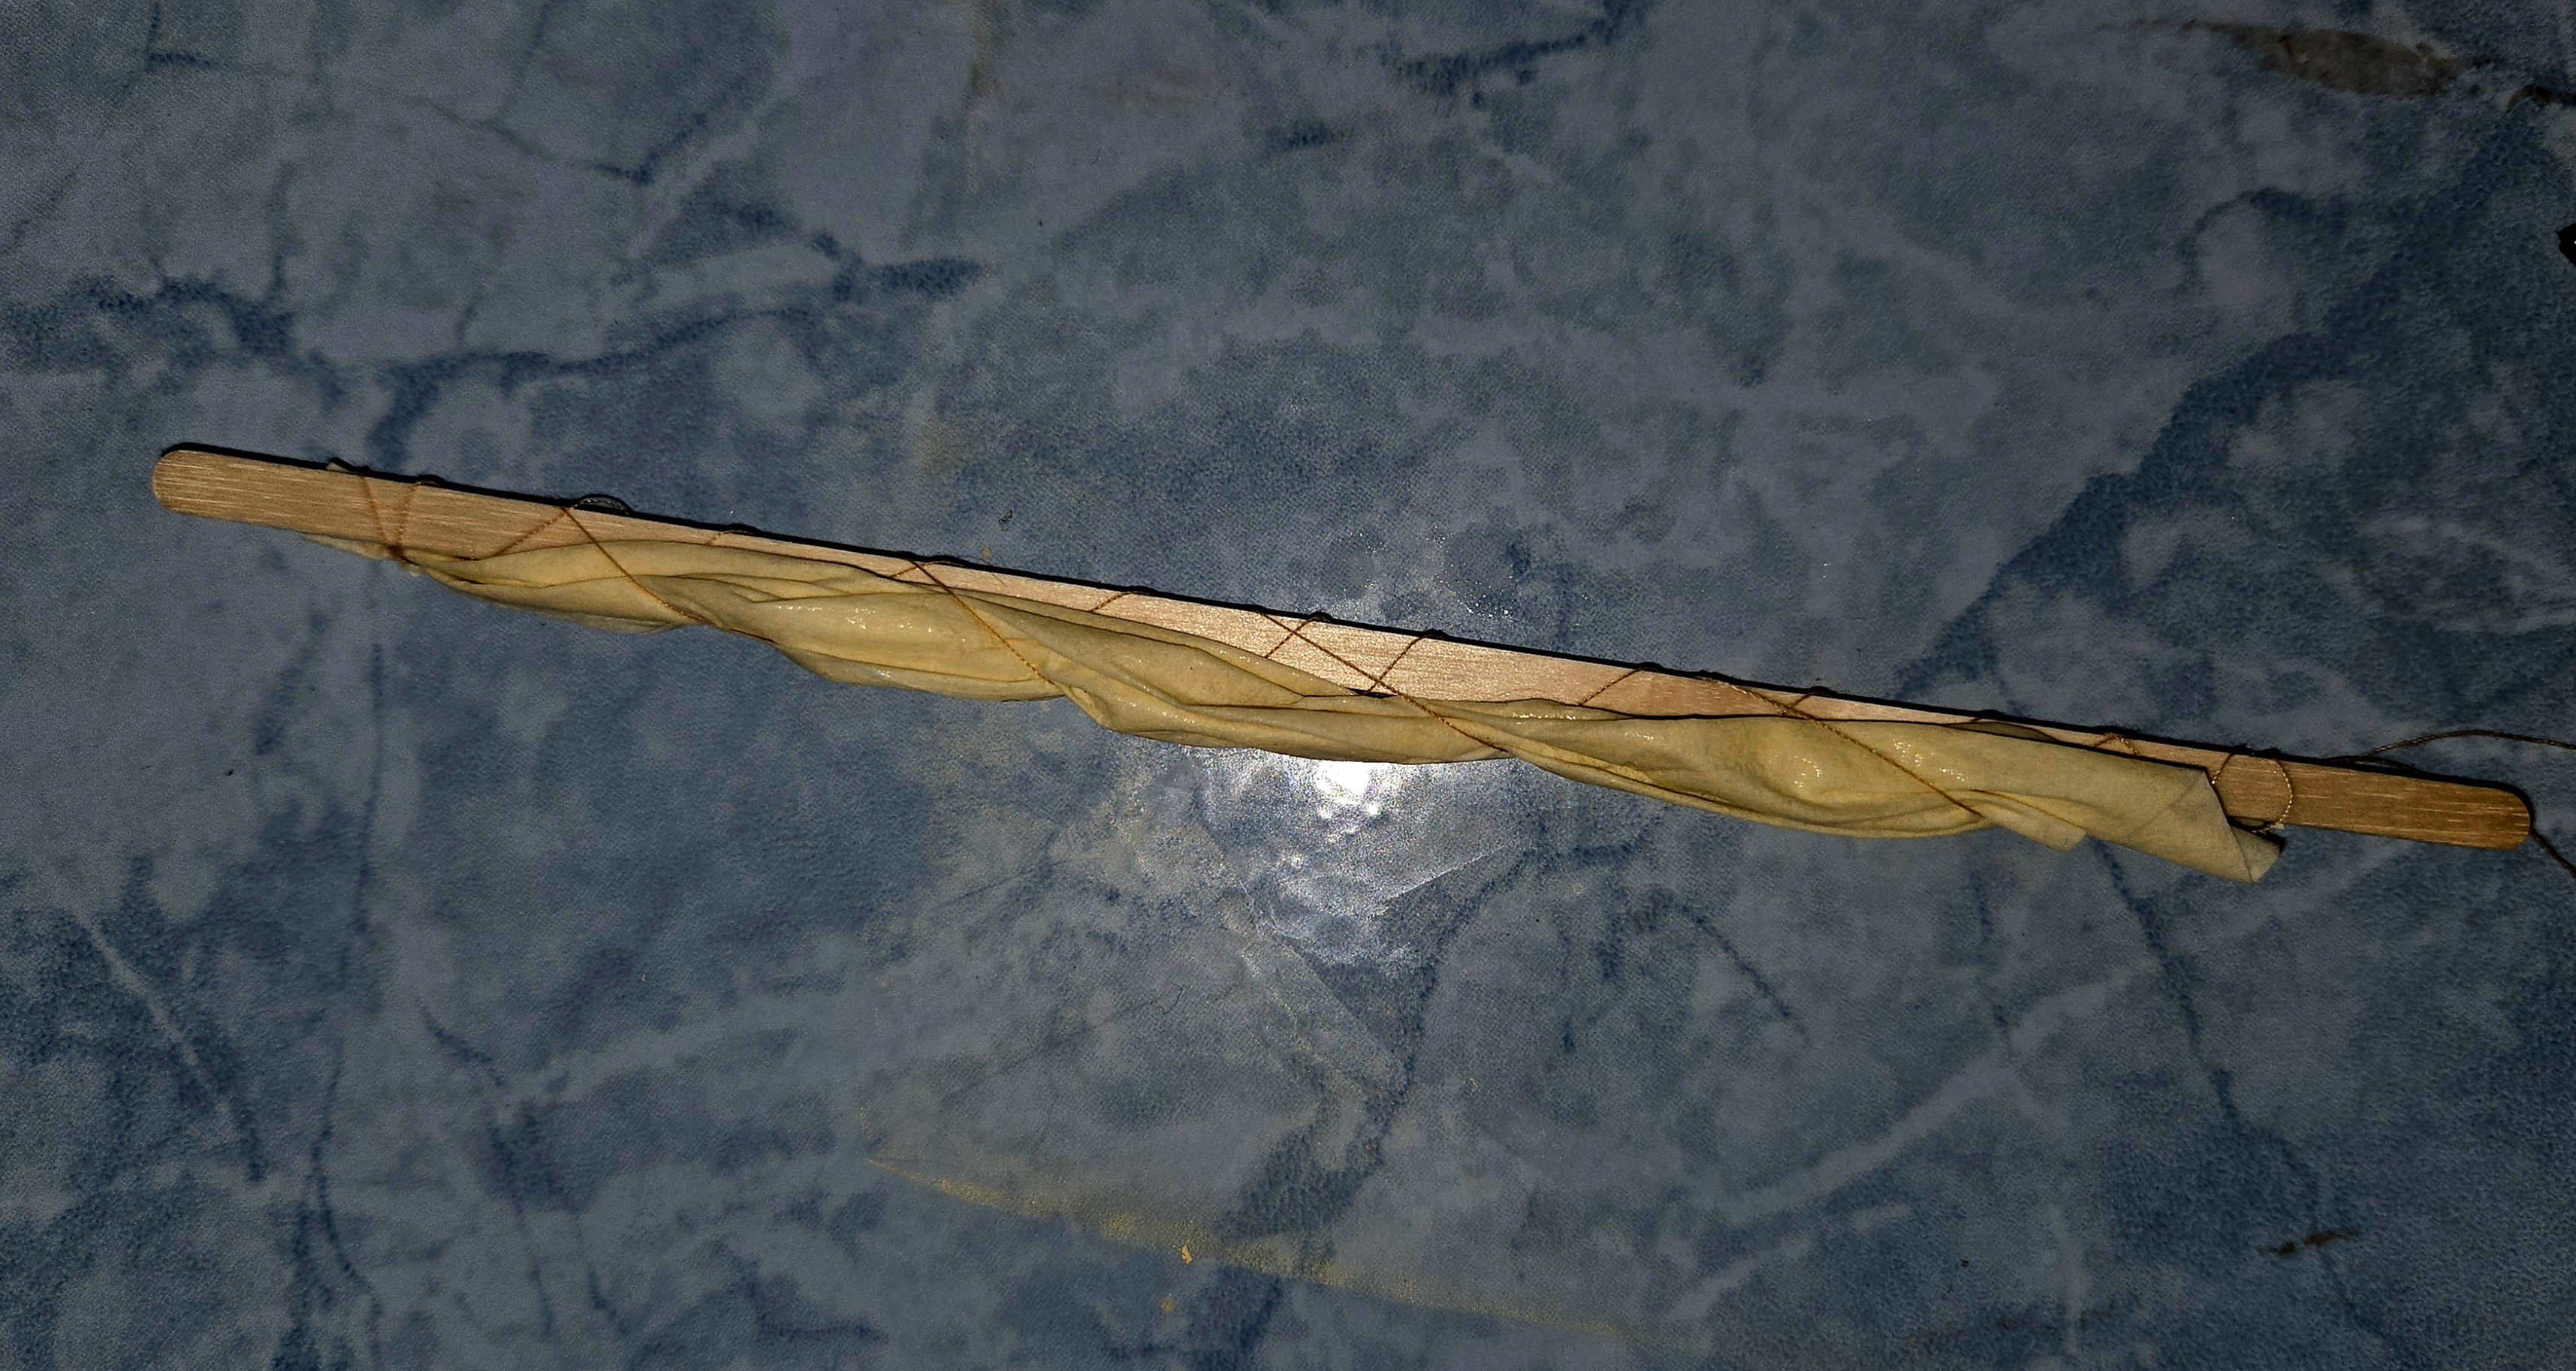
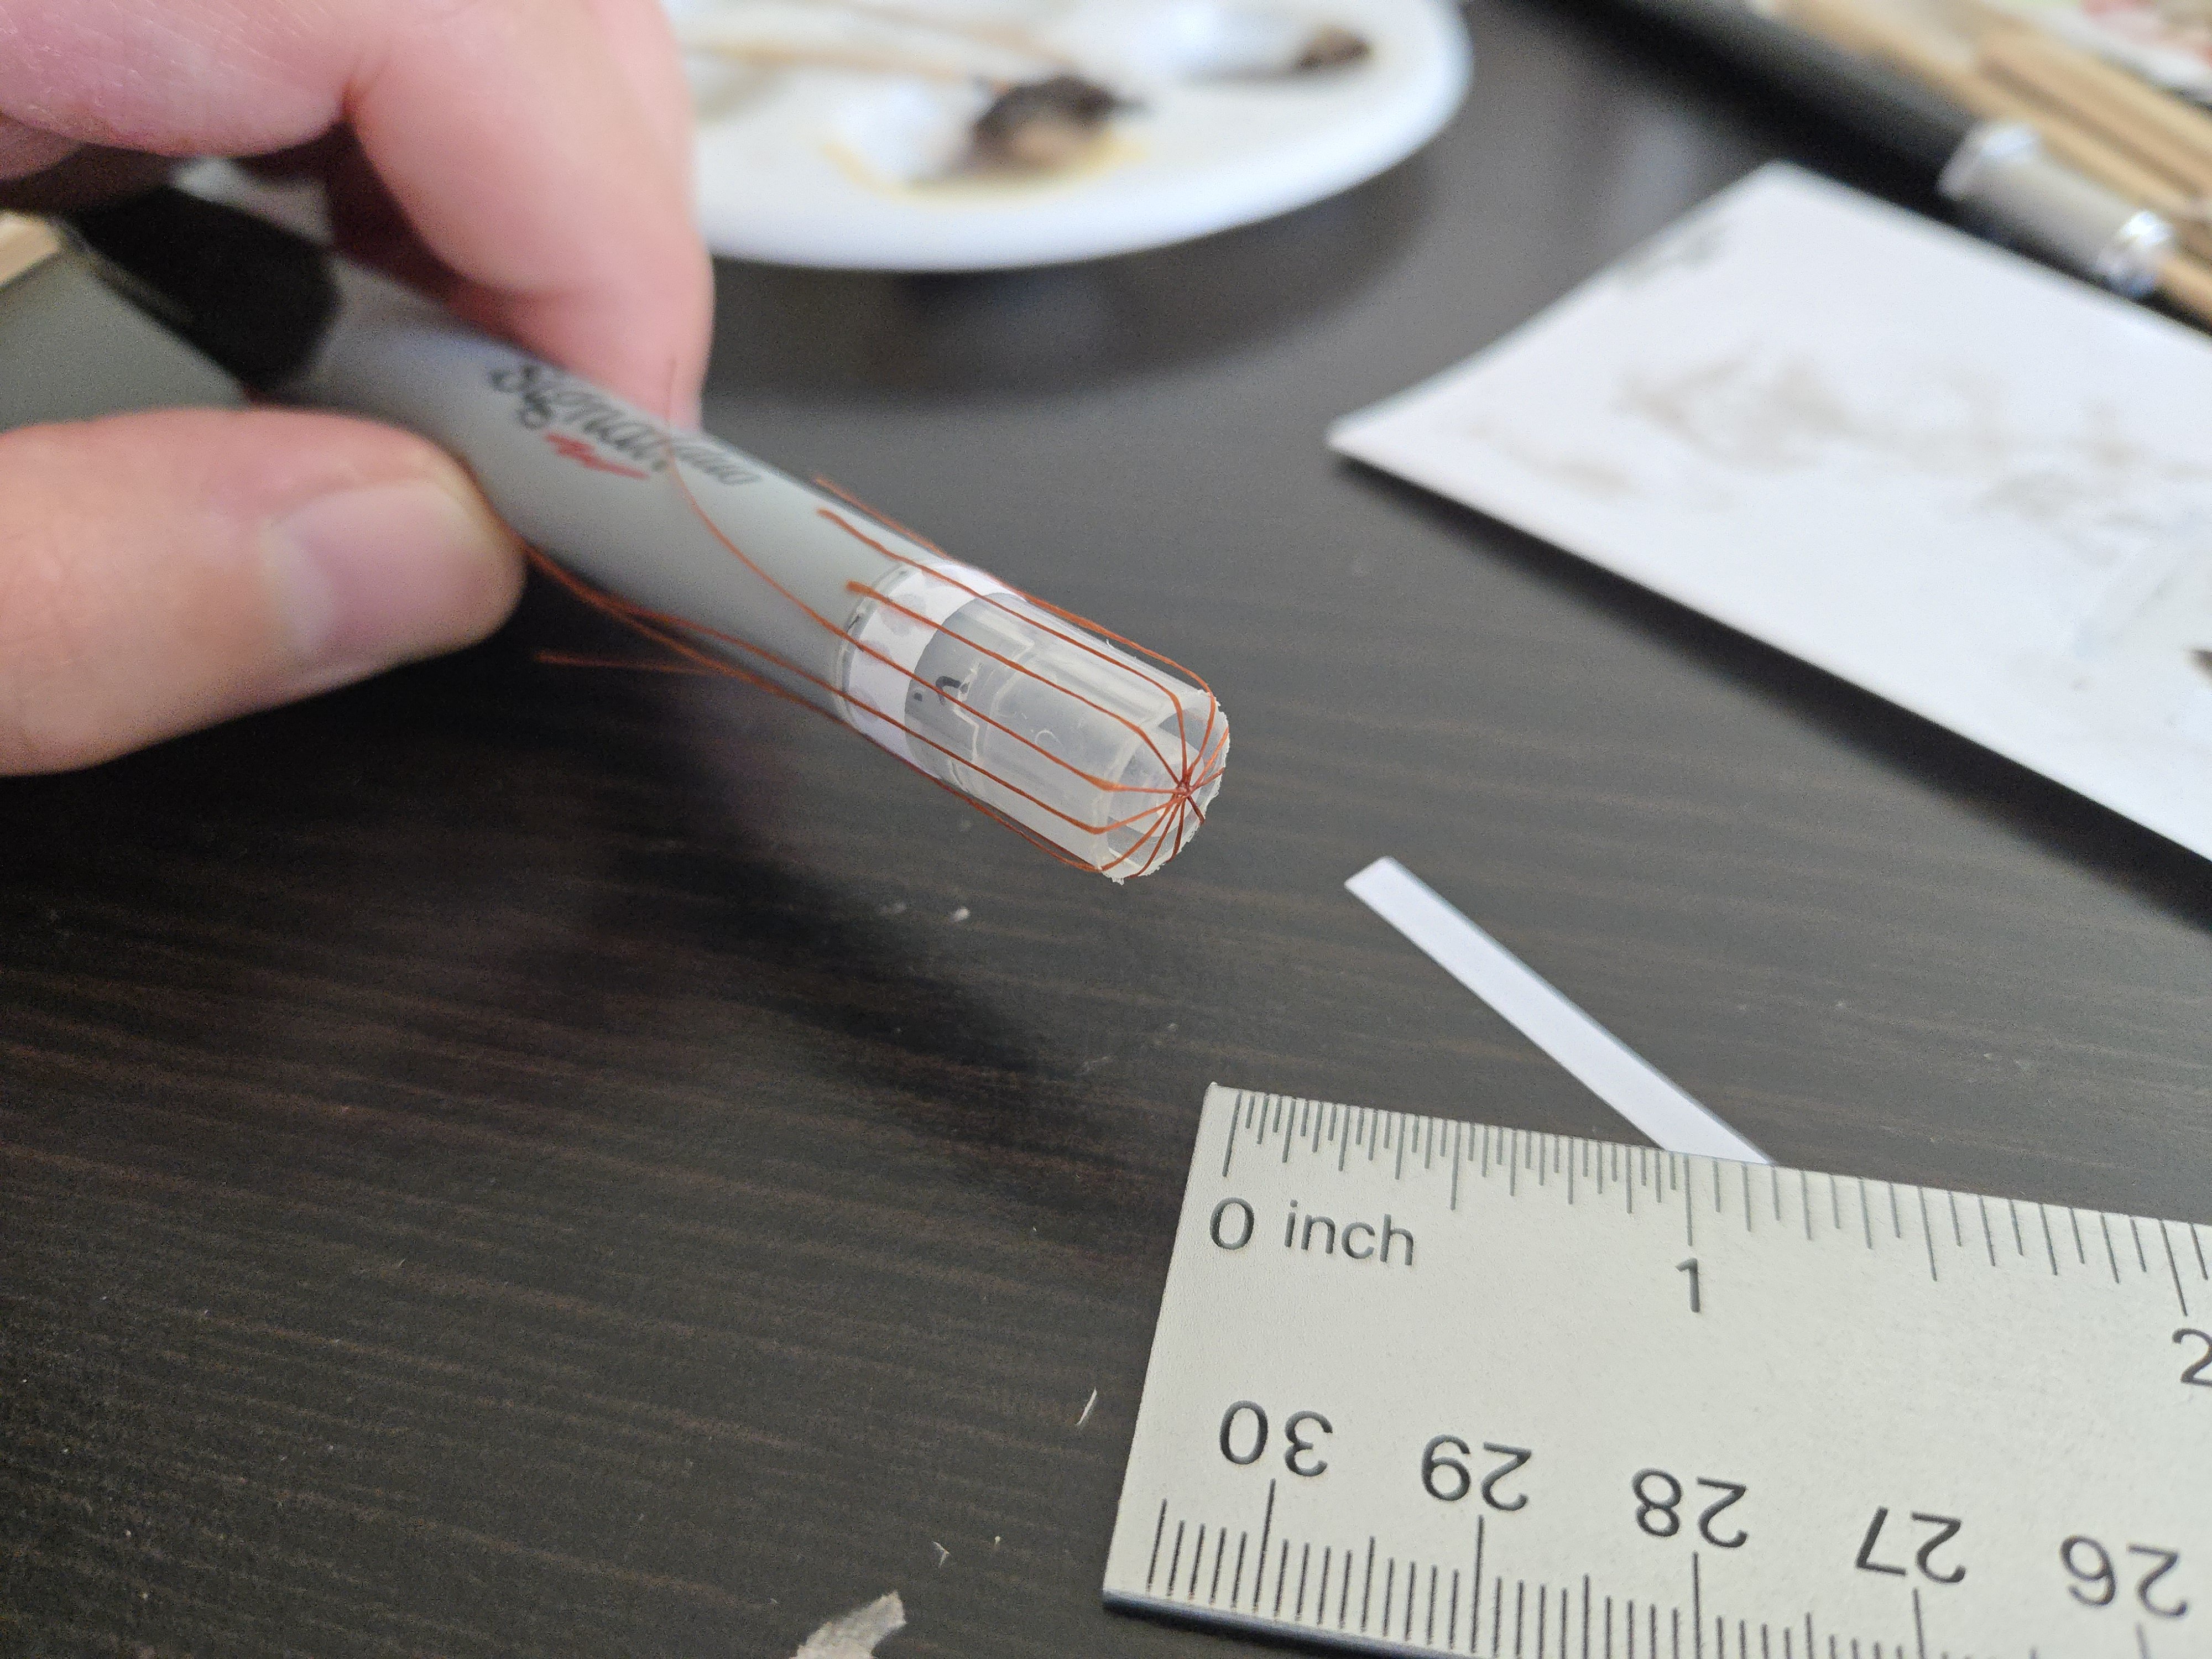
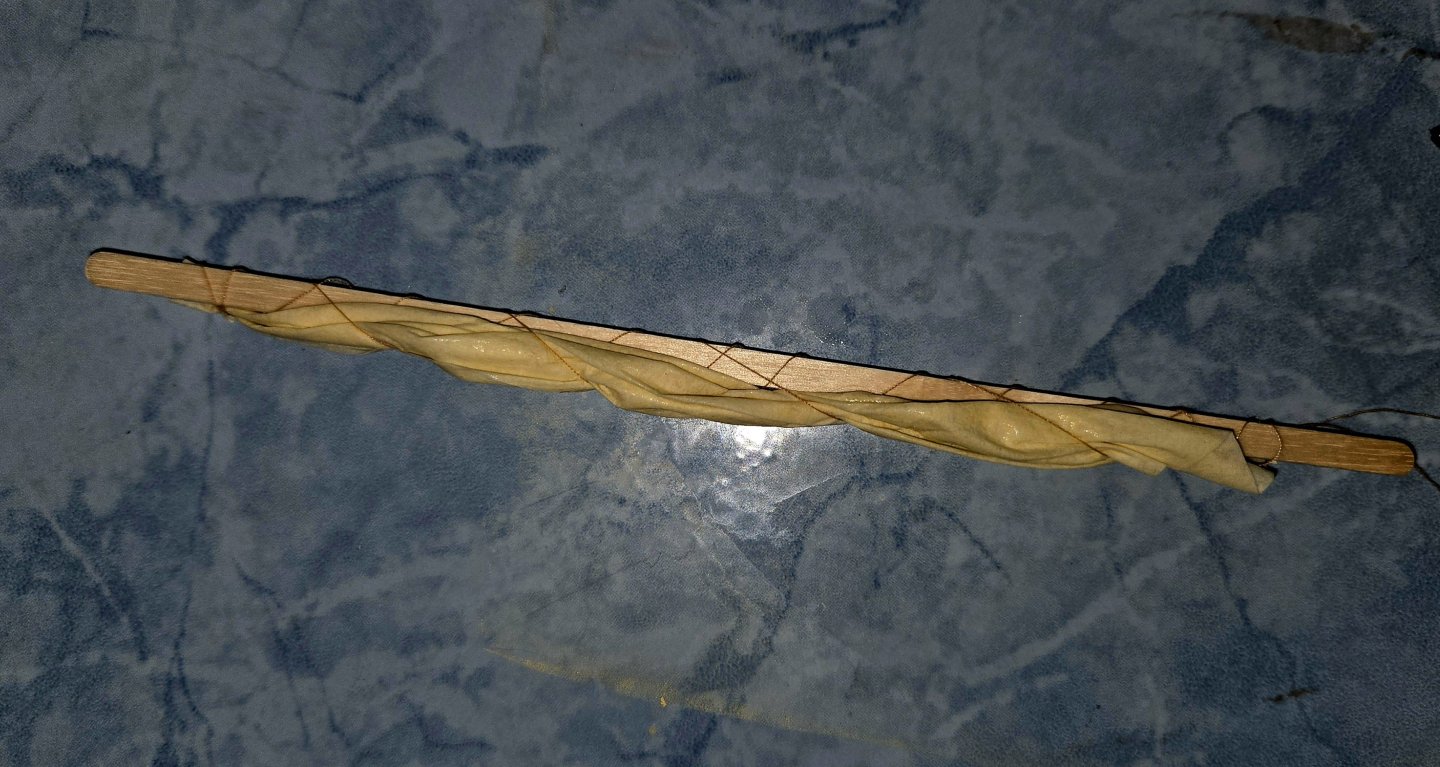
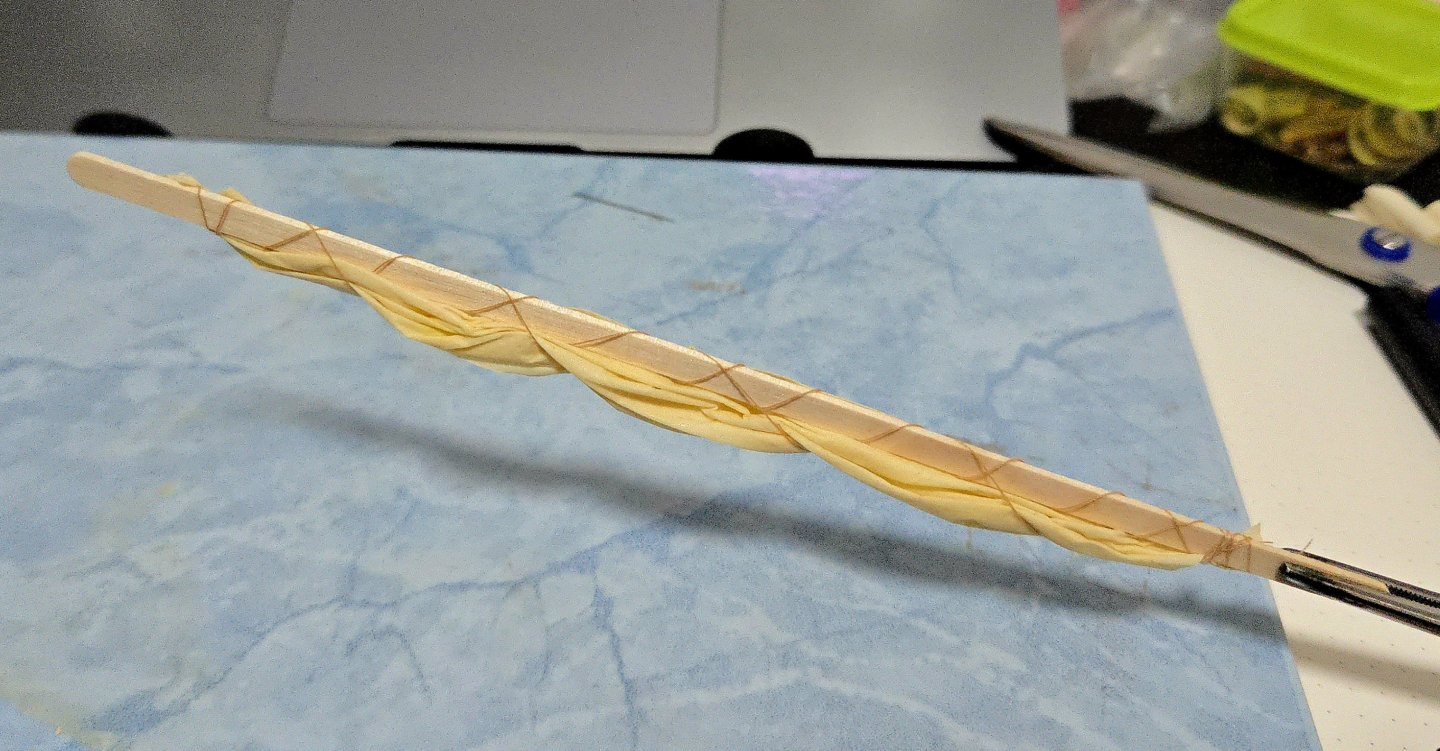
I've done a bit more work testing out coffee filters as sail material, and I think it will work for the actual build. Having already doubled up the filter paper, painted/glued it, and cut it to rough shape, it was time to try folding/rolling it into the shape of a furled sail. So, following suggestions on other build logs, I wet the sail. It does indeed take on a flexible, rubbery consistency, without becoming too weak and ripping. I then tried folding/rolling it up. This was a complete failure and produced something that looked exactly like paper folded up. Unhappy with the result, I went looking for more examples of how to do this in build logs. I also watched Tom Lauria's extremely helpful youtube videos on scale sail-making, the third part of which shows him painstakingly making a furled catboat sail (which looks great). This made very clear one of my main problems. As you may notice, I did not have my test sail attached to the yard. This was because I didn't want to stain it somehow with the sail, and I had thought, how hard can it be to roll up a bit of paper freehand? As it turns out, the job actually is much easier if you have the sail attached to the yard. So I wet the test sail again, which allowed it to flex back basically to its original shape albeit withsome extra creases, and tried again. I used a coffee stir stick as a substitute yard, punched some holes with a needle, and used my roughest throw-away thread to simply lace the sail to the stir stick. I left excess string at both ends to assist with the furling. (Apologies for the sickly color/texture in the photo, I had to use the flash and the sail was still damp). I then wrapped one loose string end around the sail and yard. On the actual sail, as far as I can tell they would use the sheets to wrap everything up, but for testing purposes this line worked. As can be seen, it didn't look great at first. But, after poking, prodding, and reshaping everything while the sail was still all tied up, I produced something that looks much more acceptable to my eyes. There are still a few issues and unrealistic creases in there, but it's definitely a step up. I think it can only look better if I do a better job at avoiding creases when I apply the glue-paint-water mix to the sail (and if I don't botch my first attempt at rolling it again, and if I lash it to a round yard instead of a coffee stir stick). I may also experiment with a slightly whiter color, too. For anyone curious about using coffee filters as substitute silkspan, my sense is that two layers of paper is reasonably thin while adding enough strength for handling. Possibly it would fine with a single layer, though, after adding watered-down glue. While I'll be working on the real sail next, I won't be able to add it until I advance on other aspects of the build. The sail will be not just furled around the yard, but, on the aft half, also resting on the rancho. This will pose a definite challenge, and the sail will have to be shaped against the rancho (probably with a layer of plastic wrap in between to keep things clean). So first I'll need to properly place all the fishing equipment and any other supplies, so that I can fix the mast, fix the rancho, and then add the furled sail. Finally, I should note that I've begun another scratch build of a Latin American workboat, so I'm looking forward to starting that log in the next couple of weeks. Apparently I'm addicted to this hobby.


-
In my experience, you don't necessarily need to wet the wood before applying sanding sealer, because the sanding sealer will raise the grain anyway (or at least mine does). But it probably wouldn't hurt. I think the best thing to do would be to experiment on some scrap wood to make sure everything works for you and that there are no weird reactions between different materials. Given the wide range of responses you've received to this question, I think it's safe to say that there's no single way to do it, it's more a matter of finding out what works for you.
-
Quite the adventure!
-
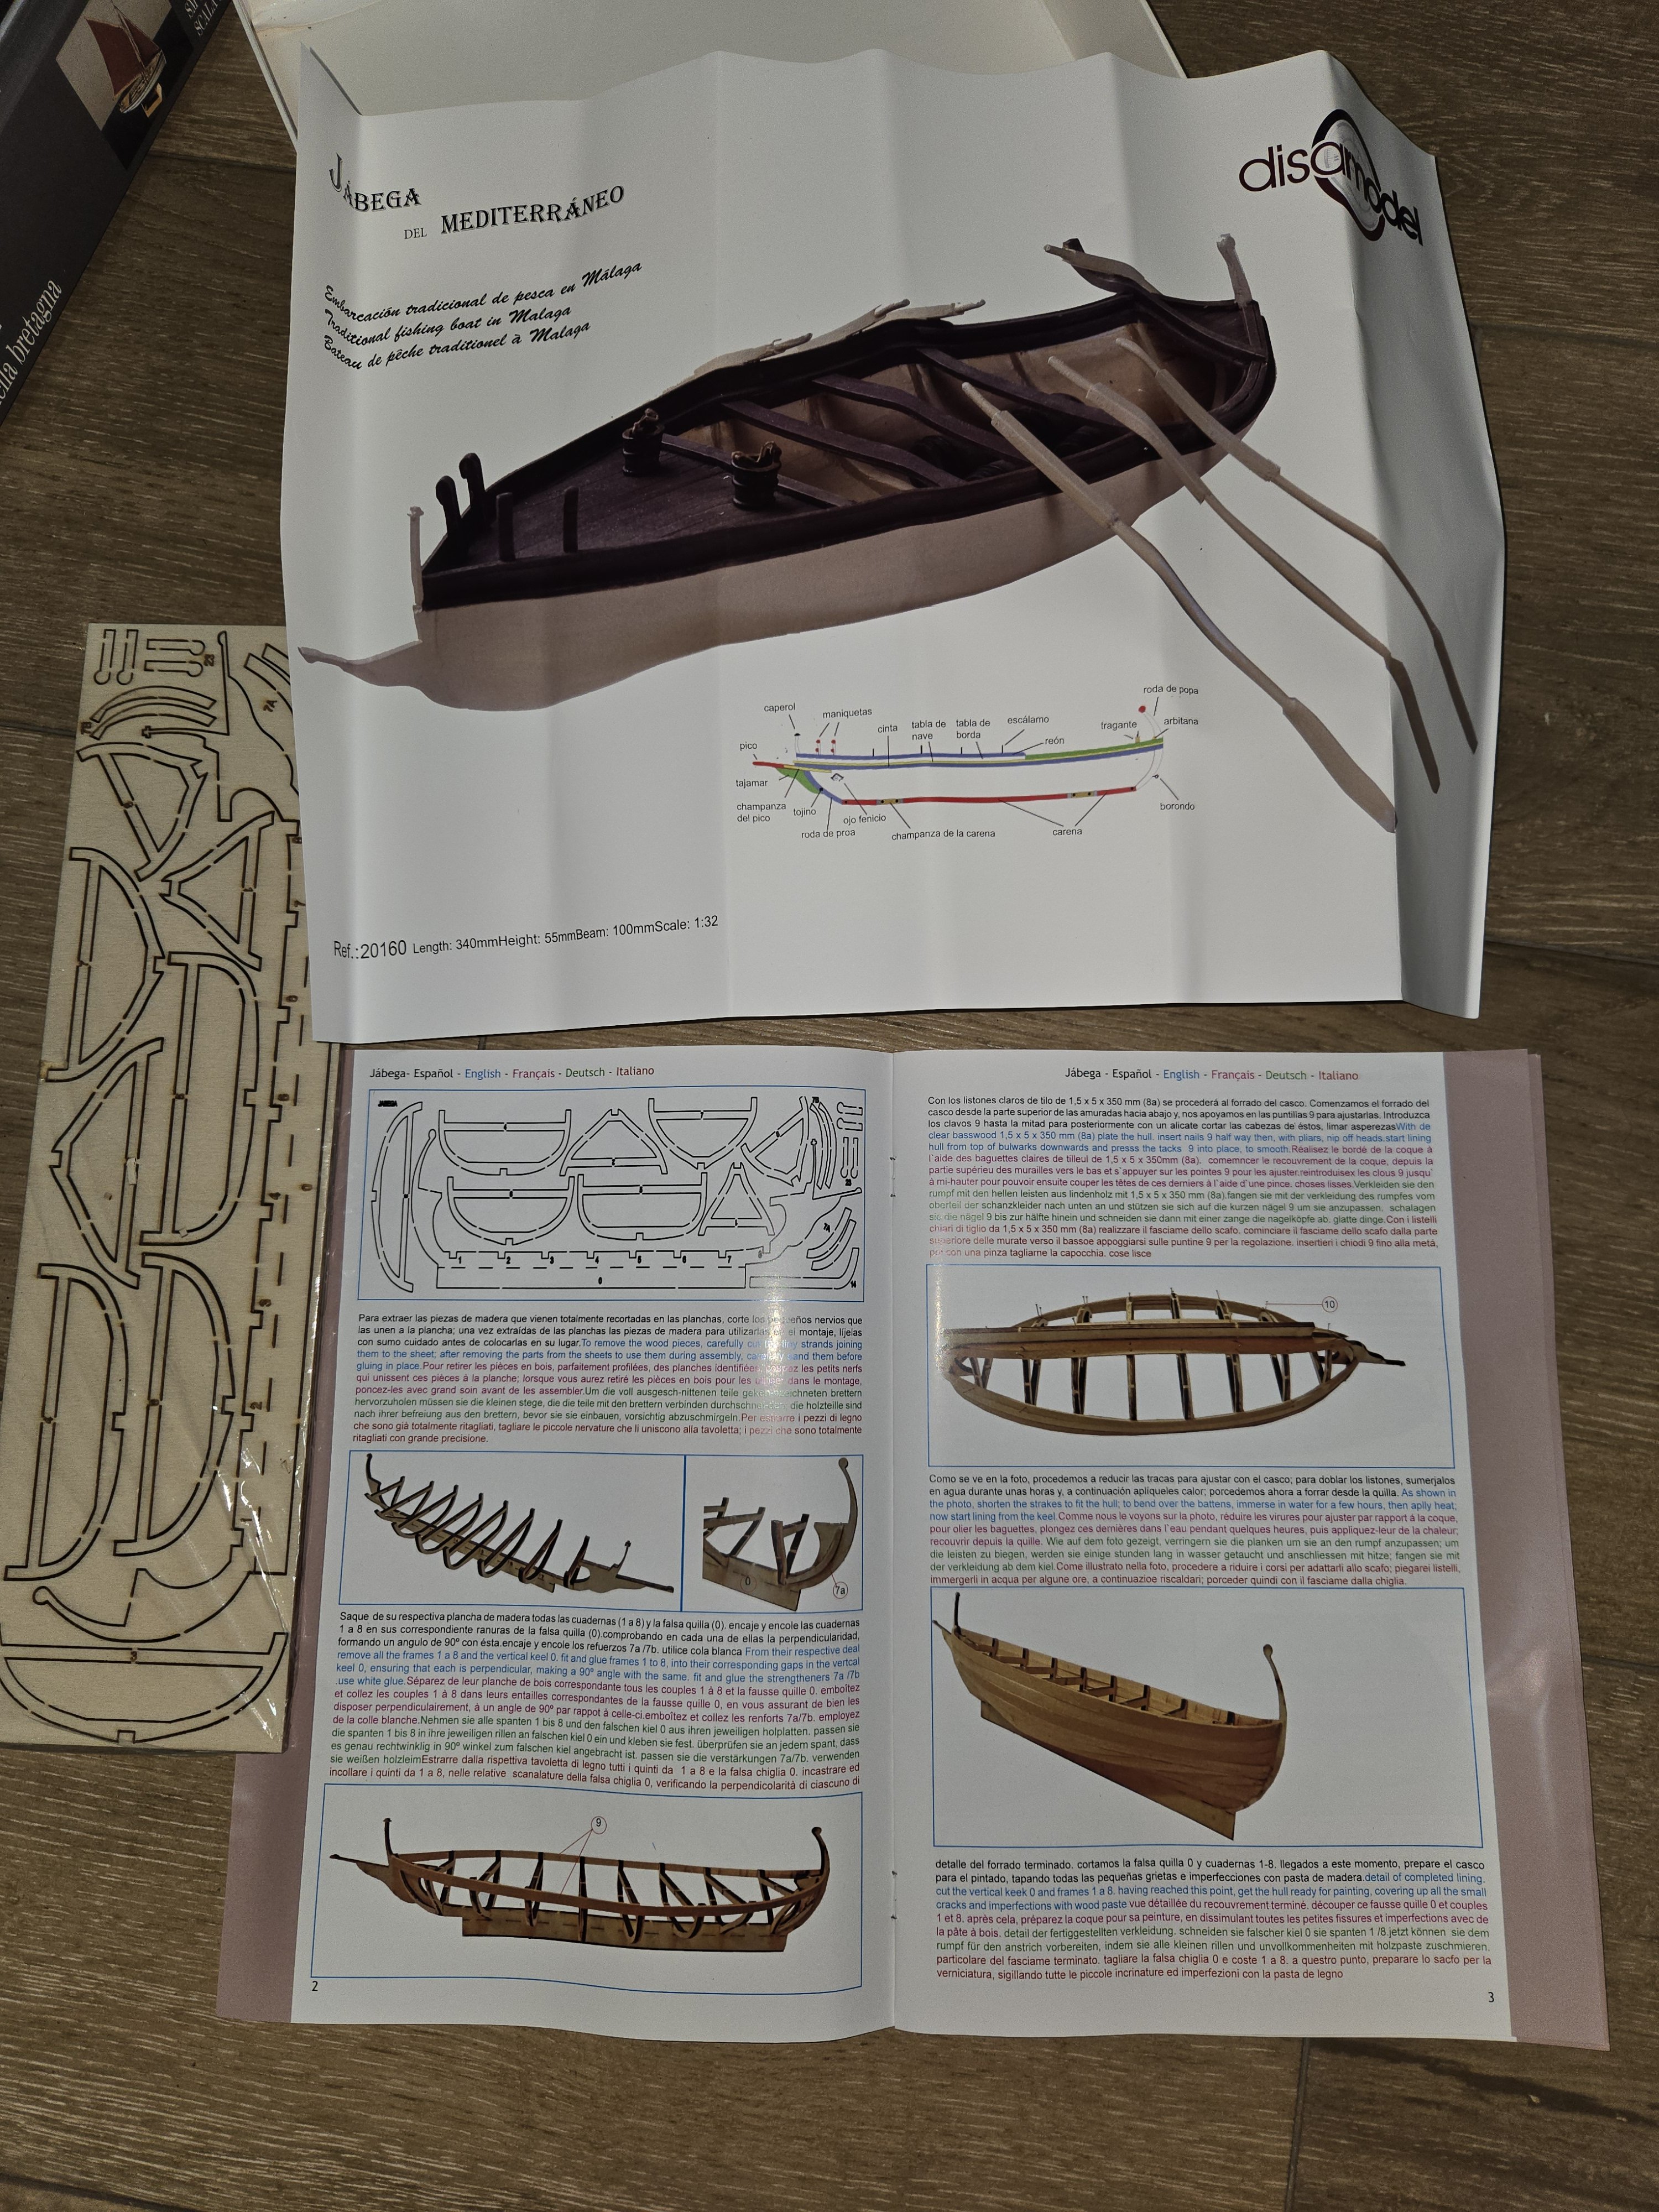
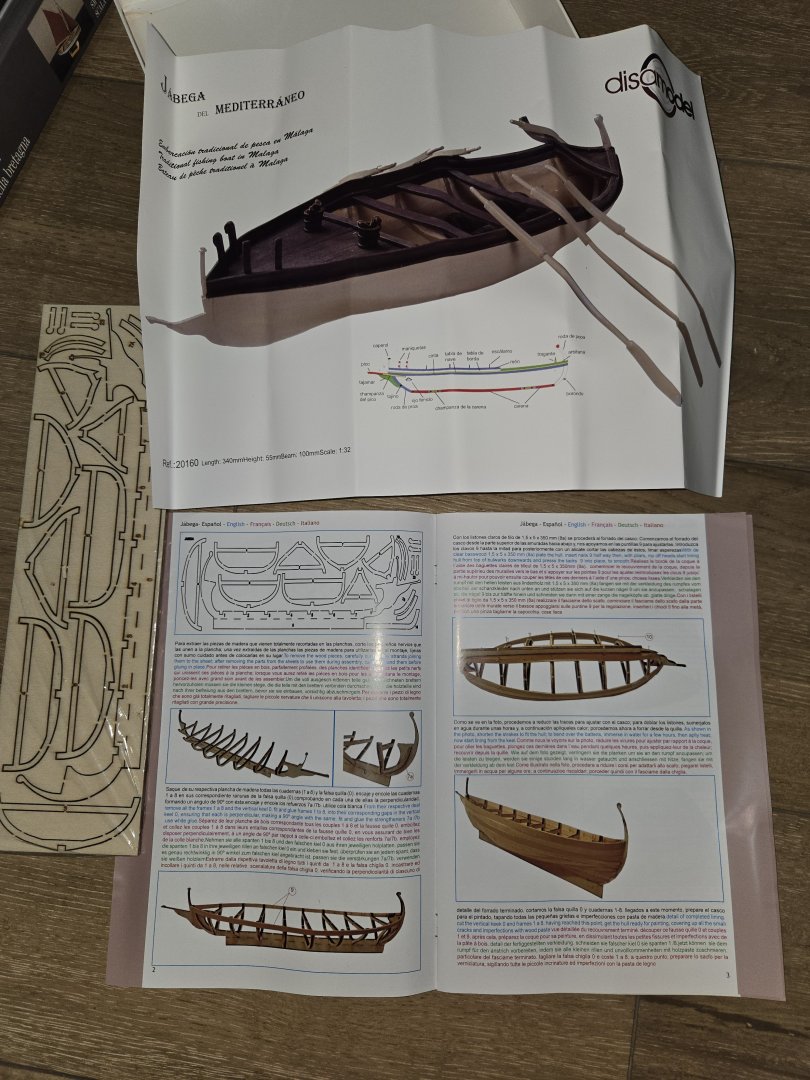
Here's a sample from the Jábega kit. Instead of a plan, they just give you the photo at the top, with a tiny side view that's supposed to serve as a guide for painting it. Why they didn't paint the model they photographed in anything like their suggested paint scheme is beyond me. You can also get a sense of the limited instructions (suddenly the hull is fully planked) and the parts, which (besides some stripwood of decent enough quality) are made of a plywood that's already chipping in its bag.
-
If you search, you should be able to find a few build logs. In general, Disar does not have a very good reputation, and a number of other logs complain about problems with the instructions. I have the Jábega kit, which I bought on sale, but I don't think I'll ever build it. The instructions are seriously lacking, the kit doesn't include plans so you're stuck going off of some very inadequate photos, and there are a lot of puzzling aspects of the kit design. More importantly for me, at least, the model's hull shape is completely wrong. Jábegas are generally long and narrow, but this kit produces a short, squat little boat. While I was prepared to kitbash the model into something more accurate, such as by adding more frames, I can't reshape the hull without turning it into basically a scratch-build, and I wish that I hadn't bought it.
-
Thanks, all, for the kind words! I can see a lot of errors and issues when I look closely, but I'm happy with how it all comes together.
- 82 replies
-
- 2
-
-
- half hull planking project
- half hull
- (and 2 more)
-
You ask an excellent question, one that I was myself wondering about when I looked over the smack's instructions. I looked in the relevant sections of Howard I. Chapelle's American Sailing Craft and American Small Sailing Craft, and while there's some discussion of the rigging, there's nothing about this particular question. He mentions that there was some influence from fishing schooners, so I suppose it would be reasonable to look in his book on American fishing schooners (which I don't have access to but which apparently has a several-hundred-page appendix full of details on every aspect of rigging, equipment, etc) to get some sense of possibilities. But I think your best bet, if you're still interested, would be to find a clear photo of a Muscongus Bay smack that shows the block. Unfortunately, I'm not sure where to find one. Maybe some local history museum or historical society has digitized photos that would be helpful?
-
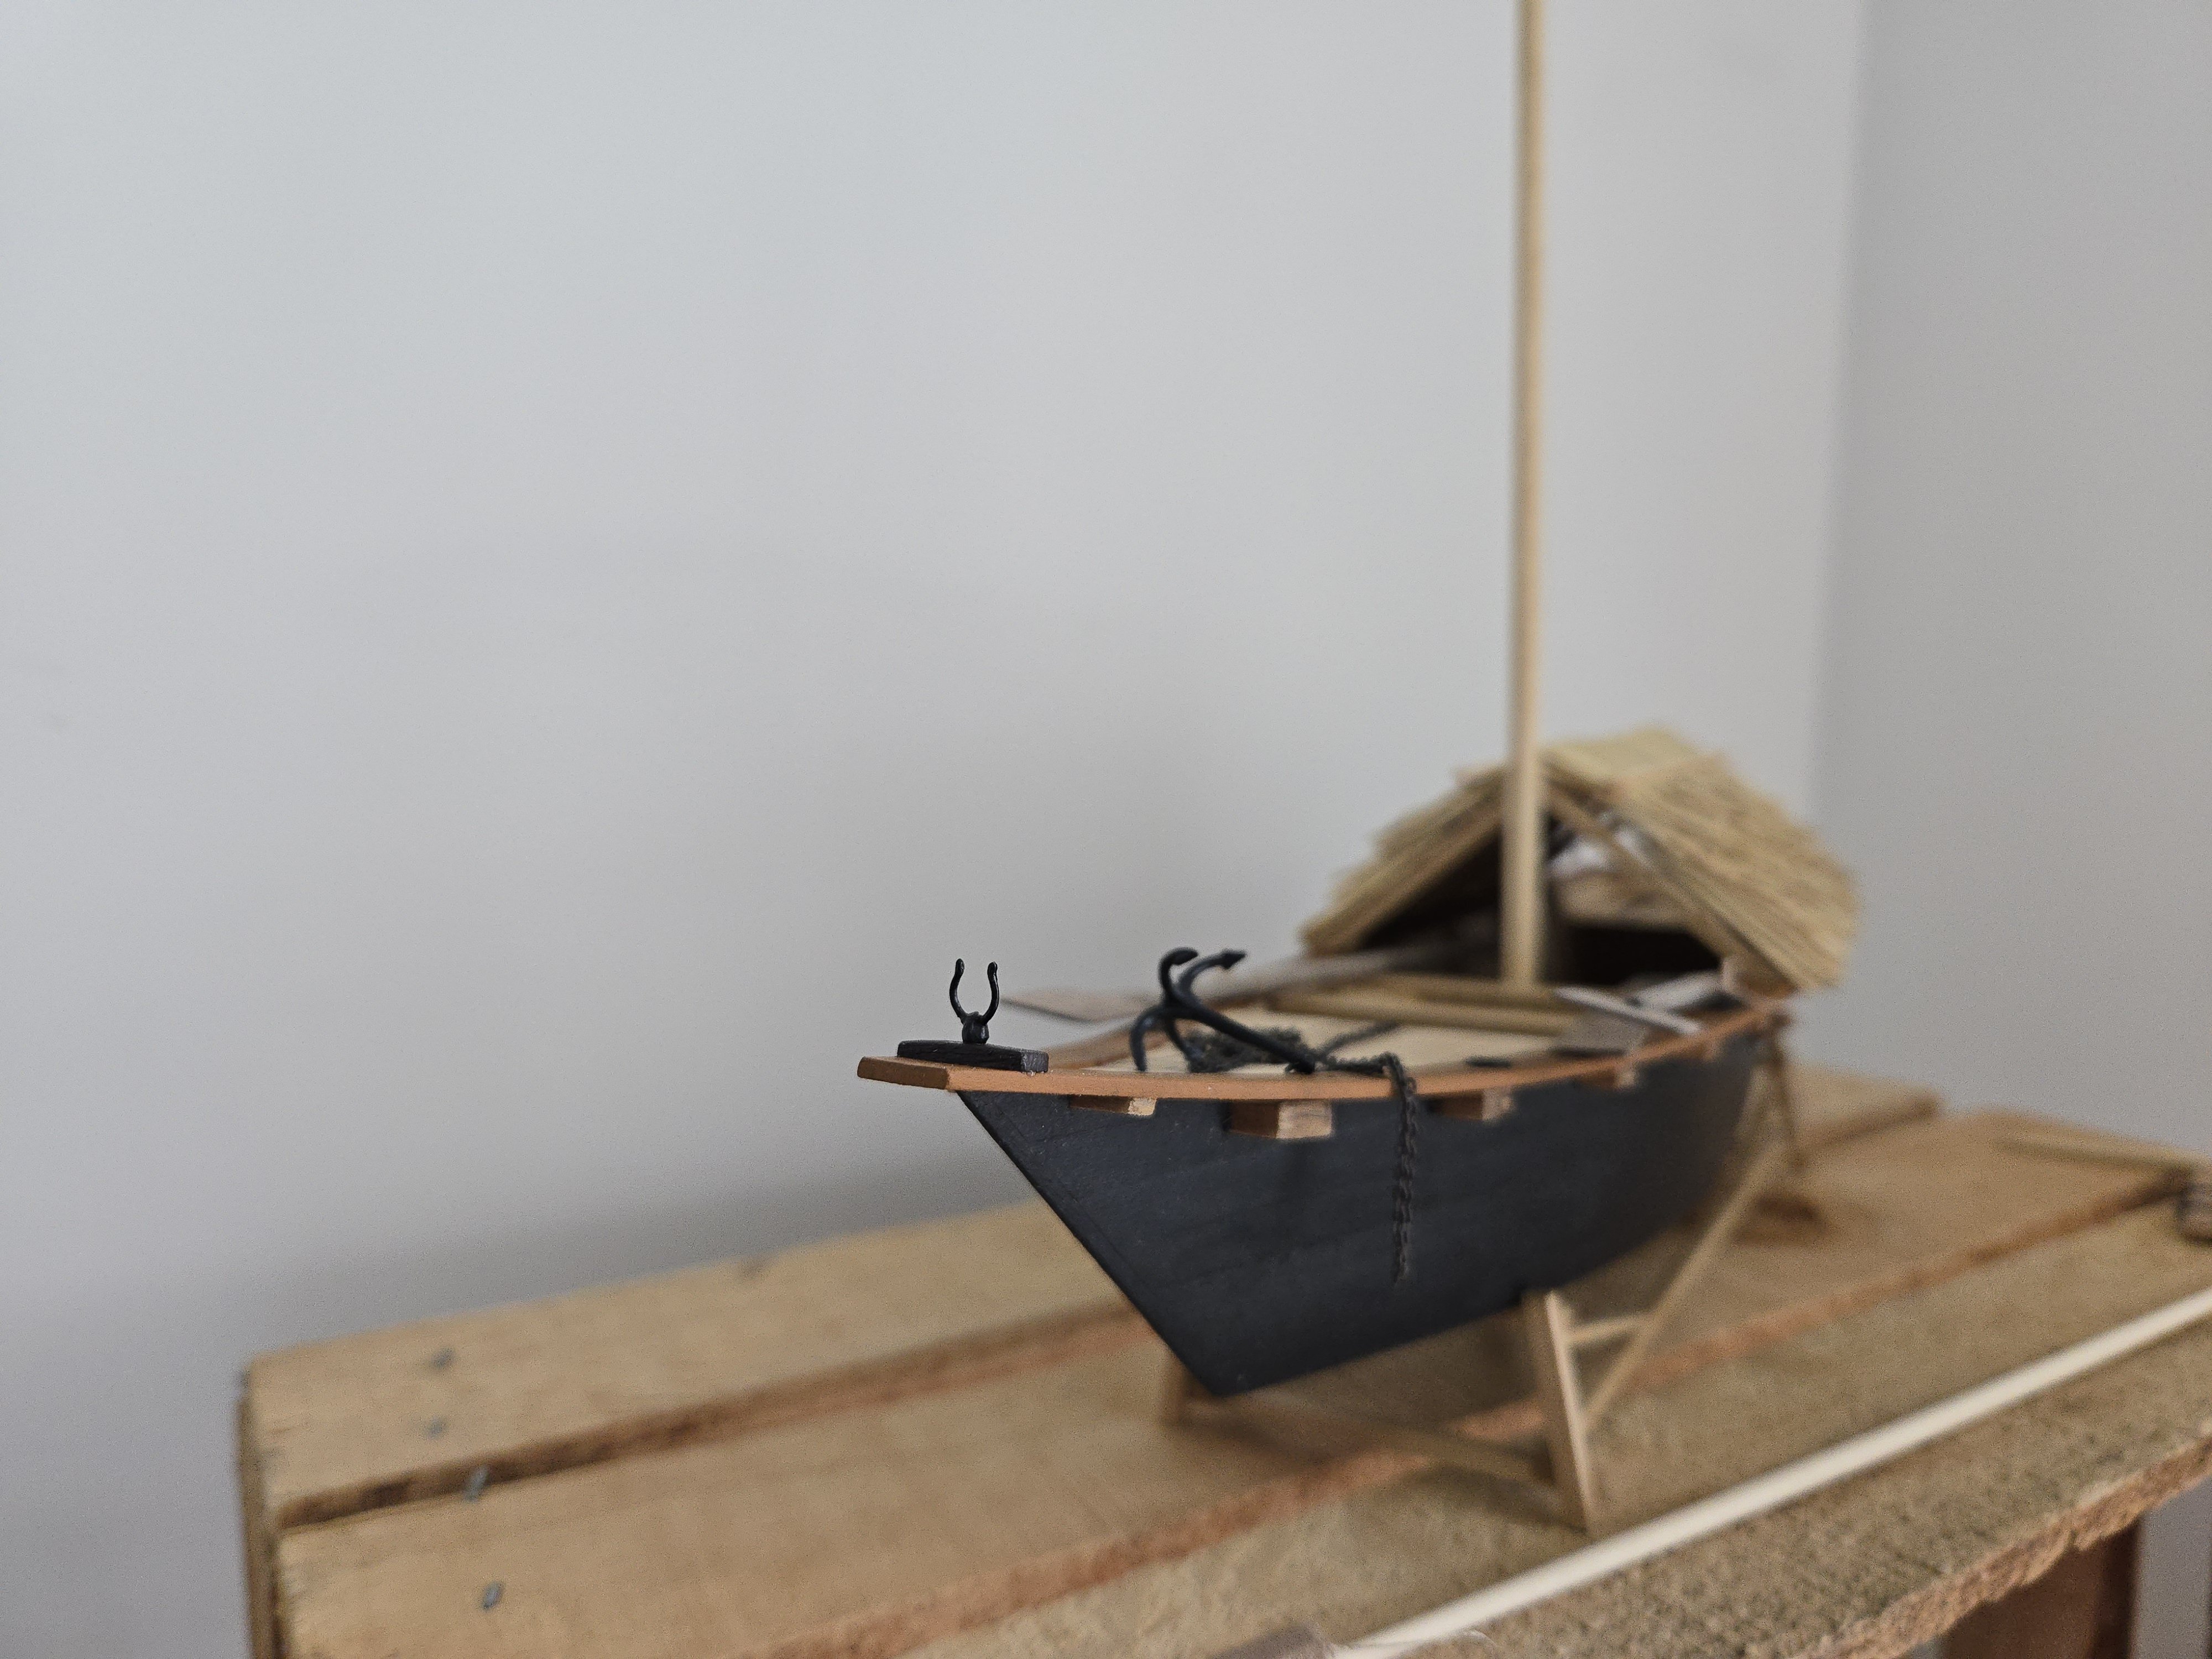
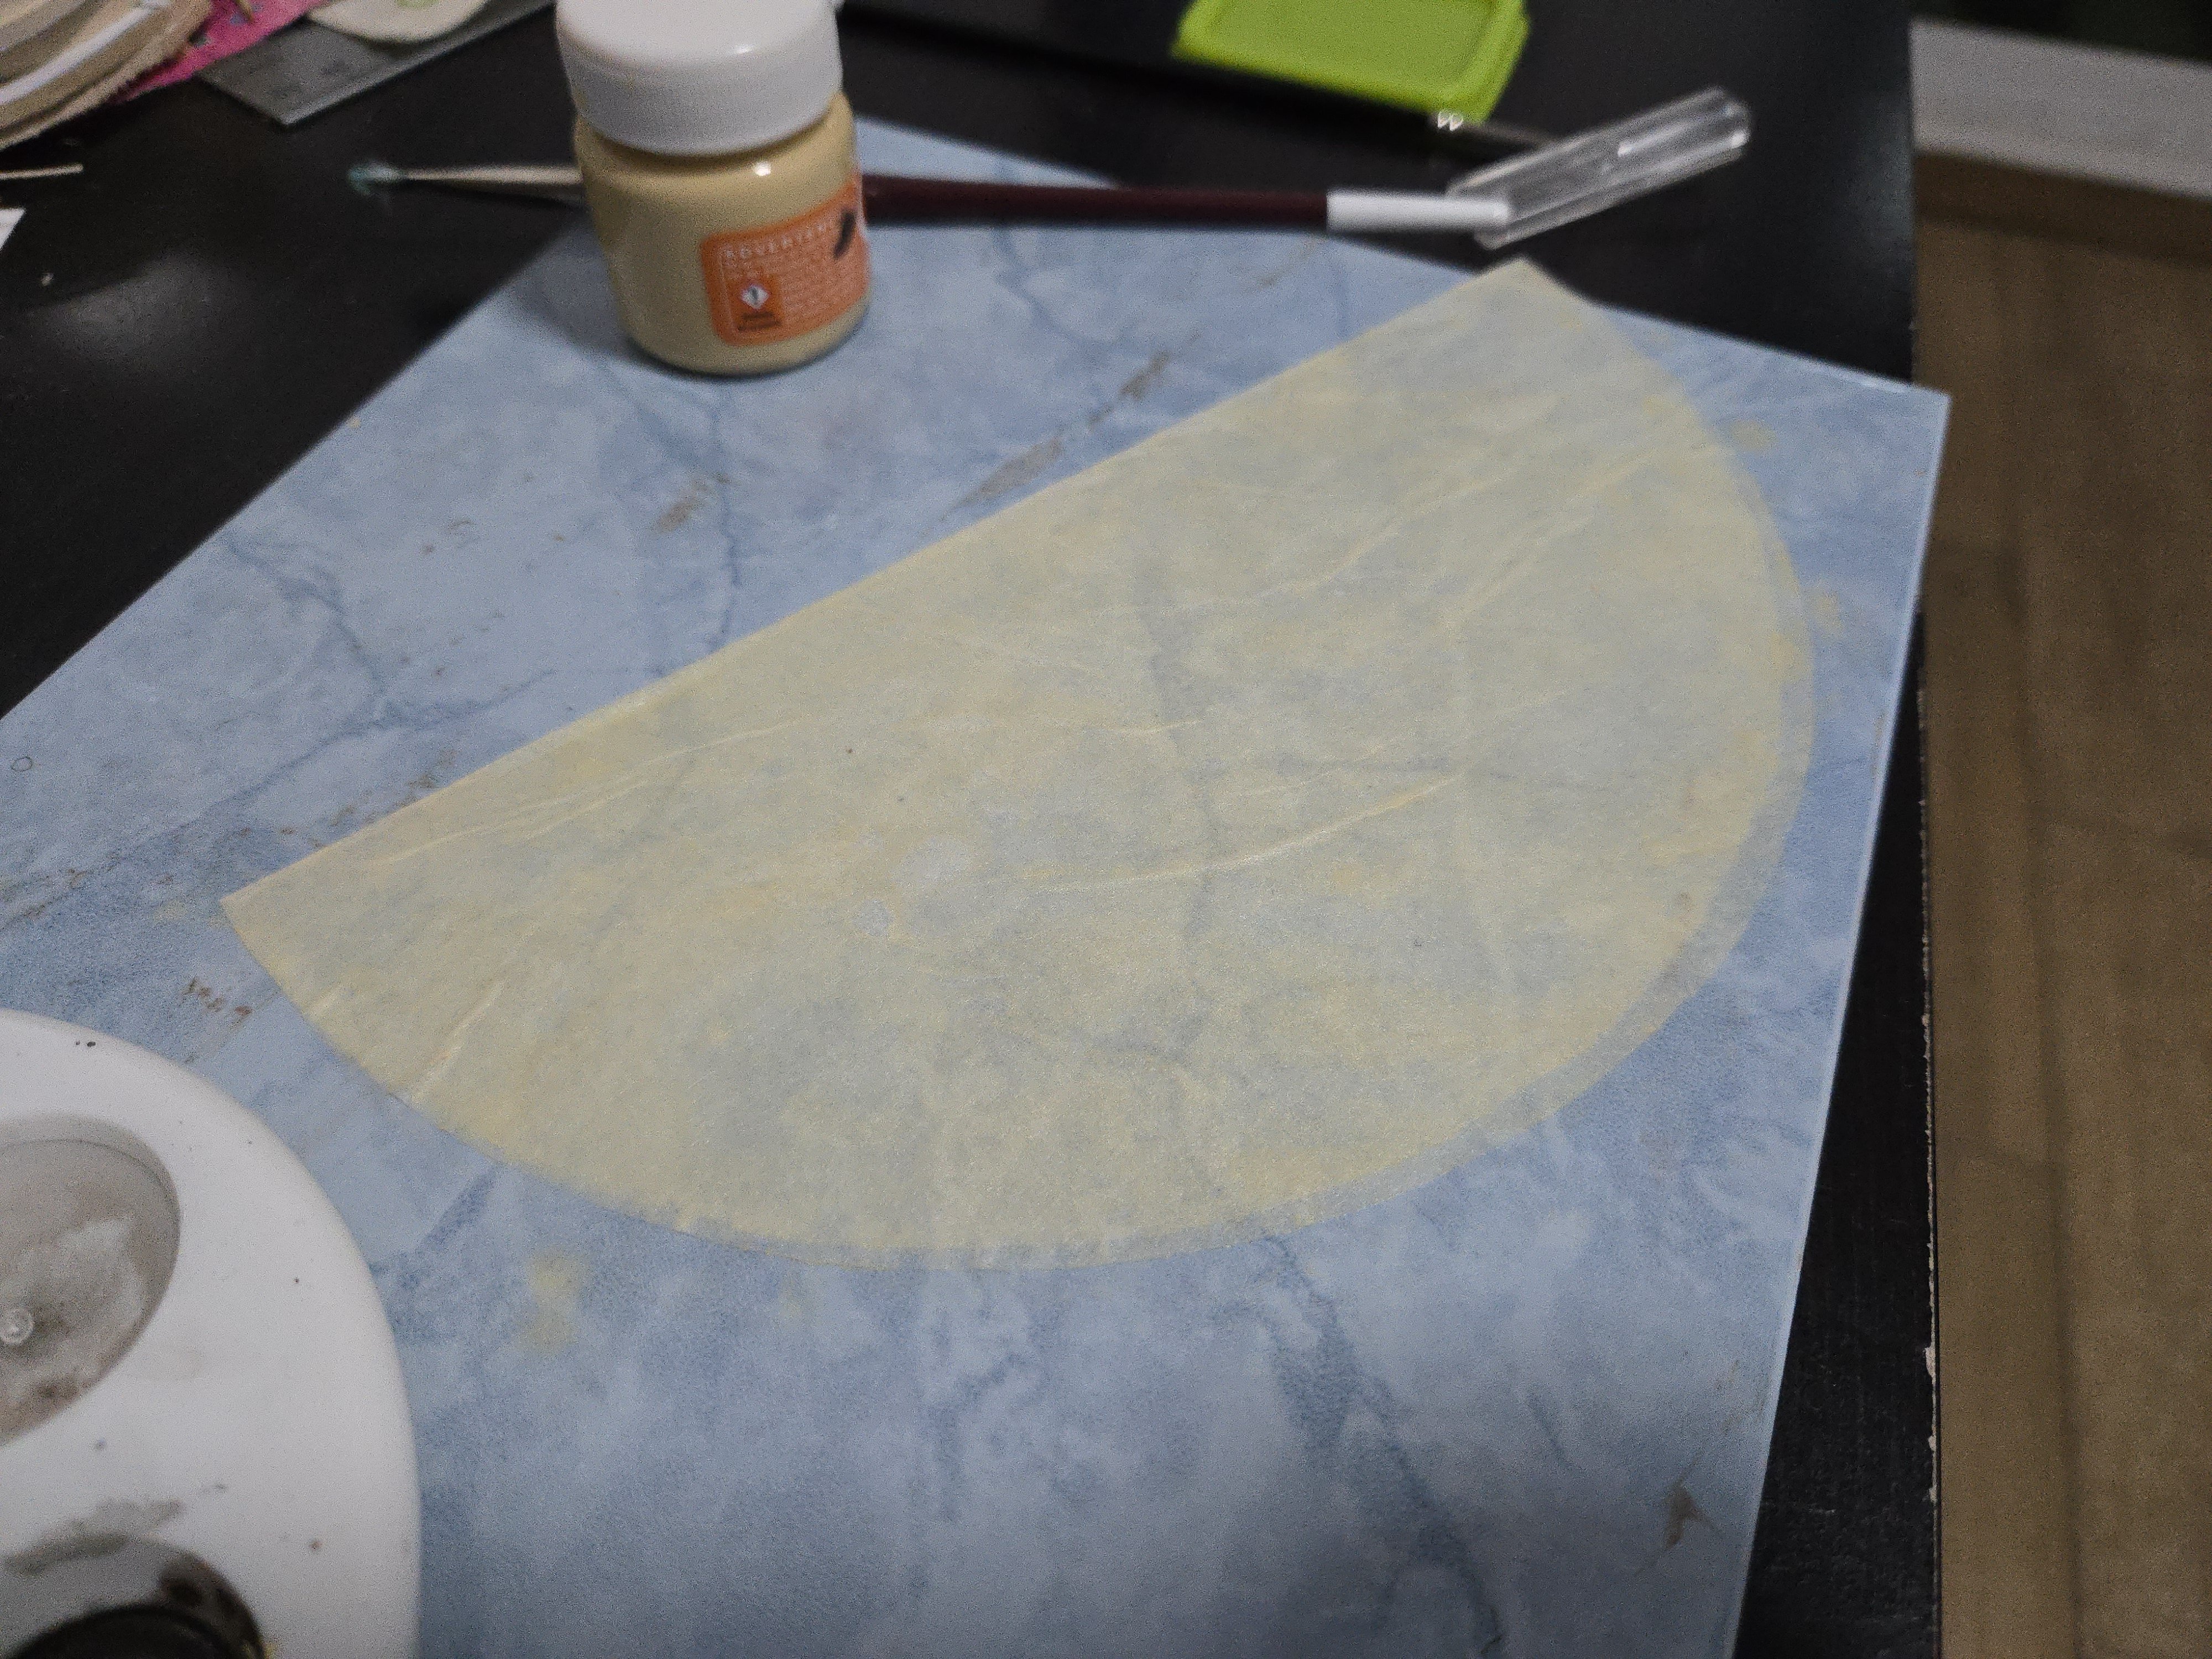
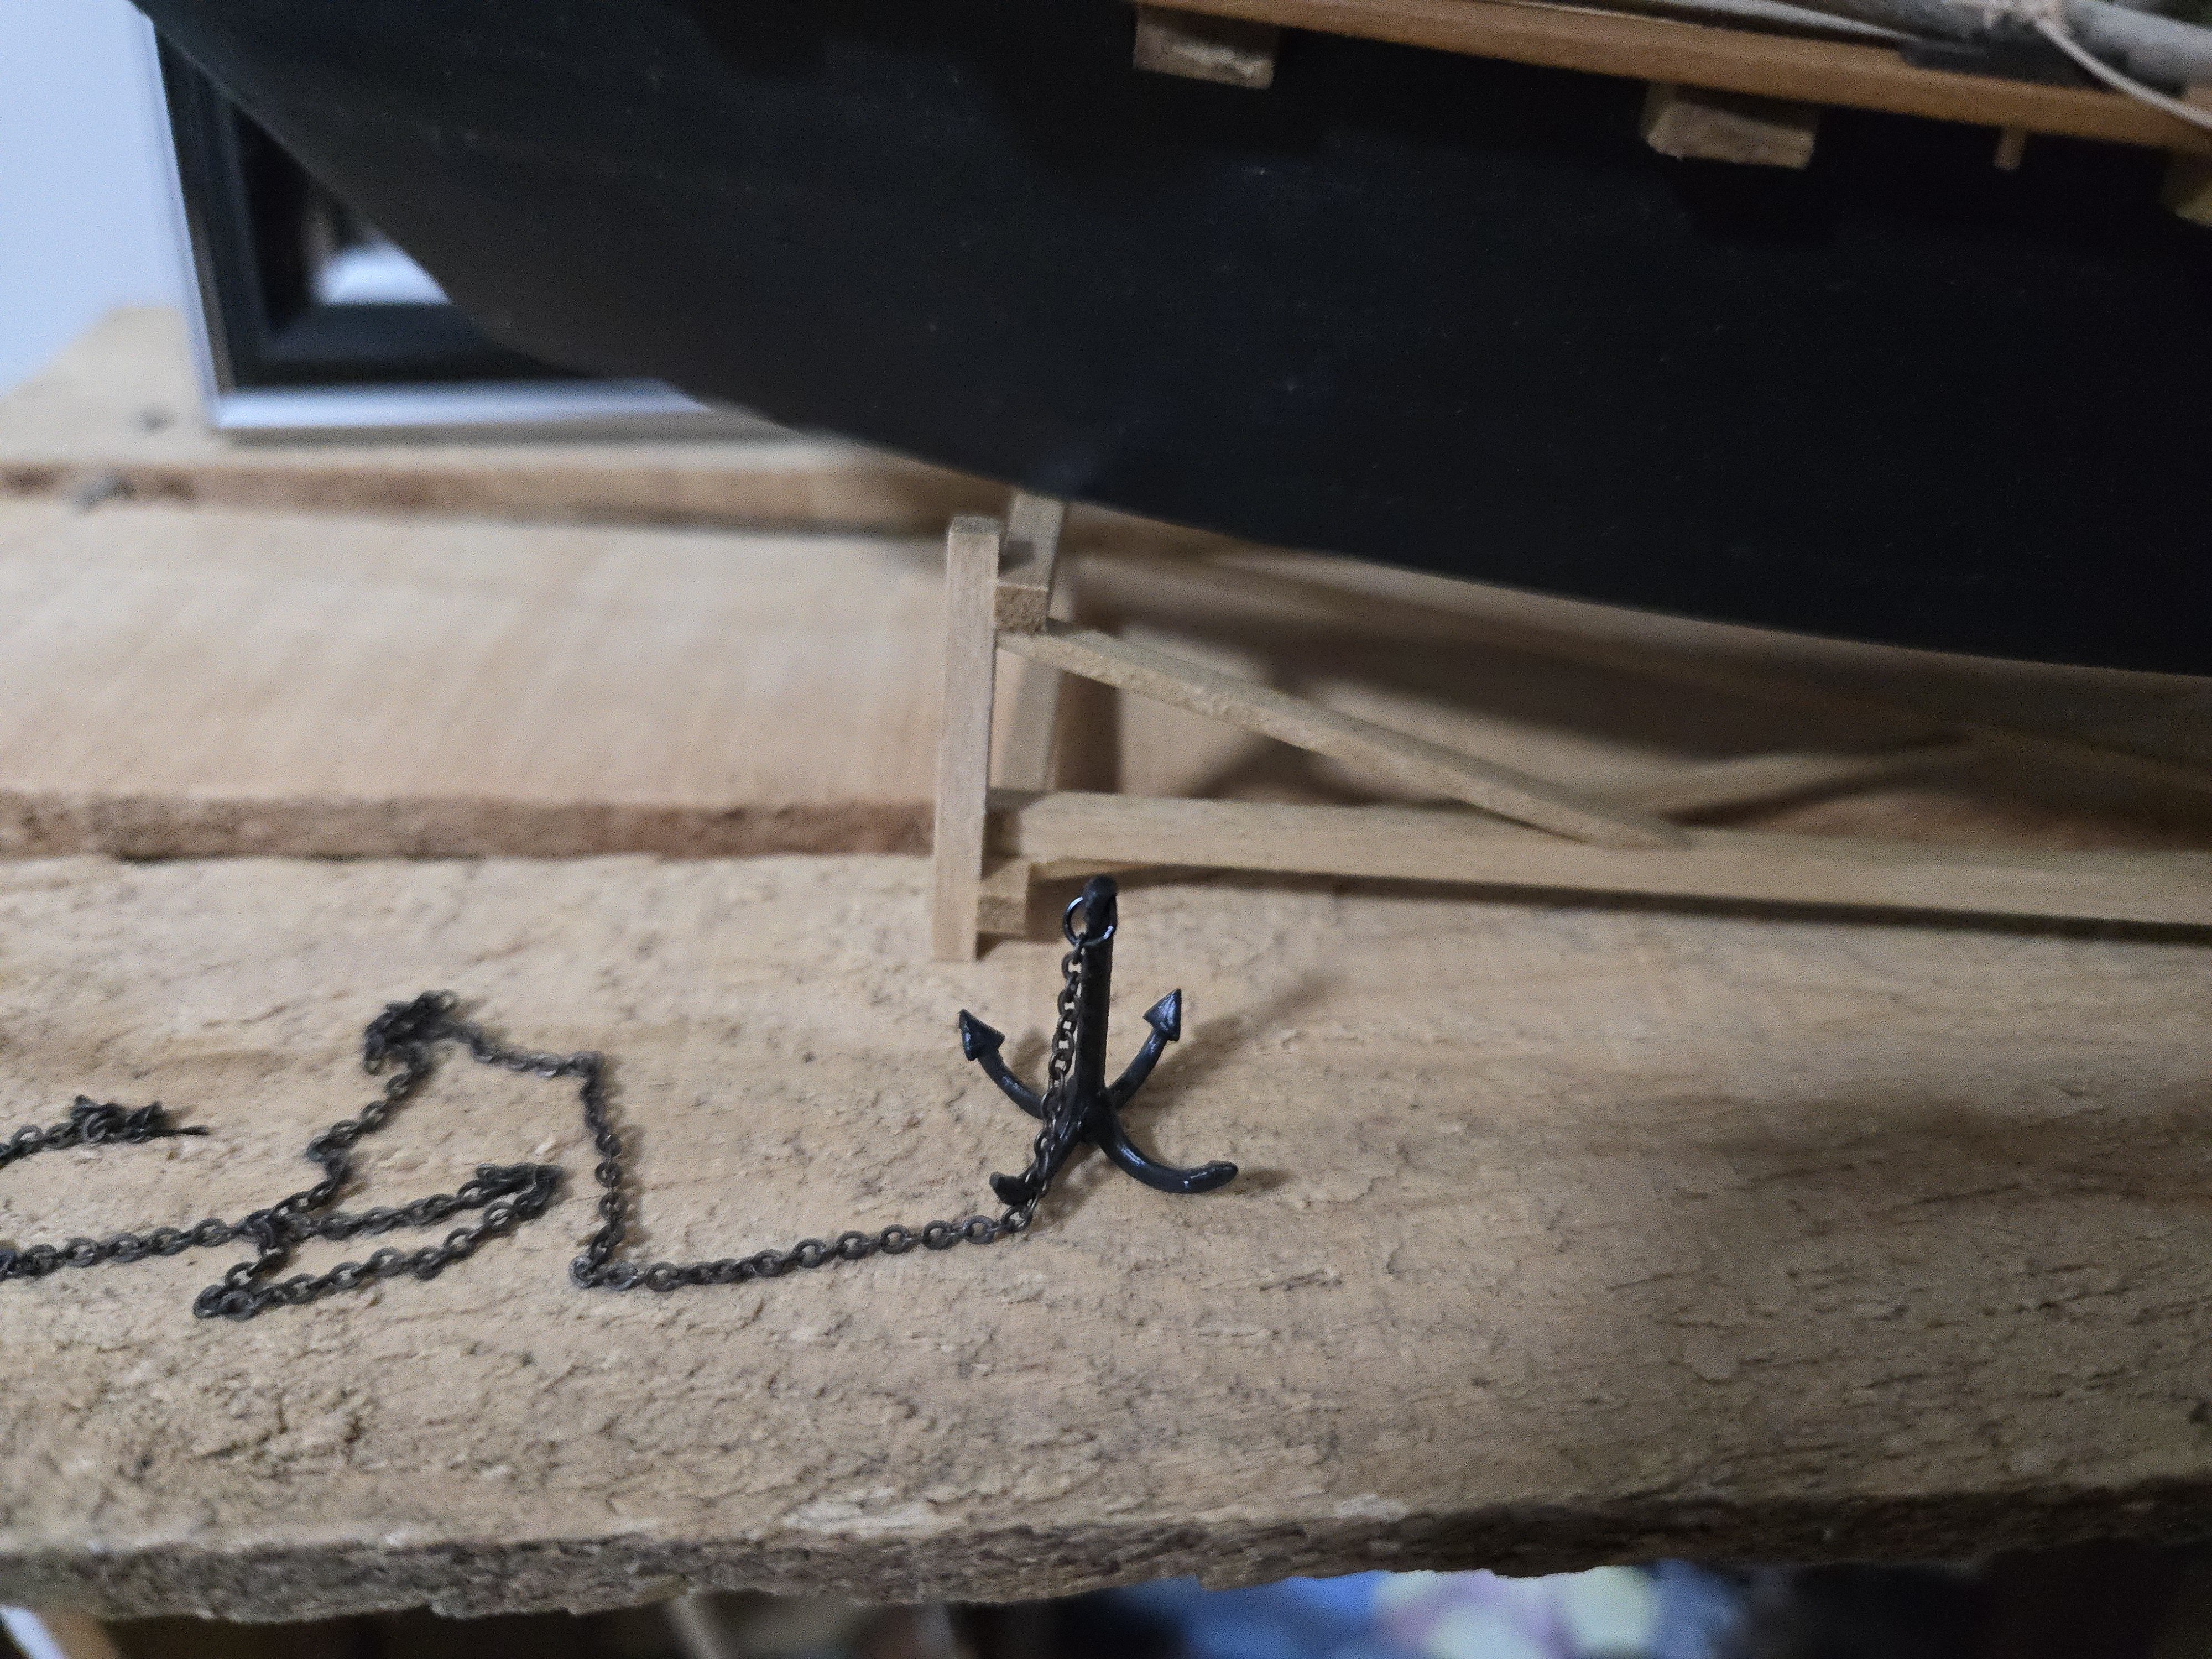
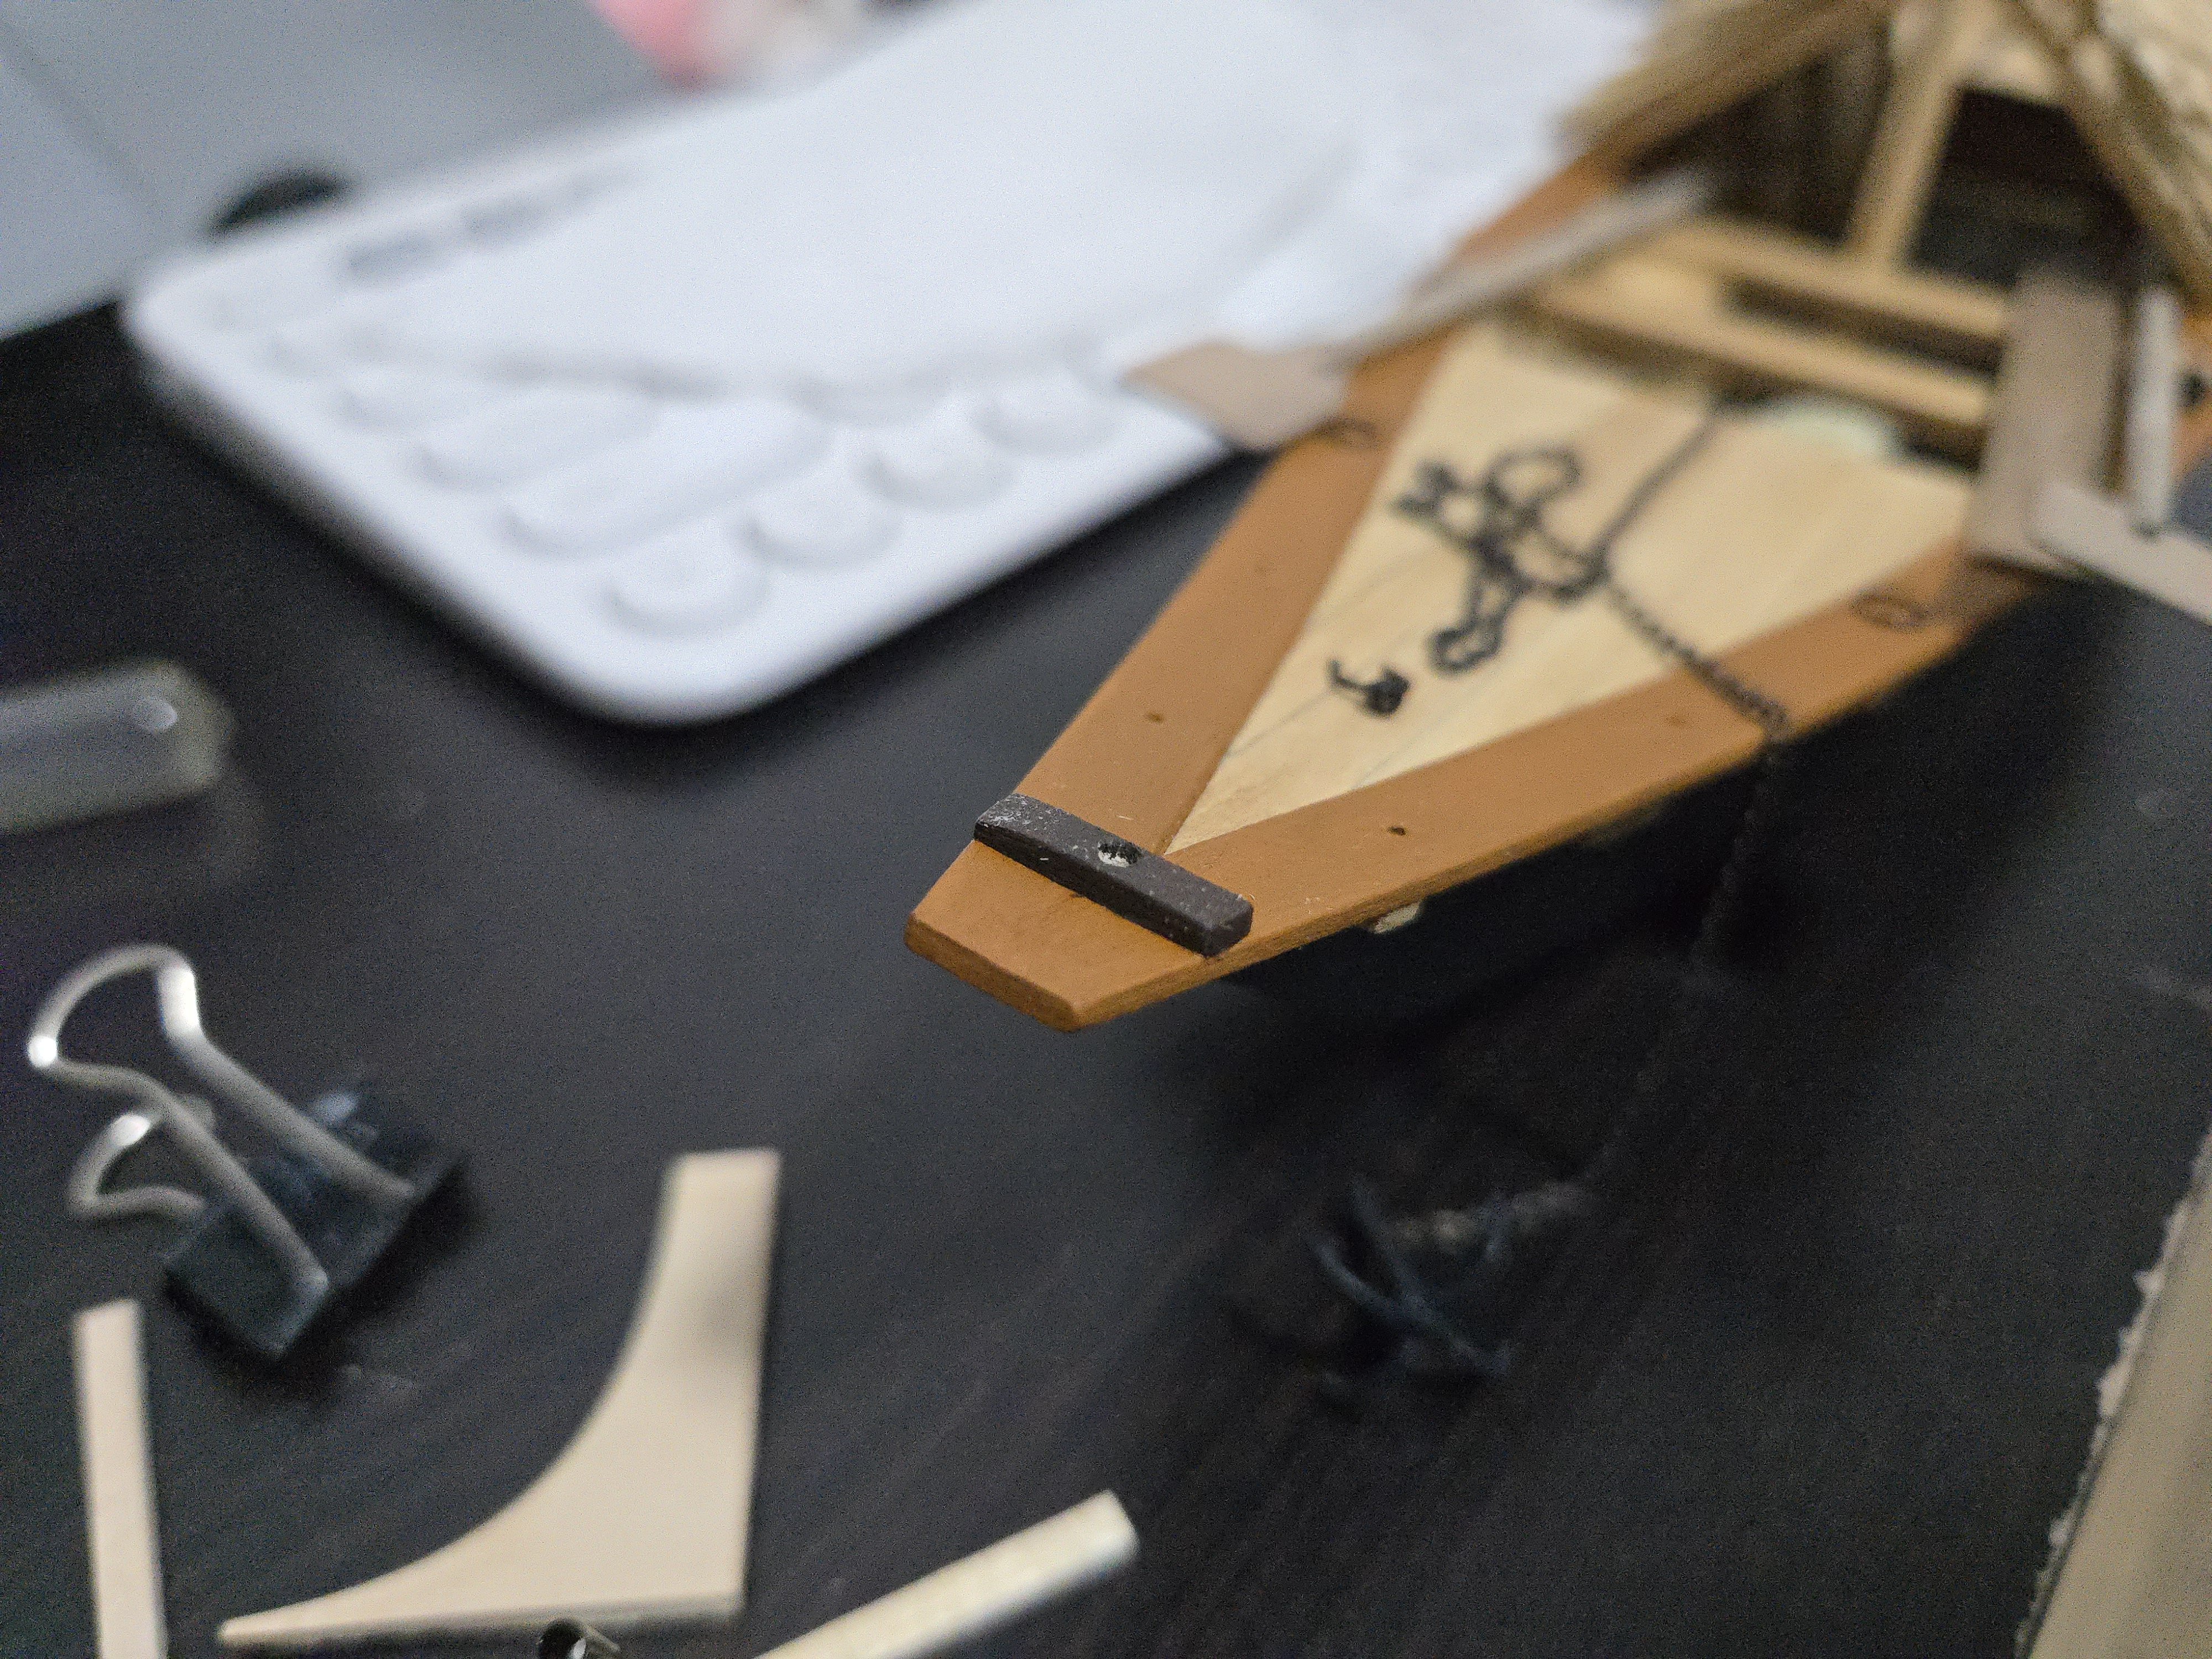
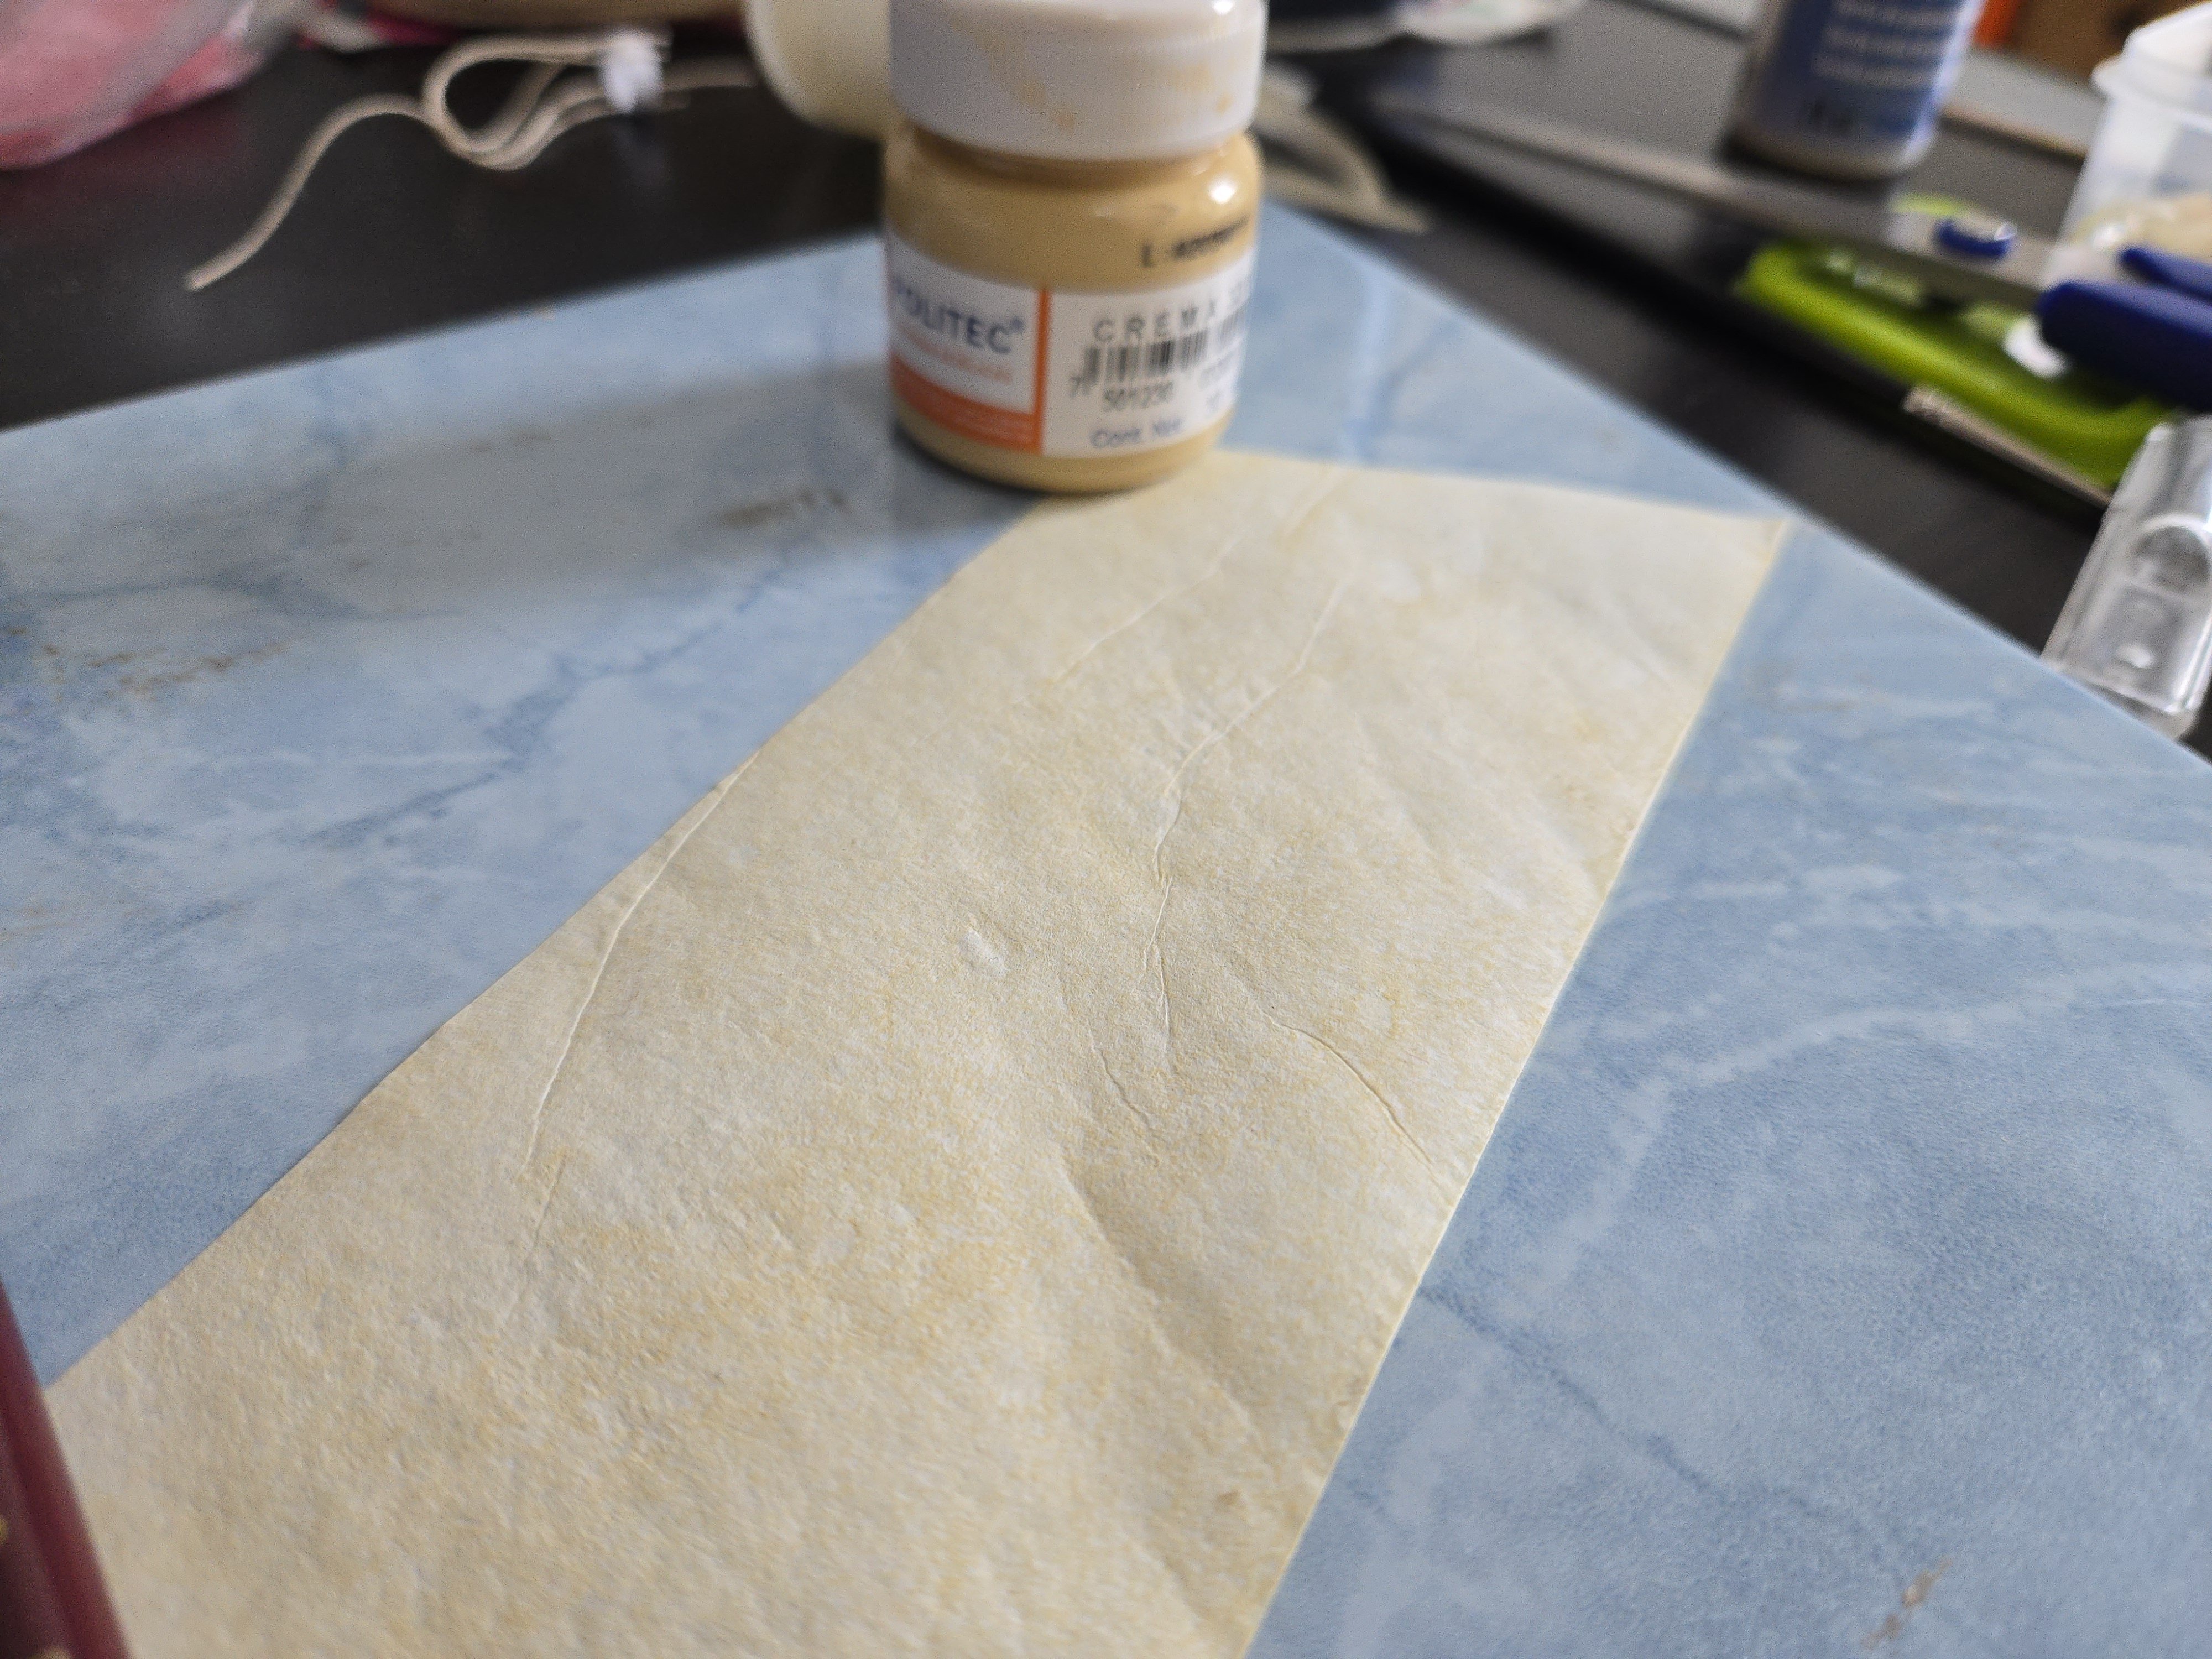
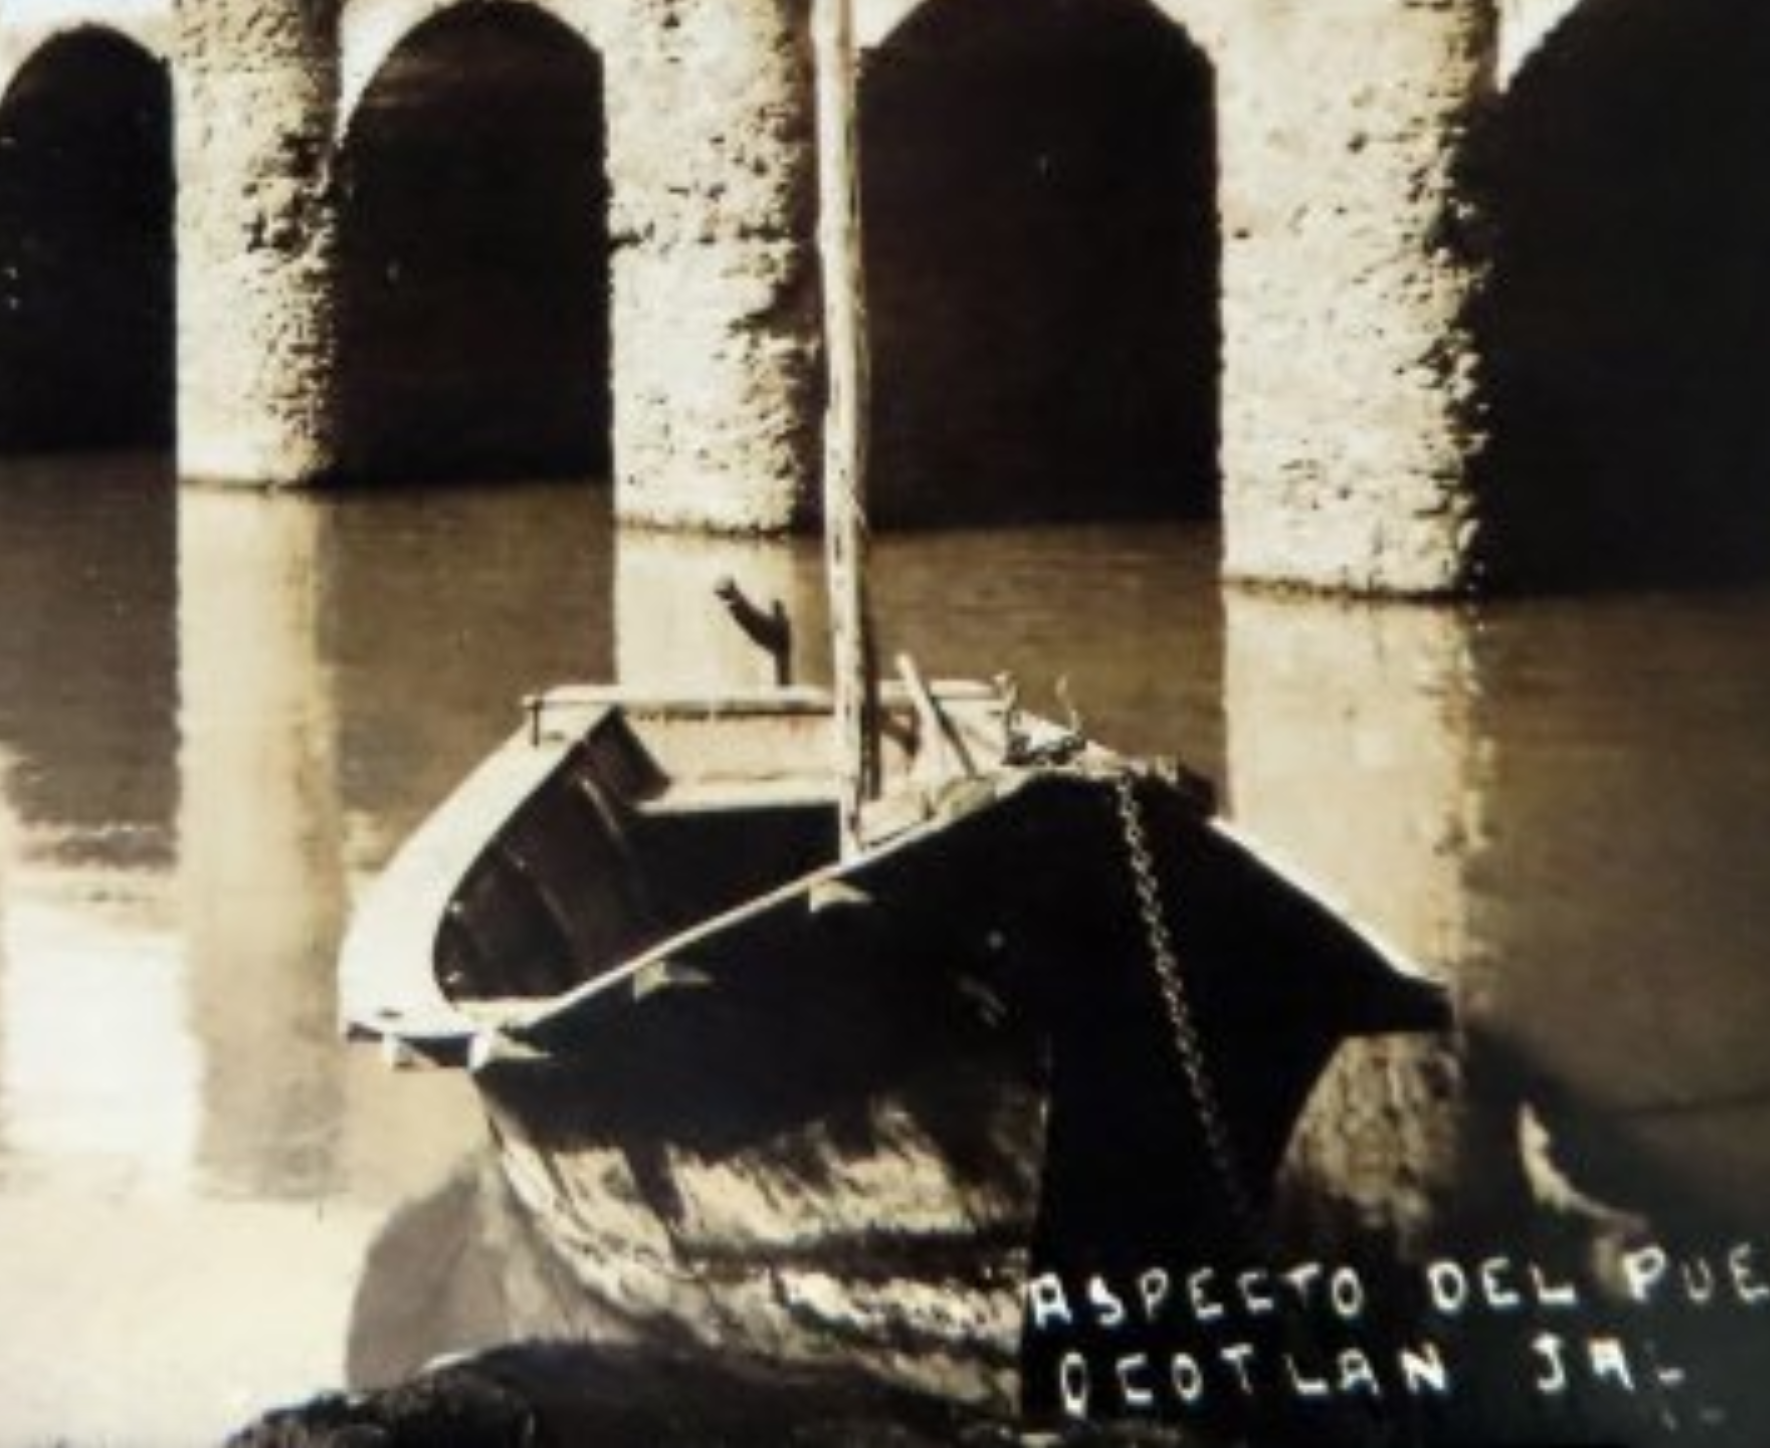
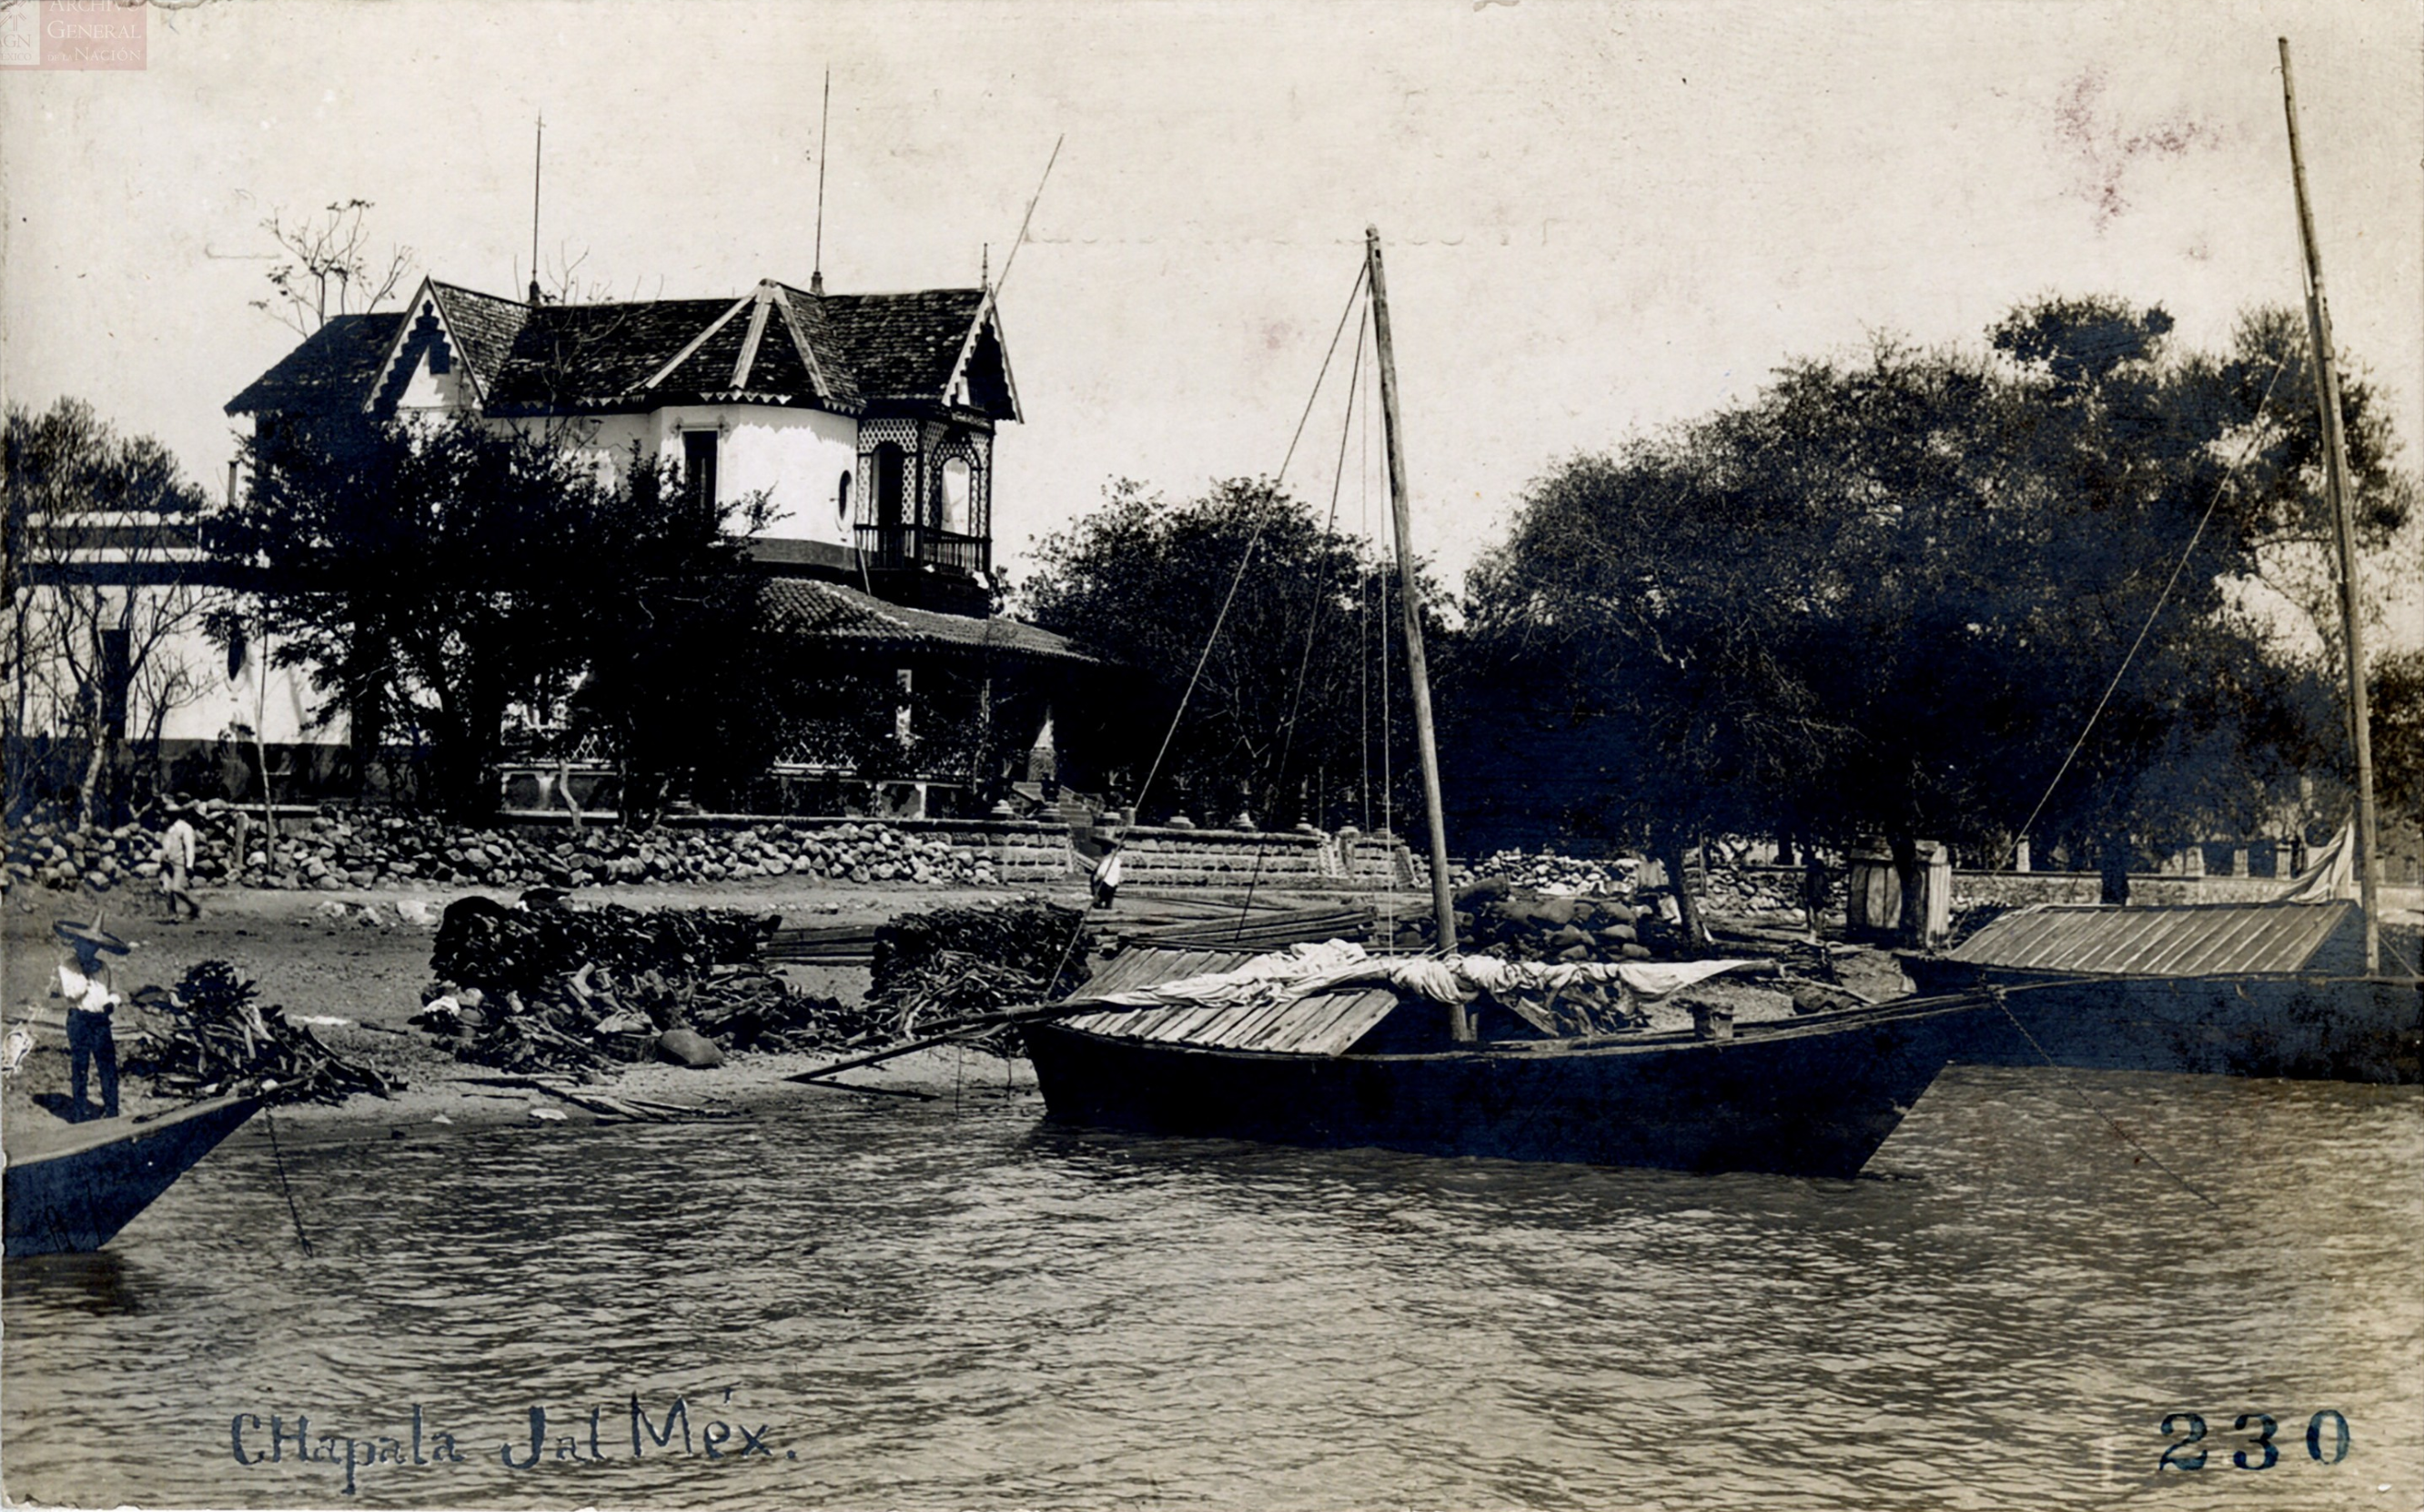
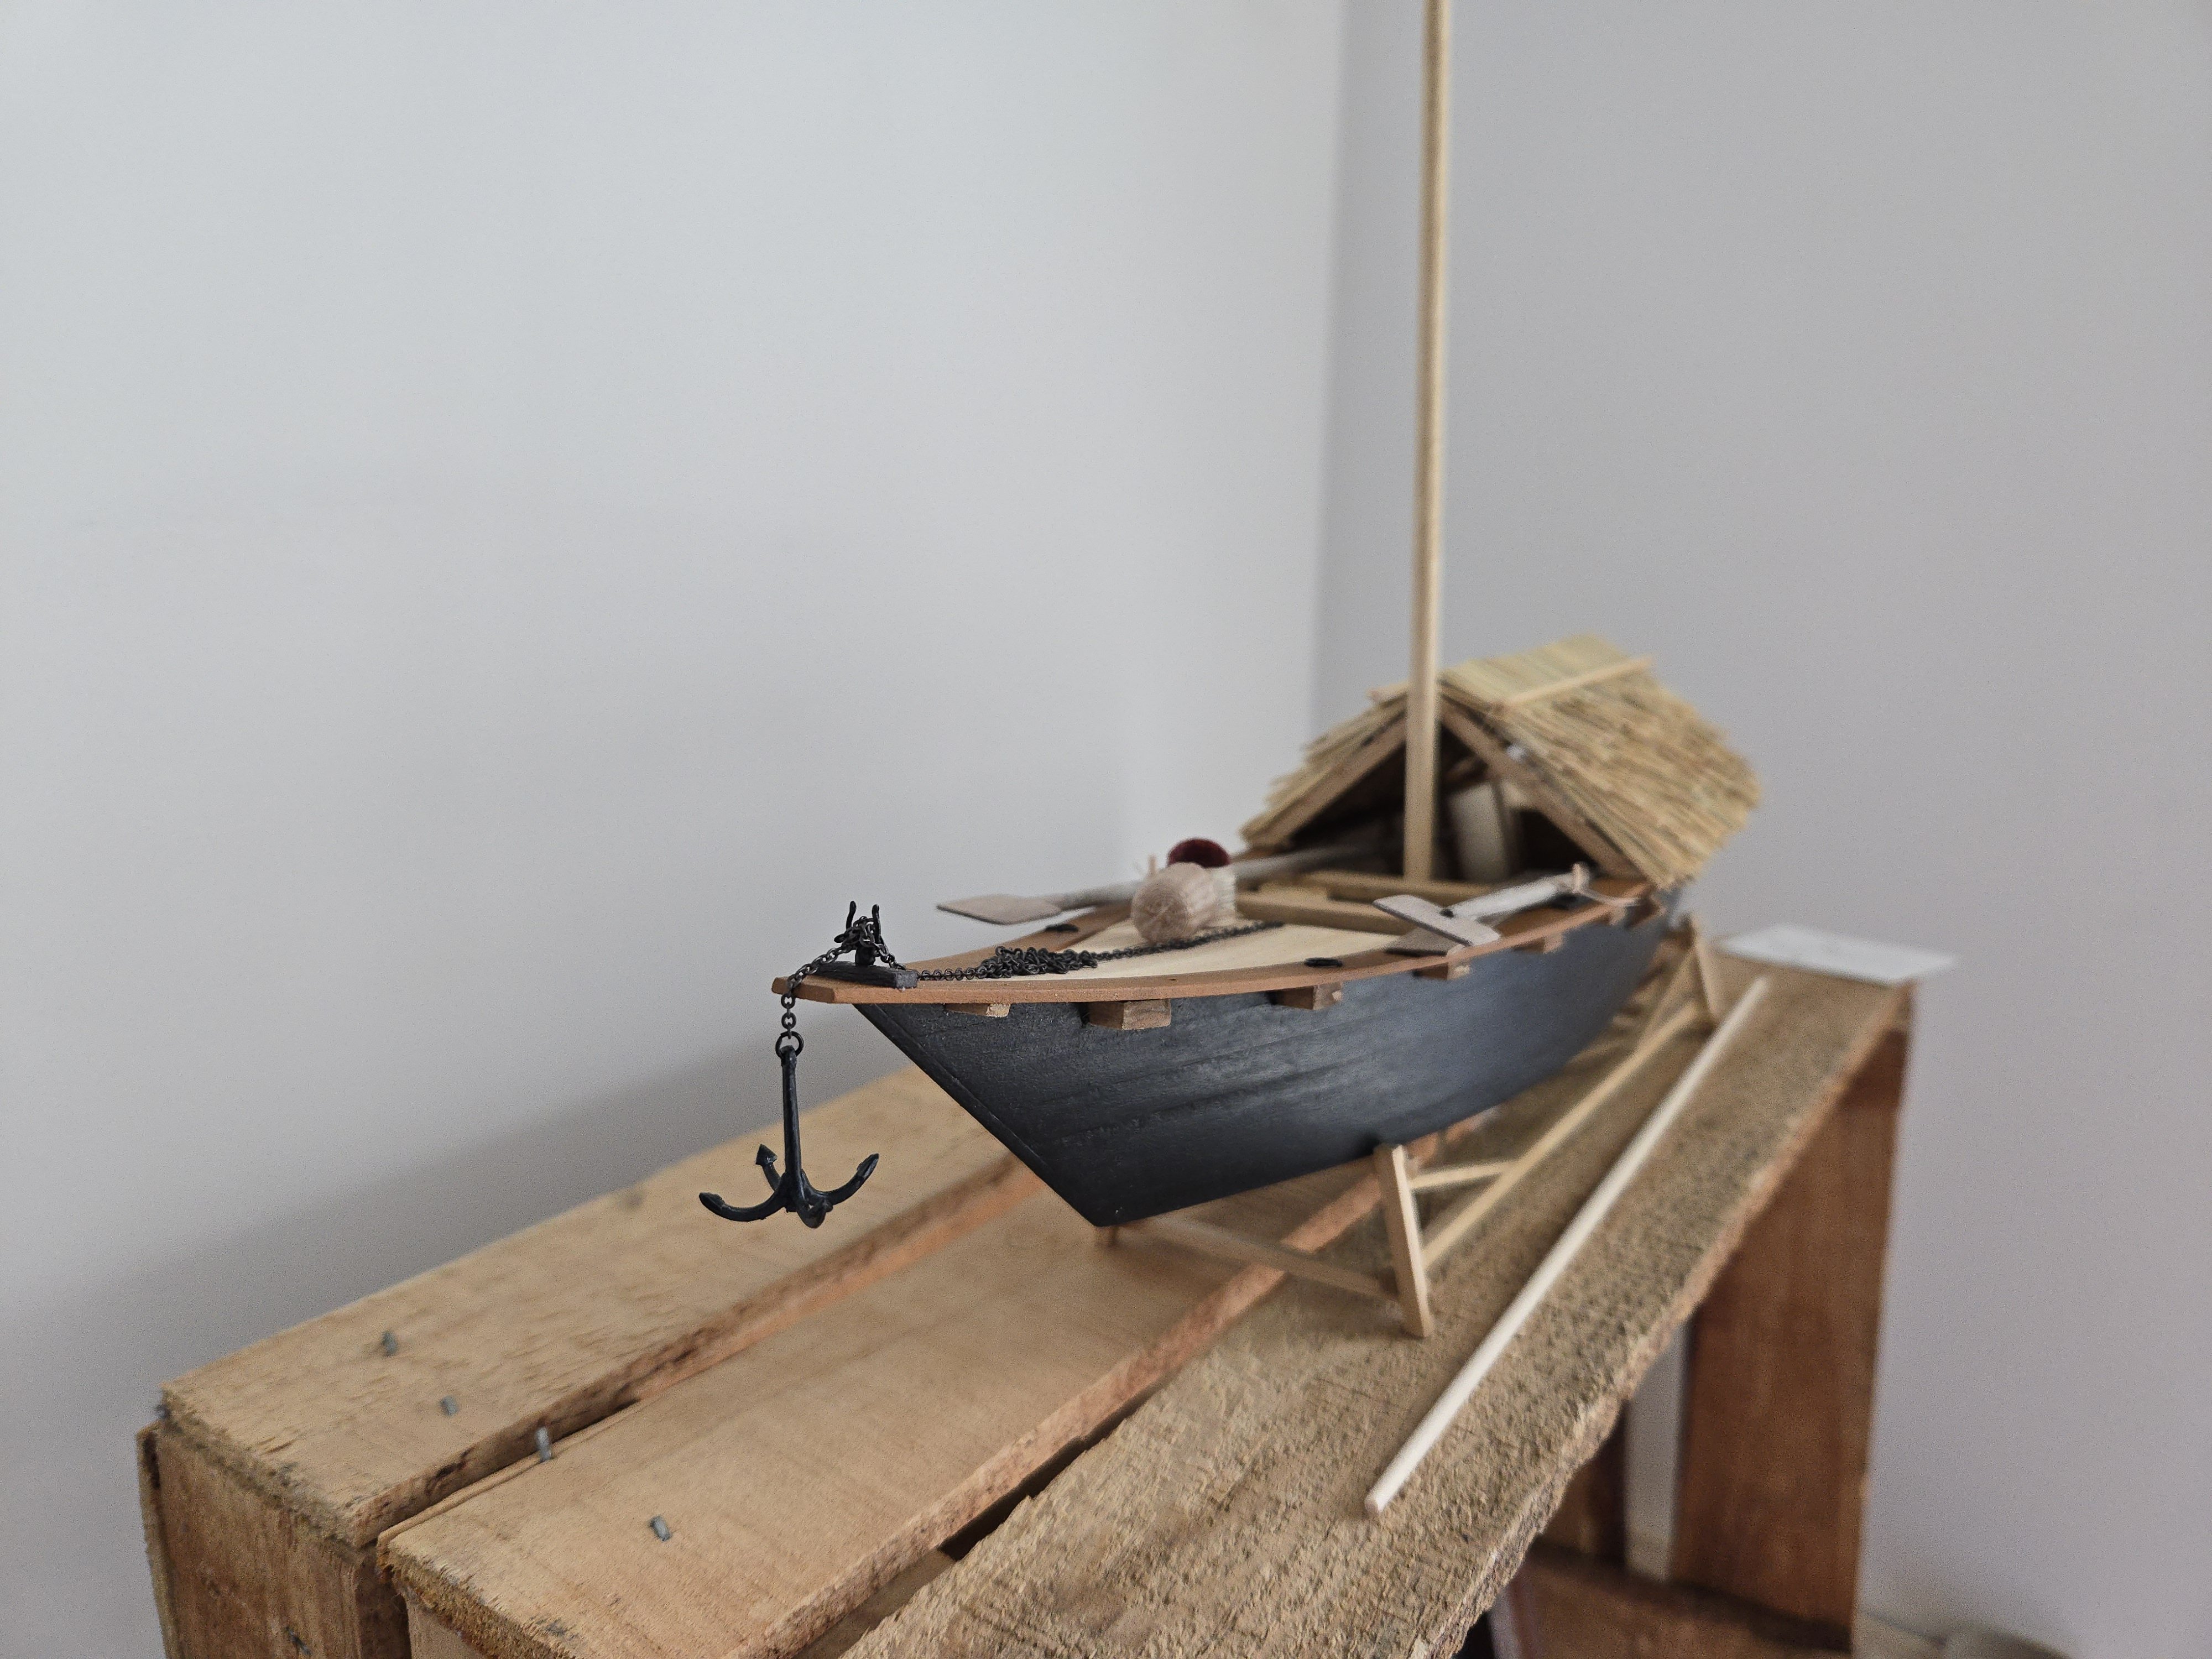
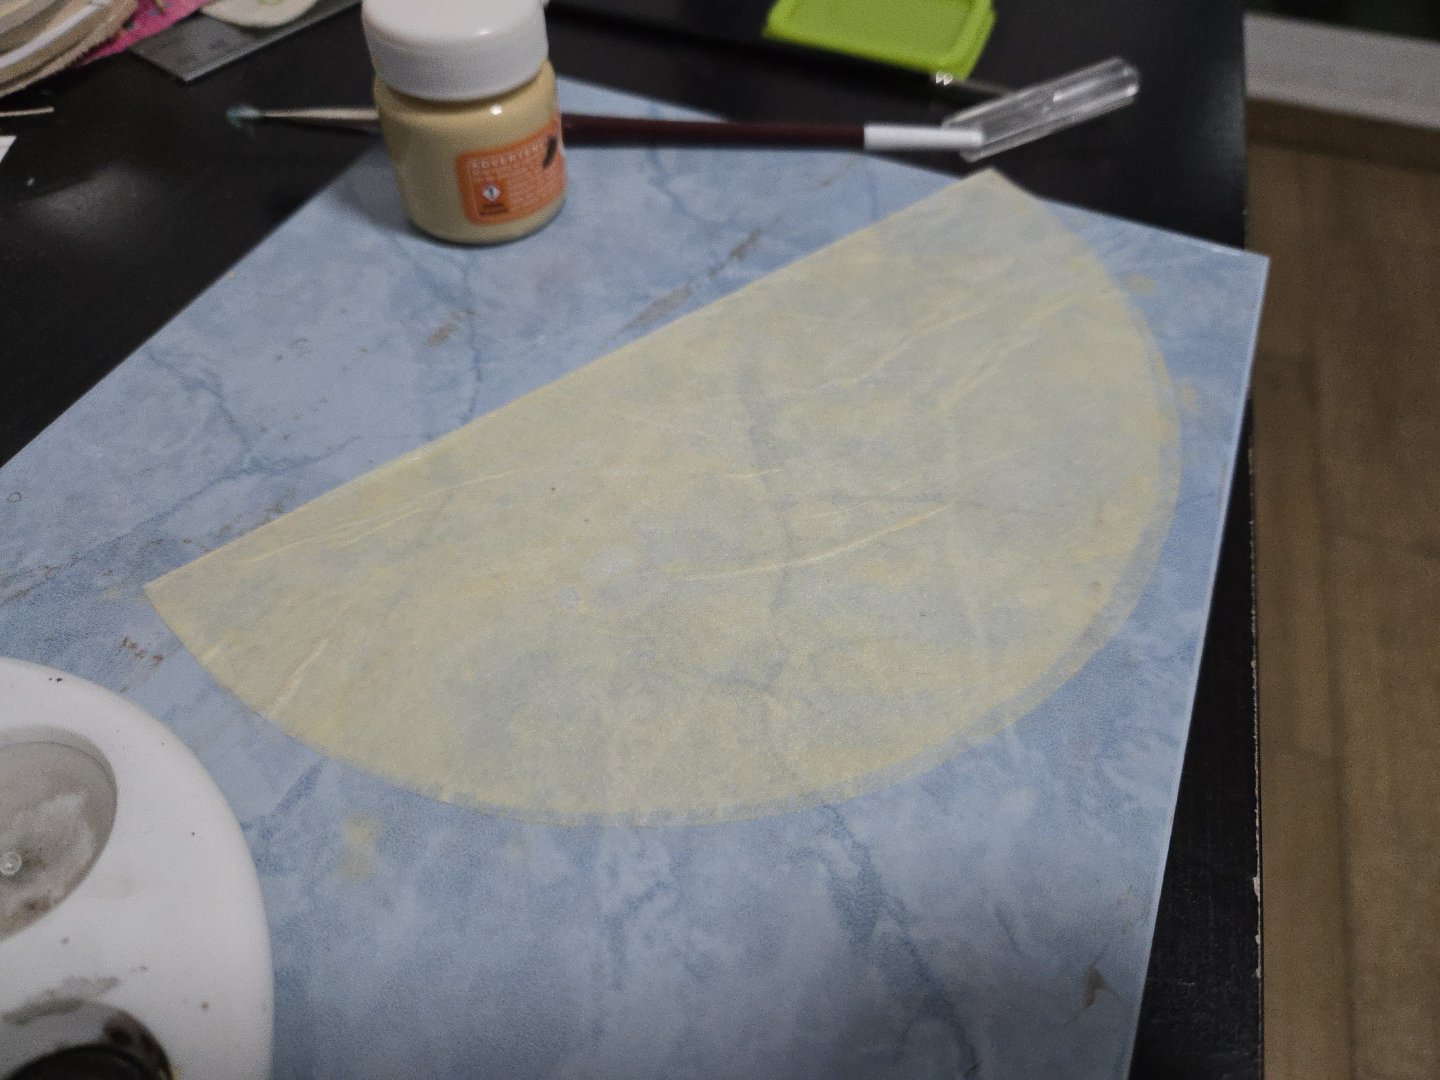
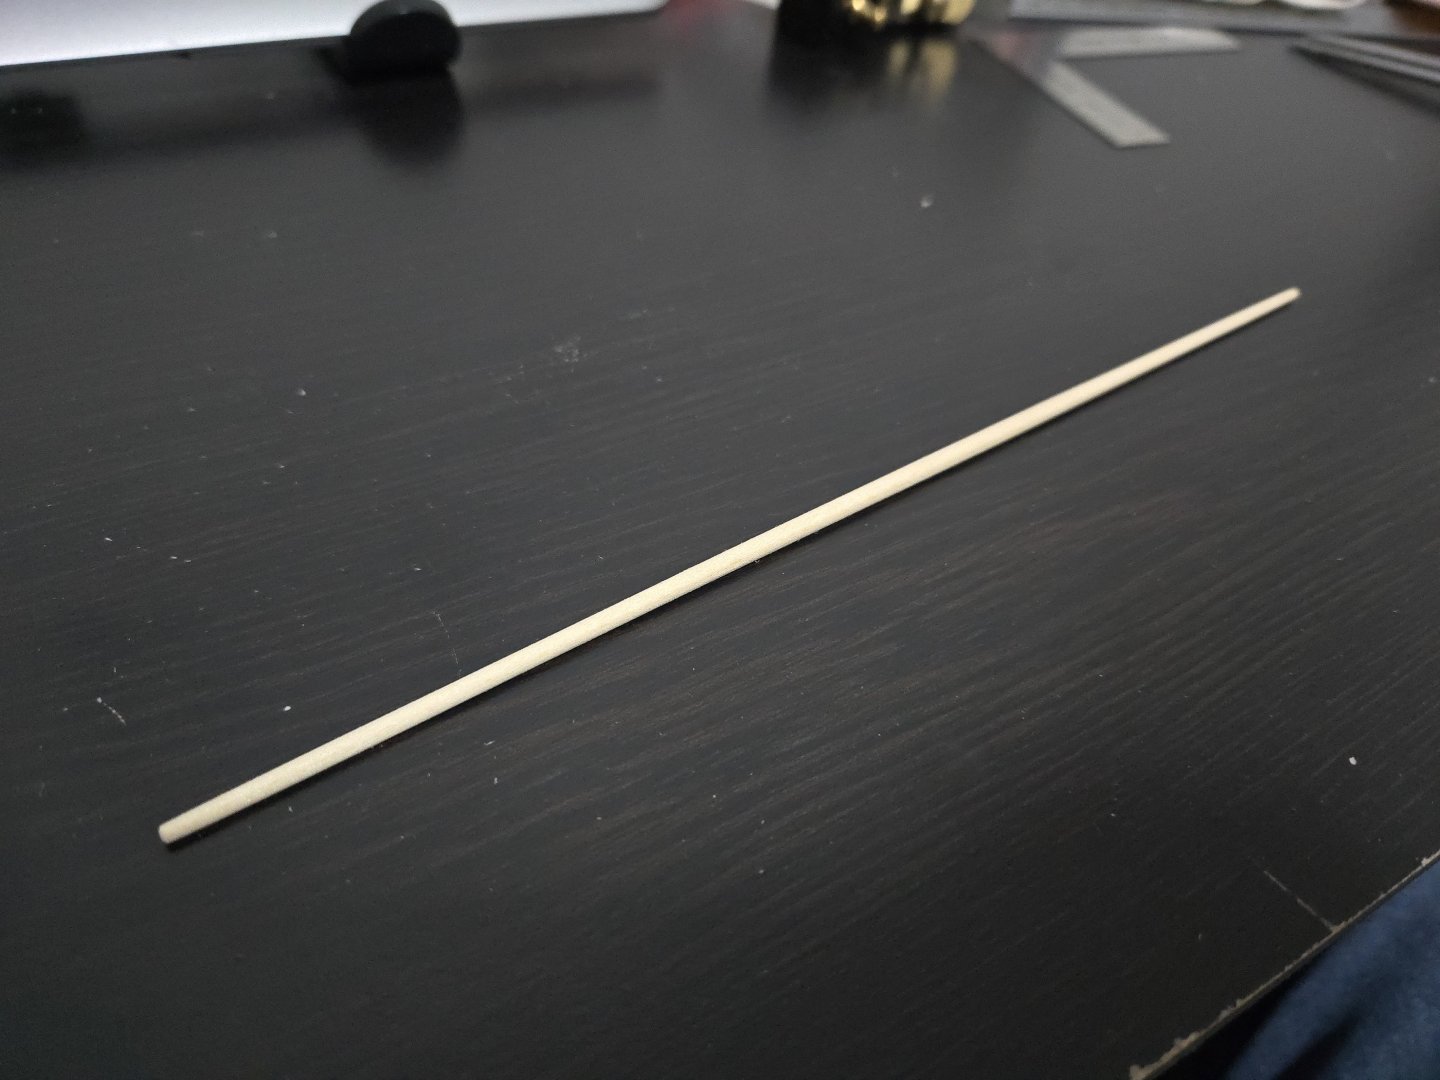
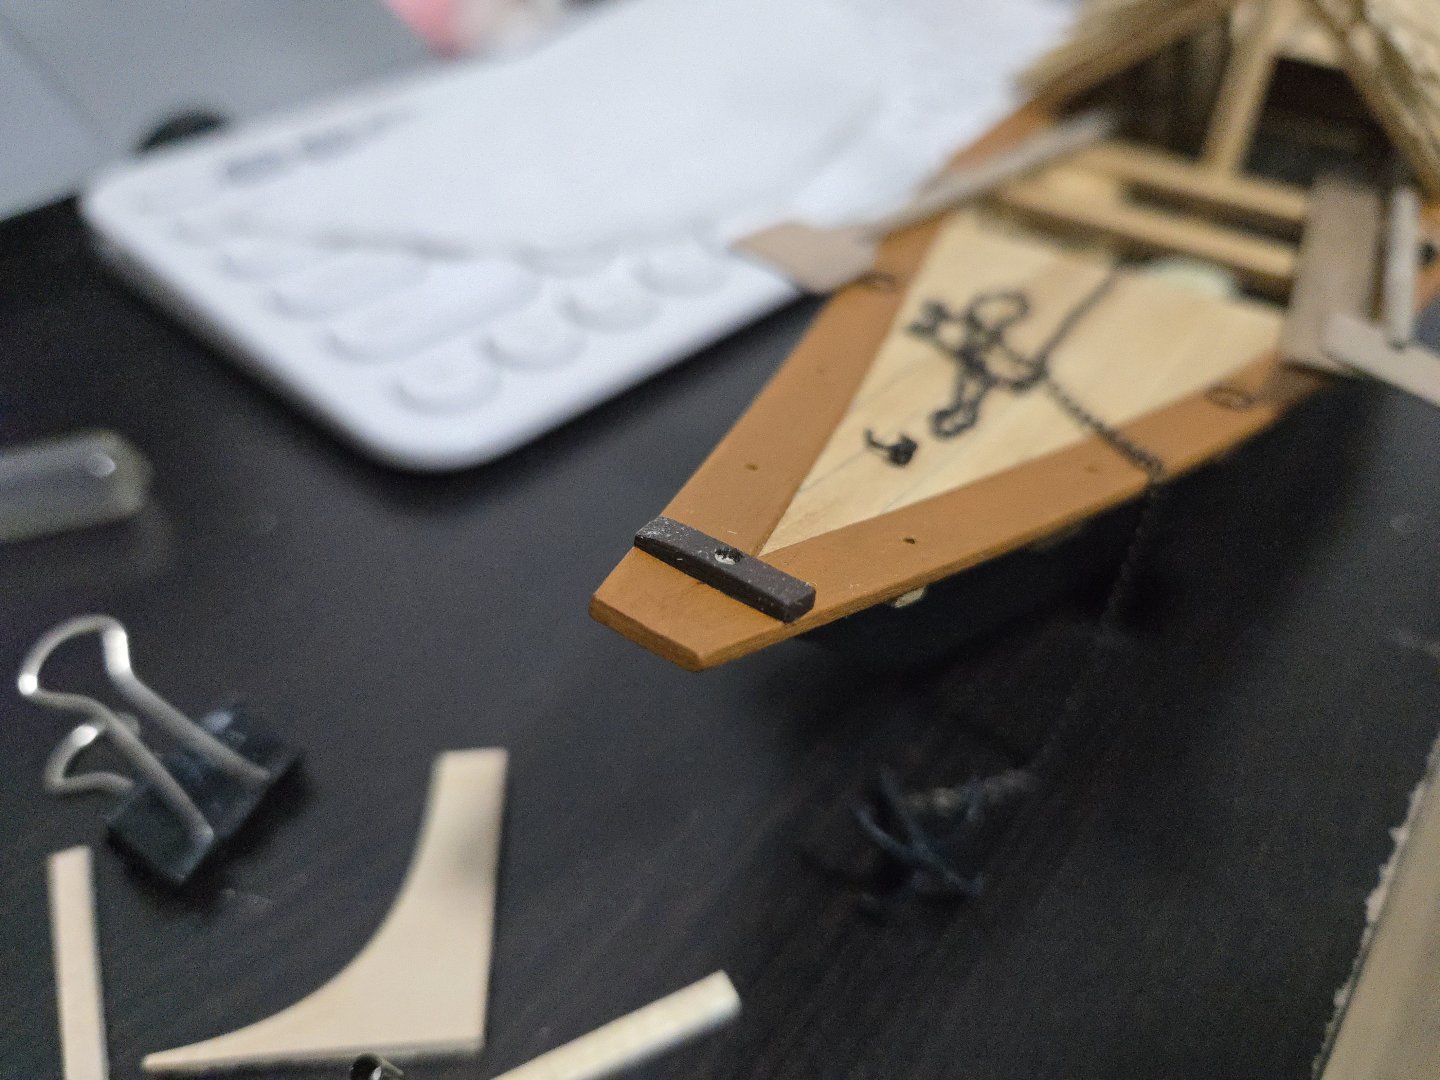
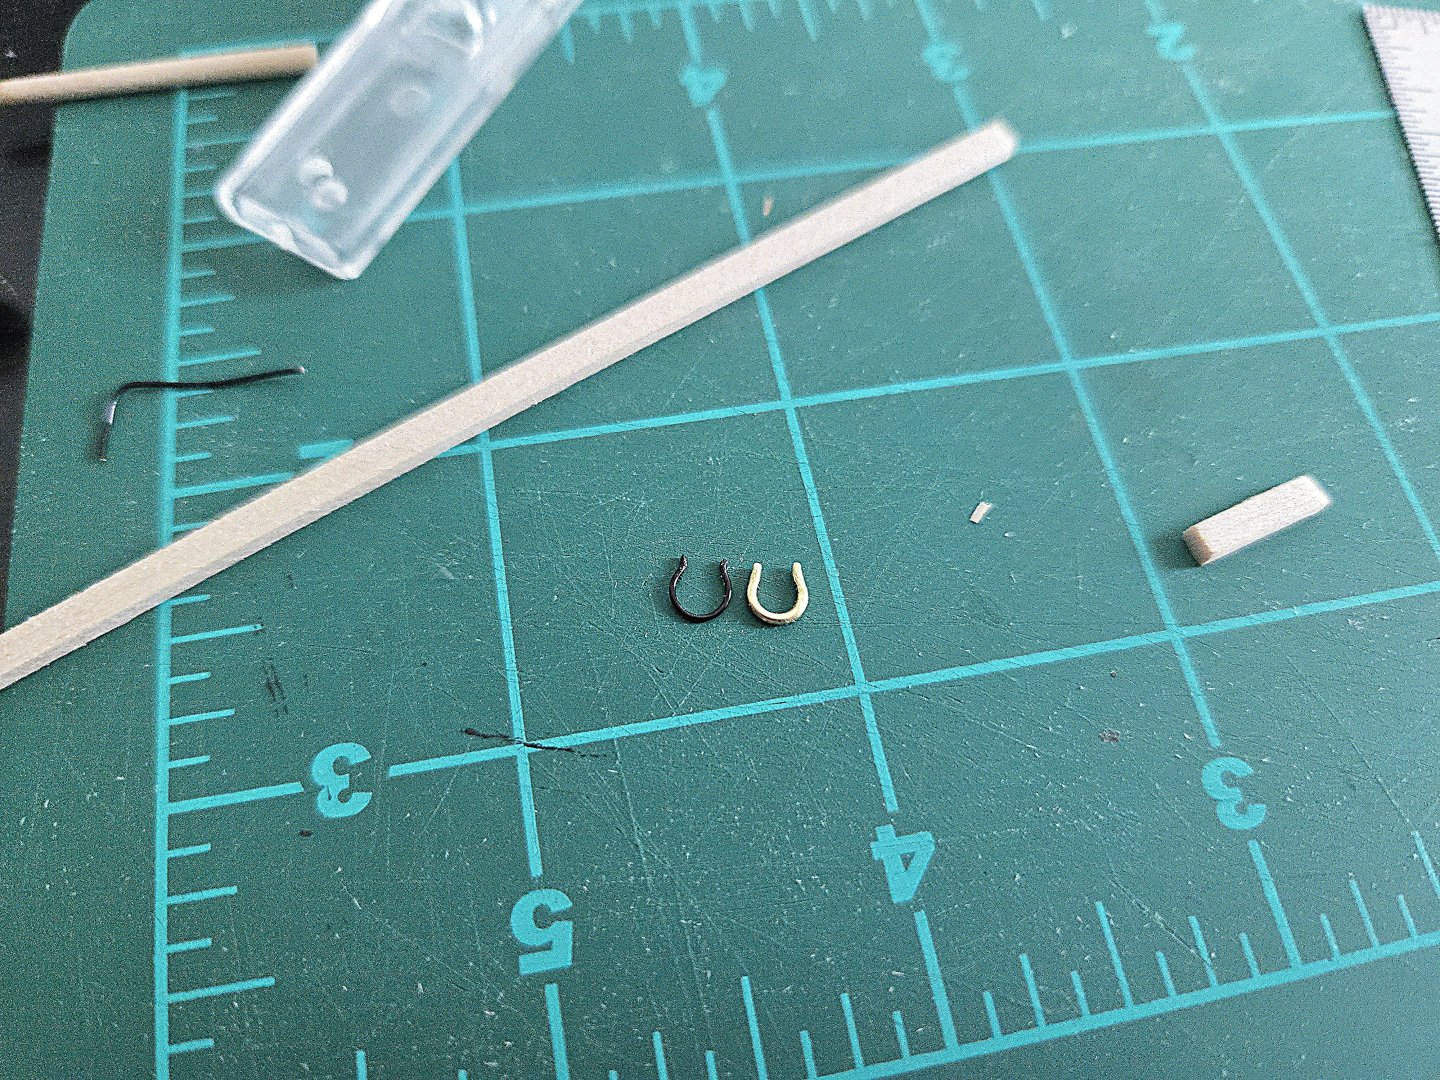
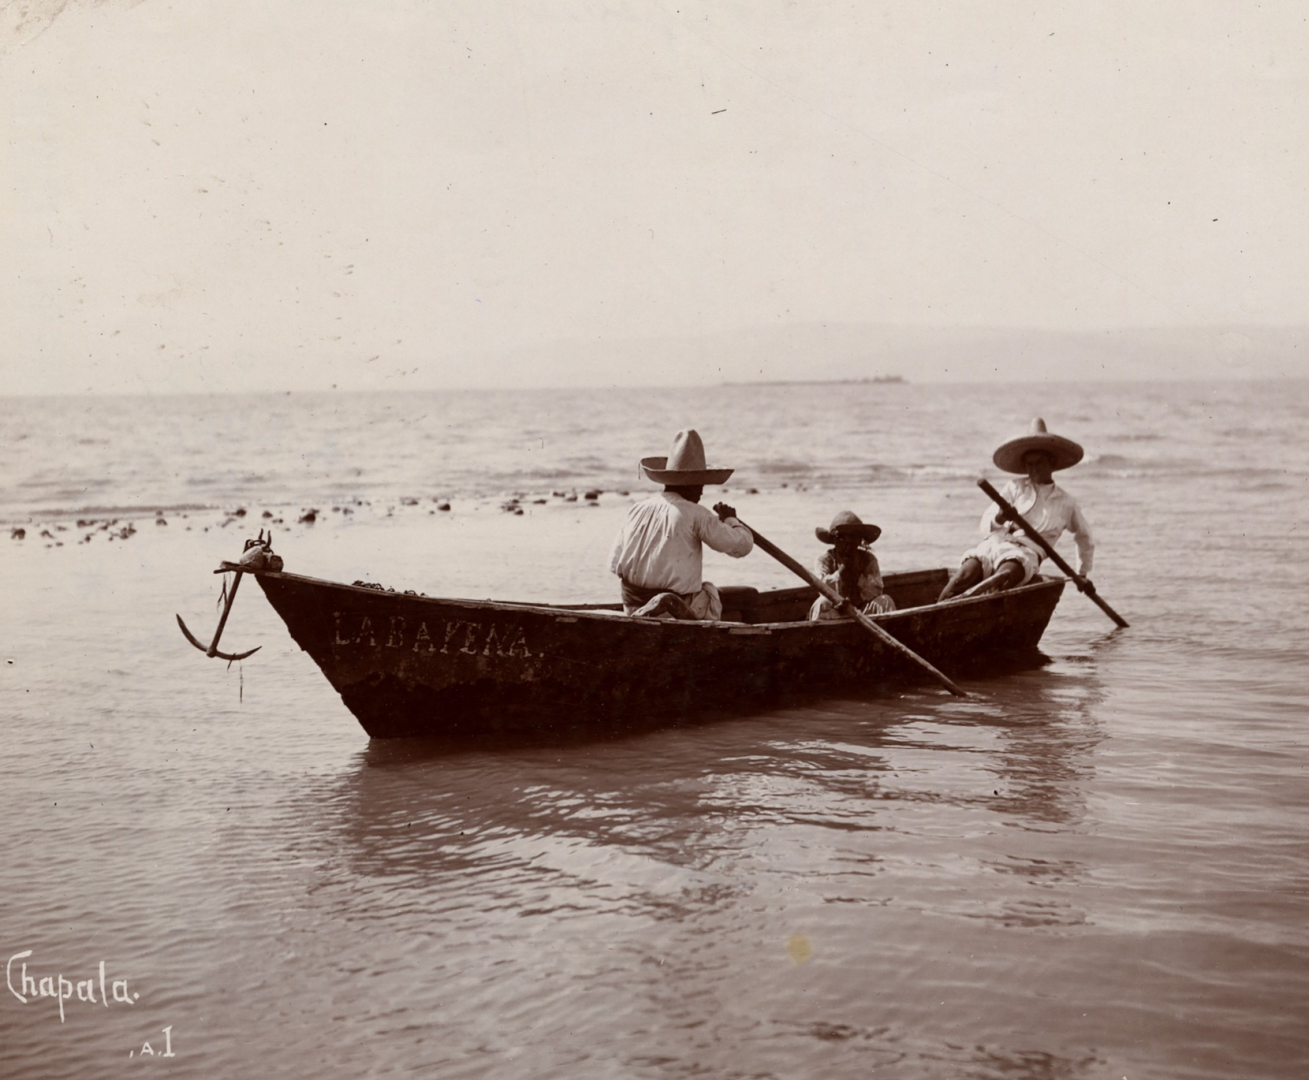
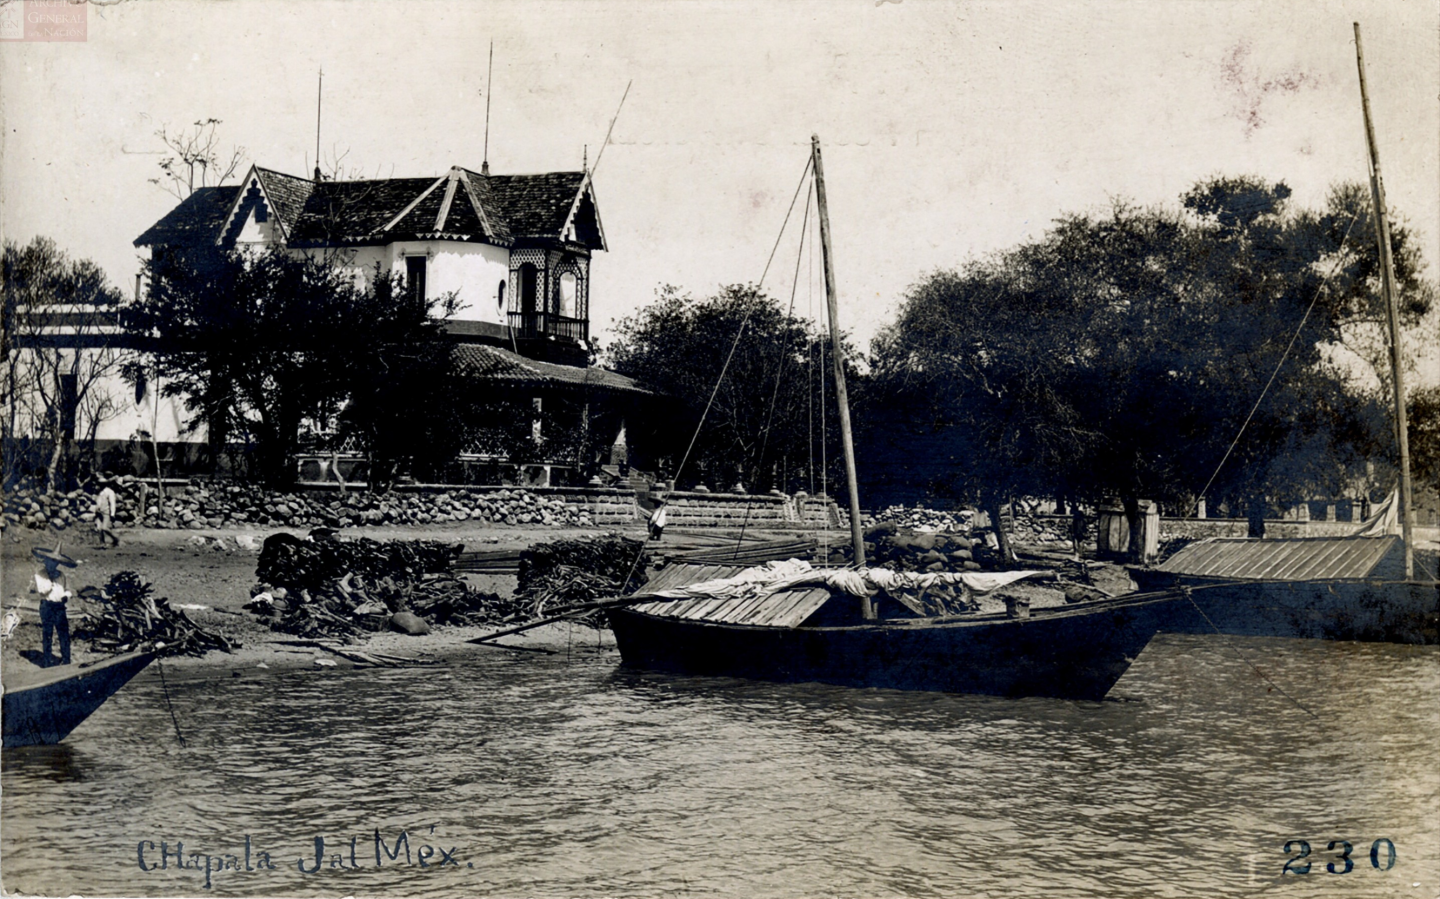
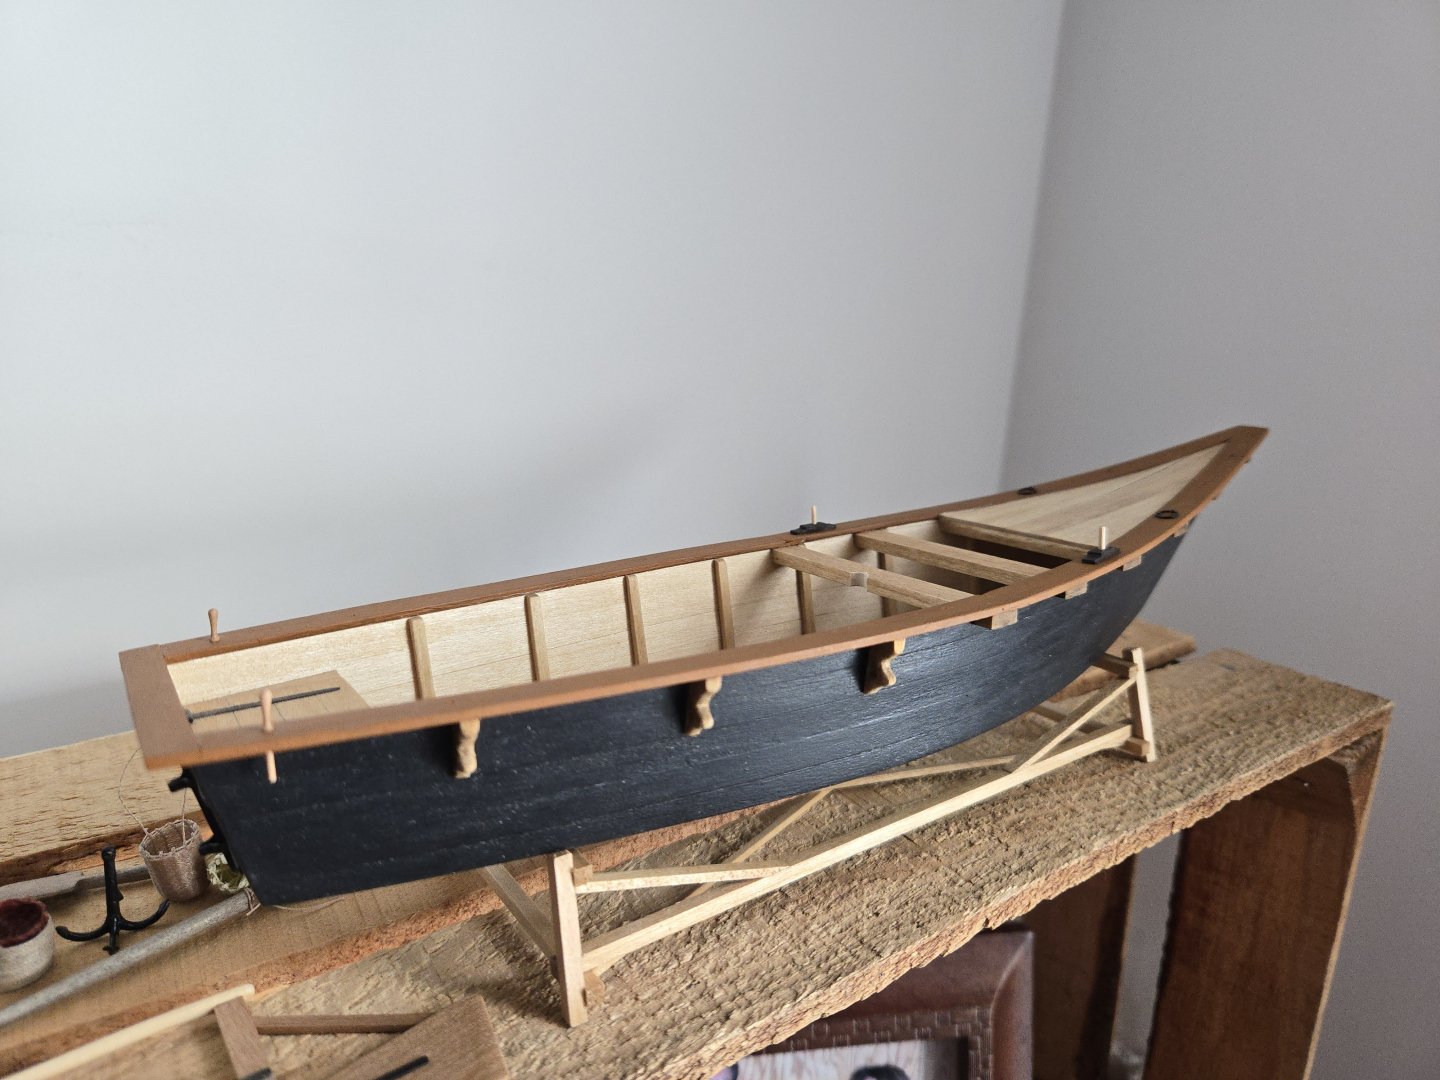
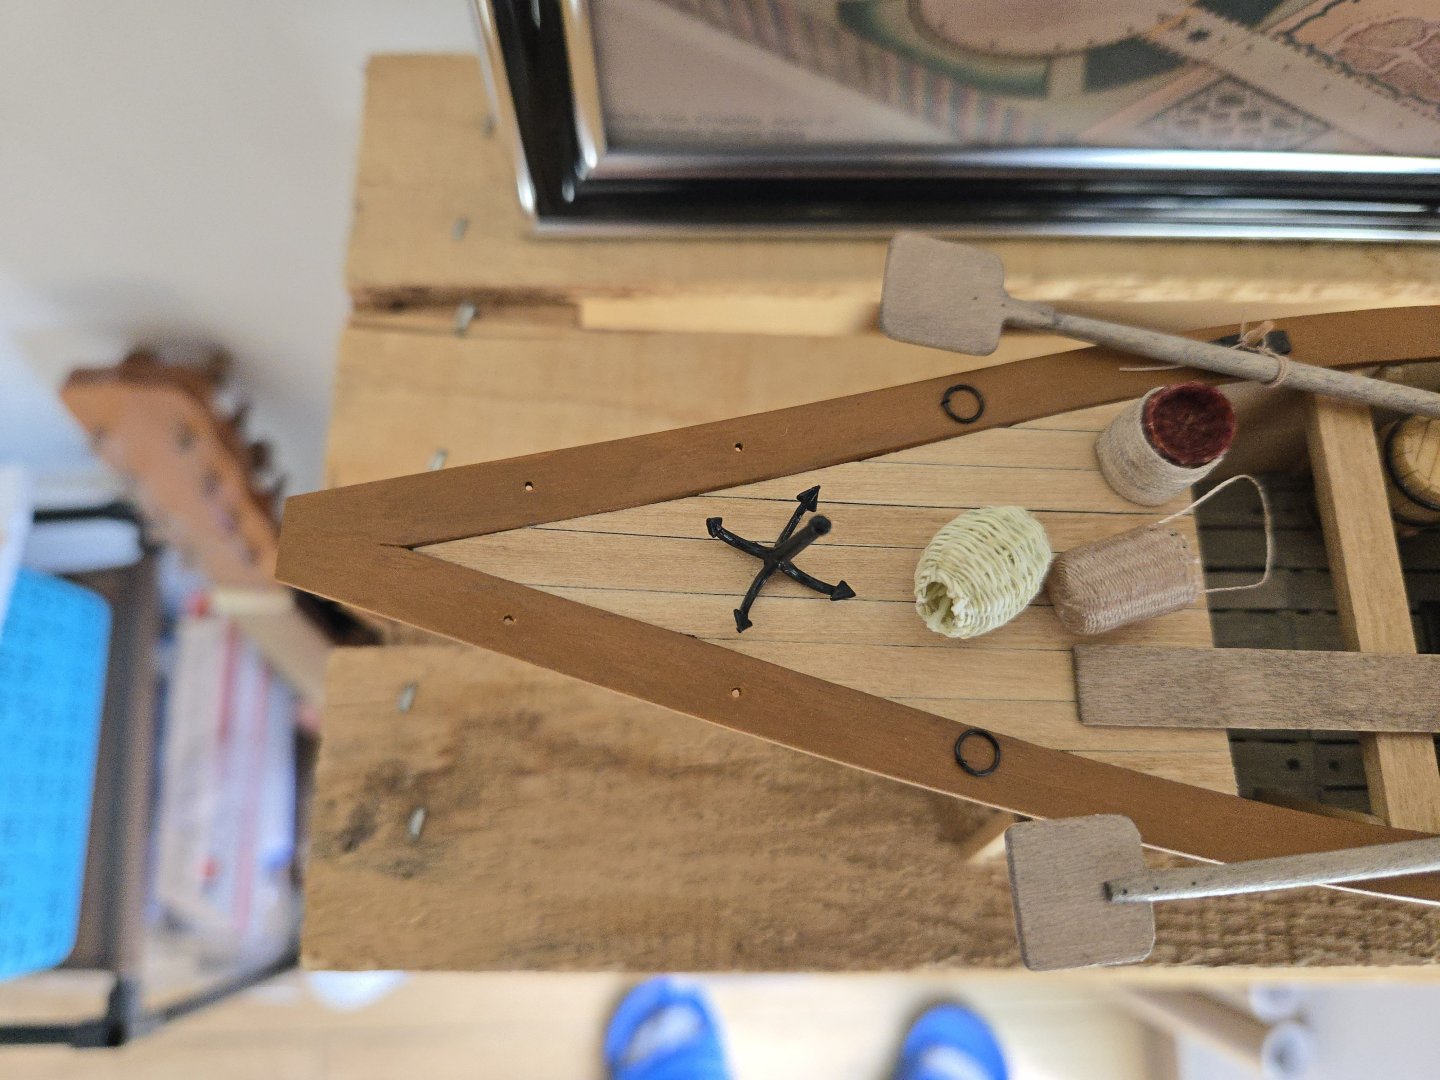
Now that I finished the Half-Hull Planking Kit, I've had a bit more time to focus on the Canoa, so I've added the anchor assembly and gotten started on the yard. I had already blackened the chain back in Chicago, but it had been sitting in a small box since then, as I didn't have any way to add a sealer coat then (brushing on matte varnish seemed like it would be too thick on the tiny chain). But, I had to pick up a matte varnish spray to finish the Half-Hull's frame, so I was able to use that to give the chain a protective coat, after first nearly blowing it off my balcony--when I do this again, I'll need to find a way to better secure whatever I'm spraying. I then used black wire to add a ring connecting the anchor to the chain, and a further half-ring to bolt the anchor to the aft end of the deck and crossbeam. This raises an unfortunate error in my build. Way back when I first made the anchor for the small Canoa, I went with a grapnel. This was because a grapnel style anchor seemed appropriate for the relatively small vessels I am making, and seemed accurate based on the (mostly rather blurry) photos I had. As a result, I went ahead and ordered a scale grapnel anchor for the Canoa de Rancho. However, as I noted in early summer or so, I've since found a lot more high-quality images of canoas. What I've only noticed recently is that grapnel anchors are nowhere to be seen. Instead, even the smallest canoas used something like an Admiralty anchor (at times seemingly quite oversized). Such as in the image below: Source: https://memoricamexico.gob.mx/swb/memorica/Cedula?oId=mvts2osBVs6S4R6nmckQ I'm not sure how this came to be historically--perhaps it's due to the influence of oceanic shipbuilding in San Blas on boatbuilding in Chapala? But in any case, my anchor is wrong. I don't really want to try to hack apart and modify my grapnel, as it may be useful for some other builds, and although my metal working skills are improving, I also don't really want to try to make my own. So instead, I'll be leaving the grapnel for now, and will order a more accurate anchor on my next visit to the US. It'll be easy then to just open the anchor ring and replace the anchor. In any case, I began work on the anchor mounting, which (as seen in the image above) was a sort of half-ring attached to a timber running across the bow. I first tried with a bit of brass rod, but found it too thick to pass through the anchor chain, so I remade it with 24-gauge black wire, the same as I had used for the anchor ring. The two half-rings are shown below. And the timber across the bow (1/8x1/16 basswood): To join the half-ring with the timber, I cut a slit into the end of a small basswood cylinder, then filed it into more of a rounded shape. I accidentally cut it too short to properly sit in the hole in the timber seen above, so I added a tiny wire loop below it, so that the loop would grab the glue more effectively (I forgot to take pictures of this). I then painted the whole thing black. Here's the result: I think it looks much more accurate than my earlier try on the smaller cargo Canoa. But there are a few issues. First, it may be a little oversized and especially too tall, although there does seem to have been a bit of variation in the actual size of these. See, for example, below: Source: https://www.mexicoenfotos.com/antiguas/jalisco/ocotlan/aspecto-del-puente-MX16575968846104/1 Second, the anchor chain doesn't actually fit on the horn. I used the same wire that fit through the end of the chain for the anchor ring, but didn't realize that the intermediate chain loops have less space (because each intermediate loop is hooked on to two other loops, whereas the end loop just connects to one, if that makes sense). So, instead of hooking the anchor on to the half-loop, I've just wrapped it around for now, which looks a bit messier. I'm considering remaking the anchor mounting to be a little shorter. If I remake it, I may test out some thinner 28-gauge wire, which should fit through the chain loops, but I suspect it is too thin to look in-scale. Changing gears, I also made the yard. As with the oars, I cut a strip of 1/8‐inch basswood and rounded and tapered it with a mini-plane and sandpaper. I'm getting better at making it round! After taking proportions from several photos, I determined that it should be 8.5-9.5 inches long. I've gone with the longer size for now, and can trim it down later if necessary. At the moment, as seen in the final photo in this post, I think it looks a little long. I've also started on a test for the sail, which I've decided I want to depict furled around the yard in lowered position, something like this: Source: https://memoricamexico.gob.mx/swb/memorica/Cedula?oId=vvts2osBVs6S4R6nk8il After reading a lot about materials and methods, it sounds like silkspan would be the best, but it doesn't seem very easy to get here. In the spirit of experimentation, I thought I would test out a material that I already have in abundance: coffee filter paper. After flattening a coffee filter, I folded it in half to make it two layers thick and applied a mix of water, white glue, and cream-colored paint. After it dried overnight, I peeled it off the tile and cut it into a trapezoidal shape. If I were to actually use this, I may build up the sail with strips of filter paper so as to get a better shape not limited by the size of the individual filter. As can be seen, I had some problems with wrinkles. Also, while I liked the texture on the upper side of the material, the side that was in contact with the tile became too smooth and flat as the glue settled there. As people who have used silkspan have suggested, suspending it in a frame instead of on a tile would probably be better, but this will work as a testbed for now. Next I need to test whether this can be convincingly rolled, and how to best add boltropes etc, which I'll report back on in future posts. In any case, here's the current state of the build with the yard (as yet unstained) balanced on top of the rancho. As it turns out, those poles running along the rancho are useful not just to hold the thatching in place, but also to hold the yard when it's lowered. I may try adding a slight bend to the yard in order to depict it sagging at bit off the rancho. Inaccurate anchor or not, I think it looks good hanging at the bow.


-
Congratulations on an excellent build! Very well done, it looks wonderful and this build log is a fascinating read.
-
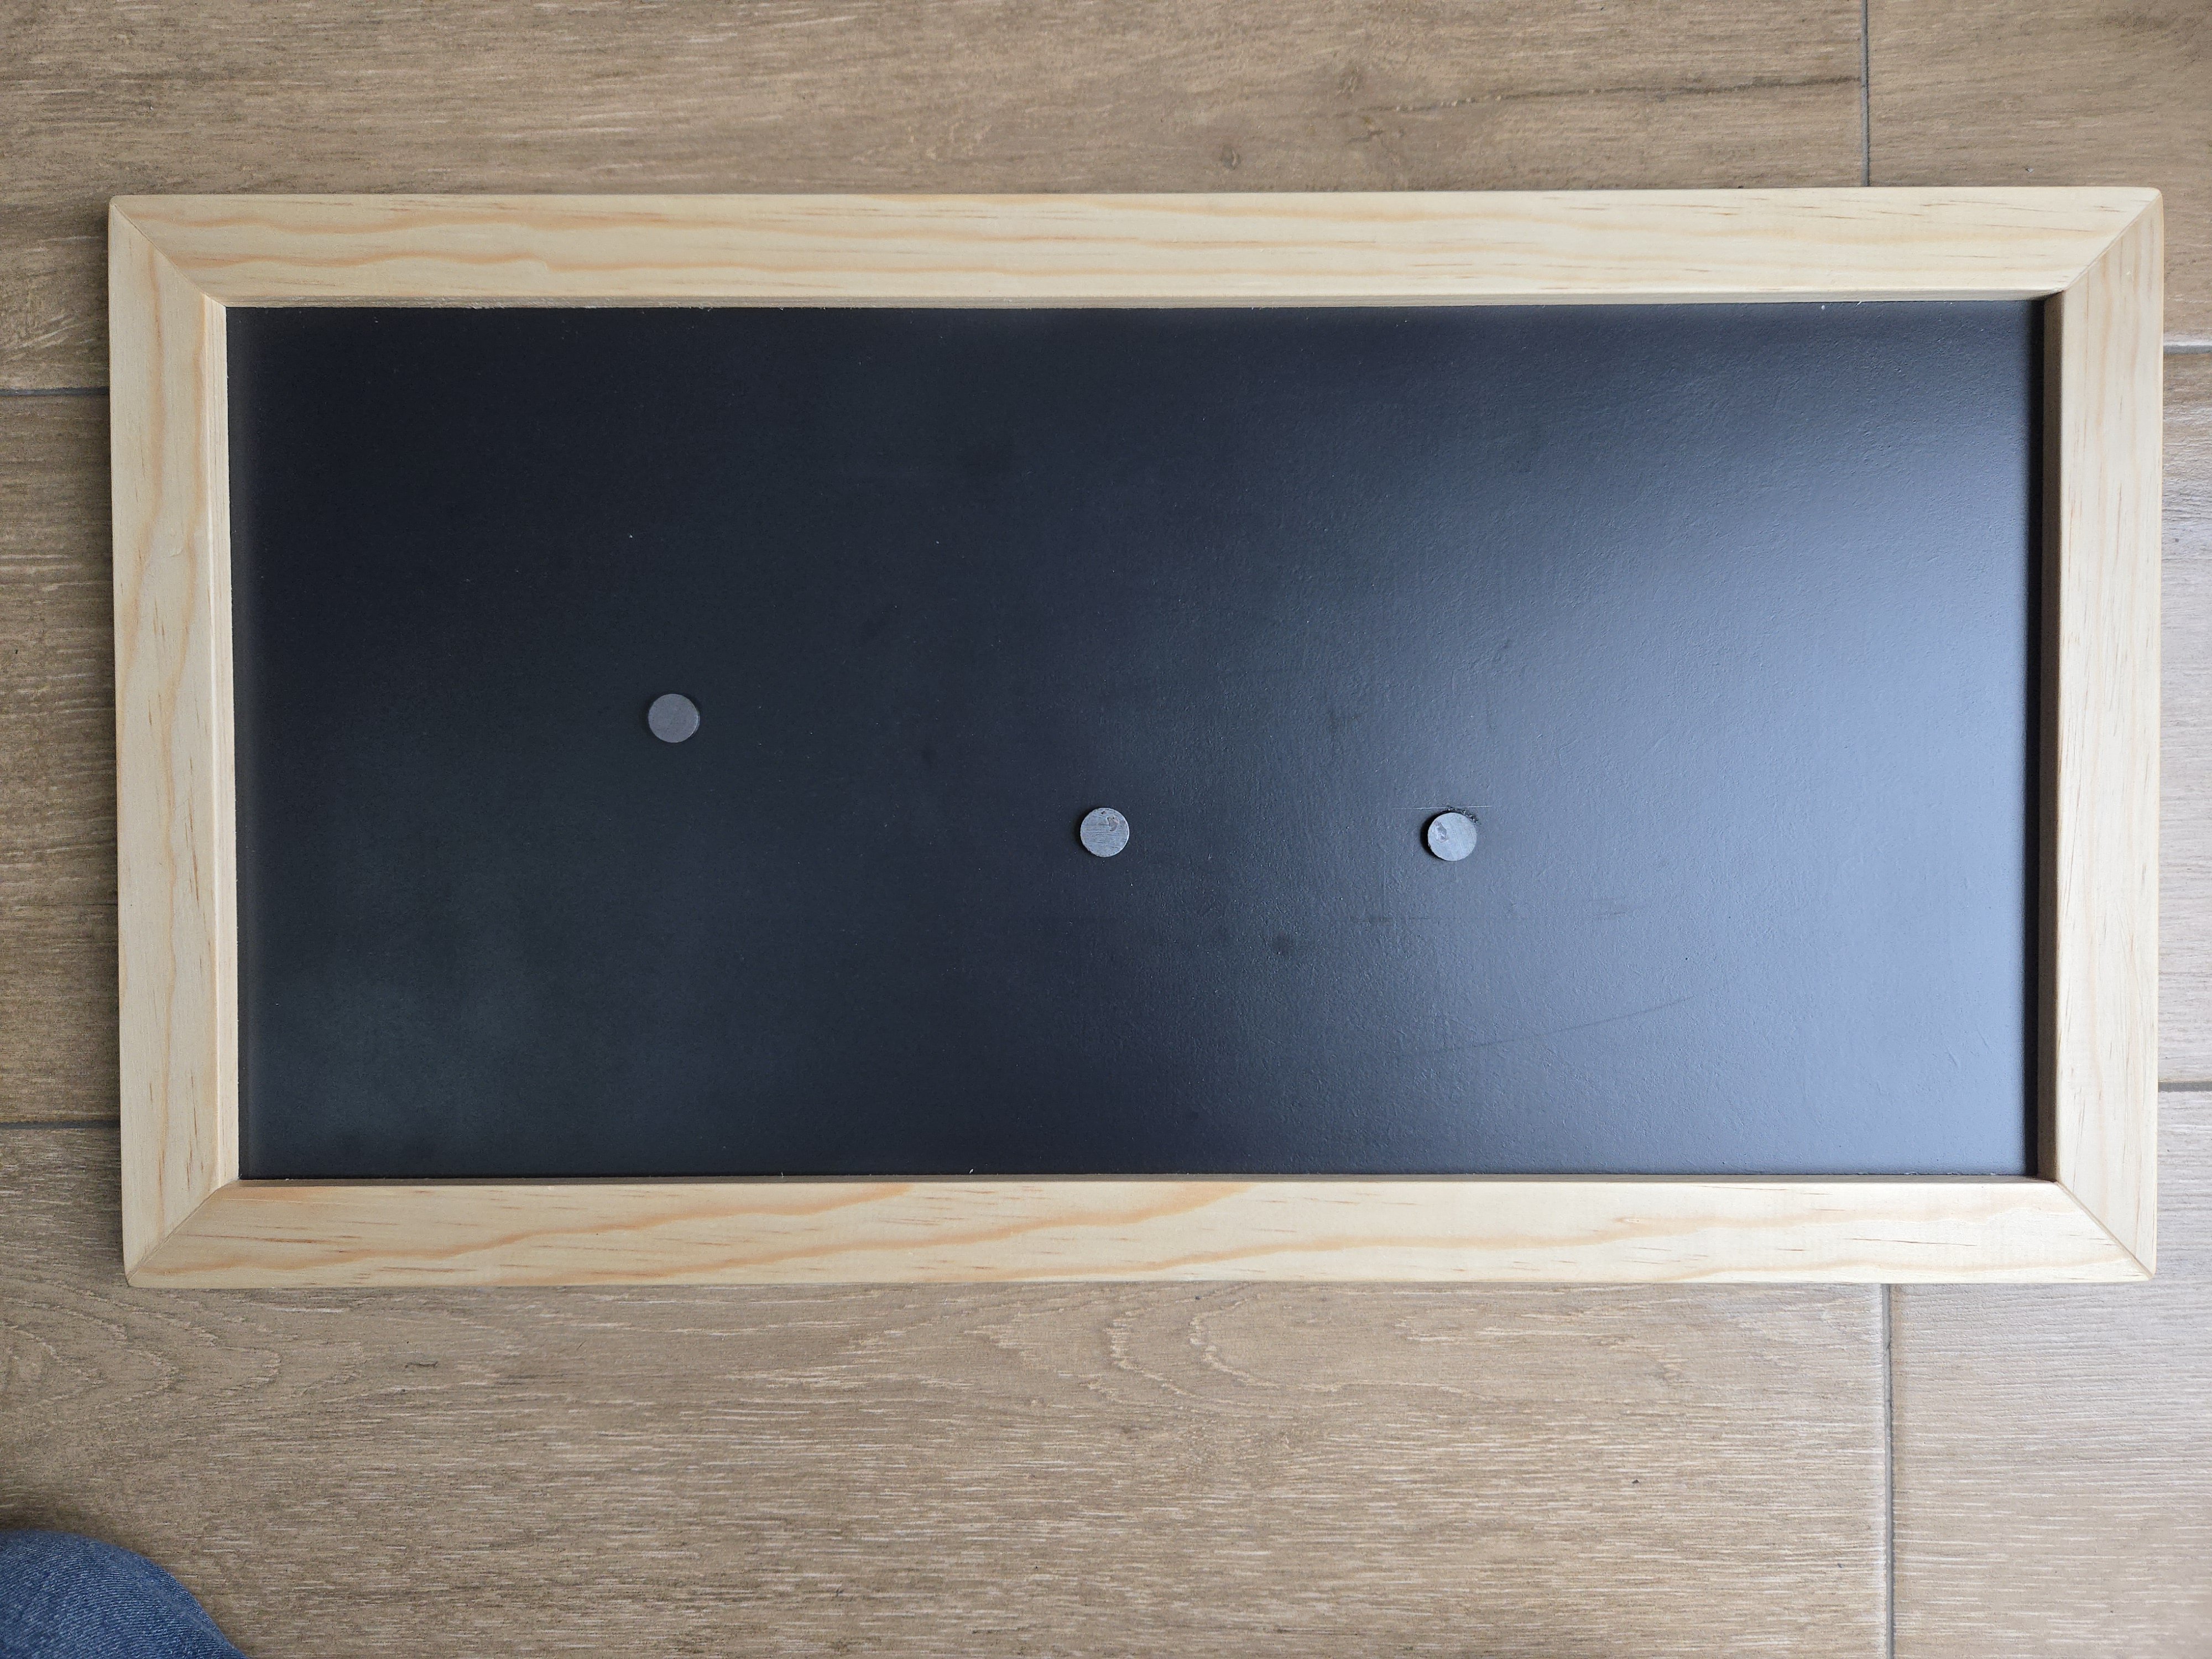
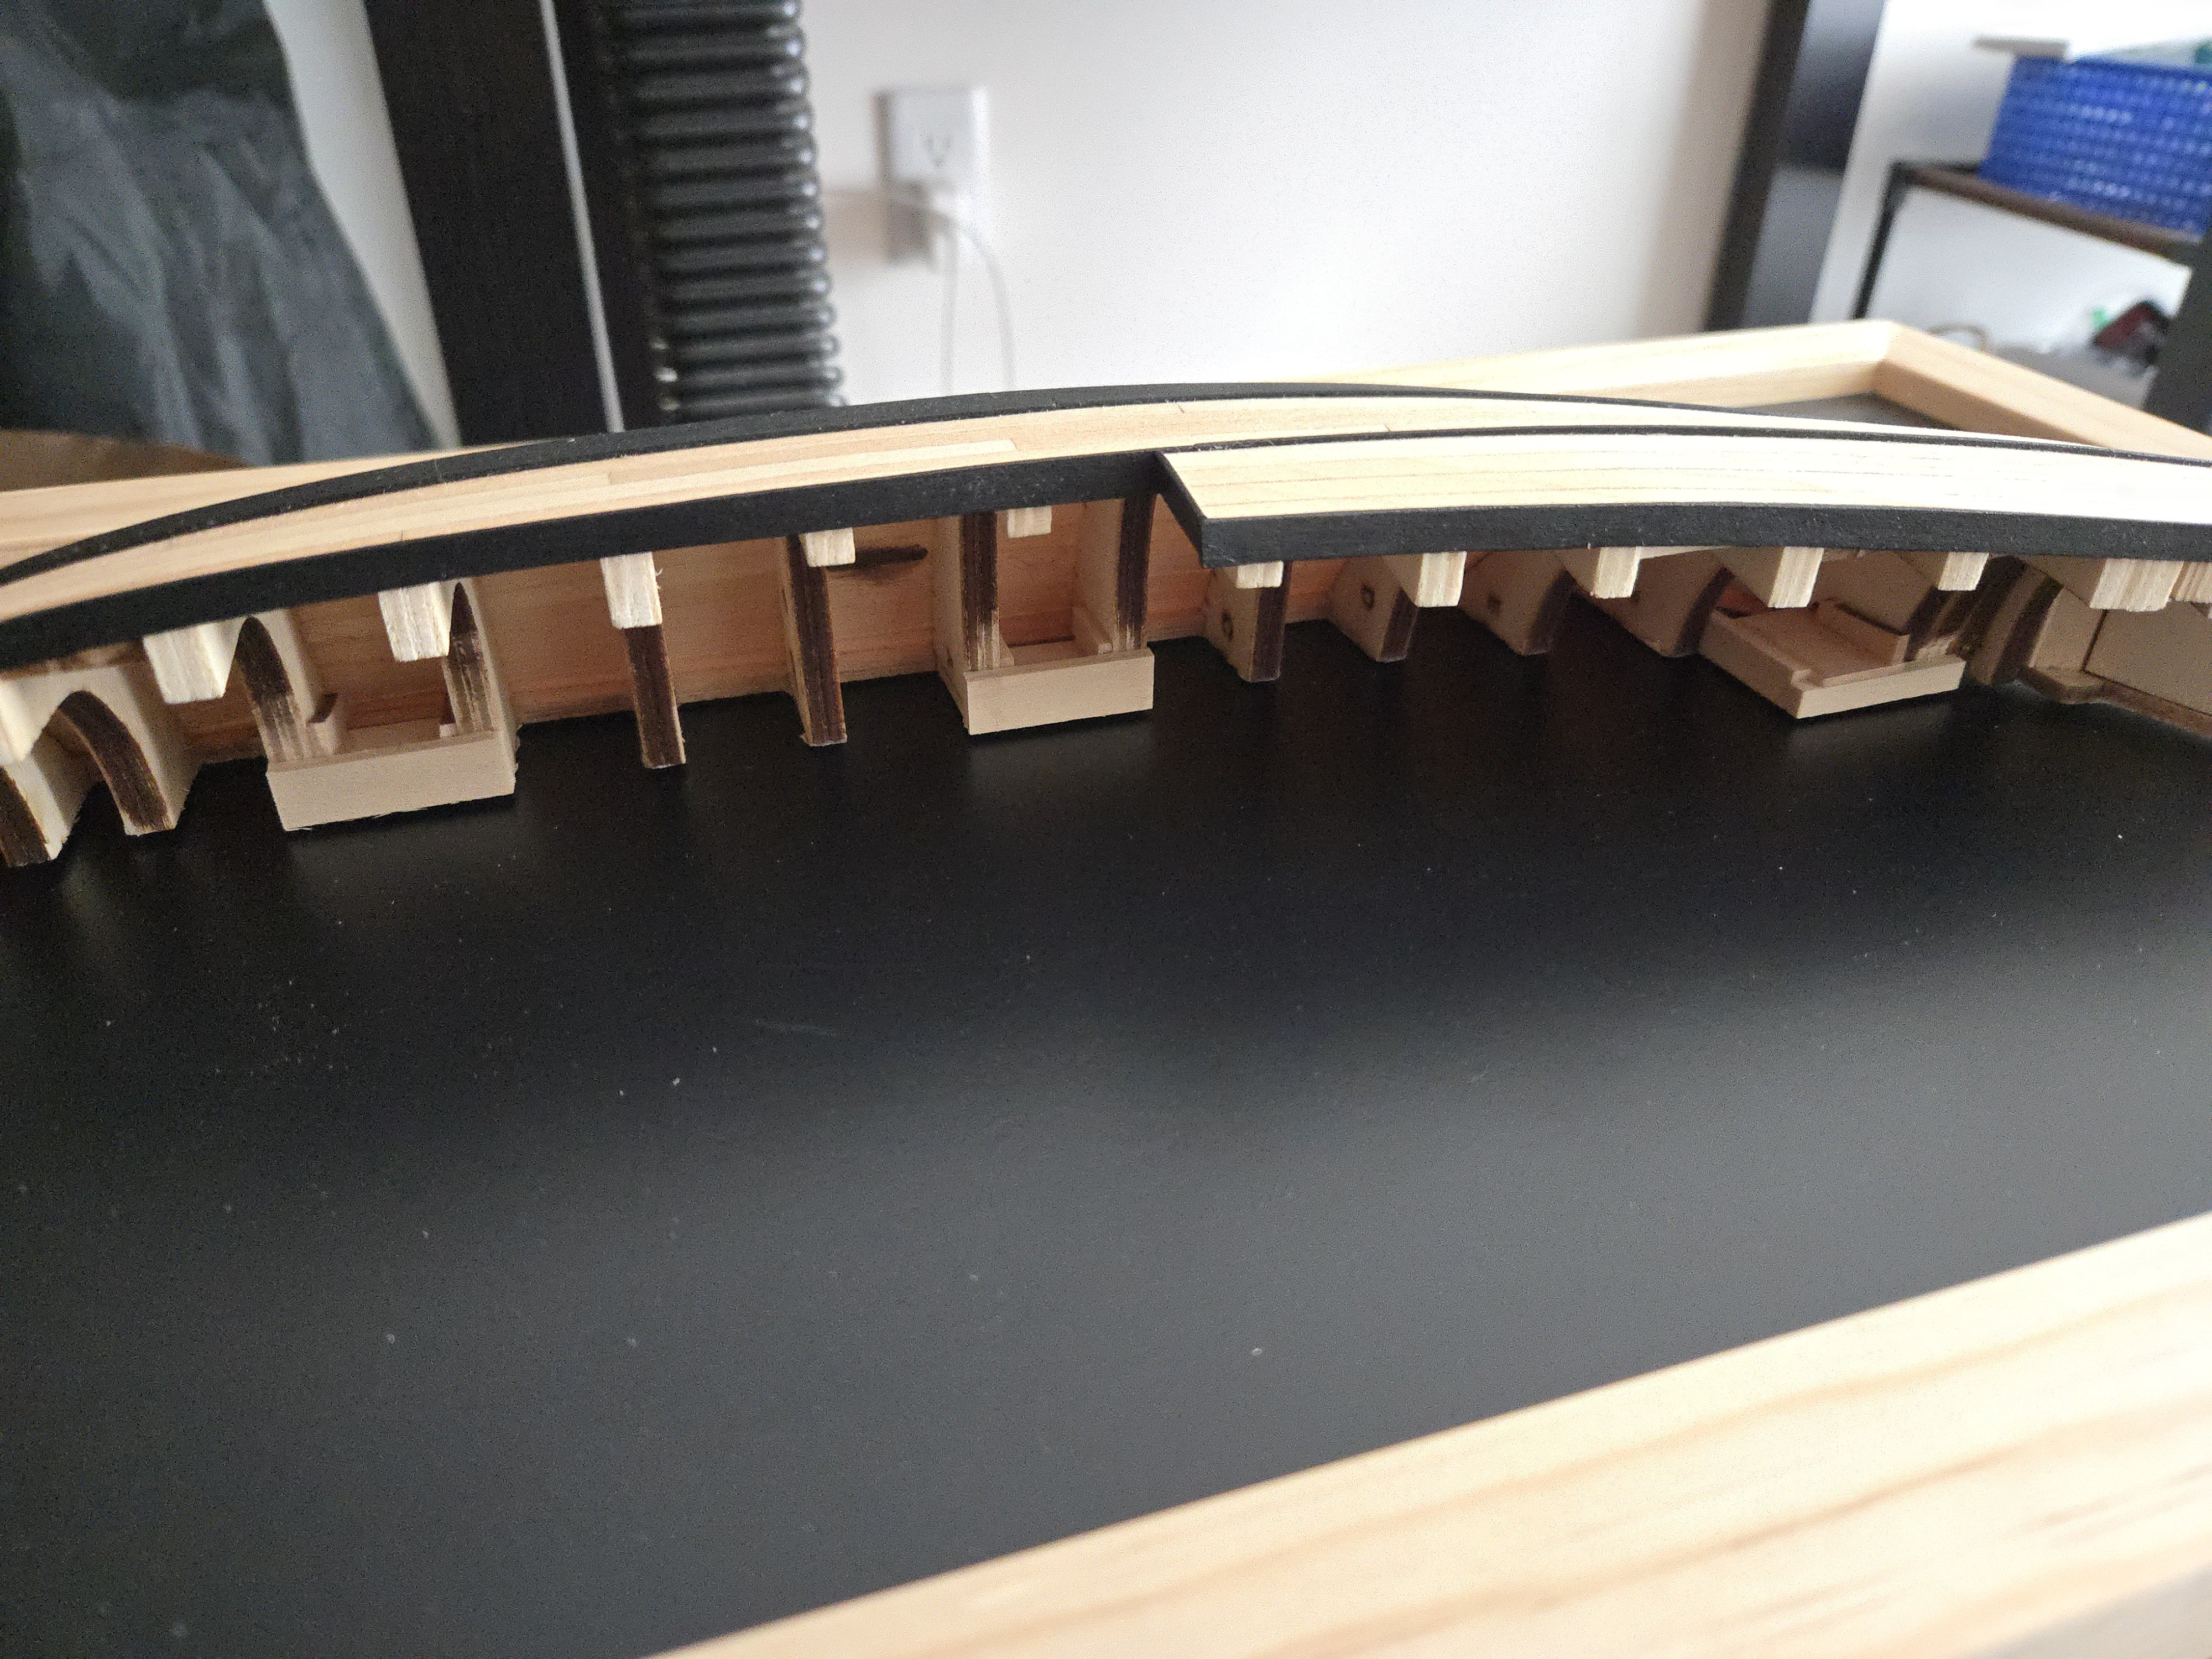
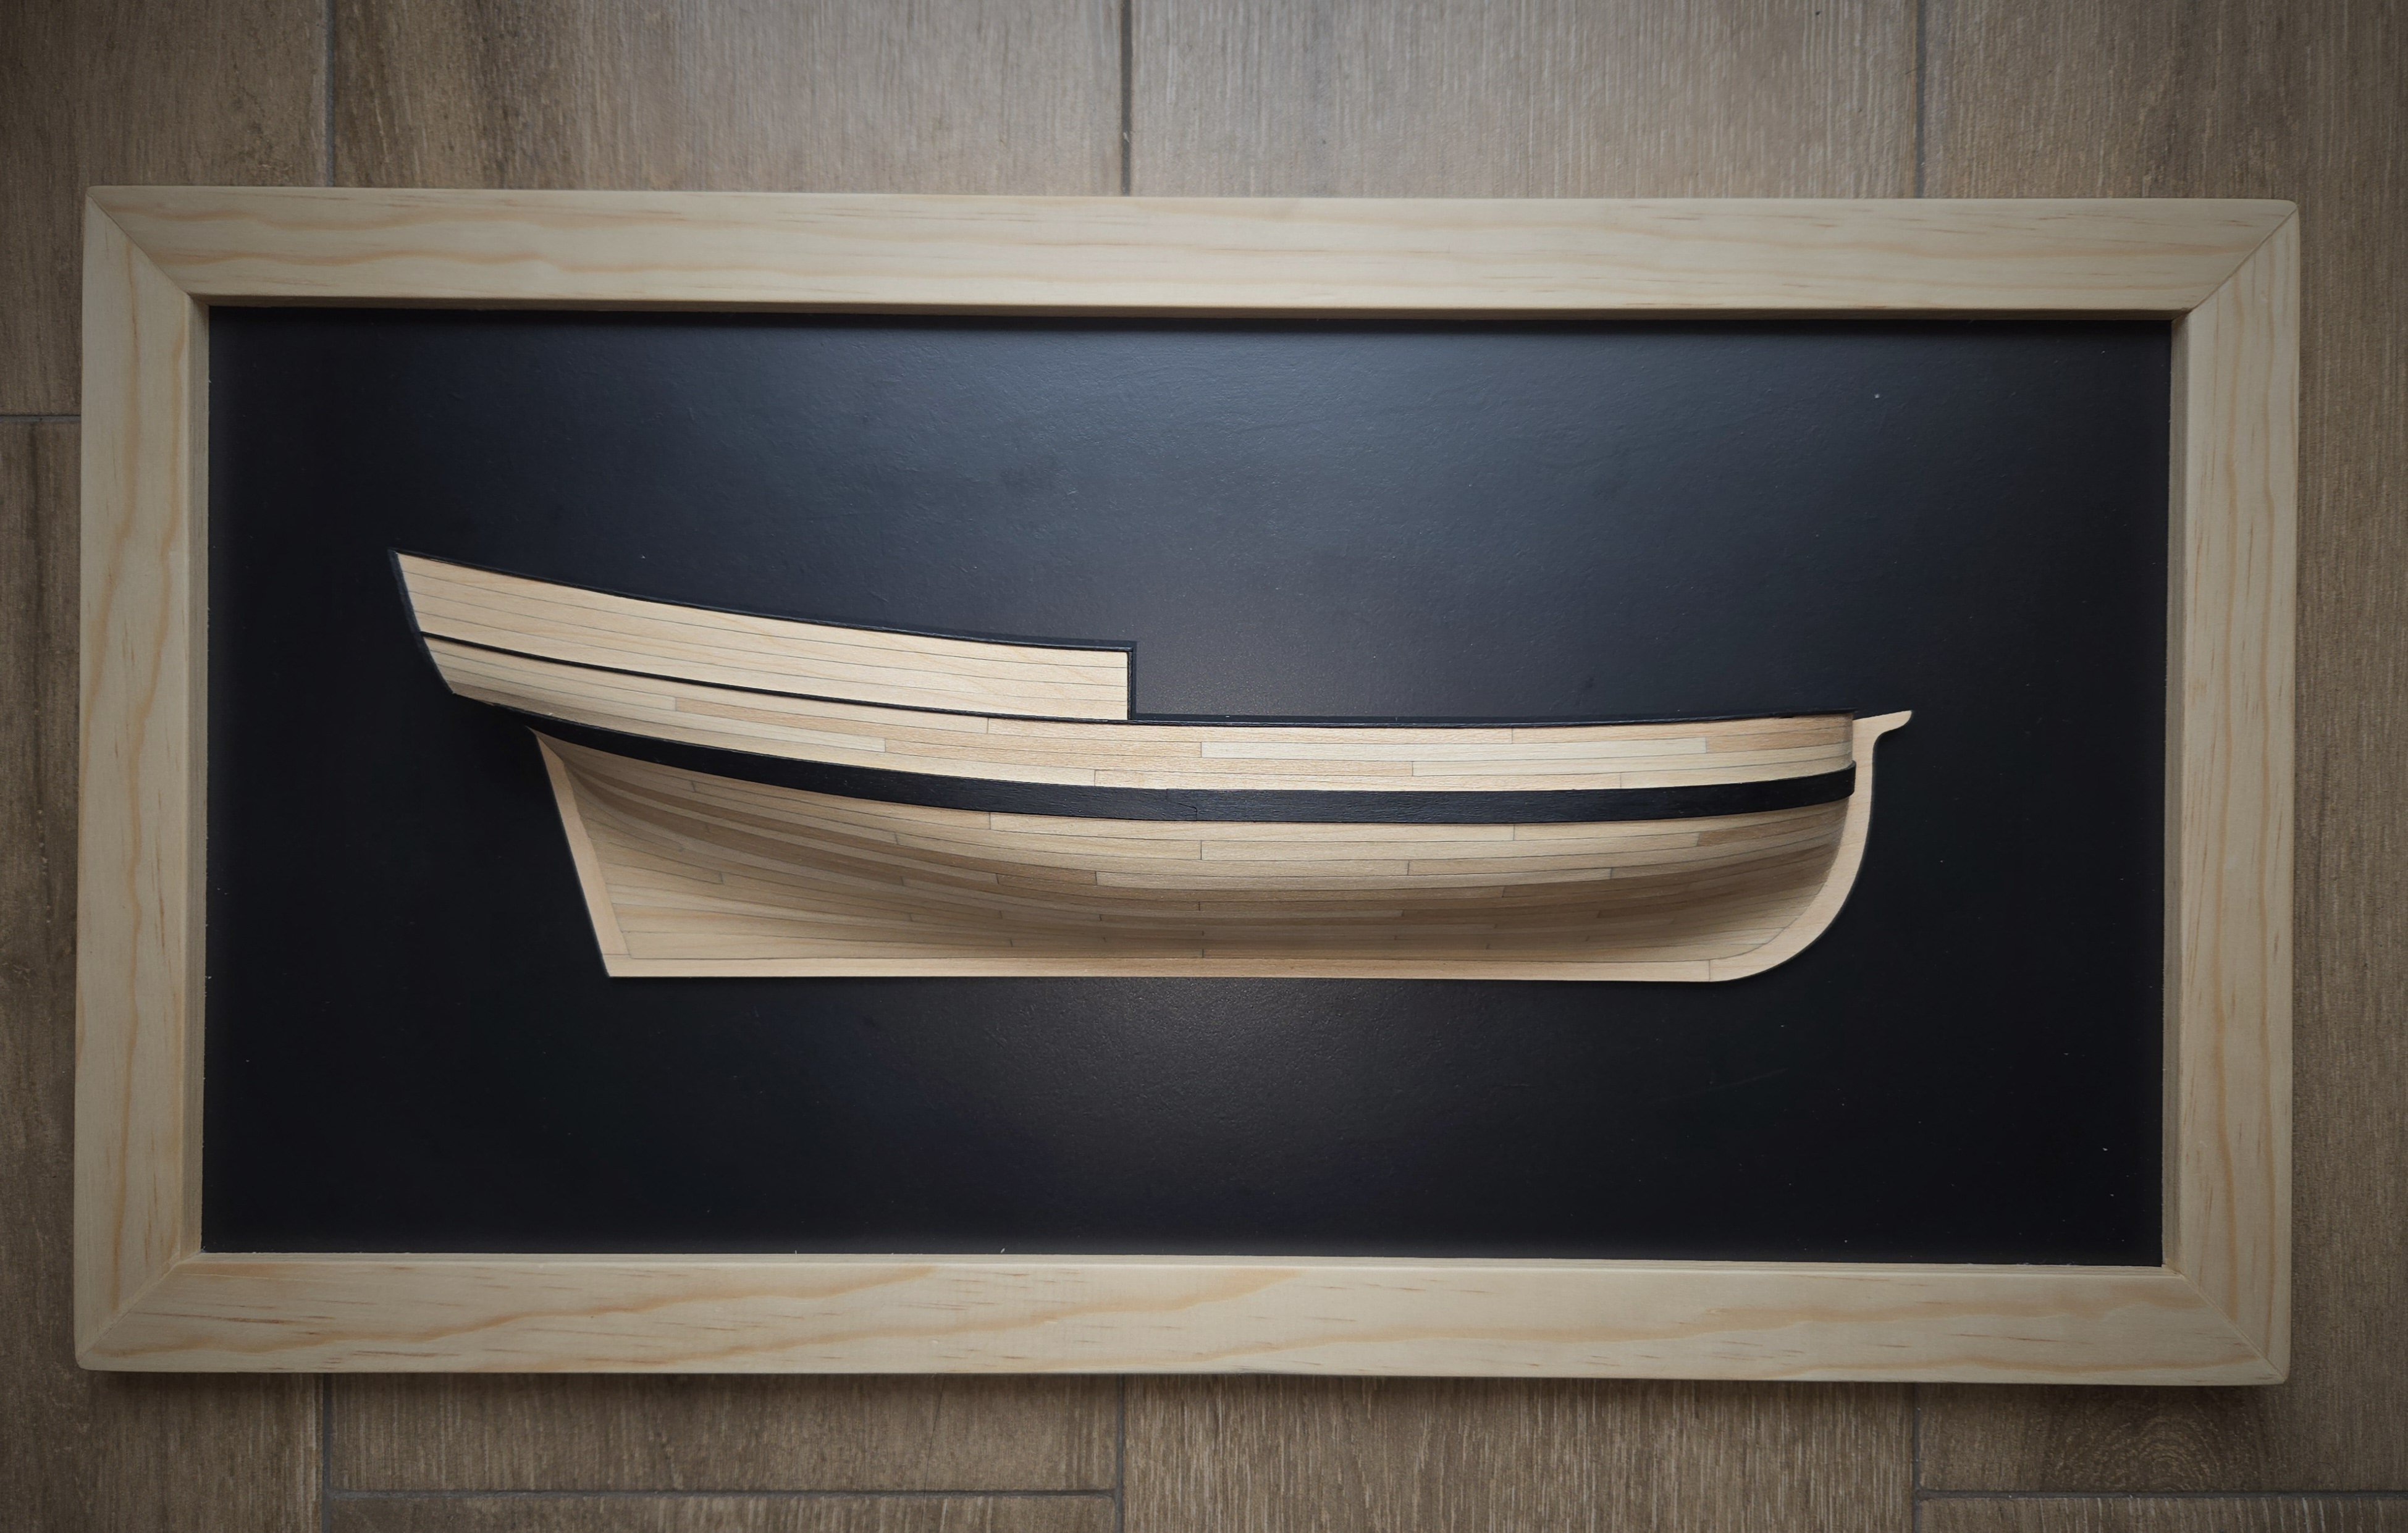
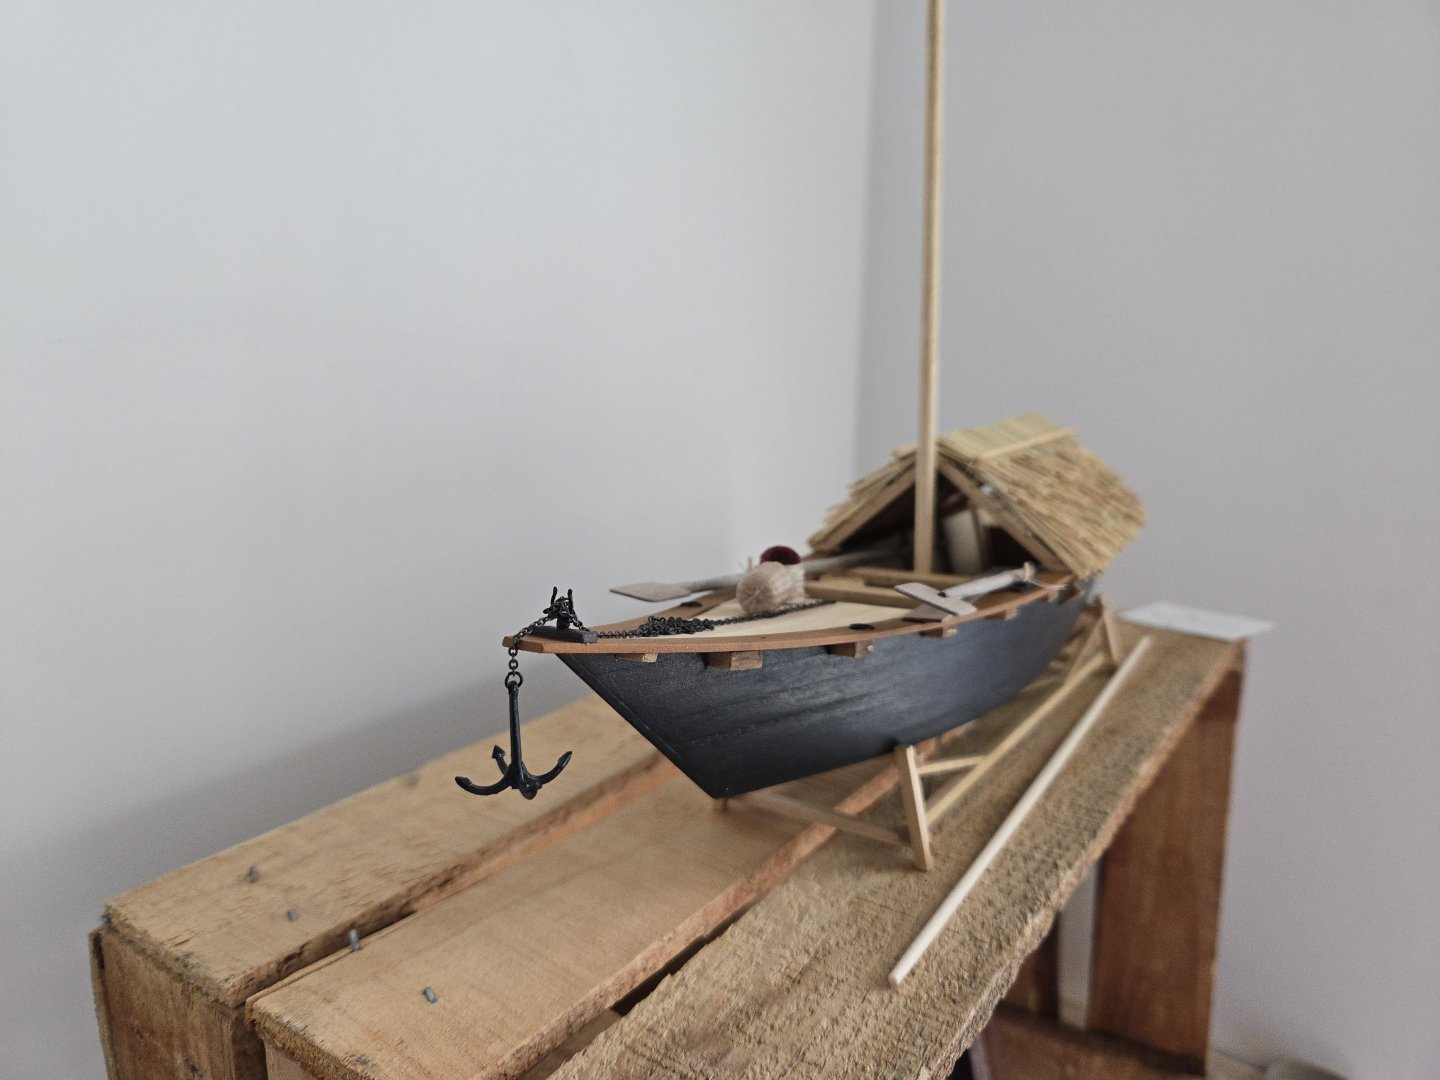
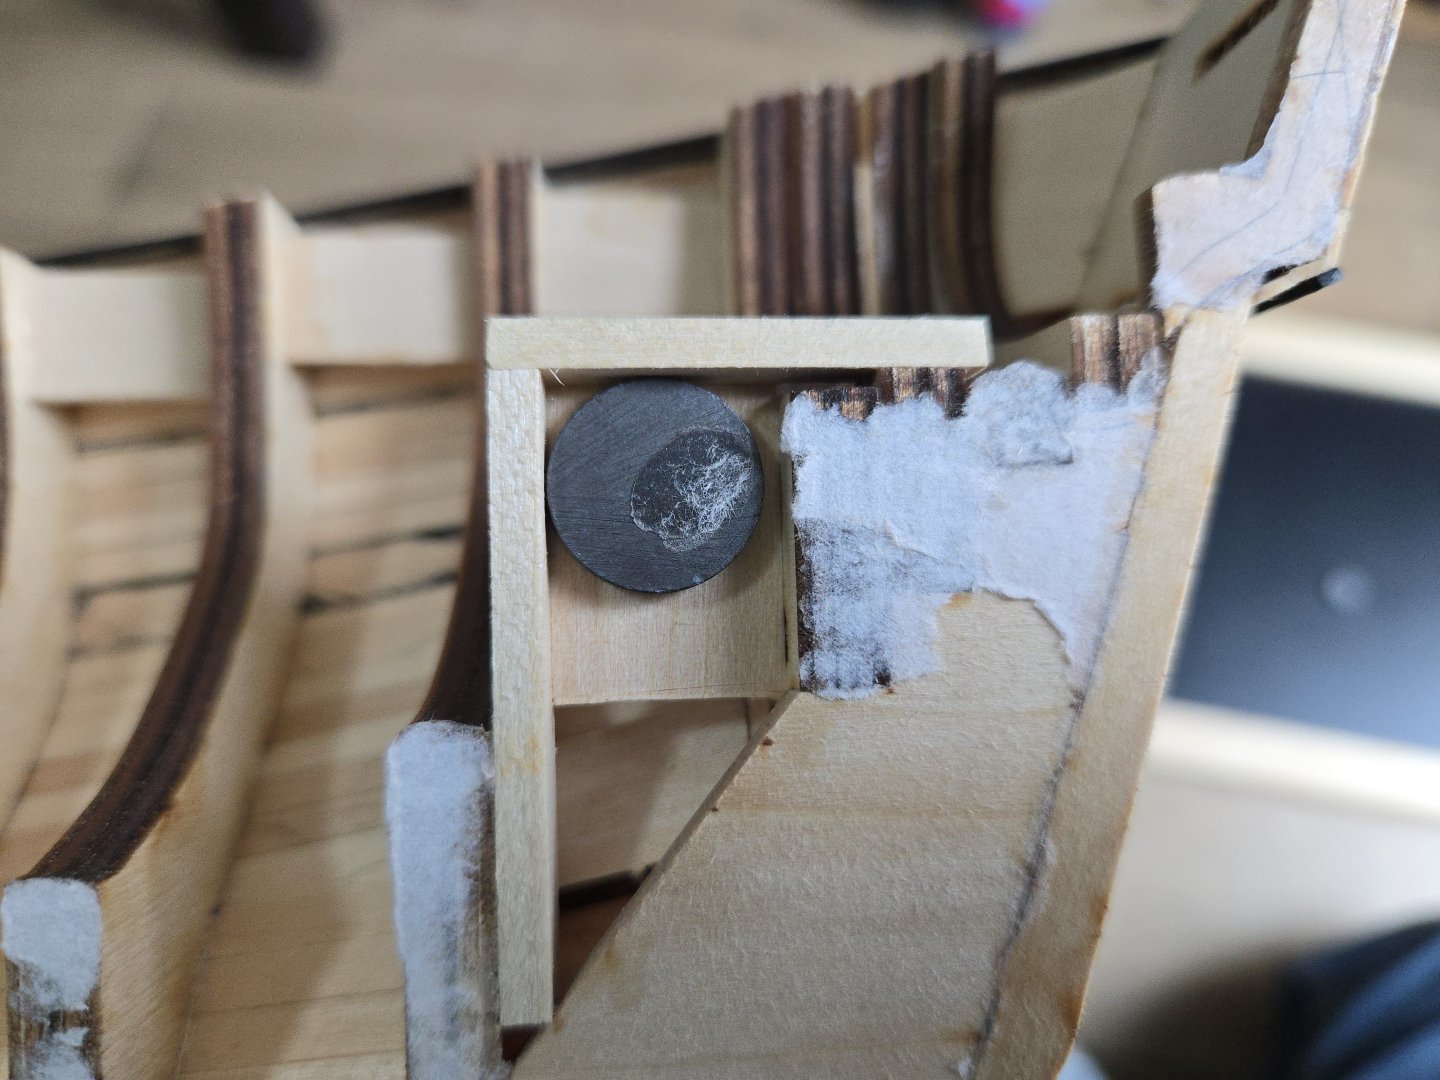
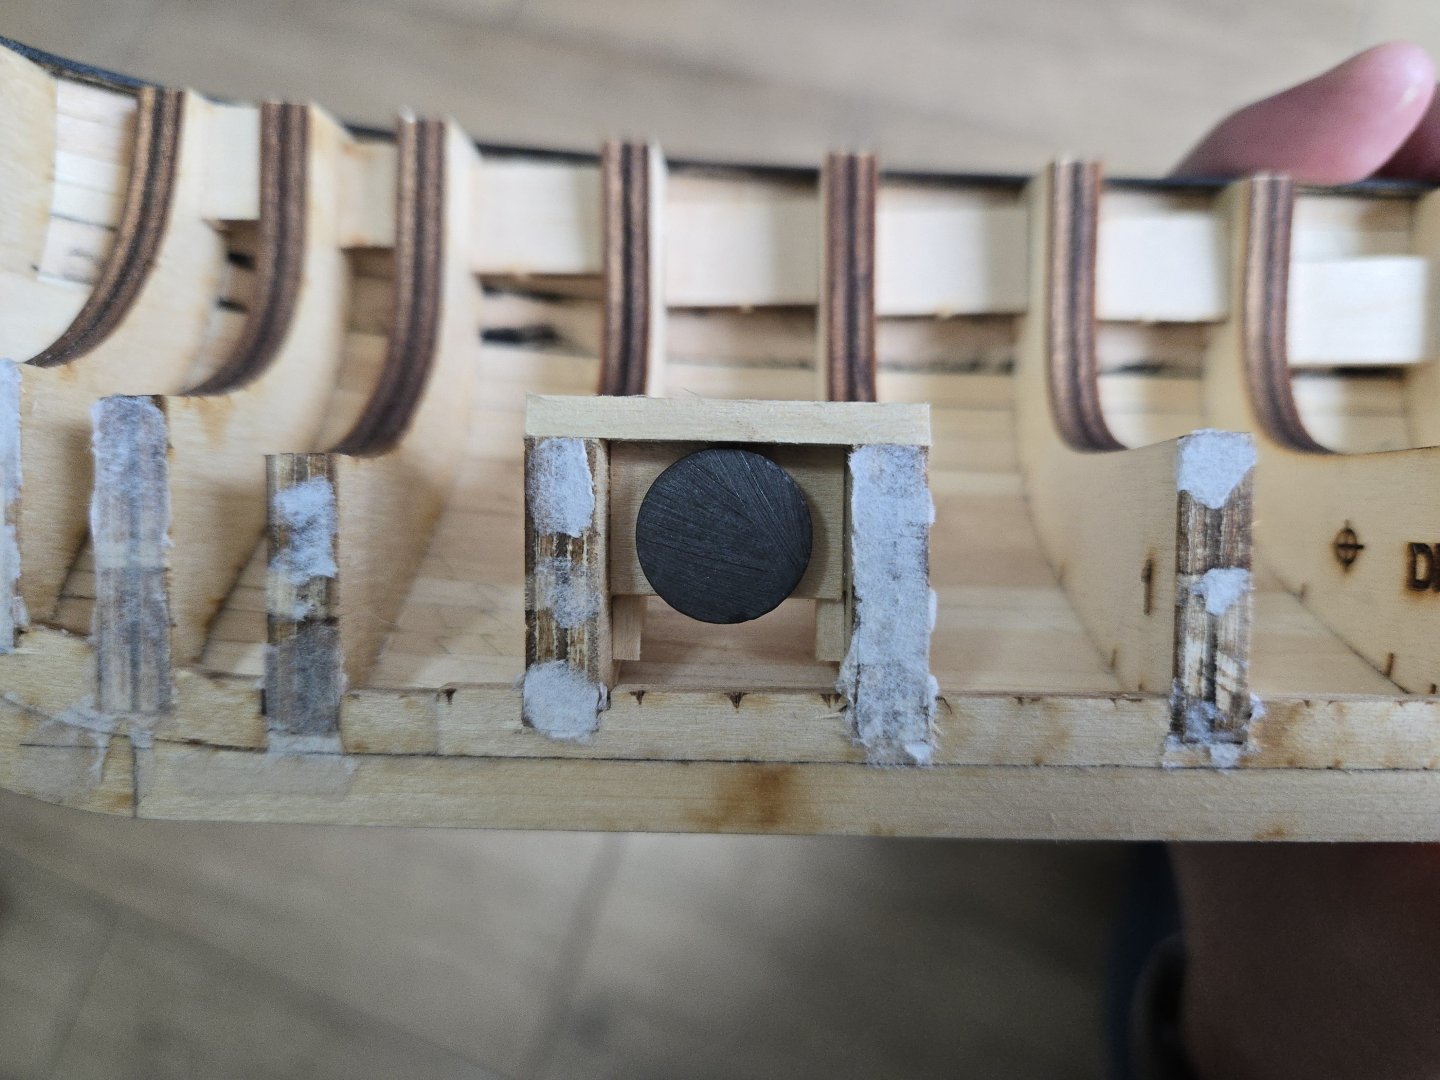
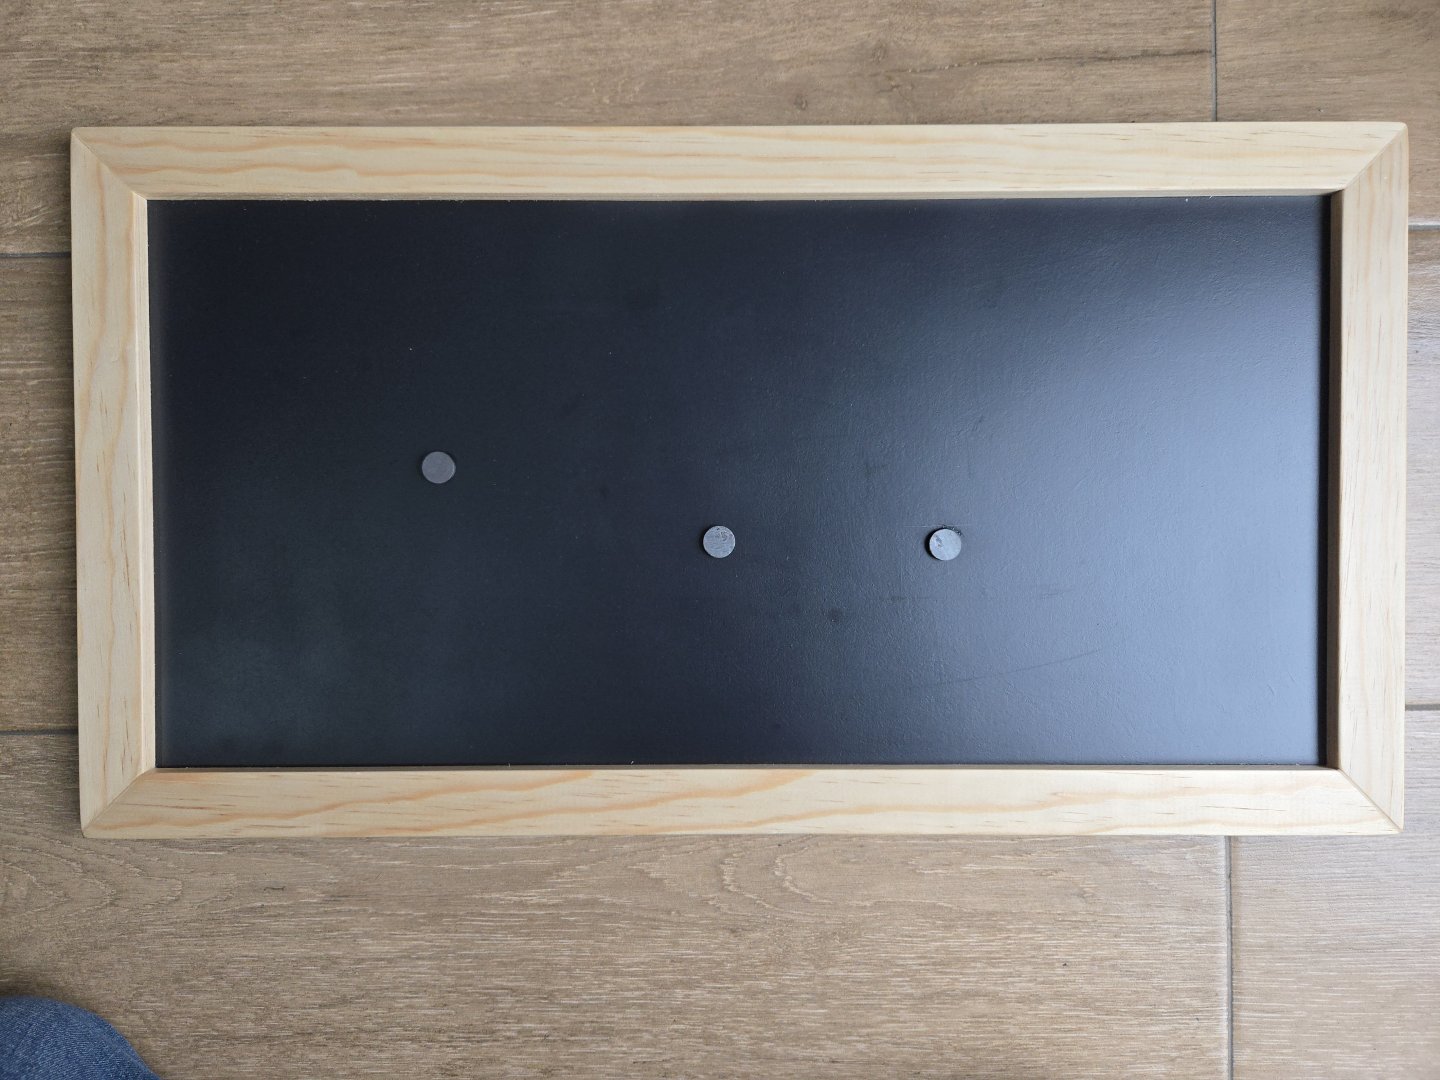
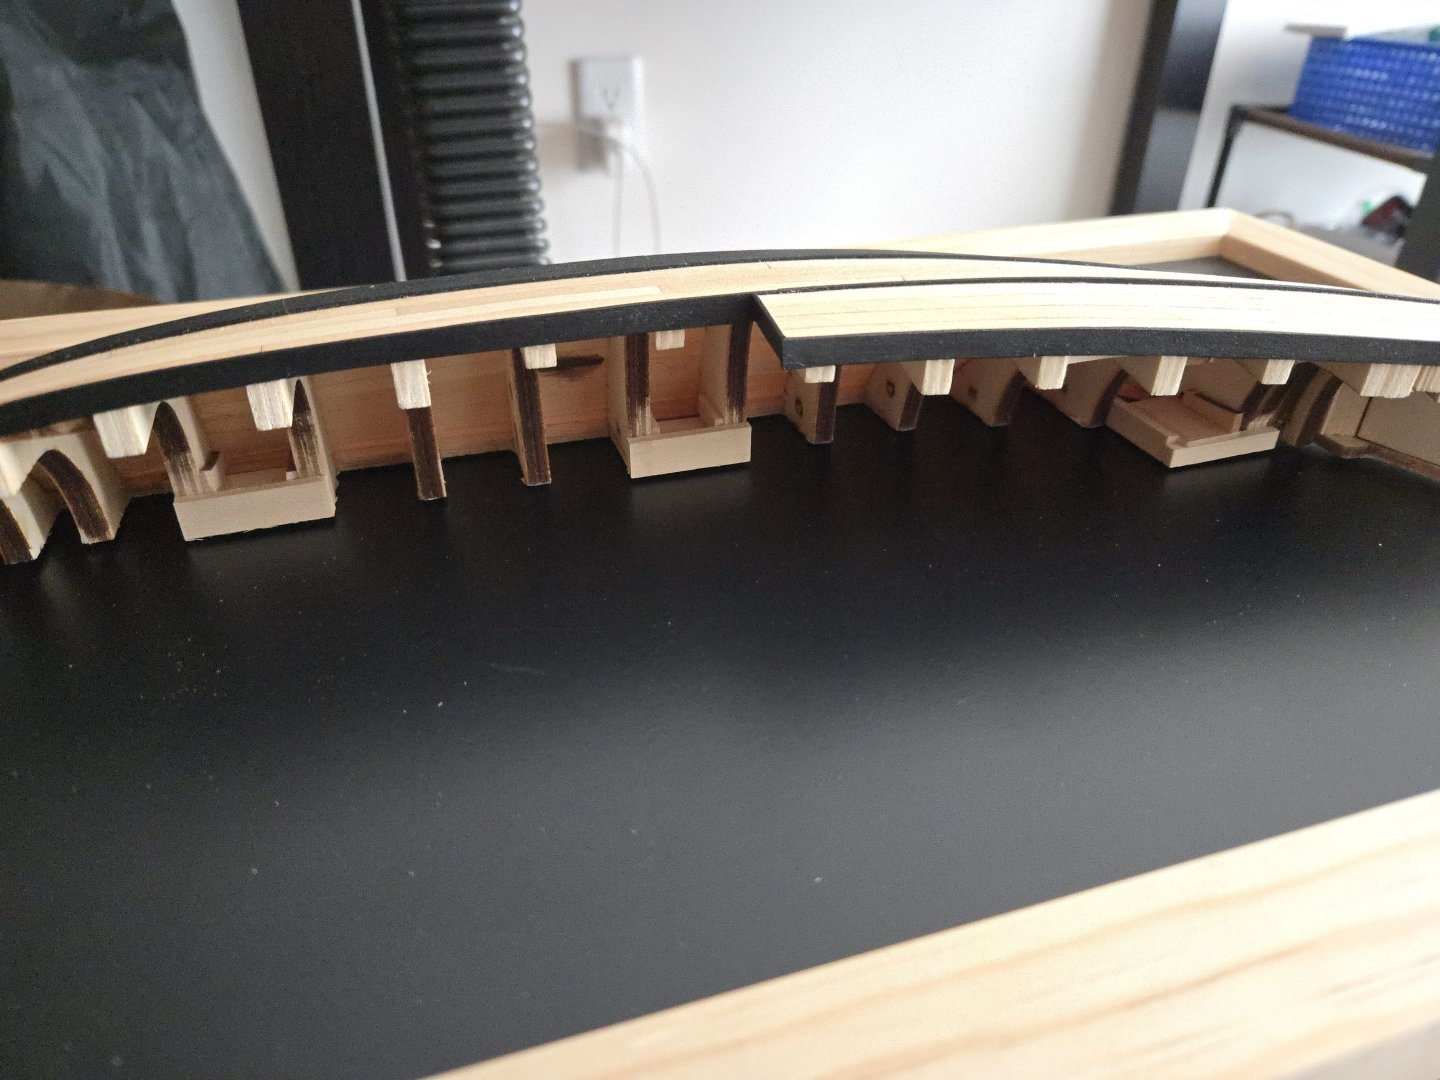
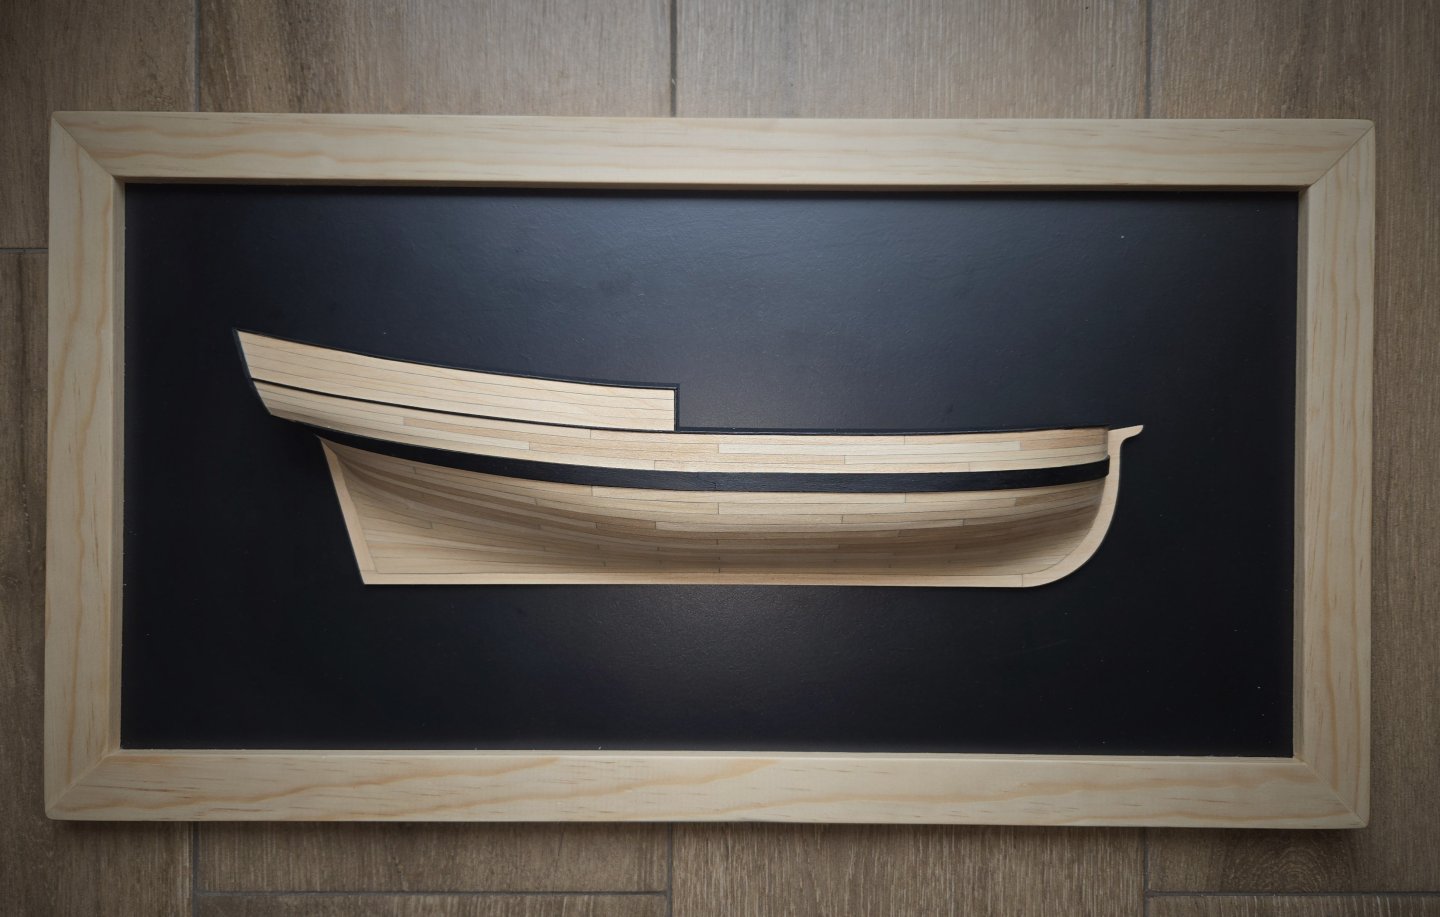
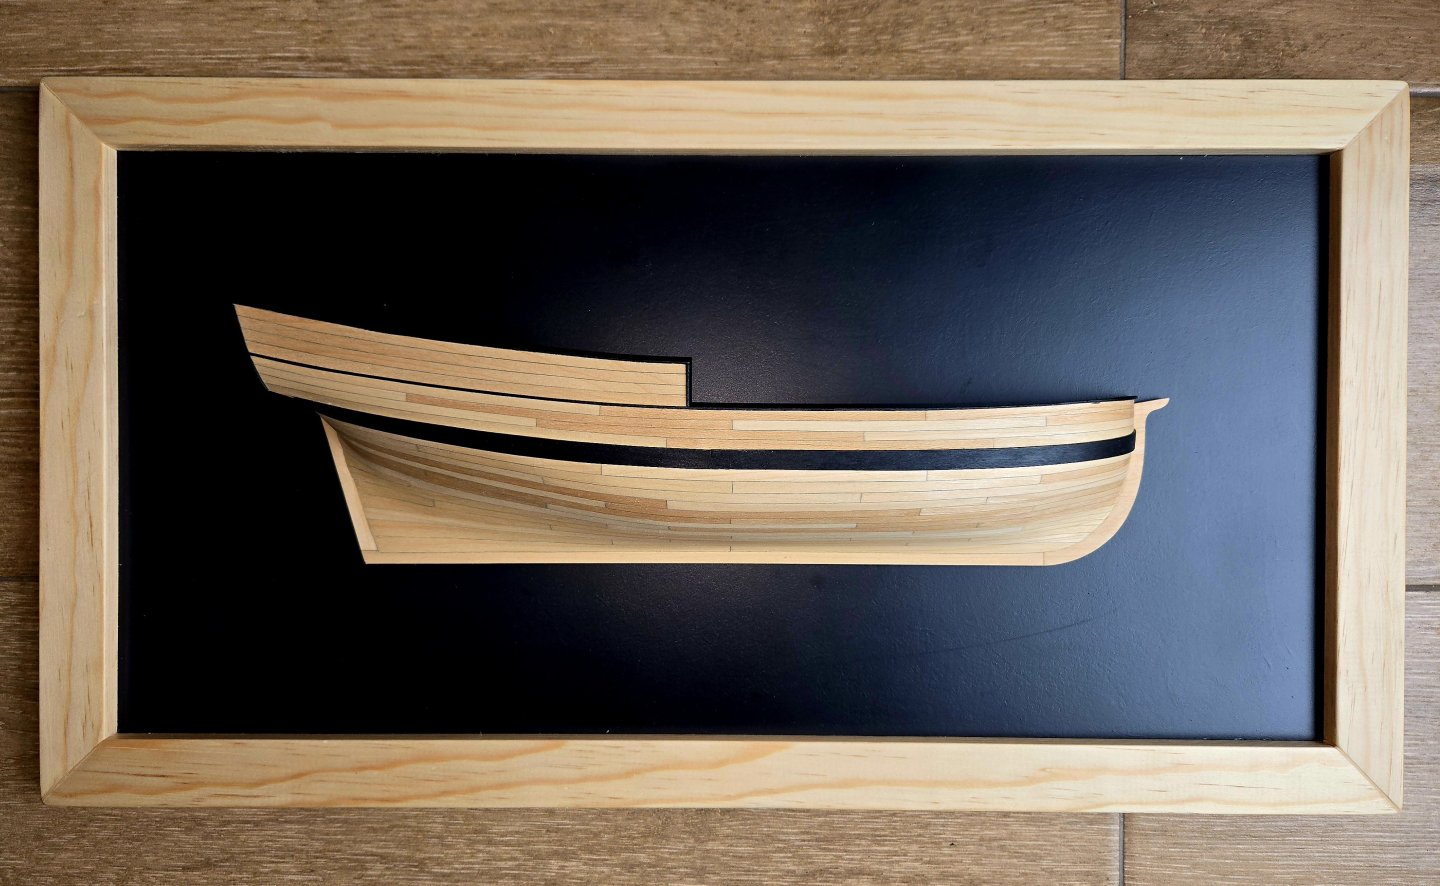
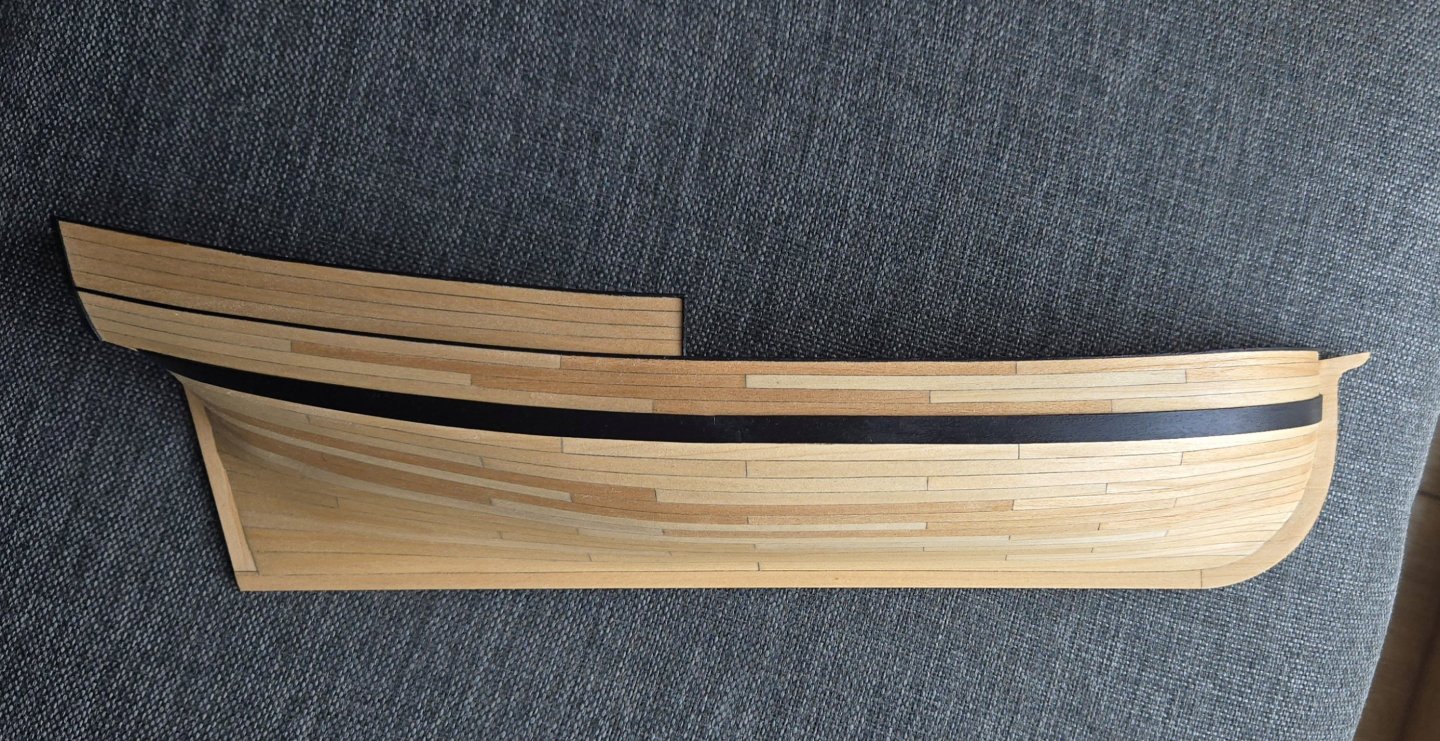
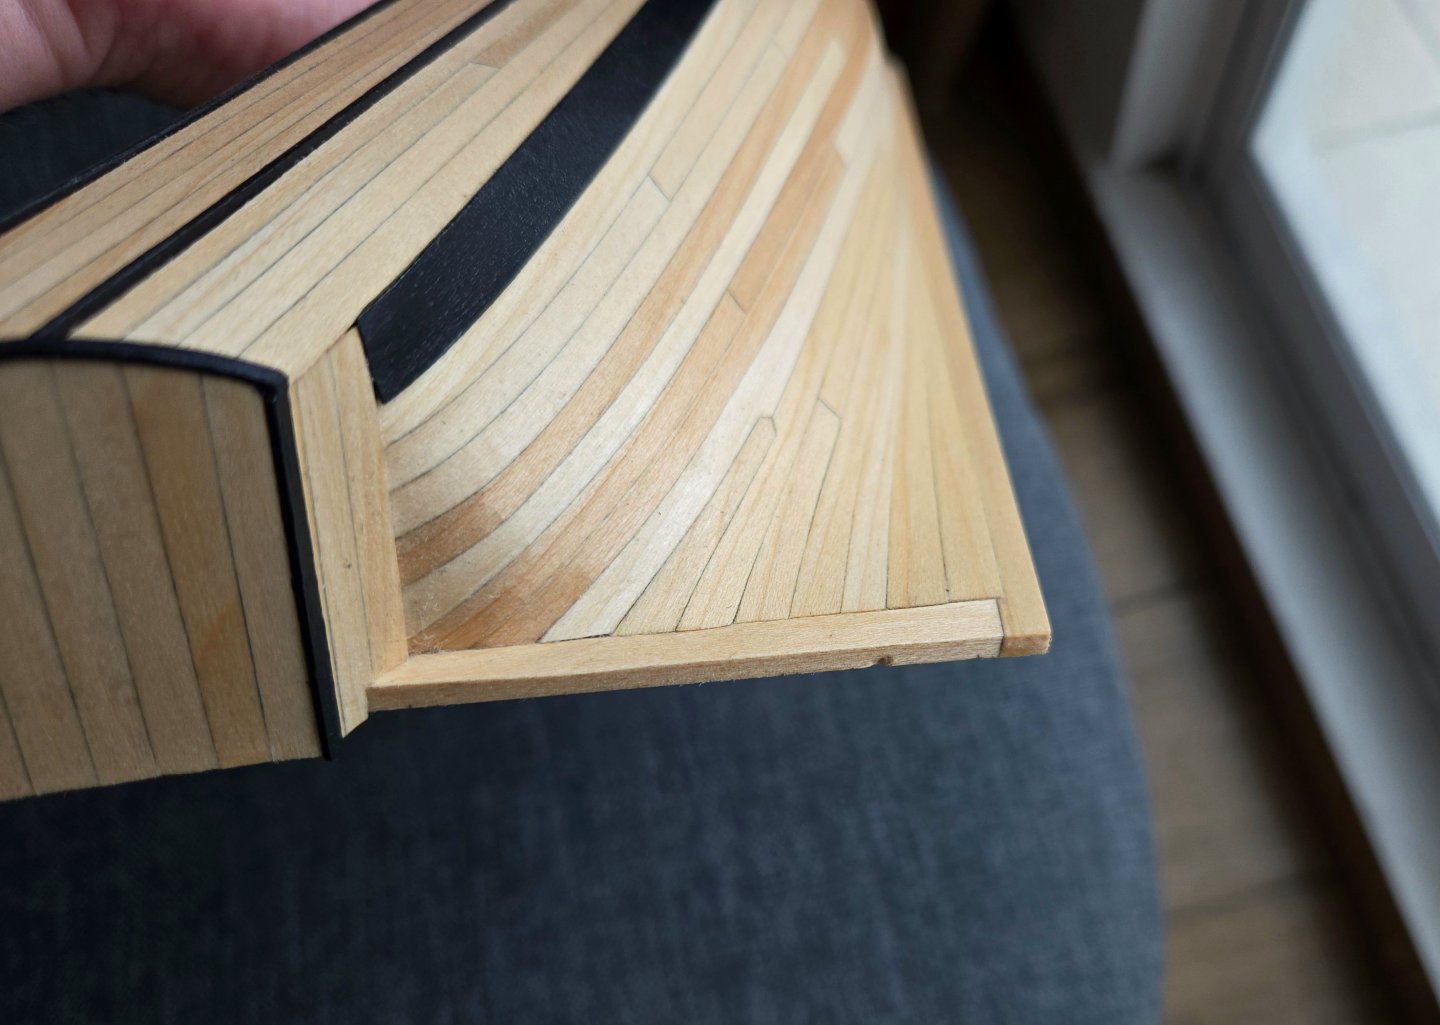
This build is finished! Following advice received on my separate post about making magnetic mountings, I decided to use simple black magnets instead of stronger neodymium ones, and I built a sort of base structure around each magnet with 1/8 and 1/16-inch basswood. This way, if the magnets start to slide over time with gravity, the frame magnet will catch against the upper support piece. I decided to go with three magnet pairs in order to have a stable connection. I had trouble getting the frame magnets to stick to the smooth background, so I ended up having to scrape off the paint at each magnet point to get a more secure connection. I glued the fore and aft magnets first after positioning the hull, and then marked the location for the central magnet by placing a small dab of paint on it before mounting the hull. (As can be seen, I had a lot of trouble getting the paper residue off the backs of the frames, but as this won't be seen, I decided against spending a lot of time and effort removing it.) Overall, I'm happy with how the hull turned out, and looking forward to hanging it somewhere on my wall. I like how the hull color ended up more or less matching the frame (although as can be seen, the lighting and camera settings really make a difference in what color the hull actually presents). A few brief thoughts on the kit are in order. Overall, I found this to be an excellent and very informative build. I feel confident tackling curved hull forms now, and learned a lot about spiling, measuring and marking bands, etc. Having a half-hull kit to teach this really allows you to focus on getting the planking right, without worrying about any other aspect of the build (or about getting the planking even on each side). Toni Levine did a fantastic job with developing this kit, and her instructions and build log (not to mention a lot of other build logs elsewhere on the site) were extremely helpful in explaining how to handle planking. That said, there are a few things that I think could be improved. Most importantly, fairing the hull was more complicated than I think necessary, in part because I think the frame design leaves a lot of room for builder error to creep in. This is especially the case at the bow and stern, but even around the middle of the hull, I had to do a lot of shimming to end up with a fair hull. I feel that it would be simpler to just provide full bulkheads that reach up to deck level or so, and/pr possibly to have included some sort of false deck to better lock the frames into position. From what I understand, the frame design was chosen to make it easier to clamp the planks while gluing, but few of my clamps were the right size for that. The fairing challenges were compounded by what I felt was a lack of clear photos in the manual of the stern, which made it very difficult for a relative beginner to figure out the right shape. All of which is to say, I still highly recommend this kit to anyone looking to learn the proper way to plank. They should just be very careful with setting up the frames, should look at a lot of other build logs to figure out the stern, and should be prepared to do a ton of sanding while fairing. Otherwise, though, this can be a very informative and meditative build that produces a great model. Thanks for following along!
- 82 replies
-
- 17
-
-

-
- half hull planking project
- half hull
- (and 2 more)
-
Beautiful work! I've enjoyed watching this build, these smaller working vessels make for such interesting models.
-
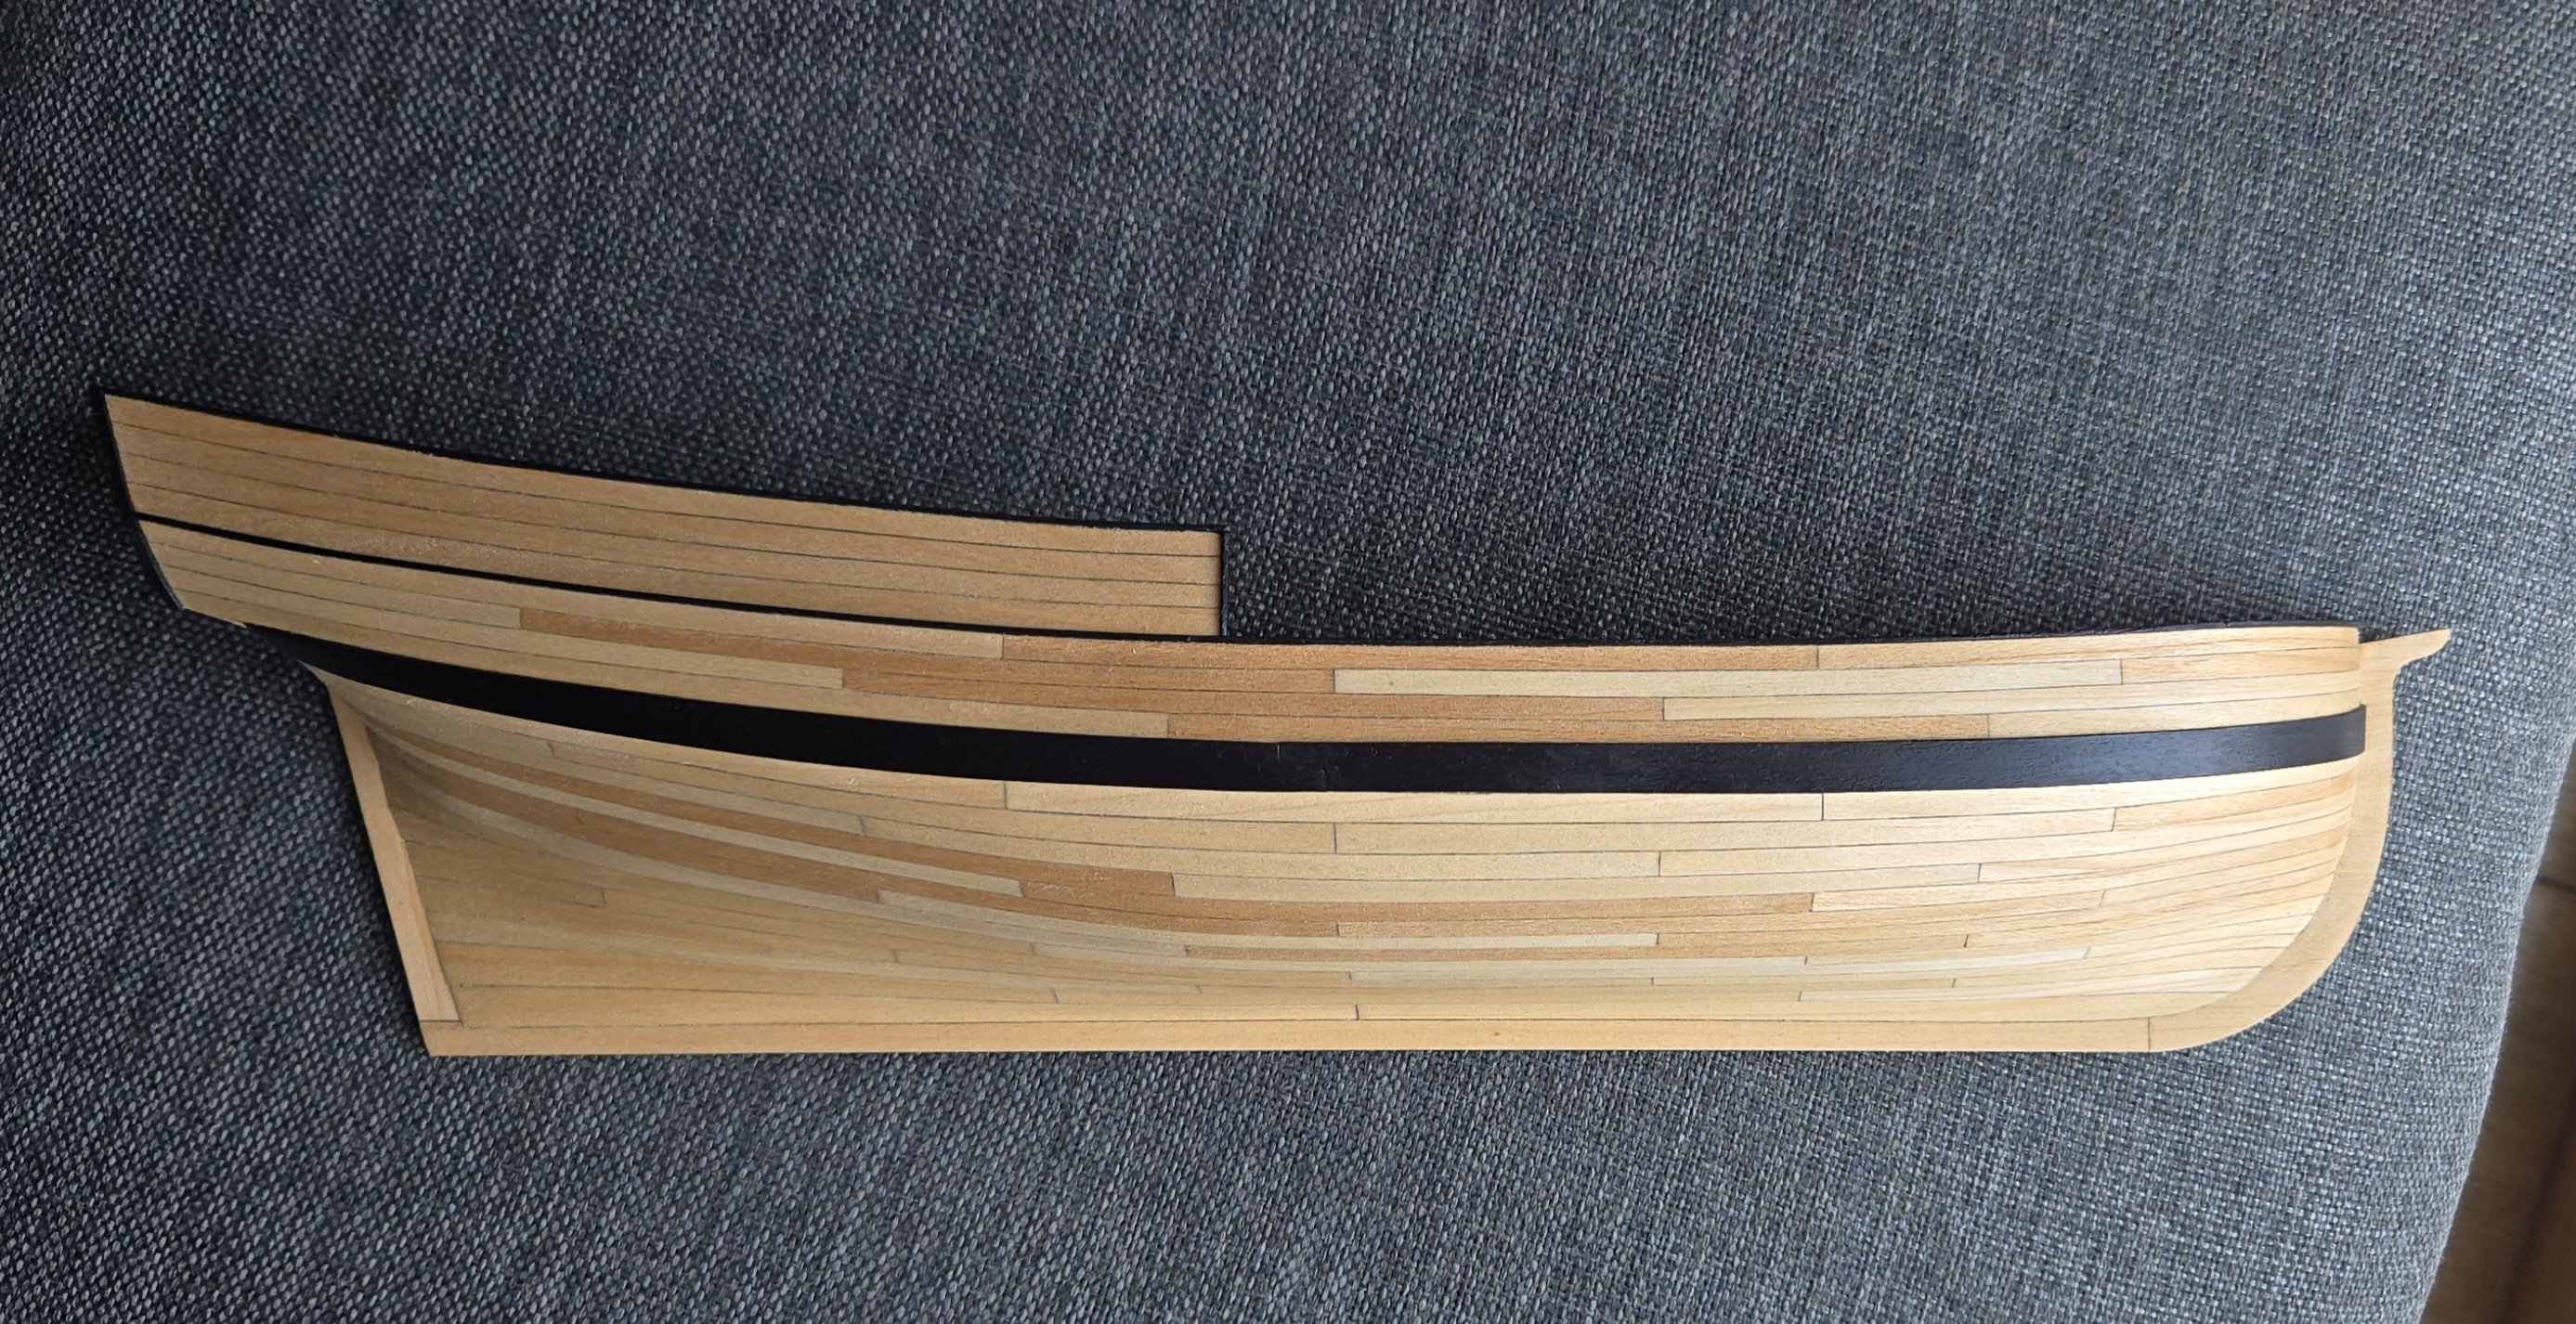
I removed the model from the building board before adding the next coats of linseed oil. Of course I dropped it almost as soon as it was off and dented the sternpost. Ah well. Further coats of linseed oil really brought some nice color to the wood. Is there any sort of finish I'm supposed to apply over the linseed oil, or can I leave it as‐is? Finally, I've also finished making a very basic frame out of pine and mdf. Nothing to write home about, but I think it will work with the hull colors and textures. All that's left to do is to add a magnetic mounting to attach the hull to the frame.

- 82 replies
-
- 9
-
-
-
- half hull planking project
- half hull
- (and 2 more)
-
Thanks! Although they don't seem to have used something like that on the actual vessels (maybe a couple sawhorses would be more accurate), I like to think the stand at least kept the same aesthetic sensibilities as the rest of the build.
-
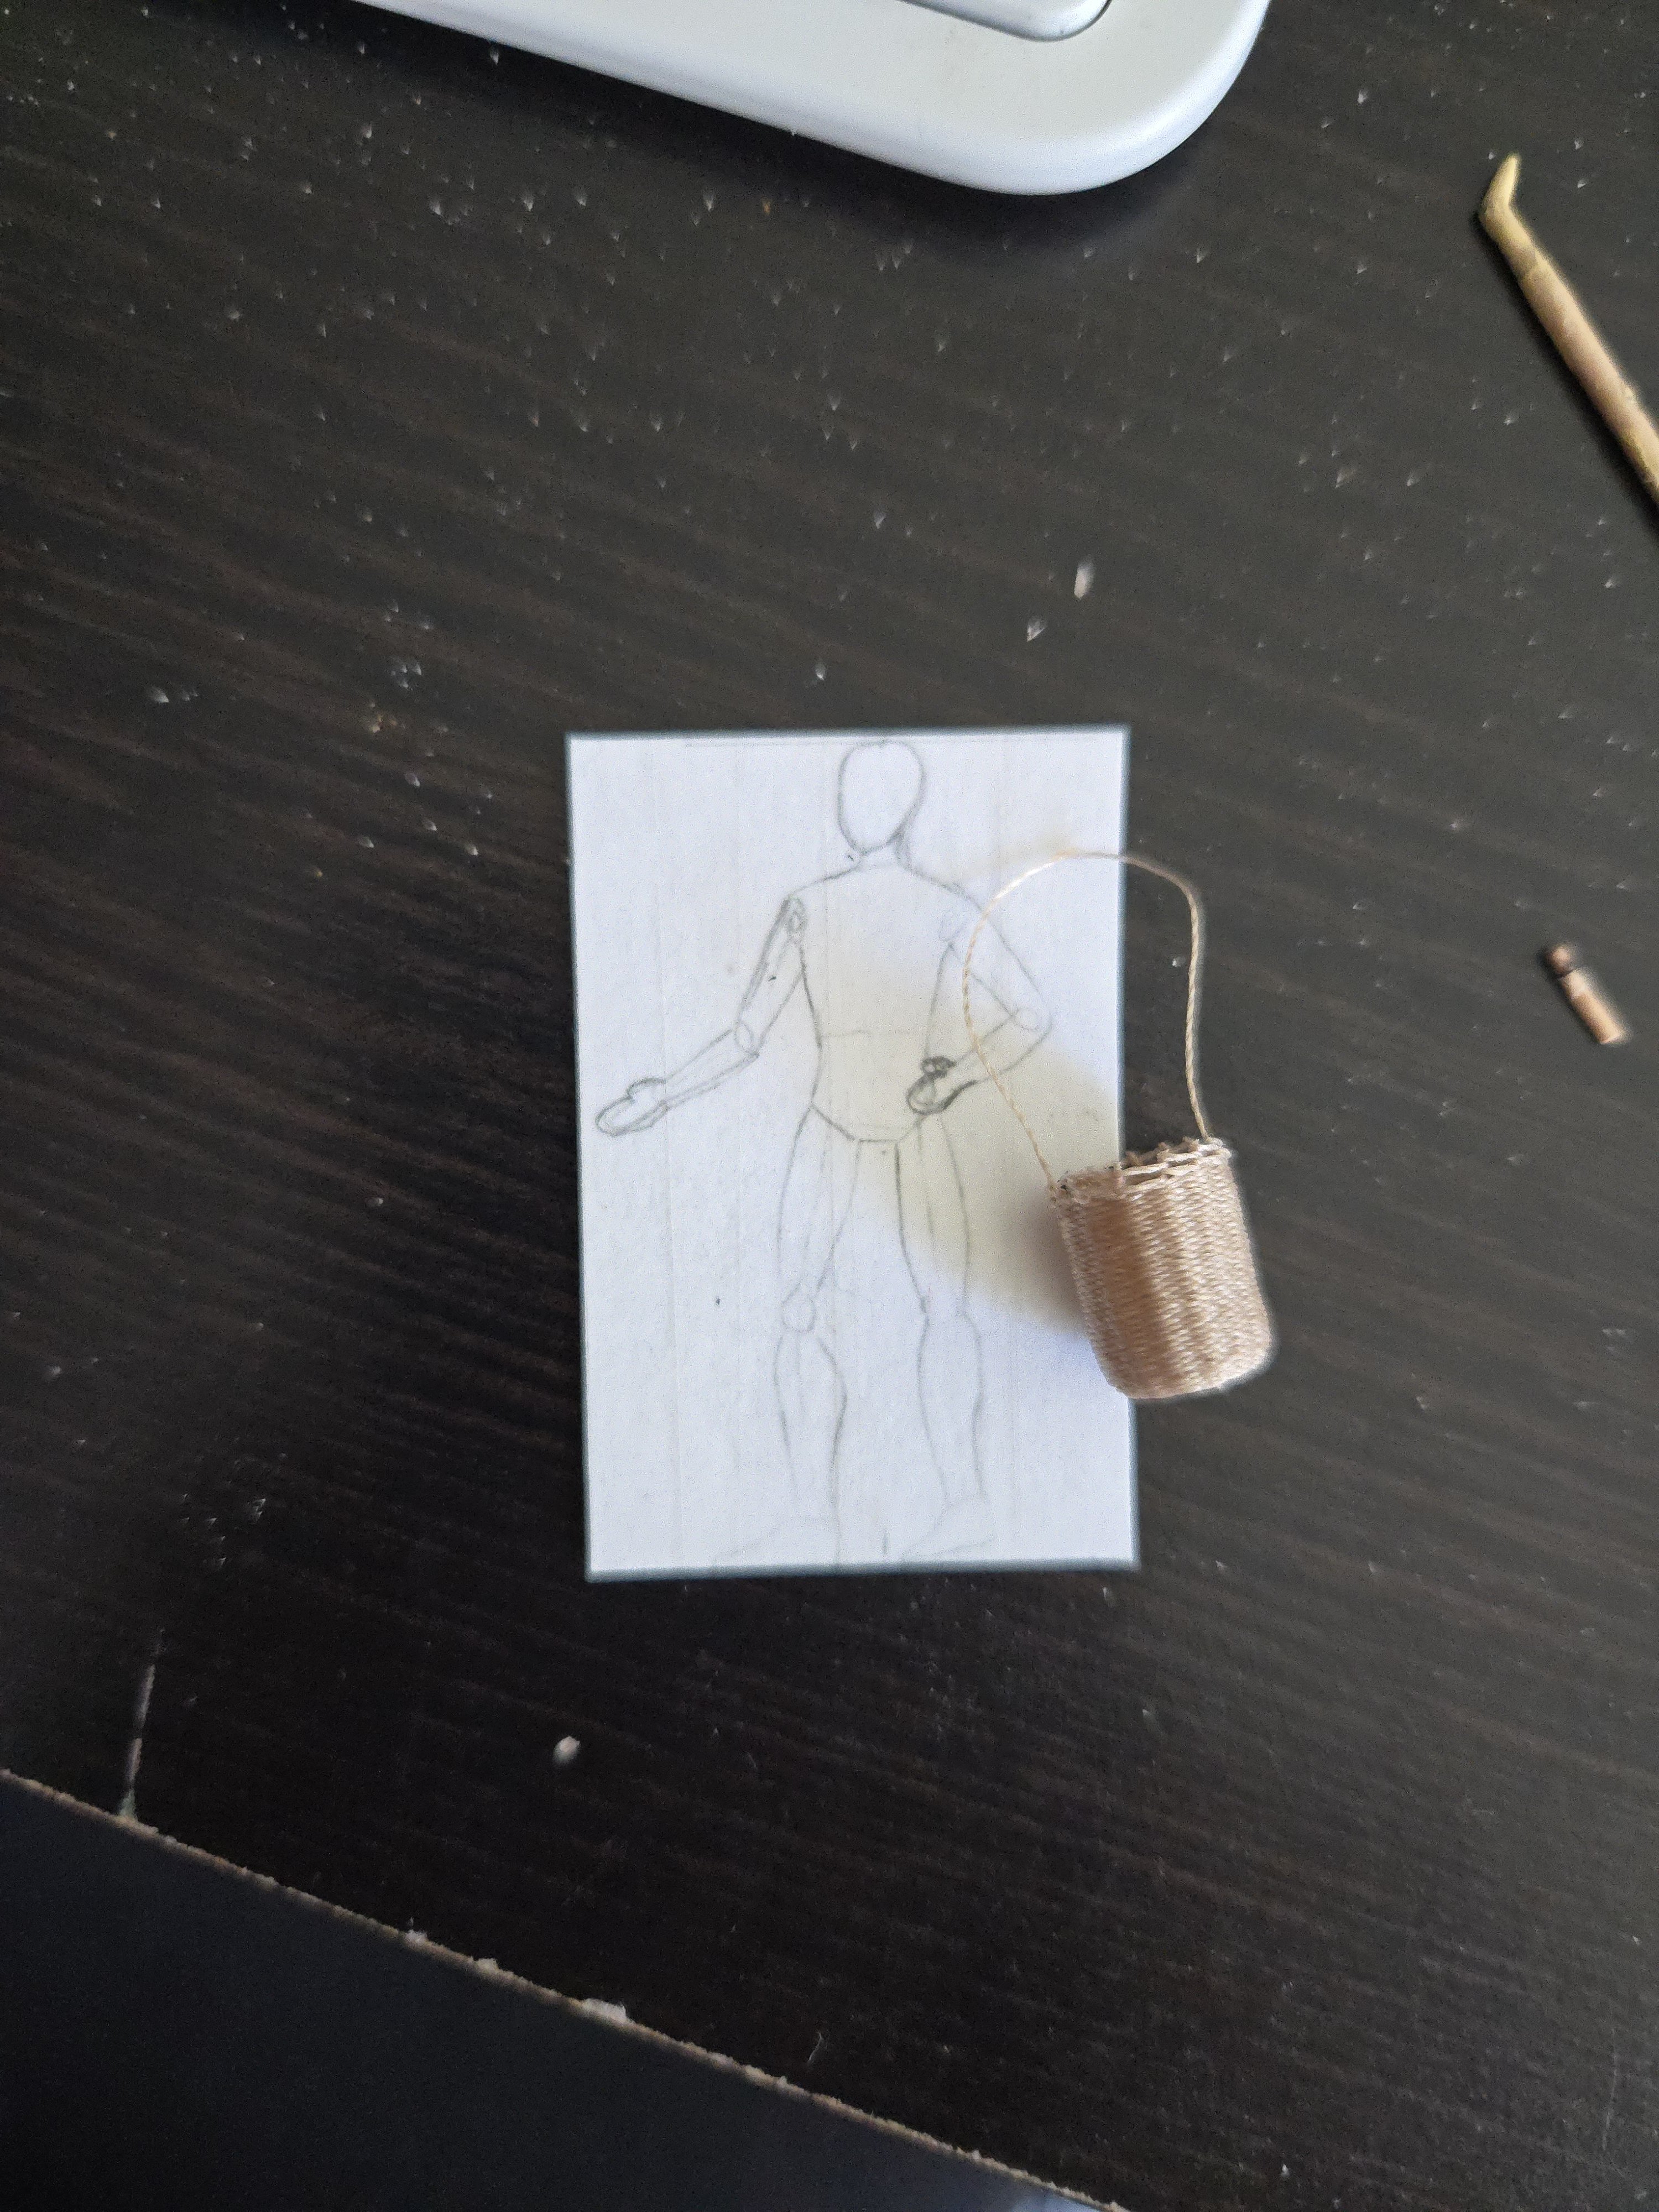
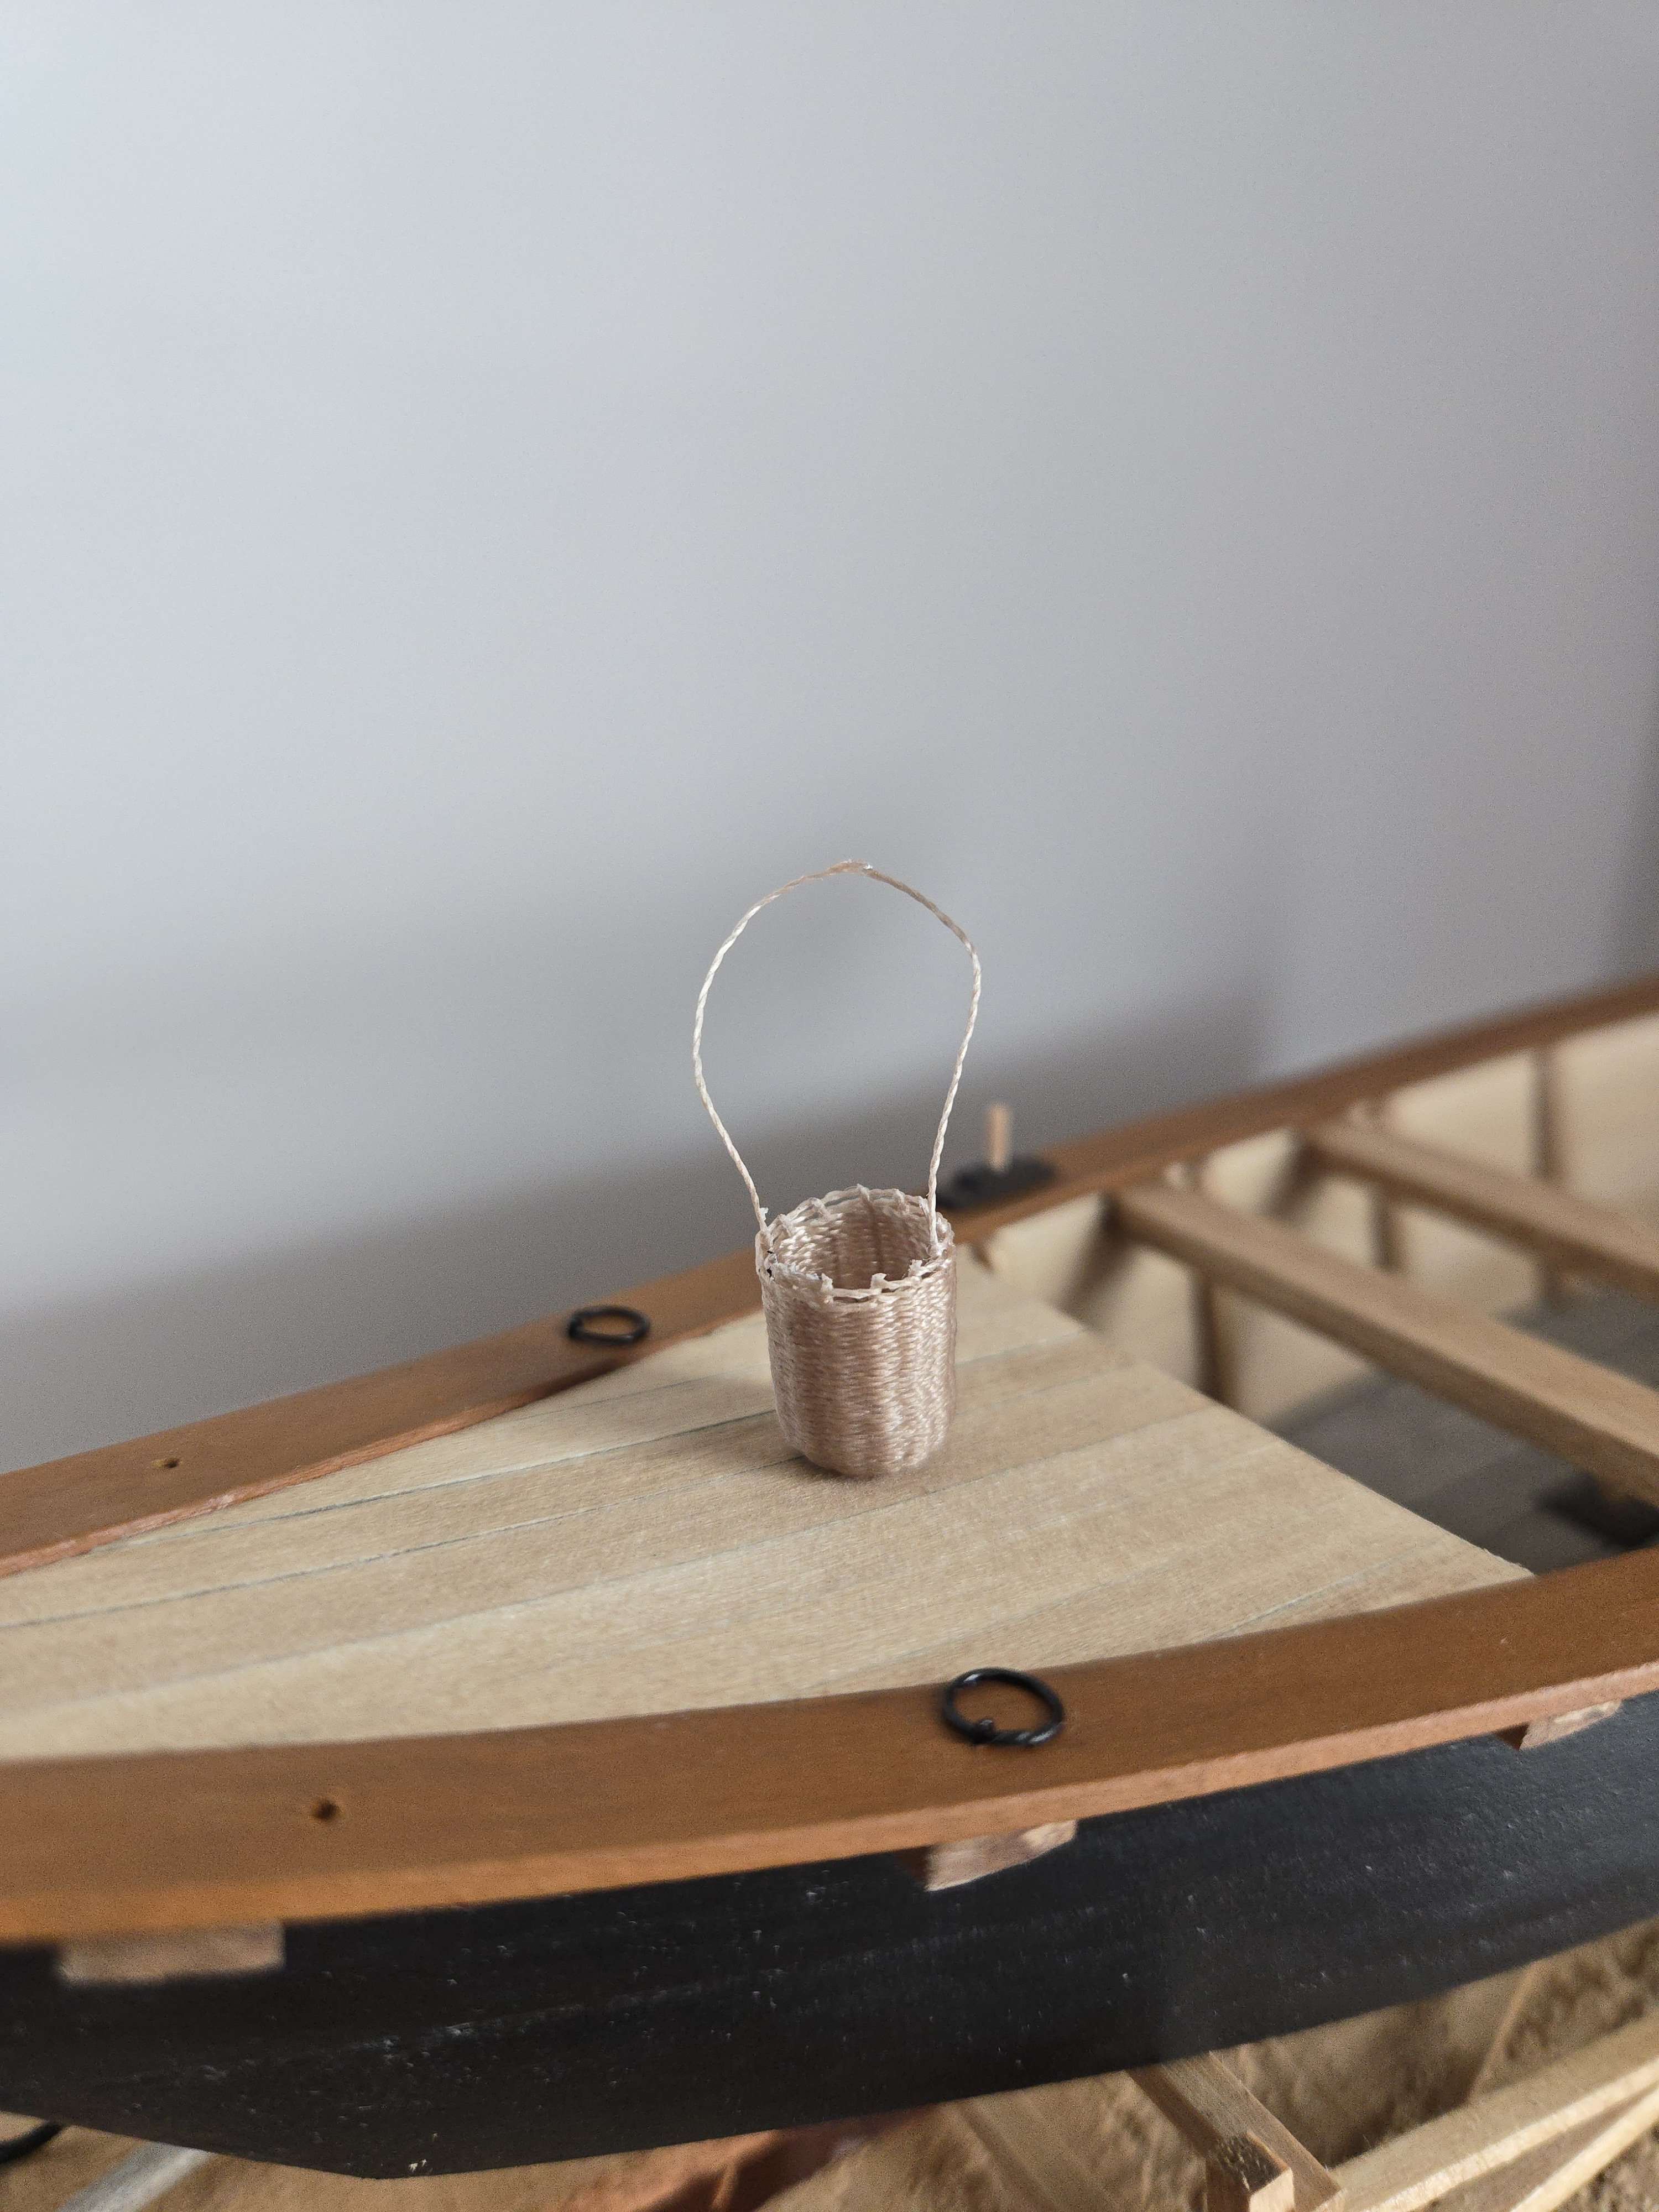
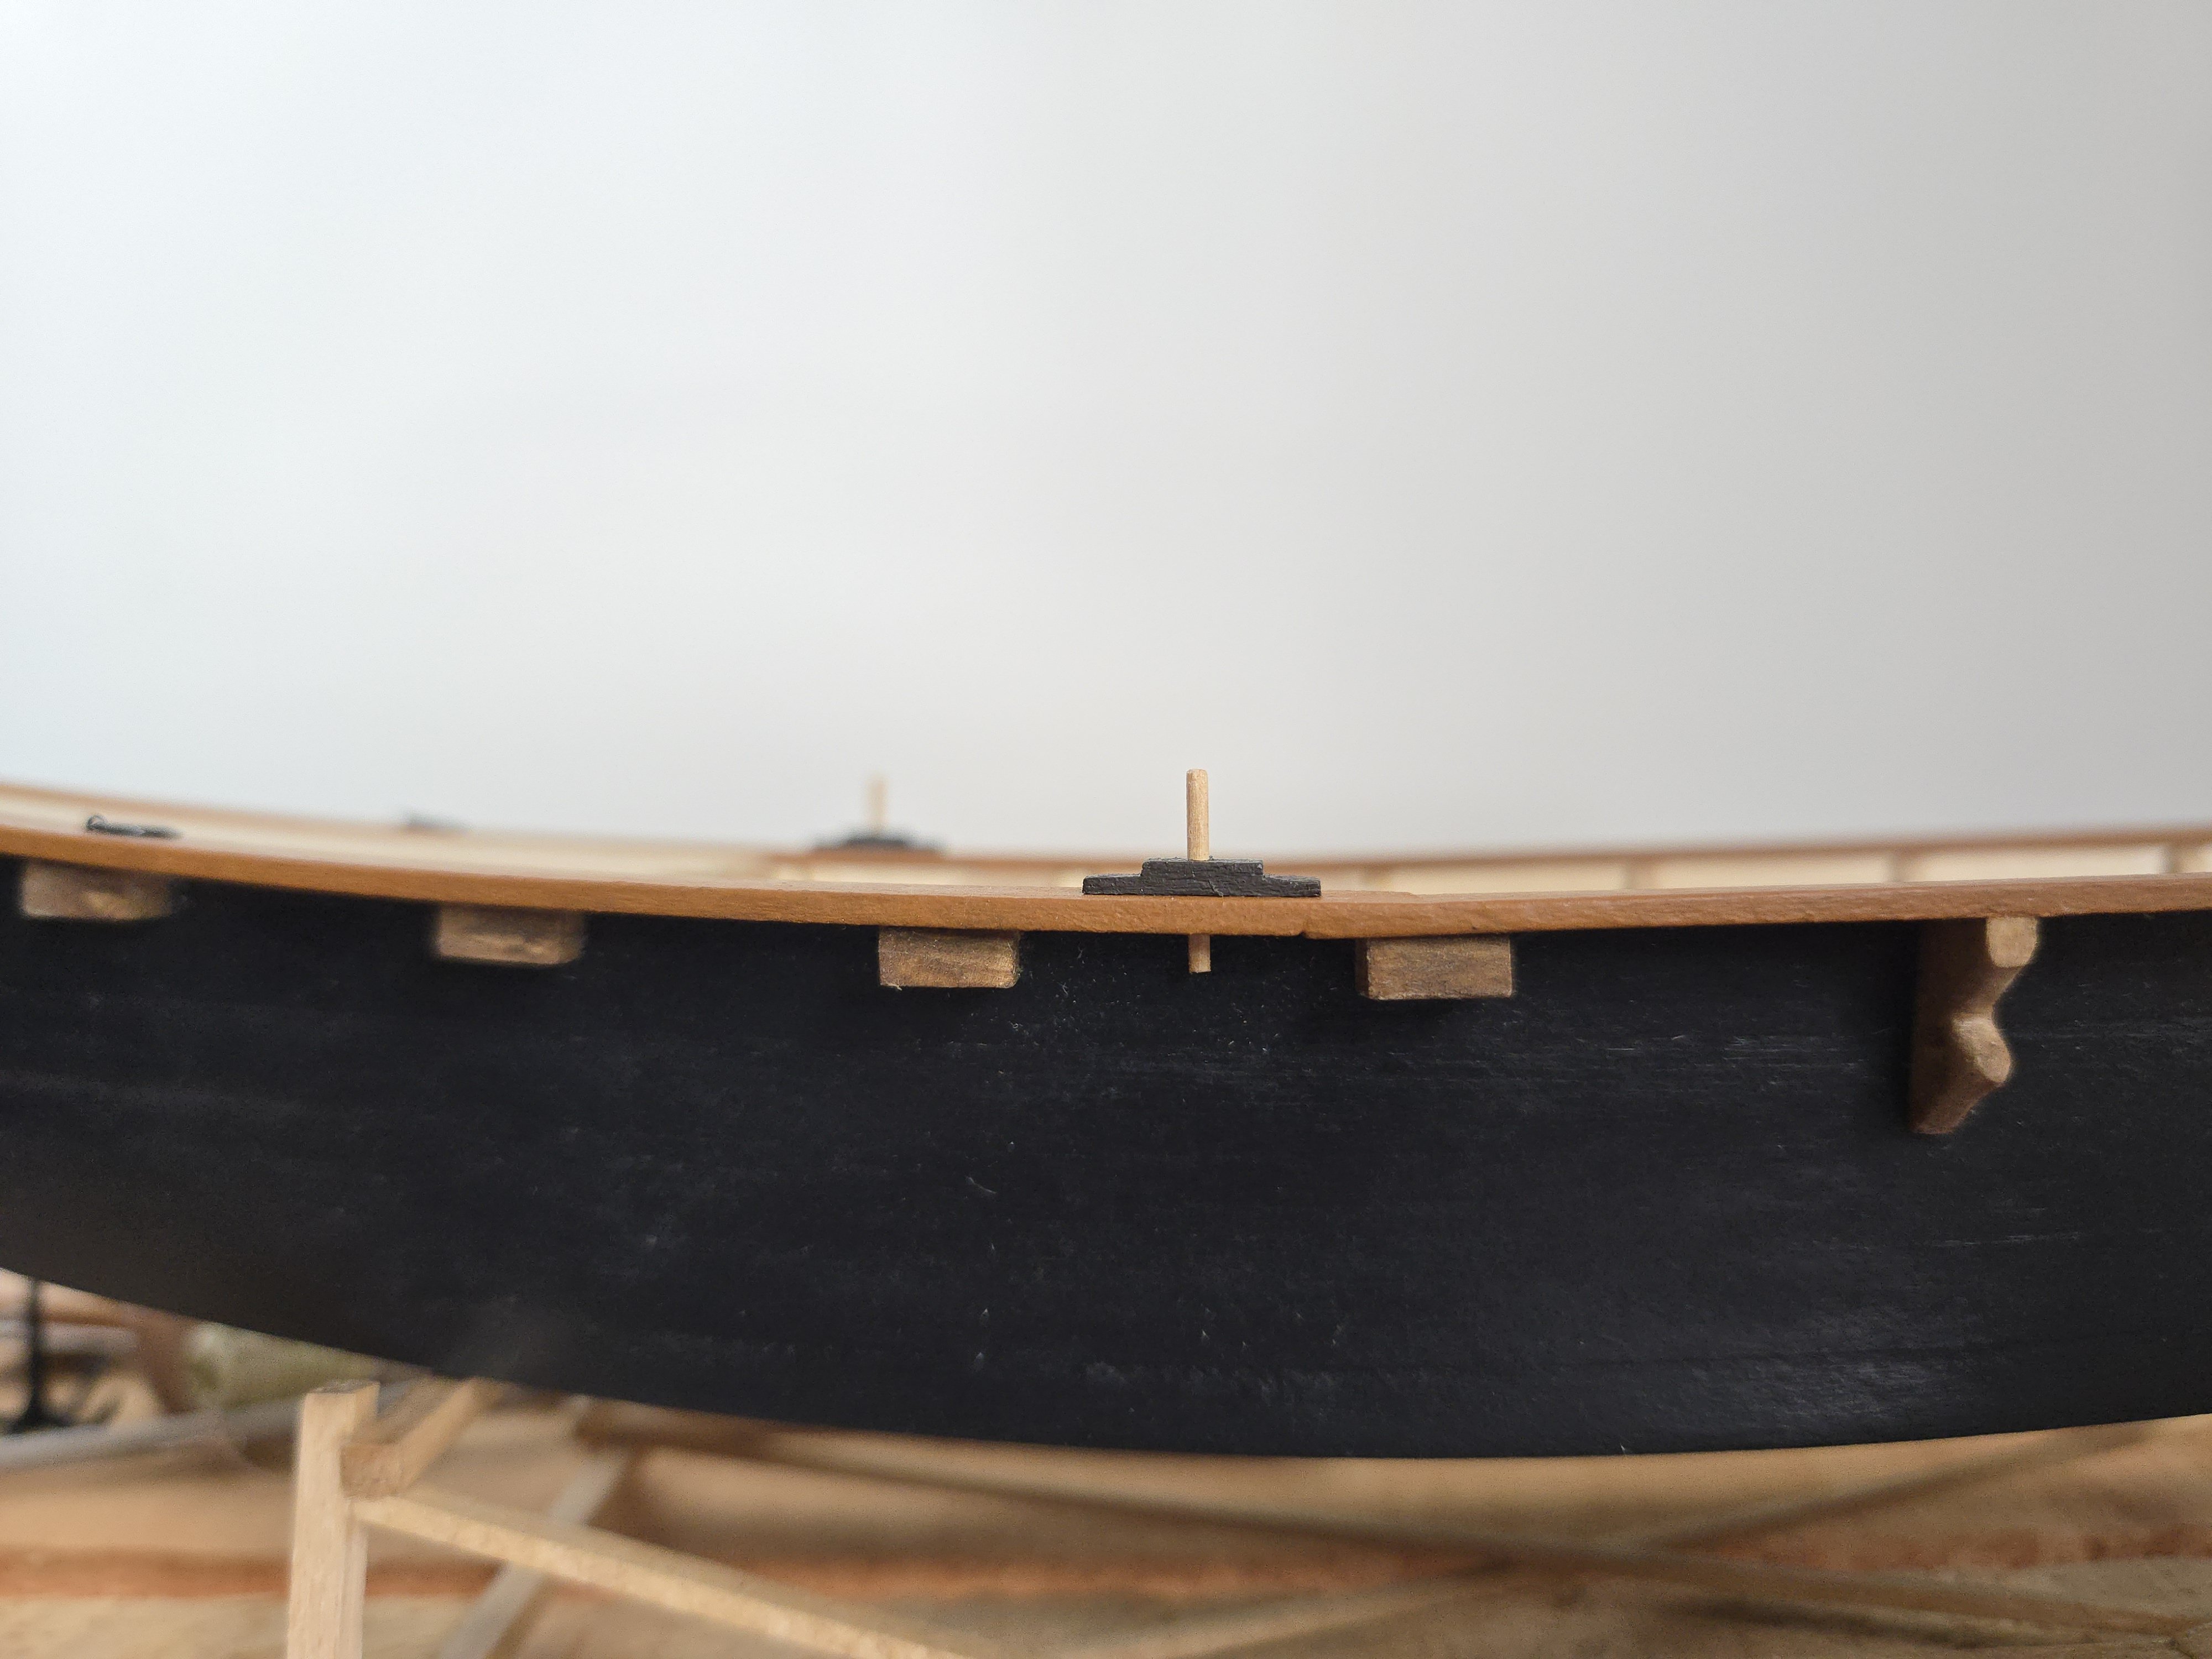
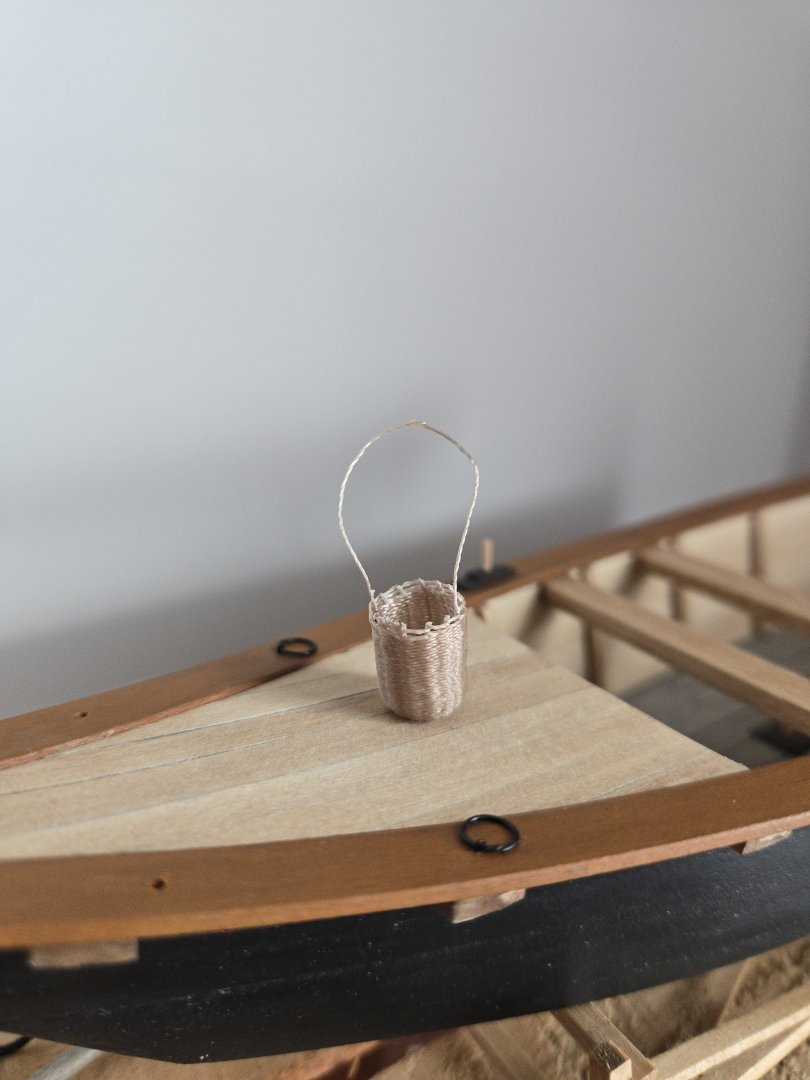
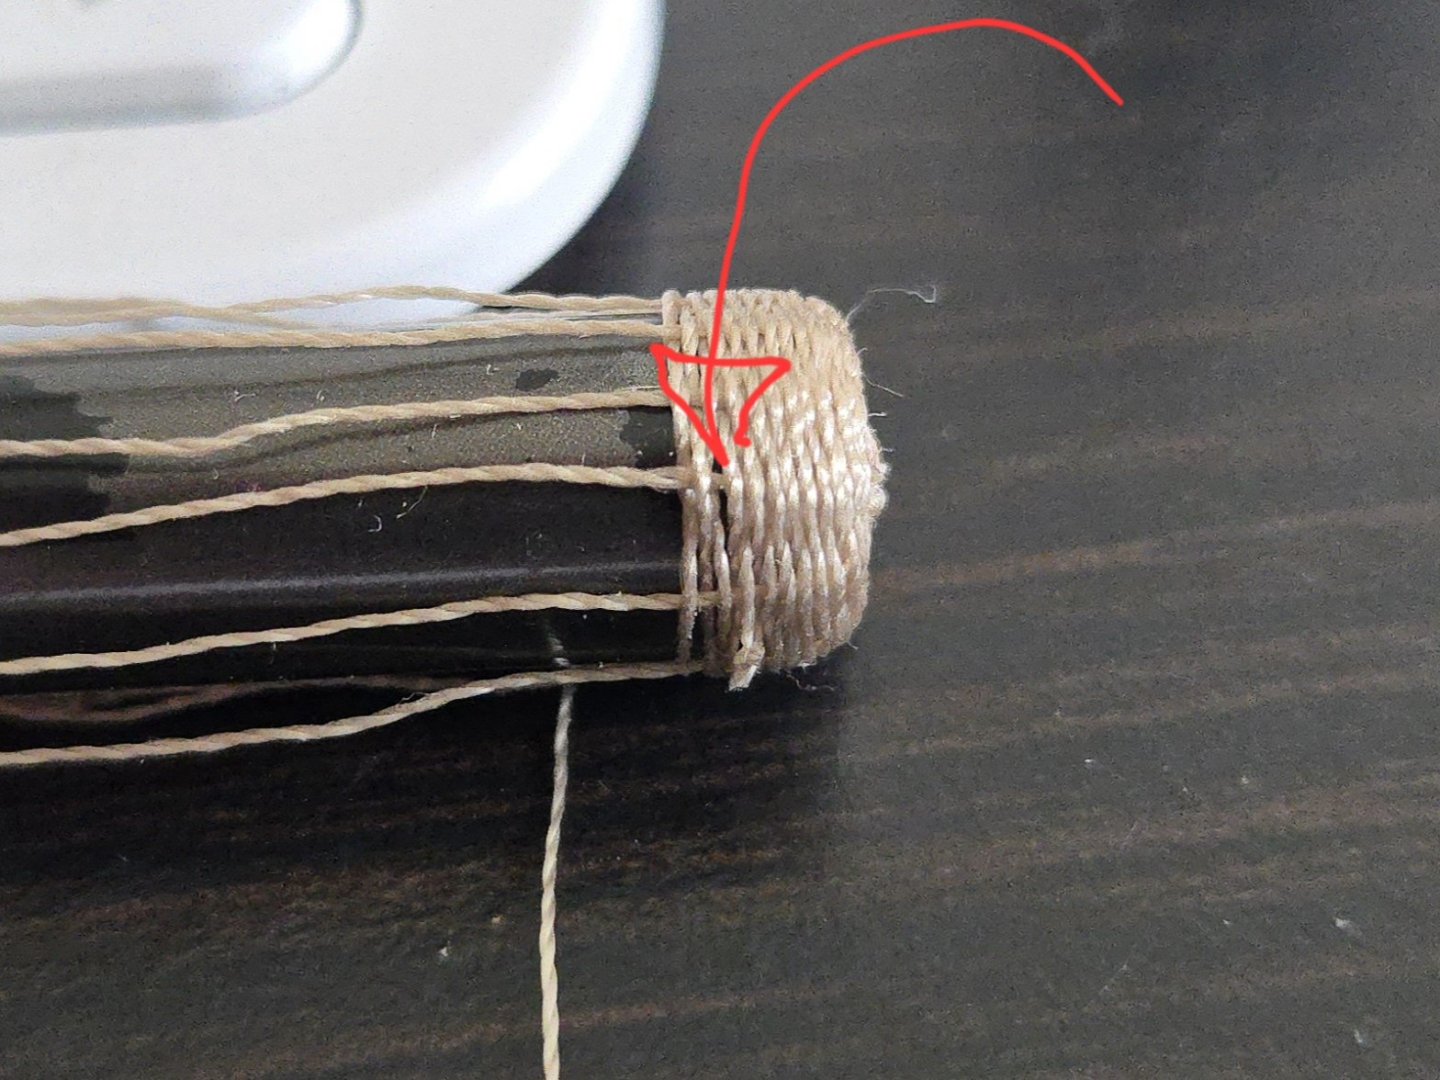
Thanks, all, for the friendly comments! I actually wasn't thrilled with how the last basket turned out, so I decided to make one more. This time I used 0.2mm jewelry nylon, the same as I used for the net lines, as it was a bit thicker than fly tying thread and so the weave would hopefully show up better. Overall it worked fairly well. One challenge with the nylon thread was that, at times, the weave thread caught in the fibers of the stake threads. This caused the small gap below. For this reason, I recommend doing each layer of the weave farther down the stakes away from the basket, and then pushing the weave tight after each layer, so you can see better whether it caught anything. Also, because the thread is made of separate strands spun together, it was possible to make a splice instead of a knot when I needed to join threads. Following Wefalck's Botter build (an excellent example of a woven net, at a much smaller scale than this), I added a couple rows of loops at the top. This turned out a bit messy for me, but it worked ok. Many photos show fishermen with a basket slung on their back, so I spliced together two of the stakes to make the sling--it will have to be reshaped with watered down glue to mimic the effect of gravity once it's placed in the final position. Overall I'm much happier with this basket than with my previous attempts. I also did some work on the hull. During my move, I had thrown out the half-full bottle of brown paint I used for the rails, only to find that it was no longer sold where I originally bought it. I was finally able to find it again, so I was able to drill some holes in the rail and touch up the paint. First, as I mentioned I was planning to do earlier, I drilled holes in the rails for the thole pins, removed the original short thole pins from their supports with alcohol, and then added new, longer thole pins that go through the rail. It's a minor difference, but I think it helps bring the hull to life. Several photos also show holes through the rail toward the bow, sometimes with a rope looped through them to serve as a tie-down point for the fore sheet, so I added these extra holes as well. The model is really coming together now. My next steps will be for the anchor assembly and the yard. I need to make a final decision about whether to include the sail fully set or not--I'm leaning towards not, as I haven't been all that pleased with the sails I've made so far.


- 286 replies
-
- 11
-
-
-
Hi Chuck, I don't think there's a reason for the line. My guess is that it's a relic from an earlier design phase, like the hash marks on the frames that look like they mark out the planking bands. Perhaps an earlier version of the kit used a large "false keel" spine and the vertical line was meant to help with alignment. Toni Levine, who designed the kit, would know more than me, though. In any case, I wouldn't worry about the line, as it doesn't serve any purpose I can discern. If you start a build log, people would love to follow along with your build!
- 82 replies
-
- 1
-
-
- half hull planking project
- half hull
- (and 2 more)
-
Congratulations, excellent job!
-
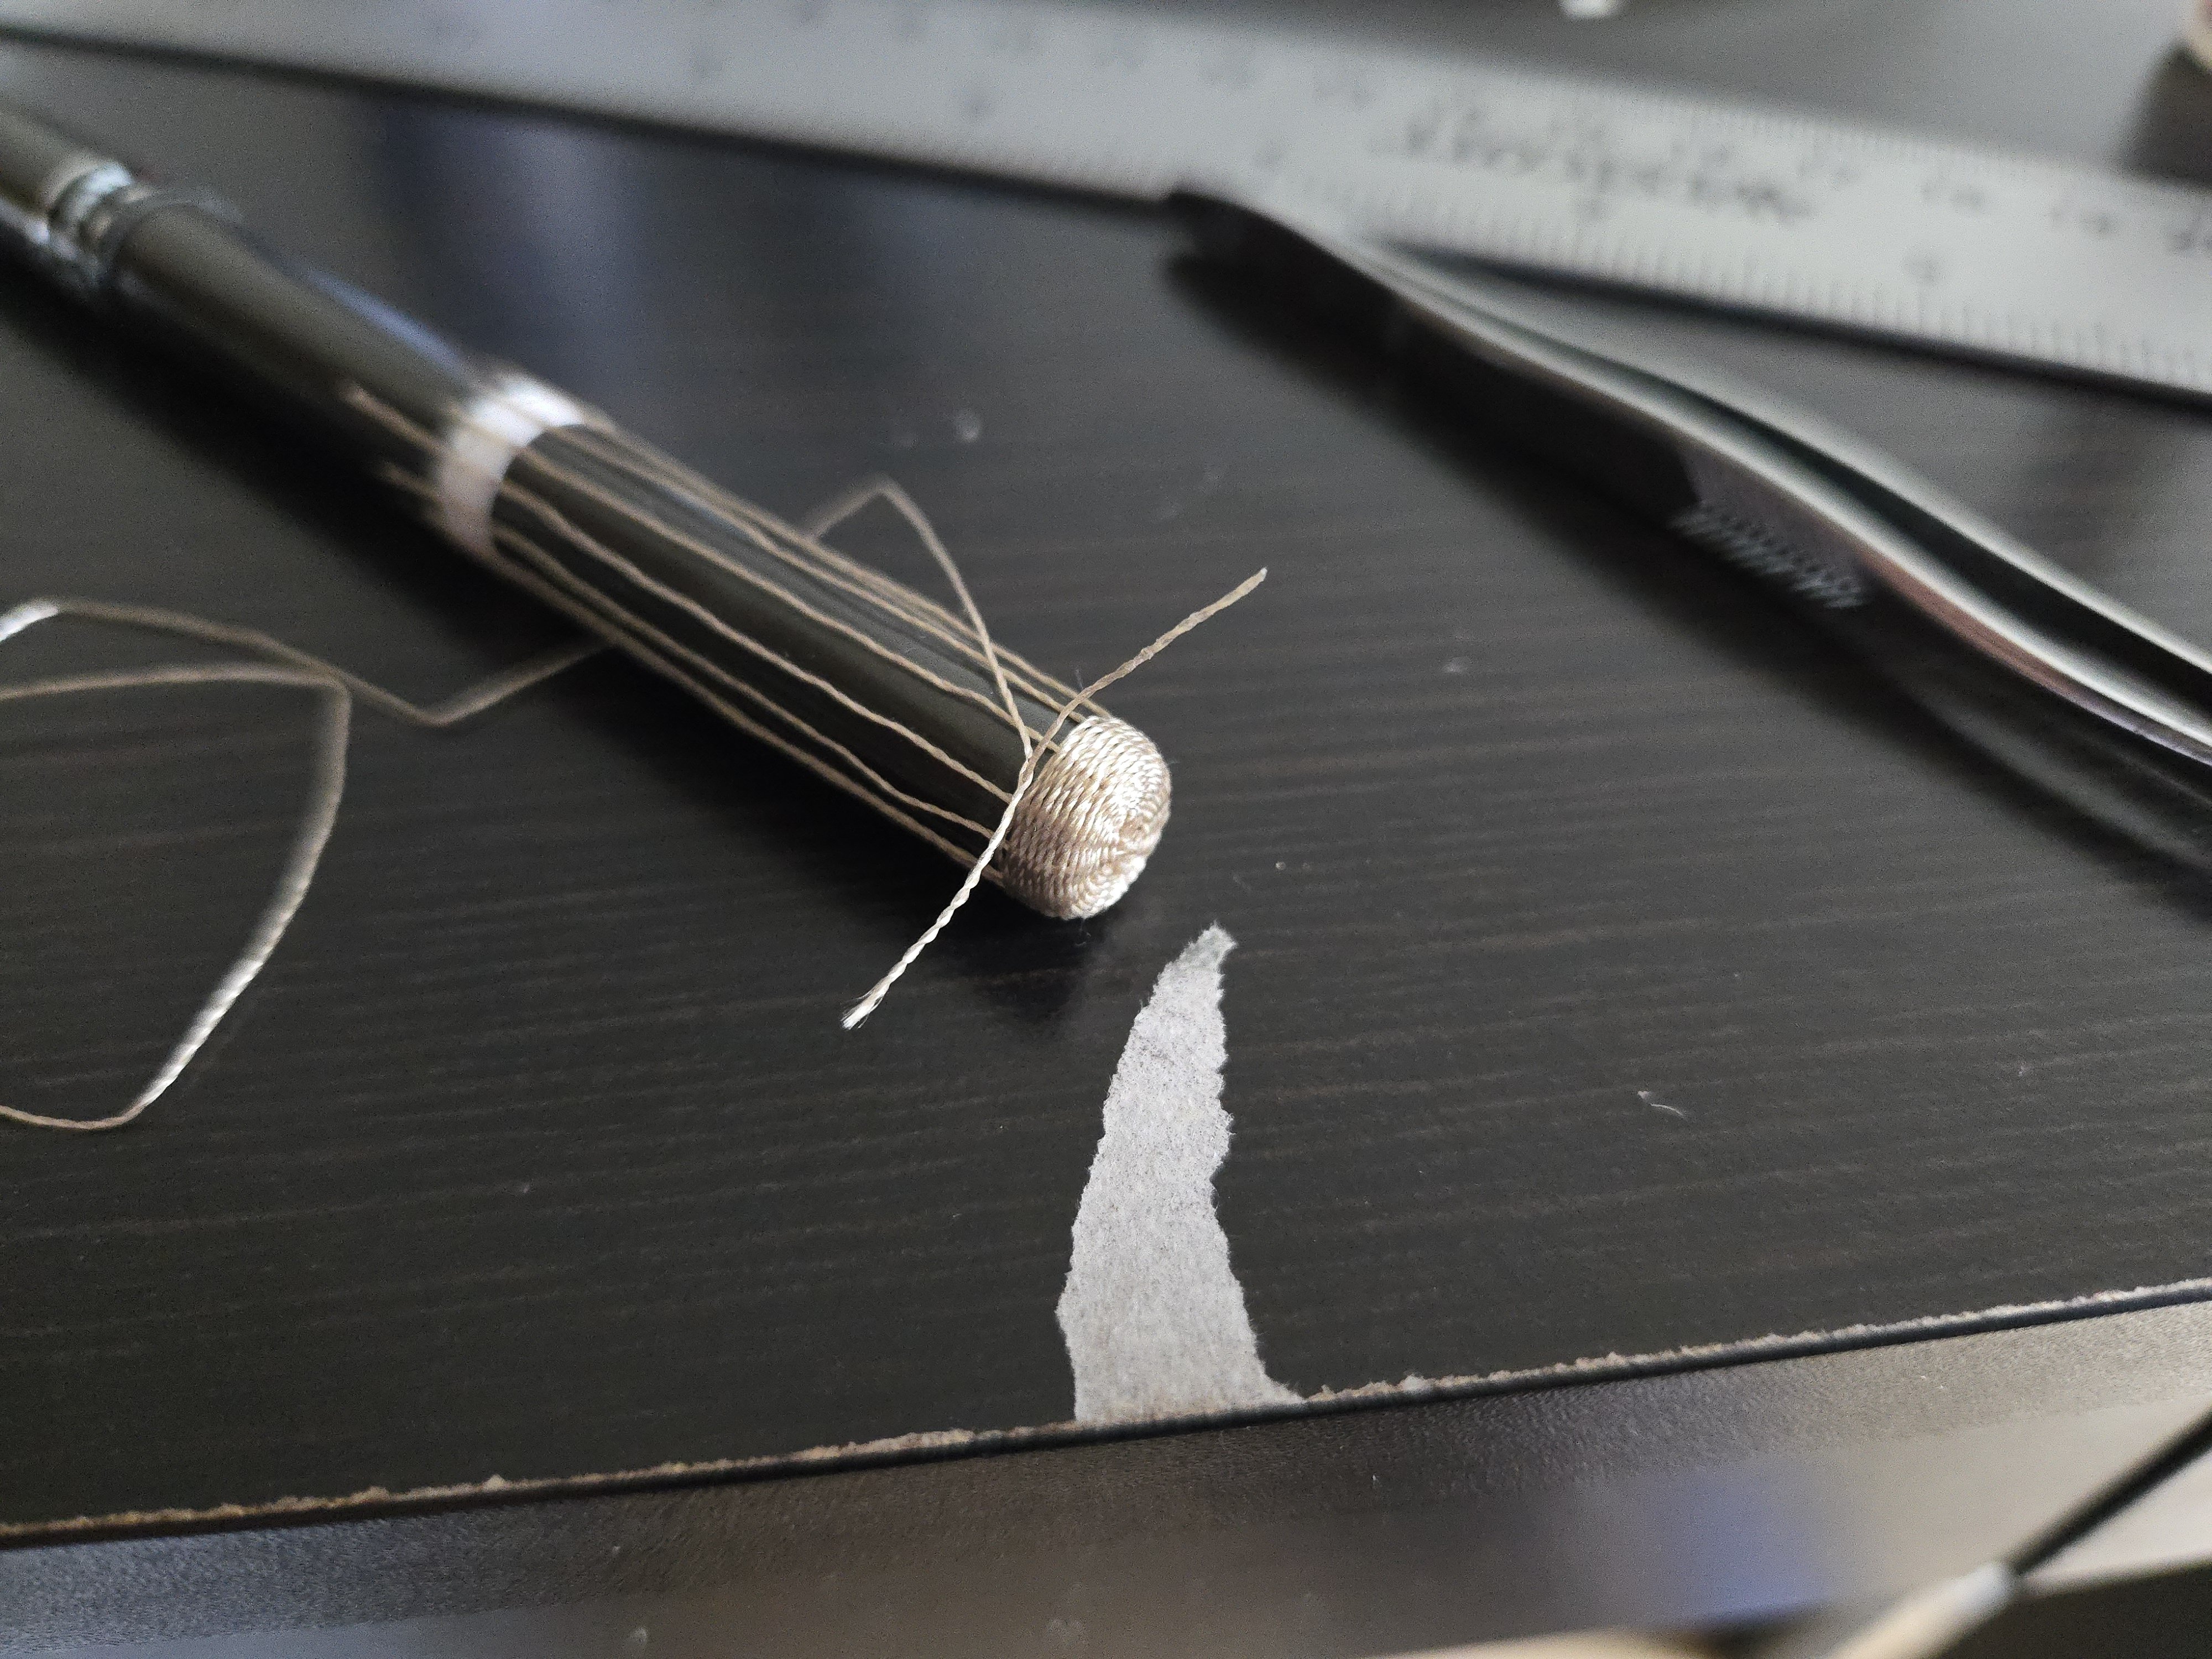
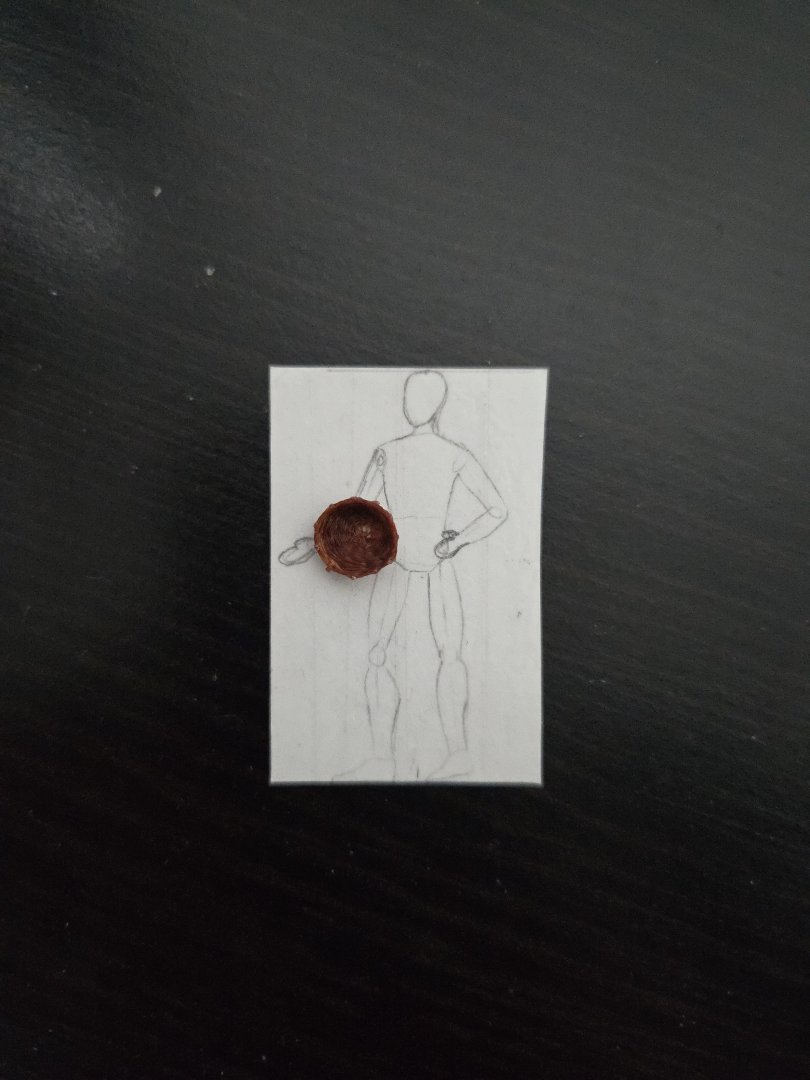
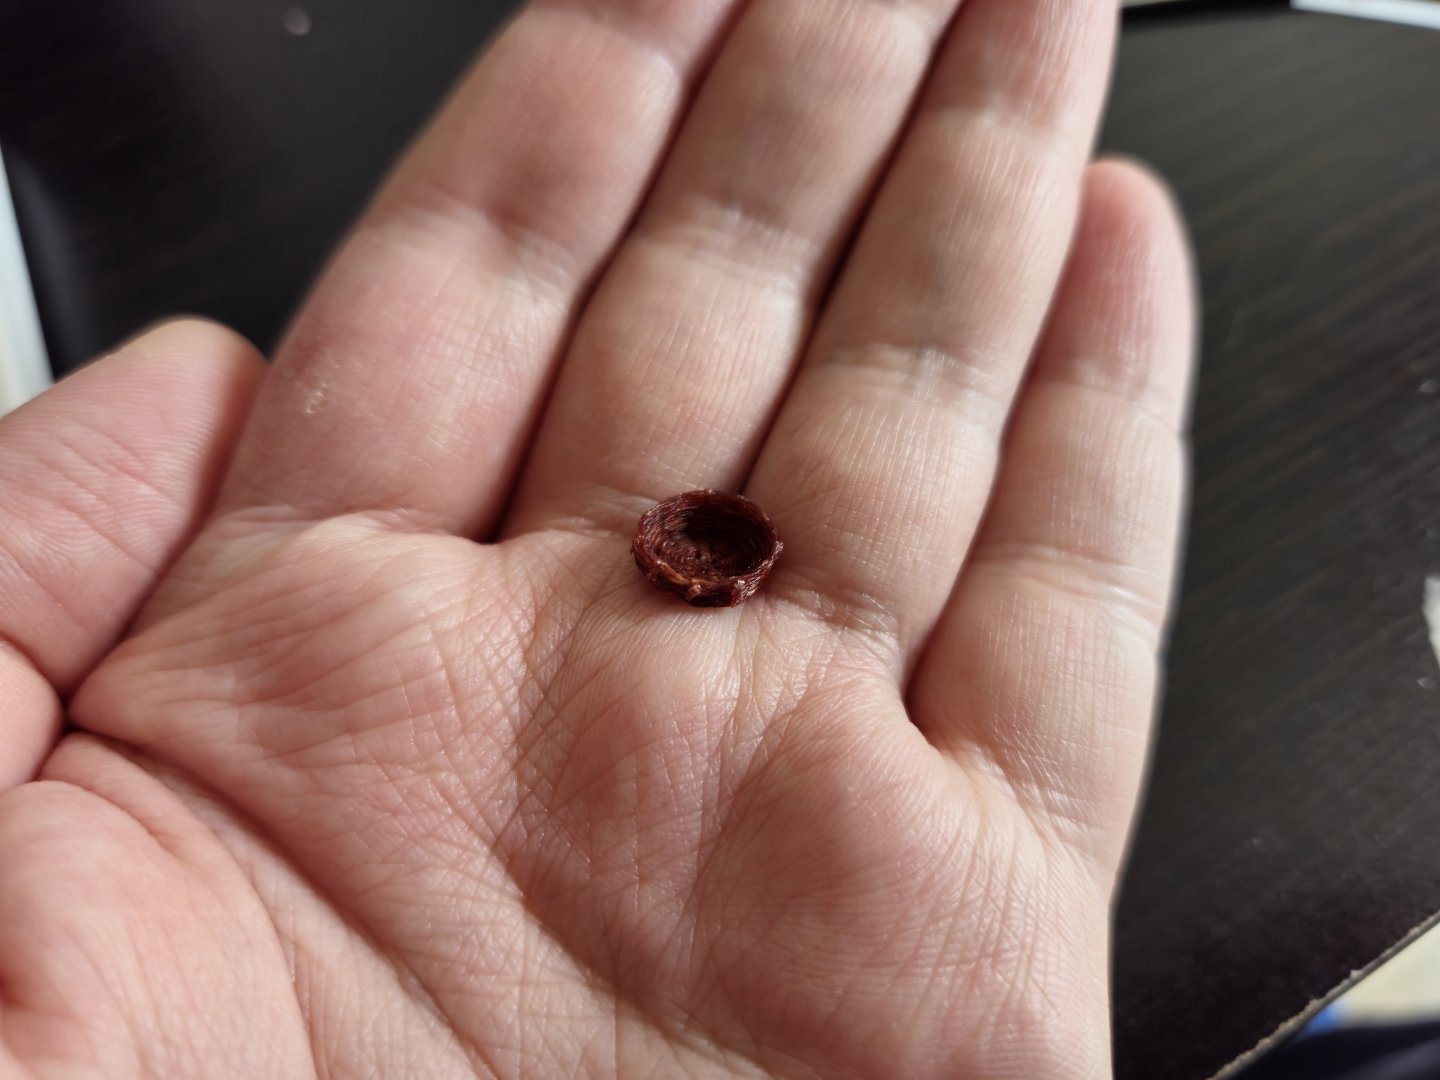
Further work on the fishing gear. I wanted to give another shot at a woven basket, this time using finer material. I thought that a good goal would be something like this rather small, wide basket--nearly a tray--which in this photo is full of charales. Source: https://www.mexicoenfotos.com/antiguas/jalisco/chapala/pescador-MX13895529520113 In order to make a finer weave, I used fly-tying thread. I used dark brown thread, both because some baskets (though not the one above) look rather dark in the photos, and because it's the thickest fly-tying thread I have. Once again I made a simple jig around a permanent marker, using 11 stakes. As I'm finding, getting the weave started is the hardest part. On this one, there was a bit of a gap at the start caused by the super glue I used to secure the initial knot preventing the thread from neatly curving. Once you get going, it's just tedious, but not particularly difficult. I did not do anything fancy around the edge of the basket, although in hindsight that would have added some interest. I finished the basket with some matte varnish and folded over the ends of the stakes. The result is a bit misshapen, and unfortunately all the details of the weave really blend together because it's quite dark and tiny. In hindsight, a lighter color thread would have been better. For his Botter build, Wefalck used what appears to have been a thicker thread for the stakes. Doing so would have perhaps given more definition to this basket's weave. Although not wholly satisfactory, this is going to be placed somewhere in the hull, partly obscured by either the rancho or the crossbeams, so I can live with these issues.


- 286 replies
-
- 10
-
-
-
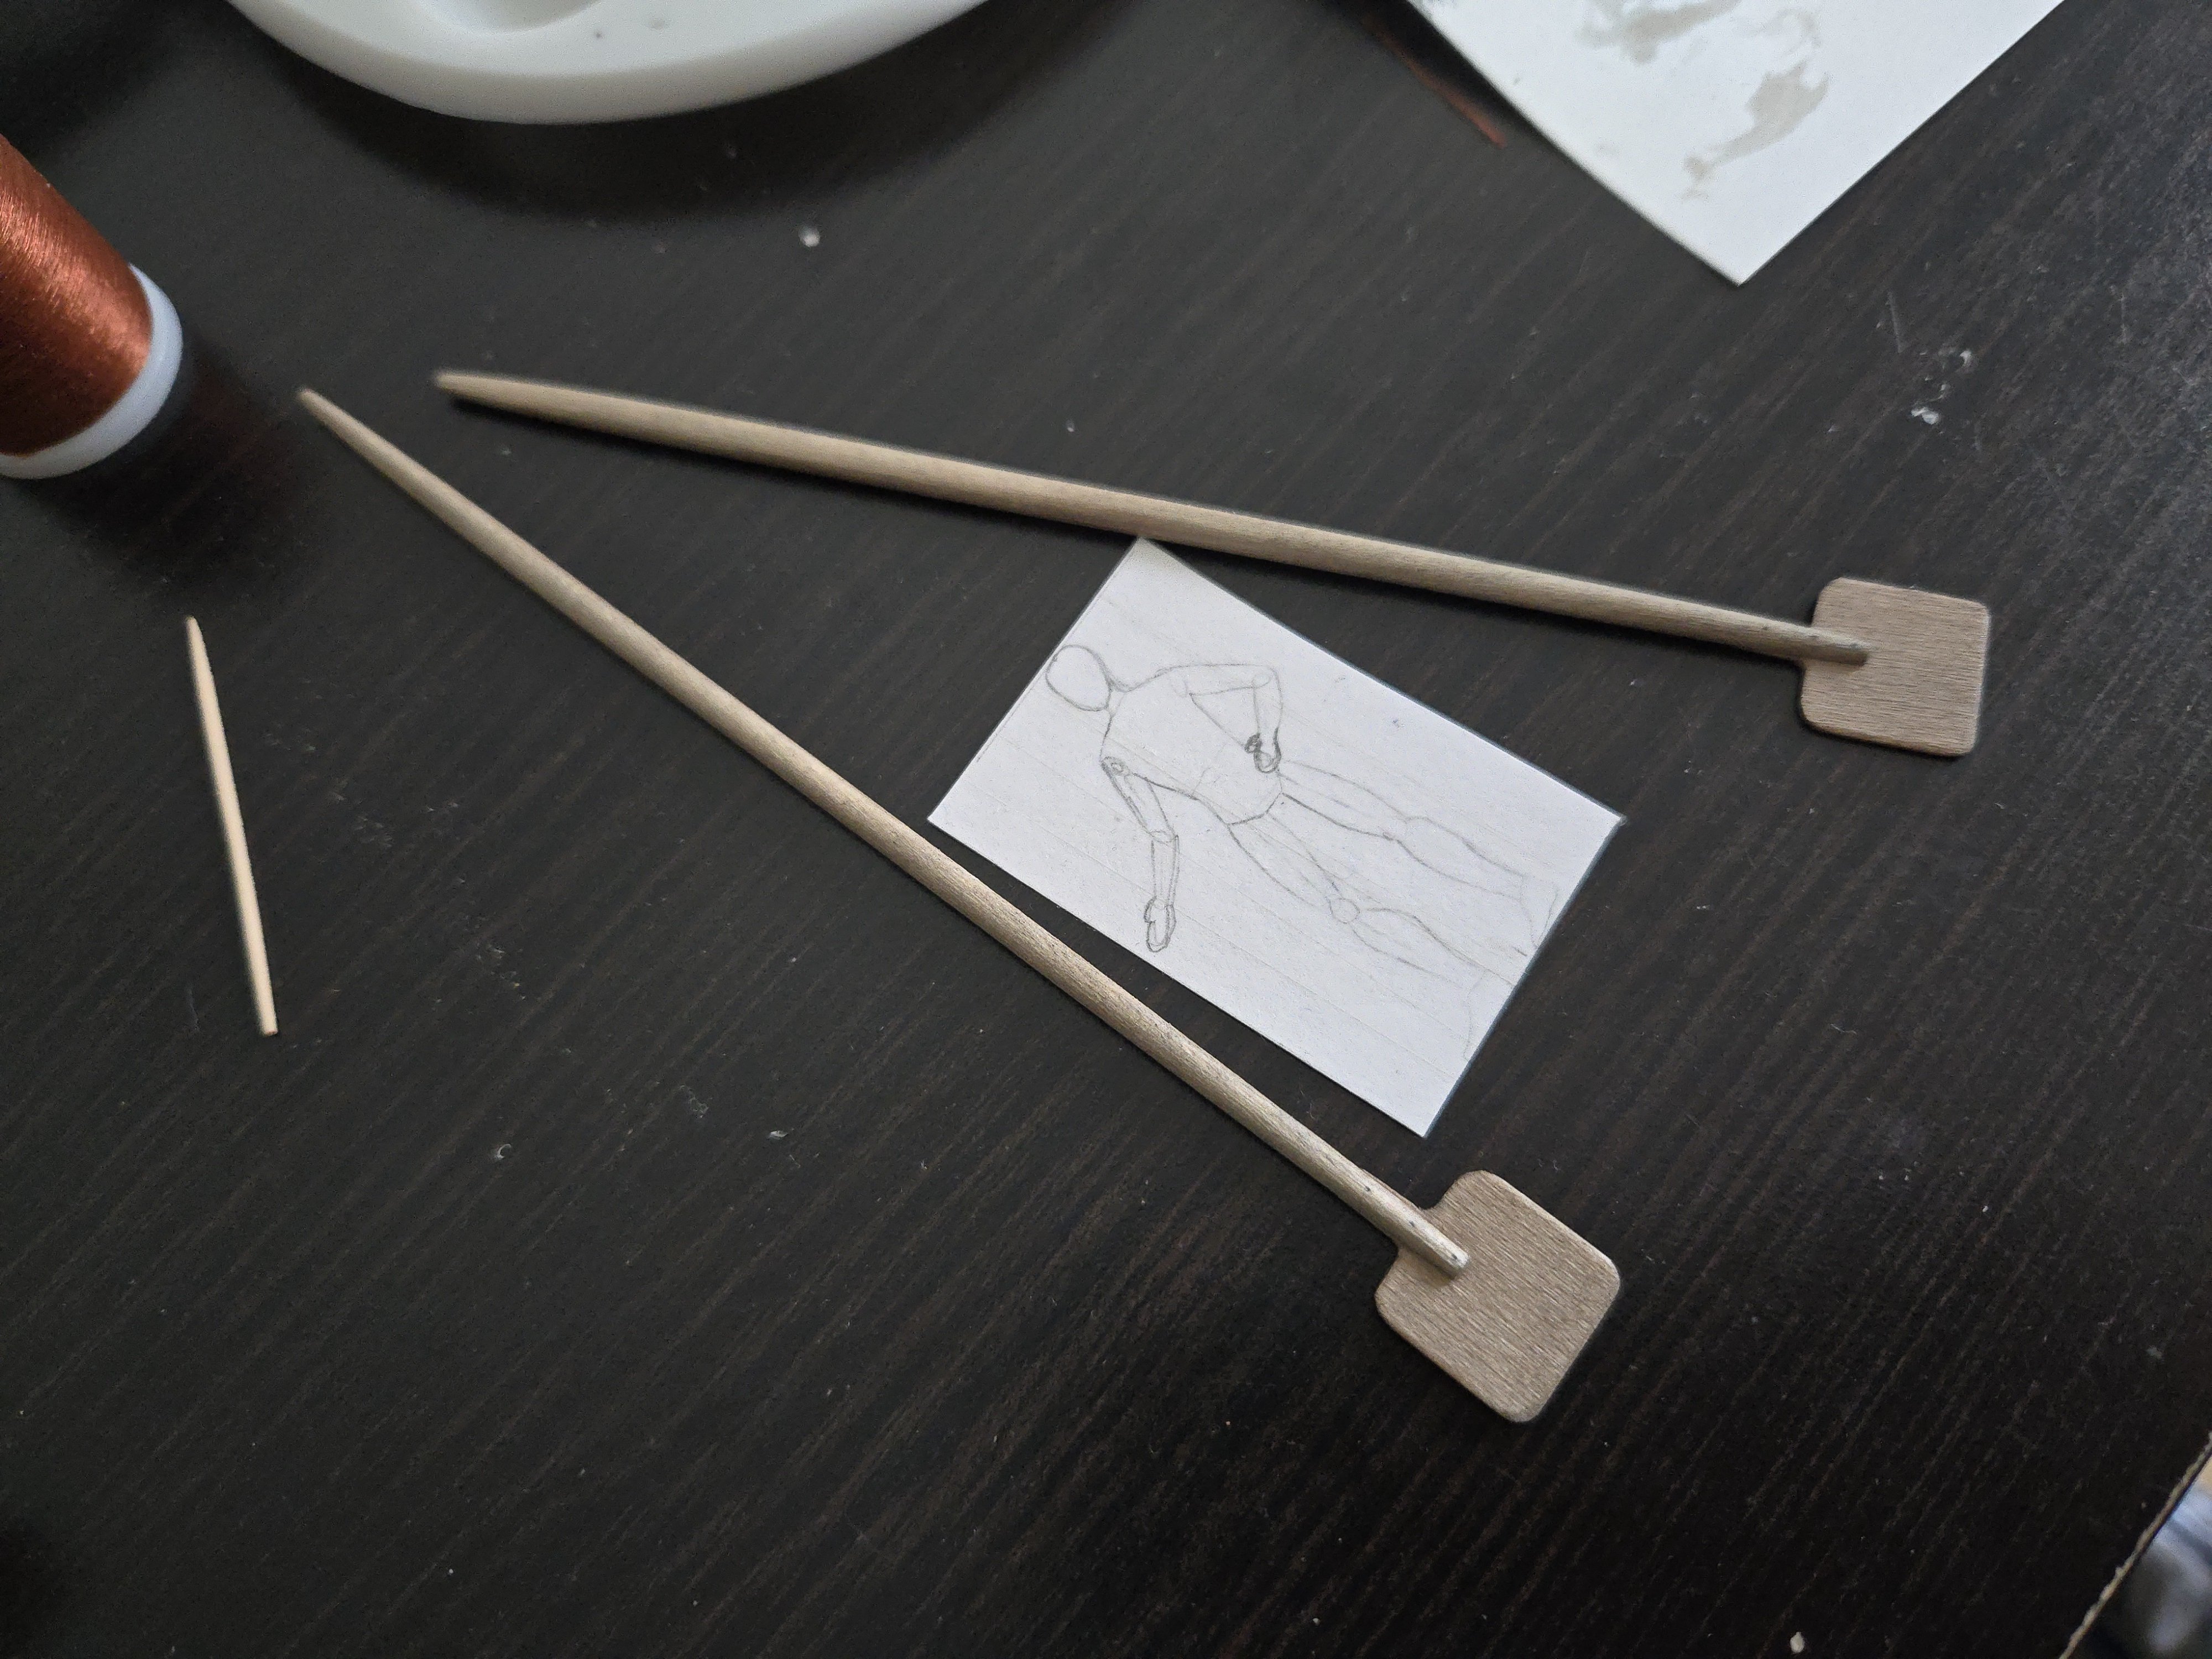
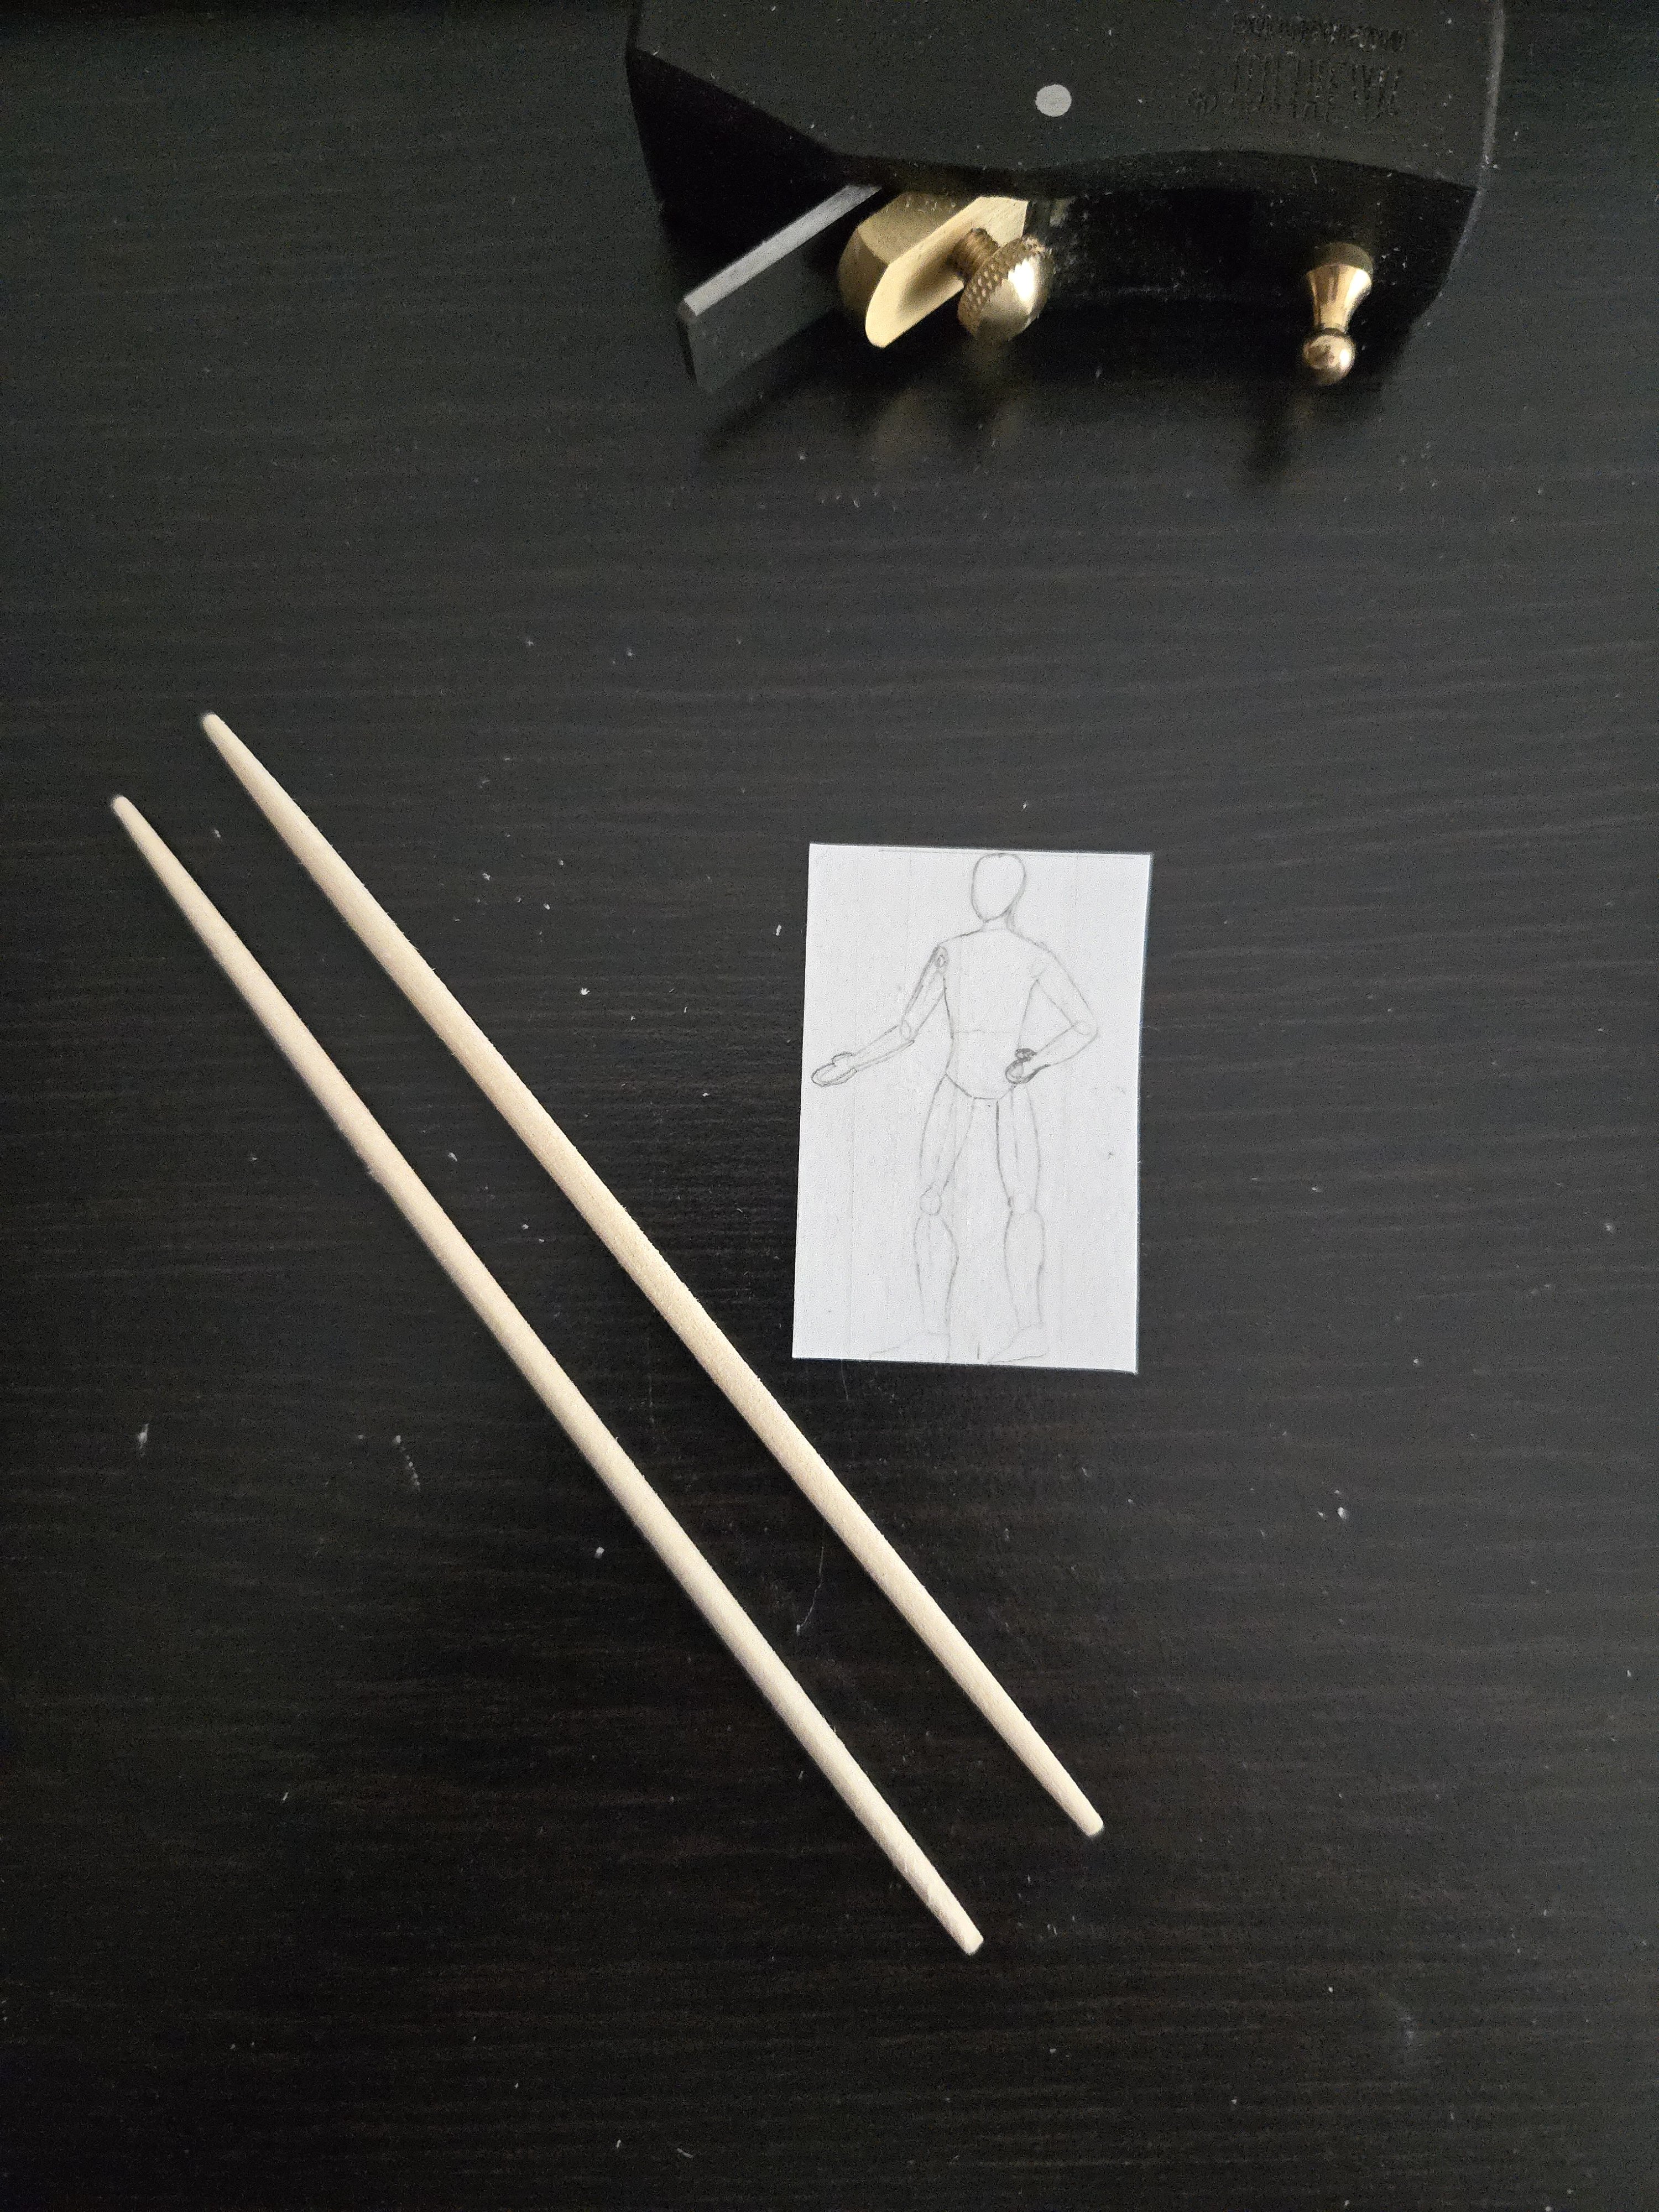
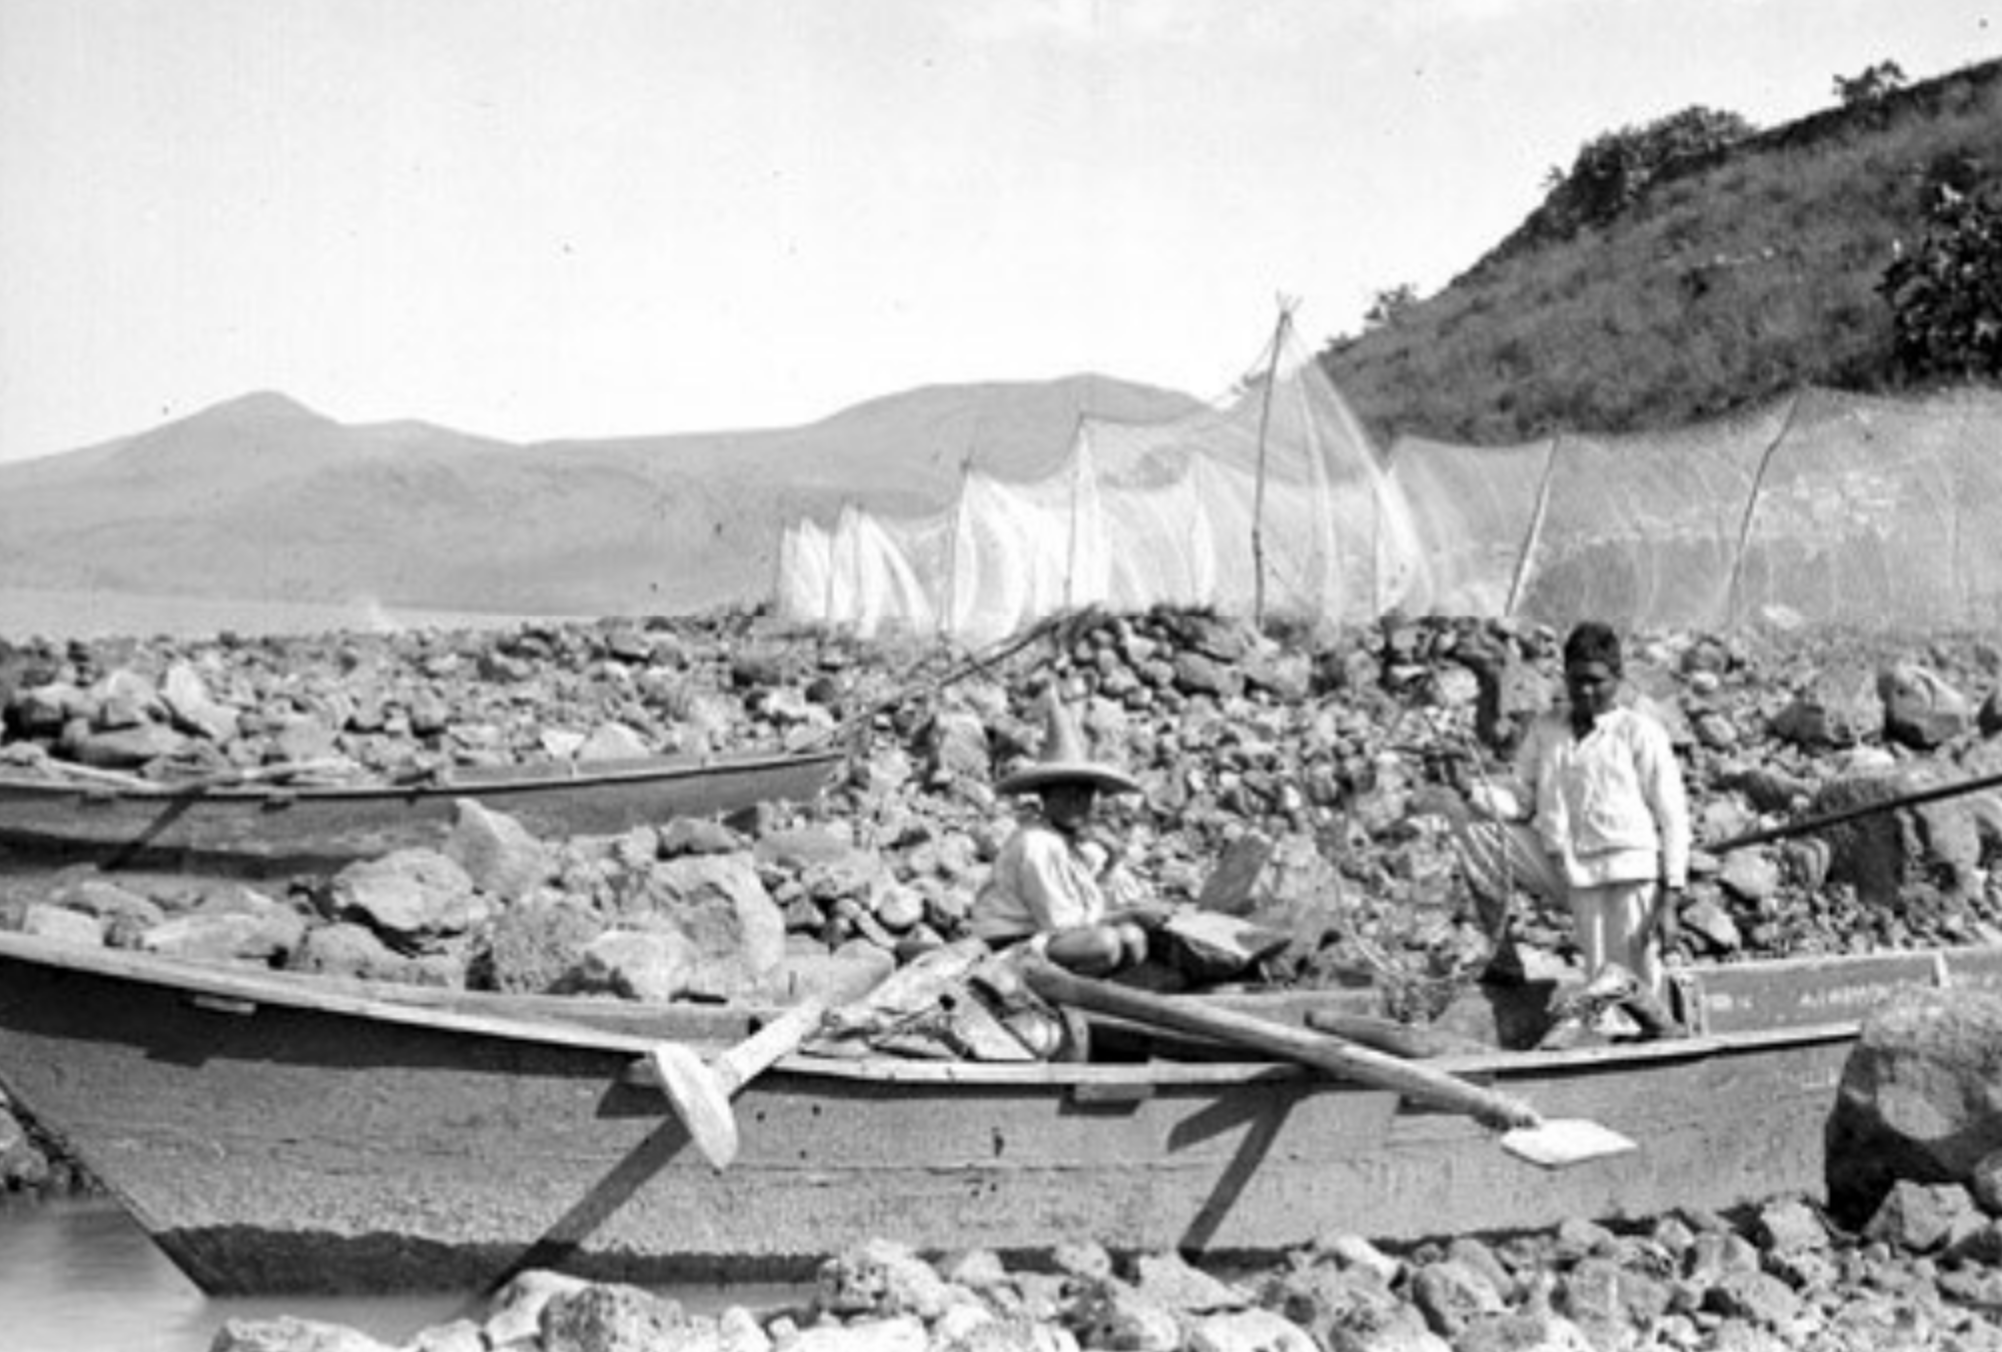
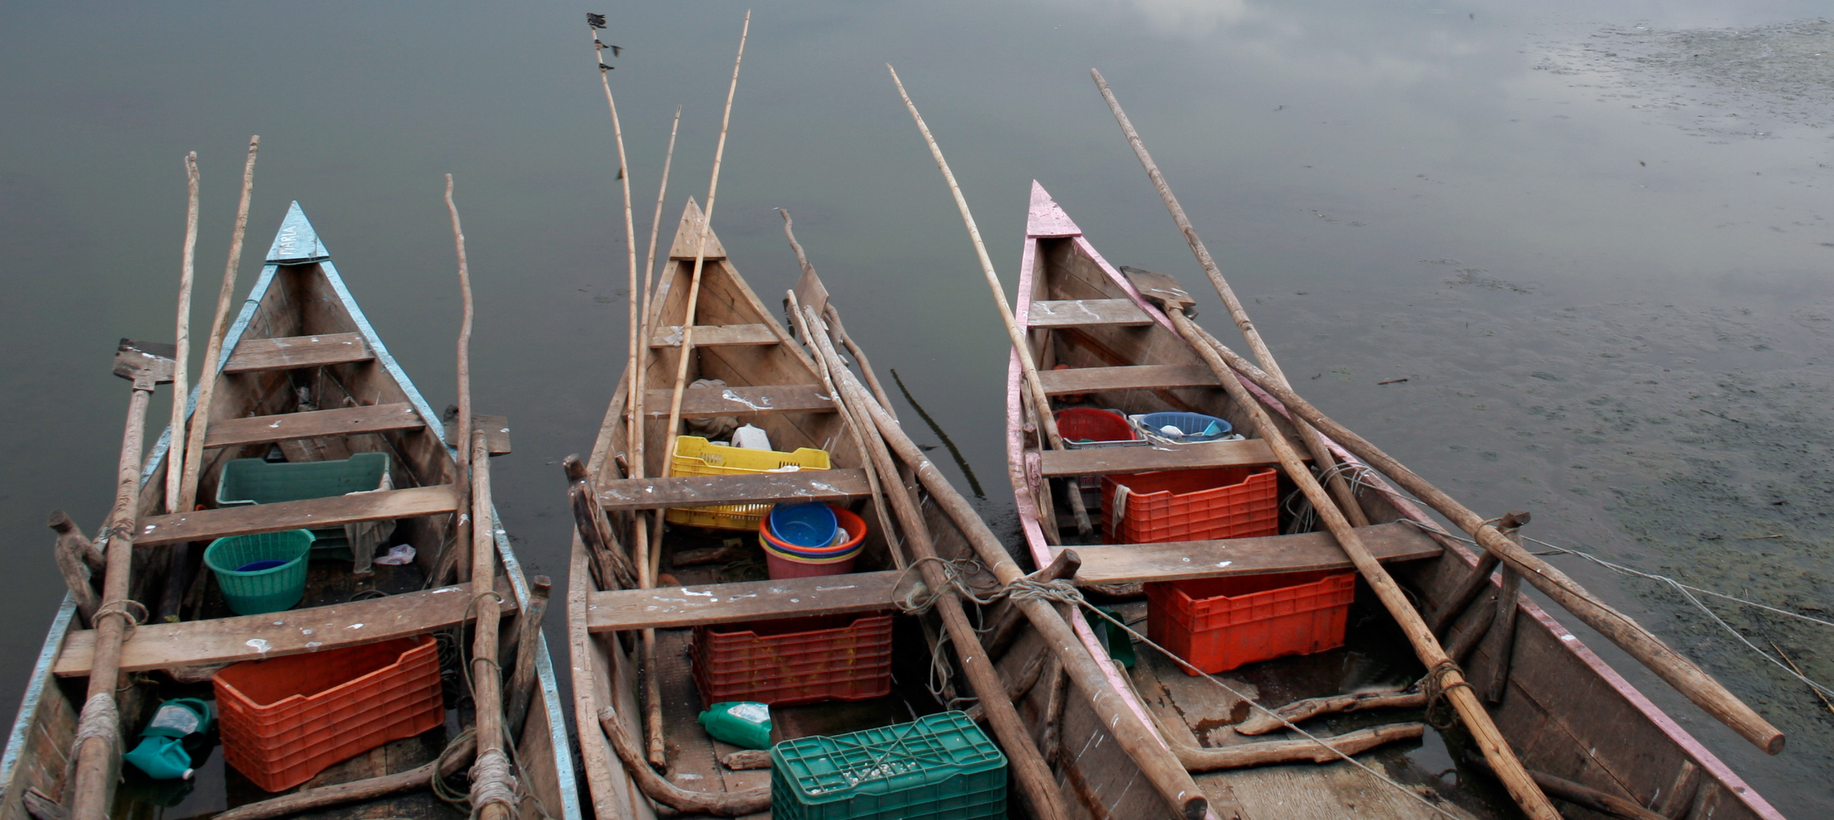
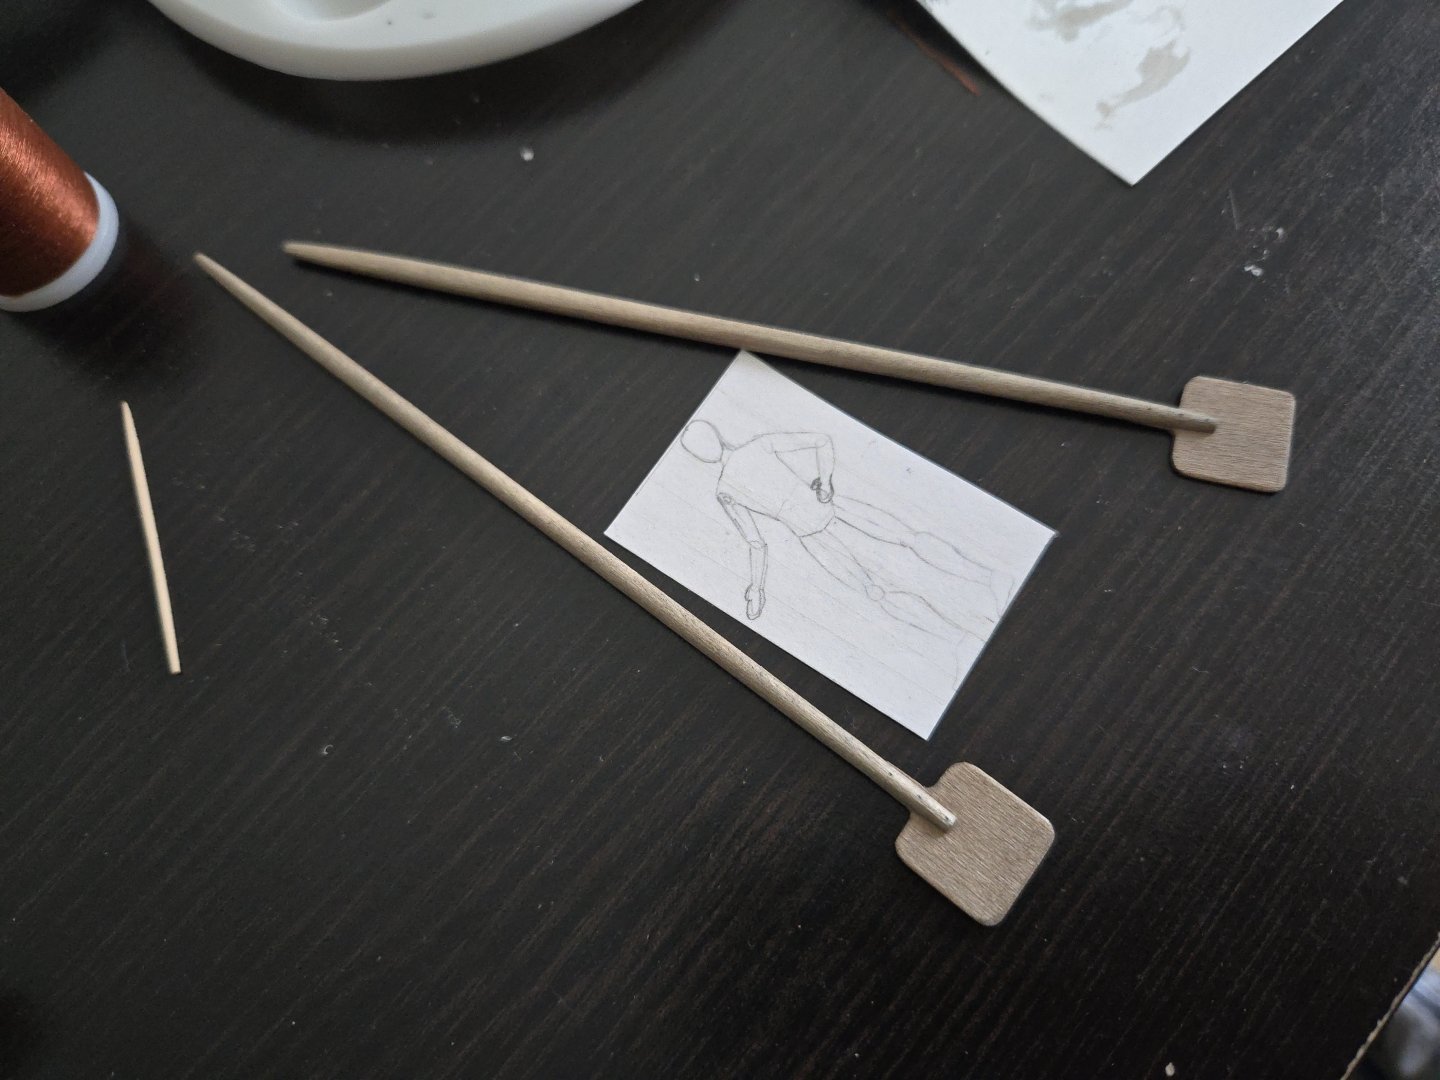
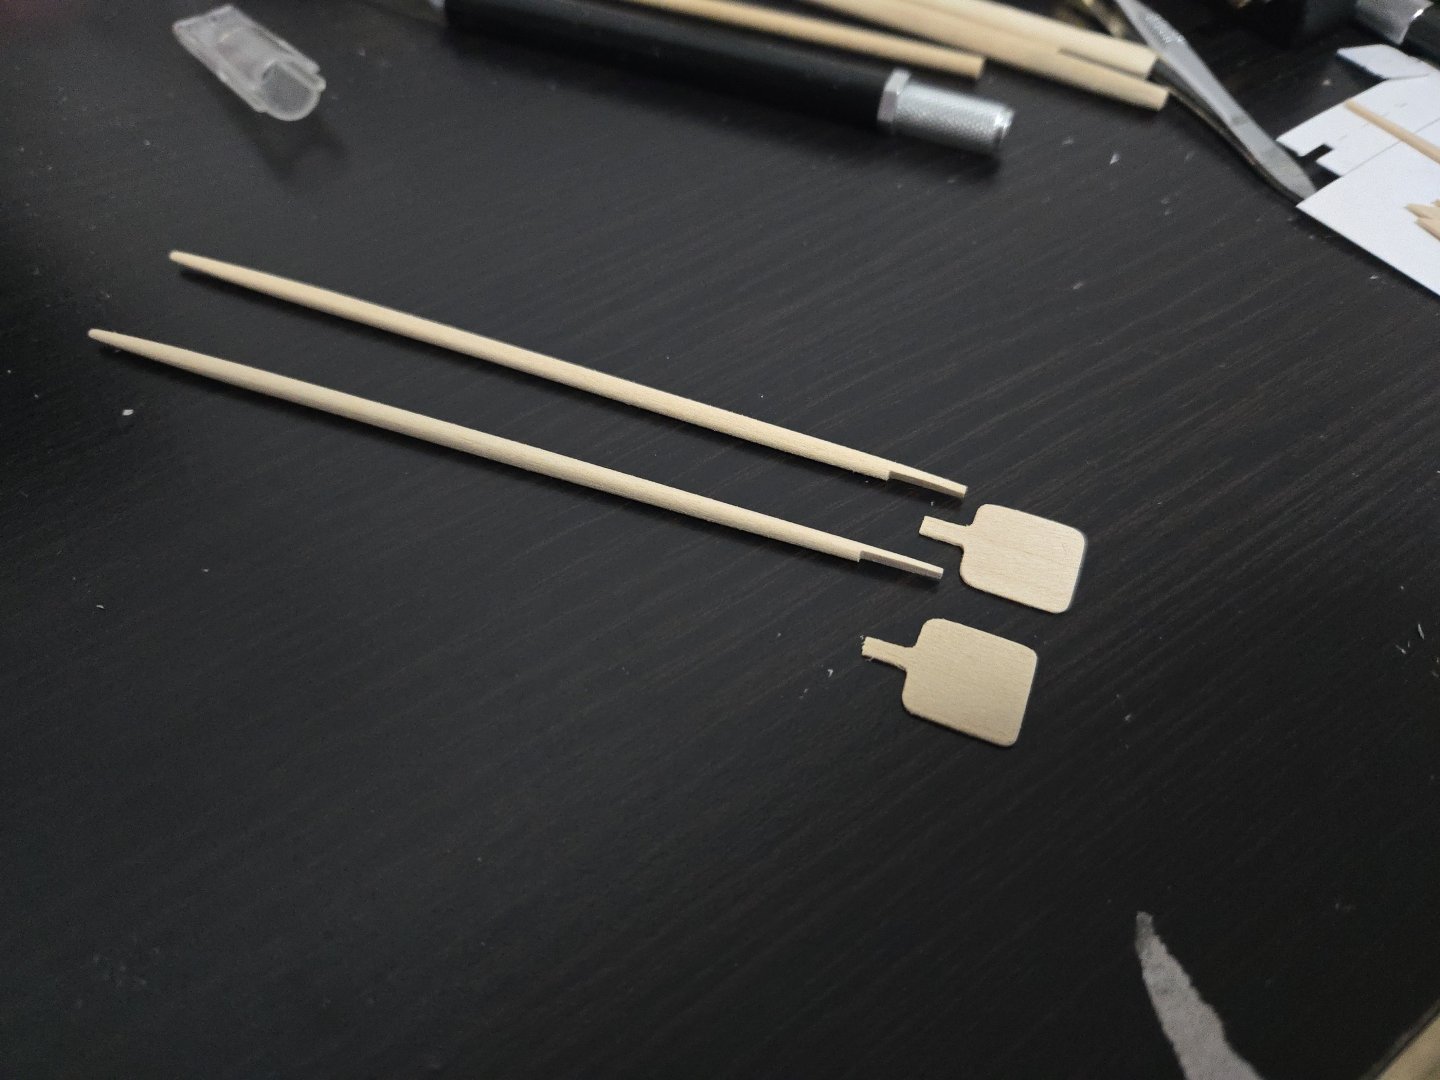
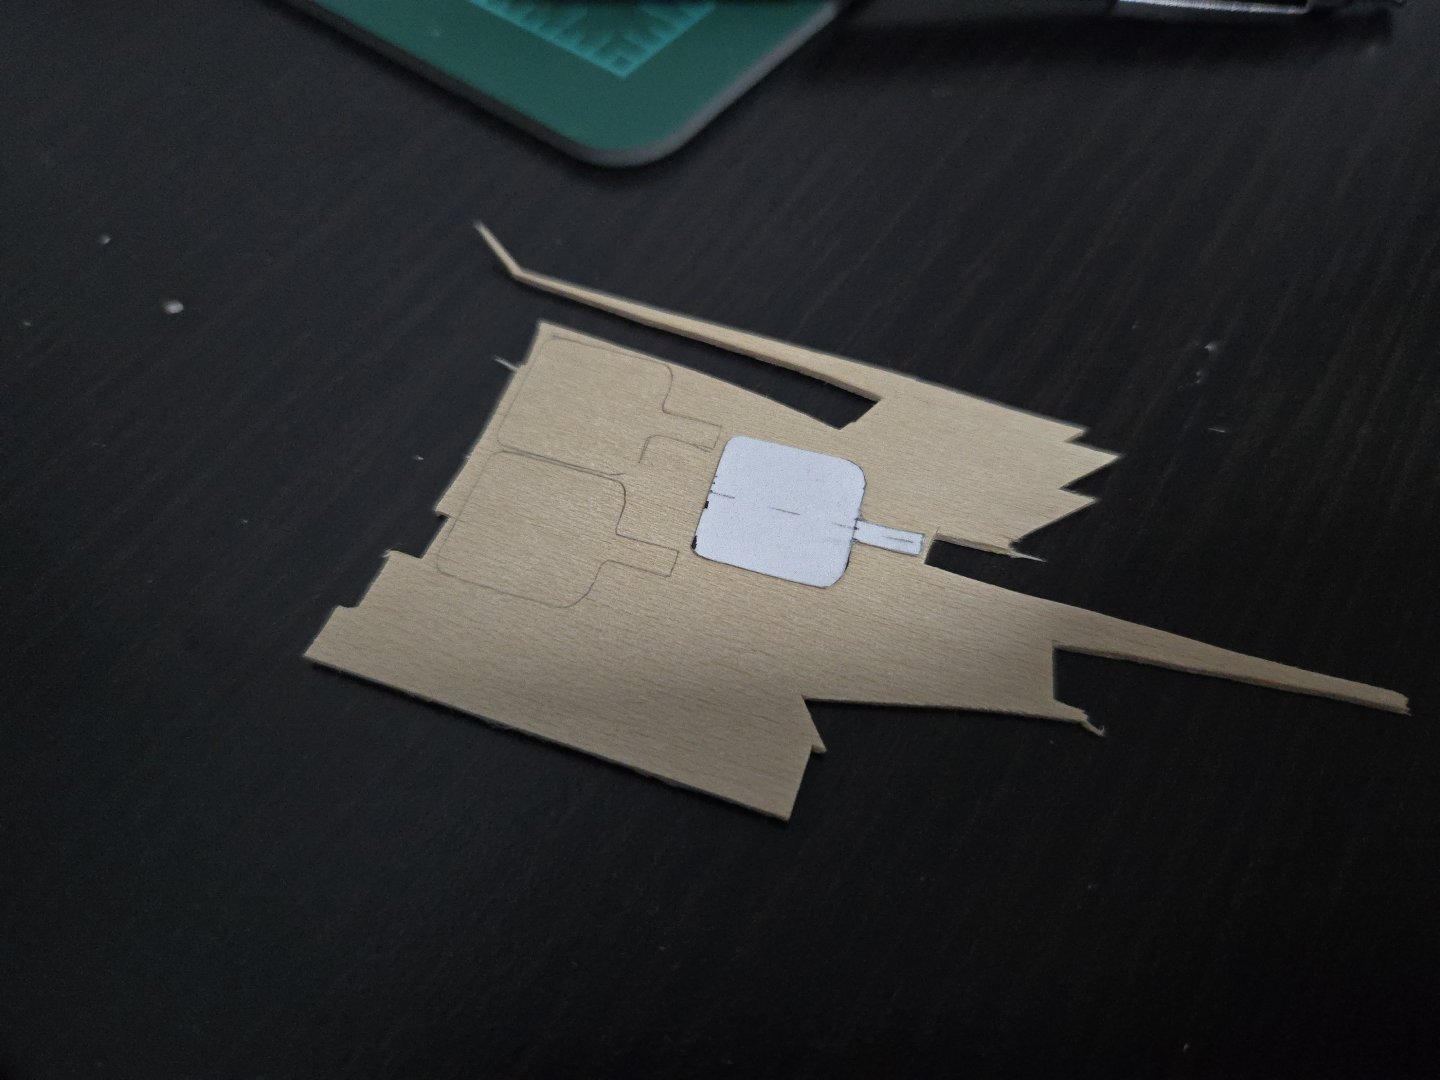
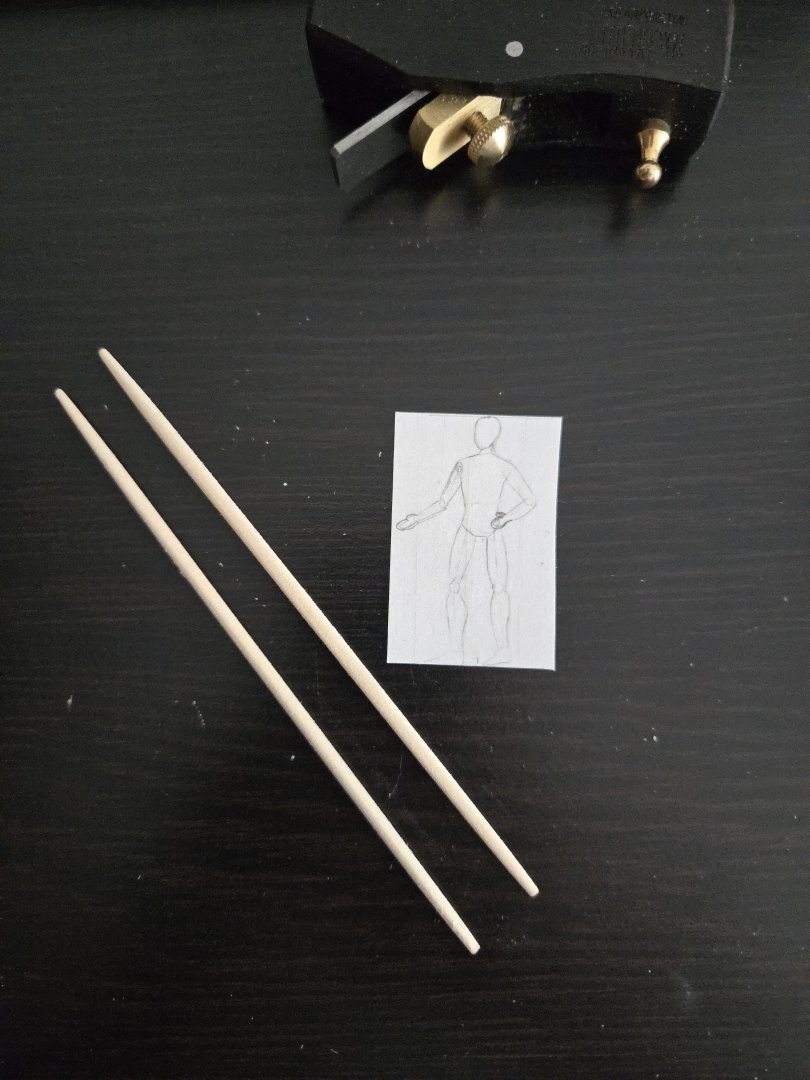
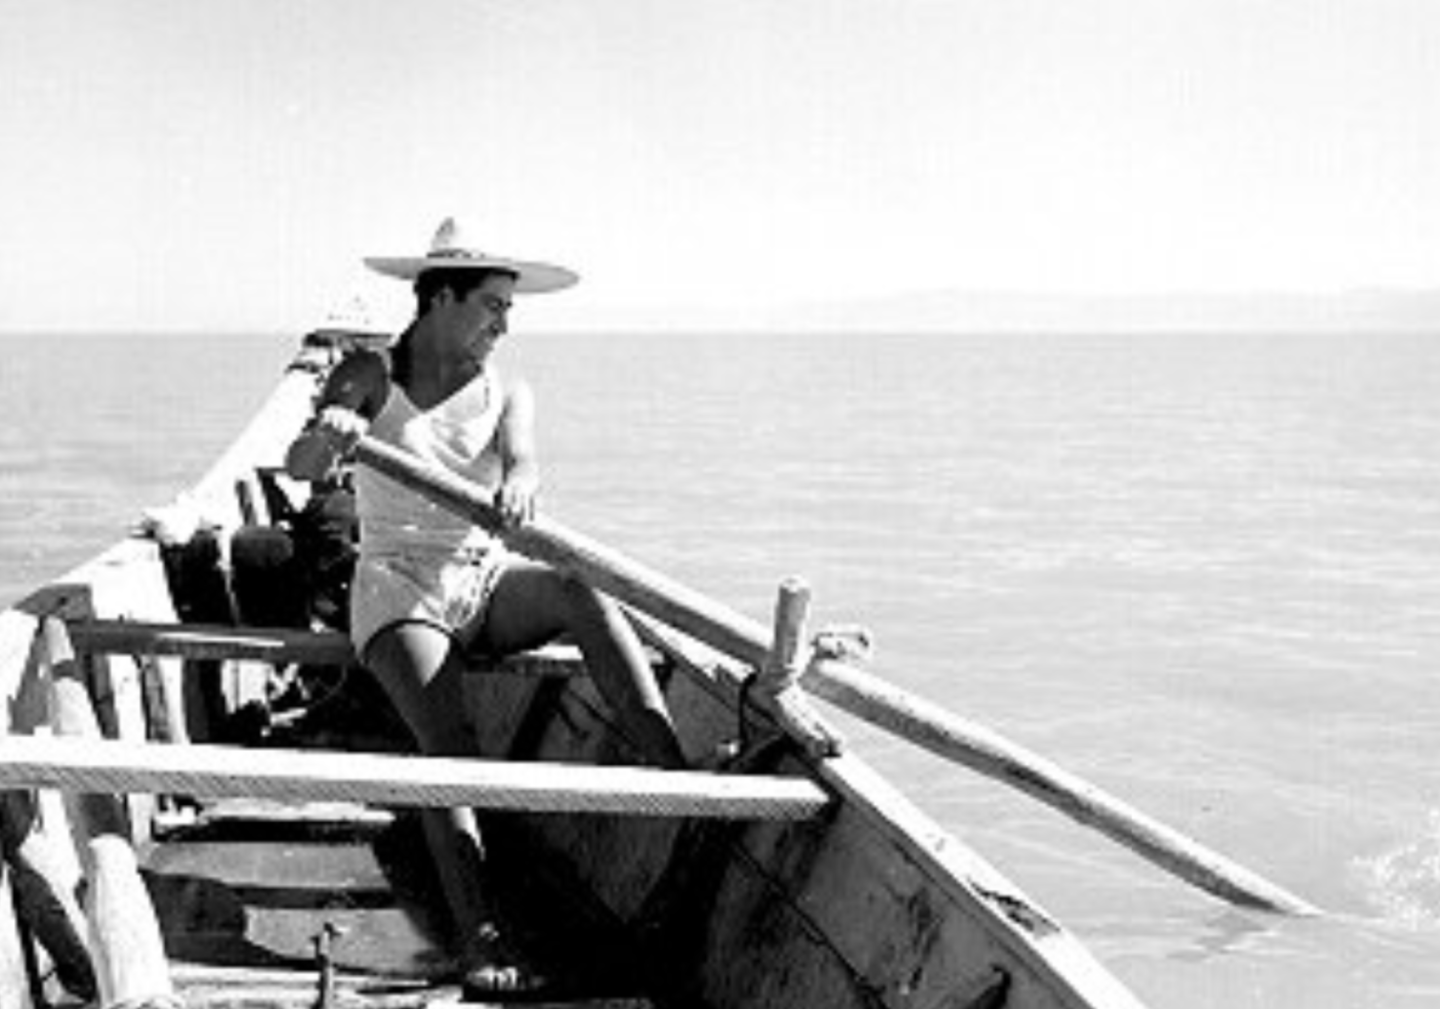
Next I made the oars. As can be seen in the following photos--one from Lake Chapala (although mislabeled as from Lake Pátzcuaro), and one of more recent vintage of the quite similar vessels from Lake Yuriría that I mentioned in an earlier post--they were made by attaching a flat, square-ish blade to the end of a long pole. Source: https://mediateca.inah.gob.mx/islandora_74/islandora/object/fotografia%3A139940 Source: https://commons.wikimedia.org/wiki/File:Lake_yuriria.jpg The first step was deciding on a length. This thread elsewhere on the site (https://modelshipworld.com/topic/26997-ships-boat-oar-length/#comment-776284 ) suggested that oar lengths 2.5-3.5 times the boat's breadth was usual for British naval ship's boats, but this seemed excessively long on the canoa, so I went with something a bit shorter. I cut the poles from a sheet of 1/8"‐thick basswood, and then used a miniplane and sandpaper to round them. This photo suggests that the oars might be widest around the pivot point/close to the handle, although the actual handle-area was more tapered. Source: https://mediateca.inah.gob.mx/islandora_74/islandora/object/fotografia%3A194349 As can be seen, I tried to represent this. The oars still look a bit long compared to the figure, but look better in the canoa as will be seen later. Next, I used card to make a template for the blades, which I traced onto 1/32‐inch basswood and cut out. I then carved out the joint at the end of the oar shaft. I decided to color the pieces with a dark brown wash, which left them quite grayed, before gluing the parts together. This way the wash wouldn't be impacted by any glue stains. In the photos above, it looks like the blades are joined with screws or bolts, so I represented this with a pencil. I then added the rope loop to attach the oars to the thole pins. The only example I could clearly make out (from the Lake Yuriría photo above) just shows a simple rope loop, but others, like the photo of tge guy rowing above, definitely seem to show a more substantial, if indistinct, set of knots. I decided that the simplest solution was just a couple of clove hitches to secure a rope (.35mm diameter from Ropes of Scale) around the oar and to create a second loop that can fit around the thole pin. (Although in hindsight, maybe a bowline would have been better--I chose a clove hitch because I've been using it a lot lately and can remember how to do it). While I've secured the knots with glue, I made sure that the rope isn't stuck to the oar, so I can slide the loop around. This way, I can possibly display it with the oars looped onto the thole pin, but with most of the oar shaft pushed back further into the Canoa. I also left the ends a little long, as I figure they would probably want to be able to easily untie and retie the loops. I'm planning on displaying it something like this. I just need to glue the thole pins into place first. I haven't done that yet because, based on some photos, in at least some cases the thole pin should actually go all the way through the rail, so I think I need to track down the rubbing alcohol, remove the thole pins from their supports, make longer ones, and get to drilling. The fun never stops...

- 286 replies
-
- 11
-
-
Thanks! Despite some issues with fairing and figuring out the stern/counter, I've found this to be a very fun and worthwhile kit that's definitely taught me a lot. I'd highly recommend starting a build log, and I'd be happy to try to answer any questions.
- 82 replies
-
- 2
-
-
- half hull planking project
- half hull
- (and 2 more)