MORE HANDBOOKS ARE ON THEIR WAY! We will let you know when they get here.
×


Bluto 1790
-
Posts
324 -
Joined
-
Last visited
Content Type
Profiles
Forums
Gallery
Events
Everything posted by Bluto 1790
-
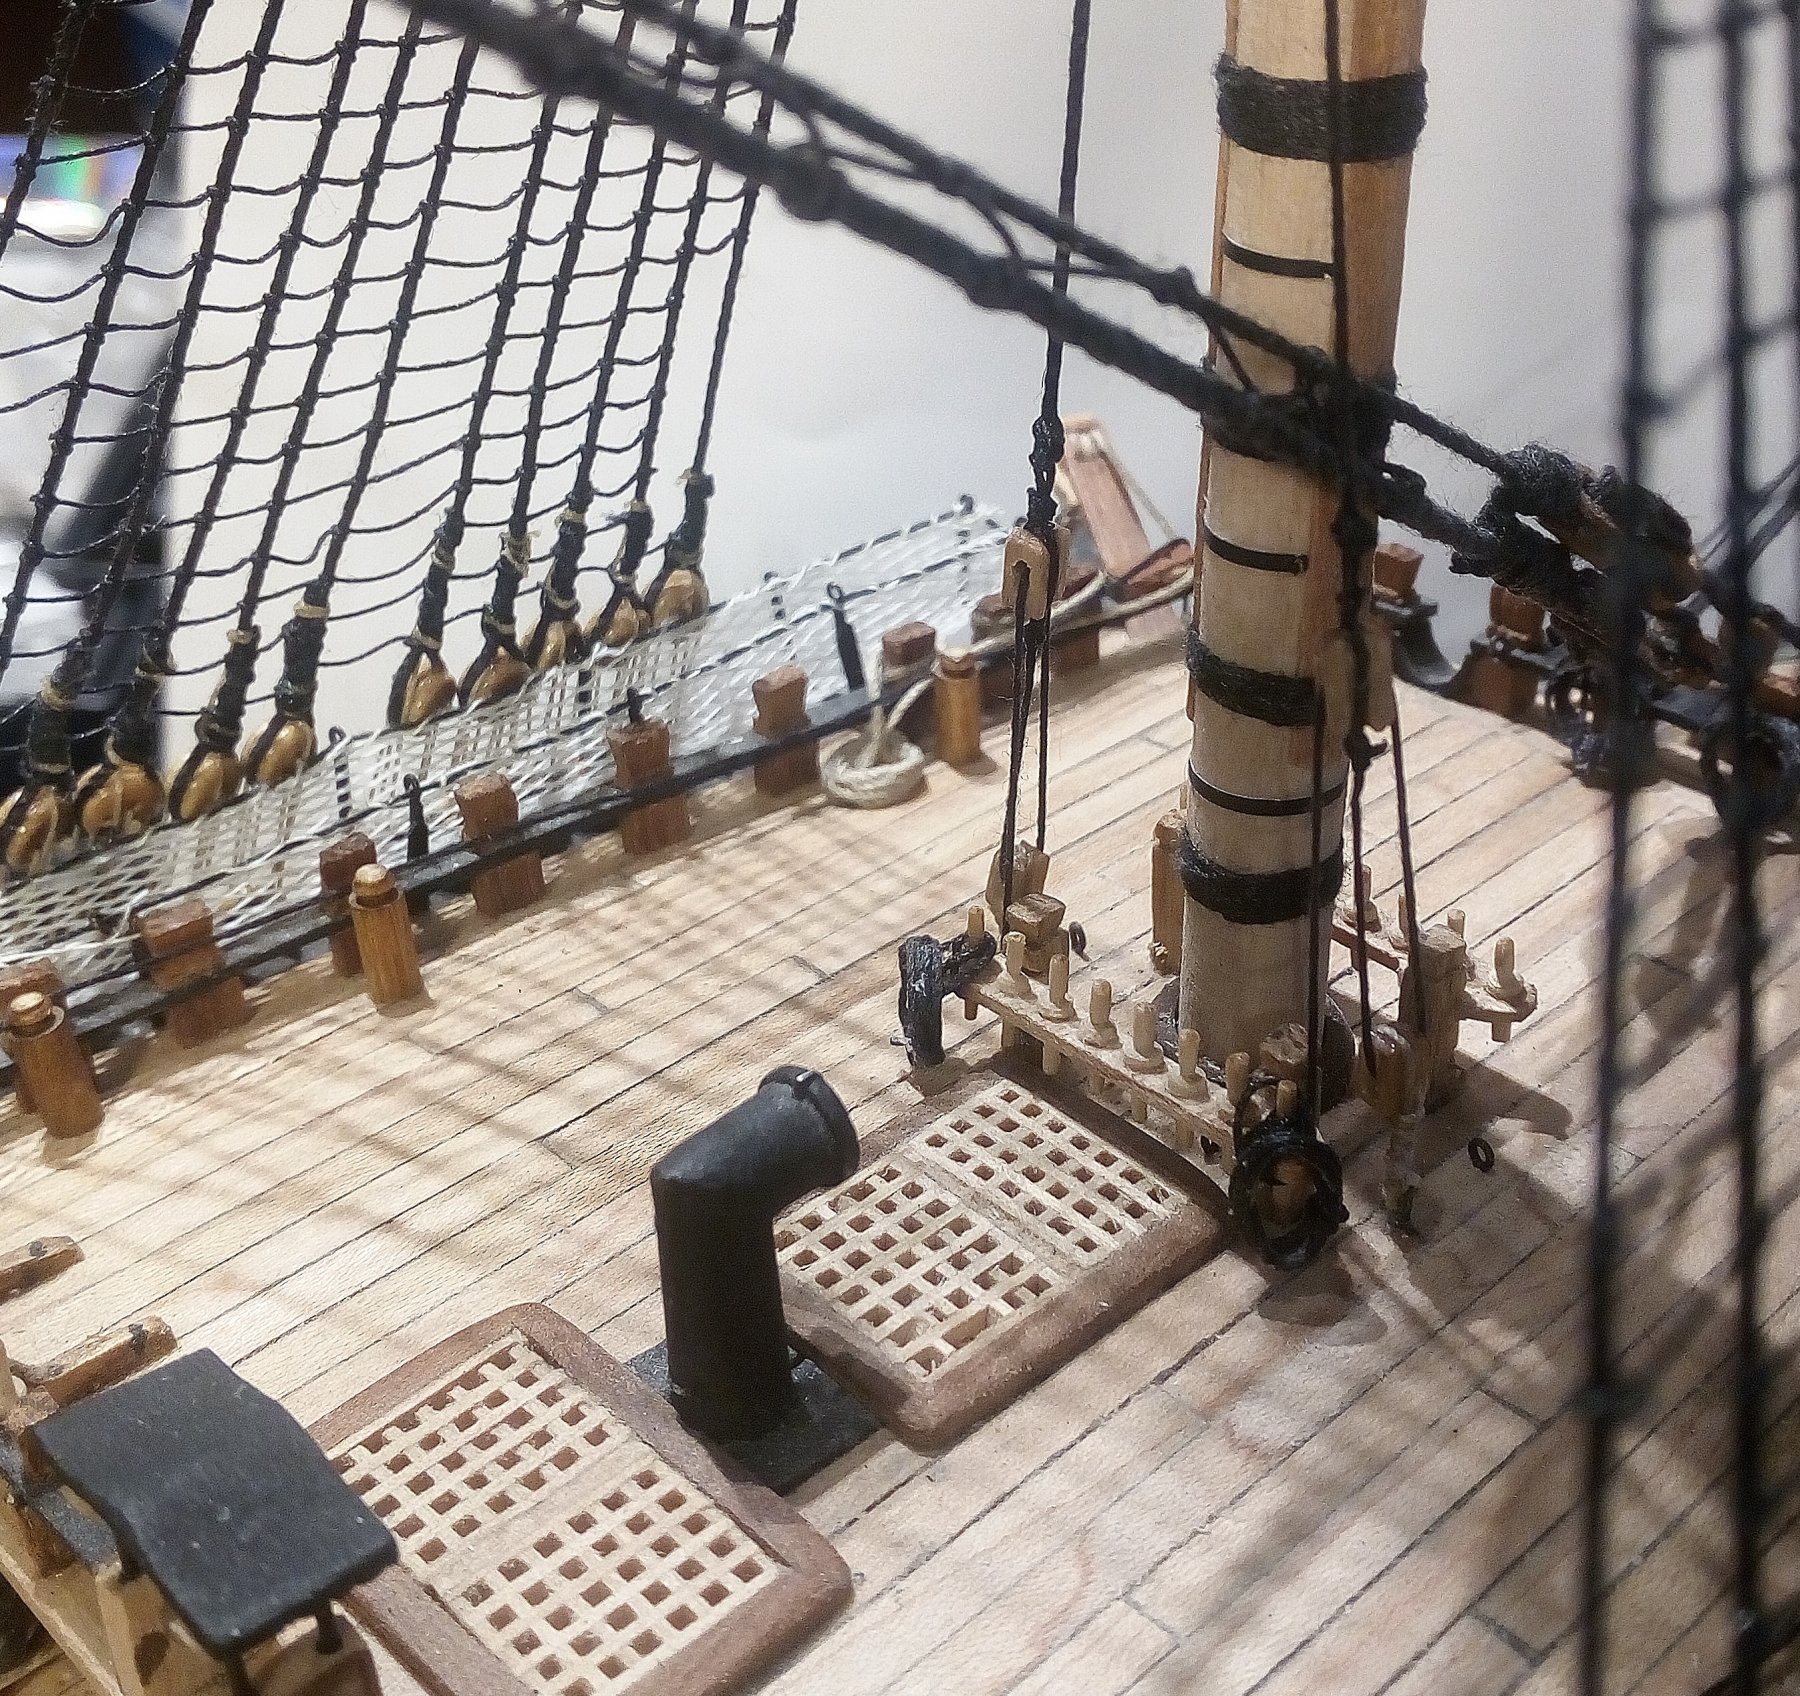
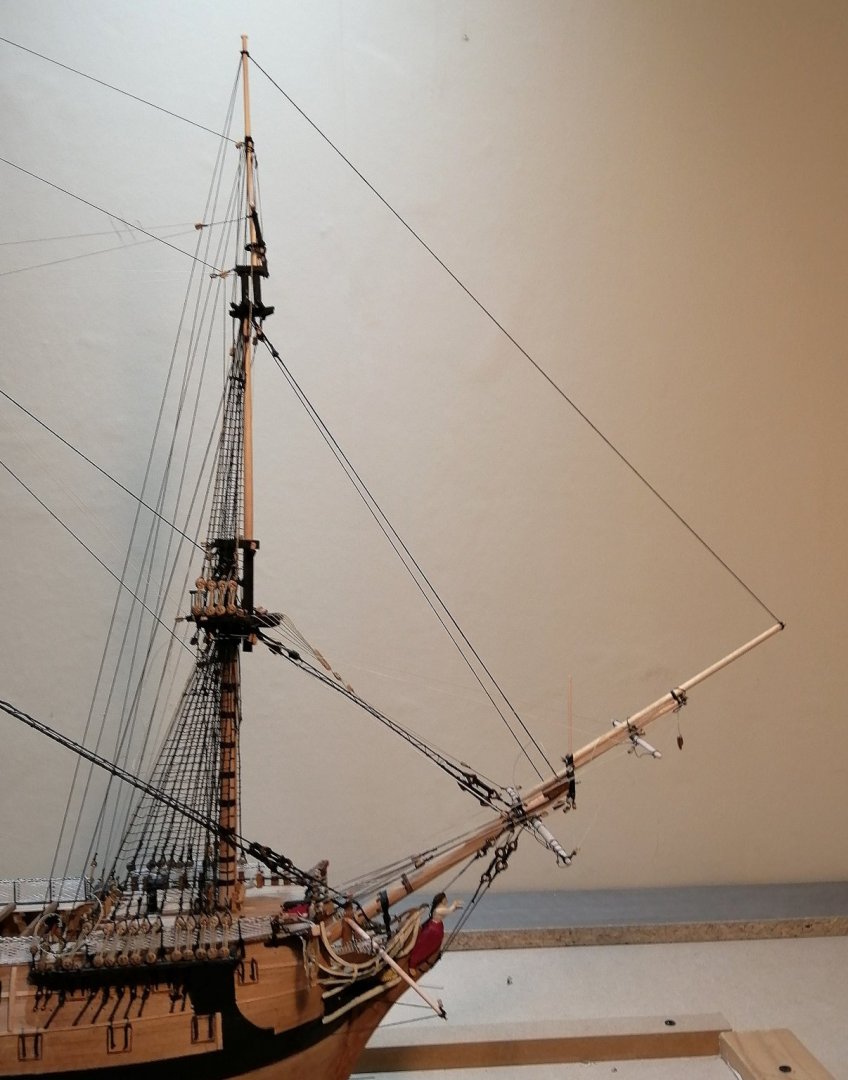
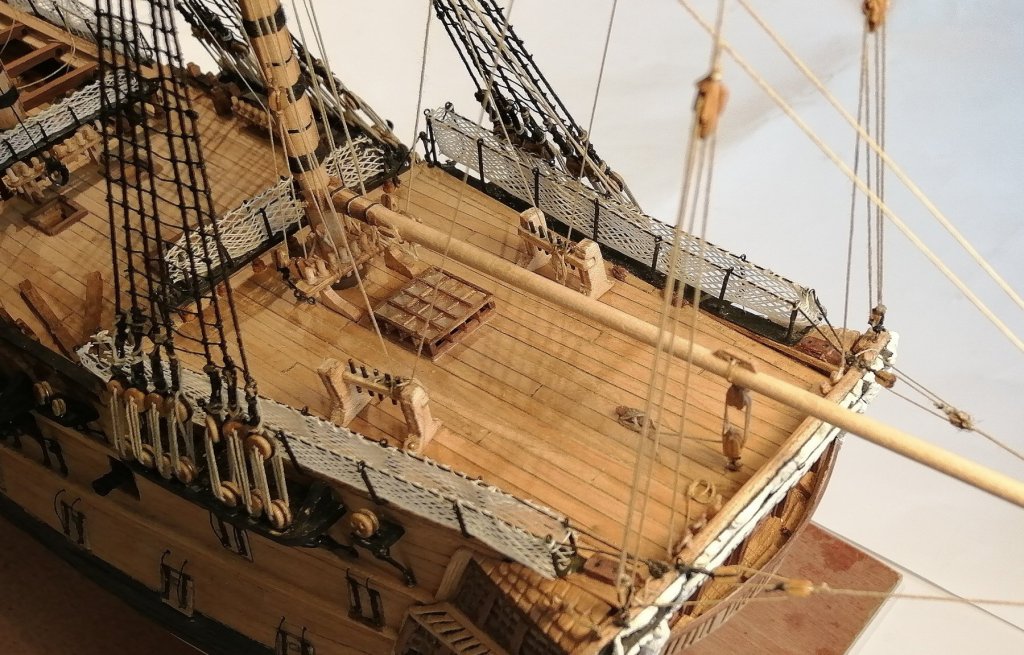
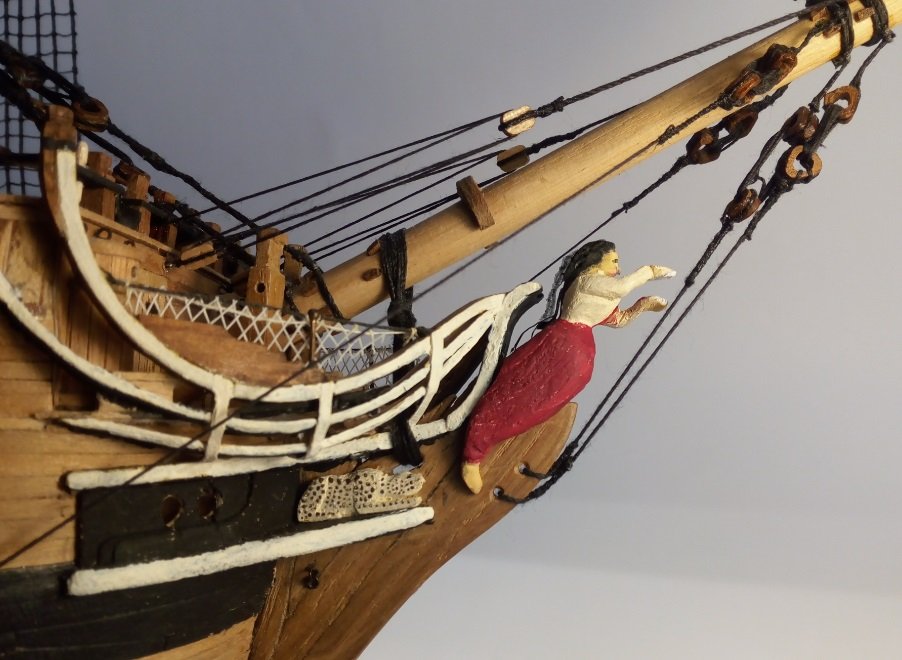
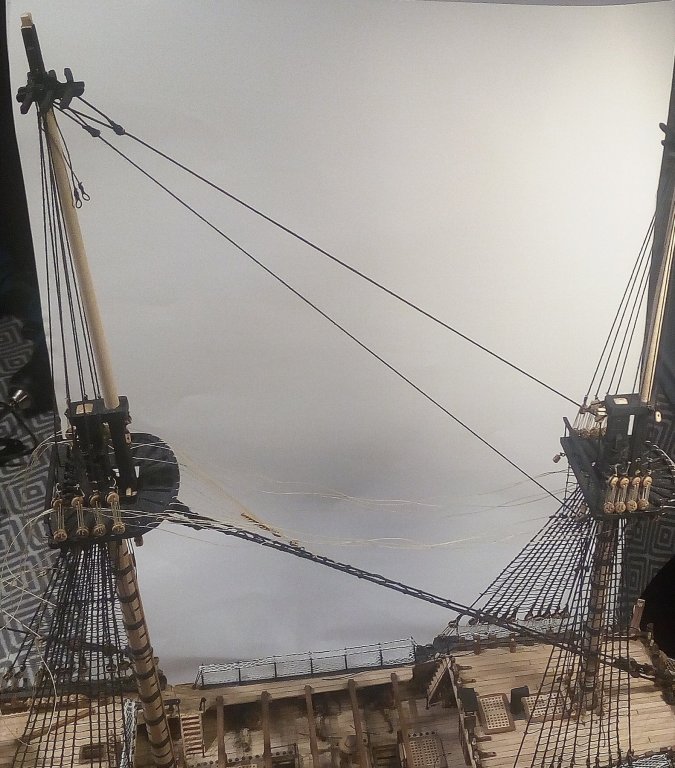
 Thanks Phil and Tom for the comments and the others for the likes. Just a quick visit here to amend the number of lines/stays that need to find a home along the fiferail:- First, the fore topmast stay and preventer have been there for a while -- that's 2. The spritsail and topmast yard halliards -- that's another 2. The spritsail topmast yard lifts -- another 2. The spritsail yard lifts combined with the topsail cluelines and sheets -- another 4 (2 each side). The jib boom & flying jib boom guys -- a further 4. The jib stay & flying jib stay outhauls -- add 2, and jib stay & flying jib stay inhauls -- another 2. Assuming that I haven't forgotten or not yet discovered any more, that makes 18 lines needing belayed up front --- and that's without having any sails rigged! Edited just to add that while routing all these lines I tried to be as practical as possible and keep them out of the line of fire of the 2 bow chaser guns, the starboard gun being already in position. I know that no-one is ACTUALLY going to fire any of these guns! - - - but it would have annoyed me if any of these lines had been in 'line of fire'!
 -
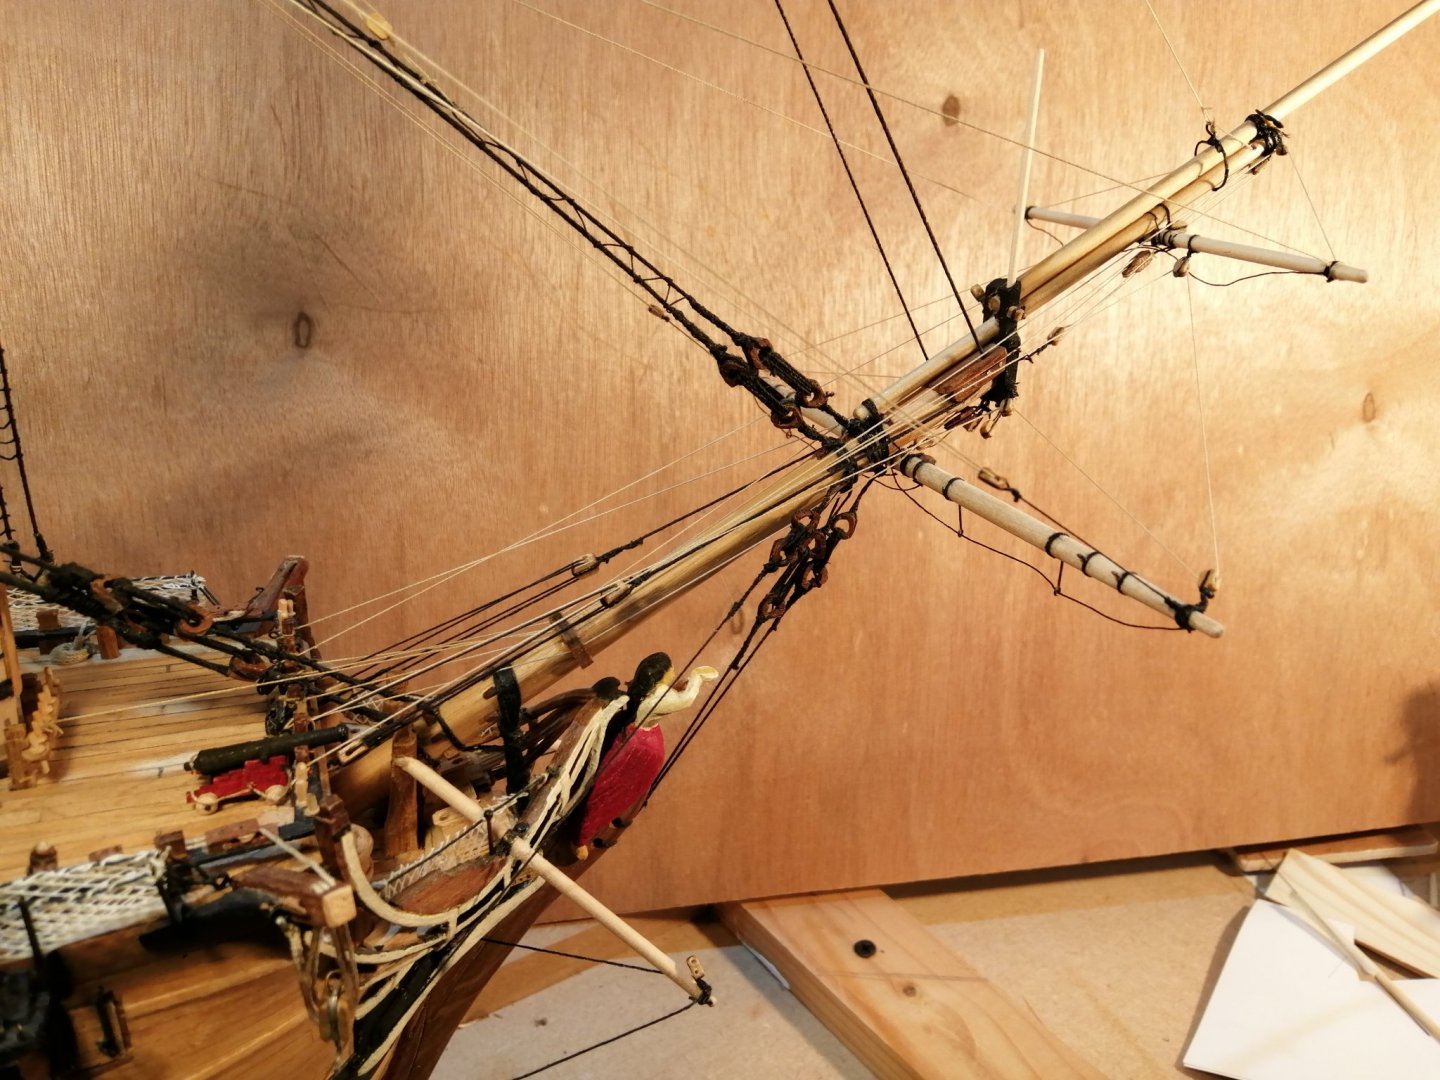
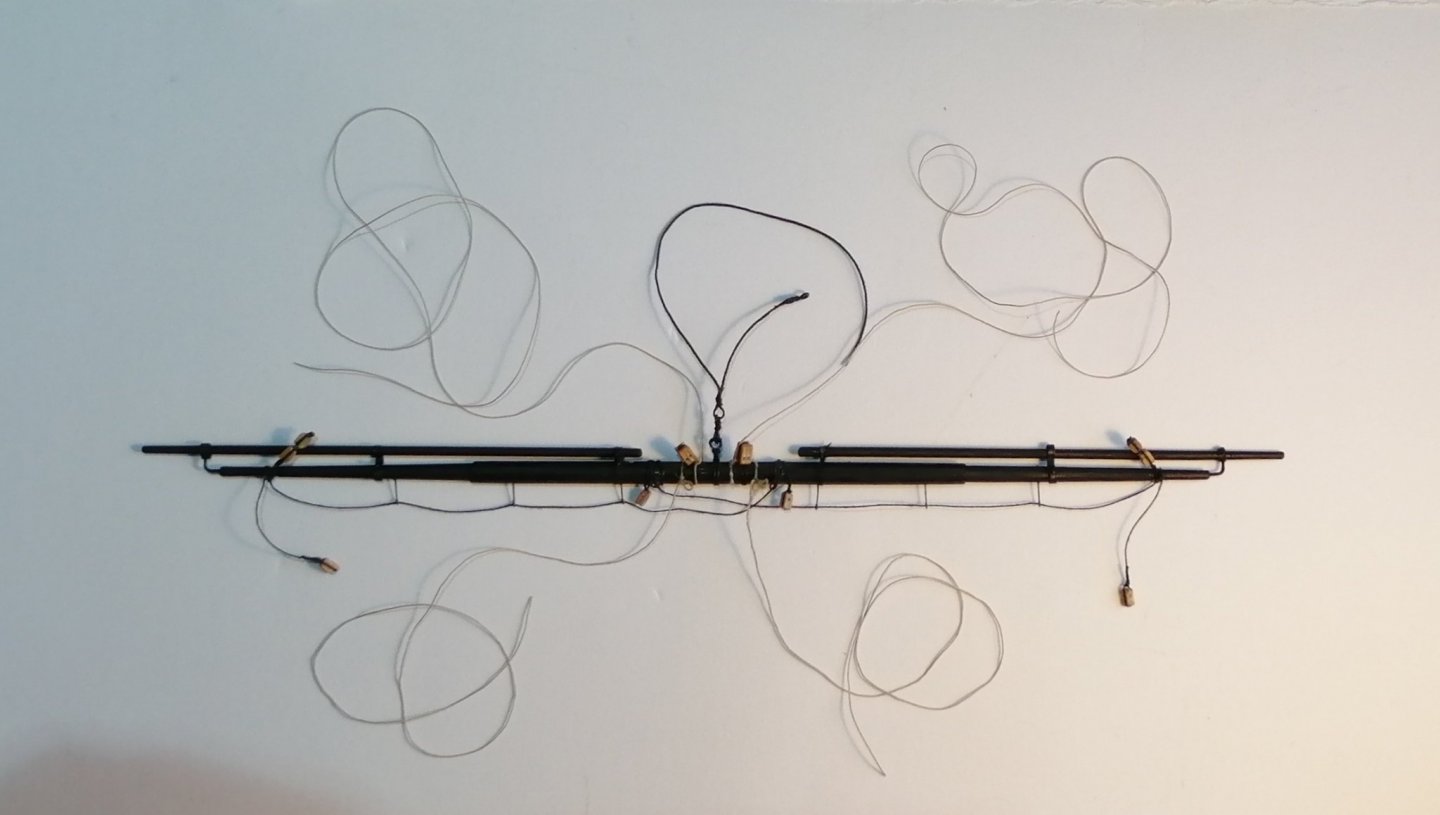
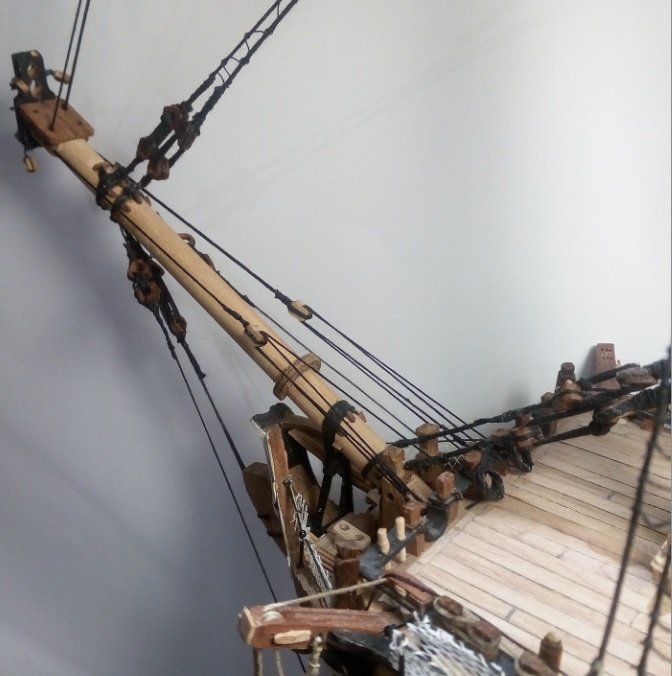
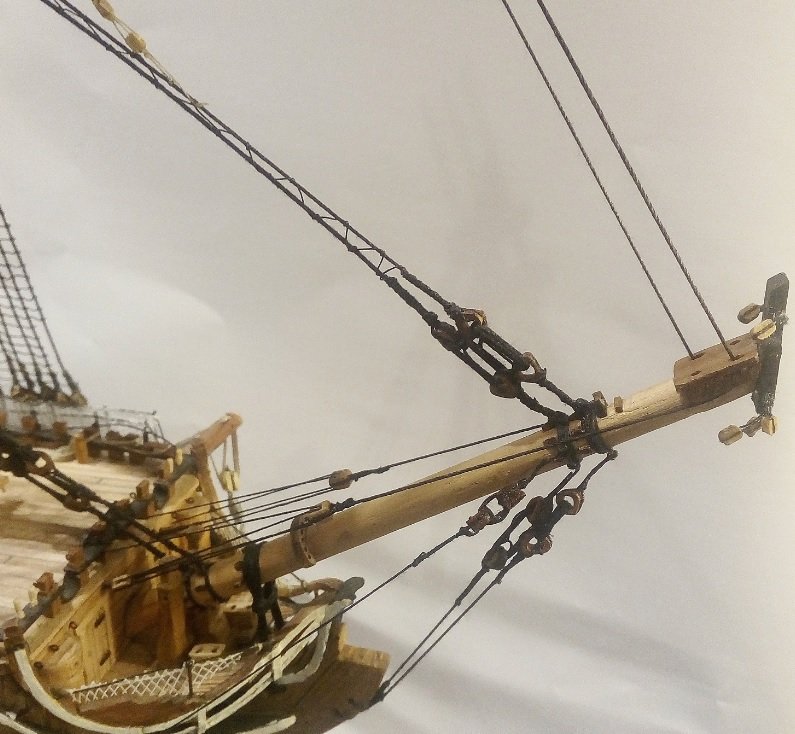
Thanks for your comment Phil ~ I can't like that posting either . . . it must be my most unliked post! …...……...………...……...……………...……………….........…………….........…………............………......……………….. Hi Tom, thanks for your comment. I was only kiddin' about Ebay! - - - after all that time and effort there's no way I'll be abandoning the build! I beavered away at it a bit today and now as well as being full height, it is also full length as I got the jib boom and flying jib boom attached. It was a bit of a double-edged sword as, while I wanted to get that done, in view of my recent mishaps, I've also been a bit reluctant to make the ship even more of a target! In any case I've now attached the fore Royal stay and as I hoped, it has pulled the mast back into perpendicular. I've still to attach the martingale and rig its stays so I hope that will further help to stabilise everything. >>> The spritsail and spritsail topmast yards had already been prepared and waiting to be fitted so I took the chance to fit them before rigging the fore royal stay. The spritsail yard requires 2 thimbles mounted atop the yard on each side and for these I used 4 copper eyelets >>> The spritsail yard was fairly straightforward to fit to the bowsprit but the topsail yard looked like it may have been a bit more tricky. So, I fitted it to the jib boom before fitting the jib boom to the bowsprit. >>> I had overlooked the fitting of 2 blocks - 1 on either side of centre, and these proved rather tricky to fit when the topsail yard was already in position. Also, in the picture above, the jib traveller (ring) looks oversize there, but it needs to be that size as it has to run along the jib boom AND the flying jib boom. Once I saw these 2 yards on the ship I just had to continue to add some of their rigging >>> For anyone building, or thinking of building HMS Leopard (Hello Tom) from the same plans as I have, the plan(s) show no belaying points along the fiferail and although I added 4 on each side of center (8 in total) I've had to use several of the timberheads as belaying points as well. So far I've estimated that I'll need at least 14 tying-off points so it might be a decent idea to add as many pins as can be squeezed in along the fiferail.

-
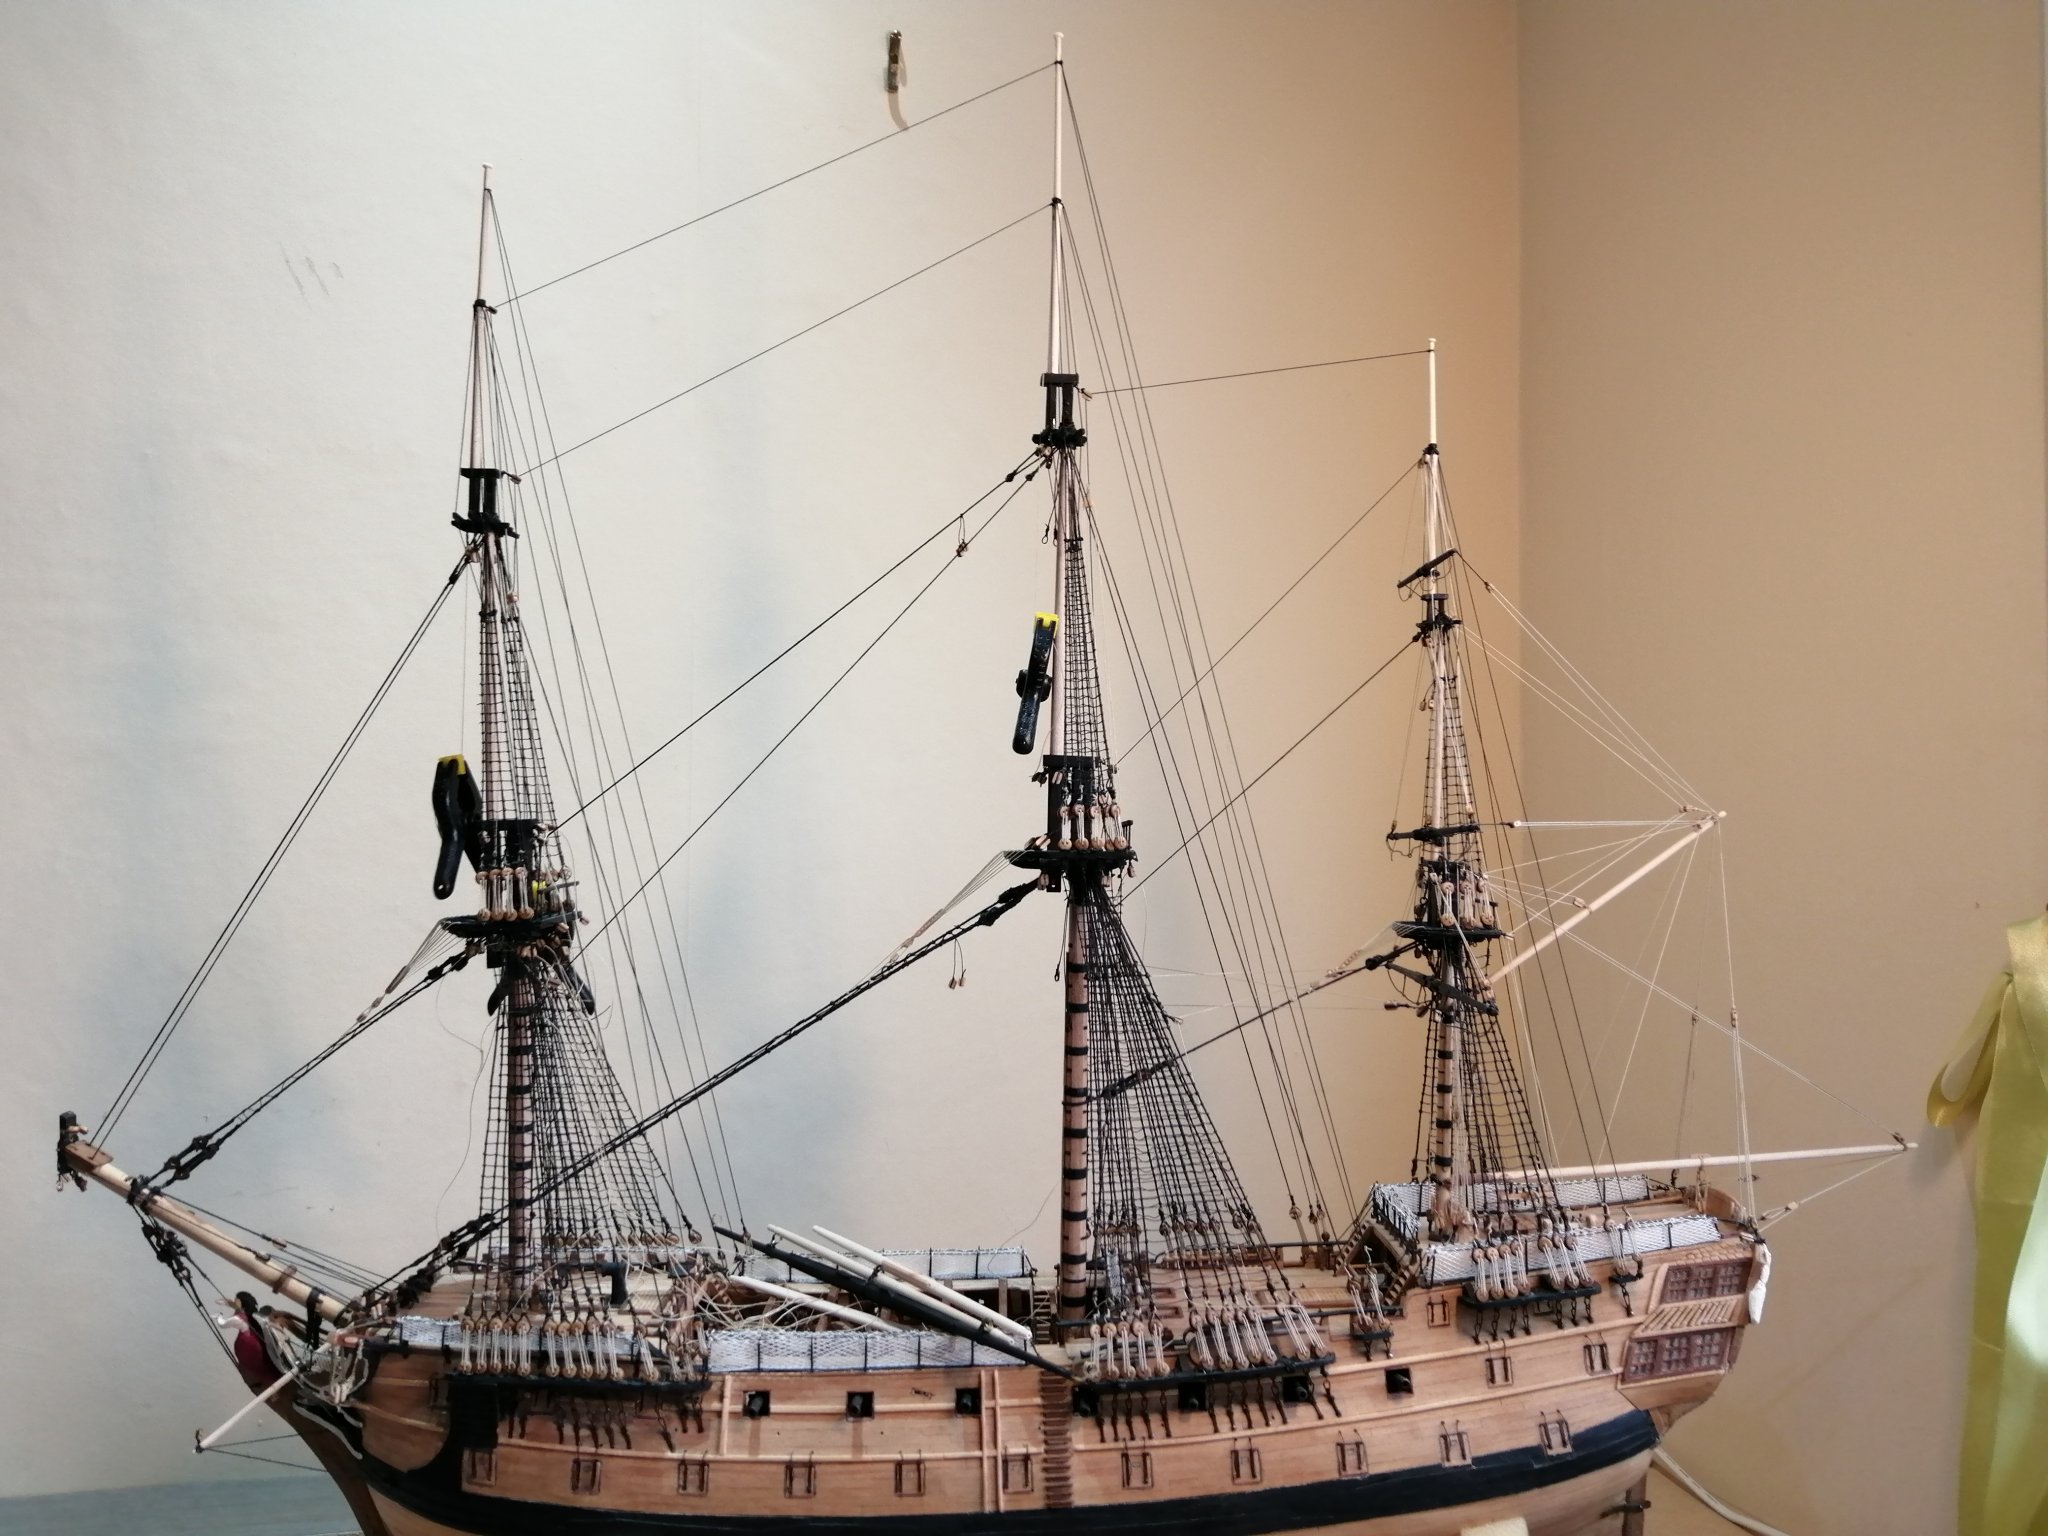
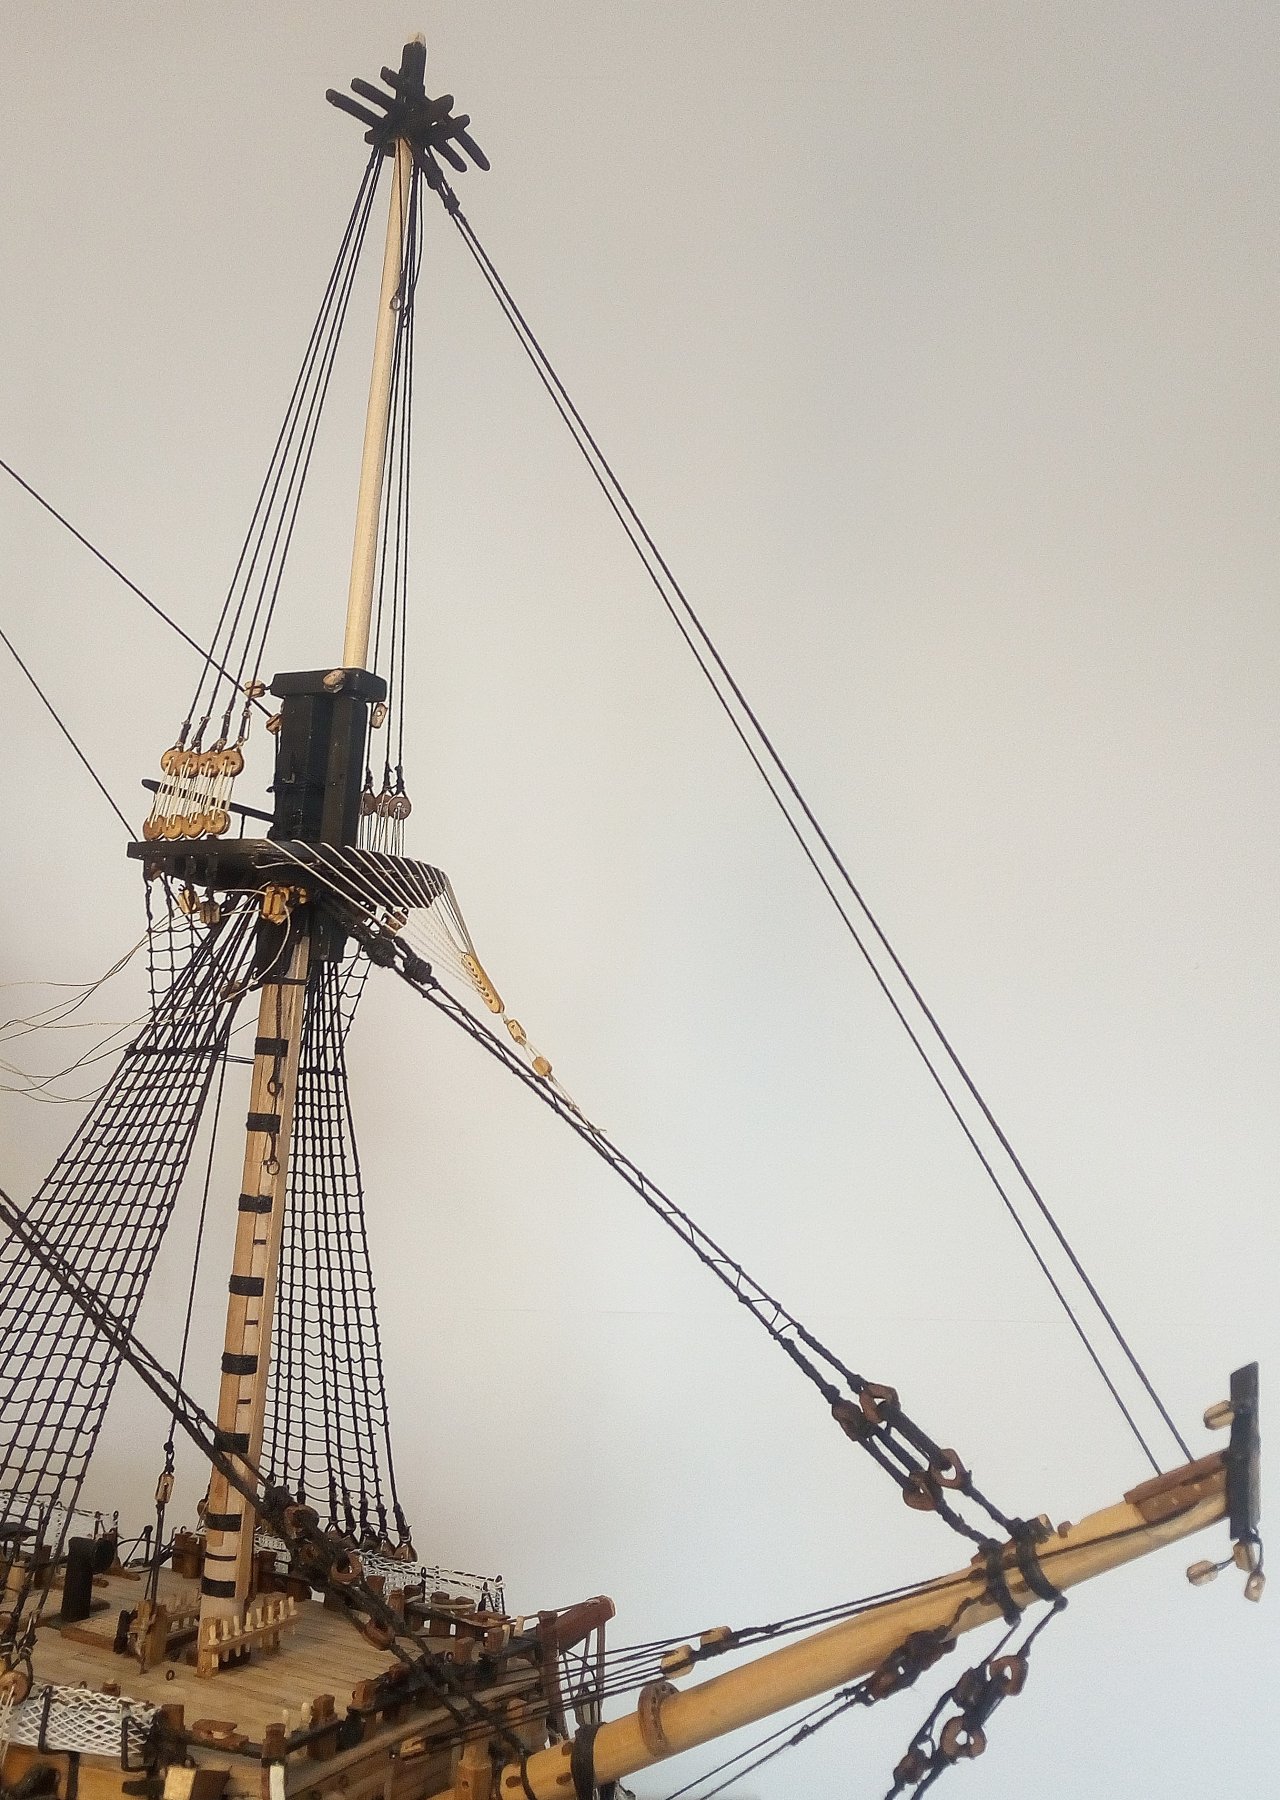
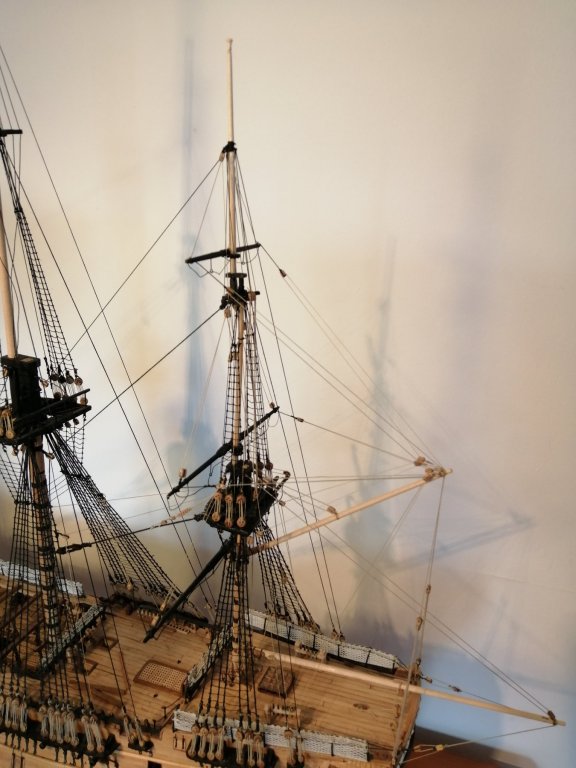
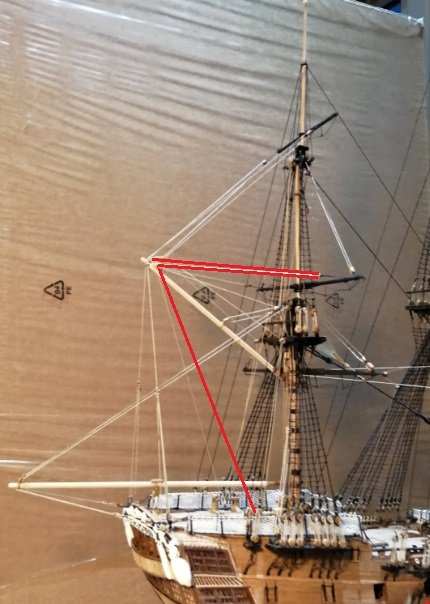
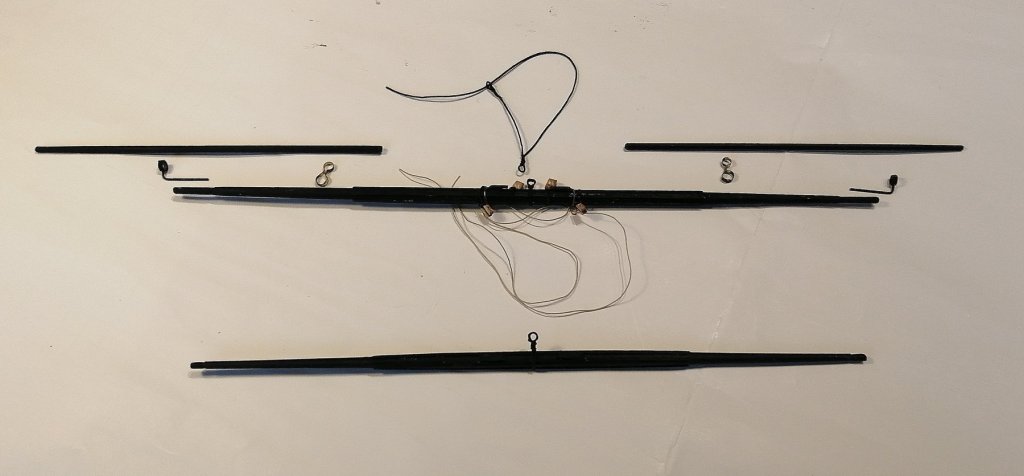
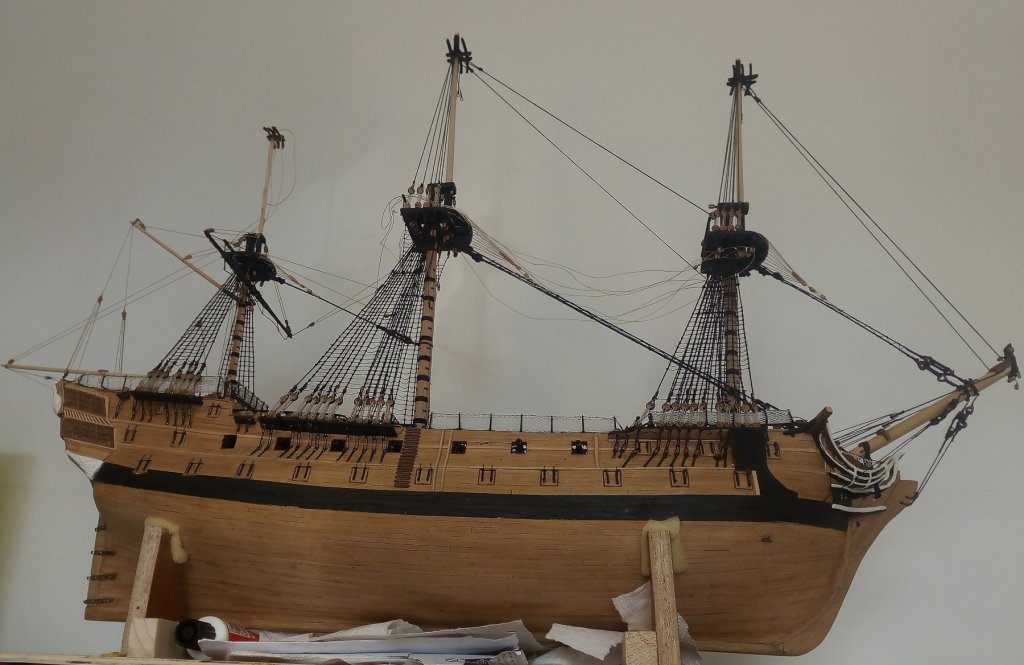
Thanks for your comment, Pete and the others for the likes. I've not posted anything for around 5 weeks but I've been busy finalising the yards for rigging to the masts and bowsprit/jib boom/flying jib boom. These 4 yards for the main and fore masts sure take some time to get ready with all the irons, stunsail yards, blocks, footropes etc. etc. etc. . . . ! I think it took me the best part of a week of evenings just to prepare the main yard . . . then there were all the others to tackle. All of that would be OK if I hadn't had another mishap. After all the masts were fully rigged and the fore had its topgallant yard rigged, my shirt cuff caught the foremast truck . . . and another sickening C-R-A-C-K. It didn't snap off but ended up like this >>> This happened around 3 weeks ago and I can only see two options -- 1) destroy the backstays, T/gallant shrouds, the T/gallant/Royal mast itself along with everything attached to it and create a new one then rebuild it all --- I REALLY don't want to have to do this. Or 2) rely on the Royal forestay which runs to the forward end of the flying jib boom to pull the 'bend' out of the Royal, and hope that would hold it securely until the ship goes into a case. In any case I've been working to get those very long, sharp, thin booms fitted to the bowsprit so that I can test my hoped-for remedy of stabilising it with the forestay. I'm about a couple of days away from completing the jib boom/flying jib boom. I hope to be back posting here and not on Ebay trying to sell an almost complete HMS Leopard !!!

-
Hi Tom, Great work on the ship's boats. That's a project I've still to arrive at . . . and I'm trying not to think about that yet. The 'big ship' is enough for me to be going on with at the moment and I have no idea how I will even begin to tackle the boats!
-
Hi Tom, I may have made some very expressive utterances during that "fun exercise" !!!
-
Some 3 weeks since my last posting and if the ship doesn't look much different it's not because there has been no work done -- quite the opposite. Several deadeyes and blocks have been fitted all around the ship and I discovered one thing that should have been done much earlier. Well, four things --- the blocks for the main and fore nave lines as well as the blocks for the main and fore topgallant halliards. When I had prepared the mizzen lower top I had fitted the block (and lines) for the topgallant halliard before fitting the top to the mast. I should have done the same for the main and fore . . . but didn't. More seriously, because there is no nave line on the mizzen it had escaped my attention that these should have been fitted to the main and fore tops BEFORE the tops were fitted to the masts. If anyone reading this is like me, and has never before reached this stage of a build, you might want to learn from this little oversight of mine. It might appear "little" but it didn't feel little when I was in the middle of trying to fit these pesky blocks to the underside of the tops with all the shrouds and backstays in place! That was one very tricky and awkward task I wouldn't want again. Just one pic with all the backstays now rigged >>> The two clamps hanging there are clipped on to the main and fore topgallant halliards to prevent them from escaping back through the mast sheaves before the spars are ready to be attached. All spars/yards with the exception of two stunsail yards and the spritsail and spritsail topsail yards have been turned. Some work still to be done to most of the yards before they make this ship look like a real ship. The main yard is now finished >>> That main yard is presently in a "safe box" as, it being more than half of the length of the hull (taffrail to beakhead) it would present a very big target for potential damage so it won't be meeting the main mast until the ship is almost complete.

-
Thanks Tom and mark for the comments and the others for the likes. Tom ~ I'm on to you! . . . I know your game - - - you want me to count them again hoping I'll come up with a lower figure coz you've still got to start your ratlines !!!
-
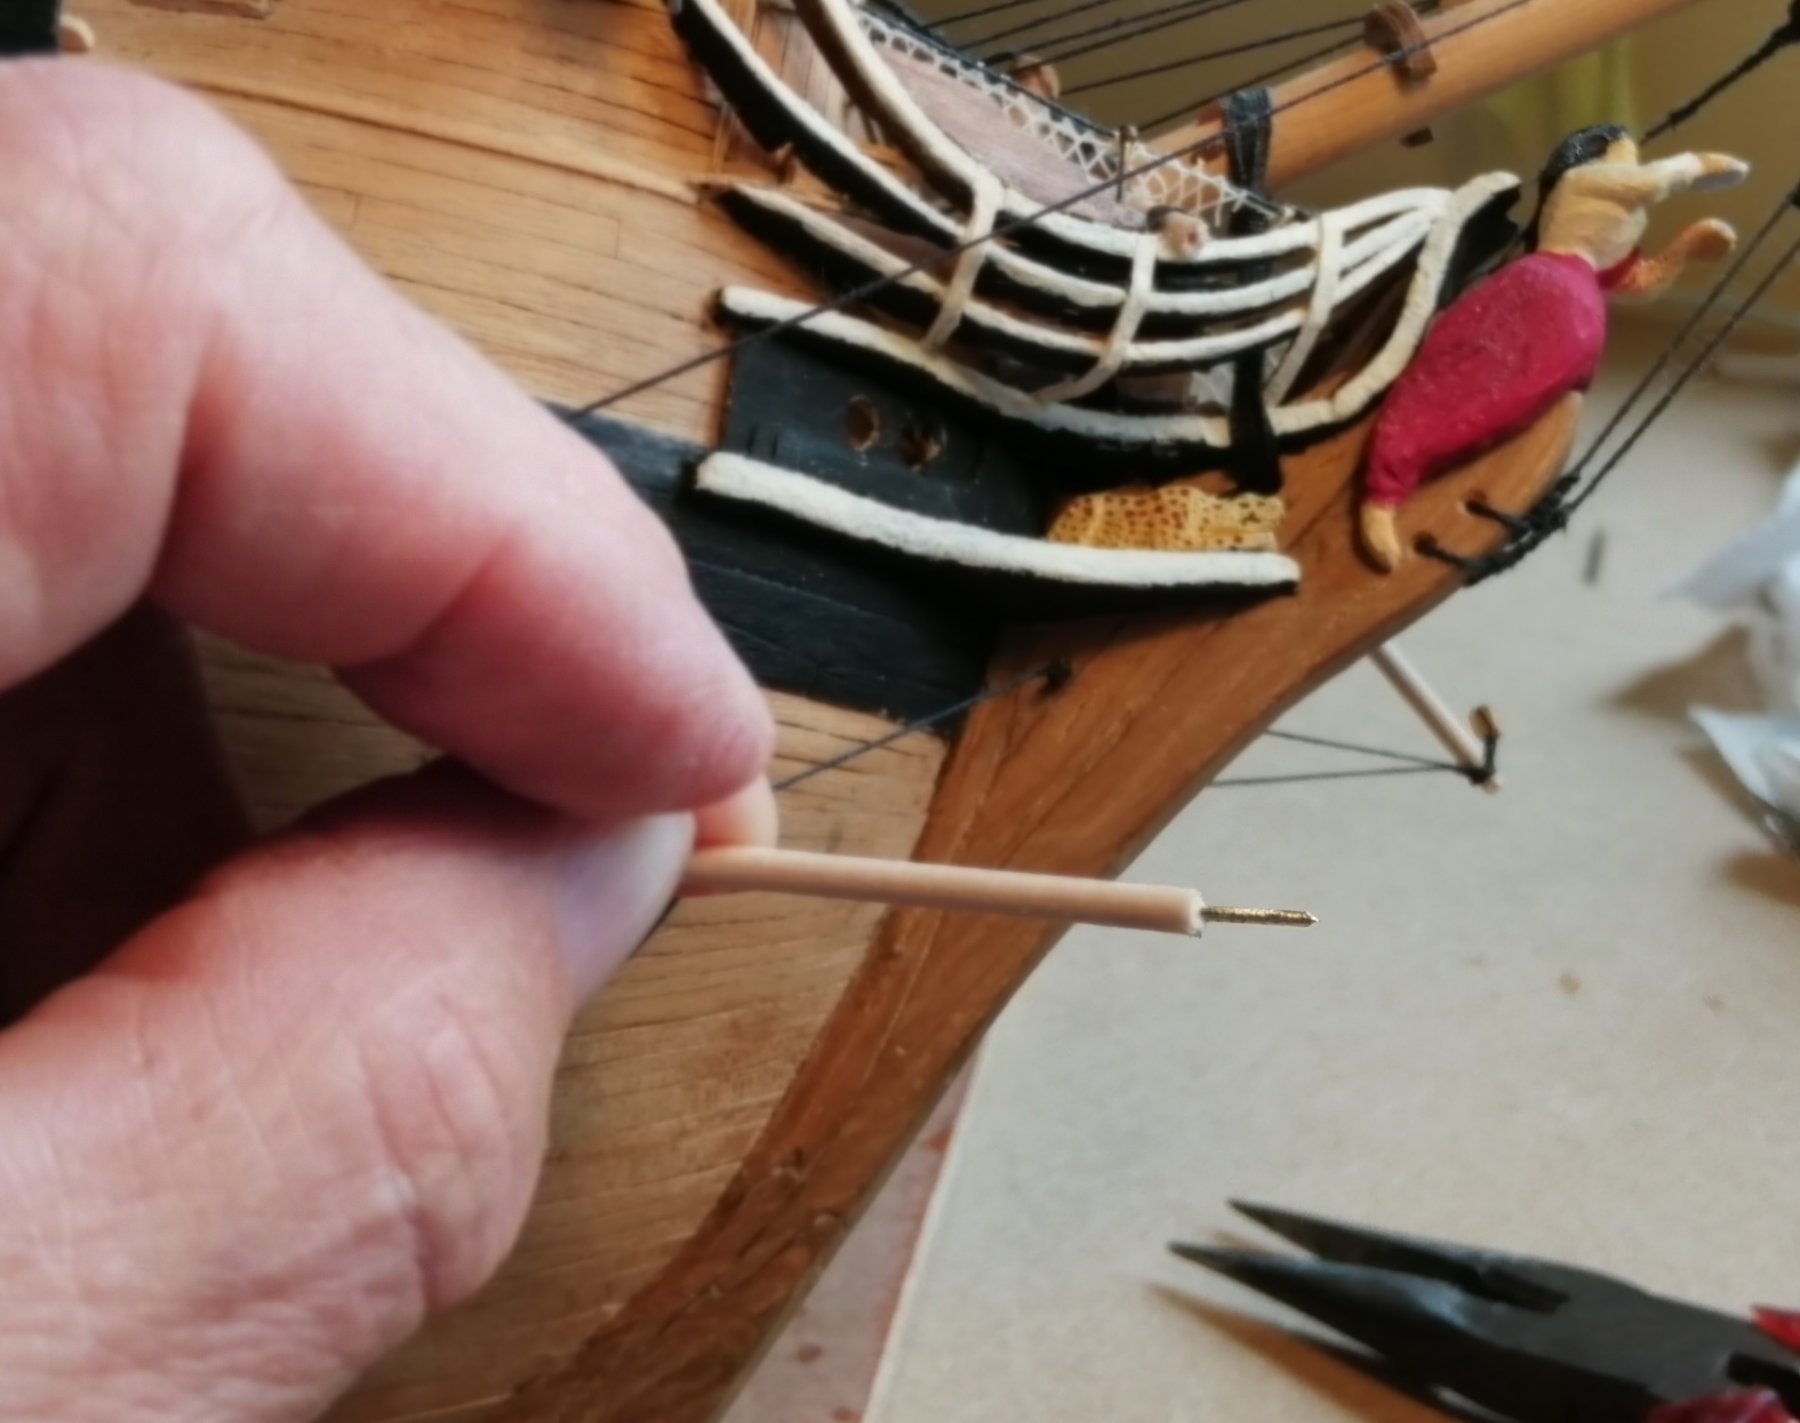
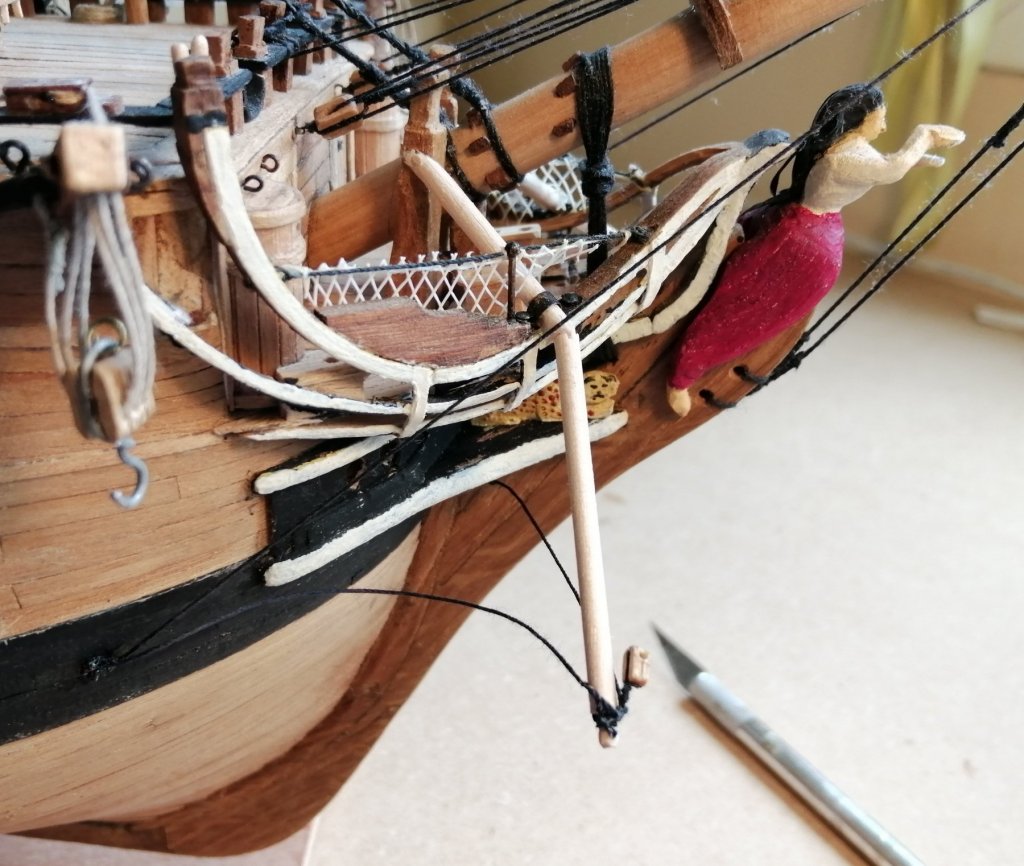
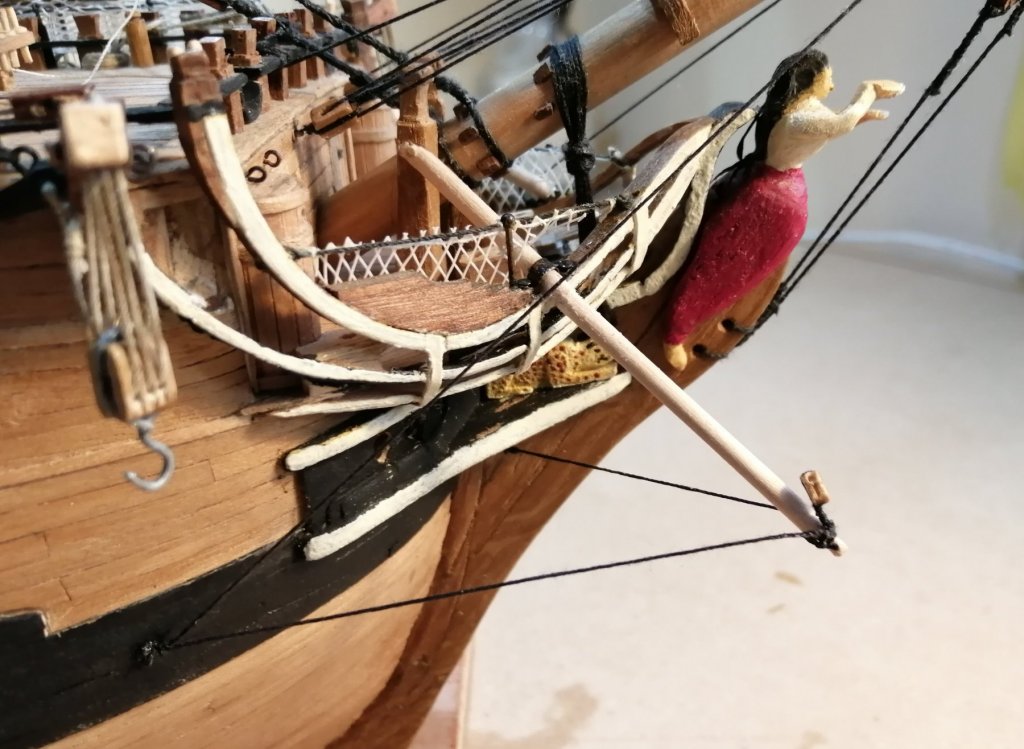
Especially since I started the rigging, when big 'sticks' started sprouting upwards and in all other directions, I've tried to be as "unclumsy" as possible and although there have been a few times spars and rigging threads and other things have been caught by my hand or whatever, they have all survived the experience - - - until now. I managed to clunk the starboard bumpkin - - - and >>> I attempted to save it by applying a little PVA glue and holding it in position by using a thread looped through the block which was clamped on to the mast top. I wasn't very confident it would work, and my lack of faith was justified when, the next morning it looked like this >>> I wasn't keen to rip it off to start again as it's glued and dowelled into the knighthead and also glued and nailed via a metal bracket on to the head timbers so I drilled a 1mm hole as close as I could in the centres of both parts of the casualty and inserted a 1mm brass wire, then glued the two pieces together again >> . . . and (hopefully) back to normal (it feels at least as firm as the original) >>>


- 257 replies
-
- 14
-

-
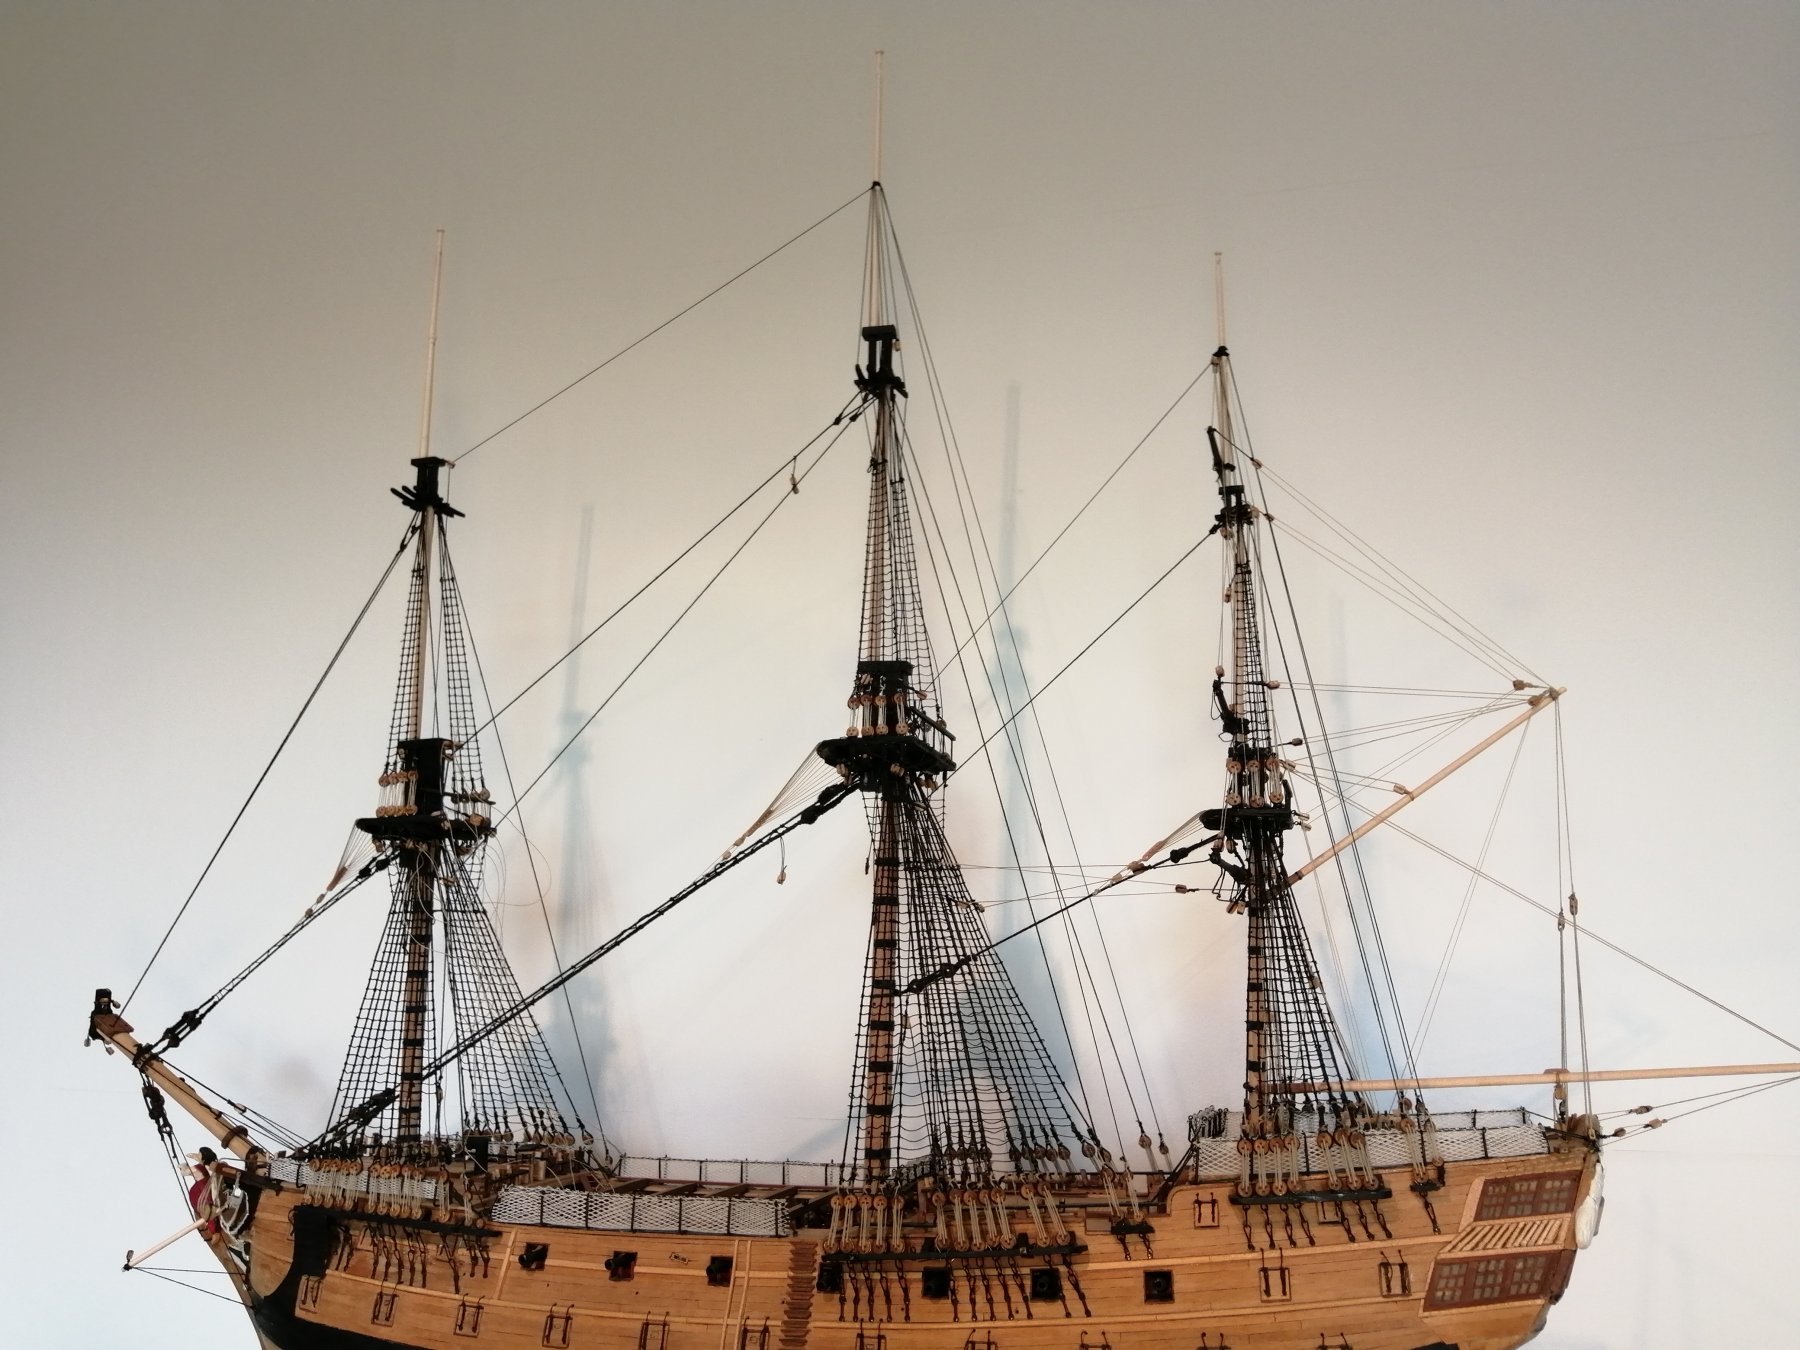
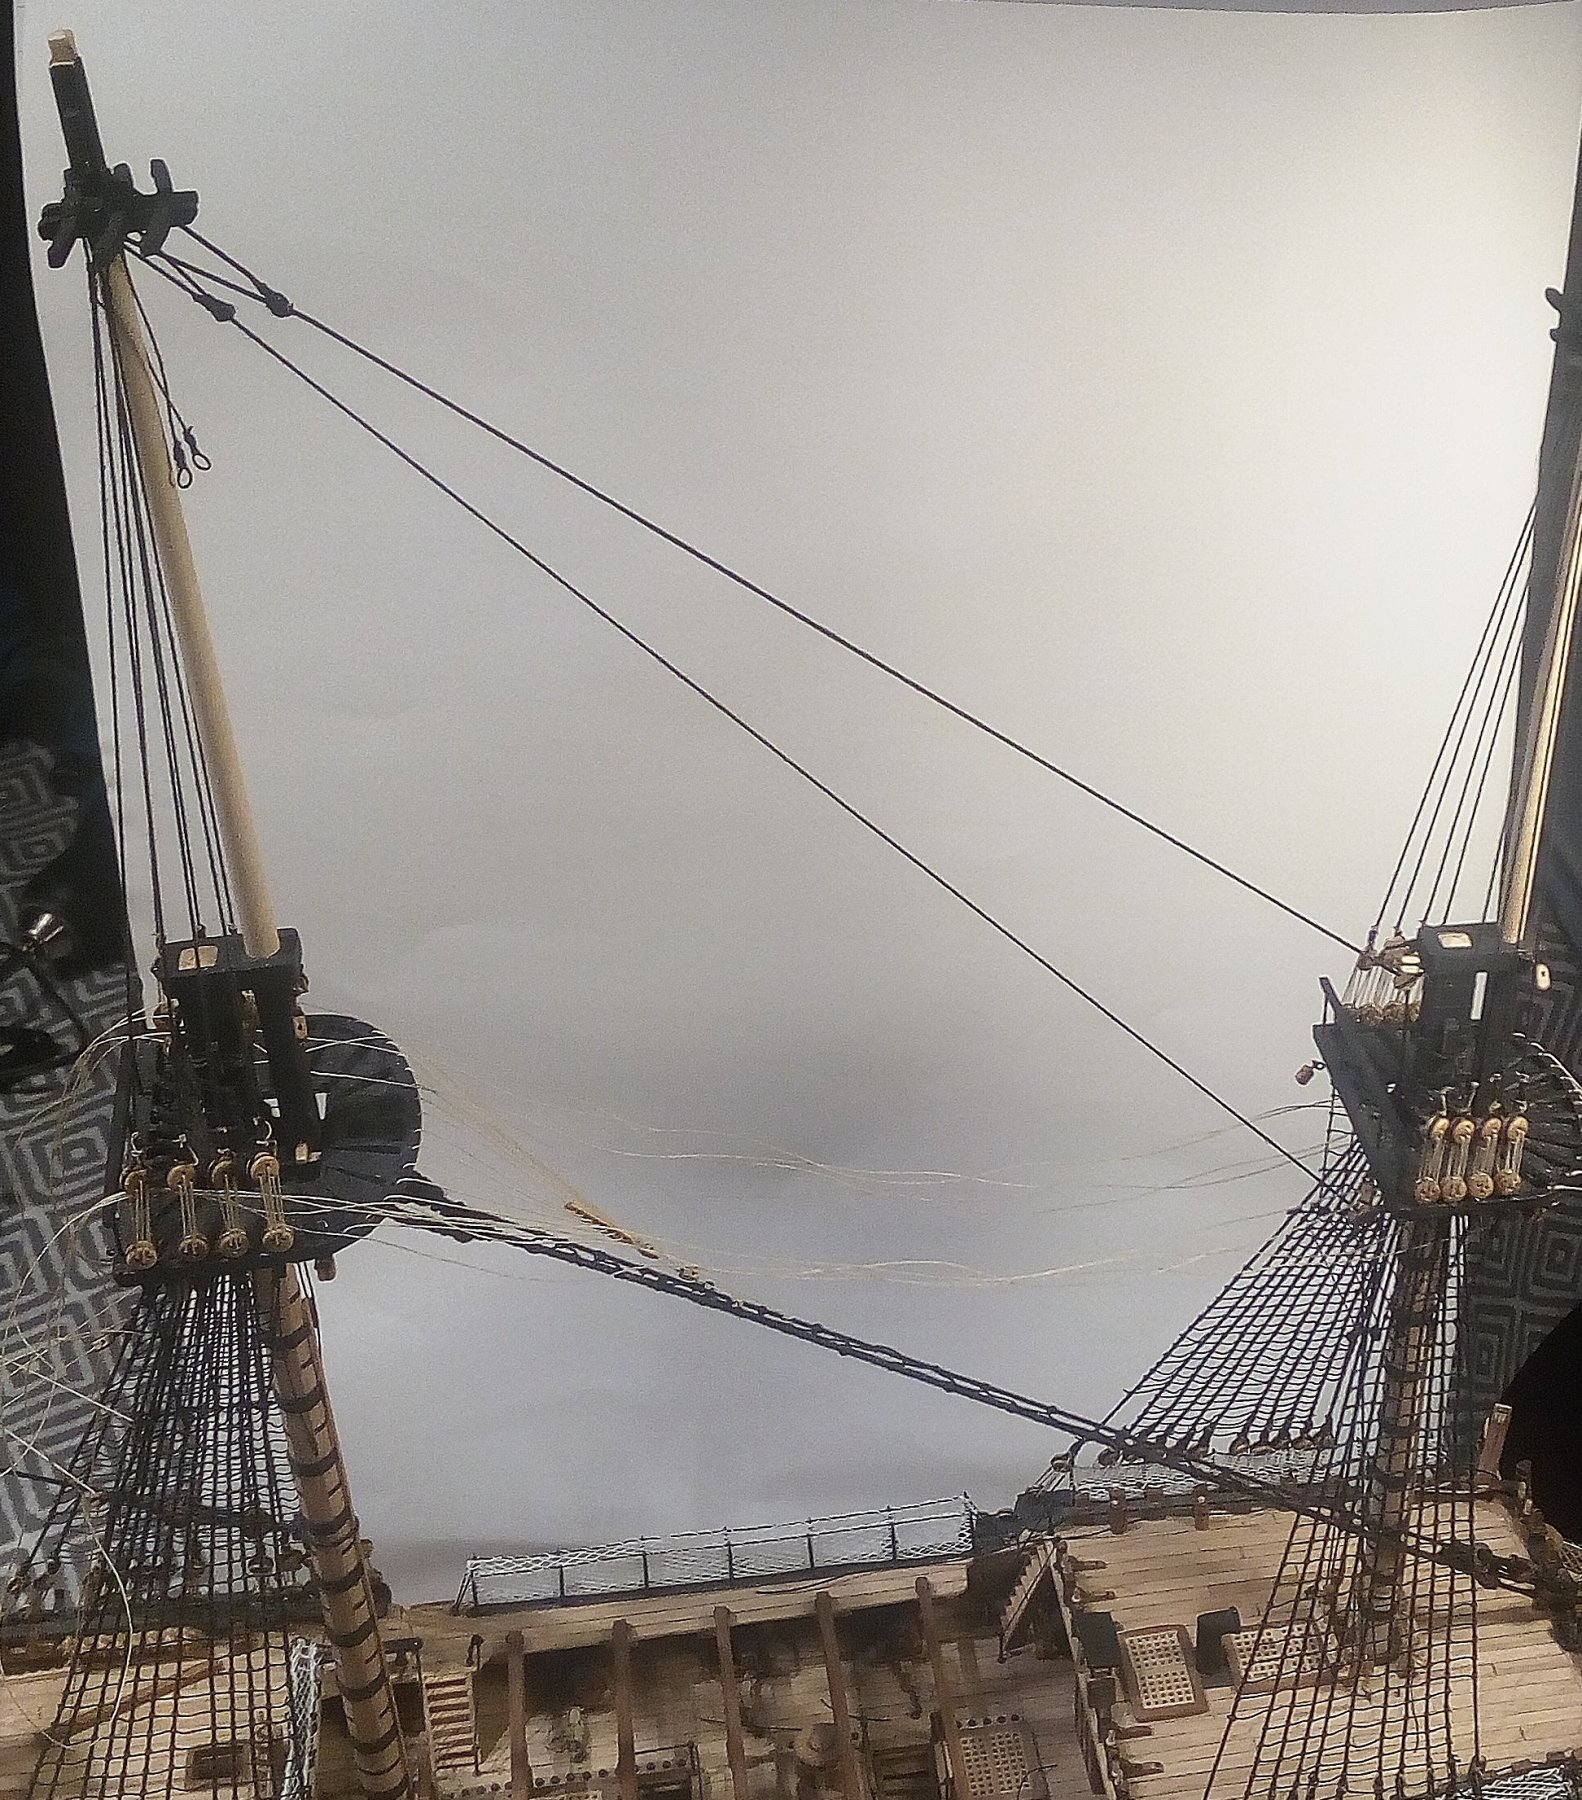
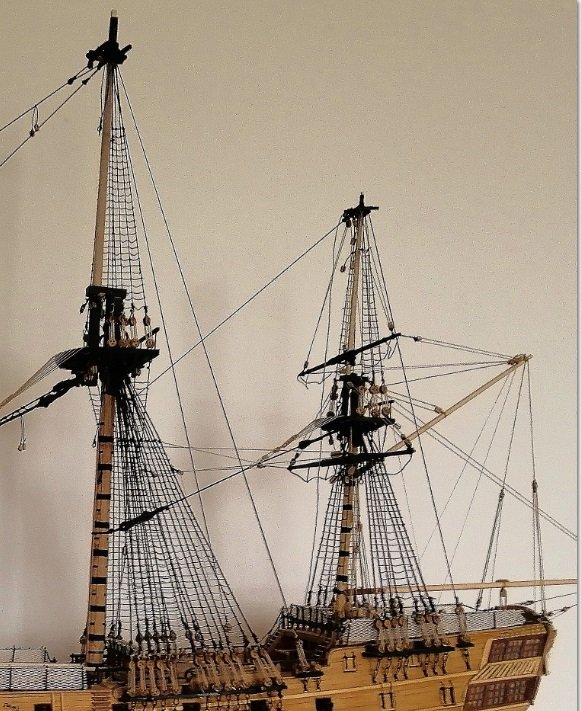
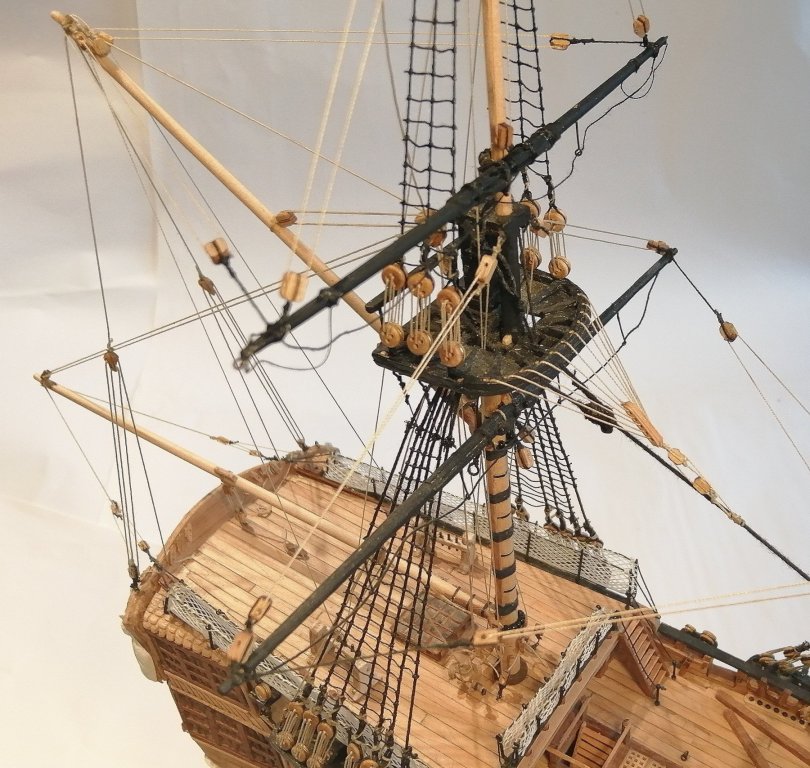
Thanks for your comments Tom and Jason and the others for the likes. The last of 1,892 ratline knots has now been tied! (After the tedium endured tying them all I felt it was worth a couple of minutes to count them.) They're all in this photo if you care to count them >>> The above photo also reveals that all 3 topgallant/royal masts are now permanently in position. With the exception of the mizzen royal stay and backstays, the mizzen is now virtually complete >>> The braces for the topmast and topgallant yards are shown as being belayed to the taffrail but I felt that was going to be too crowded together with the lines that are already made off there, so I made a change to their tying off points. The topgallant braces are routed like this >>> . . . and the topsail braces like this >>> Main royal stay and backstays, and fore topgallant and royal backstays still to be fitted then attention will be focussed on finishing the bowsprit and turning and preparing the remainder of the yards for fitting. Foredeck and quarter deck cannons still to fitted and some work on the ship's anchors also await.


- 257 replies
-
- 10
-
-
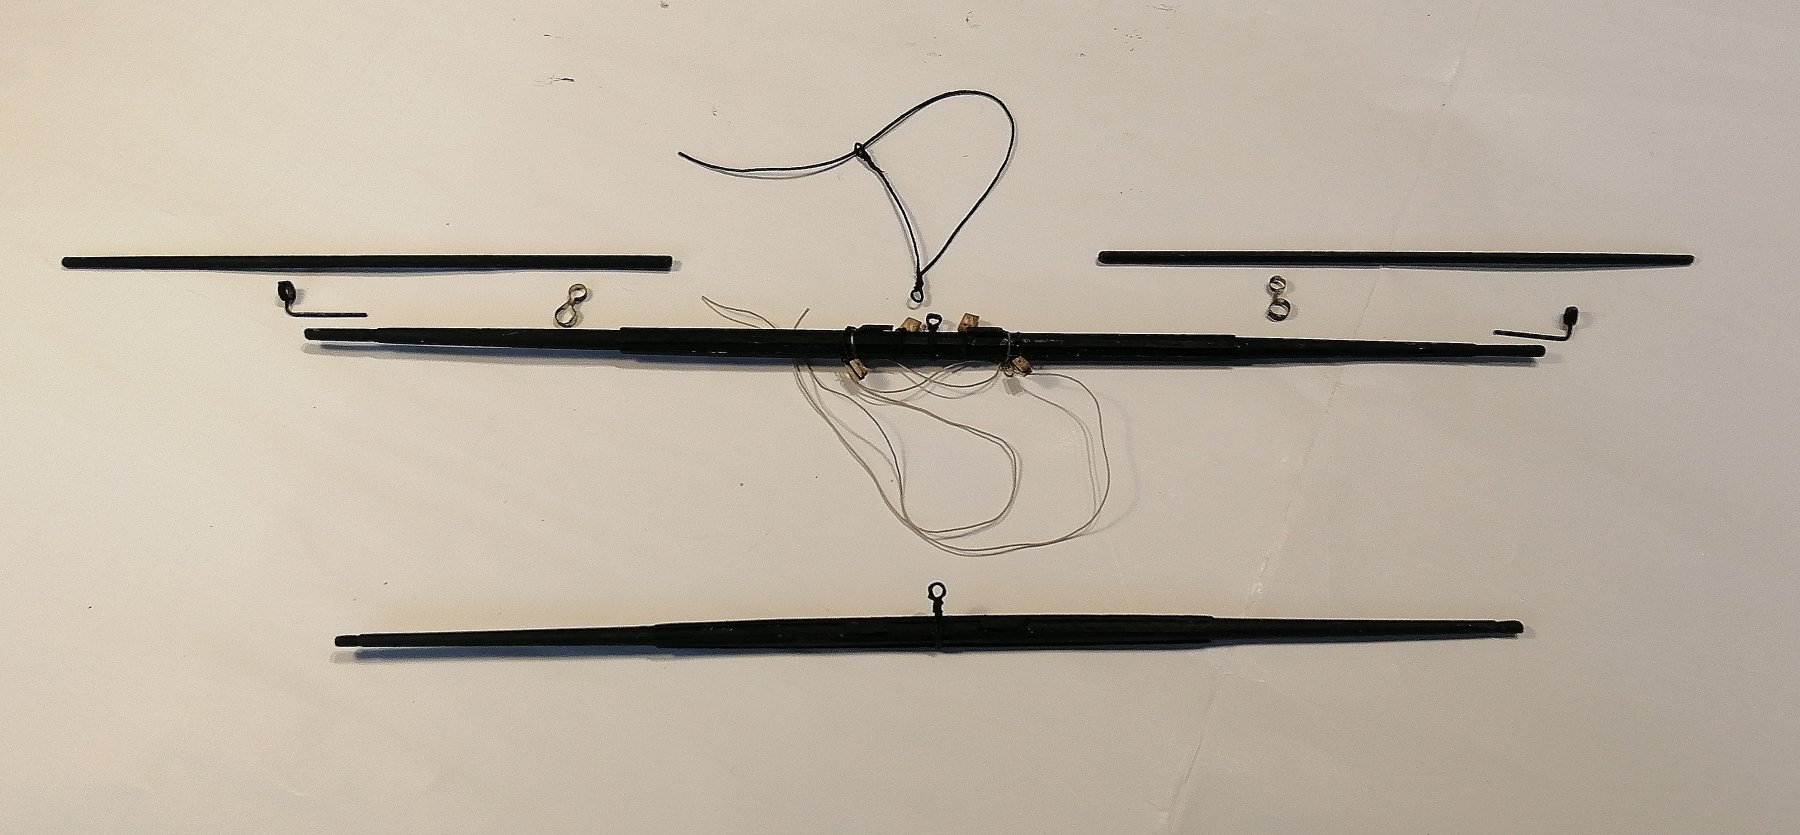
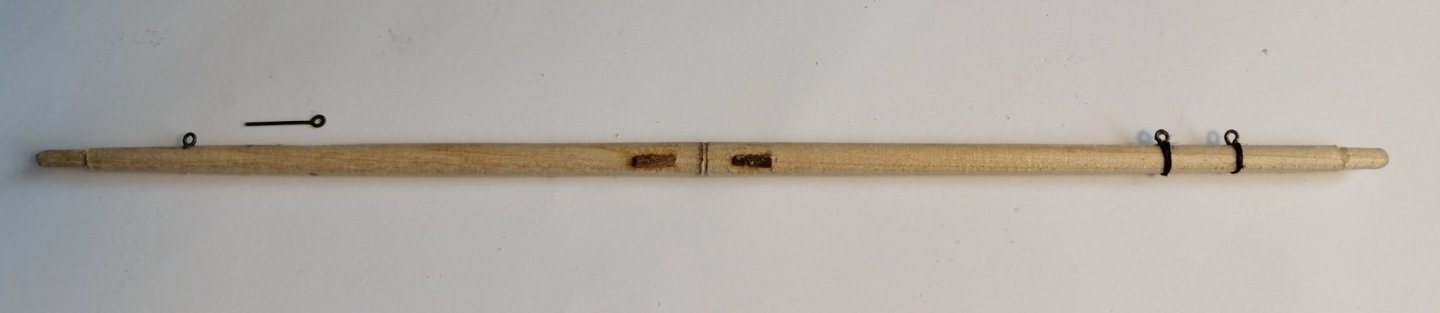
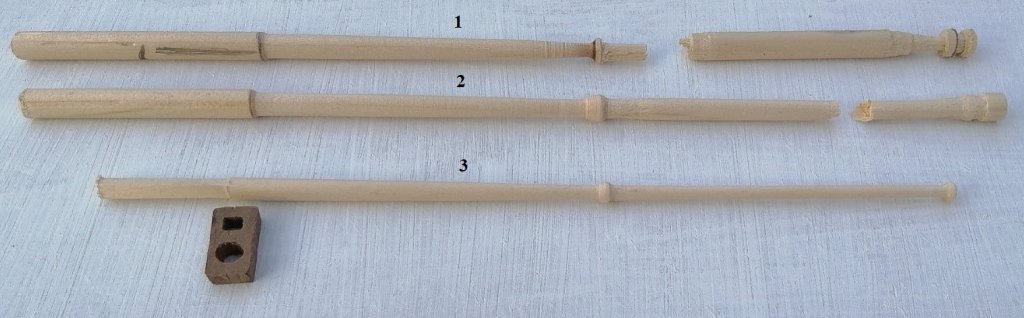
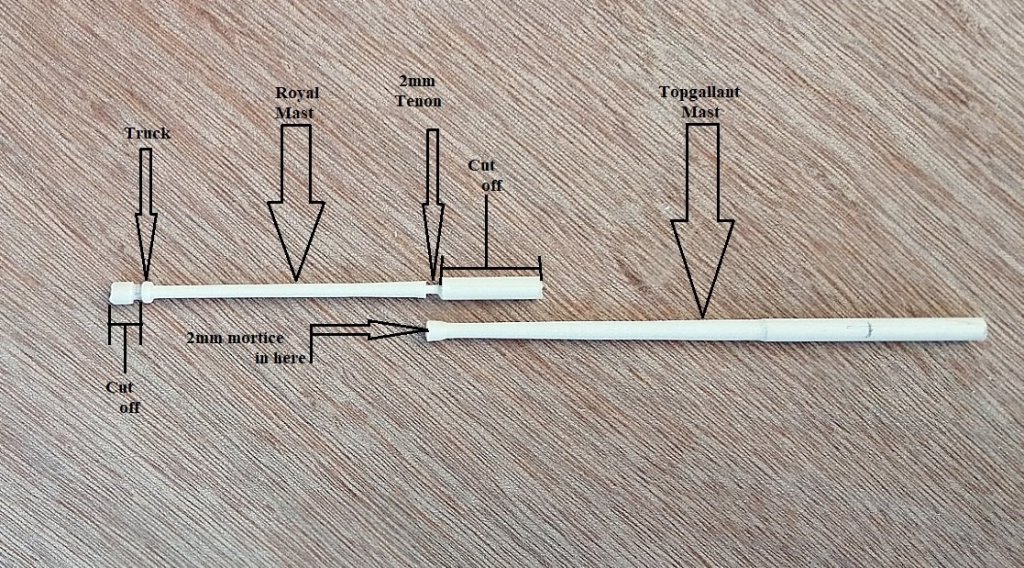
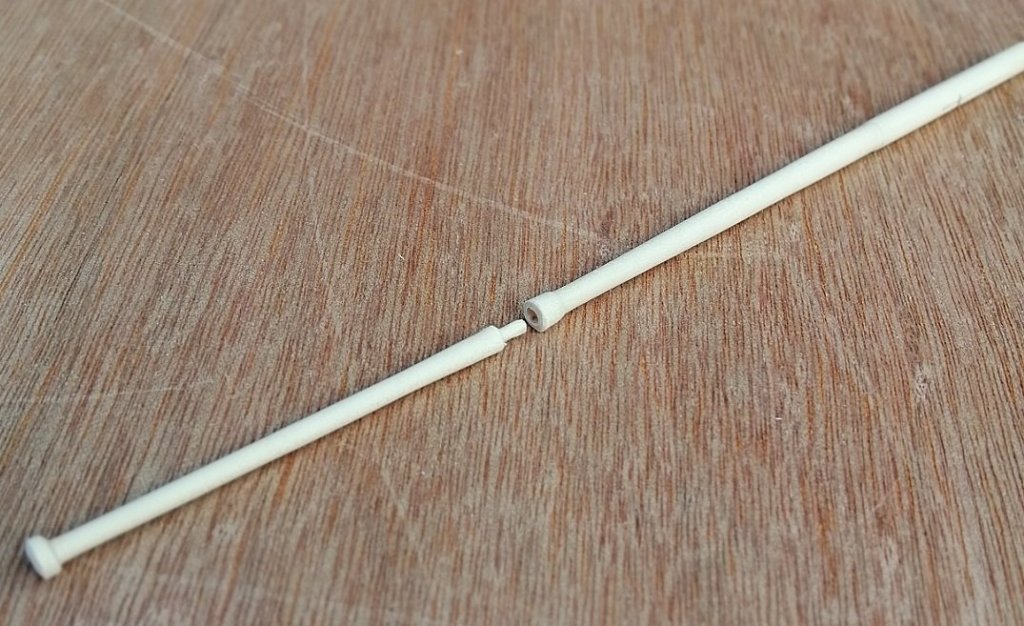
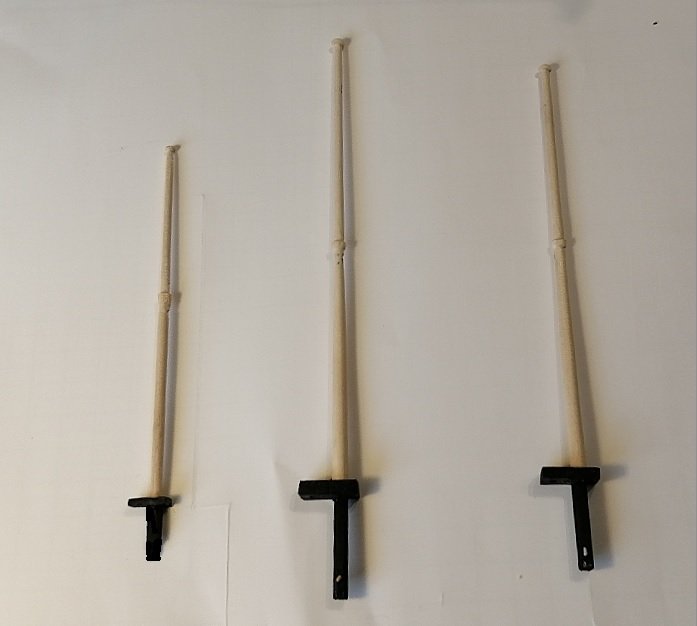
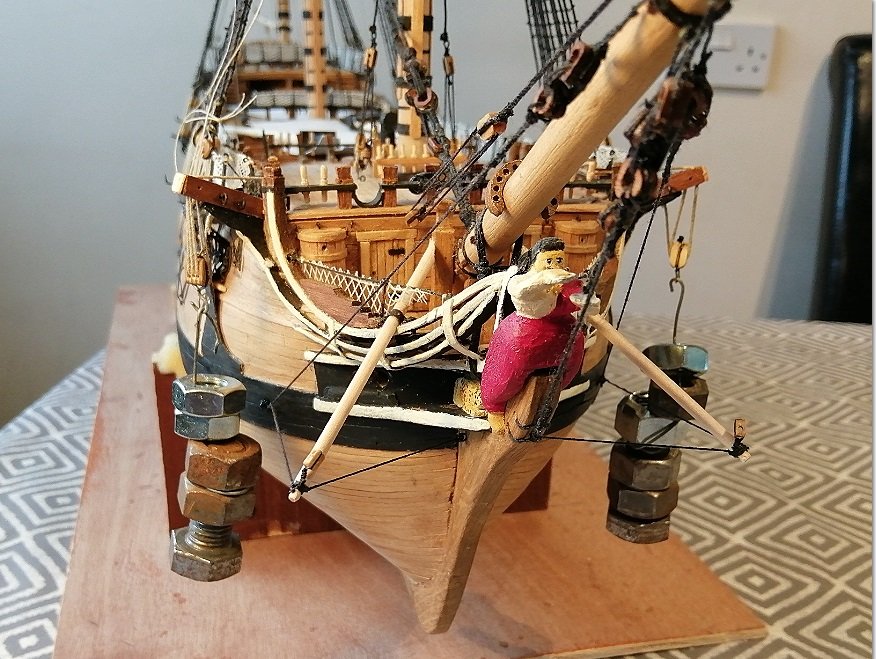
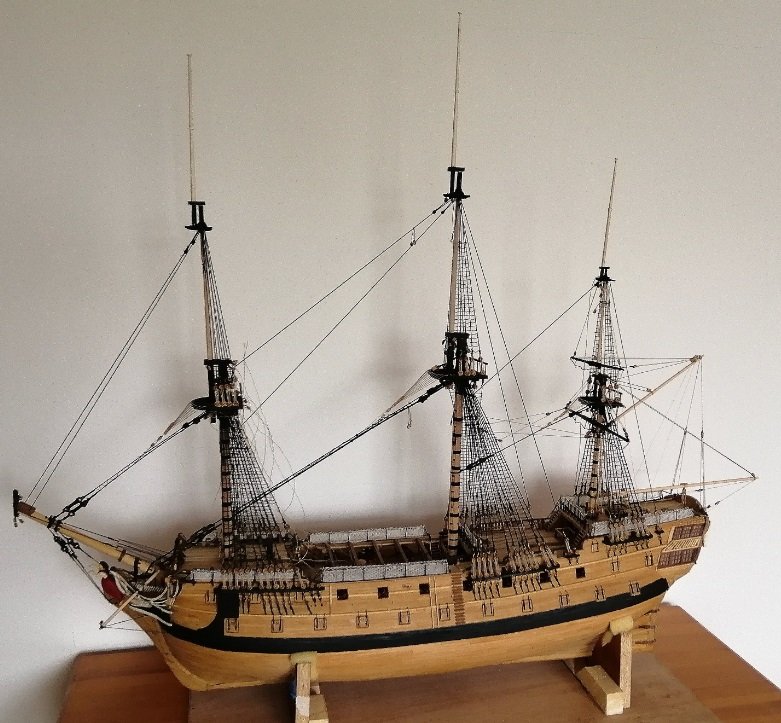
Those fore topmast shrouds are still looking for someone to complete the ratlines. (Actually, today I fitted 5 on the port side.) The mizzen topgallant/royal mast has been ready for several months but due to lack of headroom at the ship's storage place it hasn't been fitted yet. Since my last post I wanted to get the main and fore topgallant/royals made. I started on the main and after 2 failures finally got that one turned. Here are the first 2 failures along with the 3rd one which survived the lathe >>> It's very frustrating spending 30 minutes being ultra careful with these very thin lengths of wood only to see them breaking! My first attempt at the fore t'gallant/royal also ended the same as the first two above. I was so annoyed and just couldn't face beginning again so I tried to salvage the lower section by flattening it off at its 'cap' and trying to drill a 2mm hole/mortice down the centre to hopefully accept a 2mm tenon on the bottom of the royal mast. I don't know if, in reality, these masts were made separately and joined by means of a mortice and tenon joint, or if they were made as one mast??? In any case I thought I'd give the 2 part mast a try. Turning the 2mm tenon wasn't a problem - - - drilling a 2mm hole EXACTLY in the centre was potentially going to be the problem. I don't have a 'clever tool' or device for centre drilling in a round rod that is only 4mm in diameter so it had to be done by eye . . . and I would only have one chance to get it right. >>> Finally, the happy trio >>> It's probably more than 2 years since I made the bumpkins for the forepeak but have kept them off the ship until now >>> . . . and I rigged the starboard cat tackle (the port side has been there for a while) and hung some nuts and bolts on them trying to get them to hang more naturally >>> The first of the mizzen and main topmast backstays are also now rigged ( I WILL get back to these ratlines one day!) >>> Couldn't go to all that trouble turning the topgallant/royals with seeing how they look on the ship. (It IS a tall ship now . . . or it will be once these masts are fitted permanently) >>>

- 257 replies
-
- 10
-
-
Johann ~ ANYTHING that you make is guaranteed to be much better than any purchased equivalent !!!
-
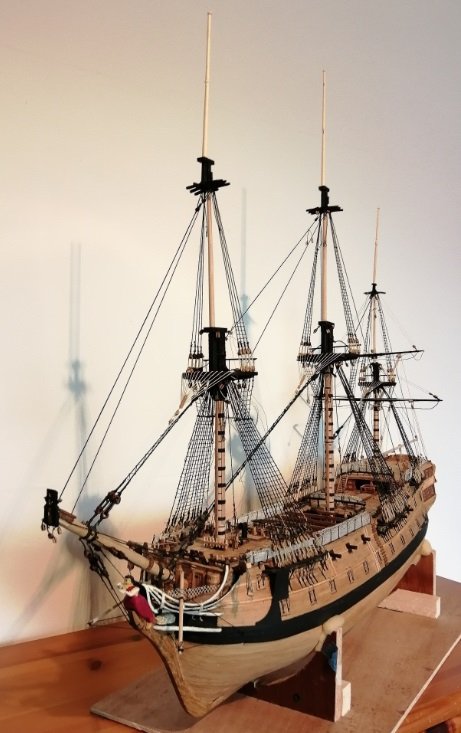
Nine months have passed since my previous posting . . . and Leopard has had nothing done to her in most of that time. After my time with the figurehead I made another attempt to get some more ratlines done and by the time I had one side of the mizzen topmast done I was once again 'ratlined-out' (My doctor says I have 'ratlinitis ad nauseum' -- I hope it's curable!) A couple of weeks ago I finished the other side and then finished both sides of the main topmast ratlines. The foremast still awaits its topmast ratlines, but it was time to divert to something less brain numbing. I turned the main yard (along with its studdingsail yards), the fore course yard and the mizzen topmast & topgallant yards. Here are the main & fore yards >>> The main yard is close to being ready for assembly with the studsail yards and irons done, the truss pendants and the yard jeer blocks fitted and the sling still to be properly attached. (The fore yard is still just as seen above). Because of their length, the 2 above yards won't be fitted to the ship just yet as they would make it very wide and very vulnerable to clumsy shipyard workers! Presently, the ship is kept up on top of the fridge/freezer in the kitchen and there is only about an inch (25mm) of headroom above the main topmast and the ceiling so as yet there are no topgallant/royal masts fitted. (My wife won't let me cut a hole in the ceiling!) So, although the mizzen topgallant yard is ready for fitting there's no mast there to which to attach it. I have now fitted the miz. topmast yard. >>> Right about now is when I felt I had to make modifications to the belaying system on the poop deck around the mizzen mast. There is a woefully inadequate amount of belaying points in this part of the ship. The deck plan shows only 7 pins on the rail behind the mast with NO BELAYING POINTS anywhere else on the poop deck. So, being the master of my own ship here, I decided to over-rule the ship's architect and have added a pinrail of 5 pins each on both sides of the deck >>> The "official" pins on the rail at the mast are already almost fully populated with the crossjack truss pendant and lifts, the peak and throat halliards and the spanker boom topping lift - - AND - when their turn comes, I'll have to find a home for the main topsail and topgallant braces somewhere on the poop deck. (As yet, I haven't discovered what else might need to be belayed to a point on the poop deck.) As the taffrail is already a bit busy with the vangs and boom guy pendants I didn't want to belay any more lines there, so the mizzen topsail braces have been belayed to the aftmost pins on each of the 'new' pinrails I have fitted on the deck. I have sent a memo (emails didn't exist in 1790) to the ship's architect advising him of the modifications.
-
Hi Tom, If I had won the lottery I would have employed someone to get them pesky ratlines finished for me !!!
-
Hi Tom, I'm just now catching up on your log. It must be nearly 8 months since my last visit as I'm not being notified by MSW of any build logs I follow. In the last 8 - 9 months all work on my ship has stopped and with some 'life things' I haven't even been lurking here. My last memory of working on the ship was these never-ending ratlines . . . and they're still not finished. I've missed so much of your recent progress and I have to say it's looking great - - your gun-port lids, that front end and the stern carvings all look great, and the ship looks magical in the dark with its lights on!
-
Hi Tom, just discovering your updates now as I'm still not getting notifications of logs that I follow -- despite ensuring that I'm still on their 'follow lists'. Your build is getting along at a good rate unlike mine as for the last month or so I've been not working on it at all !!!
-
HMS ANSON 1781 by albert - 1/48 - 64 guns
Bluto 1790 replied to albert's topic in - Build logs for subjects built 1751 - 1800
Here we go again Albert - - - another masterpiece !!! I can't decide if it's good for someone like me to be viewing your build logs as they really show up my deficiencies . . . but then it's so good to see such perfection, so I've decided - - - I'll definitely be following this! -
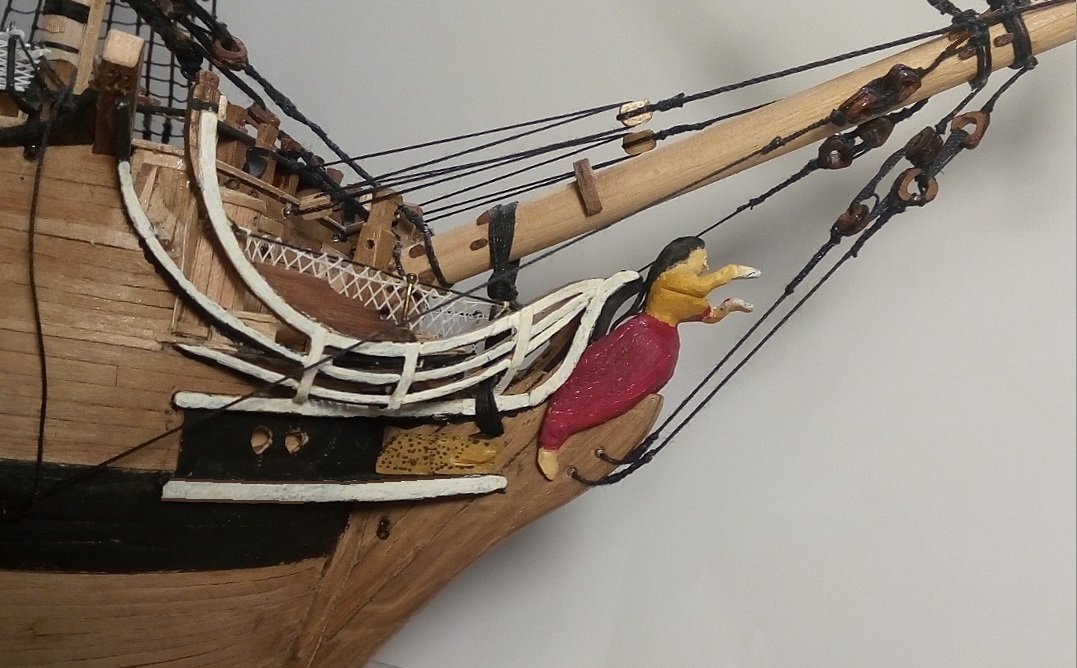
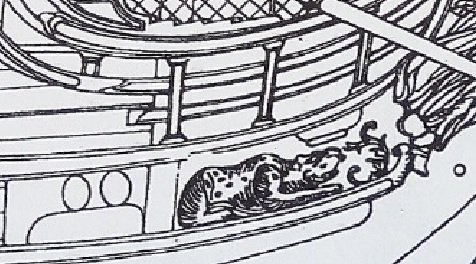
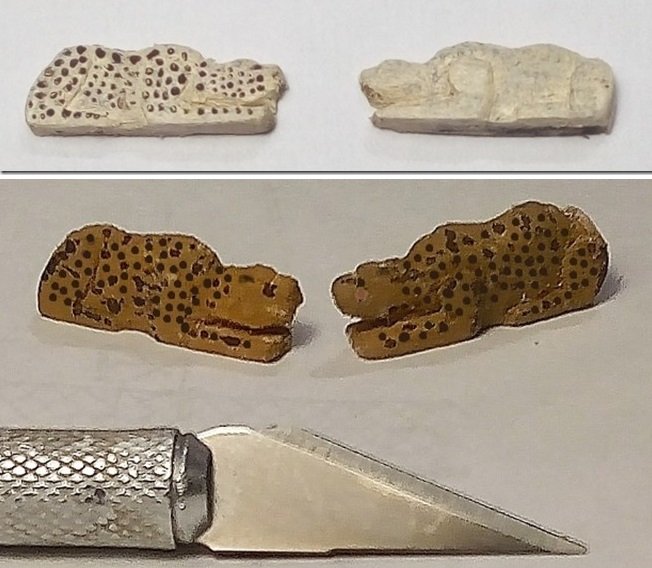
Hi Steven ~ I'll take 'Snow Leopard' ! As for the spots (or lack thereof) - - - the drawing is somewhat vague, although it hints at a few spots as there are a few shown there >>> When I look at that enlarged pic above, it does appear that the face is meant to be looking to the side rather than straight ahead. (The actual size of the cat on the drawing is only about 12mm, or about a quarter of the size of the above as I view it on my laptop monitor.) Apart from the natural colours of the wood and the black parts of the ship, the only colour I have used is on the figurehead so I think I'll just carry on with the 'Snow Leopard' colours . . . maybe I should re-name the ship HMS Snow Leopard ??? !!!
-
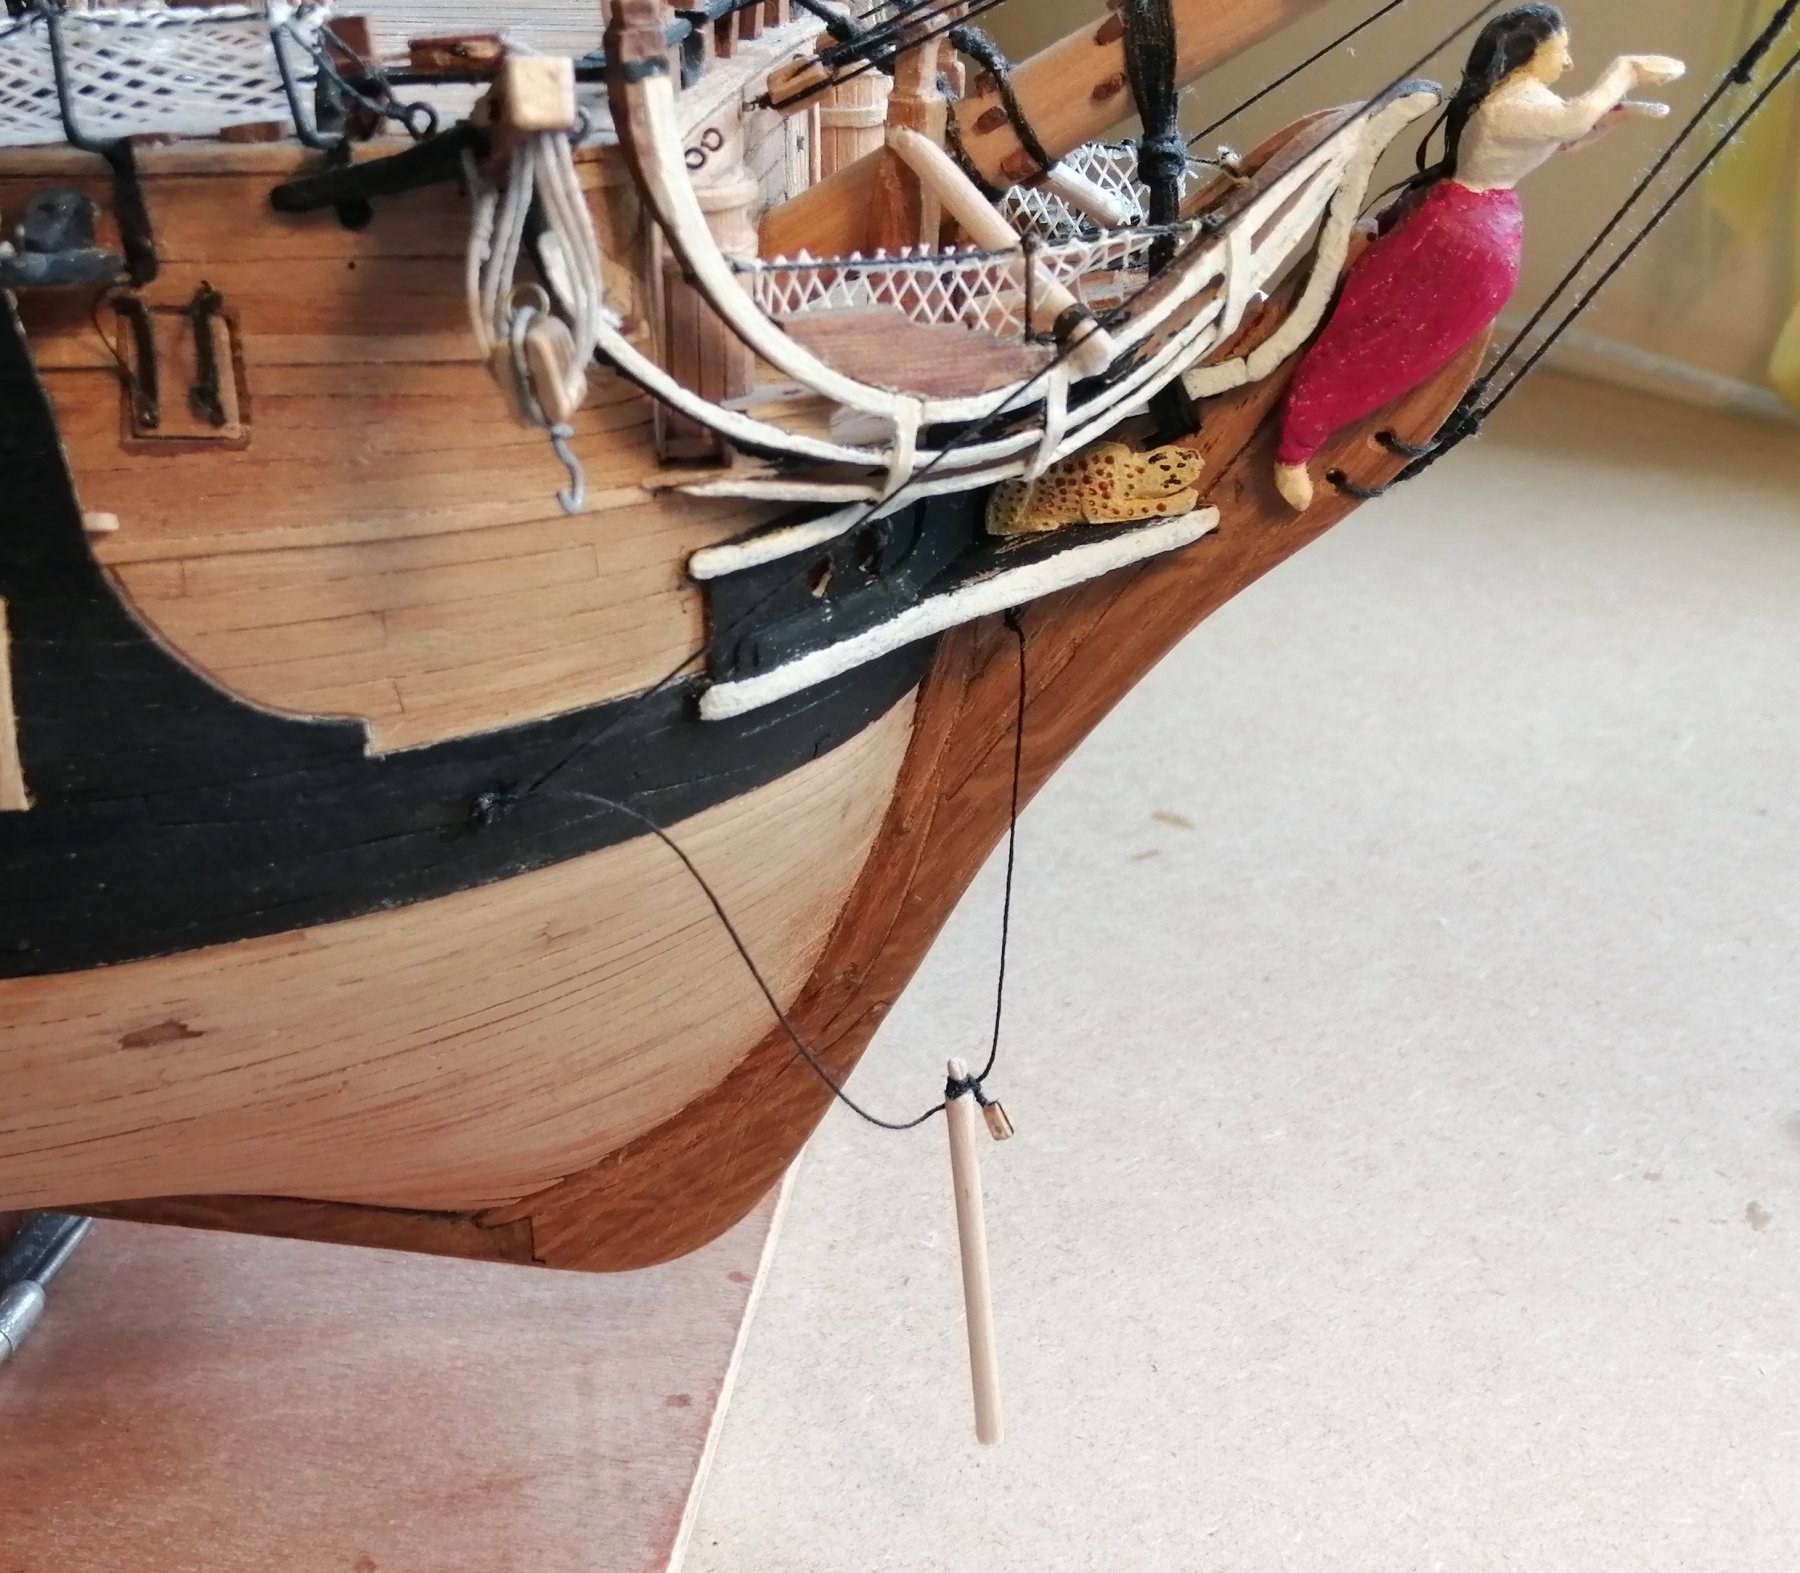
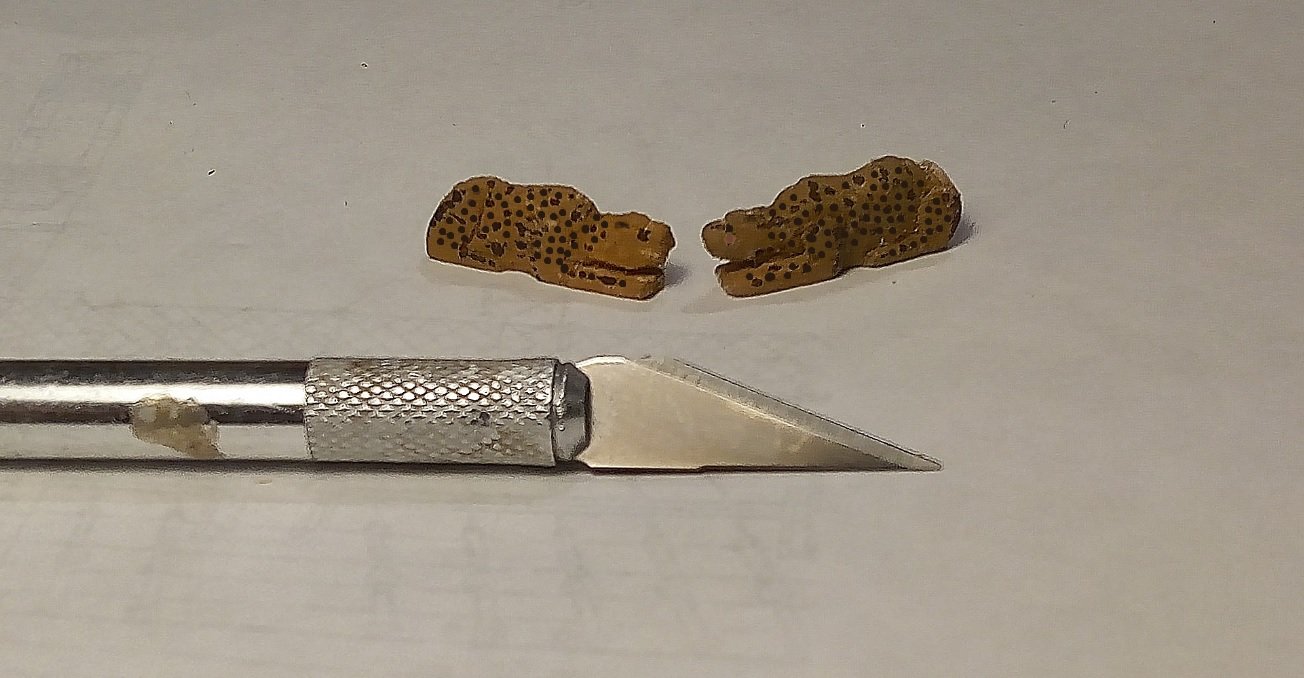
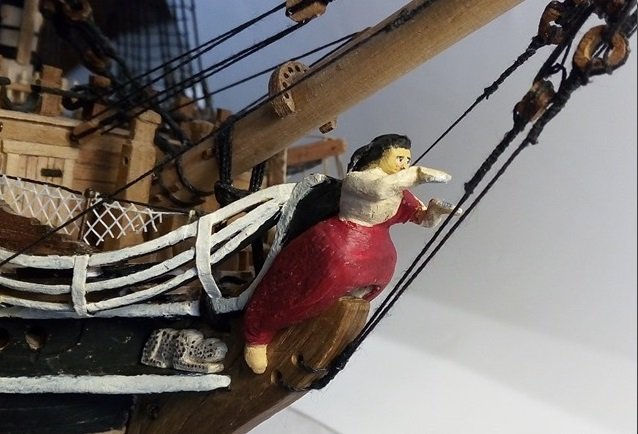
Thanks for your comment, Tom. In my post above I said the Leopards were inconspicuous crouching there on the beakhead and I was less than happy with them. They were almost invisible because of the colour of the basecoat I had applied, so I removed them and re-painted them with a paler base colour then 're-spotted' them. The spots look black BUT they are dark brown. Here's a 'before-and-after' comparison >>> They may be a little bit pale but at least now they can be seen on the ship. (I felt they were a waste of time previously, and didn't notice how invisible they were until I looked at the photos. They didn't appear as invisible in reality but I find that photos seem to give a false impression.) The drawing of the figurehead appeared to show her with 'blowing-in-the-wind' fly-away hair. I couldn't imagine how I could carve that, so I glued thin strips of black tissue paper to her head hoping to create that illusion. Also, she has had further breast reduction work done as, although her waist was reasonable slim, above there she looked like a black-haired Dolly Parton! > > >
-
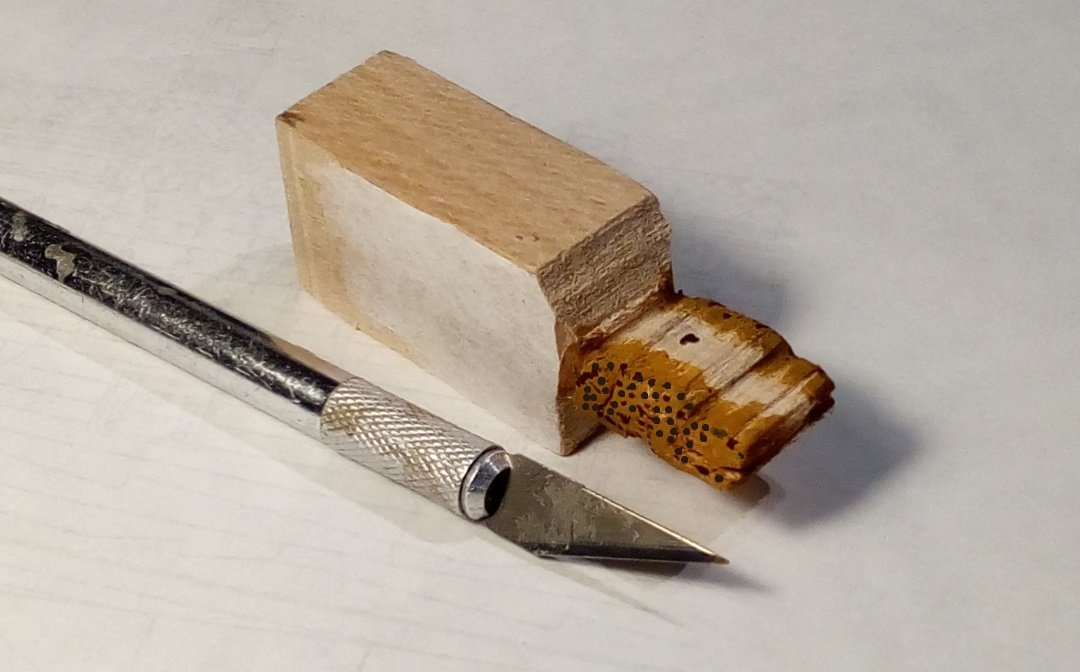
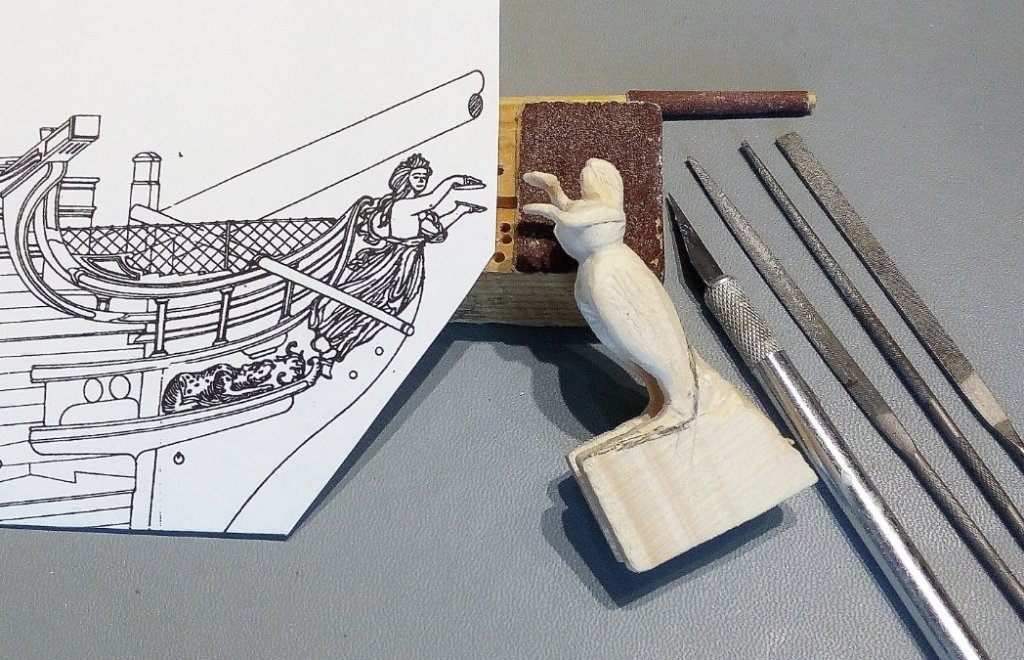
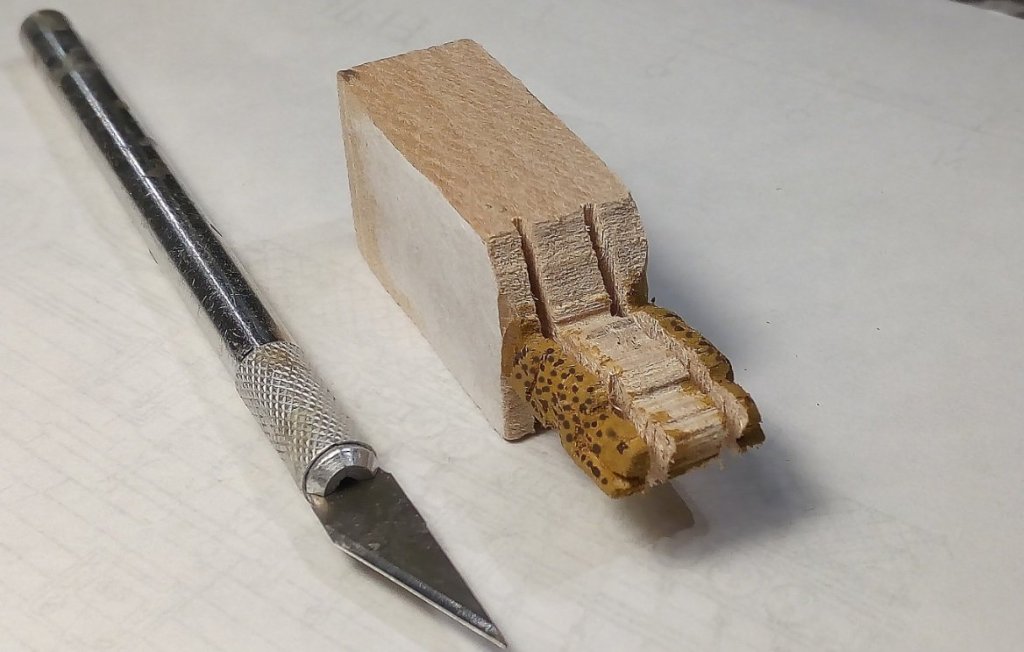
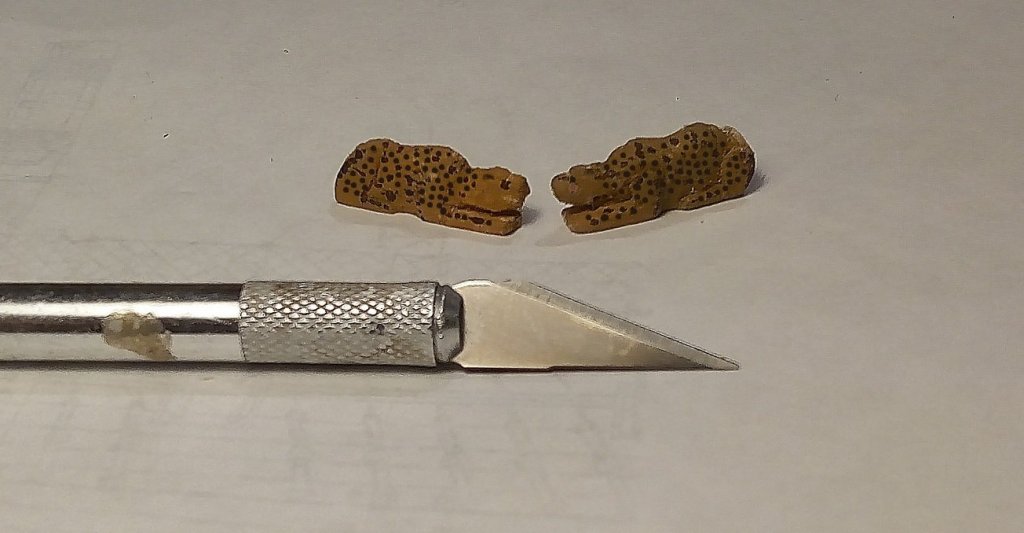
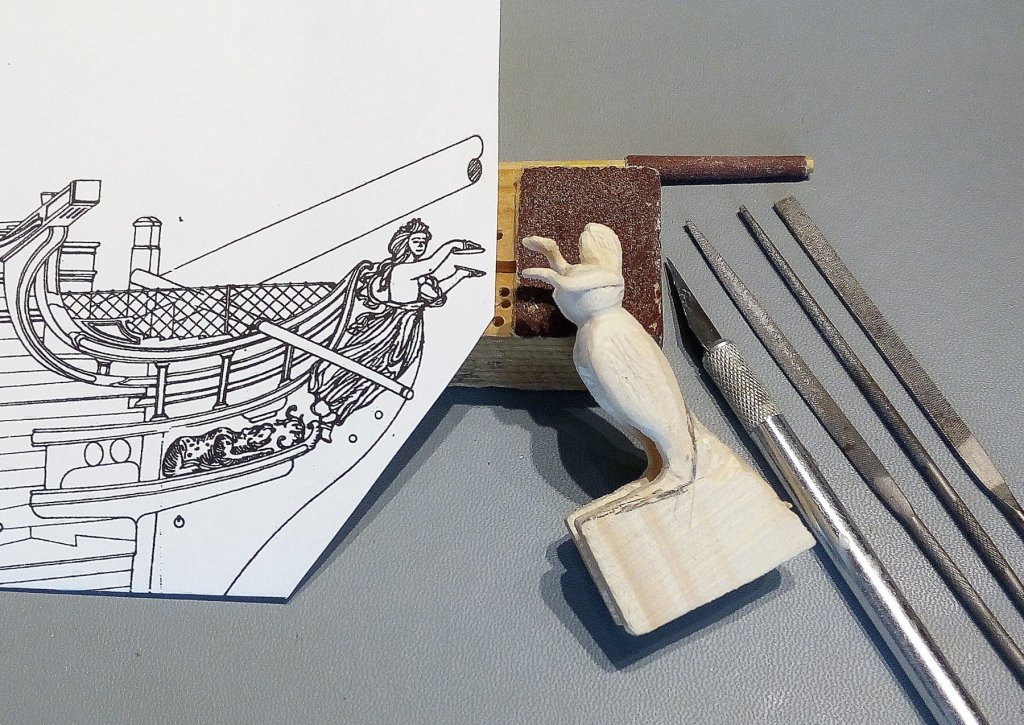
Finally rigged the mizzen topmast shrouds then made a start on the ratlines. Got 9 done on the port side and about 3 on the starboard side then decided to have a break away from all that tying of knots > > > It felt like time to have a try at creating the figurehead. The 'carvings' on the stern had been made from air drying modelling clay as I had never done any wood carving and ended up with reasonably acceptable items. Out came the clay and made a couple of attempts at the figurehead - - - both were disasters! The figurehead is much bigger than any of the stern carvings and it is also 'full width' and I just couldn't get that clay to work for me. A small scrap piece of softwood (I think it was Pine) served as a 'testbed' for my first ever attempt at wood carving. I expected it would have been as much of a disaster as had been my clay attempts. I glued the drawing of the figurehead onto the wood and roughed out the profile on the bandsaw then proceeded to try to give her the shapes she needed with a craft knife and some riffler files. I left some wood on at the feet in order to have something to hold while I tried carving. I also cut a central groove in the excess wood so that it would sit over a dummy beakhead. After initial carving I was surprised that it almost resembled the drawing! > > > I made 'her' with her face looking forward - the drawing showed her face looking to starboard but I wasn't sure if that was just meant to be a representation. Also, my 'woman' didn't have a nose and at first I couldn't figure how I could ever give her a nose. I eventually drilled a 0.8mm hole and glued in a tiny piece of wood and she has now ended up with a rather pointy nose! Also, at first, she was a bit fat and I don't think she would have been very happy with that so after considerable carving and filing and sanding she now looks a bit slimmer. Initially, the softwood carving was just meant to be an experiment and I acquired a piece of Bass wood in order to make the "real" figurehead but it turned out worse than the pine edition and it also broke in a couple of vulnerable places, so I've gone with my first one. In the picture above the starboard Leopard can be seen crouching behind her feet. Although these Leopards are quite tiny, as well as being only half width, I decided to carve them from the Bass wood. I glued a drawing on one side of a piece of the wood, roughed out the profile again on the bandsaw and carved both sides of the 'Leopard' on the same piece of wood > > > (Yes -- you're right . . . nothing on that piece of wood looks like a Leopard!) Back to the bandsaw to slice each Leopard almost off the wood > > > (Still nothing looking like a Leopard yet!) Maybe something resembles a Leopard now? > > > One of the Leopards crouches somewhat inconspicuously behind the feet of the figurehead > > >


-
Ahoy there Lin! I'll be following your progress with this build. Like you, I visited the ship last year and I was also surprised at the dimensions since this is "just" a frigate. My wife was just going to 'do' Asda while I was on the ship but she decided to come on board for a 'quick look'. She was very surprised at how much she enjoyed her extended visit and was very pleased she had done so. Although the Trincomalee isn't the ship I'm building, I was keen to get some photos of the rigging as I was close to starting the rigging on my ship at the time . . . and I'm nowhere near finishing it yet! (Didn't you make a comment like "everything is going slowly at the moment"!) Right now I'm at the figurehead stage as well and to enable me to work on it, I left a sizeable 'chunk' on the bottom. I made a 'through slot' in it and also made a dummy beakhead so that I could slip it on there while trying to pretend that I can do some carving! The picture below should show the extra bit before it is finally trimmed to its proper size >>>
-
I think you should be very pleased with them, Tom! . . . they look great. What kind of wood did you use for these barrels? A while back it hadn't occurred to me that I could have turned barrels from wood and that's why I took the easy route and bought ready made items. I'm just now catching up with your latest post as, once again, I'm still not receiving email notifications for some build logs I'm following.
-
Hi Mark, Thanks for your comments. As for the photo issue - - - what you described is exactly what I do every time. Before I click the "Post" button I always review the entire post just to ensure that everything is where it should be as well as for spelling etc. As I had experienced a problem with my post 2 posts ago, I was very particular with the last one and made very sure that all the photos were where they should be . . . but immediately after posting, one of them misbehaved! Prior to these two posts I have never had a problem, although I have read in other builders' posts that they have had similar experiences.
-
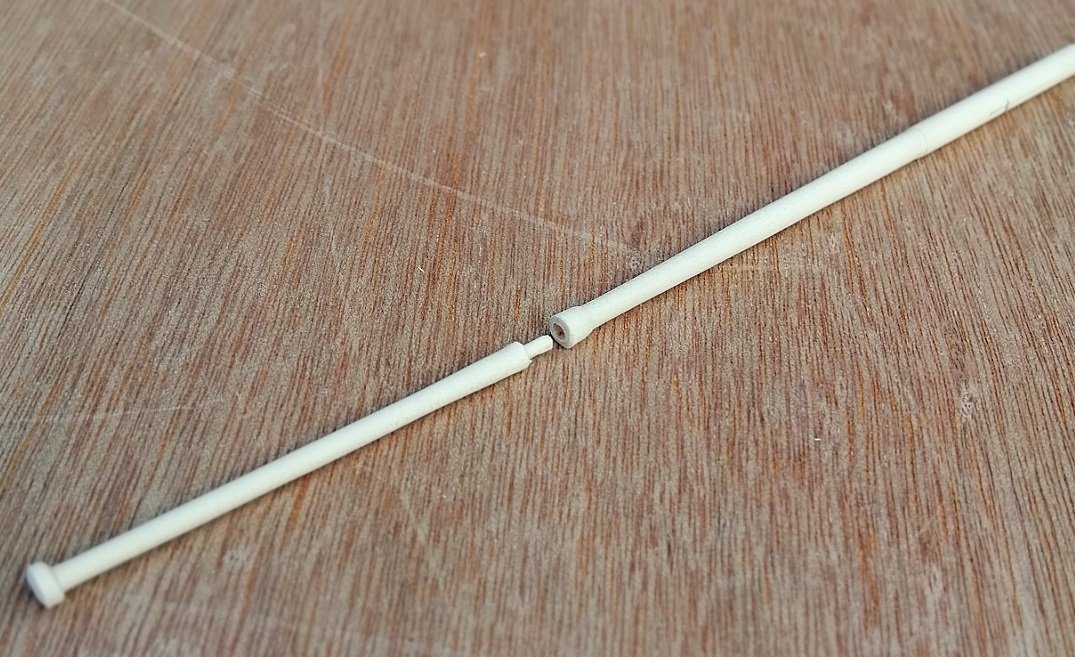
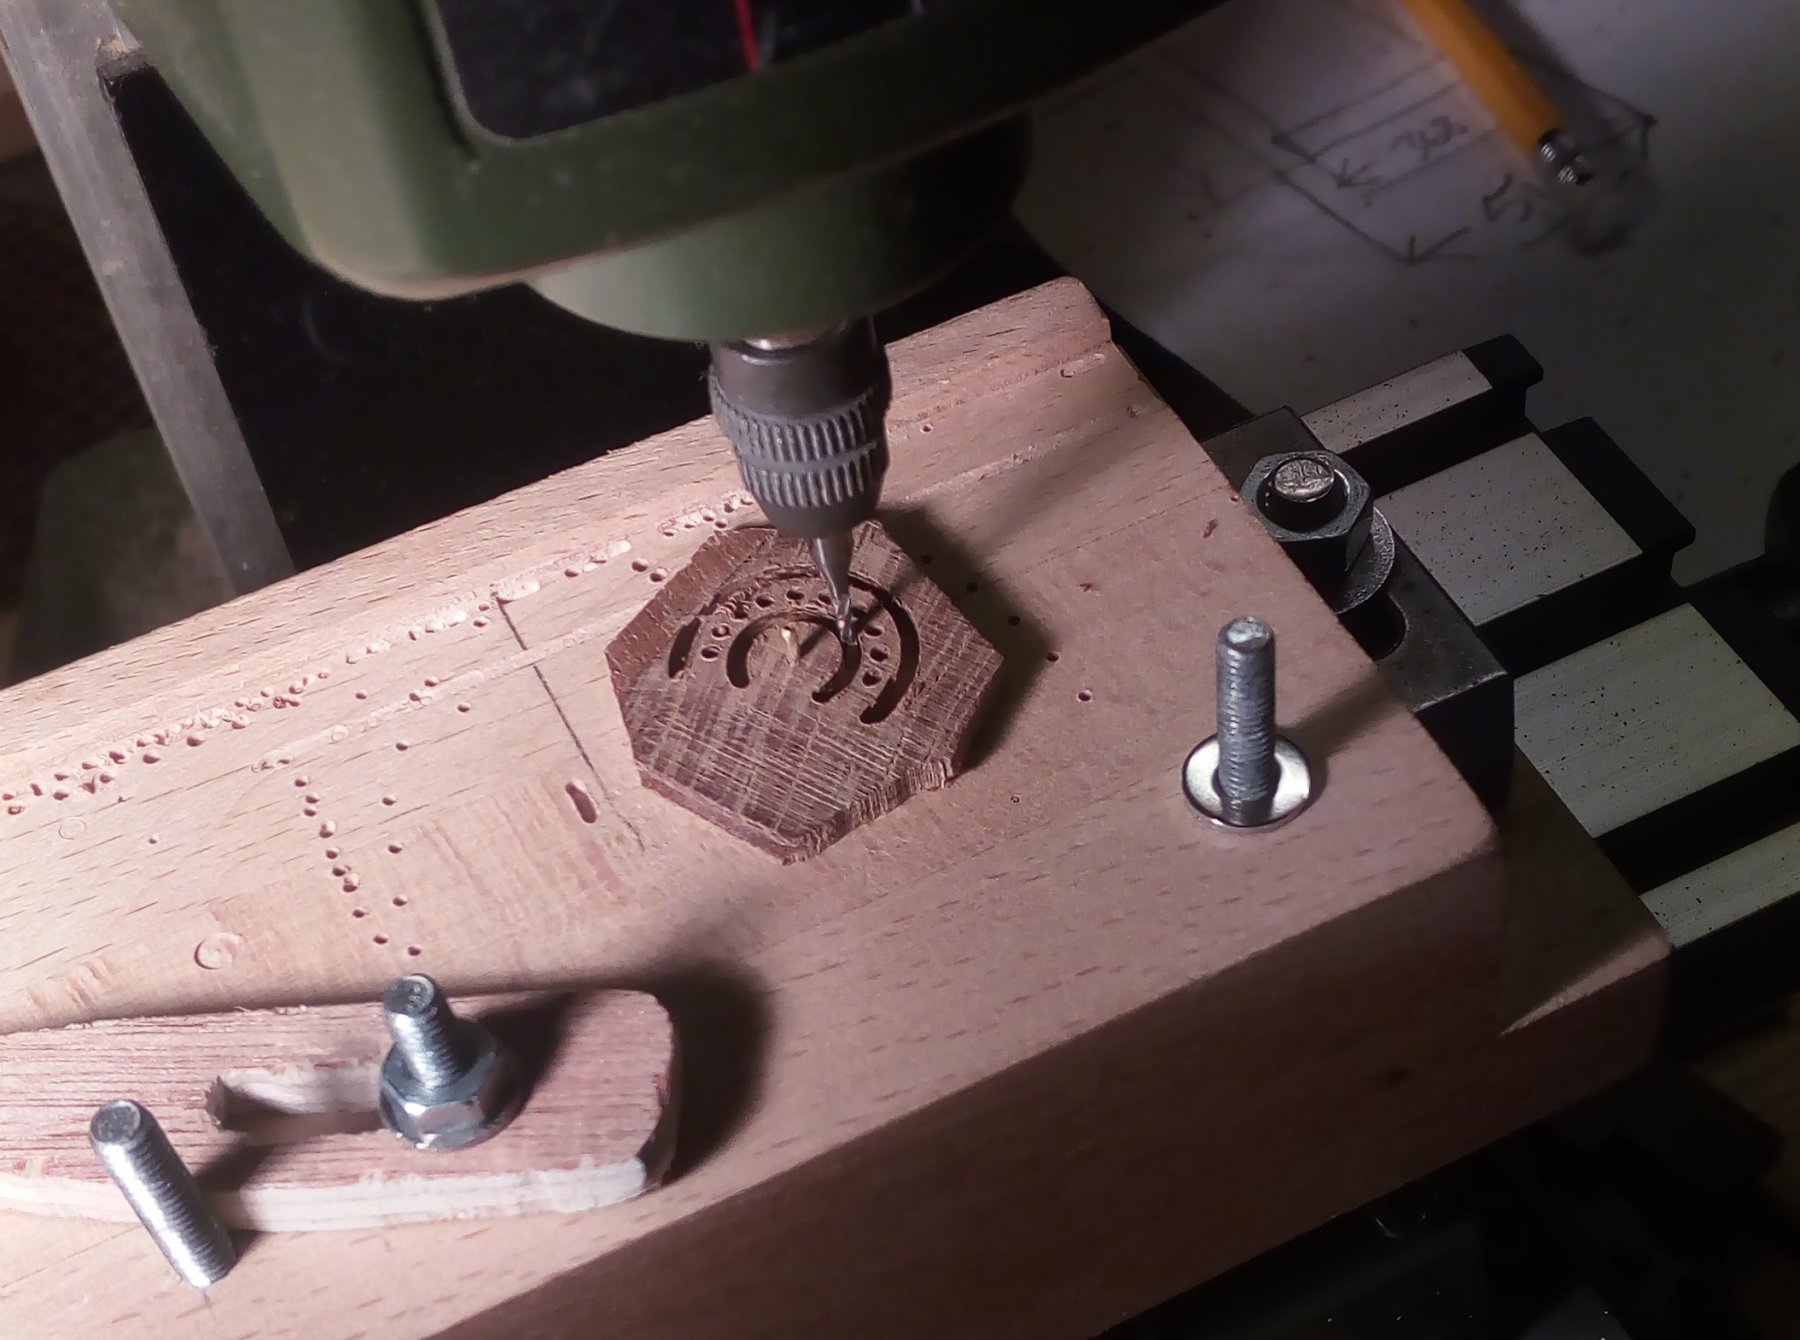
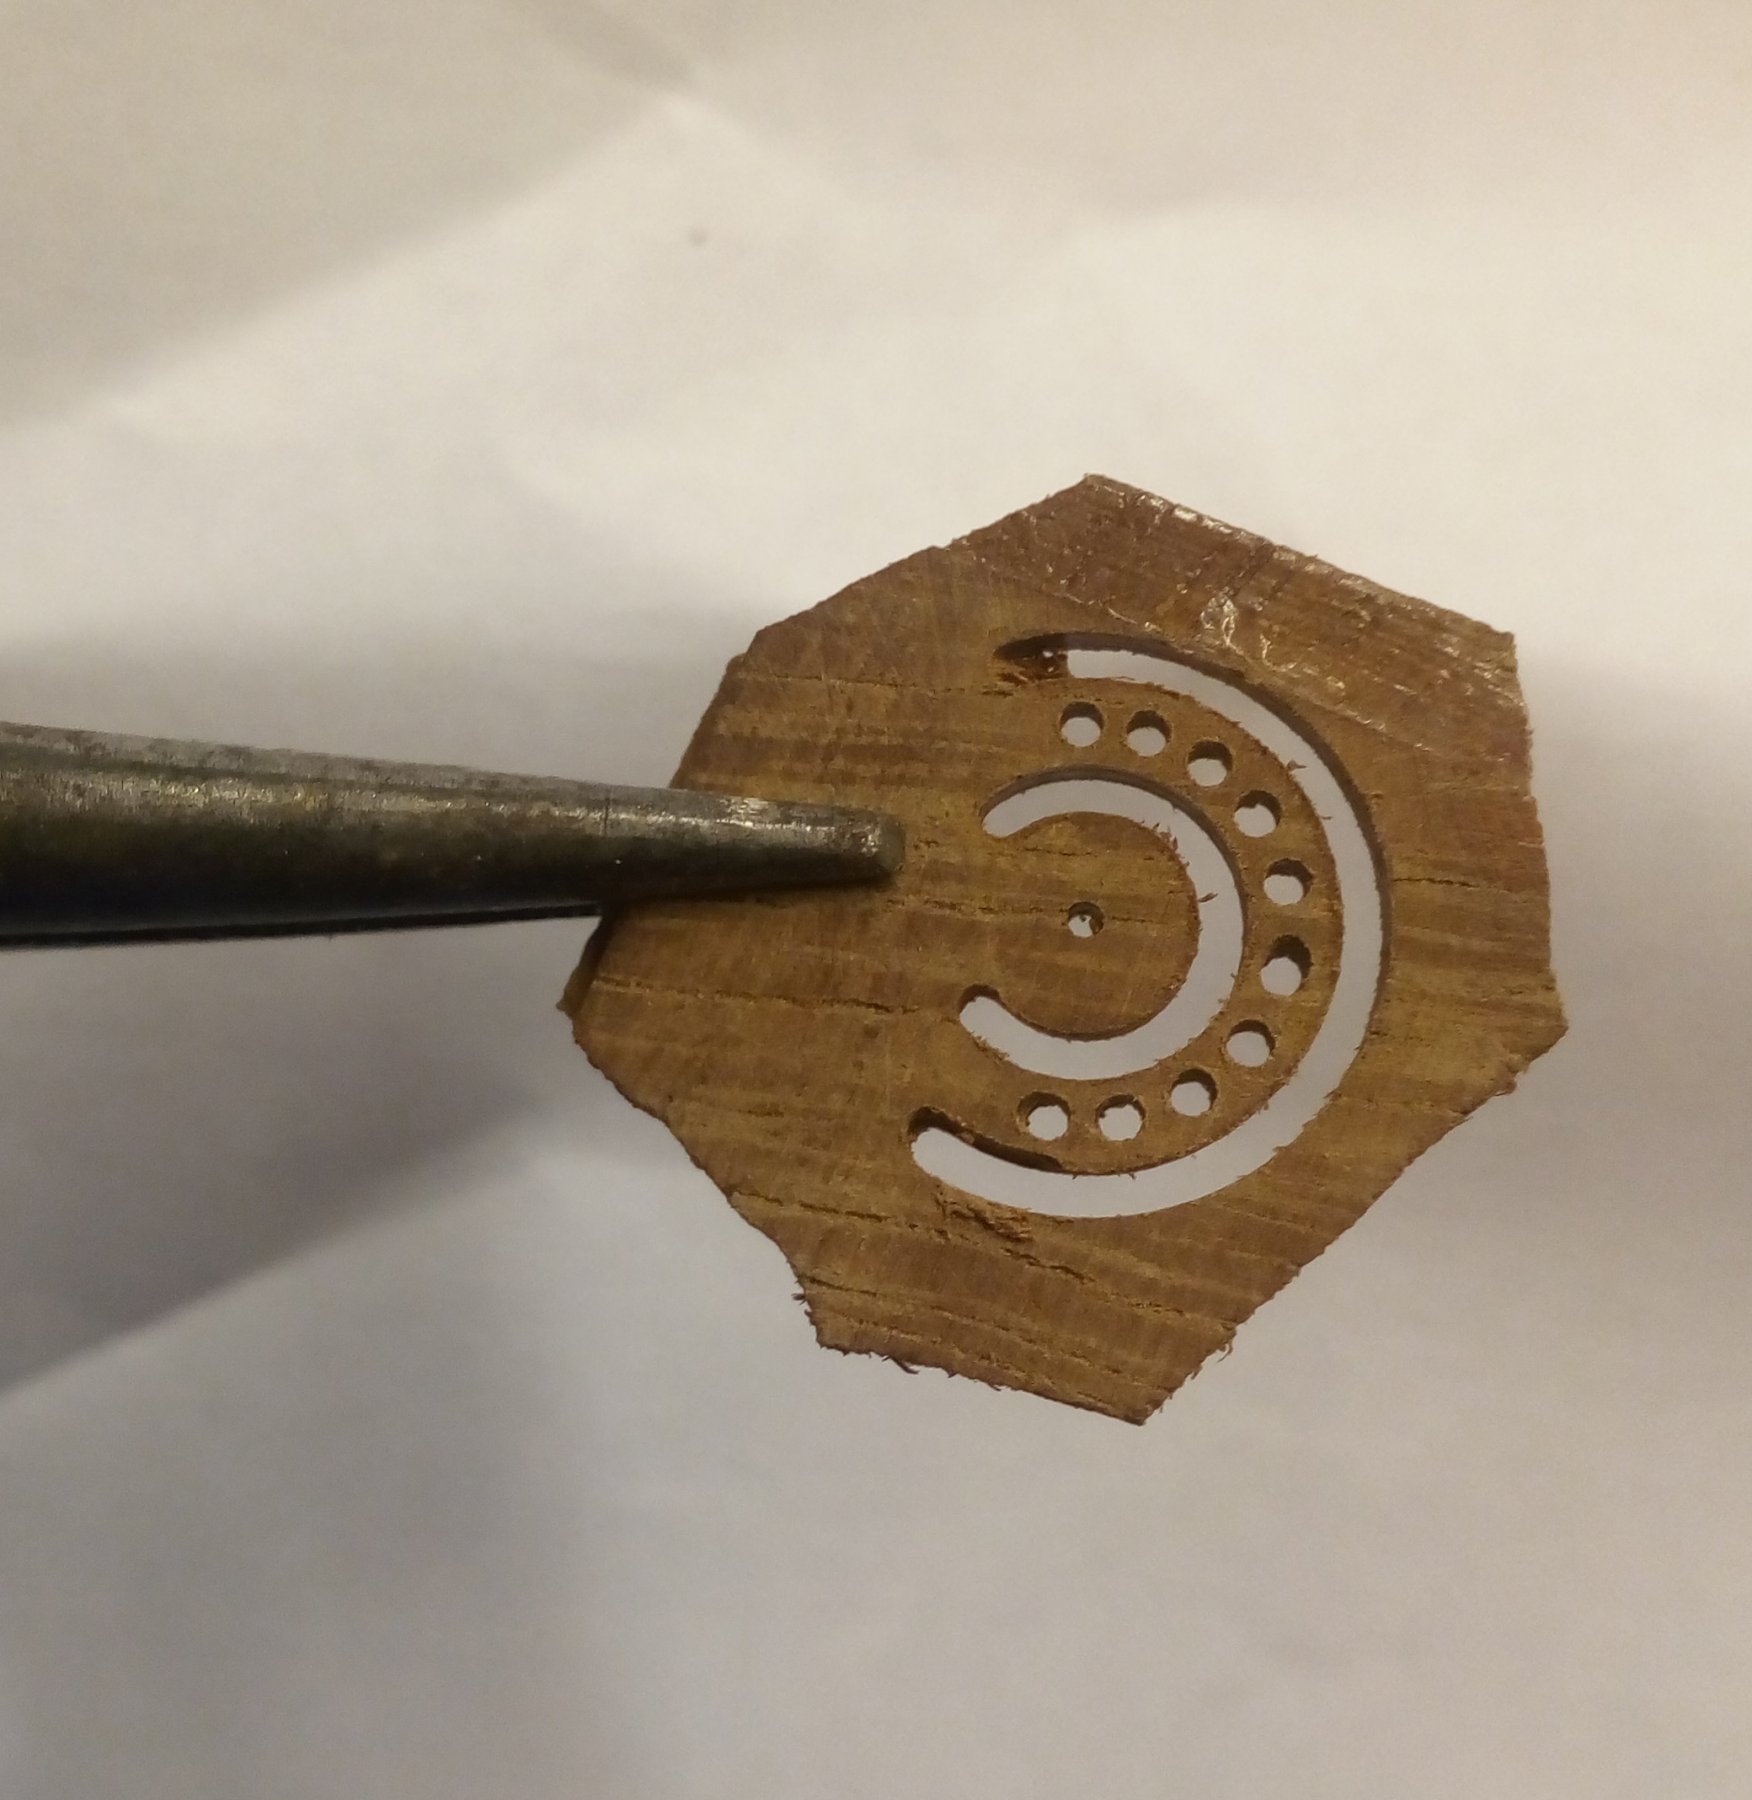
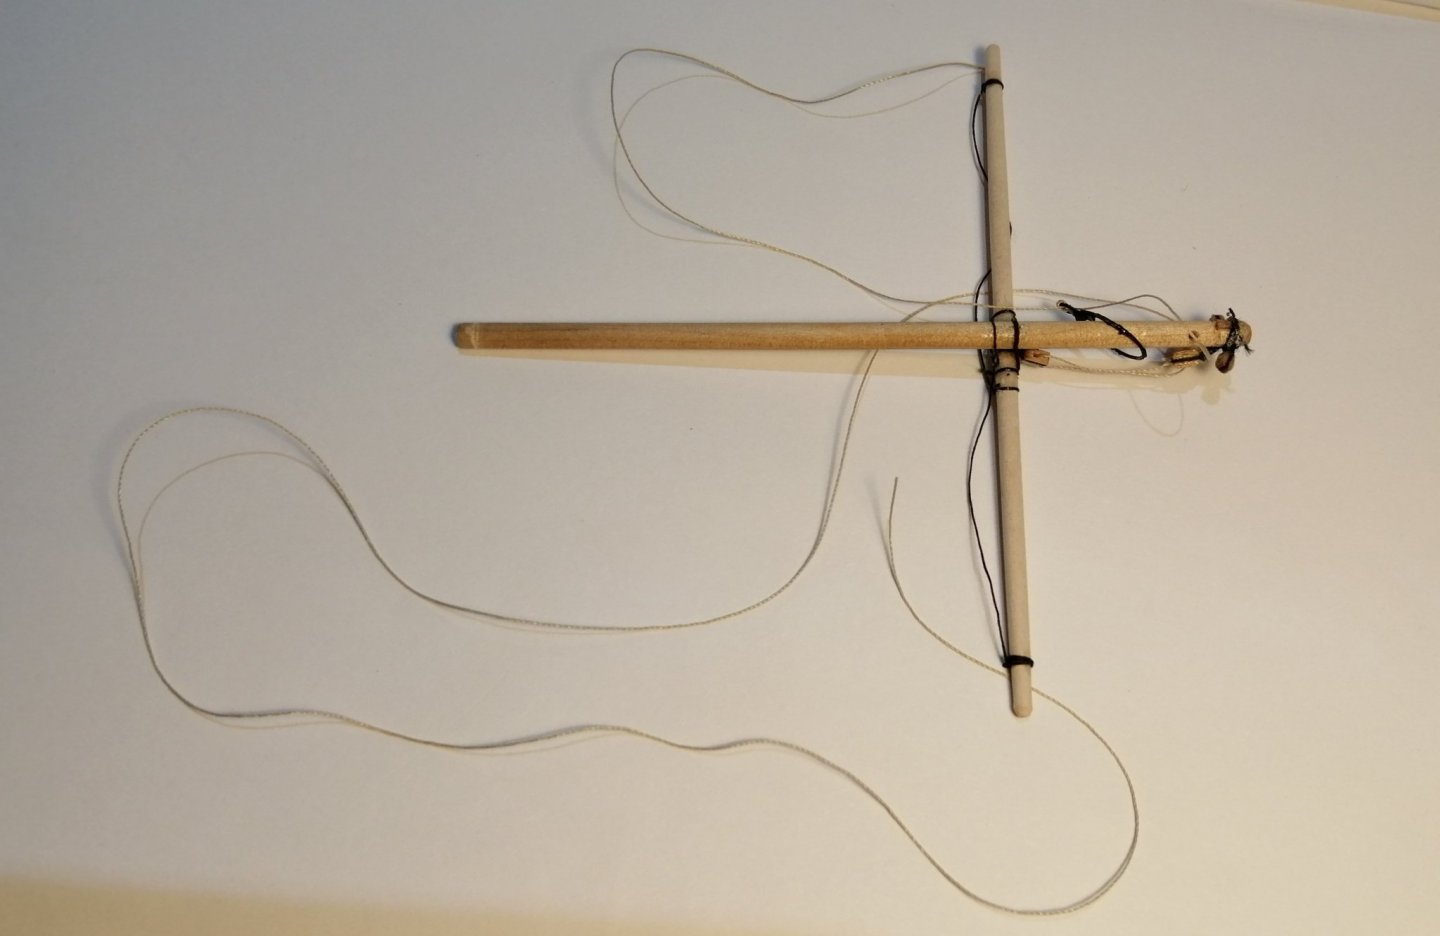
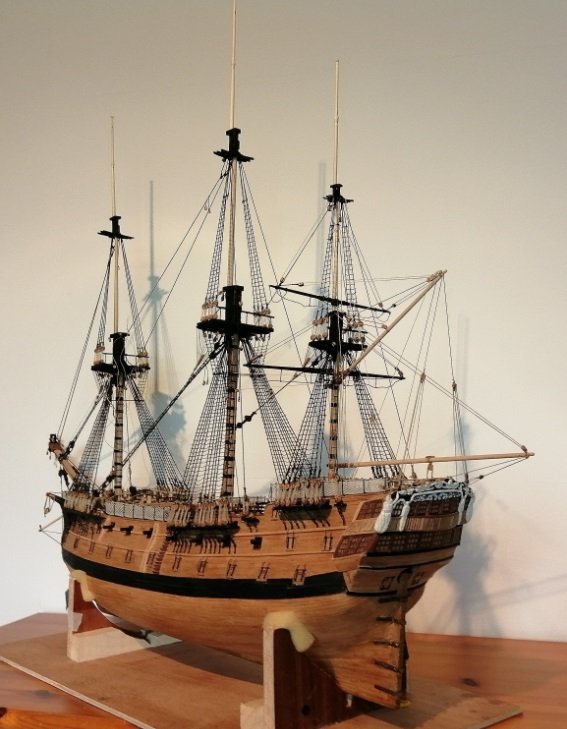
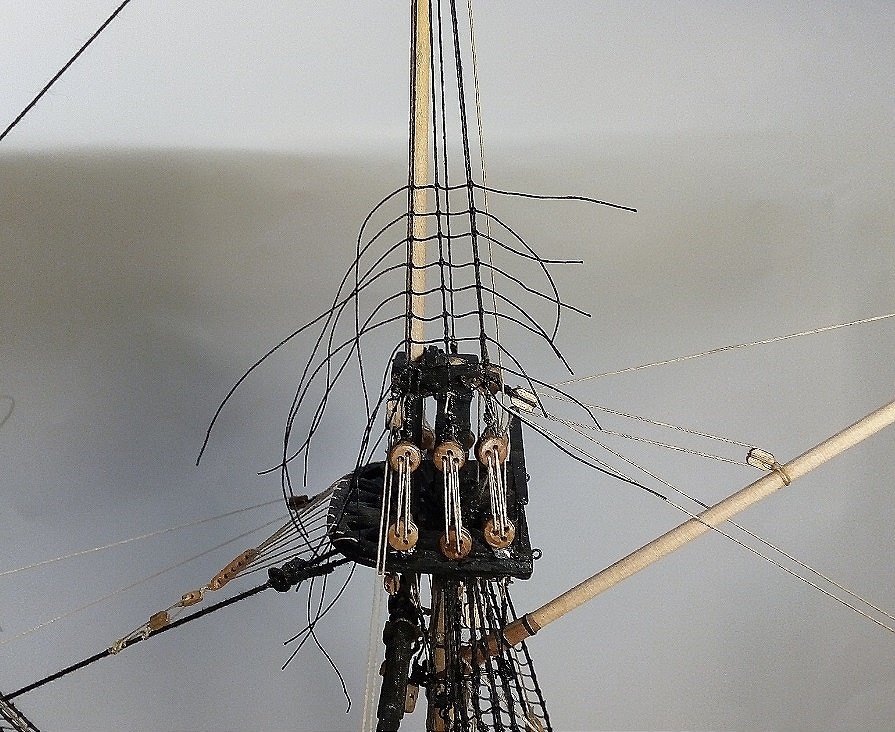
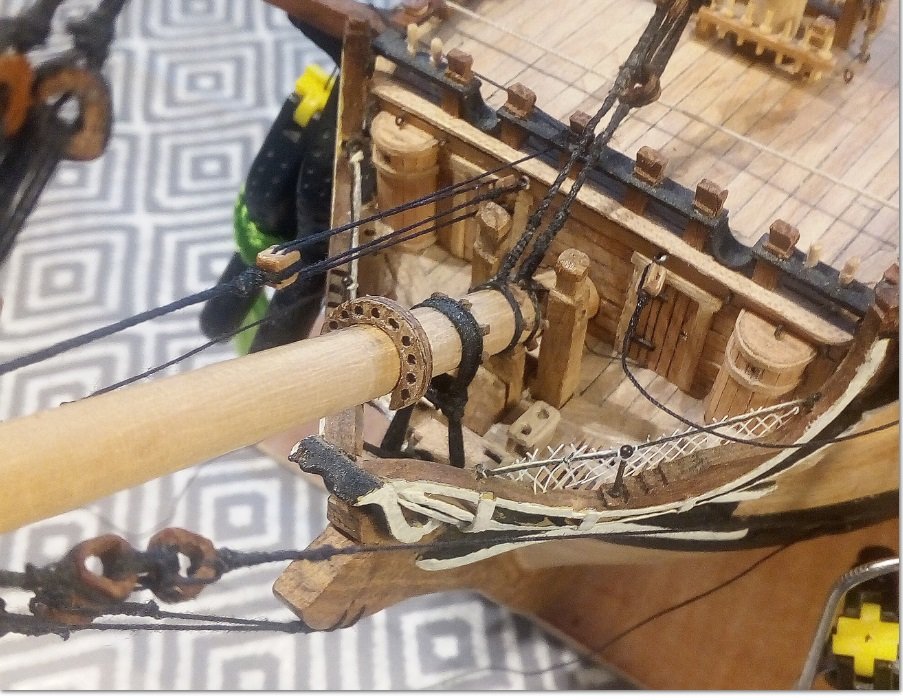
Rigged the main topmast stay and preventer > Although the above pic shows the fore topmast shrouds rigged, the main topmast stay and preventer were rigged first. The other end of the stay and preventer > Since the fore topmast shrouds were now in place it seemed right to rig the stay and preventer > Somewhere in the middle of doing these stays I decided to create and fit the fairlead for the bowsprit. The first one was done freehand and didn't turn out too well so I turned to my milling machine to do it 'properly'. Not considering that a solid piece of wood could be strong enough at that small size, I made a piece of 3 ply from thin slices of Makore. In the piece left over from my first attempt I drilled a 1mm hole near the centre and used that hole on which to pivot the wood while on a wooden jig attached to the travelling table on my milling machine. The workpiece was spun around its axis while the fairlead holes were drilled. The table was then moved enough to be able to partially cut the inner curve by spinning the piece, then moved again to another position to cut the outer curve. The following pics should explain what I did > and on the bowsprit > AND ~ ALL lower mast ratlines are finished! > Once the topmast ratlines are done I won't be looking to be doing ratlines for a while! This is the second post I have had to edit to say that at least one photo is out of sequence -- and I don't know why . . . AND I can't fix it !!!!! The last photo immediately above here SHOULD be the 3rd photo in the post.


- 257 replies
-
- 13
-
-
It's looking really good, Tom. In the outside views of the hull (in your July 9 post) it's looking so crisp and sharp. I've only just 'discovered' your last 2 posts as I haven't received any email notification -- and I haven't even been receiving notifications of replies to my own build log. Something weird going on as I'm still getting notifications for other build logs I'm following ??? Are you intending to plank the entire upper deck beams, or are you going to leave some blank areas?
-
Thanks Tom and Mark for the comments and the others for the likes. . . . and thanks Mark for editing my post! Tom ~ as for it being a 4 masted ship - - you're right! . . . . . . . . . . BUT what about this >>>> >>> >> >