MORE HANDBOOKS ARE ON THEIR WAY! We will let you know when they get here.
×


Bluto 1790
-
Posts
324 -
Joined
-
Last visited
Content Type
Profiles
Forums
Gallery
Events
Everything posted by Bluto 1790
-
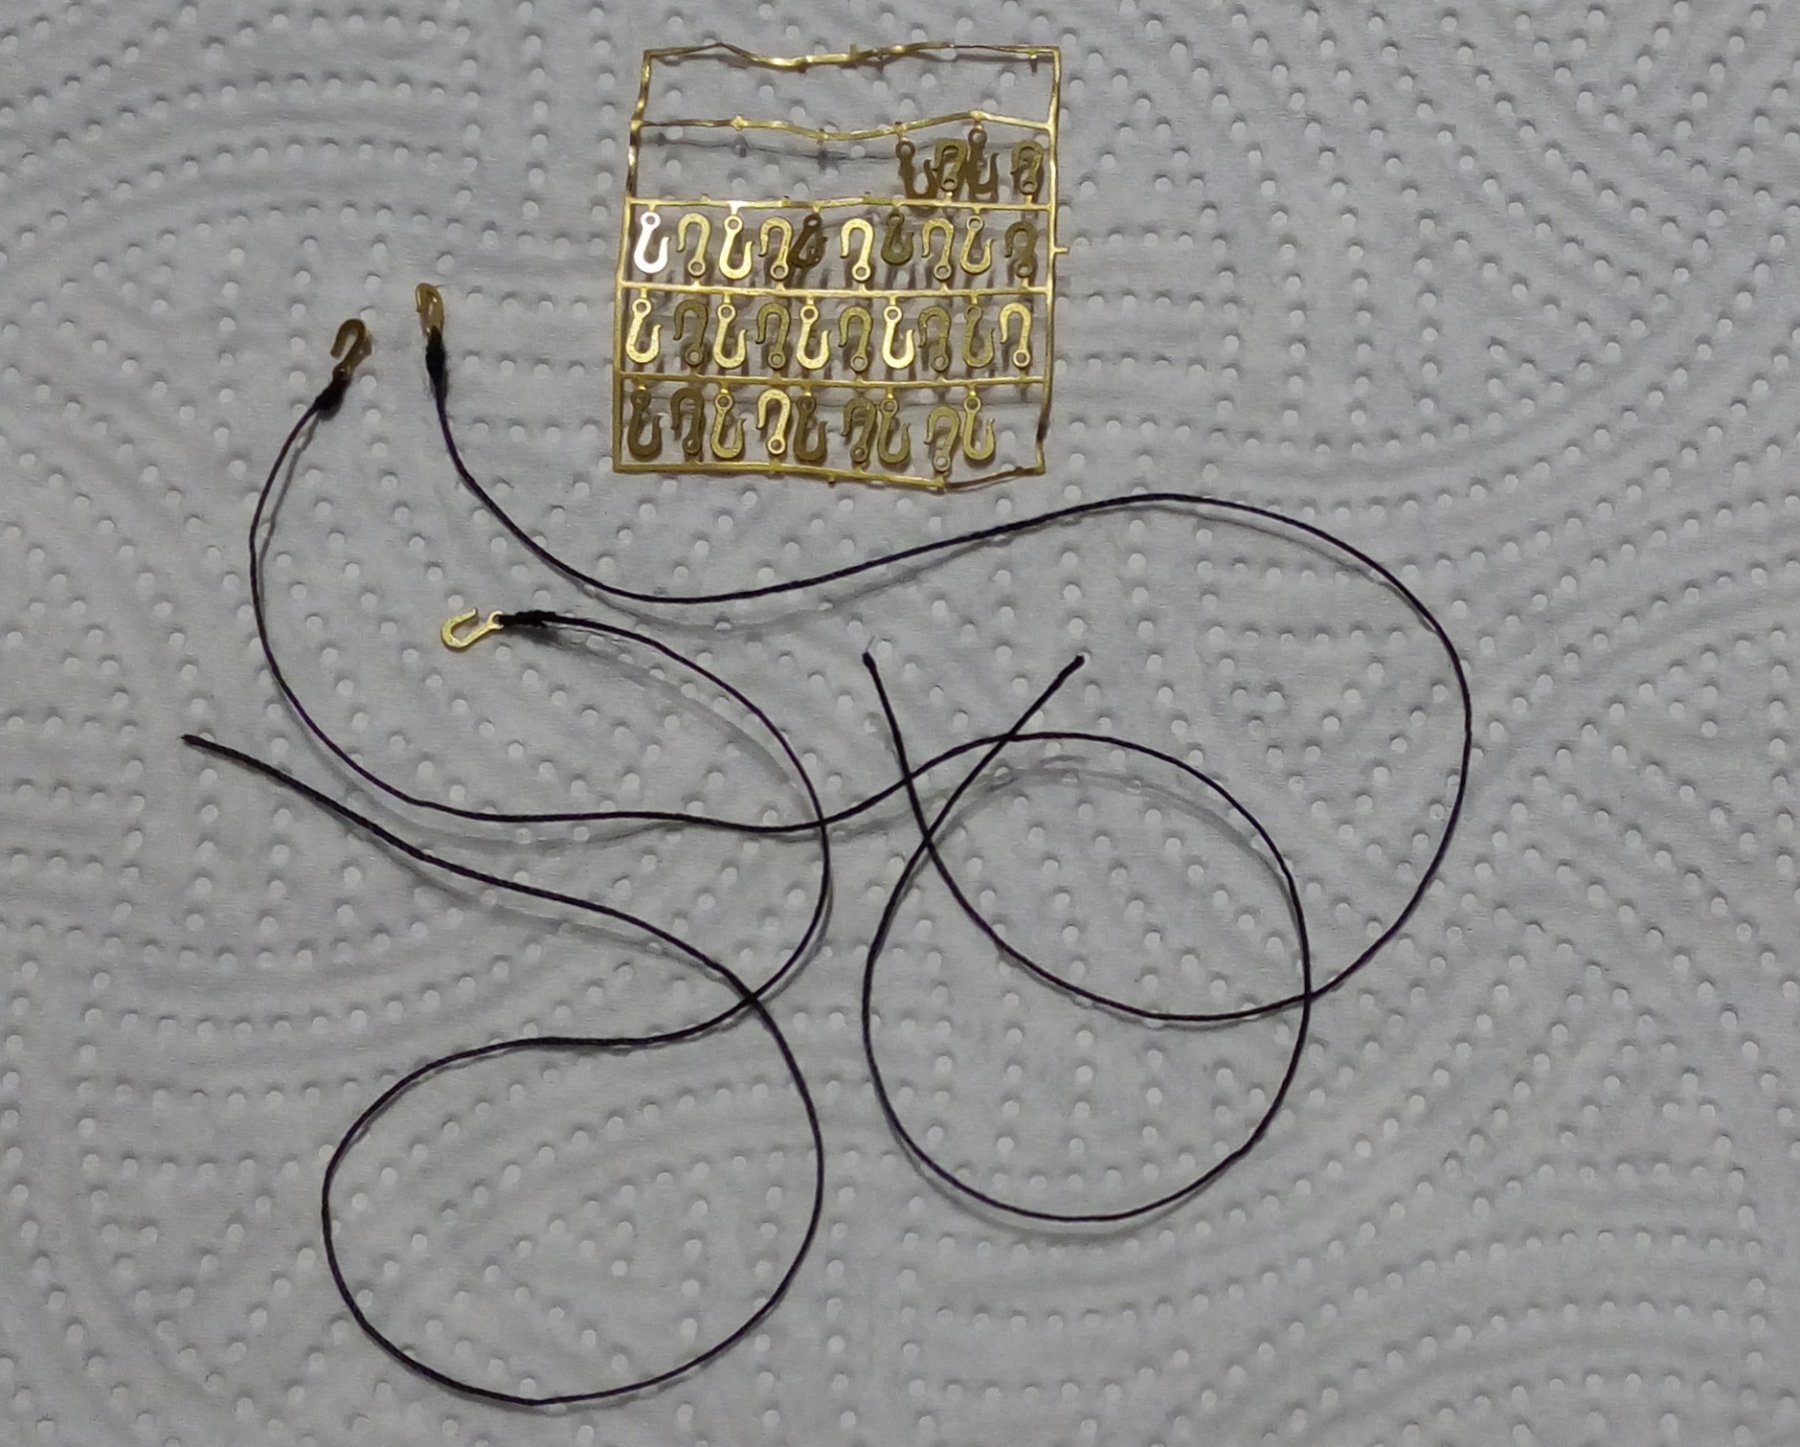
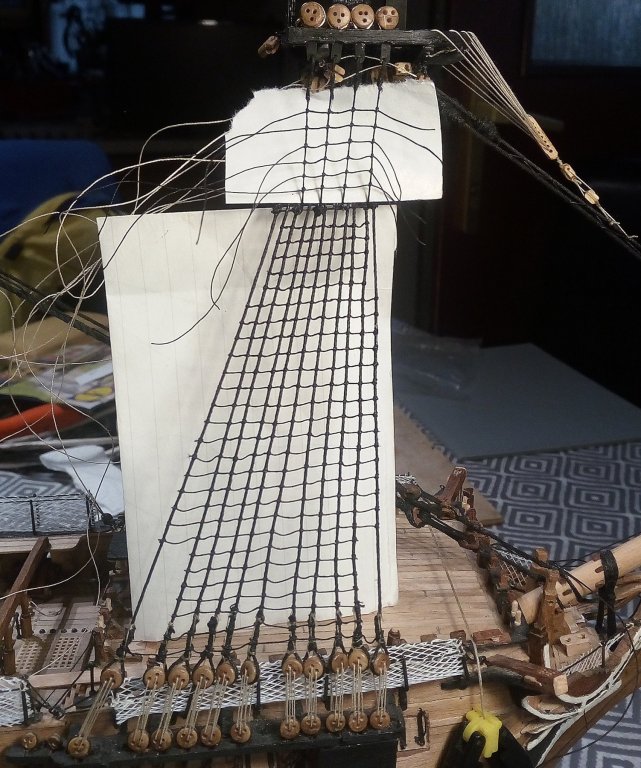
 Finished the fore shrouds' ratlines >>> Spent a couple of nights preparing 8 futtock plates and mounting the deadeyes in them for the foremast, then did the futtock shrouds and hooks (not sure if these hooks have a more 'nautical name'?) >>> Then fitted them pesky little ratlines . . . the lowest one was the trickiest owing to the tight space to work in >>> Beginning to find my way a bit with the ratlines and they don't seem just so tedious as they were with the main mast. Got just over half way up the mizzen mast right now. They're still 'adjustable' at present and can be slid up or down the shrouds. I'll wait until they're at the top before equalising them, trimming the tails and putting a drop of CA on each knot to finally seize them in position >>> Edited in an attempt to remove the bottom picture which is a duplicate of the 3rd picture in this post - - but failed !!! I have no idea how that photo got in here twice ??? - - - and can't get rid of the unwanted one !
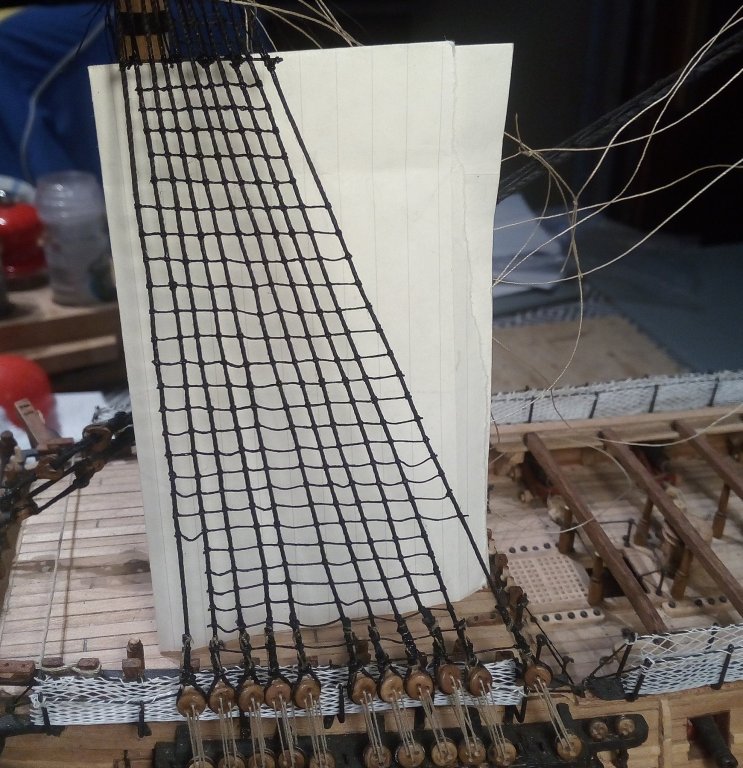

- 257 replies
-
- 12
-

-
Albert, your model is just perfection, or possibly a little better than that . . . and now you've gone a step further with that amazing base. Maybe I don't get out enough, but I've never seen a base like that before. Oh . . . and when is the launch date?
-
Thanks Tom, Albert and Popeye for the comments, and to the others for the likes. Popeye, the crosstrees for the foremast are already made but I haven't made the trestletrees yet and as I'm away on a week's sailing holiday in Croatia at the weekend, it'll be another couple of weeks before that job is done . . . but I have done another 6 ratlines on each side of the foremast!
-
Hi Tom, Great work on that lathe. Sliding dovetail for different lengths of workpiece . . . and I particularly like your hi-tech, super-sophisticated variable speed control! If it works, it works! . . . so why any need for expensive machinery when sometimes basic is best.
-
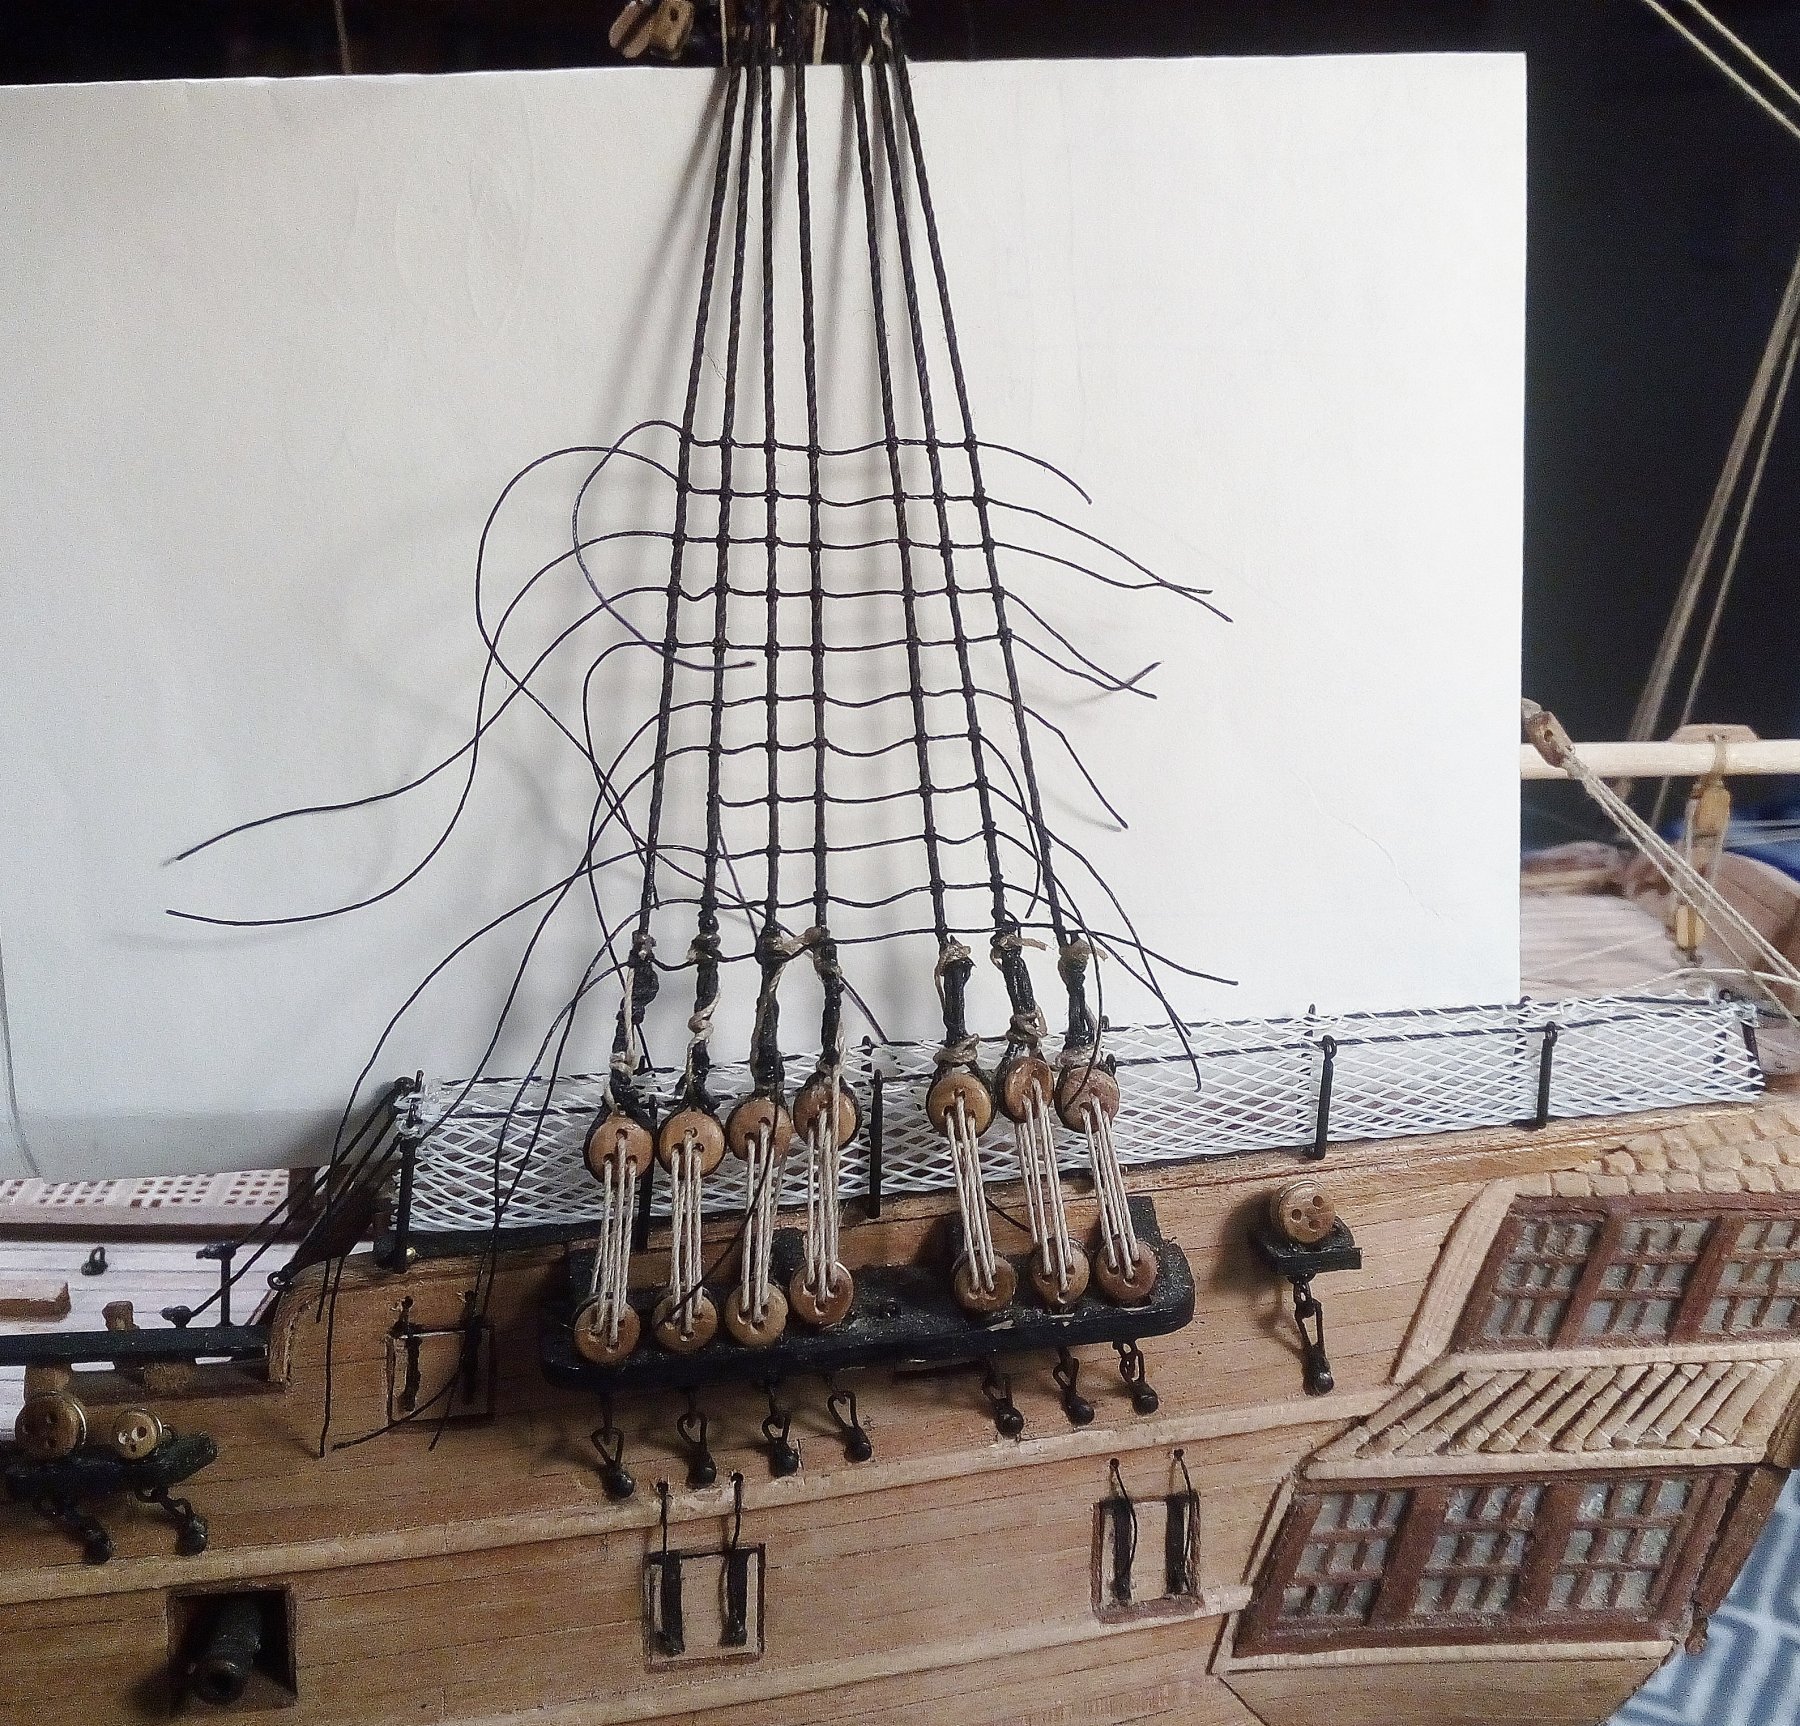
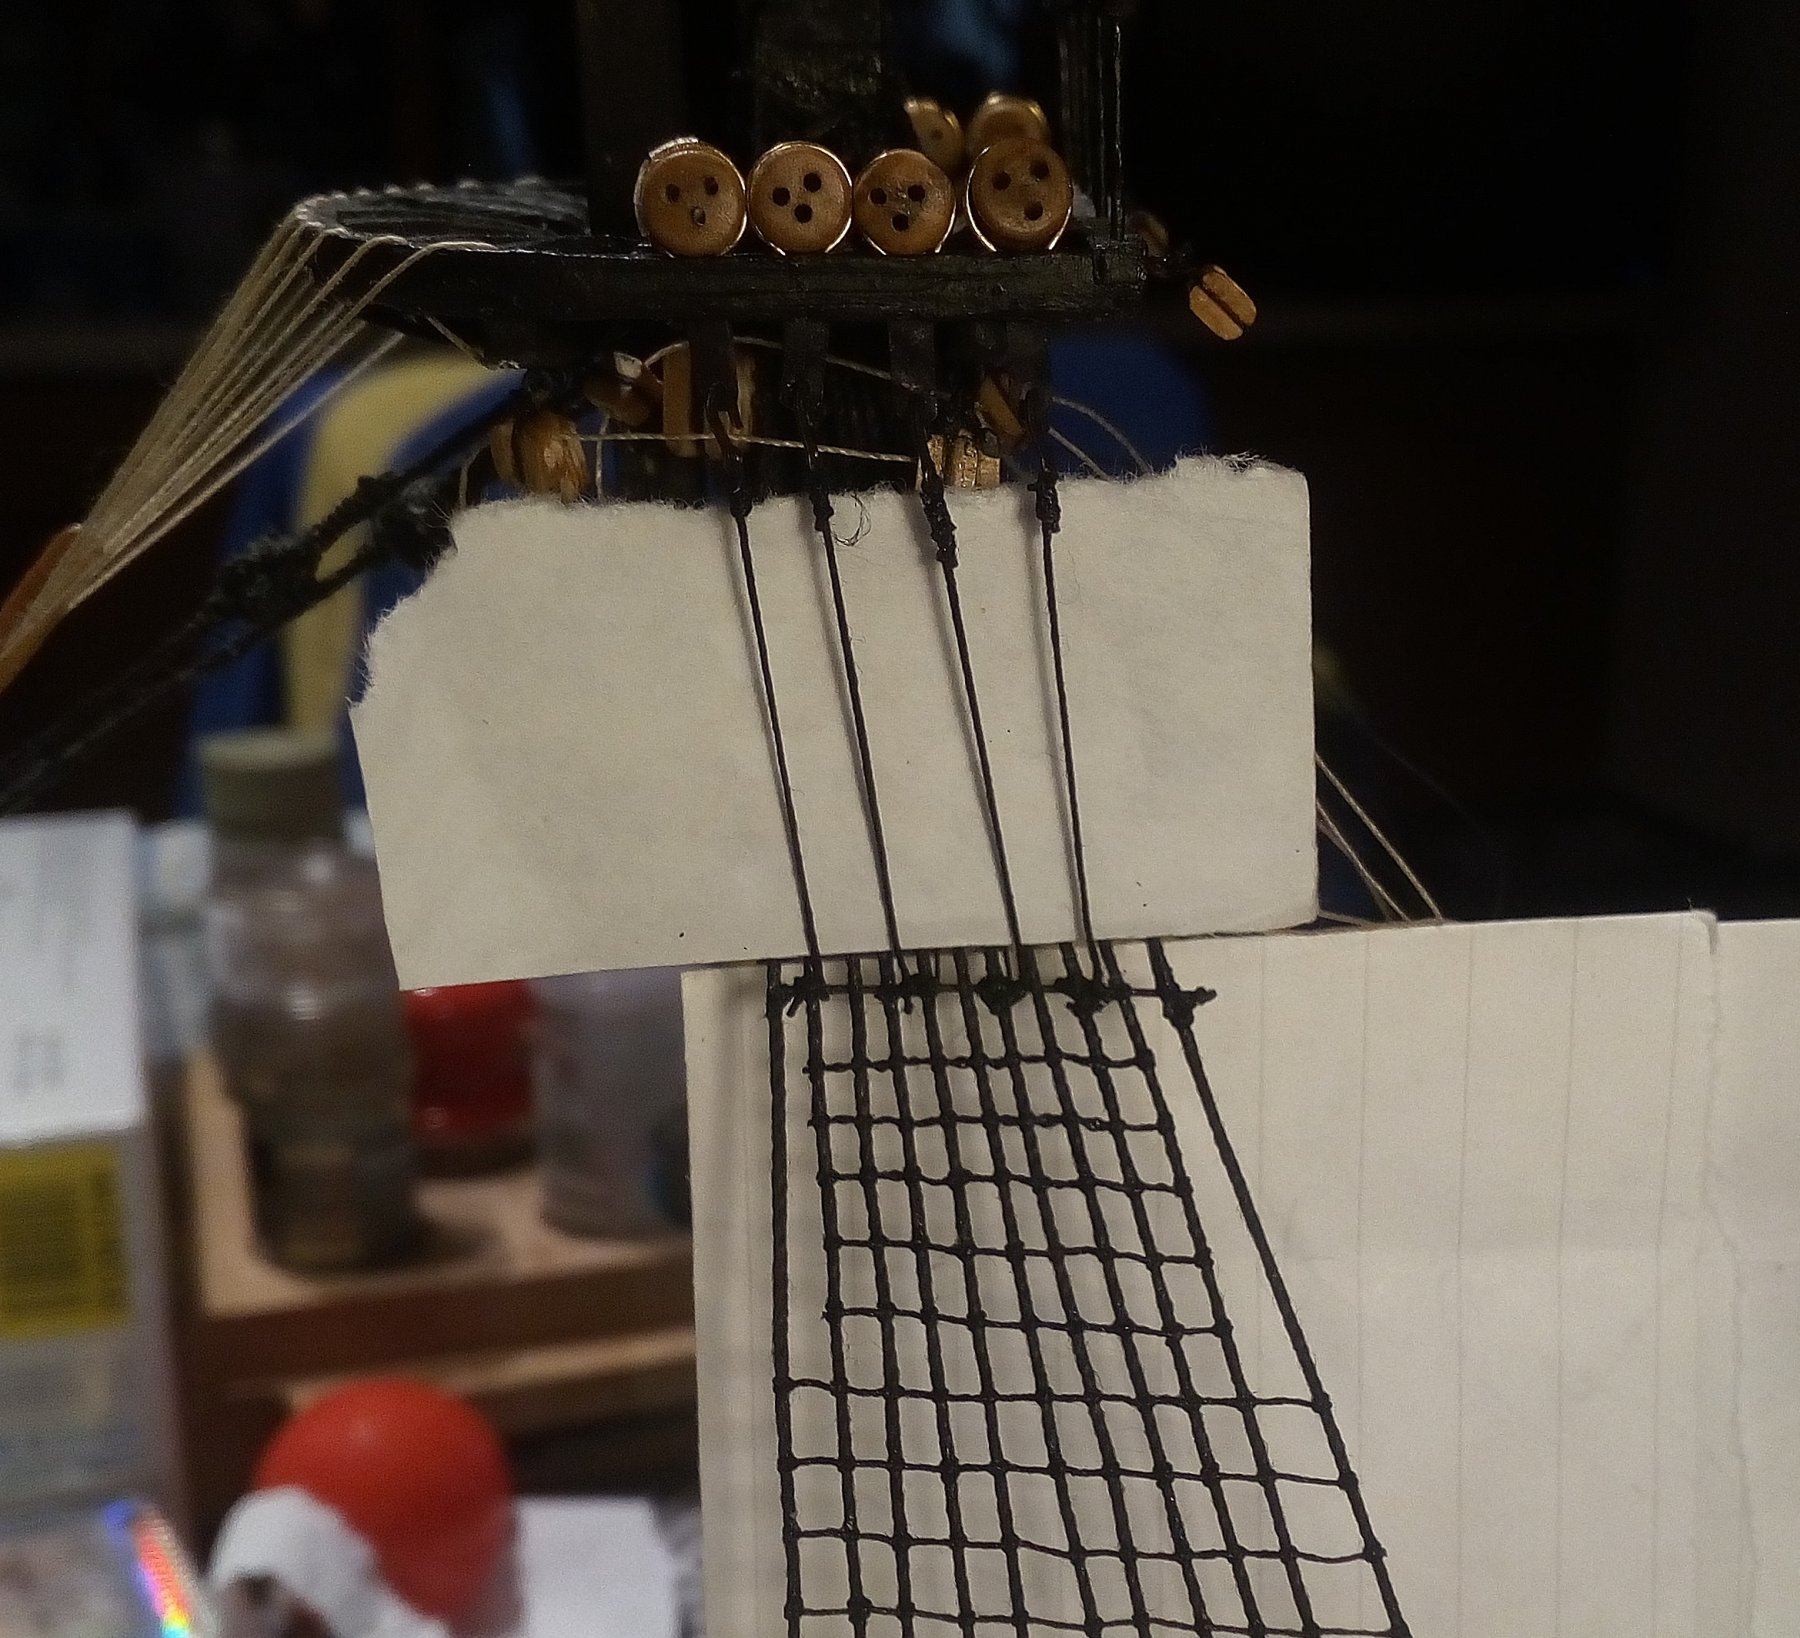
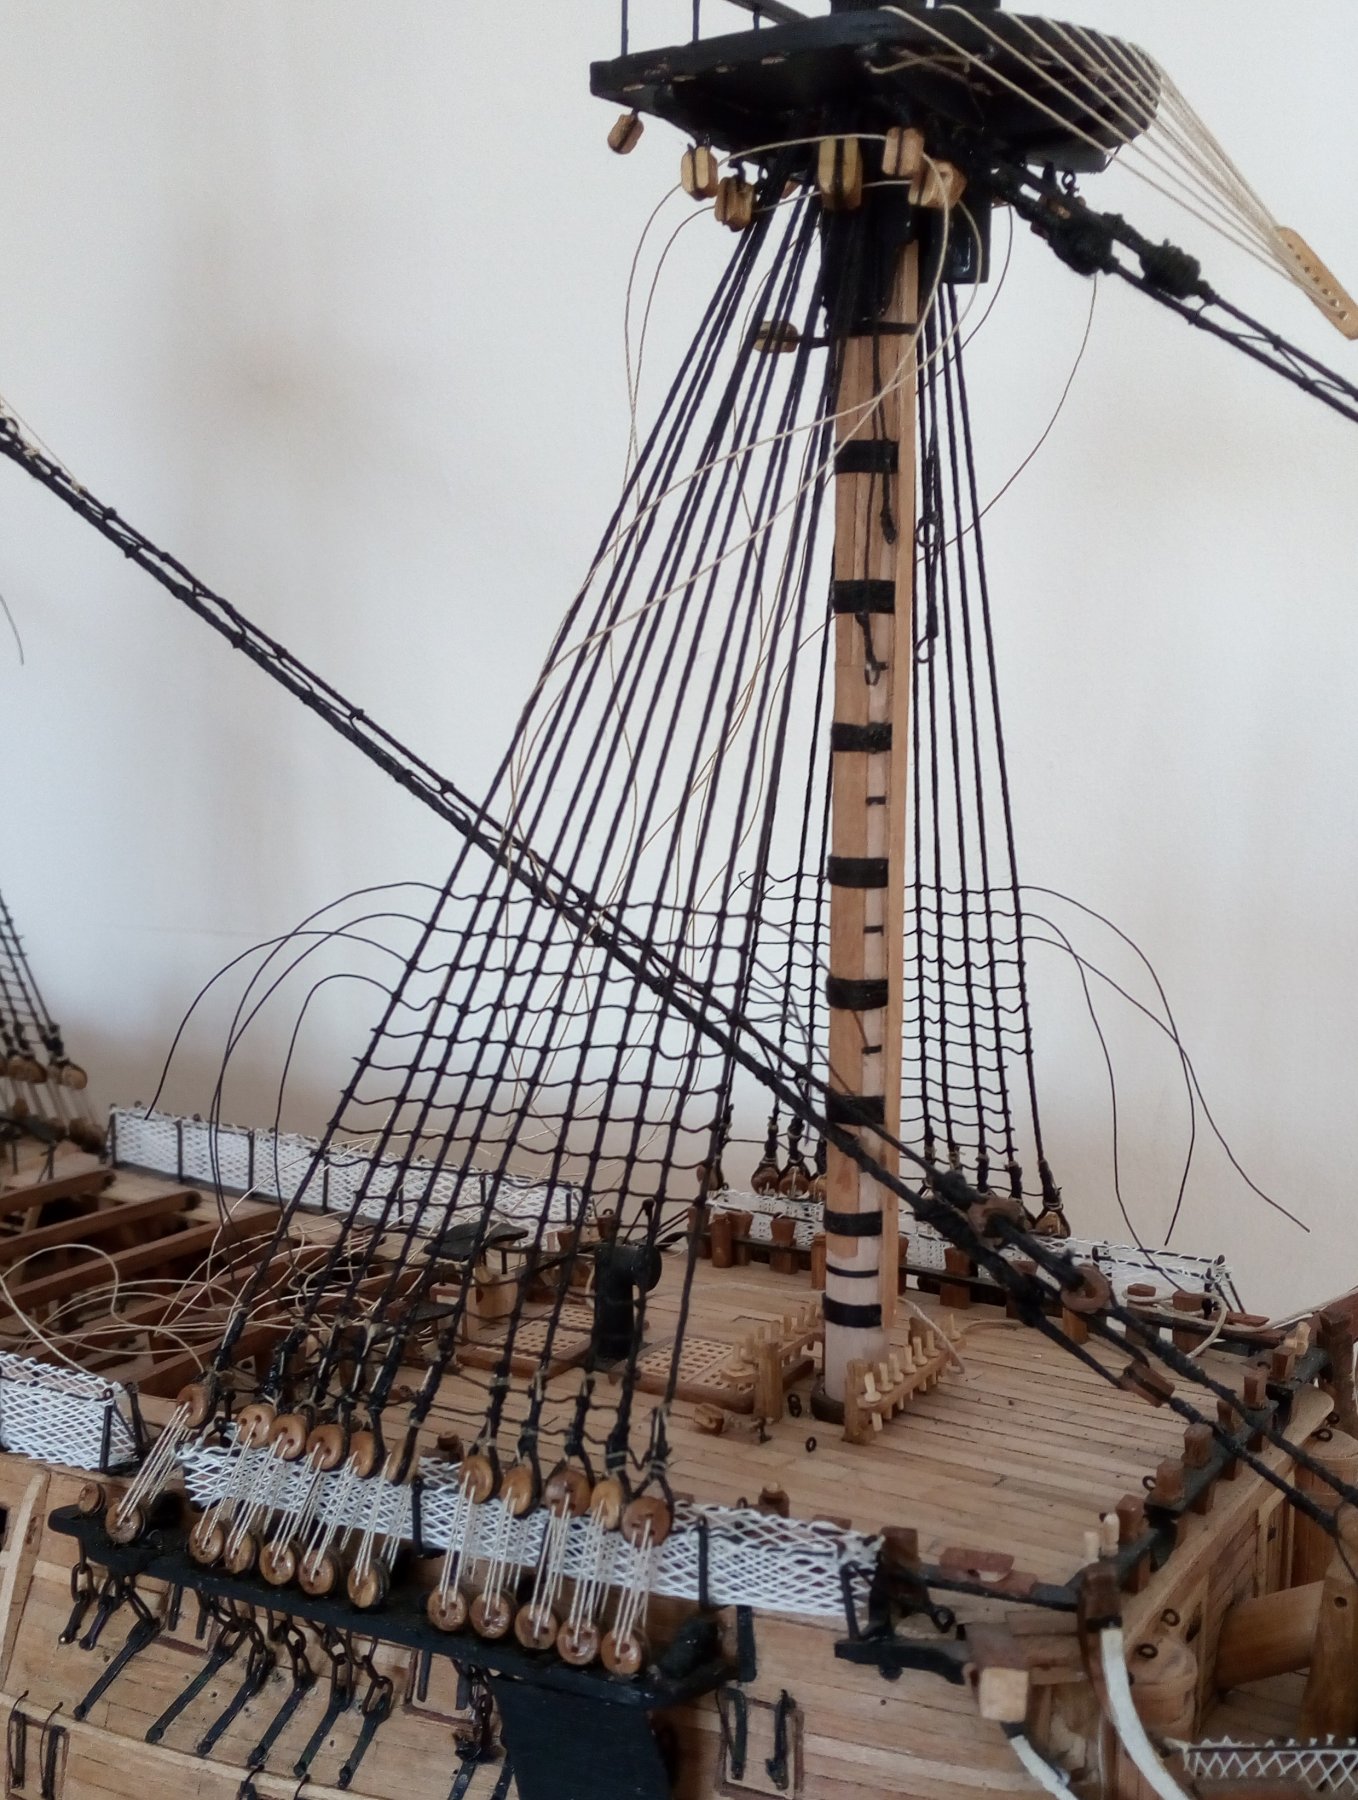
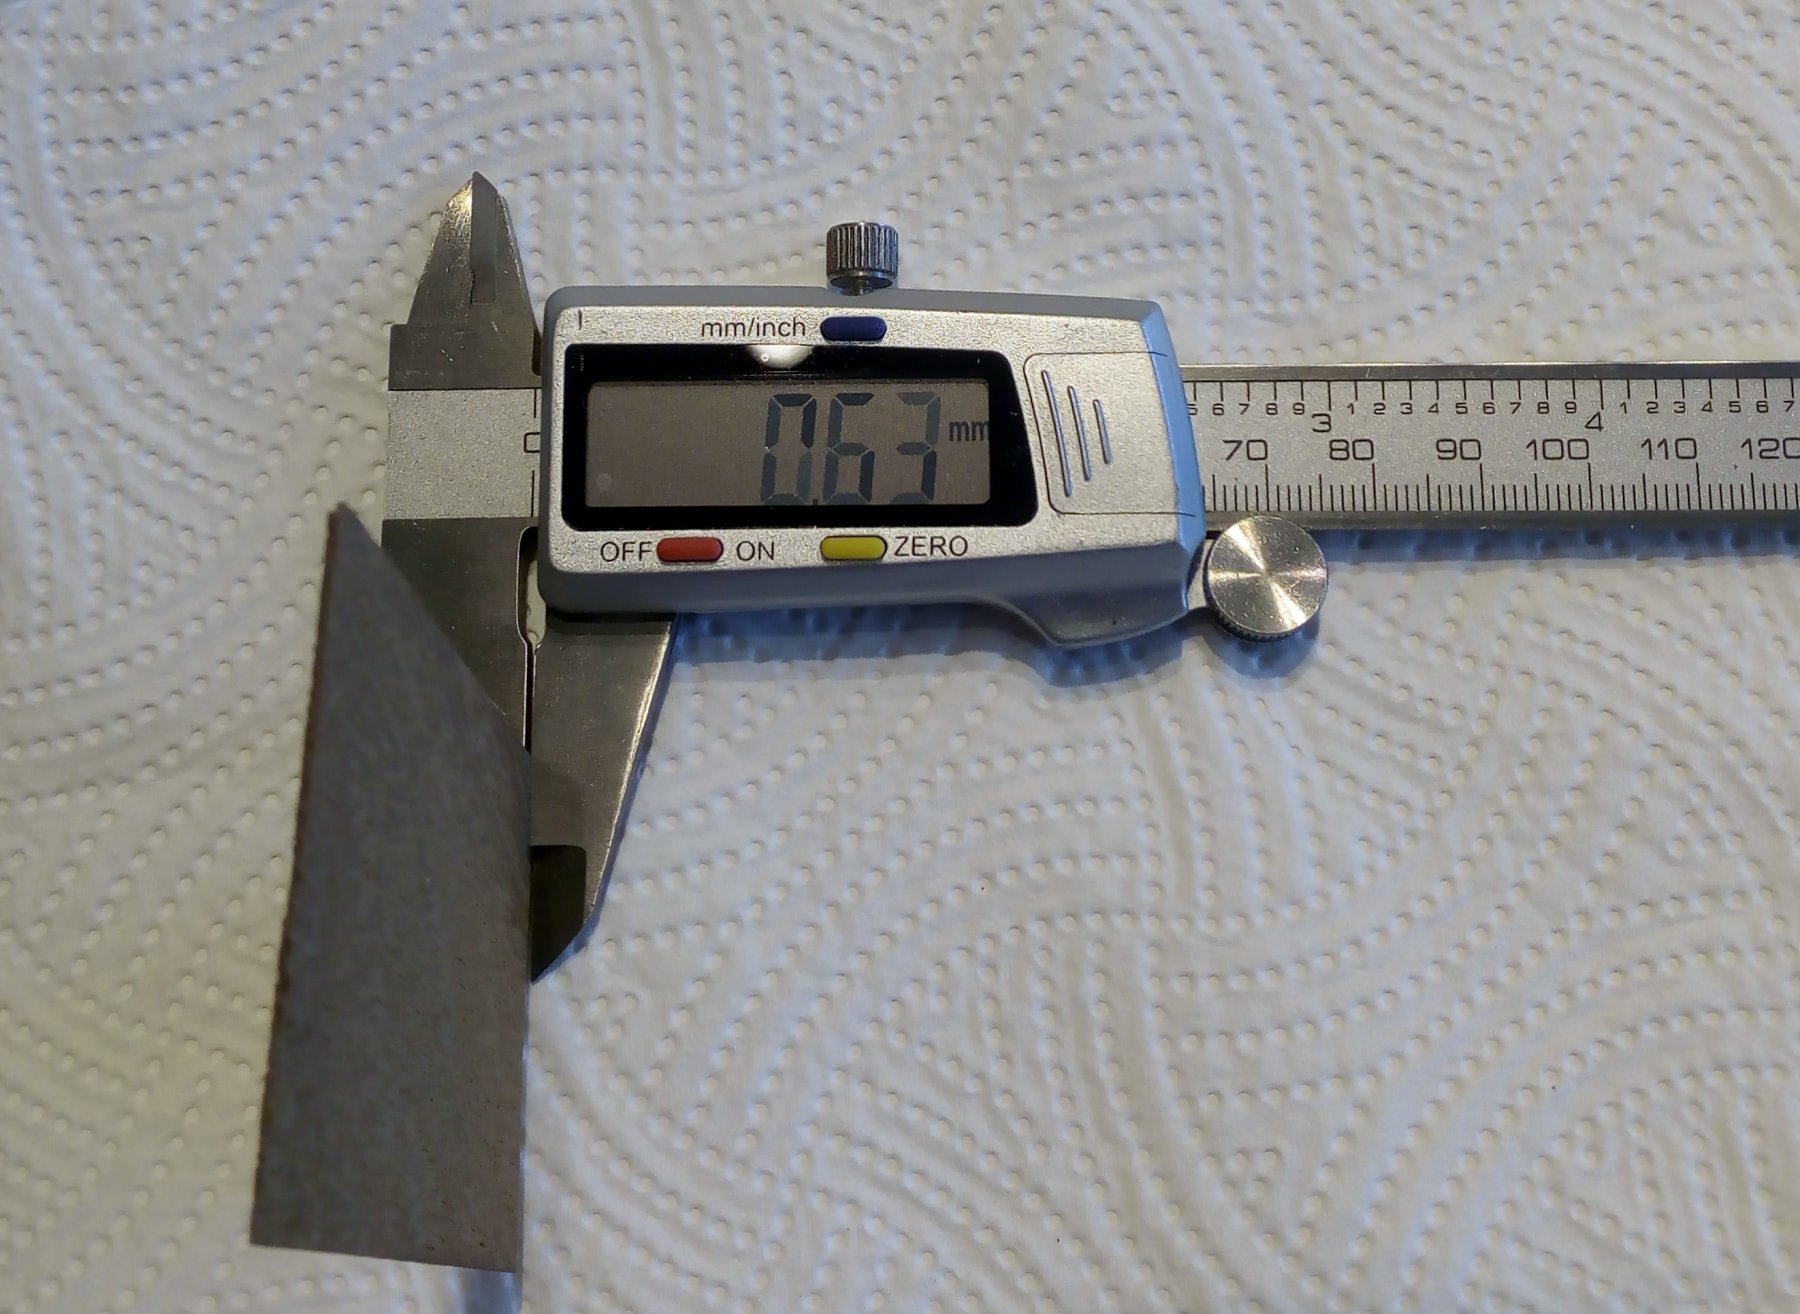
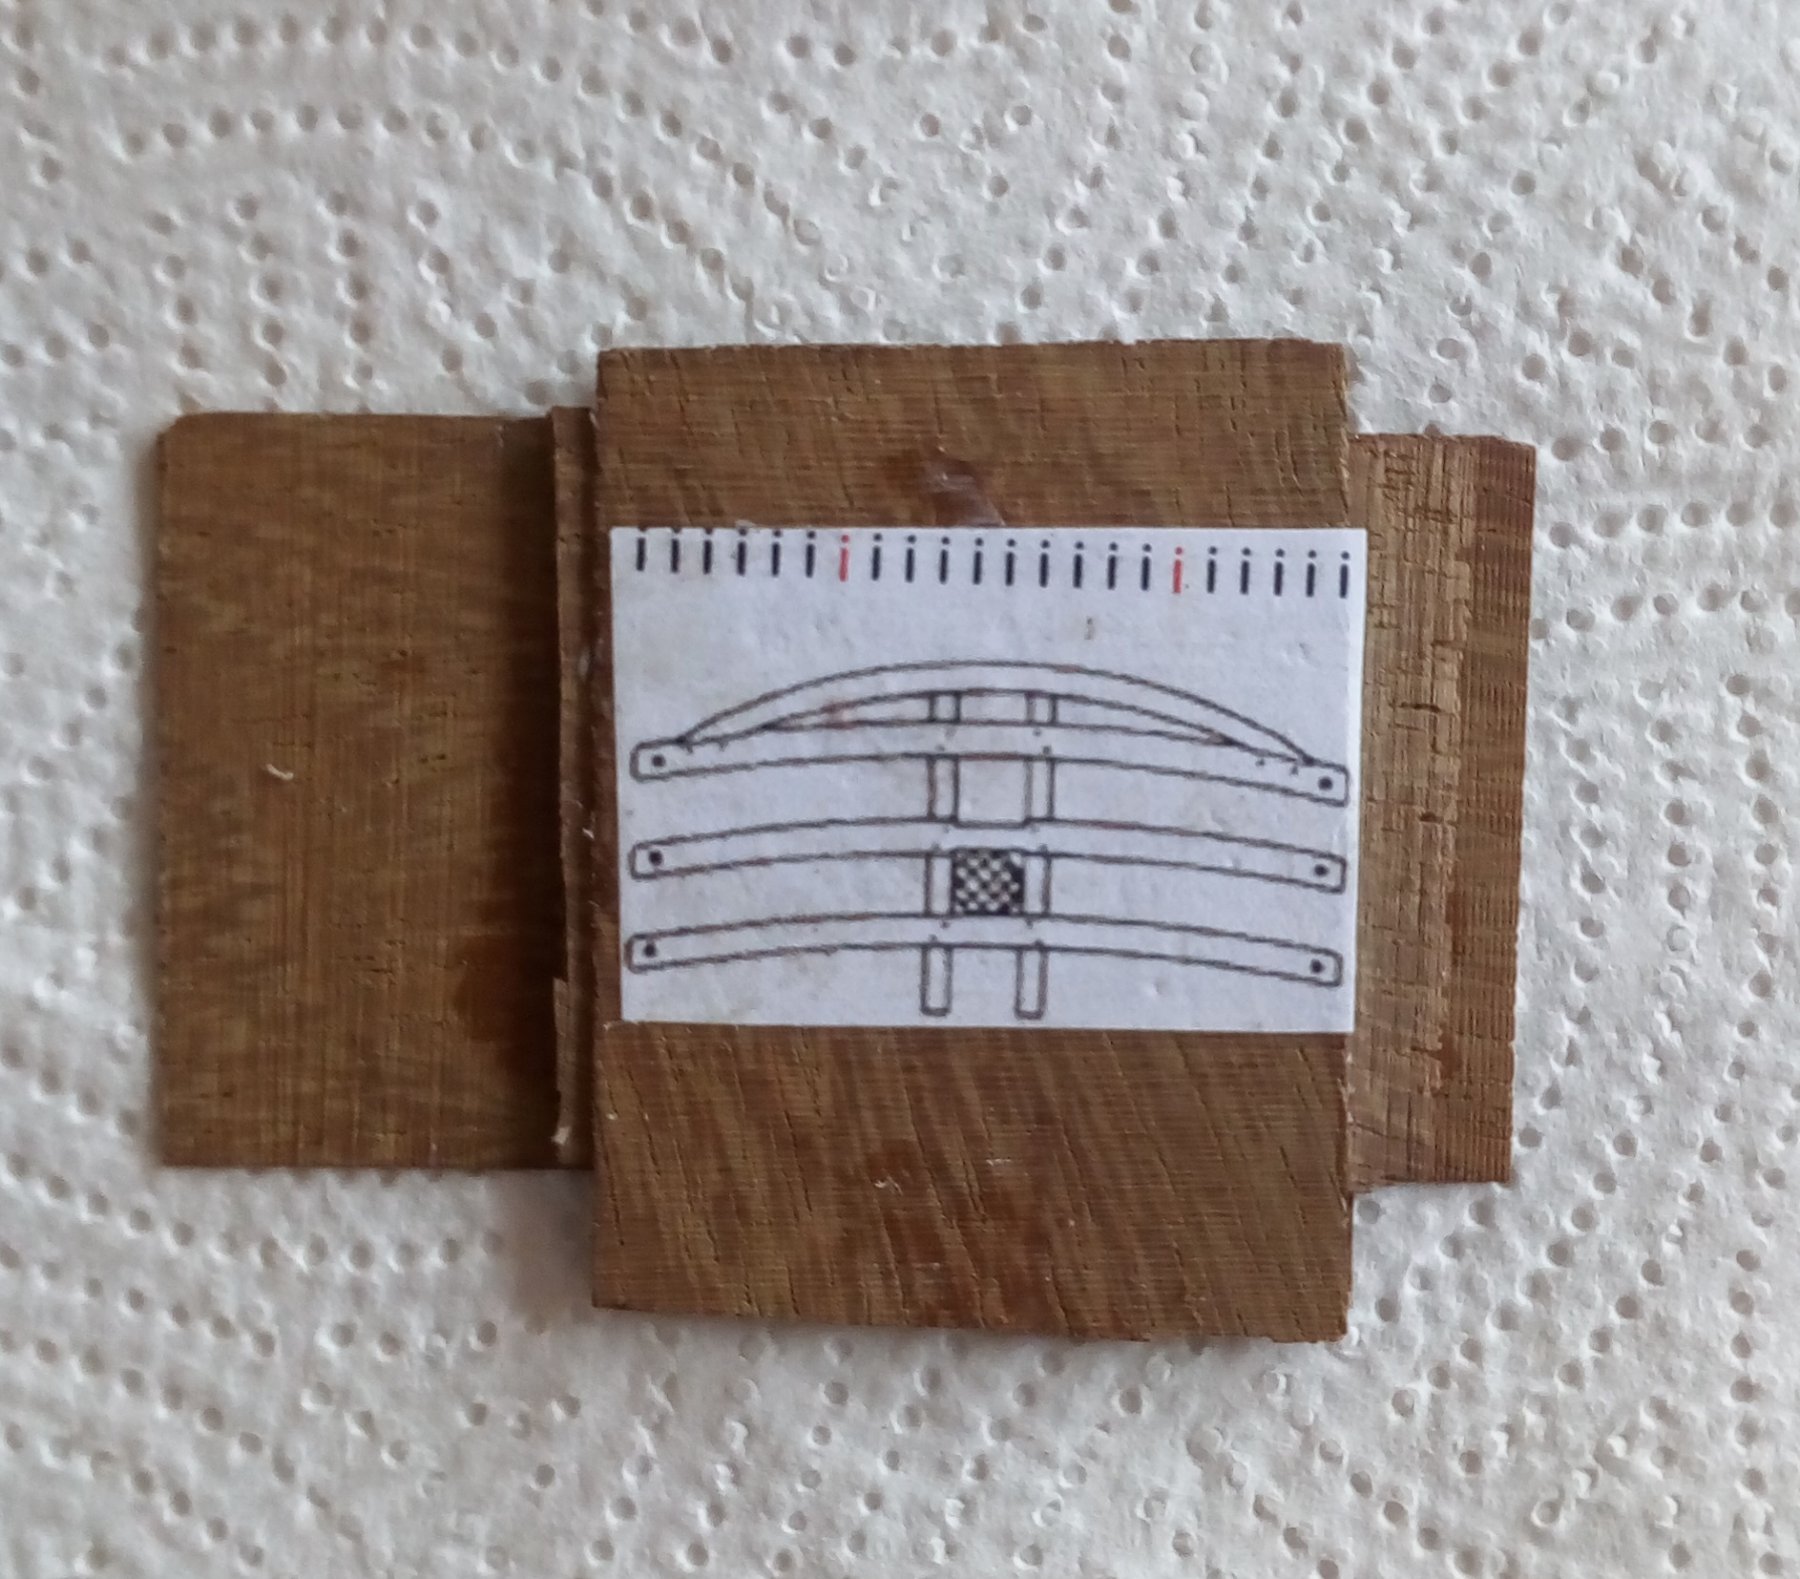
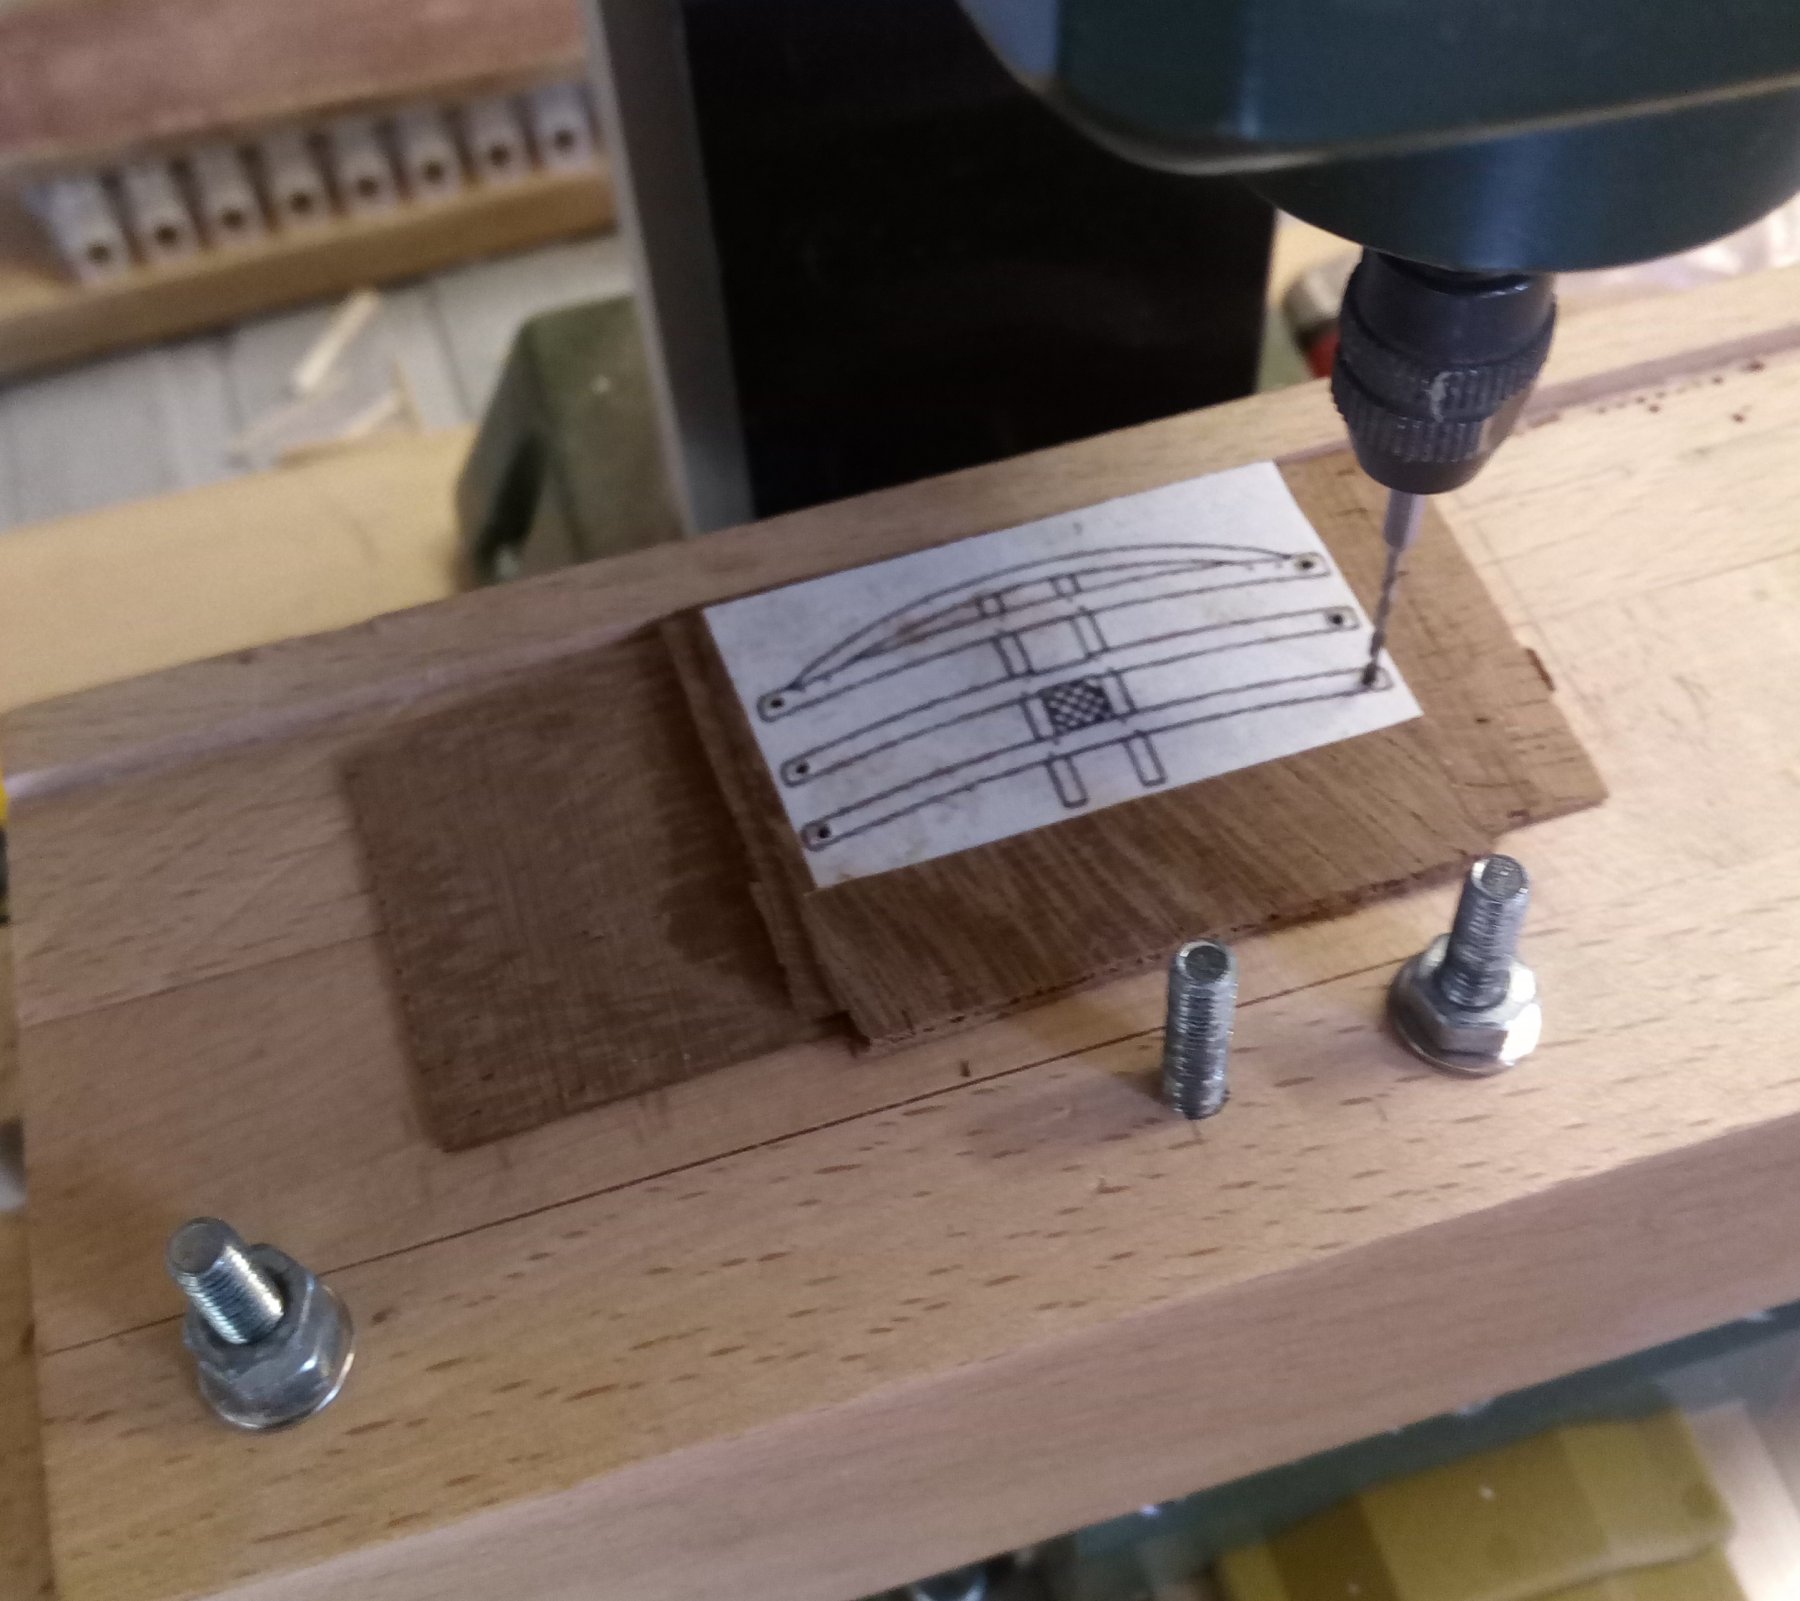
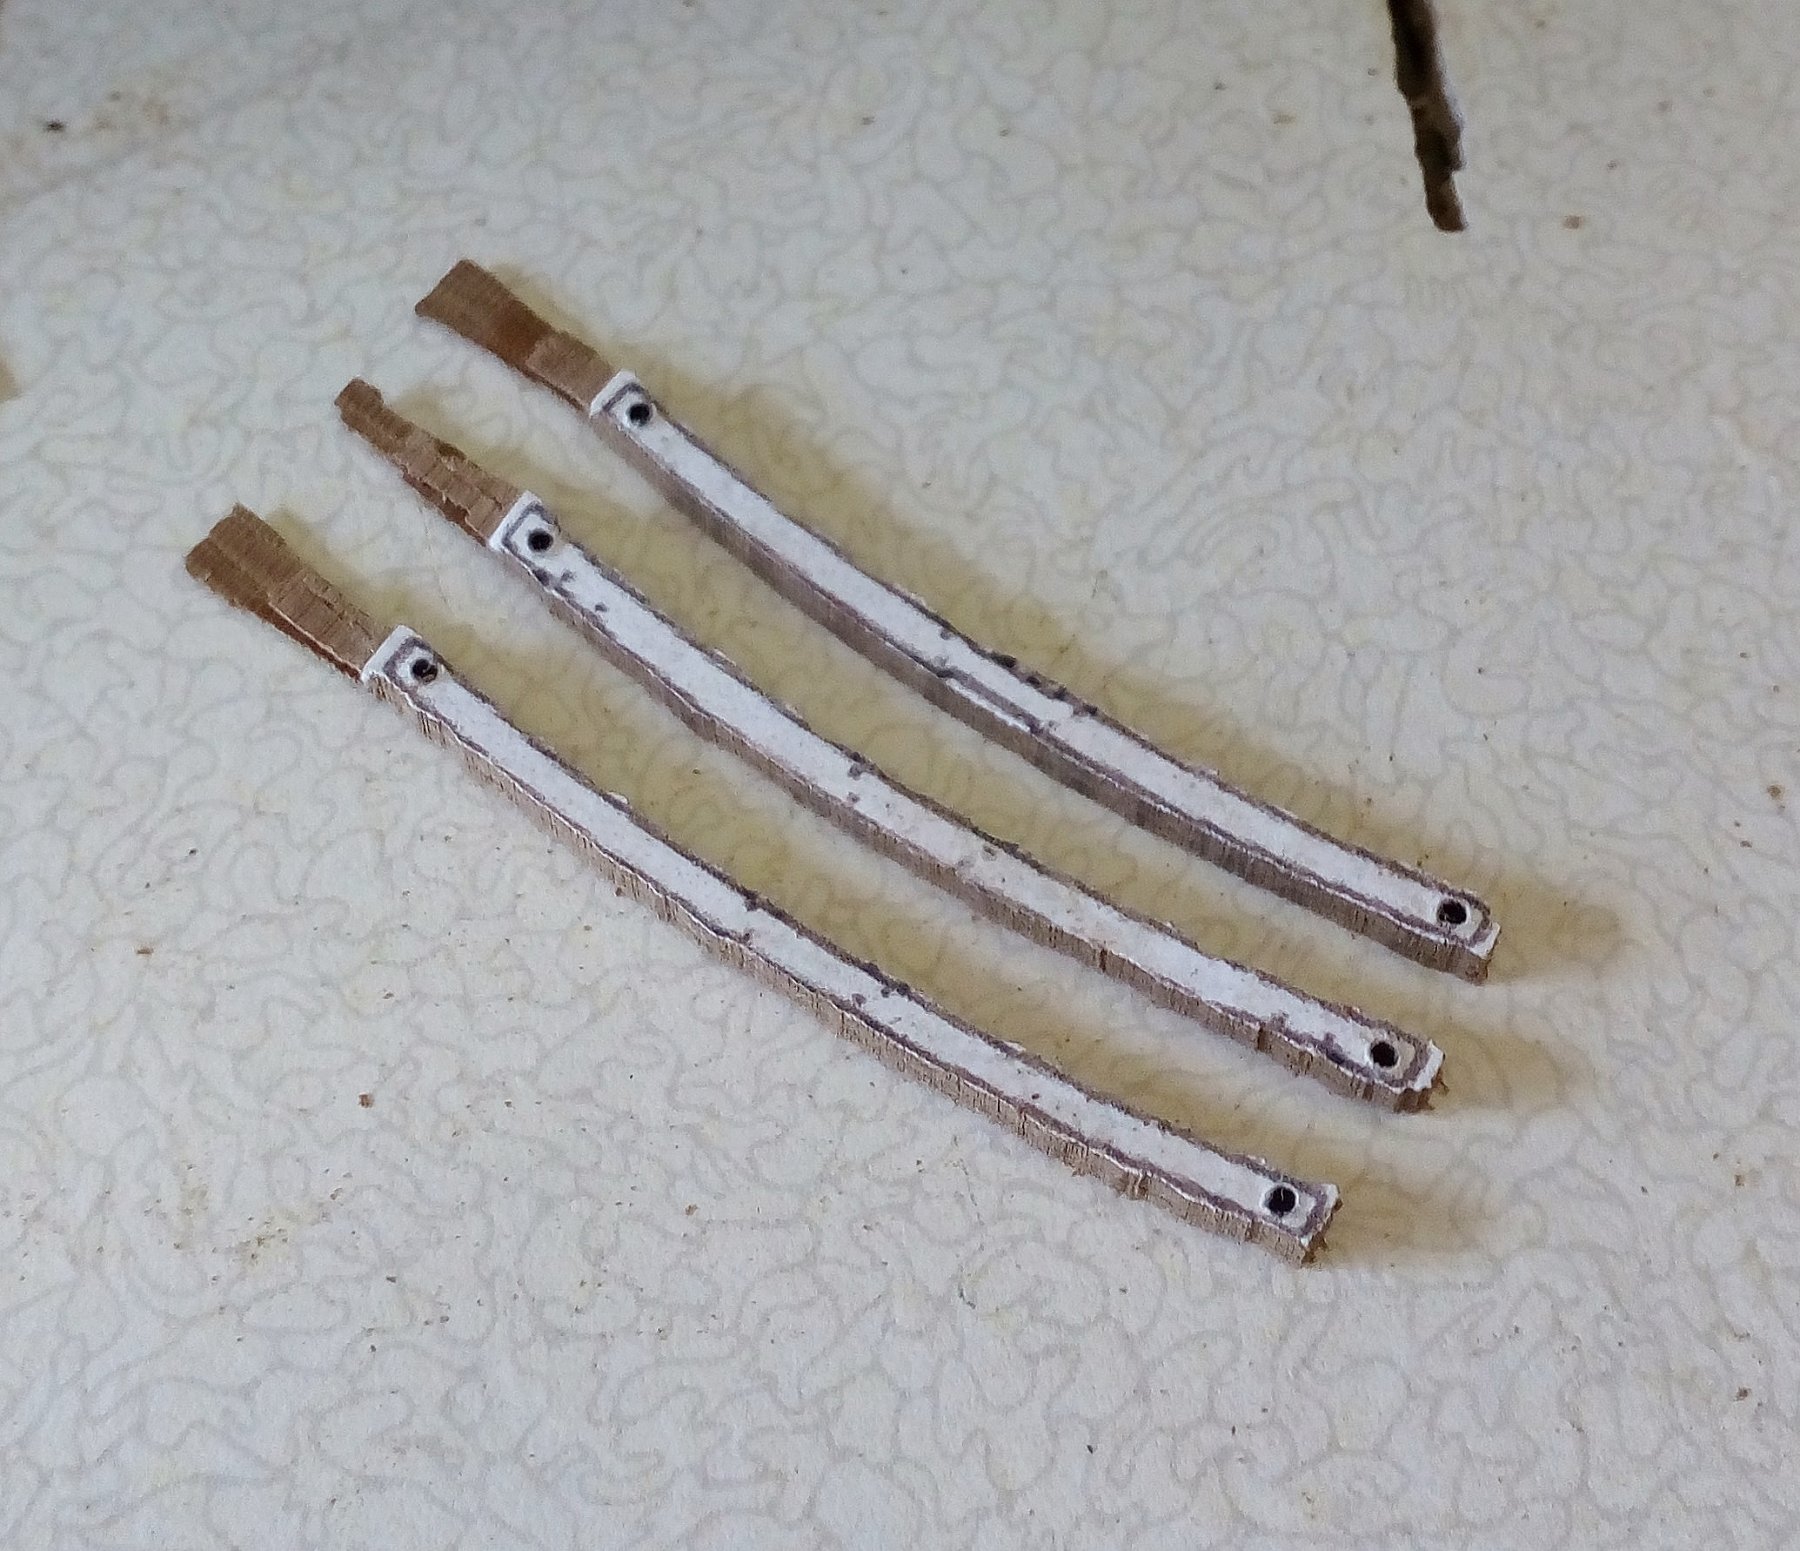
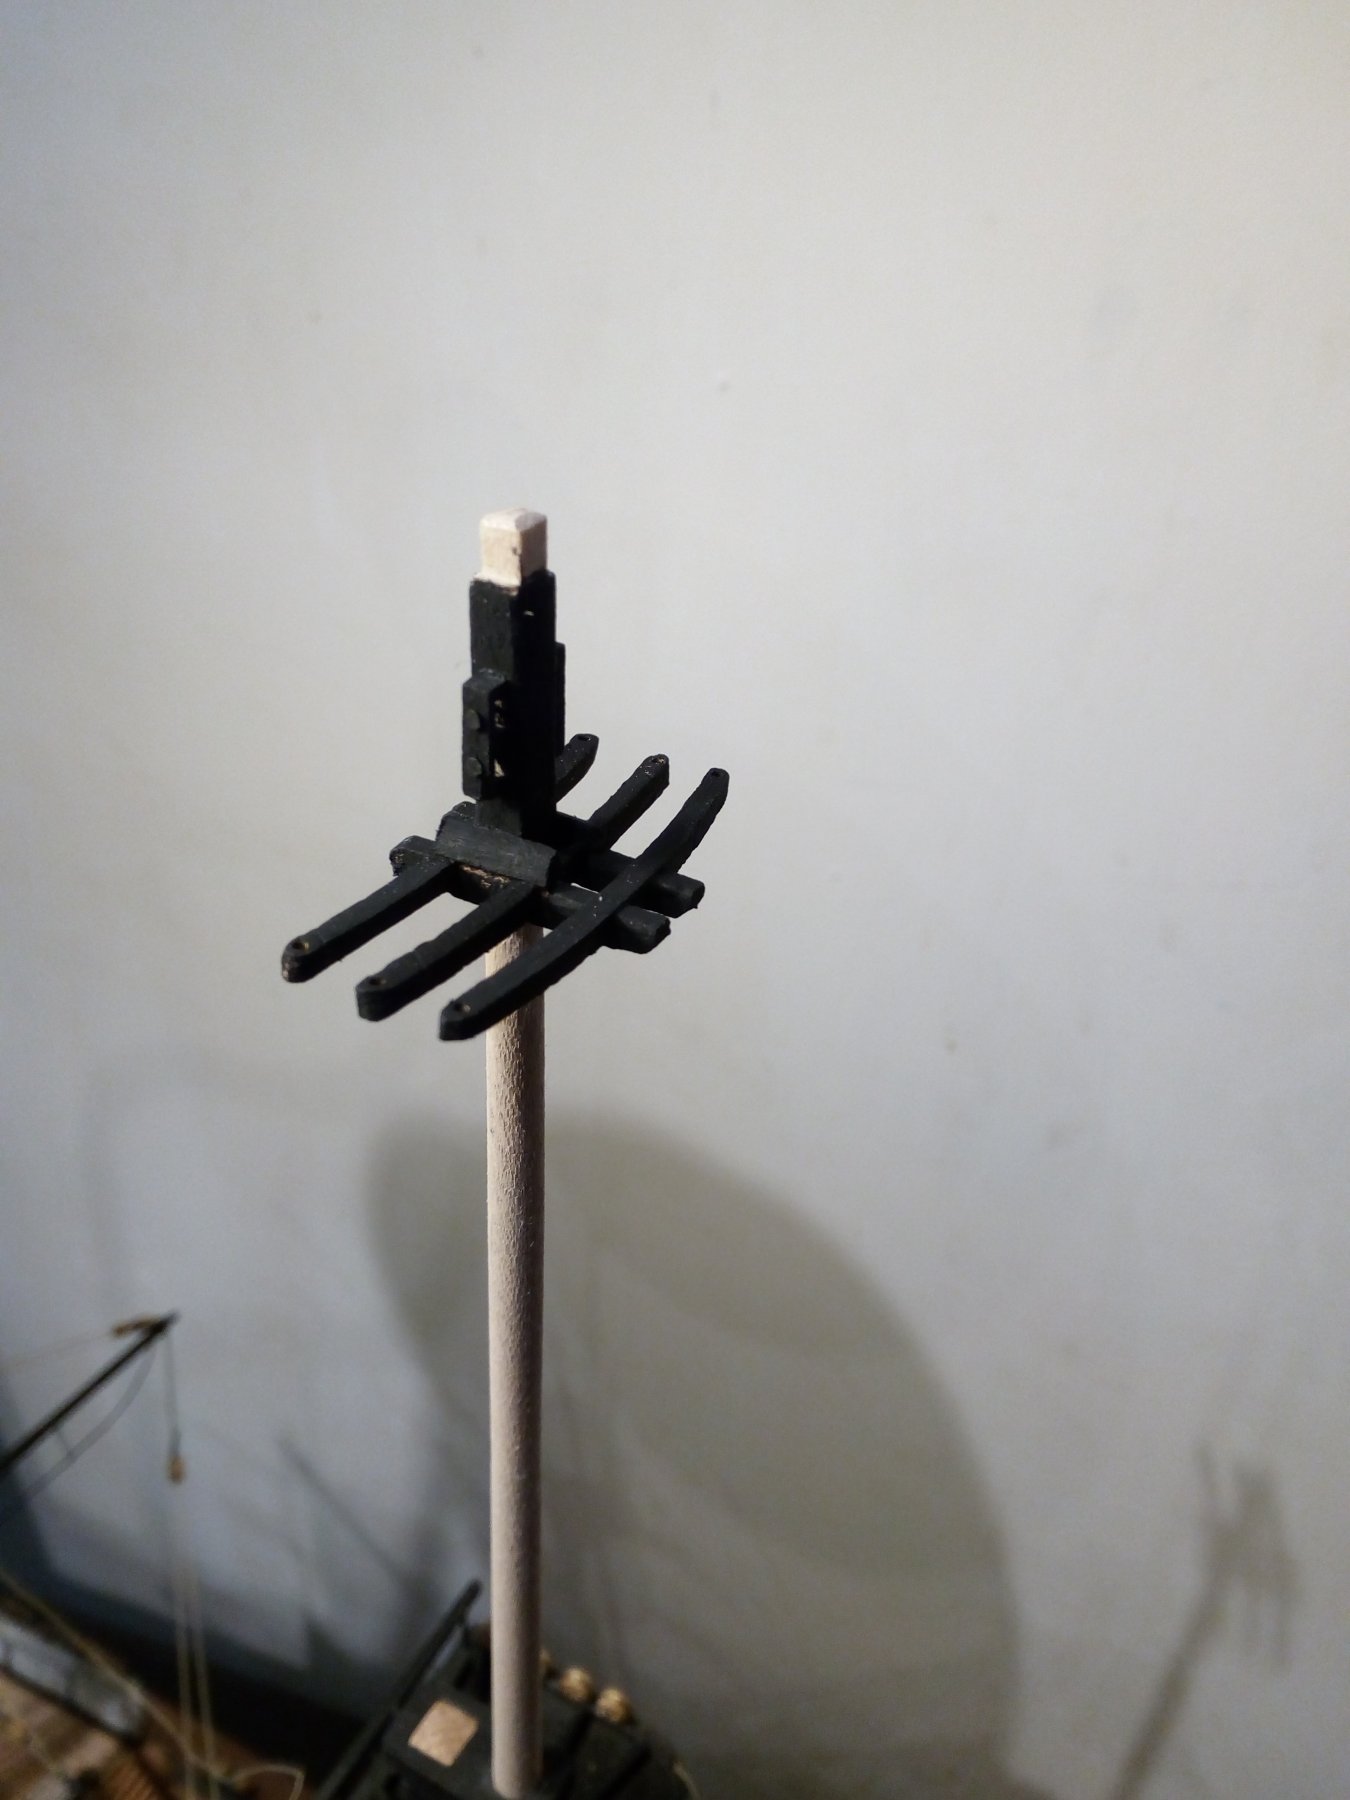
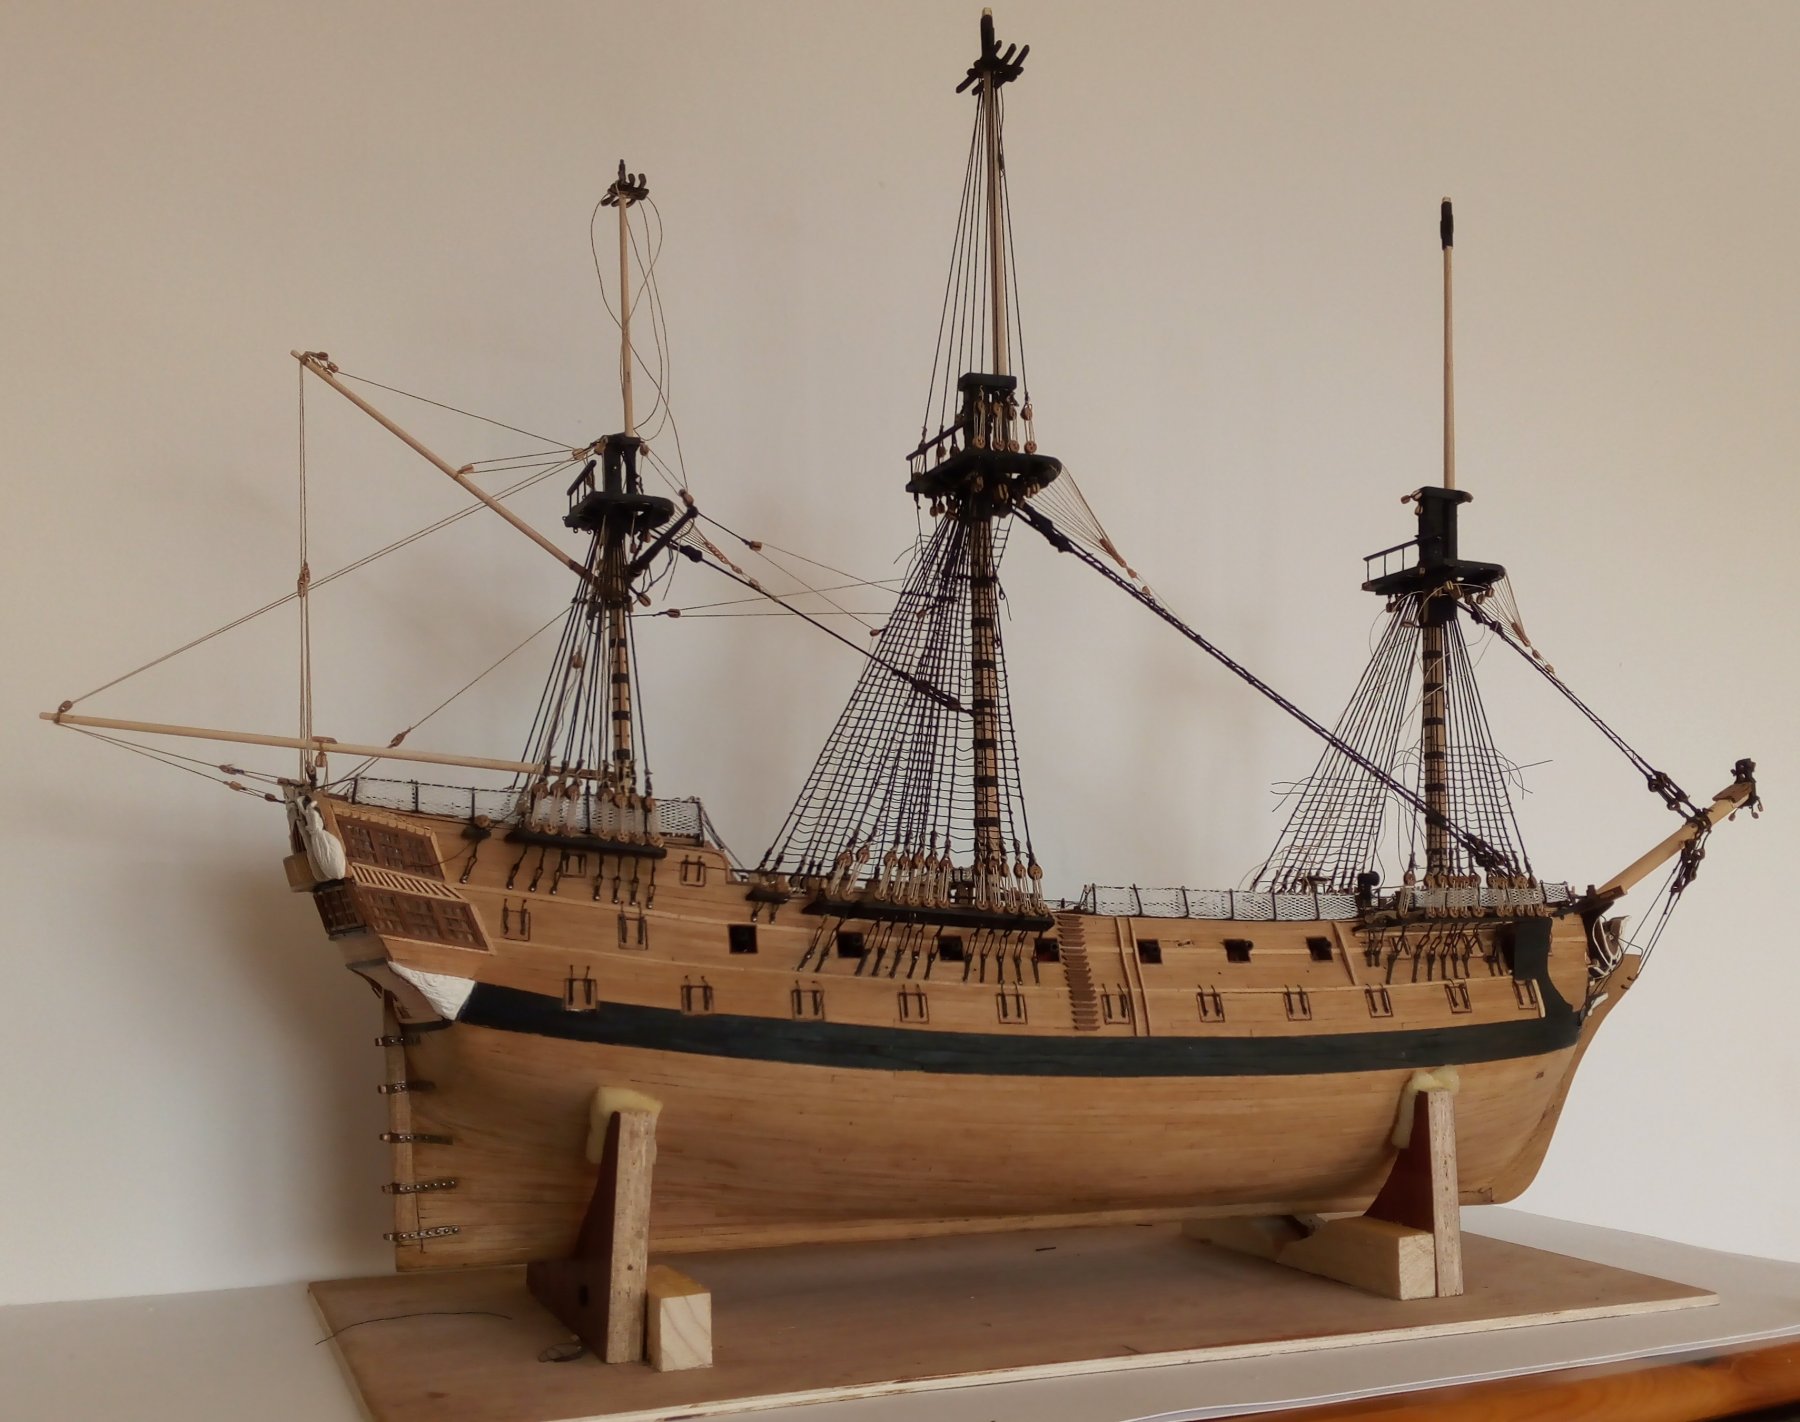
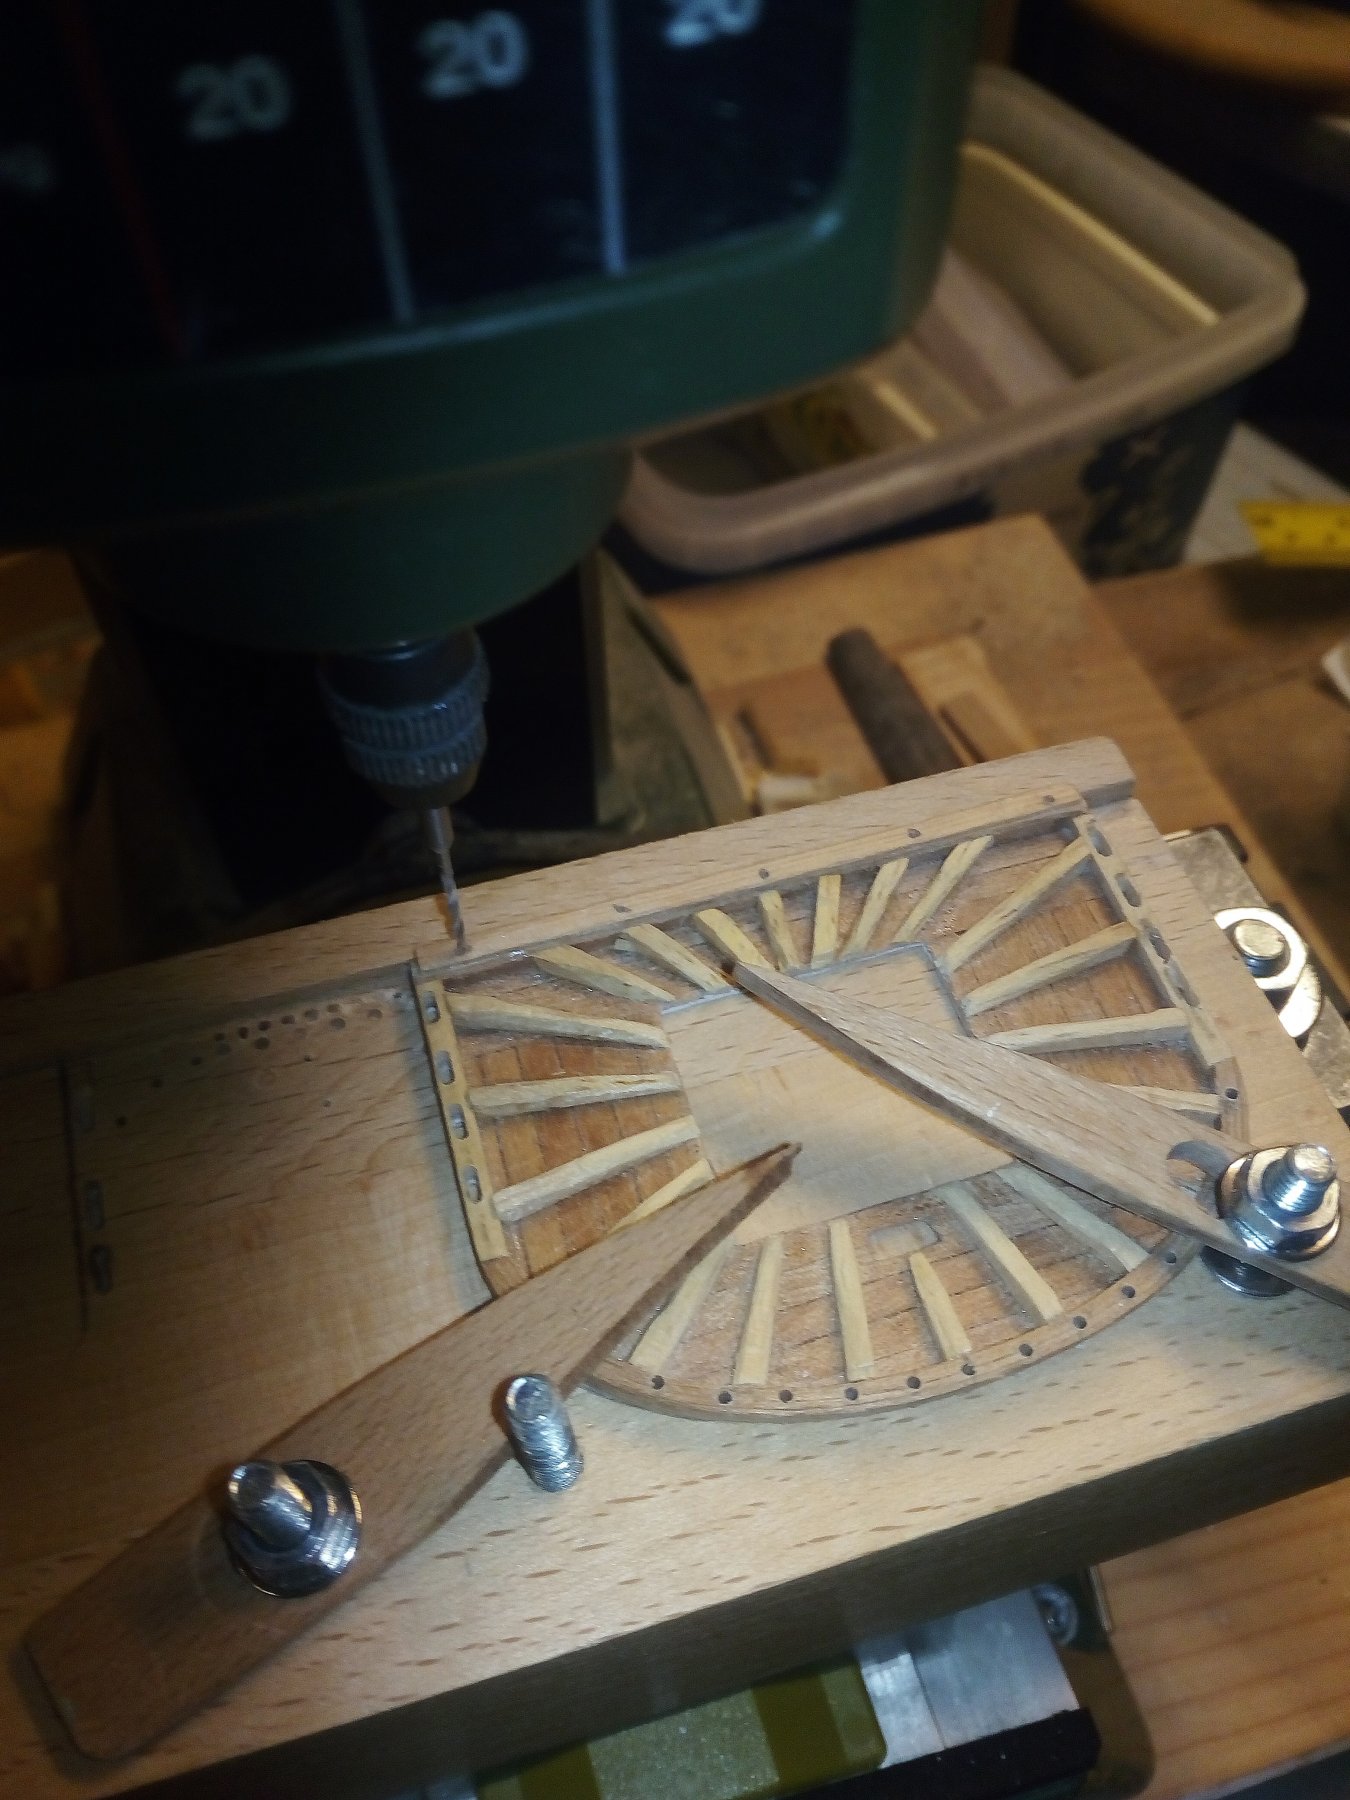
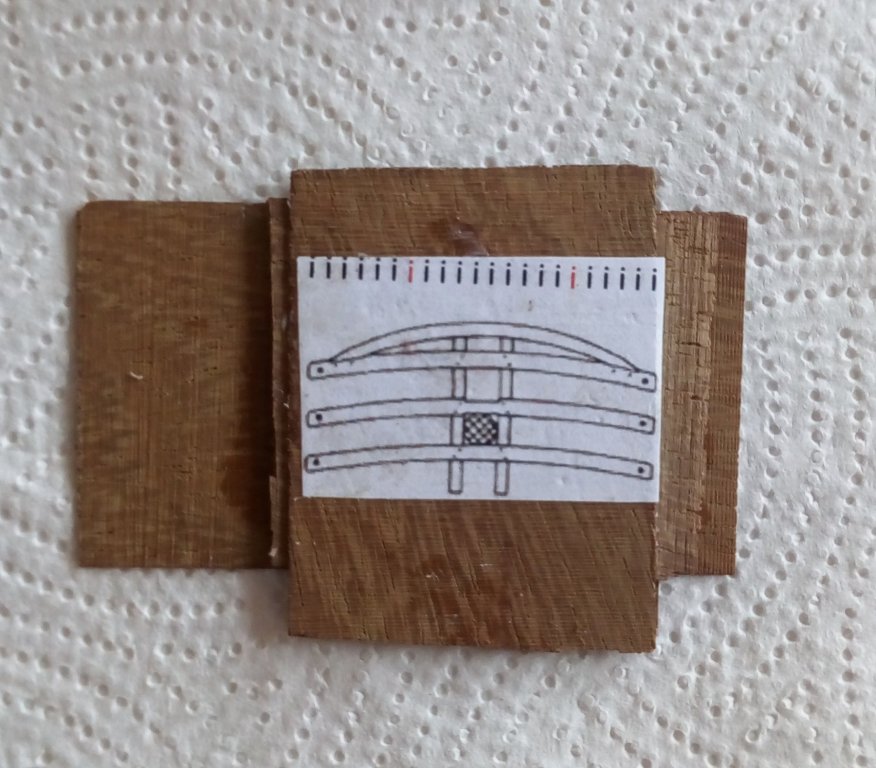
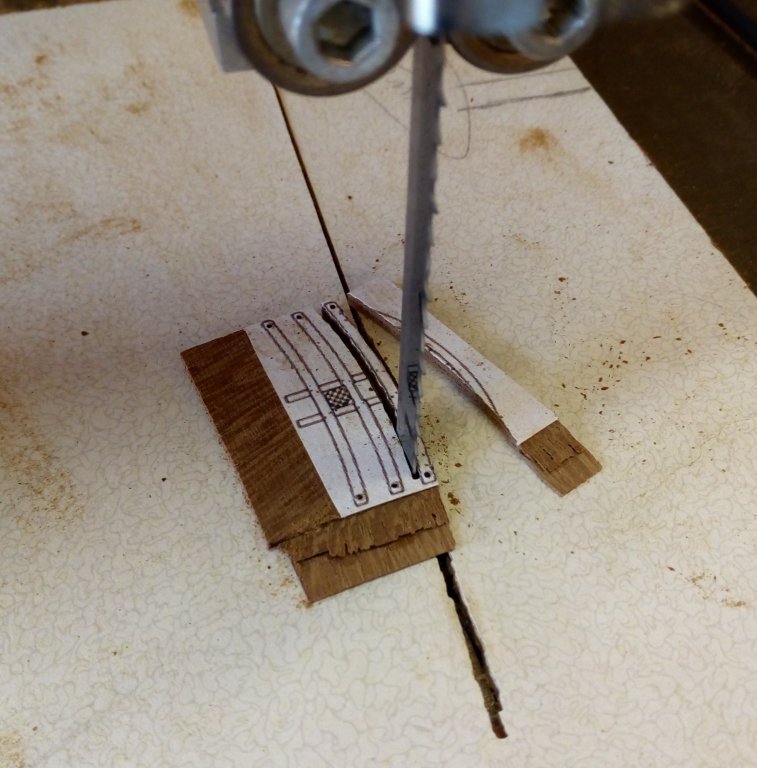
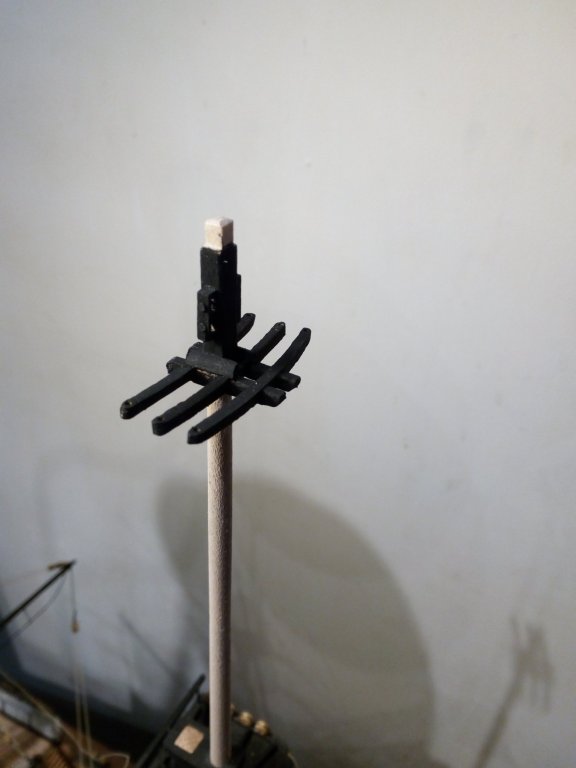
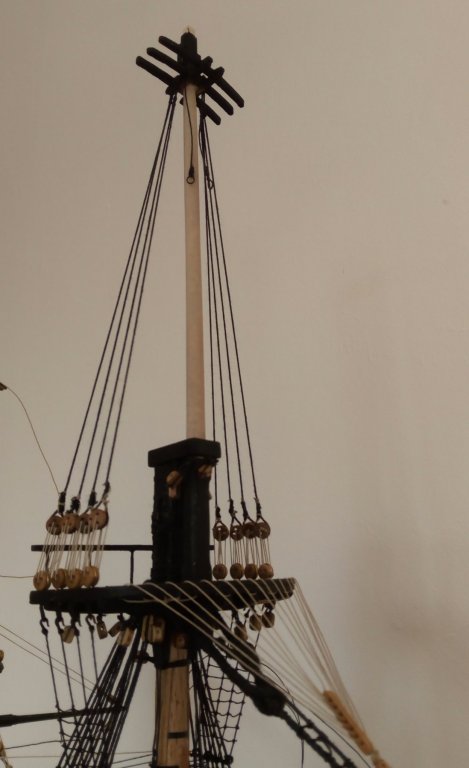
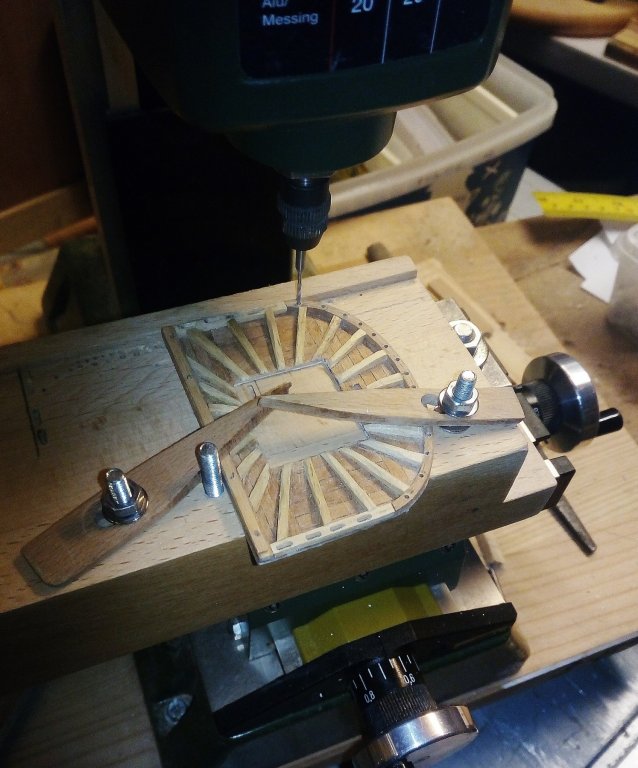
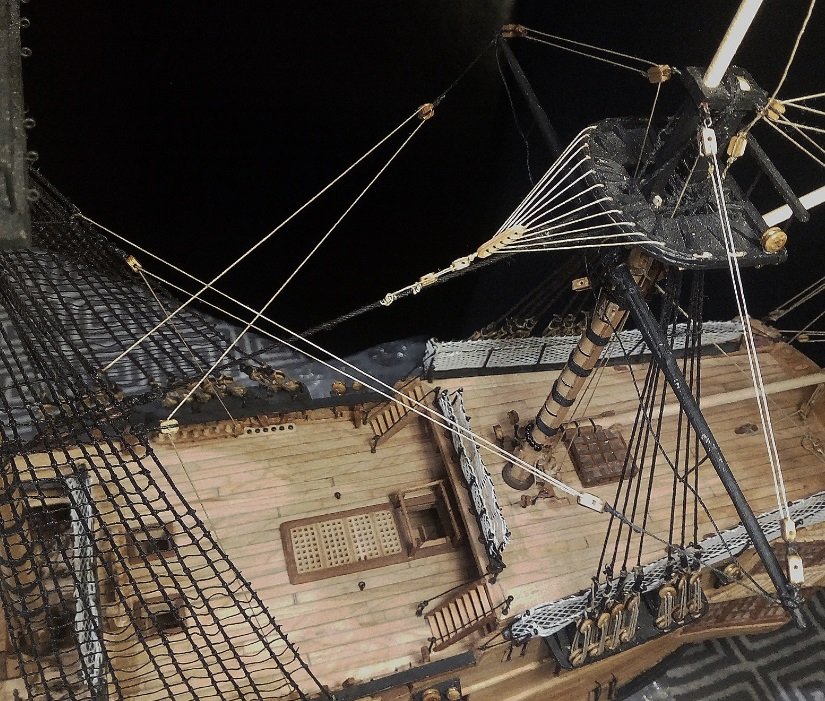
Returned to the fore mast and did a few more ratlines . . . now there are 16 on each side, so I guess that must be close to halfway to the futtock stave >>> Since I had fitted the main mast futtock shrouds I wanted to rig the topmast shrouds, but the crosstrees and bolsters would have to be in place first. Being only about 2.5mm thick, I couldn't see how I would be able to make the crosstrees from a single piece of wood. So I attempted to make my own 'plywood'. With the bandsaw I was able to slice thin strips of only 0.63mm from a piece of Makore >>> Four of these strips glued at right angles to the others produced plywood of around 2.5mm. As I'm not very artistic, and not trusting my ability to draw these crosstrees to be identical to each other, I copied and scaled a drawing from a book and glued that onto the plywood >>> The milling machine ensured that the 6 holes were perpendicular as well as being in the exact spots >>> The bandsaw released each of the strips >>> The blanks >>> . . . and fitted >>> and with the shrouds >>> Two Burton pendants also hang from the topmast platform. I only just spotted them in Petersson's rigging book before I rigged the shrouds. I don't know about anyone else, but I get a bit weary of all those brutal close-ups, so here's how Leopard looks right now >>> B.T.W. ~ that's just a 'working cradle' that Leopard is sitting in for now!


- 257 replies
-
- 17
-
-
That was a very lucky show to be honoured with the presence of your perfect model, Albert! I wish I could have been at that show!
-
Yes Tom ~ it's really easy and quick. I bought a pack of 100 tiny copper eyelets and popped the whole pack in the thinners, swished them round and in less than a minute the thinners was back in the tin. It probably took more time to dab the eyelets dry with a piece of kitchen paper!
-
Hi Tom, I've been using cellulose thinner to clean the brass ~ and copper parts before blackening. So far it has proved very successful. I pour enough of the thinners into a small container, throw the metal parts in and give them a quick stir with the tweezers and use the tweezers to fish them out again onto some clean kitchen paper roll . . . and what's left of the thinners (which is about 95% of the amount initially poured) just gets poured back into the thinners tin for the next time! (I don't use the thinners to thin cellulose paint - just use it for cleaning.) . . . and it makes a good job of cleaning the tips of the tweezers! Above, I mentioned copper parts as I've found that the "Metal Blackening for Brass" chemical that I use is equally effective on copper as well as on brass.
-
Hello Barbara and Dad, What a fabulous model your dad has built, and it's great to see that you've now got your hands on the rigging! I've just seen the news and there are ship modellers at airports all over the world trying to get tickets to Munich! Oh, and we need to see many more photos!
-
Patrick ~ ingenious method of creating these barrels - - - just like all other aspects of your build!
-
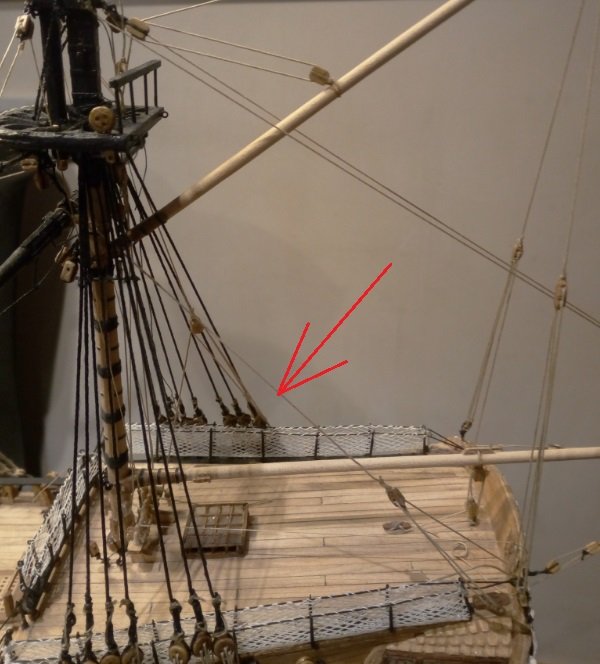
Progress is S-L-O-W !!! After rigging the foremast shrouds I continued there and made a start on the ratlines. Got 9 done on each side of the mast >>> Remembering how weary I became with the mainmast ratlines, I diverted to a few other tasks. The fore topmast has been fitted >>> and the fore crowsfeet have been rigged, and although unseen in this photo, the fore upper jeer blocks are hanging just under the top >>> I returned to the mainmast and fitted them pesky catharpins . . . and then the futtock plates and shrouds >>> Now I guess it's back to do some more foremast ratlines. The 18 (9 each side) that are already done probably represent about 30% - - - I think I'm scared to count how many are still to be done in case I find out !!!

-
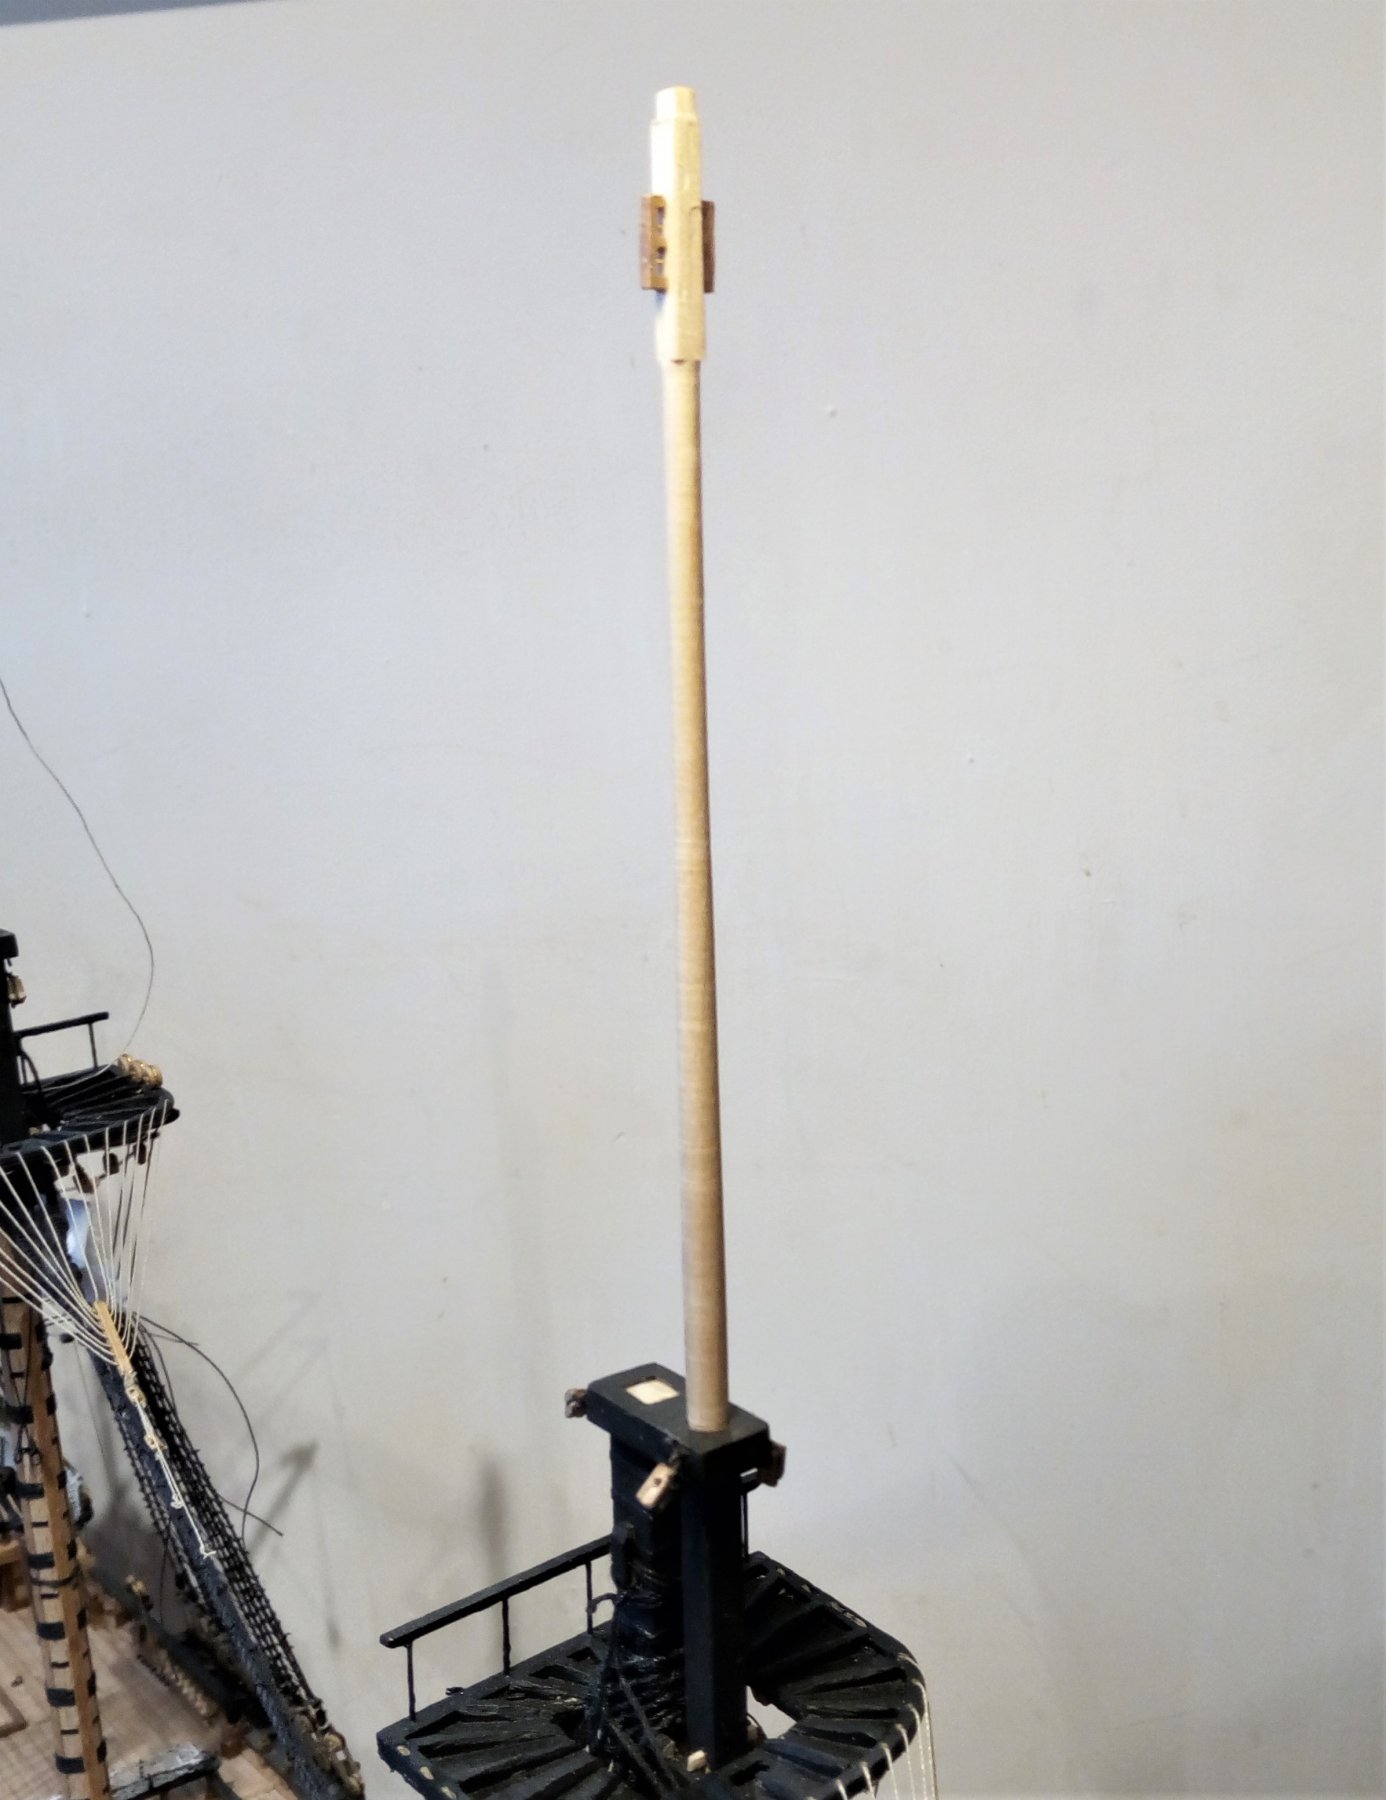
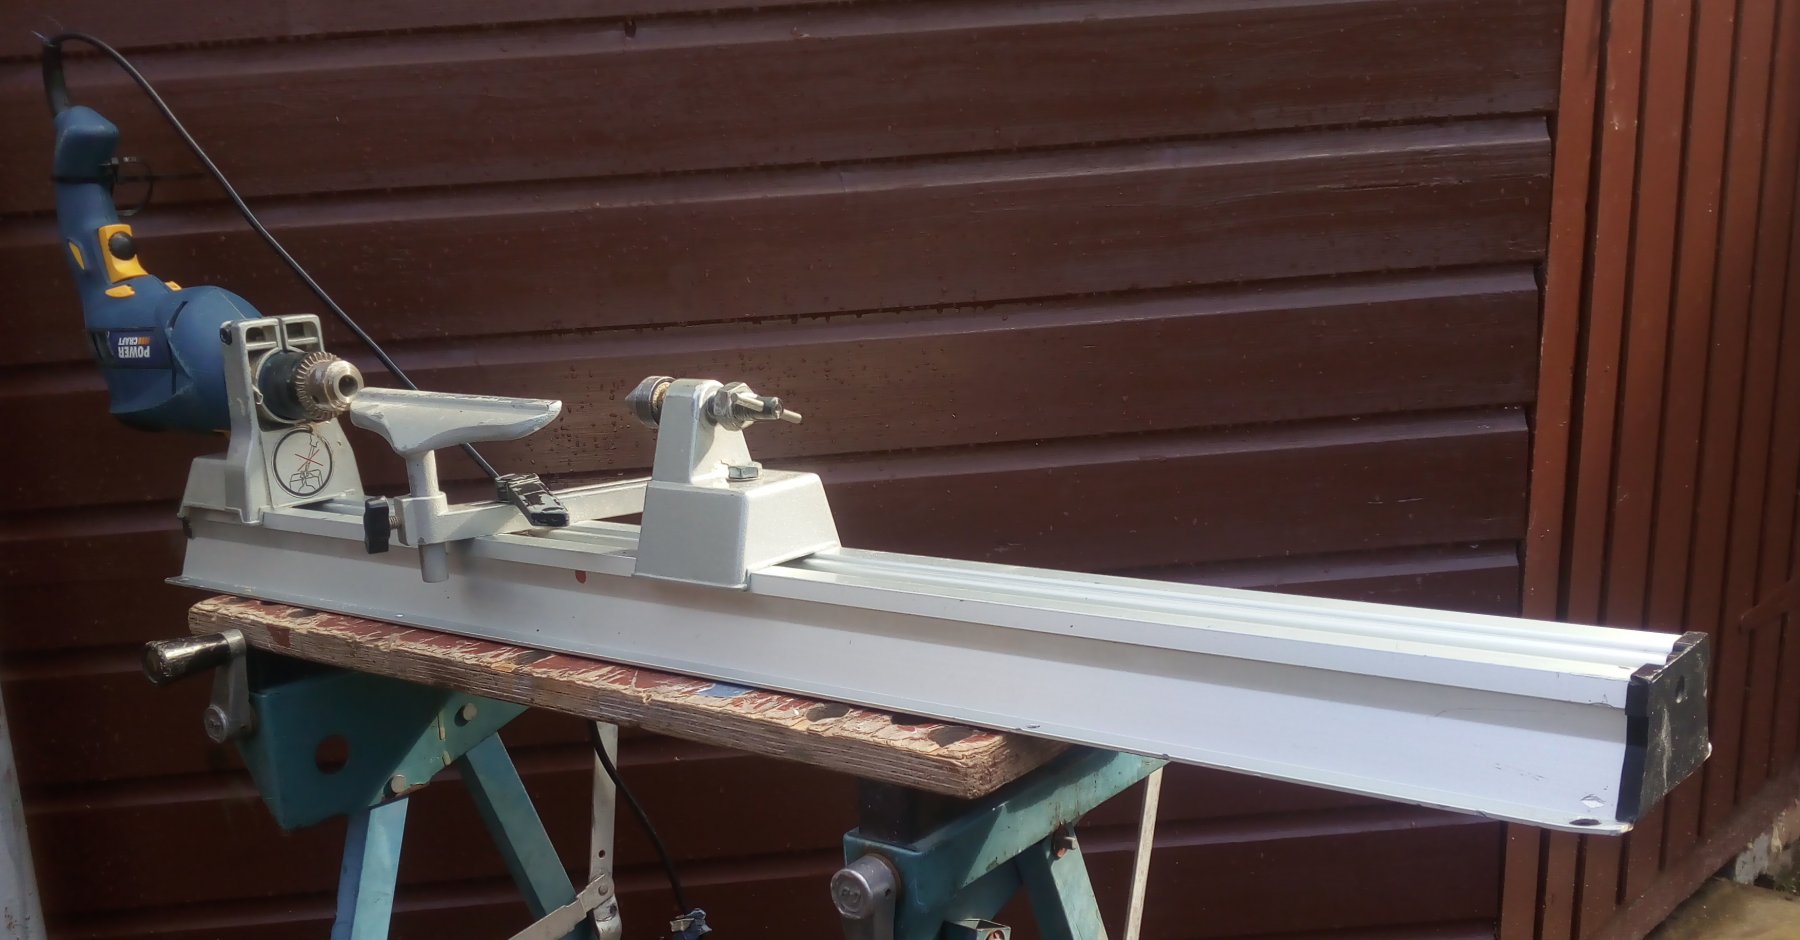
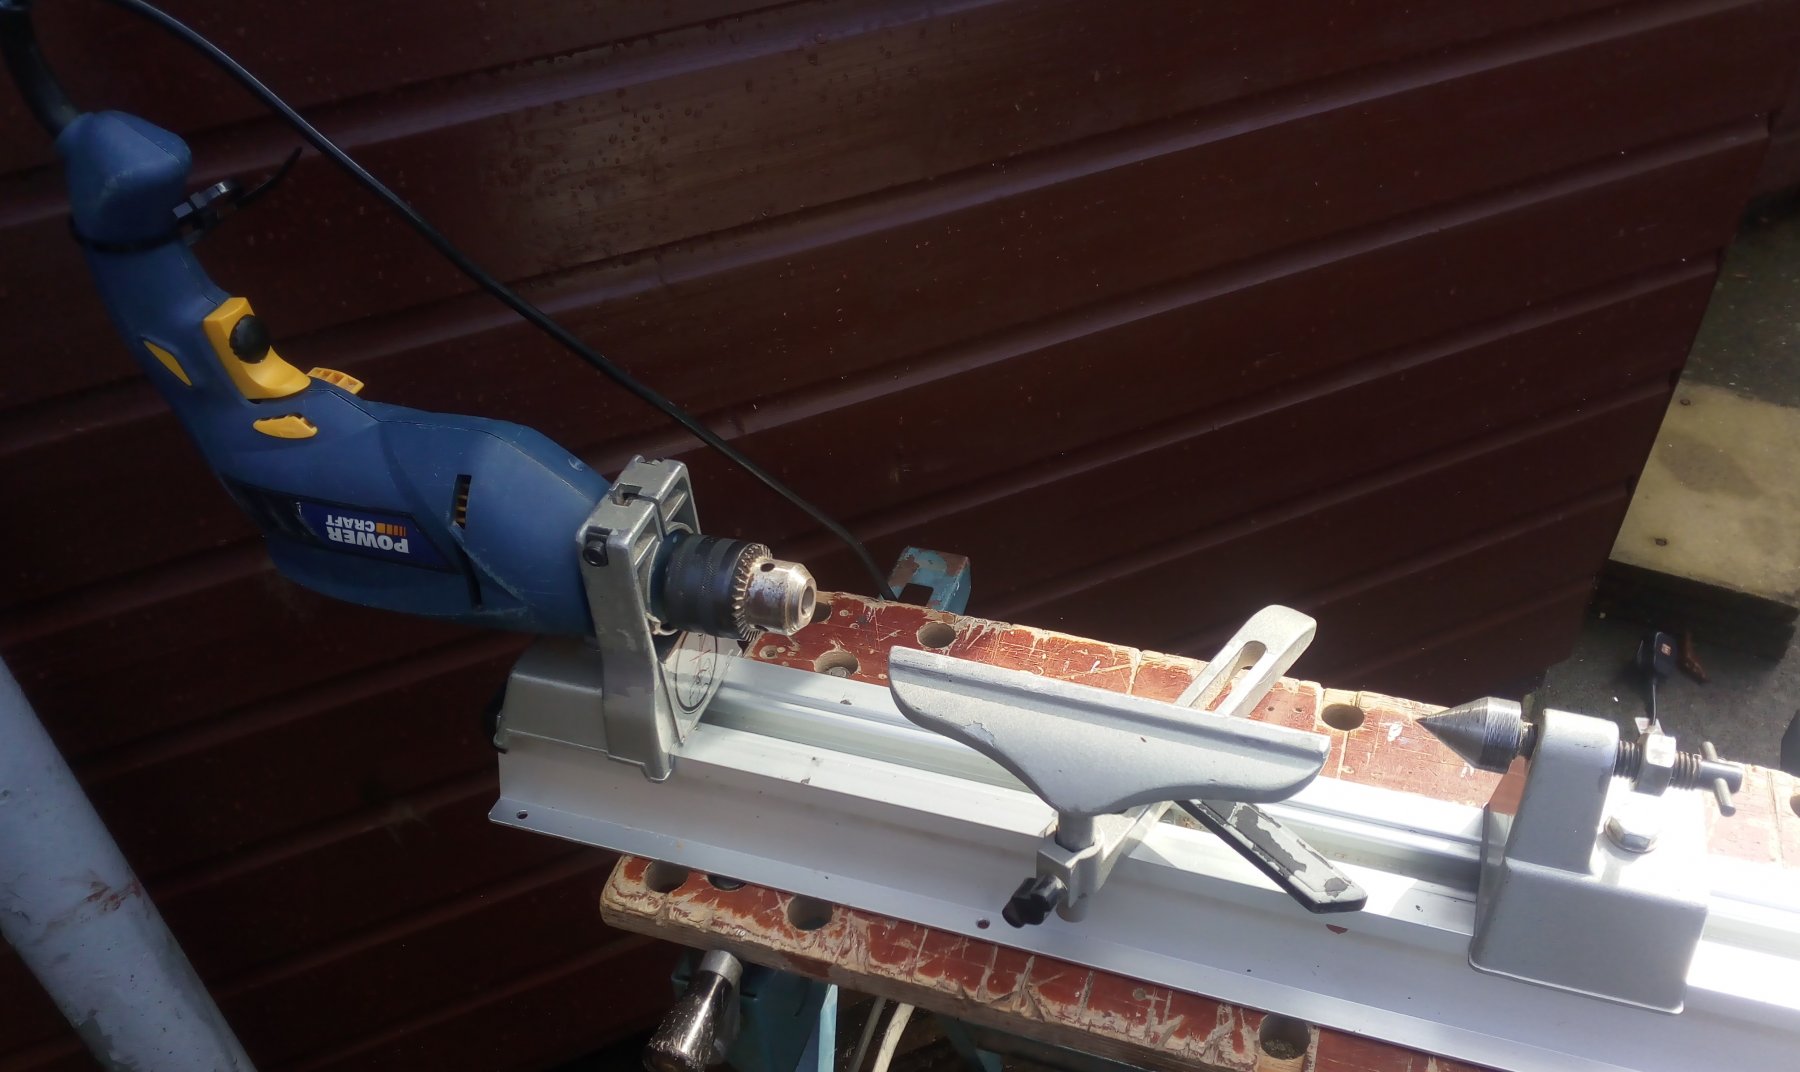
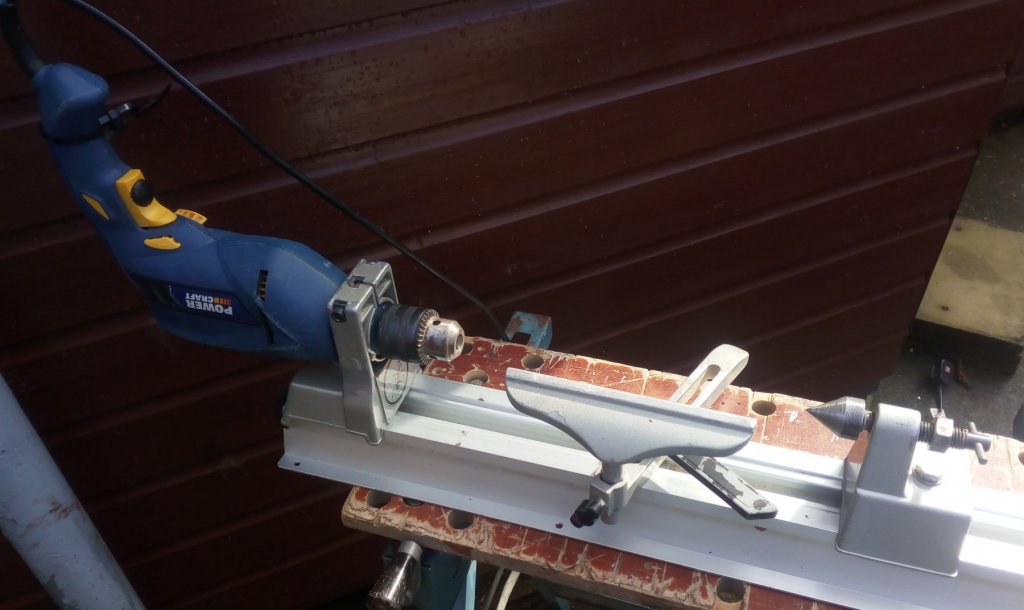
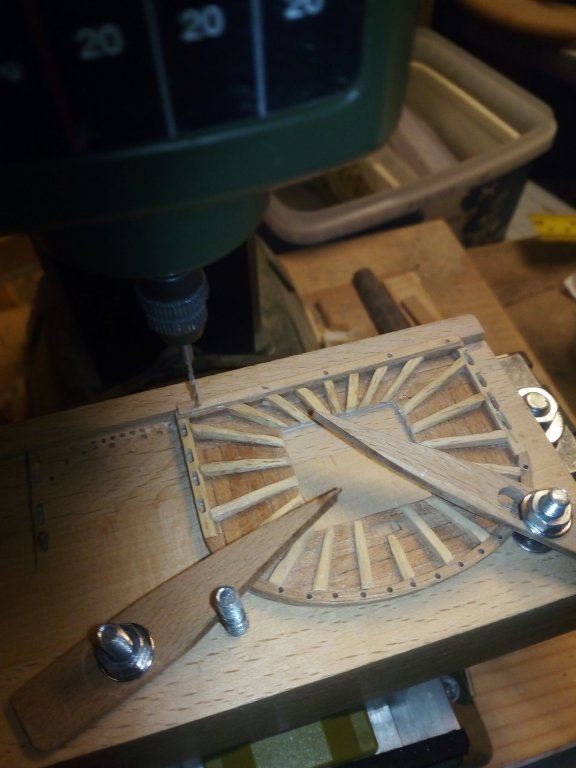
I'm really pleased to hear you're back in employment. That's a very stressful situation. Great job on the cannon barrels. I've had my cannon barrels for some time now but it didn't occur to me at the time to turn them out of wood - - - instead I bought mine from a model suppliers shop! Like you, I don't have a "proper" lathe. Some years ago I bought what I would call a jig and it's very much like the one you have built. By the way, very inventive with yours! Here's the one I use, and so far it has been perfectly adequate for the little amount of turning that I do >>> and here's a closer view of the 'business end' >>>

-
Hello Tom, I've been absent from the forum for some weeks and have just now caught up with your recent posts. The news was not what I was expecting when I came here. I'm very sorry to hear your news. Although I'm now retired, during my working life I was twice the victim of "restructuring" and I feel for you in the present circumstances. I only hope that it won't be long before you can find some suitable employment. This may now seem a little trivial, but I'll just say that your recent work on Leopard has been outstanding and hope that you'll get the feel for returning to it once you've got your other life's priorities sorted. Best regards, Jim.
-
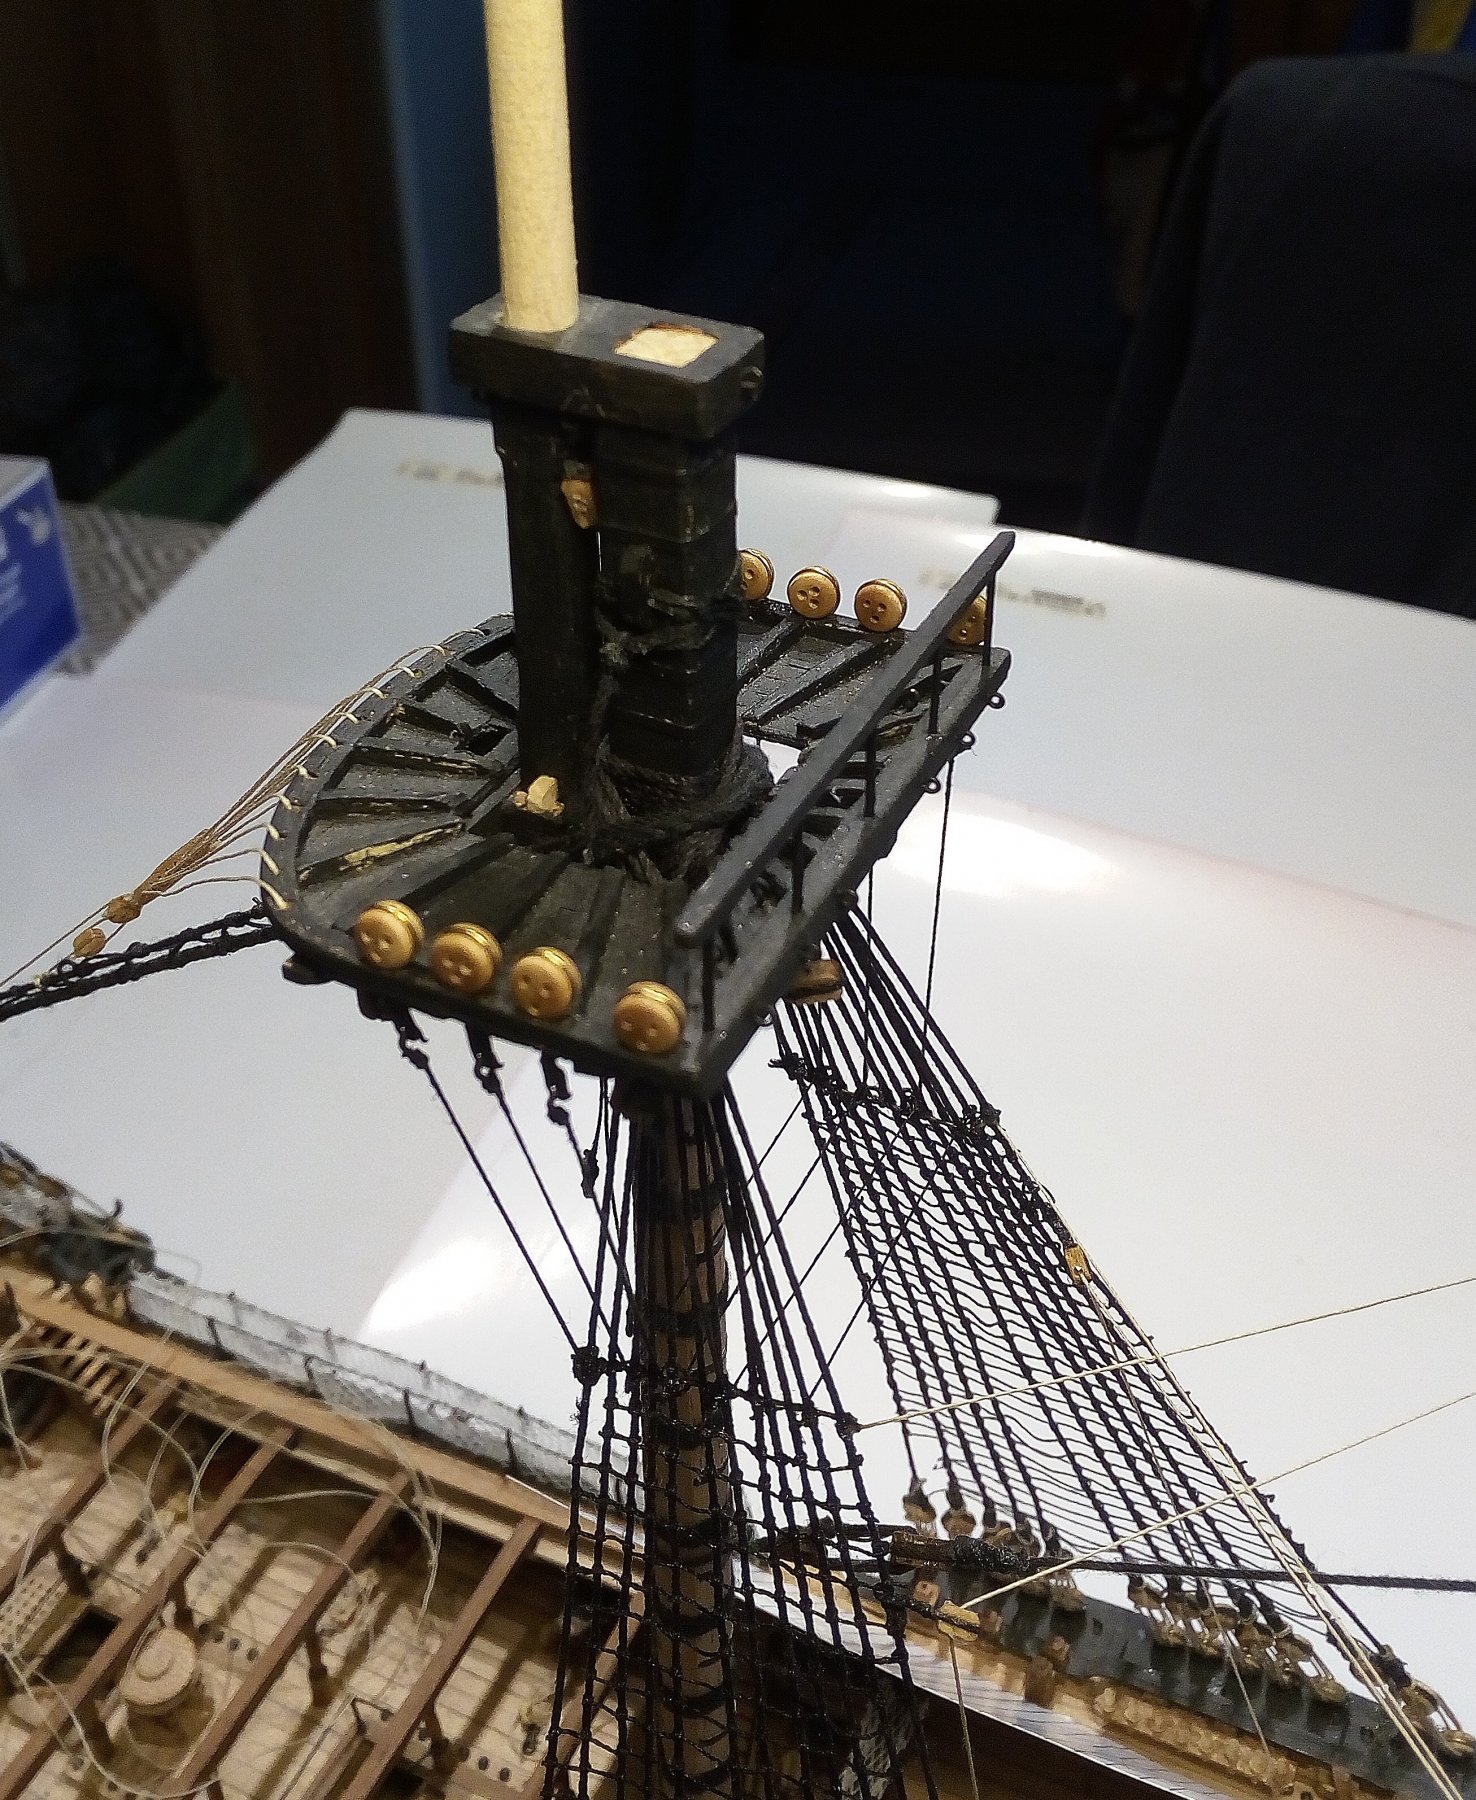
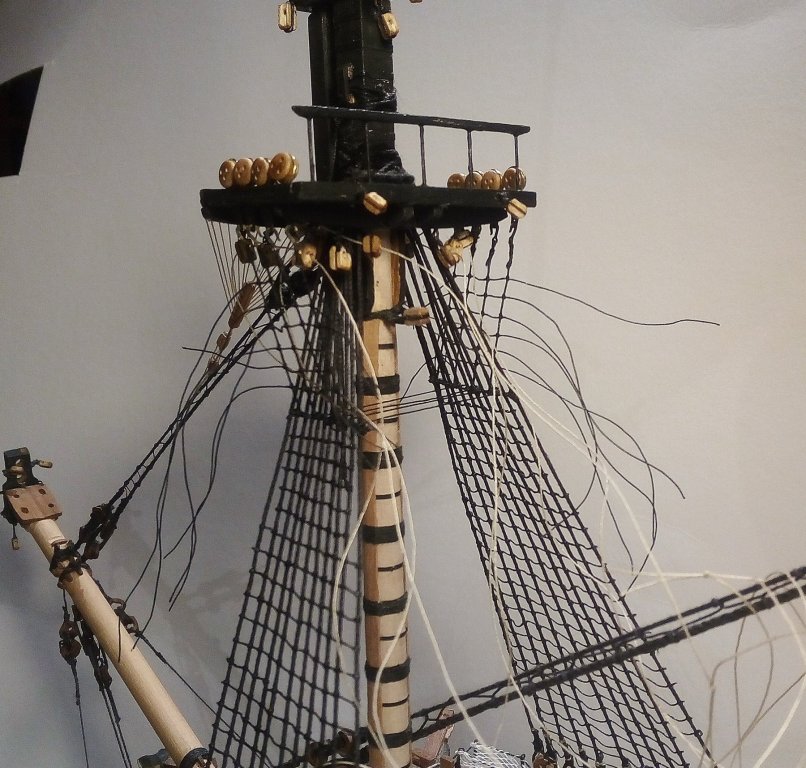
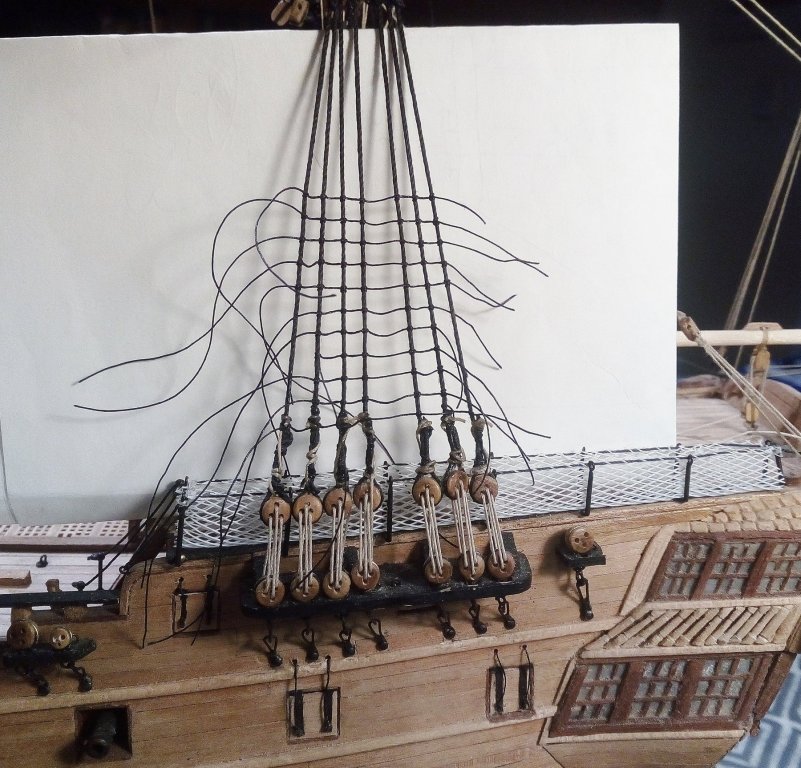
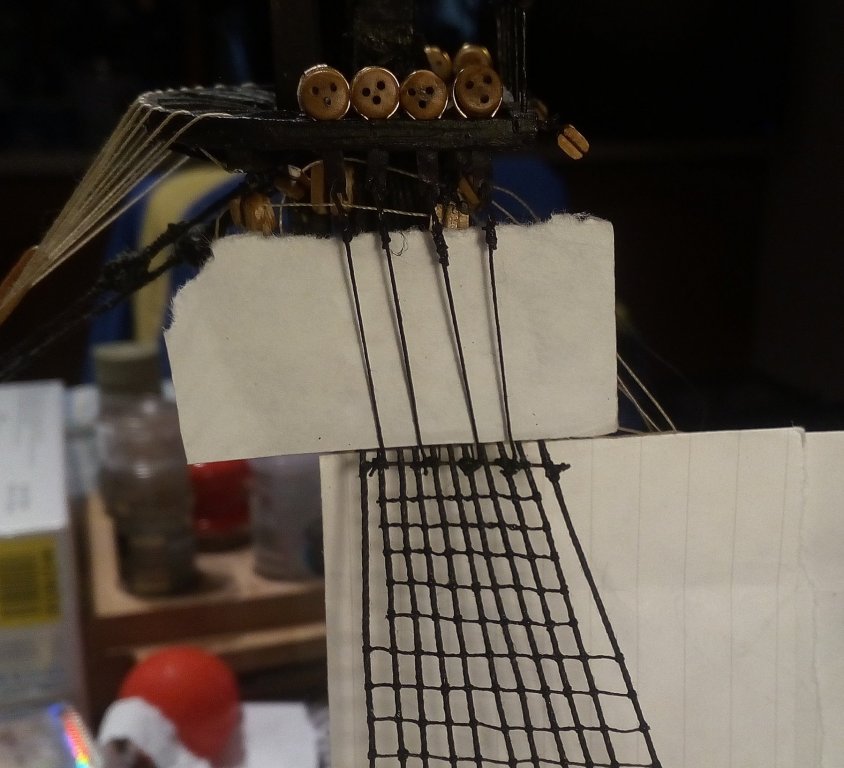
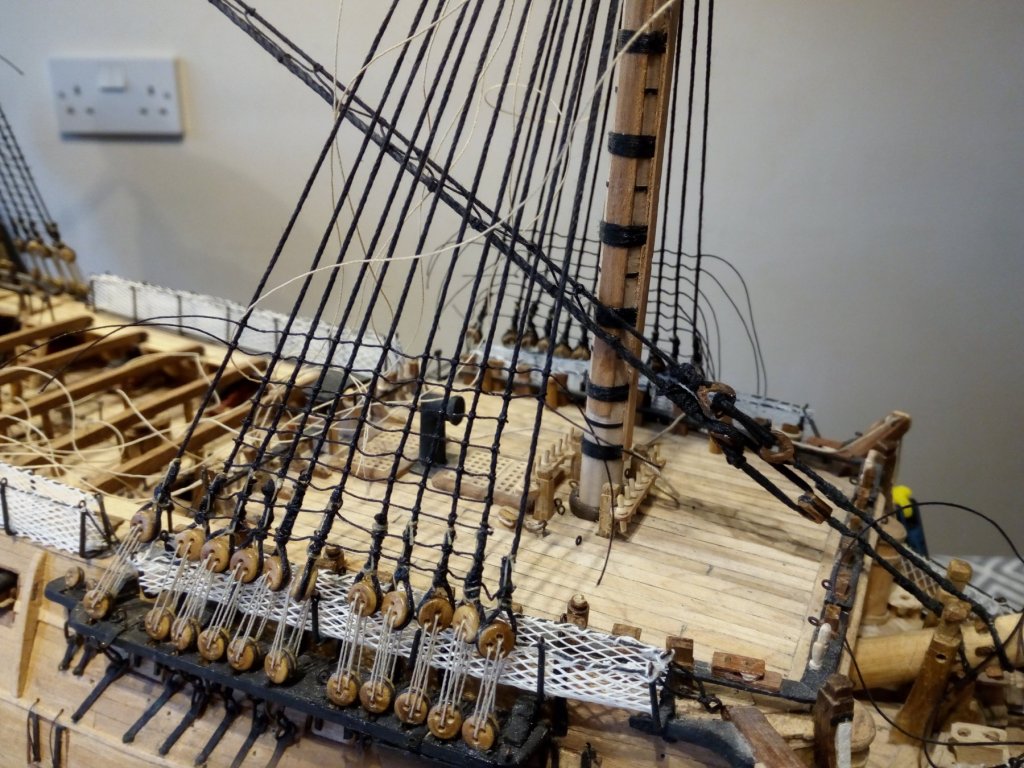
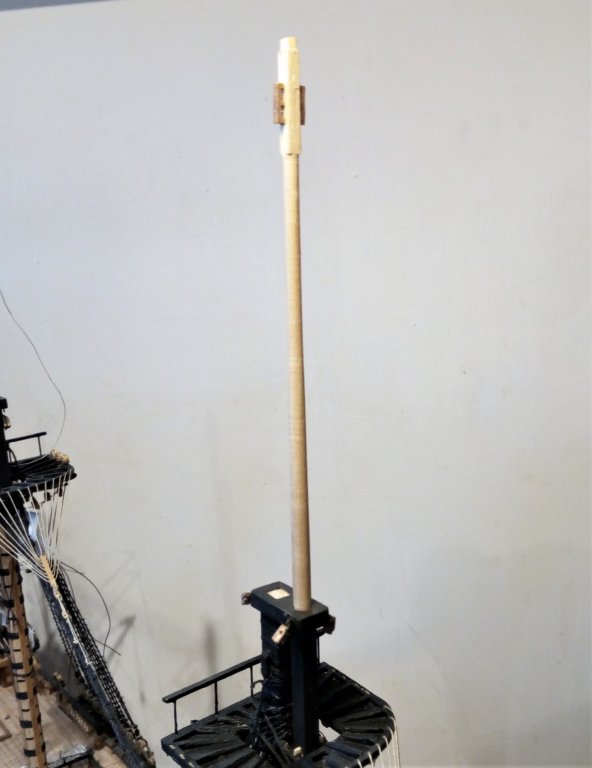
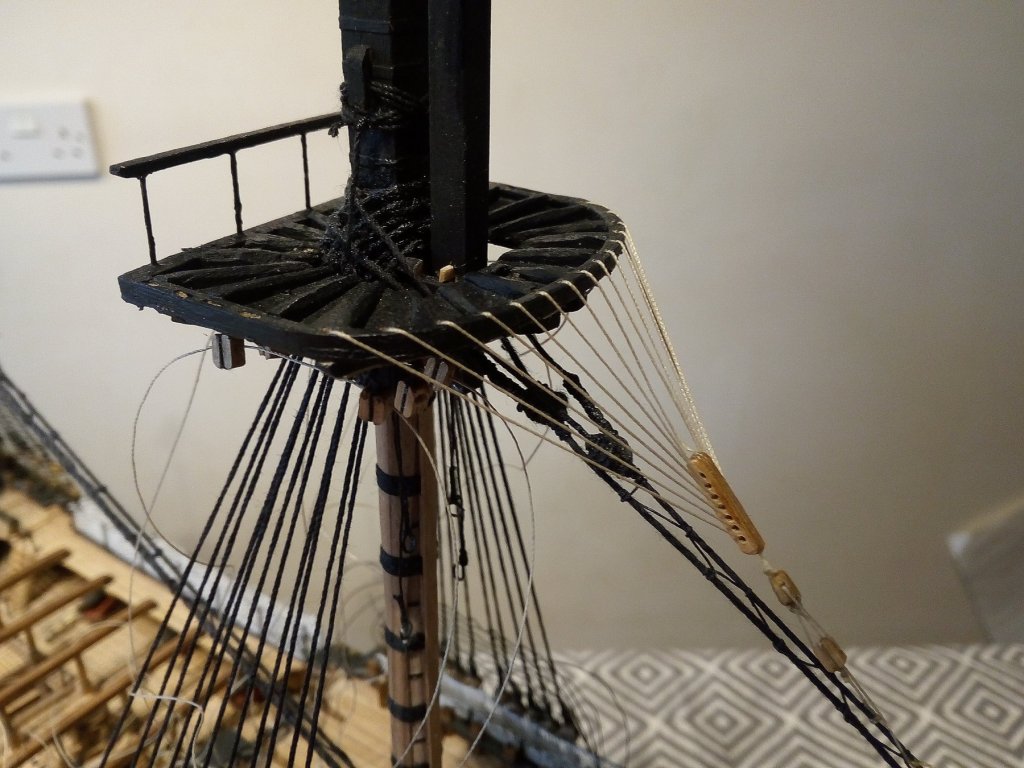
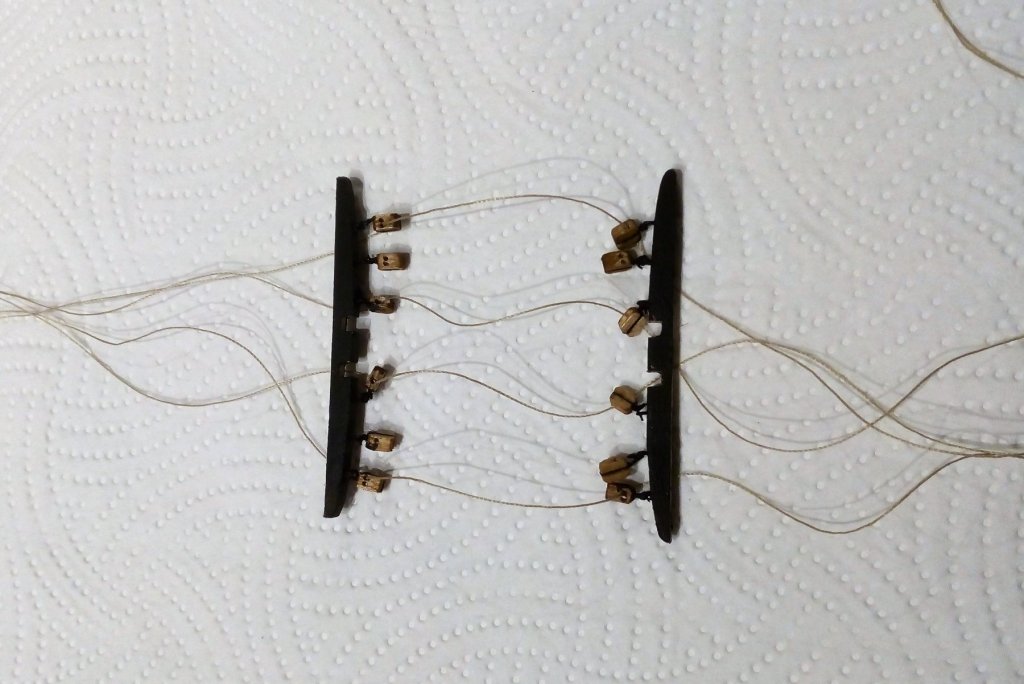
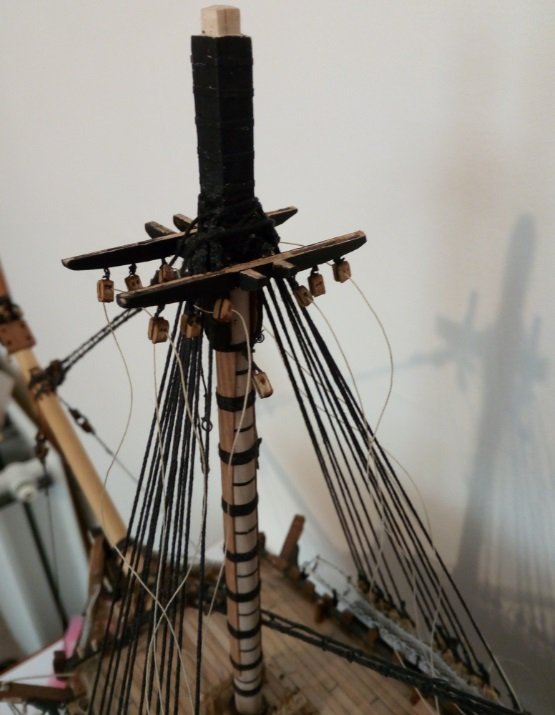
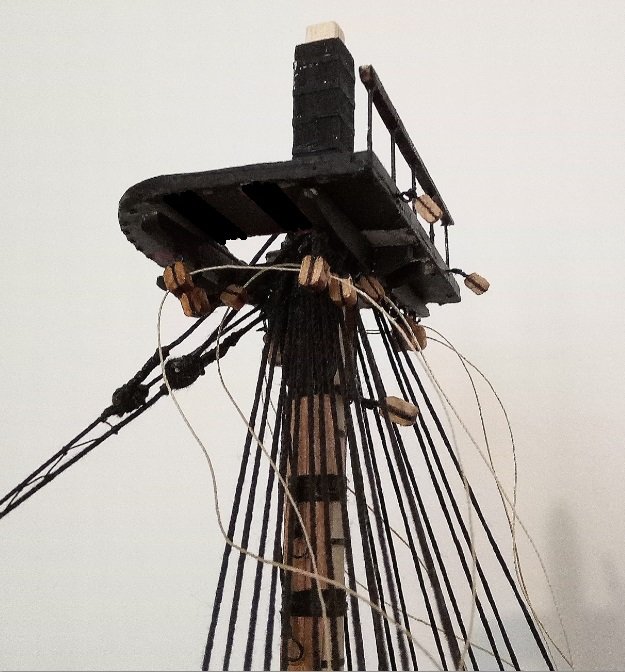
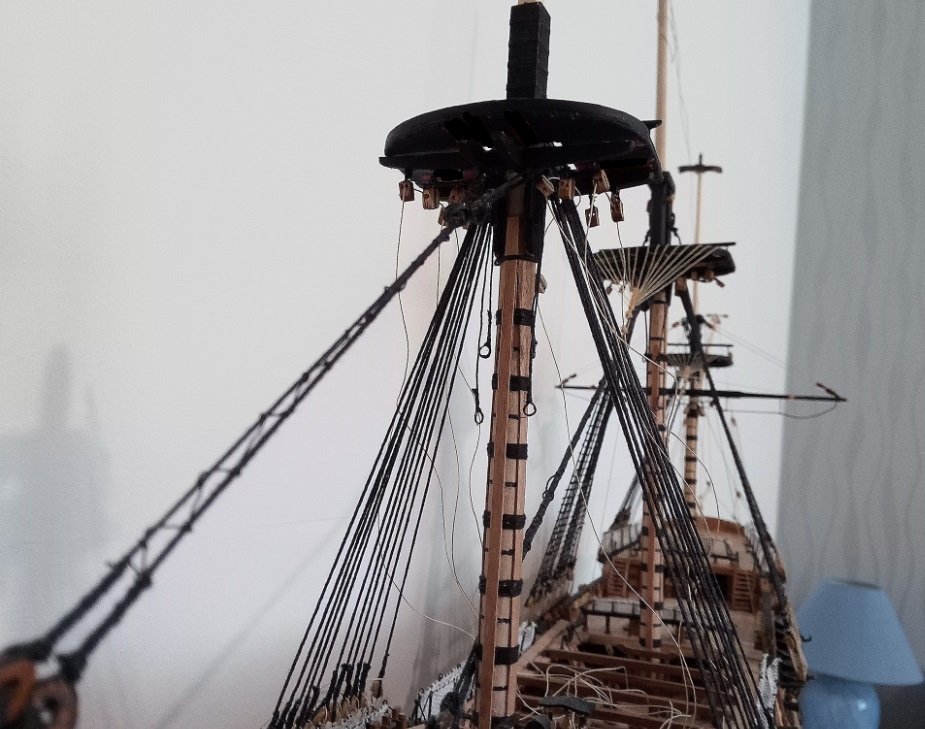
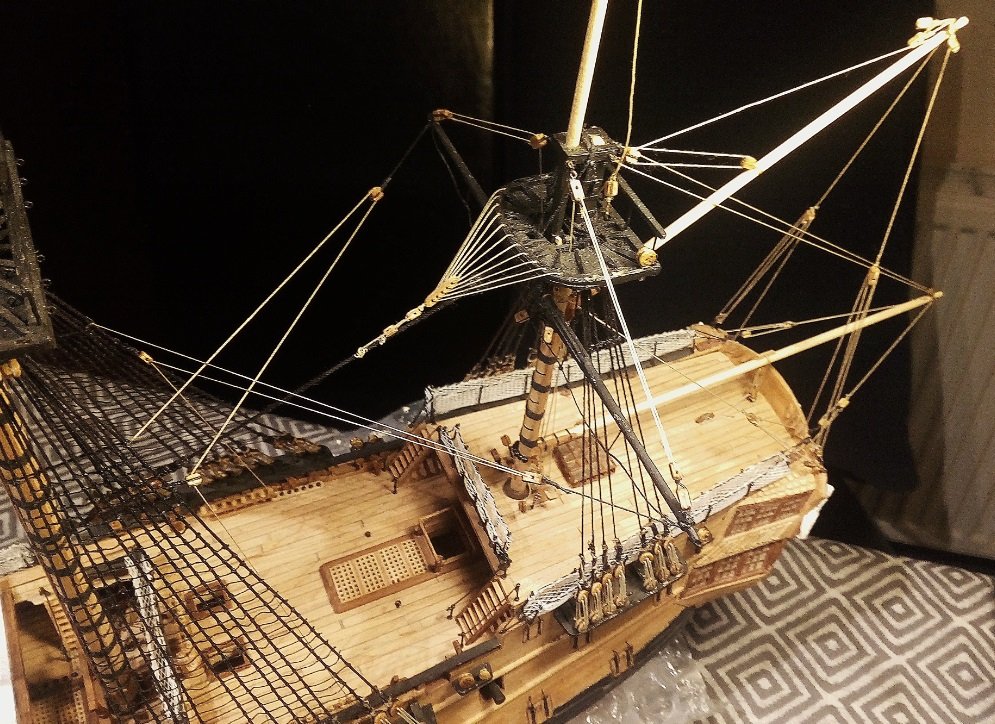
Thanks Tom, Nigel and Popeye for the comments and the helpful suggestions, and to the others for the likes. When I was looking for diversions from "ratlining" a couple of months ago I made the basic platform for the fore top. It has been some time since I made the main and mizzen tops and had forgotten just how much work is involved, and how much time it takes to complete just one top! It has probably taken me the best part of the last 2 weeks to complete the fore top. I'm glad I have a small milling machine for milling the slots for the futtock plates as well as drilling the holes for the crowsfeet and for the stanchions for the aft safety rail. (Did they really have any 'safety features' in the 18th century!) The trestletrees have been on the mast for some time but I have kept the crosstrees off for the fitting of their 12 blocks. As I don't intend to have sails only 4 lines will actually pass through these blocks - - the braces for the spritsail and for the spritsail topsail. When I looked at the underside of the main top it seemed obvious that it just might be somewhat tricky getting these lines through the tiny holes in the blocks up there in all the clutter (crowsfeet, futtock shrouds etc.) surrounding the fore top's underside . . . SO ~ I 'threaded' these lines through their blocks BEFORE mounting the crosstrees onto the trestletrees. I measured how much line would be needed for each brace and added about 30% just to make sure there will be enough length when it comes time to rig these braces . . . and just to make sure that they don't come out of the blocks accidentally, I tied the end of each line to it's other end, so for the time being each brace is a loop until knot cutting time. (At least when it's time to rig the braces I think I may have saved myself some frustration and the uttering of foreign sounding words!) (The top is not yet permanently in it's home -- it's just placed on in the following photos.)
- 257 replies
-
- 10
-
-
MONTAÑES by Amalio
Bluto 1790 replied to Amalio's topic in - Build logs for subjects built 1751 - 1800
Amalio ~ this has just got to be a full size real ship! . . . just amazing !!! -
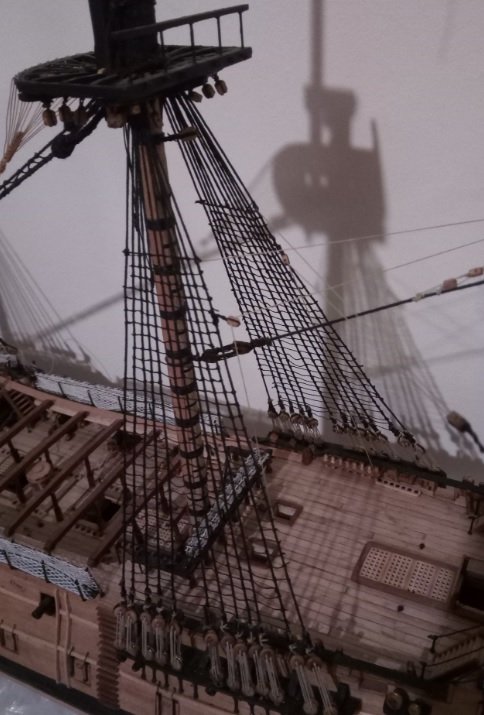
Can't believe it's almost 3 months since my last post . . . . . . I continued with the ratlines at an average of 4 - 5 per night and eventually finished up to the futtock stave on the starboard side of the main mast, by which time I was beginning to become very weary of ratlines! Nevertheless, I pressed on with the port side and got to around 60% of the way up to the futtock stave when a couple of 'life things' happened along and all work on the ship ground to a halt. To be honest, I had become seriously weary of tying what felt like millions of knots and not seeing any great progress and I think I just needed a break away from the ship, and that 'break' lasted around 6 or 7 weeks. Have now since returned to that main mast and have finished the ratlines up to the futtock stave. I was keen to get to that point on each side of the mast so that I could finally get the braces of the mizzen crossjack secured to the aftmost main shrouds. Time to get that crossjack secured - - - that shouldn't take long ??? . . . well, if that's what I thought before, I now know differently! As it's the only yard on the ship that is braced 'forward', any tension on the braces was tending to pull the yard well away from the mizzen mast. I have no rigging plan for this ship, so, following Petersson's book I rigged the truss pendant to a block on the mizzen channel then back through it's own block to a pin on the pinrail behind the mast. (Petersson's book shows a pin on the side bulwark of the poop deck, but as Leopard has none there, it would have to be the pinrain at the mast.) That wasn't working for me because all it was doing was holding the yard downwards BUT wasn't preventing the braces from pulling the yard forward by too much to be acceptable. So I had to modify where the truss pendant would have to be belayed. I fitted a block on top of the taffrail, outboard of the spanker gaff vang on the port side and from there back through it's own 'inline' block then to a cleat on the inside of the taffrail. At least this has had the desired effect of exerting an aftwards pull against the forwards pull of the braces, thus holding the yard much closer to the mast >>> So, it "only" took me 2 night's work getting the lifts equalised, followed by much frustration trying to get the lines made off to these tiny pins behind the mast . . . equalising the braces and having a similar amount of frustration getting their lines belayed while trying to maintain the correct amount of tension in the truss pendant. All in all, it was a bit like a 5 way juggling act! . . . and I have no previous juggling experience.
- 257 replies
-
- 10
-
-
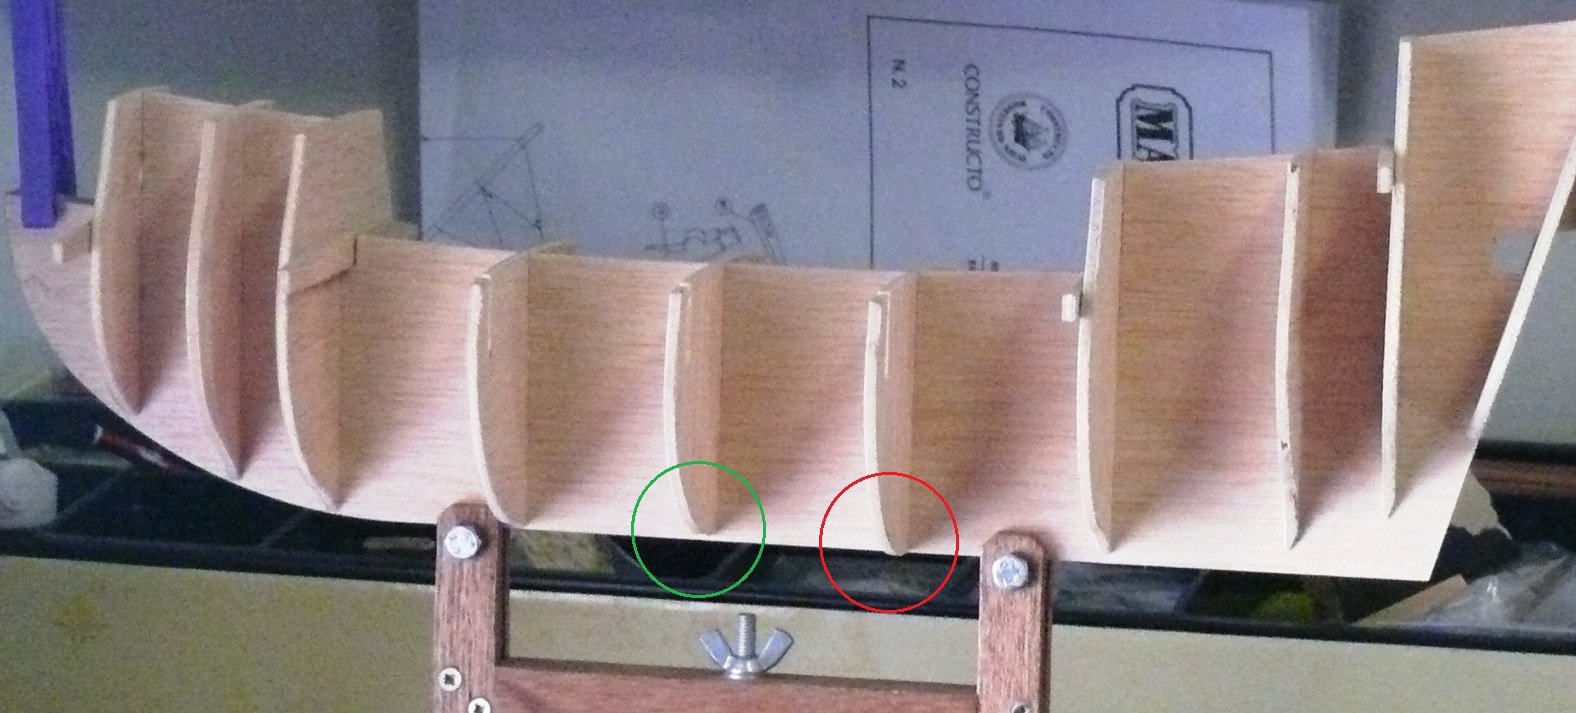
Hello Bontie, I haven't done a kit build, so can't offer advice as to how to go about kit proceedures. In your question #2 I'm not sure about the marking process but as for the bevelling the bulkheads, looking at your model I would imagine that only the 3 foremost bulkheads would need bevelling . . . and the nearer to the bow the more bevelling is required. Also, possibly the 3 aftmost bulkheads may need a little bevelling. At the bow you have already fitted some softwood fillers, and provided that you have properly formed the compound curves there, then that should act as something of a guide for any bevelling your bulkheads would require in that area. In the photo below I have used a green and a red circle to highlight what may be a discrepancy in the positioning of these bulkheads. It looks like the one in the red circle may be sitting lower than the one in the green and if that is the case it could cause your planking to be somewhat erratic. You wouldn't want to have the problem of trying to fix it AFTER the planking is done, so it might be a good idea to check it now when any high areas can still be sanded lightly, and any low areas can be built-up to give an acceptable flow to the planking. It may be an idea to post your build log in Build Logs For Ship Model Kits https://modelshipworld.com/index.php?/forum/10-build-logs-for-ship-model-kits/ where there is a fair chance that there may be other members who are also building the Mayflower kit. Hope some of this helps.

-
Hi Tom, Those spindles look great, as do the handrail and base. I can't imagine that you'll have much difficulty in mounting the balcony on to the stern.
-
Karl, the picture doesn't bother us . . . it must stay !!! - - - just like the rest of you build log.
-
Hi Tom, That planking and those wales look superb! I'm beginning to think you're building a different Leopard than me as yours looks so much better than mine. And I'm a bit jealous of your rudder hinges! When I did mine (a long time ago) I didn't consider that I would have been capable of making my own, so I bought commercially made hinges. I now wish I had made them myself.
-
Tom ~ I think I'll steal that quote and use it to re-name the title of my build log !!!
-
Well Tom ~ if you think that is cheating, I want to join your club! What you achieved by that method looks great . . . and I have to challenge your concept of 'cheating'! I would have been delighted with a result like that! As for the carvings --- I was in the same boat as you. I had never attempted any kind of carving before. What I ended up with was at least acceptable and there is still the opportunity for me to go back to them and try to improve them. I still have to do another couple to get the stern area finished . . . and then the figurehead is still to be made as well as the 2 small crouching Leopards.
-
Tom, Those stern lights and quarter galleries look superb! I really wish that I had done mine in a similar colour to yours but instead I went the opposite route . . . and it's too late now to go back and do it differently. As for your wales - - - well, I'm very annoyed at you! At a scale of 1:85 you have made super looking hook and butt wales. At my scale (1:80) I had tried to make hook and butt but was having too many failures and they looked horrible, so I 'copped out' and did the easier top and butt wales instead. I know how tricky these complicated wales are to make so my hat is well and truly off to you!
-
Albert ~ your work is just perfection! . . . and your workshop area makes me very jealous!
-
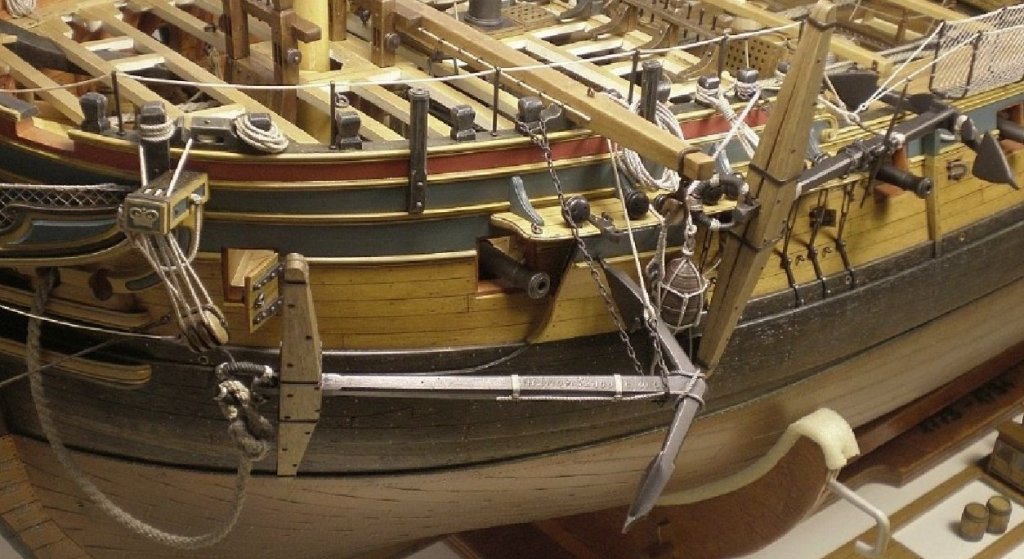
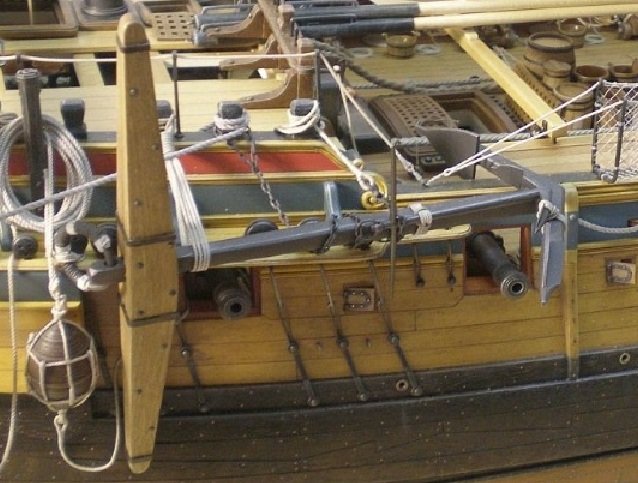
Hi Bob, Like you, I'm always looking for ways to make/attach/rig things on my ship ~ and I have to say that I've been getting lots of ideas from your build log. I found a couple of photos of a British frigate which show the anchor stowage used on that model. I'm not at that stage yet but I think I'll be trying to adapt something like this system for my model. (Just like yours, my model isn't a frigate but I think the method will adapt.) I don't know if it will be helpful to you, but here are a couple of photos anyway >>> Jim.