SiriusVoyager
-
Posts
502 -
Joined
-
Last visited
Content Type
Profiles
Forums
Gallery
Events
Everything posted by SiriusVoyager
-

Your help is needed! Can you recognise her?
SiriusVoyager replied to TM1's topic in New member Introductions
Welcome to MSW! -
Welcome to MSW!
-
Donald McKays GGGGreat Grandson
SiriusVoyager replied to Clan McKay's topic in New member Introductions
Welcome to MSW! -
Welcome to MSW!
-
New Member - Some modeling experience
SiriusVoyager replied to Dave Wells's topic in New member Introductions
Welcome to MSW! -
Welcome to MSW!
-
You will always be your own worst critic. It is looking pretty good, especially considering that it is your first build. Keep going!
-
I actually just purchased this one recently and have it in my stash now. With what I plan on building I suspect it will be about 12-16 months before I get to start it. From looking at it, it does seem like a very well done kit with very detailed instructions. Just watch for it to go on sale. I think I got it for $170 which seemed like a great price.
- 1 reply
-
- 1
-

-
I model because it allows me to create something both artistic and technical. I have never been good at anything artistic nor at creating things with my own hands. I enjoy the personal challenge, as it allows me to work on and improve on something that I find very difficult. I choose ships because of their majestic appearance and the history and exploration that they represent. It also gives me a mental escape from stresses and responsibilities of the "real world."
-
Welcome to MSW! I have been doing this a little over a year now, and I have found that The Ship Model Builder's Assistant by Charles G Davis and Historic Ship Models by Wolfram Zu Mondfeld seem to be the best books go spend the most using and have the most detailed, but general, information. They both have a textbook type feel to them.
-
Absolute beginner here - new to ship modeling
SiriusVoyager replied to AlanR's topic in New member Introductions
Welcome to MSW! -
The final product looks great, as does the display with all three. Looking forward to your next build!
-
Welcome to MSW! Nice job on your first build
-
Thanks! Yes, that is part of the fun though it may not seem like it in the moment. Each one is a learning experience. Thanks for following along!
-
Thanks Chuck. I look forward to seeing your build.
-
Nice looking little boat there! Not sure how I missed your log on this one, but I am glad to have found it.
-
Here are the last few photos before she heads to the shelf next to her friends. Thanks to everyone who has followed along and for the likes, comments and words of encouragement!


- 86 replies
-
- 5
-
-

-
- San Francisco
- Artesania Latina
- (and 2 more)
-
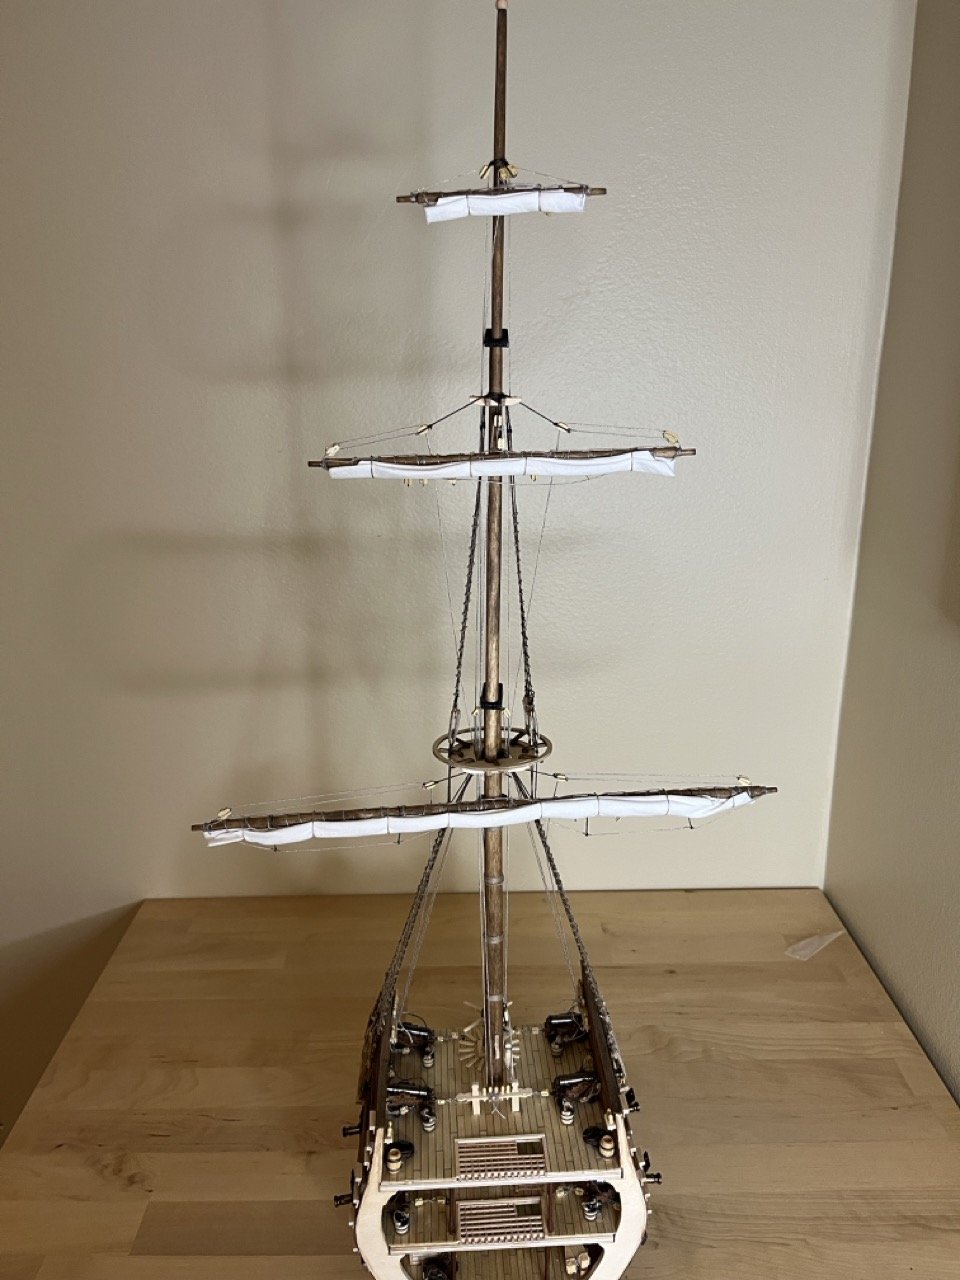
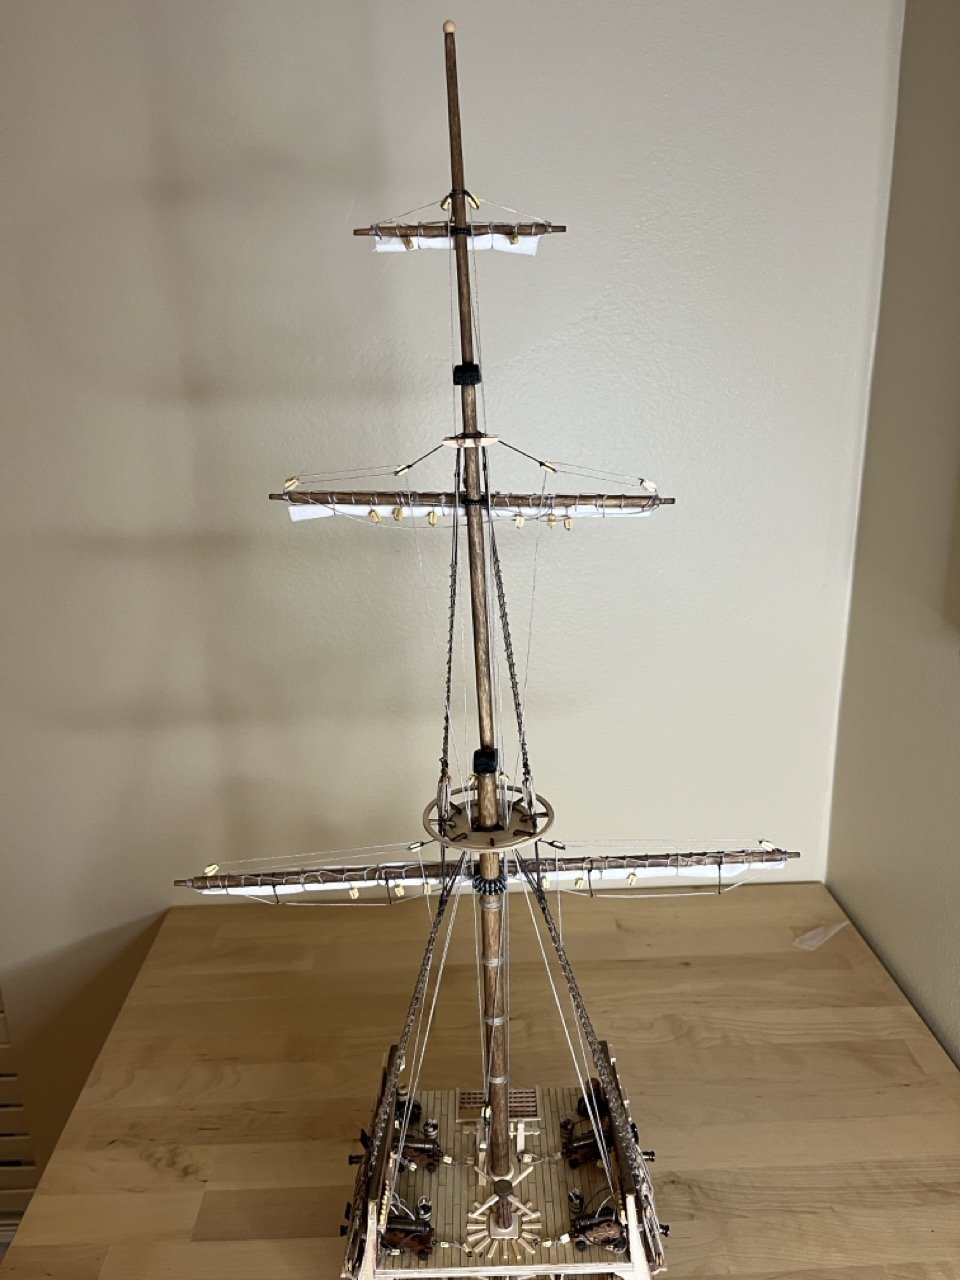
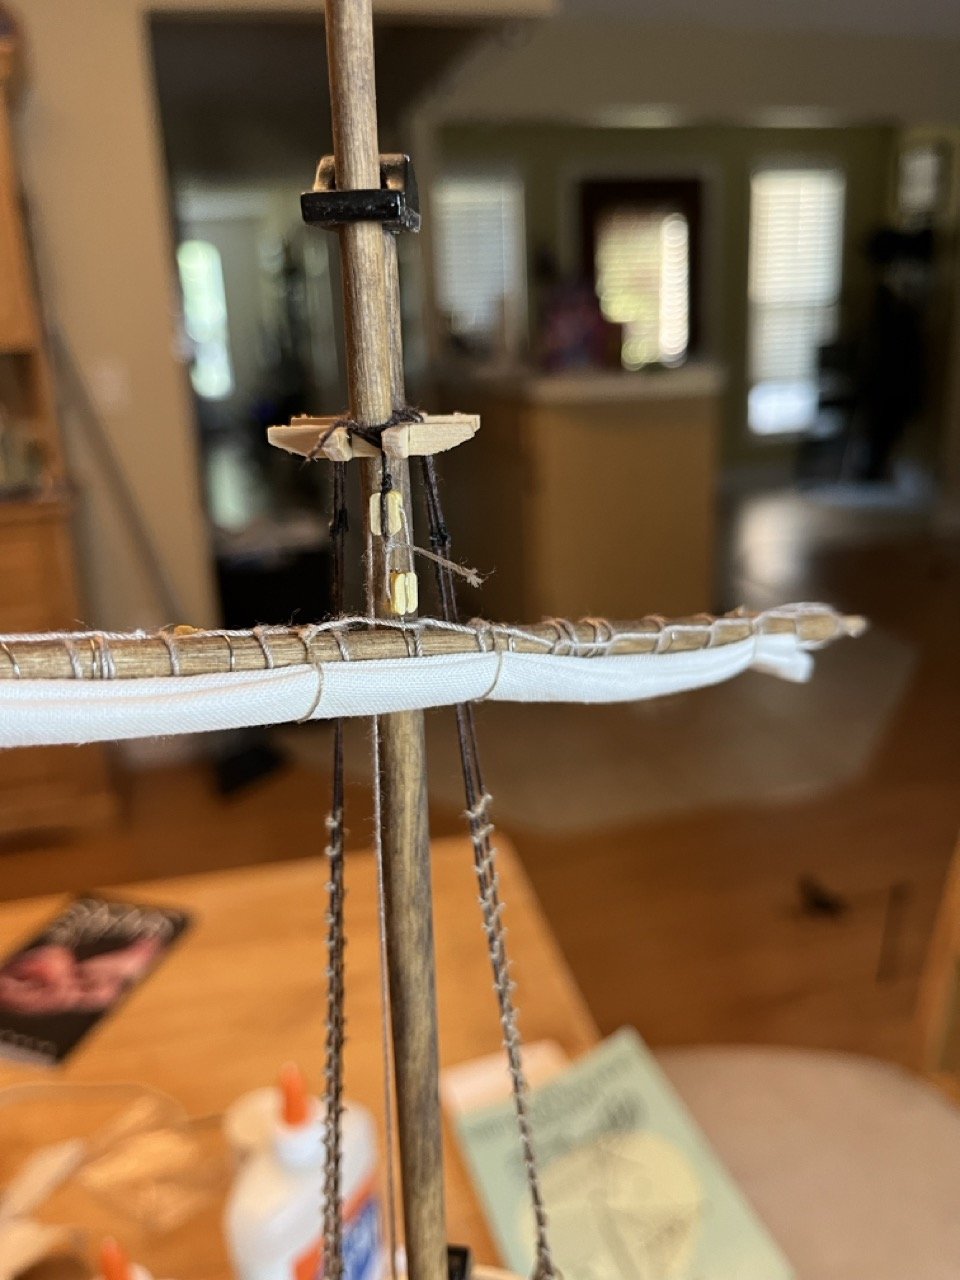
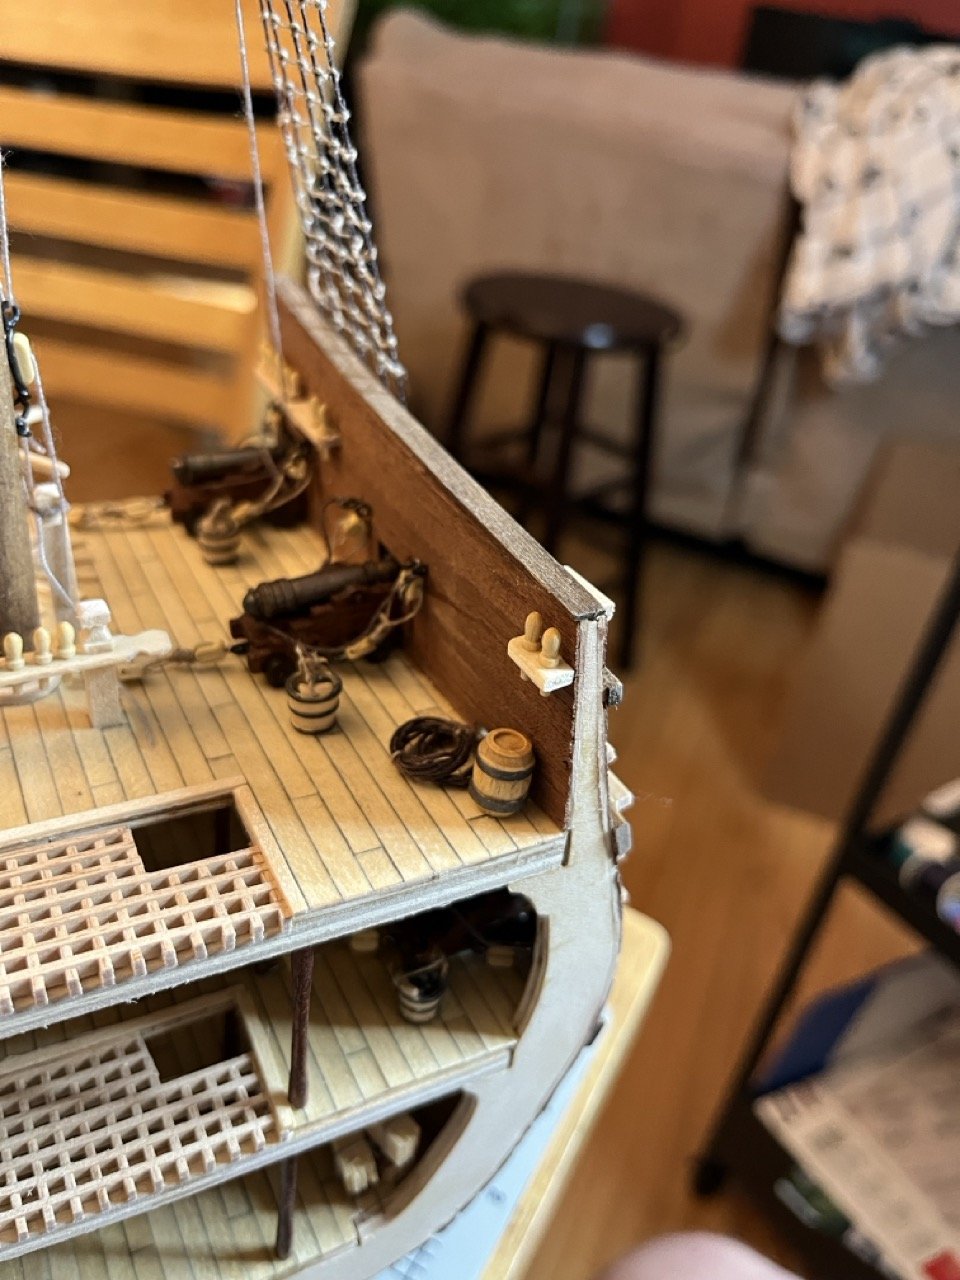
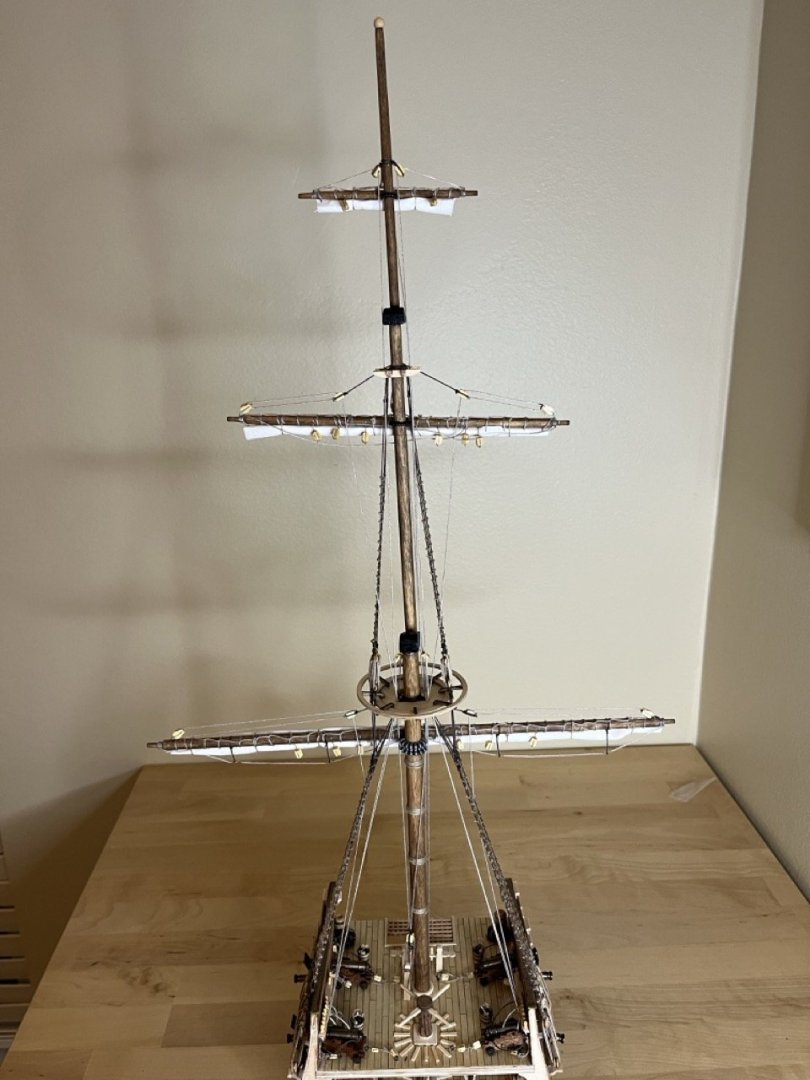
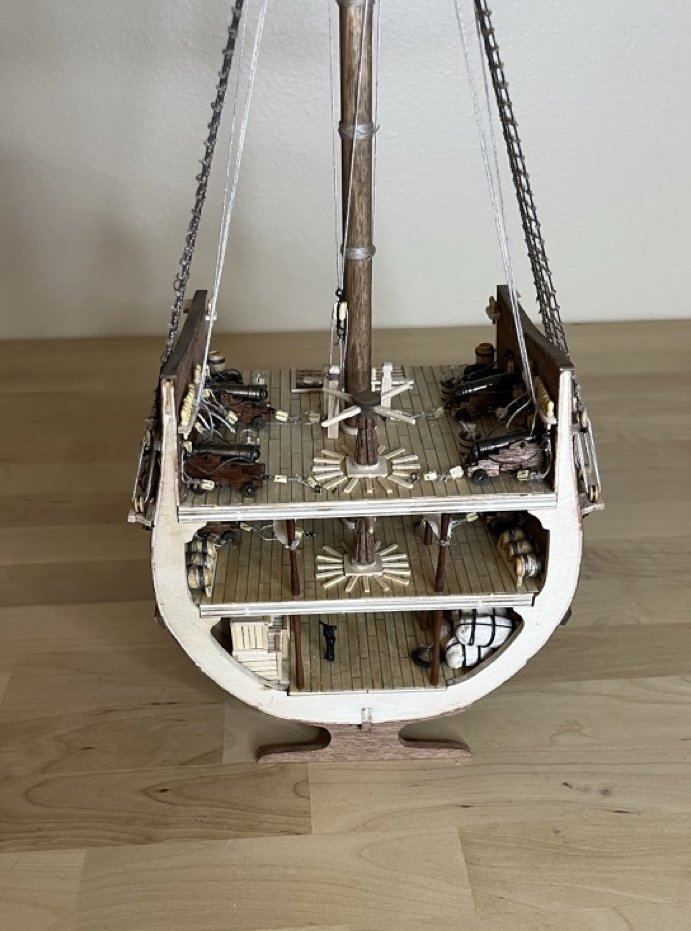
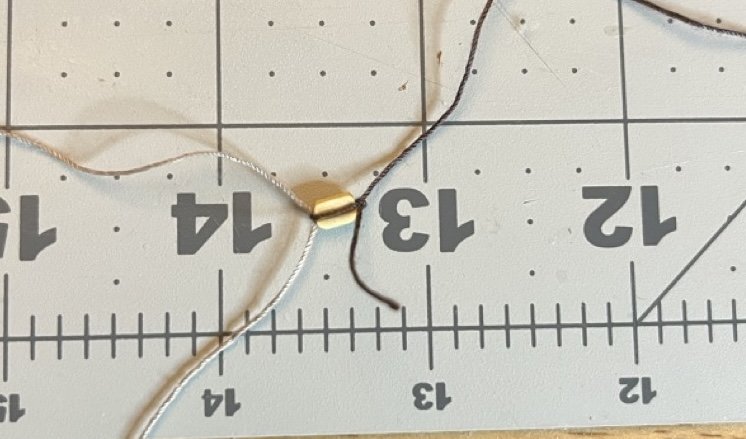
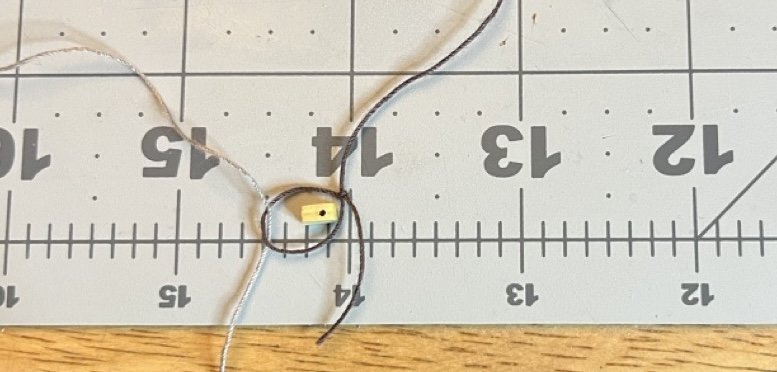
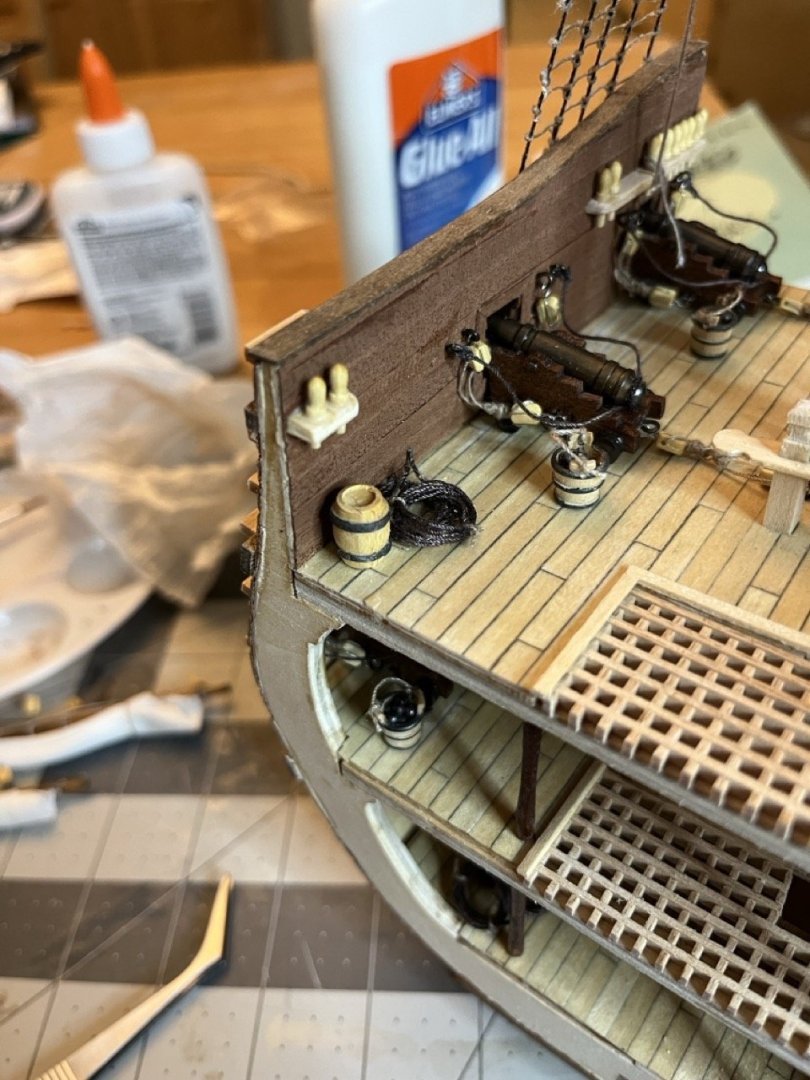
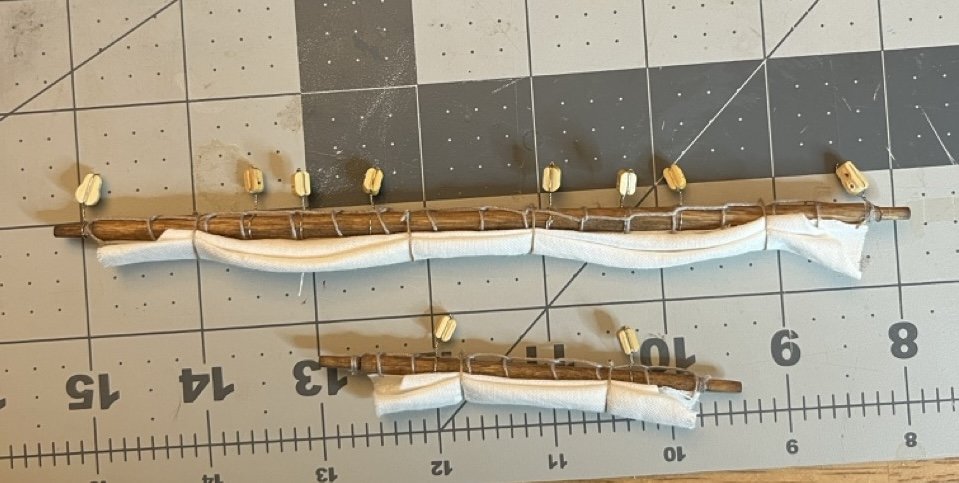
The top mast and the top gallant mast were very similar in how they are made and attached. I found a better way to fold the sails, but I still can't get them to look good on the ends. I think better material would make it easier to get the edges looking better. The top mast being held by the halyard. Here are a couple of photos on how I tied my blocks. I made a loop to tighten around the block with the line pulled through it. I tightened the darker line then tied the lighter line in place. There were also small pin rails for the flag lines. These were much easier to make off model, then attach to the bulwark after. At this point I ran into a problem while rigging the rest of the yards. I ran out of thread (good reason to make my own rope from here on out). I also looked at the remaining rigging and the couple of resources I have, and the rigging didn't make any sense to me. It seemed like they were just running lines around the model to make it look "cool." I could be mistaken and the rigging could be perfectly legitimate, but I was unable to make sense of it. I also had a problem with the flag. It was a large sticker and it folded over onto itself essentially ruining it. I am not a fan of stickers anyway. After a day and a half of contemplating I decided to call it compete as is. I learned a lot, including that I still need to work on slowing down and taking my time. Also trust my gut regardless of the instructions. Every time I didn't do what I wanted to do, I regretted it later. Things like staining the frames and adding the furniture on the lower decks prior to building up. I can say that I am content with this model and I think it would look ok to the uninitiated eye. Eventually I will build a model that I am really proud of, but in the mean time, keep practicing. Final pictures to follow next post.


- 86 replies
-
- 3
-
-
-
- San Francisco
- Artesania Latina
- (and 2 more)
-
I had this same problem with the transom knee alignment. It seemed to workout ok with my model, but I think you will be glad that you moved it. Great start with your Dory.
- 28 replies
-
- 4
-
-
- Lowell Grand Banks Dory
- Model Shipways
- (and 1 more)
-
The custom deck planking and hatch look great! (as does everything else). You definitely have some natural talent with this.