Anja
-
Posts
2,064 -
Joined
-
Last visited
Content Type
Profiles
Forums
Gallery
Events
Everything posted by Anja
-
 Hello Aldo, Welcome back. Update coming soon. I saw you found the time to upload your build log of Peggy again. Great! Hello James, Thank you for stopping by. I hope that one day you will be able to build her. She is a great ship. Hello Jan, Yes, we are getting a real group of Dutch builders here on MSW. Why not, it’s a great site with a lot of knowledge and buildlogs which are real works of art and you are able to read them as a sort of tutorial. Hello Mobbsie, Finally, you made it back here. Yes, it is a little getting used to with the new layout and how everything works. But it’sgreat and you will soon get the hang of things. uploading pictures is indeed much easier. Have you uploaded your build log of Aggy yet. I didn't miss it, did I? And your other build logs? Are you going to repost them too? Thanks everyone for looking in, it's great to see you all back. Take care, Anja
 -
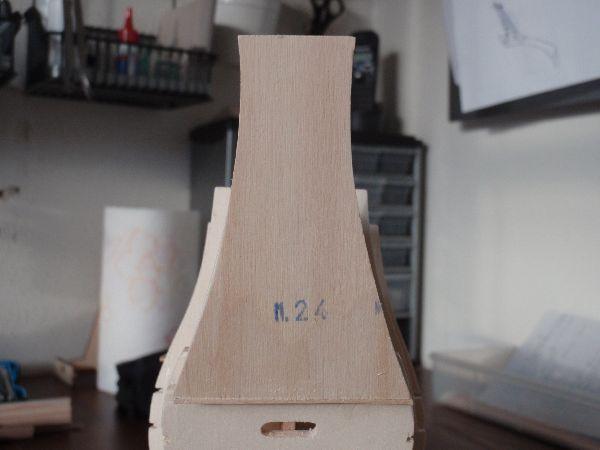
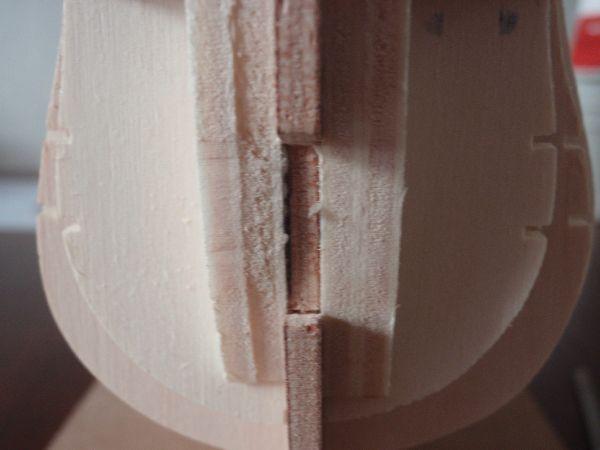
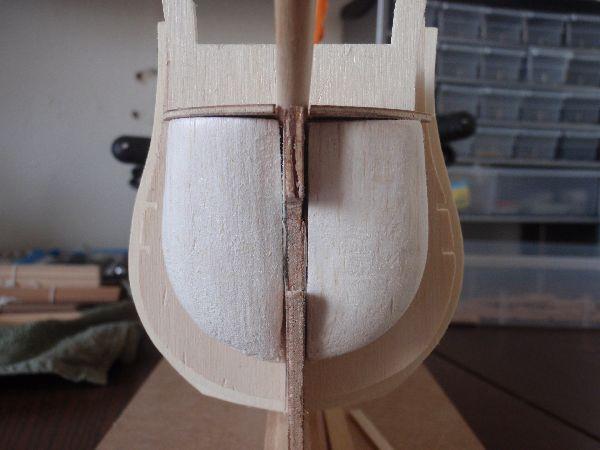
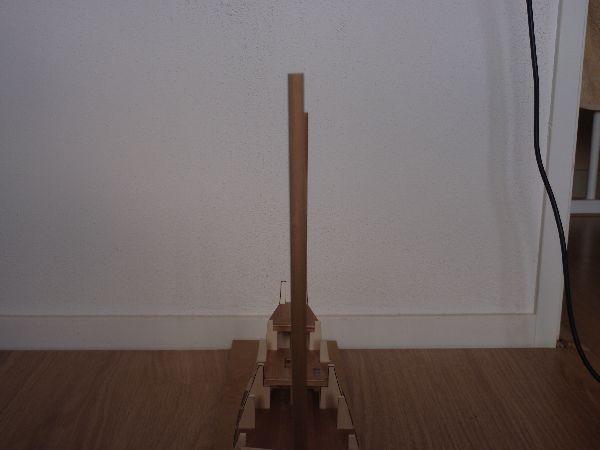
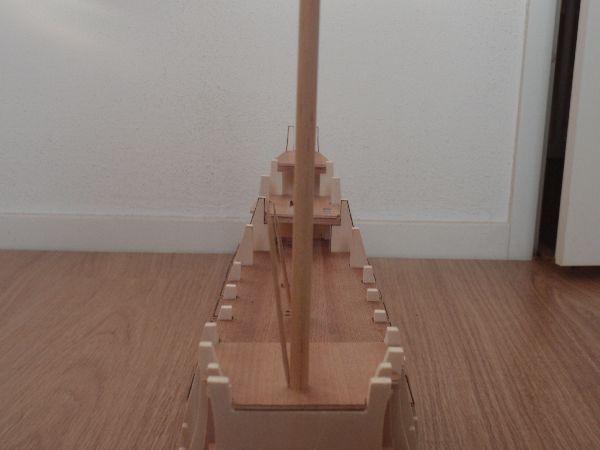
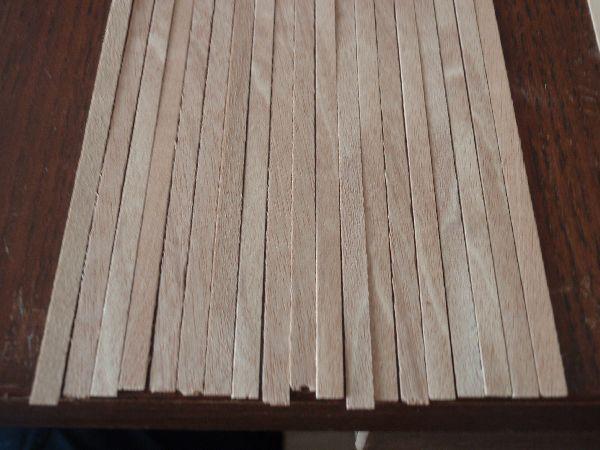
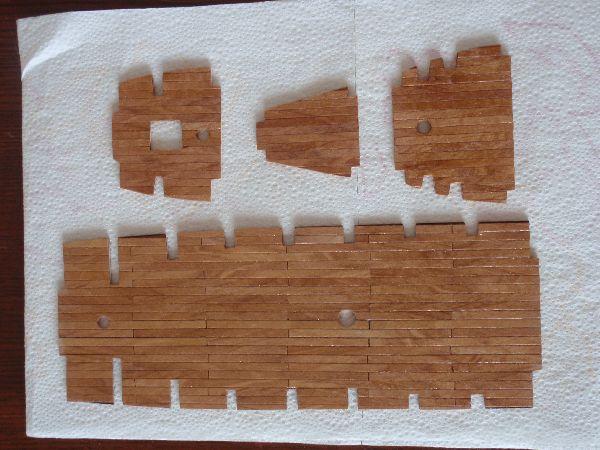
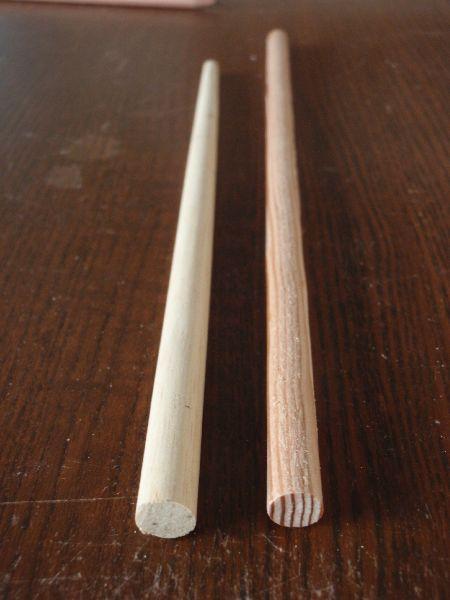
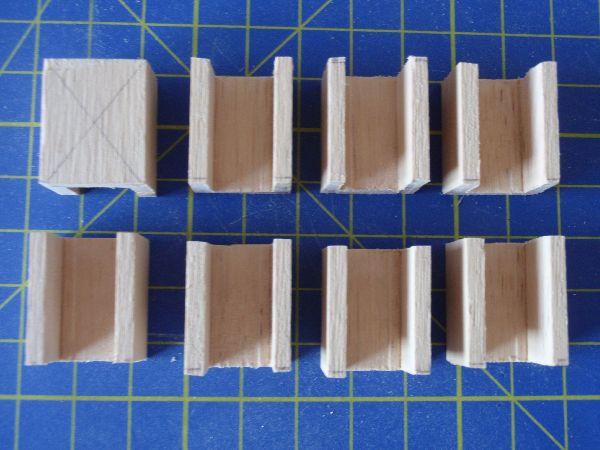
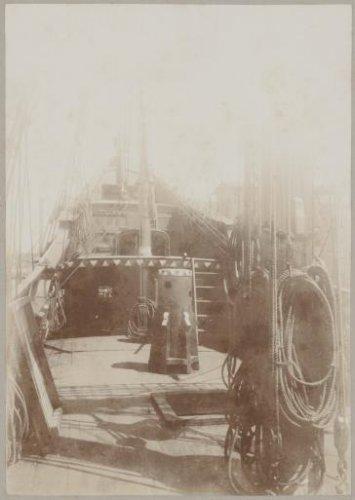
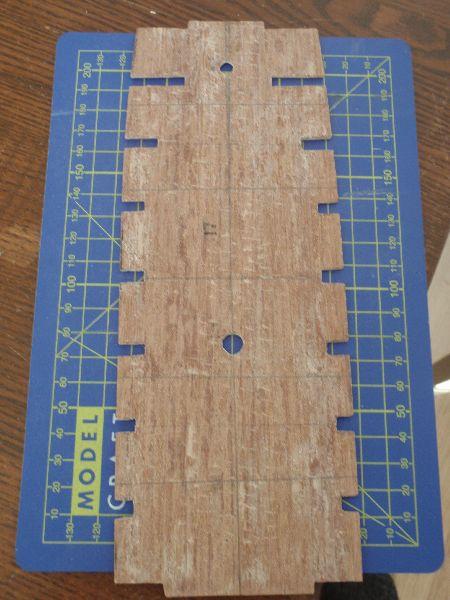
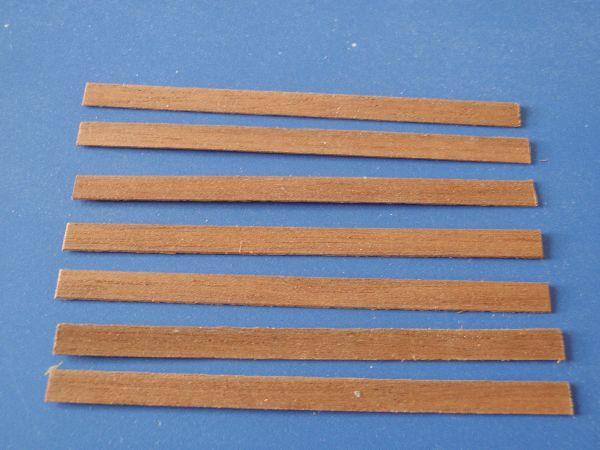
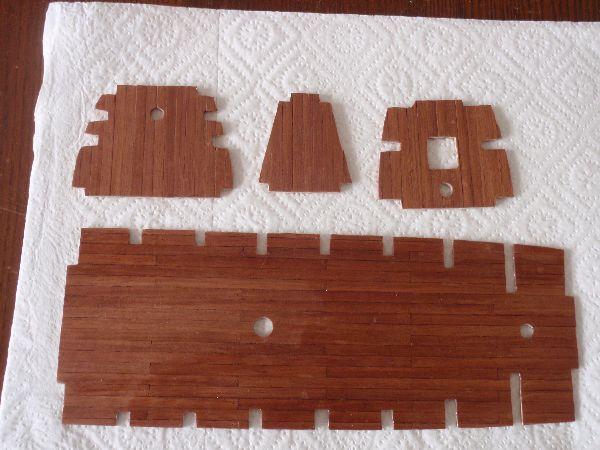
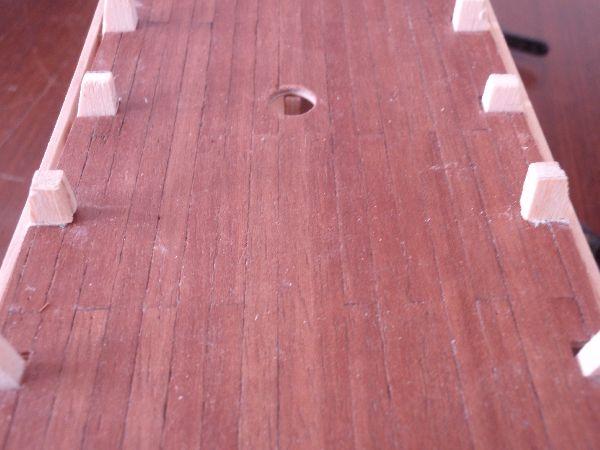
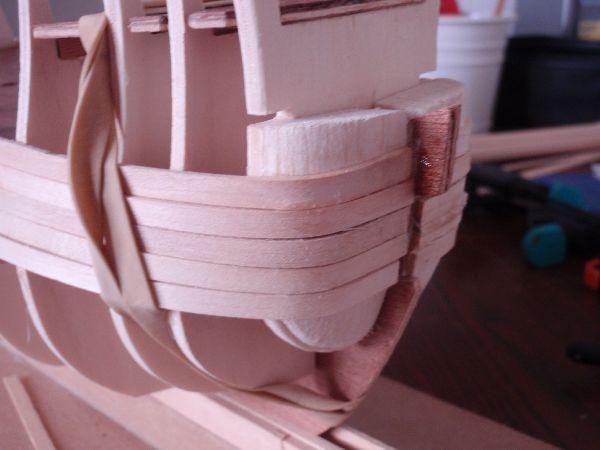
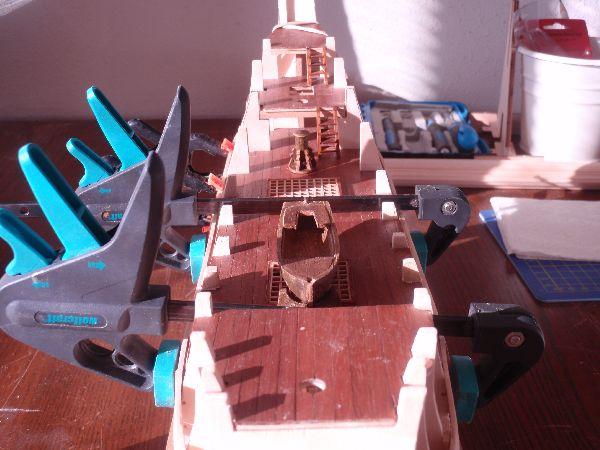
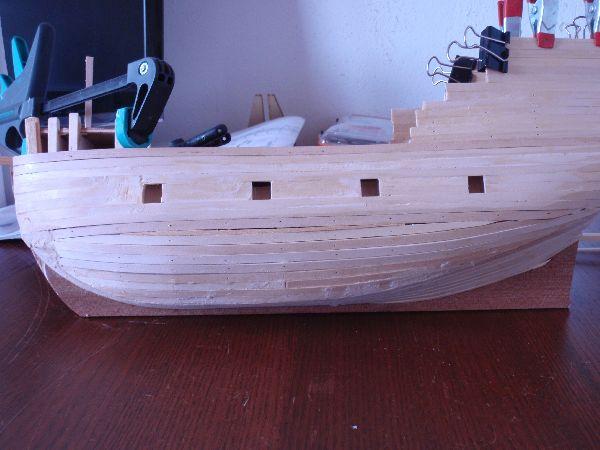
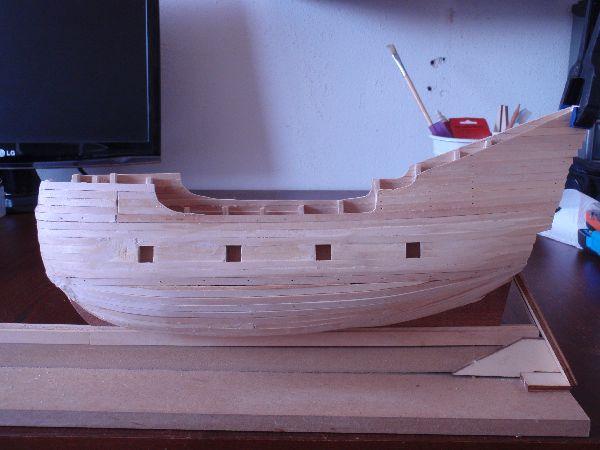
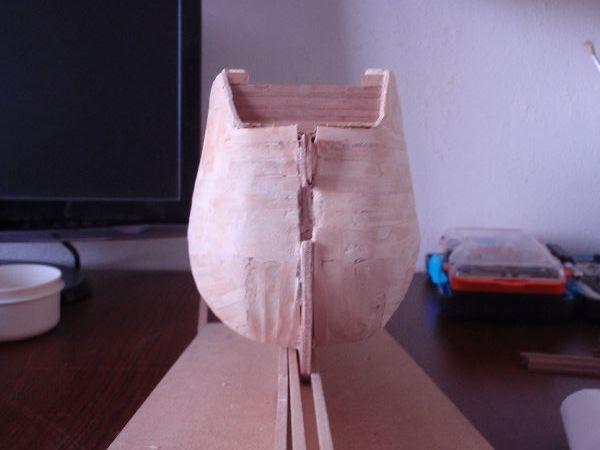
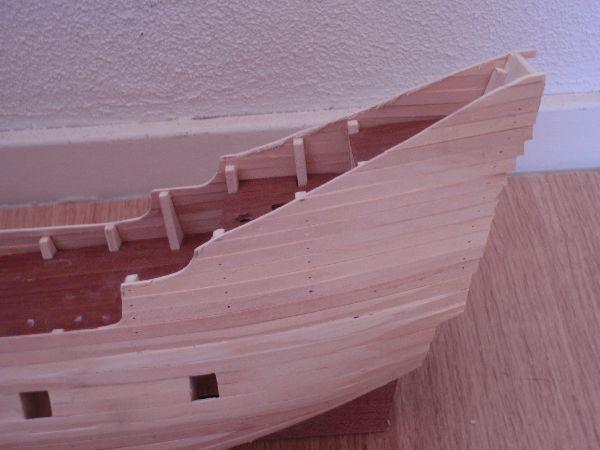
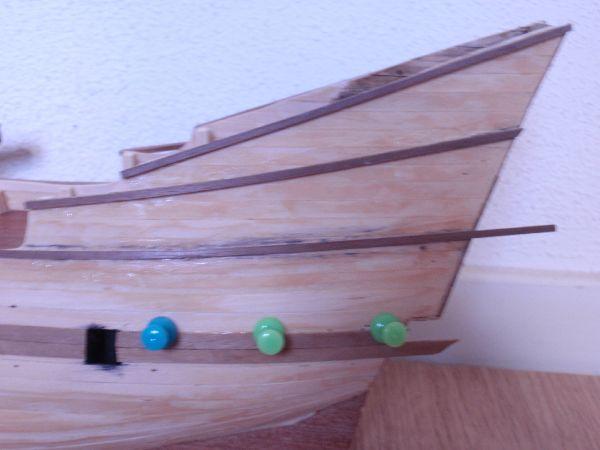
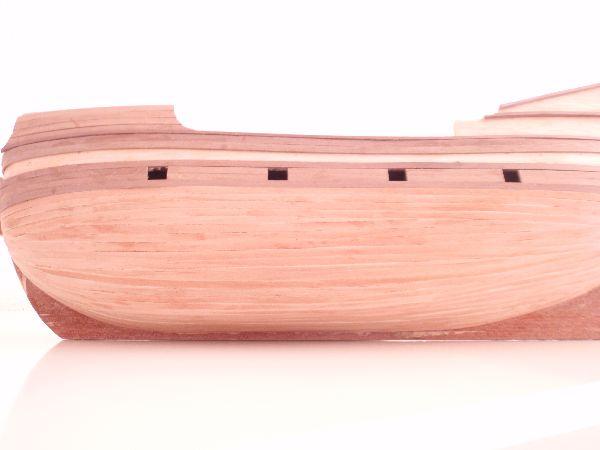
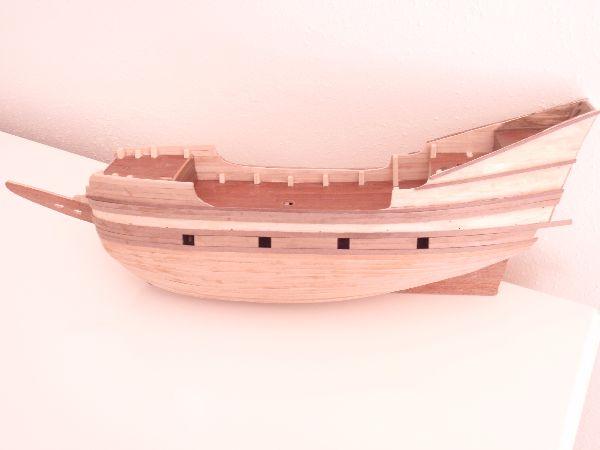
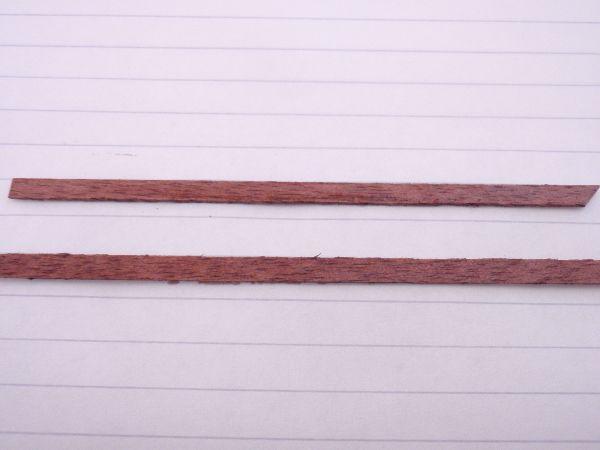
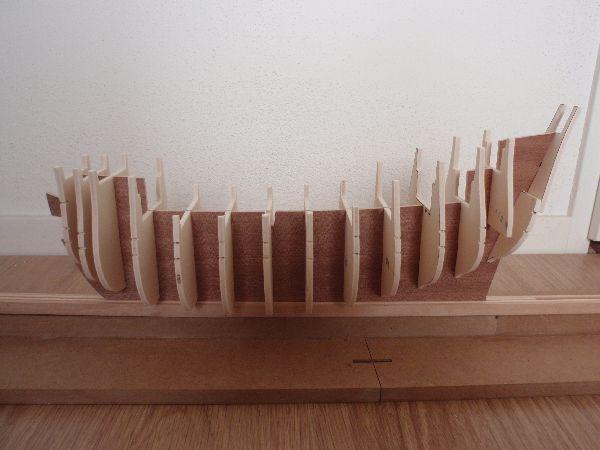
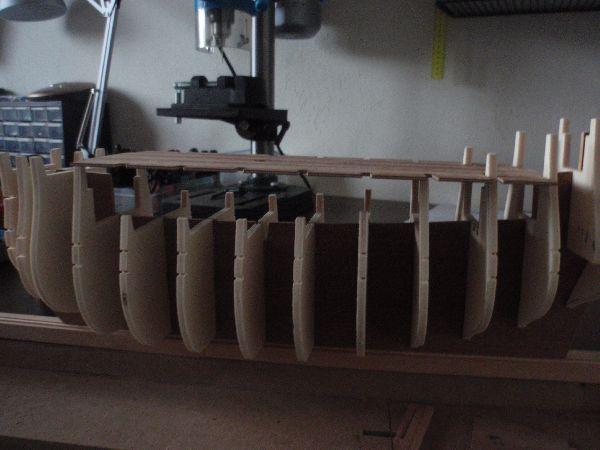
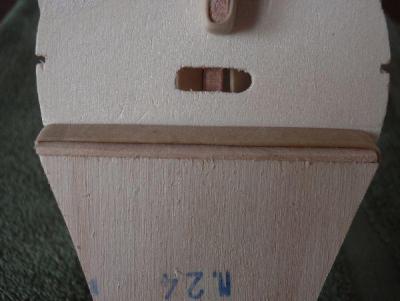
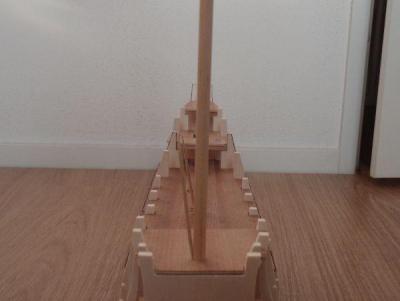
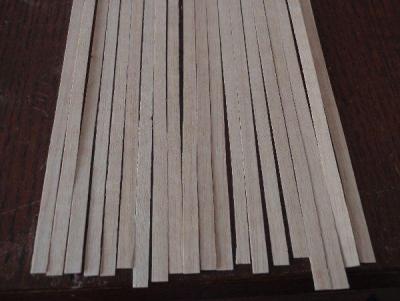
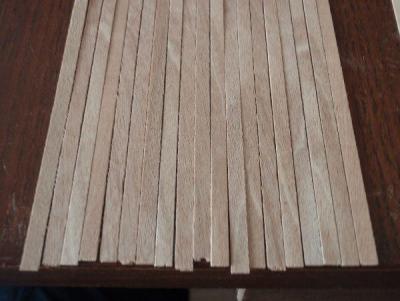
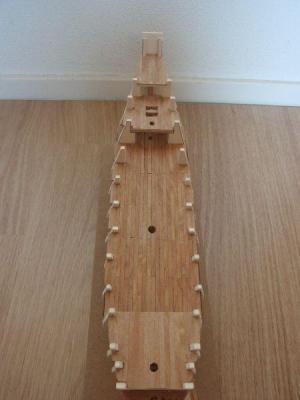
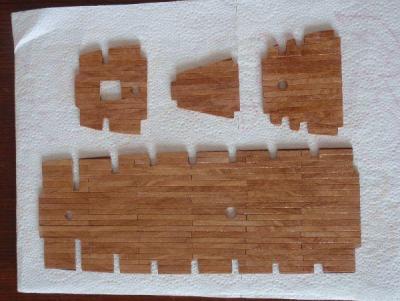
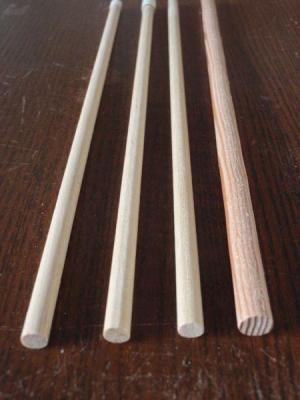
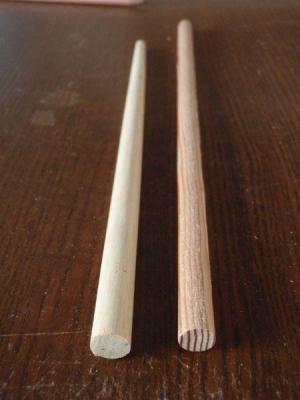
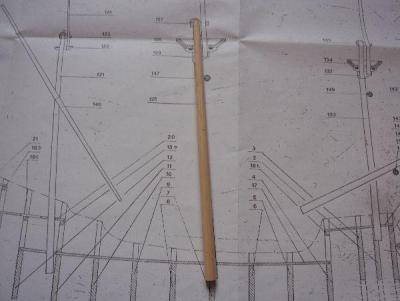
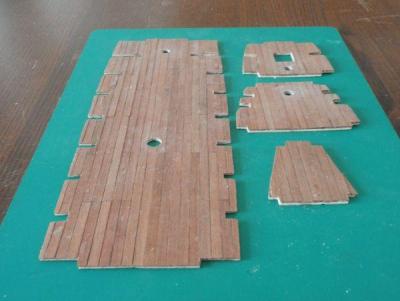
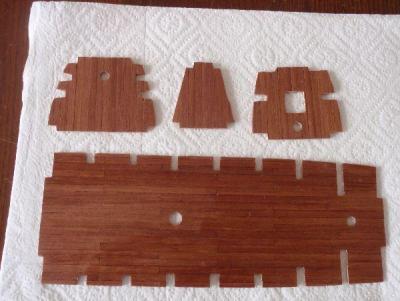
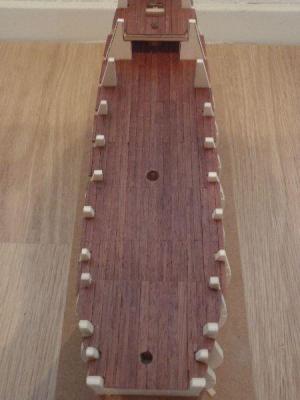
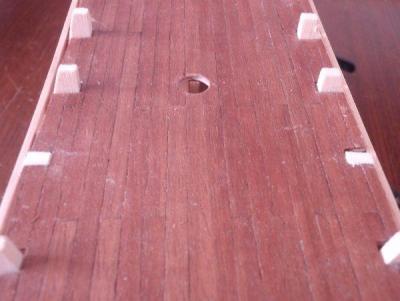
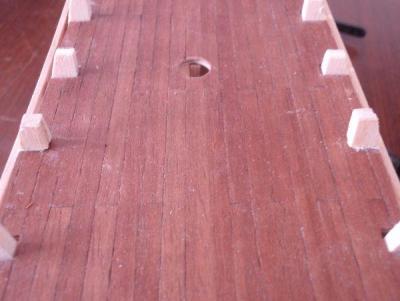
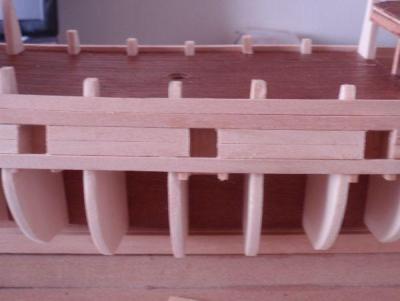
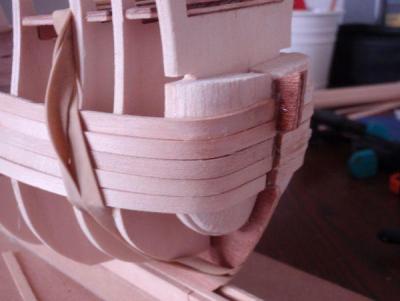
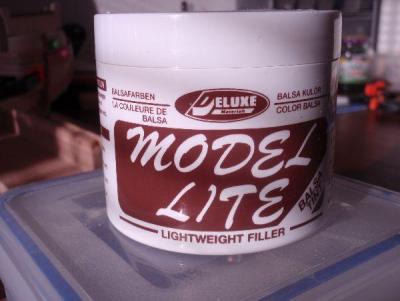
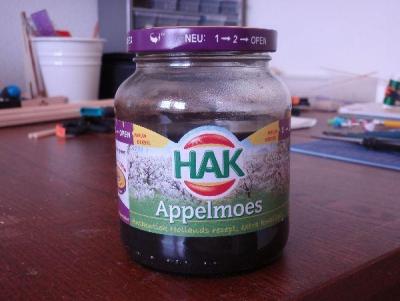
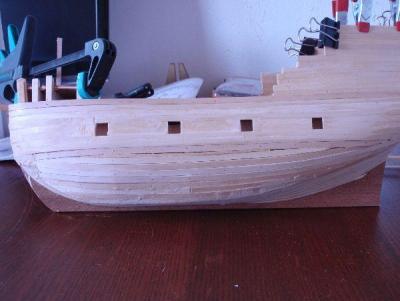
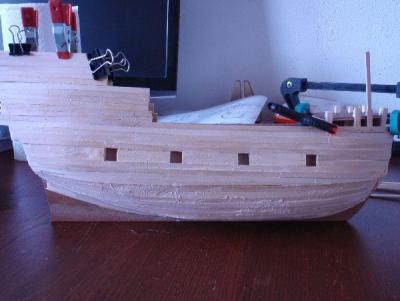
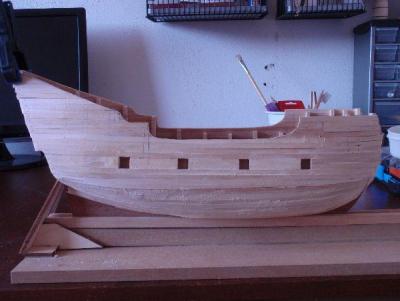
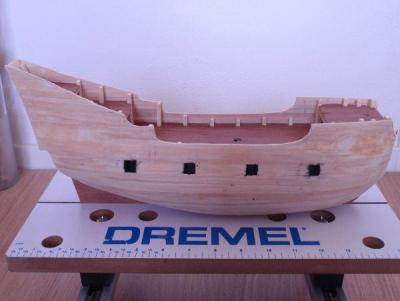
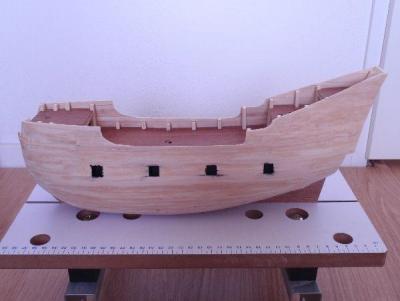
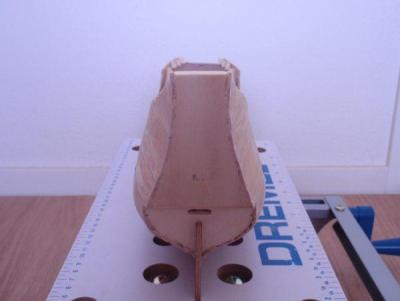
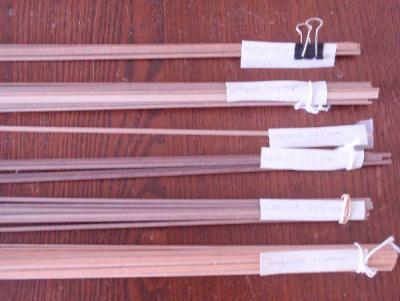
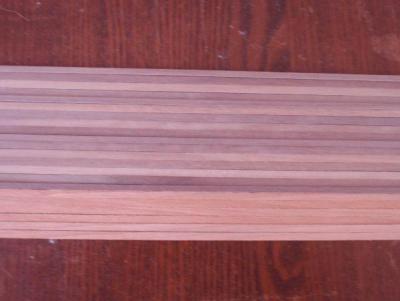
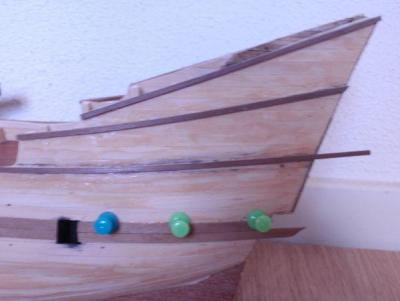
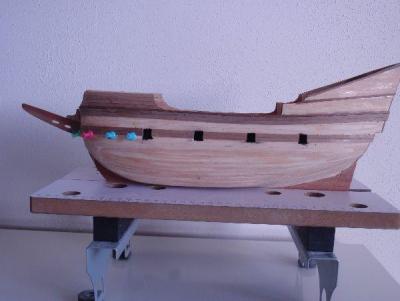
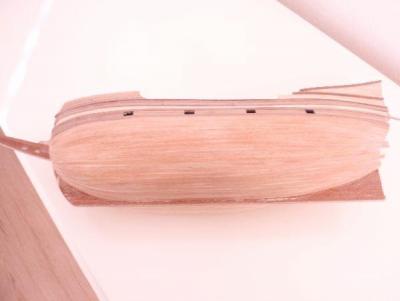
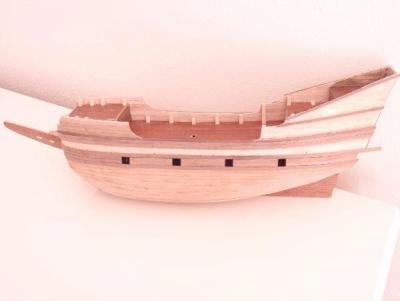
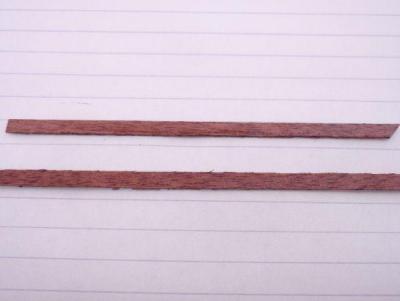
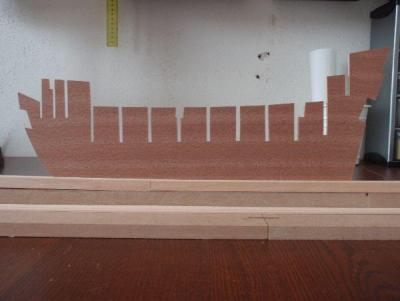
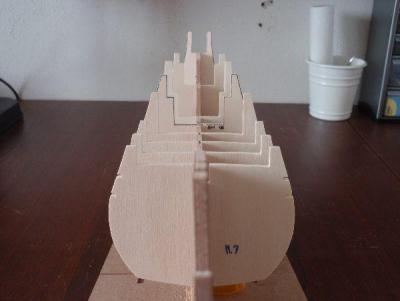
Thursday, May 17th 2012 I decided to remove the bow filler segments and replace them with larger ones, so they will fill the front of the bow and make it easier for me when I start planking. This was not a very productive week for the Half Moon. But I made some progress. I glued the transom on the frame, keeping the lower surface leveled for the triangular connecting board, which is also glued in place, secured with the help of a rubber band. Could not find a place to use a clamp for this one. I was not happy with the small bow filler segments the kit provided, so I removed them and replaced them for larger ones, made out of balsa. Did a lot of sanding to get them in the right shape. They are glued in place, but need a little more sanding to get them just right. The beak head platform is still not glued. I will wait until I'm sure it is not in the way for my new 'bashed' bow. I fitted the masts, but they won't stand in line. Only when I give them a little help with toothpicks, they will continue to stand up straight and in line. I can shape the bottom of the deck, so they will come in line. But that's a too narrow space to work. Instead I will use sticky paper or tape to wind round the bottom of the masts, so they will fit better before I glue them in place. Sorry, no pictures of that yet Later, I promise. Monday, May 28th 2012 From the deck planks, provided in the kit, about 11 of them weren't straight. That was a bit too much So I did away with them, into the spare wood parts section. From the left over wood parts I found other planks which were straight, but of a lightly darker color. I tried to do the caulking on the main deck with thread, but that wasn't a success. After sanding the thread kept coming loose and fuzzy. So I removed the thread. The decks now all have their layer of varnish. The lines are clearly visible, so I'm not sure if I will caulk the deck. As you can clearly see in the pictures the main mast was made from a different type of wood then the other masts. So I did away with this one as well. And yes, I also found a new one in the spare wood parts sectionwhich was made from the same wood and had the correct size. I'm happy While the decks are drying I made the gun ports. But no, I will not place them yet. First I have to fare the hull. Friday, June 1st 2012 No update yet. But I came across a picture of the deck of the Half Moon. Just wanted to share with you. Sunday, June 3rd 2012 The main deck looked good at first sight. But when you look closely, you can see that the horizontal lines aren't straight. And after a second layer of varnish, it looked even worse I knew it was going to irritate me when I left it like that. So, I decided to strip the deck from it's planks. But no more spare ones to choose from. So, I had to go and buy new planks for the main deck. And then I will plank it with straight lines. Let's just say it's good practice for planking and cutting planks straight. Yes, I did mark of the deck. But my problem is I can't seem to cut straight. For cutting straight lines I now use my cuttingboard. It has horizontal and vertical lines. So no more 'excuses' to not cut straight. The shop only had dark strips of wood (mahogany), so I ended up having to replace the planking of the other three little decks as well. I stripped the main deck and sanded it for a smooth surface. The three little decks were sanded smooth with the sander. After the first layer of varnish was dry, I rubbed a thin layer of dark stain on the decks. The decks are in place, but not glued yet. I first had to make sure the masts will still fit the holes. Monday, June 25th 2012 From one frame I had to remove the tops. The tops were straight on the outside, instead of obliquely to the other frames. So I removed them and made new ones. They turned out ok. I glued the gun ports in place and measured them to the right size. The edges of the gun ports still need more sanding to make them the right size. I dreaded having to do it, but I could no longer postpone it. I now, had to begin the first planking. The planks are 1.5 mm thick and 5 mm wide. The planks that cover the gun ports were measured and cut to the approximate size before gluing them in place. Because I also used short planks at the bow, a few planks tore. The likely cause is that the planks were too short to enable the forces acting on the flexure to spread out. The other planks that were placed on top and under the gun ports were used in full length and they didn’t tore. But it is still an adventure in itself. In between cutting, wetting, drying and gluing the planks, I made the ladders, gratings, capstan and the boat. In my opinion I think the boat is a little to big for the deck. It's hard to tell, because not all the deck fittings are made. So I will see. I also found myself a new wood filler to use. It's from Deluxe, a model lite wood filler that is extremely lightweight and sands easily. I really don't know why I'm telling you this, but the can of stain is so darn hard to open ...... The last time I used it, my hands were all covered with the brown stain. I grabbed an empty jar of applesauce and poured the stain in. This jar is so easy to open. Sunday, August 12th 2012 First planking is finally finished. I made mistakes and errors in judgement with this planking. It isn't looking the way it should, and it has given me a lot of headaches especially the bow section. That is also why you see lines of demarcation in the planking there instead of just one plank length. This has become a 1st degree 'haphazard planking job'. It will need a lot of sanding, filling, more sanding and modeling to get a nice smooth surface for my second planking. Sunday, September 2nd 2012 Filling and sanding is finished. I painted the inside of the gunports. I’m a miserable painter, I know and I’m sorry. That is why the gunports don’t look square anymore, but they are. The bow does look terrible, I know, but it has a smooth surface for the second planking. I didn’t want to show you this at first, but I thought, what the heck. You may all know and see that the bow was the hardest part to do. And after the second planking ...... no one will ever know how bad it looked, except for us here. I sorted out all the planks so I will not make a mistake placing them in the correct order. Made a picture of how it will look. I have planked the stern (upper, middle and lower part). The different woods used is difficult to see (tanganika, walnut, tanganika). But that might change after a layer of varnish. Edges still need to be sanded. That’s my chore for today. For the wale there is only one peace of walnut board 2x2 mm. That is one short. But I will find another one somewhere in the spare parts section. Sunday, January 6th 2013 The edges of the stern planking are sanded. The side strips and the stem and stem knee are glued in place. Second planking on the port side lower hull is finished. It went better then expected. But I ran out of tanganika board for the starboard side. So I have to email Corel if they will send me some. The color of the lower hull is to light for my liking, so I will stain it in a darker color. Friday, January 11nd 2013 Today I received my package from Corel. Talking about great service.... The new strips are even better then the ones supplied with the kit. Now I can continue the planking. Sunday, February 17th 2013 YES, Finished uploading my build log To be continued ……….


- 477 replies
-
- 10
-

-
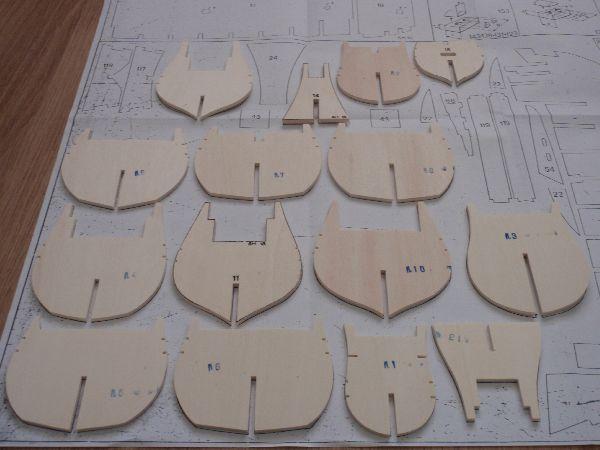
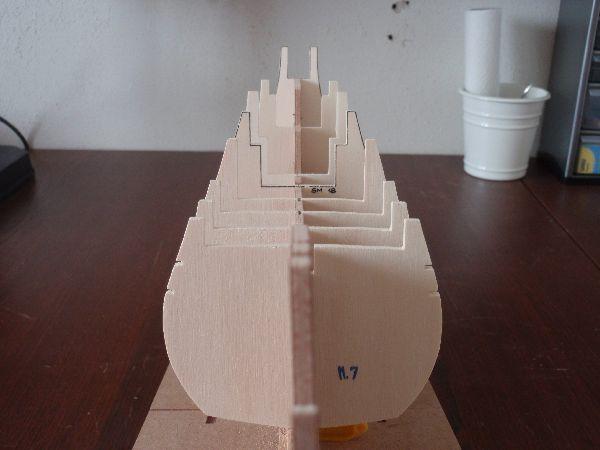
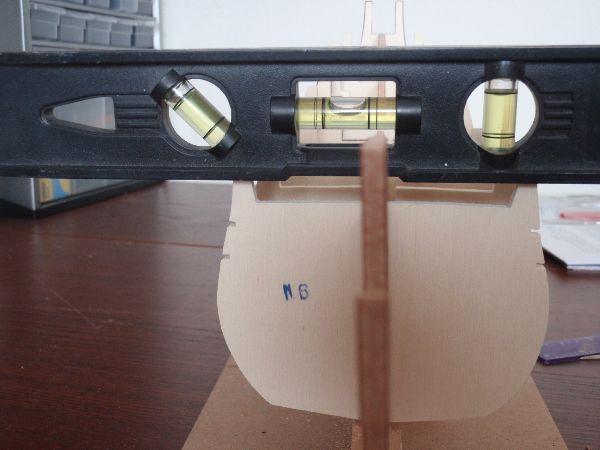
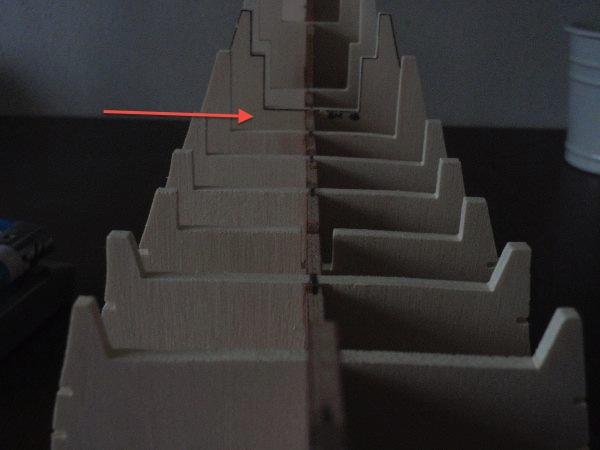
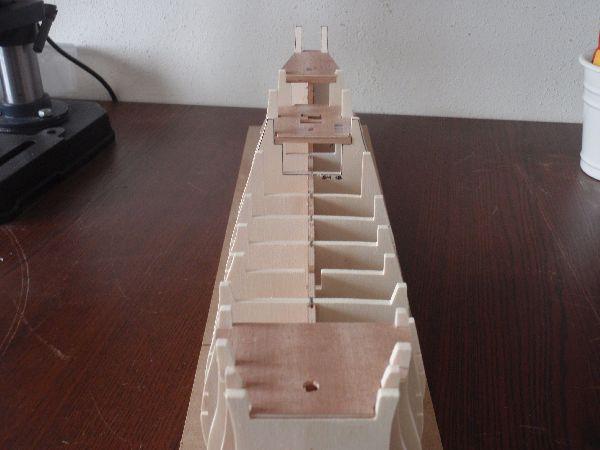
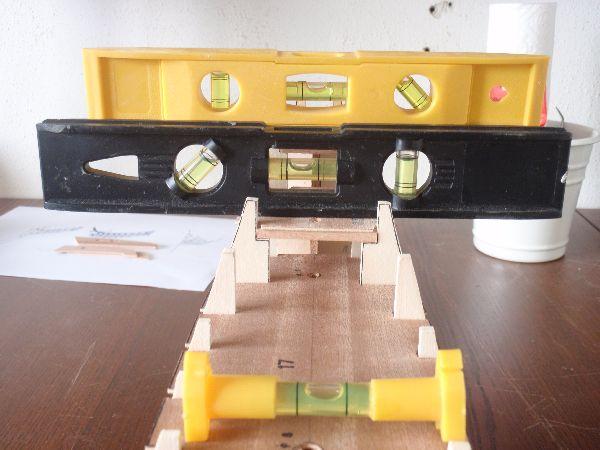
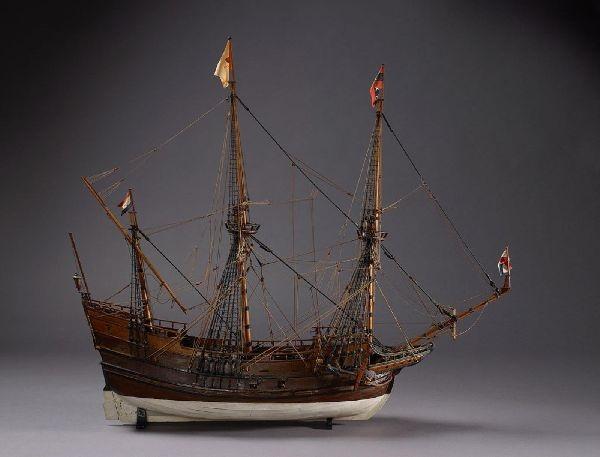
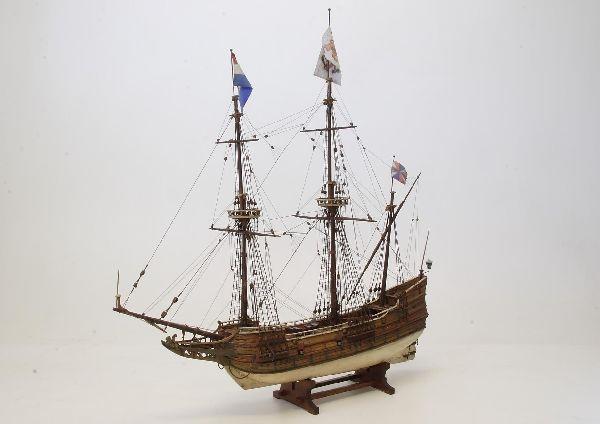
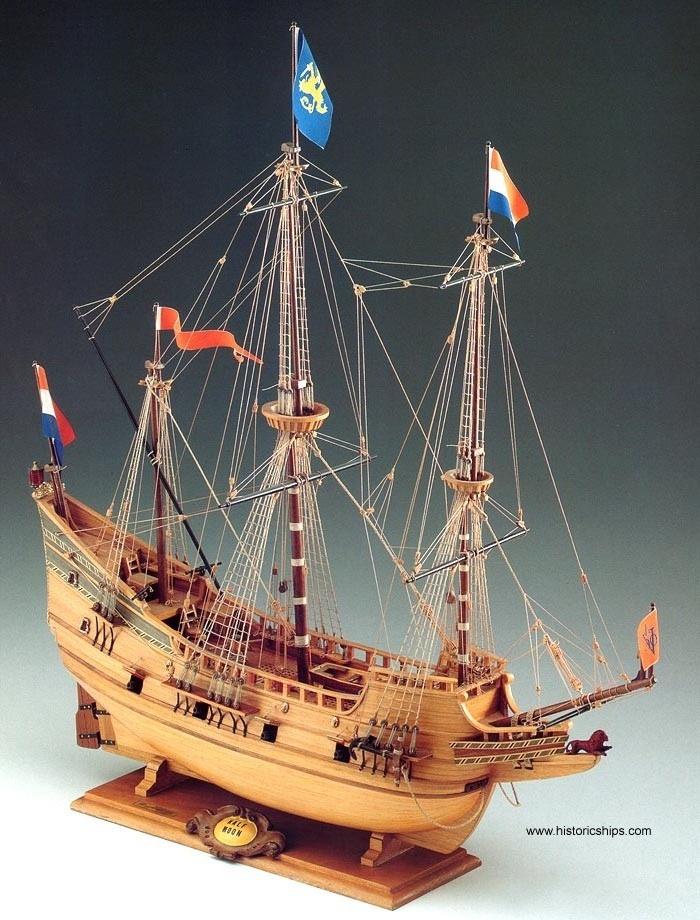
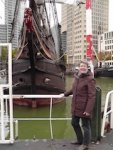
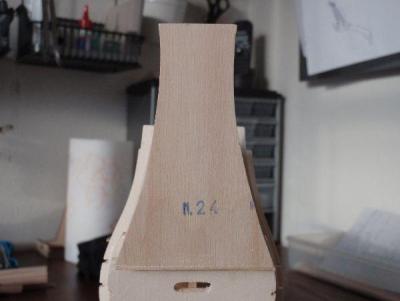
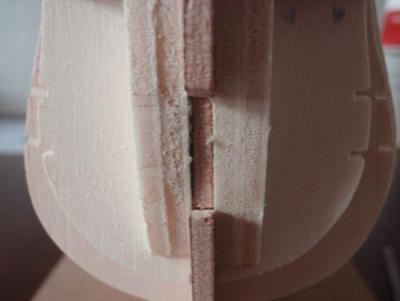
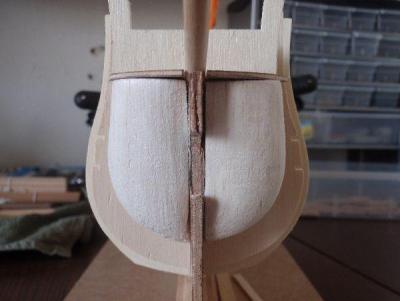
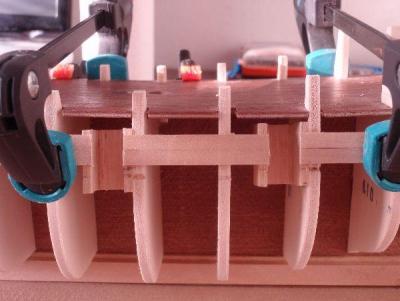
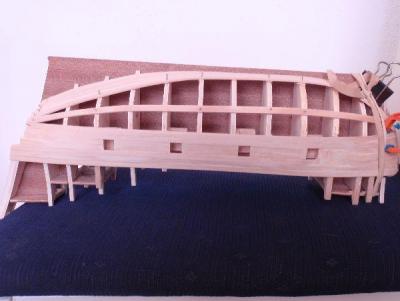
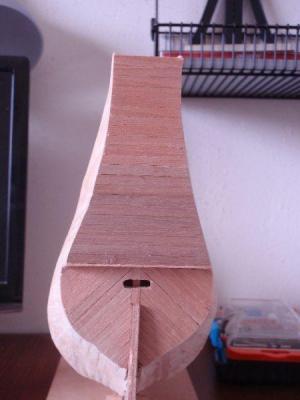
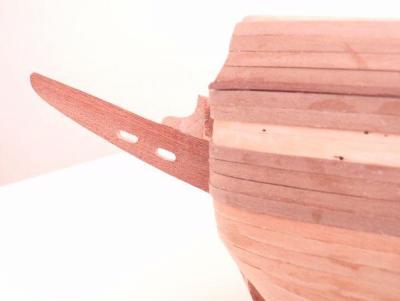
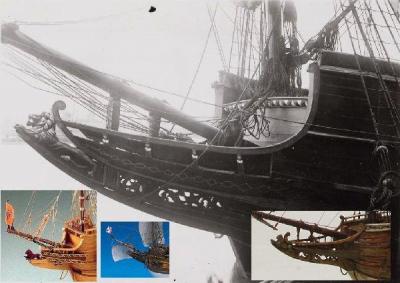
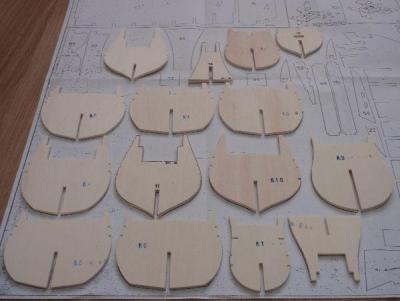
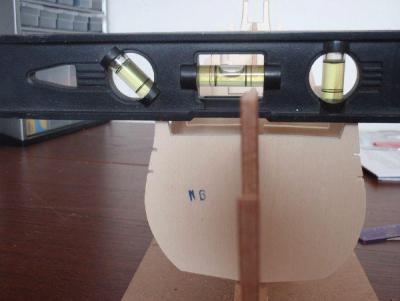
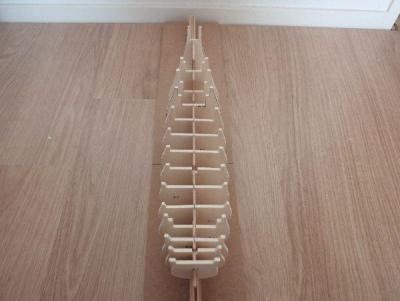
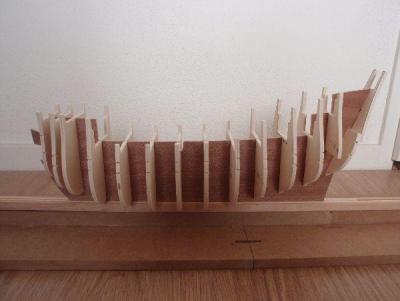
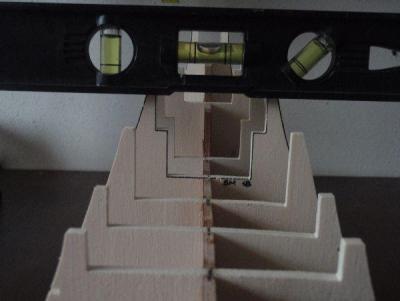
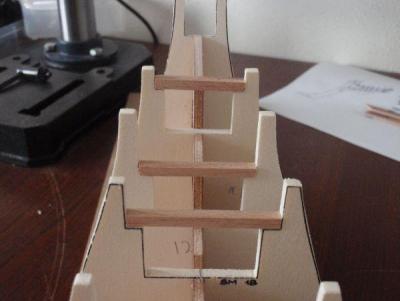
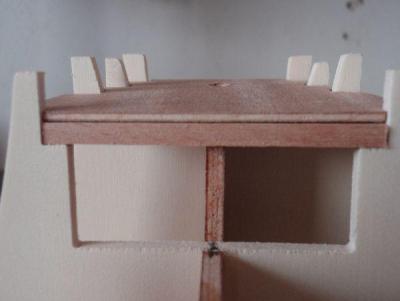
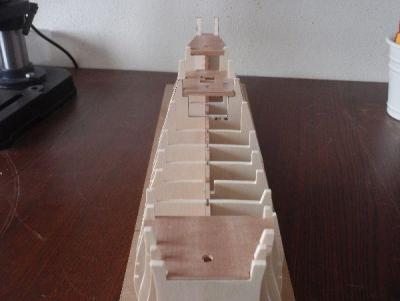
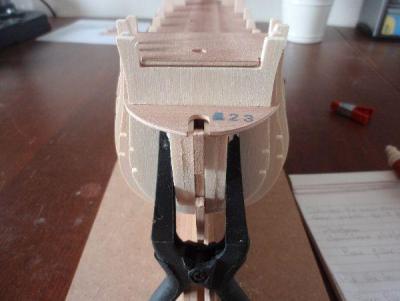
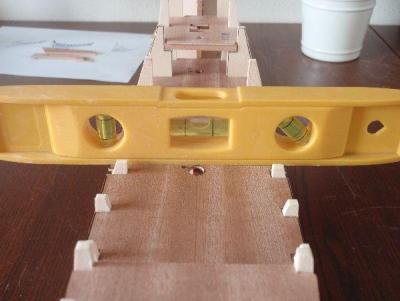
Hello everyone, Just a picture to show you the different typesof bows on the Half Moon. Bottom left by Corel Second left by Billing Boats Bottom right in the American Marine Gallery Large picture is from the replica. This built is going to be a real challenge for me. I want to make the bow the same way as the replica and the one in the Marine Gallery. What I want to do is.......... 1 - Draw the picture of the bow on paper 2 - Making sure the bow has the correct scale/size 3 - Transfer the picture to plywood 4 - Cut and adjust And last but not least, if everything fits to scale/size transfer it to wood and place the bow I'm not sure if this is the correct procedure, because I never tried scratch build before. So, If anyone has a better idea, please let me know. Any ideas or assistance in this is very welcome. Sunday, May 6th 2012 The keel is secured in the buildslip so it will remain straight. All frames fit the size on the drawings, which is great I assembled all the frames without gluing, making sure that the frames are level with the upper line of the keel. Corrections proved to be necessary for all the frames to adjust the depth of the frames. Tuesday, May 8th 2012 The frames are glued in place. In picture #1 it seems that one of the frames isn't leveled. But in picture #2 it is Maybe it's the 'eye of the beholder'? Now it's time for fitting the decks. Wednesday, May 9th 2012 The poopdeck, quarterdeck and forecastle are fitted in place. The beams on which they rest are prepared. Mind you, nothing is glued yet. The main deck needs much adjusting as you can see in the picture. It needs much filing to fit the frames. But one step at a time. Thursday, May 10th 2012 The beak head platform is in place. The bow filler segments need adjusting. I adjusted the main deck to fit the frames. The last picture is a bit too much showing of the leveling, I was just one level short to show you that all the decks are levelled. Having some difficulties uploading pictures, so I will close this post and continue in a minute. Don't go anywhere!


-
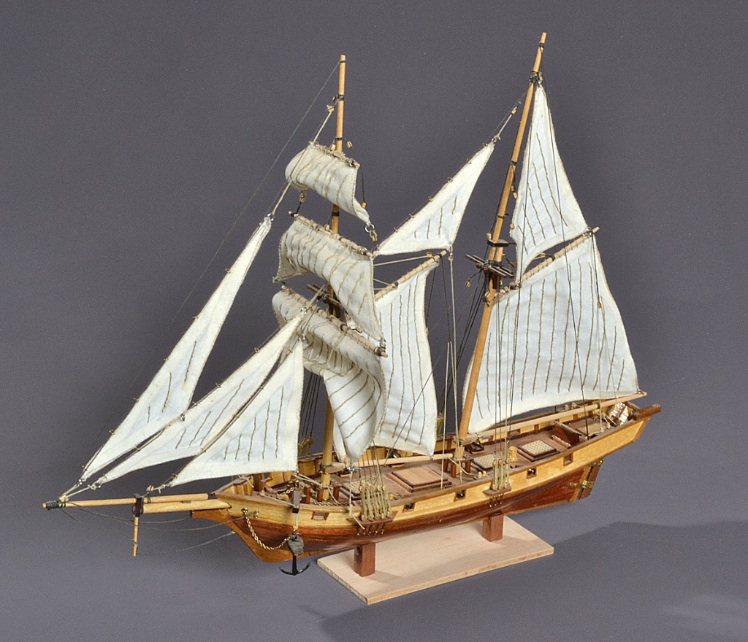
everyone and welcome (back) to my second buildlog. I started this buildlog on May 4th 2012. I will repost my log from the beginning. So here goes………... The discovery ship the Half Moon was a small and lightly armed galleon, although in VOC documents it is called a Yacht. And by Emanuel van Meteren (a Flemish Historian) even vlieboot (flyboat). The original Half Moon (Halve Maen) was commissioned on March 25, 1609, for the Dutch East India Company. She was a ship of exploration and the spaceship of her age, designed to take a crew of twenty into unknown and uncharted waters. Hired by the Dutch East India Company to find a Northeast, all-water route to Asia. but only a month out of port, the Dutch/English crew of his ship was disheartened after their passage north of Norway was blocked by Arctic ice floes. Many talked of mutiny. Sitting in his cabin, the concerned captain considered his dilemma and options. A compromise was made. The course was changed and what began as a search for a Northeast passage became a transatlantic crossing to look for a Northwest passage to the rich spice. trade of China. Of course, some think that Hudson's intention all along was to go Northwest. Hudson in North America After reaching the Maine coast and replacing a foremast lost in rough storms during her Atlantic crossing. the Half Moon sailed southward as far as the present day North Carolina Outer Banks. Then, turning northward, Hudson explored the Delaware Bay before arriving at the mouth of a wide river. Could this be a passage to the Pacific Ocean? Hudson stopped at points on the New Jersey coast before sailing the small ship up the river which today bears the Captain's name, the Hudson River, but it was soon obvious that it was an inland river, not a west-ward passage. Hudson sailed upriver to present-day Albany before returning down river, and claiming the region for the Dutch. It would be many years before the significance of Hudson s 1609 voyage to America would be understood, and the Half Moon universally recognized as one of the best known ships of exploration. The Half Moon’s Specifications The ship assigned to Hudson by the Dutch East India Company was small by 17th-century standards. Built in a Dutch shipyard of German and Danish lumber with a high forecastle and sterncastle, she resembledthe so-called Vlie boats the Dutch used on the Zuider Zee. England and the Netherlands were then fierce commercial rivals. The Dutch had a fleet of 1,680 ships, vastly outnumbering the 350 available to the English. Being lighter and narrower, with their frames spaced much wider apart and using lighter planking topside, Dutch ships were faster than their English competitors, which had tightly spaced frames. Unlike English shipbuilders, the Dutch built their oceangoing vessels with flat bottoms to negotiate the shallow entrance to the Zuider Zee. Because the original Half Moon was built using a simple geometric method called the tangent arc system, no comprehensive plans have survived. Even in the 17th century, industrial espionage was common; this may also explain why no plans have ever been found. Although the Half Moon has a large amount of sheer (the upward curve of the longitudinal lines of the hull), the decks remain surprisingly level. Today, boats are built with decks following the sweep of the sheer. A horizontal deck offered many advantages: on warships with gun ports in a line, cannons on wheeled carriages could easily be served and moved. Level decks also could be flooded when needed, lowering the risk of fire and explosion. The rig and sail plan of the Half Moon are typical of square-rigged ships of the period: a square foresail and topsail on the foremast and foretopmast; a square mainsail and topsail on the mainmast and main topmast; a triangular lateen sail hung on a long yard attached at an angle to the top of the mizzenmast. A square spritsail hanging from the bowsprit. In all, the sail area measured about 2,800 square feet. Type of ship : Yacht Construction : Build in 1608 for the chamber of Amsterdam at a shipyard in Amsterdam Purpose : Used by the Dutch East India Company from 1609 to 12/1618 Loading capacity : 80 Tons Crew : 15-20 Sail Area : 256,13 m² Length on deck : 25.9 m. On the keel length : 19.7 m. Height : 23.8 m. Width : 5.3 m. Draught : 2.6 m. Thank you for watching and enjoy! Take care, Anja
-
On 22 January, Unilever, my current employer for 36 years, has communicated it’s finale decision to all employees in the facilities department to outsource the facilities department to Sodexo as per 1 May 2013. Still we do not know what our new employer expect of us. In March, there will be an information session with Sodexo and Unilever about the transition. Also in March we get individual introductory meetings with Sodexo and individual talks about agreements/arrangements. I guess we just...
-
Hello Arjan, Although we haven't spoken on the former MSW ..... Welcome back! I love the Dutch ships of the 17th century. So I will follow your build from now on. She's looking great, and as far as I can tell you certainly have the skills to make her look like the one which is displayed in the Maritime Museum. Good luck and take care, Anja
-
MONTANES by Garward - OcCre
Anja replied to Garward's topic in - Kit build logs for subjects built from 1751 - 1800
Hello Garward and welcome back! That's a huge amount to repost. Good luck with that. Just take your time. Take care, Anja -
Hello Augie, Don't you and Sjors dare to start another war! Frank, just relax, I will be watching them closely from now on. Take care guys, Anja
-
Hello Erik, Wow, what a beautiful ship! My compliments. You may feel proud, great build. Thanks for sharing and take care, Anja
-
Montanes by pnevrin - OcCre
Anja replied to pnevrin's topic in - Kit build logs for subjects built from 1751 - 1800
Hello Per, And welcome back. It's great to see you have started your buildlog again. Take care, Anja -
Hello everyone, Thank you all for the welcome back. It's great to be back. A very warm welcome back to all of you too, it's great to see you all back here on MSW. Hope to repost my log tomorrow, today I have to go to my drawing course. So Sjors will have the PC all to himself. And Sherry, don't keep us in the dark too long! Take care everybody, talk to you soon. Anja
-
Hello Bob, Found it A first step into scratch building. I envy you As far as I can see you've made a good start. I will follow your progress. I wish you good luck with this build. Thanks for sharing and take care, Anja
-
Hello Frank, That's great. Thanks for reposting your log. Just take your time. I've reserved my seat in the front row again. Take care, Anja
-
Thank you dear!
-
Hello Wayne, I see you've got the log started. Just recently I watched a tv program about the American Queen, which is said to be the largest ever built. They are beautiful. Thanks for sharing your log and the information. It's always nice to learn about the history of a ship. Looking forward to some more pictures Take care, Anja
-
Hello Remco, Welcome back! And thank you for reposting all those pictures. You're doing a wonderful job. Looking forward to your progress, Anja
- 1,215 replies
-
- 2
-
-
- sloop
- kingfisher
- (and 1 more)
-
Hello Sherry, Glad to see you here as well. I hope to have my buildlog up and running on sunday. with a little update to go with it. Have you already made a choice for your new build? Don't forget to put the finished pictures of your Mayflower in the gallery. Take care, Anja
-
Good luck with the reposting of your log Augie. Just take your time. We will patiently sit back with the popcorn and await your updates Take care, Anja
-
Sorry Andy, Just deleted my post and wanted to repost it after you had finished uploading your pictures. But you quoted me, so I won't. Hope to get my buildlog and pictures up and running on sunday. Sjors is keeping our PC busy with his buildlogs. And it's a real pain to do this on my IPad. Thanks for posting all your pictures and take care, Anja